


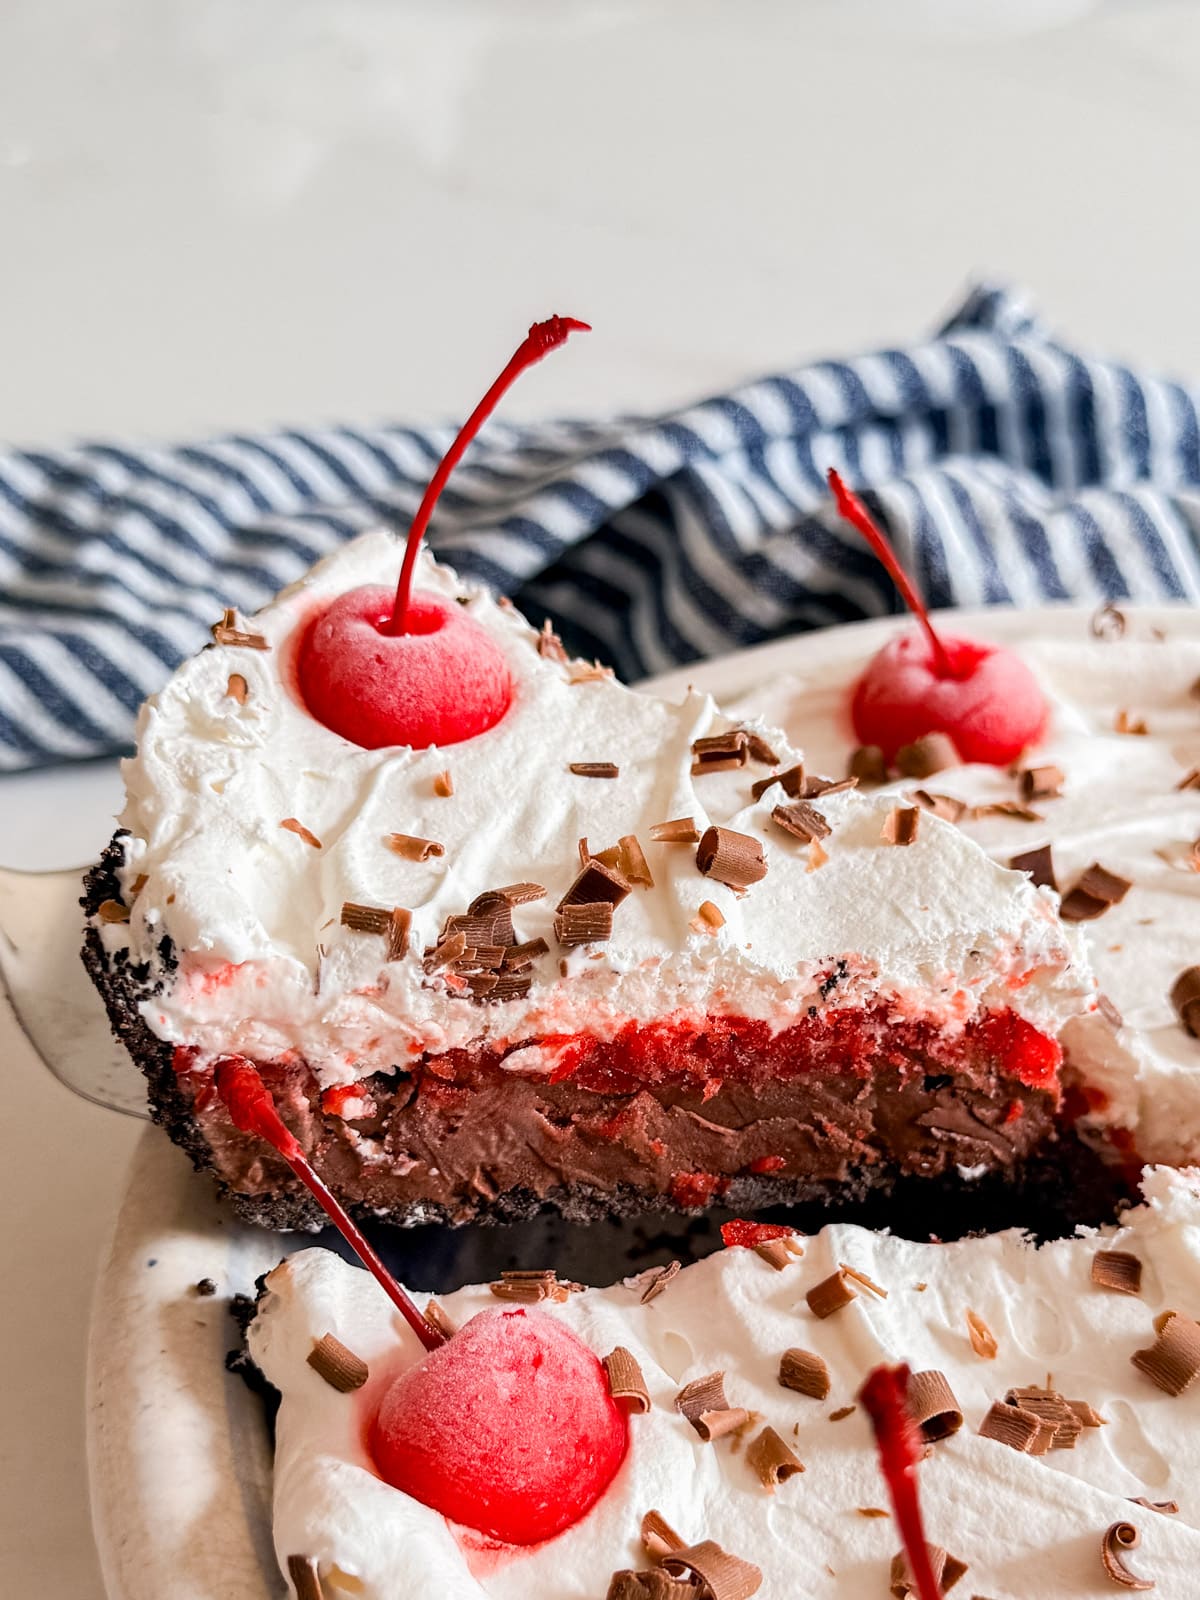
This black forest ice cream cake is made with an Oreo cookie crust, chocolate ice cream, maraschino cherries, and whipped topping. A quick and easy no-bake dessert recipe that's a showstopper on any dessert table!

Jump to:
- Why You'll Love This Black Forest Cake Ice Cream-Style
- Ingredient Information And Substitutions
- How To Make This Recipe For Easy Ice Cream Cake
- Frequently Asked Questions
- Tips For Making Ice Cream Pies
- What To Serve With This Chocolate Ice Cream Cake
- Other Delicious No-Bake Dessert Recipes To Try
- Black Forest Ice Cream Cake
Why You'll Love This Black Forest Cake Ice Cream-Style
You know what my family loves? A dessert that looks like you spent hours on it, but actually took about 10 minutes to throw together. This one's perfect for the holidays, Valentine's Day, or honestly just a Tuesday when you need something special on the table.
I'm a firm believer that there should always be an ice cream pie in the freezer... not even for guests, just because you deserve it. And this one combines two of my favorite things: a classic black forest cake and a creamy ice cream pie, in one ridiculously easy dessert. Here's what makes this easy ice cream cake recipe so great:
- No bake
- Ready in under 15 minutes
- Always a crowd-pleaser
- Freezer-friendly

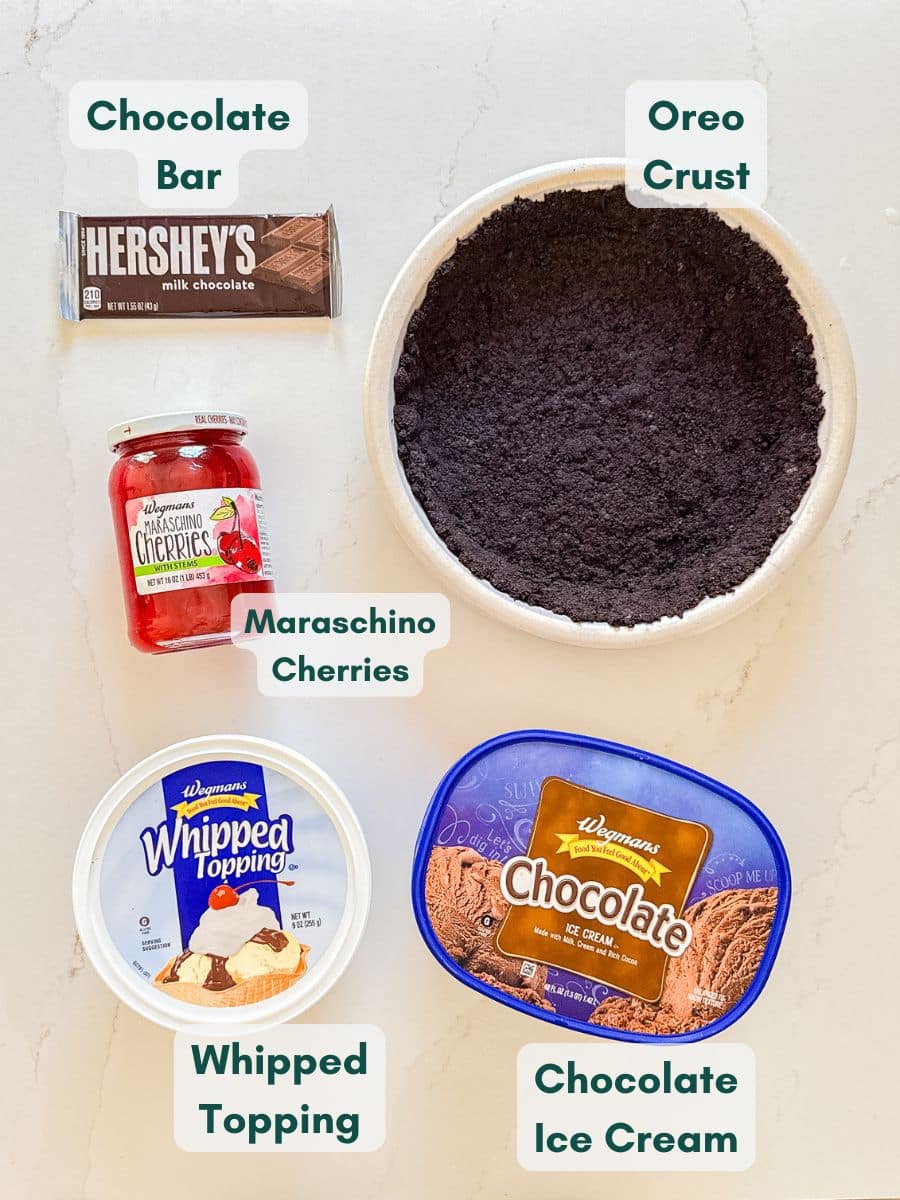
Ingredient Information And Substitutions
- Oreo cookie crust- I buy mine pre-made right in the baking aisle. You could make your own by mixing crushed Oreos with melted butter.
- Chocolate ice cream- Use your favorite brand. Chocolate is the classic choice, but cherry chocolate chip or dark chocolate would also be delicious.
- Maraschino cherries- You'll use most of them chopped and used as a layer in the pie, but pull aside a few of the prettiest ones for topping.
- Whipped topping- Adds a light, creamy layer over the cherries. Cool Whip works perfectly here.
- Chocolate shavings- For garnish. Mini chocolate chips work just as well and are even easier.
How To Make This Recipe For Easy Ice Cream Cake
Step 1- Soften the ice cream.
Pull your chocolate ice cream out of the freezer and let it sit on the counter for 7-10 minutes to soften. Drain and chop most of the cherries in a food processor, reserving a few of the prettiest ones on the side for topping.
Step 2- Build the pie.
Carefully spread the ice cream inside the Oreo crust, leaving about ¼ inch of space at the top. Use a spatula to smooth the surface.

Step 3- Add the cherries.
Evenly distribute the chopped maraschino cherries over the ice cream layer.
Step 4- Top with whipped topping.
Carefully spread the whipped topping over the cherries to cover the top of the pie completely.
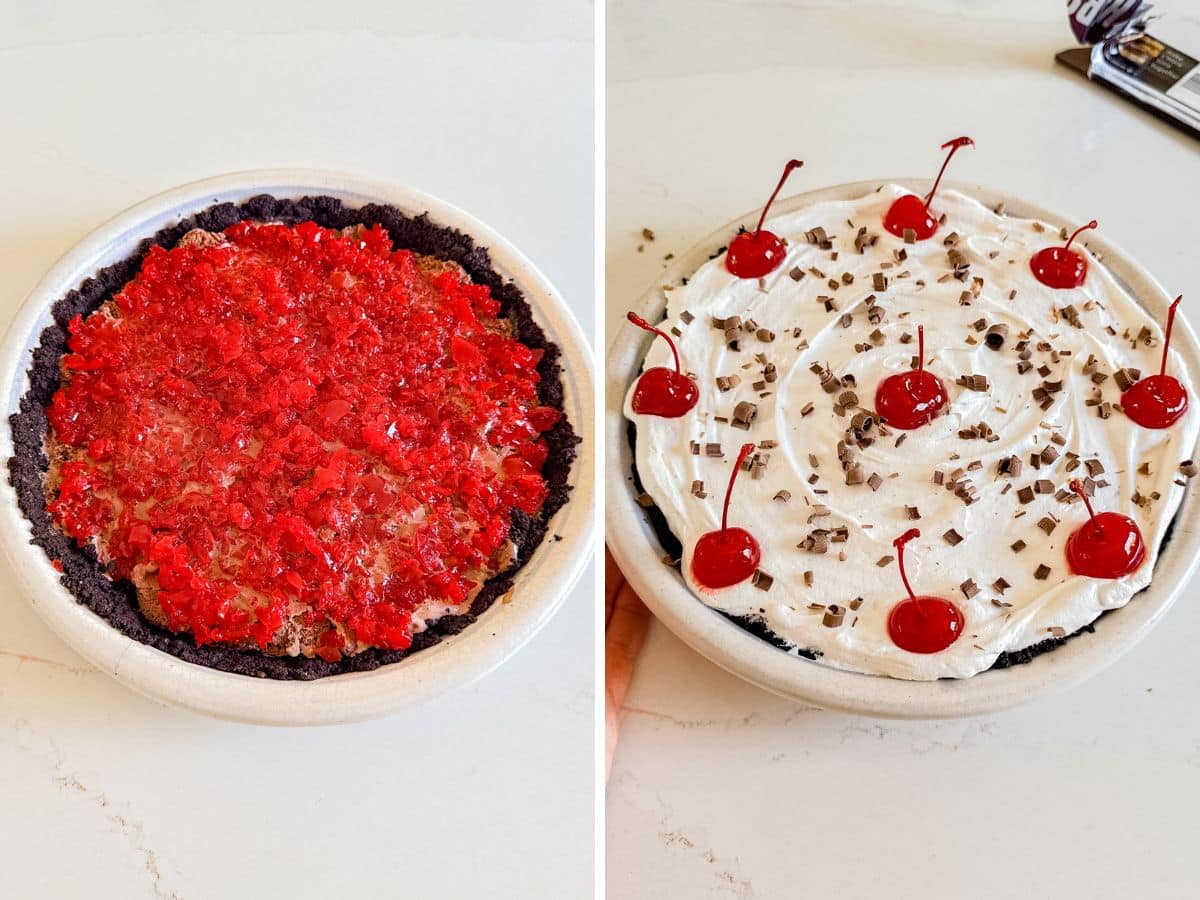
Step 5- Decorate and freeze.
Place 8 whole cherries evenly around the perimeter and 1 in the center. Sprinkle with chocolate shavings or mini chocolate chips. Return to the freezer for at least 1 hour before serving. Cover once frozen solid.
Frequently Asked Questions
Press your crust into a pie pan, spread softened ice cream over it, layer on your toppings, and freeze for at least an hour. That's it… no baking, no fuss.
Yes, pull it out a few minutes before serving to make slicing easier, then return any leftovers to the freezer right away.
Yes. This is actually a great make-ahead dessert. Assemble it, freeze it solid, then cover tightly.

Tips For Making Ice Cream Pies
- Pull aside your nine best-looking cherries before chopping the rest. It makes the decorating step much easier.
- Drain remaining cherries well and chop them small. This prevents the ice cream layer from getting icy and ensures a better distribution in every slice- be sure to put a few whole ones aside for topping.
- An offset spatula is your best friend for getting a smooth, even ice cream layer.
- Let the ice cream soften before spreading. 7-10 minutes on the counter makes all the difference and prevents tearing up the crust.
- Work quickly once the ice cream is softened. You don't want it melting before it goes back in the freezer.
- Don't skip the freeze time. A full hour minimum ensures clean slices. Longer is even better.
- Make two pies. Seriously. This goes fast, and leftovers are not a guarantee. Having a backup in the freezer is never a bad idea!
- Ingredients to prep ahead- You can drain and chop your cherries in advance and keep them in the fridge until you're ready to assemble.
- Leftovers and storage- Cover tightly and store in the freezer for up to one week.

What To Serve With This Chocolate Ice Cream Cake
This pairs perfectly with easy, no-fuss meals, the kind where dinner comes together just as quickly as dessert. A few ideas my family loves:
Other Delicious No-Bake Dessert Recipes To Try


Love this recipe? Please leave a 5 star ⭐️⭐️⭐️⭐️⭐️ rating in the recipe card below ⬇️ and/or a review in the comment section further down. Check out my Amazon Store for all my favorite tools, including those used in this recipe. And follow @thelifejolie on Instagram and TikTok!

Black Forest Ice Cream Cake
Equipment
Ingredients
- 1 Oreo cookie crust I bought mine pre-made in the baking aisle
- 4 cups Chocolate ice cream about half of a regular size box
- 16 ounces maraschino cherries pull aside the 9 prettiest cherries and drain and chop the rest
- 1 ½ cups Whipped topping about ⅓ of a container
- Chocolate shavings for garnish mini chocolate chips will also work
Instructions
- Pull container of ice cream out of the freezer and let it sit out for 7-10 minutes to soften it.
- Carefully spread your ice cream inside of the pie crust leaving about ¼ of an inch of space above it. Use a spatula to smooth the top of it (I use my offset spatula).
- Evenly distribute your chopped cherries on top of the ice cream.
- Next, carefully spread a layer of whipped topping over the cherries to cover the top of the cake.
- Decorate by placing 8 of the whole cherries around the perimeter of the pie, evenly spaced and the other cherry in the middle and sprinkle with shaved chocolate.
- Place cake back in the freezer for at least an hour. After the hour, cover it and keep in the freezer until serving.
Video
Notes
- Pull aside your nine best-looking cherries before chopping the rest. It makes the decorating step much easier.
- Drain remaining cherries well and chop them small. This prevents the ice cream layer from getting icy and ensures a better distribution in every slice- be sure to put a few whole ones aside for topping.
- An offset spatula is your best friend for getting a smooth, even ice cream layer.
- Let the ice cream soften before spreading. 7-10 minutes on the counter makes all the difference and prevents tearing up the crust.
- Work quickly once the ice cream is softened. You don't want it melting before it goes back in the freezer.
- Don't skip the freeze time. A full hour minimum ensures clean slices. Longer is even better.
- Make two pies. Seriously. This goes fast, and leftovers are not a guarantee. Having a backup in the freezer is never a bad idea!
- Ingredients to prep ahead- You can drain and chop your cherries in advance and keep them in the fridge until you're ready to assemble.
- Leftovers and storage- Cover tightly and store in the freezer for up to one week.
Christine says
Jessy says
Liz @ I Heart Vegetables says
Jessy says
Kavey at Kavey Eats says
Jessy says