
• Skip to primary navigation
  • Skip to main content
  • Skip to primary sidebar
The Life Jolie logo
  • Easy Dinner Recipes
  • Recipes
  • About
  • Contact
    • Work with me!
    • Video Production
  • Nav Social Menu

    • Email
    • Facebook
    • Instagram
    • Pinterest
    • Twitter
    • YouTube
menu icon
go to homepage
subscribe
search icon
Homepage link
  • Easy Dinner Recipes
  • Recipes
  • About
  • Contact
    • Work with me!
    • Video Production
    • Email
    • Facebook
    • Instagram
    • Pinterest
    • Twitter
    • YouTube
  • ×
    The Life Jolie » Page 18

    How to freeze onions | The Life Jolie Kitchen Basics

    How to freeze onions | The Life Jolie Kitchen Basics

    Jan 23, 2018 · Leave a Comment

    A square image showing the bag of onions for How to freeze onions.

    Do you ever end up with leftover chopped onions that ultimately get thrown out? Well no need to waste anymore chopped onions because I'm going to tell you about how to freeze onions!
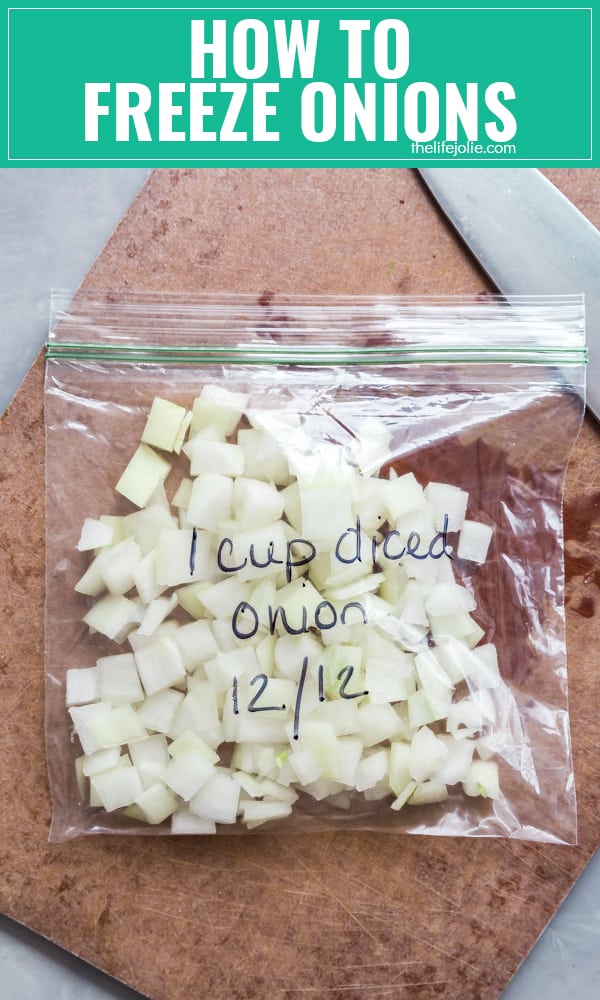
    Do you ever end up with leftover chopped onions that ultimately get thrown out? Well no need to waste anymore chopped onions because I'm going to tell you about how to freeze onions!

    This post contains Affiliate Links. Please see the disclaimer here.

    Now I know what you're thinking:

    Can you freeze onions?

    The short answer is yes. Whole onions can be frozen as long as you peel and blanch them first, but today I'm going to focus more on chopped onions (and in case you missed it, I also put together a tutorial for how to chop an onion).
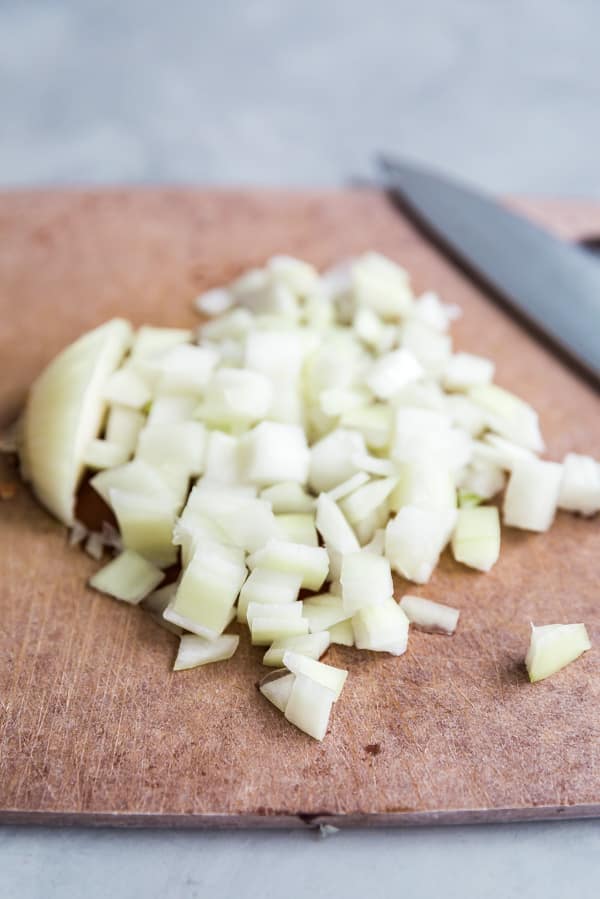
    Chopped onions on a cutting board.

    You know how you'll sometimes be preparing a meal and you end up with more chopped onion than you need? It happens to me all the time. And I really hate food waste. So if I can avoid wasting ingredients, I'll certainly take the extra step (not that there's much work involved in this). The great thing is that you can save and freeze it to use on a later date.
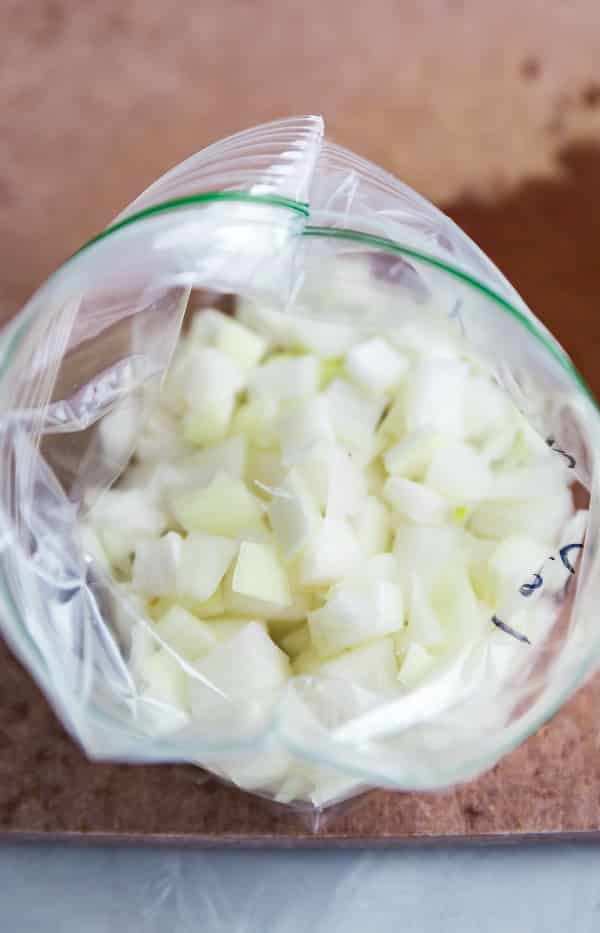
    An open bag of onions on a cutting board.

    Here's what you need to know about freezing onions:

    1. Since they're chopped, the onions don't have to be blanched. But you can if you want, it won't hurt them.
    2. Frozen onions will keep for 3-6 months.
    3. You do not have to thaw them to use- I've added them directly to a pan of oil to saute (like when I'm making my grandma's Peas with Onions, which is how I most frequently use my frozen chopped onions). Just be careful that the oil doesn't splatter. You could also add directly to soups and stews.
    4. Be mindful about how you intend to use them, as thawed onions don't hold their shape extremely well. They work great in cooked dishes, but since the shape and texture can be affected by freezing, if the recipe calls for raw onion, it's probably best to chop a fresh one.
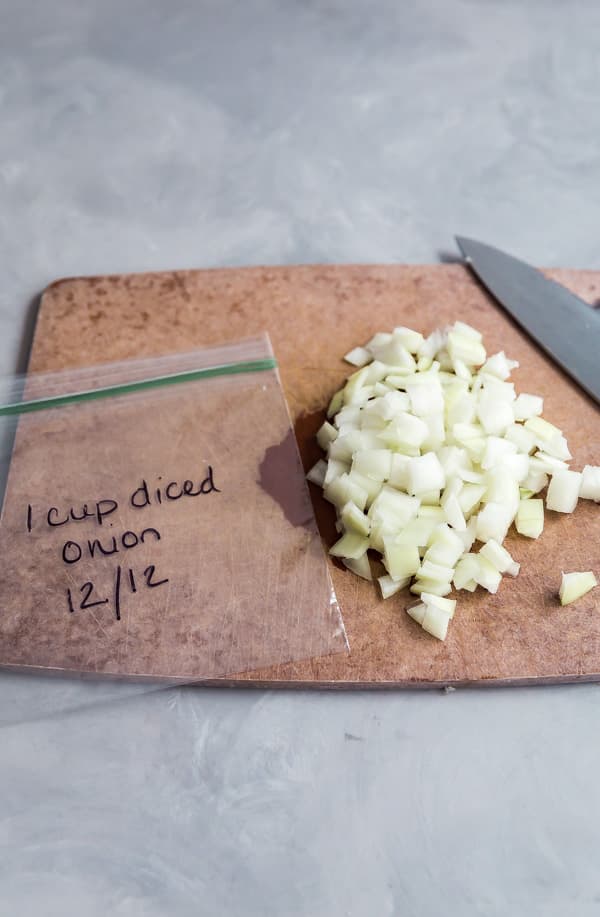
    An empty bag and chopped onions on a cutting board.

    Here's what you'll need to freeze onion:

    1. A good Chef's Knife
    2. A Cutting Board
    3. Zipper bags for storing the onions
    4. A freezer (Duh. Guys, I'm not going to link this because I'm pretty sure you all have a freezer if you're reading the post).
    A square image showing the bag of onions for How to freeze onions.

    How to freeze onions

    Jessy Freimann
    No need to waste extra chopped onions- just freeze them for later use in cooking applications!
    No ratings yet
    Print Recipe Pin Recipe
    Prep Time 5 minutes mins
    Total Time 5 minutes mins
    Course hack, How-to, kitchen basics
    Cuisine American
    Servings 4 servings

    Equipment

    • 1 chefs knife
    • 1 cutting board
    • 1 small zipper bag

    Ingredients
      

    • 1 cup diced raw onion

    Instructions
     

    • Chop the onion to your liking.
    • Measure them out to freeze in whatever portions you'd prefer (I usually go with half cup or 1 cup measurements).
    • Place the onions into zipper bags.
    • Push the air out of the bag and seal it well.
    • Label it with the contents, the measurement and the date. Place in freezer
    • When it comes time to use, you can thaw them in a refrigerator or just add them right into what you're cooking.

    Notes

    These will last in your freezer for up to 3-6 months.

    Nutrition

    Serving: 0.25cup
    Tried this recipe?Let us know how it was!

    One of my favorite recipes that features chopped onions is:

    Philly Cheese Steak Stuffed Bread Rolls
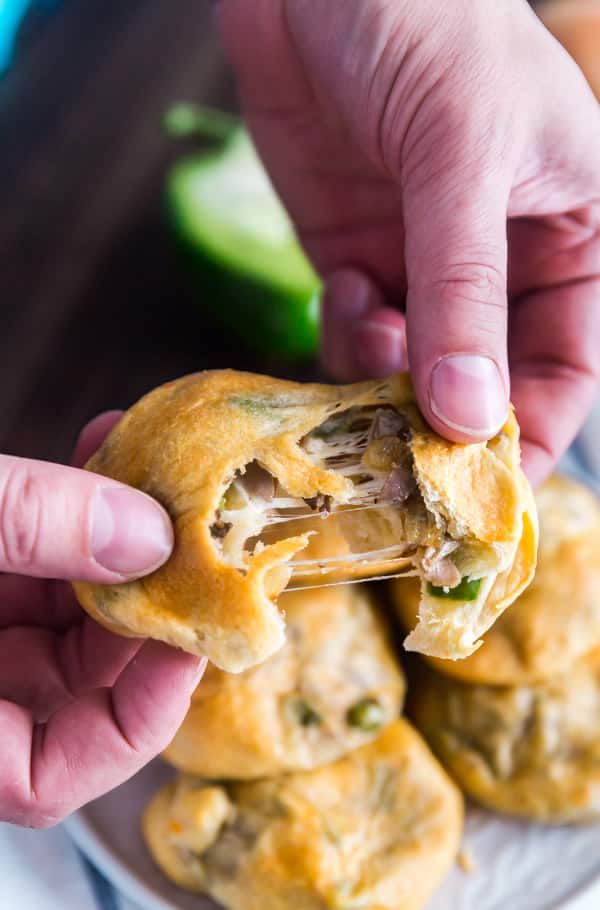
    A hand pulling apart a Philly Cheese Steak Stuffed Bread Roll with stretchy cheese.

    I also love this recipe which features chopped onions:
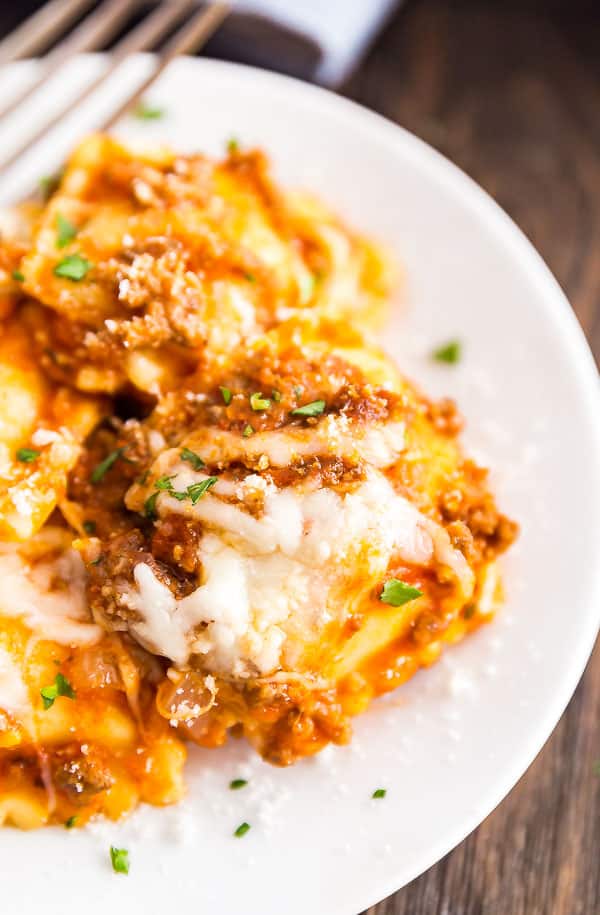
    Baked Ravioli Casserole

    A close up image of one of the cheese ravioli in this baked ravioli dish.

    You can find a full index of my recipes here.

    Don't forget to follow The Life Jolie on Pinterest for more recipe inspiration!

    Or if Pinterest isn't your style, bookmark this post!

    Let's keep the conversation going- join my Facebook group!

    Monster (Edible) Cookie Dough Truffles Recipe

    Jan 17, 2018 · 2 Comments

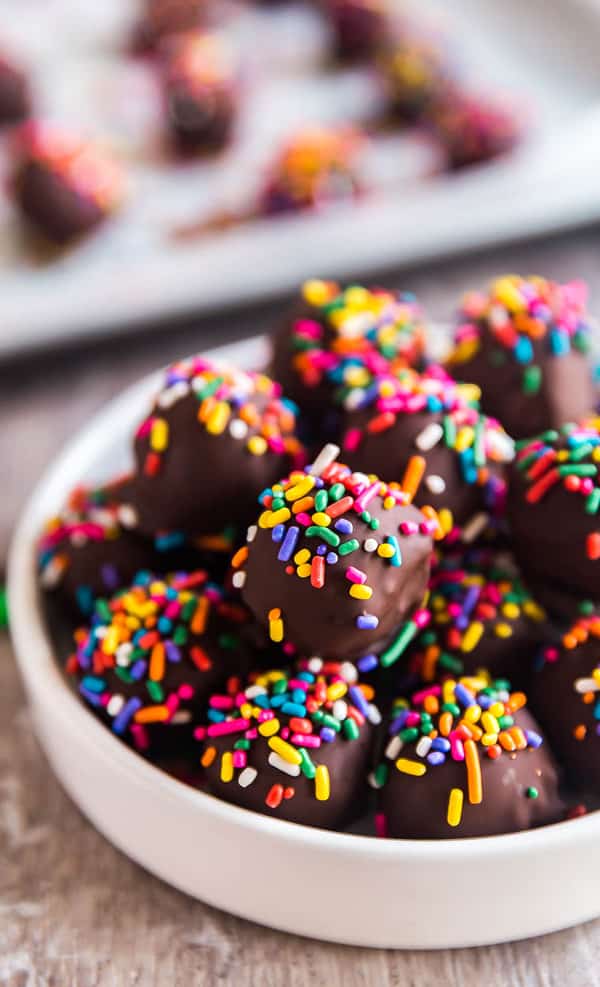
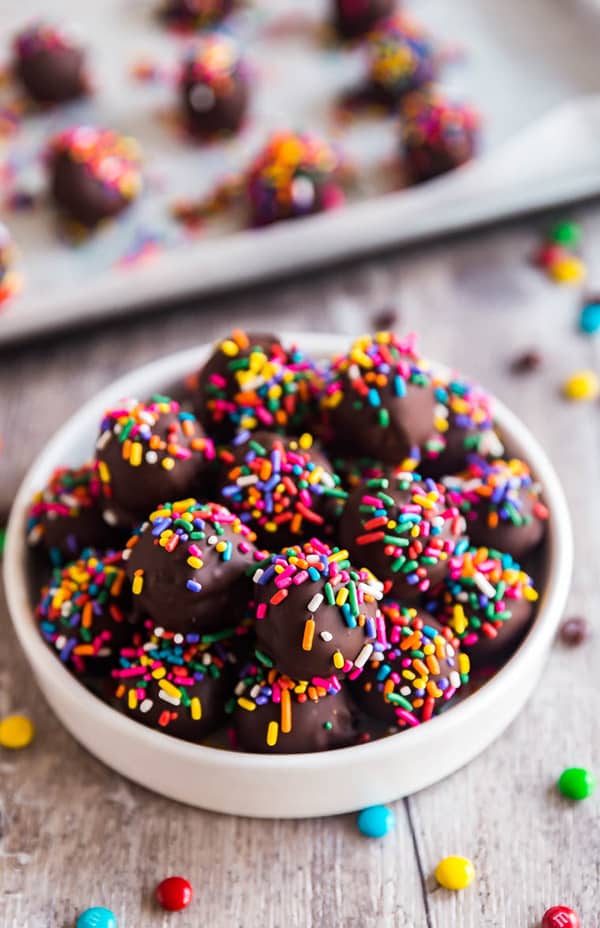
    A square image of Monster (Edible) Cookie Dough Truffles.

    Warning: You will not be able to eat just one of the Monster (Edible) Cookie Dough Truffles. They really are that good!

    A close up image of Monster (Edible) Cookie Dough Truffles.

    This post contains Affiliate Links. Please see the disclaimer here.

    I know that "gift giving season" is technically over. But sometimes it's nice to surprise your loved one's with a little something special.

    We live in a world full of people who are obsessed with cookie dough. And really, who can resist sneaking spoonfuls of sweet and delicious cookie dough? I know I can't and my daughters are relentless when they know it's cookie-making time! They're almost more excited about stealing cookie dough than they are about the actual finished cookies (almost).

    A plate of Monster (Edible) Cookie Dough Truffles with one in the middle that has a bite taken out of it.

    And with the obvious concern about raw eggs and salmonella, the creation of eggless "edible" cookie dough was pretty much a stroke of genius from whoever came up with that! I have edible in quotes because I've always been of the belief that a teeny bit raw cookie dough won't kill you. But I can see how we would all take precautions if we were going to eat large amount of the stuff. And after just a taste, you will want to eat large amounts of these cookie dough bites.

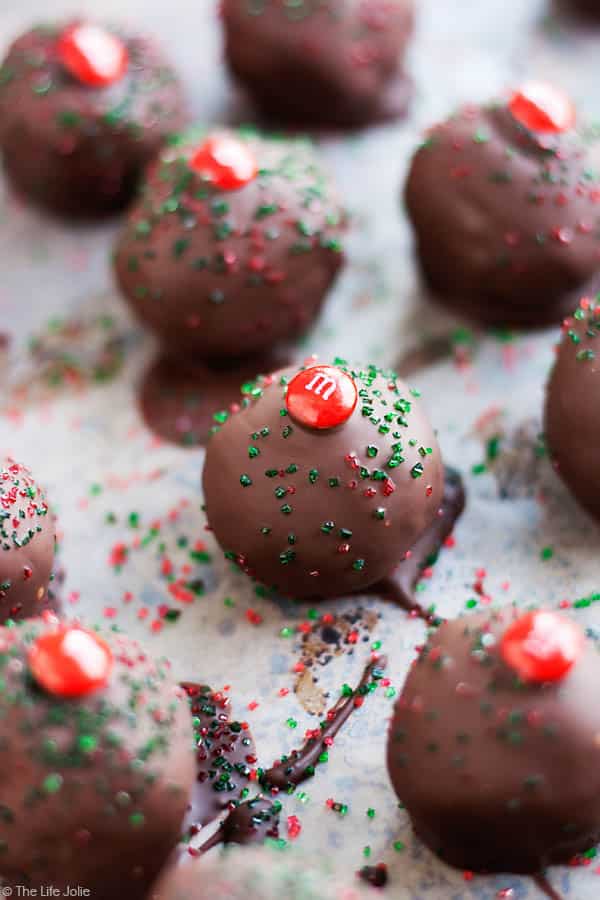
    And of course, I couldn't just stop at regular no bake cookie dough, delicious though it may be. Oh no, I had to take it an extra step and make truffles inspired by Monster Cookies. For those unfamiliar with a traditional Monster cookie recipe, they are cookies that not only contain chocolate chips, but also peanut butter, M&M's and often oatmeal.

    Monster (Edible) Cookie Dough Truffles lined up on a pan.

    I seriously love all of these things and was thrilled to include them with the exception of the oatmeal because I figured that raw oats might not be the most desirable texture to bite into (although if raw oats are your thing, by all means, throw some in. You do you.).

    These are seriously so easy to throw together. You mix a simple dough, roll it into balls and pop 'em onto a pan and into the in the freezer for 30 minutes before rolling them in melted chocolate and topping them with sprinkles. Though sprinkles aren't traditionally included in a Monster Cookies recipe, they were much too fun not to add. These are super kid-friendly and they make an excellent gift!

    Monster (Edible) Cookie Dough Truffles on a plate with a tray of more truffles behind it.

    A square image of Monster (Edible) Cookie Dough Truffles.

    Monster (Edible) Cookie Dough Truffles Recipe

    Jessy Freimann
    Who doesn't love eating cookie dough? These truffles allow you all the delicious flavor of raw cookie dough without being unsafe and taste fantastic!
    No ratings yet
    Print Recipe Pin Recipe
    Prep Time 30 minutes mins
    Cook Time 30 minutes mins
    Total Time 1 hour hr
    Course Dessert
    Cuisine American
    Servings 35 truffles
    Calories 111 kcal

    Equipment

    • 1 stand mixer
    • measuring cups
    • measuring spoons

    Ingredients
      

    • ½ cup salted butter softened (1 stick)
    • ¼ cup granulated sugar
    • ¼ cup brown sugar packed
    • 1 ½ teaspoons vanilla extract
    • 2 Tablespoons creamy peanut butter
    • ¾ cup flour
    • ¼ teaspoon salt
    • ¼ cup mini chocolate chips
    • ¼ cup mini M&M's
    • 10 ounces dark chocolate chips
    • 1 Tablespoon coconut oil or you can substitute butter

    Instructions
     

    • In a large bowl or stand mixer bowl, cream together the stick of butter, granulated sugar, brown sugar, vanilla and peanut butter until well combined. Be sure to scrape down the sides.
    • Add the flour and salt and mix well until a dough forms.
    • Mix in the mini chocolate chips and mini M&M's until everything is well combined.
    • Use a teaspoon to scoop out the dough and gently roll it into one inch balls.
    • Line the dough balls up on a wax or parchment paper lined pan and place in the freezer for 30 minutes to set.
    • Towards the end of the 30 minutes melt the dark chocolate chips by either using a double boiler or in the microwave with two 30 second increments and then 10 second increments (stirring in between each increment).
    • Using a fork, roll each dough ball in the melted chocolate and then pull it up with the fork and lightly tap of the excess.
    • Carefully place the truffle on another pan lined with wax or parchment paper and refrigerate for at least 30 minutes to set.

    Notes

    These will last up to a week in the refrigerator in an air tight container.

    Nutrition

    Serving: 4trufflesCalories: 111kcalCarbohydrates: 12gProtein: 1gFat: 7gSaturated Fat: 5gPolyunsaturated Fat: 1gMonounsaturated Fat: 1gTrans Fat: 1gCholesterol: 7mgSodium: 52mgPotassium: 62mgFiber: 1gSugar: 8gVitamin A: 88IUVitamin C: 1mgCalcium: 31mgIron: 1mg
    Tried this recipe?Let us know how it was!

    Helpful tools:


    I also love this truffle recipe:

    M&M’s Brownie Truffles

    Here's another great truffle recipe:

    Peanut Butter Brownie Truffles

    These Peanut Butter Brownie Truffles are an easy chocolate dessert recipe and an excellent gift to give this for Valentine's Day. This simple recipe is made with rich, fudgy brownies and a peanut buttery surprise in the middle.

    You can find a full index of my recipes here.

    Don't forget to follow The Life Jolie on Pinterest for more recipe inspiration!

    Or if Pinterest isn't your style, bookmark this post!

    Let's keep the conversation going- join my Facebook group! Warning: You will not be able to eat just one of the Monster (Edible) Cookie Dough Truffles. They are so insanely easy to make and are super kid friendly as well. Best of all, no eggs! They really are that good!
    How to chop an onion | The Life Jolie Kitchen Basics

    Jan 16, 2018 · Leave a Comment

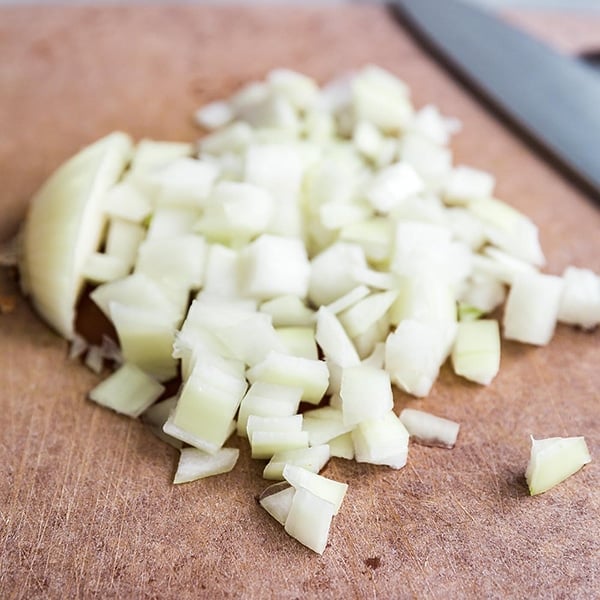
    A square image of chopped onion on a cutting board.

    I want to show you how to chop an onion the easy way! Check out this tutorial with tons of great tips for getting the perfect chopped onions.

    I want to show you how to chop an onion the easy way! Check out this tutorial with tons of great tips for getting the perfect chopped onions.

    This post contains Affiliate Links. Please see the disclaimer here.

    An onion on a cutting board.

    An onion with the top cup off.

    An onion sliced in half.

    I used to struggle with chopping onions. And I'm not talking about onion tears (I'm not crying, you're crying!). Interestingly, I don't often deal with onion tears, which I think it's due in large part to my wearing contact lenses, or perhaps my cold, evil heart....bwahahahaha! Kidding.

    Anyway, I struggled with the layers of the onions constantly falling apart when I would try to chop them. I'd end up with all sorts of jagged bits of onion, in various sizes. And it typically took double the time that it should have.

    Well, those days are long gone and I'm going to show you the steps that I take for chopping onions the quick and easy way! I think a big thing that makes this successful is using the onion stem to hold the whole operation together. And pretty soon, I'm also be posting about how to store chopped onions!

    A half an onion on a cutting board.

    A tutorial showing how to chop an onion.

    A knife cutting into an onion.

    An onion with cuts in it.

    A knife chopping an onion.

    Here are some tips for how to chop onions:

    • Make use your knife is really sharp. You're much more likely to cut yourself with a dull knife. I'm speaking entirely from experience here!
    • Use a big enough cutting board. That way you're not focusing on the bits of onion that are getting everywhere.
    • Let the onion help you. Put it to work! You can use the stem to hold it all together.
    • Don't throw away leftover chopped onion- freeze it!
    • Keep in mind that you can chop an onion in advance to using it. But the longer you wait to use it the more intense the flavor will be. This isn't necessarily a bad thing, especially if you're cooking them. But if you want a more mellow flavor (particularly if you're going to be consuming them raw) then you might want to wait until just before serving to chop.

    Chopped onion on a cutting board.

    Here are the tools you'll need for this tutorial on chopping onions:

    1. A good Chef's Knife
    2. A Cutting Board
    A square image of chopped onion on a cutting board.

    HOW TO CHOP AN ONION

    Jessy Freimann
    I want to show you how to chop an onion the easy way! Check out this tutorial with tons of great tips for getting the perfect chopped onions.
    No ratings yet
    Print Recipe Pin Recipe
    Prep Time 2 minutes mins
    Total Time 2 minutes mins
    Course Prep
    Cuisine American
    Servings 1 serving

    Ingredients
      

    • Onions
    • A sharp chef's knife
    • A decent size cutting board

    Instructions
     

    • Place the onion on the cutting board and cut the end that is not the one with the stem, so that the onion has a flat bottom.
    • Turn the onion on the cutting board with the stem facing up and the flat bottom is down on the cutting board.
    • Take the knife and cut down into the onion, directly through the stem so that there are two halves.
    • Remove the outer layer of papery skin from each half, leaving the stem intact.
    • Lay one of the onions halves on the cutting board, so that the center of the onion (that you just cut through) is facing down.
    • Turn the knife sideways and cut in toward the stem starting on the lower part of the onion and working your way up at whatever thickness you want the onion pieces to be. Make sure to stop when you get close to the stem (the stem holds it all together).
    • Now slice down into the onion working your way from one side to another- the tip of your knife should be facing the stem but not cutting through it. Once again slicing to whatever thickness you want your final pieces to be.
    • Now slice through the onion in the opposite direction starting on the side that's farthest from the onion and working your way in toward the stem. The pieces of onion will fall as you cut.
    Tried this recipe?Let us know how it was!
    A square image of chopped onion on a cutting board.

    How to chop an onion | The Life Jolie Kitchen Basics

    Jessy Freimann
    I want to show you how to chop an onion the easy way! Check out this tutorial with tons of great tips for getting the perfect chopped onions.
    No ratings yet
    Print Recipe Pin Recipe
    Prep Time 2 minutes mins
    Total Time 2 minutes mins
    Course side
    Cuisine American
    Servings 4 servings

    Equipment

    • cutting board
    • chefs knife

    Ingredients
      

    • 1 raw onion

    Instructions
     

    • Place the onion on the cutting board and cut the end that is not the one with the stem, so that the onion has a flat bottom.
    • Turn the onion on the cutting board with the stem facing up and the flat bottom is down on the cutting board.
    • Take the knife and cut down into the onion, directly through the stem so that there are two halves.
    • Remove the outer layer of papery skin from each half, leaving the stem intact.
    • Lay one of the onions halves on the cutting board, so that the center of the onion (that you just cut through) is facing down.
    • Turn the knife sideways and cut in toward the stem starting on the lower part of the onion and working your way up at whatever thickness you want the onion pieces to be. Make sure to stop when you get close to the stem (the stem holds it all together).
    • Now slice down into the onion working your way from one side to another- the tip of your knife should be facing the stem but not cutting through it. Once again slicing to whatever thickness you want your final pieces to be.
    • Now slice through the onion in the opposite direction starting on the side that's farthest from the onion and working your way in toward the stem. The pieces of onion will fall as you cut.

    Notes

    Raw onions will last up to 5 days covered in the refrigerator.
    You can easily vary your cuts to whatever size onions you need.

    Nutrition

    Serving: 0.25cup
    Tried this recipe?Let us know how it was!

    One of my favorite recipes that features chopped onions is:

    Philly Cheese Steak Stuffed Bread Rolls

    A hand pulling apart a Philly Cheese Steak Stuffed Bread Roll with stretchy cheese.

    I also love this recipe which features chopped onions:

    Baked Ravioli Casserole

    A close up image of one of the cheese ravioli in this baked ravioli dish.

    You can find a full index of my recipes here.

    Don't forget to follow The Life Jolie on Pinterest for more recipe inspiration!

    Or if Pinterest isn't your style, bookmark this post!

    Let's keep the conversation going- join my Facebook group!

    Philly Cheese Steak Stuffed Bread Rolls aka Philly Cheese Steak Bombs

    Jan 14, 2018 · 26 Comments

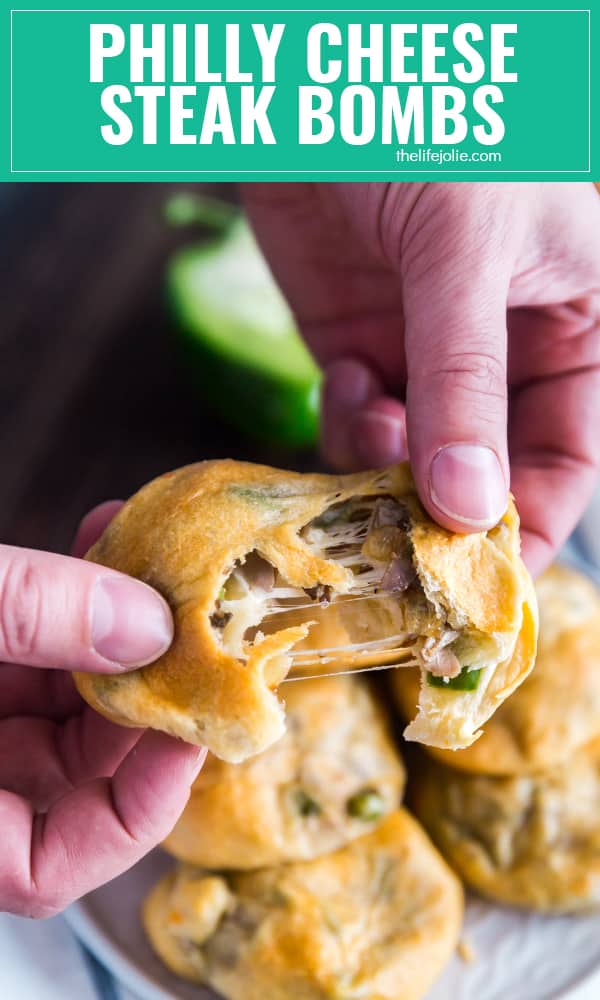
    A square image of a hand pulling apart a Philly Cheese Steak Stuffed Bread Roll.

    These Philly Cheese Steak Stuffed Bread Rolls (or Philly Cheese Steak Bombs for short) are the best game day snack- they are savory and delicious and so addictive!

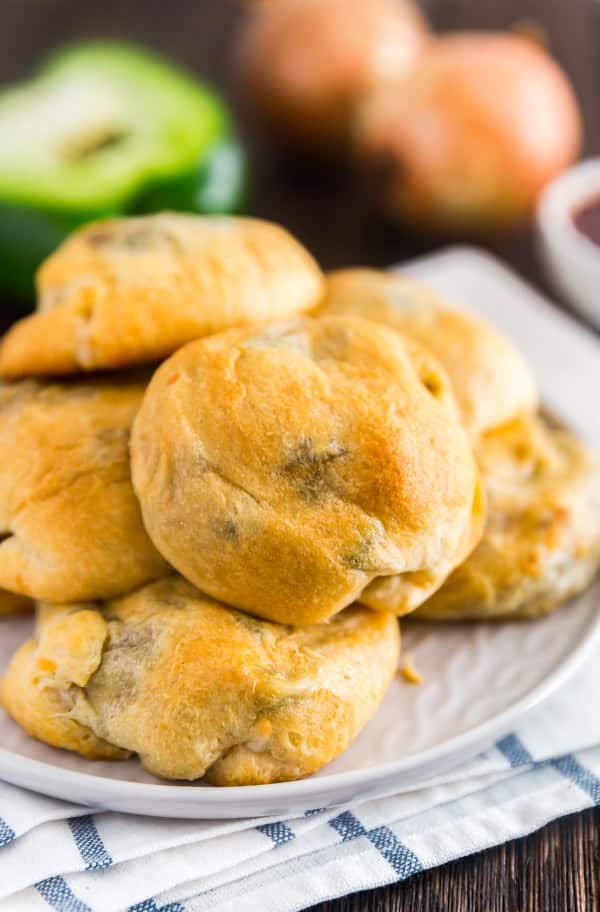
    A close up of a stack of Philly Cheese Steak Stuffed Bread Rolls on a plate.

    This post contains Affiliate Links. Please see the disclaimer here.

    It's almost time for the big game- you know the one, where everyone gets together and eats junk food, funny commercials and popstar-filled half time shows. J is totally bummed that the Bills didn't make it past the playoffs (duh). Though I'm not a huge football fan (as you can tell I'm definitely not a Bills fan!) I am a fan of making Stuffed Bread Rolls.

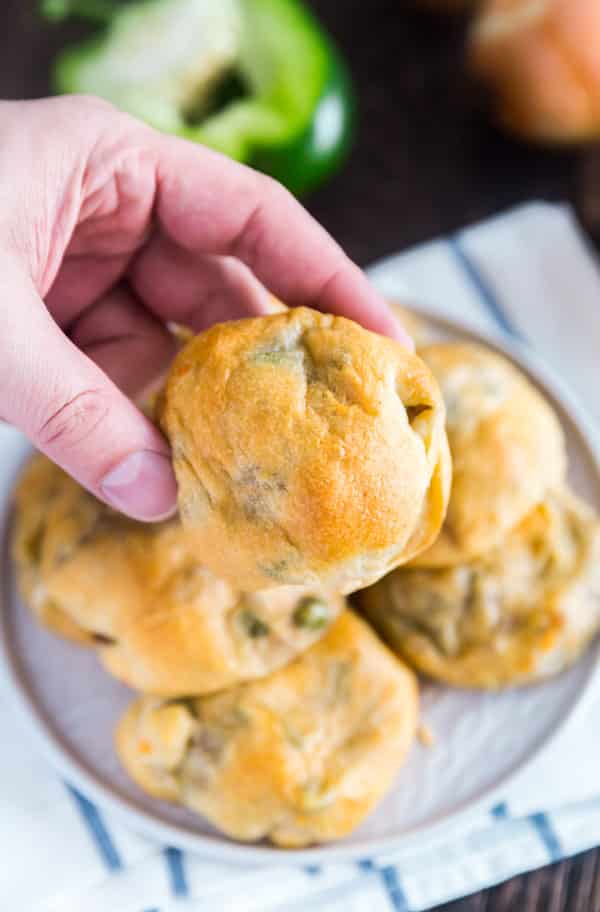
    A hand holding up a Philly Cheese Steak Stuffed Bread Roll

    These are everything that game day is about and that you'd find in a classic Philly Cheese Steak Sandwich; savory roast beef, caramelized onions and bell peppers, mozzarella cheese all wrapped up in a tender package of bread! After I finished photographing them, J and I literally could not stop eating them.

    A hand pulling apart a Philly Cheese Steak Stuffed Bread Roll with stretchy cheese.

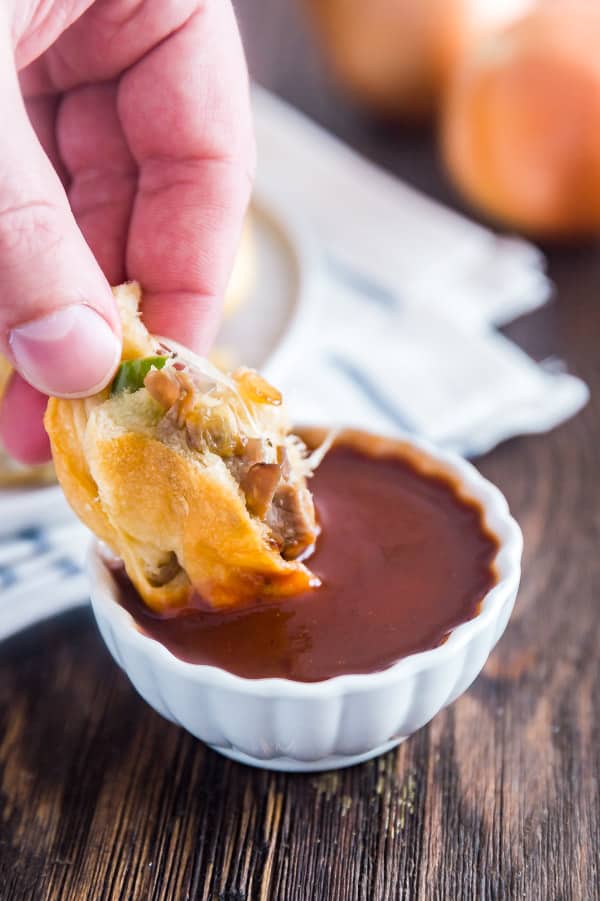
    This says a lot, because J is not really a fan of peppers and onions (he said they're not his favorite addition but he still enjoyed these. You can always leave them out if you have someone picky in your life like I do.). I dunked mine in A1 Steak Sauce, which was pretty tasty!

    I kind of wish I had made these with mushrooms as well, but I left them out this time because I didn't have any on hand. You'll want to take your time and be patient when forming the dough around the filling, it can be a bit temperamental and is quite fragile. But once you get the hang of it, they're not too bad- don't scrimp on the filling!

    A piece of a Philly Cheese Steak Stuffed Bread Roll being sdipped into a bowl of A1 steak sauce.

    Some great tips for making Cheese Steak Stuffed Bread Rolls:

    • Make sure to cool the fulling before making the rolls: the dough is delicate and if you do it while the filling is still hot it will be harder to close them.
    • I find it helpful to very gently pull on the edges of the dough to stretch it a but, just be careful when you do.
    • Don't scrimp on the filling- while you don't want to overfill them, you're making stuffed bread. So stuff it!
    • If you find a couple of holes in your roll, take bits of the extra dough (from the "long pointed part" of the crescent roll) and patch it up. They will still taste fabulous!
    • Line your pan to keep them from sticking and make clean up a little bit easier. You can use parchment but I prefer to use a silpat!

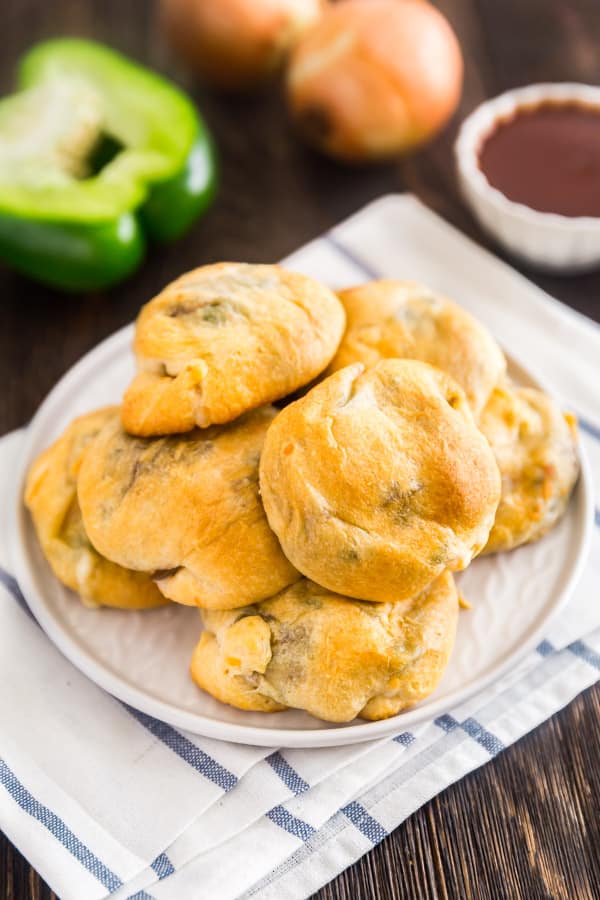
    A plate full of Philly Cheese Steak Stuffed Bread Rolls.


    A square image of a hand pulling apart a Philly Cheese Steak Stuffed Bread Roll.

    Philly Cheese Steak Stuffed Bread Rolls aka Philly Cheese Steak Bombs

    Jessy Freimann
    These Philly Cheese Steak Stuffed Bread Rolls (or Philly Cheese Steak Bombs for short) are the best game day snack- they are so easy to make and savory and delicious!
    No ratings yet
    Print Recipe Pin Recipe
    Prep Time 10 minutes mins
    Cook Time 40 minutes mins
    Total Time 50 minutes mins
    Course Appetizer
    Cuisine American
    Servings 8 rolls
    Calories 60 kcal

    Equipment

    • chefs knife
    • cutting board
    • sheet pan
    • measuring cups measuring spoons

    Ingredients
      

    • 1 Tablespoon olive oil
    • ½ cup chopped onion
    • ½ cup chopped green bell pepper
    • ⅓ pound deli roast beef roughly chopped (they came out to be around ½ inch pieces)
    • ¼ teaspoon garlic powder
    • ¼ teaspoon Montreal steak seasoning or the grill steak seasoning of your choice
    • ¼ teaspoon of Worcestershire sauce
    • 1 can crescent rolls
    • ½ cup shredded mozzarella cheese

    Instructions
     

    • In a medium frying pan, heat olive oil over medium heat.
    • Add onions and saute for 10 minutes, stirring often. They will begin to caramelize but keep an eye on them and don't let them burn.
    • Add peppers and saute for 10 mite minutes, stirring often.
    • Add the roast beef, garlic powder, steak seasoning and Worcestershire sauce. to the pan.
    • Saute for a couple minutes and then remove the pan from the heat and cool for 10 minutes.
    • Preheat the oven to 350 degrees and line a baking pan.
    • Working with one crescent roll at a time, lay out the crescent roll and gently pull the sides to stretch it slightly.
    • Place a tablespoon of the meat mixture into the middle of the larges part of the crescent dough.
    • Sprinkle some shredded mozzarella cheese onto the mixture.
    • Carefully pull all sides of the dough over the mixture and twist a bit to close all ends at the top. This should form a neat package.
    • Place the roll onto the lined pan with the side that had all the gathered edges of the crescent roll facing down.
    • Bake for around 15 minutes or until golden brown. Serve immediately.

    Notes

    Make sure to cool the fulling before making the rolls: the dough is delicate and if you do it while the filling is still hot it will be harder to close them.
    I find it helpful to very gently pull on the edges of the dough to stretch it a but, just be careful when you do.
    Don't scrimp on the filling- while you don't want to overfill them, you're making stuffed bread. So stuff it!
    If you find a couple of holes in your roll, take bits of the extra dough (from the "long pointed part" of the crescent roll) and patch it up. They will still taste fabulous!
    Line your pan to keep them from sticking and make clean up a little bit easier. You can use parchment but I prefer to use a silpat!

    Nutrition

    Serving: 2rollsCalories: 60kcalCarbohydrates: 1gProtein: 6gFat: 4gSaturated Fat: 1gPolyunsaturated Fat: 1gMonounsaturated Fat: 2gCholesterol: 16mgSodium: 328mgPotassium: 60mgFiber: 1gSugar: 1gVitamin A: 49IUVitamin C: 9mgCalcium: 89mgIron: 1mg
    Tried this recipe?Let us know how it was!

    Helpful tools:


    Here's another favorite bread recipe:

    3 Cheese Garlic Bread

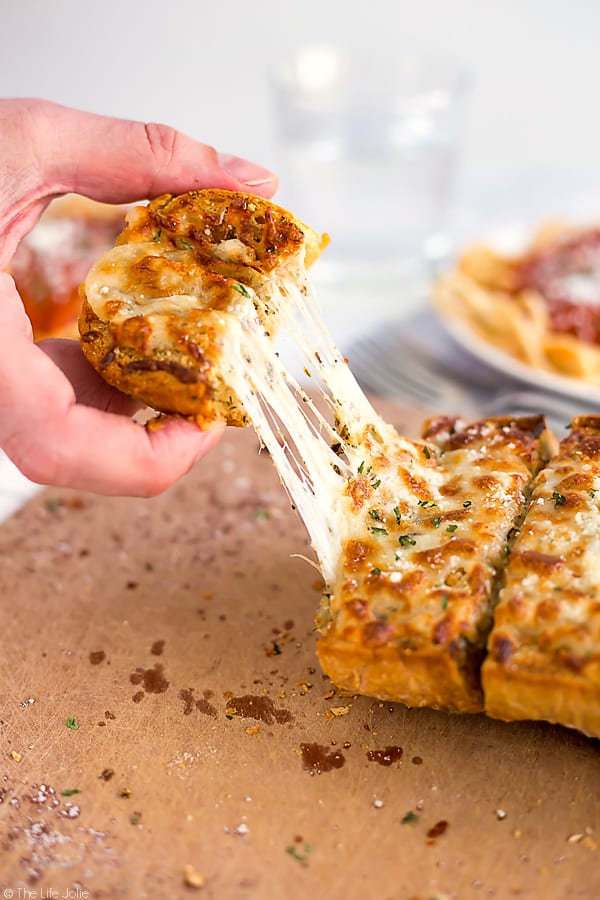
    This homemade Three Cheese Garlic Bread recipe is a super easy accompaniment to a delicious Italian meal (or any meal for that matter!). It's really quick to spread with butter, herbs and a ton of melted cheese and pre-cut so that it's even easier to pull apart and enjoy with dinner! This is a major family favorite!

    I also love this bread recipe:

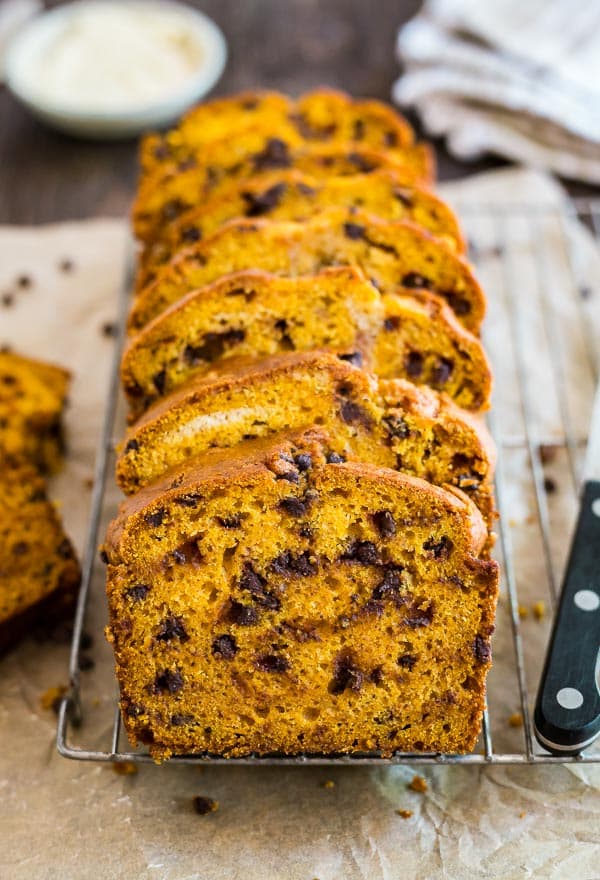
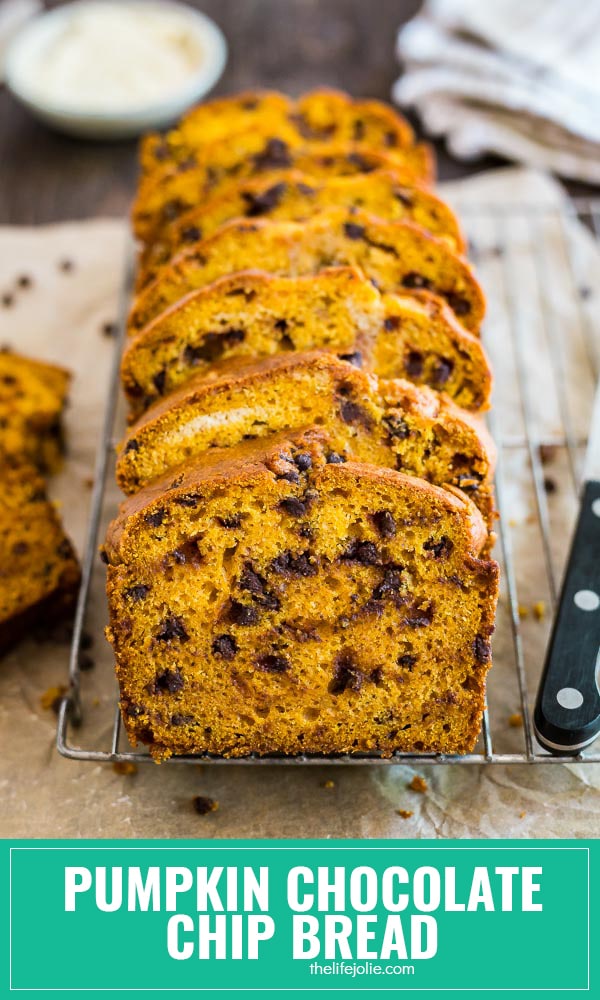
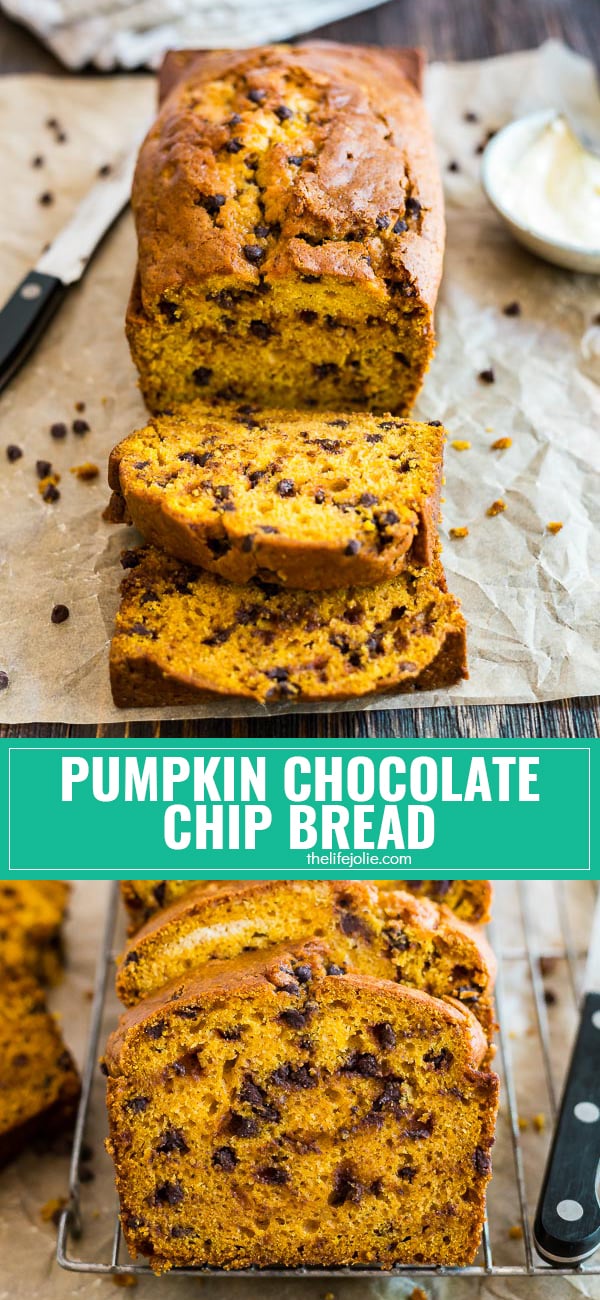
    Pumpkin Chocolate Chip Bread

    Pieces of Pumpkin Chocolate Chip Bread lined up on a coolnig rack with the front one in focus.

    You can find a full index of my recipes here.

    Don't forget to follow The Life Jolie on Pinterest for more recipe inspiration!

    Or if Pinterest isn't your style, bookmark this post!

    Let's keep the conversation going- join my Facebook group! These Philly Cheese Steak Stuffed Bread Rolls (or Philly Cheese Steak Bombs for short) are the best game day snack- they are so easy to make and savory and delicious!

    Buffalo Chicken Braid Recipe

    Jan 7, 2018 · 18 Comments

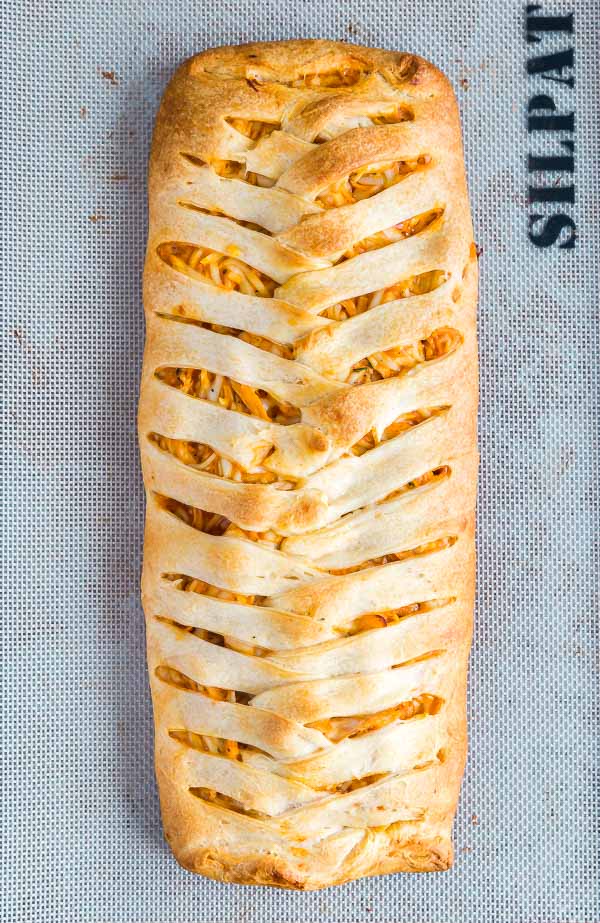
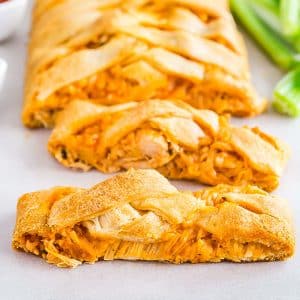
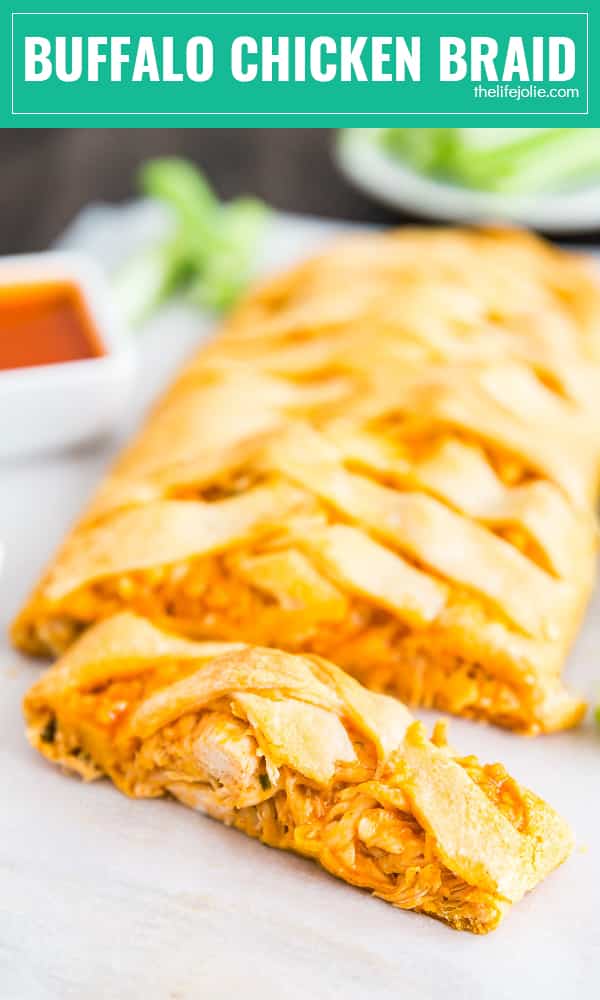
    A square image of Buffalo Chicken Braid .

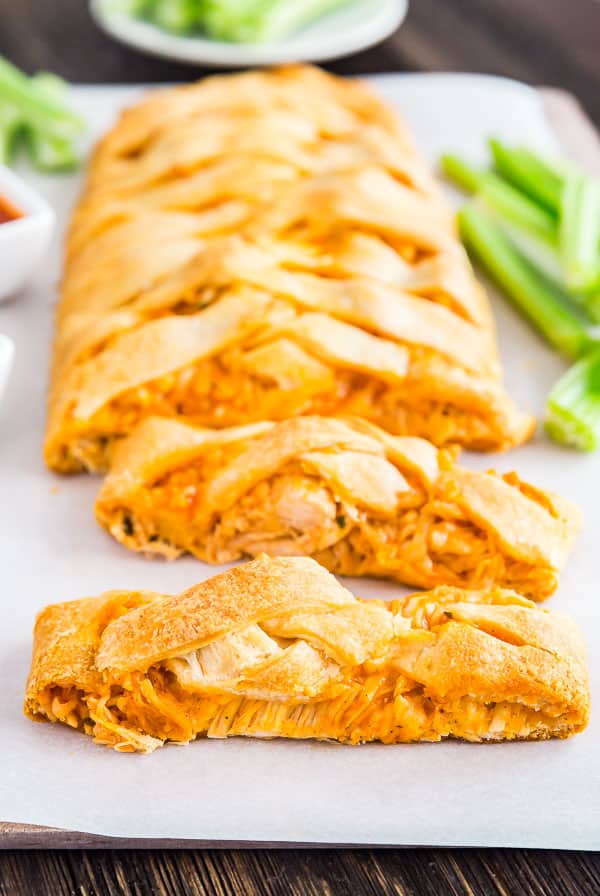
    You will not believe how easy this Buffalo Chicken Braid is to make! This is a proven crowd pleaser- your family will be fighting for seconds! 

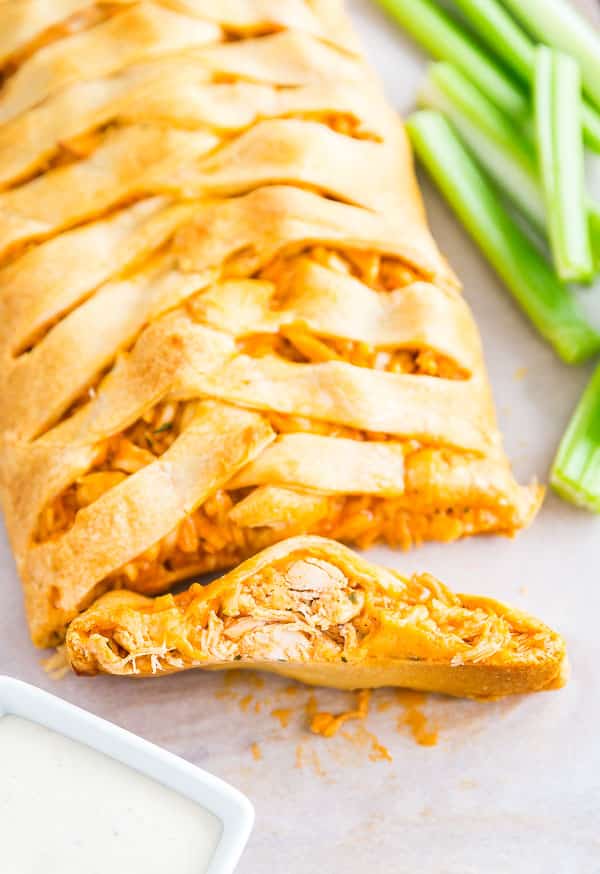
    Two slices of the Buffalo Chicken Braid with the rest of the braid behind it.

    This post contains Affiliate Links. Please see the disclaimer here.

    When it comes to snack foods, I also cannot get enough of salty, delicious, extremely naughty snack foods. I think that's why game day foods have my whole heart And it's not game day without something involving Buffalo Chicken Wings. I mean, Buffalo New York is right in our backyard. So this recipe was absolutely necessary.

    A Buffalo Chicken Braid on a pan.

    I mean, what's not to like? Spicy, savory buffalo chicken (it's basically an easy buffalo chicken dip), with mozzarella cheese and enveloped in tender crescent roll dough. Carbs make everything better (I know we're not supposed to talk about carbs this early in the yea so we'll pretend I never said that). But seriously, this was so stupid-easy to make and was really tasty!

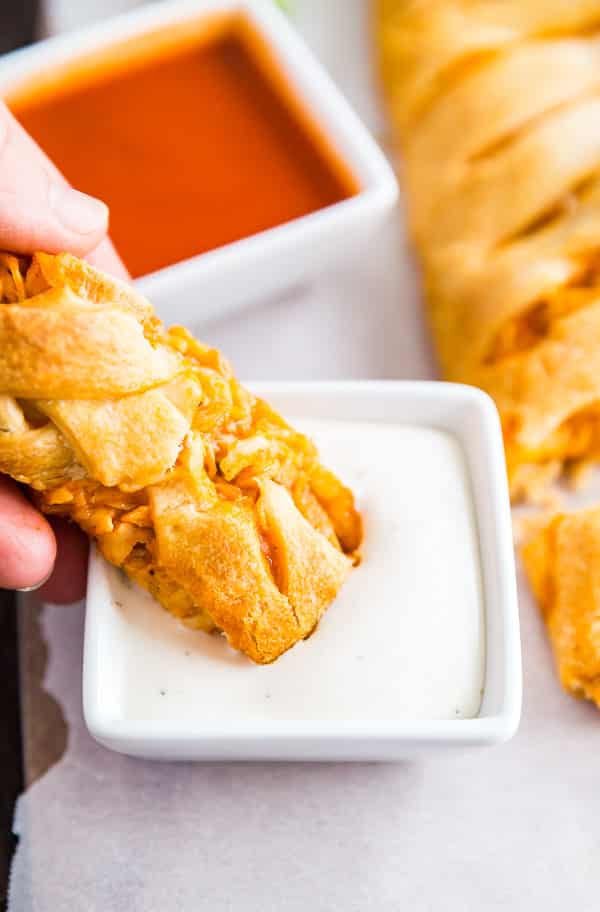
    A hand dipping a piece of Buffalo Chicken Braid into ranch dressing.

    You will, without a doubt, be the most popular person at any party or potluck that you bring this to. This is real talk here, people! J requests this for every single food day they have at his work. Trust me when I say you've got to make this!

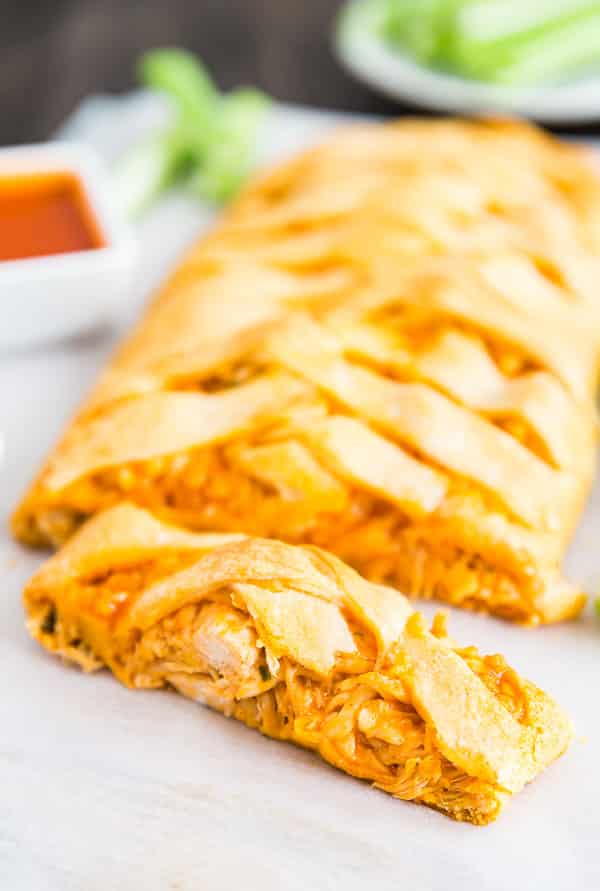
    A Buffalo Chicken Braid with a slice of it in the front.

    Expert tips for making a Buffalo Chicken Braid:

    1. You can control just how spicy it is by reducing or increasing the amount of sauce, which is why I gave a range in the recipe. Taste it as while you're mixing the chicken filling.
    2. If a crescent roll sheet isn't available (my local grocery store recently stopped carrying them and I'm SO bummed!) you can use crescent rolls- carefully unroll them and leave them in a rectangle. Use a rolling pin to roll them together so that they're one sheet. You'll want to be extra careful when braiding the dough.
    3. When cutting the dough strips that you'll be braiding, I prefer to use a pizza wheel- I've also used a knife but  the pizza wheel makes it so much easier!
    4. You can make this ahead and refrigerate it on your sheet pan until you're ready to serve; it tastes great warm or cold (though I'll admit, fresh out of the oven is better- so maybe assemble and bake it off right before serving). 

    A slice of Buffalo Chicken Braid facing the camera so you can see the filling.

    A square image of Buffalo Chicken Braid .

    Buffalo Chicken Braid Recipe

    Jessy Freimann
    This buffalo chicken braid is always a huge hit at any party. It can be assembled ahead and baked right before serving and is a great way to use leftover cooked chicken.
    No ratings yet
    Print Recipe Pin Recipe
    Prep Time 10 minutes mins
    Cook Time 35 minutes mins
    Total Time 45 minutes mins
    Course Appetizer
    Cuisine American
    Servings 8 servings
    Calories 127 kcal

    Equipment

    • sheet pan
    • measuring cups
    • paring knife
    • measuring spoons

    Ingredients
      

    • 2 cups shredded cooked chicken
    • 1 Tablespoon ranch seasoning
    • ½ cup buffalo wing sauce- make sure it's buffalo WING sauce not regular hot sauce the more sauce you add, the spicier it will be- so start with a ½ cup and taste it- add more sauce accordingly.
    • 1 ½ cups shredded mozzarella cheese
    • 1 crescent roll sheet or if they're unavailable, you can roll together 1 can of crescent roll dough

    Instructions
     

    • Preheat the oven to 350 degrees.
    • In a bowl, mix the chicken, ranch seasoning, Buffalo wing sauce and mozzarella cheese and set aside.
    • Place the crescent sheet onto the a silicone baking pan liner or piece of parchment paper and roll it slightly to flatten (you don't want it too thin).
    • Transfer the liner or dough to the sheet pan.
    • Using a pizza wheel or knife, cut strips about 1 ½ inches into each side, leaving around 3-4 inches of dough uncut on the inside.
    • Place the chicken mixture down the center where the dough is not cut.
    • Take the strips and fold them over each other, pressing lightly in the middle to create the braid.
    • Fold the ends in to hold in the filling.
    • Bake for around 30-35 minutes or until golden brown.
    • Serve immediately or refrigerate and reheat when ready to serve.

    Notes

    It can be difficult to transfer this from the pan to the serving platter or cutting board. I found the easiest way to do the transfer was to loosen it underneath with a spatula, invert it onto another pan and then invert that onto your platter or cutting board. Just be gentle and it shouldn't alter the appearance.
    You can assemble this in advance and bake right before serving.
    Leftovers last for up to 4 days covered in the refrigerator.

    Nutrition

    Serving: 2slicesCalories: 127kcalCarbohydrates: 2gProtein: 13gFat: 7gSaturated Fat: 3gPolyunsaturated Fat: 1gMonounsaturated Fat: 2gCholesterol: 43mgSodium: 299mgPotassium: 96mgSugar: 1gVitamin A: 156IUCalcium: 110mgIron: 1mg
    Tried this recipe?Let us know how it was!

    Helpful tools:


    I also love this buffalo chicken recipe is:

    Easy Buffalo Chicken Sliders

    These Quick and Easy Baked Buffalo Chicken Sliders are one of my favorite game day recipes! They come together lightning fast in the oven with a few simple ingredients like shredded chicken, ranch, buffalo sauce, mozzarella cheese and buns. They are the best appetizer to bring to any party!!

    You can find a full index of my recipes here.

    Don't forget to follow The Life Jolie on Pinterest for more recipe inspiration!

    Or if Pinterest isn't your style, bookmark this post!

    Let's keep the conversation going- join my Facebook group! This Buffalo Chicken Braid recipe is a proven crowd-pleaser! It's super easy to make and full of spicy buffalo flavor. Make this for game day and your family will fight for seconds!
    Classic Hamburger Stew Recipe

    Dec 28, 2017 · 2 Comments

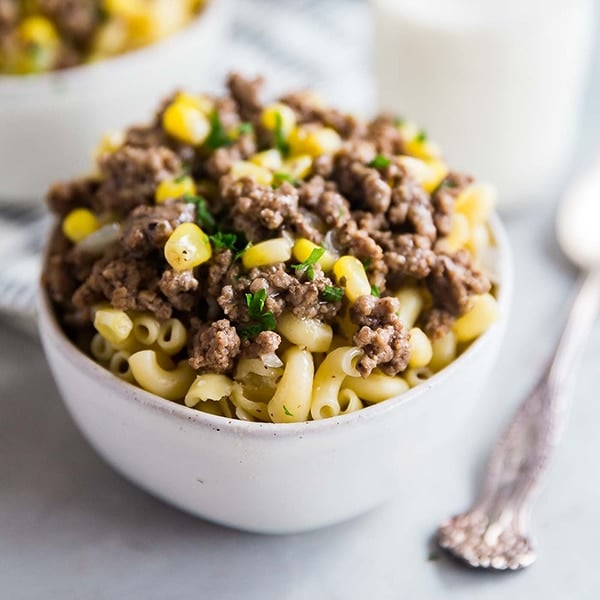
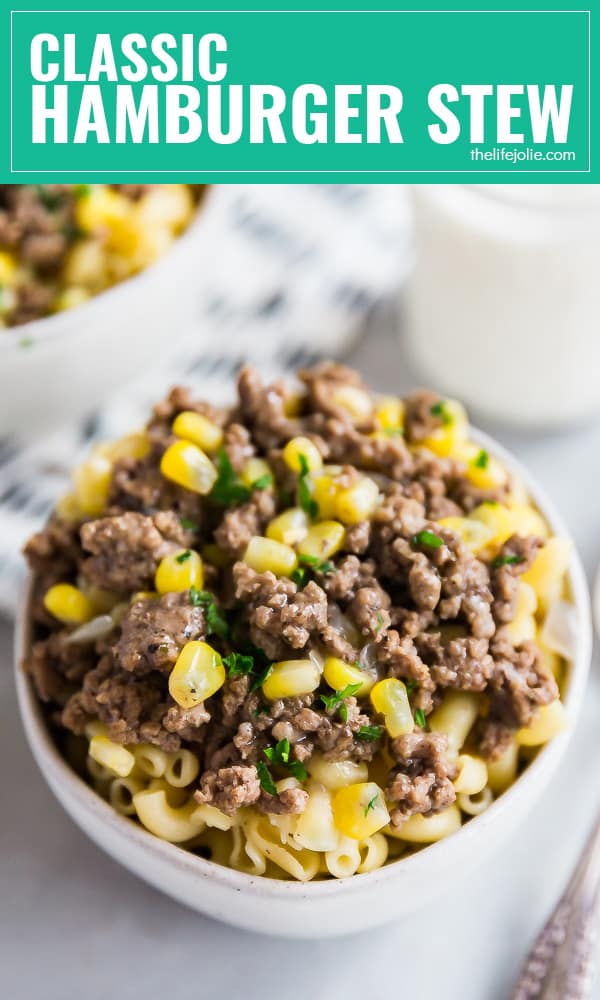
    A square image of Classic Hamburger Stew.

    This Classic Hamburger Stew will transport you right back to the dinner table of your childhood and be a simple go-to dinner the whole family will love!

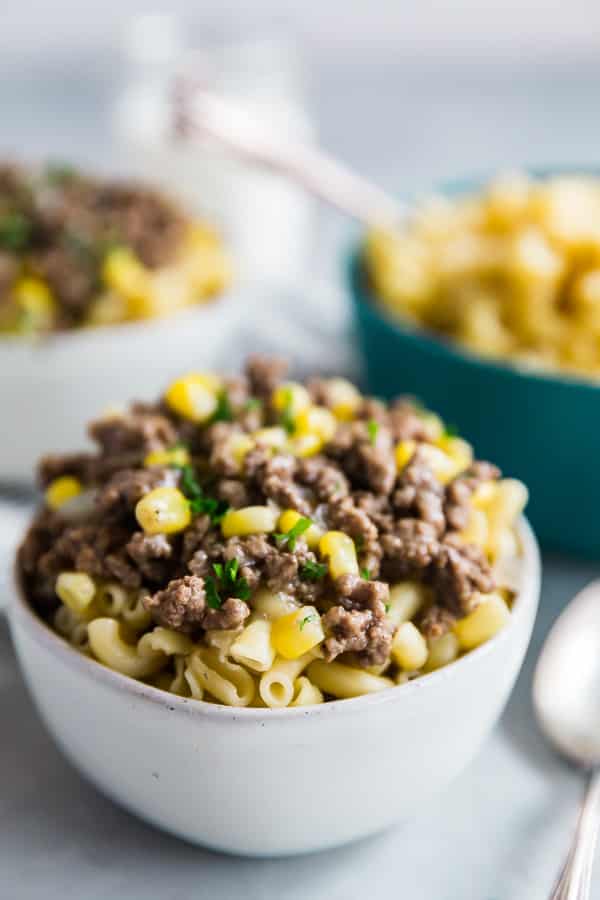
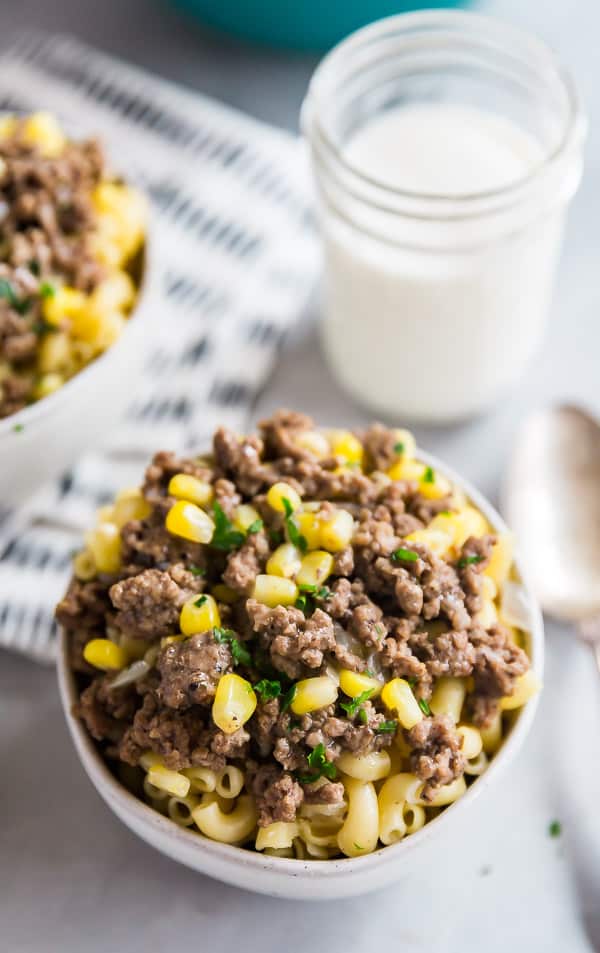
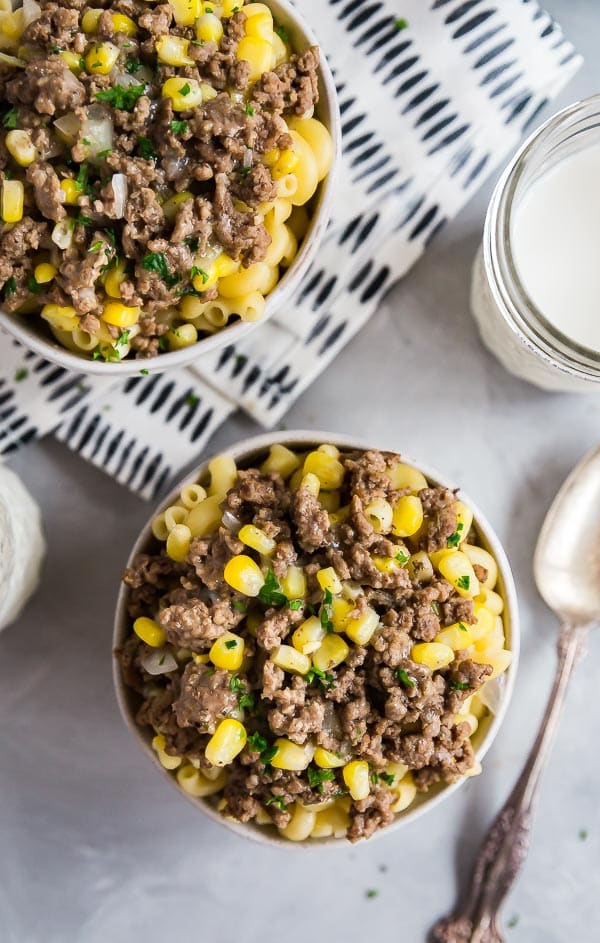
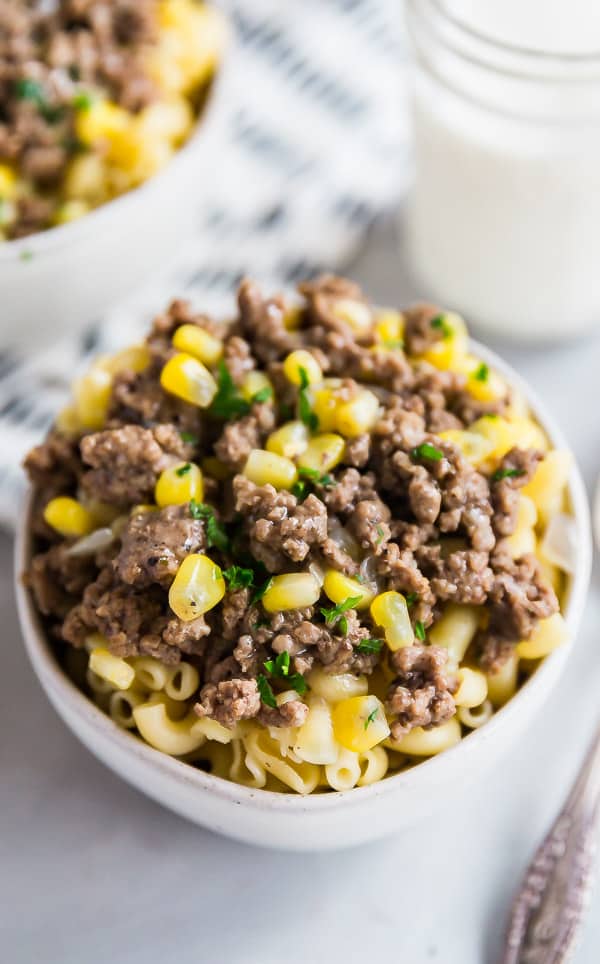
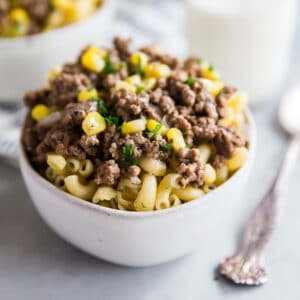
    Classic Hamburger Stew over elbow macaroni in a bowl.

    This post contains Affiliate Links. Please see the disclaimer here.

    I have to hand it to my mom. She has always had a slew of the most simple and relatively cost-efficient meals up her sleeve. These served her so well for so many years!

    They weren't fancy or even slightly exotic. But they were beyond comforting and still to this day, when she prepares these recipes (often for my girls) I can't help but eat some myself because they taste like my childhood.

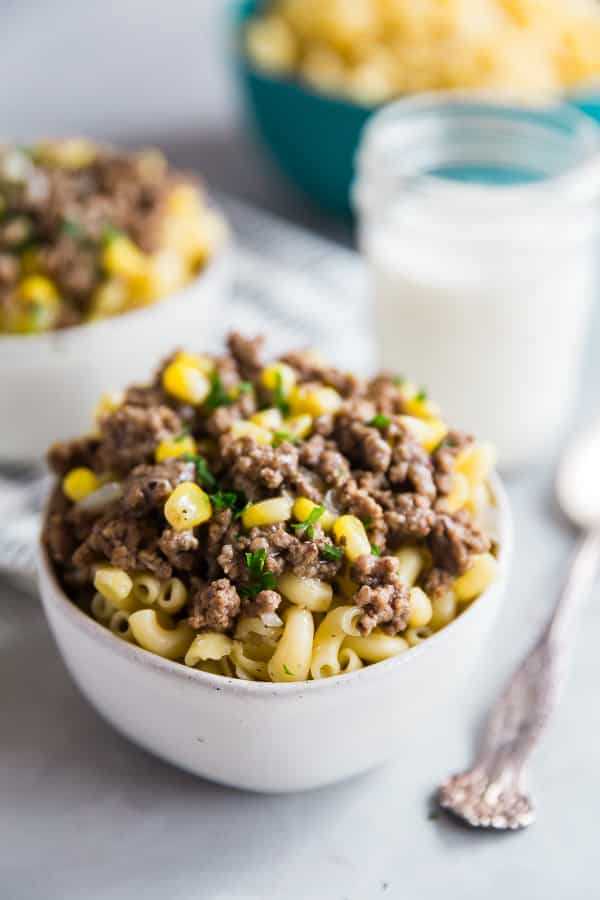
    Classic Hamburger Stew in a bowl with milk behind it.

    So when I think of stew, I typically think of fall-apart-tender chunks of beefy stew meat in a savory gravy with veggies and served over potatoes or polenta (like this one!). Now don't get me wrong, I do love that type of stew. But there's something to be said for this much simpler and dare-I-say slightly more "low-brow" hamburger stew.

    An over head shot of a couple bowls of Classic Hamburger Stew.

    You won't find any special veggies outside of the simple peas or corn that are currently inhabiting your freezer. You also won't find any root vegetables, in fact we serve this over elbow macaroni to really up the kid-friendly factor. And we use ground beef, because ain't nobody got time for a lengthy cooking process.

    A close up imageo f a bowl of Classic Hamburger Stew.

    The idea is to be able to source all the ingredients in your pantry, fridge or freezer and throw them into a pan into a quick savory meal that will comfort your family on the chilliest of nights. And though it's nothing overly fancy or particularly special, this Classic Hamburger Stew will transport you back to the dinner table of your childhood and provide any easy go-to meal for those busy nights that you don't want to be bothered putting in any extra effort.

    A bowl of Classic Hamburger Stew with a spoon next to it.

    A square image of Classic Hamburger Stew.

    Classic Hamburger Stew Recipe

    Jessy Freimann
    This Classic Hamburger Stew will transport you right back to the dinner table of your childhood and be a simple go-to dinner the whole family will love!
    No ratings yet
    Print Recipe Pin Recipe
    Prep Time 5 minutes mins
    Cook Time 25 minutes mins
    Total Time 30 minutes mins
    Course dinner, Entree, Main
    Cuisine American
    Servings 6 servings

    Ingredients
      

    • 1-1 ½ pound ground beef we prefer 80/20 so that we don't have to add oil to the pan
    • ½ cup chopped onion
    • 1 teaspoon Kosher Salt to taste
    • ¼ teaspoon ground black pepper to taste
    • ½ teaspoon Italian seasoning to taste
    • ½ cup to 1 cup water depending on how much gravy you want + some for the slurry
    • 2 Tablespoons flour or more if your slurry doesn't thicken it enough for you
    • 1 cup Frozen corn or peas
    • 2 cups Elbow macaroni cooked as per package directions

    Instructions
     

    • Saute hamburger meat over medium high heat until browned, breaking it up with the spoon, about 5-7 minutes.
    • Add onions to the pan and saute until soft about 5 more minutes.
    • season with salt, pepper and Italian seasoning to taste and add water and corn to the pan.
    • Simmer stirring often for 10-15 minutes.
    • In a small bowl, combine flour with a couple tablespoons of cold water to create a slurry.
    • Mix this into the beef mixture and stir, the sauce will thicken.
    • Taste and adjust seasonings accordingly.
    • Serve over elbow macaroni and enjoy!

    Notes

    Much of this is done to taste (as all good mom-recipes are). Feel free to alter all amount to taste or to fit the amount of people you're cooking for.
    Tried this recipe?Let us know how it was!

    Helpful tools:


    Another recipe featuring hamburger meat that I love is:

    Classic Porcupine Meatballs

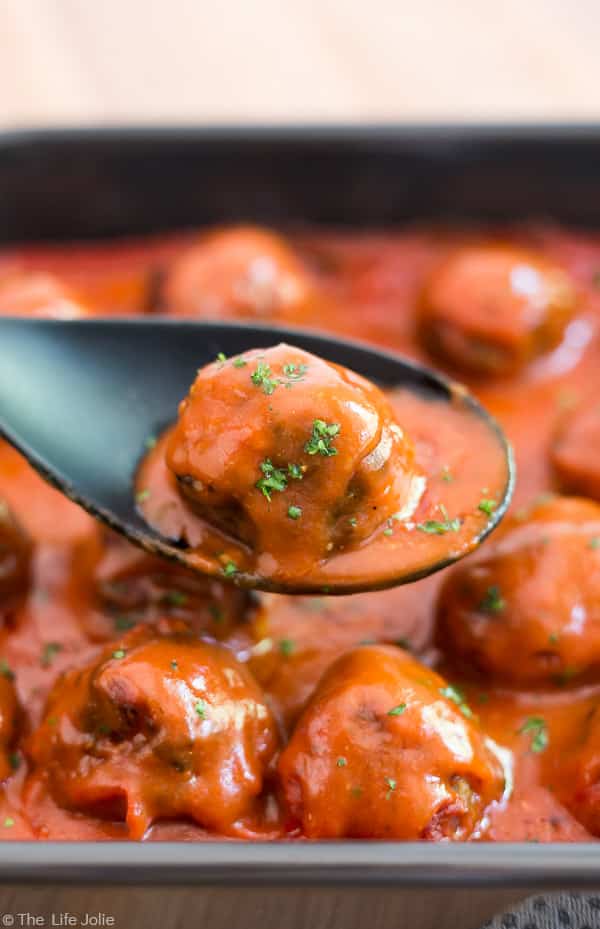
    A Classic Porcupine Meatball being picked up with a black spoon from a dark pan full of other meatballs.

    I also love this recipe featuring hamburger meat:

    20 Minute Taco Pasta

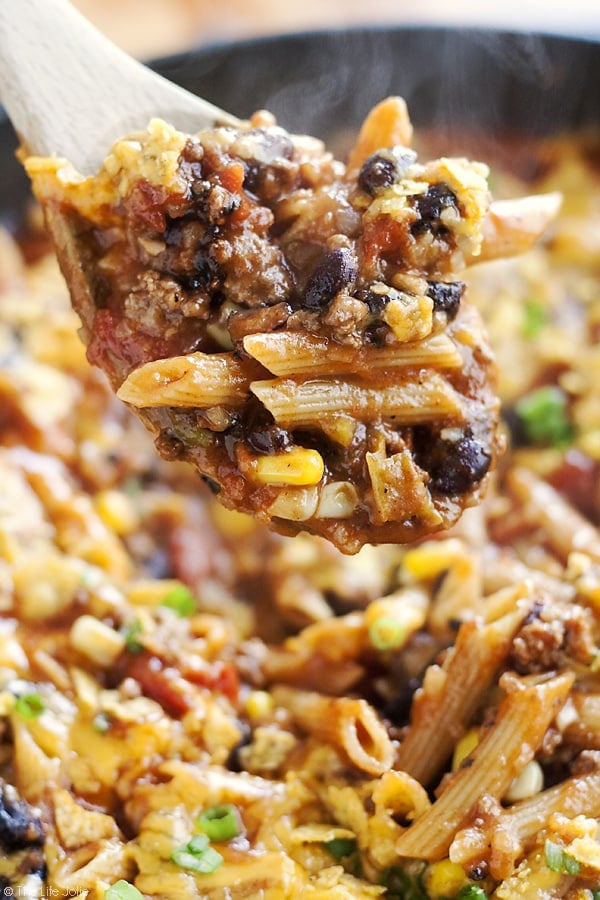
    20 Minute Taco Pasta is such an easy one pot recipe. This tasty dinner is made in one skillet with ground beef and Barilla Pronto Penne Pasta. It's creamy, cheesy and full of great flavor that the whole family will love!

    You can find a full index of my recipes here.

    Don't forget to follow The Life Jolie on Pinterest for more recipe inspiration!

    Or if Pinterest isn't your style, bookmark this post!

    Let's keep the conversation going- join my Facebook group! This Classic Hamburger Stew will transport your right back to the dinner table of your childhood and provide a simple and comforting go-to option for a quick and easy dinner recipe the whole family will love!

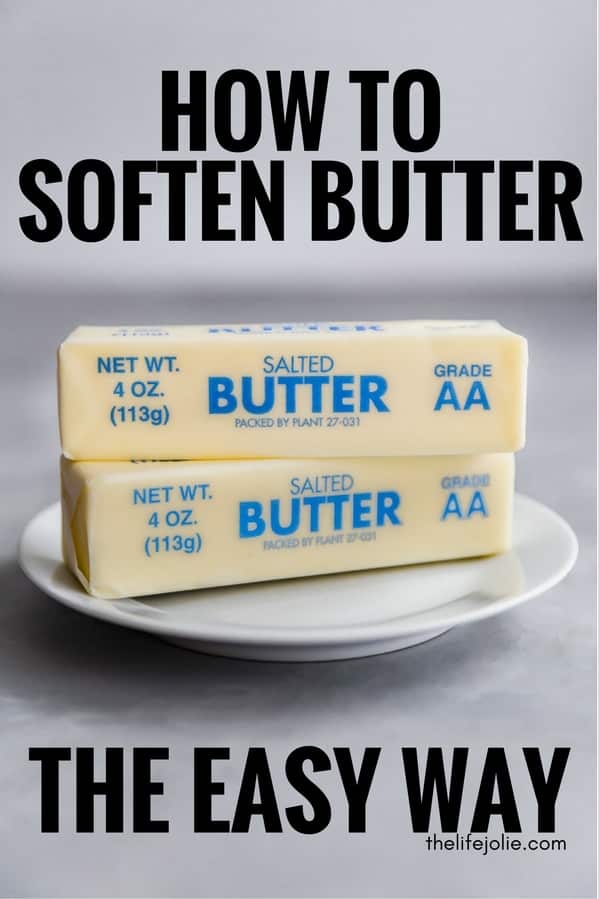
    How to soften butter the easy way | The Life Jolie Kitchen Basics

    Dec 12, 2017 · 2 Comments

    It IS possible to soften butter in the microwave without melting it and I'm going to show you how! Here are a step-by-step directions to get perfectly softened butter without having to plan ahead.

    It IS possible to soften butter in the microwave without melting it and I'm going to show you how to soften butter the easy way!

    It IS possible to soften butter in the microwave without melting it and I'm going to show you how! Here are a step-by-step directions to get perfectly softened butter without having to plan ahead.

    This post contains Affiliate Links. Please see the disclaimer here.

    If you're anything like me, you get inspired to make cookies and you fail to plan ahead. I cannot tell you how many times I've been ready to make some killer cookies, only to realize my butter is super cold and hard as a rock. And then, to make matters worse, I would put it in the microwave for much too long and end up with melted butter.

    I tried the whole put-a-glass-over-the-stick to lock out all the air. All those Pinterest hacks promising instantly softened butter? Yeah, I tried them and my butter was still not soft. I got to the point where, I knew I had to figure out how to make the microwave work for me and by butter and not against us.

    So one day, armed with a box full of sticks of butter, I set out to find a solution the this problem. After much trial and error, I figured it out.

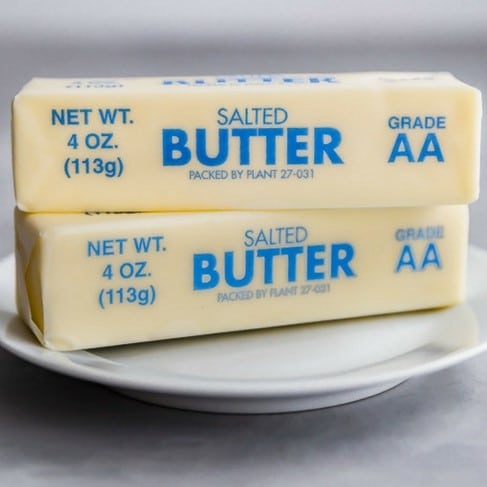
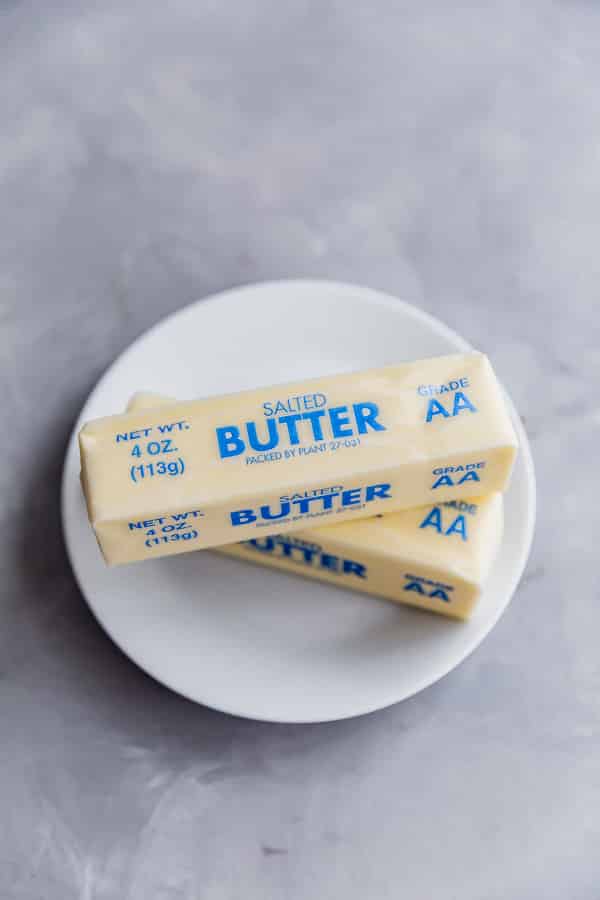
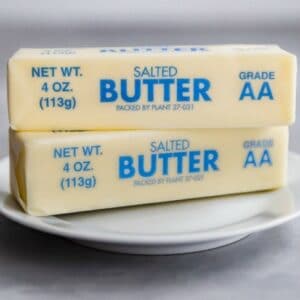
    An overhead shot of two sticks of butter on a plate from how to soften butter

    Now, as with most things in life this isn't completely fool proof. Microwaves will vary. But it's good. It's very good. You can microwave butter to soften it without ending up with a bowl full of butter that's begging you to dip some lobster meat into it. You just have to get to know your microwave.

    But in the interest of saving you some money and several sticks of wasted butter, I'm going to break it down for you in a clear way that may will take a large chunk of the trial-and-error out of the equation. You may lose one or two stick of butter up front but follow my method and you will get to know your microwave in no time and be able to make those delicious cookies without having to plan ahead!

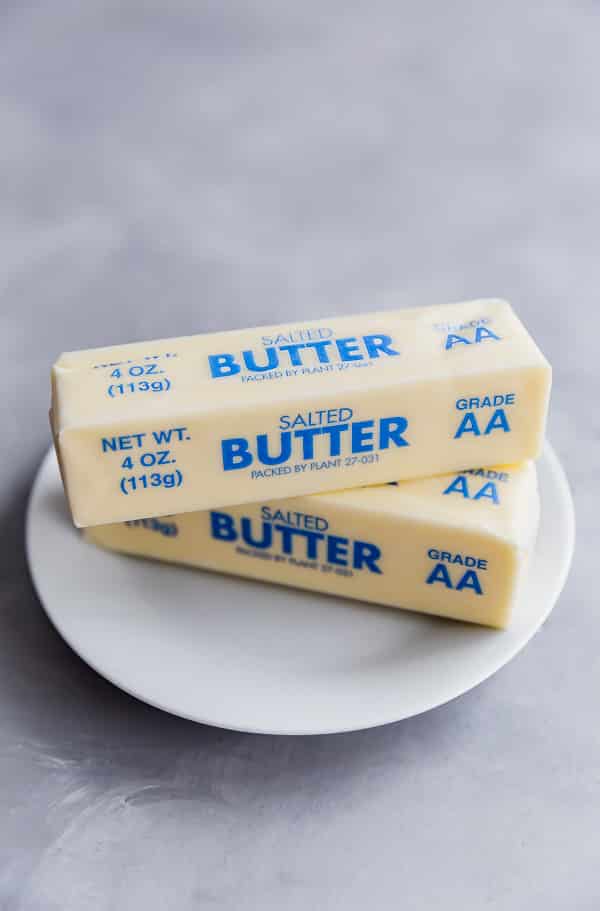
    Two sticks of butter on a plate from how to soften butter

    It IS possible to soften butter in the microwave without melting it and I'm going to show you how! Here are a step-by-step directions to get perfectly softened butter without having to plan ahead.

    How to soften butter the easy way

    Jessy Freimann
    This will show you how to easily soften butter so that it doesn't fully melt but is ready right away for baking
    5 from 1 vote
    Print Recipe Pin Recipe
    Prep Time 1 minute min
    Cook Time 1 minute min
    Total Time 2 minutes mins
    Course hack, How-to, kitchen basics
    Cuisine American
    Servings 1 stick
    Calories 1 kcal

    Equipment

    • Microwave

    Ingredients
      

    • 1 stick butter

    Instructions
     

    • Leave the butter in it's wrapper and carefully place it onto your microwave safe dish.
    • Place the dish into the microwave and close the door.
    • Run the microwave for 10 seconds at full power.
    • Open the door and feel the butter. This is where you need to use your judgement. My butter still felt relatively firm but not cold anymore and not actually warm either.
    • If the butter feels how I just described it, turn it over and nuke it for 10 more seconds.
    • If the butter feels a bit softer than I described above turn it over and microwave it for 5 more seconds.
    • If the butter feels firm but still a bit cold, microwave it for 15 more seconds.
    • After this you can carefully unwrap the butter and resume your baking.

    Notes

    After the first-or-so times you do this, you'll have an idea of exactly what to expect from your microwave. Then you'll be golden.
    In my experience, most microwaves are pretty consistent and I've personally had consistent results without our microwave (which isn't new but isn't too old either). But it's all about feeling the butter as you go.

    Nutrition

    Serving: 0.25cupCalories: 1kcalCarbohydrates: 0.1gProtein: 0.03gFat: 0.03gSaturated Fat: 0.02gMonounsaturated Fat: 0.01gCholesterol: 0.1mgSodium: 1mgPotassium: 1mgSugar: 0.1gVitamin A: 2IUCalcium: 1mg
    Tried this recipe?Let us know how it was!

    You can find a full index of my recipes here.

    Don't forget to follow The Life Jolie on Pinterest for more recipe inspiration!

    Or if Pinterest isn't your style, bookmark this post!

    Let's keep the conversation going- join my Facebook group!
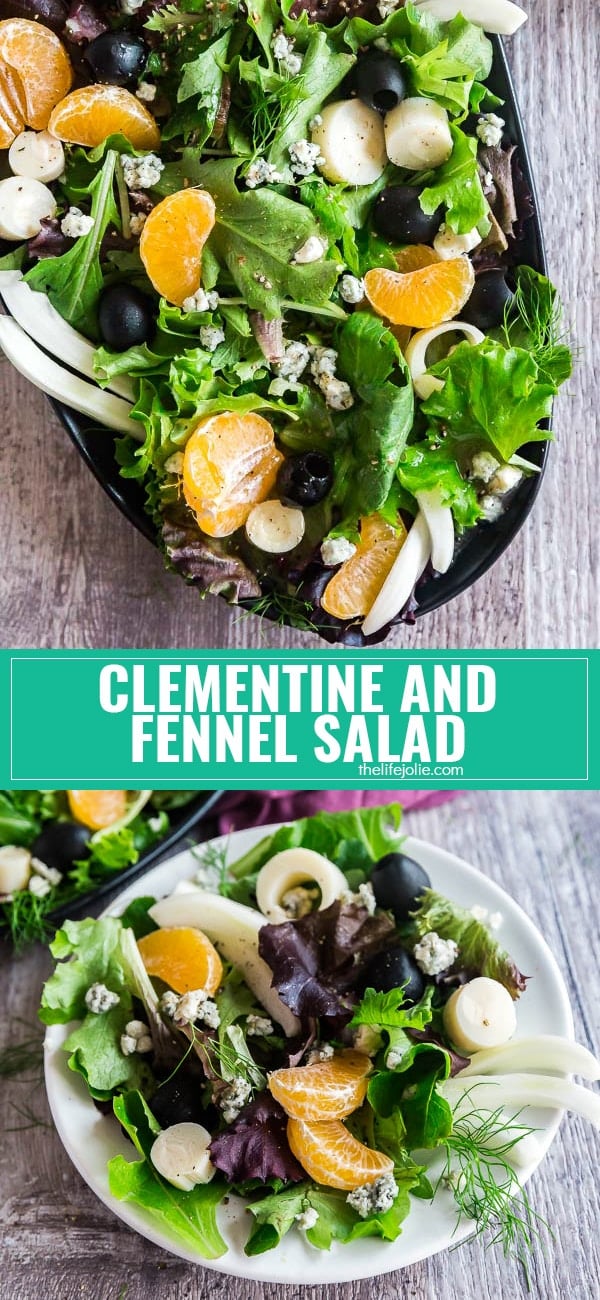
    Clementine and Fennel Salad Recipe

    Dec 7, 2017 · 8 Comments

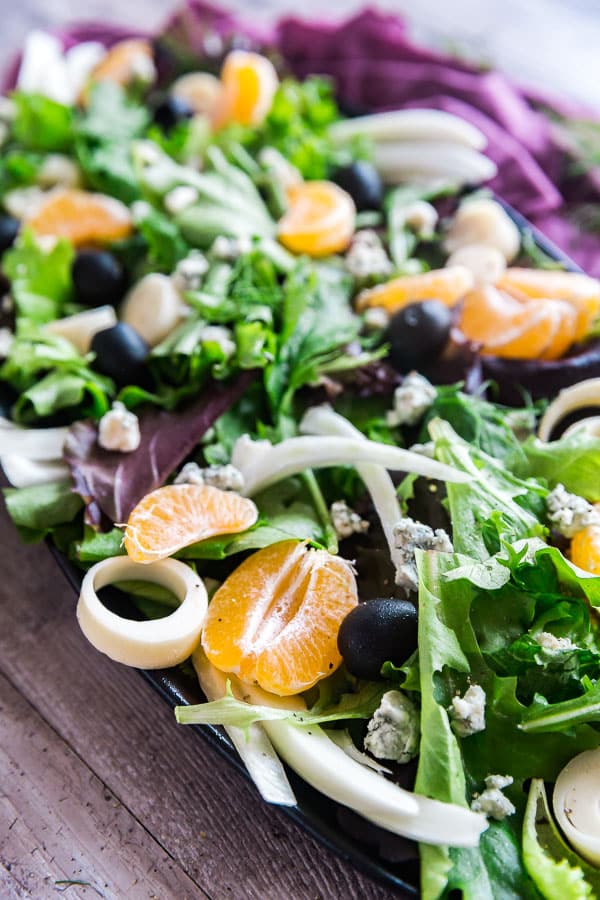
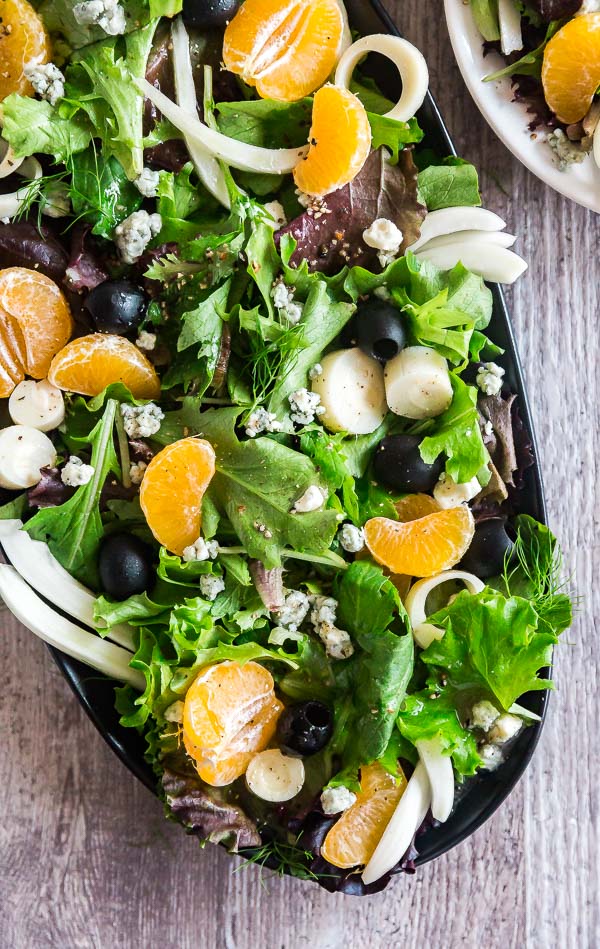
    A square image of Clementine and Fennel Salad.

    Clementine and Fennel Salad is light, fresh and delicious. It's seriously easy to throw together and special enough to serve for a holiday gathering.

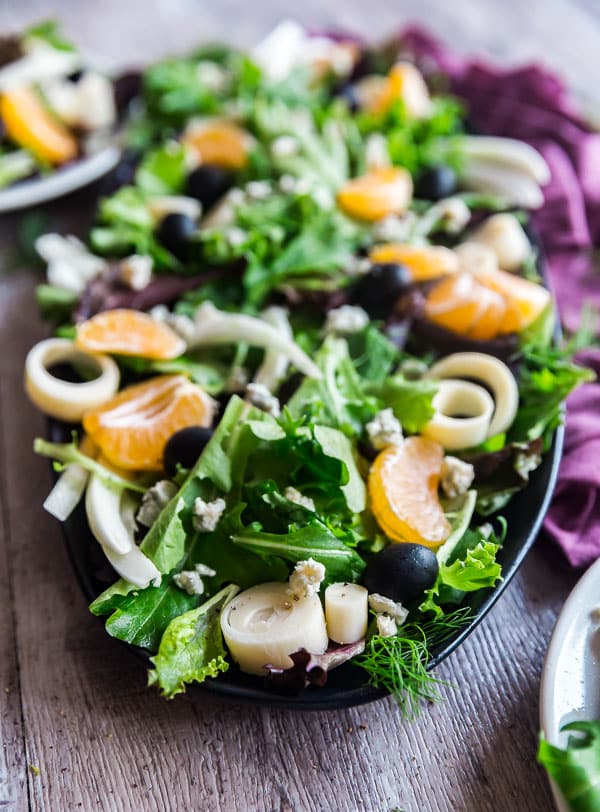
    A close up of Clementine and Fennel Salad on a black platter.

    This post contains Affiliate Links. Please see the disclaimer here.

    When I originally wrote this post, I was having one of those do-as-I-say-not-as-I-do moments. I know. I'm the worst. You see, I made this insanely delicious Fennel and Clementine Salad as my dish to pass for Christmas Day a few years ago. Everyone pretty much lost their minds over it, in the best way possible. And I knew right away that I had to share it with you guys. So I grabbed more of the fixings, took some photos and then ate it all week for lunch (#noregrets!).

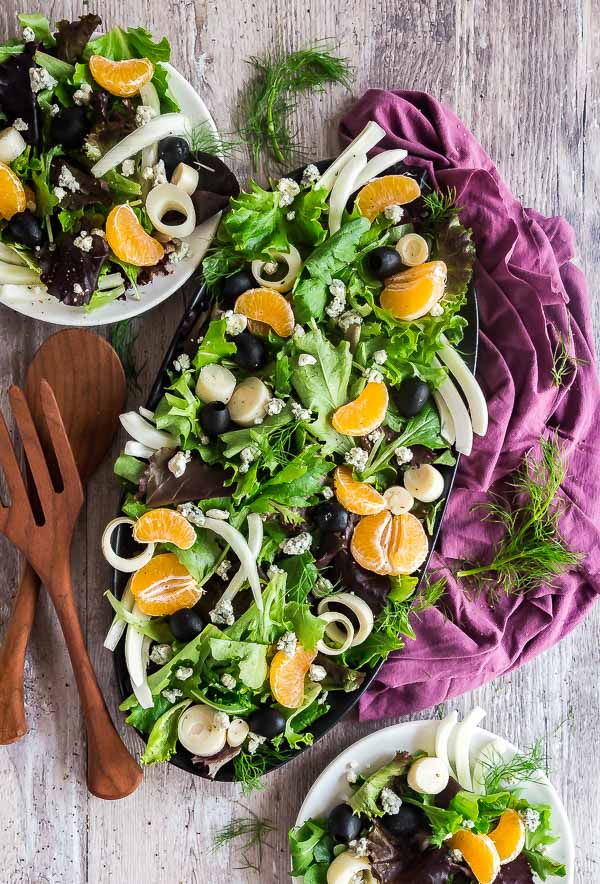
    An overhead shot of Clementine and Fennel Salad with plates of it on either side.

    This all sounds great so far, right? Yeah, sure. Except it came time to edit the photos and I realized that I failed to add the fennel to the salad that I photographed! I'm totally embarrassed; I mean, can you imagine what would happen if my head wasn't attached? I'm going to chalk this one up to pregnancy brain at it's finest, since I was pregnant at the time. Bubbles was obviously eating all my brain cells (not possible? It is now!).

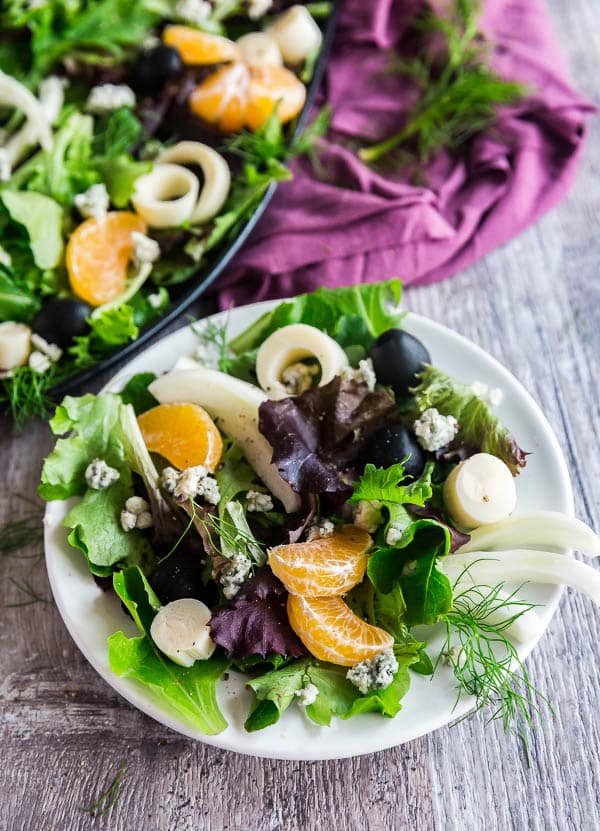
    A plate with a Clementine and Fennel Salad with the man platter behind it.

    So, yeah. It was awkward. I knew I needed to retake these photos because the fennel is a main component the salad. But I needed a minute. Between the exhaustion and discomfort of my pregnant state and the fact life took over, I waited a bit more than minute before retaking the photos. So please accept my apologies!

    THe middle of a platter of Clementine and Fennel Salad.

    But, in happier news, this is such a delicious and easy salad to assemble. The ingredients all play deliciously off of each other and in the interest of keeping it simple, I even bought a packaged dressing, Girard's Champagne Vinaigrette- it's so darn amazing! You can get it here (This is not an affiliate link- it's available on Amazon but for quadruple the price which seems silly. I personally found it at my local Wegmans).

    An overhead image of the bottom half of a platter of Clementine and Fennel Salad.

    You can also make your own dressing. I'd imagine that white balsamic would taste fantastic with this flavor combo, or even a lemon juice and olive oil dressing if you want to keep it super simple.

    So here I am, asking you to do as I say and not as I do did and make this salad with the fennel! Seriously, go make it right now! I promise, you won't regret it!

    A square image of Clementine and Fennel Salad.

    Fennel and Clementine Salad

    Jessy Freimann
    This light and delicious salad whips up in under 20 minutes and is full of delicious flavors that everyone loves!
    No ratings yet
    Print Recipe Pin Recipe
    Prep Time 20 minutes mins
    Total Time 20 minutes mins
    Course dinner, holidays, Side Dish
    Cuisine American
    Servings 8 servings
    Calories 12 kcal

    Equipment

    • cutting board
    • chefs knife
    • measuring cups
    • salad bowl
    • salad tongs

    Ingredients
      

    • 5 ounces Mixed baby greens
    • 3 Clementine tangerines peeled and pieces broken up
    • 1 bulb Fennel cleaned and sliced thin
    • 14 ounce can Whole hearts of palm drained and cut into bite-size pieces
    • 14 ounce can Black olives
    • 3 Tablespoons Crumbly blue cheese
    • ⅓ cup Girard's Champagne Vinaigrette or the dressing of your choice
    • Fresh ground pepper to taste for garnish

    Instructions
     

    • Mix all vegetables in a large bowl or plate.
    • Toss with a light amount of dressing (less is more, so start with less- you could always add more!).
    • Add some fresh ground pepper and serve immediately.

    Notes

    This can be assembled ahead and dressed just prior to serving.

    Nutrition

    Serving: 0.75cupCalories: 12kcalCarbohydrates: 3gProtein: 1gFat: 1gSaturated Fat: 1gPolyunsaturated Fat: 1gMonounsaturated Fat: 1gSodium: 20mgPotassium: 152mgFiber: 1gSugar: 1gVitamin A: 240IUVitamin C: 8mgCalcium: 17mgIron: 1mg
    Tried this recipe?Let us know how it was!

    Helpful tools:


    I also love this salad:

    Copycat Panera Bread BBQ Chicken Salad

    And another favorite salad is this one:

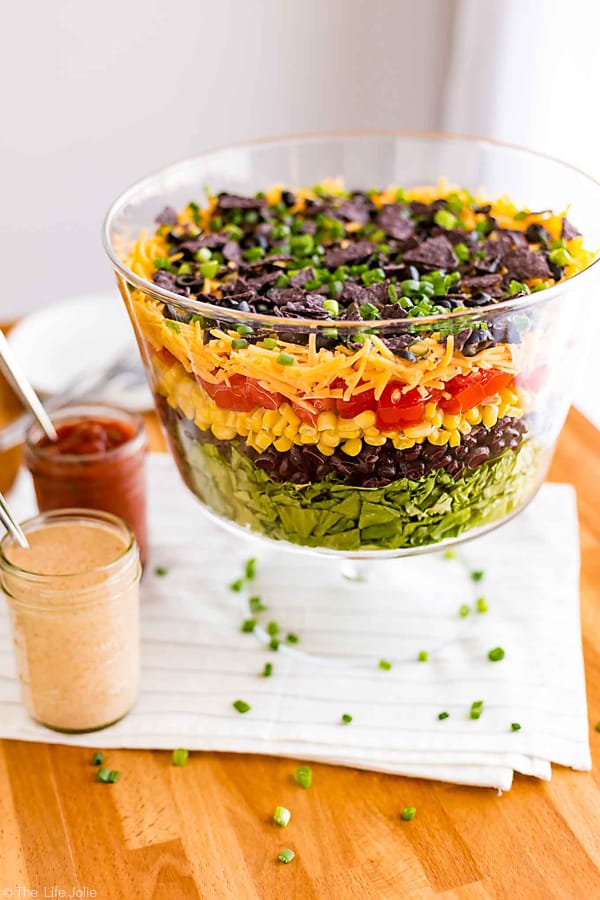
    7 Layer Taco Salad

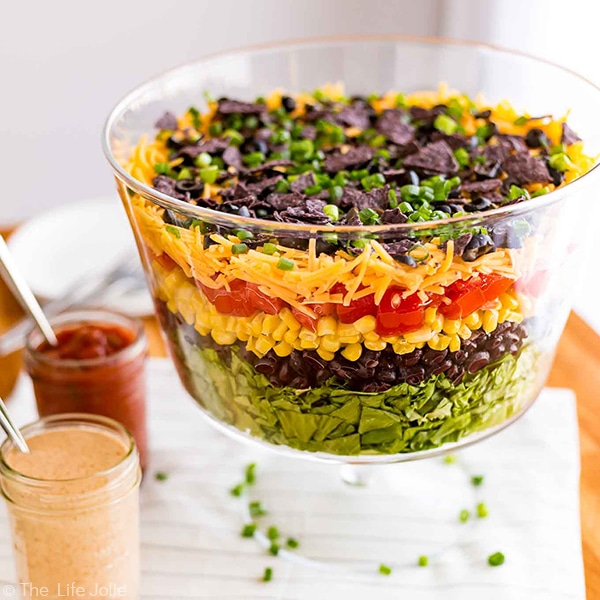
    This 7 Layer Taco Salad is an easy recipe to make for parties. Full of delicious Mexican-inspired flavors it's got seven (or more) layers of things like beans, cheese, corn, tomatoes and is served with a creamy taco ranch dressing. Top it with chicken for a healthy main dish or serve it on it's own as great side dish to pass. This is perfect to bring to a Cinco de Mayo get together!

    You can find a full index of my recipes here.

    Don't forget to follow The Life Jolie on Pinterest for more recipe inspiration!

    Or if Pinterest isn't your style, bookmark this post!

    Let's keep the conversation going- join my Facebook group!Clementine and Fennel Salad is a healthy and delicious recipe. It's quick and easy to put together but feels special enough to bring to a dinner party or to serve on on the holidays.


    How to peel a pomegranate | The Life Jolie Kitchen Basics

    Dec 5, 2017 · Leave a Comment

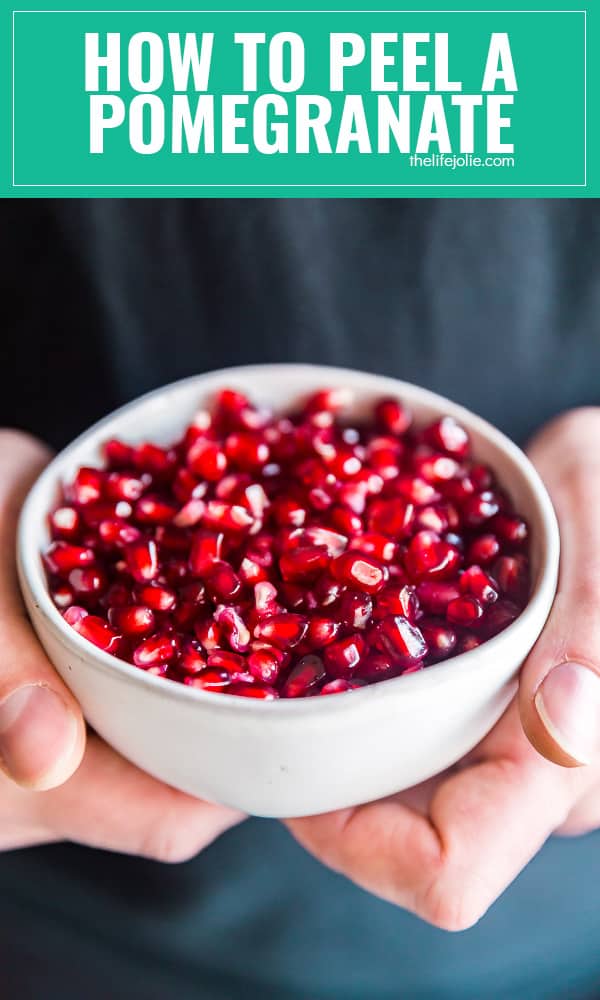
    A square image for How to peel a pomegranate.

    Seeding a pomegranate doesn't have to be difficult. Here is a simple trick to make it much easier and step-by-step instructions for how to peel a pomegranate.

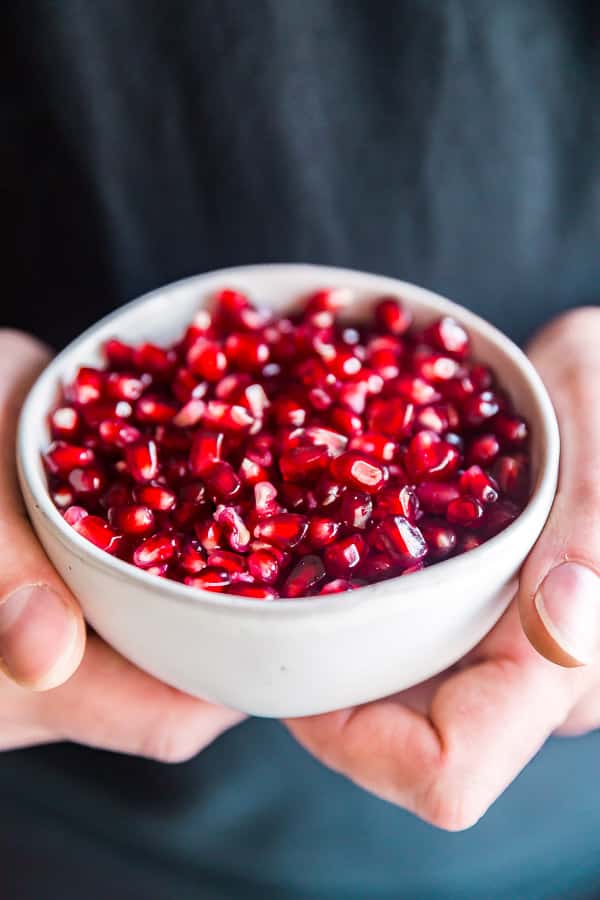
    Hands holding a bowl of pomegranate seeds for How to peel a pomegranate.

    This post contains Affiliate Links. Please see the disclaimer here.

    Did you guys just drool over my Pomegranate Thyme Baked Brie on Sunday?! Ugh, I could barely contain myself during those photos, the brie was calling to me. And it really was as delicious as it looked. I may or may not have eaten a large portion of it the minute I finished getting photos.

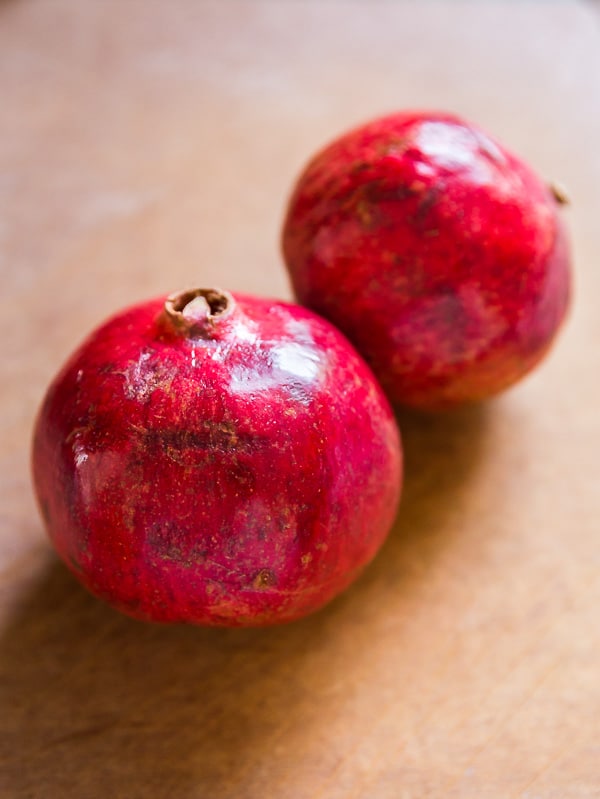
    Two whole pomegranates on a cutting board for How to peel a pomegranate.

    So I figured I should throw together a little how-to for those of you who haven't dealt with many pomegranates. I'll be honest, the first time I had a run in with a pomegranate, I was a little bit intimidated. I didn't really know what I was getting into, I just knew I was hungry. I tried to combat my intimidation with the same attitude I had during childbirth: somehow, some way, I will get whats in there out here.

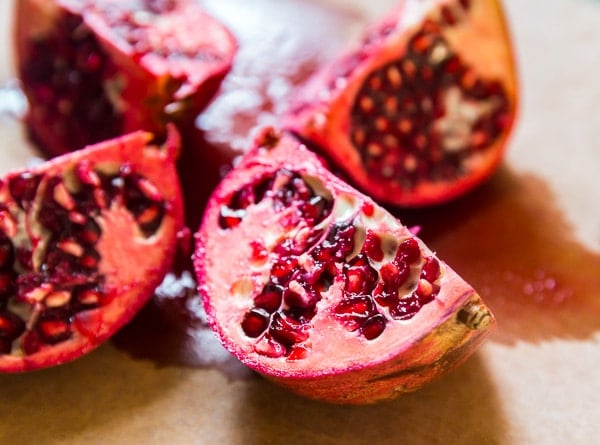
    A pomegrante cut into quarters for How to peel a pomegranate.

    Luckily, my mom is resident pomegranate peeling professional, due in large part to my dad's undying love for pomegranate seeds. The minute the season hits, he makes it his mission to gobble down as many of those tangy little seeds as possible, both for their health benefits and their great flavor.

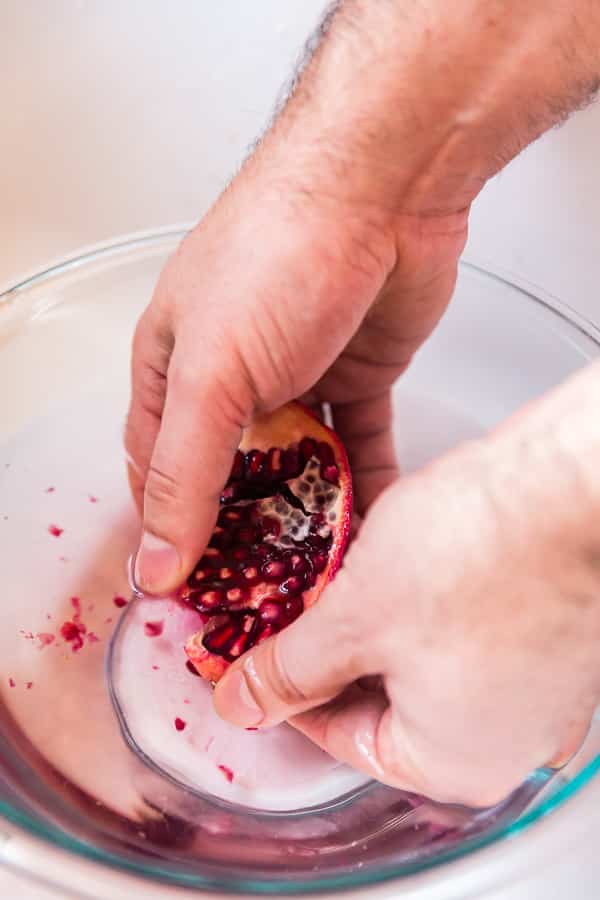
    Hands peeling a pomegranate in a bowl of water for How to peel a pomegranate

    And she let me in on a little secret to avoiding dyed-pink-hands and minimize the counter top crime scene that these fruits leave behind: a bowl of water. Groundbreaking, right?

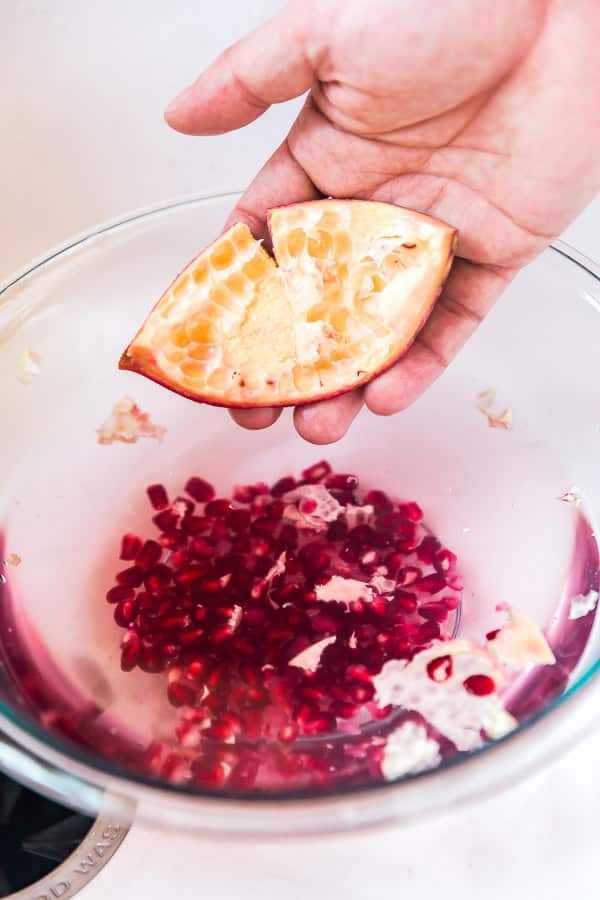
    A hand holing an empty pomegrante peel for How to peel a pomegranate.

    But you guys, it really works! By removing the seeds in the water, you prevent all the excess juices from taking over your kitchen. The best part is, the seeds tend to sink while the white, pithy membrane that houses the seeds floats to the top, so you can skim it off before draining the seeds.

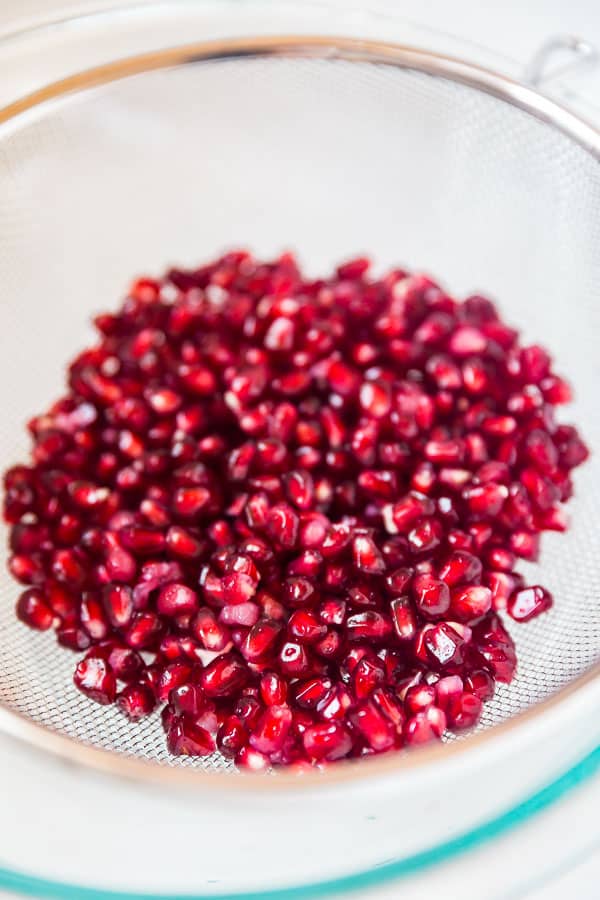
    Pomegranate seeds draining in a strainer for How to peel a pomegranate.

    Pomegranate seeds taste fantastic over salads, ice cream, yogurt or just on their own, They're a healthy snack and a fantastic way to elevate any dessert.

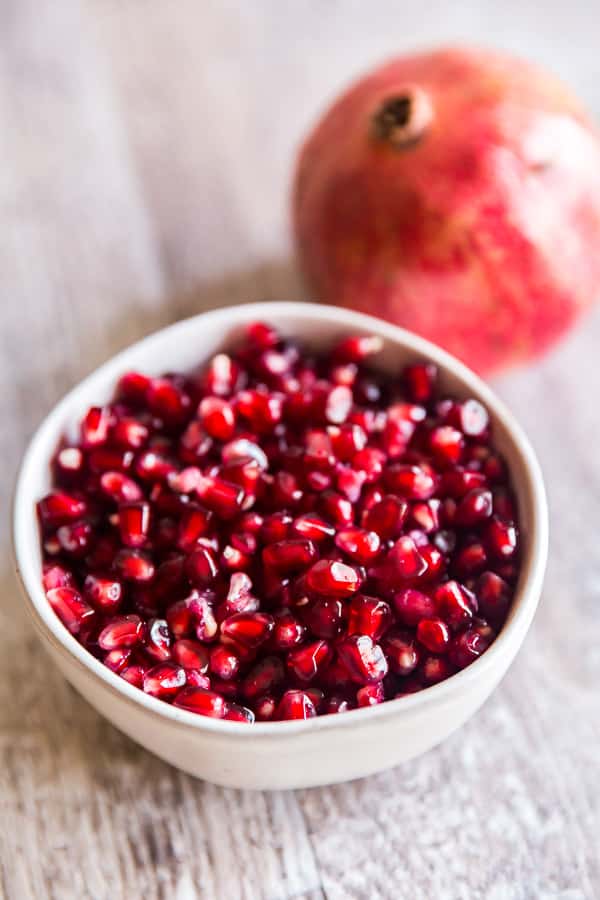
    A bowl of pomegranate seeds with a whole fruit behind it for How to peel a pomegranate.

    Try making this pomegranate sangria, this salad featuring pomegranates, and these brownies featuring pomegranates!

    You'll need these tools:

    Knife

    Cutting board

    Bowls

    Strainer

    A square image for How to peel a pomegranate.

    How to peel a pomegranate

    Jessy Freimann
    This is how I like to peel a pomegranate to eliminate the mess and the stains on your hands. It's quick and super easy!
    5 from 1 vote
    Print Recipe Pin Recipe
    Prep Time 10 minutes mins
    Total Time 10 minutes mins
    Course hacks, How-to, kitchen basics
    Cuisine American
    Servings 1 pomegranate
    Calories 234 kcal

    Equipment

    • Knife
    • cutting board
    • mixing bowl
    • Strainer

    Ingredients
      

    • 1 Pomegranate
    • Water

    Instructions
     

    • Cut your pomegranate into quarters using the knife and cutting board.
    • Fill the medium bowl half way with cool water (I leave the bowl in the sink so that it doesn't make a mess if any water comes out of the bowl.
    • Doing each quarter one at a time, place teach quarter in the bowl use your hands to remove the seeds from the white, pithy membrane. The seeds will sink down and the pith will float. If any of the pith is stuck to see seeds remove it.
    • Once all the quarters are de-seeded, skim off the pith and remove the peels from the bowl.
    • Use a strainer to full drain the water and place the seeds into the smaller bowl.

    Notes

    These will last up to 5 days covered in the refrigerator.

    Nutrition

    Serving: 1cupCalories: 234kcalCarbohydrates: 53gProtein: 5gFat: 3gSaturated Fat: 0.3gPolyunsaturated Fat: 0.2gMonounsaturated Fat: 0.3gSodium: 8mgPotassium: 666mgFiber: 11gSugar: 39gVitamin C: 29mgCalcium: 28mgIron: 1mg
    Tried this recipe?Let us know how it was!

    You can find a full index of my recipes here.

    Don't forget to follow The Life Jolie on Pinterest for more recipe inspiration!

    Or if Pinterest isn't your style, bookmark this post!

    Let's keep the conversation going- join my Facebook group!Seeding a pomegranate doesn't have to be difficult. Here is a simple trick to make it much easier and step-by-step instructions for how to peel a pomegranate.

    French Onion Creamy Mashed Potatoes

    Nov 16, 2017 · Leave a Comment

    A square image of French Onion Creamy Mashed Potatoes.

    If you love classic Mashed Potatoes, you've got to try these French Onion Creamy Mashed Potatoes- all the creamy goodness you love with a savory, umami punch from caramelized onions!

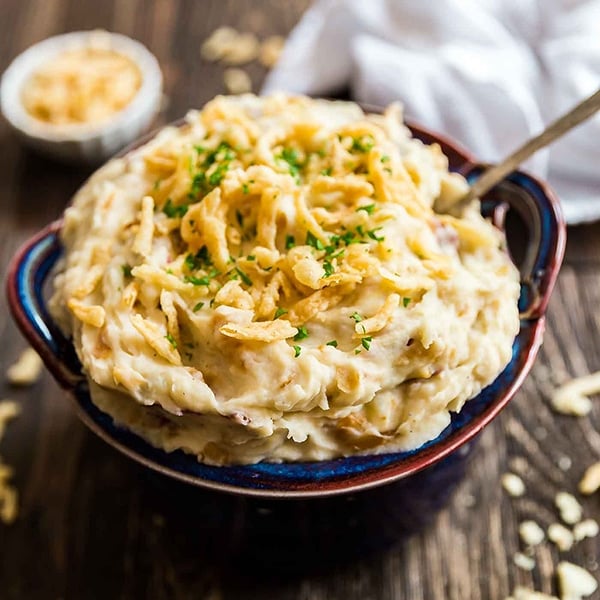
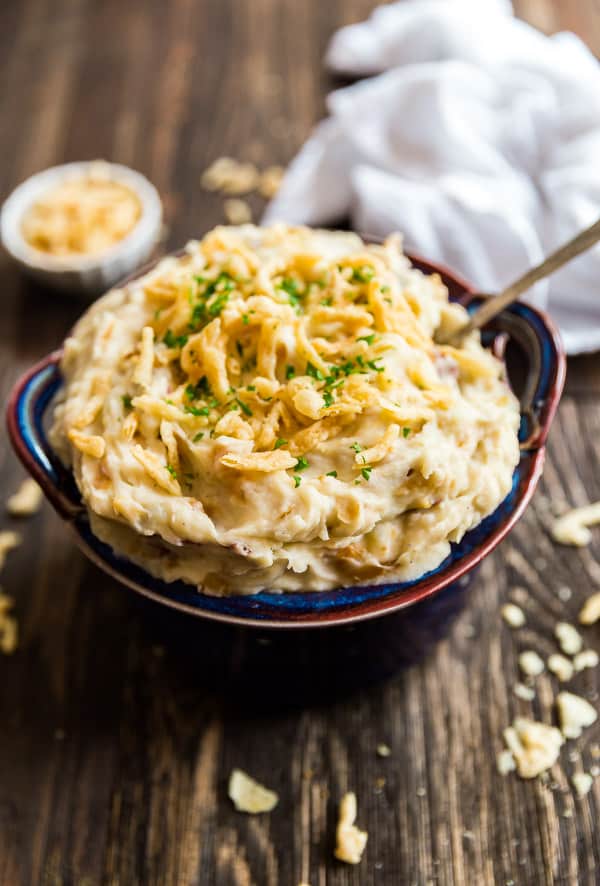
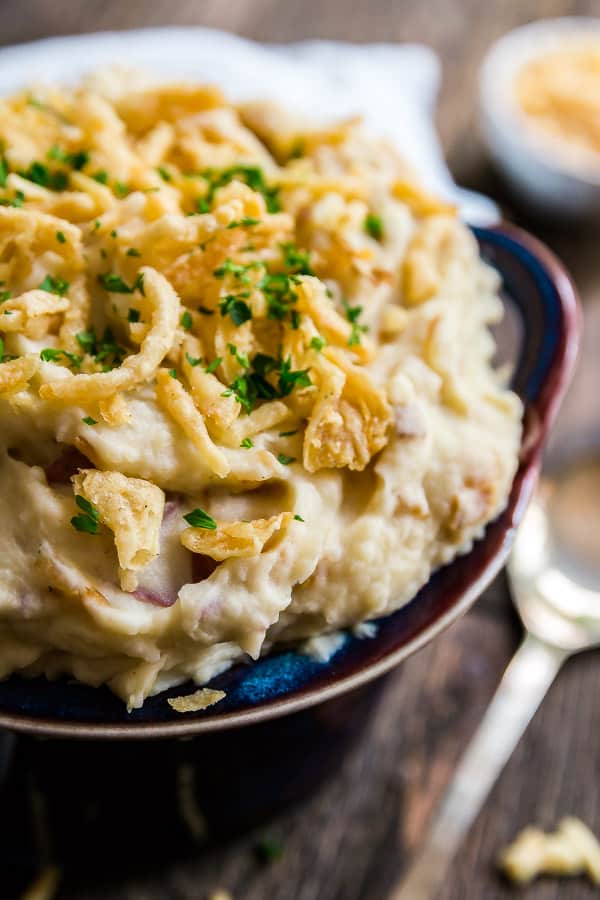
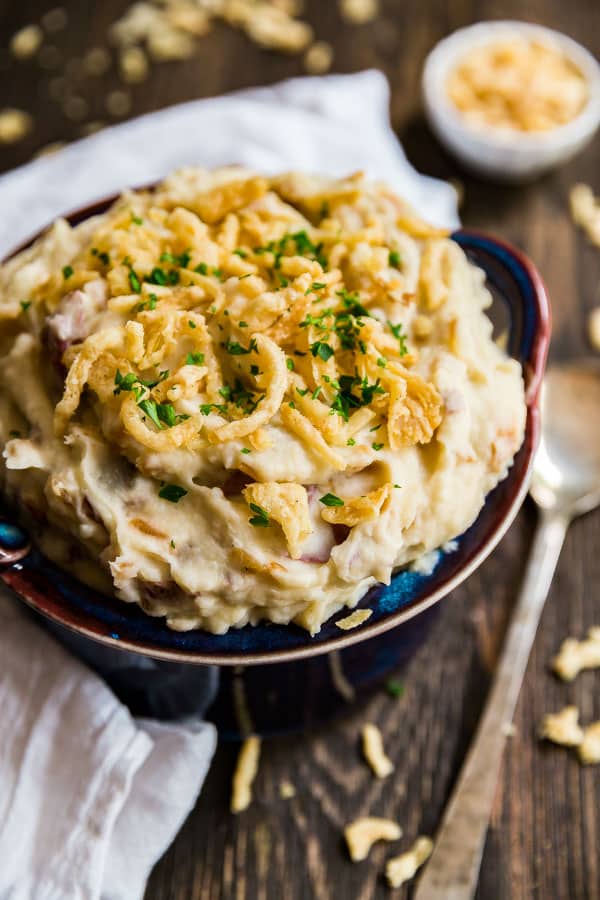
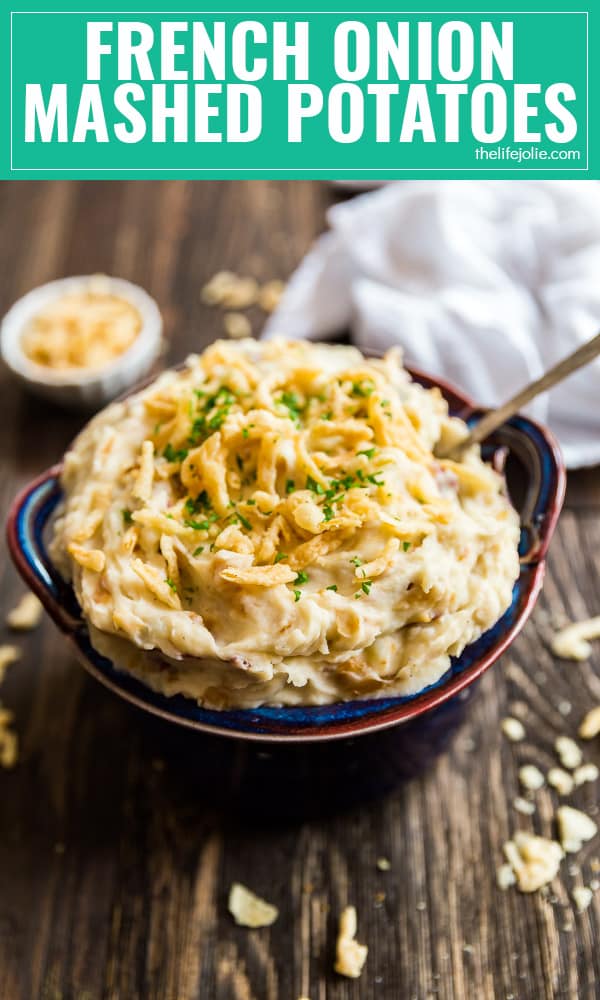
    French Onion Creamy Mashed Potatoes in a bowl with french fried onions on top and some scattered around it.

    This post contains Affiliate Links. Please see the disclaimer here.

    Life Lately: T is flourishing.

    T is seriously flourishing now that she is in the toddler room at daycare. She's working really hard at communicating and it's obvious that she's understanding so much of what we say to her as well.

    When I get home from being out or get to daycare when I do pick-ups, she immediately runs over to me and yells "Mommy!" It's pretty much the sweetest thing ever! There are times when I pull into the driveway and I can actually see her at the window waiting for me and then she turns and runs over to the top of the stairs (we have around five steps up from our entry area/dining room/dump zone) and is waiting excitedly when I walk in. She does this with J too!

    A close up image of a bowl of French Onion Creamy Mashed Potatoes

    The strange thing is, she calls both J and I mama even though she also sometimes refers to him as daddy as well. We're working on it. T also tries to say her sisters name and sometimes calls her sissy. And of course she tries to say Macie (she loves the dog!). She also knows her grandparents names (or at least their "grandparent names").

    T totally adores her sister and follows her around all day long when we're home. Luckily, A also loves this! She is thrilled to take the lead and teach T about everything. She especially loves feeding T. They often crack each other up which then cracks us up.

    When T gets home from daycare, she takes off her boots and brings right over to the cube shelf that currently houses shoes. She loves when we chase her and A and they have such a fun time goofing around on our bed at night, crawling, and purposely falling over. This typically leads to an explosion of giggles.

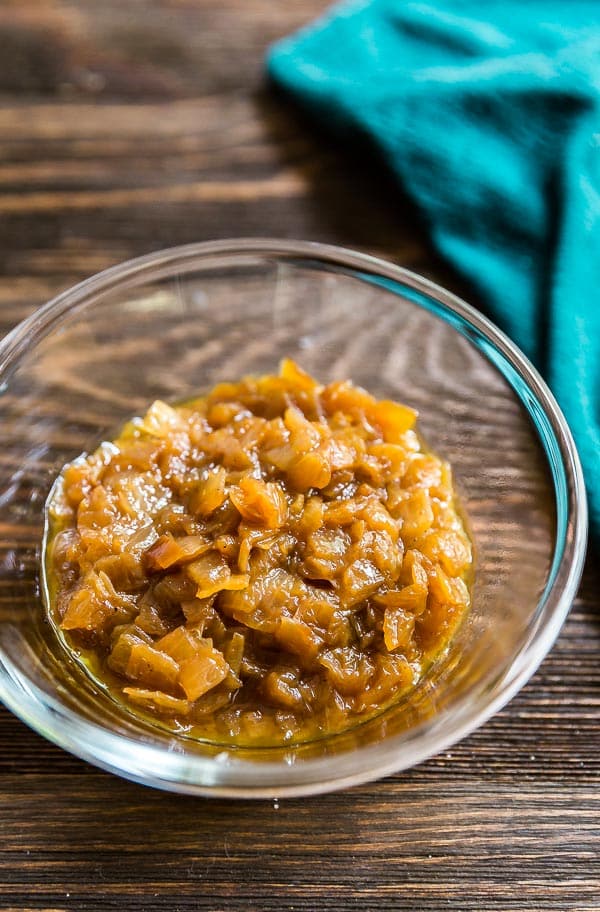
    Caramelized onions used in the French Onion Creamy Mashed Potatoes.

    But my T is also a bit mischievous, I actually have to keep her away from the toilets because she likes to stick her hand in and play with the water. Luckily, it's always the "clean" water not a "freshly used" toilet, but its still gross and a hassle to have to wash her hands a number of times in a row.

    I'll be very interested to watch her interact with her cousins next month at Christmas and especially to see how she reacts on Christmas morning!

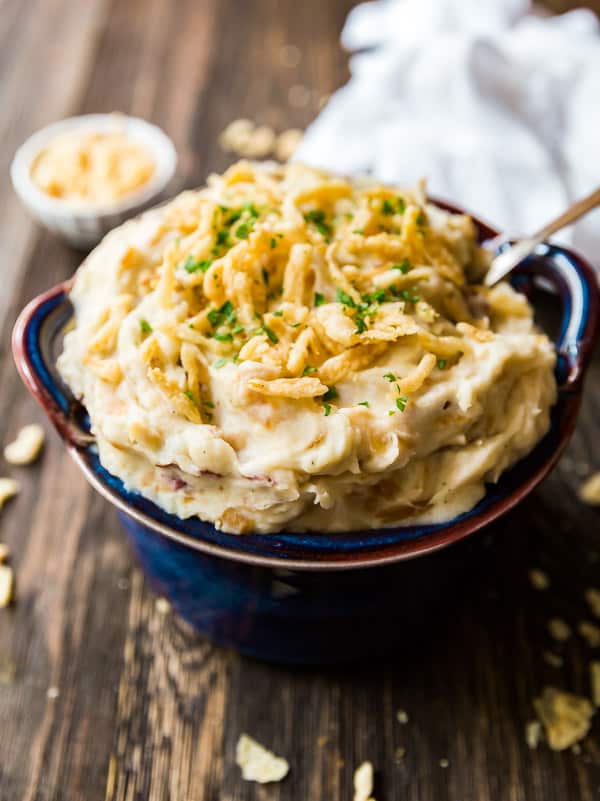
    A blue bowl of French Onion Creamy Mashed Potatoes with a spoon sticking out of it.

    French Onion Creamy Mashed Potatoes:

    One Thanksgiving staple in our family is Mashed Potatoes. J takes his mashed potatoes super seriously. Part of that is because he's a super picky eater, so his holiday eating options are always pretty limited. But also because mashed potatoes are pretty darn good- our Thanksgiving Feast just doesn't feel complete without it.

    Sometimes it's fun to add an interesting twist to traditional dishes like this. Kick things up a notch, if you will. And since I love the savory, mouthwatering flavor of French Onion soup, I figured, why not combine that with creamy mashed potatoes to add a bit of pizzazz to the usual holiday fare?

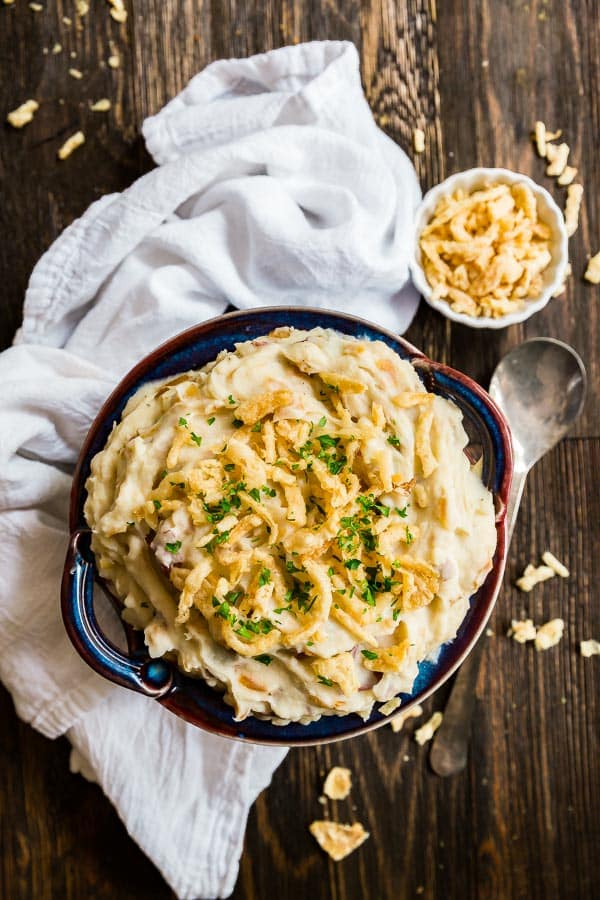
    An overhead shot of French Onion Creamy Mashed Potatoes.

    Now I'll admit, this is a bit more time consuming than my typical recipes. I'm usually all about quick recipes, but I assure you these are totally worth the extra time involved. You can even caramelize the onions the night before and reheat them before adding them to the potatoes.

    I also went ahead and added some French Fried Onions on top of these for a flavorful crunch. If your family is anything like mine, you'll find yourselves battling for those perfectly crispy French Fried onions and for that reason I strongly encourage you to have some extra on the side.

    French Onion Creamy Mashed Potatoes in a blue bowl with a spoon on the side of it.

    Here are a few tips to make the mashed potatoes even more awesome:

    1. Go easy on the liquid- mashed potatoes can go from zero to pasty super quickly. Have a light and and slowly add your milk.
    2. Warm up the milk- speaking of milk, warm it up before you add it. Nobody wants their dinner to be cold, and that includes the mashed potatoes!
    3. Don't rush the onions- the key to caramelizing onions is go low and slow. So pour yourself a glass off wine, sit back and enjoy the fantastic smell of caramelizing onions, and make sure you stir them here and there! You can even make them the night before and reheat before adding them to the potatoes.
    4. Taste it as you go- when mixing the potatoes, and really, with any cooking you do- taste them for proper flavoring and add more as you need.
    5. Use a stand mixer- work smarter, not harder.

    Hosting Thanksgiving?

    Discover the secret to hosting Thanksgiving without all the stress! Prepsgiving is your FREE guide to making a delicious Thanksgiving feast the easy way.

    A square image of French Onion Creamy Mashed Potatoes.

    French Onion Creamy Mashed Potatoes

    Jessy Freimann
    If you love classic Mashed Potatoes, you've got to try this easy French Onion Creamy Mashed Potatoes recipe- all the homemade, creamy goodness you love with a savory, umami punch from caramelized onions! This is the best simple way to kick your Thanksgiving (or any regular dinner side dish) up a notch!
    No ratings yet
    Print Recipe Pin Recipe
    Prep Time 10 minutes mins
    Cook Time 1 hour hr 15 minutes mins
    Total Time 1 hour hr 25 minutes mins
    Course Side Dish
    Cuisine American, Christmas, holidays, seasonal, Thanksgiving
    Servings 8 servings
    Calories 89 kcal

    Equipment

    • cutting board
    • chefs knife
    • Dutch oven
    • Skillet
    • stand mixer
    • Potato masher

    Ingredients
      

    Caramelized onions:

    • 2 Tablespoons olive oil
    • 2 Tablespoons salted butter
    • 4 cups diced onions
    • 1 heaping teaspoon sugar
    • ⅓ cup white wine
    • Salt
    • Pepper
    • Heaping ½ teaspoon beef base like Better than Boullion Roast Beef base

    Potatoes:

    • 8-10 large redskin potatoes cubed
    • 2 Tablespoons salted butter
    • ½ cup warm milk
    • Salt
    • Pepper
    • French fried onions
    • Chopped parsley

    Instructions
     

    Caramelized onions:

    • Melt butter and oil in a large skillet over medium heat.
    • Add onions and sugar to a pan and stir to mix.
    • Cover for the first 15 minutes, stirring periodically.
    • Remove the cover and caramelize for about 45 minutes more, turning often.
    • Once the onions are a deep golden brown color, deglaze the pan with the white wine.
    • Stir for a minute, scraping the bottom of the pan with a wooden spoon.
    • Add salt and pepper to taste and the beef base.
    • Mix well and reduce for 5 minutes.
    • Remove from heat.

    Potatoes:

    • When your onions are half way through caramelizing, boil the potatoes until cooked through and drain.
    • Add the potatoes to the to stand mixer bowl, fitted with the whisk attachment.
    • Add the butter, warm milk, salt and pepper to taste and the caramelized onions to the bowl.
    • Mix until the potatoes are mostly smooth (be careful not to over mix).
    • Transfer to the serving bowl and top with plenty of french fried onions and chopped parsley. Serve immediately.

    Notes

    • The onions can be caramelized ahead and reheated prior to mixing with the potatoes.
    • You can peel the potatoes if you prefer a smoother potato.
    • This is best served immediately but will last up to 4 days covered in the refrigerator.

    Nutrition

    Serving: 0.75cupCalories: 89kcalCarbohydrates: 0.3gProtein: 0.1gFat: 9gSaturated Fat: 4gPolyunsaturated Fat: 1gMonounsaturated Fat: 4gTrans Fat: 0.2gCholesterol: 15mgSodium: 46mgPotassium: 9mgSugar: 0.1gVitamin A: 175IUCalcium: 3mgIron: 0.1mg
    Tried this recipe?Let us know how it was!

    Helpful tools:


    Another favorite potato side dish is:

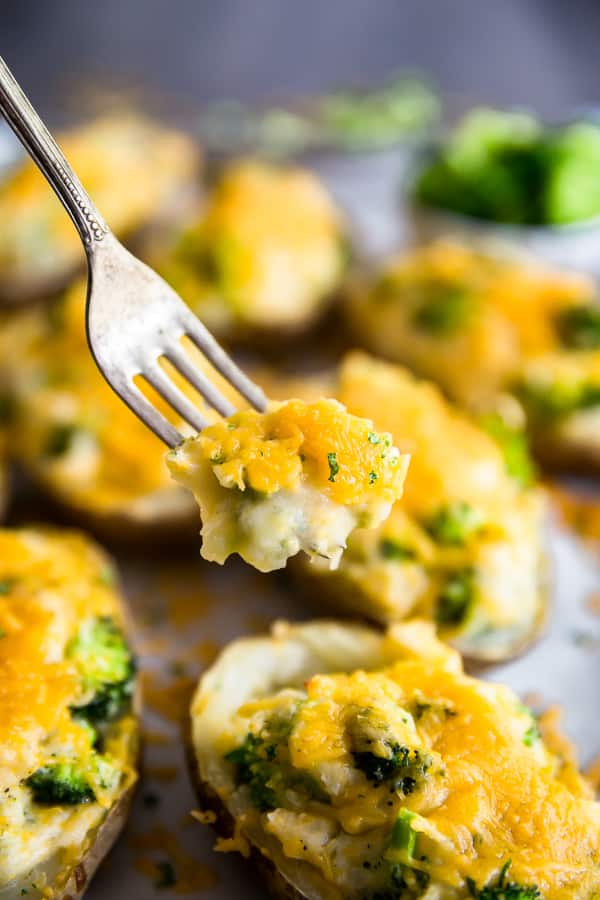
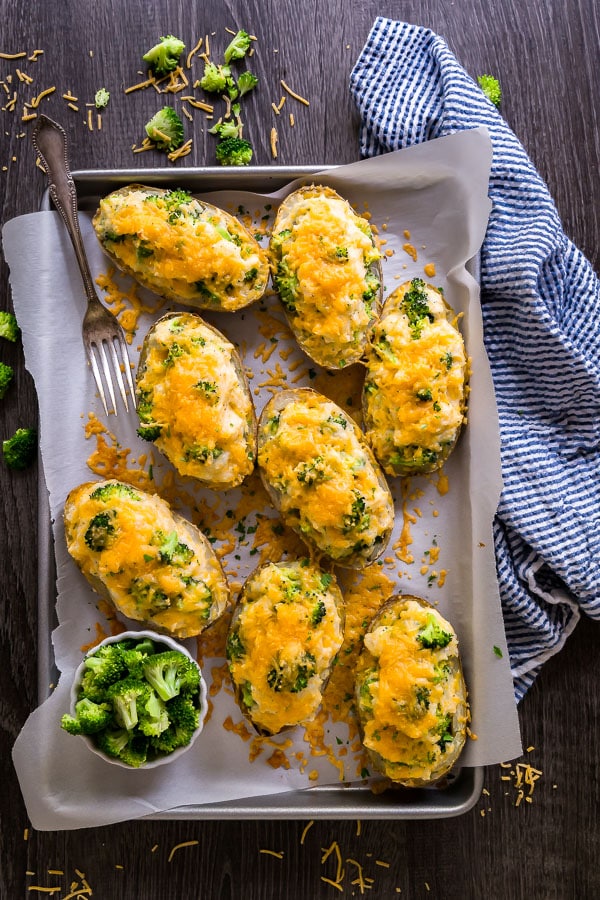
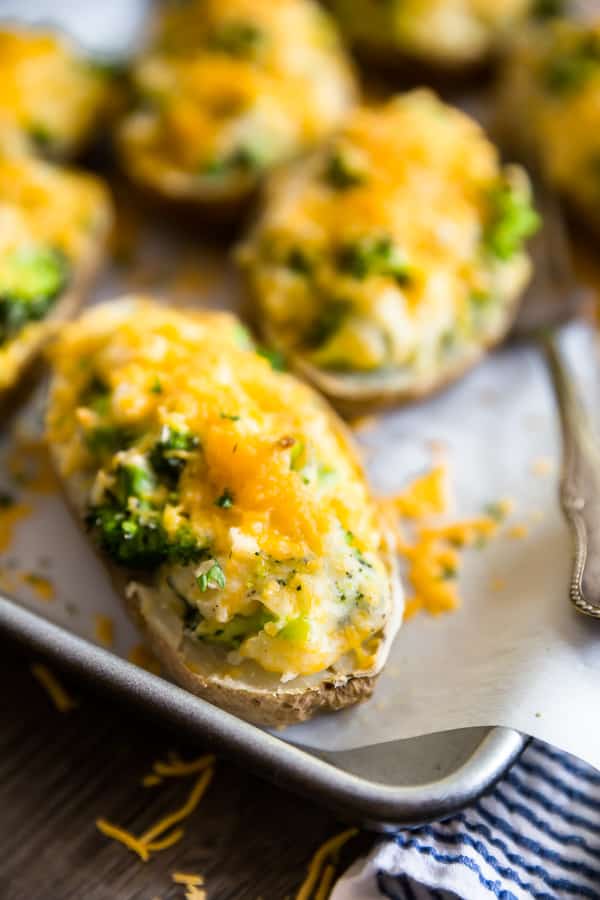
    Cheddar and Broccoli Twice Baked Potatoes

    A close up overhead of Cheddar and Broccoli Twice Baked Potatoes.

    I also love these potato side dishes:

    Loaded Potato Stacks

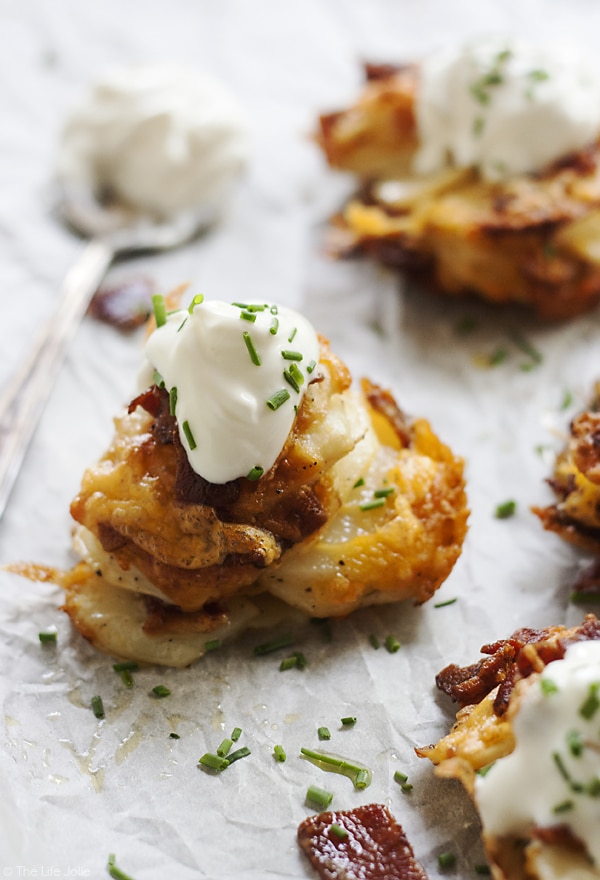
    This Loaded Baked Potato Stacks recipe is such an such an easy side dish for a weeknight dinner. Thin slices of potato, seasoned and stacked in the cups of a muffin tin and baked in the oven; these are a tasty addition to any meal and they also make a delicious game day appetizer!

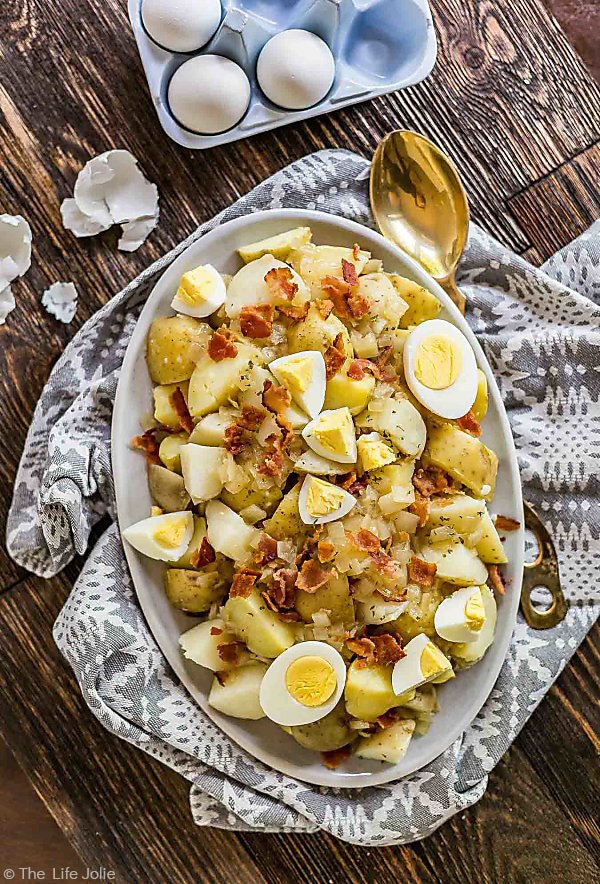
    German Potato Salad

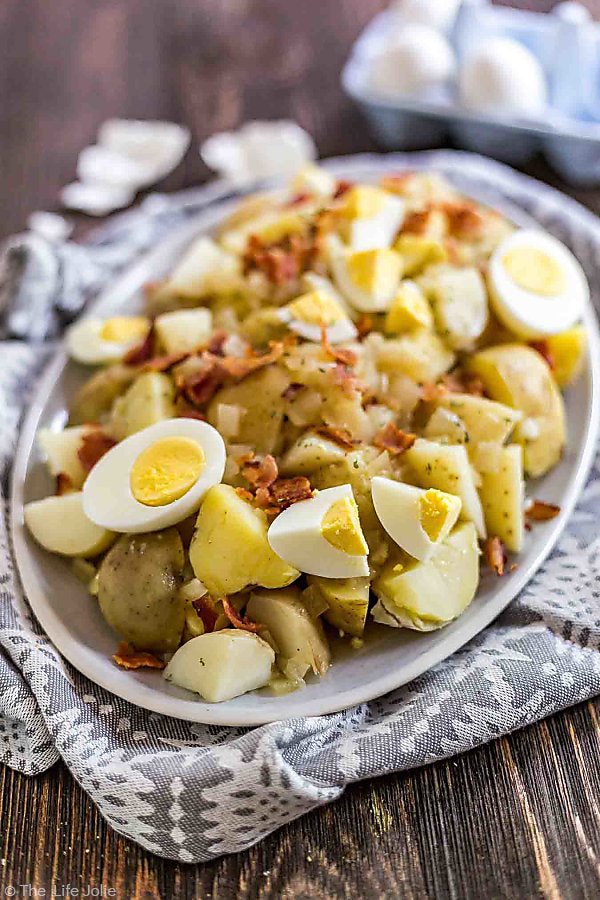
    German Potato Salad on a gray towel with eggs and egg shells in the background.

    You can find a full index of my recipes here.

    Don't forget to follow The Life Jolie on Pinterest for more recipe inspiration!

    Or if Pinterest isn't your style, bookmark this post!

    Let's keep the conversation going- join my Facebook group!
    If you love classic Mashed Potatoes, you've got to try this easy French Onion Creamy Mashed Potatoes recipe- all the homemade, creamy goodness you love with a savory, umami punch from caramelized onions! This is the best simple way to kick your Thanksgiving (or any regular dinner side dish) up a notch!

    Homemade Cranberry Sauce with Dried Cherries and Shallots Recipe

    Nov 15, 2017 · Leave a Comment

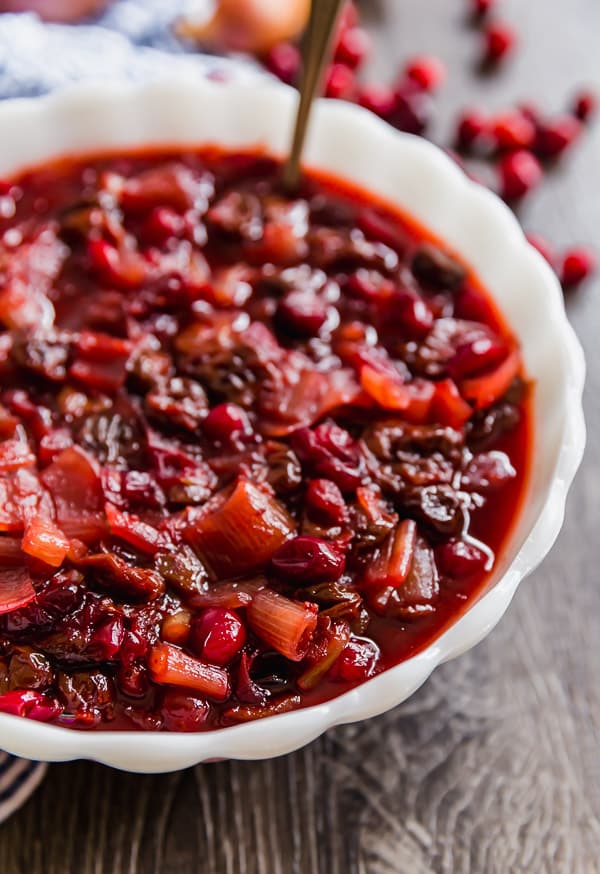
    Homemade Cranberry Sauce > Canned Cranberry Sauce (especially when it include dried cherries and shallots!). Make this for Thanksgiving!

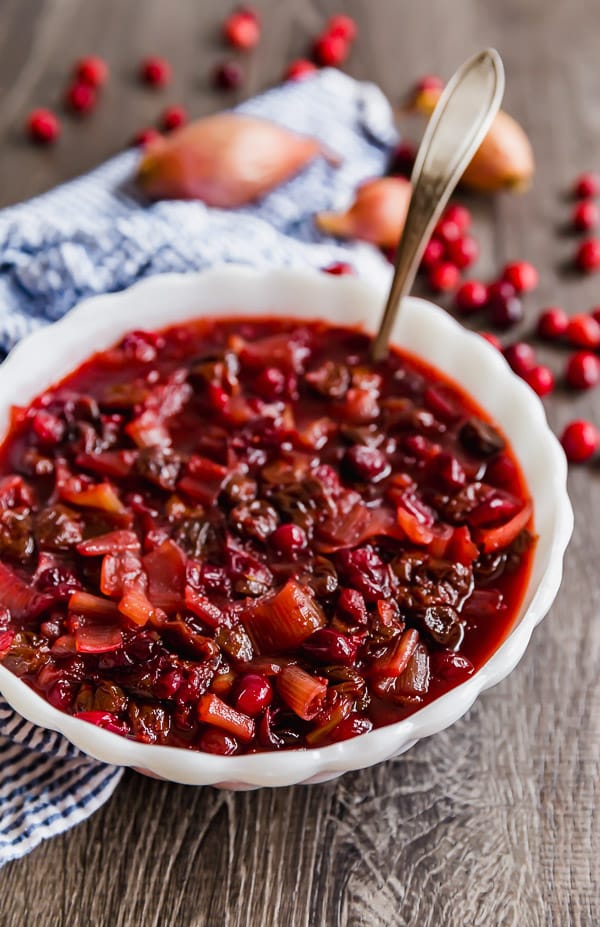
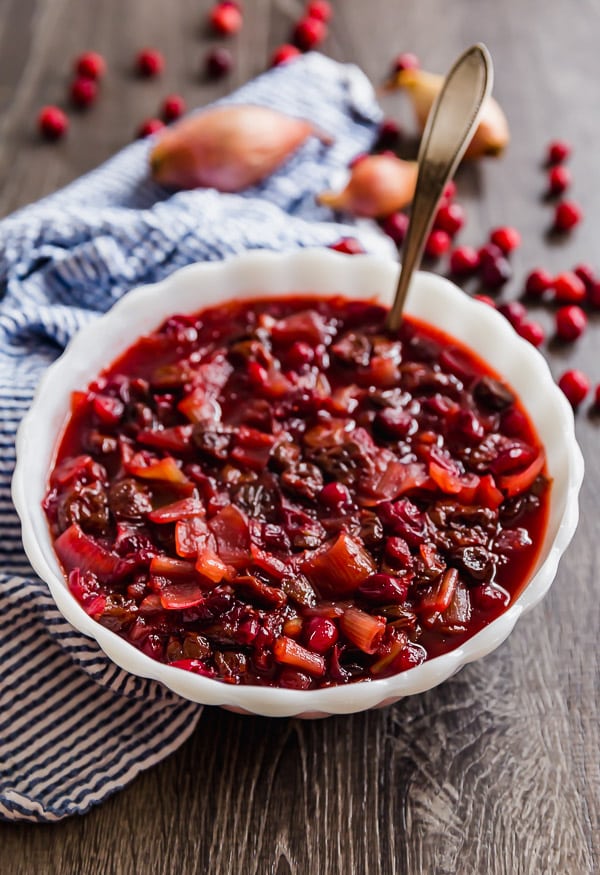
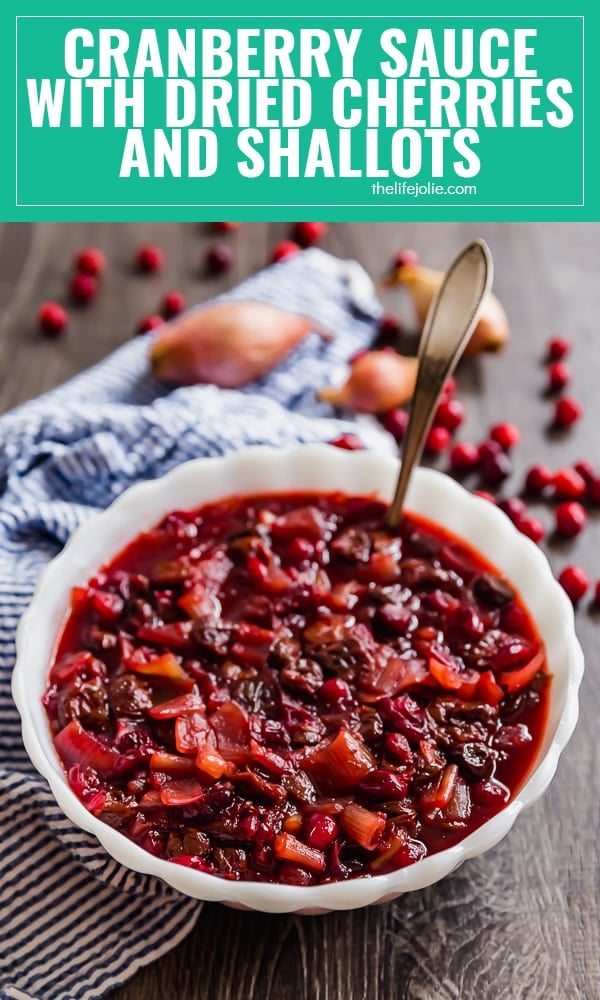
    A white bowl with Homemade Cranberry Sauce with Dried Cherries and Shallots and a blue and white striped cloth napkin.

    This post contains Affiliate Links. Please see the disclaimer here.

    Life Lately: Those Christmas People.

    Well, we are officially Those People. You know the ones who put up their Christmas tree before Thanksgiving? I always rolled my eyes hard at those people. Perhaps it's my love for Turkey Day or my lack of decorating skills. And more likely than not, it's laziness. The funny thing is, we are going to be in Nashville spending Christmas with J's side of our family this year.

    But last week J and I just kind of looked at each other and agreed to bite the bullet and put up our Christmas tree now. While we're not going all out with a ton of extra decorations, we figured we may as well get the work of putting it up over with. The fact that A has been begging to watch Christmas Mickey since September also made it an easy decision (we're all pretty excited about our Nashville Christmas this year and having all the kiddies together, so why not get into the spirit?!).

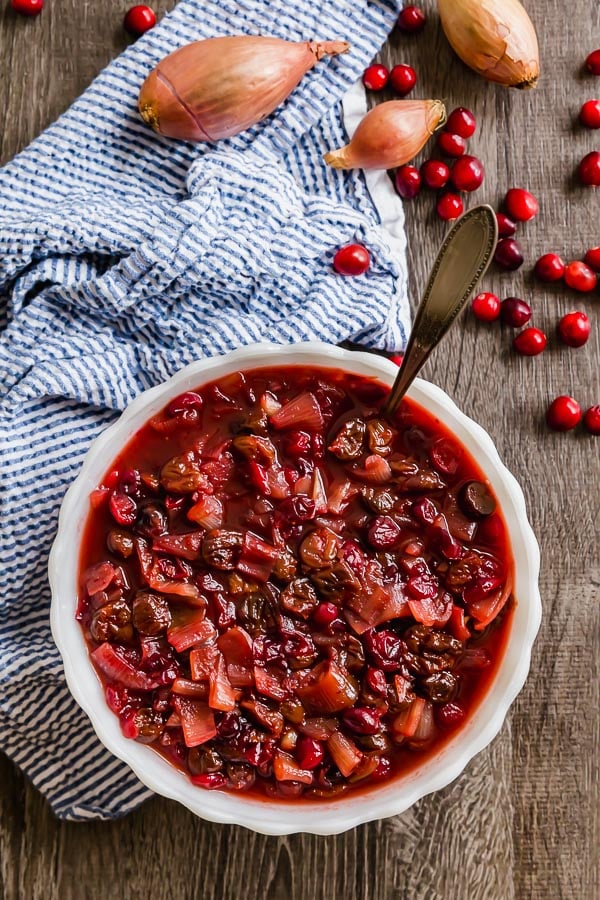
    An overhead shot of Homemade Cranberry Sauce with Dried Cherries and Shallots.

    Last Friday ended up being the perfect day for this. It was super cold that day and we had actually woken up that morning to find our lawn covered in a thin layer of snow. That morning when A woke up, I brought her to our window and showed her all the snow in our back yard. Of course she got super excited and immediately headed downstairs ("I wonder if there's snow in the front yard too?"). She then called T over say "Come here Tessa, I have something to show you" and began telling T all about snow. And my heart exploded.

    I got out of work early that day and picked up the girls. A and I made some chocolate chip cookies (the Nestle's Tollhouse recipe with some toffee bits added in- try it!) and I made a big pan of Tuna Wiggle. It was a super cold that day and evening so this was the perfect meal.

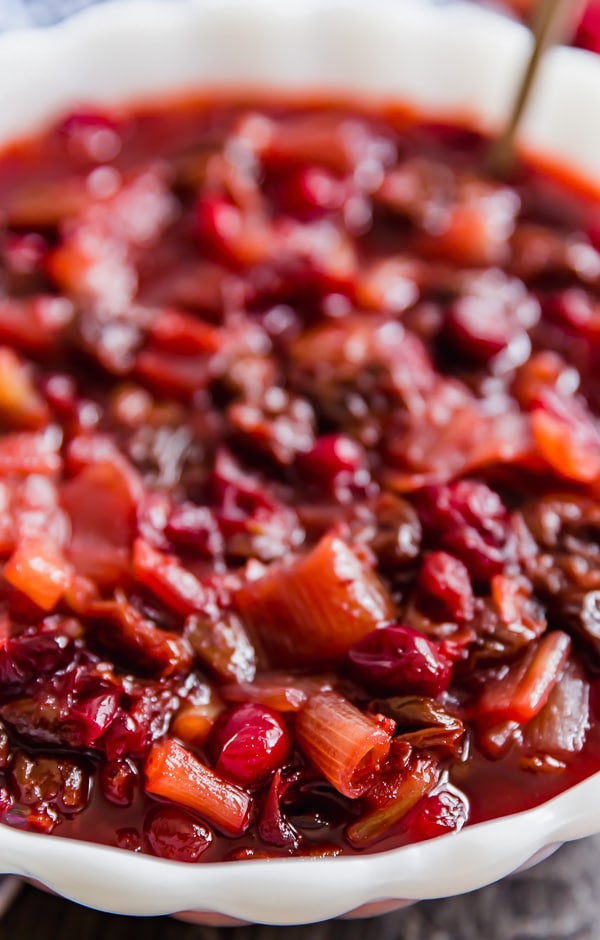
    A close up of a bowl of Homemade Cranberry Sauce with Dried Cherries and Shallots with half of it cut off.

    After dinner, J brought our tree in from our storage area in the garage and we got to work putting it together and fluffing it up (thank goodness for pre-lit trees!). The girls weren't too interested in this part but once it came time to decorate the tree, it was game on, at least for A. We keep our ornaments in a sturdy old Crate and Barrel box that I received at one of my bridal showers 9 years ago and most of the ornaments are wrapped in pieces of paper towel.

    A had such a blast unwrapping each ornament and discovering which one was next and then placing them on the tree. T wasn't that into it but she was kind of into trying to take the ornaments off (not good but shes doing better now!). Her favorite part was taking the golden angel that I picked up as a newlywed at Pier 1 and placing it onto the top of the tree. I think it's meant to be displayed on a table or in a book case but it's the right size, it's really pretty and super light so it always looks perfect on top of or tree.

    Every day, the girls insist on turning on the tree and I don't know if it's the little one's excitement or what, but I'm already in the holiday spirit!

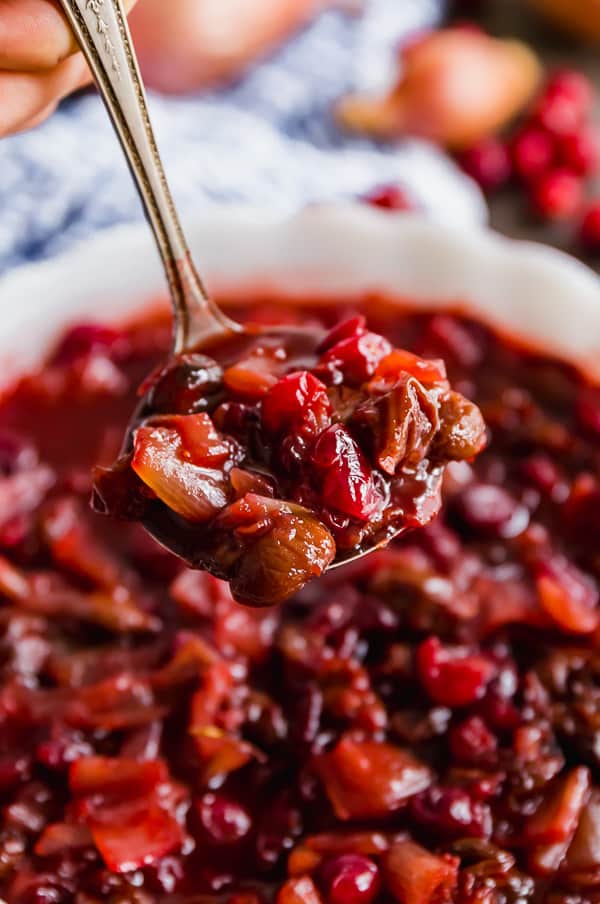
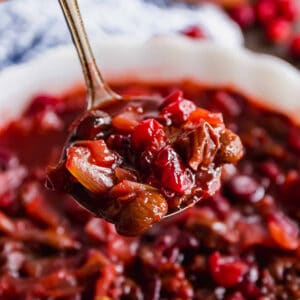
    A close up of a ladle full of Homemade Cranberry Sauce with Dried Cherries and Shallots.

    Homemade Cranberry Sauce with Dried Cherries and Shallots:

    It's so funny how our tastes change. When I was a kid, I was super specific about only having canned jellied cranberry sauce. It had to be from a can. It couldn't contain whole berries. And ideally, it should have come out of the can in one piece and maintained it,s perfect, canned shape. Kids, ugh!

    This is such a darn shame because my Aunt Mimi was the queen of the homemade cranberry sauce. I cannot remember a Thanksgiving where she didn't provide this. She had a couple versions that she went between- one involved the classic combo of cranberries and oranges (Yum! I'll have to make that some time for you guys!). The other was this recipe.

    A close up of Homemade Cranberry Sauce with Dried Cherries and Shallots.

    Thanksgiving these days isn't the same without Aunt Mimi. Her beautiful smile and quick wit are seriously missed. There's not a day that goes by that I don't think about her. So I felt it was a good idea to share a recipe she made so well so that you and your family could enjoy it too!

    I love that this Cranberry sauce has a great combo of sweet and savory with those beautifully burst cranberries injecting a bright tartness. I believe this recipe was originally featured in Gourmet Magazine a long time ago (under the name Cranberry, Shallot and Dried-Cherry Compote). While it calls for unsweetened dried tart cherries, I used regular dried cherries and it came out beautifully. But I added the link in case you wanted to get the tart ones.

    While this isn't a crazy quick recipe, it has a decent amount of hands-off time. This can also be made up to five days ahead and tastes great cold or at room temperature. And the combo of the fruit, wine and shallots makes your house smell fantastic!

    Homemade Cranberry Sauce with Dried Cherries and Shallots in a white bowl with fresh cranberries surrounding it.

    Hosting Thanksgiving?

    Discover the secret to hosting Thanksgiving without all the stress! Prepsgiving is your FREE guide to making a delicious Thanksgiving feast the easy way.

    Homemade Cranberry Sauce with Dried Cherries and Shallots

    Jessy Freimann
    This cranberry sauce adds an extra delicious and special twist to a traditional homemade cranberry sauce- this will be a hit at your holiday table!
    No ratings yet
    Print Recipe Pin Recipe
    Prep Time 5 minutes mins
    Cook Time 1 hour hr 15 minutes mins
    Total Time 1 hour hr 20 minutes mins
    Course Condiment, Side Dish
    Cuisine American, Christmas, holidays, seasonal, Thanksgiving
    Servings 8 servings
    Calories 181 kcal

    Equipment

    • 1 Sauce pan
    • 1 Measuring cups and spoons
    • 1 cutting board
    • 1 chefs knife

    Ingredients
      

    • ½ pound shallots
    • 1 Tablespoon butter
    • ¾ cup sugar
    • ½ cup white wine vinegar pull 1 Tablespoon of sugar out of it and set aside
    • 1 cup dry white wine
    • ½ teaspoon salt
    • 1 cup dried unsweetened tart cherries regular sweet dried cherries are fine too
    • 2 cups fresh or unthawed frozen cranberries
    • ½ cup water

    Instructions
     

    • Boil some water in a small sauce pan and blanch the whole shallots for one minute.
    • Drain and rinse with cold water to stop the cooking.
    • Peel the shallots and cut into 1 inch chunks (if they aren't already that size).
    • In a medium sauce pan, melt the butter over moderate heat.
    • Add the shallots and stir to coat.
    • Next add the sugar a 1 Tablespoon of the vinegar to the pan.
    • Cook, stirring periodically until everything is well combined and the sugar is beginning to caramelize, around 5-10 minutes.
    • Add the rest of the vinegar, wine and salt and bring to a boil for 1 minute.
    • Add cherries and reduce the heat slightly.
    • Simmer covered for 45 minute or until everything is tender and well combined, stirring periodically.
    • Add cranberries and water and gently boil until the berries have burst and a little bit of the liquid has evaporated, around 10 minutes. Make sure you stir it periodically.
    • Cool and serve at room temperature or cold.

    Notes

    This will last up to 5 day days in the refrigerator and can be made ahead.

    Nutrition

    Serving: 1servingCalories: 181kcalCarbohydrates: 38gProtein: 2gFat: 0.2gSaturated Fat: 0.04gPolyunsaturated Fat: 0.03gMonounsaturated Fat: 0.02gCholesterol: 0.2mgSodium: 157mgPotassium: 145mgFiber: 3gSugar: 30gVitamin A: 557IUVitamin C: 6mgCalcium: 33mgIron: 1mg
    Tried this recipe?Let us know how it was!

    Helpful tools:


    My very favorite sauce is:

    Sunday Sauce

    This is part two of the only Meat Sauce recipe you’ll ever need. It’s an extremely detailed (but still simple and easy) recipe for my Grandma’s homemade, Italian Sunday Sauce and this seriously is the very best sauce you’ll ever taste. This second part is all about adding the meatballs and fall-apart-tender pork for your sauce as well as the secret ingredient and putting it all together!

    I also love these sauce recipes:

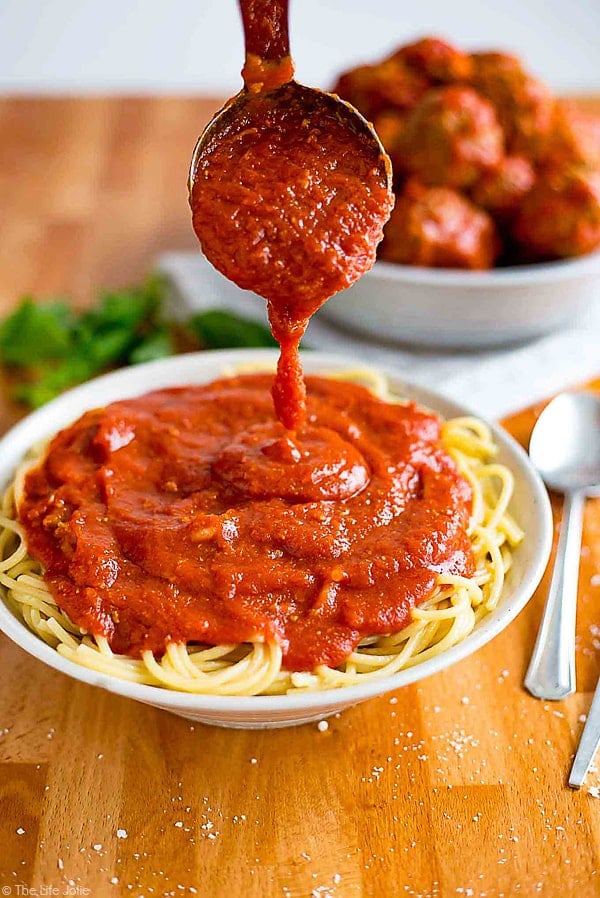
    Marinara Sauce

    This authentic, homemade Marinara Sauce is the best recipe. It's really easy to make and you can use fresh tomatoes or canned (to keep things simple!).

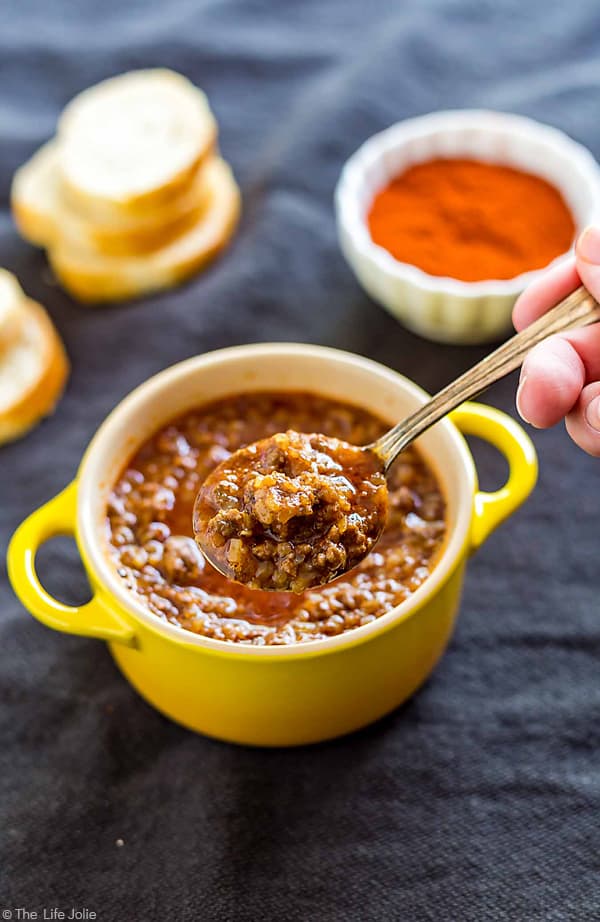
    Spicy Meat Hot Sauce

    A spoonful of spicy Meat Hot Sauce.

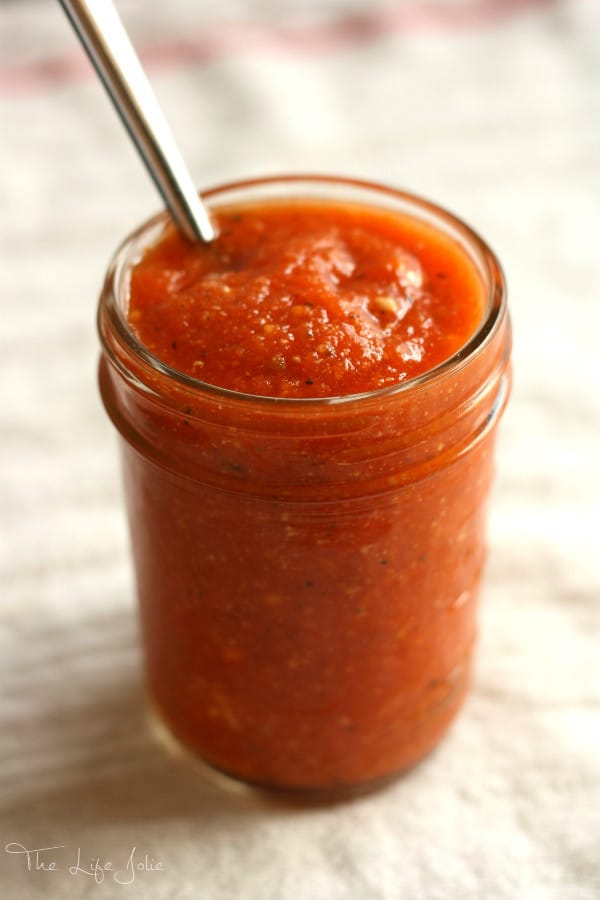
    Easy Pizza Sauce

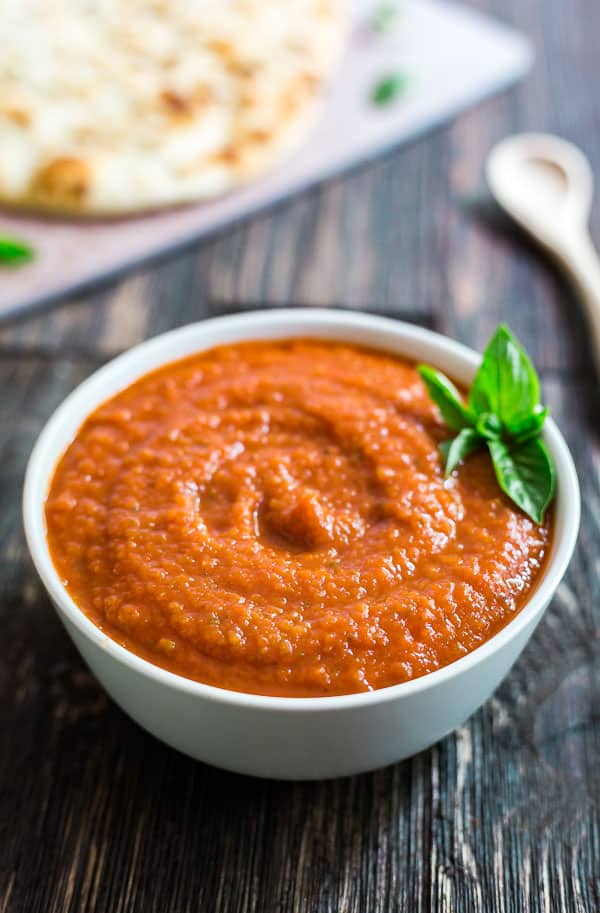
    A bowl of Easy Pizza Sauce with a spoon and flat bread in the background.

    You can find a full index of my recipes here.

    Don't forget to follow The Life Jolie on Pinterest for more recipe inspiration!

    Or if Pinterest isn't your style, bookmark this post!

    Let's keep the conversation going- join my Facebook group!

    This Homemade Cranberry Sauce with Dried Cherries and Shallots recipe so easy to make and the best alternative to canned cranberries. Made with fresh cranberries is such a great addition to any Thanksgiving dinner and would also be great any other time of year over chicken or pork!

    Apple Cinnamon Thumbprint Cookies

    Nov 12, 2017 · 2 Comments

    A squaer image of Apple Cinnamon Thumbprint Cookies.

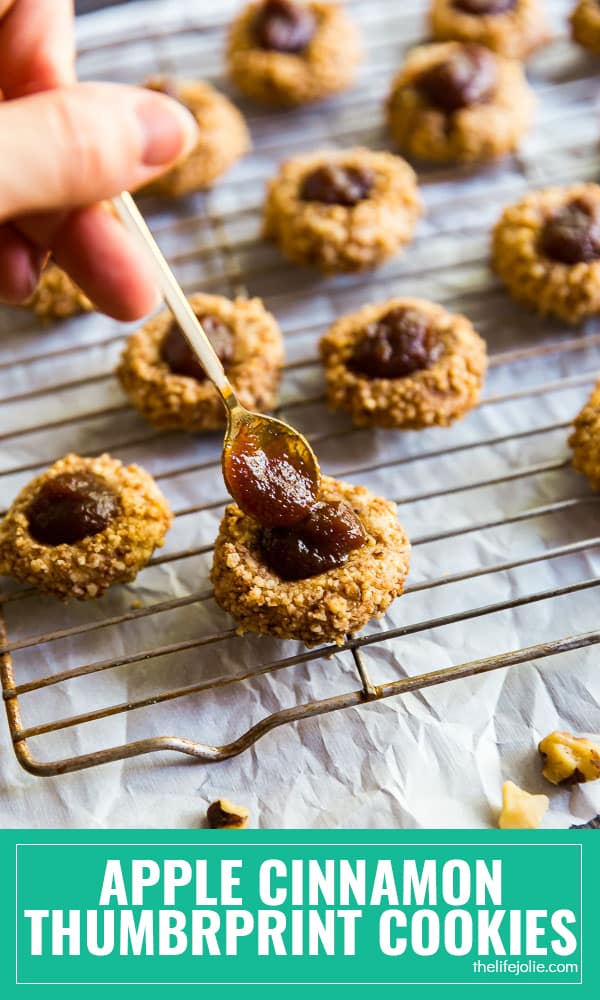
    Apple Cinnamon Thumbprint Cookies: a flavorful twist on a classic cookie that the whole family will love!

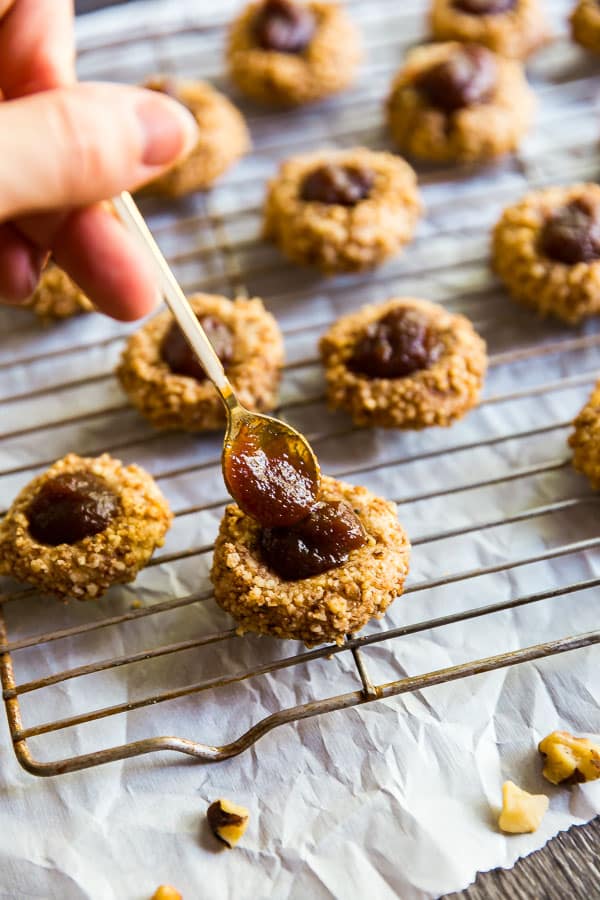
    A spoon putting apple butter into Apple Cinnamon Thumbprint Cookies.

    This is a sponsored conversation written by me on behalf of Bob’s Red Mill. As always, all opinions are my own and I only work with brands that I use, love and recommend. Please see the disclaimer here. 

    With the holiday season fast approaching, one thing I really want to focus on with my girls is how important the giving aspect of holidays is (specifically with A because T is still too little to understand). It can be so easy to get caught up in the stress of the holidays and gifts that we want for ourselves, but giving is such an important part of life in general and this is especially true around the holidays.

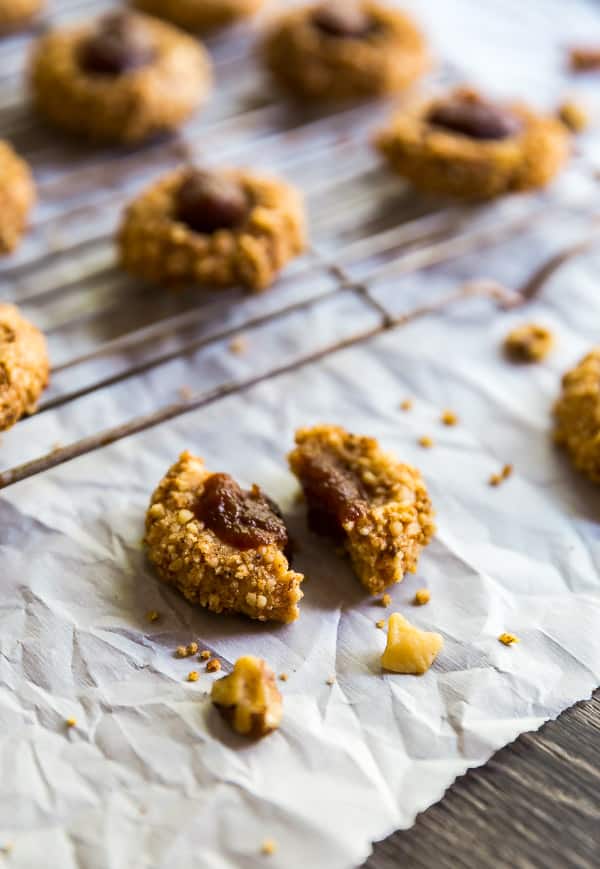
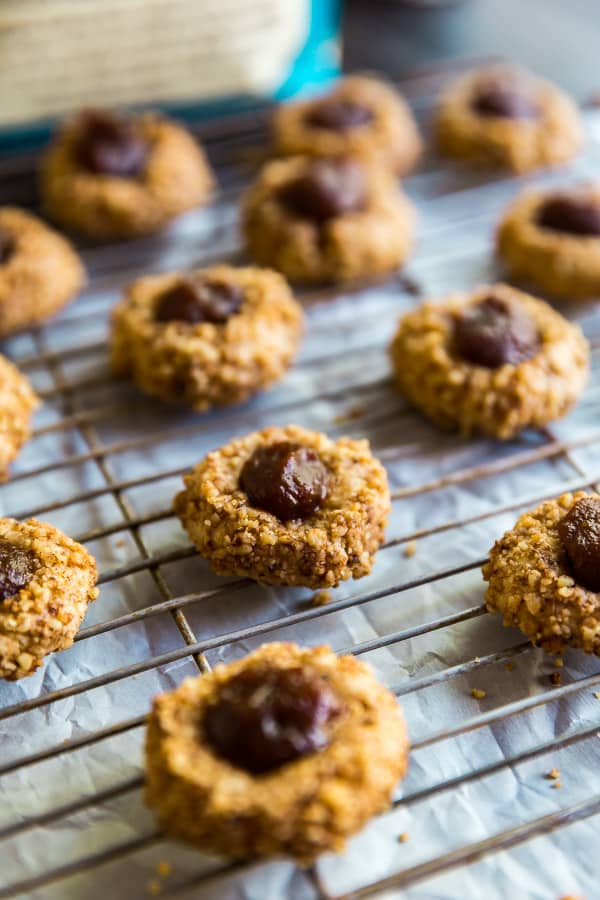
    Apple Cinnamon Thumbprint Cookies on a cooling rack with a broken cookie out front

    As you guys probably know, one of my favorite ways to show my love is through food. Taking the time to cook or bake something delicious from scratch with the sole purpose of brightening another person’s day. Letting them know your love them and are thinking of them. It’s the little things. And plus also, nothing says love like freshly baked cookies! So when the opportunity presented itself to team up with Bob’s Red Mill again (you can see our last collaboration here) to share some love through baked goods, I jumped at the chance.

    Apple Cinnamon Thumbprint Cookies of a rack.

    I’ve been a huge fan of Bob’s Red Mill products for a long time because they are the highest quality and they really take my baked good from tasty to excellent. But I am especially loyal to these products because they also believe in making the world a better place through small acts of kindness. And that is something we could all use more of in this world. So these cookies are Made with Love, Baked with Bob’s.

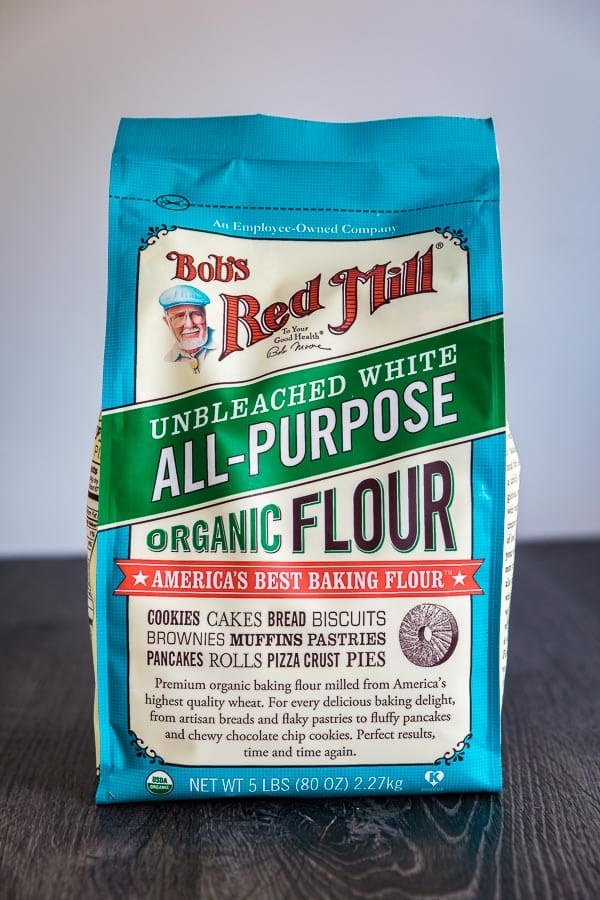
    A bag of Bob's Red Mill fou used in my Apple Cinnamon Thumbprint Cookies.

    For this collaboration, I wanted to take a traditional cookie that we all know and love and add a seasonal twist to make it even more unique and delicious. I settled on apple cinnamon as my flavor profile for a few reasons. First of all, who doesn’t love apples? Nothing says comfort and holidays like an apple-themed dessert. I also love the idea of taking the same flavors as an all-American apple pie and integrating them into a cookie.

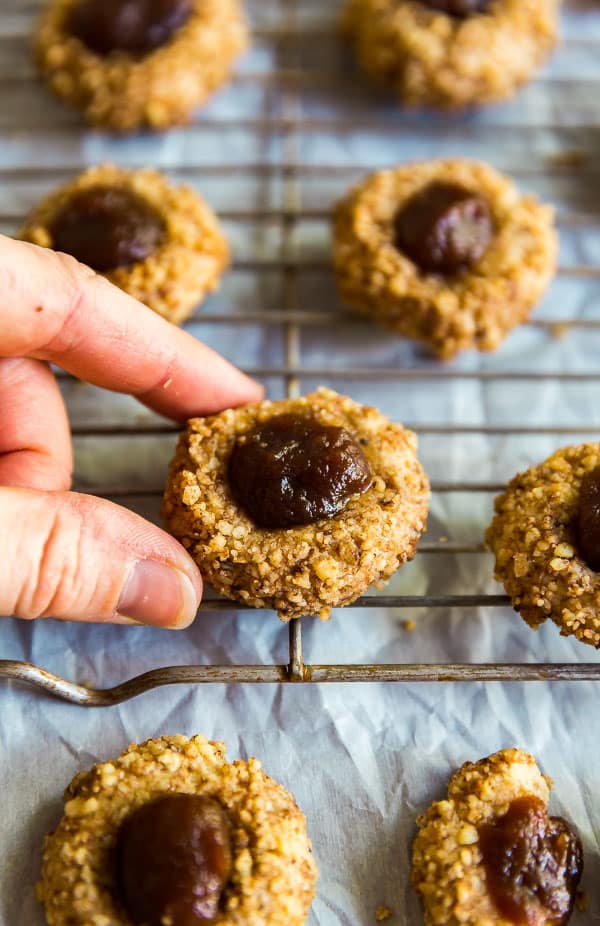
    A rack of Apple Cinnamon Thumbprint Cookies with a hand pulling one out.

    These Apple Cinnamon Thumbprint Cookies are full of great, seasonal flavor. They’re also super easy to make. For the filling, I used store-bought apple butter, but if you want to make your own apples butter, but you can find some great ones here, here and here.

    I also shared a variation of this recipe in the recipe notes if you’re baking for a friend or family member who cannot eat nuts. I try to take this into account with much of my baking because we have a few family members who cannot eat nuts and I want them to enjoy as many of my holiday confections as possible!

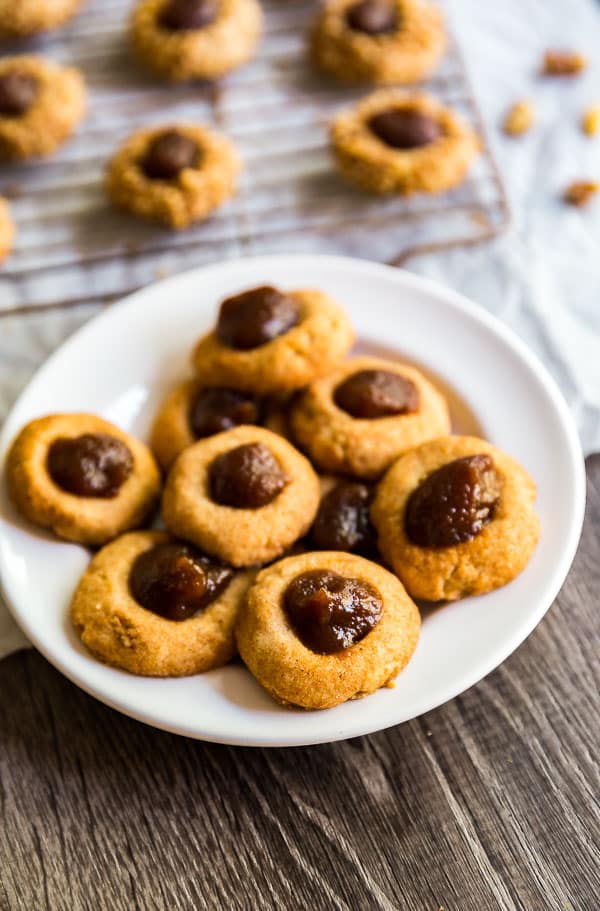
    A variation of Apple Cinnamon Thumbprint Cookies without nuts.

    I shared these Apple Cinnamon Thumbprint Cookies with one of our neighbors. We are super lucky in that we have several neighbors who are so friendly and kind. The neighbor we brought these to has been especially generous in allowing us to borrow a few tools that we don’t own. He loved these cookies as much as well did!

    Hosting Thanksgiving?

    Discover the secret to hosting Thanksgiving without all the stress! Prepsgiving is your FREE guide to making a delicious Thanksgiving feast the easy way.

    A squaer image of Apple Cinnamon Thumbprint Cookies.

    Apple Cinnamon Thumbprint Cookies

    Jessy Freimann
    Apple Cinnamon Thumbprint Cookies: a flavorful twist on a classic cookie that the whole family will love!
    No ratings yet
    Print Recipe Pin Recipe
    Prep Time 10 minutes mins
    Cook Time 12 minutes mins
    Total Time 22 minutes mins
    Course Dessert
    Cuisine American, Christmas, holidays, seasonal, Thanksgiving
    Servings 36 cookies
    Calories 44 kcal

    Equipment

    • mixing bowl
    • Hand mixer
    • stand mixer
    • sheet pan
    • measuring spoons
    • measuring cups

    Ingredients
      

    • ½ cup salted butter softened but not melted (1 stick)
    • ⅓ cup light brown sugar packed
    • 1 large egg separated
    • ½ teaspoon vanilla extract
    • 1 cup Bob's Red Mill Unbleached White All Purpose Flour
    • ½ teaspoon Kosher salt
    • 1 ¼ teaspoon ground cinnamon divided
    • ¼ teaspoon ground nutmeg
    • 1 ¼ cup finely chopped walnuts or pecans optional
    • 1 cup Apple butter

    Instructions
     

    • Preheat the oven to 350 degrees and line a baking sheet with a Silpat or parchment paper.
    • Mix butter, sugar egg yolk and vanilla until well combined.
    • Stir into flour, salt, ½ teaspoon cinnamon and nutmeg until just combined.
    • Roll into 1 inch balls.
    • In a small bowl, combine chopped nuts and remaining cinnamon.
    • Roll each ball in egg white and then the nuts mixture.
    • Place each ball onto the baking sheet around an inch apart.
    • Using your thumb or the back of a spoon, create a small hole in the middle of each cookie being careful not to go all the way through (the "thumbprint").
    • Bake 10-12 minutes. Cool completely.
    • Fill the thumbprints with apple butter. Serve immediately.

    Notes

    • If you don't want to use the nuts/cinnamon mixture you could substitute it by rolling the balls in a mixture of 2 Tablespoons of sugar + 1 teaspoon cinnamon.
    • These will last up to 4 days covered at room temperature.

    Nutrition

    Serving: 3cookiesCalories: 44kcalCarbohydrates: 5gProtein: 0.1gFat: 3gSaturated Fat: 2gPolyunsaturated Fat: 0.1gMonounsaturated Fat: 1gTrans Fat: 0.1gCholesterol: 7mgSodium: 54mgPotassium: 11mgFiber: 0.2gSugar: 5gVitamin A: 81IUVitamin C: 0.05mgCalcium: 4mgIron: 0.05mg
    Tried this recipe?Let us know how it was!

    You can find a full index of my recipes here.

    Don't forget to follow The Life Jolie on Pinterest for more recipe inspiration!

    Or if Pinterest isn't your style, bookmark this post!

    Let's keep the conversation going- join my Facebook group!
    This Apple Cinnamon Thumbprint Cookies recipe is an easy variation of a classic thumbprint cookie. Made with nuts and filled with apple butter, these have the same great flavors of an all-American apple pie and are great cookies to give to the ones you love (great Christmas cookies!). AD

    This is a sponsored post written by me on behalf of Bob’s Red Mill. 

    Cheddar and Broccoli Twice Baked Potatoes Recipe

    Nov 5, 2017 · Leave a Comment

    A square image of Cheddar and Broccoli Twice Baked Potatoes
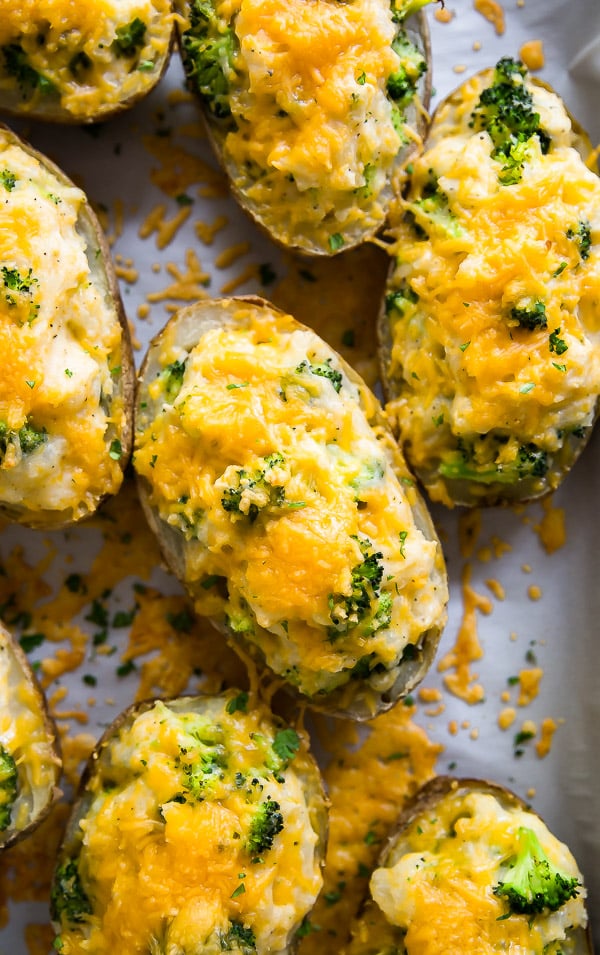
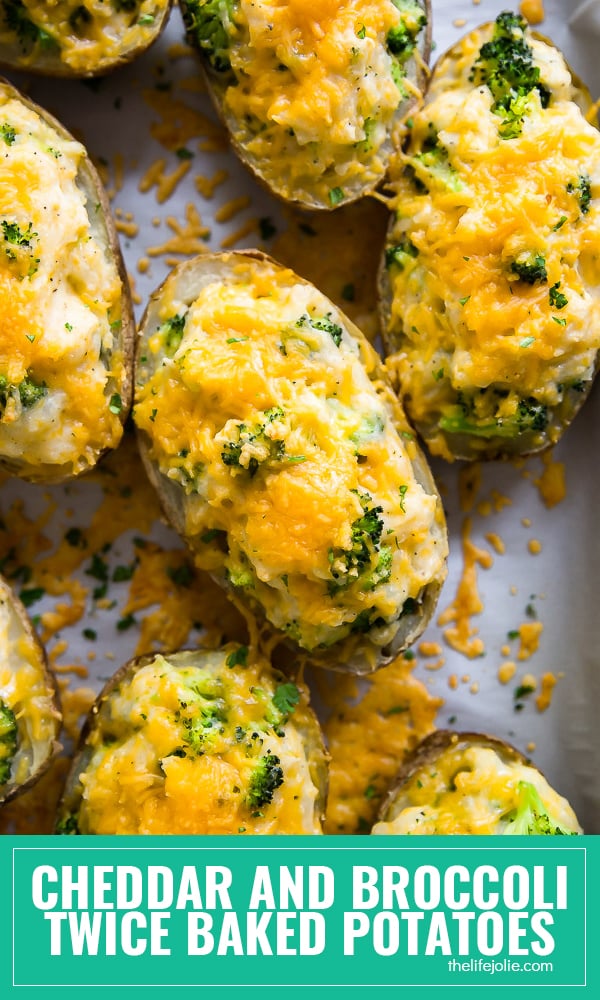
    A close up overhead of Cheddar and Broccoli Twice Baked Potatoes.

    Need a side dish that will impress? These Cheddar and Broccoli Twice Baked Potatoes will have your family fighting for seconds!

    This post contains Affiliate Links. Please see the disclaimer here.

    Life Lately: To nap or not to nap? That is the question.

    At what age do kids drop their naps? A naps great at daycare most of the time. Whenever we pick her up, they're pretty much always like "Yeah, she had a great nap!" This often means A is in a good mood too.

    Now as far as I'm concerned, my kids will nap until they're 18. They should be thrilled about this. I for one, seriously regret all the naps I skipped as a kid. I'd kill to get those back, amiright?!

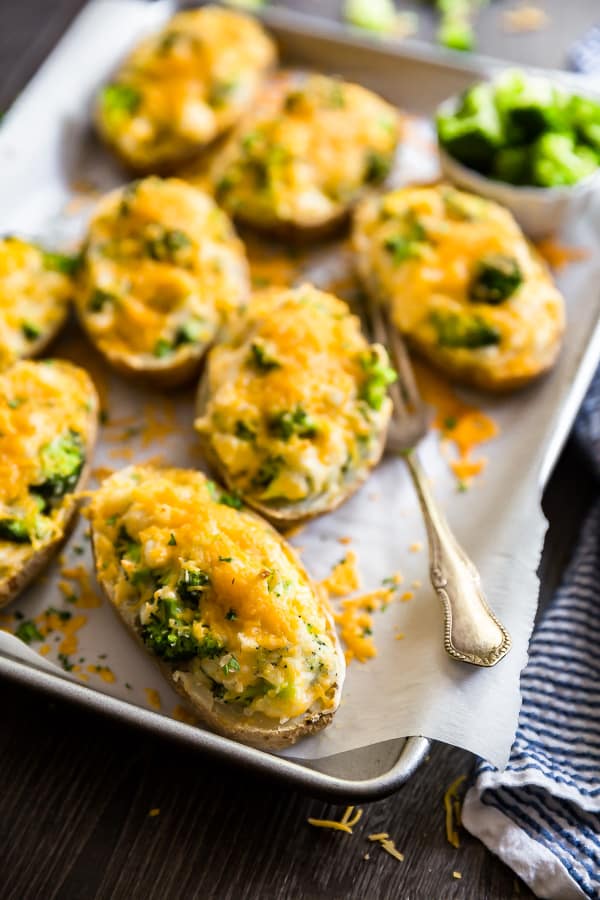
     Cheddar and Broccoli Twice Baked Potatoes on a pan lined with parchment paper.

    But on weekends, when A is home. She is not about that napping life. She will sit up and play with her toys the whole time if we lets her. And I will allow it for a short time but one of us usually goes in at some point and tells her to take a nap and usually dangles the whole "so-you-can-do-something-fun" carrot to get her to try and sleep. We have maybe a 50% success rate doing this, which is me being very generous.

    I know at some point she'll switch to having quiet time, but I'm seriously not ready for that quite yet! Parents of preschoolers, what say you?

    A fork full of Cheddar and Broccoli Twice Baked Potato.

    Cheddar and Broccoli Twice Baked Potatoes:

    You know, when I started testing this recipe, I was testing it with leftover chicken in it, as an option for using leftover chicken or turkey. And it was just ok. Unless you asked J. He was majorly not a fan of that!

    I have to tell you, once I took the chicken out of the equation and tweeked my remaining ingredients, this recipe officially became dinnertime magic.

    An overhead shot of a pan of Cheddar and Broccoli Twice Baked Potatoes

    Rich and creamy mashed potatoes mixed with bite size pieces of tender broccoli and plenty of melted cheddar cheese. When you've got broccoli, cheddar and potatoes, how can you go wrong?

    It took a little practice on my part to figure out how to hollow out the potatoes without destroying them. I found that using a paring knife to cut around the perimeter made it a lot easier.

    It was after I finished taking photos that J took a bite and within minutes, he had devoured two of them! And if J goes back for seconds, you know they're good!

    A close up of a Cheddar and Broccoli Twice Baked Potato on a pan.

    Hosting Thanksgiving?

    Discover the secret to hosting Thanksgiving without all the stress! Prepsgiving is your FREE guide to making a delicious Thanksgiving feast the easy way.

    A square image of Cheddar and Broccoli Twice Baked Potatoes

    Cheddar and Broccoli Twice Baked Potatoes Recipe

    Jessy Freimann
    Cheddar and Broccoli Twice Baked Potatoes are the ultimate cheesy side dish for your next dinner! They're an easy recipe to make with simple ingredients and lots of down time. These are the best side for a sinner party or holiday gathering!
    5 from 1 vote
    Print Recipe Pin Recipe
    Prep Time 20 minutes mins
    Cook Time 1 hour hr
    Total Time 1 hour hr 20 minutes mins
    Course Side Dish
    Cuisine American, dinner, holidays, side dish, vegetarian
    Servings 8 servings
    Calories 167 kcal

    Equipment

    • cutting board
    • chefs knife
    • sheet pan
    • measuring spoons
    • measuring cups

    Ingredients
      

    • 4 medium russet potatoes
    • 2 ½ cups broccoli florets cut to be bite size
    • 2 Tablespoons salted butter
    • 1 Tablespoon sour cream
    • 2 Tablespoons milk
    • 1 ¾ cups shredded cheddar cheese divided
    • ¾ teaspoon Kosher salt
    • ¼ teaspoon Ground black pepper

    Instructions
     

    • Poke the potatoes a couple times and microwave for 5-7 minutes (they should be just starting to soften slightly).
    • Bake the potatoes at 400 for 30-40 minutes or until they're fork tender. Remove from oven and cool for a couple minutes. Reduce the oven to 375 degrees.
    • While the potatoes bake, steam the broccoli for 7 minutes then drain and rinse with cold water to stop the cooking. Set aside.
    • When the potatoes have cooled, cut them in half legnth-wise.
    • Use a small knife to cut around the inside each half of the potatoes so that there's about ¼ inch of the inside of the potato going around the outside.
    • Carefully spoon out the insides of each potato leaving a hollow potato skin (be careful not to go all the way through).
    • Place the insides of the potatoes into a mixing bowl and add butter, sour cream, milk, 1 cup shredded cheddar cheese, salt and pepper and mix well to combine until smooth (I use my stand mixer but a hand mixer or potato masher will also work).
    • Once the potatoes are well mixed, fold in 2 cups of the broccoli.
    • Carefully spoon the potato mixture into the potato skins and return them to the baking pan. press the remaining broccoli into the top of the potatoes.
    • Bake for 20 more minutes and sprinkle them with the remaining cheese.
    • Bake for 10 minutes or until the cheese is melted and serve immediately.

    Notes

    • These will last up to 4 days covered in the refrigerator.
    • They reheat best in the microwave.

    Nutrition

    Serving: 0.5potatoCalories: 167kcalCarbohydrates: 22gProtein: 9gFat: 5gSaturated Fat: 3gPolyunsaturated Fat: 0.3gMonounsaturated Fat: 1gTrans Fat: 0.1gCholesterol: 14mgSodium: 408mgPotassium: 559mgFiber: 2gSugar: 2gVitamin A: 333IUVitamin C: 31mgCalcium: 137mgIron: 1mg
    Tried this recipe?Let us know how it was!

    One of my other favorite potato dishes is:

    Loaded Baked Potato Stacks

    This Loaded Baked Potato Stacks recipe is such an such an easy side dish for a weeknight dinner. Thin slices of potato, seasoned and stacked in the cups of a muffin tin and baked in the oven; these are a tasty addition to any meal and they also make a delicious game day appetizer!

    I also love these potato dishes:

    German Potato Salad

    An overhead photo of German Potato Saladwith a gold spoon on the right side and some egg shells in the top left corner.

     Quick and Easy Roasted Potatoes

    Helpful tools:


    You can find a full index of my recipes here.

    Don't forget to follow The Life Jolie on Pinterest for more recipe inspiration!

    Or if Pinterest isn't your style, bookmark this post!

    Let's keep the conversation going- join my Facebook group!
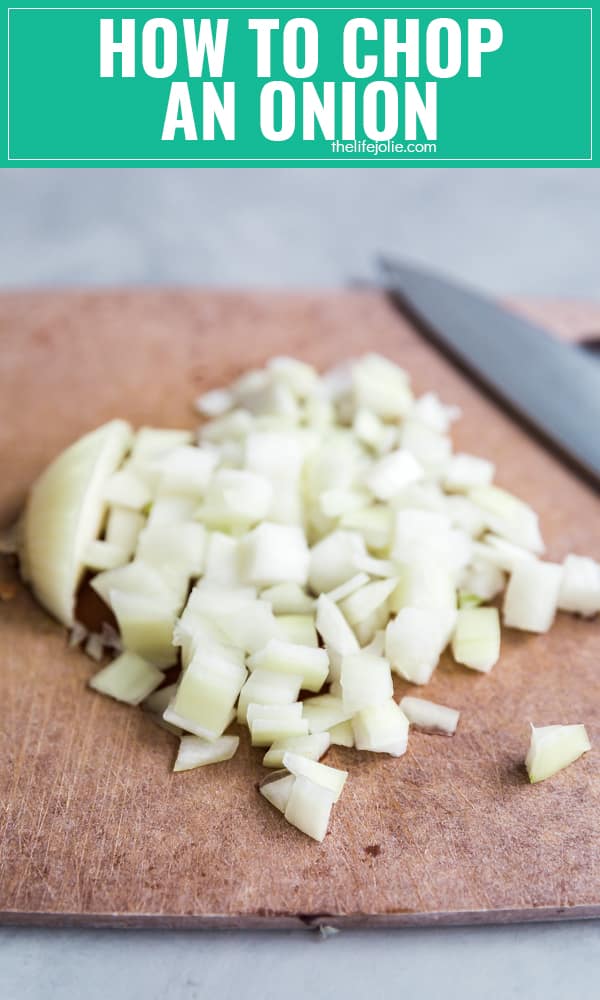
    Cheddar and Broccoli Twice Baked Potatoes are the ultimate cheesy side dish for your next dinner! They're an easy recipe to make with simple ingredients and lots of down time. These are the best side for a sinner party or holiday gathering!

    How to make a Cheesy Garlic Knot the easy way

    Nov 2, 2017 · Leave a Comment

    A square image of a Cheesy Garlic Knot being stretched.

    It could not be easier to make a Cheesy Garlic Knot and I'm going to show you how!

    Hands stretching a Cheesy Garlic Knot.

    These will be your new go-to dinner rolls.

    A pan of Cheesy Garlic Knots.

    This post contains Affiliate Links. Please see the disclaimer here.

    Life Lately: Halloween 2017

    (or skip right to the How to make a Cheesy Garlic Knot the easy way)

    So did everyone have a good Halloween? We did all sorts of Halloween events over the last couple weeks. Including a visit to a local farm with various kids activities and pumpkin picking, 3 different trick or treating excursions (rain and shine, my girls are troopers, you guys!) and visit in costume to my Grandma. We still see her other times each month, but I make a point to bring the girls over in their costumes each year. The girls love it just as much as she does, which A reminded me of while we were getting them into costume in her building lobby and A exclaimed "I'm so excited to see Grandma Eve!"

    This year, A went between a few costume options. She currently loves PJ Masks (hooray for super heroes!). As I mentioned here, she has an Owlette costume that she received for her birthday as well as jammies that look just like Catboy and a mask we got at a local art show. She also has her Belle dress, but she didn't actually end up wearing that because it's cold in these parts!

    A close up of a Cheesy Garlic Knot.

    It was certainly nice to have options, more specifically options that don't require us to spend additional money. Because costumes are $$$ for something they won't wear very often! But we were lucky enough to find a great deal on the cutest Flamingo costume at Target. And at first she wanted no part of the hood. But then when we went to the annual Trick or Treating that they do at all the businesses in the village we live in, it was raining and T was totally down with the hood after that!

    On the actual holiday, we trick or treated in our neighborhood for a little while and my parents and sister came to hang with us. It was pretty cold on Tuesday night and getting dark quickly. A was really not thrilled about being out in the dark, so trick or treating went pretty quickly for us. They were total champs about the cold (they were also pretty bundled up!). A's winter jacket kind of made her costume look like one of those super hero costumes that have built-in muscles which totally cracked me up!

    A view of the corner of a pan full of Cheesy Garlic Knots.

    They were totally thrilled to eat candy and chat with our neighbors, but to be honest, the highlight of the night for them seemed to be helping hand out candy. They loved seeing all the costumes and giving all the kids candy! It was a lot of fun and I'll be interested to see what next Halloween brings!

    How to make a Cheesy Garlic Knot the easy way:

    First of all, who loves garlic knots? *frantically waves hands in the air* Have you ever thought about adding the one thing that would make garlic knots better...melty, stretchy cheese? I know, quite the a-ha moment!

    Cheesy Garlic Knots on a pan with a cheese stretch up front.

    Having bread at a meal is always something of a treat. It brings me right back to Grandma's kitchen table enjoying our Sunday sauce and meatballs. While it would be awesome to always have warm bread with dinner, I just don't have the time to be going to the grocery store every few days to make sure it's fresh. And working with yeast terrifies me, so making it is not an option (at least not for now.

    So how great it is to be able to grab a container of refrigerated bread sticks and turn them into savory, buttery garlic knots in a matter of minutes. But even more amazing, savory, buttery garlic knots with a cheesy surprise in the middle? Let's just say, when I tested this out, my family's reviews were a sea of enthusiastic "Yassssssssssss!" and whatever the toddler version of that is.

    An over head shot of a pan of Cheesy Garlic Knots.

    These are best served right away, but you can totally assemble them earlier and store them in the fridge and then slather them with the garlicky melted butter mixture and bake them off ust before you're ready to eat.

    A close of of a Cheesy Garlic Knot on a pan with others surrounding it.

    It took a couple tests to get the baking temperature right. At first did it at a lower temp for a longer time and I burned the bottoms. Then I reduced the time at the same temp and they didn't brown at all. So I ultimately raised the temp a bit for gorgeous color and the right amount of doneness. It's helpful to line the pan with either a Silpat or parchment paper, because scrubbing sheet pans is not my favorite way to spend my time.These are a great prepare-ahead option for the holidays and your family will totally flip over all that cheesy, buttery goodness!

    Hosting Thanksgiving?

    Discover the secret to hosting Thanksgiving without all the stress! Prepsgiving is your FREE guide to making a delicious Thanksgiving feast the easy way.

    A square image of a Cheesy Garlic Knot being stretched.

    How to make a Cheesy Garlic Knot the easy way

    Jessy Freimann
    Here's a recipe for how to make a Cheesy Garlic Knot. It's so quick and easy to make tasty Italian garlic knots with refrigerated bread sticks stuffed with mozzarella cheese and slathered with garlic and butter. These are great for Thanksgiving too!
    No ratings yet
    Print Recipe Pin Recipe
    Prep Time 10 minutes mins
    Cook Time 10 minutes mins
    Total Time 20 minutes mins
    Course Side Dish
    Cuisine American, bread, hack, holidays, side dish, Thanksgiving
    Servings 12 rolls
    Calories 44 kcal

    Equipment

    • 1 sheet pan
    • 1 cutting board
    • 1 chefs knife
    • 1 Measuring cups and spoons

    Ingredients
      

    • 1 package refrigerated bread stick dough I use Pillsbury
    • 3 pieces string cheese cut into quarters
    • 5 Tablespoons salted butter melted
    • 1 teaspoon garlic powder
    • 1 teaspoon Italian seasoning

    Instructions
     

    • Preheat the oven to 400 degrees F and line sheet pans with a silpat or parchment paper.
    • Using a rolling pin, take each piece of bread stick dough and roll it a bit to flatten.
    • Place one of the string cheese quarters into a middle and then fold the short edges of dough up and over it to cover.
    • Now cross the long sides of dough over each other so that each side is now on the opposite side from where it started.
    • Flip the entire garlic knot over so that the crossed sides are underneath the center where the cheese is.
    • Gently stretch those sides up to tie a knot (tucking one underneath the other and then very gently pulling both sides to tighten) and tuck the ends under the garlic knot.
    • Make sure none of the cheese is exposed and carefully press it between your hands to seal.
    • Place the garlic knots on the lines pans with a couple inches between them.
    • In a small bowl, mix the melted butter, garlic powder and Italian seasoning until well combined.
    • Lightly brush half of the butter mixture onto the garlic knots.
    • Bake uncovered for 8-10 minutes, until golden.
    • Right after they come out of the oven, brush the remaining butter mixture onto each garlic knot and serve immediately.

    Notes

    Leftovers last up to 3 days in the refrigerator.

    Nutrition

    Serving: 2piecesCalories: 44kcalCarbohydrates: 0.3gProtein: 0.2gFat: 5gSaturated Fat: 3gPolyunsaturated Fat: 0.2gMonounsaturated Fat: 1gTrans Fat: 0.2gCholesterol: 13mgSodium: 40mgPotassium: 6mgFiber: 0.1gSugar: 0.02gVitamin A: 149IUVitamin C: 0.01mgCalcium: 4mgIron: 0.1mg
    Tried this recipe?Let us know how it was!

    Here's one of my favorite breads:

    Banana Bread

    This family recipe for banana bread is so quick and easy to put together and the results are the most delicious, moist banana bread you'll find anywhere! Click on the photo to get the recipe.

    I also love these bread recipes:

    Pieces of Pumpkin Chocolate Chip Bread lined up on a coolnig rack with the front one in focus.

    Pumpkin Chocolate Chip Bread

    Jalapeno Popper Pull Apart Bread

    This cheesy Jalapeno Popper Pull Apart Bread is an easy recipe for game day! A loaf of bread stuffed with jalapenos, cheese and bacon; it's super quick to throw together and is sure to be a hit at your next Superbowl Party!


    Helpful Tools:


    You can find a full index of my recipes here.

    Don't forget to follow The Life Jolie on Pinterest for more recipe inspiration!

    Or if Pinterest isn't your style, bookmark this post!

    Let's keep the conversation going- join my Facebook group! 
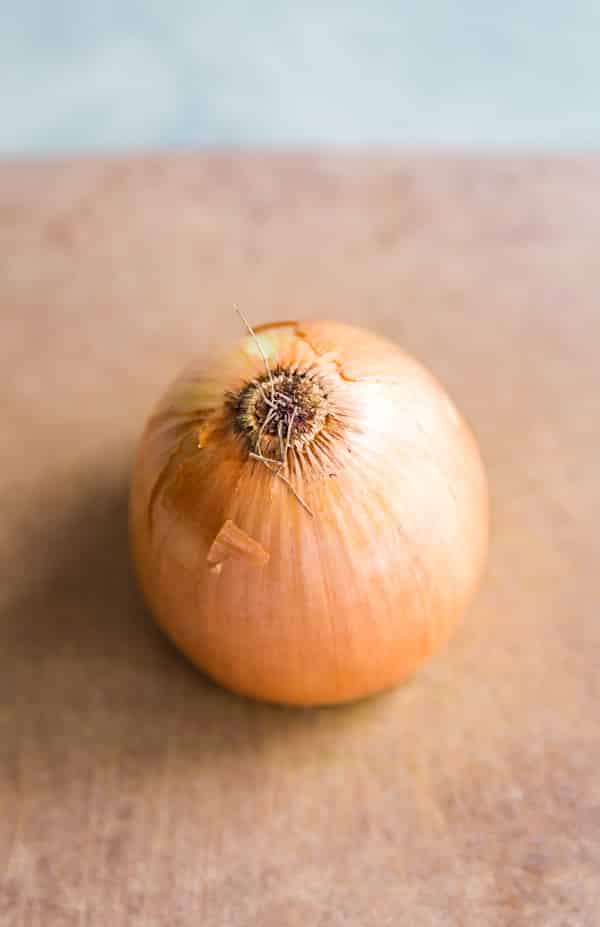
    Here's a recipe for how to make a Cheesy Garlic Knot. It's so quick and easy to make tasty Italian garlic knots with refrigerated bread sticks stuffed with mozzarella cheese and slathered with garlic and butter. These are great for Thanksgiving too!

    Supreme Pizza One Pot Pasta

    Nov 1, 2017 · 16 Comments

    A square image of Supreme Pizza One Pot Pasta.

    This is a sponsored conversation written by me on behalf of Battistoni Italian Specialty Meats. As always, all opinions are my own and I only work with brands that I use, love and recommend. This also post contains Affiliate Links. Please see the disclaimer here. 

    Supreme Pizza One Pot Pasta: minimal clean up with maximum flavor.

    A big scoop of Supreme Pizza One Pot Pasta.

    Your pasta night will never be the same.

    A pot of Supreme Pizza One Pot Pasta.

    Here in Western New York, we have a thriving culinary scene. New restaurants and eateries are popping up everywhere. They are pushing the boundaries of new and creative ways to present food. Even better, is the fact that some of my favorite brands and products are actually produced locally. So I still get to stay loyal to the brands I love while being able to "eat local". It's always a pleasure getting to introduce you guys to these foods and brands that I love along with great recipes to use them in.

    A package of Supreme Pizza One Pot Pasta.

    I'm especially excited about today's post because Battistoni Italian Specialty Meats, which is local to Buffalo, NY, recently released their All-Natural Pizzeria Pepperoni to 93 different Wegman's store locations. This makes me pretty happy because now I can find my favorite pepperoni variety at one of my favorite grocery stores!

    They are actually the first in the pepperoni category to have a product with a clean formula, cured naturally with celery powder. This replaces the chemical sodium nitrite in processing (aka the bad stuff the World Health Organization warns against). The genius part of it all, is they managed to do this while still maintaining the good stuff like spices and fat for flavor in the traditional way; hand-blended spices for 86 years! So you get a delicious and mildly spiced pepperoni (read: perfect for kids!) without the nitrates or BHA / BHT!

    A close up of a bowl of Supreme Pizza One Pot Pasta.

    Battistoni is the largest maker of authentic Italian dried meats in New York state. There's only a small number of plants in the entire United States that craft small batches this old world way from Europe as opposed to factory processing. So you're getting artisan-crafted meats that have the same care and precision as the traditional Italian way. And it all happens right here in my own proverbial backyard!

    A huge goal for Battistoni is earning the trust of their consumers, the same way a mom would trust her favorite brand of bread or milk. This can be difficult considering the general distrust that the public has for "processed" foods. But between their perfect blend of pure and delicious flavors, a healthy amount of nostalgia for their Italian ancestry and awesome advances in food science, Battistoni is making great strides in achieving that goal!

    A close up image of the cheese and pepperoni on Supreme Pizza One Pot Pasta.

    Who wants to deal with extra dishes?! One Pot Pasta to the rescue!

    What kind of food blogger would I be if I didn't share a mouthwatering recipe to illustrate a tasty way that I used my Battistoni All-Natural Pizzeria Pepperoni?! I love a good one pot pasta. There's nothing better than a meal that involves minimal clean up but still tastes fantastic! And this Supreme Pizza One Pot Pasta delivers!

    Penne pasta in a zesty tomato sauce! This pizza pasta gives you all the fixings of the Supreme Pizza of your dreams: onions, peppers, olives, Italian sausage, garlic, olive, alllll the cheese and the absolute best All-Natural Pizzeria Pepperoni! All of this in your favorite pot and you've got yourself a dinner that is sure to please.

    A bowl of Supreme Pizza One Pot Pasta with a piece of bread in it.

    A few things you should know about making a one pot pasta:

    • Stir often- you don't want that glorious pasta to stick to the bottom of your pan!
    • Keep an eye on the heat- every stove and oven is different, so another good way to avoid sticking is to keep an eye on your heat and adjust accordingly.
    • Don't fear the water- my first few tests included less water but I was worried about drowning my other ingredients, but each time it was way too dry. I found the magic number with 3 cups of water. It will feel way too liquid-y at first but have a little faith, because it will cook down and much of the liquid will be absorbed by the pasta.
    • Know when to remove the cover- I like uncover it for the last 3-5 minutes of cooking to let a bit of extra liquid evaporate just a little bit.

    An overhead shot of Supreme Pizza One Pot Pasta with a container of Battistoni Pepperoni

    To learn more about Battistoni Italian Specialty Meats, check them out in these places:

    Website | Instagram | Facebook | Snapchat: Battistoni1931

    A square image of Supreme Pizza One Pot Pasta.

    Supreme Pizza One Pot Pasta

    Jessy Freimann
    Supreme Pizza One Pot Pasta: This recipe is so easy to make and since it's made in only one pan the clean up is minimal. It's the best weeknight meal made with penne pasta and all your favorite supreme pizza toppings, this will be a hit with the whole family including your kids!
    No ratings yet
    Print Recipe Pin Recipe
    Prep Time 10 minutes mins
    Cook Time 30 minutes mins
    Total Time 40 minutes mins
    Course dinner, Main
    Cuisine dinner, Italian, one pot, Pasta
    Servings 6 -8 servings

    Ingredients
      

    • 1 teaspoon olive oil
    • ½ pound sweet Italian sausage
    • 1 cup sliced onions
    • 1 cup sliced green bell pepper
    • 2-3 garlic cloves minced or pressed
    • 8 ounces sliced mushrooms
    • Salt and pepper to taste
    • ½ cup pepperoni cut in half and then each half cut into thirds + a few extra whole pieces for topping
    • 1 2.25 ounce can of sliced black olives
    • 1 28 ounce can of tomato sauce
    • 3 cups water
    • ½ teaspoon Italian seasoning
    • ½ teaspoon salt
    • 1 16 ounce box penne pasta
    • 2 cups shredded mozzarella cheese divided
    • Chopped fresh parsley and Romano cheese for garnish

    Instructions
     

    • Heat oil in a deep heavy-bottom, oven-safe pot over medium heat.
    • Add sausage to the pan and break it up quickly with a wooden spoon.
    • Add onions, peppers, garlic and mushrooms and stir to combine.
    • Season to taste with salt and pepper.
    • Saute until the sausage crumbles have browned, stirring frequently for around 10 minutes.
    • Add the pepperoni and olives to the pan and saute for 1-2 minutes.
    • Add sauce, water, Italian seasoning, salt and pasta to the pan and stir to combine.
    • Bring the pot to a boil.
    • Once it's boiling, reduce the heat to a medium low, cover and simmer for 10 minutes, stirring periodically.
    • Remove the cover and simmer for and 3-5 minutes stirring here and there.
    • Stir in ½ cup of shredded Mozzarella cheese and sprinkle the remaining cheese on top of the pasta.
    • Place a few more whole pieces of pepperoni on top of the cheese and broil for a few minutes until the cheese is melted and bubbly.
    • Top with parsley and Romano cheese and enjoy!

    Notes

    You can also use hot Italian sausage if you want this to be spicy.
    Tried this recipe?Let us know how it was!

    Another favorite one pot pasta is:

    20 Minute Taco Pasta

    20 Minute Taco Pasta is such an easy one pot recipe. This tasty dinner is made in one skillet with ground beef and Barilla Pronto Penne Pasta. It's creamy, cheesy and full of great flavor that the whole family will love!

    I also love these pastas:

    Creamy Chicken and Broccoli Pasta

    A spoon pulling Creamy Chicken and Broccoli Pasta out of the pan.

    Bangin’ Sausage and Peppers Pasta

    An overhead image of a hand holding a bowl of Sausage and peppers pasta.

    Pasta Pomodoro

    This Pasta Pomodoro recipe is a simple pasta. The flavors of deliciously fresh tomatoes, basil and garlic come together in a sauce for this quick and easy weeknight meal.

    Helpful tools:


    You can find a full index of my recipes here.

    Don't forget to follow The Life Jolie on Pinterest for more recipe inspiration!

    Or if Pinterest isn't your style, bookmark this post!

    Let's keep the conversation going- join my Facebook group! 
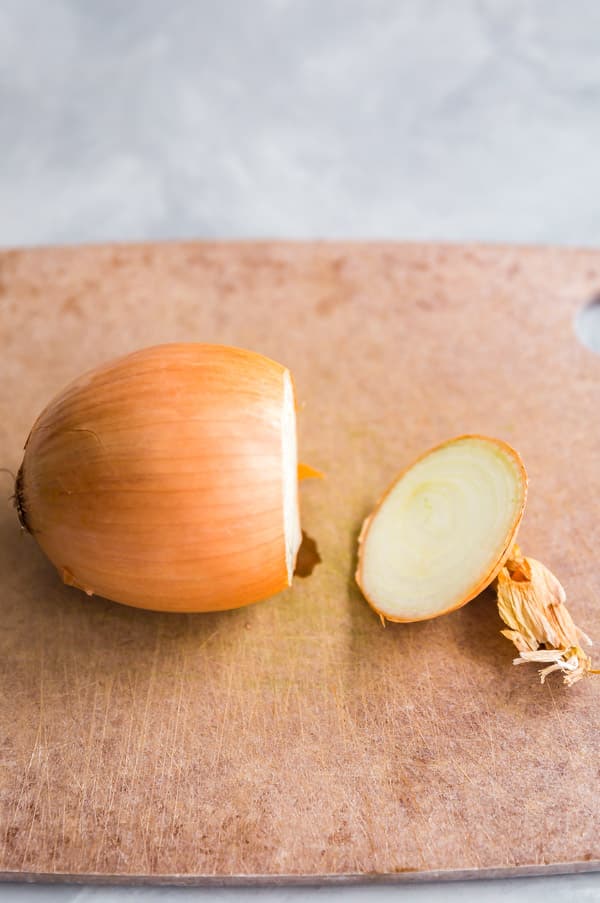
    Supreme Pizza One Pot Pasta: This recipe is so easy to make and since it's made in only one pan, the clean up is minimal. It's the best weeknight meal made with penne pasta and all your favorite supreme pizza toppings, this will be a hit with the whole family including your kids! #battistonipepperoni #whomademypepperoni #ad

    Cheesy Chicken Taco Bowls Recipe

    Oct 29, 2017 · 12 Comments

    A small square image of Cheesy Chicken Taco Bowls

    Many thanks to the American Dairy Association for hosting the tour referenced in the post. As always, all opinions are my own. This post contains Affiliate Links. Please see the disclaimer here. 

    Cheesy Chicken Taco Bowls are the best way to stretch chicken (or turkey) leftovers! They're as quick and easy as they are delicious! 

    Cheesy Chicken Taco Bowls surrounded by limes and cilantro.

    A few weeks back, I was invited by the American Dairy Association to go on a tour and learn a little bit more about where our food comes from, specifically in relation to dairy products.

    Dairy products are included in the vast majority of the food I make for myself and my family. To be honest, I never really thought much about it before, because it's so engrained in our lifestyle.

    So for the week or two period I had to give it up in the very early days of nursing T, I felt like I had nothing I could eat because I include dairy in all my food. Luckily for all of us, T did not have any allergies or sensitivities to dairy and I was able to resume my cheese and ice cream binges!

    This trip was a very large reminders that it can be so easy for us suburbanites to lose track of where our food comes from and how that fits into the big picture. It is so important to support the amazing people who provide us with freah and delicious food.

    A close up shot of Cheesy Chicken Taco Bowls with a fork in them.

    Our first day was jam packed with activity. We spent the beginning of the day touring Yancey's Fancy Cheese Plant and Processing Center which was seriously awesome. Fun fact: did you know Yancey's Fancy is New York's only Artisan Cheese Maker?

    These people know their stuff when it comes to cheese making and the quality was exceptionally high while still doing so much to make it sustainable. Between the tremendous care and precision that went into these finely-crafted cheeses and my strong desire to jump into every vat of hot cheese I came across and relax as though I was in a hot tub, I'd say it was a pretty amazing and educational experience.

    Next up was Noblehurst Farms. This is a family-owned and run farm that spans over seven generations. I was especially impressed with the fact that every conversation began and ended with the cows. There's clearly a tremendous amount of respect for these animals.

    But the thing that really blew my mind was the fact how sustainable their entire operation is. Not a thing goes to waste. They actually have a system where they take food waste and animal waste (like manure) and turn it into electricity to power the entire farm with extra going into the power grid as well.

    A close up of Cheesy Chicken Taco Bowls on a cutting board.

    Additionally, Wegman's one of my favorite places ever our biggest major grocery chain in these parts, brings all of their food waste (like all the scraps and "unusuables" from prepared foods they make) to put it to better use this way. How incredible is that?!

    We also had the pleasure of enjoying a dinner party with some of the local farmers which also presented the opportunity to get to know the staff at the American Dairy Association. This dinner was catered by FLX Table which is currently considered one of the top restaurants in the country. They seriously lived up to their reputation; the dinner was exceptional.

    The next day, was spent at the New York Wine and Culinary Center. We got to learn a little more about the American Dairy Association. Then we had the pleasure of cooking in their amazing kitchens - there were actually some cooking competitions including a mac and cheese throw down and a competition using a "secret ingredient". I made my Bacon Ranch Mac and Cheese as well as my Chicken Salad Stuffed Tomatoes (my secret ingredient was Greek Yogurt).

    It was all in good fun, but I got to taste everything and the competition was stiff. Every single thing I tried tasted amazing, I don't know how the judges decided!

    Overall, I had the most amazing time getting to learn about where our food comes from. I think what made it such a valuable experience was that it really bridged the gap that has (to an extent) always existed between me, a suburban gal, and the great people who get the food from their farm to our table.

    An overhead shot of Cheesy Chicken Taco Bowls on a cutting board.

    So in honor and celebration of my love for dairy, I threw together a quick recipe that's as easy as it is delicious and features a couple of my favorite dairy components: cheese and sour cream.

    Now we're at the time of year where we're all starting to think about what to do with leftover turkey meat. Now I made this with check but whether it's leftover chicken or turkey meat, it's always nice to have some quick and tasty dinner options to throw together and prevent waste by stretching out your leftovers.

    This was also inspired by our first day of the dairy tour and getting see all these great businesses doing everything the can to avoid waste and make their operations sustainable.

    Cheesy Chicken Taco Bowls have three main items for you to make which are all super simple (well four, really. But one is heating up some yellow rice as per the package directions). The first is the the tortilla bowls. While you technically don't have to make them, I think they make this dish even more delicious and they look pretty awesome too. You're going to get extra scrappy and hack your muffin tins for this, as I'll describe below in the recipe.

    A hand with a fork taking some Cheesy Chicken Taco Bowls

    Next is the chicken (or turkey if you're going that route). It's as simple throwing the leftover chicken along with a few tasty components into a skillet and heating them together.

    Finally there's the Avocado Crema. Once again, a matter of combining some fresh and flavorful ingredients. I like to use my mini prep processor, but you could totally do it by hand if you don't mind some added time and work). This will provide a cool and light creamy sauce to drizzle over the top of your taco bowls.

    This comes together in around 30-40 minutes max and you cannot beat all the great flavor! It's such a great weeknight meal and is also an excellent way to enjoy leftovers that you may have hanging around in your fridge!

    Cheesy Chicken Taco Bowls drizzled with avocado crema.

    Hosting Thanksgiving?

    Discover the secret to hosting Thanksgiving without all the stress! Prepsgiving is your FREE guide to making a delicious Thanksgiving feast the easy way.

    A small square image of Cheesy Chicken Taco Bowls

    Cheesy Chicken Taco Bowls Recipe

    Jessy Freimann
    Cheesy Chicken Taco Bowls are the best way to stretch chicken (or turkey) leftovers! They're as quick and easy as they are delicious! This one is a keep and also the perfect way to use Thanksgiving leftovers!
    No ratings yet
    Print Recipe Pin Recipe
    Prep Time 20 minutes mins
    Cook Time 20 minutes mins
    Total Time 40 minutes mins
    Course dinner
    Cuisine Chicken, Leftovers, Mexican, Turkey
    Servings 6 -8 bowls

    Ingredients
      

    Tortilla Bowls:

    • 6-8 taco-size flour tortillas
    • Cooking spray

    Chicken Filling:

    • 2 cups leftover cooked chicken or turkey shredded or roughly chopped
    • 1 10 oz. can rotel
    • 1 cup frozen corn
    • 1 14.5 oz. can black beans drained and rinsed
    • 1 packet of taco seasoning
    • ¼ cup water
    • Avocado Crema:
    • 1 ripe avocado peeled and pit removed.
    • 1 Tbsp. sour cream
    • The juice from ½ of a lemon around a couple Tbsp.
    • 1 pinch salt
    • Small handful of cilantro to taste

    You'll also need:

    • 1 package of yellow rice prepared as per package directions (I use Goya yellow rice)
    • 1-2 cups shredded cheddar cheese

    Instructions
     

    Start by:

    • Preparing the yellow rice as per the package directions so it can simmer while you prepare the rest of the ingredients. When it's done, set it aside for later.

    Tortilla Bowls:

    • Preheat the oven to 425 degrees and flip the muffin tins over so that the bottom is face up.
    • Lightly spray both sides of each tortilla and wedge it between 4 muffin cups so that the middle is pressed down between them and 4 sides of the tortilla curve into the spaces between the muffin cups.
    • Bake for 8 minutes and then remove from the oven to cool.
    • Once cooled, place onto a lined pan and set aside for later.
    • Chicken filling:
    • In a skillet over medium heat, combine chicken, rotel, corn, black beans, taco seasoning and water.
    • Stir periodically until heated through and steaming.

    Avocado Crema:

    • Place avocado, sour cream, lemon juice salt and cilantro into the mini prep processor.
    • Run the processor until the crema is fully combined and smooth.

    To Assemble:

    • Place a layer of rice at the bottom of each tortilla bowl so that they're ½ full.
    • Top with a big scoop of the chicken filling.
    • Sprinkle with cheddar cheese.
    • Bake for 5-10 minutes until the cheese is fully melted.
    • Drizzle with avocado crema and sprinkle with some leftover cilantro.
    • Enjoy!

    Notes

    These reheat best if the components are stored and reheated separately.
    Tried this recipe?Let us know how it was!

    Here's one of my favorite Taco-themed recipes:

    20 Minute Taco Pasta

    20 Minute Taco Pasta is such an easy one pot recipe. This tasty dinner is made in one skillet with ground beef and Barilla Pronto Penne Pasta. It's creamy, cheesy and full of great flavor that the whole family will love!

    Here are a few other Taco-themed recipes I love:

    Pulled Pork Tacos

    This BBQ Pulled Pork Tacos recipe is a fun twist on traditional mexican tacos. The pulled pork is super easy to make in the crockpot or a great way to use pulled pork leftovers. I make this with slaw and a bunch of other tasty ingredients. Click on the photo to get the recipe!

    7 Layer Taco Salad

    This 7 Layer Taco Salad is an easy recipe to make for parties. Full of delicious Mexican-inspired flavors it's got seven (or more) layers of things like beans, cheese, corn, tomatoes and is served with a creamy taco ranch dressing. Top it with chicken for a healthy main dish or serve it on it's own as great side dish to pass. This is perfect to bring to a Cinco de Mayo get together!

    Helpful Tools:


    You can find a full index of my recipes here.

    Don't forget to follow The Life Jolie on Pinterest for more recipe inspiration!

    Or if Pinterest isn't your style, bookmark this post!

    Let's keep the conversation going- join my Facebook group! 
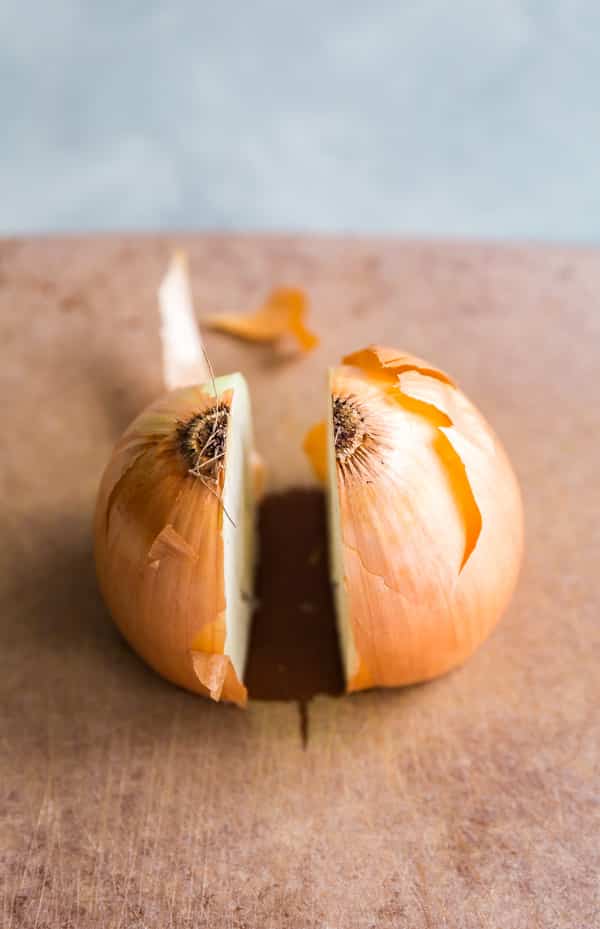
    Cheesy Chicken Taco Bowls are the best way to stretch chicken (or turkey) leftovers! They're as quick and easy as they are delicious! This one is a keep and also the perfect way to use Thanksgiving leftovers!

    Monster Peanut Butter Cup Stuffed Cupcakes

    Oct 17, 2017 · 10 Comments

    A square image of

    These Monster Peanut Butter Cup Stuffed Cupcakes are a fun treat for Halloween- your kids will love the delicious surprise inside!

    An image of Monster Peanut Butter Cup Stuffed Cupcakes and the front one has the cupcake liner peeled off it.

    This post contains Affiliate Links. Please see the disclaimer here.

    I've heard that second children are generally the wild ones. While I know this is a sweeping generalization, it certainly applies for my girls. Now I'm a firm believer there there really are no black and whites in life- just a ton of gray areas. Now there are varying levels of gray areas but I really don't think things are that cut and dry.

    So while A can totally have her wild moments, T definitely fills that Wild Woman role in our family. There are some many things that never even came up with A that are now realities with T.

    Recently, T has been full-on removing her diaper. It's often around bed time. Sometimes we'll let her hang in her diaper while we're watching Mickey and getting ready for bed, if not for any other reason, but to give her a break from clothes. She always seems to enjoy this time and has a blast playing on the bed and crawling/rolling/jumping around.

    A Monster Peanut Butter Cup Stuffed Cupcakes with other cupcakes around it and candy corn as well.

    But her daredevil side is off the chats (at least, by our standards- I'm used to A taking calculated risks, but generally being pretty cautious). T will straight up inch her way off the bed, head first until she's hanging there about to come crashing down head first. She loves to climb up on things like chairs and her rocking horse and always makes a point to stand up and shoot me a mischievous grin. It's like she knows exactly what she;s doing and she always seems to relish in it.

    While it's slightly terrifying at times, it's also super fun to see her personality come through. In some ways she's so similar to her sister, but in many ways she's so different. I like to think we got the best of both worlds in terms of our gals' personalities.


    Sometimes I totally fail at creating holiday-themed recipes. Kind of the same way I fail at decorating for the holidays. We currently do not have a speck of Halloween decor in our home, save for a few Halloween-themed sticky gel window clings that I picked up for a dollar at a grocery store after A got her flu shot. But I don't really consider those decorations as much as they are cheap entertainment and somewhat of an eyesore. That being said, I never did take down our Santa's Village from last year, so maybe I'm just really ahead of the game in that regard- HA!

    Monster Peanut Butter Cup Stuffed Cupcakes on a black cloth surrounded by candy corn.

    While I would love to be that mom who is super on top of seasonal things and celebrating holiday stuff, I'm far too much of a hot mess for that (as any of my long-time readers/Instagram story followers know!). But when I decided to do a cupcake recipe for #Choctoberfest2017 (don't forget to enter the giveaway here and check out the other amazing recipes below!) I made a promise to myself that it would be Halloween themed.

    You can totally make these cupcakes at any time of the year and to fit whatever theme you're working with. Monsters sounded like a fun option, mostly because A loves monsters (we've built them up to be fun and friendly, not scary- fingers crossed that she views them that way for a while!). Now because I wanted to get some serious height on the frosting, I actually used somewhere between 2-3 containers of frosting and an insane amount of green food coloring (something like 50 drops per container- I know, I'm insane.).

    A Monster Peanut Butter Cup Stuffed Cupcake cut open to reveal a peanut butter cup hidden inside of it.

    A little excessive, right? But it was all in good fun and you can easily cut down the amounts that you use or alter the color to your liking. To create the look of a monster I used large and small candy eyeballs (which are soooooo much fun and I pretty much want to put them on every food item that I make!!).

    I used my favorite cake mix hack for this recipes because it's hard to beat this insanely simple recipe when it yields the most moist and perfect cake. My stuffing of choice was Reese's Mini Peanut Butter Cups, but you can really put in any candy of your choosing. I think the middle what a nice surprise, and judging by the look on A's face (wide eyes and a delighted smile) I think she agreed wholeheartedly!

    A close up image of a Monster Peanut Butter Cup Stuffed Cupcake with others behind it.

    Check out these other fantastic #Choctoberfest2017 recipes: 

    "

    An InLinkz Link-up


    "

    Here are some of my other favorite Chocolate recipes:

    • Pumpkin Chocolate Chip Bread
    • Peanut Butter Cup Brownie Bites
    • Four Ingredient Chocolate Mousse
    • Quick and Easy Chocolate Pudding Cake
    • Chocolate Crinkles
    • Salted Cranberry and Pistachio Bark
    • Orange Cake with Chocolate Ganache Glaze
    • Peppermint Ice Cream Pie
    • Gluten-Free Peanut Butter Bars
    • Chocolate Cherry Oatmeal Cookie Bars
    • PB&J Brownies
    • Chocolate Peppermint Crinkles
    • German Cream Cheese Brownies
    • M&M’S® Brownie Truffles
    • S’mores Bars
    • Black Forest Ice Cream Pie
    • PMS Bark
    • Peanut Butter Brownie Truffles

    A square image of

    Monster Peanut Butter Cup Stuffed Cupcakes

    Jessy Freimann
    These Peanut Butter Stuffed Cupcakes are perfect for halloween and made to look like fun monsters. Change up the frosting and they're a delicious dessert everyone will love!
    No ratings yet
    Print Recipe Pin Recipe
    Prep Time 20 minutes mins
    Cook Time 20 minutes mins
    Total Time 40 minutes mins
    Course Dessert
    Cuisine American, Halloween, party, seasonal
    Servings 20 cupcakes
    Calories 435 kcal

    Equipment

    • 1 muffin pan
    • 1 Measuring cups and spoons
    • 1 mixing bowl
    • 1 stand mixer
    • 1 Hand mixer
    • 1 Spatula

    Ingredients
      

    • 1 chocolate cake mix I like Duncan Hines Devil's Food cake or Dark Chocolate Fudge Cake
    • 4 ounces instant chocolate pudding small boxes
    • 1 cup warm water
    • ¾ cup vegetable oil
    • 5 large eggs you can also use large if that's what you have
    • 20 Reese's Mini Peanut Butter Cups unwrapped
    • 32 ounces vanilla frosting
    • Green food coloring
    • 40 Candy eye balls

    Instructions
     

    • Preheat the oven to 325 degrees F and line your pan with cupcake liners.
    • Mix the first 5 ingredients until just combined.
    • Spoon batter ¼ of the way into the cups.
    • Place a peanut butter cup into the cup.
    • Cover it with batter (it should be most of the way full at this point).
    • Bake for 17-20 minutes or until a cake tester comes out clean.
    • Mix food coloring into the frosting until it reaches the desired shade of green.
    • Pipe the frosting onto the cupcakes (I went for height but you can always use less if you don't want them to be as tall).
    • Randomly place the candy eyeballs all over the frosting to resemble a monster.
    • Refrigerate until ready to serve to set the frosting.

    Notes

    You can always make these to match whatever your theme is- they don't have to be monster cupcakes!

    Nutrition

    Serving: 1cupcakeCalories: 435kcalCarbohydrates: 57gProtein: 4gFat: 22gSaturated Fat: 5gPolyunsaturated Fat: 10gMonounsaturated Fat: 7gTrans Fat: 0.1gCholesterol: 47mgSodium: 465mgPotassium: 128mgFiber: 1gSugar: 42gVitamin A: 72IUVitamin C: 0.02mgCalcium: 47mgIron: 1mg
    Tried this recipe?Let us know how it was!

    Helpful tools:


    You can find a full index of my recipes here.

    Don't forget to follow The Life Jolie on Pinterest for more recipe inspiration!

    Or if Pinterest isn't your style, bookmark this post!

    Let's keep the conversation going- join my Facebook group! 
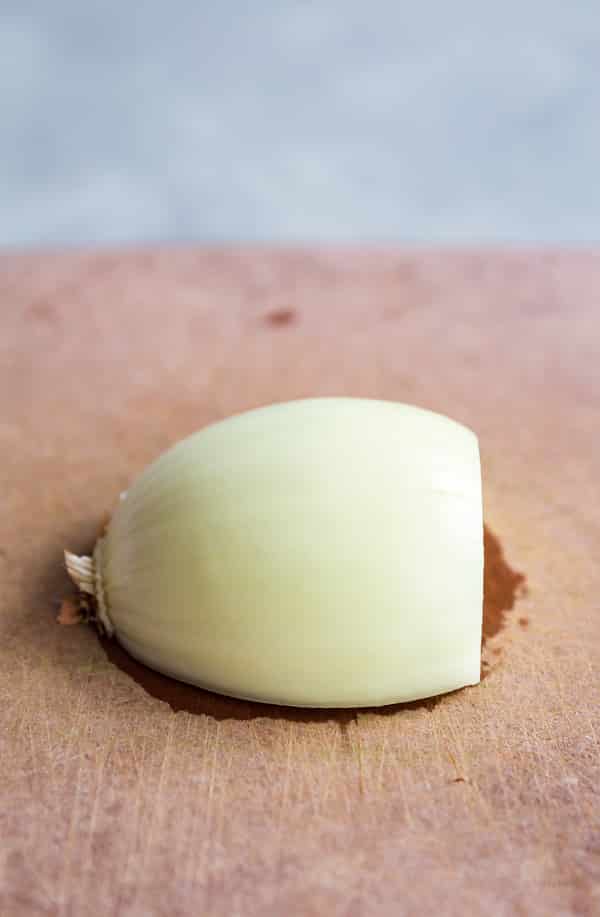
    An image of Monster Peanut Butter Cup Stuffed Cupcakes and the front one has the cupcake liner peeled off it. These diy Monster Peanut Butter Cup Stuffed Cupcakes are such an easy dessert recipe to make for kids this Halloween! This is a tutorial on how to make candy stuffed cupcakes that you can adapt to fit any occasion.
    These diy Monster Peanut Butter Cup Stuffed Cupcakes are such an easy dessert recipe to make for kids this Halloween! This is a tutorial on how to make candy stuffed cupcakes that you can adapt to fit any occasion.


    Chicken Swiss Dip

    Sep 22, 2017 · 2 Comments

    A square image of Chicken Swiss Dip.

    Hot Chicken Swiss Dip: it's ooey, gooey, cheesy and totally addictive! This is the stuff that game day dreams are made of!

    A hand pulling up a cracker full of Hot Chicken Swiss Dip from a pan of the dip with stringy cheese trailing.

    This post contains Affiliate Links. Please see the disclaimer here.

    Note: This post is in no way sponsored, endorsed or administered by the National Football League (NFL) or any of its teams. All opinions and views expressed are our own, not that of the NFL and/or any of its teams. Any team names, logos or other symbols referenced are properties of their respective organizations.

    So have you guys been enjoying the beginning of football season? I know J is super excited that it's back! It's funny because last year he claimed he wouldn't be doing much fantasy football this year. I remember looking at him and saying, "Riiiiiigggggghhhht" because he's always loved fantasy football! And of course he dove back into it, as I knew he would. I personally think it's great. It's healthy for him to have interests and do things that don't involve me and the girls.

    Hot Chicken Swiss Dip on a wooden background with a white cloth under it.

    Similar to last year, I teamed up with a group of fantastic bloggers to provide an array of delicious game day recipes to provide options for every foodie football fan out there! Unlike last year, there is  no theme for the posts, besides sharing the time-honored tradition of making insanely good food- no one was assigned teams or anything like that. But all the recipes look seriously amazing! Some of my other favs in this collab include Bacon Wrapped Cheese Smokies, and Baked Brie Crescent Bites. You can check all of them out toward to bottom of this post!

    A collage of tailgating recipes.


    Have you ever had Chicken Swiss? It's a classic dish involving boneless, skinless chicken breasts in a sauce made with cream of chicken soup, white wine, RITZ crackers and Swiss cheese. It's super heavy and comforting: perfect for a chilly autumn night (by the way, as I type this, it's amid a week full of 80 degree weather in mid-September #finallysummer).

    While I think my mom made this a few times while I was growing up, I remember this dish more specifically from a close friend of ours. Much like my husband, he has a few recipes up his sleeve that he's absolutely mastered and this is one of them. Since they live right down the street from us (at least for a few more months as their house just sold!) we've enjoyed this meal quite a bit in the last few years.

    an overhead image of Hot Chicken Swiss Dip.

    And while I'm sure I'll share that recipe someday, today I want to share an interesting twist I put on that recipe. You see, I started thinking about hot dips. I mean who doesn't love a hot, creamy, cheesy dip? It's great for a party. Perfect for game day! You can even put it in a grill-safe container (like this!) and cover it with foil to make on the grill if you're outside doing your tailgating!

    This is perfectly rich and creamy- the type of decadent snack that you probably don't want to eat every single day, but once in a while it completely hits the spot, and you find yourself unable to stop going back for more. I topped it with extra shredded Swiss cheese and some extra cracker crumbs to make the most perfect melty cheese crust with a bit of golden brown crunch.

    A photo of a hand holding a cracker with Hot Chicken Swiss Dip on it.

    I used my mini prep processor to grind the crackers into crumbs but you can also use a rolling pin and a zipper bag if you don't mind doing a little extra work. This recipe is the one I used to make my shredded chicken in advance because I don't like battling with chicken that isn't fall-apart tender (work smarter, not harder!).

    I like to serve this on RITZ crackers (not sponsored, I just love them!) although you might need a spoon, as the crackers tend to break easily because the dip is so thick and dreamy. Or you can just eat it with a spoon...no judgement. 😉

    A pan of Hot Chicken Swiss Dipwith some beers and crackers around it,

    Here are some of my favorite game day recipes:

    • Bacon Brown Sugar Cocktail Wienies
    • Artichoke Asiago Dip
    • Salami Chips
    • Sheet Pan Chicken Nachos
    • Jalapeno Popper Pull Apart Bread
    • Sweet and Spicy Kielbasa Bites
    • Bloody Mary Cheeseball
    • Meat Lover's Pizza Bites
    • BLT Bruschetta

    Here are some amazing game day recipes from some other awesome bloggers:

    Chicken Swiss Dip by The Life Jolie
    Creamy Pepita Dip by The Mexitalian
    Traeger Pulled Pork by Or Whatever You Do
    Slow Cooker Apple Cider Chicken Sliders by Cake 'n Knife
    Baked Brie Crescent Bites by The Culinary Compass
    Aunt Julie's Pepperoni Bread by Off the Eaten Path
    Jalapeño Ranch Dip by A Joyfully Mad Kitchen
    Corn Dip by Me and My Pink Mixer
    Chorizo Stuffed Bacon Wrapped Dates by Feast + West
    Bacon Wrapped Cheese Smokies by West Via Midwest
    Easy Roasted Veggie Fajitas by Hello Little Home
    Pumpkin Pulled Pork Bowls by The Speckled Palate
    Caramelized Onion Dip by Culinary Adventures with Camilla
    Easy Potato Chip Nachos by Honey and Birch
    Apple Pie Twists by 2 Cookin Mamas
    Buffalo Cauliflower + Blue Cheese Dressing by For the Love of Food
    Pigskin Cheeseball by Love & Flour

    A square image of Chicken Swiss Dip.

    Chicken Swiss Dip

    Jessy Freimann
    Hot Chicken Swiss Dip: it's ooey, gooey, cheesy and totally addictive! This easy recipe is a great appetizer made with simple ingredients. It's the comfort food that game day dreams are made of!
    No ratings yet
    Print Recipe Pin Recipe
    Prep Time 10 minutes mins
    Cook Time 30 minutes mins
    Total Time 40 minutes mins
    Course Appetizer, Snack
    Cuisine American, appetizer, Game day, party, Snack
    Servings 6 -8 appetizer servings

    Ingredients
      

    • 2 cups cooked and shredded chicken
    • 1 10 oz. can cream of chicken soup
    • ½ cup RITZ cracker crumbs divided
    • 1 ½ cups grated Swiss cheese divided
    • 2 Tbsps. dry white wine
    • ½ tsp. salt
    • ¼ tsp. pepper

    Instructions
     

    • Preheat the oven to 400 degrees.
    • In a large mixing bowl, place the chicken, cream of chicken soup, ¼ cup of RITZ cracker crumbs, ½ cup of the shredded Swiss cheese, wine, salt and pepper.
    • Stir until well combined.
    • Pour the chicken mixture into an oven safe baking container.
    • Top with the remaining ¼ cup of RITZ cracker crumbs and 1 cup of grated Swiss cheese.
    • Bake for 25-30 minutes or until the dip is hot and bubbly.
    • Serve immediately with RITZ crackers or sliced baguette.

    Notes

    I did this in a 1 quart Le Creuset baking dish but you can also your an 8x8 baking pan.
    Tried this recipe?Let us know how it was!

    Helpful tools:


    You can find a full index of my recipes here.

    Don't forget to follow The Life Jolie on Pinterest for more recipe inspiration!

    Or if Pinterest isn't your style, bookmark this post!

    Let's keep the conversation going- join my Facebook group! 
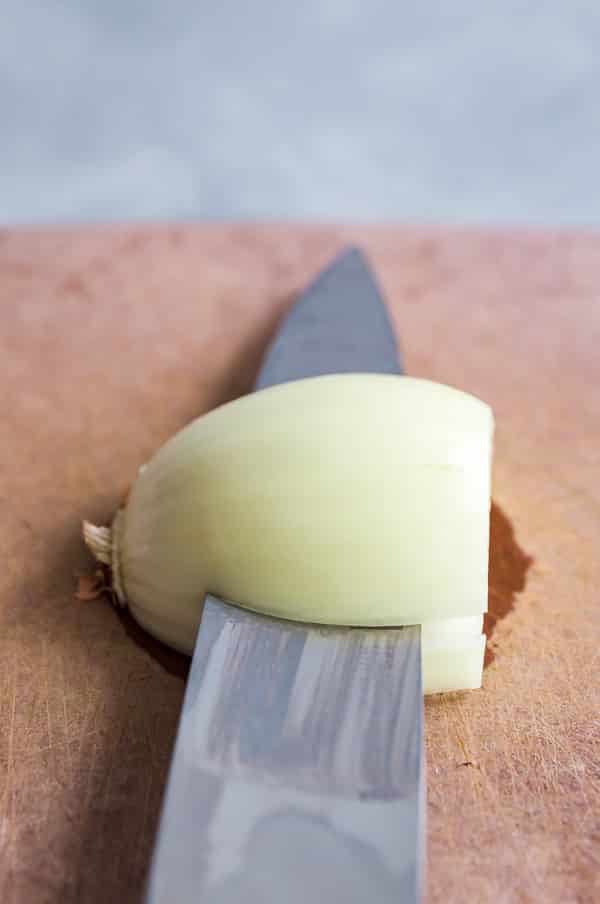
    Hot Chicken Swiss Dip: it's ooey, gooey, cheesy and totally addictive! This easy recipe is a great appetizer made with simple ingredients. It's the comfort food that game day dreams are made of!
    Hot Chicken Swiss Dip: it's ooey, gooey, cheesy and totally addictive! This easy recipe is a great appetizer made with simple ingredients. It's the comfort food that game day dreams are made of!
    Here's a killer collection of gameday snacks that are sure to make your tailgating delicious and unforgettable!

    Strawberry Banana Split Cake

    Sep 14, 2017 · 2 Comments

    A square image of Strawberry Banana Split Cake

    Need a true showstopper for your next party? Look no further! This Strawberry Banana Split Cake is as delicious as it is gorgeous and best of all, it's so easy!

    A side shot of the Strawberry Banana Split Cake on a wooden cake stand.

    This post contains Affiliate Links. Please see the disclaimer here.

    So T is starting to really get into Mickey now. It kind of feels surprising and early because she only just starting to use words to communicate with us, and not even sentences. I think part of that is because at this point with A, she wasn't actually watching shows yet.

    But that's one of the benefits of being a second child. While you may lack in the amount of photos that your parents have of the first kid, you make up for in more cookies and in our case, earlier access to TV.

    An angled shot of the cherry on top of the Strawberry Banana Split Cake.

    It's really cute, though! A has an adorable Minnie hoodie that she got for her birthday and whenever she wears it T gets all excited and goes up to point out Minnie and all the tiny Mickeys that are on it.

    Sh also loves to watch it and even gets mad when A chooses a different show to watch! And when it comes time to do the Hot Dog Dance, A loves to stand up and take T's hands and get her to dance with her. T gets a huge smile on her face and bounces right along to the music.

    An overhead shot of of Strawberry Banana Split Cake with a slice being pulled out.

    What's also interesting is that if given the choice, A will also choose shows other than Mickey at this point. However, we still put on Mickey half the time and tell her it's T's urn to choose and after she objects for a moment, she generally gets super into it and wants to watch another.

    While I'm not huge into screen time, it's also really cute to see them love Mickey as much as we adults do!

    A close up image of the side of the Strawberry Banana Split Cake.


    This is actually part of the cake I made for A's birthday! Although for that, I made two bundt cakes (one strawberry banana as per A's request and one chocolate) cut and pasted them into a 3, covered it in store-bought strawberry butter cream and finished by covering it in sprinkles. It turned out super cute and everyone loved it- sorry though, I failed at getting photos.

    But I knew I wanted to get a little over-the-top with this cake because why the heck not? And I wasn't even a little bit sad about doing a few more recipe tests (nor were my family and the neighbors who got to enjoy the results!).

    A side image of a slice being pulled out of Strawberry Banana Split Cake.

    This is another cake mix hack #cantstopwontstop. It's crazy easy to bake up! I made a fluffy banana whipped cream to fill between the two layers and also some chopped bananas and strawberries, because sometimes you just have to be a little bit extra.

    Let's have some real talk here for a second. Is anyone else intimidated by the idea of frosting a whole layer cake? I can't be the only one! So for this cake, I went with chocolate ganache. Not only is it an almost fool proof glazing option, but it is a gorgeous visual representation of the "hot fudge" you might find in a strawberry banana split. I kept this particular ganache a bit thicker to give you a little more control when trying to get that dripping effect (which is not as hard as it looks- use on offset spatula).

    A photo of Strawberry Banana Split Cake on a cake stand with a slice cut out.

    Finish it with a few dollaps of that luscious banana whipped cream and some maraschino cherries on top and you've to yourself a showstopper of a cake that will not only impress your friends and family visually- it also tastes amazing! Expert tip: pipe it on, it's super easy and look fancy AF!

    Bottom line, and as they say at Nike, just do it! *this is not sponsored by Nike, the phrase just fit here. They have no idea who I even am. 🙂

    A striaght on shot of Strawberry Banana Split Cake.

    Other great cake mix hacks include:

    • Super Easy Chocolate Pudding Cake
    • Lemon Pistachio Cake
    • Orange Cake with Chocolate Ganache Glaze
    • Pumpkin Spiced Latte Cake
    • Poppy Seed Cake

    A square image of Strawberry Banana Split Cake

    Strawberry Banana Split Cake

    Jessy Freimann
    This Strawberry Banana Split Cake is an easy dessert recipe. It is actually a cake mix hack that is inspired by the classic ice cream sundae but in the form of a layered cake. This is as delicious as it is gorgeous and a total showstopper for your next party!
    No ratings yet
    Print Recipe Pin Recipe
    Prep Time 20 minutes mins
    Cook Time 35 minutes mins
    Total Time 55 minutes mins
    Course Dessert
    Cuisine American, holidays
    Servings 8 -10 servings

    Ingredients
      

    For the cake:

    • Cooking spray
    • 1 Duncan Hines Signature Strawberry Supreme Cake Mix not sponsored, I just love them!
    • 2 pkg. of Instant Banana Pudding reserve 2 Tbsp. for the Banana Whipped Cream
    • 5 extra large eggs I used large because that is what I had on hand
    • ¾ cup of canola oil
    • 1 cup of warm water

    For the Banana Whipped Cream

    • 1 pint heavy cream
    • 2 Tbsp. Instant Banana Pudding reserved from the ones used in the cake
    • 2 Tbsp. confectioner's sugar

    For the Chocolate Ganache

    • ½ cup heavy cream
    • 1 cup dark chocolate chips

    Andplusalso:

    • 1 banana halved legnth-wise and sliced
    • 4-5 Strawberries halved and then sliced
    • Maraschino cherries for topping

    Instructions
     

    • Preheat the oven to 325 degrees and line the bottom of two 9 inch round cake pans with a sheet of parchment (I do this by tracing the bottom of the cake pan onto the parchment paper and then cutting it down to size).
    • Spray the pans with cooking spray and set aside.
    • In a large mixing bowl, combine the cake mix, eggs, pudding mixes, oil and water.
    • Beat until just combined.
    • Split the batter between the two pans and bake for around 30 minutes (begin checking it around 25 minutes, just to be safe).
    • Once the cakes have cooled, remove the first layer from the pan, onto your cake platter.
    • Next, spread half of the banana whipped cream (recipe below) onto the cake in an even layer (I find it easiest to pipe it around the edge of the first layer and then fill it in).
    • Sprinkle the sliced bananas and strawberries atop the banana whipped cream and use your hands (or a clean spatula) to gently press them into the whipped filling a bit.
    • Place the second layer onto your first layer.
    • Carefully pour the chocolate ganache onto the center of the cake and carefully use an off-set spatula to push "drips" of ganache over the sides of the cake-take your time to get the look you want.
    • Pipe dollops of banana whipped cream around the edges of the cake and one in the middle and place maraschino cherries onto each dollop.
    • Enjoy!

    Whipped Cream Topping:

    • Place the pint of heavy cream into the mixer with a whisk attachment and begin mixing it on high.
    • As it starts to thicken, add the reserves banana pudding mix and sugar.
    • Whip until it forms nice fluffy peaks (try not to over-whip it) and pipe it onto the cake as per the above directions.

    Chocolate Ganache:

    • Place the chocolate chips into a heat-safe bowl and set aside.
    • Heat the heavy cream in a small pot over medium heat, whisking often to prevent scalding.
    • After around 5-10 minutes, just before the heavy cream starts simmering, remove it from the heat and pour it into the bowl of chocolate chips.
    • Let it sit for 5 minutes and then carefully whisk it until it combines and turns into a smooth chocolate ganache.

    Notes

    -I've found that the easiest way to get a clean middle layer of whipped cream is by piping the whipped cream onto the first layer of the cake. If you don't have a piping bag and tips, put the whipped cream topping that you've reserved for to go between layers into a sandwich baggy and snip the corner off of it. Carefully use the bag the way you would a pastry bag and draw a clean line of whipped cream around the outside edge of the bottom layer and then fill it in with the remaining whipped cream.
    -If you find that the chocolate chips aren't melting nicely into the cream, pop the bowl into the microwave and zap it for 20 seconds- it should combine easily after that.
    -If the ganache is too thin, let it sit for 5-10 minutes because as it sits, it thickens. If it gets too thick it won't pour but you'll still be able to spread it on top.
    -If you're unable to find strawberry cake mix, you can substitute strawberry puree for water.
    Tried this recipe?Let us know how it was!

    Helpful Tools:


    You can find a full index of my recipes here.

    Don't forget to follow The Life Jolie on Pinterest for more recipe inspiration!

    Or if Pinterest isn't your style, bookmark this post!

    Let's keep the conversation going- join my Facebook group! 
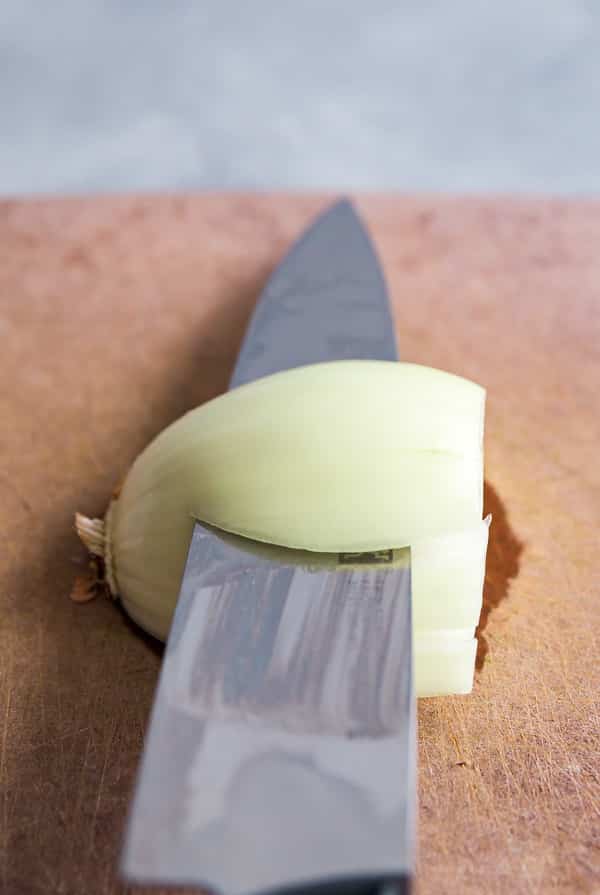
    This Strawberry Banana Split Cake is an easy dessert recipe. It's actually a cake mix hack that is inspired by the classic ice cream sundae but in the form of a layered cake. This is as delicious as it is gorgeous and a total showstopper for your next party!
    This Strawberry Banana Split Cake is an easy dessert recipe. It's actually a cake mix hack that is inspired by the classic ice cream sundae but in the form of a layered cake. This is as delicious as it is gorgeous and a total showstopper for your next party!


    Pumpkin Chocolate Chip Bread

    Sep 8, 2017 · 1 Comment

    A squaer image of Pumpkin Chocolate Chip Bread.

    Grandma's Pumpkin Chocolate Chip Bread is the perfect sweet treat to get you into the fall spirit!

    Pumpkin Chocolate Chip Bread on parchment paper with two pieces cut off of the loaf.

    This post contains Affiliate Links. Please see the disclaimer here.

    On Monday, it was a bit breezy, but an overall gorgeous day. All summer, J and I have been dying to take the girls to a local amusement park called Seabreeze. I have many happy memories of hot summer days riding the all the rides at Seabreeze with my family.

    While T is still a little young for all this, A is finally at the age to start enjoying it! Now, initially she was a little unsure and kind of hesitant. But once she gave the kiddie rides a try she was hooked! She especially loved the boats and the cars! She also had a blast on the smaller water slides and all four of us went on the lazy river, which was quite the adventure.

    We weren't sure if we should try T on any of the rides, but we ultimately decided to let her try the boats with A. The first ride earlier in the day went pretty well. The one time T got a little restless, A jumped right in and kept her on track (no pun intended- ha!).

    One pice of Pumpkin Chocolate Chip Breadon top of another on a piece of brown parchment with more pieces of Pumpkin Chocolate Chip Bread cooling on a rack behind it.

    Towards the end of the day, we let both girls get back onto the boat ride. It started out pretty well, both gals were using the pretend steering wheels to drive the boat. But then, about halfway through the ride, T decided she'd had enough and started to get up and try to get out of the boat!

    Pandemonium, you guys! The employee running this ride stopped the ride to try and get T, who was inconveniently located on the inside of the boat (i.e.not really accessible to her. Justin jokingly yelled out "who's kid is that anyway?" which got a decent laugh from the other parents. But then, as they were getting T off the ride and about to start it up again, two or three of the other kids also followed suit and started trying to escape their boat!

    Pieces of Pumpkin Chocolate Chip Bread lined up on a coolnig rack with the front one in focus.

    And all the parents around the ride are yelling to their kids to stay in. The employee is looking around, probably trying to figure out which kid to go to first. I'm just hanging out, dying laughing (I know, I'm the worst. But in all fairness, J was already with her at that point). It was definitely a memorable moment.

    Luckily, all the kids eventually calmed down and the ride continued. J and I were both kind of like "way to go Tess" which also got a few more laughs. All's well that ends well- it really was the perfect day (outside of my getting stung by a wasp- if you follow my instagram stories, you already know about that).


    I've said it before and I'll say it again, I'm not really a huge pumpkin fan. It's grown on me for sure, I just don't really get the hype. But as with most things in life, there is always an exception to the rule. My Grandma Eve's recipe for Pumpkin Chocolate Chip Bread is that exception for me. Edit: So it turns out this is actually a recipe my Mom got from a bake sale! I always thought it was my Grandma's but I stand corrected. I don't know the source prior to that but if I find it out I'll certainly update this again.

    This is actually more of a cake. And I'm sure you can make it in a bundt pan and serve it as such. But I like to use this as a "bread" so that I have an excuse to eat it for breakfast. Because cake for breakfast, duh.

    A hand holding a piece of Pumpkin Chocolate Chip Bread with butter on it and a bite take out of it.

    Finding an excuse to eat unhealthy food for breakfast just happens to be a talent of mine. I take it very seriously. You can blame that on my mom, because she allowed us to have this for breakfast once in a while as a treat. Everything in moderation.

    To up the ante a little, I like to spread butter on the top and go to town. But I'm pretty sure it's delicious on it's own. This makes 2 regular size loaf pan's worth of "bread" which is perfect- one to give and one to enjoy! The result is super moist and sweet without being jarring. Give it a try!

    An overhead shot of pieces of Pumpkin Chocolate Chip Bread spread out on a cooling rack with a knife and pieces of the bread around it.

    Other great fall treats include:

    • Orange Cranberry Torte
    • Rice Krispie Treat Turkey
    • Pumpkin Spiced Latte Cake

    Hosting Thanksgiving?

    Discover the secret to hosting Thanksgiving without all the stress! Prepsgiving is your FREE guide to making a delicious Thanksgiving feast the easy way.

    A squaer image of Pumpkin Chocolate Chip Bread.

    Pumpkin Chocolate Chip Bread

    Jessy Freimann
    This Pumpkin Chocolate Chip Bread a sweet and delicious way to celebrate the fall season. It's eay to make in 2 loaf pans or a bundt pan.
    No ratings yet
    Print Recipe Pin Recipe
    Prep Time 10 minutes mins
    Cook Time 1 hour hr 10 minutes mins
    Total Time 1 hour hr 20 minutes mins
    Course Breakfast, Dessert
    Cuisine Fall, holidays, Thanksgiving
    Servings 10 servings
    Calories 618 kcal

    Equipment

    • 2 Loaf Pan
    • 1 mixing bowl
    • 1 stand mixer
    • 1 Hand mixer
    • 1 Spatula
    • 1 Measuring cups and spoons

    Ingredients
      

    • 3 cups all purpose flour
    • 2 cups granulated sugar
    • 2 teaspoon baking powder
    • 2 teaspoon baking soda
    • ½ teaspoon Kosher salt
    • ½ teaspoon cinnamon
    • 1 cup vegetable oil
    • 4 large eggs
    • 16 ounces pure pumpkin puree NOT pumpkin pie filling
    • 1 cup mini chocolate chips

    Instructions
     

    • Preheat the over to 350 degrees F and grease 2 loaf pans or a bundt pan.
    • Beat together the eggs and oil.
    • Add the flour, sugar, baking powder, baking soda, salt and cinnamon to the bowl and mix until just combined.
    • Add the pumpkin and chocolate chips and mix everything until just combined.
    • Pour the mixture into loaf pans or bundt pan.
    • Bake uncovered for 1 hour and 10 minutes or until the cake tester comes out clean (start checking at 50 minutes because every oven varies).

    Notes

    Leftovers last for 3 days at room temperature.

    Nutrition

    Serving: 1servingCalories: 618kcalCarbohydrates: 85gProtein: 8gFat: 29gSaturated Fat: 7gPolyunsaturated Fat: 13gMonounsaturated Fat: 6gTrans Fat: 0.2gCholesterol: 77mgSodium: 464mgPotassium: 163mgFiber: 3gSugar: 53gVitamin A: 7208IUVitamin C: 2mgCalcium: 98mgIron: 3mg
    Tried this recipe?Let us know how it was!

    Helpful tools:


    You can find a full index of my recipes here.

    Don't forget to follow The Life Jolie on Pinterest for more recipe inspiration!

    Or if Pinterest isn't your style, bookmark this post!

    Let's keep the conversation going- join my Facebook group!
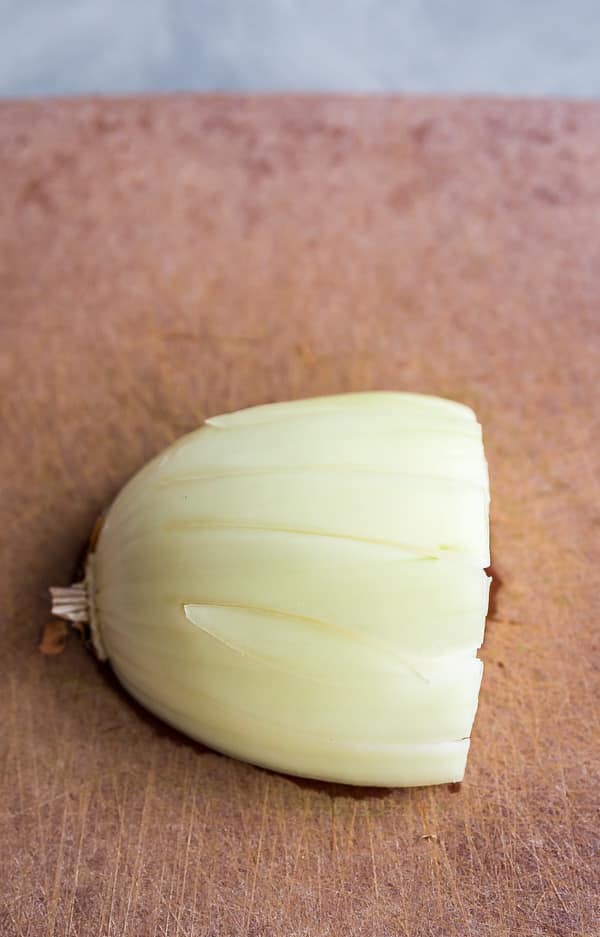
    There is nothing better than a homemade recipe from grandma and this easy Pumpkin Chocolate Chip Bread is the perfect way to get in the mood for fall! It's the best simple recipe to make from scratch if you want a perfectly moist and delicious baked treat to enjoy with family!
    There is nothing better than a homemade recipe from grandma and this easy Pumpkin Chocolate Chip Bread is the perfect way to get in the mood for fall! It's the best simple recipe to make from scratch if you want a perfectly moist and delicious baked treat to enjoy with family!


    Harvest Rice Salad

    Sep 6, 2017 · Leave a Comment

    A square image of Harvest Rice Salad.

    If you're looking for an easy, make ahead side dish for Thanksgiving then you've got to try this delicious Harvest Rice Salad!

    The side of a bowl of Harvest Rice Saladon a wood background.

    This post contains Affiliate Links. Please see the disclaimer here.

    A had her first day of preschool yesterday (cue allllll the mommy tears!). You guys, I seriously cannot believe it! I could have sworn I just brought my gal home from the hospital yesterday in her teeny little newborn onsies!!

    I won't lie, I was a little nervous. When they started letting her spend a day here and there in the preschool room (to prep her for the permanent move) she was a little bit hit or miss. There would be some days that she'd come home all excited and tell us about how much fun she had in the big girl room. Many of A's friends from the toddler room had moved up a few months prior to her, so she was always super excited to have been able to see them.

    But there were other times that she'd be a little sad about it. Now let me be clear, she wasn't at all sad about the new room or any of the teachers or students in there. She was sad because she missed her old room, specifically her old teachers. A has always loved her teachers in each of her rooms. But I think now that she's older and can communicate much better, it's helped her relationship with these particular teachers flourish even more. And they're pretty awesome as well!

    A spoonful of Harvest Rice Salad with the bowl in the background.

    We've gone out of our way to really build up the move to preschool. J and I talk all the time about how she's a big girl now (which brings the added bonus of leverage in terms of behavior!). Since daycare was closed on Friday for open house, I took the day off from work and after we left the open house, I took the girls to Target and let A pick a special first day of school outfit and even nail polish! Much like her mother, she loves her some Tar-jay, so this was a pretty big deal for her.

    That morning, she woke pretty late and was totally dragging and a bit grouchy. When we got to daycare, she was in a pretty good mood and stayed that way through our first stop which was T's new toddler room (staaahhhppp- I can't believe she's considered a toddler now!!). But when we got to her new room, A got quiet and a bit intense. She didn't have much to say to anyone and when it became apparent that J and I were about to leave, she began to cry.

    A overhead shot of Harvest Rice Salad.

    My heart broke a little. I gave her a hug and told her to be brave and to choose to make it a great day (she might have rolled her eyes at me- she's obviously my daughter!!). We then made a quick exit- I think with daycare and school drop offs, there comes a point where lingering only makes it worse.

    It ended up being ok. I called later in the day to check on her and they said she perked up pretty quickly. When we went to pick the girls up, they were both in a super happy mood and it was clear that they had an awesome day. I know it will only get easier from here!


    So this rice salad has been simmering in my brain for a while. It was inspired by a wild rice salad that they had in the salad bar at my cafeteria at work. For many, many months I had been dreaming of that salad and I knew I had to make my own version.

    The more I thought about it, the more I kept imagining this to be a surprisingly non-traditional Thanksgiving side dish that keeps coming back for more and more helpings. Celery and shallots give this a fantastic crunch which plays nicely with the nuttiness of the rice. Quick note on this- I used the slicing surface on my box grater to shave the celery, but you could also slice it thin with a knife.

    A close up of Harvest Rice Salad in a wooden bowl.

    I went with a rice blend containing wild rice because I cannot for the life of me seem to locate plain wild rice anywhere around here (but if you can, you're always welcome to use that!).

    The dried cranberries add an awesome and much needed sweetness; they also look totally festive and seasonally appropriate! But my most interesting and possibly controversial addition is the crumbly blue cheese.

    A bowl of v with a pink towel and serving spoons.

    I am a long-time, dedicated lover of all the various blue cheeses out there. And while they didn't include this in the rice salad at work, I was enjoying my rice salad on the same plate as a green salad that had some crumbly blue on top and when some of the cheese found it's way into my rice salad, I was not even slightly sad about it! I think it adds an extra special zing to this dish. But if that's not how you roll, feel free to skip it or serve it on the side.

    This is super easy to make ahead and is best served cold! So if you have a big family gathering coming up (I'm looking at you, Thanksgiving!) then you should probably make this and pat yourself on the back when everyone tells you how delicious it is! 🙂

    Harvest Rice Salad in a wooden bowl with serving utensils on the bowl.

    Hosting Thanksgiving?

    Discover the secret to hosting Thanksgiving without all the stress! Prepsgiving is your FREE guide to making a delicious Thanksgiving feast the easy way.

    Other great holiday side dishes include:

    • 2 Ingredient Apple Sauce
    • Roasted Beets Salad with Feta and Dill
    • Grandma’s Baked Artichoke Hearts
    • Peas and Shrimp Salad
    • Loaded Baked Potato Stacks
    • Nanou’s Garlic Green Beans
    • Honey Soy Glazed Carrots and Parsnips
    • Sauteed Mushrooms in a Wine Reduction
    • Sauteed Kale with Tomatoes and Mushrooms
    • Peas with Onions
    • Quick and Easy Roasted Potatoes
    A square image of Harvest Rice Salad.

    Harvest Rice Salad

    Jessy Freimann
    This savory salad brings all the delicious flavors of fall in a fresh side dish everyone will love!
    No ratings yet
    Print Recipe Pin Recipe
    Prep Time 10 minutes mins
    Cook Time 25 minutes mins
    Total Time 35 minutes mins
    Course Side Dish
    Cuisine Fall, Grains, Holiday, Salad, Thanksgiving
    Servings 8 servings
    Calories 97 kcal

    Equipment

    • 1 saucepan
    • 1 cutting board
    • 1 chefs knife
    • 1 Measuring cups and spoons

    Ingredients
      

    • 8 ounces rice blend choose your favorite rice blends, preferably unseasoned- cook per package directions and cooled.
    • 1 cup dried cranberries
    • ¾ cup shallots minced
    • 1 ½ cups celery shaved - use the slicing surface on your box grater or slice it thin with a knife
    • ¼ cup crumbly blue cheese
    • 2 Tablespoon fresh parsley chopped
    • ½ teaspoon Kosher salt
    • ¼ teaspoon ground black pepper
    • 2 Tablespoon olive oil
    • 2 Tablespoon red wine vinegar

    Instructions
     

    • Combine all ingredients in a large bowl.
    • Stir well to mix.
    • Refrigerate until it's time to serve it.
    • Enjoy!

    Notes

    This lasts up to a week in the refrigerator.

    Nutrition

    Serving: 1servingCalories: 97kcalCarbohydrates: 17gProtein: 1gFat: 4gSaturated Fat: 1gPolyunsaturated Fat: 0.4gMonounsaturated Fat: 3gSodium: 165mgPotassium: 139mgFiber: 2gSugar: 13gVitamin A: 170IUVitamin C: 4mgCalcium: 19mgIron: 0.5mg
    Tried this recipe?Let us know how it was!

    Helpful tools:


    You can find a full index of my recipes here.

    Don't forget to follow The Life Jolie on Pinterest for more recipe inspiration!

    Or if Pinterest isn't your style, bookmark this post!

    Let's keep the conversation going- join my Facebook group!
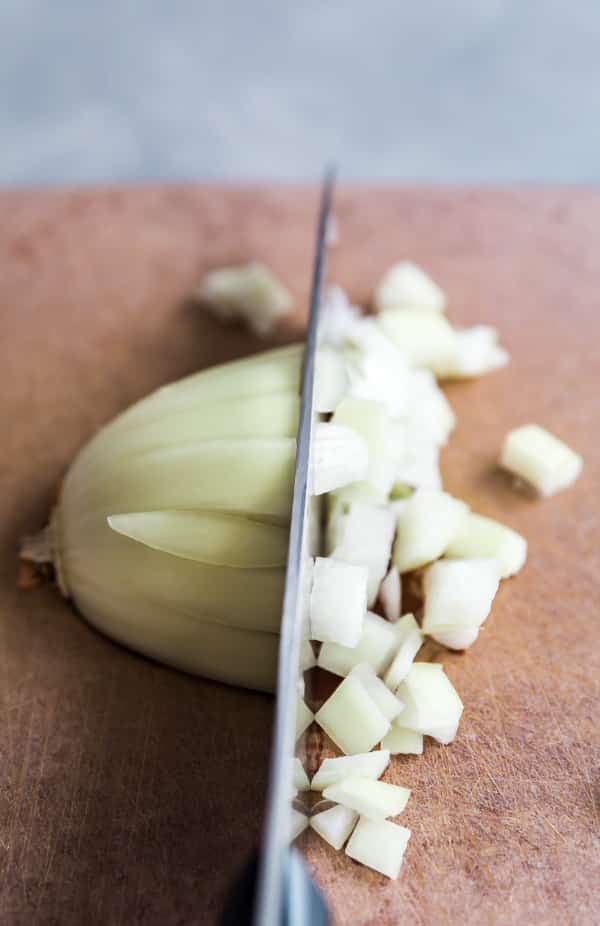
    This Harvest Wild Rice Salad is the perfect make ahead side dish for Thanksgiving or any other party. It's an easy recipe to make with dried cranberries, shallots, celery and crumbly blue cheese. Everyone will be coming back for seconds!
    This Harvest Wild Rice Salad is the perfect make ahead side dish for Thanksgiving or any other party. It's an easy recipe to make with dried cranberries, shallots, celery and crumbly blue cheese. Everyone will be coming back for seconds!

    Plums with Goat Cheese and Walnuts

    Aug 17, 2017 · 6 Comments

    A square image of plums with goat cheese and walnuts.

    This Plums with Goat Cheese and Walnuts recipe is one of the best simple and easy summer salad dishes! Made with juicy plums, earthy goat cheese and crunchy walnuts and a drizzle of honey to finish. It's a healthy option and makes a great appetizer, side dish or dessert options that the whole family will enjoy!

    An over head image of the bottom of a plate of plums with goat cheese and walnuts on a white cloth and blue background.

    This post contains Affiliate Links. For more information please see the disclaimer here.

    While three has certainly been a  challenging age so far (they don't call them Threenagers for nothing!) it's also full of crazy-fun moments! A's excellent sense of humor only continues to get better.

    I can't say I'm surprised by this because one of the cornerstones of J's and my relationship is tons and tons of laughter. You can't fight city hall, people! A has really been rising to the occasion and takes the opportunity to troll me at every turn.

    Before A goes to bed, we typically read her a story and she says her prayers. Usually, I'll lead her through this thanking God for different portions of her day and then I'll ask her who she wants to pray for and she'll usually name off a list of her loved ones and sometimes her things ("my toys").

    A man drizzling honey onto a plate of plums with goat cheese and walnuts.

    The other night I said "Ok Alice, who do you want to pray for?" and she started rattling off her laundry list of people. "My mommy, my daddy, my sister, my brother..."

    My brother?! Hold on there missy, you don't have a brother! I just about died laughing! J and I think she says this because when they say their prayers at daycare, some of the kids who do have brothers pray for them.

    An upclose, overhead shot of plums with goat cheese and walnuts.

    Well, of course the minute A realized how funny I thought that was, she began weaving it in continuously. She would get this evil little smile and give me an amused side eye, and in the most playfully innocent voice throw in "...and my brother" periodically in our prayers before exploding into giggles.

    And one night after I put her to bed, she called me (I forgot to give her BahBah, which is her blankie) and after I gave it to her and said good night, she said "...and my brother" as I was walking out of her room and we both cracked up! Silly gal!


    Well, it's August and that means that the market is full of plums! This makes me happy for a variety of reasons, not least of which is the fact that many of our local farms offer a smaller variety of plums that come with red and yellow skins.

    I don't know the name of this variety, but J's mom got super excited when she saw them because they are just like the plums she would eat on holiday in France. These little guys are super sweet and delicious and when I'm not eating them on their own, my favorite way to prepare them is this recipe for Plums with Goat Cheese and Walnuts.

    The side of a plate of plums with goat cheese and walnuts/

    This is a stupid-simple recipe. There is no cooking, and minimal prep work. I like to purchase my goat cheese already crumbled and my walnuts already chopped because I'm lazy like that.

    And I was super excited to find a lovely local Blueberry Honey (which is basically just a mild local honey) from the same farmer that provided these gorgeous plums. I hate that this might sound snobby but don't you just love buying local?

    An overhead shot of plums with goat cheese and walnuts on a white plate and white cloth and some plums and a bowl of honey next to it.

    But this is one of those minimalist mixtures where you throw a few things together and they just sing in perfect harmony. You have the sweet/tart juicy plums with the earthy, tang of the goat cheese, the crunch of the walnuts and a subtle sweetness from a light drizzle of honey.

    You guys, I seriously had to stop taking photos because I was dying to dive right into that gorgeous plate. I would be embarrassed by my complete lack of self-control, but I've made the executive decision not to be. Because yum. Go make this now and you'll understand.

    A plate of plums with goat cheese and walnuts on a white striped cloth over a blue background with a bowl of honey and drizzler in the background.

    Other great summer salads include:

    • Grilled Peaches and Burrata Salad
    • Green Bean Salad
    • Tuna Macaroni Salad
    • Peas and Shrimp Salad
    • Roasted Beets Salad with Feta and Dill
    • Greek Couscous Salad
    • Mexican Bean Salad
    • Tomato Salad
    • German Potato Salad
    • Vicky’s Tabouli
    • German Potato Salad

    A square image of plums with goat cheese and walnuts.

    Plums with Goat Cheese and Walnuts

    Jessy Freimann
    This Plums with Goat Cheese and Walnuts recipe is one of the best simple and easy summer salad dishes! Made with juicy plums, earthy goat cheese and crunchy walnuts and a drizzle of honey to finish. It's a healthy option and makes a great appetizer, side dish or dessert options that the whole family will enjoy!
    No ratings yet
    Print Recipe Pin Recipe
    Prep Time 10 minutes mins
    Total Time 10 minutes mins
    Course Dessert, Side Dish
    Cuisine appetizer, Dessert, Healthy, Light, Salad, side dish, Summer, vegetarian
    Servings 4 servings
    Calories 376 kcal

    Equipment

    • 1 cutting board
    • 1 chefs knife
    • 1 Measuring cups and spoons
    • 1 Spatula
    • 1 mixing bowl

    Ingredients
      

    • 1 ½ pounds ripe plums cut into bite size wedges or halves
    • 4 ounces Goat cheese crumbled
    • 1 cup Walnuts roughly chopped
    • 2 Tablespoons Honey

    Instructions
     

    • Combine the plums, cheese and walnuts in a plate or a bowl.
    • Drizzle lightly with honey.
    • Serve immediately.

    Notes

    Leftovers last up to 3 days in the refrigerator.

    Nutrition

    Serving: 1servingCalories: 376kcalCarbohydrates: 32gProtein: 11gFat: 26gSaturated Fat: 6gPolyunsaturated Fat: 14gMonounsaturated Fat: 4gCholesterol: 13mgSodium: 105mgPotassium: 409mgFiber: 4gSugar: 27gVitamin A: 886IUVitamin C: 17mgCalcium: 79mgIron: 2mg
    Tried this recipe?Let us know how it was!

    Helpful tools:


    You can find a full index of my recipes here.

    Don't forget to follow The Life Jolie on Pinterest for more recipe inspiration!

    Or if Pinterest isn't your style, bookmark this post!

    Let's keep the conversation going- join my Facebook group!  
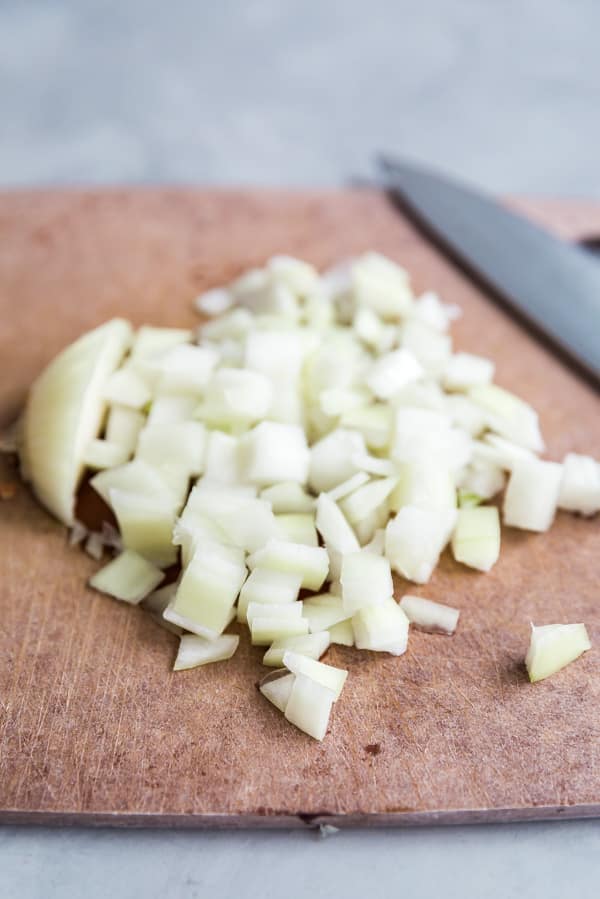
    This Plums with Goat Cheese and Walnuts recipe is one of the best simple and easy summer salad dishes! Made with juicy plums, earthy goat cheese and crunchy walnuts and a drizzle of honey to finish. It's a healthy option and makes a great appetizer, side dish or dessert options that the whole family will enjoy!
    This Plums with Goat Cheese and Walnuts recipe is one of the best simple and easy summer salad dishes! Made with juicy plums, earthy goat cheese and crunchy walnuts and a drizzle of honey to finish. It's a healthy option and makes a great appetizer, side dish or dessert options that the whole family will enjoy!

    Creamy Chicken and Broccoli Pasta

    Aug 10, 2017 · 2 Comments

    A square image of Creamy Chicken and Broccoli Pasta.

    This deliciously Creamy Chicken and Broccoli Pasta is an easy recipe and one of the ultimate comfort foods! It's ready in 30 minutes making it one of the best simple weeknight dinners for busy families!

    An overhead image of Creamy Chicken and Broccoli Pasta in a blue bowl with another bowl on the side and a glass of wine.

    This post contains Affiliate Links. For more information please see the disclaimer here.

    Last Wednesday was my birthday (I turned 30, for the third time!). I didn't say anything because I'm not really that into my birthday. While I enjoy other people's birthdays, I don't like making a big deal out of mine. J is used to this and helps me keep it low key. His is a few days before mine, so we usually have a quiet combined birthday dinner with my parents (and his is they're in town) and eat great food.

    This year, I went to work, as always. I was delighted when J called and offered to bring me lunch and eat with me, so naturally I accepted. During lunch he asked if I was planning on leaving early and I told him I was thinking I'd leave a bit early and take the girls to the playground to enjoy the gorgeous day with my girls. He said he would check his calendar and maybe meet us.

    A close up image of one side of Creamy Chicken and Broccoli Pasta with another bowl of it ourt of focus in the background.

    After lunch I went back to work and continued doing what I do. Around 3:45pm J called and asked if I had left yet. I told him I was getting ready to. He said he had a call at 4pm and to sit tight and he'd text me when he was leaving. And wouldn't you know, I walked out of my office building to be greeting by J and the girls!

    Though I'm seriously not a fan of surprises (control freak!) this was the absolute best! The girl's faces lit right up! A had a balloon for me and a bag containing some candy, some old school Whitney CD's and a gift card for The Cheesecake Factory for us to use that night.

    A spoon pulling Creamy Chicken and Broccoli Pasta out of the pan.

    First we took the girls to a kid's play place full of bounce houses. This ended up being super awesome because we were the only people there! They also had one of those sweet indoor playgrounds and the girls had a blast giggling and shrieking together inside the big twisty slide.

    After that we headed over to The Cheesecake Factory. We both worked there while we were engages and there are always a ton of great options to choose from (and hello...cheesecake!!). I'll be honest, the dinner wasn't exactly relaxing. T is at an age where she doesn't want to sit still and A is all about asserting her independence. It was a bit chaotic, but still a great time.

    A close up overhead image of Creamy Chicken and Broccoli Pasta with a spoon and fork in it.

    He had initially mentioned taking me out shopping after dinner, but we were all pretty tired and it was pretty close to bed time for the girls by the time we finished, so we opted to go home instead.

    It was seriously the absolute best night! All I really wanted for my birthday was to spend time with my family; to laugh a lot and eat great food- we did all of those things. J- you and the girls seriously went above and beyond and I love you guys so much!


    This pasta came together as a result of my failure to plan. I had all the ingredients hanging out in my fridge and had an "oh shoot" moment when I left work and realized I hadn't made a dinner plan for that evening. So when I got home, I opened my fridge and figured things out as I went along with what I had on hand.

    Now sometimes, this last minute strategy can go bad really quickly. Luckily, this particular night was the opposite- the dish came together perfectly, and was so good that I knew I had to share it with you guys!

    An image of hands holding a blue bowl of Creamy Chicken and Broccoli Pasta.

    This has a similar flavor to an Alfredo sauce, but it's a little bit lighter. I had to include some wine, because wine makes everything better and more delicious. You can always substitute chicken broth for the wine, but I really hope you'll include the wine because it adds the most fantastic flavor and the alcohol totally cooks out (I felt very comfortable feeding this pasta to my girls if that's any indication and I do not make a habit of giving them booze!).

    This recipe is super comforting and comes together in 30 minutes, making it the perfect weeknight meal as we head into fall and winter (although it still tasted awesome throughout the summer- I've made it several times this year!).

    An overhead shot of a pan of Creamy Chicken and Broccoli Pasta.

    I actually tested this as a one-pot meal, but I strongly felt it worked much better when I boiled the pasta separately. My thought is that it absorbed too much sauce and I was really happy with the balance of ingredients that I have in this sauce, so I didn't want to mess with it too much. honestly, it wasn't a huge deal cleaning my pot and my braiser.

    Serve this with some crusty Italian bread and a nice glass of that wine that you used in the recipe!

    A close up image of the Creamy Chicken and Broccoli Pasta in a pan.

    Other fabulous pasta recipes include:

    • Pasta Pomodoro
    • Tuna Casserole aka Tuna Wiggle
    • Garlic Scape Pesto
    • Marinara Sauce
    • 20 Minute Taco Pasta
    • Mexican Lasagna Roll-ups

    A square image of Creamy Chicken and Broccoli Pasta.

    Creamy Chicken and Broccoli Pasta

    Jessy Freimann
    This deliciously Creamy Chicken and Broccoli Pasta is an easy recipe and one of the ultimate comfort foods! It's ready in 30 minutes making it one of the best simple weeknight dinners for busy families!
    No ratings yet
    Print Recipe Pin Recipe
    Prep Time 10 minutes mins
    Cook Time 20 minutes mins
    Total Time 30 minutes mins
    Course dinner, Entree
    Cuisine 30 minute meals, Italian, Pasta, quick, weeknight
    Servings 4 -6 servings

    Ingredients
      

    • 1 Tbsp. olive oil
    • 3 boneless skinless chicken breasts, cut into 1 inch pieces
    • ½ tsp. salt
    • ¼ tsp. black pepper
    • 3 Tbsp. butter
    • 2-3 cloves of garlic minced or pressed
    • 3 Tbsp. flour
    • ⅓ cup of good white wine
    • 1 cup heavy cream
    • 1 14.5 oz. can low sodium chicken broth
    • 2 cups raw bite-size broccoli florets
    • ⅓ cup of Pecorino Romano cheese or Parmesan
    • 9 oz. fresh fettuccine cooked as per package directions

    Instructions
     

    • Heat oil in a large skillet over medium heat.
    • Adds chicken breast chunks to the pan.
    • Season chicken with salt and pepper.
    • Saute stirring frequently until browned, around 3-4 minutes and then remove it from the pan.
    • Melt butter in the pan.
    • Add garlic and saute stirring constantly for 1 minute.
    • Add flour and stir to create a roux.
    • Saute for another minute.
    • Add wine and lightly scrape the bottom of the pan to deglaze the pan.
    • Add heavy cream and broth.
    • Stir well to combine.
    • Add broccoli and the chicken into the pan and bring to a boil.
    • Once boiling, reduce the heat to medium low and cover.
    • Simmer covered for 10 minutes.
    • Uncover and stir in cheese and toss with cooked pasta.
    • Enjoy immediately!

    Notes

    Make sure you use a wooden or plastic spoon so you don't ruin your pan when deglazing it.
    Tried this recipe?Let us know how it was!

    Helpful tools:


    You can find a full index of my recipes here.

    Don't forget to follow The Life Jolie on Pinterest for more recipe inspiration!

    Or if Pinterest isn't your style, bookmark this post!

    Let's keep the conversation going- join my Facebook group! 
    This deliciously Creamy Chicken and Broccoli Pasta is an easy recipe and one of the ultimate comfort foods! It's ready in 30 minutes making it one of the best simple weeknight dinners for busy families!


    30 Minute Foil Packet Chicken Fajitas

    Jul 27, 2017 · 6 Comments

    A square image of Foil Packet Chicken Fajitas

    These 30 Minute Foil Packet Chicken Fajitas are a quick and easy dinner for the grill or for the oven! This recipe can be prepped ahead making it a great option for weeknight meals or easy entertaining!

    An overhead image of Foil Packet Chicken Fajitas on a platter with some tortillas and Simply Organic Ancho Chili Powder.

    Lately I've been dying for Fajitas! It's like Taco Tuesday but it feels healthier, which I'm totally on board with.

    Being that it's summer and and we want to enjoy the gorgeous weather for the (painfully short) time that it lasts, we really try to use our grill as often as possible.

    An overhead shot of one Foil Packet Chicken Fajitas packet on a platter with some grilled limes around it.

    So this hankering for Fajitas was really bugging me. It was hot, so I didn't want to turn on my stove or oven. Skewers are not exactly my favorite thing (I'll use them once in a while but more than anything I find them to be a bit of a hassle). I suppose I could have grilled bigger pieces of chicken and veggies but that also seemed like a hassle.

    And overhead image of two Foil Packet Chicken Fajitas on a platter.

    And that's when it occurred to me to grill them in neat, tidy little foil packets. I try not to toot my own horn (too much!) it really felt like a stroke of genius! J was also pretty excited about the minimal clean up, since he's a huge contributor to the cleaning of the meals.

    An image focusing on one of the packets of Foil Packet Chicken Fajitas.

    A hand pickig up a fajita made from Foil Packet Chicken Fajitas.

    This is a solid 30 minute recipe. It's perfect for a busy weeknight and can even be prepped ahead. And if you're not into the whole grilling-in-the-winter thing this can just as easily be baked in the oven (but guys, come on. Grill > oven in most cases).

    A close up image of fajitas made from the Foil Packet Chicken Fajitas.

    I also think this is also an excellent option for entertaining. I'm a huge believer that cooking and food are one of the best ways to express my love. And as we all know, I'm all about working smarter not harder. This is such an easy recipe to prep ahead and then throw onto the grill while you and your friends enjoy a beverage on the deck (...and now that you know my weekend plans...)!

    An image of the fajitas made from Foil Packet Chicken Fajitas with limes holding them up.

    Some great recipes to serve alongside your Fajitas include:

    • 7 Layer Taco Salad
    • Roasted Corn Salsa
    • Mexican Bean Salad
    • The Most Delicious Guacamole EVER!
    • 10 Minute Shrimp Salsa

    You can find a full index of my recipes here.

    Don’t forget to follow The Life Jolie on Pinterest for more recipe inspiration!

    Or if Pinterest isn’t your style, bookmark this post!

    Let’s keep the conversation going- join my Facebook group! 
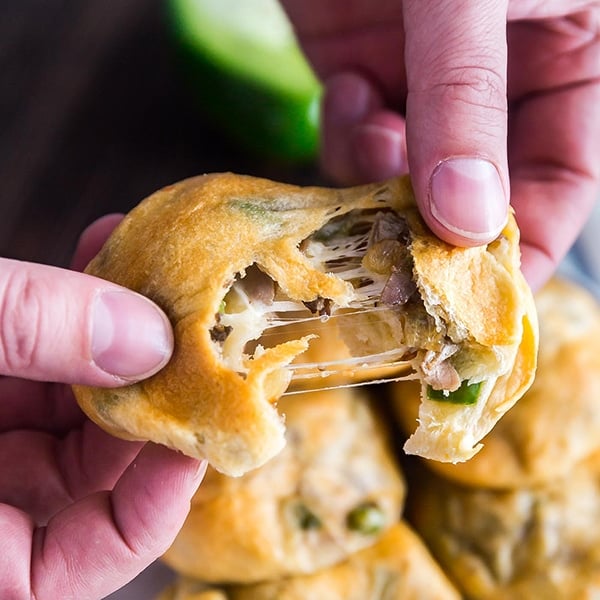
    These 30 Minute Foil Packet Chicken Fajitas are a quick and easy dinner for the grill or for the oven! This healthy recipe can be prepped ahead making it a great option for weeknight meals or easy entertaining! ad @SimplyOrganicFoods
    These 30 Minute Foil Packet Chicken Fajitas are a quick and easy dinner for the grill or for the oven! This healthy recipe can be prepped ahead making it a great option for weeknight meals or easy entertaining! ad @SimplyOrganicFoods


    Save

    Save

    Save

    • « Go to Previous Page
    • Page 1
    • Interim pages omitted …
    • Page 16
    • Page 17
    • Page 18
    • Page 19
    • Page 20
    • Page 21
    • Go to Next Page »

    Primary Sidebar

    Jessy in a kitchen holding a white casserole pan and smiling.
    Hi, I'm Jessy!

    Welcome to The Life Jolie! I share simple, delicious recipes and ingredient prep tips to make your weeknight cooking a breeze!

    More about me →

    Easy Dinner Recipes

    • An overhead image of a Mexican Shrimp Quinoa Bowl.
      Shrimp Quinoa Bowls
    • A bowl of asian soup with meatballs with a spoon and noodles in it.
      Asian Soup with Cabbage and Meatballs
    • A close up of roasted red potatoes on a pan.
      Roasted Red Potatoes Recipe
    • A spoon lifting up a scoop of eggplant parm bake with melt cheese trailing behind it.
      Eggplant Parm Bake
    • A close up of a drum chicken wing in a pile of other wings.
      Oven Baked Chicken Wings
    • An overhead image of a bowl of minestrone soup.
      Traditional Minestrone Soup Recipe

    Popular Recipes

    • A glass bowl of melted chocolate with a spatula dripping some back into the bowl.
      How To Melt Chocolate Chips In The Microwave
    • Italian Stuffed Zucchini Boats are the healthy weeknight meal you'll want to make again and again. This is a seriously easy recipe that's full of delicious flavor without all the guilt!
      Italian Stuffed Zucchini Boats
    • A close up shot of the side of a shallow bowl of shrimp mac salad.
      Shrimp Macaroni Salad
    • A white pan pouring cheese sauce over a bowl of steamed broccoli.
      Cheese Sauce for Broccoli Recipe
    • An overhead image of a plate of chicken lettuce wraps with peanut sauce next to it and all the fixings surrounding it.
      Copycat Cheesecake Factory Thai Chicken Lettuce Wraps
    • A close up image of a piece of greek marinated chicken on a white plate with lemons on the plate and in the background.
      Greek Yogurt Chicken
    Jessy in a kitchen holding a white casserole pan and smiling.
    Hi, I'm Jessy!

    Welcome to The Life Jolie! I share simple, delicious recipes and ingredient prep tips to make your weeknight cooking a breeze!

    More about me →

    Easy Dinner Recipes

    • A close up of a bagel pizza with mini pepperonis on a pan.
      Bagel Pizzas Recipe
    • A bowl of chicken and orzo soup with a spoon in it.
      Chicken and Orzo Soup
    • A bowl of Swedish meatballs and noodles.
      Swedish Meatballs And Noodles
    • A close up image of a piece of coconut shrimp on top of others.
      Coconut Shrimp With Sauce
    • An overhead image of taco soup in a bowl.
      Crockpot Taco Chicken Soup
    • A spoon pulling up a scoop of skillet lasagna with melted cheese stretching behind it.
      No Bake Lasagna Skillet

    Popular Recipes

    • A glass bowl of melted chocolate with a spatula dripping some back into the bowl.
      How To Melt Chocolate Chips In The Microwave
    • Italian Stuffed Zucchini Boats are the healthy weeknight meal you'll want to make again and again. This is a seriously easy recipe that's full of delicious flavor without all the guilt!
      Italian Stuffed Zucchini Boats
    • A close up shot of the side of a shallow bowl of shrimp mac salad.
      Shrimp Macaroni Salad
    • A white pan pouring cheese sauce over a bowl of steamed broccoli.
      Cheese Sauce for Broccoli Recipe
    • An overhead image of a plate of chicken lettuce wraps with peanut sauce next to it and all the fixings surrounding it.
      Copycat Cheesecake Factory Thai Chicken Lettuce Wraps
    • A close up image of a piece of greek marinated chicken on a white plate with lemons on the plate and in the background.
      Greek Yogurt Chicken

    Footer

    ↑ back to top

    About

    • About Me
    • Privacy Policy + Disclaimer

    Newsletter

    • Sign Up! for emails and updates
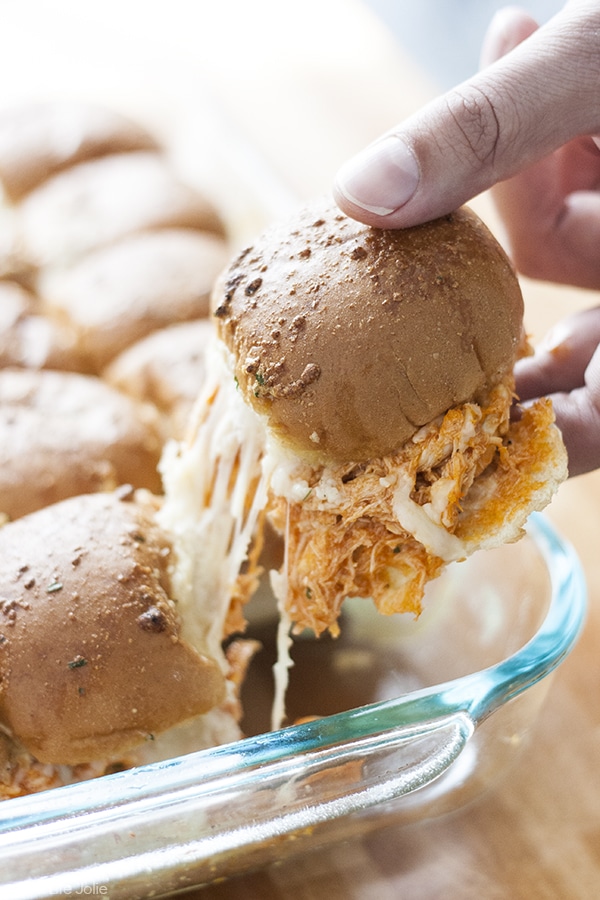
    Contact

    • Contact
    • Video Production

    As an Amazon Associate I earn from qualifying purchases.

    Copyright 2014-2021 - Jolie Ventures, LLC. All Rights Reserved. Privacy Policy.

    Rate This Recipe

    Your vote:


    A rating is required
    A name is required
    An email is required