
• Skip to primary navigation
  • Skip to main content
  • Skip to primary sidebar
The Life Jolie logo
  • Easy Dinner Recipes
  • Recipes
  • About
  • Contact
    • Work with me!
    • Video Production
  • Nav Social Menu

    • Email
    • Facebook
    • Instagram
    • Pinterest
    • Twitter
    • YouTube
menu icon
go to homepage
subscribe
search icon
Homepage link
  • Easy Dinner Recipes
  • Recipes
  • About
  • Contact
    • Work with me!
    • Video Production
    • Email
    • Facebook
    • Instagram
    • Pinterest
    • Twitter
    • YouTube
  • ×
    The Life Jolie » Page 16

    Rice Krispie Treats Turkey

    Rice Krispie Treats Turkey

    Dec 1, 2018 · 47 Comments

    A square image of a Rice Krispie Treat Turkey

    Be the hero we all need this Thanksgiving and make a Rice Krispie Treat Turkey. 
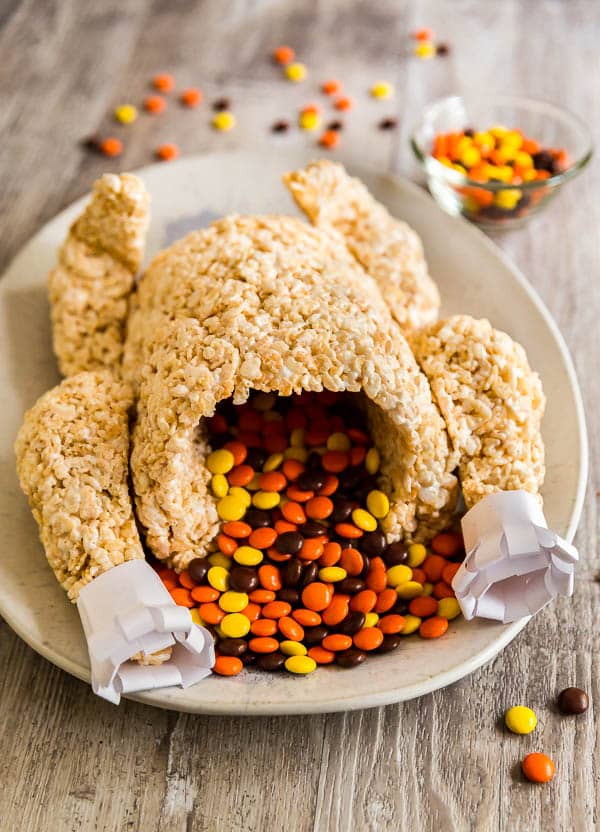
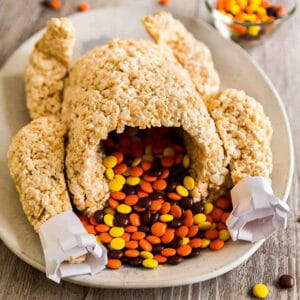
    An image of a Rice Krispie Treat Turkey with Reese's Pieces stuffed in it.

    Rice Krispie Treats Turkey

    This post contains Affiliate Links. Please see the disclaimer here.

    A long time ago in a galaxy far, far away, I saw a photo on Facebook of a turkey someone made using the Rice Krispie Treats recipe. Like, a whole turkey. As if you had just pulled it out of the oven.

    I immediately started cracking up and sent a screenshot to my cousin who has a birthday that falls on or around Thanksgiving each year. She immediately wrote back and said "I want a candle in it!" After that we shared a laugh and moved on with our respective days. But the idea stayed in my head and I knew I had to replicate it.

    So in addition to my other desserts that year, there was a lovely Rice Krispie Treat Turkey sharing the Thanksgiving dessert table and many to follow. He was stuffed with Reese's Pieces and he was amazing!
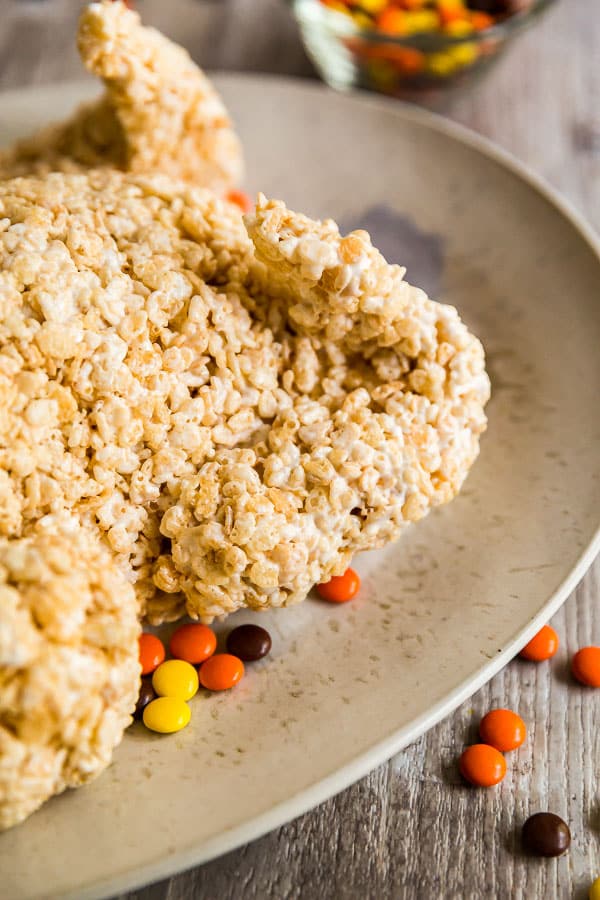
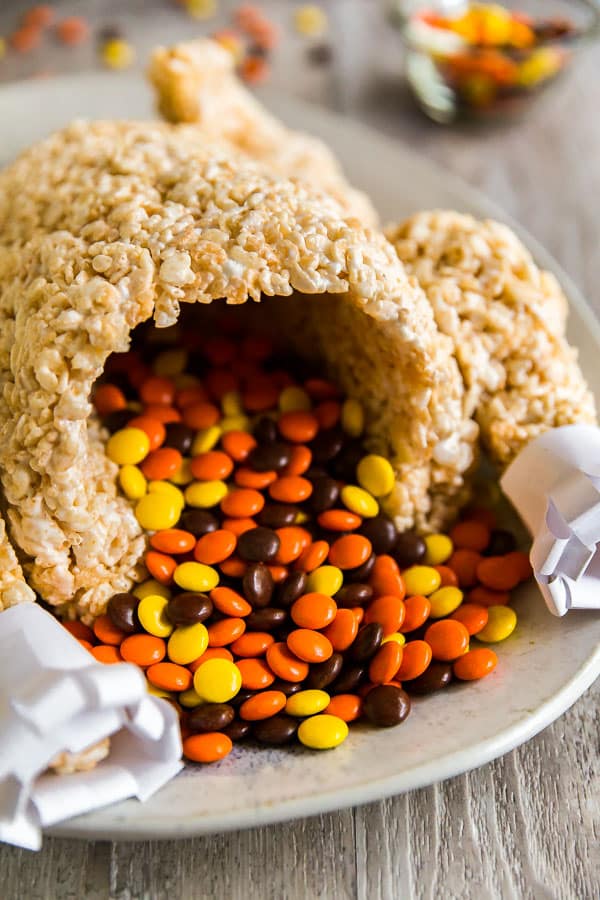
    The wing on the Rice Krispie Treat Turkey.

    The candy stuffing in this Rice Krispie Treat Turkey.

    Tips for making a Rice Krispie

    I've made this guy several times now and I still find it to be pretty easy to make. Here are some great tips to make this a little easier for you.

    • Use non-stick foil. That and my faithful can of cooking spray made everything much easier.
    • Use a plastic cup like a red solo cup or disposable coffee cup wrapped in foil to help make forming the carcass a bit easier.
    • Grab a friend. it really helps to have another person there to hold the cup while you build the turkey carcass around it.
    • Refrigerate it to set. I find that refrigerating it overnight helps it set and makes assembly much easier. Even just 30 minutes in the fridge helps, but overnight is ideal.
    • Assemble just before serving. Gravity can be an evil little trickster, specifically in the case of the drumsticks. I've have the best luck refrigerating everything and assembling just before serving. If you absolutely must assemble in advance, ball up some of the foil to place under the drums and wings to help keep them from falling.
    • Be strategic about placing your tooth picks. Try to keep in mind the spots that are most likely to succumb to gravity- I've been know to pop a toothpick into the "bone" part of the drumstick when necessary. Just don't go overboard as they can cause the pieces to fall apart if you put too many.
    • Use common sense when eating this. Make sure you and your guests are mindful of toothpicks that are used to hold the turkey together. Use common sense (like we all should be in general!) and be mindful of the toothpicks that may be in the pieces that you're eating, especially when giving this to kids.
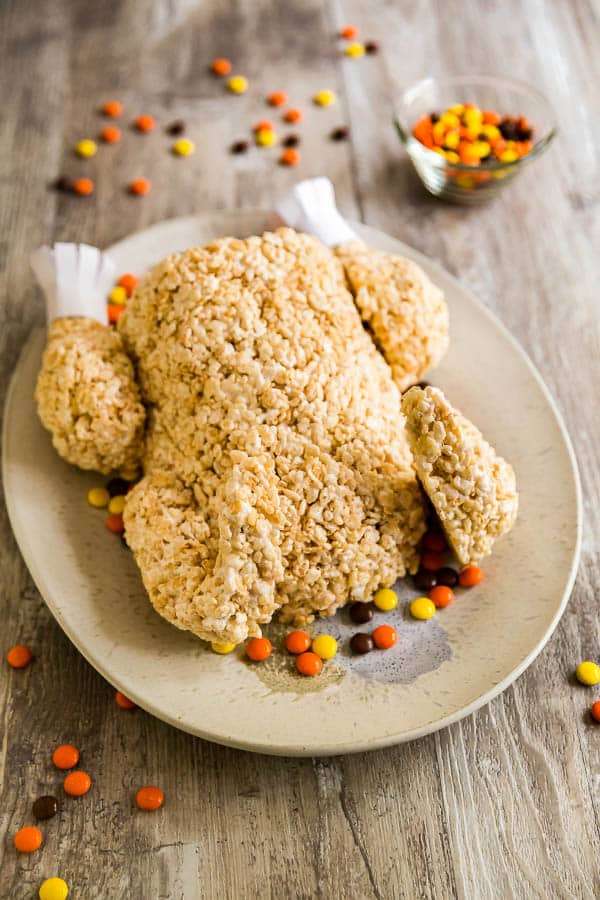
    The back view of a Rice Krispie Treat Turkey

    An overhead shot of a Rice Krispie Treat Turkey.

    Make it a meal!

    A few great recipes to round out and complete this meal are:

    • Orange Rosemary Oven Roast Turkey
    • French Onion Creamy Mashed Potatoes
    • Grandma's Baked Artichoke Hearts
    • Homemade Cranberry Sauce
    • Easy Garlic Green Beans
    • Savory Sweet Potato Casserole
    • Sausage and Corn Bread Dressing
    • Cheesy Corn Casserole
    • Chocolate Cream Pie
    • Cherry Cheesecake Pie

    Helpful tools:

    1. Cast iron dutch oven or this kind of dutch oven
    2. Measuring cups
    3. Wooden spoon
    4. Non-stick foil
    5. Toothpicks

    Hosting Thanksgiving?

    Discover the secret to hosting Thanksgiving without all the stress! Prepsgiving is your FREE guide to making a delicious Thanksgiving feast the easy way.
    A square image of a Rice Krispie Treat Turkey

    Rice Krispie Treat Turkey

    Jessy Freimann
    Be the hero we all need this Thanksgiving and make a Rice Krispie Treat Turkey. It's easier than it looks!
    5 from 7 votes
    Print Recipe Pin Recipe
    Prep Time 15 minutes mins
    Cook Time 10 minutes mins
    Resting time 30 minutes mins
    Total Time 25 minutes mins
    Course Dessert
    Cuisine American
    Servings 12 servings
    Calories 263 kcal

    Equipment

    • 1 sheet pan
    • 1 Large pot
    • 1 wooden spoon
    • 1 Measuring cups and spoons
    • 1 non-stick foil
    • 1 Red solo cup
    • 1 white paper
    • 1 clear tape
    • Toothpicks

    Ingredients
      

    • 6 Tablespoons salted butter
    • 8 cups mini marshmallows
    • 12 cups Rice Krispies cereal
    • Cooking spray
    • Reese's Pieces or whatever "stuffing"you want

    Instructions
     

    • Cover the cup with foil and make sure the non-stick side is up on that as well. Spray it well with cooking spray.
    • Lay out a large piece of foil with the non-stick side up next to the serving platter.
    • Melt your butter over medium heat.
    • Spray a mixing spoon with cooking spray and stir in the marshmallows until they've melted. Remove the pan from the heat.
    • Add your Rice Krispies and stir until well combined.
    • Pour this mixture onto the piece of non-stick foil and allow it to cool for a moment or two (you don't want it to cool completely, just slightly so that you don't burn yourself).
    • Working fast, divide the Rice Krispie Treat mixture so that there's ⅔ of it to make the body and set ⅓ of it to the side to make the wings and drumsticks.
    • Starting with the ⅔ portion of the Rice Krispie Treat mixture, take a small amount of it and create a base about an inch thick on the serving platter.
    • Place the cup on it's side onto the base so that open part of the cup is slightly off of the base where the turkey's opening will be so the majority of the cup is laying on the base.
    • Build the rest of Rice Krispie Treat mixture around the cup to create the turkey's carcass with the cup in it's cavity (once this is set you'll be able to pull the cup out and stuff it with candy). Make sure the mixture around the cavity isn't too thin. Be sure to press the mixture in well so that it's not too loose when it dries.
    • Next, take the other ⅓ of the Rice Krispie Treat mixture and divide it into four parts.
    • Use each part to mold two drumsticks and two wings and set them aside and make sure you press them into shape tightly. (I kept these on the a separate pan lined with non-stick foil- keep in mind that you'll want to shape the wings so that the thinner back parts of them go up in different directions since they will be on either side of the Turkey).
    • Cover everything with the nonstick side of the foil and allow it to rest and set for at least 30 minutes in the refrigerator (overnight is preferable).
    • To make the bone end of the drumsticks, take strips of white paper, and fold them in half length-wise.
    • Cut half way up along the fold every half inch or s and wrap it around the ends of drumsticks and secure with a piece of clear tape.
    • Use toothpicks to carefully secure your drums and wings to the turkey (this can be a bit tricky and you'll need to rig it up the right certain spots depending on your drumsticks and gravity).
    • Stuff the turkey with candy. Serve immediately or cover with non-stick foil until you're ready to serve.

    Notes

    One of our readers Rose Klein gave this awesome tip, "Just made a turkey following your recipe and wanted to add that it looks nicely roasted if you gently dust it with cinnamon, sugar and butter melted into a glaze. It gives it a nice toasty coloring, a slight taste, and cools to a nice moist looking sheen." Thanks Rose!

    Nutrition

    Serving: 1servingCalories: 263kcalCarbohydrates: 51gProtein: 3gFat: 6gSaturated Fat: 4gPolyunsaturated Fat: 0.4gMonounsaturated Fat: 2gTrans Fat: 0.2gCholesterol: 15mgSodium: 219mgPotassium: 38mgFiber: 0.1gSugar: 22gVitamin A: 2037IUVitamin C: 18mgCalcium: 4mgIron: 9mg
    Tried this recipe?Let us know how it was!

    This giveaway has ended. Congratulations to our winners Jeanne and Lola!

    Other great Rice Krispie treat creations:
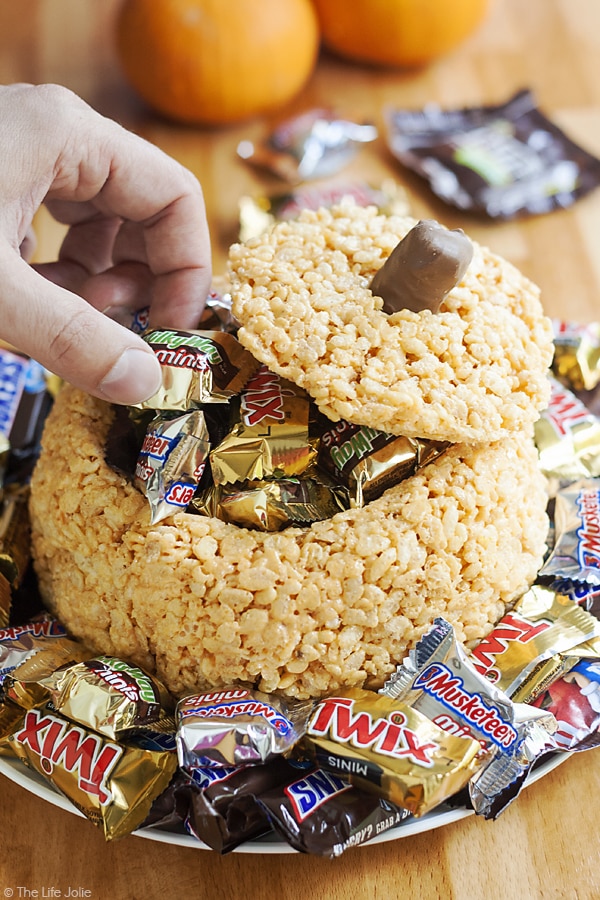
    Rice Krispie Treat Pumpkin

    This Rice Krispie Treat Pumpkin is the perfect addition to your holiday table. It's an easy, kid friendly dessert that looks awesome filled with candy and is so much fun for a Halloween party or Thanksgiving!

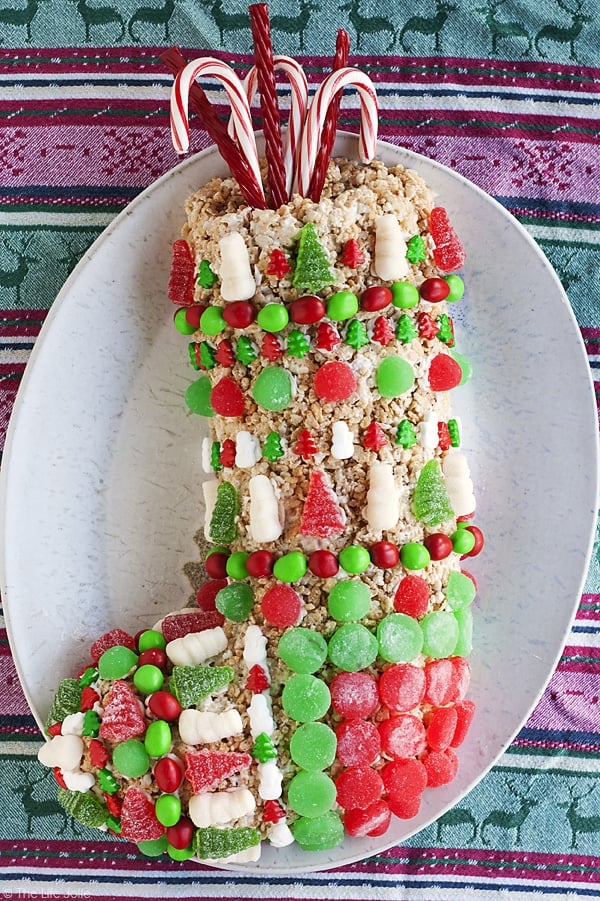
    Rice Krispie Treat Stocking

    This Rice Krispie Treat Stocking recipe is an easy Christmas dessert option for both kids and adults! It was simple to make and decorate and is meant to be made ahead. This is a fun project for the whole family to make during the holidays and is a great Gingerbread House alternative.

    You can find a full index of my recipes here.

    Don't forget to follow The Life Jolie on Pinterest for more recipe inspiration!

    Or if Pinterest isn't your style, bookmark this post!

    Let's keep the conversation going- join my Facebook group!

    Loaded Corn Fritter Recipe

    Nov 25, 2018 · 2 Comments

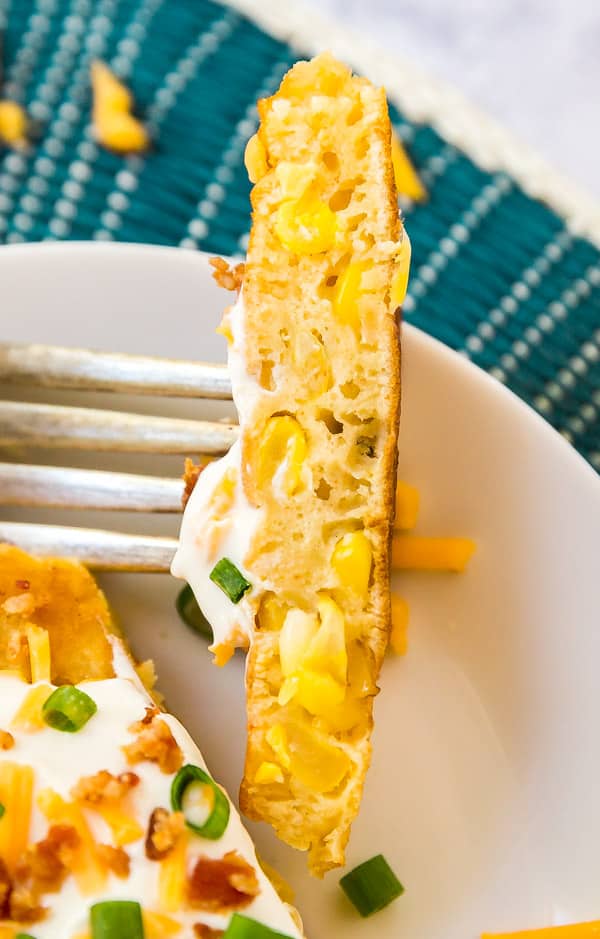
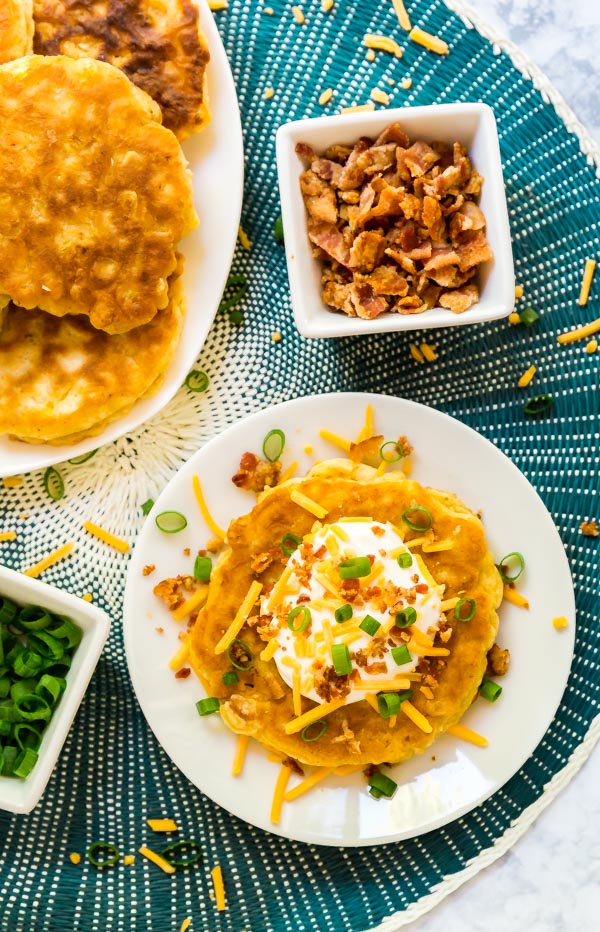
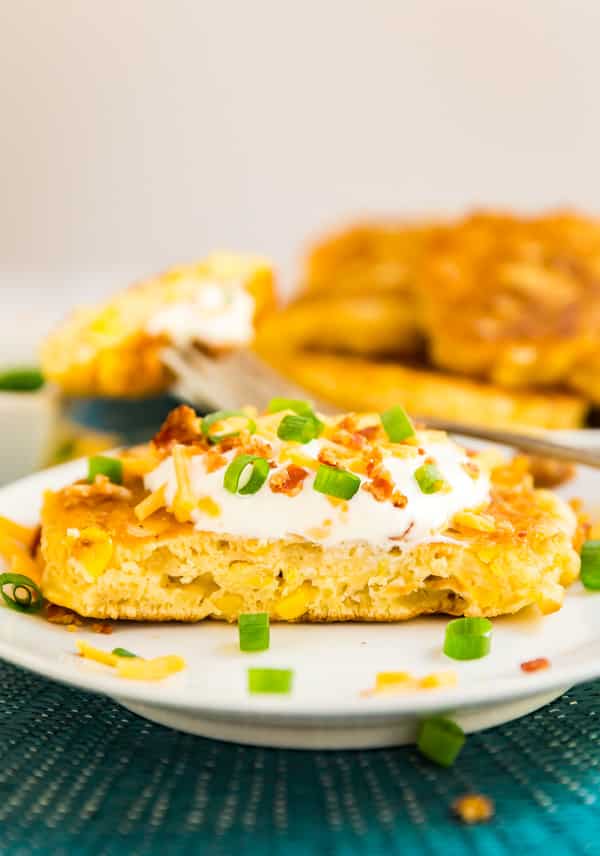
    This easy loaded corn fritter recipe with all the fixings makes an easy and delicious appetizer that you will not be able to get enough of!

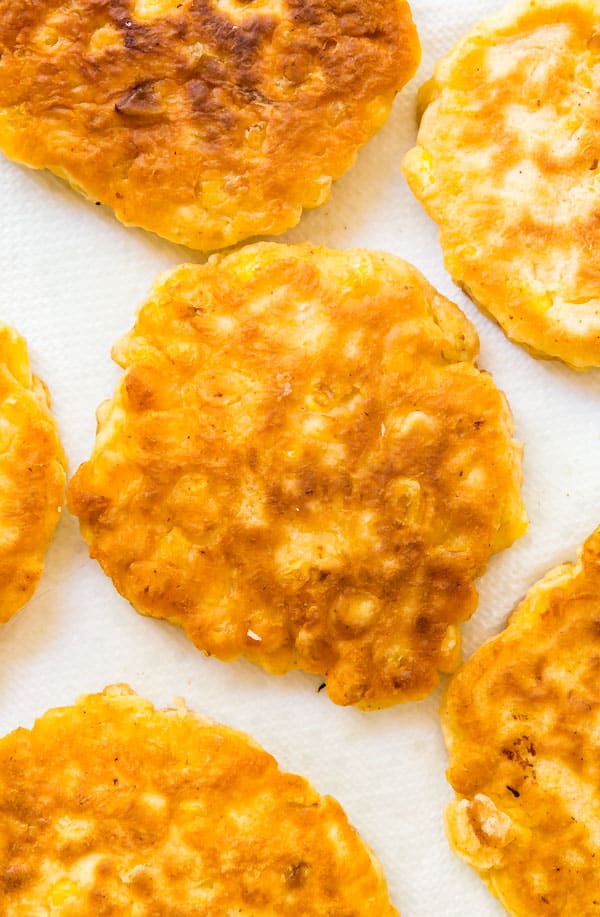
    This easy loaded corn fritter recipe makes a delicious appetizer that you will not be able to get enough of!

    Corn fritter recipe

    Loaded Corn Fritter Recipe

    This post contains Affiliate Links. Please see the disclaimer here.

    This loaded corn fritters recipe is loosely inspired by the loaded corn cakes from The Cheesecake Factory. Those are totally tasty, but more of a sweet corn cake whereas this recipe is more like a dense pancake.

    I loaded these fritters up with everyone's favorite fixings. Salty bacon, creamy sour cream, shredded sharp cheddar cheese and diced scallions. I personally love anything “loaded” and one of the ways I love to enjoy these toppings is on a good corn fritter, so it seemed like a great combo!

    corn fritters recipe

    Tips for making this corn fritters recipe

    • Be sure to thaw the corn. The first time I tested this, I didn't thaw the corn it they didn't turn out as good.
    • Make sure you fry the bacon until it's nice and crispy. I like to do it in batches, reserving the oil in a side bowl to use for frying the fritters. You can totally use the same pan, but I like to wipe out the pan before adding the reserved grease back in.
    • Be sure to mix the batter well so that everything is equally distributed and well combined.
    • Fry these in bacon grease. It creates less waste and tastes fabulous!

    corn cake recipe

    Frequently asked questions about making this fritters recipe

    • Should these be served hot or cold? They can be served both hot or cold. I prefer them hot but they also taste great cold.
    • How big should these be? I use a ¼ cup of batter per fritter to get a fritter that's a few inches across. If you want one that's smaller, more like the size of a canapé, you can totally use a tablespoon-size cookie scoop to drop smaller amounts of batter into the grease.
    • Can you make corn fritters with fresh corn? Yes, but I'd encourage you to steam it first for a few minutes.
    • Do you need a dipping sauce with this? No, because you've already got so many great toppings including sour cream.

    corn cake recipe

    Helpful tools:

    1. Chef's knife
    2. Cutting board
    3. Measuring cups
    4. Measuring spoons
    5. Mixing bowl
    6. Spatula
    7. Whisk
    8. Turner
    9. Fry pan

    This easy loaded corn fritter recipe with all the fixings makes an easy and delicious appetizer that you will not be able to get enough of!

    Loaded Corn Fritter Recipe

    Jessy Freimann
    This easy loaded corn fritter recipe with all the fixings makes a delicious appetizer that you will not be able to get enough of!
    5 from 1 vote
    Print Recipe Pin Recipe
    Prep Time 5 minutes mins
    Cook Time 20 minutes mins
    Total Time 25 minutes mins
    Course Appetizer
    Cuisine American
    Servings 7 fritters

    Ingredients
      

    • 6-8 slices bacon
    • 1 cup flour
    • 1 ½ teaspoons seasoned salt
    • ⅛ teaspoon cayenne pepper, or more if you want them to be spicy
    • ½ teaspoon garlic powder
    • 1 teaspoon baking powder
    • 2 large eggs
    • ¼ cup milk
    • 1 ½ cups frozen corn, thawed
    • 2 teaspoons salted butter, melted
    • Sour cream
    • Shredded cheddar
    • Chopped green onions (green parts only)

    Instructions
     

    • In a large fry pan, fry the bacon until crispy. Remove to a paper towel lined plate, reserve grease in a heat-safe bowl and wipe out the pan with a piece of paper towel.
    • In a medium bowl, whisk together flour, seasoning salt, cayenne pepper, garlic powder and baking powder until well combined. Set aside.
    • In a large bowl, whisk together eggs and milk until well combined.
    • Add dry ingredients to wet ingredients and mix until just combined.
    • Add corn and melted butter and mix until smooth.
    • Heat some of the bacon grease in the same fry pan over medium-medium high heat.
    • Drop ¼ cup amounts of batter into the hot oil and quickly use the measuring cup or a spoon to spread it into a pancake shape (you can also do tablespoonfuls if you want smaller corn fritters). Do this in batches, adding more bacon grease between batches so as not to dry out or overload the pan.
    • Fry for around 3-4 minutes per side until golden brown, turning once. Be sure to manage your heat so you don't burn them.
    • Remove to a paper towel lined plate.
    • Serve hot or room temperature with sour cream, shredded cheddar, chopped green onions and crumbled bacon on top.
    Tried this recipe?Let us know how it was!

    fritters

    Originally posted on Yellow Bliss Road.

    If you tried this recipe please comment and rate it 🙂 I love hearing your feedback and answering your questions! And if you make this please tag me on Instagram with @thelifejolie so I can share it <3

    Other great recipes featuring corn include:

    • Cheesy Corn Casserole
    • Cajun Black Bean and Corn Salad
    • Roasted Corn Salsa

    You can find a full index of my recipes here.

    Don’t forget to follow The Life Jolie on Pinterest for more recipe inspiration!

    Or if Pinterest isn’t your style, bookmark this post!

    Let’s keep the conversation going- join my Facebook group! 

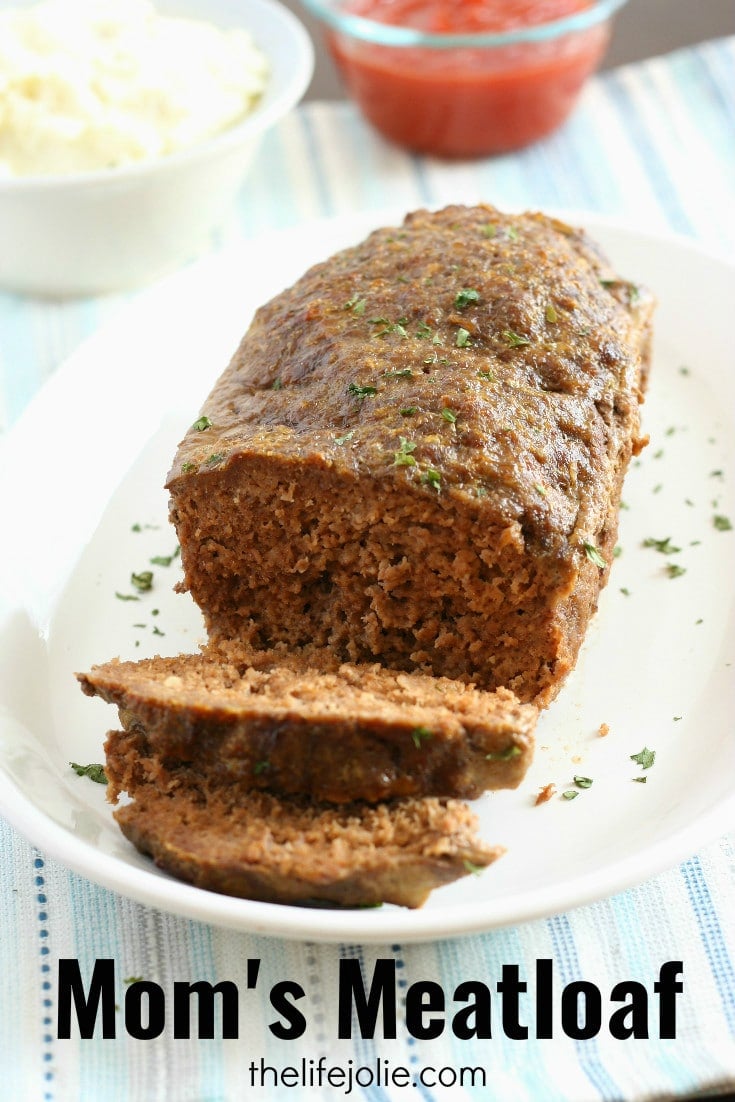
    Mom's Meatloaf Recipe

    Nov 12, 2018 · 24 Comments

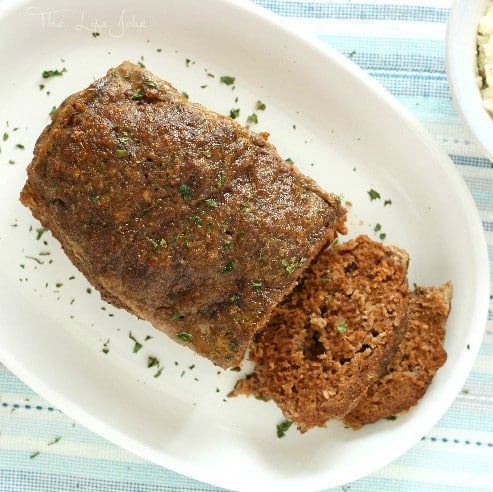
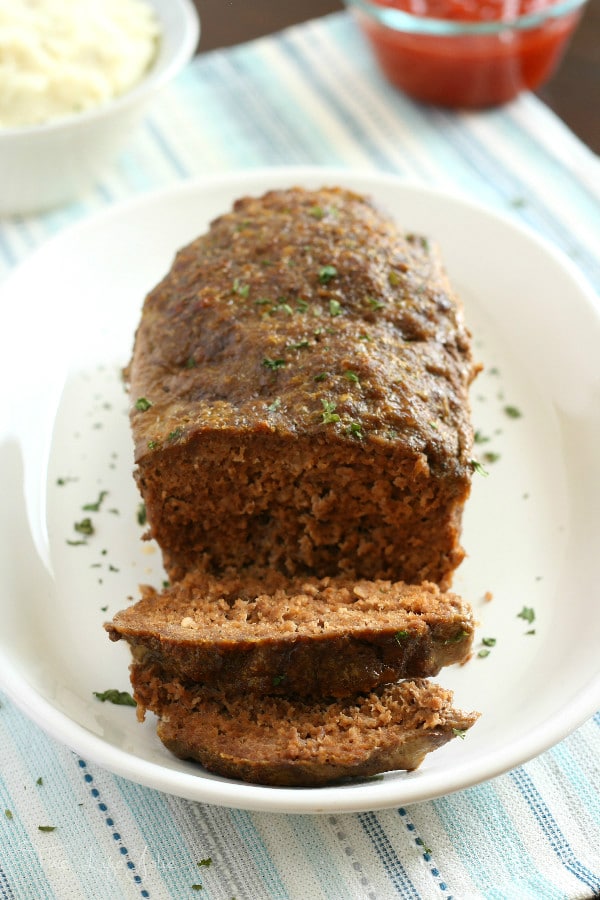
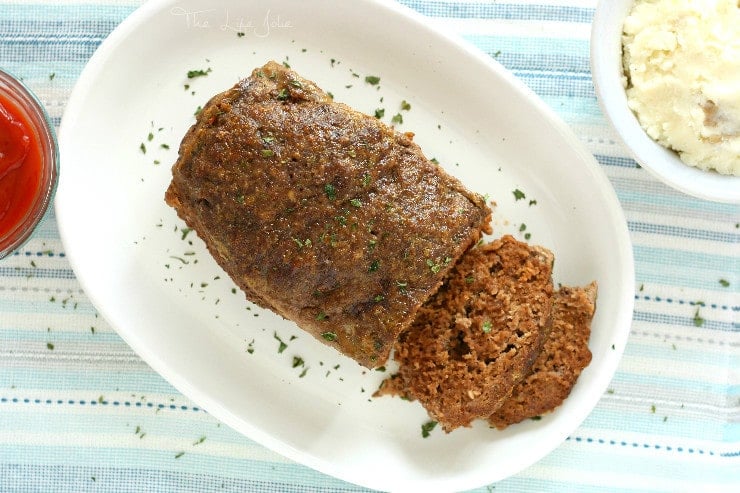
    This is my mom's meatloaf recipe- it is seriously the best meatloaf I've ever had- it's super simple and really easy to make. It's the ultimate of comfort foods and one of my favorite dinners!

    This is my mom's meatloaf recipe- it is seriously the best meatloaf I've ever had- it's super simple and really easy to make. It's the ultimate of comfort foods and one of my favorite dinners!

    This is my mom's meatloaf recipe- it is seriously the best meatloaf I've ever had- it's super simple and really easy to make. It's the ultimate of comfort foods and one of my favorite dinners!

    This post contains Affiliate Links. Please see the disclaimer here.

    Mom's Meatloaf

    My dear husband is always up for meatloaf. He is a meatloaf addict. Seriously. Being that my mom's easy meatloaf recipe is his (and my) favorite, I figured that I should probably share it with you guys so that you can jump on the meatloaf train. And as you can imagine, J was thrilled as always to find that meatloaf is on the menu for dinner tonight!

    What I love about my mom's classic meatloaf recipe is its simplicity. You're not going to find random, chopped up pieces of things in it. There are no fancy bells and whistles. It's not served with a gravy and while I love it with ketchup, you won't find her spreading ketchup over the top before serving, that's just not how we roll.

    What you will find is a simple, delicious and easy-to-make meatloaf that uses simple ingredients that most of us already have in our refrigerators and pantries. This one is a definite keeper!

    meatloaf recipe

    Tips for making easy meatloaf

    • Like most amazing mom-dishes, there really are not exact measurements- it's more a matter of adding the ingredients to the meat, mixing it super well and smelling it to make sure you can smell the flavors. And because I love you guys, we went ahead and measured out the ingredients to make it easier. That being said, I strongly encourage you to only use that as a baseline and to become one with your meatloaf. Smell it as you mix and add more of the ingredients until it smells super flavorful!
    • Make sure it's not too dry. My grandmother used to say that when it came to adding more dry ingredients, go for cheese before breadcrumbs, as the cheese holds the moisture better. She also emphasized that you want 1 egg per pound of meat. Don't underestimate the power of a palmful of warm water if it's seeming too dry after adding your eggs!
    • The baking time will vary based on the size of your meatloaf. You'll want it to temp out at 165 degrees, since there is raw egg involved.
    • I once had an old roommate who told me that you know meatloaf is there because on the outside it appears to be so brown that it's almost burned and ruined but really, it's just perfect.
    • That said you also don't want to overcook it, so you might consider checking it around the hour point and go from there (unless if you reduce the recipe).

    easy meatloaf recipe

    Frequently asked questions about making the best meatloaf

    • Can you make this recipe as a turkey meatloaf? Yes, I’ve made it several times as turkey meatloaf. Just make sure you have a heavy hand with seasonings because ground turkey has less fat content and therefore less flavor.
    • How do you make tender meatloaf? The liquid content helps make it tender, but because not to add too much liquid or it can be soggy. Also, try not to overwork the meat. Be aware that when you're making smaller meatloaves you tend to have more of the crispy edges.
    • Why does my meatloaf always fall apart? This goes back to the last question: not enough liquid. While you don't want it to be soggy, the liquid is what binds all the dry parts and meat together. It takes a little while to get to the point where you can "feel" the right texture, but once you've made it a few times, it gets into your bones. Trust me in this!
    • How long does meatloaf last? 3-4 days covered in the refrigerator.
    • Can you eat cold meatloaf? Yes, as long as it's been refrigerated. I personally love to slice up the leftovers and eat them on a sandwich with white bread and ketchup (and serve the leftover potatoes on the side). That said, I know people can be weird about leftovers so no judgement if cold meatloaf isn't your thing.
    • Can I make this as a mini meatloaf or in a muffin tin? Yes! For a smaller meatloaf, just reduce the baking time. I also have a recipe for muffin tin meatloaf.

    easy meatloaf recipe

    Make it a meal!

    A few great recipes to round out and complete this meal would be:

    • Peas with Onions
    • Easy Garlic Green Beans
    • Parmesan Garlic Roasted Potatoes
    • Cheddar and Broccoli Twice Baked Potatoes
    • Grandma's Best Banana Cake
    • Quick and Easy Chocolate Pudding Cake

    Helpful tools:

    1. Mixing bowl
    2. Chef's knife
    3. Cutting board
    4. Measuring cups
    5. Measuring spoons
    6. Mandoline
    7. Loaf Pan

    Video Tutorial for Mom's Meatloaf

    This is my mom's meatloaf recipe- it is seriously the best meatloaf I've ever had- it's super simple and really easy to make. It's the ultimate of comfort foods and one of my favorite dinners!

    Mom's Meatloaf

    Jessy Freimann
    This is my mom's meatloaf recipe- it is seriously the best meatloaf I've ever had- it's super simple and really easy to make. It's the ultimate of comfort foods and one of my favorite dinners!
    5 from 2 votes
    Print Recipe Pin Recipe
    Prep Time 10 minutes mins
    Cook Time 1 hour hr
    Resting time 5 minutes mins
    Total Time 1 hour hr 10 minutes mins
    Course Main Course
    Cuisine American
    Servings 6 servings
    Calories 492 kcal

    Equipment

    • 1 Loaf Pan
    • 1 Measuring cups and spoons
    • 1 mixing bowl

    Ingredients
      

    • 2 pounds ground beef (or turkey, in which case be heavier with the seasonings)
    • 1 teaspoon garlic powder
    • ½ teaspoon kosher salt
    • ½ teaspoon ground black pepper
    • 1 ½ teaspoons Worcestershire sauce
    • 4 Tablespoons ketchup
    • ½ cup Romano cheese
    • ½ cup seasoned bread crumbs 2
    • 2 large eggs
    • 2 Tablespoons Warm water (optional- only add this to the mixture if its too dry, you want it to be nice and moist. Start with a palmful)

    Instructions
     

    • Preheat oven to 350 degreesF. Grease the loaf pan with cooking spray (if you don't have a loaf pan just use a regular pan with high sides and just shape the meat into a loaf and use an appropriate size casserole dish).
    • Mix all ingredients really well. Smell it as you go- you'll want the smell to be strong and flavorful. The texture should be wet without being watery. But you don't want it too dry either. If it's too dry, you can always add some warm water- start with a palmful. 
    • Shape the meat into a loaf- at this point you can freeze it if you're not looking to eat it right away. You'll want to thaw it before baking.
    • Place the meat into the pan. Put a small amount of warm water around the corners of the pan. 
    • Bake for around an hour, or until the internal temperature reaches 165 degrees. Rest for 5 minutes and serve immediately.

    Notes

    Leftover last for up to 3 days in the refrigerator.

    Nutrition

    Serving: 1servingCalories: 492kcalCarbohydrates: 11gProtein: 32gFat: 35gSaturated Fat: 14gPolyunsaturated Fat: 1gMonounsaturated Fat: 15gTrans Fat: 2gCholesterol: 178mgSodium: 663mgPotassium: 510mgFiber: 1gSugar: 3gVitamin A: 197IUVitamin C: 1mgCalcium: 148mgIron: 4mg
    Tried this recipe?Let us know how it was!

    If you tried this recipe please comment and rate it 🙂 I love hearing your feedback and answering your questions! And if you make this please tag me on Instagram with @thelifejolie so I can share it <3

    Try some other dinners using ground beef:

    • Ground Beef Baked Oven Tacos
    • Easy Instant Pot Chili
    • Classic Hamburger Stew

    You can find a full index of my recipes here.

    Don’t forget to follow The Life Jolie on Pinterest for more recipe inspiration!

    Or if Pinterest isn’t your style, bookmark this post!

    Let’s keep the conversation going- join my Facebook group! 
    Almond Ginger Cookies

    Nov 6, 2018 · 12 Comments

    These Almond Ginger Cookies are such an easy dessert to make! This crispy cookie is the best slice-and-bake option if you're looking for a spicy cookie that is that isn't overly sweet. They're great for Christmas!

    These Almond Ginger Cookies are such an easy dessert to make! This crispy cookie is the best slice-and-bake option if you're looking for a spicy cookie that is that isn't overly sweet. They're great for Christmas!

    ginger snap cookies

    Almond Ginger Cookies

    This post contains Affiliate Links. Please see the disclaimer here.

    I'll usually take at least one new cookie recipe for a test drive each year. This one is from my beloved Betty Crocker's Cooky Book. I found it at our church rummage sale and jumped to get it. My mom has this too and it's practically falling apart from the amount of use it's seen over the years! I kept coming back to the recipe for ginger cookies so I knew I had to give them a go.

    The result was a spicy, crispy slice-and-bake cookie that has a great chew to it once you've gotten through that crunchy first bite. It's an excellent option for dunking into a nice hot cup of coffee or a glass of milk.

    If you're in the mood a cookie that is less up-front in blatant sweetness with a satisfying crunch and chew to it as well as a spicy kick, this cookie is your guy. It's a bit more sophisticated than your usual sugar cookie.

    ginger cookies

    Tips for how to making ginger snap cookies with almonds

    • The original recipe calls for shortening but I opted for butter because I like the flavor it adds. It also makes the cookies a it crispier.
    • The original recipe calls for light molasses but we only have dark molasses available. They still came out great!
    • I wrap the logs in wax or parchment paper for rolling to make it easier.

    ginger molasses cookies

    Frequently asked questions about making this ginger molasses cookies

    • Can I freeze these? Definitely! You have two options- to freeze them once they’re in log form to later thaw and bake or to freeze them once bakes. Both work out super well!
    • Are these cookies kid-friendly? My kids were definitely fans.
    • How long do ginger cookies last? Around a week in an airtight container.
    • Are gingersnaps and molasses cookies the same? Although they’re similar, molasses cookies tend to be softer. These are closer to a gingersnap.

    ginger cookies recipe

    Helpful tools:

    1. Measuring cups
    2. Measuring spoons
    3. Mixing bowl
    4. Spatula
    5. Stand mixer or Hand mixer
    6. Sheet pan
    7. Silpat

    These Almond Ginger Cookies are such an easy dessert to make! This crispy cookie is the best slice-and-bake option if you're looking for a spicy cookie that is that isn't overly sweet. They're great for Christmas!

    Almond Ginger Cookies

    Jessy Freimann
    These Almond Ginger Cookies are such an easy dessert to make! This crispy cookie is the best slice-and-bake option if you're looking for a spicy cookie that is that isn't overly sweet. They're great for Christmas!
    No ratings yet
    Print Recipe Pin Recipe
    Prep Time 10 minutes mins
    Cook Time 15 minutes mins
    Chill time 2 hours hrs
    Total Time 25 minutes mins
    Course Dessert
    Cuisine American
    Servings 72 cookies
    Calories 103 kcal

    Equipment

    • 1 sheet pan
    • 1 mixing bowl
    • 1 stand mixer
    • 1 Hand mixer
    • 1 Measuring cups and spoons
    • 1 Spatula

    Ingredients
      

    • 1 ½ cups salted butter, softened
    • 1 ½ cups granulated sugar
    • ¾ cups molasses
    • 4 cups all purpose flour
    • 1 ½ teaspoons baking soda
    • 1 ½ teaspoons Kosher salt
    • 1 ¼ Tablespoon ground ginger
    • 1 Tablespoon ground cinnamon
    • 1 Tablespoon ground cloves
    • 1 ½ cups almonds, finely chopped

    Instructions
     

    • In a large bowl cream the butter, sugar and molasses until fluffy and well combined.
    • In a separate bowl, combine flour, baking soda, salt, ginger, cinnamon and cloves. Stir into the butter mixture.
    • Mix in the almonds and shape into a couple of logs about 2 inches in diameter.
    • Wrap in wax paper and refrigerate at least a couple of hours until they're firm and sliceable.
    • Bake at 350 degrees F on a greased pan (or lined pan) for 12-15 minutes. Mine were ready around 12 minutes. Cool and serve.

    Notes

    These will last up to 1 week at room temperature.

    Nutrition

    Serving: 4cookiesCalories: 103kcalCarbohydrates: 13gProtein: 1gFat: 5gSaturated Fat: 3gPolyunsaturated Fat: 1gMonounsaturated Fat: 2gTrans Fat: 0.2gCholesterol: 10mgSodium: 103mgPotassium: 84mgFiber: 1gSugar: 7gVitamin A: 119IUVitamin C: 0.005mgCalcium: 19mgIron: 1mg
    Tried this recipe?Let us know how it was!

    gingersnap cookie recipe

    If you tried this recipe please comment and rate it 🙂 I love hearing your feedback and answering your questions! And if you make this please tag me on Instagram with @thelifejolie so I can share it <3

    Other great Christmas Cookie recipes are:

    • Chocolate Crinkles
    • Neapolitan Cookies
    • Slice and Bake Cookies
    • Pecan Tarts
    • Sour Cream Cookies

    You can find a full index of my recipes here.

    Don’t forget to follow The Life Jolie on Pinterest for more recipe inspiration!

    Or if Pinterest isn’t your style, bookmark this post!

    Let’s keep the conversation going- join my Facebook group! 
    These Ginger Almond Cookies are such easy Christmas cookies to make! This crispy cookie is the best slice-and-bake option if you're looking for a spicy cookie that is that isn't overly sweet.

    California Breakfast Stack

    Oct 25, 2018 · Leave a Comment

    This California Breakfast Stack is a delicious way to start your day- it's light, fresh and seriously easy to make! This is made with English muffins, cheese, bacon, tomatoes, avocado and eggs. You've got to try it!

    This California Breakfast Stack is a delicious way to start your day- it's light, fresh and seriously easy to make!

    open faced sandwich

    California Breakfast Stack

    This post contains Affiliate Links. Please see the disclaimer here.

    Remember earlier this year when we went to Orlando Florida to spend a few days at Disney World and then have some time at the beach? Ugh, I miss it so much, it was a seriously solid couple of weeks and I'm dying to head back!

    I wrote a post about all of my tips for making the most of your time at the Magic Kingdom with little ones, but one of the things that was the best possible life decision at that particular moment in time was taking a day off between our two Disney days to relax. As I mentioned before, Disney is seriously magical but also a marathon and we were all so happy to have that day in between to relax and regain our energy before going back to the parks.

    Now you're probably wondering why I'm going on about vacation when there's a perfectly good breakfast recipe to discuss (I won't be offended if you use the jump to recipe button at the top of the post, it's there for you!). Well on our day between park visits, we all woke up a little later than usual and made our way to a nearby Perkins down the street from out condo for a slow, leisurely breakfast before spending the day at the pool and making a good dinner for ourselves.

    Breakfast Sandwich

    Why a breakfast stack?

    My family used to love heading to Perkins on many weekend mornings, but unfortunately there is no longer one nearby. I used to love their berry flavored syrup as a kid, but nowadays, I'm more of a savory brunch kinda gal. So while I was at Perkins on the relaxing morning, I was immediately drawn to the California Eggs Benedict. I ended up ordering it without the hollandaise sauce because hollandaise is just not my thing.

    This turned out to be a serious delicious decision, and I liked it so much that I decided to replicate it in my contributor post at Easy Good Ideas, and of course share it with you here!

    And what's not to like? It's basically an open faced breakfast sandwich with an english muffin, melted pepper jack cheese, crispy bacon, fresh tomatoes, creamy avocado and perfectly cooked sunny side up eggs. In other words, a total egg sandwich win with a California twist!

    Tips for making California Breakfast Stack

    • Don't overcook the English muffin when toasting it. It will cook a tiny bit more in the oven when you melt the cheese on it.
    • Make sure your bacon is nice and crispy.
    • Season the tomato slices with salt and pepper as well as the eggs. This will round out all the flavors.
    • These are not a good candidate for a make-ahead meal; they're best served right away.

    Frequently asked questions about this California Breakfast Sandwich

    • I don't like spicy foods, can I use a different type of cheese? Totally! Feel free to change it out for the cheese of your choice!
    • How can I make sure the avocado doesn't turn brown? Before adding the sliced avocado, squeeze a tiny bit for fresh lemon or lime juice over it. This brightens up the whole sandwich and keeps your avocado from turning brown.
    • How do I fry a sunny side up egg? To get the perfect sunny side up egg, fry it in olive oil and once it gets cooking use the oil to baste the white part of the egg to cook that without getting it on the yolk. That way you don't have any of that unpleasant raw egg white that can sometimes occur in this type of egg, but you'll still get that perfectly runny egg yolk that we all love!
    • Can I prepare my eggs differently? Sure! Prepare it your favorite way!
    • Is this a healthy sandwich? Yes. Even though there are things like bacon and cheese, they're added in small amounts.
    • Can these be frozen and reheated? No, as I mentioned about, these are best served right away.
    • Can I make this vegetarian? Yes, just remove the bacon or use a meatless bacon substitute.

    California Breakfast Sandwich

    Helpful tools:

    1. Turner
    2. Fry pan
    3. Chef's knife
    4. Cutting board
    5. Sheet pan

    This California Breakfast Stack is a delicious way to start your day- it's light, fresh and seriously easy to make! This is made with English muffins, cheese, bacon, tomatoes, avocado and eggs. You've got to try it!

    California Breakfast Stack

    Jessy Freimann
    This California Breakfast Stack is a delicious way to start your day- it's light, fresh and seriously easy to make!
    No ratings yet
    Print Recipe Pin Recipe
    Prep Time 5 minutes mins
    Cook Time 15 minutes mins
    Total Time 20 minutes mins
    Course Breakfast
    Cuisine American

    Ingredients
      

    • 1 English muffin, sliced in half
    • 2 slices pepper jack cheese or your favorite cheese
    • 4 slices bacon, fried until crispy
    • Cooking spray
    • 2 large eggs
    • 1 medium tomato, thinly sliced
    • Salt and pepper, to taste
    • 1 small ripe avocado, peeled, seed removed and thinly sliced (you can sprinkly these with lemon or lime juice to keep it from turning brown)

    Instructions
     

    • Preheat the oven to 350° and line a small sheet pan with foil.
    • Lightly toast the english muffin halves in a toaster.
    • Place the English muffin halves with the inside facing up onto a foil-lined pan.
    • Place a slice of cheese onto each English muffin half and place it in the oven for 10 minutes.
    • While the cheese melts, fry your eggs to your liking, being careful not to break the yolk (I opted for sunny side up but this would also be great with over easy or over medium eggs). Set aside when finished.
    • Remove the English muffins from the oven when the time is up.
    • Place two slices of bacon onto each English muffin half (I break the bacon slices in half to help them fit better).
    • Top these with sliced tomatoes and sprinkle with salt and pepper to taste.
    • Next place the sliced avocado on top of each English muffin half.
    • Finally place a cooked egg onto each breakfast stack and sprinkle them with salt and pepper to taste. Serve immediately.
    Tried this recipe?Let us know how it was!

    If you tried this recipe please comment and rate it 🙂 I love hearing your feedback and answering your questions!

    Looking for some other tasty breakfast recipes?

    • Spinach and Feta Breakfast Puff Pastry Breakfast Pizza
    • Baked French Toast with Mixed Berries
    • Caprese Quiche
    • Zucchini Pancakes

    You can find a full index of my recipes here.

    Don’t forget to follow The Life Jolie on Pinterest for more recipe inspiration!

    Or if Pinterest isn’t your style, bookmark this post!

    Let’s keep the conversation going- join my Facebook group! 
    Turkey Tetrazzini

    Oct 17, 2018 · 24 Comments

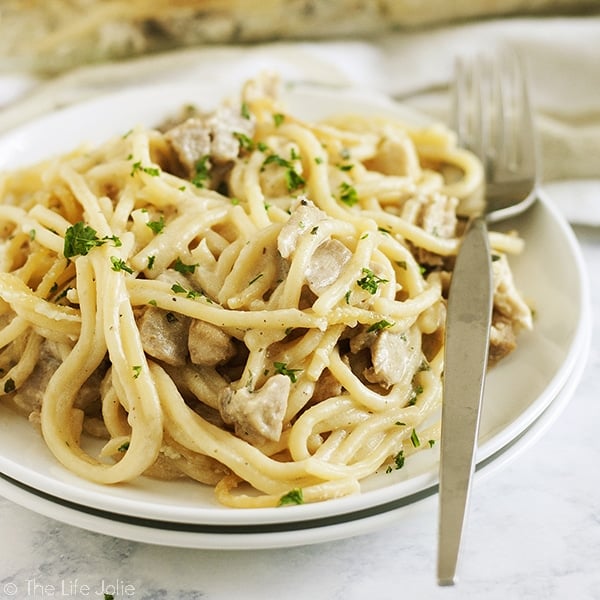
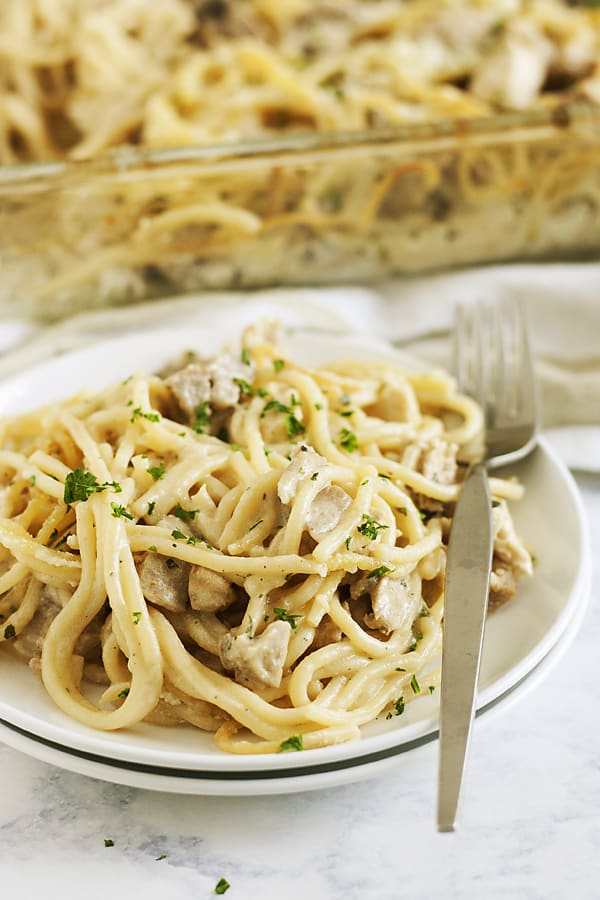
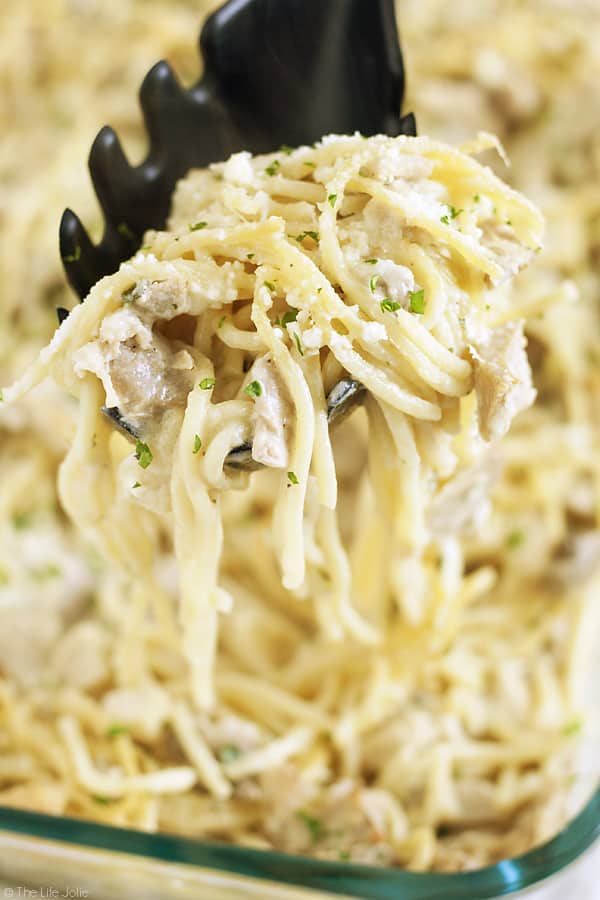
    A square image that is a close up of a plate of turkey tetrazzini with a fork in it

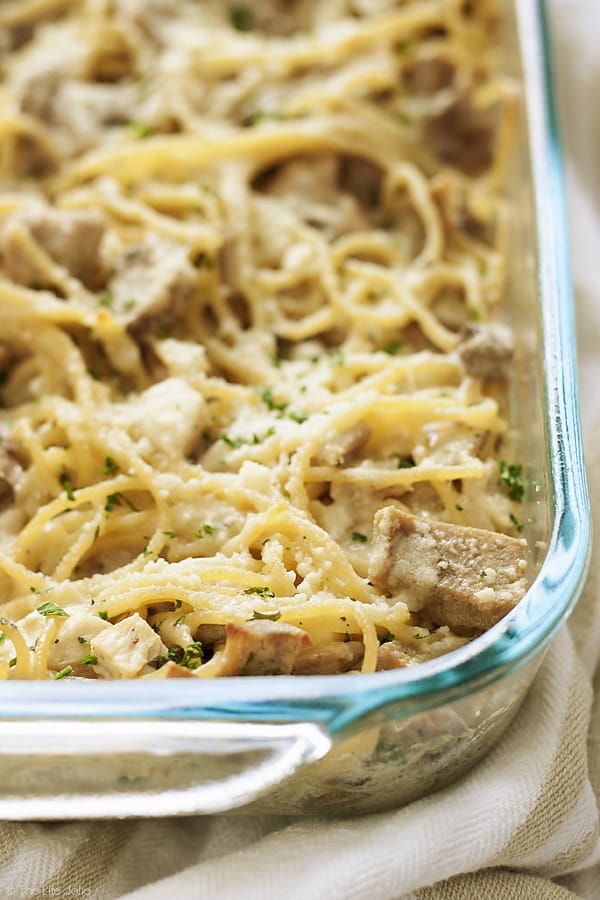
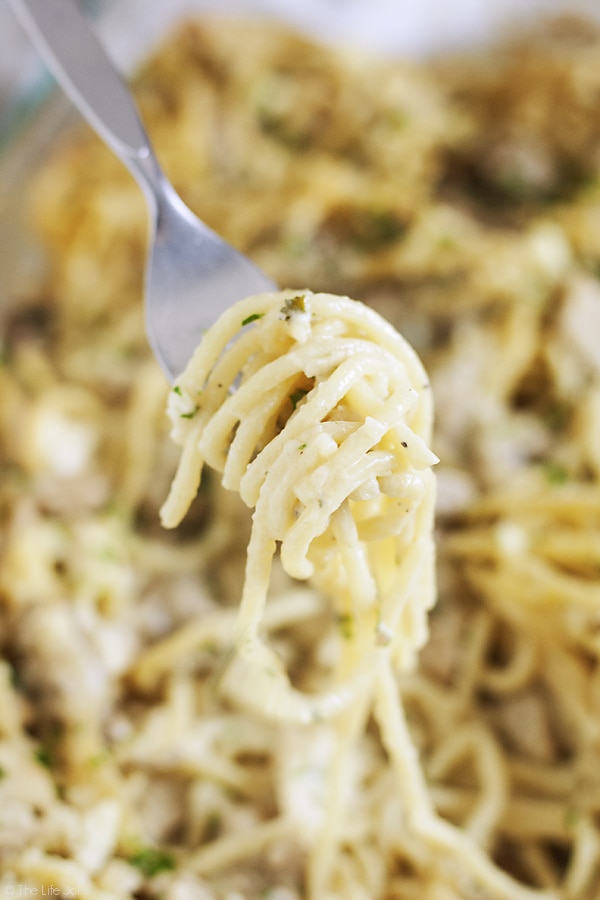
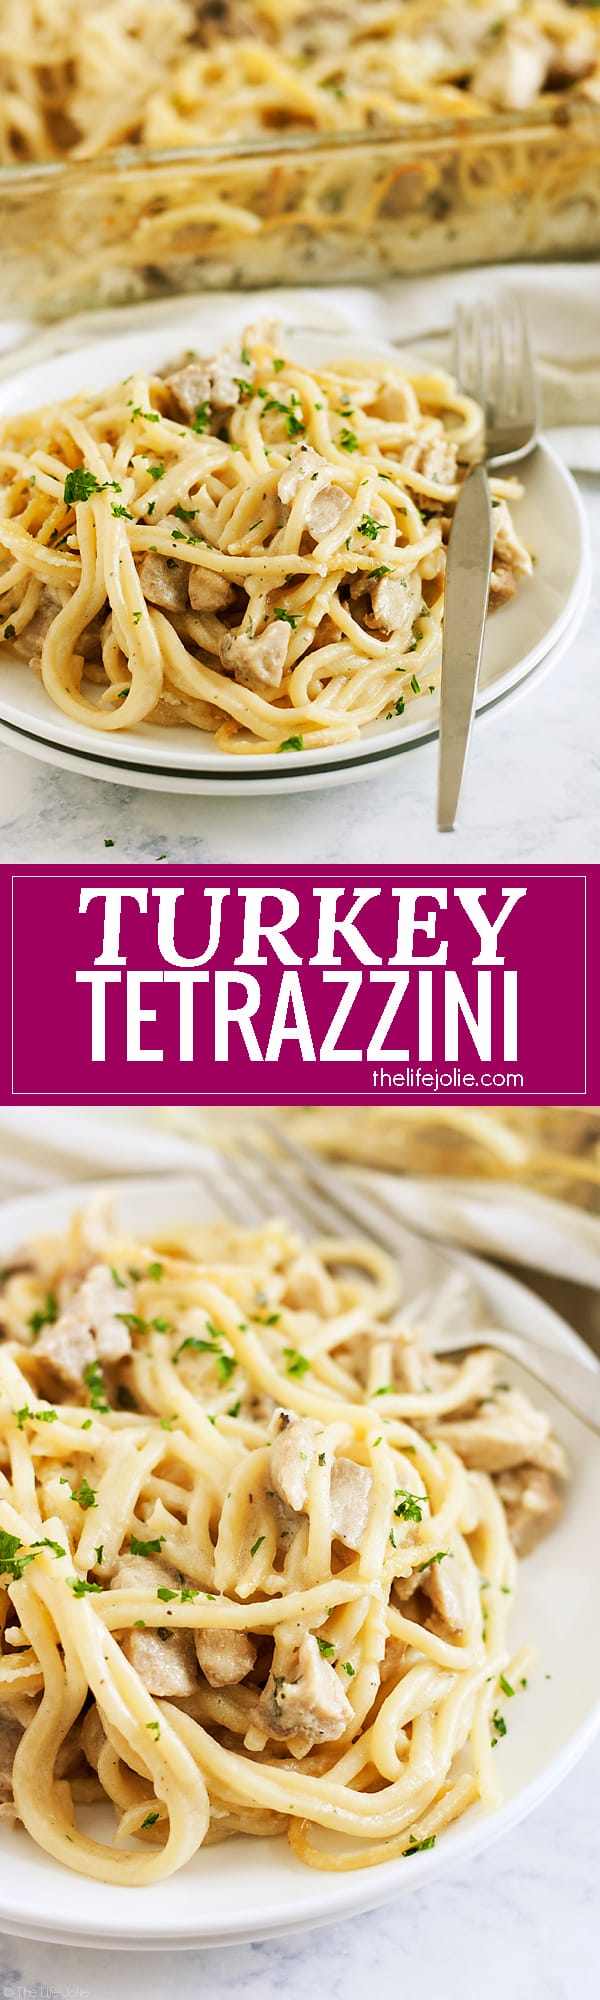
    This easy Turkey Tetrazzini is a classic family recipe! This is the best way to use leftover Turkey from Thanksgiving but is also great made as Chicken Tetrazzini. It's creamy but still light and delicious- the ultimate comfort food!

    This easy Turkey Tetrazzini is a classic family recipe! This is the best way to use leftover Turkey (or chicken!) from Thanksgiving. It's creamy but still light and delicious to eat- it's the ultimate comfort food!

    Turkey Tetrazzini

    This post contains Affiliate Links. Please see the disclaimer here.

    Here we are in the Thanksgiving homestretch. While everyone else is in crunch time trying to nail down their game plan and preparing everything for the big meal, I'm over here thinking about leftovers.

    Have you ever noticed that some people are super into leftovers while others are having none of it (literally)? I am a proud member of that first group who lives for leftovers. So as you can imagine, Thanksgiving to me is like the gift that keeps on giving. There is no shame in my leftover game.

    With my previous patterns of frenzied leftover eating in mind, it doesn't come as a surprise that I am thinking about leftovers right now. And I have the perfect leftover dish that is super simple to make and is creamy and comforting on any cold Autumn night (especially one that involves you hanging out in your PJ's, avoiding the Black Friday shopping rush!).

    This Turkey Tetrazzini recipe was my Grandma Eve's recipe. It is a beloved recipe in our family that has been enjoyed by all of us, long before I was even born.

    What could be more comforting than noodles with a creamy, sherry-laden sauce of mushrooms and tender turkey (or chicken!)? It's sprinkled with Romano cheese to add that extra oomph of flavor and then baked in the oven to let everything meld together into a perfectly luxurious but still not-too-heavy dish that your whole family will love.

    turkey tetrazzini

    Tips for making Turkey Tetrazzini

    • Cook your spaghetti al dente, as it will continue cooking a bit more as the casserole bakes.
    • I always taste the sauce before mixing it with the noodles and adjust the seasonings if needed.
    • This is best served right away, but the leftovers are still tasty.
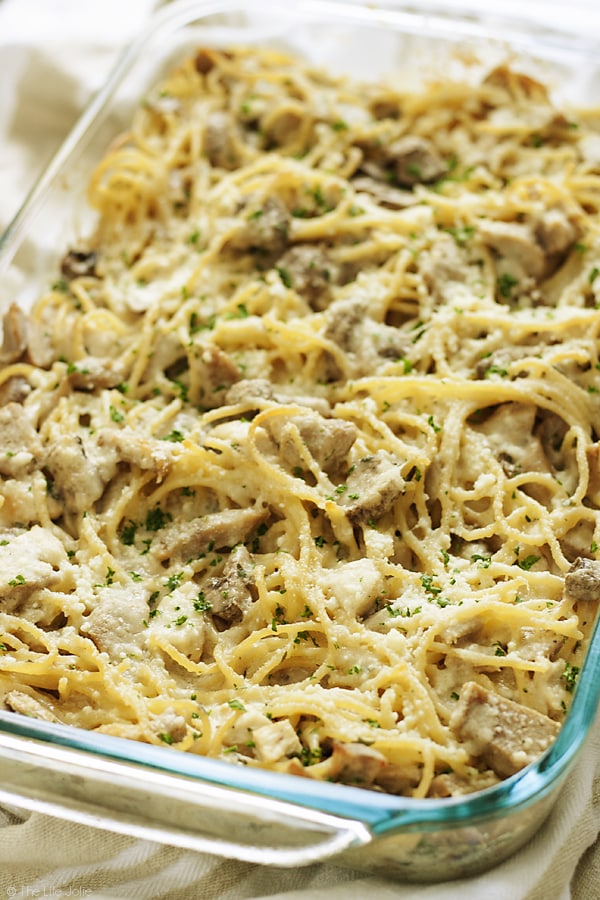
    turkey tetrazzini recipe

    Frequently asked questions about how to make Turkey Tetrazzini

    • What is a Turkey Tetrazzini? Tetrazzini is an American casserole-style dish made with a protein (in this case turkey), cream sauce, pasta, sherry or wine and mushrooms. Fun fact: It’s named for Luis Tetrazzini, an opera star, in the early 1900’s.
    • What goes well with Turkey Tetrazzini? I like to serve this with a green salad and a nice crisp glass of white wine.  I encourage you to watch some holiday-themed movies while you're eating it (too early? I think not!)!
    • How long do you cook Turkey Tetrazzini? I bake it for around 40 minutes, depending on your oven. You’ll know it’s done because it’s heated through and bubbly on the edges.
    • Can you freeze it? This is not the ideal dish to freeze as pasta and mushrooms don’t How long does it last in the refrigerator? This will last 3-4 days covered in the refrigerator.
    • Can I substitute chicken in this? Totally, this also makes an excellent Chicken Tetrazzini!
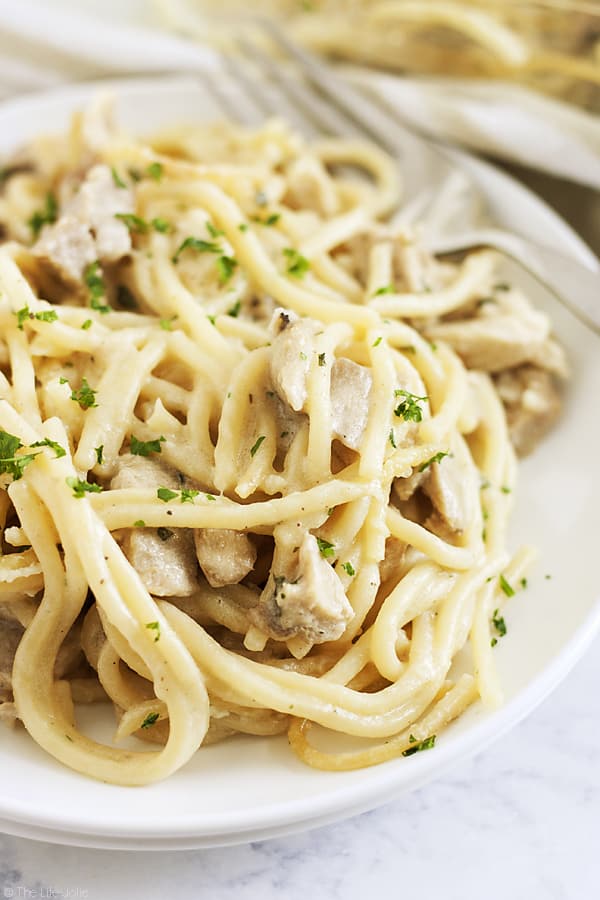
    easy turkey tetrazzini

    Helpful tools:

    1. Chef's knife
    2. Cutting board
    3. Cast iron dutch oven or this kind of dutch oven
    4. Wooden spoon
    5. Measuring cups
    6. Measuring spoons
    7. 9 x 13 pan
    turkey tetrazzini easy

    Hosting Thanksgiving?

    Discover the secret to hosting Thanksgiving without all the stress! Prepsgiving is your FREE guide to making a delicious Thanksgiving feast the easy way.

    A square image that is a close up of a plate of turkey tetrazzini with a fork in it

    Turkey Tetrazzini

    Jessy Freimann
    This easy Turkey Tetrazzini is a classic family recipe! This is the best way to use leftover Turkey from Thanksgiving but is also great made as Chicken Tetrazzini. It's creamy but still light and delicious- the ultimate comfort food!
    4.67 from 9 votes
    Print Recipe Pin Recipe
    Prep Time 15 minutes mins
    Cook Time 40 minutes mins
    Total Time 55 minutes mins
    Course Main Course
    Cuisine American
    Servings 8 servings
    Calories 352 kcal

    Equipment

    • 1 9 x 13 Pan
    • 1 mixing bowl
    • 1 saucepan
    • 1 Measuring cups and spoons

    Ingredients
      

    • 8 ounces spaghetti
    • ¼ cup salted butter (the original recipe called for margarine, but I prefer butter)
    • 2 Tablespoons all purpose flour
    • 2 cups chicken broth
    • ¾ cup half and half
    • 1-3 Tablespoons Sherry wine (optional)
    • 1 Tablespoon fresh parsley, chopped + some extra for garnish if desired
    • ½ teaspoon kosher salt
    • ⅛ teaspoon ground nutmeg
    • 1 pinch ground black pepper
    • 3 cups turkey, cooked and cubed (or you can use chicken)
    • 4 ounces mushrooms sliced (the original recipe called for a 4.5 ounce jar of mushrooms but I prefer fresh)
    • ½ cup Romano cheese, grated- or Parmesan cheese

    Instructions
     

    • Preheat oven to 350 degrees F.
    • Cook the spaghetti to al dente as per the package directions. I removed it a minute or two before the al dente time listed on my package since it will cook more in the oven. Drain and set aside.
    • In a dutch oven, melt butter. Stir in flour to make a roux and then add chicken broth, stirring constantly until the sauce has thickened.
    • Remove from heat and stir in the half & half, sherry, parsley, salt, nutmeg, and pepper until well combined. Taste for seasoning and adjust if necessary.
    • Toss in the pasta, turkey and mushrooms with sauce until everything is well coated.
    • Turn the mixture onto a 9" x 13" pan and sprinkle with the Romano cheese.
    • Bake uncovered for around 40 minutes or until bubbly and thoroughly heated. Sprinkle with chopped parsley and serve immediately.

    Notes

    Leftovers will last up to 3 days in the refrigerator.

    Nutrition

    Serving: 11servingCalories: 352kcalCarbohydrates: 25gProtein: 25gFat: 17gSaturated Fat: 8gPolyunsaturated Fat: 2gMonounsaturated Fat: 5gTrans Fat: 0.2gCholesterol: 94mgSodium: 566mgPotassium: 404mgFiber: 1gSugar: 2gVitamin A: 330IUVitamin C: 1mgCalcium: 118mgIron: 2mg
    Tried this recipe?Let us know how it was!


    chicken tetrazzini

    If you tried this recipe please comment and rate it 🙂 I love hearing your feedback and answering your questions! And if you make it please tag me on Instagram with @thelifejolie so I can share it <3

    Looking for some other things to make with leftover turkey recipes?

    • Baked Buffalo Chicken Slider
    • Copycat Panera Bread Napa Almond Chicken Salad
    • Easy Homemade Chicken Noodle Soup
    • Day-After-Thanksgiving Sandwich

    You can find a full index of my recipes here.

    Don’t forget to follow The Life Jolie on Pinterest for more recipe inspiration!

    Or if Pinterest isn’t your style, bookmark this post!

    Let’s keep the conversation going- join my Facebook group! 

    This easy Turkey Tetrazzini is a classic family recipe! This is the best way to use leftover Turkey (or chicken!) from Thanksgiving. It's creamy but still light and delicious to eat- it's the ultimate comfort food!

    2 Ingredient Applesauce

    Oct 16, 2018 · 2 Comments

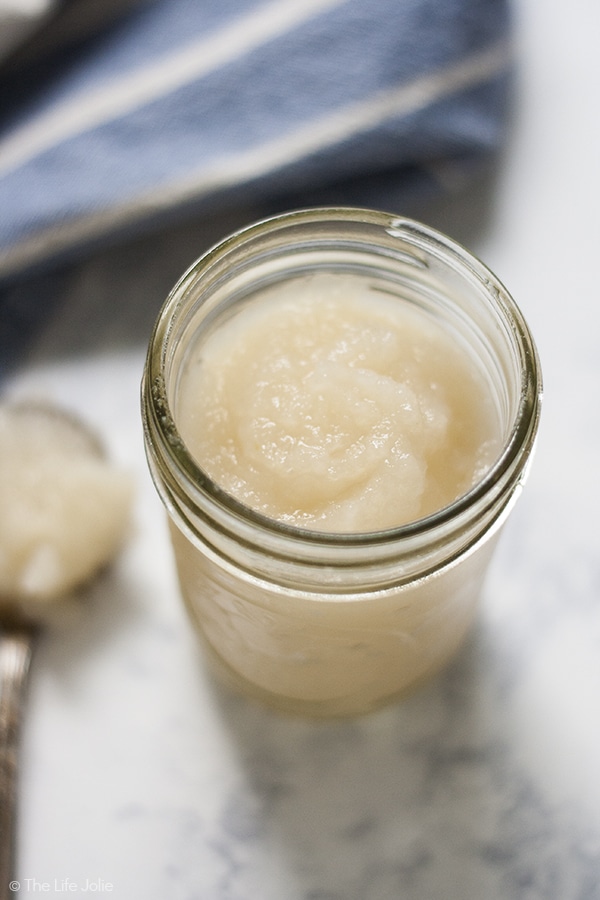
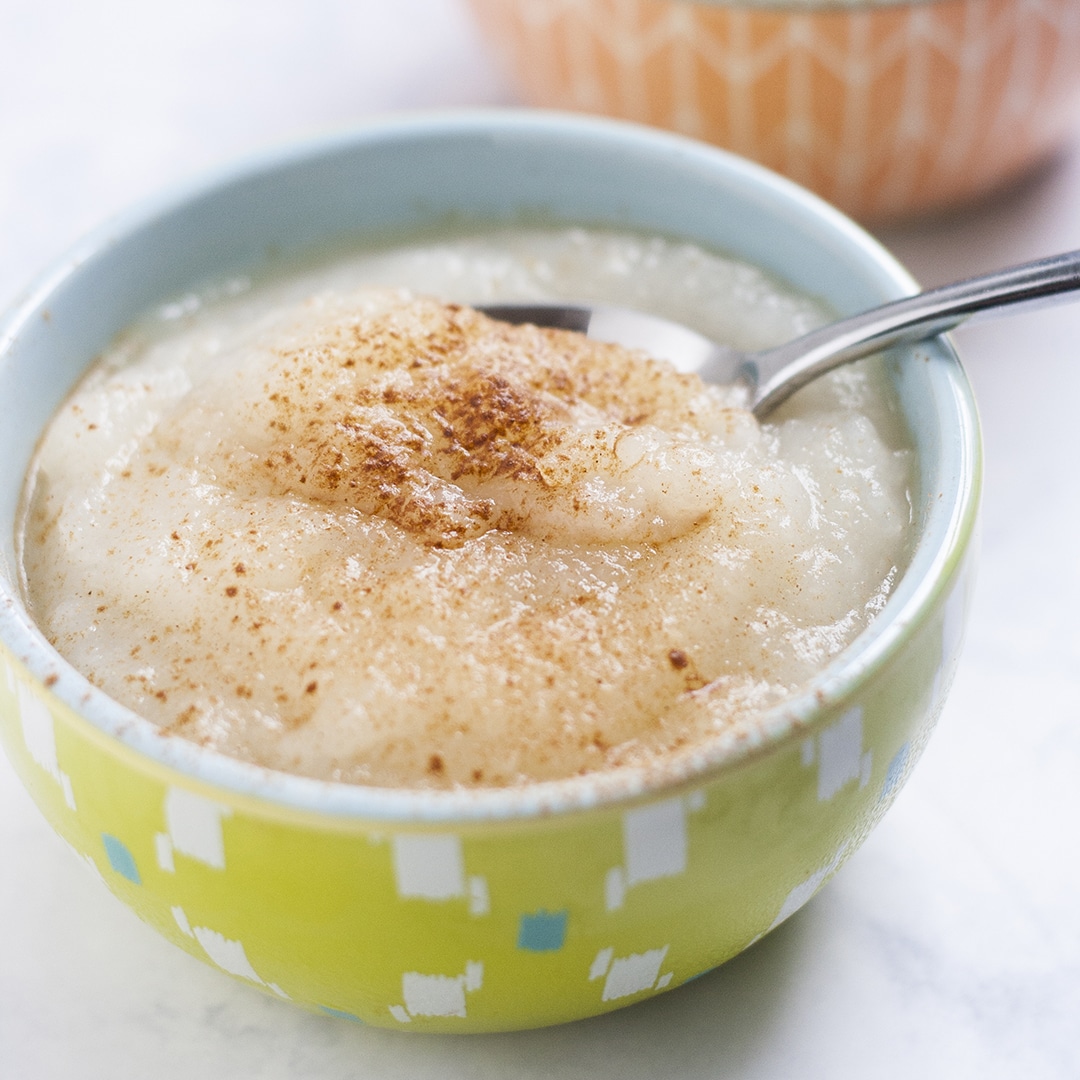
    homemade 2 Ingredient Applesauce

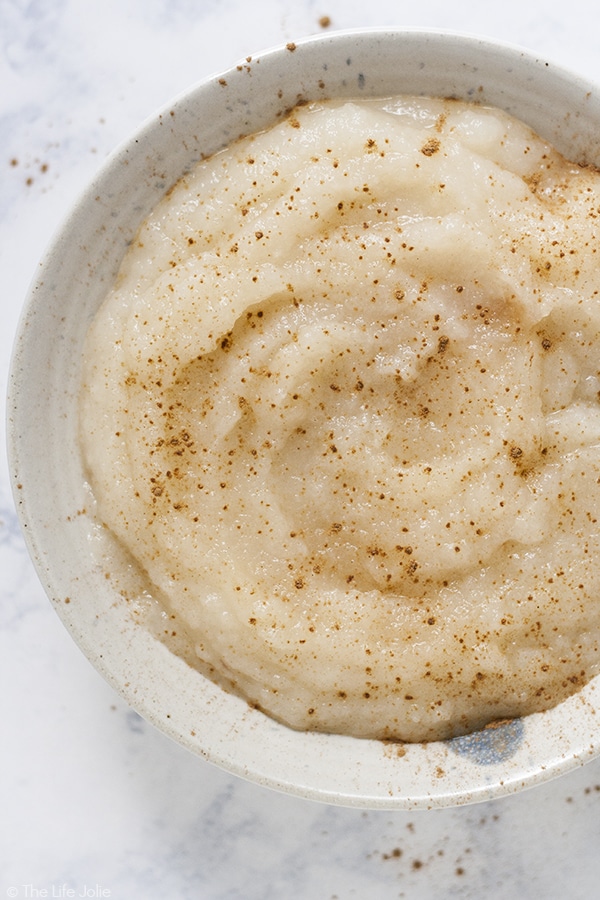
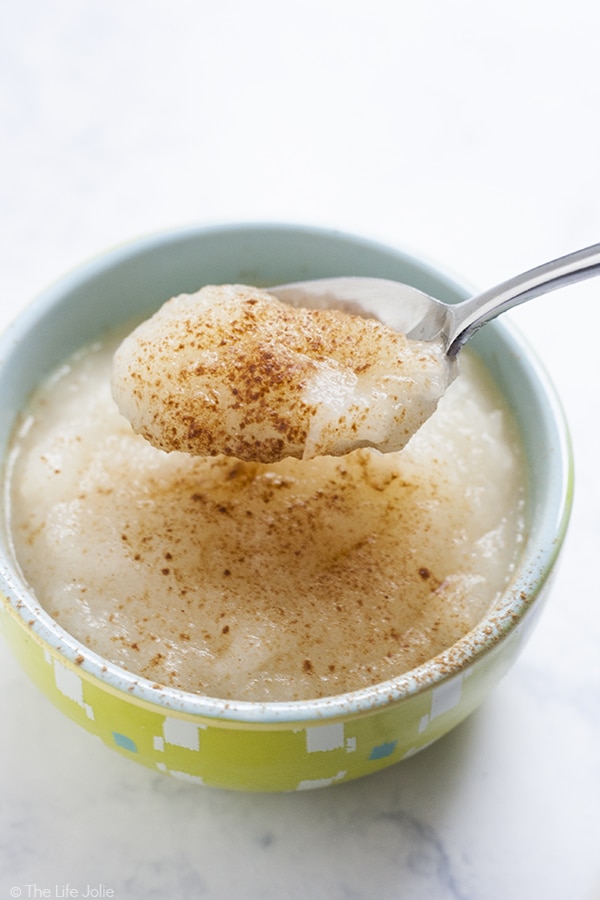
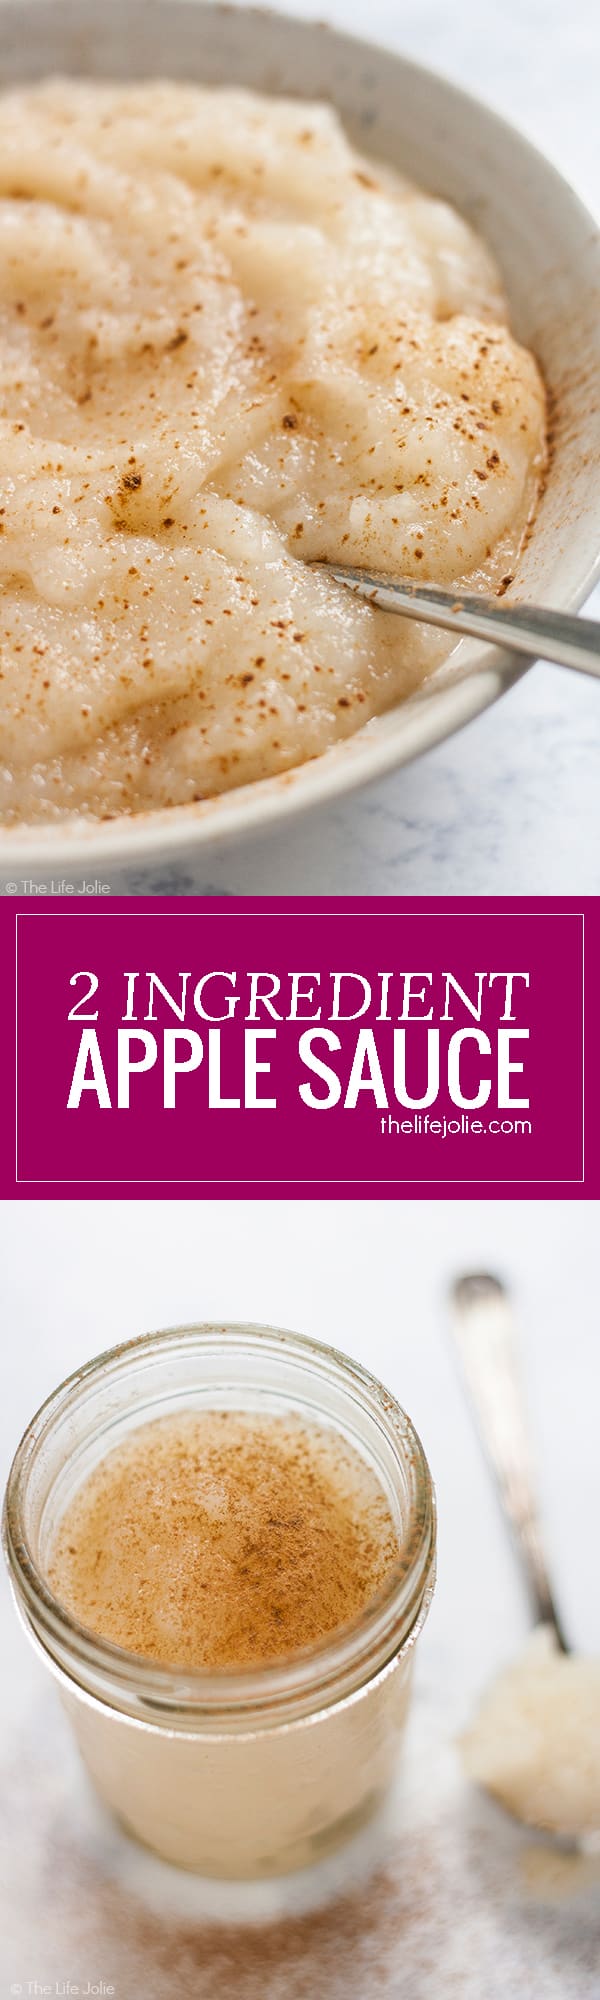
    This homemade 2 Ingredient Applesauce is one of quickest and most easy recipes ever! There is no added sugar which makes it super healthy and there are a ton of great ways you can use it.

    This homemade 2 Ingredient Applesauce is one of quickest and most easy recipes ever! There is no added sugar which makes it super healthy and there are a ton of great ways you can use it.

    2 Ingredient Applesauce

    This post contains Affiliate Links. Please see the disclaimer here.

    Other parts of the country have certain things that they do amazingly well. Northern California has wine. Georgia rocks the peaches. Washington kills it with the cherries. Here in Western New York, we pump out some pretty incredible apples. They're tasty all year around. But once the weather cools down and the leaves start changing colors, it is prime apple picking season. Our market has also been full of the most sweet, gorgeous apples. So we've been enjoying our fair share!

    Homemade applesauce has become a mainstay in our kitchen. In the past we’ve been lazy and buy the jarred applesauce. But lately, I have been making it myself and it couldn’t be easier. It takes 20 minutes, minimal effort and just 2 ingredients! My mom taught me how to make this and it is brilliant.

    You know what else I love about it? No added sugar. Now hopefully I haven't lost those of you with a sweet tooth. Hear me out. Apples are one of those fruits with a very high sugar content. That's actually how Manhattan got its nickname, The Big Apple. Because apples have tons of sugar in them and Manhattan has tons of money in it (I learned that fun fact many, many moons ago on one of these Circle Line Cruises around the island and it stuck with me!).

    applesauce recipe

    Tips for how to make homemade applesauce

    • Try to slice the apples thin, as the thinner they are, the quicker they’ll cook down.
    • I use an immersion blender to get the applesauce nice and smooth. You can also use a blender or food processor as well.
    • Once in a while I will throw some cinnamon on top, but I'm letting that be an optional ingredient since not everyone loves cinnamon.
    This homemade 2 Ingredient Applesauce is one of quickest and most easy recipes ever! The is no sugar added which makes it super healthy and it has plenty of uses! My whole family loves it!

    Frequently asked questions about this applesauce recipe

    • How long does homemade applesauce last? This lasts for up to a week or a little over a week in the refrigerator.
    • How do you make chunky applesauce? You can absolutely make this applesauce chunky, just keep a close eye on it while blending and go slow so it still has the texture you’d prefer.
    • What are some of the best ways to use this? This makes an incredibly refreshing side dish or dessert. It goes along beautiful with any meal of the day. I'm particularly fond of serving it with pork chops or potato pancakes.
    • Can you freeze it? It freezes beautifully.
    • Should I serve it cold or warm? It tastes delicious both warmed up or cold, it really comes down to personal preference.
    • What kind of apples are best for applesauce? A few of the best varieties are Braeburn, Cortland, Jonagold, Jonathan, McIntosh, Crispin, Ida Red, Gala, Fuji and Golden Delicious. Some people say you shouldn’t use pie apples for applesauce but I think it really comes down to personal preference in terms of flavor (for example, you’ll find that Cortland apples give you a more tart applesauce than Gala apples).
    how to make applesauce

    Helpful tools:

    1. Chef's knife
    2. Cutting board
    3. Large pot
    4. Wooden spoon
    5. Immersion blender

    Hosting Thanksgiving?

    Discover the secret to hosting Thanksgiving without all the stress! Prepsgiving is your FREE guide to making a delicious Thanksgiving feast the easy way.

    homemade 2 Ingredient Applesauce

    2 Ingredient Applesauce

    Jessy Freimann
    This homemade 2 Ingredient Applesauce is one of quickest and most easy recipes ever! There is no added sugar which makes it super healthy and there are a ton of great ways you can use it.
    No ratings yet
    Print Recipe Pin Recipe
    Prep Time 5 minutes mins
    Cook Time 15 minutes mins
    Total Time 20 minutes mins
    Course Condiment, Side Dish
    Cuisine American
    Servings 4 servings
    Calories 237 kcal

    Equipment

    • 1 Large pot
    • 1 Measuring cups and spoons
    • 1 Wooden Spoons
    • 1 cutting board
    • 1 chefs knife

    Ingredients
      

    • 10 apples peeled and cored
    • ½ cup water Start with ¼ and add more if you need to
    • ¼ teaspoon Ground cinnamon (optional)

    Instructions
     

    • Cut the apples into quarters and slice them as thinly as possible (the thinner they are, the quicker they cook down).
    • Place them into a pot along with ¼ cup of water (keep an eye on it and if you feel it's not enough you could always add an additional ¼ cup of water. The key is you don't want it to be too watery).
    • Bring it to a boil and then reduce the heat to medium low. Simmer, stirring frequently for around 15 minutes or until the apples are soft and beginning to break down.
    • Use and immersion blender to blend the apples. You can do then smooth or chunk, depending on your taste.
    • Sprinkle with Cinnamon if you'd like and enjoy warm or cold!

    Notes

    This lasts just over a week in the refrigerator.

    Nutrition

    Serving: 1servingCalories: 237kcalCarbohydrates: 63gProtein: 1gFat: 1gSaturated Fat: 0.1gPolyunsaturated Fat: 0.2gMonounsaturated Fat: 0.03gSodium: 6mgPotassium: 487mgFiber: 11gSugar: 47gVitamin A: 246IUVitamin C: 21mgCalcium: 29mgIron: 1mg
    Tried this recipe?Let us know how it was!
    best apples for applesauce

    If you tried this recipe please comment and rate it 🙂 I love hearing your feedback and answering your questions!

    Looking for some other great apple recipes?

    • Apple Bacon Brie Bites
    • Apple Spice Muffins
    • Cranberry Apple Crisp
    • Bloomin' Baked Caramel Apples

    You can find a full index of my recipes here.

    Don’t forget to follow The Life Jolie on Pinterest for more recipe inspiration!

    Or if Pinterest isn’t your style, bookmark this post!

    Let’s keep the conversation going- join my Facebook group! 
    This homemade 2 Ingredient Applesauce is one of quickest and most easy recipes ever! The is no sugar added which makes it super healthy and it has plenty of uses! My whole family loves it!

    Mini Pumpkin Cheesecake Recipe

    Oct 14, 2018 · 2 Comments

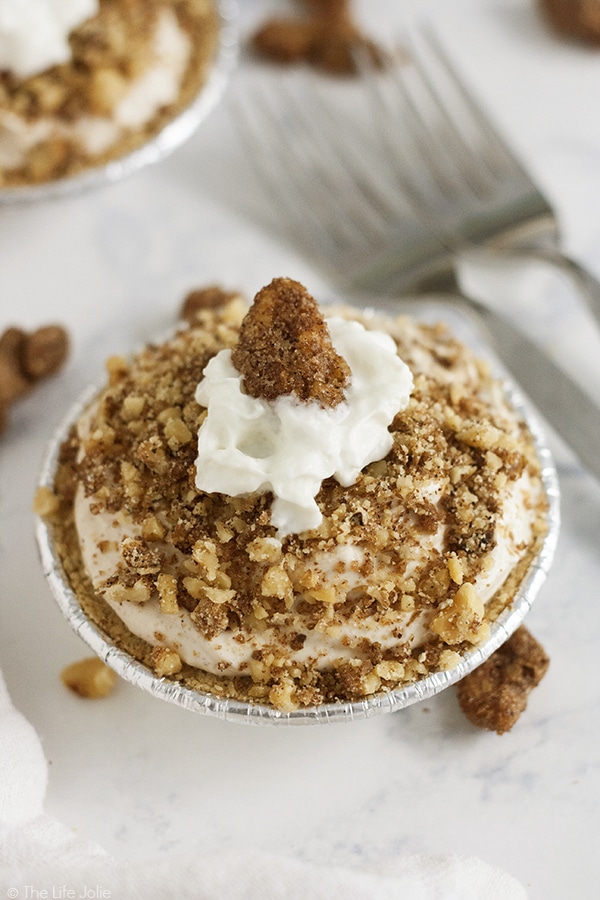
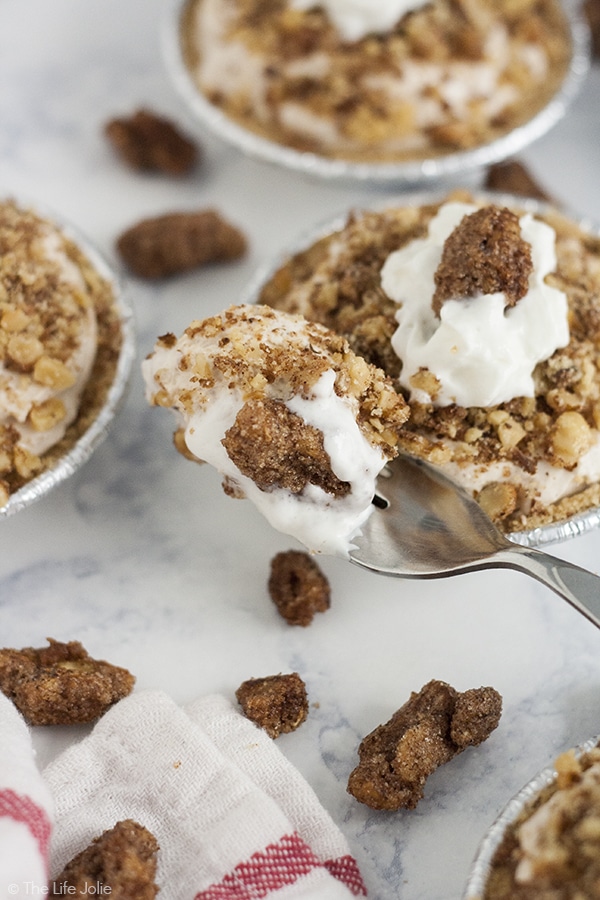
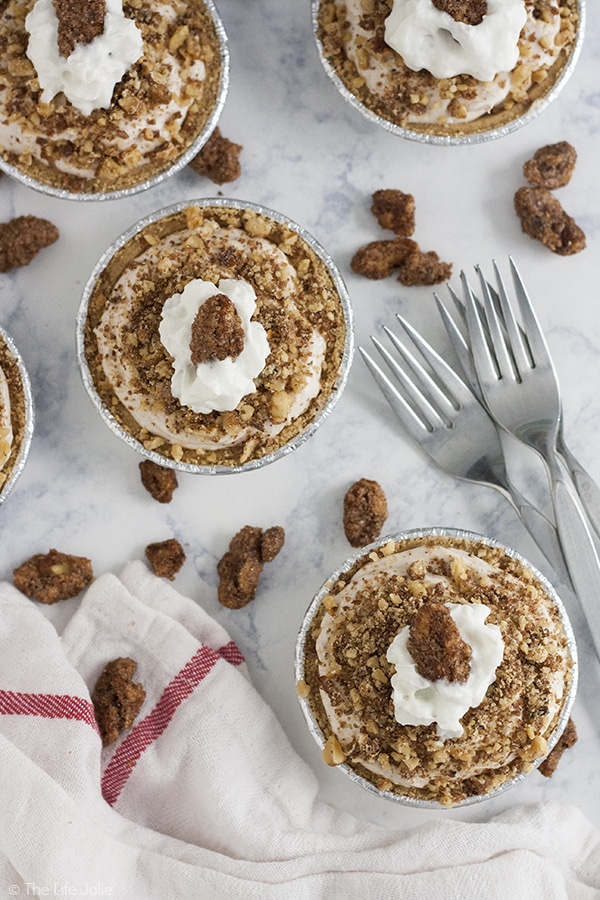
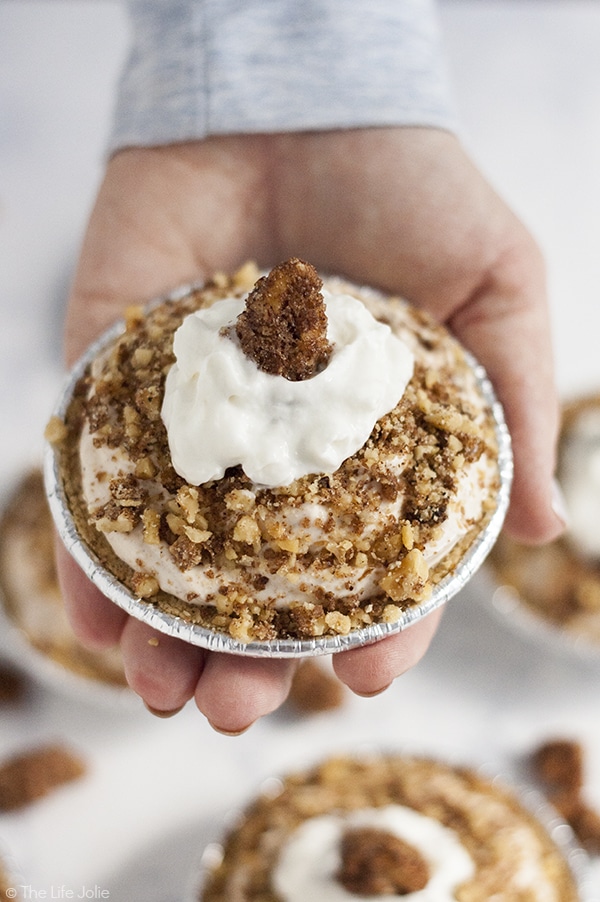
    Make this Mini Pumpkin Cheesecake Recipe for the holidays- they're no-bake, seriously easy and totally delicious! Made with pumpkin yogurt, cream cheese, powdered sugar, pumpkin pie spice and vanilla in a graham cracker crust with candied pecans on top, these are sure to please the whole family!

    Make this Mini Pumpkin Cheesecake Recipe for the holidays- they're no-bake, seriously easy and totally delicious!

    Make this Mini Pumpkin Cheesecake Recipe for the holidays- they're no-bake, seriously easy and totally delicious! Made with pumpkin yogurt, cream cheese, powdered sugar, pumpkin pie spice and vanilla in a graham cracker crust with candied pecans on top, these are sure to please the whole family!

    Mini Pumpkin Cheesecake Recipe

    This post contains Affiliate Links. Please see the disclaimer here.

    If you love food as much as I do, then you may often find it hard to choose one favorite in a broad category of foods. This is a constant dilemma in my life (the struggle is real!). Being a lover of all things cooking and recipe-creation related, there is an obvious silver lining in this situation: the ability to create recipes that combine some amazing foods. One example would be these no bake pumpkin cheesecake mini pies.

    Think about it, you’ve got the genius combination of two amazing desserts: all-American pumpkin pie and creamy cheesecake. Delicious flavors like pumpkin and candied pecans. to get you in the mood for fall festivities and the upcoming holiday season. Minimal ingredients for maximum flavor. They come together quickly and are perfect for the holidays. What’s not to like?!

    I made these using Pumpkin Pie flavored yogurt. This helps make it healthier while adding so much amazing flavor! When you combine this yogurt with cream cheese and a few other great ingredients the result is the most deliciously easy pumpkin cheesecake filling. It's smooth and delicious with the great pumpkin flavor that everyone seems to crave at this time of year.

    Now I could have just stopped there, but there are a few things that make these even better. Crushed candied pecans add the perfect amount of crunch. And what pie would be complete without whipped cream? I can't think of a better way to make pie even more delicious than by adding a generous dollop. It looks gorgeous and tastes even better!

    pumpkin pie cheesecake

    Tips for making mini pumpkin pie cheesecake

    • Use a stand mixer or hand mixer to make the filling. Work smarter, not harder.
    • When I spoon the filling into the mini pie crusts, I smoothed it quickly then used the spatula to swirl the tops. Don’t be worried about making it perfect, you’ll be sprinkling the broken up candied pecans over the top.
    • I made life easier by using canned whipped cream, but it doesn’t hold it’s shape as long as homemade whipped cream, so be sure to do that step just before serving.
    • Use a meat mallet to crush up the candied pecans. I place them in a plastic zipper bag first to keep things clean.

    cream cheese pumpkin pie

    Frequently asked questions about this mini pumpkin cheesecake recipe

    • Can I make one big pie instead? Sure! Purchase a regular size graham cracker crust and pace the filling in there. I still recommend adding the toppings just before serving, though.
    • What if I don’t want to use nuts? No problem, leave them out. It’ll still be delicious!
    • Can I freeze pumpkin cheesecake? Yes! Just make sure you pull it out 10-15 minutes prior to serving to make it a little easier to cut.
    • Do I need to cover these in the refrigerator if I’m not serving them right away? Yes, that would be a good idea.
    • Will the cheesecake firm up in the fridge? Not a ton. No bake cheesecake tends to be softer than a baked cheesecake. If you want it to be firm, I’d recommend freezing it (which would also be so good, just a different texture).
    • Can I ditch the crust and serve this as a pumpkin cheesecake dip? Yes, it would be a delicious dip! I’d serve it with whole graham crackers on the side for dipping.

    pumpkin cream pie

    Helpful tools:

    1. Meat mallet
    2. Measuring cups
    3. Measuring spoons
    4. Mixing bowl
    5. Spatula
    6. Stand mixer or Hand mixer

    Make this Mini Pumpkin Cheesecake Recipe for the holidays- they're no-bake, seriously easy and totally delicious! Made with pumpkin yogurt, cream cheese, powdered sugar, pumpkin pie spice and vanilla in a graham cracker crust with candied pecans on top, these are sure to please the whole family!

    Mini Pumpkin Cheesecake Recipe

    Jessy Freimann
    Make this Mini Pumpkin Cheesecake Recipe for the holidays- they're no-bake, seriously easy and totally delicious!
    No ratings yet
    Print Recipe Pin Recipe
    Prep Time 10 minutes mins
    Total Time 10 minutes mins
    Course Dessert
    Cuisine American
    Servings 6 servings
    Calories 103 kcal

    Equipment

    • 1 Measuring cups and spoons
    • 1 Spatula
    • 1 mixing bowl

    Ingredients
      

    • 15.9 ounces Pumpkin flavored yogurt 3 small containers
    • 6 ounces cream cheese, softened (you can zap it for 30 seconds in the microwave)
    • 1 teaspoon pure vanilla extract
    • 1 teaspoon pumpkin pie spice
    • 2 Tablespoons confectioner's sugar
    • 6 mini graham cracker crusts (or one large one)
    • ½ cup candied pecans, crushed + 6 of the pretties
    • 1 can whipped topping

    Instructions
     

    • Place the yogurt, cream cheese, vanilla extract, pumpkin pie seasoning and the confectioner's sugar into a large bowl and beat with mixer until well combined (about a minute or two).
    • Spoon the yogurt mixture into the mini graham cracker crusts and use the spatula to smooth and swirl the tops. Set aside.
    • Sprinkle crushed candied pecans onto the top of each mini cheesecake. Refrigerate covered until you're ready to serve.
    • Spray a generous dollop of whipped topping onto the top of each mini cheesecake and garnish with a whole candied pecan. Serve immediately.

    Notes

    Leftovers last 3 days in the refrigerator.

    Nutrition

    Serving: 1servingCalories: 103kcalCarbohydrates: 4gProtein: 2gFat: 10gSaturated Fat: 6gPolyunsaturated Fat: 0.4gMonounsaturated Fat: 3gCholesterol: 29mgSodium: 89mgPotassium: 41mgFiber: 0.05gSugar: 1gVitamin A: 382IUVitamin C: 0.1mgCalcium: 30mgIron: 0.1mg
    Tried this recipe?Let us know how it was!

    If you tried this recipe please comment and rate it 🙂 I love hearing your feedback and answering your questions!

    Other easy pumpkin dessert recipes include:

    • Cream Cheese Pumpkin Crunch Cake
    • Pumpkin Chocolate Chip Bread
    • White Chocolate Macadamia Nut Pumpkin Cookies
    • Pumpkin Spice Latte Cake

    You can find a full index of my recipes here.

    Don’t forget to follow The Life Jolie on Pinterest for more recipe inspiration!

    Or if Pinterest isn’t your style, bookmark this post!

    Let’s keep the conversation going- join my Facebook group! 
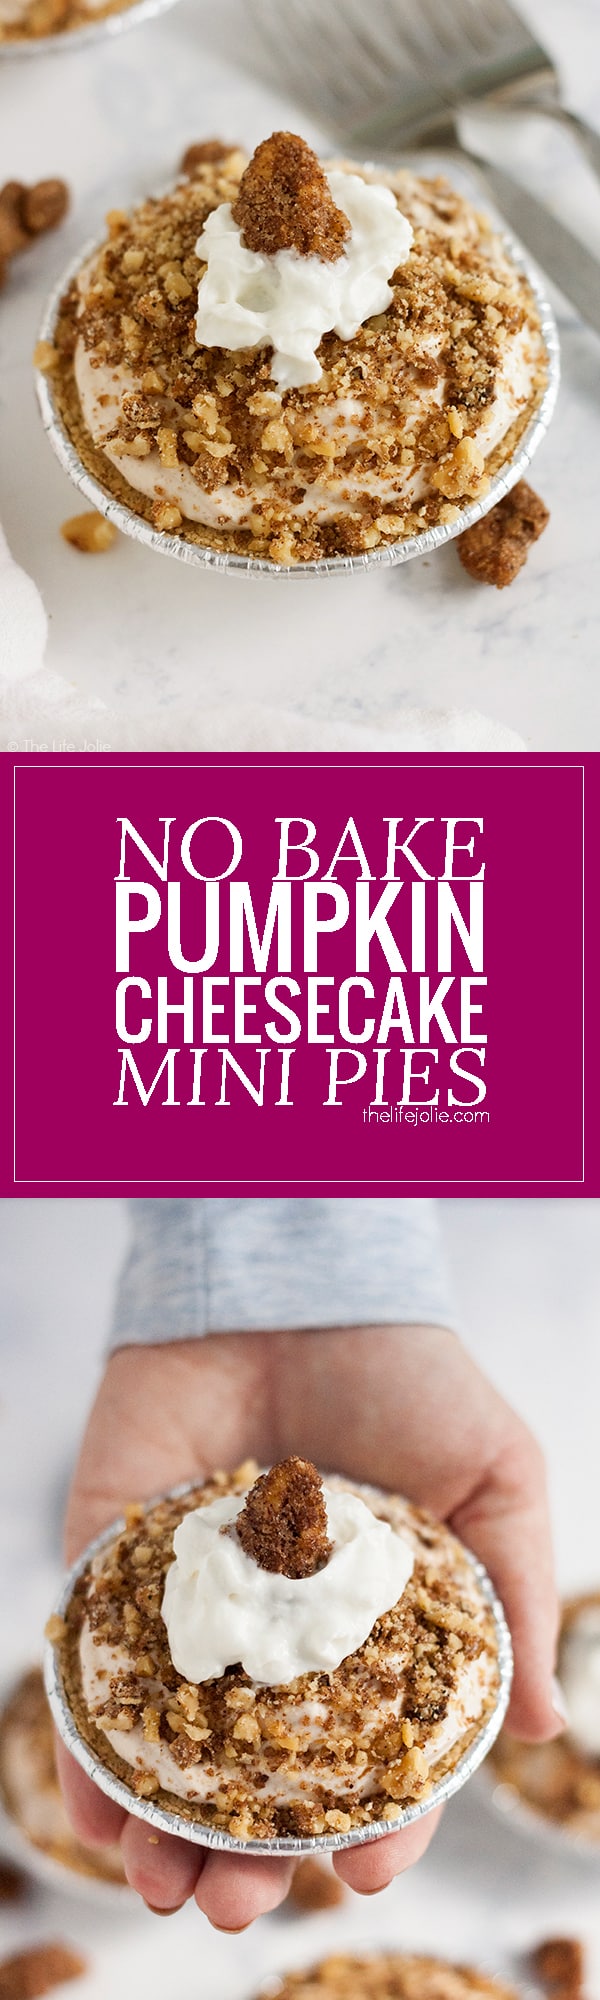
    This No Bake Pumpkin Cheesecake Mini Pies recipe is such an easy fall dessert option! A few simple ingredients (including some secret ingredients that allow this to be a no bake recipe) and you've got a delicious dessert that's quick enough to whip up for an afternoon snack but decadent enough to make for the holidays! #ad

    Baked Chicken Cordon Bleu

    Oct 7, 2018 · Leave a Comment

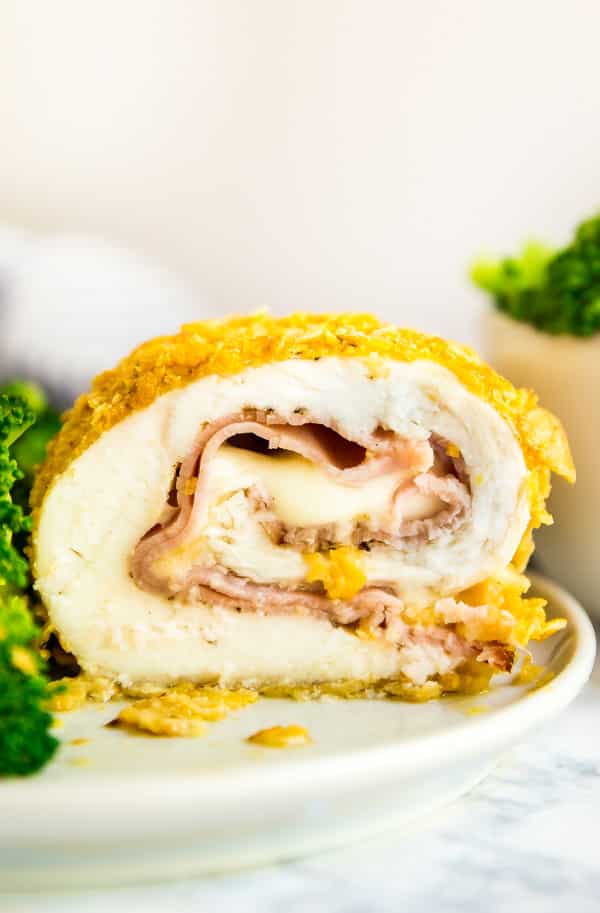
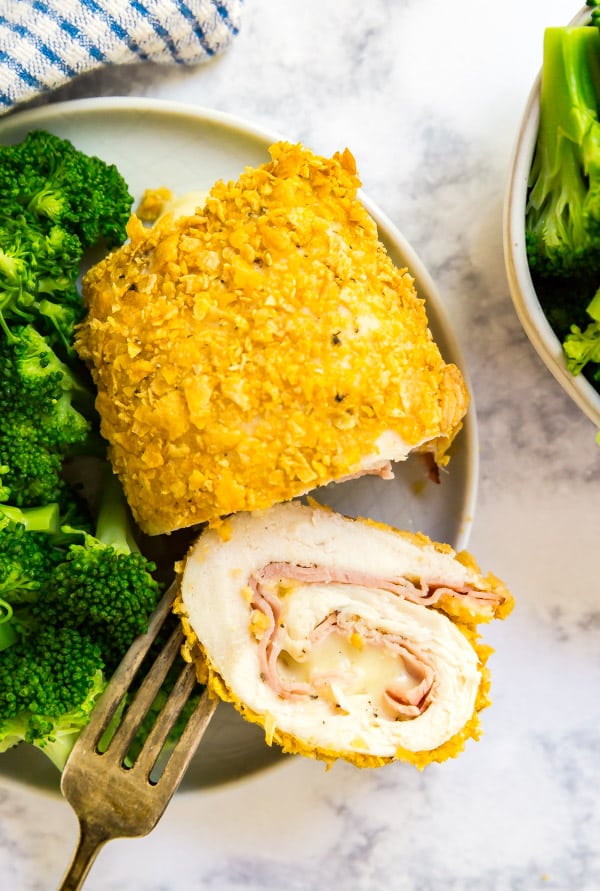
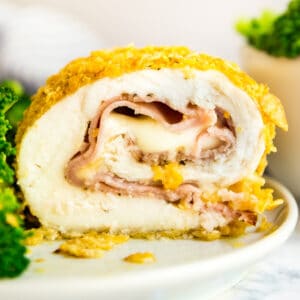
    This Baked Chicken Cordon Bleu is easy to make and so delicious. Made with chicken, corn flakes, ham and Swiss cheese, it's a weeknight meal that will wow your family!

    This Baked Chicken Cordon Bleu is easy to make and so delicious. It's a weeknight meal that will wow your family!

    This Baked Chicken Cordon Bleu is easy to make and so delicious. Made with chicken, corn flakes, ham and Swiss cheese, it's a weeknight meal that will wow your family!

    Baked Chicken Cordon Bleu

    This post contains Affiliate Links. Please see the disclaimer here.

    Growing up, I wasn't a huge fan of Swiss cheese. I was ok with it, it just wasn't my favorite. But there was one recipe that could get me to happily eat Swiss cheese and ask for more, every single time and that was my Grandma Eve's Chicken Cordon Bleu recipe.

    Now I've seen a variety of different ways to prepare Chicken Cordon Bleu. My sister's boyfriend makes a creamy, rich sauce that looks seriously delicious (still no invite, Les!!). I'e even heard of people making Chicken Cordon Bleu casserole, which sounds like an excellent idea, that I should probably add to my list of recipes to develop (by the way, please email me if you have any requests- I want to make things that you guys want to cook!).

    But today, I'm keeping things super simple, just the way my Grandma did. Thin slices of tender chicken breast rolled around savory ham and Swiss cheese (I like to use Lacey Swiss!) and breaded in a crispy coat of Corn Flakes cereal. It's pretty minimal work and maximum flavor!

    easy chicken cordon bleu

    Tips for making Cordon Bleu Chicken

    • You want your chicken to be nice and thin for easy rolling, so make sure to filet each chicken breast by laying it onto the cutting board and using a sharp knife to cut it horizontally into two thin pieces that are around the same thickness. Then cover them in saran wrap and use the flat side of a meat mallet to pound them to be of uniform thickness, around ⅛ of an inch.
    • Be sure to season both sides of the chicken liberally with salt and pepper before rolling them. Trust me, this does great things for the flavor of the whole dish.
    • Make sure you crush the corn flakes into crumbs. The easiest way to do this is by putting them into a plastic zipper bag, sealing it and using the meat mallet or rolling pin to crush them. You could also use a food processor, just don't over process them.
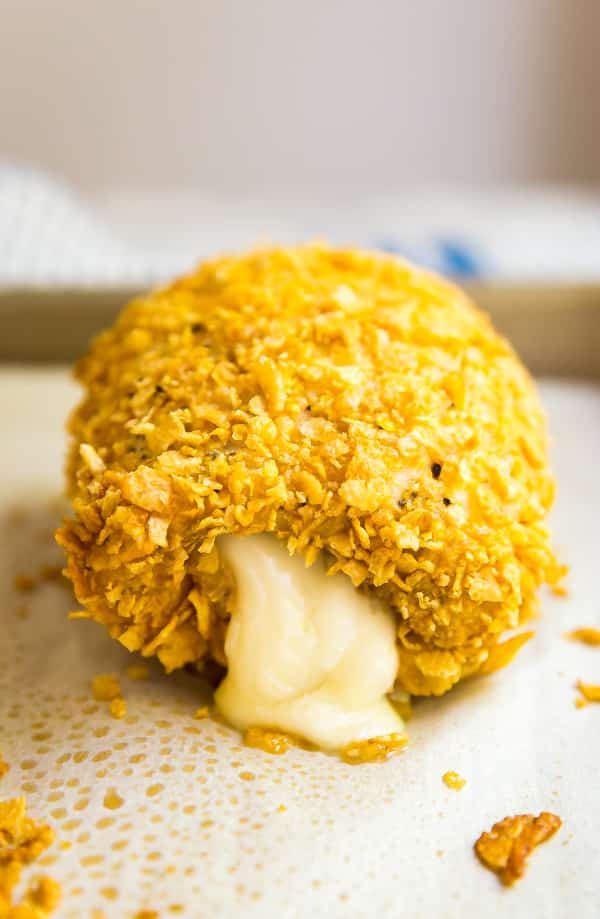
    • When rolling your chicken pieces, try to keep the cheese and ham toward the middle of the chicken pieces so it doesn't come out of the sides. I folded my ham and broke the cheese in half to make pieces that aren't as wide.
    • Carefully use a toothpick to keep the seam shut while you bread the chicken rolls.
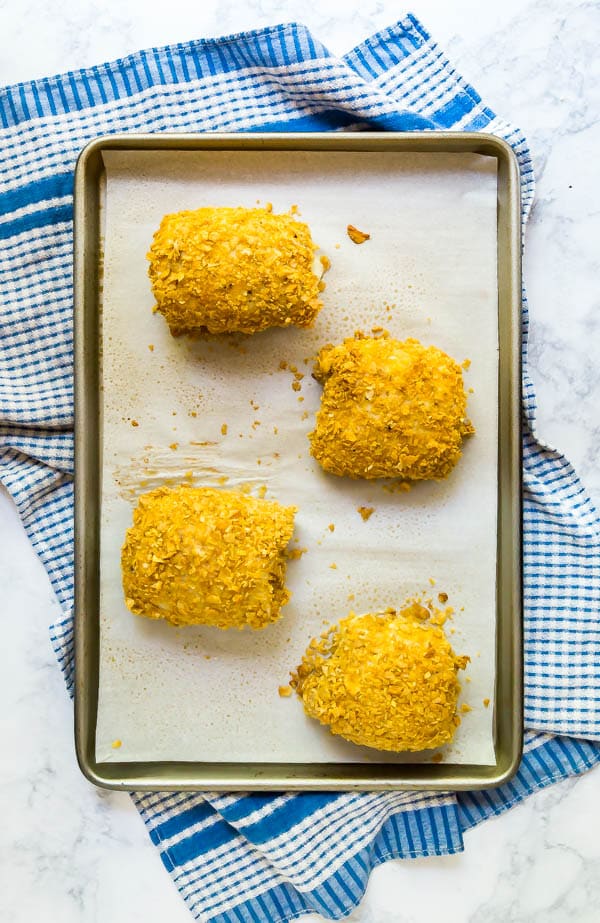
    • Dredge the chicken rolls in flour, then beaten egg, then the crushed corn flakes. Be sure to make sure that each of these components gets into the sides where you can see the chicken was rolled. I used my fingers to make sure they got in there before gently tapping off the excess.
    • Before placing the breaded chicken rolls onto the pan, carefully remove the toothpick and place them onto the pan seam side down.
    • Bake until they temp out around 160 degrees F. The temperature will continue to rise as they rest but will still be tender.
    • Rest the chicken pieces for 10 minutes to allow the juices to redistribute and crossover cooking to occur. Then serve immediately.
    • These can totally be assembled ahead and hang out covered in the fridge until you're ready to bake and serve them.
    • The leftovers are still good but these are best served right away.

    how to make chicken cordon bleu

    Helpful tools:

    1. Chef's knife
    2. Cutting board
    3. Measuring cups
    4. Sheet pan
    5. Spatula
    6. Meat mallet
    7. Bowls

    chicken cordon bleu

    This Baked Chicken Cordon Bleu is easy to make and so delicious. Made with chicken, corn flakes, ham and Swiss cheese, it's a weeknight meal that will wow your family!

    Baked Chicken Cordon Bleu

    Jessy Freimann
    This Baked Chicken Cordon Bleu is easier than you could ever imagine and so delicious. It's a weeknight meal that will wow your family!
    No ratings yet
    Print Recipe Pin Recipe
    Prep Time 10 minutes mins
    Cook Time 40 minutes mins
    Resting time 10 minutes mins
    Total Time 50 minutes mins
    Course Main Course
    Cuisine American
    Servings 4 servings

    Ingredients
      

    • Cooking spray
    • 2 large boneless skinless chicken breasts, filet into 4 pieces and pound them to between ⅛-1/4 inch
    • Salt and pepper, to taste
    • 4 slices deli ham
    • 4 slices Swiss cheese (I used Lacey Swiss)
    • ½ cup flour
    • 2 large eggs, beaten
    • 2 cups cornflakes, crushed

    Instructions
     

    • Preheat the oven to 350 degrees and line a sheet pan with parchment. Set aside.
    • Season both sides of the chicken pieces with salt and pepper to taste.
    • Fold ham and Swiss cheese to fit inside of the chicken place onto the middle each filet.
    • Carefully and tightly roll each piece of chicken around the ham and cheese being careful not to let any come out the sides. Secure the seam with a tooth pick (be sure to let a decent amount to the toothpick stick out since you'll be removing it after breading).
    • Dredge each chicken piece first in flour, then egg, then crushed corn flakes. Be sure to use your fingers to get each component into the sides of the chicken pieces where it's rolled so that everything is completely covered and gently tap off the excess. 
    • Carefully remove the toothpick and place each breaded chicken roll onto the prepared pan, seam side down. Be sure to leave some space between then so they aren't touching.
    • Cover loosely with foil and bake for 20 minutes.
    • Remove the foil and return the pan to the oven to bake for another 20 minutes of until they reach an internal temperature of 160 degrees.
    • Rest for 10 minutes and serve immediately.
    Tried this recipe?Let us know how it was!

    If you tried this recipe please comment and rate it 🙂 I love hearing your feedback and answering your questions!

    Other awesome chicken dinner recipes include:

    • Champagne Braised Chicken Thighs
    • 40 Minute One Pot Balsamic Chicken Skillet
    • Tarragon Chicken
    • Chicken Cutlets

    You can find a full index of my recipes here.

    Don’t forget to follow The Life Jolie on Pinterest for more recipe inspiration!

    Or if Pinterest isn’t your style, bookmark this post!

    Let’s keep the conversation going- join my Facebook group! 
    Salad with Shredded Brussel Sprouts Recipe

    Sep 30, 2018 · Leave a Comment

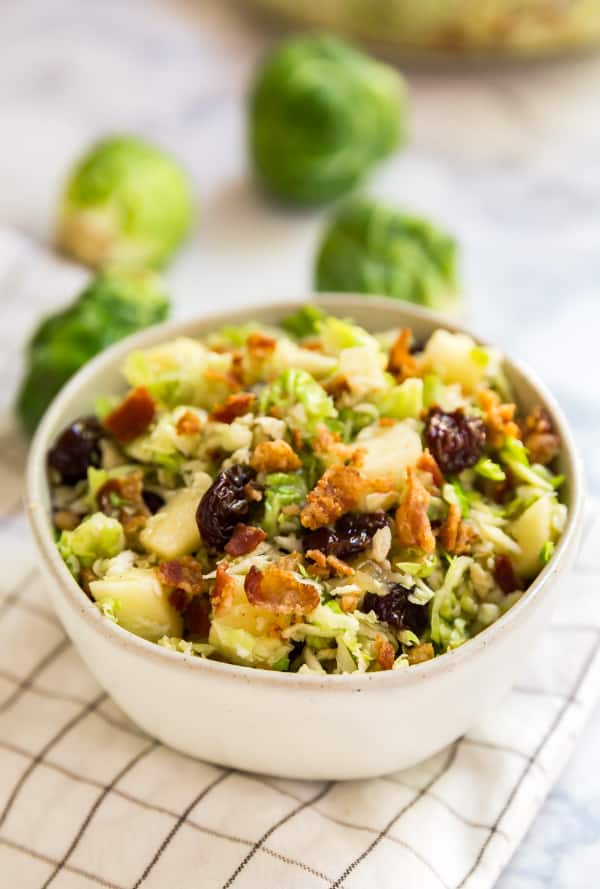
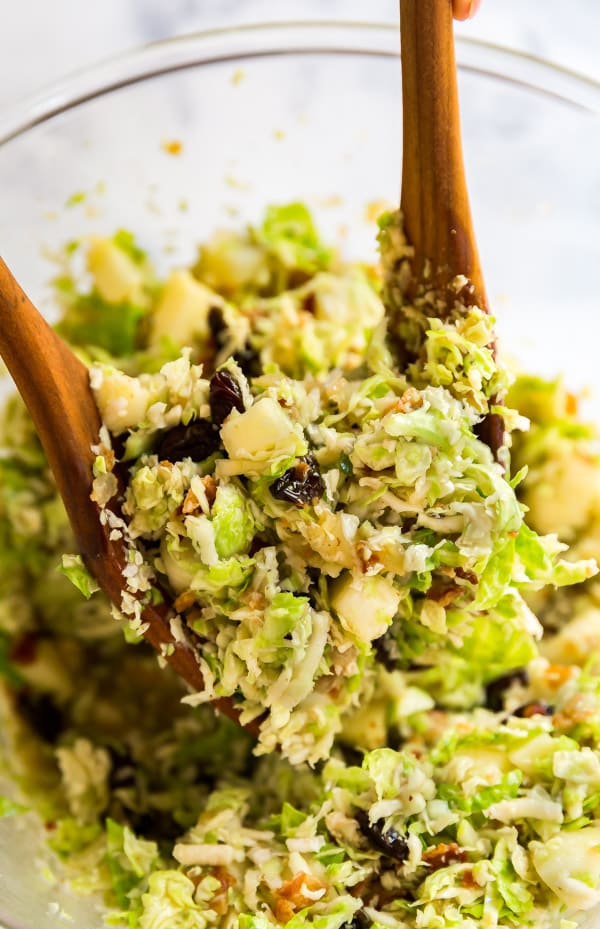
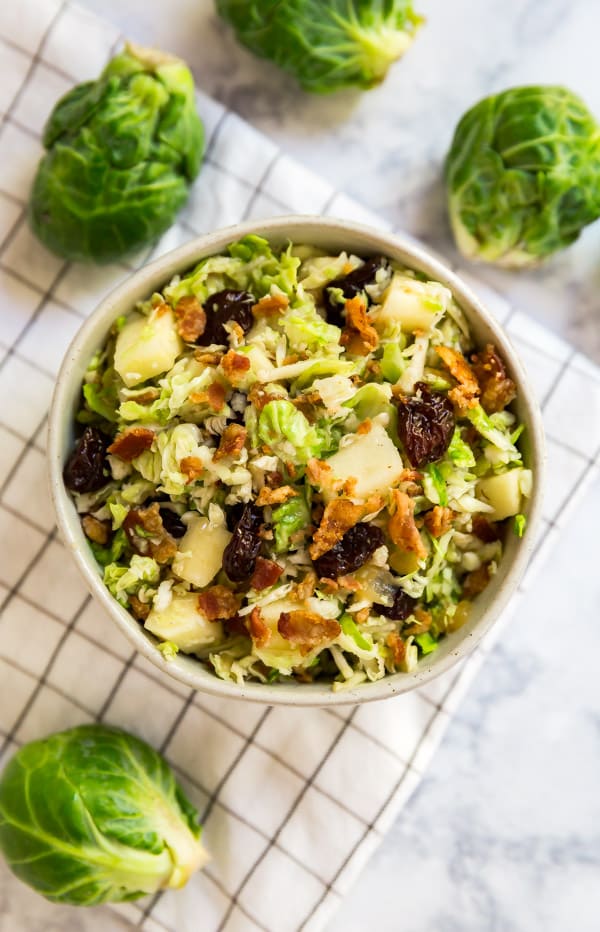
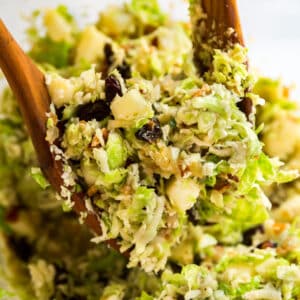
    This Salad with Shredded Brussel Sprouts Recipe is the perfect fall side dish. Made with apples and dried cherries and topped with a warm bacon dressing, this is the best way to make even the most avid Brussels Sprouts hater to change their minds!

    This Salad with Shredded Brussel Sprouts Recipe is the perfect fall side dish. Made with apples and dried cherries and topped with a warm bacon dressing, this is the best way to make even the most avid Brussel Sprouts hater to change their minds!

    best brussel sprouts recipe

    Salad with Shredded Brussels Sprouts Recipe

    This post contains affiliate links. Please see the disclaimer here.

    It wasn't until I was an adult that I really discovered my love for Brussel Sprouts. And it wasn't until last year that I really discovered my love for Brussels Sprout in the form of a salad. Prior to that I liked roasting them with simple olive oil, salt and pepper until they're nice and brown on the outside with the most perfectly nutty flavor. And some day I'll share that method.

    But today, it's all about this Brussel Sprout salad. This is basically the most light and fresh side dish you'll come across this fall, and a truly delightful and refreshing addition to your Thanksgiving feast. But more importantly, it's crazy easy to make and some of it can even be done ahead.

    brussel sprouts bacon recipe

    Tips for making a shaved Brussel Sprout salad

    • Clean the Brussels sprouts well. Cut off the bottoms, remove any dirty and outer leaves and halve any larger ones.
    • Use a food processor to shred the Brussels sprouts. This will make it so much quicker and easier. I use the shredding blade for this.
    • Sprinkle a little lemon juice over the apples to keep them from turning brown.
    • You can make the dressing ahead, just be sure to reheat it and dress the salad just before serving. I don't encourage you to dress the salad in advance as the bacon grease will solidify and it's not the most desirable texture. The leftovers still taste fine, but this is much better in the initial serving.
    • If dried cherries aren't available, dried cranberries or dried currants are an excellent substitute.
    brussel sprouts and bacon

    Helpful tools:

    1. Chef's knife
    2. Cutting board
    3. Measuring cups
    4. Measuring spoons
    5. Mixing bowl
    6. Fry pan
    7. Wooden spoon
    8. Food processor

    Hosting Thanksgiving?

    Discover the secret to hosting Thanksgiving without all the stress! Prepsgiving is your FREE guide to making a delicious Thanksgiving feast the easy way.

    This Salad with Shredded Brussel Sprouts Recipe is the perfect fall side dish. Made with apples and dried cherries and topped with a warm bacon dressing, this is the best way to make even the most avid Brussels Sprouts hater to change their minds!

    Salad with Shredded Brussel Sprouts Recipe

    Jessy Freimann
    This Salad with Shredded Brussel Sprouts Recipe is the perfect fall side dish. Made with apples and dried cherries and topped with a warm bacon dressing, this is the best way to make even the most avid Brussels Sprouts hater to change their minds!
    No ratings yet
    Print Recipe Pin Recipe
    Prep Time 10 minutes mins
    Cook Time 20 minutes mins
    Total Time 30 minutes mins
    Course Salad, Side Dish
    Cuisine American
    Servings 8 servings

    Ingredients
      

    • 12 slices bacon
    • 1 cup onion, minced
    • ½ cup apple cider vinegar
    • ¼ cup water
    • 2 Tablespoons granulated sugar
    • 3 cups shredded Brussels sprouts, cleaned and trimmed before shredding
    • 2 cups diced apples topped with a bit of lemon juice, peeled and cored
    • ¾ cup dried cherries (or dried cranberries)
    • Salt and Pepper to taste

    Instructions
     

    • Fry the bacon in batches in a frying pan until crisp, reserving all the bacon grease for later. Remove cooked bacon to a paper towel-lined plate and set aside to cool.
    • While the bacon cooks prepare Brussels sprouts, apples and dried cherries and combine in a large bowl. Crumble all bacon except for 2 slices into the bowl as well. Set aside.
    • Add all bacon grease back into the pan along with the onions and saute stirring frequently until soft, about 5-7 minutes.
    • Stir in vinegar, water, and sugar and simmer for 2-3 minutes to dissolve the sugar.
    • Pour this dressing over the salad and toss to coat. Crumble remaining two pieces of bacon over the top and serve immediately.

    Notes

    I used Gala apples but if you're looking for a more tart variety, Granny Smith is also a great option.
    Tried this recipe?Let us know how it was!

    If you tried this recipe please comment and rate it 🙂 I love hearing your feedback and answering your questions!

    Other tasty fall salad recipe include:

    • Beet Salad Recipe with Feta and Dill
    • Marinated Vegetable Salad
    • Harvest Rice Salad

    You can find a full index of my recipes here.

    Don’t forget to follow The Life Jolie on Pinterest for more recipe inspiration!

    Or if Pinterest isn’t your style, bookmark this post!

    Let’s keep the conversation going- join my Facebook group! 
    Cheesy Bodega-Style Breakfast Sandwich

    Sep 23, 2018 · Leave a Comment

    This Cheesy Bodega-Style Breakfast Sandwich in paid partnership with @landolakesktchn and @feedfeed is the most delicious and authentically “New York” way to start the day! Made with eggs, bacon, and Land O Lakes® Deli American, this is seriously easy and delicious! #LandOLakes #Feedfeed

    This Cheesy Bodega-Style Breakfast Sandwich is the most delicious and authentically “New York” way to start the day!

    This Cheesy Bodega-Style Breakfast Sandwich in paid partnership with @landolakesktchn and @feedfeed is the most delicious and authentically “New York” way to start the day! Made with eggs, bacon, and Land O Lakes® Deli American, this is seriously easy and delicious! #LandOLakes #Feedfeed

    This is a sponsored conversation on behalf of Land O’Lakes and The Feedfeed. As always, all opinions are my own. Thank you for supporting the brands that help support this blog. This post contains affiliate links. Please see the disclaimer here.

    Fun fact: when I was 19, I moved to New York City with nothing but a few thousand dollars and a dream. I had a boyfriend at the time who had already set up shop with some college friends in a long-term sublet in Hell’s Kitchen. It was an insanely low price because they were gutting the building next-door and would be moving onto our building afterwards. It was awesome and a little bit terrifying.

    I lived in NYC for a total of five years and while I'm now happily settled in the suburbs, there are a few aspects that I miss about big city life. One thing is a New York City classic: the bodega-style breakfast sandwich.

    fried egg sandwich egg sandwich

    What is a Bodega?

    Before I lived in the Big Apple, I didn't know what a bodega was. I came to learn very quickly that a bodega is a locally-owned convenience store and deli. You'll typically find some very basic grocery items and of course an assortment of munchies and beverages.

    Often, they have a flat top where they can make an assortment of hot subs and the best darn egg sandwich you'll ever taste! The more fancy-shmancy bodegas sometimes also have a salad bar-type situation (usually these can be found in lower Manhattan areas like SoHo and Tribeca).

    Most New Yorkers tend to get on friendly terms with the owners and workers at their local bodegas. The guys at the bodega near each of my apartments over the years quickly learned exactly how I liked my late-night cheesesteak and more importantly, my bacon, egg and cheese sandwich!

    bacon egg and cheese sandwich

    The anatomy of killer egg sandwich recipes

    There are a few very important components when it comes to making the ultimate bodega-style egg sandwich recipe. Obviously, there are scrambled eggs and crispy bacon. Some people opt out of the bacon, and if pork isn't your cup of tea, feel free to leave it out. I'm including it because I love the savory, crispy goodness that bacon brings to the proverbial table.

    Now, I know that in some fried egg sandwiches, you find all sorts of varieties for bread options. I'm keeping my version true to the real-deal bodega sandwiches that I still dream of by making it on a roll, just as the bodega gods intended.

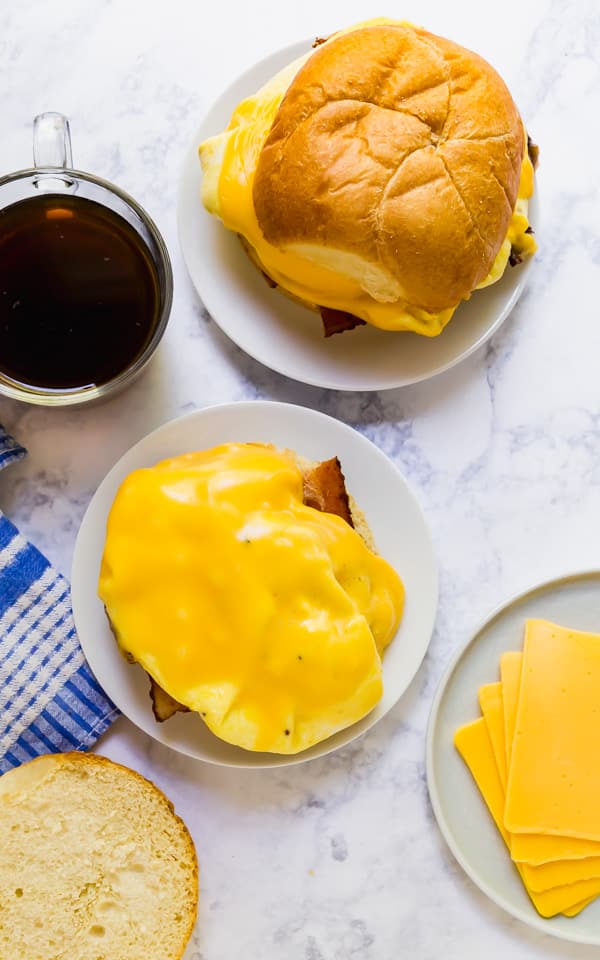
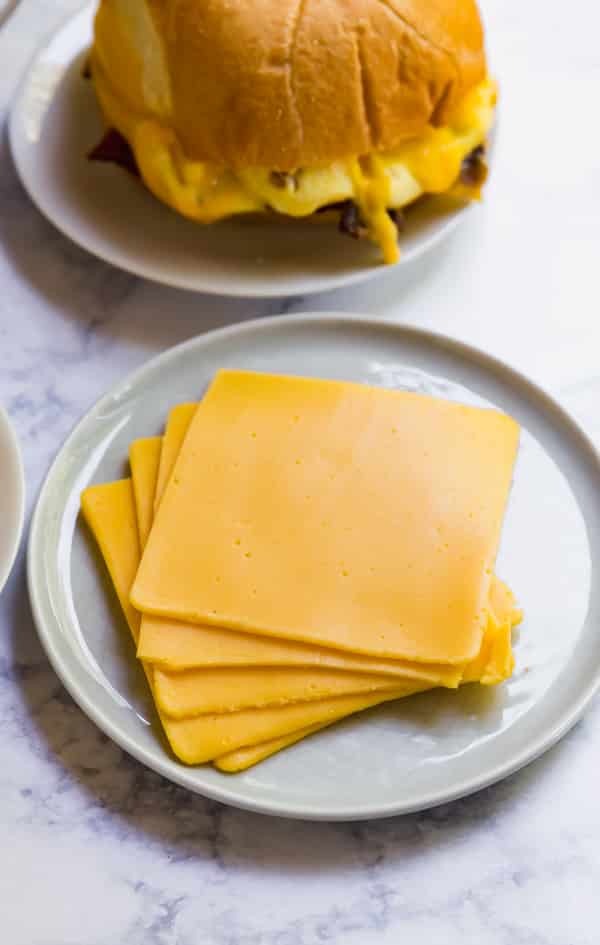
    Which brings me to another very important aspect: Deli American. There is nothing more fantastic than some wonderfully melty Deli American on your breakfast sandwich. And when it comes to Deli American, I like to go with the very best, Land O Lakes® Deli American. These are the creamy slices I grew up eating as a child and the very same ones I give to my own children, which they happily devour and beg for more! Fun side note: My mom came over the day I was photographing this, and when she saw my bag full of Deli American slices, she got all excited and started waxing poetic about how they're her favorite!

    At Land O’Lakes they spend a lot of time thinking about what they put into our food, so that we don't have to. So, you know that you're only getting high-quality products, which is one of the reasons that Land O Lakes® Deli American is America's #1 Deli American!

    Land O Lakes® Deli American breakfast sandwich recipes

    How to make an egg sandwich

    • Fry your bacon up nice and crispy.
    • Soggy bacon need not apply!
    • I like to lightly toast my bun for a couple minutes in a warm oven. And if you're feeling extra fancy, you can even butter the bun halves first.
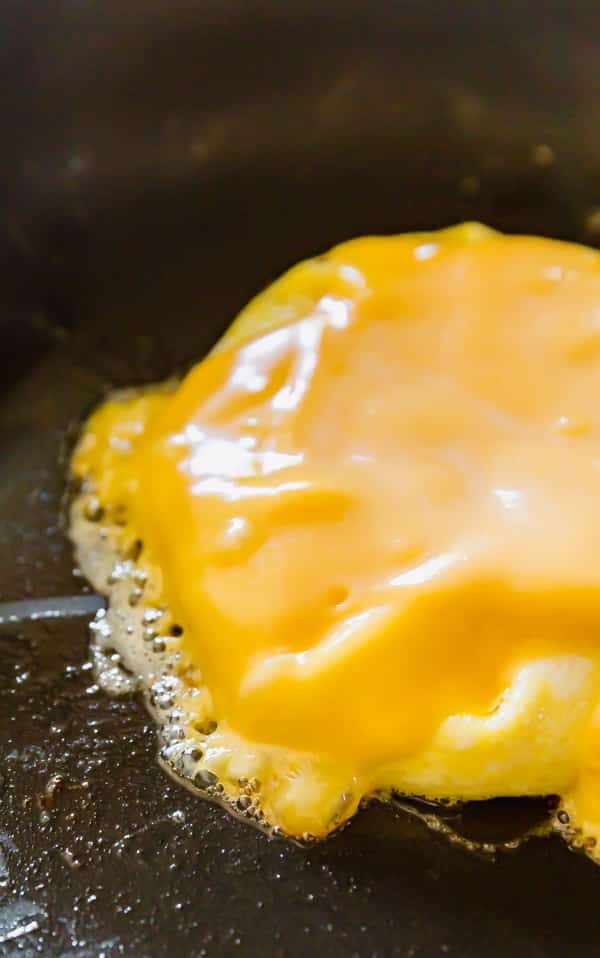
    • In terms of cooking the eggs, I'm sharing a seriously easy and fool-proof method I learned years ago from the fantastic Deb Perlman from Smitten Kitchen in a post she wrote over at Cup of Jo where she started making the scrambled egg mixture similar to a crepe and folded it over onto a slice of cheese.
    • Speaking of slices, I added not one. Not two. But three Land O Lakes® Deli American slices. Trust me when I say, this was an excellent life decision.
    • I strongly encourage you to gobble this down with a nice hot cup of coffee!
    • Because the eggs cook so fast (literally, in a matter of 2-3 minutes!), this is a seriously great option to bring to a tailgate. If you're anything like us, when we go to games, we start early. Make a bunch, wrap them in wax or parchment paper and then in foil, and your friends will be eternally grateful!
    • Feel free to add additional ingredients if you're feeling fancy or want some extra goodies on there. Some of my favorite breakfast sandwich "upgrades" include:
      • Avocado
      • Tomato
      • Sriracha
      • Buffalo sauce
      • Sausage
      • Caramelized onions
      • Pickled onions
      • Roasted red peppers


    how to make egg sandwich

    Helpful tools:

    1. Fry pan
    2. Turner
    3. Spatula
    4. Chef's knife
    5. Cutting board

    This Cheesy Bodega-Style Breakfast Sandwich in paid partnership with @landolakesktchn and @feedfeed is the most delicious and authentically “New York” way to start the day! Made with eggs, bacon, and Land O Lakes® Deli American, this is seriously easy and delicious! #LandOLakes #Feedfeed

    Cheesy Bodega-Style Breakfast Sandwich

    Jessy Freimann
    This Cheesy Bodega-Style Breakfast Sandwich is the most delicious and authentically “New York” way to start the day!
    No ratings yet
    Print Recipe Pin Recipe
    Prep Time 5 minutes mins
    Cook Time 5 minutes mins
    Total Time 10 minutes mins
    Course Breakfast
    Cuisine American
    Servings 4 servings
    Calories 661 kcal

    Ingredients
      

    • 4 Tablespoons salted butter
    • 8 large eggs
    • 1 small splash of water
    • Salt and pepper, to taste
    • 12 slices American cheese
    • 4 Kaiser rolls cut in half and lightly toasted
    • 8 slices bacon, fried until crisp and cut in half (so you’ll have a total of 4 halves)

    Instructions
     

    • In a large fry pan, melt the butter over medium heat, spreading it around to evenly coat the pan.
    • While the butter melts, whisk together the eggs, a small splash of water, salt and pepper until well combined.
    • Pour the egg mixture into the pan and swirl the pan a bit to spread out the egg so that it makes one thin layer, like you would if you were making crepes. 
    • Let the egg cook for about 30 seconds and place one slice of Land O Lakes® Deli American in the middle of the egg.
    • Let it cook another 30 seconds until there is no longer liquid that spreads when you gently poke the edge of the egg with a rubber spatula.
    • Fold all the edges of the egg up and over the cheese to completely cover it and place 2 more slices of Land O Lakes® Deli American on top of the folded egg.
    • Cover the pan for another minute or until the Deli American has melted.
    • Place the 4 halves of bacon on the bottom bun.
    • Top the bacon with the folded egg and Deli American and put the top of the bun on top of the egg and Deli American. Serve immediately.

    Nutrition

    Serving: 1servingCalories: 661kcalCarbohydrates: 4gProtein: 30gFat: 58gSaturated Fat: 28gPolyunsaturated Fat: 6gMonounsaturated Fat: 19gTrans Fat: 1gCholesterol: 494mgSodium: 1576mgPotassium: 312mgSugar: 2gVitamin A: 1501IUCalcium: 720mgIron: 2mg
    Tried this recipe?Let us know how it was!

    If you tried this recipe please comment and rate it 🙂 I love hearing your feedback and answering your questions!

    Looking for some other tasty breakfast recipes?

    • Spinach and Feta Breakfast Puff Pastry Breakfast Pizza
    • Baked French Toast with Mixed Berries
    • Caprese Quiche
    • Zucchini Pancakes

    You can find a full index of my recipes here.

    Don’t forget to follow The Life Jolie on Pinterest for more recipe inspiration!

    Or if Pinterest isn’t your style, bookmark this post!

    Let’s keep the conversation going- join my Facebook group! 
    Baked French Fries

    Sep 20, 2018 · Leave a Comment

    These Baked French Fries are perfectly crispy and crazy easy to make! Made with potatoes, oil and seasoning salt, these are a great weeknight side dish!

    These Baked French Fries are perfectly crispy and crazy easy to make! Made with potatoes, oil and seasoning salt, these are a great weeknight side dish!

    These Baked French Fries are perfectly crispy and crazy easy to make! Made with potatoes, oil and seasoning salt, these are a great weeknight side dish!

    Baked French Fries

    This post contains Affiliate Links. Please see the disclaimer here.

    I’m a sucker for a good side dish. I have a variety of sides that I cycle through, but one of the most popular sides with my family is homemade french fries, or as my girls would say "Fries!!!!!" (and yes, there are exactly five exclamation points when they say it- to say they loves them is an understatement).

    This recipe actually came about because one night we made a last minute decision to make burgers and it wasn't until I was unpacking the items I had just picked up from the store that I realized I had forgotten to pick up the tater tots I had planned to serve with our burgers! Sure I had rice and pasta hanging out in the pantry, but you guys, how could I possibly serve burgers without some form of crispy and delicious french fries recipe? Blasphemy!

    So I grabbed some potatoes that were also hanging out in a cool, dark place (kitchen tip: potatoes should always be kept in a cool, dark place but not with onions) and got to it. I knew that if these homemade baked french fries were going to stick out as something different than a basic roasted potato, I would have to make them nice and crispy.

    So I jacked the oven temp up, cut the potatoes to size and tossed them with olive oil and seasoning salt. Easy-peasy and an hour later we were enjoying our burgers with the crispiest, most delicious oven french fries I've ever made.

    homemade french fries

    Tips for how to make french fries in the oven:

    • Making sure your potatoes are all cut to be around the same size for even cooking.
    • In terms of size, I cut them into sticks that were about ½ inch thick. You can make them thinner or thicker based on your preference, just make sure you adjust the cooking times accordingly and keep an eye on them.
    • The key to nice, crispy fries is a high temperature. Don’t be alarmed my my use of a 450 degree oven. Embrace it along with each perfectly crispy bite!
    • You can get as creative as you'd like with seasonings. I kept it simple with seasoning salt but go crazy, and please let me know in the comments what interesting seasonings you opt for!

    french fries recipe

    Helpful tools:

    1. Measuring cups
    2. Measuring spoons
    3. Mixing bowl
    4. Spatula
    5. Sheet pan
    6. Silpat

    how to make french fries

    These Baked French Fries are perfectly crispy and crazy easy to make! Made with potatoes, oil and seasoning salt, these are a great weeknight side dish!

    Baked Oven Fries

    Jessy Freimann
    These Baked Oven Fries are perfectly crispy and crazy easy to make!
    No ratings yet
    Print Recipe Pin Recipe
    Prep Time 10 minutes mins
    Cook Time 55 minutes mins
    Total Time 1 hour hr 5 minutes mins
    Course Side Dish
    Cuisine American
    Servings 4 servings

    Ingredients
      

    • 5-6 Large Potatoes, cut into sticks about ½ inch in width (I used 5-6 good size potatoes but you can always do more or less)
    • 1 Tablespoon Olive oil
    • 1 teaspoon Seasoning salt

    Instructions
     

    • Preheat oven to 450 degrees. Line pan with parchment or a Silpat and set aside.
    • In a large bowl, lightly drizzle potatoes with olive oil and season to taste with seasoning salt (I was pretty liberal with it).
    • Pour the potatoes into a single layer on prepared pan.
    • Bake for 25 minutes and then flip the potatoes.
    • Bake for 20-30 more minutes (depending on your oven- check them at 20 minutes). Serve immediately.

    Notes

    These are best served immediately but can be reheated in the oven.
    Tried this recipe?Let us know how it was!

    If you tried this recipe please comment and rate it 🙂 I love hearing your feedback and answering your questions!

    Try some other easy side dish recipes:

    • Cheesy Ranch Potato Wedges
    • Homemade Scalloped Potatoes
    • Parmesan Roasted Potatoes

    You can find a full index of my recipes here.

    Don’t forget to follow The Life Jolie on Pinterest for more recipe inspiration!

    Or if Pinterest isn’t your style, bookmark this post!

    Let’s keep the conversation going- join my Facebook group! 
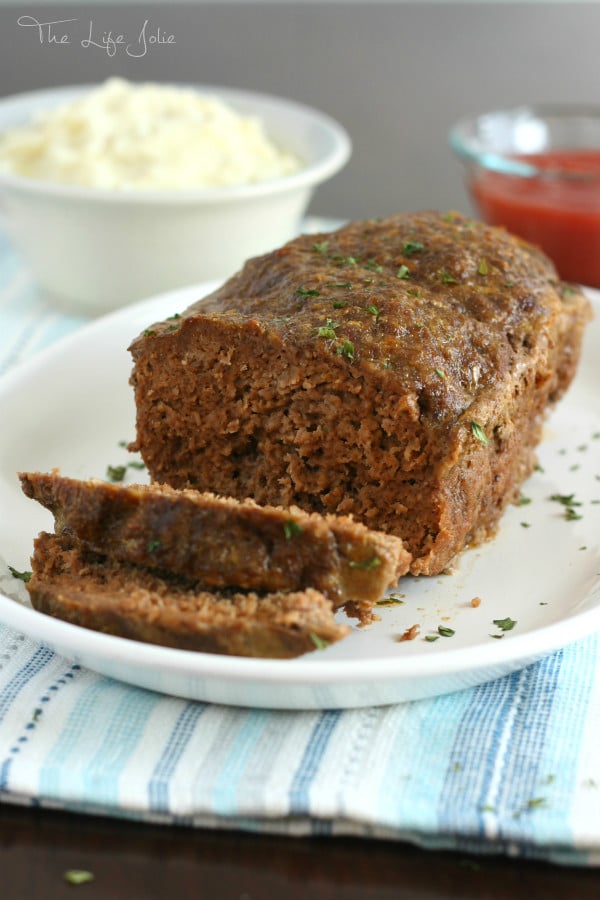
    Mexican Bean Salad Recipe

    Sep 16, 2018 · 5 Comments

    This Mexican Bean Salad Recipe is a quick and easy throw-together salad that's full of great flavor! Made with beans, celery, cilantro, tomatoes, onions, peppers, lime and slices, this is a delicious side dish the whole family will love!

    This Mexican Bean Salad Recipe is a quick and easy throw-together salad that's full of great flavor!

    mexican salad

    Mexican Bean Salad

    This post contains Affiliate Links. Please see the disclaimer here.

    I have a confession to make. When I was first introduced to the idea of this salad, I was a bit of a hater. Maybe hater is an exaggeration. A more accurate word is indifferent. We were at my sister's apartment after a gorgeous day playing in the pool and we were having a taco night. Our mom called and said she was going to make a Mexican bean salad. And Nicci and I were both like "meh, whatever you want."

    It's not that we were against the idea of a bean salad, we were just tired and didn't really care. We tend to always fall into the same habits on our taco nights. This consists of the actual tacos, mexi rice and canned refried beans. It really comes down to a combination of laziness and a picky husband.

    You can bet that I was eating my words once I tasted that Mexican salad! Seriously, you guys. It was a flavor and textural explosion in my mouth and I was not sad about it! I'm a huge lover of cilantro to begin with and the chili powder and cumin add a fantastic savory flavor. The sweetness of the corn and the acid from the lime juice and tomatoes also play really well together.

    But my favorite thing is the crunch from the celery. My mom and sister were laughing at me because I kept exclaiming how much I loved the delicious crunch that the celery added to this dish. In my opinion, it elevated the whole dish and I could not stop eating it!

    three bean salad

    Tips for making bean salad recipes

    • This can totally be made in advance. It makes an awesome meal prep for lunches.
    • To speed up the process, you can use a garlic press. It's the quickest way to get the right texture for the garlic. A mini-prep processor is always helpful to speed up chopping in general (I use the one I linked constantly!).
    • This can totally be made into a three bean salad by adding a can of another type of bean of your choice.
    • If you prefer a spicier salad, feel free to leave the seeds in the pepper.
    • If you hate cilantro, feel free to substitute fresh parsley.

    mexican bean salad

    Helpful tools:

    1. Garlic press
    2. Mini-prep processor
    3. Chef's knife
    4. Cutting board
    5. Measuring cups
    6. Measuring spoons
    7. Mixing bowl

    Video Tutorial for Mexican Bean Salad Recipe

    This Mexican Bean Salad Recipe is a quick and easy throw-together salad that's full of great flavor! Made with beans, celery, cilantro, tomatoes, onions, peppers, lime and slices, this is a delicious side dish the whole family will love!

    Mexican Bean Salad Recipe

    Jessy Freimann
    This Mexican Bean Salad Recipe is a quick and easy throw-together salad that's full of great flavor!
    5 from 1 vote
    Print Recipe Pin Recipe
    Prep Time 1 hour hr 55 minutes mins
    Total Time 1 hour hr 55 minutes mins
    Course Salad
    Cuisine Mexican
    Servings 6 servings

    Ingredients
      

    • 1 14.5 ounce can red beans, drained and rinsed
    • 1 14.5 ounce can black bean, drained and rinsed
    • 1 cup corn
    • 1 ¼ cups tomatoes, diced
    • ¾ cup celery, diced
    • ¾ cup onion, diced
    • 1-2 cloves garlic, pressed or smashed and sprinkled with a pinch of salt
    • 1-2 serrano pepper, seeded and minced (you can also leave the seeds if you want a much spicier salad)
    • 3 Tablespoons fresh cilantro, cleaned and chopped
    • The juice of 1 lime (about 2-3 Tablespoons)
    • ½ teaspoon kosher salt
    • ¼ teaspoon fresh ground black pepper
    • ½ teaspoon chili powder
    • ¾ teaspoon ground cumin

    Instructions
     

    • Mix all ingredients well.
    • Taste and adjust seasonings to your taste.
    • Serve immediately or refrigerate for up to a week.
    Tried this recipe?Let us know how it was!

    If you tried this recipe please comment and rate it 🙂 I love hearing your feedback and answering your questions!

    Try some other great salad recipes:

    • Strawberry Salad
    • Marinated Vegetable Salad
    • Cajun Black Bean Salad

    You can find a full index of my recipes here.

    Don’t forget to follow The Life Jolie on Pinterest for more recipe inspiration!

    Or if Pinterest isn’t your style, bookmark this post!

    Let’s keep the conversation going- join my Facebook group! 

    This Mexican Bean Salad recipe makes a quick and simple salad. It's healthy and easy to make and is so full of delicious flavor!

    Greek Salsa

    Aug 16, 2018 · Leave a Comment

    Greek Salsa

    Greek Salsa is a light and fresh take on a traditional salsa- it's so delicious, you won't be able to stop eating it!

    Greek Salsa is a light, healthy and fresh take on a traditional salsa- it's super easy to make with tomatoes, cucumber, olives, oregano, lemon juice, onions and feta cheese. This is so delicious, you won't be able to stop eating it!

    Greek Salsa

    This post contains Affiliate Links. Please see the disclaimer here.

    I love a good homemade salsa and I'll pretty much take it however I can get it! There's something about fresh vegetables (and sometimes fruit) and all those great flavors that make fresh salsa so much better than store-bought. And seriously easy to make.

    Sometimes it's fun to mix things up a little. Stray a bit for the traditional Mexican flavors that you typically find in a salsa recipe. Don't get me wrong, I love it and if there's a bowl of it in front of me I will keep on eating it.

    So I began brainstorming for one of my contributor posts at Yellow Bliss Road (that original post is here) I knew Greek was the way to add a fun twist. There's something about Greek flavors that lend themselves beautifully to a totally addictive, and easy salsa recipe. This is a light snack we can all get on board with!

    Of course, I had to include tomatoes, I mean this is still salsa (perhaps one might also say cucumber salsa?)! But then I added cool and refreshing cucumber, a little red onion for flavor, briny Kalamata olives, salty feta cheese, lemon juice for brightness and fresh oregano. So many amazing flavors in one place. I serve them with crispy, sea salt pita chips, to keep with our theme (try my easy Homemade Everything Pita Chips!) This would also be great with tortilla chips.

    homemade salsa recipe

    How to make salsa with greek flavors

    • Dice the tomatoes. I went with Roma tomatoes (also known as plum tomatoes) as they have less seeds and the salsa won't be as juicy.
    • Gotta have cucumber! Once again, this is diced. I went with a seedless cucumber. If you'd prefer to peel it, that's totally fine, but you don't have to.
    • Chop up some red onion. I love the color and flavor that this adds. Red onion tends to be one of the stronger flavored onions and if you want to subdue the flavor a bit, soak it in ice water while you prepare the rest of this recipe. Just be sure to drain them really well before adding them to the salsa.
    • Slice some Kalamata olives. Be sure to buy them pitted to cut down on your work. You can also use black olives if you don't like the briny flavor that Kalamata olives bring to this recipe.
    • Crumble some feta cheese on top. I buy mine already crumbled.
    • Season this with salt, pepper and fresh chopped oregano. Feel free to alter the amounts of these seasonings to your taste. Fresh oregano is really awesome in this but if you have to you can use dried, just cut the amount in half and taste it before adding more if needed.
    • Dress the salsa with olive oil and fresh lemon juice. Once again, taste it and add more as needed.

    easy salsa recipe

    Helpful tools

    1. Mixing bowl
    2. Wooden spoon
    3. Chef's knife
    4. Cutting board
    5. Measuring cups
    6. Measuring spoons
    7. Citrus reamer

    best salsa recipe

    Greek Salsa

    Greek Salsa

    Jessy Freimann
    Greek Salsa is a light and fresh take on a traditional salsa- it's so delicious, you won't be able to stop eating it!
    No ratings yet
    Print Recipe Pin Recipe
    Prep Time 10 minutes mins
    Total Time 10 minutes mins
    Course Appetizer
    Cuisine Greek
    Servings 6 servings

    Ingredients
      

    • 1 ¼ cups cups Roma tomatoes, seeded and diced
    • 1 cup seedless cucumber, diced (about half the cucumber)
    • ⅓ cup red onion, chopped
    • ¾ cup Kalamata olives, chopped
    • ½ cup Feta cheese, crumbled
    • ½ teaspoon kosher salt
    • ¼ teaspoon ground black pepper
    • 2 teaspoons fresh oregano, chopped
    • 2 Tablespoons olive oil
    • The juice from ½ lemon

    Instructions
     

    • Add all ingredients in a large bowl.
    • Mix until well combined.
    • Taste for flavor and adjust seasonings accordingly.
    • Refrigerate until serving.

    Notes

    • I serve this with sea salt pita chips, but you can also serve it with tortilla chips or over chicken.
    • This will last a few days in an air-tight container in the refrigerator.
    Tried this recipe?Let us know how it was!

    If you tried this recipe please comment and rate it 🙂 I love hearing your feedback and answering your questions!

    Try some of my other favorite salsa recipes!

    • Chunky Avocado Salsa
    • 10 Minute Shrimp Salsa
    • Roasted Corn Salsa

    You can find a full index of my recipes here.

    Don’t forget to follow The Life Jolie on Pinterest for more recipe inspiration!

    Or if Pinterest isn’t your style, bookmark this post!

    Let’s keep the conversation going- join my Facebook group! 
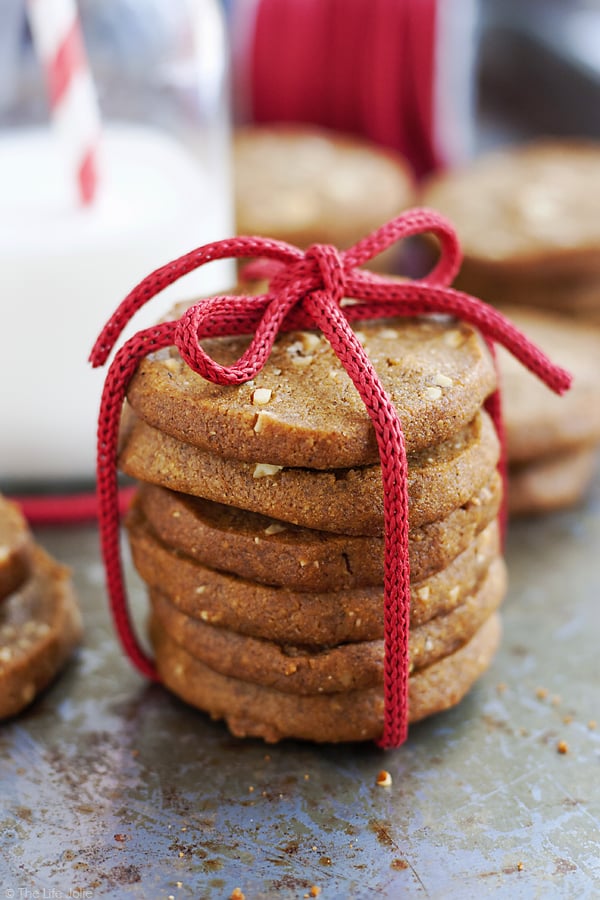
    Honey Soy Glazed Carrots and Parsnips

    Aug 13, 2018 · 6 Comments

    Honey Soy Glazed Carrots and Parsnips are a sweet and savory vegetable side dish that will please even the pickiest of palates! Made with carrots, parsnips, shallots, honey and soy sauce. This is the perfect addition to any holiday table (hello thanksgiving and Christmas!).

    Honey Soy Glazed Carrots and Parsnips are a sweet and savory vegetable side dish that will please even the pickiest of palates!

    Honey Soy Glazed Carrots and Parsnips are a sweet and savory vegetable side dish that will please even the pickiest of palates! Made with carrots, parsnips, shallots, honey and soy sauce. This is the perfect addition to any holiday table (hello thanksgiving and Christmas!).

    Honey Soy Glazed Carrots and Parsnips

    This post contains Affiliate Links. Please see the disclaimer here.

    Sometimes, my greatest source of recipe inspiration is simply perusing the public market. Our market is currently filled to the brim with the most gorgeous produce. While I don't frequently cook with carrots and parsnips, they were looking especially fantastic on one of my Saturday morning strolls through the market and I couldn't resist buying a bunch of them. And thus this Glazed Carrots recipe was born.

    At first glance, this may seem like a total fall dish. Don't get me wrong, I would happily welcome this vegetable side dish on my Thanksgiving or Christmas table. But it's also a delicious veggie side for any time of the year and a fabulous change of pace from our usual green beans, broccoli and peas, delicious though they may be.

    honey glazed carrots

    Creating a soy and honey glazed carrots recipe

    I was initially thinking of doing a honey-balsamic glaze and my first test run of this recipe was mediocre at best. I tend to be a lover of all things balsamic, so I had pretty high expectations. While that first test run didn't taste terrible, the flavors were pretty overbearing and completely blew out my palate. I knew it needed something a bit more savory, the "umami" flavor that soy brings to dishes seemed like the perfect option. So I went with it.

    Needless to say, my second test run was a raving success. The savory soy sauce with the sweet honey is the most happy marriage of flavors. The shallots add a subtle and refined flavor (as shallots tend to do!) that plays nicely with the glaze without outshining it. And so it became soy  and honey glazed carrots.

    glazed carrots recipe

    Tips for making Honey Soy Glazed Carrots and Parsnips

    • Dice the shallots nice and small. They are meant to compliment the dish, not take it over.
    • Slice the carrots and parsnips to a uniform size to help them cook more evenly.
    • I left the salt and pepper open to taste. Start with a little and taste it. Add more if need it. Always taste your food before serving so you can adjust the flavors accordingly.
    • In terms of the cooking time this could vary based on the size of your veggies so pay attention and add more time if needed.
    honey glazed carrots recipe

    Helpful tools:

    1. Large saute pan
    2. Wooden spoon
    3. Chef's knife
    4. Cutting board
    5. Measuring cups
    6. Measuring spoons

    Hosting Thanksgiving?

    Discover the secret to hosting Thanksgiving without all the stress! Prepsgiving is your FREE guide to making a delicious Thanksgiving feast the easy way.

    Honey Soy Glazed Carrots and Parsnips are a sweet and savory vegetable side dish that will please even the pickiest of palates! Made with carrots, parsnips, shallots, honey and soy sauce. This is the perfect addition to any holiday table (hello thanksgiving and Christmas!).

    Honey Soy Glazed Carrots and Parsnips

    Jessy Freimann
    Honey Soy Glazed Carrots and Parsnips are a sweet and savory vegetable side dish that will please even the pickiest of palates!
    5 from 1 vote
    Print Recipe Pin Recipe
    Prep Time 10 minutes mins
    Cook Time 15 minutes mins
    Total Time 25 minutes mins
    Course Side Dish
    Cuisine American
    Servings 4 servings
    Calories 169 kcal

    Equipment

    • 1 Large saute pan
    • 1 cutting board
    • 1 chefs knife
    • 1 Measuring cups and spoons

    Ingredients
      

    • 1 Tablespoon salted butter
    • 1 Tablespoon olive oil
    • ½ cup shallot chopped
    • 1 teaspoon Kosher salt, to taste
    • ¼ teaspoon Ground black pepper, to taste
    • 1 ½ cups carrots, peeled and cut into ½ inch chunks (about 2 medium carrots)
    • 1 ½ cups parsnips peeled and cut into ½ inch chunks (about 2 medium carrots)
    • 2 Tablespoons honey
    • 1 Tablespoon soy sauce
    • 1 Tablespoon water

    Instructions
     

    • In a sauté pan, melt the butter and oil over medium high heat.
    • Add shallots and sauté for 2 minutes, stirring them periodically.
    • Add carrots and parsnips. Season with salt and pepper and sauté for around 6 minutes, turning frequently.
    • In a separate bowl, whisk the honey, soy sauce and water until well combined.
    • Add honey mixture to the pan and reduce heat to medium-low. Cover and cook for 10 minutes or until fork tender, stirring periodically.
    • Serve immediately.

    Notes

    • Dice the shallots nice and small. They are meant to compliment the dish, not take it over.
    • Slice the carrots and parsnips to a uniform size to help them cook more evenly.
    • I left the salt and pepper open to taste. Start with a little and taste it. Add more if need it. Always taste your food before serving so you can adjust the flavors accordingly.
    • In terms of the cooking time this could vary based on the size of your veggies so pay attention and add more time if needed.

    Nutrition

    Serving: 1servingCalories: 169kcalCarbohydrates: 28gProtein: 2gFat: 7gSaturated Fat: 2gPolyunsaturated Fat: 1gMonounsaturated Fat: 3gTrans Fat: 0.1gCholesterol: 8mgSodium: 898mgPotassium: 457mgFiber: 5gSugar: 16gVitamin A: 8108IUVitamin C: 14mgCalcium: 48mgIron: 1mg
    Tried this recipe?Let us know how it was!

    If you tried this recipe please comment and rate it 🙂 I love hearing your feedback and answering your questions!

    Try some other delicious vegetable side dish recipes:

    • Easy Garlic Green Beans
    • Peas with Onions
    • Broccoli with Cheese Sauce

    You can find a full index of my recipes here.

    Don’t forget to follow The Life Jolie on Pinterest for more recipe inspiration!

    Or if Pinterest isn’t your style, bookmark this post!

    Let’s keep the conversation going- join my Facebook group! 
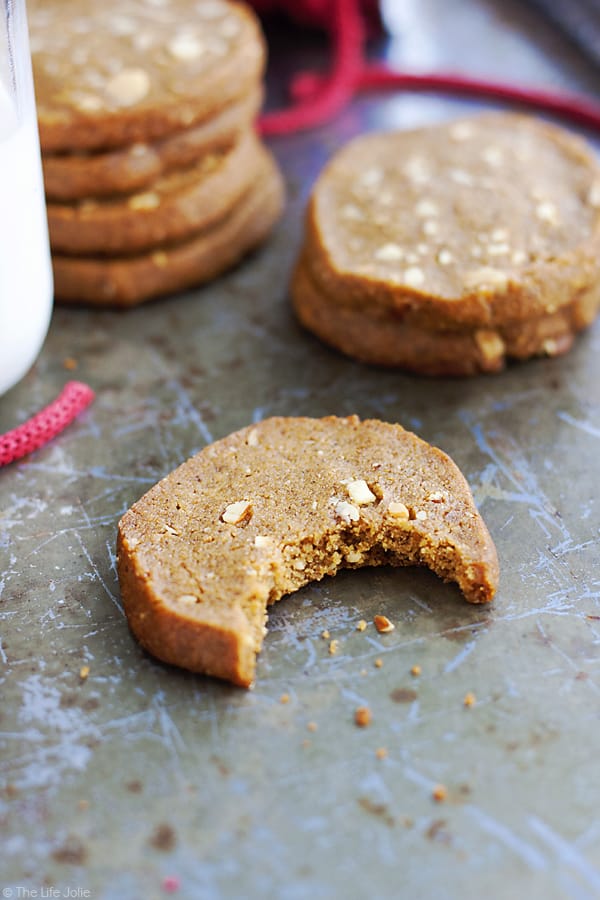
    Tarragon Chicken Recipe

    Aug 9, 2018 · Leave a Comment

    Rich, creamy and super easy to make, this Tarragon Chicken is a weeknight dinner that's as quick and comforting as it is delicious! Made with chicken breasts, fresh tarragon, white wine, chicken broth, shallots and heavy cream. You can totally switch up the herbs if you'd prefer something other than tarragon!

    Rich, creamy and super easy to make, this Tarragon Chicken is a weeknight dinner that's as comforting as it is delicious! You can totally switch up the herbs if you'd prefer something other than tarragon!

    Rich, creamy and super easy to make, this Tarragon Chicken is a weeknight dinner that's as quick and comforting as it is delicious! Made with chicken breasts, fresh tarragon, white wine, chicken broth, shallots and heavy cream. You can totally switch up the herbs if you'd prefer something other than tarragon!

    Chicken Tarragon

    This post contains Affiliate Links. Please see the disclaimer here.

    This recipe is very loosely inspired by a recipe that I found in an old New York Times cookbook. I say loosely because that recipe was for a whole roasted chicken and this is definitely not a whole roasted chicken. But the flavors sounded fantastic, so I created my own version of chicken tarragon.

    This was one of those rare recipes that came together pretty nicely on the first test. I only needed to make a few tweeks in the net test to get it perfect. It's rich and decadent cream sauce for chicken but totally quick and easy to make. I made sure to include plenty of sauce so that you can drizzle it over the noodles of you choice (I went for fresh angel hair). And the chicken comes out perfectly cooked!

    Now here's the thing about tarragon, it has a pretty distinct flavor. I'd describe it as a subtle black licorice flavor. Now black licorice can be pretty polarizing. J absolutely hated this dish because he cannot stand the flavor of tarragon. And while black licorice definitely isn't a flavor I love, in this particular dish it only adds a hint of that flavor and I think it plays really nicely off of the other. That said, if you really cannot stand the flavor of tarragon, just swap it out for your favorite fresh herb. I have a feeling lemon thyme or oregano would be amazing in this!

    creamy chicken

    Tips for making creamy Chicken Tarragon

    • Pound the chicken to around ¼ inch thickness. This allows the dish to cook pretty quickly, making it the perfect weeknight dinner.
    • Season the chicken before dredging it in flour to add even more great flavor.
    • Manage the temperature. Every stove is a little different and if you feel like it's going to fast, turn it down (or vice versa).
    • Don't sear the chicken for more than 2-3 minutes per . side at first. It likely won't be fully cooked when removed from the pan; this is ok. It will finish cooking for the last few minutes when you put it back into the pan with the sauce.
    • If shallots aren't available, onions are fine. I chose shallots because I loved the delicate flavor that they add. Onions will change the flavor a little but it'll still be delicious.
    • Like most cream sauces, this is best served immediately. The leftovers are still tasty but the cream separates a little after chilling.

    Chicken Tarragon

    Helpful tools:

    1. Garlic press
    2. Large saute pan
    3. Wooden spoon
    4. Chef's knife
    5. Cutting board
    6. Meat mallet
    7. Measuring cups
    8. Measuring spoons

    cream sauce for chicken

    Rich, creamy and super easy to make, this Tarragon Chicken is a weeknight dinner that's as quick and comforting as it is delicious! Made with chicken breasts, fresh tarragon, white wine, chicken broth, shallots and heavy cream. You can totally switch up the herbs if you'd prefer something other than tarragon!

    Tarragon Chicken

    Jessy Freimann
    Rich, creamy and super easy to make, this Tarragon Chicken is a weeknight dinner that's as comforting as it is delicious! You can totally switch up the herbs if you'd prefer something other than tarragon!
    No ratings yet
    Print Recipe Pin Recipe
    Prep Time 10 minutes mins
    Cook Time 25 minutes mins
    Total Time 35 minutes mins
    Course Main Course
    Cuisine American
    Servings 4 servings

    Ingredients
      

    • 6 Tablespoons salted butter, divided
    • 3 large boneless skinless chicken breasts, filleted (slice each piece horizontally into 2 even pieces, so 6 pieces total)
    • 2 teaspoons fresh tarragon (or any other fresh herb of your choice), chopped and divided
    • 1 teaspoon kosher salt, divided
    • ½ teaspoon ground black pepper, divided
    • ¾ cup flour, divided
    • ¼ cup shallots, minced
    • ¾ cup white wine
    • 1 14.5 ounce can chicken broth
    • ⅓ cup heavy cream
    • The pasta of your choice, cooked to al dente as per package directions

    Instructions
     

    • Melt 2 Tablespoons butter in a large skillet over medium-medium high heat.
    • While the butter melts, place the filleted chicken breasts onto a cutting board and cover with plastic wrap. Pound them to ¼ inch thickness with a meat mallet (you can also use a rolling pin if need be).
    • Season the chicken pieces with ½ teaspoon salt, ¼ teaspoon pepper and 1 teaspoon chopped fresh tarragon.
    • Place ½ cup flour in a shallow bowl and dredge the chicken pieces in the flour, lightly tapping off the excess.
    • When the butter is fully melted and covering the bottom of the skillet, cook the chicken pieces for around 2-3 minutes per side until golden brown and remove from the pan into a side plate. Work in batches so you don't overload the pan and if  it seems to be drying out, feel free to add a little bit more butter.
    • Once the chicken is removed from the pan, melt 4 more tablespoons butter. 
    • Add the shallots to the pan and saute for around a minute to soften, stirring frequently.
    • Stir in 4 tablespoons flour until there are no more lumps. Sauté for another minute until fragrant.
    • Add wine and deglaze the pan. Then add chicken broth and heavy cream and stir to fully combine.
    • Reduce the heat to medium and simmer the sauce for 5 minutes. 
    • Add ½ teaspoon salt, ¼ teaspoon pepper and 1 teaspoon fresh chopped tarragon to the pan and stir to combine.
    • Add the chicken back into the pan and simmer for another 5 minutes.
    • Serve immediately over pasta.
    Tried this recipe?Let us know how it was!

    tarragon chicken

    If you tried this recipe please comment and rate it 🙂 I love hearing your feedback and answering your questions!

    Looking for some other delicious chicken recipes?

    • Greek Yogurt Roasted Chicken Thighs
    • Champagne Braised Chicken Thighs
    • Balsamic Chicken Skillet

    You can find a full index of my recipes here.

    Don’t forget to follow The Life Jolie on Pinterest for more recipe inspiration!

    Or if Pinterest isn’t your style, bookmark this post!

    Let’s keep the conversation going- join my Facebook group! Rich, creamy and super easy to make, this Tarragon Chicken is a weeknight dinner that's as quick and comforting as it is delicious! Made with chicken breasts, fresh tarragon, white wine, chicken broth, shallots and heavy cream. You can totally switch up the herbs if you'd prefer something other than tarragon!
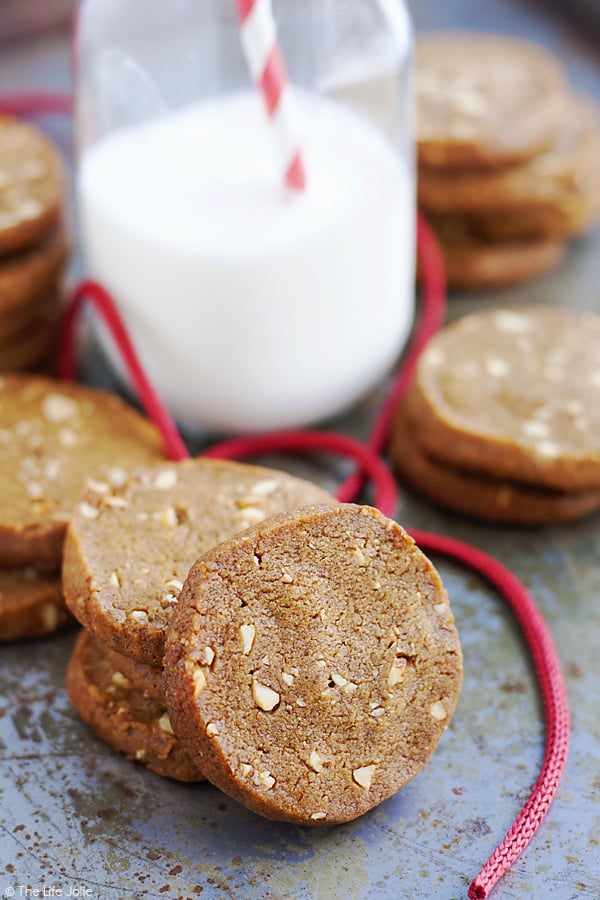
    Zucchini Pancakes

    Jul 20, 2018 · 36 Comments

    What to do with that bumper crop of zucchini? Zucchini Pancakes! Made with Bisquick, Romano cheese, shredded zucchini, butter, garlic powder and onion, they are a super easy savory breakfast and are also a great make-ahead appetizer for a party!

    What to do with that bumper crop of zucchini? Zucchini Pancakes! They are a super easy savory breakfast and are also a great make-ahead appetizer for a party!

    What to do with that bumper crop of zucchini? Zucchini Pancakes! Made with Bisquick, Romano cheese, shredded zucchini, butter, garlic powder and onion, they are a super easy savory breakfast and are also a great make-ahead appetizer for a party!

    Zucchini Pancakes

    This post contains Affiliate Links. Please see the disclaimer here.

    While I love zucchini all year around, the really legit zucchini is starts showing up in our farmers markets in the summer. That's right, I referred to squash as "legit." Seriously, though. Compared to those wimpy, little, off-season zucchini that are sprinkled throughout the grocery stores throughout the year, summer zucchini is king.

    And what's most exciting about those big old summer zucchini's is they always get better as that season progresses! When you find yourself with the unique dilemma of having way too much zucchini, you make these delicious Zucchini Pancakes, which are a reasonably healthy pancake recipe. You should also definitely make Rosie's Famous Zucchini Soup.

    This recipe originally came from a good friend of my Grandma Rose's named Mary. Mary was such a sweet, kind woman and she was also a fantastic cook. Excellent cooking skills seem to have been the trend with my Grandma and all of her friends. Mary was always very generous and made sure to make a ton of extra Zucchini Pancakes (or "Zucchini Rounds" as the ladies called them) to share with all of us.

    Although these aren't the most fluffy pancakes, these little guys are seriously SO addictive. I barely made it through taking the photos before I had to dive in. The Romano cheese adds such delicious flavor and plays the role that salt would normally play (trust me, you won't miss it!). I actually added more Romano cheese than the recipe called for because you can never have too much cheese.

    I've previously enjoyed them on their own, but I recently whipped up a quick sauce using sour cream, dill, garlic powder and black pepper and it seriously hit the spot!

    healthy pancake recipe

    Tips for making

    • I encourage you to try and squeeze out as much of the liquid as possible from the grated zucchini to avoid mushiness (I utilized J's man muscles for this since I have zero upper body strength).
    • Now you guys know I'm all about working smarter and not harder. This recipe includes bisquick mix. I'm totally fine with bisquick pancakes, but if you have a homemade pancake mix that you prefer, you can try these with that (I haven't tested it with homemade pancake mix, so please tell me how it works).
    • These last a few days in the refrigerator. They taste awesome cold or hot and they freeze well.
    • You might consider doubling the recipe. This recipe doesn't make a ton and you won't regret having extra.

    bisquick pancakes

    Helpful tools:

    1. Turner
    2. Griddle
    3. Measuring spoons
    4. Measuring cups
    5. Mixing bowl
    6. Chef's knife
    7. Cutting board
    8. Box Grater

    homemade pancake mix

    What to do with that bumper crop of zucchini? Zucchini Pancakes! Made with Bisquick, Romano cheese, shredded zucchini, butter, garlic powder and onion, they are a super easy savory breakfast and are also a great make-ahead appetizer for a party!

    Zucchini Pancakes

    Jessy Freimann
    What to do with that bumper crop of zucchini? Zucchini Pancakes! They are a super easy savory breakfast and are also a great make-ahead appetizer for a party!
    5 from 7 votes
    Print Recipe Pin Recipe
    Prep Time 10 minutes mins
    Cook Time 10 minutes mins
    Total Time 20 minutes mins
    Course Appetizer, Breakfast
    Cuisine American
    Servings 4 servings
    Calories 242 kcal

    Equipment

    • 1 Spatula
    • 1 mixing bowl
    • 1 Whisk
    • 1 Measuring cups and spoons
    • 1 Box grater

    Ingredients
      

    • ⅓ cup Bisquick
    • ¼ cup Romano cheese, grated (I eyeballed it and threw in a little more) or Parmesan
    • ⅛ teaspoon ground black pepper
    • 2 large eggs
    • 2 cups zucchini, cleaned, shredded and wrung out
    • 2 Tablespoons butter, softened
    • 1 Tablespoon Fresh parsley, chopped and to taste
    • 1 teaspoon Onion powder, to taste
    • 1 teaspoon Garlic powder, to taste
    • ¼ cup Olive oil divided

    Instructions
     

    • Mix all ingredients except the oil until well combined.
    • Heat half the oil on a griddle over medium heat.
    • Drop spoonfuls onto the pan (make sure not to overcrowd it). I use the spoon to spread the batter out so that it takes on more of a "pancake" appearance.
    • After a few minutes, turn when the pancake is golden brown. Once turned, press down on it lightly with your spatula to flatten a bit more (these should be thin). Add more oil as needed.
    • Cook for a few minutes until the other side is golden brown and let it cool on a paper towel-lined plate. Enjoy right away or over the next few days (these keep well in the refrigerator or the freezer).

    Notes

    These will last up to 3 days in the refrigerator and taste great warm or cold.

    Nutrition

    Serving: 1servingCalories: 242kcalCarbohydrates: 10gProtein: 7gFat: 20gSaturated Fat: 4gPolyunsaturated Fat: 2gMonounsaturated Fat: 12gTrans Fat: 0.01gCholesterol: 101mgSodium: 253mgPotassium: 248mgFiber: 1gSugar: 3gVitamin A: 382IUVitamin C: 13mgCalcium: 121mgIron: 1mg
    Tried this recipe?Let us know how it was!

    If you tried this recipe please comment and rate it 🙂 I love hearing your feedback and answering your questions!

    Try some other great savory breakfast options:

    • Super Easy Breakfast Tostadas
    • Puff Pastry Breakfast Pizza
    • Puff Pastry Egg Muffins

    You can find a full index of my recipes here.

    Don’t forget to follow The Life Jolie on Pinterest for more recipe inspiration!

    Or if Pinterest isn’t your style, bookmark this post!

    Let’s keep the conversation going- join my Facebook group! 
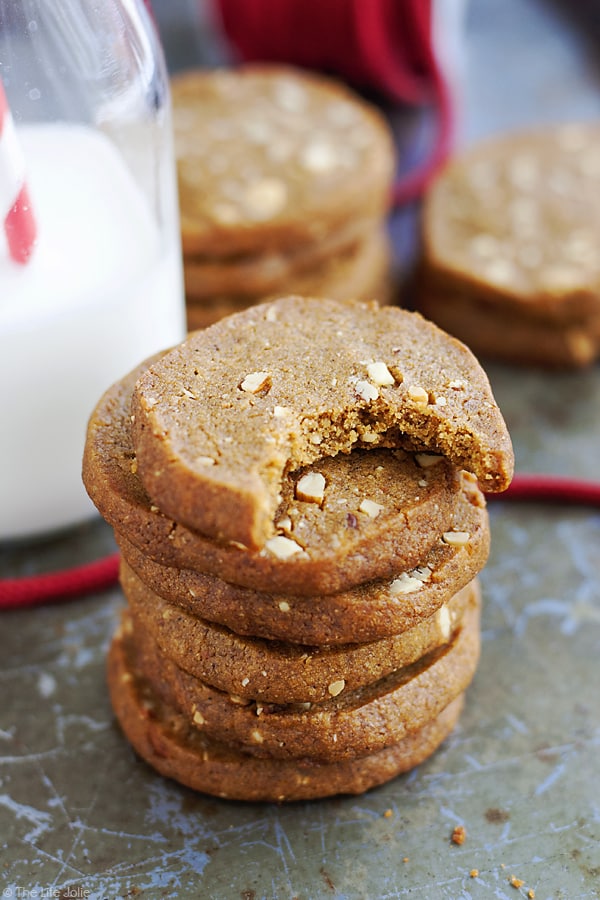
    Zucchini Pancakes are an easy to make down right addictive recipe! These make an awesome savory breakfast and are a great make ahead appetizer for a party or celebration (vegetarian game day snack, anyone?). They refrigerate well and freeze well, but they're so good, I doubt they'll make it that far!

    An Experts Guide to Enjoying Watermelon- perfect for entertaining and on-the-go snacking!

    Jul 12, 2018 · Leave a Comment

    Watermelon is one of my very favorite fruits and I'm so excited to share everything you need to know about enjoying Watermelon this summer, from how to cut a watermelon, to how to pick a watermelon and a few killer ways to upgrade your watermelon!

    Watermelon is one of my very favorite fruits and I'm so excited to share everything you need to know about enjoying Watermelon this summer!

    Watermelon is one of my very favorite fruits and I'm so excited to share everything you need to know about enjoying Watermelon this summer, from how to cut a watermelon, to how to pick a watermelon and a few killer ways to upgrade your watermelon!

    Thank you National Watermelon Promotion Board for sponsoring this post. Watermelon is the perfect portable food for enjoying wherever life takes you!

    You guys wanna know a fun fact about me. When I was around 10 years old, I won a watermelon eating contest! That's right. Teeny, little 10-year-old-me took down an entire varsity football team and a 42 year old man in one delicious sitting. I was in the 10-and-over group and my sister totally won for the 10-and-under group!

    The contest involved each of us eating a ¼ of a large watermelon and finishing first. I immediately knew I had to enter. I mean, we were (and still are!) obsessed with watermelon in my family. It's one of those foods that will be in a bowl in the fridge and all day long we'll all be sneaking back to grab another piece until the bowl is empty! I'd been training for that moment all my entire life.

    Needless to say, that's the only trophy I held onto for years and years. Such pride! And even after the contest, I still could not get enough watermelon. It was a mainstay at family picnics, my favorite way to cool down between quarters in our house league soccer games and a great snack to bring out to stay hydrated on-the-go.

    So when the opportunity was available to team up with the National Watermelon Board, I jumped at the chance. I mean, who doesn't want to share their love for the foods they love the most? Especially since we're right in the midst of prime watermelon season!

    benefits of watermelon

    Benefits of Watermelon

    • Watermelon is a perfect ingredient for on-the-go meals and snacks! It's also a delicious option for easy summer entertaining.
    • It brings excellent value- you can't beat $.17 per serving (as per the 2017 Watermelon Purchase Survey).
    • You don't have to worry about waste because the entire watermelon is edible: flesh, juice AND rind (pickle it!). Use the whole watermelon!
    • In addition to being healthy, it's a wonderful way to hydrate in the hotter months.

    How to pick a good Watermelon

    • Look for a buttery yellow spot on the rind. This is called a field spot and shows the part of the melon that sat on the ground in the field. If it's white or green it's not ripe. Go for the gold!
    • When you pick it up, it should be heavy for it's size.
    • The brown webbing on the melon will tell you how many times the bees touched the flower- the more pollination, the sweeter the watermelon!
    • Male melons are tall and elongated- they're a bit more watery. Female melons are rounder and stout- they tend to be sweeter.
    • In terms of size, you don't want it too be too big or two small- average size watermelons are just right.
    • Look for a dried out tail to indicate a ripe watermelon- a green tail indicates that it's been picked too soon.

    How to cut Watermelon- my two favorite methods

    • Triangles- cut the melon in half, length-wise and the cut each half length-wise so that you have 4 quarters. Slice each quarter into triangular slices and serve.
    • Chunks- Slice off each end of the melon and stand it up on one of the flat ends. Use your knife the "shave off" the rind cutting downward and away from your body. Once all the rind is off, cut the meat into bite-size chunks and serve.

    how to pick a good watermelon

    6 delicious ways to upgrade your Watermelon

    1. Greek- Drizzle with a little olive oil and sprinkle with chopped fresh Oregano, kosher salt, feta cheese, sliced cucumber, thinly sliced red onion.Greek Watermelon Salad
    2. Prosciutto- Add chopped slices of prosciutto, chopped walnuts, crumbly blue cheese and a light drizzle of honey.Prosciutto and Melon Salad
    3. Mojito- Squeeze on some line juice and sprinkle with turbinado sugar, lime zest and chopped fresh mint.Watermelon Mojito Salad
    4. Chili Lime- Squeeze on some lime juice and sprinkle with chili powder, kosher salt, chopped fresh cilantro and some slices of jalapeno or serrano pepper.Chili Lime Watermelon Salad
    5. Spicy Asian- Drizzle with sriracha and sprinkle with dried ground ginger, ground turmeric, kosher salt, torn fresh cilantro and chopped peanuts.Spicy Asian Watermelon Salad
    6. Caprese- Drizzle with olive oil and balsamic glaze and top with fresh mozzarella pearls (or chopped fresh mozzarella), and a chiffonade of fresh basil.Watermelon Caprese Salad

    If you tried these recipes please comment and rate it 🙂 I love hearing your feedback and answering your questions!

    Love watermelon? Make sure to enter your original watermelon recipe into Watermelon Board’s recipe contest: Enter here!

    You can find a full index of my recipes here.

    Don’t forget to follow The Life Jolie on Pinterest for more recipe inspiration!

    Or if Pinterest isn’t your style, bookmark this post!

    Let’s keep the conversation going- join my Facebook group! 
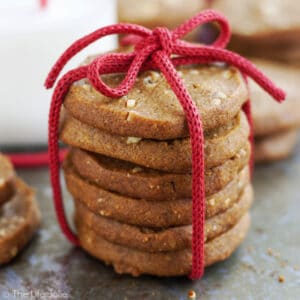
    I was selected for this opportunity as a member of CLEVER and the content and opinions expressed here are all my own.

    Black Cherry Lemonade Bourbon Slush

    Jul 8, 2018 · 2 Comments

    Black Cherry Lemonade Bourbon Slush is the most easy and delicious boozy recipe to bring to a party. It takes minutes to put together and then you freeze it overnight. Made with Lemonade and Red Stag Black Cherry Bourbon Whiskey, everyone goes crazy over this!

    Black Cherry Lemonade Bourbon Slush is the most easy and delicious boozy recipe to bring to a party. It takes minutes to put together and then you freeze it overnight. Everyone goes crazy over this!

    Black Cherry Lemonade Bourbon Slush is the most easy and delicious boozy recipe to bring to a party. It takes minutes to put together and then you freeze it overnight. Made with Lemonade and Red Stag Black Cherry Bourbon Whiskey, everyone goes crazy over this!

    Black Cherry Lemonade Bourbon Slush

    This post contains Affiliate Links. Please see the disclaimer here.

    This post has been a year in the making. I first tried this Bourbon Whiskey Slush at a family picnic last 4th of July, as in 2017! A cousin brought it and everyone was basically losing their minds over it. Including me. You guys, I don't drink much and when I do, it certainly doesn't involve Bourbon, Whiskey or anything remotely related (I'm more of a tequila gal, although these days I tend to stick to a small glass of wine or a beer).

    But this was light and sweet and totally refreshing on a hot and summer day. This was the stuff that everyone's boozy summer dreams are made of. I immediately asked them if I could share the recipe on here, which they graciously agreed to. But life was crazy busy and here we are one year later. But Ive finally gotten my act together and I'm thrilled to share this with you.

    TL:DR if you want to be the person at the party that brings the thing that makes everyone go crazy over how good it is (and with minimal effort on your part) make this boozy slushy!

    bourbon cherries

    Tips for making Alcohol Slush:

    • This is 100% a make ahead recipe. It needs to be made the night before. Unfortunately, I don't have a hack to make it freeze any fast so throw it together the night before and grab-and-go the next day. Make sure you store it in the freezer once you get to your party until everyone is ready to enjoy it!
    • In terms of purchasing your Red Stag, talk to the people at your local liquor store to figure out what the best deal will be. For me, it meant buying the little airline bottles. I ended up using thirteen of them, but it was cheaper using larger bottles.
    • The original recipe uses Crystal Light. I haven't tested this with any other brand of lemonade, but I suspect it would still be great.
    • If you have a big enough pitcher, you can totally mix it up and freeze in there.Otherwise a mixing bowl helps. My largest pitcher fit the mix but it has something of sentimental value and I was a little nervous about something happening to it so I divided it between a 9" x 13" and 8" x 8" pyrex pans (both found in that awesome Pyrex Pan Set, which I use constantly), both of which have covers which made for easy and clean freezing and transportation (we enjoyed the slush in these images on 4th of July this year!). Both filled up half way, which left plenty of room for stirring.
    • Speaking of stirring, it's a good idea to give it a stir an hour or so before serving if you have time. What's going to happen is the top layer will be ice and the bottom will still be liquid since the liquor keeps it from fully freezing (which is good because you get slush!!). Use a sturdy spoon- I used a wooden spoon- and break up that top layer of ice and then mix it together and pop it back into the freezer. It won't kill the recipe if you forget to do this, but I think it makes it a little better.

    bourbon

    Helpful tools:

    1. Mixing bowl
    2. Whisk
    3. Wooden spoon
    4. Pyrex Pan Set

    how to make a slushie

    Black Cherry Lemonade Bourbon Slush is the most easy and delicious boozy recipe to bring to a party. It takes minutes to put together and then you freeze it overnight. Made with Lemonade and Red Stag Black Cherry Bourbon Whiskey, everyone goes crazy over this!

    Black Cherry Lemonade Bourbon Slush

    Jessy Freimann
    Black Cherry Lemonade Bourbon Slush is the most easy and delicious boozy recipe to bring to a party. It takes minutes to put together and then you freeze it overnight. Everyone goes crazy over this!
    5 from 2 votes
    Print Recipe Pin Recipe
    Prep Time 5 minutes mins
    Freeze time 12 hours hrs
    Total Time 5 minutes mins
    Course Drinks
    Cuisine American
    Servings 10 servings

    Ingredients
      

    • 2 quarts Crystal Light Lemonade
    • 21 ounces Jim Beam Red Stag Black Cherry Bourbon​ (I used 13 little airline-size bottle)

    Instructions
     

    • Mix the lemonade and bourbon in a large pitcher or mixing bowl and stir well until fully combined.
    • Freeze overnight.
    • Stir the next morning and break up the ice to make a slush and return to the freezer until ready to serve.

    Notes

    If it melts, you can always refreeze it.
    Here's a note from my cousin who gave me this recipe:
    Hi Cuz! This is my recipe... glad you shared it! The ratio per this recipe is 3 to 1, a normal ratio for cocktails. Jim Beam Red Stag Bourbon is only 70 proof compared to most liquors which are 80 proof or more. If you buy a "handle" of Red Stag, it makes 3 batches! Much cheaper than the small bottles. I also make it a few days ahead to make sure it is really frozen. If you put it in a blender after it freezes, it will be more creamy and smooth. You can refreeze it after that until you serve it. For the adventurous, try different liquors and/or Crystal Light flavors! Enjoy...
    Tried this recipe?Let us know how it was!

    If you tried this recipe please comment and rate it 🙂 I love hearing your feedback and answering your questions!

    Looking for some other boozy recipes?

    • Boozy Gummy Bears
    • Grapefruit Sparkler

    You can find a full index of my recipes here.

    Don’t forget to follow The Life Jolie on Pinterest for more recipe inspiration!

    Or if Pinterest isn’t your style, bookmark this post!

    Let’s keep the conversation going- join my Facebook group! Black Cherry Lemonade Bourbon Slush is the most easy and delicious boozy recipe to bring to a party. It takes minutes to put together and then you freeze it overnight. Made with Lemonade and Red Stag Black Cherry Bourbon Whiskey, everyone goes crazy over this!
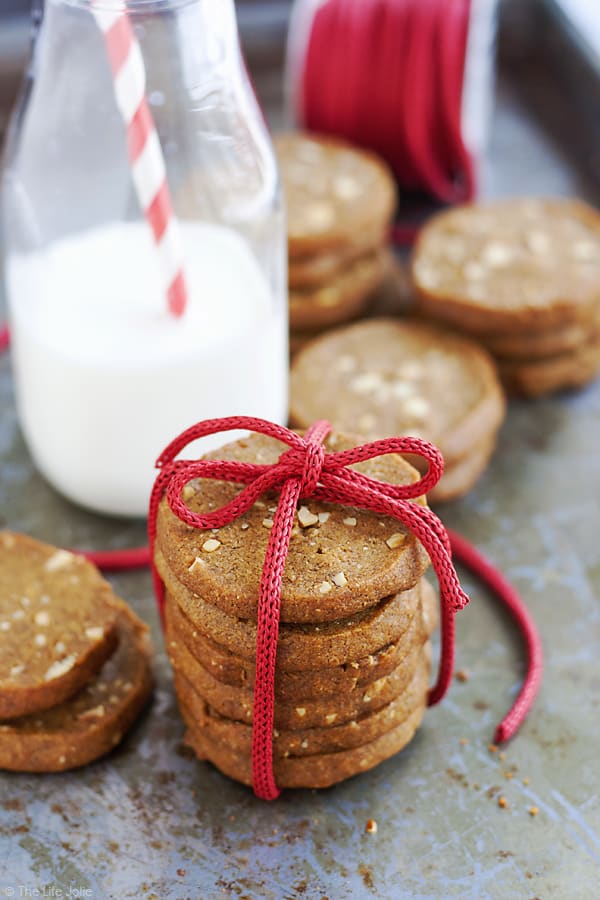
    How to Cook Steak on the Grill | The Life Jolie Kitchen Basics

    Jun 28, 2018 · Leave a Comment

    One of the best ways to make a steak is on the grill and I'm going to teach you how to cook steak on the grill. In this tutorial you'll learn tips, tricks, hacks and everything you need to know to make it as easy as possible!

    One of the best ways to make a steak is on the grill and I'm going to teach you how to cook steak on the grill. You'll learn everything you need to know to make it as easy as possible!

    One of the best ways to make a steak is on the grill and I'm going to teach you how to cook steak on the grill. In this tutorial you'll learn tips, tricks, hacks and everything you need to know to make it as easy as possible!

    How to Cook Steak on the Grill

    This is a sponsored conversation on behalf of the New York Beef Council. As always, all opinions are my own. Thank you for supporting the organizations that help support this blog. This post contains Affiliate Links. Please see the disclaimer here.

    Here in Western, NY we get about 3 months of pretty nice weather and the rest could really go either way. Now there are many meat items for which we will opt to use cooking methods other than our grill when the weather gets questionable. But when it comes to cooking steak, I don't care if there's three feet of snow outside. We are pulling out our grill. Because there is nothing better than the perfect grilled steak.

    I figured I should probably put together a guide for cooking steak on the grill. So with the help of my brilliant husband Justin who grills all the steaks in our home and my friends at the New York Beef Council who are experts in all-things-beef, I compiled everything you need to know to cook the very best steak on the grill!

    how long to grill steak

    What are the best cuts of beef for grilling?

    Direct from our friends at the NY Beef Council "The best cuts for grilling are any cuts from the rib and loin!  The “middle meats” are the summer beef lovers cuts like Ribeye, Sirloin, T-bone, Porterhouse, Strip Steaks.  However, with a little bit of love (ie- a marinade) the following cuts are great too and sometimes more economical if you are on a tight budget- Flat Iron, London Broil, Flank Steak. You could even grill an Eye Round Steak but you will really need to marinate it!"

    Conversely, when I asked about cuts of meat that are not ideal for grilling, they said this, "I definitely would avoid grilling a chuck steak and Chop Steaks!" Make sure you check out my post with more in-depth information on some of the common cuts of beef you'll come across in your meat case.

    how to cook steak on the grill

    Before grilling, remove the steak from the refigerator

    Try to avoid putting the steak onto the grill directly from the refrigerator.There is not a difference in cook time with a steak direct from the fridge and one that has had that 20 minutes to take the extra chill of the fridge off of it. Resting it prior to grilling helps promote even cooking without getting anywhere near the temperature danger zone.

    In terms of food safety, meat should not be in the danger zone (which is between 40 – 140 degrees) for more than 2 hours. There's no reason for your steak to sit out for that long. We believe it's a good idea to let the steak sit out for around 20 minutes before you grill.

    cooking steak on grill

    To season the steak before grilling or after grilling? That is the question.

    This can be a touchy subject in many grilled beef-loving circles. I've heard solid arguments on various sides of the argument and we fall into the camp of seasoning prior to grilling. Now there are two different ways you can go about this.

    • Right before you season the steak be sure to blot it a paper towel to try and remove as much moisture as you can.
    • You can season around 40 minutes prior to cooking which will almost act as a brine and absorb into the meat a bit heeding a slightly more robust flavor.
    • You can also season just before grilling, which is generally how we do it in our home because ain't nobody got time to remember to season it 40 minutes in advance. I'm just not that organized.
    • Either way be sure to gently press it into your steak.

    steak on the grill

    How to season a steak for the grill:

    For seasoning your steak there are a variety of different options out there and it really just comes down to personal preference:

    • Simple salt and pepper- Call me a purist, but this is by-far our favorite way to season my steak. It's the most simplistic, but we're always pretty liberal with our salt and pepper, making sure to gently press it into the meat right before grilling. These accent the delicious beef while still letting it be the true star!
    • Dry rub- For a dry rub you can apply it just before cooking to use as a seasoning or 2-4 hours prior to cooking to work as a marinade. Try this Cocoa Chipotle Spice Rub from Susie at Hey Grill Hey.
    • Marinade- As I mentioned above, Flat Iron, London Broil, Flank Steak, Skirt Steak, Hangar Steak and Eye Round are going to greatly benefit from being marinated. I recently shared my current favorite steak marinade recipe called Drunken Steak which I highly recommend! You can also check out my friend Shelley's Brown Sugar Bourbon Marinade Here's what you need to know about marinating:
      • If you choose to marinate anything from the “middle meat category" (loin/rib) marinate 15 min – 2 hours tops!
      • If you grill anything from the round category, which really needs to be marinated as I mentioned above, you can marinate 12-24 hours, but never over 24 hours because it will make the meat mushy and mealy.
    • Sauce- I tend not to be a big fan of store-bought sauces like A1 on my steak (although I love it on a Cheesesteak sandwich!). But sometimes a great homemade sauce is the perfect addition! Check out my friend Michele's killer Chimichurri Sauce!

    how to season a steaksteak seasoning

    Let's make steak on the grill!

    Ok guys! So you picked your cut. You removed it from the fridge 20 minutes ago and seasoned it. You preheated your grill to medium heat as per your manufacturer's directions. Now it's time to start grilling! Here's what you need to do:

    • Place your steak on the hot grill and start it cooking.
    • Cooking times will vary but here's a helpful form that breaks down general grilling times by cut. Keep in mind, this will still vary a bit based on the thickness of your steak. You'll begin to see it cooking on the sides of the steak and as a general rule, if it doesn't easily release when you try to turn it, it's probably not ready to turn.
    • After a quarter of the time, keep the steak on the same side, but turn it ¼ of the way to get some nice cross-hatch grill marks if you want to feel fancy. How to get grill marks on a steak
    • Flip the steak only once, half way through your cooking time and make sure you use grill tongs because a fork can pierce it and let all those amazingly delicious juices out and no one wants that!
    • Eventually, you'll get to the point where you can tell if it's cooked by gently pressing the steak. But to ensure the proper temperature every time use a meat thermometer. When you're approaching the end of the cooking time, insert the meat thermometer into the thickest part of the steak. When it reaches about 10 degrees less than your ideal temperature (for example, the temperature for medium-rare is 135 degrees so you'll pull it at 125 degrees) pull it off the grill and onto a plate.
    • Tent your steak with foil and let it rest for 5-7 minutes to redistribute the juices. During this time, the steak will also keep cooking and come to your optimal temperature. how long to rest steak
    • Enjoy that steak and be sure to cut against the grain!

    Helpful tools for grilling meat:

    1. Grill tongs
    2. Meat thermometer

    Don't miss the giveaway!

    One other thing I want you to know is that the New York Beef Council is hosting a giveaway of a beautiful Weber grill starting on July 1st and going until July 31st. I'll update with a link once the giveaway starts, so be sure to check back!

    And make sure to connect with the New York Beef Council in these places:

    Website | Facebook | Twitter | Instagram | Youtube | Pinterest

    Looking for some other easy how-to's?

    • How to cook a baked potato
    • How to chiffonade basil
    • How to make perfectly seared salmon

    You can find a full index of my recipes here.

    Don’t forget to follow The Life Jolie on Pinterest for more recipe inspiration!

    Or if Pinterest isn’t your style, bookmark this post!

    Let’s keep the conversation going- join my Facebook group! One of the best ways to make a steak is on the grill and I'm going to teach you how to cook steak on the grill. In this tutorial you'll learn tips, tricks, hacks and everything you need to know to make it as easy as possible!
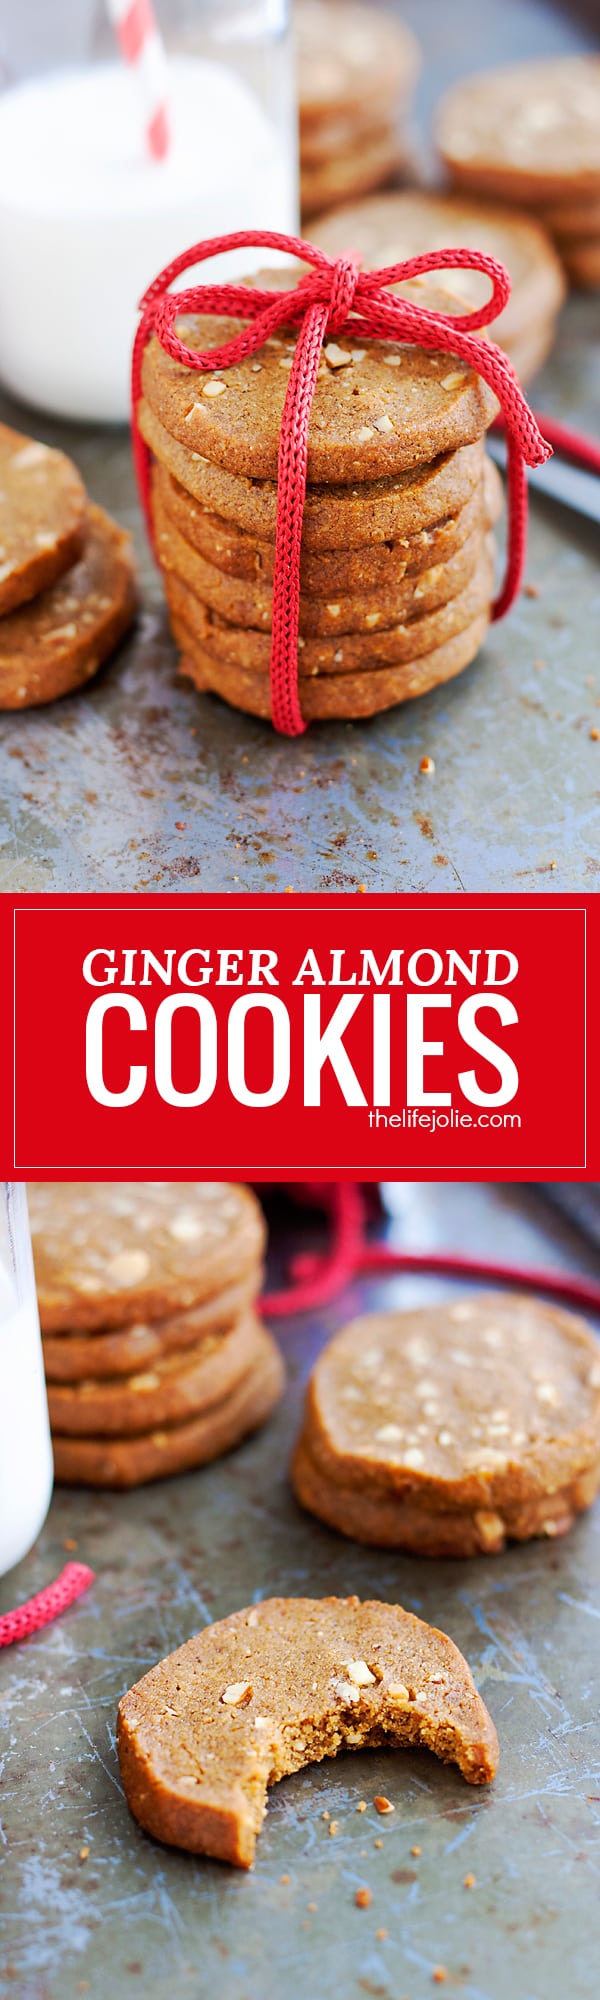
    Firecracker Vanilla Cupcakes

    Jun 21, 2018 · 4 Comments

    Firecracker Vanilla Cupcakes are the most fun kid's dessert the 4th of July- you'll love the POP ROCKS hidden inside for a totally fun surprise when you bite into them. These are a must-make and are SO easy!

    Firecracker Vanilla Cupcakes are the most fun kid's dessert the 4th of July- you'll love the POP ROCKS hidden inside for a totally fun surprise when you bite into them. These are a must-make and are SO easy!

    Firecracker Vanilla Cupcakes are the most fun kid's dessert the 4th of July- you'll love the POP ROCKS hidden inside for a totally fun surprise when you bite into them. These are a must-make and are SO easy!

    Firecracker Vanilla Cupcakes

    These cupcakes have been on my must-make list of about a year. I dreamed them up last year, right around 4th of July, but decided to hold off until this year. I knew I wanted to make something patriotic. And a filled cupcake seemed like a good way to go, specifically when I started really digging in and thinking about the theme.

    Because when you think about Independence Day and your activities for the day, fireworks immediately come to mind. And when I think fireworks, I think of loud cracks and pops (although perhaps that's because T is in a phase where she's terrified of fireworks and T and I spent her first Disney World fireworks browsing the gift shops!). With this in mind, I knew pop rocks would be the perfect way to add a fun surprise when people bite into it!

    I used a variation of my absolute favorite cake mix hack because it's the most perfectly moist vanilla cupcake recipe that you'll ever taste. And I opted to make these funfetti cupcakes to make them even more fun. Because who doesn't like funfetti, amirite?!

    confetti cupcakes

    Tips for making this firecracker vanilla cupcakes recipe:

    • Don't over mix the batter! Stop the mixer when the batter is almost fully mixed and then gently fold in the sprinkles.
    • If you have extra large eggs on hand, use those for even lighter and fluffier cupcakes.
    • If you don't like almond flavor (or can't have nuts) feel free to swap that out with whatever flavor extract you prefer.
    • I love using a cookie scoop for this because they're also great for quickly and easily filling muffin cups evenly. The scoop I used holds 3 tablespoons of batter. Highly recommend!
    • I find that the easiest way to hollow out the cupcake is to use the wide side of a pastry tip. Only bring it down so that half of the is covered. You can also use a knife. Either way don't go too deep and try to keep the piece you're taking out in one piece so you can put it back in once the pop rocks are in.
    • Speaking of Pop Rocks, make sure you put them in shortly before serving as they'll lose their pop if they sit too long.
    • I chose to keep a lighter hand on the frosting- this is more of a personal preference, but if you prefer more, just pipe more on.

    best vanilla cupcake recipe

    Helpful tools:

      1. Muffin pan
      2. Mixing bowl
      3. Measuring cups
      4. Measuring spoons
      5. Stand mixer or Hand mixer
      6. Spatula
      7. Medium cookie scoop
      8. Open star pastry tip
      9. Pop Rocks (They can be hard to find)

    cupcake recipeeasy cupcake recipe

    Video tutorial for making Firecracker Vanilla Cupcakes:

    Firecracker Vanilla Cupcakes are the most fun kid's dessert the 4th of July- you'll love the POP ROCKS hidden inside for a totally fun surprise when you bite into them. These are a must-make and are SO easy!

    Firecracker Vanilla Cupcakes

    Jessy Freimann
     Firecracker Vanilla Cupcakes are the most fun kid's dessert the 4th of July- you'll love the POP ROCKS hidden inside for a totally fun surprise when you bite into them. These are a must-make and are SO easy!
    5 from 2 votes
    Print Recipe Pin Recipe
    Prep Time 15 minutes mins
    Cook Time 20 minutes mins
    Total Time 35 minutes mins
    Course Dessert
    Cuisine American
    Servings 20 cupcakes

    Ingredients
      

    • 1 box white cake mix
    • 2 small packages instant vanilla pudding
    • 1 cup warm water
    • ¾ cup canola oil
    • 5 large or extra large eggs
    • 1 teaspoon almond extract
    • ½ cup sprinkles + extra for topping
    • 4-5 packages Pop Rocks
    • 3-4 cups Vanilla buttercream frosting (depending on how much you want)

    Instructions
     

    • Preheat the oven to 325 degrees and line a muffin tin with paper cupcake liners.
    • In a large bowl beat together cake mix, pudding mix, water, oil, eggs and almond extract until just combined. Stir in sprinkles.
    • Fill the muffin cups with 3 Tablespoons each of batter (or use a medium cookie scoop).
    • Bake 15-20 minutes and cool completely.
    • Use the back of a pastry tip to remove about an inch of the cupcake top.
    • Just before serving, pour ½ teaspoon of Pop Rocks into the hole and return the piece of cupcake into the hole to close it.
    • Pipe dabs of frosting on top and finish with a few more sprinkles.
    Tried this recipe?Let us know how it was!

    If you tried this recipe please comment and rate it 🙂 I love hearing your feedback and answering your questions!

    Looking for some other easy cupcakes recipes?

    • Peppermint Hot Chocolate Cupcakes
    • Mai Tai Cupcakes
    • Melted Ice Cream Cone Cupcakes

    You can find a full index of my recipes here.

    Don’t forget to follow The Life Jolie on Pinterest for more recipe inspiration!

    Or if Pinterest isn’t your style, bookmark this post!

    Let’s keep the conversation going- join my Facebook group! Firecracker Vanilla Cupcakes are the most fun kid's dessert the 4th of July- you'll love the POP ROCKS hidden inside for a totally fun surprise when you bite into them. These are a must-make and are SO easy because they're a cake mix hack!

    Summer Antipasto Platter

    May 31, 2018 · Leave a Comment

    What's the best way to enjoy this gorgeous summer weather? A girl's night on the deck of course! So grab your best girlfriends and enjoy this Summer Antipasto Platter. Full of cheese, meat, olives and plenty of delicious grilled vegetables it's SO easy to make and crazy delicious!

    What's the best way to enjoy this gorgeous summer weather? A girl's night on the deck of course! So grab your best girlfriends and enjoy this Summer Antipasto Platter!

    What's the best way to enjoy this gorgeous summer weather? A girl's night on the deck of course! So grab your best girlfriends and enjoy this Summer Antipasto Platter. Full of cheese, meat, olives and plenty of delicious grilled vegetables it's SO easy to make and crazy delicious!

    Thank you Middle Sister for sponsoring this post. Bring your favorite Middle Sister wine along to all of your celebrations this year!

    ...And just like that, Mother Nature flipped a switch and ushered in that gorgeous, summer weather we've all been waiting for. Never mind the fact that she basically skipped right over spring. I'll let that one slide because I am so ready for some sunshine!

    One of my favorite things about summer is being able to sit out on our back deck with a nice glass of wine and some tasty food with my girlfriends. There's generally a ton of laughter involved and some of my favorite memories involve these laid back, fun times. We all love to enjoy a bottle of great wine, which is why I'm so excited to tell you about Middle Sister Wines.

    Great wine with great friends

    Middle Sister wines were created 10 years ago by the founding women of the Wine Sisterhood. Founder Terry Wheatley was fascinated by her best friend’s middle daughter, Erin. From childhood, she was just more outrageous, more free-spirited and simply larger than life. Terry created Middle Sister wines for middle sisters everywhere, so they finally get the attention they deserve. Middle Sister wines are also proud to support Causes women care about, including Sonoma Valley Wine Business Executive MBA Scholarship for women in the wine industry, Angels Share and Heart of the Vine.

    A bottle of Middle Sister Wine

    A Grilled Antipasto Tray to bring in the summer

    I love a good antipasto salad at any time of the year. They're generally super easy to assemble and I love that there's something for everyone to enjoy. Basically, they're the perfect throw-together option for a girls night with Middle Sister wines on the back deck!

    And being that I am in full-on summer mode, I thought it would be fun to keep the summer theme going by incorporating it into my antipasti platter. Grilling was a natural next step, so I included lots of fresh and seasonal vegetables along with some light cheeses, soppressata, olives and plenty of fresh grilled baguette.

    antipasto salad

    What is antipasto?

    Antipasto means "before the meal" in Italian. It is traditionally the first course in a formal Italian meal. Typically, it will consist of things like olives, cheeses, meats, marinated vegetables...even anchovies! The great thing is, you can totally take it in whatever direction you want and substitute ingredients based on your own personal tastes and preferences.

    antipasto tray

    Tips for making a great summer antipasto platter

    • You can totally grill the vegetables ahead of time. In my opinion, they're at their very best served right away, but it's always nice to have options.
    • Make the plate pretty! This kind of appetizer lends itself as a gorgeous centerpiece for a summer girl's night and you don't have to be a food stylist to make it look pretty.
    • Pick the right platter. Not only do you want it to be big enough, but this is also a great opportunity to showcase your serveware. Even a gorgeous cutting board is a fun option!
    • Get some great bread! Girl's nights are the best times to indulge. Get some awesome and fresh baguette, drizzle it with a little olive oil and grill it up a bit for extra-delicious flavor and crunch.
    • Don't forget the wine! Middle Sister Wines are the perfect options to pair with a summer antipasto platter. There are 6 different varieties, so you'll have something for everyone!

    what is antipasto

    antipasti

    Antipasto

    What's the best way to enjoy this gorgeous summer weather? A girl's night on the deck of course! So grab your best girlfriends and enjoy this Summer Antipasto Platter. Full of cheese, meat, olives and plenty of delicious grilled vegetables it's SO easy to make and crazy delicious!

    Summer Antipasto Platter

    Jessy Freimann
    What's the best way to enjoy this gorgeous summer weather? A girl's night on the deck of course! So grab your best girlfriends and enjoy this Summer Antipasto Platter!
    5 from 3 votes
    Print Recipe Pin Recipe
    Prep Time 15 minutes mins
    Cook Time 30 minutes mins
    Total Time 45 minutes mins
    Course Appetizer
    Cuisine Italian

    Ingredients
      

    • Mushrooms
    • Zucchini
    • Bell peppers
    • Baby artichokes
    • Eggplant
    • Asparagus
    • Fresh mozzarella
    • Tomatoes
    • Soppressata
    • Ricotta Cheese
    • Romano Cheese
    • Lemon
    • Salt
    • Pepper
    • Garlic powder
    • Olive oil

    Instructions
     

    Prepping the baby artichokes

    • Using a very sharp knife, slice off the top of each baby artichoke.
    • Remove the outer leaves until you get to the more tender, lighter green leaves.
    • Gently shave off the outer layer of the stem and trim the tip. 
    • Cut each baby artichoke in half and keep in a bowl of cold water with lemon juice and put the artichoke halves in it (to keep them from turning brown while you trim the others, which can happen quickly)
    • Boil the artichoke halves and lemon for 10-15 minutes prior to grilling.

    Prepping the eggplant

    • Slice the eggplant to around ⅓ of an inch length-wise.
    • Sprinkle with kosher salt and let them sit for 10-15 minutes on a paper towel lined plate (to pull out the moisture).
    • Use more paper towel to blot the extra water off the eggplant.

    Grilled vegetables- mushrooms (on skewers), zucchini (sliced length-wise to about ¼ inch thick), bell peppers (cut into thick slices), eggplant (see above) and baby artichokes (see above)

    • Preheat the grill to medium high and spray with olive oil.
    • Drizzle all veggies with olive oil and season to taste with salt, pepper and garlic powder.
    • Grill on each side until you have some nice grill marks and the veggies are tender (see note for link to asparagus recipe and whipped ricotta recipe)

    Assembling the antipasto plate

    • Place the ingredients onto a large platter or cutting board, sectioned off by ingredient. I used bowls for the olives and whipped ricotta to add visual interest and keep them together.

    Notes

    Please find the recipe for Grilled Balsamic Asparagus.
    Please find the recipe for Whipped Ricotta.
    Tried this recipe?Let us know how it was!

    If you tried this recipe please comment and rate it 🙂 I love hearing your feedback and answering your questions!

    Looking for some other awesome summer appetizers? Try these:

    • 10 Minute Shrimp Salsa
    • Grilled Peaches and Burrata Salad
    • Deviled Eggs with Bacon and Jalapeno
    • Vicky's Tabouli

    You can find a full index of my recipes here.

    Don’t forget to follow The Life Jolie on Pinterest for more recipe inspiration!

    Or if Pinterest isn’t your style, bookmark this post!

    Let’s keep the conversation going- join my Facebook group! 
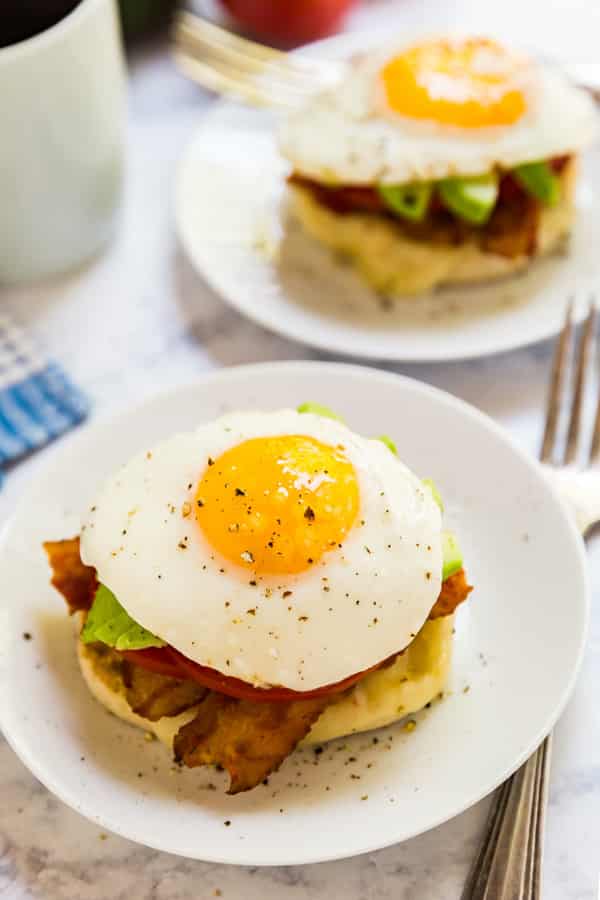
    I was selected for this opportunity as a member of CLEVER and the content and opinions expressed here are all my own.

    Grandma's Non-Smoky Homemade BBQ Sauce and Grilled Chicken

    May 21, 2018 · 2 Comments

    Grandma's Non-Smoky Homemade BBQ Sauce is the crazy easy grilling marinade that you won't be able to stop eating this summer. This is a total crowd-pleaser!

    Grandma's Non-Smoky Homemade BBQ Sauce is the crazy easy grilling marinade that you won't be able to stop eating this summer. This is a total crowd-pleaser!

    Grandma's Non-Smoky Homemade BBQ Sauce is the crazy easy grilling marinade that you won't be able to stop eating this summer. This is a total crowd-pleaser!

    Grandma's Non-Smoky Homemade BBQ Sauce

    bbq chicken

    This post contains Affiliate Links. Please see the disclaimer here.

    Do you know that for a long time this was the only thing I knew as BBQ sauce? I know. But if I'm being honest, I'm not even a tiny bit sad about it. I have very fond memories of my mom whipping this up during the summer and all of us loving dipping our chicken in it (and sometimes even our potatoes!).

    This homemade bbq sauce recipe has the added bonus of also being a BBQ chicken recipe.So I'll be showing you how to make BBQ chicken on the grill in addition to how to the bbq sauce recipe. Bonus!

    Now one complaint my husband often has about many of the BBQ sauce options out there, is that most of them are too smoky for his taste. This sauce is the perfect, easy option if you have friends or family that aren't into that smoky flavor. It's still got the delicious tang along with the bit of sweetness we all love in our BBQ sauces. It's crazy easy to and totally quick to make. And you could totally double it for a crowd (or even triple it!).

    bbq sauce recipe

    Frequently asked questions about this BBQ chicken marinade

    • What kind of chicken pieces are best to use? Honestly, all the pieces work great, it really comes down to your own personal taste. I've featured boneless, skinless chicken breasts for the photos but that's only because it won in the poll I had over on my Instagram stories (which you should totally follow because I do a lot of polls about what kinds recipes you want while also sharing all of our family's shenanigans!). Our house is split right down the middle- I'm Team BBQ Chicken Thighs while J stands firm in his love for BBQ Chicken Breast.
    • What if I forget to marinate the chicken well in advance? Don't worry I'd encourage you to marinate it for a couple hours at most, but even just marinating the chicken for 15 minutes while you prep the rest of your meal and heat the grill.
    • Can I use a different meat outside of chicken? Of course- the world is your oyster! This sauce is tasty on just about any meat you're working with!
    • Can I make the sauce in advance? Totally! I actually made it the morning before I cooked it up for these photos, but it will last up to a week in the fridge.
    • Can I reuse the marinade that the raw chicken was sitting in? Never reuse marinade that raw meat has been sitting in as it can contain bacteria which can make you very sick. The only exception is that you can boil it well for at least 3 minutes. But honestly, there will be plenty of sauce leftover, even if you don't double the recipe. Also, this tends to make a thicker sauce, especially if you puree it like I did. Throw out the leftover sauce from the marinade. After you make the sauce, put a cup of it on your raw meat, put a small portion aside for basting and then warm the rest to serve with the cooked meat.
    • I prefer a chunkier sauce, can I skip the pureeing step? Absolutely! The original sauce was served with the chunks of onions and peppers left intact. The pureeing step was really just my own addition based on my family's personal preferences.

    homemade bbq sauce

    Helpful tools:

    1. Wooden spoon
    2. Saucepan
    3. Instant Read Thermometer
    4. Grill tongs
    5. Chef's knife
    6. Cutting board
    7. Silicone brush

    bbq sauce

    Grandma's Non-Smoky Homemade BBQ Sauce is the crazy easy grilling marinade that you won't be able to stop eating this summer. This is a total crowd-pleaser!

    Grandma's Non-Smoky Homemade BBQ Sauce

    Jessy Freimann
    Grandma's Non-Smoky Homemade BBQ Sauce is the crazy easy grilling marinade that you won't be able to stop eating this summer. This is a total crowd-pleaser!
    No ratings yet
    Print Recipe Pin Recipe
    Prep Time 10 minutes mins
    Cook Time 45 minutes mins
    Inactive time 30 minutes mins
    Total Time 55 minutes mins
    Course Main Course
    Cuisine American
    Servings 4 servings

    Ingredients
      

    • 2 Tablespoons olive oil
    • 1 cup onion, minced
    • 1 cup green peppers, minced
    • 1 28 ounce can tomato sauce
    • 2 teaspoons yellow mustard, or to taste
    • 1 Tablespoon apple cider vinegar, or to taste
    • ¼ cup brown sugar, packed
    • 1 teaspoon kosher salt
    • ¼ teaspoon black pepper
    • Cooking spray
    • 4-5 chicken breasts (or whichever meat you'd like)

    Instructions
     

    • Heat the oil in a pot over medium-high heat.
    • Add onions and peppers and saute until softened, about 7-10 minutes.
    • Add sauce, mustard, vinegar, brown sugar, salt and pepper.
    • Simmer uncovered for 30 minutes, stirring periodically.
    • Use blender or food processor to blend sauce until smooth (optional). Refrigerate until you're ready to use.
    • Marinate chicken for up to a few hours in one cup of the sauce (reserve a small portion of remaining sauce for basting during grilling and save the rest for dipping later).
    • When you're ready to cook, preheat the grill to medium high. Place the chicken on the grill and dispose of the marinade.
    • Cook each piece of chicken for around 5-7 minutes per side, brushing the cooked sides of the chicken with reserved sauce (this will vary based on the thickness of your meat). 
    • Rest for 5-10 minutes and serve immediately with reserved dipping sauce.

    Notes

    The sauce ingredients are meant to be to taste. Taste the sauce as it cooks and add more of whatever you feel is needed.
    Tried this recipe?Let us know how it was!

    If you tried this recipe please comment and rate it 🙂 I love hearing your feedback and answering your questions!

    Looking for some other easy sauce recipes?

    • Cheese Sauce for Broccoli
    • Easy Pizza Sauce
    • Spicy Meat Hot Sauce
    • Sunday Sauce

    You can find a full index of my recipes here.

    Don’t forget to follow The Life Jolie on Pinterest for more recipe inspiration!

    Or if Pinterest isn’t your style, bookmark this post!

    Let’s keep the conversation going- join my Facebook group! Grandma's Non-Smoky Homemade BBQ Sauce is the crazy easy grilling marinade that you won't be able to stop eating this summer. This is a total crowd-pleaser!
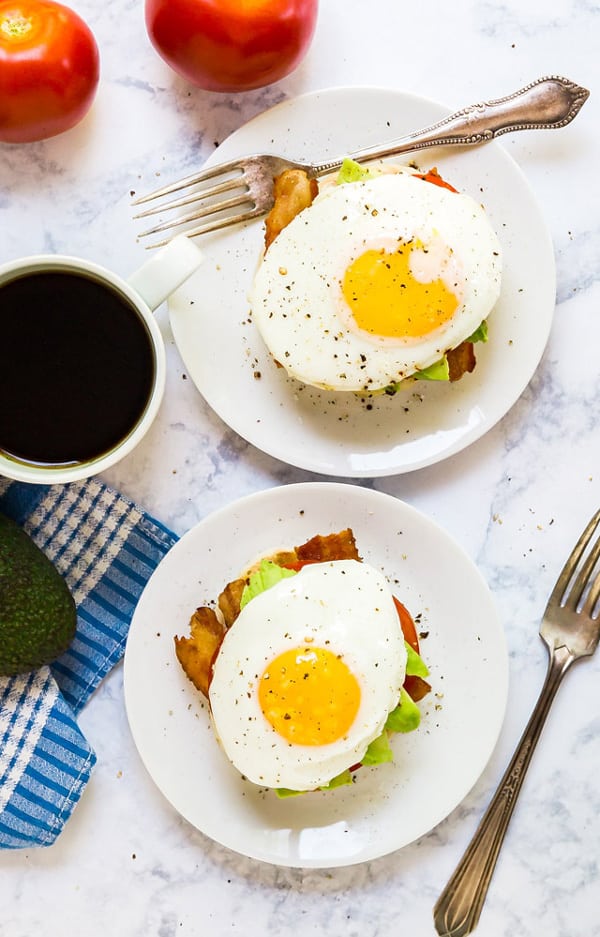
    How to cook a baked potato perfectly | The Life Jolie Kitchen Basics

    Apr 26, 2018 · 6 Comments

    Who doesn't love a good baked potato? I'm going to show you all the tips and tricks for how to cook a baked potato perfectly!

    Who doesn't love a good baked potato? I'm going to show you all the tips and tricks for how to cook a baked potato perfectly!Who doesn't love a good baked potato? I'm going to show you all the tips and tricks for how to cook a baked potato perfectly!

    How to cook a baked potato perfectly

    How to bake a potato

    This post contains Affiliate Links. Please see the disclaimer here.

    Let me start by saying that baked potatoes are not just for those of us getting the early bird special. On their own, they're super satisfying. Slightly crispy skin on the outside and tender and steaming hot potato on the inside.

    There's something so fantastically versatile about the perfect baked potato. You could keep it simple with a nice pat of butter. There's classic sour cream and chives (my personal favorite!). You could load it up with cheddar cheese, bacon, sour cream and scallions if you want to go big. And of course cheddar and broccoli are never a bad addition! But first you've got to master how to bake a potato.

    How long to bake a potato Frequently asked questions about how to make the perfect baked potato

    • How long to bake a potato? This will vary based on the size of your potatoes and your temperature. I tend to go with 400 degrees for around an hour.
    • Is a baked potato good for you? This is such a loaded question (see what I did there?). Overall, I'd say, they're reasonably healthy. Low in calories. Plenty of fiber. Yes, it's a carb. You guys know I'm all about moderation. It's all the crazy toppings that tend to knock baked potatoes into the "unhealthy" column.
    • Can you make a baked potato on the grill? Yes, however you probably won't get that great crispy skin because I tend to wrap my potatoes in foil for the grill. You'll preheat grill to medium high and cover the grill once the potatoes are on to cook of one hour.
    • How do you make a quick baked potato? After you poke the potato well with a fork, microwave for 4-5 minutes before baking for 30 minutes.

    Baked potato on grill

    How to cook a baked potato

    Helpful tools:

    1. Sheet pan
    2. Chef’s knife
    3. Cutting board


    Who doesn't love a good baked potato? I'm going to show you all the tips and tricks for how to cook a baked potato perfectly!

    How to cook a baked potato perfectly

    Jessy Freimann
    Who doesn't love a good baked potato? I'm going to show you all the tips and tricks for how to cook a baked potato perfectly!
    No ratings yet
    Print Recipe Pin Recipe
    Prep Time 5 minutes mins
    Cook Time 1 hour hr
    Total Time 1 hour hr 5 minutes mins
    Course Side Dish
    Cuisine American
    Servings 4 potatoes

    Ingredients
      

    • 4 Russet potatoes
    • Olive oil cooking spray
    • Kosher salt

    Instructions
     

    • Preheat the oven to 400 degrees.
    • Wash each potato well, scrubbing off any dirt. Dry the potatoes.
    • Pierce each potato a few times with a fork (make sure you really get it in there).
    • Lightly spray the potatoes with cooking spray and sprinkle with kosher salt to taste.
    • Place the potatoes right on the grates of the oven shelf. Place a foil lined pan on the shelf underneath them.
    • Bake for 50 minutes.
    • Remove the potatoes from the oven cool for 5-10 minutes. Serve immediately.
    Tried this recipe?Let us know how it was!

    If you tried this recipe please comment and rate it 🙂 I love hearing your feedback and answering your questions!

    Looking for some other easy kitchen how-to's?

    • Common cuts of beef and how to cook them
    • How to make perfectly seared salmon
    • How to chop an onion

    You can find a full index of my recipes here.

    Don’t forget to follow The Life Jolie on Pinterest for more recipe inspiration!

    Or if Pinterest isn’t your style, bookmark this post!

    Let’s keep the conversation going- join my Facebook group! 
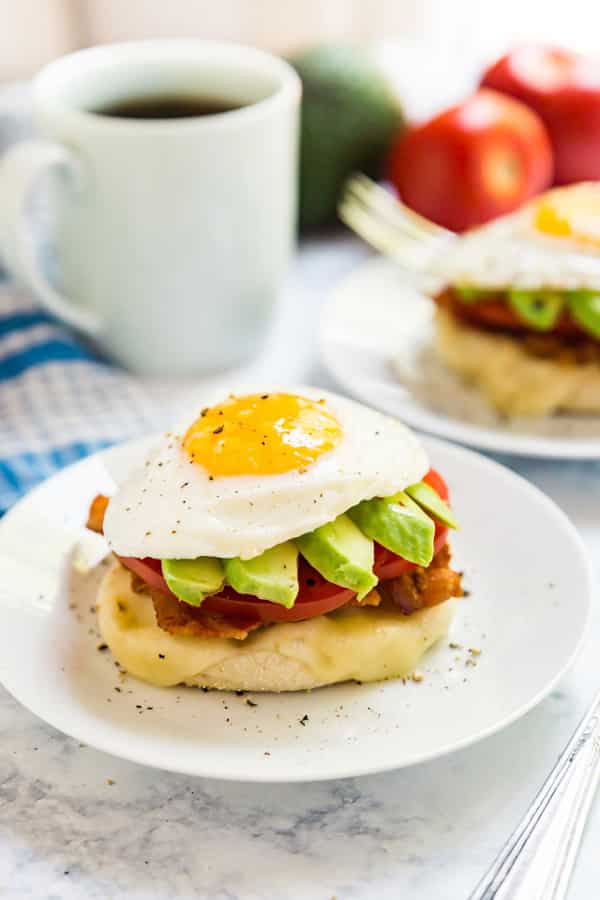
    • « Go to Previous Page
    • Page 1
    • Interim pages omitted …
    • Page 14
    • Page 15
    • Page 16
    • Page 17
    • Page 18
    • Interim pages omitted …
    • Page 21
    • Go to Next Page »

    Primary Sidebar

    Jessy in a kitchen holding a white casserole pan and smiling.
    Hi, I'm Jessy!

    Welcome to The Life Jolie! I share simple, delicious recipes and ingredient prep tips to make your weeknight cooking a breeze!

    More about me →

    Easy Dinner Recipes

    • An overhead image of a Mexican Shrimp Quinoa Bowl.
      Shrimp Quinoa Bowls
    • A bowl of asian soup with meatballs with a spoon and noodles in it.
      Asian Soup with Cabbage and Meatballs
    • A close up of roasted red potatoes on a pan.
      Roasted Red Potatoes Recipe
    • A spoon lifting up a scoop of eggplant parm bake with melt cheese trailing behind it.
      Eggplant Parm Bake
    • A close up of a drum chicken wing in a pile of other wings.
      Oven Baked Chicken Wings
    • An overhead image of a bowl of minestrone soup.
      Traditional Minestrone Soup Recipe

    Popular Recipes

    • A glass bowl of melted chocolate with a spatula dripping some back into the bowl.
      How To Melt Chocolate Chips In The Microwave
    • Italian Stuffed Zucchini Boats are the healthy weeknight meal you'll want to make again and again. This is a seriously easy recipe that's full of delicious flavor without all the guilt!
      Italian Stuffed Zucchini Boats
    • A close up shot of the side of a shallow bowl of shrimp mac salad.
      Shrimp Macaroni Salad
    • A white pan pouring cheese sauce over a bowl of steamed broccoli.
      Cheese Sauce for Broccoli Recipe
    • An overhead image of a plate of chicken lettuce wraps with peanut sauce next to it and all the fixings surrounding it.
      Copycat Cheesecake Factory Thai Chicken Lettuce Wraps
    • A close up image of a piece of greek marinated chicken on a white plate with lemons on the plate and in the background.
      Greek Yogurt Chicken
    Jessy in a kitchen holding a white casserole pan and smiling.
    Hi, I'm Jessy!

    Welcome to The Life Jolie! I share simple, delicious recipes and ingredient prep tips to make your weeknight cooking a breeze!

    More about me →

    Easy Dinner Recipes

    • A close up of a bagel pizza with mini pepperonis on a pan.
      Bagel Pizzas Recipe
    • A bowl of chicken and orzo soup with a spoon in it.
      Chicken and Orzo Soup
    • A bowl of Swedish meatballs and noodles.
      Swedish Meatballs And Noodles
    • A close up image of a piece of coconut shrimp on top of others.
      Coconut Shrimp With Sauce
    • An overhead image of taco soup in a bowl.
      Crockpot Taco Chicken Soup
    • A spoon pulling up a scoop of skillet lasagna with melted cheese stretching behind it.
      No Bake Lasagna Skillet

    Popular Recipes

    • A glass bowl of melted chocolate with a spatula dripping some back into the bowl.
      How To Melt Chocolate Chips In The Microwave
    • Italian Stuffed Zucchini Boats are the healthy weeknight meal you'll want to make again and again. This is a seriously easy recipe that's full of delicious flavor without all the guilt!
      Italian Stuffed Zucchini Boats
    • A close up shot of the side of a shallow bowl of shrimp mac salad.
      Shrimp Macaroni Salad
    • A white pan pouring cheese sauce over a bowl of steamed broccoli.
      Cheese Sauce for Broccoli Recipe
    • An overhead image of a plate of chicken lettuce wraps with peanut sauce next to it and all the fixings surrounding it.
      Copycat Cheesecake Factory Thai Chicken Lettuce Wraps
    • A close up image of a piece of greek marinated chicken on a white plate with lemons on the plate and in the background.
      Greek Yogurt Chicken

    Footer

    ↑ back to top

    About

    • About Me
    • Privacy Policy + Disclaimer

    Newsletter

    • Sign Up! for emails and updates
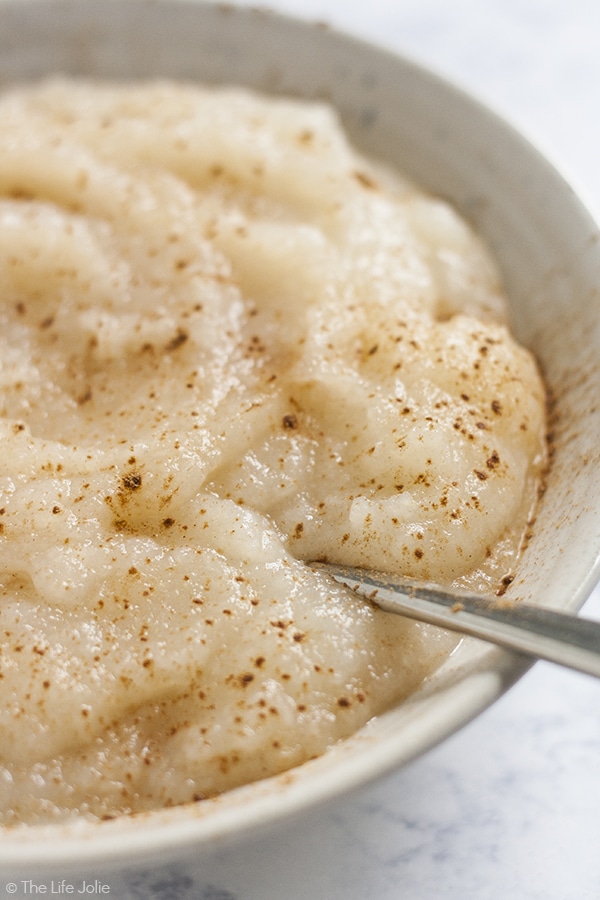
    Contact

    • Contact
    • Video Production

    As an Amazon Associate I earn from qualifying purchases.

    Copyright 2014-2021 - Jolie Ventures, LLC. All Rights Reserved. Privacy Policy.

    Rate This Recipe

    Your vote:


    A rating is required
    A name is required
    An email is required