
• Skip to primary navigation
  • Skip to main content
  • Skip to primary sidebar
The Life Jolie logo
  • Easy Dinner Recipes
  • Recipes
  • About
  • Contact
    • Work with me!
    • Video Production
  • Nav Social Menu

    • Email
    • Facebook
    • Instagram
    • Pinterest
    • Twitter
    • YouTube
menu icon
go to homepage
subscribe
search icon
Homepage link
  • Easy Dinner Recipes
  • Recipes
  • About
  • Contact
    • Work with me!
    • Video Production
    • Email
    • Facebook
    • Instagram
    • Pinterest
    • Twitter
    • YouTube
  • ×
    The Life Jolie » Page 19

    Yummy Beans or the Most Delicious Baked Beans

    Yummy Beans or the Most Delicious Baked Beans

    Jul 24, 2017 · 3 Comments

    A square image of the Most Delicious Baked Beans.

    This recipe for the Most Delicious Baked Beans is the best quick and easy recipe for a crowd! Made with brown sugar, bacon and tons of different varieties of beans, they bake up perfectly in the oven and no one will be able to resist going in for seconds!

    A close up image of the corner of a pan of Most Delicious Baked Beans with a spoon in it.

    This post contains Affiliate Links. For more information please see the disclaimer here.

    This past weekend not only flew by, but I kind of felt like I didn't get a moment to rest and breathe. It was a great weekend but I'm exhausted.

    On Friday night, J went to a new local casino with some friends. So I grabbed the girls and we had dinner at my mom's (my dad also happened to be at the casino that night).

    It was very interesting to watch A eat that night. We pan-seared some of the most fantastic Sockeye Salmon- it was sweet and delicious with the great flavor that you can only find in wild-caught salmon. We also had some simple green beans and some rice.

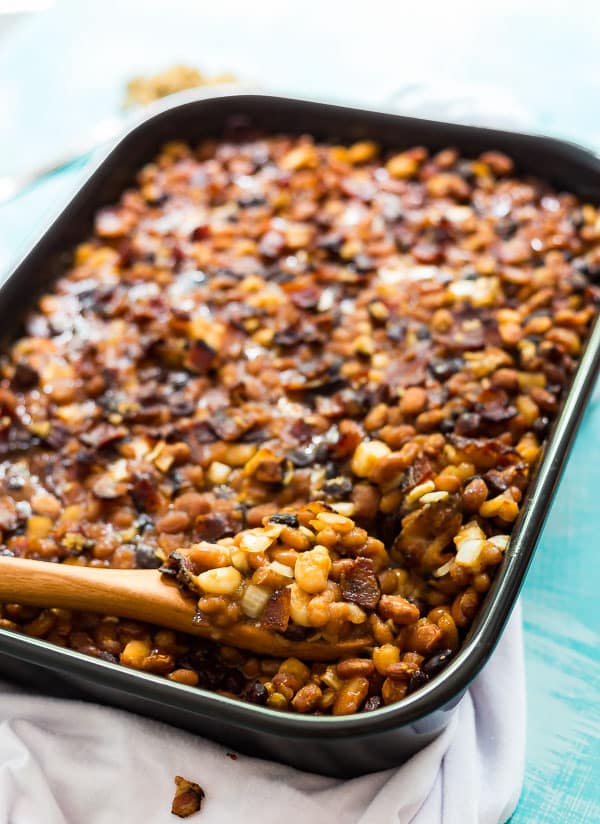
    An overhead image of Most Delicious Baked Beans on a white cloth with a blue background, some crumbled bacon, a wooden spoon and an overflowing spoonful of brown sugar.

    It was interesting because she's in the toddler phase that they all go through where they suddenly "don't like" things that they had previously loved (like Salmon and...you know...alllll the things!). If you're a longtime reader of this blog, you already know that I'm no stranger to picky eaters. J is one of the pickiest eaters I know.

    And A really isn't that picky, at least not compared to most of the toddlers I've been around. It's more just her trying to assert her independence and power. I don't make a huge deal out of it, since I refuse to have a power struggle and she always at least tries everything (ahhhh, the power of the no-thank-you-bite!).

    But under normal circumstances, when I make fish there's usually also a different protein also available for Mister-Picky. I know this is a total double standard since I never, ever cook different meals for my girls, so why would I ever do it for him? And those also happen to be the nights that A gets extra weird about fish. Coincidence? I'm starting to think it's not.
    Especially since she ate it with very little to say on Friday night when there were no alternatives available. While she didn't have the same unbridled enthusiasm as her sister, she definitely ate well beyond the requisite no-thank-you-bite.

    So it seems obvious that I need to reevaluate my strategy. It can be so easy to fall into a pattern of foods and J and I both recognize the importance of consistently introducing the girls to a variety of different foods. I'd like to start cooking at least one "weird" or more accurately, different dish per week. I'll let you guys know how it goes.


    In our circle, these beans have always been referred to as Yummy Beans. Which makes sense, because yummy is probably the best word to describe them!

    Originally shared with is by our across-the-street neighbor, Wendy, these were an instant hit and quickly became a stand by at every back yard BBQ. On a side note, as kids we could always count on Wendy to share an endless supply of Pixy Stix to fuel our summertime sugar highs!

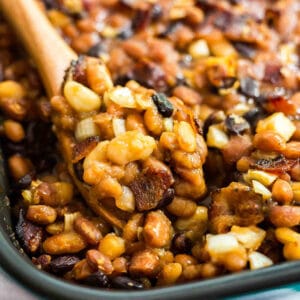
    A spoon pulling up a scoop of Most Delicious Baked Beans from the pan.

    They have the sweetness of the brown sugar, the savory smokiness of the bacon (I reserved some to top it with as well so that you'd get some bacon in every bite) and a few different varieties of beans.

    And even better they require minimal work up front. Just fry up some bacon, open a few cans, mix it all together and pop it in the oven. It makes a pretty huge amount, so this is a great go-too for a group gathering (they will want seconds!). You can always half the recipe if you're cooking for a smaller crowd.

    The recipe also calls for ground beef, which I personally omit when using this as a side dish, but if you're looking to make a meal of this, the ground beef really is the perfect addition!

    A shot of the left side of a pan of Most Delicious Baked Beanswith a spoon of brown sugar and some bacon crumbled on the side of it.

    Other great picnic sides are:

    • Grilled Peaches and Burrata Salad
    • German Potato Salad
    • Green Bean Salad
    • Tuna Macaroni Salad
    • Peas and Shrimp Salad
    • Roasted Beets Salad with Feta and Dill
    • Greek Couscous Salad
    • Mexican Bean Salad
    • Tomato Salad
    • German Potato Salad
    • Vicky’s Tabouli
    A square image of the Most Delicious Baked Beans.

    Yummy Beans or the Most Delicious Baked Beans

    Jessy Freimann
    This recipe for the Most Delicious Baked Beans is the best quick and easy recipe for a crowd! Made with brown sugar, bacon and tons of different varieties of beans, they bake up perfectly in the oven and no one will be able to resist going in for seconds!
    5 from 1 vote
    Print Recipe Pin Recipe
    Prep Time 10 minutes mins
    Cook Time 50 minutes mins
    Total Time 1 hour hr
    Course Side Dish
    Cuisine appetizer, picnic food, Side dishes, Summer
    Servings 8 -10 servings

    Ingredients
      

    • 12 oz. of peppered bacon cooked until crisp and crumbled (reserve 3 slices to the side)
    • 2 large 28 oz. cans of Bush's Baked Beans, partly drained (your choice of flavor, I went with original)
    • 3 medium 14.5 oz. cans of beans, drained (I went with Pinto, Great Northern and Black Beans because I like the variety of colors)
    • 1 medium onion chopped
    • ½ cup ketchup
    • ½ cup brown sugar + a little bit to sprinkle on top
    • 3 Tbsp. vinegar apple cider or balsamic- I used apple cider
    • 1 Tbsp. yellow mustard
    • 1 lb. of hamburger browned until 90% cooked (optional- I didn't include this)

    Instructions
     

    • Preheat the oven to 375 degrees.
    • Mix all ingredients (except for the reserved 3 slices of bacon) until well combined.
    • Pour it into a large baking dish and sprinkle a bit of brown sugar and the remaining 3 slices of crumbled bacon on top.
    • Bake for 45-50 minutes.
    • Enjoy!
    Tried this recipe?Let us know how it was!

    Helpful tools:


    You can find a full index of my recipes here.

    Don't forget to follow The Life Jolie on Pinterest for more recipe inspiration!

    Or if Pinterest isn't your style, bookmark this post!

    Let's keep the conversation going- join my Facebook group! 

    This recipe for the Most Delicious Baked Beans is the best quick and easy recipe for a crowd! Made with brown sugar, bacon and tons of different varieties of beans, they bake up perfectly in the oven and no one will be able to resist going in for seconds!
    This recipe for the Most Delicious Baked Beans is the best quick and easy recipe for a crowd! Made with brown sugar, bacon and tons of different varieties of beans, they bake up perfectly in the oven and no one will be able to resist going in for seconds!

    Baked French Toast with Mixed Berries

    Jul 17, 2017 · 14 Comments

    a square image of Baked French Toast.

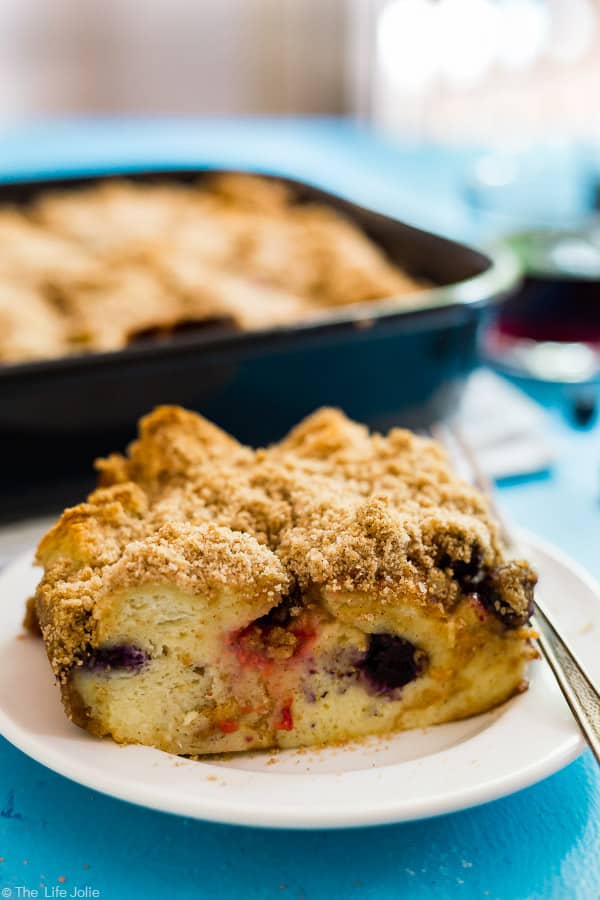
    This Baked French Toast with Mixed Berries is the best easy brunch recipe for entertaining. It's simple to make with challah, fresh berries and topped with a crunchy streusel topping; this makes a delicious breakfast casserole that is certain to please.

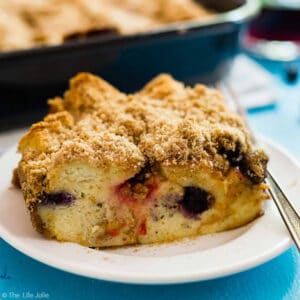
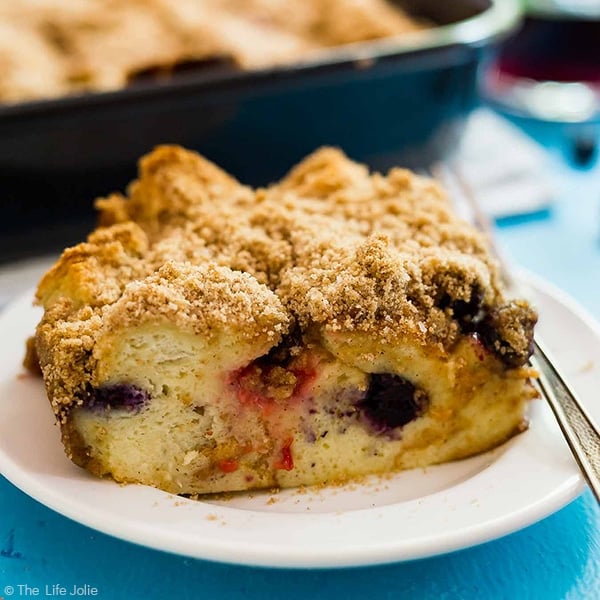
    A piece of Baked French Toast on a plate with a fork and the pan of Baked French Toast in the background.

    This post contains Affiliate Links. Please see the disclaimer here.

    T is officially 16 months old as of last Friday! She is a busy, busy little lady. Always getting into everything. At a play date this past weekend, we looked away for one moment and she got into the family''s baking drawer and dumped out a whole bag of chocolate chips! I was somewhere a between mortified and amused but the other mom was so gracious and laughed it off.

    I do this thing to amuse my girls where I curl my fingers on each hand to meet my thumb and form "binoculars" with them and hold them up to my eyes and peer out at the girls. They both get a major kick out of it. A used to shriek and the tell me through her giggles to bring the monster out again.

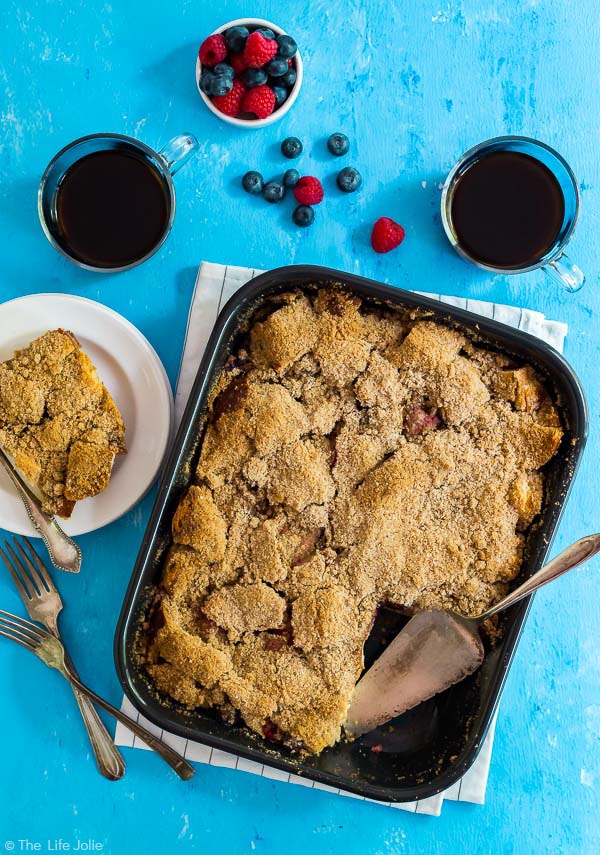
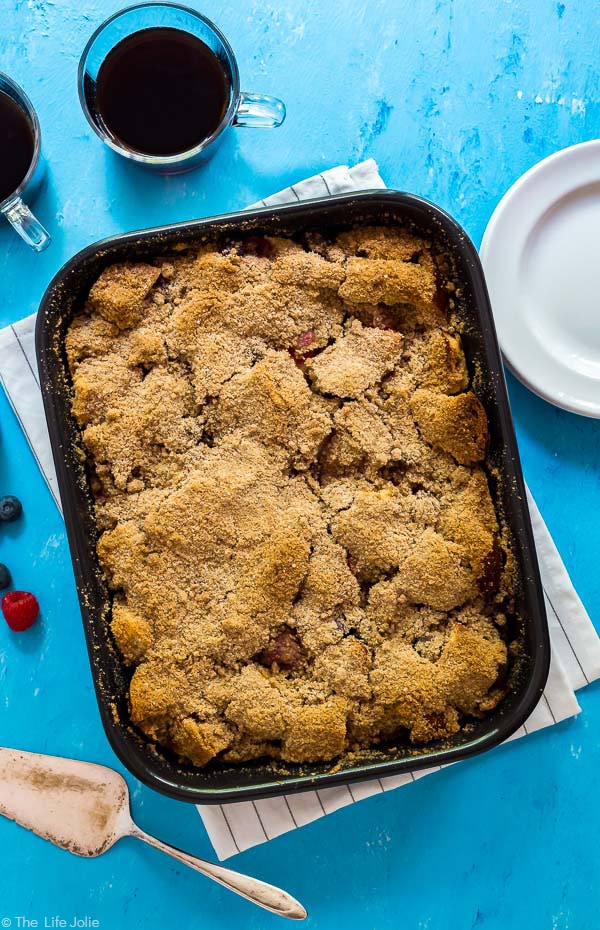
    An overhead image of a pan of with plates, coffee, berries and a pie server around it.

    This only made T love it even more. Unless she's in an extra horrible mood (which is extremely rare) this can pretty much always guarantee me a big, toothy Tessa smile. Lately, she's actually started pulling her hands up to try and mimic my "binoculars." She's still not able to curve her fingers into the exact form but it's awesome to see her making so much progress for a kid her age!

    At the begining of August, T will be getting tubes in her ears. We've been going back and forth about this for a while. On one hand we really didn't want to just jump into any major medical procedure. While this is fairly common, there are still risks anytime a person is put under.

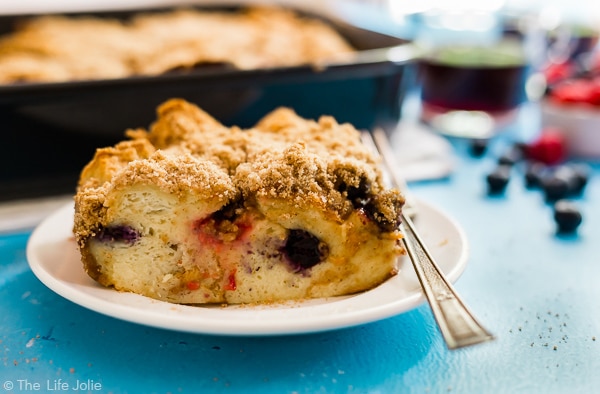
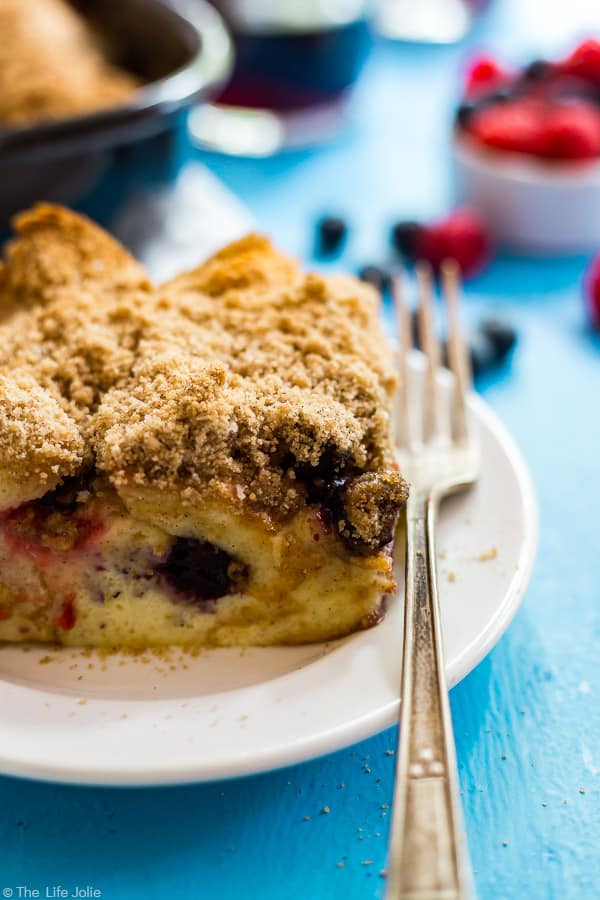
    A photo of a piece of Baked French Toast on a white plate with a fork on the side of it and coffee and berries in the background.

    But T continued to get ear infections, even into the summer (she just finished up another round of amoxicillin a couple weeks ago) and it became obvious that she wasn't growing out of this thing. We have her pre-op appointments later this week.

    I'm trying not to think too much about it, because I know I'm already going to be a basket case on the day of. I'm totally avoiding "Dr. Google." The procedure itself doesn't really bother me, it's more the thought of them having to put her under, even if it's just for fifteen minutes.

    I'll be glad when this is all over and my little girl gets some relief. I have to hand it to her- for all the discomfort those infections cause, she really is a trooper and handles it incredibly well.

    An image of a pan of Baked French Toast with coffee, berries and plates behind it.


    It's always good to have an easy and delicious, go-to brunch option. My Puff Pastry Breakfast Pizza is my favorite savory go-to but I needed a sweet go to as well. I kicked this around in my head for a while, mostly because the opportunity never presented itself.

    This changed a while back when a friend invited us over for brunch. Her sister, mom and Nephew were going to be coming into town from an hour away. He is 2 weeks younger than A and such a cutie- they were so small and now they'e practically teenagers (or at least A certainly acts that way sometimes!).

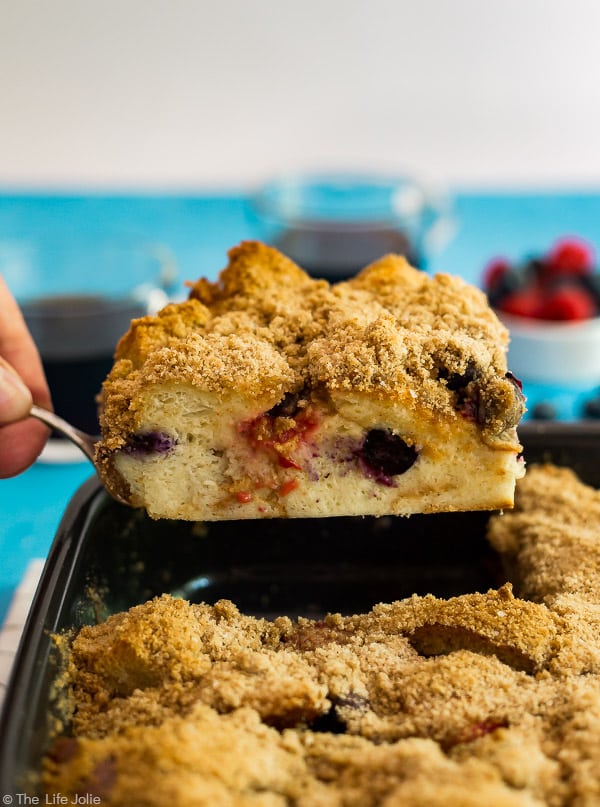
    A piece of Baked French Toast being lifted out of the pan.

    Anyway, it seemed like the perfect opportunity to try making some sort of baked french toast casserole. I did a little research and was inspired by this recipe from Ezra Pound Cake and this recipe from White Lights on Wednesday.

    After reading through both, I began mixing together items that I had on hand (I had already picked up a loaf of Challah in eager anticipation of making something). I also knew I wanted to add some berries into the mix and a streusel topping is always a good idea.

    An overhead image of Baked French Toast with a piece taken out and on a plate next to it and coffee, forks and berries around it.

    Everytime I make this, I continue to be so happy with how this turns out. It is definitely sweet, but the berries add a bright and fresh note and the streusel topping adds a delicious crunch. The inside is custard-y and delicious, like and good french toast should be.

    This is not a dish that needs syrup, although if you are a syrup lover, by all mean have at it. A sprinkle of confectioner's sugar might be a pretty addition, although not entirely necessary. I believe this dish is perfect to serve along side other brunch items that have a more savory flavor profile.

    a horizontal image of a piece of Baked French Toastwith the rest of it in the background .

    Other great brunch options include:

    Puff Pastry Breakfast Pizza

    Orange Roll Monkey Bread

    Sour Cream Coffee Cake

    Caprese Quiche

    Zucchini Pancakes

    Strawberry Goat Cheese Tart

    Chicken Salad Stuffed Tomatoes

    Asparagus and Leek Tart

    a square image of Baked French Toast.

    Baked French Toast with Mixed Berries

    Jessy Freimann
    This Baked French Toast with Mixed Berries is the best easy brunch recipe for entertaining. It's simple to make with challah, fresh berries and topped with a crunchy streusel topping; this makes a delicious breakfast casserole that is certain to please.
    No ratings yet
    Print Recipe Pin Recipe
    Prep Time 10 minutes mins
    Cook Time 40 minutes mins
    Total Time 50 minutes mins
    Course Breakfast, Main
    Cuisine Breakfast, Christmas, Holiday, Sweet
    Servings 10 servings
    Calories 342 kcal

    Equipment

    • 1 9 x 13 Pan
    • 1 mixing bowl
    • 1 Whisk
    • 1 Spatula
    • 1 mixing bowl
    • 1 cutting board
    • 1 chefs knife

    Ingredients
      

    Baked French Toast:

    • 6 large eggs
    • 2 ½ cups whole milk
    • 2 Tablespoons granulated sugar
    • 1 pinch Kosher salt
    • 1 teaspoon vanilla extract
    • 2 cups berries divided (I used raspberries and blueberries)
    • 1 loaf stale Challah cut into 1 ½ inch cubes (I cut mine and left it out overnight with a couple pieces of paper towel placed on top)

    Alton Brown's Streusel Topping

    • ½ cup all purpose flour
    • ¾ cup brown sugar
    • 1 teaspoon Kosher salt
    • 1 teaspoon ground cinnamon
    • 1 dash ground nutmeg
    • 2 Tablespoon salted butter softened

    Instructions
     

    Baked French Toast:

    • Preheat the oven to 350 degrees F and spray the 9" x 13" baking pan with cooking spray.
    • In a separate bowl mix the first five ingredients and whisk until well combined.
    • Put half of the Challah pieces into the baking pan and top with half of the berries.
    • Then put the rest of the Challah into the pan and top with the rest of the berries.
    • Pour your egg mixture evenly over the Challah and berries.
    • Top with wax or parchment paper and weigh down with another pan for 10 minutes (I happen to have multiple 9" x 13" pans and I put books in the empty one to weight it, but whatever will fit works).
    • Remove the pan and the paper and top the Challah with Streusel topping (recipe below).
    • Bake uncovered for around 50 minutes- 1 hour or until nicely browned. Allow at least 20 minutes to cool and then slice and serve.

    Streusel topping:

    • Mix all ingredients together until well combined and "crumbly."

    Notes

    Leftovers last up to 2 days in the refrigerator.

    Nutrition

    Serving: 1servingCalories: 342kcalCarbohydrates: 52gProtein: 11gFat: 10gSaturated Fat: 4gPolyunsaturated Fat: 1gMonounsaturated Fat: 3gTrans Fat: 0.1gCholesterol: 148mgSodium: 497mgPotassium: 233mgFiber: 2gSugar: 25gVitamin A: 441IUVitamin C: 1mgCalcium: 154mgIron: 2mg
    Tried this recipe?Let us know how it was!

    Helpful tools:


    You can find a full index of my recipes here.

    Don’t forget to follow The Life Jolie on Pinterest for more recipe inspiration!

    Or if Pinterest isn’t your style, bookmark this post!

    Let’s keep the conversation going- join my Facebook group! 

    This Baked French Toast with Mixed Berries is the best easy brunch recipe for entertaining. It's simple to make with challah, fresh berries and topped with a crunchy streusel topping; this makes a delicious breakfast casserole that is certain to please.


    Vicky's Easiest Ever Tabouli

    Jul 13, 2017 · 6 Comments

    A square image of the Easiest Ever Tabouli.

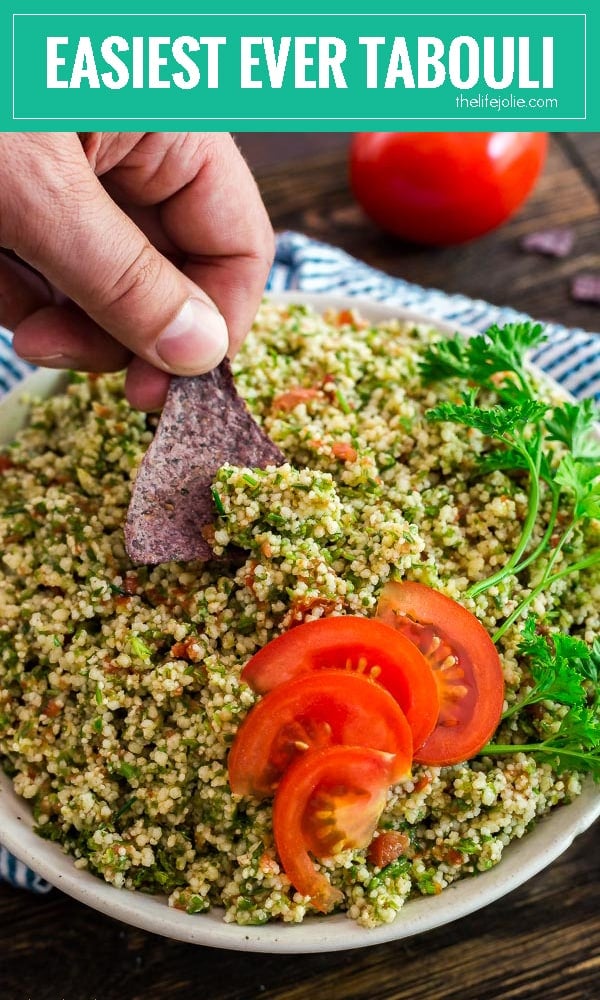
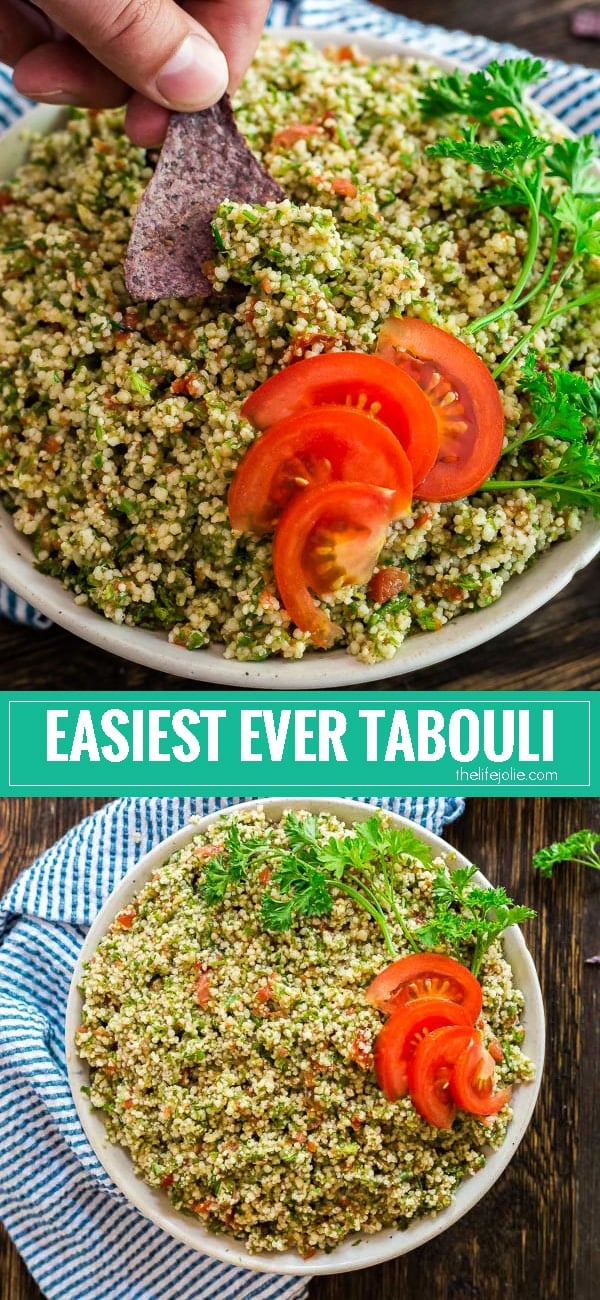
    This Easiest Ever Tabouli recipe is a healthy and simple make-ahead dish the whole family will love. It's full of fresh ingredients and great flavor and is perfect with tortilla chips as an appetizer or served as a side dish or salad with a meal.

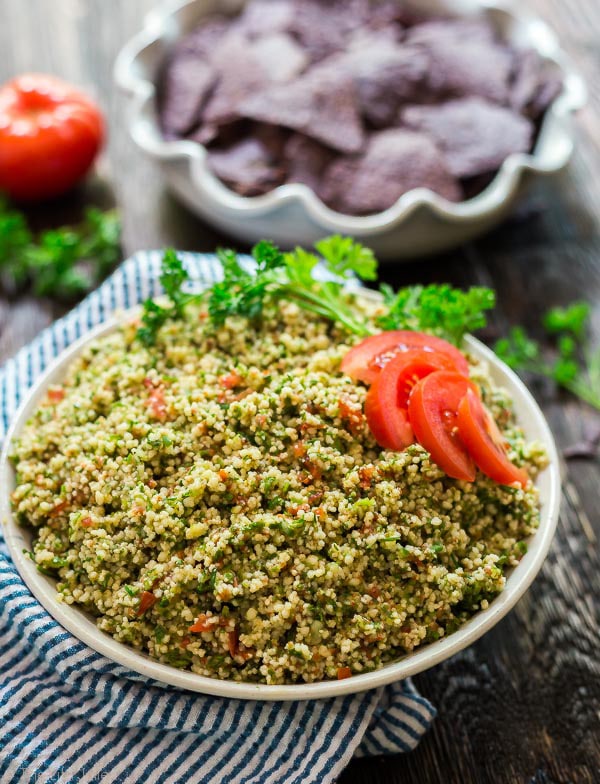
    Easiest Ever Tabouli in a bowl with tortilla chips in the background.

    This post contains Affiliate Links. Please see the disclaimer here.

    We're at a new place in our parenting life and it's fun and exciting and little bit scary. For some parents this place comes much earlier, but we're here now. The play date place.

    We are among the first of our good friends to start having babies. And while they're all extremely understanding and supportive, there aren't a lot of little ones for our girls to play with in our inner circle, save for a few people.

    Now with kids T's age (one) that's not a huge deal. She's hasn't truly begun to socialize the way an older toddler does. But A is at an age where she is beginning to form relationships with other kids. She'll come home from daycare talking about various friends and how much she loves them.

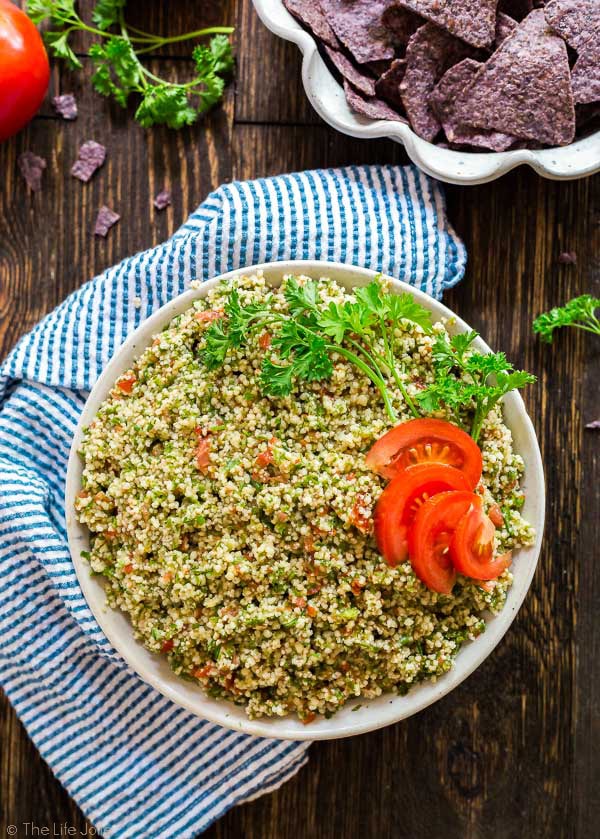
    An overhead image of Easiest Ever Tabouli with a blue nad white striped towel, an bluye tortilla chips and tomatoes above it.

    We want to make sure our girls have a good balance of time with family while still cultivating their relationships with friends outside of our inner circle.

    At parent-teacher conferences last year, we talked a little bit with A's teachers (who are amazing with giving advice on these things- apparently we're not the only parents trying to figure it all out!). We joked that it was kind of like that good old, middleschool style of dating. As if we should be leaving the other parents a note saying "do you want to have a play date? Yes, no, maybe: circle one."

    But it wasn't until very recently that we finally started actively trying to make these play dates happen (life is busy!). It was kick started when another little girl invited A to her family birthday party.

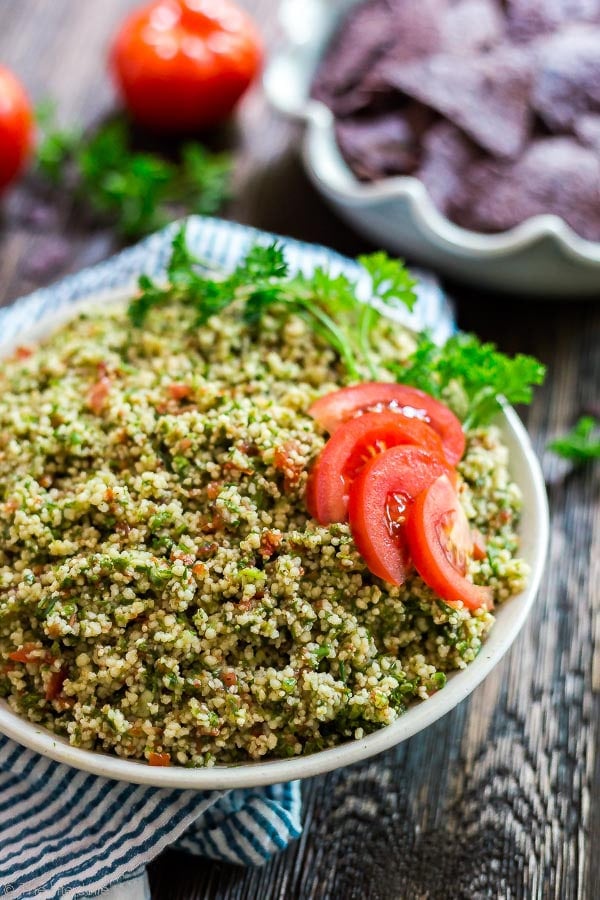
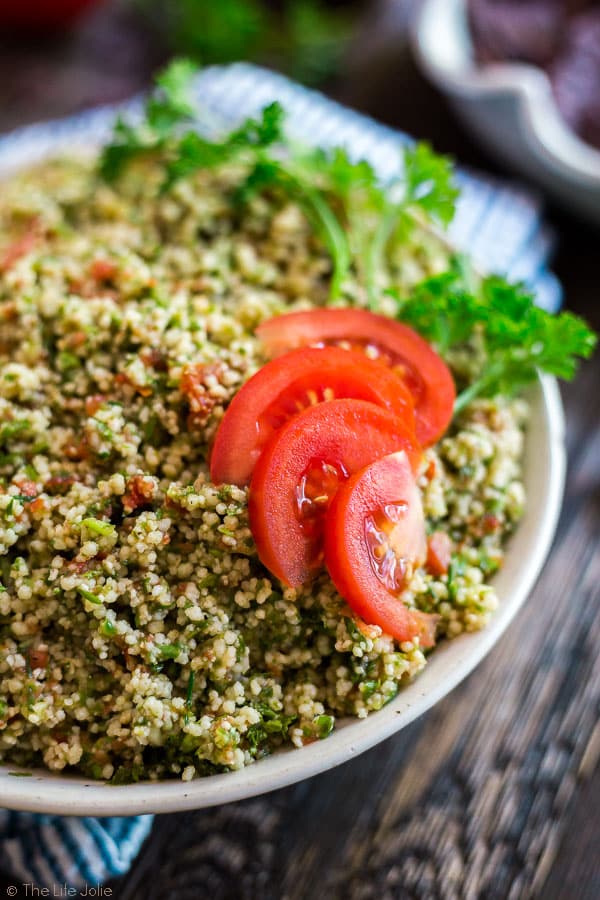
    A close up image of Easiest Ever Tabouli garnished with tomato and parsley with the sides cut off by the camera.

    I won't lie, I was a nervous wreck. Not so much for the girls, because they're pretty adaptable. But in many ways I'm an introvert and the prospect of trying to form new relationships with other parents can be intimidating, especially considering the Mommy Wars that run rampant these days and that fact that I'm not always the easiest person to be around.

    But we agreed that it was a great idea for A to spend more time with her friends and also a great idea for us to make friends with other parents who are in our stage of life. And the party ended up being a great time! Even better, this little girl's mom turned out to be even nicer than I expected, and someone I would totally want to be friends with (and am becoming friends with).

    This kick-started our attempts to hang with more of other daycare families. As it turns out we're all in the same boat in terms of trying to navigate these waters with out little ones.

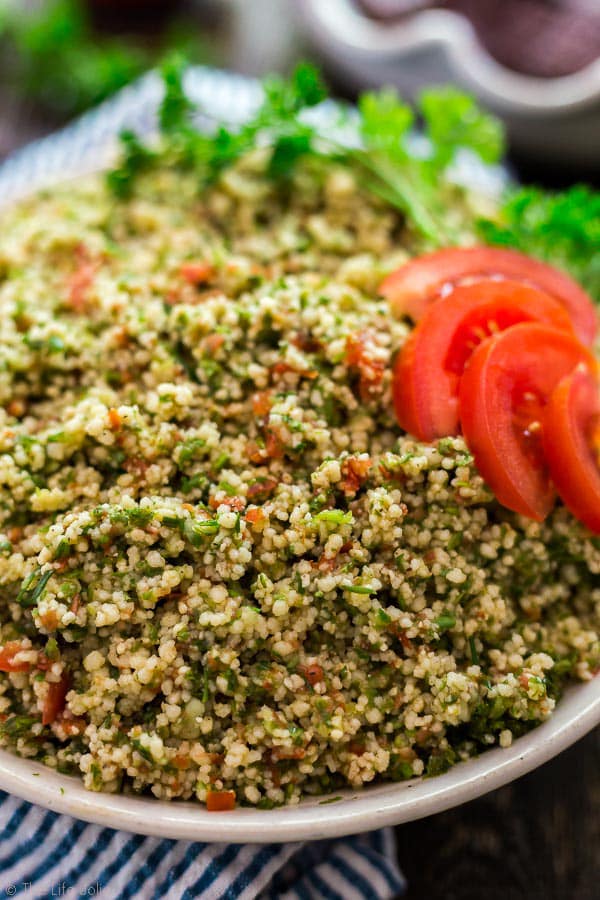
    A closer image of the right side of a bowl of Easiest Ever Tabouli.

    The night before a play date with a new family, I still get a little nervous. It's kind of like a first date- will they like us? Will we like them? Will my kid throw a tantrum and they think that our parenting skills suck?

    But each time, I leave these play dates feeling so happy to have connected with other parents and getting to see A and T have a blast with their friends. We're all right in the thick of it and it feels great to connect with other people who are living this experience. And the other parents have all been super nice!


    Did I ever mention that in addition to coming from a family full of excellent cooks, I was also fortunate enough to join a family with many great cooks? Well I did and it's awesome!

    My mother in-law Vicky makes the most incredible and easiest ever Tabouli. I was introduced to this recipe when we were preparing to throw my sister in-law her bridal shower.

    A photo of Easiest Ever Tabouli in a bowl with a bowl of blue tortilla chips in the background out of focus.

    Not only is it really quick and easy to make, but the recipe is made to be prepared the night before, which makes it a perfect dish to bring to parties or just to make ahead in general. And when I say easy, I mean that the majority of the work involves putting items into your food processor. Rough, I know.

    Vicky's Tabouli is always a favorite at every party that I bring it to. To the point that I get requests for it frequently. It's light and fresh with bright lemon notes. Fresh parsley and green onions give a nice flavor without dominating the overall taste. And the tomatoes and cucumbers add extra goodness!

    This can be served as a side dish or an appetizer. It's great on it's own and even better with tortilla chips. Once you make this, it will definitely fall into your rotation and become an instant family favorite!

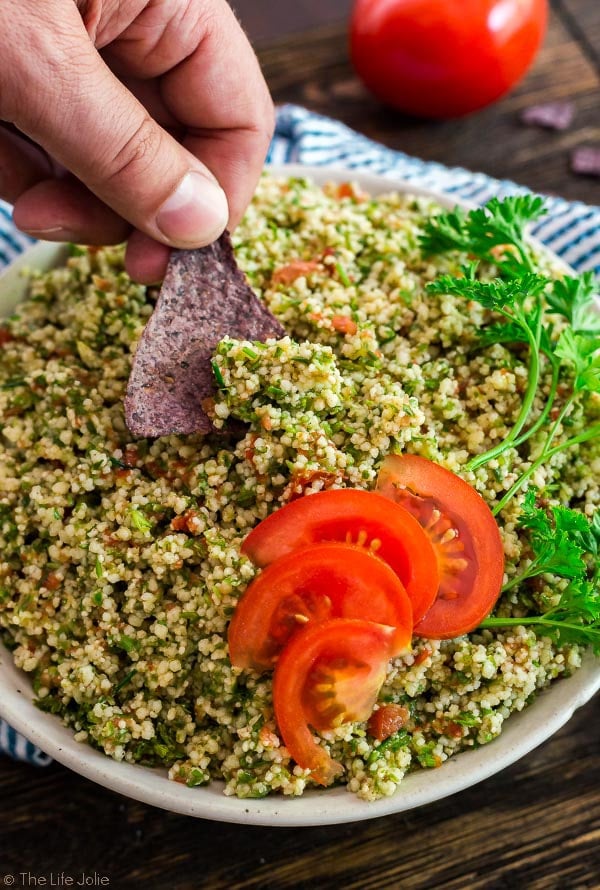
    An image of a man's hand dipping blue tortilla chip into a bowl of Easiest Ever Tabouli that is garnished with sliced tomato and parsley.

    Other great party food includes:

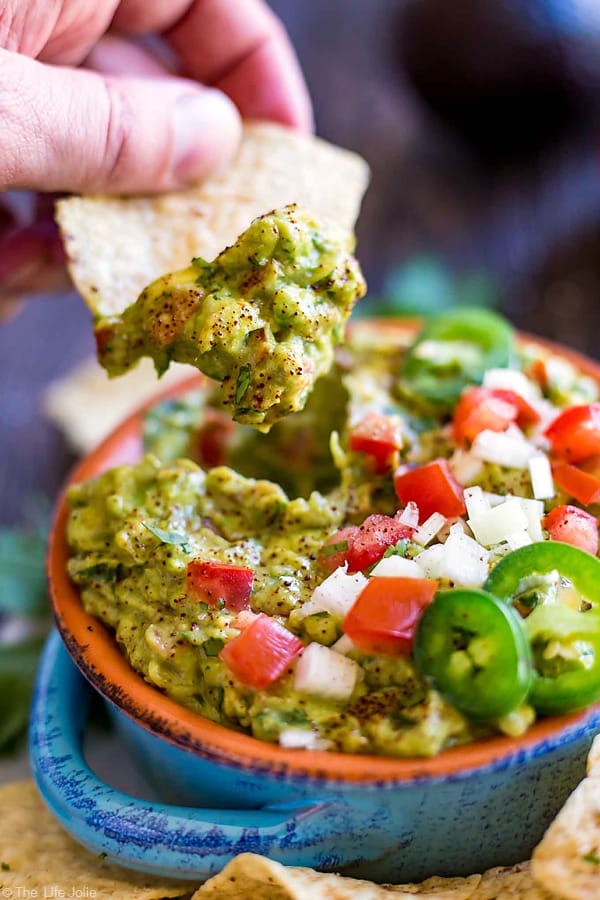
    • The Most Delicious Guacamole Ever
    • Deviled Eggs
    • Vicky’s Tabouli
    • Summer Berry Dessert Crostini
    • BLT Bruschetta
    • Roasted Corn Salsa
    • Bloody Mary Cheeseball
    • Artichoke Asiago Dip
    • 7 Layer Taco Salad
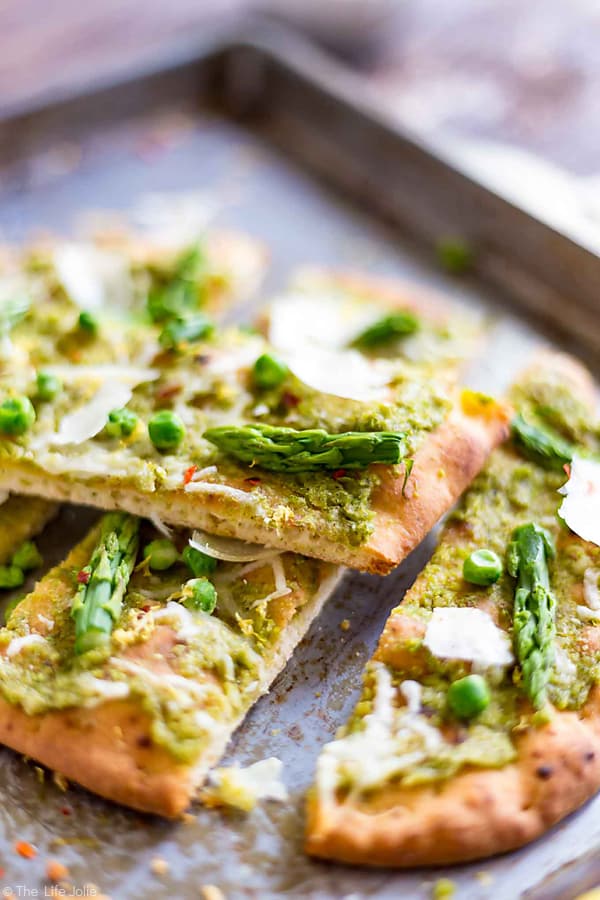
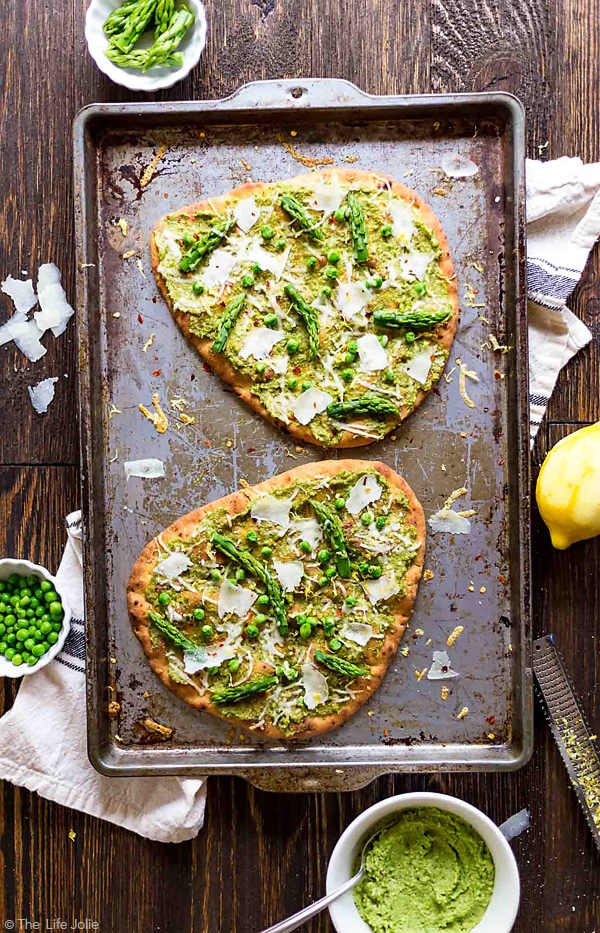
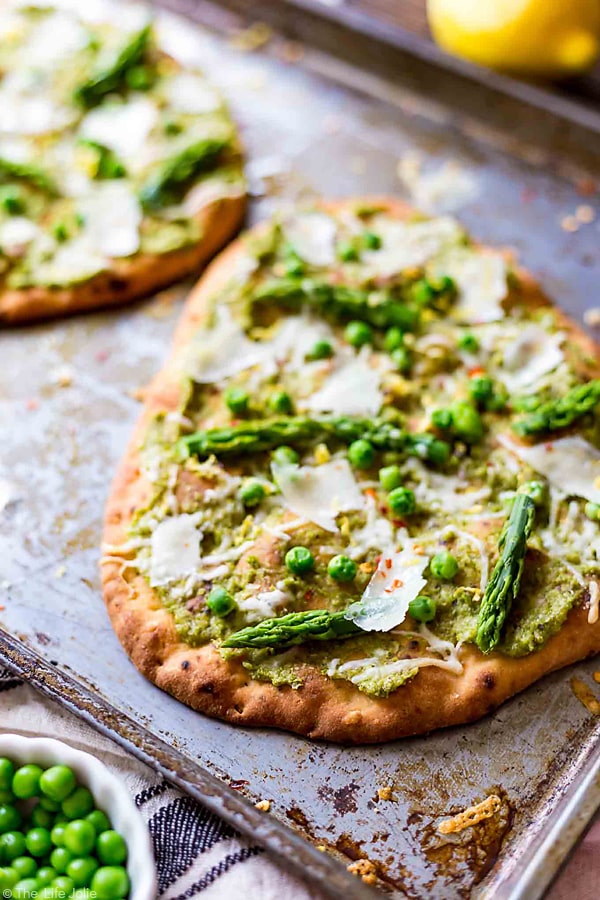
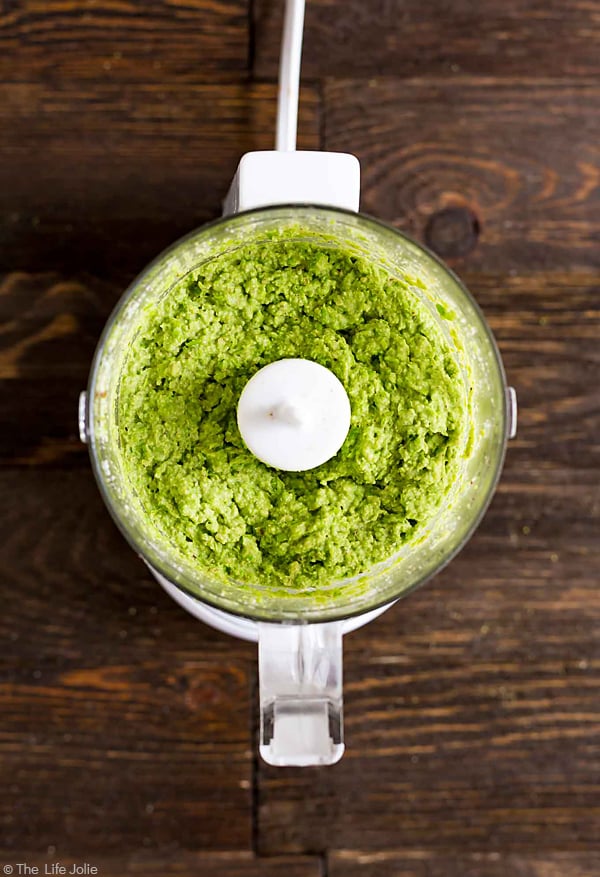
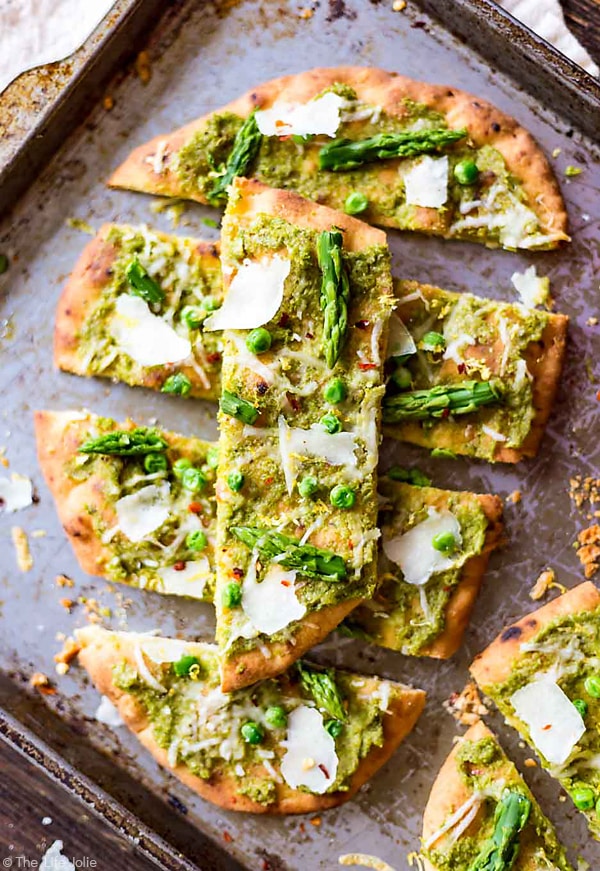
    • Pea Pesto Flatbread with Asparagus and Shaved Pecorino Romano
    • Summer Berry and Burrata Salad
    • Broccoli Rabe and Ricotta Crostini

    A square image of the Easiest Ever Tabouli.

    Vicky’s Easiest Ever Tabouli

    Jessy Freimann
    This Easiest Ever Tabouli recipe is a healthy and simple make-ahead dish the whole family will love. It's full of fresh ingredients and great flavor and is perfect with tortilla chips as an appetizer or served as a side dish or salad with a meal.
    No ratings yet
    Print Recipe Pin Recipe
    Prep Time 10 minutes mins
    Cook Time 12 hours hrs
    Total Time 12 hours hrs 10 minutes mins
    Course Appetizer, Side Dish
    Cuisine appetizer, Easy, make ahead, party, side dish, vegetarian
    Servings 8 servings

    Ingredients
      

    • 1 cucumber
    • 1 pound tomatoes remove the seeds
    • 2 bunches green onions use the green parts only
    • 1 cup parsley
    • 1 ½ tsp. salt
    • 1 ½ tsp. pepper
    • ½ cup lemon juice
    • ½ cup olive oil
    • 1 cup dry couscous

    Instructions
     

    • Take each vegetable and chop them separately in the food processor, placing each into a mixing bowl once they're chopped.
    • Add the last 5 ingredients to the bowl and mix well.
    • Refrigerate overnight, stirring one in a while.
    • Serve with tortilla or pita chips or on it's own as a side dish.
    • Enjoy!

    Notes

    It's very important to run each vegetable through the food processor separately- this cuts down on the liquid.
    Tried this recipe?Let us know how it was!

    Helpful tools:


    You can find a full index of my recipes here.

    Don’t forget to follow The Life Jolie on Pinterest for more recipe inspiration!

    Or if Pinterest isn’t your style, bookmark this post!

    Let’s keep the conversation going- join my Facebook group! 

    This Easiest Ever Tabouli recipe is a healthy and simple make-ahead dish the whole family will love. It's full of fresh ingredients and great flavor and is perfect with tortilla chips as an appetizer or served as a side dish or salad with a meal.
    This Easiest Ever Tabouli recipe is a healthy and simple make-ahead dish the whole family will love. It's full of fresh ingredients and great flavor and is perfect with tortilla chips as an appetizer or served as a side dish or salad with a meal.

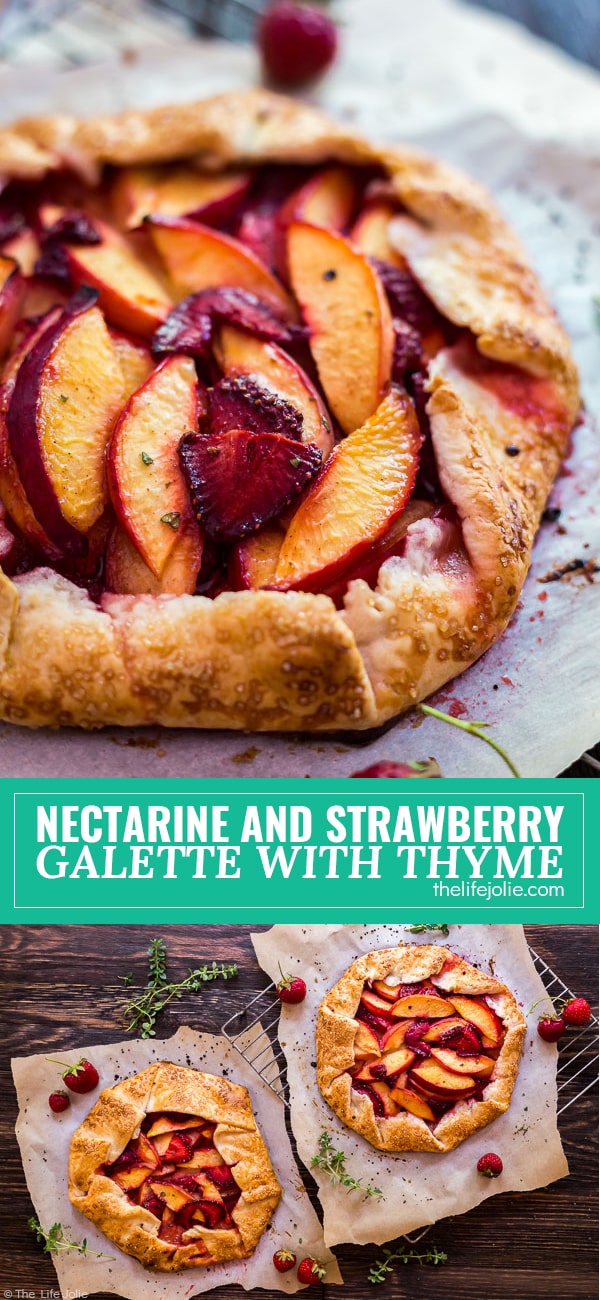
    Nectarine and Strawberry Galette with Thyme

    Jul 3, 2017 · 1 Comment

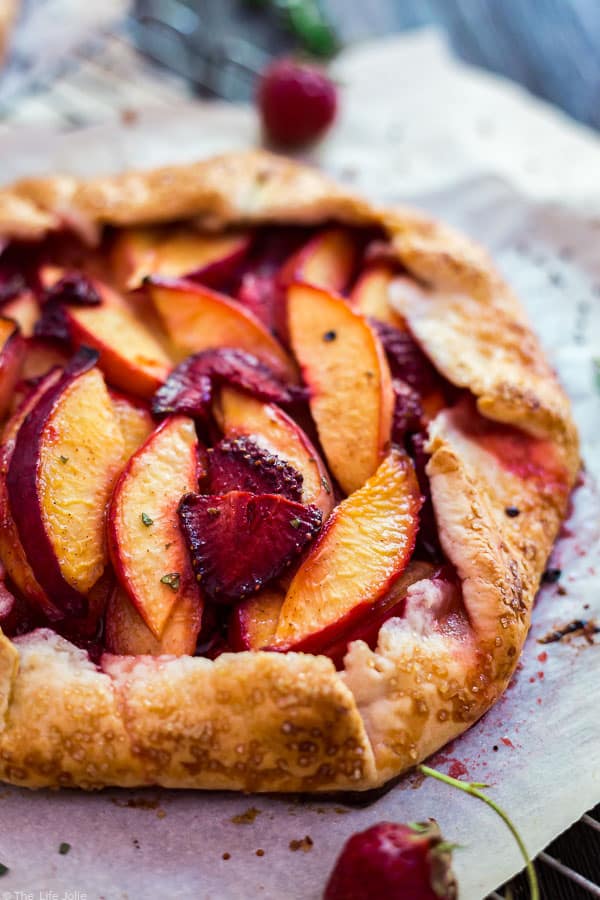
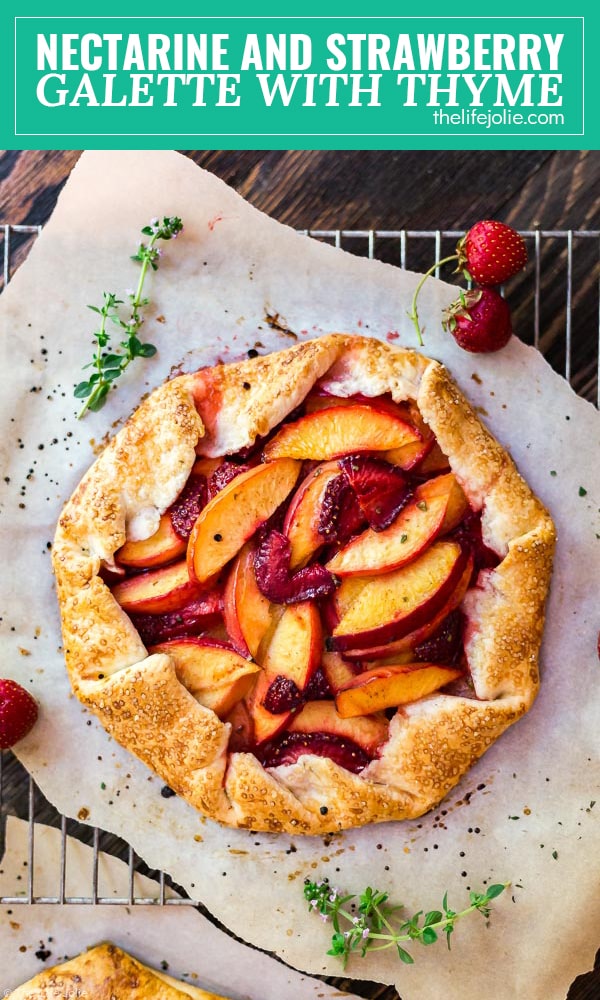
    A square image of Nectarine and Strawberry Galette with Thyme.

    This Nectarine and Strawberry Galette with Thyme recipe is a simple, rustic summer dessert. It's really easy to make with fresh ingredients and tastes delicious.

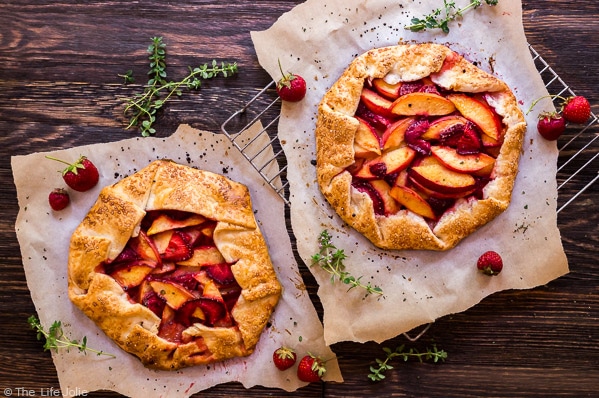
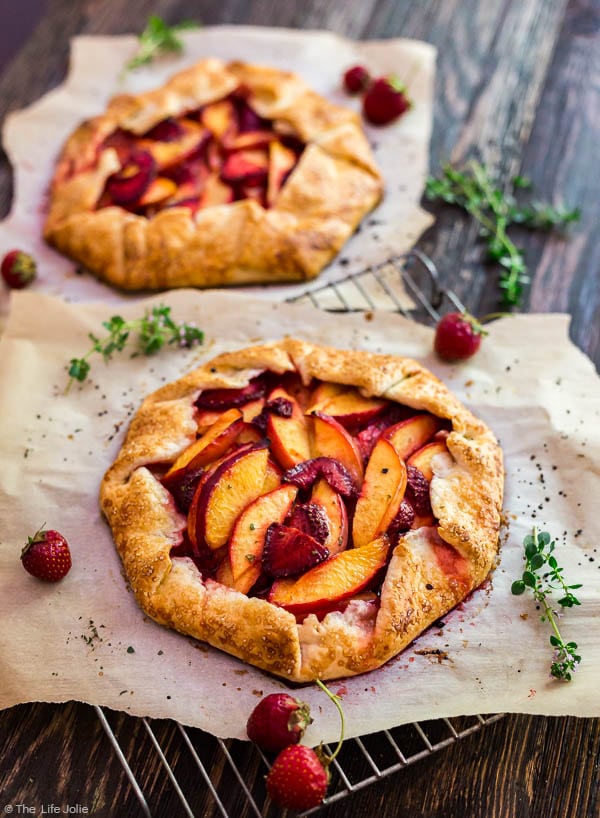
    An overhead image of two Nectarine and Strawberry Galette's with Thymeon parchment paper with a wood background and fresh thyme and strawberries surrounding it,

    This post contains Affiliate Links. Please see the disclaimer here.

    So I forgot to mention, nursing is officially done- ended at the beginning of May! Clearly I'm a little behind here. I can't believe we made it 13 months! I am so proud of both of us and so happy to have had a good experience with it this time around.

    Weaning totally sucked. Not so much for her. I think she totally could have weaned before we did and been totally happy. But it was pretty uncomfortable for a couple weeks and I was a emotional about it. The week before we left for Salt Lake City I was spending most days and nights with cabbage leaves shoved into my shirt (keep in mind that I also work full time. Thank God for cardigans that button all the way up!).

    Things in that region totally feel normal again (IE- not sore and not clogged!). My supply has totally tanked, though I'm not entirely sure if I'm still producing. If I am, I probably won't be for long.

    During our last nursing session, I stroked my sweet T's hair and I whispered into her ear how proud I was of her and how we did it. I also let her know that she would always be my baby, no matter how old she got. Then I pulled myself together and enjoyed the rest of the (short) feed.

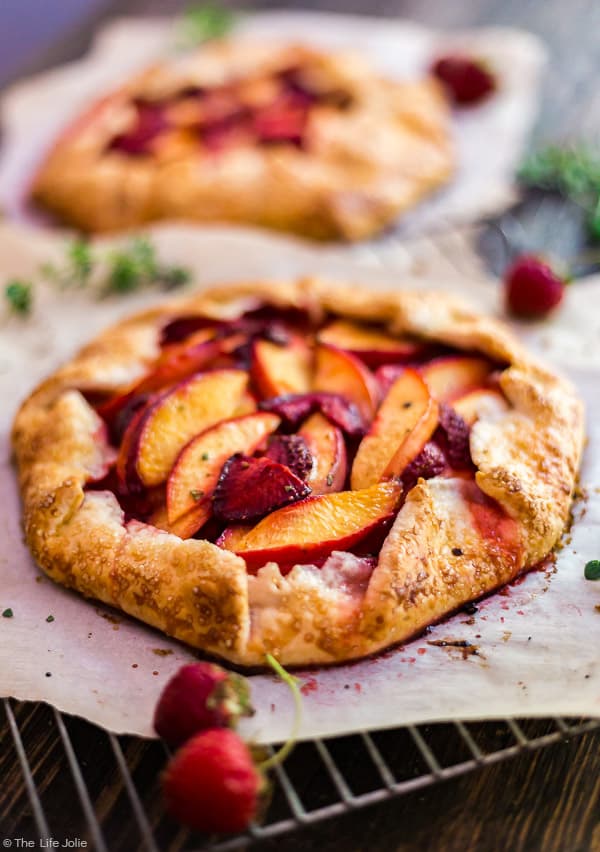
    Nectarine and Strawberry Galette with Thyme in the foreground with another out of focus behind it.

    T is definitely no worse off as a result of stopping breastfeeding. She will happily devour a bottle of cow's milk! In the last couple of months, I noticed that feeds were starting to get shorter and T was biting a ton (!!!) and often got distracted really easily. It was definitely time.

    I'll admit, it's very freeing not having to nurse anymore. I had gotten very good at nursing very discreetly in public, so I wasn't exactly tied down. I typically always layer my shirts so the top shirt would come up and the bottom down.I got so good at it that you generally couldn't see anything or even tells what she was doing.

    Still, it's nice not to have to think about it. It was a commitment and one that I was blessed and honored to make. I'll treasure the experience forever.


    My mom and I have had a little debate going on for (literally) years. It is intense, and heated. It is the source of much drama in my family.

    Just kidding.

    It's all in good fun but none-the-less, we have been going back and forth on this for a while and I'm not sure we will ever see eye-to-eye on this topic. It involves free form pies, you know the kind where you roll out your dough, place the filling into the middle and crimp the sides around it so that the middle is open. It's super rustic and totally forgiving.

    The debate revolves around the moniker. I have always been of the understanding that one would refer to this as a Galette (in case you haven't already gathered, from the name of this post). My mom, on the other hand, is firmly on team Crostata.

    A close up image of a Nectarine and Strawberry Galette with Thyme.

    Given the fact that there are many people in both camps, I think we can safely call it either of these (even though I'm obviously right, HA!).

    All that to say, our market has been so full of gorgeous produce and a couple Saturday's ago, I got a little too excited and found myself with four quarts of glorious homegrown strawberries. While this is a great problem to have, I still knew I had to get creative with strawberries.

    I made a bunch of different things (and froze some!). But for this, the plan was to make some sort of Galette. And I just-so-happened to have some perfectly ripe nectarines, some pre-made pie crusts and a bumper crop of lemon thyme.  Done and done.

    Now I didn't go too heavy on the thyme. I wanted J to eat it and picky J doesn't love himself to some thyme. And for that reason, I gave a range for the amount to thyme so you can add it to your taste.

    an image of a Nectarine and Strawberry Galette with Thyme on a cooling rack with parchment paper and another galette out of focus behind it.

    Either way, this is super quick and easy to throw together. As I mentioned, I used a pre-made pie crust, because I'm still getting over this unpleasant foray with pie. Work smarter, not harder, people!

    But as I also mentioned, Galette's are very forgiving. I mean, come on! They have that apparent rustic look which can sometimes translate to "hot mess" but in a good way, particularly in this case. I am the queen of hot mess cooking.

    But more importantly, the flavor is delicious and fresh, without being overly sweet. And I love how the fruit softens without getting mushy. And the final sprinkle of Turbinado sugar adds the most satisfying crunch! Throw this together and have a very Happy Forth of July!

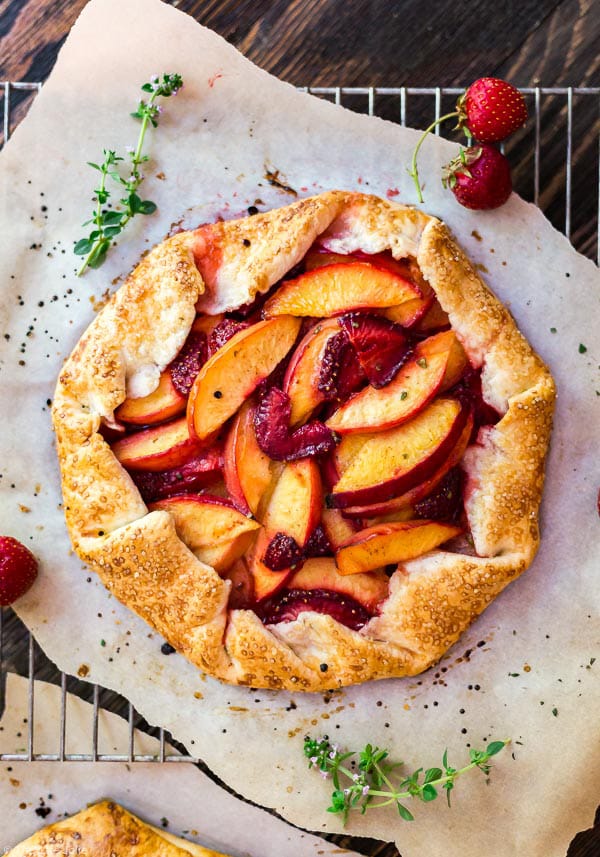
    An overhead shot of the Nectarine and Strawberry Galette with Thyme on parchment paper woth some sprigs of fresh thyme and strawberries around it.

    Some other great pie recipes include:

    • Apple Pie Filling
    • Peppermint Ice Cream Pie
    • No-Bake Pumpkin Cheesecake Mini Pies
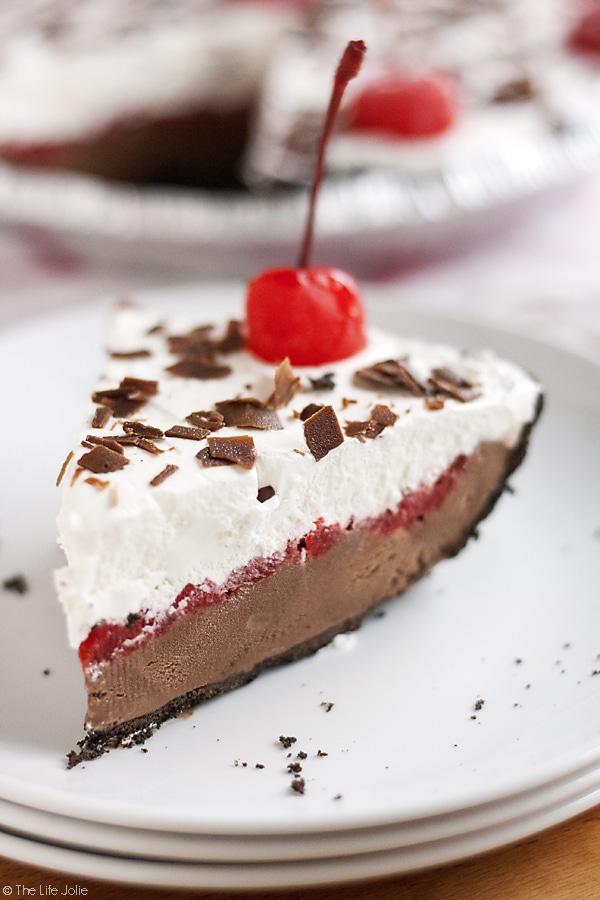
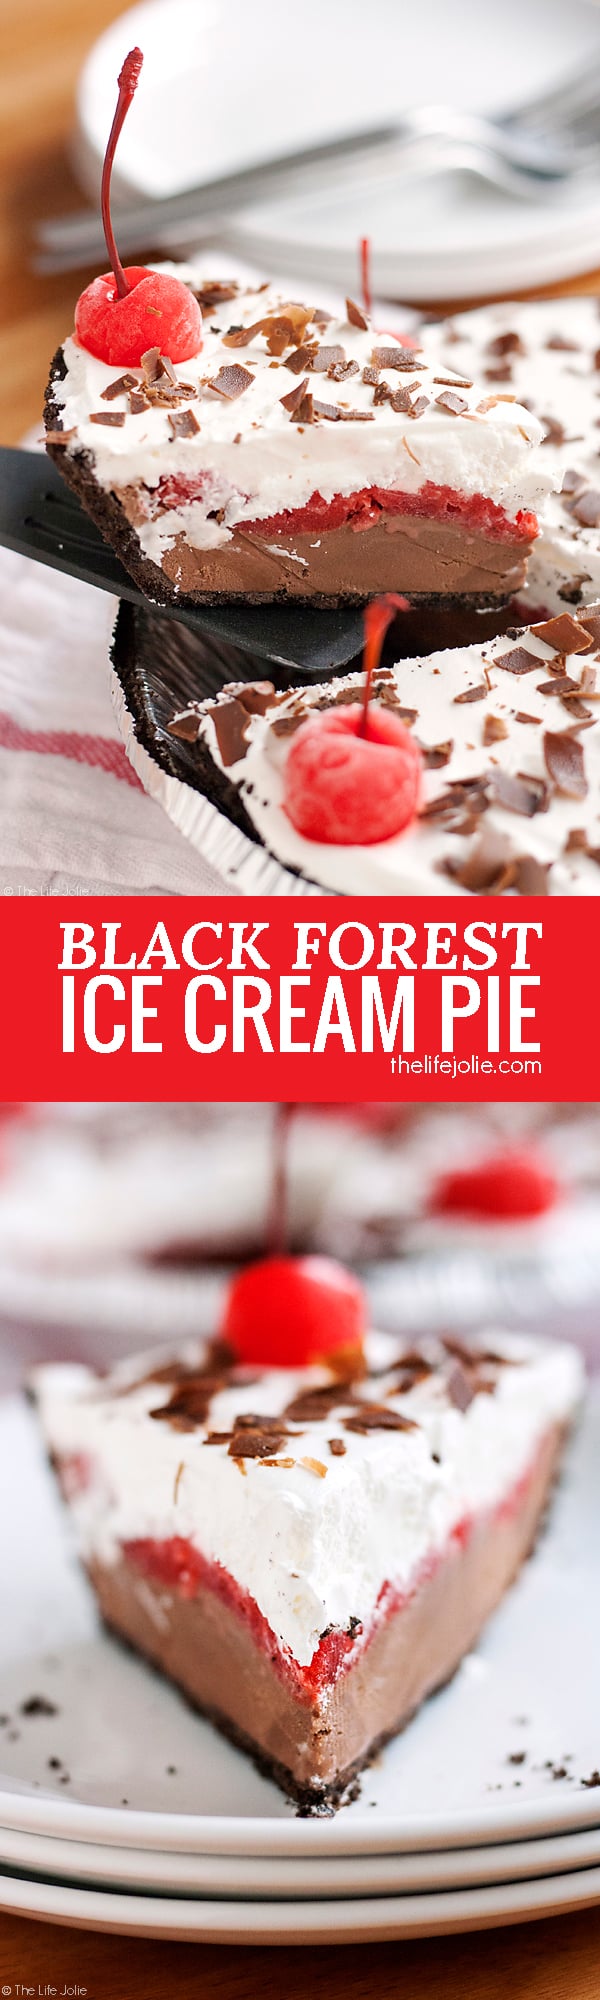
    • Black Forest Ice Cream Pie

    A square image of Nectarine and Strawberry Galette with Thyme.

    Nectarine and Strawberry Galette with Thyme

    Jessy Freimann
    This Nectarine and Strawberry Galette is a fersh and lovely way to enjoy summer's bounty of fruit for a fantastic dessert.
    4 from 2 votes
    Print Recipe Pin Recipe
    Prep Time 15 minutes mins
    Cook Time 25 minutes mins
    Total Time 40 minutes mins
    Course Dessert
    Cuisine Dessert, Fruit, pie, Summer
    Servings 8 servings
    Calories 297 kcal

    Equipment

    • 1 sheet pan
    • 1 mixing bowl
    • 1 Spatula
    • 1 Measuring cups and spoons
    • 1 cutting board
    • 1 chefs knife

    Ingredients
      

    • 2 premade pie crusts rolled out to 9 inches
    • 7 nectarines thinly sliced
    • 9 strawberries thinly sliced
    • ¼ cup granulated sugar
    • ½ teaspoon ground cinnamon
    • 1 teaspoon chopped fresh thyme lemon thyme, if you can find it
    • 2 Tablespoons salted butter cut into pea-size pieces, divided
    • 1 large egg with a little bit of water whisked in to make an egg wash

    Instructions
     

    • Preheat the oven to 450 degrees F and line two baking sheets with parchment paper and set aside.
    • In a bowl, mix the nectarines, strawberries, granulated sugar, cinnamon and thyme until well combined
    • Lay your dough out onto each sheet.
    • Place half of the fruit mixture into the middle of each pie crust, leaving 1-2 inches of dough empty around the outside.
    • Scatter the butter all over the top of each fruit mixture (half onto each Galette).
    • Working around each crust, fold the edges up and around the fruit filling, crimping as you go so that the outer edge of the Galette is covered by crust and the filling in the middle is exposed.
    • Lightly brush the egg wash onto the crust and sprinkle the entire top (crusts and filling) with Turbinado sugar.
    • Bake for 20-25 minutes or until the crust is golden brown.
    • Cool and serve.

    Notes

    Be extra careful when handling the crust, if you have any holes, this will spring a leak. It'll still be delicious, just a bit messy.

    Nutrition

    Serving: 1servingCalories: 297kcalCarbohydrates: 40gProtein: 4gFat: 14gSaturated Fat: 5gPolyunsaturated Fat: 1gMonounsaturated Fat: 6gTrans Fat: 0.1gCholesterol: 8mgSodium: 213mgPotassium: 228mgFiber: 3gSugar: 17gVitamin A: 515IUVitamin C: 12mgCalcium: 16mgIron: 2mg
    Tried this recipe?Let us know how it was!

    Helpful tools:


    You can find a full index of my recipes here.

    Don't forget to follow The Life Jolie on Pinterest for more recipe inspiration!

    Or if Pinterest isn't your style, bookmark this post!

    Let's keep the conversation going- join my Facebook group!  

    This Nectarine and Strawberry Galette with Thyme recipe is a simple, rustic summer dessert. It's really easy to make with fresh ingredients and tastes delicious.
    This Nectarine and Strawberry Galette with Thyme recipe is a simple, rustic summer dessert. It's really easy to make with fresh ingredients and tastes delicious.

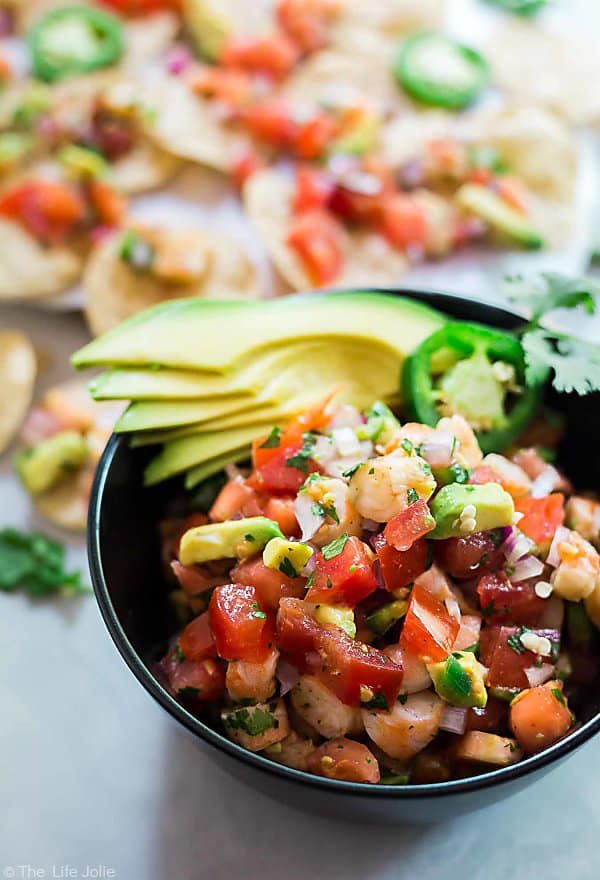
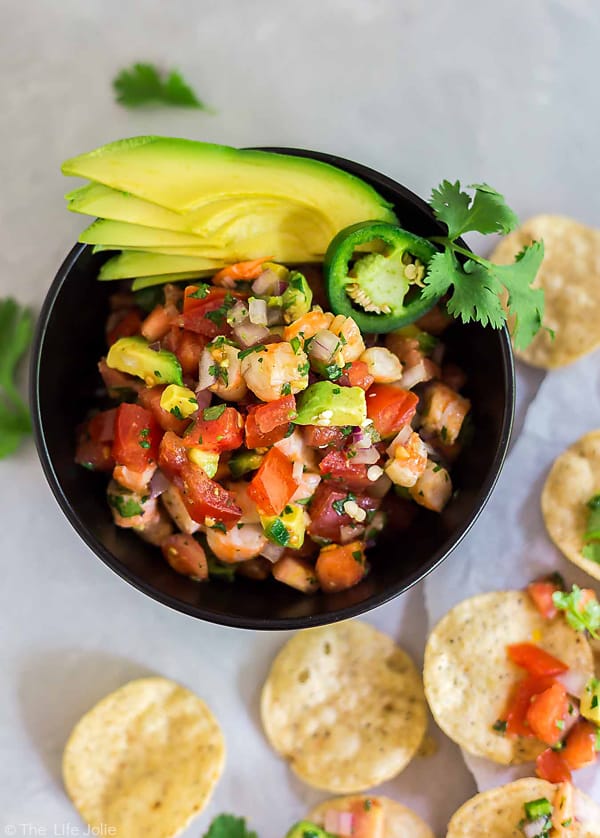
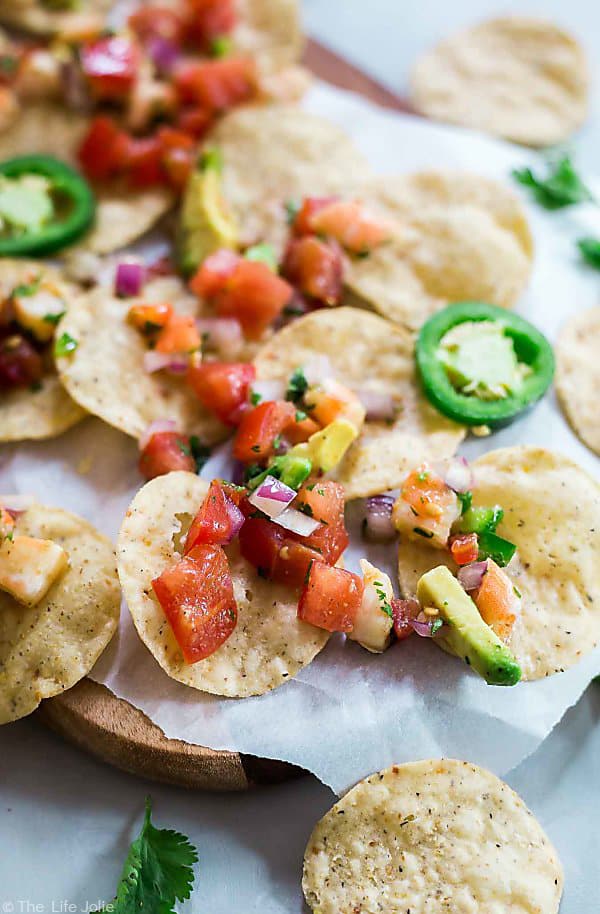
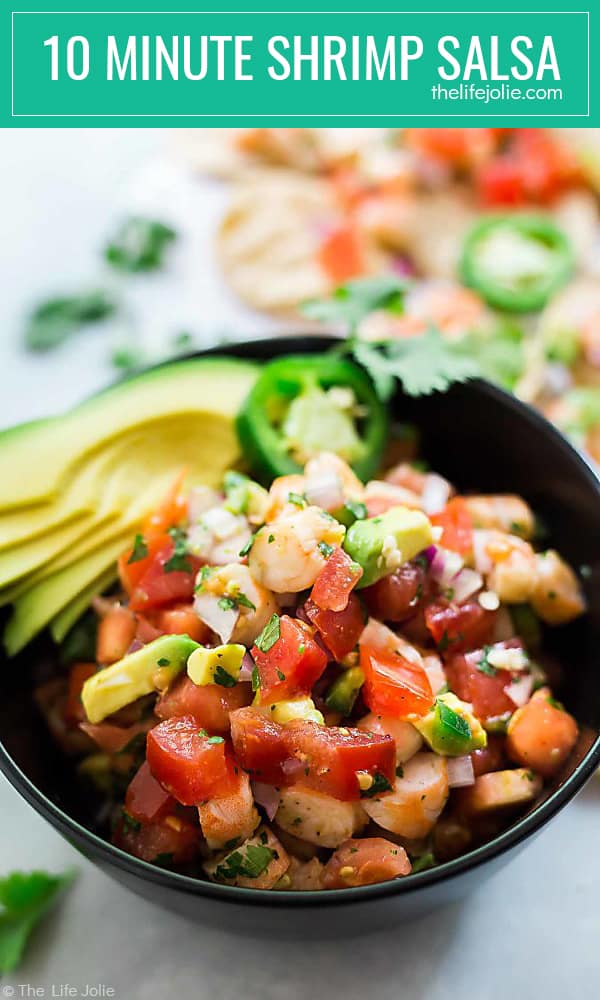
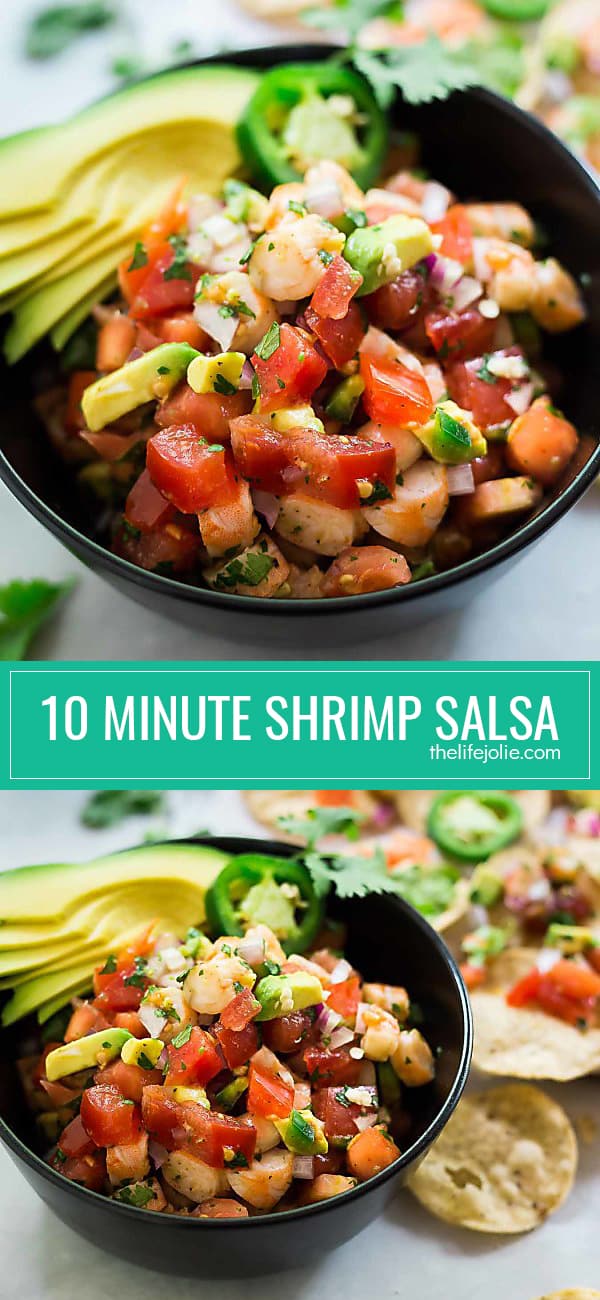
    10 Minute Shrimp Salsa

    Jun 22, 2017 · 2 Comments

    A square image of 10 Minute Shrimp Salsa.

    This 10 Minute Shrimp Salsa is a copycat version of Bubba Gump Shrimp Company’s Shakin’ Shrimp Cocktail. It is light, refreshing and super flavorful with fresh tomatoes, refreshing lime juice, onions, cilantro, spicy jalapenos and plump, juicy shrimp! You really can’t go wrong for a tasty party snack!

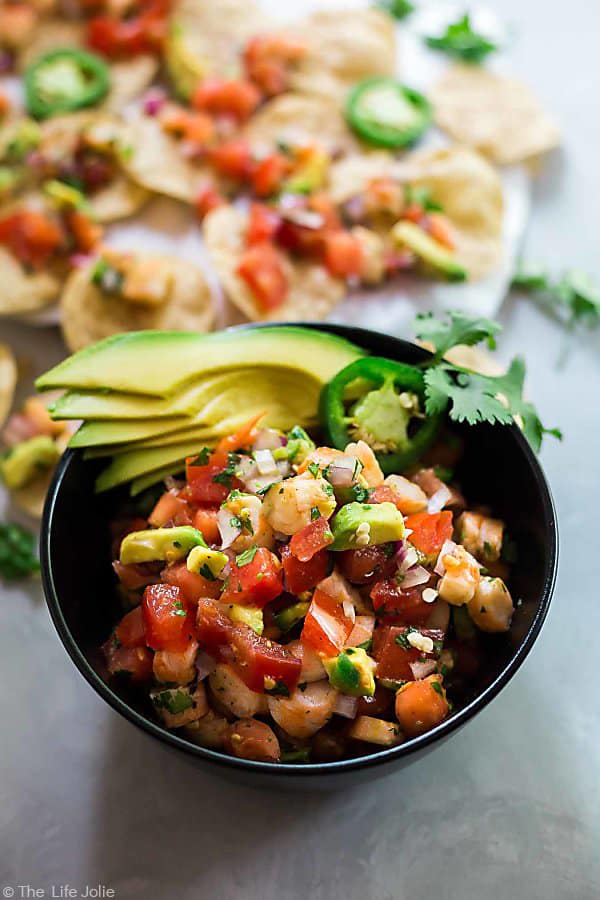
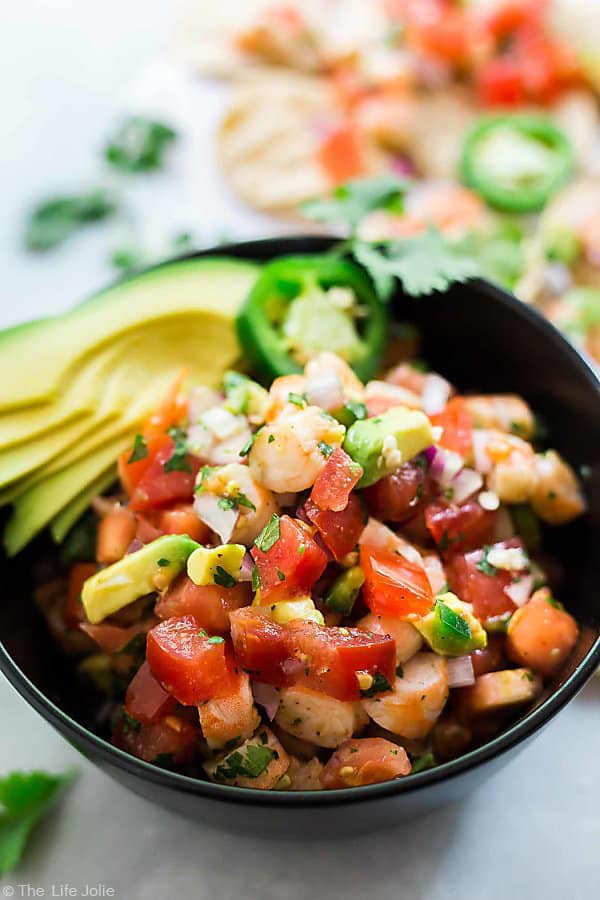
    A close up photo of 10 Minute Shrimp Salsa in a black bowl with the right side of the bowl cupt off and some chips in the background.

    This post contains Affiliate Links. Please see the disclaimer here.

    Tuesday was my Sweet A’s Birthday. You guys A is 3- can you believe it? I certainly can’t, but alas, it’s true!

    The night before she went to bed, I told her the story of the day she was born (in toddler terms, not including all the hard-to-understand details that go along with child birth!). She pretty much loved it, especially the part where I told her that she wouldn’t sleep at all on those nights.

    Then I gave her a kiss and told her it was her last two year old kiss! I got a tiny bit sad when I said that but I managed not to get emotional about it!

    An overhead shot of 10 Minute Shrimp Salsa in a bowl with avocado and chips around the bottom of it.

    When she woke the next morning, I asked her if she wanted to stay two a little bit longer. She (of course!) smiled and said “No!!” in a very firm and sure way. Well, you can’t blame me for trying!

    A had a great day with her friends at daycare. She requested Minnie hair and wore her special birthday outfit that Gigi and Papa got her.

    That night she enjoyed her requested dinner of ‘Roni’s (Pasta Pomodoro) and chocolate cake (Chocolate Pudding Cake the the Ganache from this recipe only with almond extract in plate of orange extract- you can also see the two part Facebook live of me making it in my group).

    A close up shot of tortilla chips with 10 Minute Shrimp Salsa on them.

    We had some small gifts for A to open (her big one will be given to her this weekend) and a couple gifts from her grandparents. Overall it was an excellent day and night and A said she had a great birthday!

    As you might have seen on my instagram story, my thoughts on my sweet A’s 3rd birthday are:

    “…And just like that, my biggest little one is 3! She is fiercely independent, has a quirky sense of humor, her curiosity is boundless and she’s smart as a whip. But most importantly, she has a wide-open heart for loving others. Happy Birthday my Allie-Bean. You’ve brought a world of joy into our home.”

    I love you, my sweet, 3 year old Alice Rose.


    A long time ago, in a galaxy far, far away, I worked at Bubba Gump Shrimp Company in Times Square. You know, in NYC, the center of the universe?

    It was a very interesting experience, but I met a lot of cool people. Especially my husband, the cute guy with an annoyingly perfect Jar Jar Binks impression and the most beautiful brown eyes that I haven’t been able to stop staring into for the past eleven years!

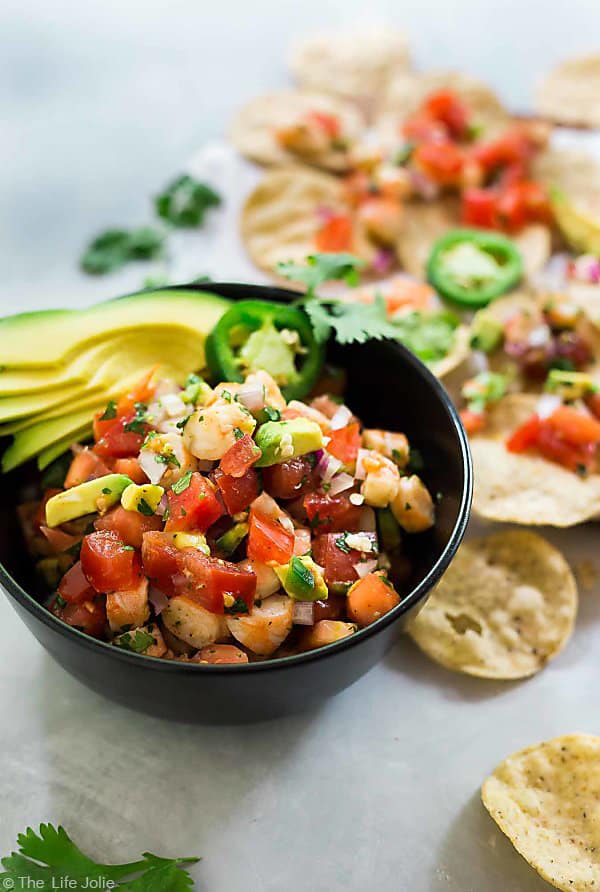
    A black bowl of 10 Minute Shrimp Salsa front and center with chips in the background out of focus.

    I eventually left for a different job opportunity but I took with me an extensive knowledge of Forrest Gump trivia and a love for certain entrees that they serve. I mean, what’s not to love about a place with so much seafood on the menu? That is right up my alley.

    One such item was added midway through my time as a Gumper. It was called Shakin’ Shrimp Cocktail and I’ve created my own version of it, which I call 10 Minute Shrimp Salsa (I know, I’m so original).

    A close up photo of a 10 Minute Shrimp Salsa in a black bowl with chips in the background out of focus.

    At the restaurant, Shakin’ Shrimp Cocktail was served in a pint glass with a metal shaker. You would bring it out to the table, add a number of lime squeezes (based on how much the guest indicated that they wanted) and then shake it all together and pour it into the bowl for the guest to enjoy with tortilla chips. Hence the play on words.

    I always found it to be a light and refreshing way to start a meal, which was a nice change since much of the menu is deep fried or quite rich.

    An overhead shot of tortilla chips spread out on a table with 10 Minute Shrimp Salsa on them and the edge of a bowl of 10 Minute Shrimp Salsa being cut off in the upper left corner.

    Here in Western New York, we are just not that fancy. Sorry, no table-side service in this house! But I’ve found that I can still get the same great mix without the shaker. There is something about fresh tomatoes, onions and avocado mixed with the heat of the jalapeno and the fresh flavor of the cilantro.

    Add the spices and the bright citrus from the lime juice and you have yourself a lovely little snack (which is an understatement- this makes a large amount and is excellent for a  crowd). This is the perfect dish to snack on by the pool and that is exactly what we did. I might even venture to add a margarita into the mix for future pool days.

    A photo of 10 Minute Shrimp Salsa in a black bowl with the left side of the bowl cut off a bit and chips out of focus in the back right side and corner.

    Other fresh and tasty appetizers include:

    • The Most Delicious Guacamole Ever
    • Deviled Eggs
    • Vicky’s Tabouli
    • Summer Berry Dessert Crostini
    • BLT Bruschetta
    • Roasted Corn Salsa
    • Bloody Mary Cheeseball
    • Artichoke Asiago Dip
    • 7 Layer Taco Salad
    • Pea Pesto Flatbread with Asparagus and Shaved Pecorino Romano
    • Summer Berry and Burrata Salad
    • Broccoli Rabe and Ricotta Crostini

    A square image of 10 Minute Shrimp Salsa.

    10 Minute Shrimp Salsa

    Jessy Freimann
    This 10 Minute Shrimp Salsa is a copycat version of Bubba Gump Shrimp Company’s Shakin’ Shrimp Cocktail. It is light, refreshing and super flavorful with fresh tomatoes, refreshing lime juice, onions, cilantro, spicy jalapenos and plump, juicy shrimp! You really can’t go wrong for a tasty party snack!
    No ratings yet
    Print Recipe Pin Recipe
    Prep Time 10 minutes mins
    Total Time 10 minutes mins
    Course Appetizer
    Cuisine appetizer, Hors D'Oeuvre, seafood, Snack
    Servings 8 servings
    Calories 135 kcal

    Equipment

    • 1 cutting board
    • 1 chefs knife
    • 1 Measuring cups and spoons

    Ingredients
      

    • 1 pound cooked shrimp peeled and deveined
    • 6 Roma tomatoes diced
    • 2 avocados diced
    • ½ red onion minced
    • 1 jalapeno pepper, diced
    • ¼ cup cilantro chopped
    • ¼ cup lime juice (2 limes)
    • 1 teaspoon Kosher salt
    • ¼ teaspoon ground black pepper,
    • ½ teaspoon ground cumin
    • ½ teaspoon chili powder
    • ⅛ teaspoon Cayenne pepper

    Instructions
     

    • Mix all ingredients together.
    • Season to taste.
    • Mix well one more time.
    • Serve immediately.

    Notes

    This can be made a head and will last a couple days in the fridge.

    Nutrition

    Serving: 1servingCalories: 135kcalCarbohydrates: 8gProtein: 9gFat: 8gSaturated Fat: 1gPolyunsaturated Fat: 1gMonounsaturated Fat: 5gTrans Fat: 0.01gCholesterol: 71mgSodium: 620mgPotassium: 450mgFiber: 4gSugar: 2gVitamin A: 671IUVitamin C: 16mgCalcium: 47mgIron: 1mg
    Tried this recipe?Let us know how it was!

    Helpful tools:


    You can find a full index of my recipes here.

    Don’t forget to follow The Life Jolie on Pinterest for more recipe inspiration!

    Or if Pinterest isn’t your style, bookmark this post!

    Let’s keep the conversation going- join my Facebook group! 

    This 10 Minute Shrimp Salsa is a copycat version of Bubba Gump Shrimp Company's Shakin' Shrimp Cocktail. It is light, refreshing and super flavorful with fresh tomatoes, refreshing lime juice, onions, cilantro, spicy jalapenos and plump, juicy shrimp! You really can't go wrong for a tasty party snack!
    This 10 Minute Shrimp Salsa is a copycat version of Bubba Gump Shrimp Company's Shakin' Shrimp Cocktail. It is light, refreshing and super flavorful with fresh tomatoes, refreshing lime juice, onions, cilantro, spicy jalapenos and plump, juicy shrimp! You really can't go wrong for a tasty party snack!

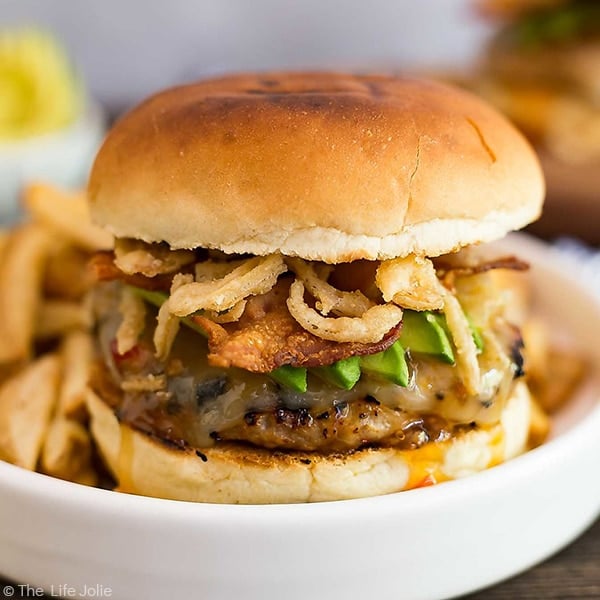
    Spicy Sweet Chili Turkey Burgers

    Jun 20, 2017 · 2 Comments

    A square mage of a Sweet Chili Turkey Burger.

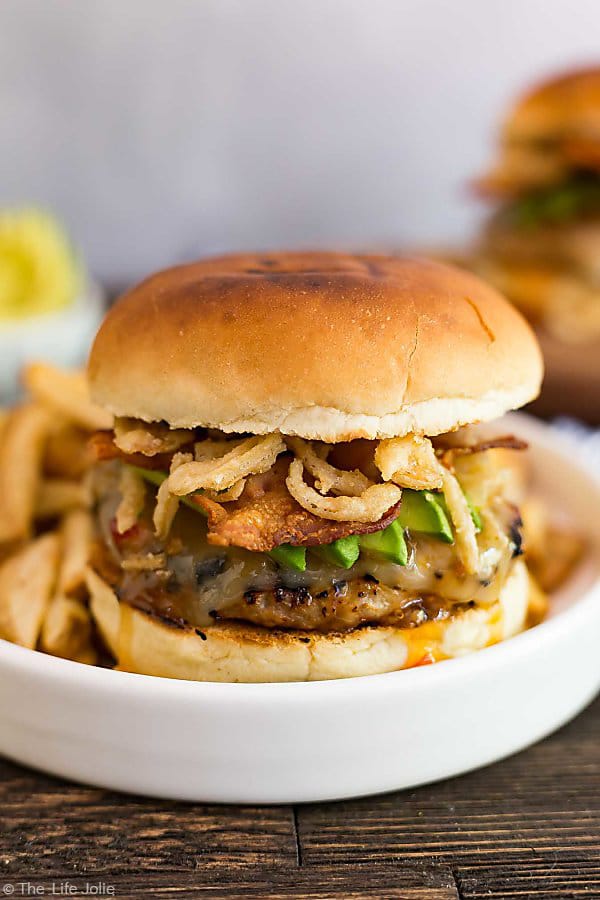
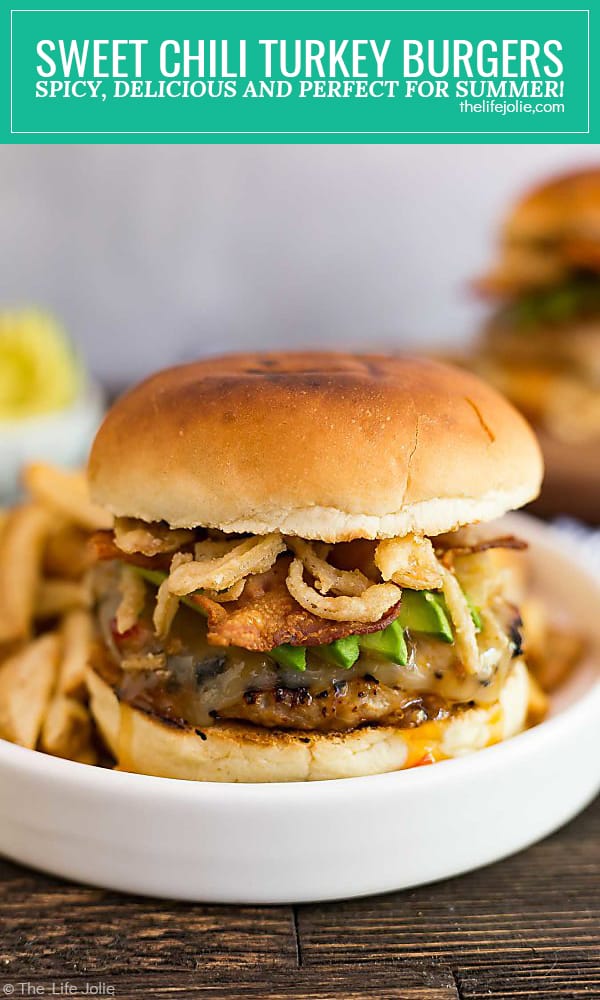
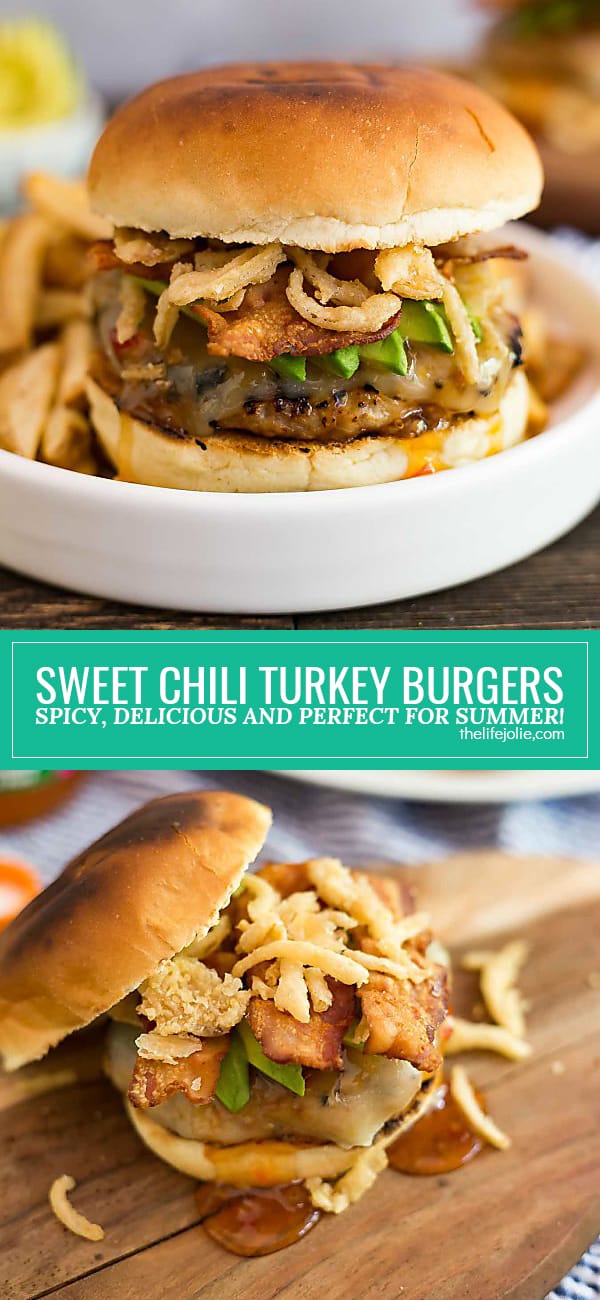
    These Spicy Sweet Chili Turkey Burgers are an easy summer recipe to make on the grill. This is a simple and healthy way to spice up the usual burgers and throw a cook out or summer party your guests will love! 

    Disclosure: This shop has been compensated by Collective Bias, Inc. and it's advertiser. All opinions are mine alone. #RedHotSummer #IPTSOE #CollectiveBias

    My friends, I'm so excited today because my awesome husband Justin has agreed to write this post! Long time readers probably know that J pops in here and there to write a post, but in the past it's always been parenting topics. But today, he wants to talk a little but about grilling! Take it away, Justin:

    A close up photo of the Sweet Chili Turkey Burger on a plate.

    Well, I'm back but today I want to talk to you about food! Now, there's no denying that Jessy does the majority of the cooking in our house, and she does a great job with it. But when it comes to grilling, that is my domain! It's only right that I come here and share a tasty grilling recipe that we created.

    The Fourth of July is right around the corner and the perfect holiday to fire up the grill. Did you know this is actually our anniversary (See Jess? I remembered!)? Yes, we were ‘those people’ that got married on Independence Day, but at least we had free fireworks!

    Now we are not super romantic, "anniversary people." We love each other very much but we don't make all these extravagant gestures to celebrate the day. I think Jessy will agree with me when I say that we love nothing more than spending the Fourth of July grilling and spending time with friends and family!

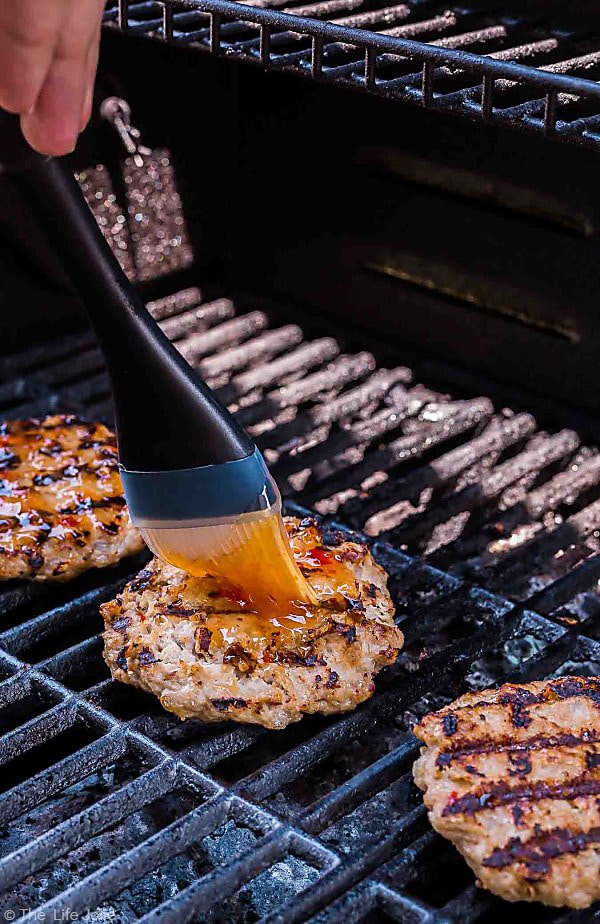
    A close up shot of a brush coming from the top left corner brushing Frank's RedHot Sweet Chili sauce onto the Sweet Chili Turkey Burgers on thew grill.

    As far as I'm concerned, nothing is more American than a good, old-fashioned cheeseburger. But since Jessy is always looking for interesting ways to kick things up a notch, we decided to deliver a turkey burger with a spicy kick!

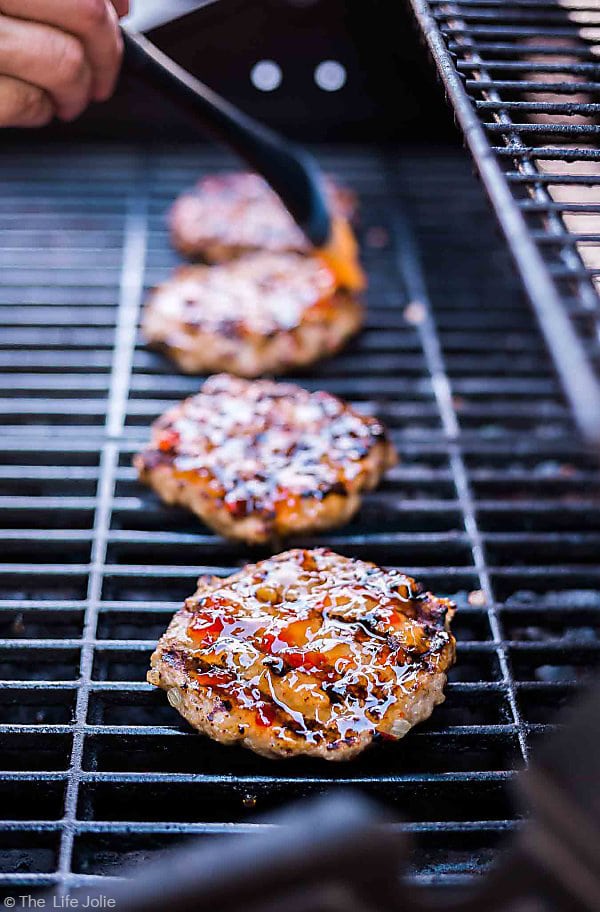
    A shot of the four Sweet Chili Turkey Burgers on the grill with the front burger in focus and a brush basting the third burger in the background out of focus.

    If you open our fridge on any given day, you will find no less than two bottles of Frank's RedHot sauce varieties. Frank’s RedHot Sauce is the most kick-@ss hot sauce out there and as they say, “I Put That $#!+ On Everything!”

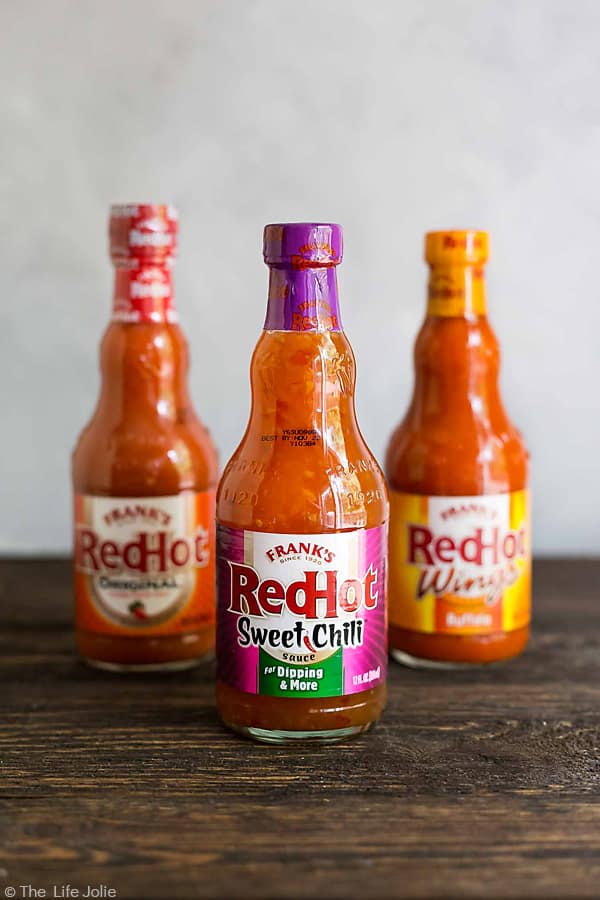
    The three Frank's Red Hot Sauce varieties including the one used on these Sweet Chili Turkey Burgers.

    This is certainly true in our house, especially Jessy! Frank’s RedHot is the perfect combination of flavor & heat. Being from an area where we know our chicken wings (we live right next to Buffalo) we know all-too-well that if it ain’t Frank’s RedHot, it ain’t buffalo!

    A straight on shot of a Sweet Chili Turkey Burger on a cutting board with a plate of grilled buns and a plate of burgers in the background out of focus.

    Frank's RedHot Original is the most versatile sauce that can be used for a wide variety of dish types. Bottom line: they're a delicious, versatile sauce, and they have tons of fun with what they do.

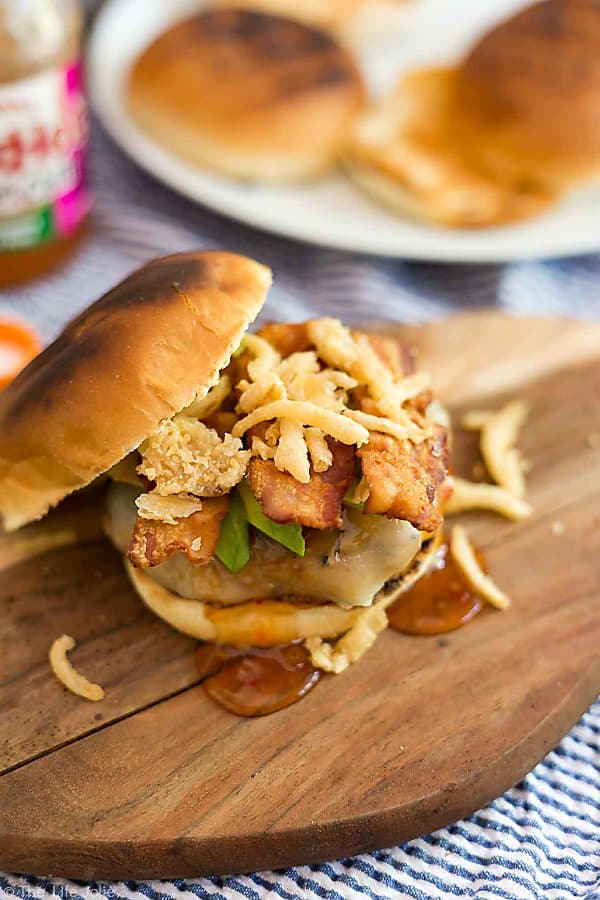
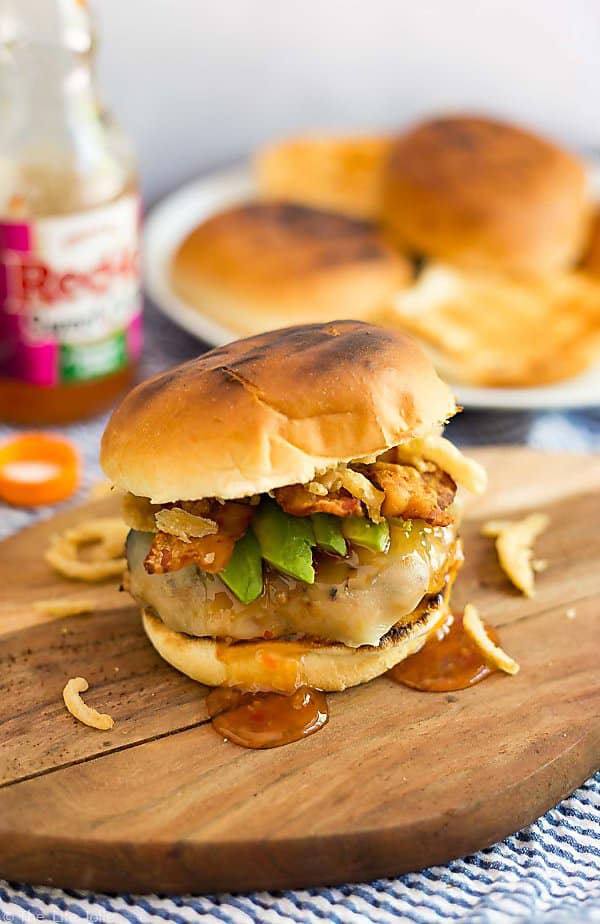
    An angled photo of the Sweet Chili Turkey Burger with the top off exposing the toppings and a bottle of Frank's RedHot Sweet Chili sauce in the background out of focus along with grilled buns.

    We are all about fun and this recipe is just that! It's a great recipe for summer entertaining or summer parties. We used Frank's RedHot Sweet Chili Sauce to add a great sweet and spicy kick to these burgers that your guests will not be able to get enough of! It's the perfect blend of flavor and heat; it enhances food without overpowering it.

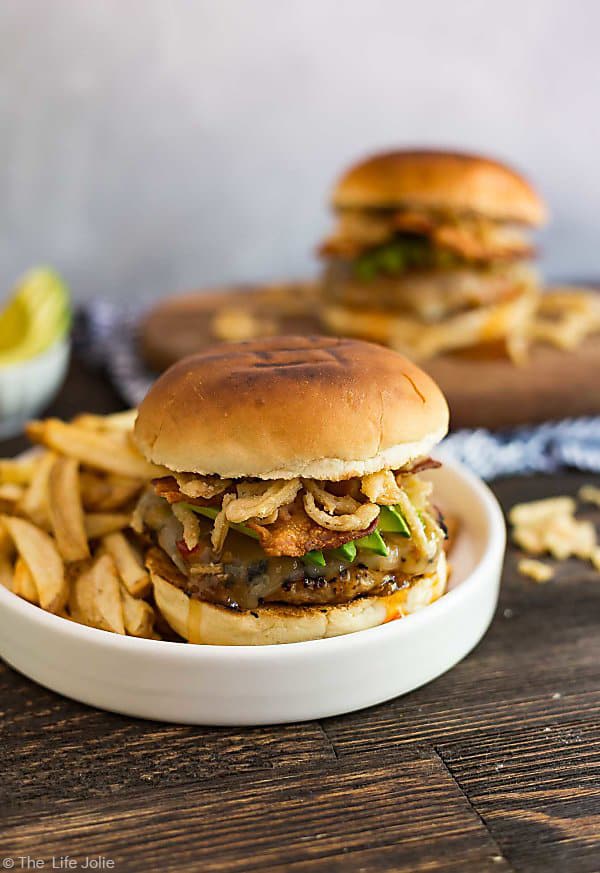
    A straight on shot of the in a plate with fries and another Sweet Chili Turkey Burger in the background out of focus.

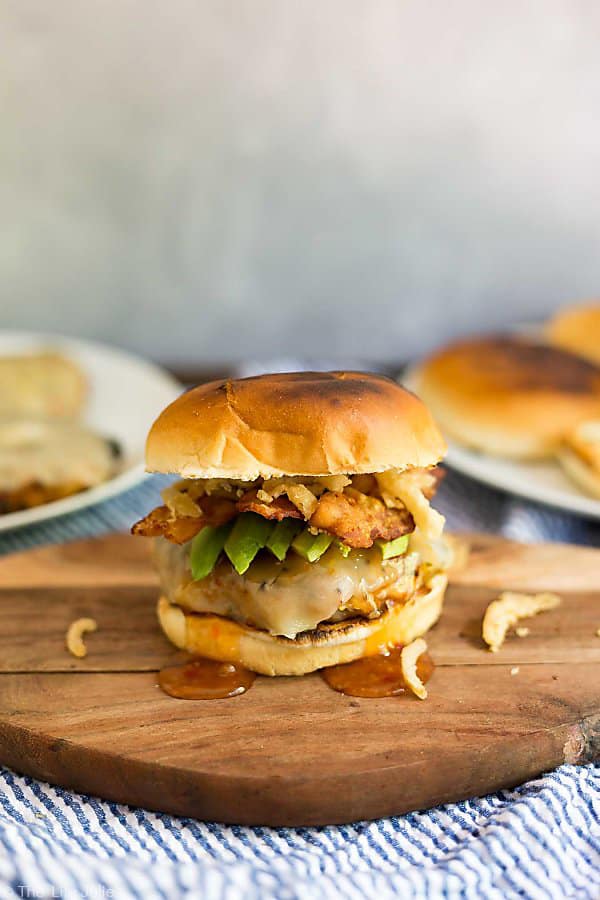
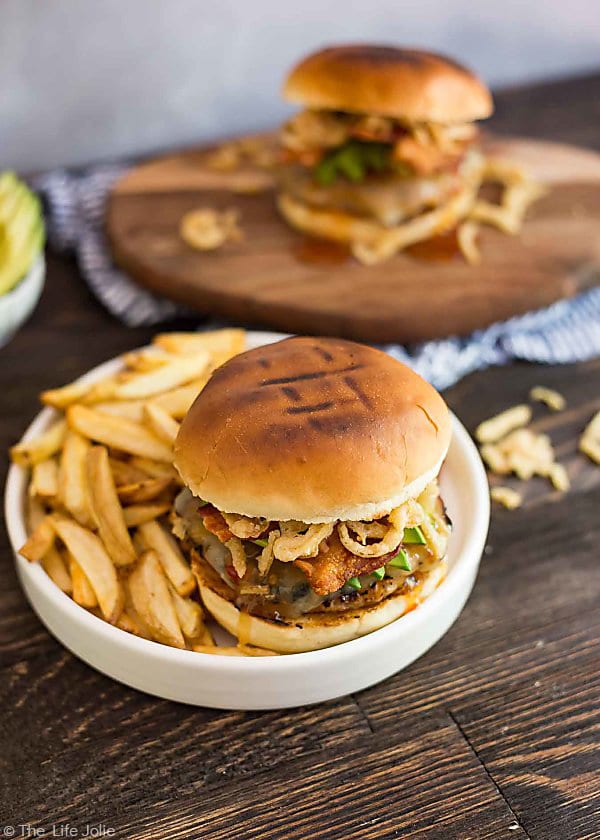
    Combined with the addition of the pepper jack cheese, you have a fantastic spiciness to wake your taste buds right up! Once you add the smokiness of the bacon, creamy avocado and crispy french fried onions, you've got yourself a killer burger that is full of great flavor and the ideal centerpiece for your next BBQ!

    A photo of Sweet Chili Turkey Burgers on a wooden cutting board with bun tops and a bottle of Frank's RedHot Sweet Chili sauce in the background out of focus.

    I hope you'll give this a shot, it's the perfect way to wow your guests this Fourth of July or at any summer gathering. Make it with our killer Oven Fries and our super-simple Green Bean Salad and you're well on your way to an all-american coomk out that everyone will love!

    An angled shot of the Sweet Chili Turkey Burgers with one on a plate with fries and then another out of focus in the background.


    A square mage of a Sweet Chili Turkey Burger.

    Spicy Sweet Chili Turkey Burgers

    Jessy Freimann
    These Spicy Sweet Chili Turkey Burgers are an easy summer recipe to make on the grill. This is a simple and healthy way to spicy up the usual burgers and throw a cook out or summer party your guests will love!
    No ratings yet
    Print Recipe Pin Recipe
    Prep Time 10 minutes mins
    Cook Time 16 minutes mins
    Total Time 26 minutes mins
    Course dinner, Entree
    Cuisine burger, cookout, Grilling, meat, Summer
    Servings 4 burgers
    Calories 696 kcal

    Equipment

    • 1 mixing bowl
    • 1 Measuring cups and spoons
    • 1 sheet pan

    Ingredients
      

    Burgers:

    • 1 pound ground turkey
    • ¼ cup Sweet Chili Sauce with some extra on the side for glazing the burgers- trust me, you do not want to skip that step!
    • 3 Tablespoons minced dried onions
    • 1 teaspoon Kosher salt
    • ¼ teaspoon ground black pepper

    Toppings:

    • 3 slices Pepperjack Cheese
    • 4 Tablespoons Sweet Chili Sauce
    • 9 slices bacon cooked to crispy
    • 1 avocado Sliced
    • 4 Tablespoons French fried onions
    • 4 burger buns I used brioche buns!

    Instructions
     

    • Heat the grill to around medium heat and spray it with non-stick cooking spray.
    • In a bowl, combine the ground turkey, Sweet Chili Sauce, dried minced onions and some salt and pepper.
    • Mix until just combined and shape into 4 equal size patties.
    • Cook the burgers for approximately 8 minutes on each side or until the internal temperature reaches 165 degrees.
    • Towards the end of the 8 minutes on the second side, take some of the Sweet Chili Sauce and brush it onto the burger and then top it with cheese and close the grill to melt the cheese. I also encourage you to grill the buns!
    • Place the burgers onto the buns, drizzle with a bit more Sweet Chili Sauce and top with bacon, avocado and french fried onions.
    • Place the top bun on all of this and enjoy!

    Nutrition

    Serving: 1burgerCalories: 696kcalCarbohydrates: 48gProtein: 43gFat: 38gSaturated Fat: 12gPolyunsaturated Fat: 6gMonounsaturated Fat: 16gTrans Fat: 0.1gCholesterol: 109mgSodium: 1637mgPotassium: 804mgFiber: 5gSugar: 21gVitamin A: 243IUVitamin C: 8mgCalcium: 202mgIron: 3mg
    Tried this recipe?Let us know how it was!

    You can find a full index of my recipes here.

    Don't forget to follow The Life Jolie on Pinterest for more recipe inspiration!

    Or if Pinterest isn't your style, bookmark this post!

    Let's keep the conversation going- join my Facebook group! 
    These Spicy Sweet Chili Turkey Burgers are an easy summer recipe to make on the grill. This is a simple and healthy way to spice up the usual burgers and throw a cook out or summer party your guests will love! 
    These Spicy Sweet Chili Turkey Burgers are an easy summer recipe to make on the grill. This is a simple and healthy way to spice up the usual burgers and throw a cook out or summer party your guests will love! 

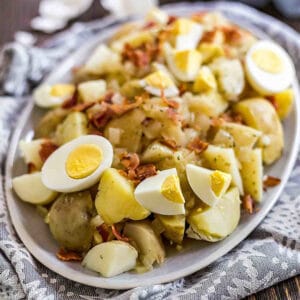
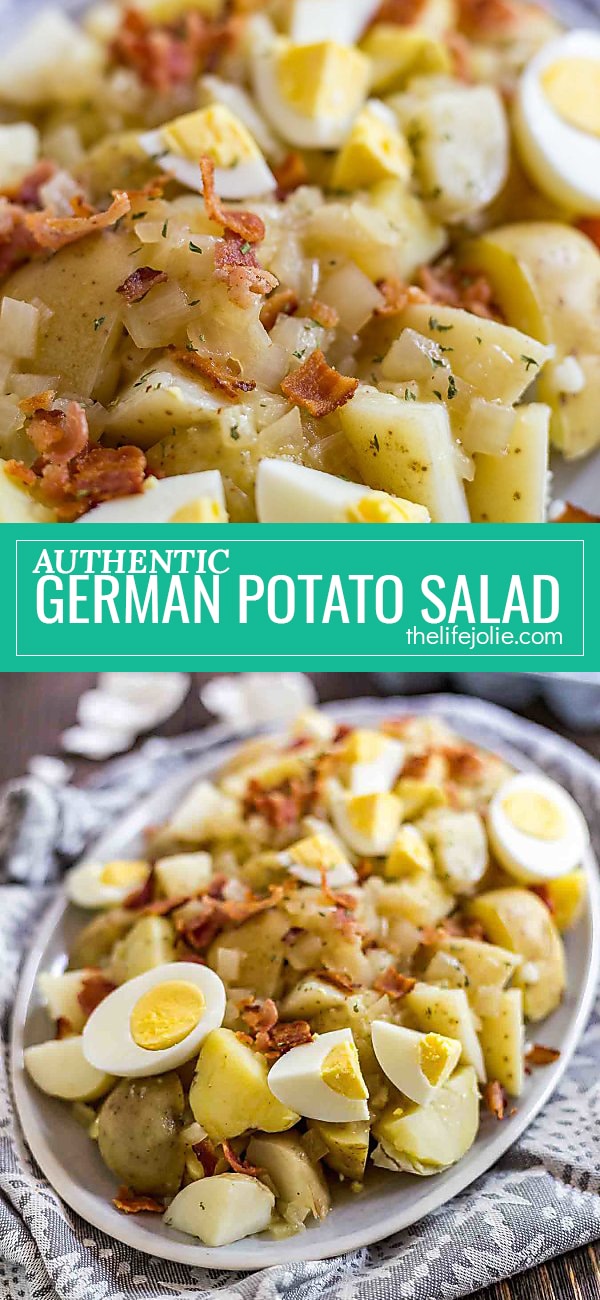
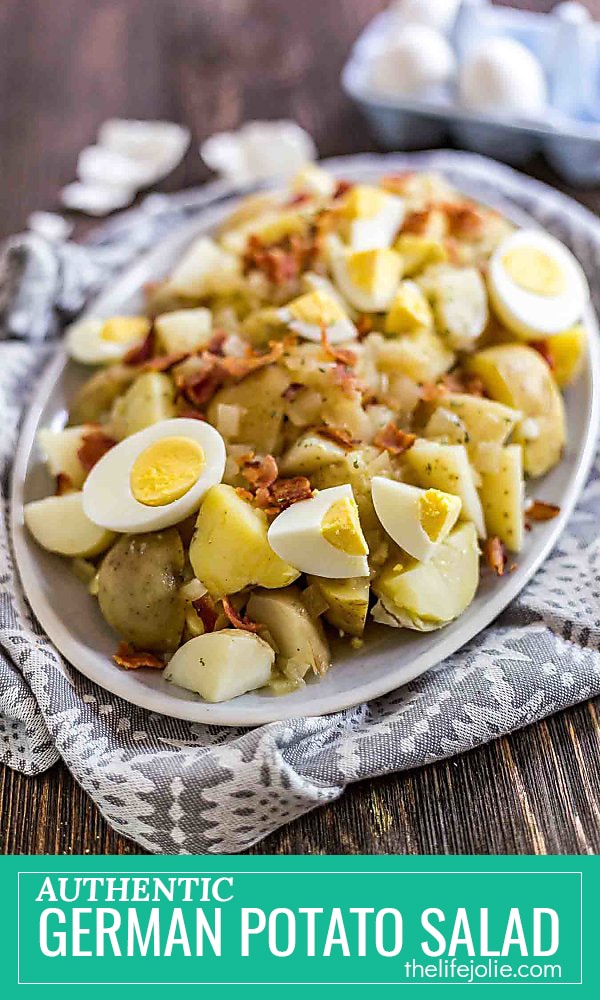
    German Potato Salad

    Jun 15, 2017 · 26 Comments

    A square photo of German Potato Salad.

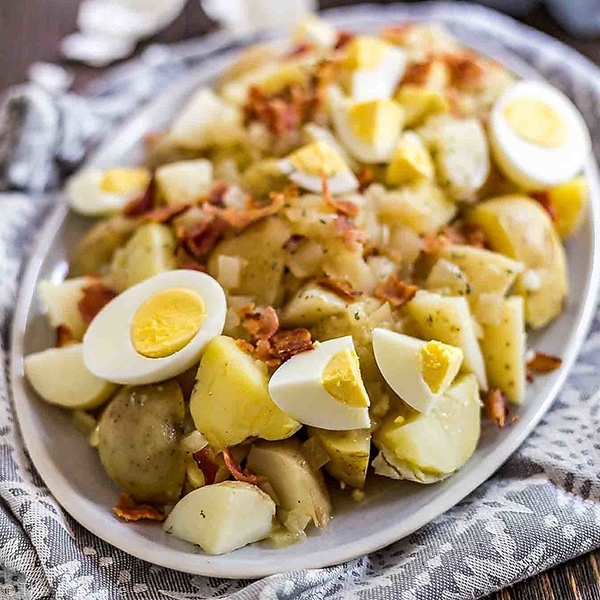
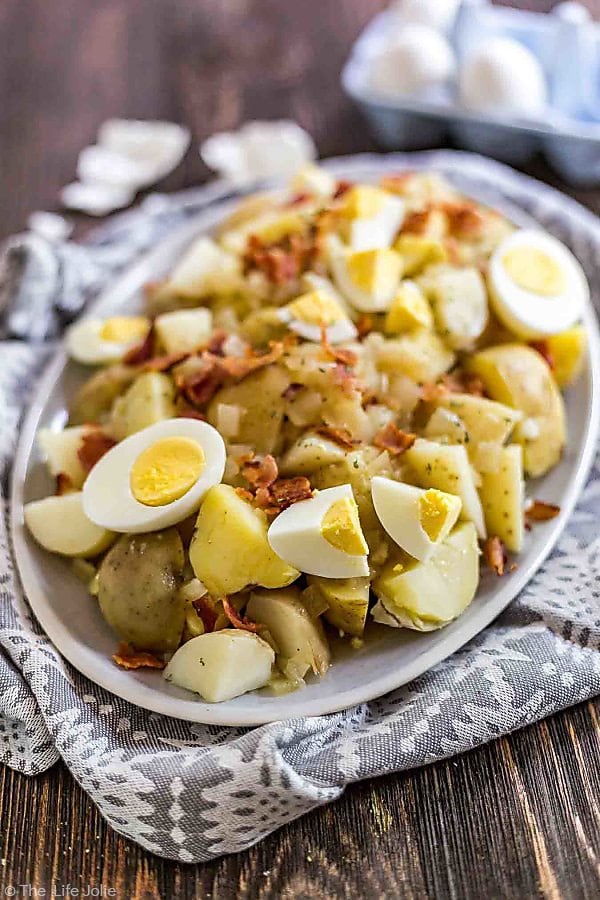
    This authentic German Potato Salad is an easy family favorite that's perfect for a picnic or gathering. It tastes great cold or warm and is topped with bacon and hard boiled eggs- this is a classic that the whole family will love!German Potato Salad on a gray towel with eggs and egg shells in the background.

    This post contains Affiliate Links. For more information please see the disclaimer here.

    So we are getting ready to have a little birthday BBQ for A next week. It's not going to be huge like T's first birthday party but it will be just as fun.

    Last year, we did a small birthday dinner for A with all our parents and my grandma and sister and it was perfect! But this year, A is at an age where she's just starting to understand the concept of birthday parties.

    While I still think a huge birthday blow out might be a bit much for her, J and I ultimately agreed that a casual BBQ with immediate family and a couple friends that are her age would be perfect.

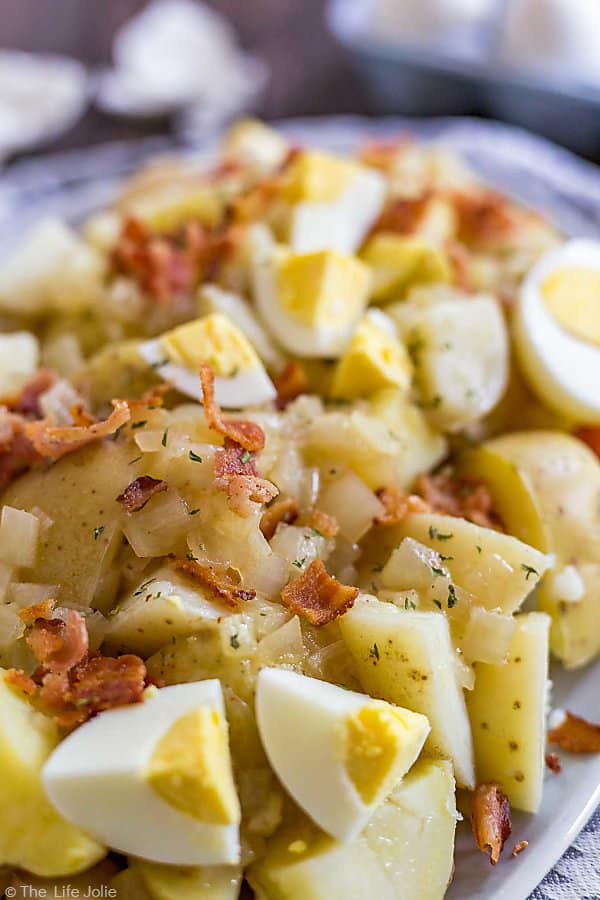
    A close up photo of the potatoes in German Potato Salad as well as bacon.

    A is super excited for this. She has been very clear that she want's a Rainbow themed birthday party. I was a bit surprised by this, I was totally expecting her to say Mickey. But I'm kind of excited for the rainbow theme and secretly happy it doesn't involve characters.

    I'm not sure if I'll be having games or anything like that, they are still a little young and we already have the playhouse and the DIY play stand, so we'll see. Either way we're excited!

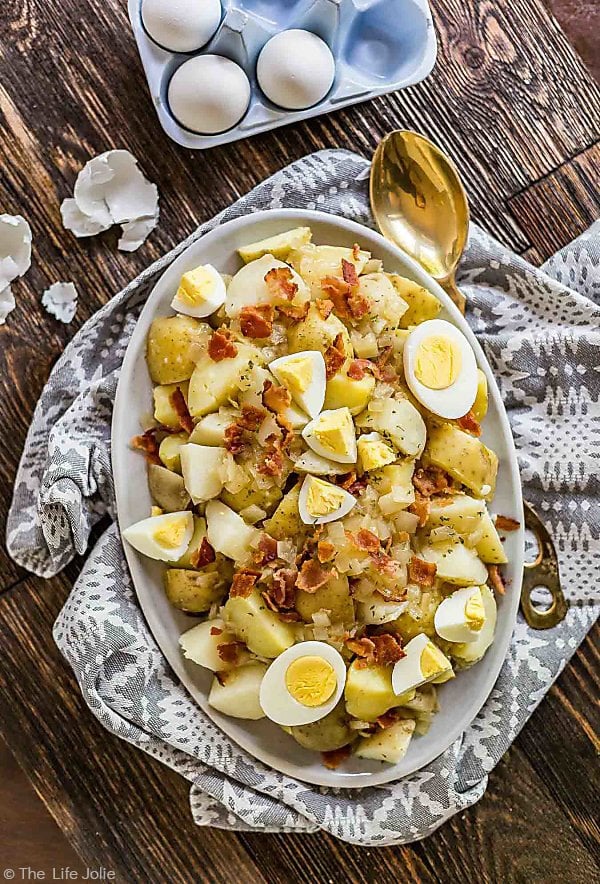
    An overhead photo of German Potato Saladwith a gold spoon on the right side and some egg shells in the top left corner.


    Are you guys sick of delicious summer recipes yet? Good. Neither am I. But once in a while I like to enjoy traditional things like potato salad in a different way.

    In this particular case, I'm referring to the usual mayonnaise-based potato salad. Delicious? Yes. Do I want it at every picnic? Not so much. Sometimes I like to mix things up a bit.

    Some people call this being a commitment-phobe. I prefer adventurous. Luckily, I have an excellent family recipe for German Potato Salad for the days when you simply cannot handle the same, old potato salad.

    A close up photo of the potatoes in German Potato Salad as well as bacon.

    German Potato Salad was always a special treat that you'd find at our family picnics and special events. While it's slightly more labor intensive, don't let that scare you because it's not a terrible amount of work or anything. But the results are simply delicious.

    Think about it. Who doesn't love a potato salad with tons of hard boiled eggs and bacon on it? And did I mention that the dressing is made using the bacon fat? I mean is there anything more awesome than food cooked in bacon fat? We all know the obvious answer is bacon itself, but fear not, bacon is included in this!

    A close up shot of the hard boiled egg in German Potato Salad.

    I think the important key to this recipe is making sure you have enough dressing. If you don't have enough it will be dry and somewhat bland. And nobody has ever been the popular gal at the picnic for bringing a bland salad.

    I remedied this by saving a couple slices of bacon so that if I needed to whip up more sauce, I could quickly render some bacon fat. It's a win/win because then you'll also have a few slices of bacon to munch on or add to the Potato Salad.

    I might even get a little crazy and tell you to make that second batch of the sauce to bring to the picnic and add to the salad right before serving. Worst case, you can always save it. I bet it would taste amazing over a spinach salad with mushrooms and frizzled onions.

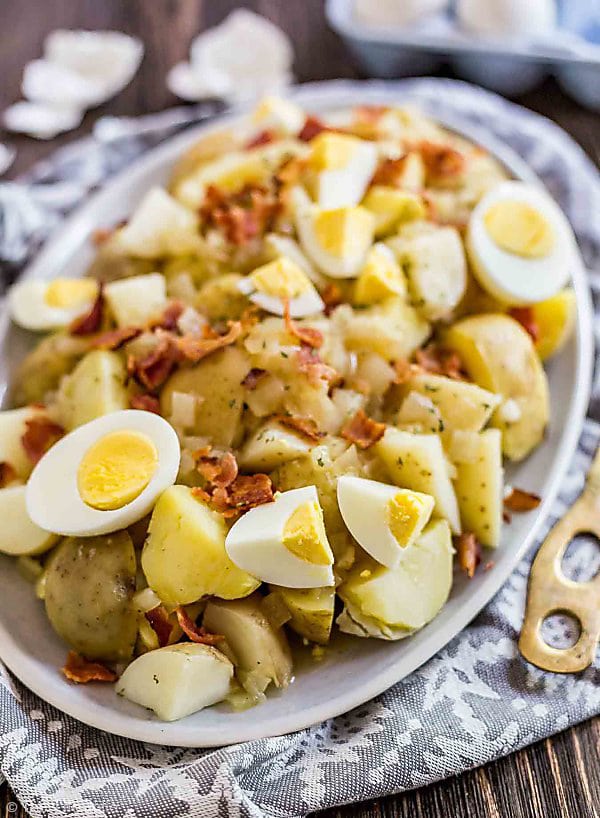
    A plate of German Potato Salad with egg shells in the background.

    Other great picnic sides include:

    Green Bean Salad

    Tuna Macaroni Salad

    Peas and Shrimp Salad

    Roasted Beets Salad with Feta and Dill

    Greek Couscous Salad

    Mexican Bean Salad

    Tomato Salad

    German Potato Salad

    Vicky’s Tabouli

    A square photo of German Potato Salad.

    German Potato Salad

    Jessy Freimann
    This authentic German Potato Salad is an easy family favorite that's perfect for a picnic or gathering. It tastes great cold or warm and is topped with bacon and hard boiled eggs- this is a classic that the whole family will love!
    No ratings yet
    Print Recipe Pin Recipe
    Prep Time 10 minutes mins
    Cook Time 20 minutes mins
    Total Time 30 minutes mins
    Course dinner, Lunch, Side Dish
    Cuisine Family, German, picnic
    Servings 8 -10 servings

    Ingredients
      

    Salad:

    • 1 bag of potatoes cut until pieces and boiled (peeling is optional)
    • 6 to 8 pieces of bacon crumbled; save the grease (or more if you're like me and LOVE bacon!)
    • 2 or 3 hard boiled eggs or more if you want

    Dressing:

    • Bacon grease from the above bacon if you don't have enough grease you can always add a little oil.
    • 1 onion chopped
    • ½ cup of apple cider vinegar
    • ½ cup of water
    • 2 Tbsp. of sugar
    • Flour

    Instructions
     

    • In the bacon grease, saute the onions over medium heat until soft, about 6-7 minutes.
    • Stir in the vinegar, water and sugar and cook for 5 minutes.
    • Whisk in a little flour to thicken (start with 1 Tbsp. and add more as you need it).
    • Mix the potatoes and some of the bacon with the dressing. Top with remaining bacon and eggs and serve warm. If you are serving later, pop it into the oven to warm before serving, stirring frequently so that it doesn't dry out.
    • Enjoy!

    Notes

    If I'm serving this later, I try to reserve some of the dressing and warm it and top it just before serving.
    Tried this recipe?Let us know how it was!

    Helpful tools:


    You can find a full index of my recipes here.

    Don't forget to follow The Life Jolie on Pinterest for more recipe inspiration!

    Or if Pinterest isn't your style, bookmark this post!

    Let's keep the conversation going- join my Facebook group! 
    This authentic German Potato Salad is an easy family favorite that's perfect for a picnic or gathering. It tastes great cold or warm and is topped with bacon and hard boiled eggs- this is a classic that the whole family will love!
    This authentic German Potato Salad is an easy family favorite that's perfect for a picnic or gathering. It tastes great cold or warm and is topped with bacon and hard boiled eggs- this is a classic that the whole family will love!


    Mai Tai Cupcakes

    Jun 12, 2017 · Leave a Comment

    A square image of Mai Tai Cupcakes.

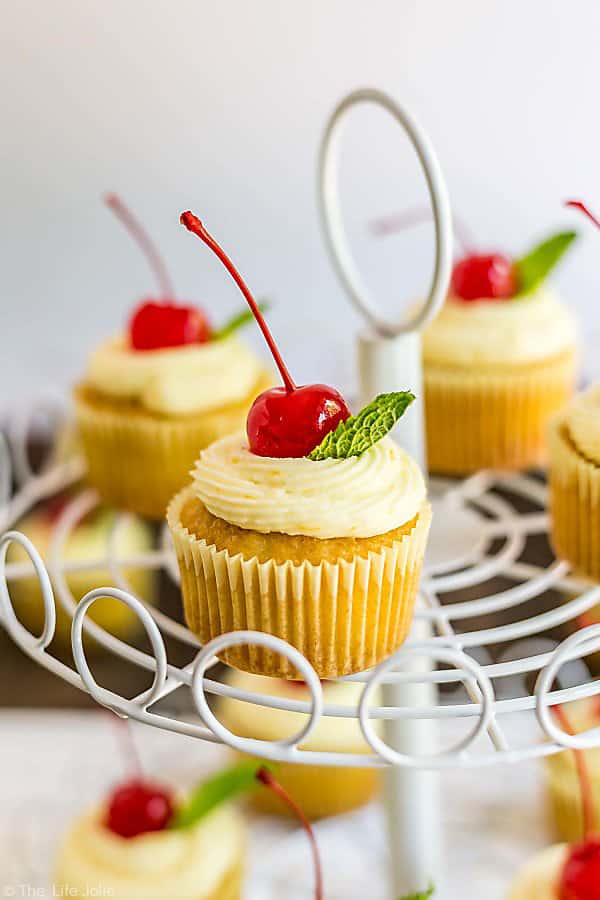
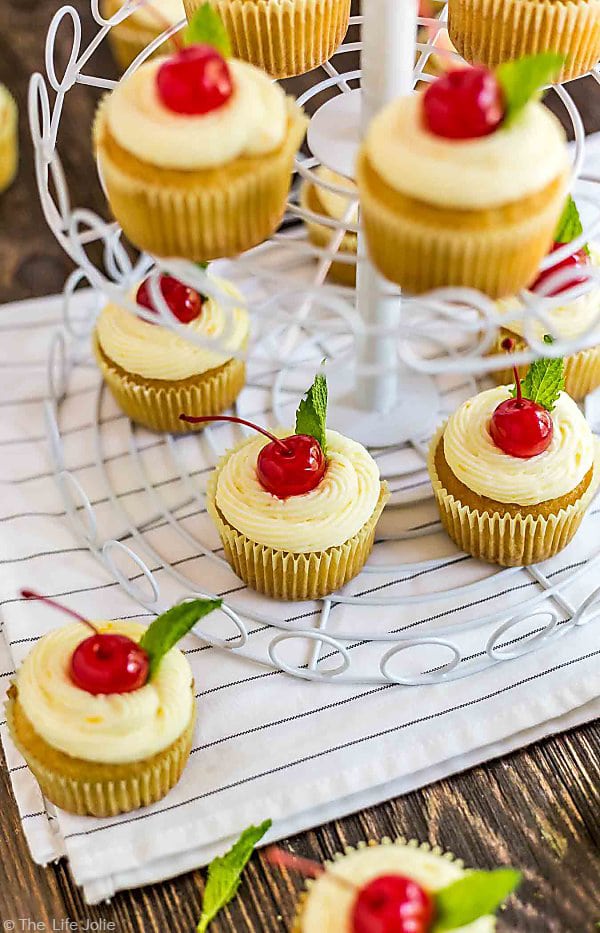
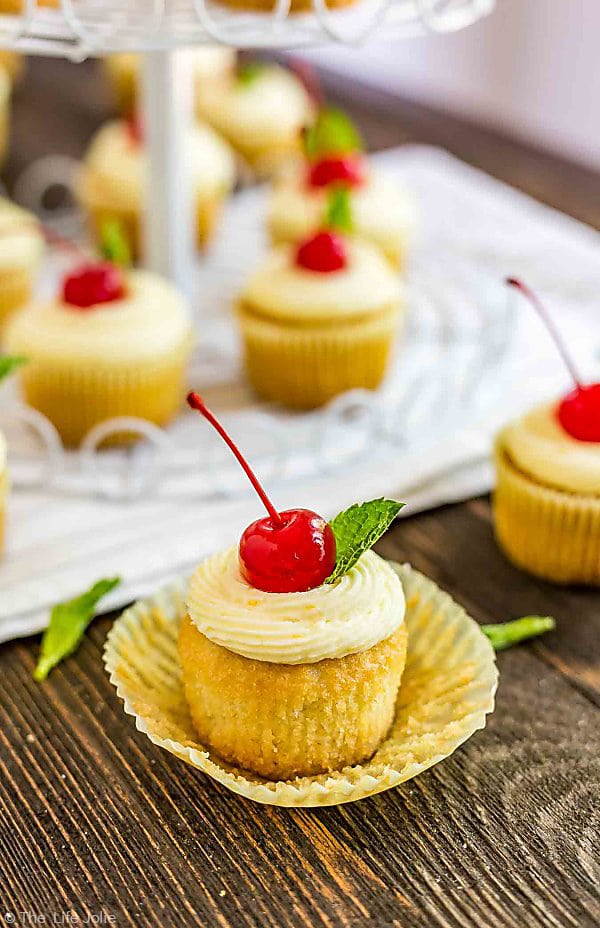
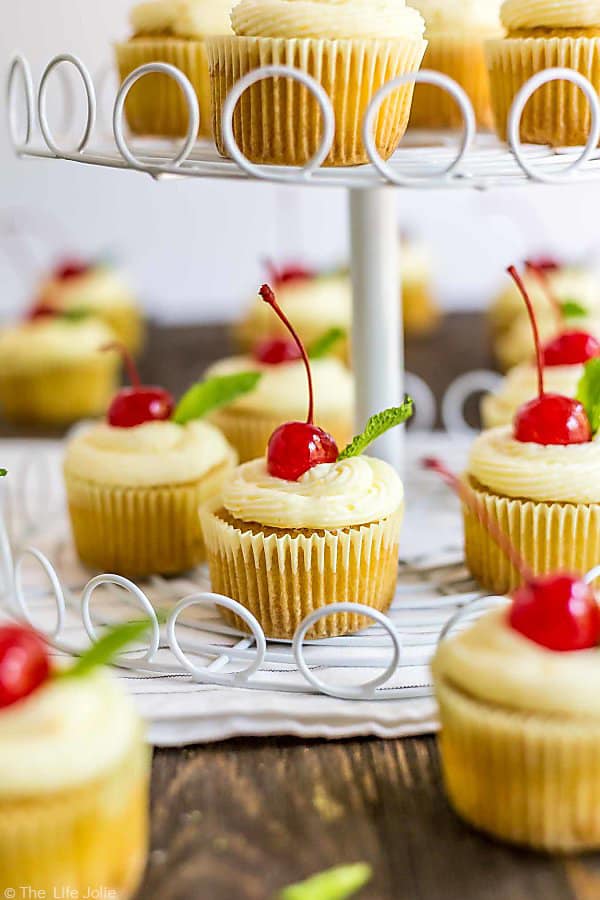
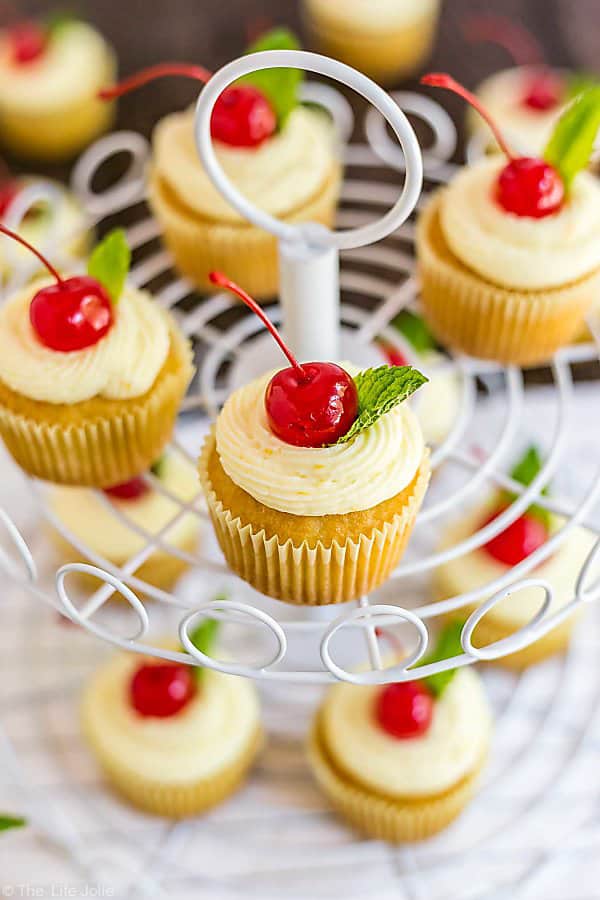
    These Mai Tai Cupcakes are an easy and delicious recipe inspired by the cocktail. There's a small amount of rum (not a ton, there are kid-friendly) in the cupcakes which makes them super moist and they're topped with a fresh orange butter cream that's bursting with flavor and a cherry and a sprig of mint on top, just like the drink!

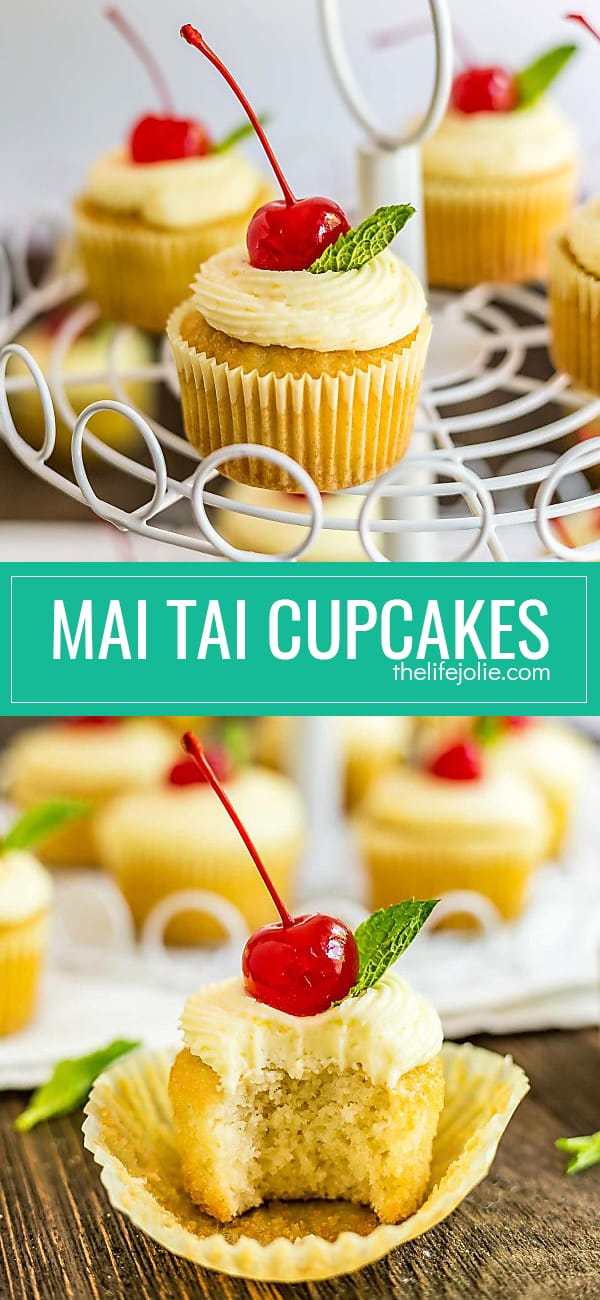
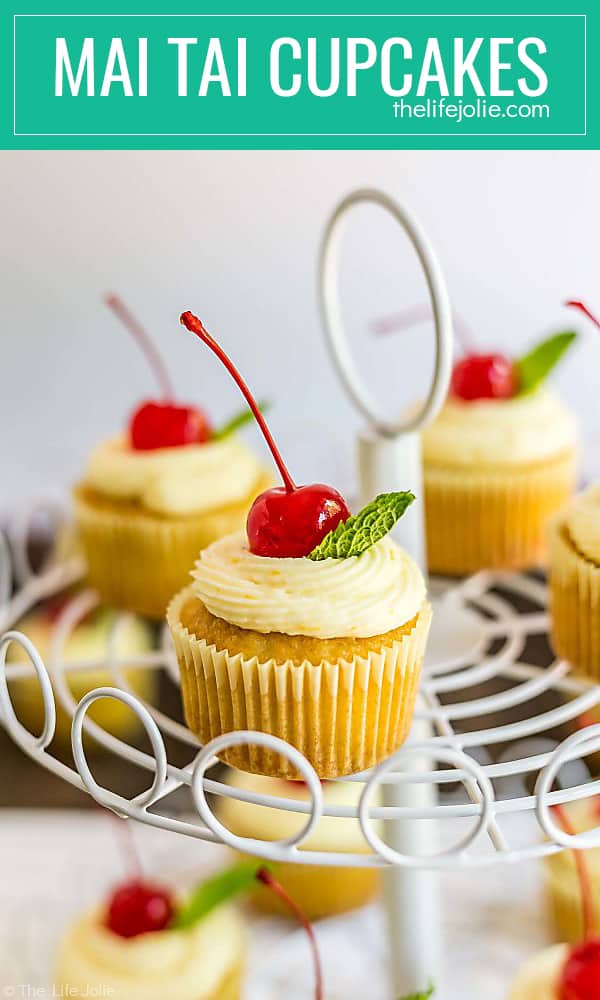
    Mai Tai Cupcakes on the top tier of a cupcake stand.

    This post contains Affiliate Links. For more information please see the disclaimer here.

    One of the ways I know that summer is (finally!) here is when it's time for the Firemen's Parade. We live in a small village. It's one of only a couple villages in our city that is on municipal electric (which is a huge money saver in our freezing cold winters!).

    We absolutely love the small town feel around here. It's a community that has all sorts of family-oriented activities throughout the year and I'm so glad my girls get to grow up in this place!

    Each year at the beginning of June, they do a Firemen's Carnival, which kicks off with a parade. In the past we would always see people setting up their lawn chairs. Oddly, they would totally set them up in the morning and then leave them all day in the Village and come back just before they close the main street in the village completely.

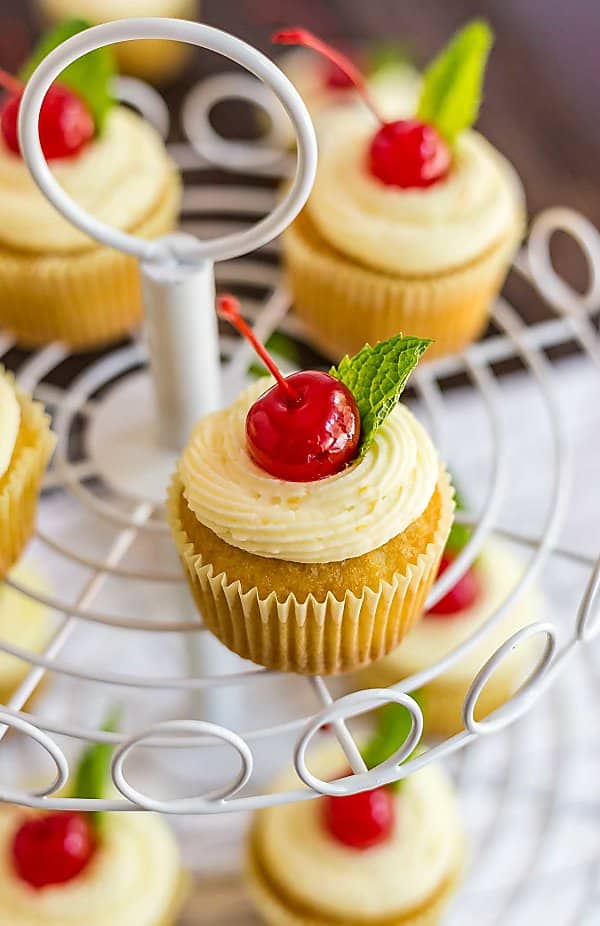
    An elevated view of Mai Tai Cupcakes on a two tier stand.

    This used to crack us up, because who leaves their stuff on the curb of the main area in their town and expects it to still be there that night? But really, it's a great testament to the more positive small town values that are in place around here. You can bet that every last one of those chairs and blankets are still there holding their rightful owner's spot at night.

    This year, we decided to bring the girls. It was a gorgeous night and we had just gotten in from our trip to Pittsburgh (another U2 concert, which was amazing as always! If you follow me on Instagram, you probably saw it in my story) and were dying to hang out with our little ladies.

    For the most part it went pretty well. We grabbed some burgers and hot dogs and got a good spot to view the parade. T seemed to enjoy the first part of the parade and was smiling and waving at everyone that went by. Then the firetrucks came by with their sirens blaring....and that was the end of T's fun. We also discovered a pretty full diaper upon our return home, which I'm sure didn't help matters.

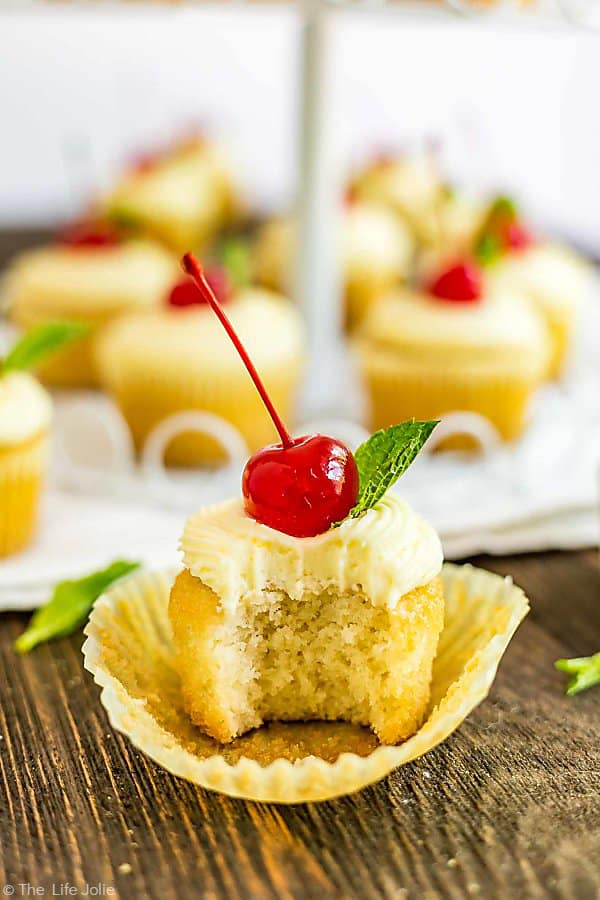
    A Mai Tai Cupcake in the front with the cupcake wrapper loosened off the sides and other Mai Tai Cupcakes in the background.

    A spent most of the parade on my lap taking it all in. She got a kick out of waving to everyone that went by and seeing all the trucks and tractors. Now, I'm not sure how parades go in other places, but around here, there are usually people in the parade who throw candy to all the kids who are watching.

    It was pretty interesting to see how timid A was about this, especially at the beginning. I mean, I get it. She was definitely one of the youngest of the kids around us.

    There was a woman and her granddaughter sitting next to us. We ended up making friends with them and chatting. The little girl was around eight years old and her name was Cadence. She immediately made a good impression on us when, not even a moment after meeting A, she gave her a small plush toy that she had with her.

    The bottom tier of a cupcake stand with one cupcake in focus and other Mai Tai Cupcakes around it.

    I actually invited Cadence to sit on our blanket so that her grandma could enjoy the chair she had with her. I was really touched by the way this little girl was super friendly to all the kids around her. She shared some of her candy grabs with other kids who didn't get any on those throws.

    But she also made a point throughout the night to get some candy for A at each throw, even making a point to ask what she likes and what she was allowed to eat. My heart melted.

    An elevated shot of Mai Tai Cupcakes focusing on the front one on the top tier of a cupcake stand.

    As for A, it took her a little while to really get into going up for candy. I know in the next few years, A will up her candy-grabbing game. This time around, she was pretty hesitant, though she finally got a bit more forthcoming towards the end.

    Overall, a great night. My only regret was that Cadence and her Grandma left before I could tell them how highly I thought of her. I can only hope my girls exhibit this sort of love and care for all those around them.


    When we were on our honeymoon in Hawaii, J lived on a diet of pineapple, Hawaiian Burgers and Mai Tai's. We're not wild party animals or anything, but let's just say there were a lot of happy hours to be had on that trip!

    Mai Tai's aren't actually my drink of choice. I'm not a huge rum fan in general, save for a frozen strawberry daiquiri here and there. It's just too sweet for me. But sometimes things translate beautifully into other areas of cooking.

    One Mai Tai Cupcake in the front with a bite in it and other Mai Tai Cupcakes in the background.

    So while I don't drink things that sweet, I will happily consume foods with rum in them! Adding the rum to these cupcakes turned out to be a stroke of genius on my part (not my most humble assertion, but bear with me).

    Now these aren't soaked in rum the way a traditional rum cake would be. There's a small enough amount to impart a tasty flavor and add an excellent moistness to these cupcakes, but the booziness baked out and I didn't think twice about allowing the girls to eat them (note: we don't make a habit of feeding our girls booze-soaked foods).

    I used Captain Morgan because I think the flavor of spiced rum is a nice addition to these (this is not sponsored, it's just a brand of rum that we like and general have in our home).

    I knew I wanted to incorporate an orange flavor into these cupcakes, as it's one of the main flavor components of a Mai Tai cocktail. There's a small amount of orange in the cupcakes, but making a fresh orange buttercream seemed like a natural next step.

    A close up of a Mai Tai Cupcake on a cupcake stand with a cherry on top.

    I'd be lying if I said buttercream is my first choice for things to top your cake/cupcake/baked good situation with. I tend to find it a bit too sweet for me. And this buttercream is quite sweet. But the orange flavor is so delicious! I happily ate two of them!

    These cupcakes have summer written alllllll over them! Give them a shot for your next BBQ!

    Other great desserts to bring to a BBQ include:

    • S’mores Bars
    • Sour Cream Coffee Cake
    • PB&J Brownies
    • Summer Berry Dessert Crostini
    • Chocolate Cherry Oatmeal Cookie Bars
    • Peach Cobbler
    • Blueberry Buckle
    • Quick and Easy Chocolate Pudding Cake
    • Banana Bread
    • Poppy Seed Cake

    A square image of Mai Tai Cupcakes.

    Mai Tai Cupcakes

    Jessy Freimann
    These Mai Tai Cupcakes are an easy and delicious recipe inspired by the cocktail. There's a small amount of rum (not a ton, there are kid-friendly) in the cupcakes which makes them super moist and they're topped with a fresh orange butter cream tat's bursting with flavor and a cherry an a sprig of mint on top, just like the drink!
    No ratings yet
    Print Recipe Pin Recipe
    Prep Time 20 minutes mins
    Cook Time 20 minutes mins
    Total Time 40 minutes mins
    Course Dessert, Snack
    Cuisine BBQ, cook out, cupcake, party, Summer
    Servings 20 cupcakes
    Calories 277 kcal

    Equipment

    • 1 muffin pan
    • 1 mixing bowl
    • 1 stand mixer
    • 1 Hand mixer
    • 1 Spatula
    • 1 Measuring cups and spoons

    Ingredients
      

    For the cupcakes:

    • 2 cups cake flour
    • 1 ¼ teaspoon baking soda
    • 1 teaspoon Kosher salt
    • ⅔ cup vegetable oil
    • ½ cup spiced rum like Captain Morgan
    • ½ cup buttermilk if you don't have this on hand, you can make it by whisking a little lemon juice into regular milk
    • 1 teaspoon pure vanilla extract
    • 1 teaspoon orange extract
    • 2 large eggs
    • 1 ½ cups granulated sugar

    For the frosting:

    • 1 cup salted butter softened (2 sticks)
    • 6 cups confectioner's sugar
    • 1 large orange zest and juice
    • 1 teaspoon pure vanilla or almond extract
    • 1 teaspoon orange extract

    Instructions
     

    For the cupcakes:

    • Heat the oven to 350 degrees F and place cupcake liners into a muffin pan.
    • Sift together the cake flour, baking soda and salt into a large mixing bowl.
    • Add the oil, rum, buttermilk, vanilla orange extract and beat until smooth.
    • In a separate bowl, beat the eggs until thick and foamy. Gradually add the sugar until well blended. Fold this thoroughly into the batter.
    • Fill the muffin cups ¾ of the way up.
    • Bake uncovered between 15-20 minutes (mine were perfect right around 17 minutes but this will vary based on your oven). Cool completely.

    For the frosting:

    • Beat all ingredients until well combined.
    • Pipe generously onto your cupcakes.
    • Refrigerate until serving.

    Notes

    This is not a rum-soak dessert like a rum cake would be. There is a small enough amount of rum that it cooks off as it bakes and is not boozy.
    If you are dead set on not cooking with rum you can substitute an additional ½ cup of buttermilk. It will change the flavor a bit but will still taste good.

    Nutrition

    Serving: 1cupcakeCalories: 277kcalCarbohydrates: 63gProtein: 3gFat: 17gSaturated Fat: 7gPolyunsaturated Fat: 5gMonounsaturated Fat: 4gTrans Fat: 0.4gCholesterol: 44mgSodium: 271mgPotassium: 48mgFiber: 1gSugar: 16gVitamin A: 341IUVitamin C: 5mgCalcium: 18mgIron: 0.2mg
    Tried this recipe?Let us know how it was!

    Helpful tools:


    You can find a full index of my recipes here.

    Don't forget to follow The Life Jolie on Pinterest for more recipe inspiration!

    Or if Pinterest isn't your style, bookmark this post!

    Let's keep the conversation going- join my Facebook group!  
    These Mai Tai Cupcakes are an easy and delicious recipe inspired by the cocktail. There's a small amount of rum (not a ton, there are kid-friendly) in the cupcakes which makes them super moist and they're topped with a fresh orange butter cream that's bursting with flavor and a cherry and a sprig of mint on top, just like the drink!
    These Mai Tai Cupcakes are an easy and delicious recipe inspired by the cocktail. There's a small amount of rum (not a ton, there are kid-friendly) in the cupcakes which makes them super moist and they're topped with a fresh orange butter cream that's bursting with flavor and a cherry and a sprig of mint on top, just like the drink!

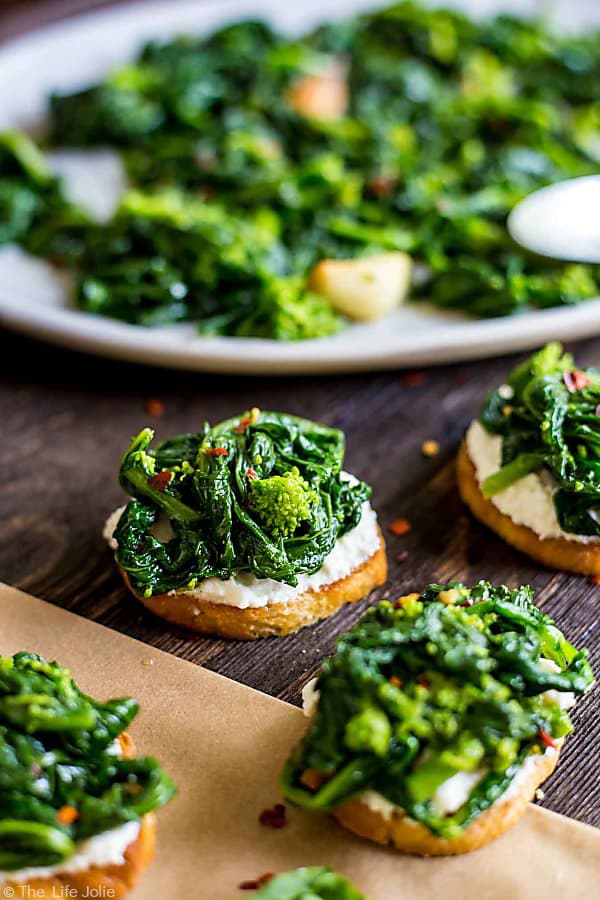
    Broccoli Rabe and Ricotta Crostini

    Jun 5, 2017 · Leave a Comment

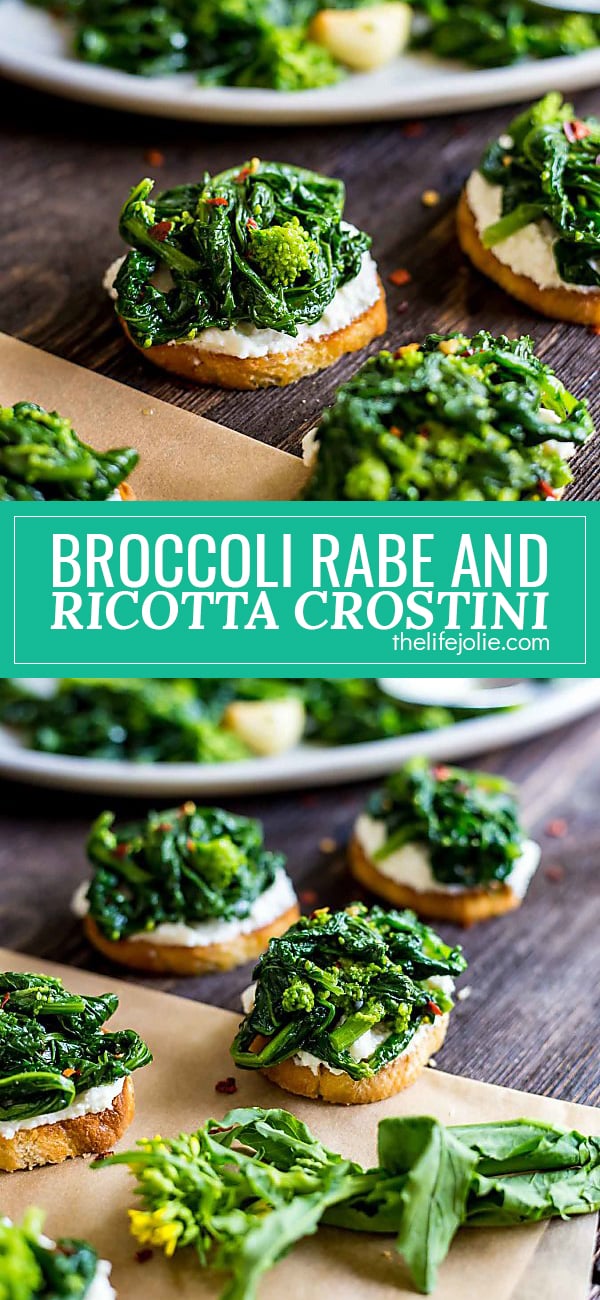
    A square image of Broccoli Rabe and Ricotta Crostini with a yellow broccoli rabe blossom in the foreground and some other crostini and a plate of broccoli rabe in the background.

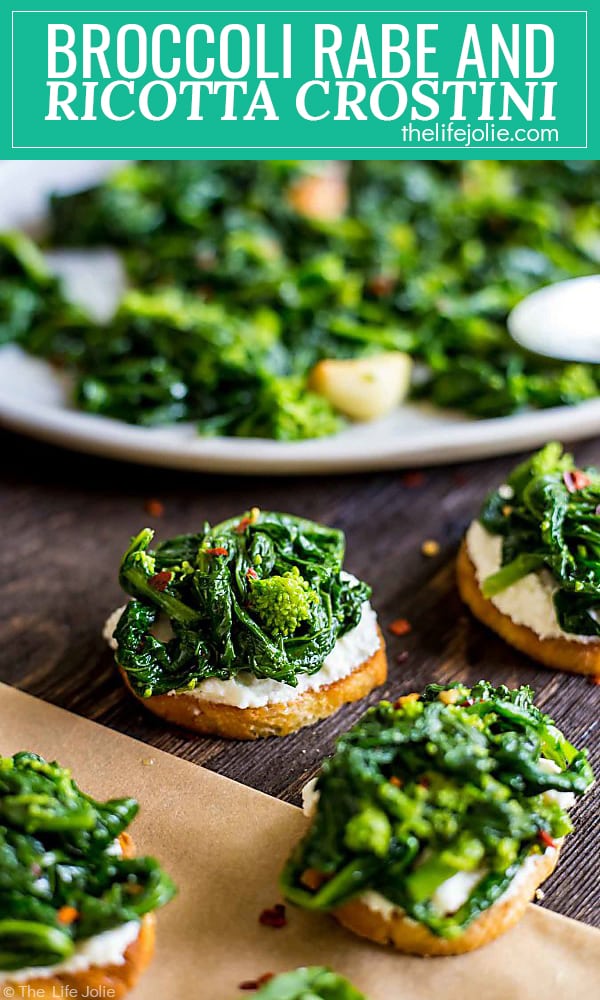
    This Broccoli Rabe and Ricotta Crostini is a simple and delicious throw-together appetizer. It's easy to make at the last minute with great garlic and spicy flavor!

    An image of Broccoli Rabe and Ricotta Crostini with a blurry crostini in the foreground and the blurry plate of broccoli rabe in the background.

    This post contains Affiliate Links. For more information please see the disclaimer here.

    We've really been working on getting our yard into shape lately. A couple weeks ago, cleaned up the front and left side of our house- planted flowers and mulched. I also planted my pots.

    This year I have pots of flowers out front. In the back I have pots of strawberries, jalapeños, Thai chili, basil, curly parsley, lemon thyme, and a cherry tomato plant for my Alice (she was fascinated with the one my mom bought!).

    I also let A pick out a small pot for her and T and then choose the flowers to put into it. She picked a Caribbean blue pot for her and an orange one for T. I was impressed with how she knew exactly what she wanted when it came to choosing pots and the flowers that now reside within them.

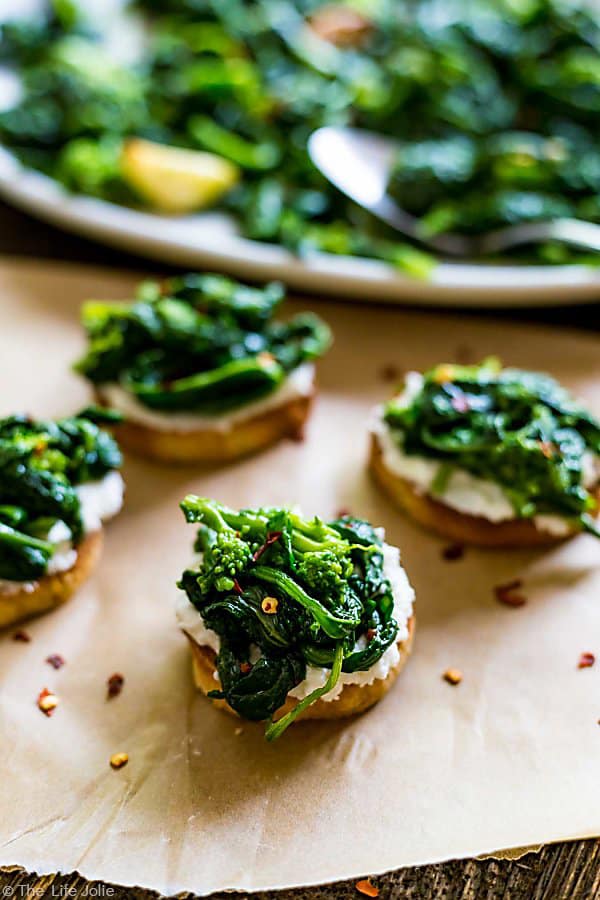
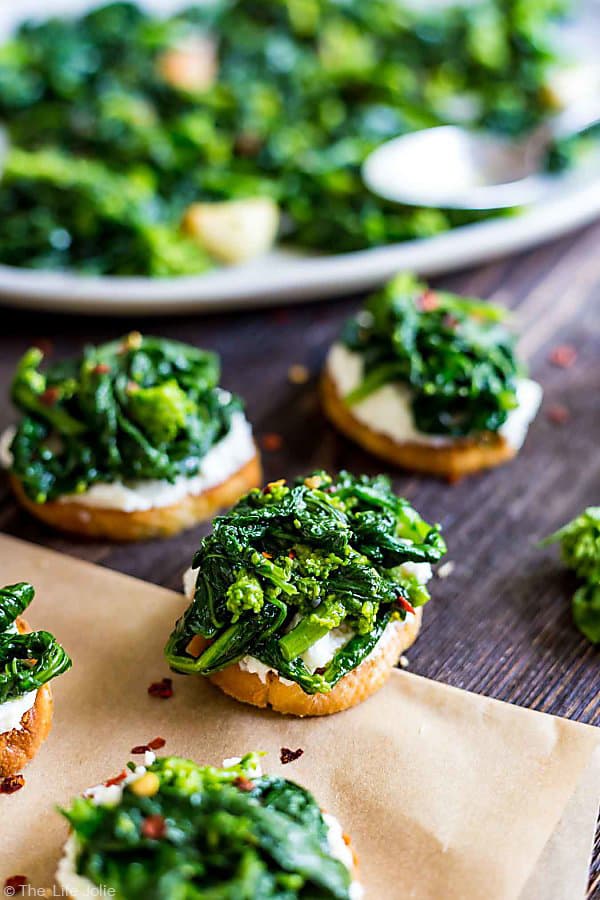
    A couple Broccoli Rabe and Ricotta Crostini's on a piece of parchment paper with crushed red pepper flakes surrounding it and a plate of broccoli rabe in the background.

    Will they all survive? The jury is still out on that one. But I'm hoping that since I'm not pregnant or a mom to a new baby I will actually be able to give these plants a bit more love. We'll see.

    We still have to clean out the back flower beds, plant a few more perennials and paint the shutters. J began staining the deck this weekend and so far it's looking great.

    The right side of our house looks like a jungle, and not in a good way! J say's he's planning on cleaning it out, but that's been on the honey-do list for a few years now. So I'm thinking about hiring that out (there's also a wild tree growing that I don't want staying that close to our house). Again, we'll see.

    It's crazy how busy life can be. Some weekends it feels like we get so much done, while others fly by and it's as if we've barely done a thing! I know I'm not the only one that feels this. We're in an extremely busy season of our life! I just wish we had more hours in the day!

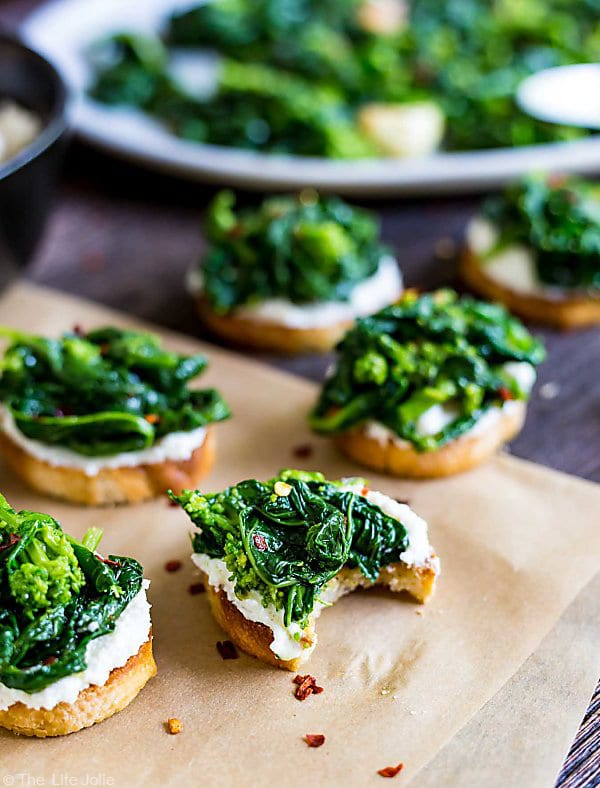
    A piece of Broccoli Rabe and Ricotta Crostini with a bite taken out of it in the front and other crostinis in the background and out of focus.


    So I recently shared my Grandma Rosie's Broccoli Rabe recipe. I had to share this variation because it was SO good and makes a quick appetizer (or light summer dinner!).

    I'm all for simple, throw-together appetizer options, especially when they taste this great! This is an excellent way to wow any food-loving guests but with minimal effort on your part.

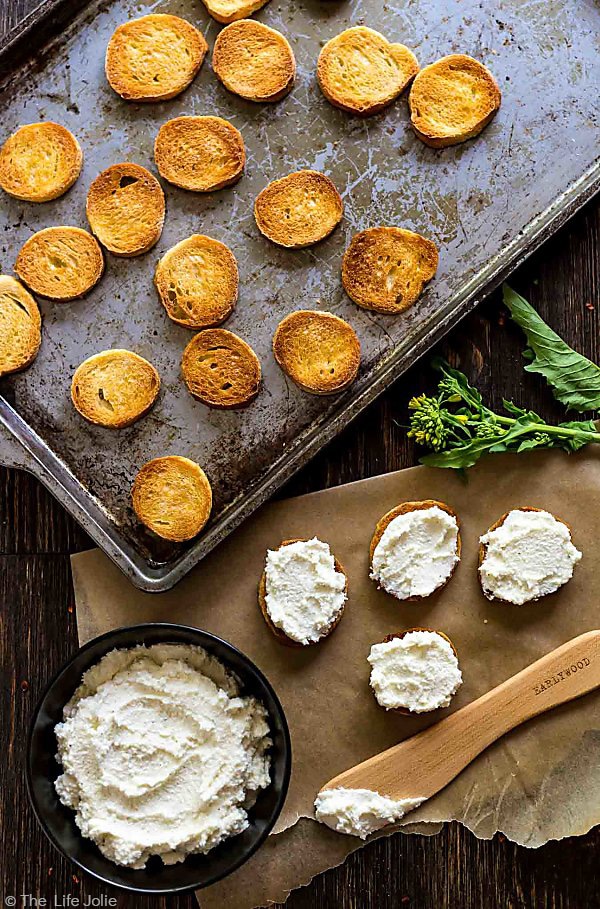
    And I'm dead serious when I say you'll wow them! These were so good that they actually became a problem for me while I was taking photos. This is all due to a big mistake on my part. An overhead photo of a tray of toasted crostini with a few crostini topped with Ricotta and a bowl of ricotta as well.

    While I was getting my pictures done, I wanted to get a bite shot. So I took a big old bite of one of these  guys, as you do. Poor decision.

    Ugh, you guys, it was so delicious, I couldn't stop eating it. Then I ate another. And another. Thank goodness I already had the majority of my shots, or I would have been in big trouble!

    An image of Broccoli Rabe and Ricotta Crostini with a blurry crostini in the foreground and the blurry plate of broccoli rabe in the background.

    I purchased a bag for pre-sliced baguette, which Wegmans does oh-so-well. But you can easily slice it yourself. It was so simple to throw the bread onto a sheet pan with a quick drizzle of olive oil and pop it under the broiler for a few minutes!

    I love that the bread gets golden brown on top, but the underside isn't toasted, so it's still super easy to bite into and maintains that lovely baguette-chewiness that we all know and love.

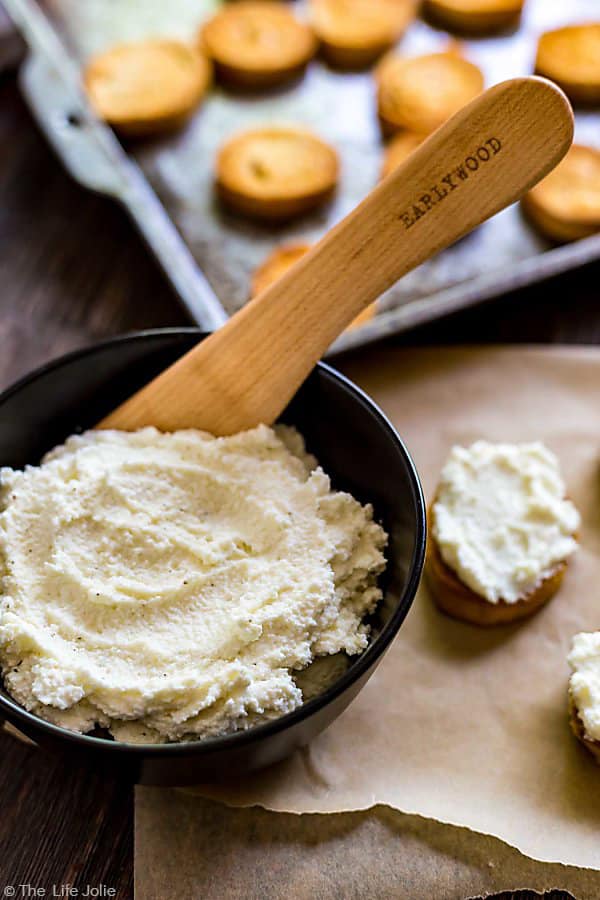
    A bowl of Ricotta cheese with a wooden knife sticking out of it and some Broccoli Rabe and Ricotta Crostini with the cheese spread on them on the side and a tray of the toasted crostini in the background.
    I got this gorgeous wood spreader from Earlywood Designs at the Everything Food Conference and I seriously love it! (this is not sponsored, I just really love their products).

    The Ricotta is just a few ingredients mixed up but it adds an excellent creaminess that plays really nicely with the savory broccoli rabe. I also sprinkled on a bit of extra crushed red pepper for a little bit more kick and color.

    I love having quick, throw-together apps like this in my repertoire. I'ts also a tasty, meatless meal and a great way to re-purpose leftover broccoli rabe!

    A Broccoli Rabe and Ricotta Crostini front and center with two out of focus crostinis in the background and a plate of broccoli rabe.

    Other great throw-together appetizers include:

    • Pea Pesto Flatbread with Asparagus and Shaved Pecorino Romano
    • Artichoke Asiago Dip
    • Sheet Pan Chicken Nachos
    • Salami Chips with a Honey Mustard Dipping Sauce
    • Apple Bacon Brie Bites
    • Bloody Mary Cheeseball
    • Sweet and Spicy Kielbasa Bites
    • Olive and Gruyere Puff Pastry Tartlets
    • Jalapeno Popper Pull Apart Bread
    • BLT Bruschetta
    • Shrimp with Pesto and Prosciutto
    • Summer Berry Dessert Crostini

    A square image of Broccoli Rabe and Ricotta Crostini with a yellow broccoli rabe blossom in the foreground and some other crostini and a plate of broccoli rabe in the background.

    Broccoli Rabe and Ricotta Crostini

    Jessy Freimann
    This Broccoli Rabe and Ricotta Crostini is a simple and delicious throw-together appetizer. It's easy to make at the last minute with great garlic and spicy flavor!
    No ratings yet
    Print Recipe Pin Recipe
    Prep Time 10 minutes mins
    Cook Time 10 minutes mins
    Total Time 20 minutes mins
    Course Appetizer
    Cuisine Easy, quick, starter, vegetarian
    Servings 12 pieces
    Calories 143 kcal

    Equipment

    • 1 cutting board
    • 1 chefs knife
    • 1 mixing bowl
    • 1 Spatula
    • 1 hand

    Ingredients
      

    • 1 Baguette Sliced
    • 2 Tablespoons Olive oil
    • 15 ounces Ricotta cheese
    • 3 Tablespoons Romano cheese
    • ½ teaspoon Kosher Salt
    • ¼ teaspoon ground black pepper
    • 2 cups Sauteed Broccoli Rabe with Garlic and Crushed Red Pepper
    • Extra crushed red pepper flake for garnish and an added kick

    Instructions
     

    • Heat the broiler to 350 degrees F (leave the oven rack in the middle).
    • Spread the sliced baguette pieces onto a baking sheet and lightly drizzle with olive oil.
    • Broil for 5-10 minutes keeping an eye on them- remove when they're golden brown.
    • Mix Ricotta cheese, Romano cheese well in a bowl and then add salt and pepper until it has enough flavor (taste it as you mix).
    • Spread the Ricotta cheese mixture onto the toasted crostini.
    • Top each Crostini with sautéed broccoli rabe.
    • Sprinkle with extra crushed red pepper flakes for an added kick.
    • Serve immediately.

    Notes

    This can be served room temperature or cold.
    You can make everything ahead and assemble these at the last minute.

    Nutrition

    Serving: 3piecesCalories: 143kcalCarbohydrates: 11gProtein: 7gFat: 8gSaturated Fat: 4gPolyunsaturated Fat: 1gMonounsaturated Fat: 3gCholesterol: 19mgSodium: 273mgPotassium: 78mgFiber: 1gSugar: 1gVitamin A: 338IUVitamin C: 1mgCalcium: 116mgIron: 1mg
    Tried this recipe?Let us know how it was!

    Helpful tools:


    You can find a full index of my recipes here.

    Don't forget to follow The Life Jolie on Pinterest for more recipe inspiration!

    Or if Pinterest isn't your style, bookmark this post!

    Let's keep the conversation going- join my Facebook group!
    This Broccoli Rabe and Ricotta Crostini is a simple and delicious throw-together appetizer. It's easy to make at the last minute with great garlic and spicy flavor!
    This Broccoli Rabe and Ricotta Crostini is a simple and delicious throw-together appetizer. It's easy to make at the last minute with great garlic and spicy flavor!

    Summer Berry and Burrata Salad

    May 22, 2017 · Leave a Comment

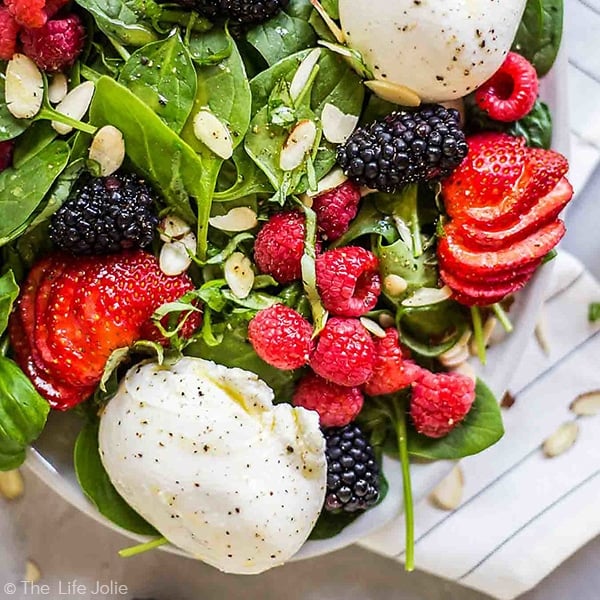
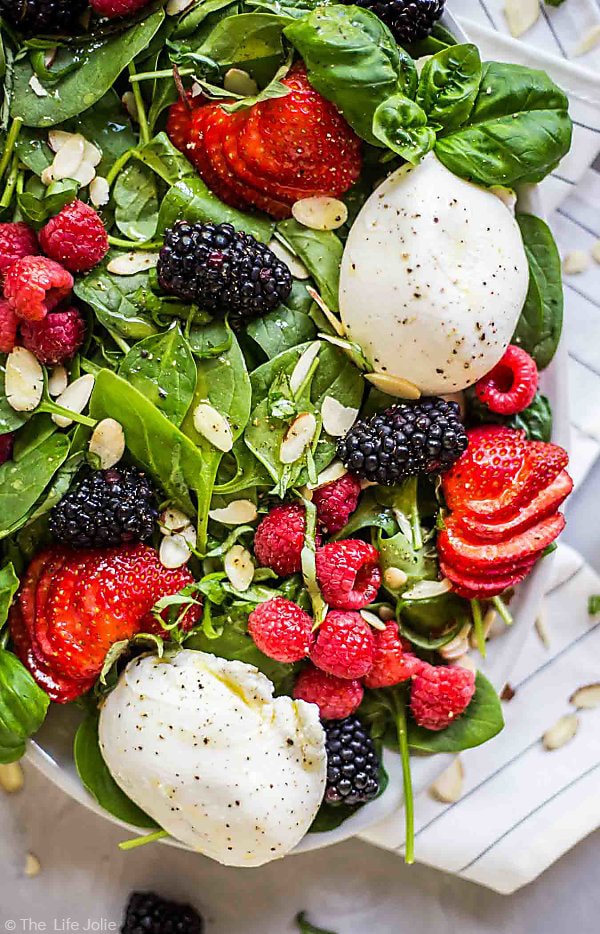
    A square shot of the Summer Berry and Burrata Salad.

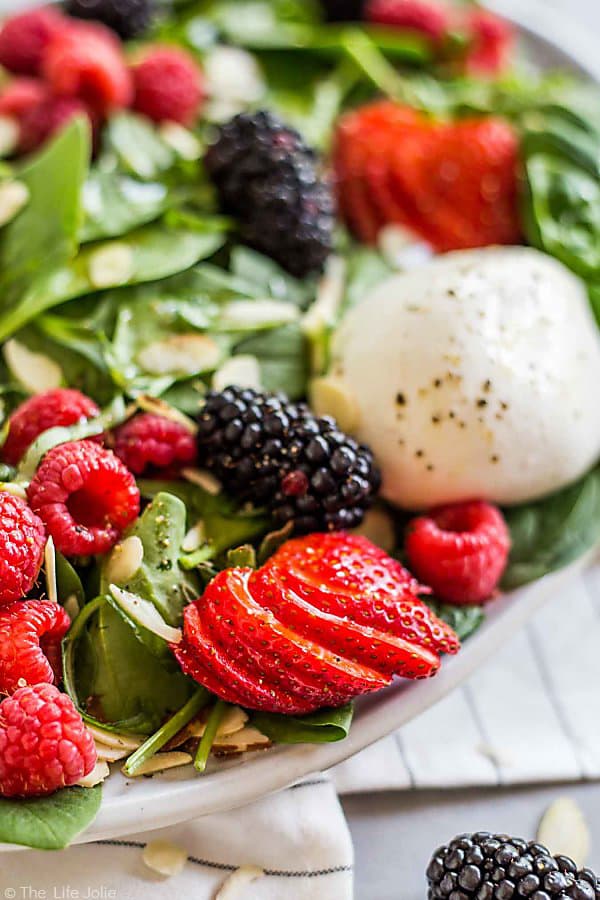
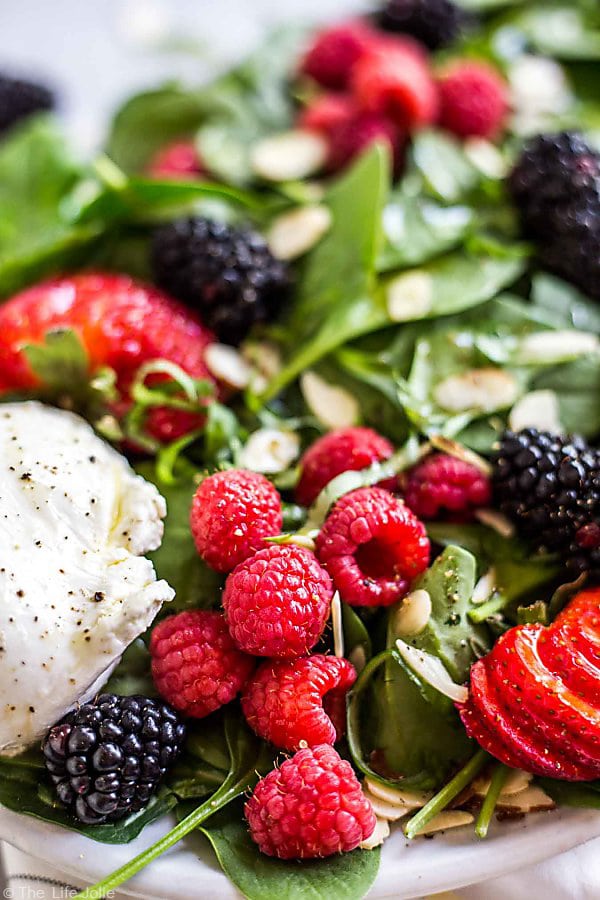
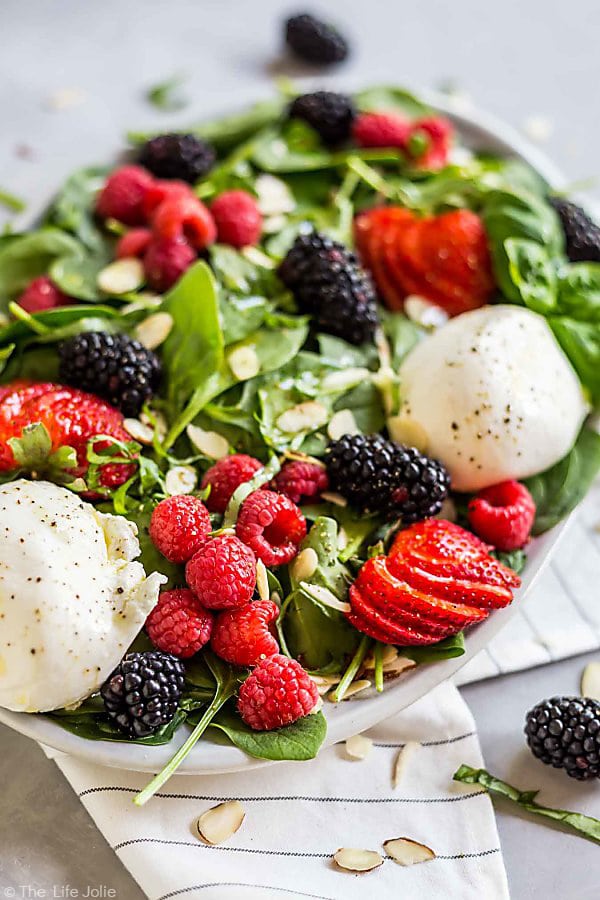
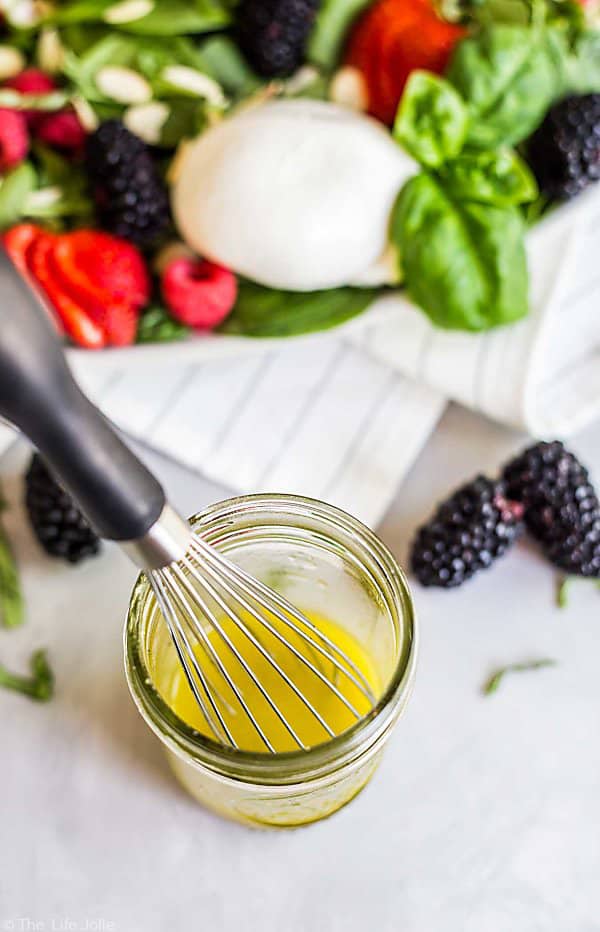
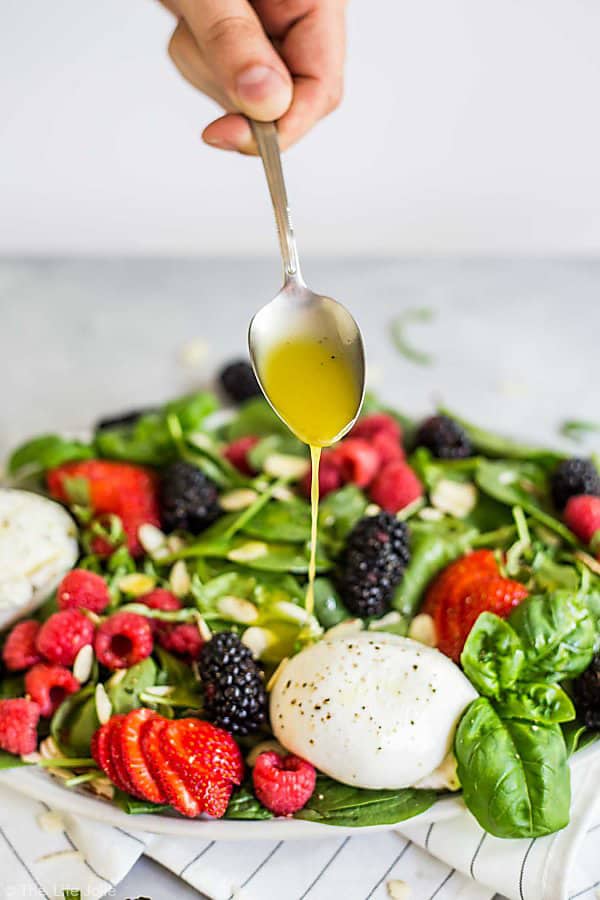
    Summer Berry and Burrata Salad is a healthy and delicious recipe. It's easy to make with baby spinach, berries, sliced almonds and creamy Burrata cheese with a homemade honey vinaigrette. This makes a festive side for entertaining guests or a great main dish on a hot summer night when you don't want to cook!

    Summer Berry and Burrata Salad

    This post contains Affiliate Links. For more information please see the disclaimer here.

    The other night J picked the girls up from daycare and we met at our church rummage sale. I love this sale because I'm constantly finding great treasure to use for food photo props and rock-bottom prices and great books and toys for the girls. A few years ago I got a killer deal on some great decor for A's Alice in Wonderland Birthday Party.

    As I was getting ready to pay, J asked me to come look at an item that he liked. We've been in the market for an end table for a little while, so I was excited that maybe he'd found one since I hadn't really looked at the furniture.

    A close up of the strawberry in the Summer Berry and Burrata Salad.

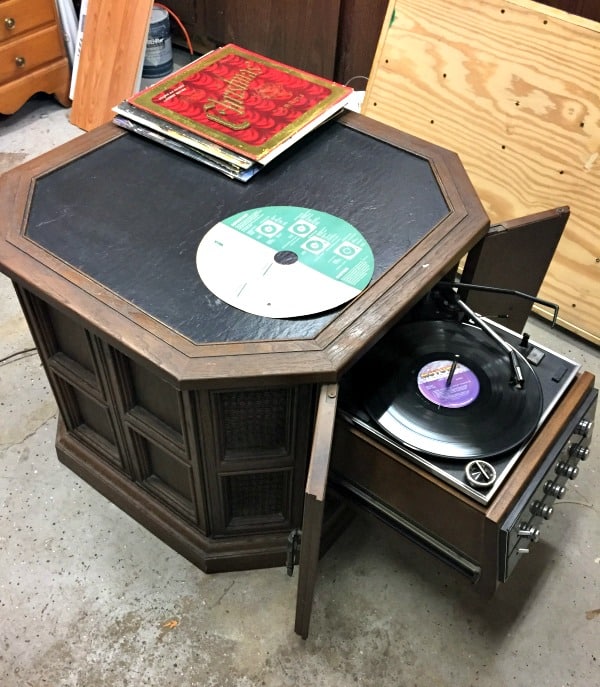
    Well, it turns out he did find a piece of furniture but it was more of an end table/record player/speakers combo platter. This guy, to be exact:

    The eyesore that now lives in my home!

    Now, typically when J has an opinion on decor, I tend to give in quickly because he so rarely shares his decor opinions that I assume it must be important to him. But this guy was a pretty decent-size piece and I didn't even know where we would put it.

    My initial reaction was, "Oh hell no!" but instead I smiled and said, "ok...I didn't realize you were that into vinyls..." Then J proceeded to tell me that he thought it was so cool and the guy seemed like he really wanted to get rid of it and he thought we'd be able to get a great price.

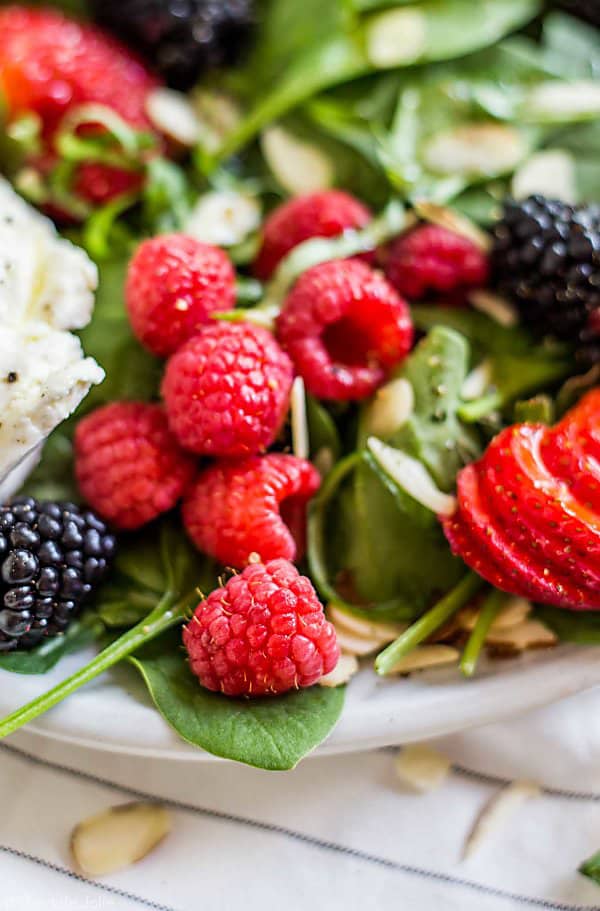
    A close up of the raspberries in the Summer Berry and Burrata Salad.

    I still wasn't really sold but I asked him where he thought we could put it. He said he was pretty sure it would fit into our living room next to the couch (where the Xbox currently hangs out). The other option was to put it in the dining room, as he thought it might go with the dining room furniture set his parents gave us.

    Then he looked at me with those big, chocolate brown eyes that I adore and said "I'd even be willing to keep it in the garage if you don't want it around the house." Well, at that moment, even though it wasn't really what I had in mind for an end table, and even though it really isn't my style, I knew I couldn't possibly say no.

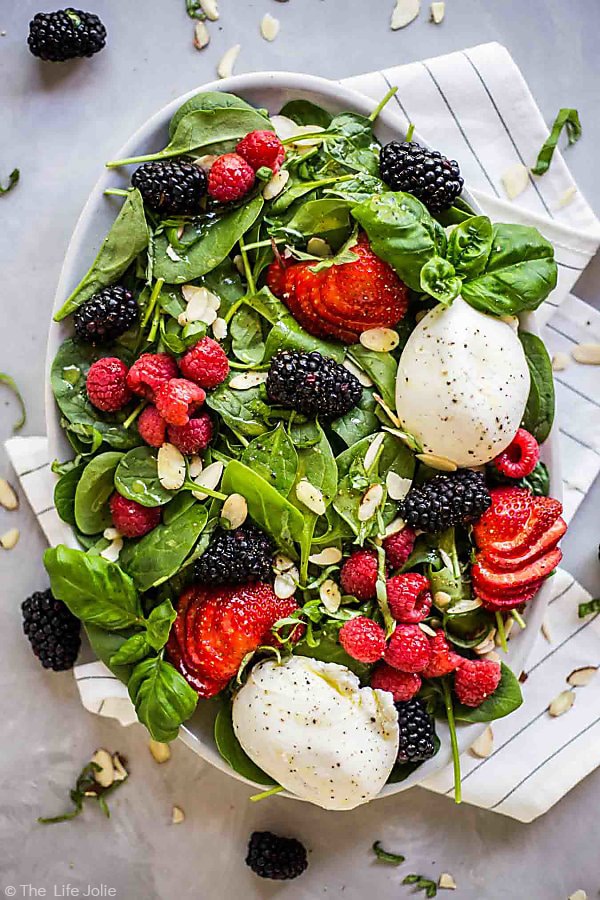
    Overhead shot of the whole Summer Berry and Burrata Salad.

    I mean, he obviously loved it if he was willing to keep the thing in the garage. Would it kill me to have a side table that also plays music? So I smiled at him and said "if you love it, you should have it." The guy even threw in tenfree vinyls to seal the deal (hello Lionel Richie!!).

    I'd love to hack it somehow to make it cuter but I'm not really sure how (ideas are welcome!!). We'll see...at least J is happy.

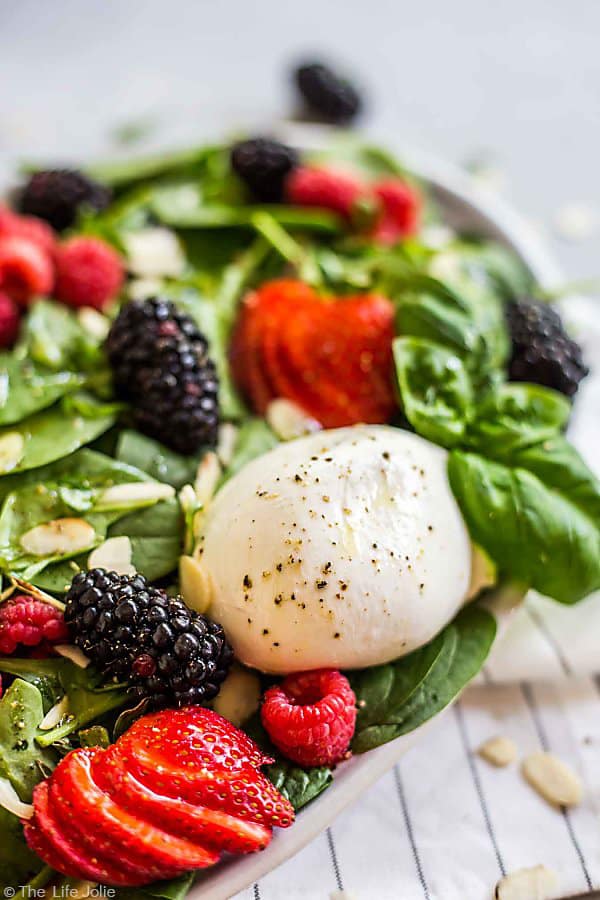
    A close up of the Burrata cheese in this Summer Berry and Burrata Salad.


    This past week we  had a couple of days that were almost 90 degrees! I forgot what it's like to have that kind of heat, but I certainly wasn't complaining.

    But that high heat and humidity definitely got me thinking about those nights. You know the ones, where it's so darn hot, you couldn't possibly fathom turning your stove on, never mind your oven!

    I love this Summer Berry and Burrata Salad.

    This recipe is made for hot summer nights like that. Fresh baby spinach. Sweet and juicy summer berries. Luxuriously creamy Burrata cheese (if you haven't tried this you should probably drop everything and get some immediately. Think: fresh mozzarella but much creamier. It really is that good!). Crunchy slivered almonds.

    This Summer Berry and Burrata Salad is perfect for a hot summer night.

    I whipped up a simple honey vinaigrette go over it. I didn't go crazy on the honey because the berries were already pretty sweet. But that little bit of honey helps cut through the acid from the vinegar and emulsify the vinaigrette.

    The dressing with the whisk in it for the Summer Berry and Burrata Salad.

    This is also a simple option to serve as a side dish or an appetizer for a dinner party. It's fancy enough to impress with minimal work on your part. And you can assemble it in advance and then dress it right before you serve it!

    Summer Berry and Burrata Salad with the dressing being drizzled on top.

    Here are a few other salads that I love:

    • Copycat Panera Bread BBQ Chicken Salad
    • 7 Layer Taco Salad
    • Vicky’s Tabouli
    • Green Bean Salad
    • Tuna Macaroni Salad
    • Tomato Salad
    • German Potato Salad
    • Fennel and Clementine Salad
    • Greek Couscous Salad
    • Mexican Bean Salad
    • Roasted Beets Salad with Feta and Dill
    • Peas and Shrimp Salad

    A square shot of the Summer Berry and Burrata Salad.

    Summer Berry and Burrata Salad

    Jessy Freimann
    Summer Berry and Burrata Salad is a healthy and delicious recipe. It's easy to make with baby spinach, berries, sliced almonds and creamy Burrata cheese with a homemade honey vinaigrette. This makes a festive side for entertaining guests or a great main dish on a hot summer night when you don't want to cook!
    No ratings yet
    Print Recipe Pin Recipe
    Prep Time 10 minutes mins
    Total Time 10 minutes mins
    Course Appetizer, Entree, Lunch, Main dish, Side Dish, Vegetarian
    Cuisine Healthy, Light, Salad, Summer, vegetarian
    Servings 2 -4 servings

    Ingredients
      

    For the salad:

    • 5 ounces baby spinach washed
    • 1 pint raspberries washed
    • 1 pint blackberries washed
    • 1 cup strawberries
    • ½ cup sliced almonds
    • 8 leaves sweet basil cut into a chiffonade
    • 3 Burrata cheese balls

    For the dressing:

    • 3 extra virgin olive oil
    • 1 ½ Tablespoons white wine vinegar
    • 1 teaspoon honey
    • Salt and pepper to taste

    Instructions
     

    For the salad:

    • In a deep bowl, mix the first six ingredients.
    • Toss with the dressing until they are evenly coated.
    • Place the salad into your serving dish and top with the balls of Burrata and a bit of fresh cracked pepper.
    • Enjoy!

    For the dressing:

    • Whisk all ingredients until well combined.

    Notes

    To chiffonade the basil, stack the leaves on top of each other and toll them. Then cut the roll (as you would cinnamon buns).
    You can easily double or triple this recipe for a crown.
    If Burrata is not available, fresh mozzarella is a good replacement and this also tastes great with crumbly blue cheese.
    You could easily top this with chicken or shrimp for a more filling entree.
    Tried this recipe?Let us know how it was!

    Helpful tools:


    You can find a full index of my recipes here.

    Don't forget to follow The Life Jolie on Pinterest for more recipe inspiration!

    Or if Pinterest isn't your style, bookmark this post!

    Let's keep the conversation going- join my Facebook group!
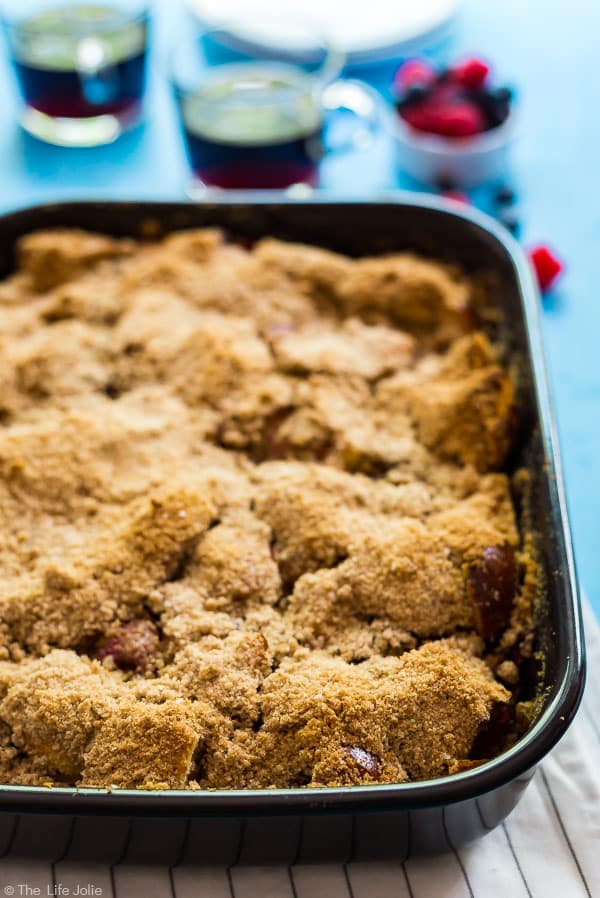
    Summer Berry and Burrata Salad is a healthy and delicious recipe. It's easy to make with baby spinach, berries, sliced almonds and creamy Burrata cheese with a homemade honey vinaigrette. This makes a festive side for entertaining guests or a great main dish on a hot summer night when you don't want to cook!Summer Berry and Burrata Salad is a healthy and delicious recipe. It's easy to make with baby spinach, berries, sliced almonds and creamy Burrata cheese with a homemade honey vinaigrette. This makes a festive side for entertaining guests or a great main dish on a hot summer night when you don't want to cook!
    Summer Berry and Burrata Salad is a healthy and delicious recipe. It's easy to make with baby spinach, berries, sliced almonds and creamy Burrata cheese with a homemade honey vinaigrette. This makes a festive side for entertaining guests or a great main dish on a hot summer night when you don't want to cook!

    Pea Pesto Flatbread with Asparagus and Shaved Pecorino Romano

    May 15, 2017 · Leave a Comment

    A square image of Pea Pesto Flatbread

    This Pea Pesto Flatbread recipe is a quick and delicious appetizer. It's super easy to make and full of fresh spring flavors and topped with asparagus and shaved Pecorino Romano cheese. This is perfect for a warm summer night while sipping wine on your patio!

    Slices of Pea Pesto Flatbread piled on top of each other.

    This post contains Affiliate Links. For more information please see the disclaimer here.

    Do you guys watch a lot of TV? We actually got rid of the satellite TV package about one year ago. It was a bit of a transition because we had both been raised with cable, and up until that time were totally used to having it.

    But I'll be completely honest with you, we haven't really missed it. That's not so say we don't still watch TV. We have an Apple TV as well as an Xbox, and use the Hulu Plus, Netflix and Disney Junior apps regularly. Most of this serves as background noise while we get our work done after the girls go to bed outside of a limited amount of Mickey or PJ Masks for A.

    aan overhead shot of unsliced Pea Pesto Flatbread.

    But one of my favorite shows to watch during my lunch break each day (gotta love streaming on my iPhone!) is The Chew. Don't their jobs just look super fun?! Getting to cook and hang out with people who have also become your friends each day (in front of a live studio audience haha!). #goals

    In addition to loving the personalities of the hosts, I am constantly inspired by all the delicious recipes that are shared each day. And that's actually where the inspiration for this recipe was born.

    An unsliced Pea Pesto Flatbread.

    In an episode that aired about a month ago, Michael Symon was talking about throwing together a last minute meal for his wife with a few things that they already had on hand. He ended up making a Pea Pesto and served it over pasta and I was all "Dude, I gotta try that."

    So I pulled out my mini prep processor and threw a bunch of things in that I thought might be tasty together. After a little tweaking, I got the balance just right for what I was looking to do.

    Pea Pesto while still in the food processor.

    Because, you see, I was not looking to serve this over pasta like Michael Symon did (I know, you guys. How dare I EVER not include pasta?! I'm to WORST.). Don't get me wrong, this would be totally delicious over a nice bowl of fresh pasta! But I had something a little different in mind.

    A photo of sliced Pea Pesto Flatbread taken from an overhead angle.

    Pea. Pesto. Flatbreads. Boom!

    Slices of Pea Pesto Flatbread.

    I had this vision of sitting out on my patio, sipping a glass of dry white wine and biting into one of these guys as a warm breeze blows through the trees and my girls run around in the yard. Ugh, summer I love you so! Side note: this is totally out of character for me, I'm typically in the red-wine-or-no-wine camp with the exception of Prosecco and champagne.

    CLose up photo of slices of Pea Pesto Flatbread.

    First of all, this is super easy to throw together, even at the last possible second. It's ready in a matter of minutes and you can easily switch up the toppings to your taste.

    I personally fell in love with these topped with asparagus (upgrade: grill them, like these!), a small amount of melted Asiago cheese, sweet peas, crushed red pepper for a spicy kick and finished with shaved Pecorino Romano when it comes out of the oven.Two Pea Pesto Flatbreads from an overhead view.

    I am not even slightly ashamed to say I ate every single one of these, though I spread it out over a couple days. It actually made an awesome lunch the bring to work and the flatbread even maintained it's delicious crunch! I enjoyed it with my Green Bean Salad (which I had also photographed the day before- work smarter, not harder!).

    So what are you waiting for? Go make these!

    An overhead photo of Pea Pesto Flatbread slices with one slice on top of the others.

    Other great appetizers that would be great with a glass of wine include:

    • Artichoke Asiago Dip
    • Salami Chips with a Honey Mustard Dipping Sauce
    • Apple Bacon Brie Bites
    • Bloody Mary Cheeseball
    • Sweet and Spicy Kielbasa Bites
    • Olive and Gruyere Puff Pastry Tartlets
    • BLT Bruschetta
    • Strawberry Goat Cheese Tart
    • Shrimp with Pesto and Prosciutto
    • Summer Berry Dessert Crostini

    A square image of Pea Pesto Flatbread

    Pea Pesto Flatbread with Asparagus and Shaved Pecorino Romano

    Jessy Freimann
    Pea Pesto Flatbread is an elevated snakc or appetizer with all the great flavors of spring.
    No ratings yet
    Print Recipe Pin Recipe
    Prep Time 10 minutes mins
    Cook Time 20 minutes mins
    Total Time 30 minutes mins
    Course Appetizer, Hors D'Oeuvre, Lunch
    Cuisine spring, vegetarian
    Servings 4 flatbreads
    Calories 657 kcal

    Equipment

    • 1 sheet pan
    • 1 Measuring cups and spoons
    • 1 cutting board
    • 1 chefs knife

    Ingredients
      

    For the pesto:

    • 1 cup green peas with a small handful reserved to top the flatbreads (if you're using frozen peas, thaw them. For fresh, blanch them for 3 minutes and then plunge them into an ice bath)
    • ⅓ cup chopped walnuts
    • 2 Tablespoon Romano cheese
    • 1 clove garlic
    • 1 Tablespoon lemon juice
    • ½ teaspoon Kosher salt
    • ½ teaspoon ground black pepper
    • 2 Tablespoon olive oil start with 1 Tablespoon and then if needed, you can drizzle more in until it gets to the texture you like.

    For the flatbreads:

    • 4 pieces Naan garlic naan is great if you can find it
    • 1 cup asparagus tips
    • 1 cup shredded Asiago cheese
    • 2 Tablespoons Romano cheese
    • ¼ teaspoon Crushed red pepper
    • 1 Tablespoon Lemon zest

    Instructions
     

    For the Pea Pesto:

    • Combine all of the pesto ingredients into the mini prep processor (or food processor).
    • Run the processor in grind mode until it's well combined. If necessary, ad more oil until it gets to the consistency that you like (I left mine a tiny bit thicker so that it would spread easier).

    For the flatbreads:

    • Preheat the over to 375 degrees F.
    • Lay the flatbreads on a pan and bake uncovered for 10-15 minutes.
    • While the flatbreads bake, blanch the asparagus tip for 2 minutes and then plunge them into an ice water bath. Then drain and dry them.
    • Spread the flatbreads with pea pesto and sprinkle with Asiago cheese.
    • Then top them with the asparagus and the peas.
    • Bake for 5 more minutes.
    • Top them with shaved Pecorino Romano and sprinkle with brushed red pepper. Serve immediately.

    Notes

    Leftovers last up to 2 days int he refrigerator.

    Nutrition

    Serving: 1flatbreadCalories: 657kcalCarbohydrates: 69gProtein: 25gFat: 31gSaturated Fat: 9gPolyunsaturated Fat: 6gMonounsaturated Fat: 8gCholesterol: 32mgSodium: 1603mgPotassium: 242mgFiber: 6gSugar: 7gVitamin A: 788IUVitamin C: 20mgCalcium: 460mgIron: 2mg
    Tried this recipe?Let us know how it was!


    You can find a full index of my recipes here.

    Don't forget to follow The Life Jolie on Pinterest for more recipe inspiration!

    Or if Pinterest isn't your style, bookmark this post!

    This Pea Pesto Flatbread recipe is a quick and delicious appetizer. It's super easy to make and full of fresh spring flavors and topped with asparagus and shaved Pecorino Romano cheese. This is perfect for a warm summer night while sipping wine on your patio!

    The most delicious guacamole EVER.

    May 1, 2017 · 11 Comments

    It's always a good idea to have an easy guacamole recipe up your sleeve and this one is seriously the best- fantastic, zesty flavor with an awesome secret ingredient to helps take the guacamole to the next level. It's a healthy snack for any celebration or game day!

    It's always a good idea to have an easy guacamole recipe up your sleeve and this one is seriously the best- fantastic, zesty flavor with an awesome secret ingredient to helps take the guacamole to the next level. It's a healthy snack for any celebration or game day!

    It's always a good idea to have an easy guacamole recipe up your sleeve and this one is seriously the best- fantastic, zesty flavor with an awesome secret ingredient to helps take the guacamole to the next level. It's a healthy snack for any celebration or game day!

    This post contains Affiliate Links. For more information please see the disclaimer here.

    Guacamole. Who doesn't love it? Actually, J doesn't love it. But I'm perfectly ok with that because that means more guacamole for me!

    It's always a good idea to have an easy guacamole recipe up your sleeve and this one is seriously the best- fantastic, zesty flavor with an awesome secret ingredient to helps take the guacamole to the next level. It's a healthy snack for any celebration or game day!

    I didn't grow up eating a large amount of avocados. I'm not really sure why. They aren't exactly cost efficient in this part of the country (to my knowledge avocados don't generally grow in places that are freezing for at least half of the year). But as I've gotten older, these have really made their way into my diet. Part of that enthusiasm may be from joining a family of great people who live in California and have access to plenty of fresh and delicious avocados.

    It's always a good idea to have an easy guacamole recipe up your sleeve and this one is seriously the best- fantastic, zesty flavor with an awesome secret ingredient to helps take the guacamole to the next level. It's a healthy snack for any celebration or game day!

    When J and I were first dating, he took me to Las Vegas to go on a house-boating trip with a group of his our friends. Our dear friend Angie introduced me to the concept of avocado as a burger topping. Though I was aware of it, I'd never actually tried it. Needless to say, I was hooked.

    It's always a good idea to have an easy guacamole recipe up your sleeve and this one is seriously the best- fantastic, zesty flavor with an awesome secret ingredient to helps take the guacamole to the next level. It's a healthy snack for any celebration or game day!

    My mother-in-law usually slices avocado into her salads (which are always really delicious, like everything else that she cooks). Over the years, avocado pretty much kept finding it's way into my diet, and I'm very happy about that. In a pinch I like to cut it in half, squeeze some lemon (or lime) over it and a little salt and pepper and go to town. But when I have a little more time and some extra ingredients, I love throwing together a delicious guacamole.

    It's always a good idea to have an easy guacamole recipe up your sleeve and this one is seriously the best- fantastic, zesty flavor with an awesome secret ingredient to helps take the guacamole to the next level. It's a healthy snack for any celebration or game day!

    Everyone has their own ideas about what makes an amazing guacamole. There are so many takes on it, and that's really the beauty of this recipe- like most recipes that I post, there are any number of variations and avenues you can take with it, and it generally turns out pretty delicious. For me, it's all about having a nice balance between the fresh veggies, the citrus flavor that the lime adds, a bit of heat from the jalapenos, a few bits of spices that I randomly throw in, and one special, secret ingredient.

    It's always a good idea to have an easy guacamole recipe up your sleeve and this one is seriously the best- fantastic, zesty flavor with an awesome secret ingredient to helps take the guacamole to the next level. It's a healthy snack for any celebration or game day!

    Tequila! (Dah-dum-duh-duh-duh-duh-dum-dum! *ala Peewee Herman).

    It's always a good idea to have an easy guacamole recipe up your sleeve and this one is seriously the best- fantastic, zesty flavor with an awesome secret ingredient to helps take the guacamole to the next level. It's a healthy snack for any celebration or game day!

    You're probably reading this and scratching your head thinking "Tequila? isn't that what you're supposed to drink or shoot along side your guacamole?" And to that I say- yes! Drink it! Tequila is delicious, albeit dangerous (I still stand by my original stance of delicious, but then I'm pretty good about knowing my limits...most of the time).

    It's always a good idea to have an easy guacamole recipe up your sleeve and this one is seriously the best- fantastic, zesty flavor with an awesome secret ingredient to helps take the guacamole to the next level. It's a healthy snack for any celebration or game day!

    I don't know what it is but a very small amount of tequila, as in maybe a half shot *at most* for every three avocados, is almost like the magical tie that binds all of these delicious ingredients. I promise, you won't taste the booze- it's such a small amount that you throw in.

    It's always a good idea to have an easy guacamole recipe up your sleeve and this one is seriously the best- fantastic, zesty flavor with an awesome secret ingredient to helps take the guacamole to the next level. It's a healthy snack for any celebration or game day!

    The purpose is not to get drunk (though if you want to, I encourage you to splurge on a nicer tequila ad add much more that I do- there is very little in this recipe). On the flip side, if you decide to leave it out, rest assured, this guacamole will still be delicious.

    It's always a good idea to have an easy guacamole recipe up your sleeve and this one is seriously the best- fantastic, zesty flavor with an awesome secret ingredient to helps take the guacamole to the next level. It's a healthy snack for any celebration or game day!

    Serve this Guacamole with:

    • Mexican Lasagna Roll-Ups
    • 7 Layer Taco Salad
    • Super Easy Baked Breakfast Tostadas
    • 30 Minute Turkey Chili
    • 20 Minute Taco Pasta
    • Roasted Corn Salsa
    • Sheet Pan Chicken Nachos
    • Mexican Bean Salad
    • Cilantro Cauliflower Rice
    • The Easiest Slow Cooker Taco Meat EVER!

    It's always a good idea to have an easy guacamole recipe up your sleeve and this one is seriously the best- fantastic, zesty flavor with an awesome secret ingredient to helps take the guacamole to the next level. It's a healthy snack for any celebration or game day!

    The most delicious guacamole EVER.

    Jessy Freimann
    It's always a good idea to have an easy guacamole recipe up your sleeve and this one is seriously the best- fantastic, zesty flavor with an awesome secret ingredient to helps take the guacamole to the next level. It's a healthy snack for any celebration or game day!
    No ratings yet
    Print Recipe Pin Recipe
    Prep Time 15 minutes mins
    Total Time 15 minutes mins
    Course Appetizer, Condiment, Side Dish, Snack
    Cuisine Cinco de Mayo, Dip, Easy, Healthy, Mexican
    Servings 6 servings
    Calories 180 kcal

    Equipment

    • 1 cutting board
    • 1 chefs knife
    • 1 mixing bowl

    Ingredients
      

    • 3 avocados ripe
    • ½ cup onion diced
    • 2 cloves garlic minced
    • 2 roma tomatoes seeded and diced
    • 1 jalapeno diced (if you like it extra spicy, leave the seeds in)
    • ¼ cup cilantro roughly chopped
    • ½ teaspoon ground cumin
    • ½ teaspoon chili powder
    • ½ teaspoon Kosher salt
    • ¼ teaspoon ground black pepper or cayenne pepper
    • ½ shot of tequila ¾ of an ounce
    • 2 limes juice to taste
    • Chips for dipping and a big old Margarita!

    Instructions
     

    • Mash up the avocado so that it is smooth with a decent amount of texture to it.
    • Add onion, garlic, tomatoes, jalapeńo and cilantro and mix well.
    • Season the guacamole to taste with salt pepper, cumin and chili powder.
    • Add the tequila and lime juice and taste until you have the balance that you're looking for.
    • Serve immediately or within the next few hours.

    Notes

    I cover the bowl with saran wrap touching the top layer of guacamole to reduce the amount of brown.

    Nutrition

    Serving: 1servingCalories: 180kcalCarbohydrates: 14gProtein: 3gFat: 15gSaturated Fat: 2gPolyunsaturated Fat: 2gMonounsaturated Fat: 10gSodium: 248mgPotassium: 598mgFiber: 8gSugar: 2gVitamin A: 470IUVitamin C: 21mgCalcium: 30mgIron: 1mg
    Tried this recipe?Let us know how it was!

    Helpful tools:


    You can find a full index of my recipes here.

    Don't forget to follow The Life Jolie on Pinterest for more recipe inspiration!     

    It's always a good idea to have an easy guacamole recipe up your sleeve and this one is seriously the best- fantastic, zesty flavor with an awesome secret ingredient to helps take the guacamole to the next level. It's a healthy snack for a Cinco de Mayo celebration or game day!

    Artichoke Asiago Dip

    Apr 27, 2017 · Leave a Comment

    This Artichoke Asiago Dip is the best easy recipe to throw together for a last-minute spring get-together. It only takes a couple of minutes to make and is fully of cheesy, delicious flavor! #ad

    This Artichoke Asiago Dip is the best easy recipe to throw together for a last-minute spring get-together. It only takes a couple of minutes to make and is fully of cheesy, delicious flavor!

    This Artichoke Asiago Dip is the best easy recipe to throw together for a last-minute spring get-together. It only takes a couple of minutes to make and is fully of cheesy, delicious flavor! #ad

    This is a sponsored conversation on behalf of RITZ and Clever. Thank you for supporting the brands that support this blog!

    Well, spring has finally sprung around here, and thank goodness for that! Rochester can be a bit...how do I say...eclectic when it comes to weather. One day it will be 72 degrees and sunny, the next it will be snowing. This makes for quite the conundrum when it comes to choosing an outfit!

    Our winters are pretty long in general and by the time March rolls around, we're all aching for spring. This year, March brought with it an almost-record-breaking windstorm and a snowstorm. So once April finally rolled around, we were all dying for daffodils and sunshine!

    This Artichoke Asiago Dip is the best easy recipe to throw together for a last-minute spring get-together. It only takes a couple of minutes to make and is fully of cheesy, delicious flavor! #ad

    As some of you may remember from past posts, I have a hit or miss history with gardening. I aspire to be one of those people with the perfect, well-manicured landscaping in all corners of the yard. But I'm really good at killing plants! It makes me sad, because I typically start strong.

    In the past few years, I've dialed it back on my gardening attempts since I was either pregnant or had new babies during the spring and summer seasons. But every year, without fail, I always plant an herb garden. There's something so wonderful, so quintessentially summer about going out and picking the fresh herbs that you need for whatever it is you're cooking at that moment. It may or may not be my own personal version of the American dream.

    This Artichoke Asiago Dip is the best easy recipe to throw together for a last-minute spring get-together. It only takes a couple of minutes to make and is fully of cheesy, delicious flavor! #ad

    Each year I've gotten a bit better at keeping my herbs alive (I've also learned that there are certain herbs that I'll never succeed with- like cilantro and dill, I always kill them!). So I'm thinking that this year could really be my year to have success with my herb garden!

    And you guys, my brain is already brimming with delicious recipe ideas to use all my fresh and delicious herbs, and I haven't even planted them yet!

    This Artichoke Asiago Dip is the best easy recipe to throw together for a last-minute spring get-together. It only takes a couple of minutes to make and is fully of cheesy, delicious flavor! #ad

    Now as you also may remember, my family has an on-going love affair with RITZ Crackers. We are very big fans of these delicious, crispy crackers and I am always looking for tasty recipes to pair with them. A little Spring RITZpiration, if you will (see what I did there?). I often find myself grabbing a box of RITZ Crackers during weekly Target shopping trips.

    This Artichoke Asiago Dip is the best easy recipe to throw together for a last-minute spring get-together. It only takes a couple of minutes to make and is fully of cheesy, delicious flavor! #ad

    Fresh and delicious spring flavors are always a good idea and this Artichoke Asiago Dip is an awesome appetizer to spread on RITZ Crackers! Artichokes give a tasty nod to spring vegetables. Asiago and Romano cheeses add fantastic savory notes. And chopped parsley brings a freshness that only homegrown herbs can provide.

    It's really quick and simple to make- an excellent option to throw together for a last minute spring get-together. It took me all of five minutes to throw this together and the results were full of great flavor! Give it a try!

    This Artichoke Asiago Dip is the best easy recipe to throw together for a last-minute spring get-together. It only takes a couple of minutes to make and is fully of cheesy, delicious flavor! #ad

    This Artichoke Asiago Dip is the best easy recipe to throw together for a last-minute spring get-together. It only takes a couple of minutes to make and is fully of cheesy, delicious flavor! #ad

    Artichoke Asiago Dip

    Jessy Freimann
    This Artichoke Asiago Dip is the best easy recipe to throw together for a last-minute spring get-together. It only takes a couple of minutes to make and is fully of cheesy, delicious flavor!
    5 from 1 vote
    Print Recipe Pin Recipe
    Prep Time 10 minutes mins
    Total Time 10 minutes mins
    Course Appetizer, Hors D'Oeuvre, Snack
    Cuisine American, Holiday, spring
    Servings 6 servings
    Calories 168 kcal

    Equipment

    • 1 Measuring cups and spoons
    • 1 mixing bowl
    • 1 Spatula

    Ingredients
      

    • 14 ounces quartered artichokes in brine drained
    • 1 cup asiago cheese shredded
    • ¼ cup Romano cheese grated
    • ½ cup sour cream
    • 3 Tablespoons mayonnaise
    • ½ teaspoon garlic powder
    • ¼ teaspoon ground black pepper
    • 1 teaspoon fresh parsley + a little extra for garnish finely chopped
    • Crackers or chips for serving

    Instructions
     

    • Roughly chop the artichokes and place them into a mixing bowl.
    • Add the Asiago cheese, Romano cheese, sour cream, mayonnaise, garlic powder, black pepper and parsley.
    • Mix until all ingredients are well combined.
    • Place the dip into the serving bowl and refrigerate until ready to serve, or for up to a week.
    • Enjoy the dip spread on Crackers or chips.

    Notes

    Leftovers last up to 3 days in the refrigerator.

    Nutrition

    Serving: 1servingCalories: 168kcalCarbohydrates: 2gProtein: 8gFat: 14gSaturated Fat: 6gPolyunsaturated Fat: 3gMonounsaturated Fat: 4gTrans Fat: 0.01gCholesterol: 30mgSodium: 368mgPotassium: 48mgFiber: 0.05gSugar: 1gVitamin A: 273IUVitamin C: 0.2mgCalcium: 262mgIron: 0.2mg
    Tried this recipe?Let us know how it was!

    You can find a full index of my recipes here.

    Don't forget to follow The Life Jolie on Pinterest for more recipe inspiration!   

    This Artichoke Asiago Dip is the best easy recipe to throw together for a last-minute spring get-together. It only takes a couple of minutes to make and is fully of cheesy, delicious flavor! Pick up supplies at Target! https://thelifejolie.com/artichoke-asiago-dip/ #FreshRITZpiration #ad

    I was selected for this opportunity as a member of CLEVER and the content and opinions expressed here are all my own.

    Mexican Lasagna Roll-Ups

    Apr 24, 2017 · 17 Comments

    Mexican Lasagna Roll-ups are a delicious combination of two family favorites: Lasagna and Tacos. This is an easy recipe featuring meat, cheese, beans, corn, tomatoes and rolled up in lasagna noodles. They're total comfort food and great for when you're cooking for family and friends!

    Mexican Lasagna Roll-ups are a delicious combination of two family favorites: Lasagna and Tacos. They're total comfort food and great for when you're cooking for family and friends!

    Mexican Lasagna Roll-ups are a delicious combination of two family favorites: Lasagna and Tacos. This is an easy recipe featuring meat, cheese, beans, corn, tomatoes and rolled up in lasagna noodles. They're total comfort food and great for when you're cooking for family and friends!

    This post contains Affiliate Links. For more information please see the disclaimer here.

    This past weekend A got her first hair cut. I'd been putting this off for quite a while.

    I absolutely love my gal's hair. It's gorgeous- a beautiful light brown color with golden streaks in it when it's under the right light. Perfectly soft and mostly straight with a slight curl at the ends (not at all what I expected, considering my hair is naturally curly).

    Mexican Lasagna Roll-ups are a delicious combination of two family favorites: Lasagna and Tacos. This is an easy recipe featuring meat, cheese, beans, corn, tomatoes and rolled up in lasagna noodles. They're total comfort food and great for when you're cooking for family and friends!

    In case you haven't noticed, I'm super emotional about her hair. I don't know why I have such a soft spot for it, but I think it has a lot to do with the fact that it was her baby hair. Even though she hasn't been a baby for a while now, that was her original hair. The hair that grew inside of me (what a strange sentence to type!). The sweet fuzzy hair that covered her perfect little baby head. It almost feels like that was the last piece of Baby Alice I had left.

    Excuse me while I go have a nice, long Mommy sob. *Cue the violins*

    Mexican Lasagna Roll-ups are a delicious combination of two family favorites: Lasagna and Tacos. This is an easy recipe featuring meat, cheese, beans, corn, tomatoes and rolled up in lasagna noodles. They're total comfort food and great for when you're cooking for family and friends!

    Ok, I'm back.

    Now that I've pulled myself together, I have to say she was pretty good at the appointment. I've been working hard for a couple of weeks, selling this appointment to her as an exciting adventure and more importantly, Big Girl time.  I was clear that it's just her and I because only Big Girls can get hair cuts and since Tessa is a baby, she doesn't get to come.

    When we arrived, A was all business. She had her sunglasses on (always!) and was incredibly serious and a bit intense. The girl at the front desk brought us each a glass of water (in Big Girl cups, of course- she was also smart enough to only fill A's half way!). A sat in her own chair in the waiting area and carefully sipped her water, while she looked around and took it all in.

    Mexican Lasagna Roll-ups are a delicious combination of two family favorites: Lasagna and Tacos. This is an easy recipe featuring meat, cheese, beans, corn, tomatoes and rolled up in lasagna noodles. They're total comfort food and great for when you're cooking for family and friends!

    When it was our turn, we headed back. By then A had warmed to her surroundings, but was still pretty serious. We started with her up in the chair with a big booster underneath her. But since her hair was so long, we had to start her out standing until the initial trim was started and then she moved back into the seat when she added the layers (it wasn't a crazy haircut, just trimming an inch or two from the ends and adding a couple long layers). I wanted to keep A's hair long until she's old enough to tell me otherwise.

    And then the moment came and that first snip happened. I'll admit I shed a few tears. But I got it together pretty quickly and life went on. They were also gracious enough to give me an envelope to save a lock of her hair.

    Mexican Lasagna Roll-ups are a delicious combination of two family favorites: Lasagna and Tacos. This is an easy recipe featuring meat, cheese, beans, corn, tomatoes and rolled up in lasagna noodles. They're total comfort food and great for when you're cooking for family and friends!

    A did a great job of staying still. After, she watched me get my hair washed, which I think was fascinating for her. I let her watch Mickey on my phone what I had my hair cut and dried (which is an extremely rare occurrence and somewhat of a special treat for her).

    This was a poor decision as she had a little bit of a tantrum when I told her she couldn't watch more in the car. But overall she was great and I was pretty proud of her. That being said, I'm totally not ready for my T to get her hair cut!


    I've been testing this Mexican Lasagna recipe for a while. I haven't done an insane amount of tests, it's been more of do-a-test-and-then-take-a-break-and-come-back-to-it-next-month situation.

    Mostly because this makes a big old pan of these lasagna rolls, twelve to be exact. So for us this means lots of leftovers. I'm not even a little bit sad about that because all the tests were delicious. But after a few days of eating leftovers, I have no problem taking a little break and coming back to it with a fresh palate.

    Mexican Lasagna Roll-ups are a delicious combination of two family favorites: Lasagna and Tacos. This is an easy recipe featuring meat, cheese, beans, corn, tomatoes and rolled up in lasagna noodles. They're total comfort food and great for when you're cooking for family and friends!

    That being said, I'm really happy with how this recipe turned out. It's full of great flavor, the beans and corn add great texture in addition to the beef. And melted cheese is never a bad thing.

    This is really the perfect option if you're looking for the great flavors you find on Taco Tuesday but you want to mix things up a bit. So if Taco Tuesday and Lasagna Sunday had some babies in twelve perfectly rolled packages, this would be them. The leftovers reheat pretty deliciously as well!

    Mexican Lasagna Roll-ups are a delicious combination of two family favorites: Lasagna and Tacos. This is an easy recipe featuring meat, cheese, beans, corn, tomatoes and rolled up in lasagna noodles. They're total comfort food and great for when you're cooking for family and friends! Mexican Lasagna Roll-ups are a delicious combination of two family favorites: Lasagna and Tacos. This is an easy recipe featuring meat, cheese, beans, corn, tomatoes and rolled up in lasagna noodles. They're total comfort food and great for when you're cooking for family and friends!

    I included some photos of how they look before rolling them. In my first test run, I really over-filled the lasagna noodles and they didn't roll up very nicely. I call that test run my "bad pancake" run, since they came out like that first bad pancake always does; not the prettiest but still tasty. I used a slotted spoon to allow a little bit of the sauce to drain before putting the filling onto the noodles to help make it a slightly cleaner process (though you will get your hands dirty, so plan on that!).

    In addition to not over-filling the noodles, I also learned that as I roll them, it helps to slightly pinch off the sides to keep the filling from coming out. When you put them into your pan, keep the end of the noodle under the roll to keep them closed. Work slowly and once you've rolled a couple, you'll be a pro at this!

    Mexican Lasagna Roll-ups are a delicious combination of two family favorites: Lasagna and Tacos. This is an easy recipe featuring meat, cheese, beans, corn, tomatoes and rolled up in lasagna noodles. They're total comfort food and great for when you're cooking for family and friends!

    Other tasty Cinco De Mayo recipes include:

    • 7 Layer Taco Salad
    • Super Easy Baked Breakfast Tostadas
    • 30 Minute Turkey Chili
    • 20 Minute Taco Pasta
    • The Most Delicious Guacamole Ever
    • Roasted Corn Salsa
    • Sheet Pan Chicken Nachos
    • Mexican Bean Salad
    • Cilantro Cauliflower Rice
    • The Easiest Slow Cooker Taco Meat EVER!

    Mexican Lasagna Roll-ups are a delicious combination of two family favorites: Lasagna and Tacos. This is an easy recipe featuring meat, cheese, beans, corn, tomatoes and rolled up in lasagna noodles. They're total comfort food and great for when you're cooking for family and friends!

    Mexican Lasagna Roll-Ups

    Jessy Freimann
    Mexican Lasagna Roll-ups are a delicious combination of two family favorites: Lasagna and Tacos. They're total comfort food and great for when you're cooking for family and friends!
    5 from 2 votes
    Print Recipe Pin Recipe
    Prep Time 15 minutes mins
    Cook Time 50 minutes mins
    Total Time 1 hour hr 5 minutes mins
    Course Cinco de Mayo, dinner, Entree
    Cuisine Cinco de Mayo, Easy, Mexican
    Servings 12 pieces
    Calories 443 kcal

    Equipment

    • 1 9 x 13 Pan
    • 1 Large pot
    • 1 cutting board
    • 1 Skillet
    • 1 wooden spoon
    • 1 Measuring cups and spoons

    Ingredients
      

    • 1 pound Lasagna noodles at least 12 but maybe make a couple more in case any break
    • 1 pound ground beef
    • ½ cup onion diced
    • 1 packet Taco seasoning
    • 1 cup frozen corn
    • 15.5 ounces black beans undrained
    • 14.5 ounces fire-roasted diced tomatoes
    • 10 oz. enchilada sauce
    • 8 ounces tomato sauce
    • 3 cup cheddar cheese shredded and divided

    Instructions
     

    • Boil lasagna noodles per package directions for al dente. Set aside (I laid mine out on wax paper the keep them from sticking to each other). Preheat the oven to 350 degrees F.
    • Brown the beef and onions over medium-high.
    • Add taco seasoning and mix. Then add corn, beans, tomatoes, enchilada sauce and tomato sauce.
    • Bring the pan to a boil and then reduce heat to medium. Simmer for around 8 minutes, stirring often.
    • Remove from heat and stir in 1 cup cheese.
    • Give it a couple minutes to cool slightly and then place a small amount of the beef mixture on the bottom of a 9x13 pan (just to wet it).
    • Lay out one noodle at a time. Spoon a thin line of the beef mixture down the middle ending about an inch from the top. Roll it up slowly, holding the sides closed as you go. Once it's rolled, place it into the pan, with the end of the noodle on the bottom.
    • Once they're all rolled, top them with remaining sauce and cover with foil.
    • Bake covered for 30-40 min and then uncover and top with 2 cups cheese.
    • Bake uncovered 10 min more or until cheese is melted. Serve immediately

    Notes

    Leftovers last up to 3 days in the refrigerator.

    Nutrition

    Serving: 2piecesCalories: 443kcalCarbohydrates: 48gProtein: 23gFat: 18gSaturated Fat: 9gPolyunsaturated Fat: 1gMonounsaturated Fat: 6gTrans Fat: 0.5gCholesterol: 55mgSodium: 796mgPotassium: 444mgFiber: 6gSugar: 5gVitamin A: 936IUVitamin C: 5mgCalcium: 239mgIron: 3mg
    Tried this recipe?Let us know how it was!

    Helpful tools:


    You can find a full index of my recipes here.

    Don't forget to follow The Life Jolie on Pinterest for more recipe inspiration!

    Mexican Lasagna Roll-ups are a delicious combination of two family favorites: Lasagna and Tacos. This is an easy recipe featuring meat, cheese, beans, corn, tomatoes and rolled up in lasagna noodles. They're total comfort food and great for when you're cooking for family and friends!

    Caprese Quiche

    Apr 3, 2017 · Leave a Comment

    Caprese Quiche is an easy breakfast or brunch recipe. This is simple, feel-good food at it's finest with mouthwatering tomatoes, mozzarella and basil. It's great to make ahead or eat right away and perfect to whip up for Easter, Mother's Day or Christmas Morning!

    Caprese Quiche is an easy breakfast or brunch recipe. This is simple, feel-good food at it's finest with mouthwatering tomatoes, mozzarella and basil. It's great to make ahead or eat right away and perfect to whip up for Easter, Mother's Day or Christmas Morning!

    Caprese Quiche is an easy breakfast or brunch recipe. This is simple, feel-good food at it's finest with mouthwatering tomatoes, mozzarella and basil. It's great to make ahead or eat right away and perfect to whip up for Easter, Mother's Day or Christmas Morning!

    This post contains Affiliate Links. For more information please see the disclaimer here.

    Can we talk about toddler stuff for a second? We are a few short months away for my Alice turning 3 and every day I am kind of astounded by the things she says and the speed at which that brain of hers works.

    a couple weeks ago, A had some sort of virus which kept her out of commission for the entire week. J was home for that entire week with her and she had a combination of symptoms, most notably an asthmatic sounding cough that kept her up at night. We kept a very close eye on this since she had pneumonia twice in one year. Luckily, it stayed out of her lungs.

    Caprese Quiche is an easy breakfast or brunch recipe. This is simple, feel-good food at it's finest with mouthwatering tomatoes, mozzarella and basil. It's great to make ahead or eat right away and perfect to whip up for Easter, Mother's Day or Christmas Morning!

    Still, it was pretty bad, keeping her up all night and causing her to vomit from coughing so hard (She may or may not have puked on our poor dog! The only reason I'm not scarred for life by this is that I was at work when it occurred. The dog, on the other hand, was thrilled but I'll stop here...). Luckily, A's doctor prescribed some inhalers which helped her stop coughing very quickly.

    Last week, A was feeling much better and we were trying to get back to normal. A started asking for water before bed. Now throughout the day, A drinks plenty of milk and gets unlimited amounts of water. We also make sure to give her plenty to drink during dinner. But for as long as I can remember, A has been well aware that after dinner there are no more drinks or food available to her until the next morning.

    Caprese Quiche is an easy breakfast or brunch recipe. This is simple, feel-good food at it's finest with mouthwatering tomatoes, mozzarella and basil. It's great to make ahead or eat right away and perfect to whip up for Easter, Mother's Day or Christmas Morning!

    Now, you can say whatever you want about this rule- I know it's not some people's parenting style, which is fine. Different strokes and all that. But for us, we find that A has no problem sleeping through the night and staying dry if the drinks and food stop after dinner. Plus, it gives her belly a much needed rest during the night. Our kid is in no way dehydrated and like I said, she gets plenty to drink and eat throughout the day.

    Now A is well aware of this rule. But as many parents know, when your kid is sick all bets are off. And since A was waking up coughing, I would bring her in some water to sip. Fast forward to a week later, the cough was gone and the rules were back in place. But Miss A had to test the boundaries, like any smart toddler.

    Caprese Quiche is an easy breakfast or brunch recipe. This is simple, feel-good food at it's finest with mouthwatering tomatoes, mozzarella and basil. It's great to make ahead or eat right away and perfect to whip up for Easter, Mother's Day or Christmas Morning!

    So I was flying solo one night at bedtime since J was at volleyball. T was already down and A had just used the potty, washed her hands and brushed her teeth. The conversation went like this:

    A: Can I have some water please?

    Me: Sorry, no more water tonight. You can have some when you wake up.

    A: But I want it.

    Me: Sorry, bro.

    A: But my cough wants it.

    Me: You don't have a cough anymore. The inhaler's helped with that.

    A: But my cough wants it (and then in the most Zoolander-sounding, fakest cough I'd every heard) *cough, cough*

    Me: Nice try- into bed!

    At this point A pulled out all the drama. It's her signature move. Her happy face immediately falls to an exaggerated frown. Her entire body slumps and she immediately switches from her quick, toddler bounciness to a snail's pace. It's as if someone turned her to slow motion, like in a movie.

    Caprese Quiche is an easy breakfast or brunch recipe. This is simple, feel-good food at it's finest with mouthwatering tomatoes, mozzarella and basil. It's great to make ahead or eat right away and perfect to whip up for Easter, Mother's Day or Christmas Morning!

    This continued with a few token tears through her story and a bit of book stalling ("I want the Jesus book" knowing full well we didn't know where that book was). The dramatics got so comically intense that while I was reading the book, I was fighting so hard to contain my laughter that I snorted.

    Well, that was all it took. A heard the snort and immediately erupted into a fit of laughter and just like that all was well in Toddlerland!


    So this Caprese Quiche is pretty killer. I feel strongly that Caprese Salad is the epitome of light and fresh eating. It's everything warm weather is made of and full of delicious summery flavors.

    Caprese Quiche is an easy breakfast or brunch recipe. This is simple, feel-good food at it's finest with mouthwatering tomatoes, mozzarella and basil. It's great to make ahead or eat right away and perfect to whip up for Easter, Mother's Day or Christmas Morning!

    My heart is longing for warm weather in such a way that lately, I find myself cooking up all sorts of dishes that feature these fresh flavors. It's almost like my brain is subliminally telling me that if I eat like it's summer then summer will hurry up and get here already (As I type this it's 42 degrees and rainy. Insert sad face here).

    I've been thinking a lot about brunch. Easter is coming and then Mother's Day. Two holidays that just scream brunch to me! I'm not even a little bit sad about that because brunch is my absolute favorite.

    Caprese Quiche is an easy breakfast or brunch recipe. This is simple, feel-good food at it's finest with mouthwatering tomatoes, mozzarella and basil. It's great to make ahead or eat right away and perfect to whip up for Easter, Mother's Day or Christmas Morning!
    An optional add-on would be a drill of a high-end balsamic vinegar- use this sparingly, it packs quite a punch!

    And when I started plotting out some kind of quiche to make, Caprese seemed like the natural next step. Savory mozzarella and Romano cheeses. Grape tomatoes and sweet basil. Egg and heavy creamy make the glorious Royale that fills this quiche. It feels rich and creamy but at the same time it's light enough that you're not cursing your decision to eat that second slice (and you will want that second slice!).

    This can be served warm, right out of the oven (let it cool for 30 minutes) or it can be made ahead and served cold, right from your refrigerator. It took me a mere 10 minutes to assemble and the rest is baking time! I experimented with a few different crusts, but I found that this works best with a frozen pie crust that's around 9 inches in diameter (when I used my Pyrex pie plate, it still tasted great but it looked less filled).

    Caprese Quiche is an easy breakfast or brunch recipe. This is simple, feel-good food at it's finest with mouthwatering tomatoes, mozzarella and basil. It's great to make ahead or eat right away and perfect to whip up for Easter, Mother's Day or Christmas Morning!

    Either way, surprise Mom with this delicious quiche- nothing says love like delicious food!

    Other great brunch options include:

    Super Easy Baked Breakfast Tostadas

    Grandma Hinz’s Apple Pancakes

    Egg Stuffed Bread

    Sweet Potato and Chorizo Hash

    Orange Roll Monkey Bread

    Peanut Butter and Banana Breakfast Cookies

    Open-Faced Egg Sandwich

    Caprese Quiche is an easy breakfast or brunch recipe. This is simple, feel-good food at it's finest with mouthwatering tomatoes, mozzarella and basil. It's great to make ahead or eat right away and perfect to whip up for Easter, Mother's Day or Christmas Morning!

    Caprese Quiche

    Jessy Freimann
    Caprese Quiche is an easy breakfast or brunch recipe. This is simple, feel-good food at it's finest with mouthwatering tomatoes, mozzarella and basil. It's great to make ahead or eat right away and perfect to whip up for Easter, Mother's Day or Christmas Morning!
    No ratings yet
    Print Recipe Pin Recipe
    Prep Time 10 minutes mins
    Cook Time 50 minutes mins
    Total Time 1 hour hr
    Course Breakfast, Brunch, Lunch, Vegetarian
    Cuisine Easter, holidays, Mother
    Servings 8 servings
    Calories 1206 kcal

    Equipment

    • 1 Pie pan
    • 1 Measuring cups and spoons
    • 1 mixing bowl
    • 1 Whisk
    • 1 cutting board
    • 1 chefs knife

    Ingredients
      

    • 1 pint grape tomatoes quartered and seeds removed
    • 10 large basil leaves cut to a thin chiffonade (or cut into thin strips)
    • ¾ cups shredded mozzarella cheese
    • 9 inch frozen pie crust
    • ⅓ cup Romano cheese grated (or Parmesan cheese works)
    • 2 large eggs
    • 1 cup heavy cream
    • 1 large pinch Kosher salt and ground black pepper

    Instructions
     

    • Preheat the oven to 350 degrees F.
    • Rinse the quartered tomatoes well to get rid of most of the seeds. Don't skip this step or there will be too much liquid. Set aside in a strainer to drain for a couple of minutes.
    • Mix the tomatoes, basil and mozzarella cheese well and place into the frozen pie crust. Sprinkle the tomato mixture with Romano cheese. Set aside.
    • In a bowl, whisk the eggs, cream and salt and pepper until well combined and creamy. Pour this into the pie crust.
    • Bake uncovered for 45-50 minutes or until the quiche is set and the top is golden. Cool for 30 minutes and enjoy warm or chill in the refrigerator serve cold.

    Notes

    To chiffonade the basil, pile all the leaves on top of each other. Then tightly roll them and thinly slice the roll.

    Nutrition

    Serving: 1servingCalories: 1206kcalCarbohydrates: 113gProtein: 20gFat: 74gSaturated Fat: 28gPolyunsaturated Fat: 8gMonounsaturated Fat: 32gTrans Fat: 0.01gCholesterol: 93mgSodium: 1070mgPotassium: 417mgFiber: 6gSugar: 3gVitamin A: 1114IUVitamin C: 8mgCalcium: 174mgIron: 6mg
    Tried this recipe?Let us know how it was!

    Helpful tools:


    You can find a full index of my recipes here.

    Don't forget to follow The Life Jolie on Pinterest for more recipe inspiration!

    Caprese Quiche is an easy breakfast or brunch recipe. This is simple, feel-good food at it's finest with mouthwatering tomatoes, mozzarella and basil. It's great to make ahead or eat right away and perfect to whip up for Easter, Mother's Day or Christmas Morning!


    Homemade Three Cheese Garlic Bread

    Mar 9, 2017 · 10 Comments

    This homemade Three Cheese Garlic Bread recipe is a super easy accompaniment to a delicious Italian meal (or any meal for that matter!). It's really quick to spread with butter, herbs and a ton of melted cheese and pre-cut so that it's even easier to pull apart and enjoy with dinner! This is a major family favorite!

    This homemade Three Cheese Garlic Bread recipe is a super easy accompaniment to a delicious Italian meal (or any meal for that matter!). It's really quick to spread with butter, herbs and a ton of melted cheese and pre-cut so that it's even easier to pull apart and enjoy with dinner! This is a major family favorite!

    This homemade Three Cheese Garlic Bread recipe is a super easy accompaniment to a delicious Italian meal (or any meal for that matter!). It's really quick to spread with butter, herbs and a ton of melted cheese and pre-cut so that it's even easier to pull apart and enjoy with dinner! This is a major family favorite!

    This post contains Affiliate Links. Please see the disclaimer here.

    Remember how a couple years ago we went to Philadelphia a few weeks before Christmas? I was right at the edge of crossing over into the third trimester of my pregnancy with Tess and A was a teeny, pint sized 18 month old.

    I didn't go too much into detail about our drive to Philadelphia in that post. That was my last long trip before T was born and our first road trip since A had really started walking. I was a little terrified and not sure what to expect.

    This homemade Three Cheese Garlic Bread recipe is a super easy accompaniment to a delicious Italian meal (or any meal for that matter!). It's really quick to spread with butter, herbs and a ton of melted cheese and pre-cut so that it's even easier to pull apart and enjoy with dinner! This is a major family favorite!

    Luckily, my back pain was no worse than usual that day and A did pretty well, all things considered. It helped that we had to stop an hour or so outside of Philadelphia so that J could take some sort of work-related call. This was also the time that A began to get a bit antsy, so it worked out nicely. J got his work stuff handled, I stretched my legs. And by stretched my legs, I mean I chased A around for 45 minutes while she got all her wiggles out.

    When we got to Philly, it was right around dinner time. And let me tell you, it was an amazing dinner. My cousin Andrea pulled out all the stops and made the most killer lasagna. After a long trip like that, I was dying for a home-cooked meal and I cannot think of anything more delicious in that moment!

    This homemade Three Cheese Garlic Bread recipe is a super easy accompaniment to a delicious Italian meal (or any meal for that matter!). It's really quick to spread with butter, herbs and a ton of melted cheese and pre-cut so that it's even easier to pull apart and enjoy with dinner! This is a major family favorite!

    What's even more incredible is that unbeknownst to us at the time, Andrea was right in the thick of the first trimester of her pregnancy with her sweet baby Maria. And not only were she and her husband still willing to host us for the weekend, but she went above and beyond to prepare some insanely delicious meals and even partook in the Ikea trip from hell, which was full of enough toddler tantrums to make anyone want to rethink having babies (and she was beyond gracious and helpful through every second of it!). She's seriously a rockstar.

    This homemade Three Cheese Garlic Bread recipe is a super easy accompaniment to a delicious Italian meal (or any meal for that matter!). It's really quick to spread with butter, herbs and a ton of melted cheese and pre-cut so that it's even easier to pull apart and enjoy with dinner! This is a major family favorite!

    Along with the lasagna, she also threw together some homemade garlic bread and it was so delicious and so simple in a way that made me wonder why in the world I hadn't ever made my own garlic bread. So I tucked that away in the back of my mind, because I knew I should probably give it a try at some point.

    Fast forward a year and a half, the world now has more two more sweet babies roaming the countryside and doing their baby thing and I'm finally getting around to making my own homemade garlic bread inspired by Andrea's!

    This homemade Three Cheese Garlic Bread recipe is a super easy accompaniment to a delicious Italian meal (or any meal for that matter!). It's really quick to spread with butter, herbs and a ton of melted cheese and pre-cut so that it's even easier to pull apart and enjoy with dinner! This is a major family favorite!

    Now I've noticed our little Freimann family unit has fallen into a bit of a pattern when it comes to the bread served with our pasta. I don't know why it is this way, but generally when we have the real-deal Sunday Sauce and Meatballs, I tend to get plain Italian bread to serve along side. For any other pasta dishes that don't involve the sacred family sauce, I tend to get Texas Toast from the freezer section. It's a total guilty pleasure and we all enjoy savory, cheesy, crispy bite!

    So in addition to my inspiration from our Philadelphia trip, I decided to combine the things I loved most about our bread habits to make this crazy delicious and dangerously addictive homemade three cheese garlic bread. I encourage you to get a good bread knife to get a nice clean cut before transferring it to your pan. This is speaking as someone who didn't get a bread knife until this year and what a difference!

    This homemade Three Cheese Garlic Bread recipe is a super easy accompaniment to a delicious Italian meal (or any meal for that matter!). It's really quick to spread with butter, herbs and a ton of melted cheese and pre-cut so that it's even easier to pull apart and enjoy with dinner! This is a major family favorite!

    The best part is that it takes mere minutes to throw together and packs quite a punch in terms of flavor! Seriously you guys, it was nearly a Battle Royale for that last piece. And the stretchy, stringy cheese brings all the wow factor! You can make as much or as little as you'd like based on how many people you have eating. And feel free to alter the measurements to your unique tastes! Here's some more melty cheese shot (because one can never have enough melty cheese shots!):

    This homemade Three Cheese Garlic Bread recipe is a super easy accompaniment to a delicious Italian meal (or any meal for that matter!). It's really quick to spread with butter, herbs and a ton of melted cheese and pre-cut so that it's even easier to pull apart and enjoy with dinner! This is a major family favorite!

    Serve this bread with:

    Pasta Pomodoro

    Marinara Sauce

    Best Ever Skillet Lasagna

    Bangin’ Sausage and Peppers Pasta

    Slow Cooker Italian Beef Stew

    Authentic Meatballs

    Sunday Sauce

    This homemade Three Cheese Garlic Bread recipe is a super easy accompaniment to a delicious Italian meal (or any meal for that matter!). It's really quick to spread with butter, herbs and a ton of melted cheese and pre-cut so that it's even easier to pull apart and enjoy with dinner! This is a major family favorite!

    Homemade Three Cheese Garlic Bread

    Jessy Freimann
    This homemade Three Cheese Garlic Bread recipe is a super easy accompaniment to a delicious Italian meal (or any meal for that matter!). It's really quick to spread with butter, herbs and a ton of melted cheese and pre-cut so that it's even easier to pull apart and enjoy with dinner! This is a major family favorite!
    No ratings yet
    Print Recipe Pin Recipe
    Prep Time 10 minutes mins
    Cook Time 20 hours hrs
    Total Time 20 hours hrs 10 minutes mins
    Course Appetizer, Side Dish
    Cuisine Family, Italian, Sunday Sauce
    Servings 8 servings
    Calories 491 kcal

    Equipment

    • 1 sheet pan
    • 1 Measuring cups and spoons
    • 1 chefs knife
    • 1 cutting board

    Ingredients
      

    • 1 loaf Italian bread
    • 6 Tablespoons salted butter softened
    • 2 teaspoon garlic powder
    • 1 teaspoon Italian seasoning
    • ¼ teaspoon ground black pepper or crushed red pepper if you're feeling spicy!
    • 2 cups shredded cheese my local store sells this as an Italian cheese mix or a pizza cheese mix.
    • ¼ cup Romano cheese

    Instructions
     

    • Heat the oven to 400 degrees F and line a pan with foil for easy clean up.
    • Cut your bread through the middle, length-wise so that there are two even pieces (a top and a bottom) and lay them onto the pan so that the cut sides are facing up. Make slices every couple of inches going most of the way through but still leaving the bottom in tact so that it's easier to pull individual pieces once it's baked.
    • Mix the butter, garlic powder, Italian seasoning and black pepper until well combined. Spread this onto both pieces of bread.
    • Bake uncovered for 10 minutes and then remove from the oven. Switch your oven from bake to broil.
    • Sprinkle the bread with the cheeses and place them back into the oven uncovered for 5-10 minutes or until the cheese and melted and bubbly. Keep an eye on the bread so that it doesn't burn! Serve right away.

    Notes

    Leftovers last up to 3 days in the refrigerator.

    Nutrition

    Serving: 1servingCalories: 491kcalCarbohydrates: 31gProtein: 12gFat: 36gSaturated Fat: 20gPolyunsaturated Fat: 4gMonounsaturated Fat: 9gTrans Fat: 0.5gCholesterol: 48mgSodium: 491mgPotassium: 162mgFiber: 2gSugar: 18gVitamin A: 469IUVitamin C: 0.02mgCalcium: 182mgIron: 1mg
    Tried this recipe?Let us know how it was!

    Helpful tools:


    You can find a full index of my recipes here.

    Don't forget to follow The Life Jolie on Pinterest for more recipe inspiration!

    This homemade Three Cheese Garlic Bread recipe is a super easy accompaniment to a delicious Italian meal (or any meal for that matter!). It's really quick to spread with butter, herbs and a ton of melted cheese and pre-cut so that it's even easier to pull apart and enjoy with dinner! This is a major family favorite!

    Melted Ice Cream Cone Cupcakes

    Mar 6, 2017 · 24 Comments

    These Melted Ice Cream Cone Cupcakes are such a fun and easy dessert recipe. This tutorial is a delicious combination of moist vanilla cupcakes, strawberry frosting, chocolate and sprinkles! They are perfect to serve at your next party!

    This post contains Affiliate Links. I was also compensated by Minted for sharing a photo and links to the invitations I chose (at absolutely no cost to you!) but as always the opinions expressed are 100% mine. I only ever recommend brands that I truly love, use and stand behind. Thank you for supporting the brands that help support this blog. For more information please see the disclaimer here.

    These Melted Ice Cream Cone Cupcakes are such a fun and easy dessert recipe. This tutorial is a delicious combination of moist vanilla cupcakes, strawberry frosting, chocolate ganache and sprinkles! They are perfect to serve at your next party!

    These Melted Ice Cream Cone Cupcakes are such a fun and easy dessert recipe. This tutorial is a delicious combination of moist vanilla cupcakes, strawberry frosting, chocolate and sprinkles! They are perfect to serve at your next party!

    We are in serious crunch time right now. T's birthday party is on Sunday- it's all coming together but we definitely have a laundry list of things to do in preparation.

    The theme for this party is Tessa's Ice Cream Social. This was a super easy choice for us because everyone in our family absolutely loves ice cream, especially Tessa! There are so many cute directions to take this theme, so J and I jumped head first into the planning.

    First things first, we had to get some invitations out. As you may remember I worked with Minted to design the most adorable birth announcements when Tessa first came onto the scene. I love their products so much and it only seemed right to go back and choose some adorable invitation's for T's party. We've come full circle on this and I love it!

    These Melted Ice Cream Cone Cupcakes are such a fun and easy dessert recipe. This tutorial is a delicious combination of moist vanilla cupcakes, strawberry frosting, chocolate and sprinkles! They are perfect to serve at your next party!

    You can purchase these invites here (but good luck choosing- there were so many adorable options, we had a very difficult time deciding which to use!).

    So we've all seen those adorable photos on pinterest and facebook of the melted ice cream cone cakes. You know the ones; colorful cakes that look as though someone took an ice cream cone and turned it upside down right on top of the cake. And the cake is decorated to look as though the ice cream from the cone is melting and dripping down the sides of the cake.

    These Melted Ice Cream Cone Cupcakes are such a fun and easy dessert recipe. This tutorial is a delicious combination of moist vanilla cupcakes, strawberry frosting, chocolate and sprinkles! They are perfect to serve at your next party!

    I'm seriously in love with this idea, but also a little intimidated. You know, me and baking- we have such a love/hate relationship which certainly includes cake decorating. But I really, wanted something like this for T's big birthday to go along with the massive ice cream sundae bar we're planning (ugh, you guys I cannot wait to share the details on that in another post. An ice cream sundae bar is always a good idea!).

    So I put my thinking cap and on said to myself, "Self, there has to be an easier way. Let's simplify!" And then I grabbed a pencil and some paper and made the most chicken scratch drawing of what I wanted to do. I'm clearly no artist but I had a game plan and I was inspired to get going.

    Now you can really use any cupcake recipe you want for this and if you go with a box mix, I certainly won't judge you. But these cupcakes that I shared last week are the perfect, easy homemade cupcake option for this recipe. And that fluffy fresh strawberry buttercream frosting tasted so delicious with the chocolate ganache.

    These Melted Ice Cream Cone Cupcakes are such a fun and easy dessert recipe. This tutorial is a delicious combination of moist vanilla cupcakes, strawberry frosting, chocolate and sprinkles! They are perfect to serve at your next party!

    I definitely went back and forth with a few different trusted cooks who know their stuff when it comes to baking and cooking. I suspected a chocolate sauce drizzle would be too thin and end up being an awful mess. I was not even trying to end up in tears as a result of yet another disastrous baking debacle.

    The opinions were unanimous that chocolate ganache would be the perfect option to get just the right amount of drip while controlling it enough that my entire world didn't end up covered in the stuff (not that everything being covered in ganache is necessarily a bad thing.).

    Melted chocolate can be temperamental at best so not having to deal with that was a total plus. And I wasn't the least bit sad to have a little bit of leftover ganache to dip the leftover strawberries from making the buttercream into.

    These Melted Ice Cream Cone Cupcakes are such a fun and easy dessert recipe. This tutorial is a delicious combination of moist vanilla cupcakes, strawberry frosting, chocolate and sprinkles! They are perfect to serve at your next party!

    I could not possibly be happier with the results. They have just the right amount of whimsical cuteness that I was shooting for and more importantly, they were insanely delicious! I think my guests will be very happy to enjoy these this weekend!

    These Melted Ice Cream Cone Cupcakes are such a fun and easy dessert recipe. This tutorial is a delicious combination of moist vanilla cupcakes, strawberry frosting, chocolate and sprinkles! They are perfect to serve at your next party!

    Other great celebratory desserts include:

    Best Vanilla Cupcakes with Fresh Strawberry Buttercream Frosting

    Black Forest Ice Cream Pie

    Orange Cake with Chocolate Ganache Glaze

    Rosie’s Award Winning Cherry Cheese Pie

    Quick and Easy Chocolate Pudding Cake

    These Melted Ice Cream Cone Cupcakes are such a fun and easy dessert recipe. This tutorial is a delicious combination of moist vanilla cupcakes, strawberry frosting, chocolate and sprinkles! They are perfect to serve at your next party!

    Melted Ice Cream Cone Cupcakes

    Jessy Freimann
    These Melted Ice Cream Cone Cupcakes are such a fun and easy dessert recipe. This tutorial is a delicious combination of moist vanilla cupcakes, strawberry frosting, chocolate and sprinkles! They are perfect to serve at your next party!
    No ratings yet
    Print Recipe Pin Recipe
    Prep Time 25 minutes mins
    Cook Time 5 minutes mins
    Total Time 30 minutes mins
    Course Dessert, Snack
    Cuisine Birthday, Celebration, Easy, Holiday, Sweet
    Servings 20 cupcakes
    Calories 290 kcal

    Equipment

    • 1 muffin pan
    • 1 mixing bowl
    • 1 stand mixer
    • 1 Hand mixer
    • 1 Spatula
    • 1 Measuring cups and spoons
    • 1 Small sauce pan
    • 1 Whisk

    Ingredients
      

    • 20 cupcakes with strawberry frosting
    • 1 ½ cups dark chocolate morsels
    • ¾ cups heavy cream
    • 20 Mini ice cream cones
    • ½ cup Rainbow sprinkles

    Instructions
     

    • Pipe swirls of strawberry frosting onto cupcakes and place them into the refrigerator to set while preparing the chocolate ganache.
    • Pour heavy cream into a pan and heat over medium heat, stirring occasionally. Once there's steam rising and it's just beginning to simmer, pour the hot cream over the chocolate morsels in a separate, heat safe bowl.
    • Let it sit for a minute or two and then begin to whisk the cream and chocolate together.
    • At first it will seems as though the chocolate is breaking up into a chocolaty, creamy mess but continue stirring because this is where the magic happens. After a few moments, the chocolate and cream will begin to combine and get darker and smooth.
    • Once they are well combined let it sit for around 15 minutes as it will thicken up a bit to make it easier to control your drips.
    • When it has reached the optimal thickness (to your liking) pull the cupcakes out of the refrigerator and slowly spoon the ganache onto the tops of the cupcakes. Start with a small amount and in the middle of the top of the cupcake and use the spoon to drizzle drips of ganache artfully down the sides. Again, start slow and work in small amounts as you'll have better control that way.
    • One each cupcake has the right amount of ganache drips, take a mini cone by the bottom of it and dip the top rim into the ganache (the way you would if you were putting a salt rim on a margarita glass). Then place it on top of the cupcake at a bit of a diagonal angle.
    • Sprinkle your cupcake with some rainbow sprinkles and enjoy!

    Notes

    Leftovers last up to 3 days in the refrigerator.

    Nutrition

    Serving: 1cupcakeCalories: 290kcalCarbohydrates: 39gProtein: 4gFat: 13gSaturated Fat: 8gPolyunsaturated Fat: 2gMonounsaturated Fat: 3gCholesterol: 11mgSodium: 168mgPotassium: 139mgFiber: 1gSugar: 24gVitamin A: 155IUVitamin C: 0.2mgCalcium: 104mgIron: 1mg
    Tried this recipe?Let us know how it was!

    Helpful tools:


    You can find a full index of my recipes here.

    Don't forget to follow The Life Jolie on Pinterest for more recipe inspiration!

    These Melted Ice Cream Cone Cupcakes are such a fun and easy dessert recipe. This tutorial is a delicious combination of moist vanilla cupcakes, strawberry frosting, chocolate and sprinkles! They are perfect to serve at your next party!

    The Best Vanilla Cupcakes with Fresh Strawberry Buttercream Frosting

    Mar 2, 2017 · 6 Comments

    These are the best Vanilla Cupcakes! They're really easy to make from scratch and taste great with Fresh Strawberry Buttercream Frosting (also homemade!). This recipe makes moist and delicious cupcakes with the most light and fluffy frosting!

    These are the best Vanilla Cupcakes! They're really easy to make from scratch and taste great with Fresh Strawberry Buttercream Frosting (also homemade!). This recipe makes moist and delicious cupcakes with the most light and fluffy frosting!

    These are the best Vanilla Cupcakes! They're really easy to make from scratch and taste great with Fresh Strawberry Buttercream Frosting (also homemade!). This recipe makes moist and delicious cupcakes with the most light and fluffy frosting!

    This post contains Affiliate Links. Please see the disclaimer here.

    This week took a rough turn when both J and I both got hit hard with a stomach bug. Monday night ended up being a bit of a tag team effort (since we only have one bathroom outside of the gross toilet that I try not to think about, which lives in our basement). This started almost the moment that we got the girls down to sleep.

    Most of Tuesday involved both of us on the couch trying to slowly re-hydrate and sleep off the previous sleepless night. I had a terrible knot in my neck. We watched a lot of Homeland and generally just tried not to die. To say food was the last thing I wanted to think about would be a gross understatement.

    These are the best Vanilla Cupcakes! They're really easy to make from scratch and taste great with Fresh Strawberry Buttercream Frosting (also homemade!). This recipe makes moist and delicious cupcakes with the most light and fluffy frosting!

    Then the girls came home from daycare and A got sick. This is the moment I've been fearing from the moment we found out we were having a baby. I don't do well with puke. Give me dirty diapers any day of the week. But vomit and I are not friends. Thank goodness for J. He is such a darn pro and I am constantly awed by what an amazing father and partner he is.

    So yes, our family's first stomach bug is upon us. My poor A was miserable on Tuesday night and I think it scared her. Additionally, I've never seen so much stuff come out of such a tiny human (sorry, but it's true- whoa!). A perked up a bit on Wednesday but we kept her home just to be safe. So far T is still her happy, busy self so I pray the she gets through this unscathed.

    That said, I've perked up a bit and am back at work today. Definitely a bit skinnier, though not exactly the diet I had in mind (SO gross!).

    These are the best Vanilla Cupcakes! They're really easy to make from scratch and taste great with Fresh Strawberry Buttercream Frosting (also homemade!). This recipe makes moist and delicious cupcakes with the most light and fluffy frosting!

    I think it's super important to have a series of base recipes that you can use in a variety of different ways. One that is so delicious on it's own but is also easy to change up when the mood strikes and make it into a whole other and often unexpected variation of itself.

    Baking is not my strong suit. I've gotten much better at it over the years, but it's confession time. Here it is, folks: I am seriously intimidated by the entire concept of creating baking recipes. I think it's because of the chemistry aspect and the fact that minor changes with ingredients can lead to major changes in your finished product.

    In many aspects of my life I am a planner. Oddly, one of the things I love most about savory cooking is the ability to fly by the seat of your pants and keep tweaking the dish and tasting it until everything is perfect balanced and irresistibly delicious.

    These are the best Vanilla Cupcakes! They're really easy to make from scratch and taste great with Fresh Strawberry Buttercream Frosting (also homemade!). This recipe makes moist and delicious cupcakes with the most light and fluffy frosting!

    That being said, I'm trying to work through my intimidation and working hard to learn more about baking. Though I have an obvious penchant for things like cake mix hacks, I'd like to work harder at creating more baked recipes from scratch (and hopefully move past my terror when I think of baking with yeast).

    For these, I actually hacked my Grandma Rose's scratch chocolate cake recipe. Though Rosie was never ashamed to use a box cake mix, her chocolate cake was loved by many.

    I can remember one time when I was frosting that very same chocolate cake and Grandma said to me with a kind smile and in her usual brash manner, "you're not very good at frosting a cake, are you?"

    Now to someone who didn't know her, that can sound kind of mean. But I have to tell you, Rosie was anything but mean. Her love for others held no bounds. She simply had a very blunt way about her. She was not one to mince words and we all loved her for it. She'd one of those little, old, Italian ladies who can say whatever she darn-well wanted and we all loved her for it.

    These are the best Vanilla Cupcakes! They're really easy to make from scratch and taste great with Fresh Strawberry Buttercream Frosting (also homemade!). This recipe makes moist and delicious cupcakes with the most light and fluffy frosting!

    And for the record, I'm really not very good at frosting cakes (hence the reason this frosting was piped onto the cupcakes). I love this piping set to get started! And it's always good to have a nice muffin pan and cupcake liners.

    These cupcakes are every bit as moist and simply delicious as one would hope. The butter cream is extremely light and fluffy with the perfect balance of sweetness and fresh strawberry flavor. If you prefer a thicker butter cream, you can always add more confectioner's sugar. I personally prefer how light this is.

    Next week I'll be sharing a variation of this cupcake that is specific to T's birthday party. It is so darn cute, I can hardly wait to show you. Stay tuned...

    Other delicious desserts include:

    Lemon Pistachio Cake

    Black Forest Ice Cream Pie

    Sour Cream Coffee Cake

    PB&J Brownies

    Coffee Snickerdoodles

    These are the best Vanilla Cupcakes! They're really easy to make from scratch and taste great with Fresh Strawberry Buttercream Frosting (also homemade!). This recipe makes moist and delicious cupcakes with the most light and fluffy frosting!

    The Best Vanilla Cupcakes with Fresh Strawberry Buttercream Frosting

    Jessy Freimann
    These are the best Vanilla Cupcakes! They're really easy to make from scratch and taste great with Fresh Strawberry Buttercream Frosting (also homemade!). This recipe makes moist and delicious cupcakes with the most light and fluffy frosting!
    No ratings yet
    Print Recipe Pin Recipe
    Prep Time 20 minutes mins
    Cook Time 20 minutes mins
    Total Time 40 minutes mins
    Course Dessert
    Cuisine Cake, Celebration, holidays
    Servings 20 cupcakes
    Calories 268 kcal

    Equipment

    • 1 muffin pan
    • 1 mixing bowl
    • 1 stand mixer
    • 1 Hand mixer
    • 1 Measuring cups and spoons
    • 1 Spatula

    Ingredients
      

    For the cupcakes:

    • 2 cups sifted cake flour
    • 1 ¼ teaspoon baking soda
    • 1 teaspoon Kosher salt
    • ⅔ cup vegetable oil
    • 1 cup buttermilk if you don't have this on hand, you can make it by whisking a little lemon juice into regular milk
    • 2 teaspoon pure vanilla extract
    • 2 large eggs
    • 1 ½ cups granulated sugar

    For the frosting:

    • 1 cup salted butter softened (2 sticks)
    • 6 cups confectioner's sugar
    • ⅔ cup strawberry puree
    • 2 teaspoon pure vanilla or almond extract

    Instructions
     

    For the cupcakes:

    • Heat the oven to 350 degrees F and place cupcake liners into a muffin pan.
    • Sift together the cake flour, baking soda and salt into a large mixing bowl.
    • Add the oil, buttermilk and vanilla and beat until smooth.
    • In a separate bowl, beat the eggs until thick and foamy. Gradually add the sugar until well blended. Fold this thoroughly into the batter.
    • Fill the muffin cups ¾ of the way up.
    • Bake uncovered between 15-20 minutes (mine were perfect right around 17 minutes but this will vary based on your oven). Cool completely.

    For the frosting:

    • Beat all ingredients until well combined.
    • Pipe generously onto your cupcakes. Refrigerate until serving.

    Notes

    Leftovers last up to 3 days in the refrigerator.

    Nutrition

    Serving: 1cupcakeCalories: 268kcalCarbohydrates: 63gProtein: 3gFat: 18gSaturated Fat: 7gPolyunsaturated Fat: 5gMonounsaturated Fat: 4gTrans Fat: 0.4gCholesterol: 44mgSodium: 278mgPotassium: 52mgFiber: 0.5gSugar: 16gVitamin A: 332IUVitamin C: 5mgCalcium: 23mgIron: 0.2mg
    Tried this recipe?Let us know how it was!

    Helpful tools:


    You can find a full index of my recipes here.

    Don't forget to follow The Life Jolie on Pinterest.

    These are the best Vanilla Cupcakes! They're really easy to make from scratch and taste great with Fresh Strawberry Buttercream Frosting (also homemade!). This recipe makes moist and delicious cupcakes with the most light and fluffy frosting!

    Lucky Charms Treats

    Feb 27, 2017 · 10 Comments

    These Lucky Charms Treats are a super easy and fun dessert recipe to celebrate St. Patrick's Day with the kids! They're made with Rice Krispies and the marshmallows from Lucky Charms and drizzled with white chocolate that's been dyed green. These snacks are such a fun option to bring to parties and get-togethers!

    These Lucky Charms Treats are a super easy and fun dessert recipe to celebrate St. Patrick's Day with the kids! They're made with Rice Krispies and the marshmallows from Lucky Charms and drizzled with white chocolate that's been dyed green. These snacks are such a fun option to bring to parties and get-togethers!

    These Lucky Charms Treats are a super easy and fun dessert recipe to celebrate St. Patrick's Day with the kids! They're made with Rice Krispies and the marshmallows from Lucky Charms and drizzled with white chocolate that's been dyed green. These snacks are such a fun option to bring to parties and get-togethers!

    This post contains Affiliate Links. Please see the disclaimer here.

    There's a little game we've been playing with the girls lately.

    We call it "The Electric Finger." J (or I) will extend our index finger toward one of the girls. At that a point, they will extend their little index finger back. The moment that the tips of our fingers touch, J (or I) will go "Bzzzzzzzz" and act as though we've just received an electrical shock and the girls will immediately start cracking up.

    These Lucky Charms Treats are a super easy and fun dessert recipe to celebrate St. Patrick's Day with the kids! They're made with Rice Krispies and the marshmallows from Lucky Charms and drizzled with white chocolate that's been dyed green. These snacks are such a fun option to bring to parties and get-togethers!

    We've played it with A for a while, actually. But recently, T has started getting into it, so it's a little thing we can all do together for a laugh. I can only imagine how much fun we'll all have together as the girls get older! I just had to share that because it makes me smile.

    I think when it comes to holidays there are two kinds of people. The ones who decorate and go all out for each one and the people who enjoy it but don't really do much. I definitely fall into the later category. Maybe there is a third category for people who hate holidays but I'm not counting them in this.

    These Lucky Charms Treats are a super easy and fun dessert recipe to celebrate St. Patrick's Day with the kids! They're made with Rice Krispies and the marshmallows from Lucky Charms and drizzled with white chocolate that's been dyed green. These snacks are such a fun option to bring to parties and get-togethers!

    I'll put it to you this way. We finally got our Christmas lights up a week or two before Christmas and we just took them down this week. Yes. We're those neighbors (sorry friendly neighborhood residents!). Also, when it comes to remembering to get special holiday outfits for the girls, I have around a 65% success rate.

    I don't give myself too hard of a time, since the girls are so young they probably won't even remember these things. But I aspire to be the kind of mom who gets into the minor holidays a bit more in the future.

    These Lucky Charms Treats are a super easy and fun dessert recipe to celebrate St. Patrick's Day with the kids! They're made with Rice Krispies and the marshmallows from Lucky Charms and drizzled with white chocolate that's been dyed green. These snacks are such a fun option to bring to parties and get-togethers!

    In the interest of this, and in an attempt to be more festive and keep things delicious, I decided to throw together some Lucky Charms Treats for Alice for all of us to enjoy. After all, my girls do have some Irish in their lineage from my husband's side.

    And since I cannot leave well enough alone, I decided to make these into Shamrocks, put them on sticks and dip them into Green White Chocolate. Sometimes I can pretend I'm  the mom who has her act together 😉

    These Lucky Charms Treats are a super easy and fun dessert recipe to celebrate St. Patrick's Day with the kids! They're made with Rice Krispies and the marshmallows from Lucky Charms and drizzled with white chocolate that's been dyed green. These snacks are such a fun option to bring to parties and get-togethers!

    I initially tried making these using only Lucky Charms cereal, but we all agreed that the texture would be a lot more desirable if I used Rice Krispies and added the Marshmallows from the Lucky Charms (because isn't that the part we all pick out to enjoy anyway? They were also much easier to cut out using Rice Krispies. The great thing is, I'm told you can buy the marshmallows on their own vs. having to pick through a box. You'll also want to have some sucker sticks and wax paper on hand! This is the cookie cutter I used.

    These are super simple to make and totally delicious. Though, I've never been a huge cereal fan, I have fond childhood memories involving those darn marshmallows. I enjoy snacking on it without any milk at all. So these treats are a natural next step for me!

    These Lucky Charms Treats are a super easy and fun dessert recipe to celebrate St. Patrick's Day with the kids! They're made with Rice Krispies and the marshmallows from Lucky Charms and drizzled with white chocolate that's been dyed green. These snacks are such a fun option to bring to parties and get-togethers!

    Needless to say, A is a total fan. And so is J. If I was allowed to bring food to our daycare center, I'd totally bring these for the other kids too. But since that's not an option at ours, my coworkers have graciously offered their assistance in eating up whatever treat I whip up. Thanks guys!

    Other tasty treats include:

    Peanut Butter Brownie Truffles

    M&M’S® Brownie Truffles

    German Cream Cheese Brownies

    PB&J Brownies

    Chocolate Cherry Oatmeal Cookie Bars

    These Lucky Charms Treats are a super easy and fun dessert recipe to celebrate St. Patrick's Day with the kids! They're made with Rice Krispies and the marshmallows from Lucky Charms and drizzled with white chocolate that's been dyed green. These snacks are such a fun option to bring to parties and get-togethers!

    Lucky Charms Treats

    Jessy Freimann
    These Lucky Charms Treats are a super easy and fun dessert recipe to celebrate St. Patrick's Day with the kids! They're made with Rice Krispies and the marshmallows from Lucky Charms and drizzled with white chocolate that's been dyed green. These snacks are such a fun option to bring to parties and get-togethers!
    No ratings yet
    Print Recipe Pin Recipe
    Prep Time 20 minutes mins
    Cook Time 10 minutes mins
    Total Time 30 minutes mins
    Course Dessert, Snack
    Cuisine St. Paddy
    Servings 20 pieces
    Calories 142 kcal

    Equipment

    • 1 9 x 13 Pan
    • 1 Large pot
    • 1 wooden spoon
    • 1 Measuring cups and spoons
    • 1 Small sauce pan

    Ingredients
      

    • 3 Tablespoons salted butter
    • 4 cups mini marshmallows
    • 5 cups Rice Krispies
    • 1 ½ cups Lucky Charms marshmallows
    • Cooking Spray
    • 1 cup white chocolate chips
    • green food coloring
    • 1 teaspoon Canola oil

    Instructions
     

    • Melt the butter over medium-low heat. While this melts, grease a 9 x 13 pan. Place a piece of wax paper across the pan and press it down so that it sticks to the pan with the sides are sticking out of the pan (this will make it easier to remove the treat in one piece later).
    • Spray a spoon with cooking spray. Add the marshmallows to the pot and stir them often until they're melted.
    • Combine the Lucky Charms Marshmallows and Rice Krispies and add to the pot. Remove it from the heat and stir everything until well combined.
    • Press down the mixture to cover the inside of the 9 x 13 pan and place a piece of wax paper across the top. Weigh it down with another pan for at least an hour to set.
    • Once it's set, remove the Rice Krispie treat from the pan. Use a cookie cutter to cut the treats into Shamrock shapes and place the sucker stick into the bottom of them, and then place them around the edges of a wax paper-lined pan. You can also take all the scraps and shape them in the cookie cutter to make additional shamrocks so that they don't go to waste (or eat them!).
    • Melt the white chocolate chips in the microwave in increments of 20 seconds, 20 seconds and then 10 seconds stirring in between and repeating until the chocolate is fully melted (this can also be done on the stove in a double boiler, but make sure to use low heat so the chocolate doesn't seize).
    • Once it's melted add some green food coloring. Note: I found that this caused my chocolate to thicken and if that happens to you stir in a little canola oil, 1 tsp. at a time, until it thins out enough to be easy to drizzle. If it's too thick, it won't drizzle well.
    • Drizzle chocolate over the treats on the diagonal and refrigerate for 20 minutes to let the chocolate set.
    • Serve immediately.

    Notes

    Leftovers last up to 3 days at room temperature.

    Nutrition

    Serving: 2piecesCalories: 142kcalCarbohydrates: 24gProtein: 1gFat: 5gSaturated Fat: 3gPolyunsaturated Fat: 0.3gMonounsaturated Fat: 1gTrans Fat: 0.1gCholesterol: 6mgSodium: 71mgPotassium: 36mgFiber: 0.1gSugar: 15gVitamin A: 521IUVitamin C: 4mgCalcium: 19mgIron: 2mg
    Tried this recipe?Let us know how it was!

    Helpful tools:


    You can find a full index of my recipes here.

    Don't forget to follow The Life Jolie on Pinterest.

    These Lucky Charms Treats are a super easy and fun dessert recipe to celebrate St. Patrick's Day with the kids! They're made with Rice Krispies and the marshmallows from Lucky Charms and drizzled with white chocolate that's been dyed green. These snacks are such a fun option to bring to parties and get-togethers!


    Tessa is 11 Months Old

    Feb 24, 2017 · Leave a Comment

    Tessa is 11 Months Old | The Life Jolie

    This post contains Affiliate Links. Please see the disclaimer here.

    Oh my gosh, you guys. We are now less than one month out from my sweet little T turning one!  That's right my friends, this gal is 11 months old! It's crazy, I could have sworn I just gave birth to her yesterday!

    Tessa is 11 Months Old | The Life Jolie
    T's first 'Ronis- a very important rite of passage. She LOVED them!!

    This past month has been pretty great outside of all of battling all the illness. But illness aside, T is all sorts of fun! In addition to crawling everywhere, pulling up on everything and successfully climbing the stairs, T has now started to clap, which is too cute for words. She is also just starting to use a little baby sign language (so far she's used the sign for eat!).

    She also has begun pushing chairs around in an early attempt to walk. She's not actually close to walking on her own but she's definitely moving in that direction.

    Tessa is 11 Months Old | The Life Jolie
    My favorite little Valentines <3

    While we've always generally failed at putting up baby gates, we have a rather large painting that we never got around to hanging, and it's actually been pretty effective in serving the same purpose as a gate (and much prettier than a gate as an added bonus!). The downside is, unless we rig it up just right, Miss T is pretty good at moving it over so she can get through. Thank goodness we go out of our way to be on top of things!

    Tessa is 11 Months Old | The Life Jolie

    She is such a little rascal. If she's headed in a direction that she knows isn't allowed (and believe me, she knows!) and I am coming her way, she will flash me a giant, knowing grin and immediately start crawling faster!

    Her sister also enjoyed pulling this stunt but when T does it, there's an extra gleam in her eye. I suspect this little one will be keeping us on our toes for years to come.

    T is a little table-food eating machine! This gal absolutely loves having meals at the table with us. For the most part it's incredibly cute too. I feed her tiny bits of food as well as give her tiny pieces on the table in front of her so she can feed herself. I'd put it on a plate but the minute that plate hits the table, her first move is to grab that plate and promptly dump it's contents.

    Tessa is 11 Months Old | The Life Jolie

    What isn't so cute is our girl's penchant for blowing raspberries with a mouth full of applesauce (or whatever good stuff she happens to be eating). The first time it was kind of funny. So we laughed. Rookie mistake. Now she's all about blowing raspberries when she's eating and it's not so cute when there's applesauce spraying across the table!

    T is still pretty much rocking the nursing. We did have a couple days right around the time she turned 11 months old that she was super distracted and not really wanting to nurse much. I was a little paranoid that she had suddenly decided to wean but it turns out her two top teeth broke through the very next night and after that we were back on track.

    I am super grateful that we are still nursing and have actually grown to love it. T looks so big to me right now, and I can feel us creeping closer to toddlerhood with each passing day. It's so bittersweet, particularly since I know I'll never again have another baby of my own (that's a definite downside of having a tubal so quickly after T was born, it basically made the reality that every first is the last first so much more stark and I can no longer operate under the notion of ignorance-is-bliss about that fact. Still the right decision, though.).

    Tessa is 11 Months Old | The Life Jolie

    T has certainly become a bit more distracted during nursing over the past few months. I'm told this is pretty normal. I don't really see myself nursing too long past a year, and definitely not pumping past a year. I love what nursing has been for T and I, and I am so glad to have had a more productive experience this time around.  While I'm a little sad to end nursing, I suspect T will happily and easily transition out of it.

    I've been giving her a sippy cup with a little water here and there. More just for her to get used to it. With A, we started the sippy cup after a year and the transition was terrifying, so after talking with a friend with kids around the same age (she started introducing sippy cups of breast milk much earlier with great success) I figured I'd throw the cup into the mix.

    Tessa is 11 Months Old | The Life Jolie
    As you can see, I kind of failed at getting photos on Valentine's Day!

    For a while T would just play with it and made a game of throwing it onto the flow, as she does with most things. Lately, shes actually been drinking the water. Sometimes, if daycare has a little extra pumped breast milk left over from the week, I'll pop that into her cup for her, which works out nicely since it's usually only an ounce or so, not really enough to use in place of a feed for me to pump (Ugh, pumping on weekends! No thanks!!).

    While sleep has generally been consistent as always, that one night I mentioned in relation to T's two top teeth was rough. Luckily, it was a Friday night, so no work the next day. J and I had stayed up early getting a little work done and watching our show in the background (lately, we've been into Homeland- SO good!). It was around 1 am when we finally decided to go to bed. And naturally, right as we were just turning out our lights, T started fussing.

    Tessa is 11 Months Old | The Life Jolie

    So we waited a minute to see if she was just shifting between sleep cycles. But a few minutes later she was still fussing and it sounded as though it was turning into crying. Any parent of a baby will tell you that you kind of learn what your babies different cries are for. Within a few minutes, it was obvious that poor T was uncomfortable.

    First J went in and tried to give her some snuggles. She wasn't really down with that. Then he gave her some baby ibuprofin. After that, I went in and tried giving her a snuggle. When that was unsuccessful, I brought out the big guns: The Boobs. That seemed to do the trick and I got some excellent snuggles after she fed!

    Tessa is 11 Months Old | The Life Jolie
    Gotta get my snuggles in while I still can!

    The next morning, knowing full well the previous night was a direct result of some teething, I popped my finger into her mouth to check things out and sure enough those two top teeth had just begun to make their way through! Thank Goodness! Needless to say, she was much happier for the rest of the weekend and everyone slept well from then on.

    The planning of T's first birthday party is well underway and the invites have been sent. I'll share more specific details about it over the next few weeks, but I'll tell you this- I think it's going to be super cute! Stay tuned...

    You can read all of my parenting related posts here.

    Don't forget to follow The Life Jolie on Pinterest for more parenting tips!

    Super Easy Baked Breakfast Tostadas

    Feb 20, 2017 · 12 Comments

    Baked Breakfast Tostadas are one of my favorite easy recipes to make for breakfast (or lunch- or brunch!). This is simple cooking at it's finest with corn tortillas, salsa, black beans, cheese and eggs. You can get creative and take it in whatever direction you'd like- this quick and delicious dish is definitely a keeper!

    Baked Breakfast Tostadas are one of my favorite easy recipes to make for breakfast (or lunch- or brunch!). This is simple cooking at it's finest with corn tortillas, salsa, black beans, cheese and eggs. You can get creative and take it in whatever direction you'd like- this quick and delicious dish is definitely a keeper!

    Baked Breakfast Tostadas are one of my favorite easy recipes to make for breakfast (or lunch- or brunch!). This is simple cooking at it's finest with corn tortillas, salsa, black beans, cheese and eggs. You can get creative and take it in whatever direction you'd like- this quick and delicious dish is definitely a keeper!

    This post contains Affiliate Links. Please see the disclaimer here.

    Weekend mornings are my absolute favorite.

    They look seriously different than they did before kids. It used to be J and I, sleeping late and then stumbling out of bed for a leisurely brunch at our favorite diner.

    Baked Breakfast Tostadas are one of my favorite easy recipes to make for breakfast (or lunch- or brunch!). This is simple cooking at it's finest with corn tortillas, salsa, black beans, cheese and eggs. You can get creative and take it in whatever direction you'd like- this quick and delicious dish is definitely a keeper!

    Nowadays, we're up quite a bit earlier. Early mornings are met with smile and giggles. We'll usually allow A an episode of Mickey Mouse Clubhouse. Before T, this sometimes worked as a bit of a snooze button for us. Now that T is in the mix, our snooze button is no longer a viable option. Specifically because T likes to make a game of trying to crawl off the bed, so it's all hands on deck.

    Eventually we make our way downstairs. These days we're much less liberal with our spending, so it's rare that we make our way out for breakfast. Often, J starts getting breakfast together while I turn on the keurig (A loves making my coffee!).

    Baked Breakfast Tostadas are one of my favorite easy recipes to make for breakfast (or lunch- or brunch!). This is simple cooking at it's finest with corn tortillas, salsa, black beans, cheese and eggs. You can get creative and take it in whatever direction you'd like- this quick and delicious dish is definitely a keeper!

    A and I often split a grapefruit and I usually make my eggs separately as I prefer them over easy. T sits next to me and I give her bits of egg and grapefruit as well as avocado or applesauce if we have it. I typically end up being the last one to start eating but I don't mind at all, especially if it means having my eggs perfectly cooked the way I like them.

    This time of day is nothing wildly out of the ordinary. It's not some magical holiday or anything like that. It's all pretty normal. Sometimes challenging (come on now, this isn't Leave It to Beaver! My kids are pretty well behaved overall but they're still young children!).

    Baked Breakfast Tostadas are one of my favorite easy recipes to make for breakfast (or lunch- or brunch!). This is simple cooking at it's finest with corn tortillas, salsa, black beans, cheese and eggs. You can get creative and take it in whatever direction you'd like- this quick and delicious dish is definitely a keeper!

    Our weekend breakfasts are a series of simple, small moments. They are the very moments that I live for. Sure, holidays and milestones are amazing and totally fun. But our weekend breakfasts, our small singular moments, are so joyful in their simplicity. As far as I'm concerned, it just doesn't get any better than that.

    Often after we eat, we'll clean up and head into the living room, which likely has toys strewn everywhere. We try to keep up with it, but life. I don't mind too much. It won't be like this forever, after all.

    Baked Breakfast Tostadas are one of my favorite easy recipes to make for breakfast (or lunch- or brunch!). This is simple cooking at it's finest with corn tortillas, salsa, black beans, cheese and eggs. You can get creative and take it in whatever direction you'd like- this quick and delicious dish is definitely a keeper!

    Now sincet we generally do our grocery shopping on the weekends, we sometimes find that we're low on or out of some ingredients. A few weeks back I was out of bread. Luckily I had some corn tortillas hanging around as well as some black beans, salsa and cheese.

    So that morning I threw together a super quick meal with all these components to accompany my eggs and Breakfast Tostadas were born.

    Now I'm not going to sit here and tell you that this is a truly authentic tostadas recipe; I'm sure it probably isn't. But it comes together in a snap with a small amount of work on your part and a large amount of deliciousness as a result. And the only thing being fried is the egg, so it kind of allows you to operate under the facade that you're being really healthy (although it's not terrible for you, let's not pretend this is healthy eating- it was a weekend, after all).

    Baked Breakfast Tostadas are one of my favorite easy recipes to make for breakfast (or lunch- or brunch!). This is simple cooking at it's finest with corn tortillas, salsa, black beans, cheese and eggs. You can get creative and take it in whatever direction you'd like- this quick and delicious dish is definitely a keeper!

    Like many of my recipes, you can totally take this in whatever direction you'd like. USe as much or as little of the ingredients as your tastes dictate and add whatever other tasty ingredients you have on hand. The idea is to keep it as simple as possible so you're not scrambling around the kitchen when you should be relaxing.

    I'd love for you to tell me in the comments what you might add or change to make this recipe your own!

    Other tasty breakfast options include:

    Grandma Hinz’s Apple Pancakes

    Egg Stuffed Bread

    Sweet Potato and Chorizo Hash

    Orange Roll Monkey Bread

    Peanut Butter and Banana Breakfast Cookies

    Open-Faced Egg Sandwich

    Baked Breakfast Tostadas are one of my favorite easy recipes to make for breakfast (or lunch- or brunch!). This is simple cooking at it's finest with corn tortillas, salsa, black beans, cheese and eggs. You can get creative and take it in whatever direction you'd like- this quick and delicious dish is definitely a keeper!

    Breakfast Tostadas

    Jessy Freimann
    Baked Breakfast Tostadas are one of my favorite easy recipes to make for breakfast (or lunch- or brunch!). This is simple cooking at it's finest with corn tortillas, salsa, black beans, cheese and eggs. You can get creative and take it in whatever direction you'd like- this quick and delicious dish is definitely a keeper!
    No ratings yet
    Print Recipe Pin Recipe
    Prep Time 5 minutes mins
    Cook Time 15 minutes mins
    Total Time 20 minutes mins
    Course Breakfast, Brunch, Lunch, Snack
    Cuisine Easy, Healthy, Mexican
    Servings 4 servings
    Calories 93 kcal

    Equipment

    • 1 sheet pan
    • 1 Whisk
    • 1 mixing bowl
    • 1 Measuring cups and spoons
    • 1 chefs knife
    • 1 cutting board

    Ingredients
      

    • Cooking spray
    • 4 Corn tortillas
    • 4 Tablespoons Salsa to taste
    • 4 Tablespoons Black beans drained and rinsed
    • 4 Tablespoons Shredded cheddar cheese to taste
    • large Eggs
    • chopped scallions and avocado for garnishing optional but delicious!

    Instructions
     

    • Preheat your over to 400 degrees F. Line a pan with foil for easy clean up and spray it with cooking spray.
    • Place your corn tortillas onto the pan, spray them lightly with cooking spray and bake uncovered for 10 minutes (they should be golden and lightly crispy).
    • When the 10 minutes is almost up begin heating your pan for your eggs and spray with cooking spray.
    • Top your tortillas with a layer of salsa, then beans and then a sprinkle of cheese.
    • Crack your eggs into your pan and then place the tostadas back into the oven for 5-7 minutes to melt the cheese.
    • Cook your eggs to your level of doneness and once the eggs are to your liking, remove the tostadas from the oven, top them with your eggs and serve immediately.

    Notes

    Get creative and add whatever tasty ingredients you have on hand!

    Nutrition

    Serving: 1servingCalories: 93kcalCarbohydrates: 16gProtein: 5gFat: 1gSaturated Fat: 0.4gPolyunsaturated Fat: 0.4gMonounsaturated Fat: 0.3gCholesterol: 1mgSodium: 160mgPotassium: 147mgFiber: 3gSugar: 1gVitamin A: 93IUVitamin C: 0.3mgCalcium: 59mgIron: 1mg
    Tried this recipe?Let us know how it was!

    Helpful tools:


    You can find a full index of my recipes here.

    Don't forget to follow The Life Jolie on Pinterest for more recipe inspiration!  

    Baked Breakfast Tostadas are one of my favorite easy recipes to make for breakfast (or lunch- or brunch!). This is simple cooking at it's finest with corn tortillas, salsa, black beans, cheese and eggs. You can get creative and take it in whatever direction you'd like- this quick and delicious dish is definitely a keeper!

    PMS Bark

    Feb 2, 2017 · 10 Comments

    This PMS Bark is the ultimate treat to fulfill both your sweet and salty cravings! Made with rich dark chocolate, salty potato chips and pretzels, peanut butter chips and buttery toffee bits, this recipe is SO easy to make and really addictive- you won't be able to get enough!!

    This PMS Bark is the ultimate treat to fulfill both your sweet and salty cravings! Made with rich dark chocolate, salty potato chips and pretzels, peanut butter chips and buttery toffee bits, this recipe is SO easy to make and really addictive- you won't be able to get enough!!

    This PMS Bark is the ultimate treat to fulfill both your sweet and salty cravings! Made with rich dark chocolate, salty potato chips and pretzels, peanut butter chips and buttery toffee bits, this recipe is SO easy to make and really addictive- you won't be able to get enough!!

    This post contains Affiliate Links. Please see the disclaimer here.

    So A is officially potty training. I struggled with the idea of potty training her for a while. She's been interested in the concept of using the potty since before she turned two but I really didn't believe she was ready until very recently.

    Now some people are super into potty training really early and I have nothing against that. Every kid is different and different things work for different families. I am only an expert on my own kids, after all.

    But our amazing Pedi and I had this great conversation at A's two year appointment where we were both on the same page about the fact that we really didn't want to push A into doing something that she isn't ready to do. Our thought process was that when it became apparent that she was ready, it would be much easier to actually do the potty training.

    Fast forward to the present, A's daycare teacher's have been telling us since around the holidays that she's been way more interested in the potty and when we're ready we were welcome to start sending her in with undies.

    This PMS Bark is the ultimate treat to fulfill both your sweet and salty cravings! Made with rich dark chocolate, salty potato chips and pretzels, peanut butter chips and buttery toffee bits, this recipe is SO easy to make and really addictive- you won't be able to get enough!!

    Did I mention how freakin' amazing my girl's teachers are? Not only have I always genuinely felt happy and secure with the knowledge that my girls are in excellent hands when I have to be at work (and my girls absolutely love each and every staff member at their center- with very good reason!) but they are also totally willing to work with us and participate in the dirty work that is potty training.

    Anyway, I couldn't possibly imagine doing something like this around the holidays, most specifically because of the interruption in our girls' routines that the holidays and having house guests presents. It seemed like a recipe for disaster. So we tabled it for a bit, kept an eye on A for signs (which were all very much alive and present) and went about our life.

    The beginning of January presented some very busy weekends which also included some work-outings for J and I. I was not about to saddle my parents with having to babysit at the beginning of potty training. That wouldn't be very nice of me.

    This PMS Bark is the ultimate treat to fulfill both your sweet and salty cravings! Made with rich dark chocolate, salty potato chips and pretzels, peanut butter chips and buttery toffee bits, this recipe is SO easy to make and really addictive- you won't be able to get enough!!

    So finally, a couple Sunday nights ago, we put A in her diaper before bed and everyone agreed that it was the last diaper because A is a big girl. And thus potty training began.

    We considered starting the first few days at home but ultimately decided that since A spends a good part of her weekdays at daycare and they have a pretty distinct routine there (and a group full of other kid's A's age who are also just starting potty training. This is one time that we're totally down with a little peer pressure) it would be a good idea to have the daytime portion of her first potty training days occur at daycare.

    I won't lie, the first two days were rough and involved a lot of accidents. I seriously had my doubts and began questioning our decision to start potty training. But as the week progressed, A turned a corner and accidents became few and far between (and often a result of us not prompting her to use the potty often enough).

    This PMS Bark is the ultimate treat to fulfill both your sweet and salty cravings! Made with rich dark chocolate, salty potato chips and pretzels, peanut butter chips and buttery toffee bits, this recipe is SO easy to make and really addictive- you won't be able to get enough!!

    And here we are now, almost two weeks in. Accidents during A's waking hours pretty much don't happen anymore and more often than not she wakes up dry in the morning as well! I will be sure to write a more specific post about the details of our laissez-faire style of potty training, but let me just say, I am so proud of our girl! The pride that she has every time she successfully uses the potty is just so awesome!

    Now given the anxiety that I had at the beginning of this thing, it should come as no surprise that I was hitting the chocolate hard. Though I love a nice glass of wine, I'm not a big drinker anymore (after an especially rough night at my cousin's wedding this past June). So chocolate and munchies are a delicious alternative which I try to enjoy in moderation.

    On one particularly liberal chocolate-and-potato-chips binge, I was thinking about how that sweet and salty flavor combination is a constant refrain when it comes to my PMS cravings. Since I'm still nursing, I haven't had to reckon with PMS in over a year and a half (a fact that I'm not even a little bit sad about. I'd be fine if it never, ever returned!) but the memory is alive and well.

    This PMS Bark is the ultimate treat to fulfill both your sweet and salty cravings! Made with rich dark chocolate, salty potato chips and pretzels, peanut butter chips and buttery toffee bits, this recipe is SO easy to make and really addictive- you won't be able to get enough!!

    And I said to myself, "Self, why aren't there more sweet and salty options to help curb those PMS-y cravings? You really need to get on top of that!" And thus, PMS Bark was born.

    So here it is, two layers of dark chocolate topped with salty potato chips and pretzels, peanut butter chips and buttery toffee bits.  So pretty much everything you need to get you through those rough PMS-y days that we all have. Or when you deserve a treat. Which is always.

    I strongly encourage you to get to your kitchen and throw this together. It's super easy to make, tastes even better and will stay good in your fridge for a week or even two (as if you'll allow it to last that long!).

    Other tasty sweets include:

    Black Forest Ice Cream Pie

    Peanut Butter Brownie Truffles

    German Cream Cheese Brownies

    PB&J Brownies

    This PMS Bark is the ultimate treat to fulfill both your sweet and salty cravings! Made with rich dark chocolate, salty potato chips and pretzels, peanut butter chips and buttery toffee bits, this recipe is SO easy to make and really addictive- you won't be able to get enough!!

    PMS Bark

    Jessy Freimann
    This PMS Bark is the ultimate treat to fulfill both your sweet and salty cravings! Made with rich dark chocolate, salty potato chips and pretzels, peanut butter chips and buttery toffee bits, this recipe is SO easy to make and really addictive- you won't be able to get enough!!
    No ratings yet
    Print Recipe Pin Recipe
    Prep Time 2 hours hrs
    Cook Time 5 minutes mins
    Total Time 2 hours hrs 5 minutes mins
    Course Dessert
    Cuisine Christmas, Holiday, Valentine
    Servings 8 servings
    Calories 521 kcal

    Equipment

    • 1 sheet pan
    • 1 Small sauce pan
    • 1 mixing bowl
    • 1 Spatula
    • 1 Whisk
    • 1 cutting board
    • 1 chefs knife

    Ingredients
      

    • 20 ounces dark chocolate morsels
    • 2 teaspoons coconut oil divided
    • ½ cup Potato chips slightly broken down into smaller pieces
    • ½ cup Pretzels slightly broken down into smaller pieces
    • ½ cup Peanut butter chips
    • ½ cup Toffee bits

    Instructions
     

    • Prepare a standard size sheet pan by lining it with wax paper (parchment will also work).
    • Pour one bag of morsels into a microwave safe bowl and melt it by heating for 30 seconds, then stirring, then 30 more seconds, then stirring then in increments of 15 seconds and stirring in between until smooth.
    • Once the chocolate is melted, stir in 1 tsp. of the coconut oil until smooth.
    • spread you chocolate into a thin, even layer so it covers most of the sheet pan (leave a little wax paper around all the edges so it's easier to peel off when you're done). I found it easiest to use my offset spatula to do this.
    • Refrigerate for 30 minutes to an hour, or when the chocolate is solid.
    • Use the above process to melt your other bag of morsels and stir in the other tsp. of coconut oil once it's melted, until everything is smooth.
    • Once again, spread your chocolate into a thin, even layer that completely covers the first layer of solid chocolate.
    • Once you've smoothed the top out, sprinkle on your chips, pretzels, peanut butter chips and toffee bits.
    • After you'd sufficiently covered your bark in these toppings, lightly press them into the chocolate using your hands.
    • Refrigerate for at least an hour and once it's solid, break the bark into shards and enjoy!

    Notes

    If you're concerned about breaking up the bark into shards, you can always score the second layer of chocolate before you place the topping on to make it easier to break up.
    This will last a good week or two in your refrigerator (if you don't keep it in the fridge, it will have a still delicious, but slightly melty texture).

    Nutrition

    Serving: 1servingCalories: 521kcalCarbohydrates: 56gProtein: 7gFat: 30gSaturated Fat: 25gPolyunsaturated Fat: 1gMonounsaturated Fat: 3gTrans Fat: 0.1gCholesterol: 16mgSodium: 186mgPotassium: 531mgFiber: 3gSugar: 34gVitamin A: 177IUVitamin C: 2mgCalcium: 222mgIron: 1mg
    Tried this recipe?Let us know how it was!

    Helpful tools:


    You can find a full index of my recipes here.

    Don't forget to follow The Life Jolie on Pinterest for more recipe inspiration!

    This PMS Bark is the ultimate treat to fulfill both your sweet and salty cravings! Made with rich dark chocolate, salty potato chips and pretzels, peanut butter chips and buttery toffee bits, this recipe is SO easy to make and really addictive- you won't be able to get enough!!

    Black Forest Ice Cream Pie

    Jan 26, 2017 · 6 Comments

    This Black Forest Ice Cream Pie is a quick and easy no bake dessert recipe. Made with an Oreo Cookie crust, chocolate ice cream, maraschino cherries and whipped topping this pie is a pretty addition to any dessert table! It's perfect for the holidays or to keep in the freezer "just because"!

    This Black Forest Ice Cream Pie is a quick and easy no bake dessert recipe. Made with an Oreo Cookie crust, chocolate ice cream, maraschino cherries and whipped topping this pie is a pretty addition to any dessert table! It's perfect for the holidays or to keep in the freezer "just because"!

    This Black Forest Ice Cream Pie is a quick and easy no bake dessert recipe. Made with an Oreo Cookie crust, chocolate ice cream, maraschino cherries and whipped topping this pie is a pretty addition to any dessert table! It's perfect for the holidays or to keep in the freezer "just because"!

    This post contains Affiliate Links. Please see the disclaimer here.

    Man has this week been a bummer! I was out of commission Monday night and Tuesday. There's been a little stomach thing going around here lately. I can't 100% accurately pinpoint it's origin but I have my suspicions. Funny story actually.

    This Black Forest Ice Cream Pie is a quick and easy no bake dessert recipe. Made with an Oreo Cookie crust, chocolate ice cream, maraschino cherries and whipped topping this pie is a pretty addition to any dessert table! It's perfect for the holidays or to keep in the freezer "just because"!

    Well. Funny in retrospect. Because at the time it was pretty much the worst case scenario, if ever there was one. If you're squeamish and/or don't want to hear about gross things, I encourage you to skip down to the recipe, because although the (unrelated) story is gross, this Black Forest Ice Cream Pie is not to be missed! I just couldn't resist sharing this story because I have to imagine there are many parents out there who will read along and say "Yes! I've lived this life!"

    Last Friday, we joined my sister and took the girls to see Disney on Ice and being the rabid Disney fans that we are, everyone was pretty excited. Without going into too much detail, lets just say that just before the show started, T had the largest, projectile spit up that I have ever seen in my entire life. Seriously, I've never seen anything like this in my entire life- I was covered along with my seat and the floor.

    This Black Forest Ice Cream Pie is a quick and easy no bake dessert recipe. Made with an Oreo Cookie crust, chocolate ice cream, maraschino cherries and whipped topping this pie is a pretty addition to any dessert table! It's perfect for the holidays or to keep in the freezer "just because"!

    Then she got J at intermission and spit up a bit more in her seat on the way home. The big miracles of the night included the fact that J packed two extra outfits instead of the usual one. The other was that her car seat somehow remained clean during the last spit up incident.

    Suffice it to say, I spent the whole weekend in mass paranoia that I would get a stomach bug (even though T slept beautifully for the rest of the night and has been totally fine and healthy every day since).

    This Black Forest Ice Cream Pie is a quick and easy no bake dessert recipe. Made with an Oreo Cookie crust, chocolate ice cream, maraschino cherries and whipped topping this pie is a pretty addition to any dessert table! It's perfect for the holidays or to keep in the freezer "just because"!

    I felt decent all weekend, outside of my usual high anxiety, but it all went down hill by midday Monday. It wasn't as horrible as it could have been (I got out of this thing without puking so that's a plus!) but needless to say I was out of commission with a churning and uncomfortable stomach Monday night and all of Tuesday 🙁 But I'm back and feeling much better!

    So now that I've completely destroyed your appetite, lets talk about this recipe, shall we (hows that for a transition?)? This has been bouncing around my head since before Christmas but life happened and I couldn't get my act together to share it until now!

    This Black Forest Ice Cream Pie is a quick and easy no bake dessert recipe. Made with an Oreo Cookie crust, chocolate ice cream, maraschino cherries and whipped topping this pie is a pretty addition to any dessert table! It's perfect for the holidays or to keep in the freezer "just because"!

    I stand by my strong belief that one should always keep an ice cream pie in the freezer. Not even for unexpected guests (because it certainly wouldn't last that long in my freezer!). More because gosh-darn-it you deserve it!

    You may remember I made this killer Peppermint Ice Cream Pie last year. And being a lover of all things chocolate and cherry, I had to take a stab at combining an ice cream pie with a Black Forest Cake.

    This Black Forest Ice Cream Pie is a quick and easy no bake dessert recipe. Made with an Oreo Cookie crust, chocolate ice cream, maraschino cherries and whipped topping this pie is a pretty addition to any dessert table! It's perfect for the holidays or to keep in the freezer "just because"!

    This is such a quick dessert to throw together and easy as pie (see what I did there?!)! So easy, in fact, that my A helped me throw it together in a matter of 10 minutes. After getting my photos, I brought it to Sunday dinner at my parents house the next night and those slices went fast.

    I encourage you to make two at once because it is highly unlikely that you will have any leftovers and after a hard day it's best to wind down over a big slice of this pie. This is also a great Valentine's Day treat to share with the one's you love (or for any holiday!)...

    Other delicious chocolaty dessert options include:

    Peanut Butter Brownie Truffles

    German Cream Cheese Brownies

    PB&J Brownies

    Chocolate Cherry Oatmeal Cookie Bars

    Quick and Easy Chocolate Pudding Cake

    This Black Forest Ice Cream Pie is a quick and easy no bake dessert recipe. Made with an Oreo Cookie crust, chocolate ice cream, maraschino cherries and whipped topping this pie is a pretty addition to any dessert table! It's perfect for the holidays or to keep in the freezer "just because"!

    Black Forest Ice Cream Pie

    Jessy Freimann
    This Black Forest Ice Cream Pie is a quick and easy no bake dessert recipe. Made with an Oreo Cookie crust, chocolate ice cream, maraschino cherries and whipped topping this pie is a pretty addition to any dessert table! It's perfect for the holidays or to keep in the freezer "just because"!
    No ratings yet
    Print Recipe Pin Recipe
    Prep Time 1 hour hr 20 minutes mins
    Total Time 1 hour hr 20 minutes mins
    Course Dessert
    Cuisine Christmas, Easy, Holiday, Sweet, Valentine's Day
    Servings 8 servings
    Calories 658 kcal

    Equipment

    • 1 Pie pan
    • 1 Measuring cups and spoons
    • 1 mini prep processor
    • 1 Spatula

    Ingredients
      

    • 1 Oreo cookie crust I bought mine pre-made in the baking aisle
    • 4 cups Chocolate ice cream about half of a regular size box
    • 16 ounces maraschino cherries pull aside the 9 prettiest cherries and chop the rest
    • 1 ½ cups Whipped topping about ⅓ of a container
    • Chocolate shavings for garnish mini chocolate chips will also work

    Instructions
     

    • Pull your container of ice cream out of the freezer and let it sit out for 7-10 minutes to soften it.
    • Carefully spread your ice cream inside of the pie crust leaving about ¼ of an inch of space above it. Use a spatula to smooth the top of it (I use my offset spatula).
    • Evenly distribute your chopped cherries on top of the ice cream.
    • Next, carefully spread a layer of whipped topping over the cherries to cover the top of the pie.
    • Decorate by placing 8 of the whole cherries around the perimeter of the pie, evenly spaced and the other cherry in the middle and sprinkle with shaved chocolate.
    • Place your pie back in the freezer for at least an hour. After the hour, cover it and keep in the freezer until serving.

    Notes

    Leftovers last up to a week in the freezer.

    Nutrition

    Serving: 1servingCalories: 658kcalCarbohydrates: 123gProtein: 8gFat: 16gSaturated Fat: 8gPolyunsaturated Fat: 0.5gMonounsaturated Fat: 6gTrans Fat: 0.01gCholesterol: 2mgSodium: 539mgPotassium: 458mgFiber: 6gSugar: 78gVitamin A: 39IUVitamin C: 0.3mgCalcium: 115mgIron: 2mg
    Tried this recipe?Let us know how it was!

    Helpful tools:


    You can find a full index of my recipes here.

    Don't forget to follow The Life Jolie on Pinterest for more recipe inspiration!

    This Black Forest Ice Cream Pie is a quick and easy no bake dessert recipe. Made with an Oreo Cookie crust, chocolate ice cream, maraschino cherries and whipped topping this pie is a pretty addition to any dessert table! It's perfect for the holidays or to keep in the freezer "just because"!

    Peanut Butter Brownie Truffles or The Great Mouse Debacle of 2017

    Jan 20, 2017 · 14 Comments

    These Peanut Butter Brownie Truffles are an easy chocolate dessert recipe and an excellent gift to give this for Valentine's Day. This simple recipe is made with rich, fudgy brownies and a peanut buttery surprise in the middle.

    These Peanut Butter Brownie Truffles are an easy chocolate dessert recipe and an excellent gift to give this for Valentine's Day. This simple recipe is made with rich, fudgy brownies and a peanut buttery surprise in the middle.

    These Peanut Butter Brownie Truffles are an easy chocolate dessert recipe and an excellent gift to give this for Valentine's Day. This simple recipe is made with rich, fudgy brownies and a peanut buttery surprise in the middle.

    This post contains Affiliate Links. Please see the disclaimer here.

    My friends, we have a bit of a situation on our hands. Around this time least year, I took some Meyer Lemon Seeds and soaked them for a few days. I placed them onto a wet piece of paper towel and put it into a zip lock bag like we did in science class when I was a kid.

    Eventually they sprouted some roots and I popped those puppies into a cute planter that I had and the prettiest little green leaves eventually began growing. By some miracle, I managed not to kill them. I'm going to assume this is due to the fact that I left the planter near the sink so I would remember to water it. And there it stayed and somehow seemed to thrive.

    Shortly after 2017 started, our cleaning lady came one day and worked her magic on our toy-strewn house. When I arrived home from work that day, I got to work preparing dinner while I waited for J and the girls to arrive home and I noticed there was a small hole in the dirt in that planter with some of the dirt scattered around the planter as well.

    These Peanut Butter Brownie Truffles are an easy chocolate dessert recipe and an excellent gift to give this for Valentine's Day. This simple recipe is made with rich, fudgy brownies and a peanut buttery surprise in the middle.

    I thought this was odd because our cleaning lady isn't one to leave a mess behind (duh) but I figured maybe it was a fluke and I somehow bumped it causing some dirt to come out. I cleaned it up and moved on with my life.

    A couple days later it was a Friday morning and J said that he noticed more dirt around the planter and another little hole. So he brought it outside and dumped it, buthe didn't find any critters. Interestingly, the bowls of food that we keep on the counter were untouched (tomatoes, onions, grapefruits, potatoes etc.).

    He ended up picked up some mouse traps and placed one out onto our counter that night. The next morning J had gone down ahead of us to check the trap. When the girls and I got downstairs, he informed me that he had caught a mouse.

    These Peanut Butter Brownie Truffles are an easy chocolate dessert recipe and an excellent gift to give this for Valentine's Day. This simple recipe is made with rich, fudgy brownies and a peanut buttery surprise in the middle.

    He then tried to tell me that we were probably good; that it was probably just one little field mouse who was looking for warmth in our cold Rochester weather. And I laughed and I laughed and I laughed and I promptly told him that I've seen Ratatouille, and I know how this sh*t works. There's never just one mouse.

    A few minutes later I opened my silverware drawer to grab utensils for all of us to eat our breakfast and sure enough, there were a ton of mouse droppings that had not been there the night before and a half eaten Taco Bell Fire sauce packet (we all have that one drawer, amiright?!). Needless to say, we all ate with plastic cutlery that morning and I'd be lying if I said we've returned the silverware to that drawer- it now has a cramped but happy home in the corner of our kitchen table.

    For a little while the evidence indicated that our fuzzy little rodent friend has only hung out on that side of the kitchen, which is where the sink connects to the basement (thus far my pantry remains unscathed, as it is on the other side of the room). On a recent visit, our cleaning lady found a few droppings on the left side of the built-in shelves in our living room but I haven't seen anything there since then.

    These Peanut Butter Brownie Truffles are an easy chocolate dessert recipe and an excellent gift to give this for Valentine's Day. This simple recipe is made with rich, fudgy brownies and a peanut buttery surprise in the middle.

    All that to say, this past weekend I put together some seriously delicious Peanut Butter Brownie Truffles. I made them on a Saturday while T napped and J and A were out picking up groceries and I added a few finishing touches later that evening before J and I headed out to a work event.

    Without thinking twice about it, I placed the pan of truffles out into the garage to chill for the night. You see, one of the benefits of living in a place where it's crazy cold for at least 6 months out of the year, is that you get to use outdoor rooms as a refrigerator. It's very convenient and I'm happy to know I can always find leftover Christmas Cookies and cold bottles of water on my parent's porch whenever I'm visiting them.

    So you can imagine my surprise when I went to begin photographing my gorgeous truffles the next morning, only to find that they had become a meal to some hungry mice. I'm not sure why I didn't remember the fact that those little guys were already partying in my kitchen after dark. I had even stored my M&M's Brownie Truffles outside in the same spot a month ago with no problems.

    These Peanut Butter Brownie Truffles are an easy chocolate dessert recipe and an excellent gift to give this for Valentine's Day. This simple recipe is made with rich, fudgy brownies and a peanut buttery surprise in the middle.

    Luckily, the mice stuck to the Truffles on the outer perimeter of the pan, so I was still able to get my photos for this post. The bad news is that for obvious reasons, I had to throw out every last truffle when I was done (and you can thank J for taking one for the team so I could get a bite shot- don't worry, it was an untouched truffle in the middle of the pan and he promptly spit the bite into the trash!).

    So now that we're on the topic of Peanut Butter Brownie Truffles, I have to ask- is there a better way to let someone know you love them, then making them this delicious chocolate and peanut butter confection?! Don't worry, that was a rhetorical question, because we all know that barring any peanut allergies, chocolate and peanut butter is the best possible way to share your love.

    This recipe couldn't be easier and makes a great Valentine's Day gift for the ones you love most. They come complete with surprise peanut butter chips in the middle (like chocolate chips only peanut butter) and are super pretty as well. The best part is, these make around 60 truffles, so plenty for you to enjoy a few a ton for yourself as well!

    These Peanut Butter Brownie Truffles are an easy chocolate dessert recipe and an excellent gift to give this for Valentine's Day. This simple recipe is made with rich, fudgy brownies and a peanut buttery surprise in the middle.

    Other great chocolaty treats are:

    4 Ingredient Chocolate Mousse

    M&M's Brownie Truffles

    Quick and Easy Chocolate Pudding Cake

    These Peanut Butter Brownie Truffles are an easy chocolate dessert recipe and an excellent gift to give this for Valentine's Day. This simple recipe is made with rich, fudgy brownies and a peanut buttery surprise in the middle.

    Peanut Butter Brownie Truffles

    Jessy Freimann
    These Peanut Butter Brownie Truffles are an easy chocolate dessert recipe and an excellent gift to give this for Valentine's Day. This simple recipe is made with rich, fudgy brownies and a peanut buttery surprise in the middle.
    No ratings yet
    Print Recipe Pin Recipe
    Prep Time 2 hours hrs
    Cook Time 30 minutes mins
    Total Time 2 hours hrs 30 minutes mins
    Course Dessert
    Cuisine Chocolate, Christmas Holiday, Gifts, Valentine's Day
    Servings 50 pieces
    Calories 69 kcal

    Equipment

    • 1 mixing bowl
    • 1 Spatula
    • 1 Measuring cups and spoons
    • 1 Small sauce pan
    • 1 Small cookie scoop

    Ingredients
      

    • 1 Family Size Chocolate Fudge Brownie Mix for a 9" x 13" pan
    • 2 large eggs
    • ½ cup vegetable oil
    • ¼ cup water
    • ¼ cup peanut butter + extra for drizzling
    • 12 ounces dark chocolate chips
    • 1 Tablespoon coconut oil measured this in solid form (or you can use butter)
    • Peanut Butter Chips

    Instructions
     

    • Preheat your oven as per the brownie mix directions.
    • Mix the brownie mix, eggs, oil and water until well combined and bake according to the package directions.
    • Allow the brownies to cool completely.
    • Crumble the brownies into a large bowl.
    • In a smaller bowl, warm ¼ cup of peanut butter for 30 seconds and pour it into the bowl with the crumbled brownies.
    • Wash and dry your hands well and use them to mix the brownies and peanut butter until fully combined.
    • Roll the brownies into 1 inch balls with 2 of the peanut butter chips in the middle. I found that the best way to do this was to flatten your piece of brownie mixture in the palm of your hand, place the peanut butter chips into the middle of it and then build the sides of the brownie ball up and around them until they're completely enclosed. Then roll them into a smooth, circular shape and place them onto a wax paper lined pan.
    • Once they're all rolled, place the pan with the brownie balls into the freezer for 30 minutes to set.
    • Melt your chocolate one of two ways- either over low heat in a double boiler stirring frequently or in the microwave in increments of 20 seconds, 20 seconds, then 10 seconds, stirring in between until it's fully melted.
    • At this point, stir in your coconut oil.
    • Roll each brownie ball until it's fully covered in the melted chocolate and then place onto a pan lined with wax paper. Chill them for 30 minutes to set the chocolate and then melt some peanut butter in the microwave for 30 seconds - 1 minute and lightly drizzle the peanut butter over the tops of the truffles.
    • Chill them in the fridge to set the peanut butter for at least an hour (or overnight) and then transfer them to an air tight container until you're ready to serve.

    Notes

    These do not have to be stored in the refrigerator, I just like them cold!

    Nutrition

    Serving: 4piecesCalories: 69kcalCarbohydrates: 4gProtein: 1gFat: 5gSaturated Fat: 3gPolyunsaturated Fat: 1gMonounsaturated Fat: 1gTrans Fat: 0.02gCholesterol: 8mgSodium: 16mgPotassium: 53mgFiber: 0.3gSugar: 2gVitamin A: 11IUVitamin C: 0.03mgCalcium: 22mgIron: 0.1mg
    Tried this recipe?Let us know how it was!

    Helpful tools:


    You can find a full index of my recipes here.

    Don't forget to follow The Life Jolie on Pinterest for more recipe inspiration!

    These Peanut Butter Brownie Truffles are an easy chocolate dessert recipe and an excellent gift to give this for Valentine's Day. This simple recipe is made with rich, fudgy brownies and a peanut buttery surprise in the middle.
    • « Go to Previous Page
    • Page 1
    • Interim pages omitted …
    • Page 17
    • Page 18
    • Page 19
    • Page 20
    • Page 21
    • Go to Next Page »

    Primary Sidebar

    Jessy in a kitchen holding a white casserole pan and smiling.
    Hi, I'm Jessy!

    Welcome to The Life Jolie! I share simple, delicious recipes and ingredient prep tips to make your weeknight cooking a breeze!

    More about me →

    Easy Dinner Recipes

    • An overhead image of a Mexican Shrimp Quinoa Bowl.
      Shrimp Quinoa Bowls
    • A bowl of asian soup with meatballs with a spoon and noodles in it.
      Asian Soup with Cabbage and Meatballs
    • A close up of roasted red potatoes on a pan.
      Roasted Red Potatoes Recipe
    • A spoon lifting up a scoop of eggplant parm bake with melt cheese trailing behind it.
      Eggplant Parm Bake
    • A close up of a drum chicken wing in a pile of other wings.
      Oven Baked Chicken Wings
    • An overhead image of a bowl of minestrone soup.
      Traditional Minestrone Soup Recipe

    Popular Recipes

    • A glass bowl of melted chocolate with a spatula dripping some back into the bowl.
      How To Melt Chocolate Chips In The Microwave
    • Italian Stuffed Zucchini Boats are the healthy weeknight meal you'll want to make again and again. This is a seriously easy recipe that's full of delicious flavor without all the guilt!
      Italian Stuffed Zucchini Boats
    • A close up shot of the side of a shallow bowl of shrimp mac salad.
      Shrimp Macaroni Salad
    • A white pan pouring cheese sauce over a bowl of steamed broccoli.
      Cheese Sauce for Broccoli Recipe
    • An overhead image of a plate of chicken lettuce wraps with peanut sauce next to it and all the fixings surrounding it.
      Copycat Cheesecake Factory Thai Chicken Lettuce Wraps
    • A close up image of a piece of greek marinated chicken on a white plate with lemons on the plate and in the background.
      Greek Yogurt Chicken
    Jessy in a kitchen holding a white casserole pan and smiling.
    Hi, I'm Jessy!

    Welcome to The Life Jolie! I share simple, delicious recipes and ingredient prep tips to make your weeknight cooking a breeze!

    More about me →

    Easy Dinner Recipes

    • A close up of a bagel pizza with mini pepperonis on a pan.
      Bagel Pizzas Recipe
    • A bowl of chicken and orzo soup with a spoon in it.
      Chicken and Orzo Soup
    • A bowl of Swedish meatballs and noodles.
      Swedish Meatballs And Noodles
    • A close up image of a piece of coconut shrimp on top of others.
      Coconut Shrimp With Sauce
    • An overhead image of taco soup in a bowl.
      Crockpot Taco Chicken Soup
    • A spoon pulling up a scoop of skillet lasagna with melted cheese stretching behind it.
      No Bake Lasagna Skillet

    Popular Recipes

    • A glass bowl of melted chocolate with a spatula dripping some back into the bowl.
      How To Melt Chocolate Chips In The Microwave
    • Italian Stuffed Zucchini Boats are the healthy weeknight meal you'll want to make again and again. This is a seriously easy recipe that's full of delicious flavor without all the guilt!
      Italian Stuffed Zucchini Boats
    • A close up shot of the side of a shallow bowl of shrimp mac salad.
      Shrimp Macaroni Salad
    • A white pan pouring cheese sauce over a bowl of steamed broccoli.
      Cheese Sauce for Broccoli Recipe
    • An overhead image of a plate of chicken lettuce wraps with peanut sauce next to it and all the fixings surrounding it.
      Copycat Cheesecake Factory Thai Chicken Lettuce Wraps
    • A close up image of a piece of greek marinated chicken on a white plate with lemons on the plate and in the background.
      Greek Yogurt Chicken

    Footer

    ↑ back to top

    About

    • About Me
    • Privacy Policy + Disclaimer

    Newsletter

    • Sign Up! for emails and updates
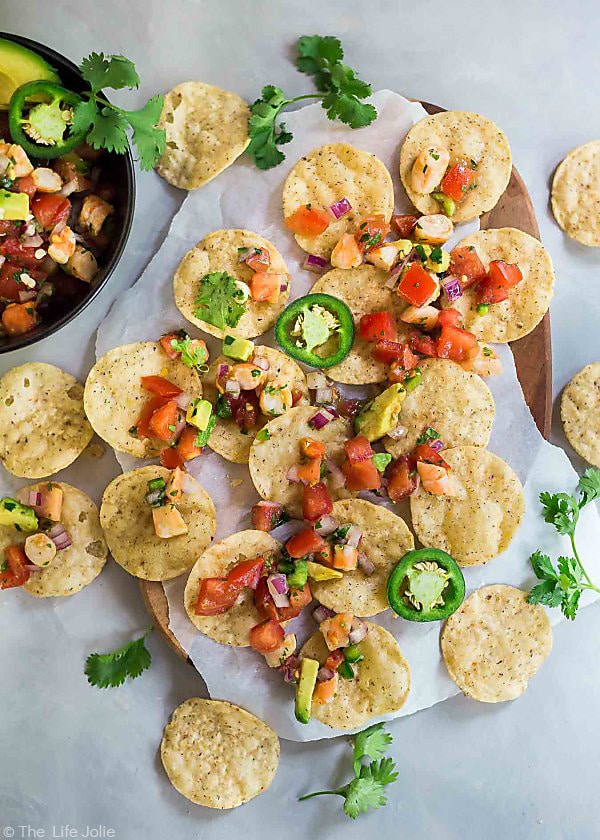
    Contact

    • Contact
    • Video Production

    As an Amazon Associate I earn from qualifying purchases.

    Copyright 2014-2021 - Jolie Ventures, LLC. All Rights Reserved. Privacy Policy.

    Rate This Recipe

    Your vote:


    A rating is required
    A name is required
    An email is required