
• Skip to primary navigation
  • Skip to main content
  • Skip to primary sidebar
The Life Jolie logo
  • Easy Dinner Recipes
  • Recipes
  • About
  • Contact
    • Work with me!
    • Video Production
  • Nav Social Menu

    • Email
    • Facebook
    • Instagram
    • Pinterest
    • Twitter
    • YouTube
menu icon
go to homepage
subscribe
search icon
Homepage link
  • Easy Dinner Recipes
  • Recipes
  • About
  • Contact
    • Work with me!
    • Video Production
    • Email
    • Facebook
    • Instagram
    • Pinterest
    • Twitter
    • YouTube
  • ×
    The Life Jolie » Page 17

    How to Chiffonade Basil | The Life Jolie Kitchen Basics

    How to Chiffonade Basil | The Life Jolie Kitchen Basics

    Apr 22, 2018 · Leave a Comment

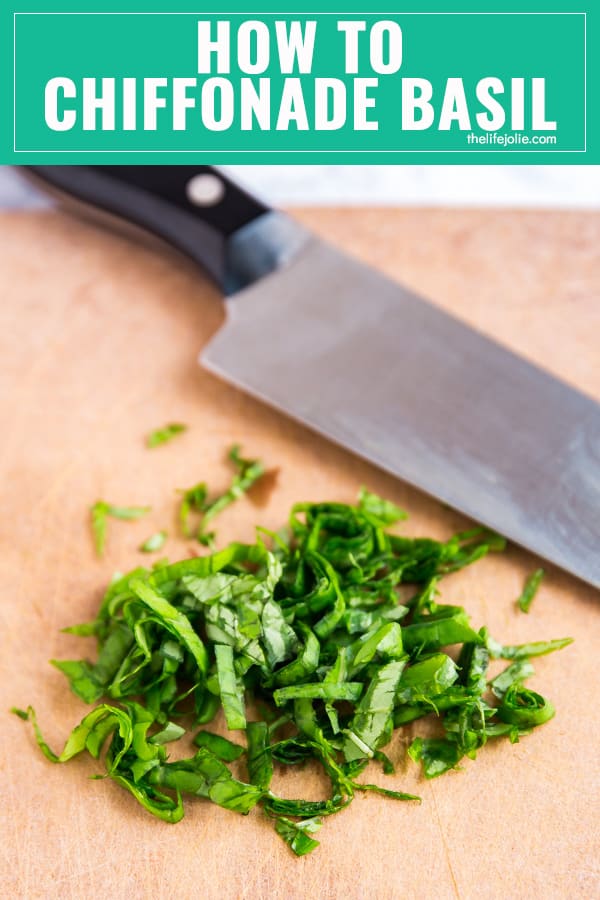
    Do you know how to Chiffonade Basil? It's super easy and can make any dish more beautiful and delicious!
    Do you know how to Chiffonade Basil? It's super easy and can make any dish more beautiful and delicious!

    Do you know how to Chiffonade Basil? It's super easy and can make any dish more beautiful and delicious! All you need is fresh basil leaves, a sharp chef's knife and a cutting board and you're ready to go!

    How to Chiffonade Basil

    This post contains Affiliate Links. Please see the disclaimer here.

    Summer is coming, you guys! I can feel it. Just kidding, it's still totally cold in Rochester, there was even and ice storm last week! But seriously, it's coming, I swear!

    One of the things I love about summer is the abundance of fresh basil. Sure, it's available in the winter around here, but it's so much better in the summer. Coincidentally, it's one of the only plants I'm (usually) able to keep alive. There's really nothing like going out to your garden (or in my case, your deck) and picking some gorgeous sweet basil leaves to add to your pasta or your salad that night.

    What does chiffonade mean?

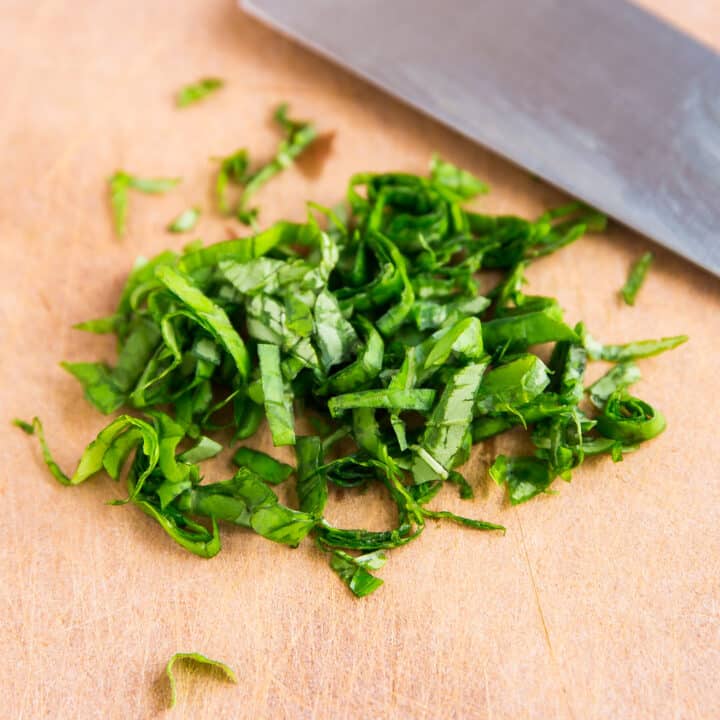
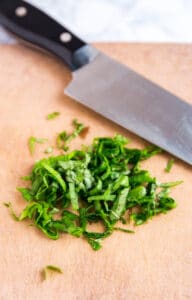
    Chiffonade is a way to prepare leafy herbs and greens by slicing the leaves into thin ribbons. It actually means little ribbons in french. This is seriously easy to do and allows to you cuts a good amount of ribbons quickly and uniformly in the most efficient way. It looks gorgeous too!

    What kind of tools do I need to do a basil chiffonade?

    1. Chef's knife- I think it's super important to have a nice, sharp knife. This goes for anything you do in the kitchen, but especially this. Not only are you more likely to cut yourself with a dull knife, but in this case, basil can bruise easily. A super sharp knife will get the perfect cut the first time, with less bruising.
    2. Cutting board- Do you know what I can't stand? Those terrible glass cutting boards. The sound alone is like nails on a chalk board for me. A high quality cutting board will last you a long, long time if you take care of it.
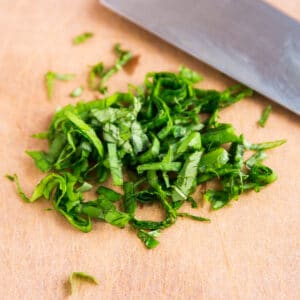
    Do you know how to Chiffonade Basil? It's super easy and can make any dish more beautiful and delicious!

    How to Chiffonade Basil?

    Jessy Freimann
    Do you know how to Chiffonade Basil? It's super easy and can make any dish more beautiful and delicious!
    No ratings yet
    Print Recipe Pin Recipe
    Prep Time 2 minutes mins
    Total Time 2 minutes mins
    Course Appetizer
    Cuisine French
    Servings 1 serving

    Ingredients
      

    • Basil leafs

    Instructions
     

    • Wash the basil leaves well and make sure they're fully dry (I try to do this in advance).
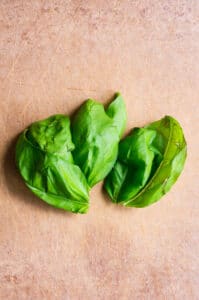
    • Stack 8 leaves on top of each other, and roll them tightly the long way.
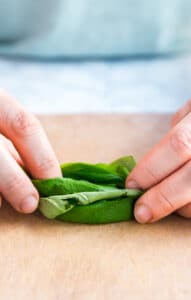
    • Use your left hand to hold the leaves in place (make sure to curl your fingers like a claw and tuck your thumb behind them).
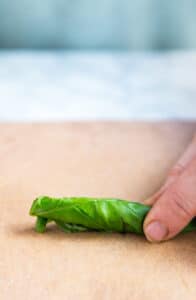
    • Hold the knife in your right hand so that your thumb and forefinger are gripping where the blade meets the handle and the rest of your fingers are gripping the knife and slice thin ribbons from the end of the roll (as though you were slicing a jelly roll).
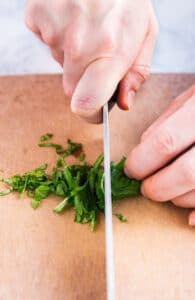
      Basil Chiffonade
    • Sprinkle the basil over your meal as a garnish, over a salad or into whatever you're cooking and enjoy!
    Tried this recipe?Let us know how it was!

    If you tried this method please comment and rate it 🙂 I love hearing your feedback and answering your questions!

    Looking for recipes that use a basil chiffonade? Here you go:

    • Supreme Pizza One Pot Pasta
    • Easy Pizza Sauce
    • Grilled Peaches and Burrata Salad
    • Caprese Quiche
    • Pasta Pomodoro
    • Strawberry Goat Cheese Tart
    • Marinara Sauce

    You can find a full index of my recipes here.

    Don’t forget to follow The Life Jolie on Pinterest for more recipe inspiration!

    Or if Pinterest isn’t your style, bookmark this post!

    Let’s keep the conversation going- join my Facebook group! 
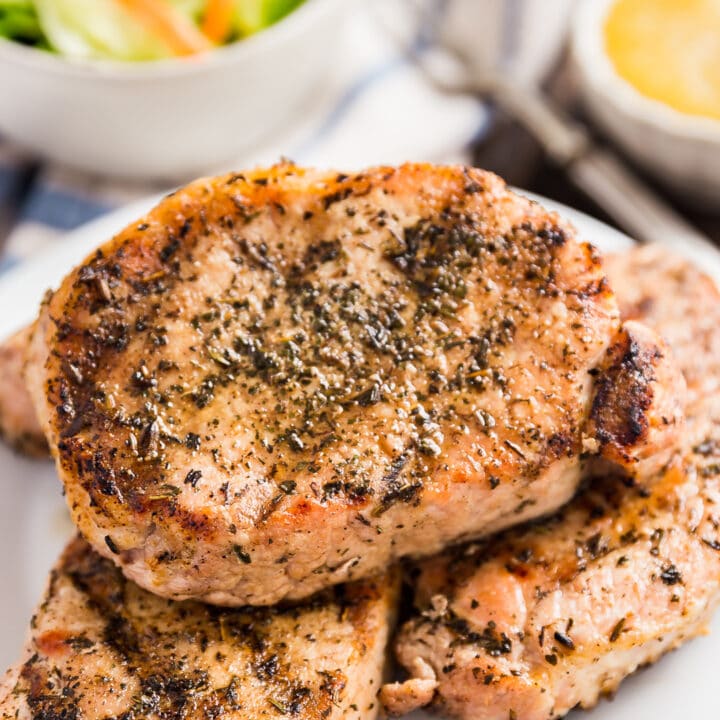
    Herb Grilled Pork Chops Recipe

    Apr 19, 2018 · 6 Comments

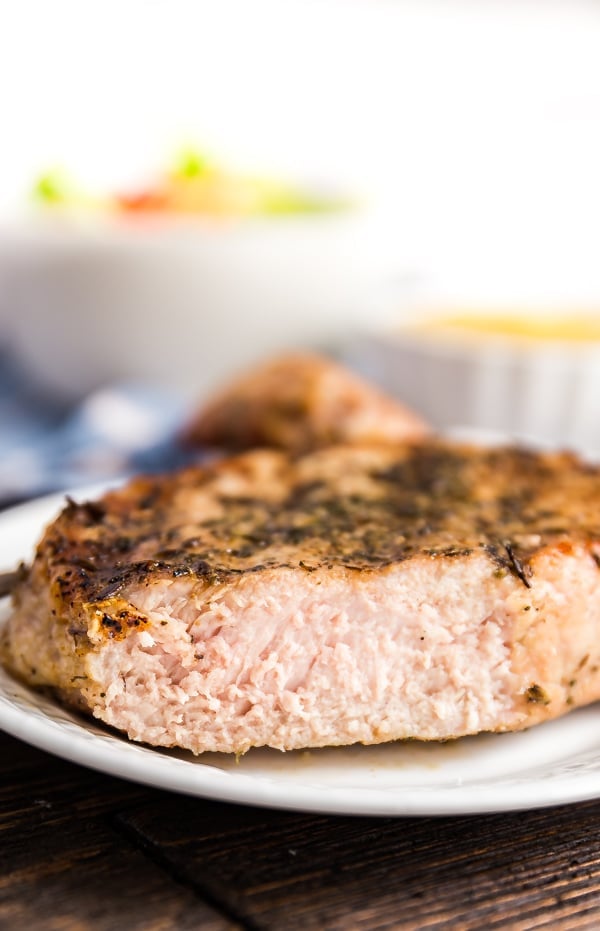
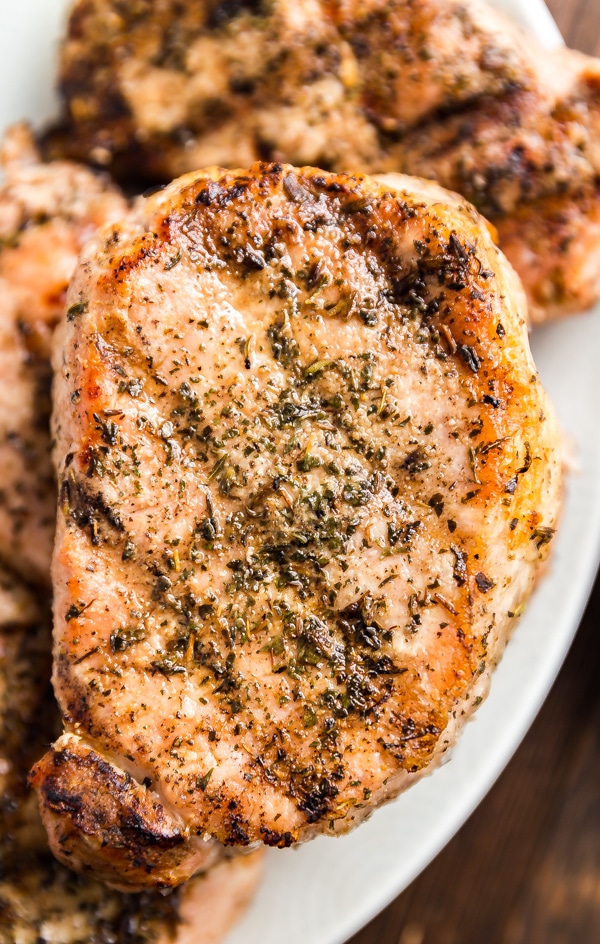
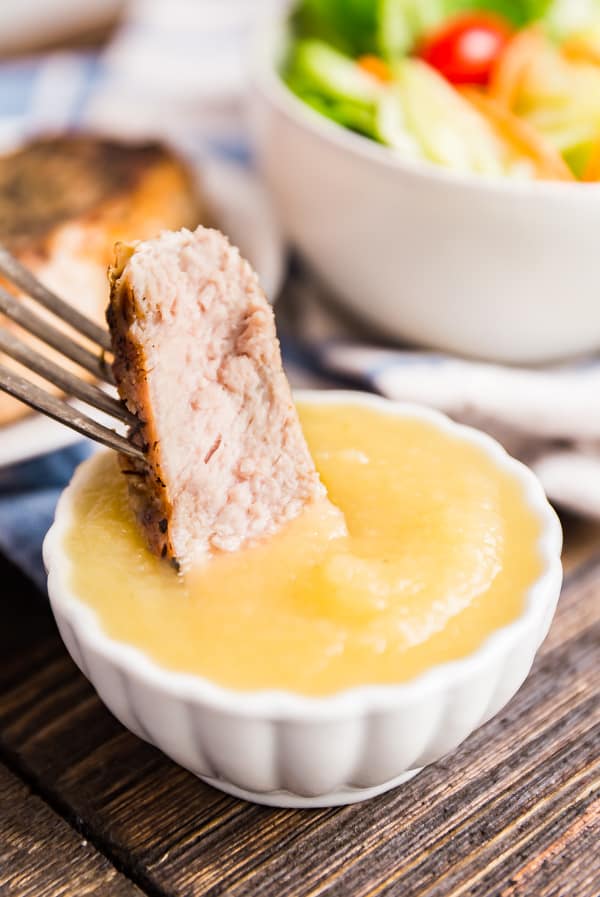
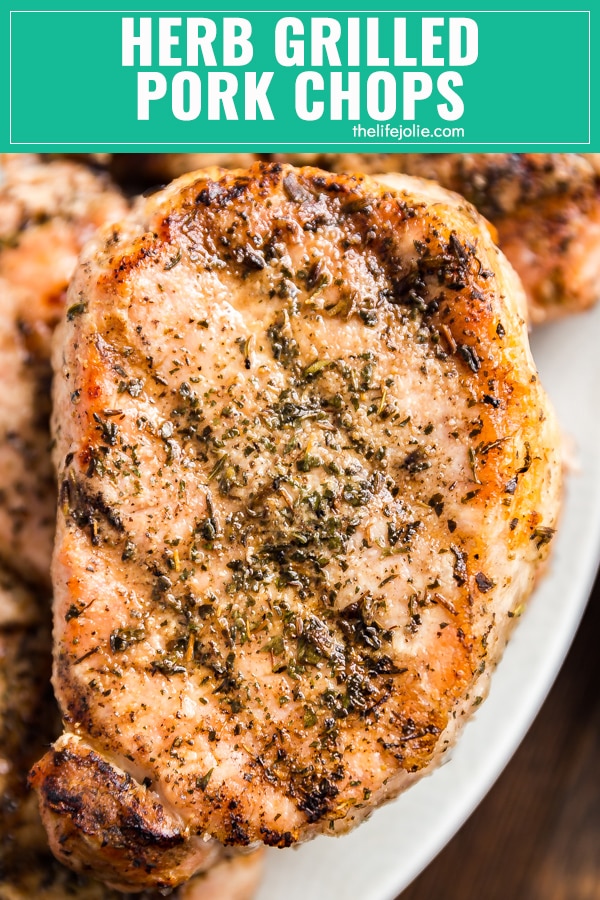
    Herb Grilled Pork Chops are my absolute favorite way to enjoy grilled pork chops. Super quick and easy to make and mouthwateringly delicious (especially when dipped in applesauce!).

    Herb Grilled Pork Chops are my absolute favorite way to enjoy grilled pork chops. Super quick and easy to make and mouthwateringly delicious (especially when dipped in applesauce!).

    Herb Grilled Pork Chops are my absolute favorite way to enjoy grilled pork chops. Super quick and easy to make and mouthwateringly delicious (especially when dipped in applesauce!).

    Herb Grilled Pork Chops

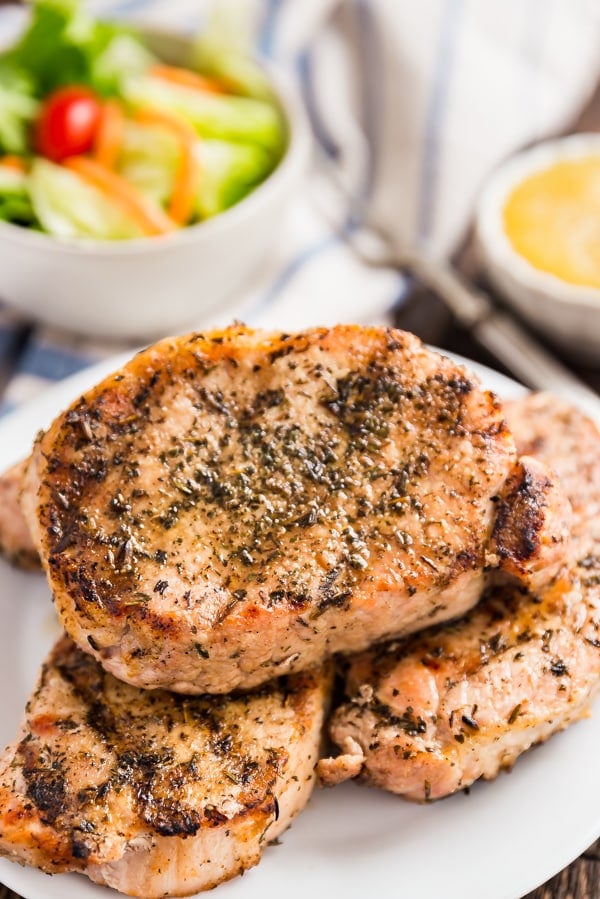
    Pork chops on the grill

    This post contains Affiliate Links. Please see the disclaimer here.

    When we lived in Vegas, we enjoyed dinner with my in-laws quite often. Partly because we lived with them for a little while until we could find an apartment and mostly because we enjoyed the quality time.

    One thing I love is when my father-in-law makes pork chops on the grill. He is definitely the one who taught Justin how to master grilling because everything he makes comes off tender, juicy and perfectly cooked.

    When J's mother seasons meat for grilling, this is one of her (and our) go-to ways to season it. A little salt and pepper. A little garlic powder. And some Herbes de Provence. And a whole lot of delicious!

    Grilled boneless pork chops

    Questions about grilled boneless pork chops:

    •  How long should I leave pork chops on the grill? This will vary based on the thickness of your chop. Ours were around an inch in thickness and we cooked them for around 5 minutes per side. My best advice is keep and eye on them and temp them.
    • What is the ideal temperature for pork chops to be cooked to? Pork chops can be cooked to 145 degrees. This will give you a tender, juicy chop that is safe to eat.
    • How hot should the grill be? We heat ours to around medium high or just a little bit under that.
    • Can I use bone-in pork chops? Yes! Grilled bone in pork chops are also delicious!
    • Can I use different herbs? Absolutely, use whatever herbs you prefer!

    Grilled bone in pork chops

    Helpful tools:

    1. Instant Read Thermometer
    2. Grill tongs
    Herb Grilled Pork Chops are my absolute favorite way to enjoy grilled pork chops. Super quick and easy to make and mouthwateringly delicious (especially when dipped in applesauce!).

    Herb Grilled Pork Chops

    Jessy Freimann
    These are super easy to throw together on a busy weeknight and they taste great!
    5 from 1 vote
    Print Recipe Pin Recipe
    Prep Time 5 minutes mins
    Cook Time 10 minutes mins
    Inactive time 30 minutes mins
    Total Time 15 minutes mins
    Course Main Course
    Cuisine American
    Servings 4 servings
    Calories 211 kcal

    Equipment

    • 1 Measuring cups and spoons
    • 1 mixing bowl

    Ingredients
      

    • Cooking spray
    • 4 pork chops, Boneless or bone-in - a little more than one inch thick
    • 1 teaspoon Kosher salt to taste
    • ¼ teaspoon Ground black pepper to taste
    • 1 teaspoon Garlic powder to taste
    • 1 teaspoon Herbes de Provence to taste

    Instructions
     

    • Remove from the refrigerator 15-20 minutes prior to grilling.
    • Spray the grill with cooking spray and preheat the grill to medium high heat.
    • Season the pork chops on both sides with salt, pepper, garlic powder and Herbes de Provence.
    • Place meat on the grill.
    • Cook for 5-6 minutes per side, turning once (this time will vary based on your grill and the thickness of the meat so keep an eye on it). Cook until the thickest part registers 140 degrees F.
    • Remove the meat to a clean plate and tent with foil. Rest for 10 minutes. Serve immediately.

    Notes

    Leftovers last up to 3 days in the refrigerator.

    Nutrition

    Serving: 1servingCalories: 211kcalCarbohydrates: 1gProtein: 29gFat: 9gSaturated Fat: 3gPolyunsaturated Fat: 1gMonounsaturated Fat: 4gTrans Fat: 0.1gCholesterol: 90mgSodium: 646mgPotassium: 513mgFiber: 0.2gSugar: 0.02gVitamin A: 16IUVitamin C: 0.1mgCalcium: 16mgIron: 1mg
    Tried this recipe?Let us know how it was!

    If you tried this recipe please comment and rate it 🙂 I love hearing your feedback and answering your questions!

    Looking for some other easy pork chop recipes?

    • Grilled Hawaiian Pork Chops
    • Brown Sugar Bourbon Pork Chops Recipe
    • Drunken Pork Chops
    • 3 Ingredient Slow Cooker Pork Chops

    You can find a full index of my recipes here.

    Don’t forget to follow The Life Jolie on Pinterest for more recipe inspiration!

    Or if Pinterest isn’t your style, bookmark this post!

    Let’s keep the conversation going- join my Facebook group! Herb Grilled Pork Chops are my absolute favorite way to enjoy grilled pork chops. Super quick and easy to make and mouthwateringly delicious (especially when dipped in applesauce!).
    Margarita Chicken Skewers Recipe

    Apr 5, 2018 · Leave a Comment

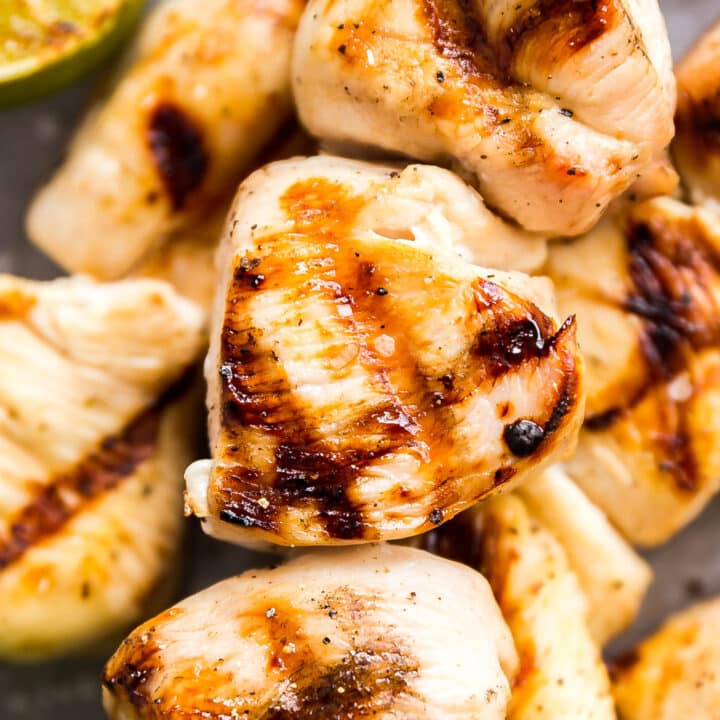
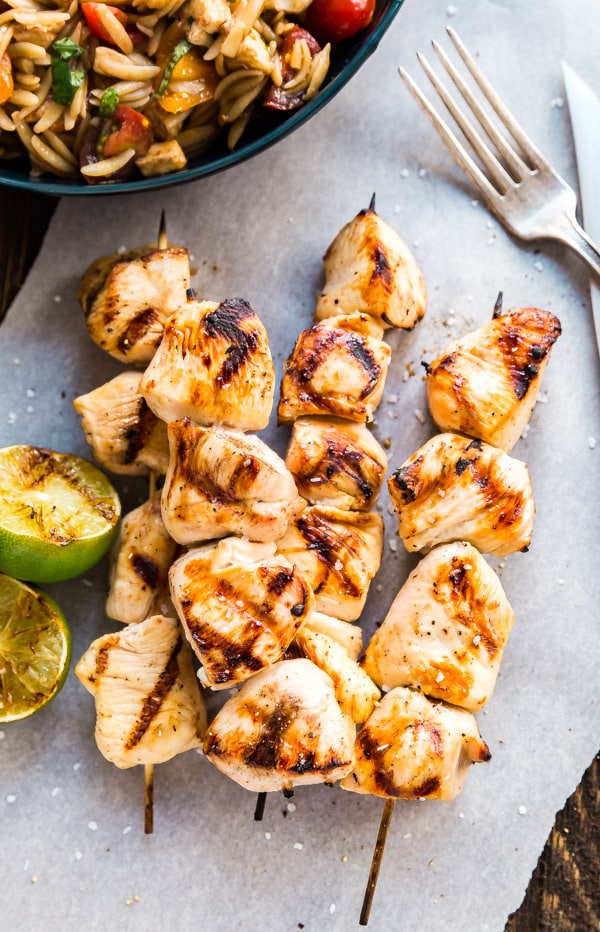
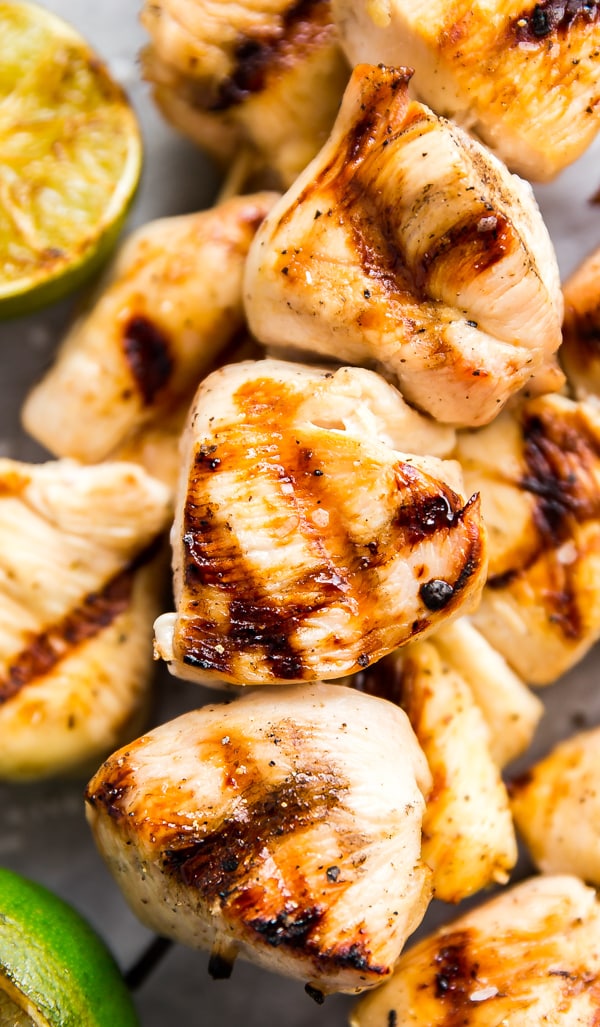
    These Margarita Chicken Skewers are a serious game changer! With a deliciously fresh citrus flavor, these are perfect to grill on a hot summer night! Made with lime juice, tequila, orange juice and olive oil, these are as easy as they are delicious!

    These Margarita Chicken Skewers are a serious game changer! With a deliciously fresh citrus flavor, these are perfect to grill on a hot summer night!

    These Margarita Chicken Skewers are a serious game changer! With a deliciously fresh citrus flavor, these are perfect to grill on a hot summer night! Made with lime juice, tequila, orange juice and olive oil, these are as easy as they are delicious!

    Margarita Chicken Skewers

    This post contains Affiliate Links. Please see the disclaimer here.

    This idea has been kicking around in my brain for way too long. I intended to develop this last summer, but life got crazy and all of the sudden it was the holidays! But here we are, and I cannot wait to share this with you guys!

    First of all, who loves a good margarita? **waves both hands enthusiastically in the air**  I don't even drink much anymore, but when it comes to liquor, tequila is my booze of choice. I know this isn't the case for a lot of people, but I think we can all agree that the tart and sweet flavors with that little bit of saltiness that margaritas bring to the table is a winning flavor combo. And even more so when you combine it with grilled chicken skewers (or really any chicken in general) as I found out!

    Margarita chicken

    This recipe has summer written allllllll over it! It's so bright and citrusy, it makes me happy, just thinking about it! Obviously, I used lime juice. And tequila (don't worry, the booze cooks off and it doesn't have a strong tequila flavor at all, promise!).

    I didn't want it to be too boozy, so I omitted the triple sec. I replaced it with some orange juice, so you still get a bit of the orange flavor that triple sec usually adds and also a tiny bit of sweetness that's normally there with simple syrup. And of course salt and pepper to balance things out.

    Initially, I was a little nervous that it would be too citrusy, but these concerns melted away the minute I taste it. This turned out to be the ultimate chicken kabob recipe! And it made the most juicy and tender chicken breast pieces as well! They'd be amazing over a salad, but I loved them on their own!

    Grilled chicken skewers

    How to make Margarita Chicken:

    • If you're using wooden skewers, soak them in water for at least an hour.
    • Whisk together lime juice, tequila, orange juice, olive oil, salt and pepper. Or you can be super lazy and throw it all in a plastic zipper bag (gallon size!) and shake it like a polaroid picture. It's up to you.
    • You can also marinate these in a bowl, but go with a non-reactive material (plastic, silicone, or glass- definitely NOT aluminum!)
    • Cut your chicken breast into 1 ½ - 2 inch chunks. The key is to have them all be the same size for even cooking. Toss those puppies into your bag of boozy goodness.
    • Let the chicken marinate for a couple hours. You can go longer, but try not to go over 12 hours (I prefer only a couple hours, though).
    • Skewer the chicken, spray the grill with cooking spray and preheat it.
    • Grill the chicken skewers and let them rest for 5-10 minutes before digging in!

    Chicken kabob marinade

    Helpful tools for making Margarita Chicken Shish Kabobs:

    1. Measuring spoons
    2. Measuring cups
    3. Mixing bowl
    4. Whisk
    5. Lemon reamer
    6. Wooden skewers
    7. Chef's knife
    8. Cutting board

    Chicken shish kabob

    These Margarita Chicken Skewers are a serious game changer! With a deliciously fresh citrus flavor, these are perfect to grill on a hot summer night! Made with lime juice, tequila, orange juice and olive oil, these are as easy as they are delicious!

    Margarita Chicken Skewers

    Jessy Freimann
    These Margarita Chicken Skewers are a serious game changer! With a deliciously fresh citrus flavor, these are perfect to grill on a hot summer night!
    No ratings yet
    Print Recipe Pin Recipe
    Prep Time 10 minutes mins
    Cook Time 15 minutes mins
    Inactive time 2 hours hrs
    Total Time 25 minutes mins
    Course Main Course
    Cuisine American
    Servings 4 servings

    Ingredients
      

    • 3-4 boneless skinless chicken breasts
    • ½ cup lime juice
    • ¼ cup good tequila
    • ¼ cup orange juice
    • ¼ cup olive oil
    • 1 teaspoon kosher salt
    • ¼ teaspoon black pepper
    • Cooking spray

    Instructions
     

    • Cut the chicken breasts into 1 ½ - 2 inch chunks. Try to make them all the same size. Place into a gallon size plastic zipper bag.
    • Whisk together lime juice, tequila, orange juice, olive oil, salt and pepper until well combined.
    • Pour into the bag with the chicken, seal the bag and shake it to make sure all the chicken is covered in the marinade. 
    • Let it marinate for 2-12 hours.
    • Place the chicken on the skewers and discard the leftover marinade.
    • Spray the grill with cooking spray and preheat it to medium high.
    • Place the chicken on the hot grill and cook uncovered for 4-5 minutes.
    • Turn the chicken skewers and cook uncovered for 4-5 minutes or until done. This could vary depending on the size of your chicken pieces.
    • Remove the chicken skewers to a clean plate and tent them with foil. Rest them for 5-10 minutes. Serve immediately.
    Tried this recipe?Let us know how it was!

    If you tried this recipe please comment and rate it 🙂 I love hearing your feedback and answering your questions!

    Looking for some other great grilling recipes?

    • Grilled Hawaiian Pork Chops
    • Brown Sugar Bourbon Pork Chops Recipe
    • Balsamic Grilled Asparagus
    • Grilled Peaches and Burrata Salad

    Don’t forget to follow The Life Jolie on Pinterest for more recipe inspiration!

    Or if Pinterest isn’t your style, bookmark this post!

    Let’s keep the conversation going- join my Facebook group! These Margarita Chicken Skewers are a serious game changer! With a deliciously fresh citrus flavor, these are perfect to grill on a hot summer night! Made with lime juice, tequila, orange juice and olive oil, these are as easy as they are delicious!
    Classic Quiche Lorraine Recipe

    Apr 3, 2018 · 2 Comments

    Is there anything better than a Classic Quiche Lorraine recipe? Simple ingredients, minimal steps and a delicious quiche to elevate any brunch! Made with eggs, cream, bacon, and gruyere cheese these are seriously easy and delicious!

    Is there anything better than Classic Quiche Lorraine? Simple ingredients, minimal steps and a delicious quiche to elevate any brunch!

    Is there anything better than a Classic Quiche Lorraine recipe? Simple ingredients, minimal steps and a delicious quiche to elevate any brunch! Made with eggs, cream, bacon, and gruyere cheese these are seriously easy and delicious!

    Classic Quiche Lorraine

    This post contains Affiliate Links. Please see the disclaimer here.

    What is quiche lorraine

    Ugh, I seriously love quiche. If I make a quiche, I will eat it all week long. For some unknown reason, I'm the only person in my house that eats them and I'm not even a little bit sad about it. More quiche for me!

    So I decided to bring it back to an old classic. Is Quiche Lorraine the original quiche recipe? I don't know for sure. All I know is it's seriously delicious in it's simplicity.

    Now you could always kick it up a notch. There are a whole slew of add-ons that can easily elevate any basic quiche recipe. But I think it's the aforementioned simplicity that makes this easy quiche so fantastic!

    Easy quiche recipe

    Tips for making Breakfast Quiche Lorraine:

    • Use a pre-made pie crust. Work smarter, not harder.
    • Make sure you don't sub out the heavy cream. This is important. I've tried to make quiches with whole milk before and it's just not the same. You need that higher fat content to get that perfectly custardy filling.
    • Hold out a small portion of the cheese to sprinkle over the top after you've added the egg mixture. It will help in getting that gorgeously golden top.
    • Keep an eye on the crust and if necessary, add a pie crust shield to make sure it doesn't overcook.
    • You'll know the quiche is cooked through when it's no longer jiggly in the middle.

    How to make a quiche

    Helpful tools:

    1. Measuring spoons
    2. Measuring cups
    3. Pie Plate
    4. Mixing bowl
    5. Whisk
    6. Grater
    7. Fry pan
    8. Tongs

    Quiche recipe

    Is there anything better than a Classic Quiche Lorraine recipe? Simple ingredients, minimal steps and a delicious quiche to elevate any brunch! Made with eggs, cream, bacon, and gruyere cheese these are seriously easy and delicious!

    Classic Quiche Lorraine Recipe

    Jessy Freimann
    Is there anything better than Classic Quiche Lorraine? Simple ingredients, minimal steps and a delicious quiche to elevate any brunch!
    No ratings yet
    Print Recipe Pin Recipe
    Prep Time 5 minutes mins
    Cook Time 50 minutes mins
    Inactive time 50 minutes mins
    Total Time 55 minutes mins
    Course Breakfast, Main Course
    Cuisine French
    Servings 6 slices

    Ingredients
      

    • 1 premade pie crust
    • 3 large eggs
    • 1 cup heavy cream
    • 1 pinch kosher salt
    • 1 pinch ground black pepper
    • 1 pinch nutmeg
    • 1 pinch onion powder
    • 1 ½ cups gruyere cheese, shredded and divided
    • 7 slices bacon, cooked until crisp, crumbled and divided(about ½ cup total)
    • Chopped chives or parsley for garnish (optional)

    Instructions
     

    • Preheat the oven to 350 degrees.
    • Place pie crust in the pie plate and crimp. Set aside.
    • Place all but 1 Tablespoon of the bacon and all but 1 Tablespoon of the cheese into the pie crust and gently mix with your fingers.
    • Whisk together eggs, cream, salt pepper, nutmeg and onion powder until well combined.
    • Pour into pie crust and sprinkle remaining cheese and bacon on top.
    • Bake for 45-50 minute or until the middle is set keeping an eye on the crust to make sure it isn't overcooking (add a shield if necessary).
    • Cool and serve or refrigerate until you're ready to serve. Garnish with chives or parsley.

    Notes

    This lasts for 4-5 days in the refrigerator.
    Tried this recipe?Let us know how it was!

    If you tried this recipe please comment and rate it 🙂 I love hearing your feedback and answering your questions!

    Looking for some other tasty brunch recipes?

    • Spinach and Feta Breakfast Puff Pastry Breakfast Pizza
    • Baked French Toast with Mixed Berries
    • Caprese Quiche
    • Zucchini Pancakes

    You can find a full index of my recipes here.

    Don’t forget to follow The Life Jolie on Pinterest for more recipe inspiration!

    Or if Pinterest isn’t your style, bookmark this post!

    Let’s keep the conversation going- join my Facebook group! Is there anything better than a Classic Quiche Lorraine recipe? Simple ingredients, minimal steps and a delicious quiche to elevate any brunch! Made with eggs, cream, bacon, and gruyere cheese these are seriously easy and delicious!
    Common Cuts of Beef and How to Cook Them | The Life Jolie Cooking Basics

    Mar 27, 2018 · Leave a Comment

    Sometimes you've to got to stray from the usual ribeye and filet mignon options- so I'm going to share a few common cuts of beef that you'll find at your grocery store and everything you need to know about cooking them. Let me demystify the meat case for you!

    Sometimes you've to got to stray from the usual ribeye and filet mignon options- so I'm going to share a few common cuts of beef that you'll find at your grocery store and everything you need to know about cooking them. Let me demystify the meat case for you!

    Sometimes you've to got to stray from the usual ribeye and filet mignon options- so I'm going to share a few common cuts of beef that you'll find at your grocery store and everything you need to know about cooking them. Let me demystify the meat case for you!

    This is a sponsored conversation on behalf of the New York Beef Council. As always, all opinions are my own. Thank you for supporting the organizations that help support this blog. This post contains Affiliate Links. Please see the disclaimer here.

    Steak night in the Freimann House

    Have you ever grabbed a steak from the store and cooked it to perfection, only to taste it and find that it's just not as good as you had expected? This very conversation has occurred in our home from time-to-time:

    Me: (glances up at husband to see his reaction after his first bite)

    J: (glances back with the same bummed out look on his face) It's not really as good as I had hoped.

    Me: I know, right? I don't understand what happened. These are the perfect medium-rare.

    J: No idea, they're definitely seasoned and cooked to temp...

    I know the meat was fresh. And I watched him season it so I know he did that right. It was cooked exactly to the temperature that we like and was the exact right color inside. But what I didn't realize at the time, is that I had purchase a cut of meat that would have benefitted tremendously from being marinated in advance instead of just throwing it on the grill.

    Demystifying the beef cuts in the meat case

    If you follow my instagram stories, you'll know that I recently had the opportunity to spend an afternoon touring the beef case at a local grocery store with my friend Jean from the New York Beef Council. This was such an eye-opening and informative experience and I am so excited to share some of what I learned with you guys.

    The New York Beef Council is an organization that has made it their mission to "enhance the lives of consumers by connecting them with beef." They are a key resource for all-things-beef here in New York State and an all-around great place to get worlds of information about beef in general. You can also find a ton great info at Beef- It's What's For Dinner (yes, just like the commercials we all knew and loved!).

    Shopping for beef can seem a bit daunting at first. There are so many options and all these words on the labels. But in addition to these two amazing resources I mentioned above, I'm here to try and clear up some of that confusion.

    Beef cuts

    What's in a meat label?

    First, I want to talk to you about some common terms that you'll come across when you're looking at labels. Those things can be so darn confusing. Here are some potentially confusing terms in normal english:

    • Grain-finished- These cows spent the majority of their life eating grass or forage before spending 4-6 months at a feedyard feasting on grains, local feed ingredients (things like potato hulls, sugar beets etc.) and hay or forage.
    • Grass-finished or grass-fed- Spent their entire lives manging grass or forage (also possibly hay or silage at a feedyard).
    • Certified organic- These cows have never been given antibiotics or growth-promoting hormones. The USDA's Agriculture Marketing Service also certifies that their feed is 100% organically grown (whether they're grain or grass finished).
    • Naturally raised (or "never-ever" yes, that's seriously a term!)- These cows are never given antibiotics or growth-promoting hormones.

    In general, all beef is nutritious and safe to eat when cooked to proper temperatures. It's a matter of choice in the types and brands preferred by you.

    Common Cuts of Beef and How to Cook Them

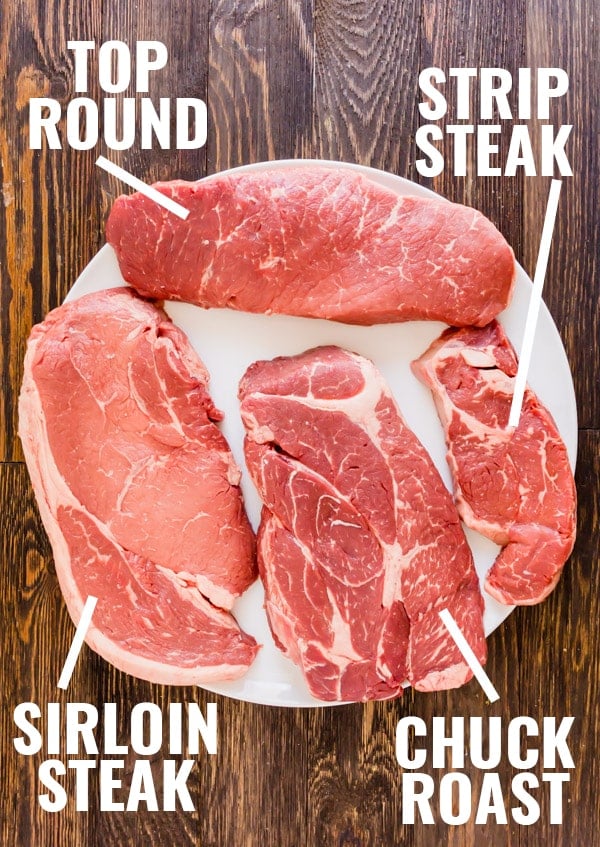
    If I went over every single cut that you could come across in your meat case, this would literally be the longest post ever. So instead, I'm going to go over some of the common cuts that you'll come across in your meat case and everything you need to know about them to prepare them to perfection! These are not your usual suspects (Filet Mignon, Ribeye, Ground beef etc.) because we all pretty much know what's up with those. Lets diversify a bit:

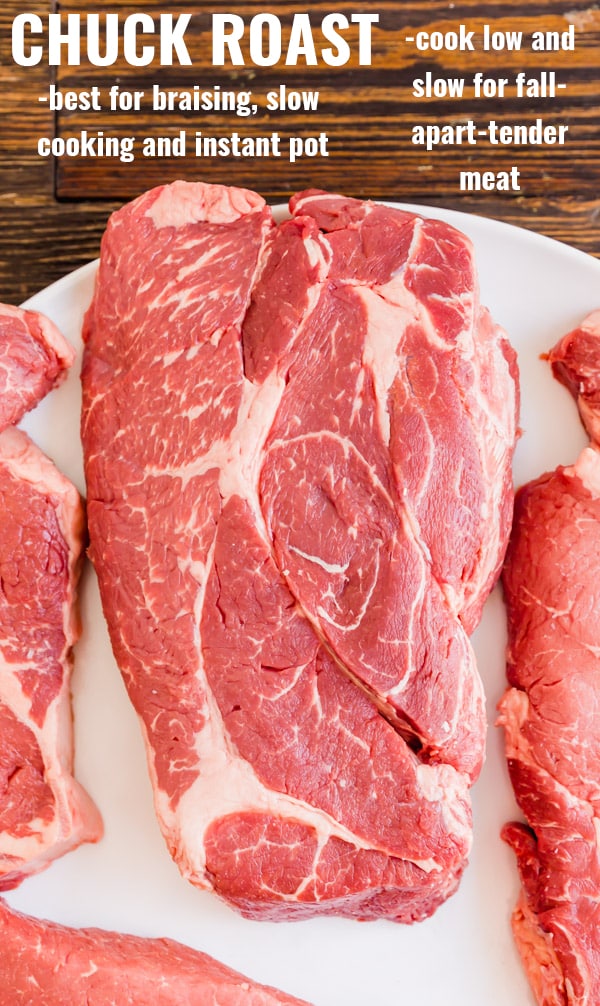
    • Chuck Roast:Other names: Pot Roast, Chuck Eye Roast, Chuck Roll Roast.
      • Best for: Slow cooker, instant pot, braising.
      • What part of the cow: Chuck (the shoulder).
      • How to prepare: Season well and sear all sides over high heat. Place in the cooking vessel with your veggies and cooking liquid and cook slowly at a low heat.
      • The result: A fall-apart tender pot roast that will warm your bones on the coldest of nights! Bonus points if you thicken the juices to make a gravy.
      • Other things to know: This is a tougher cut of meat and that's the reason you want to go low and slow with it ; to create that fall-apart-tenderness that we all know and love.Chuck Roast
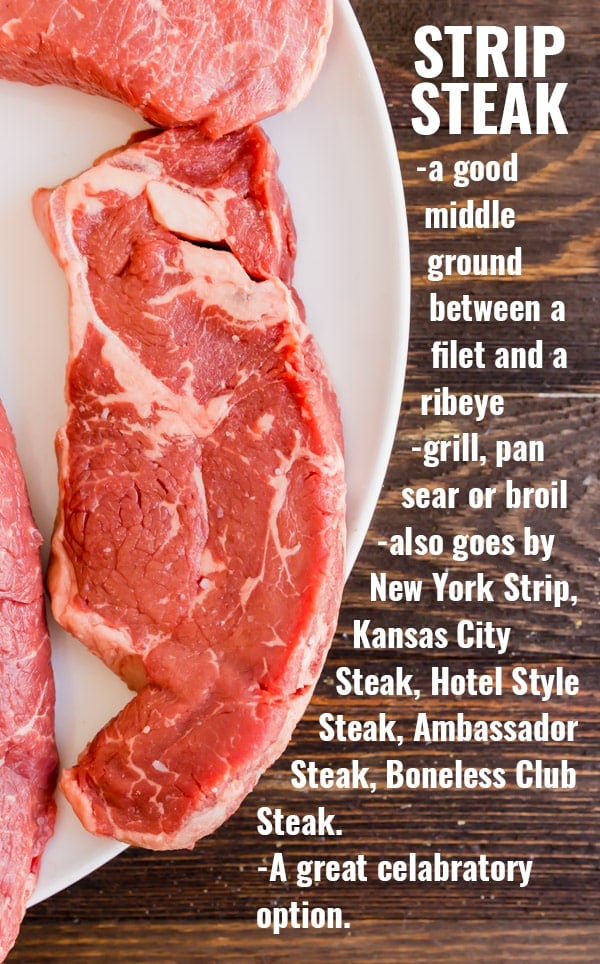
    • Strip Steak:
      • Other names: New York Strip, Kansas City Steak, Hotel Style Steak, Ambassador Steak, Boneless Club Steak
      • Best for: Grilling, pan searing.
      • What part of the cow: Loin (in the cow's mid-section, above the butt).
      • How to prepare: Season well and sear it on the grill or in a pan to your desired temperature.
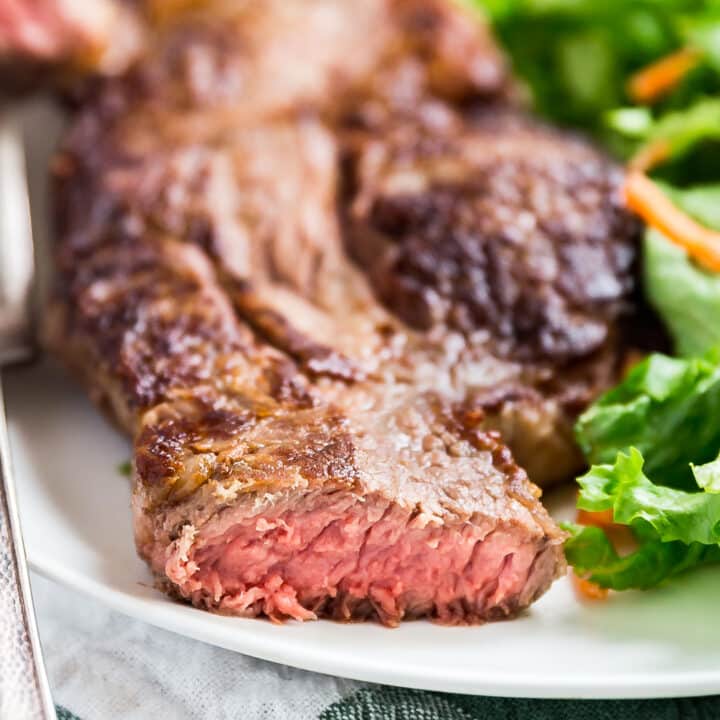
      • The result: A nice, juicy steak that's sort of in between the filet (in tenderness) and the ribeye (in flavor).
      • Other things to know: This is a great option if you're looking for a celebratory dinner without dropping all the money on a Filet or a Ribeye. Strip Steak
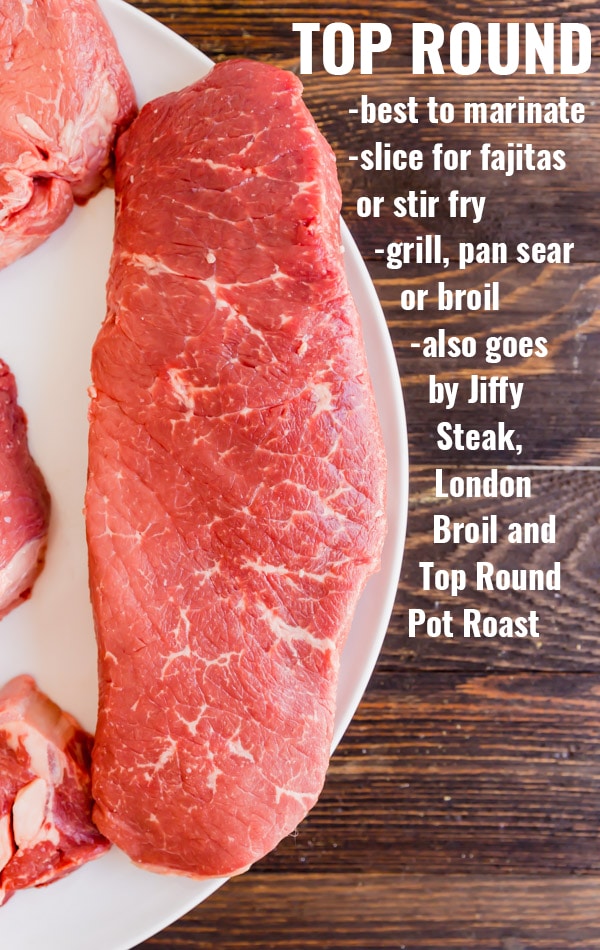
    • Top Round Steak:
      • Other names: London Broil, Jiffy Steak, Top Round Pot Roast
      • Best for: Grilling or pan searing and slicing.
      • What part of the cow: Round (the cow's backside)
      • How to prepare: This steak needs to be marinated to become nice and tender followed by grilling or pan searing and slicing.
      • The result: A flavorful steak that slices up nicely. Also great to slice for fajitas or a stir fry.
      • Other things to know: Anything over 1 ½ inches thick is considered a roast (in general, not just for this cut) and can be roasted until it reaches your desired internal temperature. Top Round
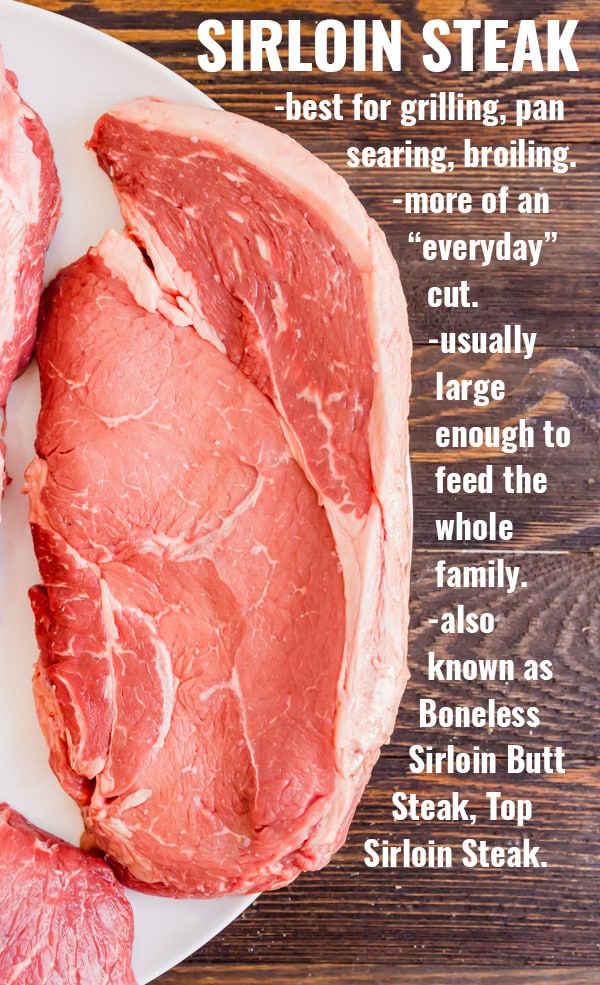
    • Sirloin Steak:
      • Other names: Boneless Sirloin Butt Steak, Top Sirloin Steak.
      • Best for: Grilling, pan searing, broiling.
      • What part of the cow: Loin (in the cow's mid-section, above the butt).
      • How to prepare: Season well and sear or grill to the desired temperature.
      • The result: A tasty weeknight meal to feed the whole family!
      • Other things to know: This is more of your "every day" steak- it's not as high end" as the Strip Steak but still a super tasty dinner and it's family-size! Sirloin Steak
    • Bonus cut, if available- Coulotte:
      • Other names: Sirloin Cap, Beef Loin.
      • Best for: Grilling, pan searing.
      • What part of the cow: Loin (in the cow's mid-section, above the butt).
      • How to prepare: Season well and sear or grill to the desired temperature.
      • The result: An even more tender version of the sirloin steak.
      • Other things to know: This may or may not be available at your local store. It is often removed which allows them to cut across the grain and maximize the tenderness.

    Secrets for making some killer steaks and roasts:

    • How much to buy: in general for a steak it's around 4 ounces per person and for a roast plan for around 6 ounces per person (or 8 if there's a bone)
    • Braising: Low and slow is the key here. The kinds of cuts you'll be braising (like the chuck roast mentioned above) come from parts of the cow that are considered work muscles- the muscles that allow them to move and go about their lives. Because those muscles get so much more use, they require a style of cooking that really breaks down all those fibers and brings about that fall-apart-tenderness that we all go crazy over. And that's where the low and slow comes in. So if you aren't using an instant pot or pressure cooker, plan on waiting. Also, for a pressure cooker or instant pot, try to stick with a natural release, which further benefits in tenderizing this cut of meat.
    • Grilling and searing: Allow the steak to come to room temperature before grilling or pan searing. This will allow it to cook a bit more evenly. We always grease our grill well before adding any meat to avoid sticking and add a generous amount of oil to the pan for searing, but a good rule to follow is if the meat doesn't easily release, it's not ready to turn. Also, make sure it's nice and hot before adding the meat.
    • Marinades: The optimal amount of time for a cut of beef to marinate is 12 to 24 hours. Anything longer than this can adversely affect the texture.
    • Turning the meat: This is an area of much debate, but I fall into the group that only turns their meat once.
    • Crossover cooking: You also need to factor in crossover cooking. Basically, when you remove the steak from your heat source, you don't want to cut into it right then and there. It needs a good 5-10 minutes to rest and I like to put it on a plate and tent it with foil. It will cook a bit more as it rests and the juices will redistribute through the steak instead of immediately draining out. Trust, me, it's worth the wait.
    • Slicing: When slicing meat, make sure you cut across the grain!
    • Temperature: I personally prefer my meat to be a perfect medium-rare but since I recognize that other people like to prepare theirs differently, here are the different temperature options:
      • Rare: 125 degrees F (52 degrees C), cool and red in the middle.
      • Medium-Rare: 135 degrees F (57 degrees C), warm and red in the middle.
      • Medium: 145 degrees F (63 degrees C), warm and pink in the middle.
      • Medium-Well: 150 degrees F (66 degrees C), slightly pink in the middle.
      • Well: 160 degrees F (71 degrees C), no pink in the middle.

    Tips for safely storing and preparing beef:

    • Refrigerate or freeze as soon as possible. If it's going to take longer that 30 minutes to get home, bring a cooler and some ice.
    • Unless it's vacuum packed, it's best to remove the beef from it's original packaging if possible. That said it won't hurt the beef if you freeze it in it's original package, as long as there are no temperature fluctuation.
    • When storing meat in the refrigerator, make sure to store it in a leak-proof container and store on the bottom shelf (just incase there's a sneaky leak you're unaware of).
    • Label your beef with at least the date (although other info is good to include like weight, cuts, portions etc) and practice first in first out.
    • Cooked portions should be refrigerated within 2 hours of cooking them, but preferably before that.
    • Ground beef doesn't last as long as other cuts of beef so use that within 1-2 days of purchase.
    • There are three safe ways to defrost meat: in the refrigerator, directly into the cooking vessel (with adjusted time for frozen meat) or fully submerged in a bowl of cold water that is changed every 30 minutes.
    • Use a separate cutting board and utensils for handling raw meat and wash your hands often to avoid cross contamination.

    One of the biggest take aways for me was this: don't be afraid to talk to your butcher! Ask questions! That's what they're there for and I've found them to be pretty friendly and super knowledgable! Now go forth and make yourselves a killer steak! And make sure to connect with the New York Beef Council in these places:

    Website | Facebook | Twitter | Instagram | Youtube | Pinterest

    Make sure you check out some of my favorite beef recipes:

    • One Pot Philly Cheese Steak Pasta
    • Easy Instant Pot Chili
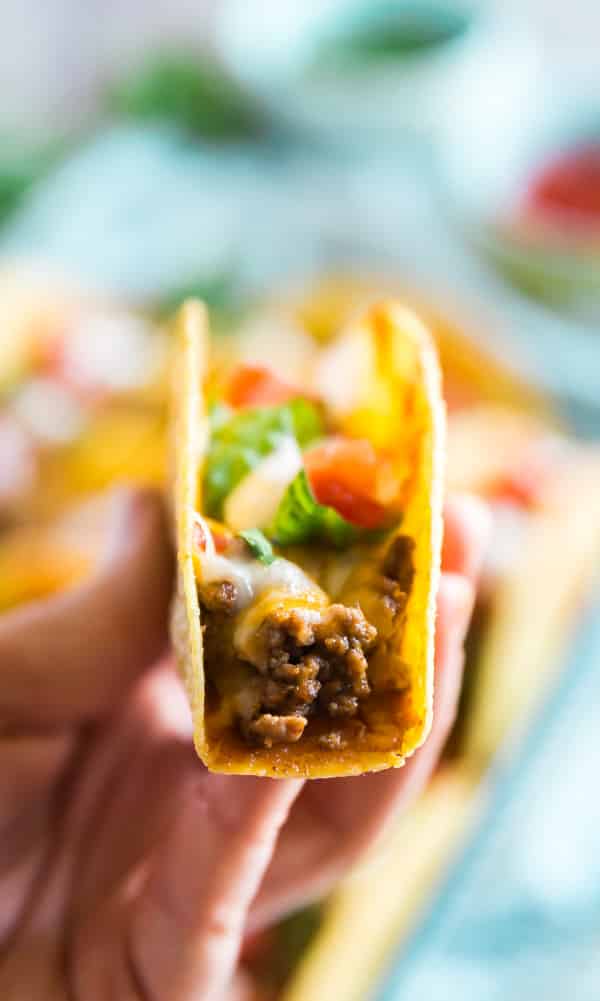
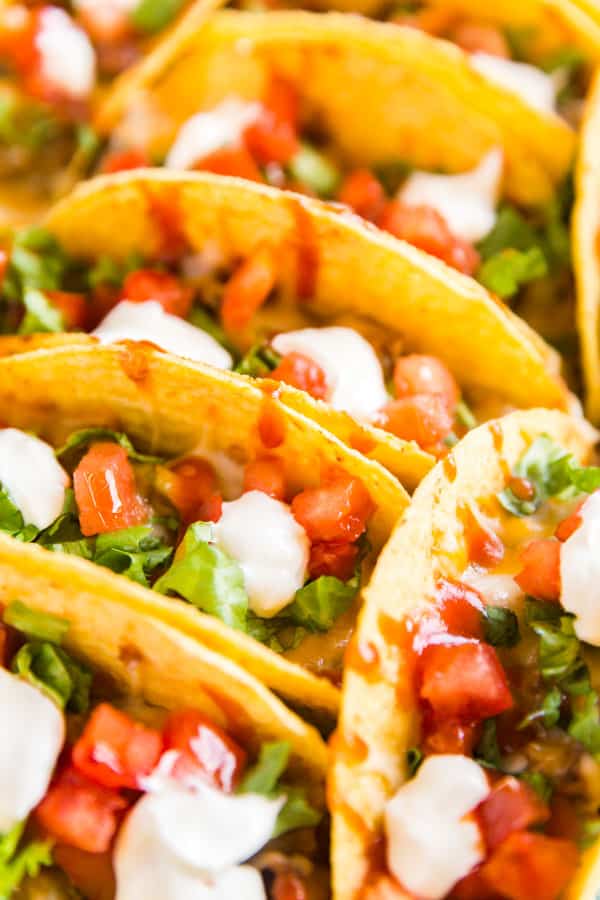
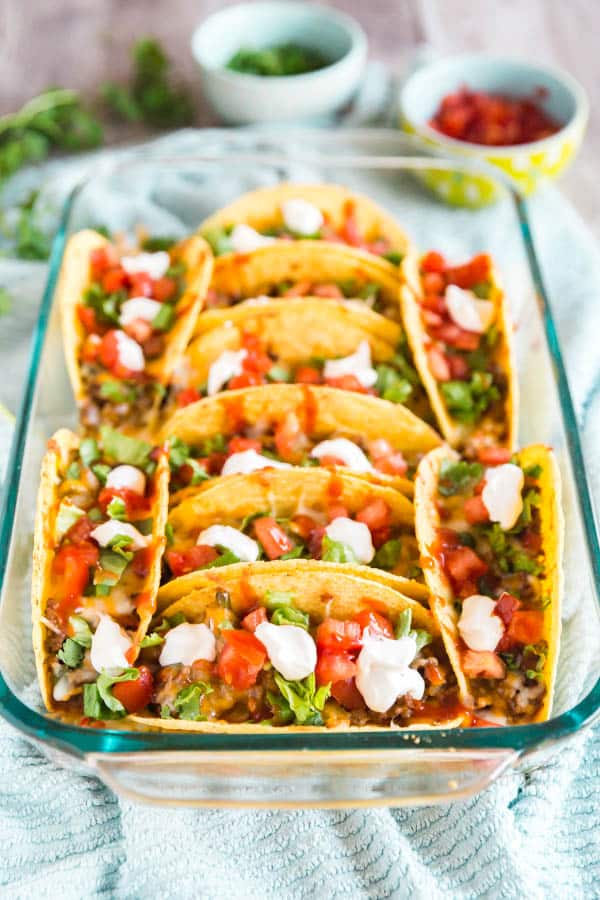
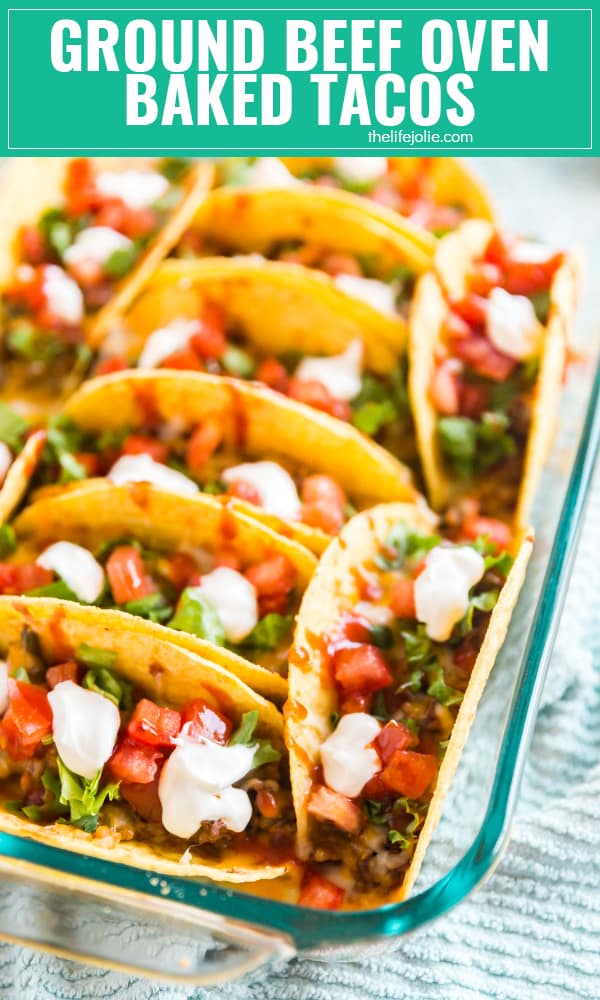
    • Ground Beef Oven Baked Tacos
    • Sandwich Steak and Onions
    • Slow Cooker Italian Beef Stew

    You can find a full index of my recipes here.

    Don’t forget to follow The Life Jolie on Pinterest for more recipe inspiration!

    Or if Pinterest isn’t your style, bookmark this post!

    Let’s keep the conversation going- join my Facebook group! 
    Spinach and Feta Breakfast Puff Pastry Pizza

    Mar 25, 2018 · 8 Comments

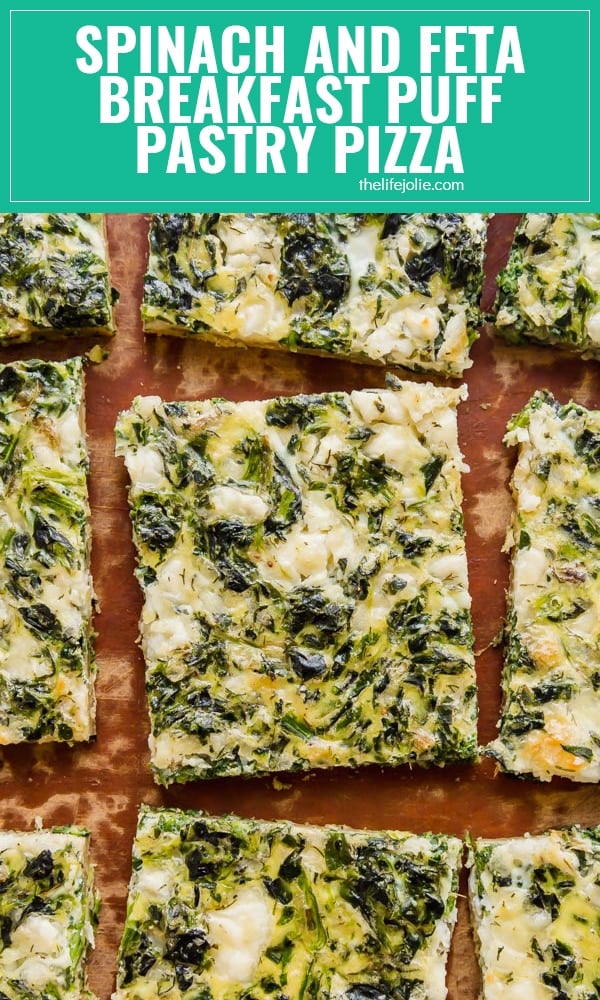
    Spinach and Feta Breakfast Puff Pastry Pizza

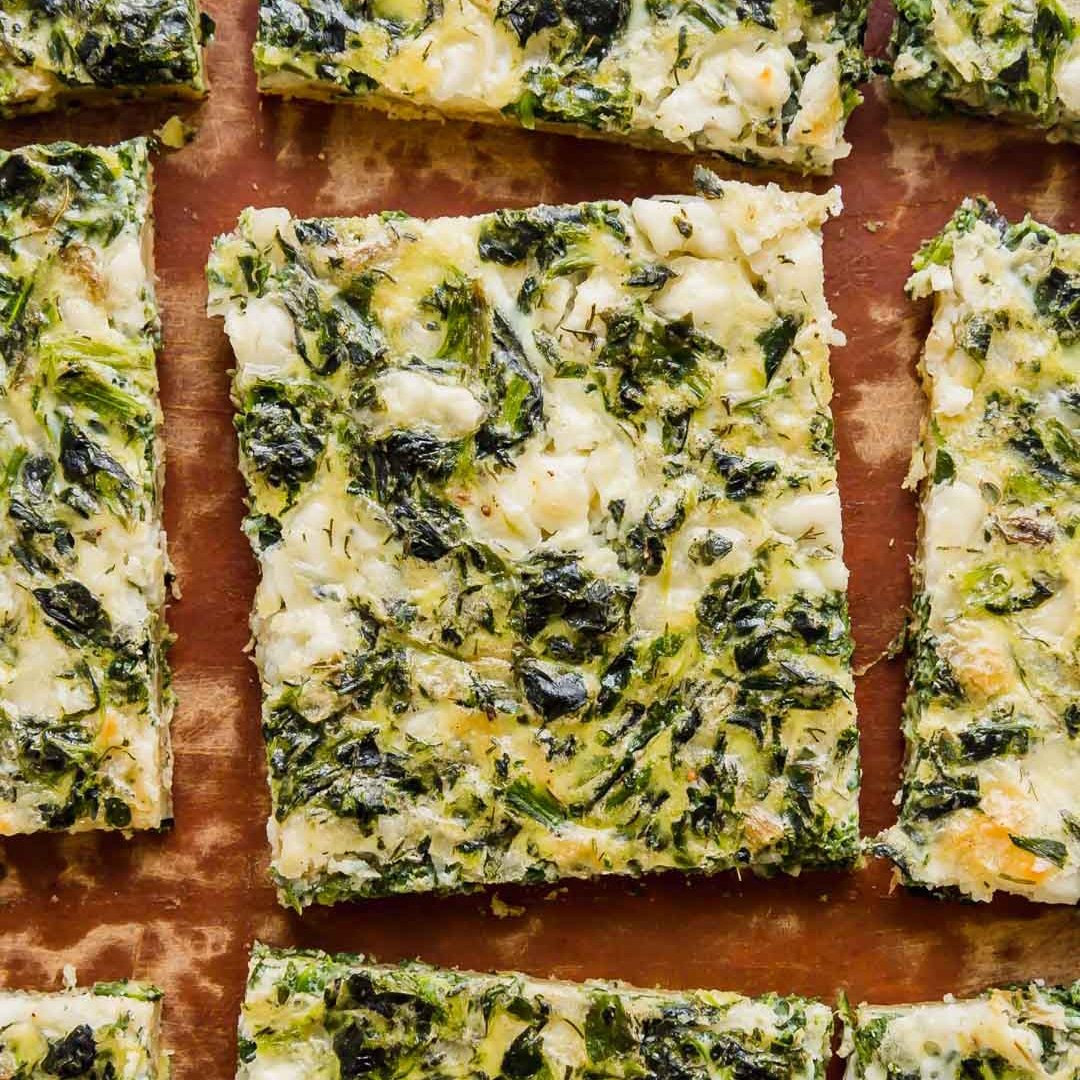
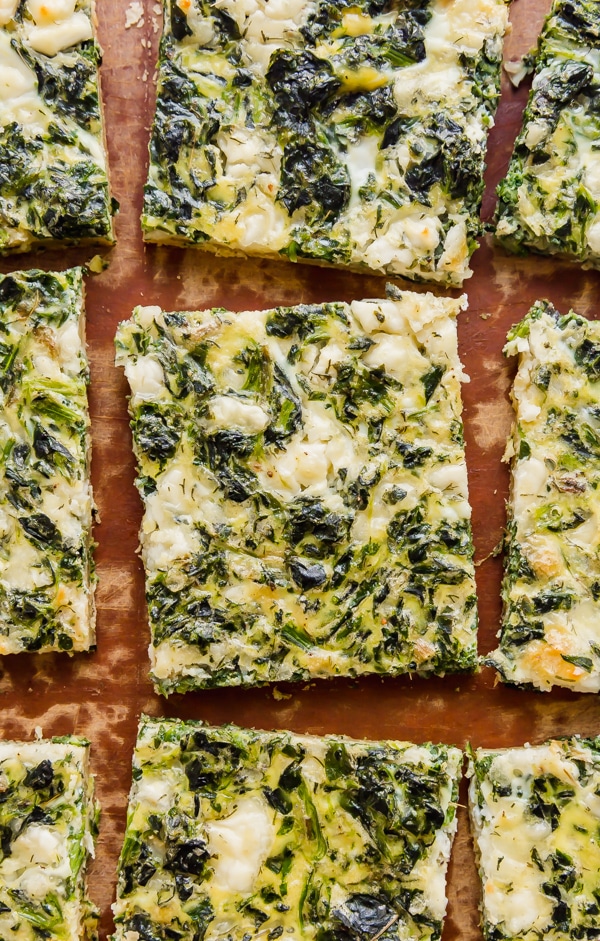
    Spinach and Feta Breakfast Puff Pastry Pizza is light and savory with a flakey puff pastry crust. This is the perfect, easy, throw-together brunch option! Spinach and Feta Breakfast Puff Pastry Pizza is light and savory with a flaky puff pastry crust. This is the perfect, easy, throw-together brunch option!

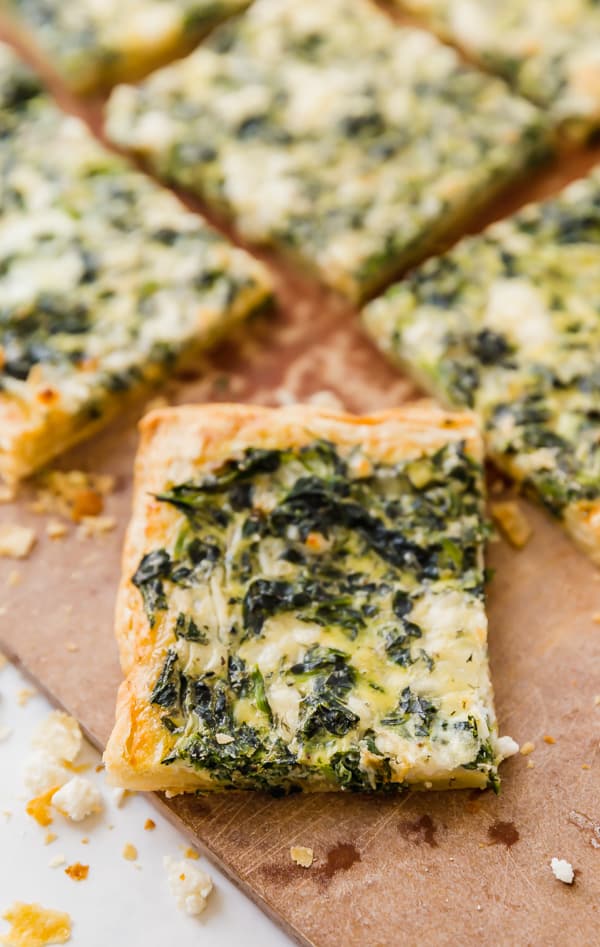
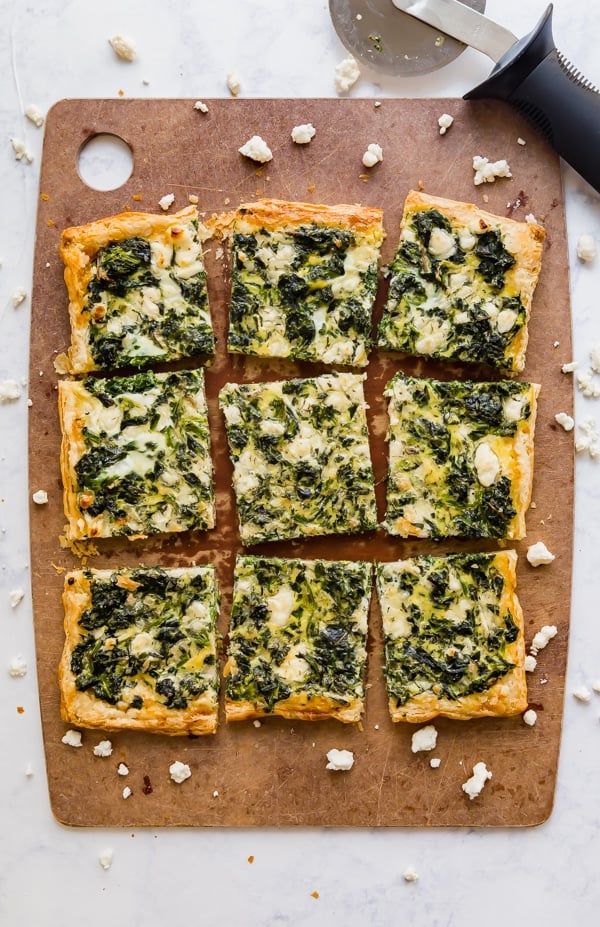
    Spinach and Feta Breakfast Puff Pastry Pizza

    This post contains Affiliate Links. Please see the disclaimer here.

    I seriously cannot believe it's taken me so long to make a variation of one of my most popular recipes:Puff Pastry Breakfast Pizza. This recipe is so delicious and seriously easy to make. It looks super pretty and is the perfect option for a light brunch with a nice fruit salad and really good coffee!

    I've been a major fan of breakfast pizza for so long now. We used to eat a ton of it in the first position I held at my old company. It was super tasty but with such a thick, bread-y crust that we all spent the rest of the day feeling super weighed down and sluggish (not that this stopped us from ordering another the very next week!).

    Breakfast pizza

    And that's one of the things I love about this version of breakfast pizza- the puff pastry makes it super light and fluffy. I end up feel satisfied but without all the extra glutenous weight staying with me all day (for the record this is not gluten free, but you know what I mean). And naturally, I had to put a tasty twist on the original recipe.

    Have you ever head really good spanakopita? You know, the savory spinach pie with briny bits of feta mixed into the filling in a flakey phyllo crust? It's a flavor profile we all know and love so I thought, why not see what it would look like if spanakopita and and puff pastry breakfast pizza had a delicious little baby. And let me tell you, it looked good!

    Spanikopita

    Tips for making Spanakopita Puff Pastry Pizza

    • When you pierce the dough with your fork, make sure you use a light hand so as not to pierce all the way through. This is to prevent springing a leak when you pour in the egg mixture later.
    • Wring out the spinach really well so your pizza filling isn't watery.
    • If it does happen to leak a bit of the egg, it's ok. Bake it as you would if it hadn't leaked and prior to serving, cut off the now-cooked egg that leaked and no one will know the difference.
    • You'll know this is done because the crust will be golden brown and the center will be set and no longer jiggly.
    • It will come out super puffed but deflate after a few minutes of being out of the oven.

    Breakfast pizza

    Helpful tools:

    1. Sheet pan
    2. Silpat
    3. Measuring spoons
    4. Measuring cups
    5. Mixing bowl
    6. Whisk
    7. Pizza cutter

    Feta cheese

    Spinach and Feta Breakfast Puff Pastry Pizza

    Spinach and Feta Breakfast Puff Pastry Pizza

    Jessy Freimann
    Spinach and Feta Breakfast Puff Pastry Pizza is light and savory with a flaky puff pastry crust. This is the perfect, easy, throw-together brunch option!
    5 from 4 votes
    Print Recipe Pin Recipe
    Prep Time 10 minutes mins
    Cook Time 25 minutes mins
    Inactive time 15 minutes mins
    Total Time 35 minutes mins
    Course Breakfast, Main Course
    Cuisine American
    Servings 8 servings

    Ingredients
      

    • 1 package frozen puff pastry sheets, thawed (my package contained 2 sheets)
    • Flour, to sprinkle on your surface for rolling out your puff pastry dough- optional
    • 6 large eggs, divided (3 for each pizza)
    • ¼ cup milk, divided (⅛ cup per puff pastry sheet)
    • 2 teaspoons kosher salt, divided (1 teaspoon for each pizza)
    • ½ teaspoon ground black pepper, divided (¼ teaspoon for each pizza)
    • 1 teaspoon dried dill, divided (½ teaspoon for each pizza)
    • 1 teaspoon garlic powder, divided (½ teaspoon for each pizza)
    • 2 pinches nutmeg divided (1 pinch for each pizza)
    • 2 10 ounce containers frozen spinach, thawed, wrung out well and divided (1 package for each pizza)
    • 1 cup feta cheese heaping and divided (½ cup for each pizza)

    Instructions
     

    • Preheat the oven to 425 degrees.
    • Lay out silpats or parchment paper. 
    • Place the thawed crust on each liner. Use a rolling pin to lightly roll them out to be a tiny bit bigger and thinner.
    • Fold the edges over slightly to create a crust, and use a bit of water to adhere them.
    • Gently prick the inside of the dough with a fork all over, being careful not to pierce all the way through.
    • Transfer the liner to a baking pan and bake the dough for about 8-10 minutes. The dough will look puffy and just starting to look golden brown. Make sure you don't under-cook this part.
    • While the crust bakes, mix the eggs, milk, salt, pepper, dill, garlic powder, and nutmeg until well combined (divided in half for each Puff Pastry Sheet). Set aside.
    • Using a fork, prick the puffy inside of the dough again and press with the back of the fork to deflate the middle so that the crust stands a bit taller. Make sure to be gentle so that the fork only pierces the top layer and doesn't go all the way through the crust.
    • Sprinkle the spinach and feta cheese evenly between the two crusts and carefully pour the egg mixture onto each crust, spreading over the spinach and cheese.
    • Return to the oven and bake for another 12-15 minutes or until the crust is golden brown and the egg is set. Serve immediately.

    Notes

    One of our readers, Anita, let me know that instead of folding over the edges you can just prick the middle. I haven't tested this, but I thought it was worth making note of. Please let me know if the comments if you try it.
    Tried this recipe?Let us know how it was!

    If you tried this recipe please comment and rate it 🙂 I love hearing your feedback and answering your questions!

    Looking for the original BreakfastPizza recipe? Here you go:

    Puff Pastry Breakfast Pizza

    This Puff Pastry Breakfast Pizza recipe is super easy and fast. You can put whatever toppings on it, but I love it with bacon, eggs and cheese. This is great for brunch, Christmas morning or a nice,relaxing weekend breakfast!

    You can find a full index of my recipes here.

    Don’t forget to follow The Life Jolie on Pinterest for more recipe inspiration!

    Or if Pinterest isn’t your style, bookmark this post!

    Let’s keep the conversation going- join my Facebook group! Spinach and Feta Breakfast Puff Pastry Pizza is light and savory with a flaky puff pastry crust. This is the perfect, easy, throw-together brunch option!
    Greek Baked Turkey Meatballs Recipe

    Mar 20, 2018 · 2 Comments

    Greek Baked Turkey Meatballs are a tasty appetizer or an excellent main dish. They're insanely easy to whip up and a healthy option as well! Ground turkey, lemon juice and greek spices make a delicious and flavorful meatball that tastes awesome with tzatziki sauce!

    Greek Baked Turkey Meatballs are a tasty appetizer or an excellent main dish. They're insanely easy to whip up and a healthy option as well!

    Greek Baked Turkey Meatballs are a tasty appetizer or an excellent main dish. They're insanely easy to whip up and a healthy option as well! Ground turkey, lemon juice and greek spices make a delicious and flavorful meatball that tastes awesome with tzatziki sauce!

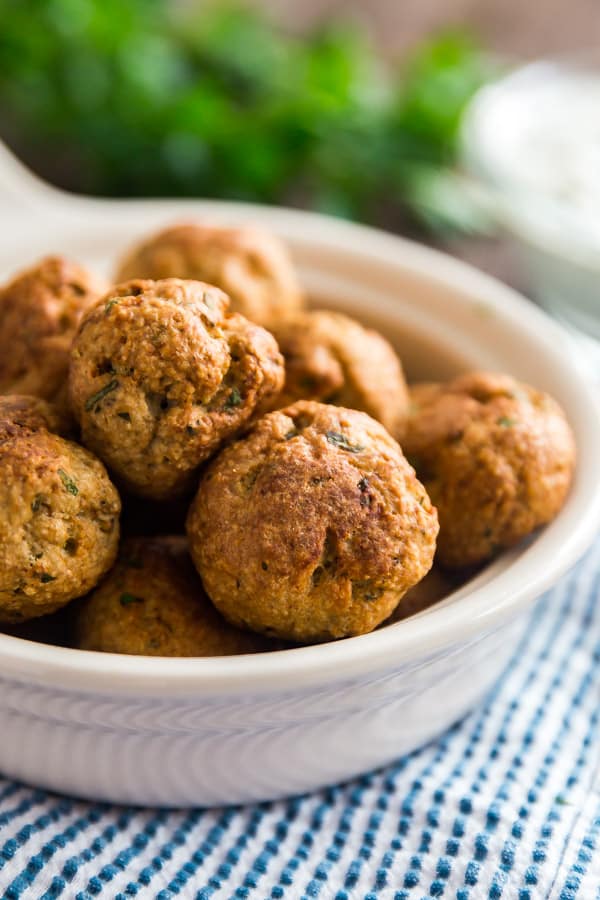
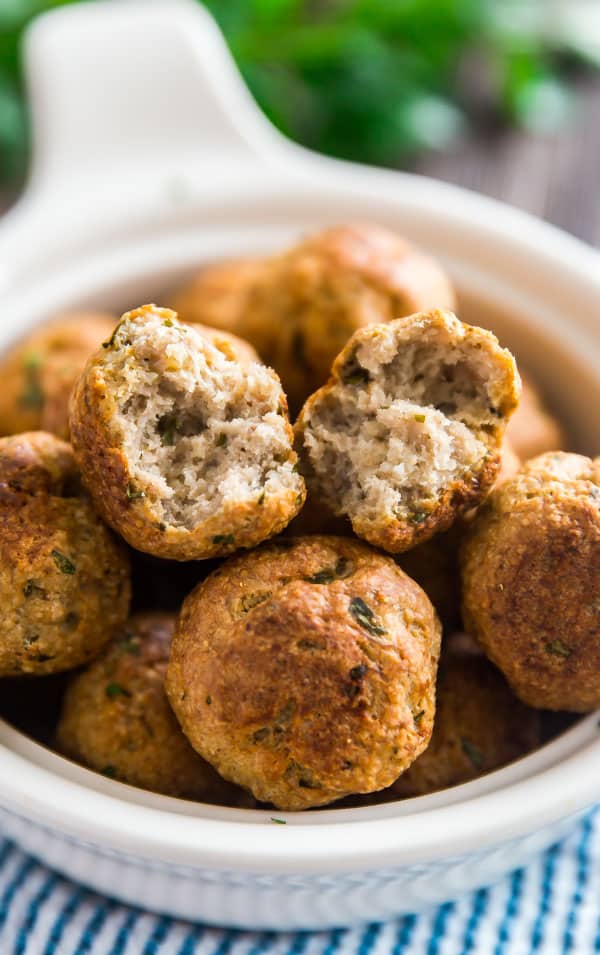
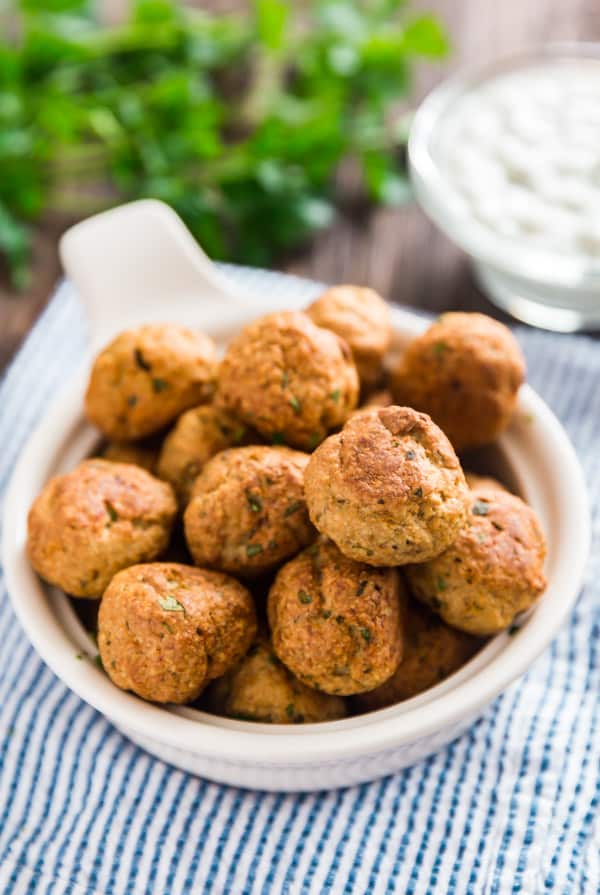
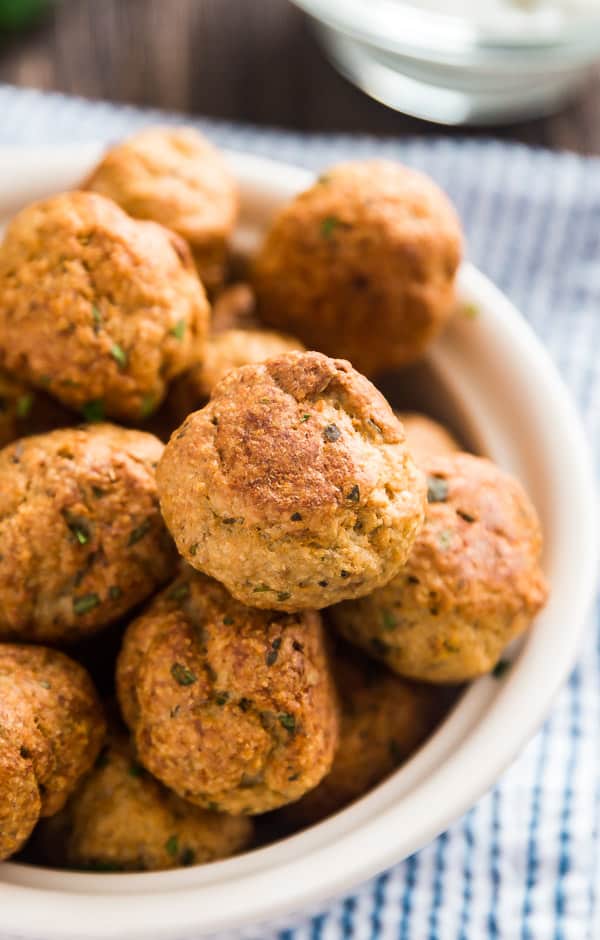
    Greek Baked Turkey Meatballs

    Greek meatballs

    This post contains Affiliate Links. Please see the disclaimer here.

    This dish originally started as a one pot meal with rice. But it just didn't work as well that way. I'll be saving the rice for another day but I had to share these turkey meatballs.

    I've had turkey meatballs on my mind for about a month, since my last trip to Trader Joe's. They have frozen turkey meatballs that are super easy to heat and delicious. We sampled some in-store and the girls went crazy for them. While I do like to keep a bag of those in my freezer, they also inspired me to make my own variation with a Greek twist.

    I find Greek flavors super fresh and delicious. Now it may be crazy snowy here in Rochester but I have spring on my mind. Perhaps I'm projecting my desperation for some sunshine in the form of a turkey meatball recipe? I don't know, but either way you've got to try these.

    Turkey meatballs

    How do you make moist turkey meatballs?

    • Use ground turkey with a higher fat content. Yes, it's more fat but that also means more flavor and more moisture. Think of it this way, it's still poultry.
    • Mix in things that add moisture. Olive oil, lemon juice, egg. Onions or garlic. You could even add a little water if you need. While I included measurements in this recipe, I always go by feel and smell and I encourage you to do the same.
    • Don't overmix! This will make your meat tough. I once saw an episode of one of Ina's cooking shows where she mixed burger meat with a fork and I think that's brilliant. That way you're not squishing the meat but rather "fluffing" it.

    Turkey meatball recipe

    What about a sauce for this turkey meatballs recipe?

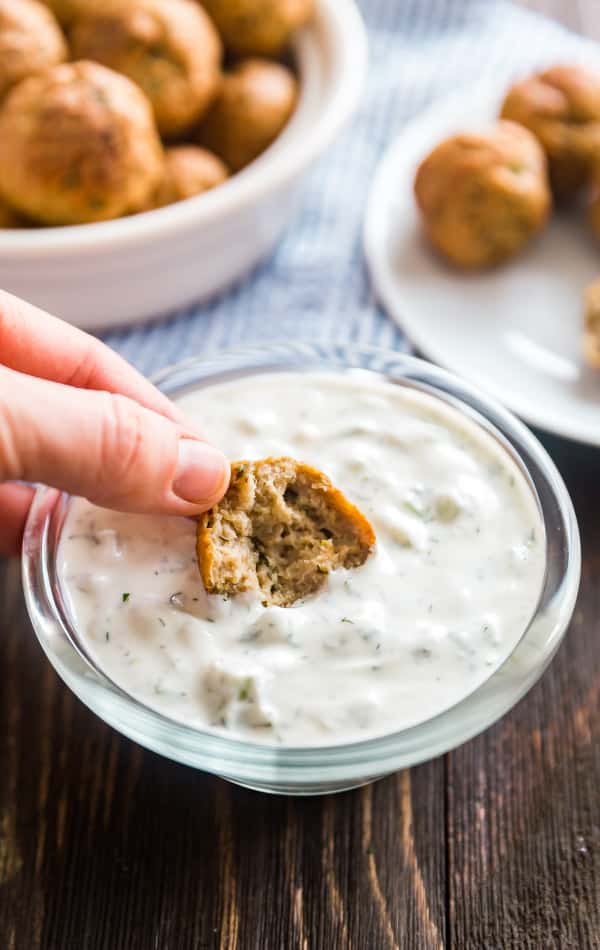
    Why, I'm glad you asked! In staying with the theme, I like to dip them into Tzatziki sauce. This is a creamy dipping sauce traditionally made of yogurt, olive oil, cucumbers, garlic, salt and lemon juice. My friend Amy over at House of Nash Eats has a killer Tzatziki sauce recipe that goes super well with these meatballs!

    Make these as a tasty appetizer for game day or a party. Or let them be a simple protein for a light dinner! You can totally cook them and freeze to reheat at a later time or even freeze them raw.

    Turkey meatballs recipe

    Helpful tools:

    1. Measuring spoons
    2. Measuring cups
    3. Chef's knife
    4. Cutting board
    5. Sheet pan
    6. Mixing bowl
    Greek Baked Turkey Meatballs are a tasty appetizer or an excellent main dish. They're insanely easy to whip up and a healthy option as well! Ground turkey, lemon juice and greek spices make a delicious and flavorful meatball that tastes awesome with tzatziki sauce!

    Greek Baked Turkey Meatballs Recipe

    Jessy Freimann
    Greek Baked Turkey Meatballs are a tasty appetizer or an excellent main dish. They're insanely easy to whip up and a healthy option as well!
    No ratings yet
    Print Recipe Pin Recipe
    Servings 6 servings

    Ingredients
      

    • 1 pound ground turkey meat
    • 1 teaspoon olive oil
    • 1 large egg
    • 1-2 cloves garlic, pressed or minced
    • ½ cup seasoned bread crumbs
    • 1 Tablespoons lemon juice
    • ½ teaspoon dried oregano
    • 1 teaspoon fresh parsley, chopped
    • 1 teaspoon kosher salt
    • ¼ teaspoon black pepper

    Instructions
     

    • Preheat the oven to 375 degrees and line a sheet pan with parchment or a silicone baking mat.
    • In a large bowl, lightly mix all ingredients with a fork until just combined.
    • Form the meat mixture into 1 ½-2 inch balls. 
    • Spread the meatballs out in a single layer on the sheet pan spray with cooking spray.
    • Bake for 20-25 minutes or until they reach an internal temperature of 165 degrees. Serve immediately

    Notes

    These taste fantastic with this Greek Tzatziki Sauce recipe from House of Nash Eats
    Tried this recipe?Let us know how it was!

    If you tried this recipe please comment and rate it 🙂 I love hearing your feedback and answering your questions!

    Other favorite meatball recipes are:

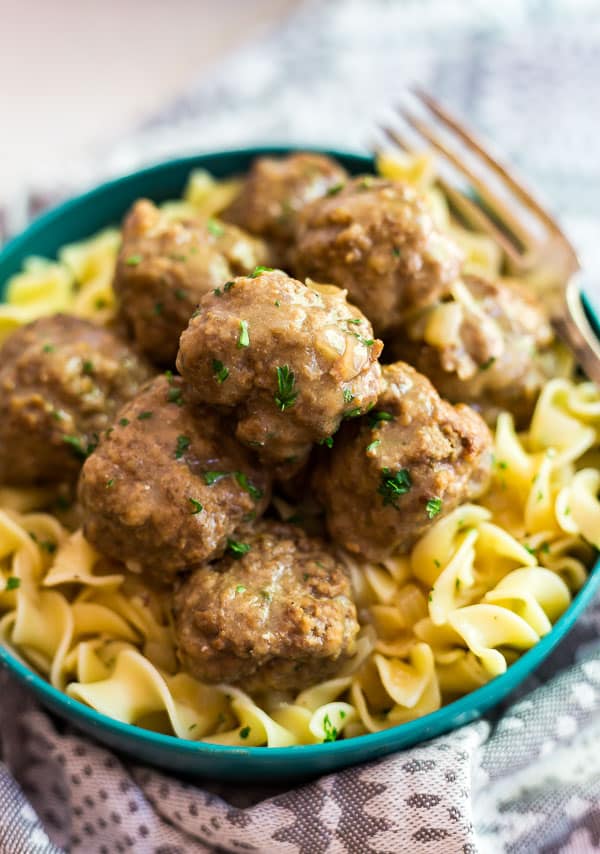
    Classic Swedish Meatballs

    A close up image of a blue bowl of Classic Swedish Meatballs with a fork in it.

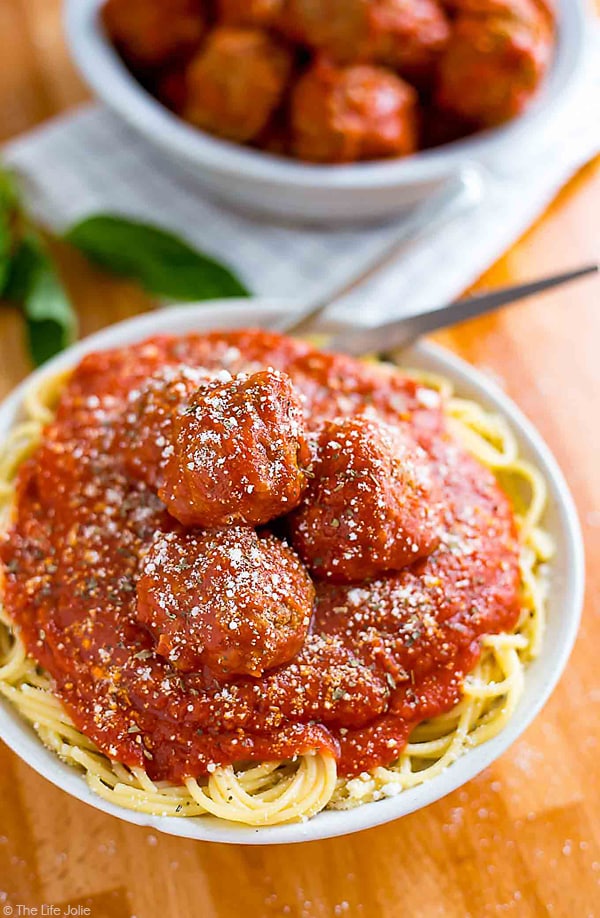
    Authentic Meatballs

    This is part one of the only Meat Sauce recipe you’ll ever need. It’s an extremely detailed (but still simple and easy) recipe for my Grandma’s homemade, Italian meat sauce and this seriously is the very best Sunday sauce you’ll ever taste. This first part is all about making authentic meatballs and fall-apart-tender pork for your sauce as well as the secret ingredient that makes this sauce so delicious!

    You can find a full index of my recipes here.

    Don't forget to follow The Life Jolie on Pinterest for more recipe inspiration!

    Or if Pinterest isn't your style, bookmark this post!

    Let's keep the conversation going- join my Facebook group! 

    Easy Instant Pot Chili Recipe

    Mar 13, 2018 · 8 Comments

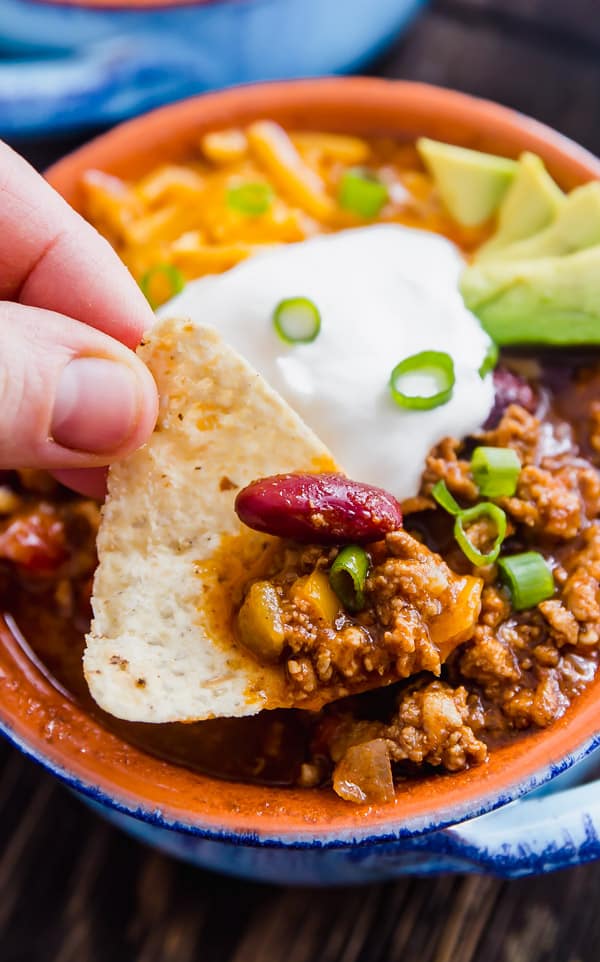
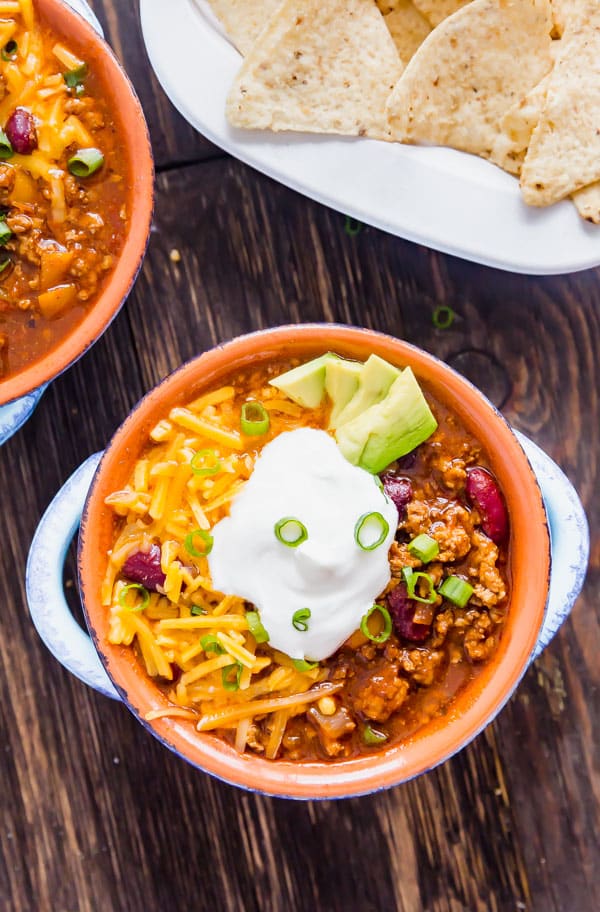
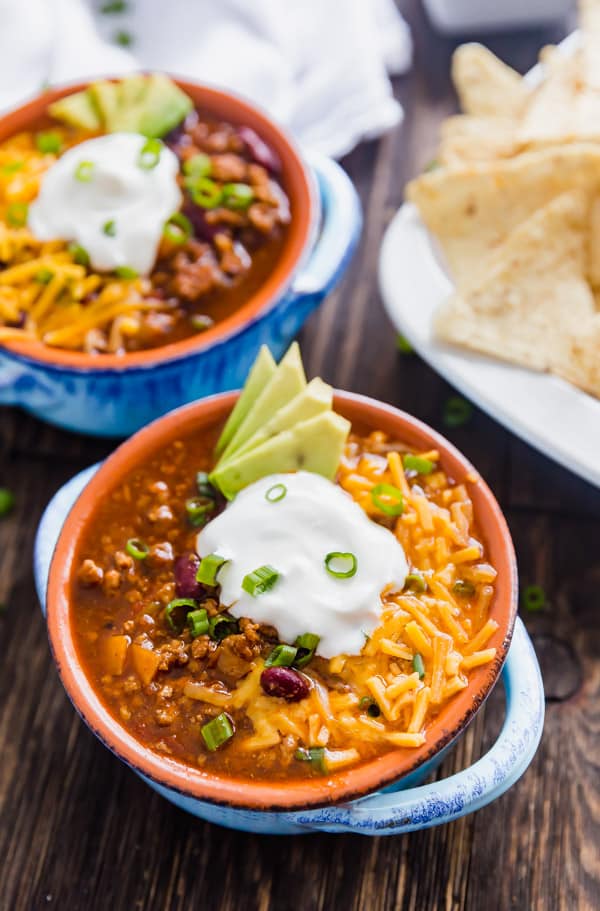
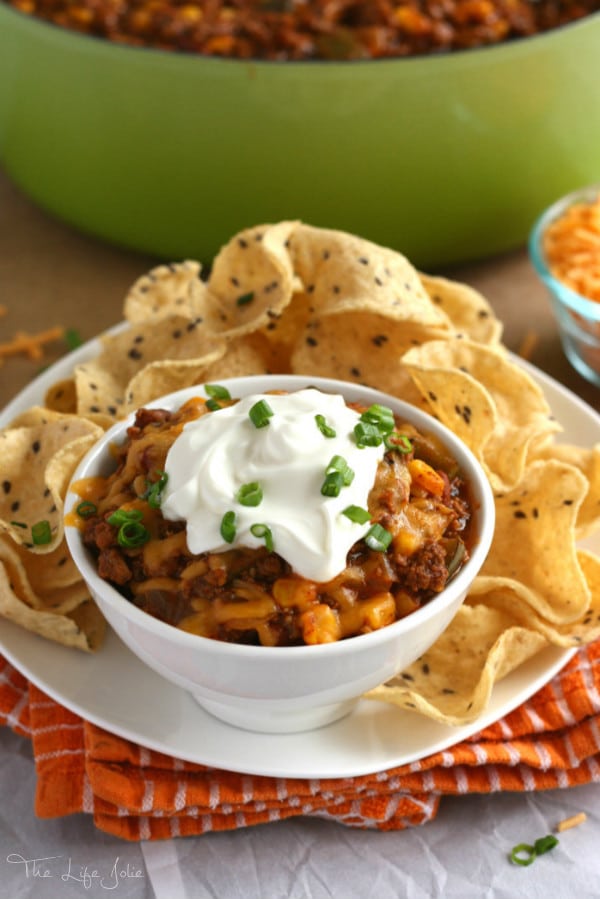
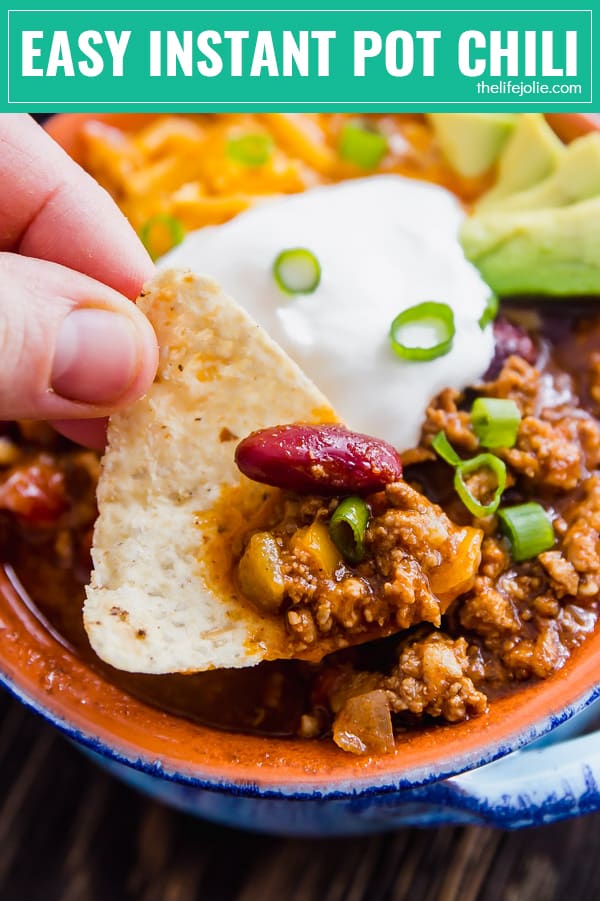
    Easy Instant Pot Chili will knock your socks off. Ready in around 30 minutes and full of mouthwatering flavor! Full of ground beef, ground pork, tons of chili seasonings, vegetables and beans it's quick and easy to make on a week night or for a party (game day anyone?!).

    Easy Instant Pot Chili will knock your socks off. Ready in around 30 minutes and full of mouthwatering flavor!

    Easy Instant Pot Chili will knock your socks off. Ready in around 30 minutes and full of mouthwatering flavor!

    Easy Instant Pot Chili

    Instant pot chili recipe

    This post contains Affiliate Links. Please see the disclaimer here.

    Now that I own an Instant Pot, I'm trying to use it a lot more. Because it's so darn easy and totally quick! So I figured I better make some chili!

    So I came up with a killer Instant Pot Chili recipe to warm you up on the coldest of days. I especially love that it allows me the ability to develop a ton of great flavor in a reasonably short amount of time. This is because the Instant Pot gives you the ability to brown meat and saute in the very same pan that it pressure cooks in, which I think is just brilliant!

    I made sure to add a variety of chili seasoning options to make the flavor as robust as possible in such a short amount of time. This would be an excellent option for a game day gathering or a casual evening with friends. It's also a super delicious weeknight meal. There's really nothing like a good homemade chili recipe!

    Chili Recipe

    Tips for making this easy chili recipe in the instant pot:

    • Prepare your ingredients before starting to cook. This is called a Mise en Place and it's something you should do before every recipe you prepare. Your overall cooking experience will run so much smoother if you do.
    • Pay attention to how much Cayenne Pepper you add. I added an entire ¼ teaspoon and it was reasonably spicy. To be honest, I was shocked that my girls ate it! You can easily cut this down to a pinch or leave it out entirely if a spicy chili recipe isn't for you.
    • Don't worry about doing a natural release. While a natural release is more important for tougher cuts of meat like chuck roast, quick release works just fine for this recipe. A natural release certainly won't hurt the recipe, so if you have the time you certainly can, but you can totally quick release it.
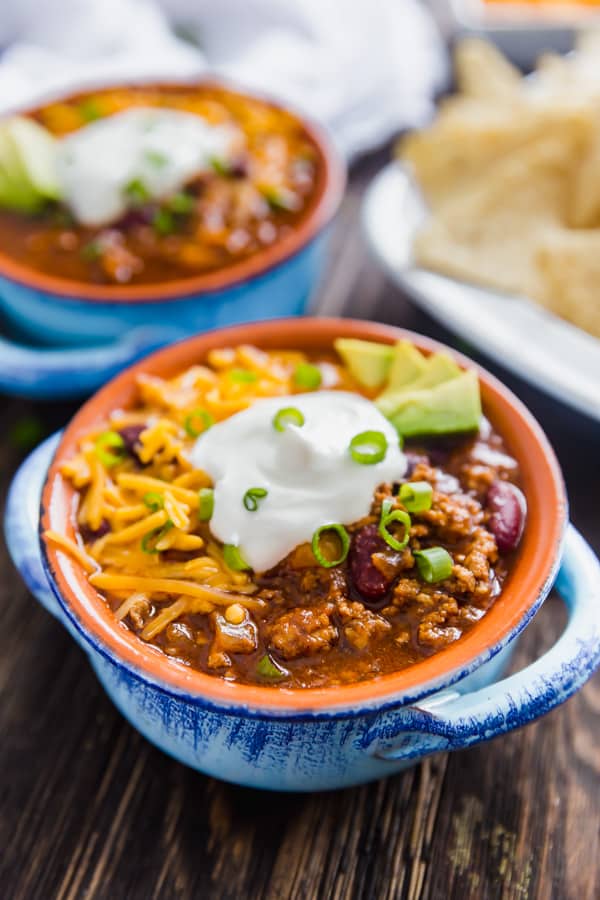
    • Have fun with your toppings! I love to add sour cream, tons of cheese, scallion and avocado onto my chili but you can really get crazy with the toppings- in fact that would be the perfect recipe for a make your own chili bar at a party! I even added some Mexican rice one night that I happened to have leftover in my fridge and it was such a delicious addition. And don't forget some nice, crispy tortilla chip for dipping!

    Easy chili recipe

    Helpful tools:

    1. Instant Pot
    2. Chef's knife
    3. Cutting board
    4. Measuring cups
    5. Measuring spoons
    6. Wooden spoon

    Homemade chili recipe with chili seasoning

    Easy Instant Pot Chili will knock your socks off. Ready in around 30 minutes and full of mouthwatering flavor! Full of ground beef, ground pork, tons of chili seasonings, vegetables and beans it's quick and easy to make on a week night or for a party (game day anyone?!).

    Easy Instant Pot Chili Recipe

    Jessy Freimann
    Easy Instant Pot Chili will knock your socks off. Ready in less than an hour and full of mouthwatering flavor!
    5 from 3 votes
    Print Recipe Pin Recipe
    Prep Time 10 minutes mins
    Cook Time 20 minutes mins
    Pressurizing 10 minutes mins
    Total Time 30 minutes mins
    Course Main Course
    Cuisine Mexican

    Ingredients
      

    • 1 Tablespoon olive oil
    • 1 pound ground beef, 80/20
    • 1 pound ground pork (if not available substitute with more ground beef)
    • 1 cup bell pepper, diced
    • 1 cup onion, diced
    • 3 cloves garlic, minced
    • 2 Tablespoons chili powder
    • 1 Tablespoon cumin
    • ½ teaspoon Mexican oregano
    • ¼ teaspoon cayenne pepper (if you don't like spicy foods half this ingredient or leave it out completely)
    • ¼ teaspoon ground coriander
    • ¼ teaspoon paprika
    • 1 14.5 ounce can diced tomatoes, with juice
    • 1 4 ounce can green chiles, drained
    • 1 15.5 ounce can red kidney beans, drained
    • 1 8 ounce can tomato sauce
    • ½ cup beef broth
    • The toppings of your choice

    Instructions
     

    • Add oil to the Instant Pot and set it to the Saute setting.
    • Add ground beef and ground pork to the pot and saute for 3-4 minutes to begin browning. Break it up, stirring frequently to ensure even browning.
    • When the meat is halfway browned add bell pepper, onion, and garlic and saute for 2 more minutes stirring frequently until the meat is fully browned and the vegetables have softened slightly. 
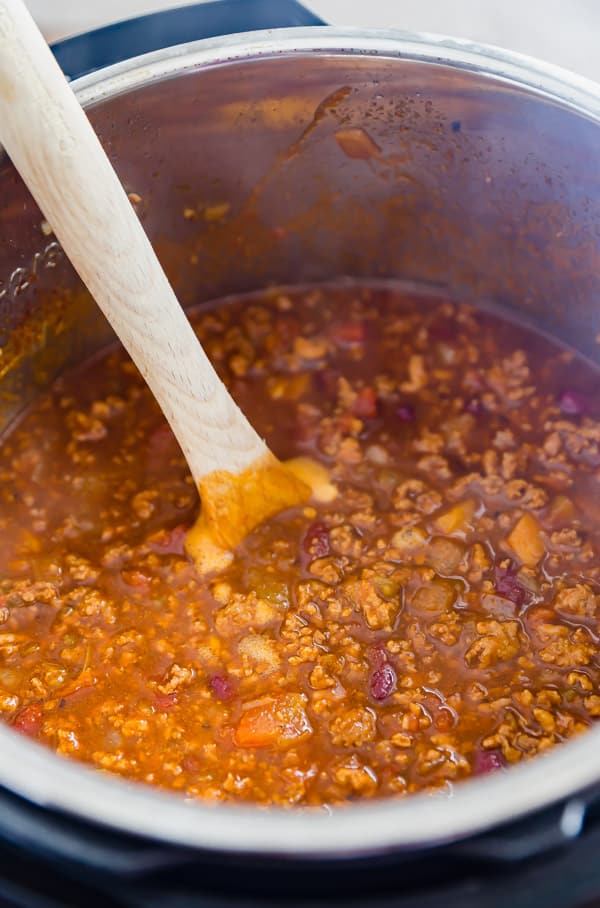
    • Add the rest of the ingredients (except for the toppings) and stir well to combine.
    • Press Cancel and secure the cover of the Instant Pot to a closed and locked position. Turn the vent to the pressurizing position and set the Instant Pot to Manual High Pressure for 12 minutes.
    • Once it's done cooking, carefully do a quick release (always turn the vent away from you, I like to use a towel).
    • Give the chili a quick stir and serve immediately with your desired toppings.

    Notes

    This will last for up to 4-5 days in the refrigerator and freezes well.
    Tried this recipe?Let us know how it was!

    If you tried this recipe please comment and rate it 🙂 I love hearing your feedback and answering your questions!

    Here's my other favorite chili recipe:

    30 Minute Turkey Chili

    This 30 Minute Turkey Chili is one of the most ultimate comfort foods! Not only is it healthy and easy to make, but it's so quick to make and has the best flavor! Definitely a keeper!

    You can find a full index of my recipes here.

    Don’t forget to follow The Life Jolie on Pinterest for more recipe inspiration!

    Or if Pinterest isn’t your style, bookmark this post!

    Let’s keep the conversation going- join my Facebook group! Easy Instant Pot Chili will knock your socks off. Ready in around 30 minutes and full of mouthwatering flavor! Full of ground beef, ground pork, tons of chili seasonings, vegetables and beans it's quick and easy to make on a week night or for a party (game day anyone?!).
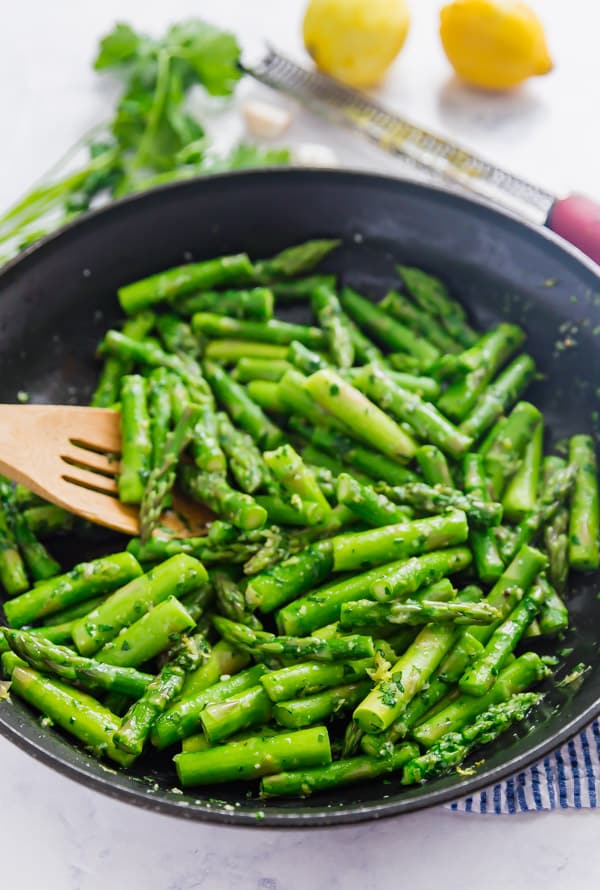
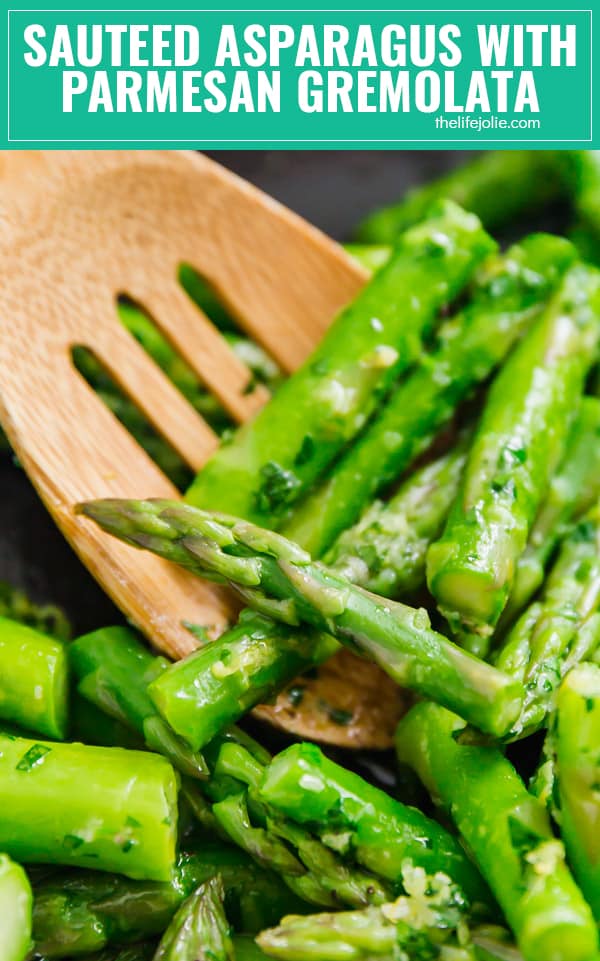
    Sautéed Asparagus with Parmesan Gremolata

    Mar 11, 2018 · 8 Comments

    Sautéed Asparagus with Parmesan Gremolata

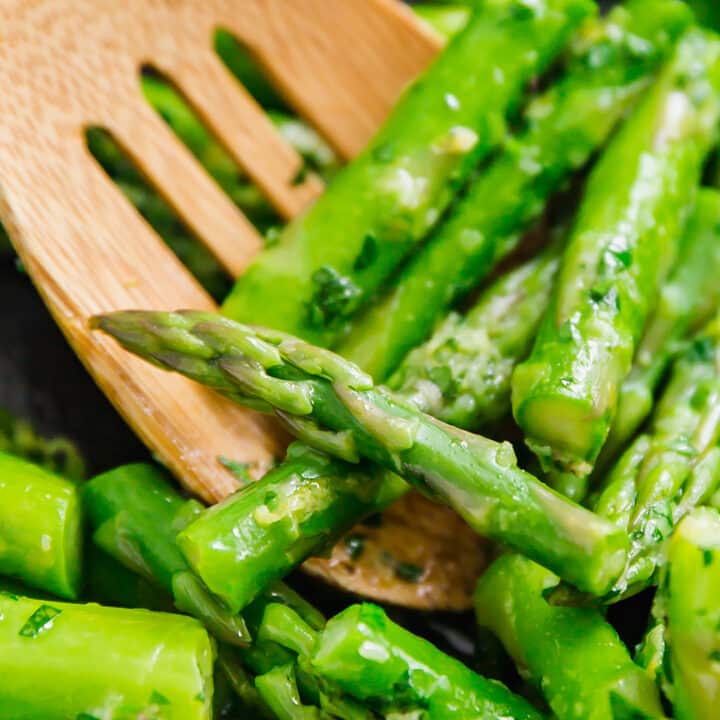
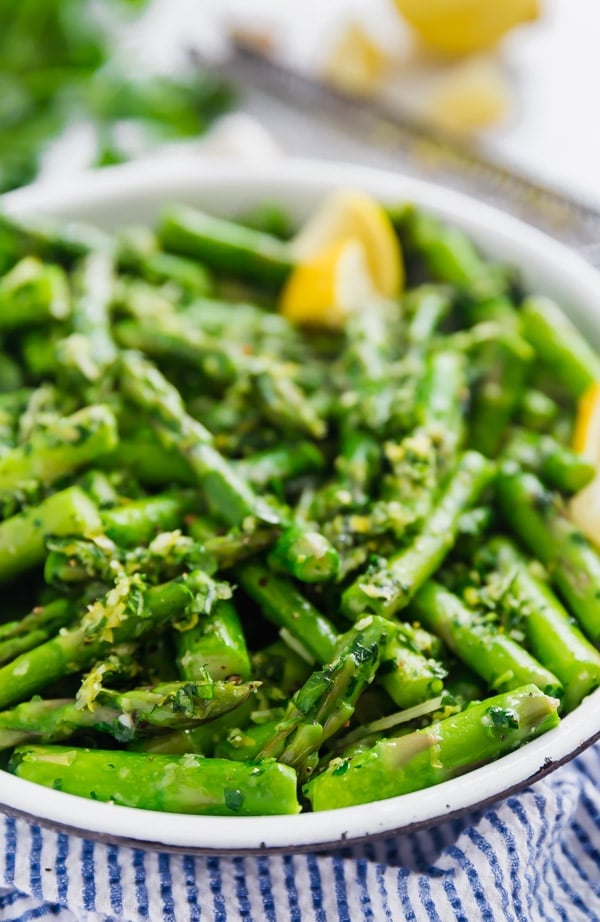
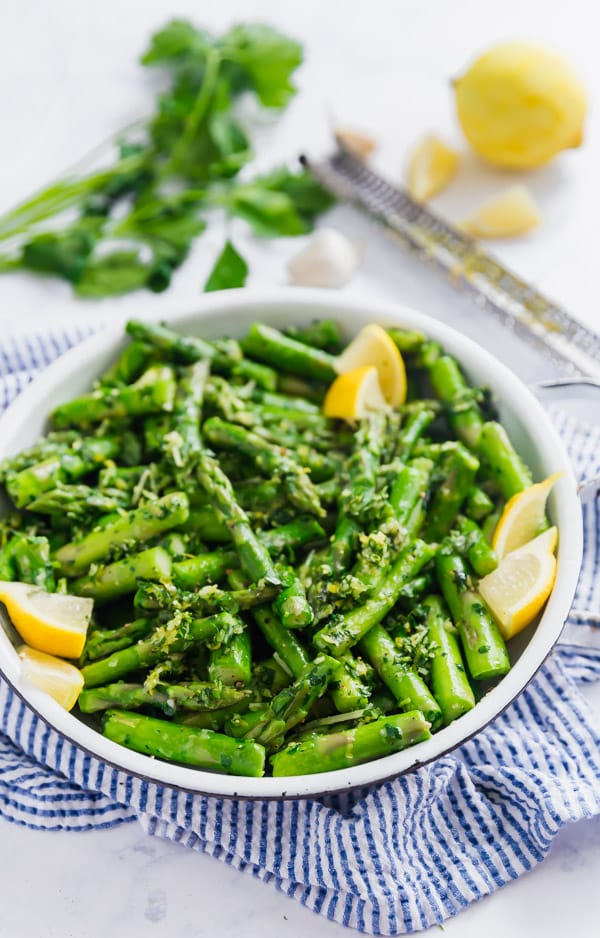
    Sautéed Asparagus with Parmesan Gremolata is a light and fresh side dish that is as quick and easy as it is delicious!

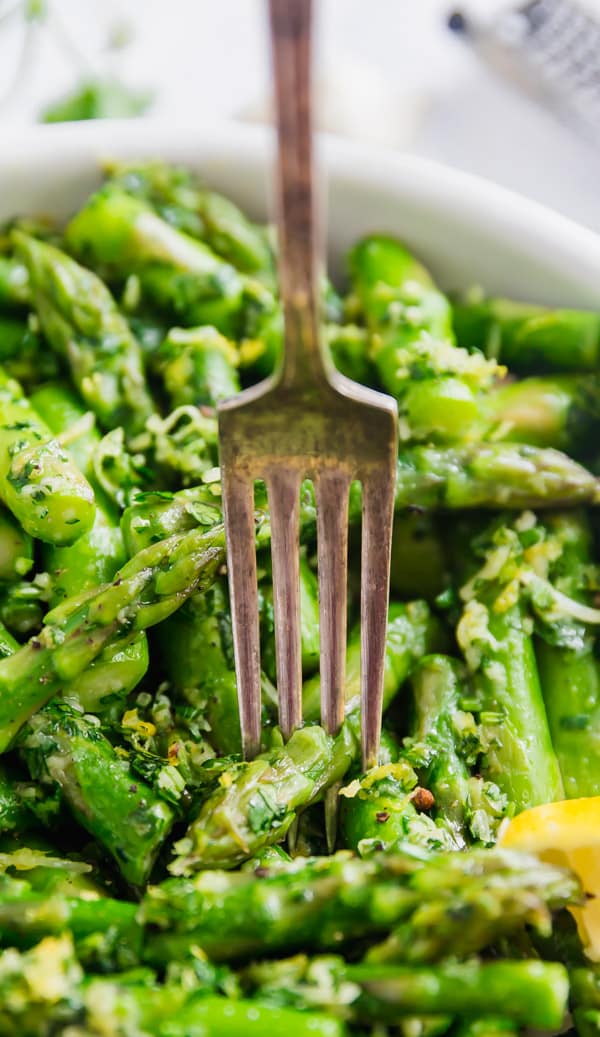
    Sautéed Asparagus with Parmesan Gremolata is a light and fresh side dish that is as quick and easy as it is delicious! Tender asparagus with a mixture of garlic, lemon zest, parsley and olive oil make an excellent and refreshing vegetable side!

    Sautéed Asparagus with Parmesan Gremolata

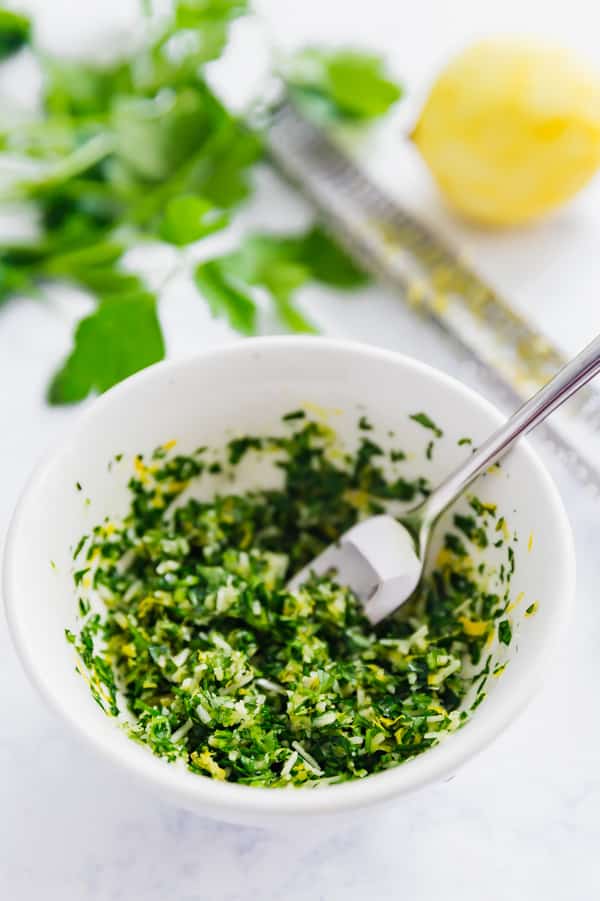
    Gremolata

    This post contains Affiliate Links. Please see the disclaimer here.

    It can be so easy to fall into the trap of making the same couple veggies for every meal. I know I'm guilty of this (broccoli/peas/corn/salad) because I'm a total creature of habit. So this year I'm trying to branch out and get more creative with my side dishes.

    One thing I don't make often enough is Asparagus. During the summer, I make balsamic grilled asparagus but the rest of the year, I'm not cooking asparagus nearly as much which is shame. So I knew another asparagus recipe was on the horizon. It was really just a matter of getting inspired.

    That inspiration came in the form of the Queen herself, Ina Garten. I love me some Ina (although I also totally wine about her on my Instagram stories sometimes- it's called H-uh-mmus not H-oo-mmus! But in all seriousness, it comes from a place of love!)! In this particular episode, Ina was making Green Beans with Gremolata and it looked so simple and so delicious that I knew I had to share my own take.

    Cooking asparagus

    But wait...what is gremolata?

    Gremolata is an Italian condiment. The primary ingredients are flat leaf parsley, lemon zest and garlic. The most traditional vessel for serving gremolata is Osso Buco but it's also a great option to serve over veggies and even makes an excellent addition to a marinade for protein or a salad dressing!

    You can also get creative with the ingredients and add other tasty things to your gremolata. In this case I went with shredded parmesan cheese. But other great add-ins include anchovies. Substituting in other citrus like oranges or limes. Also, other herbs like cilantro or mint. Or a mixture of all these things.  The world is your oyster!

    Best way to cook asparagus

    How to make Sautéed Asparagus with Parmesan Gremolata

    • You'll start by removing the woodsy bottoms (wherever it naturally breaks is the right spot) and cut the asparagus spears into thirds.
    • Then blanch your asparagus in boiling water and then plunging it into an ice bath to stop the cooking process.
    • Next you'll finely chop the parsley and grate the garlic and lemon zest. Combine those with shredded parmesan.
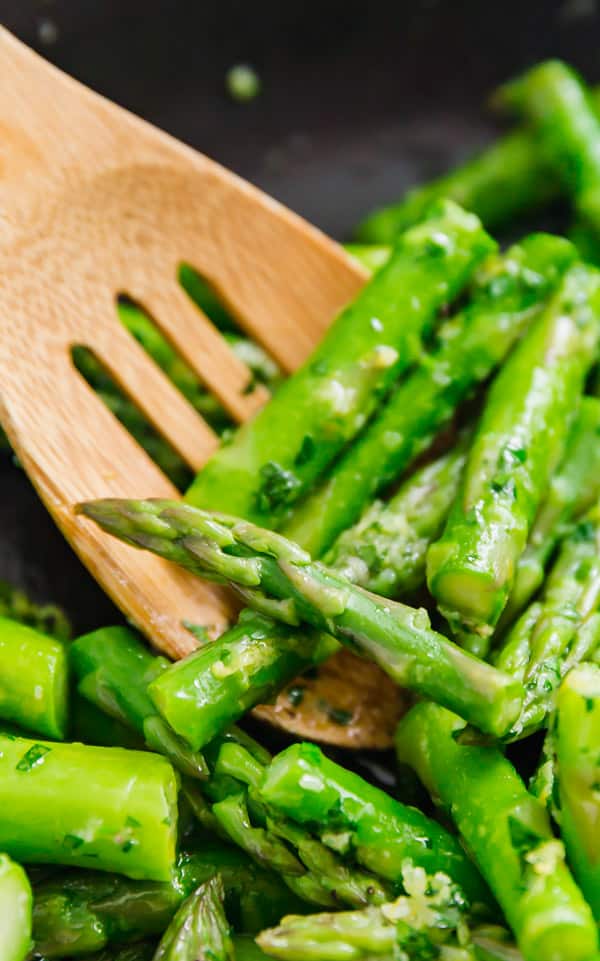
    • Heat some olive oil in a pan and throw your asparagus into the pan, sautéing for a minute or two to reheat the asparagus.
    • Top with most of (but not all of) the Gremolata and stir to incorporate. Taste for seasoning and add salt and pepper if needed.
    • Transfer to a serving bowl and top with the remaining Gremolata. Garnish with lemon pieces and sprinkle with a little lemon juice if you want.

    What is gremolata

    Helpful tools:

    1. Fry pan
    2. Chef's knife
    3. Cutting board
    4. Saucepan
    5. Microplane
    6. Measuring spoons

    Asparagus recipe

    Sautéed Asparagus with Parmesan Gremolata

    Sautéed Asparagus with Parmesan Gremolata

    Jessy Freimann
    Sautéed Asparagus with Parmesan Gremolata is a light and fresh side dish that is as quick and easy as it is delicious!
    5 from 1 vote
    Print Recipe Pin Recipe
    Prep Time 10 minutes mins
    Cook Time 7 minutes mins
    Total Time 17 minutes mins
    Course Side Dish
    Cuisine Italian

    Ingredients
      

    • 2 bunches asparagus spears, woodsy ends removed and cut into thirds.
    • 5 Tablespoons flat leaf parsley, chopped
    • 4 teaspoons lemon zest
    • 3 teaspoons garlic, grated
    • 2 Tablespoons parmesan cheese, shredded
    • 2 Tablespoons olive oil
    • Kosher salt, to taste
    • Black pepper, to taste
    • 1 lemon, cut into small wedges

    Instructions
     

    • Bring a medium pot of water to a boil.
    • Add the asparagus and blanch for 2 minutes.
    • Drain the asparagus and place it into an ice bath to stop the cooking.
    • While the asparagus cools, combine parsley, lemon zest, garlic and Parmesan cheese into a small bowl and mix well until fully combined. Set aside.
    • When the asparagus has cooled drain well.
    • Heat the oil in a large frying pan over medium-high heat.
    • Add the asparagus into the pan and saute for a couple minutes, to heat the asparagus.
    • Sprinkle with all but 1 Tablespoon of the Gremolata and stir well to coat.
    • Taste a piece of asparagus for flavor and add salt and pepper to taste if needed.
    • Transfer to a serving bowl and sprinkle with the remaining Gremolata. Garnish with lemon wedges and squeeze a little lemon juice over the top if you want. Serve immediately.

    Notes

    This will last a couple days in the refrigerator. It also tastes great cold.
    This recipe was inspired by Ina Garten's Green Beans Gremolata.
    Tried this recipe?Let us know how it was!

    If you tried this recipe please comment and rate it 🙂 I love hearing your feedback and answering your questions!

    Other favorite asparagus recipes:

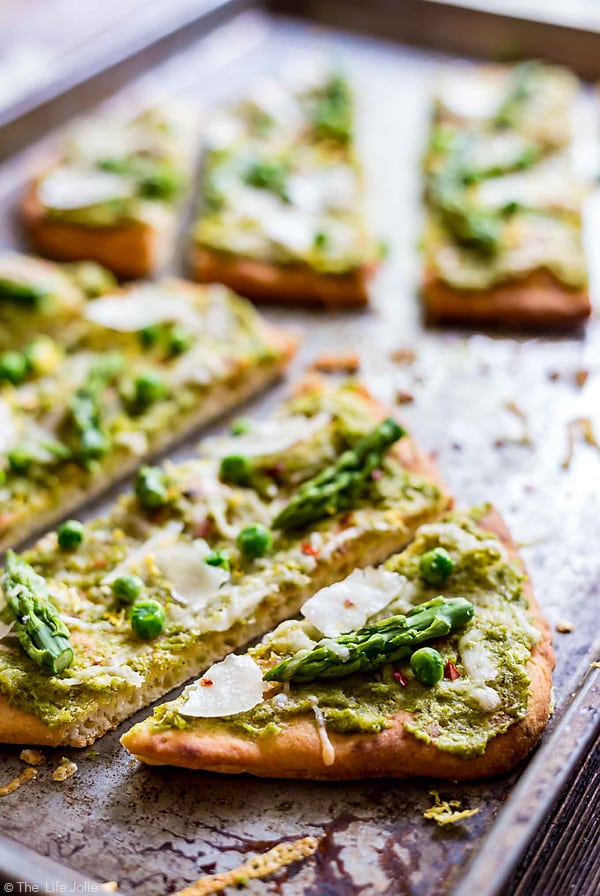
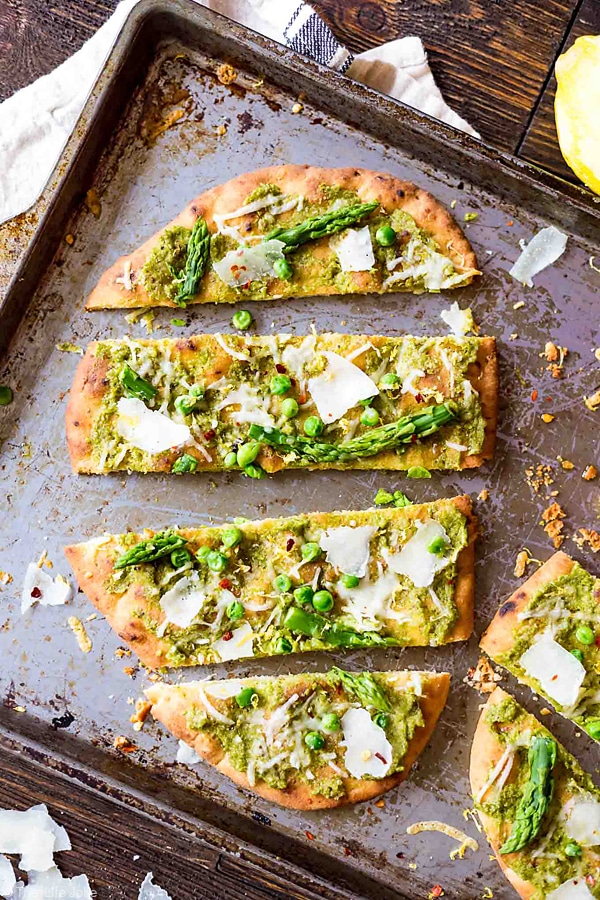
    Pea Pesto Flatbread

    CLose up photo of slices of Pea Pesto Flatbread.

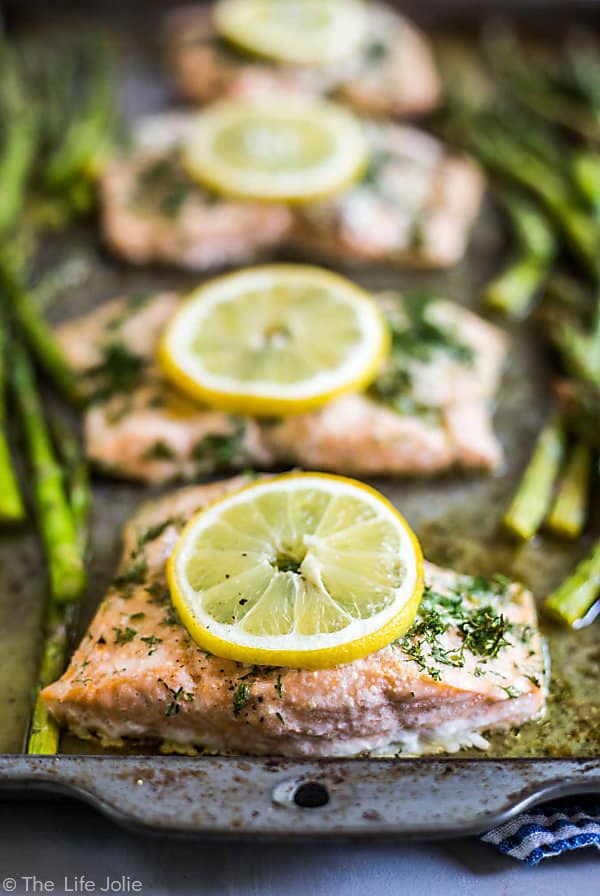
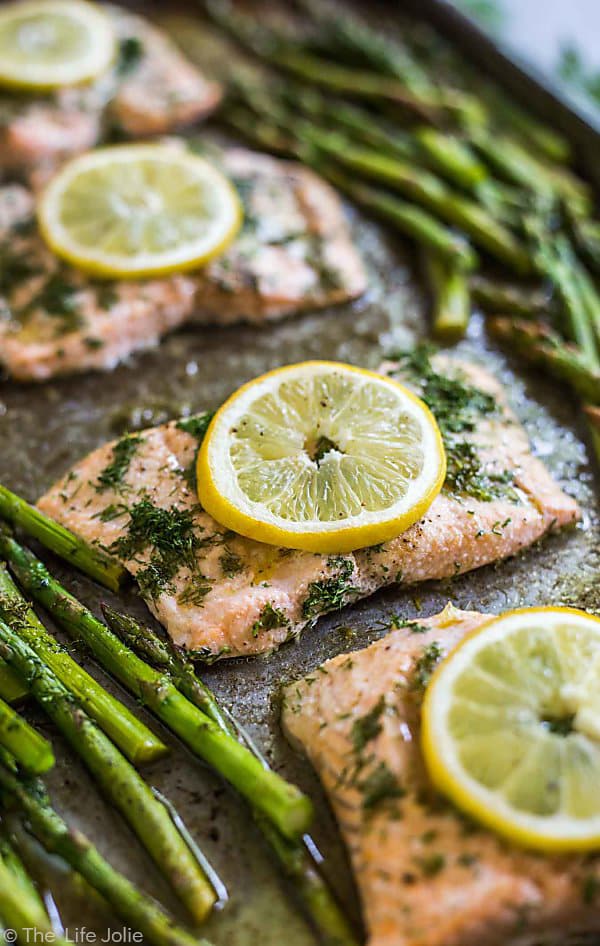
    Lemon Dill Salmon and Asparagus

    A row of 4 pieces of lemon Dill Salmon with lemon rounds on each piece on a sheet pan with the front piece of in focus and the others lined up behind it out of focus and asparagus on either side of the salmon, also out of focus.

    You can find a full index of my recipes here.

    Don’t forget to follow The Life Jolie on Pinterest for more recipe inspiration!

    Or if Pinterest isn’t your style, bookmark this post!

    Let’s keep the conversation going- join my Facebook group! Sautéed Asparagus with Parmesan Gremolata is a light and fresh side dish that is as quick and easy as it is delicious! Tender asparagus with a mixture of garlic, lemon zest, parsley and olive oil make an excellent and refreshing vegetable side!
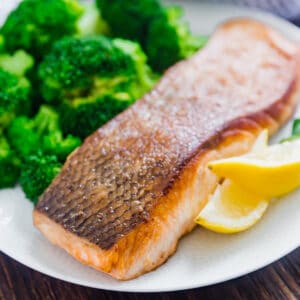
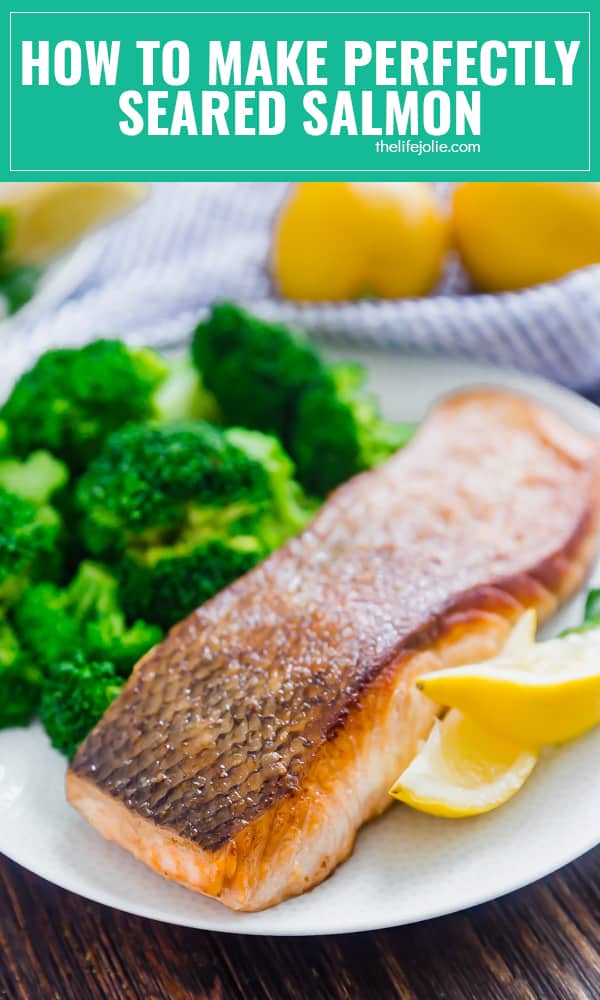
    How to Make Perfectly Seared Salmon | The Life Jolie Kitchen Basics

    Mar 8, 2018 · Leave a Comment

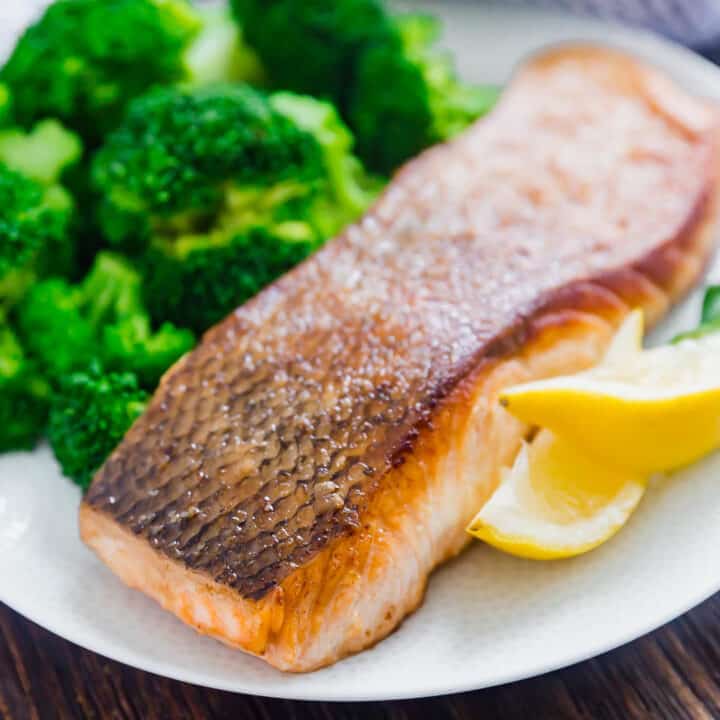
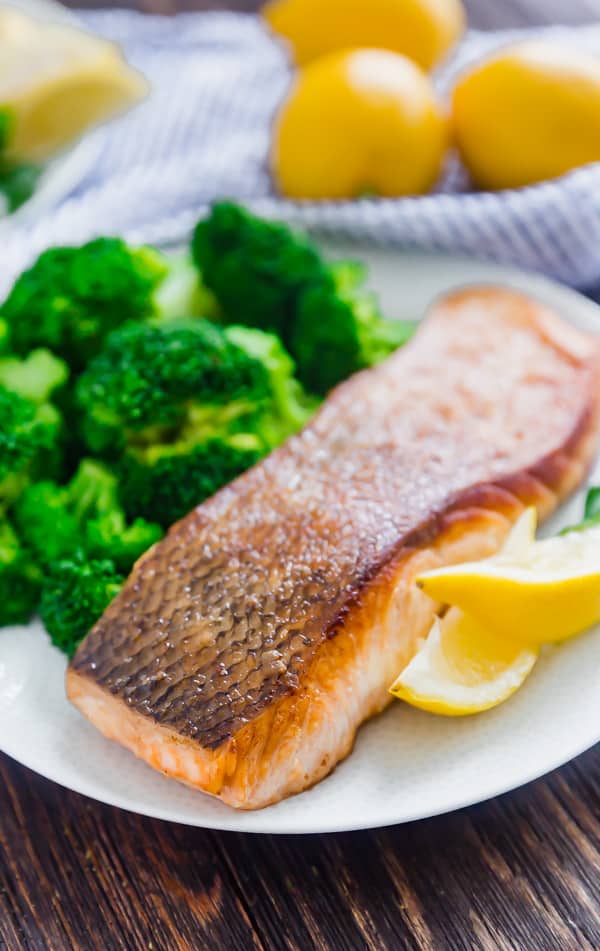
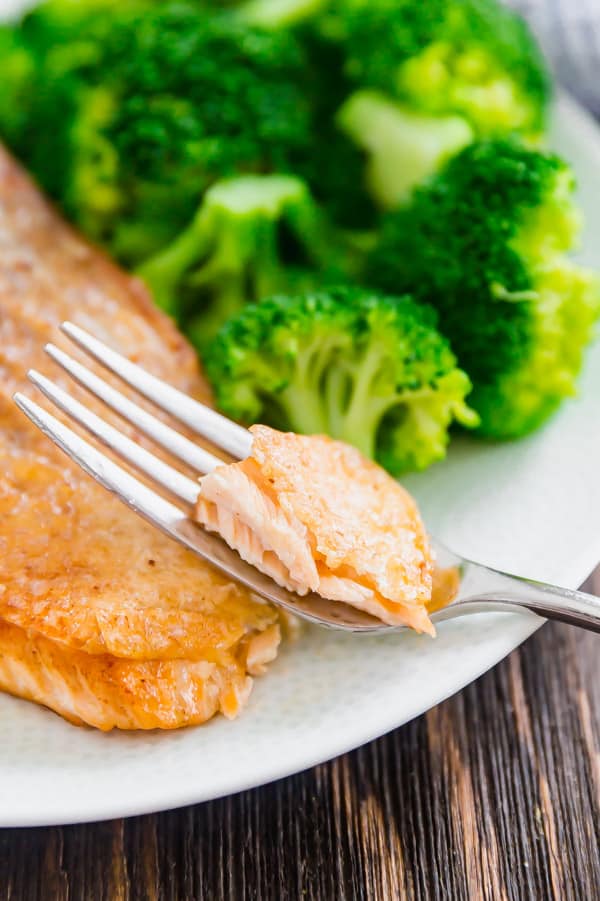
    There is nothing better than perfectly seared salmon and I'm going to show you how to get it just right! It's so easy to pan sear fish and I'm sharing all my tips and tricks to get that nice crispy outside and skin and perfectly tender inside.

    There is nothing better than perfectly seared salmon and I'm going to show you how to get it just right!

    There is nothing better than perfectly seared salmon and I'm going to show you how to get it just right! It's so easy to pan sear fish and I'm sharing all my tips and tricks to get that nice crispy outside and skin and perfectly tender inside.

    Perfectly Seared Salmon

    One skill that I think is important is knowing how to pan-sear a piece of fish, and in this case salmon. There is nothing better than perfectly pan seared salmon. Tender fish cooked to perfection. That gorgeous golden brown sear on the outside. And the very best part is that deliciously crispy skin.

    Now I know some people are weird about fish skin. And I get it. I did a poll in my Instagram stories about whether people liked their seared salmon skin side up or down and it was pretty evenly weighted in each direction.

    But in this case, the skin is the main event. It's perfectly crispy and full of amazing flavor in a way that will totally make a believer out of anyone who previously was on Team No Skin.

    Pan seared salmon

    How to Pan Sear Salmon:

    • Bring the fish to room temperature. It will help the fish cook more evenly. 15-20 minutes out of the fridge should suffice.
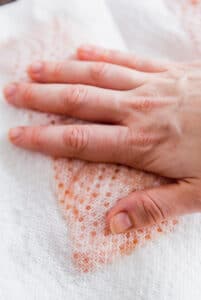
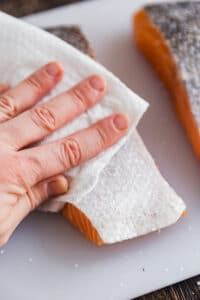
    • Dry it off. A paper towel will work very well for this. I pat it down on all sides with the paper towel.
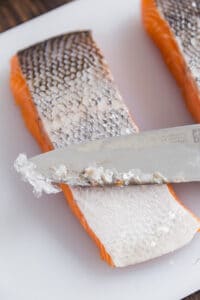
    • Remove the scales. Because no one wants to eat scale-y skin. I use the blade of my knife to scrape off the scales. It's super easy. Then maybe give it one final pat down
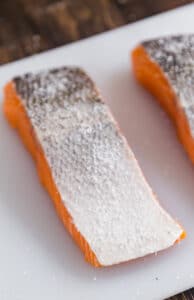
    • Salt the fish. I use coarse kosher salt for this (and pretty much everything). And then I let it sit for a couple more minutes because this will draw out surface moisture. Then give it one final pat down. It will take of a little but of the extra salt and all of that surface moisture.
    • Cover the bottom of a pan with oil. You want your pan and your oil to be screaming hot so you'll heat the pan and oil over medium high heat until it's shimmering. Stainless steel or cast iron are ideal but I managed to get a great sear with my non-stick pan as well!
    • Add the fish to the pan. This part is important: make sure it's skin-side down. The majority of the cooking will happen on the first side and we want to make sure that the skin gets perfectly crispy! Also, make sure you press the fish down for a good 10-20 seconds after it hits the pan, to ensure even searing.
    • Turn the salmon. You'll do this when about 90% of the cooking is done and then quickly sear the other side.
    • Remove it from the pan. Squeeze a little lemon over the top and sprinkle on a little black pepper if you prefer. Dig in and pat yourself on the back for making a good life decision!

    Helpful tools for searing salmon:

    1. Fry pan
    2. Fish spatula or a regular spatula works if you don't have a fish spatula)
    3. Chef's knife
    4. Cutting board
    There is nothing better than perfectly seared salmon and I'm going to show you how to get it just right! It's so easy to pan sear fish and I'm sharing all my tips and tricks to get that nice crispy outside and skin and perfectly tender inside.

    How to Make Perfectly Seared Salmon

    Jessy Freimann
    There is nothing better than perfectly seared salmon and I'm going to show you how to get it just right!
    No ratings yet
    Print Recipe Pin Recipe
    Prep Time 35 minutes mins
    Cook Time 5 minutes mins
    Inactive time 30 minutes mins
    Total Time 40 minutes mins
    Course Main Course
    Cuisine American
    Servings 2 servings

    Ingredients
      

    • 2 fillets Salmon
    • Kosher salt
    • Olive oil
    • Black pepper (optional)
    • Fresh lemon juice

    Instructions
     

    • Remove the salmon from the refrigerator and let it rest for 15-20 minutes to bring it to room temperature. 
    • Pat it down with paper towel on all sides to remove moisture.
      Seared salmon
    • Place it on a cutting board, skin-side up. Using the blade of a knife, scrape it up and down the skin to remove the scales (which will flake off). The scales have a bit of shimmer to them so you can tell if there were any left behind.
      Removing scales from salmon
    • Sprinkle salt on each side and let it sit for a couple minutes.
      Salmon with salt
    • Lightly give the fish one more pat down with paper towel to remove any moisture that the salt brought to the surface.
    • While the fish is sitting with the salt on it, place oil in the pan to cover the bottom of it and heat over medium-high heat until the oil shimmers. You can test it by adding a drop or two of water. IF the oil sizzles it's ready. If not wait another minute and try again.
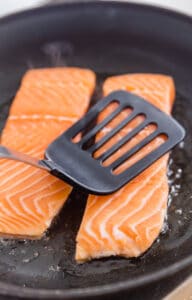
    • Add the salmon fillets one at a time, skin side down, directing them away from you. Press down on each piece of fish with the spatula for 10-20 seconds to ensure even searing.
      Salmon searing in a pan
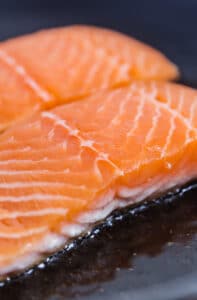
    • Allow the fish to cook most of the way like this, around 4 minutes. You'll be able to see the side of the fish begin to change color, starting at the bottom. When you go to turn it, you'll know it's ready to turn because it doesn't stick. If you find that it's sticking, wait another minute before trying again.
      Salmon as it's cooking
    • Once it's flipped cook another 30 seconds-1 minutes to an internal temperature of 145 degrees(you can also go a little less if you want it to be more "medium" which is still safe to eat).
      How to sear salmon
    • Remove the salmon from the pan. Sprinkle with some black pepper if you want and plenty of fresh lemon juice. Serve immediately.
    Tried this recipe?Let us know how it was!

    If you tried this recipe please comment and rate it 🙂 I love hearing your feedback and answering your questions!

    Other favorite fish recipes:

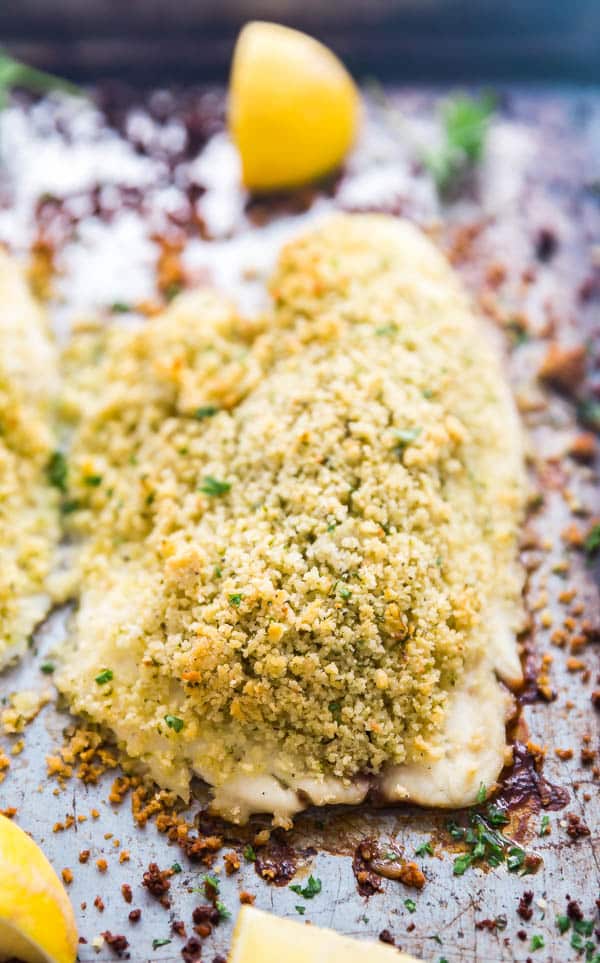
    Oven Baked Tilapia

    A close up of a piece of Panko Parmesan Crusted Baked Tilapia.

    Lemon Dill Salmon

    Three pieces of Lemon Dill Salmon lined up on the diagonal on a sheet pan with Asparagus on either side of it, the center piece of salmon is in focus and everything surrounding it is blurry. Each piece of fish has a lemon round on it.

    You can find a full index of my recipes here.

    Don’t forget to follow The Life Jolie on Pinterest for more recipe inspiration!

    Or if Pinterest isn’t your style, bookmark this post!

    Let’s keep the conversation going- join my Facebook group! There is nothing better than perfectly seared salmon and I'm going to show you how to get it just right! It's so easy to pan sear fish and I'm sharing all my tips and tricks to get that nice crispy outside and skin and perfectly tender inside.
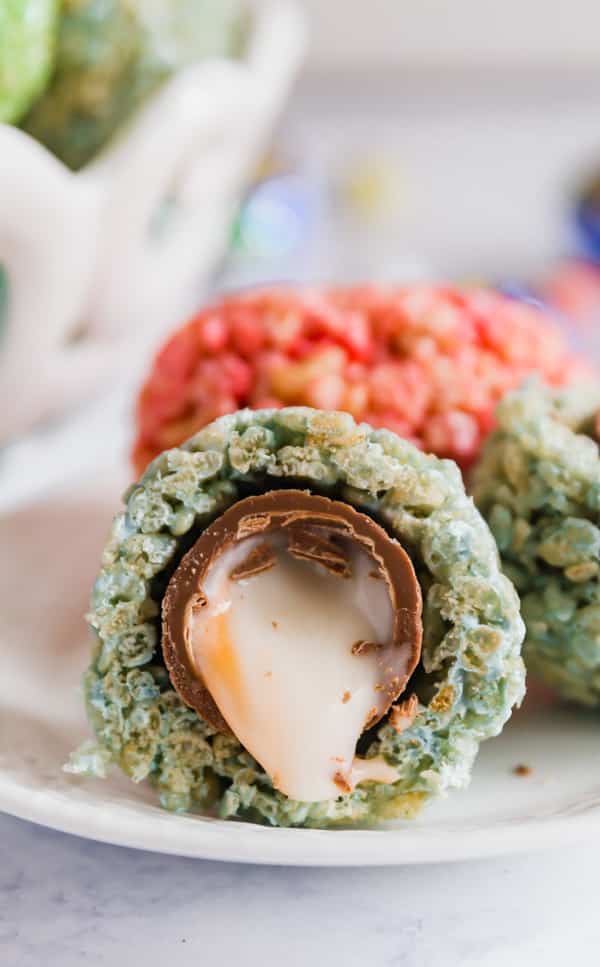
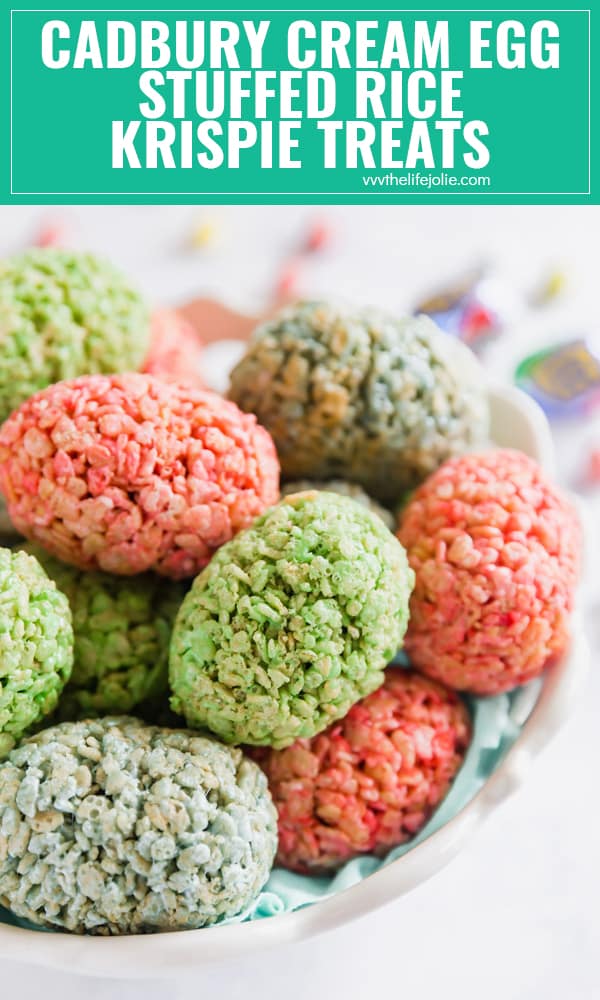
    Cadbury Creme Egg Stuffed Rice Krispie Treats + a video

    Feb 27, 2018 · 4 Comments

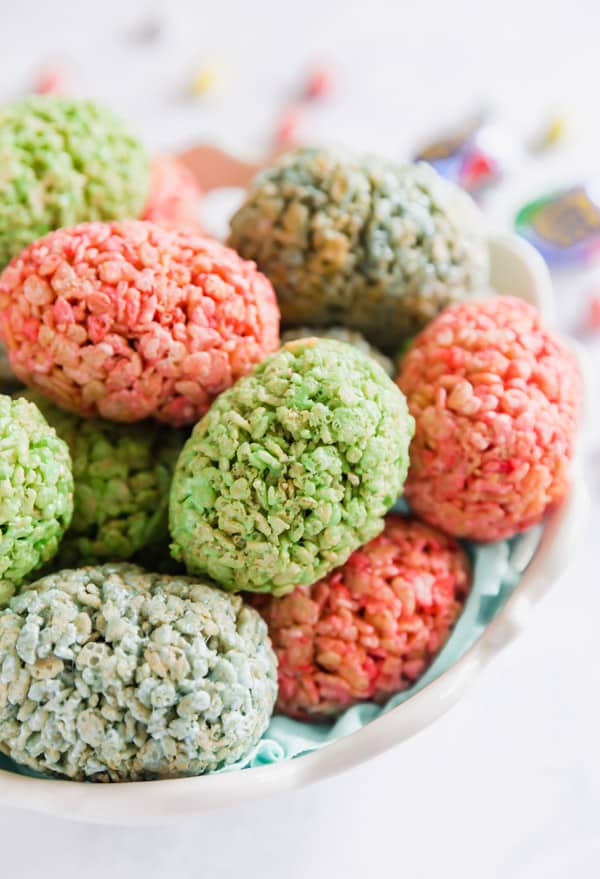
    Cadbury Cream Egg Stuffed Rice Krispie Treats are a super fun Easter treat that kids and adults will go crazy for- especially when they see the delicious surprise inside! Made with marshmallows and crispy rice cereal these are not to be missed!

    Cadbury Creme Egg Stuffed Rice Krispie Treats are a super fun Easter treat that kids and adults will go crazy for- especially when they see the delicious surprise inside!

    Cadbury Cream Egg Stuffed Rice Krispie Treats are a super fun Easter treat that kids and adults will go crazy for- especially when they see the delicious surprise inside! Made with marshmallows and crispy rice cereal these are not to be missed!

    Cadbury Creem Egg Stuffed Rice Krispie Treats

    This post contains Affiliate Links. Please see the disclaimer here.

    So you guys know that I love to get creating with the original Rice Krispie Treats recipe. What can I say, we all love them in this house! My husband and kids have quite the sweet tooth. So as you can imagine, they all really enjoy all the Easter candy that's out there on the market.

    So I got this idea on day when we were at the store and J got all excited to get the girls Cadbury Creme Eggs. I have to admit, those aren't my favorite Easter candy, they're a little sweet for me. But pretty much everyone I know loves them. So I thought, why not combine a few of their favorite things: Cadbury Creme Eggs and Rice Krispie Treats?

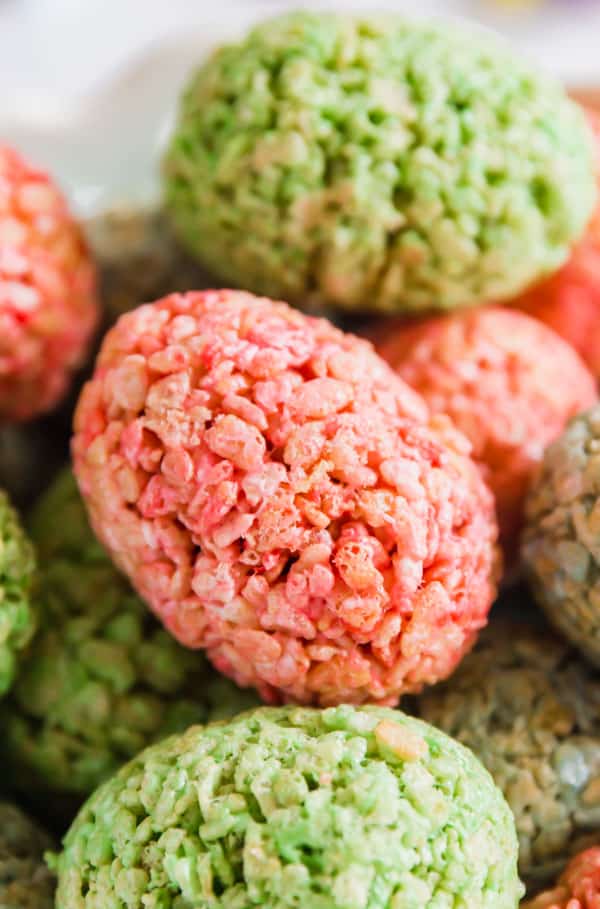
    Easter egg rice krispie treats

    Helpful tips for making Easter Egg Rice Krispie Treats:

    • I wrote the recipe out for you to divide the ingredients into thirds to give you three different colored eggs. Go through and make the eggs one color at a time instead of heating everything at once. This will make the Rice Krispie Treat recipe easier to work with.
    • Prep everything in advance, including removing the wrappers from the Cadbury Creme Eggs before starting.
    • Use Jumbo plastic Easter eggs as a mold to make life easier. Wash them well first and let them dry fully.
    • You'll use a couple tablespoons of the Rice Krispies mixture in each plastic Easter egg half, which you'll press in and mold up with the sides.
    • It helps to keep a wet paper towel nearby to wipe your fingers between eggs because they get sticky and make it harder to work with the Rice Krispies mixture.
    • Once you put the the Cadbury Creme Egg into the plastic Easter egg half, take a little more of the Rice Krispies mixture and build it up a little more around the edges.

    Rice krispie treats recipe

    Helpful tools for Rice Krispie Treat Eggs:

    1. Measuring cups
    2. Mixing bowls
    3. Sheet pan
    4. Spatula
    5. Jumbo plastic Easter eggs
    Cadbury Cream Egg Stuffed Rice Krispie Treats are a super fun Easter treat that kids and adults will go crazy for- especially when they see the delicious surprise inside! Made with marshmallows and crispy rice cereal these are not to be missed!

    Cadbury Creme Egg Stuffed Rice Krispie Treats

    Jessy Freimann
    Cadbury Cream Egg Stuffed Rice Krispie Treats are a super fun Easter treat that kids and adults will go crazy for- especially when they see the delicious surprise inside! Made with marshmallows and crispy rice cereal these are not to be missed!
    No ratings yet
    Print Recipe Pin Recipe
    Prep Time 20 minutes mins
    Cook Time 3 minutes mins
    Total Time 23 minutes mins
    Course Dessert
    Cuisine American
    Servings 18 eggs

    Ingredients
      

    • Cooking spray
    • 4 heaping cups mini marshmallows divided into thirds
    • 3 Tablespoons salted butter divided into thirds
    • 6 heaping cups Rice Krispies cereal divided into thirds
    • food coloring in the colors of your choice
    • 18 Cadbury Creme Eggs unwrapped

    Instructions
     

    • Spray the inside of microwave safe bowls.
    • Place 1 ⅓ cups of mini marshmallows and 1 Tablespoon of butter into the bowls and nuke them for 1 minute on high power.
    • Remove from the microwave and add some food coloring to the bowl (I did about 10 drops per bowl). Stir to mix well.
    • Add ⅓ of the Rice Krispies to the colored melted marshmallows and mix until fully combined.
    • Take a couple tablespoons of the mixture (eyeball it)and mold them into one of the halves of a plastic egg and pressing up the sides of it (it will stop just below the top).
    • Take a couple more Tablespoons of the mixture and repeat with the other egg half.
    • Place the slightly elongated end of a Cadbury Creme Egg into the slightly elongated half of the plastic Easter egg.
    • Take a small amount more of the mixture and build it up around the egg so that it goes just above the flat edge of the plastic egg half.
    • Take the other egg half and place it back onto the other half that has the Cadbury Creme Egg in it and push them into each other to form a whole easter egg.
    • Open the plastic egg back up and carefully remove the Rice Krispie Treat egg from inside of it.
    • Gently push the ends of the egg in to ensure that they're attached and check the sides to make sure there aren't any gaps. Fill in any gaps as needed.
    • Repeat with two more batches of the mixture in the colors of your choice.
    • Store in an air-tight container until your ready to serve.

    Notes

    These will last in an airtight container on your counter for up to a week.
    It helps to keep a wet paper towel nearby to wipe your fingers between eggs because they get sticky and make it harder to work with the Rice Krispies mixture.
    Tried this recipe?Let us know how it was!

    If you tried this recipe please comment and rate it 🙂 I love hearing your feedback and answering your questions!

    Other favorite Rice Krispie Treats recipes are:

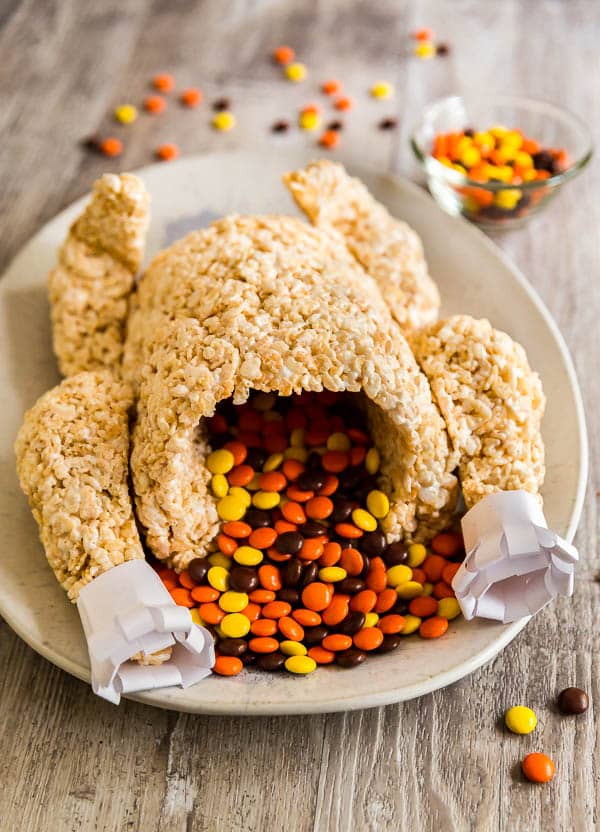
    Rice Krispie Treat Turkey

    An image of a Rice Krispie Treat Turkey with Reese's Pieces stuffed in it.

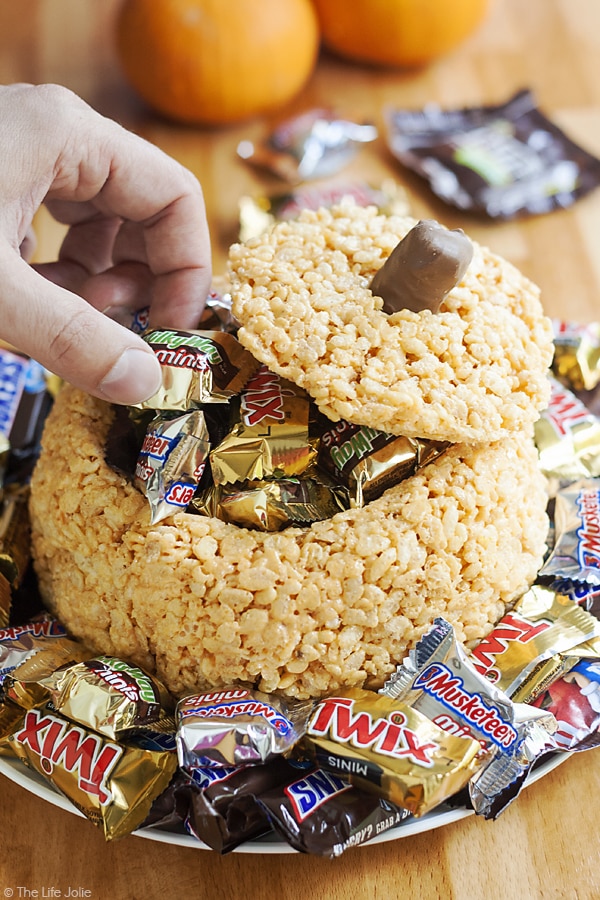
    Rice Krispie Treat Pumpkin

    This Rice Krispie Treat Pumpkin is the perfect addition to your holiday table. It's an easy, kid friendly dessert that looks awesome filled with candy and is so much fun for a Halloween party or Thanksgiving!

    You can find a full index of my recipes here.

    Don't forget to follow The Life Jolie on Pinterest for more recipe inspiration!

    Or if Pinterest isn't your style, bookmark this post!

    Let's keep the conversation going- join my Facebook group! Cadbury Cream Egg Stuffed Rice Krispie Treats are a super fun Easter treat that kids and adults will go crazy for- especially when they see the delicious surprise inside! Made with marshmallows and crispy rice cereal these are not to be missed!
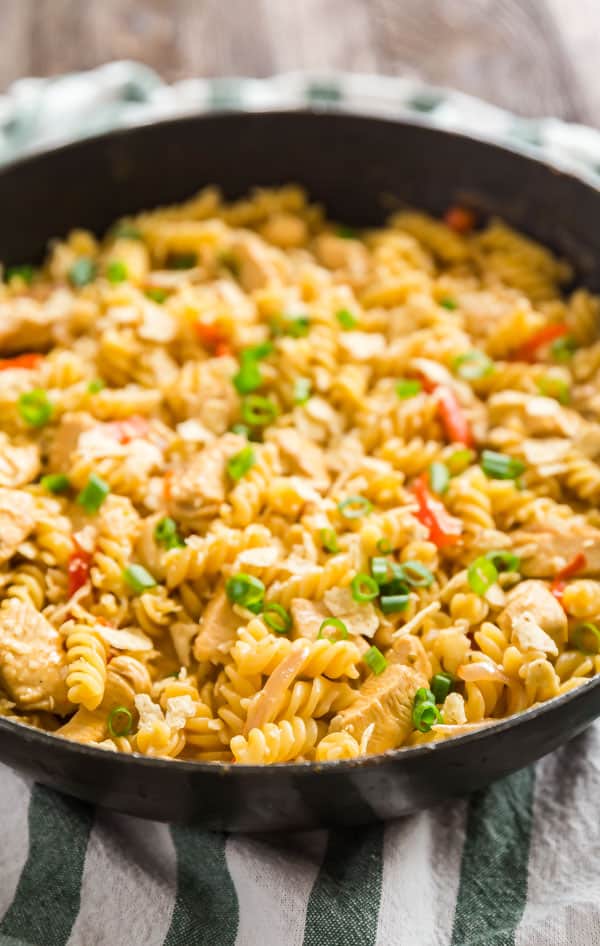
    Creamy Chicken Fajita Pasta Recipe

    Feb 25, 2018 · 4 Comments

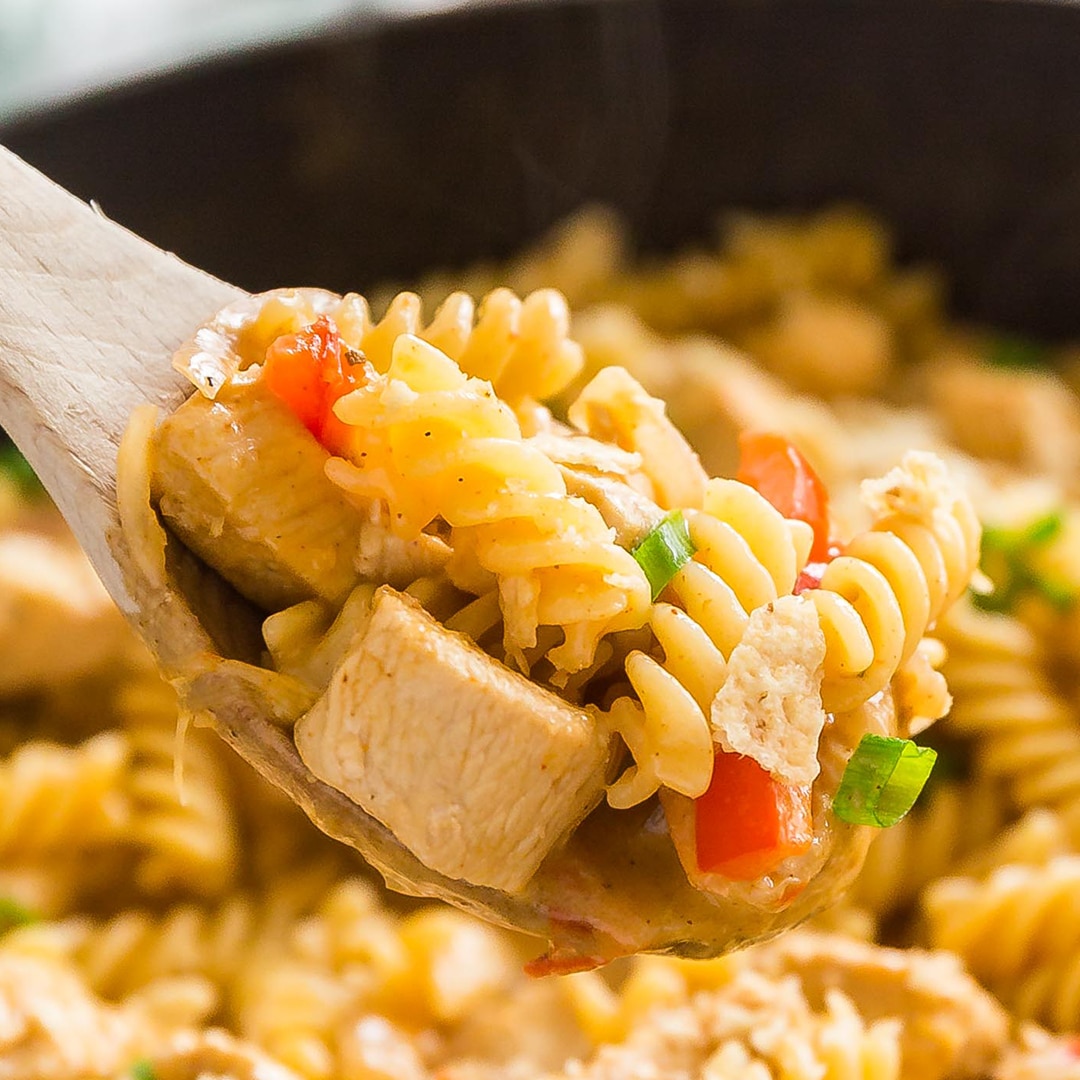
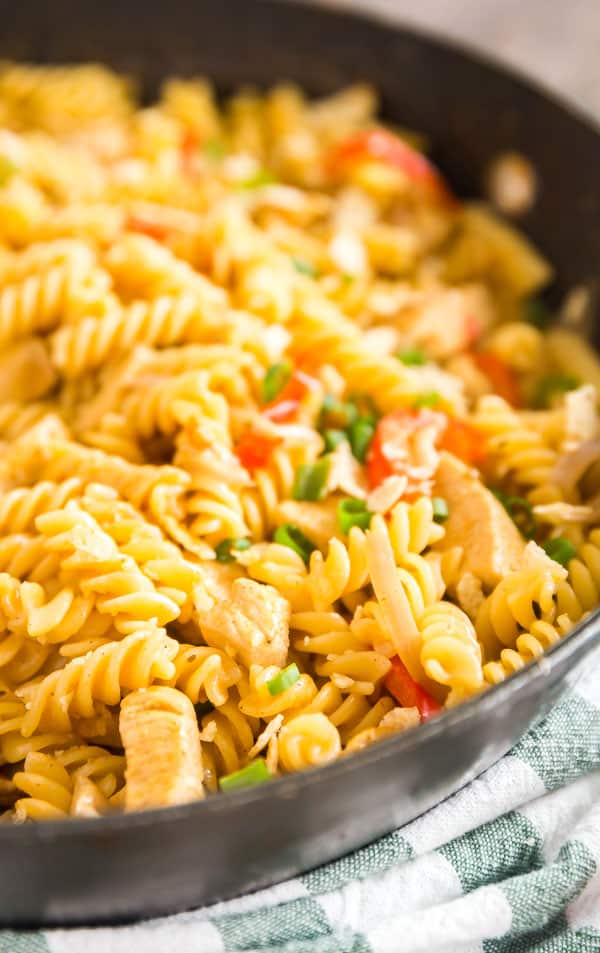
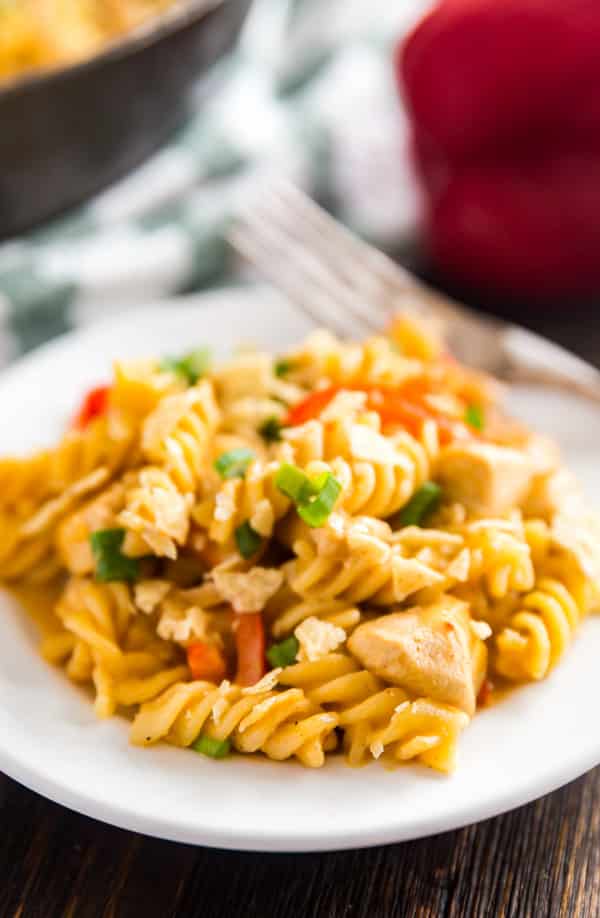
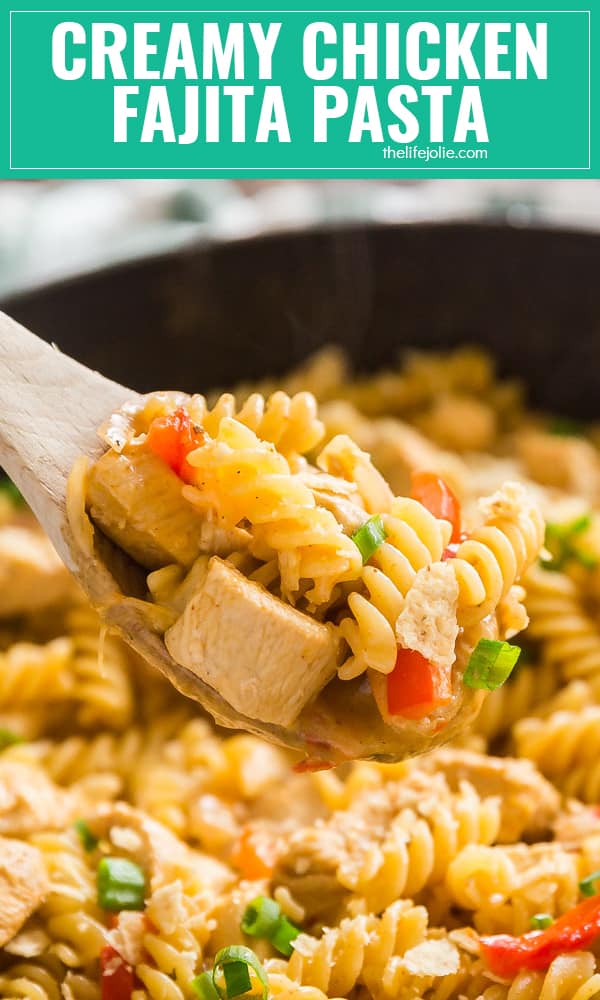
    Looking for a quick, easy and delicious weeknight meal for your family? Look no further, this Creamy Chicken Fajita Pasta is full of tender chicken, sweet peppers and onions and a spicy kick that will keep everyone coming back for seconds!

    Looking for a quick, easy and delicious weeknight meal for your family? Look no further, this Creamy Chicken Fajita Pasta is full of tender chicken, sweet peppers and onions and a spicy kick that will keep everyone coming back for seconds!

    Looking for a quick, easy and delicious weeknight meal for your family? Look no further, this Creamy Chicken Fajita Pasta is full of tender chicken, sweet peppers and onions and a spicy kick that will keep everyone coming back for seconds!

    Creamy Chicken Fajita Pasta

    This post contains Affiliate Links. Please see the disclaimer here.

    Mexican pasta

    I won't lie, for a very long time I was pretty much a purist when it comes to pasta. In my mind, there was no reason to ever stray from my usual pasta with meat sauce or marinara sauce. What can I say, I was raised eating those sauces consistently each week and they totally have my heart.

    And while I still love them, I've branched out a bit and I try to flex my creative muscles from time-to-time. This is one of those times and I am seriously in love with the results. This one is a serious keeper, you guys. Crazy easy. Quick. And super, duper flavorful!

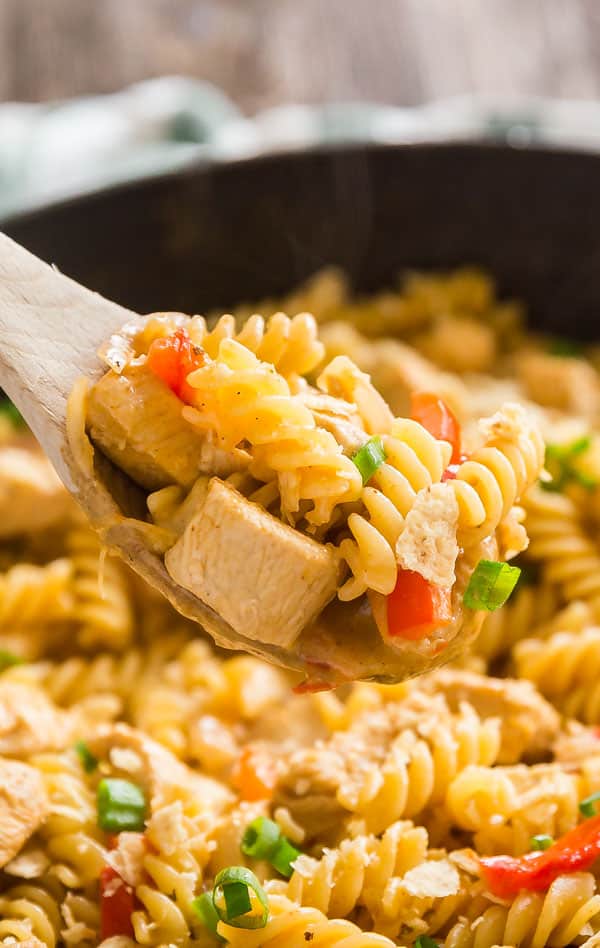
    This has all the great flavors of a Mexican pasta. Like the chicken fajitas you get at your favorite Mexican restaurant but in a super creamy, slightly decadent pasta form. The chicken is super tender and the peppers and onions are always a necessity where fajitas are concerned and a healthy dose of fajita seasoning gives the creamy sauce a spicy kick.

    Chicken fajitas in pasta form

    Frequently asked questions about Fajita Pasta:

    • Can I make this as a one pot pasta? This has not been tested in a single pot so I cannot guarantee the outcome.
    • Can I use chicken that has already been cooked? Yes, just leave the vegetables in the pan and add it at the same spot in the recipe that you'd add raw chicken continue as always since the chicken is already cooked.
    • Does this reheat well? I'd give it a 5/10 for reheating. Creamy sauces are best served right away. That said, I microwaved the leftovers and they weren't bad, just not as great as freshly prepared.
    • Can I use homemade fajita seasoning? Yes, you'd use a little less than 3 Tablespoons of homemade seasoning.
    Fajita seasoning in pasta

    Helpful tools for making Fajita Pasta:

    1. Saute pan
    2. Large pot
    3. Chef's knife
    4. Cutting board
    5. Strainer
    6. Wooden spoon
    7. Measuring spoons
    Looking for a quick, easy and delicious weeknight meal for your family? Look no further, this Creamy Chicken Fajita Pasta is full of tender chicken, sweet peppers and onions and a spicy kick that will keep everyone coming back for seconds!

    Creamy Chicken Fajita Pasta Recipe

    Jessy Freimann
    Looking for a quick, easy and delicious weeknight meal for your family? Look no further, this Creamy Chicken Fajita Pasta is full of tender chicken, sweet peppers and onions and a spicy kick that will keep everyone coming back for seconds!
    No ratings yet
    Print Recipe Pin Recipe
    Prep Time 10 minutes mins
    Cook Time 20 minutes mins
    Total Time 30 minutes mins
    Course Main
    Cuisine Mexican
    Servings 6 servings
    Calories 502 kcal

    Equipment

    • 1 Skillet
    • 1 cutting board
    • 1 chefs knife
    • 1 wooden spoon
    • 1 Measuring cups and spoons

    Ingredients
      

    • 3 Tablespoons olive oil divided
    • 1 red bell pepper thinly sliced (I also halved the slices)
    • ½ large red onion thinly sliced
    • 2 cloves garlic pressed or chopped
    • 3 large boneless skinless chicken breasts, cut into 1 inch chunks
    • 1 packet fajita seasoning or around 2 ½ Tablespoons of homemade fajita seasoning
    • 3 Tablespoons flour
    • 14.5 ounces chicken broth
    • ½ cup heavy cream
    • 1 pound Rotini cooked to al dente as per package directions (or the pasta of your choice)
    • Sliced green onions for garnish
    • Crushed tortilla chips for garnish

    Instructions
     

    • Heat 2 Tablespoons oil over medium-high heat in a large skillet.
    • Add red pepper, onions and garlic.
    • Saute to soften stirring often, about 5 minutes.
    • Remove vegetables from the pan and add 1 Tablespoon oil to the pan.
    • Add chicken to the pan and begin to brown, stirring often, about 2-3 minutes.
    • When the chicken is about half way browned, add the vegetables back into the pan and cook for another 2 minutes.
    • Sprinkle with fajita seasoning and stir to coat.
    • Sprinkle on flour and stir to coat.
    • Add broth and heavy cream to the pan and stir to combine.
    • Bring to a boil and reduce the heat to medium low.
    • Simmer for 10 minutes to reduce and thicken.
    • Add cooked pasta and toss to combine cooking about another minute.
    • Top with green onions and crushed tortilla chips and serve immediately.

    Notes

    This will last up to 3 days covered in the refrigerator.

    Nutrition

    Serving: 1servingCalories: 502kcalCarbohydrates: 63gProtein: 24gFat: 17gSaturated Fat: 6gPolyunsaturated Fat: 2gMonounsaturated Fat: 7gTrans Fat: 0.01gCholesterol: 60mgSodium: 331mgPotassium: 472mgFiber: 3gSugar: 4gVitamin A: 931IUVitamin C: 27mgCalcium: 40mgIron: 2mg
    Tried this recipe?Let us know how it was!

    Here are some other favorite pasta recipes:

    20 Minute Taco Pasta

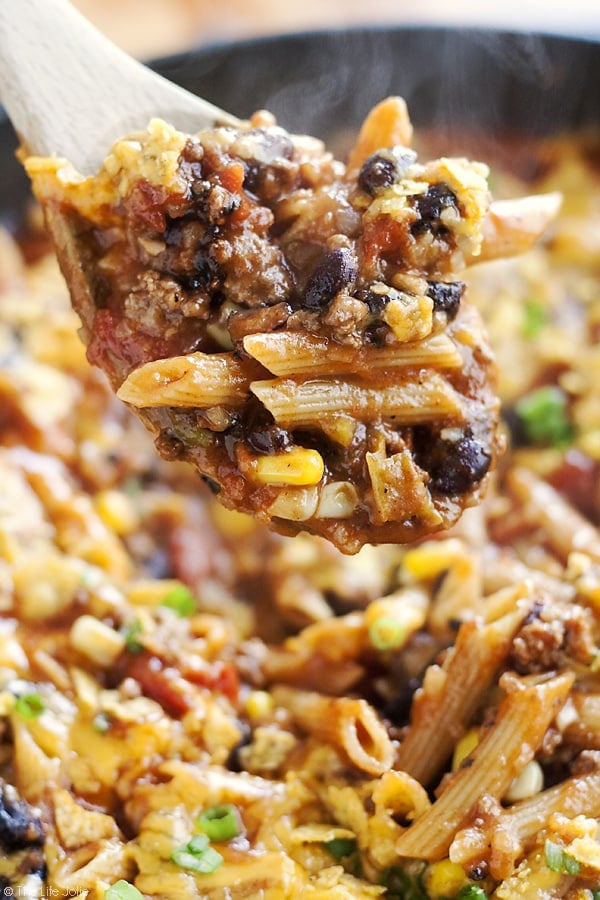
    20 Minute Taco Pasta is such an easy one pot recipe. This tasty dinner is made in one skillet with ground beef and Barilla Pronto Penne Pasta. It's creamy, cheesy and full of great flavor that the whole family will love!

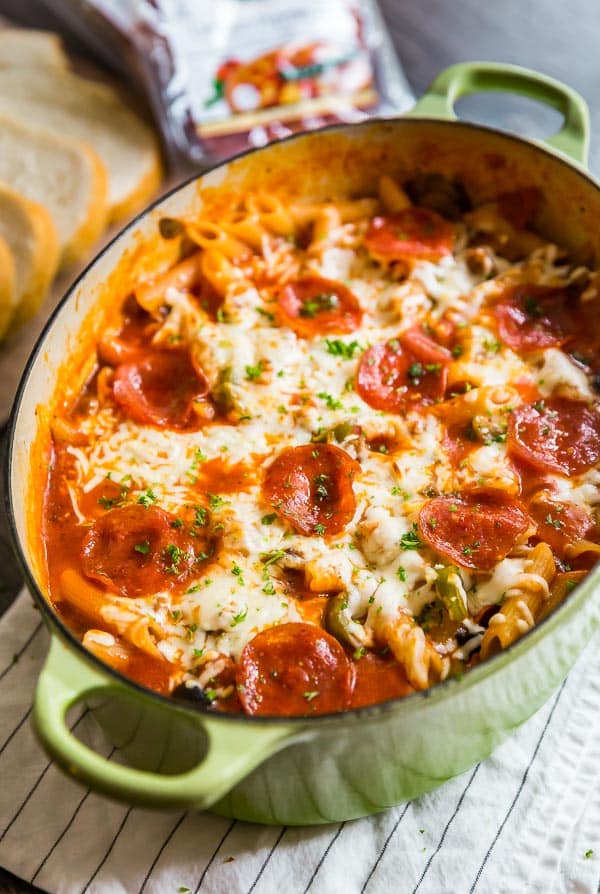
    Supreme Pizza One Pot Pasta

    A pot of Supreme Pizza One Pot Pasta.

    You can find a full index of my recipes here.

    Don't forget to follow The Life Jolie on Pinterest for more recipe inspiration!

    Or if Pinterest isn't your style, bookmark this post!

    Looking for a quick, easy and delicious weeknight meal for your family? Look no further, this Creamy Chicken Fajita Pasta is full of tender chicken, sweet peppers and onions and a spicy kick that will keep everyone coming back for seconds!

    Let's keep the conversation going- join my Facebook group! 
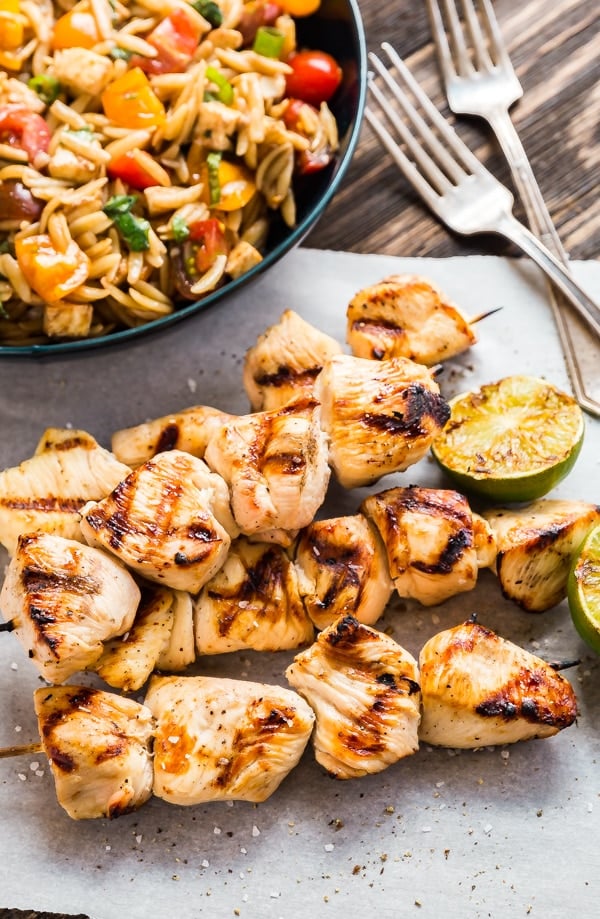
    Irish Car Bomb Cake Balls Recipe

    Feb 23, 2018 · Leave a Comment

    Irish Car Bomb Cake Balls

    Irish Car Bomb Cake Balls Recipe turns everyone's favorite shot into a sweet and delicious confection. Bring these to your next party, if you don't eat them all first!

    Irish Car Bomb Cake Balls Recipe turns everyone's favorite shot into a sweet and delicious confection. Bring these to your next party, if you don't eat them all first! Chocolate Cake with Guinness in it, made into a truffle with Irish Cream and covered in white chocolate. These are dangerously addictive!

    Irish Car Bomb Cake Balls Recipe

    This post contains Affiliate Links. Please see the disclaimer here.

    Many moons ago when I was in my early 20's and living in NYC, I worked at an Irish Pub in Chelsea. It was a super-fun pub where I also hung out and drank a bit. It was there, that I enjoyed my first Irish Car Bomb. I was skeptical at first. And I had passed on many of these before. But I finally did it and it was love at first taste.

    Cake balls

    What is an Irish Car Bomb Shot?

    This is a shot that has three main components. The first is a pint glass filled about half way with Guinness. The other two are Jameson's Irish Whiskey and Bailey's Irish Cream which are poured into a shot glass (a half ounce of each). You then drop the shot glass into the Guinness and chug it as fast as you can. This is the key to enjoying this shot because if you don't drink it fast enough, it'll curdle.

    Cake ball recipe

    Although the name is definitely insensitive, and although I'm not really a whiskey kind of gal (Tequila for life!!) once I tried this shot I loved it. It went down super easily and almost tasted a bit like dessert. But fun dessert, that gets you tipsy! So I figured why not turn it into real dessert?

    So I did just that. Not I wasn't trying to make these too boozy. What can I say, I'm getting old! So since I'm a totally lame old lady, and not really a lover of whiskey, I did not include the whiskey in with this recipe. I know. But I'm not sorry, because these are so darn delicious.

    Cake pops recipe

    How do you make Irish Car Bomb Cake Balls?

    • First thing you'll do is make your favorite chocolate cake mix in a 9" x 13" pan. That's right. I said to use a cake mix. Work smarter, not harder. But instead of the water in the cake mix, I want you to crack open a bottle of Guinness and substitute the exact same amount of Guinness in place of the water. And then drink the rest. Because you deserve it.
    • Once the cake has cooled, pull all of it out of the pan and place it into the bowl of your stand mixer. Or if you don't have one, use your hands.
    • Run the stand mixer for a few seconds until the cake is broken down into crumbs (or crush them with your hands). Try not to steal too many bites of cake for yourself. Throw a couple tablespoons of Irish Cream into the bowl and run the mixer for a few more seconds. At this point it will come together as a dough.
    • Shape them into balls and let them chill in the fridge for a bit.
    • Melt some white chocolate (and make sure you check out my handy tutorial on melting chocolate in the microwave) and dip each ball into it to cover. Transfer it to a pan lined with wax paper and and sprinkle with some chocolate sprinkles (do this right away, the chocolate dries pretty quickly!).
    • Chill them to set the chocolate and then eat up!

    Irish car bomb

    Helpful tools for this Cake Ball Recipe:

    1. 9" x 13" pan
    2. Measuring cup
    3. Measuring spoons
    4. Stand mixer or Hand mixer
    5. Mixing bowls
    6. Sheet pan

    Irish Car Bomb Cake Balls

    Irish Car Bomb Cake Balls Recipe

    Jessy Freimann
    Irish Car Bomb Cake Balls Recipe turns everyone’s favorite shot into a sweet and delicious confection. Bring these to your next party, if you don’t eat them all first!
    No ratings yet
    Print Recipe Pin Recipe
    Prep Time 20 minutes mins
    Cook Time 30 minutes mins
    Total Time 50 minutes mins
    Course Dessert
    Cuisine American
    Servings 50 pieces
    Calories 116 kcal

    Equipment

    • 1 cookie scoop
    • 1 sheet pan
    • 1 saucepan
    • 1 Measuring cups and spoons

    Ingredients
      

    • 1 Chocolate Cake mix + the ingredients that it calls for- usually eggs and liquid
    • 1 bottle Guinness this will take the place of the liquid in the cake mix recipe
    • 2 Tablespoons Irish Cream
    • 24 ounces white chocolate chips 2 bags
    • ¼ cup Chocolate sprinkles

    Instructions
     

    • Bake the cake as per the package directions but instead of the amount of water that they call for, substitute it for the same amount of Guinness.
    • Once the cake has cooled remove it from the pan and place it into the bowl of a stand mixer with the paddle attachement or a mixing bowl.
    • Run the stand mixer for a few seconds (or use your hands) to turn the cake into crumbs.
    • Add the Irish Cream and and run the mixer for a few more seconds until it comes together with an almost dough-like consistency (or use your hands).
    • Roll the cake mixture into 1-inch balls and place them on a parchment-lined pan.
    • Chill for at least an hour or overnight.
    • Melt the chocolate in the microwave in two 30 second increments and then 10 second increments, stirring in between each time until the chocolate its melted and smooth (try to do one bag at a time because it solidifies fast).
    • Using a fork, carefully roll each cake ball the melted chocolate and and transfer it to a wax paper lined pan.
    • Immediately sprinkle chocolate sprinkles on top (act fast- it hardens really quickly.
    • Chill to set and enjoy!

    Notes

    These hold up well in the refrigerator for up to a week.

    Nutrition

    Serving: 4piecesCalories: 116kcalCarbohydrates: 15gProtein: 1gFat: 6gSaturated Fat: 3gPolyunsaturated Fat: 1gMonounsaturated Fat: 2gCholesterol: 3mgSodium: 84mgPotassium: 67mgFiber: 0.2gSugar: 12gVitamin A: 4IUVitamin C: 0.1mgCalcium: 40mgIron: 0.4mg
    Tried this recipe?Let us know how it was!

    Other great cake ball inspired recipes are:

    Monster (Edible) Cookie Dough Truffles

    A plate of Monster (Edible) Cookie Dough Truffles with one in the middle that has a bite taken out of it.

    M&M’S Brownie Truffles

    These M&M's Brownie Truffles are an easy chocolate dessert recipe and an excellent gift to give this holiday season. It's a super-simple recipe made with rich, fudgy brownies and a surprise in the middle. These are a pretty addition to any Christmas cookie platter that the whole family will love!

    You can find a full index of my recipes here.

    Don't forget to follow The Life Jolie on Pinterest for more recipe inspiration!

    Or if Pinterest isn't your style, bookmark this post!

    Let's keep the conversation going- join my Facebook group!
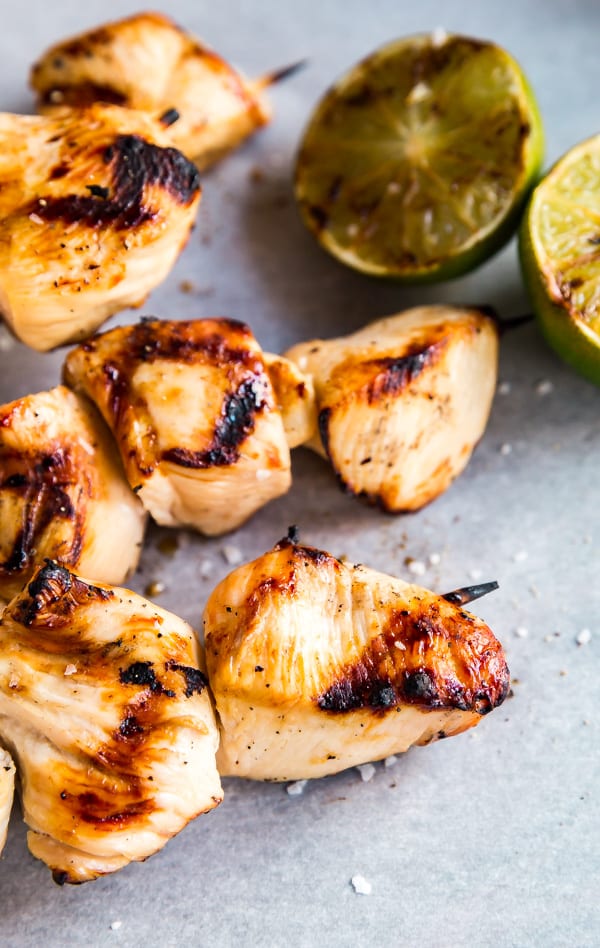
    Irish Car Bomb Cake Balls Recipe turns everyone's favorite shot into a sweet and delicious confection. Bring these to your next party, if you don't eat them all first! Chocolate Cake with Guinness in it, made into a truffle with Irish Cream and covered in white chocolate. These are dangerously addictive!

    How to separate egg whites from yolks, 2 ways | The Life Jolie Kitchen Basics

    Feb 20, 2018 · 1 Comment

    Does the idea of separating eggs make you a little nervous? Have no fear my friends, I want to show you how to separate egg whites from yolks with two different ways you can do it!

    Does the idea of separating eggs make you a little nervous? Have no fear my friends, I want to show you how to separate egg whites from yolks with two different ways you can do it!

    Does the idea of separating eggs make you a little nervous? Have no fear my friends, I want to show you how to separate egg whites from yolks with two different ways you can do it!

    How to separate egg whites from yolks

    This post contains Affiliate Links. Please see the disclaimer here.

    How to separate eggs

    I know a lot of people who are excited to make certain recipes. This is, until they read it closely and find that it requires you to separate eggs. And suddenly, that very recipe that called to them in the first place now seems a bit daunting.

    And I totally get it. Eggs can be tricky. If you hit it too hard, you run the risk of cracking it so hard that you break the yolk. Sometimes you get a rogue eggshell that infiltrates your egg white. Things can get messy really quickly.

    how to separate egg yolk from white

    Questions about separating eggs:

    • What does a recipe mean by "separated egg"? Sometimes a recipe will call for only the egg yolk or only the egg white. Sometimes it will call for them both but use each one at different times. In order to achieve this, you need to separate the egg white from the yolk.
    • Why do you separate eggs when baking? Typically egg whites can be used for leavening when whipped and added to batter and are also used make merengue. On the flip side, egg yolks can add a certain richness and are often used in making custards and mayonnaise.

    Separating eggs

    How to separate eggs:

    I'm going to share two methods for separating eggs. Neither one is better than the other, it really just comes down to personal preference. The second method is a bit messier, but it provides you a chance to make it work in the event that certain things go wrong with the first method.

    Are either of them foolproof? No. Nothing is fool proof. I cook and bake every single day, sometimes multiple times a day and I still ruin recipes and break egg yolks. But give these a try and make all those recipes that look so good to you!

    Separate eggs

    Helpful tools:

    1. Bowls

    Does the idea of separating eggs make you a little nervous? Have no fear my friends, I want to show you how to separate egg whites from yolks with two different ways you can do it!

    HOW TO SEPARATE EGG WHITES FROM YOLKS, 2 WAYS

    Jessy Freimann
    Does the idea of separating eggs make you a little nervous? Have no fear my friends, I want to show you how to separate egg whites from yolks with two different ways you can do it!
    5 from 1 vote
    Print Recipe Pin Recipe
    Prep Time 5 minutes mins
    Total Time 5 minutes mins
    Course Prep
    Cuisine American
    Servings 1 serving

    Ingredients
      

    • Raw eggs
    • A bowl

    Instructions
     

    Method 1:

    • Carefully but firmly crack the egg on the counter or table that you're working on. Try to be firm enough that you only need to do it once because the more you hit the egg against the surface, the more of a chance you have of breaking the yolk.
    • Once its cracked enough, slowly and carefully begin to separate both halves of the shell over one of the bowls. As you do this, the white will begin to drain over the sides of the shell into the bowl.
    • As you separate the shells, keep the yolk in one of the halves of the shell.
    • Once the shells are fully separated, pass the yolk back and forth between both shell halves being careful not to break the yolk. As you do this, the white will drain out into the bowl until you're left with the yolk.

    Method 2:

    • Carefully but firmly crack the egg on the counter or table that you're working on. Try to be firm enough that you only need to do it once because the more you hit the egg against the surface, the more of a chance you have of breaking the yolk.
    • Place one of your hands over a bowl with your palm facing up and your hand creating a bit of a cup.
    • Using your other hand, carefully open the egg so that both the yolk and the white go into your hand, trying not to break the yolk.
    • Move your fingers slightly apart so that the egg whites drain out into the bowl but the yolk stays in.
    • Do this until the white has fully drained and you're left with only the yolk.

    Notes

    If you're starting method 1 and you end up cracking your egg in a way that makes it so that one half of the egg is in a really small piece, you can pour the egg into your hand and begin method 2.
    Tried this recipe?Let us know how it was!


    Here are some other great how-to's:

    How to peel ginger

    Peeled ginger in a hand.

    How to chop an onion

    Chopped onions on a cutting board.

    You can find a full index of my recipes here.

    Don't forget to follow The Life Jolie on Pinterest for more recipe inspiration!

    Or if Pinterest isn't your style, bookmark this post!

    Let's keep the conversation going- join my Facebook group!
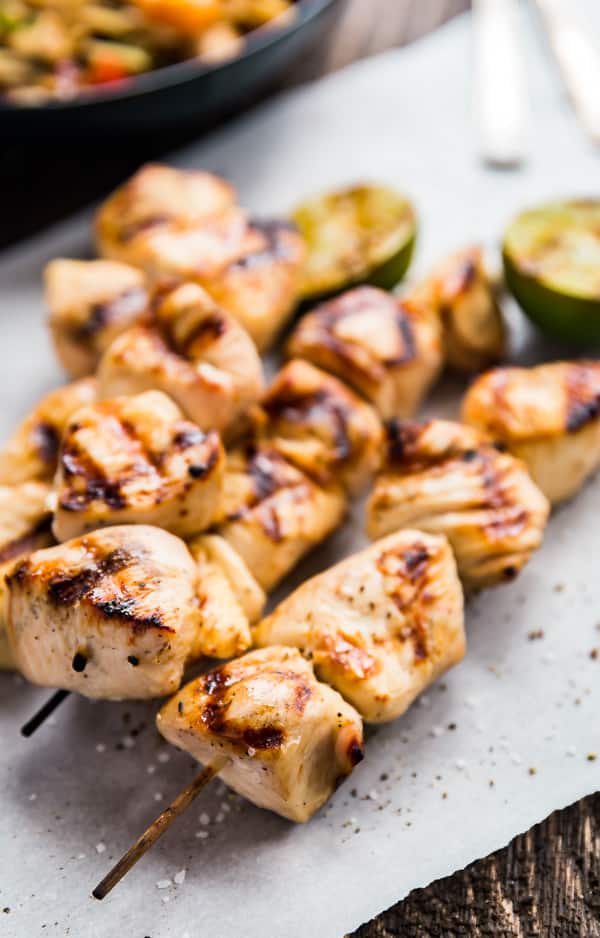
    BLT Ranch Flatbread Pizza Recipe

    Feb 14, 2018 · Leave a Comment

    A square image of BLT Ranch Flatbread Pizza.

    This BLT Ranch Flatbread Pizza is one of my favorite easy quick dinner hacks that combines two of my favorite things: pizza and BLT sandwiches. Easy never tasted so good!

    A close up shot of BLT Ranch Flatbread Pizza on a pan.

    This post contains Affiliate Links. Please see the disclaimer here.

    I'm all about throw-together lunch and dinner ideas that require very little effort for maximum flavor. Because life gets busy! Between kids school and activities and work and various commitments it can be a real struggle getting food on the table. So this is the kind of recipe that's great to have up your sleeve for those crazy nights!

    I love throwing together simple flatbreads of all different varieties for my family. My three year old really loves getting to help me assemble them, or as she says "decorate" them. She takes great pride in getting them just right and ready for our family to eat.

    This particular easy flatbread is inspired by my husband, Justin. He is a bit of a picky eater (understatement of the year- my 20 month old has a more extensive palate!!). But two things that he absolutely loves are BLT's and Ranch dressing. Though he doesn't often put these things together, BLT's make a frequent appearance in our meal rotation and Ranch dressing is a staple we always have in our fridge.

    A close up of a slice of BLT Ranch Flatbread Pizza.

    So I figured a BLT Ranch Flatbread Pizza recipe was the perfect opportunity to combine these things that he loves! Smokey bacon, crisp lettuce and sweet tomatoes combined with zesty and creamy ranch dressing. All of this served atop flatbreads that have been quickly baked until they're just crispy around the edges.

    These would be a great appetizer for a party if you cut them into smaller pieces (game day, anyone?). For a fully meal you can serve them with crispy potato chips or along with a cozy cup of soup to round out your meal. They also make a lovely light lunch on their own!

    You can totally fry the bacon ahead or use up leftover bacon, since these aren't served hot. I tend to bake the flatbreads and cool them right before assembling  but I'm sure you could also do that in advance as long s you cool them fully before wrapping so that they don't get soggy from the condensation (once cooled, store in an air-tight container on your counter for up to a day or two).

    BLT Ranch Flatbread Pizza cut up on a pan.

    Helpful tools:

    1. Spatula
    2. Sheet pan
    3. Chef's knife
    4. Cutting board
    5. Fry pan

    A square image of BLT Ranch Flatbread Pizza.

    BLT Ranch Flatbread Pizza

    Jessy Freimann
    Need dinner in under 30 minutes? Give this flatbread pizza recipe a shot- it's easy and delicious for a family dinner.
    No ratings yet
    Print Recipe Pin Recipe
    Prep Time 10 minutes mins
    Cook Time 15 minutes mins
    Total Time 25 minutes mins
    Course Lunch, Main
    Cuisine American
    Servings 4 servings
    Calories 102 kcal

    Equipment

    • chefs knife
    • cutting board
    • measuring cups
    • measuring spoons
    • sheet pan

    Ingredients
      

    • 4 Pre-made flatbreads
    • 4 Tablespoon Ranch to taste
    • 1 cup Shredded lettuce
    • 1 cup Quartered grape tomatoes
    • 4 slices cooked bacon crumbled

    Instructions
     

    • Preheat the oven to 400 degrees and line a pan with parchment or foil (for easy clean up).
    • Place the flatbreads onto the pan and bake for 10-15 minutes until the edges brown slightly. Remove from oven and cool for a few minutes.
    • Spread ranch dressing onto each flat bread in a thin layer.
    • Top with lettuce, tomatoes and bacon to taste. Serve immediately.

    Notes

    You can easily adapt the amounts of ingredients to suit your taste.
    Leftovers last up to 3 days in the refrigerator.

    Nutrition

    Serving: 1flatbreadCalories: 102kcalCarbohydrates: 1gProtein: 3gFat: 9gSaturated Fat: 2gPolyunsaturated Fat: 4gMonounsaturated Fat: 3gTrans Fat: 1gCholesterol: 12mgSodium: 270mgPotassium: 50mgSugar: 1gVitamin A: 9IUCalcium: 5mgIron: 1mg
    Tried this recipe?Let us know how it was!

    Another favorite flatbread recipe is this one:

    BBQ Chicken Flatbread Pizza

    Need a quick meal for those busy back-to-school nights when you're shuffling between activities? Look no further! This BBQ Chicken Flatbread Pizza is the perfect weeknight meal. It is really quick and easy to make- juicy grilled chicken, melty cheese, tangy BBQ sauce and crunchy fried onions. This is a meal your whole family will enjoy!

    I also love this flatbread recipe:

    Pea Pesto Flatbread

    A photo of sliced Pea Pesto Flatbread taken from an overhead angle.

    You can find a full index of my recipes here.

    Don't forget to follow The Life Jolie on Pinterest for more recipe inspiration!

    Or if Pinterest isn't your style, bookmark this post!

    Let's keep the conversation going- join my Facebook group!
    How to peel ginger | The Life Jolie Kitchen Basics

    Feb 13, 2018 · 2 Comments

    A square image for how to peel ginger.

    Did you know that you don't need to use a peeler to peel ginger? I'm going to show you how to peel ginger with one simple tool that we all have in our kitchen!

    Did you know that you don't need to use a peeler to peel ginger? I'm going to show you how to peel ginger with one simple tool that we all have in our kitchen!

    I gotta be honest here, I didn't really cook with fresh ginger up until pretty recently. Don't get me wrong, I like it. Although it's not my favorite but it adds a great zingy brightness to dishes. But as you've probably noticed, I don't do much asian-inspired cooking. This is more due to lack of knowledge and experience. I should probably learn more about this because I love eating this style of food.

    Anyway, I'm getting off topic here. Since we started our video business, I've been lucky enough to work with a variety of different clients, all of whom have unique and different types of recipes. I've been thrilled to get to sample all different foods, that I might not have normally made and have cooked outside of my comfort zone at times. Suffice it to say, it's been a source of amazing growth and I've had to learn to prepare certain things that I don't often use in my every day cooking. One of these things is fresh ginger.

    A large knob of ginger.

    How do you peel ginger?

    That, my friends is the question of the day. Let me first tell you, that you don't need to pull out your peeler the way you would if you were peeling potatoes. Oh no, that can stay right in its drawer. I will instead direct you over to your silverware drawer where you will then pull out...wait for it...a spoon.

    Wait, what?!

    Hands using a spoon to peel ginger.

    That's right. I'm telling you to peel your ginger with a spoon. I know it sounds crazy but bear with me here. Not only is it a safer option than a peeler or (God forbid!) a knife, it also helps avoid unnecessary waste since you're only scraping off the peel, leaving the most amount of the ginger available for your uses.

    This will leave you with fresh ginger that is perfect for slicing, chopping or grating and adding to all sorts of great recipes!

    Peeled ginger in a hand.

    A square image for how to peel ginger.

    How to peel ginger

    Jessy Freimann
    Here is the quickest and easiest way to peel ginger root for cooking
    5 from 2 votes
    Print Recipe Pin Recipe
    Prep Time 5 minutes mins
    Total Time 5 minutes mins
    Course hack, How-to, kitchen basics
    Cuisine Asian
    Servings 1 stalk
    Calories 333 kcal

    Equipment

    • 1 spoon

    Ingredients
      

    • 1 piece firm fresh ginger

    Instructions
     

    • Hold the ginger in your hand over a bowl or a trash can.
    • Take the spoon in the other hand and gently but firmly scrape the spoon along the area of the ginger that you want to peel. I peel away from me out of habit but you can also peel toward you since the spoon isn't sharp.
    • Repeat all around the ginger until the peel is completely removed leaving the fresh inside of the ginger.
    • Prepare as per your recipe.

    Notes

    This is best to do right before using. You can also freeze the ginger once peeled or grated.

    Nutrition

    Serving: 1gramCalories: 333kcalCarbohydrates: 9gProtein: 35gFat: 17gSaturated Fat: 2gPolyunsaturated Fat: 11gMonounsaturated Fat: 5gSodium: 16mgFiber: 3gSugar: 1gCalcium: 495mgIron: 5mg
    Tried this recipe?Let us know how it was!

    Here are some other great how-to's:

    How to chop an onion

    Chopped onion on a cutting board.

    How to peel a pomegranate

    Hands holding a bowl of pomegranate seeds for How to peel a pomegranate.

    You can find a full index of my recipes here.

    Don't forget to follow The Life Jolie on Pinterest for more recipe inspiration!

    Or if Pinterest isn't your style, bookmark this post!

    Let's keep the conversation going- join my Facebook group!
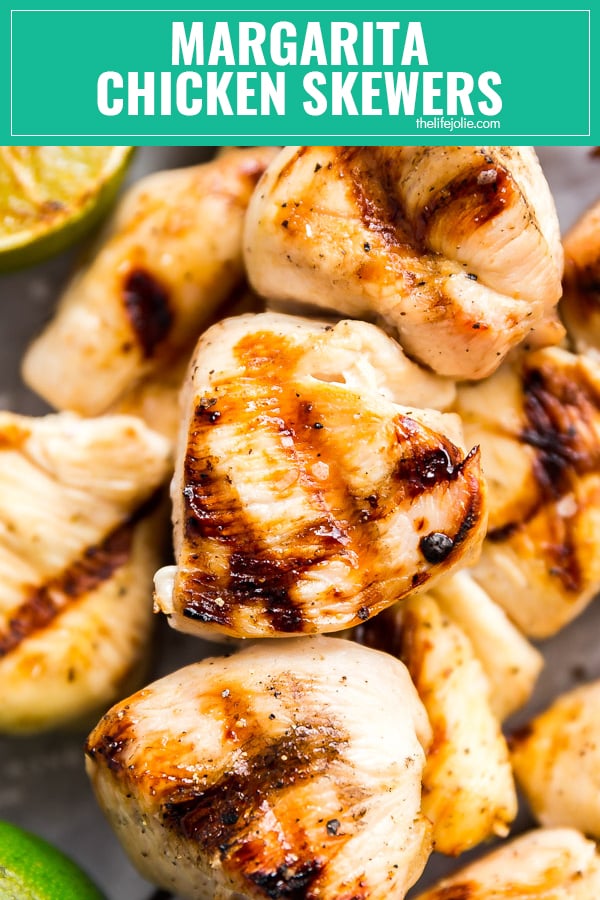
    Grandma's Best Banana Cake Recipe

    Feb 8, 2018 · 1 Comment

    A square image of Grandma's Best Banana Cake recipe.

    Bring my Grandma's Best Banana Cake recipe to your next family dinner or party. Everyone will be fighting for seconds!

    Grandma's Best Banana Cake recipe with a bite taken out of it.

    This post contains Affiliate Links. Please see the disclaimer here.

    Ahhhhh, Grandma's. They just know what's good. And they're the queens of making treats for their little one's. Especially my Grandma's! They both have/had an endless variety of delicious recipes and treats up their sleeve and they showed little to no shame in spoiling us with every single one of them.

    A plate of Grandma's Best Banana Cake recipe.

    One such is my Grandma Eve's Banana Cake. This is a recipe that is so good, the mere mention of makes my mom (her daughter) start enthusiastically waxing poetic about how "it's just the very best cake and ohmygahhhh the frosting..." And I have to be honest, I don't really remember the frosting or this cake too well. I think this has more to do with the fact that although I enjoy bananas, they've never really been my favorite or even a first choice for that matter.

    A bite one a fork of Grandma's Best Banana Cake recipe.

    But I must say, now that I'm an adult and also way, way, WAY deep down the cooking and baking rabbit hole, I completely understand why this banana cake recipe gets her going. It's insanely moist and has the most perfect balance of flavors. And the frosting is a game changer. It has an extra light and fluffy texture with just the right amount of vanilla flavor. Like, I may never make another kind of frosting again, it's just that good.

    Grandma's Best Banana Cake recipe on a plate with a fork on it.

    I made this easy banana cake in a 9" x 13" pan but you can also make it in two 8" round pans if you'd rather. Be careful not to over-mix the batter, as it will sink a bit in the middle if you do. This is easy to hide with the frosting, but it's still good to be aware of.

    This cake is a killer option to bring to a family dinner. It's great to serve a group and your friends and family will be raving over how delicious it is!

    Helpful tools:

    1. 9" x 13" pan
    2. Mixing bowl
    3. Hand mixer or Stand mixer
    4. Spatula

    A square image of Grandma's Best Banana Cake recipe.

    Grandma’s Best Banana Cake Recipe

    Jessy Freimann
    Grandma's recipes are always the best and this banana cake recipe couldn't be easier. Completely with the best homemade frosting, the whole family will love this!
    5 from 1 vote
    Print Recipe Pin Recipe
    Prep Time 30 minutes mins
    Cook Time 40 minutes mins
    Total Time 1 hour hr 10 minutes mins
    Course Dessert
    Cuisine American
    Servings 10 servings
    Calories 371 kcal

    Ingredients
      

    Cake

    • ½ cup salted butter softened + a little for preparing the pan
    • 1 ½ cups granulated sugar + a little for preparing the pan
    • 2 large eggs beat together
    • 2 cups flour
    • ½ teaspoon baking powder
    • ¾ teaspoon baking soda
    • ½ teaspoon salt
    • ¼ cup buttermilk
    • 1 cup mashed ripe bananas around 2-2 ½ bananas
    • 1 teaspoon vanilla

    Frosting:

    • 1 cup milk
    • ¼ cup + 1 Tablespoon flour maybe more if needed
    • 1 cup salted butter
    • 1 cup confectioner's sugar
    • 2 teaspoons vanilla

    Instructions
     

    Cake:

    • Preheat the oven to 350 degrees and grease and sugar a 13" by 9" pan.
    • In a medium bowl, sift together flour, baking powder, baking soda, and salt. Set aside.
    • In another medium bowl mix butter milk, ripe bananas, and vanilla until well combined. Set aside
    • In a large mixing bowl, cream together the butter, sugar and 2 eggs.
    • Add some of the flour mixture and mix.
    • Add some of the banana mixture and mix a little more.
    • Pour the batter into the prepared pan.
    • Repeat until everything is just combined.
    • Bake for 30 minutes or until a cake tester comes out clean (or a tooth pick).
    • Cool completely before frosting

    Frosting:

    • Add the flour into the milk in a small pot over medium heat, stirring continuously until it turns into a slightly thicker paste, around 3-5 minutes. Cool completely.
    • In a large bowl, cream together the butter and sugar.
    • Add the milk and flour mixture and beat until well combined.
    • Add vanilla and beat well.
    • Spread over the top of the cake and enjoy!

    Notes

    If you're not planning on eating it right after frosting, store it in the refrigerator and remove it 20-30 minutes before you want to serve it to soften up the frosting again.

    Nutrition

    Serving: 1sliceCalories: 371kcalCarbohydrates: 33gProtein: 5gFat: 30gSaturated Fat: 18gPolyunsaturated Fat: 1gMonounsaturated Fat: 8gTrans Fat: 1gCholesterol: 114mgSodium: 469mgPotassium: 95mgFiber: 1gSugar: 2gVitamin A: 954IUCalcium: 66mgIron: 1mg
    Tried this recipe?Let us know how it was!

    Another favorite cake recipe is this one:

    Poppy Seed Cake

    A man using a sieve to sprinkle powdered sugar onto a Poppy Seed Cake.

    I also love this cake recipe:

    Lemon Pistachio Cake

    This Lemon Pistachio Cake is the best easy recipe when you need a quick cake to wow your guests. This is actually a hack for a box cake mix made with pudding and topped with light and fluffy whipped cream. The result is a super moist and pretty layered cake that is so good your guests will never guess that it's only halfway homemade!

    You can find a full index of my recipes here.

    Don't forget to follow The Life Jolie on Pinterest for more recipe inspiration!

    Or if Pinterest isn't your style, bookmark this post!

    Let's keep the conversation going- join my Facebook group! Bring my Grandma's Best Banana Cake recipe to your next family dinner or party. Everyone will be fighting for seconds! It's super moist with the most light and fluffy frosting ever! This one is a keeper!

    How to cut grapefruit | The Life Jolie Kitchen Basics

    Feb 6, 2018 · Leave a Comment

    A square image for this tutorial of how to cut grapefruit.

    Grapefruit is such a delicious and refreshing breakfast option and I'm going to show you how to cut grapefruit in a quick and easy tutorial!

    Grapefruit is such a delicious and refreshing breakfast option and I'm going to show you how to cut grapefruit in a quick and easy tutorial!

    This post contains Affiliate Links. Please see the disclaimer here.

    A whole grapefruit on a cutting board.

    For the longest time I was on the fence about grapefruit. I was down with it, but it wasn't my favorite. I think my palate changed as I grew older and I got past the initial bitter bite and began to find it refreshing.

    But it wasn't until our trip to Philly, back when I was pregnant with T, that I discovered my undying love for grapefruit. We were staying with my cousin Andrea and preparing a leisurely Saturday morning breakfast (or a leisurely as it can be with an 18 month old running around!).

    A knife cutting a grapefruit in half..

    Andrea asked if I wanted to split her grapefruit with her and I shrugged and said, "sure, why not?" Once it was cut, I sprinkled a little sugar over the top of my half and dove in.

    It was in that very moment, that very bite, that my grapefruit addiction began. It was the most perfectly clean and delicious bite and after that I ate a grapefruit pretty much every morning even after my pregnancy was over. I still eat them often, though I've dialed back a bit.

    Cutting around the perimeter of the grapefruit.

    How do you cut a grapefruit?

    There are plenty of ways to cut a grapefruit, and any citrus fruit for that matter. But in my opinion, this is the best way to cut a grapefruit for simple consumption, specifically if you don't want to deal with peeling it (I cannot stand peeling citrus fruit!).

    It allows you to enjoy the grapefruit without dealing with all the pith. I think it's that pith- which is the white stuff between the peel and the fruit- and the membrane that holds each wedge of fruit is what give grapefruit the bitterness that turns people off. This also makes it easy to eat with a fork (or a spoon; I know most people like to use a spoon, which I don't really get, but you do you!).

    A hand cutting half a grapefruit.

    I like to add a nice sprinkle of sugar and dive right in. And of course the best part is drinking the juice. Because we're savages around here, me and my girls (that's right, the little one's love grapefruit too!) drink it directly from the grapefruit half. And I'm not even a little bit sorry about that!

    Give this a try and you'll know how to cut a grapefruit like a pro in no time!

    A knife cutting in to a grapefruit in this tutorial of how to cut grapefruit.

    Here's what you'll need:

    1. Cutting board
    2. Chef's Knife
    3. Paring knife

    A square image for this tutorial of how to cut grapefruit.

    How to cut grapefruit

    Jessy Freimann
    Here's how I cut a grapefruit to eat in the morning as part of my breakfast! It takes 5 minutes and tastes great!
    No ratings yet
    Print Recipe Pin Recipe
    Prep Time 5 minutes mins
    Total Time 5 minutes mins
    Course hack, How-to, kitchen basics
    Cuisine American
    Servings 1 grapefruit
    Calories 1 kcal

    Equipment

    • 1 paring knife

    Ingredients
      

    • 1 whole grapefruit
    • ½ teaspoon A little sugar optional for sprinkling

    Instructions
     

    • Place the grapefruit on the cutting board so that the top and bottom of it are on either side and the actual side of the grapefruit is on the board.
    • Slice the grapefruit in half so that you have a top and a bottom.
    • Place them onto the cutting board skin side down.
    • Use the paring knife to cut around the perimeter of the grapefruit so that the peel and white pith is separate from the fruit all the way around.
    • Now, starting at the middle of the fruit, cut on either side of each white line membrane so that you're effectively loosening each wedge of fruit from the membrane.
    • Sprinkle with a bit of sugar and enjoy! The fruit should come right out with very little effort.

    Notes

    This can be done the night before and stored in the refrigerator. Be aware that citrus tends to be a bit more tart when refrigerated.

    Nutrition

    Serving: 1grapefruitCalories: 1kcalCarbohydrates: 1gProtein: 1gPotassium: 1mgFiber: 1gSugar: 1gVitamin A: 12IUVitamin C: 1mgCalcium: 1mg
    Tried this recipe?Let us know how it was!

    Another recipe I love featuring grapefruit is:

    Grapefruit Sparkler

    This Grapefruit Sparkler is a festive champagne cocktail! I love adult beverages featuring sparkling wine and this is simple to make and refreshing to drink at brunch or to ring in the New Year. This pretty drink will be a mainstay at your next girls night

    You can find a full index of my recipes here.

    Don't forget to follow The Life Jolie on Pinterest for more recipe inspiration!

    Or if Pinterest isn't your style, bookmark this post!

    Let's keep the conversation going- join my Facebook group!
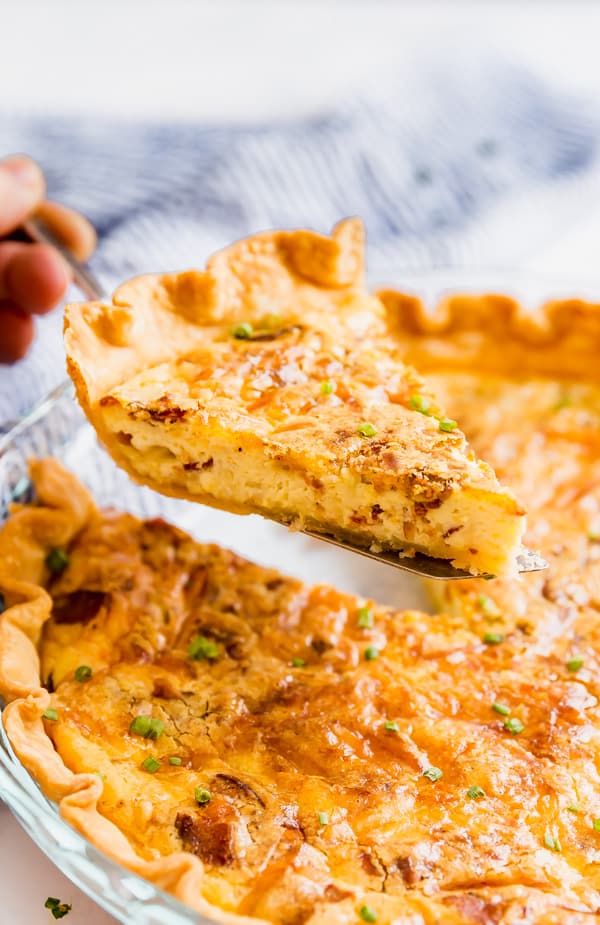
    Ground Beef Oven Baked Tacos Recipe

    Feb 4, 2018 · Leave a Comment

    Ground Beef Oven Baked Tacos in dish

    I secretly wish it was Taco Tuesday every night and once you taste these Ground Beef Oven Baked Tacos you'll understand why! 

    Ground Beef Oven Baked Tacos in a clear baking pan at a diagonal angle.

    This post contains Affiliate Links. Please see the disclaimer here.

    An overhead image of Ground Beef Oven Baked Tacos.

    Is there anything better than Taco Night? I'd say Taco Tuesday but I try not to limit myself to enjoying tacos to one single night. You only live once right?

    So my family is pretty traditional with tacos. Growing up it was all about ground beef tacos made with a packet of seasoning and topped with lettuce, tomatoes, plenty of cheese and sour cream. Once I got married, J and I branched out a bit and the Easiest Taco Meat EVER from the slow cooker became a mainstay in our fiesta-loving home.

    A hand holding up a Ground Beef Oven Baked Taco.

    But we are evolving. It's fun to mix it up a bit and thus I give you: Baked Tacos. All the great beefy taco goodness that you love in a crispy shell baked up hot with refried beans and perfectly melted cheese. Ugh, they are SO good.

    I decided to kick it up a notch for the filling in this taco bake recipe by throwing some onions and bell peppers into the mix. I diced them pretty fine because #pickyhusbandlife but he honestly, didn't seem to mind them. Honestly, this dish got rave reviews from the whole family and with good reason!

    A close up shot of Ground Beef Oven Baked Tacos.

    A few tips to help make your Ground Beef Oven Baked Tacos a success:

    1. Get the hard taco shells that stand up on their own. I've done it with both but as always, I say work smarter, not harder. Trust me.
    2. If you have a small, thin rubber spatula, use that to spread the refried beans on the shell- during the testing phase of this recipe, I had a much easier time spreading it with that instead of a regular spoon. Also, do this before you place them in the pan.
    3. These are best served right away. They're still flavorful later but the shell tend to soften over time.
    4. Once they're out of the oven, get crazy with your toppings. The world is your oyster. Lettuce, tomato, sour cream, cilantro, lime, rice, avocado. You can and should have it all!

    A pan full of Ground Beef Oven Baked Tacos.

    Ground Beef Oven Baked Tacos in dish

    Ground Beef Oven Baked Tacos

    Jessy Freimann
    I secretly wish it was Taco Tuesday every night and once you taste these Ground Beef Oven Baked Tacos you'll understand why! 
    No ratings yet
    Print Recipe Pin Recipe
    Prep Time 10 minutes mins
    Cook Time 20 minutes mins
    Total Time 30 minutes mins
    Course Main
    Cuisine Mexican
    Servings 10 tacos
    Calories 115 kcal

    Ingredients
      

    • Cooking spray
    • ¾ cup finely diced onions
    • ¾ cup finely diced bell peppers
    • 1 pound ground beef 90/10
    • 1 taco seasoning packet + the water that the packet requires
    • 1 package of 10 stand-up hard taco shells
    • ½ 14 ounce can refried beans
    • 2 cups shredded colby jack cheese
    • thetoppings of your choice lettuce, tomatoes, sour cream, etc.

    Instructions
     

    • Preheat the oven to 375 degrees.
    • Spray a saute pan with cooking spray and add the onions and peppers to the pan.
    • Saute stirring frequently for 3-4 minutes or until they've softened.
    • Add the ground beef to the pan and use a wooden spoon to break it up.
    • Saute the beef until brown stirring often, about 3-4 minutes.
    • Drain the extra oil from the pan.
    • Return the pan to the heat, add the taco seasoning to the pan with the water and cook as per the packet directions.
    • While this cooks, spread two Tablespoons of refried beans across the bottom of each taco shell (or more if you'd prefer).
    • Place the shells into a 9" x 13" baking pan.
    • Divide the meat between the shells.
    • Top the tacos with the shredded cheese
    • Bake for 12-15 minutes and serve immediately.

    Notes

    These are best served right away. If not consuming right away, store separate from toppings and reheat in the oven at 350 degrees until hot.

    Nutrition

    Serving: 2tacosCalories: 115kcalCarbohydrates: 1gProtein: 8gFat: 9gSaturated Fat: 3gPolyunsaturated Fat: 1gMonounsaturated Fat: 4gTrans Fat: 1gCholesterol: 32mgSodium: 31mgPotassium: 122mgFiber: 1gSugar: 1gVitamin A: 1IUCalcium: 8mgIron: 1mg
    Tried this recipe?Let us know how it was!

    Helpful tools:


    Another favorite taco recipe is this one:

    The Easiest Slow Cooker Taco Meat Ever!

    This Slow Cooker Taco Meat is the easiest taco meat you'll ever make. It comes together really quickly and tastes delicious!

    I also love this taco themed recipe:

    20 Minute Taco Pasta

    20 Minute Taco Pasta is such an easy one pot recipe. This tasty dinner is made in one skillet with ground beef and Barilla Pronto Penne Pasta. It's creamy, cheesy and full of great flavor that the whole family will love!

    You can find a full index of my recipes here.

    Don't forget to follow The Life Jolie on Pinterest for more recipe inspiration!

    Or if Pinterest isn't your style, bookmark this post!

    Let's keep the conversation going- join my Facebook group! I secretly wish it was Taco Tuesday every night and once you taste these quick and easy Ground Beef Oven Baked Tacos you'll understand why! Refried beans, ground beef taco meat and melted cheese in a crispy taco shell. Your family will be fighting for seconds.
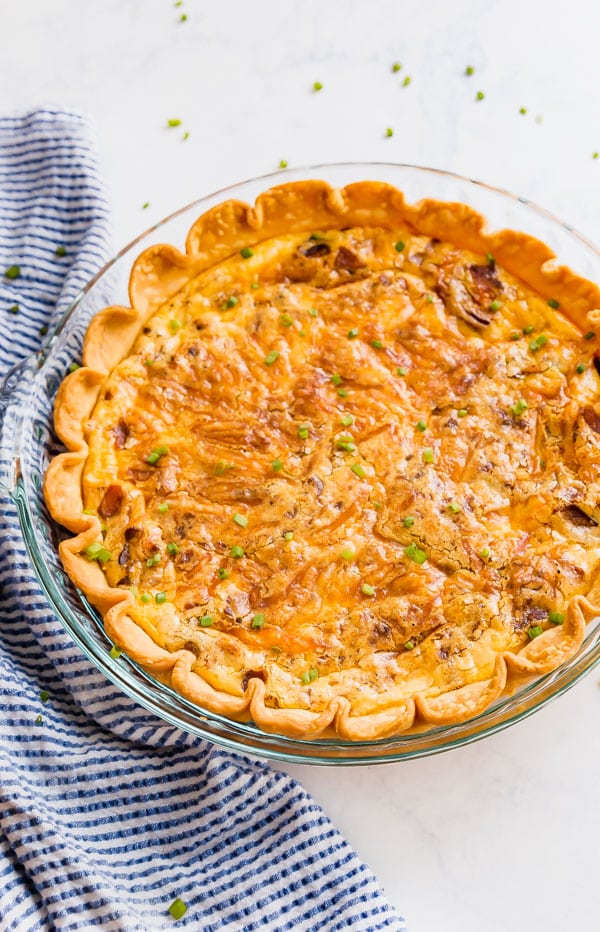
    Chocolate Cheesecake Stuffed Strawberries Recipe

    Feb 1, 2018 · 8 Comments

    A square image of Chocolate Cheesecake Stuffed Strawberries.

    Stop what you're doing and go make the Chocolate Cheesecake Stuffed Strawberries. This is not a drill!

    A Chocolate Cheesecake Stuffed Strawberry on a pan wih others out of focus in the background.

    This post contains Affiliate Links. Please see the disclaimer here.

    Do you guys know I've been working on this Cheesecake Stuffed Strawberry recipe since this time last year? Well "working on" isn't the best word for it. Because I actually got this recipe to right where I wanted it but I had a few photography problems.

    At that point, I didn't really own any piping tips (bad food blogger, right? I know.). So being the scrappy, get-it-done gal that I am, I figured I'd put it into a ziplock back and "pipe it" that way into the strawberries. And in theory this was an excellent idea because it was certainly an easy way to work with what I had and get the cheesecake filling into the strawberries.

    A half of a Chocolate Cheesecake Stuffed Strawberries on a plate of other strawberries.

    Except as I was piping, I realized that they resembled a certain emoji that we all know and love. I'll give you some clues: it's brown, it's got a swirl on top and it's got a happy little smile. That's right, my friends. Because, it was chocolate cheesecake filling, it looked like poop emoji stuffed strawberries. For Valentine's Day. I'm so romantic.

    Chocolate Cheesecake Stuffed Strawberries on a plate iwth another plate of them behind it. 

    Needless to say, I couldn't photograph them and put them onto the blog. And I also couldn't seem to get my act together enough to get some piping tips and take photos that didn't look like they involved fecal matter. So I shelved the recipe until this year in favor of some other recipes.

    But here we are, one year later and I'm definitely more prepared. I'm super excited to share these because they're totally delicious and insanely easy to make. These did not last long in our house- the girls were especially excited to see them because strawberries are one of their favorite things to eat and so is chocolate!

    A hand holding a half of a Chocolate Cheesecake Stuffed Strawberries showing the middle.

    Now you'll want to make sure that you're creating a flat enough base on the bottom of the strawberry that it will stand up on it's own. It really looks harder than it is. And it's a no bake dessert that looks like you put a ton of effort into them- these are a total show stopper and an excellent way to show your love to friends and family. Or to wow your guests at your next party.

    Chocolate Cheesecake Stuffed Strawberries on a plate.

    Here are some other killer Valentine's Day recipes to check out:

    Easy Chocolate Pudding Cupcakes
    Triple Chocolate Cupcakes
    Chocolate Boston Cream Pie Cupcakes
    Best Chocolate Fudge Recipe Ever
    Raspberry Chocolate Tart
    Chocolate Caramel Cheesecake Bites
    No Bake Chocolate Dessert Lasagna (Lush)
    Easy Ritz Cracker Toffee
    Chocolate Nutella Fudge
    Chocolate Mousse Truffle Shots
    Chocolate Pound Cake
    Red Velvet Bundt Cake with Kahlua Ganache
    Flourless Black Bean Brownies

    A square image of Chocolate Cheesecake Stuffed Strawberries.

    Chocolate Cheesecake Stuffed Strawberries Recipe

    Jessy Freimann
    Stop what you're doing and go make the Chocolate Cheesecake Stuffed Strawberries. They're an easy no-bake dessert the whole family will love!
    No ratings yet
    Print Recipe Pin Recipe
    Prep Time 20 minutes mins
    Total Time 20 minutes mins
    Course Dessert
    Cuisine American
    Servings 16 strawberries
    Calories 44 kcal

    Equipment

    • 1 paring knife
    • 1 cutting board
    • 1 pastry tip
    • 1 pastry bag

    Ingredients
      

    • 1 pound strawberries cleaned and tops removed
    • 1 8 ounce package cream cheese at room temperature
    • ¼ cup confectioner's sugar
    • ½ cup semi-sweet chocolate melted
    • 1 teaspoon vanilla extract
    • 1 Tablespoon Chocolate sprinkles for garnish

    Instructions
     

    • Use a paring knife to carefully hollow out the wider part of the strawberry (the top where you have already removed the stem). Take care not to go too deep.
    • Carefully shave a small portion off the bottom of the strawberry to flatten it so that it will stand up.
    • In a large bowl beat together the cream cheese, sugar, melted chocolate and vanilla extract until well combined and smooth.
    • Place the cheesecake mix into a piping back with a decorative tip at the bottom.
    • Carefully pipe the cheesecake filling into each other the strawberries.
    • Sprinkle chocolate sprinkles onto the cheesecake stuffed strawberries and refrigerate until you're ready to serve.

    Notes

    These will last 3-4 days covered in the refrigerator.

    Nutrition

    Serving: 3strawberriesCalories: 44kcalCarbohydrates: 8gProtein: 1gFat: 2gSaturated Fat: 1gPolyunsaturated Fat: 1gMonounsaturated Fat: 1gTrans Fat: 1gCholesterol: 1mgSodium: 1mgPotassium: 75mgFiber: 1gSugar: 4gVitamin A: 7IUVitamin C: 17mgCalcium: 8mgIron: 1mg
    Tried this recipe?Let us know how it was!

    Here's another favorite recipe featuring strawberries:

    Summer Berry and Burrata Salad

    Summer Berry and Burrata Salad

    I also love this recipe featuring strawberries:

    Nectarine and Strawberry Galette with Thyme

    An overhead shot of the Nectarine and Strawberry Galette with Thyme on parchment paper woth some sprigs of fresh thyme and strawberries around it.

    You can find a full index of my recipes here.

    Don't forget to follow The Life Jolie on Pinterest for more recipe inspiration!

    Or if Pinterest isn't your style, bookmark this post!

    Let's keep the conversation going- join my Facebook group! Stop what you're doing and go make the Chocolate Cheesecake Stuffed Strawberries. Sweet, juicy strawberries stuffed to the gills with rich, decadent chocolate cheesecake. These are so easy to make and dangerously addictive!
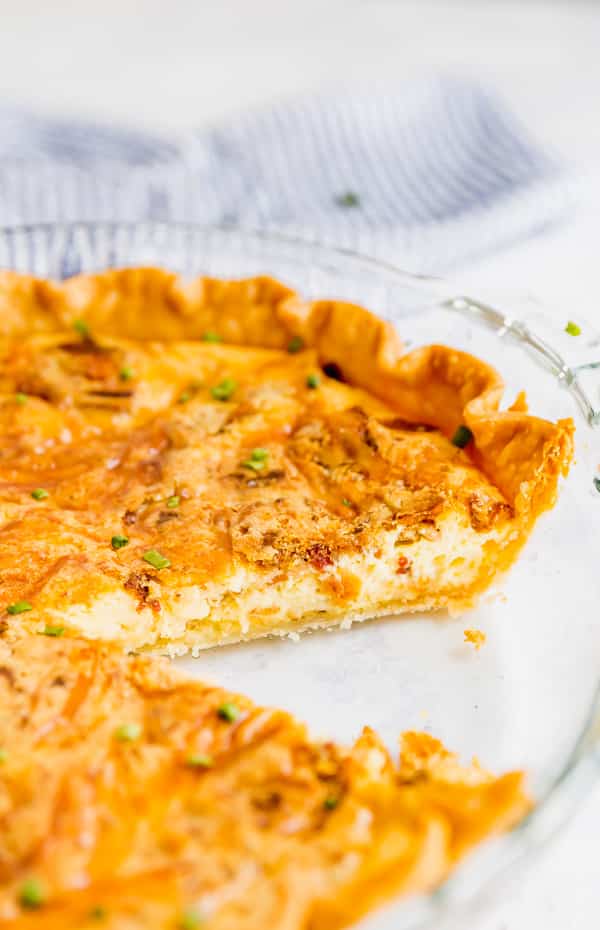
    Pepperoni Chips Recipe

    Jan 28, 2018 · 4 Comments

    A square image of the Pepperoni Chips Recipe.

    Crispy, spicy and dangerously addictive: this Pepperoni Chips Recipe is the party snack you never knew you needed and won't be able to stop eating!

    A close up shot of the Pepperoni Chips Recipe.

    This post contains Affiliate Links. Please see the disclaimer here.

    Guys, what are you making for the big game next weekend? Have you made your menu yet? Are you going to a party? Just ordering a pizza? I could care less who wins next weekend I'm rooting for the Eagles, if not for any other reason but that I can't even deal with the Tom Brady and his Uggs.

    Although there's been some talk of Sunday Sauce with Meatballs (I know that doesn't exactly scream game day, but to Italian's this is the ultimate comfort food!) but nothing is in stone yet, so I'm still brainstorming. Although it might not hurt to have some snacks that fit well into that mold.

    A hand dipping a half a pepperoni chip in to marinara sauce.

    Which brings me to my next point:

    How to make Pepperoni Chips.

    That's right, my friends. You may remember I made these insanely easy and dangerously addictive Salami Chips. Right now they're going crazy on Pinterest, and with good reason! I mean, now that the holidays are over, all the different game days are pretty much the only good excuse to have a get-together before Easter. If you need an excuse (you don't but still).

    Now if you're a person who gots extra excited when the pepperoni on their pizza get's all crispy and awesome, then this is going to be your new favorite snack. I am definitely one of those people.

    An overhear image of the Pepperoni Chips Recipe.

    So I thought to myself, "Self, I love me some Salami Chips- why not do it with Pepperoni. Because spicy food is always a good idea." And my goodness, it was probably the best idea I had that entire week, as proven by the fact that I only managed to get a few decent pictures before I could no longer stop myself from diving in and eating the entire plate. #noregrets

    This is as simple as lining a sheet pan (I love my silpats), placing some deli pepperoni onto the pan and baking it at a slightly lower heat. These Pepperoni Chips do tend to get darker quicker, so I definitely encourage you to keep an eye on them and check them after 20 minutes.

    Pepperoni Chips Recipe in a white plate with beers and marinara sauce in the background.

    I like to dip them in Marinara sauce. Homemade is always best and you should totally try my recipe for a super easy and delicious Marinara sauce. They're also delicious on their own but are definitely best served as soon as they've cooled a bit.

    Helpful tools:


    Another favorite recipe featuring pepperoni is this one:

    Supreme Pizza One Pot Pasta

    A pot of Supreme Pizza One Pot Pasta.

    I also love this recipe featuring pepperoni:

    Freezer Friendly Pizza Bagels

    An image of Freezer Friendly Pizza Bagels that on a pan fresh out of the freezer.

    You can find a full index of my recipes here.

    Don't forget to follow The Life Jolie on Pinterest for more recipe inspiration!

    Or if Pinterest isn't your style, bookmark this post!

    Let's keep the conversation going- join my Facebook group! Crispy, spicy and dangerously addictive: this Pepperoni Chips Recipe is the party snack you never knew you needed and won't be able to stop eating! They're seriously easy to make and are totally delicious for a party or get together (hello game day!!).
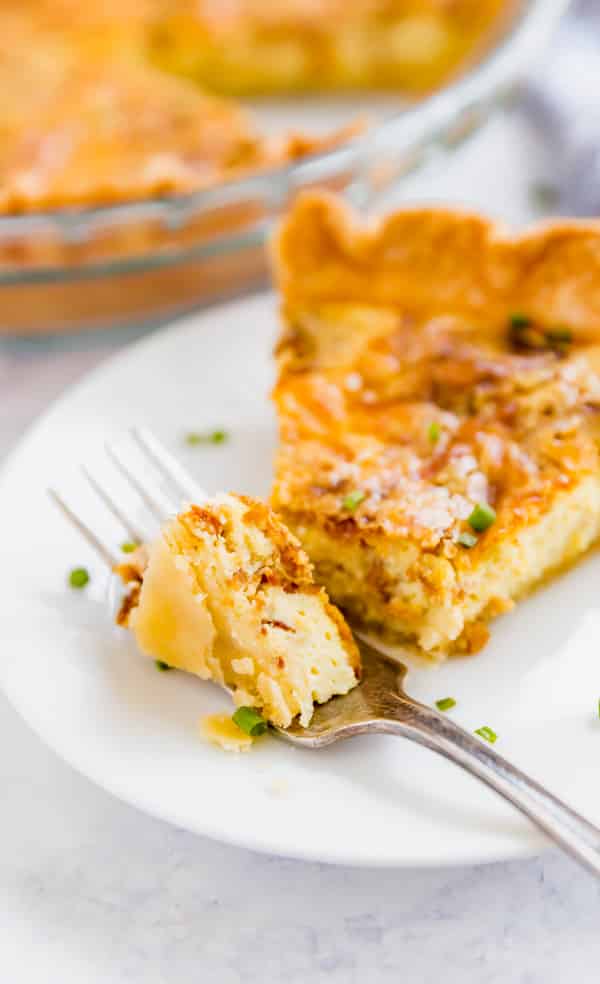
     

    Easy Beef Stroganoff Recipe (Instant Pot and Slow Cooker)

    Jan 25, 2018 · Leave a Comment

    A square image of the Easy Beef Stroganoff Recipe.

    This Easy Beef Stroganoff Recipe is the perfect way to warm up on a cold night. With options for both the Instant Pot and Slow Cooker, this delicious comfort food has never been easier to make!

    Easy Beef Stroganoff Recipe on a white plate

    This post contains Affiliate Links. Please see the disclaimer here.

    I love having a good amount of recipes up my sleeve that are reserved for cold winter nights. I mean, I live in Rochester, NY. It's pretty much a cold winter night like 9 months out of the year (I may be exaggerating, but only a tad!) Beef Stroganoff is one of those recipes.

    If I had posted this recipe a year ago it would have been called Slow Cooker Beef Stroganoff. Because up until recently I always made it in the slow cooker because there's nothing better than fall-apart-tender beef with mushrooms in gravy. But since I got an instant pot, I try to create recipes for both a Slow Cooker as well as an Instant Pot, so you guys can have options.An overhead image of Easy Beef Stroganoff Recipe.

    This recipe has actually evolved over the years. About a million years ago as a bright-eyed, bushy-tailed newlywed, I found a recipe for a slow cooker beef stroganoff. that I used to make all the time. This was before the days of Pinterest and back then I had all the recipes that I found online saved in a folder in an old yahoo email account.

    Somehow over the years, I lost the password to that email and cannot for the life of me remember any other emails that may be connected with it to get back in. I finally gave up trying to get into the account and grieved all those lost recipes.

    A cloe up image of Easy Beef Stroganoff Recipe.

    Luckily, I had made that one beef stroganoff recipe so many times that I had a basic idea of the ingredients that went into it. So I kept making my own version over the years and it evolved into a more set recipe that my family enjoys in our regular meal rotation.

    I think one thing that really changed the game with this recipe was the addition of a little white wine. It adds the most fantastic flavor and I strongly encourage you to use it. But if alcohol isn't how you roll you can always substitute the same amount of extra broth. Either way if you're looking for easy beef stroganoff, this is the recipe for you!

    I also gave the option of browning the beef before cooking it in the slow cooker or instant pot. Now you don't have to do it this way if you don't have the extra time (it still tastes fantastic!) but it will make the flavor even better if you do, so it's totally up to you

    A plate of Easy Beef Stroganoff Recipe with onion and mushrooms behind it.

    A square image of the Easy Beef Stroganoff Recipe.

    Easy Beef Stroganoff Recipe (Instant Pot and Slow Cooker)

    Jessy Freimann
    Take all the extra work out of dinner by making this delicious beef stroganoff in your Instant Pot or Slow Cooker.
    No ratings yet
    Print Recipe Pin Recipe
    Prep Time 10 minutes mins
    Cook Time 40 minutes mins
    Total Time 50 minutes mins
    Course Main
    Cuisine American
    Servings 6 servings
    Calories 211 kcal

    Equipment

    • 1 slow. cooker
    • 1 instant pot
    • 1 cutting board
    • 1 chefs knife

    Ingredients
      

    • 1 Tablespoon olive oil omit if you're skipping the optional first step of browning the meat
    • 1.5-2 pounds stew beef
    • 1 cup diced onion
    • 2 cloves garlic pressed or minced
    • 8 ounces quartered or sliced mushrooms
    • ½ cup white wine
    • 1 14.5 ounce can beef broth
    • 3 Tablespoons flour + additional for thickening
    • ½ teaspoon dried dill
    • 1 teaspoon salt
    • ¼ teaspoon pepper
    • 1 teaspoon dried parsley
    • 2-3 Tablespoons sour cream
    • Egg noodles

    Instructions
     

    Instant Pot Recipe:

    • Choose the saute setting and heat the oil.
    • Pat the stew meat dry with a paper towel and season with salt and pepper to taste.
    • Saute until the beef is almost brown stirring often, around 3 minutes.
    • Add onion, garlic and mushrooms to the pan and continue to saute stirring frequently for 2 more minutes or until vegetables have softened.
    • Add white wine to the pan and deglaze scraping and brown bits up from the bottom of the pan for one minute.
    • In a separate bowl mix broth, 3 Tablespoons flour, dill, salt, pepper and parsley until well combined.
    • Pour the broth mixture into the instant pot and press the cancel button.
    • Cover the pot and change the setting to the Meat/Stew setting to cook on high pressure. Once its done, carefully do a quick release.
    • When the pressure is fully released, remove the cover and change the setting to saute again. It will begin to boil almost immediately.
    • Use a small amount of flour mixed with a little water to make a slurry. Slowly add some of the slurry into the pot and stir. It will begin to thicken.
    • Keep adding the slurry until it's reached your desired thickness.
    • Stir in the sour cream and serve over hot egg noddles.

    Slow Cooker Recipe:

    • Heat the oil in a large saute pan over medium high heat.
    • Pat the stew meat dry with a paper towel and season with salt and pepper to taste.
    • Saute until the beef is almost brown stirring often, around 3 minutes.
    • Add onion, garlic and mushrooms to the pan and continue to saute stirring frequently for 2 more minutes or until vegetables have softened.
    • Add white wine to the pan and deglaze scraping and brown bits up from the bottom of the pan for one minute.
    • In a separate bowl mix broth, 3 Tablespoons flour, dill, salt, pepper and parsley until well combined.
    • Place the beef mixture into the slow cooker and pour the broth mixture over it.
    • Cover the slow cooker and cook for 8 hours on low.
    • (Optional Step you can always just skip to the next step) Remove the beef mixture to a pot over medium heat and add a flour slurry to thicken.
    • Stir in the sour cream and serve over hot noodles.

    Notes

    If you want these recipes to be a bit easier, you can skip browning the meat and pour all the ingredients (except the sour cream) into the instant pot or slow cooker and cook as per the directions.
    You can also choose to forgo thickening the gravy if you're happy with how thick it is, it's more of a personal preference thing.

    Nutrition

    Serving: 0.33cupsCalories: 211kcalCarbohydrates: 1gProtein: 26gFat: 9gSaturated Fat: 3gPolyunsaturated Fat: 1gMonounsaturated Fat: 4gCholesterol: 73mgSodium: 726mgPotassium: 454mgFiber: 1gSugar: 1gVitamin A: 31IUVitamin C: 1mgCalcium: 36mgIron: 3mg
    Tried this recipe?Let us know how it was!

    Helpful tools:


    I also really love this beef recipe:

    Sandwich Steaks and Onions

    A wooden spoon with a piece of Sandwich Steak and Onions on it.

    Slow Cooker Italian Beef Stew

    This Slow Cooker Italian Beef Stew recipe is one of my favorite easy comfort food meals. With tender meat, vegetables, tomatoes (and a little bit of wine for good measure!) this tastes fantastic served over potatoes, pasta or polenta with a nice, crusty piece of bread!

    You can find a full index of my recipes here.

    Don't forget to follow The Life Jolie on Pinterest for more recipe inspiration!

    Or if Pinterest isn't your style, bookmark this post!

    Let's keep the conversation going- join my Facebook group! This Easy Beef Stroganoff Recipe is the perfect way to warm up on a cold night. With options for both the Instant Pot and Slow Cooker, this delicious comfort food has never been easier to make for dinner!
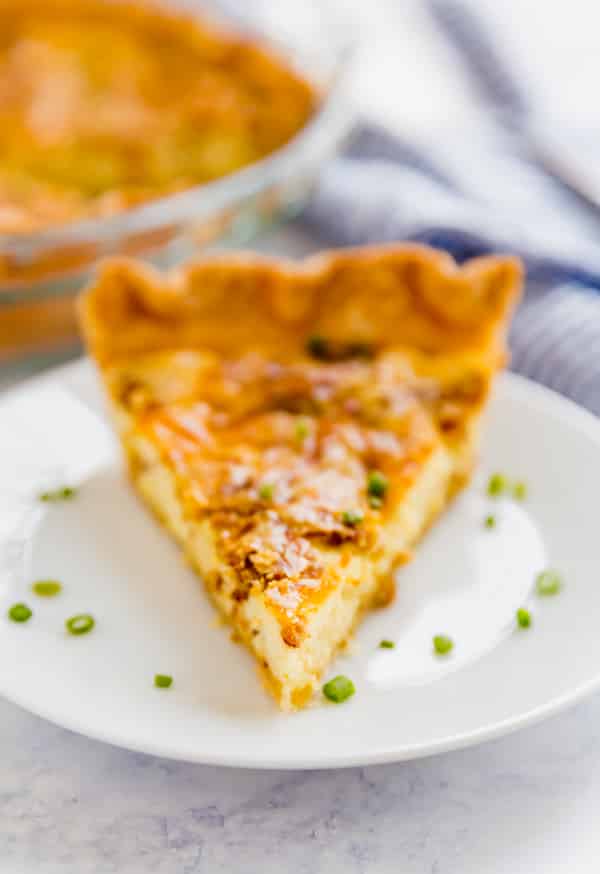
     

    Savory Sauteed Green Beans with Mushrooms, Shallots and Pancetta

    Jan 24, 2018 · Leave a Comment

    A square image of Sauteed Green Beans with Mushrooms, Shallots and Pancetta.

    Meet Savory Sauteed Green Beans with Mushrooms, Shallots and Pancetta: your new go-to green beans recipe. 

    A pan full of Sauteed Green Beans with Mushrooms, Shallots and Pancetta.

    This post contains Affiliate Links. Please see the disclaimer here.

    These green beans are going to rock your world.

    I know that sounds insane. Green beans. Rocking worlds. Bear with me here. As far as green bean recipes go, this is going to be your new go-to. And if you know me you know that it's hard for me to say that any green bean recipe that is on the same level as Nanou's Garlic Green Beans (which are amazing!). But I would say these two green beans recipes are definitely my two go-to's! This is my mom's recipe- she's awesome!

    An overhead image of Sauteed Green Beans with Mushrooms, Shallots and Pancetta in a pan.

    One thing I really love about this particular recipe is the really savory flavor. The combo of the pancetta (you can also substitute bacon if pancetta isn't available) and the mushrooms adds that savory goodness. Even J, which does not like mushrooms happily ate these (pushing the mushrooms to the side of course) because of the great flavor that they provided.

    Sauteed Green Beans with Mushrooms, Shallots and Pancetta on a plate.

    Cooking fresh green beans is an excellent addition to any meal. They're quick and easy enough to serve alongside any weeknight dinner and make your veggies a little more enjoyable. But they're also special enough to be the perfect addition to a dinner party or holiday feast.

    I typically blanch them in a pot of boiling water and then saute everything in a large saute pan. You can even blanch the green beans in advance, just put them in an ice bath to stop the cooking process and store in your fridge.

    A close up shot of Sauteed Green Beans with Mushrooms, Shallots and Pancetta in a pan.

    I left the seasonings to taste because we all have different tastes in our seasoning levels. That's a big part of most of my recipes, but especially this one: tasting as you go! First of all, I'm always looking for an excuse to taste my food. But it's the absolute best way to makes sure it all tastes fantastic.

    Hosting Thanksgiving?

    Discover the secret to hosting Thanksgiving without all the stress! Prepsgiving is your FREE guide to making a delicious Thanksgiving feast the easy way.

    A square image of Sauteed Green Beans with Mushrooms, Shallots and Pancetta.

    Savory Sauteed Green Beans with Mushrooms, Shallots and Pancetta

    Jessy Freimann
    Meet Savory Sauteed Green Beans with Mushrooms, Shallots and Pancetta: your new go-to green beans recipe. These green beans are going to rock your world!
    No ratings yet
    Print Recipe Pin Recipe
    Prep Time 10 minutes mins
    Cook Time 15 minutes mins
    Total Time 25 minutes mins
    Course Side Dish
    Cuisine American
    Servings 6 servings
    Calories 50 kcal

    Equipment

    • 1 chefs knife
    • 1 cutting board
    • 1 saute pan
    • 1 wooden spoon

    Ingredients
      

    • 16 ounces green beans cleaned and trimmed
    • 1 Tablespoon olive oil
    • 4 ounces diced pancetta or bacon if pancetta is not available
    • 1 cup finely diced shallots
    • 6 ounces mushrooms quartered
    • Salt and pepper to taste

    Instructions
     

    • Bring a large pot of water to a boil.
    • Add the green beans and boil for around 4-5 minutes.
    • Drain and plunge the green beans into an ice water bath to stop the cooking process.
    • Heat the olive oil in a large saute pan on over medium high heat.
    • Add the pancetta to the pan and saute until brown, around 5 minutes stirring often. Remove from pan.
    • Add shallots and mushrooms to the pan.
    • Saute for 5 minutes until softened, stirring often.
    • Add green beans to the pan and season with salt and pepper to taste, stirring to mix.
    • Add the pancetta back into the pan and saute another 2-3 minutes to heat everything through.
    • Serve immediately and enjoy!

    Notes

    The reheat pretty well in a saute pan and will last up to 4 days covered in the refrigerator.

    Nutrition

    Serving: 0.33cupCalories: 50kcalCarbohydrates: 6gProtein: 2gFat: 3gSaturated Fat: 1gPolyunsaturated Fat: 1gMonounsaturated Fat: 2gSodium: 6mgPotassium: 250mgFiber: 2gSugar: 3gVitamin A: 522IUVitamin C: 10mgCalcium: 29mgIron: 1mg
    Tried this recipe?Let us know how it was!

    Helpful tools:


    My other favorite green beans recipe is this one:

    Nanou’s Garlic Green Beans

    Garlic Green Beans is one of my favorite side dish recipes! It's easy to make and pretty healthy with Crispy Green Beans sauteed in a skillet. Fresh parley adds a great, herbaceous brightness with a little bit of butter and garlic. This is special enough food for Thanksgiving or any other holiday meal and also great in a pinch on a busy weeknight!

    I also love this green bean recipe:

    Green Bean Salad

    A close up shot of Green Bean Salad.

    You can find a full index of my recipes here.

    Don't forget to follow The Life Jolie on Pinterest for more recipe inspiration!

    Or if Pinterest isn't your style, bookmark this post!

    Meet Savory Sauteed Green Beans with Mushrooms, Shallots and Pancetta: your new go-to green beans recipe. They're super quick and easy to make and perfect for a weeknight meal but special enough to serve at a dinner party or for holiday dinner. These green beans are going to rock your world!

    Let's keep the conversation going- join my Facebook group! 

    How to freeze onions | The Life Jolie Kitchen Basics

    Jan 23, 2018 · Leave a Comment

    A square image showing the bag of onions for How to freeze onions.

    Do you ever end up with leftover chopped onions that ultimately get thrown out? Well no need to waste anymore chopped onions because I'm going to tell you about how to freeze onions!

    Do you ever end up with leftover chopped onions that ultimately get thrown out? Well no need to waste anymore chopped onions because I'm going to tell you about how to freeze onions!

    This post contains Affiliate Links. Please see the disclaimer here.

    Now I know what you're thinking:

    Can you freeze onions?

    The short answer is yes. Whole onions can be frozen as long as you peel and blanch them first, but today I'm going to focus more on chopped onions (and in case you missed it, I also put together a tutorial for how to chop an onion).

    Chopped onions on a cutting board.

    You know how you'll sometimes be preparing a meal and you end up with more chopped onion than you need? It happens to me all the time. And I really hate food waste. So if I can avoid wasting ingredients, I'll certainly take the extra step (not that there's much work involved in this). The great thing is that you can save and freeze it to use on a later date.

    An open bag of onions on a cutting board.

    Here's what you need to know about freezing onions:

    1. Since they're chopped, the onions don't have to be blanched. But you can if you want, it won't hurt them.
    2. Frozen onions will keep for 3-6 months.
    3. You do not have to thaw them to use- I've added them directly to a pan of oil to saute (like when I'm making my grandma's Peas with Onions, which is how I most frequently use my frozen chopped onions). Just be careful that the oil doesn't splatter. You could also add directly to soups and stews.
    4. Be mindful about how you intend to use them, as thawed onions don't hold their shape extremely well. They work great in cooked dishes, but since the shape and texture can be affected by freezing, if the recipe calls for raw onion, it's probably best to chop a fresh one.

    An empty bag and chopped onions on a cutting board.

    Here's what you'll need to freeze onion:

    1. A good Chef's Knife
    2. A Cutting Board
    3. Zipper bags for storing the onions
    4. A freezer (Duh. Guys, I'm not going to link this because I'm pretty sure you all have a freezer if you're reading the post).

    A square image showing the bag of onions for How to freeze onions.

    How to freeze onions

    Jessy Freimann
    No need to waste extra chopped onions- just freeze them for later use in cooking applications!
    No ratings yet
    Print Recipe Pin Recipe
    Prep Time 5 minutes mins
    Total Time 5 minutes mins
    Course hack, How-to, kitchen basics
    Cuisine American
    Servings 4 servings

    Equipment

    • 1 chefs knife
    • 1 cutting board
    • 1 small zipper bag

    Ingredients
      

    • 1 cup diced raw onion

    Instructions
     

    • Chop the onion to your liking.
    • Measure them out to freeze in whatever portions you'd prefer (I usually go with half cup or 1 cup measurements).
    • Place the onions into zipper bags.
    • Push the air out of the bag and seal it well.
    • Label it with the contents, the measurement and the date. Place in freezer
    • When it comes time to use, you can thaw them in a refrigerator or just add them right into what you're cooking.

    Notes

    These will last in your freezer for up to 3-6 months.

    Nutrition

    Serving: 0.25cup
    Tried this recipe?Let us know how it was!

    One of my favorite recipes that features chopped onions is:

    Philly Cheese Steak Stuffed Bread Rolls

    A hand pulling apart a Philly Cheese Steak Stuffed Bread Roll with stretchy cheese.

    I also love this recipe which features chopped onions:

    Baked Ravioli Casserole

    A close up image of one of the cheese ravioli in this baked ravioli dish.

    You can find a full index of my recipes here.

    Don't forget to follow The Life Jolie on Pinterest for more recipe inspiration!

    Or if Pinterest isn't your style, bookmark this post!

    Let's keep the conversation going- join my Facebook group!
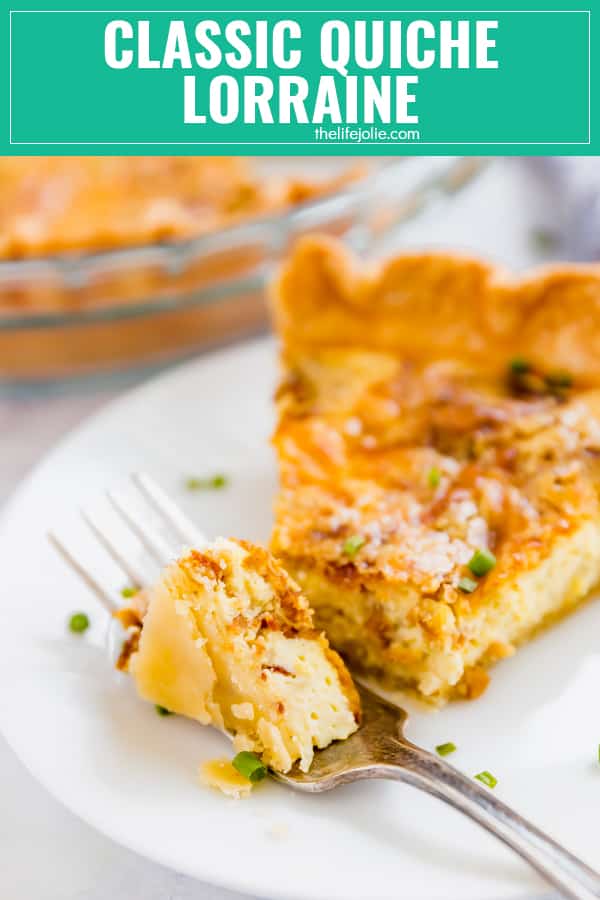
    • « Go to Previous Page
    • Page 1
    • Interim pages omitted …
    • Page 15
    • Page 16
    • Page 17
    • Page 18
    • Page 19
    • Interim pages omitted …
    • Page 21
    • Go to Next Page »

    Primary Sidebar

    Jessy in a kitchen holding a white casserole pan and smiling.
    Hi, I'm Jessy!

    Welcome to The Life Jolie! I share simple, delicious recipes and ingredient prep tips to make your weeknight cooking a breeze!

    More about me →

    Easy Dinner Recipes

    • An overhead image of a Mexican Shrimp Quinoa Bowl.
      Shrimp Quinoa Bowls
    • A bowl of asian soup with meatballs with a spoon and noodles in it.
      Asian Soup with Cabbage and Meatballs
    • A close up of roasted red potatoes on a pan.
      Roasted Red Potatoes Recipe
    • A spoon lifting up a scoop of eggplant parm bake with melt cheese trailing behind it.
      Eggplant Parm Bake
    • A close up of a drum chicken wing in a pile of other wings.
      Oven Baked Chicken Wings
    • An overhead image of a bowl of minestrone soup.
      Traditional Minestrone Soup Recipe

    Popular Recipes

    • A glass bowl of melted chocolate with a spatula dripping some back into the bowl.
      How To Melt Chocolate Chips In The Microwave
    • Italian Stuffed Zucchini Boats are the healthy weeknight meal you'll want to make again and again. This is a seriously easy recipe that's full of delicious flavor without all the guilt!
      Italian Stuffed Zucchini Boats
    • A close up shot of the side of a shallow bowl of shrimp mac salad.
      Shrimp Macaroni Salad
    • A white pan pouring cheese sauce over a bowl of steamed broccoli.
      Cheese Sauce for Broccoli Recipe
    • An overhead image of a plate of chicken lettuce wraps with peanut sauce next to it and all the fixings surrounding it.
      Copycat Cheesecake Factory Thai Chicken Lettuce Wraps
    • A close up image of a piece of greek marinated chicken on a white plate with lemons on the plate and in the background.
      Greek Yogurt Chicken
    Jessy in a kitchen holding a white casserole pan and smiling.
    Hi, I'm Jessy!

    Welcome to The Life Jolie! I share simple, delicious recipes and ingredient prep tips to make your weeknight cooking a breeze!

    More about me →

    Easy Dinner Recipes

    • A close up of a bagel pizza with mini pepperonis on a pan.
      Bagel Pizzas Recipe
    • A bowl of chicken and orzo soup with a spoon in it.
      Chicken and Orzo Soup
    • A bowl of Swedish meatballs and noodles.
      Swedish Meatballs And Noodles
    • A close up image of a piece of coconut shrimp on top of others.
      Coconut Shrimp With Sauce
    • An overhead image of taco soup in a bowl.
      Crockpot Taco Chicken Soup
    • A spoon pulling up a scoop of skillet lasagna with melted cheese stretching behind it.
      No Bake Lasagna Skillet

    Popular Recipes

    • A glass bowl of melted chocolate with a spatula dripping some back into the bowl.
      How To Melt Chocolate Chips In The Microwave
    • Italian Stuffed Zucchini Boats are the healthy weeknight meal you'll want to make again and again. This is a seriously easy recipe that's full of delicious flavor without all the guilt!
      Italian Stuffed Zucchini Boats
    • A close up shot of the side of a shallow bowl of shrimp mac salad.
      Shrimp Macaroni Salad
    • A white pan pouring cheese sauce over a bowl of steamed broccoli.
      Cheese Sauce for Broccoli Recipe
    • An overhead image of a plate of chicken lettuce wraps with peanut sauce next to it and all the fixings surrounding it.
      Copycat Cheesecake Factory Thai Chicken Lettuce Wraps
    • A close up image of a piece of greek marinated chicken on a white plate with lemons on the plate and in the background.
      Greek Yogurt Chicken

    Footer

    ↑ back to top

    About

    • About Me
    • Privacy Policy + Disclaimer

    Newsletter

    • Sign Up! for emails and updates

    Contact

    • Contact
    • Video Production

    As an Amazon Associate I earn from qualifying purchases.

    Copyright 2014-2021 - Jolie Ventures, LLC. All Rights Reserved. Privacy Policy.

    Rate This Recipe

    Your vote:


    A rating is required
    A name is required
    An email is required