
• Skip to primary navigation
  • Skip to main content
  • Skip to primary sidebar
The Life Jolie logo
  • Easy Dinner Recipes
  • Recipes
  • About
  • Contact
    • Work with me!
    • Video Production
  • Nav Social Menu

    • Email
    • Facebook
    • Instagram
    • Pinterest
    • Twitter
    • YouTube
menu icon
go to homepage
subscribe
search icon
Homepage link
  • Easy Dinner Recipes
  • Recipes
  • About
  • Contact
    • Work with me!
    • Video Production
    • Email
    • Facebook
    • Instagram
    • Pinterest
    • Twitter
    • YouTube
  • ×
    The Life Jolie » Page 20

    Open-Faced Egg Sandwich

    Open-Faced Egg Sandwich

    Jan 16, 2017 · 10 Comments

    This Open-Faced Egg Sandwich is the best easy recipe option to throw together in the morning. Made with toast, fried eggs, cheese and tomatoes it's a healthy and delicious way to start the day!
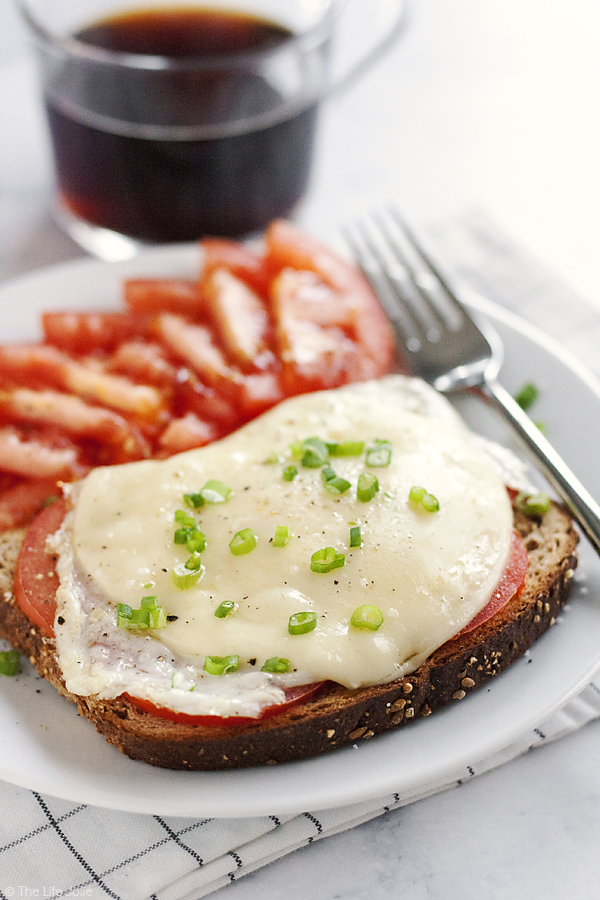
    This Open-Faced Egg Sandwich is the best easy recipe option to throw together in the morning. Made with toast, fried eggs, cheese and tomatoes it's a healthy and delicious way to start the day!

    This Open-Faced Egg Sandwich is the best easy recipe option to throw together in the morning. Made with toast, fried eggs, cheese and tomatoes it's a healthy and delicious way to start the day!

    This post contains Affiliate Links. Please see the disclaimer here.

    I am a lover of brunch. It's kind of J's and my thing. I mean, we met in NYC where I lived for 5 years and J lived for 2.5 years. If you've ever lived in the Big Apple you probably know that brunch is a way of life.
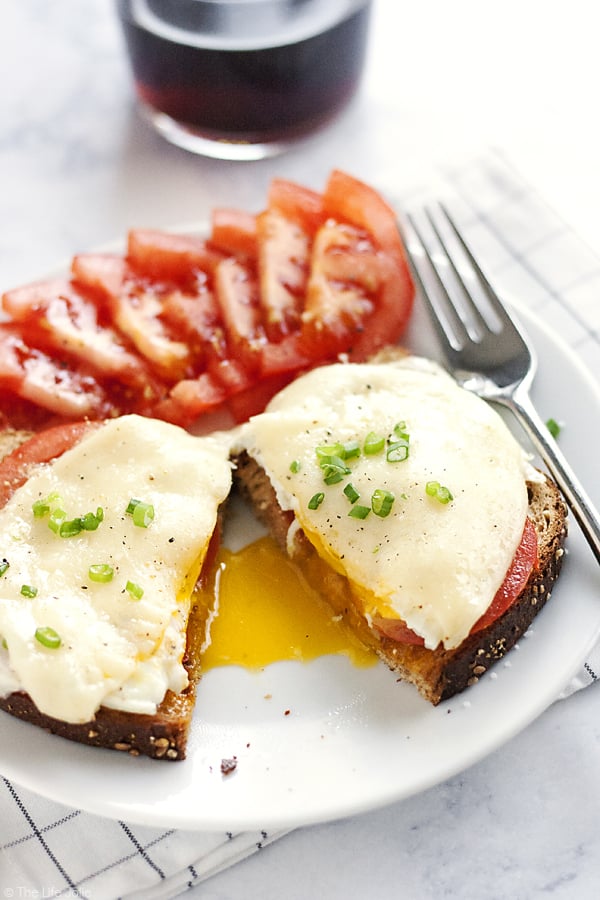
    This Open-Faced Egg Sandwich is the best easy recipe option to throw together in the morning. Made with toast, fried eggs, cheese and tomatoes it's a healthy and delicious way to start the day!

    When we lived in Vegas as newlyweds, we worked terrible schedules that left little time to actually see each other. One of the only times of day that we were both most frequently around was in the morning. We often found ourselves enjoying breakfast and brunch foods together as often as we could.
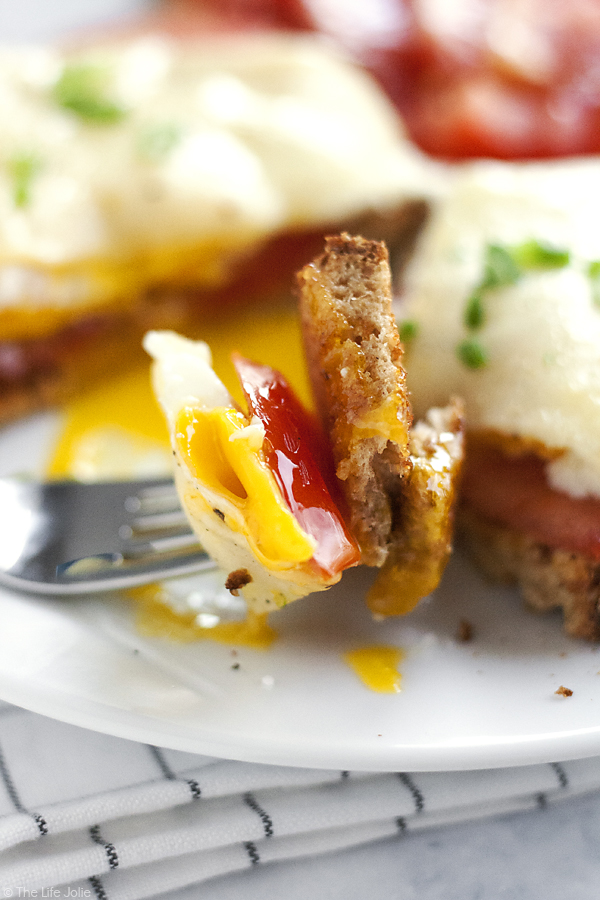
    This Open-Faced Egg Sandwich is the best easy recipe option to throw together in the morning. Made with toast, fried eggs, cheese and tomatoes it's a healthy and delicious way to start the day!

    This was back in the day when leisurely brunches out were just as common for us as seemingly unlimited funds (we were not wealthy but in retrospect it felt that way compared to all the added expenses of children and home ownership!) and sleeping in happened really, really often! Imagine that!
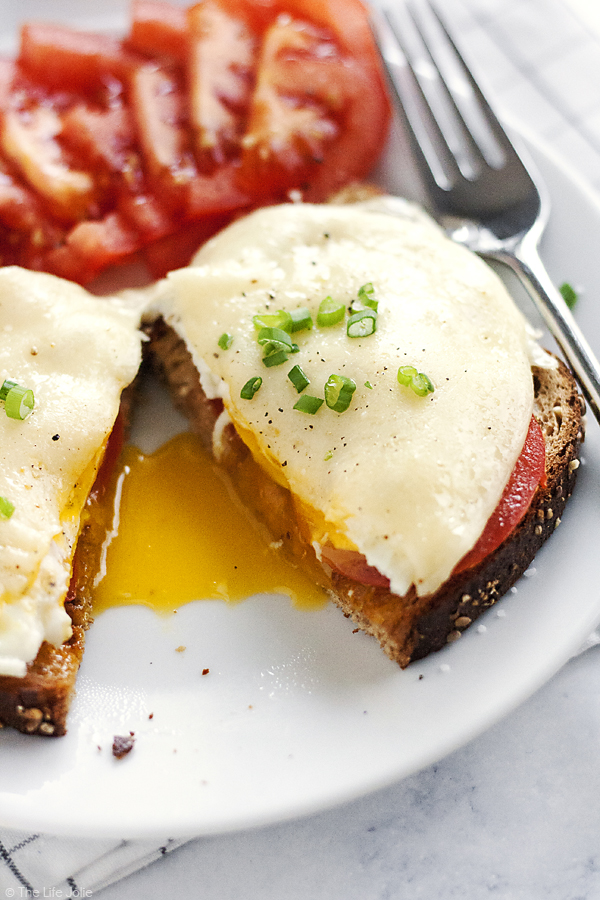
    This Open-Faced Egg Sandwich is the best easy recipe option to throw together in the morning. Made with toast, fried eggs, cheese and tomatoes it's a healthy and delicious way to start the day!

    This has carried over into our current family life, albeit in a different form. Though the days of sleeping in and lingering over our eggs are gone, we are still a family who enjoys a good breakfast spread! And the best part is, our schedules are pretty much in line with each other (thank goodness!).
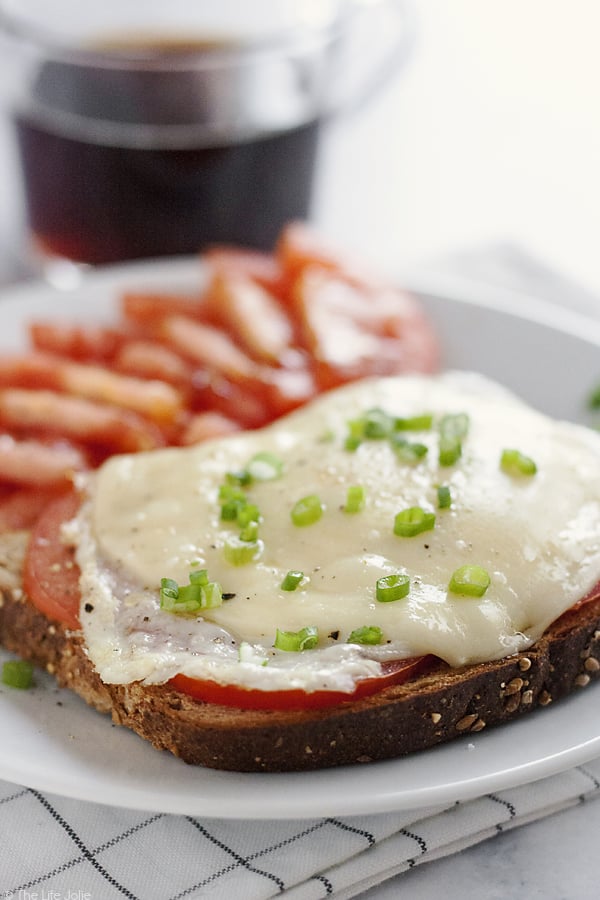
    This Open-Faced Egg Sandwich is the best easy recipe option to throw together in the morning. Made with toast, fried eggs, cheese and tomatoes it's a healthy and delicious way to start the day!

    Some days we enjoy heading out to our favorite diner for breakfast, but most days we make a tasty breakfast at home. This is how my blueberry pancake kick started when I was pregnant with A. In general, J's family rocks at putting together a big, delicious breakfast on the weekend mornings. It's a tradition that I'm excited to carry on for our girls.

    This Open-Faced Egg Sandwich is the best easy recipe option to throw together in the morning. Made with toast, fried eggs, cheese and tomatoes it's a healthy and delicious way to start the day!

    This open-faced sandwich is a quick throw-together meal that I developed for the mornings that I used to go into work late (I previously worked one late shift per week where I would stay until 8pm, on those days I would also head in a bit later- I don't miss it, not even a little bit).
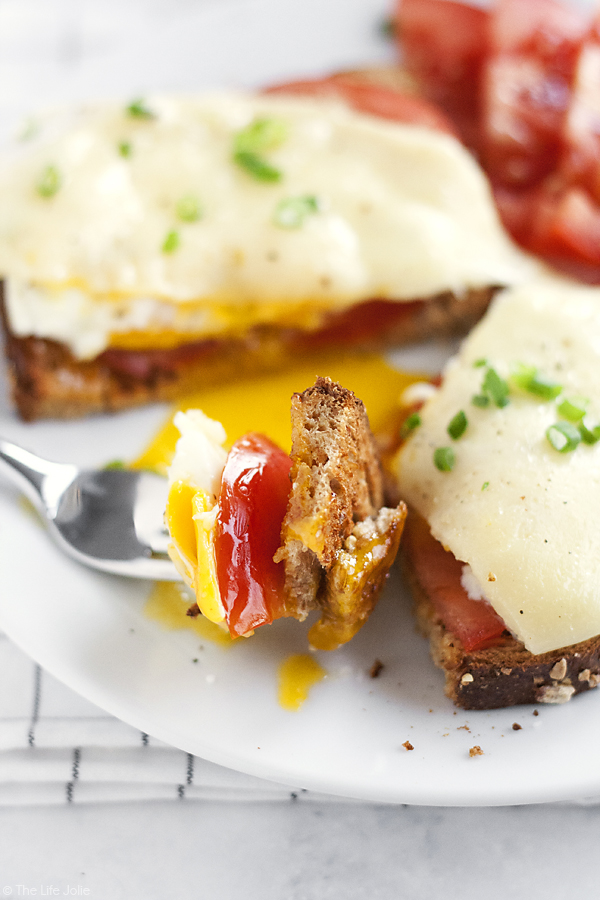
    This Open-Faced Egg Sandwich is the best easy recipe option to throw together in the morning. Made with toast, fried eggs, cheese and tomatoes it's a healthy and delicious way to start the day!

    I always seem to have the ingredients on hand. It elevates simple eggs and toast without too much extra work. This is also totally customizable based on what you have on hand. If I ever figure out how not to kill plants, I would love to grow some chives to chop up and throw on top (I always forget to pick them up from the store). Scallions are always a great addition too!
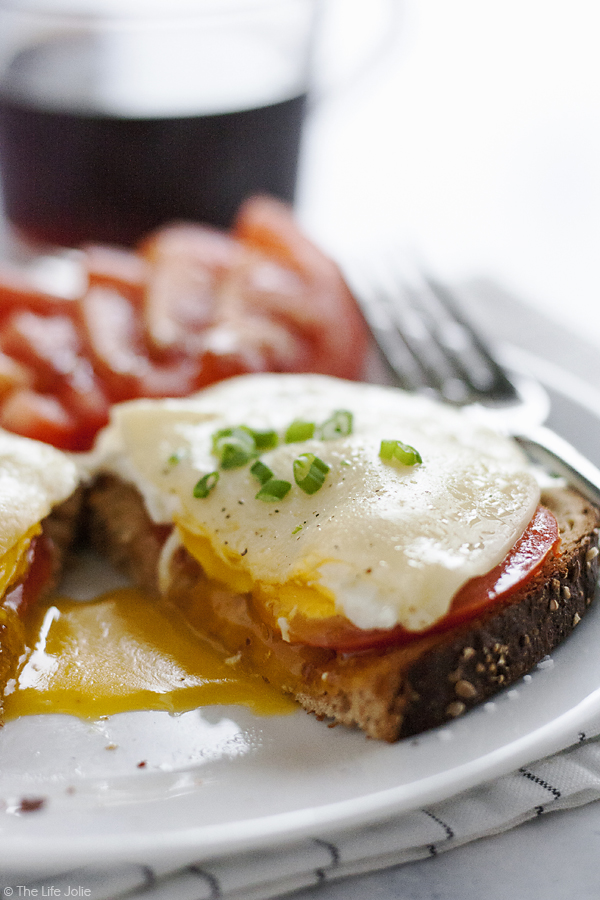
    This Open-Faced Egg Sandwich is the best easy recipe option to throw together in the morning. Made with toast, fried eggs, cheese and tomatoes it's a healthy and delicious way to start the day!

    Other tasty breakfast options include:

    Grandma Hinz’s Apple Pancakes

    Egg Stuffed Bread

    Sweet Potato and Chorizo Hash

    Orange Roll Monkey Bread

    Peanut Butter and Banana Breakfast Cookies
    A close up of an open faced egg sandwich.

    Tomato Egg Sandwich

    Jessy Freimann
    This open-faced tomato egg sandwich is ready in less than 15 minutes and is packed with flavor. With a jammy center and melted provolone, it's hearty, delicious, and the perfect way to start the day.
    No ratings yet
    Print Recipe Pin Recipe
    Prep Time 5 minutes mins
    Cook Time 10 minutes mins
    Total Time 15 minutes mins
    Course Breakfast
    Cuisine Easy, quick, vegetarian
    Servings 1 servings
    Calories 450 kcal

    Equipment

    • 1 Fry pan
    • 1 chefs knife
    • 1 cutting board
    • 1 sheet pan

    Ingredients
      

    • 1 ½ Tablespoon salted butter
    • 2 large eggs
    • 4 slices tomato
    • 1 slice bread lightly toasted
    • 2 slices provolone cheese
    • Salt and pepper to taste

    Instructions
     

    • Preheat the broiler to high and line a sheet pan with foil.
    • Melt 1 Tablespoon butter in frying pan over medium-high heat and fry eggs until they've just reached over easy, adding salt and pepper to taste. While the eggs cook, lightly toast the bread.
    • On the prepared pan, butter the bread with remaining butter, stack the eggs onto the toast, followed by the tomatoes (sprinkle them with a little salt and pepper) and the provolone cheese on top.
    • Pop this into the oven 6 inches under the broiler for 1-2 minutes or until the cheese is melted. Watch it closely so it doesn't burn.
    • Sprinkle with chopped scallions or chives and serve immediately.

    Notes

    • Don't overcook the eggs. You want the yolk still slightly runny when going into the oven. It'll continue cooking in there, so pull them earlier than you think.
    • Toast your bread lightly. A light toast before assembling keeps the bread from going soggy under the eggs and tomato.
    • Pat your tomatoes dry. Too much moisture from the tomato can make things soggy. A quick pat with a paper towel does the trick.
    • Add the scallions last. That finishing touch makes a real difference. Chives work just as well if that's what you have.
    • Don't be afraid to mix it up. This sandwich is totally customizable, and you can easily swap the cheese, pile on extra veggies, or add meat.
    • Ingredients to prep ahead- Slice your tomatoes and chop your scallions or chives ahead of time to make morning assembly even faster.
    • Leftovers and storage- This sandwich is best enjoyed fresh. If you do have leftovers, store components separately in the fridge for up to 2 days and reassemble when ready to eat.

    Nutrition

    Serving: 1servingCalories: 450kcalCarbohydrates: 6gProtein: 24gFat: 37gSaturated Fat: 20gPolyunsaturated Fat: 3gMonounsaturated Fat: 11gTrans Fat: 1gCholesterol: 443mgSodium: 559mgPotassium: 452mgFiber: 1gSugar: 3gVitamin A: 2299IUVitamin C: 15mgCalcium: 359mgIron: 2mg
    Tried this recipe?Let us know how it was!


    You can find a full index of my recipes here.

    Don't forget to follow The Life Jolie on Pinterest for more recipe inspiration.
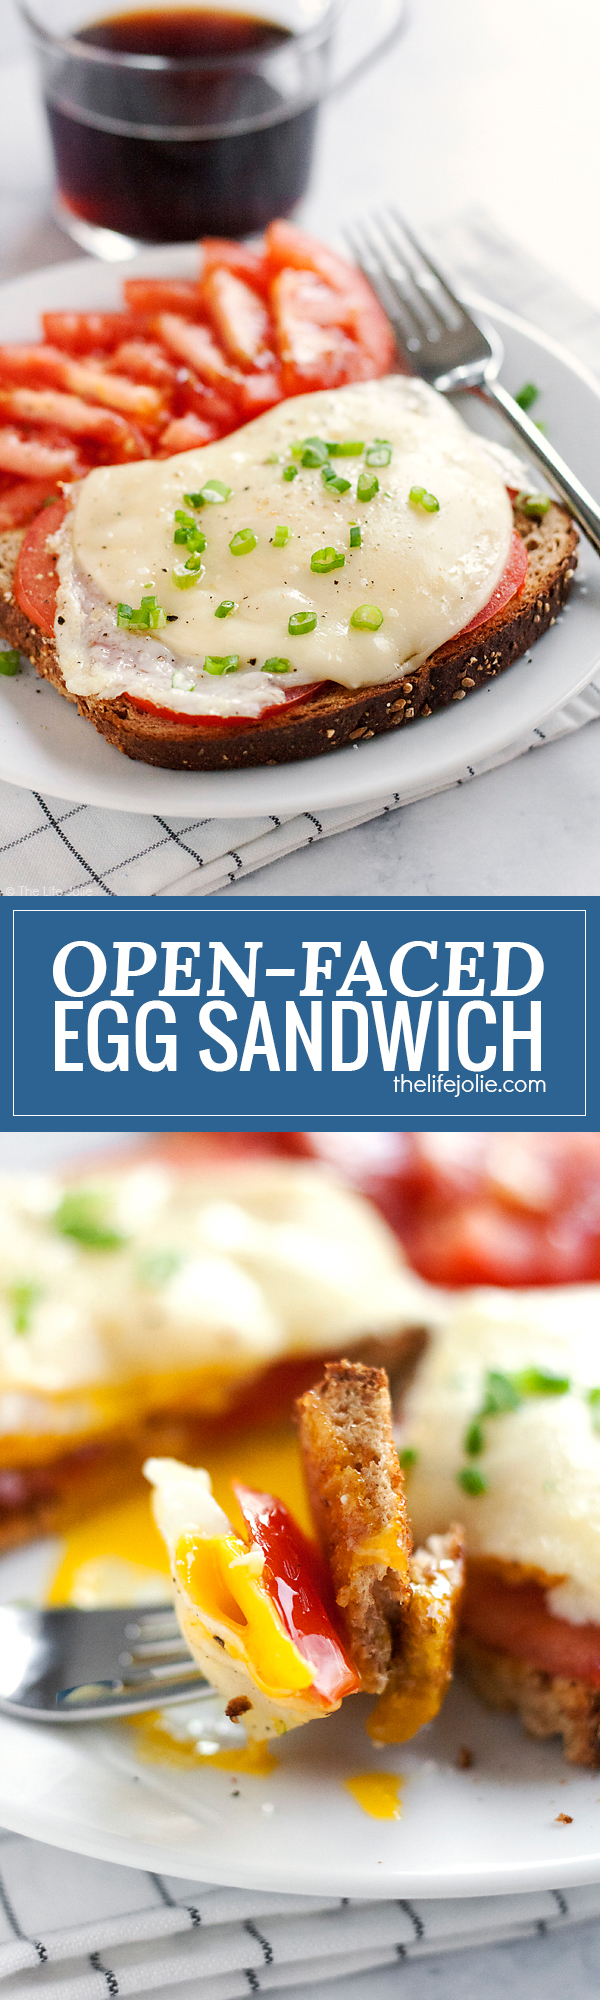
    This Open-Faced Egg Sandwich is the best easy recipe option to throw together in the morning. Made with toast, fried eggs, cheese and tomatoes it's a healthy and delicious way to start the day!

    Tessa is 10 months old!

    Jan 13, 2017 · Leave a Comment

    Tessa is 10 Months Old | The Life Jolie

    Ok, didn't I just write a 9 month update for my Tess?! This may have something to do with the fact that I was a tad late on this but either way, wow! Can someone please stop the clock right now?!

    Tessa is 10 Months Old | The Life Jolie

    So this month brought T's first Christmas and what a whirlwind it was! If you have kids, you probably know that holidays are a lot for young ones to handle and can reek havoc on a baby and toddler schedule. With that in mind, I have to say I'm proud of both my girls. They handled the madness-that-was the holidays like pros.

    Tessa is 10 Months Old | The Life Jolie

    On Christmas Eve we hung out during the day and added some finishing touches on our dishes-to-pass for that night. Both gals got a good nap and once we were all dressed and ready, we went to an early children's mass at a local church.

    I was prepared with all the stickers for A and T was pretty good although she was about ready for a second nap when we got to church. Naturally, she fought and it and was a bit fussy. The latter part of mass involved her and Justin hanging in the back.

    Tessa is 10 Months Old | The Life Jolie

    She was more than happy to crawl around and be passed around at my Uncle's house after church. A was just happy to get to hang with her older cousin Stella. Those girls were running circles around the house which I'm sure made my parents and Aunts/Uncles/Grandparents a bit nostalgic.

    Tessa is 10 Months Old | The Life Jolie

    Christmas morning began with T having a projectile spit-splosion all over our bedroom/bathroom. Oddly she only got a drop or two on her jammies, so the Christmas jammies stayed on. She was pretty happy after and was thrilled to follow her sister around and play with all the new toys that Santa brought.

    Tessa is 10 Months Old | The Life Jolie

    Around the time we were opening gifts (my sister, parents and Justin's parents were over) we tried putting her down for a nap but she was having none of it. It wasn't until after our big breakfast that she was finally ready.

    We spent Christmas Day afternoon and night at my parents house enjoying a fantastic meal and relaxing. The girls had a blast and once again behaved really well considering the interruption to their routine. T was also battling another ear infection during this time and was still a rockstar through it all.

    Tessa is 10 Months Old | The Life Jolie

    She really didn't understand what was going on but she still had a great time, as usual. A totally understood what was up and was super excited. I think she got a bit overwhelmed with opening gifts and we ended up bringing some of her still-wrapped gifts to my parents house to finish opening there, which worked out well. We all got seriously spoiled this year!

    New Years was also pretty relaxing. We had a nice lunch with T's Godfather and ended up having a casual dinner at my parents house and later falling asleep long before the ball dropped.

    Tessa is 10 Months Old | The Life Jolie

    J was feeling pretty under the weather that whole weekend so I took the girls to an open house at my Uncle's house so he could have a little break to nap and try to get better. We had a great time catching up but it was at this event that I began to notice that T was fully engulfed in the "stranger danger" phase. If I left her eyesight for even a second she was not happy about it and she made sure everyone knew. The only person she would even go to that day (ans only for a short time) was my mom.

    She is crazy about her daddy and sister (and Maciebear too!) but currently she's particularly attached to me and gets fussy if I leave to room at home as well. I'd be lying if I said I didn't secretly love it. I've gotten so used to J being A's favorite (though she's come around to me quite a bit and we have our own special and silly moments which are such a joy).

    It was while my in-laws were here that T finally starting being willing to try feeding herself soft solids as opposed to purees. We're still giving purees since I have them but she pretty much gets what we eat (within reason, if I think it's a choking hazard she can wait on that).

    I just get everything really small and give it to her and she goes to town. She loves eggs, grapefruit, broccoli, rice, chicken, sausage, pasta etc. It's good fun and a bit messy. I have permission to give her everything but honey. So we're enjoying T's new found love for all-the-things.

    Nursing is still going strong. If there is a boob anywhere near T, she dives right in. We're in the home stretch now and I can see the finish line in the distance. I have mixed feelings about stopping. I love the bond and the knowledge that I'm providing the majority of her nutrients. I wish it could have worked out like this with A but I don't feel guilty that it didn't.

    Tessa is 10 Months Old | The Life Jolie

    I also like the fact that it's been a game changer in terms of losing weight. I'm terrified to see what will happen to my waistline once I'm not sharing all my calories with T.

    I won't miss the pumping. It's definitely a hassle to have to leave my work twice a day and the act of pumping is also not my favorite thing. I'm glad I've been able to make it work but I'll be glad(er!) to never have to use a breast pump again after this.

    T continues to sleep like a pro. I am so grateful for this. We put her to bed about 30 minutes before A and she gets a little mad. I think she wants to stay and hang. But that usually means she fusses for a moment or two and then rolls over and goes right to sleep.

    Tessa is 10 Months Old | The Life Jolie

    Tess continues to love the raging bull face. She also loves to laugh with us. When we get her giggling, she never wants to stop, it's the best! She always gets really happy when I sing to her and loves if we put her upside down. A gets such a kick out of tickling T and making her giggle.

    This gal definitely has a mischievous streak. She's in the middle of a leap where she loves to test limits and she always turns around when she knows she's doing something she shouldn't, just to make sure we're watching (we always are). And then gives us a big old grin. And if I playfully chide her she cracks up even more!

    Tessa is 10 Months Old | The Life Jolie

    Standing continues to be one of her favorite things to do. Some days, she even gets extra daring and is able to stand on her own with no hands for a second or two before she tumbles down. We cheer her on but I'm so not ready for her to walk yet! She's already super fast at crawling.

    T-girl is moving at the speed of light. It's so bitter sweet, but mostly sweet! I absolutely love that we're beginning to see bits and pieces of her sunny personality. Her fun sense of humor is beginning to come through as well as a fiery determination. It's especially beautiful seeing my two girls interact and love on each other.

    Tessa is 10 Months Old | The Life Jolie

    There's so much that I never knew or understood until I had kids. I was really, really happy before them but I never could have imagined the amount of joy they wouldto our home. There aren't enough words to adequately describe it. It's the very best thing in the world!

    In two months my T girl turns one. I know I should probably start planning her birthday party. I suspect A will be pretty excited to plan this as well. And based on what occurs at our dinner table each night, I suspect T will be pretty excited to dive into that smash cake...

    You can read all of my parenting related posts here.

    Don't forget to follow The Life Jolie on Pinterest for more parenting tips!

    Date Night Fish for Two with a Lemon Sherry Pan Sauce

    Jan 11, 2017 · 15 Comments

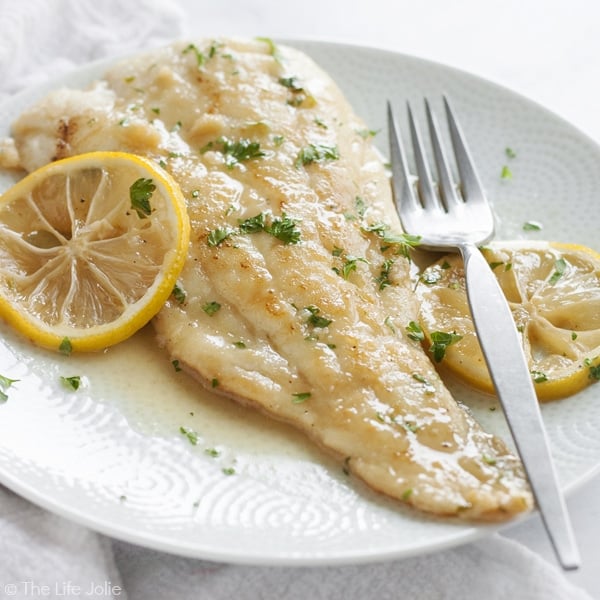
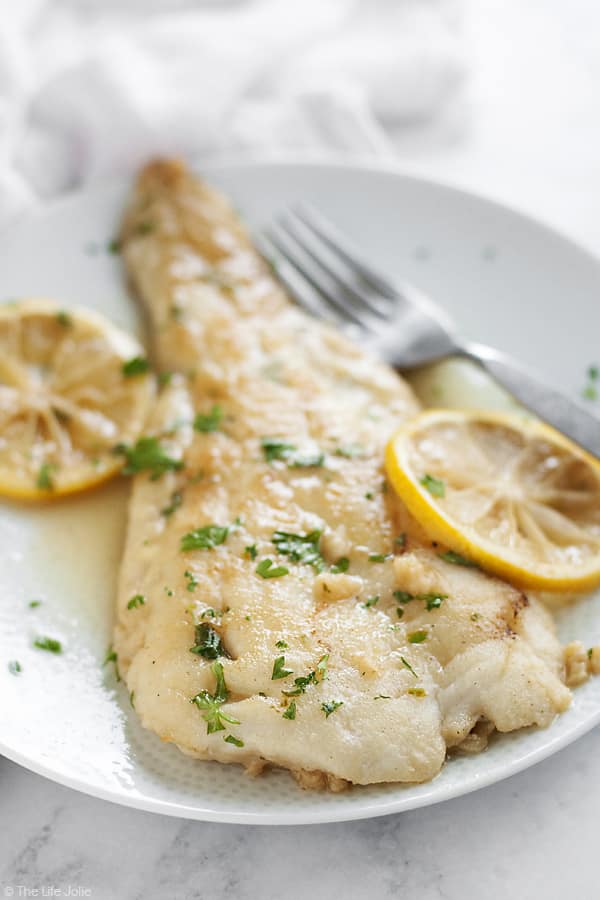
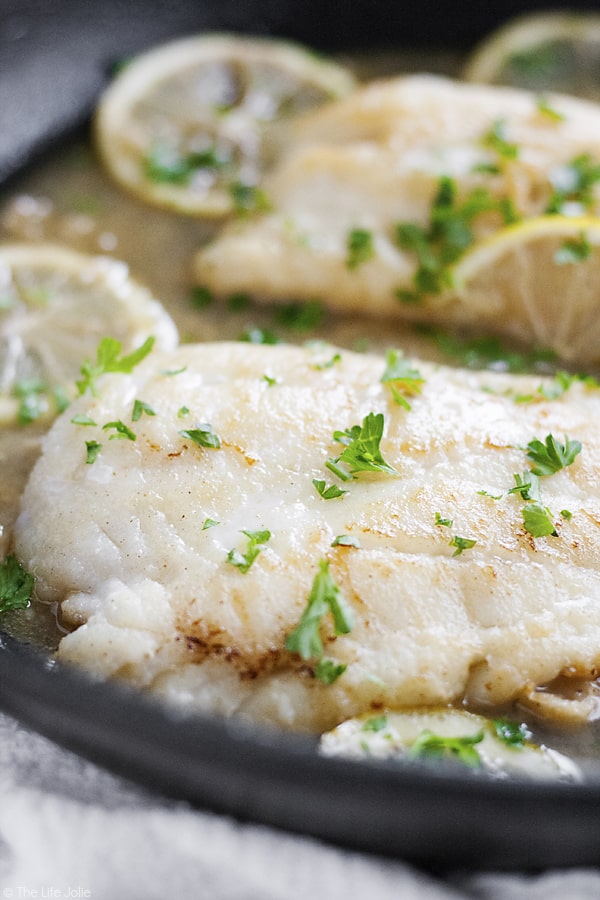
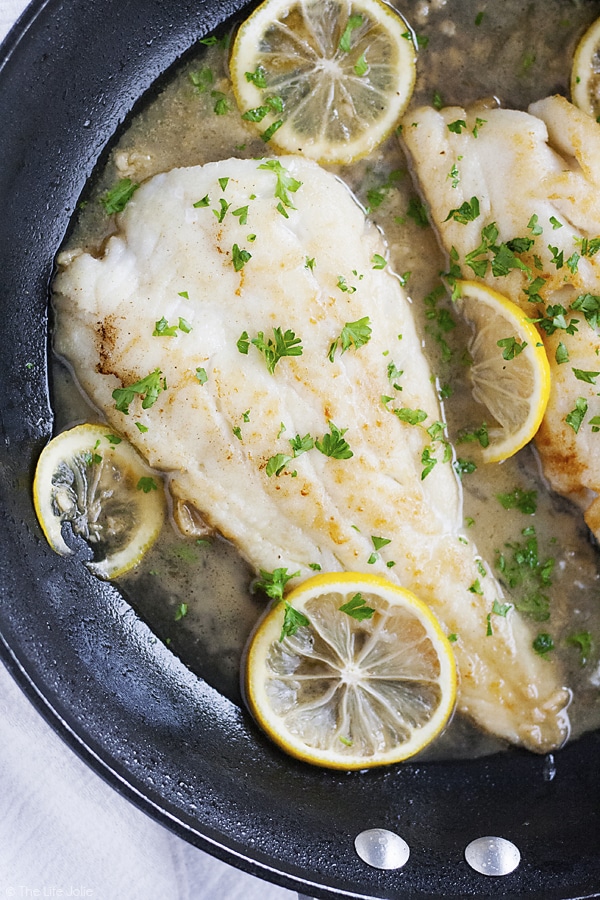
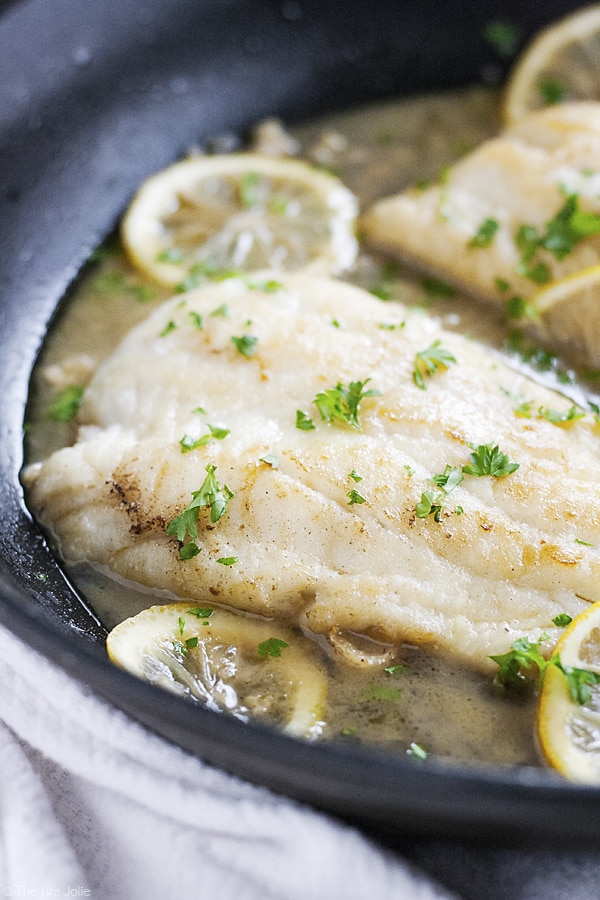
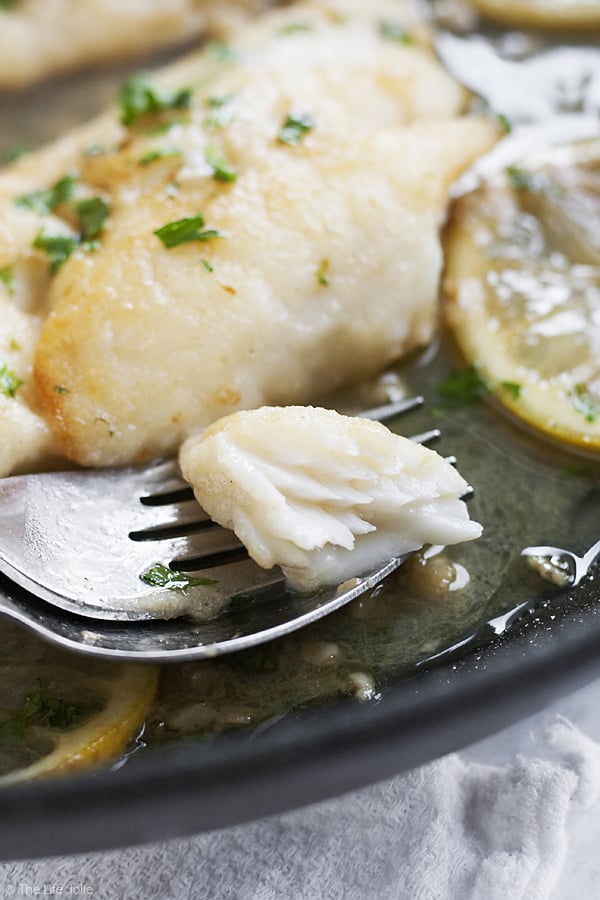
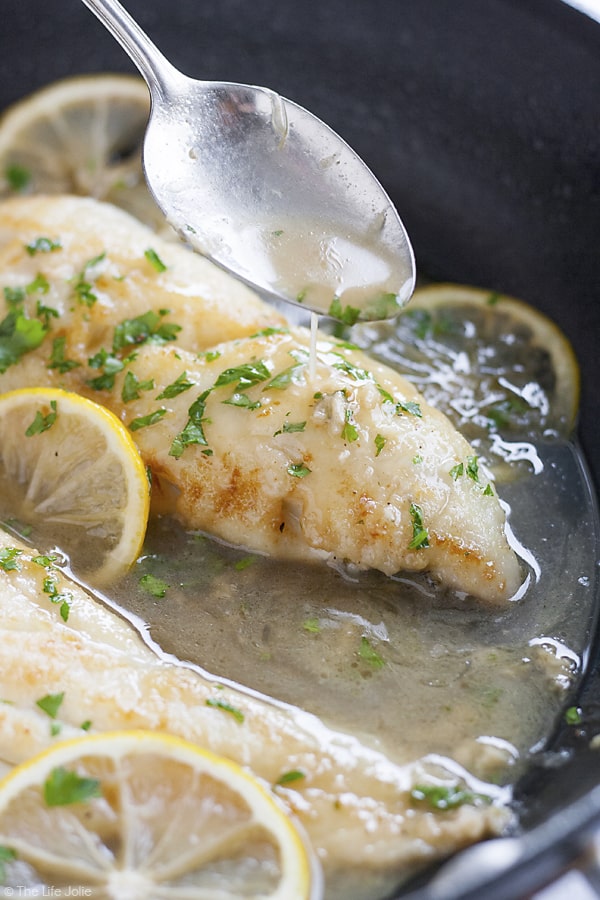
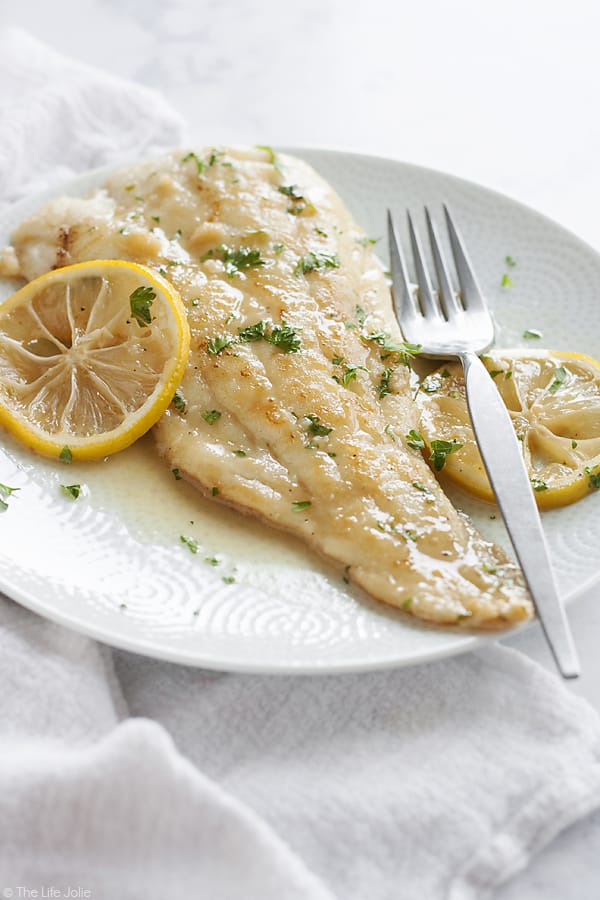
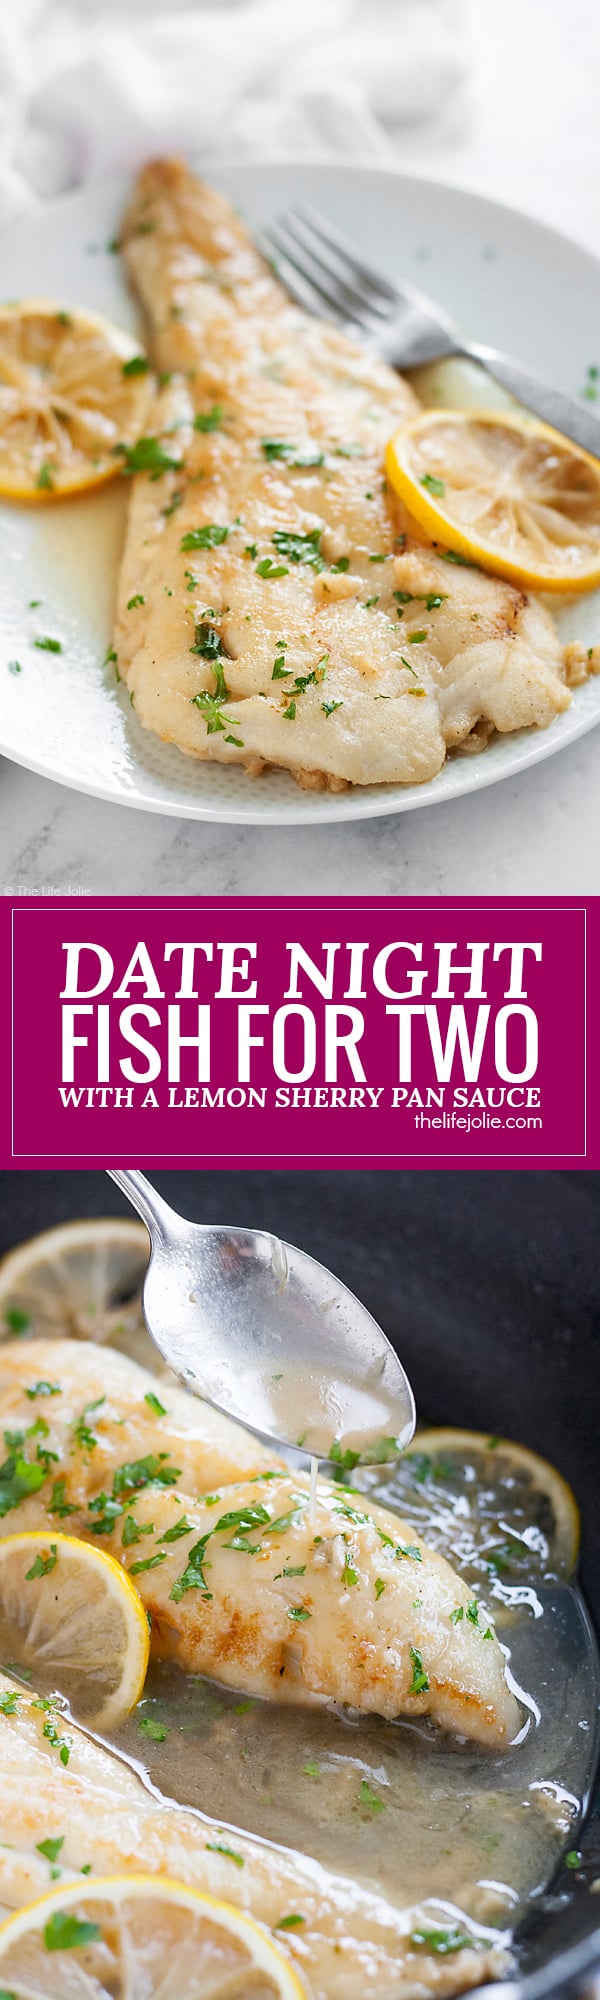
    This Date Night Fish for Two with a Lemon Sherry Pan Sauce is such an easy date night recipe option! It works great with any white fish and is the best way to use a few simple ingredients to create a healthy and delicious treat for dinner with the person you love. This is perfect for Valentine's Day!

    This Date Night Fish for Two with a Lemon Sherry Pan Sauce is such an easy date night recipe option! It works great with any white fish and is the best way to use a few simple ingredients to create a healthy and delicious treat for dinner with the person you love. This is perfect for Valentine's Day!

    This Date Night Fish for Two with a Lemon Sherry Pan Sauce is such an easy date night recipe option! It works great with any white fish and is the best way to use a few simple ingredients to create a healthy and delicious treat for dinner with the person you love. This is perfect for Valentine's Day!

    This post contains Affiliate Links. Please see the disclaimer here.

    My in-laws spent the Christmas holiday with us this year. It was pretty fantastic having them. I also took a little extra time off of work to get more quality time and prepare for T's first Christmas.

    Whenever they come and visit, my mother-in-law Vicky usually cooks at least one meal (or more depending on how long they're in town) in addition to helping me on the nights that I cook. Even though I love cooking, I look forward to these nights because she always makes something delicious.

    This Date Night Fish for Two with a Lemon Sherry Pan Sauce is such an easy date night recipe option! It works great with any white fish and is the best way to use a few simple ingredients to create a healthy and delicious treat for dinner with the person you love. This is perfect for Valentine's Day!

    There's something about our moms (and moms-in-law) with their tried and true recipes. They always get it right! I hope some day my kids and their spouses view me this way, because I certainly don't always get it right.

    Anyway, the day before Christmas Eve- Christmas Eve Eve?- we spent the morning at a local trampoline park that has become a favorite place to take A, since they have certain hours that are designated specifically for toddlers and I don't have to worry about any big kids trampling my gal (though, I suspect she'd be able to hold her own).

    This Date Night Fish for Two with a Lemon Sherry Pan Sauce is such an easy date night recipe option! It works great with any white fish and is the best way to use a few simple ingredients to create a healthy and delicious treat for dinner with the person you love. This is perfect for Valentine's Day!

    After that we headed over to Wegmans to get some lunch and pick up some last minute items for our holiday dishes-to-pass. On our way, we realized we should probably grab something to make for dinner and realized that we were all craving fish (Justin clearly was not a part of his conversation since he's such a picky eater. But he ended up with chicken, so all's well that ends well!).

    This Date Night Fish for Two with a Lemon Sherry Pan Sauce is such an easy date night recipe option! It works great with any white fish and is the best way to use a few simple ingredients to create a healthy and delicious treat for dinner with the person you love. This is perfect for Valentine's Day!

    Now I should tell you, I am a lover of all things seafood. But when it comes to fish in my land-locked part of the country, I tend to prefer salmon. I find it super flavorful and it's easy to come by pretty great quality salmon around here. Although I still like other fish, but I find the wild ones that are most readily available in my area to not be as flavorful as I like. I still eat them and enjoy them but I just gravitate toward salmon for some reason.

    This Date Night Fish for Two with a Lemon Sherry Pan Sauce is such an easy date night recipe option! It works great with any white fish and is the best way to use a few simple ingredients to create a healthy and delicious treat for dinner with the person you love. This is perfect for Valentine's Day!

    That night we went with wild Haddock. Vicky worked her magic and we sat down and enjoyed a great dinner as a family. I knew from the first bite that this would be a fish dish that I make over and over again.

    Haddock is a pretty mild white fish. It's quick and simple to prepare but in my opinion it's best served with a flavorful sauce. Let me just say the Lemon Sherry pan sauce that Vicky made really brought this fish to a bright and tasty level. Additionally, it was super simple and quick to prepare with minimal work involved.

    I knew I wanted to share this recipe with you, my dear friends. And the more I thought about it, the more my brain kept connecting this dish with the idea of a romantic date night. It's easy to prepare, full of delicious flavor, but also light enough that you're not feeling terribly uncomfortable and weighed down when you finish (though still satisfied).

    I think you can use any mild white fish with this. I usually gravitate towards haddock or cod (I'm not really a Tilapia fan but that could also work). Halibut, Grouper and Mahi Mahi would also be delicious, though not as budget friendly. I adapted the recipe for two, to make it an excellent date night dish (who's planning for Valentine's Day?!) but you could always double it to cook for your family!

    This Date Night Fish for Two with a Lemon Sherry Pan Sauce is such an easy date night recipe option! It works great with any white fish and is the best way to use a few simple ingredients to create a healthy and delicious treat for dinner with the person you love. This is perfect for Valentine's Day!

    Other great options to round this meal out are:

    Fennel and Clementine Salad

    Peas with Onions

    Cilantro Cauliflower Rice

    Orange Cake with Chocolate Ganache Glaze

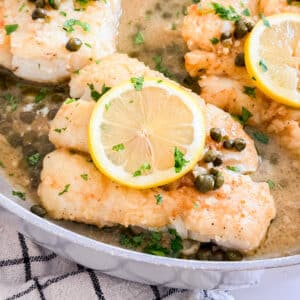
    A close up of a pieces of fish in a pan of caper sauce with a lemon round on top of it.

    Fish in Lemon Caper Sauce

    Jessy Freimann
    Make fish in lemon caper sauce for a light, flavorful dinner that comes together in just about 20 minutes. Perfect for a special date night or an easy weeknight meal.
    4.34 from 3 votes
    Print Recipe Pin Recipe
    Prep Time 5 minutes mins
    Cook Time 20 minutes mins
    Total Time 25 minutes mins
    Course dinner, Entree, Valentine
    Cuisine Date night, fish, Light, quick
    Servings 4 servings
    Calories 219 kcal

    Equipment

    • 1 Skillet
    • 1 cutting board
    • 1 chefs knife
    • 1 Measuring cups and spoons
    • 1 wooden spoon
    • 1 Garlic Press

    Ingredients
      

    • 4 filets white fish I used cod but use your favorite white fish
    • Kosher Salt and black pepper to taste
    • ½ cup flour
    • 3 Tablespoons salted butter divided
    • 1 Tablespoon olive oil
    • 3 cloves garlic pressed or minced
    • 3 ounces nonpareil capers drained
    • ¾ cup dry cooking sherry
    • ¼ cup chicken broth
    • 1 large lemon you'll use juice from half and you can thinly slice the other half of the lemon for garnish
    • 2 Tablespoons fresh parsley,

    Instructions
     

    • Pat fish dry and season with salt and pepper to taste. Dredge each piece of fish in the flour so that the entire piece if fully covered and tap off the excess.
    • Heat a large skillet over medium-high heat and melt 1 Tablespoon of butter with olive oil.
    • Place fish into the pan and sear each side of the fish until it's a nice golden brown, around 2 minutes per side. Remove the fish to a side plate and tent with foil.
    • Add another Tablespoon of butter to the pan and reduce the heat to medium.
    • Add minced garlic capers and sauté for about a minute or two, stirring often so it doesn't burn.
    • Deglaze the pan with sherry, for 2 minutes scraping the bottom of the pan with a wooden spoon to get all the flavorful brown bits pulled up.
    • Add broth and the juice from ½ a lemon.
    • Simmer for 6-7 minutes until reduced slightly. Taste and add salt and pepper to taste if needed.
    • Add fish back in to the pan and simmer 2 more minutes.
    • Turn off the heat and add the last tablespoon of butter. Once the butter is melted, gently stir it in, and top the fish with the lemon rounds. Sprinkle with chopped parsley and serve immediately.

    Notes

    • Pat the fish dry before seasoning. Any moisture on the surface will prevent a good sear.
    • Don't move the fish while it's searing. Let it sit undisturbed for the full time to build that golden crust.
    • Always deglaze when making the pan sauce. All those golden bits left in the pan from searing the fish add incredible flavor to the sauce.
    • Taste the sauce as it simmers. Adjust the lemon, salt, or pepper to your liking before adding the fish back in.
    • Finish with a squeeze of fresh lemon. A little extra lemon right before serving brightens the whole dish up.
    • Ingredients to prep ahead- Mince the garlic and drain the capers. The fish is best seasoned and cooked fresh.
    • Leftovers and storage- Store in an airtight container in the fridge for up to 2 days. Reheat gently on the stovetop over low heat to avoid overcooking the fish. 

    Nutrition

    Serving: 1servingCalories: 219kcalCarbohydrates: 18gProtein: 3gFat: 13gSaturated Fat: 6gPolyunsaturated Fat: 1gMonounsaturated Fat: 5gTrans Fat: 0.3gCholesterol: 23mgSodium: 716mgPotassium: 123mgFiber: 2gSugar: 1gVitamin A: 467IUVitamin C: 19mgCalcium: 32mgIron: 2mg
    Tried this recipe?Let us know how it was!

    Helpful Tools:


    You can find a full index of my recipes here.

    Don't forget to follow The Life Jolie on Pinterest for other amazing recipes!

    This Date Night Fish for Two with a Lemon Sherry Pan Sauce is such an easy date night recipe option! It works great with any white fish and is the best way to use a few simple ingredients to create a healthy and delicious treat for dinner with the person you love. This is perfect for Valentine's Day!

    Olive and Gruyere Puff Pastry Tartlets

    Dec 29, 2016 · 8 Comments

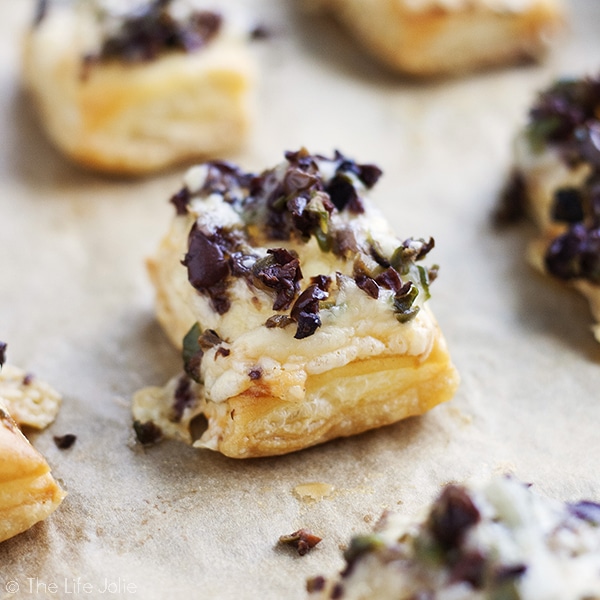
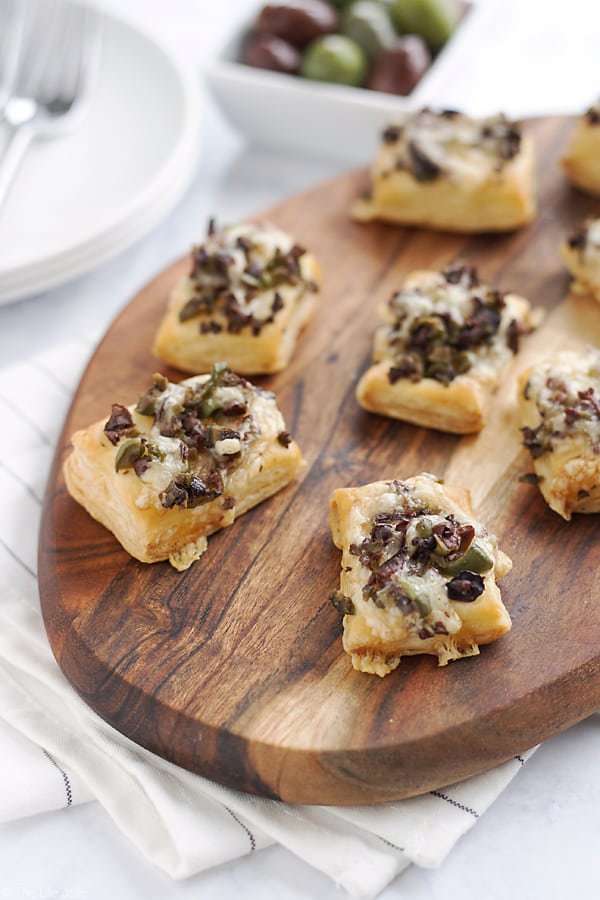
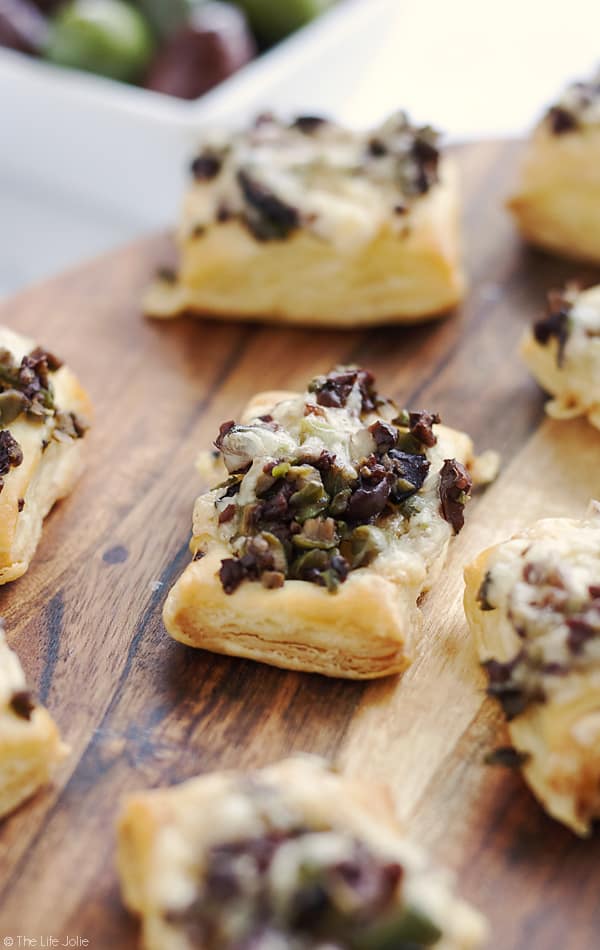
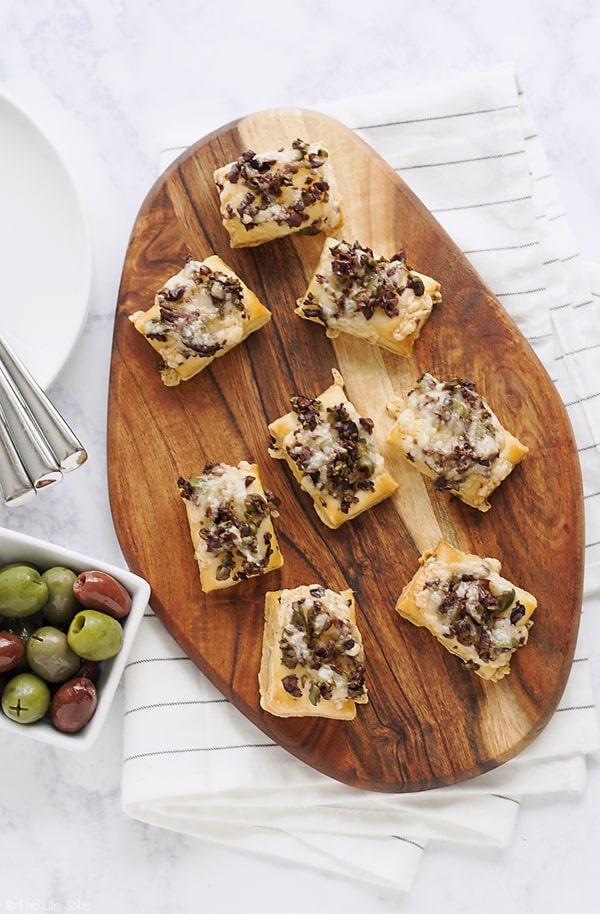
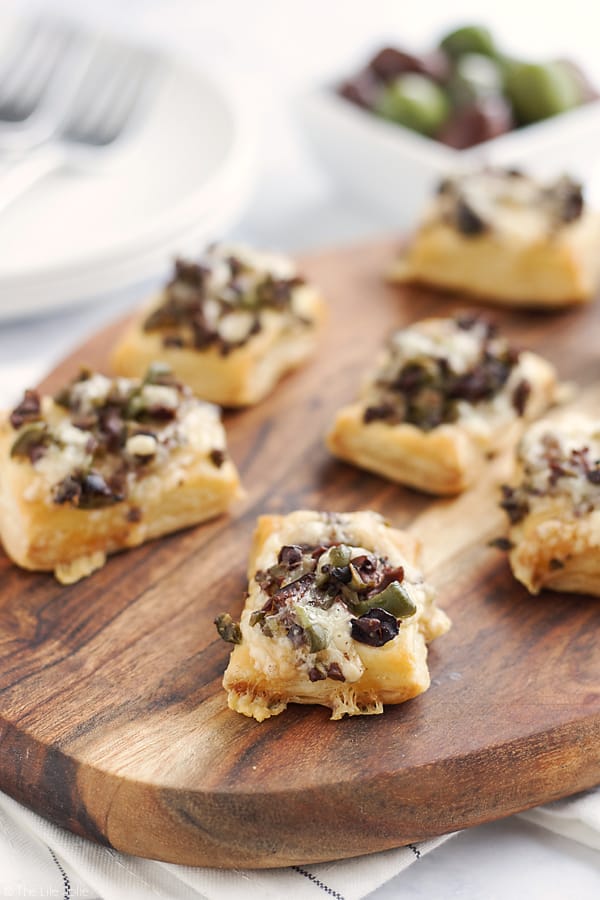
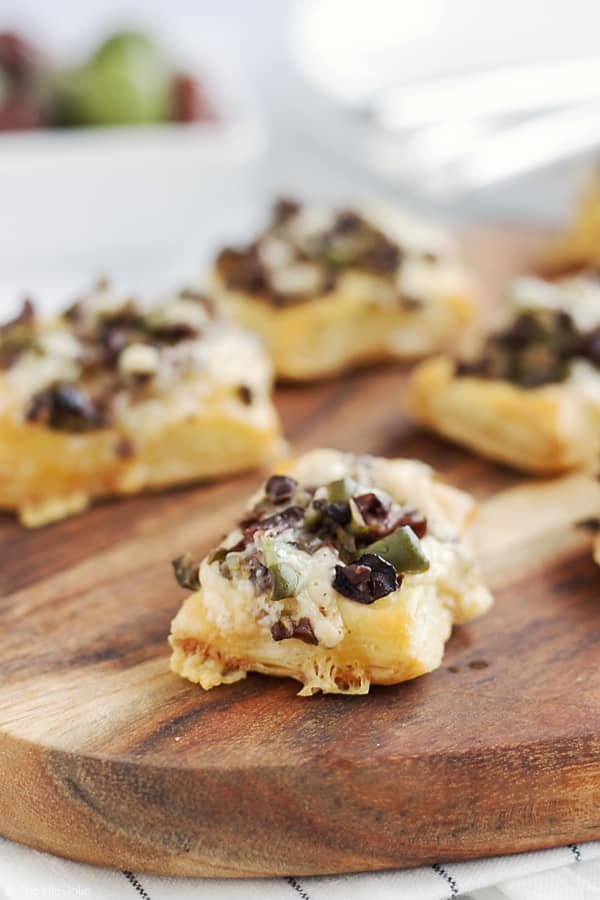
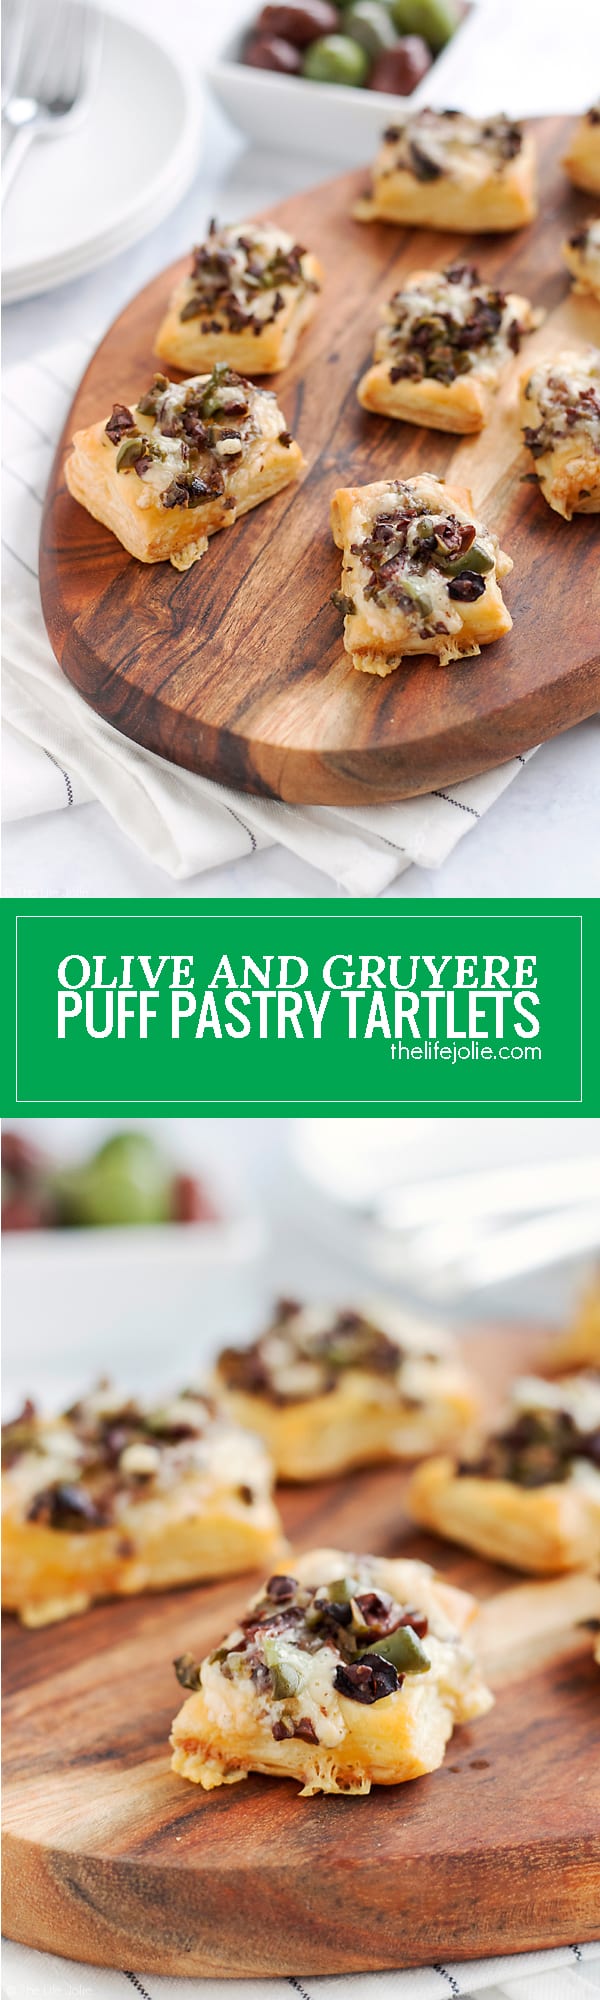
    This Olive and Gruyere Puff Pastry Tartlets recipe is one of my new favorite easy appetizers to throw together! Just four simple ingredients (including frozen puff pastry dough, olives and cheese) and they come together quickly for the holidays or any parties you may be having!

    This Olive and Gruyere Puff Pastry Tartlets recipe is one of my new favorite easy appetizers to throw together! Just four simple ingredients (including frozen puff pastry dough, olives and cheese) and they come together quickly for the holidays or any parties you may be having!

    This Olive and Gruyere Puff Pastry Tartlets recipe is one of my new favorite easy appetizers to throw together! Just four simple ingredients (including frozen puff pastry dough, olives and cheese) and they come together quickly for the holidays or any parties you may be having!

    This post contains Affiliate Links. Please see the disclaimer here.

    Can you guys believe 2016 is coming to an end? I certainly cannot! It's been such an amazing year, not only for my family but for this little blog of mine!

    I didn't know what to expect at the beginning of 2016 since I was pregnant and I knew my time would be split a bit more. But I am so appreciative that you guys stuck around and continue to hang out in this community and share in my love for food and family!  <3

    I have some exciting things planned for this site in 2017 and I only hope you'll stick around and get involved as I'm super excited to have you! And of course if there's anything you want to see more of or if you have any idea, please, please please reach out to me here. I'd love to hear from you!

    This Olive and Gruyere Puff Pastry Tartlets recipe is one of my new favorite easy appetizers to throw together! Just four simple ingredients (including frozen puff pastry dough, olives and cheese) and they come together quickly for the holidays or any parties you may be having!

    So back to New Years! I feel there are two different ways people go about celebrating this holiday. There are the people who get dressed up and go all out, whether it be a party or a fancy dinner! There are usually bubbly beverages and fine food involved in this. Maybe even dancing (although trust me when I say you do NOT want to see me dance. It's rough. J on the other hand is a sight for sore eyes on the dance floor...).

    There are also the people who like to put on their favorite pair of PJ's for a relaxing night in. This can still involve tasty food and beverages (in fact, it should!) and the banging of pots and pans when the ball drops. And heck, if a little dancing happens, I certainly wouldn't fault you!

    This Olive and Gruyere Puff Pastry Tartlets recipe is one of my new favorite easy appetizers to throw together! Just four simple ingredients (including frozen puff pastry dough, olives and cheese) and they come together quickly for the holidays or any parties you may be having!

    J and I tend to fall into that second group of people. PJ's will always win for our favorite outfits and since we have young kids, a relaxing night in is generally always a welcome plan (minus the pots and pans because infant sleep). Give us tasty food, board games and a few close friends any day of the week.

    That's not to say that you have to give up on finer, fancier things if you take this approach. I'm a firm believer in keeping a celebratory vibe for my New Years Eve festivities, even when they're of the casual variety. And as you've probably guessed this often translates to taking the opportunity to make some nicer foods to indulge in. Like this recipe!

    This Olive and Gruyere Puff Pastry Tartlets recipe is one of my new favorite easy appetizers to throw together! Just four simple ingredients (including frozen puff pastry dough, olives and cheese) and they come together quickly for the holidays or any parties you may be having!

    I love olives and cheese, like all the best people do. And I got excited about taking these ingredients beyond you're usual cheese platter (not that there's anything wrong with a cheese platter!).

    The original plan was for these to be Savory Palmier's based on an Ina Garten recipe that drew me in one day while I was watching her show at my parent's house. But when I was in the testing phase of this recipe things did not go well.

    Puff Pastry can be a tricky beast, even when you're using the pre-made variety like I do. I've had great success with my Puff Pastry Breakfast Pizza (though I've received feedback that some have a tough time with that) but I had a disastrous time making those darn Palmier's. The dough kept cracking on me and when I attempted to roll and cut it, the whole operation fell apart (literally).

    This Olive and Gruyere Puff Pastry Tartlets recipe is one of my new favorite easy appetizers to throw together! Just four simple ingredients (including frozen puff pastry dough, olives and cheese) and they come together quickly for the holidays or any parties you may be having!

    Now, I try to always keep in mind that when it comes to baking and cooking, especially when dealing with something as temperamental as Puff Pastry dough, any number of variables can effect the success of your final product. But after a few tries with those Palmier's I ultimately threw in the towel in the interest of the work-smarter-not-harder thought process and took a different approach.

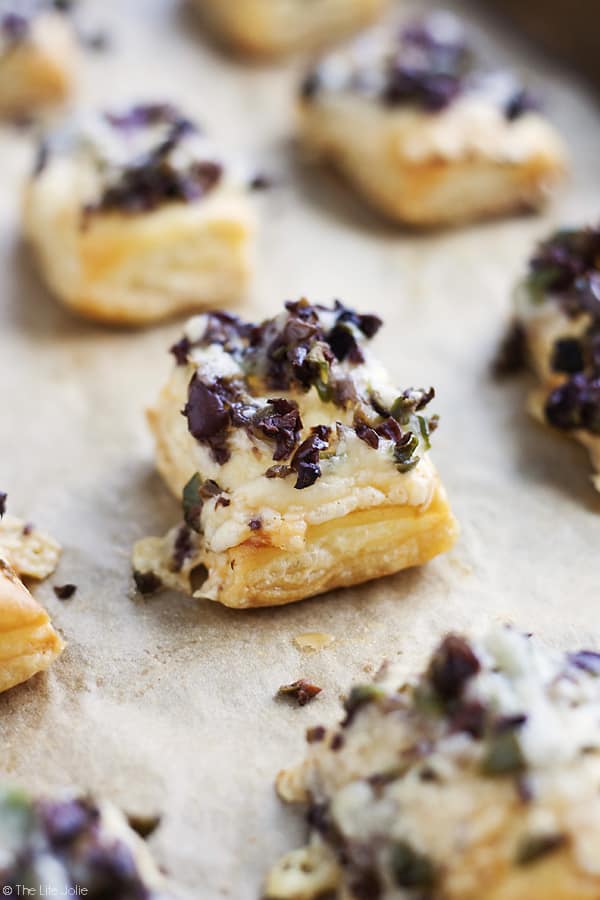
    Instead of rolling and cutting, I rolled out my puff pastry dough a bit and used my pizza cutter to cut the dough into smaller pieces before I topped them with my ingredients and baked them.

    This Olive and Gruyere Puff Pastry Tartlets recipe is one of my new favorite easy appetizers to throw together! Just four simple ingredients (including frozen puff pastry dough, olives and cheese) and they come together quickly for the holidays or any parties you may be having!

    Not only was this a stress-free take with the same flavors, but the final product was so cute and pretty and tasted fantastic! These are oh-so-savory and go beautifully with a nice glass of wine.

    This recipe makes around four dozen little tartlets (and the recipe can easily be cut in half by using only 1 puff pastry sheet and half the toppings). It tastes best right out of the oven, but was still tasty the next day. If you do cut the recipe in half, make sure you keep the thawing puff pastry well-wrapped in your fridge so it doesn't dry out like mine did.

    Other tasty appetizer options include:

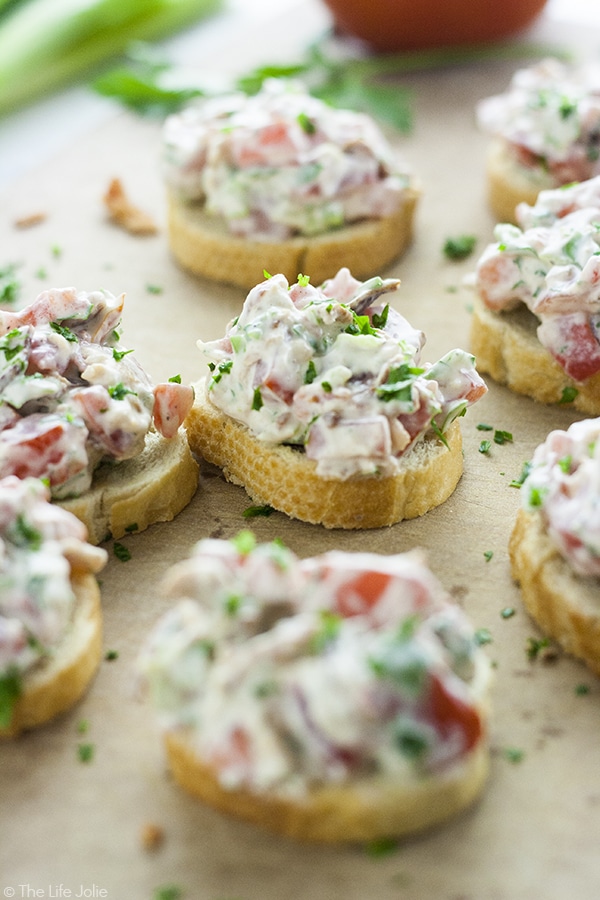
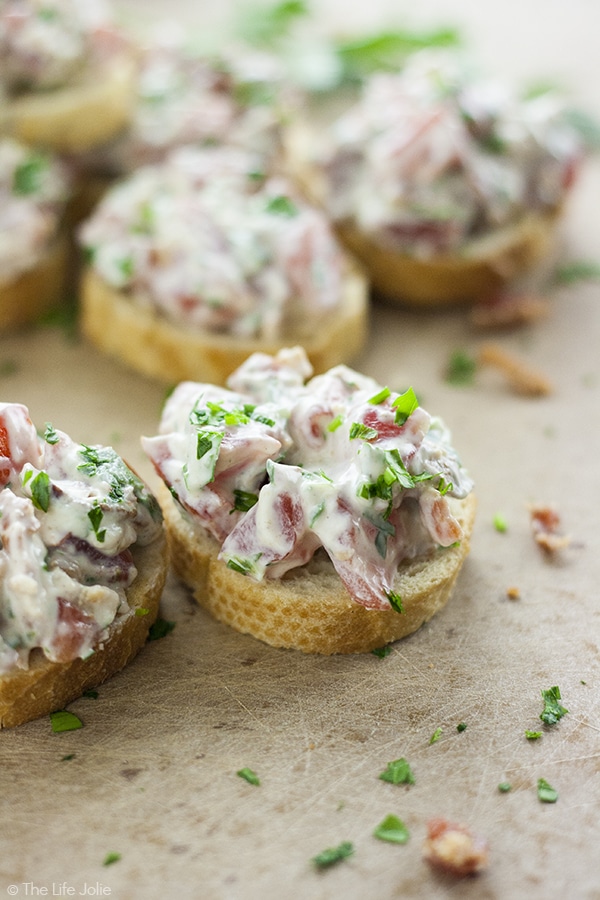
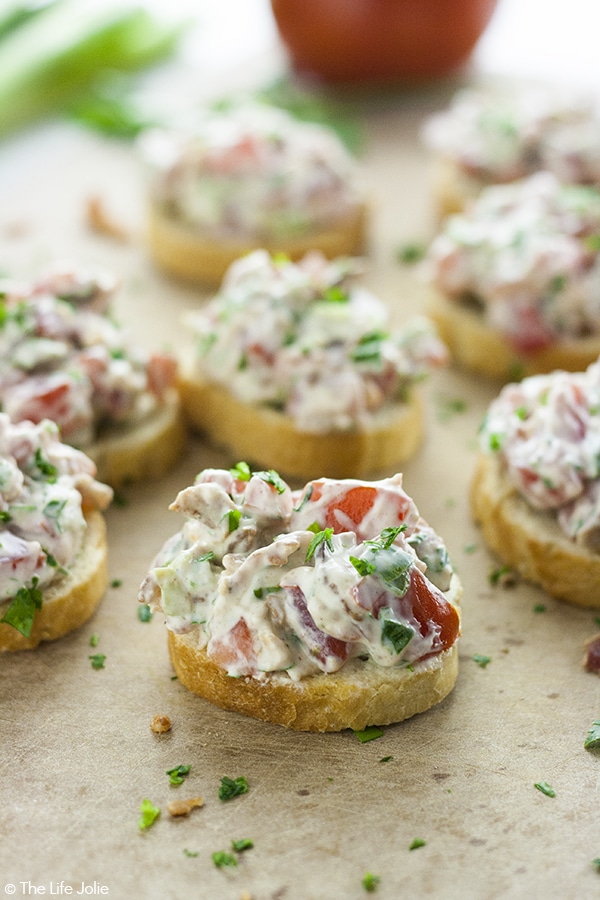
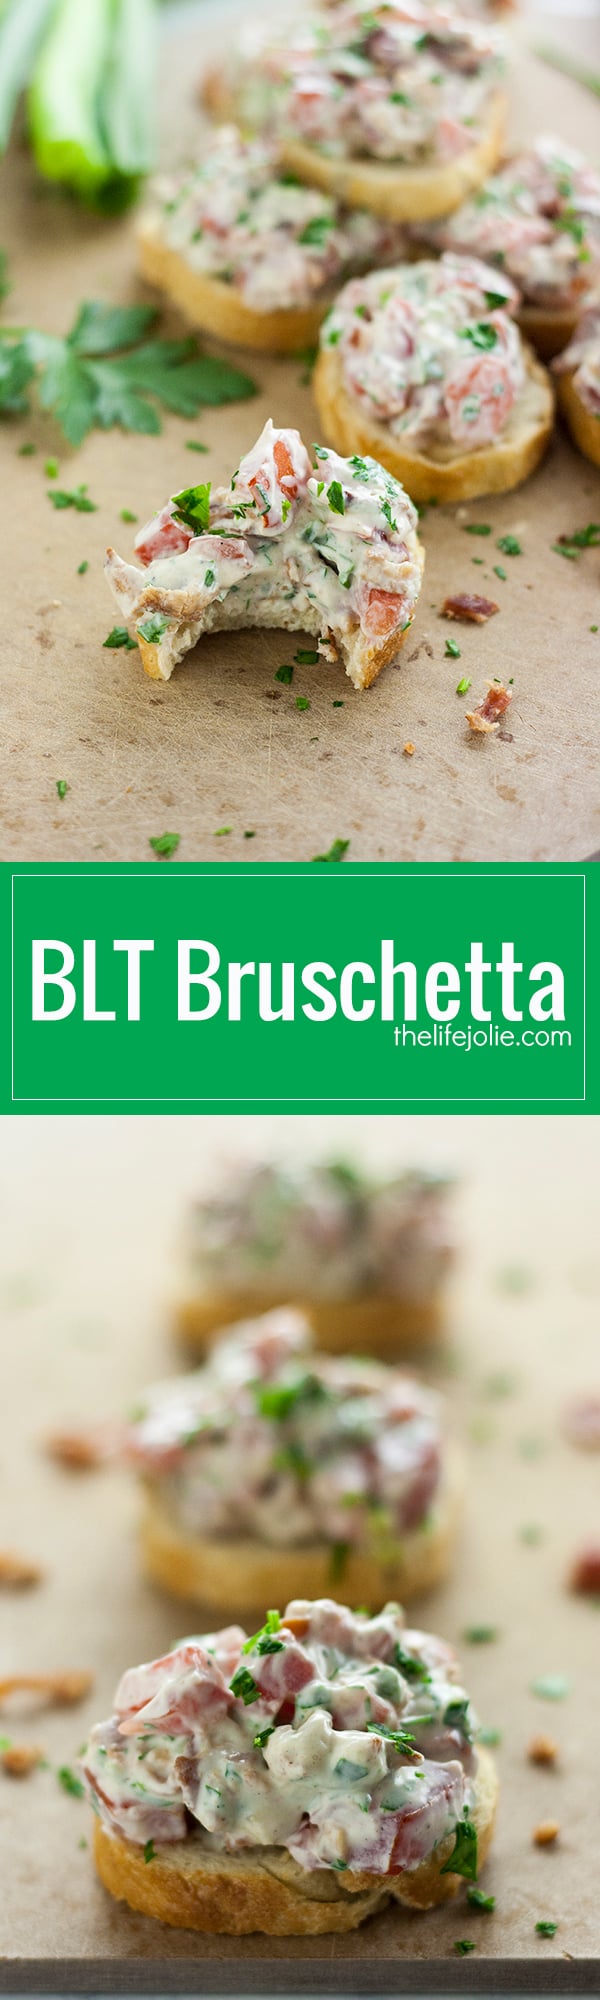
    BLT Bruschetta

    Apple Bacon Brie Bites

    Sweet and Spicy Kielbasa 

    This Olive and Gruyere Puff Pastry Tartlets recipe is one of my new favorite easy appetizers to throw together! Just four simple ingredients (including frozen puff pastry dough, olives and cheese) and they come together quickly for the holidays or any parties you may be having!

    Olive and Gruyere Puff Pastry Tartlets

    Jessy Freimann
    These are the perfect appetizer to pair with a glass of wine. They're quick and easy to make and everyone loves them!
    No ratings yet
    Print Recipe Pin Recipe
    Prep Time 10 minutes mins
    Cook Time 20 minutes mins
    Total Time 30 minutes mins
    Course Appetizer, Hors D
    Cuisine Christmas, holidays, New Years
    Servings 10 servings
    Calories 381 kcal

    Equipment

    • 1 sheet pan
    • 1 Rolling Pin
    • 1 chefs knife
    • 1 cutting board
    • 1 Measuring cups and spoons

    Ingredients
      

    • 2 puff pastry sheets thawed (I do this by putting into the fridge the night before- keep it wrapped so it doesn't dry out!)
    • 1 large egg mix with 1 Tablespoon water to make an egg wash
    • 1 ½ cups Gruyere cheese shredded and divided in half
    • 1 ½ cups olives chopped and divided in half (I used my mini prep processor- the olives I went with were pitted kalamata and pitted castelvetrano, but use your favorite varieties!).

    Instructions
     

    • Preheat your oven to 400 degrees and line your pan with parchment for easy clean up. Combine your chopped olives and gruyere cheese shreds. Set aside.
    • On a lightly floured surface, roll out your thawed puff pastry dough a tad and cut the dough into 1 ½-2 inch pieces- I used a round pizza cutter to make this easier.
    • Place the dough pieces on your pans with about an inch or so between them.
    • Lightly brush your puff pastry pieces with the egg wash.
    • Divide the olive and cheese mixture between each puff pastry piece. You don't want to put too much but the amount of mixture should be the perfect amount to cover each puff pastry piece (I had none left over, and each piece was well covered).
    • Bake the tartlets for around 20 minutes, turning the pan a little more than half way through (try not to open the oven for the first 10 minutes if you can avoid it).
    • Serve immediately.

    Notes

    Make sure you're working fast, as puff pastry behaves better when it's very cold. Don't hesitate to put it back into the fridge for a few if you feel it's too warm.
    Try to resist the temptation to open the oven for the first 10 minutes of optimal results.

    Nutrition

    Serving: 1servingCalories: 381kcalCarbohydrates: 23gProtein: 10gFat: 28gSaturated Fat: 9gPolyunsaturated Fat: 3gMonounsaturated Fat: 15gCholesterol: 22mgSodium: 579mgPotassium: 55mgFiber: 1gSugar: 1gVitamin A: 268IUVitamin C: 0.001mgCalcium: 216mgIron: 1mg
    Tried this recipe?Let us know how it was!

    Helpful tools:


    You can find a full index of my recipes here.

    Don't forget to follow The Life Jolie on Pinterest.

    This Olive and Gruyere Puff Pastry Tartlets recipe is one of my new favorite easy appetizers to throw together! Just four simple ingredients (including frozen puff pastry dough, olives and cheese) and they come together quickly for the holidays or any parties you may be having!

    Grapefruit Sparkler

    Dec 27, 2016 · 16 Comments

    This Grapefruit Sparkler is a festive champagne cocktail! I love adult beverages featuring sparkling wine and this is simple to make and refreshing to drink at brunch or to ring in the New Year. This pretty drink will be a mainstay at your next girls night

    This Grapefruit Sparkler is a festive champagne cocktail! I love adult beverages featuring sparkling wine and this is simple to make and refreshing to drink at brunch or to ring in the New Year. This pretty drink will be a mainstay at your next girls night!

    This Grapefruit Sparkler is a festive champagne cocktail! I love adult beverages featuring sparkling wine and this is simple to make and refreshing to drink at brunch or to ring in the New Year. This pretty drink will be a mainstay at your next girls night!

    This post contains Affiliate Links. Please see the disclaimer here.

    I've had an on-again-off-again relationship with grapefruit for a long time. As a child I was not a fan, like most children (my A is an exception, she loves sharing a grapefruit with me!). As I got older, I ate a little bit of grapefruit here and there as a young adult.

    Then, when I was at the very end of my second trimester with T, we were in Philadelphia visiting my cousin Andrea and her husband Nate. It was a gorgeous Saturday morning and we were making breakfast when Andrea asked if I wanted to split a grapefruit with her.

    This Grapefruit Sparkler is a festive champagne cocktail! I love adult beverages featuring sparkling wine and this is simple to make and refreshing to drink at brunch or to ring in the New Year. This pretty drink will be a mainstay at your next girls night!

    Initially I was hesitant. Up until then, I'd been so hit-or-miss with grapefruits that  I didn't want to waste a perfectly good half-a-grapefruit on my fickle pregnant taste buds. But I thought, why not? It's good for me and for T, after all.

    So I sprinkled it with a bit of sugar and dove in face first. That grapefruit was perfectly tangy and even a little bit sweet. It tasted so clean and refreshing and I couldn't get enough! I don't know what happened, but I was suddenly a believer!

    This Grapefruit Sparkler is a festive champagne cocktail! I love adult beverages featuring sparkling wine and this is simple to make and refreshing to drink at brunch or to ring in the New Year. This pretty drink will be a mainstay at your next girls night!

    After that, it was as though a switch was flipped and I had to have more grapefruit. I was buying them unapologetically by the bagful. A grapefruit was on my plate literally every single morning through the end of my maternity leave. I also bought grapefruit chapstick and grapefruit flavored seltzer. Now I still adore grapefruits on weekend mornings, but I've toned it down a bit for the sake of convenience and my wallet.

    With New Years fast approaching, I thought it only appropriate to combine this clean, fresh favor with another favorite of mine- champagne! Instant celebration.
    This Grapefruit Sparkler is a festive champagne cocktail! I love adult beverages featuring sparkling wine and this is simple to make and refreshing to drink at brunch or to ring in the New Year. This pretty drink will be a mainstay at your next girls night!

    Now that I had my primary components, I knew I needed a little something extra, to sweeten the deal on might say. So I put on my thinking cap and remembered an article I once read from the one-and-only Martha Stewart about how to make candied lemons.

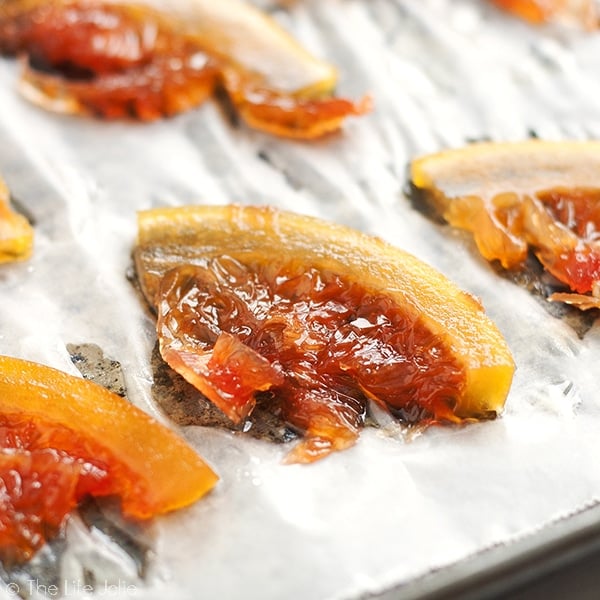
    I figured candied grapefruit peels would not only make a pretty garnish, but they'd make a tasty grapefruit infused simple syrup. So I made a few little changes of my own to accommodate my needs and got to work.

    This Grapefruit Sparkler is a festive champagne cocktail! I love adult beverages featuring sparkling wine and this is simple to make and refreshing to drink at brunch or to ring in the New Year. This pretty drink will be a mainstay at your next girls night!

    The results were a champagne cocktail with that deliciously dry bite that you tend to find in both the grapefruit and sparkling wine, with a bit of fruity sweetness from the simple syrup.

    On my first sip the dryness hit me immediately, but I found it to be pretty satisfying and really refreshing. I think this is fancy enough to serve at a New Years Eve cocktail party (or any celebratory event) but also an excellent option for that New Years Day brunch when you need a little hair of the dog to pick you up.

    The bonus of this is you also get the candied grapefruit/simple syrup recipe which can translate to any citrus fruit beautifully. Now for this I cut off the fruit part of the candied grapefruit and only used the peels, but those are totally tasty as well!

    This Grapefruit Sparkler is a festive champagne cocktail! I love adult beverages featuring sparkling wine and this is simple to make and refreshing to drink at brunch or to ring in the New Year. This pretty drink will be a mainstay at your next girls night!

    Other great cocktail party favorites include:

    Boozy Gummy Bears

    BLT Bruschetta

    Apple Bacon Brie Bites

    Sweet and Spicy Kielbasa Bites

    This Grapefruit Sparkler is a festive champagne cocktail! I love adult beverages featuring sparkling wine and this is simple to make and refreshing to drink at brunch or to ring in the New Year. This pretty drink will be a mainstay at your next girls night

    Grapefruit Sparkler

    Jessy Freimann
    This Grapefruit Sparkler is a festive champagne cocktail! I love adult beverages featuring sparkling wine and this is simple to make and refreshing to drink at brunch or to ring in the New Year. This pretty drink will be a mainstay at your next girls night!
    No ratings yet
    Print Recipe Pin Recipe
    Prep Time 10 minutes mins
    Cook Time 1 hour hr
    Total Time 1 hour hr 10 minutes mins
    Course Cocktails
    Cuisine Christmas, Girls Night, holidays, New Years
    Servings 1 servings
    Calories 379 kcal

    Equipment

    • 1 sheet pan
    • 1 cutting board
    • 1 chefs knife
    • 1 Measuring cups and spoons

    Ingredients
      

    For the candied grapefruit peels and grapefruit-infused simple syrup:

    • 1 grapefruit
    • 2 cups granulated sugar
    • 2 cups water

    For each Grapefruit Sparkler:

    • 1 Tablespoon Sugar
    • 2 Tablespoons grapefruit-infused simple syrup + a little extra to rim your glass
    • 1 Tablespoon fresh squeezed grapefruit juice
    • 8 ounces Champagne or sparkling wine of your choice mine was semi-dry

    Instructions
     

    For the candied grapefruit peels and grapefruit-infused simple syrup:

    • Start by slicing your grapefruit in half. Then lay each half flat-side down and cup it into thin slices (discard the seeds). Finally cut each slice in half and set aside.
    • Bring the sugar and water to a boil in a saute pan whisking until the sugar is dissolved. Reduce the heat to medium-low.
    • Place the grapefruit slices in the water in a single layer (it's ok if they overlap a bit). Let them simmer (not boil!) for an hour or until the rinds are translucent.
    • Place them on a pan lined with wax paper to cool.
    • Allow the remaining liquid to cool a bit and then strain it into a container and refrigerate covered for up to a week or two.
    • Once cool, remove the fruit from the rind.

    For each Grapefruit Sparkler:

    • Dip the rim of your glass into the grapefruit-infused simple syrup and then into some sugar.
    • Next place the 2 Tablespoons grapefruit-infused simple syrup into the glass followed by the 1 Tablespoon of fresh squeezed grapefruit juice.
    • Fill the rest of the glass with chilled Champagne or sparkling wine and place a candied grapefruit rind onto the rim (or into the glass). Serve immediately.

    Notes

    I wrote the cocktail recipe for each individual glass so it can be adapted to make these for as many or as few people as you want. I'm told you can help keep leftover sparkling wine fresh by placing a spoon in the opening of the bottle. This would be tasty with the citrus of your choice, but I love grapefruit best!

    Nutrition

    Serving: 1servingCalories: 379kcalCarbohydrates: 73gProtein: 2gFat: 0.4gSaturated Fat: 0.1gPolyunsaturated Fat: 0.1gMonounsaturated Fat: 0.1gSodium: 40mgPotassium: 595mgFiber: 4gSugar: 63gVitamin A: 2945IUVitamin C: 84mgCalcium: 83mgIron: 3mg
    Tried this recipe?Let us know how it was!

    Helpful tools:


    You can find a full index of my recipes here.

    Don't forget to follow The Life Jolie on Pinterest.

    This Grapefruit Sparkler is a festive champagne cocktail! I love adult beverages featuring sparkling wine and this is simple to make and refreshing to drink at brunch or to ring in the New Year. This pretty drink will be a mainstay at your next girls night

    M&M’S® Brownie Truffles

    Dec 14, 2016 · 12 Comments

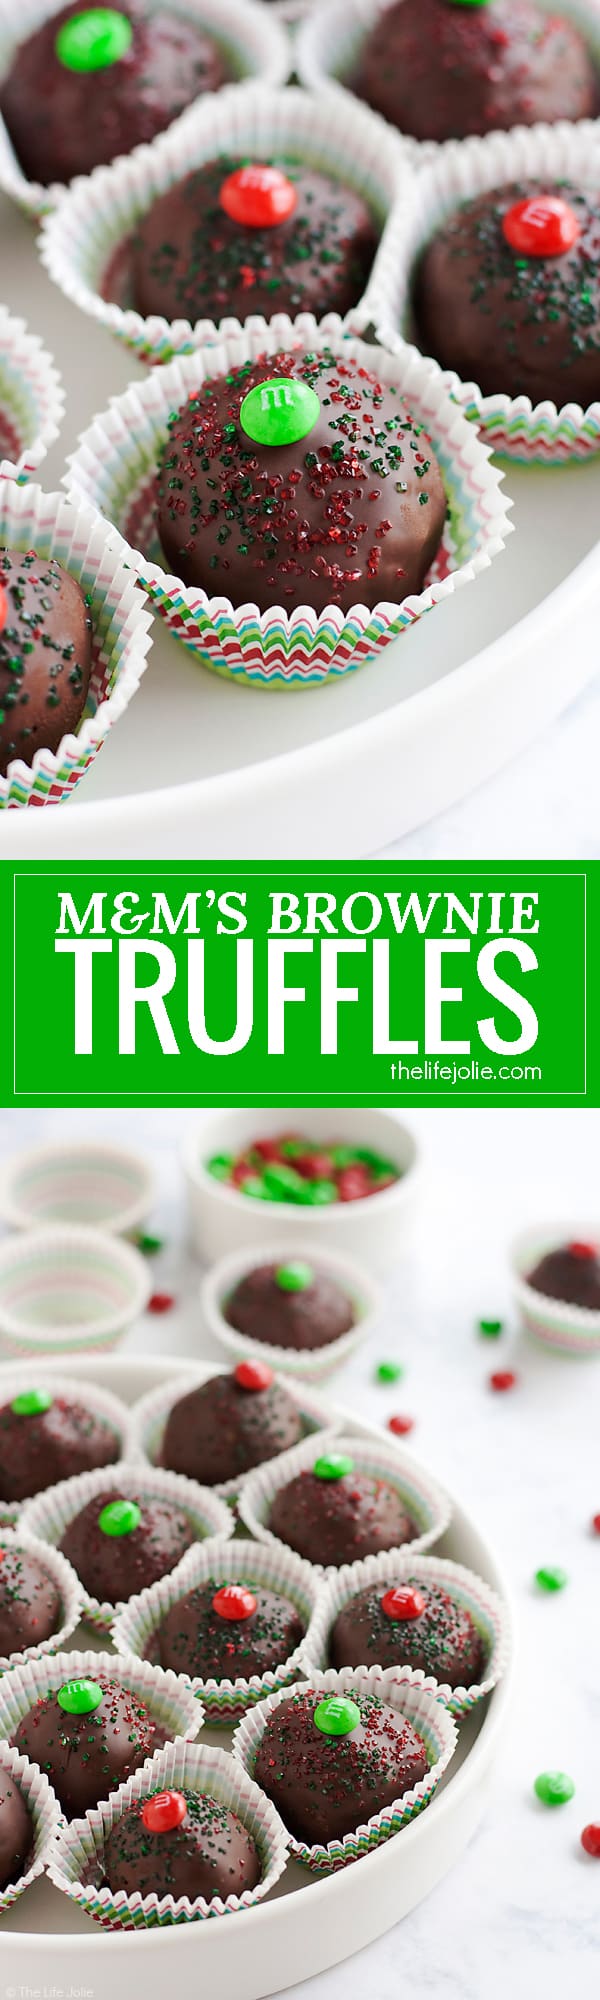
    These M&M's Brownie Truffles are an easy chocolate dessert recipe and an excellent gift to give this holiday season. It's a super-simple recipe made with rich, fudgy brownies and a surprise in the middle. These are a pretty addition to any Christmas cookie platter that the whole family will love!

    This shop has been compensated by Collective Bias, Inc. and its advertiser, MARS Incorporated. All opinions are mine alone. #BakeInTheFun #CollectiveBias

    These Brownie Truffles are an easy chocolate dessert recipe and an excellent gift to give this holiday season. It's a super-simple recipe made with rich, fudgy brownies and a surprise in the middle. These are a pretty addition to any Christmas cookie platter that the whole family will love!

    These M&M's Brownie Truffles are an easy chocolate dessert recipe and an excellent gift to give this holiday season. It's a super-simple recipe made with rich, fudgy brownies and a surprise in the middle. These are a pretty addition to any Christmas cookie platter that the whole family will love!

    One of the things I love most about this season is giving gifts. There is something so special about seeing the look on other people's faces when you give them something great. I especially love that I get to teach my girls what an awesome feeling it is to give gifts to others.

    A few years ago, I've started a tradition of giving homemade gifts to our neighbors. We happen to live in a neighborhood full of really, really nice people. So I try to bring them something delicious each year and spread a little cheer while I'm at it. It's fun, I bundle A (and now T) up and we make our rounds and deliver some treats.

    These M&M's Brownie Truffles are an easy chocolate dessert recipe and an excellent gift to give this holiday season. It's a super-simple recipe made with rich, fudgy brownies and a surprise in the middle. These are a pretty addition to any Christmas cookie platter that the whole family will love!

    Every year I try to find or create delicious recipes to make and give. The best thing about holiday baking is that these treats provide two gifts in one. The first is the gift of family time: getting to bake and bond with my family. Not to mention enjoying these treats together. The other gift is baking these treats and giving them to the people we love. So it really is a win for everyone involved!

    These M&M's Brownie Truffles are an easy chocolate dessert recipe and an excellent gift to give this holiday season. It's a super-simple recipe made with rich, fudgy brownies and a surprise in the middle. These are a pretty addition to any Christmas cookie platter that the whole family will love!

    This year I knew I wanted to do something of the truffle variety. Not the delicious, woodsy fungi that you find shaved over pasta at a fancy restaraunt. The chocolate kind. Because chocolate is always a good idea!

    You know, I made truffles once, as a newlywed. And they were delicious. But they were not the most simple thing to make. In truth, they were a bit of a hassle and were pretty messy. Let's just say I was finding chocolate remnants in random nooks and crannies in my kitchen for months afterwards!

    These M&M's Brownie Truffles are an easy chocolate dessert recipe and an excellent gift to give this holiday season. It's a super-simple recipe made with rich, fudgy brownies and a surprise in the middle. These are a pretty addition to any Christmas cookie platter that the whole family will love!
    Click on this coupon to get this great deal!

    Now, if you're on Pinterest and have a feed that shows you a decent amount of food, you've probably seen cake balls or cake pops. These are nothing new; they're simple to make, tasty to eat and they look adorable. Basically, a great option for a simple gift to share.

    But I wanted something a bit more rich and decadent. Because if there is ever a time to indulge, the holidays are that time! With that in mind, I set out to make some brownie truffles.

    These M&M's Brownie Truffles are an easy chocolate dessert recipe and an excellent gift to give this holiday season. It's a super-simple recipe made with rich, fudgy brownies and a surprise in the middle. These are a pretty addition to any Christmas cookie platter that the whole family will love!

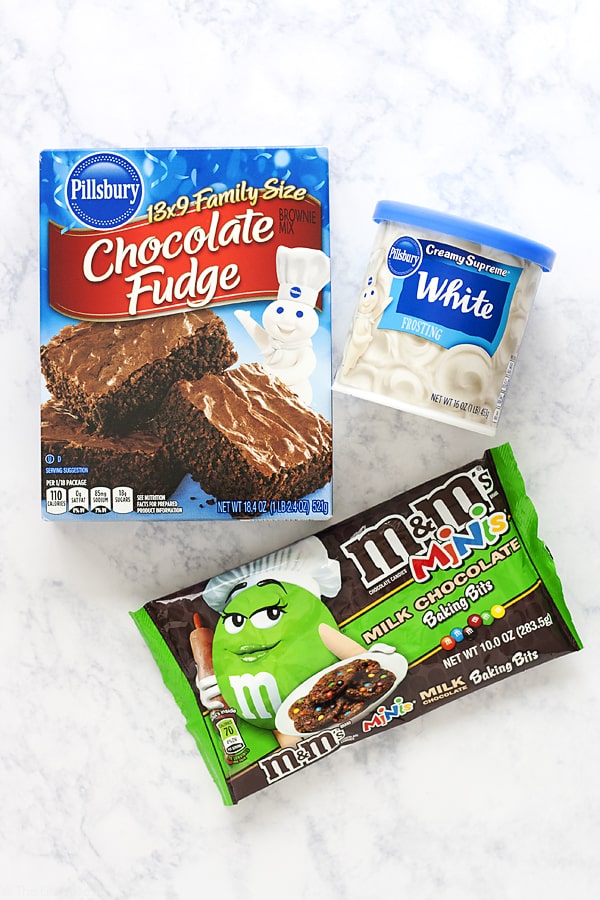
    Now I could have made brownies from scratch. But I'm all for the work smarter, not harder state of mind. Luckily for me, Pillsbury™ makes a some pretty fantastic options for quick and delicious for baked goods.

    For these, I used the Pillsbury™ Family Size Chocolate Fudge Brownie Mix along with some Pillsbury™ Creamy Supreme® Vanilla Flavored Frosting. I've been using a variety Pillsbury™ products for a long time, so collaborating on a delicious truffle recipe was the easiest decision ever.

    These M&M's Brownie Truffles are an easy chocolate dessert recipe and an excellent gift to give this holiday season. It's a super-simple recipe made with rich, fudgy brownies and a surprise in the middle. These are a pretty addition to any Christmas cookie platter that the whole family will love!

    I also knew I wanted to add a little something extra to make these even more special and festive. So I added some M&M’S® Brand Minis Milk Chocolate Baking Bits as a fun surprise inside of the truffles as well as a nice decorative touch on top.

    These M&M's Brownie Truffles are an easy chocolate dessert recipe and an excellent gift to give this holiday season. It's a super-simple recipe made with rich, fudgy brownies and a surprise in the middle. These are a pretty addition to any Christmas cookie platter that the whole family will love!

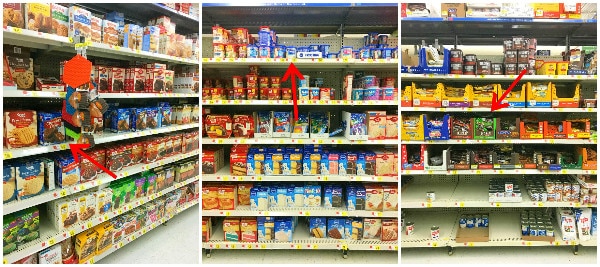
    I had a super-easy time finding all of the ingredients and Pillsbury™ products at my local Walmart in the Baking Aisle.

    These M&M's Brownie Truffles are an easy chocolate dessert recipe and an excellent gift to give this holiday season. It's a super-simple recipe made with rich, fudgy brownies and a surprise in the middle. These are a pretty addition to any Christmas cookie platter that the whole family will love!

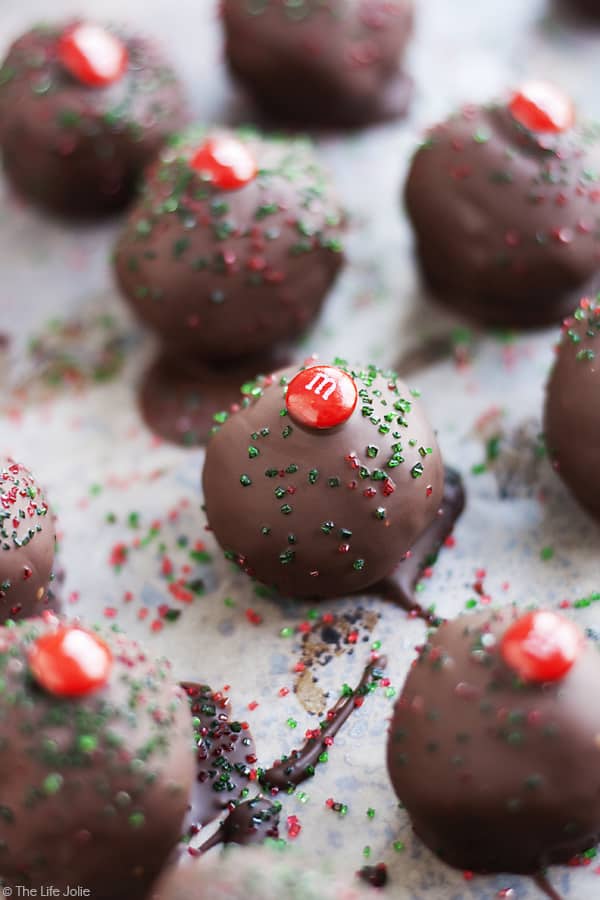
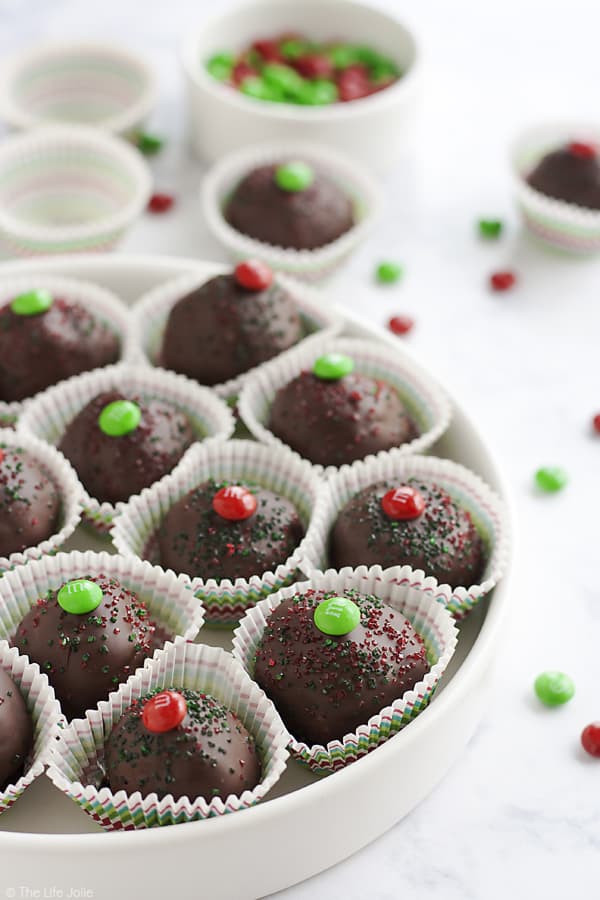
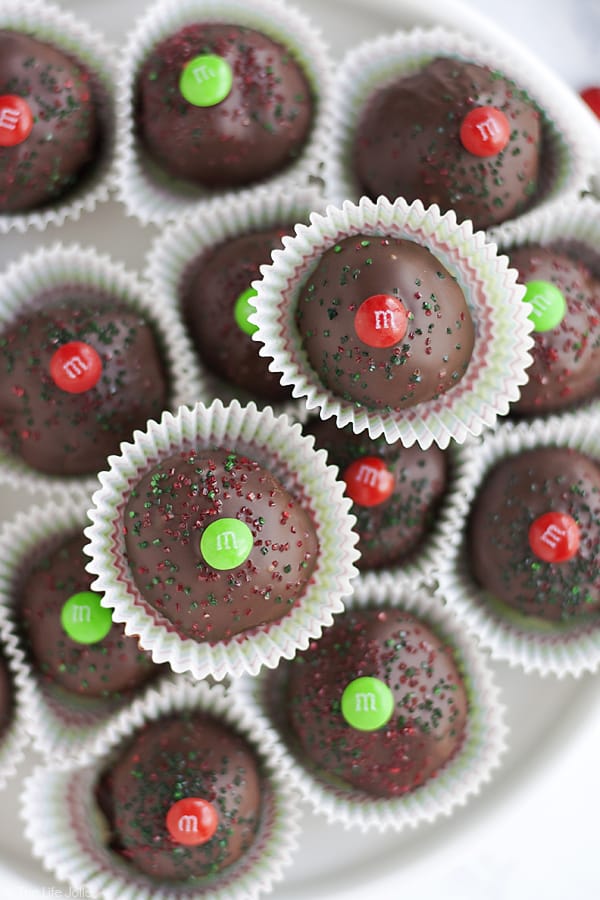
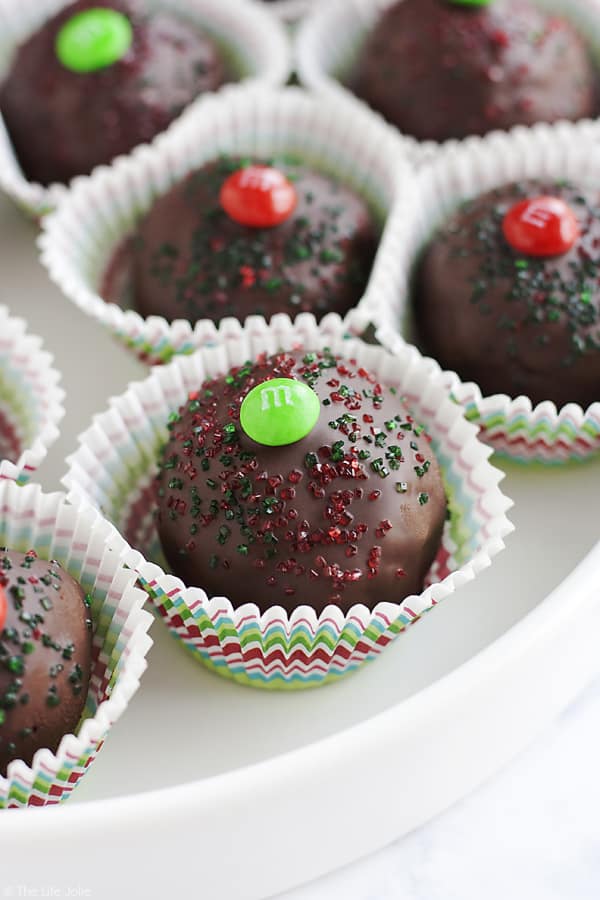
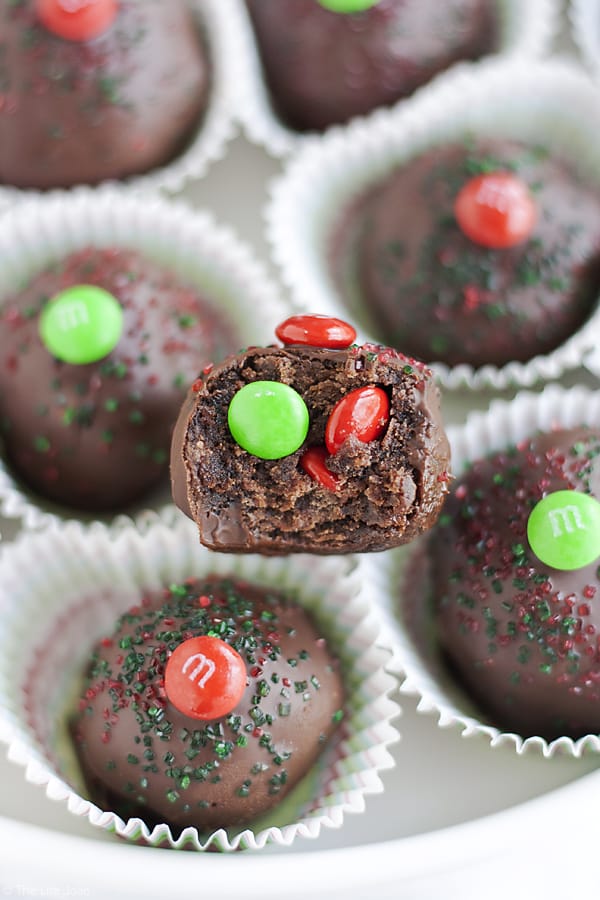
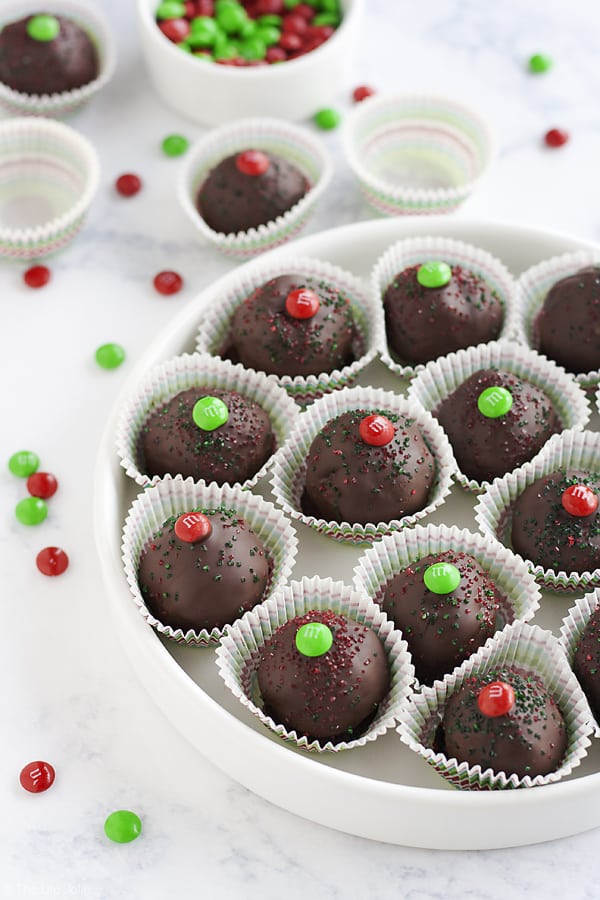
    The result was a simple-to-make truffle with a dark chocolate shell. The inside is soft and fudgy brownie with the M&M’S® Brand Minis Milk Chocolate Baking Bits. I love the bit of crunch the red and green sugar sprinkles add to the candy shell along with the pretty pop of color from the red and green M&M’S® Brand Minis Milk Chocolate Baking Bits.

    These M&M's Brownie Truffles are an easy chocolate dessert recipe and an excellent gift to give this holiday season. It's a super-simple recipe made with rich, fudgy brownies and a surprise in the middle. These are a pretty addition to any Christmas cookie platter that the whole family will love!

    As I mentioned, these make excellent gifts to share with your friends and family. They also freeze well, although I doubt they'll make it to the freezer because they're so delicious you probably won't be able to stop eating them (try them with a nice cold glass of Great Value® brand milk!).

    These M&M's Brownie Truffles are an easy chocolate dessert recipe and an excellent gift to give this holiday season. It's a super-simple recipe made with rich, fudgy brownies and a surprise in the middle. These are a pretty addition to any Christmas cookie platter that the whole family will love!

    Brownie Truffles

    Jessy Freimann
    These Brownie Truffles are an easy chocolate dessert recipe and an excellent gift to give this holiday season. It's a super-simple recipe made with rich, fudgy brownies and a surprise in the middle. These are a pretty addition to any Christmas cookie platter that the whole family will love!
    No ratings yet
    Print Recipe Pin Recipe
    Prep Time 2 hours hrs
    Cook Time 30 minutes mins
    Total Time 2 hours hrs 30 minutes mins
    Course Dessert
    Cuisine Chocolate, Christmas, Gifts, Holiday
    Servings 48 pieces
    Calories 90 kcal

    Equipment

    • 1 9 x 13 Pan
    • 1 mixing bowl
    • 1 Hand mixer
    • 1 Measuring cups and spoons
    • 1 Spatula

    Ingredients
      

    • Family Size Chocolate Fudge Brownie Mix I used pillsbury- you want a mix large enough to fit into a 9" x 13" pan
    • 2 large eggs
    • ½ cup vegetable oil
    • ¼ cup water
    • ¼ cup Vanilla frosting
    • 12 ounces dark chocolate chips
    • 1 Tablespoon coconut oil
    • 1 cup Mini M&M's I used the green and red candies to be more festive for the holidays
    • Red and green sugar sprinkles optional garnish

    Instructions
     

    • Preheat oven as per the brownie mix directions. Spray the pan with cooking spray and line with parchment for easy removal.
    • Mix the brownie mix, eggs, oil and water until well combined and bake according to the package directions. Allow the brownies to cool completely.
    • Crumble the brownies into a large bowl.
    • In a smaller bowl, warm the frosting for 30 seconds in the microwave and pour it into the bowl with the crumbled brownies.
    • Use clean hands to mix the brownies and frosting until fully combined.
    • Roll the brownies into 1 inch balls around 3-4 mini M&M's. I found that the best way to do this was to flatten your piece of brownie mixture in the palm of your hand, place the mini M&M's into the middle of it and then build the sides of the brownie ball up and around them until they're completely enclosed. Then roll them into a smooth, circular shape and place them onto a parchment-lined sheet pan.
    • Once they're all rolled, place the pan with the brownie balls into the freezer for 30 minutes to set.
    • Melt the chocolate chips- either over low heat in a double boiler stirring frequently or in the microwave. Stir coconut oil into there melted chocolate until fully combined.
    • Roll each brownie ball until its fully covered in the melted chocolate and then place onto a pan lined with wax paper. While the chocolate is still wet, top it with a mini M&M and sprinkle with sugar sprinkles.
    • Chill in the fridge to set the chocolate for at least an hour (or overnight) and then transfer them to an airtight container until you're ready to serve.

    Notes

    These do not have to be stored in the refrigerator, I just like them cold!

    Nutrition

    Serving: 4piecesCalories: 90kcalCarbohydrates: 8gProtein: 1gFat: 6gSaturated Fat: 3gPolyunsaturated Fat: 1gMonounsaturated Fat: 1gTrans Fat: 0.02gCholesterol: 8mgSodium: 16mgPotassium: 48mgFiber: 0.4gSugar: 6gVitamin A: 22IUVitamin C: 0.1mgCalcium: 28mgIron: 0.2mg
    Tried this recipe?Let us know how it was!

    This post was sponsored by Collective Bias and it's advertiser, MARS Incorporated. As always, the opinions are 100% mine. Thank you for supporting the brands that help support this blog. For more information, please see my disclaimer.

    You can find a full index of my recipes here.

    Don't forget to follow The Life Jolie on Pinterest for more recipe inspiration!

    Linked up at

    These M&M's Brownie Truffles are an easy chocolate dessert recipe and an excellent gift to give this holiday season. It's a super-simple recipe made with rich, fudgy brownies and a surprise in the middle. These are a pretty addition to any Christmas cookie platter that the whole family will love!

    Rice Krispie Treat Stocking

    Dec 8, 2016 · 8 Comments

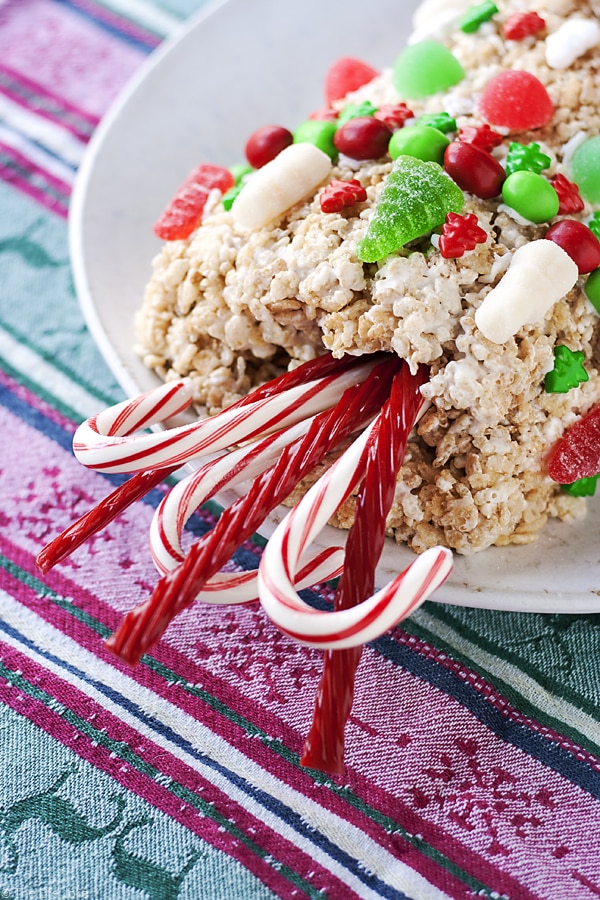
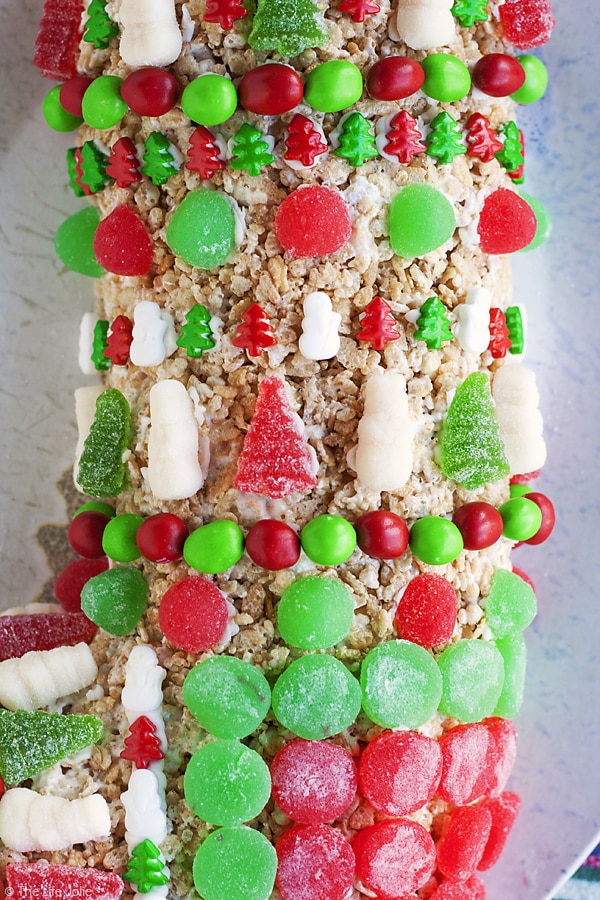
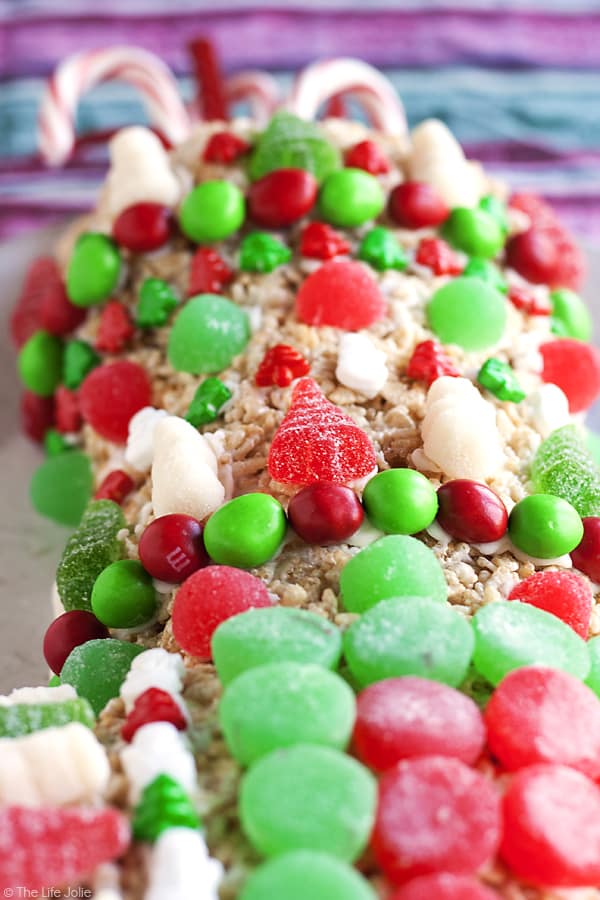
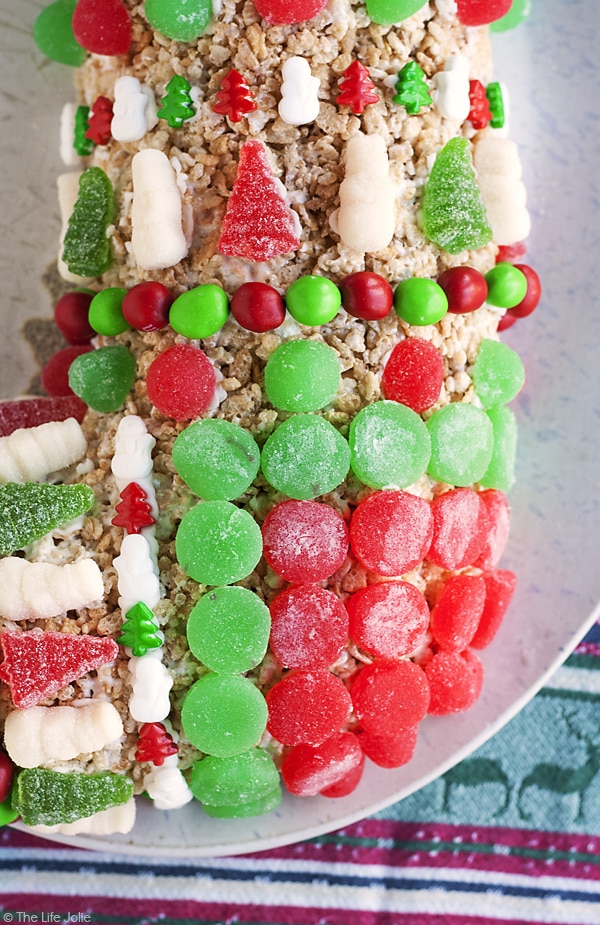
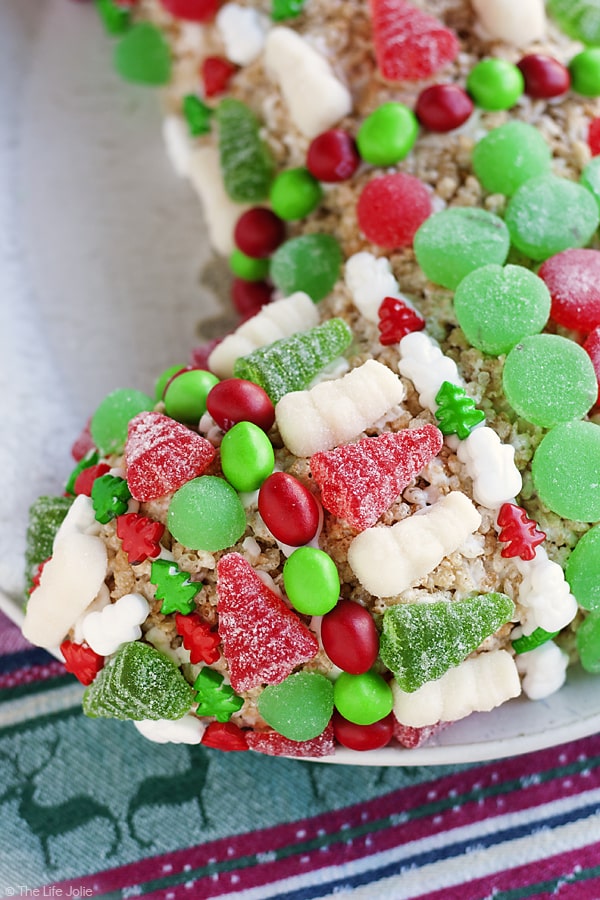
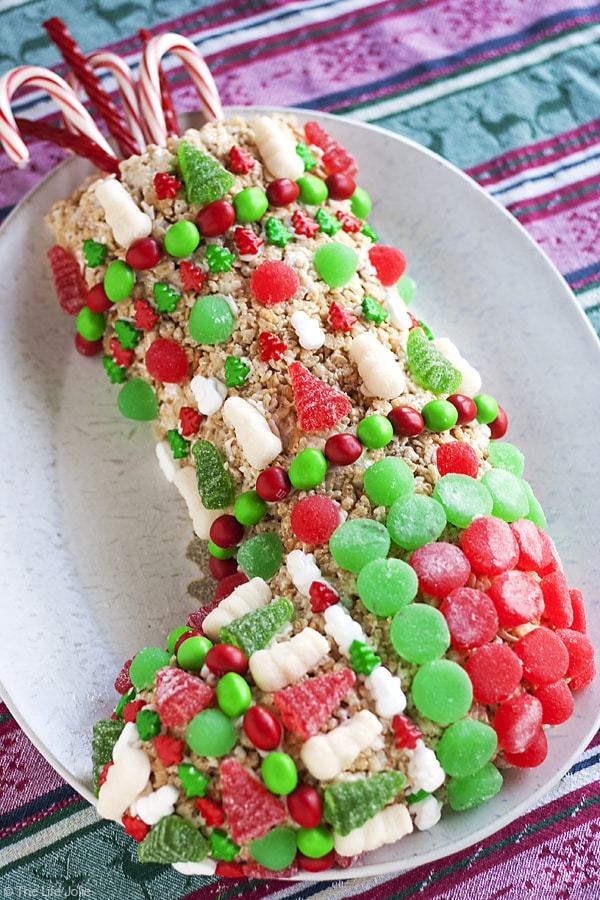
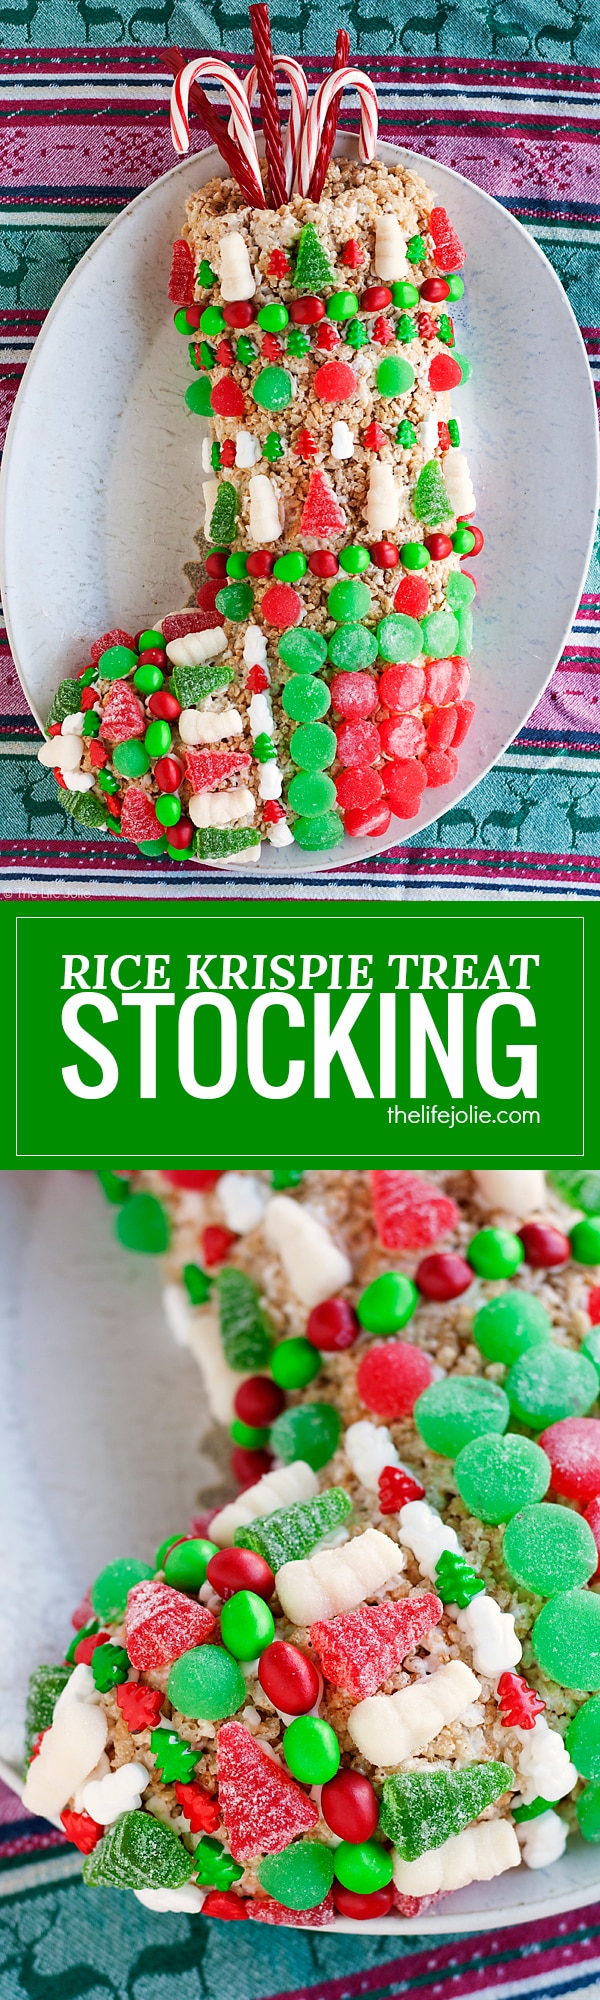
    This Rice Krispie Treat Stocking recipe is an easy Christmas dessert option for both kids and adults! It was simple to make and decorate and is meant to be made ahead. This is a fun project for the whole family to make during the holidays and is a great Gingerbread House alternative.

    This Rice Krispie Treat Stocking recipe is an easy Christmas dessert option for both kids and adults! It was simple to make and decorate and is meant to be made ahead. This is a fun project for the whole family to make during the holidays and is a great Gingerbread House alternative.

    This Rice Krispie Treat Stocking recipe is an easy Christmas dessert option for both kids and adults! It was simple to make and decorate and is meant to be made ahead. This is a fun project for the whole family to make during the holidays and is a great Gingerbread House alternative.

    This post contains Affiliate Links. Please see the disclaimer here.

    Another day, another holiday-themed Rice Krispie Treat sculpture (by the way this is NOT sponsored by Kelloggs, I just really love Rice Krispie Treats). I don't know what it is but I cannot stop dreaming up fun things to make with Rice Krispie Treats.  And this one is a definite showstopper!

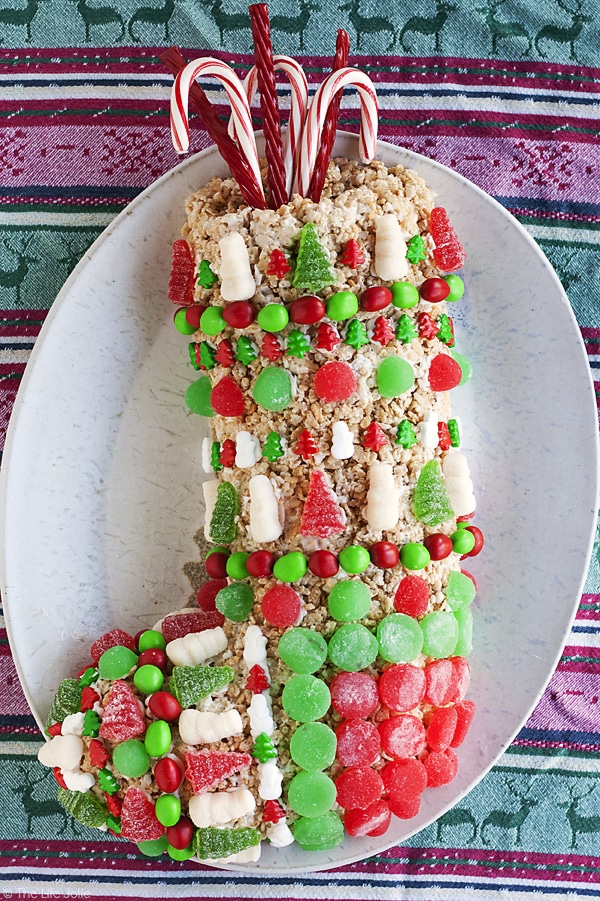
    I knew I wanted to do something Christmas-y this time. I had a few ideas floating around in my head, but I ultimately settled on the stocking because I got ridiculously excited about the idea of decorating it with all sorts of candy (and eating all that candy too!).

    This Rice Krispie Treat Stocking recipe is an easy Christmas dessert option for both kids and adults! It was simple to make and decorate and is meant to be made ahead. This is a fun project for the whole family to make during the holidays and is a great Gingerbread House alternative.

    Can I just say, the struggle is real. If my husband and A get even an inkling that I'm thinking of making anything Rice Krispie Treats-related, they immediately make a point to hang out in the kitchen like vultures ready to swoop in and get them some Rice Krispie Treat goodness!

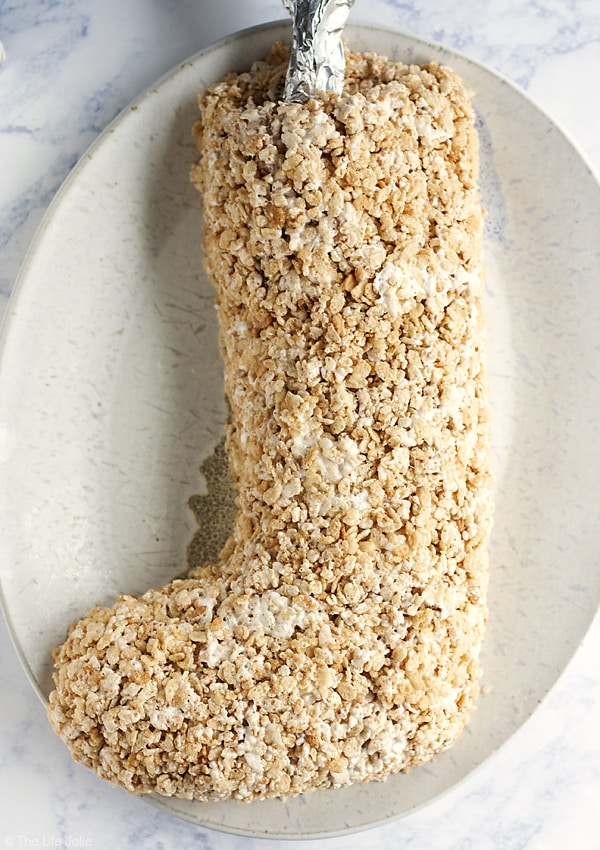
    This stocking was actually pretty easy to construct. Are you guys ready to know my big secret? This is pretty crazy and I'm not sure if you can handle it (sarcasm) but here goes...the only hollow part is the very top of the stocking. I know. You're shocked.

    This Rice Krispie Treat Stocking recipe is an easy Christmas dessert option for both kids and adults! It was simple to make and decorate and is meant to be made ahead. This is a fun project for the whole family to make during the holidays and is a great Gingerbread House alternative.

    The big thing that I've learned in my time of creating these confections is that gravity is not your friend. This is definitely still the case for this stocking. Interestingly, gravity has been less friendly when it comes to holding the candy on this time around, while being much more generous with the stocking itself.

    This Rice Krispie Treat Stocking recipe is an easy Christmas dessert option for both kids and adults! It was simple to make and decorate and is meant to be made ahead. This is a fun project for the whole family to make during the holidays and is a great Gingerbread House alternative.

    I think this is a super fun project to make with your kids. It's probably best to make it with older kids, especially if you're as hardcore as I am about everything being perfectly in line. And you'll all need to exercise a bit of patience because the best way to help combat that darn gravity is by adding a little bit of candy and then popping the stocking into the refrigerator for 10 minutes to help the frosting work it's adhesive magic.

    This Rice Krispie Treat Stocking recipe is an easy Christmas dessert option for both kids and adults! It was simple to make and decorate and is meant to be made ahead. This is a fun project for the whole family to make during the holidays and is a great Gingerbread House alternative.

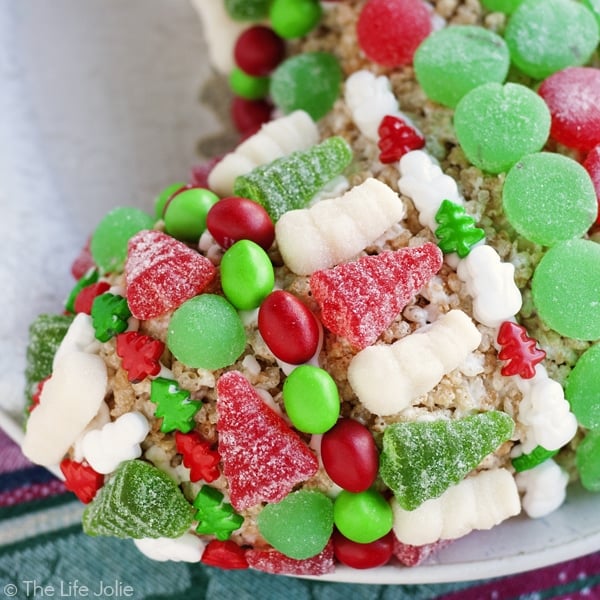
    There are so many great options in terms of candy to use, so you can really get creative. I pretty much pillaged my local grocery store's bulk section (and I'd be lying if I said this is the first time I've pillaged that department!). MY original hope was to also use the licorice sticks on the actual stocking but those little guys just would not stick for me!

    The M&M's were also a bit challenging, but I consider it a blessing because that's when I discovered how helpful popping it into the fridge between batches of candy was for my sanity. As a general rule, the flatter and lighter the candy, the better. I bet shoestring licorice would have worked beautifully as well.

    This Rice Krispie Treat Stocking recipe is an easy Christmas dessert option for both kids and adults! It was simple to make and decorate and is meant to be made ahead. This is a fun project for the whole family to make during the holidays and is a great Gingerbread House alternative.

    Also, get creative. I actually cut some of the gumdrops in half which helped to flatten them out and that also allowed me to do more with less (not that having extra candy to munch on is a bad thing). Either way, have fun with it and bring the extra frosting and extra candy with you on the day you intend to serve it in case you have any stubborn candy that doesn't want to stay put.

    This Rice Krispie Treat Stocking recipe is an easy Christmas dessert option for both kids and adults! It was simple to make and decorate and is meant to be made ahead. This is a fun project for the whole family to make during the holidays and is a great Gingerbread House alternative.

    I'm really happy with how it turned out. I think it makes a gorgeous centerpiece to any holiday dessert table, especially if you're looking to make a big impression. It's also super kid-friendly and 100% edible! Although my kid is never one to turn down pie or a cookie, she was absolutely in awe of this once I showed her the finished product, so it is also great in addition to your requisite cookie plate/pie/cake situation. Happy eating!

    This Rice Krispie Treat Stocking recipe is an easy Christmas dessert option for both kids and adults! It was simple to make and decorate and is meant to be made ahead. This is a fun project for the whole family to make during the holidays and is a great Gingerbread House alternative.

    Here are some other holiday-themed Rice Krispie Treat creations:

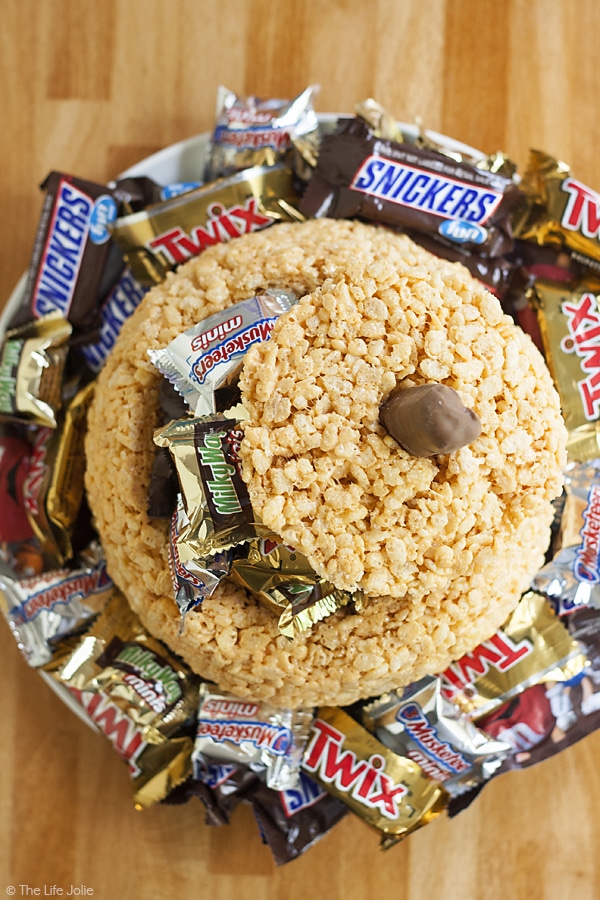
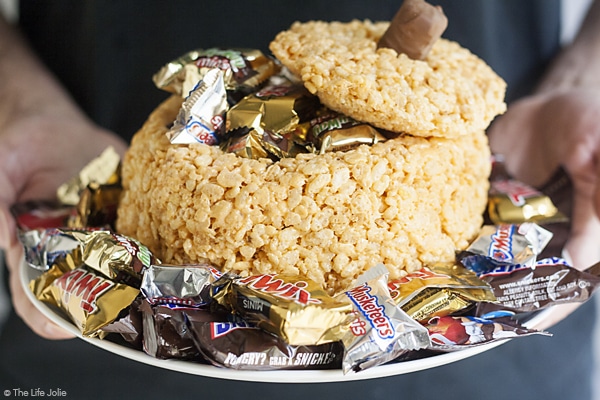
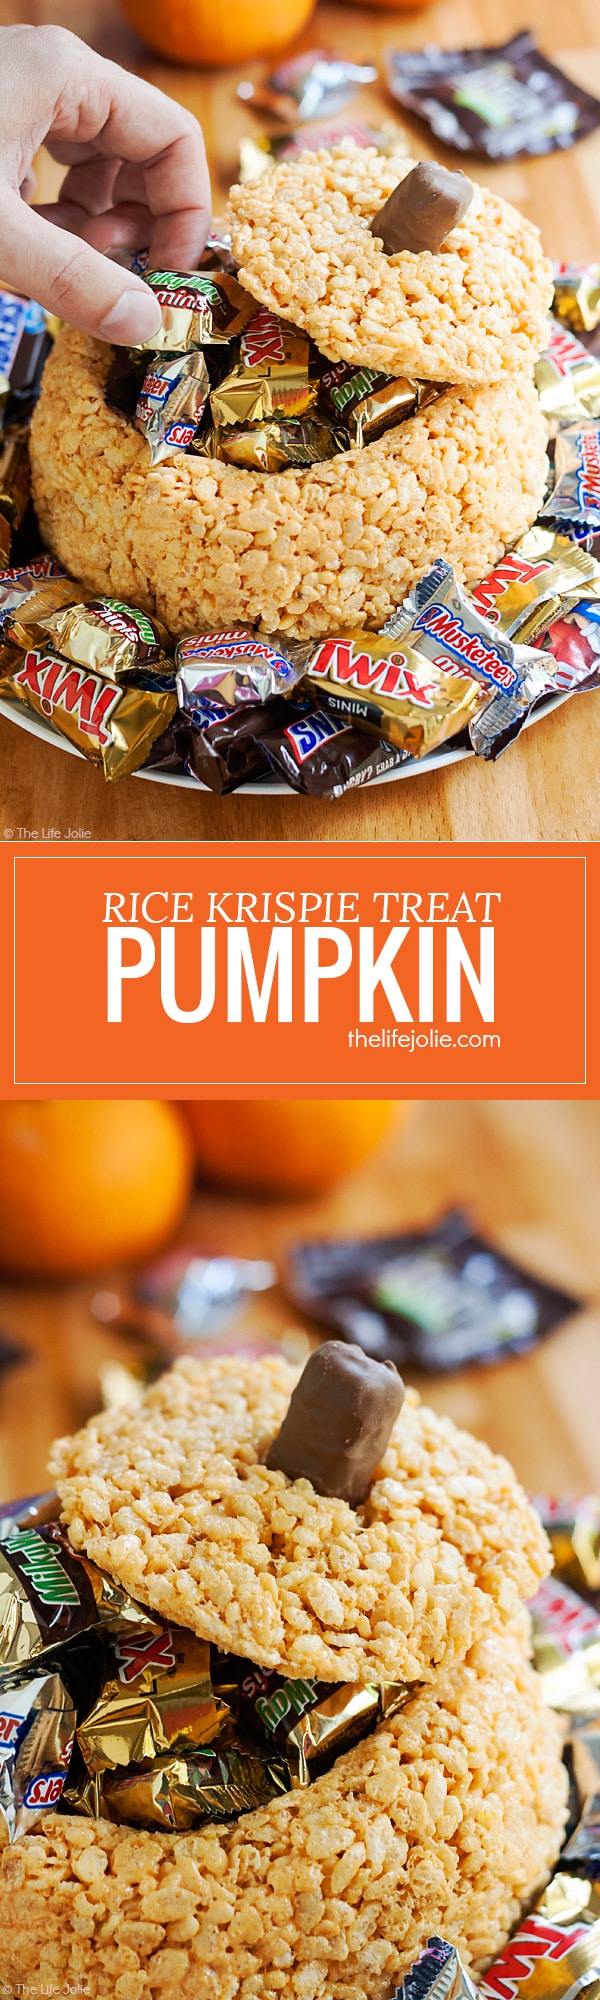
    Rice Krispie Treat Pumpkin

    Rice Krispie Treat Turkey

    This Rice Krispie Treat Stocking recipe is an easy Christmas dessert option for both kids and adults! It was simple to make and decorate and is meant to be made ahead. This is a fun project for the whole family to make during the holidays and is a great Gingerbread House alternative.

    Rice Krispie Treat Stocking

    Jessy Freimann
    This Rice Krispie Treat Stocking recipe is an easy Christmas dessert option for both kids and adults! It was simple to make and decorate and is meant to be made ahead. This is a fun project for the whole family to make during the holidays and is a great Gingerbread House alternative.
    No ratings yet
    Print Recipe Pin Recipe
    Prep Time 2 hours hrs
    Cook Time 10 minutes mins
    Total Time 2 hours hrs 10 minutes mins
    Course Dessert
    Cuisine Christmas, holidays, Kids
    Servings 12 servings
    Calories 302 kcal

    Equipment

    • 1 Dutch oven
    • 1 wooden spoon

    Ingredients
      

    • 6 Tablespoons salted butter
    • 8 cups mini marshmallows
    • 12 cups Rice Krispies cereal
    • Cooking spray
    • Whatever candies you want to decorate your stocking with this is a double batch of Rice Krispie Treats and makes a big stocking so make sure you have a good amount of candy.
    • 4 ounces Cookie icing mine was around 4 oz. and the tube itself seemed to be around 8 inches long- I used the majority of the tube

    Instructions
     

    • Lay out a large piece of foil with the non-stick side up next to your serving platter.
    • Take another piece of nonstick foil and roll it to put into the hollow part of the stocking while it sets. Make sure the non-stick side is facing out on this as well. Spray it all over with cooking spray.
    • Melt your butter in a large, non-stick pot over medium heat.
    • Spray a mixing spoon with cooking spray and stir in the marshmallows until they've fully melted. Remove the pan from the heat.
    • Add your Rice Krispies and stir until well combined.
    • Pour this mixture onto the piece of non-stick foil you laid out and allow it to cool for a moment or two (you don't want it to cool completely, just slightly so that you don't burn yourself).
    • While it cools, wash and dry your hands and spray them with cooking spray. You'll want to work fast because the Rice Krispie Treat mixture is much easier to work with while it's still hot (it helps to have someone there to assist you and spray your hands down).
    • Divide your Rice Krispie Treat mixture so that you have ⅔ of it to make the middle and boot of the stocking and set ⅓ of it to make the hollow top part of the stocking.
    • Working quickly, build a flat base with some of the ⅓ portion of Rice Krispie mixture where the top part of your stocking will sit. Mine was only around 6 inches max.
    • Place the rolled up foil piece onto that base and use the rest of the ⅓ portion of the Rice Krispie mixture to build the top of the stocking around it so it's hollow.
    • Take the other ⅔ of the Rice Krispie mixture and build it into the middle and "foot" part of the stocking so that it's attached to the hollow part that you just built and appears like the stocking is totally hollow all the way down (so the entire stocking should be level and seamless like the photo I posted above of the stocking before it was decorated).
    • Once you have the basic shape you want with all of the Rice Krispie mixture utilized, use your hands to pack it in firmly and shape the stocking to your liking.
    • Refrigerate it for at least an hour to set the stocking.
    • When you're decorating, use the frosting to paste on your candy. Work in batches, refrigerate for around 10 minutes every few rows to help the candy adhere to the stocking. I kept it refrigerated until I was ready to serve.
    • Once the frosting and candy were set, I lightly covered it with plastic wrap.
    • When you're ready to serve, remove the rolled foil and place some candy popping out of the top of the stocking. I found candy canes and Twizzlers to be a great option because of their long shape.
    • Enjoy!

    Notes

    Be especially careful about the hollow part: you want it to be firmly packed together so it doesn't fall apart but you also don't want the rolled up piece of foil to get stuck in there so after you pack it, give the foil a little wiggle to loosen it a bit.
    Be mindful about the candy you choose- light and flat is Twizzlers to stick and the M&M's were challenging as well.

    Nutrition

    Serving: 1servingCalories: 302kcalCarbohydrates: 57gProtein: 3gFat: 8gSaturated Fat: 4gPolyunsaturated Fat: 1gMonounsaturated Fat: 2gTrans Fat: 0.2gCholesterol: 15mgSodium: 237mgPotassium: 42mgFiber: 0.1gSugar: 28gVitamin A: 2037IUVitamin C: 18mgCalcium: 4mgIron: 9mg
    Tried this recipe?Let us know how it was!

    Helpful tools:


    You can find a full index of my recipes here.

    Don't forget to follow The Life Jolie on Pinterest for more recipe inspiration!

    Linked up at

    This Rice Krispie Treat Stocking recipe is an easy Christmas dessert option for both kids and adults! It was simple to make and decorate and is meant to be made ahead. This is a fun project for the whole family to make during the holidays and is a great Gingerbread House alternative.

    German Cream Cheese Brownies

    Dec 2, 2016 · 10 Comments

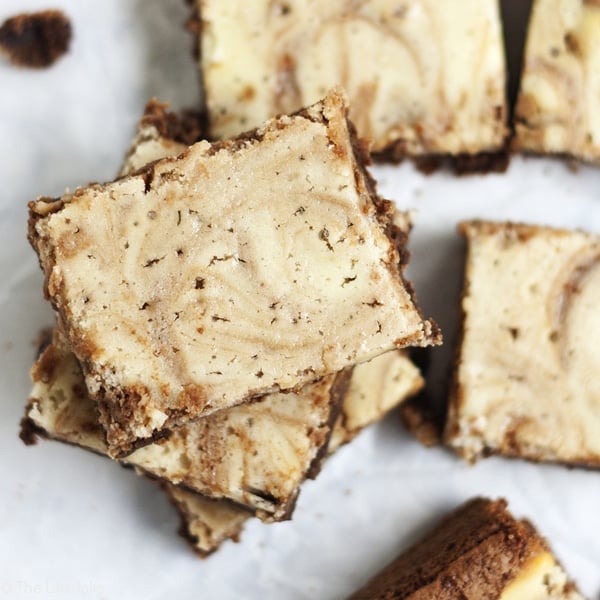
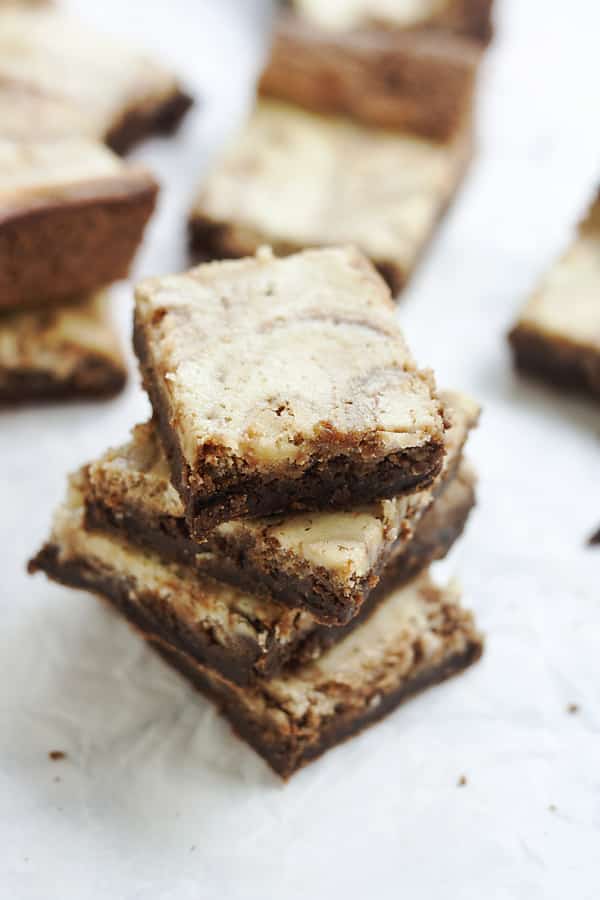
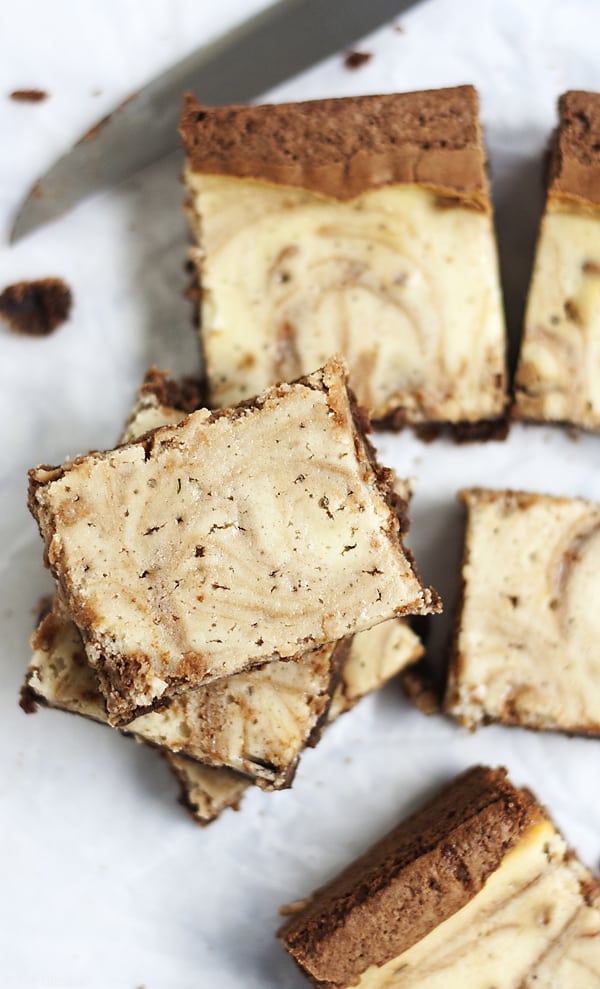
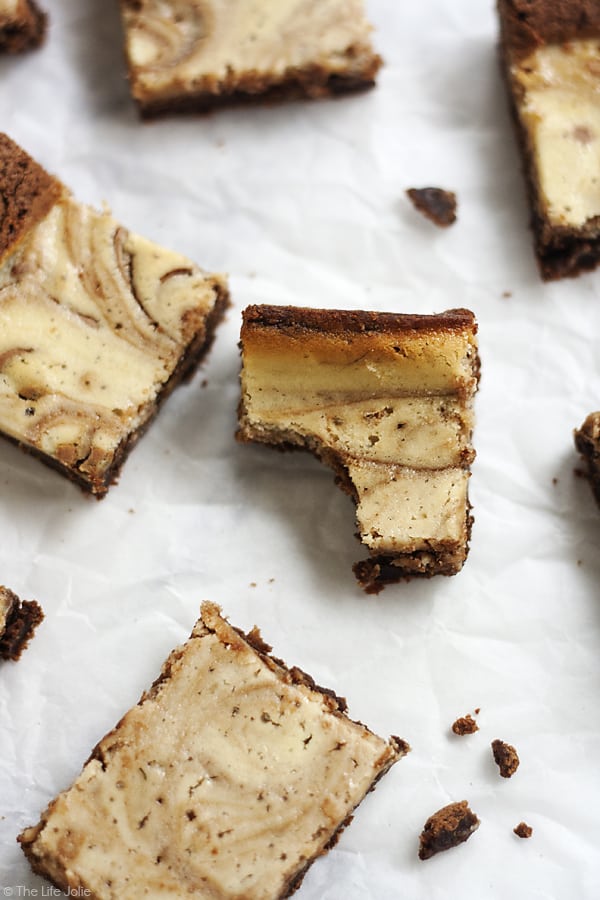
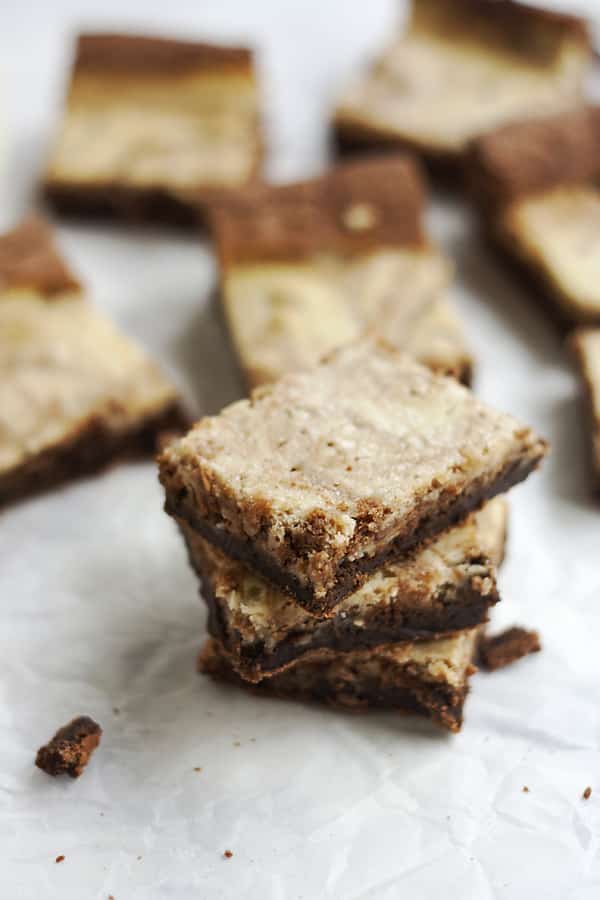
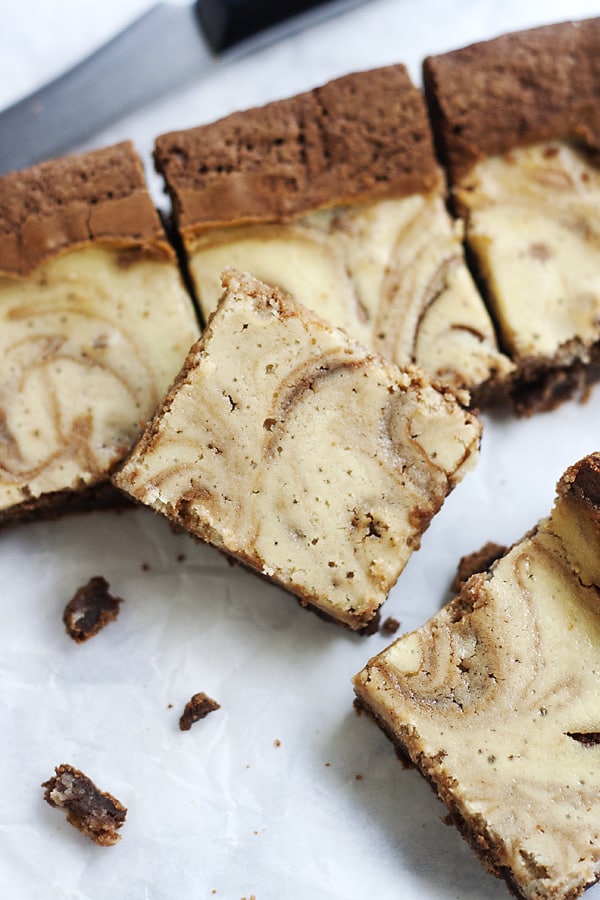
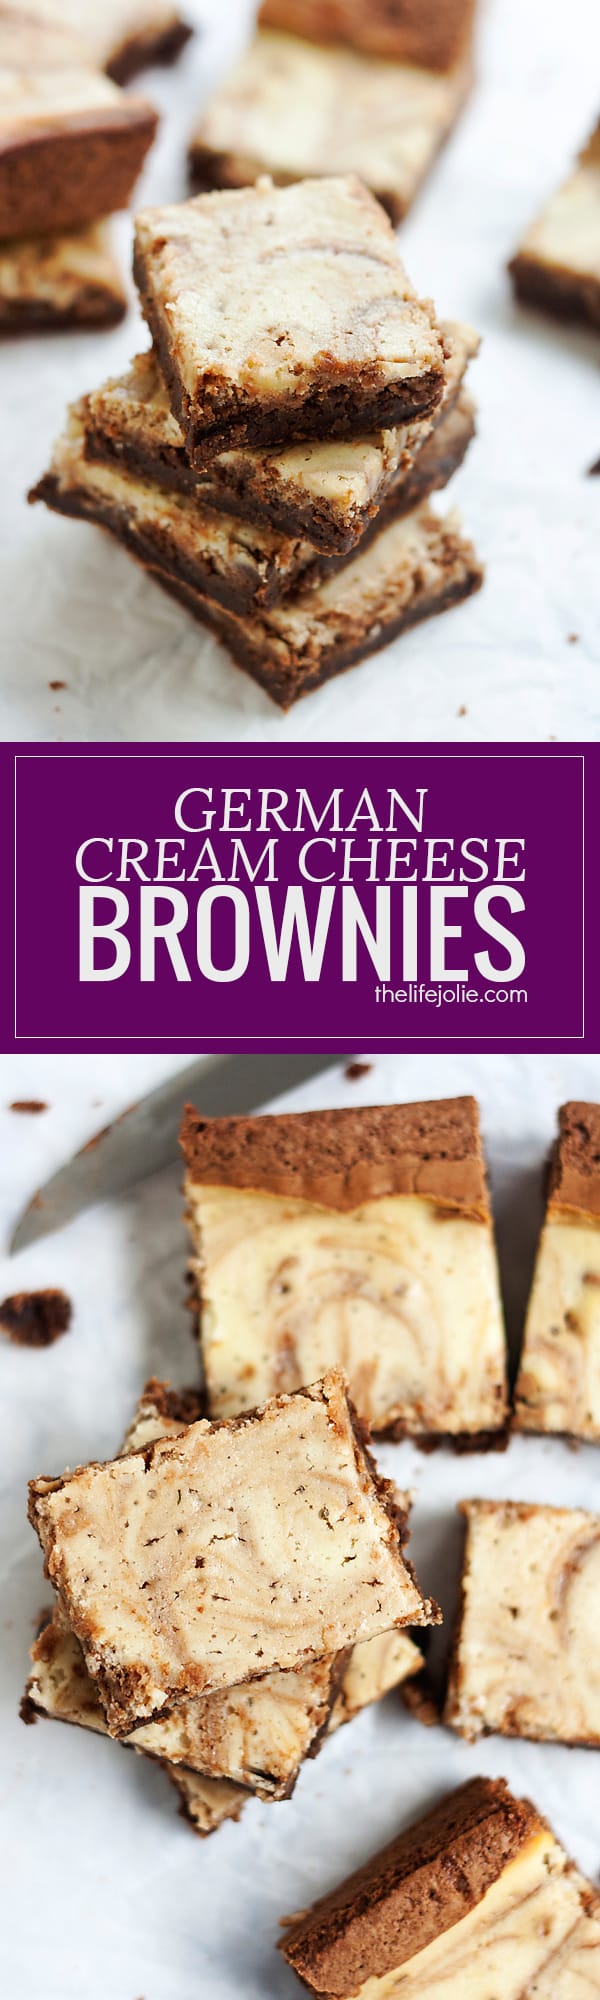
    These homemade German Cream Cheese Brownies are a delicious addition to any holiday cookie platter. This recipe is made from scratch but SO easy! Rich chocolate brownies swirled with sweet cream cheese helps make this a decadent treat your family will love!

    These homemade German Cream Cheese Brownies are a delicious addition to any holiday cookie platter. This recipe is made from scratch but SO easy! Rich chocolate brownies swirled with sweet cream cheese helps make this a decadent treat your family will love!

    These homemade German Cream Cheese Brownies are a delicious addition to any holiday cookie platter. This recipe is made from scratch but SO easy! Rich chocolate brownies swirled with sweet cream cheese helps make this a decadent treat your family will love!

    This post contains Affiliate Links. Please see the disclaimer here.

    I'm here today with a nice healthy dose of rich, decadent chocolatey-goodness! Just kidding, these aren't actually healthy (sorry). But they are definitely delicious so I'm actually not sorry, because flavor > healthy, especially around the holidays.

    When I was going through family dessert recipes for the holidays, this recipe came up and my mom got all excited. I believe her words were "It's not Christmas without German Cream Cheese Brownies.

    These homemade German Cream Cheese Brownies are a delicious addition to any holiday cookie platter. This recipe is made from scratch but SO easy! Rich chocolate brownies swirled with sweet cream cheese helps make this a decadent treat your family will love!

    This took me by surprise, because I could not not for the life of me remember even having these in my 32 25 years of family Christmas dessert tables.

    And since I can't leave anything well enough alone (my mom is totally used to this by now) I mentioned my lack of brownie-filled memories right then and there. She then reminded me that I tend to avoid the more rich and decadent desserts, which is right. I'm more of a Pecan Tart kind of gal.

    These homemade German Cream Cheese Brownies are a delicious addition to any holiday cookie platter. This recipe is made from scratch but SO easy! Rich chocolate brownies swirled with sweet cream cheese helps make this a decadent treat your family will love!

    She also went on to tell me that she's been making these for so long that she can't remember where exactly she got the recipe but she thinks it might have been on the box for the type chocolate chocolate used in this very recipe. This makes sense considering the name.

    All that to say, I do enjoy something so sinfully rich once in a while. And the holidays are perfect for this kind of naughty food.

    These homemade German Cream Cheese Brownies are a delicious addition to any holiday cookie platter. This recipe is made from scratch but SO easy! Rich chocolate brownies swirled with sweet cream cheese helps make this a decadent treat your family will love!

    I mean, really, is chocolate ever actually a bad idea? Of course not! Though I tend to gravitate towards more savory foods, it's still chocolate and I'm pretty sure I eat at least a little bit each day.

    But the thing that really takes this over the top and pushes you into the (rich) rabbit hole is the addition of the cream cheese. So in addition the the chocolaty goodness you also have the aspect of cream, cheesecake-y happiness to push the decadence factor over-the-top.

    These homemade German Cream Cheese Brownies are a delicious addition to any holiday cookie platter. This recipe is made from scratch but SO easy! Rich chocolate brownies swirled with sweet cream cheese helps make this a decadent treat your family will love!

    Since this was one of those lovely recipes that was handwritten on a recipe card in my mom's overflowing recipe box, I can't confirm it's origin. We suspect it may have been on the back of a box of Baker's chocolate because the recipe specifies the use of Baker's chocolate. But I can't confirm this.

    Either way, make these for your next holiday party. We like to refrigerate them prior to eating because they have the cheese in them and also because they get a fantastic, chewy texture.

    Other great Christmas cookies are:

    Grandma Rose's Pecan Tarts

    Neapolitan Cookies

    Slice and Bake Cookies

    Chocolate Crinkles

    Sour Cream Cookies

    These homemade German Cream Cheese Brownies are a delicious addition to any holiday cookie platter. This recipe is made from scratch but SO easy! Rich chocolate brownies swirled with sweet cream cheese helps make this a decadent treat your family will love!

    German Cream Cheese Brownies

    Jessy Freimann
    These homemade German Cream Cheese Brownies are a delicious addition to any holiday cookie platter. This recipe is made from scratch but SO easy! Rich chocolate brownies swirled with sweet cream cheese helps make this a decadent treat your family will love!
    No ratings yet
    Print Recipe Pin Recipe
    Prep Time 10 minutes mins
    Cook Time 40 minutes mins
    Total Time 50 minutes mins
    Course Dessert
    Cuisine Chocolate, Christmas, Holiday, Thanksgiving
    Servings 20 pieces
    Calories 156 kcal

    Equipment

    • 1 9&quot; x 9&quot; Baking Pan
    • 1 mixing bowl
    • 1 Spatula
    • 1 Measuring cups and spoons

    Ingredients
      

    • 4 ounces Baker's German Sweet Chocolate
    • 5 Tablespoons salted butter divided
    • 3 ounces cream cheese softened
    • 1 cup granulates sugar
    • 3 large eggs divided
    • ½ cup all purpose flour + 1 Tablespoon - divided
    • 1 ½ teaspoons pure vanilla extract divided
    • ½ teaspoon baking powder
    • ¼ teaspoon Kosher salt
    • ½ cup nuts coarsely chopped - optional - I didn't use them
    • ¼ teaspoon almond extract

    Instructions
     

    • Preheat your oven to 350 degrees F and grease and line a 9x9 pan with parchment paper (extend it up over the sides for easy removal).
    • Melt chocolate and 3 Tablespoons butter in a double boiler over low heat, stirring constantly (or do it in the microwave in two 15 second increments followed by 10 second increments, stirring between each increment until it's fully melted). Set aside to cool.
    • Cream the remaining butter in with the cream cheese until softened and well combined, about 2 minutes.
    • Slowly add ¼ cup of sugar until it's light and fluffy, then stir in 1 egg, 1 Tablespoon flour, and ½ teaspoon vanilla and set aside.
    • In a separate bowl, beat the remaining 2 eggs until they're fluffy and light in color. Gradually add the remaining ¾ cup sugar and beat it all together until thickened.
    • Fold in the baking powder, salt and remaining ½ cup flour, followed by the cooled chocolate. Stir in the nuts if using, almond extract and remaining 1 teaspoon vanilla.
    • Once this is all combined, measure 1 cup of the chocolate batter and set aside.
    • Spread the remaining chocolate batter to cover the bottom of the baking pan.
    • Pour the cream cheese mixture over the chocolate batter on the baking pan and spread it out.
    • Drop the remaining 1 cup of chocolate batter in spoonfuls all over the cheese mixture.
    • Using a butter knife, swirl the chocolate batter dollops with the cream cheese mixture to create a marbling effect (Don't over do it, I learned that less is more. I think I swirled a bit too much on mine so the marbling in the photos isn't as pronounced as it could be.).
    • Bake uncovered for 35-40 minutes and then cool and cut into squares.
    • Store covered and in the refrigerator until you're ready to serve.

    Notes

    These are best refrigerated.

    Nutrition

    Serving: 1pieceCalories: 156kcalCarbohydrates: 17gProtein: 3gFat: 9gSaturated Fat: 4gPolyunsaturated Fat: 1gMonounsaturated Fat: 3gTrans Fat: 0.1gCholesterol: 40mgSodium: 87mgPotassium: 75mgFiber: 1gSugar: 12gVitamin A: 188IUVitamin C: 0.01mgCalcium: 22mgIron: 1mg
    Tried this recipe?Let us know how it was!

    Helpful Tools:


    You can find a full index of my recipes here.

    Don't forget to follow The Life Jolie on Pinterest for more recipe inspiration!

    Linked up at

    These homemade German Cream Cheese Brownies are a delicious addition to any holiday cookie platter. This recipe is made from scratch but SO easy! Rich chocolate brownies swirled with sweet cream cheese helps make this a decadent treat your family will love!

    Chocolate Peppermint Crinkles

    Nov 28, 2016 · 8 Comments

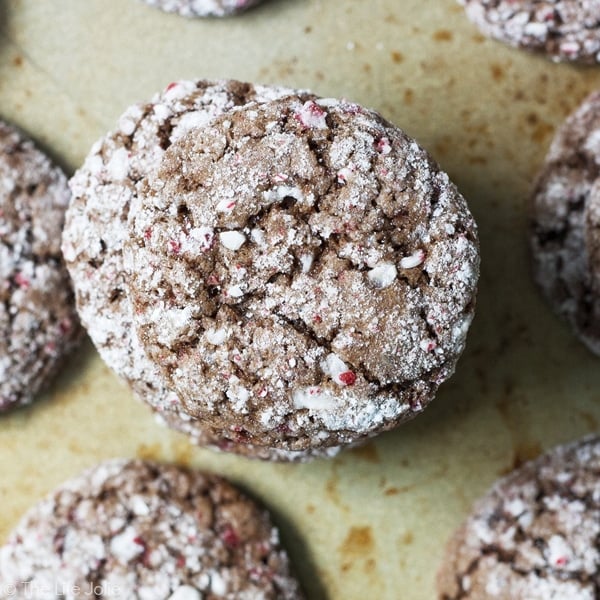
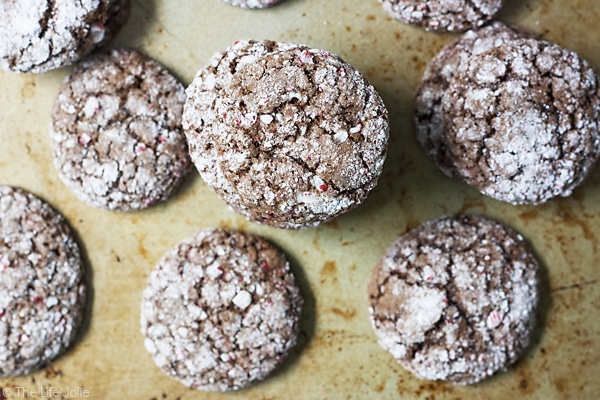
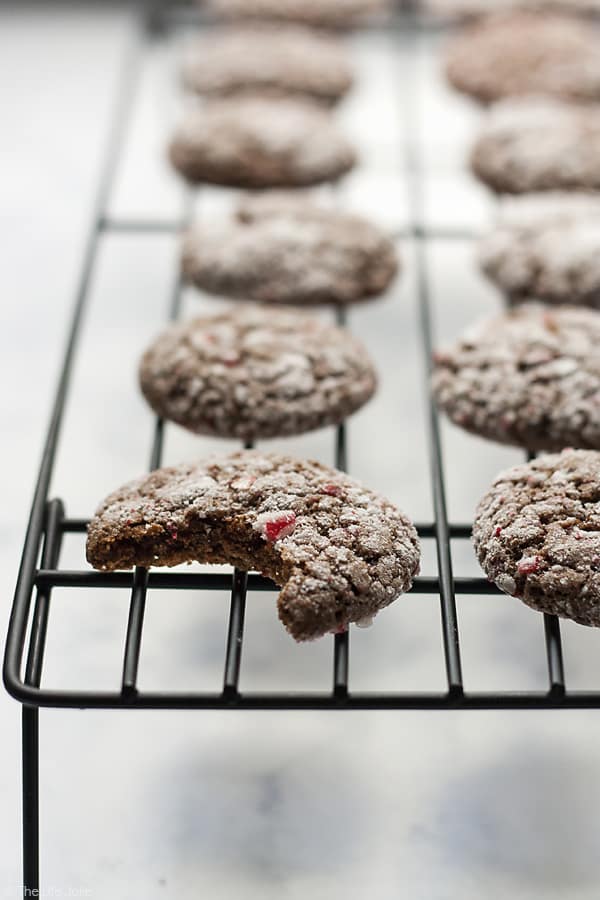
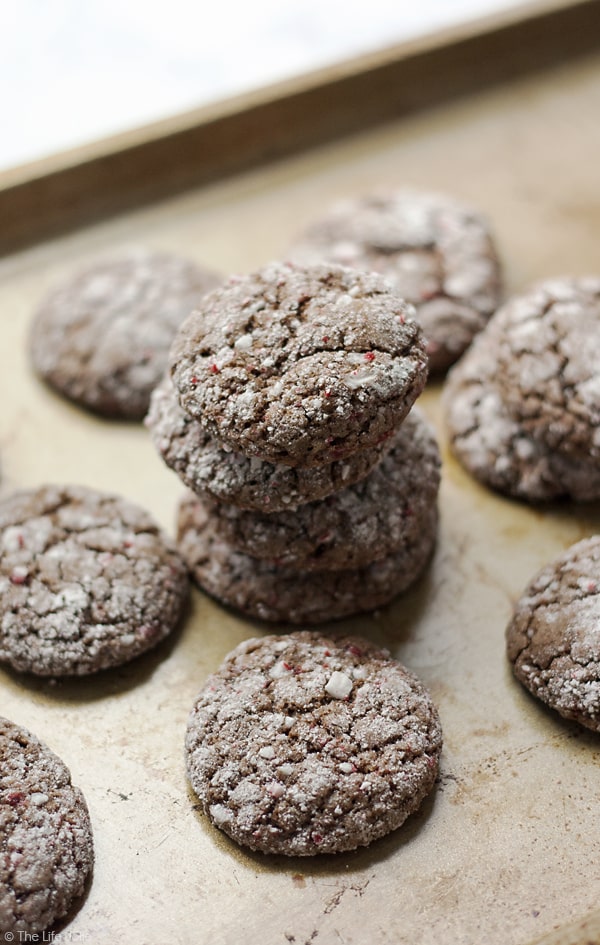
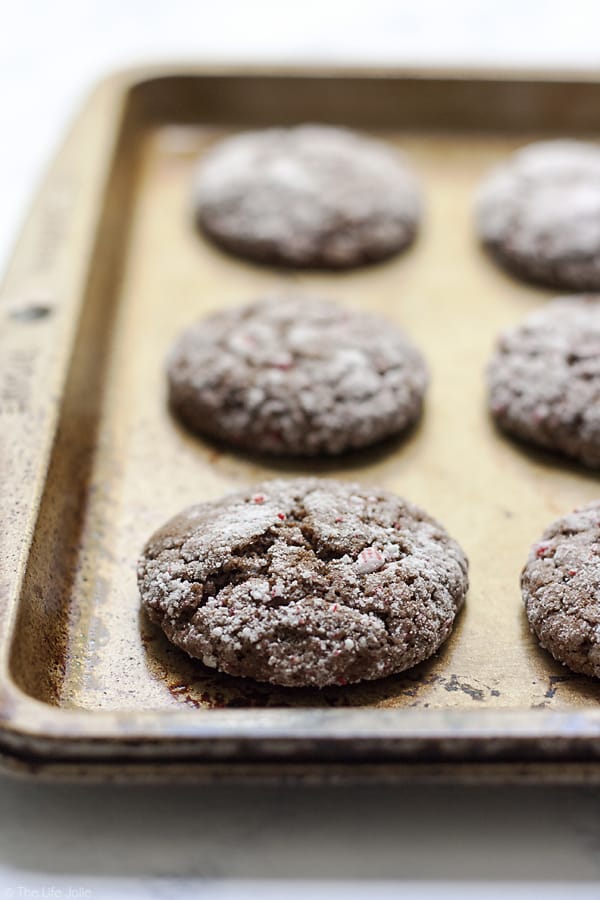
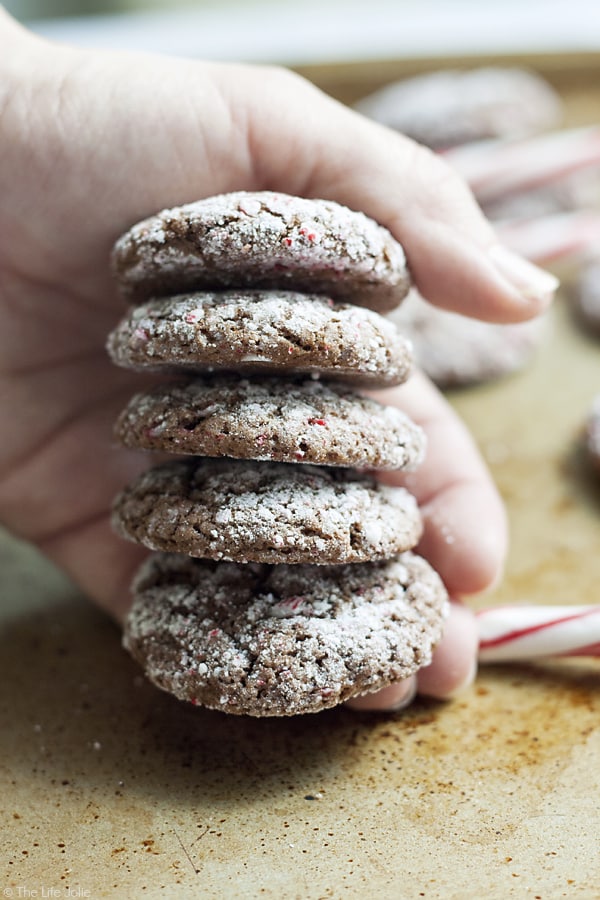
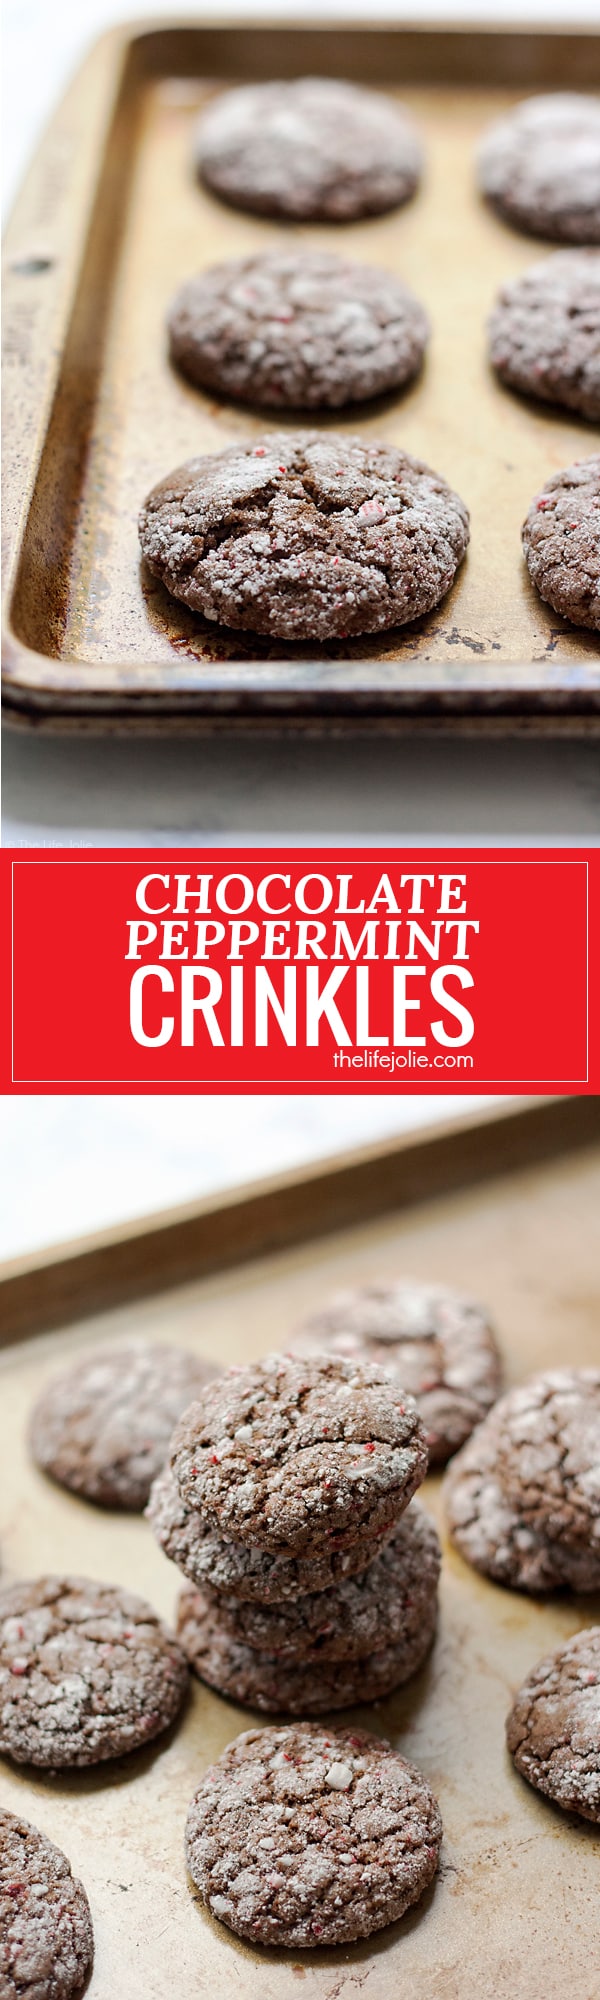
    These Chocolate Peppermint Crinkles are an easy way to add a fun spin to a traditional recipe. These cookies are chewy and fudgy but they also have a delicious mint flavor. They are the best Christmas cookie for kids to make and eat!

    These Chocolate Peppermint Crinkles are an easy way to add a fun spin to a traditional recipe. These cookies are chewy and fudgy but they also have a delicious mint flavor. They are the best Christmas cookie for kids to make and eat! 

    These Chocolate Peppermint Crinkles are an easy way to add a fun spin to a traditional recipe. These cookies are chewy and fudgy but they also have a delicious mint flavor. They are the best Christmas cookie for kids to make and eat!

    This post contains Affiliate Links. Please see the disclaimer here.

    Well here we are. Thanksgiving has come and gone and we're all a little fatter and happier for it (at least I am!). We spent our Thanksgiving just outside of Nashville with some of our family.

    We got to enjoy a week of great food, quality time, tense games of Aggravation (how am I only just discovering this game?!), much lighter and less appropriate games of Cards Against Humanity and enough laughter to fill our happiness cups until they runneth many times over (I know, I have poor English skills but that statement is as accurate as it gets!).

    These Chocolate Peppermint Crinkles are an easy way to add a fun spin to a traditional recipe. These cookies are chewy and fudgy but they also have a delicious mint flavor. They are the best Christmas cookie for kids to make and eat!

    My one regret is that I massively failed at taking photos this trip. Sure, I got a few but not nearly enough and almost none on the actual day of Thanksgiving. Sorry, friends. I'll try to do better at Christmas.

    Back to the topic at hand. Now that Thanksgiving is over, I can unapologetically dive into Christmas cooking, specifically the all-important baking of the cookies!

    These Chocolate Peppermint Crinkles are an easy way to add a fun spin to a traditional recipe. These cookies are chewy and fudgy but they also have a delicious mint flavor. They are the best Christmas cookie for kids to make and eat!

    I'd be lying if I said that I haven't been thinking about Christmas cookies long before the holiday season began. Like many families, a major favorite and old standby in our Christmas Cookie repertoire is Chocolate Crinkles. So this year, I thought I'd add a fun riff on these by combining another tasty flavor into one lovely little cookie.

    Two flavors that I love, love, love together are chocolate and peppermint. I feel like this is a very divisive flavor combo. There are actually people in my life who have been known to call York Peppermint Patties chocolate covered tooth paste  (Oh, the shame!!).

    These Chocolate Peppermint Crinkles are an easy way to add a fun spin to a traditional recipe. These cookies are chewy and fudgy but they also have a delicious mint flavor. They are the best Christmas cookie for kids to make and eat!

    I try not to have that have that kind of negativity in my life, so I tune that nonsense out. Give me all the chocolate and peppermint and we'll call it a day.

    So combining these two seemed like a natural next step, specifically for a season that has an abundance of candy canes readily available!

    These Chocolate Peppermint Crinkles are an easy way to add a fun spin to a traditional recipe. These cookies are chewy and fudgy but they also have a delicious mint flavor. They are the best Christmas cookie for kids to make and eat!

    This cookie still has the same fantastically chewy texture that we all know and love. It's still dusted in white which gives the festive, snowy feel, just like the traditional Chocolate Crinkles. Although, in these it's not as stark of a contrast with the brown cookie because of the candy canes mixed into the confectioner's sugar.

    Never-the-less, this is a fun way to add a little extra something to a kid-friendly family classic. These also freeze well, so don't hesitate to make them now and pop them into the freezer to thaw closer to Christmas (if you manage to keep yourself from eating them right away- I certainly wouldn't blame you if you did!).

    Other Christmas Cookies that I love are:

    Chocolate Crinkles

    Neapolitan Cookies

    Slice and Bake Cookies

    Pecan Tarts

    Sour Cream Cookies

    These Chocolate Peppermint Crinkles are an easy way to add a fun spin to a traditional recipe. These cookies are chewy and fudgy but they also have a delicious mint flavor. They are the best Christmas cookie for kids to make and eat!

    Chocolate Peppermint Crinkles

    Jessy Freimann
    These Chocolate Peppermint Crinkles are an easy way to add a fun spin to a traditional recipe. These cookies are chewy and fudgy but they also have a delicious mint flavor. They are the best Christmas cookie for kids to make and eat!
    No ratings yet
    Print Recipe Pin Recipe
    Prep Time 10 minutes mins
    Cook Time 12 minutes mins
    Total Time 22 minutes mins
    Course Dessert
    Cuisine Chocolate, Christmas, Cookies, Family, holidays
    Servings 36 cookies
    Calories 119 kcal

    Equipment

    • 1 sheet pan
    • 1 Hand mixer
    • 1 stand mixer
    • 1 Spatula
    • 1 Measuring cups and spoons

    Ingredients
      

    • ½ cup vegetable oil
    • 4 ounces unsweetened chocolate
    • 2 cups granulated sugar
    • 4 large eggs
    • 2 teaspoon peppermint extract
    • 2 cups all purpose flour
    • 2 teaspoon baking powder
    • ½ teaspoon Kosher salt
    • ½ cup confectioner's sugar
    • ½ cup candy canes crusted into a powder (I used my meat mallet to pound them to smithereens!)

    Instructions
     

    • Melt chocolate. You can do this in a double boiler, melt the chocolate over medium heat, stirring frequently (keep an eye on this and go slow because it can seize if the heat is too high!). You can also microwave it for 15 seconds then stir. Then another 15 seconds and then stir again and then in 10 second increments stirring between each until it's fully melted.
    • In a bowl, mix oil, chocolate and sugar until well combined.
    • Add your eggs and vanilla and mix until combined
    • Add flour, baking powder and salt to the wet ingredients and mix until just combined (don't over mix!).
    • Chill for at least a few hours. I chilled it overnight.
    • Preheat your oven to 350 degrees F. Prepare your cookie pans by either greasing them or lining with parchment paper.
    • In a small bowl, mix your confectioner's sugar and the crushed candy canes until well combined.
    • Roll teaspoons of dough into small balls and cover in confectioner's sugar mixture. Bake for 10-12 minutes (don't over bake!). Cool and serve.

    Notes

    These freeze really well and last up to 2 weeks in an airtight container at room temperature.

    Nutrition

    Serving: 3cookiesCalories: 119kcalCarbohydrates: 19gProtein: 2gFat: 5gSaturated Fat: 2gPolyunsaturated Fat: 2gMonounsaturated Fat: 1gTrans Fat: 0.02gCholesterol: 21mgSodium: 65mgPotassium: 42mgFiber: 1gSugar: 11gVitamin A: 30IUCalcium: 21mgIron: 1mg
    Tried this recipe?Let us know how it was!

    Helpful Tools:


    You can find a full index of my recipes here.

    Don't forget to follow The Life Jolie on Pinterest for more recipe inspiration!

    Linked up at

    These Chocolate Peppermint Crinkles are an easy way to add a fun spin to a traditional recipe. These cookies are chewy and fudgy but they also have a delicious mint flavor. They are the best Christmas cookie for kids to make and eat!

    PB&J Brownies

    Nov 10, 2016 · 24 Comments

    These homemade PB&J Brownies are an easy and delicious holiday dessert option. Chewy, fudgey chocolate brownies with a swirl of peanut butter and the fruit spread of your choice on top, these are made from scratch and would be great on a Thanksgiving of Christmas dessert table or just because you deserve a tasty dessert!
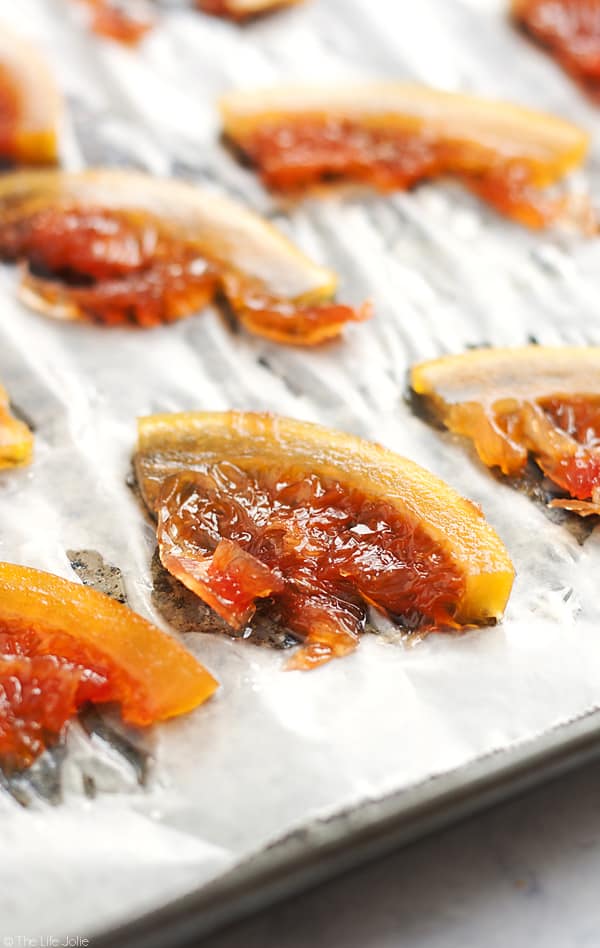
    This shop has been compensated by Collective Bias, Inc. and its advertiser. All opinions are mine alone. #EasyHolidayEats #CollectiveBias

    These homemade PB&J Brownies are an easy and delicious holiday dessert option. Chewy, fudgey chocolate brownies with a swirl of peanut butter and the fruit spread of your choice on top, these are made from scratch and would be great on a Thanksgiving of Christmas dessert table or just because you deserve a tasty dessert!
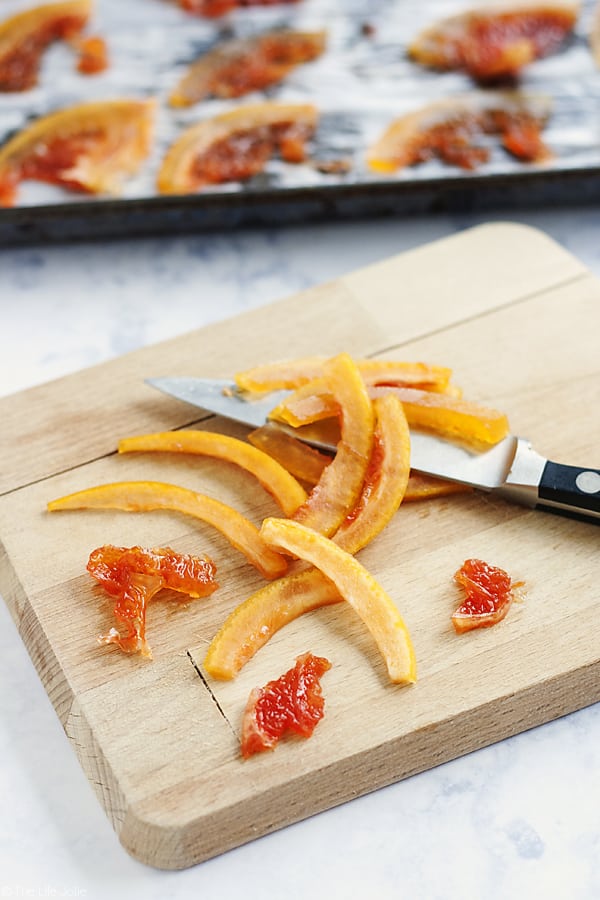
    The upcoming Thanksgiving holiday has me thinking about foods that bring me back to my childhood. Some of these are family driven like the Baked Artichokes that I posted earlier this week and Rosie's Award Winning Cherry Cheese Pie.

    Others are those quintessential childhood foods. The ones that are so beloved in our American culture that even the smell of them is enough to transport us back to that happy, carefree place of our childhood.

    These homemade PB&J Brownies are an easy and delicious holiday dessert option. Chewy, fudgey chocolate brownies with a swirl of peanut butter and the fruit spread of your choice on top, these are made from scratch and would be great on a Thanksgiving of Christmas dessert table or just because you deserve a tasty dessert!

    Like to your mom's kitchen table, biting into to your PB&J for a quick lunch, before heading back out to continue playing until your mom calls you in for dinner. Or getting off the bus and coming in to be greeted with the smell of freshly baked brownies for a glorious after school snack.

    These bring back the happiest of food memories. They will always have a happy place in my heart and my diet! So combining them into a rich, decadent dessert for the holidays is a natural next step. I had actually been planning to post the recipe for these brownies for a while when an opportunity became available to collaborate with and feature Smucker's Fruit & Honey Fruit Spreads.

    These homemade PB&J Brownies are an easy and delicious holiday dessert option. Chewy, fudgey chocolate brownies with a swirl of peanut butter and the fruit spread of your choice on top, these are made from scratch and would be great on a Thanksgiving of Christmas dessert table or just because you deserve a tasty dessert!
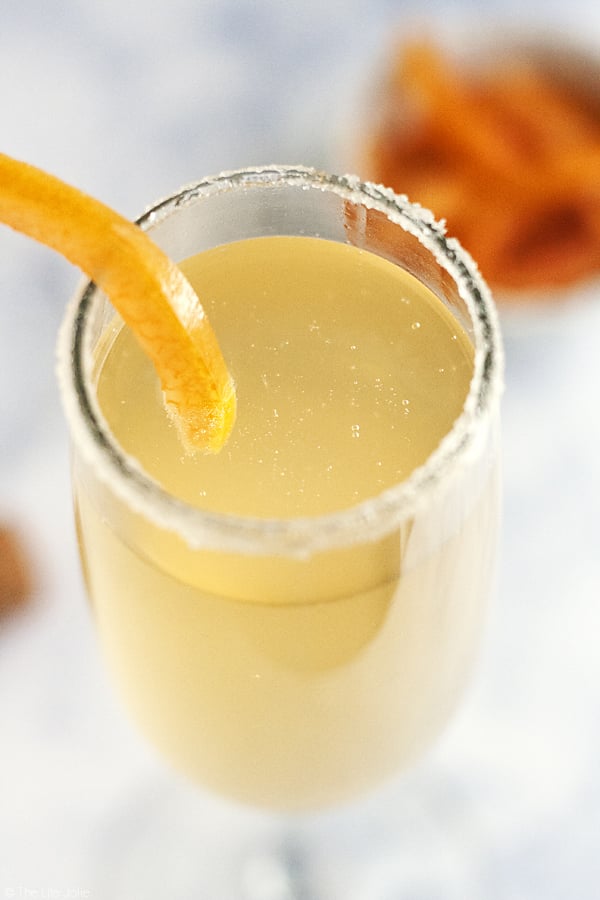
    I come from a long line of very loyal Smucker's fans. Their many varieties of spreads have played a leading role in various meals and snacks throughout my childhood and now in my own family's life.

    Interestingly, I had been in such a habit of getting my favorite Smucker's Seedless Blackberry Jam, that I hadn't even realized these Fruit and Honey Spreads existed. Boy, have I been missing out!!

    These homemade PB&J Brownies are an easy and delicious holiday dessert option. Chewy, fudgey chocolate brownies with a swirl of peanut butter and the fruit spread of your choice on top, these are made from scratch and would be great on a Thanksgiving of Christmas dessert table or just because you deserve a tasty dessert!

    First of all, they're sweetened naturally with honey. And I gotta tell you, this allows the true flavors of the fruit to really shine through while still maintaining the subtle sweetness of the honey. It also makes a texture that is the best possible consistency to smear on a piece of bread or to (ahem) swirl with peanut butter on top of a pan full of deliciously chocolaty brownie batter.

    There were so many different sweet and savory ideas that came to me when I started thinking up recipe ideas for the spreads. I'm a sucker for a quick and simple meal solution and these spreads have potential far beyond your morning toast.

    These homemade PB&J Brownies are an easy and delicious holiday dessert option. Chewy, fudgey chocolate brownies with a swirl of peanut butter and the fruit spread of your choice on top, these are made from scratch and would be great on a Thanksgiving of Christmas dessert table or just because you deserve a tasty dessert!

    But being that it's November, my brain is living in a constant state of Thanksgiving Brainstorming. I can't help it you guys, it's one of the biggest eating holidays of the year. I'm getting hungry just thinking about it!

    I'm also a huge proponent of having a variety of different desserts available on Thanksgiving. Although I love pie, I am thankful for a holiday where I can eat all the things. Those things should absolutely include PB&J Brownies (see what I did there?).

    These homemade PB&J Brownies are an easy and delicious holiday dessert option. Chewy, fudgey chocolate brownies with a swirl of peanut butter and the fruit spread of your choice on top, these are made from scratch and would be great on a Thanksgiving of Christmas dessert table or just because you deserve a tasty dessert!

    Think about it. Rich, fudgy brownies swirled with creamy peanut butter and Smucker's Fruit & Honey Triple Berry Fruit Spread. It's two comforting childhood standby's baked into one amazingly decadent dessert that the whole family will love. And it looks so pretty, it will be such a festive addition to any holiday dessert table.

    TL:DR: Smucker's Fruit & Honey Fruit Spreads are an excellent option for easy holiday entertaining. You should really make these amazing PB&J Brownies for Thanksgiving or Christmas or Hanukkah or just because you deserve a brownie (you really do!).

    These homemade PB&J Brownies are an easy and delicious holiday dessert option. Chewy, fudgey chocolate brownies with a swirl of peanut butter and the fruit spread of your choice on top, these are made from scratch and would be great on a Thanksgiving of Christmas dessert table or just because you deserve a tasty dessert!

    I opted to use the Triple Berry Fruit Spread in this recipe. But they would be pretty incredible with any of the five varieties that are available like Strawberry, Blueberry Lemon, Concord Grape, or if you're feeling spicy, Strawberry Jalapeno!

    They're conveniently located with Smucker's other great products at your local Walmart.

    These homemade PB&J Brownies are an easy and delicious holiday dessert option. Chewy, fudgey chocolate brownies with a swirl of peanut butter and the fruit spread of your choice on top, these are made from scratch and would be great on a Thanksgiving of Christmas dessert table or just because you deserve a tasty dessert!

    These homemade PB&J Brownies are an easy and delicious holiday dessert option. Chewy, fudgey chocolate brownies with a swirl of peanut butter and the fruit spread of your choice on top, these are made from scratch and would be great on a Thanksgiving of Christmas dessert table or just because you deserve a tasty dessert!

    PB&J Brownies

    Jessy Freimann
    These homemade PB&J Brownies are an easy and delicious holiday dessert option. Chewy, fudgey chocolate brownies with a swirl of peanut butter and the fruit spread of your choice on top, these are made from scratch and would be great on a Thanksgiving of Christmas dessert table or just because you deserve a tasty dessert!
    No ratings yet
    Print Recipe Pin Recipe
    Prep Time 10 minutes mins
    Cook Time 50 minutes mins
    Total Time 1 hour hr
    Course Dessert
    Cuisine Christmas, Holiday, Thanksgiving
    Servings 12 servings
    Calories 352 kcal

    Equipment

    • 1 9 x 13 Pan
    • 1 mixing bowl
    • 1 Measuring cups and spoons
    • 1 Sauce pan

    Ingredients
      

    • 4 ounces unsweetened chocolate chopped
    • ½ cup salted butter
    • 2 cups granulated sugar
    • 3 large eggs
    • 1 teaspoon pure vanilla extract
    • ½ teaspoon Kosher salt
    • 1 cup all purpose flour
    • ¼ cup creamy peanut butter
    • ¼ cup jam any flavor

    Instructions
     

    • Preheat your oven to 350 degrees F. Grease an 8x8 pan, line it with enough parchment paper that extra comes up over the sides (for easy removal) and then grease the parchment paper and set aside.
    • Melt chocolate and butter in a large, microwave safe bowl by microwaving it for 30 seconds, stirring, microwaving for 30 seconds more, stirring again and then continuing to microwave in 15 second increments and stirring between until it's fully melted. You can also use a double boiler.
    • Once it's fully melted and smooth, add to a mixing bowl and whisk in sugar.
    • Next, whisk in each egg followed by vanilla extract and salt until well combined.
    • Stir in flour with a spoon until it's fully combined.
    • Pour batter into the prepared pan pan and use a spatula to spread it evenly.
    • Warm peanut butter and your jam separately for around 20-30 seconds each to soften them a bit.
    • Add spoonfuls of the peanut butter and the jam, alternating them over the batter.
    • Using a butter knife, swirl the peanut butter and fruit spread together. Try not to over-swirl for the prettiest marbling.
    • Bake uncovered for 50-60 minutes or until set.
    • Cool completely (brownies tend to do a lot of crossover cooking) and then use the parchment to remove the brownies in once piece and cut them into 12 pieces. Serve immediately.

    Notes

    These will last up to 3 days at room temperature.

    Nutrition

    Serving: 1servingCalories: 352kcalCarbohydrates: 50gProtein: 5gFat: 17gSaturated Fat: 9gPolyunsaturated Fat: 1gMonounsaturated Fat: 5gTrans Fat: 0.3gCholesterol: 67mgSodium: 204mgPotassium: 146mgFiber: 2gSugar: 37gVitamin A: 304IUVitamin C: 1mgCalcium: 25mgIron: 2mg
    Tried this recipe?Let us know how it was!

    This post was sponsored by Collective Bias and it's advertiser but as always, the opinions are 100% mine. Thank you for supporting the brands that help support this blog. For more information, please see my disclaimer.

    Helpful Tools:


    You can find a full index of my recipes here.

    Don't forget to follow The Life Jolie on Pinterest for more recipe inspiration!

    Linked up at

    These homemade PB&J Brownies are an easy and delicious holiday dessert option. Chewy, fudgey chocolate brownies with a swirl of peanut butter and the fruit spread of your choice on top, these are made from scratch and would be great on a Thanksgiving of Christmas dessert table or just because you deserve a tasty dessert!

    Apple Spice Muffins

    Oct 26, 2016 · 20 Comments

    Apple Spice Muffins are one of my favorite fall recipes. Made with tasty chunks of apple, applesauce with cinnamon, nutmeg and ginger, they're so easy to make and taste great as breakfast or as a dessert!

    Apple Spice Muffins are one of my favorite fall recipes. Made with tasty chunks of apple, applesauce with cinnamon, nutmeg and ginger, they're so easy to make and taste great as breakfast or as a dessert!

    Apple Spice Muffins are one of my favorite fall recipes. Made with tasty chunks of apple, applesauce with cinnamon, nutmeg and ginger, they're so easy to make and taste great as breakfast or as a dessert!

    This post contains Affiliate Links. Please see the disclaimer here.

    Are you guys noticing a trend around here lately? Like this post. And this post. Now here we are: another week, another apple recipe.

    Apple Spice Muffins are one of my favorite fall recipes. Made with tasty chunks of apple, applesauce with cinnamon, nutmeg and ginger, they're so easy to make and taste great as breakfast or as a dessert!

    But I'm not sorry, not even a little bit. For a few reasons. First off, the apples are insane right now and I love them so much! #cantstopwontstop 

    Apple Spice Muffins are one of my favorite fall recipes. Made with tasty chunks of apple, applesauce with cinnamon, nutmeg and ginger, they're so easy to make and taste great as breakfast or as a dessert!

    Also, these muffins are no joke. Perfectly moist, deliciously flavored with spices that pull you so deep into seasonal happiness you'll want nothing but crisp Autumn air and cozy boots forever and ever.

    Apple Spice Muffins are one of my favorite fall recipes. Made with tasty chunks of apple, applesauce with cinnamon, nutmeg and ginger, they're so easy to make and taste great as breakfast or as a dessert!

    I cut nice, solid chunks of apple to add into the batter. My apple of choice was Granny Smith, but any other variety that holds up well in baking will work (20 Ounce, Cortland etc.). But I constantly find myself coming back to Granny Smith's when I cook. They add this fantastic tartness the breaks up the typical sweetness of baked goods.

    Apple Spice Muffins are one of my favorite fall recipes. Made with tasty chunks of apple, applesauce with cinnamon, nutmeg and ginger, they're so easy to make and taste great as breakfast or as a dessert!

    The finishing touch was a sprinkle of Turbinado sugar. This adds a glorious crunchy texture to the top of them and looks like pretty little diamonds on top of these gorgeous muffins.

    Apple Spice Muffins are one of my favorite fall recipes. Made with tasty chunks of apple, applesauce with cinnamon, nutmeg and ginger, they're so easy to make and taste great as breakfast or as a dessert!

    This recipe actually makes a couple dozen muffins, so it's excellent if you're feeding a crowd. You can easily freeze half the batch or better yet share it with a beloved friend or family member (because what better way to share love than with freshly baked muffins?).

    I'll tell you this, when I brought a batch of these into work, my coworkers went at it like a pack of hungry wolves and I'm pretty sure there were no regrets.

    Apple Spice Muffins are one of my favorite fall recipes. Made with tasty chunks of apple, applesauce with cinnamon, nutmeg and ginger, they're so easy to make and taste great as breakfast or as a dessert!

    Need more fall recipe ideas? Here ya go:

    Pumpkin Spice Latte Cake

    Two Ingredient Apple Sauce

    No-Bake Pumpkin Cheesecake Mini Pies

    Bloomin' Baked Caramel Apples

    Apple Spice Muffins are one of my favorite fall recipes. Made with tasty chunks of apple, applesauce with cinnamon, nutmeg and ginger, they're so easy to make and taste great as breakfast or as a dessert!

    Apple Spice Muffins

    Jessy Freimann
    Apple Spice Muffins are one of my favorite fall recipes. Made with tasty chunks of apple, applesauce with cinnamon, nutmeg and ginger, they're so easy to make and taste great as breakfast or as a dessert!
    No ratings yet
    Print Recipe Pin Recipe
    Prep Time 10 minutes mins
    Cook Time 20 minutes mins
    Total Time 30 minutes mins
    Course Breakfast, Dessert
    Cuisine Fall, gift

    Ingredients
      

    • 4 eggs
    • 1 cup of vegetable or canola oil
    • 3 cups of flour
    • 2 cups of sugar
    • 2 tsp. of baking powder
    • 2 teaspoon of baking soda
    • ½ tsp. of salt
    • 1 tsp. of cinnamon
    • ½ tsp. of ginger
    • ¼ teaspoon of nutmeg
    • 2 cups of applesauce
    • 2 large Granny Smith apples peeled, cored and diced into ½ inch pieces

    Instructions
     

    • Preheat the oven to 350 degrees and line your muffin pans with muffin cups (or if you'd prefer not to use muffin cups, you can instead grease your pan with cooking spray).
    • Beat together your eggs and oil until well combined.
    • Add the next 6 ingredients and beat until just combined.
    • Add your applesauce and diced apples and mix quickly until fully combined.
    • Scoop your batter into your muffin pan, filling the muffin cups almost to the top.
    • Bake for about 20 minutes or until your cake tester comes out clean.
    • Enjoy once they've cooled!

    Notes

    These freeze well once baked and make a great gift!
    Tried this recipe?Let us know how it was!

    Helpful tools:


    You can find a full index of my recipes here.

    Don't forget to follow The Life Jolie on Pinterest for more recipe inspiration!

    Linked up at

    Apple Spice Muffins are one of my favorite fall recipes. Made with tasty chunks of apple, applesauce with cinnamon, nutmeg and ginger, they're so easy to make and taste great as breakfast or as a dessert!

    Rice Krispie Treat Pumpkin

    Oct 24, 2016 · 6 Comments

    This Rice Krispie Treat Pumpkin is the perfect addition to your holiday table. It's an easy, kid friendly dessert that looks awesome filled with candy and is so much fun for a Halloween party or Thanksgiving!

    This Rice Krispie Treat Pumpkin is the perfect addition to your holiday table. It's an easy, kid friendly dessert that looks awesome filled with candy and is so much fun for a Halloween party or Thanksgiving!

    This Rice Krispie Treat Pumpkin is the perfect addition to your holiday table. It's an easy, kid friendly dessert that looks awesome filled with candy and is so much fun for a Halloween party or Thanksgiving!

    This post contains Affiliate Links. Please see the disclaimer here.

    I'm not always the craftiest. I try my hardest and give every project I commit to the college shot. While I'm not terrible with crafts, I'd say I have about a 50% success rate. Needless to say, I still have many projects where I end up looking like the "Nailed it" side of the comparison (ie- not good).

    The reason I say this is because last night when I was editing my photos for this post, I asked J if he thought they were ok. You see, photography is something I've been working hard to get better at and I've started to really enjoy photographing food. But like most people, I have my insecure moments.

    This Rice Krispie Treat Pumpkin is the perfect addition to your holiday table. It's an easy, kid friendly dessert that looks awesome filled with candy and is so much fun for a Halloween party or Thanksgiving!

    When he looked at the photos he said "yeah, they're good. Just not what you usually do." And when I asked him what he meant by that, he said that this is more of a project than a recipe. In a way, he's right. I mean, who hasn't made Rice Krispie Treats, right?

    But after I got such an awesomely supportive response with my Rice Krispie Treat Turkey, I just had to throw together another for Halloween. And believe-you-me I have some other ideas cooking up in my brain for Rice Krispie Treats as well!

    This Rice Krispie Treat Pumpkin is the perfect addition to your holiday table. It's an easy, kid friendly dessert that looks awesome filled with candy and is so much fun for a Halloween party or Thanksgiving!

    This isn't terribly difficult to make. I used a single batch of Rice Krispie Treats which yielded a small pumpkin perfect for an intimate family gathering along with other desserts. You could easily double or triple this for a larger group as well.

    In initial test runs, I attempted to built this pumpkin around a balloon. The plan was that once the pumpkin was set I would pop the balloon and be left with a perfectly shaped pumpkin, kind of like when you do paper mache. Suffice it to say that was a total fail.

    This Rice Krispie Treat Pumpkin is the perfect addition to your holiday table. It's an easy, kid friendly dessert that looks awesome filled with candy and is so much fun for a Halloween party or Thanksgiving!

    Now if you're feeling extra brave and craftier than I am, you can crave a face into it as well. Our pumpkin was simply too small for this to work. It was still adorable, though much more orange in person. Use a very sharp knife and extra care when you're hollowing out your pumpkin. A husband who is handy with a knife is also helpful. 🙂

    This Rice Krispie Treat Pumpkin is the perfect addition to your holiday table. It's an easy, kid friendly dessert that looks awesome filled with candy and is so much fun for a Halloween party or Thanksgiving!

    Other great fall desserts are:

    Bloomin' Baked Caramel Apples

    No-Bake Pumpkin Cheesecake Mini Pies

    Pumpkin Spice Latte Cake

    Rice Krispie Treat Turkey

    Helpful tools:

    Non-Stick Foil (this is key when you're sculpting Rice Krispie Treats)

    Hosting Thanksgiving?

    Discover the secret to hosting Thanksgiving without all the stress! Prepsgiving is your FREE guide to making a delicious Thanksgiving feast the easy way.

    This Rice Krispie Treat Pumpkin is the perfect addition to your holiday table. It's an easy, kid friendly dessert that looks awesome filled with candy and is so much fun for a Halloween party or Thanksgiving!

    Rice Krispie Treat Pumpkin

    Jessy Freimann
    This Rice Krispie Treat Pumpkin is the perfect addition to your holiday table. It's an easy, kid friendly dessert that looks awesome filled with candy and is so much fun for a Halloween party or Thanksgiving!
    No ratings yet
    Print Recipe Pin Recipe
    Prep Time 20 minutes mins
    Cook Time 10 minutes mins
    Total Time 30 minutes mins
    Course Dessert
    Cuisine American
    Servings 6 servings
    Calories 263 kcal

    Equipment

    • 1 sheet pan
    • 1 mixing bowl
    • 1 Spatula
    • 1 non-stick foil

    Ingredients
      

    • 3 Tablespoon salted butter
    • 4 cups mini marshmallows
    • Yellow and red food coloring
    • 6 cups Rice Krispies cereal
    • The candy of your choice I used a fun-size Twix bar for the stem

    Instructions
     

    • Melt butter in a non-stick pan over low heat.
    • Add marshmallows to the pan, stirring until melted.
    • Stir in food coloring. I did around 12 drops of yellow then 4 drops of red and mine was a light orange. You can tailor this to the shade you want but I'd encourage you to err on the side of a 3:1 ratio of yellow to red, respectively.
    • Once you have the shade of orange you want, add the Rice Krispies and remove the pot from the heat. Stir until everything is well combined.
    • Lay out a piece of non-stick foil (with the non-stick side facing up) and pour the Rice Krispie mixture onto it. Give it a moment or two to cool so that you don't burn your hands and in that time wash your hands well and spray them with cooking spray.
    • Working quickly, shape the Rice Krispie mixture into a ball in the shape that you want for your pumpkin, we went with short and wide to make hollowing it out easier.
    • Pack it tightly and wrap it in foil If you're in a rush you can refrigerate for at least 2 hours, but overnight is preferable (and if you go the overnight route, refrigerating isn't necessary).
    • Once the pumpkin is set, unwrap it and place it onto your serving plate. Coming in at an angle, the same way you do when you're carving a real pumpkin, cut the top off and set aside. Be careful not to cut all the way through.
    • Once the top is off, carefully hollow out the pumpkin to your liking, making sure not to go through the bottom. If you're feeling extra crafty, you can even shape the pieces you cut out of the center of your pumpkin into mini pumpkins.
    • To finish the top, slice the pointy tip off the bottom of top. On the top side of it, cut a hole that is slightly smaller than the mini candy bar you'll be using for the stem and carefully push the candy bar into the hole. You can always carefully press the outsides of the pumpkin in a bit to accommodate the top, just be gentle.
    • Fill the pumpkin with the candy of your choice, and surround it with candy as well for added decoration. Place the top on at an angle and enjoy!
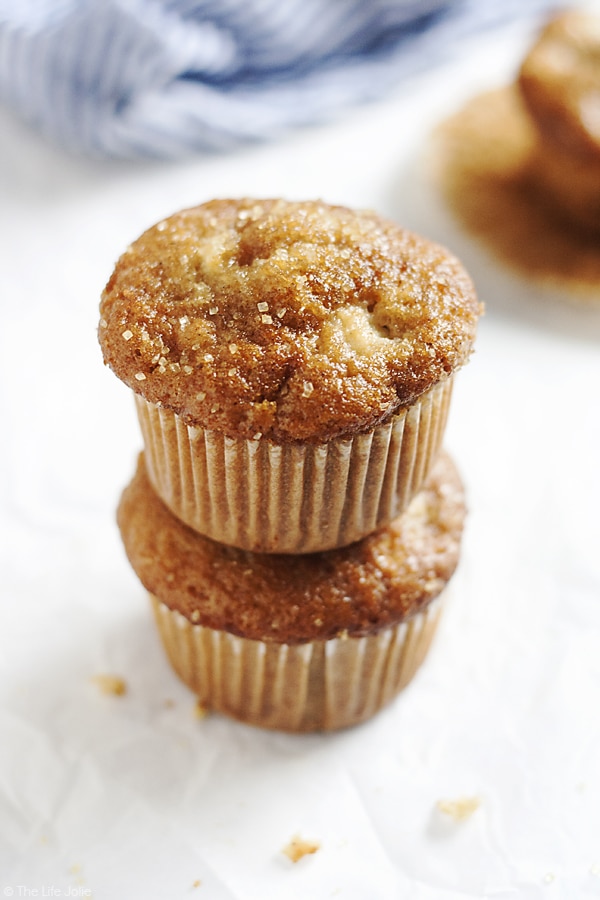
    Notes

    This makes a small pumpkin you can always double or triple this to make a larger pumpkin.

    Nutrition

    Serving: 1servingCalories: 263kcalCarbohydrates: 51gProtein: 3gFat: 6gSaturated Fat: 4gPolyunsaturated Fat: 0.4gMonounsaturated Fat: 2gTrans Fat: 0.2gCholesterol: 15mgSodium: 219mgPotassium: 38mgFiber: 0.1gSugar: 22gVitamin A: 2037IUVitamin C: 18mgCalcium: 4mgIron: 9mg
    Tried this recipe?Let us know how it was!

    You can find a full index of my recipes here.

    Don't forget to follow The Life Jolie on Pinterest for more recipe inspiration!

    Linked up at

    This Rice Krispie Treat Pumpkin is the perfect addition to your holiday table. It's an easy, kid friendly dessert that looks awesome filled with candy and is so much fun for a Halloween party or Thanksgiving!

    Bloomin' Baked Caramel Apples

    Oct 17, 2016 · 2 Comments

    This Bloomin' Baked Caramel Apples recipe is the perfect fall dessert! They're quick and easy to make and deliciously sweet!

    This Bloomin' Baked Caramel Apples recipe is the perfect fall dessert! They're quick and easy to make and deliciously sweet! 

    This Bloomin' Baked Caramel Apples recipe is the perfect fall dessert! They're quick and easy to make and deliciously sweet!

    This post contains Affiliate Links. Please see the disclaimer here.

    Have you guys seem Bloomin' Onions? I can't tell you for sure where they started, but the first place I've heard had them was Outback Steakhouse. I'm all for Bloomin' Onions, because yum! I mean, what's not to love? Crispy, fried onion-y goodness with a tasty dipping sauce. Yes, please!

    So when I was deciding what apple recipes I wanted to blog this year, I kept coming back to baked apples. And apples crisp. And baked apples stuffed with apple crisp (yaaaaasssss!). But I have certain qualms about baked apples. Nothing major, just one little thing. I don't love having to cut my desserts the way I do when I eat a steak.

    This Bloomin' Baked Caramel Apples recipe is the perfect fall dessert! They're quick and easy to make and deliciously sweet!

    This obviously isn't a huge problem. I certainly wouldn't turn down a baked apple over my own laziness. But the fact remains. So when I was recently reminded the Bloomin' Onions exist the answer to my not-wanting-to-cut-a-baked-apple dilemma was clear: make a Bloomin' Baked Caramel Apple.

    Since I have a surplus of apples hanging out in my kitchen at all times in the fall, I grabbed an apple and a knife and got to work. The cutting was slightly labor intensive, but really not terrible. I added a few pantry basics to give it a little bit of apple crisp-style filling and drizzled with some leftover prepared caramel sauce and I had myself a tasty little dessert!

    This Bloomin' Baked Caramel Apples recipe is the perfect fall dessert! They're quick and easy to make and deliciously sweet!

    So I made them and took some photos and I was pretty excited. And because I was being a little backwards, I did some research after I made and photographed as opposed to before. I'm not sure why, I think I got so excited that I just went with it.

    When I eventually did a little research (specifically to see how people were cutting their Bloomin' Apples) I found that other people were cutting the tops off their apples before cutting the "blooms." I'm not sure why I didn't think to do that from the beginning but once I tested it out with that, it was much easier to cut (duh!).

    This Bloomin' Baked Caramel Apples recipe is the perfect fall dessert! They're quick and easy to make and deliciously sweet!

    I love that this recipe is easy to make for one single apple or for a crowd. I've written the recipe for 4 people, but you can find the measurements for a single apple in the notes. This is such a pretty and festive fall dessert with that "wow" factor that will impress your guests (when I finished photographing them, my mom and mother-in-law were waiting like vultures!).

    I used Granny Smith Apples because I love how the tartness plays so well with the sweet caramel but if you have a different apple preference, then go for it (Cortland, Galas and 20 oz. varieties tend to bake up beautifully). One big, important tip: don't scrimp on the caramel- it makes this dish!

    This Bloomin' Baked Caramel Apples recipe is the perfect fall dessert! They're quick and easy to make and deliciously sweet!

    I also love these great fall recipes:

    Pumpkin Spice Latte Cake

    Two Ingredient Apple Sauce

    No-Bake Pumpkin Cheesecake Mini Pies

    This Bloomin' Baked Caramel Apples recipe is the perfect fall dessert! They're quick and easy to make and deliciously sweet!

    Bloomin’ Baked Caramel Apples

    Jessy Freimann
    This Bloomin’ Baked Caramel Apples recipe is the perfect fall dessert! They’re quick and easy to make and deliciously sweet! 
    No ratings yet
    Print Recipe Pin Recipe
    Prep Time 10 minutes mins
    Cook Time 55 minutes mins
    Total Time 1 hour hr 5 minutes mins
    Course Dessert
    Cuisine American
    Servings 4 servings
    Calories 256 kcal

    Equipment

    • 1 9 inch Baking dish
    • 1 Measuring cups and spoons
    • 1 paring knife
    • 1 cutting board

    Ingredients
      

    • 4 large Granny Smith apples or the apples of your choice
    • 4 Tablespoon rolled oats
    • 4 Tablespoon granulated sugar
    • ½ teaspoon ground cinnamon
    • ¼ teaspoon Kosher salt
    • 1 cup apple cider
    • 4 Tablespoons caramel sauce I found this in the ice cream section of my frozen foods department.

    Instructions
     

    • Cut off the top of each apple and cut around the core (but not all the way to the bottom because you want it to be closed so the filling doesn't come out). Scoop out most of the core.
    • Use the knife to cut 2-3 circles in the perimeter around the hole where the core was, making sure not to cut all the way through to the bottom. It should look like a bullseye.
    • Turn the apple over to the top is face-down. Placing the tip of your knife about a centimeter or so from the center of the bottom of the apple and cut down to the top of the apple. Do this all the way around the outside of the apple to create the "petals." Place them top-side-up into an 8" x 8" baking pan.
    • In a separate bowl, mix oats, sugar, cinnamon and salt. Divide the mixture between the four apples and stuff it into the middle of each apple where the core used to be.
    • Pour apples cider around the apples so that it covers the booth of your pan.
    • Bake uncovered for 45-55 minutes. Remove from the oven and drizzle with caramel sauce. Serve immediately.

    Notes

    If you are making a single apple, the measurements are 1 Tablespoon each of rolled oats, sugar and melted butter, 1 pinch of cinnamon and ¼ cup of apple cider or enough to cover the bottom of a small baking pan.

    Nutrition

    Serving: 1servingCalories: 256kcalCarbohydrates: 65gProtein: 2gFat: 1gSaturated Fat: 0.1gPolyunsaturated Fat: 0.3gMonounsaturated Fat: 0.1gSodium: 219mgPotassium: 334mgFiber: 6gSugar: 52gVitamin A: 140IUVitamin C: 11mgCalcium: 34mgIron: 1mg
    Tried this recipe?Let us know how it was!

    You can find a full index of my recipes here.

    Don't forget to follow The Life Jolie on Pinterest for more recipe inspiration!

    Linked up at

    This Bloomin' Baked Caramel Apples recipe is the perfect fall dessert! They're quick and easy to make and deliciously sweet!

    Cilantro Lime Cauliflower Rice

    Oct 12, 2016 · 2 Comments

    This shop has been compensated by Collective Bias, Inc. and its advertiser. All opinions are mine alone. #FeedYourFoodie #CollectiveBias

    Cilantro Lime Cauliflower Rice is such an easy, low carb side dish. With cauliflower, garlic, cilantro and lime juice it cooks up really quickly and tastes especially great with Mexican food. This is definitely one of my new favorite healthy recipes!

    Now that the pregnancy phase of my life is over, I've been trying to focus on living a healthier lifestyle. I've never been a big fan of dieting, it just doesn't seem healthy to me and offends my foodie sensibilities.

    I'm super happy to be back to my pre-Alice weight but I try not to focus too much on the numbers. I don't even own a scale! Instead, I try to focus on finding delicious, healthy, real foods to enjoy in my day-to-day life.

    Cilantro Lime Cauliflower Rice is such an easy, low carb side dish. With cauliflower, garlic, cilantro and lime juice it cooks up really quickly and tastes especially great with Mexican food. This is definitely one of my new favorite healthy recipes!

    This can be a challenge at times because life is busy! Between working full time outside of the home, trying to be as present and involved as possible with my girls and Justin and still creating great content here at The Life Jolie, time is limited at best. And making every single meal from scratch isn't always an option.

    Luckily for me, there's LEAN CUISINE® MARKETPLACE meals. I cannot tell you how many times Lean Cuisine has saved my morning and allowed me be able to bring to work a flavorful lunch, made with organic ingredient options. It is so nice to be able to grab a Lean Cuisine from the freezer and get out the door on time.

    Cilantro Lime Cauliflower Rice is such an easy, low carb side dish. With cauliflower, garlic, cilantro and lime juice it cooks up really quickly and tastes especially great with Mexican food. This is definitely one of my new favorite healthy recipes!

    I love the fact that Lean Cuisine continues to add new flavors so that you always have a tasty option that stays on-trend with modern cuisine while still being packed with health and wellness benefits.

    They are really in tune with people's varying needs. Gluten-free options. Protein-packed options. No-GMOs. No matter what your needs, they've created an option for you that will also be filled with great flavor.

    Cilantro Lime Cauliflower Rice is such an easy, low carb side dish. With cauliflower, garlic, cilantro and lime juice it cooks up really quickly and tastes especially great with Mexican food. This is definitely one of my new favorite healthy recipes!

    Some of the most recent flavors they've added are LEAN CUISINE® MARKETPLACE Cheese & Fire-Roasted Chile Tamale, LEAN CUISINE® MARKETPLACE Chicken Tikka Masala and LEAN CUISINE® MARKETPLACE Southwest – Style Potato Bake. Now you're hungry, right? Me too.

    Since I can't leave a great thing well enough alone, I had to make something delicious to serve with these options. And the first thing that came to mind was Cauliflower Rice. My mom has recently been dabbling in this and every time she makes it, I cannot stop eating it!

    Since the Cheese and Fire-Roasted Chile Tamale has become a new favorite, I figured the citrus-y lime with fresh cilantro would perfectly compliment the deliciously spicy sauce that is served over the Tamale.

    Cilantro Lime Cauliflower Rice is such an easy, low carb side dish. With cauliflower, garlic, cilantro and lime juice it cooks up really quickly and tastes especially great with Mexican food. This is definitely one of my new favorite healthy recipes!

    Cauliflower Rice is such a versatile side because it really picks up the flavors of whatever you add to it. I can imagine so many inspired flavor-additions to help this pair nicely with whatever you are enjoying for lunch or dinner, especially all of Lean Cuisine's versatile options, no matter what you're in the mood for.

    I also love the ease with which this comes together. At first I was slightly intimidated about the idea of turning a head of cauliflower into cauliflower rice. But it was so quick to cut it down into pieces and run it through my food processor. And one single head made a ton of cauliflower rice, so much so that I was able to freeze some for later.

    Cilantro Lime Cauliflower Rice is such an easy, low carb side dish. With cauliflower, garlic, cilantro and lime juice it cooks up really quickly and tastes especially great with Mexican food. This is definitely one of my new favorite healthy recipes!

    It cooked up lightning-fast as well. From start-to-finish it took not even fifteen minutes (and it would be even less time if you purchase your cauliflower pre-riced). Basically, it's the perfect, healthy weeknight side dish.

    Want to learn more about Lean Cuisine? Connect here:

    Facebook | Twitter | Instagram

    Cilantro Lime Cauliflower Rice is such an easy, low carb side dish. With cauliflower, garlic, cilantro and lime juice it cooks up really quickly and tastes especially great with Mexican food. This is definitely one of my new favorite healthy recipes!

    A close up image of a wooden spoon holding a scoop of cilantro clime cauliflower rice.

    Cilantro Lime Cauliflower Rice

    Jessy Freimann
    This cilantro lime cauliflower rice is an easy, low-carb side dish packed with fresh flavor that comes together in just 20 minutes.
    No ratings yet
    Print Recipe Pin Recipe
    Prep Time 10 minutes mins
    Cook Time 10 minutes mins
    Total Time 20 minutes mins
    Course dinner, healthy, Lunch, Side Dish
    Cuisine Healthy, Mexican
    Servings 6 servings
    Calories 65 kcal

    Equipment

    • 1 Skillet
    • 1 wooden spoon
    • 1 cutting board
    • 1 chefs knife
    • 1 food processor

    Ingredients
      

    • 2 Tablespoons olive oil
    • 4 large garlic cloves pressed or minced
    • 16 ounces frozen cauliflower rice
    • 1 teaspoon Kosher salt to taste
    • ¼ teaspoon ground black pepper to taste
    • ¼ cup fresh cilantro chopped
    • 3 Tablespoons lime juice 1 lime's worth of juice

    Instructions
     

    • Heat the oil in a skillet over medium-high heat your oil over medium/medium high heat.
    • Once the oil is hot, add the garlic and sauté for 2 minutes, stirring often so it doesn't burn.
    • Add cauliflower rice, salt and pepper.
    • Cook about 5-7 minutes, turning and stirring frequently.
    • Remove the pan from the heat and stir in cilantro and lime juice. Serve immediately.

    Notes

    • Keep the garlic moving. It can burn quickly at medium-high heat, so stir frequently and keep a close eye on it.
    • Add the cilantro and lime off the heat. This preserves their fresh, bright flavor. Adding them while the pan is still hot can dull them.
    • Taste as you go. This is one of those recipes where you can really eyeball the ingredients and adjust to your liking.
    • Skip the cilantro if it's not your thing. Fresh parsley makes a great substitute and gives a similar fresh finish without the polarizing flavor.
    • Bulk it up. Diced bell peppers, corn, or black beans are all delicious additions that make it even more of a complete side dish.
    • Add some heat. A pinch of red pepper flakes or a diced jalapeño tossed in with the garlic is a great way to kick things up a notch.
    • Ingredients to prep ahead- The cauliflower can be riced and stored in the fridge a day in advance. The garlic can also be minced ahead of time.
    • Leftovers and storage- Store in an airtight container in the fridge for up to 3 days. Reheat in a pan over medium heat.

    Nutrition

    Serving: 1servingCalories: 65kcalCarbohydrates: 5gProtein: 2gFat: 5gSaturated Fat: 1gPolyunsaturated Fat: 1gMonounsaturated Fat: 3gSodium: 411mgPotassium: 248mgFiber: 2gSugar: 2gVitamin A: 49IUVitamin C: 39mgCalcium: 22mgIron: 0.4mg
    Tried this recipe?Let us know how it was!

    This post was sponsored by Collective Bias and it's advertiser but as always, the opinions are 100% mine. Thank you for supporting the brands that help support this blog. For more information, please see my disclaimer.

    Stay in the loop! Get on the mailing list here.

    You can find a full index of my recipes here.

    Don't forget to follow The Life Jolie on Pinterest for more recipe inspiration!

    Linked up at

    Cilantro Lime Cauliflower Rice is such an easy, low carb side dish. With cauliflower, garlic, cilantro and lime juice it cooks up really quickly and tastes especially great with Mexican food. This is definitely one of my new favorite healthy recipes!

    Day After Thanksgiving Sandwich

    Sep 19, 2016 · Leave a Comment

    This Day After Thanksgiving Sandwich is one of my favorite recipes to enjoy leftovers! Tender turkey, sandwiched between halves of your favorite bun with tangy cranberry sauce, savory stuffing and mayonnaise. I love enjoying this for lunches or dinners around the holidays!

    This Day After Thanksgiving Sandwich is one of my favorite recipes to enjoy leftovers! Tender turkey, sandwiched between halves of your favorite bun with tangy cranberry sauce, savory stuffing and mayonnaise. I love enjoying this for lunches or dinners around the holidays!

    This Day After Thanksgiving Sandwich is one of my favorite recipes to enjoy leftovers! Tender turkey, sandwiched between halves of your favorite bun with tangy cranberry sauce, savory stuffing and mayonnaise. I love enjoying this for lunches or dinners around the holidays!

    So, last weeks post about Roast Turkey Thighs got me into a bit of a Thanksgiving mood. I know, you guys. And I'm sorry. 

    I try to resist holidays this early, especially when the stores start hurling them into my face in August (am I the only one who feels like it gets earlier and earlier each year?).

    This Day After Thanksgiving Sandwich is one of my favorite recipes to enjoy leftovers! Tender turkey, sandwiched between halves of your favorite bun with tangy cranberry sauce, savory stuffing and mayonnaise. I love enjoying this for lunches or dinners around the holidays!

    But the turkey! It called to me. And I started thinking about leftovers. I mean, who doesn't love Thanksgiving leftovers?

    This also got me thinking of a sandwich shop J and I used to frequent when we lived in Las Vegas as newlyweds. My in-laws turned us onto it- a place called Capriotti's, maybe you've heard of it?

    Capriotti's has many amazing sandwich options to choose from, the their most popular sandwich would be The Bobbie.

    This Day After Thanksgiving Sandwich is one of my favorite recipes to enjoy leftovers! Tender turkey, sandwiched between halves of your favorite bun with tangy cranberry sauce, savory stuffing and mayonnaise. I love enjoying this for lunches or dinners around the holidays!

    Imagine fresh roast turkey, stuffing, cranberry sauce and mayo on a hero roll. So pretty much Thanksgiving on a bun!

    I'm almost ashamed to admit that on my first time enjoying a sandwich from Capriotti's, I ignored my mother-in-law's good advice and instead ordered some sort of roast beef sub.

    Talk about poor decision making! I should have remembered that moms will never lead you in the wrong direction, at least in terms of food.

    But I was stubborn and I thought I was in the mood for beef. That sandwich was delicious too. But then she gave me a bite of her Bobbie and I instantly knew I'd made a bad decision in not ordering it.

    This Day After Thanksgiving Sandwich is one of my favorite recipes to enjoy leftovers! Tender turkey, sandwiched between halves of your favorite bun with tangy cranberry sauce, savory stuffing and mayonnaise. I love enjoying this for lunches or dinners around the holidays!

    Luckily for me, she was generous enough to trade me half of her Bobbie for half of my roast beef sandwich (that, my friends, is love!). And from there I was hooked.

    In our short time in Vegas, I enjoyed many-a-Bobbie, each better than the last. And after we left, I dreamed of having a Capriotti's in Rochester so that I could enjoy a delicious Bobbie once again (so if you're reading this, Capriotti's- come to Rochester! Trust me, everyone will love you guys as much as I do!!).

    Anyway, there I was, dreaming of The Bobbie with a plate of delicious Turkey leftovers. So the natural next step became apparent: I needed to recreate The Bobbie.

    This Day After Thanksgiving Sandwich is one of my favorite recipes to enjoy leftovers! Tender turkey, sandwiched between halves of your favorite bun with tangy cranberry sauce, savory stuffing and mayonnaise. I love enjoying this for lunches or dinners around the holidays!

    And I did just that! Tender turkey, sandwiched between two halves of my favorite bun. The savory stuffing plays nicely with the tangy cranberry sauce (go with the whole berry- the texture is excellent!).

    This sandwich is the most fantastic way to enjoy leftovers on the day after Thanksgiving. Pair it with some crispy chips, a nice big glass of milk and finish it off with a slice of Pumpkin Spice Latte Cake and Boom! You've got yourself a tasty leftover lunch or dinner!

    Here are some other great Thanksgiving recipes:

    Nanou's Garlic Green Beans

    Honey Soy Glazed Carrots and Parsnips

    Sauteed Mushrooms in a Wine Reduction

    Quick and Easy Roasted Potatoes

    Hosting Thanksgiving?

    Discover the secret to hosting Thanksgiving without all the stress! Prepsgiving is your FREE guide to making a delicious Thanksgiving feast the easy way.

    This Day After Thanksgiving Sandwich is one of my favorite recipes to enjoy leftovers! Tender turkey, sandwiched between halves of your favorite bun with tangy cranberry sauce, savory stuffing and mayonnaise. I love enjoying this for lunches or dinners around the holidays!

    Day After Thanksgiving Sandwich

    Jessy Freimann
    This Day After Thanksgiving Sandwich is everything that your holiday leftover dreams are made of! Roast turkey, stuffing, cranberries and may on a roll- everyone loves them!
    No ratings yet
    Print Recipe Pin Recipe
    Prep Time 5 minutes mins
    Total Time 5 minutes mins
    Course dinner, holiday, Lunch
    Cuisine Leftovers, Sandwich, Turkey
    Servings 1 sandwich
    Calories 659 kcal

    Equipment

    • 1 chefs knife
    • 1 cutting board

    Ingredients
      

    • 1 sub roll
    • ⅓ cup Roast turkey sliced (fresh is better!)
    • ⅓ cup Leftover stuffing
    • ¼ cup Whole berry cranberry sauce
    • 2 Tablespoons Mayonnaise
    • Salt and pepper to taste

    Instructions
     

    • Spread some mayonnaise onto the bottom half of your bun- you you love mayonnaise, you can also spread some on the top bun. Season with salt and pepper to taste.
    • Lay your pieces of turkey in an even layer.
    • Top with a layer of cranberry sauce and then a layer of stuffing.
    • Finish by adding the top bun. Serve immediately.

    Notes

    I love to dip this in leftover gravy!

    Nutrition

    Serving: 1sandwichCalories: 659kcalCarbohydrates: 79gProtein: 20gFat: 30gSaturated Fat: 5gPolyunsaturated Fat: 14gMonounsaturated Fat: 7gTrans Fat: 0.1gCholesterol: 37mgSodium: 1733mgPotassium: 236mgFiber: 4gSugar: 30gVitamin A: 256IUVitamin C: 1mgCalcium: 41mgIron: 13mg
    Tried this recipe?Let us know how it was!

    You can find a full index of my recipes here.

    Don't forget to follow The Life Jolie on Pinterest for more recipe inspiration!

    Linked up at

    This Day After Thanksgiving Sandwich is one of my favorite recipes to enjoy leftovers! Tender turkey, sandwiched between halves of your favorite bun with tangy cranberry sauce, savory stuffing and mayonnaise. I love enjoying this for lunches or dinners around the holidays!

    BLT Bruschetta

    Sep 9, 2016 · 4 Comments

    This BLT Bruschetta recipe is the perfect dish-to-pass for a last minute get together, party or game day celebration. Tomatoes, bacon, parsley and green onions come together in a creamy mixture and are spread atop crispy slices of baguette. This delicious flavor combination makes wonderful little appetizers that you won't be able to stop eating!
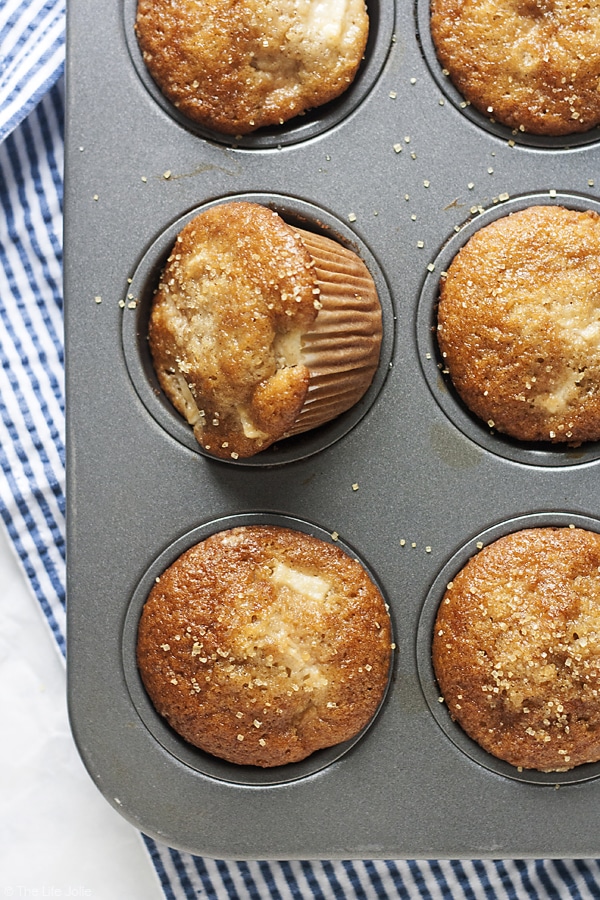
    This BLT Bruschetta recipe is the perfect dish-to-pass for a last minute get together, party or game day celebration. Tomatoes, bacon, parsley and green onions come together in a creamy mixture and are spread atop crispy slices of baguette. This delicious flavor combination makes wonderful little appetizers that you won't be able to stop eating!
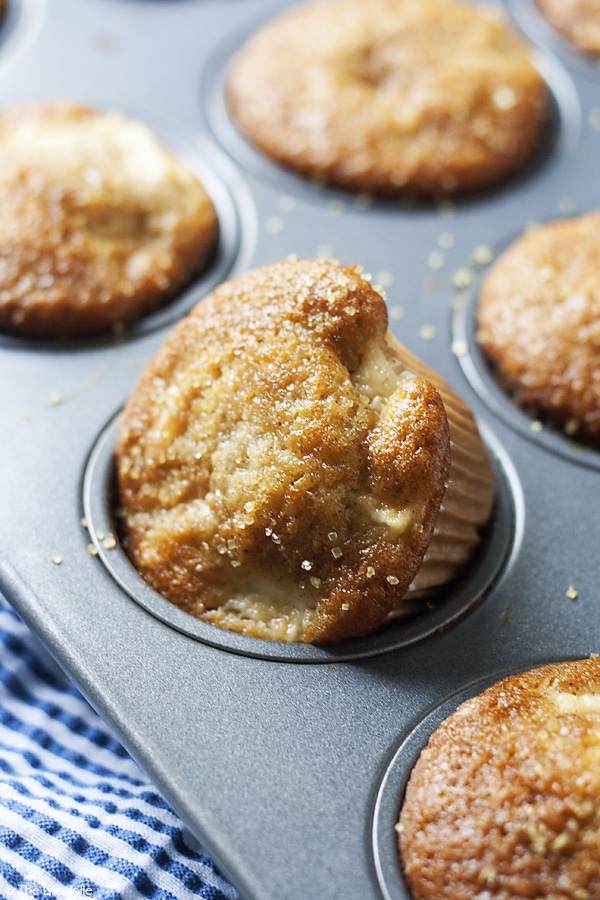
    This BLT Bruschetta recipe is the perfect dish-to-pass for a last minute get together, party or game day celebration. Tomatoes, bacon, parsley and green onions come together in a creamy mixture and are spread atop crispy slices of baguette. This delicious flavor combination makes wonderful little appetizers that you won't be able to stop eating!
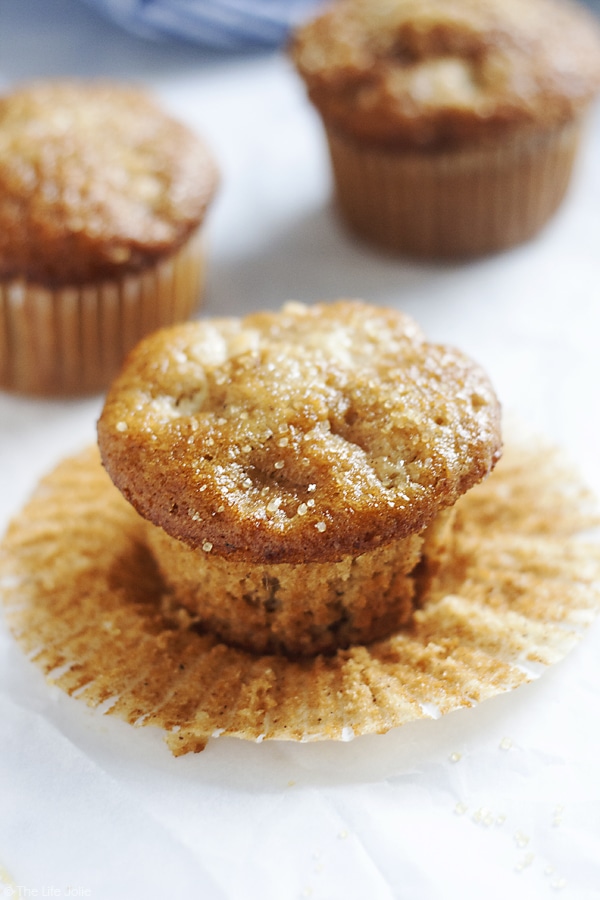
    This post contains Affiliate Links. Please see the disclaimer here.

    For years and years my Aunt Mimi and Uncle Earl would have a New Years Day open house. It was a casual affair full of great food, refreshing drinks and all sorts of interesting people.

    I always looked forward to this event. My cousins and I would hangout and catch up while eating all the things.

    This BLT Bruschetta recipe is the perfect dish-to-pass for a last minute get together, party or game day celebration. Tomatoes, bacon, parsley and green onions come together in a creamy mixture and are spread atop crispy slices of baguette. This delicious flavor combination makes wonderful little appetizers that you won't be able to stop eating!
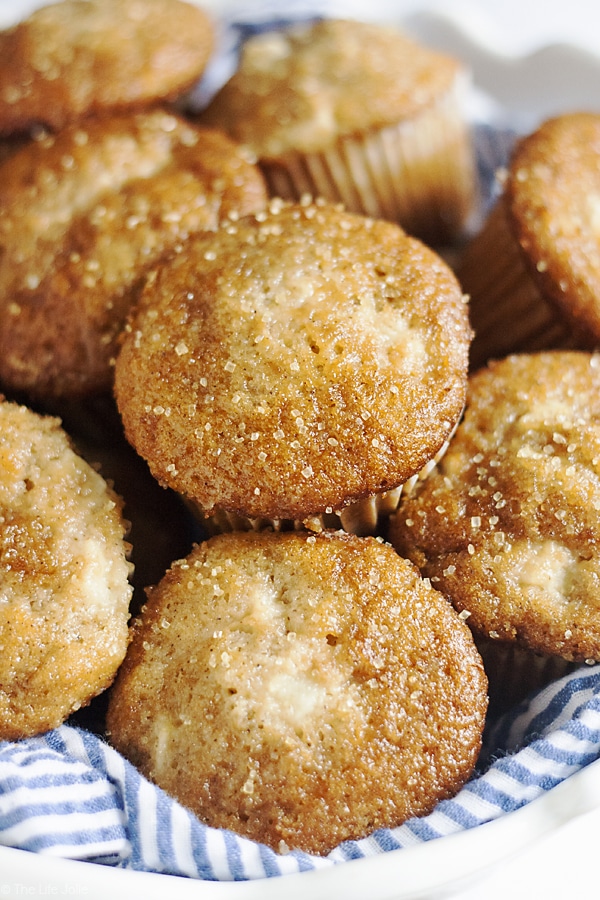
    As I got older, I also began looking forward to bringing a dish to pass. It was such fun coming up with ideas for new and interesting appetizer and dessert options.

    One such year, I found a recipe for BLT Bites from Taste of Home. To say it was love at first site would be an understatement.

    I mean it's a BLT in an adorable, bite-size form, what's not to like? I knew I had to make it for that year's New Year's Day open house.

    This BLT Bruschetta recipe is the perfect dish-to-pass for a last minute get together, party or game day celebration. Tomatoes, bacon, parsley and green onions come together in a creamy mixture and are spread atop crispy slices of baguette. This delicious flavor combination makes wonderful little appetizers that you won't be able to stop eating!
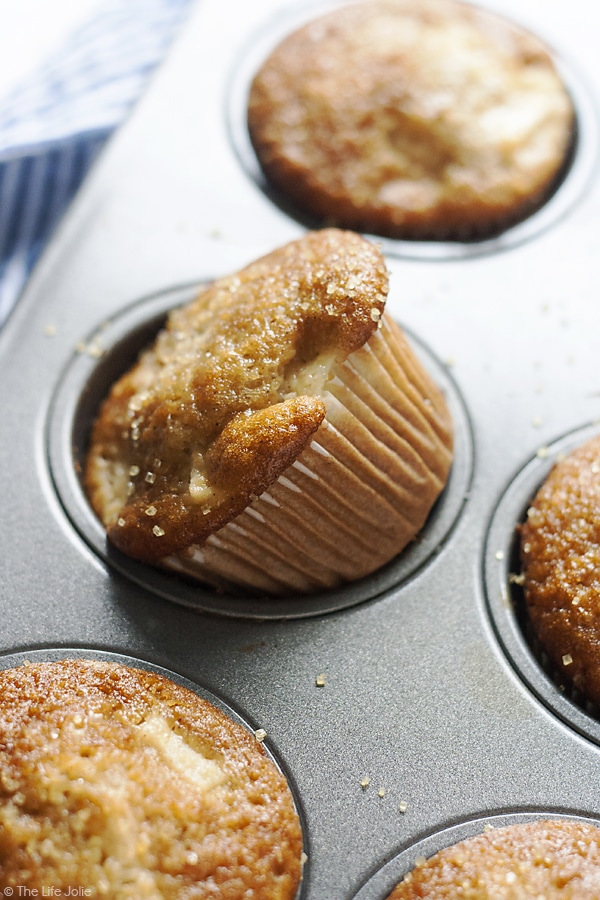
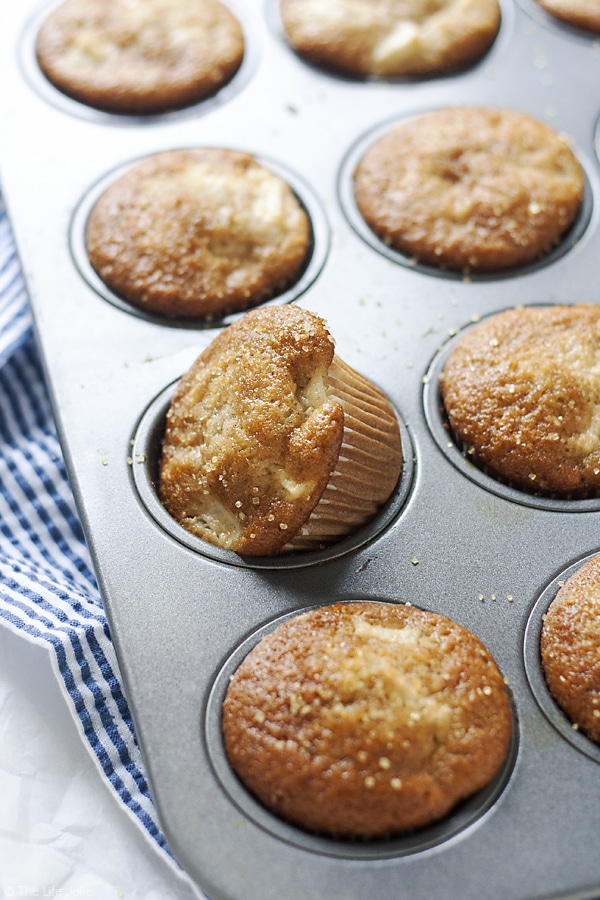
    Ahhhh, those were simpler times. I was younger then and really just beginning to get my feet wet when it came to cooking.

    I was bright-eyed and all-too-eager to put all of my  kitchen tools to work. One might say I was overly-ambitious. I prefer excited.

    This BLT Bruschetta recipe is the perfect dish-to-pass for a last minute get together, party or game day celebration. Tomatoes, bacon, parsley and green onions come together in a creamy mixture and are spread atop crispy slices of baguette. This delicious flavor combination makes wonderful little appetizers that you won't be able to stop eating!

    The morning of the party, I got to work. My kitchen smelled of delicious bacon, frying on the stove. I began the task of hollowing out the cherry tomatoes.

    In my fantasy of making the perfect BLT Bites, I imagined these teeny, tiny stuffed tomatoes. So without thinking about how objects in photos can sometimes appear to be different in size than how they look in real life, I purchased grape tomatoes instead of cherry tomatoes. Silly me.

    This BLT Bruschetta recipe is the perfect dish-to-pass for a last minute get together, party or game day celebration. Tomatoes, bacon, parsley and green onions come together in a creamy mixture and are spread atop crispy slices of baguette. This delicious flavor combination makes wonderful little appetizers that you won't be able to stop eating!

    As you can probably guess, I had an extremely difficult time trying to hollow out the tomatoes to the point that I knew it was not going to work.

    So I did what any stubbornly optimistic gal would do. I threw myself a pity party which lasted all of five minutes and then I MacGyvered the recipe into what I needed it to be.

    I had already made a decent mess out of the tomatoes when it occurred to me: why not chop them up and add them to the mixture. Everything tastes better on bread anyway. Because carbs.

    This BLT Bruschetta recipe is the perfect dish-to-pass for a last minute get together, party or game day celebration. Tomatoes, bacon, parsley and green onions come together in a creamy mixture and are spread atop crispy slices of baguette. This delicious flavor combination makes wonderful little appetizers that you won't be able to stop eating!

    So I picked myself up by my boot straps, ran out to Wegmans (ie- the other happiest place on earth) and grabbed some pre-sliced baguette.

    I toasted those puppies up, topped them with the BLT mixture and the rest was history. You can imagine how thrilled I was when everyone when crazy over them!

    This BLT Bruschetta recipe is the perfect dish-to-pass for a last minute get together, party or game day celebration. Tomatoes, bacon, parsley and green onions come together in a creamy mixture and are spread atop crispy slices of baguette. This delicious flavor combination makes wonderful little appetizers that you won't be able to stop eating!

    I've made these a handful of times since then, changing the recipe more and more until it was exactly what I wanted it to be.

    And now here we are. Savory bacon, sweet tomatoes, green onions and parsley for flavor. All mixed together in a creamy mixture of mayonnaise and sour cream and served atop crispy pieces of sliced baguette.

    These will not last long at any party, so make sure you eat a couple while you're preparing them. Ya know, just to make sure they're good (oh, they're good!)!

    This BLT Bruschetta recipe is the perfect dish-to-pass for a last minute get together, party or game day celebration. Tomatoes, bacon, parsley and green onions come together in a creamy mixture and are spread atop crispy slices of baguette. This delicious flavor combination makes wonderful little appetizers that you won't be able to stop eating!

    Other great appetizer options for parties and game day:

    Buffalo Chicken Braid

    Bacon Jalapeno Ranch Crescents

    Philly Cheese Steak Bombs

    Meat Lover's Pizza Bites

    Helpful tools:

    Sheet Pan

    This BLT Bruschetta recipe is the perfect dish-to-pass for a last minute get together, party or game day celebration. Tomatoes, bacon, parsley and green onions come together in a creamy mixture and are spread atop crispy slices of baguette. This delicious flavor combination makes wonderful little appetizers that you won't be able to stop eating!

    BLT Bruschetta

    Jessy Freimann
    This BLT Bruschetta recipe is the perfect dish-to-pass for a last minute get together, party or game day celebration. Tomatoes, bacon, parsley and green onions come together in a creamy mixture and are spread atop crispy slices of baguette. This delicious flavor combination makes wonderful little appetizers that you won't be able to stop eating!
    5 from 1 vote
    Print Recipe Pin Recipe
    Prep Time 10 minutes mins
    Cook Time 12 minutes mins
    Total Time 22 minutes mins
    Course Appetizer
    Cuisine Game day, party
    Servings 12 servings
    Calories 138 kcal

    Equipment

    • 1 Fry pan
    • 1 Tongs
    • 1 cutting board
    • 1 chefs knife
    • 1 Measuring cups and spoons

    Ingredients
      

    • 1 baguette sliced to about ½ an inch thick
    • 1 cup crumbled bacon
    • 2 cups tomatoes seeded and diced
    • ¼ cup scallions chopped
    • ¼ cup fresh parsley chopped
    • ⅓ cup sour cream
    • ¼ cup mayonnaise
    • ¼ teaspoon Kosher salt
    • ¼ teaspoon ground black pepper

    Instructions
     

    • Preheat oven to 350 degrees F and line a sheet pan with parchment.
    • Spread baguette slices on the pan in a single layer and bake uncovered for 10-12 minutes (don't go too long, you don't want them to be impossible to bite into). Cool completely.
    • While the baguette slices bake, mix bacon, tomatoes, scallions, parsley, sour cream, mayonnaise, salt and pepper until well combined.
    • Once the baguette slices have cooled, place scoops of the bacon mixture onto the pieces of baguette and serve immediately.

    Notes

    If serving later make everything ahead, but wait to top the baguette until just before serving.

    Nutrition

    Serving: 1servingCalories: 138kcalCarbohydrates: 12gProtein: 7gFat: 7gSaturated Fat: 3gPolyunsaturated Fat: 2gMonounsaturated Fat: 1gTrans Fat: 0.01gCholesterol: 19mgSodium: 494mgPotassium: 107mgFiber: 1gSugar: 2gVitamin A: 376IUVitamin C: 6mgCalcium: 35mgIron: 1mg
    Tried this recipe?Let us know how it was!

    You can find a full index of my recipes here.

    Don't forget to follow The Life Jolie on Pinterest for more recipe inspiration!
    Linked up at

    This BLT Bruschetta recipe is the perfect dish-to-pass for a last minute get together, party or game day celebration. Tomatoes, bacon, parsley and green onions come together in a creamy mixture and are spread atop crispy slices of baguette. This delicious flavor combination makes wonderful little appetizers that you won't be able to stop eating!

    Spanish Rice

    Aug 15, 2016 · 6 Comments

    This easy Spanish Rice recipe has been a mainstay in my family for as long as I can remember. It's a really quick recipe which makes it perfect to make on a weeknight and is great for back-to-school. Delicious tomato sauce combines so well with ground beef and rice- the whole family will love this homemade, healthy meal!

    This easy Spanish Rice recipe has been a mainstay in my family for as long as I can remember. It's a really quick recipe which makes it perfect to make on a weeknight and is great for back-to-school. Delicious tomato sauce combines so well with ground beef and rice- the whole family will love this homemade, healthy meal!

    This post contains Affiliate Links. Please see the disclaimer here.

    This easy Spanish Rice recipe has been a mainstay in my family for as long as I can remember. It's a really quick recipe which makes it perfect to make on a weeknight and is great for back-to-school. Delicious tomato sauce combines so well with ground beef and rice- the whole family will love this homemade, healthy meal!

    One thing I love about my family's Marinara Sauce is that here are plenty of variations for using it. While I will always have an extreme love in my heart for pasta, sometimes, pasta isn't the answer (Gasp!!). I know. I just said the unthinkable. But it's true. Marinara Sauce happens to be a delicious options for other vehicles of ingestion. One such vehicle is Spanish Rice.

    This easy Spanish Rice recipe has been a mainstay in my family for as long as I can remember. It's a really quick recipe which makes it perfect to make on a weeknight and is great for back-to-school. Delicious tomato sauce combines so well with ground beef and rice- the whole family will love this homemade, healthy meal!

    The term Spanish Rice can sometimes be a source of confusion. This is because it means different things to different people. In my family this means a simple but delicious meal of marinara sauce, rice and ground beef. It's not one of those meals you break your back making. It's pretty fast to make. It's super satisfying. It's full of delicious flavor and it's relatively healthy. The recipe is actually more of an Italian Spanish rice. Random, I know. Either way, it's the perfect weeknight meal with a green salad (and if you're feeling fancy, a glass of red wine!).

    This easy Spanish Rice recipe has been a mainstay in my family for as long as I can remember. It's a really quick recipe which makes it perfect to make on a weeknight and is great for back-to-school. Delicious tomato sauce combines so well with ground beef and rice- the whole family will love this homemade, healthy meal!

    With back-to-school time looming in a all-to-near future (or starting now in certain states) I couldn't think of a better time to share this family recipe. Because although I don't have any school age kids, my girls are both in daycare and J and I both work full time. So it sure does feel like back to school time in our busy home.

    This easy Spanish Rice recipe has been a mainstay in my family for as long as I can remember. It's a really quick recipe which makes it perfect to make on a weeknight and is great for back-to-school. Delicious tomato sauce combines so well with ground beef and rice- the whole family will love this homemade, healthy meal!

    Isn't Adulting such a time suck?? I mean, I love the sense of pride we feel supporting ourselves and paying our bills. But it can be so hard getting and quality time with our girls between trying to get a healthy dinner on the table, cleaning up from dinner, bathing the girls and going about our bedtime routine. Something's gotta give, but we shouldn't have to sacrifice great food.

    This easy Spanish Rice recipe has been a mainstay in my family for as long as I can remember. It's a really quick recipe which makes it perfect to make on a weeknight and is great for back-to-school. Delicious tomato sauce combines so well with ground beef and rice- the whole family will love this homemade, healthy meal!

    In the beginning, I wondered how these superwoman Moms did it. Especially as kids get older and you add activities and real school into the mix. But I'm beginning to learn that it's these super-simple, potentially life-saving recipes that not only taste amazing but are so easy to put together in a pinch. Bottom Line: Make this for your family. It will be an instant hit, the leftover reheat perfectly and it freezes really well!

    Some of my other favorite weeknight recipes include:

    Skillet Lasagna

    Stuffed Peppers Rice Skillet

    Pasta Pomodoro

    This easy Spanish Rice recipe has been a mainstay in my family for as long as I can remember. It's a really quick recipe which makes it perfect to make on a weeknight and is great for back-to-school. Delicious tomato sauce combines so well with ground beef and rice- the whole family will love this homemade, healthy meal!

    Spanish Rice

    Jessy Freimann
    This easy Spanish Rice recipe has been a mainstay in my family for as long as I can remember. It's a really quick recipe which makes it perfect to make on a weeknight and is great for back-to-school. Delicious tomato sauce combines so well with ground beef and rice- the whole family will love this homemade, healthy meal!
    No ratings yet
    Print Recipe Pin Recipe
    Prep Time 5 minutes mins
    Cook Time 20 minutes mins
    Total Time 20 minutes mins
    Course Main dish, quick
    Cuisine Italian
    Servings 6 servings
    Calories 280 kcal

    Equipment

    • 1 Skillet
    • 1 saucepan
    • 1 wooden spoon
    • 1 Measuring cups and spoons

    Ingredients
      

    • 1 pound ground beef 80/20
    • 2-3 cups marinara sauce minus the basil
    • 2 cups cooked rice
    • Romano cheese for sprinkling
    • Crushed red pepper for sprinkling if you're feeling spicy!

    Instructions
     

    • In a skillet, cook the beef over medium heat until fully browned. Drain well.
    • Mix the marinara sauce in with the beef and simmer for 10 minutes.
    • Mix rice into the sauce and beef mixture. You want it to have a nice, wet texture without being soupy.
    • Sprinkle with Romano cheese and crushed red pepper and enjoy!

    Notes

    Some people feel that the rice sucks up all of the sauce. If this is a concern for you, you can always serve the rice on the side and add it to the sauce and beef mixture when serving.
    This reheats and freezes very well.

    Nutrition

    Serving: 1servingCalories: 280kcalCarbohydrates: 19gProtein: 15gFat: 16gSaturated Fat: 6gPolyunsaturated Fat: 1gMonounsaturated Fat: 7gTrans Fat: 1gCholesterol: 54mgSodium: 438mgPotassium: 465mgFiber: 1gSugar: 3gVitamin A: 354IUVitamin C: 6mgCalcium: 30mgIron: 2mg
    Tried this recipe?Let us know how it was!

    You can find a full index of my recipes here.

    Don't forget to follow The Life Jolie on Pinterest for more recipe inspiration

    Linked up at

    This easy Spanish Rice recipe has been a mainstay in my family for as long as I can remember. It's a really quick recipe which makes it perfect to make on a weeknight and is great for back-to-school. Delicious tomato sauce combines so well with ground beef and rice- the whole family will love this homemade, healthy meal!

    Greek Couscous Salad

    Jul 25, 2016 · 6 Comments

    This Greek Couscous Salad recipe is a light and healthy side dish for lunch or dinner. It's quick and easy to make and is full of delicious flavors of Feta cheese, vegetables, olives and fresh herbs. Click on the photo to get the recipe!

    This post contains Affiliate Links. Please see the disclaimer here.

    This Greek Couscous Salad recipe is a light and healthy side dish for lunch or dinner. It's quick and easy to make and is full of delicious flavors of Feta cheese, vegetables, olives and fresh herbs.

    This Greek Couscous Salad recipe is a light and healthy side dish for lunch or dinner. It's quick and easy to make and is full of delicious flavors of Feta cheese, vegetables, olives and fresh herbs. Click on the photo to get the recipe!

    Earlier this summer, we were having a dinner at my parents house. I can't remember what the occasion was but we had all brought a dish to pass and were having a great meal with my parents and in laws. I had made this fantastic Tomato Salad but had made the mistake of adding two jalapenos instead of one, resulting in an extremely spicy salad.

    So we were all eating it and as everyone began to taste the tomato salad, you could see us all looking around the table with the same mouth-on-fire look on our faces. Everyone was clearly trying to keep it cool (see what I did there?) but it was painfully obvious that I had rendered the salad spicy to the point that it was very difficult to eat.

    Luckily, my mother in-law had made a Greek-style pasta salad that she had originally gotten from Bon Appetit that was not only delicious, but also helped cool our mouth while still bursting with fresh summer flavors.

    This Greek Couscous Salad recipe is a light and healthy side dish for lunch or dinner. It's quick and easy to make and is full of delicious flavors of Feta cheese, vegetables, olives and fresh herbs. Click on the photo to get the recipe!

    When she was making the salad in my kitchen before we headed over to my parents house, she had assembled the ingredients in a bowl and poured hot pasta. I was initially skeptical of this process because anytime I've make a pasta salad in the past, I've always cooled the pasta before mixing it with the other ingredients, sine these type of salad are often served cold.

    Vicky assured me that adding the hot pasta was a very good move because it caused the cheese to melt a bit and helped the flavors meld together and once I got a taste of this salad I realized just how right she was and I was also thrilled to enjoy such a delicious salad in the wake of my Tomato Salad snafu (which is normally so delicious when there isn't all that extra heat!).

    This Greek Couscous Salad recipe is a light and healthy side dish for lunch or dinner. It's quick and easy to make and is full of delicious flavors of Feta cheese, vegetables, olives and fresh herbs. Click on the photo to get the recipe!

    There are two big takeaways here. The first is never doubt a mom when you already know she's a good cook. Not only did her pasta salad save the day for these tomato-loving Western New Yorker's but it added a new perspective on pasta salad and a seriously delicious side dish for that dinner.

    The second take away is this fantastic Greek Couscous Salad recipe. I was really inspired by the delicious flavors in this pasta salad that I just had to create my own. I wanted to be a bit healthier so I used Wegman's Golden Jewel blend which includes Israeli Couscous, Tri-colored Orzo, split baby Garbanzo Beans and Red Quinoa.  If you cannot find this, regular Israeli Couscous or a similar blend works just fine. FYI, it's an 8 oz. package.

    The flavors come together so beautifully between the salty Feta cheese, the briny olive and the veggies and herbs. This lasts for the week in the fridge, making it an excellent option to make on Sunday and take to work with lunch each day. It's also also an excellent dish to pass.

    This Greek Couscous Salad recipe is a light and healthy side dish for lunch or dinner. It's quick and easy to make and is full of delicious flavors of Feta cheese, vegetables, olives and fresh herbs. Click on the photo to get the recipe!

    Helpful tools:

    Mini-prep processor

    Other great summer side dish options:

    Mexican Bean Salad

    Tomato Salad

    Green Bean Salad

    German Potato Salad

    Greek Couscous Salad

    Jessy Freimann
    This Greek Couscous Salad recipe is a light and healthy side dish for lunch or dinner. It's quick and easy to make and is full of delicious flavors of Feta cheese, vegetables, olives and fresh herbs.
    No ratings yet
    Print Recipe Pin Recipe
    Prep Time 10 minutes mins
    Cook Time 10 minutes mins
    Total Time 20 minutes mins
    Course Side Dish
    Cuisine Greek
    Servings 6
    Calories 32 kcal

    Ingredients
      

    • 1 ¼ cups cucumber diced
    • ½ cup Kalamata olives rough chopped
    • ⅓ cup fresh parsley chopped
    • ⅓ cup fresh dill chopped
    • ½ cup scallions chopped (dark and light green only)
    • 1 ½ cups grape tomatoes quartered
    • 1 cup crumbled feta cheese
    • ½ teaspoon kosher salt
    • ¼ teaspoon ground black pepper
    • 1-2 Tablespoon emon juice
    • 3 cups cooked couscous mix of choice

    Instructions
     

    • Cook the couscous according to the package directions.
    • Mix together all of the ingredients except for the couscous.
    • Top the ingredients with the hot couscous and mix well. Serve immediately or refrigerate until serving.

    Notes

    This will last up to 4 days covered in the refrigerator and can be served warm or cold.

    Nutrition

    Serving: 1.33cCalories: 32kcalCarbohydrates: 4gProtein: 1gFat: 2gSaturated Fat: 1gPolyunsaturated Fat: 1gMonounsaturated Fat: 1gSodium: 377mgPotassium: 195mgFiber: 1gSugar: 2gVitamin A: 940IUVitamin C: 15mgCalcium: 30mgIron: 1mg
    Tried this recipe?Let us know how it was!

    You can find a full index of my recipes here.

    Don't forget to follow The Life Jolie on Pinterest for more recipe inspiration!

    Linked up at

    This Greek Couscous Salad recipe is a light and healthy side dish for lunch or dinner. It's quick and easy to make and is full of delicious flavors of Feta cheese, vegetables, olives and fresh herbs. Click on the photo to get the recipe!

    Summer Berry Dessert Crostini

    Jul 8, 2016 · 4 Comments

    This Summer Berry Dessert Crostini recipe is a light and delicious summer dessert. You can also call it dessert bruschetta. It uses ripe summer berries, mascarpone cheese sweetened with honey and grilled baguette. This easy dessert is super quick to make and a real crowd pleaser!

    This post contains Affiliate Links. Please see the disclaimer here.

    This Summer Berry Dessert Crostini recipe is a light and delicious summer dessert. You can also call it dessert bruschetta. It uses ripe summer berries, mascarpone cheese sweetened with honey and grilled baguette. This easy dessert is super quick to make and a real crowd pleaser!

    This Summer Berry Dessert Crostini recipe is a light and delicious summer dessert. You can also call it dessert bruschetta. It uses ripe summer berries, mascarpone cheese sweetened with honey and grilled baguette. This easy dessert is super quick to make and a real crowd pleaser!

    I dreamed up this recipe one Friday morning while I was sitting at my desk at work waiting to get out early. Obviously I was hungry (aren't I always??). It was the first week or two that the homegrown Strawberries were showing up in our stores and at the public market and I was thinking about how I wanted to enjoy them. I thought a twist on Bruschetta or a Crostini might be fun so I dove right in and just went for it.

    This Summer Berry Dessert Crostini recipe is a light and delicious summer dessert. You can also call it dessert bruschetta. It uses ripe summer berries, mascarpone cheese sweetened with honey and grilled baguette. This easy dessert is super quick to make and a real crowd pleaser!

    Let me first say that I could pretty much eat that mascarpone cheese with a spoon. The honey adds a subtle sweetness without being overbearing and that creaminess creates a decadence that takes this dessert over the top.

    This Summer Berry Dessert Crostini recipe is a light and delicious summer dessert. You can also call it dessert bruschetta. It uses ripe summer berries, mascarpone cheese sweetened with honey and grilled baguette. This easy dessert is super quick to make and a real crowd pleaser!

    I went with a multigrain baguette to add a deliciously nutty flavor and texture. I used a pastry brush to brush the slices with olive oil and lightly grilled them. They ended up with a crisp exterior while still maintaining the chewy center that we all love from baguette.

    This Summer Berry Dessert Crostini recipe is a light and delicious summer dessert. You can also call it dessert bruschetta. It uses ripe summer berries, mascarpone cheese sweetened with honey and grilled baguette. This easy dessert is super quick to make and a real crowd pleaser!

    Initially, I tested the berries on the stove but they broke down too much and became more of a chunky sauce. It was a delicious sauce, but it wasn't want I envisioned for this recipe. So my next move was to sprinkle some sugar onto the raw berries and let the mascarate for an hour or two. The berries broke down just enough to make them a bit juicier while still maintaining the right texture.

    This Summer Berry Dessert Crostini recipe is a light and delicious summer dessert. You can also call it dessert bruschetta. It uses ripe summer berries, mascarpone cheese sweetened with honey and grilled baguette. This easy dessert is super quick to make and a real crowd pleaser!

    This is the perfect light dessert to follow a relaxing dinner outside on a warm night. Pair this with a crisp Riesling and you have yourself one hell of a dessert that will surely impress even the pickiest of guests (and my two year old also loved it!)!

    This Summer Berry Dessert Crostini recipe is a light and delicious summer dessert. You can also call it dessert bruschetta. It uses ripe summer berries, mascarpone cheese sweetened with honey and grilled baguette. This easy dessert is super quick to make and a real crowd pleaser!

    This Summer Berry Dessert Crostini recipe is a light and delicious summer dessert. You can also call it dessert bruschetta. It uses ripe summer berries, mascarpone cheese sweetened with honey and grilled baguette. This easy dessert is super quick to make and a real crowd pleaser!

    Summer Berry Dessert Crostini

    Jessy Freimann
    This Summer Berry Dessert Crostini recipe is a light and delicious summer dessert. You can also call it dessery bruschetta. It uses ripe summer berries, mascarpone cheese sweetened with honey and grilled baguette. This easy dessert is super quick to make and a real crowd pleaser!
    No ratings yet
    Print Recipe Pin Recipe
    Prep Time 1 hour hr
    Cook Time 10 minutes mins
    Total Time 1 hour hr 10 minutes mins
    Course Dessert
    Cuisine Italian
    Servings 8 servings
    Calories 281 kcal

    Equipment

    • 1 sheet pan
    • 1 cutting board
    • 1 chefs knife
    • 1 mixing bowl
    • 1 Measuring cups and spoons

    Ingredients
      

    • 2 cups berries of your choice cleansed and sliced (if needed)
    • 1 Tablespoons granulated sugar
    • 1 loaf multigrain baguette sliced
    • 2 Tablespoons olive oil
    • 8 ounces Mascarpone cheese
    • 2 Tablespoons honey

    Instructions
     

    • Sprinkle berries with sugar and allow to mascerate for at least an hour.
    • Preheat grill to medium high.
    • While grill is heating, mix honey with Mascarpone cheese until smooth and well combined. Set aside.
    • Brush baguette slices with olive oil and grill until they get some nice brown grill marks, about a few minutes of each side.
    • Spread cheese mixture onto each slice of baguette and then top with berries. Serve immediately.

    Notes

    You can prep everything ahead and then grill and assemble just before serving.

    Nutrition

    Serving: 1servingCalories: 281kcalCarbohydrates: 26gProtein: 5gFat: 17gSaturated Fat: 9gPolyunsaturated Fat: 1gMonounsaturated Fat: 3gCholesterol: 28mgSodium: 209mgPotassium: 62mgFiber: 2gSugar: 11gVitamin A: 415IUVitamin C: 1mgCalcium: 76mgIron: 1mg
    Tried this recipe?Let us know how it was!

    Some of my other favorite summer desserts are:

    This Blueberry Buckle whips up super quick and easy. This moist cake is bursting with sweet, juicy blueberries with the most incredible streusel topping. It's the quintessential summer dessert and a true crowd-pleaser! Click on the photo to get the recipe!
    Blueberry Buckle

    This peach cobbler is everything that summer is about- It's quick and easy to make, the peaches are bursting with flavor and the dough is light as a feather! Click on the photo to read more...
    Peach Cobbler

    This Peppermint Ice Cream Pie recipe is super easy to make. It features a delicious Oreo crust, your favorite mint chocolate chip ice cream and whipped cream. The work for you is minimal and the response is always fantastic!
    Peppermint Ice Cream Pie


    You can find a full index of my recipes here.

    Don't forget to follow The Life Jolie on Pinterest for more recipe inspiration!

    Linked up at

    This Summer Berry Dessert Crostini recipe is a light and delicious summer dessert. You can also call it dessert bruschetta. It uses ripe summer berries, mascarpone cheese sweetened with honey and grilled baguette. This easy dessert is super quick to make and a real crowd pleaser!

    BBQ Pulled Pork Tacos

    Jun 30, 2016 · 4 Comments

    This BBQ Pulled Pork Tacos recipe is a fun twist on traditional mexican tacos. The pulled pork is super easy to make in the crockpot or a great way to use pulled pork leftovers. I make this with slaw and a bunch of other tasty ingredients. Click on the photo to get the recipe!

    This BBQ Pulled Pork Tacos recipe is a fun twist on traditional Mexican tacos. The pulled pork is super easy to make in the crockpot or a great way to use pulled pork leftovers. I make this with slaw and a bunch of other tasty ingredients.

    This post contains Affiliate Links. Please see the disclaimer here.

    Pulled Pork Tacos, you guys. Ugh, I love this concept so much, I can’t even handle it. Think about it. It's as if two of my favorite things, Pulled Pork and Tacos, got married and had a gorgeous little baby with all the fixings. And here she is in all of her BBQ glory!

    This BBQ Pulled Pork Tacos recipe is a fun twist on traditional Mexican tacos. The pulled pork is super easy to make in the crockpot or a great way to use pulled pork leftovers. I make this with slaw and a bunch of other tasty ingredients. Click on the photo to get the recipe!

    If you’re anything like me, you enjoy pulled pork but you like it even more with a variety of toppings. I’m the worst, I can never leave things well enough alone. I sometimes just have to mess with it in hopes of making it even more delicious. Most of the time it works out and this time was no exception.

    This BBQ Pulled Pork Tacos recipe is a fun twist on traditional mexican tacos. The pulled pork is super easy to make in the crockpot or a great way to use pulled pork leftovers. I make this with slaw and a bunch of other tasty ingredients. Click on the photo to get the recipe!

    This recipe was inspired by a BBQ taco that was on a menu at a local restaurant. That version was made with brisket and didn’t go too far into specifics about toppings. The minute I saw the words “BBQ Taco” I was instantly inspired, I knew I had to create a version of this.

    This BBQ Pulled Pork Tacos recipe is a fun twist on traditional mexican tacos. The pulled pork is super easy to make in the crockpot or a great way to use pulled pork leftovers. I make this with slaw and a bunch of other tasty ingredients. Click on the photo to get the recipe!

    I love that you can totally get creative with the toppings. I personally went with shredded cheddar, black beans, coleslaw and some chives to make it pretty. I opted for flour tortillas because that's how I roll, but I bet these would be great with corn tortillas if that's how you roll.

    This BBQ Pulled Pork Tacos recipe is a fun twist on traditional mexican tacos. The pulled pork is super easy to make in the crockpot or a great way to use pulled pork leftovers. I make this with slaw and a bunch of other tasty ingredients. Click on the photo to get the recipe!

    I think it would be totally fun to mix up the toppings. Jalapenos? Yes. Pickled Red onions? Hell yes. Pepperjack cheese? Hello lover! Have fun with it and make these guys whatever you want them to be. I'm thinking these would be perfect for a party- who doesn't love a taco bar, especially with this fun twist!

    Here are some of the other slow cooker recipes that I love:

    This Slow Cooker Pulled Pork recipe is so simple and easy. And it results in the most delicious, tender pulled pork you'll ever taste! Check it out out to get the recipe and 5 expert tips for pulling the best Pulled Pork! Click on the photo to read more!
    Slow Cooker Pulled Pork

    The Easiest Slow Cooker
    The Easiest Slow Cooker Taco Meat Ever!

    This Super-Easy Slow Cooker Shredded Chicken is a very simple recipe. It's a kitchen hack showing you how to make really easy-to-shred chicken using your crock pot. It freezes really well and tastes great in many recipes!
    Super-Easy Slow Cooker Shredded Chicken

    This BBQ Pulled Pork Tacos recipe is a fun twist on traditional mexican tacos. The pulled pork is super easy to make in the crockpot or a great way to use pulled pork leftovers. I make this with slaw and a bunch of other tasty ingredients. Click on the photo to get the recipe!

    BBQ Pulled Pork Tacos

    Jessy Freimann
    This BBQ Pulled Pork Tacos recipe is a fun twist on traditional mexican tacos. The pulled pork is super easy to make in the crockpot or a great way to use pulled pork leftovers. I make this with slaw and a bunch of other tasty ingredients.
    No ratings yet
    Print Recipe Pin Recipe
    Prep Time 10 minutes mins
    Cook Time 8 hours hrs
    Total Time 8 hours hrs 10 minutes mins
    Course Main
    Cuisine American
    Servings 8
    Calories 340 kcal

    Ingredients
      

    • 8 flour tortillas
    • 4 cups Pulled pork
    • ½ cup your favorite BBQ sauce
    • ½ cup cheddar cheese shredded
    • 1 14 ounce can black beans rinsed and drained
    • 1 cup pre made coleslaw
    • Chopped chives to garnish

    Instructions
     

    • Divide pulled pork between 8 tortillas.
    • Drizzle with BBQ sauce and sprinkle with shredded cheddar.
    • Top with black beans and coleslaw and sprinkle with chives. Serve immediately.

    Notes

    These are best served right away. they will last up to 3 days covered in the refrigerator- for best results store ingredients separately and heat and assemble when ready to consume.

    Nutrition

    Serving: 2tacosCalories: 340kcalCarbohydrates: 36gProtein: 19gFat: 13gSaturated Fat: 5gPolyunsaturated Fat: 1gMonounsaturated Fat: 1gCholesterol: 58mgSodium: 972mgPotassium: 43mgFiber: 1gSugar: 18gVitamin A: 248IUVitamin C: 2mgCalcium: 153mgIron: 2mg
    Tried this recipe?Let us know how it was!

    You can find a full index of my recipes here.

    Don't forget to follow The Life Jolie on Pinterest for more recipe inspiration!

    Linked up at

    Strawberry Goat Cheese Tart

    Jun 20, 2016 · 2 Comments

    The Strawberry Goat Cheese Tart recipe is great for a brunch or a low-key get-together. It’s quick and easy to make using frozen puff pastry and tastes delicious! Click on the photo to get the recipe!

    This post contains Affiliate Links. Please see the disclaimer here.

    When the weather is nice, I beg and bargain and torment my poor husband until he finally agrees to go with me and the girls to our local public market. Rochester has one of the best open-air public markets I've come across. There is plenty of gorgeous fresh produce at low prices along with a variety of delicious made-to-order food and beverage items (the cheese shop, you guys. The cheese shop!!). This is a place where I find SO much inspiration for my recipes. It's my happy place.

    The Strawberry Goat Cheese Tart recipe is great for a brunch or a low-key get-together. It’s quick and easy to make using frozen puff pastry and tastes delicious! Click on the photo to get the recipe!

    Right now at the market, the strawberries are beginning to really look gorgeous. I happen to love strawberries, I mean, who doesn't? I love them so much that I really try to get as many as I can in the summer when they're at their peak. Sometimes I get a little too excited and buy more strawberries than we can eat that week. So I'm always trying to think of new and interesting ways to enjoy strawberries. And that's where this Strawberry Goat Cheese Tart comes in.

    The Strawberry Goat Cheese Tart recipe is great for a brunch or a low-key get-together. It’s quick and easy to make using frozen puff pastry and tastes delicious! Click on the photo to get the recipe!

    Now while strawberries seen to be universally loved, goat cheese is a another story. When it comes to goat cheese, there are two types of people. The ones who ride the goat cheese train and the ones who cannot stand it. It's very polarizing. I personally enjoy it, but in small portions. My mom and my sis? Not so much. I suppose I could have used a different cheese for this tart, but I think the earthy flavor of the Goat Cheese plays really nicely with the strawberries. Still, I urge you to use a light hand on the cheese when making this tart as the cheese can get overpowering if you add too much (which I found out in my first test run of this recipe).

    The Strawberry Goat Cheese Tart recipe is great for a brunch or a low-key get-together. It’s quick and easy to make using frozen puff pastry and tastes delicious! Click on the photo to get the recipe!

    One thing I love about this recipe is it's super quick to make and perfect to throw together for a family brunch or a relaxed get-together. Puff pastry takes the extra hassle out of making a crust. The cheese melts perfectly in harmony with the strawberries and a drizzle of balsamic vinegar and some ribbons of basil add that extra "something" to take this tart over-the-top.

    The Strawberry Goat Cheese Tart recipe is great for a brunch or a low-key get-together. It’s quick and easy to make using frozen puff pastry and tastes delicious! Click on the photo to get the recipe!

    I encourage you to use a higher quality balsamic vinegar for drizzling. In general, high quality ingredients are always a better option, but especially in this case a nice, thick balsamic is the proverbial icing on the cake.The most helpful tools for this recipe are a pastry brush and parchment paper. Throw this tart together and enjoy it with a nice glass of crisp white wine on a beautiful summer evening!

    Some other recipes I have featuring puff pastry are as follows:

    This Asparagus and Leek tart has the most amazing flavor combination from the addition of Gruyere cheese and fresh herbs. It is quick and easy to put together and the results are delicious!
    Asparagus and Leek Tart

    Puff Pastry Breakfast Pizza
    Puff Pastry Breakfast Pizza

    The Strawberry Goat Cheese Tart recipe is great for a brunch or a low-key get-together. It’s quick and easy to make using frozen puff pastry and tastes delicious! Click on the photo to get the recipe!

    Strawberry Goat Cheese Tart

    Jessy Freimann
    The Strawberry Goat Cheese Tart recipe is great for a brunch or a low-key get-together. It’s quick and easy to make using frozen puff pastry and tastes delicious!
    No ratings yet
    Print Recipe Pin Recipe
    Prep Time 10 minutes mins
    Cook Time 20 minutes mins
    Total Time 30 minutes mins
    Course Appetizer
    Cuisine American
    Servings 6
    Calories 61 kcal

    Ingredients
      

    • 1 sheet of frozen puff pastry dough thawed
    • Flour and water for your surface
    • 4-6 ounces goat cheese crumbled
    • 8-10 large strawberries sliced
    • Balsamic vinegar for drizzling
    • 2-3 fresh basil leaves sliced thin in a chiffonade for garnish

    Instructions
     

    • Preheat oven to 425 degrees.
    • On a lightly floured surface, roll out puff pastry dough so that it’s slightly thinner and there are no cracks (you can fix any cracks with a bit of water). Use a pastry brush to brush water onto the edges and fold the edges over slightly to create a crust. Prick the inside of your dough with a fork.
    • Bake for about 8-10 minutes. Your dough should look puffy and golden brown. Use your fork to gently prick the inside dough a couple of times and press the middle down to deflate it a bit so that the outside crust sits a bit higher.
    • Add your cheese in a even layer all over the middle of the dough and then lay the sliced strawberries on top in pretty rows.
    • Return the tart to the oven and bake for 5-7 more minutes.
    • Drizzle lightly with balsamic vinegar and sprinkle with basil. Serve immediately for best results (this can be refrigerated until later if need be).

    Notes

    This is best served right away but can be refrigerated and eaten for up to 3 days.

    Nutrition

    Serving: 1sliceCalories: 61kcalCarbohydrates: 3gProtein: 4gFat: 4gSaturated Fat: 3gPolyunsaturated Fat: 1gMonounsaturated Fat: 1gCholesterol: 9mgSodium: 70mgPotassium: 60mgFiber: 1gSugar: 2gVitamin A: 207IUVitamin C: 21mgCalcium: 32mgIron: 1mg
    Tried this recipe?Let us know how it was!

    You can find a full index of my recipes here.

    Don't forget to follow The Life Jolie on Pinterest for more recipe inspiration!

    Linked up at

    Shrimp with Pesto and Prosciutto

    Jun 13, 2016 · 6 Comments

    This Shrimp with Pesto and Prosciutto recipe is seriously easy and tastes delicious. It's super quick to make (10-15 minutes tops!!) and uses only 3 ingredients making it the perfect starter for a dinner party or a girls night! Click on the photo to get the recipe!

    Gah, this appetizer!! I seriously cannot even handle it, I love it so! These Shrimp with Pesto and Prosciutto are such a delicious and elegant appetizer option for a dinner party or a relaxing night on your deck enjoying a glass of wine and some pickers with your closest friends. Because now that the weather is nice, I know you're looking for an excuse to pop that bottle and enjoy every ounce of warmth before it's gone (or maybe that's just me!).

    This Shrimp with Pesto and Prosciutto recipe is seriously easy and tastes delicious. It's super quick to make (10-15 minutes tops!!) and uses only 3 ingredients making it the perfect starter for a dinner party or a girls night! Click on the photo to get the recipe!

    I have a confession to make. Many, many moons ago, I was working as a server at the local Yacht Club. It was the wedding of the club's Commodore and his wife and it was all hands on deck (see what I did there?). During the cocktail hour they had the usual passed hors d'oeuvres. Bacon wrapped scallops, canapes. All the usual suspects that you'd expect to enjoy with you booze at this type of event. There were also the most amazing jumbo shrimp covered in pesto and wrapped in prosciutto.

    This Shrimp with Pesto and Prosciutto recipe is seriously easy and tastes delicious. It's super quick to make (10-15 minutes tops!!) and uses only 3 ingredients making it the perfect starter for a dinner party or a girls night! Click on the photo to get the recipe!

    Being the burgeoning foodie that I was, I simply had to try one. So a friend and I grabbed a couple of them and snuck off to the ladies locker room where we knew our male boss wouldn't be able to catch us. That first bite was a revelation! It was rich, savory and decadent and I couldn't get enough! So naturally we snuck an entire tray back there and had at it (hungry teenagers- we were the worst!).

    This Shrimp with Pesto and Prosciutto recipe is seriously easy and tastes delicious. It's super quick to make (10-15 minutes tops!!) and uses only 3 ingredients making it the perfect starter for a dinner party or a girls night! Click on the photo to get the recipe!

    Now here I am, many years later. I have to be honest, I still don't regret sneaking those shrimp. In fact, my biggest regret about this whole thing is not replicating the recipe sooner. But I finally bit the bullet and grabbed a bag of shrimp. I would have loved to use jumbo shrimp, but with my limited budget those gorgeous large argentine shrimp that they have at Trader Joes worked just fine.

    This Shrimp with Pesto and Prosciutto recipe is seriously easy and tastes delicious. It's super quick to make (10-15 minutes tops!!) and uses only 3 ingredients making it the perfect starter for a dinner party or a girls night! Click on the photo to get the recipe!

    This recipe couldn't be easier and takes around 10-15 minutes tops. It's perfect to whip up for that upcomin girls night and makes an impressivbe dinner party starter. And you can always double or triple the recipe for a crowd. I kept it super simple by using jarred Pesto sauce but I bet this would be even better if you made it with homemade pesto, like my Garlic Scape Pesto. Either way get these little guys into your oven- you will not regret it!

    This Shrimp with Pesto and Prosciutto recipe is seriously easy and tastes delicious. It's super quick to make (10-15 minutes tops!!) and uses only 3 ingredients making it the perfect starter for a dinner party or a girls night! Click on the photo to get the recipe!

    This Shrimp with Pesto and Prosciutto recipe is seriously easy and tastes delicious. It's super quick to make (10-15 minutes tops!!) and uses only 3 ingredients making it the perfect starter for a dinner party or a girls night! Click on the photo to get the recipe!

    Shrimp with Pesto and Prosciutto

    Jessy Freimann
    Shrimp with Pesto and Prosciutto are such a tasty appetizer- the perfect flavor combo and they cook up just right to give your event an extra special feel.
    No ratings yet
    Print Recipe Pin Recipe
    Prep Time 5 minutes mins
    Cook Time 5 minutes mins
    Total Time 10 minutes mins
    Course Appetizer
    Cuisine American
    Servings 15 pieces
    Calories 83 kcal

    Equipment

    • 1 sheet pan
    • 1 chefs knife
    • 1 cutting board
    • 1 Measuring cups and spoons

    Ingredients
      

    • 15 jumbo raw shrimp thawed if necessary, peeled and deveined (you can leave the tails if you want to)
    • ⅔ cups pesto
    • 15 thin slices of prosciutto

    Instructions
     

    • Preheat broiler to high and move the oven rack to about 6 inches from the top of the oven. Line a sheet pan with foil.
    • Toss the shrimp in the pesto until well coated.
    • Wrap each piece of shrimp in a slice pf prosciutto and skewer it with a toothpick to secure.
    • Place each shrimp in a single layer on a sheet pan and for around 5 minutes, flipping once midway through (keep an eye on them based on your oven's hot spots). Serve immediately.

    Notes

    These will last up to 3 days in the refrigerator.

    Nutrition

    Serving: 3piecesCalories: 83kcalCarbohydrates: 1gProtein: 3gFat: 7gSaturated Fat: 2gPolyunsaturated Fat: 1gMonounsaturated Fat: 1gTrans Fat: 0.01gCholesterol: 19mgSodium: 213mgPotassium: 27mgFiber: 0.2gSugar: 0.4gVitamin A: 243IUCalcium: 24mgIron: 0.1mg
    Tried this recipe?Let us know how it was!

    Make it a meal!

    A few great recipes to round out and complete this meal are:

    • Easiest Ever Hot Artichoke Dip
    • Smothered Pork Tenderloin in Apple Cider Gravy
    • Cheesy Garlic Knot
    • Beet Salad Recipe with Feta and Dill
    • Sour Cream Cookies
    • No Bake Peanut Butter Pie
    • Caprese Quiche

    You can find a full index of my recipes here.

    Don't forget to follow The Life Jolie on Pinterest for more recipe inspiration!

    Linked up at

    Blueberry Buckle

    Jun 3, 2016 · 6 Comments

    A square shot of Blueberry Buckle.

    Blueberry Buckle whips up super quick and easy. This moist cake is bursting with sweet, juicy blueberries with the most incredible streusel topping. It's the quintessential summer dessert and a true crowd-pleaser! 

    A delicious piece of Blueberry Buckle.This post contains Affiliate Links. For more information please see the disclaimer here.
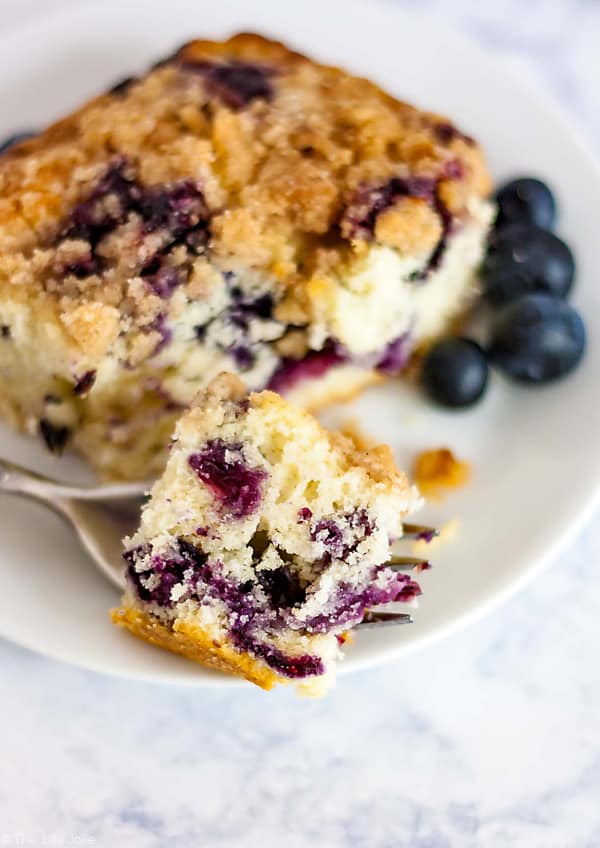
    I love blueberries. Seriously. They're so healthy and incredibly delicious. When I was a kid, I would eat them like they were going out of style. Some things never change, this is still the case.

    A plate of Blueberry Buckle with a bite of it on a fork.

    While I'm normally quite frugal, I will pay big bucks to have them around to snack on. And one of my favorite ways to enjoy blueberries is in this Blueberry Buckle.

    An overhead shot of Blueberry Buckle.

    My sweet Grandma Eve has been whipping this up for as long as I can remember. Looking back, I can think of many a happy summer gatherings ending with this simple confection, on a warm night around my parents kitchen table. If I was lucky, my parents might even allow me to have a small second piece.

    A piece of Blue berry Buckle on a plate.

    This is the quintessential summer dessert. It whips up super quickly, making it an excellent candidate for that last minute get together.

    A piece of Blueberry Buckle beeing pulled up and out of the pan.

    The end result is a moist, delicious cake, bursting with sweet, juicy blueberries with the most incredible streusel topping to add a bit of crunch. I like to enjoy this at all hours of the day, if it lasts that long! There's no shame in my cake-for-breakfast game!

    Blueberries on a table surrounding a piece of Blueberry Buckle.

    Other great summer treats include:

    • Boozy Gummy Bears
    • Blueberry Buckle
    • Peach Cobbler
    • Strawberry Goat Cheese Tart
    • Summer Berry Dessert Crostini
    • Black Forest Ice Cream Pie
    • Peppermint Ice Cream Pie
    • S'mores Bars

    A square shot of Blueberry Buckle.

    Blueberry Buckle

    Jessy Freimann
    Blueberry Buckle whips up super quick and easy. This moist cake is bursting with sweet, juicy blueberries with the most incredible streusel topping. It's the quintessential summer dessert and a true crowd-pleaser!
    No ratings yet
    Print Recipe Pin Recipe
    Prep Time 5 minutes mins
    Cook Time 50 minutes mins
    Total Time 55 minutes mins
    Course Breakfast, Dessert
    Cuisine Berries, Easy, Fruit, Summer
    Servings 9 servings
    Calories 333 kcal

    Equipment

    • 1 9 inch Baking dish
    • 1 mixing bowl
    • 1 Hand mixer
    • 1 stand mixer
    • 1 Measuring cups and spoons
    • 1 Spatula

    Ingredients
      

    BUCKLE INGREDIENTS:

    • ¾ cup granulated sugar
    • ¼ cup salted butter softened
    • 1 large egg
    • ½ cup whole milk
    • 2 cups all purpose flour
    • 1 teaspoon baking powder
    • ½ teaspoon Kosher salt
    • 1 cups blueberries rinsed and well drained

    STREUSEL TOPPING INGREDIENTS:

    • ½ cup granulated sugar
    • ⅓ cup all purpose flour
    • ½ teaspoon ground cinnamon
    • ¼ cup salted butter softened

    Instructions
     

    Blueberry Buckle

    • Preheat oven to 375 degrees F. Grease a 9" x 9" square pan.
    • Mix sugar, butter and egg until well combined. Add milk and mix to combine.
    • Whisk together flour, baking powder and salt and add to the sugar mixture until just combined.
    • Fold in blueberries. The dough will be sticky (somewhere between a batter and a dough) but it is just as it's supposed to be, so don't add any more liquid!
    • Spread the batter carefully to cover the bottom of the pan.

    Topping

    • In a separate bowl, mix sugar, flour, cinnamon and butter using a pastry cutter or fork until well combined with a crumbly consistency.
    • Top the batter with the streusel topping and bake for 45-50 minutes or until your cake tester comes out clean. Serve warm or cooled.

    Notes

    This will last up to 5 days covered at room temperature.

    Nutrition

    Serving: 1servingCalories: 333kcalCarbohydrates: 56gProtein: 4gFat: 11gSaturated Fat: 7gPolyunsaturated Fat: 1gMonounsaturated Fat: 3gTrans Fat: 0.4gCholesterol: 29mgSodium: 264mgPotassium: 72mgFiber: 1gSugar: 30gVitamin A: 347IUVitamin C: 2mgCalcium: 53mgIron: 2mg
    Tried this recipe?Let us know how it was!

    Helpful tools:


    You can find a full index of my recipes here.

    Don't forget to follow The Life Jolie on Pinterest for more recipe inspiration!

    If Pinterest isn't your cup of tea, you can also bookmark this recipe.

    Blueberry Buckle whips up super quick and easy. This moist cake is bursting with sweet, juicy blueberries with the most incredible streusel topping. It's the quintessential summer dessert and a true crowd-pleaser!

    Egg Stuffed Bread

    May 2, 2016 · 3 Comments

    This Egg Stuffed Bread recipe is a delicious, easy brunch or breakfast option. Imagine crusty loaves of french bread, stuffed with your favorite omelette fillings, cheese and eggs. It's quick and delicious to serve during the holidays and is sure to be a family favorite!

    So next week is Mother's Day, you guys! I feel like I've started every recent post by saying how fast time is flying. I suppose I cannot help it because of our current season of life. But with Mother's Day 2016 grinning at us on the horizon, I cannot help but think about how last Mother's Day seems so long ago. A wasn't even a full year old and T wasn't even on her way! What a difference a year can make.

    This Egg Stuffed Bread recipe is a delicious, easy brunch or breakfast option. Imagine crusty loaves of french bread, stuffed with your favorite omelette fillings, cheese and eggs. It's quick and delicious to serve during the holidays and is sure to be a family favorite!

    So here we are preparing for another Mother's Day. If your family is anything like ours, Mother's Day will likely consist of a low-key day filled with relaxation, love and delicious brunch food. With this in mind, I would be remiss if I didn't share this fantastic Egg Stuffed Bread that I recently whipped up. It is so good, in fact, that I decided to push it ahead of all the other recipes I had planned to share (trust me, your Mom will be glad!).

    This Egg Stuffed Bread recipe is a delicious, easy brunch or breakfast option. Imagine crusty loaves of french bread, stuffed with your favorite omelette fillings, cheese and eggs. It's quick and delicious to serve during the holidays and is sure to be a family favorite!

    When we were trying to think of brunch recipes for my cousin's bridal shower (which was a couple weeks ago) I got this idea to stuff bread with an Omelette. After all, Omelettes and bread can really only make each other better. But being that our bride is Gluten-Free, we ultimately scrapped that idea in favor of a few different Crustless Quiches (one of which I will share with you soon!). Still, I couldn't get the Egg Stuffed Bread concept out of my mind, so I grabbed a few baguette rolls and some tasty items that happened to be hanging out in my fridge and got to work!

    This Egg Stuffed Bread recipe is a delicious, easy brunch or breakfast option. Imagine crusty loaves of french bread, stuffed with your favorite omelette fillings, cheese and eggs. It's quick and delicious to serve during the holidays and is sure to be a family favorite!

    What resulted was a super-tasty, really simple Egg Stuffed Bread that had a deliciously, custard-y center, and is filled with Ham, Peppers, Chives and cheese. The great thing is, you can really take these in any direction you'd like! Got spinach and artichokes in your fridge? Awesome, throw them in. Prefer Gruyere cheese over Cheddar? No problem, swap them out!

    This Egg Stuffed Bread recipe is a delicious, easy brunch or breakfast option. Imagine crusty loaves of french bread, stuffed with your favorite omelette fillings, cheese and eggs. It's quick and delicious to serve during the holidays and is sure to be a family favorite!

    These come together really quickly. While they reheat better than expected, they're best served right out of the oven. The rolls I found were actually about 6 inches each- pretty large. I chose a nice, crusty bread so that I wouldn't end up with a soggy mess. This was a good move because the finished stuffed bread was crunchy on the outside and had an inside with the luxurious texture similar to a Strata. If you use smaller rolls, just be sure to check them earlier in the baking process and pull them from the oven once the center is no longer jiggly or liquid-y and they're golden on top. Now go make these! 🙂

    This Egg Stuffed Bread recipe is a delicious, easy brunch or breakfast option. Imagine crusty loaves of french bread, stuffed with your favorite omelette fillings, cheese and eggs. It's quick and delicious to serve during the holidays and is sure to be a family favorite!
    This Egg Stuffed Bread recipe is a delicious, easy brunch or breakfast option. Imagine crusty loaves of french bread, stuffed with your favorite omelette fillings, cheese and eggs. It's quick and delicious to serve during the holidays and is sure to be a family favorite!

    Egg Stuffed Bread

    Jessy Freimann
    Egg Stuffed Bread is a delicious brunch food- savory, delicious and easy to make, this is ure to please!
    No ratings yet
    Print Recipe Pin Recipe
    Prep Time 40 minutes mins
    Cook Time 30 minutes mins
    Inactive time 10 minutes mins
    Total Time 1 hour hr 20 minutes mins
    Course Breakfast
    Cuisine American
    Servings 4 servings
    Calories 360 kcal

    Equipment

    • 1 cutting board
    • 1 chefs knife
    • 1 Measuring cups and spoons
    • 1 sheet pan

    Ingredients
      

    • 4 baguette rolls mine were about 6 inches long
    • 1 cup diced omelette fillings I used ham, red bell peppers and chives but you can really use whatever you like, just make sure that they're diced small
    • ½ cup shredded cheddar cheese
    • 6 large eggs
    • ⅔ cup whole milk
    • 1 teaspoon kosher salt to taste
    • ¼ teaspoon ground black pepper

    Instructions
     

    • Preheat oven to 350 degrees F. Line a sheet pan.
    • Hollow out bread so that it forms a boat. Make sure you don't cut all the way through! I left a small amount of the bread in the middle.
    • Split omelette fillings between the rolls and then split cheese between each. Place them on pan and set aside.
    • In a separate bowl, beat together eggs, milk, salt and pepper until well combined.
    • Carefully pour egg mixture equally into each bread boat. It takes a second for the fillings and bread to absorb the egg and if you go too fast they will overflow.
    • Bake for about 30 minutes and serve immediately.

    Notes

    These are best eaten right away, but leftovers last up to 3 days in the refrigerator

    Nutrition

    Serving: 1servingCalories: 360kcalCarbohydrates: 36gProtein: 25gFat: 13gSaturated Fat: 4gPolyunsaturated Fat: 2gMonounsaturated Fat: 3gTrans Fat: 0.03gCholesterol: 302mgSodium: 1454mgPotassium: 176mgFiber: 1gSugar: 7gVitamin A: 501IUCalcium: 158mgIron: 12mg
    Tried this recipe?Let us know how it was!

    Enjoy!

    You can find a full index of my recipes here.

    Don't forget to follow The Life Jolie on Pinterest for more recipe inspiration!

    Linked up at

    • « Go to Previous Page
    • Page 1
    • Interim pages omitted …
    • Page 18
    • Page 19
    • Page 20
    • Page 21
    • Go to Next Page »

    Primary Sidebar

    Jessy in a kitchen holding a white casserole pan and smiling.
    Hi, I'm Jessy!

    Welcome to The Life Jolie! I share simple, delicious recipes and ingredient prep tips to make your weeknight cooking a breeze!

    More about me →

    Easy Dinner Recipes

    • An overhead image of a Mexican Shrimp Quinoa Bowl.
      Shrimp Quinoa Bowls
    • A bowl of asian soup with meatballs with a spoon and noodles in it.
      Asian Soup with Cabbage and Meatballs
    • A close up of roasted red potatoes on a pan.
      Roasted Red Potatoes Recipe
    • A spoon lifting up a scoop of eggplant parm bake with melt cheese trailing behind it.
      Eggplant Parm Bake
    • A close up of a drum chicken wing in a pile of other wings.
      Oven Baked Chicken Wings
    • An overhead image of a bowl of minestrone soup.
      Traditional Minestrone Soup Recipe

    Popular Recipes

    • A glass bowl of melted chocolate with a spatula dripping some back into the bowl.
      How To Melt Chocolate Chips In The Microwave
    • Italian Stuffed Zucchini Boats are the healthy weeknight meal you'll want to make again and again. This is a seriously easy recipe that's full of delicious flavor without all the guilt!
      Italian Stuffed Zucchini Boats
    • A close up shot of the side of a shallow bowl of shrimp mac salad.
      Shrimp Macaroni Salad
    • A white pan pouring cheese sauce over a bowl of steamed broccoli.
      Cheese Sauce for Broccoli Recipe
    • An overhead image of a plate of chicken lettuce wraps with peanut sauce next to it and all the fixings surrounding it.
      Copycat Cheesecake Factory Thai Chicken Lettuce Wraps
    • A close up image of a piece of greek marinated chicken on a white plate with lemons on the plate and in the background.
      Greek Yogurt Chicken
    Jessy in a kitchen holding a white casserole pan and smiling.
    Hi, I'm Jessy!

    Welcome to The Life Jolie! I share simple, delicious recipes and ingredient prep tips to make your weeknight cooking a breeze!

    More about me →

    Easy Dinner Recipes

    • A close up of a bagel pizza with mini pepperonis on a pan.
      Bagel Pizzas Recipe
    • A bowl of chicken and orzo soup with a spoon in it.
      Chicken and Orzo Soup
    • A bowl of Swedish meatballs and noodles.
      Swedish Meatballs And Noodles
    • A close up image of a piece of coconut shrimp on top of others.
      Coconut Shrimp With Sauce
    • An overhead image of taco soup in a bowl.
      Crockpot Taco Chicken Soup
    • A spoon pulling up a scoop of skillet lasagna with melted cheese stretching behind it.
      No Bake Lasagna Skillet

    Popular Recipes

    • A glass bowl of melted chocolate with a spatula dripping some back into the bowl.
      How To Melt Chocolate Chips In The Microwave
    • Italian Stuffed Zucchini Boats are the healthy weeknight meal you'll want to make again and again. This is a seriously easy recipe that's full of delicious flavor without all the guilt!
      Italian Stuffed Zucchini Boats
    • A close up shot of the side of a shallow bowl of shrimp mac salad.
      Shrimp Macaroni Salad
    • A white pan pouring cheese sauce over a bowl of steamed broccoli.
      Cheese Sauce for Broccoli Recipe
    • An overhead image of a plate of chicken lettuce wraps with peanut sauce next to it and all the fixings surrounding it.
      Copycat Cheesecake Factory Thai Chicken Lettuce Wraps
    • A close up image of a piece of greek marinated chicken on a white plate with lemons on the plate and in the background.
      Greek Yogurt Chicken

    Footer

    ↑ back to top

    About

    • About Me
    • Privacy Policy + Disclaimer

    Newsletter

    • Sign Up! for emails and updates

    Contact

    • Contact
    • Video Production

    As an Amazon Associate I earn from qualifying purchases.

    Copyright 2014-2021 - Jolie Ventures, LLC. All Rights Reserved. Privacy Policy.

    Rate This Recipe

    Your vote:


    A rating is required
    A name is required
    An email is required