
• Skip to primary navigation
  • Skip to main content
  • Skip to primary sidebar
The Life Jolie logo
  • Easy Dinner Recipes
  • Recipes
  • About
  • Contact
    • Work with me!
    • Video Production
  • Nav Social Menu

    • Email
    • Facebook
    • Instagram
    • Pinterest
    • Twitter
    • YouTube
menu icon
go to homepage
subscribe
search icon
Homepage link
  • Easy Dinner Recipes
  • Recipes
  • About
  • Contact
    • Work with me!
    • Video Production
    • Email
    • Facebook
    • Instagram
    • Pinterest
    • Twitter
    • YouTube
  • ×
    The Life Jolie

    Cilantro Lime Cauliflower Rice

    Cilantro Lime Cauliflower Rice

    May 26, 2026 · 2 Comments

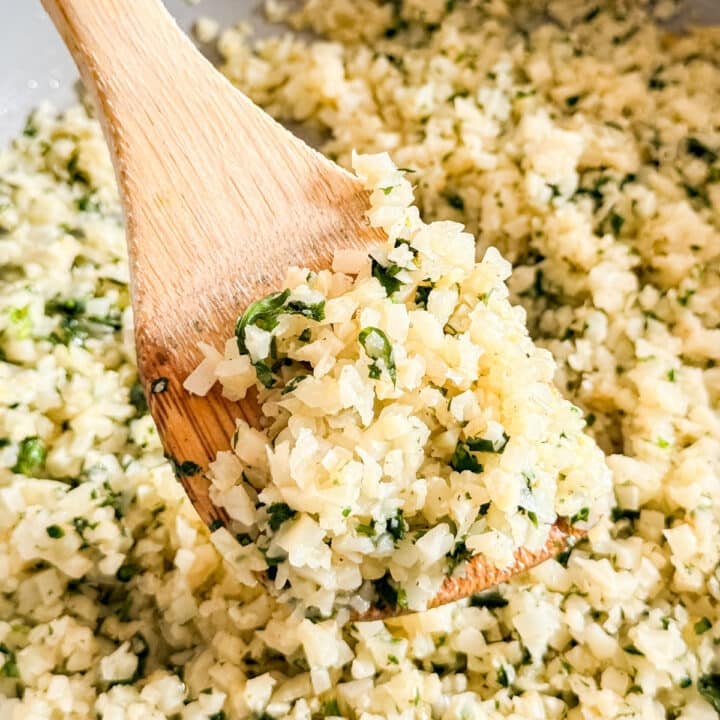
    A close up image of a wooden spoon holding a scoop of cilantro clime cauliflower rice.

    This cilantro lime cauliflower rice is an easy, low-carb side dish packed with fresh flavor that comes together in just 20 minutes.
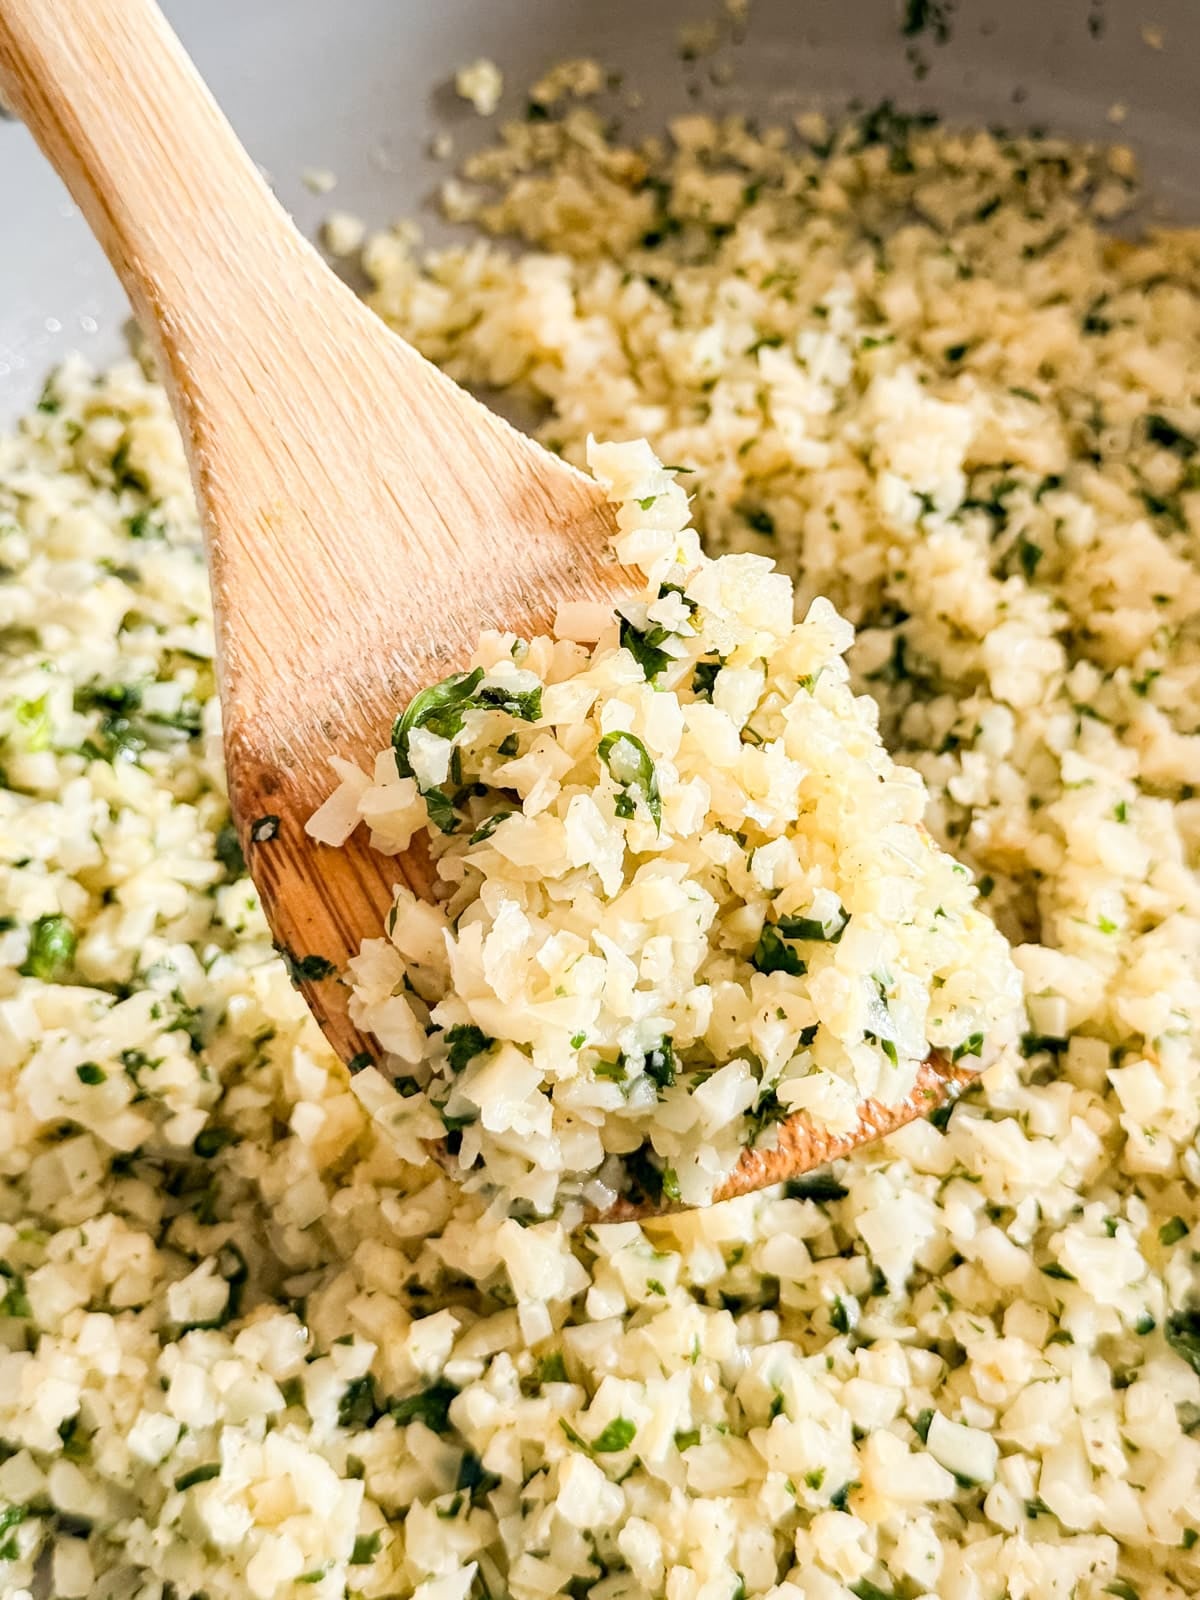
    A close up image of a wooden spoon holding a scoop of cilantro clime cauliflower rice.
    [feast_advanced_jump_to]

    Why You'll Love This Cauliflower Rice Cilantro Lime

    I often have a tough time finding delicious, healthy recipes that actually fit into a busy weeknight, but this one completely delivers. At first, I was slightly intimidated by the idea of turning a whole head of cauliflower into rice, so I picked up a bag of frozen cauliflower rice, and it worked just as well!

    What I love most is how versatile it is. Cauliflower rice really picks up the flavors of whatever you add to it, and this cilantro lime version pairs perfectly with just about any Mexican-inspired meal. It also comes together quickly and easily, making it the perfect healthy weeknight side dish. Here's why this cauliflower rice recipe is a total winner:

    • Ready in just 20 minutes
    • Low-carb and healthy
    • Fresh, vibrant flavors
    • Incredibly versatile
    • Freezer friendly
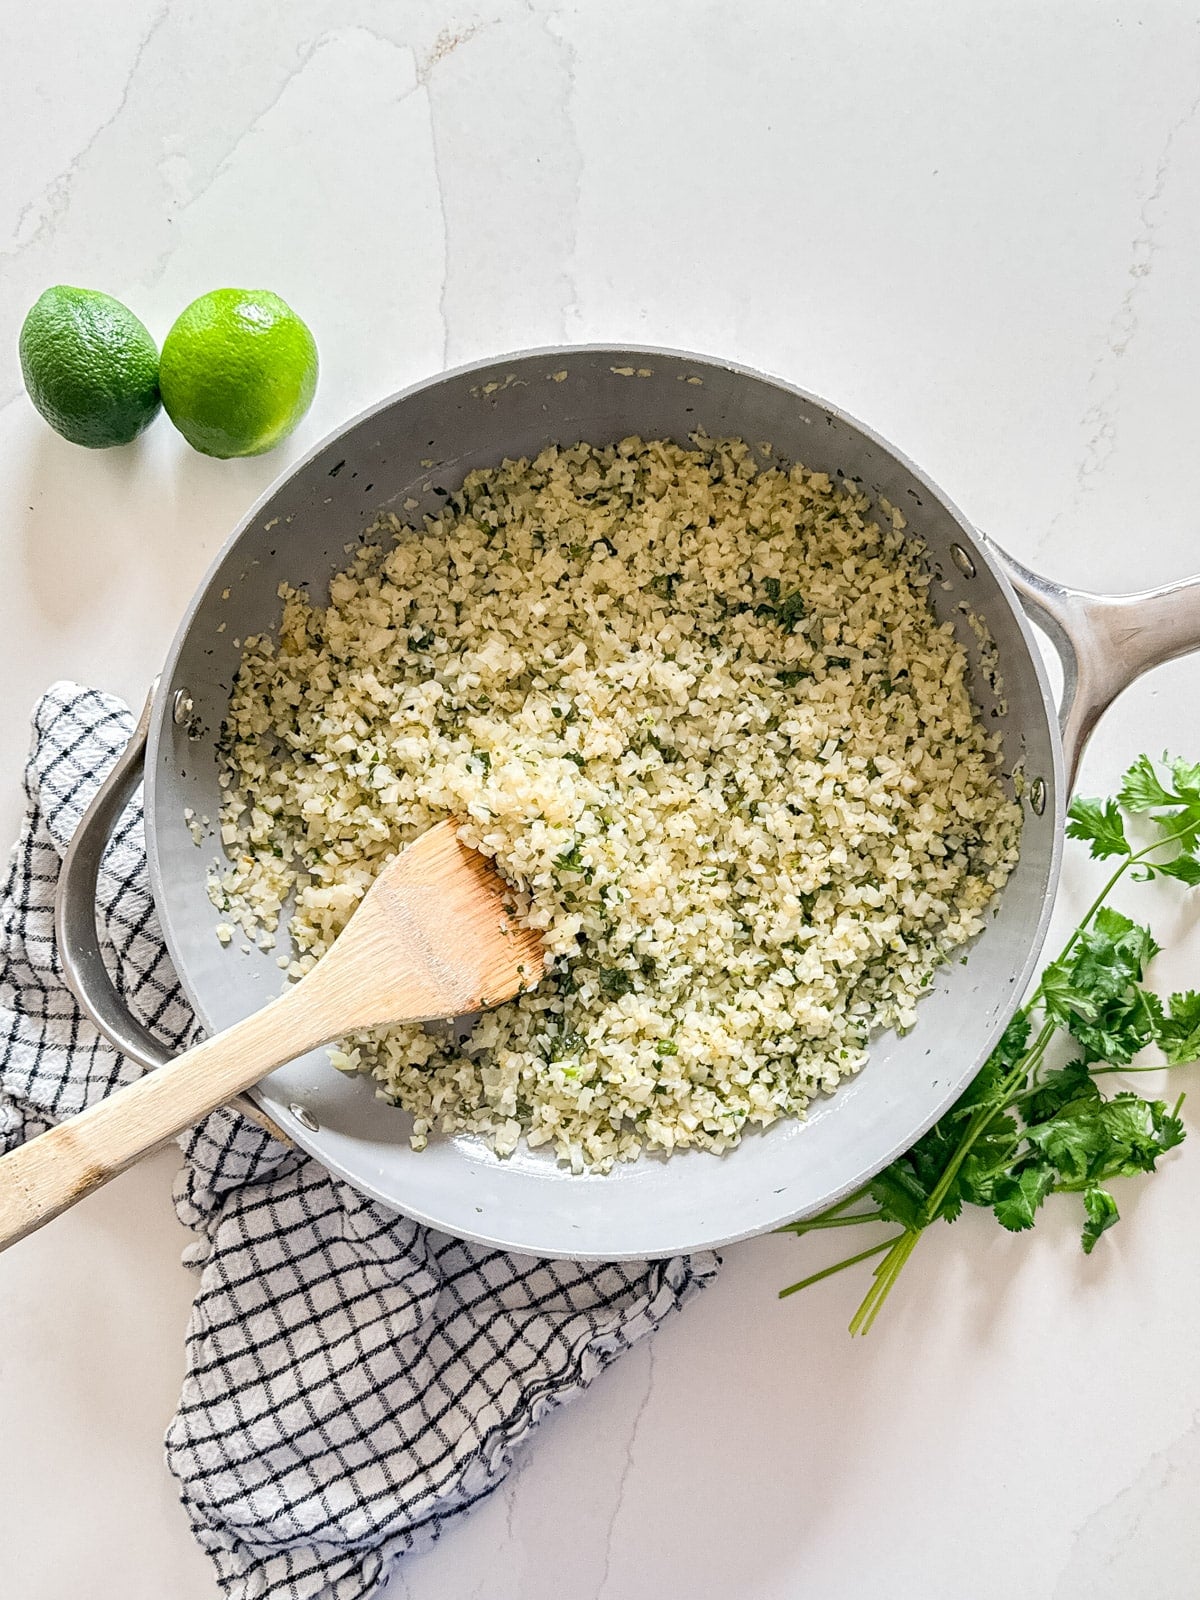
    An overhead image of cauliflower rice in a pan.

    Ingredient Information And Substitutions

    • Cauliflower rice- Frozen cauliflower rice is my go-to, but fresh or store-bought pre-riced cauliflower both work great here as well. Fresh may cook a tad quicker, so keep an eye on it.
    • Olive oil- Used to sauté the garlic. Avocado oil works as a substitute.
    • Lime juice- Adds a citrusy brightness that ties everything together. Lemon juice can work as a substitute, though the flavor will be slightly different.
    • Fresh cilantro- Adds a bright, fresh finish. If you're not a cilantro fan, fresh parsley works as a substitute.
    • Garlic- Adds a savory, aromatic base. Measure this with your heart. Garlic powder can substitute in a pinch.
    • Salt and black pepper- Season to taste.
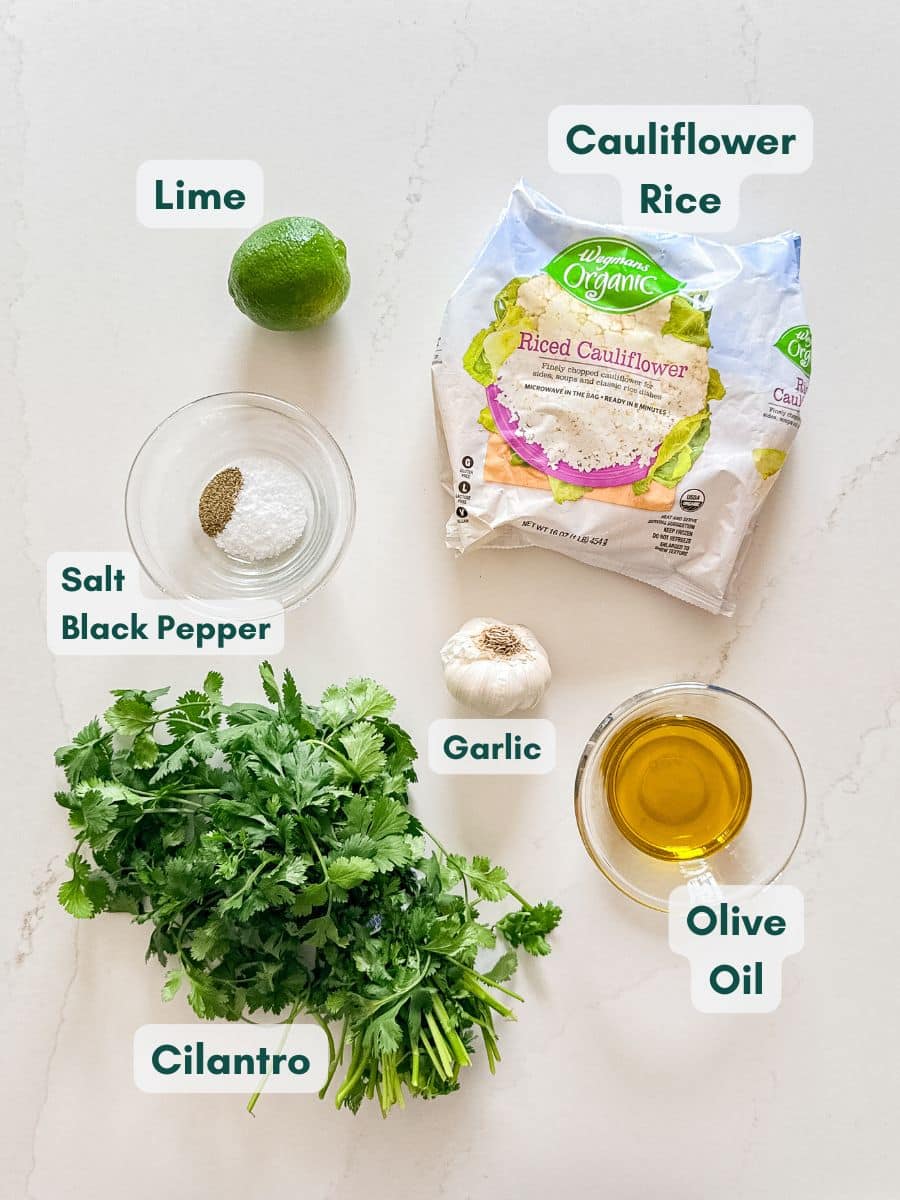
    An overhead image of labeled recipe ingredients.

    How To Make Cauliflower Frozen Rice

    Step 1- Sauté the garlic. 

    Heat the olive oil in a deep sauté pan over medium to medium-high heat. Once hot, add the garlic and sauté for 2-3 minutes, stirring frequently. Don't let it burn.
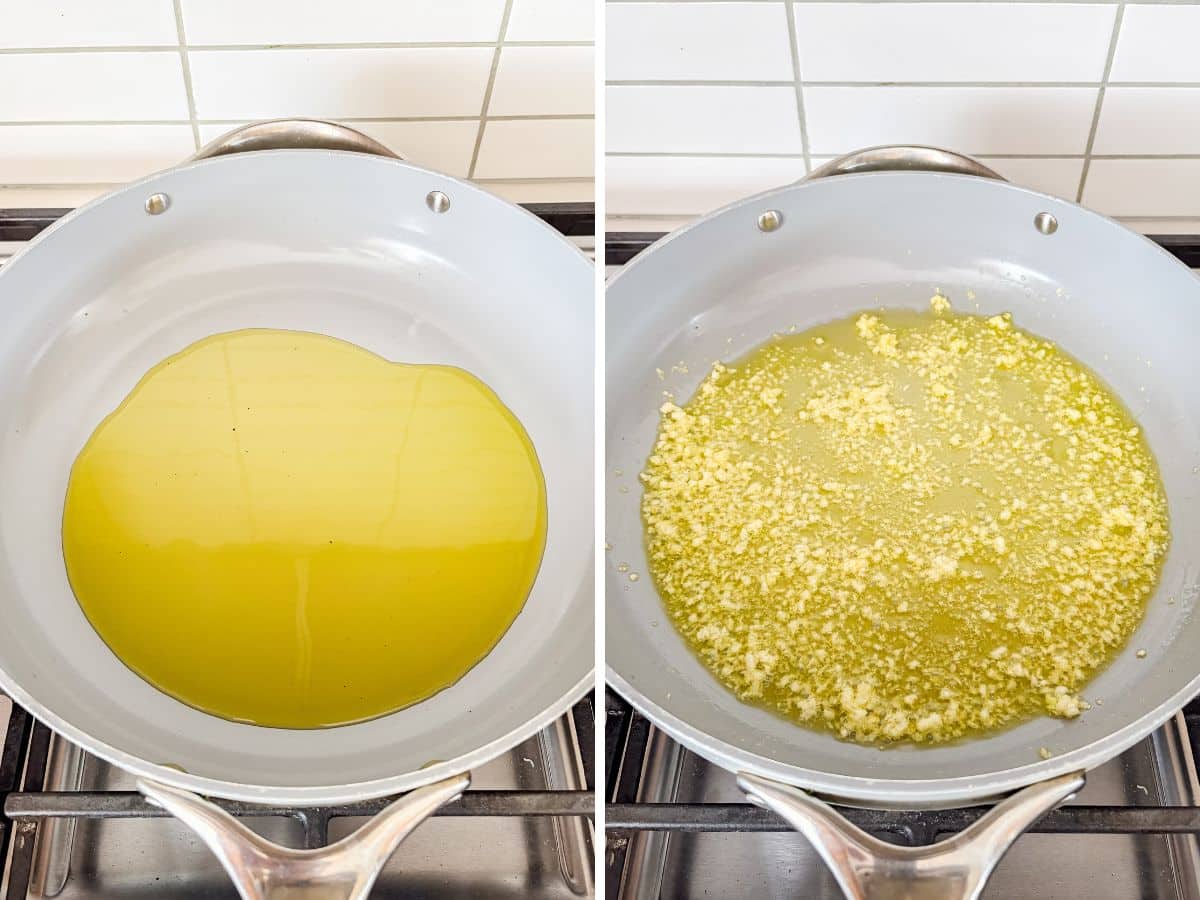
    Olive oil heating in a pan and then minced garlic added and cooking.

    Step 2- Add the cauliflower rice. 

    Add the cauliflower rice, salt, and pepper to the pan and sauté for about 5-7 minutes, turning frequently.

    Step 3- Finish and serve. 

    Remove the pan from the heat and add the fresh cilantro and lime juice. Give everything a good stir and serve immediately.
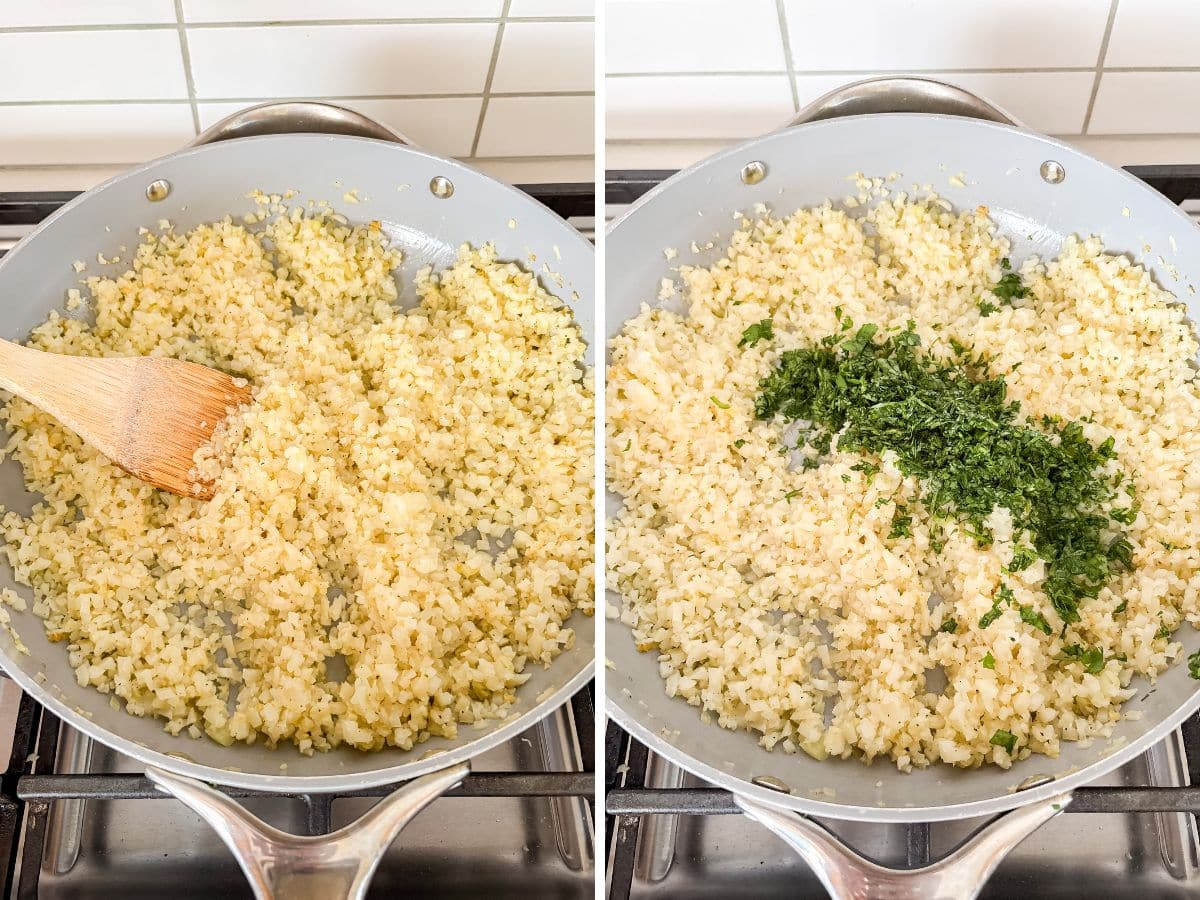
    Cauliflower rice added to the pan and cooking and then lime juice and cilantro added at the end.

    Frequently Asked Questions

    What is riced cauliflower?

    It's simply cauliflower that's been processed into small, rice-sized pieces. It makes a great low-carb substitute for regular rice and picks up whatever flavors you cook it with.

    How to make cauliflower rice?

    Cut a head of cauliflower into pieces and run them through a food processor in small batches until you get a rice-like texture. Just be careful not to over-process it. You want small pieces, not a puree.

    How to cook frozen cauliflower rice?

    Simply add it straight to a hot pan with a little oil and season to your liking. No need to thaw it first.
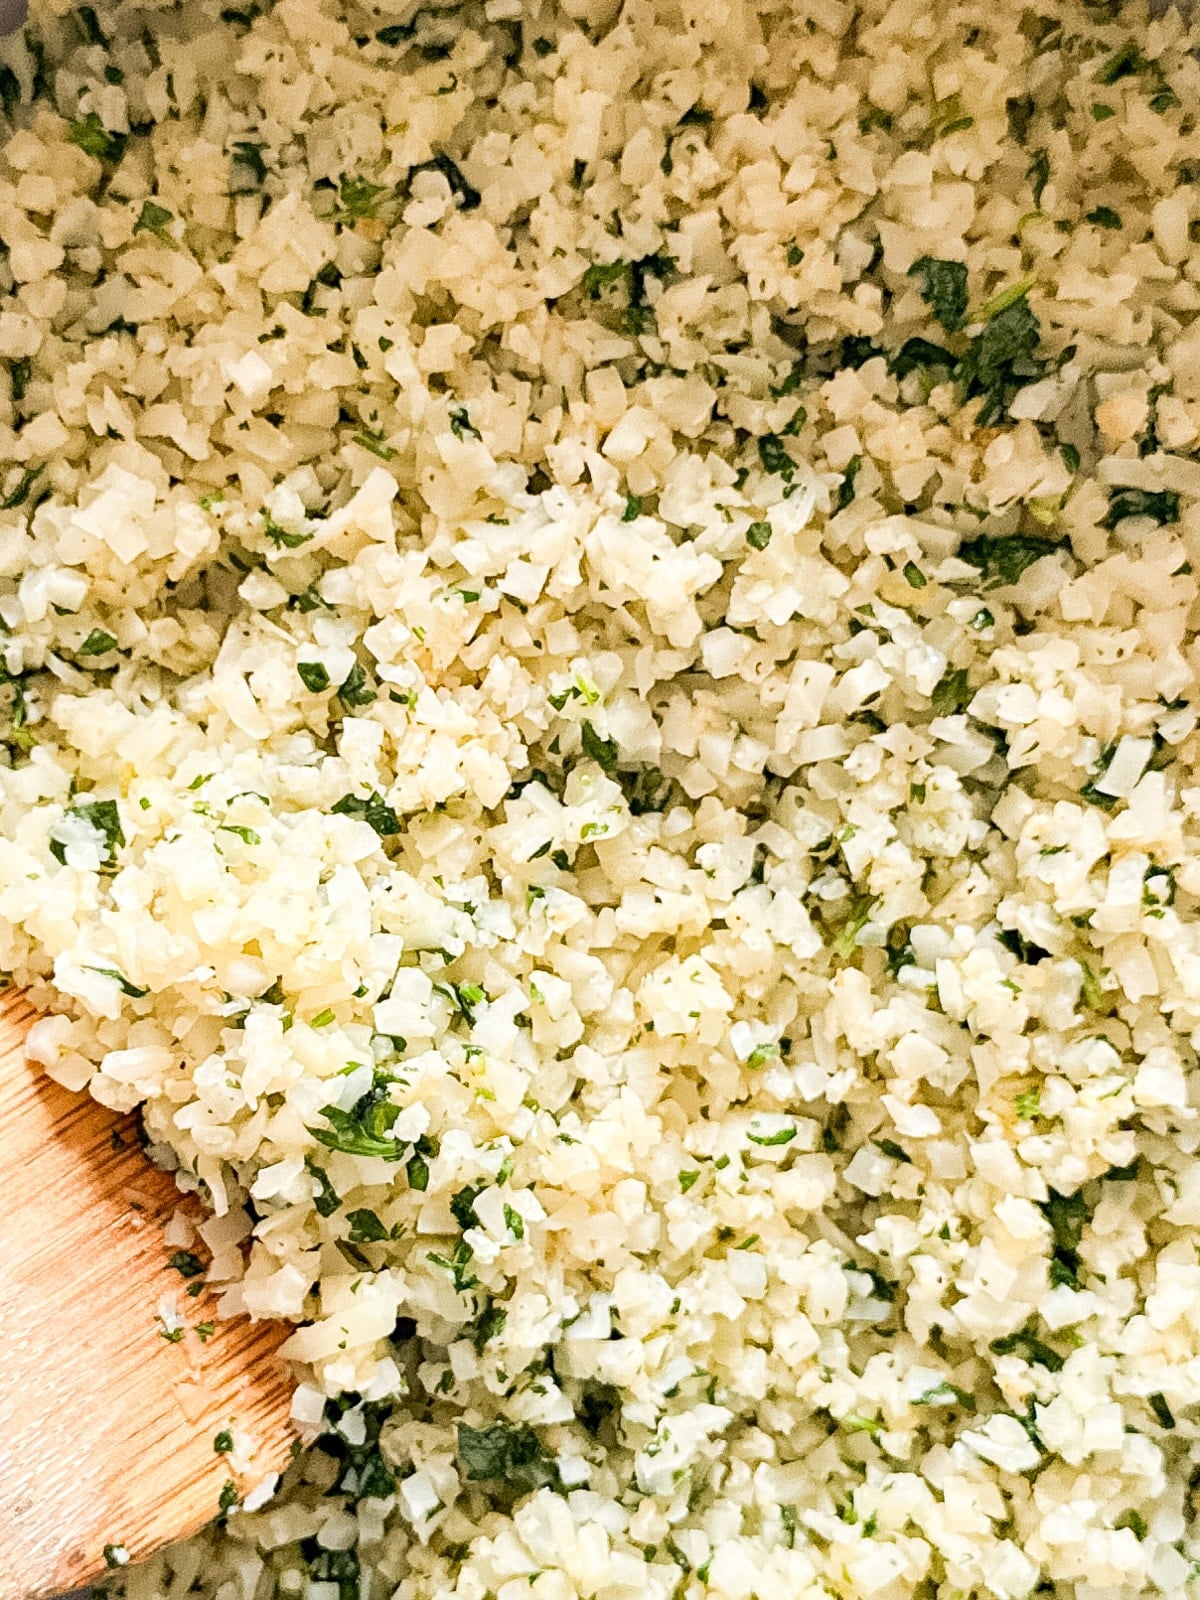
    A close up image of cauliflower rice in a pan.

    Tips For Making Frozen Cauliflower Rice

    • Keep the garlic moving. It can burn quickly at medium-high heat, so stir frequently and keep a close eye on it.
    • Add the cilantro and lime off the heat. This preserves their fresh, bright flavor. Adding them while the pan is still hot can dull them.
    • Taste as you go. This is one of those recipes where you can really eyeball the ingredients and adjust to your liking.
    • Skip the cilantro if it's not your thing. Fresh parsley makes a great substitute and gives a similar fresh finish without the polarizing flavor.
    • Bulk it up. Diced bell peppers, corn, or black beans are all delicious additions that make it even more of a complete side dish.
    • Add some heat. A pinch of red pepper flakes or a diced jalapeño tossed in with the garlic is a great way to kick things up a notch.
    • Ingredients to prep ahead- The cauliflower can be riced and stored in the fridge a day in advance. The garlic can also be minced ahead of time.
    • Leftovers and storage- Store in an airtight container in the fridge for up to 3 days. Reheat in a pan over medium heat.
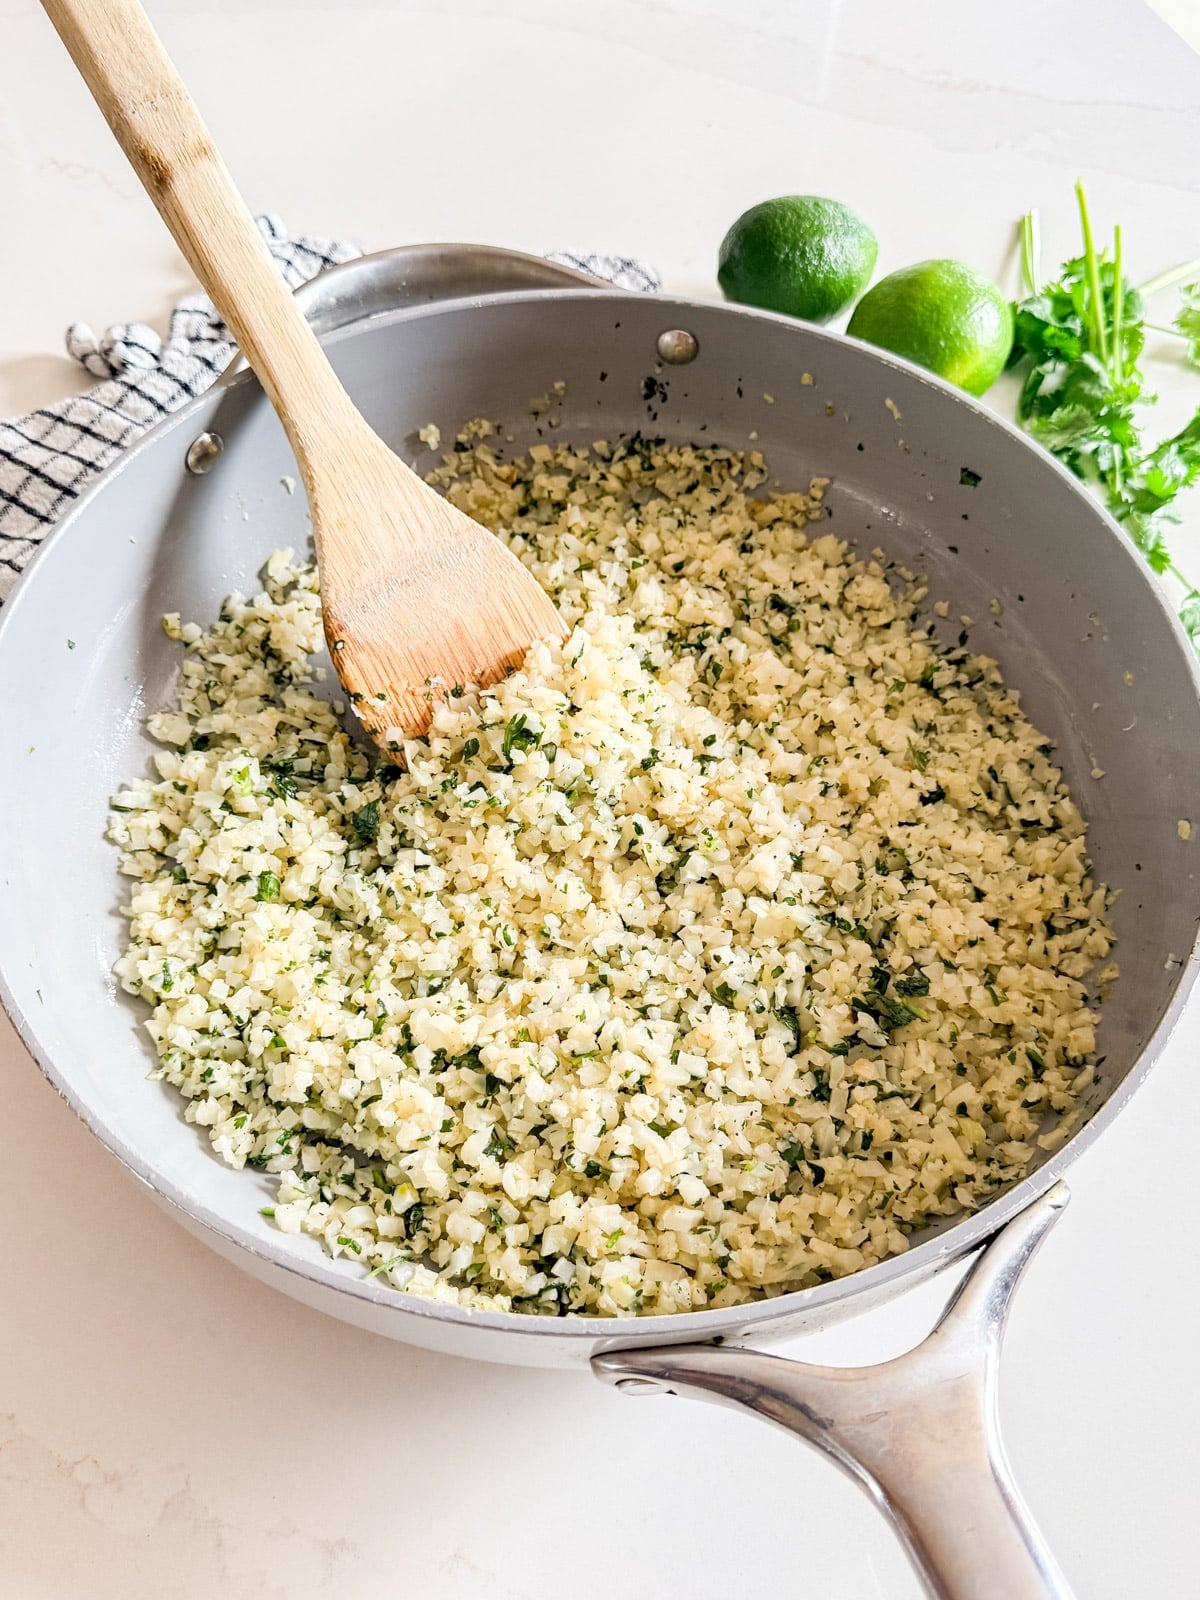
    A pant of frozen cauliflower rice that's been cooked with a spoon in it.

    What To Serve With Mexican Cauliflower Rice

    This pairs so well with any Mexican-inspired meal! Here are a few of my favorites to build out a full spread:

    • Roasted Corn Salsa
    • Bean and Cheese Burrito Recipe
    • Hot Bean Dip Recipe
    • Mexican Lasagna Roll-Ups

    Other Healthy Side Dish Recipes To Try

    • A plate of broccoli rice casserole with the pan and raw broccoli florets in the background.
      Rice and Broccoli Casserole
    • A wooden spoon stirring a pan of zucchini and tomatoes.
      Sautéed Zucchini And Tomatoes
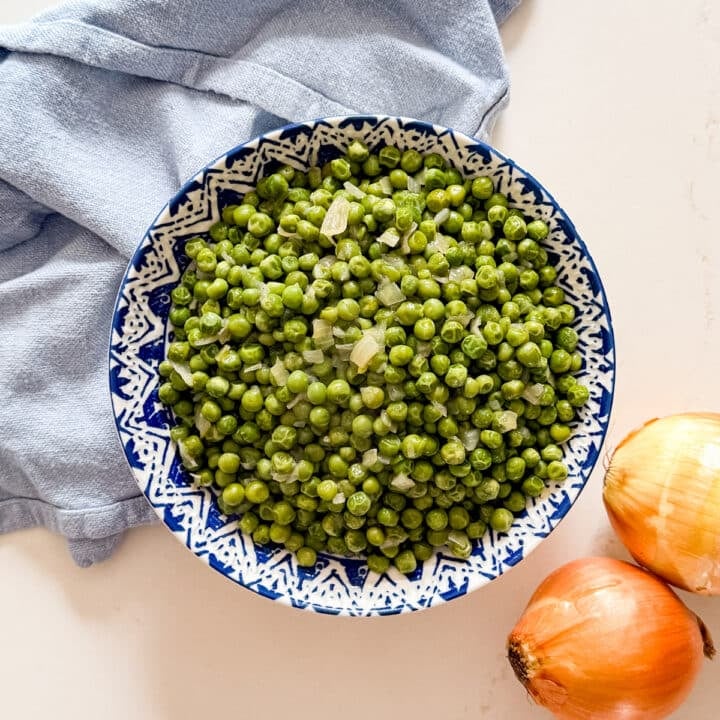
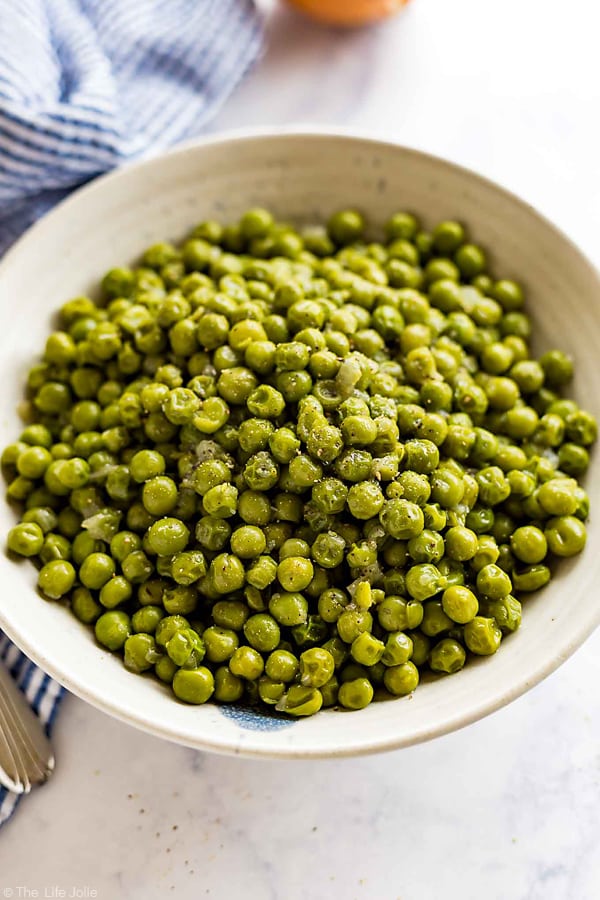
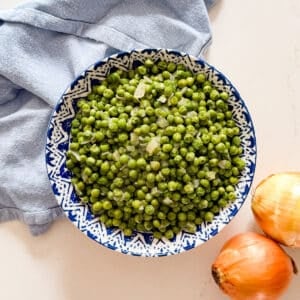
    • An overhead image of a bowl of green peas and onions.
      Easy Green Peas Recipe
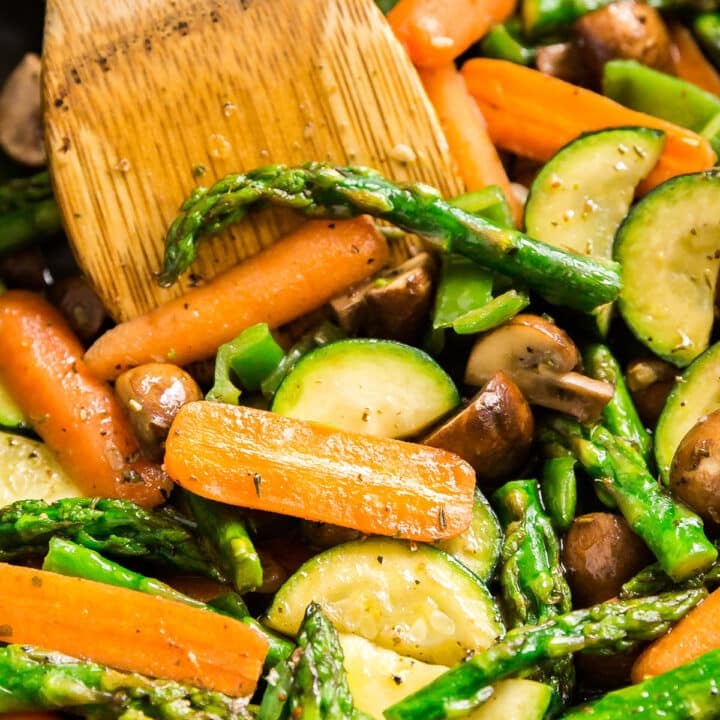
    • A close up image of sautéed veggies in a pan with a wooden turner in it.
      Easy Sautéed Vegetables

    Love this recipe? Please leave a 5 star ⭐️⭐️⭐️⭐️⭐️ rating in the recipe card below ⬇️ and/or a review in the comment section further down. Check out my Amazon Store for all my favorite tools, including those used in this recipe. And follow @thelifejolie on Instagram and TikTok!
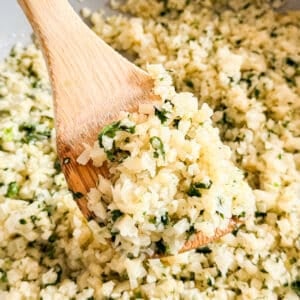
    A close up image of a wooden spoon holding a scoop of cilantro clime cauliflower rice.

    Cilantro Lime Cauliflower Rice

    Jessy Freimann
    This cilantro lime cauliflower rice is an easy, low-carb side dish packed with fresh flavor that comes together in just 20 minutes.
    No ratings yet
    Print Recipe Pin Recipe
    Prep Time 10 minutes mins
    Cook Time 10 minutes mins
    Total Time 20 minutes mins
    Course dinner, healthy, Lunch, Side Dish
    Cuisine Healthy, Mexican
    Servings 6 servings
    Calories 65 kcal

    Equipment

    • 1 Skillet
    • 1 wooden spoon
    • 1 cutting board
    • 1 chefs knife
    • 1 food processor

    Ingredients
      

    • 2 Tablespoons olive oil
    • 4 large garlic cloves pressed or minced
    • 16 ounces frozen cauliflower rice
    • 1 teaspoon Kosher salt to taste
    • ¼ teaspoon ground black pepper to taste
    • ¼ cup fresh cilantro chopped
    • 3 Tablespoons lime juice 1 lime's worth of juice

    Instructions
     

    • Heat the oil in a skillet over medium-high heat your oil over medium/medium high heat.
    • Once the oil is hot, add the garlic and sauté for 2 minutes, stirring often so it doesn't burn.
    • Add cauliflower rice, salt and pepper.
    • Cook about 5-7 minutes, turning and stirring frequently.
    • Remove the pan from the heat and stir in cilantro and lime juice. Serve immediately.

    Notes

    • Keep the garlic moving. It can burn quickly at medium-high heat, so stir frequently and keep a close eye on it.
    • Add the cilantro and lime off the heat. This preserves their fresh, bright flavor. Adding them while the pan is still hot can dull them.
    • Taste as you go. This is one of those recipes where you can really eyeball the ingredients and adjust to your liking.
    • Skip the cilantro if it's not your thing. Fresh parsley makes a great substitute and gives a similar fresh finish without the polarizing flavor.
    • Bulk it up. Diced bell peppers, corn, or black beans are all delicious additions that make it even more of a complete side dish.
    • Add some heat. A pinch of red pepper flakes or a diced jalapeño tossed in with the garlic is a great way to kick things up a notch.
    • Ingredients to prep ahead- The cauliflower can be riced and stored in the fridge a day in advance. The garlic can also be minced ahead of time.
    • Leftovers and storage- Store in an airtight container in the fridge for up to 3 days. Reheat in a pan over medium heat.
    Nutrition

    Serving: 1servingCalories: 65kcalCarbohydrates: 5gProtein: 2gFat: 5gSaturated Fat: 1gPolyunsaturated Fat: 1gMonounsaturated Fat: 3gSodium: 411mgPotassium: 248mgFiber: 2gSugar: 2gVitamin A: 49IUVitamin C: 39mgCalcium: 22mgIron: 0.4mg
    Tried this recipe?Let us know how it was!

    Muffin Tin Potato Stacks

    May 22, 2026 · 2 Comments

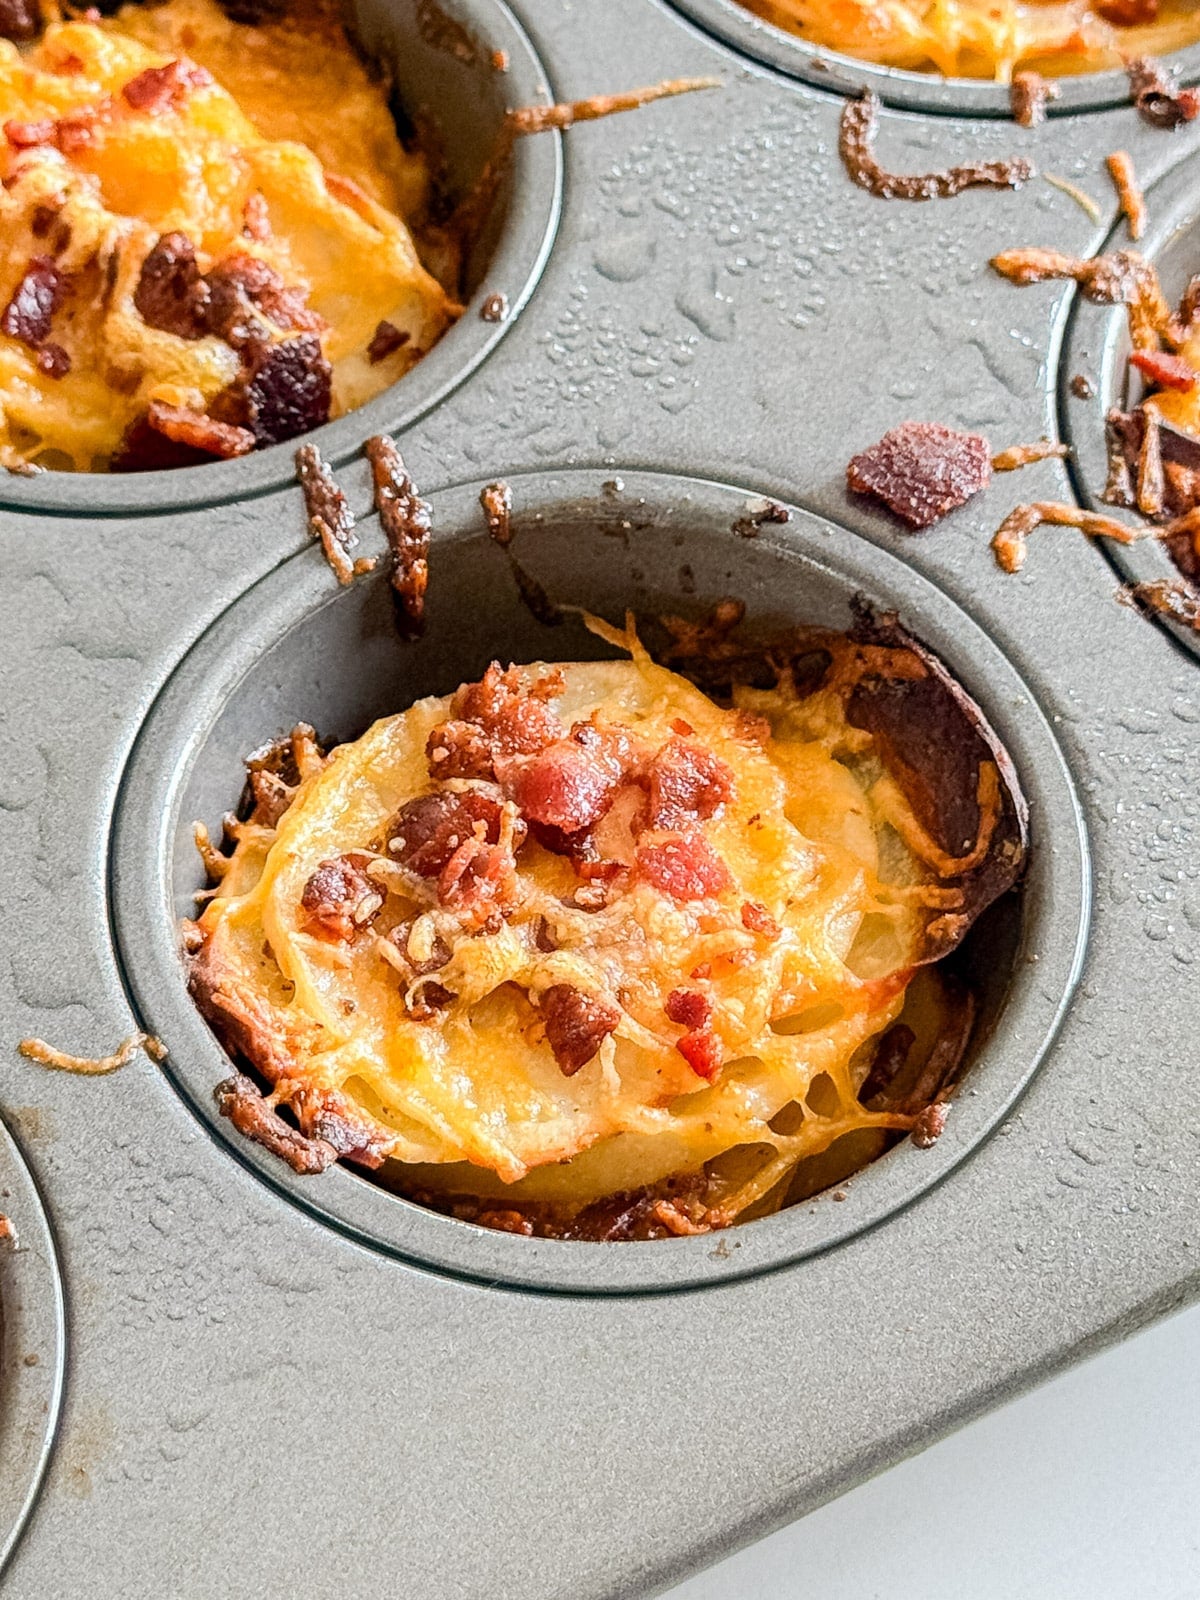
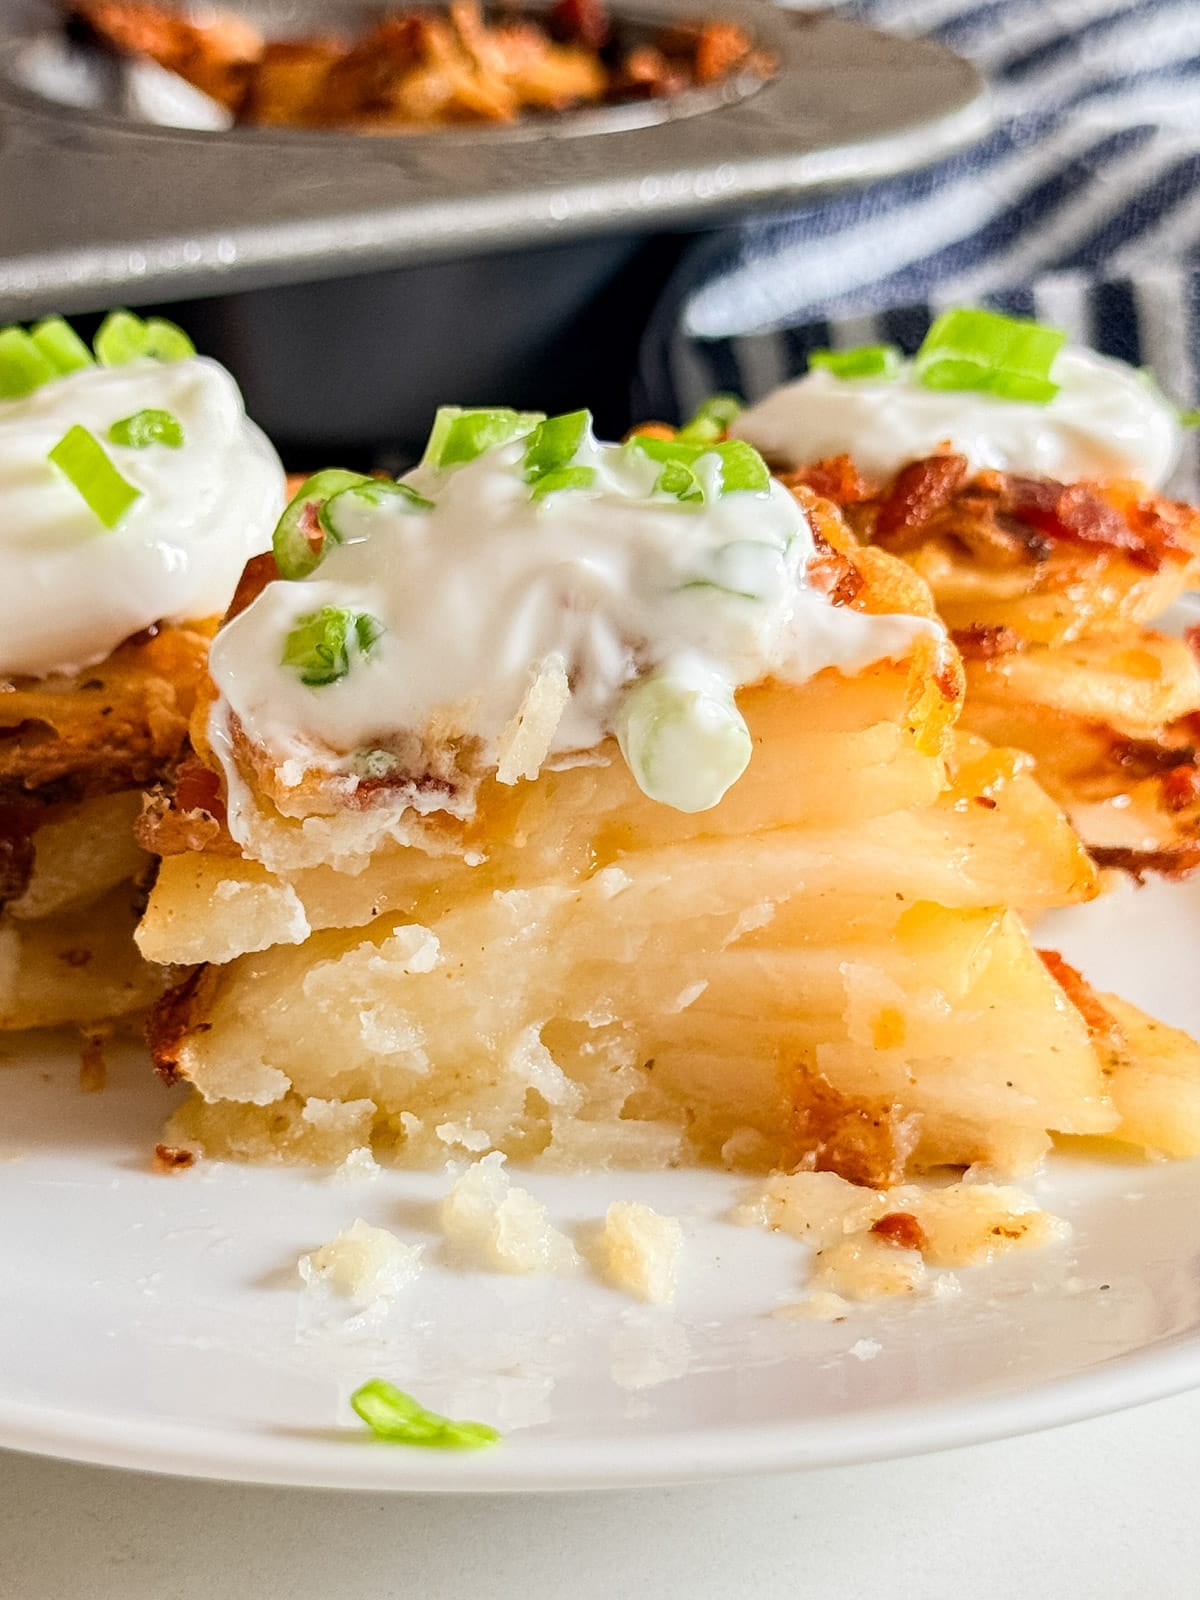
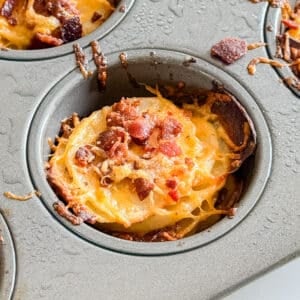
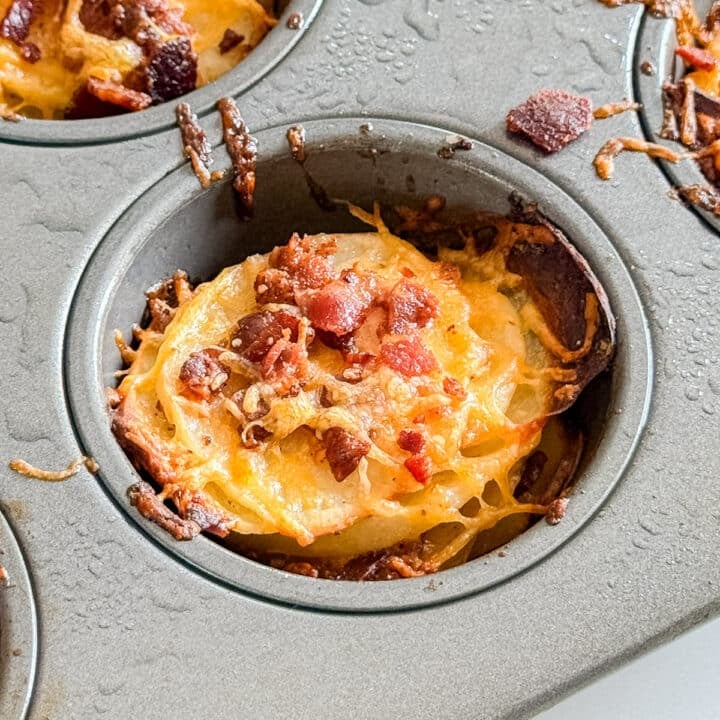
    A close up of a potato stack in a muffin tin with cheese and bacon.

    These muffin tin potato stacks are a fun, easy side dish made with thin slices of potato. They're seasoned and stacked in a muffin pan, then baked until tender and loaded with cheese, bacon, and sour cream.

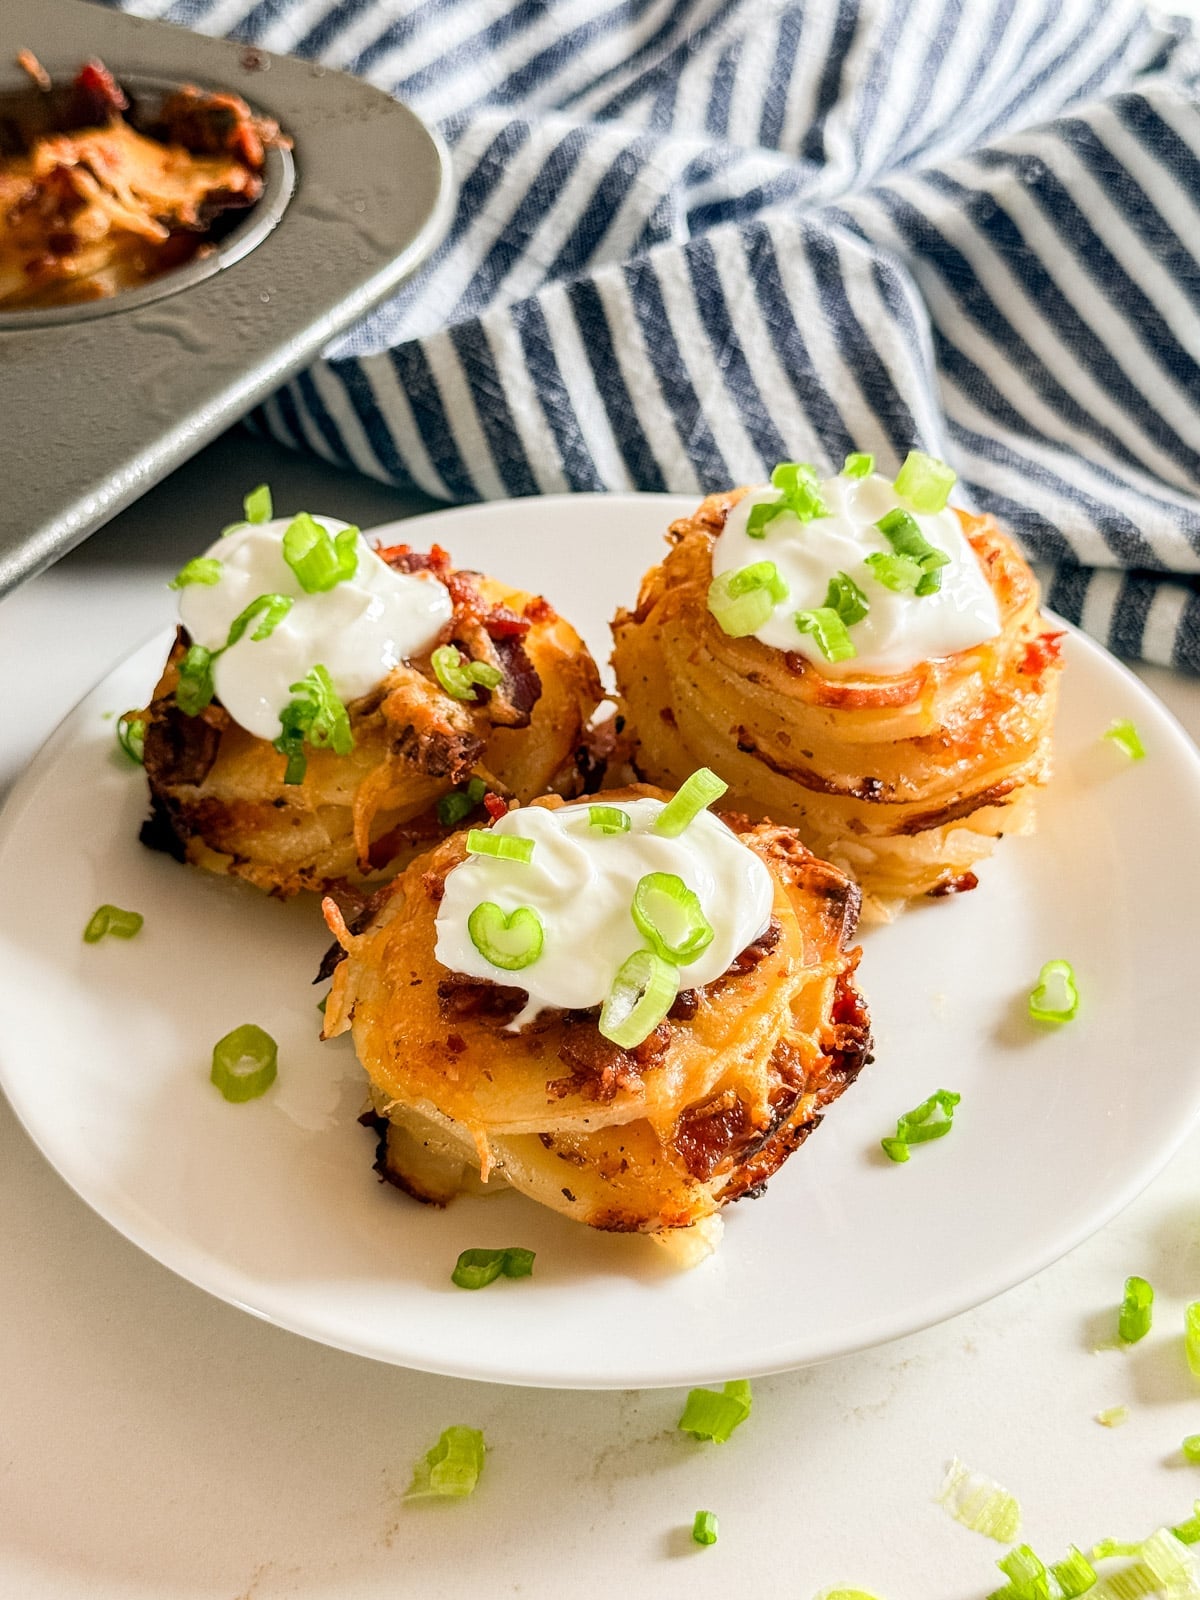
    3 loaded potato stacks on a white plate.
    [feast_advanced_jump_to]

    Why You'll Love These Potato Stacks Muffin Tin Style

    I always get these ideas to make things that are "loaded." And while I originally wanted to do loaded scalloped potatoes, I couldn't quite get that recipe to work. Then my mother-in-law mentioned that someone had made potato stacks in a muffin pan, and it immediately reignited my ambitions.

    There's melted cheese that gets a little crispy on top, bacon (which never needs an explanation), and rich sour cream with chives for that perfect onion-y finish. I see many of these little stacks in my future because it's so easy and has a world of potential for all sorts of great flavor combos! Here's why these sweet potato stacks are a total winner:

    • Fun, unique presentation
    • Ready in just over an hour
    • Loaded with classic toppings
    • Perfect as a side or appetizer
    • Easy to customize
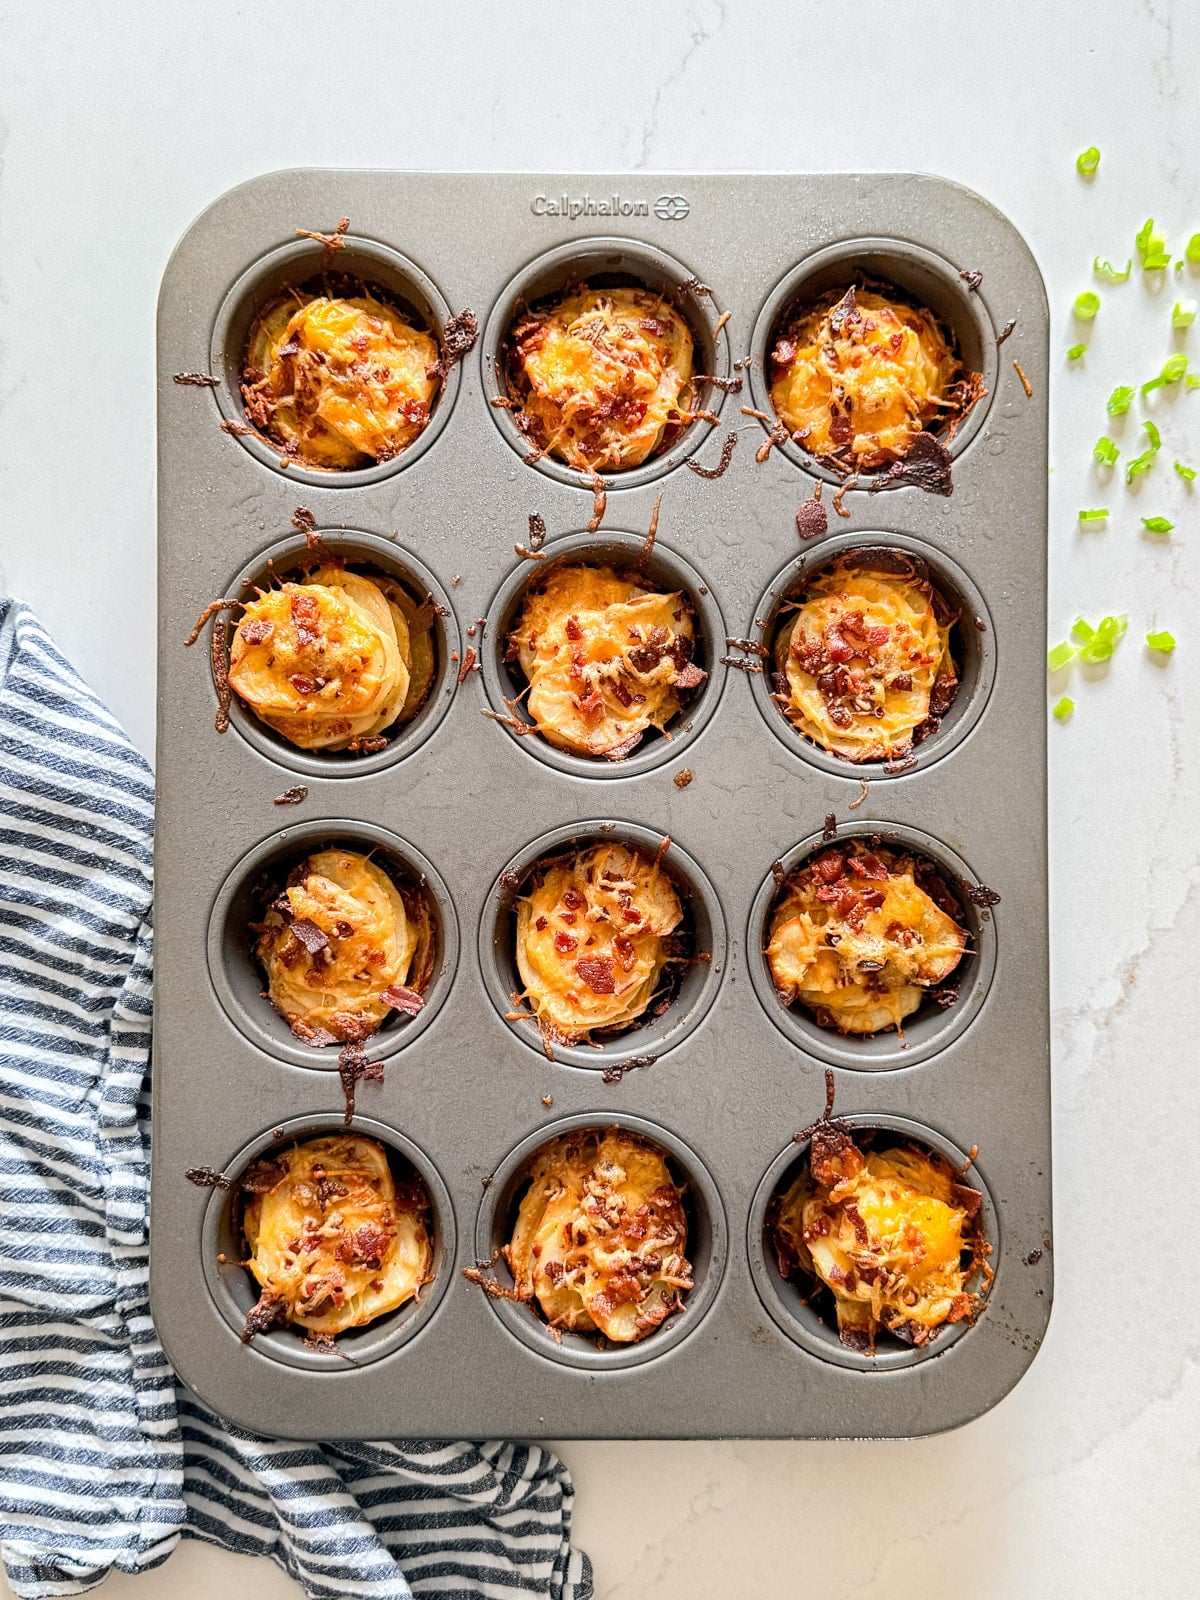
    An overhead image of a muffin pan full of loaded potato stacks.

    Ingredient Information And Substitutions

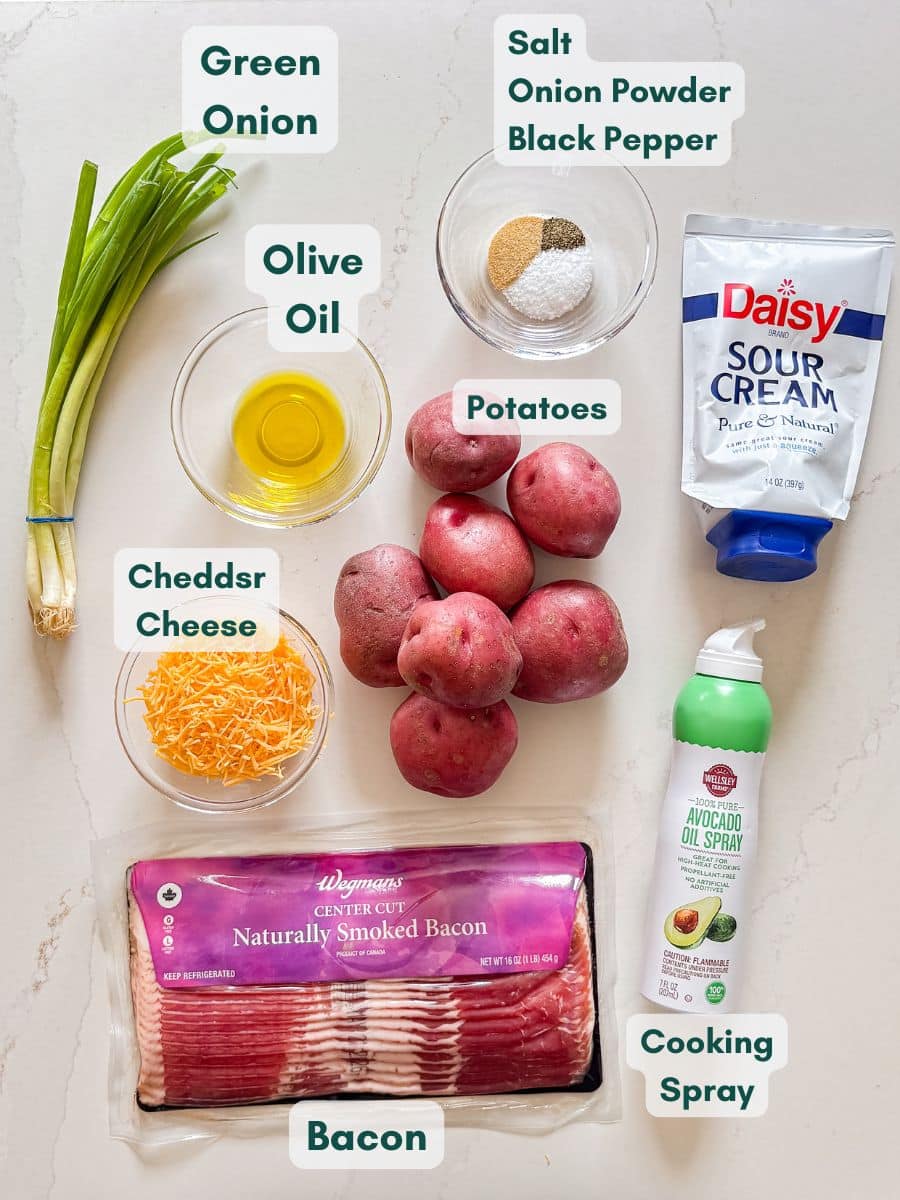
    • Small/medium potatoes- Any variety works here. Red, Yukon gold, or russet potatoes all work great.
    • Shredded cheddar cheese- Gets melty and a little crispy on top. Colby or Monterey Jack are good alternatives.
    • Bacon- Adds a smoky, crispy element throughout the stacks. Turkey bacon works as a lighter substitute.
    • Olive oil- Helps the seasonings stick to the potatoes. Avocado oil will work too.
    • Cooking spray- Keeps the stacks from sticking to the muffin tin. These still stick a bit, so a silicone muffin pan is the very best option.
    • Sour cream- The creamy finishing touch. Greek yogurt is a lighter alternative, but Mexican crema has a similar tang.
    • Green onions- Adds a fresh, onion-y garnish. Chives work just as well.
    • Onion powder- Adds a subtle savory depth. Use garlic powder instead... or both!
    • Pepper- Just enough to round everything out.
    • Salt- Season to taste.
    An overhead image of labeled recipe ingredients.

    How To Make Potato Stacks In Muffin Tin

    Step 1- Prep and preheat. 

    Preheat your oven to 375 degrees F and lightly spray each cup of your muffin tin with cooking spray.

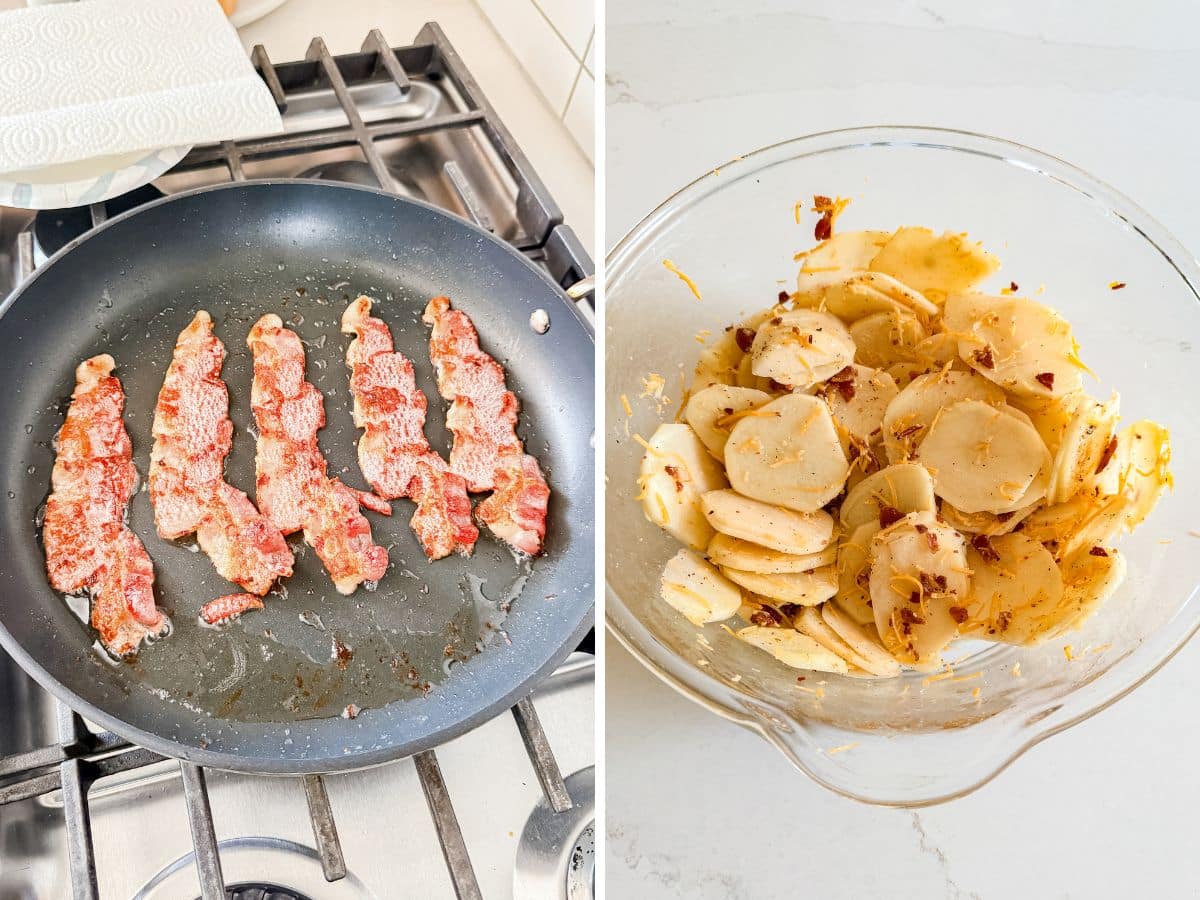
    Step 2- Mix everything. 

    In a large bowl, combine the potatoes, olive oil, salt, pepper, onion powder, ¾ of the cheese, and ¾ of the crumbled bacon. Use your clean hands to mix everything. 

    Bacon strips frying in a pan and thinly sliced Potatoes coated in oil and seasoning in a glass bowl.

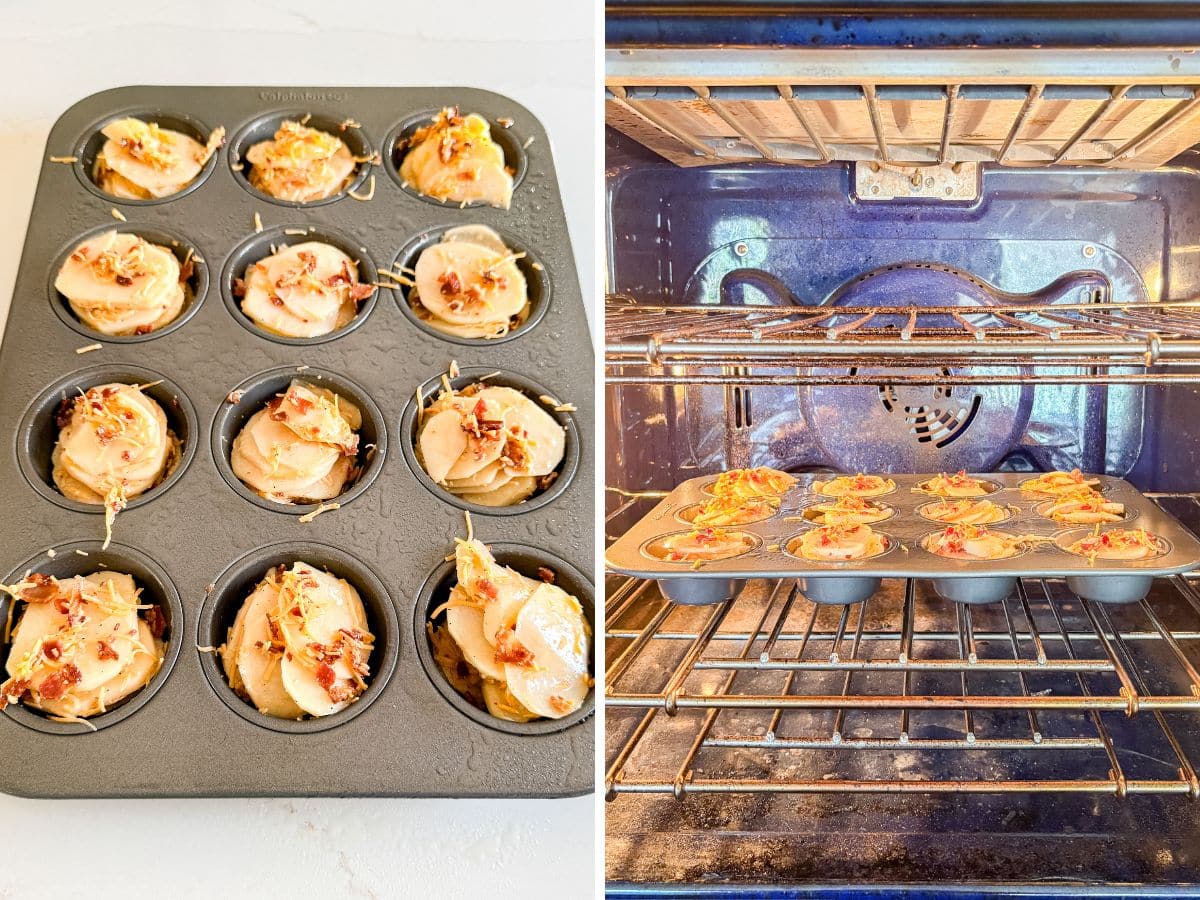
    Step 3- Fill the muffin tin. 

    Stack the potato slices into each muffin cup so they're all roughly the same height. If there are any extra bits of bacon and cheese left in the bowl, place them on top of each stack.

    Step 4- Bake. 

    Bake for 45-55 minutes until the potatoes are tender all the way through. A cake tester or thin knife works great for checking doneness.

    Potato stacks in the muffin tin and the tin in the oven.

    Step 5- Add toppings and serve. 

    Once tender, sprinkle the remaining cheese and crumbled bacon on top and pop them back in the oven for a minute or two to melt. Serve immediately, topped with a dollop of sour cream and a sprinkle of fresh chives. 

    A close up of a potato stack in a muffin tin with cheese and bacon.

    Frequently Asked Questions

    Can I make these ahead of time? 

    You can, but be aware that he potatoes will likely oxidize and turn brown- they'll still be good to eat, but they won't be as pretty. Assemble the stacks and refrigerate unbaked. When ready to serve, bake as directed, adding a few extra minutes since they'll be going in cold.

    Can I use a regular muffin tin or do I need a mini one? 

    A regular-sized muffin tin works perfectly here. Тhat's actually what the recipe is designed for. If you have a silicone muffin pan, this is really your time to shine!

    How do I remove the stacks cleanly? 

    Use a small offset spatula or butter knife to gently lift each stack out. Take your time, and they'll come out in one piece.

    A close up of a potato stack cut in half revealing the fluffy cooked inside of the potatoes.

    Tips For Making Potato Stacks

    • Grease the muffin pan well- These definitely stick- a silicone pan is best but either way, cooking spray is your friend here.
    • Use your clean hands to mix. It's the best way to make sure every potato slice gets evenly coated without the slices sticking together.
    • Slice the potatoes as evenly as possible. Uniform slices mean everything cooks at the same rate. A mandoline slicer is great for this if you have one.
    • Don't add extra oil. to the potatoes The recipe only calls for a small amount, and that's intentional. Мore oil results in greasy stacks, instead use the cooking spray to prevent sticking.
    • Check doneness with a cake tester. It's the easiest way to make sure the potatoes are tender all the way through without disturbing the stacks.
    • The loaded toppings here are a classic combo, but feel free to switch things up. Crumbled blue cheese, caramelized onions, or even a drizzle of hot sauce are all delicious variations.
    • Ingredients to prep ahead- The bacon can be fried and crumbled ahead of time and stored in the fridge. The potatoes are best sliced fresh to avoid browning.
    • Leftovers and storage- Store in an airtight container in the fridge for up to 3 days. Reheat in the oven to bring back that crispy cheese topping.
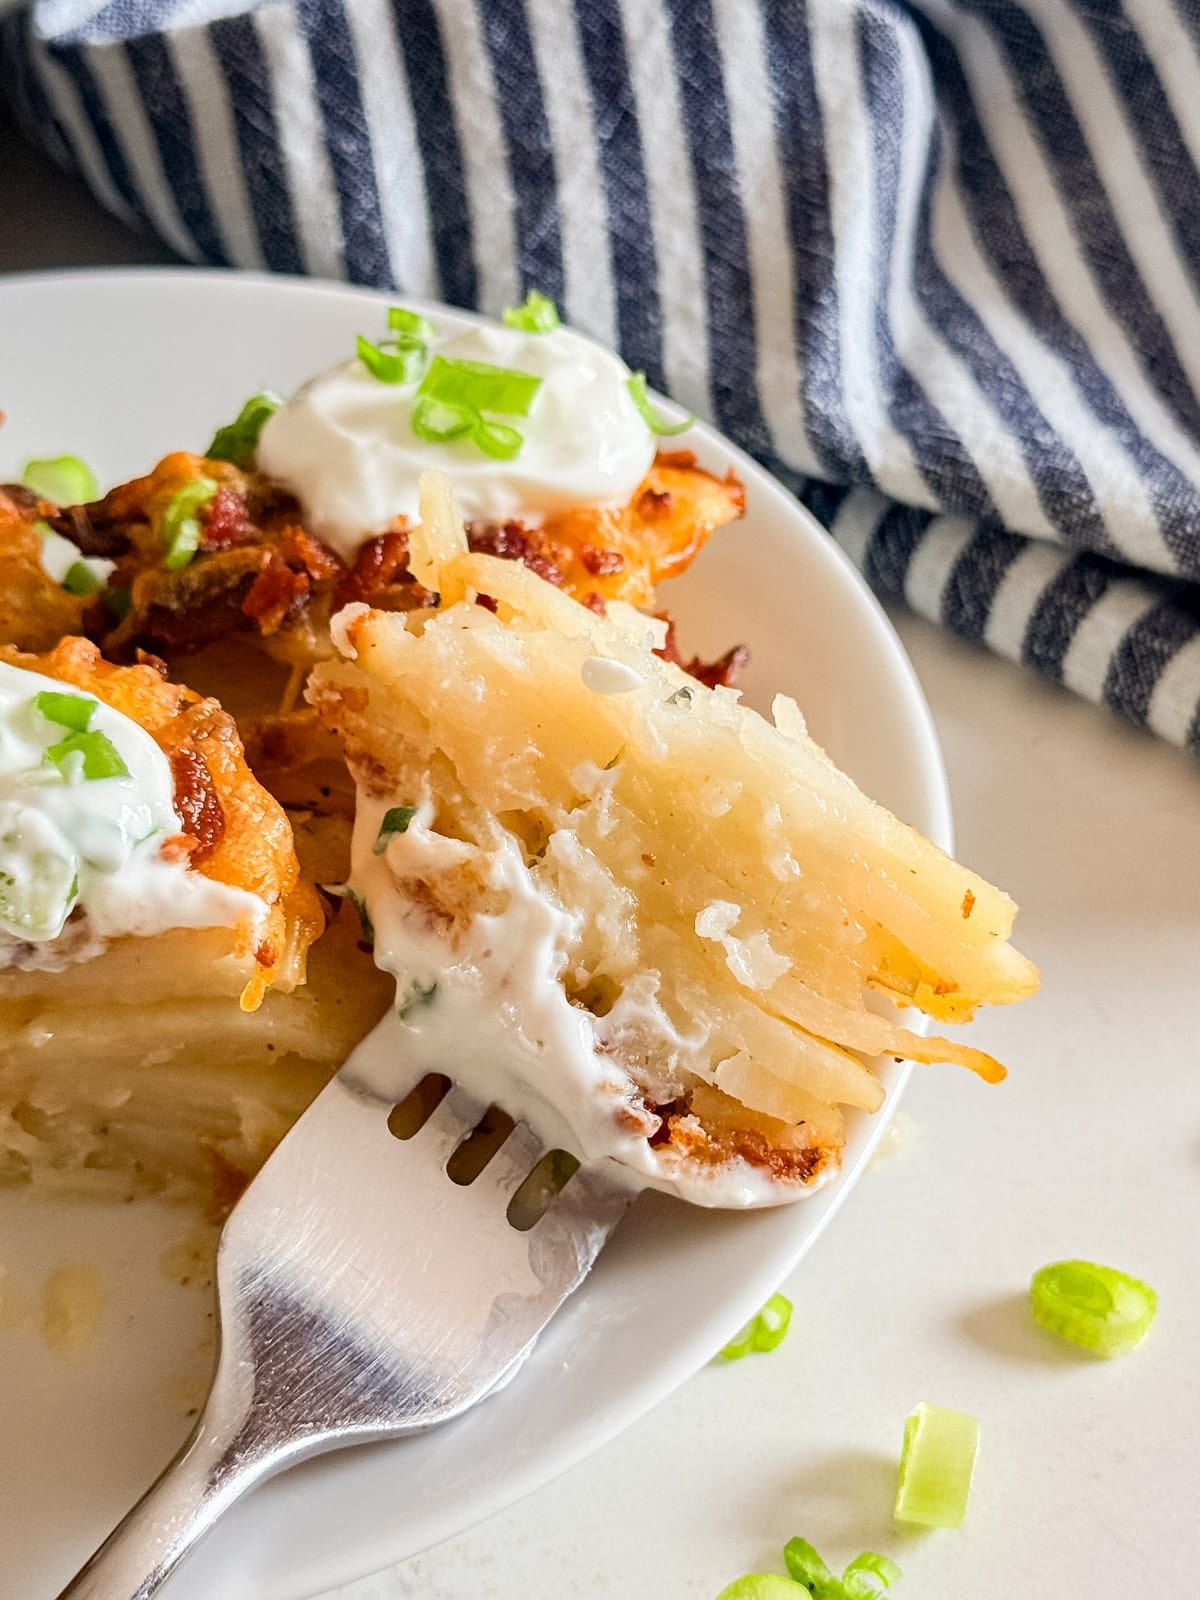
    A bite of loaded potato stacks on a fork.

    What To Serve With This Recipe For Potato Stacks

    These make such a great side dish for so many meals. Pair them with a protein, add a veggie side, and finish with something sweet for a full spread the whole family will love:

    • Homemade Meatballs In Sauce
    • Tomato Onion Salad
    • Greens and Beans Recipe
    • Cherry Cheese Pie

    Other Side Dish Recipes To Try

    • A plate of garlic green beans with a striped towel, garlic bulbs and parsley in the background.
      Garlic And Butter Green Beans
    • Honey Soy Glazed Carrots and Parsnips are a sweet and savory vegetable side dish that will please even the pickiest of palates! Made with carrots, parsnips, shallots, honey and soy sauce. This is the perfect addition to any holiday table (hello thanksgiving and Christmas!).
      Honey Soy Glazed Carrots and Parsnips
    • An overhead image of a bowl of green peas and onions.
      Easy Green Peas Recipe
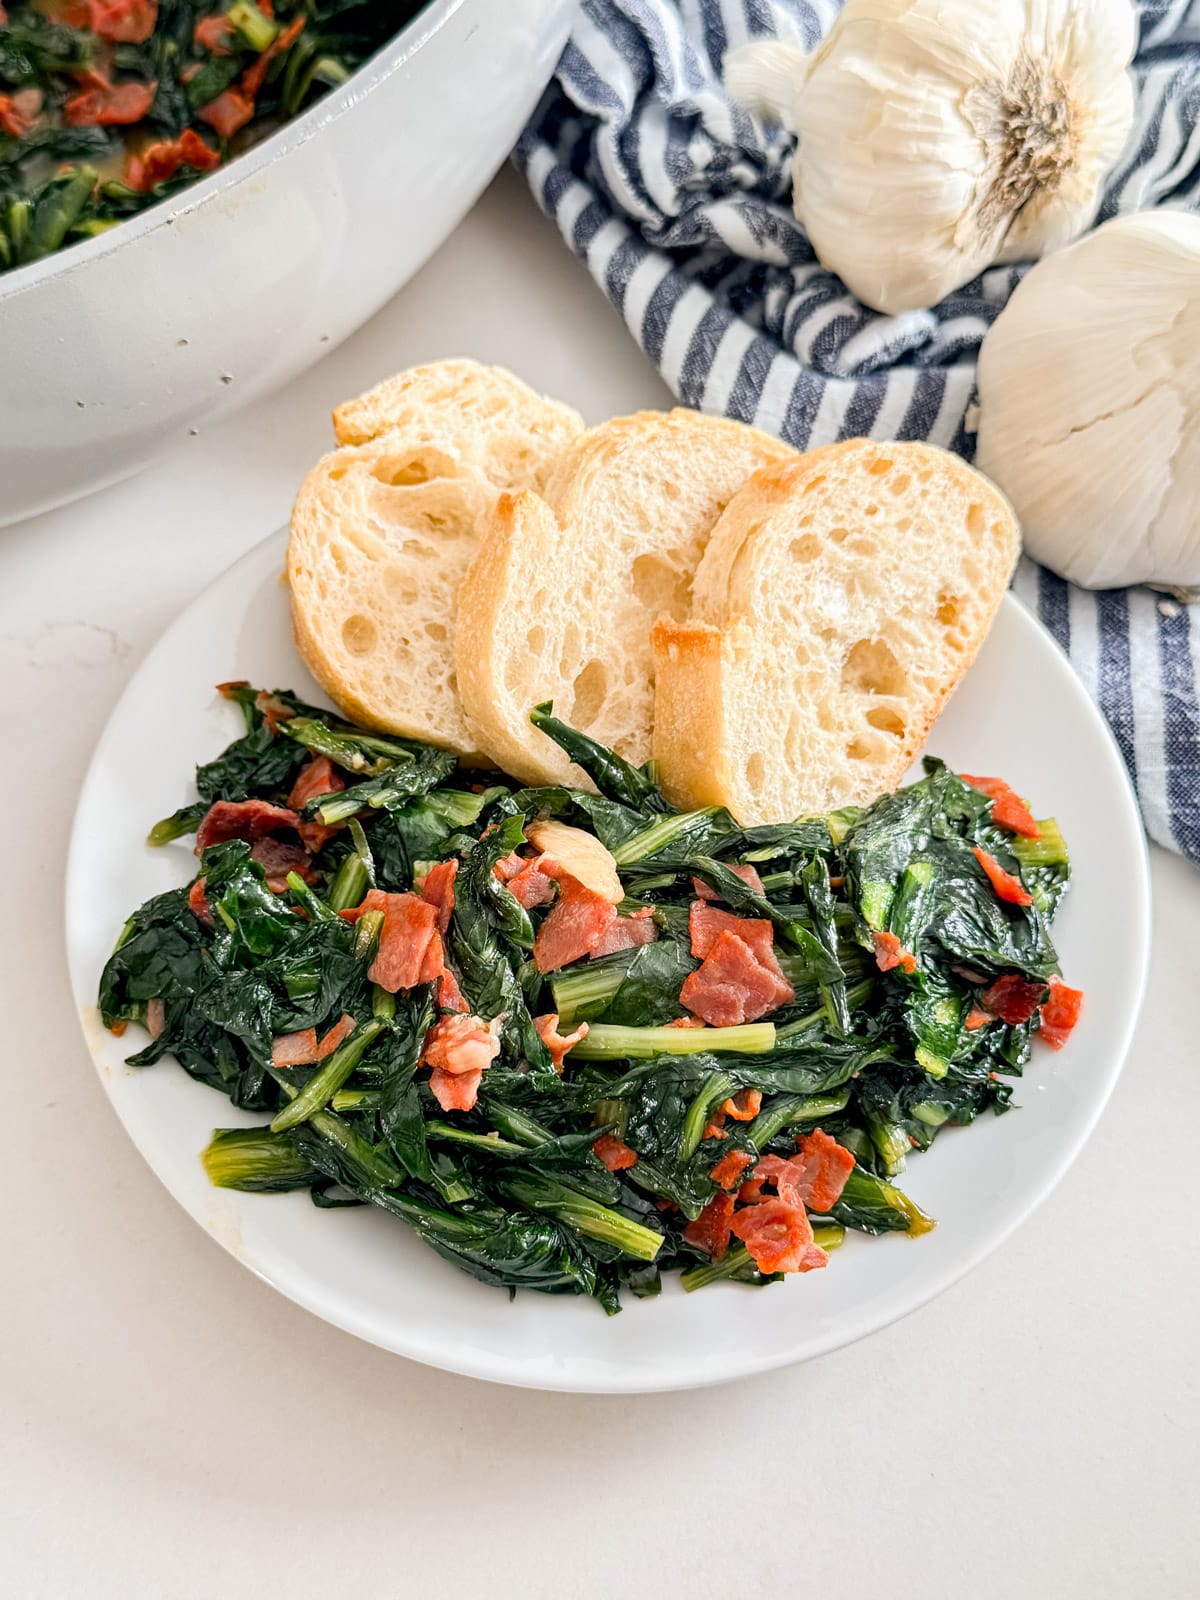
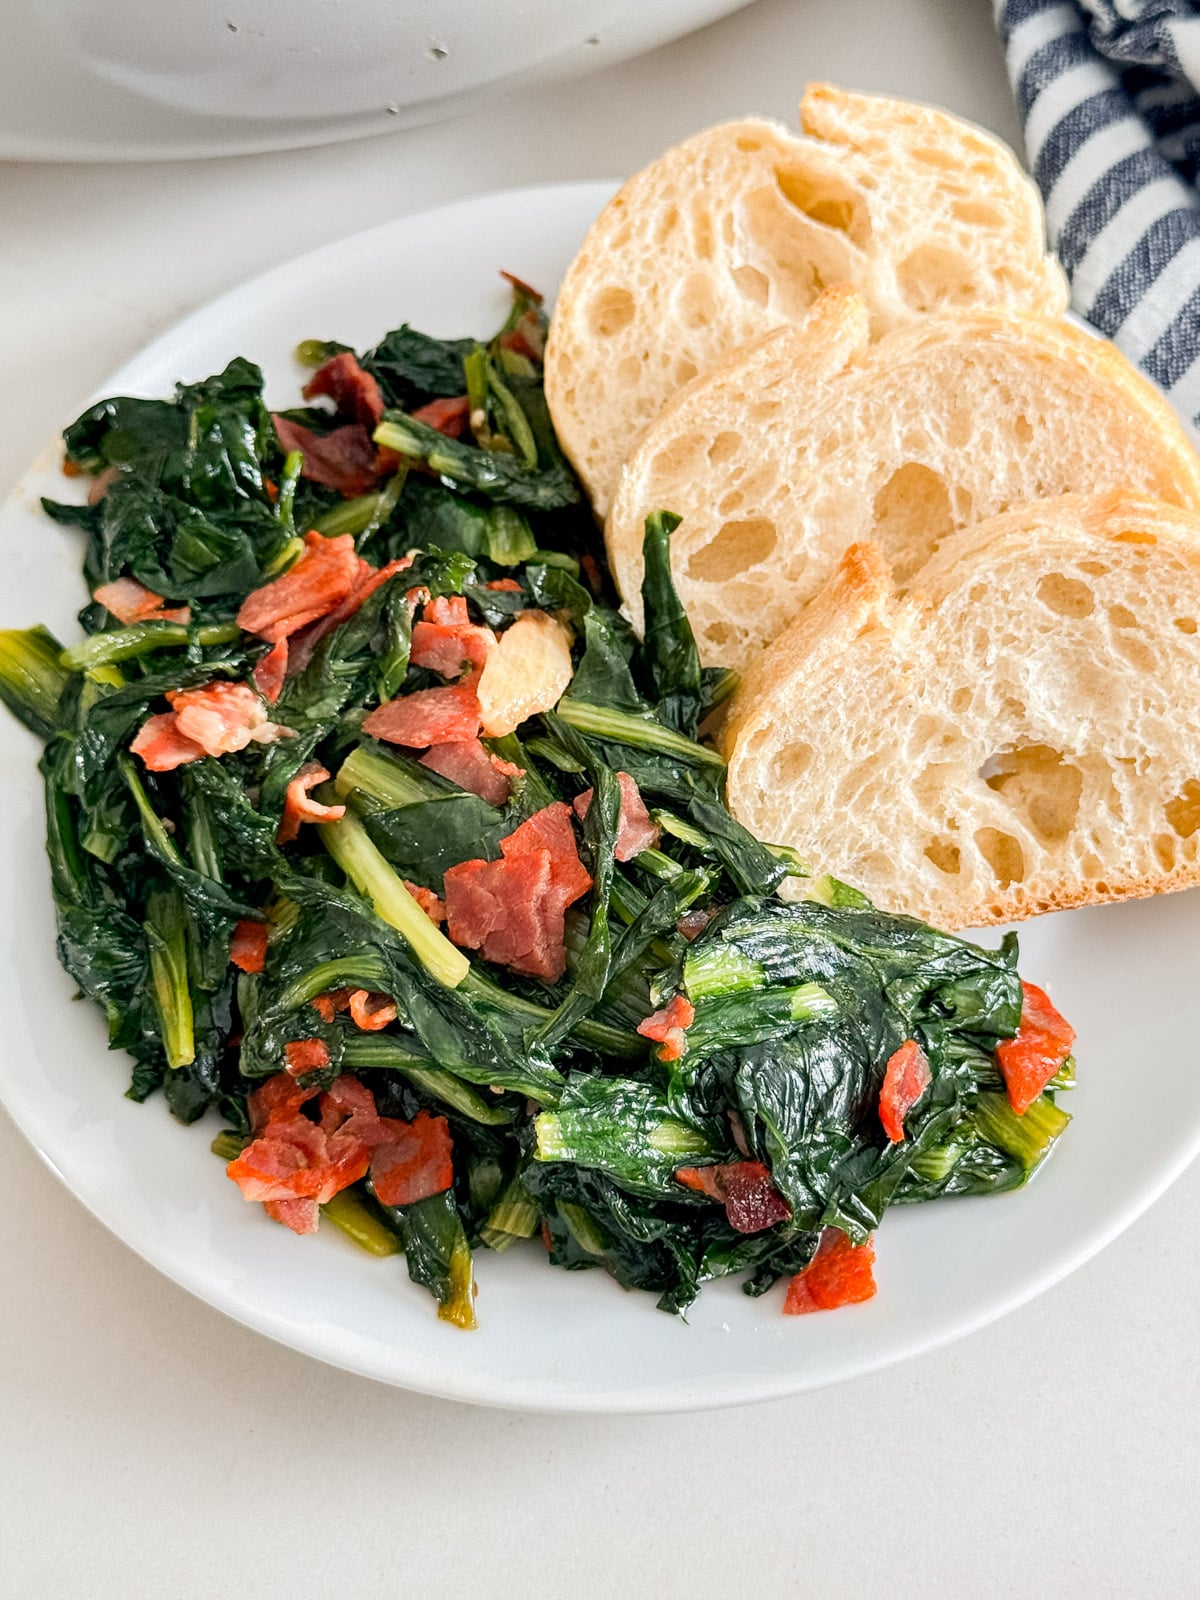
    • A plate of dandelion greens with bread.
      Dandelion Greens Recipe

    Love this recipe? Please leave a 5 star ⭐️⭐️⭐️⭐️⭐️ rating in the recipe card below ⬇️ and/or a review in the comment section further down. Check out my Amazon Store for all my favorite tools, including those used in this recipe. And follow @thelifejolie on Instagram and TikTok!

    A close up of a potato stack in a muffin tin with cheese and bacon.

    Muffin Tin Potato Stacks

    Jessy Freimann
    These muffin tin potato stacks are a fun, easy side dish made with thin slices of potato. They're seasoned and stacked in a muffin pan, then baked until tender and loaded with cheese, bacon, and sour cream.
    No ratings yet
    Print Recipe Pin Recipe
    Prep Time 10 minutes mins
    Cook Time 1 hour hr
    Total Time 1 hour hr 10 minutes mins
    Course dinner, Lunch, Side Dish
    Cuisine American
    Servings 12 stacks
    Calories 167 kcal

    Equipment

    • 1 muffin pan
    • 1 cutting board
    • 1 chefs knife
    • 1 mixing bowl
    • 1 Measuring cups and spoons

    Ingredients
      

    • Cooking spray
    • 7 medium potatoes peeled and sliced thin (any variety will do but I used red potatoes because that's what I had)
    • 1 teaspoon olive oil
    • 1 teaspoon Kosher salt
    • ¼ teaspoon ground black pepper
    • 1 teaspoon onion powder
    • 1 cup cheddar cheese shredded
    • 5 strips bacon fried to a crisp and crumbled and divided
    • Sour cream and fresh chopped chives for garnish

    Instructions
     

    • Preheat your oven to 375 degrees F and lightly spray each cup in your muffin tin with cooking spray.
    • In a bowl combine your potatoes, oil, salt, pepper, onion powder, ¾ of the cheese and ¾ of the crumbled bacon. Use your hands to mix this, making sure the the slices of potatoes don't stick together and that everything is evenly coated.
    • Place stacks of potatoes into each muffin cup so that they are around the same height. If there are any extra bits of bacon and cheese left in the mixing bowl, place them on top of each stack.
    • Bake for around 45-55 (until the potatoes are tender all the way though- I used my cake tester to test them).
    • Once tender, sprinkle a little bit more cheese and crumbled bacon on top. Put them back into the oven and let them melt for a minute or two and serve immediately topped with a dollop of sour cream and a sprinkle of chives.

    Video

    Notes

    • Grease the muffin pan well- These definitely stick- a silicone pan is best but either way, cooking spray is your friend here.
    • Use your clean hands to mix. It's the best way to make sure every potato slice gets evenly coated without the slices sticking together.
    • Slice the potatoes as evenly as possible. Uniform slices mean everything cooks at the same rate. A mandoline slicer is great for this if you have one.
    • Don't add extra oil. to the potatoes The recipe only calls for a small amount, and that's intentional. Мore oil results in greasy stacks, instead use the cooking spray to prevent sticking.
    • Check doneness with a cake tester. It's the easiest way to make sure the potatoes are tender all the way through without disturbing the stacks.
    • The loaded toppings here are a classic combo, but feel free to switch things up. Crumbled blue cheese, caramelized onions, or even a drizzle of hot sauce are all delicious variations.
    • Ingredients to prep ahead- The bacon can be fried and crumbled ahead of time and stored in the fridge. The potatoes are best sliced fresh to avoid browning.
    • Leftovers and storage- Store in an airtight container in the fridge for up to 3 days. Reheat in the oven to bring back that crispy cheese topping.

    Nutrition

    Serving: 2stacksCalories: 167kcalCarbohydrates: 20gProtein: 6gFat: 7gSaturated Fat: 3gPolyunsaturated Fat: 1gMonounsaturated Fat: 3gTrans Fat: 0.01gCholesterol: 15mgSodium: 339mgPotassium: 593mgFiber: 2gSugar: 2gVitamin A: 107IUVitamin C: 11mgCalcium: 80mgIron: 1mg
    Tried this recipe?Let us know how it was!

    Roasted Corn Salsa

    May 18, 2026 · 6 Comments

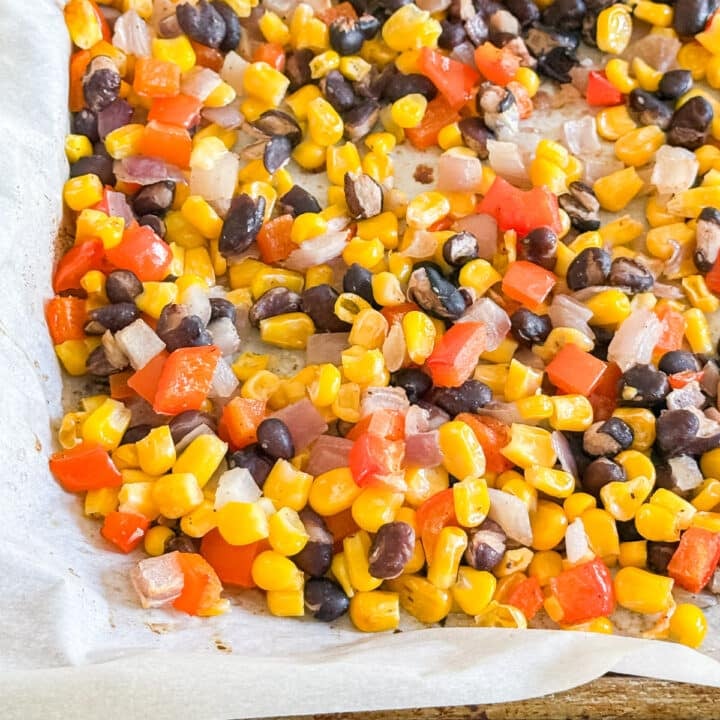
    A close up image of the corner of the pan of corn salsa.

    This roasted corn salsa is simple to make, full of flavor, and goes with just about anything! Delicious over tacos, chicken, eggs... or just scooped up with a bowl of tortilla chips.

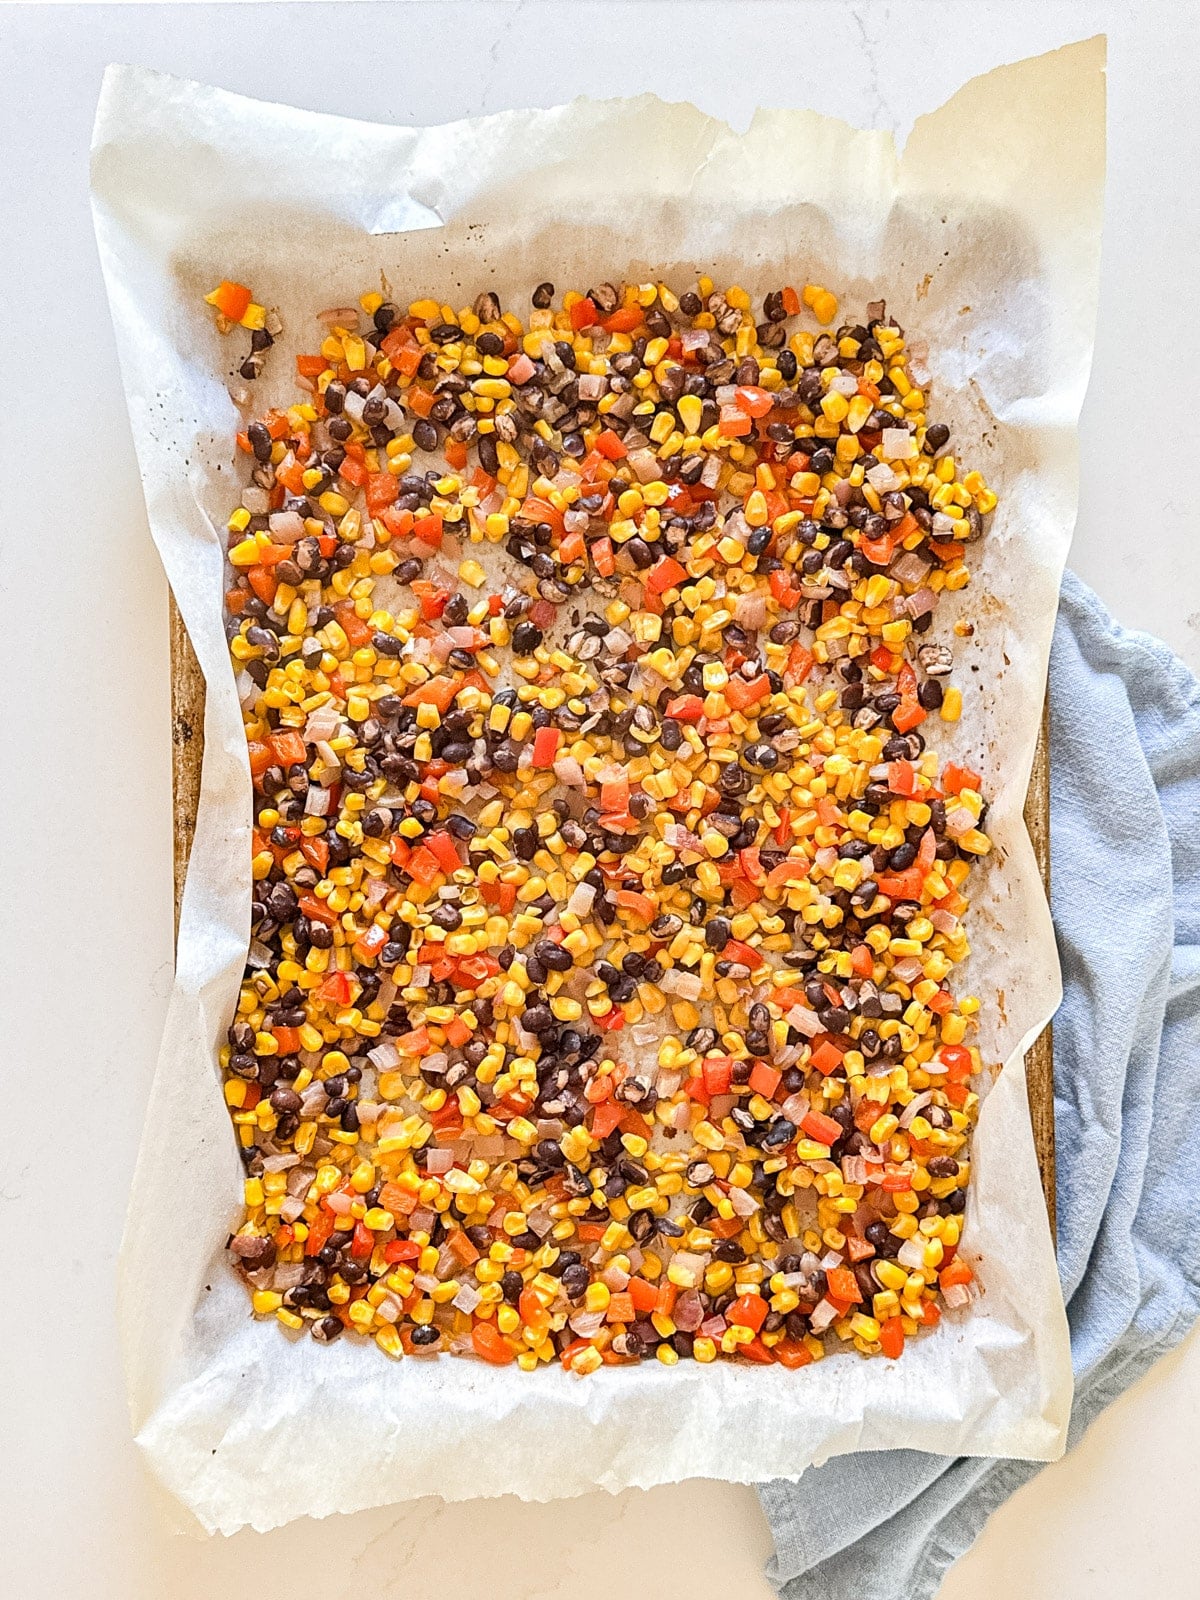
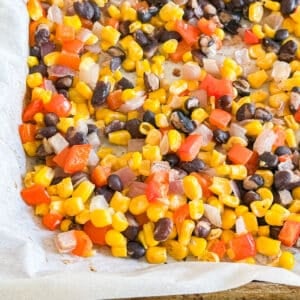
    An overhead image of the corn salsa on a parchment lined baking pan.
    [feast_advanced_jump_to]

    Why You'll Love This Roasted Chili Corn Salsa

    I'll be honest, I originally threw this together as a topping for another recipe, but the moment I tasted the leftovers on their own, I was completely hooked. It's what I call a base recipe. It's delicious as is, but you can also kick it up a notch by adding whatever you want. A diced jalapeño for heat, a little cilantro for freshness, or a squeeze of lime… the possibilities are endless!

    One morning, I fried up a corn tortilla, added some tomato salsa, piled on a few generous scoops of this bean salsa, and topped it with a couple of over-easy eggs. Best Sunday breakfast ever. I also love it over grilled chicken, mixed into a taco salad, or spooned over fish.

    I seriously love this so much, I now keep a container of it in my fridge all week long. It just makes everything better. Here's why this black bean and corn salsa is a total winner:

    • Ready in 35 minutes
    • Incredibly versatile
    • Simple ingredients
    • Great for meal prep
    • Works as a topping, side, or dip
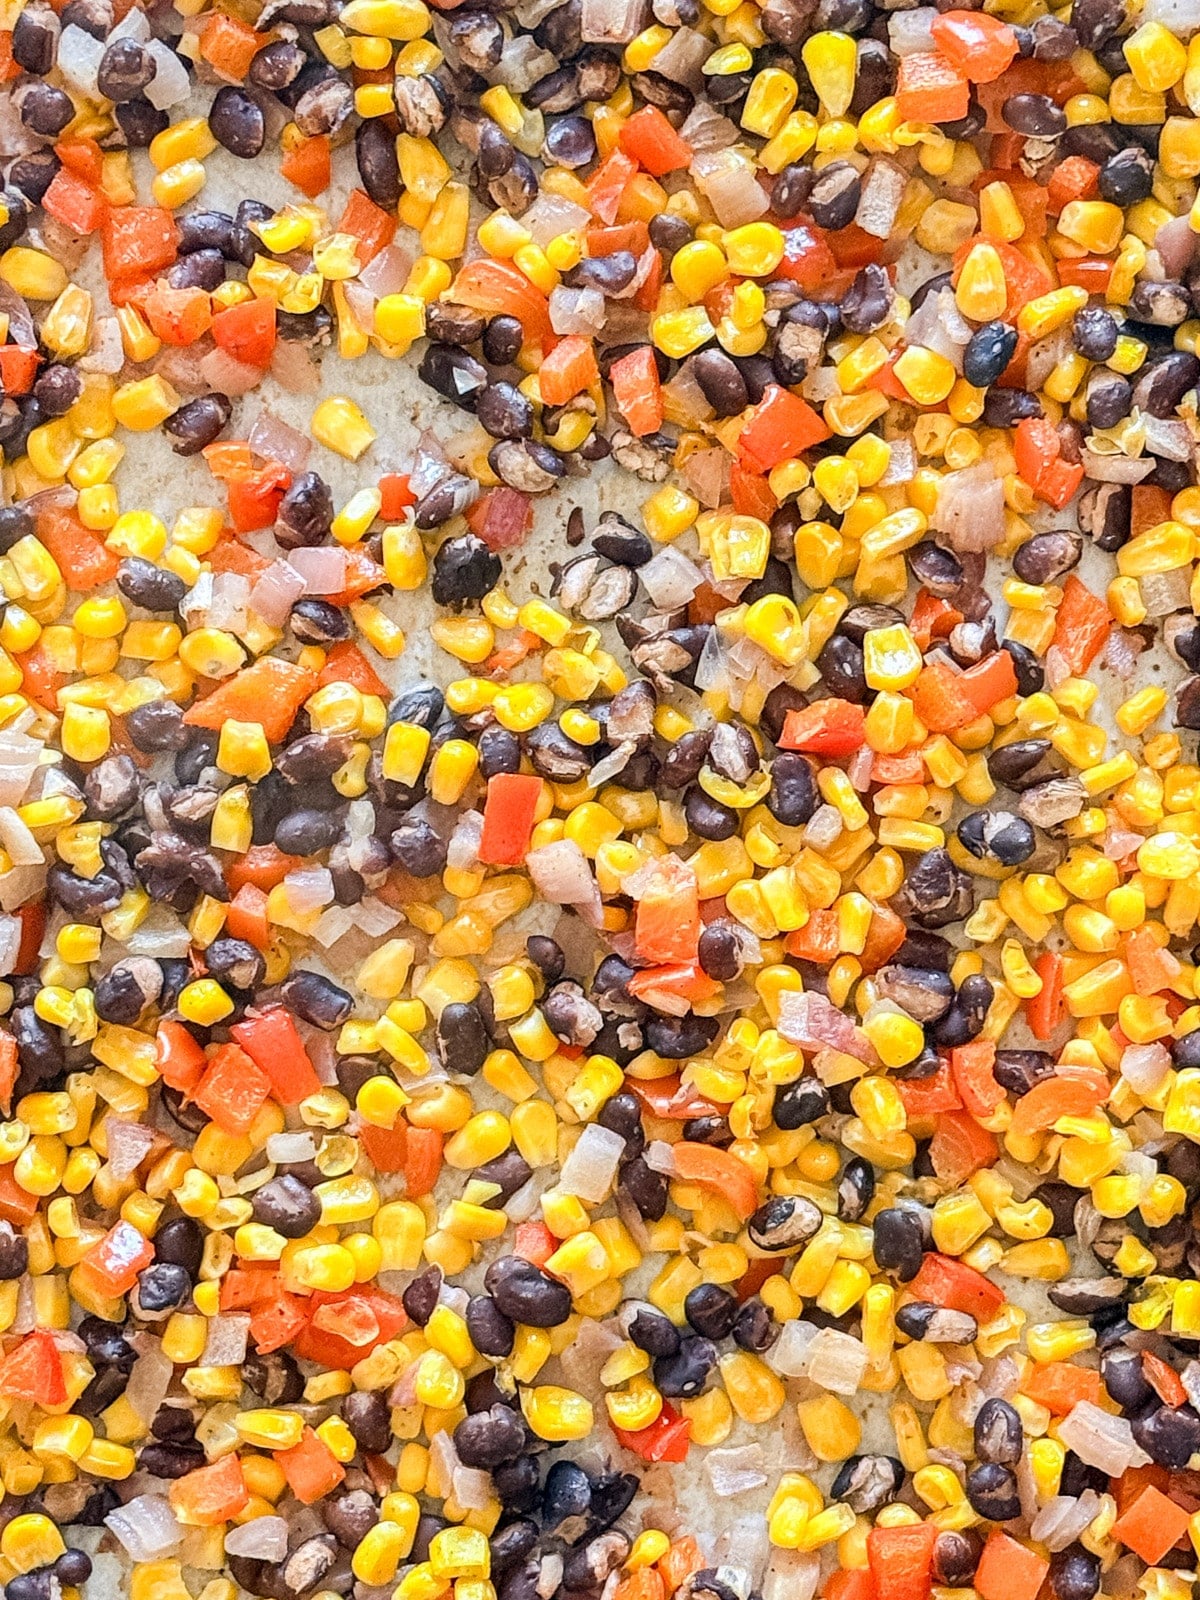
    A close up overhead image of corn salsa spread out on the sheet pan.

    Ingredient Information And Substitutions

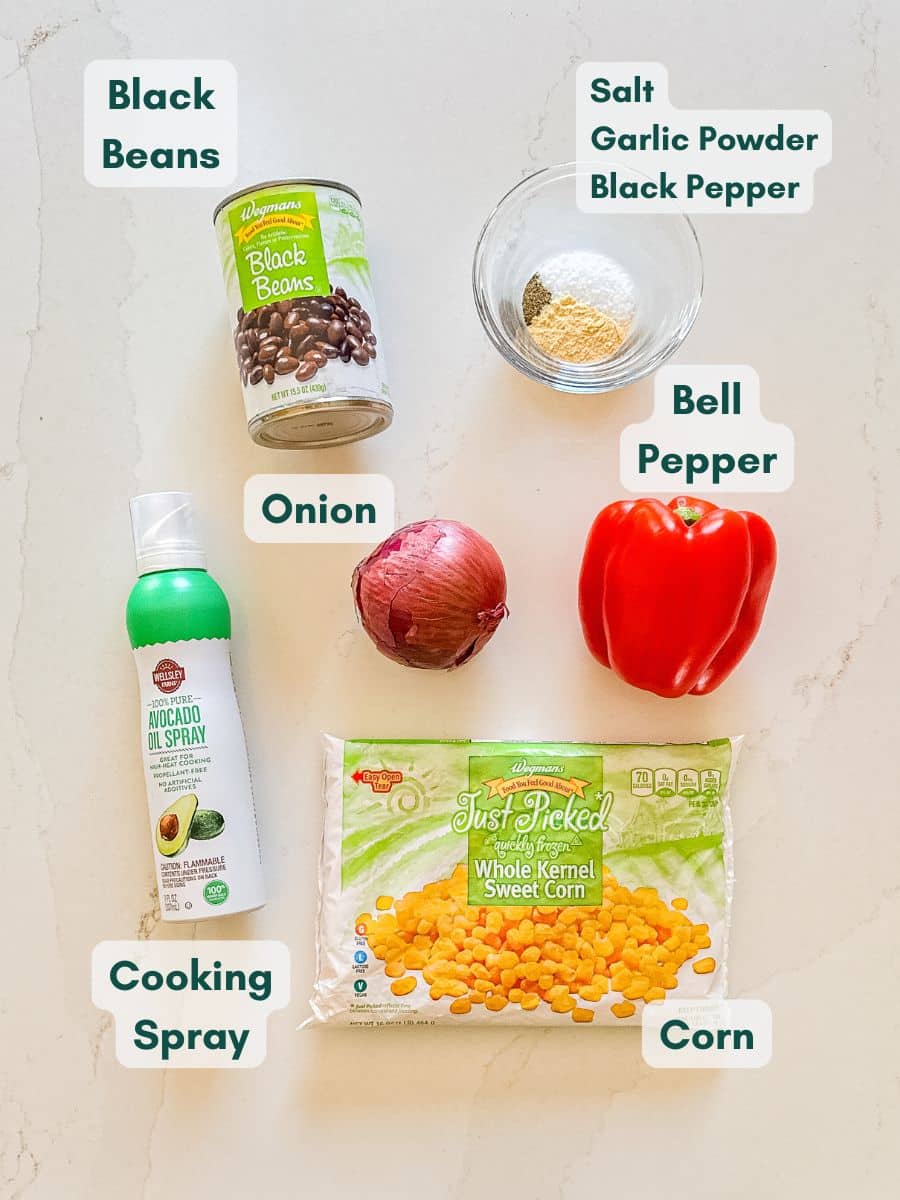
    • Frozen corn- Roasts up beautifully straight from frozen. Fresh corn cut off the cob works great too, when it's in season.
    • Black beans- Adds protein and heartiness. Pinto beans work well as an alternative.
    • Red bell pepper- Adds sweetness and color. Any color bell pepper works as a substitute, especially yellow or orange.
    • Red onion- Gives a slightly sharp, savory flavor that mellows beautifully when roasted. A white or yellow onion works too.
    • Cooking spray- Helps everything roast evenly without sticking to the pan.
    • Garlic powder- Adds a savory depth to the salsa. Fresh minced garlic can work too, though it may brown faster at high heat.
    • Kosher salt- Season to taste.
    • Ground black pepper- Just enough to round everything out.
    An overhead image of labeled recipe ingredients.

    How To Make This Black Bean and Corn Salsa Recipe

    Step 1- Preheat and prep. 

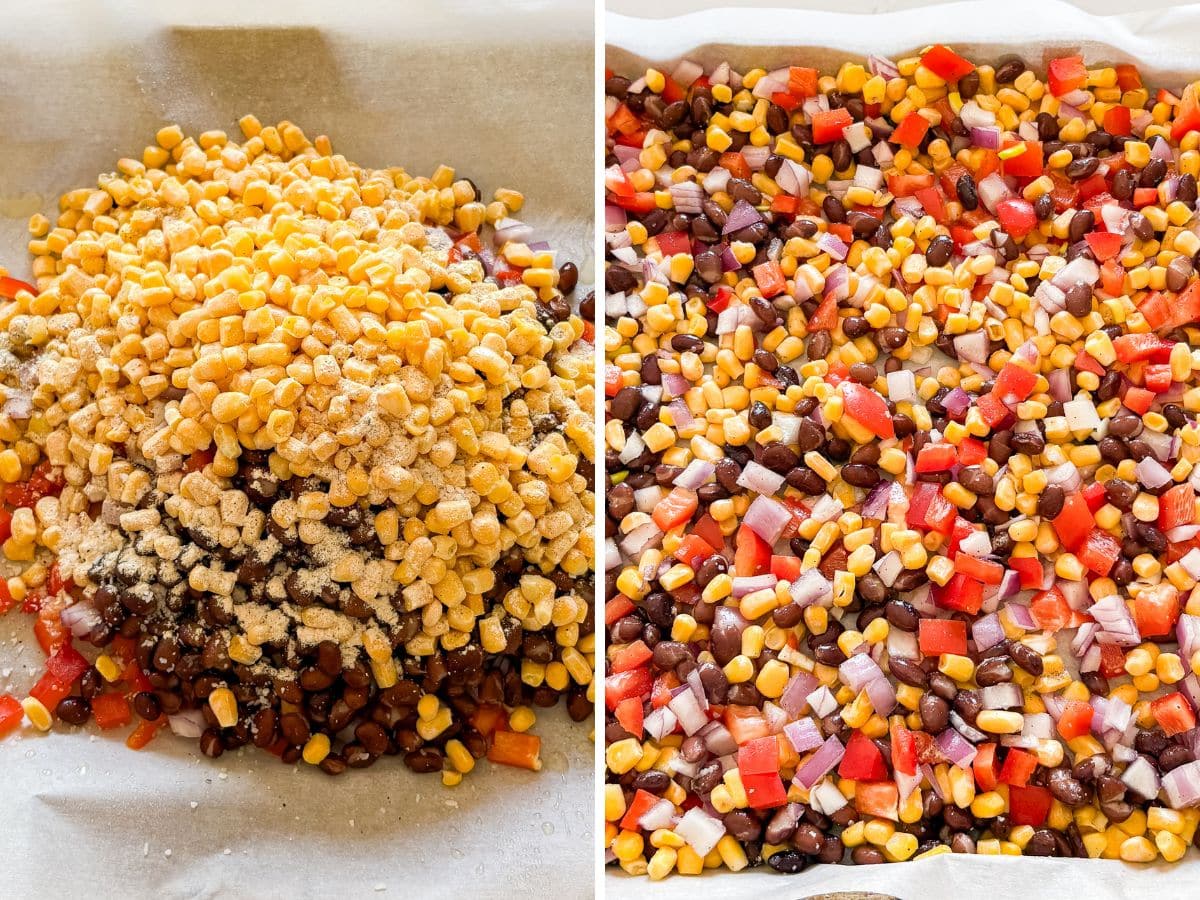
    Preheat your oven to 400 degrees F and spray your pan well with cooking spray.

    Step 2- Mix and spread. 

    Combine all the veggies and beans and spread them in an even layer on your pan. Give the top another spray of cooking spray.

    All the ingredients piled onto a parchment tined sheet pan and then mixed together and spread out.

    Step 3- Season. 

    Season generously with salt, pepper, and garlic powder to taste.

    Step 4- Roast. 

    Bake for 30 minutes, flipping periodically. Let cool and serve.

    The pan in the oven and then the salsa being flipped in the middle of roasting.

    Frequently Asked Questions

    How to make corn salsa? 

    Mix corn kernels and black beans with diced red onion and bell pepper, then spread the mixture onto a sheet pan. Season and roast at 400 degrees F for 30 minutes, flipping a few times.

    Can I make this salsa ahead of time? 

    Absolutely. This actually tastes even better the next day as the flavors meld together. Make it up to 3 days ahead and store in an airtight container in the fridge. It also freezes really well!

    Can I make this salsa spicy? 

    Yes. Add a diced jalapeño before roasting, or stir in a pinch of cayenne after. A drizzle of hot sauce right before serving works great too.

    A close up image of the corner of the pan of corn salsa.

    Tips For Black Bean Corn Salsa

    • Don't crowd the pan. Spreading everything in a single even layer is key to getting that roasted, slightly charred flavor rather than steaming.
    • Flip periodically. Giving the veggies a toss a couple of times while roasting helps everything caramelize evenly.
    • Double the batch. This salsa disappears fast, so making extra means you'll have it ready to go all week.
    • Stir it into leftovers. Spoon it over last night's taco meat or mix it into a salad. It instantly kicks everything up a notch!
    • Customize it. Add a diced jalapeño for heat, fresh cilantro for brightness (after roasting), a squeeze of lime, or even a pinch of smoked paprika for a subtle smoky depth.
    • Mix in extras. Diced avocado, cherry tomatoes, or crumbled cotija cheese are all delicious additions that take this salsa to the next level. Add these just before serving.
    • Ingredients to prep ahead- The veggies and beans can be mixed and stored in the fridge the night before. Just spread the mixture on the pan and roast when ready.
    • Leftovers and storage- Store in an airtight container in the fridge for up to 3 days.
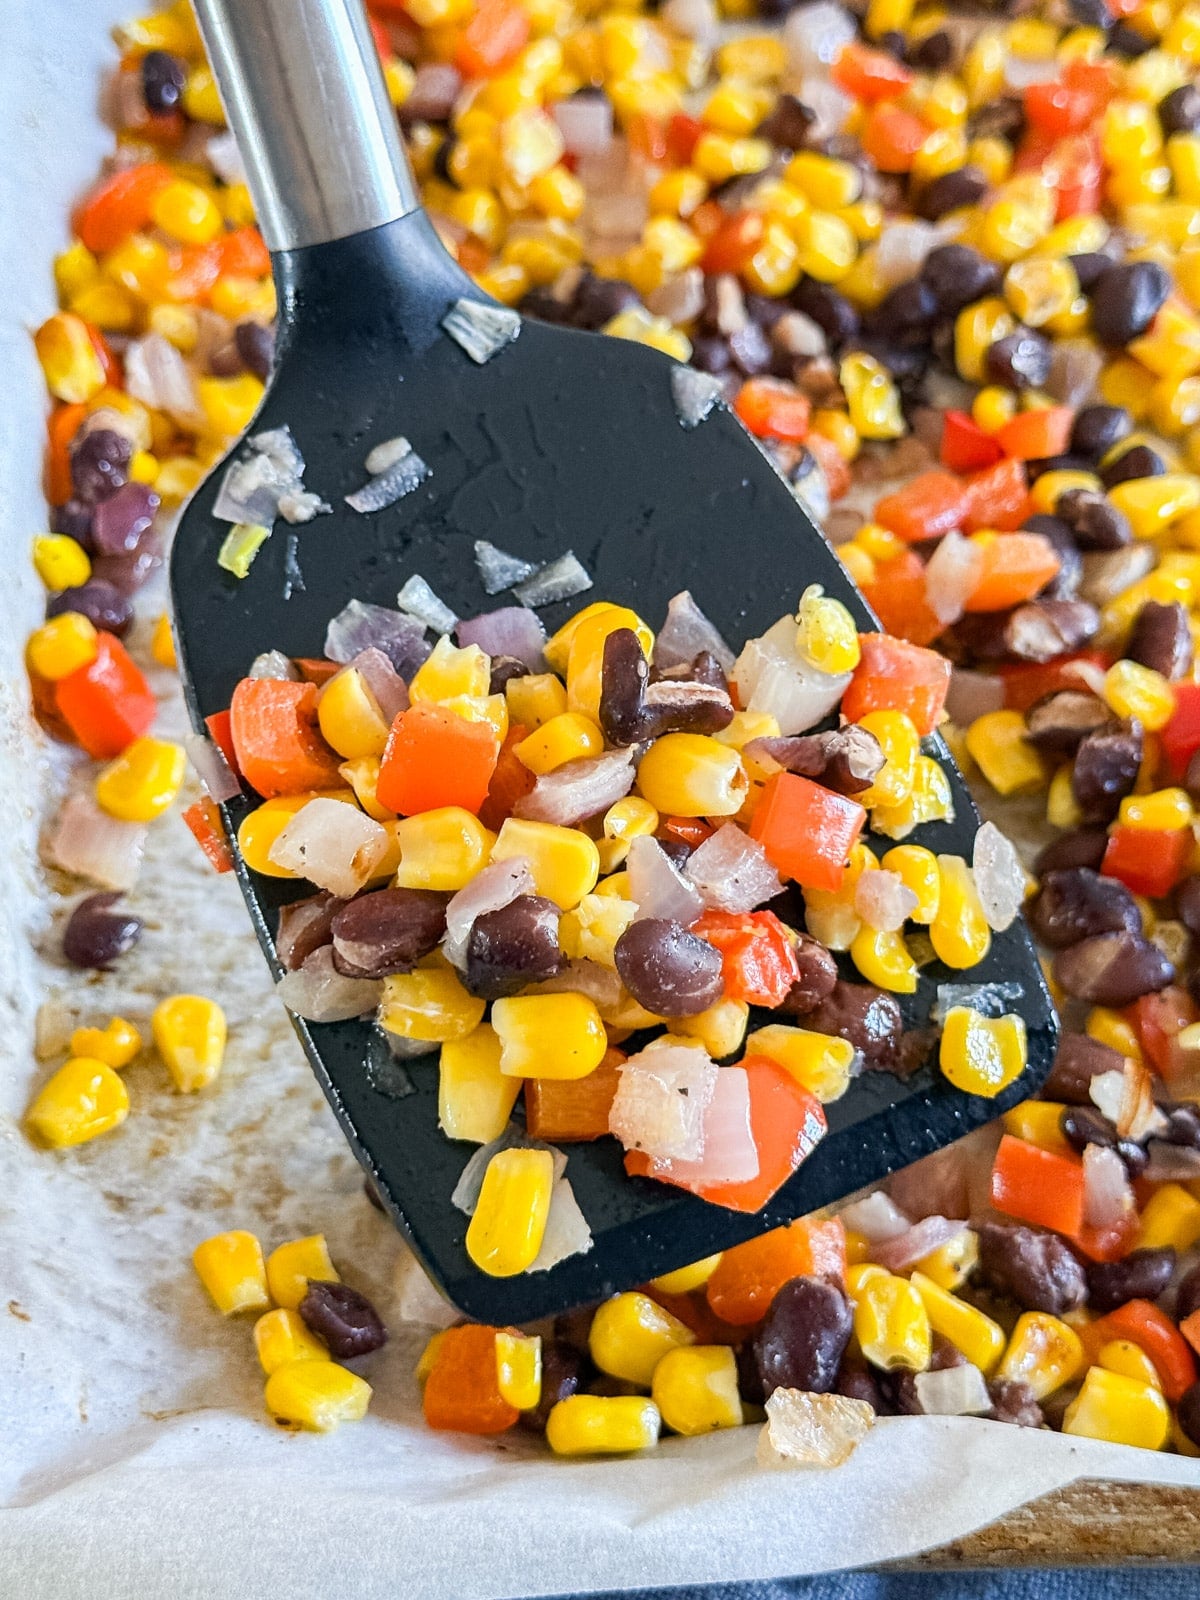
    A spatula holding corn salsa up close to the camera from the pan.

    What To Serve With Corn and Black Bean Salsa

    This salsa is so versatile that it really goes with just about anything. Here are some of my favorite ways to serve it:

    • Bean and Cheese Burrito Recipe
    • Slow Cooker Taco Meat (and Instant Pot!)
    • Black Bean Turkey Chili
    • The most delicious guacamole EVER

    Other Appetizer and Snack Recipes To Try

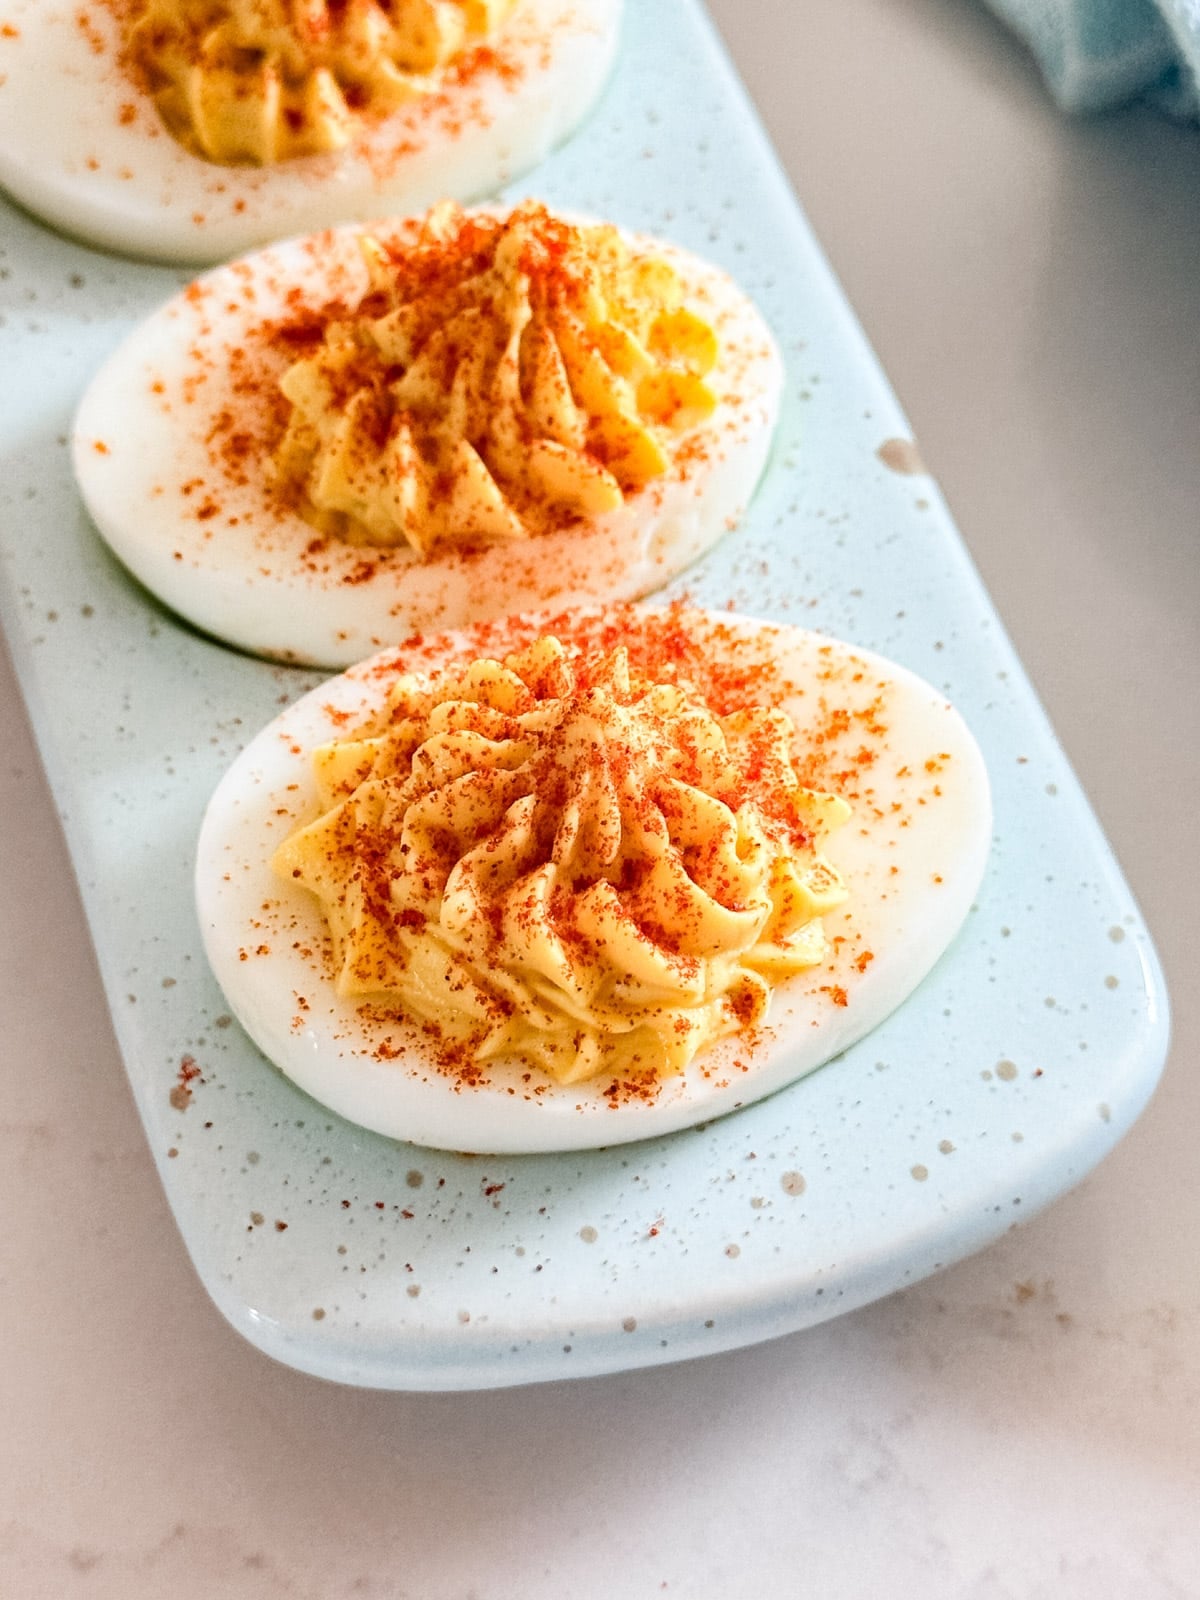
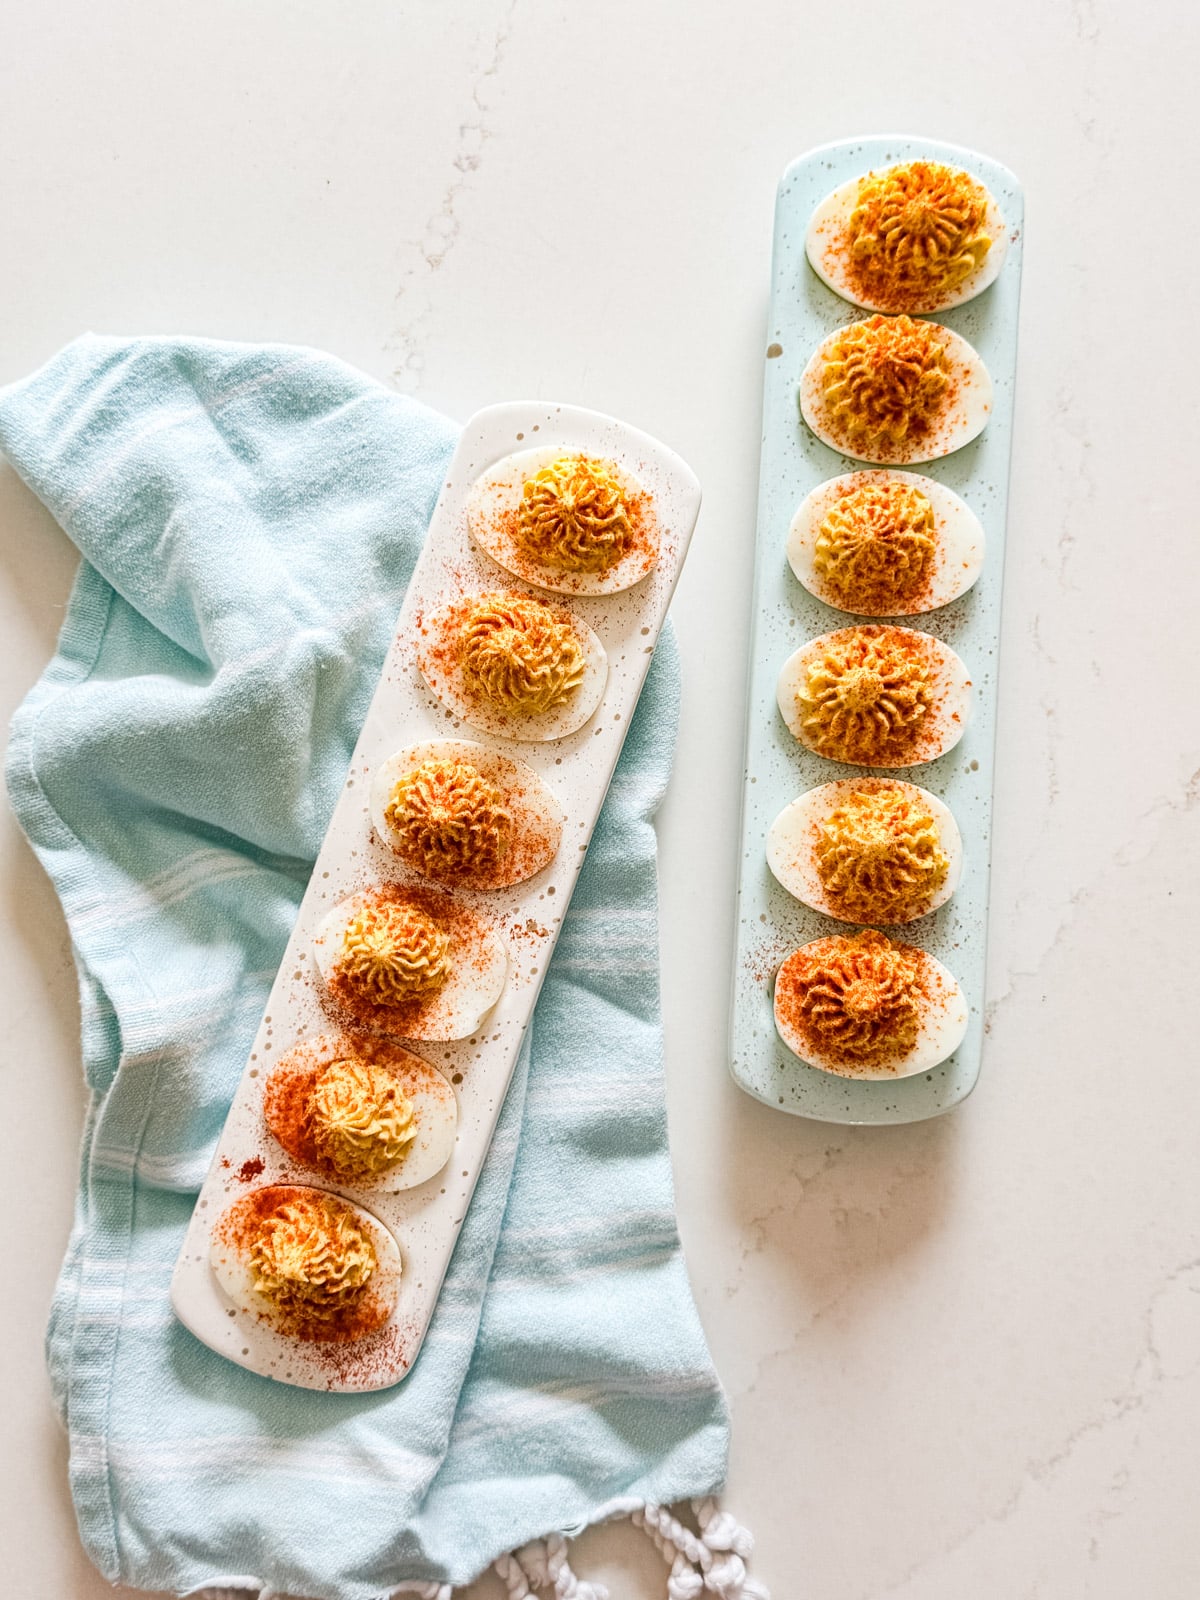
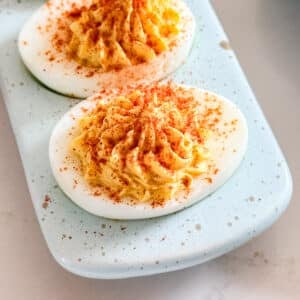
    • A close up image of a devil egg lined up on the end of a long plate with others behind it.
      Easy Deviled Eggs
    • A hand putting a tortilla chip up with taco dip on it.
      7 Layer Taco Dip
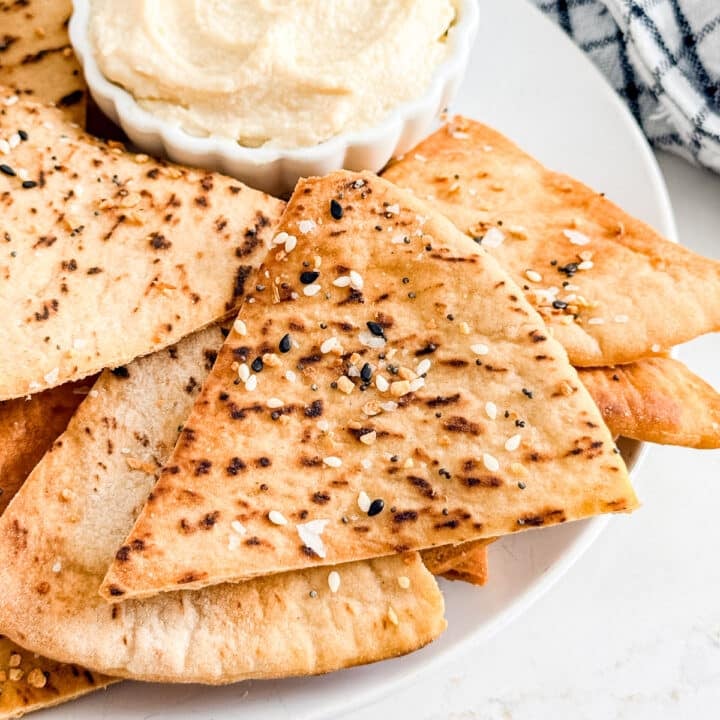
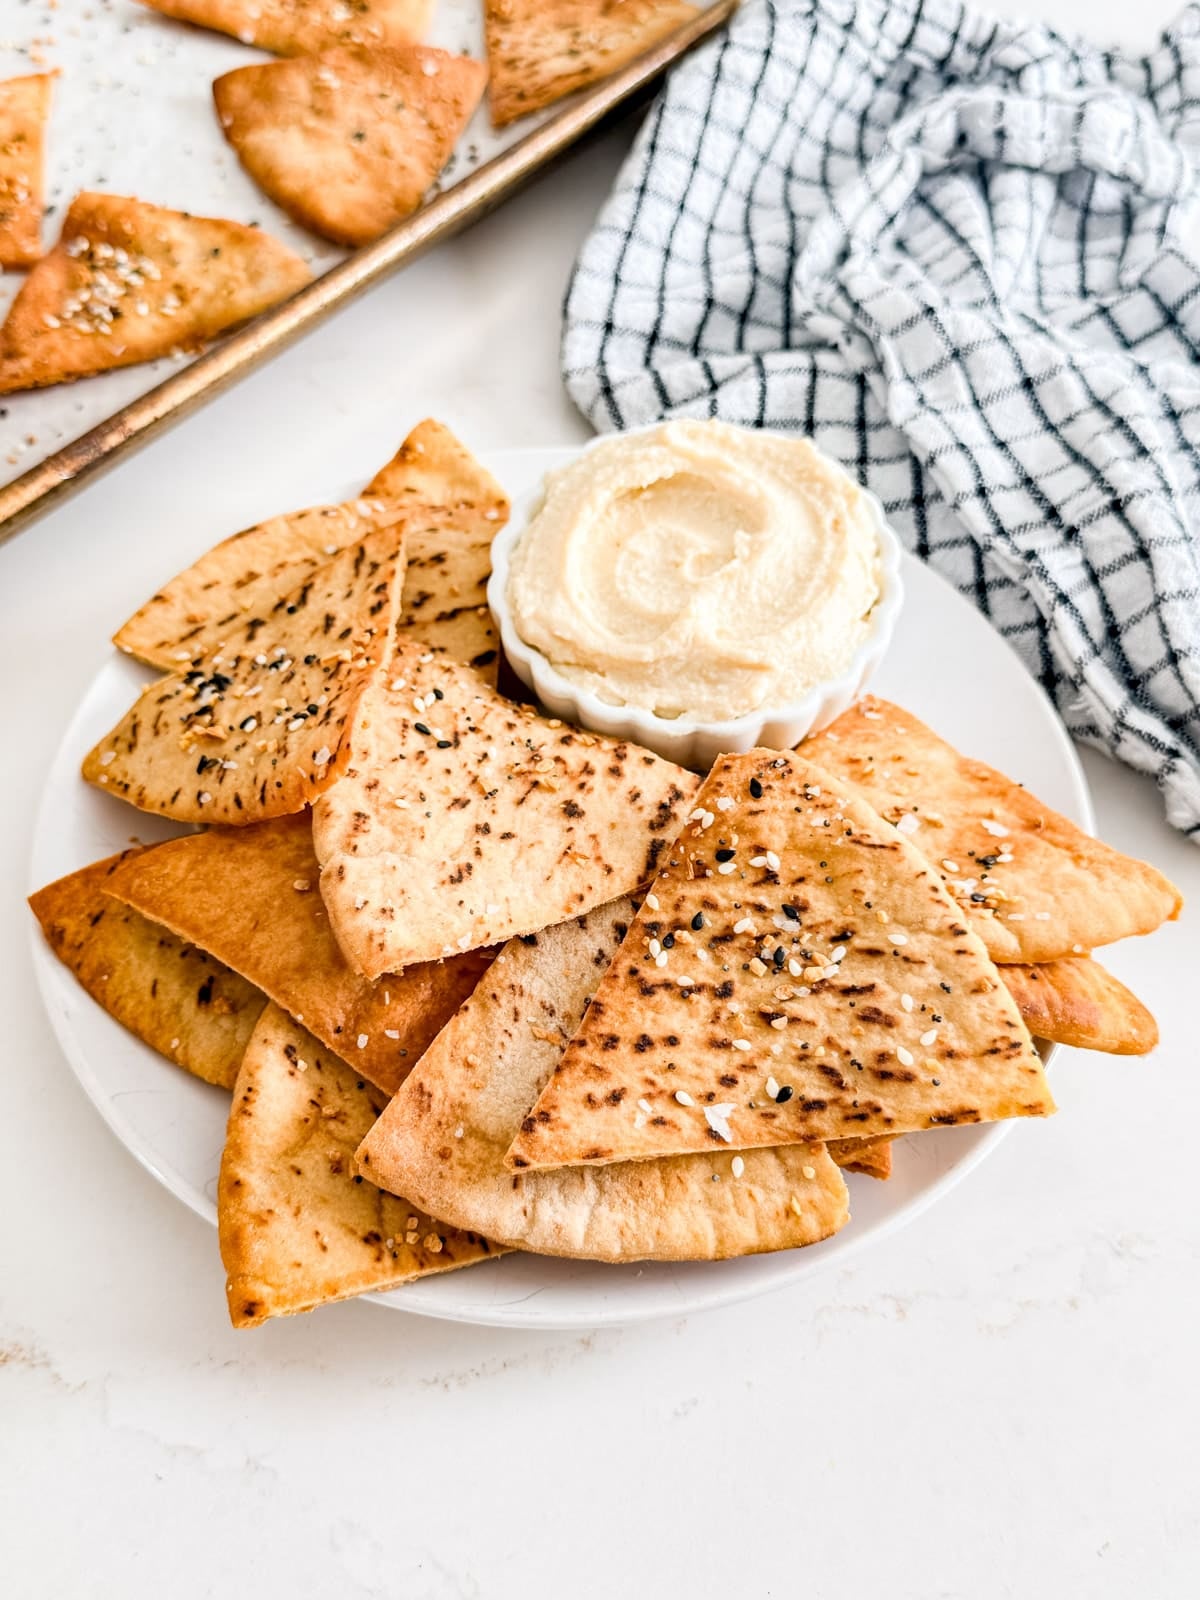
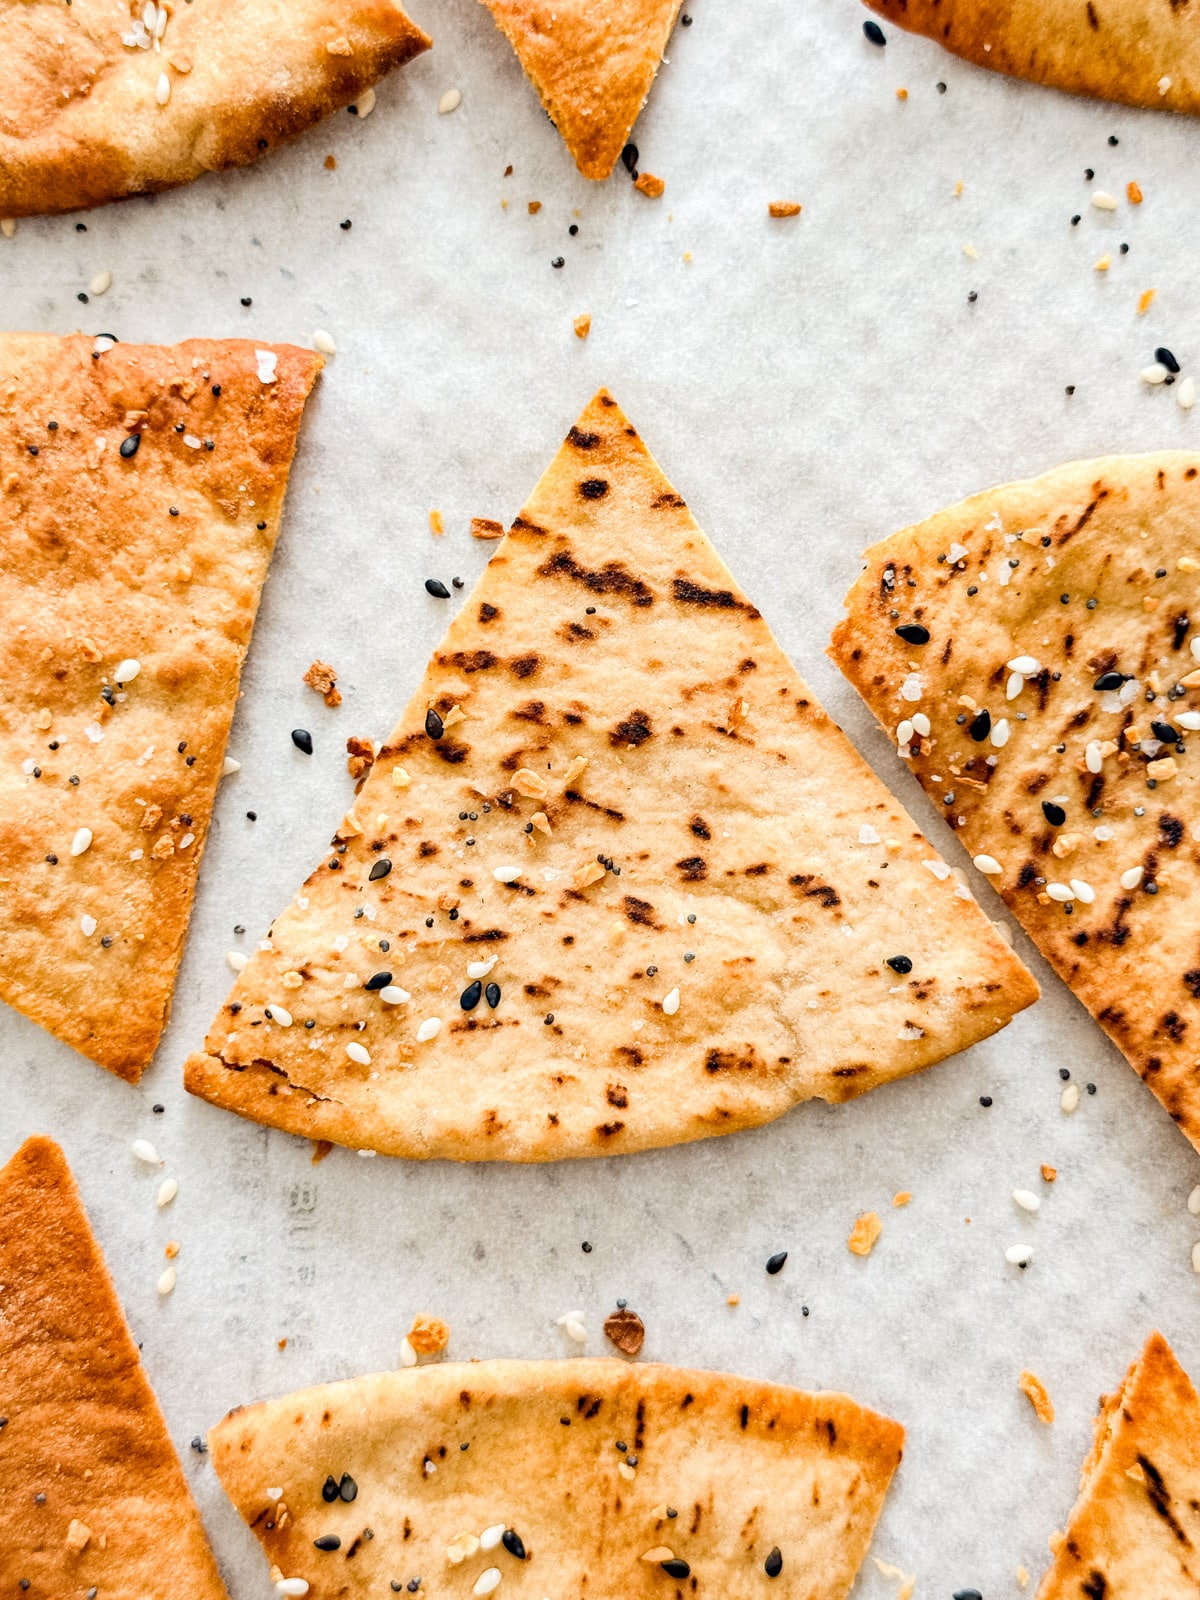
    • A close up of a pita chip onto top of other pita chips.
      Pita Chips Recipe
    • A close up image of a Brie Apple Phyllo Cup on a pan.
      Brie Apple Phyllo Cups

    Love this recipe? Please leave a 5 star ⭐️⭐️⭐️⭐️⭐️ rating in the recipe card below ⬇️ and/or a review in the comment section further down. Check out my Amazon Store for all my favorite tools, including those used in this recipe. And follow @thelifejolie on Instagram and TikTok!

    A close up image of the corner of the pan of corn salsa.

    Roasted Corn Salsa

    Jessy Freimann
    This roasted corn salsa is simple to make, full of flavor, and goes with just about anything! Delicious over tacos, chicken, eggs... or just scooped up with a bowl of tortilla chips.
    No ratings yet
    Print Recipe Pin Recipe
    Prep Time 5 minutes mins
    Cook Time 30 minutes mins
    0 minutes mins
    Total Time 35 minutes mins
    Course Appetizer, dinner, Lunch
    Cuisine condiment, vegetarian
    Servings 6 servings
    Calories 163 kcal

    Equipment

    • sheet pan
    • 1 cutting board
    • 1 chefs knife
    • 1 Measuring cups and spoons

    Ingredients
      

    • Cooking spray
    • 1 cup red onion diced
    • 2 cups frozen corn
    • 1 cup red bell pepper diced
    • 14.5 ounces black beans drained and rinsed
    • 1 teaspoon kosher salt
    • ¼ teaspoon ground black pepper
    • 1 teaspoon Garlic Powder

    Instructions
     

    • Preheat oven to 400 degrees F and spray your pan well with the cooking spray or line with parchment and spray..
    • Mix all veggies and beans well and spread in an even layer on the pan.
    • Spray more cooking spray on the veggies.
    • Season liberally with salt, pepper and garlic powder to taste.
    • Bake for 30 minutes, flipping once half way through. Cool and serve.

    Video

    Notes

    • Don't crowd the pan. Spreading everything in a single even layer is key to getting that roasted, slightly charred flavor rather than steaming.
    • Flip periodically. Giving the veggies a toss a couple of times while roasting helps everything caramelize evenly.
    • Double the batch. This salsa disappears fast, so making extra means you'll have it ready to go all week.
    • Stir it into leftovers. Spoon it over last night's taco meat or mix it into a salad. It instantly kicks everything up a notch!
    • Customize it. Add a diced jalapeño for heat, fresh cilantro for brightness (after roasting), a squeeze of lime, or even a pinch of smoked paprika for a subtle smoky depth.
    • Mix in extras. Diced avocado, cherry tomatoes, or crumbled cotija cheese are all delicious additions that take this salsa to the next level. Add these just before serving.
    • Ingredients to prep ahead- The veggies and beans can be mixed and stored in the fridge the night before. Just spread the mixture on the pan and roast when ready.
    • Leftovers and storage- Store in an airtight container in the fridge for up to 3 days.

    Nutrition

    Serving: 1servingCalories: 163kcalCarbohydrates: 34gProtein: 9gFat: 1gSaturated Fat: 0.2gPolyunsaturated Fat: 0.4gMonounsaturated Fat: 0.2gSodium: 393mgPotassium: 503mgFiber: 9gSugar: 2gVitamin A: 785IUVitamin C: 38mgCalcium: 30mgIron: 2mg
    Tried this recipe?Let us know how it was!

    Meat Lover's Mini Pizza Bites

    May 15, 2026 · 8 Comments

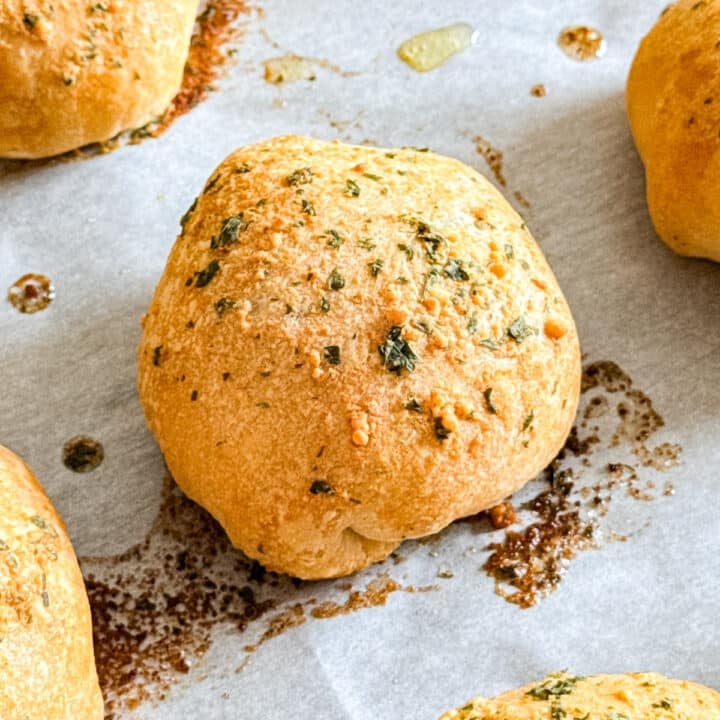
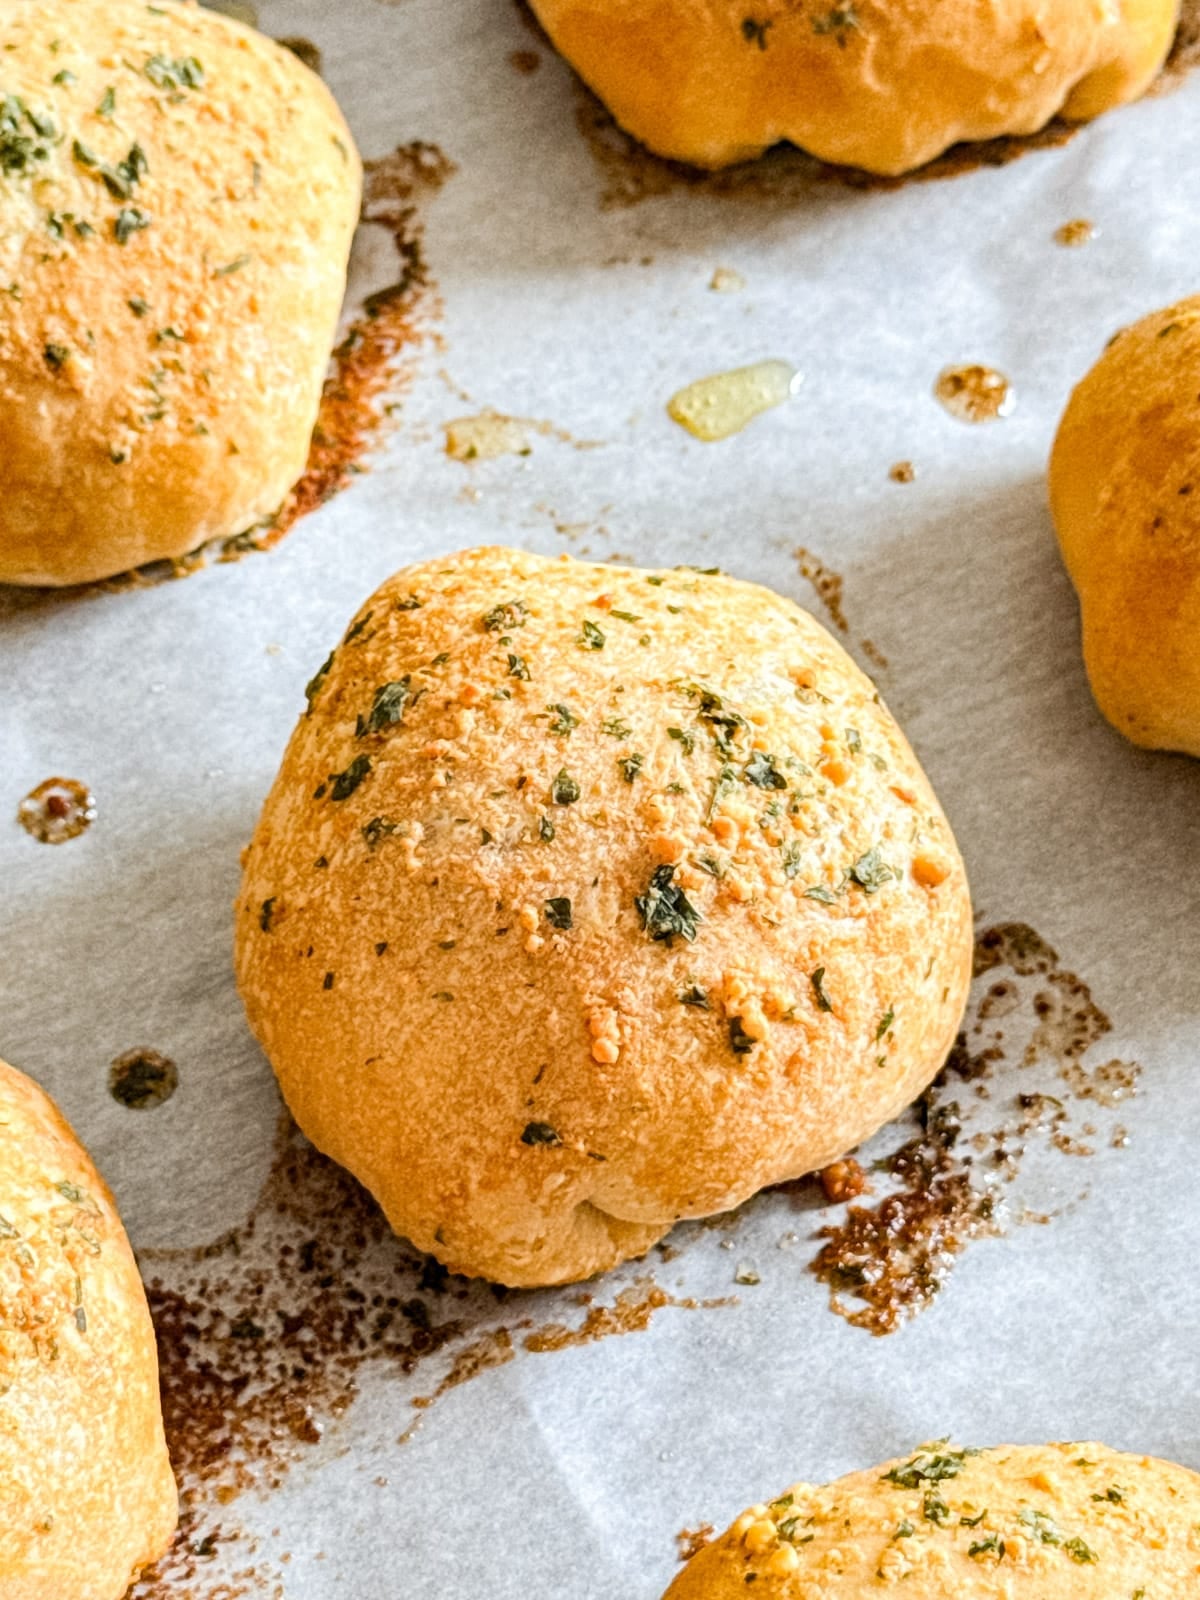
    A close up image of a meat lovers pizza bite on a pan.

    These meat lover's mini pizza bites are the ultimate game day appetizer. Pepperoni, sausage, bacon, and melted cheese all wrapped up in a warm, buttery biscuit and served with tomato sauce for dipping.

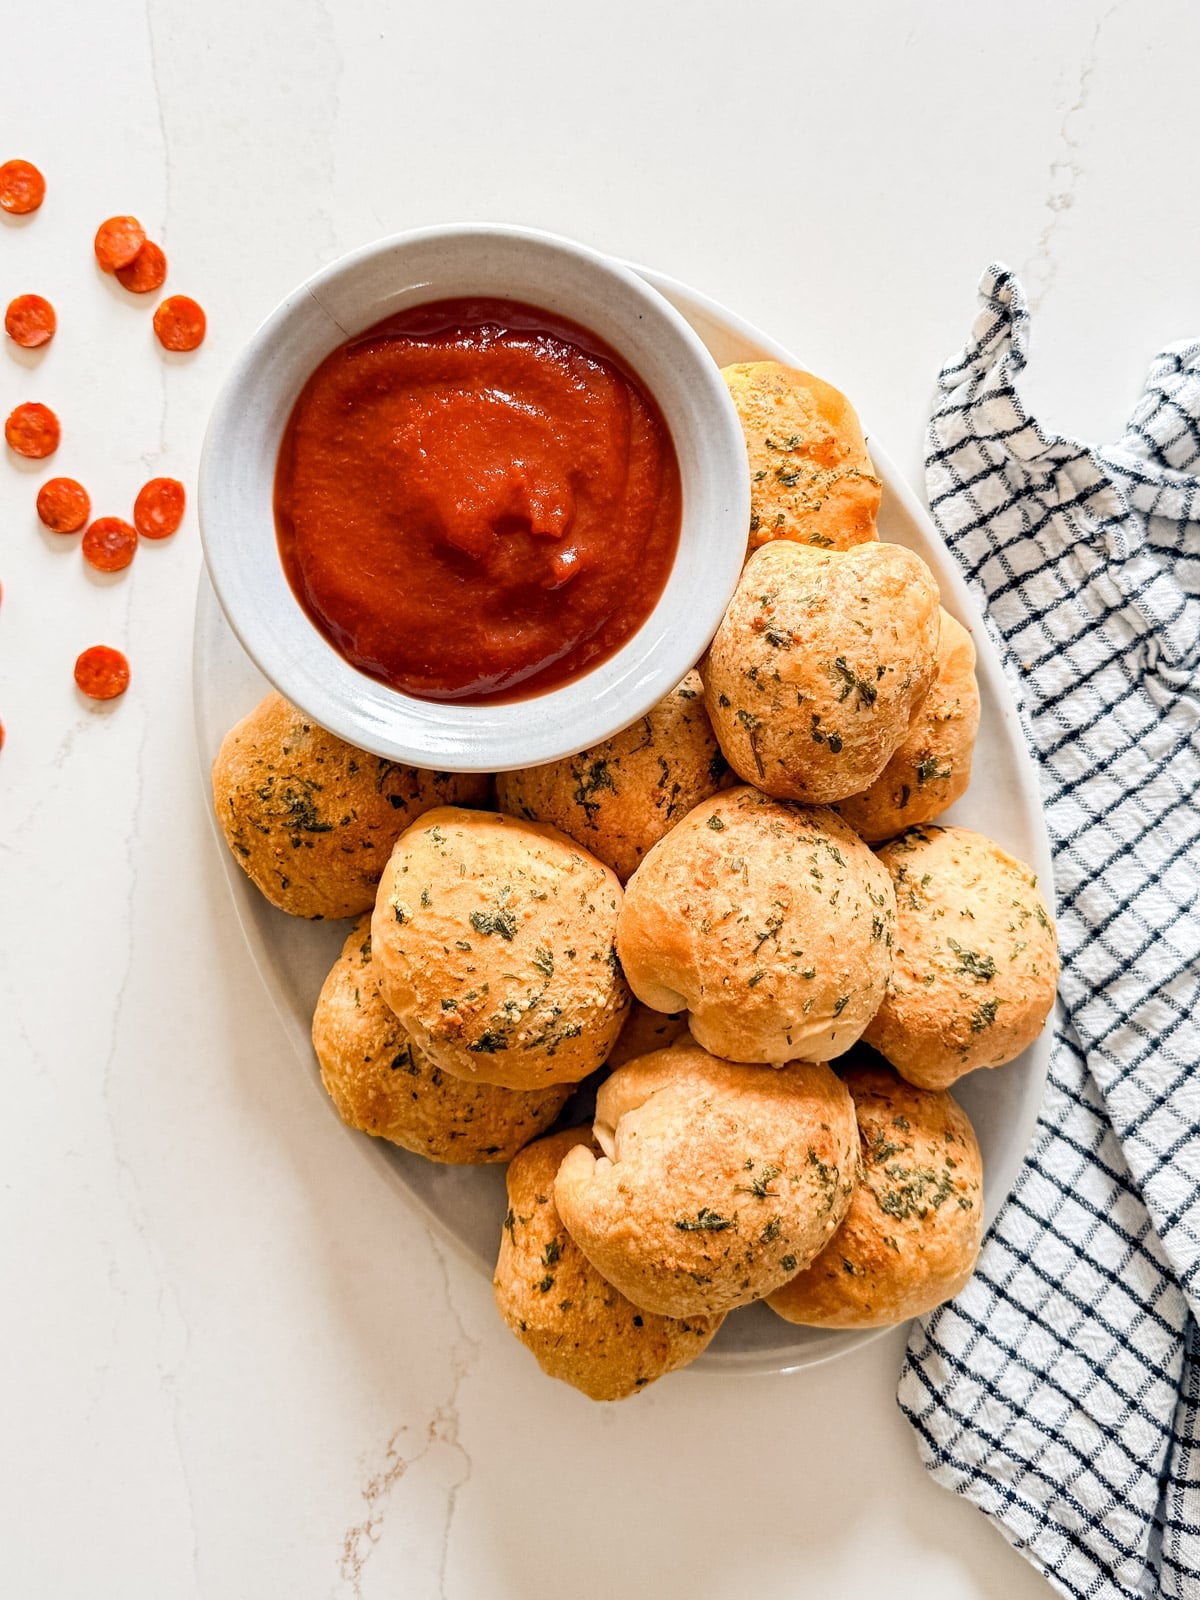
    An overhead image of a plate of mini pizza bites with a bowl of pizza sauce.
    [feast_advanced_jump_to]

    Why You'll Love This Pizza Bread

    Tailgating is pretty much my favorite part of game day. Because what's not to love about eating delicious, indulgent food while hanging out and getting ready to watch the game? And these bites are exactly the kind of snack that doesn't last more than five minutes on the table, and for a good reason.

    Imagine little bundles of delicious dough packed with savory sausage, crispy bacon, pepperoni, and melty mozzarella, all wrapped up in a warm biscuit and dipped into zesty tomato sauce. It's seriously so good. Here's why this recipe is a total winner:

    • Ultimate game day appetizer
    • Ready in under an hour
    • Easy to assemble ahead
    • Crowd-pleaser  
    A close up image of a meat lovers pizza bite on a pan.

    Ingredient Information And Substitutions

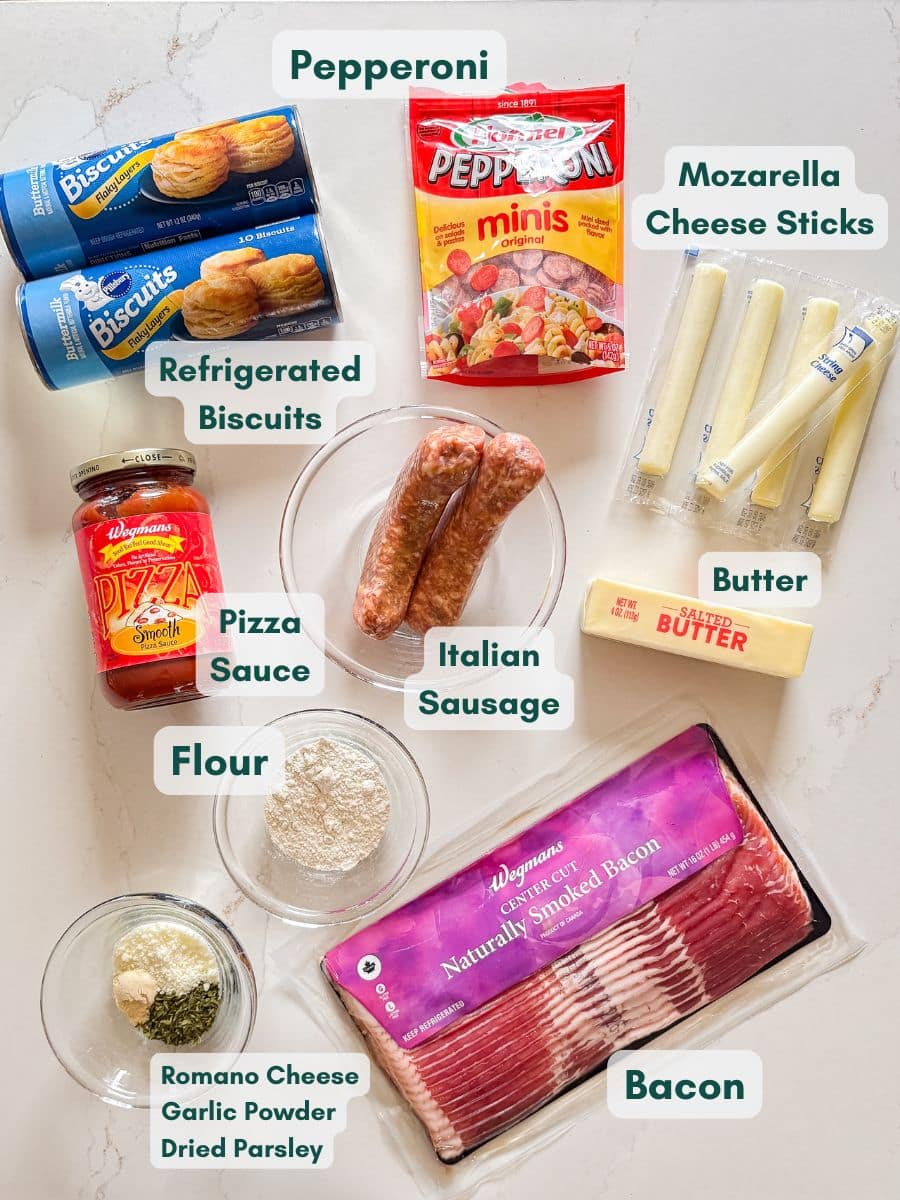
    • Bacon- Adds a smoky, crispy element to the filling. Turkey bacon works as a lighter substitute.
    • Italian sausage- Gives the filling a rich, savory flavor. Mild or hot, totally your call. Ground beef or turkey sausage can substitute.
    • Mini pepperoni- Packs a ton of pizza flavor into every bite. Regular pepperoni, quartered, works just as well.
    • Refrigerated biscuits- The base. Make sure to grab a regular size, not grands. They're easier to work with here.
    • String cheese- Melts perfectly inside each bite. Any good melting cheese, like mozzarella or provolone, works too.
    • Butter- Combined with the seasonings for that irresistible golden, garlicky topping.
    • Dried parsley- Adds a little color and flavor to the butter topping. Fresh parsley works just as well here. 
    • Garlic powder- Mixed into the butter for a savory, garlicky finish. Fresh minced garlic can substitute.
    • Romano cheese- Stirred into the butter topping for a sharp, salty kick. Parmesan works great as a substitute.
    • Flour- Just enough for your surface when rolling out the biscuits.
    An overhead image of labeled recipe ingredients.

    How To Make Pizza Bread Rolls

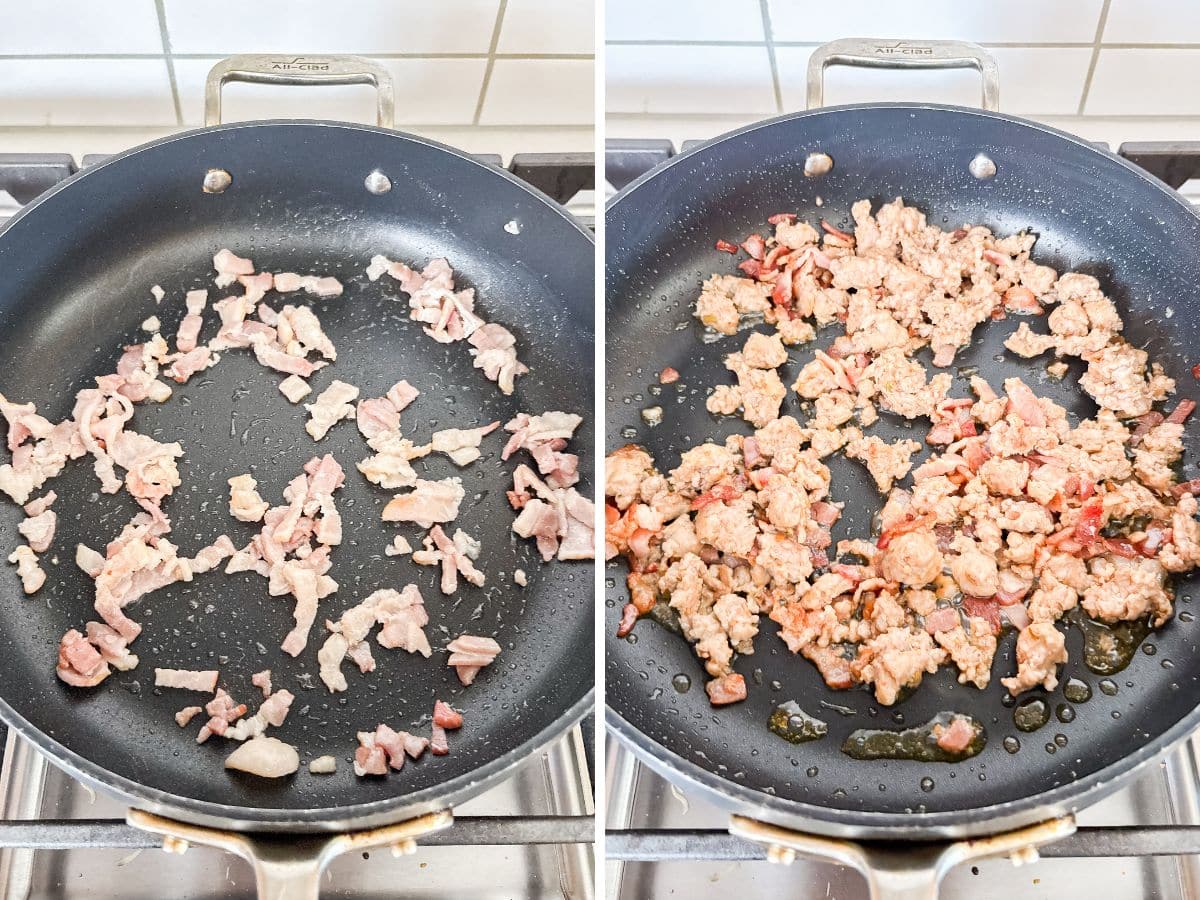
    Step 1- Cook the meat. 

    Heat a pan over medium-high heat and add the bacon, sautéing for about 2 minutes. Add the sausage, breaking it up as it cooks, for about 5 minutes.

    Meat filling cooking in a frying pan.

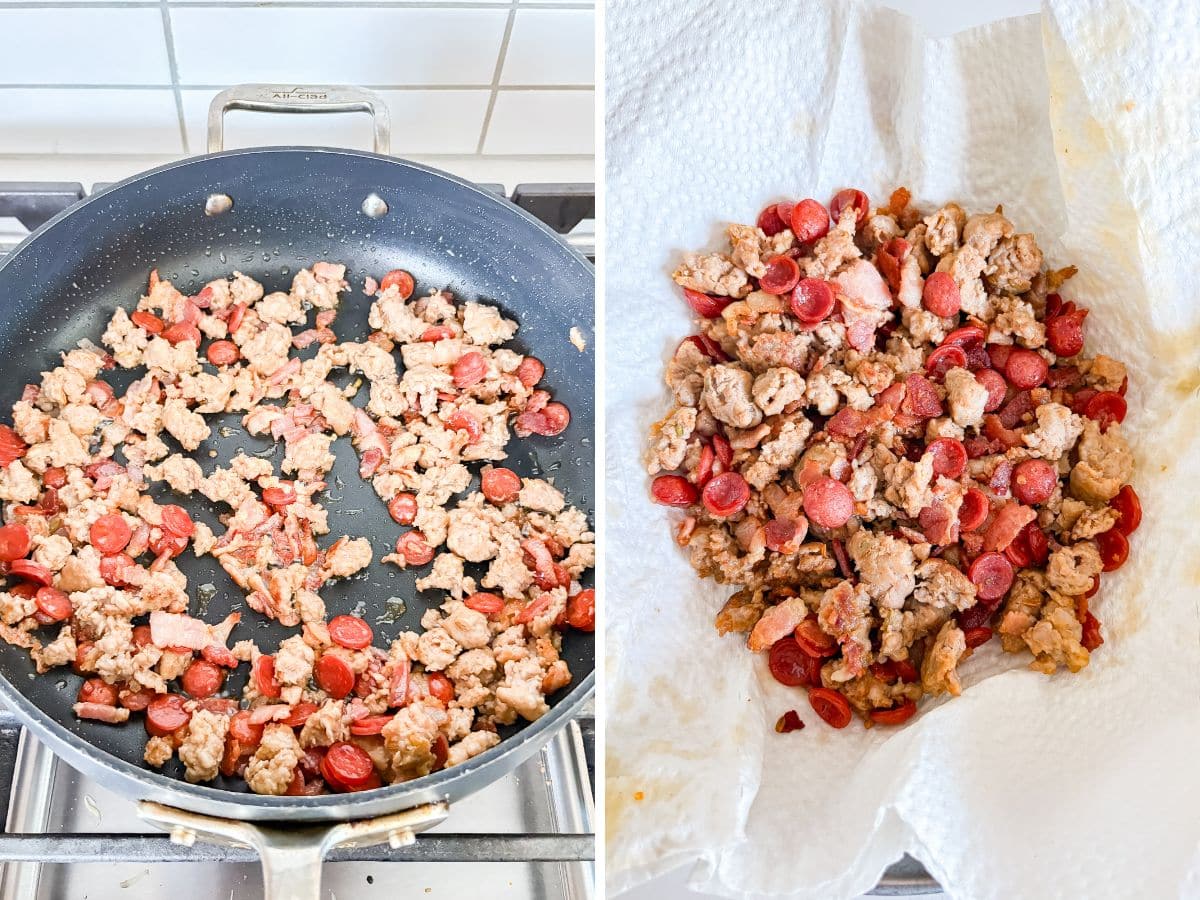
    Step 2- Add the pepperoni. 

    Toss in the pepperoni and keep stirring until the bacon is crispy and the sausage is nicely browned, about another 5 minutes.

    Step 3- Drain and cool. 

    Drain the meat mixture into a paper towel-lined bowl and let it cool for a couple of minutes.

    Pepperoni added to the pan and then the meat mixture draining on a paper towel lined plate.

    Step 4- Prep your surface. 

    Preheat the oven to 350 degrees F. Sprinkle some flour onto your surface and rolling pin, then roll each biscuit out flat to about the thickness of a pie crust.

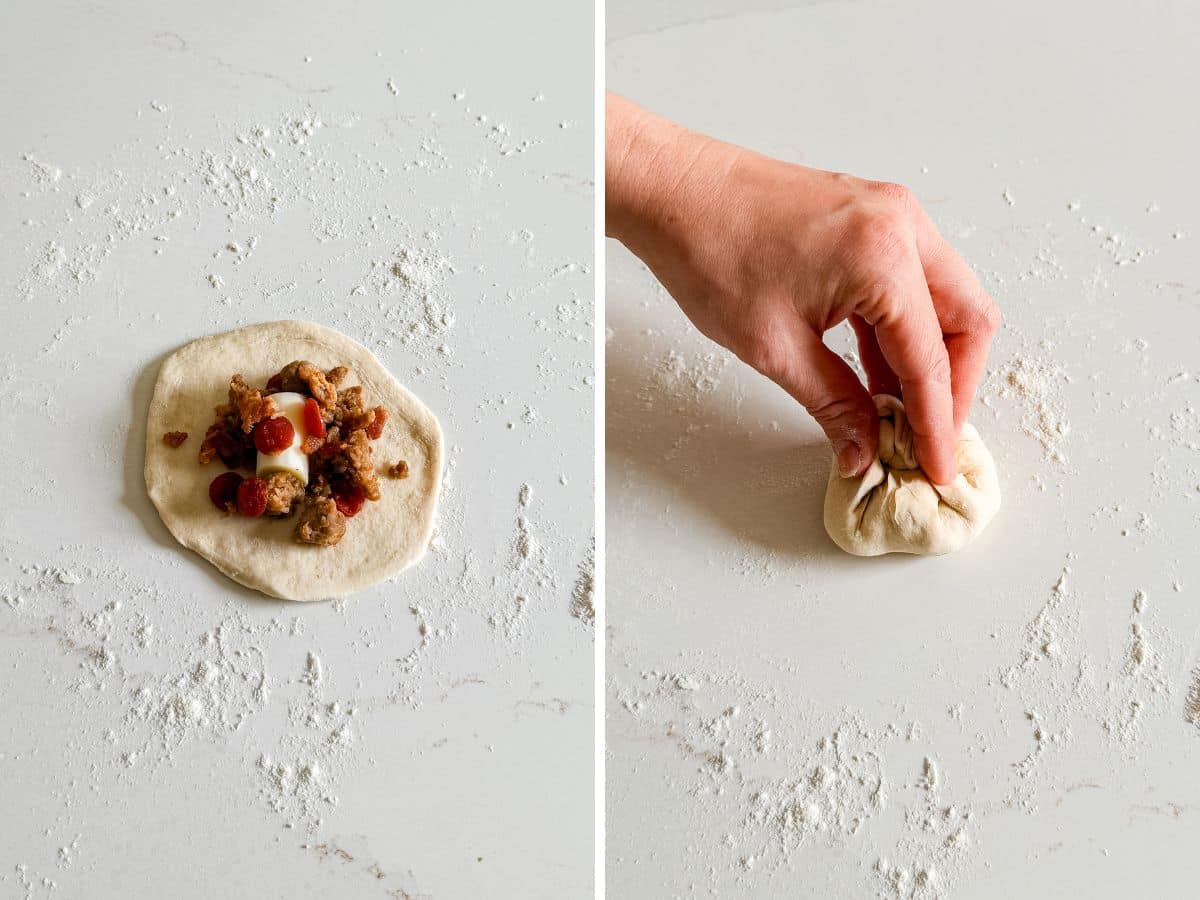
    Step 5- Fill the biscuits. 

    Place a spoonful of the meat mixture into the center of each biscuit along with a piece of cheese. Don't overfill them.

    Biscuit rolled thin with filling and cheese in it and then a hand holding it folded around the filling.

    Step 6- Seal and arrange. 

    Gather the edges of the dough up and around the filling, pressing them together in the middle to seal into a little bun-like package. Place sealed-side down onto a parchment-lined pan.

    Step 7- Butter and bake. 

    Mix the butter, parsley, garlic powder, and Romano cheese and brush over the top of each pizza bite. Bake for 15-17 minutes until golden brown.

    Butter topped pizza bites on a pan and the pan in the oven.

    Frequently Asked Questions

    How to make pizza bread? 

    Cook and drain your meat filling, roll out the biscuit dough, fill and seal, then brush with the garlic butter and bake. That's really all there is to it.

    How long do you cook pizza rolls in an air fryer?

    If you want to use an air fryer instead of the oven, cook them at 350 degrees F for about 8-10 minutes, checking halfway through. They crisp up well in the air fryer.

    What are the best flavors to put in pizza bites? 

    The meat lover combo here is always a crowd favorite, but you can really go in any direction you like. Try a veggie version with mushrooms and peppers, or a classic margherita with fresh basil and mozzarella.

    A hand holding a pizza bite that's cut in half revealing the cheesy, meaty filling.

    Tips For This Pizza Bites Recipe

    • Drain the meat well. Any excess grease will make the dough soggy, so don't skip the paper towel step.
    • Roll the biscuits thin. You want them about the thickness of a pie crust so they bake through evenly.
    • Don't overfill the biscuits. A spoonful of filling is plenty. Too much and they won't seal properly.
    • Press the seams firmly. Make sure the edges are really pinched together so nothing leaks out during baking.
    • Serve with warm marinara. A good dipping sauce takes these completely over the top.
    • Ingredients to prep ahead- Assemble the pizza bites the night before, cover, and refrigerate. Just brush with the butter topping and bake when ready to serve.
    • Leftovers and storage- Store leftovers in an airtight container in the fridge for up to 3 days. Reheat in the oven or air fryer to bring back that crispy crust.
    Pizza Bites on a plate with sauce n the background.

    What To Serve With Pizza Bites

    These are perfect as part of a bigger game day or party spread. Here are a few favorites to round out the table:

    • Easy Deviled Eggs
    • Chicken Swiss Dip
    • Broccoli Rabe and Ricotta Crostini
    • Buffalo Chex Mix Recipe

    Other Appetizer Recipes To Try

    • A close up image of a buffalo chicken slider.
      Buffalo Chicken Sliders
    • A bbq chicken flatbread on a pan with another behind it.
      BBQ Chicken Flatbread
    • A close up image of the side of a slice of pizza bread revealing the melty cheese and pepperoni inside, on top of the rest of the pizza roll.
      Crescent Roll Pizza Braid
    • A square image of Buffalo Chicken Braid .
      Buffalo Chicken Braid Recipe

    Love this recipe? Please leave a 5 star ⭐️⭐️⭐️⭐️⭐️ rating in the recipe card below ⬇️ and/or a review in the comment section further down. Check out my Amazon Store for all my favorite tools, including those used in this recipe. And follow @thelifejolie on Instagram and TikTok!

    A close up image of a meat lovers pizza bite on a pan.

    Meat Lover's Mini Pizza Bites

    Jessy Freimann
    These meat lover's mini pizza bites are the ultimate game day appetizer. Pepperoni, sausage, bacon, and melted cheese wrapped in a warm, buttery biscuit and served with tomato sauce for dipping, ready in under an hour.
    No ratings yet
    Print Recipe Pin Recipe
    Prep Time 15 minutes mins
    Cook Time 30 minutes mins
    Total Time 45 minutes mins
    Course Appetizer, Snack
    Cuisine American, Italian
    Servings 10 pieces
    Calories 395 kcal

    Equipment

    • 1 sheet pan
    • 1 Rolling Pin
    • 1 Skillet
    • 1 cutting board
    • 1 chefs knife
    • 1 Measuring cups and spoons
    • 1 wooden spoon

    Ingredients
      

    • 3 slices bacon diced
    • 2 Italian sausage links casings removed
    • ⅓ cup mini pepperoni or you can quarter regular size pepperoni slices
    • 1 package refrigerated biscuits regular size, not grands
    • ¼ cup flour
    • 3 pieces string cheese quartered
    • ½ cup salted butter melted, 1 stick
    • 1 teaspoon dried parsley
    • ½ teaspoon garlic powder
    • 1 Tablespoon Romano Cheese
    • 1 cup marinara sauce or pizza sauce

    Instructions
     

    • Heat a skillet over medium high heat, add your bacon and sauté it for 2 minutes.
    • Add sausage to the pan and begin browning it and breaking it up with a wooden spoon for 5 minutes.
    • Add the pepperoni to the pan and keep stirring it periodically until the bacon is crispy and the sausage is nicely browned, about another 5 minutes.
    • Drain the meat into a paper towel lined bowl and let it cool for a couple minutes.
    • While the meat mixture cools, preheat your oven to 350 degrees F.
    • Sprinkle some flour onto a clean surface along with the rolling pin. Roll each biscuit or that it's flat (to a similar thickness to a pie crust).
    • Divide the meat mixture into the middle of each biscuit along with a piece of the string cheese- don't over fill them!
    • Gather the outsides of the biscuit dough all the way around the filling and bring those edges up to the middle and press them into the middle to seal. This will create a nice little bun-like package.
    • Place the pizza bites sealed-side down onto a parchment-lined sheet pan so they aren't touching.
    • In a separate bowl mix the melted butter, parsley, garlic powder and Romano cheese and brush it onto the top of each pizza bite.
    • Bake for 15-17 minutes or until golden brown. Serve immediately with marinara sauce.

    Video

    Notes

    • Drain the meat well. Any excess grease will make the dough soggy, so don't skip the paper towel step.
    • Roll the biscuits thin. You want them about the thickness of a pie crust so they bake through evenly.
    • Don't overfill the biscuits. A spoonful of filling is plenty. Too much and they won't seal properly.
    • Press the seams firmly. Make sure the edges are really pinched together so nothing leaks out during baking.
    • Serve with warm marinara. A good dipping sauce takes these completely over the top.
    • Ingredients to prep ahead- Assemble the pizza bites the night before, cover, and refrigerate. Just brush with the butter topping and bake when ready to serve.
    • Leftovers and storage- Store leftovers in an airtight container in the fridge for up to 3 days. Reheat in the oven or air fryer to bring back that crispy crust.

    Nutrition

    Serving: 2piecesCalories: 395kcalCarbohydrates: 27gProtein: 9gFat: 29gSaturated Fat: 11gPolyunsaturated Fat: 5gMonounsaturated Fat: 11gTrans Fat: 0.4gCholesterol: 51mgSodium: 900mgPotassium: 265mgFiber: 1gSugar: 3gVitamin A: 395IUVitamin C: 2mgCalcium: 40mgIron: 2mg
    Tried this recipe?Let us know how it was!

    Green Bean Salad Recipe

    May 11, 2026 · 6 Comments

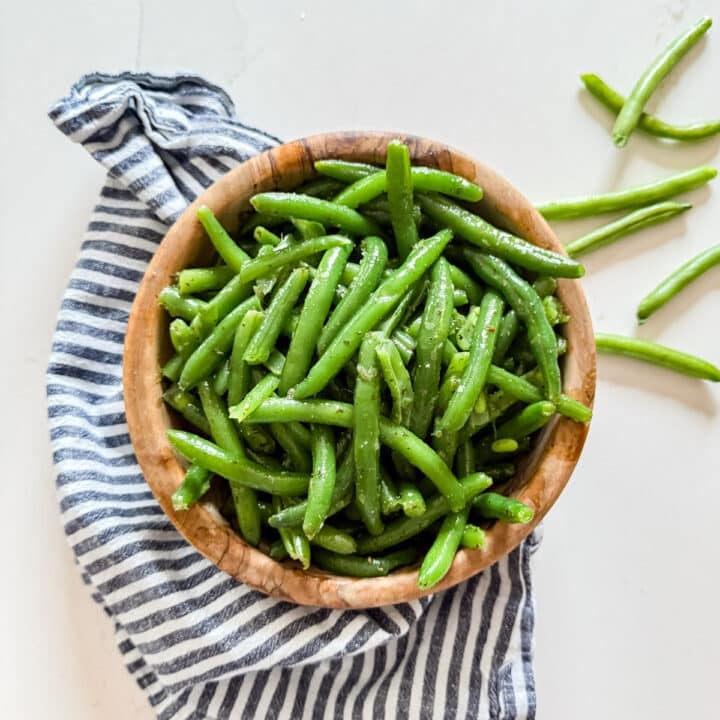
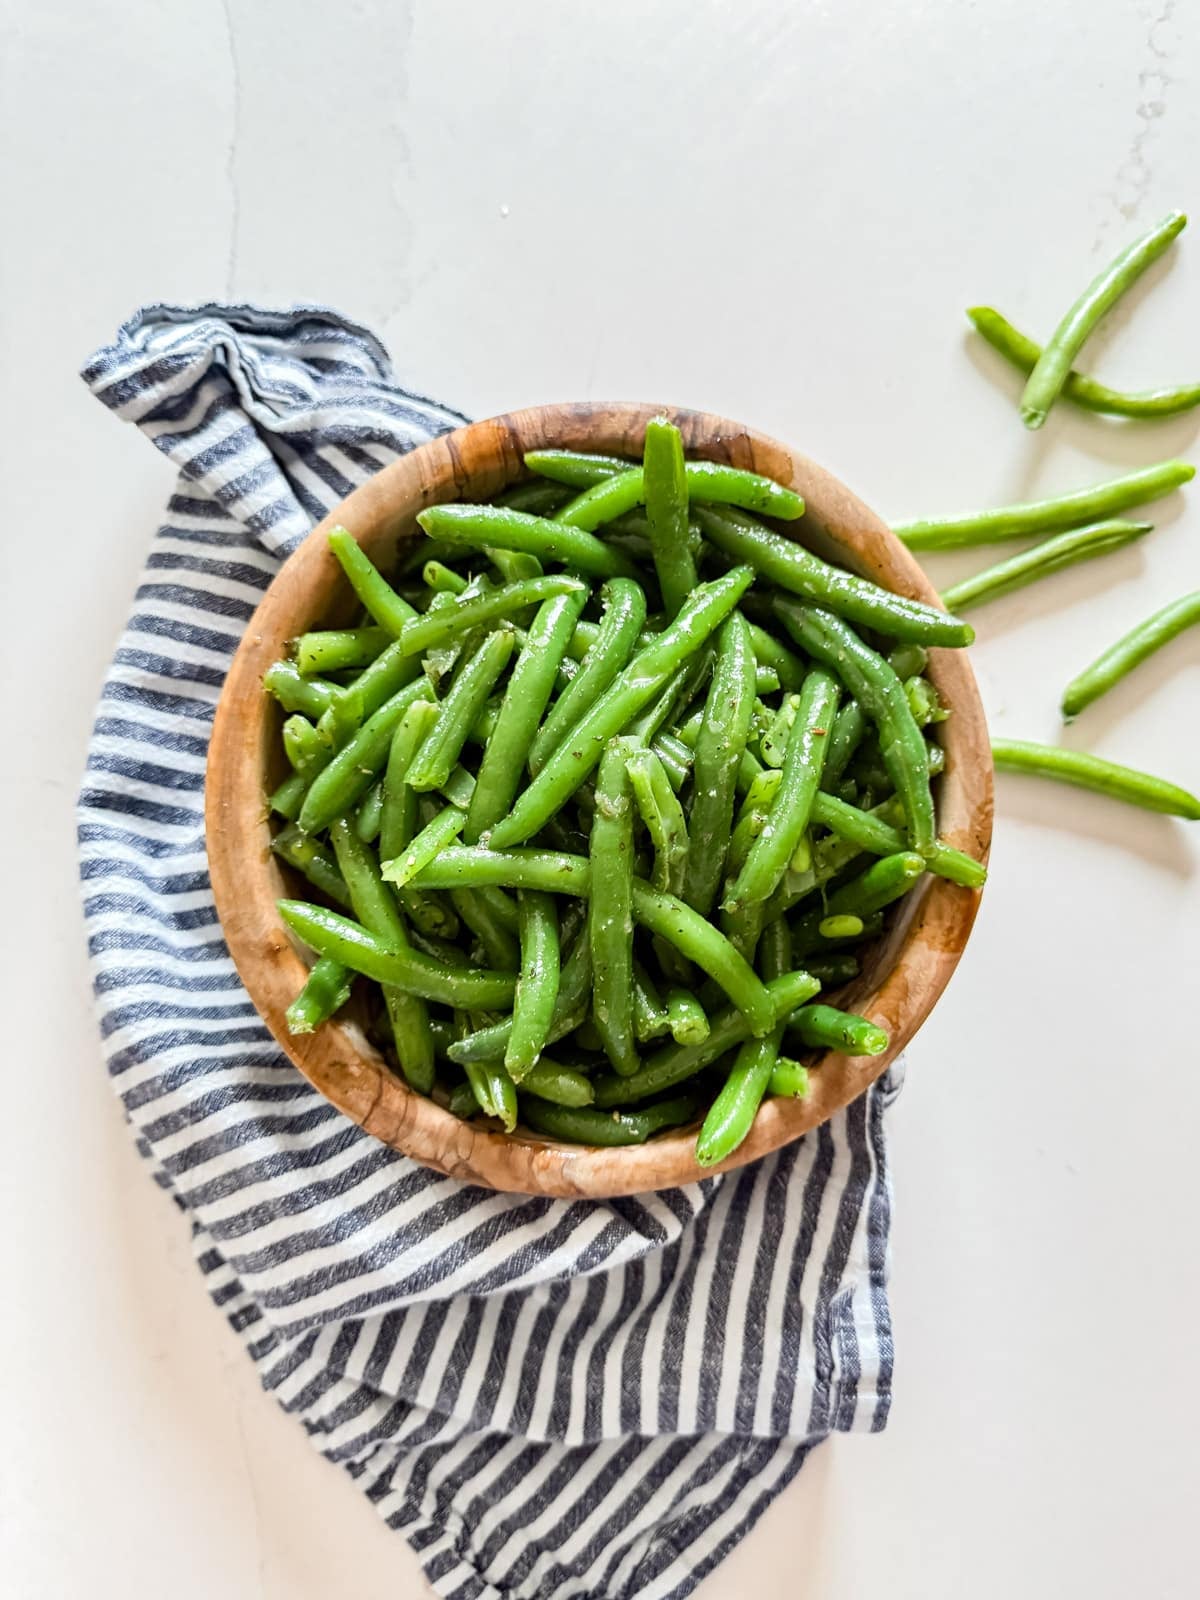
    An overhead image of green bean salad in a wooden bowl.

    This green bean salad recipe makes an Italian-inspired side dish that's simple and fresh. A red wine vinaigrette ties it all together in just 20 minutes, and it can easily be made ahead.

    An overhead image of green bean salad in a wooden bowl.
    [feast_advanced_jump_to]

    Why You'll Love This Cold Green Bean Salad

    I've been eating this salad for as long as I can remember. My Grandma Rose made it every single summer the minute the weather got nicer, and it's been a staple ever since. The ingredients are super simple, but the flavor is delicious. You've got the brightness from the red wine vinegar, the savory depth from the garlic, and that little touch of dried mint that makes it unique. 

    What I love most is that you can make it exactly how you like it. I personally go a little heavier on the vinegar with liberal seasonings, but that's just me. Taste as you go and make it your own! Here's why this green bean salad is a recipe you'll find yourself coming back to all summer long:

    • Ready in 20 minutes
    • Simple, minimal ingredients
    • Make-ahead friendly
    • Completely customizable
    • Perfect for summer gatherings
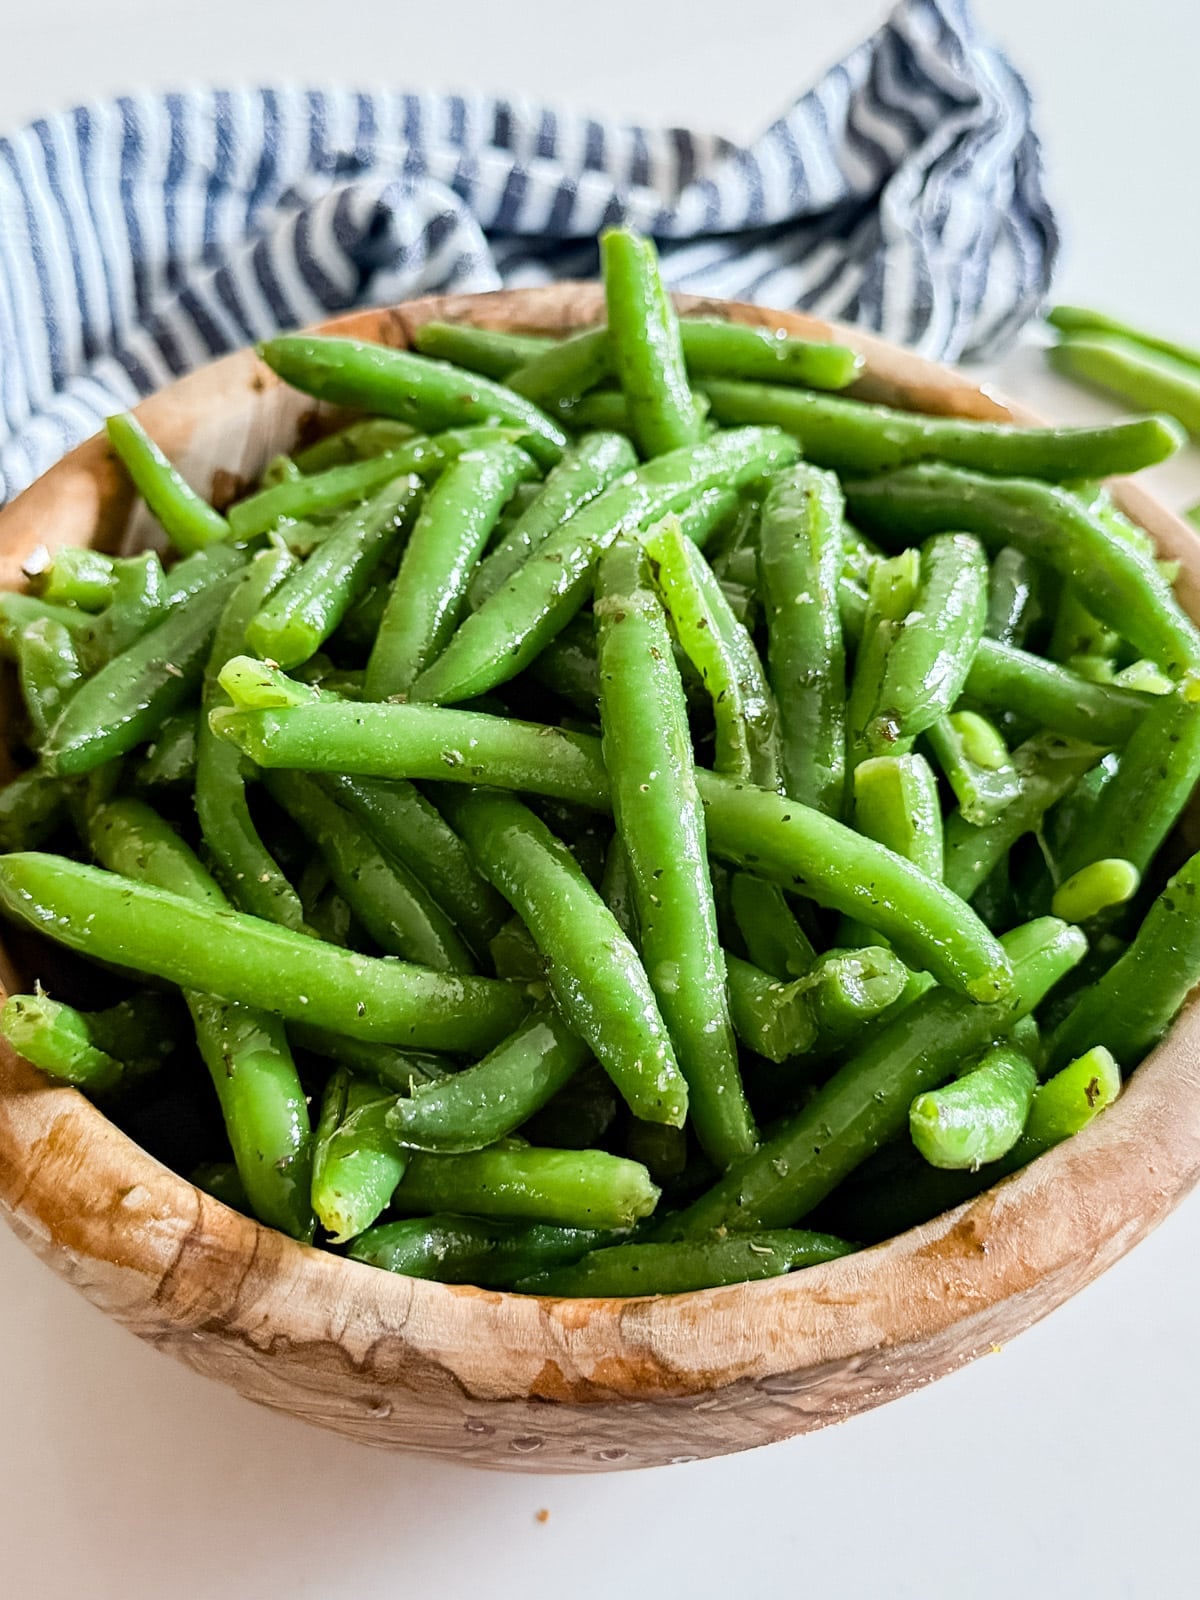
    A close up image of a bowl of cold green bean salad.

    Ingredient Information And Substitutions

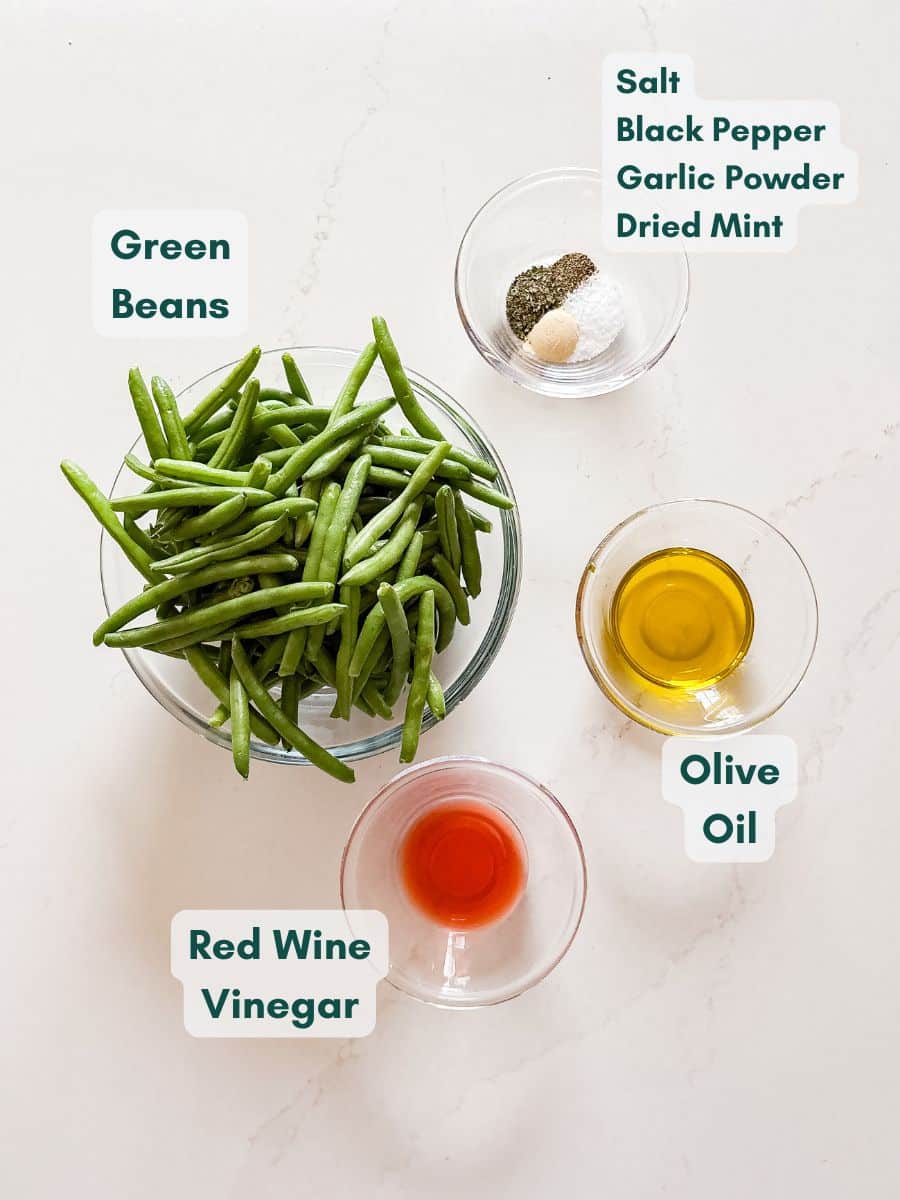
    • Green beans- Fresh green beans work best here.
    • Olive oil- Adds richness to the dressing. Good-quality olive oil makes a difference in terms of flavor.
    • Red wine vinegar- Gives the dressing its bright, tangy flavor. White wine vinegar works as a substitute.
    • Garlic powder- Adds a savory depth to the dressing.
    • Dried mint- The secret ingredient that makes this salad truly special. Fresh mint can be used instead, but add a bit more.
    • Pepper- Just enough to round everything out.
    • Salt- Season to taste.
    An overhead image of labeled recipe ingredients.

    How To Make This Green Beans Cold Salad

    Step 1- Boil the green beans. 

    Cook the green beans until fork-tender, around 5-7 minutes. Be careful not to overcook them!

    Step 2- Transfer to an ice bath. 

    Drain immediately and transfer to an ice bath to stop the cooking process. This keeps the color bright and the texture a bit crisp. Dry the beans well.

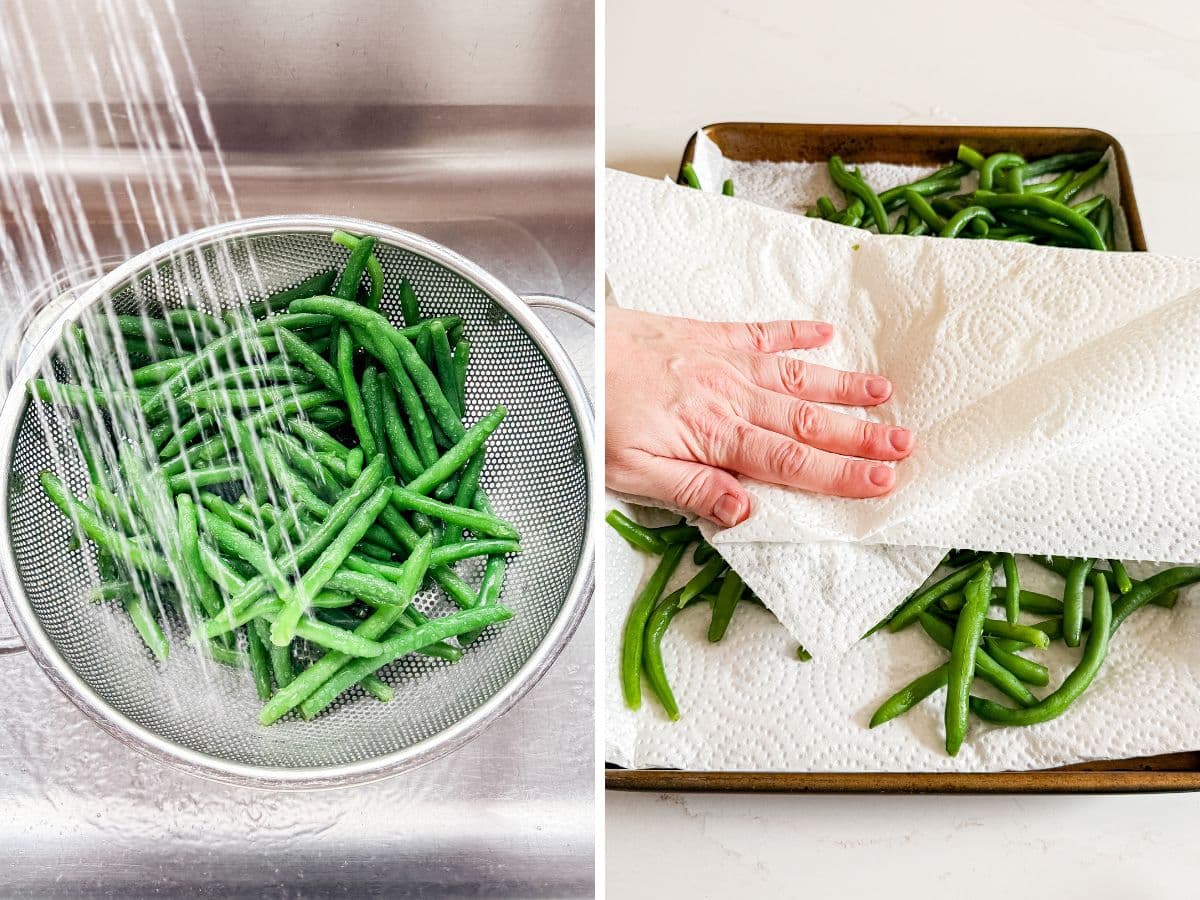
    Blanched green beans under cold water and then being dried with paper towels on a sheet pan.

    Step 3- Dress the salad. 

    Once the beans have cooled, toss them with the olive oil and red wine vinegar.

    Step 4- Season. 

    Add the salt, pepper, garlic powder, and dried mint to taste.

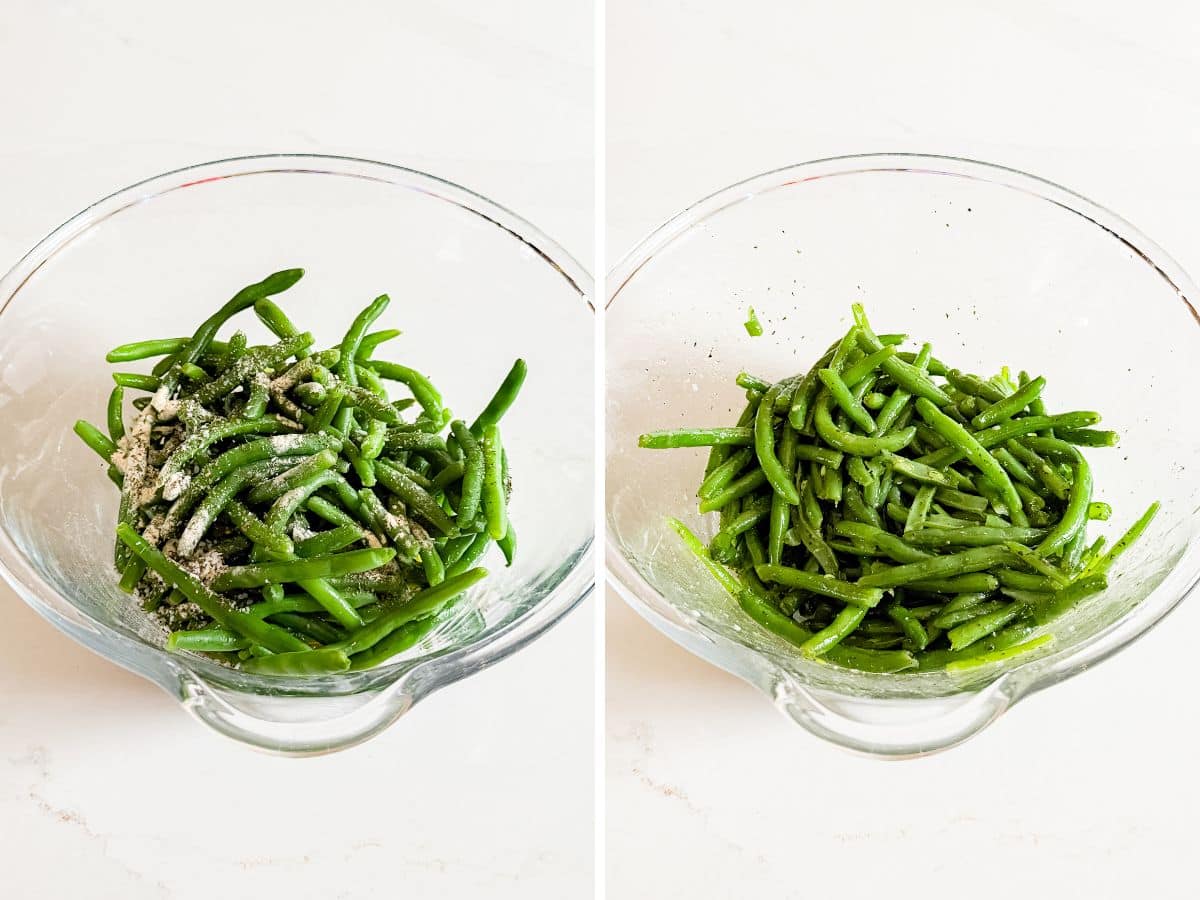
    Green beans with the seasoning on them and then all mixed together.

    Step 5- Chill and serve. 

    Refrigerate until ready to serve, then give everything one more toss to redistribute the dressing before serving.

    Frequently Asked Questions

    Can I add other ingredients to this salad? 

    Absolutely. Halved cherry tomatoes, sliced olives, crumbled feta, or even canned tuna are all delicious additions. It's a very forgiving recipe, so feel free to get creative.

    Can I serve this salad warm?

    You can. It's traditionally served cold, but it's just as delicious served warm straight after cooking. Just dress and season right away and dig in.

    How do I know when the green beans are done cooking? 

    You're looking for fork-tender. They should have a little bite left, but not be crunchy. Around 5-7 minutes does the trick, but start checking early since every stove is a little different.

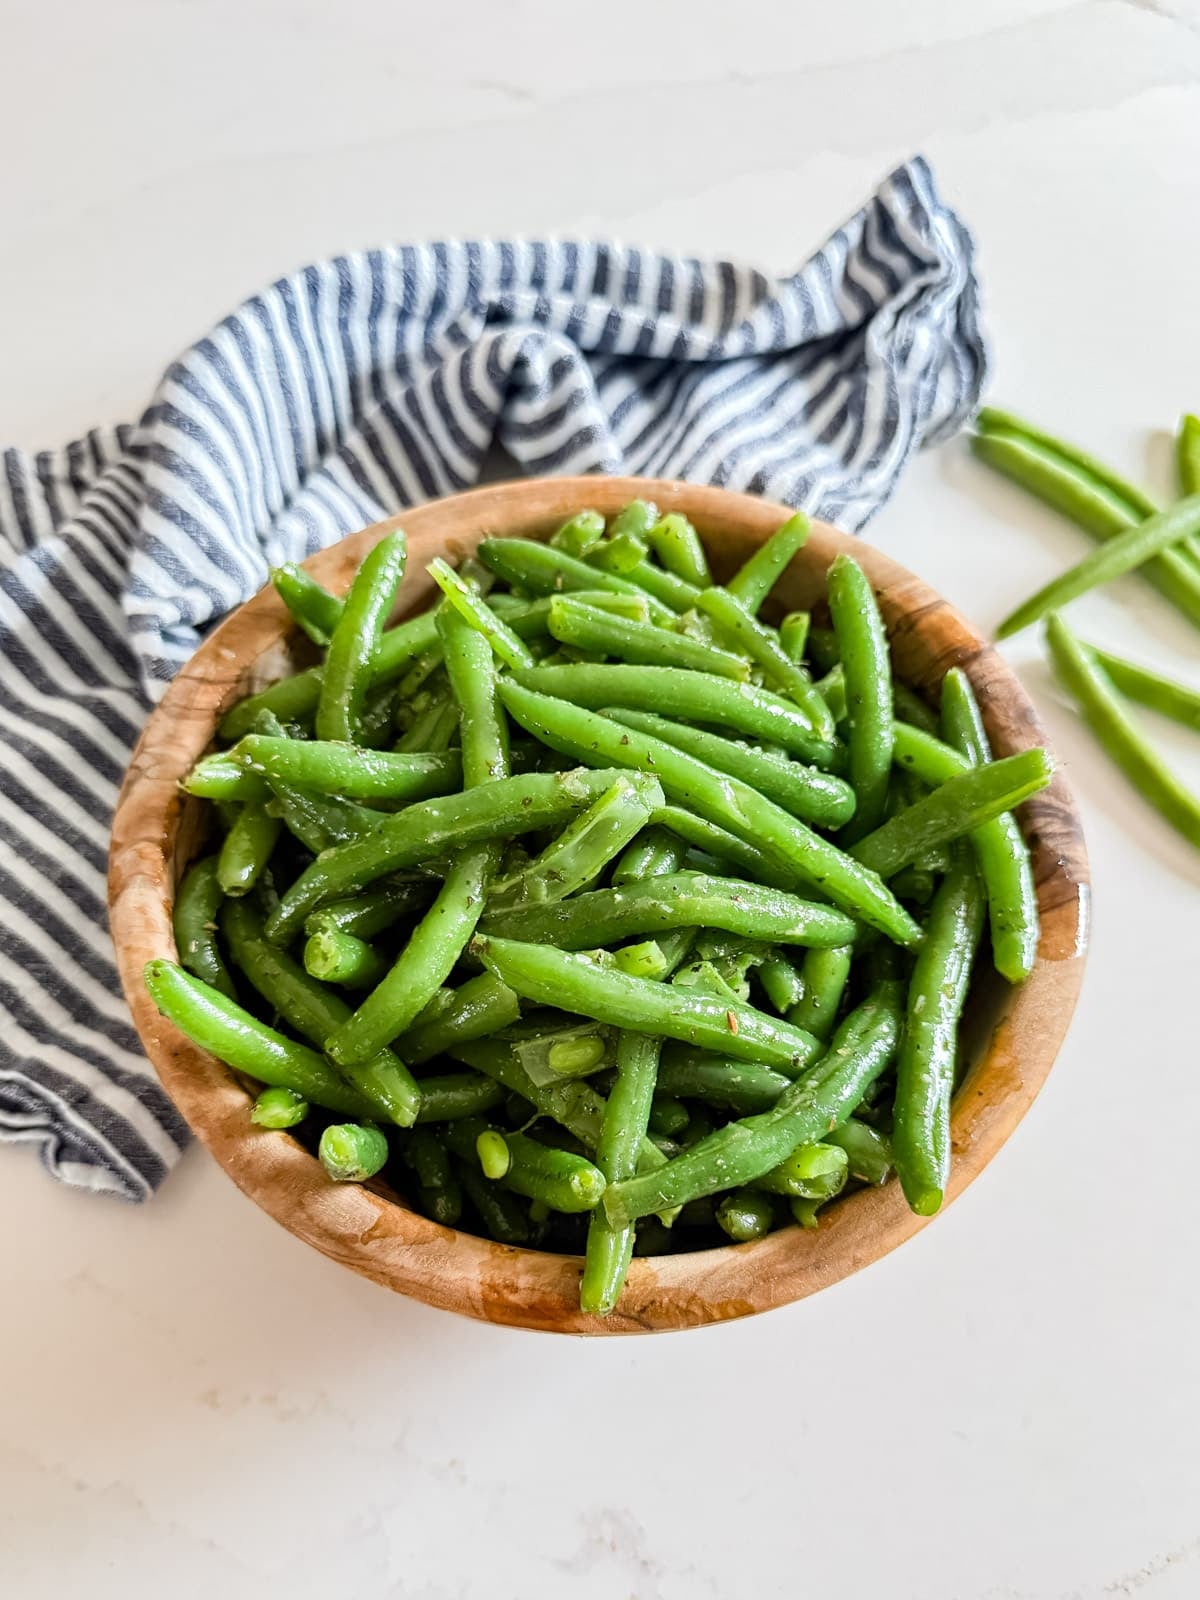
    A wooden bowl of green bean salad with a striped towel in the background.

    Tips For Green Beans Salad

    • Don't skip the ice bath. This is what keeps the green beans bright green and perfectly crisp. Skipping it means they'll keep cooking and turn mushy.
    • Trim your beans evenly. Uniform pieces mean everything cooks at the same rate.
    • Pat the beans dry after the ice bath before dressing. Excess water can dilute the dressing.
    • Dress while slightly cool, not cold. The beans absorb the dressing better when they're not completely chilled yet.
    • Make a big batch. This tastes even better the next day as the flavors meld together, so leftovers are always a good idea.
    • Ingredients to prep ahead- The green beans can be boiled a day ahead and kept in the fridge until you're ready to dress and serve.
    • Leftovers and storage- Store in an airtight container in the fridge for up to 3 days.

    What To Serve With Green Bean Salads

    This salad is such a versatile side that pairs beautifully with so many meals. These are some of the best recipes for green bean salad pairings the whole family will love:

    • Breaded Pork Cutlets Recipe
    • Crispy Fried Potatoes
    • Corn Pudding Casserole
    • Raspberry Lemon Icebox Pie Recipe

    Other Salad Recipes To Try

    • A bowl of tomato salad with onions and cucumbers with a checked towel and fresh tomatoes in the background.
      Tomato Onion Salad
    • An overhead image of beet salad topped with feta cheese with lemons, dill, onion and a white napkin around it.
      Roasted Beet Salad with Feta and Dill
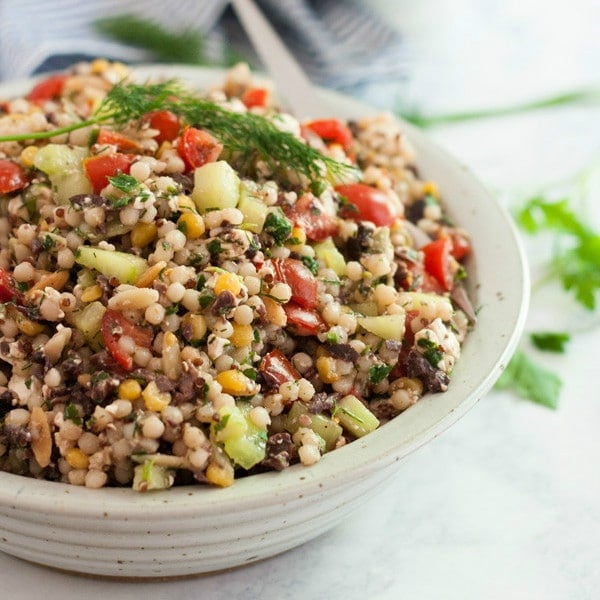
    • This Greek Couscous Salad recipe is a light and healthy side dish for lunch or dinner. It's quick and easy to make and is full of delicious flavors of Feta cheese, vegetables, olives and fresh herbs. Click on the photo to get the recipe!
      Greek Couscous Salad
    • This Mexican Bean Salad Recipe is a quick and easy throw-together salad that's full of great flavor! Made with beans, celery, cilantro, tomatoes, onions, peppers, lime and slices, this is a delicious side dish the whole family will love!
      Mexican Bean Salad Recipe

    Love this recipe? Please leave a 5 star ⭐️⭐️⭐️⭐️⭐️ rating in the recipe card below ⬇️ and/or a review in the comment section further down. Check out my Amazon Store for all my favorite tools, including those used in this recipe. And follow @thelifejolie on Instagram and TikTok!

    An overhead image of green bean salad in a wooden bowl.

    Green Bean Salad Recipe

    Jessy Freimann
    This green bean salad recipe makes an Italian-inspired side dish that's simple and fresh. A red wine vinaigrette ties it all together in just 20 minutes, and it can easily be made ahead.
    No ratings yet
    Print Recipe Pin Recipe
    Prep Time 10 minutes mins
    Cook Time 10 minutes mins
    Total Time 20 minutes mins
    Course dinner, Lunch, Salad, Side Dish, Vegetarian
    Cuisine Easy, Family, Italian, Summer, Vegan, vegetarian
    Servings 6 servings
    Calories 109 kcal

    Equipment

    • 1 Large pot
    • 1 Strainer
    • 1 cutting board
    • 1 chefs knife
    • 1 Measuring cups and spoons
    • 1 wooden spoon
    • 1 mixing bowl

    Ingredients
      

    • 1 pound Green beans ends trimmed
    • 4 Tablespoons extra virgin olive oil to taste
    • 2 Tablespoon red wine vinegar to taste
    • 1 teaspoon Salt to taste
    • ¼ teaspoon Pepper to taste
    • 1 teaspoon Garlic powder to taste
    • 1 teaspoon Dried mint to taste

    Instructions
     

    • Boil green beans until fork tender, around 5-7 minutes.
    • Drain and put them into an ice bath to stop the cooking (you do not want over cooked green beans!).
    • Once they've cooled, dress with oil and vinegar.
    • Season with salt, pepper, garlic and dried mint to taste.
    • Refrigerate until you're ready to serve and toss once more before serving to redistribute the dressing.

    Video

    Notes

    • Don't skip the ice bath. This is what keeps the green beans bright green and perfectly crisp. Skipping it means they'll keep cooking and turn mushy.
    • Trim your beans evenly. Uniform pieces mean everything cooks at the same rate.
    • Pat the beans dry after the ice bath before dressing. Excess water can dilute the dressing.
    • Dress while slightly cool, not cold. The beans absorb the dressing better when they're not completely chilled yet.
    • Make a big batch. This tastes even better the next day as the flavors meld together, so leftovers are always a good idea.
    • Ingredients to prep ahead- The green beans can be boiled a day ahead and kept in the fridge until you're ready to dress and serve.
    • Leftovers and storage- Store in an airtight container in the fridge for up to 3 days.

    Nutrition

    Serving: 1servingCalories: 109kcalCarbohydrates: 6gProtein: 1gFat: 10gSaturated Fat: 1gPolyunsaturated Fat: 1gMonounsaturated Fat: 7gSodium: 393mgPotassium: 170mgFiber: 2gSugar: 2gVitamin A: 531IUVitamin C: 9mgCalcium: 31mgIron: 1mg
    Tried this recipe?Let us know how it was!

    Shrimp Quinoa Bowls

    May 8, 2026 · Leave a Comment

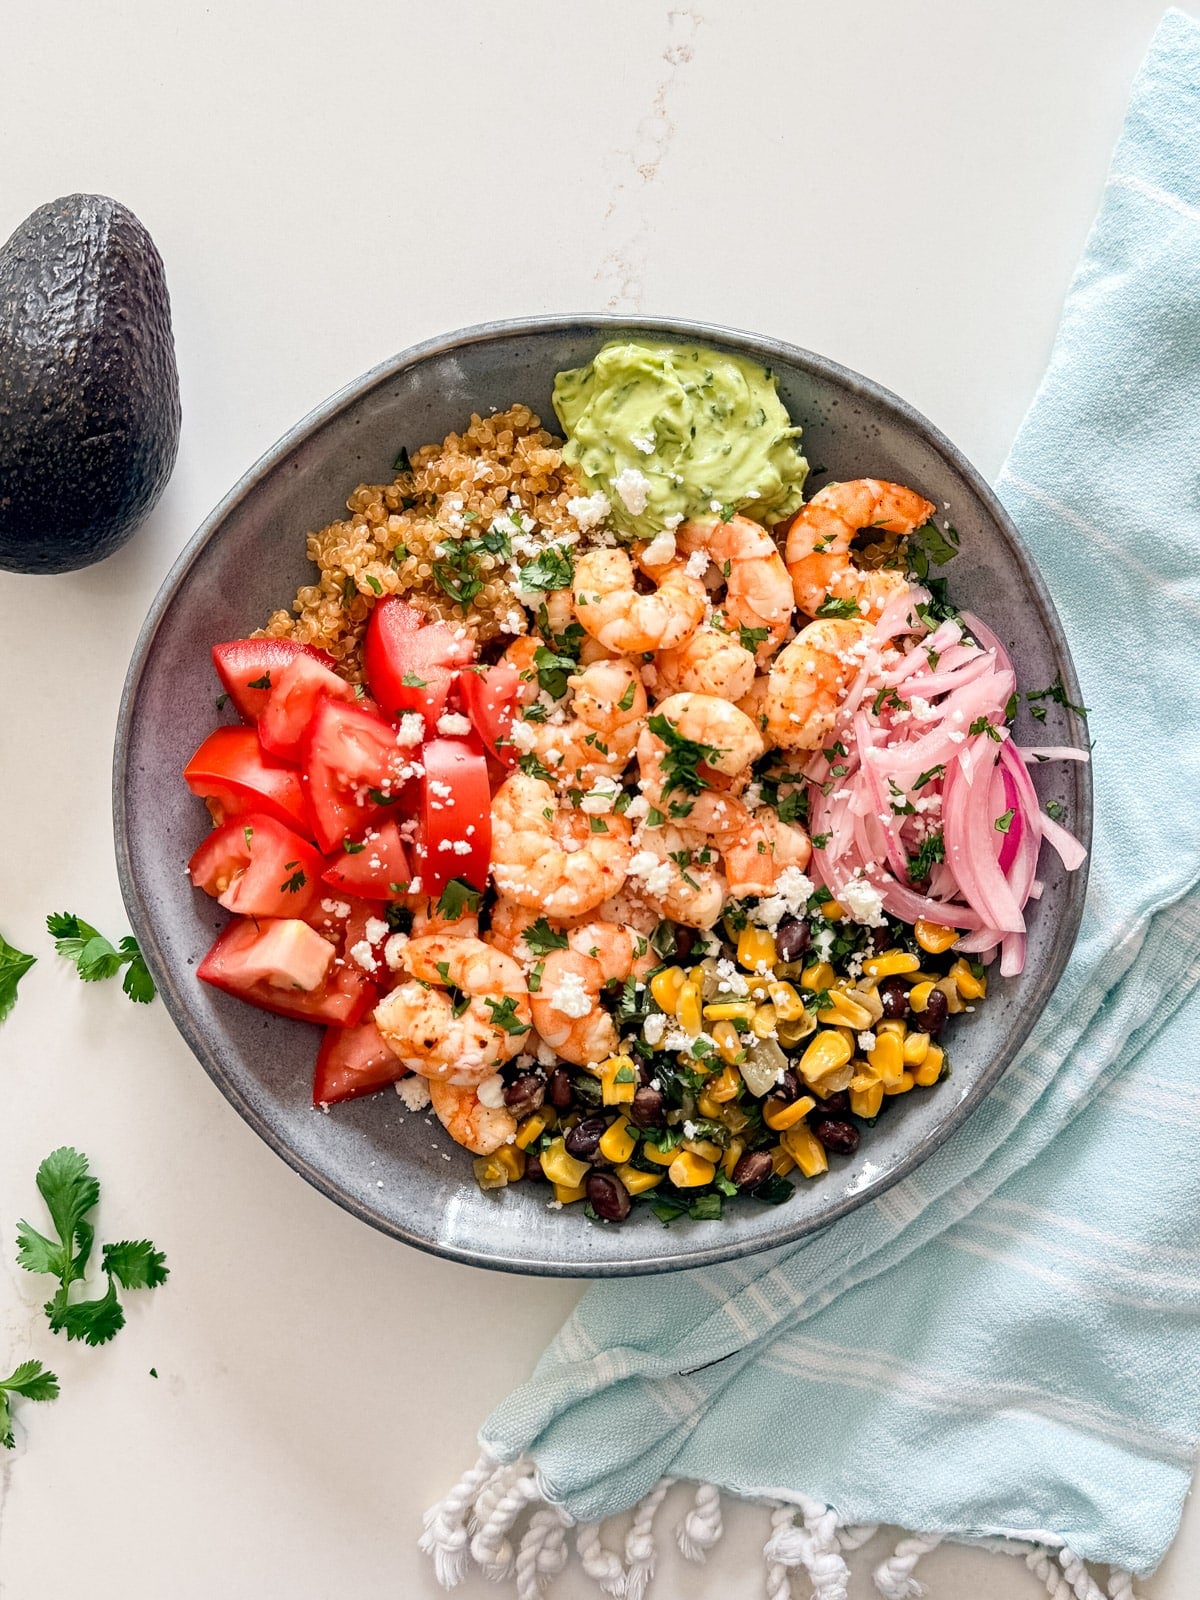
    An overhead image of a Mexican Shrimp Quinoa Bowl.

    These shrimp quinoa bowls are loaded with bold Mexican-inspired flavors, from broiled Tajin shrimp to fresh toppings, and they're ready in just 30 minutes.

    An overhead image of a Mexican Shrimp Quinoa Bowl.
    [feast_advanced_jump_to]

    Why You'll Love These Shrimp Taco Bowls

    I'll be honest, I'm not the biggest quinoa fan. It's just never been at the top of my list. But I've been on a mission to change that by preparing it in ways that actually get me excited, and this recipe completely did the trick. Cooking the quinoa in chicken broth with taco seasoning is an absolute game-changer! It soaks up all that flavor and becomes the most delicious base for everything piled on top.

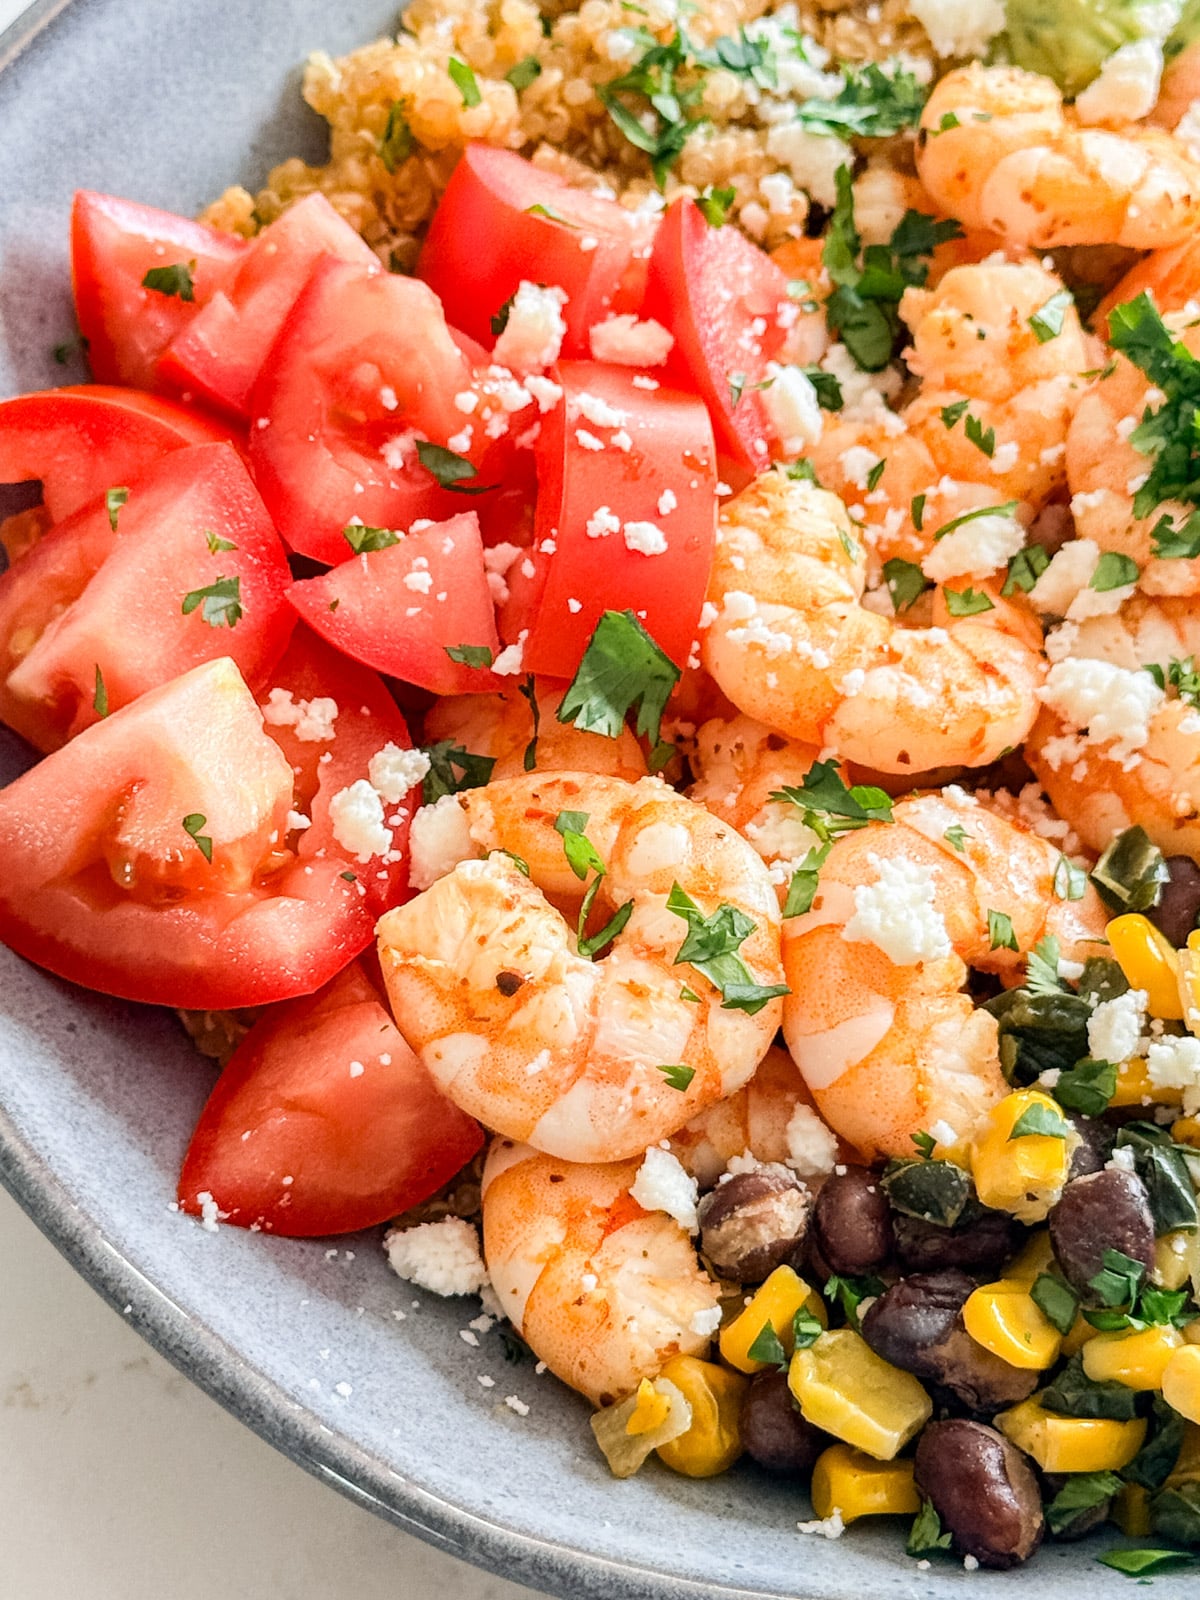
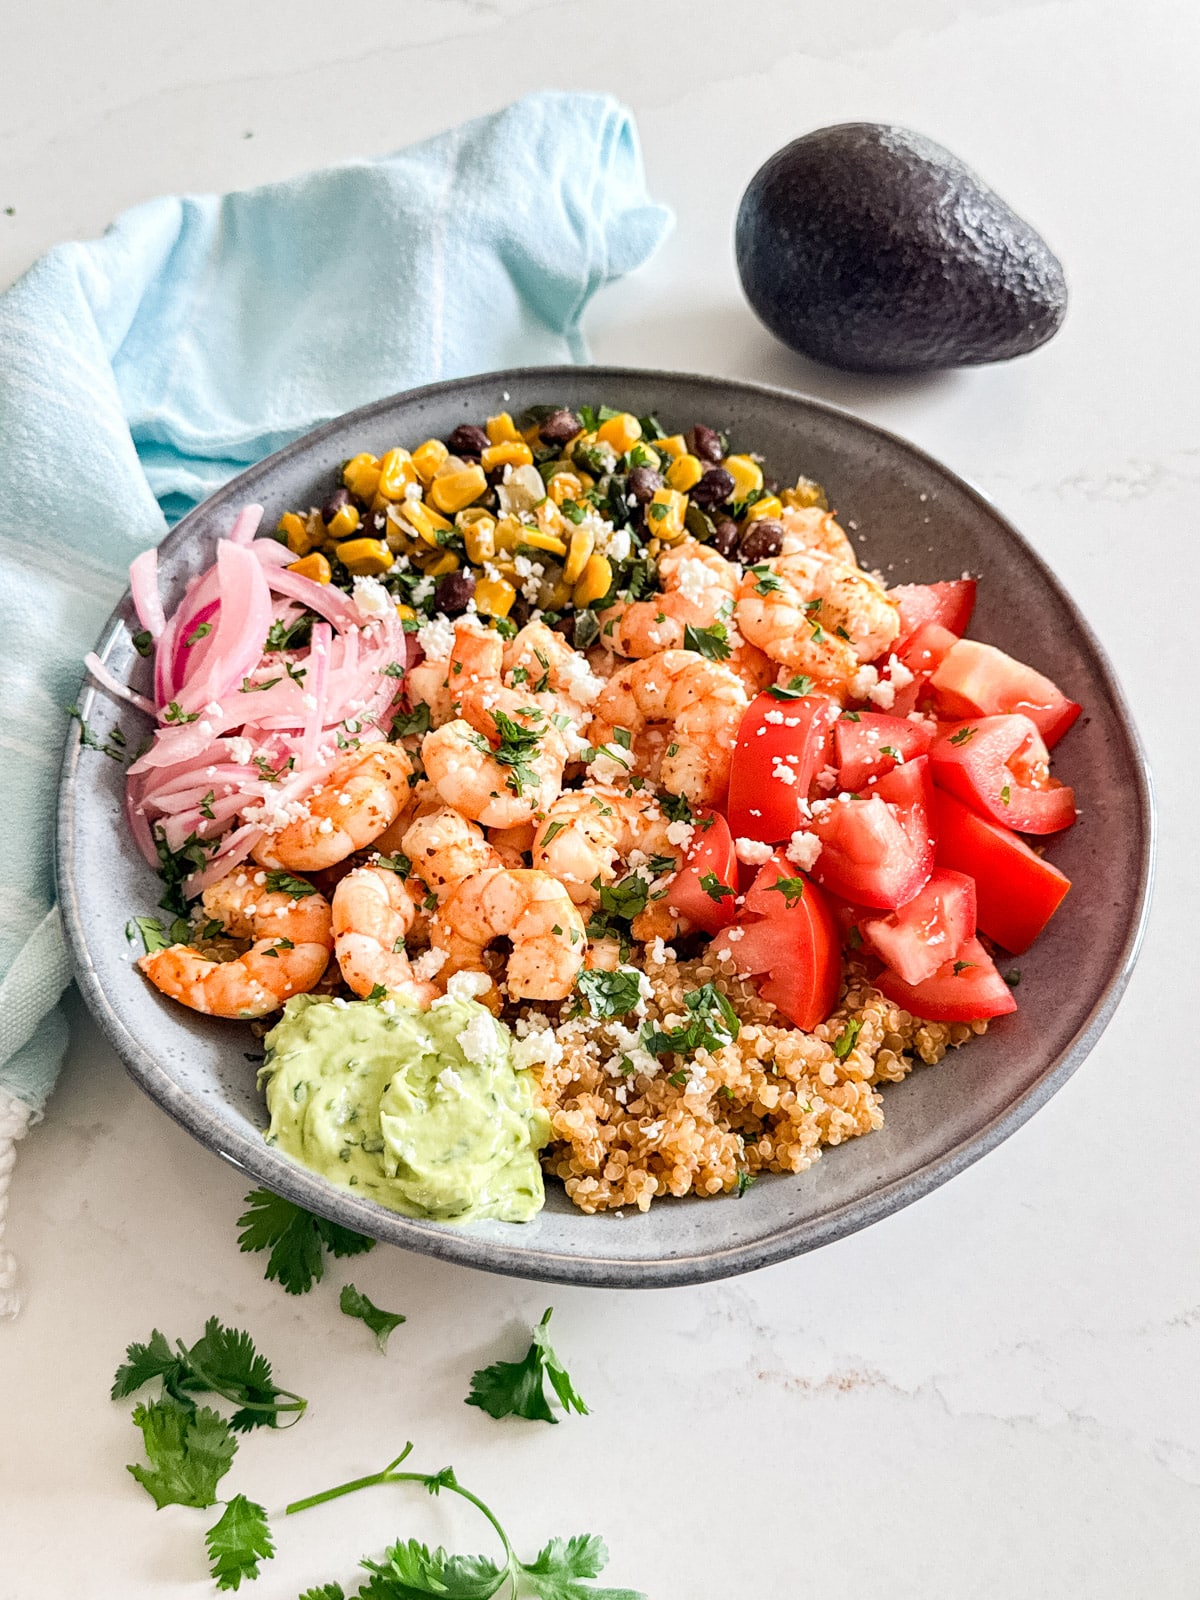
    And those broiled Tajin shrimp? They come together in literally minutes and pack so much flavor. Throw on some fresh tomatoes, corn salsa, pickled onions, and avocado crema, and honestly, every bite is just so good. Whether you're trying to eat a little healthier or just want something fresh and satisfying for dinner, these taco bowls always deliver. Here's why this recipe is a total winner:

    • Easy to customize
    • Mexican-inspired flavors
    • Ready in 30 minutes
    • Light but satisfying
    A close up image of the shrimp, tomatoes and corn salsa on a quinoa bowl.

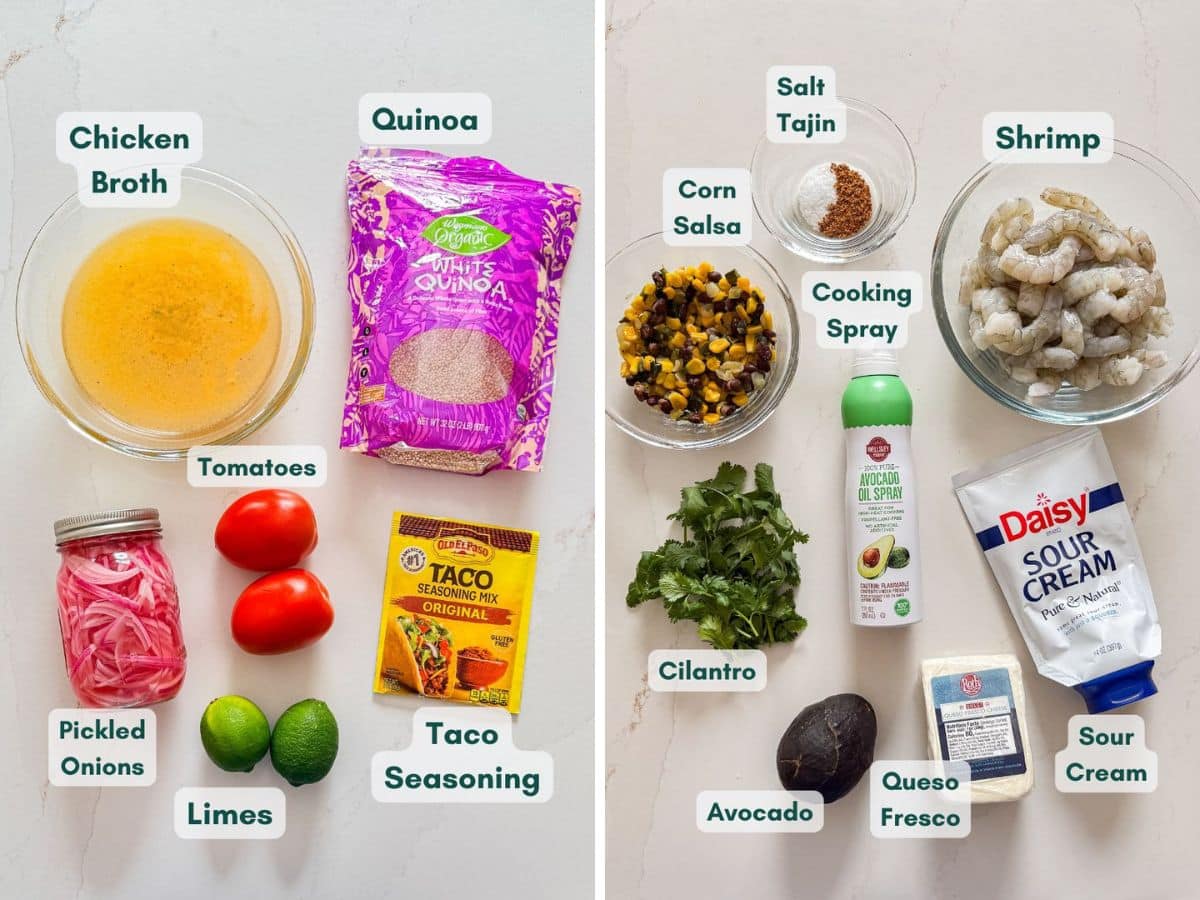
    Ingredient Information And Substitutions

    • Large shrimp- These broil quickly and stay juicy. Frozen shrimp works great. Just thaw completely, and pat dry before seasoning.
    • Quinoa- A good base that soaks up all the flavors. Brown rice or farro works well as a substitute.
    • Chicken broth- Cooking the quinoa in broth instead of water adds a ton of savory flavor.
    • Lime juice- Brightens everything up. Fresh is always best here.
    • Tomatoes- Adds freshness and color. I used Roma, but grape or cherry tomatoes are awesome too.
    • Corn salsa- My recipe is super easy, but store-bought also works great.
    • Pickled onions- Add a tangy, bright contrast to the rich toppings. Easy to make ahead (I LOVE this recipe!) or grab from the store.
    • Avocado crema- The creamy finishing touch. Sour cream or plain Greek yogurt blended with avocado, lime juice, cilantro and a pinch of salt works perfectly.
    An overhead image of labeled recipe ingredients.

    How To Make Taco Bowls

    Step 1- Cook the quinoa. 

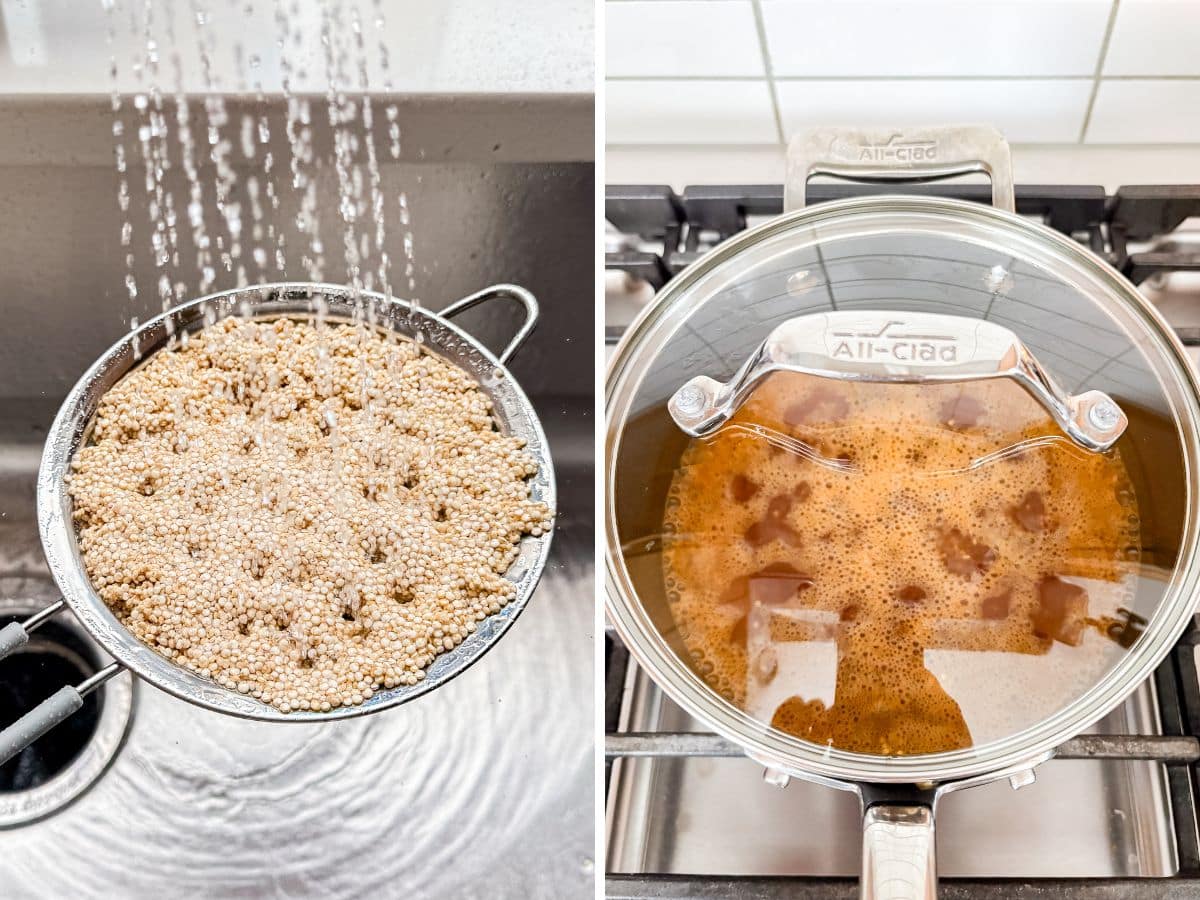
    Rinse your quinoa well until the water runs clear. Combine the quinoa, chicken broth, and taco seasoning in a pot. Bring to a boil, then reduce to low, cover, and simmer for 15 minutes. Remove from heat and let stand for 10 minutes.

    Quinoa being rinsed and then cooking in a covered pot.

    Step 2- Season the shrimp. 

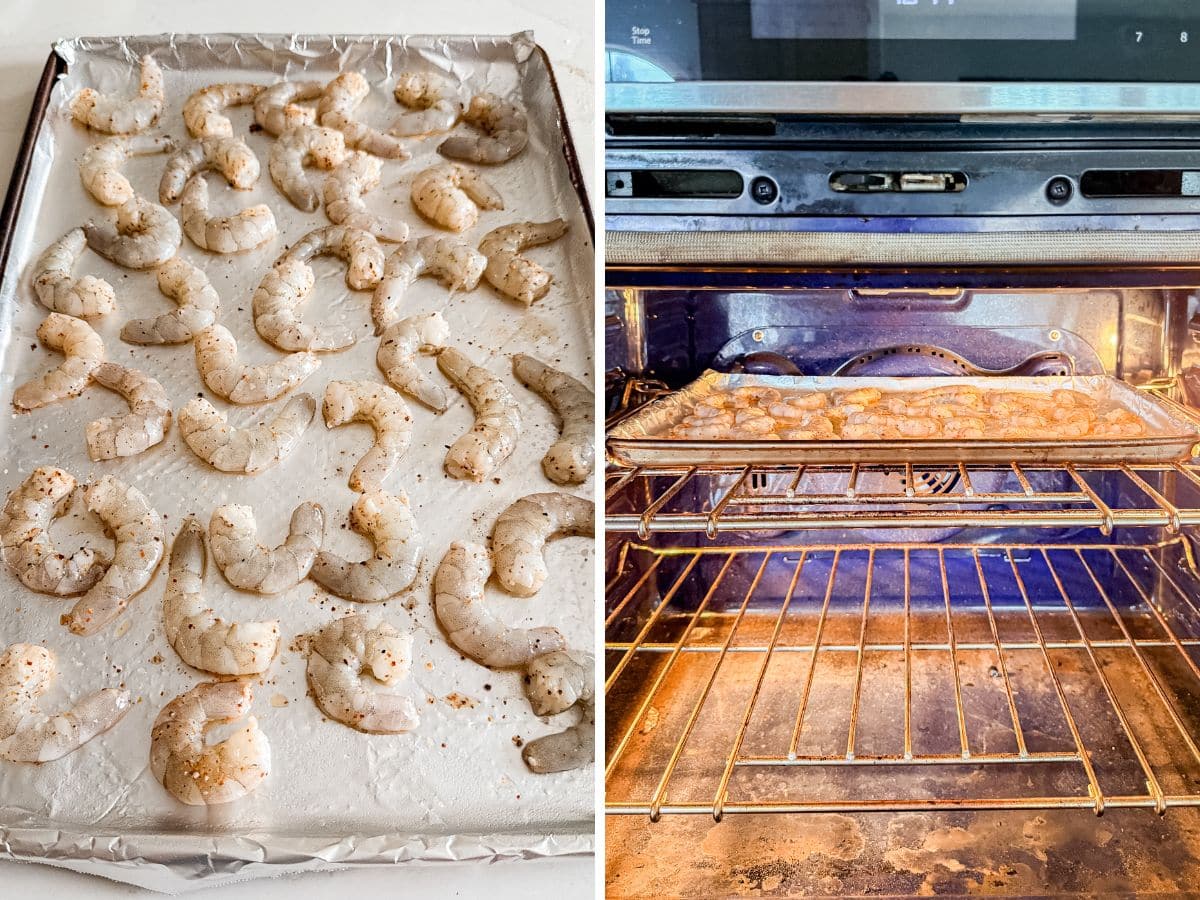
    Toss the shrimp with lime juice, Tajin, and salt until evenly coated.

    Step 3- Broil the shrimp. 

    Spray your pan with cooking spray and broil the shrimp for 2 minutes per side until cooked through.

    Seasoned shrimp on a foil-lined pan and then in the oven.

    Step 4- Assemble the bowls. 

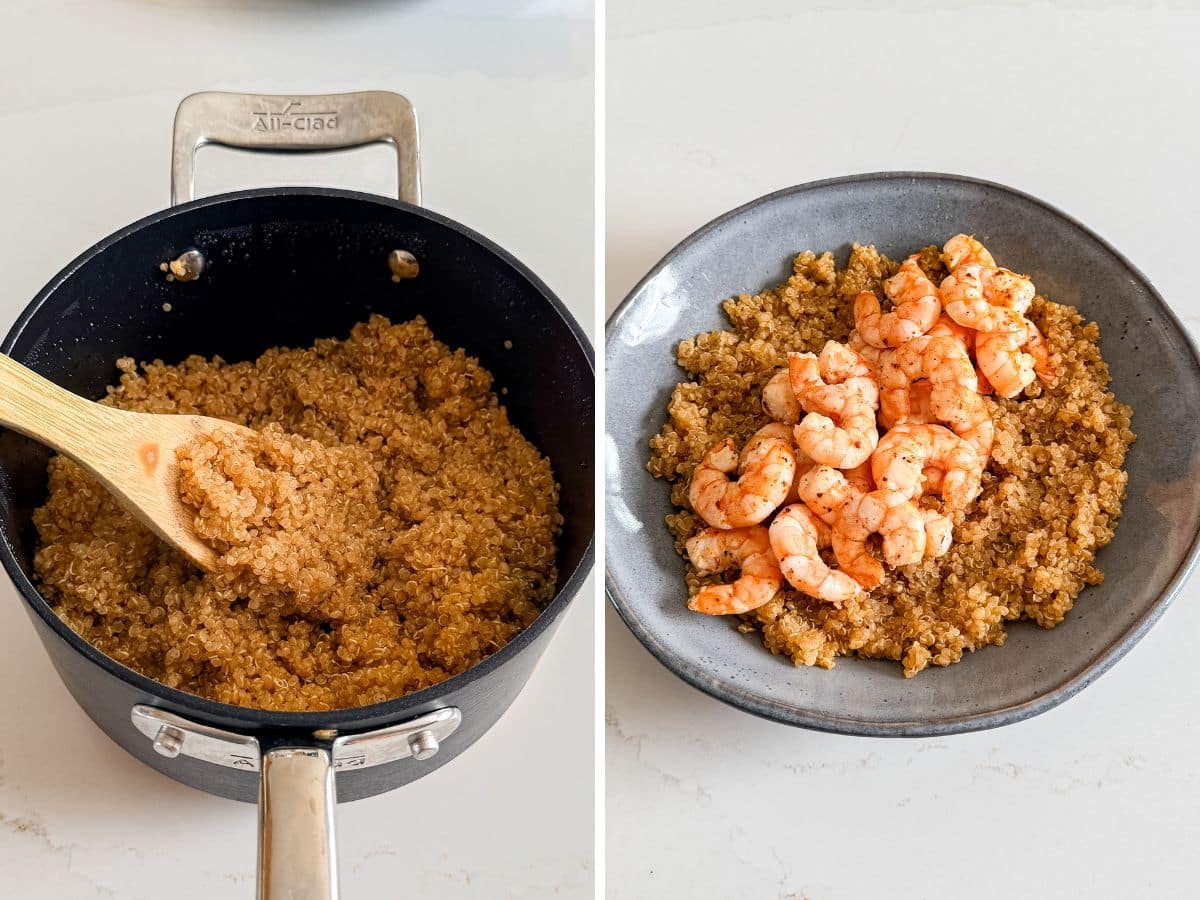
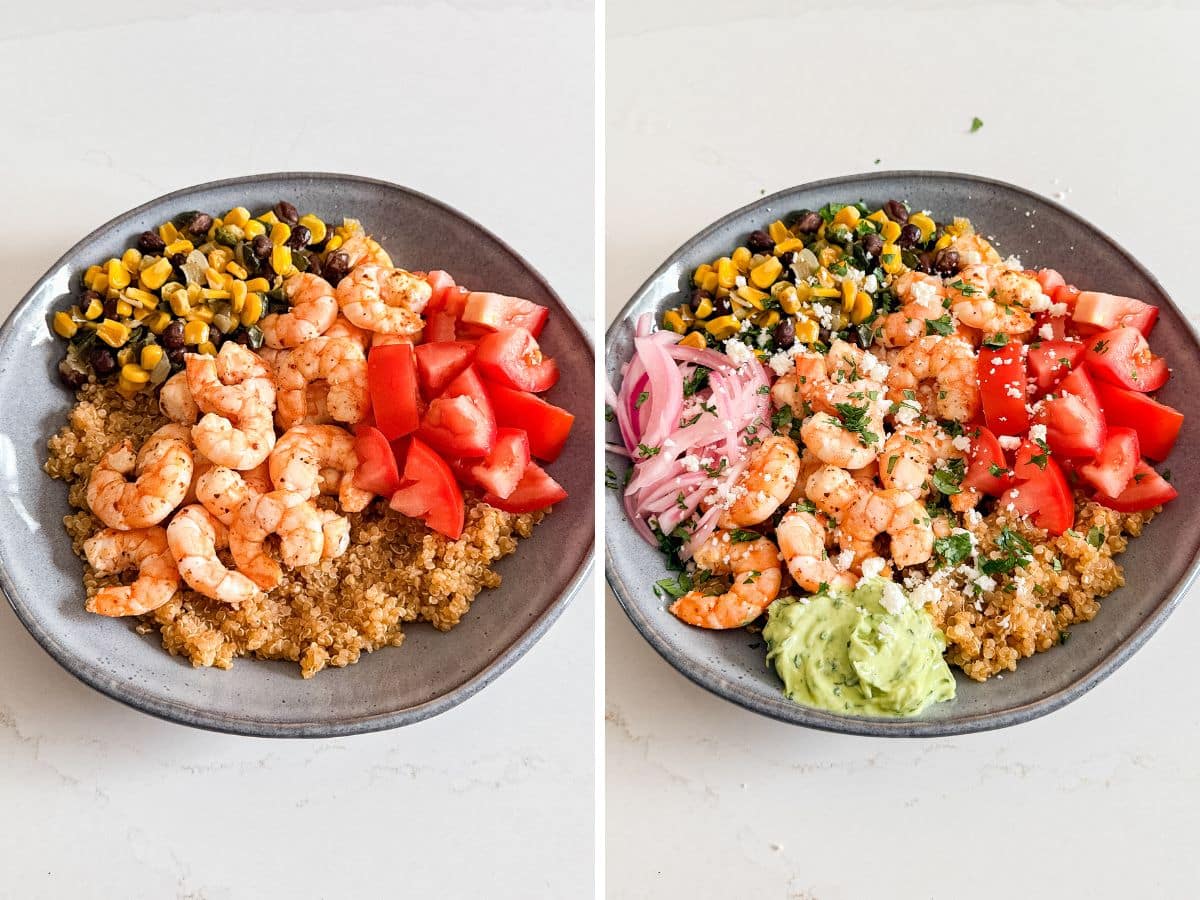
    Divide the quinoa between bowls and top with the broiled shrimp, tomatoes, corn salsa, pickled onions, and avocado crema. Serve immediately.

    Cooked quinoa in a pot with a wooden spoon and then quinoa and shrimp in a bowl.
    Tomatoes and corn salsa added to the quinoa bowl and then pickled onions and avocado crema.

    Frequently Asked Questions

    Tips For Making Blackened Shrimp Bowls

    • Pat your shrimp dry before seasoning. Any extra moisture will prevent them from getting that beautiful charred edge under the broiler.
    • Let the quinoa steam. That 10-minute rest off the heat is important, it finishes cooking and gets perfectly fluffy.
    • Prep your toppings first. The shrimp cooks so quickly that you want everything else ready to go before they hit the broiler.
    • Make it your own. Swap in different toppings like shredded cabbage, jalapeños, or cotija cheese to mix things up.
    • Add a little heat, like a pinch of cayenne to the shrimp seasoning, or a drizzle of hot sauce over the finished bowl for some extra heat.
    • Watch for the curl. Shrimp are done when they turn pink and form a loose C shape. If they curl into a tight O, they're overcooked, so keep a close eye on them.
    • Ingredients to prep ahead- The quinoa, pickled onions, and corn salsa can all be made ahead and stored in the fridge.
    • Leftovers and storage- Store components separately in airtight containers in the fridge for up to 3 days. Reheat the quinoa and shrimp separately and add fresh toppings before serving.
    A shrimp and quinoa bowl with a towel and avocado in the background and some cilantro next to it.

    What To Serve With Shrimp Burrito Bowls

    These bowls are a complete meal on their own, but if you're building out a bigger spread, here are some great options to round things out into a full Mexican rice bowls style feast:

    • Mexican Bean Salad Recipe
    • Mexican Lasagna Roll-Ups
    • Hot Bean Dip Recipe
    • Loaded Chicken Nachos

    Other Quick Dinner Recipes To Try

    • An overhead image of a beef burrito bowl with another next to it and limes and cilantro on the side.
      Beef Burrito Bowls
    • An overhead image of chicken and rice stew in a blue bowl with a napkin and veggies around it.
      Italian Chicken and Rice Stew
    • An overhead image of a bowl of chicken chili.
      Easy Chili Chicken
    • An overhead image of a plate of snow pea stir fry with shrimp over white rice with raw snow peas, a striped towel and rice around it.
      Shrimp and Snow Pea Stir Fry

    Love this recipe? Please leave a 5 star ⭐️⭐️⭐️⭐️⭐️ rating in the recipe card below ⬇️ and/or a review in the comment section further down. Check out my Amazon Store for all my favorite tools, including those used in this recipe. And follow @thelifejolie on Instagram and TikTok!

    An overhead image of a Mexican Shrimp Quinoa Bowl.

    Shrimp Quinoa Bowls

    Jessy Freimann
    These shrimp quinoa bowls are loaded with bold Mexican-inspired flavors, from broiled Tajin shrimp to fresh toppings, and they're ready in just 30 minutes.
    No ratings yet
    Print Recipe Pin Recipe
    Prep Time 10 minutes mins
    Cook Time 20 minutes mins
    Total Time 30 minutes mins
    Course Main
    Cuisine American, Mexican
    Servings 4 servings
    Calories 391 kcal

    Equipment

    • 1 Small sauce pan
    • 1 sheet pan
    • 1 chefs knife
    • 1 cutting board
    • 1 Measuring cups and spoons

    Ingredients
      

    • 1 cup quinoa rinsed well
    • 2 cups chicken broth
    • 1 Tablespoon Taco seasoning
    • Cooking spray
    • 1 pounds large shrimp peeled and deveined and thawed
    • 2 Tablespoons lime juice 1 lime
    • 2 teaspoons Tajin
    • 1 teaspoon Kosher salt
    • 1 cup roasted corn salsa
    • 1 cup avocado crema
    • 2 Roma tomatoes diced
    • ⅓ cup pickled red onions
    • ⅓ cup queso fresca
    • Cilantro for garnish

    Instructions
     

    • Place quinoa, broth and taco seasoning in a medium sauce pan and bring to a boil. Once boiling, cover, reduce to a simmer for 15 minutes and then remove from heat and let stand still covered for 10 minutes.
    • While the quinoa cooks, preheat the broiler to a high temperature and pat your shrimp dry.
    • Line a sheet pan with foil and spray well with cooking spray. Place shrimp on the pan along with lime juice, Tajin and salt.
    • Toss the shrimp to evenly coat and then spread in a single layer.
    • Place the pan under the broiler (about 6 inches from it) and cook the shrimp for 2 minutes.
    • Remove the pan from the oven and flip each shrimp. Place the pan back in the oven and cook for 1-2 more minutes until the shrimp is fully cooked. Remove from the oven.
    • Divide the quinoa between 4 bowls and then the shrimp. Top your bowl with corn salsa, tomatoes, pickled red onions, avocado crema, cilantro and queso fresco and serve immediately.

    Video

    Notes

    • Pat your shrimp dry before seasoning. Any extra moisture will prevent them from getting that beautiful charred edge under the broiler.
    • Let the quinoa steam. That 10-minute rest off the heat is important, it finishes cooking and gets perfectly fluffy.
    • Prep your toppings first. The shrimp cooks so quickly that you want everything else ready to go before they hit the broiler.
    • Make it your own. Swap in different toppings like shredded cabbage, jalapeños, or cotija cheese to mix things up.
    • Add a little heat, like a pinch of cayenne to the shrimp seasoning, or a drizzle of hot sauce over the finished bowl for some extra heat.
    • Watch for the curl. Shrimp are done when they turn pink and form a loose C shape. If they curl into a tight O, they're overcooked, so keep a close eye on them.
    • Ingredients to prep ahead- The quinoa, pickled onions, and corn salsa can all be made ahead and stored in the fridge.
    • Leftovers and storage- Store components separately in airtight containers in the fridge for up to 3 days. Reheat the quinoa and shrimp separately and add fresh toppings before serving.

    Nutrition

    Serving: 1servingCalories: 391kcalCarbohydrates: 45gProtein: 27gFat: 13gSaturated Fat: 3gPolyunsaturated Fat: 3gMonounsaturated Fat: 5gTrans Fat: 0.01gCholesterol: 156mgSodium: 1876mgPotassium: 783mgFiber: 8gSugar: 4gVitamin A: 1039IUVitamin C: 14mgCalcium: 164mgIron: 3mg
    Tried this recipe?Let us know how it was!

    Asian Soup with Cabbage and Meatballs

    May 4, 2026 · 63 Comments

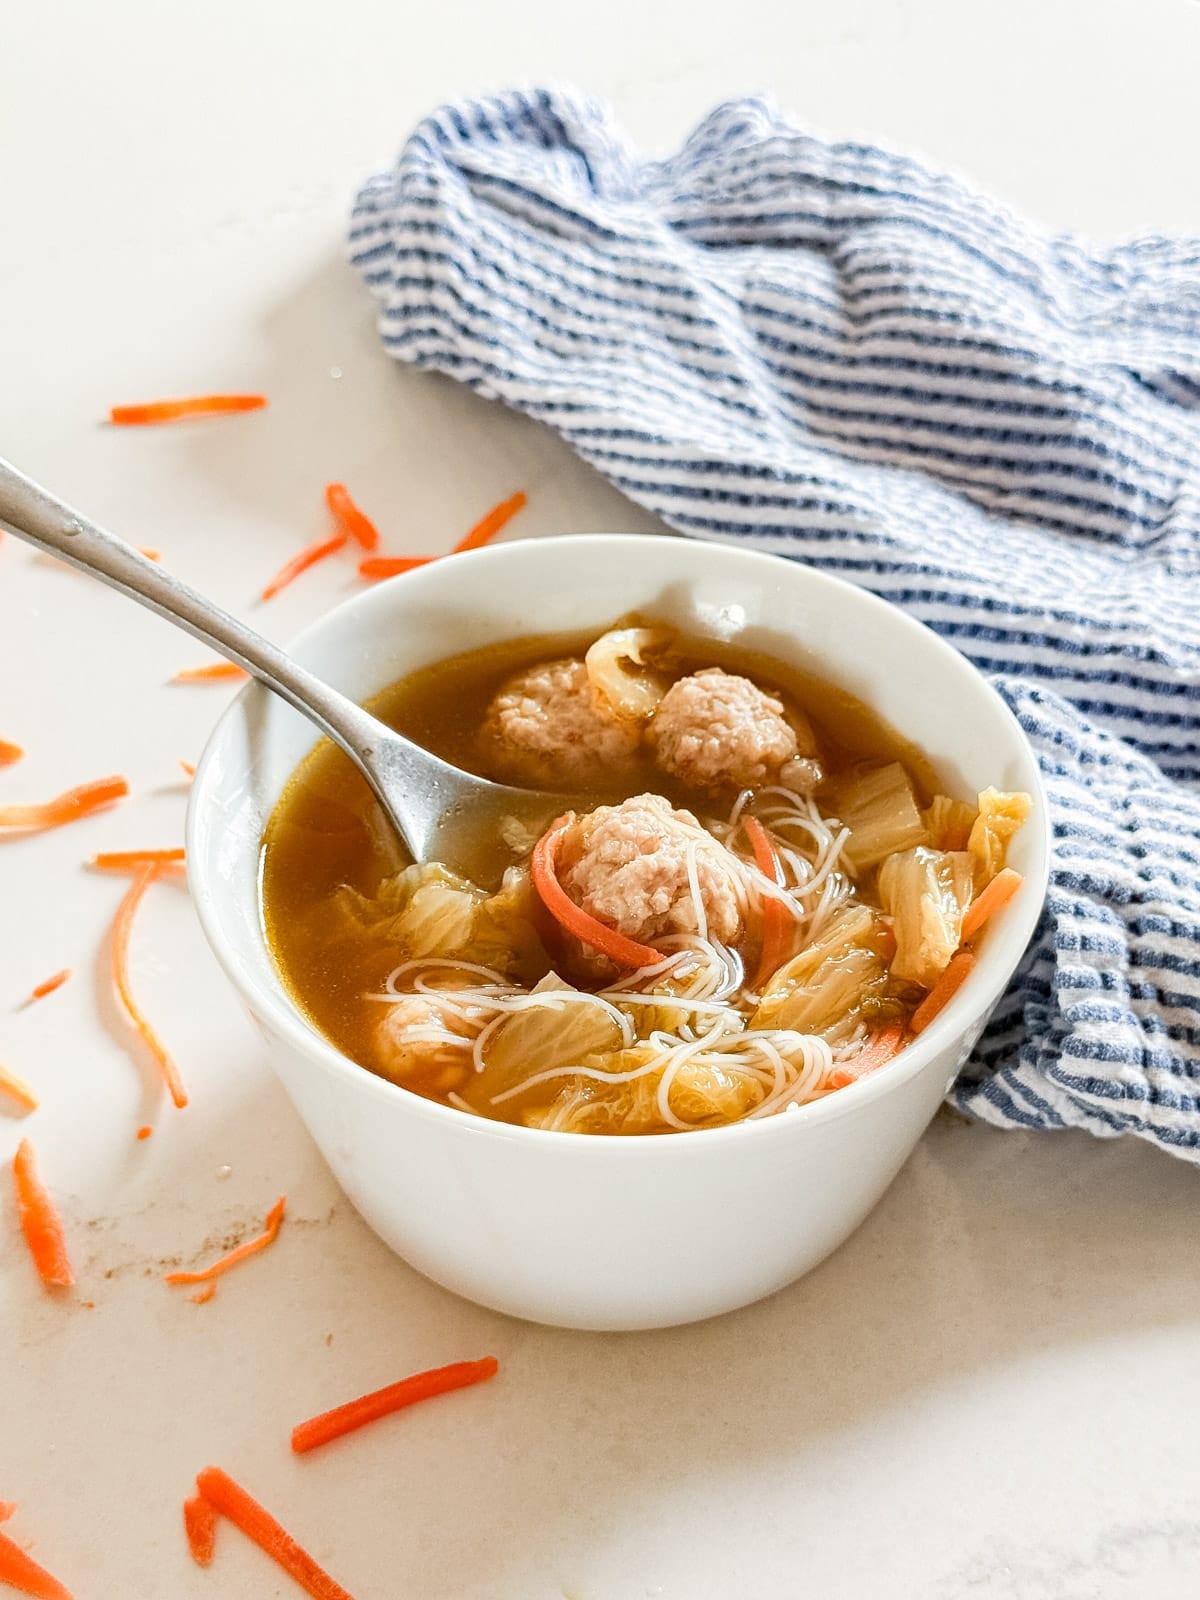
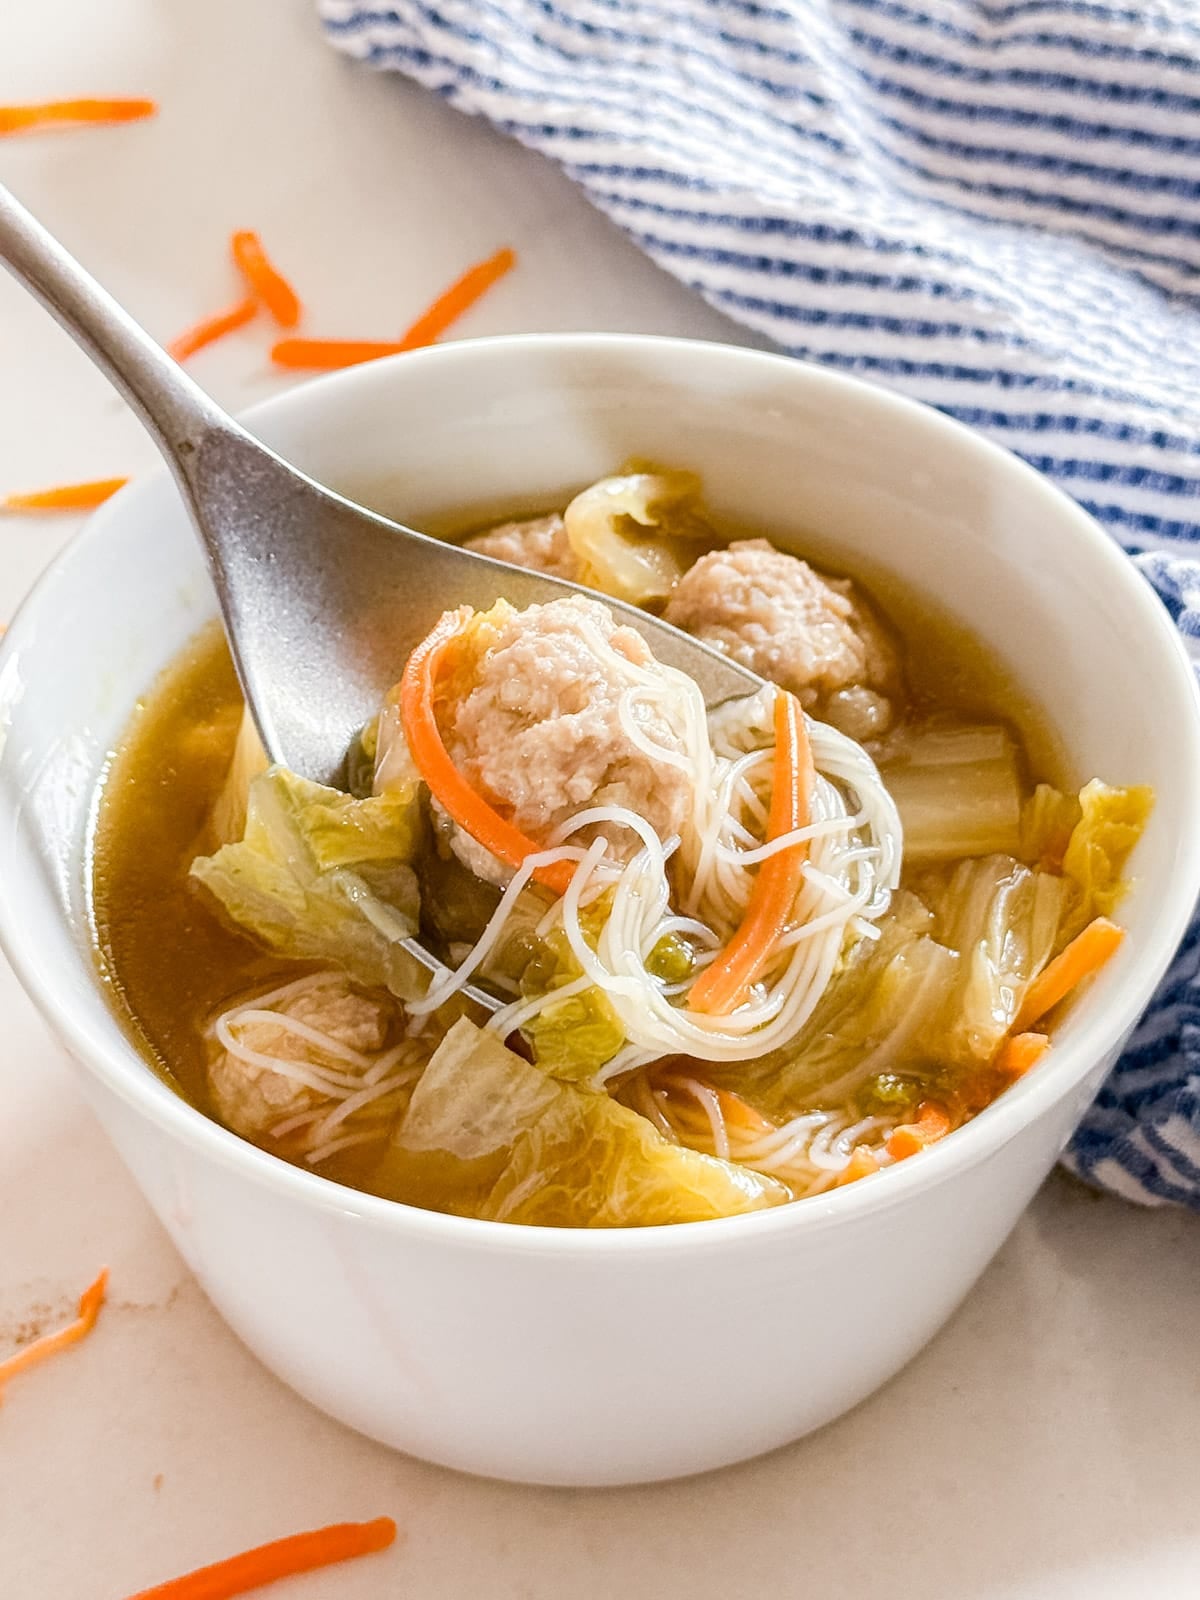
    A bowl of asian soup with meatballs with a spoon and noodles in it.

    This Asian Soup with Cabbage and Meatballs is packed with tender pork and shrimp meatballs, hearty napa cabbage, and a deeply savory broth that comes together in just over an hour.

    A bowl of asian soup with meatballs with a spoon and noodles in it.
    [feast_advanced_jump_to]

    Why You'll Love This Asian Noodle Soup

    I love eating Asian food, but I don't cook in this style nearly enough. The problem is I've always felt like a total newbie in this area, which is exactly why testing this recipe was such a fun experience for me. It comes from my blogger friend Charmaine's cookbook all about healthy Chinese cooking, and it completely blew me away. 

    Those tender pork and shrimp meatballs and that umami-packed broth are seriously off the charts. The comfort factor here is at an all-time high, and my family went absolutely crazy for it. Serve it with vermicelli or glass noodles, and you've got a complete, cozy meal on your hands. Here's why this noodle soup is a total winner:

    • Deeply savory broth
    • Light, tender meatballs
    • Simple, wholesome ingredients
    • Perfect for cold weather
    • Works as a starter or a full meal
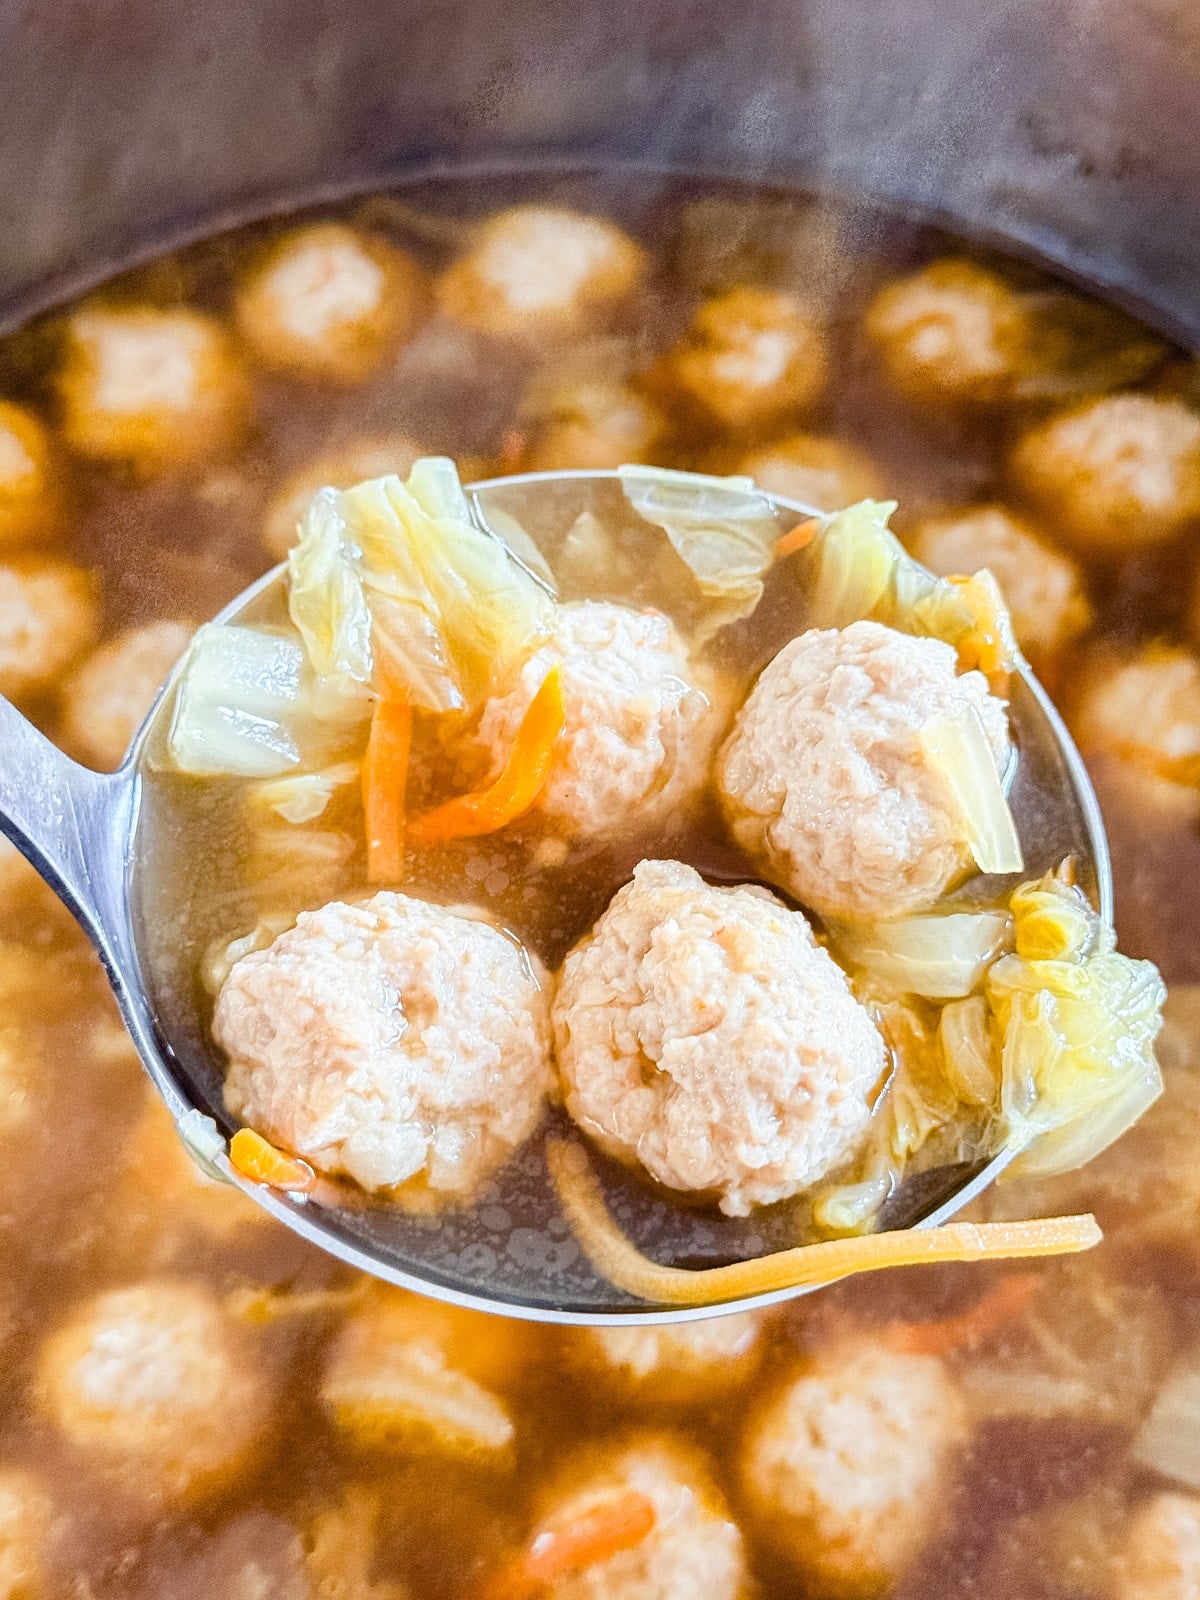
    A ladle scooping Asian soup with meatballs and cabbage

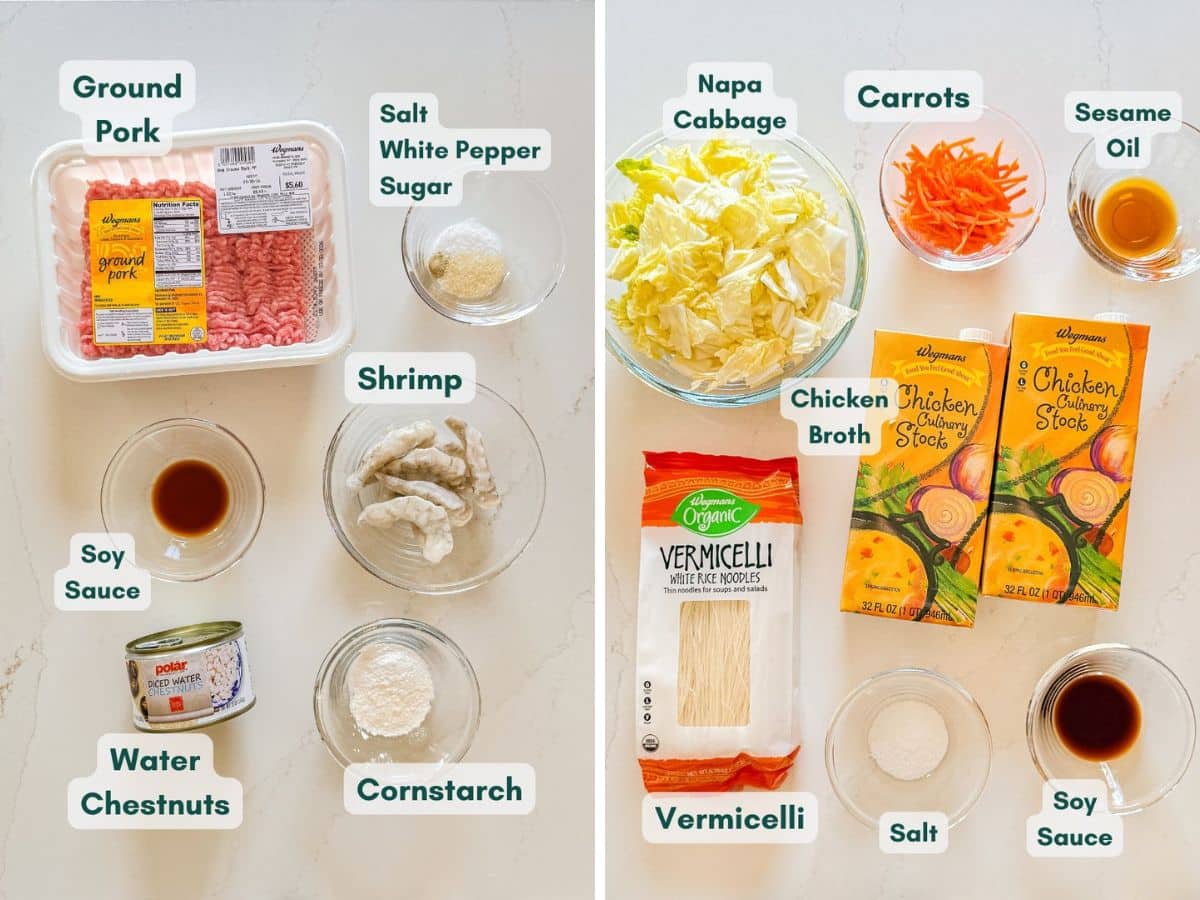
    Ingredient Information And Substitutions

    • Ground pork- The base of the meatballs, giving them richness and flavor. Ground chicken or turkey can work as a lighter substitute.
    • Minced shrimp- Adds a subtle sweetness and lightness to the meatballs. You can omit if needed, just add a bit more pork to compensate, but I think the shrimp makes these extra special.
    • Water chestnuts- Finely diced, these give every bite a satisfying crunch. Canned water chestnuts work perfectly here.
    • Napa cabbage- Adds body and a mild, slightly sweet flavor to the soup. Savoy cabbage can substitute.
    • Carrot- Sliced into the broth for a touch of sweetness and color, I prefer shredded.
    • Sesame oil- Stirred in at the end for a nutty, aromatic finish. Don't skip this one.
    • Soy sauce- Used both in the meatballs and the broth for deep, savory flavor. Tamari works as a gluten-free substitute.
    • Cornstarch- Helps bind the meatballs together and keeps them light and airy.
    • Chicken stock- The base of the broth. Homemade Chinese chicken stock is ideal (also in the cookbook), but store-bought works great too.
    • Ground white pepper- Adds a gentle heat to the meatballs. Black pepper can substitute in a pinch.
    • Sugar- Just a pinch in the meatballs to balance the savory flavors.
    • Salt- Used in both the meatballs and the broth.
    • Vermicelli- optional but I love the addition of noodles!
    An overhead image of labeled recipe ingredients.

    How To Make This Asian Soup Recipe

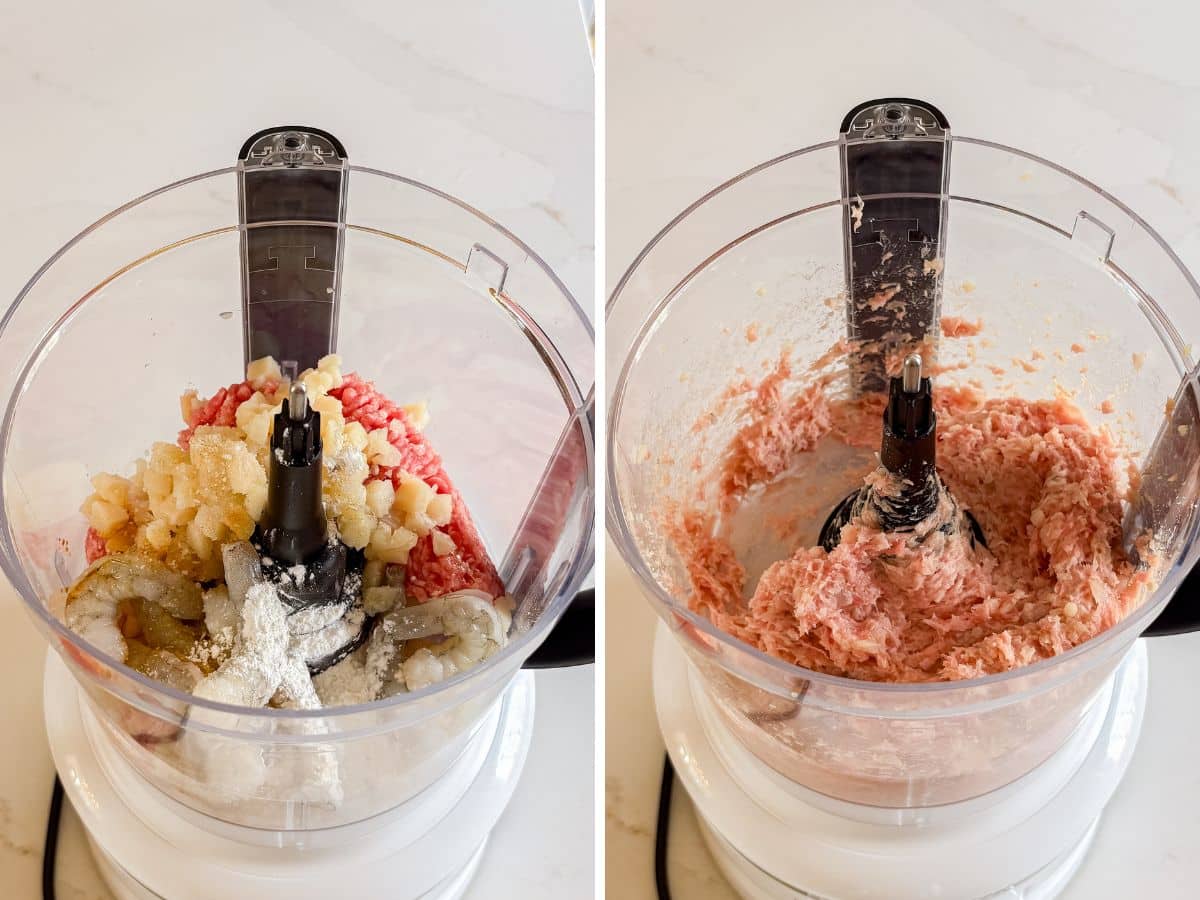
    Step 1- Make the meatball mixture. 

    Combine the ground pork, minced shrimp, water chestnuts, soy sauce, sugar, salt, white pepper, and cornstarch in a bowl and mix well. Set aside to marinate for about 15 minutes.

    Meatball ingredients in the food processor and then all mixed together.

    Step 2- Start the broth. 

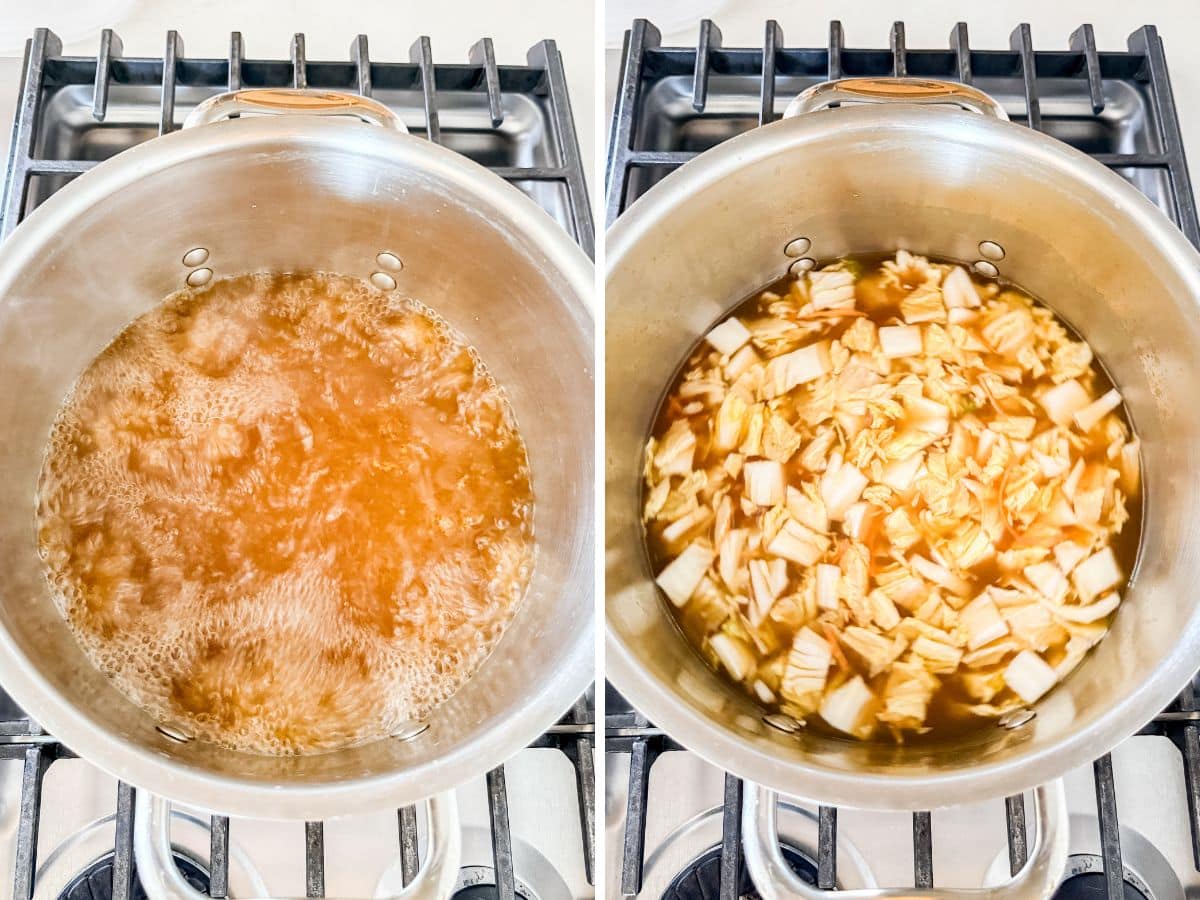
    Bring the chicken stock to a boil in a wok or large pot over high heat. Add the cabbage and carrot, and let everything simmer for about 30 minutes.

    Broth boiling in a pot and then cabbage and carrots added to the pot.

    Step 3- Form the meatballs. 

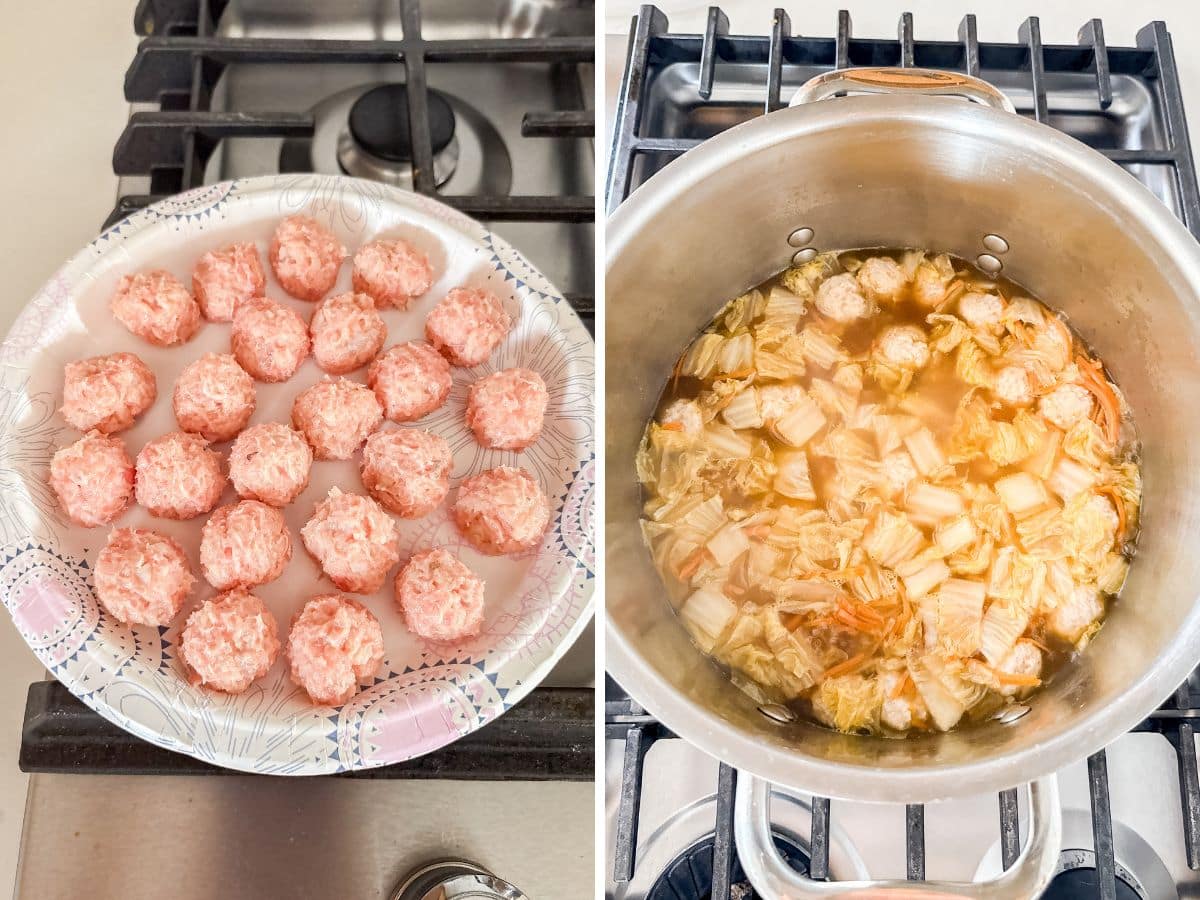
    Roll about a heaping tablespoon of the pork mixture into a ball and repeat until all the mixture is used up.

    Step 4- Cook the meatballs. 

    Carefully drop the meatballs into the simmering soup one at a time. Avoid stirring. They'll rise to the top as they cook through, which takes about 3 minutes.

    Meatballs rolled and on a plate and then added tot the broth to cook.

    Step 5- Finish the soup. 

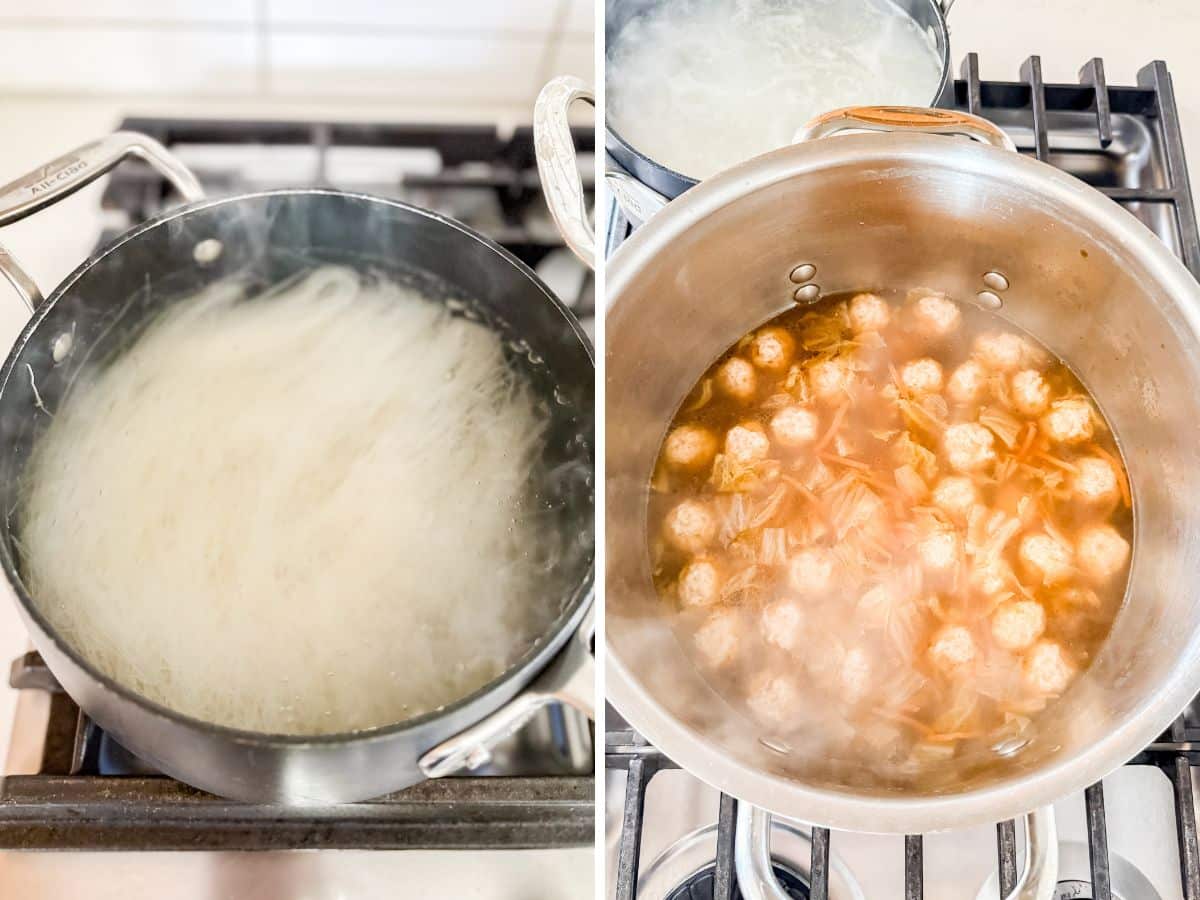
    Just before turning off the heat, stir in the salt, sesame oil, and soy sauce. Serve hot with vermicelli or glass noodles.

    Vermicelli boiling in a pot and then the soup once the meatballs have risen to the top.

    Frequently Asked Questions

    Can I make this soup ahead of time? 

    Yes. The broth and vegetables can be made ahead and refrigerated. Form and simmer the meatballs fresh when you're ready to serve for the best texture.

    Can I make this soup spicy? 

    Definitely. A pinch of chili flakes, a drizzle of chili oil, or a little sriracha stirred in at the end are all great ways to add some heat.

    Can I add noodles directly to the soup?

    You can. Add vermicelli or glass noodles directly to the pot in the last few minutes of cooking and let them soak up all that delicious broth.

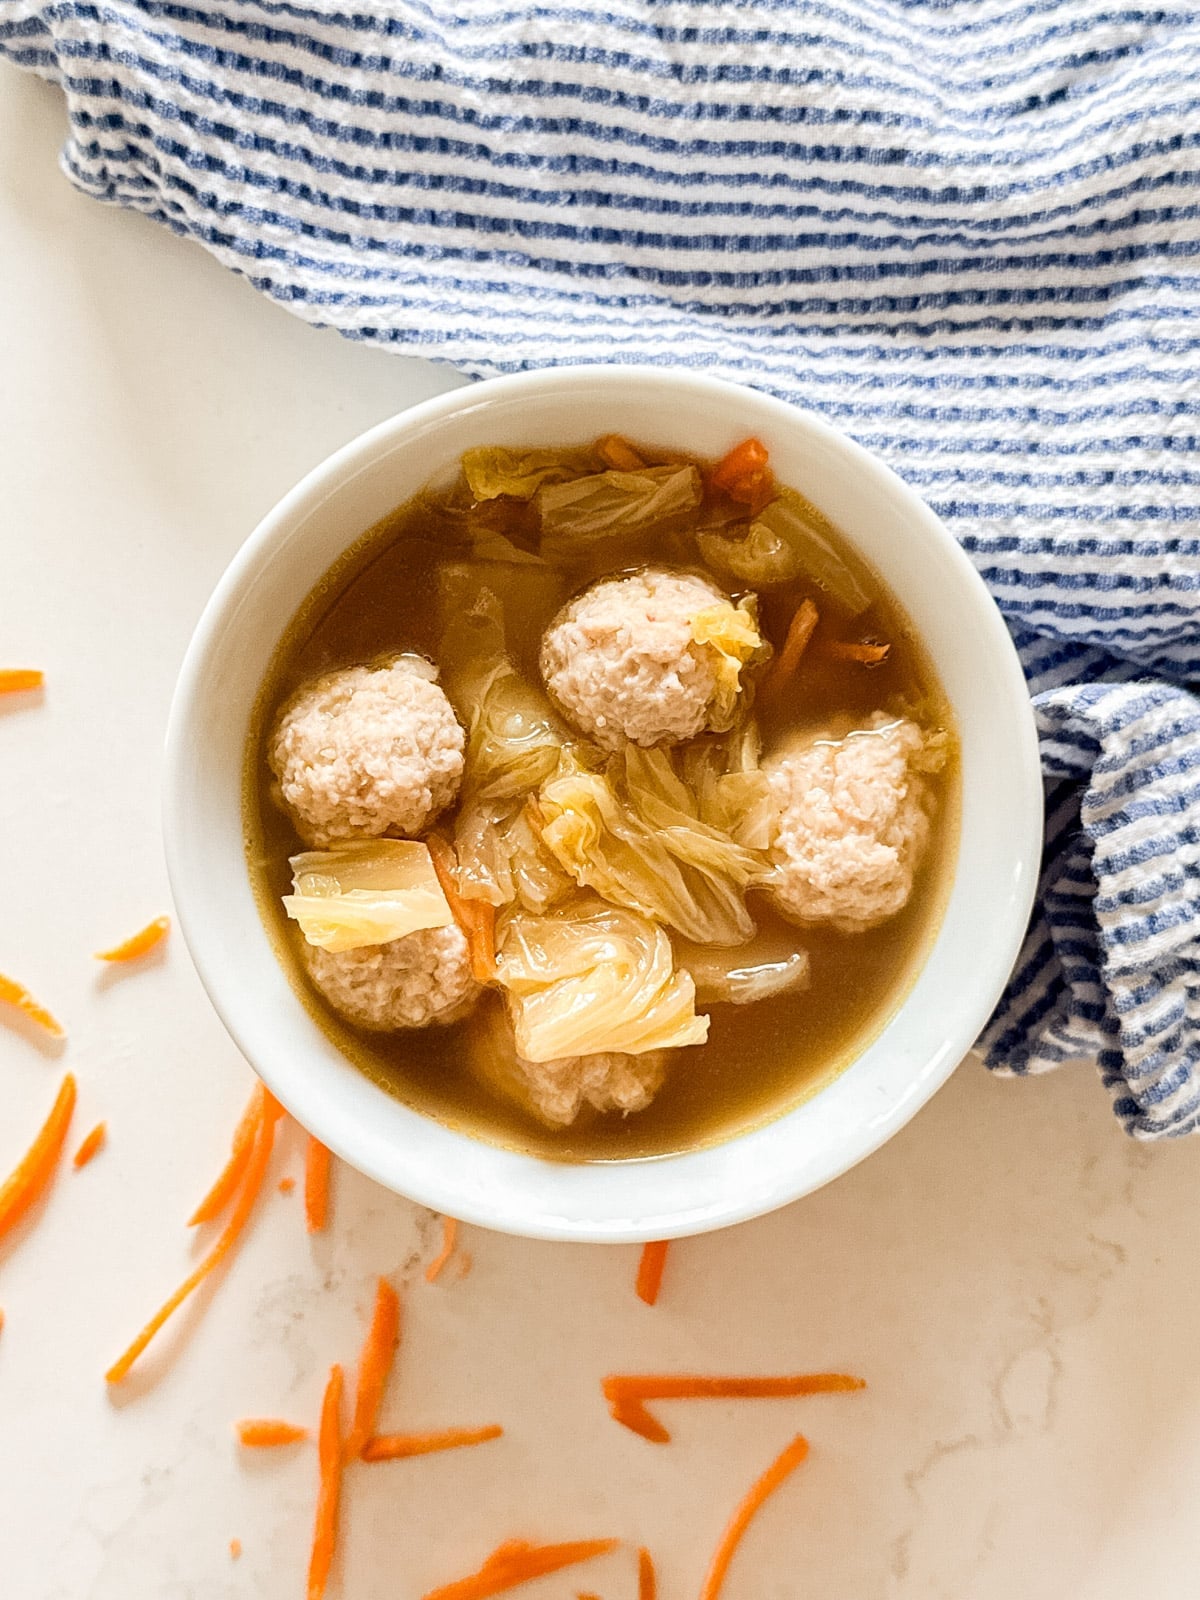
    An overhead image of a bowl of Asian meatball soup with carrots and a striped napkin next to it.

    Tips For Making This Asian Cabbage Soup

    • Don't skip the marinating time. Letting the meatball mixture rest for 15 minutes makes a big difference in flavor and texture.
    • Drop meatballs in gently. Keep them intact by adding them one at a time, then avoid stirring as they cook.
    • Watch for the float. The meatballs will rise to the surface when they're cooked through. That's your cue that they're done!
    • Add sesame oil at the end. Stirring it in just before serving preserves that nutty, aromatic flavor.
    • Ingredients to prep ahead- You can mix and refrigerate the meatball mixture up to a day in advance. The vegetables can also be prepped and stored in the fridge.
    • Leftovers and storage- Store leftovers in an airtight container in the fridge for up to 3 days. Reheat gently on the stovetop over medium-low heat.
    A close up of a spoon of soup and meatballs being lifted from the bowl.

    What To Serve With Chinese Cabbage Soup

    This soup is hearty enough to be a meal on its own, but if you want to build out a full spread, here are a few favorites that pair with it:

    • Grilled Artichokes
    • Asian Grilled Pork Tenderloin
    • Ramen Asian Coleslaw Recipe
    • Caramel Blossom Cookies

    Other Soup Recipes To Try

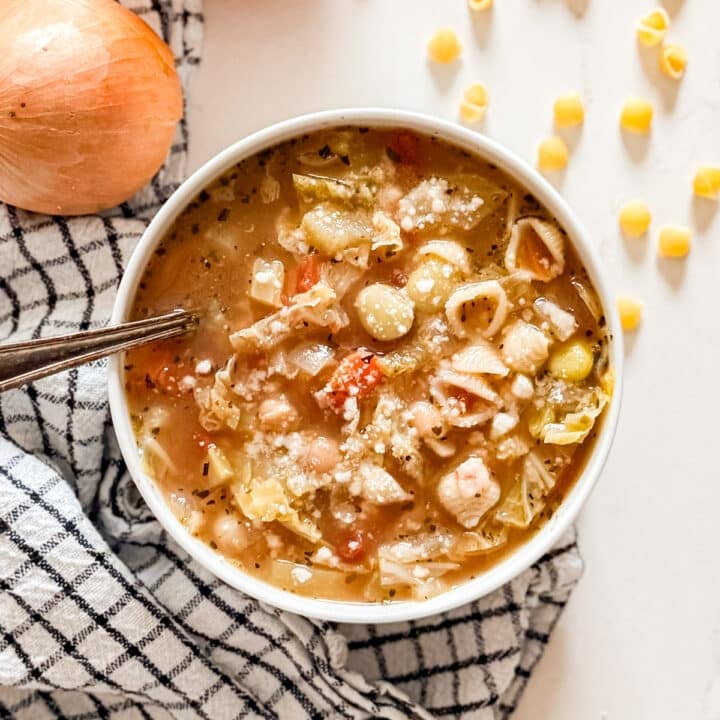
    • An overhead image of a bowl of minestrone soup.
      Traditional Minestrone Soup Recipe
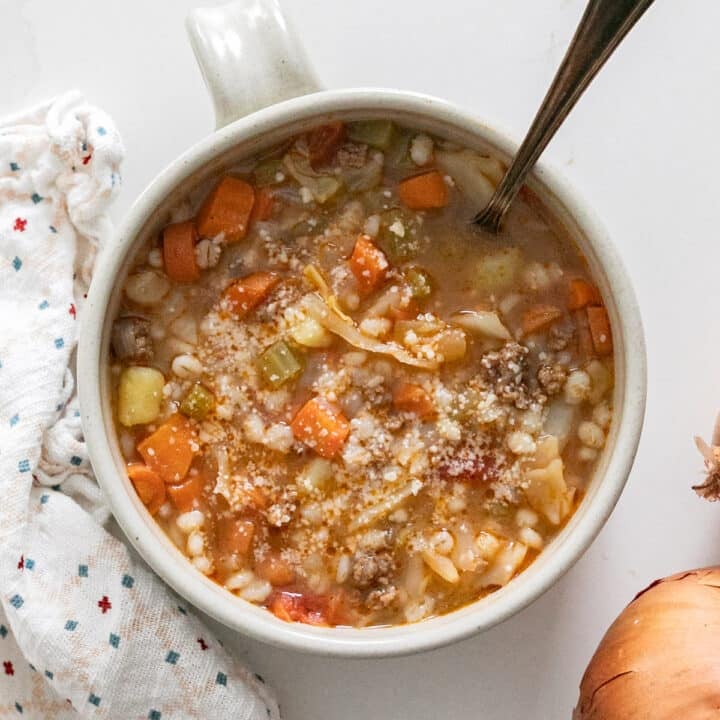
    • An overhead image of a bow of cabbage soup with a spoon in it.
      Cabbage Soup with Hamburger
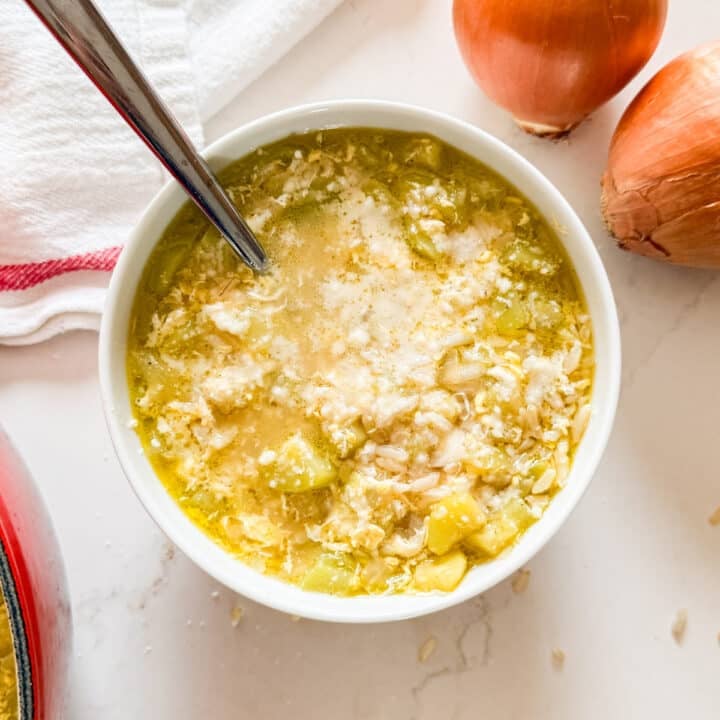
    • An overhead image of a bowl of zucchini soup with onions and a tea towel next to it.
      Zucchini Soup
    • A bowl of tomato soup on a plate with a spoon and grilled cheese.
      Tomato Bisque Soup Recipe

    Love this recipe? Please leave a 5 star ⭐️⭐️⭐️⭐️⭐️ rating in the recipe card below ⬇️ and/or a review in the comment section further down. Check out my Amazon Store for all my favorite tools, including those used in this recipe. And follow @thelifejolie on Instagram and TikTok!

    A bowl of asian soup with meatballs with a spoon and noodles in it.

    Asian Soup with Cabbage and Meatballs

    Jessy Freimann
    This Asian Soup with Cabbage and Meatballs is packed with tender pork and shrimp meatballs, hearty napa cabbage, and a deeply savory broth that comes together in just over an hour.
    5 from 1 vote
    Print Recipe Pin Recipe
    Prep Time 30 minutes mins
    Cook Time 35 minutes mins
    Total Time 1 hour hr 5 minutes mins
    Course Appetizer, Entree, Main, Soup
    Cuisine Asian, Easy, Pork, Shrimp, Soup
    Servings 8 servings
    Calories 227 kcal

    Equipment

    • 1 Dutch oven
    • 1 Ladle
    • 1 wooden spoon
    • 1 cutting board
    • 1 chefs knife
    • 1 mini prep processor
    • 1 cookie scoop
    • 1 Measuring cups and spoons

    Ingredients
      

    For the pork meatballs:

    • ½ pound ground pork
    • ¼ pound minced shrimp 4 to 6 large shrimp
    • ¼ cup water chestnuts finely diced
    • 1 teaspoon soy sauce
    • ½ teaspoon granulated sugar
    • ½ teaspoon Kosher salt
    • 1 pinch ground white pepper
    • 1 ½ Tablespoon cornstarch

    For the soup:

    • 10 cups Basic Chinese Chicken Stock page 25 of The Healthy Wok Chinese Cookbook, or store bought chicken stock
    • 2 cups napa cabbage cut into 1 inch pieces
    • 1 cup carrot sliced or shredded
    • 2 teaspoons Kosher salt
    • 2 teaspoons sesame oil
    • 2 teaspoons soy sauce

    Instructions
     

    To make the meatballs:

    • In a bowl, mix the ground pork, shrimp, water chestnuts, soy sauce, sugar, salt, pepper, and cornstarch.
    • Set aside to marinate for about 15 minutes.

    To make the soup:

    • In a wok or dutch oven over high heat, bring the chicken stock to a boil.
    • Add the cabbage and carrot, and simmer for about 30 minutes.
    • Roll about heaping tablespoons of pork mixture into a ball and continue until all the pork mixture is used.
    • Carefully drop the meatballs into the boiling soup one at a time. Avoid stirring.
    • As the meatballs cook, they will rise to the top. They will take about 3 minutes to cook through.
    • Add the salt, sesame oil, and soy sauce just before turning off the heat. Serve immediately over vermacelli.

    Video

    Notes

    • Don't skip the marinating time. Letting the meatball mixture rest for 15 minutes makes a big difference in flavor and texture.
    • Drop meatballs in gently. Keep them intact by adding them one at a time, then avoid stirring as they cook.
    • Watch for the float. The meatballs will rise to the surface when they're cooked through. That's your cue that they're done!
    • Add sesame oil at the end. Stirring it in just before serving preserves that nutty, aromatic flavor.
    • Ingredients to prep ahead- You can mix and refrigerate the meatball mixture up to a day in advance. The vegetables can also be prepped and stored in the fridge.
    • Leftovers and storage- Store leftovers in an airtight container in the fridge for up to 3 days. Reheat gently on the stovetop over medium-low heat.

    Nutrition

    Serving: 1servingCalories: 227kcalCarbohydrates: 16gProtein: 16gFat: 11gSaturated Fat: 3gPolyunsaturated Fat: 2gMonounsaturated Fat: 5gCholesterol: 52mgSodium: 1328mgPotassium: 548mgFiber: 1gSugar: 6gVitamin A: 2744IUVitamin C: 7mgCalcium: 43mgIron: 1mg
    Tried this recipe?Let us know how it was!

    Roasted Red Potatoes Recipe

    May 1, 2026 · 10 Comments

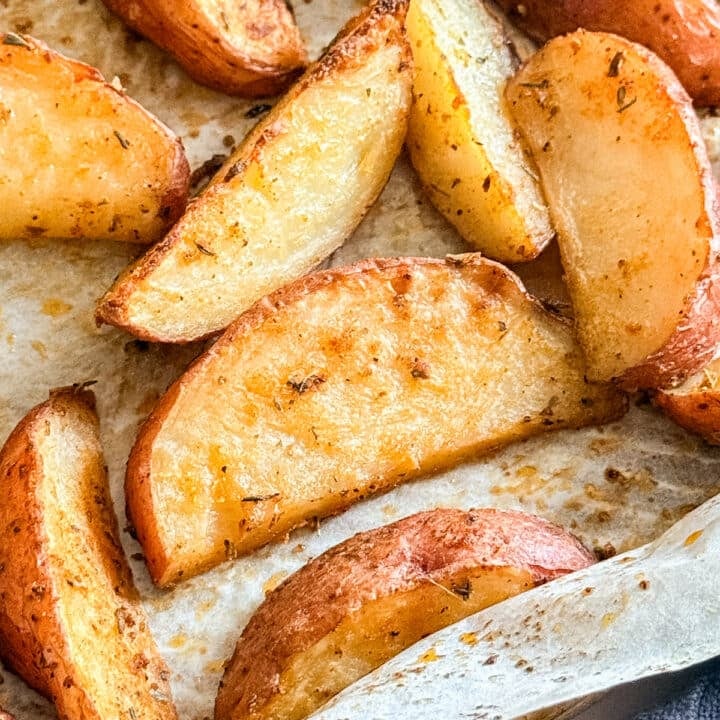
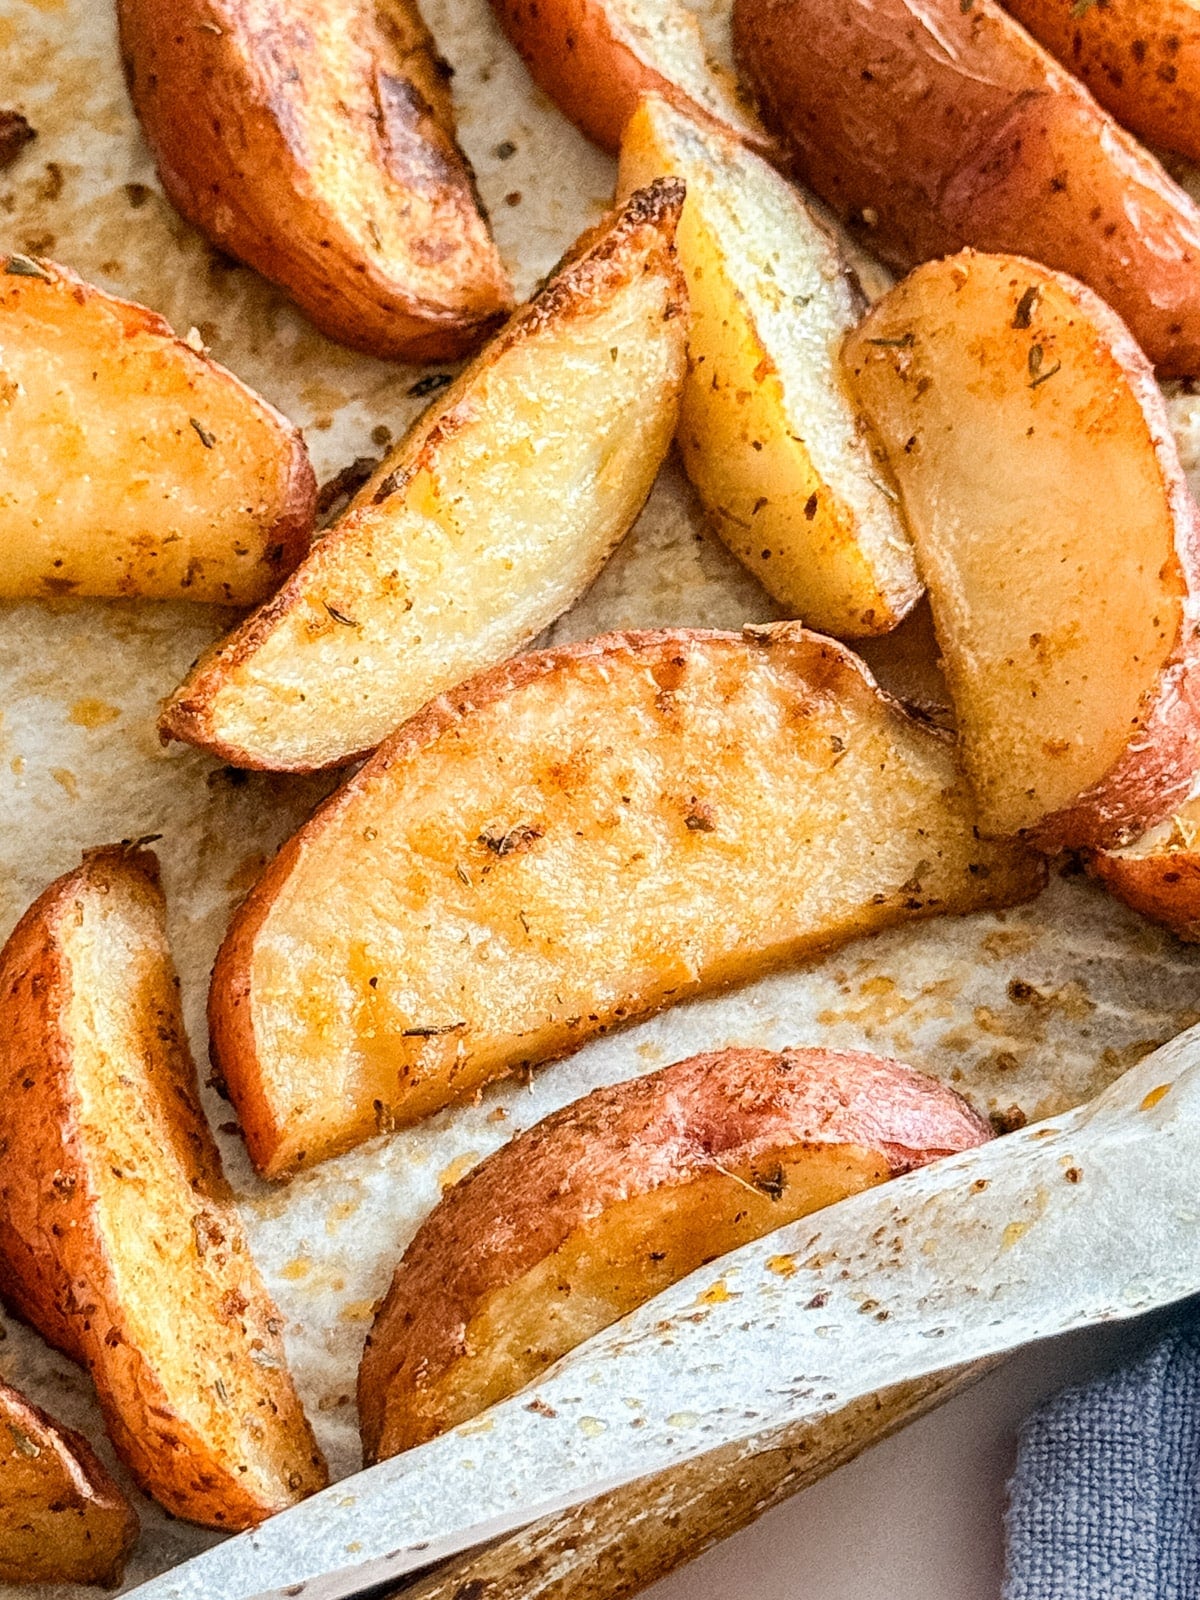
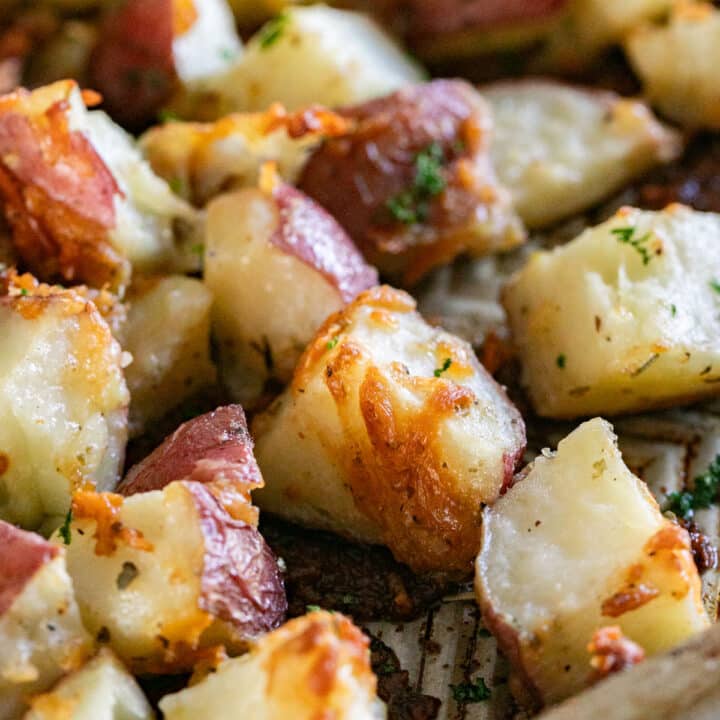
    A close up of roasted red potatoes on a pan.

    Make this roasted red potatoes recipe for a simple, satisfying side dish that delivers crispy golden edges, fluffy centers, and bold flavor all in just 45 minutes. 

    A close up of roasted red potatoes on a pan.
    [feast_advanced_jump_to]

    Why You'll Love These Roasted Red Skin Potatoes

    Being married to a Mr. Meat-and-Potatoes means we eat potatoes in just about every form imaginable. I love roasting them until they're nice and crispy, but that can sometimes take forever, so I started cutting them into wedges, which helps them cook so much more quickly. 

    A simple seasoning blend of garlic, onion, Italian seasoning, and a little paprika takes them completely over the top. The result is golden, crispy-edged potatoes that make the whole house smell incredible and disappear off the plate fast. Here's why these roasted little red potatoes are a total winner:

    • Pairs with everything
    • Crispy edges, fluffy centers
    • Ready in under 45 minutes
    • Simple pantry seasonings
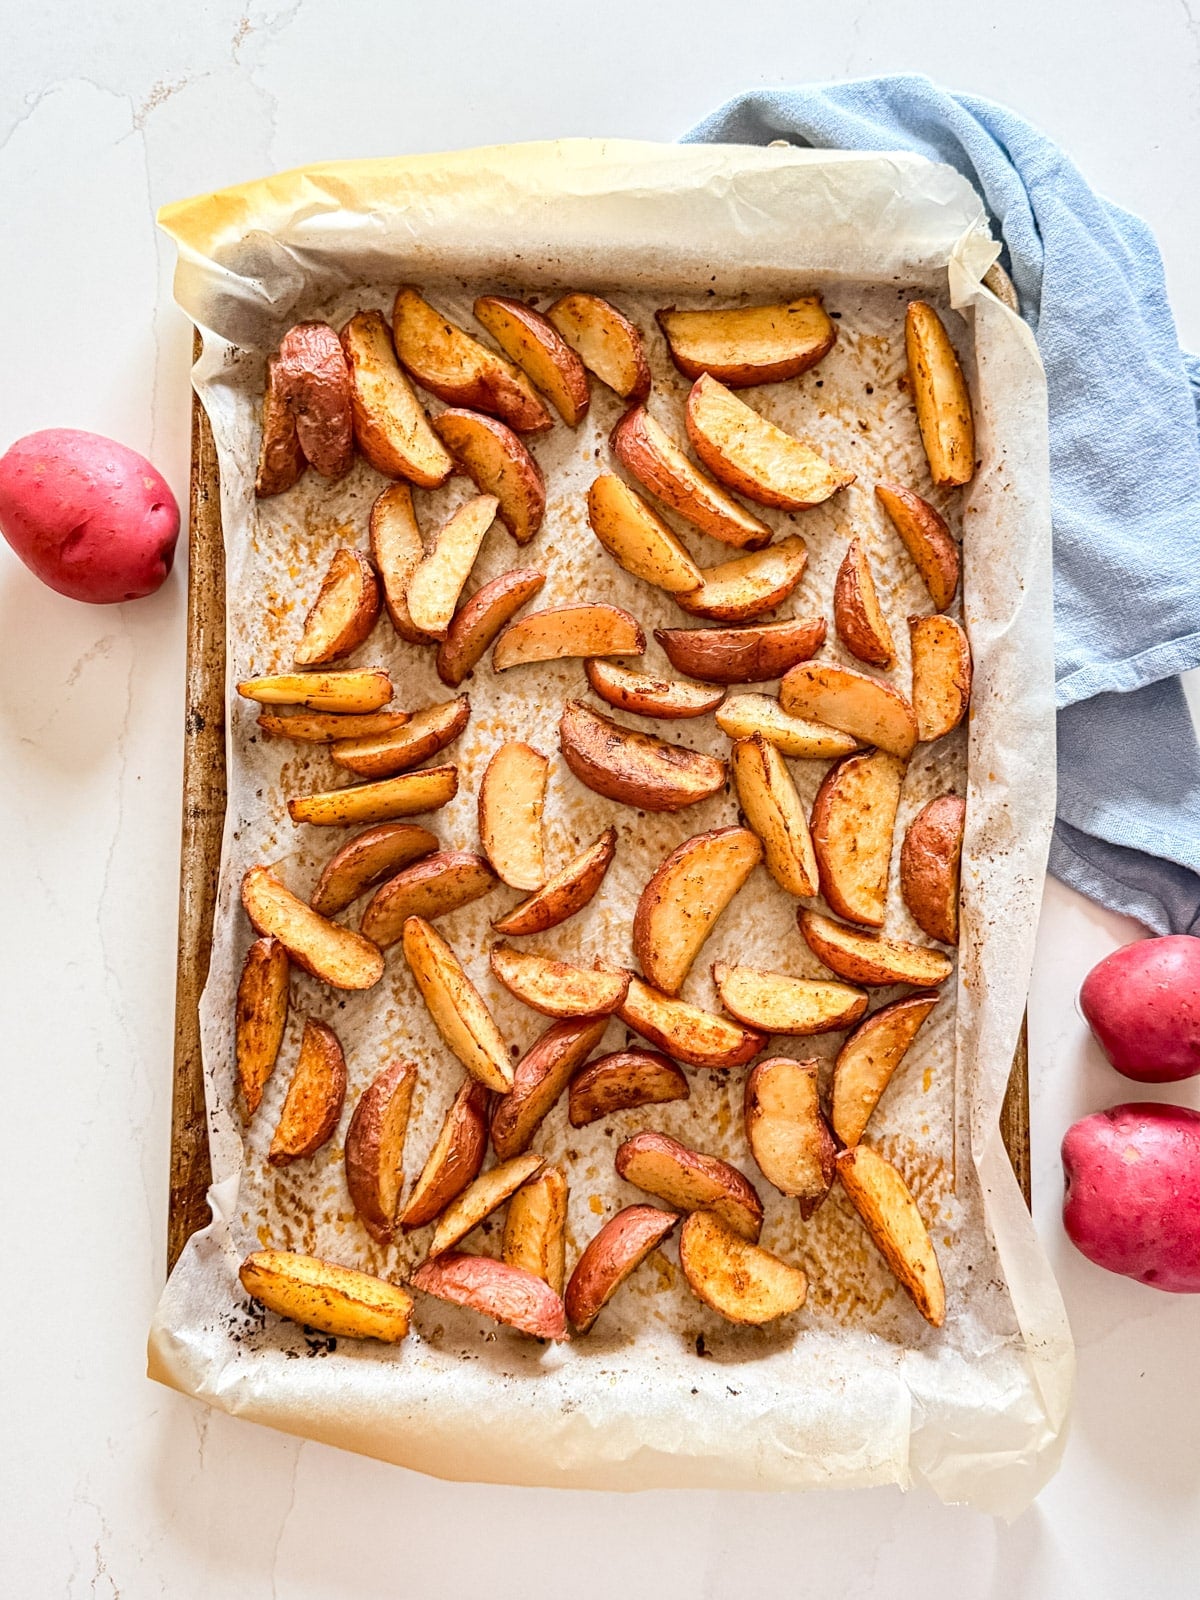
    An overhead image of a pan of roasted potatoes.

    Ingredient Information And Substitutions

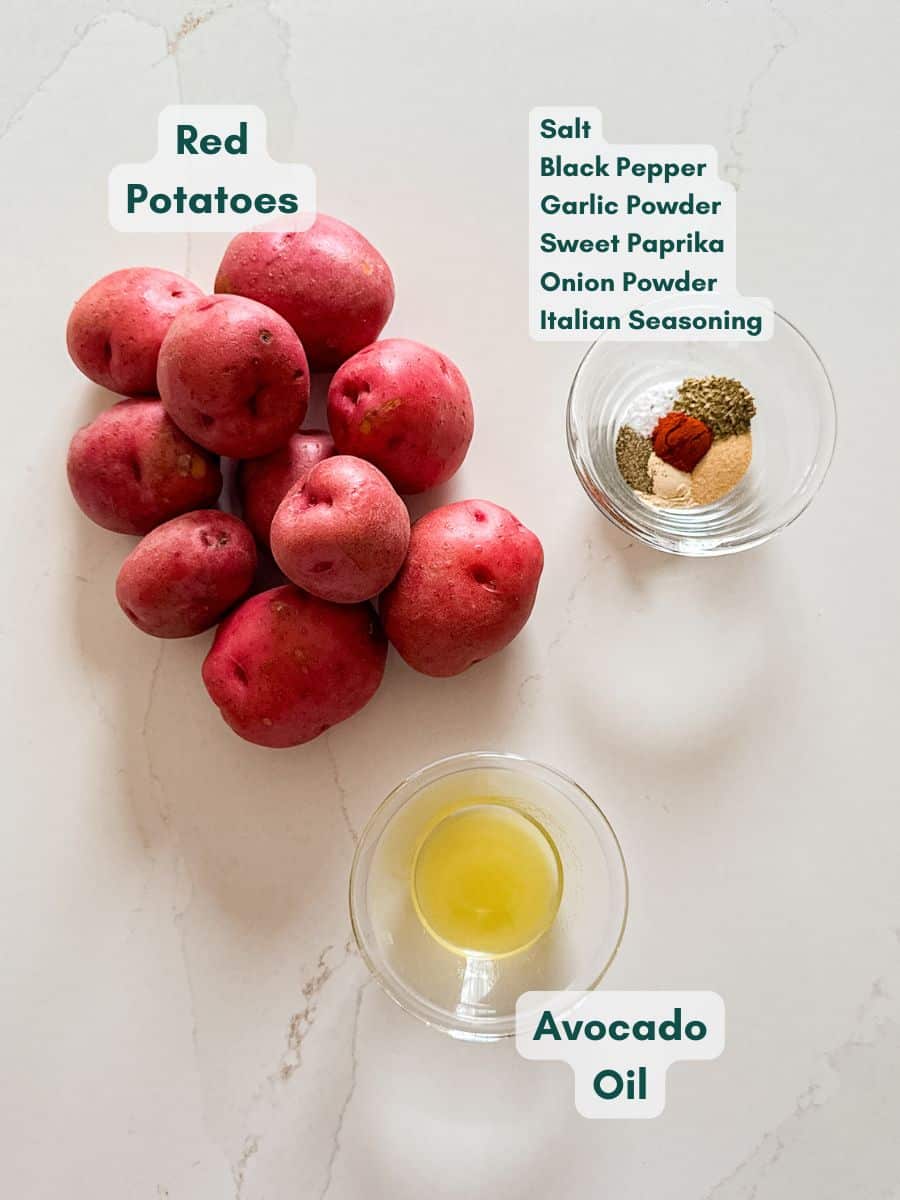
    • Red potatoes- These are ideal for roasting because their thin skin crisps up perfectly and they hold their shape well. Baby or mini red potatoes work just as well.
    • Avocado oil- A high-heat oil that helps the potatoes crisp up without burning. Vegetable oil also works.
    • Garlic powder- Adds savory depth.
    • Onion powder- Rounds out the seasoning blend.
    • Italian seasoning- Gives a herby, savory note. Swap in dried rosemary, thyme, or oregano if you prefer.
    • Paprika- Adds a subtle warmth and beautiful color. Smoked paprika adds a little more heat.
    • Black pepper- Just enough to finish everything off.
    • Salt- Brings all the flavors together. Kosher salt works great here.
    An overhead image of labeled recipe ingredients.

    How to Make Roasted Red Potatoes in Oven

    Step 1- Mix the seasoning. 

    Combine the salt, garlic powder, onion powder, Italian seasoning, paprika, black pepper, and avocado oil in a large bowl and stir everything together.

    Step 2- Coat the potatoes. 

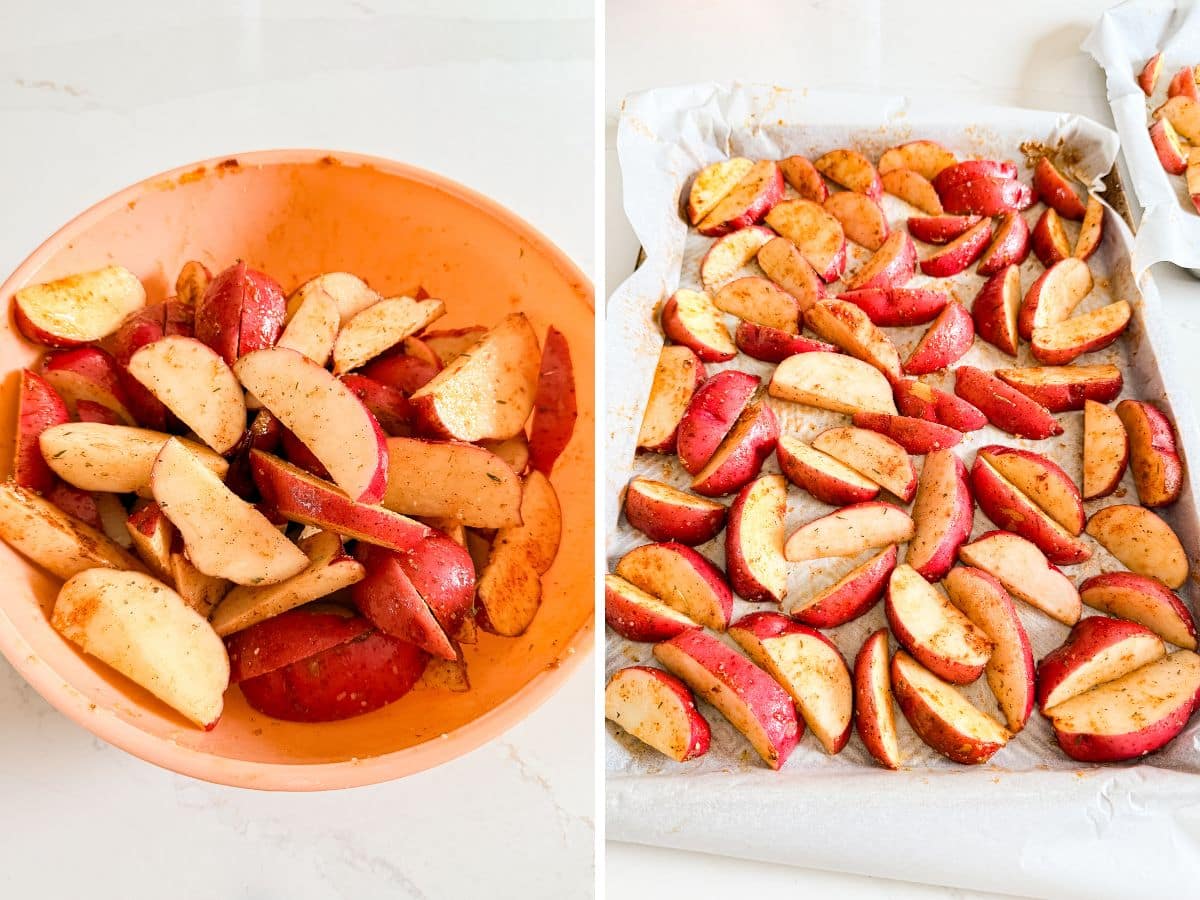
    Add your potato wedges to the bowl and toss until they're evenly coated in the seasoning mixture.

    Seasoned potatoes in a bowl and then spread on a lined sheet pan.

    Step 3- Roast. 

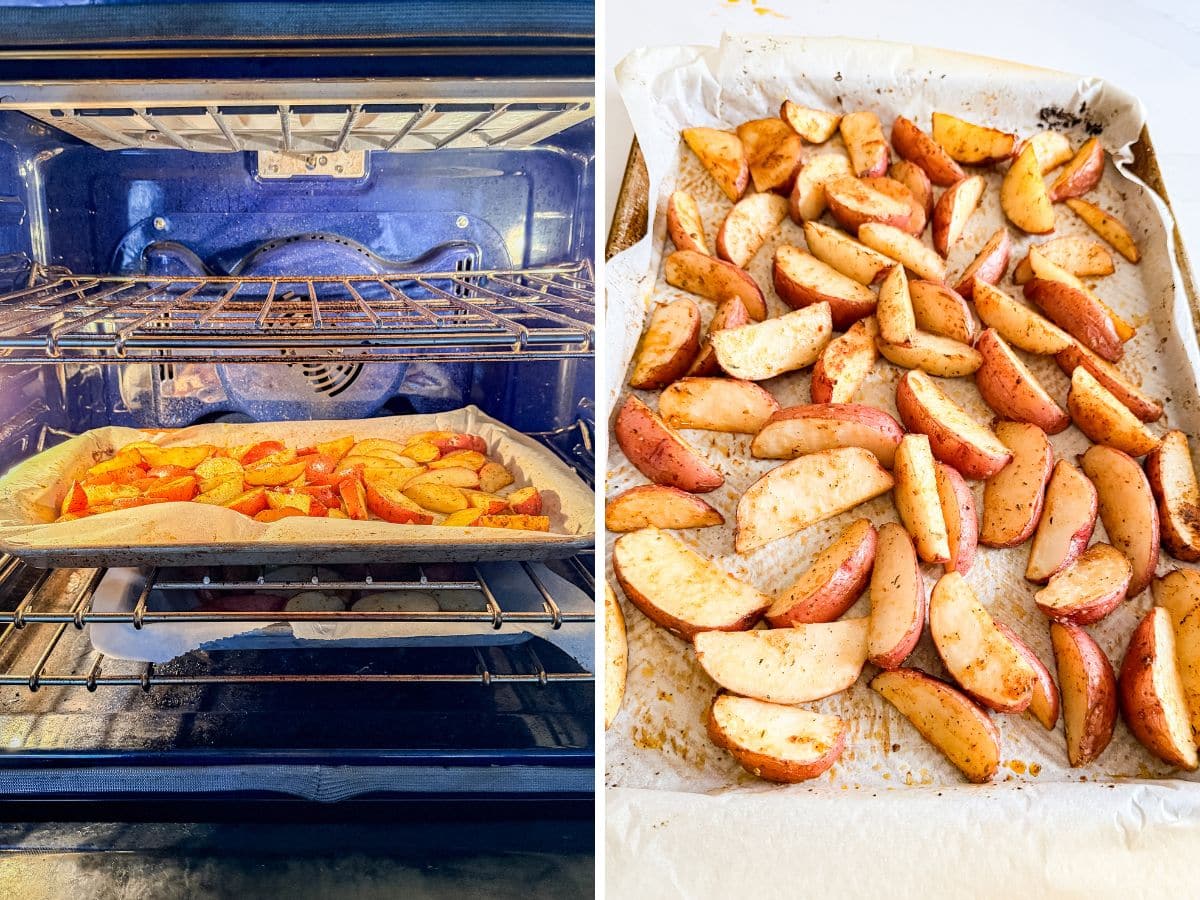
    Spread the potatoes in a single layer on a sheet pan and roast at 450 degrees F for 20 minutes. Flip and roast for another 20 minutes, until golden brown and crispy.

    Potatoes in the oven and then the pan out of the oven and cooked.

    Frequently Asked Questions

    What to eat with roasted potatoes? 

    These go with just about everything… chicken, steak, pork, seafood, or eggs. They're one of those sides that fit into any meal!

    Can you make ahead roasted potatoes? 

    You can. Par-roast them for about 20 minutes, let them cool, and refrigerate. It works great for regular wedges or roasted baby red potatoes. Pop them back into a 450 degrees F oven for 15-20 minutes to crisp back up.

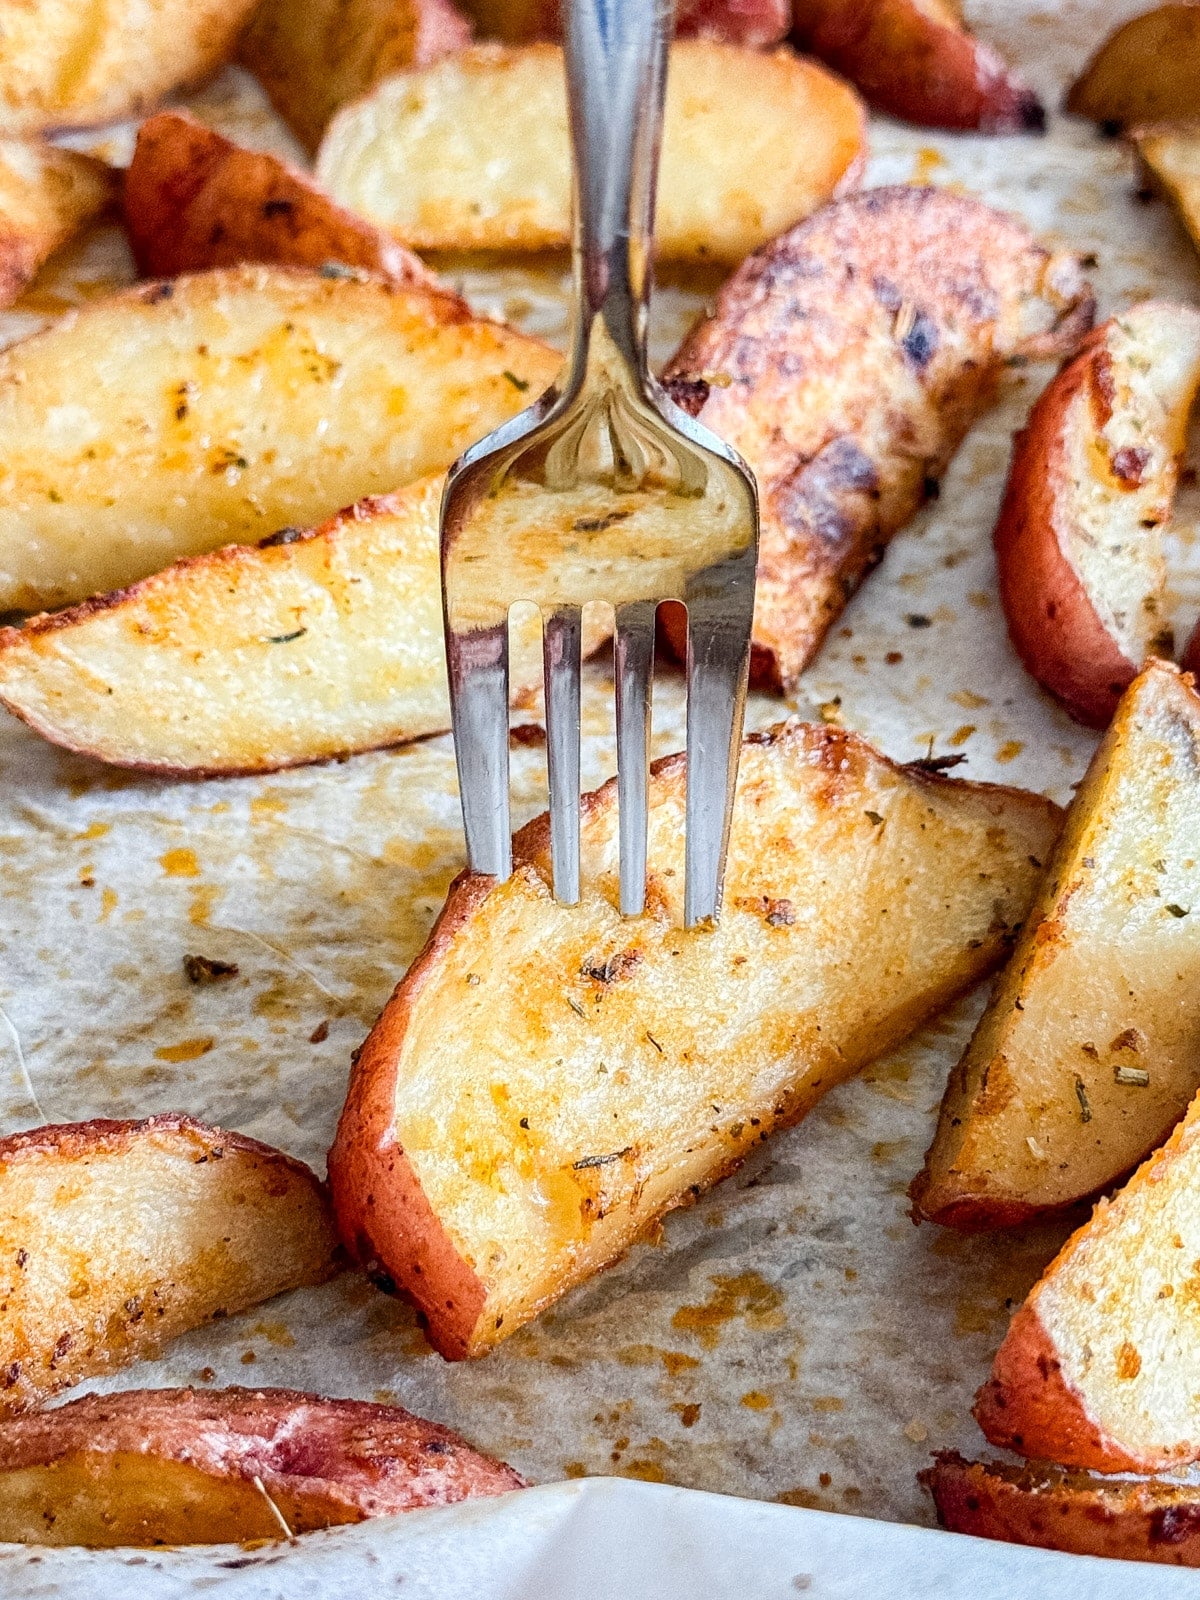
    A close up of a fork in a roasted potato.

    Tips For Making These Oven Roasted Red Potatoes

    • Single layer is non-negotiable. Crowding the pan causes the potatoes to steam rather than roast. Give them space- I'll often split between 2 pans.
    • High heat = crispy potatoes. Don't be tempted to lower the temperature. Roasting at 450 degrees F is what gets you that golden crust.
    • Dry your potatoes well. Any moisture on the surface will work against crispiness. Pat them dry before tossing with oil.
    • Cut evenly. Uniformly sized wedges mean everything finishes cooking at the same time. If you're using roasted mini red potatoes, halve them instead of cutting into wedges.
    • Ingredients to prep ahead- You can toss the potatoes with the seasoning and oil a few hours in advance, then keep them covered in the fridge until ready to roast.
    • Leftovers and storage- Store leftovers in an airtight container in the fridge for up to 3 days. Reheat in the oven to bring the crispiness back.
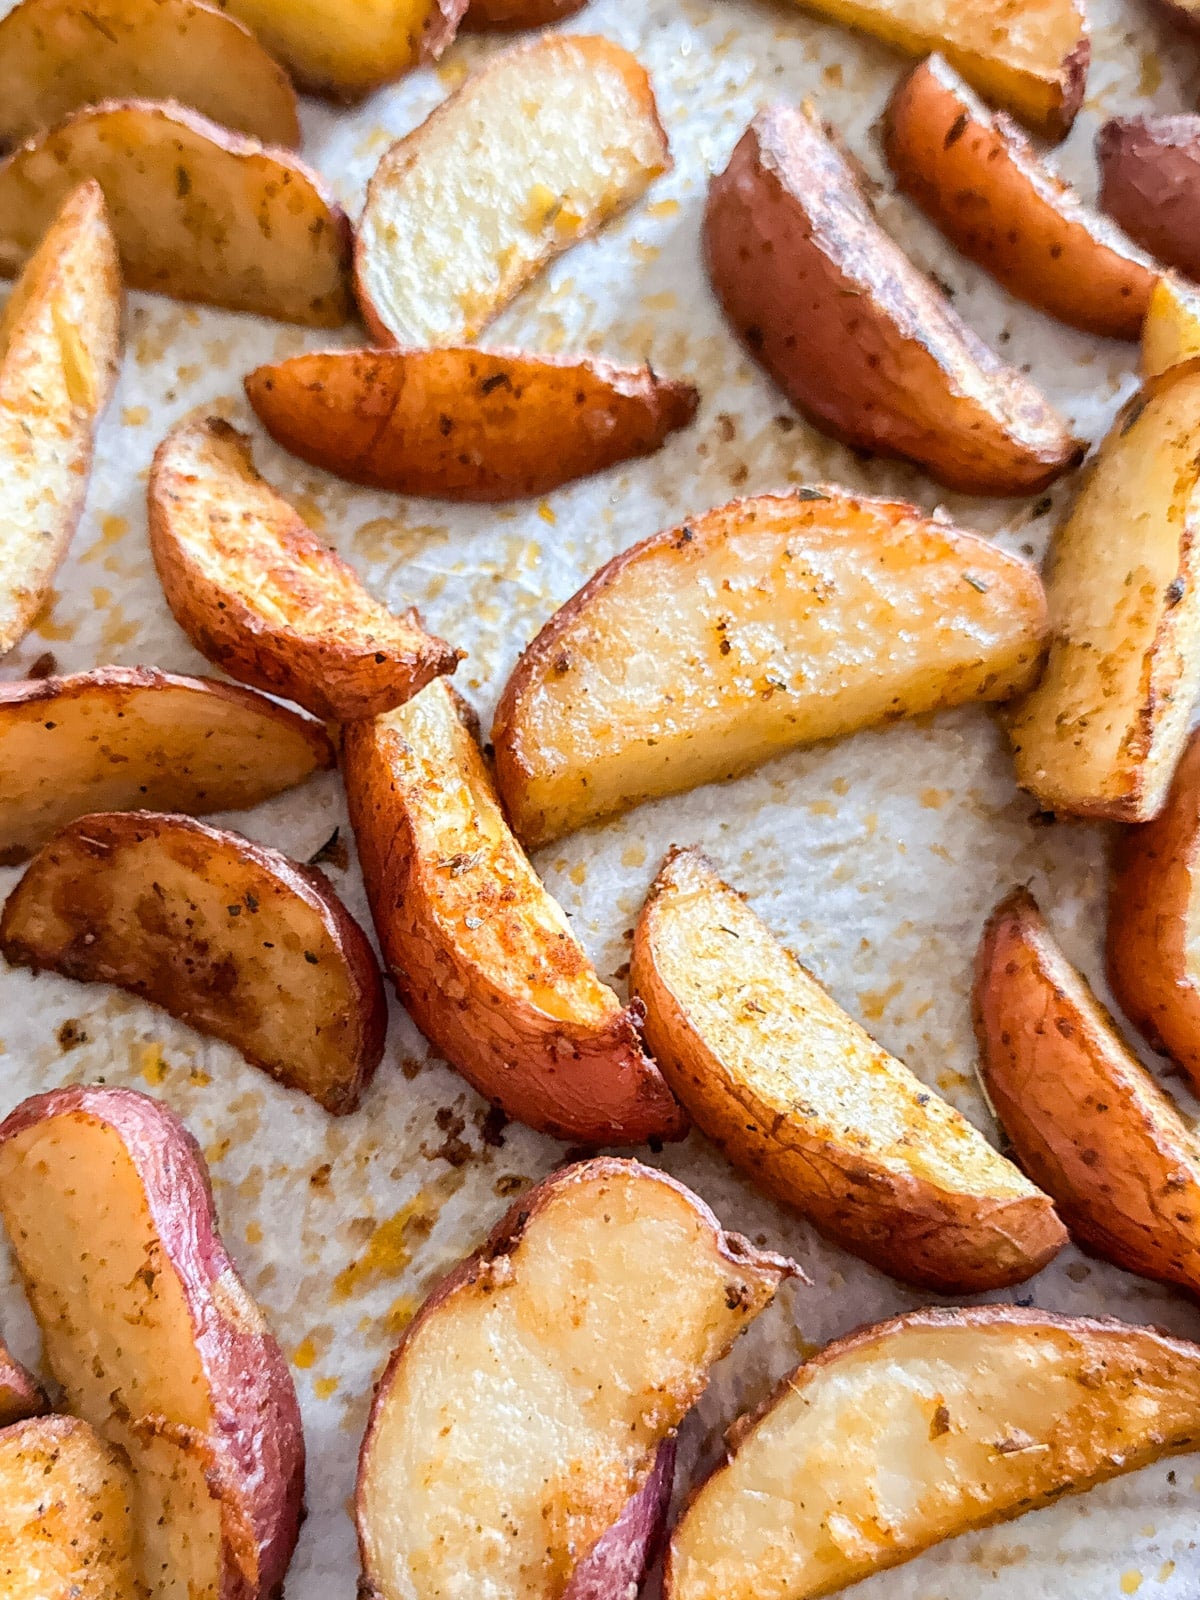
    Roasted red potatoes on a pan.

    What To Serve With Red Roasted Potatoes

    These make such a great side for so many meals. Pair them with a protein, add a veggie, and something sweet to finish, and you've got a full dinner spread the whole family will love. Here are a few of my favorite ways to round out these roasted red potatoes:

    • Oven Baked Chicken Wings
    • Grilled Artichokes
    • Easy Deviled Eggs
    • Chocolate Orange Cake Recipe

    Other Potato Recipes To Try

    • A close up image of roasted potatoes on a sheet pan.
      Crispy Parmesan Potatoes
    • A plate of scalloped potatoes with a bowl of cheese and the pan of them in the background.
      Mom's Creamy Scalloped Potatoes
    • A close up of fried potatoes in a pan with a wooden spoon in it.
      Crispy Fried Potatoes
    • The corner of a pan of cheesy ranch potatoes.
      Ranch Potatoes Recipe

    Love this recipe? Please leave a 5 star ⭐️⭐️⭐️⭐️⭐️ rating in the recipe card below ⬇️ and/or a review in the comment section further down. Check out my Amazon Store for all my favorite tools, including those used in this recipe. And follow @thelifejolie on Instagram and TikTok!

    A close up of roasted red potatoes on a pan.

    Roasted Red Potatoes Recipe

    Jessy Freimann
    Make this roasted red potatoes recipe for a simple, satisfying side dish that delivers crispy golden edges, fluffy centers, and bold flavor all in just 45 minutes. 
    No ratings yet
    Print Recipe Pin Recipe
    Prep Time 5 minutes mins
    Cook Time 40 minutes mins
    Total Time 45 minutes mins
    Course Side Dish
    Cuisine American
    Servings 6 servings
    Calories 136 kcal

    Equipment

    • 2 sheet pan
    • 1 cutting board
    • 1 chefs knife
    • 1 Measuring cups and spoons
    • 1 Spatula
    • 1 mixing bowl

    Ingredients
      

    • 8 cups red potatoes cleaned and cut into uniform wedges
    • 1 teaspoon Kosher salt
    • 1 teaspoon Garlic powder
    • 1 teaspoon Onion powder
    • 1 teaspoon Italian seasoning
    • ½ teaspoon sweet paprika
    • ¼ teaspoon ground black pepper
    • 3 Tablespoons avocado oil

    Instructions
     

    • Preheat the oven to 450 degrees F and line sheet pans with parchment paper.
    • In a large bowl combine potatoes, salt, garlic powder, onion powder, Italian seasoning, paprika, black pepper and avocado oil. Toss until all the potatoes are evenly coated.
    • Pour the potatoes onto the sheet pans in a single layer.
    • Roast for 20 minutes uncovered and flip the potatoes.
    • Roast for another 20 minutes and serve immediately.

    Video

    Notes

    • Single layer is non-negotiable. Crowding the pan causes the potatoes to steam rather than roast. Give them space- I'll often split between 2 pans.
    • High heat = crispy potatoes. Don't be tempted to lower the temperature. Roasting at 450 degrees F is what gets you that golden crust.
    • Dry your potatoes well. Any moisture on the surface will work against crispiness. Pat them dry before tossing with oil.
    • Cut evenly. Uniformly sized wedges mean everything finishes cooking at the same time. If you're using roasted mini red potatoes, halve them instead of cutting into wedges.
    • Ingredients to prep ahead- You can toss the potatoes with the seasoning and oil a few hours in advance, then keep them covered in the fridge until ready to roast.
    • Leftovers and storage- Store leftovers in an airtight container in the fridge for up to 3 days. Reheat in the oven to bring the crispiness back.

    Nutrition

    Serving: 1servingCalories: 136kcalCarbohydrates: 17gProtein: 2gFat: 7gSaturated Fat: 1gPolyunsaturated Fat: 1gMonounsaturated Fat: 5gSodium: 406mgPotassium: 473mgFiber: 2gSugar: 1gVitamin A: 95IUVitamin C: 9mgCalcium: 18mgIron: 1mg
    Tried this recipe?Let us know how it was!

    Bean and Cheese Burrito Recipe

    Apr 27, 2026 · 10 Comments

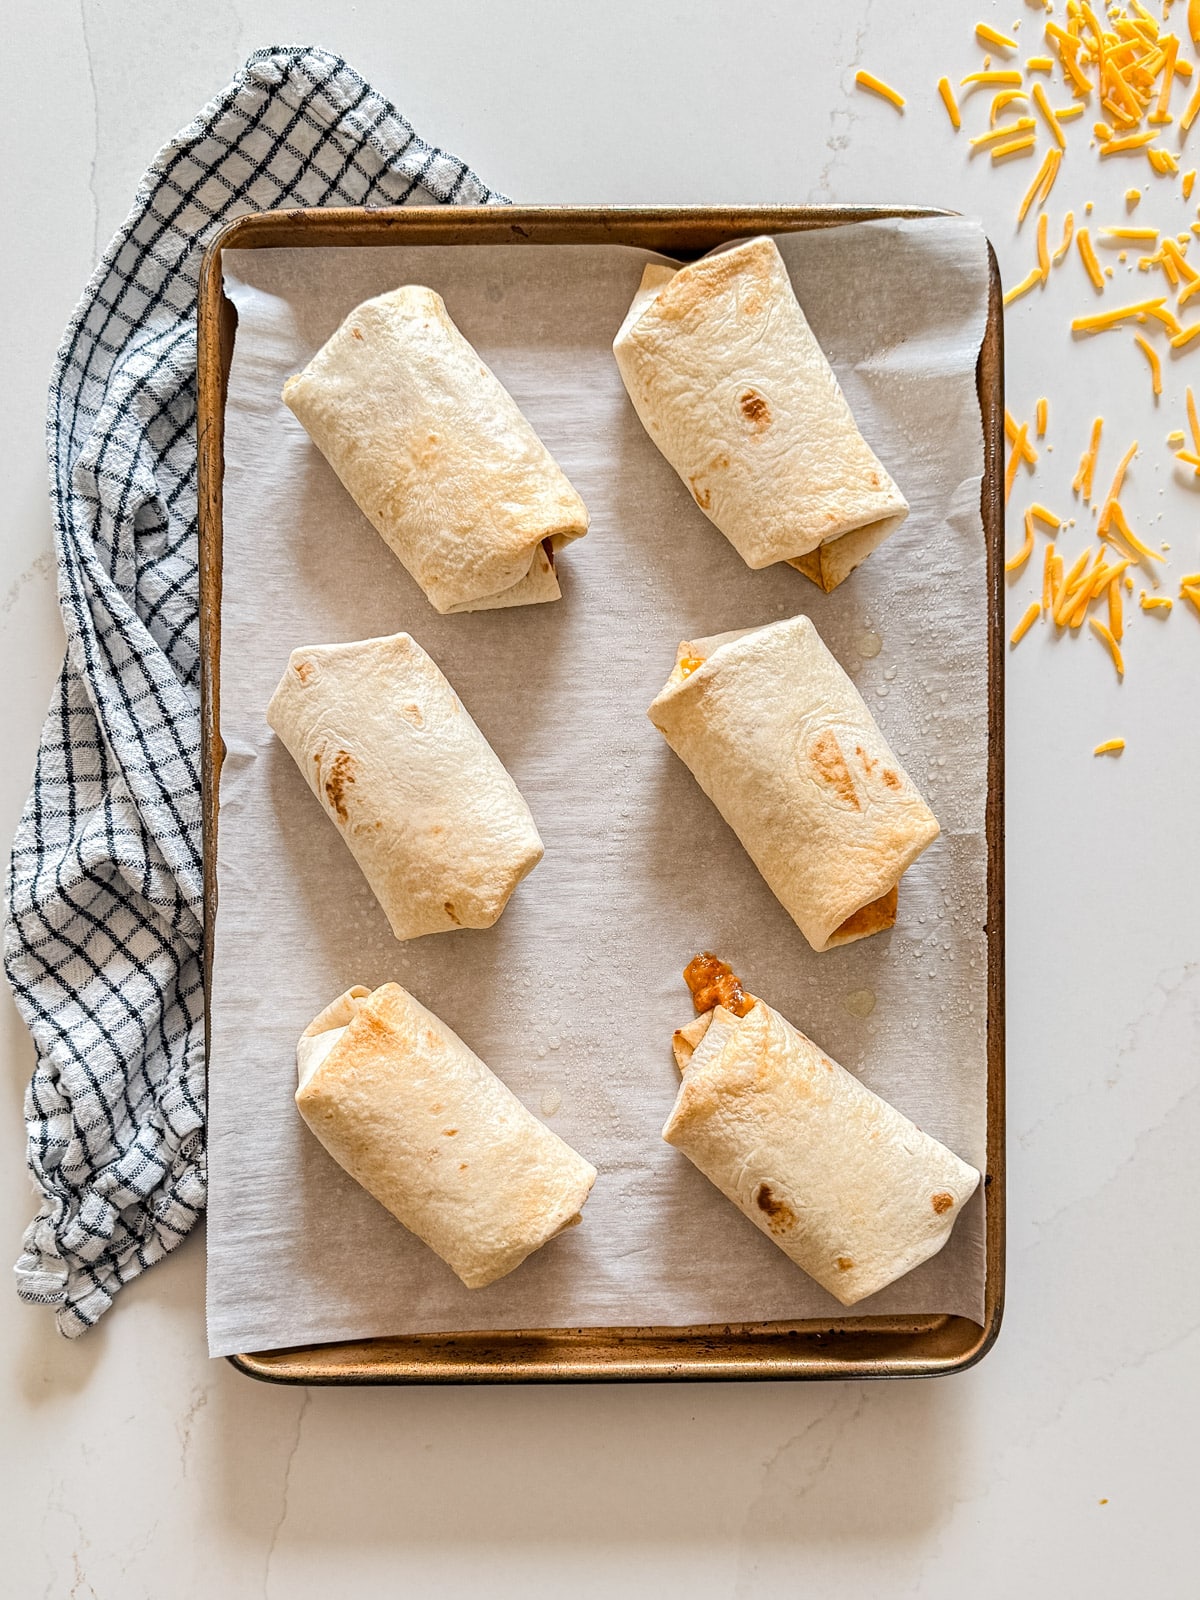
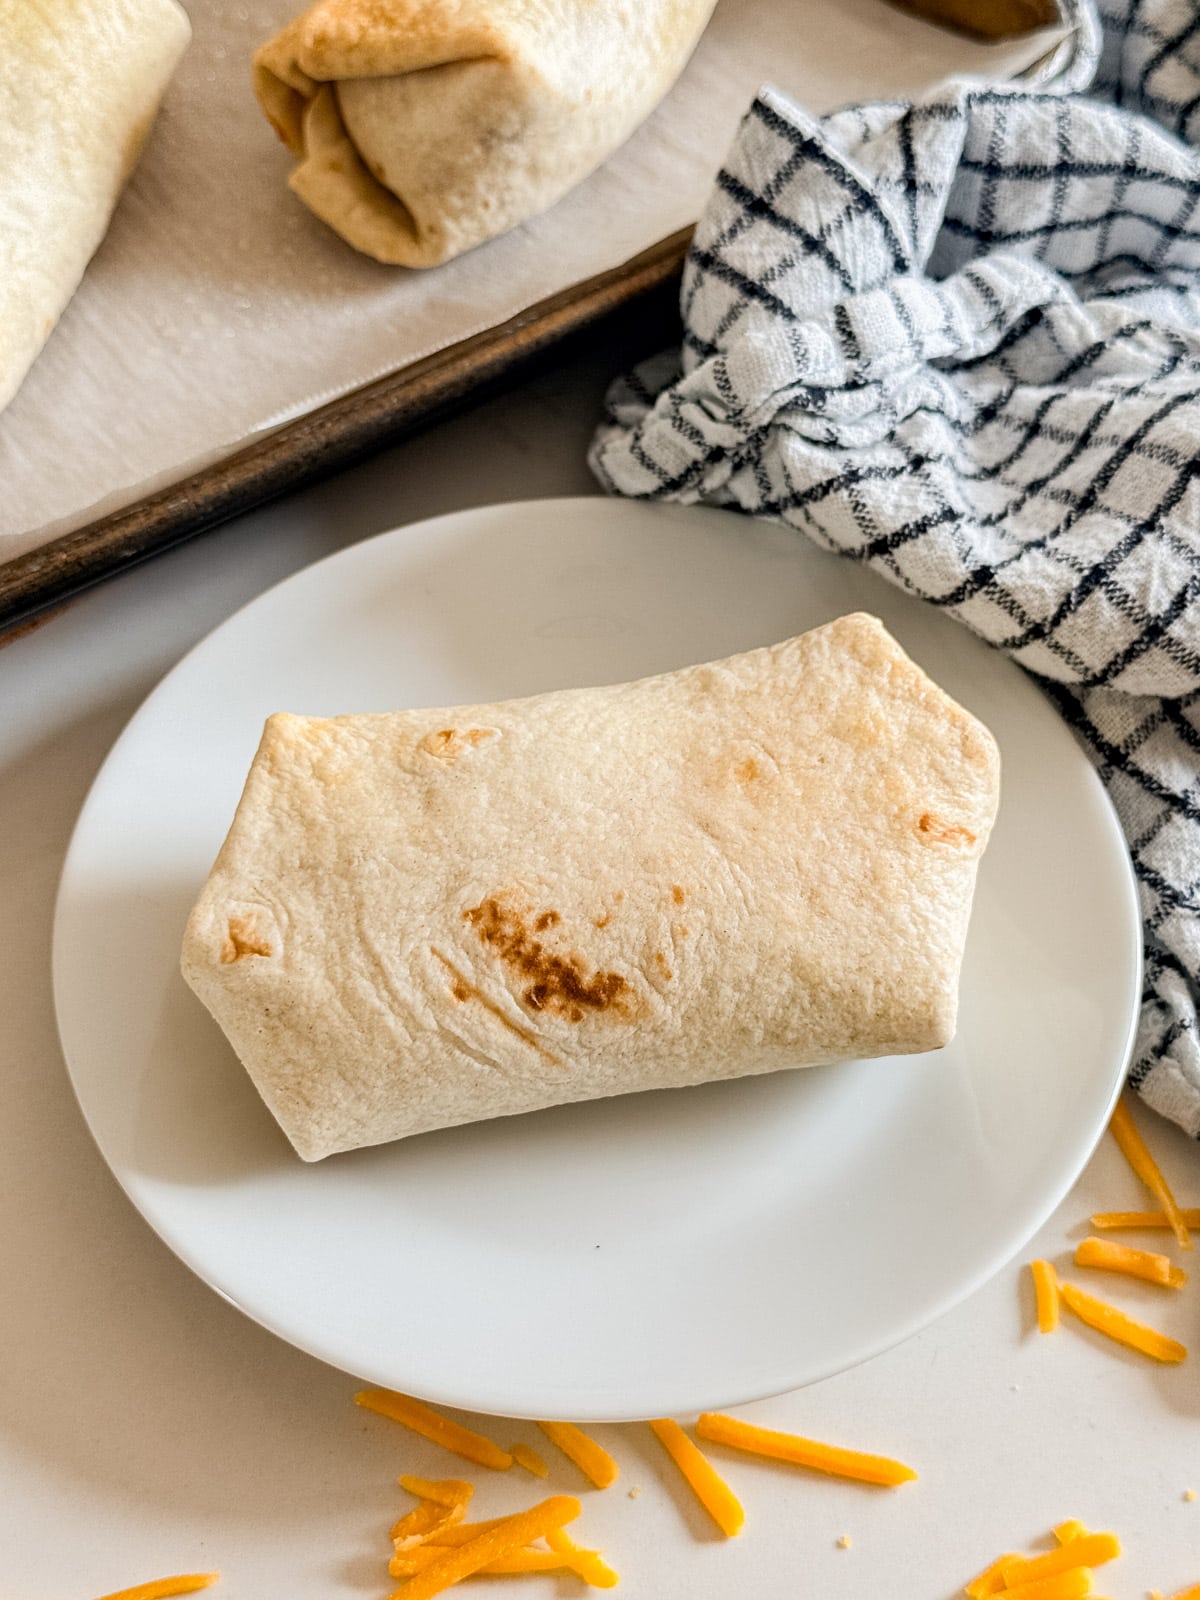
    A bean burrito on a sheet pan.

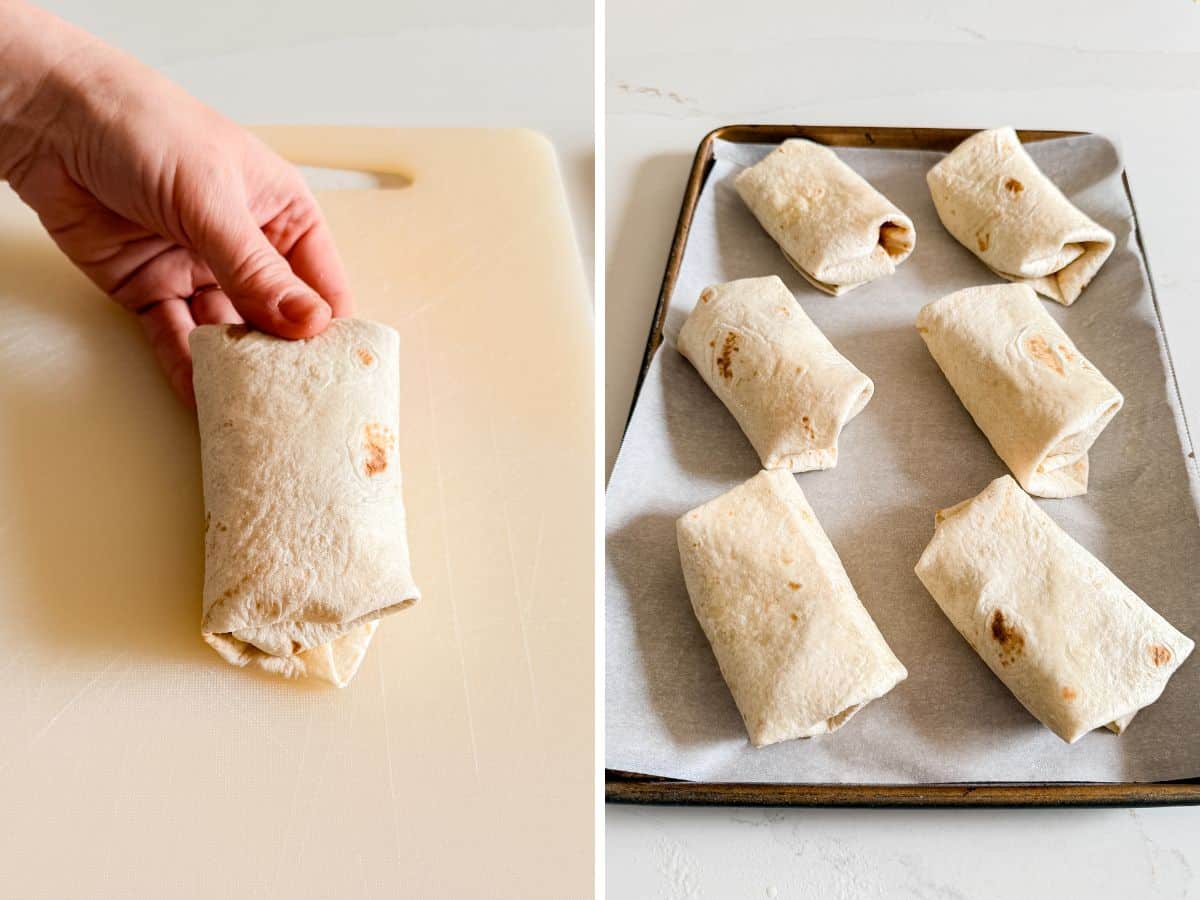
    Enjoy this bean and cheese burrito recipe whenever the craving hits- great fresh of frozen! Each batch comes together in just 30 minutes and are an instant family favorite!

    A bean burrito on a sheet pan.
    [feast_advanced_jump_to]

    Why You'll Love My Burritos With Beans

    I'll be honest… bean burritos are not my personal first choice. I'm more of a taco supreme kind of girl. But my family? They are absolutely obsessed with a good refried bean burrito. It doesn't matter what's on the menu or what the occasion is... these are always met with pure excitement.

    So when I was stocking up the freezer in preparation for some upcoming chaos in our house, making a big batch of these was a no-brainer. And honestly, watching how thrilled they get every single time they pull one out of the freezer makes me love this recipe too. Here's what else there is to love:

    • 10 minutes of prep
    • Freezer-friendly
    • Perfect grab-and-go
    • Kid and family approved
    A bean burrito cut in half revealing the cheese and refried beans inside.

    Ingredient Information And Substitutions

    • Flour tortillas- Pliable and perfect for rolling without cracking. Corn tortillas are too stiff for freezer burritos. If needed, swap in your favorite low-carb or gluten-free tortillas- I prefer the 8 inch size and contrary to the below photo, my preferred bran is Mission.
    • Refried beans- The heart of the burrito. Fat-free works just as well, or swap in black bean refried beans for a different flavor.
    • Sharp cheddar cheese- Gives a bold, cheesy flavor in every bite. Freshly shredded melts better, but pre-bagged works. Try Pepper Jack for heat or Monterey Jack for something milder.
    • Taco sauce- Optional, but it adds a nice punch of flavor and keeps things from feeling dry. Salsa works as a substitute, or skip it entirely if you prefer.
    • Chili powder- Gives the beans some Tex-Mex flavor. Add a little extra if you like more heat.
    • Cumin- Adds warmth and depth to the bean mixture. For a different flavor, try a pinch of smoked paprika or a little extra chili powder instead.
    • Onion powder- Rounds out the seasoning blend with a savory, slightly sweet flavor.
    • Salt & pepper- Brings all the flavors together. Adjust to taste.
    An overhead image of labeled recipe ingredients.

    How To Make This Bean Burrito Recipe

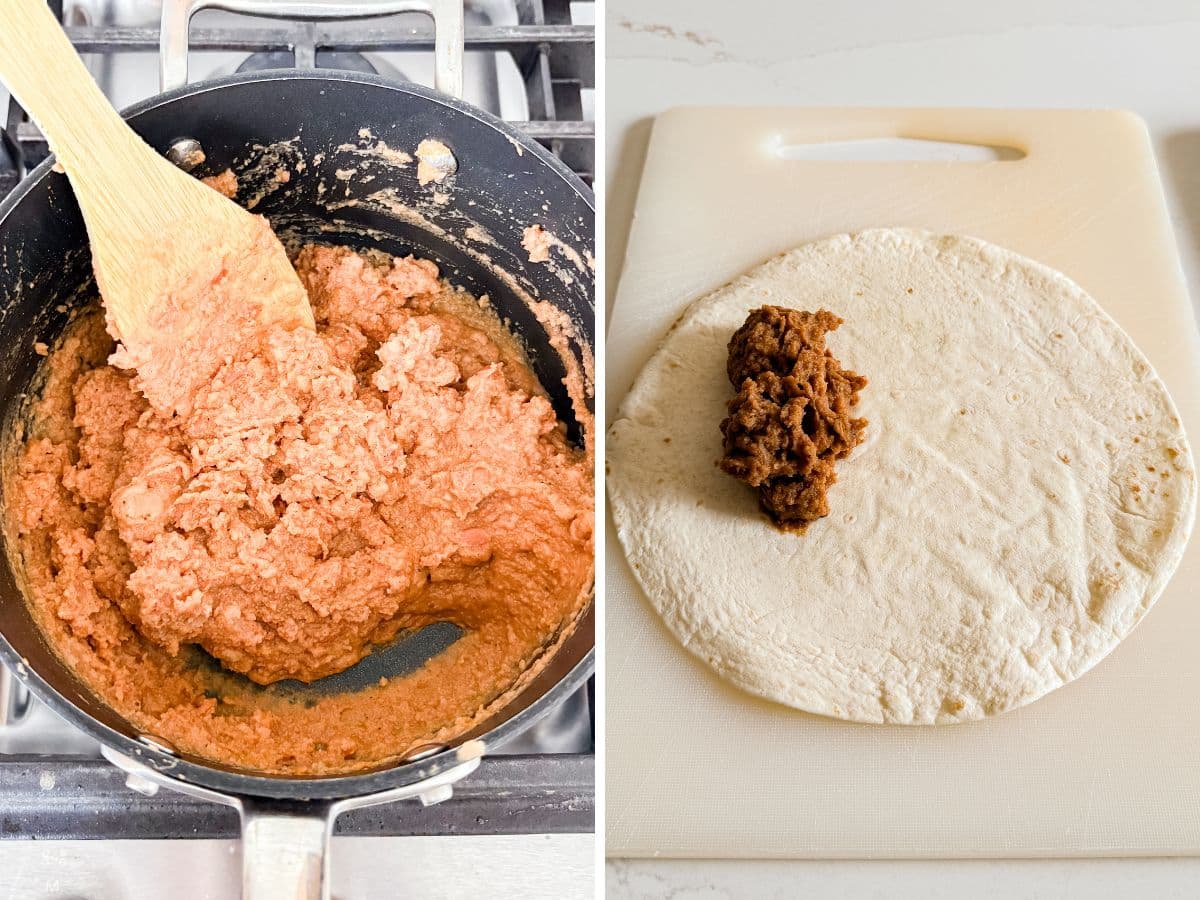
    Step 1- Season and heat the beans.

    Add the refried beans, salt, pepper, chili powder, cumin, and onion powder to a pan over medium-high heat. Cook, stirring, until heated through and softened, about 5 minutes. Remove from heat and cool slightly.

    Refried beans cooking in a pan and the some of the beans on the side of a flour tortilla.

    Step 2- Build the burritos.

    Lay out all six tortillas flat. Divide the seasoned beans evenly down the side of each one. Top each with a drizzle of taco sauce, then divide the shredded cheese evenly between all six.

    Step 3- Roll them up.

    Tuck in both sides toward the middle, then fold the end of each tortilla closest to you up over the filling. Roll away from you to seal.

    Cheese and sauce on top of the beans and then a hand rolling the burritos.

    Step 4- Bake immediately.

    Place each burrito seam-side down on a lined sheet pan so they aren't touching. Spray the tops with cooking spray and bake uncovered at 375 degrees F for 15 minutes.

    A hand holding the fully rolled burrito and the burritos lined up on the sheet pan.

    Step 4a- Wrap and freeze

    Place each burrito seam-side down near the end of a long piece of saran wrap. Fold the end over the top, tuck in the sides, and roll until the burrito is snug. Place the wrapped burritos in a freezer bag and add the date.

    I prefer the thaw before cooking and then baking uncovered at 375 degrees F for 15 minutes, until heated through and the tortillas are lightly golden. Or microwave for 1-2 minutes, until the center is warm.

    Frequently Asked Questions

    Are these similar to a Taco Bell bean burrito?

    They're very similar: simple, cheesy, and totally satisfying. The biggest difference is that there are no onions- these are homemade, so you can control exactly what goes in them!

    Do these need to be thawed before reheating? 

    I would encourage it, but if you go straight to the oven from frozen, I'd encourage you to monitor the cooking and increase the cook time.

    Can I add other fillings? 

    Feel free to add diced green chiles, Spanish rice, or a spoonful of sour cream before rolling. Just keep in mind that sour cream can change texture after freezing.

    An overhead image of bean burritos on a sheet pan.

    Tips for Making These Bean And Cheese Burritos

    • To take these to the next level, try making your refried beans and tortillas from scratch. That said, canned beans and store-bought tortillas work perfectly and keep things super quick and easy.
    • Don't overfill. Too much filling makes rolling really difficult, and the burritos are more likely to fall apart. 
    • Warm your tortillas before rolling if they're stiff or cracking. 15 seconds in the microwave, wrapped in a paper towel, does the trick.
    • Roll tightly if freezing. A snug wrap in plastic wrap before going into the freezer bag helps maintain the shape and keeps everything together. 
    • Label your freezer bags with the date so you know exactly how long they've been in there.
    • Ingredients to prep ahead- This recipe is basically assembly, so there's almost nothing to prep in advance. You could pre-shred your cheese if you want to shave off a few extra minutes.
    • Leftovers and storage- Freeze wrapped burritos for up to 3 months. Thaw and reheat in the oven.
    A bean burrito on a white plate.

    What To Serve With This Bean Burritos Recipe

    These are fantastic on their own, but if you're craving that classic Taco Bell bean and cheese burrito experience at home, pair them with some of my favorite sides to round things out:

    • Hot Bean Dip Recipe
    • Mexican Bean Salad Recipe
    • Loaded Chicken Nachos
    • Avocado Salsa

    Other Delicious Freezer-Friendly Recipes To Try

    • A pile of homemade meatballs in tomato sauce.
      Homemade Meatballs In Sauce
    • A bowl of chicken and egg noodles soup with sliced bread and another bowl behind it.
      Dutch Oven Chicken Noodle Soup
    • A close up of a bagel pizza with mini pepperonis on a pan.
      Bagel Pizzas Recipe
    • A close up of a bacon egg and cheese muffin on a plate with the other ones.
      Bacon Egg And Cheese Muffins

    Love this recipe? Please leave a 5 star ⭐️⭐️⭐️⭐️⭐️ rating in the recipe card below ⬇️ and/or a review in the comment section further down. Check out my Amazon Store for all my favorite tools, including those used in this recipe. And follow @thelifejolie on Instagram and TikTok!

    A bean burrito on a sheet pan.

    Bean and Cheese Burrito recipe

    Jessy Freimann
    Enjoy this bean and cheese burrito recipe whenever the craving hits- great fresh of frozen! Each batch comes together in just 30 minutes and are an instant family favorite!
    No ratings yet
    Print Recipe Pin Recipe
    Prep Time 10 minutes mins
    Cook Time 20 minutes mins
    Total Time 30 minutes mins
    Course Main, Main Course, Main dish
    Cuisine Mexican
    Servings 6 burritos
    Calories 257 kcal

    Equipment

    • 1 sheet pan
    • 1 Small sauce pan
    • 1 wooden spoon
    • 1 cutting board
    • 1 Measuring cups and spoons

    Ingredients
      

    • 14 ounces Refried Beans
    • ½ teaspoon Kosher salt
    • ¼ teaspoon ground black pepper
    • ½ teaspoon onion powder
    • ½ teaspoon cumin
    • ½ teaspoon chili powder
    • 6 Flour tortillas 8 inch size
    • ⅓ cup Taco sauce optional
    • 1 ½ cup sharp cheddar cheese shredded

    Instructions
     

    • Lay out 6 tortillas and divide beans onto the side of each tortilla.
    • Drizzle 1 Tablespoon of taco sauce onto the beans and sprinkle cheese on top of the beans.
    • Fold the sides of the tortilla into the middle and take the end of each tortilla closest to you and fold it over the beans. Toll the burrito away from you to close it.
    • Optional- If freezing, wrap in plastic wrap and freeze in a zipper freezer bag with the contents and date on it. Thaw before baking.
    • For baking, lay them in a single layer on a lined sheet pan and spray the tops of the burritos with cooking spray.
    • Bake in a preheated oven at 375 degrees F for 15 minutes. Serve immediately.

    Video

    Notes

    • To take these to the next level, try making your refried beans and tortillas from scratch. That said, canned beans and store-bought tortillas work perfectly and keep things super quick and easy.
    • Don't overfill. Too much filling makes rolling really difficult, and the burritos are more likely to fall apart. 
    • Warm your tortillas before rolling if they're stiff or cracking. 15 seconds in the microwave, wrapped in a paper towel, does the trick.
    • Roll tightly if freezing. A snug wrap in plastic wrap before going into the freezer bag helps maintain the shape and keeps everything together. 
    • Label your freezer bags with the date so you know exactly how long they've been in there.
    • Ingredients to prep ahead- This recipe is basically assembly, so there's almost nothing to prep in advance. You could pre-shred your cheese if you want to shave off a few extra minutes.
    • Leftovers and storage- Freeze wrapped burritos for up to 3 months. Thaw and reheat in the oven.

    Nutrition

    Serving: 1burritoCalories: 257kcalCarbohydrates: 24gProtein: 12gFat: 12gSaturated Fat: 6gPolyunsaturated Fat: 1gMonounsaturated Fat: 3gCholesterol: 28mgSodium: 1078mgPotassium: 106mgFiber: 4gSugar: 3gVitamin A: 459IUVitamin C: 0.3mgCalcium: 273mgIron: 2mg
    Tried this recipe?Let us know how it was!

    Zucchini Soup

    Apr 24, 2026 · 15 Comments

    An overhead image of a bowl of zucchini soup with onions and a tea towel next to it.

    This zucchini soup is simple, light, and comes together in about 30 minutes. With just a handful of ingredients, it turns into a comforting, everyday kind of meal that still feels really satisfying.

    An overhead image of a bowl of zucchini soup with onions and a tea towel next to it.
    [feast_advanced_jump_to]

    Why You’ll Love This Zucchini Soup Recipe

    This recipe proves that you shouldn’t judge a book by its cover. It’s been made in my family for years by my Grandma Rose, and for the longest time, I refused to even try it just because of how it looked. But once I finally did, I went back for another bowl… and then another.

    It comes together quickly, uses ingredients you probably already have, and feels especially good when you want something a little lighter. It may not be the prettiest dish, but it’s comforting, inexpensive, and always satisfying. Here’s why you should make it:

    • Simple ingredients 
    • Light but still filling
    • Ready in 30 minutes
    • Easy to double 
    A close up image of a ladle in a pot of zucchini soup.

    Ingredient Information And Substitutions

    • Zucchini- The base of the dish. I like to peel mine, but you don't have to if you prefer the texture. If it's a larger zucchini, remove the seeds.
    • Onion- Adds depth and flavor. A yellow onion is perfect.
    • Broth- Keeps everything light while adding flavor. I prefer chicken broth, but vegetable broth works fine as well.
    • Salt- Start small and adjust as everything cooks down.
    • Black pepper- Adds a bit of warmth. Adjust the amount to your taste.
    • Eggs- Cracking in a few eggs at the end and mixing them in really well gives it the effect of a Stracciatella soup (aka an Italian version of egg drop soup).
    An overhead image of labeled recipe ingredients.

    How To Make Squash Zucchini Soup

    Step 1- Heat the oil.

    Warm olive oil in a pot over medium to medium-high heat.

    Step 2- Cook the onions.

    Add the chopped onion, season lightly with salt and pepper, and let it soften for a few minutes. Keep an eye on the pieces so they don’t brown, lowering the heat if needed.

    Onions frying in oil in a dutch oven.

    Step 3- Add the zucchini.

    Stir in the zucchini and season again lightly. Let everything cook for about 10-15 minutes, until the zucchini softens and begins to release moisture. Reduce the heat if needed to avoid browning.

    Zucchini added to the pan with salt and pepper and cooking down.

    Step 4- Pour in the broth.

    Pour in the broth and let it simmer gently for about 5-10 minutes, until everything is tender and well combined.

    Step 5- Add eggs.

    Once the zucchini is fully softened and the flavors have come together, bring up the temperature to medium-high so that the soup is bubbling.

    Crack in the eggs one at a time, using your spoon to break them up and mix them in, making sure to break the yolks. You will see the strings of egg solidify and cook as you stir them in the boiling water.

    Step 6- Finish and serve.

    Cook a few minutes more and serve over rice with plenty of Romano cheese.

    Broth added and simmered then eggs cracked in and cooked in bubbling soup.

    Frequently Asked Questions

    Is this more like a soup or a stew?

    It’s somewhere in between. It has some broth, but it’s not overly liquid-heavy. If you prefer it more soup-like, just add extra broth to reach your desired consistency.

    Can I blend it for a smoother texture?

    I prefer not to, because I love the texture and the eggs.

    Can I double this recipe?

    Yes, it doubles really easily. Just use a larger pot and give everything a bit more time to cook down properly. At this point, I don't even use measurements... I just do it by feel and the amount I'm looking for.

    A bowl of zucchini soup with a spoon in it.

    Tips For Making Chicken Soup With Zucchini

    • Keep the heat on the lower side once the zucchini goes in. Let it slowly break down and release its moisture without browning.
    • The eggs make it richer, but you can just as easily leave them out if the taste (or texture) bothers you.
    • This is a great base recipe to build on. Other zucchini soup recipes include garlic, fresh herbs, or even a sprinkle of cheese on top when serving to change it up a bit.
    • I like to serve this over rice, with a piece of crusty bread. It helps soak up the broth and makes it feel more like a full meal.
    • Ingredients to prep ahead- Chop the zucchini and onion ahead of time and store them in the fridge.
    • Leftovers and storage- Store in an airtight container in the fridge for up to 3-4 days. Reheat gently on the stovetop or in the microwave, adding a splash of broth if needed. You can freeze it, but the texture may soften slightly.
    A close up of a spoon full of zucchini soup being pulled from the bowl.

    What To Serve With This Recipe

    This dish works great on its own, but you can easily turn it into a full meal with a few simple additions:

    • Easy Deviled Eggs
    • Fried Cabbage With Bacon Recipe
    • Broccoli Rabe and Ricotta Crostini
    • Cinnamon Toast Crunch Bars

    Other Soup Recipes To Try

    • An overhead image of a bowl of bean soup with Italian sausage.
      Italian Bean Soup With Sausage
    • An overhead image of a bowl of minestrone soup.
      Traditional Minestrone Soup Recipe
    • A bowl of chicken and orzo soup with a spoon in it.
      Chicken and Orzo Soup
    • A close up of a bowl of chicken wild rice creamy soup with a spoon in it and another bowl in the background.
      Wild Rice Creamy Chicken Soup (Great with Turkey Too!)

    Love this recipe? Please leave a 5 star ⭐️⭐️⭐️⭐️⭐️ rating in the recipe card below ⬇️ and/or a review in the comment section further down. Check out my Amazon Store for all my favorite tools, including those used in this recipe. And follow @thelifejolie on Instagram and TikTok!

    An overhead image of a bowl of zucchini soup with onions and a tea towel next to it.

    Zucchini Soup

    Jessy Freimann
    This zucchini soup is simple, light, and comes together in about 30 minutes. With just a handful of ingredients, it turns into a comforting, everyday kind of meal that still feels really satisfying.
    No ratings yet
    Print Recipe Pin Recipe
    Prep Time 10 minutes mins
    Cook Time 25 minutes mins
    Total Time 35 minutes mins
    Course Appetizer, Lunch
    Cuisine Healthy, Soup
    Servings 6 servings
    Calories 94 kcal

    Equipment

    • 1 Dutch oven
    • 1 Peeler
    • 1 cutting board
    • 1 chefs knife
    • 1 Measuring cups and spoons

    Ingredients
      

    • 2 Tablespoons olive oil
    • 1 cup onion chopped
    • 1 teaspoon Kosher salt
    • ¼ teaspoon ground black pepper
    • 3 cups zucchini peeled and chopped (remove seeds if you're using larger zucchini)
    • 3 cups chicken broth
    • 2-3 large eggs

    Instructions
     

    • Heat oil in a large pot over medium-high heat.
    • Add onions, sprinkle with a pinch of salt and pepper to taste and sweat them for a few minutes (manage your heat to make sure they don't brown).
    • Add zucchini to the pot and again sprinkle remaining salt and pepper to taste. Let these cook for about 10-15 minutes stirring periodically until they begin to break down and release a little moisture. The onions will also break down more.
    • Add the chicken broth to the pot and bring to a boil. Reduce the heat to medium and let it simmer for 10-15 minutes. Taste and adjust seasoning as needed.
    • Increase the heat so that the soup is bubbling and crack your eggs into the pot one at a time, breaking the yokes and stir them in to combine. You will see the broken up egg solidify and the it will take on the appearance that's similar to egg drop soup after a couple minutes.
    • Once the eggs are cooked, serve immediately over rice with plenty of Romano cheese.

    Video

    Notes

    • Keep the heat on the lower side once the zucchini goes in. Let it slowly break down and release its moisture without browning.
    • The eggs make it richer, but you can just as easily leave them out if the taste (or texture) bothers you.
    • This is a great base recipe to build on. Other zucchini soup recipes include garlic, fresh herbs, or even a sprinkle of cheese on top when serving to change it up a bit.
    • I like to serve this over rice, with a piece of crusty bread. It helps soak up the broth and makes it feel more like a full meal.
    • Ingredients to prep ahead- Chop the zucchini and onion ahead of time and store them in the fridge.
    • Leftovers and storage- Store in an airtight container in the fridge for up to 3-4 days. Reheat gently on the stovetop or in the microwave, adding a splash of broth if needed. You can freeze it, but the texture may soften slightly.

    Nutrition

    Serving: 1servingCalories: 94kcalCarbohydrates: 5gProtein: 4gFat: 7gSaturated Fat: 1gPolyunsaturated Fat: 1gMonounsaturated Fat: 4gTrans Fat: 0.01gCholesterol: 64mgSodium: 853mgPotassium: 246mgFiber: 1gSugar: 3gVitamin A: 217IUVitamin C: 13mgCalcium: 31mgIron: 1mg
    Tried this recipe?Let us know how it was!


    Eggplant Parm Bake

    Apr 20, 2026 · Leave a Comment

    A spoon lifting up a scoop of eggplant parm bake with melt cheese trailing behind it.

    This eggplant parm bake is a lighter, comforting twist on a classic Italian favorite. It comes together with simple ingredients and is perfect for a cozy family dinner, especially when you want something hearty without feeling too heavy.

    A spoon lifting up a scoop of eggplant parm bake with melt cheese trailing behind it.
    [feast_advanced_jump_to]

    Why You’ll Love This Eggplant Parmigiana Recipe

    This isn’t your typical eggplant parmesan... the heavily breaded, deep-fried kind. And while that version definitely has its place, this one is a little different. It’s based on the way Grandma Rose used to make it: simple, comforting, and meant to be shared around a big table with pasta, extra sauce, and maybe even some meatballs.

    Instead of thick, crispy slices, this version uses thin eggplant lightly coated in flour and egg, then pan-fried until golden. It gives you that perfect texture without feeling overly heavy. Everything gets layered with sauce and cheese, almost like an eggplant lasagna, and baked until bubbly. Here’s why this eggplant parmigiana bake is worth trying:

    • Lighter but still full of flavor
    • Simple, everyday ingredients
    • Great for a crowd
    • Easy to prep ahead
    • Cozy and satisfying
    A plate of baked eggplant parm with a fork holding a bite of it on the plate.

    Ingredient Information And Substitutions

    • Eggplant- You don't have to peel if you don't want to, but peeling makes it softer, which is my preferred way.
    • Flour- Helps create a light coating. You can use gluten-free flour if needed.
    • Eggs- Helps everything stick together.  
    • Olive oil- Used for pan frying. Any neutral oil works too.
    • Marinara sauce- Use store-bought or homemade, depending on time.
    • Romano or Parmesan cheese- Adds that salty, sharp flavor.
    • Mozzarella- Melts into that classic cheesy layer. Full-fat mozz is best. 
    • Salt- Brings out flavor in both the coating and eggplant.
    • Black pepper- Adds a bit of depth.
    An overhead image of labeled recipe ingredients.

    How To Make This Baked Parmesan Eggplant Recipe

    Step 1- Prep the coating.

    Add the flour to a shallow bowl and mix with salt and pepper. In a separate bowl, whisk the eggs until fully combined.

    Step 2- Heat the oil.

    Heat a few tablespoons of oil in a pan over medium-high heat. You can use two pans to speed things up!

    Step 3- Coat the eggplant.

    Dredge each slice of eggplant in flour, shake off the excess, then dip it in egg so it’s fully coated.

    An eggplant slice being dredged in flour and then the floured eggplant slice been dipped in beaten egg.

    Step 4- Fry until golden.

    Place the slices in the pan and cook for a few minutes on each side until golden. Adjust the heat as needed and add more oil as you go, since the eggplant absorbs it quickly.

    Step 5- Drain the slices.

    Transfer the cooked eggplant to a paper towel-lined plate to remove excess oil.

    Floured and egged eggplant slices frying in olive oil and then turned over and golden brown.

    Step 6- Preheat and start layering.

    Preheat the oven to 350 degrees F. Spread a thin layer of marinara sauce on the bottom of a baking dish, then add a layer of eggplant.

    A layer of marinara sauce in the 9" x 13" pan and then a layer of fried eggplant slices.

    Step 7- Build the layers.

    Top with a thin layer of sauce and sprinkle with Romano or Parmesan cheese. Repeat the layers 3-4 times until everything is used up.

    Step 8- Add the final cheese and bake.

    Finish with shredded mozzarella on top and bake for 30-45 minutes, until bubbly. Serve immediately.

    Added layers of sauce and cheese and eggplant slices into the pan and then topped with mozzarella cheese.

    Frequently Asked Questions

    Can I make this ahead of time?

    Yes, you can fry the eggplant slices and prepare the sauce in advance. Assemble everything just before baking for the best texture.

    How do I help with the bitterness of the eggplant?

    I like to lay the peeled and thinly cut eggplant slices onto paper towel-lined sheet pans and sprinkle them with salt. Let them sit for ten minutes and grently blot any moisture before dredging the slices in flour and egg. This helps reduce bitterness while also drawing out extra moisture.

    This is a totally optional step- my Grandma never did it, and the recipe was still great.

    Is this healthier than traditional versions?

    It’s lighter since there’s no heavy breading or deep frying, but it’s still a comfort dish with cheese and sauce.

    What to serve with eggplant parmesan?

    It pairs really well with pasta and extra sauce for a classic combo. You can also add a simple salad or some roasted vegetables to balance things out and make it a full meal.

    An overhead image of a pan of baked eggplant parmesan.

    Tips For Making This Eggplant Baked Parmesan Recipe

    • Try to keep the eggplant slices similar in thickness so they cook at the same rate- I prefer ⅛-1/4 inch.
    • Optional eggplant prep- lay the peeled and thinly cut eggplant slices onto paper towel-lined sheet pans and sprinkle them with salt. Let them sit for ten minutes and grently blot any moisture before dredging the slices in flour and egg. This helps reduce bitterness while also drawing out extra moisture.
    • Don’t skip draining. Letting the fried slices rest on paper towels keeps the final dish from getting too oily.
    • Work in batches. Frying takes the most time, so using two pans helps speed things up.
    • Thin layers of sauce and cheese help everything cook evenly without getting too heavy.
    • Eggplant absorbs oil quickly, so don’t be afraid to add more as you go.
    • Freshly shredded cheese is a must. It melts so much better, especially the Parmesan or Romano. Tastes better too!
    • Ingredients to prep ahead- Slice the eggplant and make the sauce in advance. Shred the cheese.
    • Leftovers and storage- Store in an airtight container in the fridge for up to 3-4 days. Reheat in the oven for the best texture.
    A plate of eggplant parmesan.

    What To Serve With Parmesan Baked Eggplant

    This dish is great on its own, but it really shines as part of a full, cozy meal. You can keep it classic or mix things up depending on what you’re in the mood for. Try pairing it with:

    • Pasta Pomodoro Recipe
    • Greens and Beans Recipe
    • Apple Chicken Salad
    • Lemon Parfait Cups Dessert

    Other Italian Recipes To Try

    • An overhead image of a bowl of bean soup with Italian sausage.
      Italian Bean Soup With Sausage
    • A fork pulling a bite from a stuffed pepper with cheese stretching from the pull.
      Vegetarian Italian Stuffed Peppers
    • A plate of spaghetti with meat sauce on top of it.
      Meat Sauce Recipe
    • A pile of homemade meatballs in tomato sauce.
      Homemade Meatballs In Sauce

    Love this recipe? Please leave a 5 star ⭐️⭐️⭐️⭐️⭐️ rating in the recipe card below ⬇️ and/or a review in the comment section further down. Check out my Amazon Store for all my favorite tools, including those used in this recipe. And follow @thelifejolie on Instagram and TikTok!

    A spoon lifting up a scoop of eggplant parm bake with melt cheese trailing behind it.

    Eggplant Parm Bake

    Jessy Freimann
    This eggplant parm bake is a lighter, comforting twist on a classic Italian favorite. It comes together with simple ingredients and is perfect for a cozy family dinner, especially when you want something hearty without feeling too heavy.
    5 from 1 vote
    Print Recipe Pin Recipe
    Prep Time 15 minutes mins
    Cook Time 1 hour hr
    Total Time 1 hour hr 15 minutes mins
    Course Main
    Cuisine Italian
    Servings 10 servings
    Calories 238 kcal

    Equipment

    • 9 x 13 Pan
    • chefs knife
    • cutting board
    • Skillet
    • Spatula

    Ingredients
      

    • 2 large eggplant peeled and sliced very thin (around ¼ inch max.)
    • 6 large eggs start with 5 and add another if needed
    • 1 cup flour
    • Salt and pepper to taste
    • ¼ cup Olive oil
    • 3 cups marinara sauce
    • ½ cup grated Romano cheese or Parmesan
    • 1 ¼ cups shredded mozzarella cheese

    Instructions
     

    • Place the flour into a wide, shallow bowl and add salt and pepper to taste, mixing well.
    • Place the eggs into another wide, shallow bowl and whisk to mix the yolks and whites.
    • Begin heating a couple Tablespoons of oil over medium-high heat in the pan (I use two pans to make it go quicker).
    • While the oil heats, begin by dredging each slice of eggplant in the flour.
    • Tap off the excess flour and then soak it for a moment in egg so that all sides are fully covered.
    • Tap off the excess egg and fry each slice of egg plant in the pan until golden on each side, around a few minutes of each side. make sure to adjust the heat as needed and add more oil to the pan as needed (these tend to suck up the oil pretty quickly so you will need more).
    • Once each side is golden, drain the eggplant slices on a paper towel lined plate.
    • Preheat the oven to 350 degrees.
    • Ladle a thin layer of marinara sauce on the bottom of the baking pan.
    • Add a layer of egg plant.
    • Top it with a thin layer of sauce.
    • Sprinkle some of the Romano cheese on top.
    • Reheat these layers 3-4 times until you're out of eggplant slices.
    • Sprinkle this with shredded mozzarella cheese.
    • Bake uncovered for 30-45 minutes or until bubbly. Serve immediately.

    Video

    Notes

    • Try to keep the eggplant slices similar in thickness so they cook at the same rate- I prefer ⅛-1/4 inch.
    • Optional eggplant prep- lay the peeled and thinly cut eggplant slices onto paper towel-lined sheet pans and sprinkle them with salt. Let them sit for ten minutes and grently blot any moisture before dredging the slices in flour and egg. This helps reduce bitterness while also drawing out extra moisture.
    • Don’t skip draining. Letting the fried slices rest on paper towels keeps the final dish from getting too oily.
    • Work in batches. Frying takes the most time, so using two pans helps speed things up.
    • Thin layers of sauce and cheese help everything cook evenly without getting too heavy.
    • Eggplant absorbs oil quickly, so don’t be afraid to add more as you go.
    • Freshly shredded cheese is a must. It melts so much better, especially the Parmesan or Romano. Tastes better too!
    • Ingredients to prep ahead- Slice the eggplant and make the sauce in advance. Shred the cheese.
    • Leftovers and storage- Store in an airtight container in the fridge for up to 3-4 days. Reheat in the oven for the best texture.

    Nutrition

    Serving: 1servingCalories: 238kcalCarbohydrates: 20gProtein: 12gFat: 13gSaturated Fat: 4gPolyunsaturated Fat: 1gMonounsaturated Fat: 6gTrans Fat: 0.01gCholesterol: 128mgSodium: 541mgPotassium: 498mgFiber: 4gSugar: 6gVitamin A: 617IUVitamin C: 7mgCalcium: 161mgIron: 2mg
    Tried this recipe?Let us know how it was!

    Dandelion Greens Recipe

    Apr 17, 2026 · Leave a Comment

    A plate of dandelion greens with bread.

    If you’ve never tried a dandelion greens recipe before, this is a great place to start. It comes together in about 30 minutes and turns a slightly bitter green into something rich, garlicky, and just a little spicy.

    A plate of dandelion greens with bread.
    [feast_advanced_jump_to]

    Why You’ll Love This Dandelion Green Recipe

    Dandelion greens might not be the first thing you reach for at the store, but once you try them like this, they’re hard to forget. The slight bitterness mellows as they cook, especially when paired with garlic, olive oil, and a little heat from red pepper flakes.

    This is one of those recipes that’s been passed down in my family for years, turning something simple into something you actually look forward to eating. If you’re new to cooking with dandelion greens, you might be surprised how quickly they come together and how flavorful they are. Here’s why it works so well:

    • Ready in about 30 minutes
    • Simple, minimal ingredients
    • Bold, savory flavor with a little heat
    • Works as a side or light meal
    A close up of a pan of dandelion greens with a wooden spoon in it.

    Ingredient Information And Substitutions

    • Dandelion greens- Slightly bitter and hearty. If you can’t find them, try escarole or broccoli rabe as alternatives.
    • Capicola hot ham- Brings a salty, slightly spicy flavor. You can substitute with pancetta or prosciutto. I went heavy on this ingredient because I like it but you can halve it,
    • Olive oil- Adds richness and helps everything cook evenly. You can use avocado oil if needed.
    • Garlic cloves- Lightly smashed to release flavor. Minced garlic works too, but keep an eye on it so it doesn’t burn.
    • Crushed red pepper flakes- Adds a subtle heat. Adjust to your preference or leave it out if you prefer mild.
    • Kosher salt- Enhances all the flavors. Start small and adjust as needed.
    • Black pepper- Adds a little depth and balance.
    An overhead image of labeled recipe ingredients.

    How To Cook Dandelion Greens

    Step 1- Heat the oil.

    Warm the olive oil in a large sauté pan over medium-high heat.

    Step 2- Cook the garlic and spices.

    Add the garlic cloves and red pepper flakes. Cook for about 4-5 minutes, stirring often so the garlic softens without burning.

    A pan with garlic, oil and crushed red pepper flakes and then chopped capicola ham added to the pan.

    Step 3- Add the capicola.

    Stir in the capicola and cook for a few more minutes until it starts to crisp slightly.

    Step 4- Add the greens.

    Add the dandelion greens to the pan. Season with salt and pepper.

    Step 5- Cook until tender.

    Let the greens cook down for about 10 minutes, stirring frequently as they soften.

    Dandelion greens added to the pan and then cooked down.

    Step 6- Taste and adjust.

    Give everything a taste and adjust the seasoning if needed.

    Step 7- Serve.

    Serve warm, ideally with a slice of crusty Italian bread.

    A close up image of spicy dandelion greens on a plate with some bread slices in the background.

    Frequently Asked Questions

    What are the benefits of dandelion greens?

    Dandelion greens are packed with nutrients like vitamins A, C, and K, along with fiber and antioxidants. They’re often known for supporting digestion and overall health, making them a great addition to any meal.

    How do I cook dandelion greens?

    Sauté them with olive oil, garlic, and seasoning. This helps soften their texture and mellow out the bitterness, especially when paired with bold flavors or a little heat.

    Do I need to soak or prep the greens?

    Just make sure they’re well-washed and trimmed before cooking.

    Dandelion greens of a slice of bread.

    Tips For How To Cook Dandelion Greens

    • Look for younger, smaller greens. Larger, more mature ones tend to be a bit more bitter but still work great.
    • Rinse really well to remove any hidden grit. You may need to soak and rinse a few times.
    • Trim the ends, which are tougher and may be a bit dried out. I like to cut the greens into smaller pieces (about 1-2 inches).
    • Don’t rush the garlic. Cook it gently so it softens and infuses the oil without burning.
    • The greens shrink quite a bit as they cook, so don’t worry if the pan looks full at first. You can totally add it in batches.
    • Season to balance the bitterness. The salt, fat, and spice help mellow the greens, so don’t skip them. Start small and adjust as everything cooks down- taste as you go.
    • Ingredients to prep ahead- Wash and trim the greens. Chop the capicola.
    • Leftovers and storage- Keep in the fridge for up to 5 days and reheat in the microwave or on the stovetop.
    A plate of dandelion greens and bread.

    What To Serve With Dandelion Greens

    These greens are great on their own, especially with a slice of crusty Italian bread to soak up all the flavor. They're also great with richer flavors, and you can easily turn them into a full meal with a few simple additions:

    • Mushrooms in White Wine Sauce
    • Slow Cooker Italian Sausage
    • Sheet Pan Sausage and Roasted Veggies
    • Citrus Cranberry Shortbread Cookies

    Other Greens Recipes To Try

    • Sautéed Kale with Mushrooms and Tomatoes is the best healthy side dish. It whips up super quickly and easily and tastes fantastic! This also makes a satisfying vegetable main dish.
      Sautéed Kale with Mushrooms and Tomatoes
    • A square photos of broccoli rabe with garlic on a plate.
      Broccoli Rabe Recipe with Garlic
    • A plate of garlic green beans with a striped towel, garlic bulbs and parsley in the background.
      Garlic And Butter Green Beans
    • An extreme close up of the ends and tips of skillet asparagus in a pan
      Sautéed Garlic Asparagus

    Love this recipe? Please leave a 5 star ⭐️⭐️⭐️⭐️⭐️ rating in the recipe card below ⬇️ and/or a review in the comment section further down. Check out my Amazon Store for all my favorite tools, including those used in this recipe. And follow @thelifejolie on Instagram and TikTok!

    A plate of dandelion greens with bread.

    Dandelion Greens Recipe

    Jessy Freimann
    If you’ve never tried a dandelion greens recipe before, this is a great place to start. It comes together in about 30 minutes and turns a slightly bitter green into something rich, garlicky, and just a little spicy.
    No ratings yet
    Print Recipe Pin Recipe
    Prep Time 10 minutes mins
    Cook Time 20 minutes mins
    Total Time 35 minutes mins
    Course Side Dish
    Cuisine Italian
    Servings 6 servings
    Calories 224 kcal

    Equipment

    • chefs knife
    • cutting board
    • measuring spoons
    • saute pan

    Ingredients
      

    • 3 Tablespoons olive oil
    • 3 cloves garlic take the tip of your knife and lightly poke it all over each garlic clove to help release the flavors
    • ½ teaspoon Crushed red pepper flakes or more to taste
    • 8 ounces Capicola hot ham cut into 1 inch pieces (the original recipe called for half this amount, but I liked the capicola so I doubled it- feel free to half the amount if you prefer)
    • 24 ounces fresh dandelion greens well cleaned and ends trimmed, roughly chopped
    • 1 teaspoon kosher salt to taste
    • ¼ teaspoon ground black pepper to taste

    Instructions
     

    • Heat oil over medium high heat.
    • Add garlic cloves and red pepper flakes to the pan and saute about 4-5 minutes, stirring frequently (do not let the garlic burn- you can always reduce the heat if necessary!).
    • Add the Capicola and saute a few more minutes until it begins to crisp, stirring often.
    • Stir in the Dandelion greens and season with salt and pepper to taste.
    • Allow the dandelions to cook down, stirring frequently, around 10 minutes.
    • Taste them for flavor and add more seasoning if necessary.
    • Serve with Italian bread and enjoy!

    Video

    Notes

    • Look for younger, smaller greens. Larger, more mature ones tend to be a bit more bitter but still work great.
    • Rinse really well to remove any hidden grit. You may need to soak and rinse a few times.
    • Trim the ends, which are tougher and may be a bit dried out. I like to cut the greens into smaller pieces (about 1-2 inches).
    • Don’t rush the garlic. Cook it gently so it softens and infuses the oil without burning.
    • The greens shrink quite a bit as they cook, so don’t worry if the pan looks full at first. You can totally add it in batches.
    • Season to balance the bitterness. The salt, fat, and spice help mellow the greens, so don’t skip them. Start small and adjust as everything cooks down- taste as you go.
    • Ingredients to prep ahead- Wash and trim the greens. Chop the capicola.
    • Leftovers and storage- Keep in the fridge for up to 5 days and reheat in the microwave or on the stovetop.

    Nutrition

    Serving: 1servingCalories: 224kcalCarbohydrates: 11gProtein: 13gFat: 17gSaturated Fat: 5gPolyunsaturated Fat: 2gMonounsaturated Fat: 9gCholesterol: 34mgSodium: 1273mgPotassium: 461mgFiber: 4gSugar: 1gVitamin A: 11572IUVitamin C: 40mgCalcium: 216mgIron: 4mg
    Tried this recipe?Let us know how it was!

    Oven Baked Chicken Wings

    Apr 15, 2026 · Leave a Comment

    A close up of a drum chicken wing in a pile of other wings.

    These oven baked chicken wings are crispy on the outside, tender on the inside, and coated in a simple, sweet, and spicy sauce. They’re easy to make and perfect for game day, gatherings, or a low-effort dinner.

    A close up of a drum chicken wing in a pile of other wings.
    [feast_advanced_jump_to]

    Why You’ll Love These Oven Baked Crispy Chicken Wings

    Around here, crispy chicken wings are pretty much non-negotiable for game day. There’s just something about a big tray of wings that everyone gathers around, no matter what else is on the table. And honestly, once you make them at home, it’s hard to go back to anything else.

    I’ve always been a fan of that sweet and spicy combo, especially when the wings are extra crispy on the outside and still perfectly tender inside. This recipe keeps things really simple, but still gives you that same satisfying texture and flavor you’d expect from your favorite wings. Here’s why this one’s worth making:

    • Crispy without frying
    • Sweet and spicy flavor
    • Minimal prep
    • Perfect for game day or easy dinners
    A parchment-lined bowl of oven baked chicken wings.

    Ingredient Information And Substitutions

    • Chicken wings- The base. You can use whole wings if needed, just separate them into drumettes and flats first by cutting through the joint with a sharp knife.
    • Buffalo wing sauce- Brings the heat and tang. Make sure it’s labeled “wing sauce” for the right thickness and flavor.
    • Honey- Adds sweetness to balance the spice. Maple syrup can work in a pinch.
    • Olive oil- Helps the skin crisp up in the oven. Avocado oil works well too.
    • Black pepper- Adds a bit of warmth and balance.
    • Kosher salt- Enhances overall flavor. Start small and adjust as needed.
    • Veggie dippers- Optional but I love te freshness! Celery and carrots are both classic sides to buffalo wings, thanks to that refreshing crunch. Bell peppers, radishes, or even snap peas would be good too!
    • Blue cheese or ranch dressing- Classic, cool and creamy dipping options. Use whichever you prefer.
    An overhead image of labeled recipe ingredients.

    How To Make Easy Baked Crispy Chicken Wings

    Step 1- Coat the wings.

    Preheat your oven to 400 degrees F. Line a sheet pan with foil, then place a baking rack on top if you have one. Spray the rack well with cooking spray.

    Add the wings to a large bowl, drizzle with oil, and toss until everything is evenly coated.

    Step 2- Arrange on the pan and season.

    Place the wings on the prepared pan in a single layer, making sure they aren’t touching. Sprinkle with salt and pepper, adjusting based on your preference.

    Chicken wings tossed in oil and then lined up on a sheet pan.

    Step 3- Bake.

    Bake uncovered for 30 minutes. Remove the pan, flip each piece, and return to the oven for another 30 minutes.

    Step 4- Make the sauce.

    Near the end of baking, combine the wing sauce and honey in a small saucepan over medium heat. Warm it gently, whisking occasionally, until it just begins to steam.
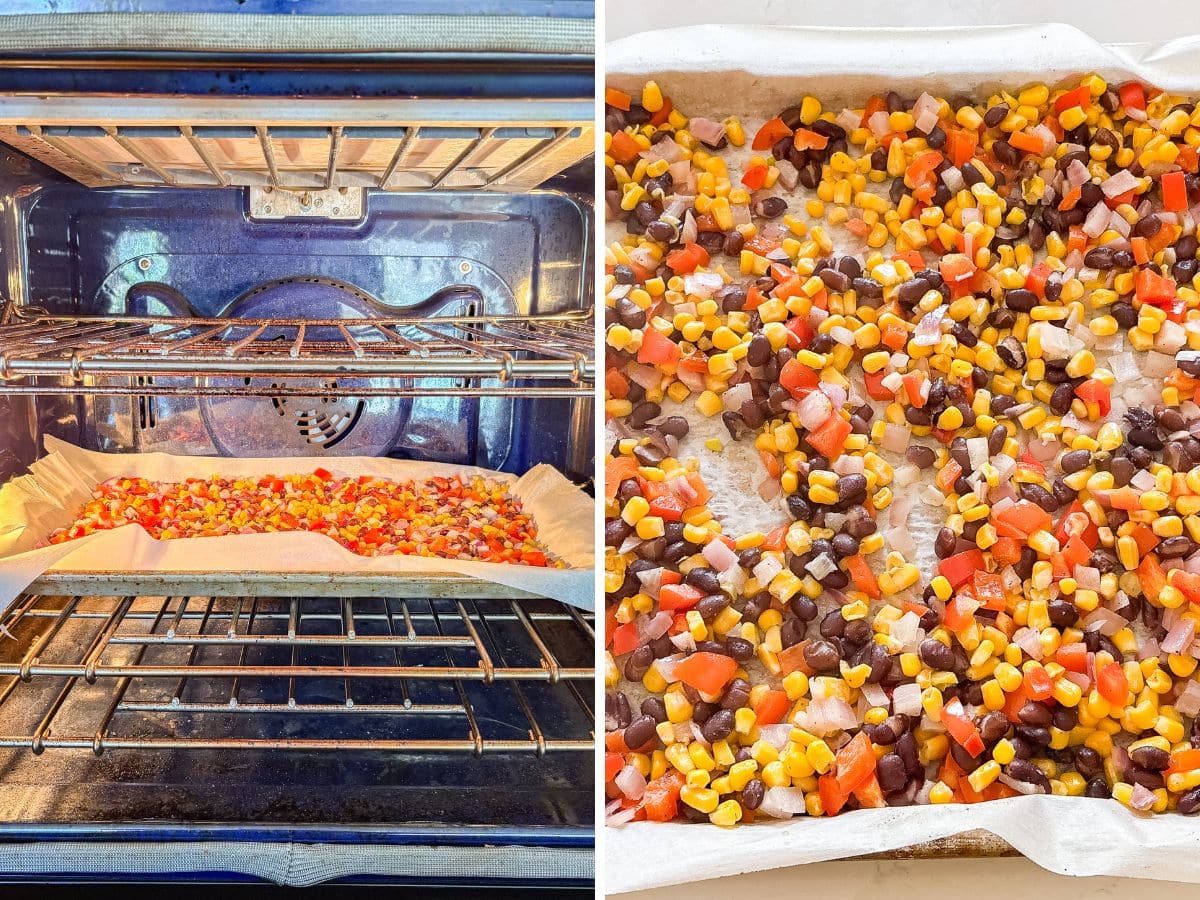
    Step 6- Optional extra crisp.

    For extra crispiness, switch the oven to broil and cook each side for about 2 minutes. Watch closely so they don’t burn.

    Step 7- Toss and serve.

    Transfer the cooked wings to a clean bowl, drizzle with the sauce, and toss to coat. Serve immediately.

    Wing sauce simmering on a burner and then being poured over the cooked chicken wings.

    Frequently Asked Questions

    Do I need to thaw the chicken wings first?

    Yes. Thawing helps the wings cook evenly and crisp up better. The safest way to thaw is either overnight in the refrigerator or fully submerged in cold water (be sure to change the water every 30 minutes!)

    Should I boil the wings before baking?

    No, that step isn’t needed for this recipe.

    What temperature should they be cooked to?

    Chicken should reach an internal temperature of 165 degrees F. Be sure to temp with a probe at the thickest part and make sure you aren't touching the bone.

    A close up image of a flat chicken wing on a pile of other wings.

    Tips For Making Crispy Baked Chicken Wings

    • Use a wire rack if you can. This helps the air circulate around the wings so they crisp on all sides instead of sitting in grease.
    • Don’t overcrowd the pan. Leaving space between each piece makes a big difference in texture.
    • Flip halfway through. This ensures even browning and crispiness.
    • Broil at the end. A quick broil gives you that extra golden, crispy finish.
    • Go easy on the sauce. Add it gradually so the wings stay crisp rather than becoming soggy. You can always add more, but it's harder to take it away.
    • Serve right away. These are best straight out of the oven, still hot and crispy.
    • Ingredients to prep ahead- Pat the wings dry and store them in the fridge. Chop veggies if needed.
    • Leftovers and storage- Store in an airtight container in the fridge for up to 3-4 days. Reheat in the oven or air fryer to bring back the crispiness.
    An overhead image of a bowl of chicken wings with celery and carrots around it.

    What To Serve With Baked Chicken Wings

    These wings are great on their own or as part of a game day spread, but you can easily turn them into a full meal by adding a simple side, a hearty main, and something sweet to finish it off:

    • Slow Cooker BBQ Meatballs
    • Easy Instant Pot Chili Recipe
    • BLT Ranch Flatbread Pizza Recipe
    • No Bake Peanut Butter Pie

    Other Appetizer Recipes To Try

    • The side of a sheet pan of chicken nachos with all the fixings.
      Loaded Chicken Nachos
    • A close up image of a buffalo chicken slider.
      Buffalo Chicken Sliders
    • A square image of Chicken Swiss Dip.
      Chicken Swiss Dip
    • A close up of a bacon wrapped chicken bite in a bowl of others.
      Bacon-Wrapped Chicken Bites

    Love this recipe? Please leave a 5 star ⭐️⭐️⭐️⭐️⭐️ rating in the recipe card below ⬇️ and/or a review in the comment section further down. Check out my Amazon Store for all my favorite tools, including those used in this recipe. And follow @thelifejolie on Instagram and TikTok!

    A close up of a drum chicken wing in a pile of other wings.

    Oven Baked Chicken Wings

    Jessy Freimann
    These oven baked chicken wings are crispy on the outside, tender on the inside, and coated in a simple, sweet, and spicy sauce. They’re easy to make and perfect for game day, gatherings, or a low-effort dinner.
    No ratings yet
    Print Recipe Pin Recipe
    Prep Time 5 minutes mins
    Cook Time 1 hour hr 5 minutes mins
    Total Time 1 hour hr 10 minutes mins
    Course Appetizer
    Cuisine American
    Servings 6 servings
    Calories 370 kcal

    Equipment

    • sheet pan
    • baking rack
    • large mixing bowl
    • Tongs

    Ingredients
      

    • 3 ½ pounds chicken wings separated into flats and drumettes
    • 1 Tablespoon olive oil
    • 1 teaspoon Kosher salt, to taste
    • ¼ teaspoon Ground black pepper, to taste
    • ½ cup buffalo wing sauce (make sure it says wing sauce and not just hot sauce)
    • 3 Tablespoons honey

    Instructions
     

    • Preheat the oven to 400 degrees F. Line a sheet pan with foil and top with a baking rack if you have one. Spray it well with cooking spray and set aside.
    • Place the flat and drumettes in a large mixing bowl. Drizzle with oil and toss to fully coat.
    • Place all flats and drumettes onto the prepared pan so that they aren't touching.
    • Sprinkle with salt and pepper to taste.
    • Bake for 30 minutes uncovered.
    • Remove the pan from the oven and turn each flat and drumette.
    • Return the pan to the oven and bake for an additional 30 minutes.
    • Towards the end of the baking time, combine buffalo wing sauce and honey in a small saucepan over medium heat. 
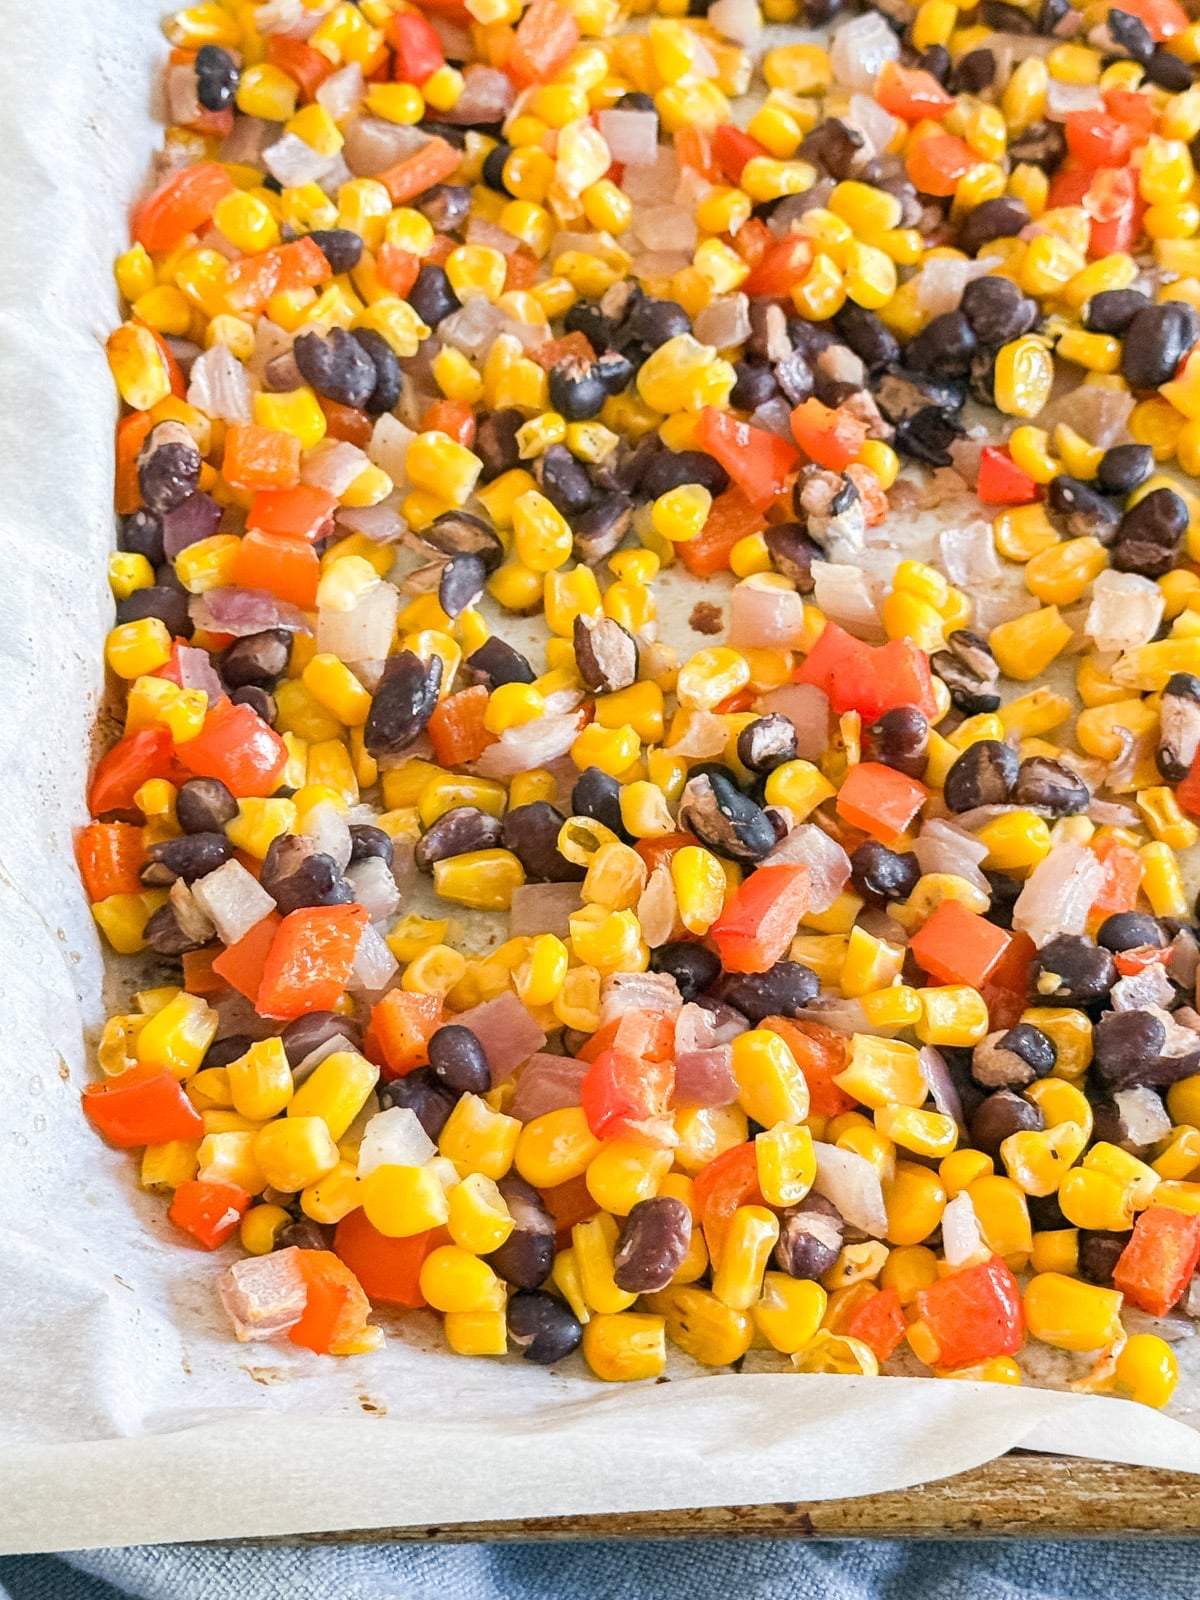
    • Heat the sauce through, whisking periodically until it's just barely starting to simmer and steam is rising. Remove the sauce from the heat and set aside.
    • (Optional) for extra crispy wings, bump the oven up to broil and broil each side for 2 minutes, keeping a close eye on them so that they don't burn.
    • Place the cooked wings into a clean bowl and slowly drizzle with sauce.
    • Toss to fully coat and serve immediately with your favorite creamy dressing and veggies.

    Video

    Notes

    • Use a wire rack if you can. This helps the air circulate around the wings so they crisp on all sides instead of sitting in grease.
    • Don’t overcrowd the pan. Leaving space between each piece makes a big difference in texture.
    • Flip halfway through. This ensures even browning and crispiness.
    • Broil at the end. A quick broil gives you that extra golden, crispy finish.
    • Go easy on the sauce. Add it gradually so the wings stay crisp rather than becoming soggy. You can always add more, but it's harder to take it away.
    • Serve right away. These are best straight out of the oven, still hot and crispy.
    • Ingredients to prep ahead- Pat the wings dry and store them in the fridge. Chop veggies if needed.
    • Leftovers and storage- Store in an airtight container in the fridge for up to 3-4 days. Reheat in the oven or air fryer to bring back the crispiness.

    Nutrition

    Serving: 1servingCalories: 370kcalCarbohydrates: 9gProtein: 26gFat: 25gSaturated Fat: 7gPolyunsaturated Fat: 5gMonounsaturated Fat: 11gTrans Fat: 0.3gCholesterol: 110mgSodium: 1106mgPotassium: 230mgFiber: 0.04gSugar: 9gVitamin A: 210IUVitamin C: 1mgCalcium: 18mgIron: 1mg
    Tried this recipe?Let us know how it was!


    Traditional Minestrone Soup Recipe

    Apr 10, 2026 · 4 Comments

    An overhead image of a bowl of minestrone soup.

    This traditional minestrone soup recipe comes together in about 35 minutes and is packed with vegetables, beans, and pasta for a cozy, satisfying meal. 

    A close up image of a bowl of minestrone soup with a spoon in it.
    [feast_advanced_jump_to]

    Why You’ll Love This Minestrone Italian Soup

    If you’ve been struggling with planning lunches lately, I’ve definitely been there. You start the week with good intentions, and then suddenly you’re rushing in the morning or just grabbing something you didn’t really want. A big pot of this soup is exactly what fixes that problem.

    Truth is, I’ve always been a soup person (any season, any temperature). There’s something about a bowl of vegetables, beans, and pasta that just feels comforting. This version is loosely adapted from a recipe I tried years ago and have been tweaking ever since. It’s hearty, flexible, and perfect for using up what’s in your fridge. Here’s why you should make this minestrone soup recipe:

    • Flexible with what you have
    • Great for meal prep
    • Hearty, not too heavy
    • Easy to adjust seasonally
    An overhead image of a bowl of minestrone soup.

    Ingredient Information And Substitutions

    • Onion- Adds a savory base. Yellow or white onions both work well.
    • Carrots- Adds a slight sweetness. You can use pre-cut carrots to save time. 
    • Celery- Brings subtle flavor and texture. Can swap with extra carrots if needed.
    • Zucchini- Light and tender. Yellow squash works just as well.
    • Savoy cabbage- Adds bulk and texture. Green cabbage can be substituted.
    • Garlic- Fresh is best, but jarred minced garlic works in a pinch.
    • Olive oil- Used for sautéing. Avocado oil can be used instead.
    • Chicken broth- Adds depth. Vegetable broth works great for a vegetarian option.
    • Canned diced tomatoes- Brings acidity and body. Crushed tomatoes can be used for a smoother texture.
    • Cannellini beans- Creamy and mild. Great northern or navy beans are good swaps.
    • Lima beans- Adds variety and texture. You can skip or replace with peas.
    • Small shell pasta- Holds the broth nicely. Any small pasta shape works.
    • Dried herbs- Basil and oregano add classic Italian flavor. Italian seasoning can be used instead.
    • Sugar- Helps balance acidity.
    • Bay leaf- Adds depth while simmering. Remember to remoe it before seving.
    • Parmesan rind- Gives richness to the broth. Optional, but worth it if you have one.
    • Balsamic vinegar- Adds a subtle tang at the end. Red wine vinegar works too.
    • Romano cheese- For serving. Parmesan is a great alternative.
    • Salt and pepper- Adjust to taste as everything comes together.
    An overhead image of labeled recipe ingredients.

    How To Make Minestrone Soup With Pasta

    Step 1- Cook the vegetables.

    Warm the oil in a large pot over medium-high heat. Add the onion, garlic, carrots, and celery with a pinch of salt and pepper, and cook for a few minutes until they begin to soften.

    Mirepoix sautéing in a dutch oven.

    Step 2- Add the base ingredients.

    Pour in the broth and stir in the diced tomatoes, zucchini, cabbage, beans, herbs, sugar, bay leaf, and Parmesan rind. Bring everything up to a boil.

    Veggies and broth added to the pot.

    Step 3- Simmer.

    Lower the heat and let the soup gently simmer for about 20 minutes so the flavors can develop.

    Soup simmering in the dutch oven.

    Step 4- Cook the pasta.

    Add the pasta and cook for about 5 minutes, or until tender. Stir in the balsamic vinegar and adjust with salt and pepper as needed.

    Step 5- Finish and serve.

    Remove the bay leaf and Parmesan rind, then serve warm, topped with Romano cheese.

    A close up of a spoon holding a scoop of minestrone soup.

    Frequently Asked Questions

    What is vegetarian minestrone soup?

    It’s simply a version made without meat or chicken broth. You can easily swap in vegetable broth and keep everything else the same.

    What is the origin of minestrone soup?

    Minestrone comes from Italy and was traditionally made with whatever vegetables were available, which is why there are so many variations today.

    Can I make this soup ahead of time?

    Yes! This soup is great for meal prep. The flavors get even better as it sits, so it’s perfect to make a day or two in advance and reheat when needed.

    A bowl of traditional minestrone soup with a checked napkin and an onion behind it.

    Tips For Making This Italian Soup Minestrone

    • Sauté the base well. Letting the onions, carrots, and celery soften properly builds a deeper flavor from the start.
    • This soup is very forgiving. Swap vegetables based on what’s in your fridge, and it will still turn out great.
    • Add pasta last. This keeps it from getting too soft, especially if you plan on leftovers. You can also cook it separately and add a handful to each bowl when serving.
    • Don’t skip the vinegar. It might seem small, but it adds a subtle brightness that brings everything together.
    • Let it sit before serving. Even 10-15 minutes helps the flavors settle and deepen.
    • Ingredients to prep ahead- Chop all vegetables in advance and store them in the fridge so everything is ready to go.
    • Leftovers and storage- Store in an airtight container in the fridge for up to 4 days. Add a splash of broth when reheating if it thickens. You can also freeze it for up to 2-3 months.

    What To Serve With Italian Minestrone Soup

    This soup is filling on its own, but adding a few simple sides turns it into a full meal that feels a little more special:

    • BBQ Chicken Flatbread
    • Italian Stuffed Zucchini Boats
    • Tomato Onion Salad
    • Banana Bread Bars

    Other Soup Recipes To Try

    • A bowl of asian soup with meatballs with a spoon and noodles in it.
      Asian Soup with Cabbage and Meatballs
    • A spoon holding up a scoop of lentil soup with ham from a black bowl of it.
      Carrot and Lentil Soup
    • A close up of a bowl of chicken wild rice creamy soup with a spoon in it and another bowl in the background.
      Wild Rice Creamy Chicken Soup (Great with Turkey Too!)
    • A bowl of chicken and egg noodles soup with sliced bread and another bowl behind it.
      Dutch Oven Chicken Noodle Soup

    Love this recipe? Please leave a 5 star ⭐️⭐️⭐️⭐️⭐️ rating in the recipe card below ⬇️ and/or a review in the comment section further down. Check out my Amazon Store for all my favorite tools, including those used in this recipe. And follow @thelifejolie on Instagram and TikTok!

    An overhead image of a bowl of minestrone soup.

    Traditional Minestrone Soup Recipe

    Jessy Freimann
    This traditional minestrone soup recipe comes together in about 35 minutes and is packed with vegetables, beans, and pasta for a cozy, satisfying meal. 
    No ratings yet
    Print Recipe Pin Recipe
    Prep Time 10 minutes mins
    Cook Time 30 minutes mins
    Total Time 40 minutes mins
    Course Main, Main Course, Main dish, Soup
    Cuisine American, Italian
    Servings 8 servings
    Calories 133 kcal

    Equipment

    • 1 Dutch oven
    • 1 chefs knife
    • 1 cutting board
    • 1 Measuring cups and spoons
    • 1 wooden spoon

    Ingredients
      

    • 2 Tablespoons olive oil
    • 1 cup onion diced
    • ½ cup celery diced
    • 1 cup carrots diced
    • 2 cloves garlic minced
    • 2 quarts chicken broth
    • 16 ounces diced tomatoes canned
    • 1 cup zucchini diced- about 1 medium
    • 2 cups savoy cabbage shredded
    • 14.5 ounces cannellini beans canned and drained
    • ½ cup frozen lima beans
    • 1 teaspoon dried basil
    • 1 teaspoon dried oregano
    • 1 teaspoon sugar
    • 1 bay leaf
    • 1 Parmasan rind
    • ⅓ cup small shell pasta
    • 1-2 Tablespoon balsamic vinegar
    • Salt and pepper to taste
    • Romano cheese

    Instructions
     

    • Heat oil in a large pot over medium high heat and and sauté onions, garlic, carrots and celery with a sprinkle of salt and pepper for a 3-5 minutes or until they soften.
    • Stir in broth, diced tomatoes, zucchini, cabbage, cannellini beans, lima beans, basil, oregano, sugar, bay leaf and Parmesan rind. Bring to a boil.
    • Reduce to a simmer and let it simmer for 20 minutes.
    • Add pasta and let it cook for 5 minutes until or until the pasta is cooked. Add balsamic vinegar and some salt and pepper to taste.
    • Parmesan rind and bay leaf. Serve immediately with Romano cheese.

    Video

    Notes

    • Sauté the base well. Letting the onions, carrots, and celery soften properly builds a deeper flavor from the start.
    • This soup is very forgiving. Swap vegetables based on what’s in your fridge, and it will still turn out great.
    • Add pasta last. This keeps it from getting too soft, especially if you plan on leftovers. You can also cook it separately and add a handful to each bowl when serving.
    • Don’t skip the vinegar. It might seem small, but it adds a subtle brightness that brings everything together.
    • Let it sit before serving. Even 10-15 minutes helps the flavors settle and deepen.
    • Ingredients to prep ahead- Chop all vegetables in advance and store them in the fridge so everything is ready to go.
    • Leftovers and storage- Store in an airtight container in the fridge for up to 4 days. Add a splash of broth when reheating if it thickens. You can also freeze it for up to 2-3 months.

    Nutrition

    Serving: 1servingCalories: 133kcalCarbohydrates: 20gProtein: 7gFat: 4gSaturated Fat: 1gPolyunsaturated Fat: 0.5gMonounsaturated Fat: 3gCholesterol: 5mgSodium: 1023mgPotassium: 382mgFiber: 5gSugar: 6gVitamin A: 3000IUVitamin C: 17mgCalcium: 87mgIron: 2mg
    Tried this recipe?Let us know how it was!

    Easy Green Peas Recipe

    Apr 6, 2026 · 4 Comments

    An overhead image of a bowl of green peas and onions.

    This easy green peas recipe is a simple, comforting side dish that comes together in about 30 minutes. Made with just a handful of ingredients, it’s perfect for busy weeknights but just as great alongside a holiday meal.

    A close up imae of this easy green peas recipe.
    [feast_advanced_jump_to]

    Why You’ll Love This Frozen Green Peas Dish

    With all the recipe testing and new dishes happening in my kitchen, you’d think there’s always something different on the table... and there usually is. But there are always those go-to recipes we come back to again and again. The kind made with simple ingredients you already have, that come together without much effort and somehow turn out perfectly every single time. This is one of those go-to sides.

    I’m always a little amazed at how something so simple can taste this good. I was never big on onions growing up, but in this dish, they cook down so much that they practically melt into the peas, adding flavor without being noticeable. It completely changed things for me, and now it’s one of those easy veggie sides I can throw together anytime. Here’s why this recipe is a must-try:

    • Simple pantry ingredients
    • Weeknight or holiday-ready
    • Uses frozen peas
    • Family-friendly and flexible
    An overhead image of a bowl of green peas and onions.

    Ingredient Information And Substitutions

    • Peas- The star of the dish. Frozen peas work perfectly here, but fresh peas are a great option when they’re in season.
    • Onion- Adds depth and a slight sweetness as it cooks down. Yellow or white onions both work.
    • Olive oil- Used to sauté the onions.
    • Water- Helps soften the peas and bring everything together. Broth can be used for extra flavor.
    • Salt- Brings out all the flavors. Adjust based on taste and your preference.
    • Black pepper- Adds a little warmth. You can skip or reduce if preferred.
    An overhead image of labeled recipe ingredients.

    How To Cook Frozen Green Peas

    Step 1- Heat the oil.

    Warm the olive oil in a pan over medium to medium-high heat.

    Step 2- Cook the onions.

    Add the minced onion and season with salt and pepper. Let them cook gently until softened, but not browned.

    Olive oil heating in a medium pan and then then onions cooking in it.

    Step 3- Add the peas.

    Stir in the peas and season again lightly. Cook for a couple of minutes, stirring frequently.

    Step 4- Add liquid.

    Pour in enough water to just cover the peas and bring everything to a boil.

    Frozen peas added to the onions and then water added and the peas simmering.

    Step 5- Simmer.

    Once boiling, reduce the heat to medium and let it simmer for about 15-20 minutes, until the liquid has mostly reduced and the peas are tender.

    Step 6- Serve.

    Give everything a quick stir and serve warm.

    A close up image of peas and onions in a bowl.

    Frequently Asked Questions

    How long should I boil green peas?

    They usually need about 15-20 minutes of simmering time to become tender and flavorful.

    Are frozen peas good for you?

    Yes! They’re picked and frozen at peak freshness, which helps preserve their nutrients, making them a healthy and convenient option.

    How else can I season peas?

    A squeeze of lemon will brighten things up, while some freshly shredded Parmesan makes them even more savory.

    A bowl of peas with onions and a napkin in the background.

    Tips For Making This Frozen Peas Side Dish

    • Let the onions cook low and slow, so they soften and turn slightly sweet without browning. That’s what gives the dish its best flavor.
    • Once you add the peas, stir them often so they cook evenly and don’t stick to the pan. No need to stir once you add the water.
    • Don’t worry if there’s still a little liquid left toward the end. You want most of it to cook off, but a small amount helps keep everything soft and flavorful.
    • Swap the water for broth for a little extra flavor. It’s a simple upgrade that makes a difference. Either vegetable or chicken broth will work.
    • If you’re using fresh peas, keep an eye on them as they cook. They’ll soften more quickly than frozen peas.
    • Ingredients to prep ahead- Chop the onion in advance and store it in the fridge.
    • Leftovers and storage- Store leftovers in an airtight container in the fridge for up to 3 days. Reheat gently on the stovetop or in the microwave until warmed through.
    Peas with Onions is the most easy side dish! With a few simple ingredients, this recipe is a snap to throw together on a busy week night but delicious enough to serve at a gathering or with a holiday dinner.

    What To Serve With This Green Peas Recipe

    This easy side pairs well with just about anything and helps round out a simple meal. Whether you’re making a quick dinner or something a little more special, it fits right in. Try serving it with:

    • Swedish Meatballs And Noodles
    • Italian Stuffed Zucchini Boats
    • Crispy Fried Potatoes
    • Tomato Onion Salad

    Other Side Dishes To Try

    • A wooden spoon stirring a pan of zucchini and tomatoes.
      Sautéed Zucchini And Tomatoes
    • A bowl or artichoke and olive spread surrounded by toasted baguette.
      Artichoke and Olive Spread
    • A plate of sausage and veggies with a fork on it.
      Sheet Pan Sausage and Roasted Veggies
    • A wooden spoon in a pan of sauteed mushrooms.
      Mushrooms in White Wine Sauce

    Love this recipe? Please leave a 5 star ⭐️⭐️⭐️⭐️⭐️ rating in the recipe card below ⬇️ and/or a review in the comment section further down. Check out my Amazon Store for all my favorite tools, including those used in this recipe. And follow @thelifejolie on Instagram and TikTok!

    An overhead image of a bowl of green peas and onions.

    Easy Green Peas Recipe

    Jessy Freimann
    This easy green peas recipe is a simple, comforting side dish that comes together in about 30 minutes. Made with just a handful of ingredients, it’s perfect for busy weeknights but just as great alongside a holiday meal.
    No ratings yet
    Print Recipe Pin Recipe
    Prep Time 5 minutes mins
    Cook Time 25 minutes mins
    Total Time 30 minutes mins
    Course dinner, side
    Cuisine Easy, vegetables, week night
    Servings 6 servings
    Calories 113 kcal

    Equipment

    • 1 saucepan
    • 1 cutting board
    • 1 chefs knife
    • 1 Measuring cups and spoons

    Ingredients
      

    • 2 Tablespoons Olive oil
    • 1/1 cup onion minced
    • 1 teaspoon Kosher salt
    • ¼ teaspoon ground black pepper
    • 16 ounces green peas frozen
    • 1-2 cups water

    Instructions
     

    • In a medium sauce pan, heat the oil over medium high heat.
    • Add the onions to the pan and season with salt and pepper.
    • Sweat the onions for a few minutes stirring often until they are soft but not browned.
    • Add peas to the pan and sauté for a couple minutes, stirring often.
    • Add water to just cover the peas and bring everything to a boil. Once boiling, the heat to medium.
    • Simmer for about 15-20 minutes or until the water has reduced to a very small amount and the peas are cooked. Taste and add more salt and pepper if needed. Serve immediately

    Video

    Notes

    • Let the onions cook low and slow, so they soften and turn slightly sweet without browning. That’s what gives the dish its best flavor.
    • Once you add the peas, stir them often so they cook evenly and don’t stick to the pan. No need to stir once you add the water.
    • Don’t worry if there’s still a little liquid left toward the end. You want most of it to cook off, but a small amount helps keep everything soft and flavorful.
    • Swap the water for broth for a little extra flavor. It’s a simple upgrade that makes a difference. Either vegetable or chicken broth will work.
    • If you’re using fresh peas, keep an eye on them as they cook. They’ll soften more quickly than frozen peas.
    • Ingredients to prep ahead- Chop the onion in advance and store it in the fridge.
    • Leftovers and storage- Store leftovers in an airtight container in the fridge for up to 3 days. Reheat gently on the stovetop or in the microwave until warmed through.

    Nutrition

    Serving: 1servingCalories: 113kcalCarbohydrates: 13gProtein: 4gFat: 5gSaturated Fat: 1gPolyunsaturated Fat: 1gMonounsaturated Fat: 3gSodium: 395mgPotassium: 225mgFiber: 5gSugar: 5gVitamin A: 579IUVitamin C: 32mgCalcium: 27mgIron: 1mg
    Tried this recipe?Let us know how it was!

    Easy Deviled Eggs

    Apr 3, 2026 · 20 Comments

    A close up image of a devil egg lined up on the end of a long plate with others behind it.

    If you need a go-to appetizer that’s quick, simple, and always a hit, these easy deviled eggs are it. They come together in about 35 minutes and are perfect for holidays, picnics, or just using up extra hard-boiled eggs.

    A close up image of a devil egg lined up on the end of a long plate with others behind it.
    [feast_advanced_jump_to]

    Why You’ll Love These Simple Deviled Eggs

    There’s just something about this recipe that feels classic and comforting. It keeps things exactly how they should be: no complicated steps, no hard-to-find ingredients... just that creamy, tangy filling everyone expects. And this appetizer always disappears fast, whether you’re making it for a holiday or a casual get-together.

    I’ve always been a huge fan of deviled eggs. If they’re on the table, I’m absolutely going back for seconds… or thirds. And I fully stand by the fact that they’re not just a “once-a-year” thing. Sure, they’re perfect for Easter, but honestly? They’re just as good any time you need something easy, reliable, and crowd-pleasing. Here’s why you should try this easy deviled eggs recipe:

    • Minimal ingredients
    • Quick to make
    • Always a crowd favorite
    • Easy to adjust
    • Great for any occasion
    An overhead image of two long, thin deviled egg plates full of deviled eggs on a blue napkin.

    Ingredient Information And Substitutions

    • Eggs- The base of this recipe. Use large eggs for best results.
    • Mayonnaise- Adds creaminess. Greek yogurt can work as a lighter option that will change the flavor slightly.
    • Apple cider vinegar- Brings a little tang. White vinegar or lemon juice can be used instead.
    • Yellow mustard- Classic flavor. Dijon can be swapped in for a slightly sharper taste.
    • Sugar- Just a pinch balances the acidity.
    • Paprika- For garnish. Smoked paprika adds depth and Creole seasoning works great if you want a little extra spice.
    • Salt- Enhances all the flavors in the filling. Add a little at a time and taste as you go.
    • Pepper- Adds a subtle kick. Freshly ground works best, but use what you have.
    An overhead image of labeled recipe ingredients.

    How To Make Deviled Eggs

    Step 1- Cook the eggs.

    Place the eggs in a pot and cover them with cold water. Bring to a boil over medium-high heat, then reduce to a simmer, cover, and cook for about 13 minutes. Transfer to an ice bath or run under cold water to cool.

    Step 2- Peel the eggs.

    Step 3- Slice and separate.

    Pat the eggs dry, then cut them in half lengthwise. Gently remove the yolks and place them in a separate bowl. Rinse the egg whites if needed, then set them on a paper towel to drain.

    Gently peel the eggs under cool running water. This helps the shells come off more cleanly.

    A hardboiled egg cut in half on a cutting board and then both halves with the yolks removed.

    Step 4- Make the filling.

    Add the mayonnaise, apple cider vinegar, mustard, sugar, salt, and pepper to the yolks. Mash everything together with a fork until smooth and creamy. Adjust seasoning if needed.

    A bowl of the egg yolk mixture with a spatula in it and the filling being piped into the egg white halves.

    Step 5- Fill and garnish.

    Spoon or pipe the filling back into the egg whites. Sprinkle with paprika and serve.

    Frequently Asked Questions

    How do you cook eggs for this simple deviled eggs recipe?

    Place the eggs in a pot, cover with cold water, and bring to a boil. Once boiling, reduce to a simmer, cover, and cook for about 13 minutes. Transfer to cold water or an ice bath to stop the cooking.

    What are the best toppings for deviled eggs?

    Paprika is the classic choice, but you can also use chives, crispy bacon, or a sprinkle of Creole seasoning for extra flavor. It’s an easy way to switch up a deviled eggs recipe without changing the base.

    Can I make them ahead of time?

    Yes! You can boil and peel the eggs a day ahead. For the best texture, wait to fill them until closer to serving, or store the filling and whites separately and assemble when ready.

    A close up of three deviled eggs on a deviled egg plate.

    Tips For Making Classic Deviled Eggs

    • Peel the eggs under running water. Start from the wider end where the air pocket is. This helps the shells slide off more easily and keeps the whites smooth.
    • Don’t overmix the filling. Mash until creamy, but avoid making it too thin or runny.
    • Taste as you go. Adjust the vinegar, mustard, and seasoning little by little until it tastes just right.
    • You can use a piping bag or zip-top bag. It will make filling the eggs cleaner and quicker.
    • Slice with a sharp knife. Wipe the knife between cuts to keep the edges clean and neat.
    • Use slightly older eggs. They tend to peel more easily than very fresh eggs.
    • Let filled eggs sit in the fridge for a bit so the filling firms up and the flavor settles.
    • If a few whites tear while peeling, it’s totally fine. You can still use the yolks, and it just means a little extra filling for the rest.
    • Ingredients to prep ahead- You can hard-boil and peel the eggs a day in advance.
    • Leftovers and storage- Store in an airtight container in the fridge for up to 2 days. This classic deviled eggs recipe is best enjoyed fresh.
    A close up of deviled eggs on a plate.

    What To Serve With Easter Deviled Eggs

    This appetizer is great on its own, but it also fits perfectly into a bigger spread. To round out this traditional deviled eggs recipe, pair it with:

    • Asparagus Leek Tart
    • Apple Chicken Salad
    • Ranch Potatoes Recipe
    • Coffee Cake with Cinnamon Streusel

    More Simple Appetizer Recipes To Try

    • A white bowl of fried pickles with the pan behind it and a blue and white towel in the background.
      Oven Fried Pickles Recipe
    • A close up image of a Brie Apple Phyllo Cup on a pan.
      Brie Apple Phyllo Cups
    • A hand holding a chip with avocado salsa.
      Avocado Salsa
    • 3 BBQ Chicken sliders on a white plate.
      Chicken BBQ Sliders

    Love this recipe? Please leave a 5 star ⭐️⭐️⭐️⭐️⭐️ rating in the recipe card below ⬇️ and/or a review in the comment section further down. Check out my Amazon Store for all my favorite tools, including those used in this recipe. And follow @thelifejolie on Instagram and TikTok!

    A close up image of a devil egg lined up on the end of a long plate with others behind it.

    Easy Deviled Eggs

    Jessy Freimann
    If you need a go-to appetizer that’s quick, simple, and always a hit, these easy deviled eggs are it. They come together in about 35 minutes and are perfect for holidays, picnics, or just using up extra hard-boiled eggs.
    No ratings yet
    Print Recipe Pin Recipe
    Prep Time 20 minutes mins
    Cook Time 15 minutes mins
    Total Time 35 minutes mins
    Course Appetizer, Side Dish
    Cuisine Easter, eggs, Holiday, picnic, spring, Summer, vegetarian
    Servings 24 deviled eggs
    Calories 44 kcal

    Equipment

    • 1 saucepan
    • 1 chefs knife
    • 1 cutting board
    • 1 Measuring cups and spoons
    • 1 mixing bowl
    • 1 Spatula

    Ingredients
      

    • 12 large eggs
    • 2 Tablespoon mayonnaise
    • 2 Tablespoon apple cider vinegar
    • 1-2 Teaspoon yellow mustard
    • 1 pinch granulated sugar
    • ½ teaspoon kosher salt
    • ¼ teaspoon ground black pepper
    • ½ teaspoon Paprika for sprinkling over the top

    Instructions
     

    • Hard boil this eggs and allow them to cool completely in an ice water bath.
    • Carefully peel the eggs under cool water to help get a cleaner peel. Dry the eggs gently with a paper towel.
    • Cut each egg in half. Reserve all of the yokes in a large mixing bowl. Optional- you can carefully wash off my egg whites and put them on a paper towel to drain.
    • Place the mayonnaise, apple cider vinegar, yellow mustard, sugar and salt and pepper into the bowl with the yolks and mix well with a fork, crushing up the yolks until fully combined and creamy. Taste and adjust the measurements of ingredients to your taste.
    • Carefully spoon or pipe a teaspoon of the yolk mixture into the egg white halves and then sprinkle with Paprika. Serve immediately or refrigerate until serving.

    Video

    Notes

    • Peel the eggs under running water. Start from the wider end where the air pocket is. This helps the shells slide off more easily and keeps the whites smooth.
    • Don’t overmix the filling. Mash until creamy, but avoid making it too thin or runny.
    • Taste as you go. Adjust the vinegar, mustard, and seasoning little by little until it tastes just right.
    • You can use a piping bag or zip-top bag. It will make filling the eggs cleaner and quicker.
    • Slice with a sharp knife. Wipe the knife between cuts to keep the edges clean and neat.
    • Use slightly older eggs. They tend to peel more easily than very fresh eggs.
    • Let filled eggs sit in the fridge for a bit so the filling firms up and the flavor settles.
    • If a few whites tear while peeling, it’s totally fine. You can still use the yolks, and it just means a little extra filling for the rest.
    • Ingredients to prep ahead- You can hard-boil and peel the eggs a day in advance.
    • Leftovers and storage- Store in an airtight container in the fridge for up to 2 days. This classic deviled eggs recipe is best enjoyed fresh.

    Nutrition

    Serving: 3deviled eggsCalories: 44kcalCarbohydrates: 0.3gProtein: 3gFat: 3gSaturated Fat: 1gPolyunsaturated Fat: 1gMonounsaturated Fat: 1gTrans Fat: 0.01gCholesterol: 93mgSodium: 94mgPotassium: 37mgFiber: 0.03gSugar: 0.2gVitamin A: 157IUVitamin C: 0.001mgCalcium: 15mgIron: 0.5mg
    Tried this recipe?Let us know how it was!

    Bagel Pizzas Recipe

    Mar 30, 2026 · 4 Comments

    A close up of a bagel pizza with mini pepperonis on a pan.

    This bagel pizzas recipe makes a quick, nostalgic snack that comes together in about 30 minutes. They’re easy to customize with your favorite toppings and can even be frozen for later, making them perfect for busy days or after-school cravings.

    a close up of a bagel pizza with mini pepperonis on a pan.
    [feast_advanced_jump_to]

    Why You’ll Love Homemade Bagel Pizzas

    If you grew up loving those classic freezer pizza snacks, this recipe will feel like a fun throwback. Making them at home is surprisingly simple, and it’s also a great way to use up bagels that are starting to get a little stale.

    The best part is their flexibility. Once you’ve got the base down, you can add whatever toppings you like and have a batch ready in no time. They freeze beautifully, so you can always have a quick snack or lunch option ready. Here's why you’ll love homemade pizza bagels:

    • Easy to customize
    • Quick to make
    • Freezer-friendly
    • Great for leftover bagels
    An overhead image of bagel pizzas on a lined sheet pan with mini pepperonis and a blue flowered napkin around it.

    Ingredient Information And Substitutions

    • Bagels- Plain, sesame, whole wheat, or everything bagels all work well. Slightly stale bagels are actually perfect here.
    • Pizza sauce- Adds that classic pizza flavor. Marinara works just as well if that’s what you have on hand.
    • Mozzarella cheese- Melts nicely and gives that classic stretch. A pizza cheese blend or provolone can also be used.
    • Toppings- Pepperoni is always a favorite, but you can also use mushrooms, olives, bell peppers, cooked sausage, or whatever you enjoy on a bagel pizza.
    An overhead image of labeled recipe ingredients.

    How To Make This Pizza Bagel Recipe

    Step 1- Arrange the bagels on the pan.

    Line a baking pan with parchment. Preheat the oven to 400 degrees F.

    Place the bagel halves on the prepared baking pan, cut side up. Bake for 7-8 minutes uncovered.

    Cut bagels on a lined sheet pan and then the pan i nthe oven.

    Step 2- Add toppings.

    Remove the bagels from the oven and spread a thin layer of sauce over each bagel half. Sprinkle cheese on top, then finish with your favorite toppings.

    Sauce on the par-baked bagels and then topped with cheese.

    Step 3- Bake.

    Return the bagels to the oven for 10 more minutes or until the cheese is fully melted and bubbly.

    Pepperoni on the pizza bagels and then the pan i nthe oven.

    Make Ahead Instructions

    Add the sauce and toppings immediately, then place the pan in the freezer for a couple of hours until the bagels are completely frozen. 

    Once frozen solid, transfer the bagels to a freezer bag for easy storage. Add a square of parchment between each if stacking.

    Bake frozen bagels at 400 degrees F for 10-15 minutes, or microwave them on high for 2 minutes until heated through.

    A close up image of a pizza bagel with a bite taken out of it on the pan.

    Frequently Asked Questions

    What’s the best way to make pizza bagel bites?

    Use mini bagels or cut regular ones into smaller pieces, then bake until the cheese is melted and the edges are lightly crisp.

    Can I cook these in the air fryer?

    Yes. If you’re making an air fryer pizza bagel, cook at around 350 degrees F for about 5-7 minutes, or until the cheese is melted and bubbly.

    How do I keep them from getting soggy?

    This is why I like to par-bake the bagels before adding the toppings. It keeps them from absorbing the sauce.

    A close up overhead image of pizza bagels lined up on a pan.

    Tips For Making A Homemade Pizza Bagel

    • Use slightly stale bagels. They hold up well under the sauce and toppings and get nicely crisp in the oven. This is also a great way to repurpose leftover bagels.
    • Slice evenly. Keeping the bagel halves similar in size helps them cook at the same rate.
    • Let them cool slightly before serving. The cheese sets slightly as it cools, making it easier to handle (especially for kids).
    • If you’re making a big batch, set up an assembly line. Lay everything out and build them all at once to save time.
    • Let the cheese get nice and bubbly before removing it. That’s when you know they’re ready.
    • You can mix and match toppings on the same tray so everyone gets what they like.
    • Ingredients to prep ahead- Slice the bagels and portion out your toppings so everything is ready.
    • Leftovers and storage- Keep cooked bagels in the fridge for up to 3 days. Reheat in the oven or air fryer to crisp them back up. Freeze in a sealed bag for up to 2 months.

    What To Serve With Bagel Pizza Recipe

    These mini pizzas are great on their own, but you can easily turn them into a full meal with a few simple sides. Try serving them with:

    • Shrimp Macaroni Salad
    • Garlic Parmesan Roasted Broccoli
    • Artichoke and Olive Spread
    • Coffee Cake with Cinnamon Streusel

    Other Snack Recipes To Try

    • A close up image of a Brie Apple Phyllo Cup on a pan.
      Brie Apple Phyllo Cups
    • This Artichoke Asiago Dip is the best easy recipe to throw together for a last-minute spring get-together. It only takes a couple of minutes to make and is fully of cheesy, delicious flavor! #ad
      Artichoke Asiago Dip
    • This cheesy Jalapeno Popper Pull Apart Bread is an easy recipe for game day! A loaf of bread stuffed with jalapenos, cheese and bacon; it's super quick to throw together and is sure to be a hit at your next Superbowl Party!
      Jalapeno Popper Pull Apart Bread
    • This Olive and Gruyere Puff Pastry Tartlets recipe is one of my new favorite easy appetizers to throw together! Just four simple ingredients (including frozen puff pastry dough, olives and cheese) and they come together quickly for the holidays or any parties you may be having!
      Olive and Gruyere Puff Pastry Tartlets

    Love this recipe? Please leave a 5 star ⭐️⭐️⭐️⭐️⭐️ rating in the recipe card below ⬇️ and/or a review in the comment section further down. Check out my Amazon Store for all my favorite tools, including those used in this recipe. And follow @thelifejolie on Instagram and TikTok!

    A close up of a bagel pizza with mini pepperonis on a pan.

    Bagel Pizzas Recipe

    Jessy Freimann
    This bagel pizzas recipe makes a quick, nostalgic snack that comes together in about 30 minutes. They’re easy to customize with your favorite toppings and can even be frozen for later, making them perfect for busy days or after-school cravings.
    No ratings yet
    Print Recipe Pin Recipe
    Prep Time 10 minutes mins
    Cook Time 20 minutes mins
    Total Time 30 minutes mins
    Course Appetizer
    Cuisine American
    Servings 8 pieces
    Calories 214 kcal

    Equipment

    • 1 sheet pan
    • 1 chefs knife
    • 1 cutting board
    • 1 Measuring cups and spoons

    Ingredients
      

    • 4 Bagels sliced in half
    • ½ cup pizza sauce or more to your taste
    • 1 cup mozzarella cheese shredded
    • ⅓ cup pepperoni or other toppings of your choice

    Instructions
     

    • Line a baking pan with parchment and preheat the oven to 400 degrees F.
    • Lay bagels on the baking pan, flat side up. Bake uncovered for 7 minutes and remove from the oven.
    • Spread a thin layer of sauce on the bagels, top them with cheese and toppings.
    • Bake for 10 more minutes until the cheese is melted and bubbly. Cool for 3 minutes and serve immediately.

    Video

    Notes

    • Use slightly stale bagels. They hold up well under the sauce and toppings and get nicely crisp in the oven. This is also a great way to repurpose leftover bagels.
    • Slice evenly. Keeping the bagel halves similar in size helps them cook at the same rate.
    • Let them cool slightly before serving. The cheese sets slightly as it cools, making it easier to handle (especially for kids).
    • If you’re making a big batch, set up an assembly line. Lay everything out and build them all at once to save time.
    • Let the cheese get nice and bubbly before removing it. That’s when you know they’re ready.
    • You can mix and match toppings on the same tray so everyone gets what they like.
    • Ingredients to prep ahead- Slice the bagels and portion out your toppings so everything is ready.
    • Leftovers and storage- Keep cooked bagels in the fridge for up to 3 days. Reheat in the oven or air fryer to crisp them back up. Freeze in a sealed bag for up to 2 months.

    Nutrition

    Serving: 2piecesCalories: 214kcalCarbohydrates: 29gProtein: 10gFat: 6gSaturated Fat: 3gPolyunsaturated Fat: 1gMonounsaturated Fat: 2gTrans Fat: 0.1gCholesterol: 16mgSodium: 515mgPotassium: 122mgFiber: 1gSugar: 1gVitamin A: 161IUVitamin C: 1mgCalcium: 83mgIron: 1mg
    Tried this recipe?Let us know how it was!


    Chicken and Orzo Soup

    Mar 27, 2026 · 20 Comments

    A bowl of chicken and orzo soup with a spoon in it.

    This cozy chicken and orzo soup is a comforting twist on classic chicken noodle soup, made with tender chicken, spinach, and a savory Parmesan broth. It’s simple, uses everyday ingredients, and comes together in about 45 minutes.

    A bowl of chicken and orzo soup with a spoon in it.
    [feast_advanced_jump_to]

    Why You’ll Love This Orzo Soup

    This soup started as a loosely adapted recipe passed along by a friend years ago, and it quickly became a regular in my kitchen. I’ve tweaked it over time based on what I had on hand and how I like my soup to be. It’s the kind of recipe that doesn’t need much fuss to be good. Simple ingredients, minimal prep, and a cozy payoff every time. 

    What I love most about this soup is how balanced it feels. The broth is savory without being heavy, the orzo adds just enough heartiness, and the spinach keeps things fresh. Nothing overpowers anything else, which makes it easy to enjoy bowl after bowl. It’s comforting in the way classic chicken soup is, but just a little more interesting. Here’s why this chicken orzo works so well:

    • Great for leftovers and meal prep
    • Simple, pantry-friendly ingredients
    • Cozy but not heavy
    • Ready in about 30 minutes
    A ladle with a scoop of soup from the pot.

    Ingredient Information And Substitutions

    • Cooked shredded chicken breast- Rotisserie chicken works great, or use leftover roasted or poached chicken thighs for a slightly richer flavor.
    • Cooked orzo- Small pasta that gives the soup body. Elbows or ditalini can work too.
    • Chicken broth- Keeps the soup flavorful. Vegetable broth is a good alternative.
    • Olive oil- Avocado oil is a great substitute. Butter can also be used for a richer base.
    • Yellow onion- Adds sweetness and depth. White onion is a fine swap.
    • Baby spinach- Adds color and freshness. Kale can be used if chopped well
    • Parmesan rinds- Optional but highly recommended for extra depth. Romano rind also works.
    • Garlic cloves- Fresh garlic provides the best flavor. Garlic paste can work in a pinch.
    • Herbes de Provence- Adds a subtle herbal note. Italian seasoning or thyme is good too.
    • Salt- Adjust to taste depending on your broth.
    • Black pepper- Adds a touch of heat. Freshly ground is best.
    • Lemon- adds just the right amount of brightness!
    An overhead image of labeled recipe ingredients.

    How To Make This Chicken Orzo Soup Recipe

    Step 1- Sauté the aromatics.

    Heat the olive oil in a large pot over medium heat. Add the diced onion and garlic, cooking for about 10 minutes until softened and fragrant, but not fully browned.
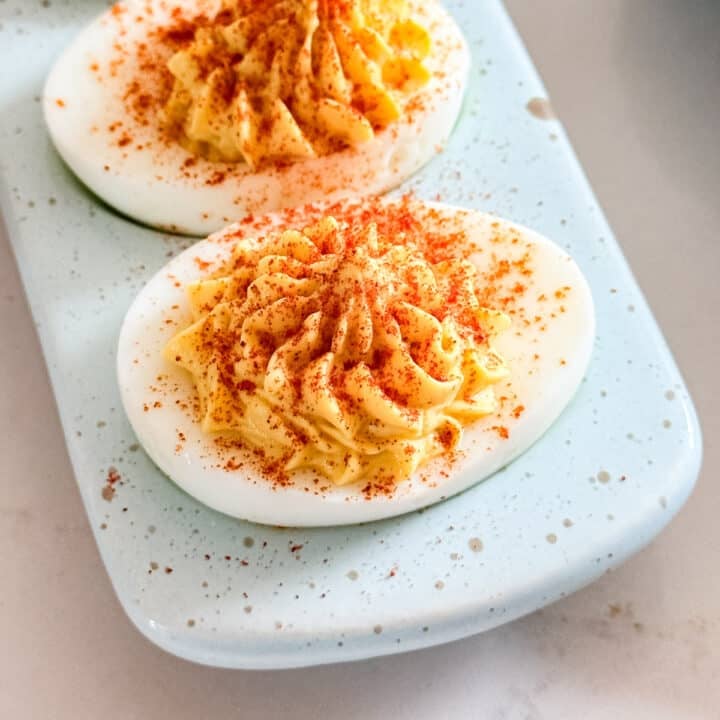
    Step 2- Add the seasoning.

    Stir in the herbes de Provence and let the mixture cook for about 1 minute to allow the flavors to bloom.

    Onions sautéing with herbs and then broth added in.

    Step 3- Build the broth.

    Pour in the chicken broth, then add the salt, pepper, shredded chicken, and Parmesan rinds. Bring everything to a gentle boil, then lower the heat and simmer for 20-30 minutes.

    Step 4- Finish the soup.

    Remove the Parmesan rinds, then stir in the cooked orzo, baby spinach and lemon juice. Simmer for 2 minutes just until the spinach wilts. Serve warm with extra-grated Parmesan on top.

    Orzo cooking and then soup simmering.

    Frequently Asked Questions

    Can I make this soup ahead of time?

    Yes. It reheats very well and tastes even better the next day.

    Can I use uncooked orzo instead of cooked?

    You can, but keep in mind that orzo absorbs quite a bit of liquid as it cooks. If you'd rather cook it in the soup, you may need to add extra broth and keep an eye on the texture.

    Can I add lemon to this soup?

    Absolutely. A squeeze of fresh citrus at the end gives it a light lemon orzo soup feel and brightens everything up without overpowering the broth.

    A close up image of a spoon holding a scoop of soup from the bowl.

    Tips For Making This Chicken And Orzo Soup Recipe

    • Season in layers. Add a little salt early, then taste and adjust at the end after the Parmesan rind does its thing.
    • Take your time with the onions. Letting them soften fully adds a subtle sweetness and deeper flavor to the broth.
    • Use a Parmesan rind if you can. It adds a rich, savory depth without overpowering anything. The secret to extra flavorful broth!
    • Don’t over-simmer after adding pasta. Once the orzo goes in, the soup is basically done. You can even turn off the heat and let it sit while the greens wilt.
    • Ingredients to prep ahead- Dice the onion, mince the garlic, and shred the chicken. Cook and drain the orzo as well.
    • Leftovers and storage- Keep in an airtight container in the fridge for up to 3 days. Reheat gently with a splash of broth. Or, freeze without the orzo and add a fresh batch when reheating.
    An overhead image of a bowl of soup with chicken and orzo.

    What To Serve With Chicken Soup With Orzo Pasta

    This soup is satisfying on its own, but it’s even better paired with something simple on the side. Here are my favorite dishes to round out this soup:

    • Artichoke and Olive Spread
    • Sautéed Zucchini And Tomatoes
    • Roasted Fall Vegetables
    • Chocolate Cake Trifle

    Other Tasty Soup Recipes To Try

    • A bowl of squash soup with burrata and cilantro on top and chunks of squash and cilantro in the background.
      Savory Spiced Butternut Squash Soup
    • A ladle holding chicken minestrone with the rest of the pot behind it.
      Chicken Minestrone Soup (Slow Cooker + Instant Pot)
    • A spoon holding up a scoop of lentil soup with ham from a black bowl of it.
      Carrot and Lentil Soup
    • A bowl of tomato soup on a plate with a spoon and grilled cheese.
      Tomato Bisque Soup Recipe

    Love this recipe? Please leave a 5 star ⭐️⭐️⭐️⭐️⭐️ rating in the recipe card below ⬇️ and/or a review in the comment section further down. Check out my Amazon Store for all my favorite tools, including those used in this recipe. And follow @thelifejolie on Instagram and TikTok!

    A bowl of chicken and orzo soup with a spoon in it.

    Chicken And Orzo Soup

    Jessy Freimann
    This cozy chicken and orzo soup is a comforting twist on classic chicken noodle soup, made with tender chicken, spinach, and a savory Parmesan broth. It’s simple, uses everyday ingredients, and comes together in about 45 minutes.
    No ratings yet
    Print Recipe Pin Recipe
    Prep Time 10 minutes mins
    Cook Time 40 minutes mins
    Total Time 50 minutes mins
    Course Main, Main Course, Main dish, Soup
    Cuisine American
    Servings 8 servings
    Calories 200 kcal

    Equipment

    • 1 Dutch oven
    • 1 Wooden Spoons
    • 1 cutting board
    • 1 chefs knife
    • 1 Measuring cups and spoons

    Ingredients
      

    • 2 Tablespoons olive oil
    • 1 cup onion diced
    • 4 cloves garlic minced
    • ½ teaspoon Herbes de Provence
    • 64 ounces chicken broth
    • 1 parmesan rind
    • ½ teaspoon Kosher salt
    • ¼ teaspoon ground black pepper
    • 2 ½ cups cooked chicken chopped
    • 1 cup orzo cooked per package directions for al dente
    • 2 cups baby spinach roughly chopped
    • 2 Tablespoons lemon juice or more to your taste

    Instructions
     

    • Heat oil in a large dutch over over medium high heat. Add onion and sauté for 3-5 minutes to soften.
    • Add garlic, Herbes de Provence, salt and pepper and cook for 1-2 more minutes.
    • Stir in broth, Parmesan rind and chicken. Bring to a boil and then reduce heat to medium low. Simmer 30 minutes stirring periodically.
    • Add orzo, spinach and lemon juice and remove the Parmesan rind. Simmer another minute to wilt spinach and serve immediately.

    Video

    Notes

    • Season in layers. Add a little salt early, then taste and adjust at the end after the Parmesan rind does its thing.
    • Take your time with the onions. Letting them soften fully adds a subtle sweetness and deeper flavor to the broth.
    • Use a Parmesan rind if you can. It adds a rich, savory depth without overpowering anything. The secret to extra flavorful broth!
    • Don’t over-simmer after adding pasta. Once the orzo goes in, the soup is basically done. You can even turn off the heat and let it sit while the greens wilt.
    • Ingredients to prep ahead- Dice the onion, mince the garlic, and shred the chicken. Cook and drain the orzo as well.
    • Leftovers and storage- Keep in an airtight container in the fridge for up to 3 days. Reheat gently with a splash of broth. Or, freeze without the orzo and add a fresh batch when reheating.

    Nutrition

    Serving: 1servingCalories: 200kcalCarbohydrates: 18gProtein: 15gFat: 7gSaturated Fat: 1gPolyunsaturated Fat: 1gMonounsaturated Fat: 4gCholesterol: 37mgSodium: 1028mgPotassium: 265mgFiber: 1gSugar: 2gVitamin A: 729IUVitamin C: 6mgCalcium: 35mgIron: 1mg
    Tried this recipe?Let us know how it was!

    Swedish Meatballs And Noodles

    Mar 23, 2026 · 12 Comments

    A bowl of Swedish meatballs and noodles.

    Swedish meatballs and noodles is a cozy stovetop dinner with tender meatballs in a creamy, savory gravy. It’s a comforting family meal that comes together in about 30 minutes.

    A bowl of Swedish meatballs and noodles.
    [feast_advanced_jump_to]

    Why You’ll Love These Easy Swedish Meatballs

    I come from a long line of wonderful cooks, and food has always been a big part of our family. Many of my favorite childhood memories revolve around meals shared around the table, especially recipes from my grandmas, Rose and Eve, who each brought their own delicious ideas to the kitchen.

    These meatballs are one of those comforting dishes that’s perfect for a chilly Sunday evening but easy enough for a weeknight too. Everything cooks right on the stovetop, so there’s no need to turn on the oven. I grew up eating these saucy meatballs with boiled or mashed potatoes, but serving them over egg noodles is just as delicious and a little less work. Some reasons to love this recipe:

    • Cozy and comforting
    • Rich, savory gravy
    • One-pan dinner
    • Ready in 40 minutes
    An overhead image of a pan of Swedish meatballs and gravy.

    Ingredient Information And Substitutions

    • Ground beef- I prefer a 90/10 mix. This creates juicy meatballs without too much grease. Ground turkey or a mixture of beef and pork also works well.
    • Plain bread crumbs- Helps bind the meatballs and keeps them tender. Panko can be used for extra texture.
    • Egg- Binds everything together.
    • Avocado oil- Used for browning the meatballs. Olive oil or butter works too.
    • Onion- Adds savory depth to the gravy. Yellow or white onions both work.
    • Flour- Thickens the sauce. A gluten-free flour blend can also be used. I like King Arthur's 1:1 Gluten Free Flour.
    • Beef broth- Creates the rich base of the gravy. You can also use vegetable broth for a similar savory base.
    • Sour cream- Adds creaminess and a slight tang. Greek yogurt can be substituted if needed, though it may be a bit tangier.
    • Nutmeg- A classic ingredient in Swedish meatballs that gives them their signature flavor.
    • Salt- Enhances the flavor of the meatballs and sauce. Adjust to taste if your broth is already salted.
    • Black pepper- Adds mild warmth and balance. White pepper can also be used.
    An overhead image of labeled recipe ingredients.

    How To Make Easy Swedish Meatballs

     Step 1- Make the meatball mixture.

    In a bowl, combine the salt, pepper, nutmeg, breadcrumbs, egg, and ground beef until just combined. Form into about 15 golf-ball-sized meatballs. 

    Step 2- Brown the meatballs.

    Heat 2 tablespoons of avocado oil in a large skillet over medium heat. Add the meatballs and cook until browned. Remove them from the pan and set aside. 

    Raw meatballs frying in a pan and then the browned meatballs in the pan.

    Step 3- Cook the onion and start the gravy.

    Sauté the onion in the same pan until it begins to soften. Add the salt, pepper, poultry seasoning, and nutmeg, and cook for 3-5 minutes. Stir in the flour until smooth and cook for 2 minutes.

    Step 4- Add broth and meatballs.

    Pour in 3 cups of beef broth and return the meatballs to the pan. Bring the mixture to a boil, then lower the heat and simmer for about 10 minutes.

    Onions frying in the pan and then the gravy in the pan with the meatballs added back in.

    Step 5- Finish the sauce.

    Lower the heat. In a small bowl, mix ¼ cup sour cream with a splash of cold water, then stir the mixture into the sauce and serve.
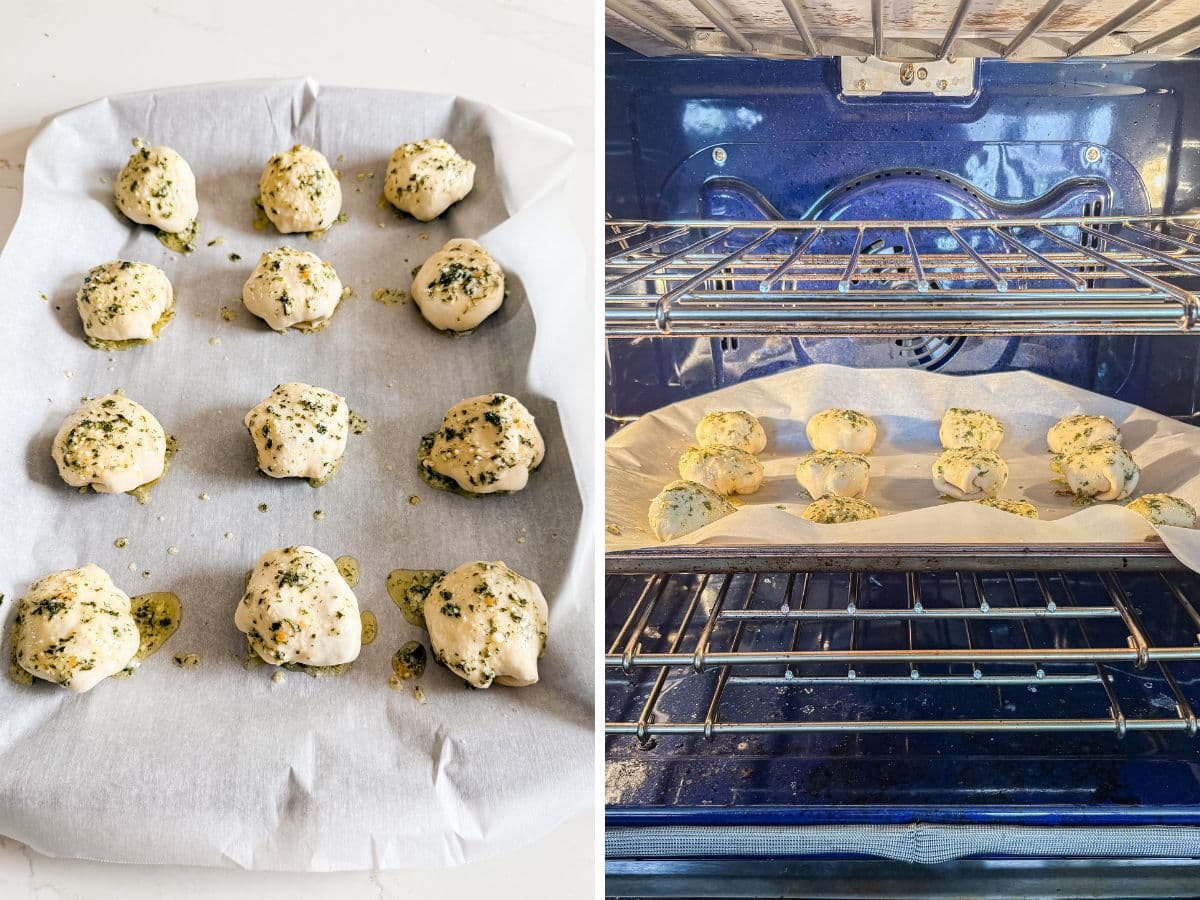
    A spoon pouring gravy over a bowl of noodles and Swedish meatballs.

    Frequently Asked Questions

    How do you make Swedish meatballs?

    Ground beef is mixed with breadcrumbs, egg, and seasonings, shaped into meatballs, browned in a skillet, and then simmered in a rich gravy until tender.

    How to make the sauce for Swedish meatballs?

    The sauce starts with sautéed onions and flour to create a thick base. Beef broth is added and simmered with the meatballs, then finished with sour cream for a creamy, savory gravy.

    What goes with Swedish meatballs?

    Classic options include egg noodles or mashed potatoes. Roasted vegetables, green beans, or a light cucumber salad also pair nicely with the rich gravy.

    A close up image of a Swedish meatball with gravy on egg noodles.

    Tips For Making This Easy Swedish Meatballs Recipe

    • Mix the meatball mixture gently. Overworking the meat can make the meatballs tough, so mix just until everything comes together.
    • Brown the meatballs well. Letting them develop a little color in the pan adds flavor and helps them hold their shape when simmering in the sauce.
    • Cook the flour for a minute or two. This helps remove the raw flour taste and gives the gravy a smoother texture.
    • Thin the sour cream first. Mixing it with a splash of cold water helps it blend smoothly into the sauce without curdling.
    • Ingredients to prep ahead- You can mix and shape the meatballs a few hours ahead of time and keep them covered in the refrigerator until ready to cook.
    • Leftovers and storage- Store leftovers in an airtight container in the refrigerator for up to 3 days. Reheat gently on the stovetop or in the microwave until warmed through.
    A close up of a half Swedish meatball revealing the moist center on a fork.

    What To Serve With Swedish Meatballs And Gravy

    These meatballs are rich and comforting, so pairing them with simple sides helps round out the meal. Try serving them with:

    • Sheet Pan Sausage and Roasted Veggies
    • Brie Apple Phyllo Cups
    • Garlic And Butter Green Beans
    • Firecracker Vanilla Cupcakes

    Other Dinner Recipes To Try

    • A wooden spoon scooping up creamy taco pasta from the pan.
      One Pot Cheesy Taco Pasta
    • Sausage and peppers pasta on a white plate with a napkin, onion and mushrooms in the background and a fork across the back of the plate.
      Pasta With Sausage Peppers And Onions
    • A wooden spoon pulling a a scoop of unstuffed peppers from the skillet.
      Unstuffed Peppers Skillet
    • Mexican Lasagna Roll-ups are a delicious combination of two family favorites: Lasagna and Tacos. This is an easy recipe featuring meat, cheese, beans, corn, tomatoes and rolled up in lasagna noodles. They're total comfort food and great for when you're cooking for family and friends!
      Mexican Lasagna Roll-Ups

    Love this recipe? Please leave a 5 star ⭐️⭐️⭐️⭐️⭐️ rating in the recipe card below ⬇️ and/or a review in the comment section further down. Check out my Amazon Store for all my favorite tools, including those used in this recipe. And follow @thelifejolie on Instagram and TikTok!

    A bowl of Swedish meatballs and noodles.

    Swedish Meatballs and Noodles

    Jessy Freimann
    Swedish meatballs and noodles is a cozy stovetop dinner with tender meatballs in a creamy, savory gravy. It’s a comforting family meal that comes together in about 40 minutes.
    No ratings yet
    Print Recipe Pin Recipe
    Prep Time 10 minutes mins
    Cook Time 30 minutes mins
    Total Time 40 minutes mins
    Course dinner, Entree
    Cuisine beef, dinner, Easy, Family
    Servings 6 servings
    Calories 282 kcal

    Equipment

    • 1 Skillet
    • 1 Wooden Spoons
    • 1 mixing bowl
    • 1 Measuring cups and spoons

    Ingredients
      

    • 1 pound ground beef 90/10
    • ½ cup plain bread crumbs
    • 1 ½ teaspoon kosher salt divided
    • ½ teaspoon ground black pepper divided
    • 1 large egg
    • ¼ teaspoon nutmeg + ⅛ teaspoon
    • 2 Tablespoons avocado oil or other neutral oil
    • 1 cup onion chopped
    • 2 Tablespoons Flour
    • ¼ teaspoon Poultry seasoning to taste
    • 3 cups beef broth
    • ¼ cup sour cream mixed with a splash of water

    Instructions
     

    • Mix the ground beef, bread crumbs, 1 teaspoon salt, ¼ teaspoon black pepper and ¼ teaspoon nutmeg together and form 15 meatballs that are around the size of golf balls.
    • Heat over medium high avocado oil in a large skillet and add meatballs. Brown on all sides. Remove from the pan when each meatball is browned.
    • Add onions and sauté to soften about 3 minutes. Stir in flour, remaining salt, remaining peppers, ⅛ teaspoon nutmeg, and poultry seasoning until no lumps remain. Cook 2 minutes.
    • Stir in beef broth and return meatballs to the pan. Bring to a boil and reduce the heat to medium low. Simmer for 10 minutes stirring periodically.
    • Once the meatballs are cooked through, turn off the heat and stir in the sour cream mixture.
    • Serve immediately over egg noodles or potatoes.

    Video

    Notes

    • Mix the meatball mixture gently. Overworking the meat can make the meatballs tough, so mix just until everything comes together.
    • Brown the meatballs well. Letting them develop a little color in the pan adds flavor and helps them hold their shape when simmering in the sauce.
    • Cook the flour for a minute or two. This helps remove the raw flour taste and gives the gravy a smoother texture.
    • Thin the sour cream first. Mixing it with a splash of cold water helps it blend smoothly into the sauce without curdling.
    • Ingredients to prep ahead- You can mix and shape the meatballs a few hours ahead of time and keep them covered in the refrigerator until ready to cook.
    • Leftovers and storage- Store leftovers in an airtight container in the refrigerator for up to 3 days. Reheat gently on the stovetop or in the microwave until warmed through.

    Nutrition

    Serving: 1servingCalories: 282kcalCarbohydrates: 5gProtein: 15gFat: 22gSaturated Fat: 7gPolyunsaturated Fat: 1gMonounsaturated Fat: 10gTrans Fat: 1gCholesterol: 59mgSodium: 1083mgPotassium: 326mgFiber: 1gSugar: 2gVitamin A: 64IUVitamin C: 2mgCalcium: 39mgIron: 2mg
    Tried this recipe?Let us know how it was!

    Banana Bread Bars

    Mar 20, 2026 · 2 Comments

    A slice of banana bread bar on a white plate.

    These banana bread bars are soft and moist, topped with rich cream cheese frosting. They’re an easy dessert to make and a great way to use up ripe bananas.

    A banana bread bar with a bite taken out of it.
    [feast_advanced_jump_to]

    Why You’ll Love These Banana Bars

    Bananas are easily the most popular fruit in our house. My husband and both of my girls love them, so we almost always have some sitting in the fruit bowl. I’m a little picky, though. I prefer my bananas on the green side, so once they start getting really ripe, I want no part of them!

    If you ever find yourself staring at a bunch of overly ripe bananas and wondering what to do with them, this recipe is a great solution. These soft, cake-like bars are simple to make and have that cozy banana flavor everyone loves. The cream cheese frosting adds just the right amount of sweetness without making them overly heavy. Here’s why they work so well:

    • Soft, moist texture
    • Simple pantry ingredients
    • Easy to slice and share
    • Cream cheese frosting finish
    An overhead image of a banana bar on a white plate.

    Ingredient Information And Substitutions

    • Ripe bananas- The key flavor in the bars. The browner they are, the stronger the banana taste.
    • All-purpose flour- Forms the base of the bars. A 1:1 gluten-free baking blend can work if needed.
    • Granulated sugar- Sweetens the batter and helps create a tender crumb.
    • Eggs- Help bind the ingredients together and add structure.
    • Vegetable oil- Keeps the bars moist. Melted butter or canola oil can also work.
    • Cream cheese- Gives the frosting a smooth, tangy base. Full-fat works best for texture.
    • Butter- Helps create a creamy frosting.
    • Vanilla extract- Adds warmth and depth to the flavor.
    • Confectioner’s sugar- Sweetens and thickens the frosting.
    • Baking powder- Helps give the bars lift and structure.
    • Baking soda- Works with the bananas to create a light texture.
    • Ground cinnamon- Adds a warm, subtle spice flavor. You can omit it if you prefer.
    • Kosher salt- Balances the sweetness and enhances flavor.
    An overhead image of labeled recipe ingredients.

    How To Make This Banana Bars Recipe

    Step 1- Prep ingredients.

    Heat the oven to 350 degrees F. Coat a 9 x 13-inch pan with cooking spray, then line it with parchment paper, leaving some overhang on the sides.

    In a medium bowl, whisk together the flour, baking powder, baking soda, cinnamon, and salt until evenly mixed. Set aside.

    Place the bananas in another bowl and mash until they’re mostly smooth.

    Dry ingredients in a glass bowl and mashed bananas in another glass bowl.

    Step 2- Mix the batter.

    Mix the sugar, eggs, oil, vanilla and the bananas, stirring until fully combined.

    Reduce the mixer speed to low and slowly incorporate the dry ingredients. Once everything is just combined, transfer the batter to the prepared pan and spread it evenly with a spatula.

    Wet ingredients mixed together and then with the dry ingredients added.

    Step 6- Bake and cool.

    Bake for 25-30 minutes, or until a toothpick inserted in the center comes out clean. Allow the bars to cool completely before adding the frosting.

    Step 7- Make the frosting base.

    While the bars cool, beat together the cream cheese, butter, and vanilla until smooth.

    Batter in a 9 x 13 pan  and cream cheese in a mixing bowl.

    Step 8- Finish the frosting and assemble.

    Gradually add the confectioner’s sugar and mix until the frosting is creamy. Spread it over the cooled bars, cut into 12 pieces, and serve.

    Frosting mixed together in a bowl and then spread on the baked banana bars.

    Frequently Asked Questions

    Do the bananas have to be very ripe?

    Not necessarily. The riper the bananas, the stronger the banana flavor and the easier they are to mash. But slightly ripe bananas still work.

    Can I make them without the frosting?

    You can. The bars are still soft and flavorful on their own. If you skip the frosting, a light dusting of powdered sugar is a nice, simple option.

    Can I make them ahead of time?

    Yes. You can bake the bars a day in advance and frost them once they’ve cooled completely.

    A slice of banana bread bar on a white plate.

    Tips For Making Banana Bars With Cream Cheese Icing

    • Line the pan with parchment. Let a little hang over the sides so you can lift the bars out easily for slicing.
    • Mix the dry ingredients first. Having them ready makes it easier to add them to the batter all at once. 
    • Use a mixer for the bananas. It breaks them down quickly, and you'll need the mixer for the rest of the batter anyway.
    • Use softened cream cheese. This helps the frosting mix smoothly without lumps.
    • Cool completely before frosting. If the bars are still warm, the frosting can melt.
    • Ingredients to prep ahead- Let the cream cheese and butter sit at room temperature before making the frosting for easier mixing.
    • Leftovers and storage- Store covered in the refrigerator for 3-4 days, or freeze for up to 3 months.

    What To Serve With Banana Bars With Cream Cheese Frosting

    These bars are wonderful on their own, but they also pair nicely with a few simple treats if you’re building out a dessert spread or brunch table. Here are a few ideas to serve alongside them:

    • Double Chocolate Peanut Butter Chip Cookies
    • Orange Cranberry Cake
    • Rolo Pretzel Bites
    • Chocolate Mousse Cups

    Other Banana Recipes To Try

    • A close up image of a chocolate chip banana muffin inside a bowl of other muffins.
      Moist Banana Chocolate Chip Muffins
    • A square image of Grandma's Best Banana Cake recipe.
      Grandma's Best Banana Cake Recipe
    • Two slices of banana bread next to the loaf with a banana on the side.
      Buttermilk Banana Bread Recipe
    • A square image of Strawberry Banana Split Cake
      Strawberry Banana Split Cake

    Love this recipe? Please leave a 5 star ⭐️⭐️⭐️⭐️⭐️ rating in the recipe card below ⬇️ and/or a review in the comment section further down. Check out my Amazon Store for all my favorite tools, including those used in this recipe. And follow @thelifejolie on Instagram and TikTok!

    A slice of banana bread bar on a white plate.

    Banana Bread Bars

    Jessy Freimann
    These banana bread bars are soft and moist, topped with rich cream cheese frosting. They’re an easy dessert to make and a great way to use up ripe bananas.
    No ratings yet
    Print Recipe Pin Recipe
    Prep Time 10 minutes mins
    Cook Time 30 minutes mins
    Cooling time 30 minutes mins
    Total Time 1 hour hr 10 minutes mins
    Course Dessert
    Cuisine American
    Servings 12 pieces
    Calories 213 kcal

    Equipment

    • mixing bowl
    • Spatula
    • stand mixer
    • measuring cups
    • measuring spoons
    • 9 x 13 Pan

    Ingredients
      

    Banana Bars

    • Cooking spray
    • 1 cup flour
    • 1 teaspoon baking powder
    • ½ teaspoon baking soda
    • ¾ teaspoon ground cinnamon
    • ¼ teaspoon ¼ teaspoon kosher salt
    • 1 cup ripe bananas,  peeled (around 2 medium bananas)
    • 1 cup granulated sugar
    • 2 large eggs
    • ⅓ cup vegetable oil
    • 1 teaspoon vanilla extract

    Cream Cheese Frosting

    • 4 ounces cream cheese frosting softened
    • 1 teaspoon vanilla extract
    • ⅓ cup butter, softened
    • 2 cups confectioner's sugar

    Instructions
     

    Banana Bars

    • Preheat the oven to 350 degrees F. Spray a 9" x 13" pan with cooking spray and line with parchment, allowing some extra parchment to stick up over the sides. Set aside.
    • In a medium bowl, whisk together the flour, baking powder, baking soda, cinnamon and salt. Set aside.
    • In a large bowl, whip together the bananas to break them down.
    • Add sugar, eggs, oil and vanilla and mix until well combined.
    • With the mixer on low, gradually blend in the dry ingredients until just combined and pour into the prepared pan. Use a spatula to smooth the batter into an even layer.
    • Bake for 25-30 minutes until a toothpick comes out clean and cool completely.

    Cream cheese frosting

    • While the bars cool, mix cream cheese, vanilla and butter until well combined.
    • Gradually mix in the confectioner's sugar until everything is smooth. Spread the frosting over the cooled bars, cut into 12 pieces and serve.

    Video

    Notes

    • Line the pan with parchment. Let a little hang over the sides so you can lift the bars out easily for slicing.
    • Mix the dry ingredients first. Having them ready makes it easier to add them to the batter all at once. 
    • Use a mixer for the bananas. It breaks them down quickly, and you'll need the mixer for the rest of the batter anyway.
    • Use softened cream cheese. This helps the frosting mix smoothly without lumps.
    • Cool completely before frosting. If the bars are still warm, the frosting can melt.
    • Ingredients to prep ahead- Let the cream cheese and butter sit at room temperature before making the frosting for easier mixing.
    • Leftovers and storage- Store covered in the refrigerator for 3-4 days, or freeze for up to 3 months.

    Nutrition

    Serving: 1pieceCalories: 213kcalCarbohydrates: 52gProtein: 2gFat: 9gSaturated Fat: 2gPolyunsaturated Fat: 4gMonounsaturated Fat: 2gTrans Fat: 0.04gCholesterol: 32mgSodium: 118mgPotassium: 37mgFiber: 0.3gSugar: 23gVitamin A: 56IUVitamin C: 0.01mgCalcium: 35mgIron: 1mg
    Tried this recipe?Let us know how it was!

    Shrimp Macaroni Salad

    Mar 16, 2026 · 80 Comments

    A close up shot of the side of a shallow bowl of shrimp mac salad.

    If you want to be the most popular person at the picnic, make this shrimp macaroni salad. It comes together in just 20 minutes and is packed with tender pasta, crisp veggies, and a bold, creamy dressing everyone loves.

    A close up shot of the side of a shallow bowl of shrimp mac salad.
    [feast_advanced_jump_to]

    Why You’ll Love This Macaroni Shrimp Salad

    There’s just something about a big bowl of pasta salad sitting on the table in the summer. It’s cool, creamy, and one of those sides you keep going back to for “just one more bite.” This recipe has been in my family for years, and like any good grandmas macaroni salad, it’s simple, reliable, and always a hit.

    What really sets this apart is the balance of textures. The shrimp are tender and hearty, the celery and onion add crunch, and the pasta soaks up every bit of that flavorful dressing. It’s a fun seafood twist that still feels familiar and comforting. Here’s why you’ll want to make it:

    • Always a crowd-pleaser
    • Very easy to make
    • Made with everyday ingredients
    • Perfect to prep ahead
    An over head image of a bowl of Shrimp Macaroni Salad with celery and onions around it.

    Ingredient Information And Substitutions

    • Cooked large shrimp- Adds hearty texture and protein. Frozen (thawed) shrimp works great, and canned shrimp is an easy substitute with a slightly softer texture.
    • Medium shell pasta- Cooks up tender and holds onto the dressing well. Elbow macaroni or another small pasta shape works too.
      Finely diced onion- Adds sharp flavor and crunch. Soak in cold water for 10 minutes to mellow it out if needed.
    • Finely diced celery- Brings fresh crunch. You can swap with diced bell pepper or carrot.
    • Fresh parsley- Adds brightness and color. Dried parsley can be used in a pinch, but fresh is best.
    • Mayonnaise- The base for this creamy mixture. Use full-fat for the richest flavor.
    • Lemon juice- Adds freshness and balances the richness. Fresh lemon juice gives the best flavor, but bottled works too.
    • Yellow mustard- Gives subtle tang and depth. Dijon can be substituted for a sharper flavor.
    • Worcestershire sauce- Adds savory depth and a little tang. You can substitute soy sauce for a similar salty richness.
    • Hot sauce- Brings a little kick. Adjust to taste or swap with a pinch of cayenne pepper for heat.
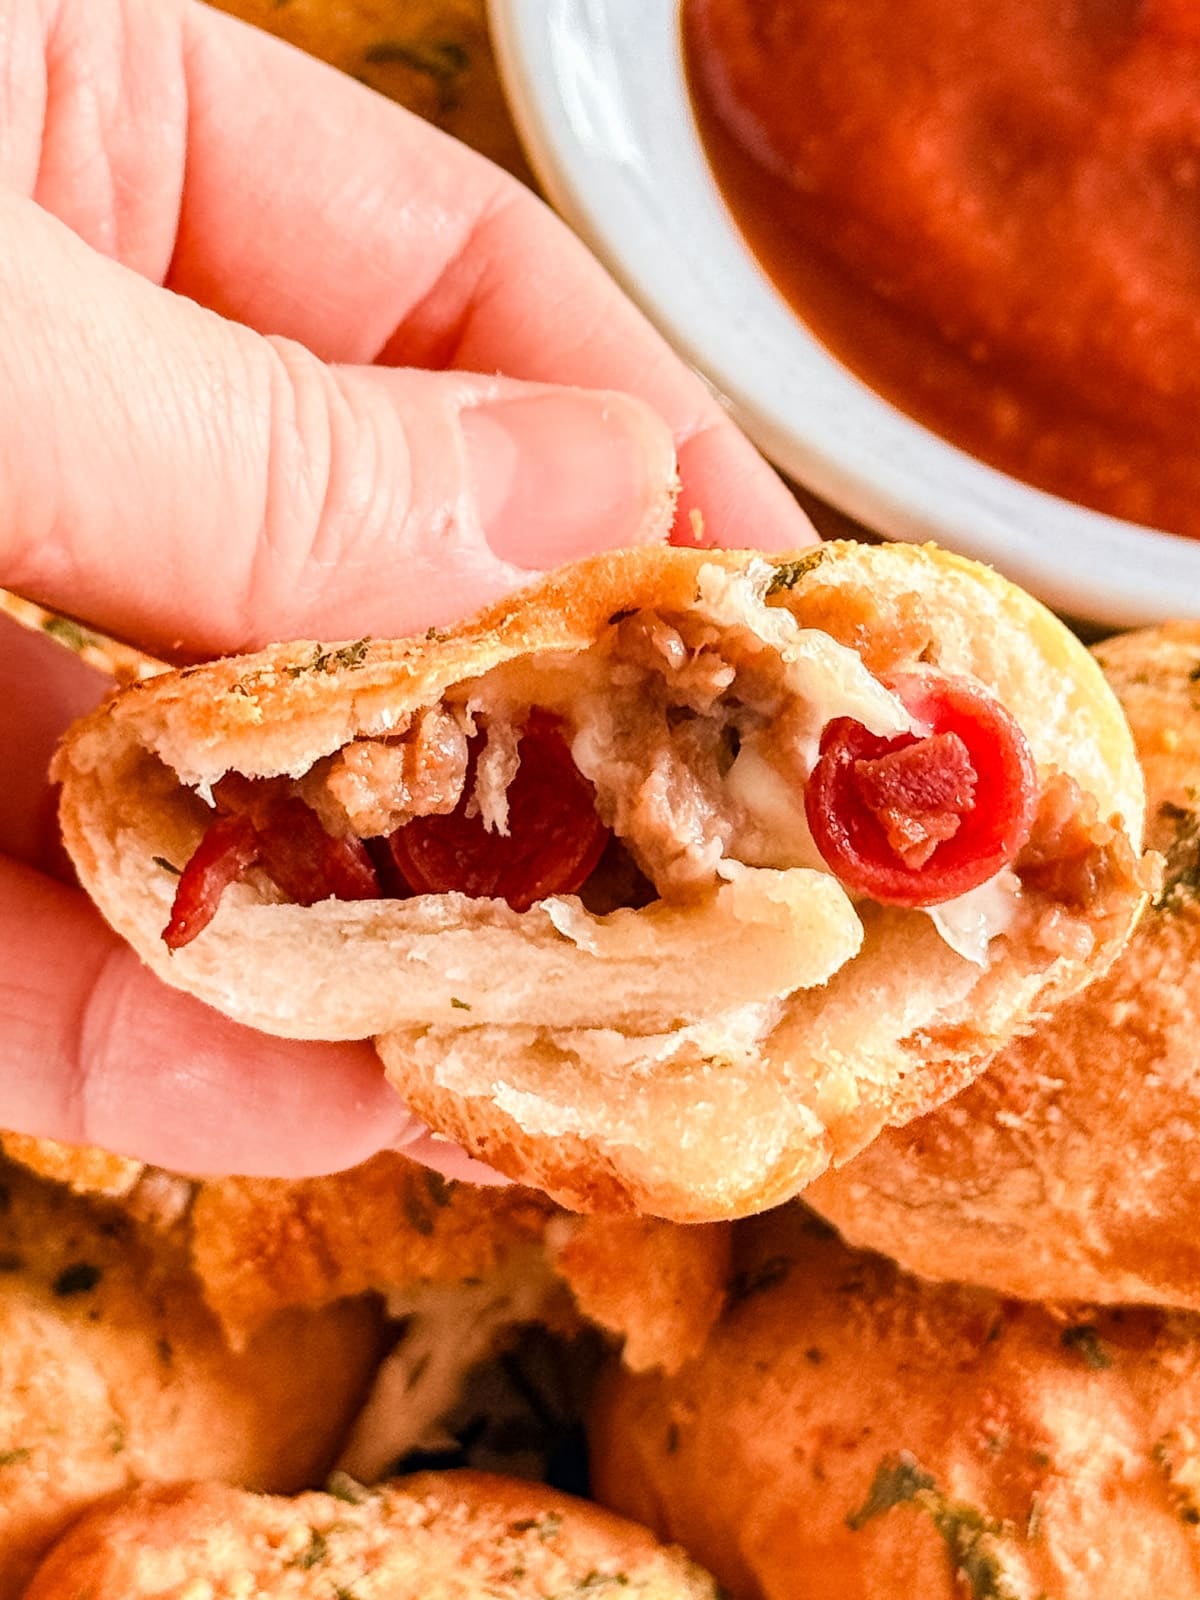
    • Garlic powder- Adds mild garlic flavor. You can substitute with a small amount of grated fresh garlic if preferred.
    • Sugar- Just a pinch balances everything out. Honey works as a substitute.
    • Kosher salt- Enhances all the flavors. Table salt can be used, but reduce the amount slightly.
    • Ground black pepper- Adds a little bite. Freshly cracked pepper gives the best flavor.
    An overhead image of the ingredients labeled for this salad.

    How To Make This Macaroni Salad With Shrimp

    Step 1- Cook the pasta.

    Bring a large pot of salted water to a boil and cook the pasta until al dente according to the package directions. Drain and rinse under cold water to cool it completely.

    Shell pasta being stirred in a pot of boiling water on a stove.

    Step 2- Prepare the dressing.

    In a bowl, whisk together all of the dressing ingredients until smooth. Give it a taste and adjust the seasoning as needed.

    A bowl of the dressing being whisked together.

    Step 3- Combine everything.

    Add the cooked pasta, shrimp, onion, celery, and parsley to a large mixing bowl. Pour the dressing over the top and stir until everything is evenly coated. Chill for at least one hour before serving.

    All the salad ingredients in a large bowl about to be mixed together.

    Frequently Asked Questions

    Can I make this ahead of time?

    Yes. This cold macaroni salad actually tastes even better after it sits for a few hours because the flavors have time to come together. Just give it a good stir before serving.

    How long can this pasta salad sit out at room temperature?

    Since it contains shrimp and mayonnaise, it shouldn’t sit out for more than about an hour. If serving outside, place the bowl over a larger bowl filled with ice to help keep it chilled.

    Can I add other mix-ins?

    Absolutely. Try adding chopped hard-boiled eggs, diced pickles, or extra fresh herbs to change things up while keeping this creamy macaroni salad recipe just as delicious. Since this is a pretty popular recipe, check out the comments on this post to see some of the awesome add-ins that other readers have added.

    A close up image of a spoon holding a scoop of this shrimp macaroni salad recipe.

    Tips For Making This Easy Macaroni Salad

    • Use cooked shrimp to save time. It keeps this shrimp and macaroni salad quick and easy to throw together.
    • Cook the pasta just to al dente. It will soften slightly as it absorbs the dressing.
    • Drain everything well. Fully drain the shrimp, pasta, and vegetables to prevent the salad from becoming watery.
    • Chill before serving. As it rests, the dressing for macaroni salad soaks into the pasta, and the flavors deepen.
    • Lighten it up if you’d like. Swap part of the mayo with plain Greek yogurt for a slightly lighter version.
    • Halve the recipe if needed. This makes a generous batch, so cut it in half if you’re not feeding a crowd.
    • Ingredients to prep ahead. Dice the vegetables and prepare the shrimp in advance to save time.
    • Leftovers and storage. Store covered in the refrigerator for up to 4 days. Stir before serving and add a spoonful of mayo if needed. It doesn’t freeze well.
    A bowl of shrimp mac salad on a green and white towel.

    What To Serve With This Macaroni Salad Shrimp

    This dish pairs beautifully with grilled mains and fresh sides. Because it’s hearty and creamy, it balances well with lighter vegetables and something sweet to finish. Try serving this classic macaroni salad with:

    • Maple Dijon Grilled Pork Chop Marinade
    • Tomato Onion Salad
    • Grilled Balsamic Asparagus
    • Blueberry Lemon Dump Cake

    Other Easy Macaroni Salad Recipes To Try

    • A white bowl full of classic tuna macaroni salad.
      Tuna Macaroni Salad
    • A bowl of crab mac salad on top of a second bowl with celery and an onion behind it.
      Crab Pasta Salad
    • A white bowl of tortellini salad with the main bowl in the background.
      Tortellini Pesto Pasta Salad
    • A bowl of pasta salad with a white towel behind it and tomatoes and basil around it.
      Zesty Italian Pasta Salad

    Love this recipe? Please leave a 5 star ⭐️⭐️⭐️⭐️⭐️ rating in the recipe card below ⬇️ and/or a review in the comment section further down. Check out my Amazon Store for all my favorite tools, including those used in this recipe. And follow @thelifejolie on Instagram and TikTok!

    A close up shot of the side of a shallow bowl of shrimp mac salad.

    Shrimp Macaroni Salad Recipe

    Jessy Freimann
    If you want to be the most popular person at the picnic, make my Grandma's Shrimp Macaroni Salad! While the ingredients are fresh and delicious, the dressing is the true MVP and will have everyone running back for seconds!
    4.98 from 87 votes
    Print Recipe Pin Recipe
    Prep Time 10 minutes mins
    Cook Time 10 minutes mins
    Total Time 20 minutes mins
    Course Side Dish
    Cuisine American
    Servings 10 servings
    Calories 155 kcal

    Equipment

    • Dutch oven
    • Wooden Spoons
    • mixing bowl
    • cutting board
    • Chef Knife
    • Measuring cups and spoons
    • Whisk

    Ingredients
      

    Salad:

    • 1 pound medium shell pasta cooked per package directions to al dente
    • ⅔ cup finely diced onion
    • 1 ¼ cups finely diced celery
    • 2 Tablespoons chopped fresh parsley
    • 1 ½ pounds cooked large shrimp peeled, deveined and roughly chopped into large chunks

    Dressing:

    • 1 cup mayonnaise
    • 2 Tablespoons lemon juice
    • 1 teaspoon garlic powder
    • 1 teaspoon yellow mustard
    • 1-2 generous pinch sugar
    • ½ teaspoon hot sauce
    • 1 teaspoon Worcestershire sauce
    • 1 teaspoon kosher salt
    • ½ teaspoon ground black pepper

    Instructions
     

    Salad:

    • Combine all ingredients in a large mixing bowl.
    • Add dressing and mix well to combine.
    • Refrigerate for at least 1 hour or until you're ready to serve.

    Dressing:

    • Whisk all ingredients until well combined.
    • Taste and adjust seasonings to your taste.
    • Pour over the salad. Refrigerate until serving.

    Video

    Notes

    • Buy shrimp that's already cooked, it's one less step for you. Frozen is best but canned will work.
    • Cook the pasta to al dente. As it sits, it will absorb the dressing and soften up a little more.
    • Make it ahead. Letting it sit in the dressing a little bit helps it all meld together and deepens the flavor.
    • Taste the dressing as you go. This is pretty much the case for any cooking recipe (not so much baking) but take the measurements as a starting point and make this to your taste.
    • Make a little extra dressing. Sometimes as it sits, the pasta sucks up the dressing, so it’s not a bad idea to make a half batch of the dressing to add if needed before serving (and if not, it tastes awesome on a green salad!). This is especially applicable if you’re making this a day ahead.
    • This recipe makes a pretty large amount. If you're not serving a crowd, or you don't want as many left overs, half it.
    • Leftovers and storage: This will last up to 4 days covered in the refrigerator.

    Nutrition

    Serving: 1cupCalories: 155kcalCarbohydrates: 1gProtein: 0.3gFat: 17gSaturated Fat: 3gPolyunsaturated Fat: 10gMonounsaturated Fat: 4gTrans Fat: 0.04gCholesterol: 9mgSodium: 394mgPotassium: 18mgFiber: 0.1gSugar: 0.4gVitamin A: 16IUVitamin C: 1mgCalcium: 4mgIron: 0.1mg
    Tried this recipe?Let us know how it was!

    Pita Chips Recipe

    Mar 13, 2026 · 3 Comments

    A close up of a pita chip onto top of other pita chips.

    This pita chips recipe is one of the easiest snacks you can make at home. They’re crispy, full of flavor, and ready in about 20 minutes, making them perfect for last-minute guests or quick appetizers. 

    A close up of a pita chip onto top of other pita chips.
    [feast_advanced_jump_to]

    Why You’ll Love These Homemade Pita Chips

    Sometimes the best snacks are the simplest ones. These pita chips come together in just a few minutes with pita bread, a little oil, and Everything But The Bagel seasoning. They bake up perfectly crisp in the oven and are ideal for dipping into hummus, guacamole, or any of your favorite spreads.

    They’re also a great throw-together snack for last-minute guests and, honestly, couldn’t be easier to make. I like baking them until they’re nice and crispy, but you can also leave a little chew in the middle if that’s more your thing. And if you’re not in the mood to turn on the oven, you can easily make pita chips in air fryer too. Here’s why this recipe works so well:

    • Ready in about 20 minutes
    • Made with a few ingredients
    • Perfect for dips and spreads
    • Easy to customize 
    An overhead image of a pan of baked pita chips.

    Ingredient Information And Substitutions

    • Pita bread- The base of the recipe. Whole wheat, multigrain, or white pita all work well. Thicker pita breads create sturdier chips, but I like the kind that are meant to be pita pockets so I can have thinner chips. 
    • Olive oil cooking spray- Helps the chips crisp up and gives the seasoning something to stick to- I also use avocado oil cooking spray. Regular olive oil brushed lightly on top works too.
    • Everything Bagel Seasoning- Adds tons of flavor with garlic, sesame, onion, and salt. You can also use garlic powder, za’atar, or simple sea salt if preferred.
    An overhead image of labeled recipe ingredients.

    How To Make Pita Chips

    Step 1- Cut the pita bread.

    Set your oven to 400 degrees F and line a baking sheet with parchment paper or a silicone baking mat.

    Slice each pita in half, then cut each half into three wedge-shaped pieces. If using pitas that are pockets, slice on the fold to make each each wedge into two thin wedges.

    Pita cut into 6 wedges and then a knife cutting each wedge in half.

    Step 3- Arrange on the pan and add oil and seasoning.

    Place the wedges in a single layer on the prepared baking sheet. Lightly spray the tops of the pita wedges with olive oil cooking spray. Then, sprinkle everything bagel seasoning evenly over the pita pieces and gently press it in with your hands. Then turn them over and repeat the process on the other side.

    Pita wedges spread in a single layer on a pan and then with oil and seasoning on them.

    Step 4- Bake, then enjoy.

    Bake for 7 minutes, flip each chip and bake an additional 3-5 minutes until the chips are crisp and lightly golden. Enjoy warm or let them cool slightly before serving.

    Step 4A- Instructions for pita chips in air fryer

    After oiling and seasoning both sides of the chips, Place in a single layer in the air fryer that's been preheated to 375 degrees F. Cook 3 minutes, shake and cook another 3-4 minutes until golden.

    Pita chips in an air fryer basket before cooking and then after.

    Frequently Asked Questions

    Do I need to separate the pita layers?

    You don’t have to, but you can if you want thinner chips. Keeping the layers together makes the chips a little sturdier. I prefer them thinner.

    Are pita chips healthy?

    They can be a lighter snack than many fried chips, especially when baked at home. Since you control the oil and seasoning, they’re often a simple option to enjoy with dips like hummus or yogurt-based spreads.

    Why are some chips browning faster than others?

    Some wedges may be slightly thinner than others. If needed, you can remove the crisp ones early and let the rest finish baking.

    A close up image of a pita chip in a bowl of hummus.

    Tips For Making Baked Pita Chips

    • Cut the pita evenly. Keeping the wedges about the same size helps them bake at the same rate, preventing some pieces from burning while others stay soft.
    • Bake in a single layer. Spread the wedges out in the pan, so the heat circulates and crisps them properly.
    • This recipe also works well for air fryer pita chips. Prepare the wedges the same way, spray lightly with oil, add seasoning, and cook at about 375 degrees F for 5-7 minutes, shaking halfway through so they crisp without over-browning.
    • Adjust the baking time to your preference. Bake a little shorter for chips that are crisp on the edges with a bit of chew in the middle, or a few minutes longer for fully crunchy chips.
    • Ingredients to prep ahead- You can cut the pita wedges earlier in the day and keep them covered until you’re ready to bake.
    • Leftovers and storage- Store cooled chips in an airtight container on the counter for a few days. They’re best fresh, but you can crisp them back up with a quick minute in the oven if needed.
    A plate of pita chips with a bowl of hummus on it.

    What To Serve With Pita Chips

    These chips are perfect for dipping and make an easy addition to snack boards or casual gatherings. Pair them with a few dips to turn them into a simple appetizer spread. Try serving them with:

    • Easy Peach Salsa
    • The Most Delicious Guacamole EVER 
    • Artichoke and Olive Spread
    • Artichoke Asiago Dip
    An overhead close up of the pita chips lined up on a pan.

    Other Snack Recipes To Try

    • A close up image of a Brie Apple Phyllo Cup on a pan.
      Brie Apple Phyllo Cups
    • A close up image of the corner of the pan of corn salsa.
      Roasted Corn Salsa
    • A square image of 10 Minute Shrimp Salsa.
      10 Minute Shrimp Salsa
    • This French Onion Cheese Ball is a delicious savory appetizer that is sure to impress all your friends. It's also super easy to whip up!
      French Onion Cheese Ball

    Love this recipe? Please leave a 5 star ⭐️⭐️⭐️⭐️⭐️ rating in the recipe card below ⬇️ and/or a review in the comment section further down. Check out my Amazon Store for all my favorite tools, including those used in this recipe. And follow @thelifejolie on Instagram and TikTok!

    A close up of a pita chip onto top of other pita chips.

    Pita Chips Recipe

    Jessy Freimann
    This pita chips recipe is one of the easiest snacks you can make at home. They’re crispy, full of flavor, and ready in about 20 minutes, making them perfect for last-minute guests or quick appetizers. 
    5 from 1 vote
    Print Recipe Pin Recipe
    Prep Time 5 minutes mins
    Cook Time 10 minutes mins
    Total Time 15 minutes mins
    Course Appetizer, Snack
    Cuisine American, Game day, holidays, Snack
    Servings 48 chips
    Calories 14 kcal

    Equipment

    • sheet pan
    • Silpat
    • Chef Knife
    • air fryer

    Ingredients
      

    • 4 large pitas
    • Cooking spray
    • 1 Tablespoon Everything Bagel seasoning

    Instructions
     

    • Preheat the oven to 400 degrees F (or 375 degrees F is using an air fryer) and line a pan with a silpat or parchment paper. Set aside.
    • Cut the pita in half and then cut each half into three wedges. If working with pita pockets, cut each wedge in half for thinner chips.
    • Line the wedges up in a single layer on the pan.
    • Spray a light layer of olive oil onto the tops of the pita chips and sprinkle generously with Everything Bagel Seasoning. Flip the chips and repeat on the other side of them.

    Oven Instructions

    • Bake for 5 minutes, flip and bake for another 5 minutes or until they're golden and crispy. Cool and serve.

    Air Fryer Instructions:

    • Place chips in a single layer in the air fryer, cook for 3 minutes. Shake and cook for another 3-4 minutes or until they're golden and crispy. Cool and serve.

    Video

    Notes

    • Cut the pita evenly. Keeping the wedges about the same size helps them bake at the same rate, preventing some pieces from burning while others stay soft.
    • Bake in a single layer. Spread the wedges out in the pan, so the heat circulates and crisps them properly.
    • This recipe also works well for air fryer pita chips. Prepare the wedges the same way, spray lightly with oil, add seasoning, and cook at about 375 degrees F for 5-7 minutes, checking halfway through so they crisp without over-browning.
    • Adjust the baking time to your preference. Bake a little shorter for chips that are crisp on the edges with a bit of chew in the middle, or a few minutes longer for fully crunchy chips.
    • Ingredients to prep ahead- You can cut the pita wedges earlier in the day and keep them covered until you’re ready to bake.
    • Leftovers and storage- Store cooled chips in an airtight container on the counter for a few days. They’re best fresh, but you can crisp them back up with a quick minute in the oven if needed.

    Nutrition

    Serving: 8chipsCalories: 14kcalCarbohydrates: 3gProtein: 0.5gFat: 0.1gSaturated Fat: 0.01gPolyunsaturated Fat: 0.03gMonounsaturated Fat: 0.01gSodium: 43mgPotassium: 6mgFiber: 0.1gCalcium: 4mgIron: 0.1mg
    Tried this recipe?Let us know how it was!


    Coconut Shrimp With Sauce

    Mar 9, 2026 · 4 Comments

    A close up image of a piece of coconut shrimp on top of others.

    Try coconut shrimp with sauce made from apricot preserves and Sriracha! It's lightly sweet, a little spicy, and incredibly easy to make. Perfect for busy weeknights when you want something fun that still feels a little special.

    A close up image of a piece of coconut shrimp on top of others.
    [feast_advanced_jump_to]

    Why You’ll Love This Coconut Shrimp And Sauce

    Coconut shrimp has always felt light and fresh to me, which is probably why I associate it with warmer months. It’s an easy, fun dish that doesn’t feel heavy, and this version keeps the sweetness subtle while letting the coconut flavor shine.

    The shrimp are served with an apricot Sriracha dipping sauce that has just a little kick, since sweet and spicy always work well together. It’s simple, flavorful, and ties everything together without overpowering like some creamy sauces sometimes do. Here's why this baked coconut shrimp works:

    • Light, fresh flavor
    • Baked, not fried
    • Simple ingredients, big flavor
    • Works for any occasion
    An overhead image of a bowl of coconut shrimp with apricot sauce.

    Ingredient Information And Substitutions

    • Large shrimp- Peeled and deveined. Fresh shrimp are great, but frozen work just fine. Medium shrimp can be used too, just watch the cook time.
    • Coconut milk- Full-fat gives the best flavor and helps the coating stick. Light coconut milk works, but won’t be as rich.
    • Water- Used to thin the dipping sauce to a smooth, dippable consistency.
    • Sriracha- Adds heat to both the marinade and the sauce. Adjust to taste.
    • Rice vinegar- Balances the sweetness in the sauce. Apple cider vinegar works too.
    • Apricot preserves- The base of the dipping sauce. Peach preserves are a good alternative.
    • Panko breadcrumbs- Keeps the coating light and crispy. Regular breadcrumbs can be used, but the texture will be softer.
    • Sweetened coconut flakes- Adds texture and a subtle sweetness. Unsweetened coconut works if you prefer it less sweet.
    • Garlic salt- Seasons both the shrimp and the sauce. Swap with garlic powder plus salt if needed.
    • Chili powder- Adds warmth without much heat. Smoked paprika is a good substitute.
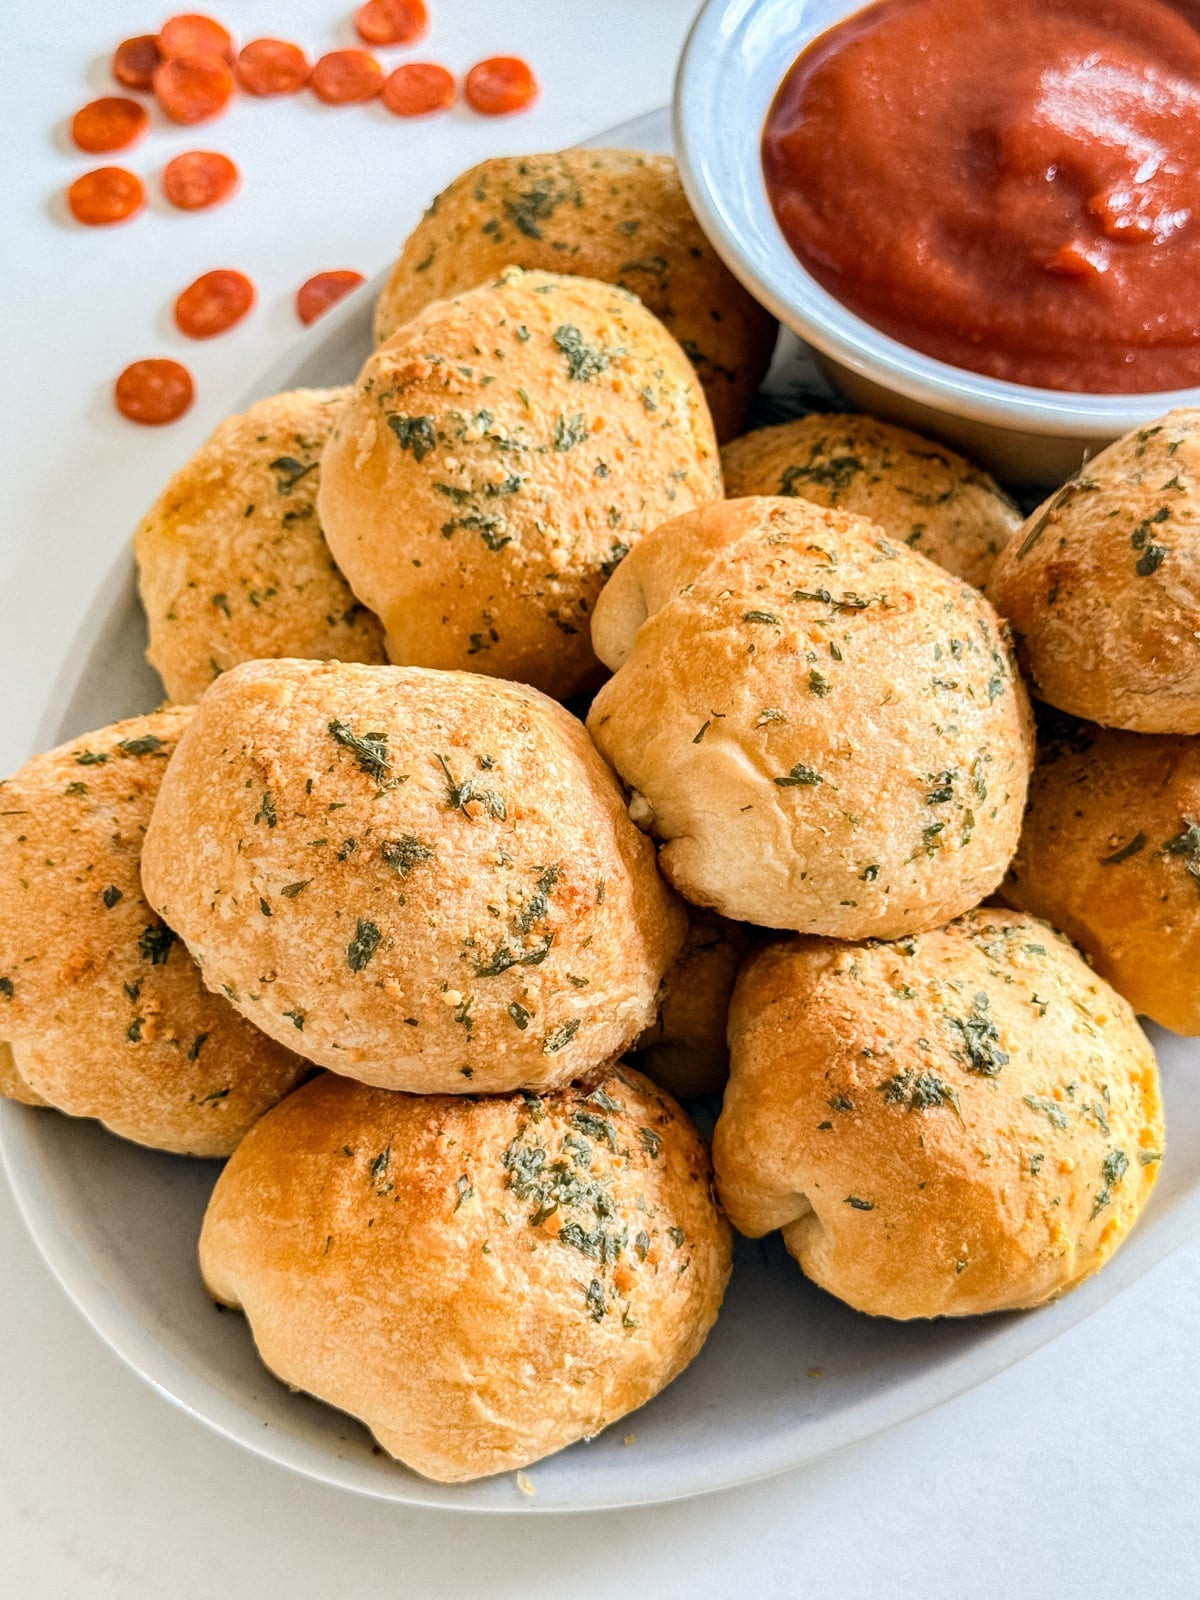
    An overhead image of. labeled recipe ingredients.

    How To Make Coconut Milk Shrimp

    Step 1- Marinate the shrimp. 

    Preheat the oven to 400 degrees F. Line a couple of sheet pans with a Silpat or parchment paper, then set aside.

    In a large bowl, mix the coconut milk and Sriracha. Add the shrimp and let them sit while you prep the rest.

    Coconut milk marinade with a whisk in it and then and then shrimp added in.

    Step 2- Make the coating and dipping sauce. 

    In a medium bowl, mix the panko, coconut flakes, garlic salt, and chili powder until evenly combined.

    While the shrimp bake, combine the apricot preserves, Sriracha, garlic salt, water, and rice vinegar in a microwave-safe bowl. Heat for about 30 seconds and stir until smooth.

    Coconut mixture in a bowl and then the sauce mixed in a different bowl.

    Step 3- Coat the shrimp. 

    Working one at a time, tap off excess marinade, then press the shrimp into the coconut mixture to help it stick.

    Lightly tap off any extra coating. Place the shrimp in rows on the prepared pans, leaving space so they aren’t touching.

    Shrimp in the coconut mixture and then breaded shrimp lined up on a baking sheet.

    Step 6- Bake the shrimp.

    Bake for 15-20 minutes, checking around 15 minutes so the coconut doesn’t get too dark. Serve right away with the sauce.

    A hand dipping a coconut shrimp into the apricot dipping sauce.

    Frequently Asked Questions

    What are the best coconut shrimp sides?

    Anything simple works well: rice, a crisp salad, or roasted veggies. You want sides that won’t compete with the sauce.

    What is the best sauce for coconut shrimp?

    A sauce with a balance of sweet + heat is my favorite. Apricot + Sriracha is a simple combo that tastes like it took more effort than it did.

    How do you make coconut shrimp sauce?

    Stir preserves with Sriracha, a splash of vinegar, and a little water, then warm it briefly to make it smooth and dippable.

    A bowl of coconut shrimp and sauce.

    Tips For Making This Coconut Milk Shrimp REcipeRecipe

    • Thaw the shrimp overnight in the fridge when you can, or submerge in cold water for a quicker option.
    • The coconut milk separates in the can, so give it a good shake (or whisk it) before mixing the marinade.
    • If the shrimp are touching, they’ll steam instead of crisp up. Make sure you give them space on the pan. 
    • Start checking early. Coconut can go from golden to too-dark quickly, so peek around the 15-minute mark.
    • Ingredients to prep ahead- Mix the dry coating ingredients and stir together the sauce ingredients.
    • Leftovers and storage- Store in an airtight container in the fridge for 2-3 days. Reheat in the oven or air fryer to crisp them back up.
    Coconut shrimp in a bowl with sauce.

    What To Serve With This Coconut Shrimp Recipe

    To make this feel like a full meal, pair it with something starchy, something fresh, and a little something sweet to finish:

    • Ranch Potatoes Recipe
    • Avocado Salsa
    • Green Bean Salad
    • Chocolate Cake Trifle

    Other Shrimp Recipes To Try

    • This Pea Salad with Shrimp recipe is a super easy side dish that's perfect for any gathering! It's served cold because it's creamy with sweet green peas (I totally used frozen!), shrimp, and cashews and water chestnuts which make it crunchy. Make this if you need a tasty and light Thanksgiving side dish!
      Peas Salad with Shrimp
    • A square image of 10 Minute Shrimp Salsa.
      10 Minute Shrimp Salsa
    • An overhead image of a plate of snow pea stir fry with shrimp over white rice with raw snow peas, a striped towel and rice around it.
      Shrimp and Snow Pea Stir Fry
    • A close up shot of the side of a shallow bowl of shrimp mac salad.
      Shrimp Macaroni Salad

    Love this recipe? Please leave a 5 star ⭐️⭐️⭐️⭐️⭐️ rating in the recipe card below ⬇️ and/or a review in the comment section further down. Check out my Amazon Store for all my favorite tools, including those used in this recipe. And follow @thelifejolie on Instagram and TikTok!

    A close up image of a piece of coconut shrimp on top of others.

    Coconut Shrimp With Sauce

    Jessy Freimann
    Try coconut shrimp with sauce made from apricot preserves and Sriracha! It's lightly sweet, a little spicy, and incredibly easy to make. Perfect for busy weeknights when you want something fun that still feels a little special.
    No ratings yet
    Print Recipe Pin Recipe
    Prep Time 15 minutes mins
    Cook Time 20 minutes mins
    Inactive time 20 minutes mins
    Total Time 35 minutes mins
    Course Main, Main Course, Main dish
    Cuisine American
    Servings 6 servings
    Calories 182 kcal

    Equipment

    • Bowls
    • sheet pan
    • Silpat

    Ingredients
      

    Coconut Shrimp:

    • 1 pound large shrimp, peeled, deveined and thawed (I got shrimp with the tails removed but that's optional)
    • 16 ounces coconut milk, unsweetened
    • 1 teaspoon Sriracha
    • 1 cup Panko bread crumbs
    • 1 cup sweetened coconut flakes
    • ¾ teaspoon garlic salt
    • ½ teaspoon chili powder

    Spicy Apricot Dipping Sauce

    • ¼ cup apricot preserves
    • 1 teaspoon Sriracha
    • 1 ½ teaspoons water
    • ½ teaspoon rice vinegar

    Instructions
     

    Coconut Shrimp:

    • In a large bowl stir together coconut milk and Sriracha until well combined. Place submerge shrimp in this mixture and set aside to marinate while you prepare the other components of this recipe.
    • Preheat the oven to 400 degrees F and line couple sheet pans with a silpat or parchment paper and set aside.
    • In a medium bowl mix together Panko bread crumbs, coconut flakes, garlic salt and chili powder until well combined.
    • Take each piece of shrimp one-by-one and lightly tap off the excess marinade. Place it into the bowl with the coconut mixture and cover it with the mixture, pressing gently to help adhere the mixture to the shrimp.
    • Very lightly tap off the excess coconut mixture and line the shrimp up in three rows onto your pans so that they aren't touching.
    • Bake for 15-20 minutes (start watching around 15 minutes so that they don't get too dark).
    • Serve immediately with Spicy Apricot Dipping Sauce.

    Spicy Apricot Dipping Sauce:

    • Combine apricot preserves, Sriracha, garlic salt, water and rice vinegar in a small, microwave safe bowl.
    • Microwave for 30 seconds to heat.

    • Mix well until fully combine and serve immediately with coconut shrimp.

    Video

    Notes

    • Thaw the shrimp overnight in the fridge when you can, or submerge in cold water for a quicker option.
    • The coconut milk separates in the can, so give it a good shake (or whisk it) before mixing the marinade.
    • If the shrimp are touching, they’ll steam instead of crisp up. Make sure you give them space on the pan. 
    • Start checking early. Coconut can go from golden to too-dark quickly, so peek around the 15-minute mark.
    • Ingredients to prep ahead- Mix the dry coating ingredients and stir together the sauce ingredients.
    • Leftovers and storage- Store in an airtight container in the fridge for 2-3 days. Reheat in the oven or air fryer to crisp them back up.

    Nutrition

    Serving: 1servingCalories: 182kcalCarbohydrates: 22gProtein: 12gFat: 5gSaturated Fat: 4gPolyunsaturated Fat: 0.4gMonounsaturated Fat: 0.4gTrans Fat: 0.01gCholesterol: 95mgSodium: 874mgPotassium: 169mgFiber: 2gSugar: 10gVitamin A: 208IUVitamin C: 2mgCalcium: 64mgIron: 1mg
    Tried this recipe?Let us know how it was!

    Crockpot Taco Chicken Soup

    Mar 5, 2026 · 2 Comments

    An overhead image of taco soup in a bowl.

    Need a dinner that cooks itself? This crockpot taco chicken soup comes together with just 5 minutes of prep, and the slow cooker (or Instant Pot) does the rest. Perfect for busy nights.
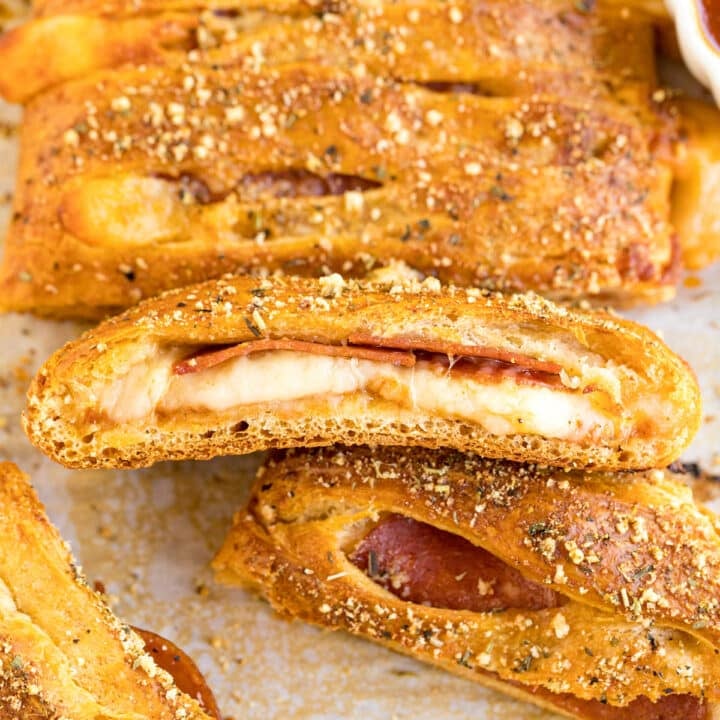
    An overhead image of bowls of taco soup.
    [feast_advanced_jump_to]

    Why You’ll Love This Chicken Crock Pot Taco Soup

    Imagine tossing everything into your slow cooker (or Instant Pot) and then getting on with your day. No standing over the stove, no stirring, no babysitting a pot of soup. It’s the kind of dinner that works around your schedule instead of the other way around. When it’s done, the chicken is so tender it practically falls apart, and two forks are all you need to shred it before stirring it back in with cooked rice.

    Top it with a little cheese, crushed tortilla chips, and fresh cilantro, and you’ve got a bowl of chicken taco soup that’s hearty and hard to resist. I originally planned this as a crockpot meal, but it works just as well in the Instant Pot when you need it done faster. Here’s why this recipe works so well:

    • Family-friendly and filling
    • Minimal prep
    • Truly hands-off
    • Easy to customize
    A close up image of a ladle full of chicken taco soup.

    Ingredient Information And Substitutions

    • Chicken breasts- Boneless and skinless cook up tender and shred easily. You can swap with chicken thighs if you prefer.
    • Cooked rice- Stirred in at the end for extra heartiness. You can leave it out or use brown rice.
    • Chicken broth- The base of the soup. Vegetable broth can be used instead.
    • Water- Helps balance consistency.
    • Onion- Adds flavor and depth. Red, yellow or white onions both work.
    • Bell pepper- Brings mild sweetness. Use whatever color you prefer.
    • Corn- Adds texture and sweetness. Frozen corn works too.
    • Black beans- They make the soup even heartier. Pinto beans can be substituted.
    • Rotel- The best diced tomatoes with green chiles! Another brand is fine if you can't find it.
    • Taco seasoning packet- Adds classic taco flavor. Homemade taco seasoning works great too.
    • Toppings (optional)- Finish with shredded cheddar cheese, cilantro, and crushed tortilla chips to add a little extra flavor and crunch.
    An overhead image of labeled recipe ingredients.

    How To Make Chicken Crockpot Taco Soup

    Step 1- Add the base ingredients.

    Add all of the soup ingredients except for the chicken and rice to your pot. Stir until everything is well combined.

    Step 2- Add the chicken.

    Place the chicken breasts into the mixture. For the crockpot, cover with the lid and cook on high for 4 hours. 

    For your Instant Pot, secure the lid and set the vent to “Seal.” Cook on “Manual” for 12 minutes, then allow a 10-minute natural release. Lastly, carefully quick-release any remaining steam.

    Crockpot with soup ingredients in it and then covered and cooking.

    Step 3- Shred the chicken.

    Remove the chicken from the pot and shred it with two forks.

    Step 4- Finish the soup.

    Return the shredded chicken to the soup and stir in the cooked rice.

    Cooked soup in the crockpot and shredded chicken in a bowl.

    Step 5- Serve.

    Serve immediately and top with cheese, cilantro, and crushed tortilla chips.

    Frequently Asked Questions

    Can I use frozen chicken?

    Yes, frozen chicken works. Add about an extra hour in the slow cooker, or a few extra minutes if using the Instant Pot.

    Can I prep this ahead of time?

    Absolutely. You can add all the ingredients (except rice) to the pot, cover, and refrigerate until ready to cook.

    What if the soup is too thick?

    If the rice absorbs more liquid than expected, simply add a little extra chicken broth until it reaches your preferred consistency. You can also serve the rice on the side to add when serving.

    Tips For Making This Slow Cooker Chicken Taco Soup

    • Chop your vegetables evenly, so they cook at the same rate and are easy to scoop up with each spoonful.
    • Trim any excess fat from the chicken before adding it to the pot to keep the broth from becoming greasy. Especially important if using thigh meat.
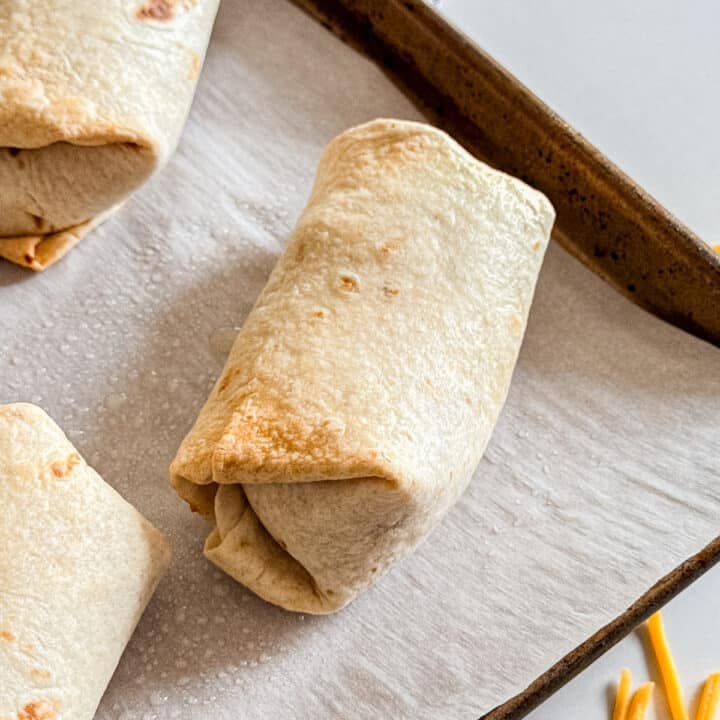
    • Make it spicier by using Original or Hot Rotel, or mix extra cayenne into the taco seasoning.
    • This soup is meant to be simple, but you can always customize it. Add extra beans, toss in some diced jalapeño for heat, or adjust the seasoning to your taste.
    • Ingredients to prep ahead- Chop the onion and bell pepper, and measure out the canned ingredients.
    • Leftovers and storage- Store in an airtight container in the fridge for up to 1 week. Reheat on the stovetop or in the microwave until warmed through.
    A close up image of a bowl of taco soup.

    What To Serve With Chicken Tacos Soup

    This soup is filling on its own, but you can easily turn it into a full meal with a few simple sides. I love pairing it with something fresh and something a little sweet to round things out. Try serving this chicken taco soup recipe with:

    • Avocado Salsa
    • Sautéed Zucchini And Tomatoes
    • BBQ Chicken Flatbread
    • Cherry Cheese Pie

    Other Soup Recipes To Try

    • A spoon holding a scoop of potato ham soup.
      Creamy Ham and Potato Soup
    • A bowl of chicken and egg noodles soup with sliced bread and another bowl behind it.
      Dutch Oven Chicken Noodle Soup
    • A bowl of squash soup with burrata and cilantro on top and chunks of squash and cilantro in the background.
      Savory Spiced Butternut Squash Soup
    • A bowl of tomato soup on a plate with a spoon and grilled cheese.
      Tomato Bisque Soup Recipe

    Love this recipe? Please leave a 5 star ⭐️⭐️⭐️⭐️⭐️ rating in the recipe card below ⬇️ and/or a review in the comment section further down. Check out my Amazon Store for all my favorite tools, including those used in this recipe. And follow @thelifejolie on Instagram and TikTok!

    An overhead image of taco soup in a bowl.

    Crockpot Taco Chicken Soup

    Jessy Freimann
    Need a dinner that cooks itself? This crockpot taco chicken soup comes together with just 5 minutes of prep, and the slow cooker (or Instant Pot) does the rest. Perfect for busy nights.
    5 from 1 vote
    Print Recipe Pin Recipe
    Prep Time 5 minutes mins
    Cook Time 4 hours hrs
    Inactive time 4 hours hrs
    Total Time 4 hours hrs 5 minutes mins
    Course Main, Main Course, Soup
    Cuisine Mexican
    Servings 8 servings
    Calories 220 kcal

    Equipment

    • 1 slow. cooker
    • 1 instant pot
    • chefs knife
    • 1 cutting board
    • 1 Measuring cups and spoons
    • 1 Wooden Spoons

    Ingredients
      

    Soup:

    • 1 cup onion, chopped
    • 1 cup bell pepper, chopped
    • 14.5 ounces corn, canned and drained
    • 14.5 ounces black beans, roughly drained
    • 10 ounces rotel, canned and undrained
    • 1 packet taco seasoning
    • 32 ounces chicken broth
    • 1 cup water
    • 3 boneless skinless chicken breasts
    • 1 cup cooked rice

    Possible Toppings:

    • Shredded cheddar cheese
    • Cilantro
    • Crushed tortilla chips

    Instructions
     

    Slow Cooker instructions:

    • Add all soup ingredients except for the chicken and rice to the slow cooker pot. Stir until well combined.
    • Add chicken breasts to the pot and cover. 
    • Turn the slow cooker on to high and cook for 4 hours.
    • Remove the chicken and shred with forks.
    • Put the shredded chicken back into the soup along with the cooked rice. 
    • Serve immediately and top with cheese, cilantro and crushed tortilla chips.

    Instant Pot instructions:

    • Add all soup ingredients except for the chicken and rice to the Instant Pot pot. Stir until well combined.
    • Add chicken breasts to the pot and cover. Turn the vent on the top of the cover to "Seal."
    • Set the Instant Pot to "Manual" and set it for 12 minutes.
    • Once the 12 minutes is up, let it naturally release for 10 minutes and then do a quick release to release the remaining steam.
    • When the steam has stopped, take off the cover. Remove the chicken and shred with forks.
    • Put the shredded chicken back into the soup along with the cooked rice. 
    • Serve immediately and top with cheese, cilantro and crushed tortilla chips.

    Video

    Notes

    • Chop your vegetables evenly, so they cook at the same rate and are easy to scoop up with each spoonful.
    • Trim any excess fat from the chicken before adding it to the pot to keep the broth from becoming greasy. Especially important if using thigh meat.
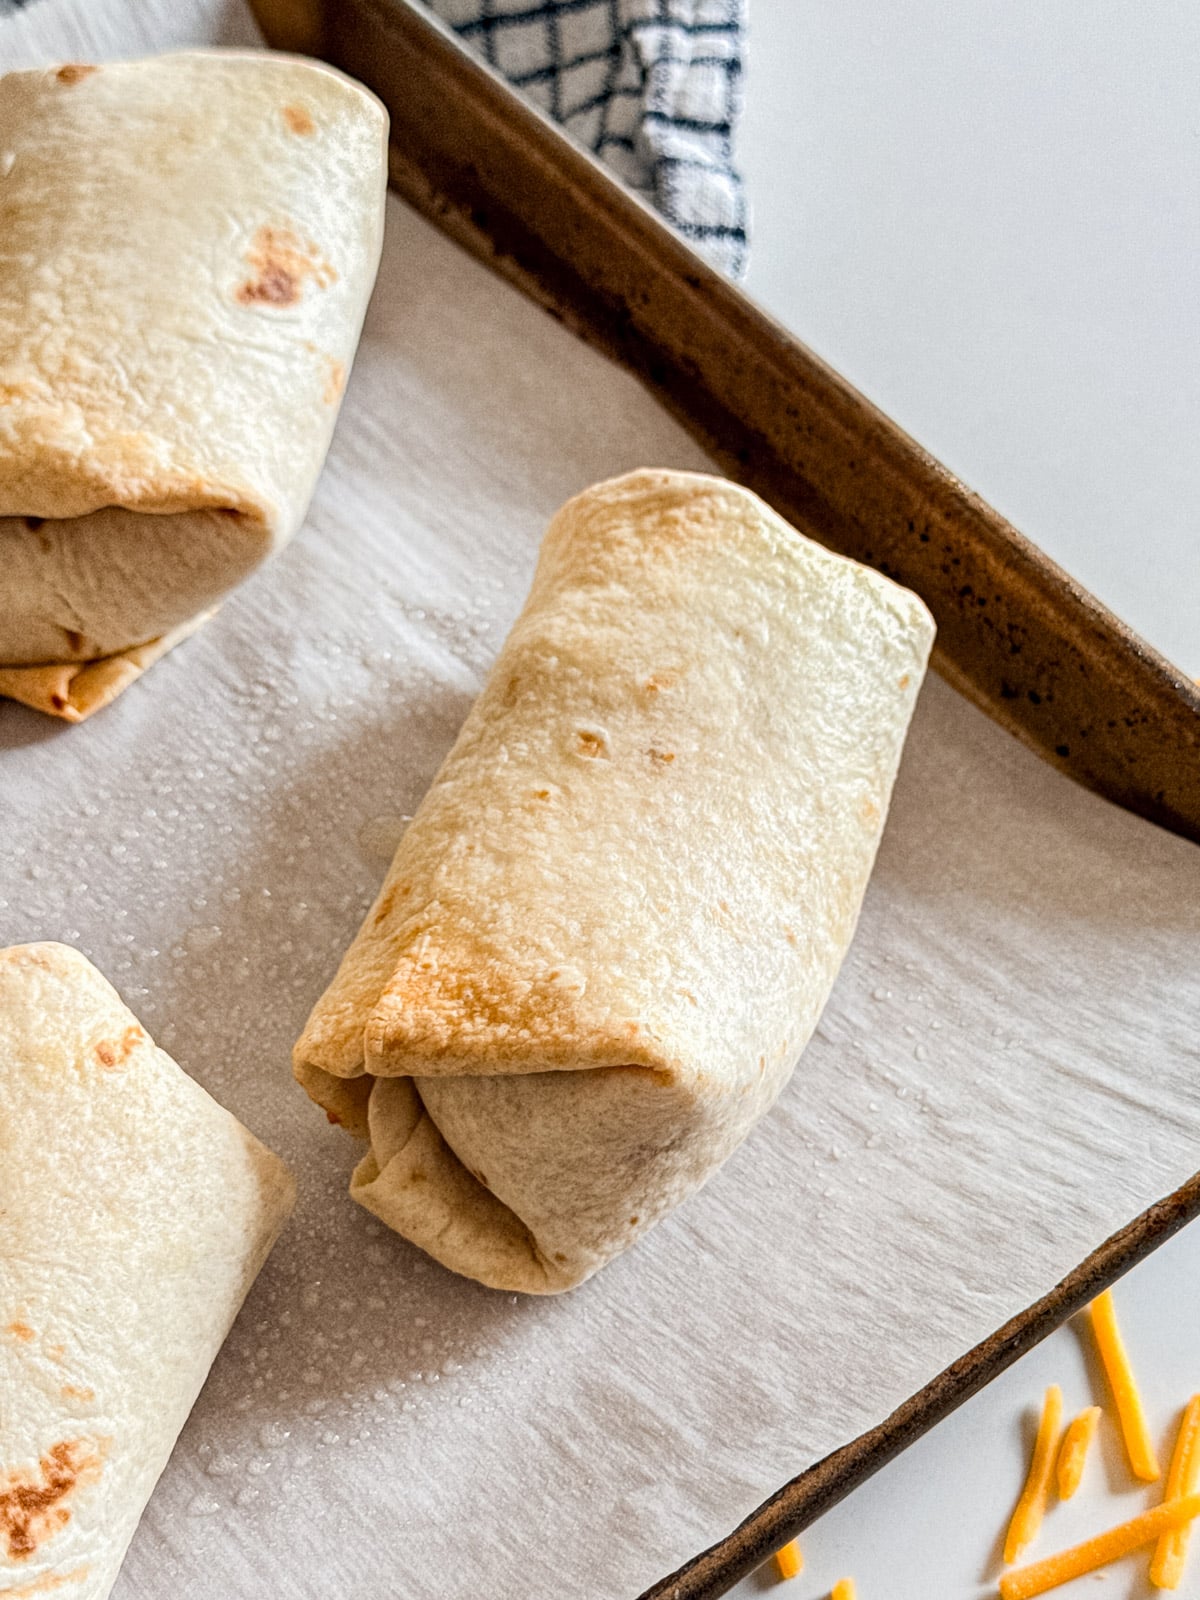
    • Make it spicier by using Original or Hot Rotel, or mix extra cayenne into the taco seasoning.
    • This soup is meant to be simple, but you can always customize it. Add extra beans, toss in some diced jalapeño for heat, or adjust the seasoning to your taste.
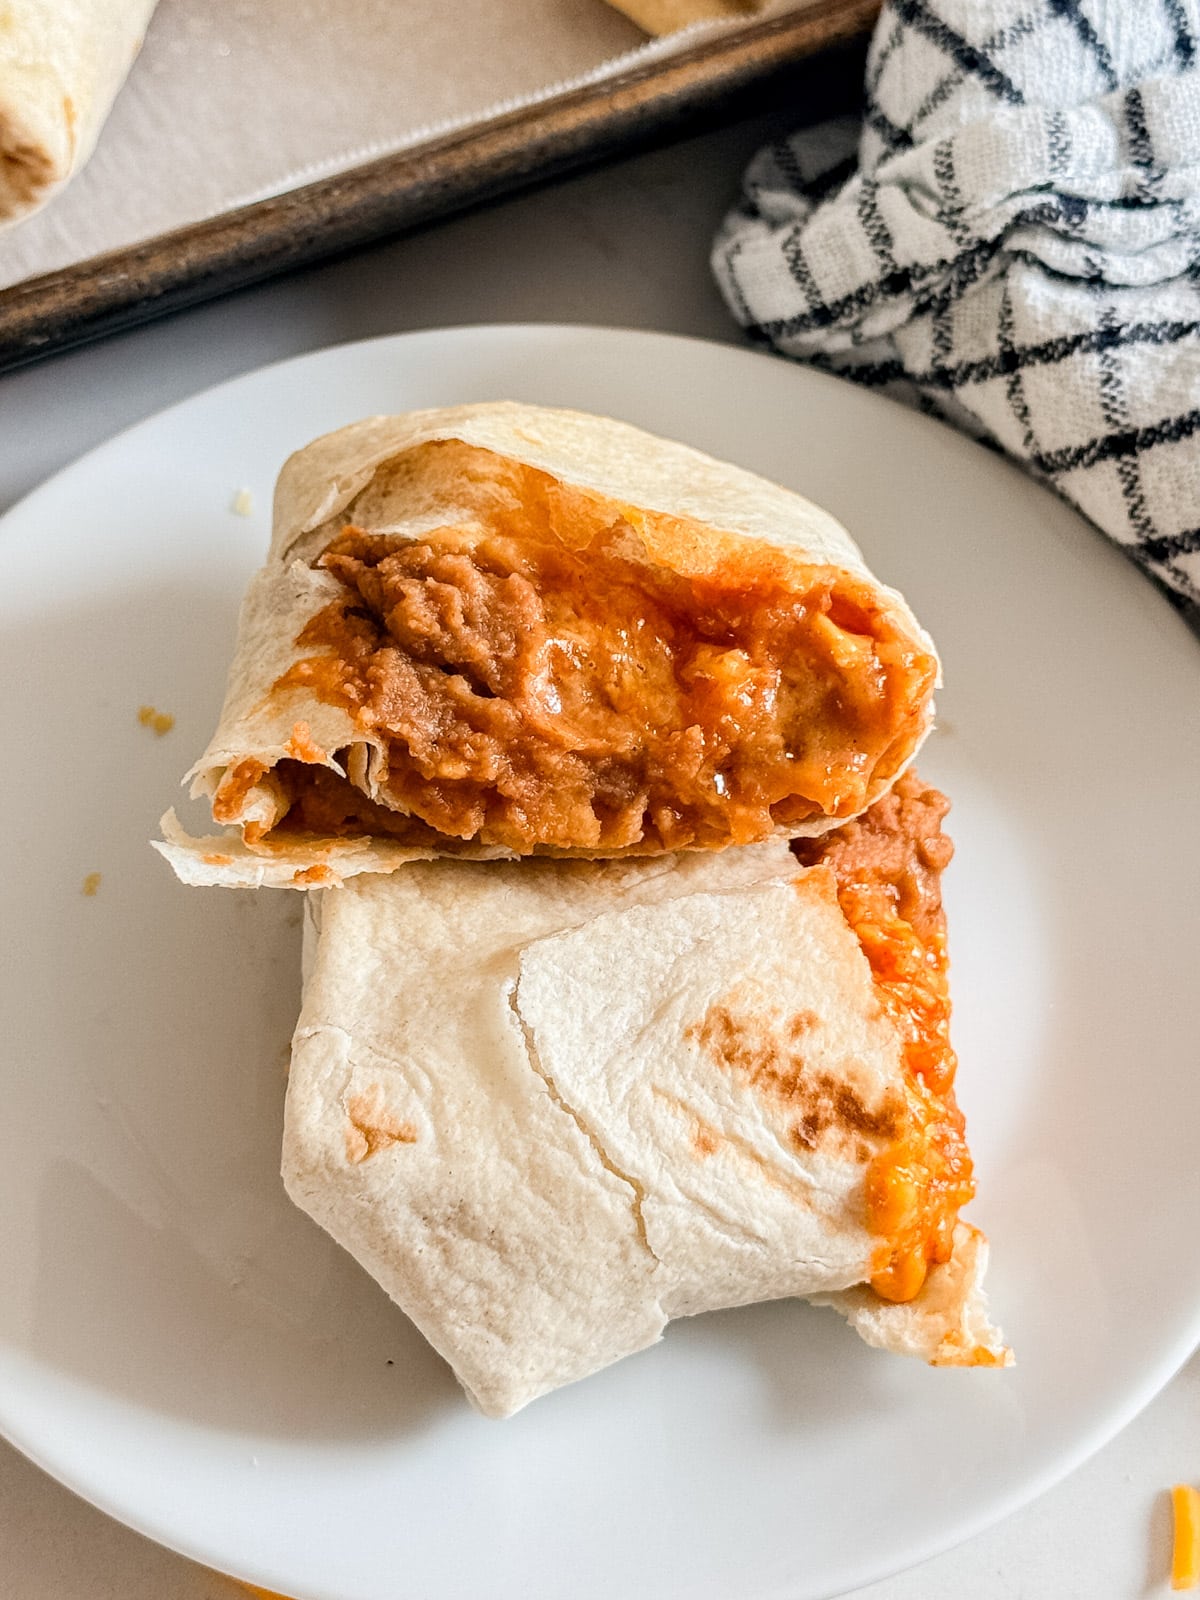
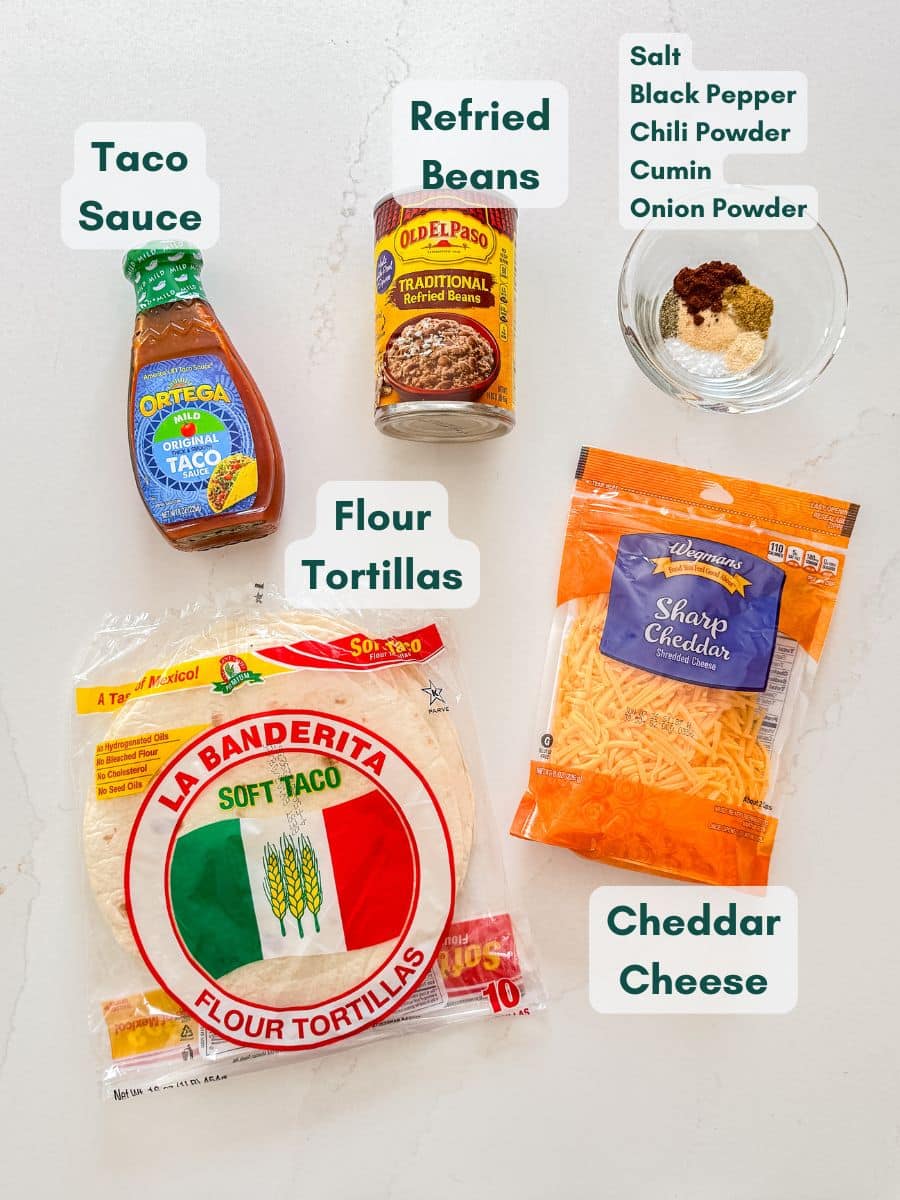
    • Ingredients to prep ahead- Chop the onion and bell pepper, and measure out the canned ingredients.
    • Leftovers and storage- Store in an airtight container in the fridge for up to 1 week. Reheat on the stovetop or in the microwave until warmed through.

    Nutrition

    Serving: 1servingCalories: 220kcalCarbohydrates: 35gProtein: 17gFat: 3gSaturated Fat: 0.5gPolyunsaturated Fat: 1gMonounsaturated Fat: 1gTrans Fat: 0.01gCholesterol: 29mgSodium: 830mgPotassium: 574mgFiber: 7gSugar: 5gVitamin A: 605IUVitamin C: 10mgCalcium: 41mgIron: 2mg
    Tried this recipe?Let us know how it was!
    • Page 1
    • Page 2
    • Page 3
    • Interim pages omitted …
    • Page 21
    • Go to Next Page »

    Primary Sidebar

    Jessy in a kitchen holding a white casserole pan and smiling.
    Hi, I'm Jessy!

    Welcome to The Life Jolie! I share simple, delicious recipes and ingredient prep tips to make your weeknight cooking a breeze!

    More about me →

    Easy Dinner Recipes

    • An overhead image of a Mexican Shrimp Quinoa Bowl.
      Shrimp Quinoa Bowls
    • A close up of roasted red potatoes on a pan.
      Roasted Red Potatoes Recipe
    • A spoon lifting up a scoop of eggplant parm bake with melt cheese trailing behind it.
      Eggplant Parm Bake
    • A close up of a drum chicken wing in a pile of other wings.
      Oven Baked Chicken Wings
    • A bowl of Swedish meatballs and noodles.
      Swedish Meatballs And Noodles
    • A close up image of a piece of coconut shrimp on top of others.
      Coconut Shrimp With Sauce

    Popular Recipes

    • A glass bowl of melted chocolate with a spatula dripping some back into the bowl.
      How To Melt Chocolate Chips In The Microwave
    • Italian Stuffed Zucchini Boats are the healthy weeknight meal you'll want to make again and again. This is a seriously easy recipe that's full of delicious flavor without all the guilt!
      Italian Stuffed Zucchini Boats
    • A close up shot of the side of a shallow bowl of shrimp mac salad.
      Shrimp Macaroni Salad
    • A white pan pouring cheese sauce over a bowl of steamed broccoli.
      Cheese Sauce for Broccoli Recipe
    • An overhead image of a plate of chicken lettuce wraps with peanut sauce next to it and all the fixings surrounding it.
      Copycat Cheesecake Factory Thai Chicken Lettuce Wraps
    • A close up image of a piece of greek marinated chicken on a white plate with lemons on the plate and in the background.
      Greek Yogurt Chicken
    Jessy in a kitchen holding a white casserole pan and smiling.
    Hi, I'm Jessy!

    Welcome to The Life Jolie! I share simple, delicious recipes and ingredient prep tips to make your weeknight cooking a breeze!

    More about me →

    Easy Dinner Recipes

    • An overhead image of taco soup in a bowl.
      Crockpot Taco Chicken Soup
    • A spoon pulling up a scoop of skillet lasagna with melted cheese stretching behind it.
      No Bake Lasagna Skillet
    • A bowl of hearty lamb stew.
      Easy Lamb Stew Recipe
    • A close up of a wooden spoon in a pan of taco pasta.
      One Pan Taco Pasta With Chicken
    • An overhead image of a bowl of linguine with clam sauce.
      Red Clam Sauce
    • A bowl of bacon mac and cheese.
      Baked Mac And Cheese With Bacon

    Popular Recipes

    • A glass bowl of melted chocolate with a spatula dripping some back into the bowl.
      How To Melt Chocolate Chips In The Microwave
    • Italian Stuffed Zucchini Boats are the healthy weeknight meal you'll want to make again and again. This is a seriously easy recipe that's full of delicious flavor without all the guilt!
      Italian Stuffed Zucchini Boats
    • A close up shot of the side of a shallow bowl of shrimp mac salad.
      Shrimp Macaroni Salad
    • A white pan pouring cheese sauce over a bowl of steamed broccoli.
      Cheese Sauce for Broccoli Recipe
    • An overhead image of a plate of chicken lettuce wraps with peanut sauce next to it and all the fixings surrounding it.
      Copycat Cheesecake Factory Thai Chicken Lettuce Wraps
    • A close up image of a piece of greek marinated chicken on a white plate with lemons on the plate and in the background.
      Greek Yogurt Chicken

    Footer

    ↑ back to top

    About

    • About Me
    • Privacy Policy + Disclaimer

    Newsletter

    • Sign Up! for emails and updates

    Contact

    • Contact
    • Video Production

    As an Amazon Associate I earn from qualifying purchases.

    Copyright 2014-2021 - Jolie Ventures, LLC. All Rights Reserved. Privacy Policy.

    Rate This Recipe

    Your vote:


    A rating is required
    A name is required
    An email is required