
• Skip to primary navigation
  • Skip to main content
  • Skip to primary sidebar
The Life Jolie logo
  • Easy Dinner Recipes
  • Recipes
  • About
  • Contact
    • Work with me!
    • Video Production
  • Nav Social Menu

    • Email
    • Facebook
    • Instagram
    • Pinterest
    • Twitter
    • YouTube
menu icon
go to homepage
subscribe
search icon
Homepage link
  • Easy Dinner Recipes
  • Recipes
  • About
  • Contact
    • Work with me!
    • Video Production
    • Email
    • Facebook
    • Instagram
    • Pinterest
    • Twitter
    • YouTube
  • ×
    The Life Jolie » Page 14

    Cheesy Squash Casserole

    Cheesy Squash Casserole

    Nov 1, 2019 · 2 Comments

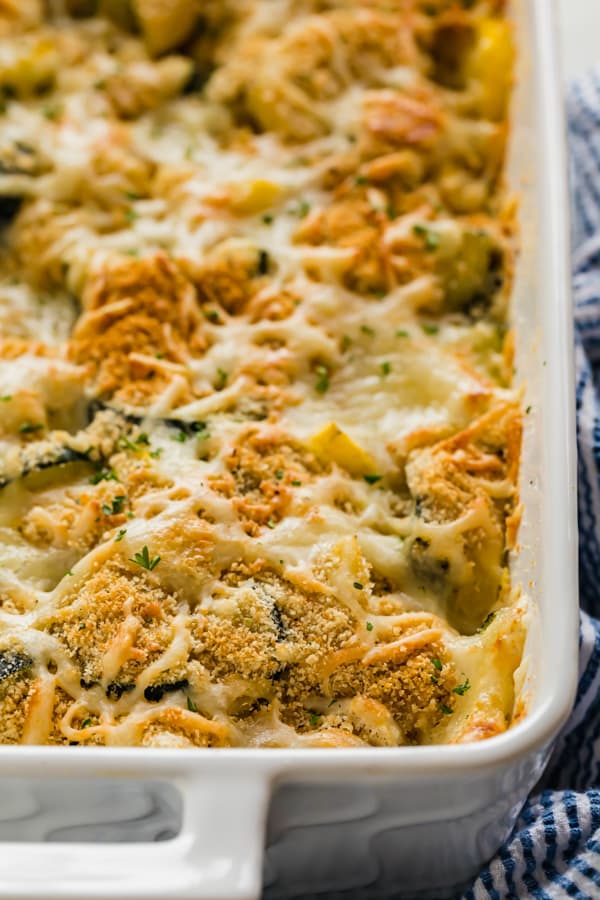
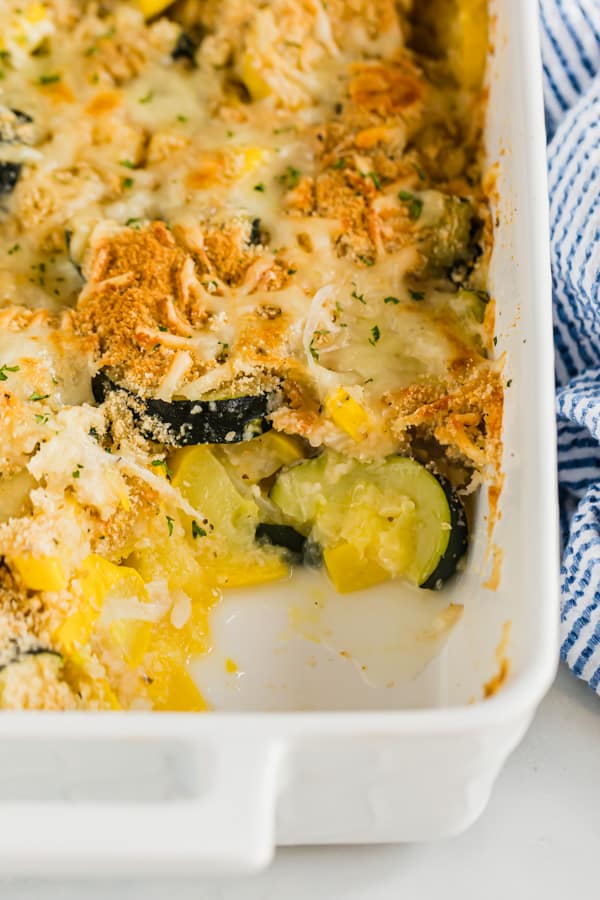
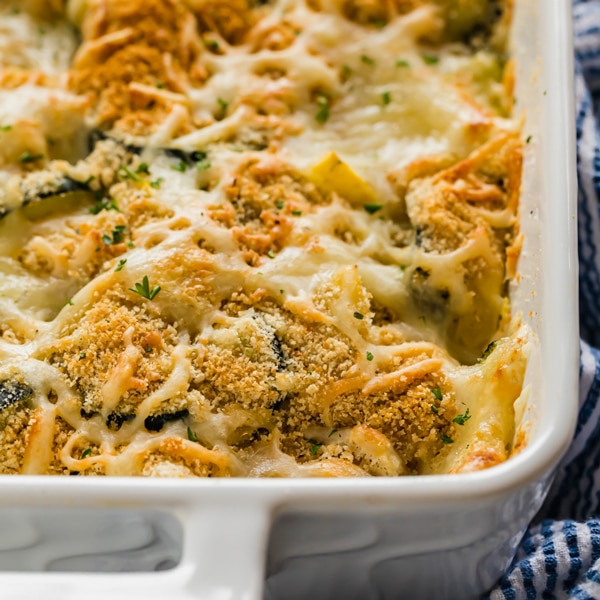
    Cheesy Squash Casserole is the kind of side dish that will impress even the pickiest of eaters. Tender yellow squash and zucchini, savory bread crumbs and deliciously melty cheese make this side dish a total crowd pleaser!
    Cheesy Squash Casserole is the kind of side dish that will impress even the pickiest of eaters. Tender yellow squash and zucchini, savory bread crumbs and deliciously melty cheese make this side dish a total crowd pleaser!

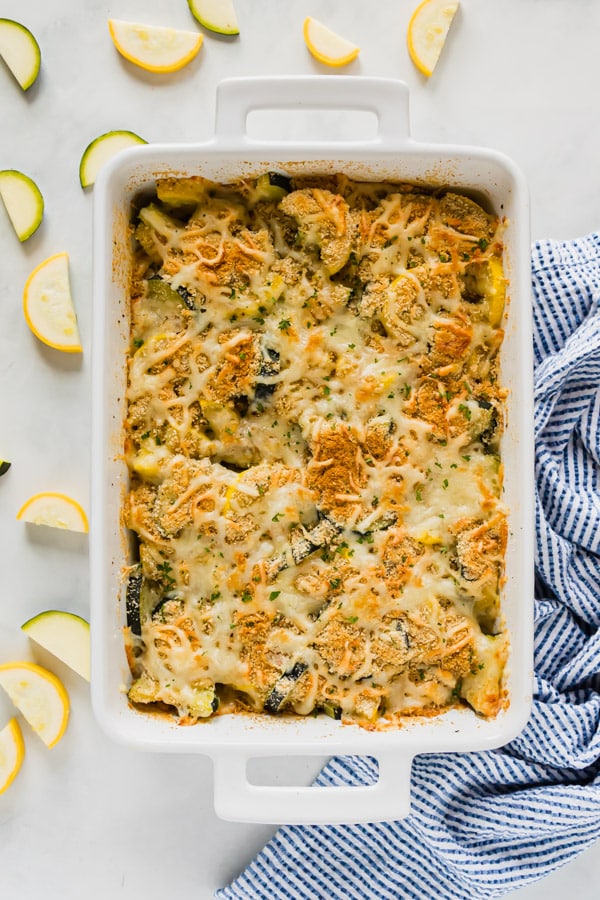
    An overhead image of a pan os squash casserole.

    Try some other great vegetable side dishes like Easy Sautéed Veggies, Garlic Parmesan Roasted Broccoli, and Sautéed Kale with Mushrooms and Tomatoes.

    Cheesy Squash Casserole

    This post contains Affiliate Links. Please see the disclaimer here.

    Isn't it amazing how some really good, melty cheese and savory flavors can make most foods taste fantastic? I've had a touch-and-go relationship with squash for as long as I can remember. I'm not a huge fan of most varieties, but if I had to choose a variety it would definitely be zucchini and yellow squash.

    But this squash and zucchini casserole is a total winner. It's the kind of side dish that you can throw together for a family gathering and know full well everyone will be back for seconds. Not only that, it's super simple to make without any extra hassle. Get ready to fall in love with squash all over again!
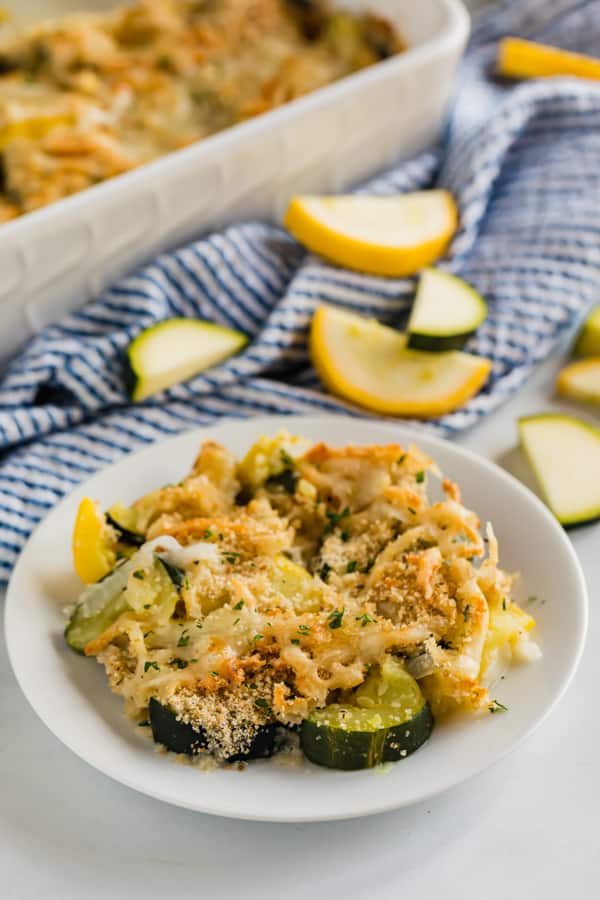
    A plate of squash casserole

    Tips for making this Squash Casserole recipe

    • It's up to you what texture you want for the zucchini and squash. If you're looking for more of a tender/crisp, slice it to be more of ⅓ inch and blanch for only 5 minutes. If you want a softer texture, slice them to ¼ inch and blanch for 7 minutes.
    • Be sure to drain the yellow squash and zucchini well (if possible, overnight) to eliminate unnecessary water.
    • When it comes to the cheese and the bread crumbs, I like to layer them with half the cheese, the bread crumbs and then the other half of the cheese.
    • To cut the butter, I take each pat of butter and and cut it into nine small cubes (make a tic tac toe board on it!).
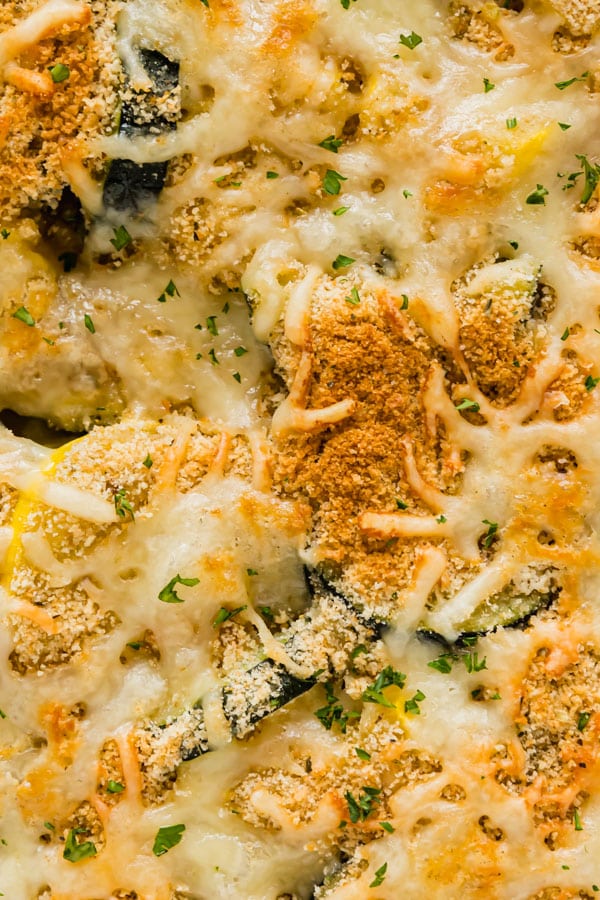
    A close up image of the cheesy crust on top of squash casserole recipe

    How many cups in a zucchini?

    It's tough to say as the sizes vary, but you can get 3 cups per pound of zucchini.

    Is yellow squash different from zucchini?

    They're similar but not the same. Besides the obvious color difference, they're slightly different shapes (the yellow squash tapers) and the yellow squash has a slightly sweeter flavor.

    Can I make this ahead?

    Not completely, but you can definitely boil and drain the squash, zucchini and onions ahead and assemble and bake the day you plan to serve it.

    How long will squash casserole keep in refrigerator?

    Although this is best enjoyed right out of the oven, this will last in the refrigerator covered for up to four days.

    Can squash casserole be frozen?

    I wouldn't recommend it as squash and zucchini have a higher water content and tend to thaw a bit soggy.
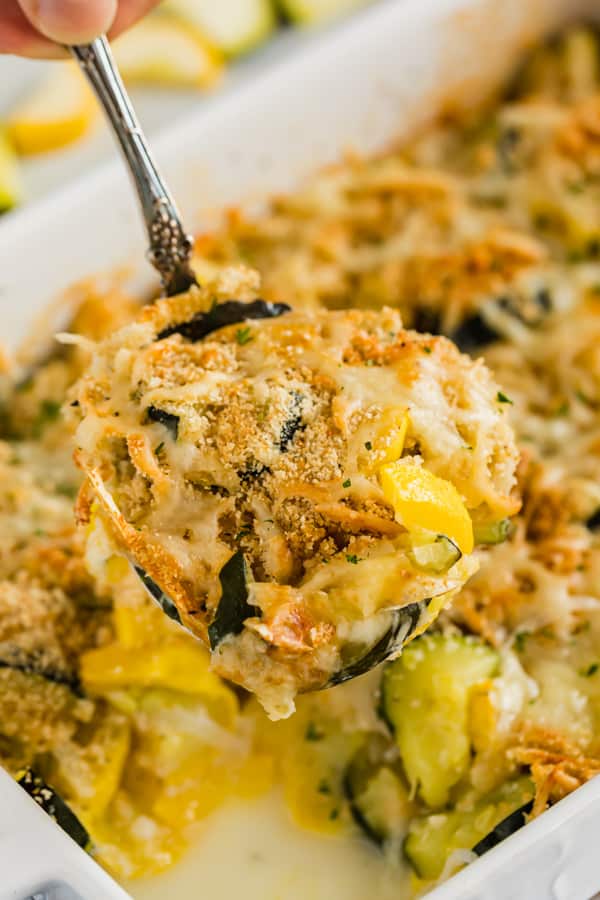
    A spoon with scoop of squash casserole

    Ingredients for making Zucchini Casserole

    • Zucchini
    • Yellow squash
    • Onion
    • Kosher salt
    • Black pepper
    • Granulated sugar
    • Milk
    • Gruyere cheese
    • Seasoned bread crumbs
    • Butter
    A side angle shot of the corner of the pan of zucchini casserole

    Helpful tools:

    1. Chef's knife
    2. Cutting board
    3. Measuring cups
    4. Measuring spoons
    5. Dutch oven
    6. Wooden spoon
    7. 11" x 7" baking pan
    The inside of a pan of squash casserole

    Hosting Thanksgiving?

    Discover the secret to hosting Thanksgiving without all the stress! Prepsgiving is your FREE guide to making a delicious Thanksgiving feast the easy way.
    Cheesy Squash Casserole is the kind of side dish that will impress even the pickiest of eaters. Tender yellow squash and zucchini, savory bread crumbs and deliciously melty cheese make this side dish a total crowd pleaser!

    Cheesy Squash Casserole

    Jessy Freimann
    Cheesy Squash Casserole is the kind of side dish that will impress even the pickiest of eaters. Tender yellow squash and zucchini, savory bread crumbs and deliciously melty cheese make this side dish a total crowd pleaser!
    5 from 1 vote
    Print Recipe Pin Recipe
    Prep Time 10 minutes mins
    Cook Time 35 minutes mins
    Total Time 45 minutes mins
    Course Side Dish
    Cuisine American
    Servings 8 servings
    Calories 151 kcal

    Equipment

    • 1 11" x 7" baking pan
    • 1 mixing bowl
    • 1 Spatula
    • 1 Box grater
    • 1 cutting board
    • 1 chefs knife

    Ingredients
      

    • 1 pound zucchini, cut length-wise and sliced into ¼-1/3 inch pieces
    • 1 pound yellow squash, cut length-wise and sliced into ¼-1/3 inch pieces
    • 1 medium onion, thinly sliced
    • 1 teaspoon Kosher salt
    • ¼ teaspoon ground black pepper
    • ¼ teaspoon granulated sugar
    • ¼ cup milk
    • 1 cup grated gruyere cheese, divided
    • ½ cup seasoned bread crumbs
    • 2 Tablespoons salted butter, cut into small chunks

    Instructions
     

    • Preheat the oven to 350 degrees F and grease an 11" x 7" baking pan. Set aside.
    • Boil water and blanch zucchini, yellow squash and onions for 5-7 minutes until tender. Drain well.
    • Place vegetables in an even layer in the prepared pan.
    • Sprinkle and even layer of salt, pepper and sugar over the vegetables.
    • Pour milk evenly over the vegetables.
    • Sprinkle ½ cup cheese evenly over the vegetables.
    • Sprinkle the bread crumbs evenly over the vegetables.
    • Sprinkle the other ½ cup cheese evenly over the vegetables.
    • Scatter cubes of butter over the top of the casserole.
    • Bake uncovered for 30 minutes or until golden brown (you can also broil it for the last 2 minutes, just keep an eye on it, so it doesn't burn). Serve immediately.

    Notes

    Leftovers last up to 3 days refrigerated.

    Nutrition

    Serving: 1servingCalories: 151kcalCarbohydrates: 11gProtein: 8gFat: 9gSaturated Fat: 5gPolyunsaturated Fat: 1gMonounsaturated Fat: 3gTrans Fat: 0.1gCholesterol: 27mgSodium: 540mgPotassium: 360mgFiber: 2gSugar: 4gVitamin A: 498IUVitamin C: 21mgCalcium: 212mgIron: 1mg
    Tried this recipe?Let us know how it was!
    A plate of squash casserole

    If you tried this recipe please comment and rate it 🙂 I love hearing your feedback and answering your questions! And if you make this please tag me on Instagram with @thelifejolie so I can share it <3

    You can find a full index of my recipes here.

    Don’t forget to follow The Life Jolie on Pinterest for more recipe inspiration!

    Or if Pinterest isn’t your style, bookmark this post!

    Let’s keep the conversation going- join my Facebook group! 
    Ciabatta Italian Bread Stuffing

    Oct 28, 2019 · 1 Comment

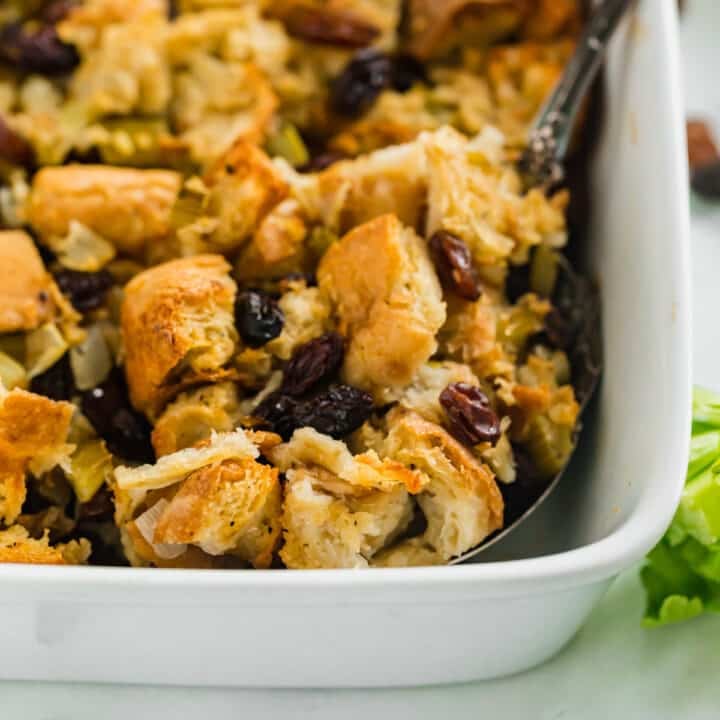
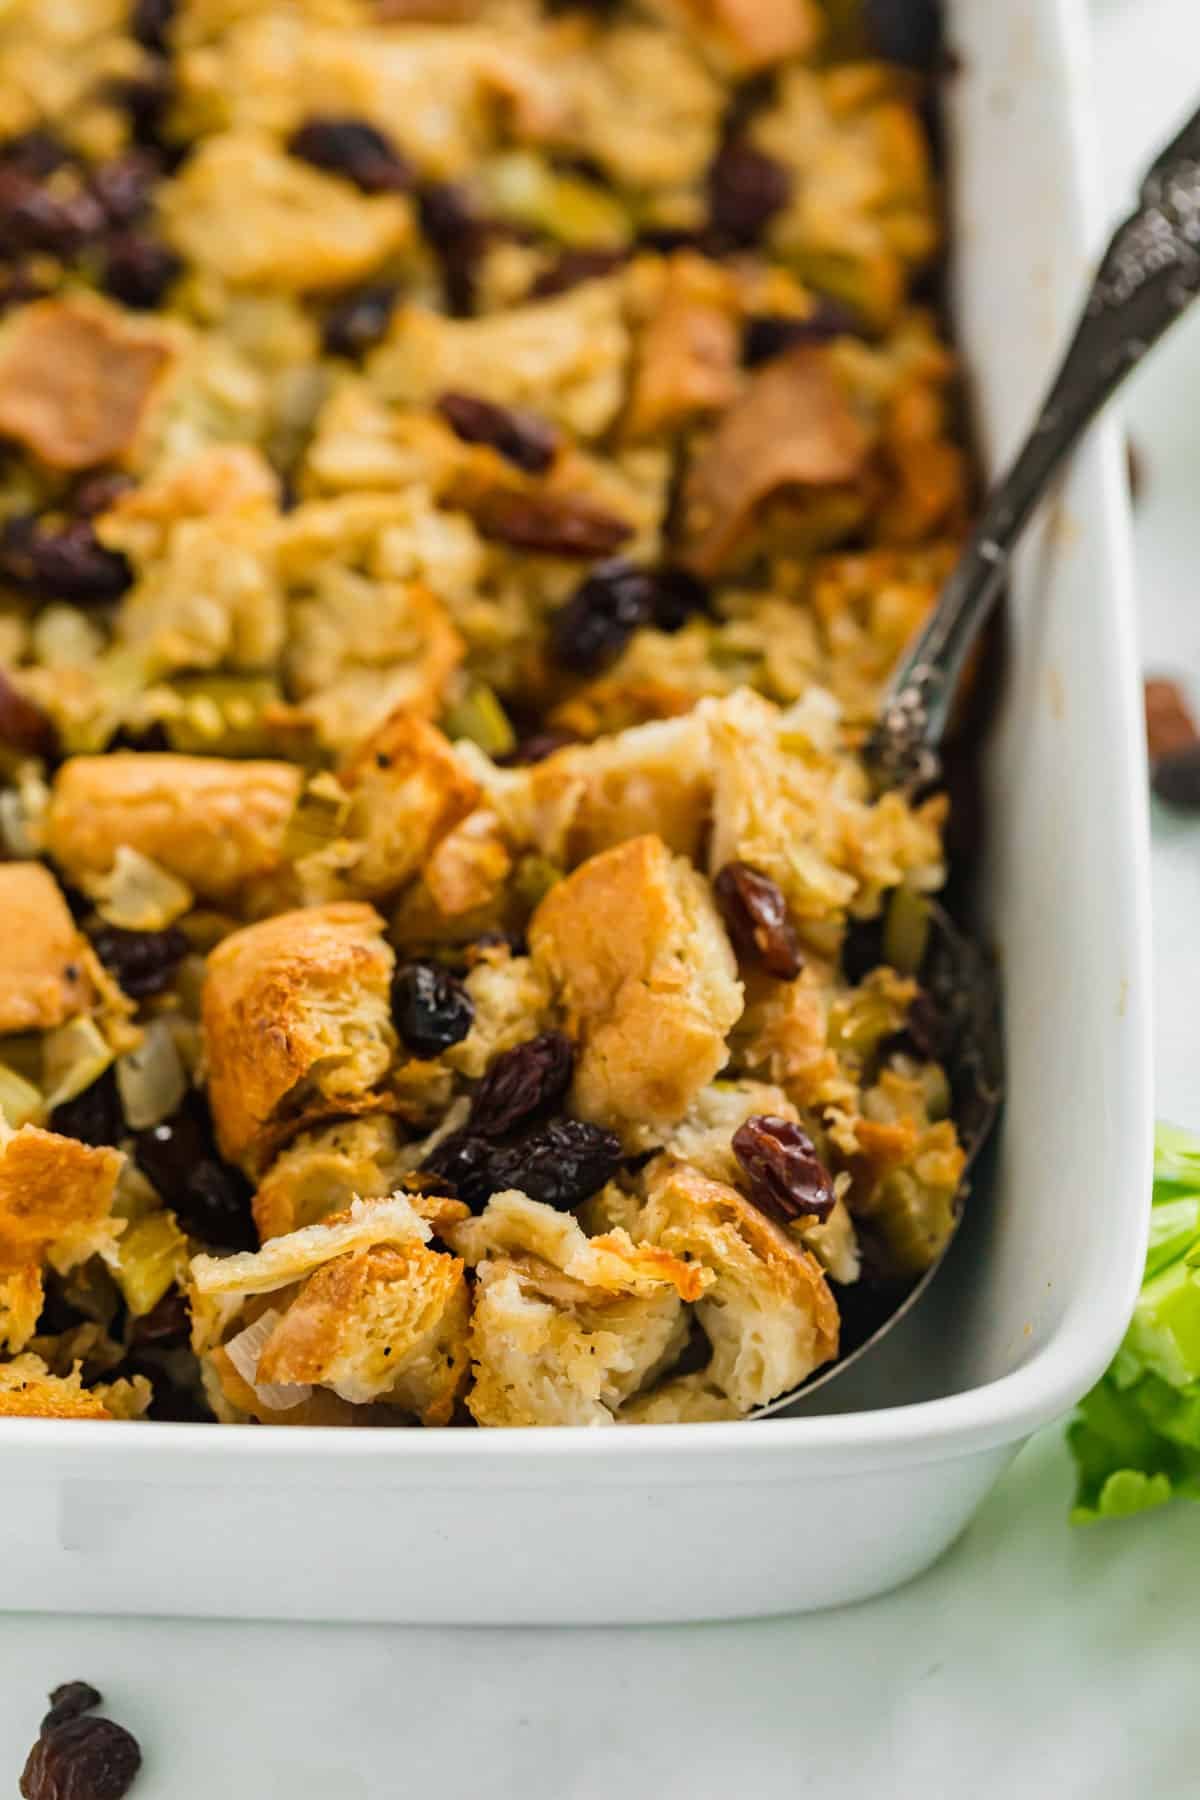
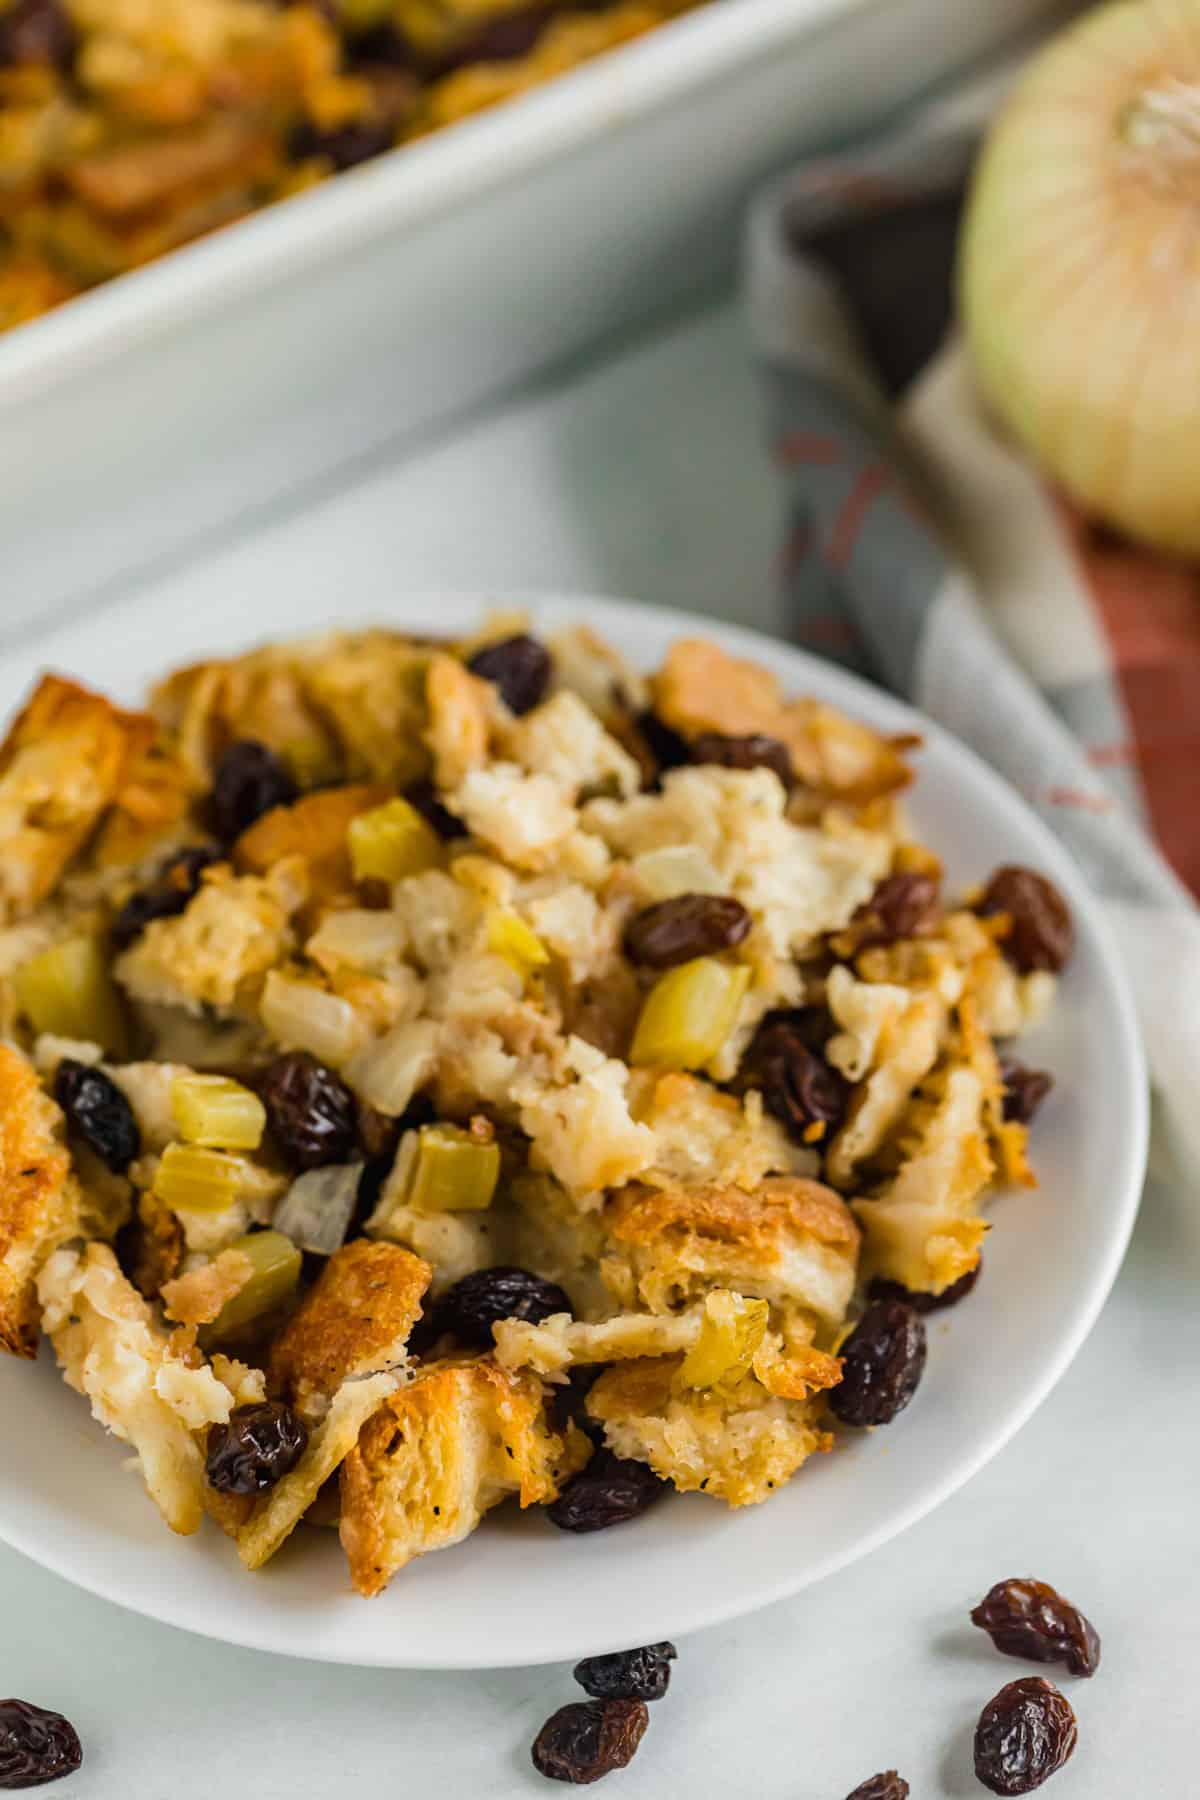
    The corner of Italian bread stuffing in a white casserole dish with a spoon in it.

    This Italian Bread Stuffing recipe is about to become your new go-to for Thanksgiving. Whether you serve it on its own or use it as a stuffing for your turkey, this easy ciabatta stuffing adds a flavorful twist to a traditional holiday side dish!

    The corner of Italian bread stuffing in a white casserole dish with a spoon in it
    [feast_advanced_jump_to]

    Why You'll Love This Italian Bread Stuffing 

    So, here's the thing. I'm not a huge fan of stuffing (or dressing, if you prefer). I think we're all a little weird about textures in our own ways — for me, that means I'm not into mushy textures. And in my experience, I've found most homemade stuffing recipes to be sort of mushy.

    But this Italian stuffing for Thanksgiving is definitely one that I can get on board with! Yes, it's soft in the middle. But it gets a subtle golden brown crispiness on the top as it bakes, and the flavor is spot-on.

    When I brought some of it to my daughter's daycare for the teachers to sample, they all immediately asked when it would be on the blog — it was a total hit! Trust me when I say, this Italian stuffing recipe will become a new holiday favorite like it has for my family!

    • Easy prep
    • Simple ingredients
    • Crowd pleaser
    • Sweet and savory
    • Two cooking methods
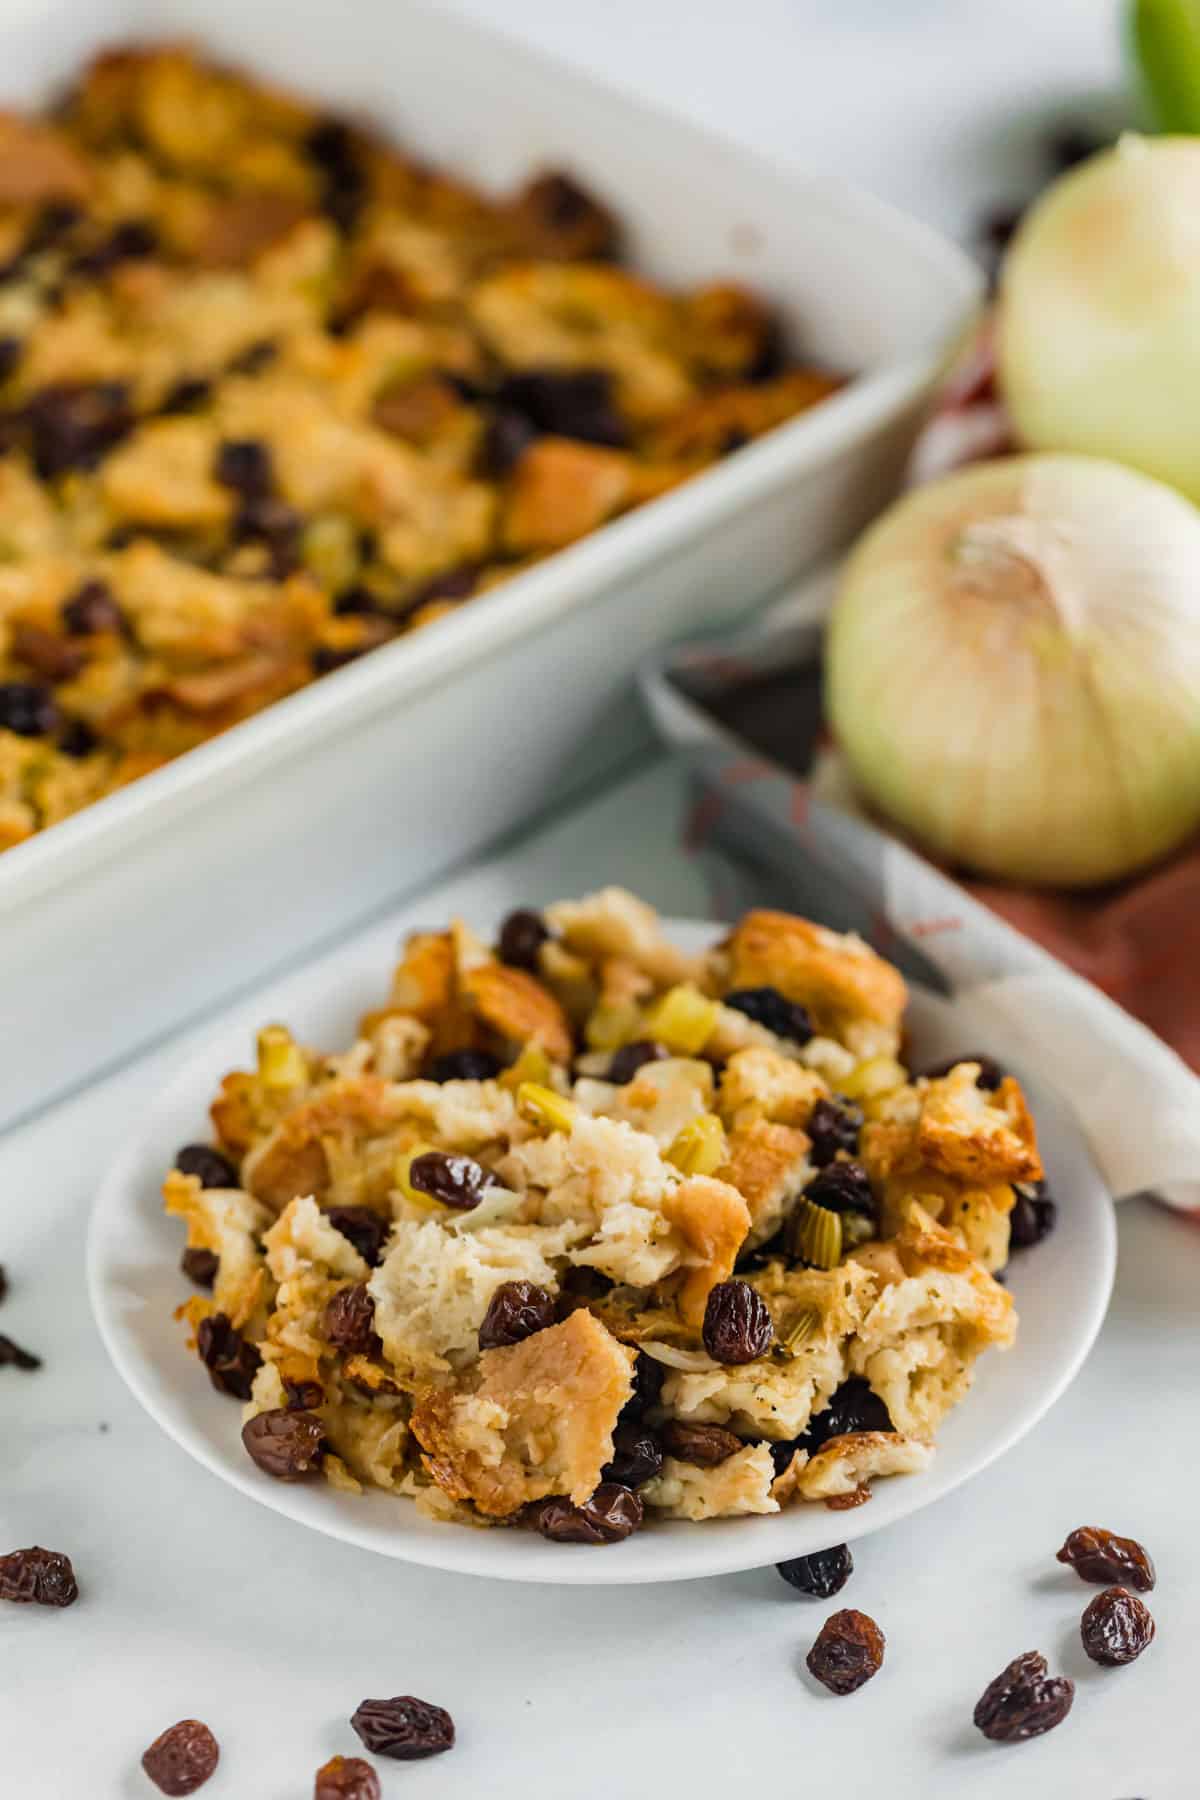
    A plate of stuffing with the casserole dish full of it in the background and some onions.

    Ingredient Information and Substitutions

    • Ciabatta Bread - The delicious base for this Italian stuffing recipe! While there's nothing else quite like it, a crusty Italian loaf or French loaf are the closest substitutes. I toast them to add a bit more texture to this dish and keep them from getting soggy.
    • Butter and olive oil - Use this combo to sauté your veggies.
    • Onion and celery - A classic base of flavor that adds some texture as well.
    • Garlic - Is it even Italian without this ingredient? Stick with fresh cloves for the best flavor if you can.
    • Seasonings - A simple blend of Kosher salt, freshly ground black pepper, and Italian seasoning is all you need for this ciabatta stuffing recipe.
    • Chicken Broth - Vegetable broth is a good substitute if you want to make this Italian bread stuffing vegetarian.
    • White Wine - I think this adds a better flavor, but you could always substitute more broth.
    • Raisins - I'm not normally a dried fruit fan in my cooking, but the raisins really help round out the flavor in this Italian stuffing. You can also substitute dried currants, cherries, or cranberries if you prefer.

    How to Make Ciabatta Stuffing

    Step 1: Sauté the veggies

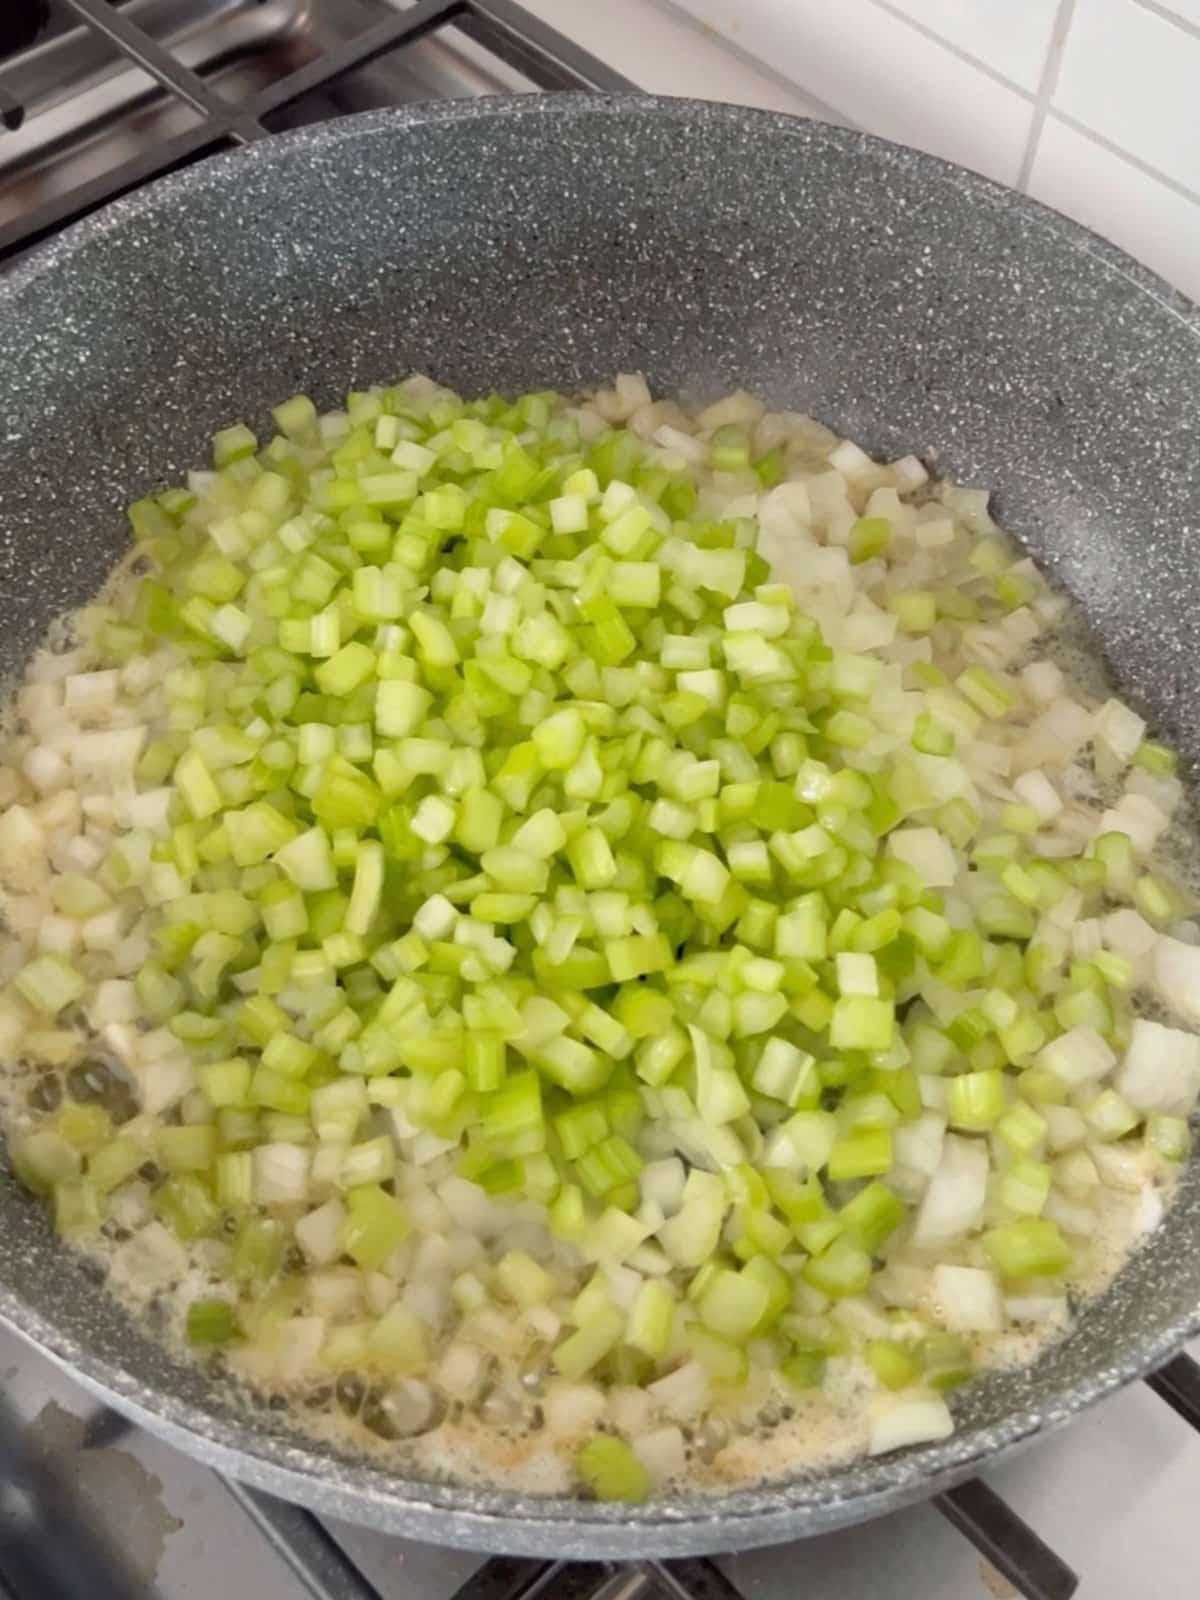
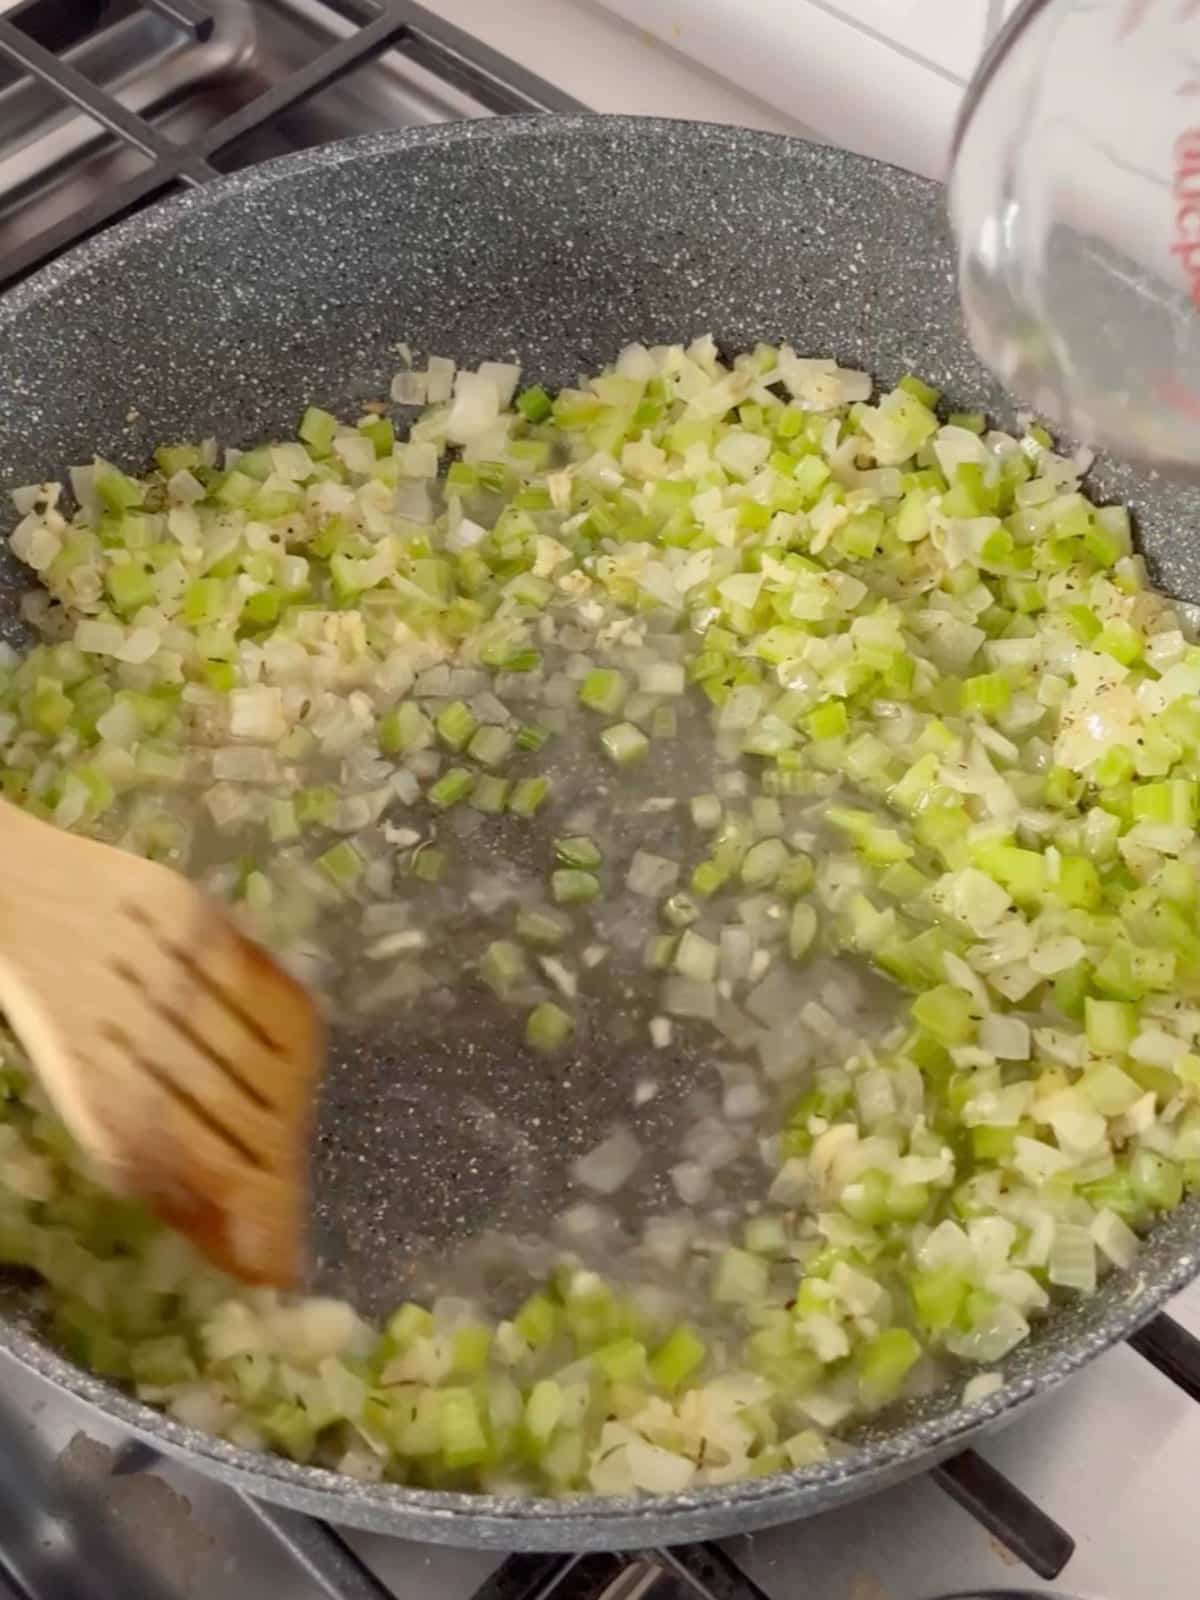
    Toast the bread for 10 minutes at 350 degrees in a single layer. While the bread toasts, melt butter and olive oil in a skillet on the stove. Add the onions and celery and cook for about 5 minutes, stirring frequently.

    A skillet on a stove with diced onion and celery in it.

    Step 2: Season and deglaze with wine

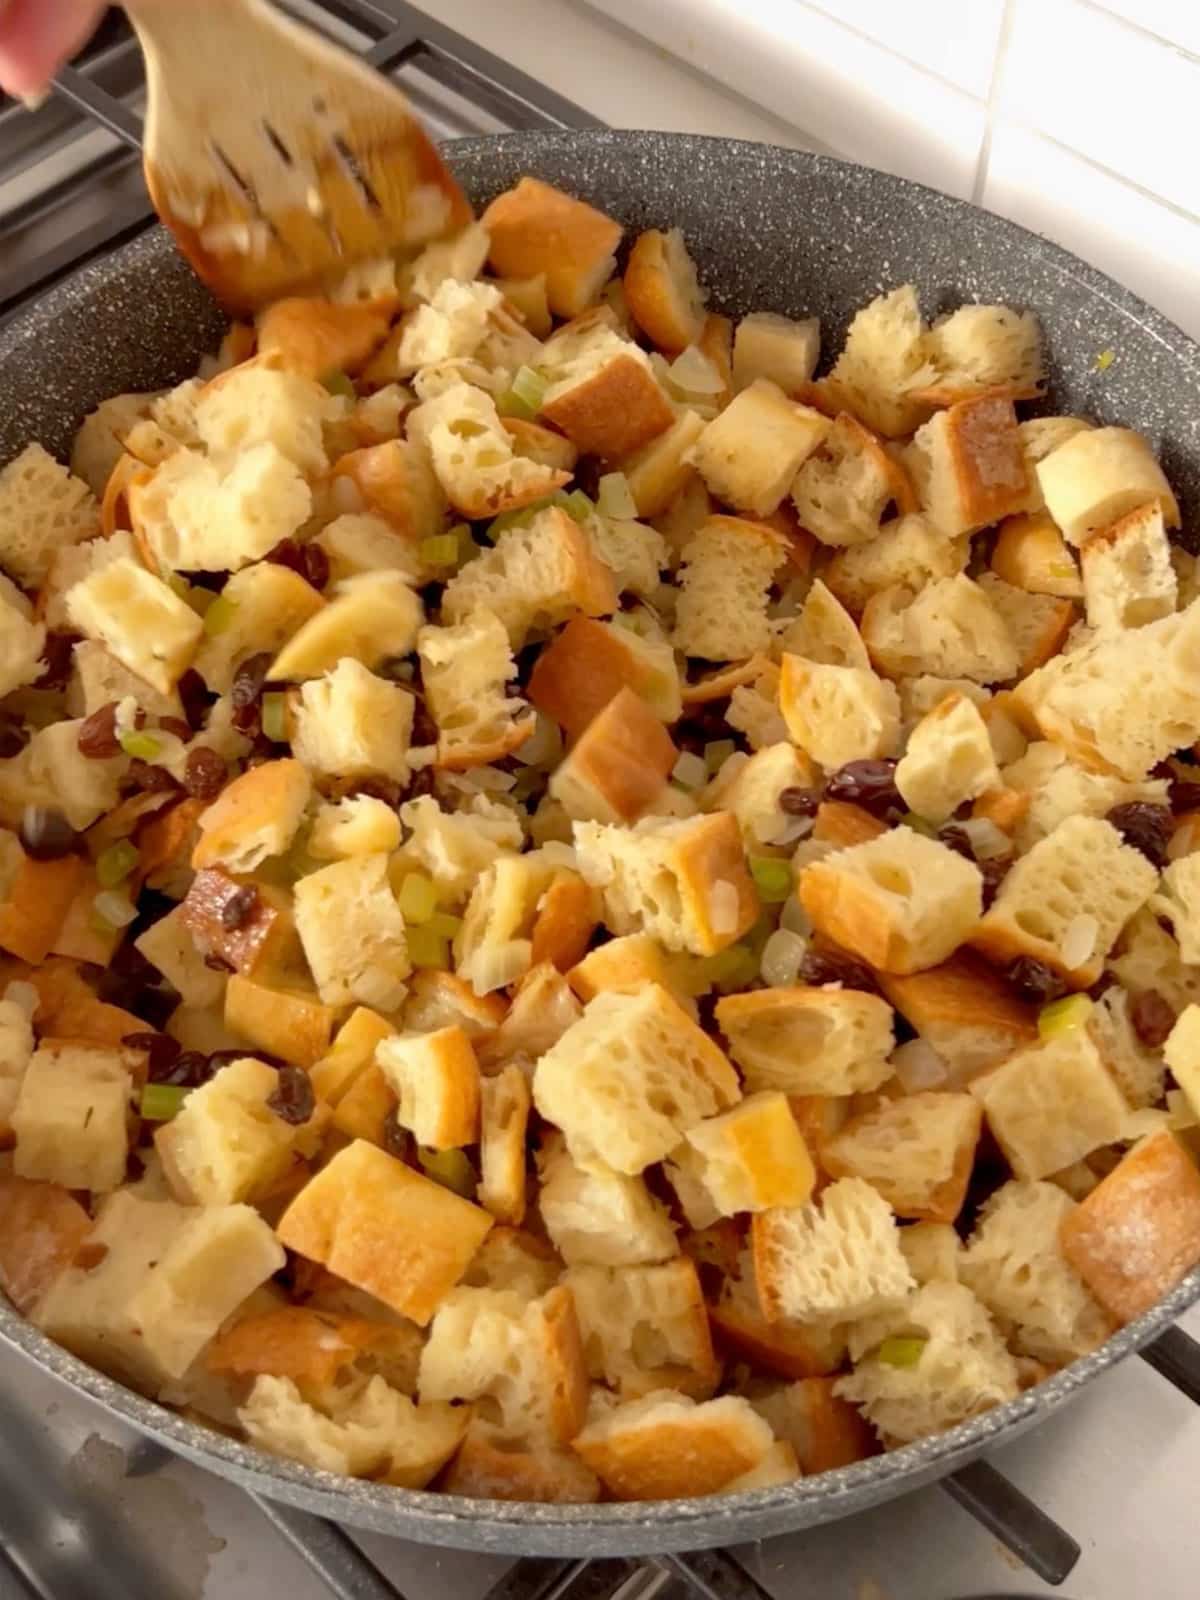
    Stir the garlic until fragrant, then season with salt, pepper, and Italian seasoning. Add the wine, reduce heat, and simmer for about 2 minutes.

    A wooden spoon deglazing the pan of celery and onion with white wine.

    Step 3: Combine everything together

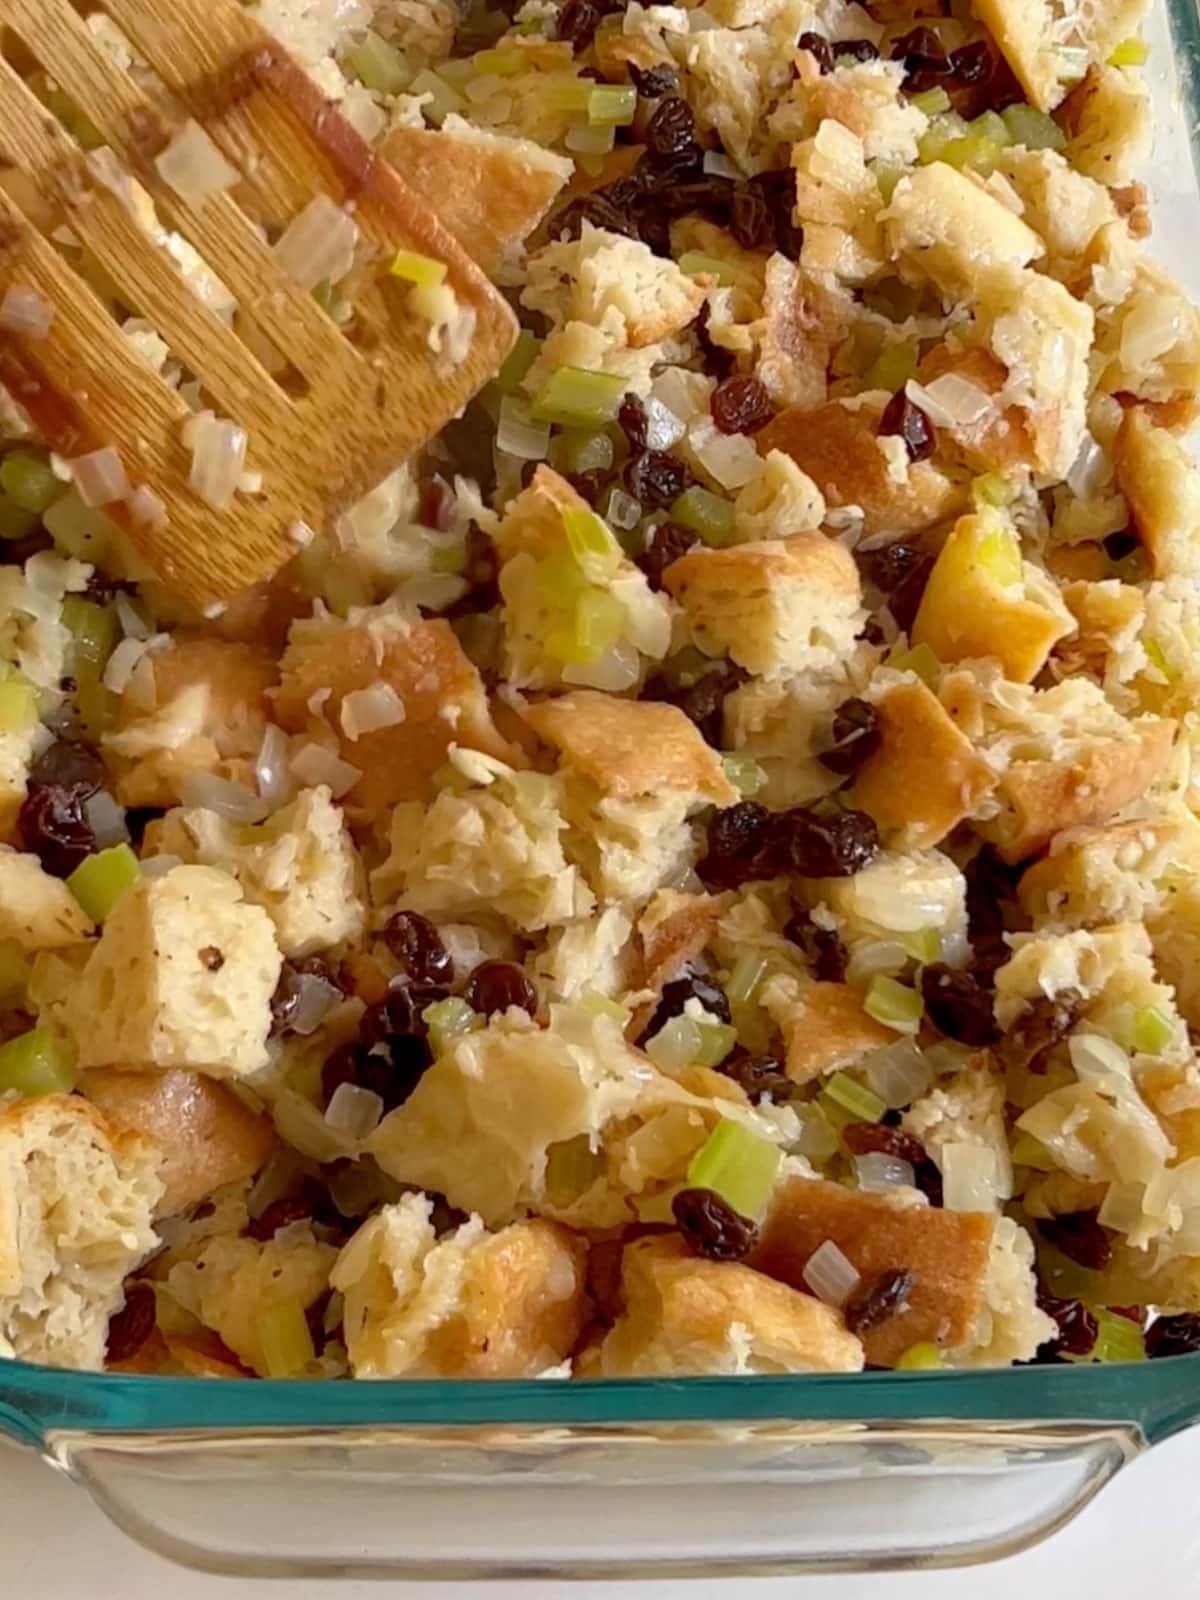
    Stir the bread, raisins, and broth into the pan until the bread has absorbed most of the liquid.

    Bread and remaining stuffing ingredients combined in the skillet.

    Step 4: Bake

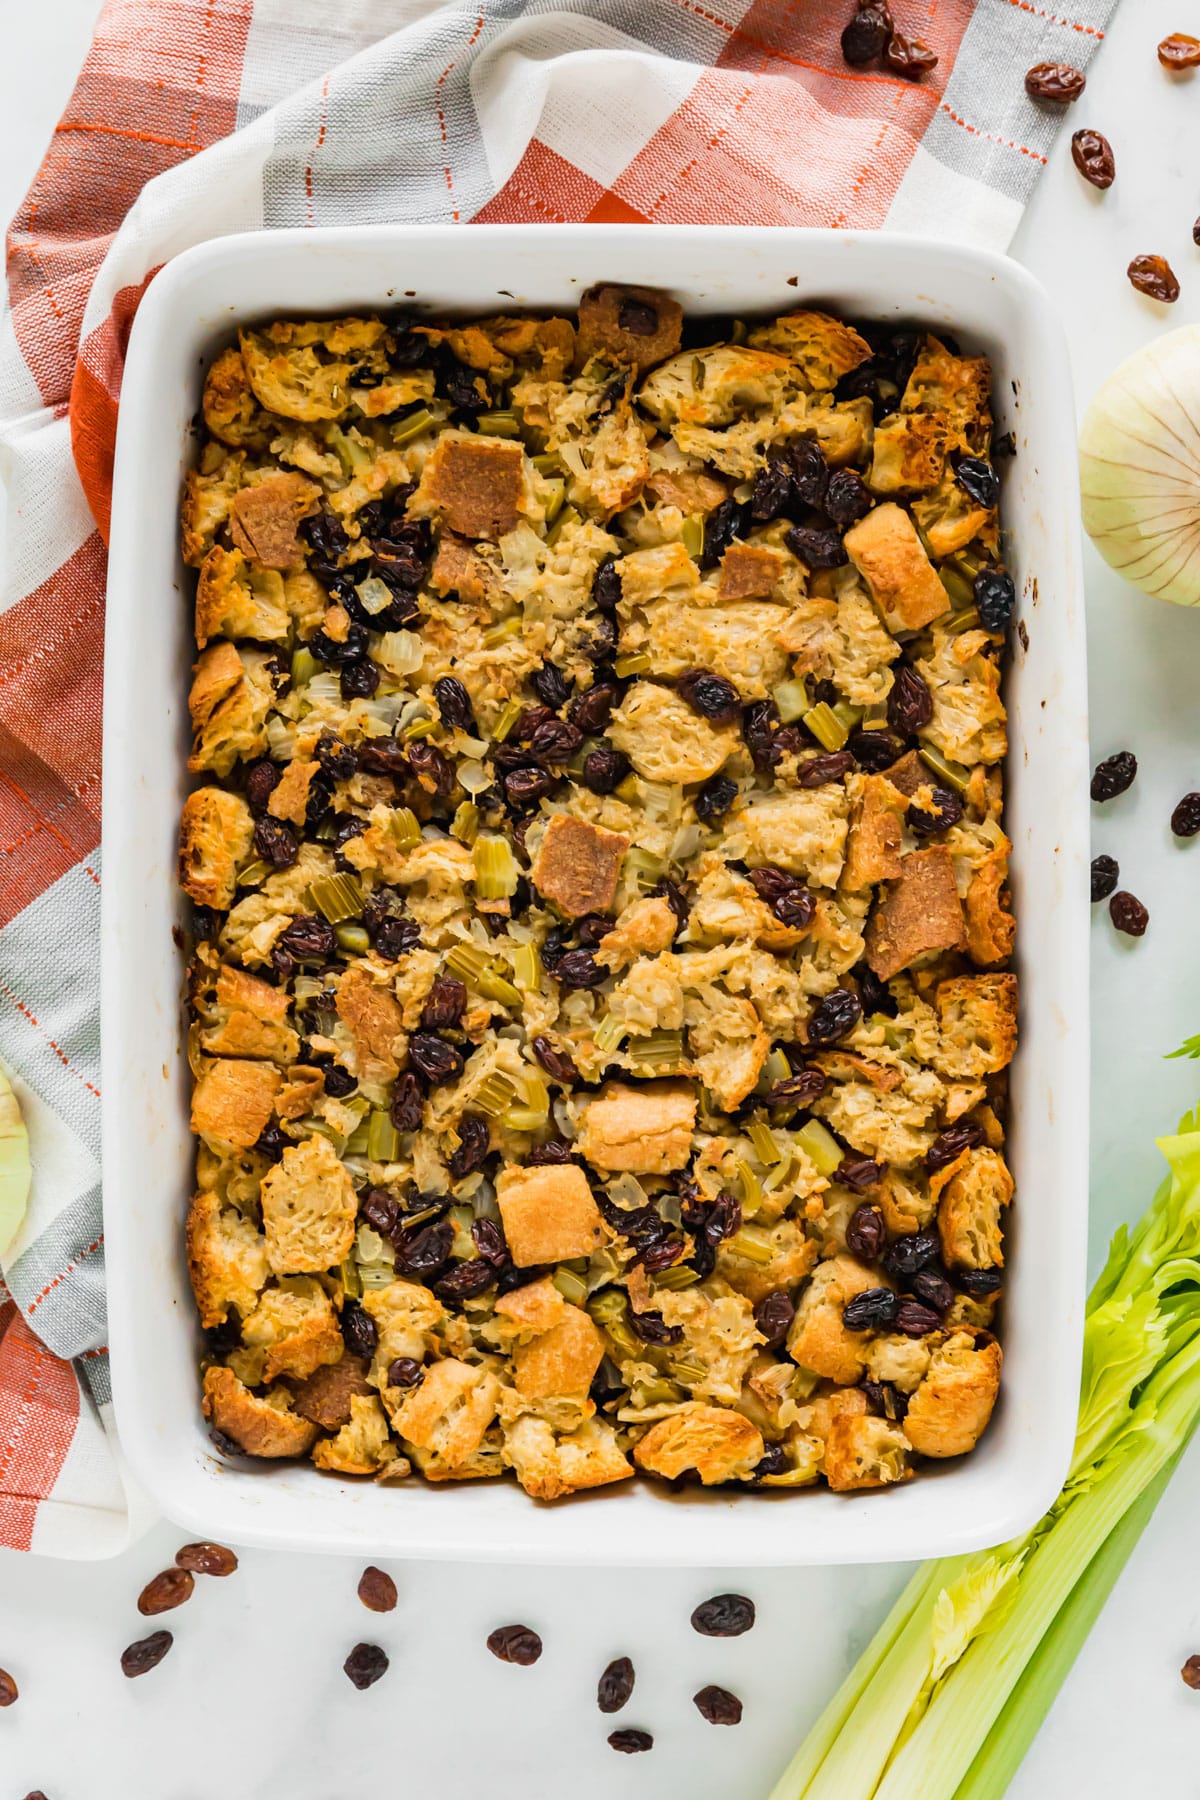
    Transfer the Italian stuffing mixture to a greased 9x13-inch pan and bake uncovered for 45 minutes.

    It should be golden brown on top. If it starts to brown too quickly, cover the pan with foil, then remove it for the last few minutes of baking.

    The stuffing ingredients spread in a clear baking dish.

    Frequently asked questions

    What is the difference between stuffing and dressing?

    It's all in the name. I tend to use the terms interchangeably, but technically stuffing is used to stuff a turkey (or chicken) while dressing is cooked separately. But you do you!

    Can I use this ciabatta stuffing to stuff my turkey?

    Yes! You can make everything up until the step where you place the dressing into the 9" x 13" and instead stuff it into the cavity.

    Is it safe to stuff a turkey?

    Yes, just be sure to stuff the cavity just before placing the turkey into the oven — letting it sit in the turkey at room temp can introduce bacteria. Also, make sure that the internal temperature of both the turkey and the stuffing reaches 165 degrees to avoid food-borne illness. And make sure you don't over-stuff it!

    Can I make this Italian stuffing recipe ahead of time?

    Yes, you can assemble this up to a day in advance and store it in the refrigerator. Then, remove 30 minutes before cooking and bake as directed before serving.

    How long does leftover stuffing last in the refrigerator?

    Italian bread stuffing will keep for up to 4 days in the refrigerator well-covered or stored in an airtight container.

    An overhead image of turkey stuffing in a white casserole dish with an orange and white checked napkin under i and celery and raisins around it.

    Tips for making this Italian stuffing recipe

    • Make homemade bread cubes. I like to cut the ciabatta into 1-inch chunks and leave it out overnight so that it's a little bit stale. Then, while I'm making the rest of the dressing components on the stove, I toast it in the oven to crisp it up a bit more so that it absorbs the broth nicely.
    • Use a mix of butter and olive oil. This combo prevents the butter from burning when you're sautéing the veggies.
    • Achieve the perfect texture. Once I mix the bread into the stovetop mixture, I keep stirring and folding it in so that it starts to break down. I still like to keep some of the bread chunky and intact, but that's more a matter of personal preference. You can also let the bread break down more if you'd like.
    • Season to taste. As with all my recipes, taste as you go and just before serving to ensure this Italian bread stuffing is to your liking.
    • In the bird or on the side? Although I personally prefer my dressing outside of the bird, you can absolutely use it to stuff the bird. Be sure to stuff the cavity just before placing the turkey into the oven — letting it sit in the turkey at room temp can introduce bacteria. Also, make sure that the internal temperature of both the turkey and the stuffing reaches 165 degrees to avoid food-borne illness. And make sure you don't over-stuff it!
    • Prep ahead- You can dice the onion and celery ahead and cut the bread into chunks. You can also assemble all the way up before baking and covered and refrigerate. Remove from the fridge 30 minutes before baking.
    • Leftovers and storage- This will last up to 4 days covered in the refrigerator.
    A close up image of dressing on a white plate with a serving dish of it in the background with onions.

    What To Serve With Ciabatta Stuffing

    Round out your holiday meal with these recipes:

    • Lemon Herb Roast Turkey
    • Scalloped Potatoes
    • Roasted Fall Vegetables
    • Cherry Cheese Pie

    Other Thanksgiving Side Dishes To Try...

    • A plate of artichoke hearts with a fork on it and a white and red napkin and garlic behind it.
      Grandma's Baked Artichoke Hearts
    • An extreme close up of the ends and tips of skillet asparagus in a pan
      Sautéed Garlic Asparagus
    • A square image of French Onion Creamy Mashed Potatoes.
      French Onion Creamy Mashed Potatoes
    • A close up image of a serving spoon holding a scoop of corn pudding in the pan of it.
      Corn Pudding Casserole

    Discover the secret to hosting Thanksgiving without all the stress!

    Prepsgiving is your FREE guide to making a delicious Thanksgiving feast the easy way.

    Love this recipe? Please leave a 5 star ⭐️⭐️⭐️⭐️⭐️ rating in the recipe card below ⬇️ and/or a review in the comment section further down. Check out my Amazon Store for all my favorite tools, including those used in this recipe. And follow @thelifejolie on Instagram and TikTok!

    The corner of Italian bread stuffing in a white casserole dish with a spoon in it.

    Ciabatta Italian Bread Stuffing

    Jessy Freimann
    This Italian Bread Stuffing recipe is about to become your new go-to for Thanksgiving. Whether you serve it on its own or use it as a stuffing for your turkey, this easy ciabatta stuffing adds a flavorful twist to a traditional holiday side dish!
    5 from 1 vote
    Print Recipe Pin Recipe
    Prep Time 10 minutes mins
    Cook Time 1 hour hr
    Total Time 1 hour hr 10 minutes mins
    Course Side Dish
    Cuisine American
    Servings 10 servings
    Calories 98 kcal

    Equipment

    • cutting board
    • Chef Knife
    • measuring cups
    • saute pan
    • Wooden Spoons
    • 9 x 13 Pan
    • sheet pan

    Ingredients
      

    • 8 cups day-old ciabatta cut into 1 inch chunks (this was around 1 ½ loaves for me but it will depend on the size of your loaves)
    • Cooking spray
    • 2 Tablespoons butter
    • 1 Tablespoon olive oil
    • 1 ¼ cup diced onion
    • 1 ¼ cup diced celery
    • 3-4 large garlic cloves, minced
    • 1 teaspoon kosher salt
    • ¼ teaspoon ground black pepper
    • 1 teaspoon Italian seasoning
    • ¾ cups white wine
    • 3 cups chicken broth (or turkey broth)
    • 1 ½ cups raisins

    Instructions
     

    • Preheat the oven to 350 degrees and line a sheet pan with parchment.
    • Spread bread chunks onto pan in a single layer (use multiple pans if you need to) and toast in oven for 10 minutes.
    • While the bread toasts, melt butter and oil in a large skillet over medium-high heat.
    • Add onions and celery and saute for around 4-5 minutes, stirring often to soften.
    • Add garlic and saute a minute more until fragrant.
    • Season with salt, pepper and Italian seasoning and deglaze the pan with wine.
    • Reduce the heat to medium-low and simmer wine for 2 minutes.
    • Add bread, raisin and broth to the pan and stir well to combine until the bread has absorbed most of the liquid.. As you stir, the bread break down, this is good. You can leave some chunky or stir until it's fully broken down, depending on your texture preference (I like to leave some chunks for a little texture).
    • Pour the mixture into a greased 9" x 13" pan and spread into an even layer.
    • Bake uncovered for 45 minutes or until the top is golden brown. Check it half way through and if it browns too quickly, cover it in foil until the last couple minutes.
    • Serve immediately.

    Video

    Notes

    • Make homemade bread cubes. I like to cut the ciabatta into 1-inch chunks and leave it out overnight so that it's a little bit stale. Then, while I'm making the rest of the dressing components on the stove, I toast it in the oven to crisp it up a bit more so that it absorbs the broth nicely.
    • Use a mix of butter and olive oil. This combo prevents the butter from burning when you're sautéing the veggies.
    • Achieve the perfect texture. Once I mix the bread into the stovetop mixture, I keep stirring and folding it in so that it starts to break down. I still like to keep some of the bread chunky and intact, but that's more a matter of personal preference. You can also let the bread break down more if you'd like.
    • Season to taste. As with all my recipes, taste as you go and just before serving to ensure this Italian bread stuffing is to your liking.
    • In the bird or on the side? Although I personally prefer my dressing outside of the bird, you can absolutely use it to stuff the bird. Be sure to stuff the cavity just before placing the turkey into the oven — letting it sit in the turkey at room temp can introduce bacteria. Also, make sure that the internal temperature of both the turkey and the stuffing reaches 165 degrees to avoid food-borne illness. And make sure you don't over-stuff it!
    • Prep ahead- You can dice the onion and celery ahead and cut the bread into chunks. You can also assemble all the way up before baking and covered and refrigerate. Remove from the fridge 30 minutes before baking.
    • Leftovers and storage- This will last up to 4 days covered in the refrigerator.

    Nutrition

    Serving: 1cupCalories: 98kcalCarbohydrates: 18gProtein: 1gFat: 2gSaturated Fat: 0.3gPolyunsaturated Fat: 0.2gMonounsaturated Fat: 1gCholesterol: 2mgSodium: 504mgPotassium: 212mgFiber: 2gSugar: 1gVitamin A: 10IUVitamin C: 1mgCalcium: 18mgIron: 1mg
    Tried this recipe?Let us know how it was!

    You can find a full index of my recipes here.

    Don’t forget to follow The Life Jolie on Pinterest for more recipe inspiration!

    Or if Pinterest isn’t your style, bookmark this post!

    Let’s keep the conversation going- join my Facebook group! 
    Make-and-Take Thanksgiving

    Oct 15, 2019 · Leave a Comment

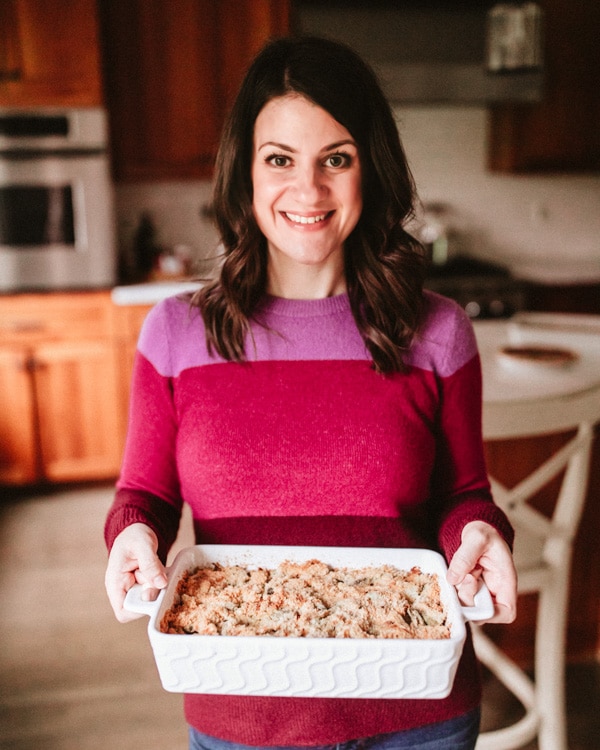
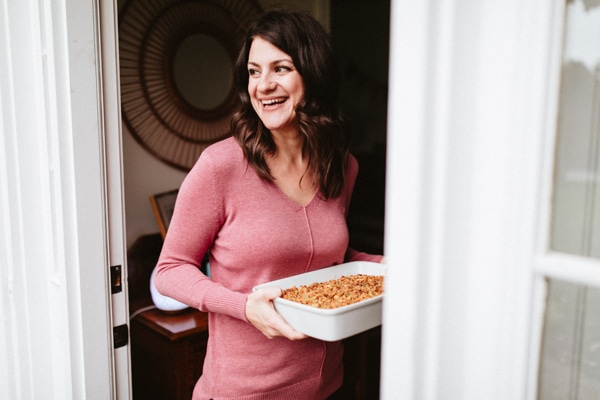
    A woman holding a casserole.

    I am so excited to share a a project I've been working on for a few months for your Thanksgiving prep. It's truly been a labor of love, but lets rewind for a minute and I'll start from the beginning.

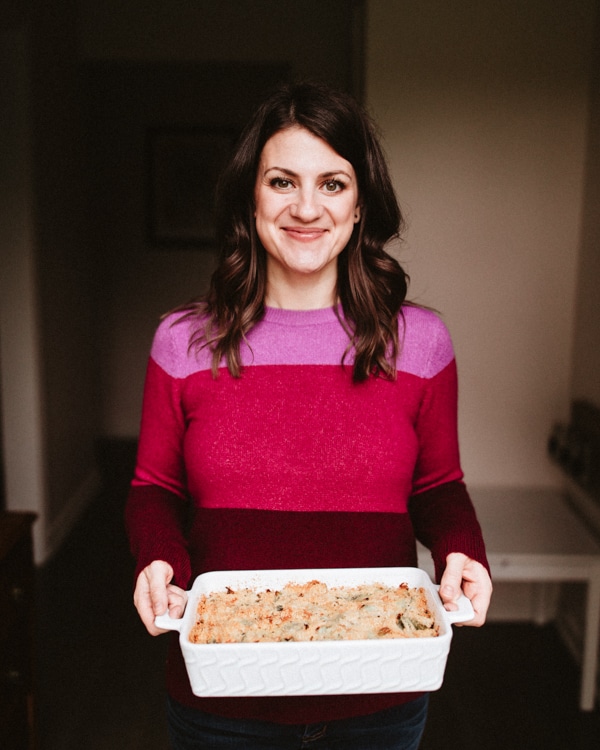
    A woman holding a casserole.

    Chatting with you

    Anyone who follows me knows that my favorite place to connect with you guys is on Instagram. So a few months back, I asked a bunch of Thanksgiving-related questions and did some polls as well. And your responses were pretty interesting to say the least.

    An overwhelming amount of you guys were very clear that you're less interested in hosting Thanksgiving, but would love help with choosing and preparing something to bring to Thanksgiving dinner. I heard you guys loud and clear so I began thinking about how I can help.

    A woman sitting on a counter eating pumpkin pie.

    Introducing: Make-and-Take Thanksgiving!

    Did you know studies show that many people's stress increases by 38% during the holidays. This is insane to me, because the holidays are supposed to be a time for us to relax and enjoy time with friends and family. But I also get it. We all have this vision of a picture-perfect feast in our minds but getting there can be half the battle. 

    My mission is clear: I want to help take some of the stress out of Thanksgiving!

    So I've created a series to do just that: Make-and-Take Thanksgiving is a free 5 days series designed to take all the guesswork out of making a killer dish to bring to your Thanksgiving gathering. My goal is to simplify the process and empower you to get cooking!

    A gal with a casserole

    Here's how it works:

    • This totally free series runs from November 4th-8th.
    • I'll be going through the process of choosing and making a Thanksgiving dish-to-pass, with actionable steps sent each day directly to your inbox to streamline the entire process (don't worry, this will all be seriously easy; no complicated tasks here and absolutely no spam!).
    • This will give you the opportunity to try making the recipe before the big day.
    • There will be a printable guide to help you through the each of the steps and Ill also be over on Instagram chatting through things.
    • Be sure to use #makeandtakethanksgiving and tag me @thelifejolie for anything you share on social media, I love to share those tags in my IG Stories and will be hosting is $100 amazon gift card giveaway throughout the week of the series (more on that in your emails once the series begins)!
    • I'll also be sending out reminder emails the week of Thanksgiving to help keep you on track with the things you need to do to prepare your dish-to-pass.

    A woman in a doorway with a thanksgiving dish to pass

    Sounds awesome- how do I sign up?!

    Just put in your first name and email address below and you're in! By signing up you consent to receive emails from me. No spam ever- promise!

    I'm so excited to get started and for you join in on the fun!

    In the meantime, check out some of my favorite Thanksgiving recipes!

    French Onion Cheese Ball

    Oct 7, 2019 · Leave a Comment

    This French Onion Cheese Ball is a delicious savory appetizer that is sure to impress all your friends. It's also super easy to whip up!

    This French Onion Cheese Ball is a delicious savory appetizer that is sure to impress all your friends. It's also super easy to whip up!

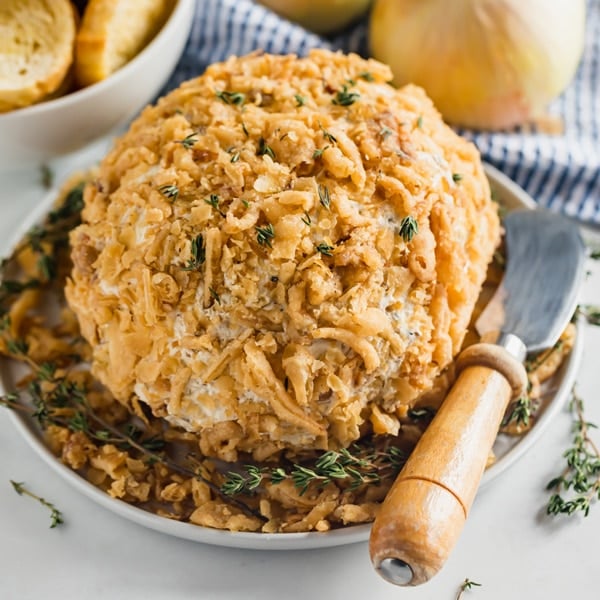
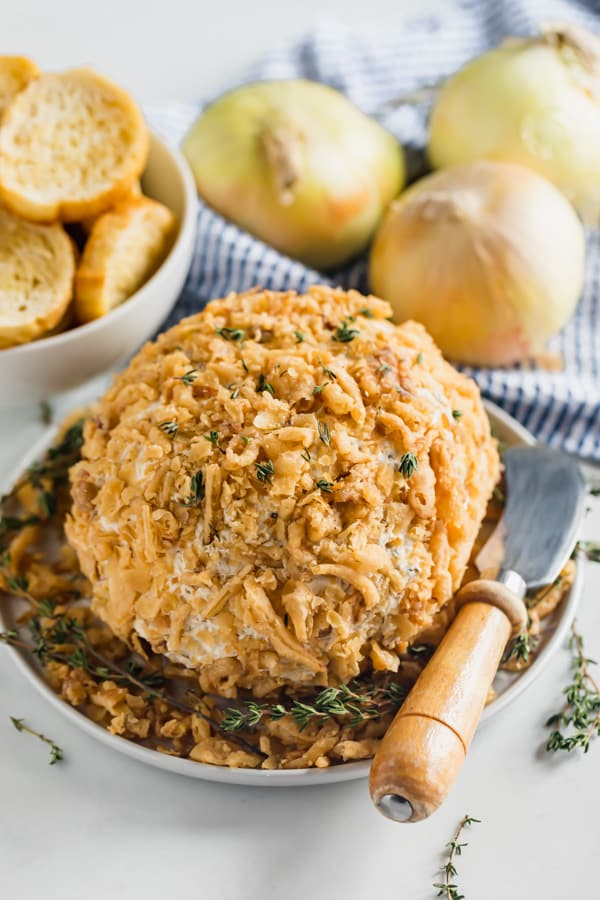
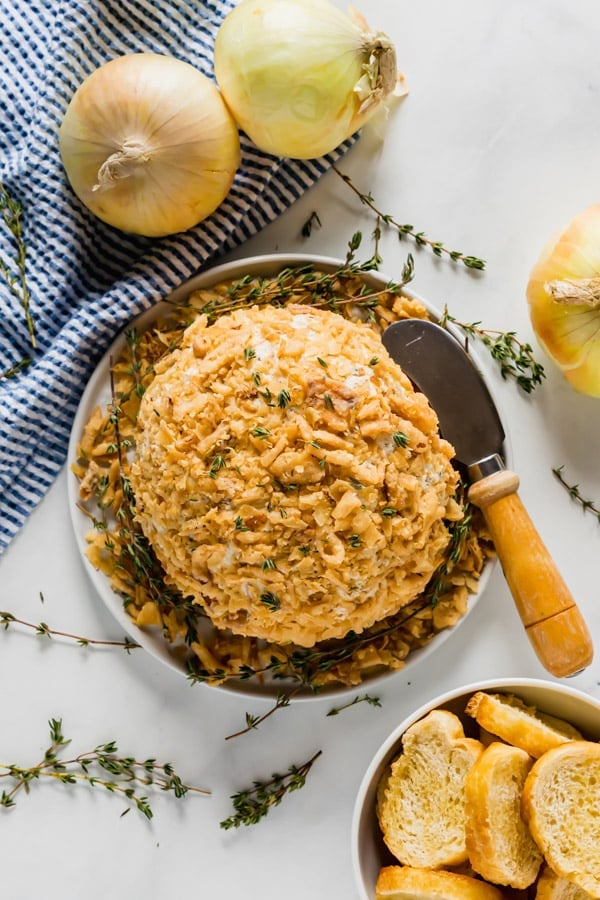
    A French onion cheeseball on a plate.

    French Onion Cheese Ball

    This post contains Affiliate Links. Please see the disclaimer here.

    Try some other great appetizer recipes like Bloody Mary Cheese Ball, Pomegranate and Thyme Baked Brie and Asiago Artichoke Dip.

    In my mind, Cheese Balls are the quintessential option to bring to a party. They're super easy to make, and are always a crowd pleaser. And they also give a ton of great potential for a variety of flavor combinations.

    This particular cheese ball recipe was inspired by a classic french onion dip. It's made with caramelized onions so it's got all the savory goodness of a cozy french onion soup. Rolled into a ball of cream cheese and covered in crispy french fired onions and a sprinkle of fresh thyme, it's truly a showstopper.

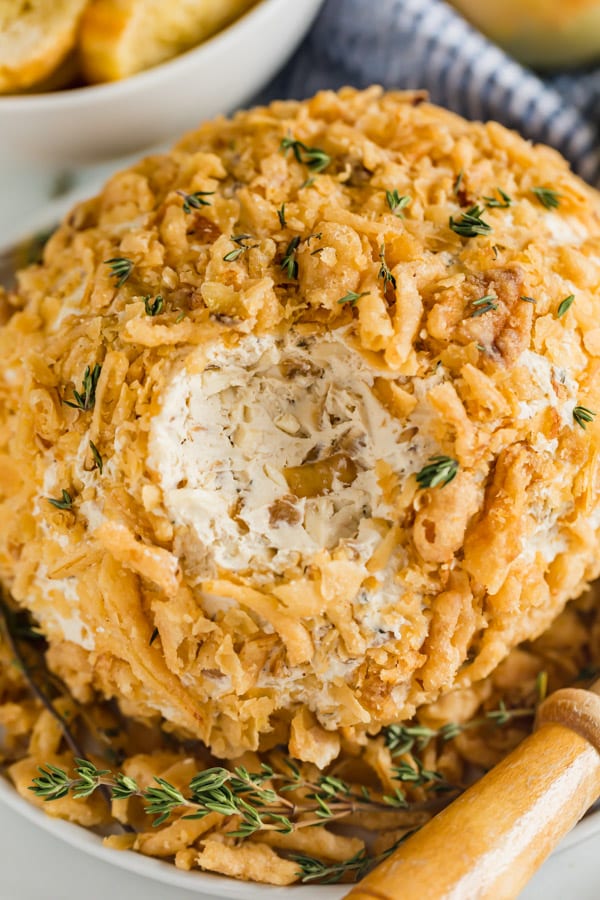
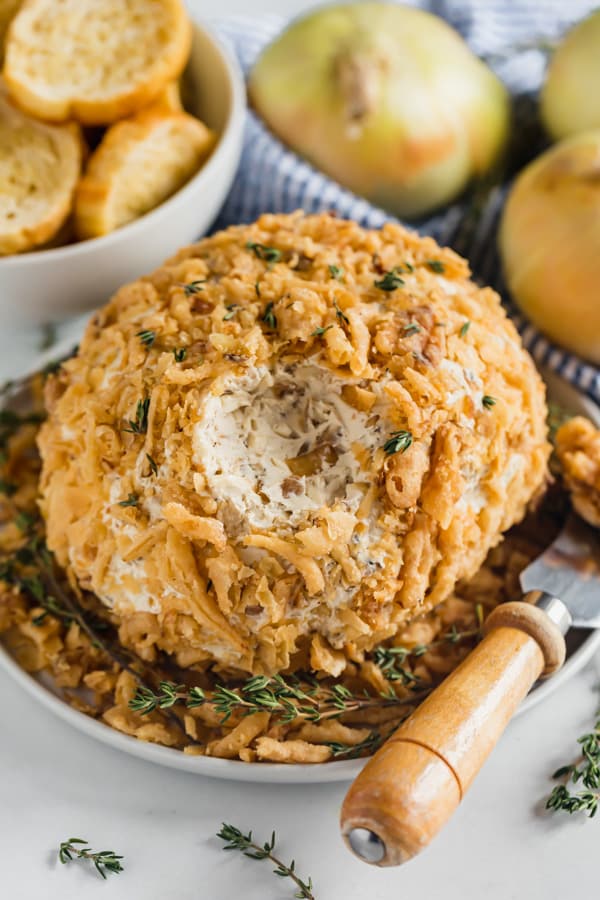
    A close of of the spot on the cheeseball where the scoop was taken.

    Tips for how to make a cheese ball

    • Softening the cream cheese helps it max more evenly- you can leave it at room temperature in advance or zap it in the microwave for 30 seconds to a minute.
    • If you're having trouble rolling the mixture into a ball, pop it into the fridge for 10 minutes and try again, that should help. I also use plastic wrap to help get a nice shape.
    • I refrain from rolling the cheese ball in the french fried onions until shorty before serving to help maintain their nice, crispy texture.

    An overhead image of the cheese ball.

    How do you caramelize onions?

    Don't worry, it's easy. You place some oil in a saute pan and heat it over medium. Then add your onions (in this case they're chopped but you can also slice them). Then you let them go, stirring periodically. They key is to never let the heat go over medium, because you want them to go low and slow. You should also keep an eye on the heat and reduce if needed.

    How long can a cheese ball keep in the refrigerator?

    Up to 3 days covered, although the french fried onions may lose their crispy texture. You could totally make the cheeseball ahead and top with the fried onions before serving.

    Can I freeze a cheese ball?

    Yes, although I'd freeze this without the french fried onions. Be sure to wrap it well and thaw 24 hours prior to serving.

    How do you serve a cheese ball?

    I like to serve it with crackers and sliced and toasted baguette but you can also serve it with vegetable crudite.

    Can I serve this as cheeseball bites?

    Totally! I haven't measured but it should make around 20 bites depending on the size you make them (I'd say to use a small cookie scoop).

    A piece of baguette with cheese on it.

    Ingredients:

    • Olive oil
    • Onions
    • Balsamic vinegar
    • Fresh thyme
    • Kosher salt
    • Ground black pepper
    • Cream cheese
    • Worcestershire sauce
    • Onion powder
    • Gruyere cheese
    • Low sodium soy sauce
    • French Fried onions

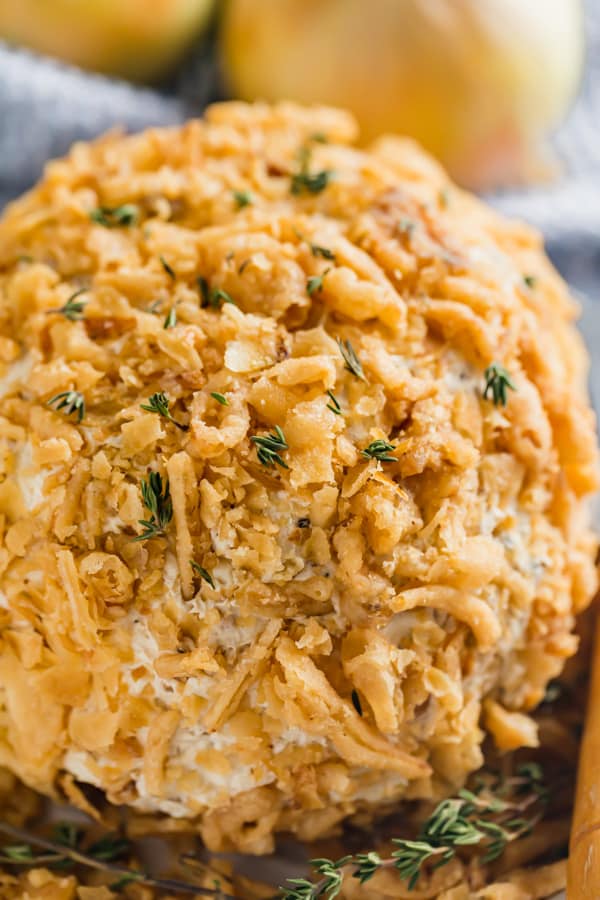
    A close up of the french fried onions on a cheese ball.

    Helpful tools:

    1. Chef's knife
    2. Cutting board
    3. Measuring cups
    4. Measuring spoons
    5. Mixing bowl
    6. Stand mixer or Hand mixer
    7. Large saute pan
    8. Wooden spoon

    A cheese ball recipe with a scoop taken out of it.

    This French Onion Cheese Ball is a delicious savory appetizer that is sure to impress all your friends. It's also super easy to whip up!

    French Onion Cheese Ball

    Jessy Freimann
    This French Onion Cheese Ball is a delicious savory appetizer that is sure to impress all your friends. It's also super easy to whip up!This French Onion Cheeseball is a delicious savory appetizer that is sure to impress all your friends. It's also super easy to whip up!
    5 from 2 votes
    Print Recipe Pin Recipe
    Prep Time 15 minutes mins
    Cook Time 30 minutes mins
    Chill time 1 hour hr
    Total Time 1 hour hr 45 minutes mins
    Course Appetizer, Snack
    Cuisine American, French
    Servings 8 servings
    Calories 459 kcal

    Equipment

    • 1 mixing bowl
    • 1 stand mixer
    • 1 Hand mixer
    • 1 Measuring cups and spoons
    • 1 Spatula

    Ingredients
      

    • 2 Tablespoons Olive oil
    • 3 cups chopped onions
    • 1 Tablespoon balsamic vinegar
    • 1 teaspoon chopped fresh thyme + extra for garnish
    • 1 ½ teaspoon kosher salt, divided
    • ¼ teaspoon ground black pepper, divided
    • 16 ounces cream cheese, softened
    • 1 teaspoon Worcestershire sauce
    • ½ teaspoon onion powder
    • 1 cup shredded gruyere cheese
    • 1 Tablespoon low sodium soy sauce
    • 1 can french fried onions

    Instructions
     

    • Heat oil over medium heat in a sauté pan.
    • Once the oil is shimmering add onions. Saute for 10 minutes, stirring often.
    • Add balsamic vinegar, thyme, 1 teaspoon salt, ¼ teaspoon pepper to pan.
    • Cook for 20 more minutes, stirring periodically or until the onions are golden and caramelized (reduce the heat if necessary). Remove from heat and set aside to cool.
    • In a large bowl combine cream cheese, Worcestershire sauce, onion powder, remaining salt, remaining pepper, gruyere cheese and soy sauce. Mix until well combined.
    • Add cooled onions and mix again until well combined.
    • Shape cheese into a ball and wrap in plastic wrap.
    • Refrigerate for at least an hour to overnight.
    • Just before serving, unwrap ball and roll it in the french fried onions. Top with chopped fresh thyme and serve with crackers and toasted baguette.

    Notes

    This can be made ahead up to 3 days but the onions may lose their crunch,

    Nutrition

    Serving: 1servingCalories: 459kcalCarbohydrates: 18gProtein: 9gFat: 39gSaturated Fat: 20gPolyunsaturated Fat: 2gMonounsaturated Fat: 9gCholesterol: 75mgSodium: 994mgPotassium: 195mgFiber: 1gSugar: 5gVitamin A: 932IUVitamin C: 5mgCalcium: 239mgIron: 0.4mg
    Tried this recipe?Let us know how it was!

    If you tried this recipe please comment and rate it 🙂 I love hearing your feedback and answering your questions! And if you make this please tag me on Instagram with @thelifejolie so I can share it <3

    You can find a full index of my recipes here.

    Don’t forget to follow The Life Jolie on Pinterest for more recipe inspiration!

    Or if Pinterest isn’t your style, bookmark this post!

    Let’s keep the conversation going- join my Facebook group! 
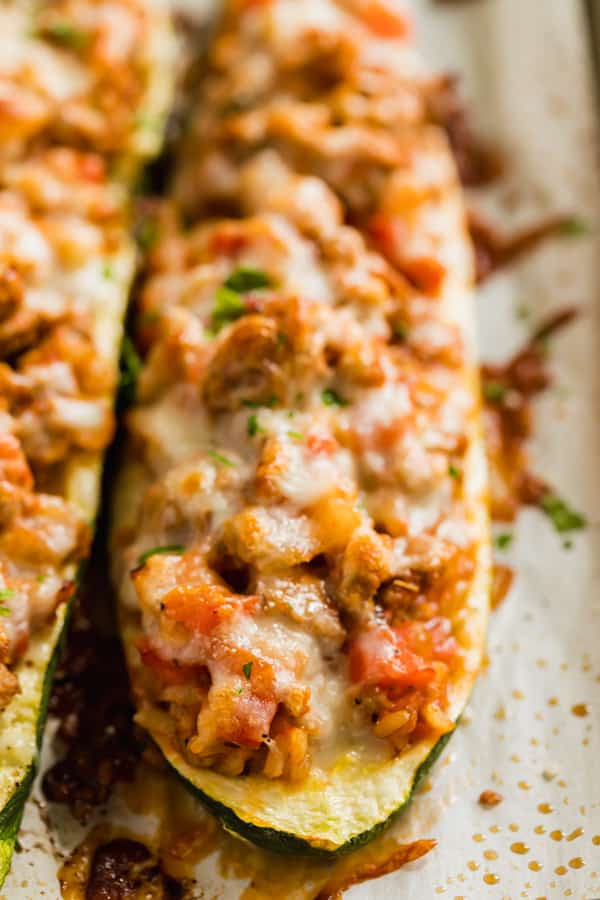
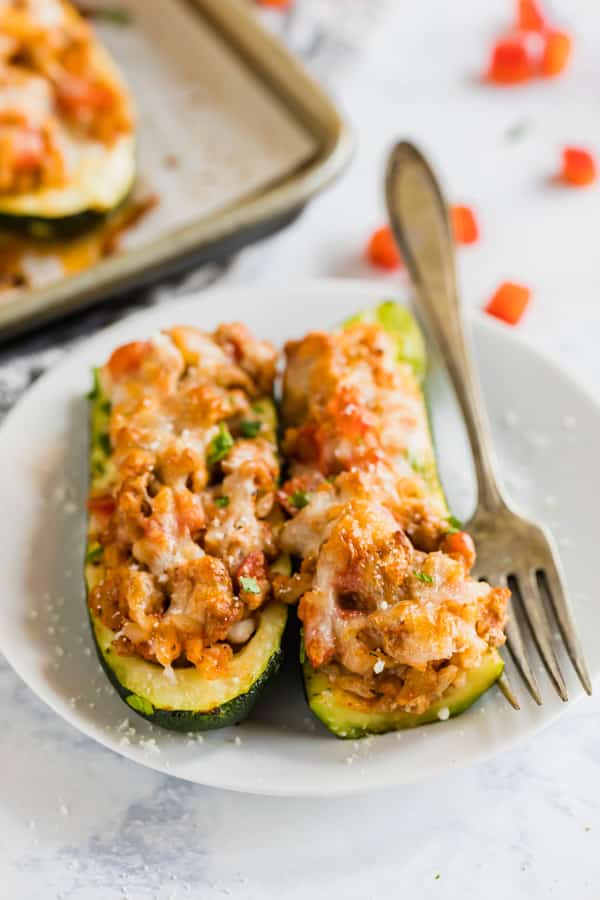
    Italian Stuffed Zucchini Boats

    Sep 23, 2019 · 60 Comments

    Italian Stuffed Zucchini Boats are the healthy weeknight meal you'll want to make again and again. This is a seriously easy recipe that's full of delicious flavor without all the guilt!

    Italian Stuffed Zucchini Boats are the healthy weeknight meal you'll want to make again and again. This is a seriously easy recipe that's full of delicious flavor without all the guilt!

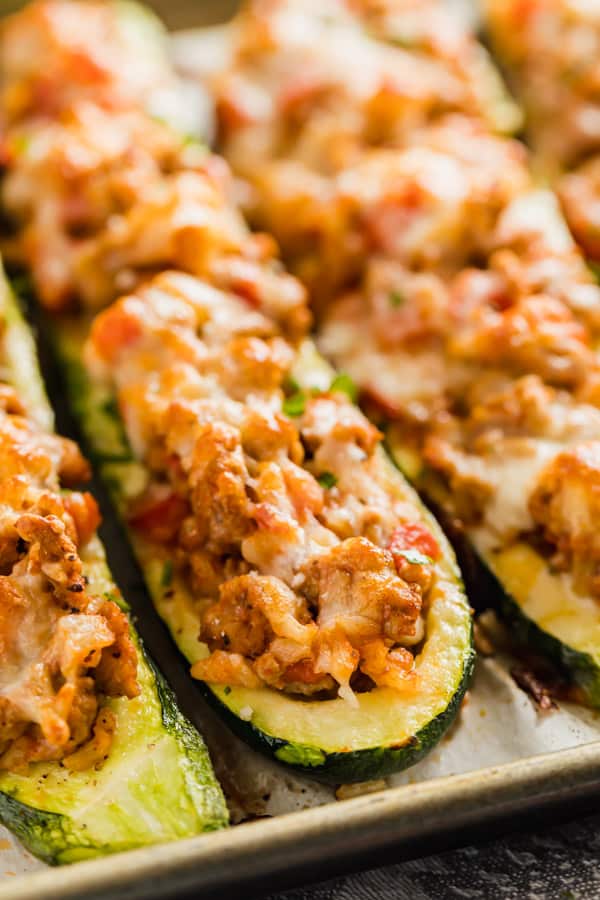
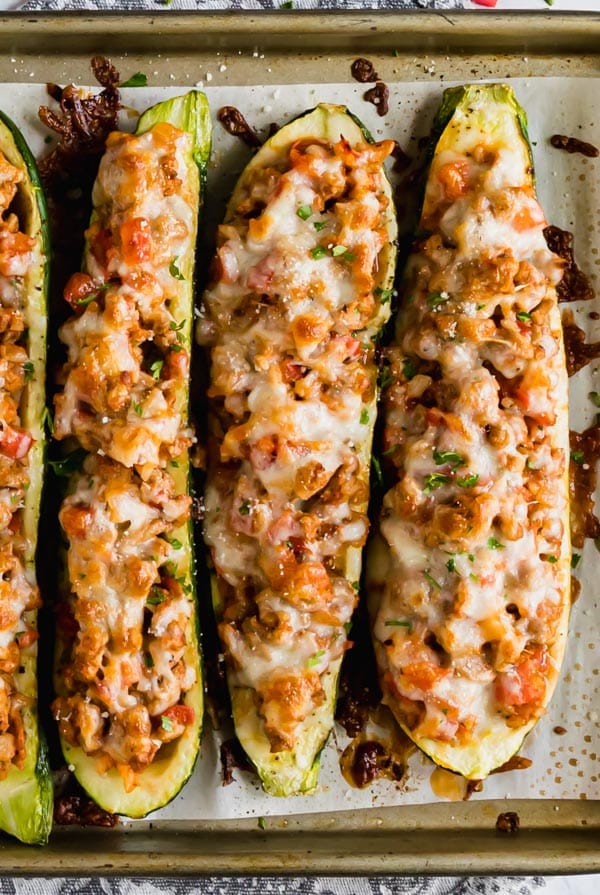
    Zucchini boats lined up on a pan.

    Zucchini Boats

    This post contains Affiliate Links. Please see the disclaimer here.

    Try some of my other tasty zucchini recipes:

    • Zucchini Pancakes
    • Zucchini Soup
    • Sautéed Vegetables
    • Grilled Salmon with Summer Veggies

    I'll be honest, zucchini isn't usually my go-to veggie. It's tasty enough, but squash and I have a spotty relationship. That being said, I think one of the best ways to enjoy zucchini is by making stuffed zucchini boats.

    I decided to go with an Italian theme for these (what can I say, we cook what we know!). This is a variation of my Stuffed Peppers Casserole and it is so good! It comes together pretty quickly and easily but I went with more nutritious ingredients to eliminate the guilt.

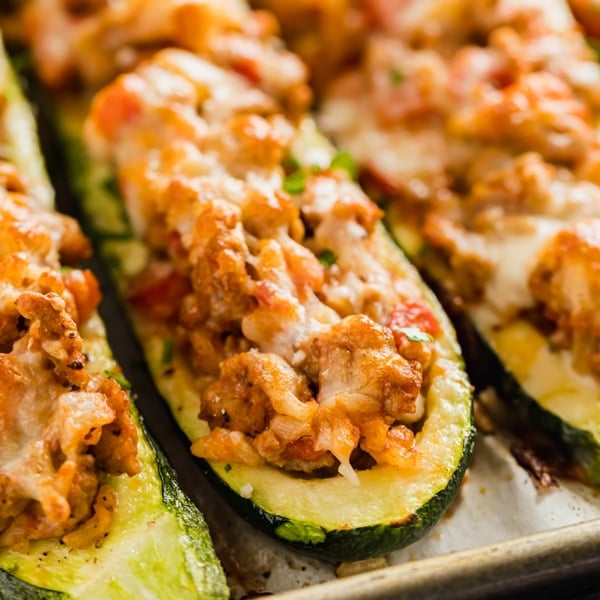
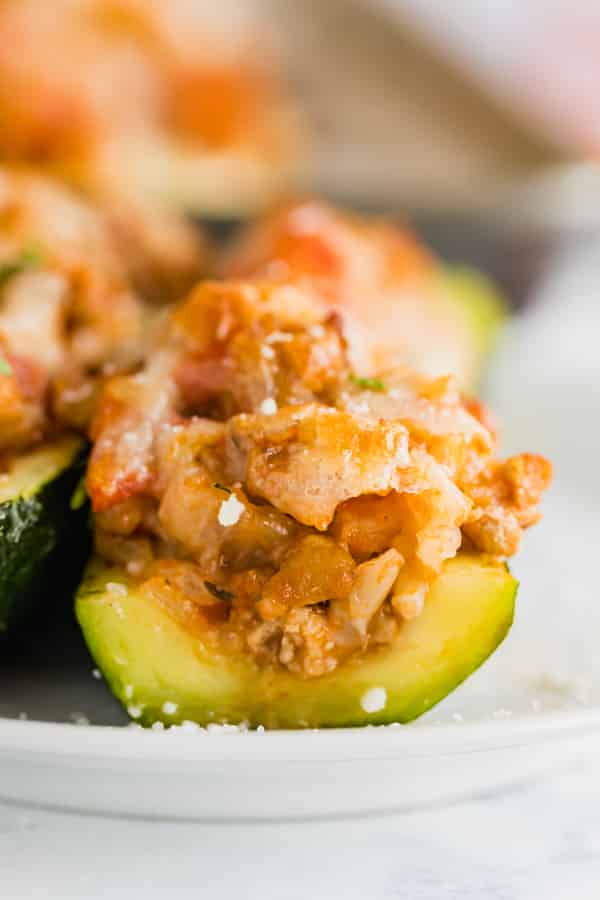
    A straight-on close up shot of the inside of stuffed zucchini boats.

    Tips for making Baked Zucchini

    • The easiest way to remove the zucchini seeds is to use a spoon to gently scrape them out.
    • I bake these with the cut side up. Give them a quick spray with olive oil cooking spray and a sprinkle of salt and pepper for even more flavor before they go into the oven the first time.
    • To measure the water, just fill the empty small sauce can half way. This helps get any leftover sauce out of the can and gives you the right amount of water.
    • This is a great way to use leftover rice, but you can always buy one of the microwavable containers of rice, just be sure it's plain.
    • Be sure to taste the filling before stuffing the zucchini and adjust the seasonings to your taste.

    An overhead image of stuffed zucchini on a pan.

    How do I prepare zucchini for stuffed zucchini?

    The first thing I do is wash the zucchini. Then I cut each zucchini in half length-wise. Using a spoon, I scoop out the seeds from the middle to hollow them out (bring careful not to go all the way through). Then I place them cut-side up on a lines sheet pan. I spray with olive oil cooking spray and season lightly with salt and pepper and preface them so begin the cooking process while I prepare the filling.

    Do I have to precook the zucchini?

    I would recommend it so that the zucchini isn't overly crispy and undercooked.

    Can I use a different meat?

    Absolutely. If turkey isn't a thing, ground chicken or ground beef works just as well. You could even use Italian sausage, just remove it from the casings if it isn't already.

    Can I use white rice?

    Absolutely, just make sure it comes in cooked.

    Do you eat the skin on zucchini boats?

    Yes! You do not have to peel them.

    Can I freeze zucchini boats?

    I don't recommend freezing the actual zucchini as it will thaw to be soggy. But you can always make the filling and freeze that and then thaw when you're ready to make them.

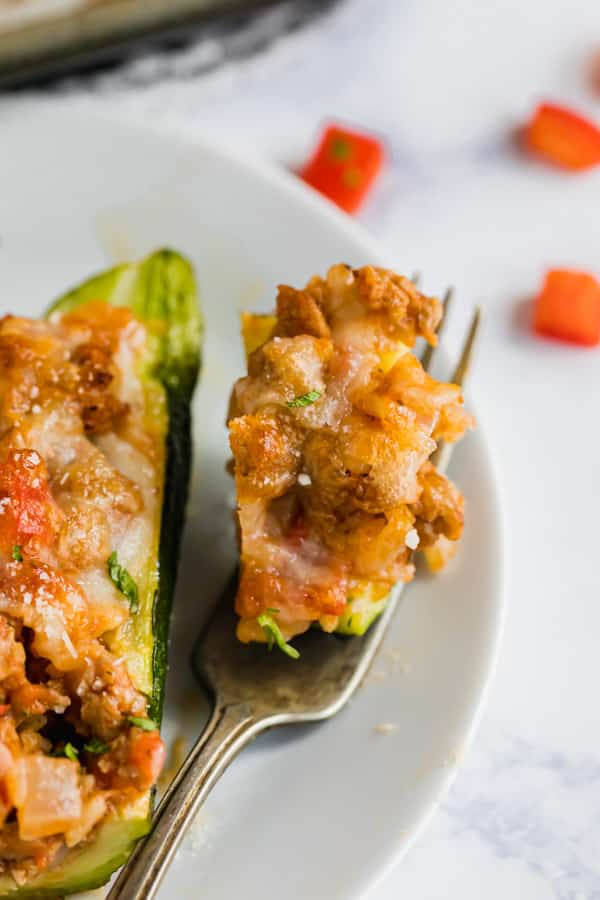
    A forkful of baked zucchini

    Ingredients for making Stuffed Zucchini

    • Zucchini
    • Olive oil
    • Onion
    • Red pepper
    • Garlic
    • Ground turkey
    • Salt
    • Pepper
    • Italian seasoning
    • Romano cheese
    • Tomato sauce
    • Tomato
    • Cooked rice
    • Mozzarella cheese

    A close up image of zucchini boats on a pan

    Helpful tools:

    1. Sheet pan
    2. Chef’s knife
    3. Cutting board
    4. Large saute pan
    5. Wooden spoon
    6. Measuring cups
    7. Measuring spoons

    Stuffed Zucchini on a plate with a fork.

    Italian Stuffed Zucchini Boats are the healthy weeknight meal you'll want to make again and again. This is a seriously easy recipe that's full of delicious flavor without all the guilt!

    Italian Stuffed Zucchini Boats

    Jessy Freimann
    Italian Stuffed Zucchini Boats are the healthy weeknight meal you'll want to make again and again. This is a seriously easy recipe that's full of delicious flavor without all the guilt!
    4.98 from 38 votes
    Print Recipe Pin Recipe
    Prep Time 10 minutes mins
    Cook Time 30 minutes mins
    Total Time 40 minutes mins
    Course Main, Main Course, Main dish
    Cuisine American, Italian
    Servings 8 pieces
    Calories 191 kcal

    Equipment

    • 1 cutting board
    • 1 chefs knife
    • 1 Measuring cups and spoons
    • 1 sheet pan
    • 1 Skillet
    • 1 wooden spoon

    Ingredients
      

    • 4 medium zucchini, cleaned, halved length-wise and seeds scooped out.
    • Cooking spray
    • ½ teaspoon Kosher salt + additional for precooking the zucchini
    • ¼ teaspoon ground black pepper + additional for precooking the zucchini
    • 1 Tablespoon olive oil
    • 1 medium onion, finely diced
    • 1 medium red bell pepper, seeded and finely diced
    • 2-3 cloves garlic, minced
    • 1 pound ground turkey
    • 1 teaspoon Italian seasoning
    • 3 Tablespoons Romano cheese
    • 8 ounces tomato sauce
    • 4 ounces water (½ of the empty tomato sauce can)
    • 1 medium tomato, seeded and finely diced
    • 1 cup cooked rice
    • 1 cup Mozzarella cheese

    Instructions
     

    • Preheat the oven to 400 degrees F and line a sheet pan with parchment or a silicone liner.
    • Place zucchini halves cut-side up, onto the pan. Spray with cooking spray and sprinkle with salt and pepper to taste. Bake for 10 minutes and then remove from the oven and set aside.
    • While the zucchini bakes, heat oil in a large skillet over medium high heat.
    • Add onion and peppers to the pan and saute for around 4 minutes to soften.
    • Add garlic and saute for 1 minute more.
    • Add ground turkey and brown, breaking up with a wooden spoon around 3-5 minutes.
    • Reduce heat to medium and season with ½ teaspoon salt, 1/ teaspoon pepper, Italian seasoning, Romano cheese, sauce, water and diced tomato. Saute for 5-7 minutes.
    • Add cooked rice and stir to combine, remove from heat.
    • Divide mixture between each zucchini boat and sprinkle each with mozzarella cheese.
    • Bake uncovered for 15 more minutes and serve immediately.

    Notes

    Leftovers last up to 4 days refrigerated.

    Nutrition

    Serving: 1servingCalories: 191kcalCarbohydrates: 14gProtein: 20gFat: 7gSaturated Fat: 3gPolyunsaturated Fat: 1gMonounsaturated Fat: 3gTrans Fat: 0.01gCholesterol: 44mgSodium: 430mgPotassium: 621mgFiber: 2gSugar: 5gVitamin A: 1034IUVitamin C: 42mgCalcium: 126mgIron: 1mg
    Tried this recipe?Let us know how it was!

    If you tried this recipe please comment and rate it 🙂 I love hearing your feedback and answering your questions! And if you make this please tag me on Instagram with @thelifejolie so I can share it <3

    You can find a full index of my recipes here.

    Don’t forget to follow The Life Jolie on Pinterest for more recipe inspiration!

    Or if Pinterest isn’t your style, bookmark this post!

    Let’s keep the conversation going- join my Facebook group! 
    Grilled Salmon Recipe with Summer Vegetable Relish

    Sep 9, 2019 · Leave a Comment

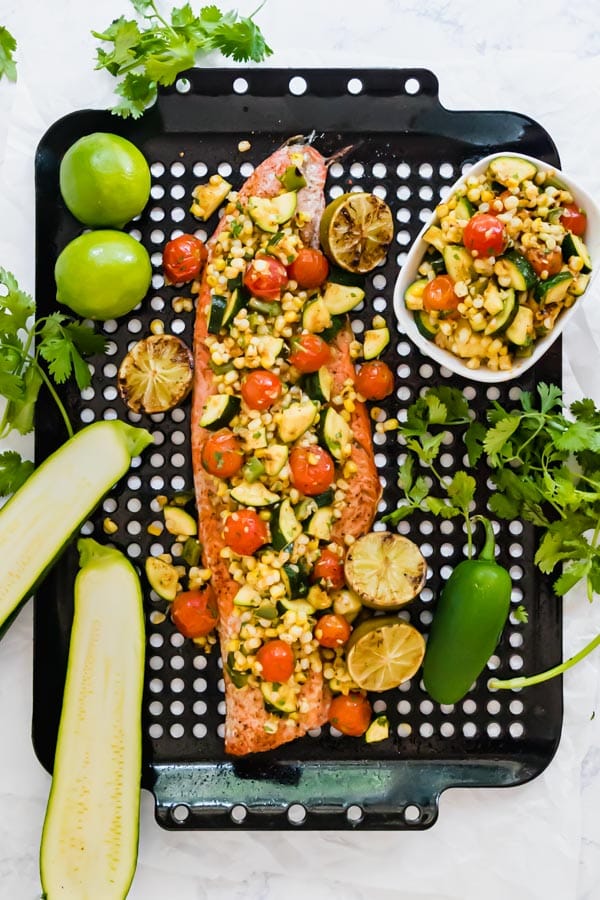
    This Grilled Salmon Recipe with Summer Vegetable Relish will make you want to grill all year around- it's super quick and easy to make for a fresh dinner you'll love!

    This Grilled Salmon Recipe with Summer Vegetable Relish will make you want to grill all year around- it's super quick and easy to make for a fresh dinner you'll love!

    Grilled Salmon Recipe

    An overhead image of this grilled salmon on a pan with the relish on top.

    This post contains Affiliate Links. Please see the disclaimer here.

    Check out some of my other salmon recipes:

    • Hawaiian Grilled Salmon
    • Salmon Patties
    • 20 Minute Lemon Dill Baked Salmon

    Salmon is one of my absolute favorite fish. It's full of fantastic flavor and is so good for you! You probably figured that out, considering the excessive amount of salmon recipes not this site (not sorry). And I cannot tell you how thrilled I was when my kids discovered they love it too.

    This was inspired by the gorgeous abundance of fresh produce that I see at the market in the late summer/early fall. We've been gobbling it up quickly around here, and I was just dying to throw it all on the grill and serve it over some salmon, so that's what I did!

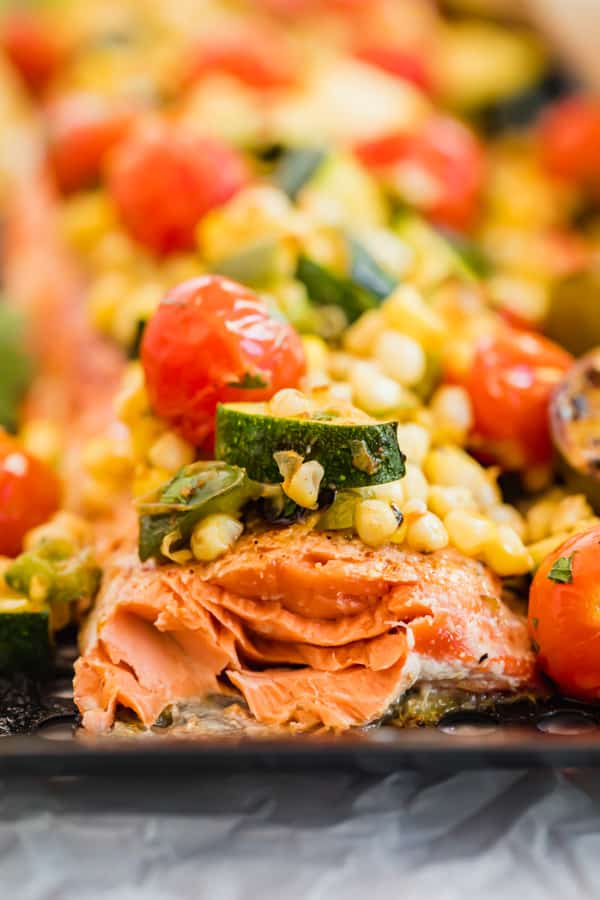
    A straight on close up image of the salmon with a piece cut off revealing the inside of it.

    Tips for how to grill salmon and veggies

    • If you have a grill pan, I encourage you to use it (and grease it really well!). If not, you can also use well-greased heavy duty foil or just place the salmon on a (very) well grease grill, skin side down.
    • There is no need to flip the salmon.
    • Be sure to prep everything in advance as the grilling can go pretty fast, especially the vegetables!
    • In terms of grilling your vegetables, you'll want to manage them and remove them in the order of what cook fastest. In this case it's tomatoes, zucchini, jalapeño pepper, corn and limes. I like to have a large clean plate available to remove them to as needed and then while the salmon finishing, I can chop the zucchini and cut the kernels off the corn to make the relish.
    • I'm a big fan of tasting the relish and altering the the flavorings to your taste.

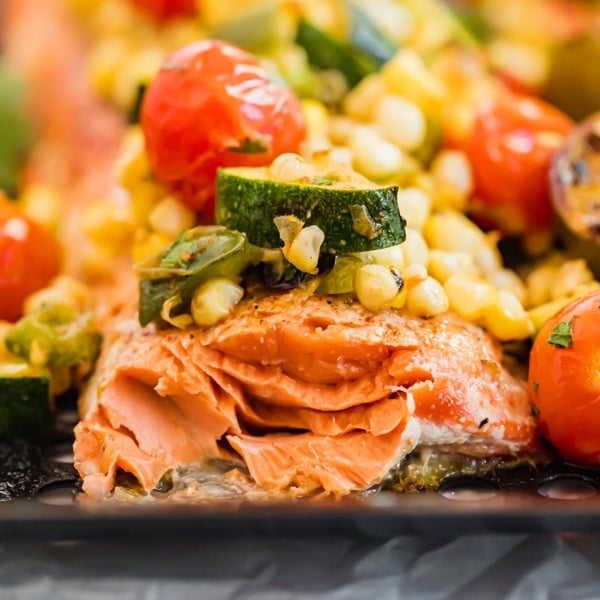
    A close up inage of the side of the salmon with the veggies on top.

    How do you season grilled salmon?

    For this recipe I like to use olive oil, lime juice, salt, pepper, garlic powder and chili powder.

    What variety of salmon is best to use?

    Any fresh salmon at your local fish counter (or fish monger) will work, but my personal favorite is Sockeye Salmon as it has even more delicious flavor!

    How long do you grill salmon?

    It will depend on thickness of the salmon but around 15 minutes (give or take) until it reaches temp.

    How do I know if my salmon is fully cooked?

    The best way to tell us by inserting a meat thermometer into the thickest part of the salmon. The safe temperature for consuming fish is 145 degrees.

    What's the best way to cut corn off the cob?

    A trick I learned a million years ago is to place it vertically into the center part of a bundt pan. Cut downwards and away from yourself, being careful to also cut away from the hand holding the corn (place one hand at the top of the cob so you don't cut yourself). The kernels will fall right into the deep part of the bandit pan!

    How long does grilled salmon last?

    Up to 3 days if stored covered in the refrigerator. You can reheat in the oven or microwave.

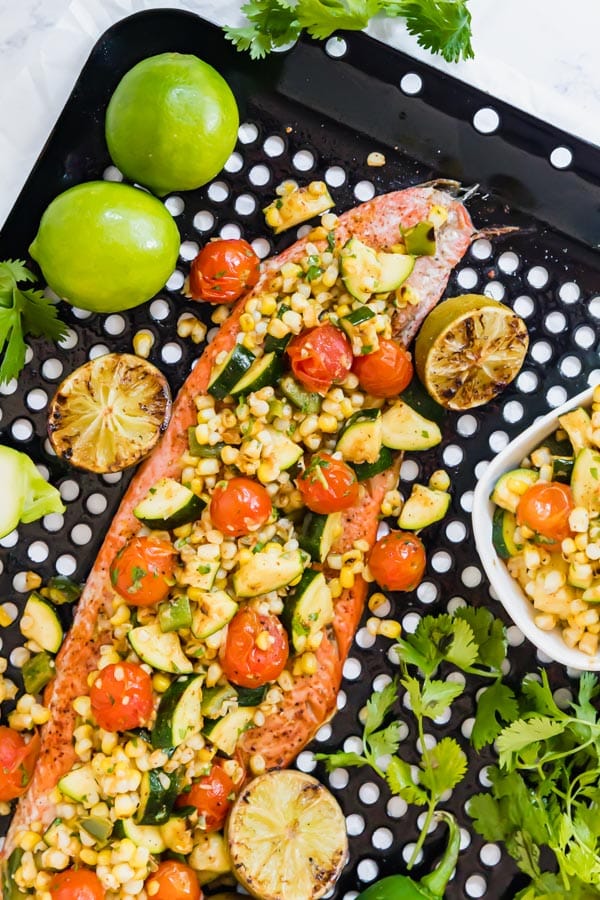
    A closer overhead image of half the salmon on the pan.

    Ingredients for making Grilled Salmon with Vegetable Relish

    • Salmon
    • Olive oil
    • Limes
    • Salt
    • Pepper
    • Garlic powder
    • Chili powder
    • Cherry tomatoes
    • Zucchini
    • Jalapeño pepper
    • Corn
    • Cooking spray
    • Fresh cilantro

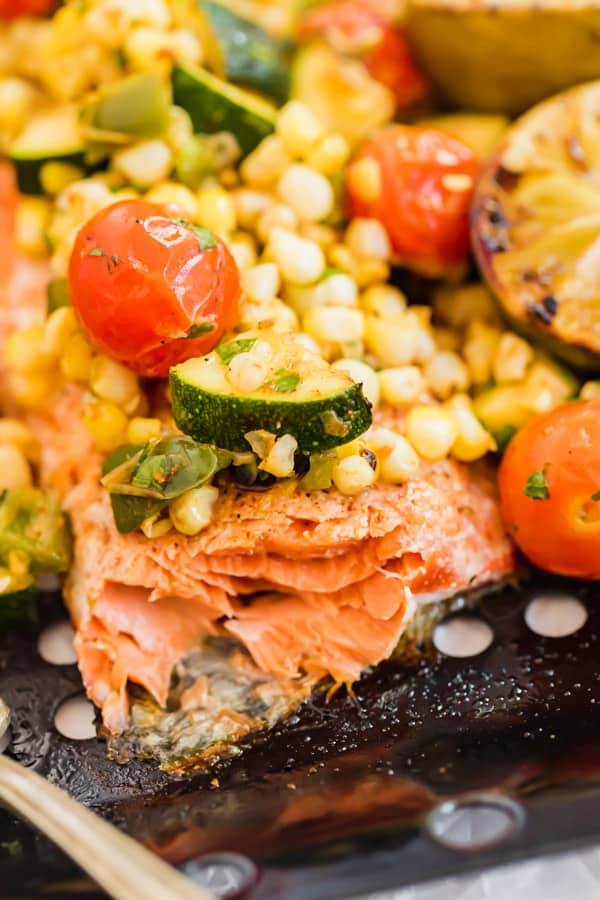
    A close image of the salmon with pieces of it flaked off.

    Helpful tools:

    1. Measuring spoons
    2. Measuring cups
    3. Chef's knife
    4. Cutting board
    5. Mixing bowl
    6. Grilling pan
    7. Grill tongs
    8. Meat thermometer

    This Grilled Salmon Recipe with Summer Vegetable Relish will make you want to grill all year around- it's super quick and easy to make for a fresh dinner you'll love!

    Grilled Salmon Recipe with Summer Vegetable Relish

    Jessy Freimann
    This Grilled Salmon Recipe with Summer Vegetable Relish will make you want to grill all year around- it's super quick and easy to make for a fresh dinner you'll love!
    No ratings yet
    Print Recipe Pin Recipe
    Prep Time 15 minutes mins
    Cook Time 20 minutes mins
    Total Time 35 minutes mins
    Course Main, Main Course, Main dish
    Cuisine American, Mexican
    Servings 6 servings
    Calories 296 kcal

    Equipment

    • 1 grill tongs and turner
    • 1 cutting board
    • 1 chefs knife
    • 1 Measuring cups and spoons

    Ingredients
      

    • Cooking spray
    • 2 pound salmon filet also known as a side of salmon
    • 2 Tablespoons olive oil, divided
    • 3 limes, halved and divided
    • 2 teaspoons Kosher salt, divided
    • 1 pint cherry tomatoes
    • 2 medium zucchini, sliced length-wise into quarters
    • 1 large jalapeno pepper, halved and seeded
    • 1 ear corn, husks and silk removed
    • ½ teaspoon ground black pepper divided
    • 1 teaspoon chili powder divided
    • 1 teaspoon garlic powder divided
    • 2 Tablespoons fresh cilantro, chopped

    Instructions
     

    • Spray the grill with cooking spray and preheat the grill to medium.
    • While the grill heats, spray a grill pan with cooking spray (or a large piece of heavy duty foil if you don't have a grill pan).
    • Place the salmon onto the pan and drizzle with 1 tablespoon olive oil and the juice from ½ lime. Then season with ½ teaspoon salt, ¼ teaspoon pepper, ½ teaspoon chili powder and ½ teaspoon garlic powder. Set aside.
    • Place cherry tomatoes onto skewers and place onto a large plate with zucchini, jalapeno pepper, corn and remaining limes.
    • Spray vegetables on each side with cooking spray and sprinkle with 1 teaspoon salt.
    • Place the pan with the salmon and all the veggies onto the grill and cover.
    • Cook for 5 minutes. Remove the tomatoes to the same plate you brought them out on (they should be just starting to burst a bit). Turn the rest of the veggies.
    • Cover and cook for 3-5 more minutes. Remove zucchini and peppers (they should have a nice char but not be soggy).
    • Turn the corn and limes and close- cover and cook for 5 more minutes.
    • Remove corn and limes from the grill. Begin checking the temperature of the fish and remove when the thickest part reaches 145 degrees (around 5-10 more minutes).
    • Once the fish has been removed from the heat, let it rest.
    • While the fish rests, remove corn from husks, dice the zucchini and jalapeno pepper and remove the tomatoes from the skewers.
    • Combine all the veggies in a large bowl an add the juice from half of a lime (one of the grilled ones), 1 Tablespoon olive oil, ½ teaspoon salt, ¼ teaspoon pepper, ½ teaspoon chili powder, ½ teaspoon garlic powder and cilantro. Mix well.
    • Spoon the vegetable relish over the salmon and serve immediately with additional limes on the side.

    Notes

    Leftovers last 2 days refrigerated.

    Nutrition

    Serving: 1servingCalories: 296kcalCarbohydrates: 10gProtein: 32gFat: 15gSaturated Fat: 2gPolyunsaturated Fat: 4gMonounsaturated Fat: 7gCholesterol: 83mgSodium: 862mgPotassium: 1142mgFiber: 2gSugar: 4gVitamin A: 731IUVitamin C: 42mgCalcium: 51mgIron: 2mg
    Tried this recipe?Let us know how it was!

    If you tried this recipe please comment and rate it 🙂 I love hearing your feedback and answering your questions! And if you make this please tag me on Instagram with @thelifejolie so I can share it <3

    You can find a full index of my recipes here.

    Don’t forget to follow The Life Jolie on Pinterest for more recipe inspiration!

    Or if Pinterest isn’t your style, bookmark this post!

    Let’s keep the conversation going- join my Facebook group! 
    Easy Peach Salsa

    Jul 22, 2019 · 18 Comments

    You've got to try this easy Peach Salsa! Made with just a few simple ingredients, this versatile dip adds a unique and delicious twist on a traditional salsa recipe and it really lets the peaches shine.

    You've got to try this easy Peach Salsa! Made with just a few simple ingredients, this versatile dip adds a unique and delicious twist on a traditional salsa recipe and it really lets the peaches shine.

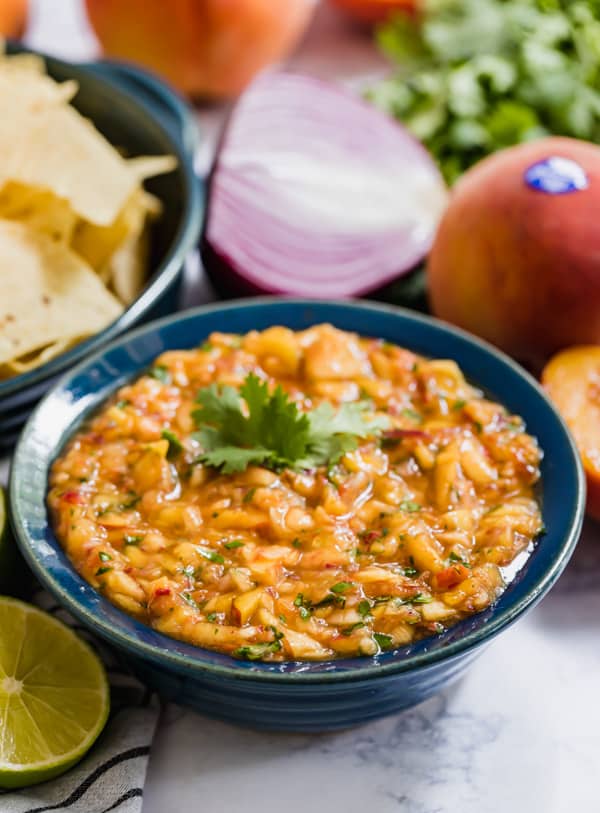
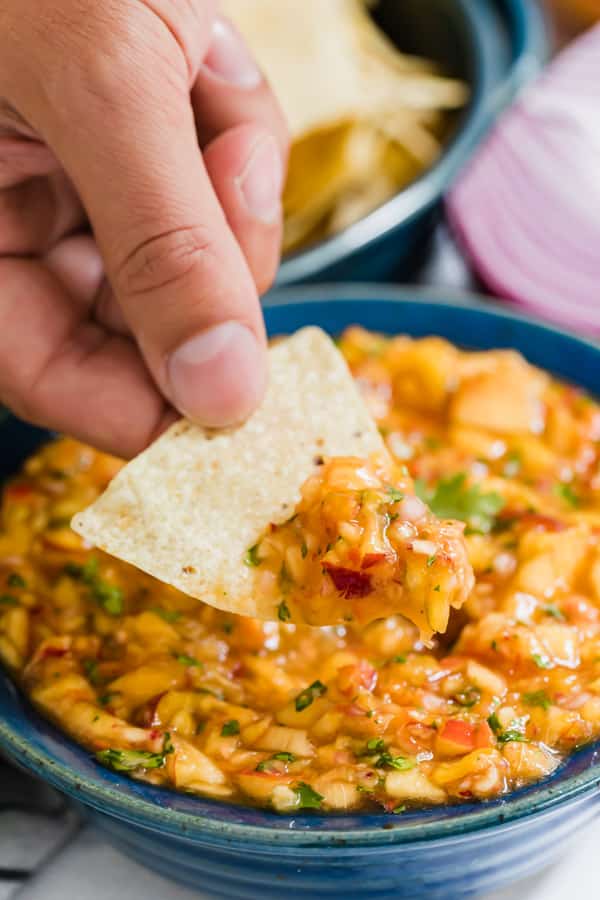
    Peach salsa in a bowl with chips and peaches behind it.

    This is a sponsored conversation on behalf of Wegmans. Thank you for supporting the brands that support this blog. This post contains Affiliate Links. Please see the disclaimer here.

    Peach Salsa

    Stone fruit season is upon us once again! There is nothing better than summer produce- the abundance of deliciously ripe and perfect fruits and vegetables is unmatched and stone fruits are among my favorites. Since the season can be short around here, I get so excited, that I often find myself with an excessive amount of produce to eat through, which is a very good problem to have!

    So naturally I'm always on the hunt for creative, tasty ways to enjoy these goodies. It's especially fun to put a fruity twist on traditional recipes, like salsa in this case. For today's post, I had a little help from my friends at Wegmans and I'm thrilled to share their simple and deliciously addictive Peach Salsa recipe with you!

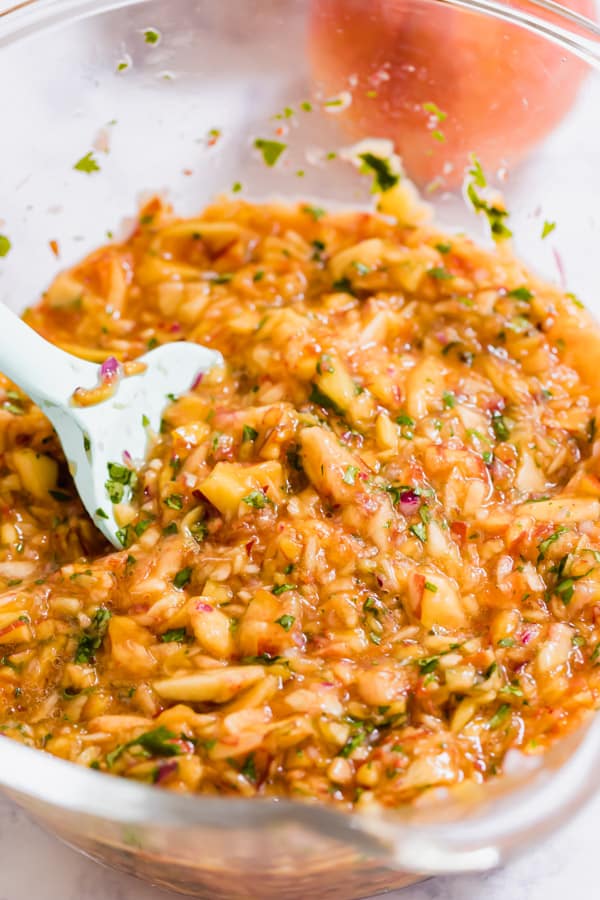
    Peach salsa in a mixing bowl with a spoon

    Exclusive stone fruit varieties bring unmatched flavor and consistently high quality.

    One of the things that makes Wegmans such a beloved grocery chain is the fact that quality is always a top priority in all of their offerings. This is especially evident in their produce section, where the endless options always look fantastically fresh. They also take their partnerships with growers very seriously and offer some unique varieties that are true showstoppers.

    Two such varieties are exclusive to Wegmans; Lori Anne Peaches and Wegmans White Pearl Nectarines. These varieties are extremely popular around here, and for very good reason!

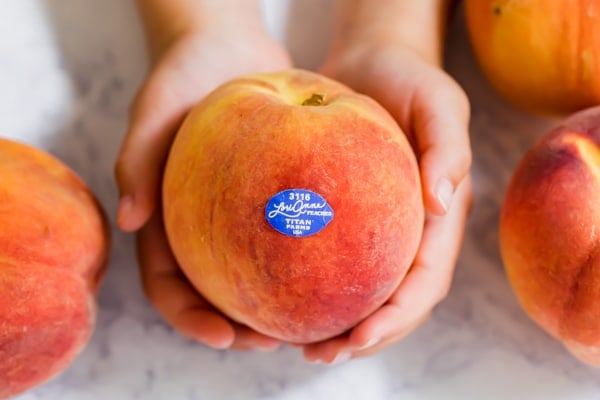
    Two hands holding a Lori Anne Peach

    Lori Anne Peaches

    Lori Anne Peaches are pretty special to me. My beloved Grandma Eve, introduced my mom and I to them several years ago and we've been hooked ever since! Lori Anne peaches were created at Titan Farms for Wegmans in 2013 and they’re now the #1 peach in the month of July. Titan Farms is owned by Chalmers and Lori Anne Carr. Lori Anne is the peach’s namesake (how cool is that?!).

    Every summer, Titan Farms sends more than 2.5 million Lori Anne Peaches, which are hand-picked directly into small totes, then sized and delicately packed in single layers for shipment. Peaches ordered on a Monday, are harvested and packed that day, then shipped on Tuesdays. When they arrive at Wegmans 3-4 times a week, they’ve only been off the tree for 3-4 days, so you know you're getting the most fresh, juicy peaches!

    Wegmans White Pearl Nectarines

    Wegmans White Pearl Nectarines come from Family Tree Farms in Reedley, California. Dave Jackson is a 7th -generation farmer at the helm of this operation. When members of the Wegmans produce team visited the farm in 2012 to taste the new fruits, they raved about one exceptionally sweet white nectarine. On a handshake deal, Dave named it the Wegmans Pearl and planted 10 acres exclusively for Wegmans.

    This season, Dave’s sending Wegmans approximately 150,000 pounds of Wegmans Pearls, plus other varieties of sweet, juicy stone fruit! These deliciously flavorful nectarines are so popular, it's hard for Wegmans to keep up with demand, so Dave’s planting 15-25 more acres for them.

    Wegmans Summer Fruit Festival

    In honor of these delicious varieties, they're hosting a Summer Fruit Festival event at your local Wegmans. There will be samples of several fantastic recipes featuring Lori Anne Peaches with additional activities, a prize wheel, giveaways and some fun small freebies. This event is being held on July 26, and 27  from 11am - 3pm each day. You should definitely stop by and check out the best of the season summer fruit!

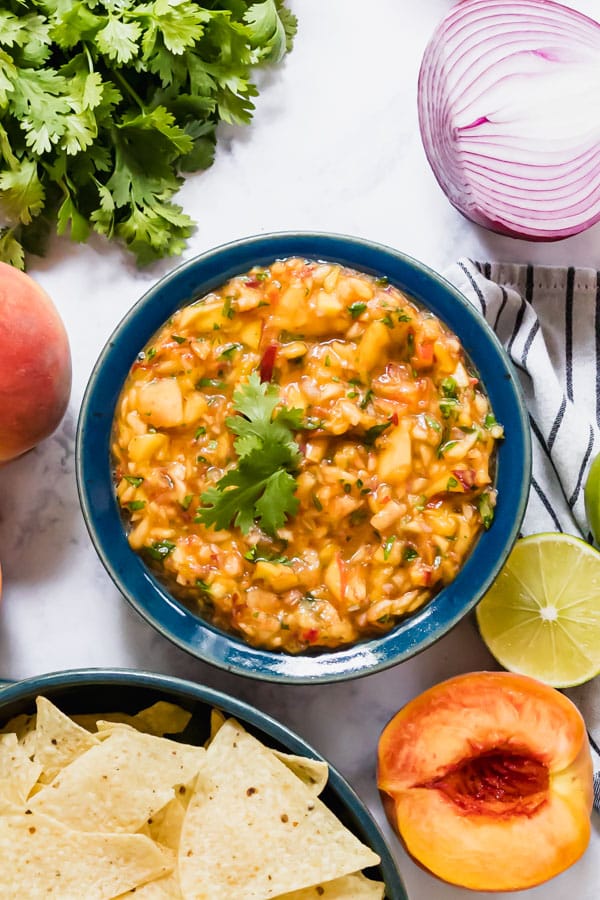
    An overhead image of a bowl of peach salsa

    Tips for making this salsa recipe with peaches

    • I like to slice the peaches in a uniform size.
    • Make sure you process them in small batches to help them break down evenly in the food processor (and also so that you don't accidentally puree them!).
    • If you prefer a more mellow flavor to the red onions, you can submerge them in an ice bath for 10 minutes while you prepare the rest of the ingredients. Be sure to drain them well and dry them off before adding them to the recipe.
    • Always be sure to taste the salsa and adjust the seasonings to your taste.

    How do you choose fresh peaches?

    The first thing I do is pick them up and smell them. You want a deliciously fragrant peach. I also like to use peaches that are a teeny bit firmer for this recipe. They shouldn't be mushy but if you pick one up and (very gently!) squeeze it, it should have a very small amount of give.

    Can I use frozen peaches?

    Although fresh peaches are preferable, you can also substitute 16 ounces of frozen peaches. Be sure to thaw them first!

    How do you serve peach salsa?

    The great thing about this homemade salsa is that it's super versatile. You can keep it simple and serve it with tortilla chips. Serve it over chicken, fish, steak, shrimp- this would be a delicious addition to your protein of choice. You can also use it as a condiment to serve atop tacos, a salad or nachos!

    How long does fresh salsa last?

    This will keep 3-5 days covered in the refrigerator.

    A hand holding a chip with peach salsa on it.

    Ingredients for fresh peach salsa

    • Peaches
    • Red onion
    • Lime
    • Fresh cilantro
    • Wegmans Organic Sweet Chili Sauce
    • Salt

    How to make salsa with peaches

    1. Slice the peaches and chop them in the food processor. Be sure to work in small batches and transfer to a mixing bowl.
    2. Place the onion and lime juice into the food processor and pulse until it's a little pulpy but not pureed (you want a little texture). Add this to the mixing bowl with the peaches.
    3. Add the cilantro, chili sauce and salt and mix well to combine. Enjoy!

    Helpful tools:

    1. Food processor
    2. Chef's knife
    3. Cutting board
    4. Spatula
    5. Measuring cups
    6. Measuring spoons

    Two hands holding a Lori Anne Peach

    You've got to try this easy Peach Salsa! Made with just a few simple ingredients, this versatile dip adds a unique and delicious twist on a traditional salsa recipe and it really lets the peaches shine.

    Peach Salsa

    Jessy Freimann
    You've got to try this easy Peach Salsa! Made with just a few simple ingredients, this versatile recipe adds a unique and delicious twist on a traditional salsa recipe and it really lets the peaches shine.
    5 from 7 votes
    Print Recipe Pin Recipe
    Prep Time 20 minutes mins
    Total Time 20 minutes mins
    Course Appetizer, Condiment
    Cuisine Mexican
    Servings 8 servings
    Calories 67 kcal

    Equipment

    • 1 cutting board
    • 1 chefs knife
    • 1 mixing bowl
    • 1 Measuring cups and spoons
    • 1 Spatula

    Ingredients
      

    • 5 large peaches, skin on, pits removed and sliced
    • ½ cup red onion, chopped
    • 2 Tablespoons lime juice (1 lime)
    • 3 Tablespoons fresh cilantro, chopped
    • ¼ cup Sweet Chili Sauce
    • Kosher salt, to taste

    Instructions
     

    • Chop peaches in the food processor. Be sure to work in small batches, transferring to a mixing bowl between each batch.
    • Place the onion and lime juice into the now empty food processor and pulse until it's a little pulpy but not pureed (you want a little texture). Add to the mixing bowl with the peaches.
    • Add the cilantro, chili sauce and salt to taste to the bowl and mix well to combine.
    • Taste and adjust seasoning as needed. Serve immediately or refrigerate until serving.

    Notes

    This lasts up to 3 days covered in the refrigerator.

    Nutrition

    Serving: 1servingCalories: 67kcalCarbohydrates: 16gProtein: 1gFat: 0.4gSaturated Fat: 0.03gPolyunsaturated Fat: 0.1gMonounsaturated Fat: 0.1gSodium: 94mgPotassium: 153mgFiber: 2gSugar: 13gVitamin A: 369IUVitamin C: 6mgCalcium: 7mgIron: 0.4mg
    Tried this recipe?Let us know how it was!

    If you tried this recipe please comment and rate it 🙂 I love hearing your feedback and answering your questions! And if you make this please tag me on Instagram with @thelifejolie so I can share it <3

    Check out some of my other salsa recipes:

    • Greek Salsa
    • Chunky Avocado Salsa Recipe
    • 10 Minute Shrimp Salsa
    • Roasted Corn Salsa

    You can find a full index of my recipes here.

    Don’t forget to follow The Life Jolie on Pinterest for more recipe inspiration!

    Or if Pinterest isn’t your style, bookmark this post!

    Let’s keep the conversation going- join my Facebook group! 
    Baked Lasagna Dip

    Jul 18, 2019 · 2 Comments

    Baked Lasagna Dip is a tasty twist on a classic lasagna recipe. With all the flavors we love in traditional lasagna, this hot dip is sure to please!

    Baked Lasagna Dip is a tasty twist on a classic lasagna recipe. With all the flavors we love in traditional lasagna, this hot dip is sure to please!

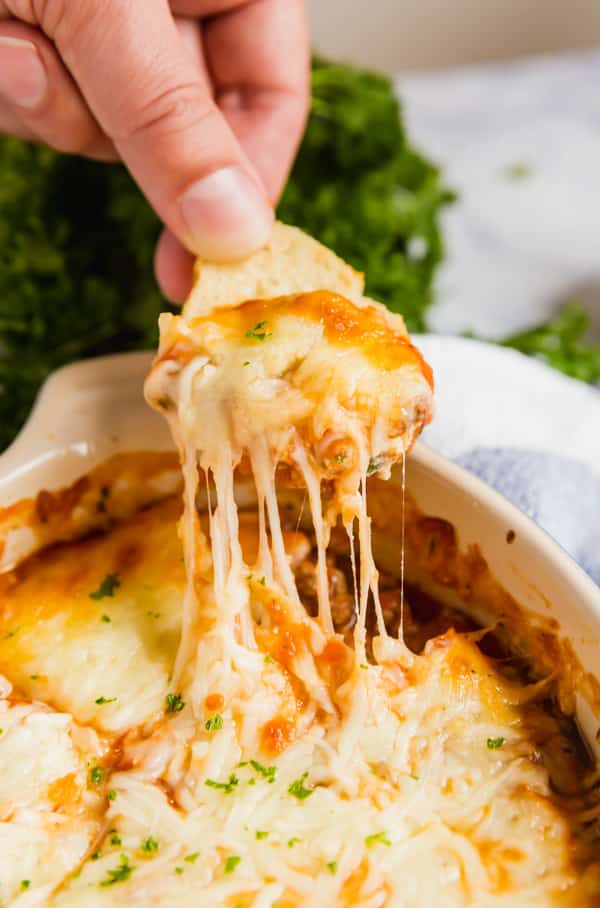
    A hand holding a baguette pulling stretchy cheese from lasagna dip.

    This post contains Affiliate Links. Please see the disclaimer here.

    Check out some of my other hot dip recipes:

    • Hot Artichoke Dip
    • Hot 7 Layer Bean Dip
    • Chicken Swiss Dip

    Baked Lasagna Dip

    Lasagna. The totally comforting Italian recipe we all know and love. In my family, classic lasagna is the stuff of legends and often finds it's way into various holiday's in addition to whatever the main protein is that day.

    When you love something so much, it's only natural to want it all the time. But Italian lasagna is a lot of work. So it seemed like a good idea to create a simple option to get all the things we love about a traditional lasagna without all the hassle.

    Lasagna Dip gives you the delicious meaty-creamy-cheesy-saucy goodness that keeps us all coming back for seconds and thirds. Like many hot dips, I like to serve it with sliced baguette and some fresh chopped parsley, fresh out of the oven!

    Tips for making lasagna as a dip

    • Be sure to use a non-stick pan for browning the beef.
    • I like to use beef with a lower fat content so that there's less grease.
    • I always drain the beef once it's cooked before adding the seasoning. That way you avoid extra grease but still have all the great flavor.
    • I mix together the ricotta ingredients while I let the beef cool; two birds, one stone!
    • You an totally use pre-made marinara sauce but I prefer to use my crazy simple marinara sauce recipe.

    What do you dip into lasagna dip?

    I like to use sliced baguette.

    Can lasagna dip be made ahead of time?

    You can easily assemble this ahead and bake it just before serving. You may need to add 10 minutes to the cooking time.

    How long does lasagna dip last?

    Around 3 days covered in the refrigerator.

    Can lasagna dip be reheated?

    Totally! I'd cover the pan in foil and reheat it in the oven until hot and bubbly.

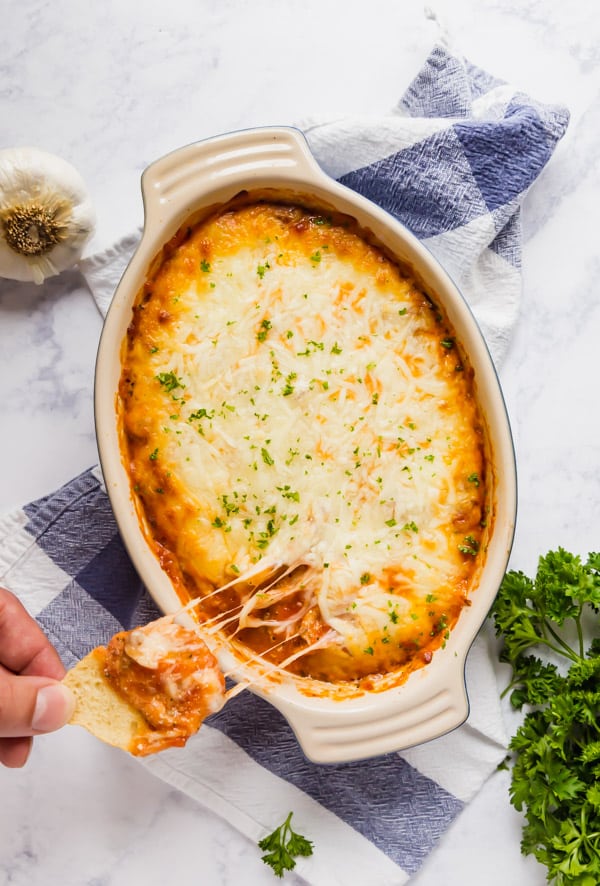
    An overhead image of a container of lasagna dip with a hand pulling stretchy cheese on a baguette from it.

    Ingredients for making Lasagna Dip

    • Ground beef
    • Italian seasoning
    • Garlic powder
    • Onion powder
    • Kosher salt
    • Ground black pepper
    • Ricotta cheese
    • Romano cheese (or Parmesan)
    • Dried parsley
    • Marinara sauce
    • Mozzarella cheese
    • Baguette
    • Olive oil
    • Fresh parsley

    How to make Lasagna Dip

    1. Brown the ground beef in a non-stick saute pan. While it cooks, break it up with a wooden spoon. Drain any excess grease and return the beef to the pan. Stir the seasonings into the beef and set it aside off the heat to cool slightly.
    2. While the beef cools, mix together all the ingredients for the ricotta cheese until they're well combined.
    3. Spread the ricotta mixture in a even layer to cover the bottom of a 1 quart baking dish, then spread the cooled ground beef evenly over the top of the ricotta.
    4. Cover the top of the beef evenly with marinara sauce.
    5. Sprinkle shredded mozzarella cheese over the top of the dip.
    6. Bake for 25 minutes. While it bakes, lay sliced baguette pieces in a single layer on a sheet pan. Give them a light spray with olive oil cooking spray and place them in the oven on the bottom rack for the last 10 minutes of bake time.
    7. You can broil the lasagna dip for the last minute or two if you want some nice brown color on the cheese - just keep a close eye on it, so it doesn't burn!
    8. Serve immediately and try not to eat it all in one sitting.

    Helpful tools:

    1. Large saute pan
    2. Wooden spoon
    3. Measuring cups
    4. Measuring spoons
    5. Mixing bowl
    6. Spatula
    7. One quart baking dish

    Slices of baguette on a plate with lasagna dip on them

    Baked Lasagna Dip is a tasty twist on a classic lasagna recipe. With all the flavors we love in traditional lasagna, this hot dip is sure to please!

    Baked Lasagna Dip

    Jessy Freimann
    Baked Lasagna Dip is a tasty twist on a classic lasagna recipe. With all the flavors we love in traditional lasagna, this hot dip is sure to please!
    5 from 1 vote
    Print Recipe Pin Recipe
    Prep Time 10 minutes mins
    Cook Time 35 minutes mins
    Total Time 45 minutes mins
    Course Appetizer
    Cuisine Italian
    Servings 6 servings

    Ingredients
      

    • ½ pound ground beef I used beef with a lower fat content so there would be less grease
    • 1 teaspoon Italian seasoning
    • 1 ½ teaspoon garlic powder divided
    • ½ teaspoon onion powder
    • ½ teaspoon kosher salt
    • ½ teaspoon ground black pepper divided
    • 1 8 ounce container ricotta cheese
    • ¼ cup Romano or Parmesan cheese
    • 1 teaspoon dried parsley
    • 1 cup marinara sauce
    • 1 ¼ cup mozzarella cheese shredded
    • Baguette sliced
    • Olive oil cooking spray
    • Fresh parsley chopped (garnish)

    Instructions
     

    • Preheat the oven to 375 degrees.
    • In a non-stick saute pan, brown ground beef until cooked using a wooden spoon to break up the beef.
    • Once cooked, drain the excess grease and return the beef to the pan.
    • Season the beef with Italian seasoning, 1 teaspoon garlic powder, onion powder, salt and ¼ teaspoon pepper. Stir to combine and set aside off the heat to cool slightly.
    • While the beef cools, add ricotta cheese, Romano or Parmesan cheese, dried parsley, ½ teaspoon garlic powder and ¼ teaspoon ground black pepper to a large bowl and stir until well combined.
    • In a 1 quart baking dish, spread the ricotta mixture in an even layer to cover the bottom of the pan.
    • Spread the cooled beef evenly over the top of the ricotta layer.
    • Spread marinara sauce evenly over the beef layer.
    • Sprinkle mozzarella cheese over the top of the dip.
    • Bake for 25 minutes (you can broil for the last minute or two if you want to brown the cheese slightly).
    • While it bakes, place the sliced baguette onto a sheet pan and spray with olive oil cooking spray. Place them into the oven on the bottom rack for the last 10 minutes of baking.
    • Sprinkle with chopped fresh parsley and serve immediately with sliced baguette.
    Tried this recipe?Let us know how it was!

    If you tried this recipe please comment and rate it 🙂 I love hearing your feedback and answering your questions! And if you make this please tag me on Instagram with @thelifejolie so I can share it <3

    You can find a full index of my recipes here.

    Don’t forget to follow The Life Jolie on Pinterest for more recipe inspiration!

    Or if Pinterest isn’t your style, bookmark this post!

    Let’s keep the conversation going- join my Facebook group! 
    Blueberry Cucumber Salad Recipe

    Jul 15, 2019 · 4 Comments

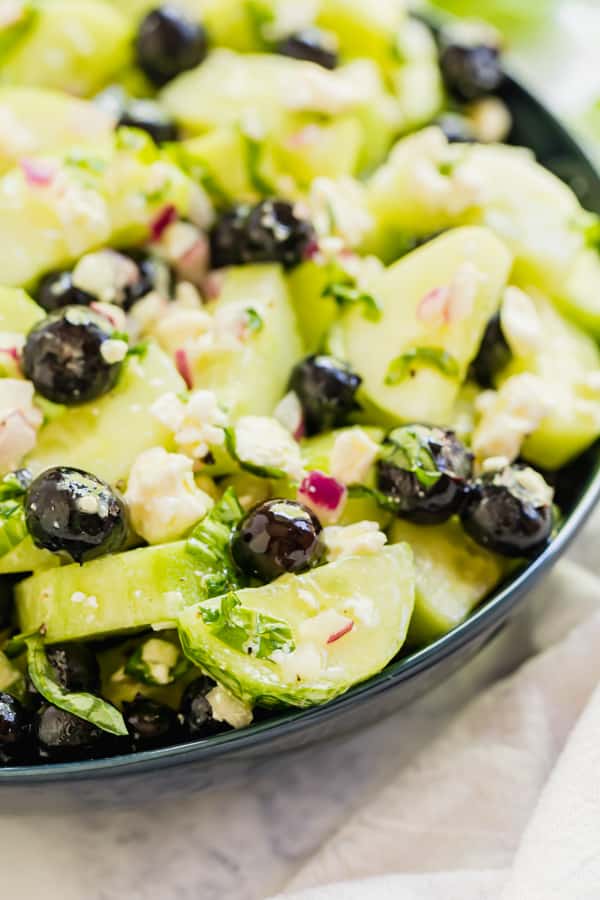
    Ready for a picnic side dish that isn't the same old salad selection we've all seen? This Blueberry Cucumber Salad recipe with Feta Cheese and a white balsamic dressing is light and refreshing! You'll want to bring it to every family gathering this summer!

    Ready for a picnic side dish that isn't the same old salad selection we've all seen? This Blueberry Cucumber Salad recipe with Feta Cheese and a white balsamic dressing is light and refreshing! You'll want to bring it to every family gathering this summer!

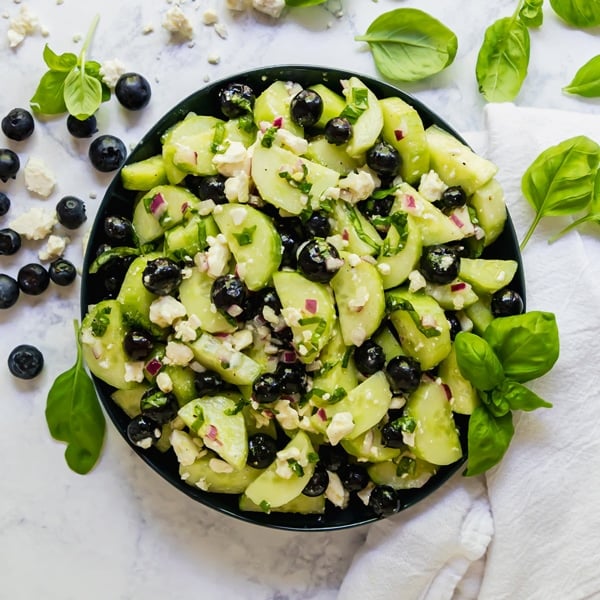
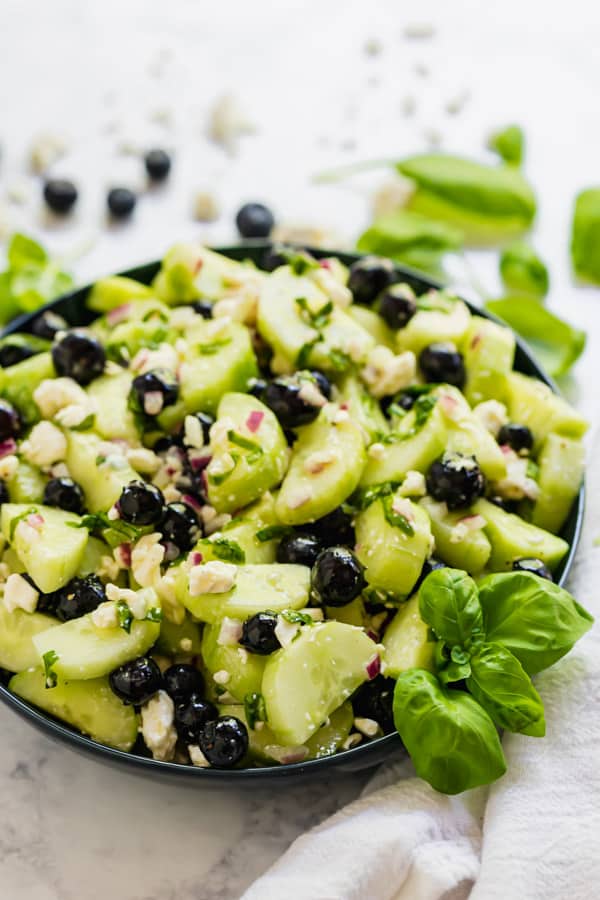
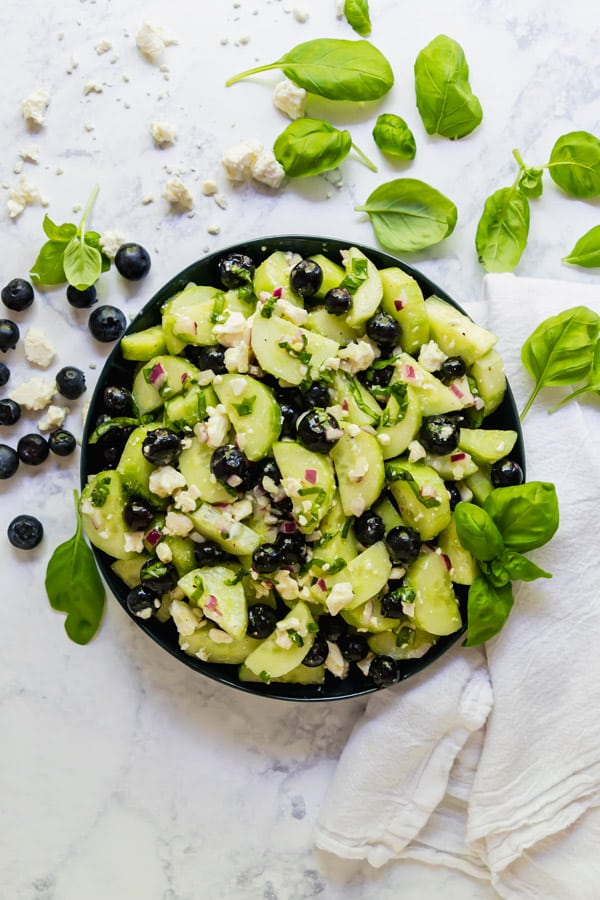
    A bowl of cucumber salad with feta, blueberries and basil around it.

    This post contains Affiliate Links. Please see the disclaimer here.

    Check out some of my other salad recipes:

    • Peas Salad with Shrimp
    • 7 Layer Taco Salad
    • Mexican Bean Salad
    • Beet Salad with Feta and Dill

    Blueberry Cucumber Salad Recipe

    We all know the typical picnic go-to sides. Mac salad. Potato salad. Perhaps a green salad or even a jello salad. But today, I'm here to mix it up with a delicious and more interesting variation of a cucumber salad (although I still have serious love for my other cucumber salad recipes like  Cucumber Tomato Salad and Asian Cucumber Salad.

    This recipe was originally inspired by a salad created by Wegmans. I first tried it at my cousin's wedding party. Her and her husband were married in their home state of North Carolina and then came back north and hosted a big picnic to celebrate with all their friends and family that live up here. They had Wegmans cater it and the food was so good. But this salad was the real star of the show and I knew I had to make my own version of it.

    I think the combination of blueberries and feta cheese is seriously genius- they go together perfectly. Wegmans recipe uses fresh mint, but I prefer basil. Mix it all up with some finely diced red onion and a super easy homemade white balsamic vinaigrette and you've got yourself a killer salad that's sure to please!

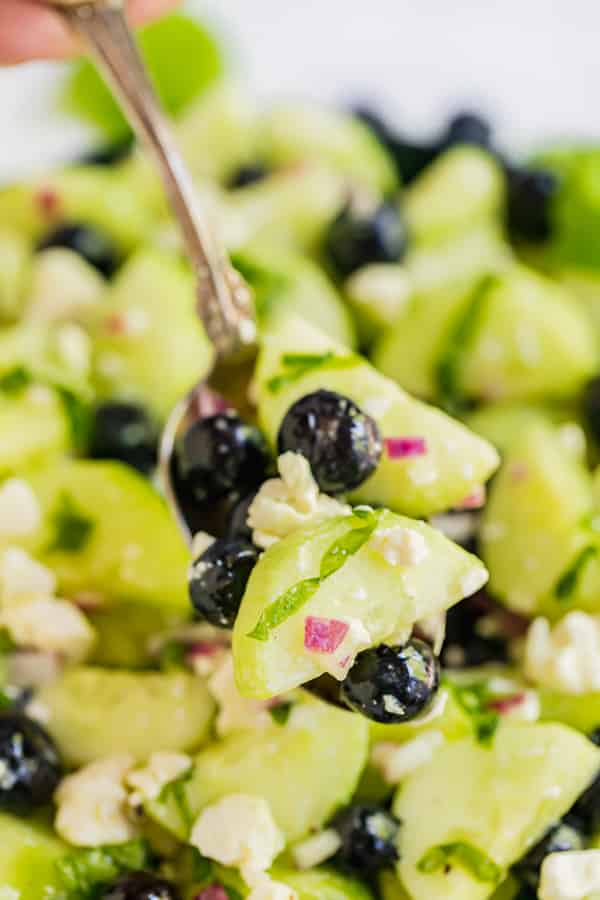
    A spoon holding a scoop of blueberry cucumber salad

    Tips for making cucumber salad

    • Be sure to slice the onions super fine, so they add flavor but aren't super overwhelming.
    • If you're looking for a more subdued onion flavor, you can submerge the chopped onion in an ice bath for 10 minutes to chill them out a bit (literally and figuratively!).
    • I prefer to peel the cucumbers for this but if you're partial to the skin you can always cut them unpeeled.

    Can I make Cucumber salad ahead?

    Yes, but perhaps hold off on adding the cheese until just before serving.

    Are cucumbers and vinegar a healthy snack?

    Yes, just don't go too heavy on the salt!

    What kind of cucumber should I use for cucumber salad?

    I prefer to use English cucumbers for this as they have a minimal amount of seeds.

    Can I use a different cheese instead of feta?

    Yes! This would be fantastic with goat cheese too!

    How long can you keep cucumbers in vinegar?

    Around 3 days for the best texture.

    An overhead image of a bowl of cucumber salad recipe with feta and blueberries

    Ingredients for making this cucumber blueberry salad

    • Cucumbers
    • Blueberries
    • Red onion
    • Feta cheese
    • Fresh basil
    • Olive oil
    • White balsamic vinegar
    • Honey
    • Kosher salt
    • Ground black pepper

    How to make this cucumber salad

    1. Peel the cucumbers, slice them in half lengthwise, scoop out the seeds and slice. Chop the red onion as finely as you can and chiffonade the basil (I've got a great tutorial on the best way to do this!).
    2. Gently stir together the cucumbers, blueberries, feta cheese, onion, basil in a large bowl.
    3. In a smaller bowl, whisk together olive oil, white balsamic vinegar and honey until well combined and pour over the salad.
    4. Toss everything together and season to taste with salt and pepper. Be sure to taste as you do this and adjust all ingredients to your taste.
    5. Devour!

    Make it a meal!

    A few great recipes to round out and complete this meal would be:

    • Tropical Pineapple Chicken
    • Blistered Shishito Peppers
    • Balsamic Grilled Asparagus
    • Raspberry Lemon Icebox Pie

    Helpful tools:

    1. Mixing bowl
    2. Chef’s knife
    3. Cutting board
    4. Measuring cups
    5. Measuring spoons

    Aa close up of a bowl of this cucumber salad recipe

    Ready for a picnic side dish that isn't the same old salad selection we've all seen? This Blueberry Cucumber Salad recipe with Feta Cheese and a white balsamic dressing is light and refreshing! You'll want to bring it to every family gathering this summer!

    Blueberry Cucumber Salad Recipe

    Jessy Freimann
    Ready for a picnic side dish that isn't the same old salad selection we've all seen? This Blueberry Cucumber Salad recipe with Feta Cheese and a white balsamic dressing is light and refreshing! You'll want to bring it to every family gathering this summer!
    4.75 from 4 votes
    Print Recipe Pin Recipe
    Prep Time 10 minutes mins
    Total Time 10 minutes mins
    Course Salad, Side Dish
    Cuisine American
    Servings 6 servings
    Calories 176 kcal

    Equipment

    • 1 cutting board
    • 1 chefs knife
    • 1 mixing bowl
    • 1 Measuring cups and spoons
    • 1 Spatula

    Ingredients
      

    Salad

    • 4 cups english cucumbers peeled, halved lengthwise, seeds scooped out and sliced (around 2 large English cucumbers)
    • 1 pint blueberries
    • ¼ cup red onion finely diced
    • ¾ cup Feta cheese
    • 8 large fresh basil leaves chiffonade

    Dressing

    • 3 Tablespoons olive oil
    • 2 Tablespoons white balsamic vinegar
    • ½ teaspoon honey
    • ½ teaspoon Kosher salt to taste
    • ¼ teaspoon Ground black pepper to taste

    Instructions
     

    • In a large bowl combine cucumbers, blueberries, red onion, Feta cheese and basil.
    • In a small bowl, whisk together oil, vinegar and honey until well combined.
    • Pour the dressing over the salad and toss to coat.
    • Season with salt and pepper to taste.
    • Serve immediately or refrigerate until serving.

    Notes

    Leftovers last up to 4 days in the refrigerator.

    Nutrition

    Serving: 1servingCalories: 176kcalCarbohydrates: 17gProtein: 4gFat: 11gSaturated Fat: 4gPolyunsaturated Fat: 1gMonounsaturated Fat: 6gCholesterol: 17mgSodium: 411mgPotassium: 193mgFiber: 2gSugar: 11gVitamin A: 223IUVitamin C: 10mgCalcium: 113mgIron: 1mg
    Tried this recipe?Let us know how it was!

    If you tried this recipe please comment and rate it 🙂 I love hearing your feedback and answering your questions! And if you make this please tag me on Instagram with @thelifejolie so I can share it <3

    You can find a full index of my recipes here.

    Don’t forget to follow The Life Jolie on Pinterest for more recipe inspiration!

    Or if Pinterest isn’t your style, bookmark this post!

    Let’s keep the conversation going- join my Facebook group! 
    Roasted Vegetable Flatbread

    Jul 8, 2019 · 2 Comments

    Need a good, meatless dinner or appetizer? This Roasted Vegetable Flatbread delivers! It's super easy to throw together and tastes fantastic.

    Need a good, meatless dinner or appetizer? This Roasted Vegetable Flatbread delivers! It's super easy to throw together and tastes fantastic.

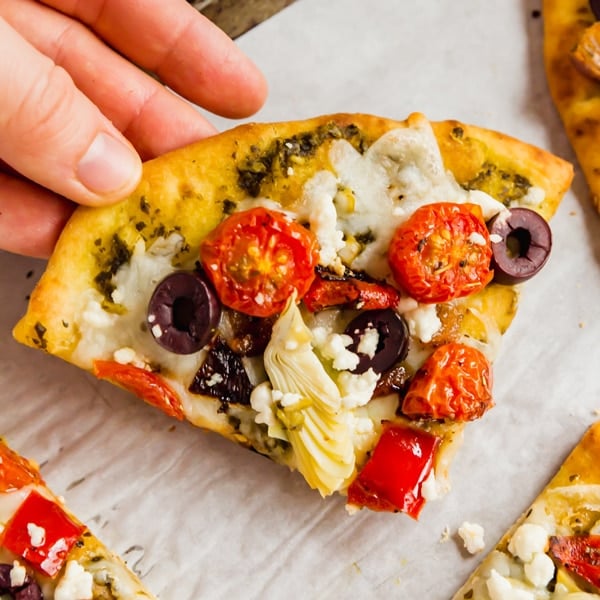
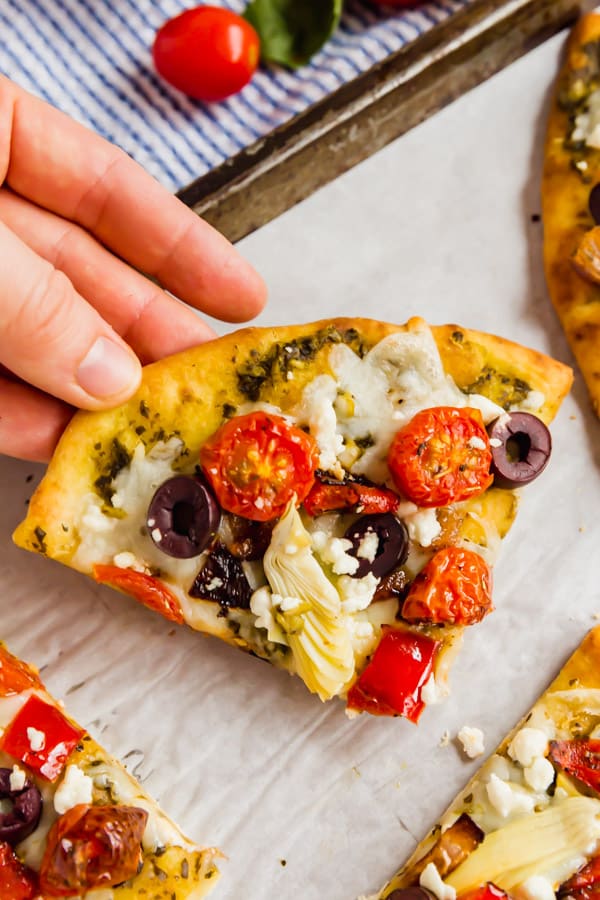
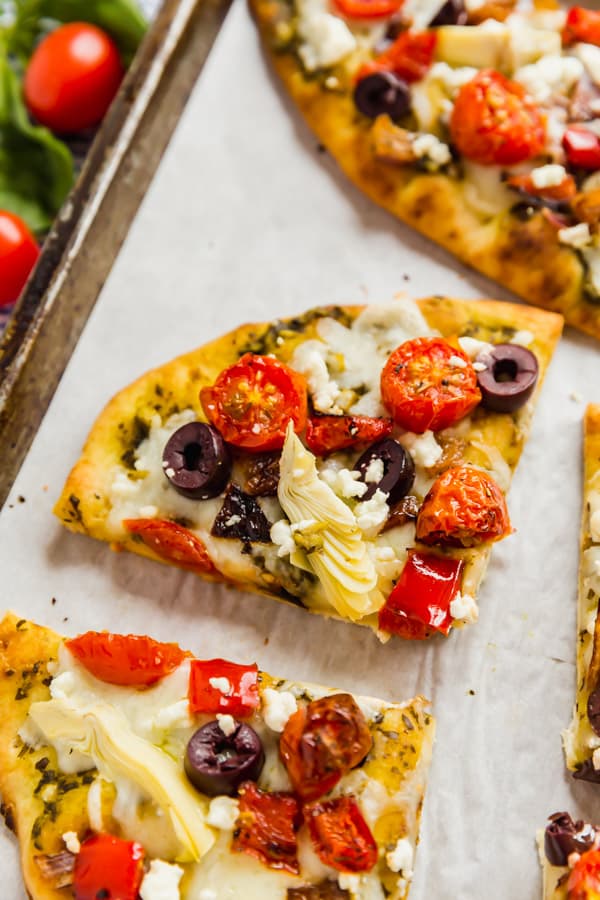
    A hand picking up a piece of flatbread pizza from a pan

    This post contains Affiliate Links. Please see the disclaimer here.

    Check out some of my other flatbread recipes:

    • BLT Ranch Flatbread Pizza
    • Pea Pesto Flatbread
    • BBQ Chicken Flatbread Pizza

    Roasted Vegetable Flatbread

    A million years ago, I worked at the Cheesecake Factory. One of the pizzas they had on he menu back then, was a Veggie Goat Cheese pizza and it was so good! That item has been off the menu for a while now, but I still think about it, so I knew I had to make my own variation!

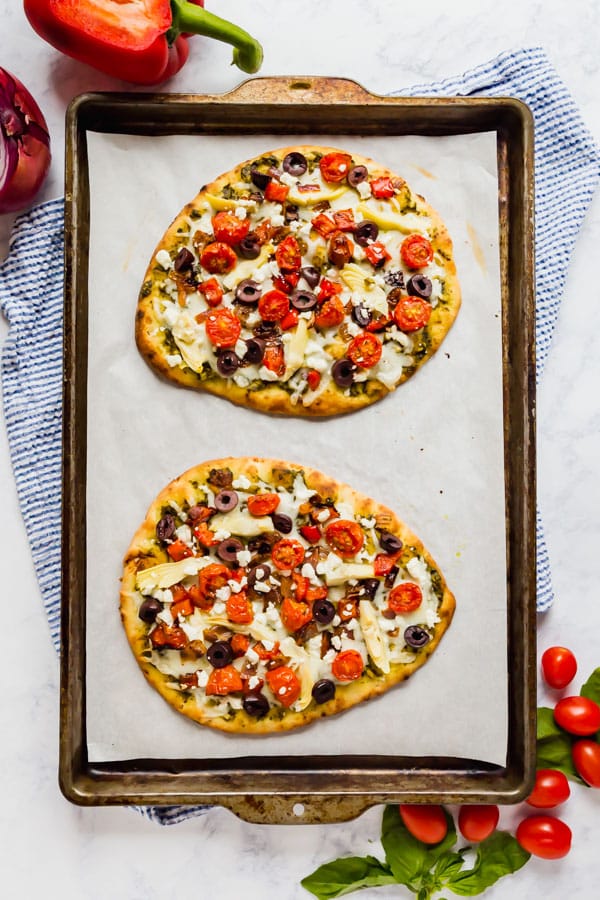
    To keep things quick and simple I opted to make this using flatbread instead of traditional pizza dough. Flatbread pizza takes all the work out of making pizzas without sacrificing any of the delicious flavor. The veggies roast up pretty quickly and once you assemble the pizza, it bakes even quicker. This leaves you with a killer meatless option that will have your family fighting for seconds!

    Two flatbreads with roasted veggies on a pan

    Tips for making flatbread pizza

    • Try to cut the vegetables to around the same size for even roasting.
    • While the veggies are roasting you can slice the olives, cut the artichoke hearts into smaller pieces and prepare the cheeses. I buy the artichokes already quartered but like the cut them to be a bit smaller.
    • My local grocery store makes a killer garlic naan, but this also tastes fantastic with plain naan as well.

    What is flatbread?

    Basically, flatbread is unleavened bread. While you can make your own flatbread recipe from scratch, I prefer to use pre-made naan which is an Indian variation of this.

    What is flatbread used for?

    You can eat it plain, use it for dips and also like traditional bread, like sandwiches. Or like this recipe, use it as a crust for pizza.

    Can I roast the veggies ahead of time?

    Yes! You can do assemble the pizzas up to a day ahead of time and then bake them just before serving. Be aware you may need to add 5-10 minutes to the baking time to make sure they're heated through.

    How long does leftover flatbread pizza last?

    Up to 3 days covered in the refrigerator.

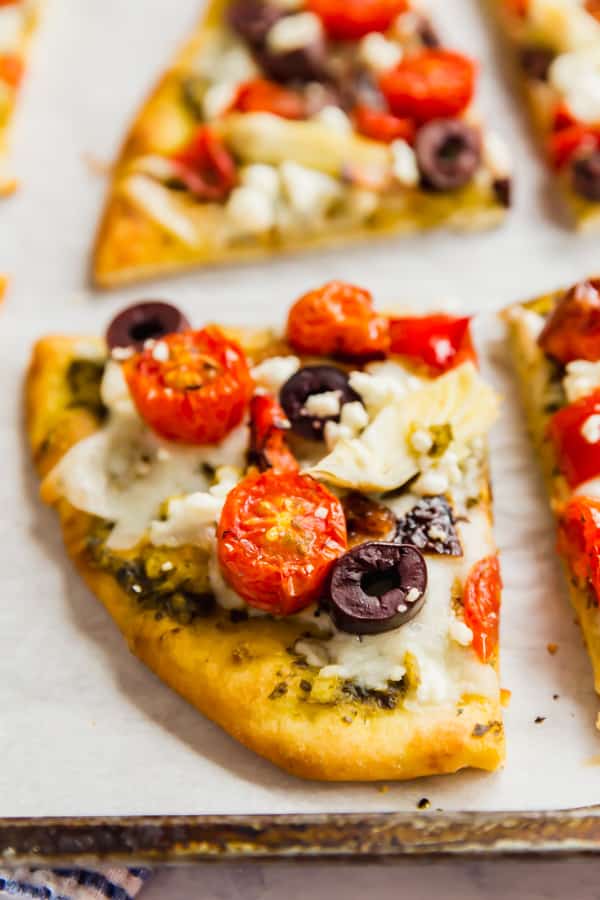
    A close up of roasted vegetable flatbread

    Ingredients for making this flatbread pizza recipe

    • Onion
    • Bell pepper
    • Cherry tomatoes
    • Olive oil
    • Kosher salt
    • Ground black pepper
    • Garlic powder
    • Italian seasoning
    • Garlic naan
    • Pesto sauce
    • Mozzarella cheese
    • Kalamata olives
    • Artichoke hearts
    • Goat cheese

    How to make flatbread pizza

    1. Season the vegetables with olive oil, salt, pepper, garlic powder and Italian seasoning and roast them in the oven.
    2. During the last 5 minutes of the veggies roasting time, I like to add the naan to the oven to begin warming it.
    3. Once the baking time is up, remove the veggies and the naan and reduce the heat to 375 degrees.
    4. Assemble the pizzas. Start by spreading your favorite pesto sauce onto the naan.
    5. Top with mozzarella cheese, the roasted vegetables, olives, artichoke hearts and goat cheese.
    6. Return the pizzas to the oven and bake for 10-15 minutes and then slice and serve immediately.

    Helpful tools:

    1. Spatula
    2. Sheet pan
    3. Chef’s knife
    4. Cutting board

    A piece of flatbread pizza on a pan

    Need a good, meatless dinner or appetizer? This Roasted Vegetable Flatbread delivers! It's super easy to throw together and tastes fantastic.

    Roasted Vegetable Flatbread

    Jessy Freimann
    Need a good, meatless dinner or appetizer? This Roasted Vegetable Flatbread delivers! It's super easy to throw together and tastes fantastic.
    5 from 1 vote
    Print Recipe Pin Recipe
    Prep Time 10 minutes mins
    Cook Time 35 minutes mins
    Total Time 45 minutes mins
    Course Main, Main Course, Main dish
    Cuisine American
    Servings 2 pieces
    Calories 760 kcal

    Equipment

    • 1 sheet pan
    • 1 cutting board
    • 1 chefs knife
    • 1 Measuring cups and spoons

    Ingredients
      

    • ⅓ cup onion chopped
    • ⅓ cup red bell pepper chopped
    • ⅓ cup cherry tomatoes halved
    • 1 Tablespoon olive oil
    • ½ teaspoon Kosher salt to taste
    • ¼ teaspoon Ground black pepper to taste
    • ½ teaspoon Garlic powder to taste
    • ½ teaspoon Italian seasoning to taste
    • 2 pieces garlic naan or plain
    • 3 Tablespoons pesto sauce
    • ½ cup mozzarella cheese shredded
    • ¼ cup kalamata olives sliced
    • ¼ cup marinated quartered artichoke hearts halved
    • ¼ cup goat cheese crumbled (you can also use feta if you'd prefer)

    Instructions
     

    • Preheat the oven to 400 degrees F and line 2 sheet pans with parchment.
    • In a large bowl, toss the onions, peppers and cherry tomatoes with olive oil.
    • Season them to taste with salt, pepper, garlic powder and Italian seasoning. Toss to evenly coat and pour onto one of the sheet pans in a single layer.
    • Bake for 20 minutes.
    • Place 2 pieces of naan onto the other pan. Add this to the oven during the last 5 minutes of the vegetables bake time.
    • When the bake time is up, remove the vegetables and the naan from the oven and reduce the temperature to 375 degrees F.
    • Divide the pesto sauce between the two pieces of naan and spread evenly over the top of them.
    • Sprinkle the mozzarella cheese over the top of them and sprinkle with the roasted vegetables, olives, artichoke hearts and goat cheese.
    • Return the pizzas to the oven and bake for 10-15 minutes or until the cheese is melted and bubbly. Slice and serve immediately.

    Notes

    Leftovers last up to 3 days in the refrigerator.

    Nutrition

    Serving: 1pieceCalories: 760kcalCarbohydrates: 69gProtein: 24gFat: 42gSaturated Fat: 13gPolyunsaturated Fat: 1gMonounsaturated Fat: 10gCholesterol: 47mgSodium: 2282mgPotassium: 200mgFiber: 5gSugar: 8gVitamin A: 2162IUVitamin C: 45mgCalcium: 331mgIron: 2mg
    Tried this recipe?Let us know how it was!

    If you tried this recipe please comment and rate it 🙂 I love hearing your feedback and answering your questions! And if you make this please tag me on Instagram with @thelifejolie so I can share it <3

    You can find a full index of my recipes here.

    Don’t forget to follow The Life Jolie on Pinterest for more recipe inspiration!

    Or if Pinterest isn’t your style, bookmark this post!

    Let’s keep the conversation going- join my Facebook group! 
    Asian Grilled Pork Tenderloin

    Jul 2, 2019 · Leave a Comment

    It's a busy summer weeknight- what's for dinner? Asian Grilled Pork Tenderloin! It's crazy easy to make and and full of unexpected but delicious flavor!

    It's a busy summer weeknight- what's for dinner? Asian Grilled Pork Tenderloin! It's crazy easy to make and and full of unexpected but delicious flavor!

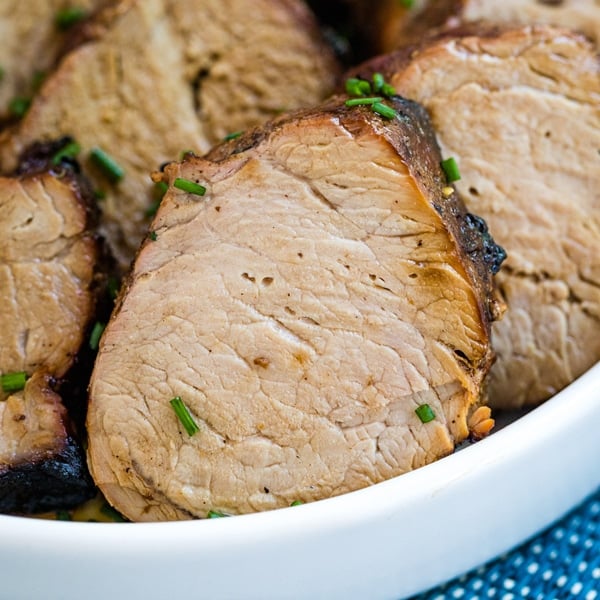
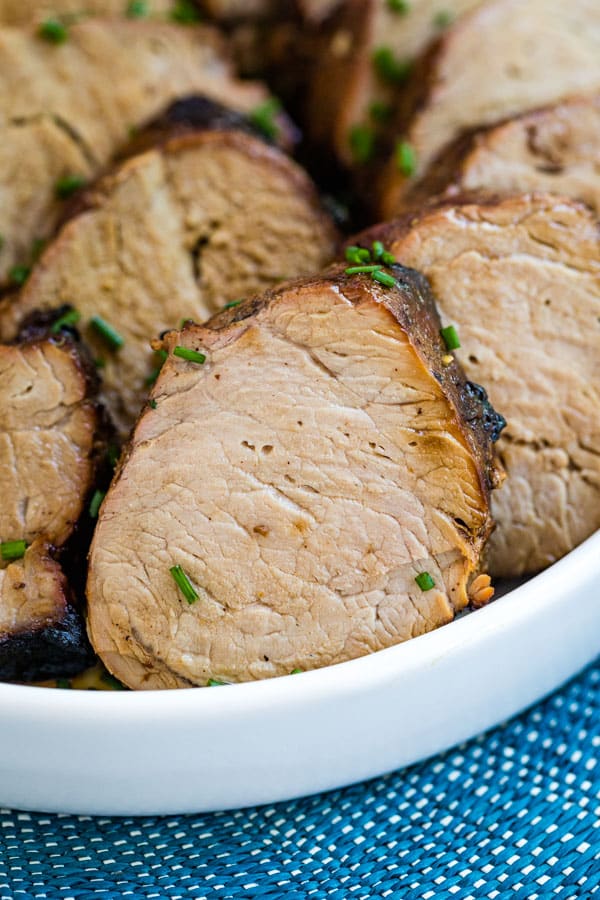
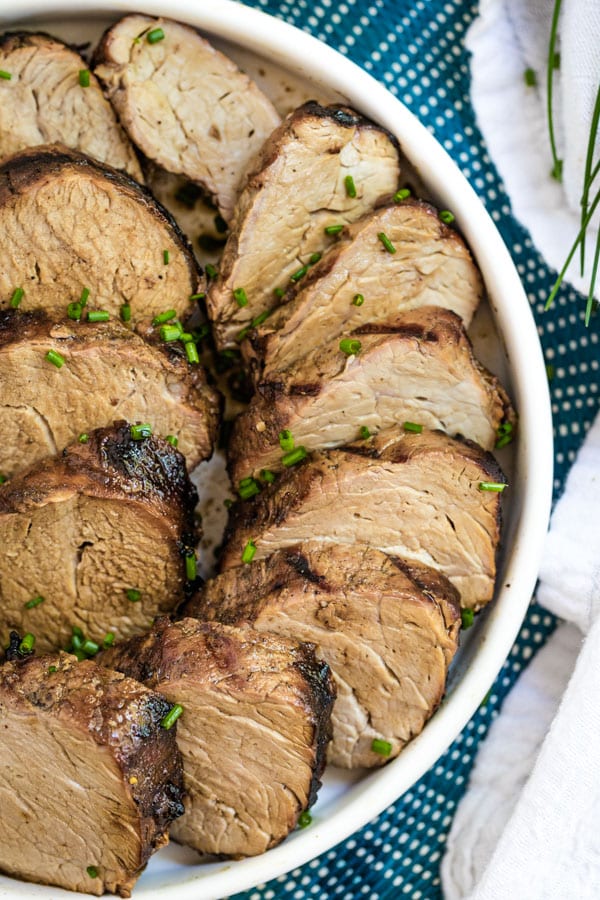
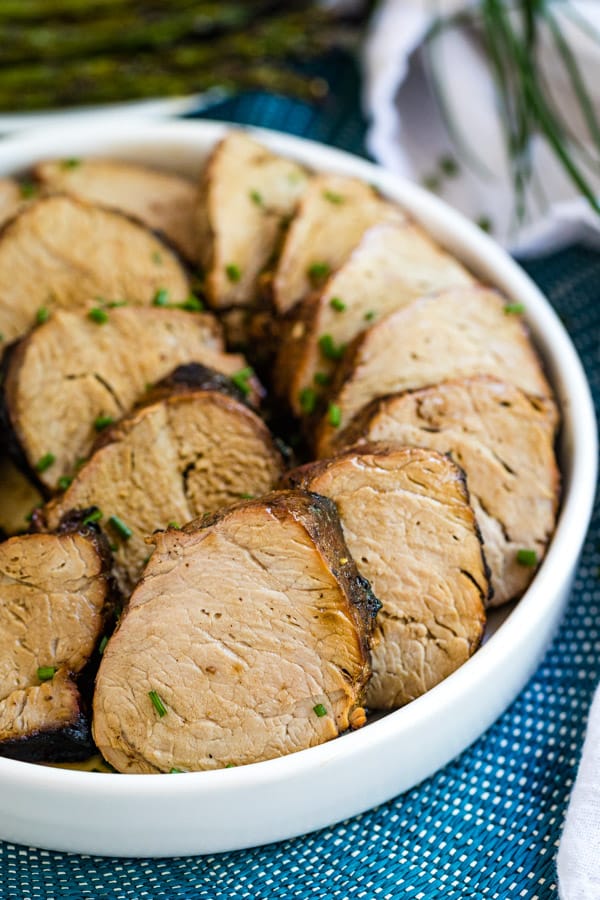
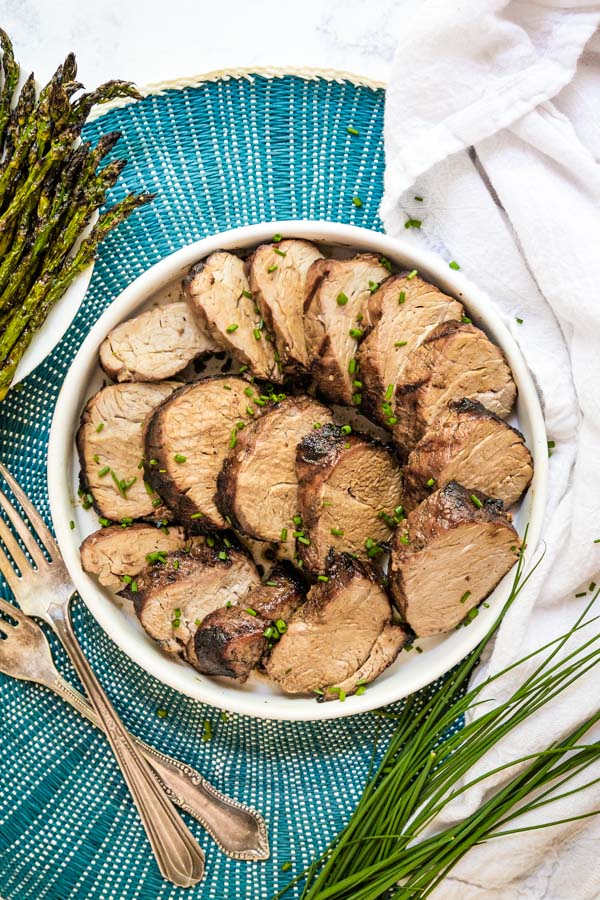
    A close up image of a slice of pork tenderloin on a plate.

    This recipe is part of my Dump it 'til it's hot series of dump recipes. It's all about making delicious food with minimal prep, no pre-cooking, the ability to freeze for a good make-ahead meal. And trust me when I say, easy never tasted so good!

    This post contains Affiliate Links. Please see the disclaimer here.

    Other great pork tenderloin recipes include:

    • Greek Pork Tenderloin
    • Smothered Pork Tenderloin

    Asian Grilled Pork Tenderloin

    This recipe came from one of those fantastic church cookbooks. You know the ones, that have a variety of recipes from each parishioner and are bound at a local Staples or Office Max. Those are a goldmine of great recipes and I always buy a bunch of them each year at our church rummage sale.

    This particular recipe was of interest to me because some of the ingredients seemed like an odd fit and not the kind of thing you'd typically find in pork tenderloin recipes (I'm looking at you, cinnamon!). I was curious to see how it would all shake out and I figured I'd give it a shot. I'm totally glad I did because this one is a total keeper!

    An overhead image of the side of a plate of grilled pork tenderloin

    Tips for grilling this pork tenderloin

    • Be sure to spray the grill well with cooking spay to prevent sticking.
    • I like to pull my pork from the fridge before preheating the grill to help it get a little closer to room temperature before hitting the heat.
    • I also rest the pork for 5-10 minutes after grilling to allow the juices to redistribute before carving.
    • This recipe has a lot of sugar (the honey!). The first time I made it, it got seriously charred because I kept it on direct heat for the entire time. Don't do this! Sear it quickly on each side and then move it to the top rack and reduce the heat a little for the remainder of the cooking time. This will help getting it to temp without burning the outside.
    • Be sure to carve against the grain.

    Slcies of pork tenderloin on a plate.

    How long do you marinade pork tenderloin?

    You can marinate it up to 5 days (as long as it doesn't put you past the use-by date). In my opinion, it's best to marinate pork tenderloin from 1 hour - overnight if you're not freezing it right away. Any longer could adversely affect the texture.

    Is there a difference between pork loin and pork tenderloin?

    Although they aren't located too far from each other on the pig (both from different parts of the loin muscle). Pork loin is larger, wider and thicker than a pork tenderloin. It's a lighter meat with a fat cap on top and has a mild flavor. It can be bought bone-in or boneless.

    Pork tenderloin is long and skinny. It's a more delicate muscle and is one of the more tender meat's you'll find. It's also a bit darker and color and a bit pricier to purchase.

    How do you keep pork tenderloin from drying out?

    The marinade with be the first step in helping with keeping the pork tenderloin moist.  But most importantly, don't over cook the meat! Use a meat thermometer.

    What temperature do you cook pork tenderloin to?

    Pork is best served and safe to consume at an internal temperature of 145 degrees. The meat will be a tiny bit pink in the middle, and that's ok. And be sure to rest the meat so the juices don't come spilling out- you want those to stay in the meat, not on your cutting board!

    How long do you grill pork tenderloin?

    I start by grilling for around a minute or two per side over high heat and then reduce the heat and place the pork on the higher rack for another 10-15 minutes or until it reaches the internal temperature just under 145 degrees.

    Can I freeze pork tenderloin?

    Yes, either freeze it right after you place it in the marinade or freeze after cooking and cooling. Thaw before cooking.

    How long does pork tenderloin last?

    Leftovers last around 3-4 days covered in the refrigerator.

    What goes with this grilled pork tenderloin recipe?

    • Rainbow Asian Chicken Salad
    • Crunchy Ramen Coleslaw
    • Cabbage and Pork Meatball Soup

    A high overhead image of a platter of sliced pork tenderloin.

    Ingredients for making this pork tenderloin marinade

    • Pork tenderloin
    • Ground ginger
    • Crushed red pepper flakes
    • Ground cinnamon
    • Olive oil
    • Honey
    • Soy sauce
    • Jalapeno pepper
    • Fresh chives

    How to cook pork tenderloin on the grill

    1. Mix all marinade ingredients.
    2. Submerge pork tenderloin the marinade.
    3. When you're ready to cook, grease the grill with cooking spray and preheat to medium high heat.
    4. Sear each side of the pork tenderloin for a minute or two and then move the tenderloin to the top rack (off the main heat).
    5. Reduce the heat the just below medium and cover the grill.
    6. Cook for around 10-15 minutes more or until the internal temperature is 145 degrees.
    7. Remove the pork from the grill and rest of a few minutes.
    8. Carve and serve.

    Helpful tools:

    1. Gallon freezer zipper bags
    2. Measuring spoons
    3. Measuring cups
    4. Chef's knife
    5. Cutting board
    6. Whisk
    7. Mixing bowl
    8. Grill tongs
    9. Meat thermometer

    It's a busy summer weeknight- what's for dinner? Asian Grilled Pork Tenderloin! It's crazy easy to make and and full of unexpected but delicious flavor!

    Asian Grilled Pork Tenderloin

    Jessy Freimann
    It's a busy summer weeknight- what's for dinner? Asian Grilled Pork Tenderloin! It's crazy easy to make and and full of unexpected but delicious flavor!
    No ratings yet
    Print Recipe Pin Recipe
    Prep Time 10 minutes mins
    Cook Time 25 minutes mins
    Resting time 10 minutes mins
    Total Time 35 minutes mins
    Course Main
    Cuisine Asian
    Servings 6 servings
    Calories 508 kcal

    Equipment

    • 1 grill tongs and turner
    • 1 Measuring cups and spoons
    • 1 mixing bowl
    • 1 cutting board
    • 1 chefs knife

    Ingredients
      

    • 1 Pork tenderloin
    • 1 teaspoon Ground ginger
    • ¼ teaspoon Crushed red pepper flakes
    • ½ teaspoon Ground cinnamon
    • ¼ cup Olive oil
    • ⅓ cup Honey
    • ¼ cup Soy sauce
    • 1 Jalapeno pepper seeds removed and finely diced
    • 1 Tablespoon Fresh chives optional garnish

    Instructions
     

    • Mix all marinade ingredients.
    • Submerge pork tenderloin the marinade.
    • When you're ready to cook, grease the grill with cooking spray and preheat to medium high heat.
    • Sear each side of the pork tenderloin for a minute or two and then move the tenderloin to the top rack (off the main heat).
    • Reduce the heat the just below medium and cover the grill.
    • Cook for around 10-15 minutes more or until the internal temperature is 145 degrees F.
    • Remove the pork from the grill and rest of a few minutes tented in foil. Carve and serve.

    Notes

    Leftovers last up to 3 days in the refrigerator.

    Nutrition

    Serving: 1servingCalories: 508kcalCarbohydrates: 17gProtein: 64gFat: 20gSaturated Fat: 5gPolyunsaturated Fat: 3gMonounsaturated Fat: 11gTrans Fat: 0.1gCholesterol: 197mgSodium: 700mgPotassium: 1233mgFiber: 0.4gSugar: 16gVitamin A: 78IUVitamin C: 3mgCalcium: 24mgIron: 3mg
    Tried this recipe?Let us know how it was!

    Now that you know how to make this Asian Grilled Pork Tenderloin recipe, be sure to share it and tag @thelifejolie on Instagram and Facebook.  And be sure to pin it to save for later or bookmark it!

    Check out other Dump It ‘Til It’s Hot posts:

    • Dump recipes main page
    • My introduction post
    • Best tools for prepping dump recipes
    • Tips for making dump dinners

    Be sure to subscribe to gain access to all the bonuses and recipe previews!

    Easy Dinners subscribe button

    You can find a full index of my recipes here.

    Let’s keep the conversation going- join my Facebook group!

    Pot Roast Recipe (Slow Cooker + IP)

    Jul 1, 2019 · Leave a Comment

    This Pot Roast Recipe couldn't be easier. Just throw a few very common ingredients into your crockpot or instant pot and then relax knowing you've got a seriously delicious dinner ahead of you!

    This Pot Roast Recipe couldn't be easier. Just throw a few very common ingredients into your crockpot or instant pot and then relax knowing you've got a seriously delicious dinner ahead of you!

    A close up image of pot roast on a plate.

    This recipe is part of my Dump it 'til it's hot series of dump recipes. It's all about making delicious food with minimal prep, no pre-cooking, the ability to freeze for a good make-ahead meal. And trust me when I say, easy never tasted so good!

    This post contains Affiliate Links. Please see the disclaimer here.

    Other great beef recipes include:

    • Beef Tips
    • Sheet Pan Beef and Broccoli
    • Beef Burrito Bowls

    Pot Roast Recipe

    Is there anything as comforting as pot roast? Mouthwatering, savory, fall-apart-tender beef with a flavorful gravy! This is the kind of heart, homey food we all can't get enough of.

    I've come across all sorts of pot roast recipes. And you while they're probably all delicious, the ingredient list is often lengthy, with all sorts of precooking and chopping and other nonsense. Now, I'm all for doing a variety of things to build flavor. But sometimes it's nice to keep it simple. So that's exactly what I'm doing for this recipe.

    An overhead close up image of pot roast

    Tips for making Crock Pot Roast (and Instant Pot Roast too!)

    • I don't bother adding additional salt because the dry onion soup mix has plenty of sodium in it.
    • If you're making slow cooker pot roast, you'll add the slurry of flour and water for the last 30 minutes of cooking and switch the heat to high for that time.
    • When making this in the Instant Pot, make sure the the rubber seal is on correctly. If not, you won't get the pressure needed to ensure nice, tender meat. I'm speaking from experience here!
    • For the Instant Pot, be sure to do a natural pressure release for at least 10-15 minutes. This is the best way to ensure really tender meat.
    • To thicken the gravy in the Instant Pot, remove the meat after cooking and depressurizing. Then turn the Instant Pot to the saute setting and add the slurry to thicken while you shred the meat.
    • Make sure you use a high quality red wine. It doesn't have to be expensive, just dry and a red wine that you'd actually want to drink (bonus: you can enjoy a glass of leftover wine with dinner!).

    Crock pot roast on a plate with mashed potatoes and gravy.

    What is the best cut of meat for pot roast?

    The great thing about the Crock Pot Roast recipe, is cheap cuts of beef tend to work best for pot roast. The the long cooking time over low heat (or the high pressure in the Instant Pot) help break down the tissue and make it super tender. My favorite cut for this is chuck roast. You can also use rump roast or even brisket.

    Can you cook pot roast from frozen?

    I wouldn't encourage it. This recipe uses a larger piece of meat and the center may not get to the temperature safety zone during cooking.

    Can I add vegetables and potatoes to this recipe?

    You totally can, just be sure to add a 14 ounce can of beef broth. You can add them at the beginning if using making slow cooker pot roast but if you're using the instant pot, follow the recipe and then remove the meat to shred. Once the meat is out of the pot, add the potatoes and veggies and run the Instant Pot over manual high pressure for 5 minutes and then do a quick release when the time is up. Remove the veggies and thicken the gravy on the saute setting.

    Can I substitute anything for the wine?

    This definitely tastes best with wine, but you can also substitute beef broth for the wine if you'd prefer not to use alcohol.

    Can I freeze pot roast?

    Yes, either freeze it with the other ingredients before cooking (be sure to thaw before you cook) or after in it's gravy. It will last for around 3 months in an airtight container.

    How long does pot roast last?

    The leftover will last 2-3 lays covered in the refrigerator. You can reheat individual portions in the microwave.

    What goes with pot roast?

    I like to serve this with mashed potatoes (I love my French Onion Mashed Potatoes but you can also buy the pre-made refrigerated mashed potatoes is you're pressed for time). I also love a good vegetable like Peas with Onions or Garlic Cooked Carrots.

    An overhead image of a pan of this pot roast recipe

    Ingredients for Pot Roast

    • Chuck roast
    • Water
    • Red wine
    • Dry onion soup mix
    • Flour (or cornstarch if you're avoiding gluten or want a glossier gravy)

    How to make Crockpot Roast Beef

    1. Place beef, onion soup mix, wine and water into the crockpot.
    2. Cover and cook on low for 7-8 hours.
    3. Make a slurry with flour and water and add to the pot- raise the heat to high for the last 30 minutes of cooking.
    4. Enjoy!

    How to make Instant Pot Roast

    1. Place beef, onion soup mix, wine and water into the Instant Pot.
    2. Cover and cook on manual high pressure for 60 minutes.
    3. Do a natural pressure release for 15 minutes.
    4. Uncover and remove meat to shred.
    5. Turn the Instant Pot to the saute setting.
    6. Make a slurry with flour and water and add to the pot- simmer for a few minutes to thicken.
    7. Enjoy!

    A close up image of a piece of shredded pressure cooker pot roast

    Helpful tools:

    1. Slow cooker
    2. Instant pot
    3. Gallon freezer zipper bags
    4. Slow cooker liners
    5. Measuring cups

    This Pot Roast Recipe couldn't be easier. Just throw a few very common ingredients into your crockpot or instant pot and then relax knowing you've got a seriously delicious dinner ahead of you!

    Pot Roast Recipe (Crockpot + IP)

    Jessy Freimann
    This Pot Roast Recipe couldn't be easier. Just throw a few very common ingredients into your crockpot or instant pot and then relax knowing you've got a seriously delicious dinner ahead of you!
    No ratings yet
    Print Recipe Pin Recipe
    Prep Time 5 minutes mins
    Cook Time 8 hours hrs
    Instant Pot cooking time 1 hour hr 15 minutes mins
    Total Time 9 hours hrs 20 minutes mins
    Course Main
    Cuisine American
    Servings 6 servings

    Ingredients
      

    • 1 3-4 pound chuck roast
    • 1 cup water + a couple Tablespoons for the slurry
    • ½ cup red wine
    • 1 packet dry onion soup mix
    • 2-3 Tablespoons flour or cornstarch if you're avoiding gluten or want a glossier gravy

    Instructions
     

    Slow Cooker instructions

    • Place beef, onion soup mix, wine and water into the crockpot.
    • Cover and cook on low for 7-8 hours.
    • Make a slurry with flour and a couple tablespoons of water and add to the crockpot 30 minutes before it's done cooking. Cover and raise the heat to high.
    • Remove meat and shred once gravy has thickened. Serve immediately.

    Instant Pot instructions

    • Place beef, onion soup mix, wine and water into the Instant Pot.
    • Cover and cook on manual high pressure for 60 minutes.
    • Do a natural pressure release for 15 minutes.
    • Uncover and remove meat to shred.
    • Turn the Instant Pot to the saute setting.
    • Make a slurry with flour and a couple Tablespoons of water and add to the pot- simmer for a few minutes to thicken.
    • Serve immediately once gravy has thickened.

    Notes

    To make this with potatoes and vegetables, add a 14 ounce can of beef broth to the recipe:
    Slow cooker: You can add them at the beginning.
    Instant Pot: follow the recipe and then remove the meat to shred. Once the meat is out of the pot, add the potatoes and veggies and run the Instant Pot over manual high pressure for 5 minutes and then do a quick release when the time is up. Remove the veggies and thicken the gravy on the saute setting.
    Tried this recipe?Let us know how it was!

    A close up image of slow cooker pot roast with mashed potatoes on a plate.

    Now that you know how to make this Pot Roast Recipe be sure to share them and tag @thelifejolie on Instagram and Facebook.  And be sure to pin it to save for later or bookmark it!

    Check out other Dump It ‘Til It’s Hot posts:

    • Dump recipes main page
    • My introduction post
    • Best tools for prepping dump recipes
    • Tips for making dump dinners

    Be sure to subscribe to gain access to all the bonuses and recipe previews!

    Easy Dinners subscribe button

    You can find a full index of my recipes here.

    Let’s keep the conversation going- join my Facebook group! 

    Oatmeal Raisin Cookies

    Jun 27, 2019 · 1 Comment

    Oatmeal Raisin Cookies are a total blast from the past. Take one bite and you'll immediately be transported to those soft, delicious oatmeal cookies your mom used to make for after school snacks! They're an easy and delicious treat for the whole family.

    Oatmeal Raisin Cookies are a total blast from the past. Take one bite and you'll immediately be transported to those soft, delicious oatmeal cookies your mom used to make for after school snacks! They're an easy and delicious treat for the whole family.

    A close up image of the front cookie on a place of Oatmeal cookies

    Check out some of my other favorite cookie recipes:

    • Sour Cream Cookies
    • Chocolate Crinkle Cookies
    • Classic Peanut Butter Cookies
    • Toll House Cookie Recipe

    Oatmeal Raisin Cookies

    Ok, so I know everyone wants to hate on oatmeal cookies with raisins. We've all seen the memes of a sad face talking about how that's the face when you realize those are raisins in what you thought were oatmeal chocolate chip cookies. And I get it, I love chocolate too! But this oatmeal cookie recipes holds a special place in my heart.

    And yes, it is the original Quaker Oatmeal Cookies, you know the recipe they used to have on the back of their container. That was always my mom's go-to oatmeal raisin cookie recipe when I was a kid. And why mess with perfection? They always come out perfectly soft and chewy with the perfect sweet, but not-too-sweet flavor. I'm so thrilled to be able to make these for my kids now!

    A child's hand holding an oatmeal cookie

    Tips for making oatmeal cookies

    • I always mix together the dry ingredients (minus the oats) before mixing the wet ingredients. That way I can add them all at once and everything is evenly distributed.
    • It's best if you can leave the butter out the night before to soften at room temperature. But if planning ahead isn't an option, check out my post on how to soften butter in the microwave.
    • Try not to over-mix your cookie dough.
    • This dough does not have to be chilled.
    • Be sure to line your pans to avoid sticking!
    • I like to use a cookie scoop to give more uniform chunks of dough.
    • Place a piece of bread in the container with the leftovers to keep the cookies soft.

    What kind of oats do you use for cookies?

    You can use old fashioned oats (also called rolled oats) or quick oats (or instant oats)

    Do I need to cook oats for oatmeal cookies?

    No- I put them in uncooked.

    Can you substitute steel cut oats for rolled oats in cookies?

    I don't encourage using steel cut oats for this recipe. Steel cut oats are oat kernels and need to be cooked first.

    How long do you bake oatmeal cookies?

    The bake for 8-10 minutes

    How do you store oatmeal raisin cookies?

    I keep them in an air tight container at room temperature. They will last for a week.

    Can you freeze oatmeal raisin cookies?

    These freeze very well- you can either freeze the dough and thaw before baking or freeze after baking. Freeze them in an air-tight container and they'll last for 3-4 months.

    A straight on image of oatmeal raisin cookies

    Ingredients for making this oatmeal cookie recipe

    • Flour
    • Baking soda
    • Cinnamon
    • Kosher salt
    • Butter
    • Brown sugar
    • Granulated sugar
    • Eggs
    • Vanilla extract
    • Uncooked oats
    • Raisins

    How to make this oatmeal raisin cookie recipe

    1. Combine dry ingredients in a medium bowl and set aside.
    2. Beat together butter and sugars until light and fluffy.
    3. Add eggs and vanilla and beat until well combined.
    4. Add dry ingredients and beat until just combined.
    5. Fold in oatmeal and raisins.
    6. Scoop Tablespoons of cookie dough with about 2 inches between them on a lined pan.
    7. Bake for 8-10 minute or until the edges are just starting to brown.
    8. Cool and devour!

    Rows of this oatmeal raisin cookies recipe

    Helpful tools:

    1. Sheet pan
    2. Silpat
    3. Mixing bowl
    4. Spatula
    5. Stand mixer or Hand mixer
    6. Measuring cups
    7. Measuring spoons
    8. Cookie scoop

    Oatmeal Raisin Cookies are a total blast from the past. Take one bite and you'll immediately be transported to those soft, delicious oatmeal cookies your mom used to make for after school snacks! They're an easy and delicious treat for the whole family.

    Oatmeal Raisin Cookies

    Jessy Freimann
    Oatmeal Raisin Cookies are a total blast from the past. Take one bite and you'll immediately be transported to those soft, delicious oatmeal cookies your mom used to make for after school snacks! They're an easy and delicious treat for the whole family.
    5 from 2 votes
    Print Recipe Pin Recipe
    Prep Time 10 minutes mins
    Cook Time 10 minutes mins
    Total Time 20 minutes mins
    Course Dessert
    Cuisine American
    Servings 48 cookies

    Ingredients
      

    • 1 ½ cups flour
    • 1 teaspoon baking soda
    • 1 teaspoon ground cinnamon
    • ½ teaspoon kosher salt
    • 14 Tablespoon butter (½ cup + 6 Tablespoons or 1 + ¾ sticks butter)
    • ¾ cup brown sugar, packed
    • ½ cup granulated sugar
    • 2 large eggs
    • 1 teaspoon vanilla extract
    • 3 cups uncooked Quaker Oats, old fashioned or quick
    • 1 cup raisins

    Instructions
     

    • Preheat the oven to 350 degrees and line sheet pans with parchment or a silicone liner.
    • Whisk together flour, baking soda, cinnamon and salt in a medium bowl and set aside.
    • Beat together butter, brown sugar and granulated sugar until light and fluffy.
    • Add eggs and vanilla and beat until well combined.
    • Add dry ingredients and beat until just combined.
    • Fold in oatmeal and raisins.
    • Scoop Tablespoonfuls of cookie dough with about 2 inches between them onto a lined pan.
    • Bake for 8-10 minute or until the edges are just starting to brown.
    • Cool and serve.

    Notes

    These will last up to a week in an airtight container at room temperature. Add a piece of bread to keep them soft.
    Tried this recipe?Let us know how it was!

    If you tried this recipe please comment and rate it 🙂 I love hearing your feedback and answering your questions! And if you make this please tag me on Instagram with @thelifejolie so I can share it <3

    You can find a full index of my recipes here.

    Don’t forget to follow The Life Jolie on Pinterest for more recipe inspiration!

    Or if Pinterest isn’t your style, bookmark this post!

    Let’s keep the conversation going- join my Facebook group! 
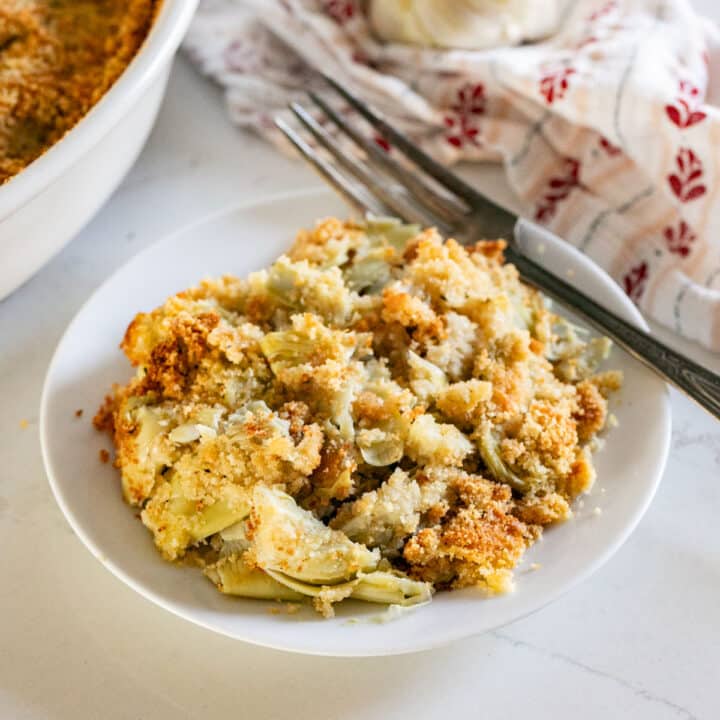
    Easy Grilled Peaches

    Jun 17, 2019 · Leave a Comment

    Easy Grilled Peaches are the quintessential summer dessert. Light and refreshing with the perfect scoop of vanilla ice cream, this simple dessert is sure to please!

    Easy Grilled Peaches are the quintessential summer dessert. Light and refreshing with the perfect scoop of vanilla ice cream, this simple dessert is sure to please!

    Grilled peaches on a plate with ice cream on top.

    Easy Grilled Peaches

    This post contains Affiliate Links. Please see the disclaimer here.

    Check out some of my other summer dessert recipes:

    • No Bake S'mores Bars
    • Raspberry Lemon Ice Box Pie
    • Nectarine and Strawberry Galette
    • Mai Tai Cupcakes

    I made this recipe a long time about at a tasty dinner with both my and Justin's parents. This simple summer dessert is a modern version of peaches and cream. That night, everyone went absolutely nuts over them, and as you can imagine, there were no leftovers!

    I love that grilling makes the skin of the peaches loosen so you can enjoy bites of peach and ice cream without any fuzzy skin. The honey and a bit of cinnamon add the perfect flavor any grilled fruit. I like to finish the ice cream off with a drizzle of honey and a couple fresh thyme leaves to make these a more special elevated dessert, without all the hassle.

    This is by far the most simple of all the summer peach recipes out there. Once you try it, you will be making this grilled peaches recipe alllll summer long!

    An over head images of theis grilled peaches recipe on a plate topped with ice cream.

    Tips for making grilled peaches and cream

    • Spray the grill with cooking spray before heating to prevent sticking.
    • When grilling, I like to start with them flat side down. Be careful not to burn it!
    • I brush the honey and sprinkle the cinnamon onto the flat side after turning it, as the honey will make it burn quickly if it's directly on the burner.
    • I like to let it cook a couple minutes on the skin side to help loosen the skin a tiny bit.
    • It's a good idea to pre-scoop the ice cream. You can store it on a small sheet pan lined with parchment or wax paper in the freezer until you're read to serve.

    Do peaches need to be ripe to grill?

    I'd encourage you to work with ripe peaches, as unripe ones tend to be a bit tart. That said, try not to use super soft peaches, as they might turn mushy.

    How do you cut a peach in half on the grill?

    I use a paring knife to do this. If you look at the peach, there is a natural seam. Use this as your guide and run your knife all around it. Then carefully twist both halves in opposite direction to split the cut peach into two halves.

    How do you remove peach pits?

    If it doesn't easily pop out, you can use a paring knife to cut around the pit for easier removal.

    Can you cut peaches ahead of time?

    I wouldn't recommend it, as they brown easily once cut.

    How long do grilled peaches last?

    Although these are at their best consumed immediately after cooking, they leftover grilled peaches will last a couple days in the fridge.

    How do you reheat grilled peach leftovers?

    I'd either reheat them covered in the oven at 350 until heated through or in the microwave.

    Honey being drizzled over the ice cream on a grilled peach

    Ingredients for grilled peaches

    • Cooking spray
    • Peaches
    • Honey
    • Cinnamon
    • Vanilla ice cream
    • Fresh thyme

    How to grill peaches

    1. Cut the peaches in half and remove the pits.
    2. Spray grill with cooking spray and preheat to medium heat.
    3. Grill peaches for 3-5 minutes, flat-side down or until you have some nice grill marks (you can rotate them a bit halfway through to get crosshatch grill marks).
    4. Turn the peaches so the skin side is down and carefully brush each flat side with a little honey. Then sprinkle with some cinnamon.
    5. Remove peaches from the grill and serve immediately with a scoop of vanilla ice cream, a drizzle of honey and a couple of fresh thyme leaves.
    6. Devour!

    Helpful tools:

    1. Grill tongs
    2. Silicone brush
    3. Measuring spoons
    4. Cutting board
    5. Paring knife

    A close up image of a grilled peach with ice cream on top.

    Easy Grilled Peaches are the quintessential summer dessert. Light and refreshing with the perfect scoop of vanilla ice cream, this simple dessert is sure to please!

    Easy Grilled Peaches

    Jessy Freimann
    Easy Grilled Peaches are the quintessential summer dessert. Light and refreshing with the perfect scoop of vanilla ice cream, this simple dessert is sure to please!
    No ratings yet
    Print Recipe Pin Recipe
    Prep Time 5 minutes mins
    Cook Time 10 minutes mins
    Total Time 15 minutes mins
    Course Dessert
    Cuisine American
    Servings 6 peach halves

    Ingredients
      

    • Cooking spray
    • 3 large peaches
    • 2-3 Tablespoons honey + a little more for drizzling
    • ½ teaspoon cinnamon
    • 6 scoops vanilla ice cream
    • Fresh thyme leaves for garnish (optional)

    Instructions
     

    • Spray the grill with cooking spray and preheat to medium.
    • While the grill is heating cut the peaches in half and remove the pits.
    • Place the peaches flat side down on the grill and cook for 3-5 minutes until you have nice grill marks (you can rotate them a bit half way through this to get crosshatch marks if you want).
    • Turn the peaches so the skin side is down and cook for 3-5 more minutes.
    • While they cook, brush the flat sides with honey and sprinkle with cinnamon.
    • Serve immediately with a scoop of ice cream, a drizzle of honey and a sprinkle of fresh thyme leaves.

    Notes

    Cooking time will vary based on the size and ripeness of the peaches and your grill's hot spots- keep a close eye on them so you don't overcook!
    Tried this recipe?Let us know how it was!

    A grilled peach with ice cream melting on top of it.

    If you tried this recipe please comment and rate it ? I love hearing your feedback and answering your questions!

    You can find a full index of my recipes here.

    Don’t forget to follow The Life Jolie on Pinterest for more recipe inspiration!

    Or if Pinterest isn’t your style, bookmark this post!

    Let’s keep the conversation going- join my Facebook group! 
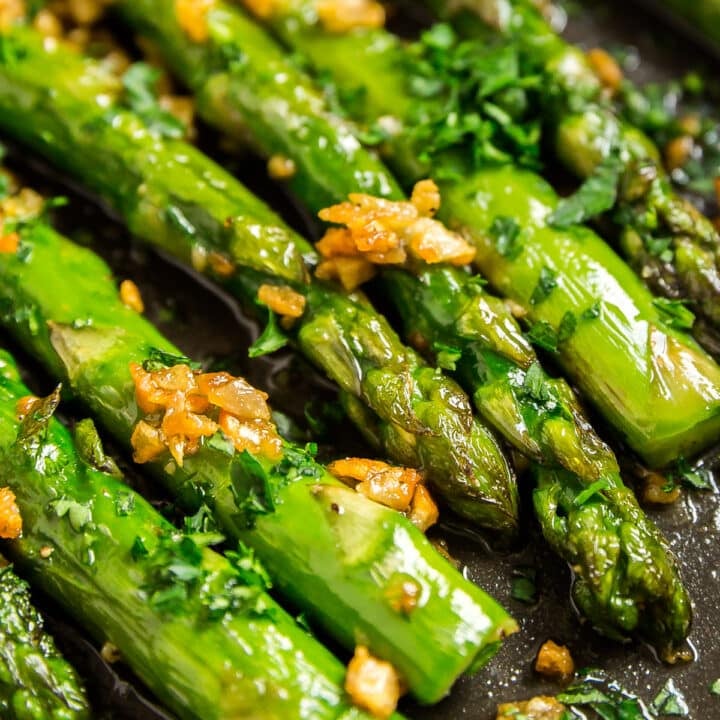
    Maple Dijon Grilled Pork Chop Marinade

    Jun 7, 2019 · Leave a Comment

    This Maple Dijon Grilled Pork Chop Marinade is so full of savory, delicious flavor, it'll be on repeat for the entire summer! It's easy to throw together and freeze or cook right away!

    This Maple Dijon Grilled Pork Chop Marinade is so full of savory, delicious flavor, it'll be on repeat for the entire summer! It's easy to throw together and freeze or cook right away!

    Pork chops on a plate.

    This recipe is part of my Dump it 'til it's hot series of dump recipes. It's all about making delicious food with minimal prep, no pre-cooking, the ability to freeze for a good make-ahead meal. And trust me when I say, easy never tasted so good!

    This post contains Affiliate Links. Please see the disclaimer here.

    Other great grilled pork chops recipes include:

    • Hawaiian Pork Chops
    • Herb Grilled Pork Chops
    • Brown Sugar Bourbon Pork Chops

    Ugh, these pork chops are so good! I seriously don't know what else to write about these. They're just that good! And I'll be honest, I had my doubts. I'm normally not a big fan of maple syrup. I don't dislike it, but it's just not my go-to sweetener. But after this recipe, I appreciate how a little bit can really bring out some super delicious flavors in certain recipes.

    This is adapted from a recipe I found in on of those old, homemade church cookbooks that I love so much. Every year, I grab a bunch of them at our church rummage sale, they're a treasure trove of recipe inspiration!  Throw this together and freeze for a busy night, or pop them right onto the grill for a dinner the whole family will love!

    Tips for making grilled pork chops

    • You can marinate these for as little as 10 minutes but for best results give them at least a few hours.
    • The optimal temperature for safely cooking pork chops is 145 degrees. How this translates to pork chop grill time will vary based on the thickness, but a digital thermometer will help to get these to the correct temperature.
    • Make sure you rest the chops for a good 5-10 minutes before serving to allow the juices to redistribute.
    A straight on image of a grilled pork chop with a piece cut off revealing the perfectly cooked inside.

    What is the best cut of meat for Grilled Pork Chops?

    Honestly, that comes down to what you prefer. This recipe would be fantastic with bone-in or boneless chops!

    How do you choose the best pork chops?

    Look for chops that are a more vivid red or pink. They should be firm and smell fresh. And don't be afraid to consult your butcher, as they're super knowledgable.

    Can you make this gluten free?

    Yes, just substitute coconut aminos or liquid aminos for the soy sauce.

    How long do you marinade pork chops?

    At least a couple hours to overnight.

    Can you freeze pork chops in the marinade?

    Yes, but I'd encourage you to thaw them fully before cooking.

    How do you keep grilled pork chops from getting dry?

    Don't overcook them! Overcooking pork chops makes them super tough and dry. Use an meat thermometer and pull them when they reach the right temperature and then rest them.

    What temperature are grilled pork chops done?

    The safe temperature to cook pork to is 145 degrees. I like to pull them around 143 degrees and then test them tented in foil for at least a few minutes. During that time they'll come to temp and the juices will redistribute.

    This grilled pork chop marinade recipe on a plate.

    Ingredients for this pork chop marinade

    • Pork chops
    • Dijon mustard
    • Maple syrup
    • Soy sauce
    • Lime juice
    • Olive oil
    • Koser salt
    • Garlic powder
    • Dried rosemary

    How to grill pork chops

    1. Mix all marinade ingredients until well combined.
    2. Submerge pork chops in the marinade and refrigerate until you're ready to grill.
    3. Remove the chops from the refrigerator, grease the grill and preheat to medium high.
    4. Place the meat on the grill and cook for around 5-6 minutes per side depending on thickness.
    5. Once the pork chops reach 145 degrees, remove from the heat and rest for a few minutes.
    6. Devour!

    Helpful tools:

    1. Instant Read Thermometer
    2. Grill tongs
    3. Mixing bowl
    4. Whisk

    A bite of grilled pork chop on a fork.

    This Maple Dijon Grilled Pork Chop Marinade is so full of savory, delicious flavor, it'll be on repeat for the entire summer! It's easy to throw together and freeze or cook right away!

    Maple Dijon Grilled Pork Chop Marinade

    Jessy Freimann
    This Maple Dijon Grilled Pork Chop Marinade is so full of savory, delicious flavor, it'll be on repeat for the entire summer! It's easy to throw together and freeze or cook right away!
    No ratings yet
    Print Recipe Pin Recipe
    Prep Time 5 minutes mins
    Cook Time 12 minutes mins
    Marinating time 1 hour hr
    Total Time 1 hour hr 17 minutes mins
    Course Main Course
    Cuisine American

    Ingredients
      

    • 2 Tablespoons dijon mustard
    • 2 Tablespoons maple syrup
    • 1 Tablespoon soy sauce
    • 2 Tablespoons lime juice (around 1 lime)
    • ¼ cup olive oil
    • 1 teaspoon garlic powder
    • ½ teaspoon kosher salt
    • ¾ teaspoon dried rosemary
    • 4-6 pork chops
    • Cooking spray

    Instructions
     

    • In a large bowl whisk dijon mustard, maple syrup, soy sauce, lime juice, oil, garlic powder, salt and rosemary until well combined.
    • Submerge pork chops in the mixture so everything is well coated. Marinate in the refrigerator for a couple hours to overnight (or freeze).
    • When you're ready to cook, remove the chops from the refrigerator.
    • Spray the grill with cooking spray and heat it to medium high.
    • Place the chops onto the grill and dispose of the marinade.
    • Cook for 5-6 minutes per side depending on the thickness of the chops, until they reach an internal temperature of just under 145 degrees. You can rotate the chops slightly halfway through each side to get nice crosshatch grill marks if you want.
    • Remove the chops from the grill and rest tented in foil for a couple minutes. Serve immediately.
    Tried this recipe?Let us know how it was!

    A prok chop on a plate with asparagus.

    Now that you know how to make this Maple Dijon Grilled Pork Chop Marinade recipe, be sure to share it and tag @thelifejolie on Instagram and Facebook.  And be sure to pin it to save for later or bookmark it!

    Check out other Dump It ‘Til It’s Hot posts:

    • Dump recipes main page
    • My introduction post
    • Best tools for prepping dump recipes
    • Tips for making dump dinners

    Be sure to subscribe to gain access to all the bonuses and recipe previews!

    Easy Dinners subscribe button

    You can find a full index of my recipes here.

    Let’s keep the conversation going- join my Facebook group!

    Black Bean Burger Recipe

    Jun 6, 2019 · Leave a Comment

    This Black Bean Burger recipe is so good, it'll turn even the biggest meat and potatoes lovers into Meatless Monday fans! Great flavor and minimal work makes these an easy and satisfying vegetarian dinner!

    This Black Bean Burger recipe is so good, it'll turn even the biggest meat and potatoes lovers into Meatless Monday fans! Great flavor and minimal work makes these an easy and satisfying vegetarian dinner!

    Hands holding a black bean burger on a bun.

    This recipe is part of my Dump it 'til it's hot series of dump recipes. It's all about making delicious food with minimal prep, no pre-cooking, the ability to freeze for a good make-ahead meal. And trust me when I say, easy never tasted so good!

    This post contains Affiliate Links. Please see the disclaimer here.

    Other great burger recipes include:

    • Hawaiian Burger Recipe
    • Sweet Chili Turkey Burgers

    Black Bean Burger

    Do you know I never actually tried a meatless burger until well into adulthood?! I'm kind of embarrassed by this, but what can you do? A while back I had found a fantastic black bean burger recipe and like an idiot I managed to lose it. I scoured Pinterest and google in search of that recipe for more time than I'd even like to admit, but I could never find it. And I never wanted to try to duplicate it since I was afraid I'd never be able to live up to them.

    But now I'm a bit older with a lot of years of cooking under my belt. So now seemed like a better time than any to try my hand at creating a black bean burger recipe. And I have to say, I'm happy with how they turned out! They're full of delicious, fresh flavor and totally satisfying.

    A pile of bean burger patties on a plate.

    Tips for making this black bean burger recipe

    • I rinse and drain my black beans really well so there isn't any extra liquid in the mixture.
    • A food processor is really helpful for getting all the ingredients mashed up and mixed together but if you don't have one, just use a fork and some elbow grease!
    • I like to let the patties chill for at least 30 minutes to firm up a bit (or just freeze them for later!).

    Are Black Bean Burgers good for you?

    Yes, this is one of the more nutritious recipes on my site (that said, I'm not a nutrition professional so if that's a concern for you, be sure to consult a registered dietitian).

    How do you keep black bean burgers from falling apart?

    The binder is what keeps these together and it's mixture of Panko bread crumbs and egg. I also make sure to pack the patties pretty tightly and gently smooth the edges of the patties in.

    Why are my veggie burgers mushy?

    Too much liquid. Add a small amount of additional Panko bread crumbs until they get to a more desirable texture.

    Can you freeze black bean burgers?

    Yes- they freeze very well and the can go directly from the freezer onto the grill or pan. To freeze, I like to line a pan with parchment or wax paper and line the patties up in a single layer. Once frozen, I transfer them into a plastic zipper bag.

    Can veggie burgers go bad?

    Yes. These will last around 3-5 days raw in the refrigerator and around 3-6 month in the freezer.

    How do you know when veggie burgers are done?

    Once they reach an internal temperature of 165 degrees.

    A close up photo of the side of a black bean burger recipe on a bun.

    Ingredients for making a bean burger

    • Black beans
    • Red bell pepper
    • Fresh cilantro
    • Dried minced onions
    • Garlic salt
    • Cumin
    • Smoked paprika
    • Chili powder
    • Cayenne pepper
    • Panko bread crumbs
    • Egg
    • Lime juice
    • Olive oil

    How to make black bean burgers

    1. Place all ingredients into the food processor.
    2. Pulse the food processor until the ingredients are mostly ground but not completely (because I like a little texture).
    3. Divide mixture into six equal portions and tightly pack them into patties that are a little less than an inch thick.
    4. Place the patties on to a parchment-lined sheet pan and chill for at least 30 minutes (or freeze)
    5. Cook on the grill or in a pan and serve.

    A straight on image of a bean burger recipe on a bun.

    Helpful tools:

    1. Food processor
    2. Chef's knife
    3. Cutting board
    4. Spatula
    5. Measuring cups
    6. Measuring spoons

    This Black Bean Burger recipe is so good, it'll turn even the biggest meat and potatoes lovers into Meatless Monday fans! Great flavor and minimal work makes these an easy and satisfying vegetarian dinner!

    Black Bean Burger Recipe

    Jessy Freimann
    This Black Bean Burger recipe is so good, it'll turn even the biggest meat and potatoes lovers into Meatless Monday fans! Great flavor and minimal work makes these an easy and satisfying vegetarian dinner!
    No ratings yet
    Print Recipe Pin Recipe
    Prep Time 10 minutes mins
    Cook Time 10 minutes mins
    Total Time 20 minutes mins
    Course Main
    Cuisine American
    Servings 6 burgers

    Ingredients
      

    • 2 14 ounce cans black beans, rinsed and drained
    • 1 cup red bell pepper, finely diced
    • ¼ cup fresh cilantro chopped
    • ¼ cup dried minced onions
    • 1 teaspoon garlic salt
    • 1 teaspoon cumin
    • ¼ teaspoon smoked paprika
    • ½ teaspoon chili powder
    • ⅛ teaspoon cayenne pepper
    • ¼ cup Panko bread crumbs
    • 1 large egg
    • 1 Tablespoon lime juice
    • 1 teaspoon olive oil

    Instructions
     

    • Place all ingredients into the food processor.
    • Pulse the food processor until the ingredients are mostly ground but not completely ( I like a little texture). Scrape down the sides as needed.
    • Divide mixture into six equal portions and tightly pack them into patties that are a little less than an inch thick.
    • Place the patties on to a parchment-lined sheet pan and chill for at least 30 minutes (or freeze)
    • Cook on the grill or in a pan until they reach an internal temperature of 165 degrees and serve.
    Tried this recipe?Let us know how it was!

    Now that you know how to make this Black Bean Burger recipe, be sure to share it and tag @thelifejolie on Instagram and Facebook.  And be sure to pin it to save for later or bookmark it!

    Check out other Dump It ‘Til It’s Hot posts:

    • Dump recipes main page
    • My introduction post
    • Best tools for prepping dump recipes
    • Tips for making dump dinners

    Be sure to subscribe to gain access to all the bonuses and recipe previews!

    Easy Dinners subscribe button

    You can find a full index of my recipes here.

    Let’s keep the conversation going- join my Facebook group!

    Ranch Chicken Foil Packets

    Jun 5, 2019 · Leave a Comment

    Ranch Chicken Foil Packets make a quick and easy dump dinner in a delicious little package. Throw them on the grill or pop them in the oven and you'll have a flavorful dinner on the table in under 30 minutes!

    Ranch Chicken Foil Packets make a quick and easy dump dinner in a delicious little package. Throw them on the grill or pop them in the oven and you'll have a flavorful dinner on the table in under 30 minutes!

    A close up of a foil packet meal with chicken and potatoes and broccoli

    This recipe is part of my Dump it 'til it's hot series of dump recipes. It's all about making delicious food with minimal prep, no pre-cooking, the ability to freeze for a good make-ahead meal. And trust me when I say, easy never tasted so good!

    This post contains Affiliate Links. Please see the disclaimer here.

    Other great chicken recipes include:

    • Coconut Cilantro Lime Grilled Chicken
    • Honey Balsamic Chicken
    • Grilled Hawaiian Chicken
    • Lemon Pepper Chicken Drumsticks

    Ranch Chicken Foil Packets

    Foil packet dinners are kind of fun, right? Your own cute little package that you open up to find your own dinner, ready to go! Not only does it make dinner fun, it makes it almost effortless and still delicious.

    Since we're all big lovers of all-things-ranch around here, I went with ranch seasoning to add a great, zesty flavor to this meal. I also sprinkled a little shredded cheddar over the veggies before placing the chicken on top. So that as it cooks/steams, the cheese melts in with the ranch seasoning and the juices from the chicken turn it into a flavorful sauce that coats the potatoes and broccoli!

    An overhead image of chicken foil packets

    Tips for making Chicken Foil Packets

    • Toss the ingredients well with the seasoning and some oil so that everything is well coated for optimal flavor.
    • Be sure to use the heavy duty foil so you don't have to worry about leakage. Spread out large pieces of foil on your counter so you can assemble these all at once.
    • When you put the potatoes and broccoli into the centers of the foil sheets and use your hands to clump them together as tightly as you can. Then sprinkle the shredded cheddar on them.
    • Carefully place the chicken on top of the veggies.
    • To close the packets, pull the sides up first and then bring the top and bottom together and crimp it down the center so that it's fully and tightly closed.
    • Let the packets rest for a few minutes before serving.

    A close up photo of the chicken in these foil packet dinners

    How long does it take to grill foil packets?

    Around 20 minutes.

    Do I have to grill the foil packets?

    No, you can also back them at 400 degrees for 20 minutes

    What is the temperature for grilling ranch chicken foil packets?

    I like to got for medium high or around 400 degrees.

    What is the internal temperature for cooked chicken?

    The safe temperature for consuming poultry is 165 degrees.

    Can I use other cuts of chicken?

    Sure! You can also use boneless chicken thighs.

    What kind of ranch seasoning do you use for this?

    I used Hidden Valley Ranch seasoning packets.

    Can I freeze foil packets?

    You can freeze the ingredients prior to cooking, but I'd do it in plastic zipper bags.

    How long do foil packets last?

    These stay good for up to 3 days in the refrigerator.

    A plate full of ranch chicken foil packets

    What do you serve with ranch chicken packets?

    You don't really have to serve anything because they are a complete meal, but if you want something extra, I like to serve it with:

    • Cucumber Tomato Salad
    • Mexican Bean Salad
    • Red Cabbage Salad

    What are the ingredients for Ranch Chicken Foil Packets?

    • Chicken tenderloins
    • Baby potatoes
    • Broccoli
    • Olive oil
    • Ranch seasoning
    • Shredded cheddar cheese

    An overhead image of a chicken foil packet

    How do you make Ranch Chicken Foil Packet Meals?

    1. Place the broccoli and baby potatoes in a large bowl.
    2. Drizzle with oil and sprinkle with ranch seasoning.
    3. Toss until everything is fully coated.
    4. Divide evenly between four large sheets of foil.
    5. Use your hands to carefully push the veggies together tightly and sprinkle with shredded cheddar.
    6. In the same bowl place chicken
    7. Drizzle with oil and sprinkle with ranch seasoning.
    8. Toss until the chicken is fully coated.
    9. Divide the chicken between the foil packets and place on top of the veggies.
    10. Close the packets and make sure they're sealed.
    11. Grill for 20 minutes at medium high heat.
    12. Remove the packets from the heat and let them rest for a couple minutes.
    13. Enjoy!

    Helpful tools:

    1. Gallon freezer zipper bags
    2. Measuring spoons
    3. Chef's knife
    4. Cutting board
    5. Mixing bowl
    6. Grill tongs
    7. Meat thermometer

    Ranch Chicken Foil Packets make a quick and easy dump dinner in a delicious little package. Throw them on the grill or pop them in the oven and you'll have a flavorful dinner on the table in under 30 minutes!

    Ranch Chicken Foil Packets

    Jessy Freimann
    Ranch Chicken Foil Packets make a quick and easy dump dinner in a delicious little package. Throw them on the grill or pop them in the oven and you'll have a flavorful dinner on the table in under 30 minutes!
    5 from 2 votes
    Print Recipe Pin Recipe
    Prep Time 10 minutes mins
    Cook Time 20 minutes mins
    Total Time 30 minutes mins
    Course Main Course
    Cuisine American
    Servings 4 servings

    Ingredients
      

    • Cooking spray
    • 24 ounces baby potatoes
    • 2-3 crowns broccoli, cut into large florets
    • 3 Tablespoons olive oil, divided
    • 2 packets ranch seasoning, divided
    • ¼ cup shredded cheddar cheese, divided
    • 1 package chicken tenderloins (around 8 tenderloins)

    Instructions
     

    • Preheat the grill to medium high.
    • Lay out 4 large pieces of foil and spray them with cooking spray.
    • Place the potatoes and broccoli florets into a large bowl. Drizzle with 2 Tablespoons oil and sprinkle with 1 packet of ranch seasoning.
    • Toss so that everything is fully coated.
    • Divide potatoes and broccoli between the pieces of foil, using your hands to gently push them into a tight clump in the middle of each piece of foil.
    • Divide the shredded cheddar between each foil pack sprinkling over the veggies.
    • In the same large bowl, place the chicken tenderloins. Drizzle with remaining oil and sprinkle with other packet of ranch seasoning.
    • Toss so that the chicken is fully coated.
    • Divided the chicken pieces between each piece of foil, placing the tenderloins on top of the veggies.
    • Close the foil packets by folding each of the sides in. Then bring the top and the bottom pieces together and crimp it all together so that it's fully sealed.
    • Grill for 20 minutes and then remove from the heat and rest for a couple minutes. Serve immediately.
    Tried this recipe?Let us know how it was!

    Now that you know how to make this Ranch Chicken Foil Packets recipe, be sure to share it and tag @thelifejolie on Instagram and Facebook.  And be sure to pin it to save for later or bookmark it!

    Check out other Dump It ‘Til It’s Hot posts:

    • Dump recipes main page
    • My introduction post
    • Best tools for prepping dump recipes
    • Tips for making dump dinners

    Be sure to subscribe to gain access to all the bonuses and recipe previews!

    Easy Dinners subscribe button

    You can find a full index of my recipes here.

    Let’s keep the conversation going- join my Facebook group!

    Hawaiian Grilled Salmon

    Jun 4, 2019 · 2 Comments

    One of my favorite summer dinners is Hawaiian Grilled Salmon. It's super easy to throw together in a seriously flavorful marinade. You'll be going back to this recipe again and again!

    One of my favorite summer dinners is Hawaiian Grilled Salmon. It's super easy to throw together in a seriously flavorful marinade. You'll be going back to this recipe again and again!

    Hawaiian grilled salmon on a pan with pineapple on top.

    This recipe is part of my Dump it 'til it's hot series of dump recipes. It's all about making delicious food with minimal prep, no pre-cooking, the ability to freeze for a good make-ahead meal. And trust me when I say, easy never tasted so good!

    This post contains Affiliate Links. Please see the disclaimer here.

    Other great salmon recipes include:

    • Salmon Patties
    • 20 Minute Lemon Dill Salmon
    • Chili Lime Baked Salmon
    • Perfectly Seared Salmon

    Hawaiian Grilled Salmon

    I am a lover of all-things-seafood. But my favorite fish, continues to be salmon. It's super flavorful and very pretty to look at. It's also really easy to make for dinner, and generally always comes out tasting delicious!

    One of my favorite ways to prepare salmon is grilling it. And with the popularity of my Hawaiian Pork Chops and Hawaiian Chicken, it seemed only right to make a Hawaiian Grilled Salmon Recipe. And this recipe translated perfectly into my dump-and-go series!

    Tips for making this grilled salmon recipe

    • Be careful not to overcook the salmon as it will dry out.
    • Make sure you’re using low sodium soy sauce. It’s much too salty with normal soy sauce.
    • Don’t throw out the pineapple juice from the can of pineapple rings- some of this goes into the marinade.
    • Whisk together all the marinade ingredients well so that the sugar dissolves.
    • Be sure to grill the pineapple, it gets even more delicious!

    The Hawaiian grilled salmon recipe on a plate with a side of broccoli.

    How long do you marinate salmon?

    You only need to marinate fish for 30 minutes to an hour max, to avoid the marinade adversely affecting the texture of the fish.

    How long do you grill salmon?

    Around 10-15 minutes total, but this will vary based on the size and thickness of the filet.

    What temperature should grilled salmon be?

    The safe temperature for consuming cooked fish is 145 degrees. Use a meat thermometer and try not to go over the temperature as the fish will dry out.

    Do you cook salmon with the skin up or down?

    I grill my salmon skin side down.

    Do you flip salmon on the grill?

    You can but you don't have to. I always spray the grill with cooking spray before preheating. But if you're worried about the flesh sticking, you don't have to flip it.

    Do you eat the skin on salmon?

    That's totally a matter of personal preference. The skin is full of nutrients, so if you're into it, you can totally eat it. If not, that's ok too.

    What goes with this salmon recipe?

    • Rainbow Asian Chicken Salad
    • Crunchy Ramen Coleslaw
    • Cabbage and Pork Meatball Soup

    An image of salmon that's beein grilled with pineapple on top.

    Ingredients for Hawaiian Salmon:

    • Salmon filets
    • Low sodium soy sauce
    • Water
    • Sesame oil
    • Brown sugar
    • Ground ginger
    • Crushed red pepper flakes
    • Garlic
    • Tomato ketchup
    • Can pineapple rings
    • 2 Tablespoons cornstarch
    • Scallions

    How to grill salmon

    1. Mix marinade ingredients.
    2. Submerge salmon filets in marinade.
    3. Grill the salmon and pineapple rings.
    4. Thicken marinade with cornstarch and bring to a boil.
    5. Rest salmon for a couple minutes.
    6. Serve and enjoy!

    Helpful tools:

    1. Gallon freezer zipper bags
    2. Measuring spoons
    3. Measuring cups
    4. Chef's knife
    5. Cutting board
    6. Whisk
    7. Sheet pan
    8. Mixing bowl
    9. Grill tongs
    10. Meat thermometer

    One of my favorite summer dinners is Hawaiian Grilled Salmon. It's super easy to throw together in a seriously flavorful marinade. You'll be going back to this recipe again and again!

    Hawaiian Grilled Salmon

    Jessy Freimann
    One of my favorite summer dinners is Hawaiian Grilled Salmon. It's super easy to throw together in a seriously flavorful marinade. You'll be going back to this recipe again and again!
    5 from 4 votes
    Print Recipe Pin Recipe
    Prep Time 10 minutes mins
    Cook Time 15 minutes mins
    Rest time 5 minutes mins
    Total Time 30 minutes mins
    Course Main Course
    Cuisine Hawaiian

    Ingredients
      

    • ¾ cup low sodium soy sauce
    • ¼ cup water
    • 1 Tablespoon sesame oil
    • ⅓ cup brown sugar
    • ¼ teaspoon ground ginger
    • ½ teaspoon crushed red pepper flakes, you can add more if you want it spicy
    • 2 large cloves garlic, minced or pressed
    • 1 Tablespoons tomato ketchup
    • 1 can pineapple rings, reserve ½ cup pineapple juice for marinade
    • 4-6 filets salmon
    • 2 Tablespoons corn starch
    • 2-3 scallions, sliced on the diagonal

    Instructions
     

    • Whisk the low sodium soy sauce, water, sesame oil, brown sugar, ground ginger, red pepper flakes, garlic ketchup and pineapple juice until well combined.
    • Pour the marinade over salmon filets and let them sit for at least 10 minutes to an hour.
    • Spray the grill with non-stick cooking spray and heat it to medium-high.
    • Place the salmon filets and pineapple rings on the grill and reserve the marinade to make the sauce. 
    • Grill them for 5-7 minutes on each side depending on thickness until the fish reaches an internal temperature of 145 degrees at the thickest part. You can rotate them a bit midway through each side if you want a nice crosshatch grill mark (this is optional). You don't need to turn the salmon if you don't want to- if you don't turn it cook for 10-15 minutes or until it reaches an internal temperature of 145 degrees.
    • Remove them from the grill and rest them for 5 minutes.
    • While the salmon cooks, strain the marinade into a sauce pan. Heat over medium heat until it starts boiling. Whisk the cornstarch with a small amount of water to form a slurry.
    • Boil for 2 minutes then add the slurry and reduce it to low heat for a couple minutes to thicken the sauce.
    • Drizzle the fish and pineapple with sauce, sprinkle with chopped scallions and serve immediately.
    Tried this recipe?Let us know how it was!

    Now that you know how to make this Hawaiian Grilled Salmon recipe, be sure to share it and tag @thelifejolie on Instagram and Facebook.  And be sure to pin it to save for later or bookmark it!

    Check out other Dump It ‘Til It’s Hot posts:

    • Dump recipes main page
    • My introduction post
    • Best tools for prepping dump recipes
    • Tips for making dump dinners

    Be sure to subscribe to gain access to all the bonuses and recipe previews!

    Easy Dinners subscribe button

    You can find a full index of my recipes here.

    Let’s keep the conversation going- join my Facebook group!

    Grilled Steak Fajitas

    Jun 3, 2019 · Leave a Comment

    Steak Fajitas are good, but Grilled Steak Fajitas are better! Tender flank steak makes a great fajita protein with charred peppers and onions- this is an easy dinner that's perfect for a summer get-together.

    Steak Fajitas are good, but Grilled Steak Fajitas are better! Tender flank steak makes a great fajita protein with charred peppers and onions- this is an easy dinner that's perfect for a summer get-together.

    An overhead image of a sheet pan qwith grilled steak fajitas, peppers, onions, tortillas and fresh cilantro.

    This recipe is part of my Dump it 'til it's hot series of dump recipes. It's all about making delicious food with minimal prep, no pre-cooking, the ability to freeze for a good make-ahead meal. And trust me when I say, easy never tasted so good!

    This post contains Affiliate Links. Please see the disclaimer here.

    Other great grilling recipes include:

    • Grilled Hawaiian Chicken
    • Balsamic Grilled Asparagus
    • Herb Grilled Pork Chops
    • Drunken Steak Marinade

    Grilled Steak Fajitas

    Does anyone else love fajitas? I'm all about any dish that comes out sizzling hot when you order it at a restaurant. Not only is it full for great flavor, but it's relatively light and I don't feel weighted down while I'm eating it.

    I figured a good steak fajita recipe was in order, and it seemed like a natural fit with this dump recipe series. And June seemed like an even better time to share this, since I knew I wanted this month's dump week to be grilling themed! Let me just say, this steak fajita marinade is a total winner! All you'll need is a few ingredients and and a plastic zipper bag.

    The side of a pan containing the flank steak used for this steak fajitas recipe

    Tips for making Beef Fajitas on the grill

    • I cut the veggies larger to make it easier to grill them and then slice after grilling.
    • Pull the marinated beef and veggies out of the fridge 20 minutes before you intend to cook it, to help it get a little closer to room temperature.
    • Before preheating the grill, spray it with nonstick cooking spray to avoid sticking.
    • Use a meat thermometer to get it to the temperature for the level of doneness you're looking for (I like to cook to 140 degrees for medium-rare).
    • Rest the meat for 10 minutes before carving to allow for crossover cooking and for the juices to redistribute.
    • Be sure to carve against the grain and try to slice the meat thin for easier eating.

    What cut of beef is best for fajitas?

    I like to use flank steak for this recipe. You can also use skirt steak or if those aren't available, sirloin steak (just be sure to marinate it longer).

    How do you slice the vegetables so they don't fall through the grill grates?

    I slice the onions into rings but I don't separate the rings. For the peppers, I slice off the top and dispose of it as well as the seeds. Them I slice off the bottom and keep it whole and slice off each of the sides and keep them whole. That way, they're flat chunks that you can easily rest on the grill grates without them slipping through. Once they're cooked and have cooled a bit, I slice them into thinner slices for the fajitas.

    What goes into the flank steak marinade?

    I tried to keep things simple but still flavorful so for this marinade, I use a mixture of fajita seasoning, lime juice, olive oil and salt.

    What is the difference between taco seasoning and fajita seasoning?

    Taco seasoning tends to have a bit of a bolder flavor with a higher amount of chili powder and a few additional ingredients. Fajita seasoning is more subtle, which allows the beef flavor to truly shine through.

    How long do you marinate the flank steak?

    The optimal amount of time for a cut of beef to marinate is 12 to 24 hours. Anything longer than this can adversely affect the texture.

    How long do these last?

    Grilled flank steak is best served right away. That said, you can reheat these in a pan or in the microwave. They will last covered in the refrigerator for around 3 days.

    Can you freeze steak fajitas?

    I would encourage you to freeze the raw beef and veggies in the marinade before cooking. They will last for up to 3 months.

    What goes with steak fajitas?

    A few great recipes to round out and complete this meal would be:

    • Mexican Bean Salad
    • 7 Layer Taco Salad
    • Guacamole

    The peppers and onions on a pan used to serve with beef fajitas

    Ingredients for this steak fajitas recipe

    • Flank steak
    • Lime juice
    • Fajita seasoning
    • Kosher salt
    • Olive oil
    • Bell peppers
    • Red onion
    • Cilantro
    • Tortillas

    How to make steak fajitas

    1. Mix the marinade ingredients well and allow the beef and veggies to marinate.
    2. Remove the beef from the fridge and let it sit while the grill preheats.
    3. Cook to the level of doneness you're looking for and allow the beef to rest.
    4. Slice the beef against the grain and slice the veggies.
    5. Serve immediately on tortillas with cilantro.

    A grilled flank steak fajita in a tortilla.

    Grilled Beef Fajitas Recipe Upgrades

    Although this is designed to be a dump-and-go recipe, here are a few “upgrades” you can make if you have a little extra time on your hands and don’t mind doing a small amount of extra work. You don’t have to do them to have a delicious meal, but they will make this recipe come out even more delicious:

    • Turn the beef 45 degrees halfway through grilling each side to get some nice cross-hatch grill marks.
    • Slice some limes in half and grill those as well.
    • Grill the tortillas slightly to add a little char to them.

    Helpful tools:

    1. Gallon freezer zipper bags
    2. Measuring spoons
    3. Measuring cups
    4. Chef's knife
    5. Cutting board
    6. Whisk
    7. Mixing bowl
    8. Citrus reamer
    9. Grill tongs
    10. Meat thermometer

    flank steak sliced up on a pan for fajitas

    Steak Fajitas are good, but Grilled Steak Fajitas are better! Tender flank steak makes a great fajita protein with charred peppers and onions- this is an easy dinner that's perfect for a summer get-together.

    Grilled Steak Fajitas

    Jessy Freimann
    Steak Fajitas are good, but Grilled Steak Fajitas are better! Tender flank steak makes a great fajita protein with charred peppers and onions- this is an easy dinner that's perfect for a summer get-together.
    No ratings yet
    Print Recipe Pin Recipe
    Prep Time 10 minutes mins
    Cook Time 15 minutes mins
    Resting time 30 minutes mins
    Total Time 55 minutes mins
    Course Main Course
    Cuisine Mexican
    Servings 4 servings

    Ingredients
      

    • 2 Tablespoons olive oil
    • ⅓ cup lime juice
    • 1 packet fajita seasoning
    • 1 teaspoon kosher salt
    • 2 large bell peppers, cut into large chunks (any color)
    • 2 large red onions, cut into rings but not separated
    • 1 1 ½-2 pound flank steak
    • Cooking spray
    • Fresh cilantro
    • Flour tortillas

    Instructions
     

    • In a large bowl, whisk together olive oil, lime juice, fajita seasoning and salt until well combined.
    • Submerge flank steak, peppers and onion in the marinade and refrigerate until you're ready to cook (for at least 30 minutes). You can also freeze at this point in a plastic zipper bag.
    • Remove the beef from the refrigerator 20 minute prior to grilling. While it rests, spray the grill with cooking spray and preheat to medium high.
    • Place steak and vegetables on the grill and cook for around 7-10 minutes per side (rotating 45 degrees halfway through each side to get nice crosshatch grill marks). Cooking time will vary baked on the thickness of the steak so use a meat thermometer to get to the temperature you want- I cooked it 140 for medium rare.
    • Remove the steak and vegetables from the grill and let the steak rest for 10 minutes.
    • Slice the vegetables into thinner slices and slice the beef thinly against the grain.
    • Serve immediately in flout tortillas with fresh cilantro.
    Tried this recipe?Let us know how it was!

    Now that you know how to make this Grilled Steak Fajitas recipe, be sure to share it and tag @thelifejolie on Instagram and Facebook.  And be sure to pin it to save for later or bookmark it!

    Check out other Dump It ‘Til It’s Hot posts:

    • Dump recipes main page
    • My introduction post
    • Best tools for prepping dump recipes
    • Tips for making dump dinners

    Be sure to subscribe to gain access to all the bonuses and recipe previews!

    Easy Dinners subscribe button

    You can find a full index of my recipes here.

    Let’s keep the conversation going- join my Facebook group!

    Balsamic Caramelized Onions and Peppers with Hot Italian Sausage

    May 6, 2019 · Leave a Comment

    Balsamic Caramelized Onions and Peppers are the perfect addition to a spicy Italian Sausage sandwich. They're super easy to whip up with just a few ingredients!

    Balsamic Caramelized Onions and Peppers are the perfect addition to a spicy Italian Sausage sandwich. They're super easy to whip up, with just a few ingredients!

    An Italian sausage sandwich with caramelized onions and peppers on it.

    Balsamic Caramelized Onions and Peppers

    This is a sponsored conversation on behalf of Honeysuckle White and Shady Brook Farms. Thank you for supporting the brands that support this blog. This post contains Affiliate Links. Please see the disclaimer here.

    For as long as I can remember, I've been a lover of Italian sausage. There's nothing like that first glorious bite, hot off the grill. A big old Italian sausage sandwich was actually my go-to order at Yankee Stadium when I lived in NYC and went to games. And I especially loved how they piled each sandwich high with onions and peppers with bonus points when I can smother this sandwich in cheese. So it seemed like a good idea to share an Italian sausage sandwich with my own recipe for some awesome sautéed peppers and onions that are slowly caramelized and finished with a little bit of balsamic vinegar, which adds the most perfect tang to contrast with the spicy sausage!

    Since I'm a little older and a lot wiser now, I find myself looking for meat options that are not only deliciously flavorful, but super high-quality and more nutritious. Which is a big reason that I'm super excited for my third installment in my collaboration with Shady Brook Farms (if you're located on the East Coast) and Honeysuckle White (if you live in the Midwest and on the West Coast).

    A straight on image of a bite out of a sausage sandwich with this caramelized onion recipe

    Shady Brook Farms Hot Italian Turkey Sausage Links

    Shady Brook Farms turkeys are raised without growth-promoting antibiotics. They along with sister brand Honeysuckle White are the only major turkey brands to exclusively provide family farm-raised turkeys. This effort to help consumers understand
    where their food comes from and how it was produced makes me feel good about serving these products to my friends and family.

    The wide variety of turkey products that they provide makes it super easy to throw them on the grill and have a versatile and unique meal in no time. They taste awesome by themselves or act as the perfect base for seasoning combinations, flavors and toppings.

    They come in a wide variety of delicious flavor, but today I opted to use the Shady Brook Farms Hot Italian Turkey Sausage Links as they add the perfect amount of spiciness without being overwhelming. And the Balsamic peppers and onions compliment the spicy kick from the sausage perfectly!

    A Package of Shady Brook Farms Hot Italian Turkey Sausage links with the cooked sandwiches next to them

    Click here to find the Shady Brook Farms Hot Italian Turkey Sausage Link that are featured in this recipe at a retailer near you!

    Tips for how to caramelize onions and peppers

    • Give yourself plenty of time. You want to do this low and slow so that the onions don't burn for that you'll need time so that you'll never have to raise the heat over medium.
    • I start the onions first and then add the peppers.
    • I wait until the last 5 minutes of baking to add the vinegar.

    A picture showing how to caramelize onions in a pan

    Frequently asked questions about this peppers and caramelized onions recipe

    • Why won't my onions caramelize? It's quite likely that your heat is too high. It also takes a good 30-40 minutes to get there, so be patient.
    • How do you cut an onion to caramelize? You'll remove the root and the skin and then you can cut the onions however you want. The smaller they are, the quicker they'll caramelize. For this recipe I kept everything to a rough dice to make them easier to eat when you bite into the sausage sandwich.
    • How do you caramelize onions without burning them? Once again, this comes back to using lower heat and stirring often.
    • How dark should caramelized onions be? It really comes down to personal preference, but generally darer than golden. The darker they get the more flavorful they'll be.
    • Are caramelized onions high in sugar? Although they have a sweeter flavor (because the larger sugar molecules break down during the low and slow cooking) I don't add additional sugar to this outside of the vinegar at the end.
    • Why are my caramelized onions bitter? Most likely they either burned or the outside cooked and the inside did not- both of these things are due to using heat that's too high.
    • Can you make caramelized onions ahead of time? Yes, you can make these a couple days ahead and refrigerate until serving.
    • How long do caramelized onions last? Around 3-4 days covered in the refrigerator or a few months in the freezer.
    • How do you reheat caramelized onions? In the microwave or the stove over low heat.

    Italian sausage on a grill.

    Make it a meal!

    A few great recipes to round out and complete this meal would be:

    • Baked Oven Fries
    • Mexican Bean Salad
    • Greens and Beans
    • Marinated Vegetable Salad
    • Tuna Macaroni Salad
    • Peanut Butter No-Bake Cookies
    • Easy Chocolate Pie

    sauteed peppers and onions in a bowl

    Helpful tools:

    1. Measuring cups
    2. Measuring spoons
    3. Chef's knife
    4. Cutting board
    5. Large saute pan
    6. Wooden spoon
    7. Instant read thermometer
    8. Grill tongs and turner

    A sausage sandwich with peppers and onions and cheese on it.

    Balsamic Caramelized Onions and Peppers are the perfect addition to a spicy Italian Sausage sandwich. They're super easy to whip up with just a few ingredients!

    Balsamic Caramelized Onions and Peppers

    Jessy Freimann
    Balsamic Caramelized Onions and Peppers are the perfect addition to a spicy Italian Sausage sandwich. They're super easy to whip up with just a few ingredients!
    No ratings yet
    Print Recipe Pin Recipe
    Prep Time 10 minutes mins
    Cook Time 45 minutes mins
    Total Time 55 minutes mins
    Course Condiment
    Cuisine American
    Servings 6 servings

    Ingredients
      

    • ¼ cup olive oil
    • 1 ½ cups red onion, roughly chopped (around 1 large onion)
    • 1 ½ cups red bell pepper, roughly chopped (around 1 ½ large peppers)
    • 1-2 Tablespoons balsamic vinegar
    • Kosher salt, to taste (optional)
    • Ground black pepper, to taste (optional)
    • 1 package Shady Brook Farms Hot Italian Turkey Sausage Links (6 links total)
    • 6 hero rolls
    • 6 slices provolone or mozzarella cheese

    Instructions
     

    • In a large saute pan, heat olive oil over medium heat.
    • Add onions to the pan and saute for 5-7 minutes, stirring often.
    • Reduce heat to medium low and add peppers. Saute 45 minutes stirring often (manage the heat so they don't burn!). Add balsamic vinegar for the last 5-10 minutes of cooking and remove from heat.
    • While the onions and peppers caramelize, spray the grill with cooking spray and preheat to medium high.
    • Add Shady Brook Farms Hot Italian Turkey Sausage Links to the grill. Cook for around 10 minutes or until they reach an internal temperature of 165 degrees, turning frequently. 
    • While sausage links cook, preheat the broiler in the oven and line a sheet pan with parchment. Lay rolls onto sheet pan, cut side up.
    • When sausage links are cooked through, place each link into a bun. Top with onions and peppers and then a slice of cheese.
    • Broil 3-5 minutes or until the cheese is melted (keep a close eye on them so you don't burn them!). Serve immediately.
    Tried this recipe?Let us know how it was!

    A Package of Shady Brook Farms Hot Italian Turkey Sausage links with the cooked sandwiches with peppers and onions around it.

    If you tried this recipe please comment and rate it 🙂 I love hearing your feedback and answering your questions! And if you make it please tag me on Instagram with @thelifejolie so I can share it <3

    Looking for some other recipes featuring Italian Sausage?

    • One Pan Baked Italian Sausage and Veggies Recipe
    • Slow Cooker Sausage and Peppers
    • Spicy Sausage Pasta with Rapini
    • Bean and Sausage Soup

    You can find a full index of my recipes here.

    Don’t forget to follow The Life Jolie on Pinterest for more recipe inspiration!

    Or if Pinterest isn’t your style, bookmark this post!

    Let’s keep the conversation going- join my Facebook group!
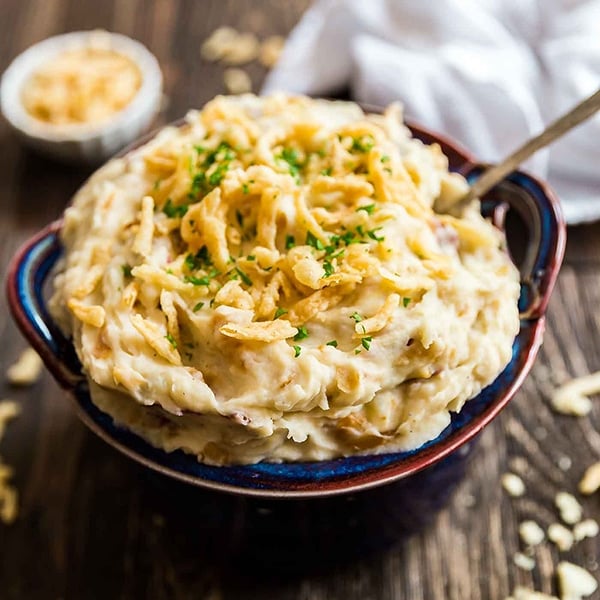
    Balsamic Caramelized Onions and Peppers are the perfect addition to a spicy Italian Sausage sandwich. They're super easy to whip up with just a few ingredients!

    Baked Italian Grinder Recipe

    May 3, 2019 · 2 Comments

    A close up overhead image of Italian Grinder Sandwiches.

    This baked Italian Grinder Sandwich recipe is the perfect crowd-pleasing main dish. Packed with capicola hot ham, salami, melty cheese, and banana peppers stuffed in a hoagie roll and dipped in Italian dressing- game day never tasted so good!

    A close up overhead image of Italian Grinder Sandwiches in a glass pan with a blue striped napkin.
    [feast_advanced_jump_to]

    Why You'll Love This Italian Hoagie Recipe

    Around here, a popular type of submarine sandwich is an Italian Sub Sandwich. It's typically made with salami, capicola hot ham, and sometimes regular deliham. This popular sandwich — also called a hero, a hoagie sandwich, or most recently on TikTok, a grinder sandwich — is a mainstay on the menu of every local sub shop.

    I've grown up loving these sandwiches and wanted to make them toasted, because melty cheese is always a good idea! So I got rid of all the items that can become soggy when heated (like lettuce and tomatoes!) and stuck with the basics. These are seriously quick and easy to throw together and would be a total hit at any game day or casual social gathering. If you love sandwiches as much as I do, make a day of it and start with is Bodega-Style Breakfast Sandwiches!

    Here's why I love this Italian Sub Recipe:

    • Perfect for crowds
    • Can easily be customized
    • Warm sandwich that doesn't wear you down
    • Flavorful
    • Quick to make
    An image of an Italian sub sandwich with some banana peppers in front of it with other sandwiches and a bowl of Italian dressing in the background.

    Ingredient Information and Substitutions

    • Meat- The Italian grinder meats I prefer for this are Capicola hot ham for a nice kick and salami. Both Genoa or hard salami work great for this. I personally enjoy the bit of spiciness the Capicola adds, but if you don't love spicy foods, deli ham also works great.
    • Peppers- In keeping with adding a spicy kick to this recipe, I used sliced banana peppers. If you want a milder option, roasted red pepper strips or sweet peppers also work.
    • Cheese- This recipe calls for sliced Provolone cheese, but you can also use mozzarella cheese.
    • Rolls- You favorite 6 inch roll works great and should fit sandwiches perfectly in a 9" x 13" baking pan.
    An overhead image of the sandwich ingredients labeled.

    How To Make An Italian Grinder Sandwich

    Step 1: Prep the rolls

    Place the rolls in a preheated oven for 5 minutes to toast them slightly.

    Hands holding a sub roll open on a cutting board  showing that it's still connected in the back.

    Step 2: Add the fillings

    Layer the capicola hot ham, salami, banana peppers, and cheese into each of the hoagie bread rolls.

    Grinder sandwiches filled with meats, cheese and banana peppers in a glass pan

    Step 3: Bake

    Place the Italian sub sandwiches back in the oven and bake for 20 minutes. Serve with Italian dressing and devour!

    A pan of Italian Grinders in a oven about to bake.

    Frequently Asked Questions

    What is in a classic Italian sub sandwich?

    Everyone has a different way of dressing their Italian hoagie sandwich. I personally like to make my Italian sub recipe with provolone cheese, lettuce, tomato, banana peppers, a little mayo, and some oil (which is a sauce similar to Italian dressing that is used on these subs). Some people throw on onions and even more hot peppers as well.

    What is the difference between a sub and a grinder?

    The difference between these sandwiches is actually more about where you live than what's on them. Layer some meat, cheese, toppings, and dressing on a long Italian style roll, and you've got yourself a sub, hero, grinder, hoagie, blimpie...the list can go on.

    Where does the name sub come from?

    Originally a sub was named for navy shipyard workers and the submarines these hoagie sandwiches resembled. The term grinder is thought to have originated from the amount of grinding or chewing it took to eat one.
    What do you serve with this Italian sub recipe?

    What else can I add to my Italian Sub?

    I like to serve this hoagie recipe with some Italian dressing for dipping, but you can also add fresh ingredients like lettuce and tomato onto the sandwiches after they're done baking.

    How long will an Italian sub sandwich last?

    These are best served right away, hot out of the oven. But they will last for up to 4 days cooled and covered in the refrigerator.

    How do you reheat hoagies?

    These are best reheated in the oven but can also be reheated in the microwave.

    An overhead image of a glass pan of grinder sandwiches.

    Tips For Making An Italian Sub

    • Don't slice all the way through. Slice 6 hero rolls length-wise but don't slice all the way through. You want the halves intact so they can cradle the sandwich ingredients.
    • Don't skip pre-baking the hoagie buns. Before filling the buns, bake them for 5 minutes to very lightly toast the buns. This helps avoid sogginess.
    • Customize as desired. Feel free to add regular ham, veggies, or other meats to this hoagie recipe. Just be sure to add after baking to keep your sandwich from getting soggy.
    • Leftovers and Storage- these will last up to 4 day covered in the refrigerator.

    What To Serve With Italian Subs

    A few great recipes to round out and complete this meal would be:

    • Baked French Fries
    • Sriracha Chex Mix
    • 7 Layer Taco Salad
    • Sour Cream Cookies

    Try These Other Delicious Sandwich Recipes

    • This easy Banh Mi Sandwich is a tasty twist on the traditional Vietnamese specialty. It's super easy to make and is a totally satisfying sandwich you'll want to make again and again!
      Easy Banh Mi Sandwich
    • A hand holding a half sandwich revealing the egg salad in the center.
      Avocado Egg Salad
    • A hand holding a half chicken salad sandwich revealing the inside of it
      Copycat Panera Chicken Salad Recipe
    • A spoon holding up a scoop of ham salad from a blue bowl behind it.
      Old Fashioned Ham Salad Recipe

    Love this recipe? Please leave a 5 star ⭐️⭐️⭐️⭐️⭐️ rating in the recipe card below ⬇️ and/or a review in the comment section further down. Check out my Amazon Store for all my favorite tools, including those used in this recipe. And follow @thelifejolie on Instagram and TikTok!

    A close up overhead image of Italian Grinder Sandwiches.

    Baked Italian Grinder Recipe

    Jessy Freimann
    This baked Italian Grinder recipe is the perfect crowd-pleasing main dish. Packed with capicola hot ham, salami, melty cheese, and banana peppers stuffed in a hoagie roll and dipped in Italian dressing- game day never tasted so good!
    5 from 4 votes
    Print Recipe Pin Recipe
    Prep Time 10 minutes mins
    Cook Time 25 minutes mins
    Total Time 35 minutes mins
    Course dinner, Main, Main Course
    Cuisine American
    Servings 6 pieces
    Calories 355 kcal

    Equipment

    • cutting board
    • Chef Knife
    • 9 x 13 Pan

    Ingredients
      

    • 6 hero rolls sliced length-wise but leaving both sides of the roll attached to each other.
    • 18 slices capicola hot ham
    • 18 slices salami
    • 1 cup banana peppers sliced
    • 6 slices provolone cheese
    • Italian dressing for serving

    Instructions
     

    • Preheat the oven to 350 degrees. Place the rolls into a 9" x 13" baking pan, open-side up.
    • Toast the rolls for 5 minutes and remove from oven.
    • Place 3 folded slices of capicola hot ham onto the bottom of each roll.
    • Add a layer of 3 folded pieces of salami onto the sandwiches.
    • Divide the sliced banana peppers between the 6 sandwiches.
    • Fold each slice of provolone cheese in half to break into two pieces and place on top of the banana peppers.
    • Return the pan to the oven and bake for 20 minutes. Serve immediately with Italian dressing.

    Video

    Notes

    • Don't slice all the way through. Slice 6 hero rolls length-wise but don't slice all the way through. You want the halves intact so they can cradle the sandwich ingredients.
    • Don't skip pre-baking the hoagie buns. Before filling the buns, bake them for 5 minutes to very lightly toast the buns. This helps avoid sogginess.
    • Customize as desired. Feel free to add regular ham, veggies, or other meats to this hoagie recipe. Just be sure to add after baking to keep your sandwich from getting soggy.
    • Leftovers and Storage- these will last up to 4 day covered in the refrigerator.

    Nutrition

    Serving: 1pieceCalories: 355kcalCarbohydrates: 34gProtein: 17gFat: 16gSaturated Fat: 6gPolyunsaturated Fat: 1gMonounsaturated Fat: 6gCholesterol: 34mgSodium: 1044mgPotassium: 181mgFiber: 2gSugar: 5gVitamin A: 237IUVitamin C: 17mgCalcium: 156mgIron: 11mg
    Tried this recipe?Let us know how it was!

    Fernie's Famous Chicken Casserole

    Apr 15, 2019 · 6 Comments

    This is the Chicken Casserole to end all chicken casserole recipes! Creamy and delicious but also so easy to make- this is the perfect way to feed a crowd!

    This is the Chicken Casserole to end all chicken casserole recipes! Creamy and delicious but also so easy to make- this is the perfect way to feed a crowd!

    chicken and rice casserole

    Chicken Casserole

    This post contains Affiliate Links. Please see the disclaimer here.

    Today's recipe is one I'm so excited to share, and in our family, the stuff of legend's. My Aunt Fern is a pretty fantastic cook, and her easy Chicken Casserole is tasty and comforting dinner that dreams are made of.

    This creamy Chicken Casserole is an excellent option for feeding a crowd, because it makes a pretty big portion. It is so good, that they actually served it at both my bridal and baby showers (my only regret was not taking a bigger portion of the leftover home!).

    This is the Chicken Casserole to end all chicken casserole recipes! Creamy and delicious but also so easy to make- this is the perfect way to feed a crowd!

    Tips for making Chicken and Rice Casserole

    • I know it's tempting to skip boiling the chicken and substitute with a rotisserie chicken and some store-bought broth. While I would normally be totally on board with making these substitutions, this particular recipe was designed to cook the chicken and then use the cooking water in the casserole. I strongly encourage you to avoid substituting on this part.
    • Make sure you're tasting everything as you go. Although I provide measurements, like every good family recipe this one was always done by taste and not exact measurements. So taste it and adjust everything as you go.
    • When you mix all the casserole ingredients together, it's going to look pretty soupy. Don't let this make you nervous- you want a lot of liquid because as it bakes, the casserole will absorb the liquid and you don't want it to dry out.
    • The good thing is, the first half of baking is done covered. So when you remove the cover, you can check and see if it's drying out. If it is, add a little more of the cooking juices before topping with the corn flakes.
    • My favorite piece of advice is to put a little hot sauce on it. My sister and I love to do this when we eat this.

    easy chicken casserole

    Frequently asked questions about making Chicken Rice Casserole

    • Can I make a smaller batch if I'm not looking to feed a crowd? Yes! The original recipe is designed to be made in a two 4 Quart Baking Dishes. But you can always halve the recipe and use one 4 quart baking dish. I make it in a 9" x 13" pan and put the remaining in my 8" x 8" baking pan.
    • What if I don't eat nuts? The nuts are totally optional, you can leave them out and still have a perfectly delicious chicken casserole (my aunt always made a smaller nutless-batch for my Grandma who couldn't eat nuts).
    • Can you freeze Chicken casserole? Yes! be sure to cover it well.
    • How long does chicken casserole last in the refrigerator? About 3-4 days covered.
    • How do you reheat chicken casserole? Either in the oven or the microwave.

    chicken casserole recipes

    Make it a meal!

    A few great recipes to round out and complete this meal would be:

    • Garlic Parmesan Roasted Broccoli
    • Marinated Vegetable Salad
    • Garlic Green Beans
    • Peas with Onions
    • Lemon Pound Cake
    • Coconut Cake

    chicken rice casserole

    Helpful tools:

    1. Measuring cups
    2. Measuring spoons
    3. Mixing bowl
    4. Spatula
    5. Dutch oven
    6. Wooden spoon
    7. Chef's knife
    8. Cutting board
    9. 4 Quart Baking Dishes

    Video tutorial for making Chicken Casserole

    This is the Chicken Casserole to end all chicken casserole recipes! Creamy and delicious but also so easy to make- this is the perfect way to feed a crowd!

    Chicken Casserole

    Jessy Freimann
    This is the Chicken Casserole to end all chicken casserole recipes! Creamy and delicious but also so easy to make- this is the perfect way to feed a crowd!
    5 from 1 vote
    Print Recipe Pin Recipe
    Prep Time 10 minutes mins
    Cook Time 2 hours hrs
    Total Time 2 hours hrs 10 minutes mins
    Course Main Course
    Cuisine American
    Servings 14 servings
    Calories 397 kcal

    Equipment

    • 1 Large pot
    • 1 9 x 13 Pan
    • 1 cutting board
    • 1 chefs knife
    • 1 Measuring cups and spoons

    Ingredients
      

    • Cooking spray
    • 8 chicken pieces (breast and thigh pieces)
    • 4 cups instant rice
    • 2 Tablespoons mayonnaise (Hellmans!)
    • 10 ounces cream of chicken soup
    • 8 ounces sour cream
    • 1 teaspoon garlic powder
    • 1 cup slivered almonds
    • 2 ribs celery, diced
    • 5 large eggs, hard boiled, peeled, sliced into quarters and then halved
    • 1 teaspoon Kosher salt, to taste
    • ¼ teaspoon Ground black pepper, to taste
    • 4 cups chicken broth use the broth left from boiling the chicken- start with 3 cups and add more as needed
    • 3 cups cornflakes

    Instructions
     

    • Preheat the oven to 350 degrees F and grease two 4 quart baking pans (or 9" x 13" and 8" x 8" pans) with cooking spray.
    • Boil chicken in 4-5 cup of water for 1 hour and then cool slightly. Bone chicken, shred and set aside reserving broth for later.
    • While chicken boils, cook instant rice as per package directions. 
    • In a large bowl, combine chicken, rice, mayonnaise, cream of chicken soup, sour cream, garlic powder, slivered almonds, celery and hardboiled eggs. Stir well.
    • Taste this mixture and add salt and pepper if needed (or add a little more of other ingredients if you feel they're needed).
    • Stir in 3 cups of broth and add 1 more if necessary (you want it to be soupy since the rice absorbs so much liquid during baking).
    • Pour mixture into baking pans and cover with foil.
    • Bake covered for 30 minutes.
    • Remove the pan from the oven and uncover. Look at the casserole and if it looks like it's too dried out, ladle a little more of the chicken cooking broth over the casserole to moisten a bit before topping with corn flakes.
    • Bake uncovered for an additional 30 minutes or until heated through and bubbly. Serve immediately.

    Notes

    I recently found out that my aunt actually bakes the chicken with the water for an hour for even better flavor (this was obviously after I made the video). So you can do that for an even more hands-off approach to cooking the chicken and for even better flavor. I'd go with a 350 degree oven.

    Nutrition

    Serving: 1servingCalories: 397kcalCarbohydrates: 30gProtein: 20gFat: 22gSaturated Fat: 6gPolyunsaturated Fat: 5gMonounsaturated Fat: 9gTrans Fat: 0.1gCholesterol: 129mgSodium: 698mgPotassium: 283mgFiber: 2gSugar: 2gVitamin A: 462IUVitamin C: 3mgCalcium: 68mgIron: 5mg
    Tried this recipe?Let us know how it was!

    If you tried this recipe please comment and rate it 🙂 I love hearing your feedback and answering your questions! And if you make this please tag me on Instagram with @thelifejolie so I can share it <3

    Other delicious casserole recipes include:

    • Tuna Casserole
    • Cheesy Broccoli Rice Casserole
    • Baked Ravioli Casserole
    • Bacon Cheeseburger Tater Tot Casserole

    You can find a full index of my recipes here.

    Don’t forget to follow The Life Jolie on Pinterest for more recipe inspiration!

    Or if Pinterest isn’t your style, bookmark this post!

    Let’s keep the conversation going- join my Facebook group! 

    Great Grandma Hinz's Lemon Pound Cake Recipe

    Apr 10, 2019 · Leave a Comment

    My Great Grandma's Lemon Pound Cake Recipe is a serious keeper! Easy to make, subtly sweet with a light and moist crumb that no one can resist.

    My Great Grandma's Lemon Pound Cake Recipe is a serious keeper! Easy to make, subtly sweet with a light and moist crumb that no one can resist.

    pound cake slice

    Lemon Pound Cake Recipe

    This post contains Affiliate Links. Please see the disclaimer here.

    There's nothing more special than family recipes. And this one goes waaayyyyy back! It's always good to have a good pound cake recipe on hand. A cake like this is ideal for any occasion and always appreciated by those who get to enjoy it.

    This is a truly fantastic lemon pound cake recipe. I especially love that it's not overly sweet, but just sweet enough to satisfy your sweet tooth. It's also got a nice balance in terms of lemon flavor- you will not end up puckering up from tartness when you taste this!

    lemon pound cake overhead shot

    Tips for making pound cake

    • Make sure you don't skip the step of separating the eggs- this is important to help create just the right texture.
    • Mix the dry ingredients separately and slowly add them to the creamed butter/sugar mixture going back and forth with the milk. That way everything mixes in evenly and it also prevents over-mixing.
    • When you whip the egg whites, be sure to start in a clean bowl with clean attachments. Egg whites can be finicky and won't whip up properly if there's other stuff in the bowl.
    • When adding the egg whites to the bowl, gently fold them into the batter so you don't take all the air out of the whipped eggs- that air helps lighten the cake.

    pound cake recipe

    Frequently asked questions about making this pound cake recipe

    • What does pound cake mean? Traditionally, pound cake is make with a pound of flours, sugar, eggs and butter.
    • How do you store pound cake? I store it covered on my kitchen counter.
    • How long does pound cake last? 3-5 days.
    • Can pound cake be frozen? Yes! Be sure to wrap it well!
    • What kind of pan do you use for pound cake? This recipe is written for a tube pan, but I didn't have one so I used a bundt pan.

    lemon pound cake recipe

    Make it a meal!

    A few great recipes to round out and complete this meal would be:

    • Crock Pot Ham
    • Scalloped potatoes
    • Garlic Green Beans
    • Peas and Shrimp Salad
    • Garlic Mushrooms

    best pound cake recipe

    Helpful tools:

    1. Measuring cups
    2. Measuring spoons
    3. Mixing bowl
    4. Spatula
    5. Stand mixer or Hand mixer
    6. Citrus reamer
    7. Microplane
    8. Tube Pan or Bundt pan

    easy pound cake recipe

    My Great Grandma's Lemon Pound Cake Recipe is a serious keeper! Easy to make, subtly sweet with a light and moist crumb that no one can resist.

    Lemon Pound Cake Recipe

    Jessy Freimann
    My Great Grandma's Lemon Pound Cake Recipe is a serious keeper! Easy to make, subtly sweet with a light and moist crumb that no one can resist.
    No ratings yet
    Print Recipe Pin Recipe
    Course Dessert
    Cuisine American
    Servings 8 servings

    Ingredients
      

    • 1 cup + 1 Tablespoon salted butter (2 sticks + 1 tablespoon)
    • 1 cup sugar
    • 2 lemons zest
    • 1 Tablespoon lemon juice (optional- if you want it extra lemon-y)
    • 5 large eggs, seperated and whites beaten until stiff
    • ¾ cup warm milk
    • 3 cups flour
    • 2 teaspoons baking powder
    • Confectioner's sugar, for serving.

    Instructions
     

    • Preheat the oven to 350 degrees and generously grease a tube or bundt pan. Set aside.
    • Cream butter, sugar and lemon zest together until light and creamy.
    • Add egg yolks. If using lemon juice add this at this time. Mix until just combined.
    • In a separate bowl sift flour and baking powder together.
    • Add a small amount of dry ingredients into wet ingredients and keep going back and forth until both are just mixed in.
    • Gently fold in whipped egg whites until everything is combined.
    • Place into prepared cake pan  and bake for 45-50 minutes until a toothpick comes out clean (err on the shorter side if using a dark coated pan). 
    • Cool and serve with a sprinkle of confectioner's sugar.
    Tried this recipe?Let us know how it was!

    If you tried this recipe please comment and rate it 🙂 I love hearing your feedback and answering your questions! And if you make it please tag me on Instagram with @thelifejolie so I can share it <3

    Looking for some other great cake recipes?

    • Poppy Seed Cake
    • Lemon Pistachio Cake
    • Orange Cake with Chocolate Ganache Glaze
    • Pumpkin Spiced Latte Cake

    You can find a full index of my recipes here.

    Don’t forget to follow The Life Jolie on Pinterest for more recipe inspiration!

    Or if Pinterest isn’t your style, bookmark this post!

    Let’s keep the conversation going- join my Facebook group! 
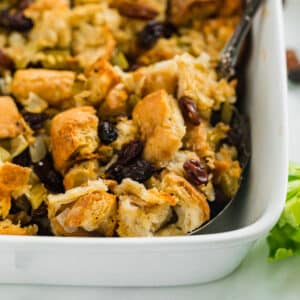
    Vegetarian Chili (Crockpot + IP)

    Apr 4, 2019 · Leave a Comment

    This Vegetarian Chili is a super satisfying meatless main dish. Made in the crock pot or instant pot, it’s a healthy meal that you can easily prep in advance.

    vegetarian chili

    This recipe is part of my Dump it 'til it's hot series of dump recipes. It's all about making delicious food with minimal prep, no pre-cooking, the ability to freeze for a good make-ahead meal. And trust me when I say, easy never tasted so good!

    This post contains Affiliate Links. Please see the disclaimer here.

    Vegetarian Chili

    Another recent request from you guys is meatless dump recipes. Now, I’ll be honest, meatless meals aren’t exactly my strong suit. But I had a blast creating this recipe.

    I was actually pretty excited to have this vegetarian chili. After I photographed it, I packed it up and used it as lunch prep for the entire week and it made a very satisfying lunch. This crockpot vegetarian chili is also a great meatless Monday option for a family full of meat-lovers.

    vegetarian chili recipe

    vegetarian chili slow cooker

    Tips for making this vegetarian chili recipe

    • Drain all your beans and corn well. Don’t worry about rinsing them.
    • Be aware that the vegetable broth gives a slightly different flavor that most people are used to in chili, it’s almost a tiny bit sweet. If you prefer a more traditional flavor, substitute beef or chicken broth for the vegetable broth.
    • Use whatever color bell peppers you prefer.
    • I use a jalapeno (with the seeds removed) and a bit of cayenne pepper to add a nice kick. If you prefer it to be not as spicy, substitute a small can of mild diced green chiles and black pepper in place of cayenne pepper.

    crock pot vegetarian chili

    Frequently asked questions about making vegetarian chili (slow cooker + IP)

    • How long is vegetarian chili good for? 5-6 days covered in your refrigerator.
    • Can you freeze vegetarian chili? Yes- either before or after cooking.
    • What to serve with vegetarian chili? I like to serve it with some shredded cheese, chopped scallions and some crumbled tortilla chips, but feel free to add any of your favorite chili toppings!

    slow cooker vegetarian chili

    Vegetarian Chili Recipe Upgrades

    Although this is designed to be a dump-and-go recipe, here are a few “upgrades” you can make if you have a little extra time on your hands and don’t mind doing a small amount of extra work. You don’t have to do them to have a delicious meal, but they will make this recipe come out even more delicious:

    • Make some homemade guacamole to go with this!

    Make it a meal!

    A few great recipes to round out and complete this meal would be:

    • Mexican Bean Salad
    • Ground Beef Oven Baked Tacos
    • Cajun Black Bean and Corn Salad

    Instant Pot vegetarian chili

    Helpful tools:

    1. Gallon freezer zipper bags
    2. Measuring cups
    3. Measuring spoons
    4. Chef's knife
    5. Cutting board
    6. 9" x 13" pan
    7. Slow cooker
    8. Instant pot
    9. Slow cooker liners

    Vegetarian Chili (Crockpot + IP)

    Jessy Freimann
    This Vegetarian Chili is a super satisfying meatless main dish. Made in the crock pot or instant pot, it’s a healthy meal that you can easily prep in advance.
    No ratings yet
    Print Recipe Pin Recipe
    Prep Time 10 minutes mins
    Cook Time 6 hours hrs
    Total Time 6 hours hrs 10 minutes mins
    Course Main Course
    Cuisine Mexican
    Servings 6 servings

    Ingredients
      

    • 1 medium onion, diced
    • 2 bell peppers, diced
    • 1 jalapeno, diced (if you don't want it to be spicy, sub small can mild diced green chiles)
    • 3 garlic cloves, minced
    • 1 cup vegetable broth (can sub chicken or beef broth for a more traditional flavor)
    • 1 14 ounce can diced tomatoes
    • 1 14 ounce can black beans, drained
    • 1 14 ounce can pinto beans, drained
    • 1 14 ounce can kidney beans, drained
    • 1 14 ounce can corn, drained
    • 1 8 ounce can tomato sauce
    • 2 teaspoons chili powder
    • 1 ½ teaspoons kosher salt
    • 1 teaspoon cumin
    • ½ teaspoon oregano
    • ½ teaspoon ground coriander
    • ¼ teaspoon smoked paprika
    • ¼ teaspoon black pepper
    • The toppings of your choice

    Instructions
     

    Crockpot instructions

    • Mix all ingredients in crockpot until well combined (except for the toppings). At this point it can also be placed into 1-2 plastic zipper bags to freeze.
    • Cover and cook on low for 6 hours or high for 3 hours.
    • Serve immediately with the toppings of your choice.

    Instant Pot instructions

    • Mix all ingredients in Instant Pot until well combined (except for the toppings). At this point it can also be placed into 1-2 plastic zipper bags to freeze.
    • Cover and press the Manual High Pressure. Set the instant pot for 10 minutes and set the steam release to sealing.
    • Once the time is up, do a quick release and serve immediately with the toppings of your choice.
    Tried this recipe?Let us know how it was!

    Now that you know how to make this Vegetarian Chili recipe, be sure to share it and tag @thelifejolie on Instagram and Facebook.  And be sure to pin it to save for later or bookmark it!

    Check out other Dump It ‘Til It’s Hot posts:

    • Dump recipes main page
    • My introduction post
    • Best tools for prepping dump recipes
    • Tips for making dump dinners

    Be sure to subscribe to gain access to all the bonuses and recipe previews!Easy Dinners subscribe button

    You can find a full index of my recipes here.

    Let’s keep the conversation going- join my Facebook group!
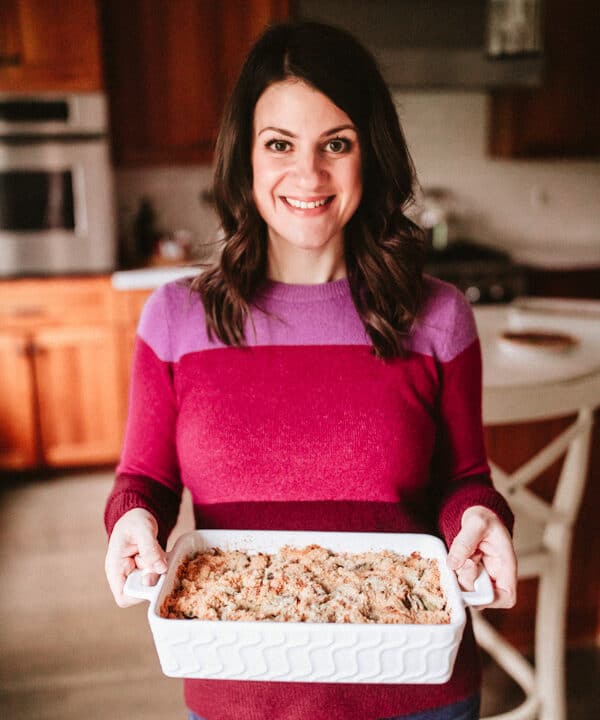
    • « Go to Previous Page
    • Page 1
    • Interim pages omitted …
    • Page 12
    • Page 13
    • Page 14
    • Page 15
    • Page 16
    • Interim pages omitted …
    • Page 21
    • Go to Next Page »

    Primary Sidebar

    Jessy in a kitchen holding a white casserole pan and smiling.
    Hi, I'm Jessy!

    Welcome to The Life Jolie! I share simple, delicious recipes and ingredient prep tips to make your weeknight cooking a breeze!

    More about me →

    Easy Dinner Recipes

    • An overhead image of a Mexican Shrimp Quinoa Bowl.
      Shrimp Quinoa Bowls
    • A bowl of asian soup with meatballs with a spoon and noodles in it.
      Asian Soup with Cabbage and Meatballs
    • A close up of roasted red potatoes on a pan.
      Roasted Red Potatoes Recipe
    • A spoon lifting up a scoop of eggplant parm bake with melt cheese trailing behind it.
      Eggplant Parm Bake
    • A close up of a drum chicken wing in a pile of other wings.
      Oven Baked Chicken Wings
    • An overhead image of a bowl of minestrone soup.
      Traditional Minestrone Soup Recipe

    Popular Recipes

    • A glass bowl of melted chocolate with a spatula dripping some back into the bowl.
      How To Melt Chocolate Chips In The Microwave
    • Italian Stuffed Zucchini Boats are the healthy weeknight meal you'll want to make again and again. This is a seriously easy recipe that's full of delicious flavor without all the guilt!
      Italian Stuffed Zucchini Boats
    • A close up shot of the side of a shallow bowl of shrimp mac salad.
      Shrimp Macaroni Salad
    • A white pan pouring cheese sauce over a bowl of steamed broccoli.
      Cheese Sauce for Broccoli Recipe
    • An overhead image of a plate of chicken lettuce wraps with peanut sauce next to it and all the fixings surrounding it.
      Copycat Cheesecake Factory Thai Chicken Lettuce Wraps
    • A close up image of a piece of greek marinated chicken on a white plate with lemons on the plate and in the background.
      Greek Yogurt Chicken
    Jessy in a kitchen holding a white casserole pan and smiling.
    Hi, I'm Jessy!

    Welcome to The Life Jolie! I share simple, delicious recipes and ingredient prep tips to make your weeknight cooking a breeze!

    More about me →

    Easy Dinner Recipes

    • A close up of a bagel pizza with mini pepperonis on a pan.
      Bagel Pizzas Recipe
    • A bowl of chicken and orzo soup with a spoon in it.
      Chicken and Orzo Soup
    • A bowl of Swedish meatballs and noodles.
      Swedish Meatballs And Noodles
    • A close up image of a piece of coconut shrimp on top of others.
      Coconut Shrimp With Sauce
    • An overhead image of taco soup in a bowl.
      Crockpot Taco Chicken Soup
    • A spoon pulling up a scoop of skillet lasagna with melted cheese stretching behind it.
      No Bake Lasagna Skillet

    Popular Recipes

    • A glass bowl of melted chocolate with a spatula dripping some back into the bowl.
      How To Melt Chocolate Chips In The Microwave
    • Italian Stuffed Zucchini Boats are the healthy weeknight meal you'll want to make again and again. This is a seriously easy recipe that's full of delicious flavor without all the guilt!
      Italian Stuffed Zucchini Boats
    • A close up shot of the side of a shallow bowl of shrimp mac salad.
      Shrimp Macaroni Salad
    • A white pan pouring cheese sauce over a bowl of steamed broccoli.
      Cheese Sauce for Broccoli Recipe
    • An overhead image of a plate of chicken lettuce wraps with peanut sauce next to it and all the fixings surrounding it.
      Copycat Cheesecake Factory Thai Chicken Lettuce Wraps
    • A close up image of a piece of greek marinated chicken on a white plate with lemons on the plate and in the background.
      Greek Yogurt Chicken

    Footer

    ↑ back to top

    About

    • About Me
    • Privacy Policy + Disclaimer

    Newsletter

    • Sign Up! for emails and updates
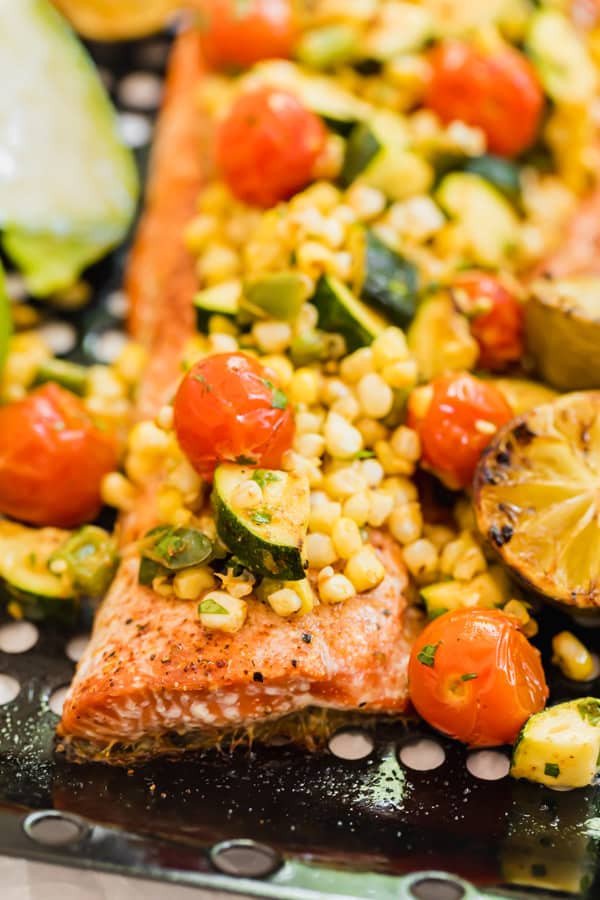
    Contact

    • Contact
    • Video Production

    As an Amazon Associate I earn from qualifying purchases.

    Copyright 2014-2021 - Jolie Ventures, LLC. All Rights Reserved. Privacy Policy.

    Rate This Recipe

    Your vote:


    A rating is required
    A name is required
    An email is required