
• Skip to primary navigation
  • Skip to main content
  • Skip to primary sidebar
The Life Jolie logo
  • Easy Dinner Recipes
  • Recipes
  • About
  • Contact
    • Work with me!
    • Video Production
  • Nav Social Menu

    • Email
    • Facebook
    • Instagram
    • Pinterest
    • Twitter
    • YouTube
menu icon
go to homepage
subscribe
search icon
Homepage link
  • Easy Dinner Recipes
  • Recipes
  • About
  • Contact
    • Work with me!
    • Video Production
    • Email
    • Facebook
    • Instagram
    • Pinterest
    • Twitter
    • YouTube
  • ×
    The Life Jolie » Page 15

    Crockpot Spiral Ham

    Crockpot Spiral Ham

    Apr 1, 2019 · 7 Comments

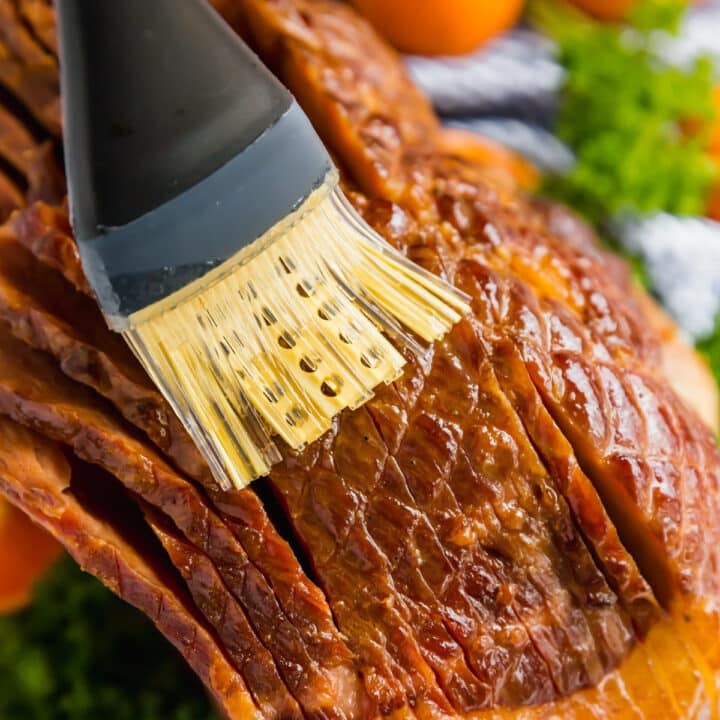
    Brushing juices onto a spiral ham.

    Crockpot Spiral Ham is tender, juicy, and slightly sweet & tangy thanks to the combination of brown sugar and hot sauce. Just 5 minutes of work for you, and the slow cooker does the rest!
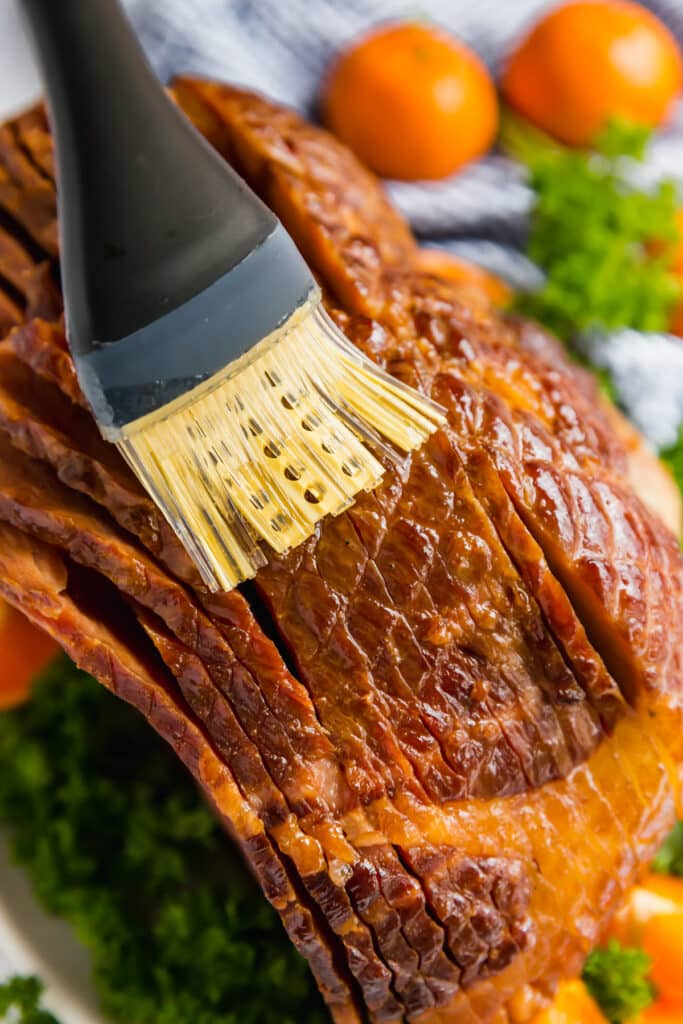
    Brushing juices onto a spiral ham.
    [feast_advanced_jump_to]

    Why You'll Love This Crockpot Ham

    Ham in a slow cooker is a great way to make an already easy main dish effortless. I’ve come across a variety of ham recipes in the past. Many were delicious! And I was excited to put my own spin on this- it tasted great with Scalloped potatoes and Garlic Green Beans.

    Now, of course, I included brown sugar. But from there, I added some unexpected items to bring a little depth to the recipe. Jim Beam Red Stag brings a deep sweetness  (don’t worry, the alcohol cooks off!), and a few dashes of hot sauce add a nice zing without actually making it spicy. Here's why I love this recipe:

    • Dump and go recipe
    • Incredibly flavorful
    • Great for entertaining and holidays
    • Family friendly
    • Easy
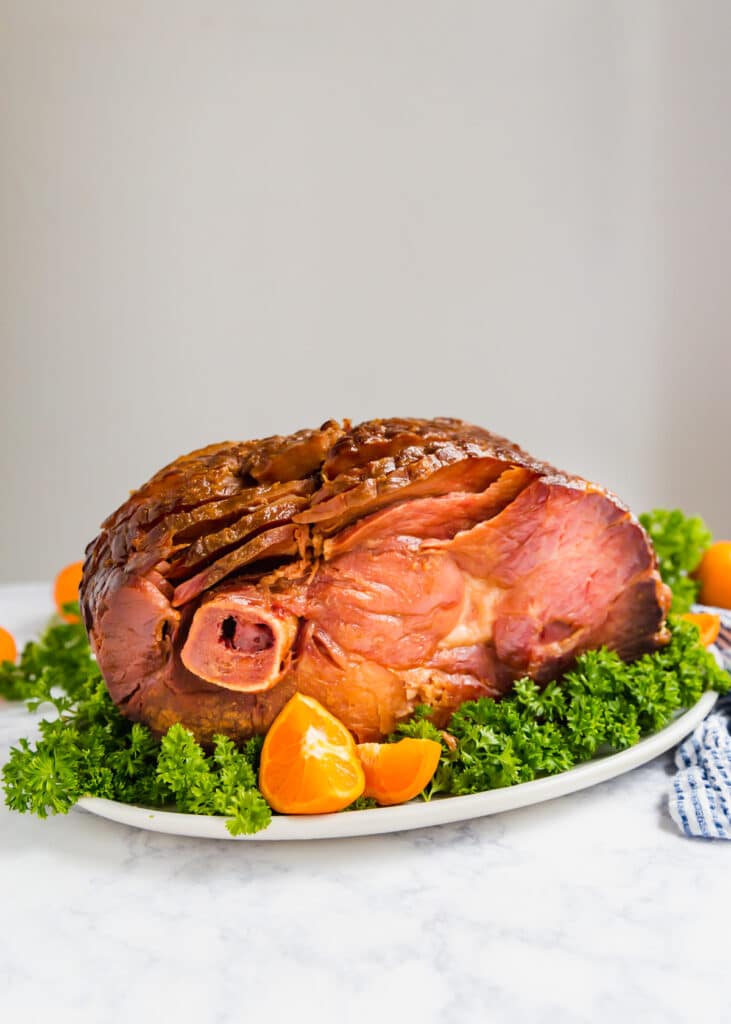
    A straight on image of a spiral ham on a platter with oranges and parsley.

    Ingredient Information And Substitutions:

    • Brown Sugar - Adds a subtle sweetness that isn't overbearing but adds enhances the flavor of the ham and other ingredients. I usually use light but dark brown sugar works great as well- it just gives a deeper flavor.
    • Spiral Cut Ham - It's fine to make slow cooker spiral ham with bone-in or boneless ham. I prefer spiral cut because it's takes the work out of slicing.
    • Jim Beam Red Stag - The flavorful whiskey is the perfect addition to crock pot spiral ham. Don't worry; the alcohol cooks off! I don't encourage you to substitute anything for the booze.
    • Hot Sauce - A few dashes of hot sauce adds a zesty flavor, but don't worry; it's not spicy or overwhelming. Just delicious! I like Franks Red Hot but Tabasco Sauce works great as well.

    How To Cook A Spiral Ham In The Crock Pot

    Step 1: Prepare sauce

    Mix together the half of the brown sugar, Red Stag, and hot sauce until combined. Set aside.
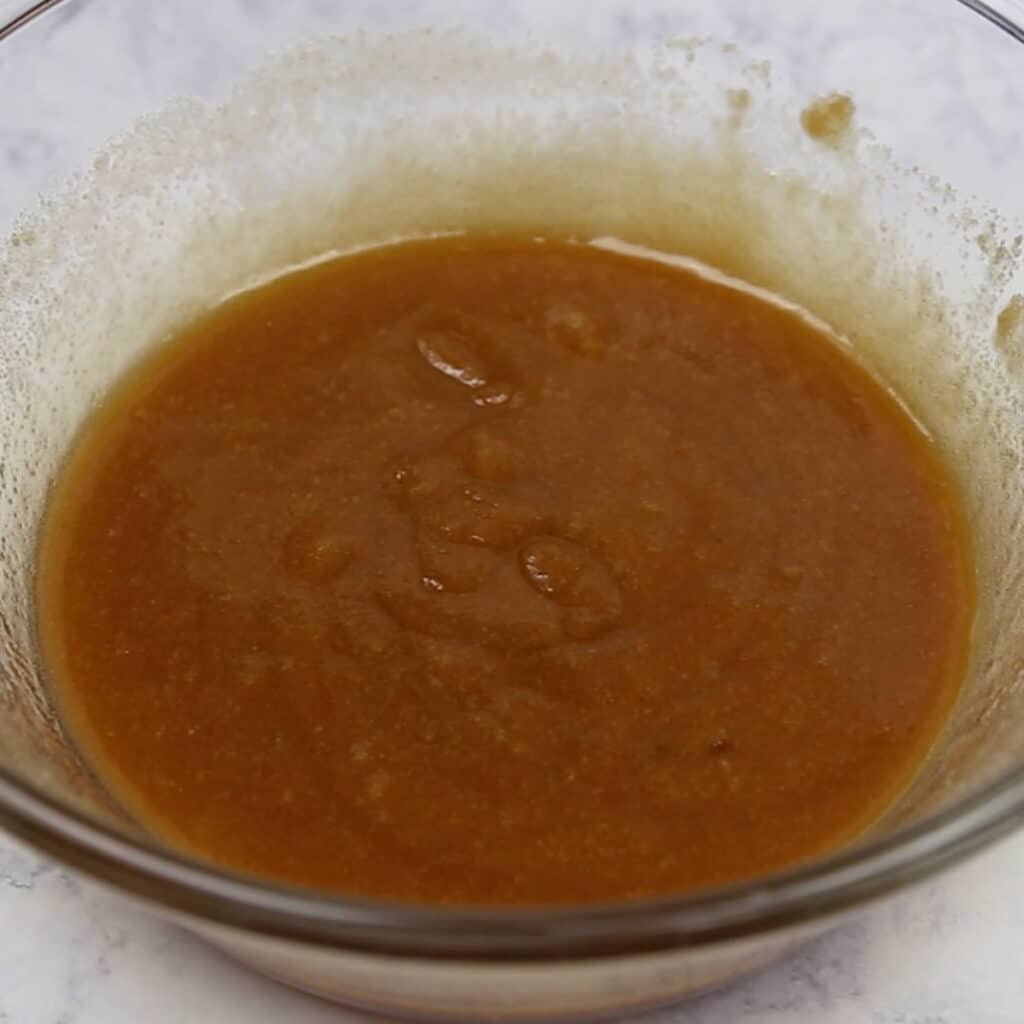
    Sauce of brown sugar, Jim Beam Red Stag and Hot sauce all mixed together in a bowl.

    Step 2: Add brown sugar to crockpot

    Sprinkle remaining brown sugar along the bottom of the crockpot.
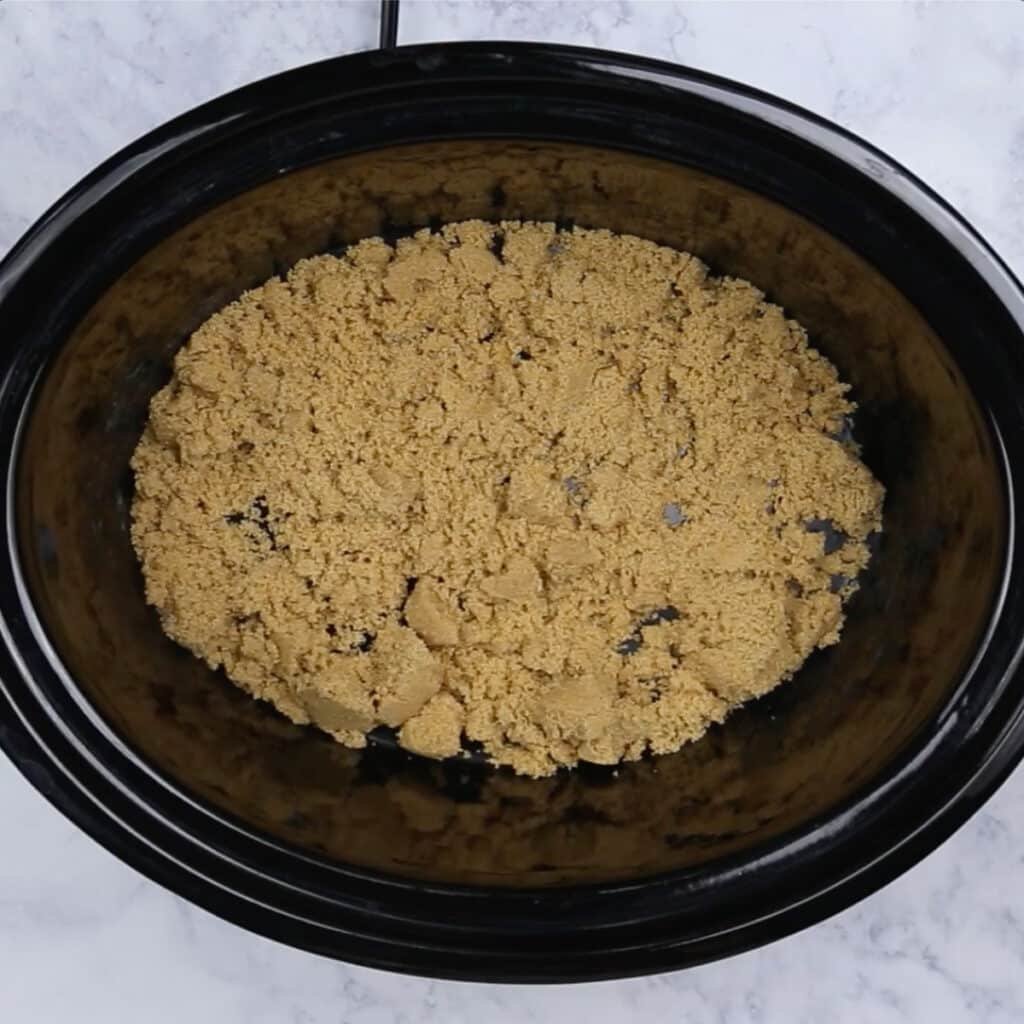
    Brown sugar in the bottom of a crockpot.

    Step 2: Place ham in crockpot and cover in sauce

    Place the ham on top of the brown sugar and turn it so it fits well. Pour over ham.
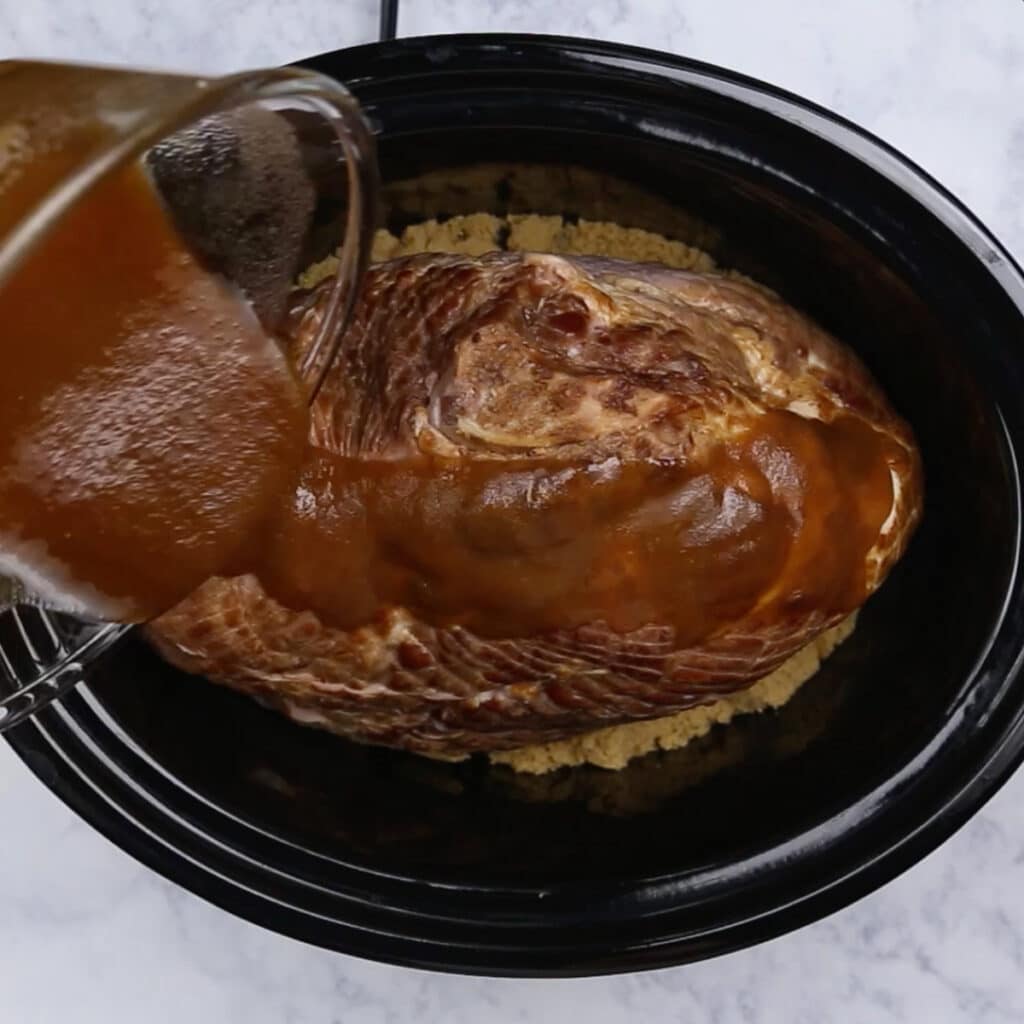
    Sauce being poured on a spiral ham in a crockpot.

    Step 4: Cover and cook

    Cover and cook the spiral ham in the crock pot for 6-8 hours on low or until it reaches 145 degrees. Baste a few times during the cooking period. Serve and enjoy!
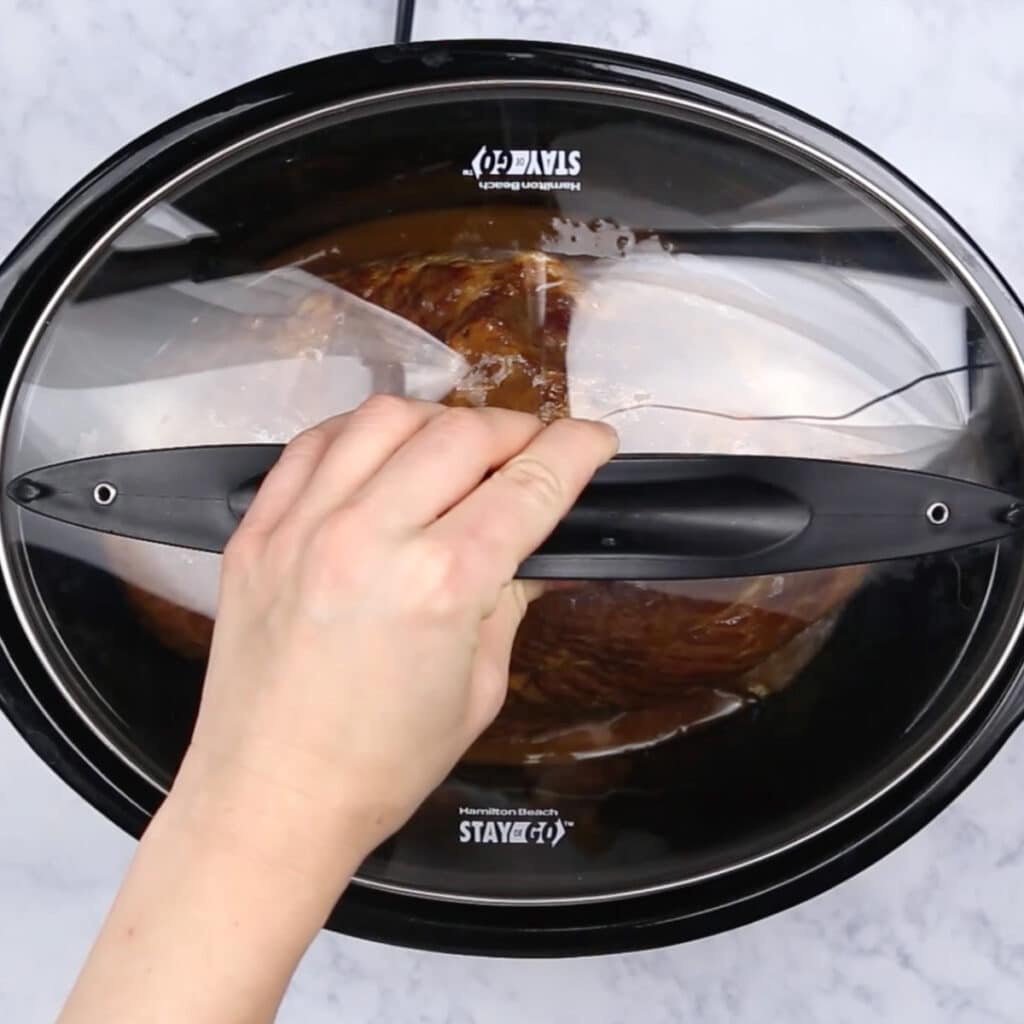
    A hand placing the cover on the crockpot.

    Frequently Asked Questions

    Should I use bone-in or boneless ham?

    If you can find a boneless spiral ham that’s small enough, it makes cutting even easier. Around here, they only have bone-in spiral ham, and that worked as well. The biggest concern is making sure that the spiral ham fits in the crock pot.

    Do you add water to ham?

    Not for this ham recipe. I’ve found that it not extra moisture is needed. The sugar melts and combines with the juices from the ham.

    How long does crockpot ham last?

    4-5 days covered in the refrigerator.

    Can you reheat sliced crock pot spiral ham?

    Yes- I do it in the oven or in smaller portions in the microwave.

    How long to cook a spiral ham?

    This recipe calls for cooking 6-8 hours on low in your slow cooker.

    How do you keep sliced ham moist when reheated?

    I like to save the juices and reheat the ham in the juices.

    How do you make a brown sugar glaze for ham in a slow cooker?

    I place the juices into a pan and reduce them. If you’re pressed for time, you can just thicken the juices with a cornstarch slurry.

    Can I freeze sliced ham?

    Yes, I freeze leftover crockpot ham in a plastic zipper bag.

    Can I make this in the Instant Pot?

    Although I try to provide IP directions for all of my slow cooker recipes, this particular recipe isn't ideal for instant pot cooking as it doesn't start with much liquid, and liquid is an important component to instant pot cooking.
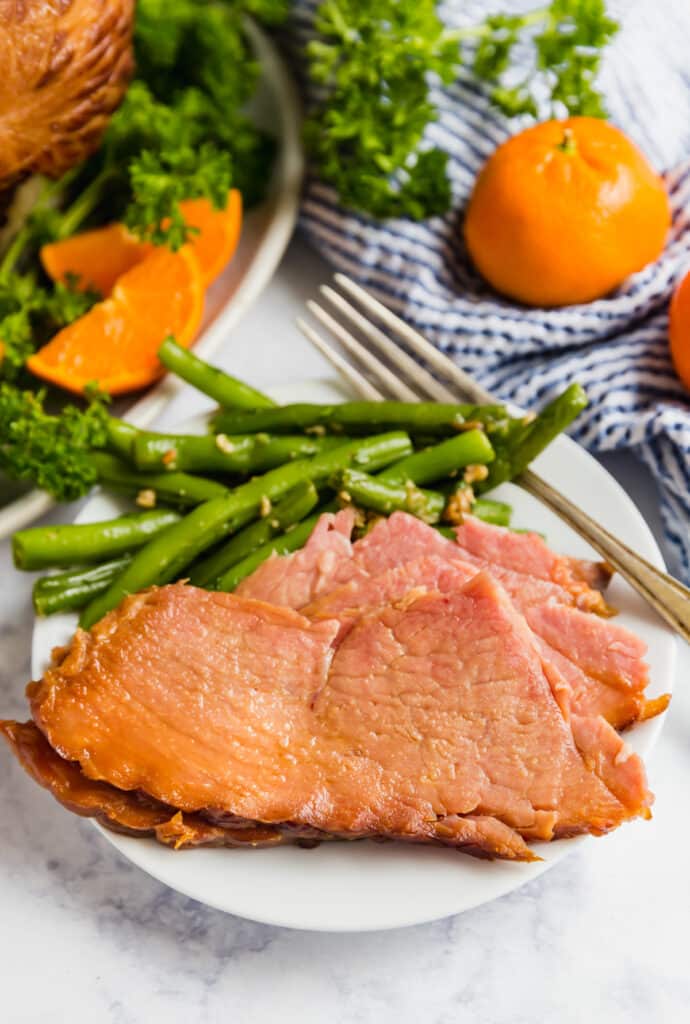
    Sliced ham on a plate with green beans.

    Tips For Making Sliced Ham

    • Shape and size matter. My ham was around 7 pounds. Be mindful of the shape and size of the ham when purchasing. You want to make sure it will fit into the bowl of the slow cooker and fit under the cover.
    • When you place the ham into the slow cooker, place it whichever way will best allow it to fit into the pot and still be able to cover it.
    • Mix the sauce well. You'll know it's ready to pour because it will be completely liquid.
    • Use the juices to moisten the ham when serving. You can also thicken it into a more traditional ham glaze.
    • Reheating and leftovers: This reheats well in the oven (mix in juices and cover to maintain moisture) or as individual servings in the microwave. Store covered in the refrigerator for up to 4-5 days.
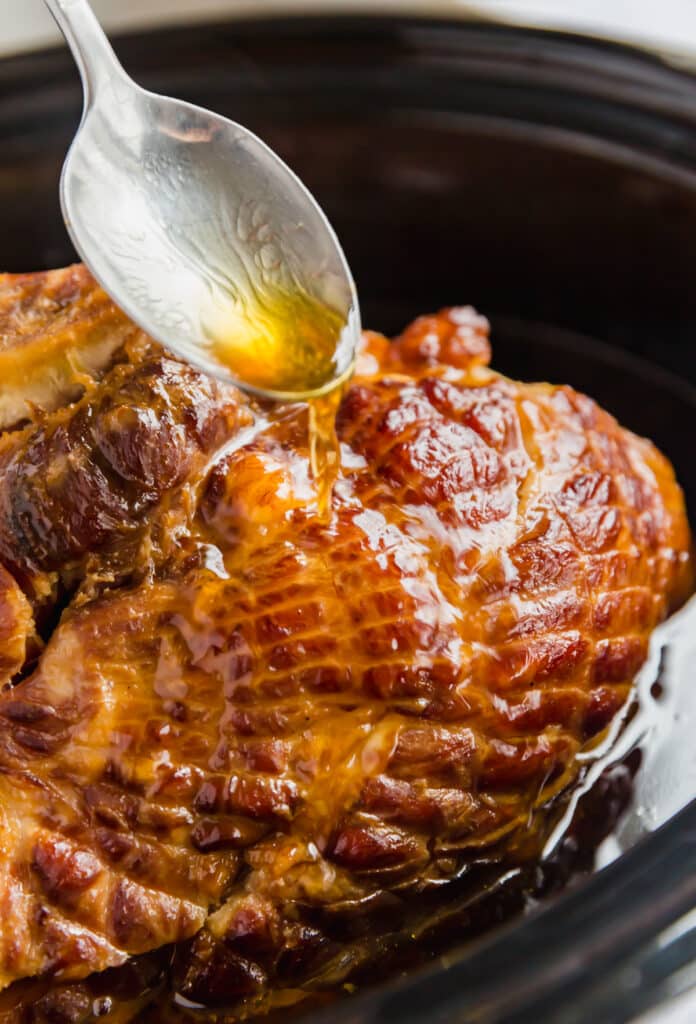
    Spoon pouring juices on a spiral ham.

    More Slow Cooker Recipes To Try...

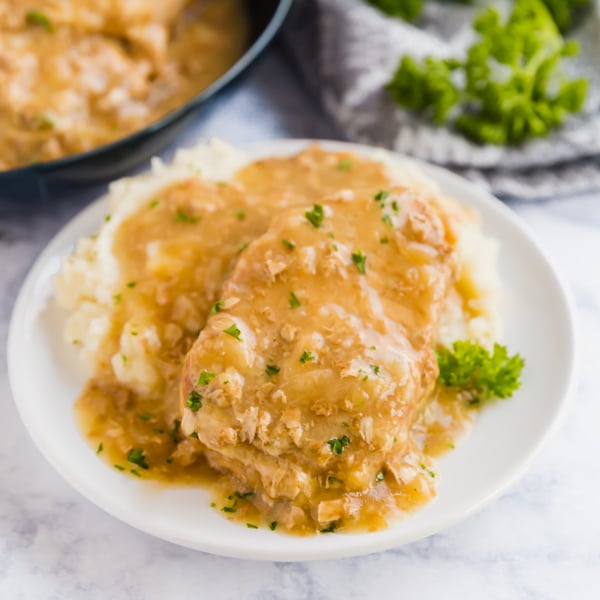
    • Say goodbye to dry and tough pork chops: these Smothered Crock Pot Pork Chops are the ultimate fall-apart tender comfort food. With just 4 ingredients, this easy dinner will be your new go-to dump dinner!
      Fall Apart Slow Cooker Pork Chops
    • Pulled bbq chicken in a bun on a white plate.
      Pulled BBQ Chicken Recipe
    • Corned beef and potatoes, cabbage and carrot on a white plate.
      Instant Pot Corned Beef and Cabbage
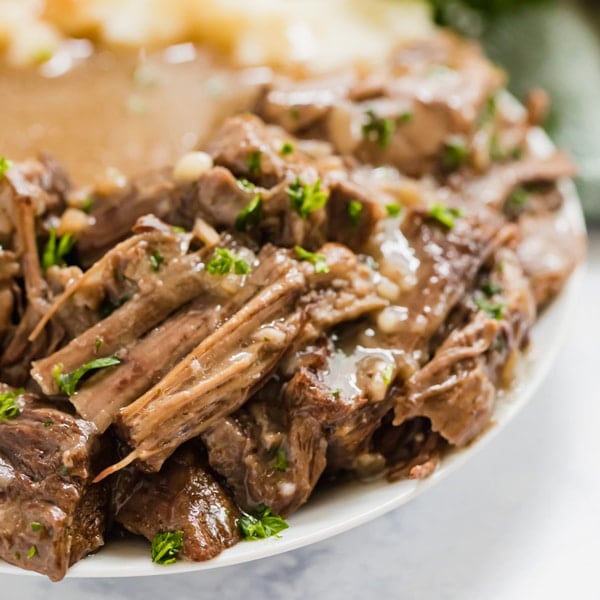
    • This Pot Roast Recipe couldn't be easier. Just throw a few very common ingredients into your crockpot or instant pot and then relax knowing you've got a seriously delicious dinner ahead of you!
      Pot Roast Recipe (Slow Cooker + IP)

    Love this recipe? Please leave a 5 star ⭐️⭐️⭐️⭐️⭐️ rating in the recipe card below ⬇️ and/or a review in the comment section further down. Check out my Amazon Store for all my favorite tools, including those used in this recipe. And follow @thelifejolie on Instagram and TikTok!

    Brushing juices onto a spiral ham.

    Crockpot Spiral Ham

    Jessy Freimann
    Crockpot Spiral Ham is tender, juicy, and slightly sweet & tangy thanks to the combination of brown sugar and hot sauce. Just 5 minutes of work for you, and the slow cooker does the rest!
    5 from 3 votes
    Print Recipe Pin Recipe
    Prep Time 5 minutes mins
    Cook Time 8 hours hrs
    Total Time 8 hours hrs 5 minutes mins
    Course Main Course
    Cuisine American
    Servings 10 servings
    Calories 167 kcal

    Equipment

    • slow. cooker
    • Bowl
    • Whisk

    Ingredients
      

    • 2 cups brown sugar, divided
    • 1 6-8 pound spiral cut half ham, bone-in or boneless
    • 1 1.7 ounce Jim Beam Red Stag bottle (airline bottle)
    • 2-3 dashes hot sauce, like Frank's Red Hot

    Instructions
     

    • In a bowl, whisk together 1 cup brown sugar, Red Stag and hot sauce until well combined. Set aside.
    • Place remaining brown sugar in an even layer on the bottom of the crock pot.
    • Place the ham on top of the sugar, turning it whichever way you need to to fit the top of the pot on.
    • Pour over the ham and use a brush to make sure it's covered evenly if necessary.
    • Cover and cook on low for 6-8 hours until it reaches an internal temperature of 145 degrees, basting a few times throughout cooking. Slice and serve immediately.

    Video

    Notes

    • Shape and size matter. My ham was around 7 pounds. Be mindful of the shape and size of the ham when purchasing. You want to make sure it will fit into the bowl of the slow cooker and fit under the cover.
    • When you place the ham into the slow cooker, place it whichever way will best allow it to fit into the pot and still be able to cover it.
    • Mix the sauce well. You'll know it's ready to pour because it will be completely liquid.
    • Use the juices to moisten the ham when serving. You can also thicken it into a more traditional ham glaze.
    • Reheating and leftovers: This reheats well in the oven (mix in juices and cover to maintain moisture) or as individual servings in the microwave. Store covered in the refrigerator for up to 4-5 days.

    Nutrition

    Serving: 3slicesCalories: 167kcalCarbohydrates: 43gProtein: 0.1gSodium: 12mgPotassium: 59mgSugar: 43gCalcium: 37mgIron: 0.3mg
    Tried this recipe?Let us know how it was!

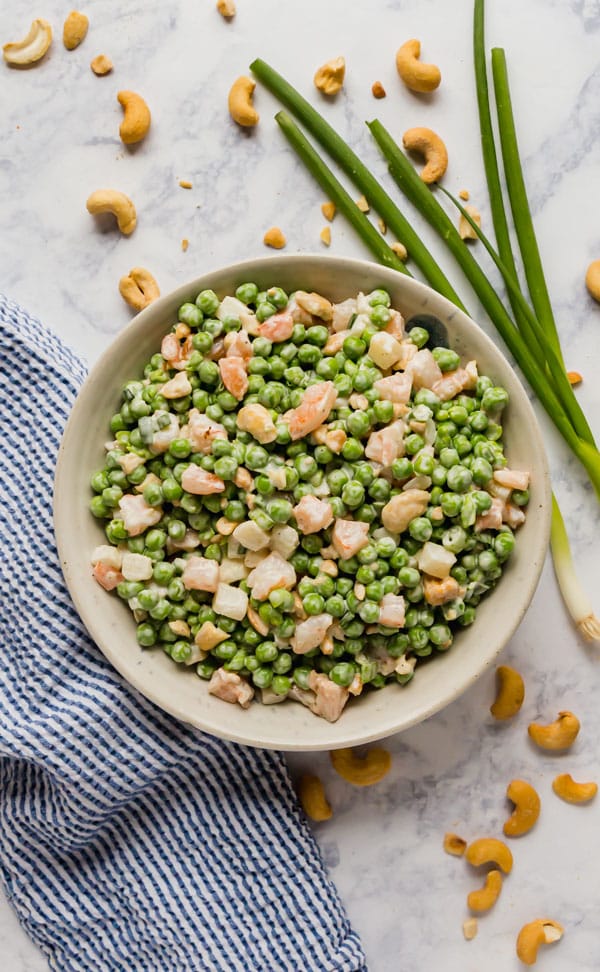
    Peas Salad with Shrimp

    Mar 27, 2019 · 26 Comments

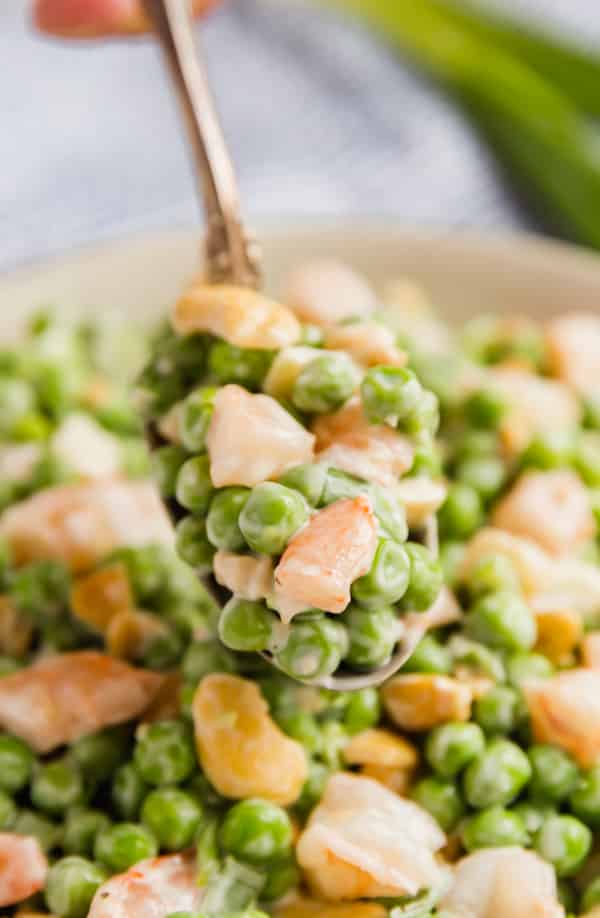
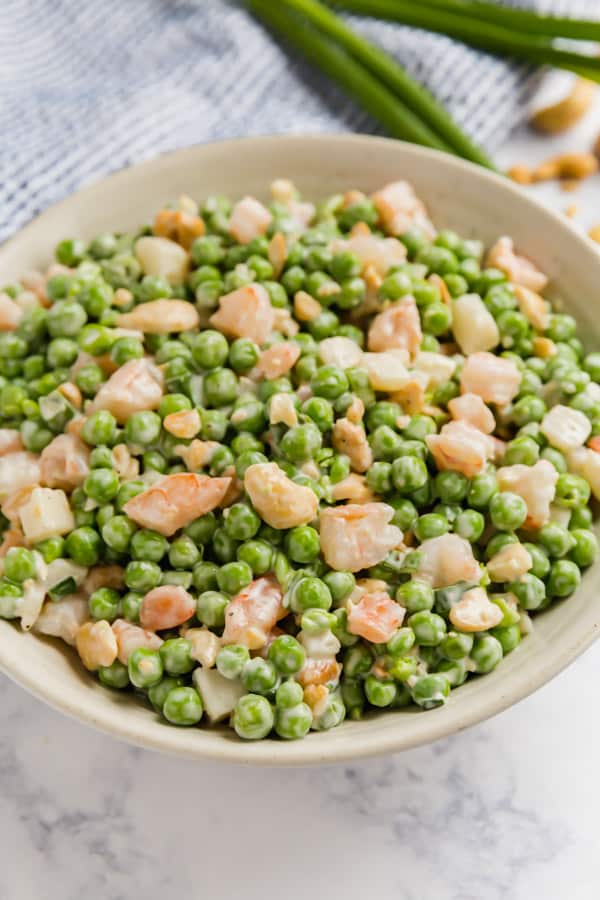
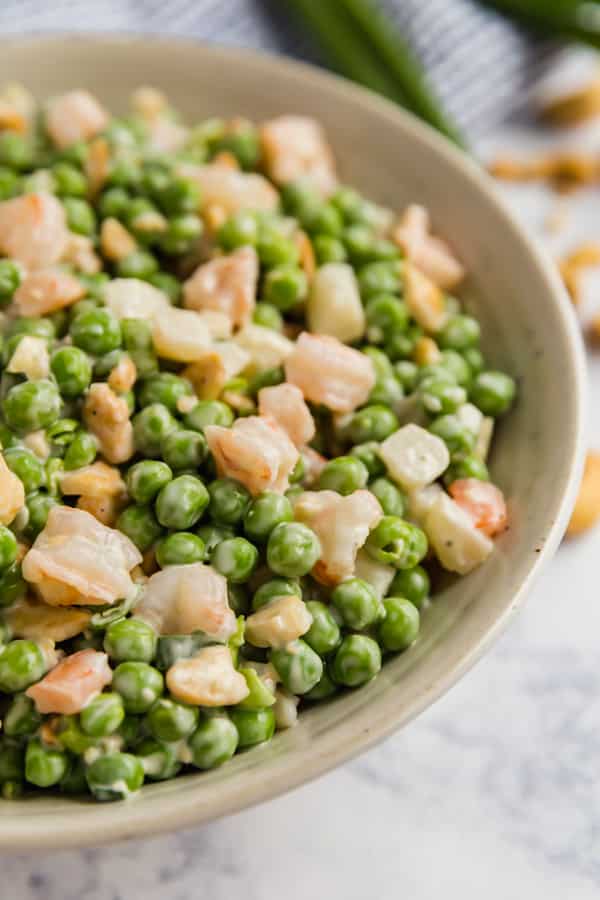
    This Pea Salad with Shrimp recipe is a super easy side dish that's perfect for any gathering! It's served cold because it's creamy with sweet green peas (I totally used frozen!), shrimp, and cashews and water chestnuts which make it crunchy. Make this if you need a tasty and light Thanksgiving side dish!

    This Pea Salad with Shrimp recipe is a super easy side dish that's perfect for any gathering! It's light and creamy and your family will fight for seconds!

    Pea salad

    Pea Salad

    This post contains Affiliate Links. Please see the disclaimer here.

    I was first introduced to this salad on my first Thanksgiving as a married gal. J and I were living in Las Vegas at the time, which was conveniently close to much of his extended family in California. So we hopped into my inlaw's car and didn't stop until we made it to Calabasas.

    My husband's Aunt Kerry hosted us and it was a holiday to remember full of lots of laughter. What was also memorable was the fantastic meal Aunt Kerry prepared. Between the gorgeous spread she created and the delicious dishes that many of the other guests brought, we had a feast fit for a king (or queen!).

    But one dish made a big impression on me. It was a green pea salad filled with baby shrimp and sweet peas. It was full of great flavor and texture and was a light and refreshing addition to a heavy meal. And when I inquired about it Aunt Kerry and J's mom told me how this dish was an old-faithful addition to most of their past family Thanksgivings and was a simple mix of a few basic ingredients.

    I love how there are a few basic ingredients but they still manage to pack a terrific flavor punch. In addition to shrimp and peas, chopped water chestnuts and cashews give this dish a great crunch and minced green onions add plenty of aromatic flavor. A little salt and pepper and some mayonnaise to bind it all together and you've got yourself some serious English pea salad happiness.

    pea salad recipe

    Tips for how to make this pea salad recipe

    • Do not thaw the peas in the microwave- you don’t want them to cook. I move them into the refrigerator the night before to thaw. IF you’re pressed for time, you can also put them into a colander and run them under cool water for a couple minutes.
    • If you can, buy the water chestnuts pre-chopped for ease. Otherwise, a mini prep processor is super helpful.
    • Baby shrimp aren't available around here, so I grabbed frozen shrimp that was already cooked along with frozen peas.
    • Don’t get too hung up on measurements. This recipe was given to me as a list of ingredients and I figured out the measurements I liked best; I encourage you to do this as well. Taste it as you go!
    • My mother in-law uses whole cashews but I like them broken up a bit. I place them in a plastic zipper bag and give them a couple hits with a meat mallet.
    Sweet pea salad

    Frequently asked questions about making pea salad with shrimp

    • Can this pea salad be made ahead? Yes! Keep it covered and refrigerated and when you’re ready to serve, give it a quick stir and you’re ready to go.
    • How long do the leftovers last in the refrigerator? 2-3 days covered in the refrigerator.
    • Can I use canned peas? I wouldn't recommend it. Frozen or fresh is totally the way to go for this salad.
    • Can you make pea salad without mayonnaise? Yes, you can substitute greek yogurt for the mayonnaise, just know that it will change the flavor (or try vegan mayo).
    green pea salad

    Make it a meal!

    A few great recipes to round out and complete this meal would be:

    • Salmon Patties
    • Roasted Beet Salad
    • Artichoke and Olive Tapenade
    • Crescent Roll Veggie Pizza
    • Coconut Cake
    • Chocolate Chip Banana Bread Muffins

    Helpful tools

    1. Chef's knife
    2. Cutting board
    3. Measuring cups
    4. Measuring spoons
    5. Mixing bowl
    6. Mini prep processor
    7. Colander

    Hosting Thanksgiving?

    Discover the secret to hosting Thanksgiving without all the stress! Prepsgiving is your FREE guide to making a delicious Thanksgiving feast the easy way.

    This Pea Salad with Shrimp recipe is a super easy side dish that's perfect for any gathering! It's served cold because it's creamy with sweet green peas (I totally used frozen!), shrimp, and cashews and water chestnuts which make it crunchy. Make this if you need a tasty and light Thanksgiving side dish!

    Pea Salad with Shrimp

    Jessy Freimann
    This Pea Salad with Shrimp recipe is a super easy side dish that's perfect for any gathering! It's light and creamy and your family will fight for seconds!
    5 from 2 votes
    Print Recipe Pin Recipe
    Prep Time 10 minutes mins
    Draining time 8 hours hrs
    Total Time 10 minutes mins
    Course Salad
    Cuisine American
    Servings 8 servings
    Calories 404 kcal

    Equipment

    • 1 Measuring cups and spoons
    • 1 mixing bowl
    • 1 Spatula
    • 1 chefs knife
    • 1 cutting board

    Ingredients
      

    • 32 ounces green peas, frozen thawed (do not thaw in the microwave)
    • 1 pound shrimp cooked - baby cocktail shrimp are preferred- if these are not available, you can dice larger shrimp like I did
    • 8 ounces water chestnuts drained and chopped
    • 1 bunch green onions, chopped (white and green parts)
    • 1 cup salted cashews (I chopped them in this but my mother in law leaves them whole- they taste delicious either way!
    • 1 teaspoon Kosher salt, to taste
    • ¼ teaspoon Ground black pepper, to taste
    • ¾ cup mayonnaise

    Instructions
     

    • Defrost the peas the night before in the refrigerator or in a colander under running cold water for a few minutes. Do not microwave the peas to defrost them, this will ruin the texture
    • Drain peas and then pat dry to remove excess water. Place into mixing bowl.
    • Add shrimp, water chestnuts, and green onion to the bowl.
    • Stir in mayonnaise. Start with a scoop or two and mix it. Add additional scoops as needed until you get the consistency you want. You want it the be lightly dressed without swimming in the mayonnaise (unless that's how you like it!).
    • Season with salt and pepper to taste. Refrigerate until you're ready to serve.

    Notes

    Leftovers will last up to 2 days in the refrigerator.

    Nutrition

    Serving: 1servingCalories: 404kcalCarbohydrates: 28gProtein: 21gFat: 24gSaturated Fat: 4gPolyunsaturated Fat: 11gMonounsaturated Fat: 8gTrans Fat: 0.04gCholesterol: 100mgSodium: 611mgPotassium: 589mgFiber: 8gSugar: 9gVitamin A: 911IUVitamin C: 46mgCalcium: 78mgIron: 3mg
    Tried this recipe?Let us know how it was!

    If you tried this recipe please comment and rate it 🙂 I love hearing your feedback and answering your questions! And if you make this please tag me on Instagram with @thelifejolie so I can share it <3

    Try some other recipes featuring peas:

    • Pasta with Peas
    • Peas with Onions

    You can find a full index of my recipes here.

    Don’t forget to follow The Life Jolie on Pinterest for more recipe inspiration!

    Or if Pinterest isn’t your style, bookmark this post!

    Let’s keep the conversation going- join my Facebook group! 

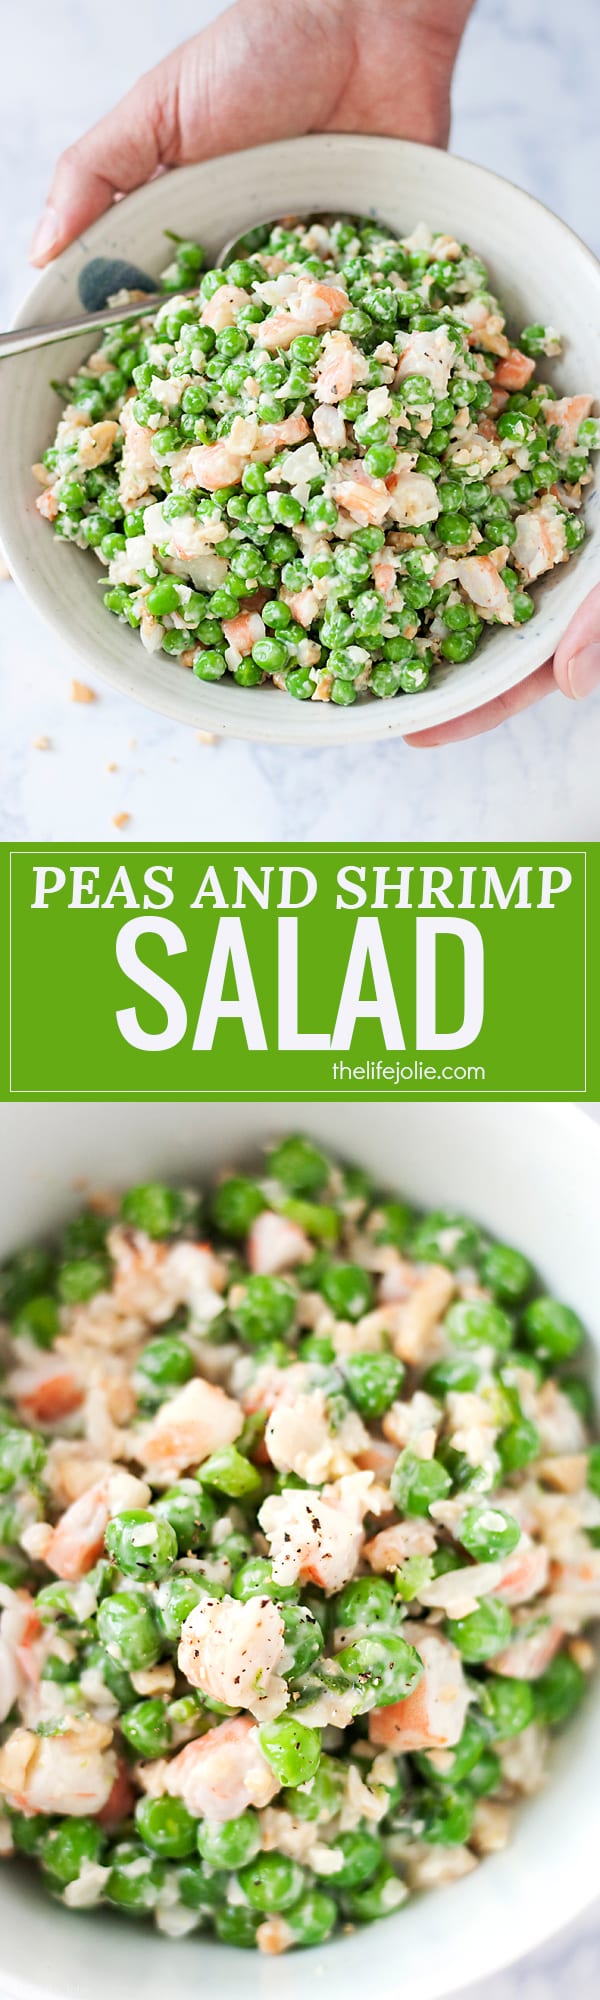
    This Peas and Shrimp Salad recipe is a super easy side dish that's perfect for any holiday get together! It's served cold because it's creamy with sweet green peas (I totally used frozen!), shrimp, and cashews and water chestnuts which make it crunchy. Make this if you need a tasty and light Thanksgiving side dish!

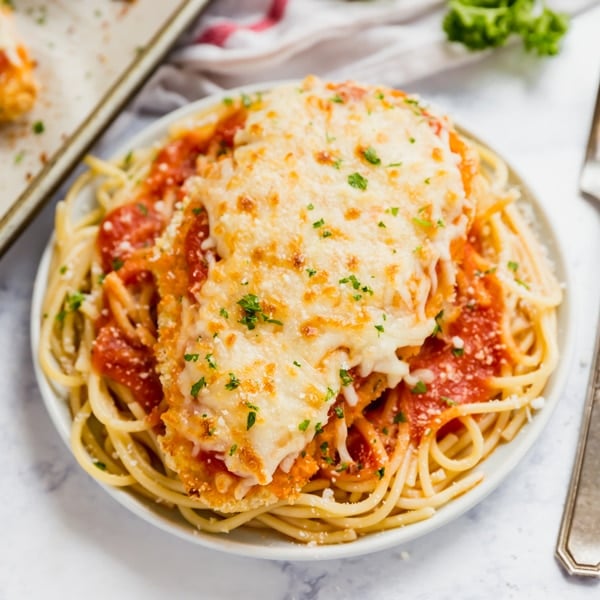
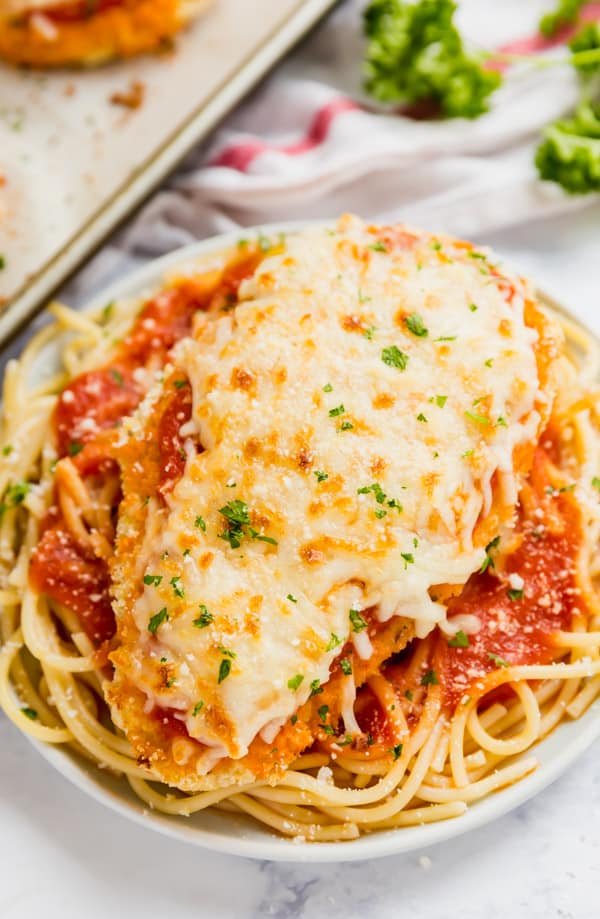
    Baked Chicken Parmesan

    Mar 25, 2019 · 6 Comments

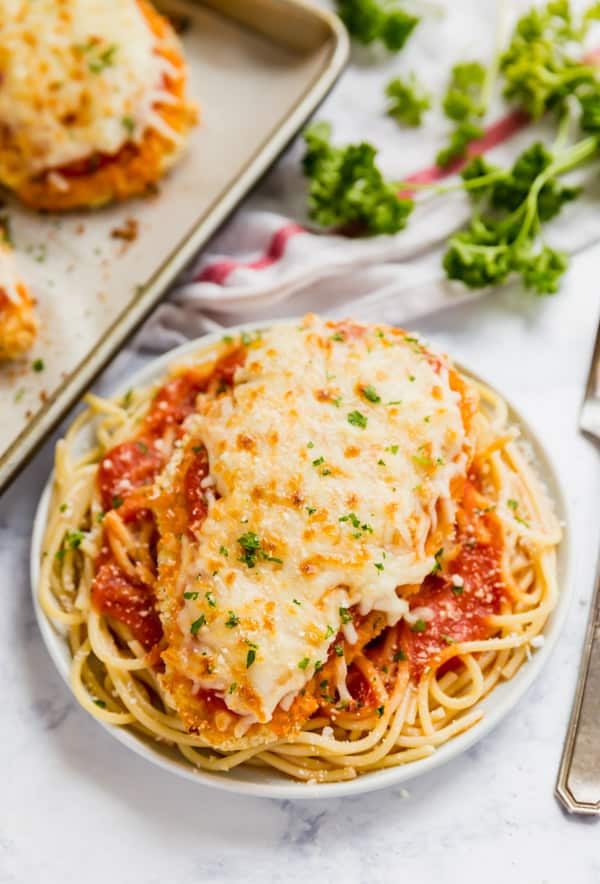
    Baked Chicken Parmesan is a quick and easy version of a classic family favorite. Your family will fight for seconds!

    Baked Chicken Parmesan is a quick and easy version of a classic family favorite. Your family will fight for seconds!

    chicken parmesan recipe

    Chicken Parmesan

    This post contains Affiliate Links. Please see the disclaimer here.

    While I didn't eat a ton of chicken parm when I was growing up, I got into it when I was a server at the Olive Garden. I liked to get it with a side of fettuccine alfredo, to make things extra unhealthy! So when I married a man who loves a good easy chicken parmesan recipe, I knew I should probably learn to make it myself.

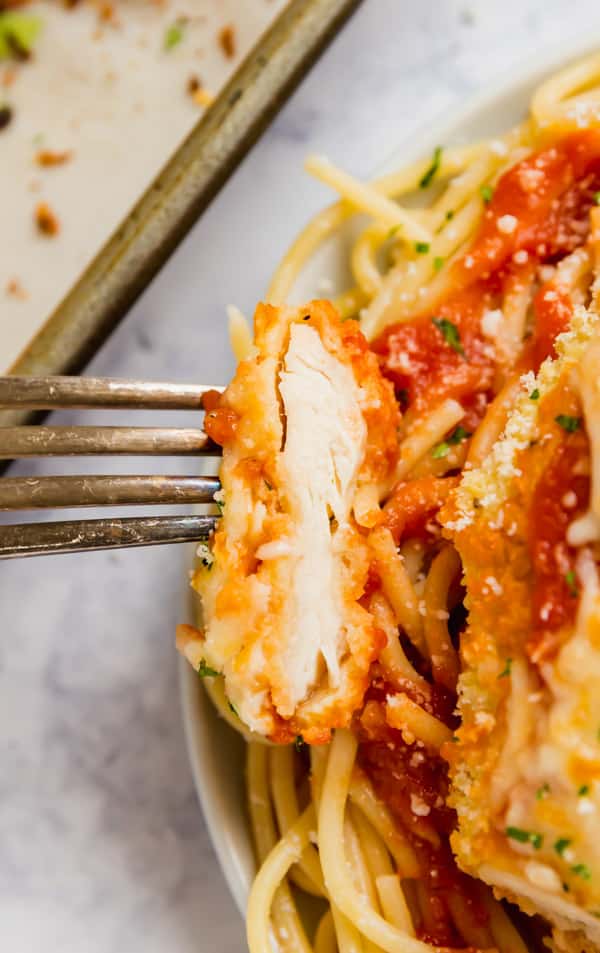
    Although most places fry the chicken, I opted to bake it both for ease and in an effort to be healthy. This this a pretty easy recipe and comes together really quickly as well- perfect for a weeknight dinner! It comes together deliciously crispy on the outside with perfectly tender chicken on the inside.

    baked chicken parmesan

    Tips for how to make chicken parmesan

    • Filet the chicken breasts by cutting them length-wise to make four thin pieces. Then cover in plastic wrap and pound with a mallet. Try and make them all the same thickness (between ⅛ and ¼ inch).
    • Season them well on both sides with salt and pepper. This is important because you want it to be flavorful.
    • I turn these half way through cooking but you can also use baking racks on the pan (spray them well with cooking spray to avoid sticking) .
    • I line my pan with parchment to provide easy clean up.
    • I make large batches of my marinara sauce to have on hand for recipes like this (it's so easy and so good!). But like Ina says, if you don't have any homemade on hand, store bought is fine!
    • This is best served right away!

    baked chicken parmesan recipe

    Frequently asked questions about making Baked Chicken Parmesan

    • Is chicken parmesan and chicken parmigiana the same? Yes.
    • What goes with chicken parmesan? I like to serve this with spaghetti and more of the marinara sauce.
    • Is Chicken Parmesan Italian? It originated in America in Italian American communities and was derived from Eggplant Parmesan).
    • How long does chicken parmesan last in the refrigerator? Around 3 days, covered.
    • How do you reheat chicken parmesan? In the oven or microwave.
    • Can you freeze chicken parmesan? If you're going to freeze it I recommend freezing it once breaded but before cooking.

    easy chicken parmesan

    Make it a meal!

    A few great recipes to round out and complete this meal would be:

    • Three Cheese Garlic Bread
    • Roasted Beet Salad
    • Summer Bounty Strawberry Salad
    • Four Ingredient Chocolate Mousse
    • Cherry Chocolate Oatmeal Cookie Bars

    chicken parmesan

    Helpful tools:

    1. Sheet pan
    2. Silpat
    3. Chef's knife
    4. Cutting board
    5. Baking rack
    6. Measuring cups
    7. Measuring spoons

    Video Tutorial for Baked Chicken Parmesan

    Baked Chicken Parmesan is a quick and easy version of a classic family favorite. Your family will fight for seconds!

    Baked Chicken Parmesan

    Jessy Freimann
    Baked Chicken Parmesan is a quick and easy version of a classic family favorite. Your family will fight for seconds!
    5 from 3 votes
    Print Recipe Pin Recipe
    Prep Time 10 minutes mins
    Cook Time 20 minutes mins
    Total Time 30 minutes mins
    Course Main Course
    Cuisine Italian
    Servings 4 servings

    Ingredients
      

    • Cooking spray
    • 2 chicken breasts, filet and pounded thin- between ¼ and ⅛ inch thick
    • ½ cup flour
    • 2 large eggs, beaten
    • ¾ cup panko bread crumbs
    • ½ cup Romano or Parmesan cheese + 1-2 Tablespoons for topping
    • ½ teaspoon garlic powder
    • ½ - 1 cup marinara sauce + more if serving with pasta
    • 1 ¼ cups mozzarella cheese, shredded
    • Fresh parsley, chopped

    Instructions
     

    • Preheat the oven to 400 degrees and line a sheet pan with parchment. If using a baking rack, spray well with cooking spray.
    • Take 3 shallow bowls and place flour in the first, beat the egg in the second and combine panko, ½ cup Romano or Parmesan cheese and garlic powder in the third. Set aside.
    • Season pounded chicken pieces to taste with salt and peppers.
    • Dredge each chicken piece in flour and tap of excess.
    • Cover in egg so both sides are fully covered and tap off excess.
    • Cover chicken in panko mixture until fully covered and tap off excess.
    • Place the chicken pieces on the pan so they aren't touching and lightly spray with cooking spray.
    • Bake for 20 minutes (if not using racks, turn once halfway through).
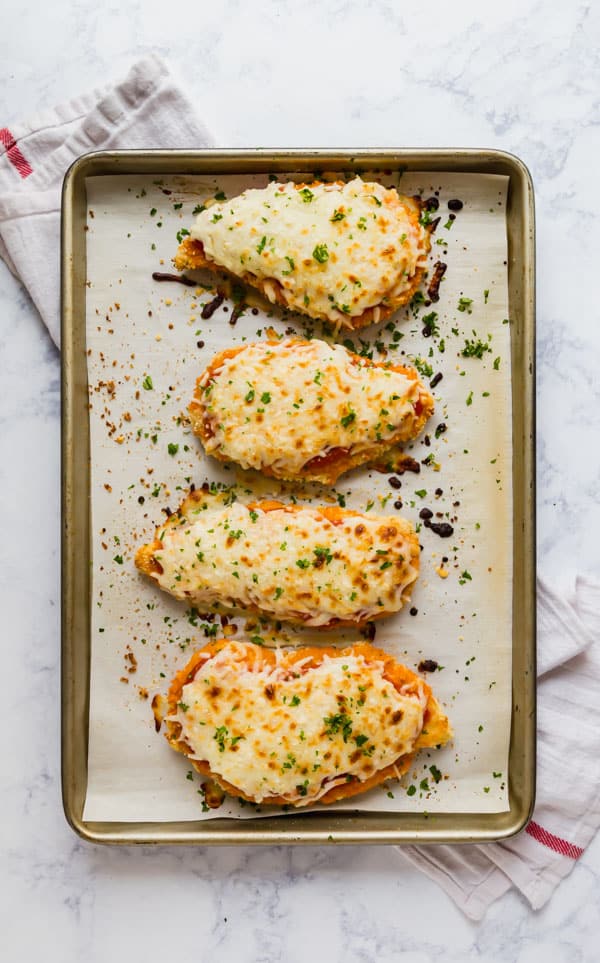
    • Remove from the oven and turn the broiler on to high (leave the rack in the middle position). Spread a thin layer of sauce over the top of each piece of chicken.
    • Divide the mozzarella cheese between each piece of chicken and sprinkle some Romano or Parmesan cheese on top.
    • Return the pan to the oven and broil for 3-4 minutes to melt the cheese- watch it carefully so it doesn't burn.
    • Garnish with chopped parsley and serve immediately.
    Tried this recipe?Let us know how it was!

    If you tried this recipe please comment and rate it 🙂 I love hearing your feedback and answering your questions! And if you make this please tag me on Instagram with @thelifejolie so I can share it <3

    Try some other great chicken dinners:

    • Baked Chicken with Caramelized Shallots
    • Baked Chicken Cordon Bleu
    • Tarragon Chicken
    • Chicken Cutlets

    You can find a full index of my recipes here.

    Don’t forget to follow The Life Jolie on Pinterest for more recipe inspiration!

    Or if Pinterest isn’t your style, bookmark this post!

    Let’s keep the conversation going- join my Facebook group! 

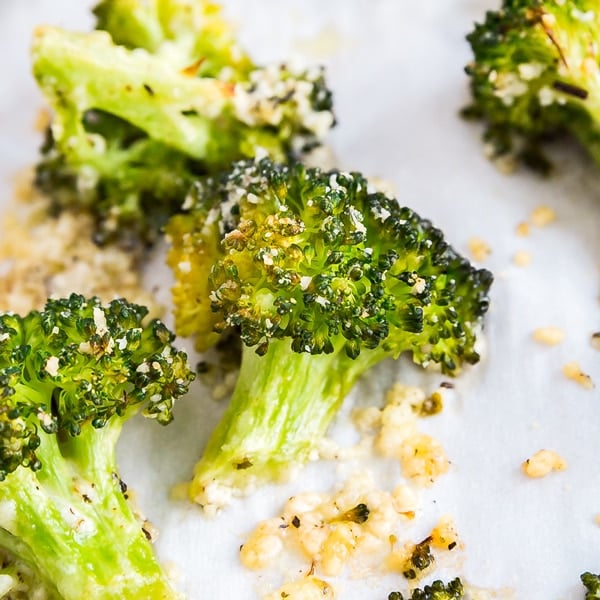
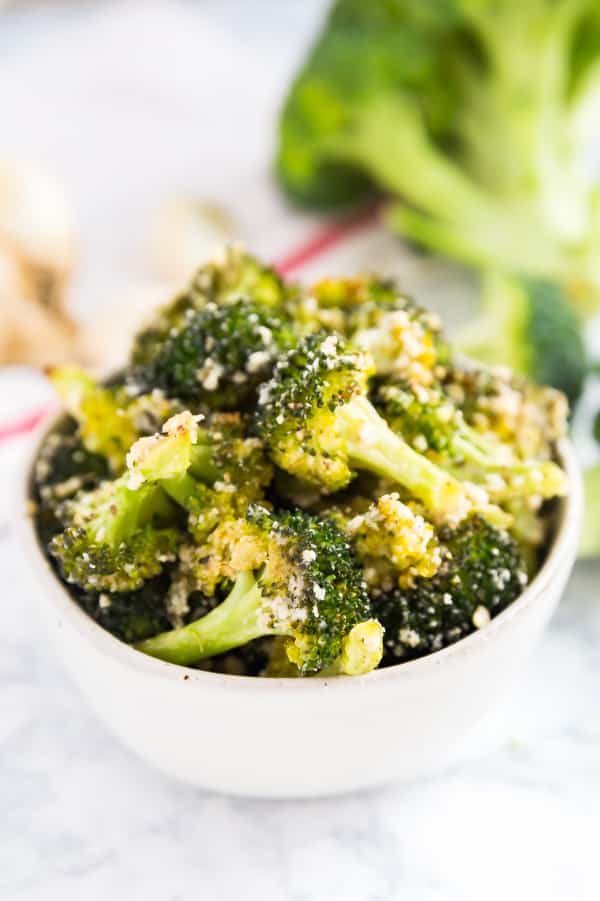
    Garlic Parmesan Roasted Broccoli

    Mar 22, 2019 · Leave a Comment

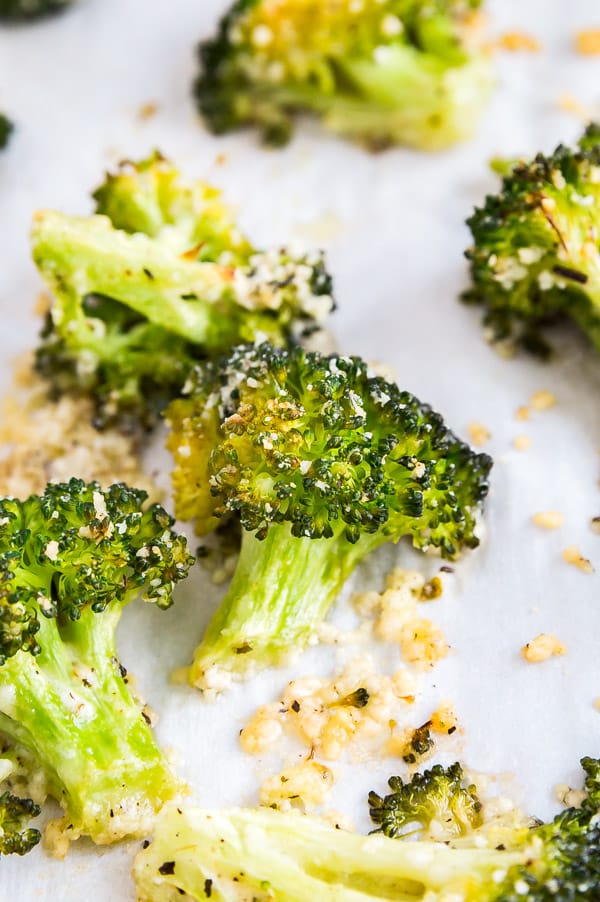
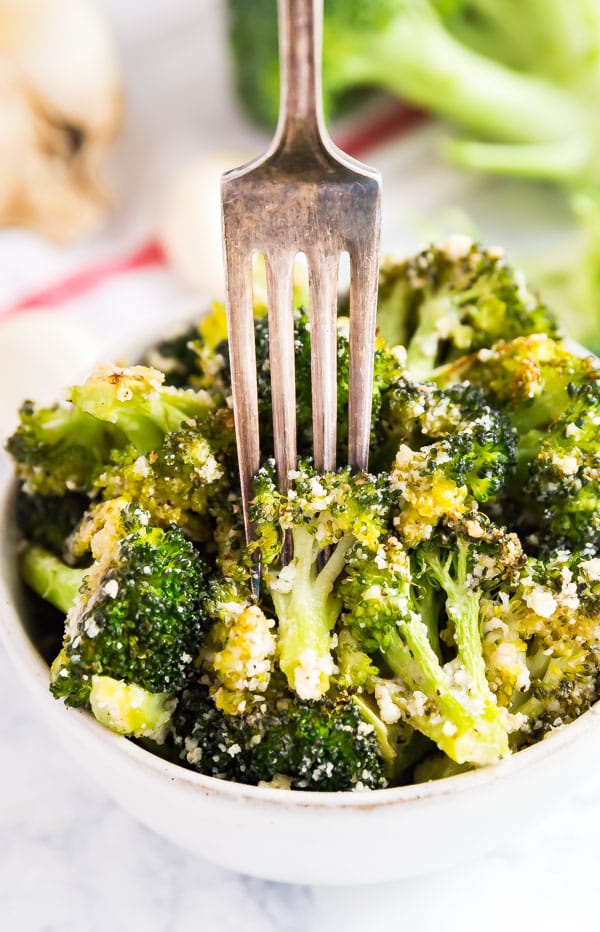
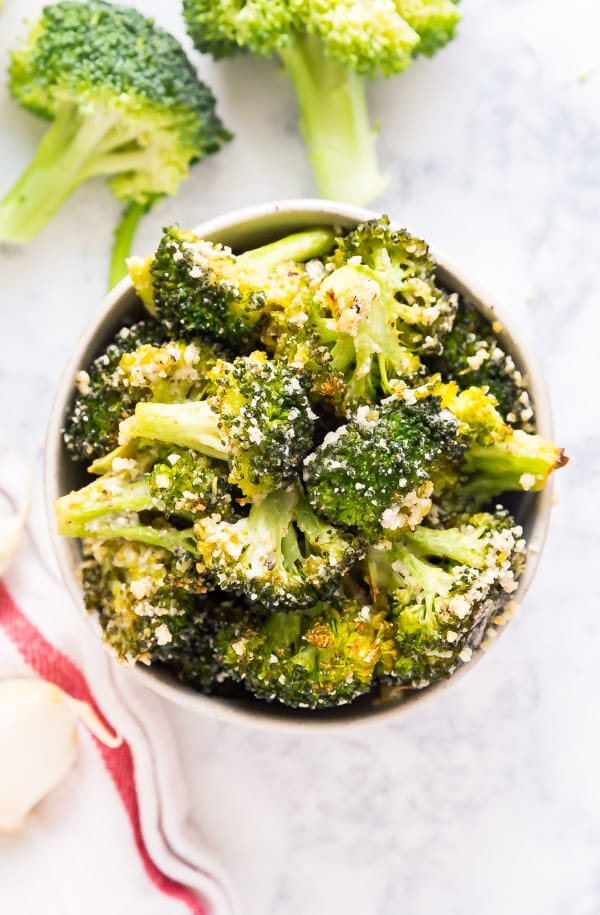
    Garlic Parmesan Roasted Broccoli is a seriously easy side dish with a tasty kick of flavor. Just toss your broccoli florets with a few simple ingredients, pop them in the oven and you've go a deliciously addictive side dish!

    Garlic Parmesan Roasted Broccoli is a seriously easy side dish with a tasty kick of flavor. Just toss your broccoli florets with a few simple ingredients, pop them in the oven and you've go a deliciously addictive side dish!

    roasted broccoli

    Garlic Parmesan Roasted Broccoli

    This post contains Affiliate Links. Please see the disclaimer here.

    We eat a lot of broccoli around here. I think, as a parent, when you find a veggie the whole family will eat- a unicorn veggie-  you find yourself making it a lot. Obviously, our unicorn veggie is broccoli.

    And while steamed broccoli tends to be the go-to, I also love roasting it. Oven roasted broccoli takes on the most fantastic flavor and texture. It's simple enough for a weeknight meal but special enough to serve alongside a holiday dinner. And with ingredients that you already have on hand (and very few at that!).

    how to cook broccoli

    Tips for how to cook broccoli in the oven

    • Line the pan with parchment or a silicone liner- this will help provide easier clean up!
    • Cut the broccoli florets to be all around the same size for even cooking.
    • When you're mixing the ingredients, be sure to mix really well so everything is evenly coated.
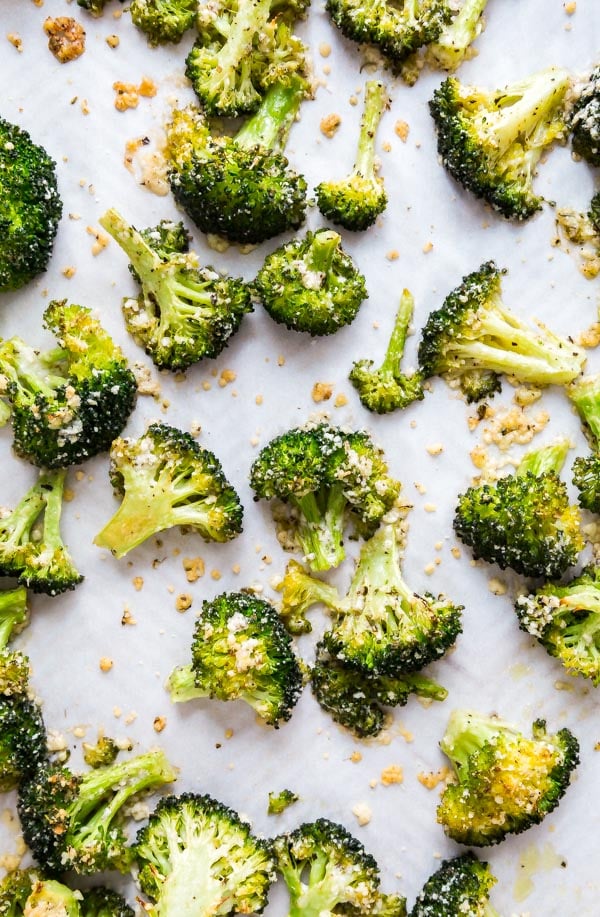
    • Spread the broccoli in an even, single layer on the pan. If the pan is overloaded, the broccoli will steam and won't get the nice texture you want. If necessary, split it between two pans.
    • Taste it for seasoning and adjust as necessary before.

    broccoli

    Frequently asked questions about baked broccoli

    • Can you reheat roasted broccoli? Yes, although the texture is best right out of the oven.
    • How do you reheat roasted broccoli? Either place it back in the oven until heather through or in a non-stick saute pan.
    • How long does it last? 4-5 days covered in the refrigerator.
    • Can this be made ahead? Yes, it's an excellent meal prep option.

    how to roast broccoli

    Make it a meal!

    A few great recipes to round out and complete this meal would be:

    • Drunken Steak
    • Easy Meatloaf and Potatoes Dinner
    • Roasted Beet Salad
    • Broccoli and Cheese Sauce
    • Four Ingredient Chocolate Mousse
    • Cherry Chocolate Oatmeal Cookie Bars

    broccoli recipes

    Helpful tools:

    1. Measuring spoons
    2. Measuring cups
    3. Chef's knife
    4. Cutting board
    5. Sheet pan

    Garlic Parmesan Roasted Broccoli is a seriously easy side dish with a tasty kick of flavor. Just toss your broccoli florets with a few simple ingredients, pop them in the oven and you've go a deliciously addictive side dish!

    Garlic Parmesan Roasted Broccoli

    Jessy Freimann
    Garlic Parmesan Roasted Broccoli is a seriously easy side dish with a tasty kick of flavor. Just toss your broccoli florets with a few simple ingredients, pop them in the oven and you've go a deliciously addictive side dish!
    5 from 1 vote
    Print Recipe Pin Recipe
    Prep Time 10 minutes mins
    Cook Time 25 minutes mins
    Total Time 35 minutes mins
    Course Side Dish
    Cuisine American
    Servings 4 servings

    Ingredients
      

    • 4-5 cups broccoli florets cut to 2 inch pieces
    • ¼ cup olive oil
    • 1 cup grated parmesan cheese
    • 2 teaspoon garlic powder
    • ¼ teaspoon ground black pepper
    • Kosher salt to taste optional

    Instructions
     

    • Preheat the oven to 400 degrees and line a sheet pan with parchment paper or a silicone liner.
    • In a large bowl all ingredients. Until the broccoli is well coated.
    • Spread broccoli in a single layer on the pan.
    • Bake for 20-25 minutes until the broccoli is fork tender.
    • Taste for seasoning and if needed add kosher salt to taste.
    • Serve immediately or refrigerate for up to 5 days.
    Tried this recipe?Let us know how it was!

    If you tried this recipe please comment and rate it 🙂 I love hearing your feedback and answering your questions! And if you make this please tag me on Instagram with @thelifejolie so I can share it <3

    Other recipes featuring broccoli:

    • Sheet Pan Beef and Broccoli
    • Broccoli and Cheese Sauce
    • Cheesy Broccoli Rice Casserole

    You can find a full index of my recipes here.

    Don’t forget to follow The Life Jolie on Pinterest for more recipe inspiration!

    Or if Pinterest isn’t your style, bookmark this post!

    Let’s keep the conversation going- join my Facebook group! 

    Garlic Mushrooms Recipe

    Mar 11, 2019 · Leave a Comment

    mushroom

    My Grandma's Garlic Mushrooms are a seriously easy recipe with delicious flavor. Make them as a delicious make-ahead side dish for a weeknight meal or a special holiday dinner!

    mushroom recipes

    Garlic Mushrooms

    This post contains Affiliate Links. Please see the disclaimer here.

    Like most kids, I had my moment where I would freak out if I found a mushroom on my plate. Luckily, that moment went by pretty quickly and it's all thanks to my Grandma's Garlic Mushrooms. Made with minimal ingredients and lots of love these are a great go-to recipe to make a head to go with your weeknight dinner, while still being special enough to serve as a side dish at a holiday dinner or family gathering.

    I love the way the garlic flavor mixes with the crushed red pepper (which gives it a nice little kick). I've tried several mushroom recipes, but this is one of the ones I will always keep coming back to. I used to eat them over white rice as a teenager!

    sauteed mushrooms

    Tips for making Sauteed Mushrooms with Garlic

    • Be careful not to burn the garlic- if you do it will add a terribly bitter flavor to the oil and you'll need to start over.
    • For the reason mentioned above, we keep our garlic cloves whole for this recipe.
    • Before cooking, I take the tip of my knife and gently poke all over each peeled piece of garlic to help the juices release (this is one of my Grandma's signature moves!).
    • I try to keep me heat a bit lower so that the mushrooms cook slowly.
    • I season these with salt and pepper at the end of the cook time to avoid having the mushrooms release too much liquid during cooking (salt causes that to happen).

    mushroom

    Frequently asked questions about how to cook mushrooms with garlic

    • What types of mushrooms are best for this recipe? Honestly, whatever mushroom is your favorite! I like cremini mushrooms, also known as baby bella. But I've also made these with button mushrooms (or white mushrooms) with great success.
    • Can you reheat mushrooms? Yes- these are a great make-ahead side dish! You can microwave them or heat over medium heat in a non-stick pan.
    • What is the best way to clean mushrooms? Try to avoid submerging them in water, as mushrooms have really high moisture content to begin with. They sell mushroom brushes for cleaning them, but I’ve found that a damp paper towel does the trick. Or purchase them pre-cleaned.
    • When do you season sautéed mushrooms? Because mushrooms contain so much water already, I don’t add the salt and pepper until the end.
    • How long do sautéed mushrooms last? These last around 4 days covered in the refrigerator.
    • Can I freeze mushrooms? I don't recommend it because the contain so much water that later defrosting them might adversely affect. their texture.

    cremini mushrooms

    Make it a meal!

    A few great recipes to round out and complete this meal would be:

    • Drunken Steak
    • Easy Meatloaf and Potatoes Dinner
    • Roasted Beet Salad
    • Broccoli and Cheese Sauce
    • Four Ingredient Chocolate Mousse
    • Cherry Chocolate Oatmeal Cookie Bars

    types of mushrooms

    Helpful tools:

    1. Large saute pan
    2. Wooden spoon
    3. Chef's knife
    4. Cutting board

    mushroom

    Garlic Mushrooms

    Jessy Freimann
    My Grandma's Garlic Mushrooms are a seriously easy recipe with delicious flavor. Make them as a delicious make-ahead side dish for a weeknight meal or a special holiday dinner!
    No ratings yet
    Print Recipe Pin Recipe
    Prep Time 10 minutes mins
    Cook Time 30 minutes mins
    Total Time 40 minutes mins
    Course Side Dish
    Cuisine Italian
    Servings 4 servings

    Ingredients
      

    • ¼ cup olive oil
    • 2-3 cloves garlic
    • ½ teaspoon crushed red pepper (or more if you want it spicy)
    • 16 ounces petite mushrooms, cleaned and trimmed ouf tough parts of the stalk
    • Kosher salt, to taste

    Instructions
     

    • Heat oil in large saute pan just over medium heat.
    • Add garlic and saute 5-7 minutes turning often to brown (make sure they don't burn).
    • Add mushrooms to pan and saute for 5 minutes stirring often.
    • Reduce heat to medium low and saute for around 15 minutes.
    • Add salt to taste and saute another 2 minutes. Serve immediately or refrigerate and reheat.

    Notes

    If using larger mushrooms you can half or quarter them.
    Tried this recipe?Let us know how it was!

    If you tried this recipe please comment and rate it 🙂 I love hearing your feedback and answering your questions! And if you make this please tag me on Instagram with @thelifejolie so I can share it <3

    Try some other great vegetable side dishes include:

    • Sautéed Shredded Brussels Sprouts
    • Sauteed Mushrooms in a Wine Reduction
    • Grandma's Baked Artichokes
    • Honey Soy Glazed Carrots and Parsnips
    • Garlic Green Beans

    You can find a full index of my recipes here.

    Don’t forget to follow The Life Jolie on Pinterest for more recipe inspiration!

    Or if Pinterest isn’t your style, bookmark this post!

    Let’s keep the conversation going- join my Facebook group! 

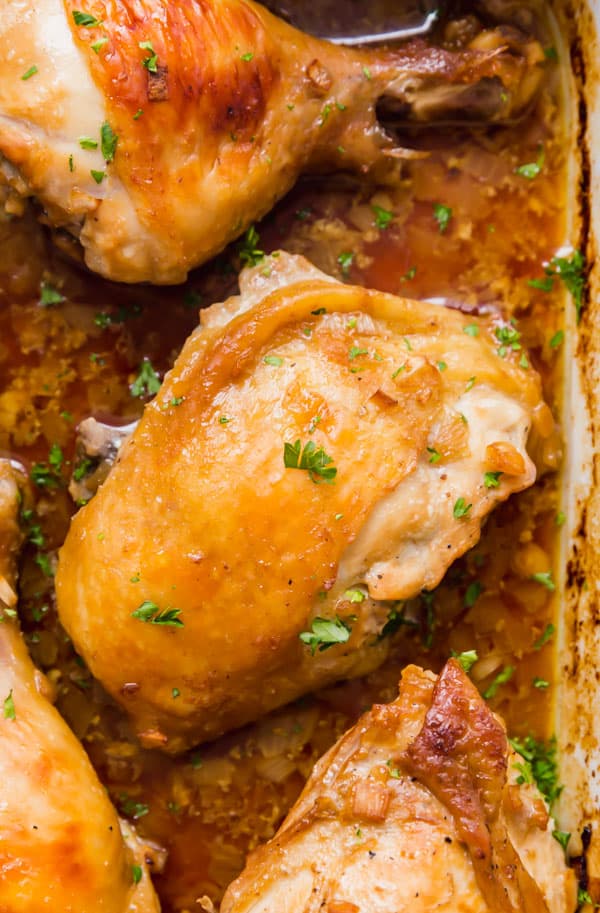
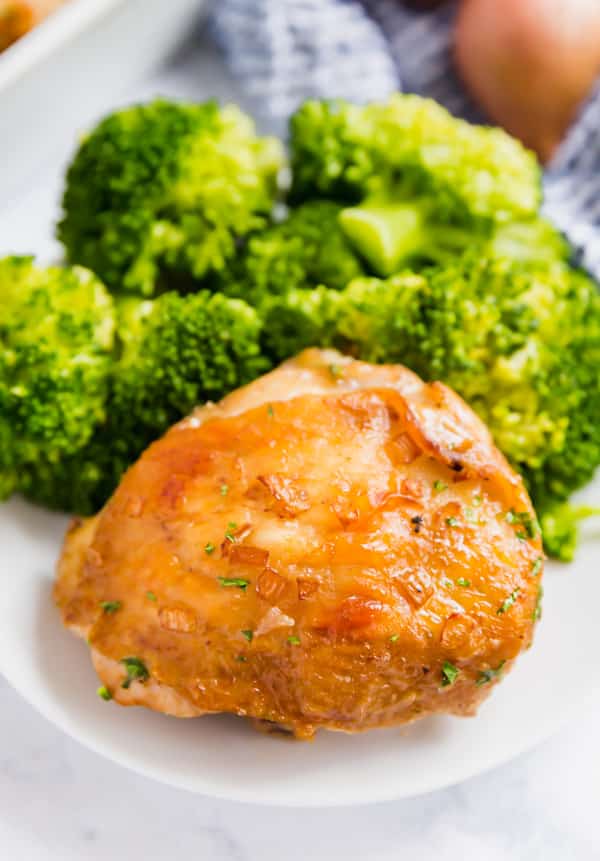
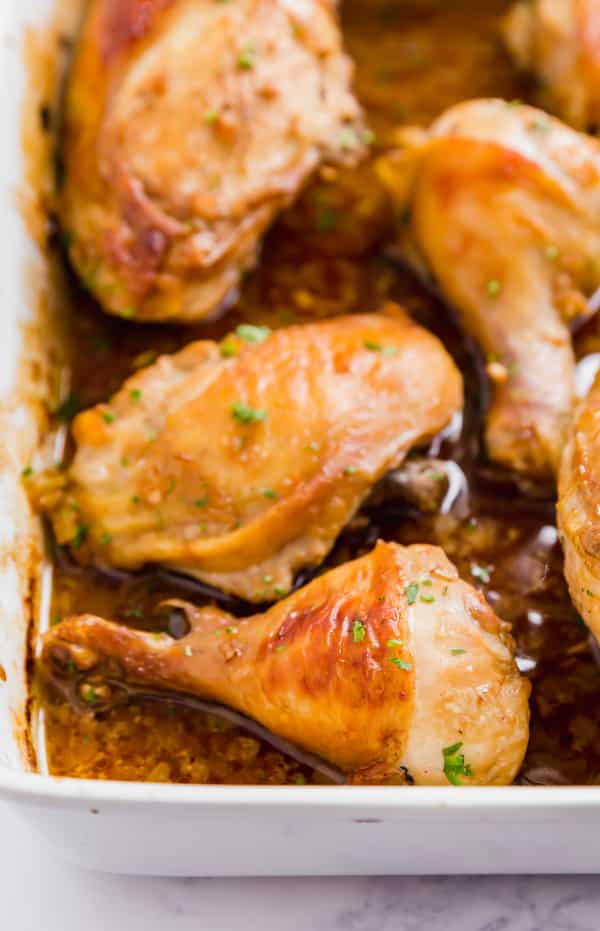
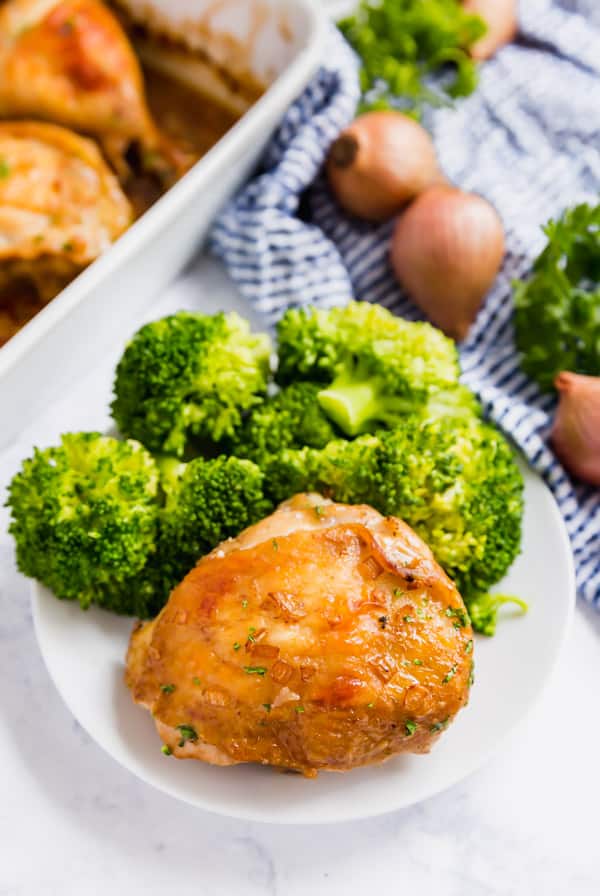
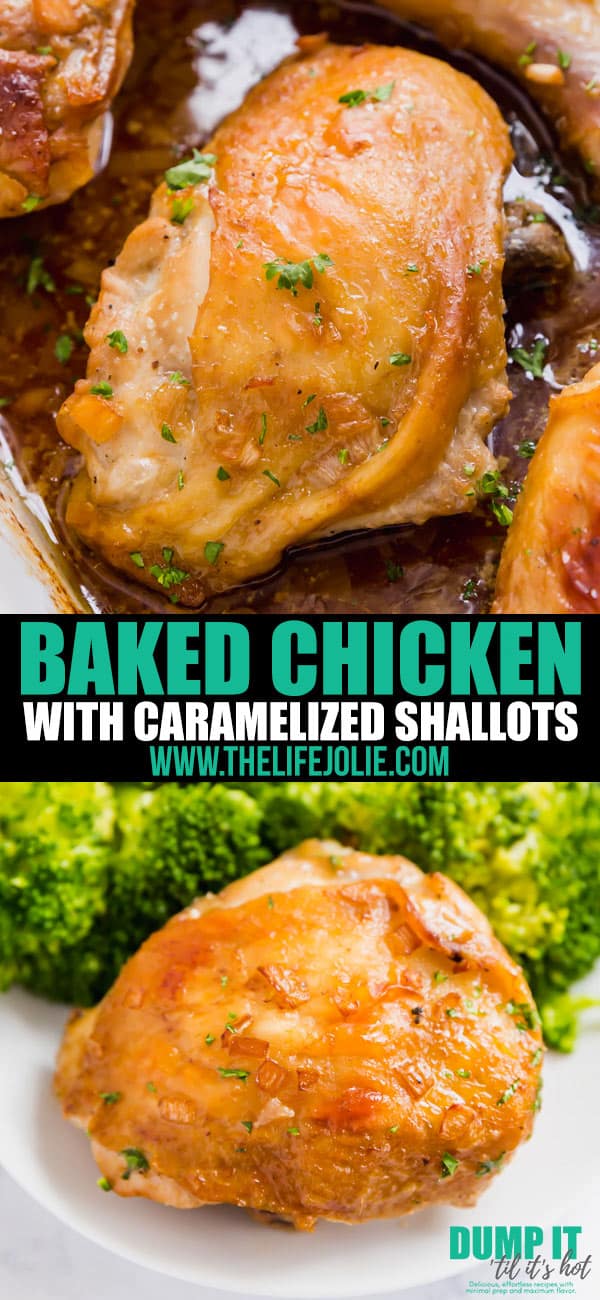
    Baked Chicken With Caramelized Shallots

    Mar 8, 2019 · 2 Comments

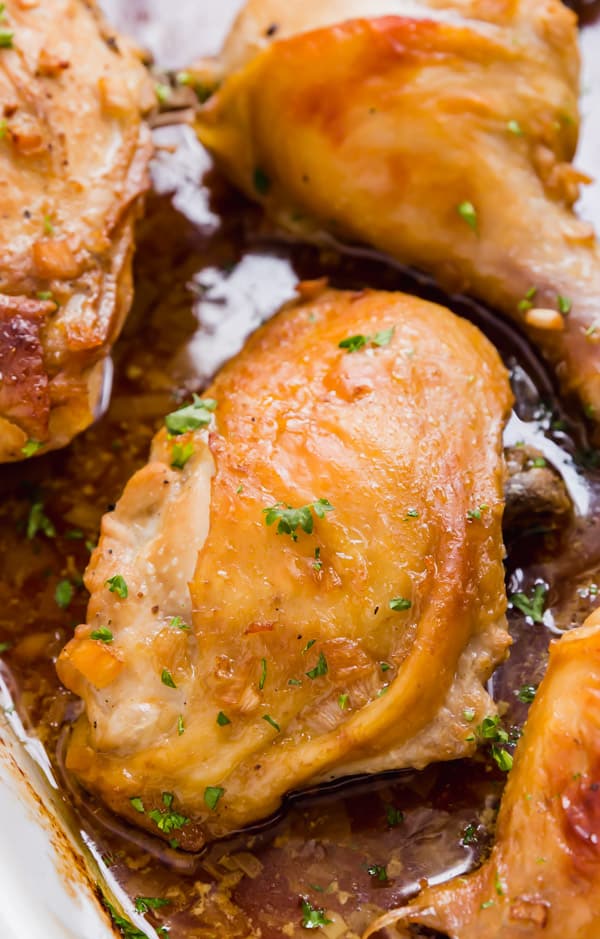
    Baked Chicken with Caramelized Shallots is about to become your go-to weeknight roast chicken recipe. Tender chicken with crispy golden-brown skin and the most flavorful sauce, this easy recipe is a real winner!

    Baked Chicken with Caramelized Shallots is about to become your go-to weeknight roast chicken recipe. Tender chicken with crispy golden-brown skin and the most flavorful sauce, this easy recipe is a real winner!

    baked chicken

    This recipe is part of my Dump it 'til it's hot series of dump recipes. It's all about making delicious food with minimal prep, no pre-cooking, the ability to freeze for a good make-ahead meal. And trust me when I say, easy never tasted so good!

    This post contains affiliate links. Please see the disclaimer here.

    Baked Chicken with Caramelized Shallots

    I've been making this roast chicken recipe for a super long time. So long, in fact, that I don't even remember where I first got it. Over the years, I made it so often that I even stopped measuring out the ingredients, I just eyeball them. But I measured them just for you to make this super easy.

    My family always gets super excited when they find out that this oven roasted chicken is our dinner. They love how perfectly tender the chicken comes out, but the real star of the show is the sauce that develops in the bottom of the pan. I always make sure to serve this with a nice, crusty loaf of Italian breast so we can sop up that amazing sauce!

    baked chicken recipes

    Tips for how to bake chicken with shallots

    • Although it can be tempting to use regular onions, use shallots. Seriously, the flavor is so much better with shallots.
    • I'm terrible at breaking down a whole chicken, so I always ask the butchers at my local grocery store to do it for me while I shop. It saves me so much time!
    • Save the carcass and the wings from the chicken to make soup (make my awesome chicken noodle soup- it's so easy and you can totally add the leftovers from this recipe!). You can also freeze it to make later.
    • I start my chicken pieces skin-side down. You'll be turning them half way through cooking and that allows the skin to get crispy and perfectly golden brown during the second half of the cook time.
    • Rest the chicken for 5-7 minutes before serving to redistribute the juices and allow the chicken to fully come to temp (165 degrees).

    roast chicken

    Frequently asked questions about making oven baked chicken with shallots

    • Can you freeze baked chicken? Yes- either before cooking (be sure to thaw before cooking) or after works just fine, but if you're freezing the leftovers, they typically come out best when you shred them before freezing.
    • Can I reheat baked chicken? Yes- I reheat this in the microwave or in a pot on the stove.
    • How long does baked chicken last? 3-4 days covered in the refrigerator.
    • How do you serve roast chicken? I like to serve this with potatoes or rice, a steamed vegetable and a crusty loaf of Italian bread.
    • How long to bake chicken? I bake these for 20 minutes on each side, so a total of 40 minutes at 425 degrees. Since the breast pieces are thicker, I always check the temperature for doneness on those. Every oven is different, so make sure they're cooked to 163 degrees and add additional bake time if needed.
    • When baking chicken do you cover it with foil? While you might for some recipes, I don't cover this recipe because I like the skin to get nice and crispy.

    roast chicken

    Make it a meal!

    A few great recipes to round out and complete this meal would be:

    • Peas with Onions
    • Easy Garlic Green Beans
    • French Onion Mashed Potatoes
    • Quick and Easy Chocolate Pudding Cake

    how to bake chicken

    Helpful tools:

    1. Chef's knife
    2. Cutting board
    3. Measuring cups
    4. Measuring spoons
    5. Whisk
    6. Gallon freezer zipper bags
    7. 9" x 13" pan

    Video Tutorial for making Baked Chicken with Caramelized Shallots

    Baked Chicken with Caramelized Shallots is about to become your go-to weeknight roast chicken recipe. Tender chicken with crispy golden-brown skin and the most flavorful sauce, this easy recipe is a real winner!

    Baked Chicken with Caramelized Shallots

    Jessy Freimann
    Baked Chicken with Caramelized Shallots is about to become your go-to weeknight roast chicken recipe. Tender chicken with crispy golden-brown skin and the most flavorful sauce, this easy recipe is a real winner!
    5 from 1 vote
    Print Recipe Pin Recipe
    Prep Time 5 minutes mins
    Cook Time 40 minutes mins
    Resting time 5 minutes mins
    Total Time 45 minutes mins
    Course Main Course
    Cuisine American
    Servings 6 pieces

    Ingredients
      

    • 1 cup shallots diced
    • ¼ cup red wine vinegar
    • ⅓ cup soy sauce
    • 2 Tablespoons olive oil
    • ½ teaspoon kosher salt
    • ¼ teaspoon ground black pepper
    • 1 whole chicken cut into pieces (I freeze the carcass and wings separately to make chicken noodle soup)

    Instructions
     

    • In a bag or bowl, combine shallots, vinegar, soy sauce, oil, salt and pepper.
    • Toss with chicken pieces until they’re fully covered.
    • If freezing, place bag into the freezer and fully thaw when ready to bake. Or refrigerate until ready to bake.
    • When ready to bake, preheat the oven to 425 degrees.
    • Pour all ingredients including extra marinade into 9” x 13” baking pan arranging chicken pieces so that they’re skin-side down.
    • Bake uncovered for 20 minutes.
    • Remove the pan from the oven and turn the chicken over so that the skin side is up.
    • Bake and additional 20 minutes or until skin is golden brown and largest pieces reach an internal temperature of 162 degrees.
    • Rest the chicken for 5-10 minutes, top with chopped fresh parsley for garnish and serve immediately.

    Notes

    I love to serve this with fresh bread to dip in the delicious sauce!
    Tried this recipe?Let us know how it was!

    Now that you know how to make this Baked Chicken with Caramelized Shallots recipe, be sure to share it and tag @thelifejolie on Instagram and Facebook.  And be sure to pin it to save for later or bookmark it!

    Check out other Dump It ‘Til It’s Hot posts:

    • Dump recipes main page
    • My introduction post
    • Best tools for prepping dump recipes
    • Tips for making dump dinners

    Be sure to subscribe to gain access to all the bonuses and recipe previews!

    Easy Dinners subscribe button

    You can find a full index of my recipes here.

    Let’s keep the conversation going- join my Facebook group! 

    Baked Chicken with Caramelized Shallots is about to become your go-to weeknight roast chicken recipe. Tender chicken with crispy golden-brown skin and the most flavorful sauce, this easy recipe is a real winner!

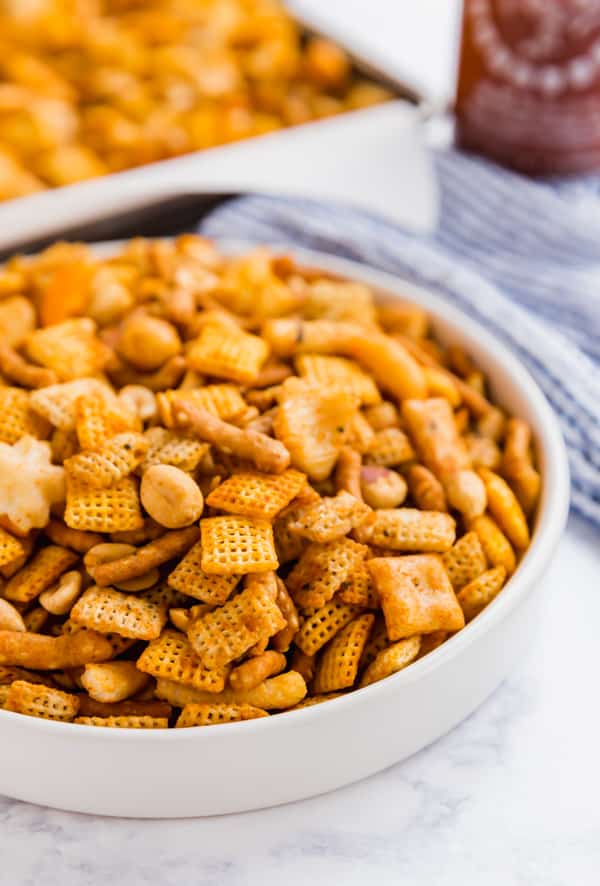
    Sriracha Chex Mix

    Feb 27, 2019 · 1 Comment

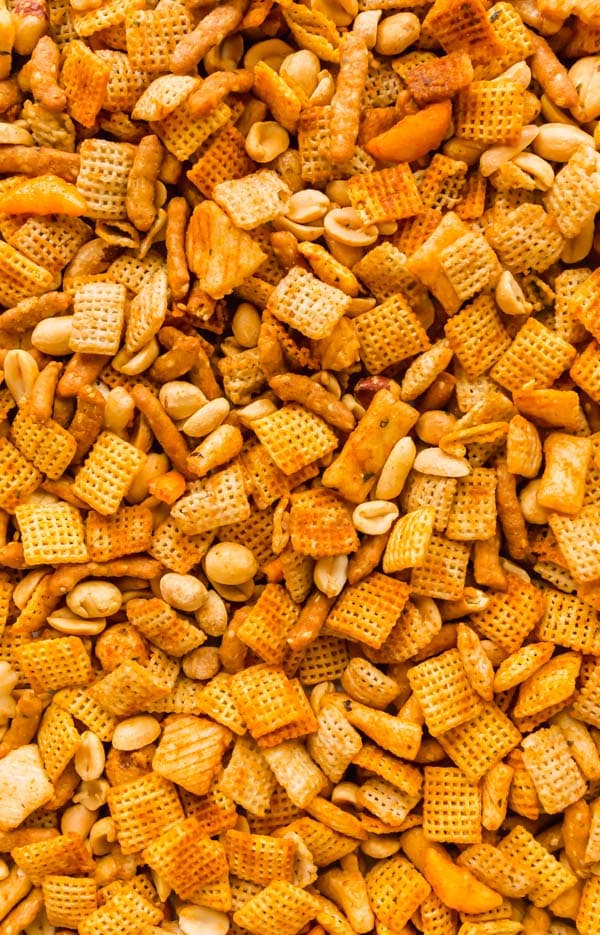
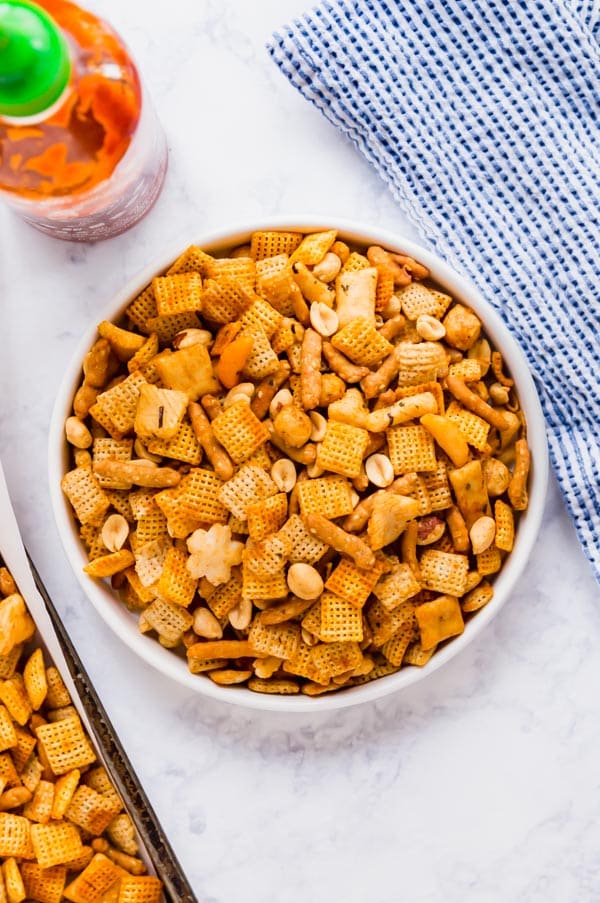
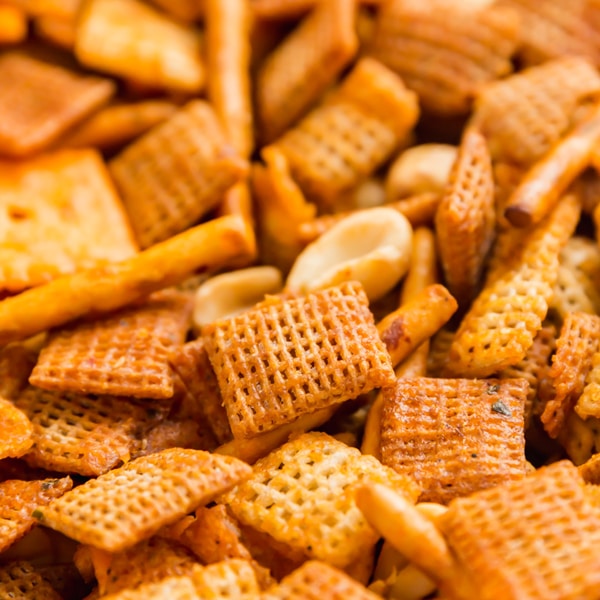
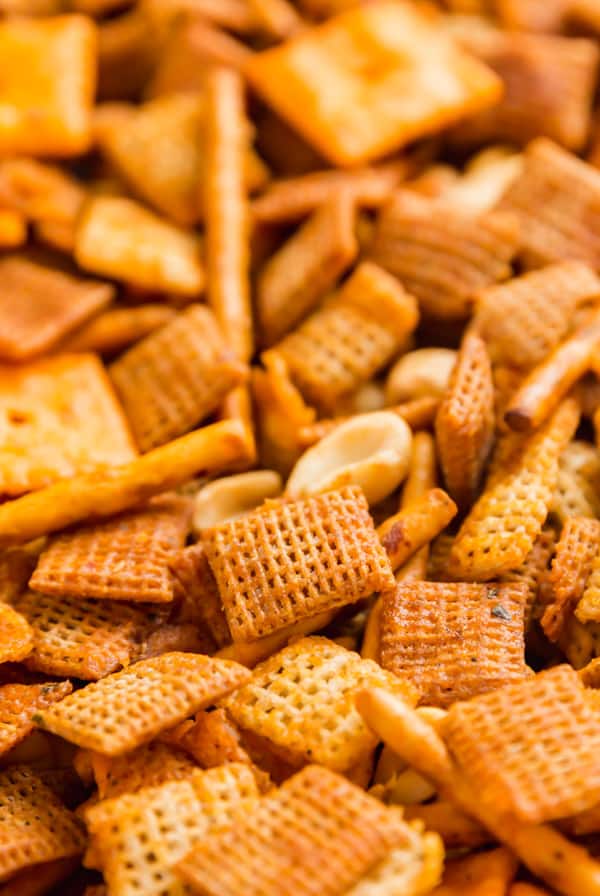
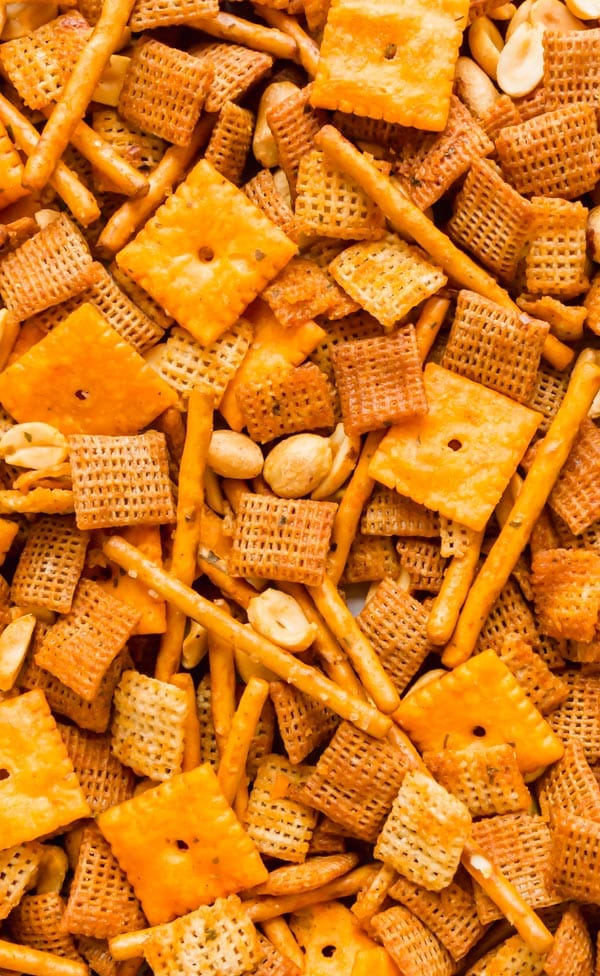
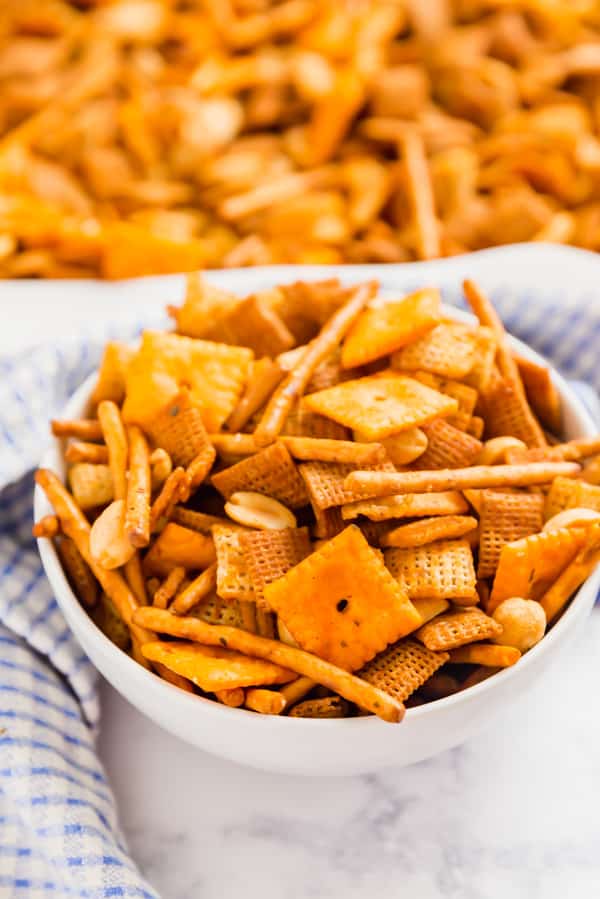
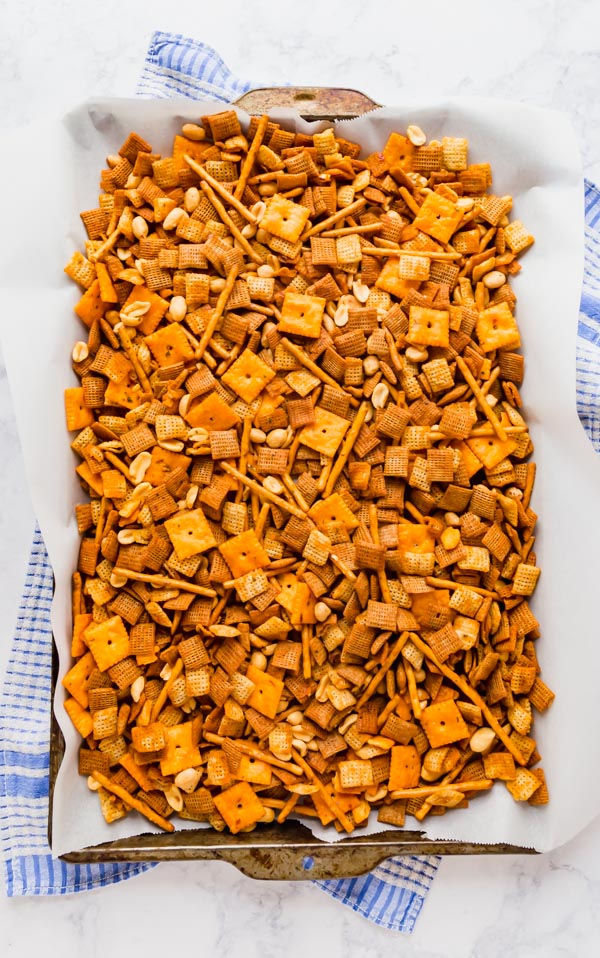
    Chex Mix is everyone's favorite party mix and the addition of Sriracha kicks it up a notch in more ways than one!

    Chex Mix is everyone's favorite party mix and the addition of Sriracha kicks it up a notch in more ways than one!

    Chex mix

    Sriracha Chex Mix

    This post contains Affiliate Links. Please see the disclaimer here.

    I don't know about you, but I love a good Chex Mix recipe, like my Buffalo Chex Mix Recipe. I'm pretty sure we all grew up with our mom/dad/aunt/cousin or whoever else whipping up that crazy easy and totally addictive party snack based off the original Chex mix recipe on the back of the cereal box a million years ago! My mom loved to throw this together before family gatherings and put little styrofoam bowls out on the tables for our guests to munch on throughout the night.

    And now that I'm an adult, I totally get why it's such a go-to snack to feed a crowd. It's super easy to make, and also crazy quick. You don't even have to turn on your oven or pull out the slow cooker. And the possibilities for ingredients are totally open and interchangeable. I mean, it's called Chex Party Mix for a reason!

    So in an attempt to kick the party up a notch, I decided to make my own variation of the original recipe, with everyone's favorite and lately quite popular condiment, Sriracha. Spicy, savory and full of umami goodness, Sriracha and a few other asian-inspired ingredients make a snack mix that will keep all your friends coming back for more!

    Chex mix recipe

    Tips for making homemade Chex mix

    • Because this is an Asian-inspired recipe, I added Asian rice snacks (which I found in the bulk section at my local grocery store- you can always substitute broken up rice crackers if rice snacks aren't available because rice snacks are basically rice crackers in cuter shapes).
    • Mix together the wet ingredients in a small bowl before adding to the dry ingredients. Melt the butter and whisk in the Sriracha, soy sauce and seasonings.
    • I like to pour half of the sauce into the dry mixture and toss it well to coat before pouring the remaining wet mixture onto the dry ingredients and mixing again. This is to try and get all the dry ingredients evenly coated. I went with low sodium soy sauce to keep the flavors balanced.
    • Much like making the Original Chex Mix, you'll microwave this mixture for six minutes, stirring at 2 minute intervals. I also tested it in the oven, but I was never truly happy with the results so I stuck with the microwave method.
    • Cool the Chex Mix completely. I do this by spreading the mixture in a single layer onto a couple of sheet pans (my pans aren't big enough to keep it on one single pan). I let it cool for at least 30 minutes or until it's completely cool before transferring it to an airtight container. During this time it will cool down and crisp up. I usually give it a few stirs periodically while cooling it.
    • I like to line the sheet pans with parchment for easy clean up

    chex mix recipe oven

    Frequently asked questions about making Chex snack mix with Sriracha

    • How long does Chex mix last? Around 4-6 weeks in an airtight container on your counter.
    • How do you bake Chex mix in the oven? Bake for 1 hour at 250 degrees stirring every 15 minutes and then cool for 30 minutes.
    • Can you freeze party mix? Yes- place in a zipper freezer bag and it will last for 6 months in the freezer.

    chex party mix recipe

    Make it a meal!

    A few great recipes to round out and complete this meal would be:

    • BBQ Crock Pot Meatballs
    • Easy Instant Pot Chili
    • Garbage Plate
    • BLT Ranch Flatbread Pizza
    • No Bake Peanut Butter Pie

    chex party mix

    Helpful tools:

    1. Mixing bowl
    2. Spatula
    3. Measuring cups
    4. Measuring spoons
    5. Whisk
    6. Sheet pan

    Chex Mix is everyone's favorite party mix and the addition of Sriracha kicks it up a notch in more ways than one!

    Sriracha Chex Mix

    Jessy Freimann
    Chex Mix is everyone's favorite party mix and the addition of Sriracha kicks it up a notch in more ways than one!
    5 from 1 vote
    Print Recipe Pin Recipe
    Prep Time 5 minutes mins
    Cook Time 6 minutes mins
    Cooling time 30 minutes mins
    Total Time 11 minutes mins
    Course Snack
    Cuisine American
    Servings 8 servings

    Ingredients
      

    • 3 cups corn Chex cereal
    • 3 cups rice chex cereal
    • 1 ½ cups rice cracker snacks (or broken up rice crackers)
    • 1 ½ cups sesame sticks
    • 1 cup dry roasted peanuts
    • 2 ½ Tablespoons salted butter, melted
    • 3 Tablespoons Sriracha sauce
    • 1 Tablespoon low sodium soy sauce
    • ⅛ teaspoon ground ginger
    • ¼ teaspoon dried cilantro

    Instructions
     

    • Place both varieties for Chex cereal, rice cracker snacks, sesame sticks and peanuts into a large microwave safe bowl. Toss to combine and set aside.
    • Line 2 sheet pans with parchment and set aside.
    • Whisk together melted butter, Sriracha, soy sauce, ground ginger and dried cilantro until well combined.
    • Pour half of the Sriracha mixture over the dry ingredients and toss to coat well.
    • Pour the remaining Sriracha mixture into dry ingredients and toss once more to evenly coat.
    • Microwave for 2 minutes on high and stir well.
    • Microwave for another 2 minutes on high and stir well again.
    • Microwave for 2 more minutes on high and stir well once again (so in total, you'll have microwaved it for a total of 6 minutes stirring every 2 minutes). 
    • Pour the mixture onto the pans, spreading them out into one single layer on each pan. Allow the Chex Mix to cool for at least 30 minutes or until completely cooled stirring periodically. Store in an airtight container at room temperature for up to a month.

    Notes

    Oven directions: Bake for 1 hour at 250 degrees stirring every 15 minutes and then cool for 30 minutes.
    Tried this recipe?Let us know how it was!

    If you tried this recipe please comment and rate it 🙂 I love hearing your feedback and answering your questions! And if you make this please tag me on Instagram with @thelifejolie so I can share it <3

    Other great snack recipes are:

    • Buffalo Chex Mix
    • Salami Chips
    • Everything Pita Chips
    • Pepperoni Chips

    You can find a full index of my recipes here.

    Don’t forget to follow The Life Jolie on Pinterest for more recipe inspiration!

    Or if Pinterest isn’t your style, bookmark this post!

    Let’s keep the conversation going- join my Facebook group! 

    Baked Fish Sticks

    Feb 25, 2019 · Leave a Comment

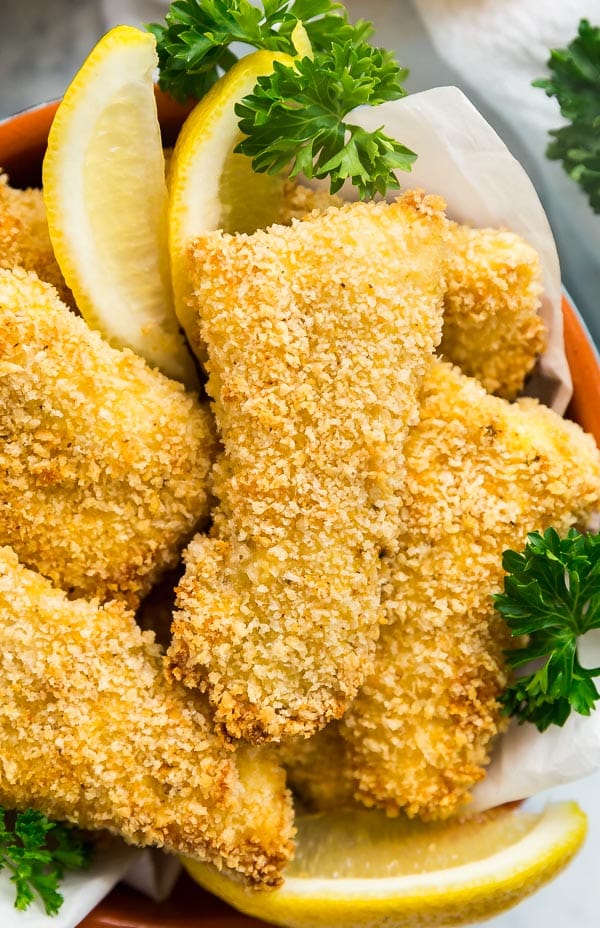
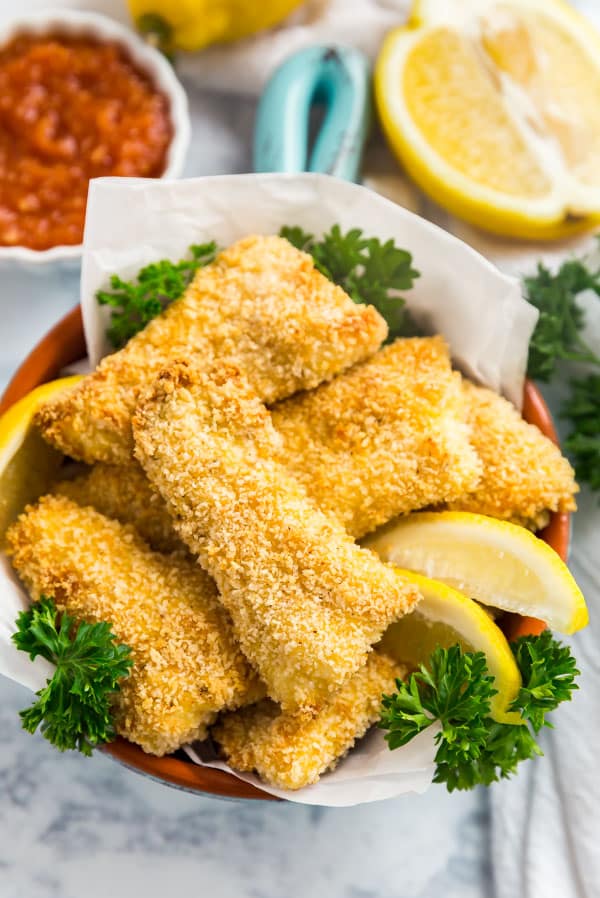
    These baked fish sticks are an easy homemade version of the childhood meal we all know and love. Tender white fish with a crispy panko crust, they're are a quick and delicious dinner the whole family will love! This is an excellent weeknight meal.

    These baked fish sticks are an easy homemade version of the childhood meal we all know and love. Tender white fish with a crispy panko crust, they're are a quick and delicious dinner the whole family will love!

    baked fish

    Baked Fish Sticks

    This post contains Affiliate Links. Please see the disclaimer here.

    Pretty much everyone I know enjoyed fish sticks as a child. Even my seafood-hating husband has fond memories of fish fingers his mom used to make them. They definitely made several appearances in our home as a kid, often alongside some mac and cheese.

    So I figured it would be fun to create my own fish sticks recipe because while packaged foods can be tasty and convenient, there's no substitute for a home cooked meal. Luckily, these are super easy to make and come out crazy delicious every time!

    Fish sticks

    Tips for making breaded fish sticks

    • Before breading, pat the fish dry and season to taste with salt and pepper.
    • Try to cut the fish into pieces that are similar in size for even cooking.
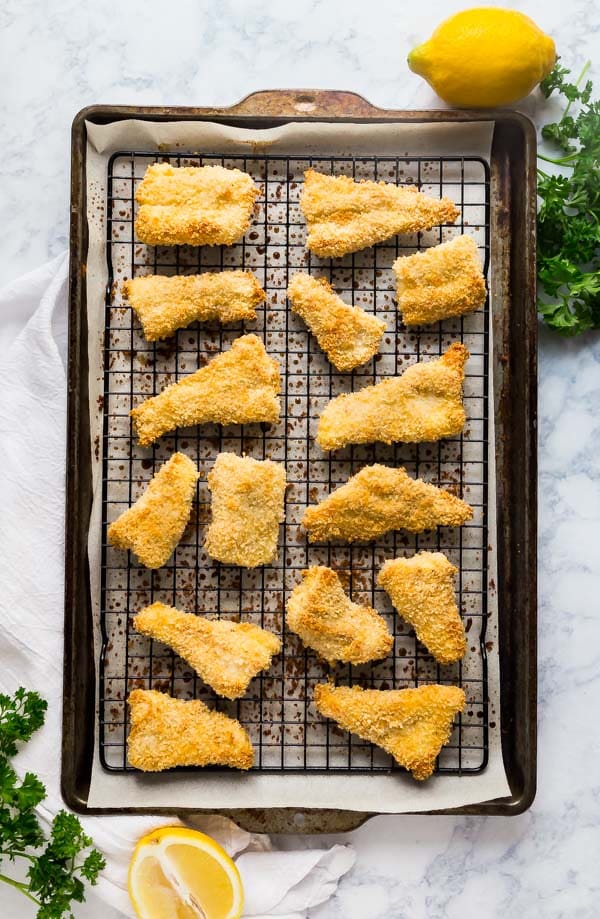
    • If you have a baking rack, this is the perfect recipe to use it. I spray it down with cooking spray and place it on top of a lined baking pan. This allows the fish sticks to crisp up on both sides without turning.
    • If you don't have a baking rack, you can turn the fish stick halfway through.

    baked fish recipes

    Frequently asked questions about how to bake fish sticks

    • What kind of fish do you use? I opted for catfish because it's very mild in flavor and budget-friendly. But any mild white fish will work. I'd also use haddock or cod.
    • How long do you cook fish sticks for? For this recipe, they cook up nicely in around 20 minutes at 400 degrees.
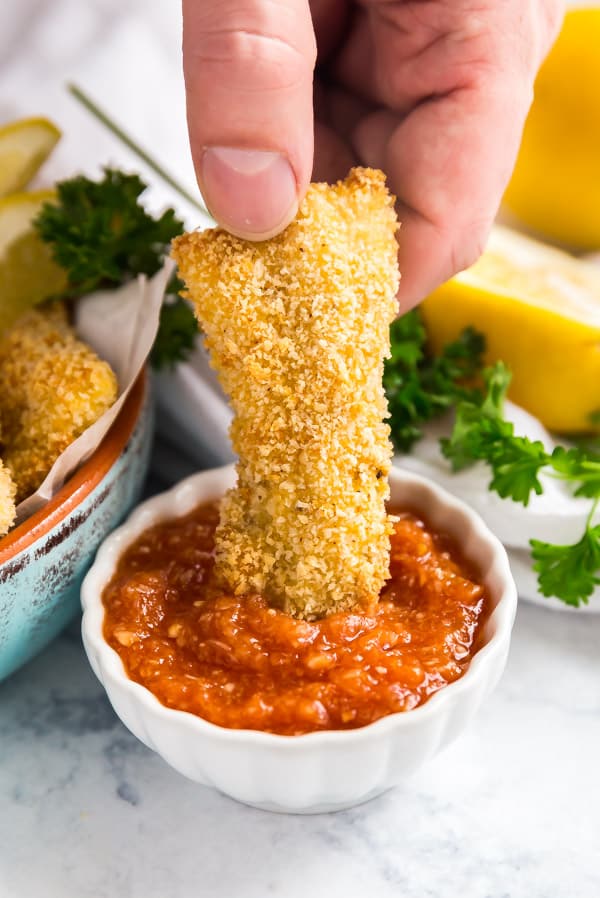
    • What do you use to dip the fish sticks? This comes down to personal preference but some options are cocktail sauce, ketchup, tartar sauce and my husband likes plain mayonnaise.
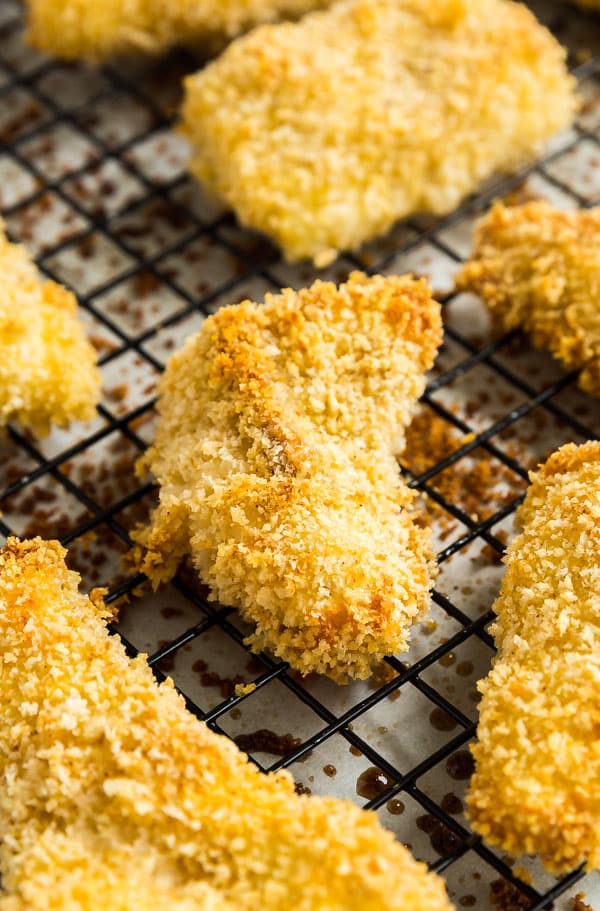
    • How do you make fish sticks crispy?  I use panko bread crumbs, as they make a crispier crust.  And as mentioned above, a baking rack helps create a crispier crust all around.
    • How long do fish sticks last? Up to 3 days covered in the refrigerator.
    • Can you reheat them? Yes- they'll be crispier in the oven but you can also microwave them.

    how long to bake fish

    Make it a meal!

    A few great recipes to round out and complete this meal would be:

    • Peas with Onions
    • Easy Garlic Green Beans
    • Baked French Fries
    • Summer Bounty Strawberry Salad
    • Grandma's Best Banana Cake
    • Quick and Easy Chocolate Pudding Cake

    fish sticks recipe

    Helpful tools:

    1. Sheet pan
    2. Silpat
    3. Chef's knife
    4. Cutting board
    5. Baking rack
    6. Measuring cups
    7. Measuring spoons

    These baked fish sticks are an easy homemade version of the childhood meal we all know and love. Tender white fish with a crispy panko crust, they're are a quick and delicious dinner the whole family will love! This is an excellent weeknight meal.

    Baked Fish Sticks

    Jessy Freimann
    These baked fish sticks are an easy homemade version of the childhood meal we all know and love. Tender white fish with a crispy panko crust, they're are a quick and delicious dinner the whole family will love!
    No ratings yet
    Print Recipe Pin Recipe
    Prep Time 10 minutes mins
    Cook Time 20 minutes mins
    Total Time 30 minutes mins
    Course Main Course
    Cuisine American
    Servings 4 servings

    Ingredients
      

    • Cooking spray
    • 1 pound white fish filets, I used cat fish but any mild white fish will work- try cod or haddock!
    • Kosher salt, to taste
    • Ground black pepper, to taste
    • ½ cup flour
    • 2-3 large eggs, beaten (start with two and beat a third if needed)
    • 1 ¼ cup panko bread crumbs
    • 1 teaspoon seasoning salt

    Instructions
     

    • Preheat the oven to 400 degrees and line a sheet pan. Top it with a baking rack if you have one and spray the baking rack (or pan) with cooking spray.
    • Pat the fish dry with a paper towel and cut into equal size sticks. It will vary based on the size but I halved the fish the long way and then cut it into thirds. Sprinkle the fish with salt and pepper to taste.
    • In 3 shallow bowls, place the following: flour in the first, beaten eggs in the second and in the third stir together the panko bread crumbs and seasoned salt.
    • Dredge each fish piece in flour and tap off the excess. 
    • Then submerge each fish piece in the egg making sure it's fully covered before gently tapping of the excess.
    • Finally, cover each fish piece in the panko mixture. Once fully covered carefully tap off the excess and place onto the baking rack or pan (you can generally get a lot of fish stick on one pan, just make sure they aren't touching).
    • Bake for around 20 minutes or cooked through. If not using a baking rack, flip the fish sticks midway through the cooking time. Serve immediately with lemon wedges for squeezing and your dipping sauce of choice. 
    Tried this recipe?Let us know how it was!

    If you tried this recipe please comment and rate it 🙂 I love hearing your feedback and answering your questions! And if you make this please tag me on Instagram with @thelifejolie so I can share it <3

    Other great fish recipes are:

    • Date Night Fish for Two
    • Chili Lime Baked Salmon
    • Italian Tuna Salad
    • 20 Minute Lemon Dill Salmon

    You can find a full index of my recipes here.

    Don’t forget to follow The Life Jolie on Pinterest for more recipe inspiration!

    Or if Pinterest isn’t your style, bookmark this post!

    Let’s keep the conversation going- join my Facebook group! 

    Reader Request: Shepherd's Pie

    Feb 18, 2019 · 8 Comments

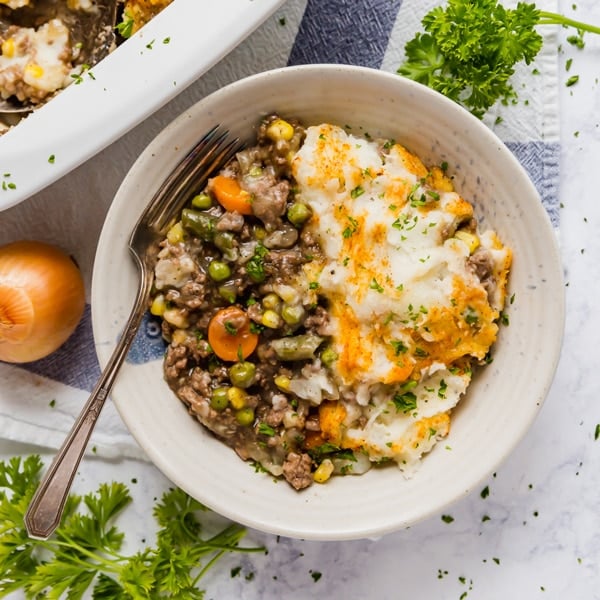
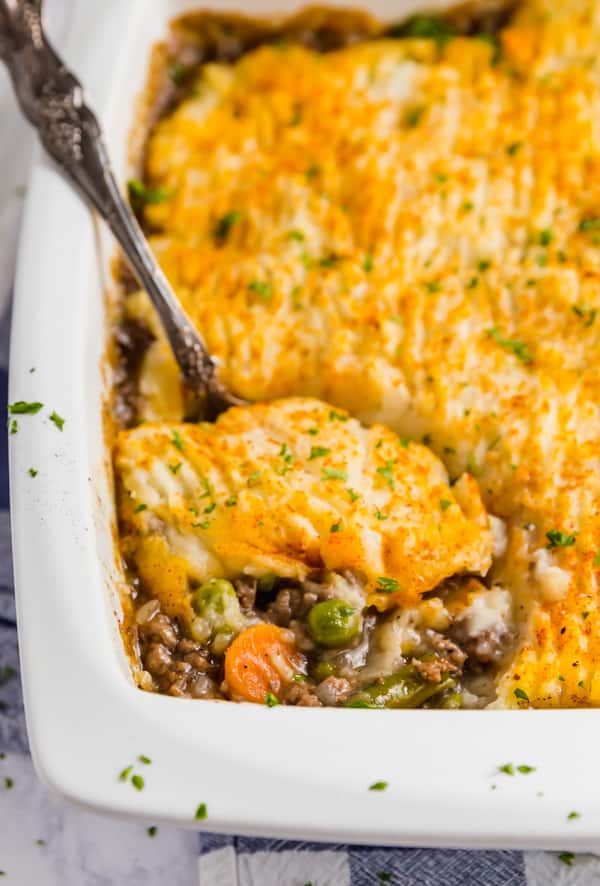
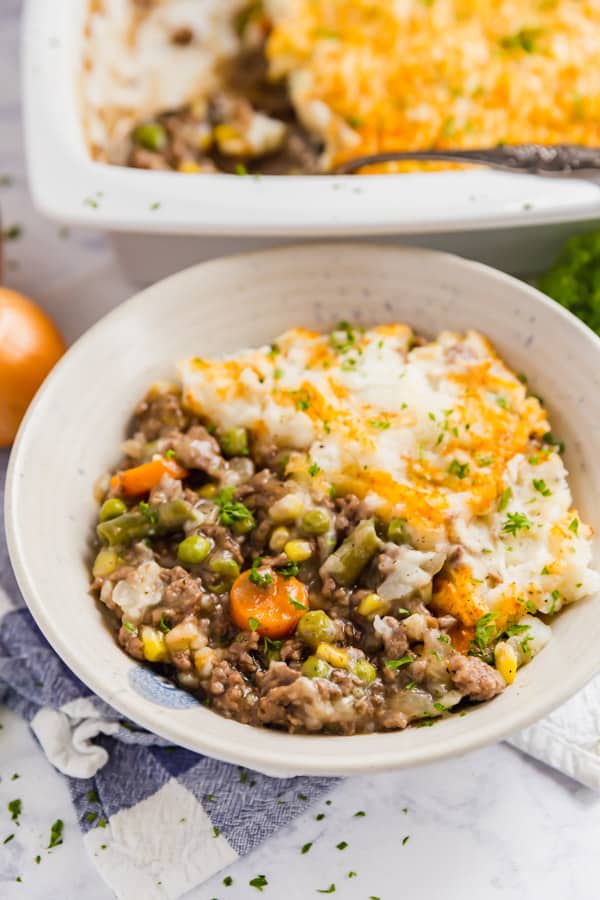
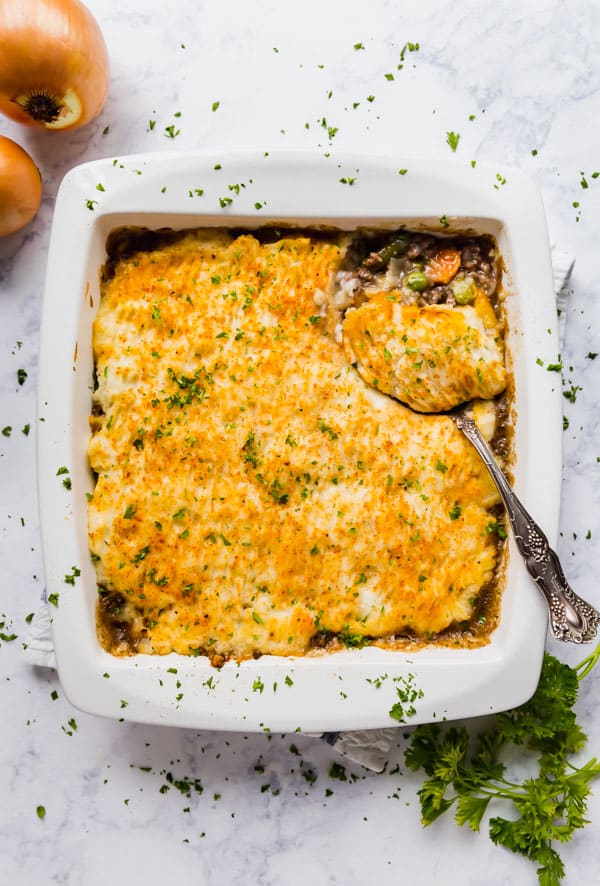
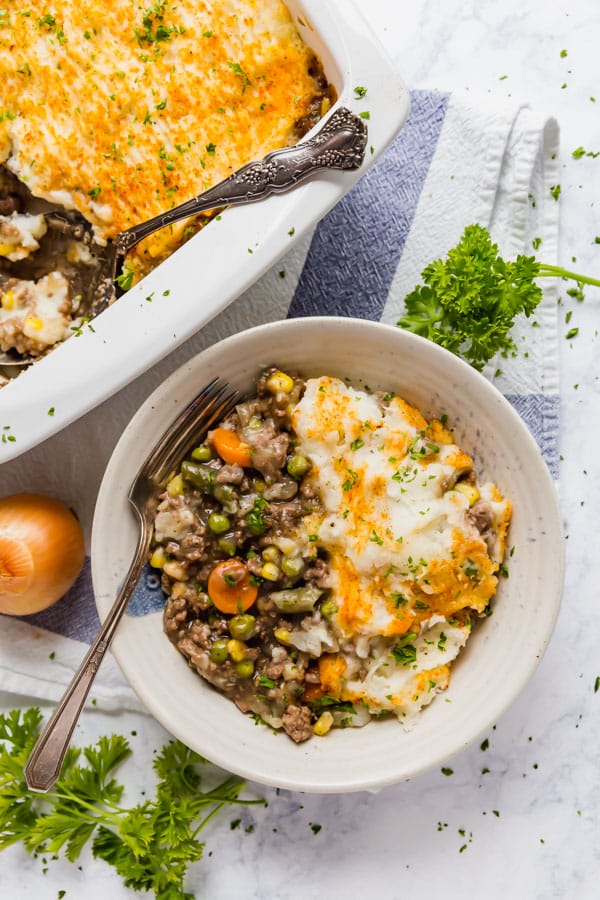
    This is the best Shepherd's Pie recipe! It's so easy to make and comes together pretty quickly as well. It's a super simple mix of beef, vegetables and mashed potatoes that is sure to please the whole family!

    This easy Shepherd’s Pie makes a cozy and delicious dinner that’s ready in around 30 minutes making it the perfect weeknight dinner!

    shepherds pie recipe

    This post contains Affiliate Links. Please see the disclaimer here.

    Shepherd’s Pie

    I’m sad to say, I didn't grow up eating a Shepherd's Pie. But it's the flavors of the savory meat, vegetables and creamy mashed potatoes that bring me to that cozy, happy place of the stick-to-your-bones food we ate when I was a kid.

    I love that this easy Shepherds Pie recipe only takes around forty minutes (with at least half of that as down time while it bakes). I went out of my way to make sure there was the right ratio of filling to potatoes. I’ve come across a lot of other Shepherd’s Pie recipes that were super heavy on the potatoes, and it was always a little much for me. This makes a cozy and easy weeknight dinner the whole family will love.

    shepherd's pie recipe

    Tips for making this Shepherd’s Pie recipe

    • I used a frozen veggie mix of corn, carrots, peas, green beans and lima beans, but you could always used whatever frozen veggies you prefer.
    • This recipe makes a smaller pan, around 8x8 or 9x9. If you need more you can always double the recipe for a 9x13 pan.
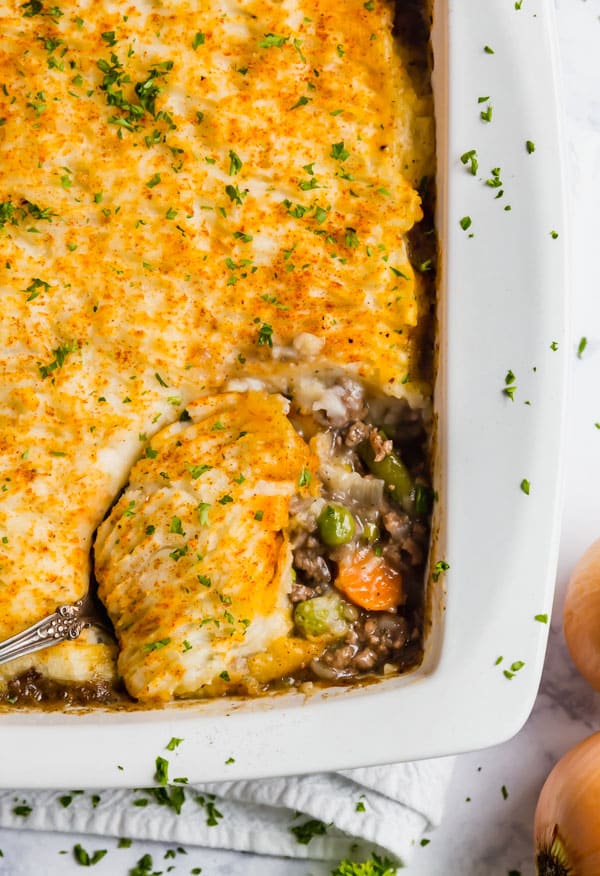
    • I use the tips of a fork to rough up the potatoes a tad before topping with paprika and baking. It helps form a nice crust.

    shepherd's pie

    Frequently asked questions about making this Easy Shepherd’s Pie Recipe

    • Can you prepare Shepherd’s Pie in advance? Yes- I’d prepare everything up until baking and then bake before serving. You may need to bake it a little longer since you’ll want to refrigerate it if you’re assembling in advance.
    • Can I reheat Shepherd’s Pie? Yes- I reheat this in the microwave.
    • How long does Shepherd’s Pie last? 3-4 days covered in the refrigerator.
    • Is Shepherd’s Pie traditionally made with lamb? Yes- one might also call this cottage pie as traditional Shepherd’s Pie is made with lamb. But I tried to keep it as simple as possible with ingredients that we usually have in our pantries, refrigerators and freezers.
    • What if I don’t cook with alcohol? No problem, just replace the wine with additional beef broth.

    best shepherds pie recipe

    Make it a meal!

    A few great recipes to round out and complete this meal would be:

    • Easy Garlic Green Beans
    • Summer Bounty Strawberry Salad
    • Grandma's Best Banana Cake
    • Quick and Easy Chocolate Pudding Cake

    easy shepherd's pie

    Helpful tools:

    1. Large saute pan
    2. Wooden spoon
    3. Chef's knife
    4. Cutting board
    5. Measuring cups
    6. Measuring spoons
    7. 9" x 9" baking pan

    Video Tutorial for making Shepherd's Pie

    This is the best Shepherd's Pie recipe! It's so easy to make and comes together pretty quickly as well. It's a super simple mix of beef, vegetables and mashed potatoes that is sure to please the whole family!

    Shepherd's Pie

    Jessy Freimann
    This easy Shepherd’s Pie makes a cozy and delicious dinner that’s ready in around 30 minutes making it the perfect weeknight dinner!
    5 from 1 vote
    Print Recipe Pin Recipe
    Prep Time 10 minutes mins
    Cook Time 30 minutes mins
    Total Time 40 minutes mins
    Course Main Course
    Cuisine Irish
    Servings 6 servings

    Ingredients
      

    • 1 lb. of ground beef
    • 1 onion diced
    • 2 cloves of garlic minced
    • 1 ½ cups of frozen mixed vegetables
    • 3 Tbsp. corn starch
    • ½ cup dry red wine
    • 1 14 ounce can of beef broth
    • 1 tsp. of salt
    • ¼ tsp. of pepper
    • ¼ tsp. of Herbes de Provence
    • 1 teaspoon Worcestershire sauce

    For the Mashed Potatoes:

    • 5 cups of diced potatoes peeled and boiled until fork tender
    • 4 Tbsp. of butter
    • 1 tsp. of salt
    • ¼ tsp. of pepper
    • ¾ tsp. of garlic powder
    • ¼ cup of milk
    • Paprika

    Instructions
     

    • Preheat the oven to 350 degrees. Brown beef over medium heat, breaking it up with a spoon. Once it's brown, drain the oil and set the meat aside.
    • Add onion, garlic and mixed vegetables to the pan. Saute for 10 minutes and then sprinkle with cornstarch and mix it well.
    • Add wine, broth, salt, pepper, Herbes de Provence and Worcestershire Sauce and your meat and cook over medium high heat for 10 minutes or until the sauce reduces and thickens a bit. Taste for seasoning and adjust accordingly.
    • While the beef simmers, mix up all mashed potato ingredients (except for the Paprika) until well combined and not lumpy.
    • If your skillet isn't oven safe transfer the meat mixture to a pan that is. 
    • Carefully cover the beef with a layer of mashed potatoes. Used a fork to rough up the top a bit and sprinkle lightly with paprika (hold it high so that it distributes evenly). 
    • Bake for 20-25 minutes or until hot and bubbly. Serve immediately.
    Tried this recipe?Let us know how it was!

    If you tried this recipe please comment and rate it 🙂 I love hearing your feedback and answering your questions! And if you make this please tag me on Instagram with @thelifejolie so I can share it <3

    Try some other dinners using ground beef:

    • Ground Beef Baked Oven Tacos
    • Easy Instant Pot Chili
    • Classic Hamburger Stew

    You can find a full index of my recipes here.

    Don’t forget to follow The Life Jolie on Pinterest for more recipe inspiration!

    Or if Pinterest isn’t your style, bookmark this post!

    Let’s keep the conversation going- join my Facebook group! 

    My Favorite Hack for Easy Weeknight Dinners (and a few other great tips!)

    Feb 11, 2019 · 8 Comments

    I’m so excited to share one of my favorite hacks for weeknight dinners! Wegmans chef-developed ready-to-cook entrées in oven-safe packaging offer a great way to get a delicious dinner onto the table with minimal work and clean up!

    I’m so excited to share one of my favorite hacks for weeknight dinners! Wegmans chef-developed ready-to-cook entrées in oven-safe packaging offer a great way to get a delicious dinner onto the table with minimal work and clean up!

    easy weeknight dinners

    dinner ideas

    This is a sponsored conversation on behalf of Wegmans. Thank you for supporting the brands that support this blog. This post contains Affiliate Links. Please see the disclaimer here.

    Do you ever have those nights when you just cannot seem to get it together and get dinner on the table? I totally do- at least once a week (I know, I know, as a food blogger, you’d think I’d always have awesome food around and while that's partly true, the struggle is still real in our home!). Suffice it to say, weeknight dinners can be a serious beast for all of us!   

    You guys know that a big focus this year is providing awesome solutions to give you dinner ideas that make it all a little easier for you (like my series of dump recipes!). So today, I'm super excited to share one of my favorite hacks for making weeknight dinners a little easier for all of us, but still super delicious.

    Now, longtime readers and Instagram followers already know about my undying love for all things Wegmans. Wegmans was founded here in Rochester more than 100 years ago and has grown to become a company that’s well loved by consumers and their employees alike. Their goal is helping people make great meals easy, and they go above and beyond to make that happen! I prefer Wegmans brand in so many products because the quality and flavor are excellent.

    And they’ve done it again! My friends at Wegmans have come up with a seriously awesome option for those nights that you want a great meal without all the hassle. Wegmans chef-developed ready-to-cook entrées in oven-safe packaging are an easy way to put a delicious meal on the table without all the extra work.

    dinner

    easy dinner ideas

    Why do I love Wegmans ready-to-cook entrées?

    • Minimal prep and cleanup- These are designed to go right into your oven in their packaging (just peel off the labels and pop the whole package into the oven in your favorite baking pan!).
    • Convenience- These stay fresh in your fridge for up to two weeks and also freeze beautifully, so you can have them ready to grab on those crazy nights when you just need a break! (Bonus: they recently added Seafood entrées in oven-safe packaging! They come frozen and go straight from the freezer to the oven, cooking in 40 minutes or less).
    • Safe- Their packaging is designed to safely cook in the oven. It’s made without added BPA. Wegmans has tested these at Rochester Institute of Technology and Virginia Tech and they’ve been proven food-safe.
    • Food You Feel Good About- These are made without preservatives, artificial colors or artificial flavors. I’m proud to serve these to my family!

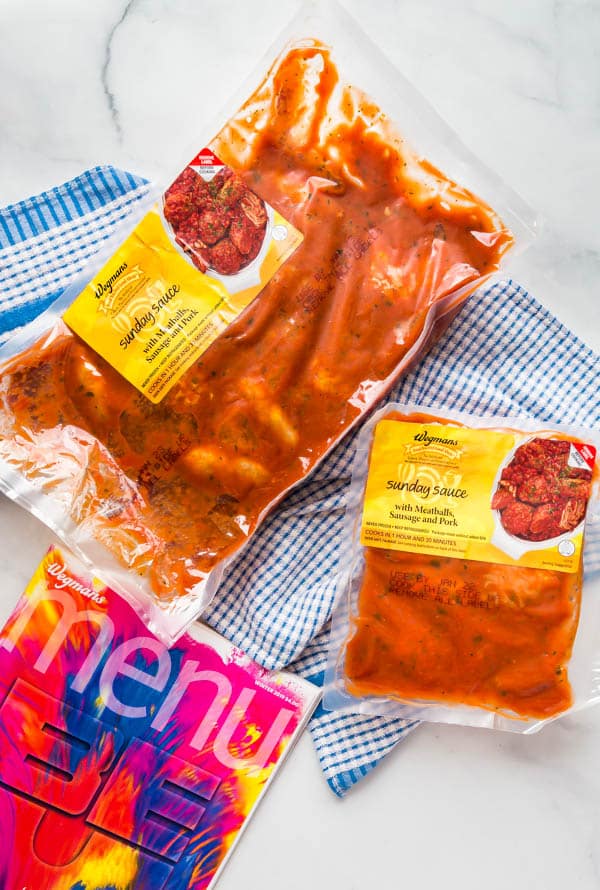
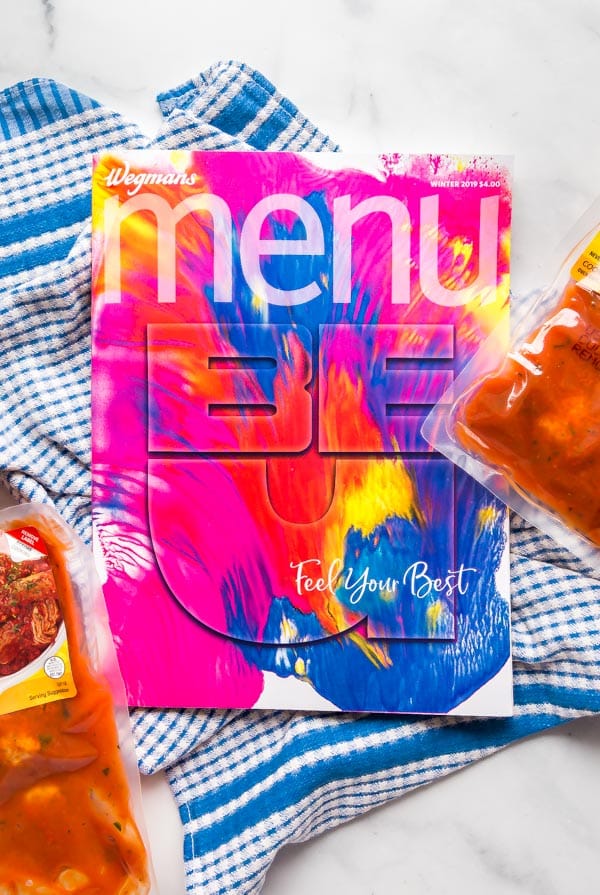
    Wegmans Menu Magazine

    quick dinner ideas

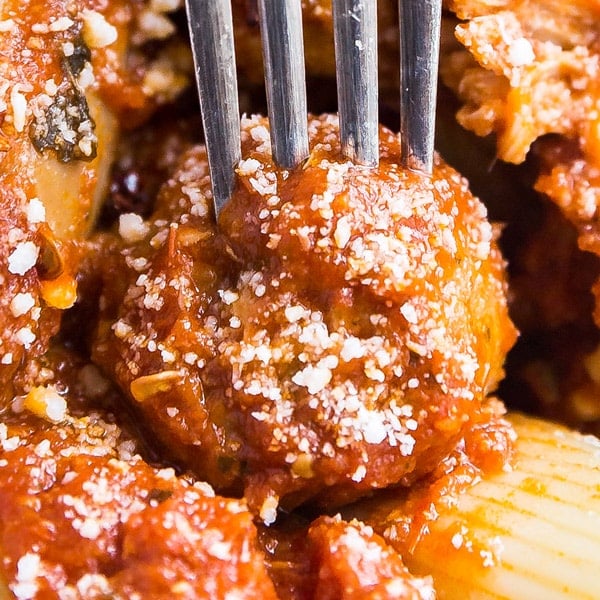
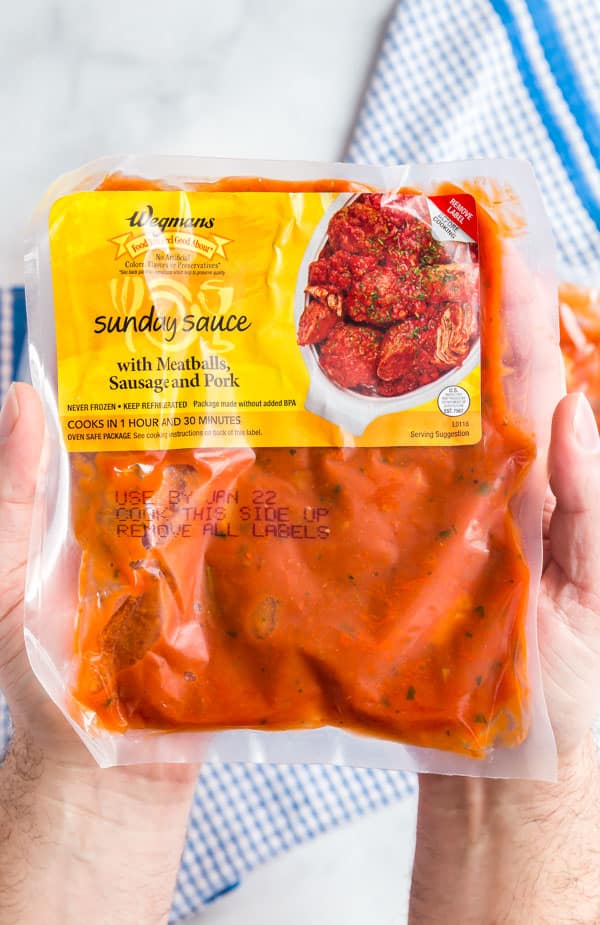
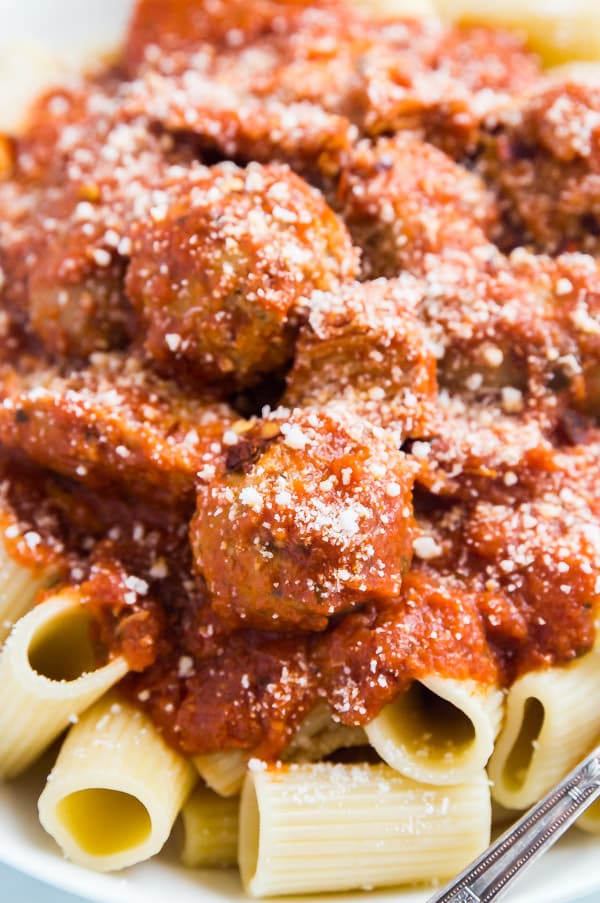
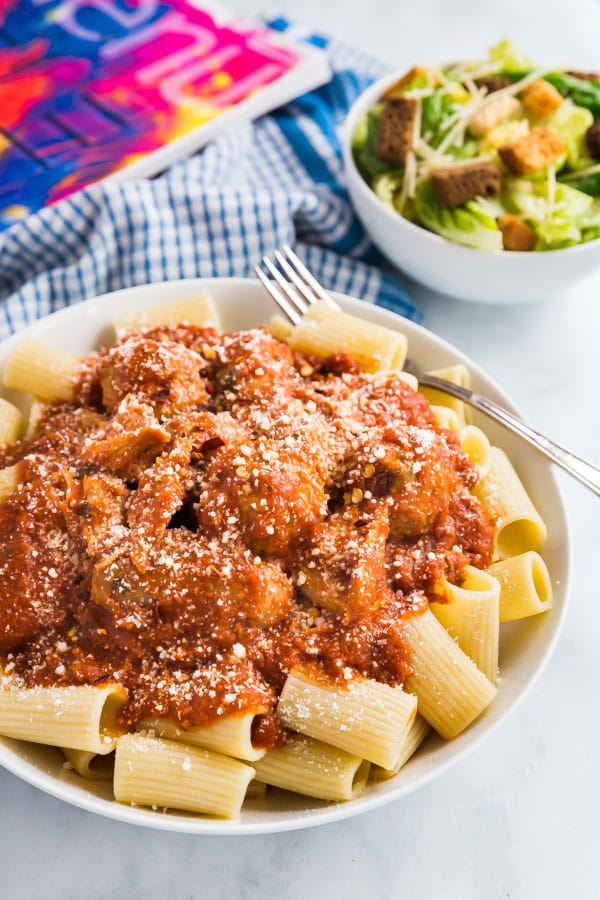
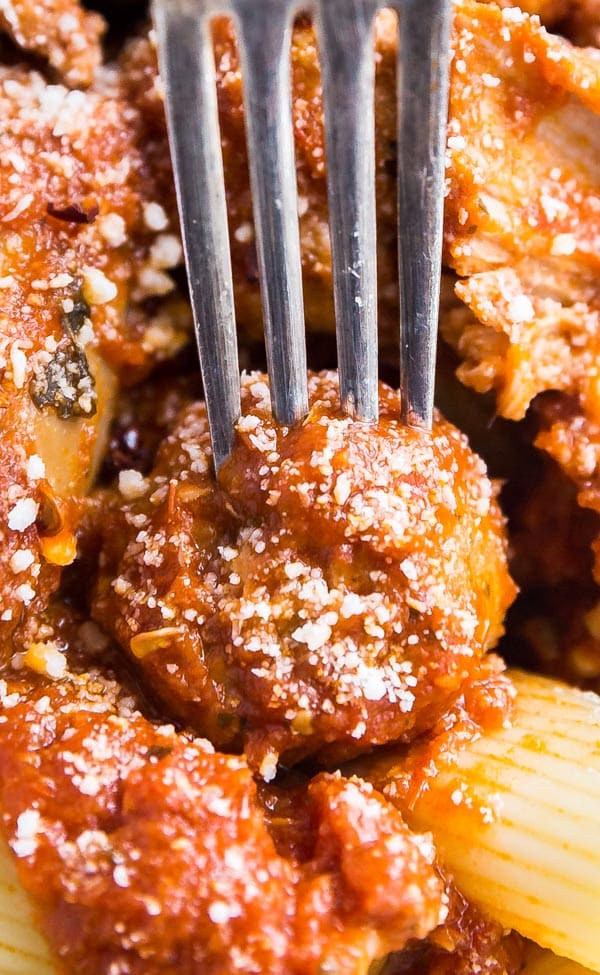
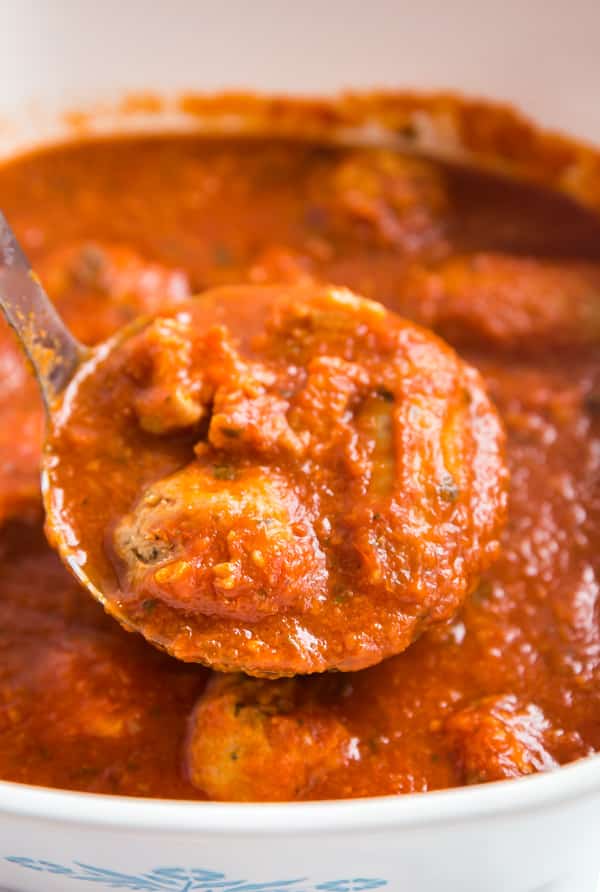
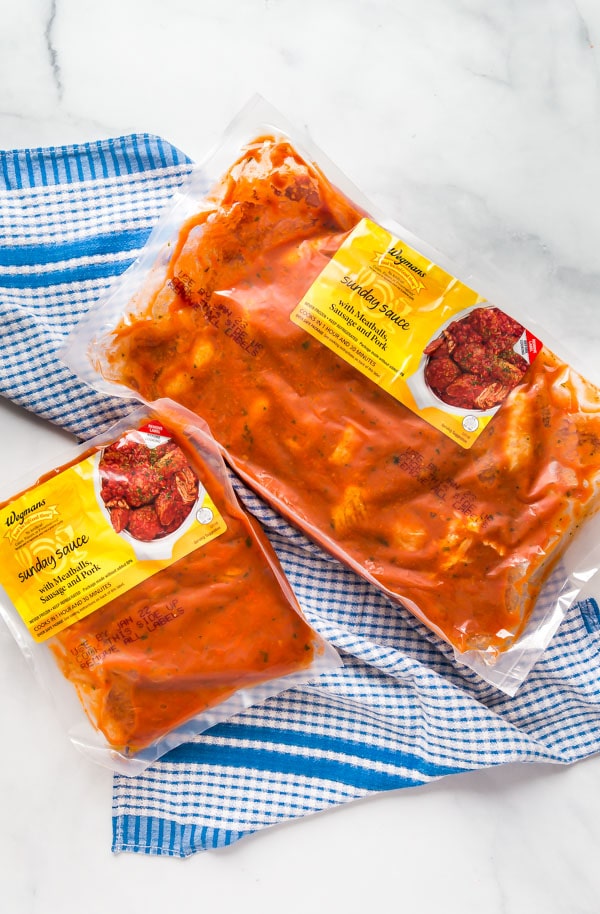
    I recently made the Ready-To-Cook Food You Feel Good About Sunday Sauce in oven-safe packaging! My family loves a cozy Italian meal and this dinner really delivered- my girls were asking for seconds and thirds (“more ‘roni’s please!”).

    This classic tomato sauce comes with a seriously hearty mix of meatballs, Italian sausage and fall-apart-tender pork loin (my personal favorite!). I paired it with Wegmans Italian Classics Rigatoni and their Caesar Salad kit for a balanced, flavorful dinner.

    Best of all, preparing this delicious meal is almost effortless! Here’s what you do:

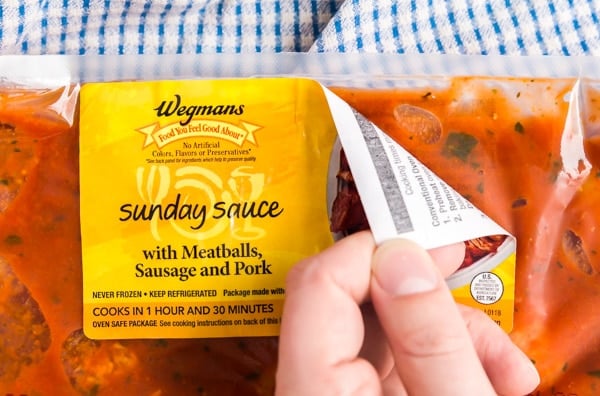
    1. Remove the labels from the packaging- There’s a label on each side of the package and it peels off very easily. No need to remove the sauce from the packaging or even cut holes to vent, just remove the labels and it’s ready to cook! The directions are conveniently located on the back of the label on the front of the package.  Wegmans label removal
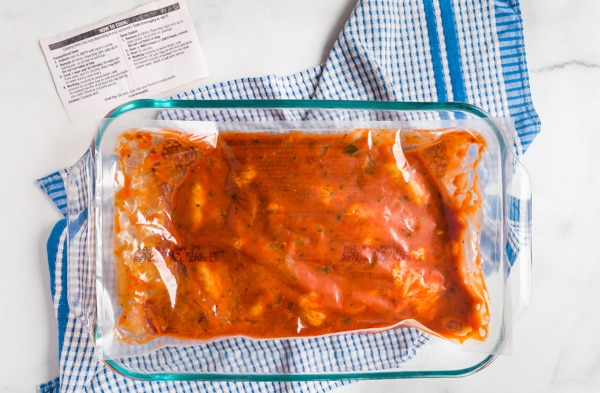
    2. Place it into a baking pan and bake- Since the bag is oven-safe, you can place the entire unopened package right into your favorite baking pan (I like to use my 9" x 13" pan) and bake it on the center rack of the oven. Some entrées even have slow cooker instructions!  Wegmans Sunday sauce in baking pan
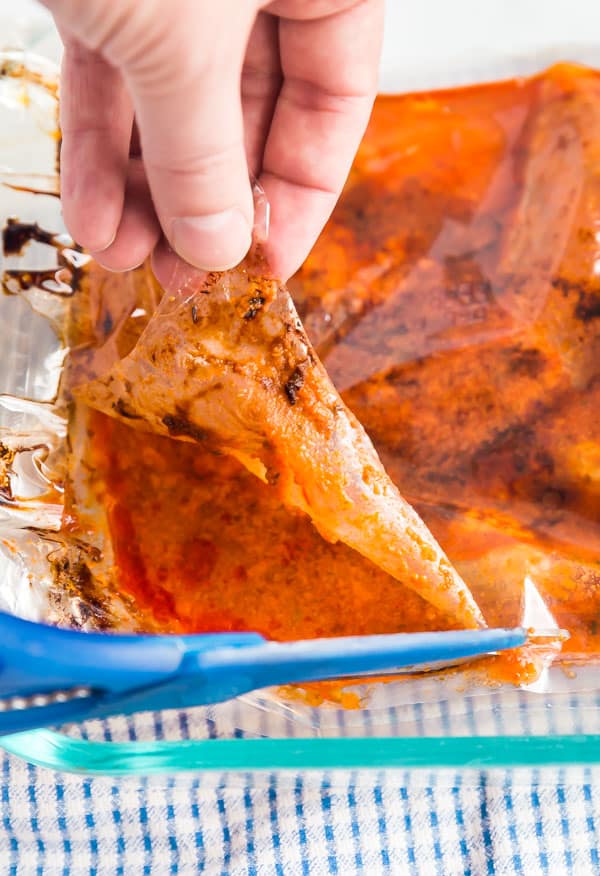
    3. Peel back the film and serve- Once the cooking time is up, it’s as simple as peeling back the film and serving! You can also use kitchen scissors if you don’t want to peel. The clean up is minimal thanks to the awesome packaging!  Cutting open sauce packaging

    Other great hacks and easy dinner ideas to make it all easier!

    • Keep some convenient basics on hand- I try to always have convenience items in my pantry, fridge and freezer. These would include things like instant rice, steam-in-the-bag veggies, salad kits, frozen garlic bread, etc.
    • Salad kit hack- Mix your salad kit right in the bag for even easier clean up. Cut the top off the bag open, pour the dressing and other packaged components into the bag, roll it shut and shake until everything is fully combined!
    • Food prep- Although, I was never really able to get the hang of meal prepping, one great way to help reduce the work of weeknight cooking is to prep certain meal components in advance. I opt for items that I know will reheat well. You can easily make a big batch of your favorite grains to serve with meals during the week. Bake up some potatoes. Steam veggies. Pre-chop raw veggies (my kids love to dip raw veggies in hummus with their dinner!).
    • Double batch for leftovers- Some Wegmans ready-to-cook entrées come in large and small sizes. I always opt for the larger size to ensure there are leftovers for the next day’s lunch or dinner. You can also cook more than one entrée to ensure an additional full meal the next day. Which option you choose will depend on the size of your family. We have two small children so a large package works well for two meals but for larger families or families with older kids, cooking two entrées might be a better option.

    what to make for dinner

    dinner ideas for tonight

    Video Tutorial for making Wegmans Ready-To-Cook Sunday Sauce

    Head over and check out all the delicious options for Wegmans chef-developed ready-to-cook entrées in oven-safe packaging and to find out where to buy.

    You can find a full index of my recipes here.

    Don’t forget to follow The Life Jolie on Pinterest for more recipe inspiration!

    Or if Pinterest isn’t your style, bookmark this post!

    Let’s keep the conversation going- join my Facebook group!

    Tips to make dump recipes and make ahead meals easier

    Feb 1, 2019 · Leave a Comment

    I'm excited to share some great tips, tricks and hacks for making preparing dump recipes and make ahead meals easier and more efficient! Check these out to make dinner preparation a breeze (plus tons of info about freezer cooking too!)

    Here is my third post to prepare you for my Dump Recipe series, Dump It 'Til It's Hot which kicks off next week! If you've been following along, I introduced the series and shared some of my favorite tools for making dump dinners. And today I'm excited to share some great tips for making dump recipes and make ahead meals easier!

    I'm excited to share some great tips, tricks and hacks for making preparing dump recipes and make ahead meals easier and more efficient! Check these out to make dinner preparation a breeze (plus tons of info about freezer cooking too!)

    This post contains Affiliate Links. Please see the disclaimer here.

    Prepping these easy dinner recipes:

    • Schedule the preparation into your week- And stick to it. You'll be glad you did!
    • Inventory and organize your pantry and freezer- Do this prior to shopping that way you'll know what pantry items you already have and you'll know how much space you have in the freezer.
    • Shop sales and stock up on meat- and any ingredients that might be pricier.
    • Mis en place- One thing that's important in any cooking situation is the prepare and measure out all your ingredients before combining them. This is known as the mis en place.
    • Batch prep- One way to work smarter and not harder is to take some time and batch prepare a bunch of these meals (you can easily double or triple the recipes) to use as freezer meals and thaw later when you're ready to cook them. One of the bonuses I created exclusively for my email subscribers is a chart that lets you know exactly how much of each ingredient you'll need to measure out for all five of that month's recipes, to save you time. Subscribe here to gain access to that and all the other bonuses.
    • If you don't want to batch cook- That's totally ok too. You can also do it bit-by-bit. An efficient way to do this is to double the recipe when you're prepping a single recipes for dinner. Then freeze one batch and cook the other right away.
    • Make sure you use high-quality freezer bags and containers- To better preserve the food quality if you're freezing them. I like these.
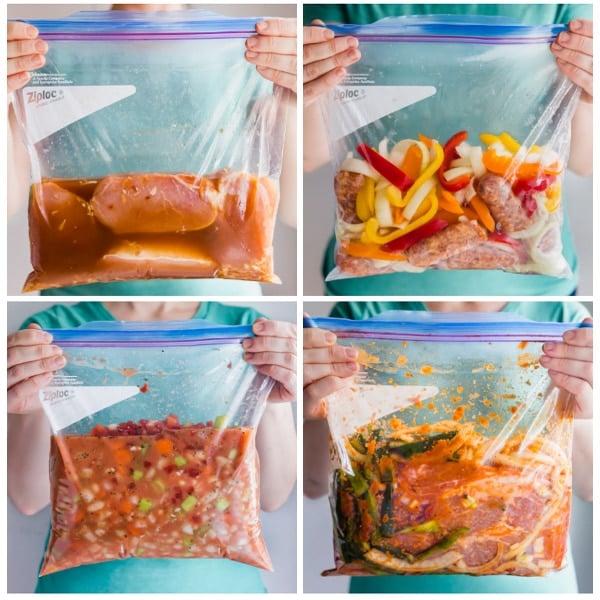
    • Label freezer bags- I like to label mine ahead of time with name of the recipe, the date, basic directions ("thaw and cook on high in the crockpot for 8 hours" or "thaw and bake in a 9" x 13" baking pan at 400 for 40 minutes") and note anything needed to add the day-of or served on the side.
    • Empty your trash can prior to starting the prep work- That way you can bang out all the prep without having to pause to take out the trash and replace the bag.
    • Pre-cut products- If budget is not a concern for you (or time is more of a priority) don't be afraid to use pre-chopped products like veggies. And even though I'm always going to prefer the use of fresh veggies, if you're really not into mincing things like garlic or ginger, you can purchase that pre-minced in a jar. While the flavor isn't as robust, it's more about working smarter, not harder. Don't underestimate the use of a mini prep processor or a chopper.
    • Grab a friend- A second set of hands is always helpful and it's more fun to do with a friend. Even better, grab a bunch of friends and have a little meal prep party and fill everyone's freezers!
    • Stand the bags up before filling- This is especially helpful if you're batching several make ahead freezer meals at once. These bag rack holders are great for this or you can fold the zipper part over all around the top.
    • Form an assembly line- To fill those bags even more efficiently!
    • Mix them up so the spices don't get stuck at the top- This goes for in the freezer bags or dumping the ingredients directly into the cooking vessel of choice. Make sure all the ingredients are evenly distributed unless the recipe indicates otherwise.
    • Freeze the bags flat- to give you more room in your freezer (I say this as a gal with two and a half freezers at a SO disorganized and generally overflowing- do as I say, not as I do!).
    • Freeze in disposable pans- Then the items that need to go in the oven will already be in their cooking vessel. And you get the added bonus of easier clean up!
    • Give these as a gift- know a new mom (or soon to be new mom) or other person who could use some support and a delicious meal? These are the perfect option. Even better, if it's a situation where they've just returned from the hospital and are receiving a ton of meals already because yours can pop right into the freezer. That way, in a few weeks when all the meals have stopped coming, they're have delicious and effortless meals in their freezer, ready to thaw!

    Cooking these easy dinners

    • Thaw overnight prior to making- This tip is specific to if you're using these as make ahead freezer meals. Technically, you're supposed to fully thaw something before placing it in a slow cooker or instant pot. The concern is that because you're cooking at a lower temperature, the meat will sit in the temperature danger zone for too long. That said, I've broken this rule for things like chicken breasts and pork chops since they're so small and will cook quicker. I wouldn't put in a frozen pork shoulder of chuck roast since they're so much larger and take a longer time. So the bottom line is use your best judgement and a healthy dose of common sense.
    • Slow cookers, instant pots, ovens and grills may vary- All machines are different. The items in my favorite tools post are the one's that I tested all these dump recipe in. Keep in mind that you may have to adjust cooking times based on your specific equipment.
    • A quick and easy hack for shredding meat- specifically chicken, is to use a potato masher or stand mixer. But two forks totally work as well!
    • Wait for the food to cool before storing leftovers-This helps maintain the texture. No one likes soggy food!
    • A note on sides- Some of these dump recipes are best served over rice and might taste god with an easy veggie side. I only include side ideas that are crazy easy and don't require you to hang out at the stove and babysit them but keep in mind that you can often cook veggies and grains ahead of time!

    Make sure you check out the main page for the dump series. And don't forget to subscribe to get all the free bonuses!

    You can find a full index of my recipes here.

    Don’t forget to follow The Life Jolie on Pinterest for more recipe inspiration!

    Or if Pinterest isn’t your style, bookmark this post!

    Let’s keep the conversation going- join my Facebook group! 

    Sweet and Spicy Kielbasa Sausage Bites

    Feb 1, 2019 · 14 Comments

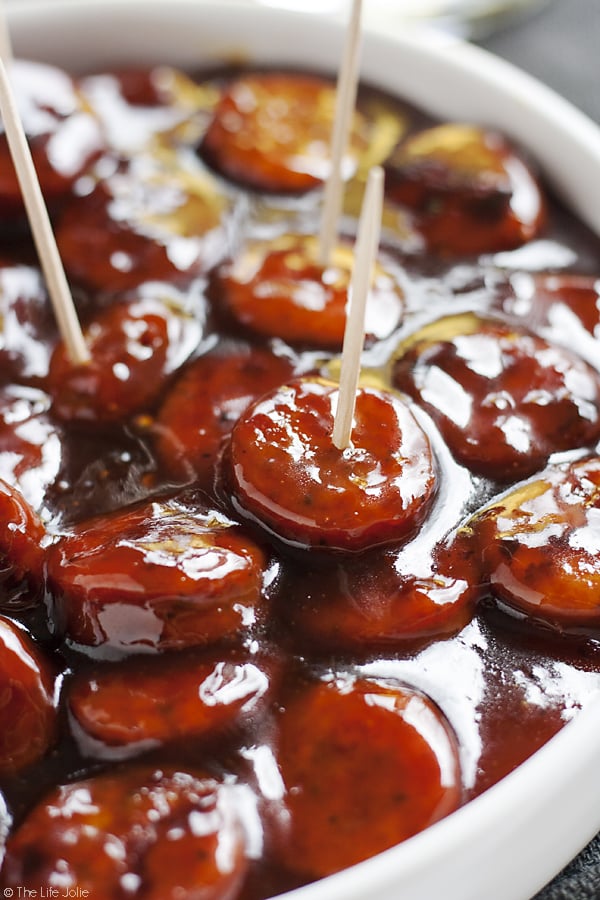
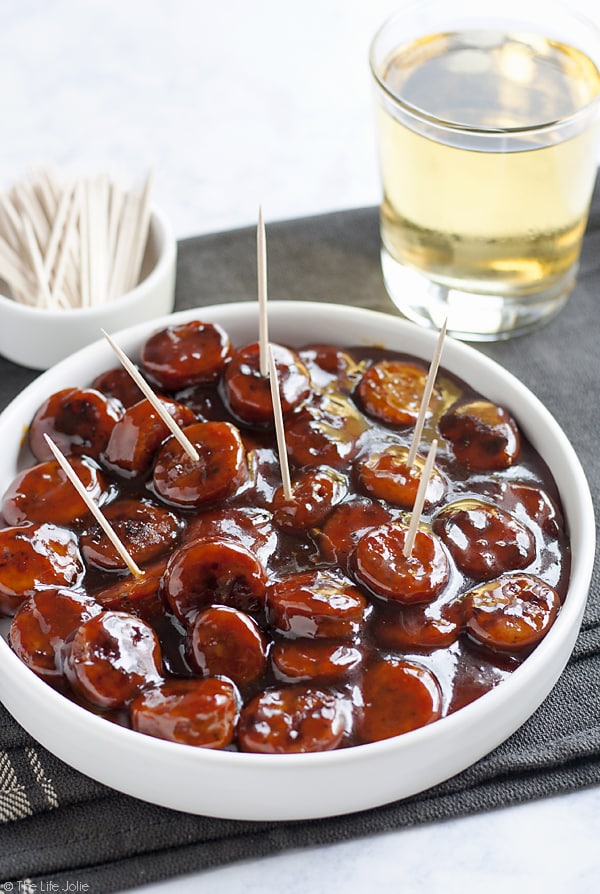
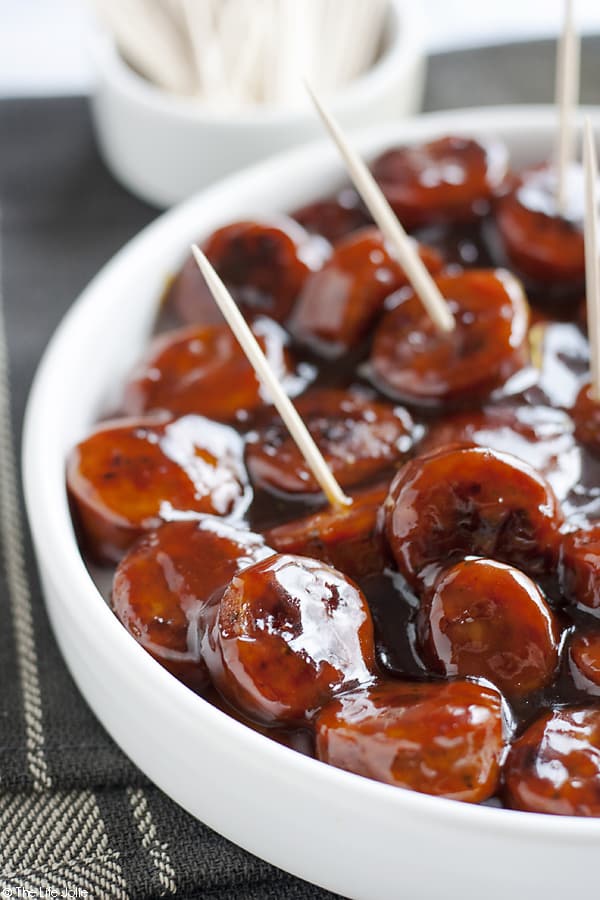
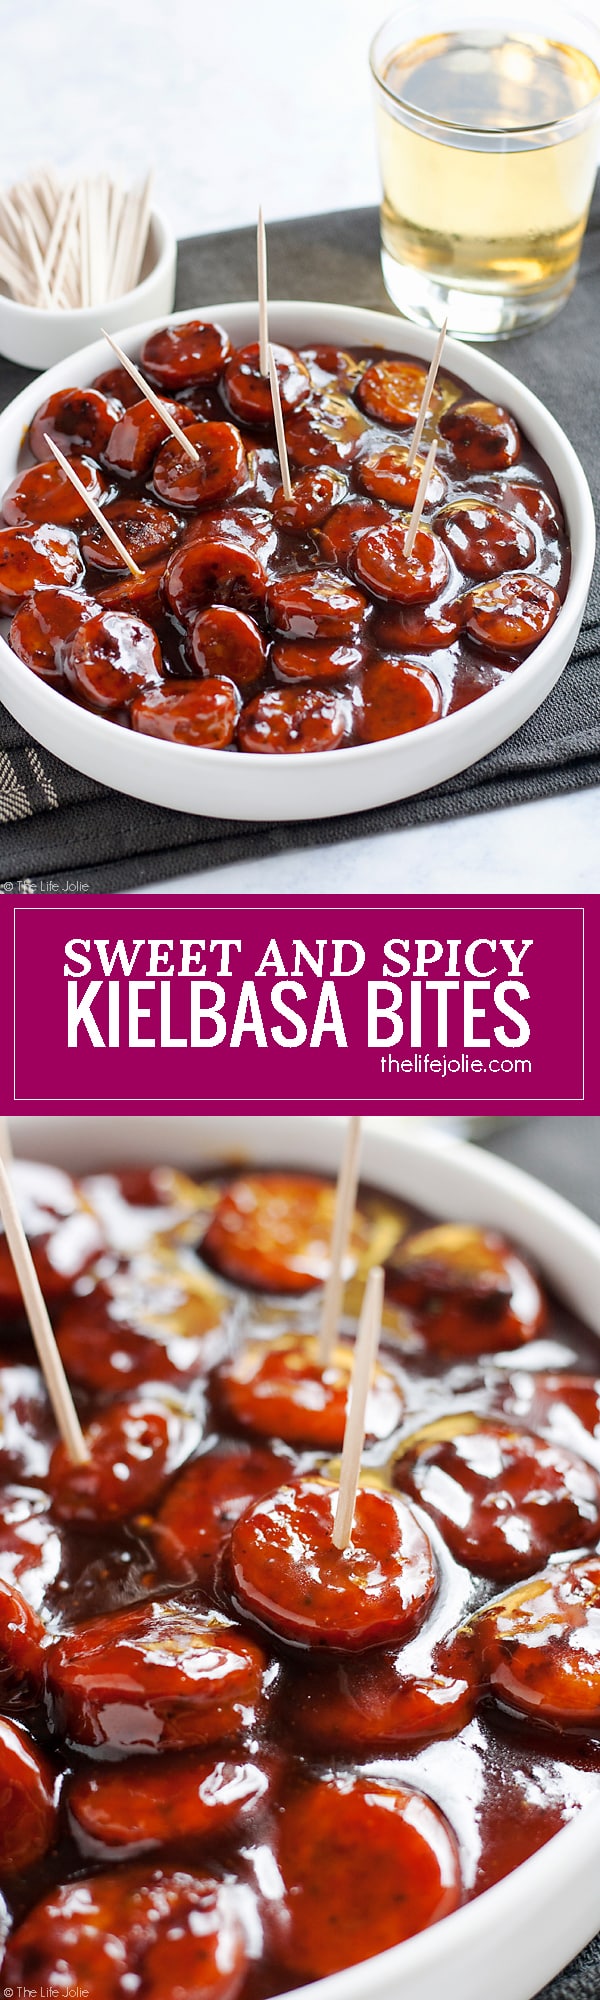
    Sweet and Spicy Kielbasa Sausage Bites are such an easy recipe! Just 3 simple ingredients and these glazed sausage bites are sure to be a hit at any holiday or game day party!

    Sweet and Spicy Kielbasa Sausage Bites are such an easy recipe! Just 3 simple ingredients and these glazed sausage bites are sure to be a hit at any holiday or game day party!

    kielbasa

    This post contains Affiliate Links. Please see the disclaimer here.

    Sweet and Spicy Kielbasa Sausage Bites

    While I don't have the insane sweet tooth that some of the people do, I enjoy sweet things once in a while. I especially enjoy sweet things when they have a kick of spiciness to them! I think the heat helps take the edge off the sugary sweetness!

    When I was dreaming up this recipe, I immediately knew I wanted to feature kielbasa. The fantastic smokiness seemed like the perfect compliment to a sweet and spicy sauce. Many other kielbasa recipes that I’ve seen are pastas and while tasty, I wanted a meaty appetizer.

    kielbasa recipes

    Tips for how to cook kielbasa bites

    • Be sure to heat the sauce over medium low heat- you want it to melt together nice and slowly.
    • I always brown the sausage. Not only does this bring it to temp, it gives it a nice texture that comes from that sear.
    • This kielbasa recipe is best served right away. If it sits around for too long the sauce thickens and it's not as good cold. That being said it's so good that it probably won't last that long anyway.

    kielbasa sausage

    Frequently asked questions about making this kielbasa sausage recipe

    • How long does kielbasa last? While this is best consumed right away, this will last up to 3 days covered in the refrigerator.
    • What’s the best way to reheat this recipe? You can microwave it or heat it over medium heat in a non-stick pan 25 minutes from start to finish
    • Do you season kielbasa? For this particular recipe, it’s not necessary. Between the kielbasa and the sauce there’s already plenty of flavor.
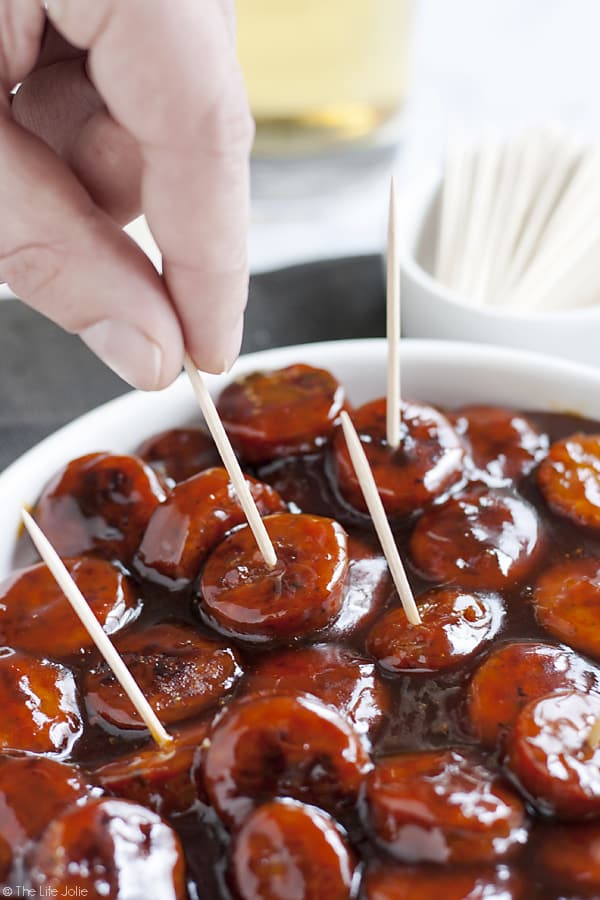
    • What is the best way to serve this kielbasa recipe? I like to serve it on a serving dish with toothpicks. You can also keep them in a smaller slow cooker on warm.

    how to cook kielbasa

    Make it a meal!

    A few great recipes to round out and complete this meal would be:

    • BBQ Crock Pot Meatballs
    • Easy Instant Pot Chili
    • Garbage Plate
    • BLT Ranch Flatbread Pizza
    • No Bake Peanut Butter Pie

    Helpful tools:

    1. Large saute pan
    2. Wooden spoon
    3. Chef's knife
    4. Cutting board
    5. Measuring cups
    6. Measuring spoons
    7. Saucepan
    8. Whisk

    Sweet and Spicy Kielbasa Sausage Bites are such an easy recipe! Just 3 simple ingredients and these glazed sausage bites are sure to be a hit at any holiday or game day party!

    Sweet and Spicy Kielbasa Sausage Bites

    Jessy Freimann
    Sweet and Spicy Kielbasa Sausage Bites are such an easy recipe! Just 3 simple ingredients and these glazed sausage bites are sure to be a hit at any holiday or game day party!
    5 from 3 votes
    Print Recipe Pin Recipe
    Prep Time 5 minutes mins
    Cook Time 20 minutes mins
    Total Time 25 minutes mins
    Course Appetizer
    Cuisine American
    Servings 6 servings
    Calories 297 kcal

    Equipment

    • 1 Skillet
    • 1 cutting board
    • 1 chefs knife
    • 1 Measuring cups and spoons

    Ingredients
      

    • 1 cup apricot preserves
    • 4 Tablespoons hot sauce (I like Frank's Red Hot for this)
    • 13 ounces Kielbasa sliced

    Instructions
     

    • Whisk together apricot preserves and hot sauce in a small pot over medium/medium low heat. Stir periodically for around 7 minutes or until it starts to bubble.
    • While the sauce heats, grease large sauté pan with cooking spray and heat to medium high.
    • Add sliced kielbasa to the pan and brown for around 5 minutes on each side until it's nicely seared.
    • Drain oil and reduce heat to a little below medium.
    • Add the sauce to the pan with the kielbasa and cook for around 10-15 minutes until the sauce reduces, stirring frequently. Serve immediately.

    Notes

    If you're doubling or tripling for a crowd, do meat in shifts so they all get a nice sear. This is best served right away, but if you must let it sit do it in a warm slow cooker.

    Nutrition

    Serving: 1servingCalories: 297kcalCarbohydrates: 27gProtein: 9gFat: 18gSaturated Fat: 6gPolyunsaturated Fat: 2gMonounsaturated Fat: 8gCholesterol: 43mgSodium: 783mgPotassium: 188mgFiber: 0.1gSugar: 17gVitamin A: 95IUVitamin C: 11mgCalcium: 16mgIron: 1mg
    Tried this recipe?Let us know how it was!

    If you tried this recipe please comment and rate it 🙂 I love hearing your feedback and answering your questions! And if you make this please tag me on Instagram with @thelifejolie so I can share it <3

    Other great meaty appetizer recipes are:

    • Philly Cheese Steak Bombs
    • Salami Chips
    • Baked Buffalo Chicken Sliders
    • BBQ Crockpot Meatballs

    You can find a full index of my recipes here.

    Don’t forget to follow The Life Jolie on Pinterest for more recipe inspiration!

    Or if Pinterest isn’t your style, bookmark this post!

    Let’s keep the conversation going- join my Facebook group!

    Pinterest for more recipe inspiration!    These Sweet and Spicy Kielbasa Bites are such an easy recipe! Just 3 simple ingredients and they're ready in around 20 minutes. These glazed sausage bites are sure to be at hit at any holiday or game day party!

    Best tools for prepping dump recipes

    Jan 30, 2019 · Leave a Comment

    I put together a list of the best tools to get easy dump dinners onto your table. They make the recipe prep as efficient as possible.

    As I mentioned in my last post introducing my new series Dump it 'til it's hot, I'd be sharing some posts this week with some of the best tools for preparing dump recipes. I try to keep things as simple as possible to get these easy dinners onto your table, but here are some awesome tools that I love, which will make the preparation of these recipe as efficient as possible.

    This post contains Affiliate Links. Please see the disclaimer here.

    I put together a list of the best tools to get easy dump dinners onto your table. They make the recipe prep as efficient as possible.

    Basic tools for prepping ingredients:

    While I know that most of us don't have huge kitchens with tons of space for a million different gadgets, the following items are important to have on hand for preparing any recipe and don't really require explanation (you probably already have them on hand but here are the ones that I love.

    • Measuring spoons
    • Measuring cups
    • Liquid measuring cup
    • Chef's knife
    • Cutting board
    • Mini prep processor or a chopper- to make prep a breeze!

    Equipment for cooking dump dinners:

    For this series I'll be sharing recipes for a variety of different cooking styles that all fall under the "dump recipe" umbrella. Some will be meant primarily for Crock Pot / Instant Pot dinners. Some will be recipes that you can dump into a pan and bake. Some will be recipes you can Marinate ahead and grill. The following equipment will help you be able to prepare these easy dinner recipes:

    • Slow cooker- I like this particular slow cooker because I can transport it easily to parties and get-togethers.
    • Instant pot- This has been a lifesaver for me on days when I forget to dump the ingredients into the slow cooker and still want that amazingly fall-apart-tender-meat.
    • 9" x 13" pan- Any of dump recipes that call for baking are written to be baked in this size pan.
    • Grill tongs- Always good to have for any of the grilling recipes!
    • Meat thermometer- Once again, a must when grilling meats.

    Tools for making ahead meals, freezer meals and meal prep:

    The great thing about dump-and-go recipes is that they lend themselves very well to make ahead meals, easy freezer meals and meal prep for things like lunches throughout the week. I also threw a few items on here to make your life easier and more efficient when making these recipes.

    • Gallon freezer zipper bags- these are my bags of choice for preparing my dump recipes.
    • Meal prep containers- This set of 5 containers is perfect for making meals ahead to have for lunch throughout the week.
    • Bag rack holder- This is perfect for batch cooking to hold your bags open so you can make an assembly line and fill your freezer.
    • Slow cooker liners- because minimal clean up is never a bad thing!

    Make sure you check out the main page for the dump series. And don't forget to subscribe to get all the free bonuses!

    You can find a full index of my recipes here.

    Don’t forget to follow The Life Jolie on Pinterest for more recipe inspiration!

    Or if Pinterest isn’t your style, bookmark this post!

    Let’s keep the conversation going- join my Facebook group! 

    Introducing my new series, Dump It 'Til It's Hot!

    Jan 28, 2019 · Leave a Comment

    Stop struggling to get dinner on the table and start making dump recipes! With minimal preparation and maximum flavor, these also make fantastic make ahead freezer meals and meal preps for lunches throughout the week. Easy never tasted so good!

    Today’s post is a little different, but for the past couple months I’ve been working on a project and I’m so excited to share with you guys! One thing that’s super important to me is to create content that really helps you, brings you value and helps you overcome challenges in the kitchen.

    At the end of each year, I do a reader survey and I look closely at your responses and use that to guide me in the type of recipes I’ll create. This year, I noticed an overwhelming amount of responses telling me that you guys really struggle with having time to put together meals for your family and coming up with ideas and inspiration for these meals.

    This is such a universal challenge- no matter where you’re at in life, you gotta eat- but life is busy. There has got to be an easier way to enjoy a great meal with great flavor without sacrificing quality time with your family.

    As I sat and thought about it, my mission became clear: I need to create a meal you can feel proud to serve to your family without all the effort and hassle for you.

    Stop struggling to get dinner on the table and start making dump recipes! With minimal preparation and maximum flavor, these also make fantastic make ahead freezer meals and meal preps for lunches throughout the week. Easy never tasted so good!

    So I’m super proud to share the big project I’ve been working on for you guys:

    Easy Dinners dump recipe logo

    Here's how it will work:

    At the beginning of each month, I’m going to share 5 recipes for dump dinners. These are meals that require just a small amount of prep for you to then freeze for later or dump right into your slow cooker / instant pot / baking pan / grill and let it cook while you relax.

    But I’m not stopping there! I want to make things as simple as possible, so in addition to these great recipes, I’m putting together some killer bonus content exclusively for my email subscribers. You’ll find things like earlier access to recipes, printable grocery lists, prep list, batch cooking charts and other awesome and helpful things sent right to your inbox. And all completely free (without any spam and without sharing your info because I hate that as much as you guys do!)

    Easy Dinners subscribe button

    Let's get started!

    Tonight ( I'll be going live on my instagram account to talk about it and answer any questions if anyone has them (and be sure to follow along on that account as well since I'll have giveaways periodically!).

    I created a landing page with all the specifics about this series and where you can browse all the current dump recipes on this site. This week, I'll have two more posts going live. The first will be a few of my favorite tools for making dump-and-go recipes so that you can make sure you're well stocked. The next will be some general tips and tricks for dump recipes to make it all even easier for you!

    And then next week, the first 5 recipes will drop (unless you're an email subscriber, in which case you'll see a preview of one of my favorites before then! Sign up here!) and we'll be off to the races!

    I'm so thrilled to put this together for young I can't wait to hear what you guys think of all these recipes! We had a blast testing these first 5 recipes in our home and my family totally loved all of them!

    You can find a full index of my recipes here.

    Don’t forget to follow The Life Jolie on Pinterest for more recipe inspiration!

    Or if Pinterest isn’t your style, bookmark this post!

    Let’s keep the conversation going- join my Facebook group! 

    Easy Banh Mi Sandwich

    Jan 23, 2019 · Leave a Comment

    This easy Banh Mi Sandwich is a tasty twist on the traditional Vietnamese specialty. It's super easy to make and is a totally satisfying sandwich you'll want to make again and again!

    This easy Banh Mi Sandwich is a tasty twist on the traditional Vietnamese specialty. It's super easy to make and is a totally satisfying sandwich you'll want to make again and again!

    banh mi sandwich

    banh mi

    Easy Banh Mi

    This is a sponsored conversation on behalf of Honeysuckle White and Shady Brook Farms. Thank you for supporting the brands that support this blog. This post contains Affiliate Links. Please see the disclaimer here.

    Did you guys make a resolution for this year? I typically fail at New Years resolutions, so this year, instead of making one that I know I won't keep, I've resolved to simply try to make better food choices while still enjoying treats in moderation. A little 80/20 if you will; 80% balanced foods that more nutritious, a rainbow of fruits and veggies and all-around good food and 20% of the processed and "naughty" stuff. I've definitely slipped up a bit but I'm taking it a day at a time.

    So it seemed like a good time to share a recipe that's got that same balance involved: this super simple and totally delicious Banh Mi Sandwich. It's my own tasty twist on a Vietnamese Banh Mi with great flavor from the pickled veggies, fresh cilantro, jalapeño peppers and creamy Sriracha mayo.

    And the protein that pulls it all together is Shady Brook Farms Spinach & Kale Turkey Patties. These delicious and nutritious patties are the perfect centerpiece to this sandwich. They're my new favorite go-to protein that allows me to enjoy a satisfying and nutritious lunch or dinner that's also super easy to throw together!

    vietnamese banh mi

    Shady Brook Farms Spinach & Kale Turkey Patties

    Shady Brook Farms Turkey products are an excellent way to stay on track with your New Years Resolution. They're committed to food transparency and helping to put delicious, nutritious food on the family table while also helping you understand where your food comes from and how it's produced.

    As I mentioned in my roast turkey post, Shady Brook Farms and sister brand Honeysuckle White are the only major turkey brands to exclusively provide family farm-raised turkeys, which makes me feel good about serving these products to my family and friends. All of their turkeys are raised without growth-promoting antibiotics and no added hormones or steroids.

    You can find Shady Brook Farms products at retailers on the East Coast, while Honeysuckle White products are available at retailers in the Midwest / West Coast. They offer a variety of tasty products that can help you stick to your goals, including Ground Turkey, Cheese Stuffed Italian Meatballs, HomeStyle Turkey Meatloaf and Turkey Breast Strips.

    Click here to find the Shady Brook Farms Spinach & Kale Turkey Patties that are featured in this recipe at a retailer near you!

    Shady Brook Farms Spinach & Kale Turkey Patties

    Shady Brook Farms Spinach & Kale Turkey Patties Banh Mi

    Tips for making this Banh Mi Sandwich

    • I like to prepare the pickled vegetables in advance, usually the night before. They can also be prepared the day-of, but they do require at least a couple hours to marinate.
    • I like to slice my radishes, carrots and onions to be very thin. A Mandoline works great for this and you can usually find the carrots pre-shredded.
    • If you don't want the pickled veggies to be as spicy, removed the pepper seeds before chopping and adding to the mixture.
    • My favorite way to cook the Shady Brook Farms Spinach & Kale Turkey Patties is to grill them, either outside on our grill or on the stovetop using a grill pan.
    • Be sure to cook the patties until they reach an internal temperature of 165 degrees, which is considered the safe temperature for consuming poultry. I insert an Instant Read Thermometer into the thickest part of the pattie for the most accurate results (and the juices will also run clear).
    • When cooking on the stovetop, if you find that the patties haven't reached 165 degrees, you can add a small splash of water to the bottom of the pan and cover it for a couple minutes to lightly steam until it reaches the right temperature for consumption.
    • You can usually find Sriracha mayo in the grocery store near the other prepared mayonnaise products but you can also make your own by adding Sriracha sauce to mayonnaise and tasting it until you have the flavor balance that you want (start with a little and add more).

    banh mi recipe

    Frequently asked questions about making a Banh Mi

    • Can I freeze the Shady Brook Farms Spinach & Kale Turkey Patties? Yes! They freeze very well wrapped in plastic wrap and bagged in a zipper freezer bag.
    • What if I don't like spicy foods? No problem! Remove the seeds from the pepper used in the pickled veggies or omit it entirely (this includes the sliced jalapeño peppers) and substitute with plain mayo (or make your own Sriracha mayo with a smaller amount of Sriracha).
    • What is a traditional banh mi? A Banh Mi is Vietnamese street food that a hybrid of a Vietnamese and French sandwich. Usually served on a baguette with pickled vegetables, cilantro, chilis and cucumber featuring various protein options.
    • Is this an authentic Banh Mi? Probably not. While it's inspired by a traditional Banh Mi, I've added my own twist to this sandwich and while it's may not be traditional, it sure is delicious!
    • Can Banh Mi be eaten cold? Yes, but this sandwich is best served just after the patties are cooked.

    Vietnamese Banh Mi sandwich

    Make it a meal!

    A few great recipes to round out and complete this meal are:

    • Rainbow Asian Chicken Salad
    • Crunchy Ramen Coleslaw
    • Cabbage and Pork Meatball Soup

    Helpful tools:

    1. Mandoline
    2. Mixing bowl
    3. Spatula
    4. Chef's knife
    5. Cutting board
    6. Measuring cups
    7. Measuring spoons
    8. Grill pan
    9. Turner
    10. Instant Read Thermometer

    Banh Mi sandwich recipe

    This easy Banh Mi Sandwich is a tasty twist on the traditional Vietnamese specialty. It's super easy to make and is a totally satisfying sandwich you'll want to make again and again!

    Easy Banh Mi Sandwich

    Jessy Freimann
    This easy Banh Mi Sandwich is a tasty twist on the traditional Vietnamese specialty. It's super easy to make and is a super satisfying sandwich you'll want to make again and again!
    No ratings yet
    Print Recipe Pin Recipe
    Prep Time 10 minutes mins
    Cook Time 15 minutes mins
    Pickling time 4 hours hrs
    Total Time 25 minutes mins
    Course Main Course
    Cuisine French, Vietnamese
    Servings 4 servings

    Ingredients
      

    Pickled Vegetables

    • ½ cup white vinegar
    • ½ cup rice vinegar
    • 1 cup radishes, cleaned and thinly sliced
    • 1 cup carrots shredded
    • ½ cup red onion, peeled and thinly sliced
    • 1 jalapeno pepper, halved, seeds removed and sliced
    • ⅓ cup granulated sugar (if you prefer the mixture to be sweeter you can use ½ cup if you prefer less sweet, use ¼ cup)
    • ½ teaspoon kosher salt

    Banh Mi Sandwich

    • Cooking spray
    • 4 Shady Brook Farms Spinach & Kale Turkey Patties
    • 1-2 jalapeno peppers, sliced
    • Fresh cilantro
    • 4 Tablespoons Sriracha mayonnaise
    • 1 long baguette, cut into 4 pieces and sliced to make a top and a bottom (baguette sizes may vary, so you may need 2)

    Instructions
     

    Pickled Vegetables

    • In a small pan, heat white and rice vinegars over medium heat until they're just beginning to steam and simmer, around 5 minutes. You don't want it to boil. Remove from the heat
    • While the vinegars heat up, place radishes, carrots, onion and jalapeno pepper into a large bowl. Sprinkle with sugar and salt and toss to combine.
    • Pour the warm vinegars over the vegetables and stir until all components are well combined. Cover and refrigerate for at least 4 hours, or overnight.

    Banh Mi Sandwich

    • Spray a grill pan (or your grill) with cooking spray and heat over medium high heat.
    • Once it's nice and hot add Shady Brook Farms Spinach & Kale Turkey Patties. 
    • Cook for 6-7 minutes per side turning once and check temperature. If it hasn't reached 165 degrees keep cooking (if using a grill pan, add a small splash of water to steam for a couple minutes until it reaches temp).
    • Remove from heat and rest for 3-5 minutes. Slice in half.
    • While the Shady Brook Farms Spinach & Kale Turkey Patties cook, Slice the baguette so you have a top and a bottom. 
    • Drizzle a generous portion of Sriracha mayonnaise onto the bottom bun.
    • Place the pattie halves onto the bottom bun in a single layer.
    • Top with plenty of pickled vegetables, additional sliced jalapenos if you like spicy foods, fresh cilantro and the top bun. Serve immediately.
    Tried this recipe?Let us know how it was!

    Shady Brook Farms Turkey Patties

    If you tried this recipe please comment and rate it 🙂 I love hearing your feedback and answering your questions! And if you make it please tag me on Instagram with @thelifejolie so I can share it <3

    Looking for some other great sandwich recipes?

    • Cheesy Bodega Style Breakfast Sandwich
    • Copycat Panera Bread Napa Almond Chicken Salad Sandwich
    • Day-After-Thanksgiving Sandwich

    You can find a full index of my recipes here.

    Don’t forget to follow The Life Jolie on Pinterest for more recipe inspiration!

    Or if Pinterest isn’t your style, bookmark this post!

    Let’s keep the conversation going- join my Facebook group!

    Sautéed Kale with Mushrooms and Tomatoes

    Jan 22, 2019 · 35 Comments

    Sautéed Kale with Mushrooms and Tomatoes is the best healthy side dish. It whips up super quickly and easily and tastes fantastic! This also makes a satisfying vegetable main dish.

    Sautéed Kale with Mushrooms and Tomatoes is the best healthy side dish. It whips up super quickly and easily and tastes fantastic! 

    sauteed kale

    Sautéed Kale

    This post contains Affiliate Links. Please see the disclaimer here.

    I love greens. Kale. Escarole. Chard. Spinach. Mustard Greens. Dandelion greens. I love them all so hard! They're all so darn healthy and so delicious in their own ways. Growing up, I had a love/hate relationship with greens, like most kids (I know most kids are more on the hate side of that, but you know what I mean).

    Kale didn’t actually come onto my radar until it became the sexy new food trend in recent years. While our current food culture is almost saturated with it, I've noticed it can be very divisive. I think it's the wild amount of texture it brings to dishes can turn some people off but I rather enjoy the texture.

    The first time a variation of this recipe was made, it was by my mom. She made it with Swiss Chard and we knew instantly that it was a keeper. In addition to the healthy greens, you have onions and garlic to throw in some fantastic flavor, mushrooms for the umami factor, tomatoes for a bit of acid and some crushed red pepper for a nice kick.

    Sauteed Kale recipe

    Tips for how to cook kale

    • Pre-washed and cut kale can help make the prep much quicker and easier.
    • If you're working with kale that isn't prepackaged (or any greens for that matter) make sure you wash it extra well and keep an eye out for worms (this was the first thing my grandma taught me when working with greens).
    • Either way, remove those fibrous stems. They're edible but not terribly enjoyable to chew. Take the extra step and remove those stems, you'll be glad you did!
    • If you're really feeling frisky, you can throw in a few tablespoons of white wine to really pull everything together.

    Frequently asked questions about making this sautéed kale recipe

    • Do I have to use kale? This particular recipe is amazing with any greens you choose. I happened to have kale on hand and so this recipe was born. But feel free to sub any other type of greens.
    • What do you serve with sautéed kale? This dish not only makes an excellent veggie side, but also a hearty meatless main.  I've been eating it for lunch all week over brown rice and it's made an excellent lunch!
    • Should you massage kale before eating? If you’re eating it raw then yes. For this preparation, it’s not necessary because cooking it will tenderize it.
    • How long does sautéed kale last? This stays good covered in the fridge for up to a week.
    • What’s the best way to reheat sautéed kale? I do it in the microwave, but you can also do it in a small pan over medium heat stirring often.
    • Can this be frozen? I wouldn’t recommend it.

    how to cook kale

    Make it a meal!

    A few great recipes to round out and complete this meal would be:

    • Smothered Pork Tenderloin
    • Baked Chicken Cordon Bleu
    • French Onion Mashed Potatoes
    • Summer Bounty Strawberry Salad
    • Grandma's Best Banana Cake
    • Quick and Easy Chocolate Pudding Cake

    Helpful tools:

    1. Large saute pan
    2. Wooden spoon
    3. Chef's knife
    4. Cutting board
    5. Measuring cups
    6. Measuring spoons

    Sautéed Kale with Mushrooms and Tomatoes is the best healthy side dish. It whips up super quickly and easily and tastes fantastic! This also makes a satisfying vegetable main dish.

    Sautéed Kale With Mushrooms and Tomatoes

    Jessy Freimann
    Sauteed Kale with Mushrooms and Tomatoes is the best healthy side dish. This also makes a great vegetarian main dish. I love to cook a big batch to eat with lunch or dinner- it's full of delicious flavor!
    5 from 3 votes
    Print Recipe Pin Recipe
    Prep Time 10 minutes mins
    Cook Time 15 minutes mins
    Total Time 25 minutes mins
    Course Side Dish
    Cuisine American
    Servings 4 servings
    Calories 173 kcal

    Equipment

    • 1 Skillet
    • 1 cutting board
    • 1 chefs knife
    • 1 Measuring cups and spoons

    Ingredients
      

    • 16 ounces kale cleaned well, trimmed of stems and cut down to the size that you make lettuce in a normal salad- not a chopped salad
    • 1 medium onion, diced
    • 4 cloves garlic, minced or pressed
    • 1 Roma tomato, diced
    • 8 ounces mushrooms sliced
    • 3 Tablespoons Olive oil
    • 1 teaspoon Kosher Salt to taste
    • ¼ teaspoon ground black pepper, to taste
    • 1 teaspoon Garlic powder to taste
    • ¼ teaspoon Crushed red pepper to taste
    • 3 tablespoons white wine (optional)

    Instructions
     

    • Heat a olive oil over medium to medium high heat in saute pan and add garlic and onion. 
    • Sprinkle with a bit of salt and pepper to taste and saute stirring frequently for 5 minutes until they are sweating but not browning.
    • Add mushrooms, season with salt and pepper and allow them to brown 3-4 more minutes stirring often.
    • Add greens to the pan and season liberally with salt, pepper, garlic powder and crushed red pepper. Mix everything together and allow the greens to cook down for 3-5 minutes, turning them periodically.
    • Add the diced tomatoes and wine. Cover and cook down for 5-7 minutes, stirring periodically.
    • Once everything is well combined serve as a side dish or over rice as a meatless main dish.

    Notes

    This will last up to 3 days in the refrigerator.

    Nutrition

    Serving: 1servingCalories: 173kcalCarbohydrates: 11gProtein: 6gFat: 12gSaturated Fat: 2gPolyunsaturated Fat: 2gMonounsaturated Fat: 8gSodium: 649mgPotassium: 648mgFiber: 6gSugar: 3gVitamin A: 11367IUVitamin C: 110mgCalcium: 305mgIron: 2mg
    Tried this recipe?Let us know how it was!

    If you tried this recipe please comment and rate it 🙂 I love hearing your feedback and answering your questions! And if you make this please tag me on Instagram with @thelifejolie so I can share it <3

    Try some other great vegetable side dishes include:

    • Sautéed Shredded Brussels Sprouts
    • Grandma's Baked Artichokes
    • Honey Soy Glazed Carrots and Parsnips
    • Garlic Green Beans

    You can find a full index of my recipes here.

    Don’t forget to follow The Life Jolie on Pinterest for more recipe inspiration!

    Or if Pinterest isn’t your style, bookmark this post!

    Let’s keep the conversation going- join my Facebook group! 

    Sauteed Kale with Mushrooms and Tomatoes is the best healthy side dish. This also makes a great vegetarian main dish. I love to cook a big batch to eat with lunch or dinner- it's full of delicious flavor!

    Smothered Pork Tenderloin in Apple Cider Gravy

    Jan 11, 2019 · 34 Comments

    This Smothered Pork Tenderloin in Apple Cider Gravy is the best meaty main dish for dinner. It’s special enough for an intimate dinner party but also makes a quick and cozy weeknight meal! This recipe is so easy but tastes fantastic and comes together pretty quickly!

    This Smothered Pork Tenderloin in Apple Cider Gravy is the best meaty main dish for dinner. It’s special enough for an intimate dinner party but also makes a quick and cozy weeknight meal!

    Pork tenderloin

    Smothered Pork Tenderloin

    This post contains Affiliate Links. Please see the disclaimer here.

    I love a good stick-to-your-bones, meat-and-potatoes dinner. And this roasted pork tenderloin truly delivers! The pork loin comes out perfectly juicy and delicious. The gravy is so good you'll feel absolutely no shame when you drown your entire plate in it as you simultaneously contemplate filling your tub with it (Who me? Never!).

    I originally started dreaming this recipe up as a quick and tasty weeknight meal. I make a lot of pork tenderloin, particularly on weeknights. It's a cut of meat that's pretty quick and easy to throw together and it always stays so tender!

    Since I has some delicious apple cider hanging out in the fridge, I figured why not throw it into the gravy? And I know that some of you are shaking your heads at the thought of something sweet invading your gravy. But do me a favor and try to keep an open mind. The cider actually helps balance out all of the deliciously savory flavors and adds a nice amount of depth. The saccharine fruitiness that can often overpower some sauces is simply not there.

    pork tenderloin recipes

    Tips for how to cook pork tenderloin smothered in gravy

    • While olive oil is typically my go-to oil for cooking, for this recipe I use canola or vegetable oil because you’ll be searing the tenderloin over high heat and it has a higher smoke point.
    • I left the seasoning amounts to taste, but I always give it a nice sprinkle.
    • The amount of cornstarch I use give you a nice, thick gravy but if you want it a bit thinner, feel free to halve it.
    • If apple cider isn’t available, you can always substitute apple juice.
    • This recipe is designed to be made in a cast iron pan. But if you don’t have one, it’s ok, just be sure to get a nice sear on it and allow a bit more baking time if needed since other types of pans don’t conduct heat as well as cast iron.
    • I cook my pork to 145 degrees and then rest it for 5-10 minutes in a foil tent to redistribute the juices (it will continue cooking a bit more).

    how to cook pork tenderloin

    Frequently asked questions about making pork tenderloin recipes

    • How long do you cook a pork tenderloin in oven? This one goes for about 20 minutes. No all ovens are different so start temping around 15 minutes and when the internal temperature at the thickest part of the tenderloin reaches 145 degrees you can pull it and rest it.
    • What do you serve with this pork tenderloin? I personally love it with mashed potatoes since the gravy is so delicious and a green veggie of some sort.
    • Why sear the pork tenderloin? It locks in the flavor and also reduces the baking time.
    • Can pork be served pink? Yes, it’s ok if it’s a little pink which is why I pull it at 145 degrees.
    • Can I double the recipe for a crowd? While this isn't the ideal dish for feeding a crowd though could always double or triple it by transferring into a large baking pan, just know that it may take longer to cook.

    pork tenderloin oven

    Make it a meal!

    A few great recipes to round out and complete this meal would be:

    • Peas with Onions
    • Easy Garlic Green Beans
    • French Onion Mashed Potatoes
    • Summer Bounty Strawberry Salad
    • Grandma's Best Banana Cake
    • Quick and Easy Chocolate Pudding Cake

    Helpful tools:

    1. Chef's knife
    2. Cutting board
    3. Measuring cups
    4. Measuring spoons
    5. Mixing bowl
    6. Whisk
    7. Cast iron skillet

    This Smothered Pork Tenderloin in Apple Cider Gravy is the best meaty main dish for dinner. It’s special enough for an intimate dinner party but also makes a quick and cozy weeknight meal! This recipe is so easy but tastes fantastic and comes together pretty quickly!

    Smothered Pork Tenderloin in Apple Cider Gravy

    Jessy Freimann
    This Smothered Pork Tenderloin in Apple Cider Gravy is the best meaty main dish for dinner. It’s special enough for an intimate dinner party but also makes a quick and cozy weeknight meal!
    5 from 1 vote
    Print Recipe Pin Recipe
    Prep Time 5 minutes mins
    Cook Time 30 minutes mins
    Resting time 10 minutes mins
    Total Time 35 minutes mins
    Course Main Course
    Cuisine American
    Servings 6 servings
    Calories 207 kcal

    Equipment

    • 1 Measuring cups and spoons
    • 1 cutting board
    • 1 chefs knife
    • 1 cast iron skillet

    Ingredients
      

    • 2 Tablespoons vegetable oil
    • 1 ¼ pound pork tenderloin
    • ½ teaspoon Kosher salt, to taste
    • ¼ teaspoon Ground black pepper, to taste
    • ½ teaspoon Dried thyme, to taste
    • 14.5 ounces chicken broth
    • 2 Tablespoons corn starch (you can cut this to 1 Tablespoon if you want a sightly thinner gravy)
    • 10.5 ounces cream of mushroom soup canned
    • 1 packet dry onion soup seasoning
    • ½ cup apple cider (or apple juice if cider is not available)

    Instructions
     

    • Preheat the oven to 425 degrees F. In a cast iron skillet, heat oil over medium high. 
    • Pat pork tenderloin dry and season with salt, pepper and dried thyme to taste.
    • When the pan is hot, sear the pork on all sides. Keep a close eye on it because cast iron tends to move things along faster than regular pans. You want it to have a nice brown sear without burning it.
    • While the pork sears, in a separate bowl whisk broth into cornstarch until combined. Then whisk in mushroom soup, onion soup seasoning and apple cider to combine. Set aside.
    • Once each side is seared, dump broth mixture over the pork and bake uncovered for around 20-25 minutes or until the thickest part of the pork reaches an internal temperature of 145 degrees.
    • Remove the pork from the pan and let it rest under a foil tent for 10 minutes. Slice and serve with gravy immediately.

    Notes

    I use a cast iron pan that I can transfer directly into the oven. You can also use a regular saute pan and then transfer the pork into an over-safe baking dish before pouring the broth mixture over it and baking. If you don't use cast iron, make sure you account for a little extra cooking time as regular pans tend to go a bit slower than cast iron.

    Nutrition

    Serving: 1servingCalories: 207kcalCarbohydrates: 8gProtein: 22gFat: 9gSaturated Fat: 2gPolyunsaturated Fat: 3gMonounsaturated Fat: 3gTrans Fat: 0.1gCholesterol: 65mgSodium: 850mgPotassium: 468mgFiber: 0.2gSugar: 2gVitamin A: 7IUVitamin C: 0.2mgCalcium: 14mgIron: 1mg
    Tried this recipe?Let us know how it was!

    If you tried this recipe please comment and rate it 🙂 I love hearing your feedback and answering your questions! And if you make it please tag me on Instagram with @thelifejolie so I can share it <3

    Looking for some other great meaty main dishes?

    • Roast Turkey Thighs for Two
    • 3 Ingredient Slow Cooker Pork Chops
    • Mom's Meatloaf
    • Greek Yogurt Roasted Chicken

    You can find a full index of my recipes here.

    Don’t forget to follow The Life Jolie on Pinterest for more recipe inspiration!

    Or if Pinterest isn’t your style, bookmark this post!

    Let’s keep the conversation going- join my Facebook group!

    This Smothered Pork Tenderloin in Apple Cider Gravy is the best meat main dish for a holiday dinner when you have a small group of people to feed and also makes a quick and cozy weeknight meal! This recipe is so easy but tastes fantastic and comes together quickly!

    Reader Request: Super Foods Kale Salad Recipe

    Jan 2, 2019 · Leave a Comment

    Need a delicious and satisfying detox meal? This Super Foods Kale Salad Recipe is just what you're looking for! And you won't want to miss my tips for making the kale much more enjoyable to eat raw!

    Need a delicious and satisfying detox meal? This Super Foods Kale Salad Recipe is just what you're looking for! And you won't want to miss my tips for making the kale much more enjoyable to eat raw!

    kale salad recipe

    Reader Request: Kale Salad Recipe

    This post contains Affiliate Links. Please see the disclaimer here.

    Guys, I'm doing a new thing on my blog. As many of you probably saw, I've had a reader survey going, which is something I do each year around the holidays. I seriously love doing it because none of this is possible without you guys and I seriously value your opinions. I want to create recipes and content that helps you and makes your life better. So I made sure to add a section where you can request recipes that you'd like me to create!

    And let me just say, you guys had so many great ideas for delicious dishes, I could hardly wait to get into my kitchen and get started. So now, once a month (or sometimes more!) I'll be tackling some of your requests and creating recipes that you want me to make! And of course, you're always welcome to reach out to me if you have requests or comment here or DM me on Instagram.

    So the first reader request I'm tackling is a Kale Salad. And I figured, now that we're fresh into the new year, likely with a slew of resolutions just waiting to be broken (don't be like me- be strong, you can do it!), now is the perfect time to share this healthy Kale Quinoa Salad. This season also inspired me to add some other killer super foods like sweet blueberries, quinoa and salmon to pack in plenty of protein and make this a satisfying meal, carrots and red cabbage, creamy avocado, hard boiled eggs and sliced almonds.

    lacinato kale

    How to prepare kale to serve raw

    Now I'll be honest and tell you that kale is generally not my go-to salad green because it's extremely fibrous and there is such a thing as too much texture. But being a video creator has it's perks and one of those it that I've had to shoot a few kale salad recipes and quickly learned a few tricks to make this salad a bit more enjoyable to eat:

    • Remove the stems. I know this probably goes without saying, but I'm saying it anyway. Those stems are the very worst culprit when it comes to adding that fibrous texture that can be tough to bite through.
    • Chop it up. I prefer to take my kale salad as a chopped salad because it also cuts down on the texture.
    • Massage your kale. I know this sounds weird, but give your kale a good 3-5 minute massage using your clean hands like you're kneading bread. You'll know it's ready when it just starts to wilt and it should be crispy and but not rubbery. Not only will this help tenderize the kale a bit, but I'm sure it'll appreciate a nice massage as well!
    • Use your dressing to aid in the massage. So you actually have two options where this is concerned. Traditionally, you'll squeeze a little lemon juice and sprinkle a little salt onto the kale before massaging it. But I instead just throw they dressing onto the kale. It's got salt, pepper and dried herbs in it and the vinegar adds the bit of acid that you need. Work smarter, not harder, my friends!

    kale quinoa salad

    Frequently asked questions about making massaged kale salad

    • What is the best dressing for kale salad? My kale salad dressing is a simple vinaigrette made with olive oil, white balsamic vinegar, honey, dijon mustard, salt, pepper and Italian seasoning. It's fantastic!
    • Can you eat kale raw in a salad? Yes! And if you follow my directions about it will be much more palatable.
    • How do you season a kale salad? The dressing for this seasoning contained just the right amount of seasoning.
    • Can kale salad be made ahead? Yes- If you are planning to make this ahead of time, you can skip the massaging step and just dress it in advance. the acid in the dressing with help break down the fibers over time the same way that massaging the kale does right away.
    • Which kale is best for salad? The most common varieties of kale available (at least near me) are the regular curly kale and Lacinato kale, which is also called dinosaur kale. the latter of the two is more flat, but you'll just follow the same directions for tenderizing. The variety pictured in this post wis the regular curly kale.

    kale salad dressing

    Make it a meal!

    A few great recipes to round out and complete this meal are:

    • 2 Ingredient Applesauce
    • Savory Butternut Squash Soup
    • Everything Pita Chips
    • Detox Lentil Soup
    • Copycat Panera Bread Napa Almond Chicken Salad Sandwich

    Helpful tools:

    1. Mixing bowl
    2. Chef's knife
    3. Cutting board
    4. Measuring cups
    5. Measuring spoons

    Need a delicious and satisfying detox meal? This Super Foods Kale Salad Recipe is just what you're looking for! And you won't want to miss my tips for making the kale much more enjoyable to eat raw!

    Super Foods Kale Salad Recipe

    Jessy Freimann
    Need a delicious and satisfying detox meal? This Super Foods Kale Salad Recipe is just what you're looking for! And you won't want to miss my tips for making the kale much more enjoyable to eat raw!
    No ratings yet
    Print Recipe Pin Recipe
    Prep Time 10 minutes mins
    Cook Time 20 minutes mins
    Total Time 30 minutes mins
    Course Salad
    Cuisine American
    Servings 4 servings
    Calories 616 kcal

    Ingredients
      

    Kale Salad Dressing

    • ½ cup olive oil
    • ¼ Tablespoons white balsamic vinegar
    • 3 teaspoons honey
    • 2 teaspoon prepared dijon mustard
    • kosher salt, to taste
    • ground black pepper, to taste
    • Italian seasoning, to taste

    Kale Salad

    • 4 filets salmon
    • 16 ounces kale, stems removed and roughly chopped
    • 1 pint blueberries
    • 1 cup cooked quinoa
    • 2 avocados, sliced
    • ½ cup carrots, shredded
    • 1 cup reb cabbage, shredded
    • ⅓ cup almonds, sliced
    • 4 large hardboiled eggs, peeled and sliced

    Instructions
     

    • Preheat the oven to 400 degrees F and line a sheet pan with foil or parchment (if foil, grease it). Place the salmon onto the pan and sprinkle with a squeeze of lemon juice and salt and ground black pepper to taste.
    • Bake the salmon for 15-20 minutes or until the internal temperature of 145 degrees.
    • While the salmon bakes, cook the quinoa according to package directions and hard boil the eggs. 
    • Also while the salmon bakes, whisk together all dressing ingredients until well combined.
    • Place the chopped kale into a large mixing bowl and pour the dressing onto the chopped kale. Start with some of the dressing and add more as necessary, to your taste.
    • Using clean hands, gently massage the kale like you're kneading bread. Do this for 3-5 minutes until its tenderized but still is still crisp to the bite (taste it!).
    • Add all remaining salad ingredients to the bowl and toss to combine and evenly coat additional ingredients.
    • When the salmon has cooked, cool it for a couple minutes and serve flaked over the salad immediately. 

    Nutrition

    Serving: 1servingCalories: 616kcalCarbohydrates: 44gProtein: 8gFat: 49gSaturated Fat: 6gPolyunsaturated Fat: 7gMonounsaturated Fat: 34gTrans Fat: 0.003gCholesterol: 1mgSodium: 24mgPotassium: 806mgFiber: 13gSugar: 19gVitamin A: 2886IUVitamin C: 22mgCalcium: 65mgIron: 2mg
    Tried this recipe?Let us know how it was!

    If you tried this recipe please comment and rate it 🙂 I love hearing your feedback and answering your questions! And if you make it please tag me on Instagram with @thelifejolie so I can share it <3

    Looking for some other great salad recipes?

    • Summer Bounty Strawberry Salad
    • Marinated Vegetable Salad
    • Rainbow Asian Chicken Salad
    • Copycat Panera Bread BBQ Chicken Salad

    You can find a full index of my recipes here.

    Don’t forget to follow The Life Jolie on Pinterest for more recipe inspiration!

    Or if Pinterest isn’t your style, bookmark this post!

    Let’s keep the conversation going- join my Facebook group! 

    Crinkle Chocolate Cookies

    Dec 17, 2018 · 32 Comments

    A stack of crinkle chocolate cookies with a bite taken out of the top cookie.

    These crinkle chocolate cookies are soft, fudgy, and rolled in powdered sugar for that classic crackled look. They’re a must-have on any holiday cookie tray and they come together in just about 30 minutes.

    A stack of crinkle chocolate cookies with a bite taken out of the top cookie.
    [feast_advanced_jump_to]

    Why You’ll Love This Chocolate Crinkle Cookie Recipe

    These are the cookies everyone recognizes the moment they hit the holiday table. I mean, we’ve all seen those crackled, sugar-dusted beauties show up on cookie platters year after year. And with good reason! They’re soft, chewy, and loaded with chocolatey goodness in every bite.

    What I love most about these cookies is that they look impressive, but they’re surprisingly easy to make. Even if baking isn’t really your thing, this recipe is pretty hard to mess up. They turn out perfectly chewy every time: rich, fudgy, and totally irresistible. And heads-up... this recipe makes a nice-sized batch, but don’t expect leftovers. Here’s why you’ll love every single bite of this chocolate crinkle cookie:

    • Rich & fudgy
    • Holiday-perfect
    • Fail-proof bake
    • Total crowd-pleaser
    A close up overhead image of cookies lined up next to each other.

    Ingredient Information And Substitutions

    • All-purpose flour- Gives the cookies structure and balance. Use a 1:1 gluten-free baking blend if needed.
    • Unsweetened chocolate- Melted real chocolate gives rich, deep flavor. 
    • Granulated sugar- Sweetens and helps the cookies spread just right.
    • Confectioner’s sugar- Creates that classic crinkled, snowy look.
    • Vegetable oil- Keeps the cookies soft and chewy. Canola oil works too.
    • Eggs- Bind the dough and add moisture.
    • Vanilla extract- Enhances the chocolate flavor and adds warmth. Add almond extract for a twist, or skip it if you don’t have it.
    • Baking powder- Helps the cookies puff and crackle beautifully.
    • Kosher salt- Balances the sweetness and deepens the chocolate flavor. Swap with sea salt if needed.
    An overhead image of labeled recipe ingredients.

    How To Make This Chocolate Crinkle Cookies Recipe

    Step 1- Mix the chocolate base.

    In a large mixing bowl, beat together the oil, melted chocolate, and sugar until smooth and slightly fluffy. Mix in the eggs, followed by the vanilla, until everything is well blended.

    Wet ingredients mixed together then eggs added.

    Step 2- Combine the ingredients and chill the dough.

    In a separate bowl, whisk together the flour, baking powder, and salt. Add this mixture to the wet ingredients and stir just until combined. Don’t overmix! Cover the bowl and chill for at least a few hours.

    Step 3- Preheat and prep.

    Cookie dough with dry ingredients mixed in and then being shaped into a dough ball after chilling.

    Preheat the oven to 350 degrees F. Prepare your baking sheets by lightly greasing them or lining with parchment paper or a silicone baking mat.

    Step 4- Roll and coat.

    Scoop about a teaspoon of dough at a time, roll into small balls, and coat generously in confectioner’s sugar.

    The cookie dough ball being rolled in confectioner's sugar and then the sugar covered dough balls lined up on a baking sheet.

    Step 5- Bake and cool.

    Place on the prepared pans and bake for 10–12 minutes, until the edges are set. Let them cool slightly on the pan, then transfer to a rack to finish cooling before serving.

    Frequently Asked Questions

    Can I chill the dough overnight?

    Absolutely. Chilling overnight actually helps deepen the chocolate flavor and makes scooping and rolling easier.

    Why didn’t my cookies crack?

    They were probably too warm when baked. Make sure the dough is well-chilled before rolling and baking, and coat it in a nice layer of powdered sugar for plenty of definition.

    Do they stay soft after baking?

    They do! Just don’t overbake. Store them in an airtight container to keep that chewy texture. I add a slice of bread to absorb extra air.

    A plate of crinkle cookies with one with a bite taken.

    Tips For Making The Chocolate Crinkles

    • Melt the chocolate slowly over low heat or in short microwave bursts, stirring often, for smooth, glossy chocolate. I also like to chop it first. You can check out my guide on how to melt chocolate for step-by-step tips.
    • Chill the dough well. Cold dough is easier to roll and helps prevent spreading in the oven.
    • Coat generously. Give each dough ball a thick layer of confectioner’s sugar for those bold crinkles.
    • Don’t overbake. They should look slightly soft in the center when you pull them out. The edges will continue to set as they cool.
    • Expect a little deflation. They’ll settle slightly as they cool. That’s what keeps them chewy!
    • Add a flavor twist. Try a pinch of espresso powder or a hint of peppermint for something fun.
    • Ingredients to prep ahead- Melt the chocolate and measure the dry ingredients.
    • Leftovers and storage- Keep cookies in an airtight container for up to 1 week or freeze up to 3 months.
    A close up overhead image of cookies lined up next to each other.

    What To Serve With Chocolate Brownie Crinkle Cookies

    I love serving these with a few other holiday sweets. They’re the kind of cookie that deserves some good company (and maybe a cup of cocoa!). Here are my favorite pairings:

    • Orange Cinnamon Pull-Apart Bread
    • Strawberry Cream Cheese Pie
    • Rolo Pretzel Bites
    • Chocolate Mousse Cups

    Other Cookie Recipes To Try

    • A pile of sour cream cookies where the one in the middle has a bite out of it exposing the cakey center of the cookie.
      Sour Cream Cookies
    • A plate of Neapolitan cookies stacked into a pyramid shape.
      Italian Rainbow Cookie Recipe
    • A stack of cranberry shortbread cookies.
      Citrus Cranberry Shortbread Cookies
    • A stack of 4 Pumpkin White Chocolate chip cookies with other cookies behind it.
      Pumpkin White Chocolate Chip Cookies

    Love this recipe? Please leave a 5 star ⭐️⭐️⭐️⭐️⭐️ rating in the recipe card below ⬇️ and/or a review in the comment section further down. Check out my Amazon Store for all my favorite tools, including those used in this recipe. And follow @thelifejolie on Instagram and TikTok!

    A stack of crinkle chocolate cookies with a bite taken out of the top cookie.

    Crinkle Chocolate Cookies

    Jessy Freimann
    These crinkle chocolate cookies are soft, fudgy, and rolled in powdered sugar for that classic crackled look. They’re a must-have on any holiday cookie tray, and they come together in just about 30 minutes.
    5 from 6 votes
    Print Recipe Pin Recipe
    Prep Time 10 minutes mins
    Cook Time 12 minutes mins
    Total Time 22 minutes mins
    Course Dessert
    Cuisine American
    Servings 36 cookies
    Calories 119 kcal

    Equipment

    • mixing bowl
    • stand mixer
    • Spatula
    • chefs knife
    • cutting board
    • measuring cups
    • measuring spoons
    • sheet pan
    • Silpat

    Ingredients
      

    • ½ cup vegetable oil
    • 4 ounces unsweetened chocolate, chopped and melted
    • 2 cups granulated sugar
    • 4 large eggs
    • 2 teaspoons vanilla extract
    • 2 cups all-purpose flour
    • 2 teaspoons baking powder
    • ½ teaspoon Kosher salt
    • 1 cup confectioner's sugar

    Instructions
     

    • In a large mixing bowl beat together oil, chocolate and sugar until light and fluffy. 
    • Add eggs and vanilla extract and mix until well combined.
    • In a separate bowl combine flour, baking powder and salt and add to the wet ingredients.
    • Mix until just combined (don't over mix) and chill for at least a few hours (I chilled it overnight).
    • Preheat the oven to 350 degrees F. Prepare cookie pans by either greasing them or lining with parchment paper or a silicone liner.
    • Roll teaspoons of dough into small balls and cover in confectioner's sugar. Bake for 10-12 minutes (don't over bake). Cool and serve.

    Video

    Notes

    • Melt the chocolate slowly over low heat or in short microwave bursts, stirring often, for smooth, glossy chocolate. I also like to chop it first. You can check out my guide on how to melt chocolate for step-by-step tips.
    • Chill the dough well. Cold dough is easier to roll and helps prevent spreading in the oven.
    • Coat generously. Give each dough ball a thick layer of confectioner’s sugar for those bold crinkles.
    • Don’t overbake. They should look slightly soft in the center when you pull them out. The edges will continue to set as they cool.
    • Expect a little deflation. They’ll settle slightly as they cool. That’s what keeps them chewy!
    • Add a flavor twist. Try a pinch of espresso powder or a hint of peppermint for something fun.
    • Ingredients to prep ahead- Melt the chocolate and measure the dry ingredients.
    • Leftovers and storage- Keep cookies in an airtight container for up to 1 week or freeze up to 3 months.

    Nutrition

    Serving: 3cookiesCalories: 119kcalCarbohydrates: 21gProtein: 2gFat: 5gSaturated Fat: 2gPolyunsaturated Fat: 2gMonounsaturated Fat: 1gTrans Fat: 0.02gCholesterol: 21mgSodium: 65mgPotassium: 42mgFiber: 1gSugar: 11gVitamin A: 30IUCalcium: 21mgIron: 1mg
    Tried this recipe?Let us know how it was!

    Buffalo Chex Mix Recipe

    Dec 14, 2018 · 5 Comments

    This Buffalo Chex Mix recipe brings the crunchy goodness of Original Chex Mix but with a spicy Buffalo kick that we all love- it's down right addictive!

    This Buffalo Chex Mix recipe brings the crunchy goodness of Original Chex Mix but with a spicy Buffalo kick that we all love- it's down right addictive!

    chex mix

    Buffalo Chex Mix

    This post contains Affiliate Links. Please see the disclaimer here.

    Who loves Chex Mix, raise your hand (waves hands wildly in the air)?!  I cant believe I had never made this before! My mom used to when I was a kid, but until now, I've always bought the bags of Original Chex Mix from the store.

    I was craving some the other day so I figured I should throw it together, but I decided to give it a fun little twist. Since everyone loves Buffalo flavored foods, I figured a Buffalo Chex Mix would be a super tasty option!  And let me just say, I was right!

    Between the kick of spicy from the Buffalo Wing Sauce and the zesty flavor that the ranch seasoning brings, this Chex party mix is so good you won't be able to stop eating it! I used two varieties of Chex Cereal, pretzels, Cheezits and peanuts, which all add some fun flavor variety and a satisfying crunch. And it too me less than 10 minutes of hands-on time to throw this together!

    chex party mix

    Tips for making Homemade Chex Mix

    • I tend to add all the liquid ingredients into the measuring cup and whisking in the seasoning right in the cup to prevent additional dishes.
    • Be sure to stir the liquid mixture into the Chex Mix really well so that everything is evenly coated. It'll seem like there's not enough, but trust me, the flavor packs more of a punch than you'd expect.
    • Make sure you use a nice, deep mixing bowl so you don't have too many pieces fall out of the bowl while you're stirring.
    • I like to line two sheet pans with parchments (for easier clean up) and spread the Chex Mix out in a single layer on the pans to dry.
    • These make an excellent holiday gift and would look super festive in a mason jar or a clear plastic gift bag with some ribbon tired around it and a gift tag! They're also a killer game day snack!

    chex mix recipe

    Frequently asked questions about making Buffalo Chex Mix

    • What are the different things in Chex mix? For this recipes I use two varieties Chex cereal, pretzel sticks, peanuts and Cheezits. You can totally replace any of these items with a similarly sized snack item if you prefer.
    • How long does homemade Chex mix last? Around 4-6 weeks in an airtight container at room temperature.
    • Can you freeze this? Yes, it can be frozen in an airtight contain for 4-6 months.
    • How long do you microwave Chex Mix? 6 minutes, stirring twice (so stirring every 2 minutes).

    original chex mix recipe

    Helpful tools:

    1. Mixing bowl
    2. Spatula
    3. Measuring cups
    4. Measuring spoons
    5. Whisk
    6. Sheet pan

    This Buffalo Chex Mix recipe brings the crunchy goodness of Original Chex Mix but with a spicy Buffalo kick that we all love- it's down right addictive!

    Buffalo Chex Mix recipe

    Jessy Freimann
    This Buffalo Chex Mix recipe brings the crunchy goodness of Original Chex Mix but with a spicy Buffalo kick that we all love- it's down right addictive!
    5 from 1 vote
    Print Recipe Pin Recipe
    Prep Time 5 minutes mins
    Cook Time 6 minutes mins
    Cooling time 45 minutes mins
    Total Time 11 minutes mins
    Course Snack
    Cuisine American
    Servings 8 servings

    Ingredients
      

    • 3 cups Rice Chex cereal
    • 3 cups Wheat Chex cereal
    • 1 cup pretzel sticks
    • 1 cup Cheezits
    • 1 cup Dry roasted peanuts
    • 2 Tablespoons salted butter
    • ⅓ cup Buffalo wing sauce (make sure it's wing sauce not hot sauce)
    • 1 packet Ranch seasoning

    Instructions
     

    • In a large bowl mix together both types of Chex cereal, pretzel sticks, Cheezits and peanuts until well combined. Set aside.
    • Melt the butter in a microwave (I did around d 45 seconds) and whisk it with the wing sauce and ranch seasoning until well combined.
    • Pour half the wing sauce mixture over the Chex mixture and stir it all up. Pour the remaining mixture over Chex mixture and stir to lightly coat everything.
    • Microwave for 2 minutes on high. Remove the bowl and stir well.
    • Microwave for another 2 minutes on high. Remove the bowl and stir well.
    • Microwave for 2 more minutes on high. Remove the bowl and pour onto 2 parchment-line sheet pans to cool for 30-45 minutes.
    • Once cooled give it a quick stir to break up and pieces that might be stuck together and store in an airtight container until serving.
    Tried this recipe?Let us know how it was!

    If you tried this recipe please comment and rate it 🙂 I love hearing your feedback and answering your questions! And if you make this please tag me on Instagram with @thelifejolie so I can share it <3

    Other great Buffalo recipes are:

    • Buffalo Chicken Sliders
    • Buffalo Chicken Braid
    • Buffalo Chicken Taquitos
    • Buffalo Chicken Quesadilla

    You can find a full index of my recipes here.

    Don’t forget to follow The Life Jolie on Pinterest for more recipe inspiration!

    Or if Pinterest isn’t your style, bookmark this post!

    Let’s keep the conversation going- join my Facebook group! 

    Peanut Butter No Bake Cookies

    Dec 12, 2018 · Leave a Comment

    These Peanut Butter No Bake Cookies have just the right amount of crunch while also being chewy- they're a hit with both kids and adults without all the hassle of having to bake them!

    These Peanut Butter No Bake Cookies have just the right amount of crunch while also being chewy- they're a hit with both kids and adults without all the hassle of having to bake them!

    no bake cookies

    Peanut Butter No Bake Cookies

    This post contains Affiliate Links. Please see the disclaimer here.

    Are you ready for a deliciously crispy cookie without all the hassle of baking? Because if so, then today you've hit the jackpot! This actually worked out pretty perfectly because my friend Alli of the blog Tornadough Alli just wrote a fantastic cookbook and she has the most delicious and easy recipe for no bake cookies in there which I've decided to share with you.

    Her book is called Untraditional Desserts: 100 Classic Treats with a Twist and is full of so many amazing recipes that I had a hard time choosing what to make first! Since a lot of my followers on Instagram have requested a delicious no bake cookie recipe, it was pretty easy to narrow it down. These Chocolate Peanut Butter Cornflake Cookies seemed like the perfect option!

    I have to tell you- these no bake cookies were not only crazy easy to make, but the results were dangerously addictive and we all couldn't stop eating them! This is ideal for those of you who aren't really into baking, but still wants to make a cookie that everyone goes nuts over, and with minimal ingredients too!

    peanut butter no bake cookies

    Helpful tips for how to make no bake cookies

    • Instead of dirtying up pans, clear some space and line your counter with parchment paper.
    • When you're heating the sugar and corn syrup, be sure you don't go over medium heat. You don't want the mixture to boil, you just want to sugar to dissolve and combine.
    • When I put the heaping Tablespoons of the cooke mixture onto the parchment, I gently press it together with my (clean) fingers.
    • For some great tips on melting chocolate, check out this post on how to melt chocolate in the microwave.
    • The get a nice thin drizzle, go slowly and hold the spoon higher in the air.

    chocolate peanut butter no bake cookies

    Frequently asked questions about chocolate no bake cookies

    • How long do no bake cookies last? These were good for up to a week on your counter in an airtight container.
    • Can I freeze these cookies? I'd probably stay away from freezing these as the texture may be altered.
    • How long does it take these cookies to set? I let them set for 20 minutes and then I gave them another 15 minutes to let the chocolate drizzle set and they came out perfect!
    • How many cookies does this recipe make? If you use large scoops you can get 24. I went with smaller scoops and got around 48.

    chocolate no bake cookies

     Helpful tools:

    1. Mixing bowl
    2. Spatula
    3. Measuring cups
    4. Measuring spoons
    5. Whisk
    6. Saucepan
    7. Cookie scoop

    These Peanut Butter No Bake Cookies have just the right amount of crunch while also being chewy- they're a hit with both kids and adults without all the hassle of having to bake them!

    Peanut Butter No Bake Cookies

    Jessy Freimann
    These Peanut Butter No Bake Cookies have just the right amount of crunch while also being chewy- they're a hit with both kids and adults without all the hassle of having to bake them!
    No ratings yet
    Print Recipe Pin Recipe
    Prep Time 10 minutes mins
    Cook Time 5 minutes mins
    Setting time 45 minutes mins
    Total Time 15 minutes mins
    Course Dessert
    Cuisine American
    Servings 24 cookies

    Ingredients
      

    • 6 cups corn flakes cereal
    • 1 cup corn syrup
    • 1 cup granulated sugar
    • 1 cup creamy peanut butter
    • ¼ cup chocolate chips
    • ½ teaspoon vegetable oil

    Instructions
     

    • Line the counter with parchment paper and place the cornflakes in a mixing bowl. Set aside.
    • In a medium saucepan, combine corn syrup and granulated sugar. Whisk together over medium heat until well combined and the sugar has dissolved, about 4 minutes. Do not boil.
    • Remove the pan from the heat and stir in the peanut butter until well combined.
    • Pour the peanut butter mixture over the cornflakes and stir together until the corn flakes are fully coated.
    • Drop heaping tablespoonfuls on to the parchment paper and gently shape them with your fingers. Let them set for 30 minutes.
    • Pour the chocolate chips and vegetable oil into a small bowl and microwave in 30 second increments stirring in between until smooth and melted.
    • Lightly drizzle the melted chocolate over each cookie and let them sit for 15 minutes so the chocolate can set. Serve immediately or store in an airtight container.
    Tried this recipe?Let us know how it was!

    no bake cookie recipe

    If you tried this recipe please comment and rate it 🙂 I love hearing your feedback and answering your questions! And if you make this please tag me on Instagram with @thelifejolie so I can share it <3

    Other delicious holiday cookies include:

    • Pecan Tarts
    • Slice and Bake Cookies
    • Chocolate Crinkles
    • Sour Cream Cookies

    You can find a full index of my recipes here.

    Don’t forget to follow The Life Jolie on Pinterest for more recipe inspiration!

    Or if Pinterest isn’t your style, bookmark this post!

    Let’s keep the conversation going- join my Facebook group! 

    Salami Chips with a Honey Mustard Dipping Sauce

    Dec 12, 2018 · 20 Comments

    These Salami Chips are killer party snack and taste even better with a Honey Mustard dipping sauce. You won't believe how easy they are to make!

    These Salami Chips are killer party snack and taste even better with a Honey Mustard dipping sauce. You won't believe how easy they are to make!

    salami

    Salami in Chip Form

    This post contains Affiliate Links. Please see the disclaimer here.

    We have a bar here in Rochester called Windjammers. It's in a part of town called Charlotte (pronounces Sh-are-lot- with are sounding like the word are and the lot sounding like the word lot- which always baffles the non-Rochestarians!). There is lots to love about Windjammers. The dollar beer shelf. Their absolutely killer wings. And their Salami Chips.

    This was a discovery that came to light when we had a work outing that involved enjoying a beverage and some appetizers on the perfect summer afternoon in their outdoor seating area. When salami appetizers that looked like chips came out, I was pretty surprised to see them. I didn't know this was a thing- but I certainly wasn't sad about it!

    So now years later, I finally got my act together and made some. I don't know what took me so long because the were so insanely easy and an addictive salty snack! They have the perfect amount of crispiness and that salty flavor that we all crave once in a while. And the sweetness of the honey mustard sauce that I serve them with them adds the perfect amount of balance to this snack.

    genoa salami

    Tips for making Baked Salami

    • Be sure to line your pan for easier clean up.
    • I laid all the pieces of salami in a single layer on the pan. They will shrink a bit as they bake.
    • Allow the chips to cool a bit (so you don’t burn your hands) and then move them to a paper towel lined plate to drain, as they do get a bit greasy.
    • If you have approximately a minute and thirty seconds to spare, you can whisk together some honey and mustard to make the awesome honey mustard sauce.

    hard salami

    Frequently asked questions about this Salami Chips recipe

    • Can you freeze salami chips? I wouldn’t advise it as freezing could adversely affect the texture.
    • How long do salami chips last? They last around a week in an airtight container in the refrigerator and the sauce will last a couple weeks in the refrigerator.
    • Is it better to use genoa salami or hard salami? Either option will work, it just depends which you prefer. I went with hard salami because it was a bit smaller and I could fit more onto my pan.
    • What kind of prepared mustard is best for the honey mustard? I’ve found yellow mustard is best. I also tested dijon but it was much too spicy.

    hard salami

    Make it a meal!

    A few great recipes to round out and complete this meal are:

    • Sheet Pan Chicken Nachos
    • Sweet and Spicy Kielbasa Bites
    • Philly Cheese Steak Bombs
    • Quick and Easy Buffalo Chicken Sliders

    Helpful tools:

    1. Sheet pan
    2. Measuring spoons
    3. Measuring cups
    4. Whisk
    5. Bowls

    honey mustard

    These Salami Chips are killer party snack and taste even better with a Honey Mustard dipping sauce. You won't believe how easy they are to make!

    Salami Chips

    Jessy Freimann
    These Salami Chips are killer party snack and taste even better with a Honey Mustard dipping sauce. You won't believe how easy they are to make!
    5 from 1 vote
    Print Recipe Pin Recipe
    Prep Time 5 minutes mins
    Cook Time 30 minutes mins
    Total Time 35 minutes mins
    Course Snack
    Cuisine American
    Servings 4 servings
    Calories 272 kcal

    Equipment

    • 1 sheet pan
    • 1 mixing bowl
    • 1 Whisk
    • 1 Measuring cups and spoons

    Ingredients
      

    • ½ pound salami sliced thin
    • ¼ cup prepared yellow mustard
    • 2 Tablespoons honey

    Instructions
     

    • Preheat the oven to 300 degrees F and line sheet pans with foil or parchment paper.
    • Lay slices of salami in a single layer on pans.
    • Bake for 25-30 minutes.
    • While the salami bakes, whisk together prepared yellow mustard and honey in a small bowl until it's well combined. Refrigerate until serving.
    • When the chips are done baking, allow them to cool a bit and then drain on a paper towel lined plate (they shed a lot of oil!).
    • Serve immediately or store for up to a week in the refrigerator in an airtight container.

    Notes

    This is best served immediately but leftovers can be refrigerated for up to 3 days.

    Nutrition

    Serving: 1servingCalories: 272kcalCarbohydrates: 10gProtein: 13gFat: 20gSaturated Fat: 7gPolyunsaturated Fat: 2gMonounsaturated Fat: 9gTrans Fat: 0.003gCholesterol: 45mgSodium: 1453mgPotassium: 243mgFiber: 1gSugar: 9gVitamin A: 11IUVitamin C: 0.1mgCalcium: 18mgIron: 1mg
    Tried this recipe?Let us know how it was!

    If you tried this recipe please comment and rate it 🙂 I love hearing your feedback and answering your questions! And if you make this please tag me on Instagram with @thelifejolie so I can share it <3

    Other great snacks include:

    • Pepperoni Chips
    • Buffalo Chex Mix
    • Everything Pita Chips

    You can find a full index of my recipes here.

    Don’t forget to follow The Life Jolie on Pinterest for more recipe inspiration!

    Or if Pinterest isn’t your style, bookmark this post!

    Let’s keep the conversation going- join my Facebook group! 

    These Salami Chips are a seriously addictive appetizer recipe! They're super easy snacks to make and taste even better with a Honey Mustard dipping sauce. This is the perfect food to bring to parties and game day gatherings!

    Sautéed Shredded Brussel Sprouts featuring Holland House Cooking Wines

    Dec 4, 2018 · 2 Comments

    These Sautéed Shredded Brussel Sprouts and a festive holiday side dish recipe that's also super quick and easy to make! Made with Brussel Sprouts, Shallots, Pancetta, Holland House Sherry Cooking Wine and fresh Pomegranate Seeds.

    These Sautéed Shredded Brussel Sprouts are a festive holiday side dish recipe that's also super quick and easy to make!

    This is a sponsored conversation on behalf of Holland House Cooking Wine. Thank you for supporting the brands that support this blog. 

    Sautéed Shredded Brussels Sprouts

    Sautéed Shredded Brussel Sprouts

    Sautéed Shredded Brussel Sprouts with Sherry Cooking Wine on side

    Today, the name of the game is easy and delicious holiday side dishes. It’s always a good idea to have simple side dish recipes up your sleeve. And with the holidays in mind, I like to make sure these dishes feel extra festive.

    Shaved Brussels Sprouts are the foundation of this dish. Sautéed Shallots and pancetta add a delicious savory flavor. Fresh pomegranate seeds add a delicious brightness (both in flavor and color) and makes this dish even more beautiful. But one ingredient that I think helps bring it all together is Holland House Sherry Cooking Wine. With hints of nut and caramel, it adds hit of delicious, nutty flavor.

    Holland House Cooking Wines are the great way to stir in bold flavor to your holiday recipes. This bold boost of flavor can elevate any dish whether it’s a super quick weeknight meal or and extra special family gathering. They are available in five varieties – Marsala, Sherry, White, Red and White with Lemon.

    Holland House Cooking Wines

    Cooking Wine

    Tips for making this shredded Brussels Sprouts recipe

    • To prep the Brussels Sprouts, you'll rinse them, cut off the bottom stem, remove the outer leaves, and halve them.
    • If possible, try to purchase pancetta that is pre-diced. But if that's not possible, dice the pancetta to be the same size as the shallots to help them cook evenly.
    • Make sure you let the Holland House Sherry Cooking Wine reduce by half. This will cook off the alcohol while still leaving the delicious flavor.
    • Add the pomegranate seeds at the very last minute, they're not supposed to be cooked.
    Sherry cooking wine next to pomegranates

    Frequently asked questions about making this sautéed Brussel Sprouts recipe

    • What if I don't have pancetta available to me? No problem! You can substitute for the same amount of bacon.
    • What is the best way to get the seeds out of the pomegranate? I did a whole post on the very easiest way to remove seeds from a pomegranate!
    • Can I shred Brussels Sprouts in advance? I would encourage you to leave them whole up until you're ready to cook, but if you need to shred them in advance, store them in an air-tight container in the refrigerator for up to 2 days.

    • What's the easiest way to shred the Brussels Sprouts? Use a food processor with the shredding blade.
    • Can these be frozen? I wouldn't recommend freezing as they my come out mushy when thawed.
    • How long will leftovers last? Although these are best consumed right away, they will last up to 3 days in an air tight container in the refrigerator.

    Sautéed Shredded Brussel Sprouts with Pomegranate Seeds

    Helpful tools:

    1. Chef's knife
    2. Cutting board
    3. Food processor
    4. Measuring cups
    5. Measuring spoons
    6. Large sauté pan
    7. Wooden spoon

    Hosting Thanksgiving?

    Discover the secret to hosting Thanksgiving without all the stress! Prepsgiving is your FREE guide to making a delicious Thanksgiving feast the easy way.

    Check out more taste-tempting recipes and quick tips on Holland House’s label – like replacing ⅓ cup of water with Holland House White Cooking Wine when boiling rice to create amazing flavor. Or, add a boost to roasts and other beef and pork favorites.
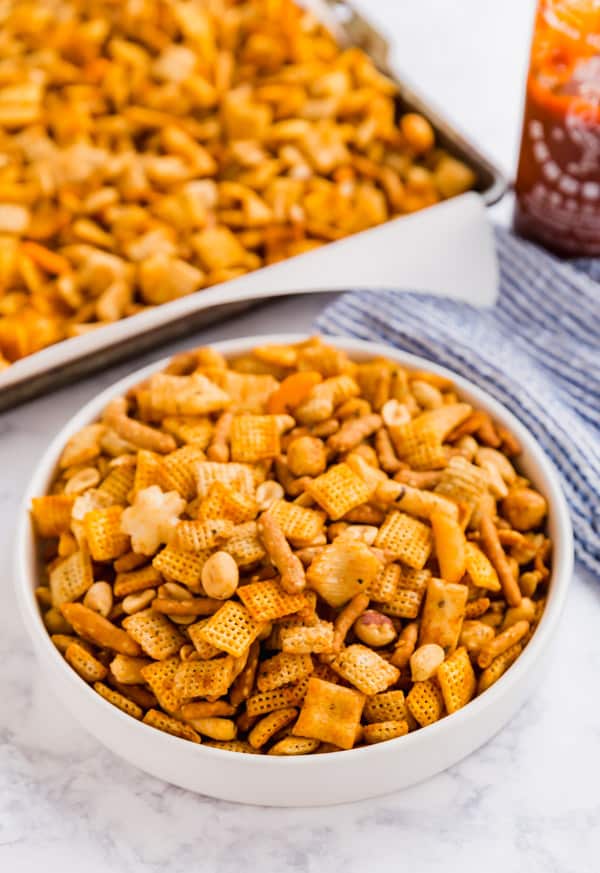
    Be sure to follow Holland House on Facebook and Pinterest for more delicious recipes and tips! Visit the Holland House website to download a redeemable coupon for your next grocery store visit.
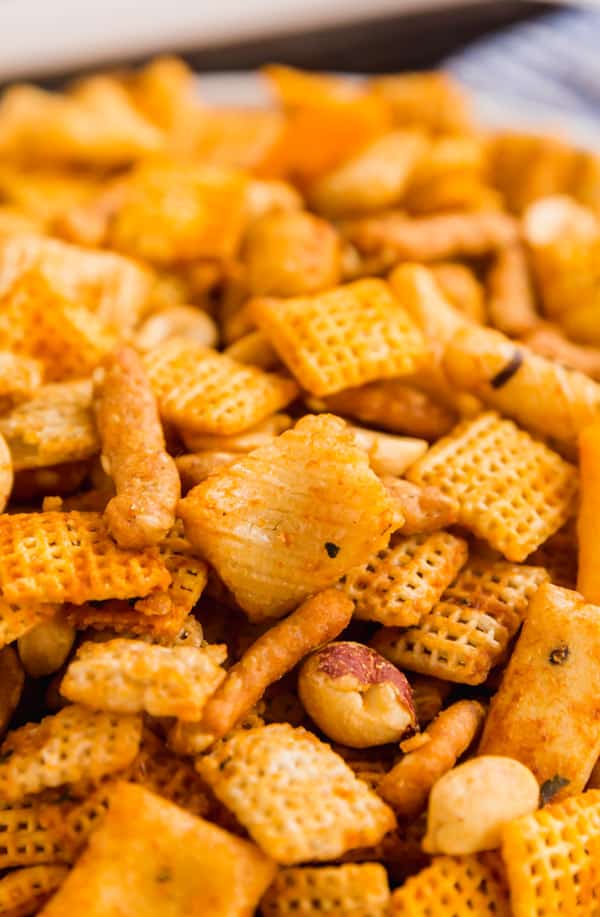
    These Sautéed Shredded Brussel Sprouts and a festive holiday side dish recipe that's also super quick and easy to make! Made with Brussel Sprouts, Shallots, Pancetta, Holland House Sherry Cooking Wine and fresh Pomegranate Seeds.
    Sautéed Shredded Brussels Sprouts

    Jessy Freimann
    These Sautéed Shredded Brussels Sprouts and a festive holiday side dish recipe that's also super quick and easy to make! 
    5 from 1 vote
    Print Recipe Pin Recipe
    Prep Time 10 minutes mins
    Cook Time 20 minutes mins
    Total Time 25 minutes mins
    Course Side Dish
    Cuisine American
    Servings 6 servings

    Ingredients
      

    • 1 Tablespoon olive oil
    • 3 medium shallots, peeled and diced
    • 4 ounces pancetta, diced
    • ½ cup Holland House Sherry Cooking Wine
    • 3 cups Brussel sprouts, cleaned, stems and outer leaves removed and halved
    • Salt and pepper
    • 1 cup fresh pomegranate seeds

    Instructions
     

    • Shred the Brussels Sprouts with a food processor and set aside.
    • Heat the oil in a large skillet over medium-high heat. 
    • Add shallots and pancetta into the pan and saute stirring often until the shallots are softened and the pancetta is brown and crispy, around 8 minutes
    • Add the Holland House Sherry Cooking Wine to the pan and reduce the heat to medium right way. Use a wooden spoon to deglaze the pan. 
    • Simmer until it's reduced by half, about 5 minutes.
    • Add shredded Brussels Sprouts and saute stirring often for around 7 minutes.
    • Taste and if needed, add salt and pepper. Top with pomegranate seeds and serve immediately.
    Tried this recipe?Let us know how it was!

    If you tried this recipe please comment and rate it 🙂 I love hearing your feedback and answering your questions! And if you make it please tag me on Instagram with @thelifejolie so I can share it <3

    Looking for some other great holiday side dish recipes?

    • Brussels Sprouts Salad
    • Grandma's Baked Artichoke Hearts
    • Easy Garlic Green Beans

    You can find a full index of my recipes here.

    Don’t forget to follow The Life Jolie on Pinterest for more recipe inspiration!

    Or if Pinterest isn’t your style, bookmark this post!

    Let’s keep the conversation going- join my Facebook group! 

    This is a sponsored post written by me on behalf of Holland House.

    Classic Peanut Butter Cookies

    Dec 2, 2018 · 8 Comments

    These classic peanut butter cookies are just like the old fashioned cookies your mom used to make; nice and chewy in the middle with just a tiny bit of crunch around the edges. This has been a family favorite recipe for generations!

    These classic peanut butter cookies are just like the old fashioned cookies your mom used to make; nice and chewy in the middle with just a tiny bit of crunch around the edges. This has been a family favorite recipe for generations!

    A plate of peanut butter cookies

    Peanut Butter Cookies

    This post contains Affiliate Links. Please see the disclaimer here.

    These homemade peanut butter cookies are one of those perfect foods where one bite instantly transports me back to my childhood in my mom's kitchen. You know the one's that are perfectly simple peanut butter cookies with a chewy center and just the right amount of crunch on the outside?

    My girls and husband basically went crazy over these when they tried them and as you can imagine the batch didn't last long in our home. This is one of those classic recipes from the Betty Crocker Cooky Book that is so old but full of so many fantastic recipes. I'm not trying to tell you that these are the best peanut butter cookies...but I'm not going to tell you that they're not. Grab a stack with a big old glass of milk and you've got yourself the best, nostalgic dessert or afternoon snack.

    easy peanut butter cookies with one on top of a glass with a bite in it

    Tips for how to make peanut butter cookies

    • Although the original recipe calls for shortening, I prefer to use butter, both for it's delicious flavor and texture.
    • Be sure to chill the dough for at least an hour to keep them from spreading too much. They will still spread, so give yourself about 3 inches between cookies, but not as much.
    • Place a little flour in a small bowl and dip your fork into it before pressing it into the balls of dough to keep it from sticking.

    how to make peanut butter cookies and a picture of a cookie on a tray

    Frequently asked questions about making easy peanut butter cookies

    • Can you freeze peanut butter cookies? Yes, you have two options. Either let them cool completely after baking and then freeze well wrapped or freeze the dough balls on a parchment lined pan and once frozen, bag them up in a zipper freezer bag.
    • What makes these cookies soft and chewy in the middle? The wet ingredients really help with this, namely the butter, egg and peanut butter.
    • How do you keep cookies chewy? I store them on my counter in an airtight container with a slice of bread in there with them. The bread gets stale and crispy from all the air, allowing the cookies to maintain their texture.

    A plate of homemade peanut butter cookies

    Helpful tools:

    1. Measuring cups
    2. Measuring spoons
    3. Mixing bowl
    4. Spatula
    5. Stand mixer or Hand mixer
    6. Sheet pan
    7. Silpat
    8. Small cookie scoop

    Video Tutorial for making Classic Peanut Butter Cookies

    These classic peanut butter cookies are just like the old fashioned cookies your mom used to make; nice and chewy in the middle with just a tiny bit of crunch around the edges. This has been a family favorite recipe for generations!

    Classic Peanut Butter Cookies

    Jessy Freimann
    These classic peanut butter cookies are just like the old fashioned cookies your mom used to make; nice and chewy in the middle with just a tiny bit of crunch around the edges. This has been a family favorite recipe for generations!
    4.50 from 2 votes
    Print Recipe Pin Recipe
    Prep Time 10 minutes mins
    Cook Time 12 minutes mins
    Chill time 1 hour hr
    Total Time 22 minutes mins
    Course Dessert
    Cuisine American
    Servings 3 dozen

    Ingredients
      

    • ½ cup salted butter, softened
    • ½ cup creamy peanut butter
    • ½ cup granulated sugar
    • ½ cup light brown sugar, packed
    • 1 large egg
    • 1 ¼ cups flour + a little extra for dipping the fork
    • ½ teaspoon baking powder
    • ¾ teaspoon baking soda
    • ¼ teaspoon kosher salt

    Instructions
     

    • In a large bowl mix butter, peanut butter, granulated sugar, brown sugar and egg until well combined. Set aside.
    • In another bowl whisk together flour, baking powder, baking soda and salt. 
    • Add dry ingredients to the wet ingredients to combine and chill for at least an hour.
    • Preheat the oven to 375 degrees and grease or line a sheet pan.
    • Roll the dough into 1 ¼ inch balls and place about 3 inches apart on the pan. 
    • Dip a fork into some flour and gently flatten each ball making a crisscross imprint with the fork on each cookie.
    • Bake for 10-12 minutes and serve warm or cooled.
    Tried this recipe?Let us know how it was!

    A best peanut butter cookies on a glass

    If you tried this recipe please comment and rate it 🙂 I love hearing your feedback and answering your questions! And if you make this please tag me on Instagram with @thelifejolie so I can share it <3

    Other great cookie recipe include:

    • Almond Ginger Cookies
    • Coffee Snickerdoodle Cookies
    • Peanut Butter Double Chocolate Chip Cookies

    You can find a full index of my recipes here.

    Don’t forget to follow The Life Jolie on Pinterest for more recipe inspiration!

    Or if Pinterest isn’t your style, bookmark this post!

    Let’s keep the conversation going- join my Facebook group! 

    • « Go to Previous Page
    • Page 1
    • Interim pages omitted …
    • Page 13
    • Page 14
    • Page 15
    • Page 16
    • Page 17
    • Interim pages omitted …
    • Page 21
    • Go to Next Page »

    Primary Sidebar

    Jessy in a kitchen holding a white casserole pan and smiling.
    Hi, I'm Jessy!

    Welcome to The Life Jolie! I share simple, delicious recipes and ingredient prep tips to make your weeknight cooking a breeze!

    More about me →

    Easy Dinner Recipes

    • An overhead image of a Mexican Shrimp Quinoa Bowl.
      Shrimp Quinoa Bowls
    • A bowl of asian soup with meatballs with a spoon and noodles in it.
      Asian Soup with Cabbage and Meatballs
    • A close up of roasted red potatoes on a pan.
      Roasted Red Potatoes Recipe
    • A spoon lifting up a scoop of eggplant parm bake with melt cheese trailing behind it.
      Eggplant Parm Bake
    • A close up of a drum chicken wing in a pile of other wings.
      Oven Baked Chicken Wings
    • An overhead image of a bowl of minestrone soup.
      Traditional Minestrone Soup Recipe

    Popular Recipes

    • A glass bowl of melted chocolate with a spatula dripping some back into the bowl.
      How To Melt Chocolate Chips In The Microwave
    • Italian Stuffed Zucchini Boats are the healthy weeknight meal you'll want to make again and again. This is a seriously easy recipe that's full of delicious flavor without all the guilt!
      Italian Stuffed Zucchini Boats
    • A close up shot of the side of a shallow bowl of shrimp mac salad.
      Shrimp Macaroni Salad
    • A white pan pouring cheese sauce over a bowl of steamed broccoli.
      Cheese Sauce for Broccoli Recipe
    • An overhead image of a plate of chicken lettuce wraps with peanut sauce next to it and all the fixings surrounding it.
      Copycat Cheesecake Factory Thai Chicken Lettuce Wraps
    • A close up image of a piece of greek marinated chicken on a white plate with lemons on the plate and in the background.
      Greek Yogurt Chicken
    Jessy in a kitchen holding a white casserole pan and smiling.
    Hi, I'm Jessy!

    Welcome to The Life Jolie! I share simple, delicious recipes and ingredient prep tips to make your weeknight cooking a breeze!

    More about me →

    Easy Dinner Recipes

    • A close up of a bagel pizza with mini pepperonis on a pan.
      Bagel Pizzas Recipe
    • A bowl of chicken and orzo soup with a spoon in it.
      Chicken and Orzo Soup
    • A bowl of Swedish meatballs and noodles.
      Swedish Meatballs And Noodles
    • A close up image of a piece of coconut shrimp on top of others.
      Coconut Shrimp With Sauce
    • An overhead image of taco soup in a bowl.
      Crockpot Taco Chicken Soup
    • A spoon pulling up a scoop of skillet lasagna with melted cheese stretching behind it.
      No Bake Lasagna Skillet

    Popular Recipes

    • A glass bowl of melted chocolate with a spatula dripping some back into the bowl.
      How To Melt Chocolate Chips In The Microwave
    • Italian Stuffed Zucchini Boats are the healthy weeknight meal you'll want to make again and again. This is a seriously easy recipe that's full of delicious flavor without all the guilt!
      Italian Stuffed Zucchini Boats
    • A close up shot of the side of a shallow bowl of shrimp mac salad.
      Shrimp Macaroni Salad
    • A white pan pouring cheese sauce over a bowl of steamed broccoli.
      Cheese Sauce for Broccoli Recipe
    • An overhead image of a plate of chicken lettuce wraps with peanut sauce next to it and all the fixings surrounding it.
      Copycat Cheesecake Factory Thai Chicken Lettuce Wraps
    • A close up image of a piece of greek marinated chicken on a white plate with lemons on the plate and in the background.
      Greek Yogurt Chicken

    Footer

    ↑ back to top

    About

    • About Me
    • Privacy Policy + Disclaimer

    Newsletter

    • Sign Up! for emails and updates

    Contact

    • Contact
    • Video Production

    As an Amazon Associate I earn from qualifying purchases.

    Copyright 2014-2021 - Jolie Ventures, LLC. All Rights Reserved. Privacy Policy.

    Rate This Recipe

    Your vote:


    A rating is required
    A name is required
    An email is required