
• Skip to primary navigation
  • Skip to main content
  • Skip to primary sidebar
The Life Jolie logo
  • Easy Dinner Recipes
  • Recipes
  • About
  • Contact
    • Work with me!
    • Video Production
  • Nav Social Menu

    • Email
    • Facebook
    • Instagram
    • Pinterest
    • Twitter
    • YouTube
menu icon
go to homepage
subscribe
search icon
Homepage link
  • Easy Dinner Recipes
  • Recipes
  • About
  • Contact
    • Work with me!
    • Video Production
    • Email
    • Facebook
    • Instagram
    • Pinterest
    • Twitter
    • YouTube
  • ×
    The Life Jolie » Page 13

    Roasted Garlic Mashed Potatoes

    Roasted Garlic Mashed Potatoes

    Nov 4, 2021 · Leave a Comment

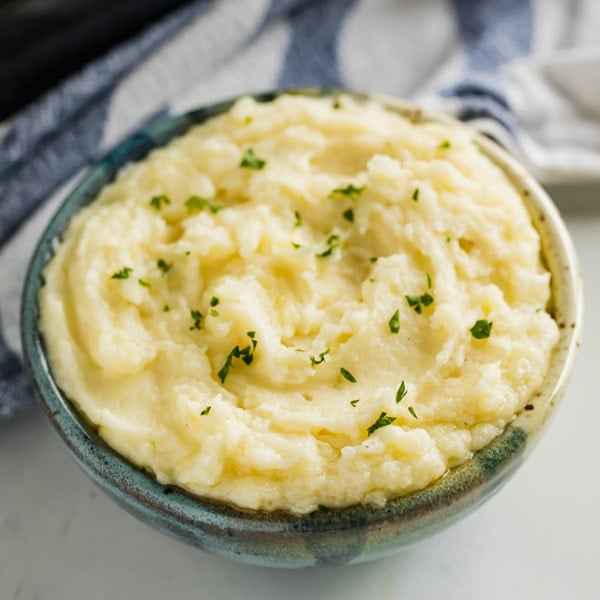
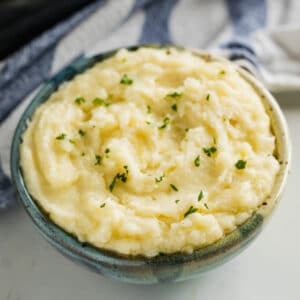
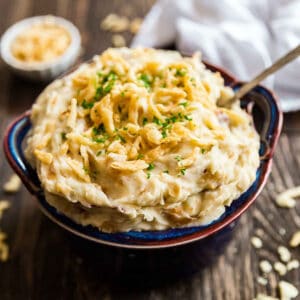
    An overhead image of a bowl of mashed potatoes with melting pats of butter and chopped parsley on top with a head of garlic, grey napkin and sprigs of parsley round it.

    Making some of your dishes ahead is always a good idea and this creamy, decadent roasted garlic mashed potatoes recipe is perfect to make in advance!

    Try these other awesome mashed potatoes recipes: Make Ahead Mashed Potatoes and French Onion Mashed Potatoes.
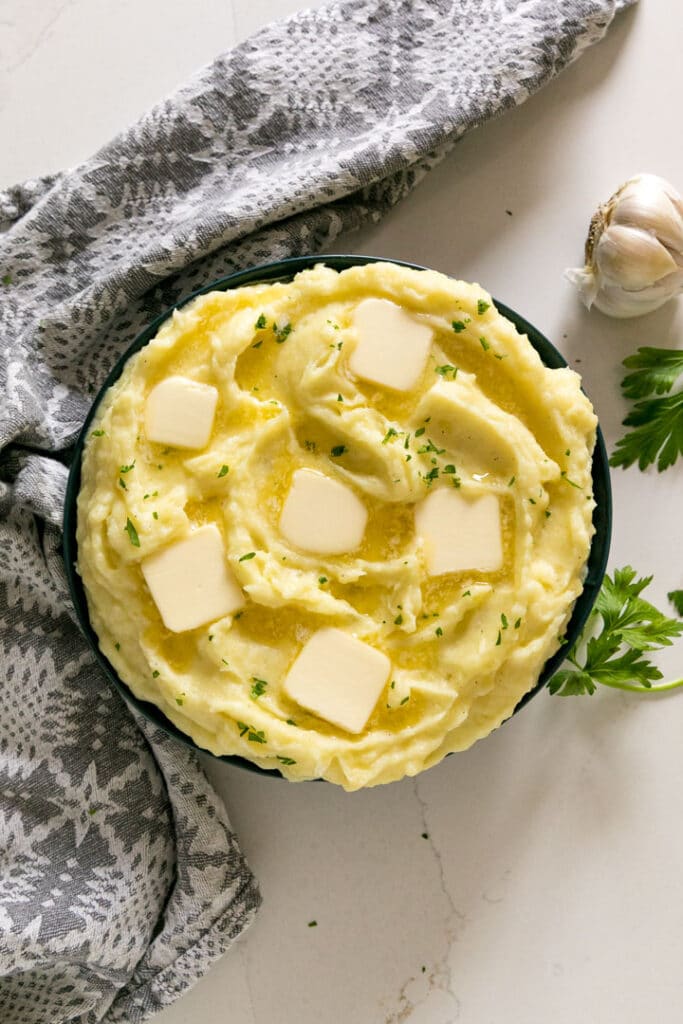
    An overhead image of a bowl of mashed potatoes with melting pats of butter and chopped parsley on top with a head of garlic, grey napkin and sprigs of parsley round it.

    Garlic Mashed Potatoes

    To me, it's not Thanksgiving without mashed potatoes (or really most other cozy family dinners for that matter!). I've been an enthusiast all my life and plan to stay that way.

    This year it occurred to me to add roasted garlic. No idea why I didn't think to do that before but I sure am glad I did! In my opinion it adds the most deliciously savory flavor without being overwhelming.

    Actually, when I was testing this recipe, I served it with a big family dinner. I was initially nervous the potatoes weren't garlic-y enough with the one head of roasted garlic that I added. But the overwhelming opinion for the 12+ people in attendance was that it was the perfect amount to make the potatoes extra delicious without overdoing it.
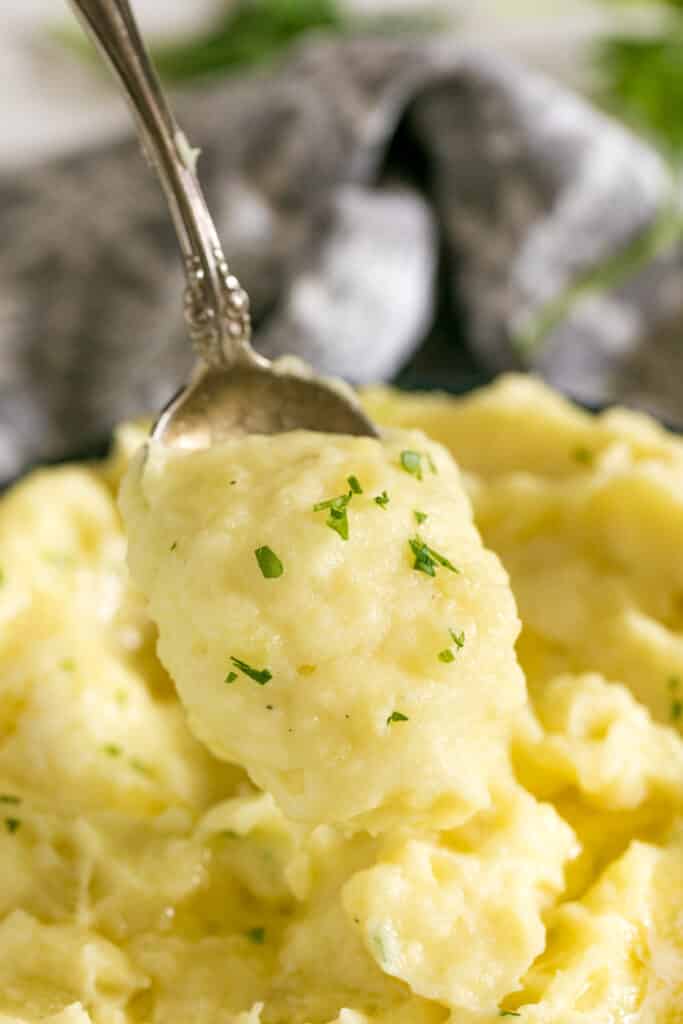
    A spoon holding a scoop of mashed potatoes with a bowl of them behind it and a grey napkin.

    Tips for how to make garlic mashed potatoes

    • Cook the potatoes in a pot of cold water and make sure the water goes about an inch or two above them.
    • I like to add the butter into the bowl and then pour the hot drained potatoes over them to help them start melting.
    • Warm your milk for a minute or so in the microwave before adding to the potatoes to keep them nice and hot as they mash.
    • Always taste these before you serve and adjust the seasonings to your taste.

    Helpful ingredient information:

    • Roasted Garlic: I like to roast my garlic ahead of time. Click here to read the post I wrote about how to roast garlic.
    • Potatoes: My favorite potatoes to use for roasted garlic mashed potatoes is butter potatoes or Yukon gold. Another good option is russet.
    • Other ingredients: I tried to keep it simple for this recipe and let the garlic be the star of the show. Of course I had to include salted butter. My liquid of choice for this is whole milk so that they aren't too rich and heavy. And the addition of salt and pepper balances out the flavors.
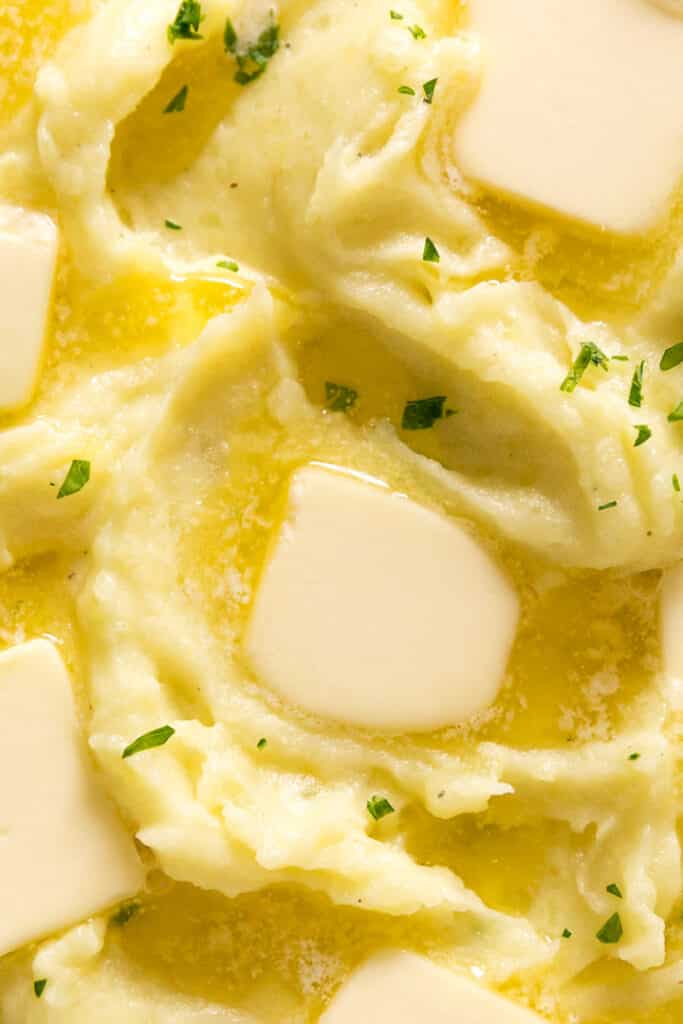
    An overhead close up of the top of a bowl of this garlic mashed potatoes recipe with chopped parsley and melting butter pats on top of it.

    How long do I boil potatoes for mashed potatoes?

    I start my potatoes in cold water and bring them to a boil which takes about 10 minutes. Then I let them boil until they're fork tender. Usually this will take around 10 minutes but keep an eye on them and check them because they could go faster depending on the size of the chunks.

    What's the best way to mash my potatoes?

    So this is definitely a matter of personal preference. Some people like manual potato mashers (to do it by hand) and others swear by using a ricer. My favorite method is using my stand mixer and then taking the manual potato masher and getting any chunks I may have missed by hand.

    How do I keep mashed potatoes warm?

    I like to make them and put them into a slow cooker set to warm. Cover it and give them a stir once in a while and you'll be good to go for dinner!

    Leftovers and reheating:

    These leftover will last for up to 4 days covered in the fridge. You can either reheat individual potions in the microwave or for best results in a pan over medium heat on your stove. You can even mix in a small amount of milk to get a creamier consistency.

    Ingredients that can be prepped ahead:

    • Roast garlic
    • Clean potatoes

    Helpful tools:

    1. Chef's knife
    2. Cutting board
    3. Measuring cups
    4. Measuring spoons
    5. Dutch oven
    6. Wooden spoon
    7. Stand mixer or Hand mixer
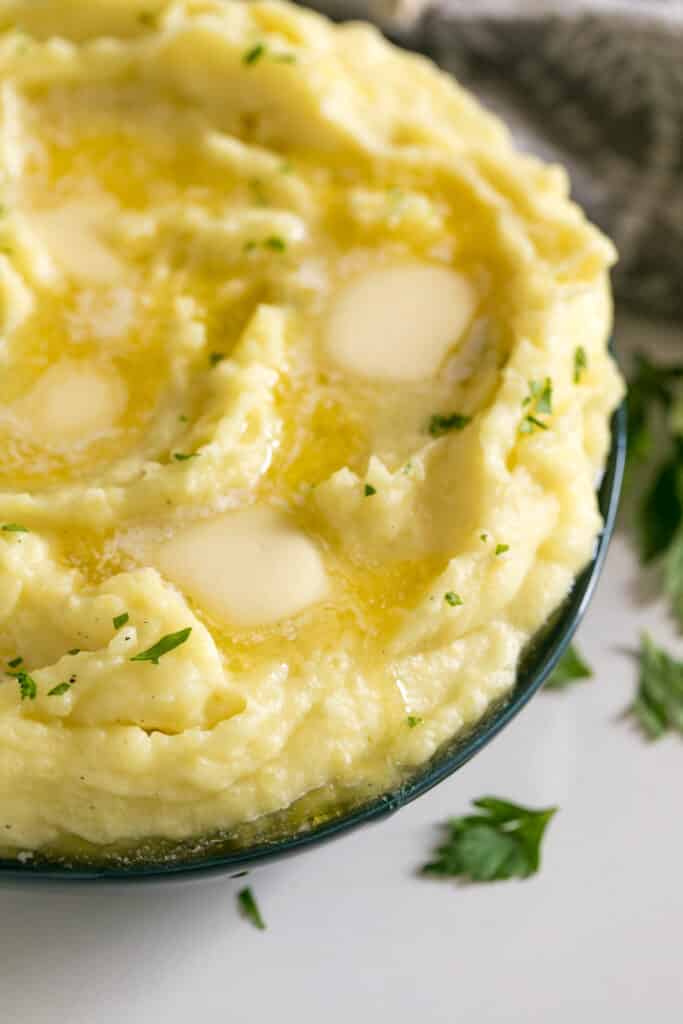
    The side of a bowl of mashed potatoes with melting butter pats on top of it in a blue bowl.

    Hosting Thanksgiving?

    Discover the secret to hosting Thanksgiving without all the stress! Prepsgiving is your FREE guide to making a delicious Thanksgiving feast the easy way.

    Love this recipe? Please leave a 5 star ⭐️⭐️⭐️⭐️⭐️ rating in the recipe card below ⬇️ and/or a review in the comment section further down. Check out my Amazon Store for all my favorite tools, including those used in this recipe. And follow @thelifejolie on Instagram and TikTok!
    An overhead image of a bowl of mashed potatoes with melting pats of butter and chopped parsley on top with a head of garlic, grey napkin and sprigs of parsley round it.

    Roasted Garlic Mashed Potatoes

    Jessy Freimann
    Is it even a holiday dinner without mashed potatoes?! Making some of your dishes ahead is always a good idea and these creamy, decadent potatoes lend themselves perfectly to being made in advance!
    5 from 1 vote
    Print Recipe Pin Recipe
    Prep Time 10 minutes mins
    Cook Time 20 minutes mins
    Garlic roasting time 1 hour hr
    Total Time 1 hour hr 30 minutes mins
    Course Side Dish
    Cuisine American
    Servings 8 servings
    Calories 335 kcal

    Equipment

    • 1 Large pot
    • 1 Potato masher
    • 1 cutting board
    • 1 chefs knife
    • 1 wooden spoon
    • 1 Measuring cups and spoons

    Ingredients
      

    • 1 head roasted garlic (or 2 if you want them to be extra garlicky)
    • 5 pounds Yukon Gold or Butter Potatoes, peeled and cut into 2 inch chunks
    • ½ cup salted butter, cut into chunks (1 stick)
    • ½ cup whole milk, warmed
    • 1 teaspoon kosher salt (to taste- add more if needed)
    • ¼ teaspoon ground black pepper (to taste- add more if needed)

    Instructions
     

    • Place potatoes into a pot of cold water so they're covered with an inch or two of water on top of them.
    • Bring to a boil. Once boiling, cook for 10 minutes or until potatoes are fork tender.
    • Place butter at the bottom of the mixing bowl.
    • Drain potatoes well and pour them into the mixing bowl over the butter while still steaming hot. Give them a minute so the butter can begin to melt.
    • Begin mixing with your electric mixer (or a potato masher) to start breaking the potatoes up a bit.
    • Add roasted garlic, milk, salt and pepper. Mix more until well combined and no chunks remain.
    • Taste and adjust seasonings. Serve immediately.
    Notes

    This can be made earlier in the day and held on warm in a slow cooker.

    Nutrition

    Serving: 1servingCalories: 335kcalCarbohydrates: 51gProtein: 7gFat: 12gSaturated Fat: 8gPolyunsaturated Fat: 1gMonounsaturated Fat: 3gTrans Fat: 0.5gCholesterol: 32mgSodium: 405mgPotassium: 1235mgFiber: 6gSugar: 3gVitamin A: 386IUVitamin C: 57mgCalcium: 63mgIron: 2mg
    Tried this recipe?Let us know how it was!

    Apple Cider Glazed Roast Turkey Recipe

    Oct 18, 2021 · Leave a Comment

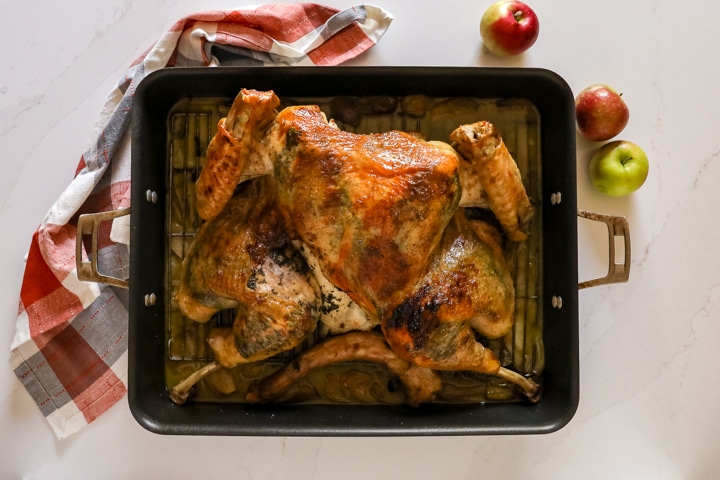
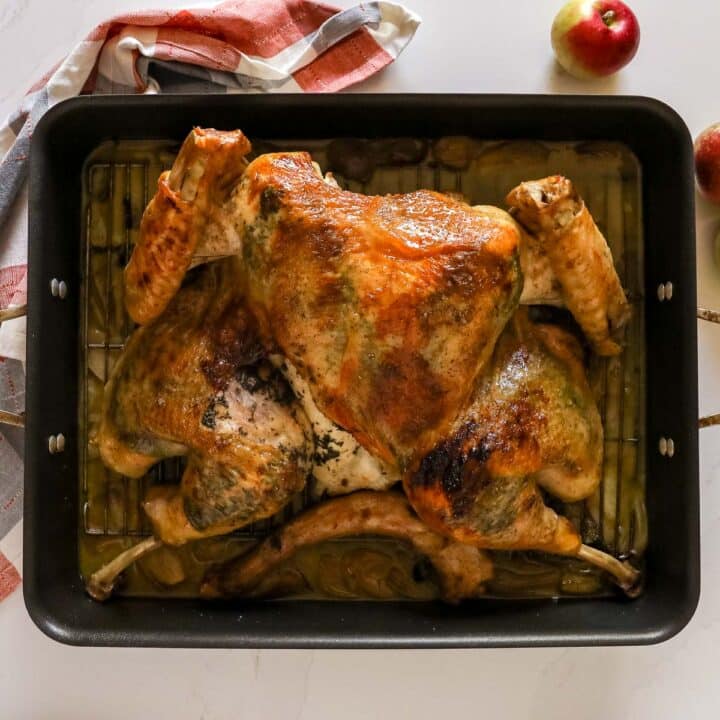
    An overhead image of a roasted whole turkey butterflied and laid out in a roasting pan on a orange and grey towel with apples on the side of it.

    If you're looking for a quick and easy recipe for a whole roast turkey recipe, this is the one! Roasted to perfection with a delicious Apple Cider Glaze, this deliciously juicy bird will be a total showstopper this Thanksgiving.

    Check out these other great recipes featuring pecans: Pumpkin Crunch Cake, Caramel Pretzel Turtles

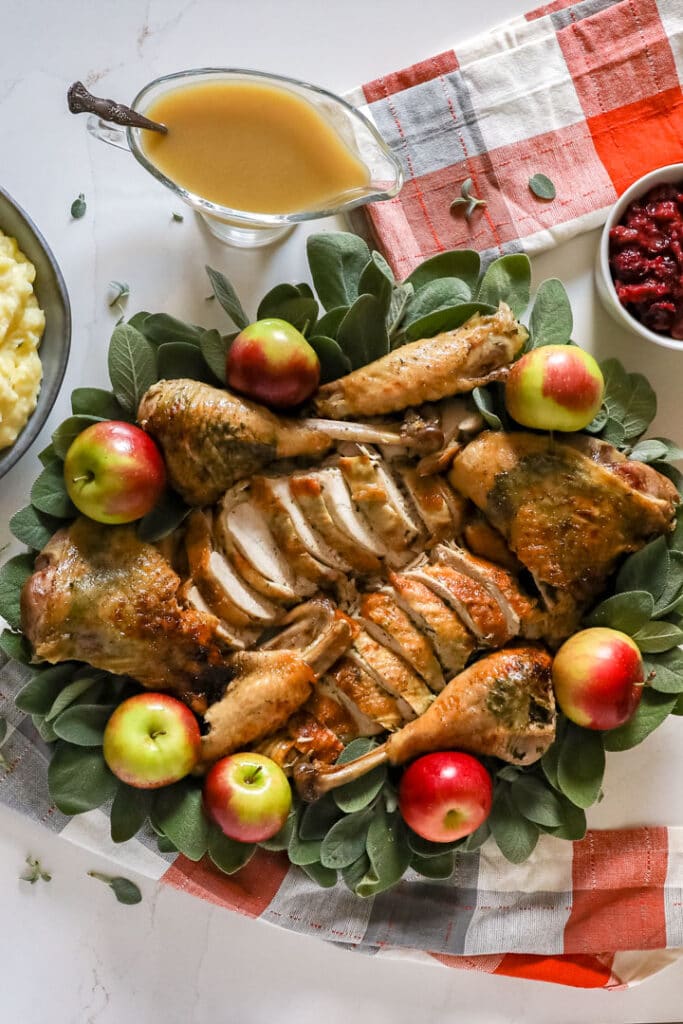
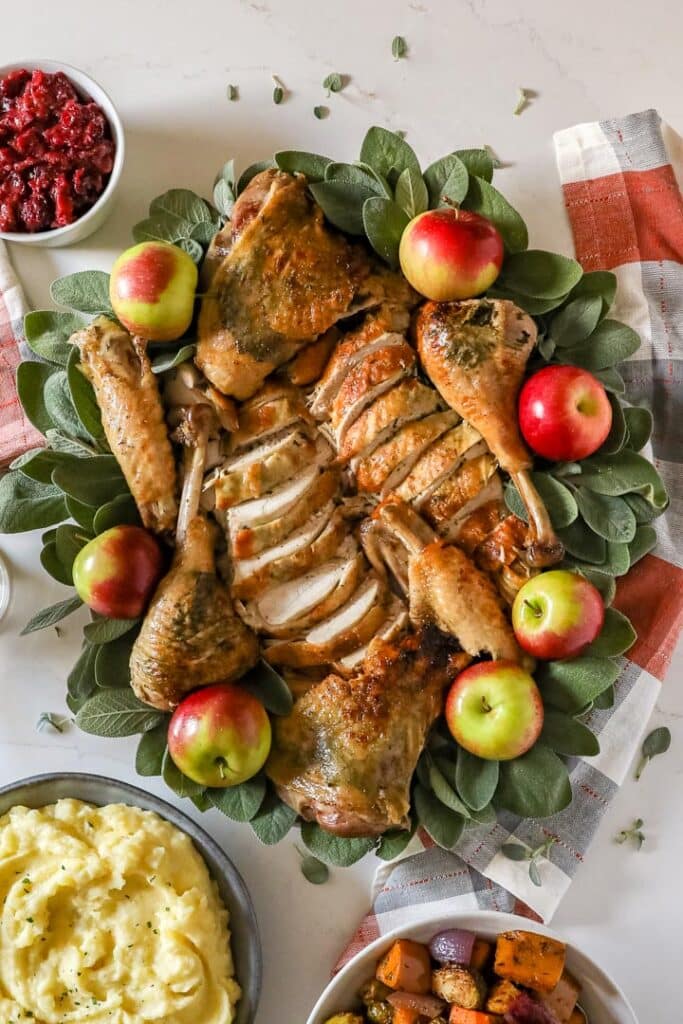
    An overhead image of a carved up turkey on a platter with sage and apples with grav on the side of it and orange and grey napkins..

    Tips for how to make a turkey

    • If your turkey is frozen, give it enough time to thaw- typically you'll want to plan for 1 day for every 4 pounds, so you'll want to move your turkey to the fridge 4 days ahead for a 16 pound turkey.
    • Pull it out of it's wrapping, remove the gizzards and pat dry your turkey the day before you intend to serve it. I leave mine in the fridge uncovered so that the skin dries a bit because I think it makes the skin crispier, just make sure you have plenty of room so that it won't touch anything else.
    • Remove the turkey from the fridge an hour prior to roasting to let it come closer to room temperature.
    • I tend to set an alarm and pull my butter out of the fridge the night before so I have plenty of time to let it soften. But if you forget, I wrote a whole post about how to soften butter in the microwave.
    • Using a meat Thermometer that you can keep in the the bird as it cooks is key for this recipe- not only to make sure you don't overcook the meat, but to know when to start brushing the apple cider glaze onto the turkey. I use this meat thermometer.
    • Make sure you rest your turkey for a good 20-30 minutes before carving.
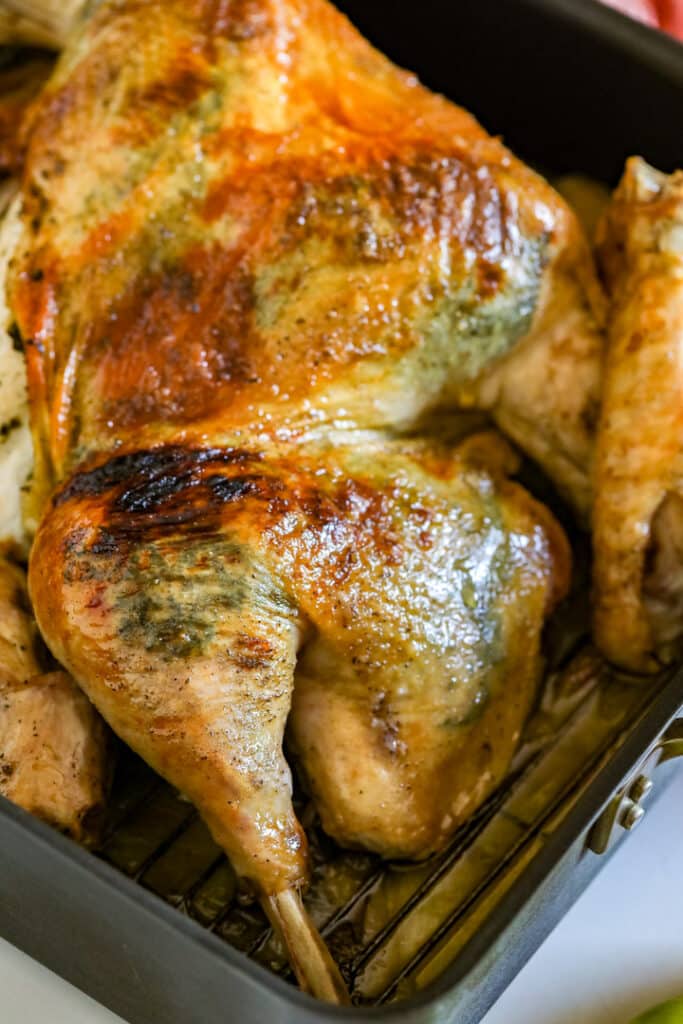
    A close up image of a roast turkey leg in the roasting pan.

    Helpful ingredient information

    • Turkey: This recipe is for a whole roasted turkey that has had the backbone removed and lays flat. It's been written for an 11-15 pound bird, but will work for a larger or smaller bird, just plan to adjust the cooking time accordingly.
    • Compound Butter: I like to make a compound butter of salted butter, fresh sage, fresh parsley, fresh thyme, kosher salt and pepper. For this recipe, I only use the butter under the turkey skin. I use a little olive oil and some salt and pepper on the skin and eventually brush the cider glaze onto the turkey later in the roasting process.
    • Apple Cider Glaze: This delicious glaze is super easy to make and adds the perfect bit of sweetness to your turkey. Made with apple cider, brown sugar, shallot, fresh sage, fresh parsley, fresh thyme, kosher salt, pepper and a little butter.
    • Veggies for the pan: I love adding the pan juices to my gravy for extra special flavor, so I always start by placing some ingredients into the bottom of my roasting pan. I use shallot, apple slices, fresh sage, fresh parsley, fresh thyme and a mixture of water and a little apple cider.
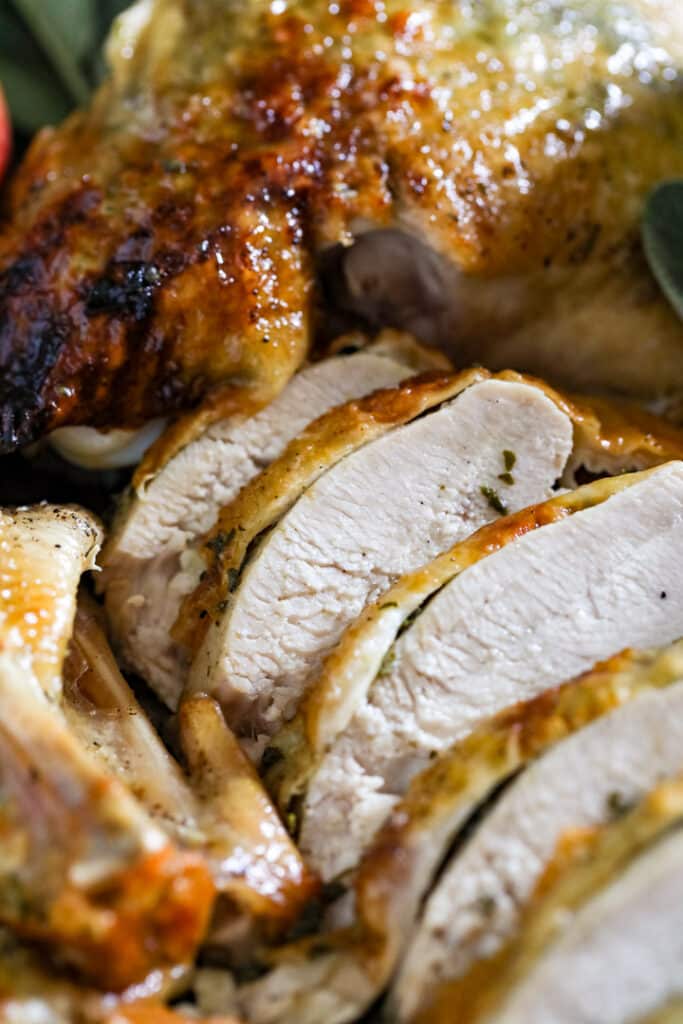
    A close up image of pieces of sliced roast turkey breat.

    How do I roast a turkey and keep it moist?

    The most important thing is to pull the turkey from the oven when it reaches the safe temperature for serving so it doesn't overcook. Additionally spatchcocking the turkey helps it cook more evenly.

    How to tell when a turkey is done?

    I pull the turkey from the oven when the internal temperature of the thickest part of the meat hits 161 degrees. It will continue cooking as it rests and come to 165 degrees which is the safe temperature for serving poultry.

    What does spatchcock mean and do I have to do it?

    Spatchcock means you butterfly the turkey by cutting out the backbone and laying it flat to promote even cooking and a more tender bird. It also allows the turkey to cook faster. I find most butchers will spatchcock it for you, but it's super easy to do yourself. I wrote a blog post about how to spatchcock a turkey. While you don't have to do this, I feel it's easier and almost always results in a better turkey. If you choose not to spatchcock your turkey, you'll want to adjust your cooking temperature and time based on the directions in this blog post.

    Can I prep the turkey in advance?

    Yes, you can prep it up to a day in advance.

    Do you roast a turkey covered or uncovered?

    I roast it un covered but I check on it every 30 minutes and if parts of the skin seem to be browning too fast, I'll cover only those parts with foil so they don't burn (and then remove it for the glazing process at the end).

    Why rest at room temperature before and after baking?

    You rest it before so that it isn't crazy cold when it first foes into the oven- this allows it to cook more evenly. Resting it after roasting helps to redistribute the juices and allow for crossover cooking.

    Leftovers:

    Leftovers last for up to 5 days covered in the refrigerator and freeze for up to 3 months.

    An overhead image of a roasted whole turkey butterflied and laid out in a roasting pan on a orange and grey towel with apples on the side of it.

    Ingredients that can be prepped ahead:

    • Wash fresh herbs
    • Wash apples
    • Cut shallots
    • Remove butter from the refrigerator to soften (or make compound butter)
    • Prep turkey entirely

    Helpful tools:

    1. Chef's knife
    2. Cutting board
    3. Roasting Pan
    4. Mini-Prep Processor
    5. Measuring cup
    6. Measuring spoons
    7. Whisk
    8. Saucepan
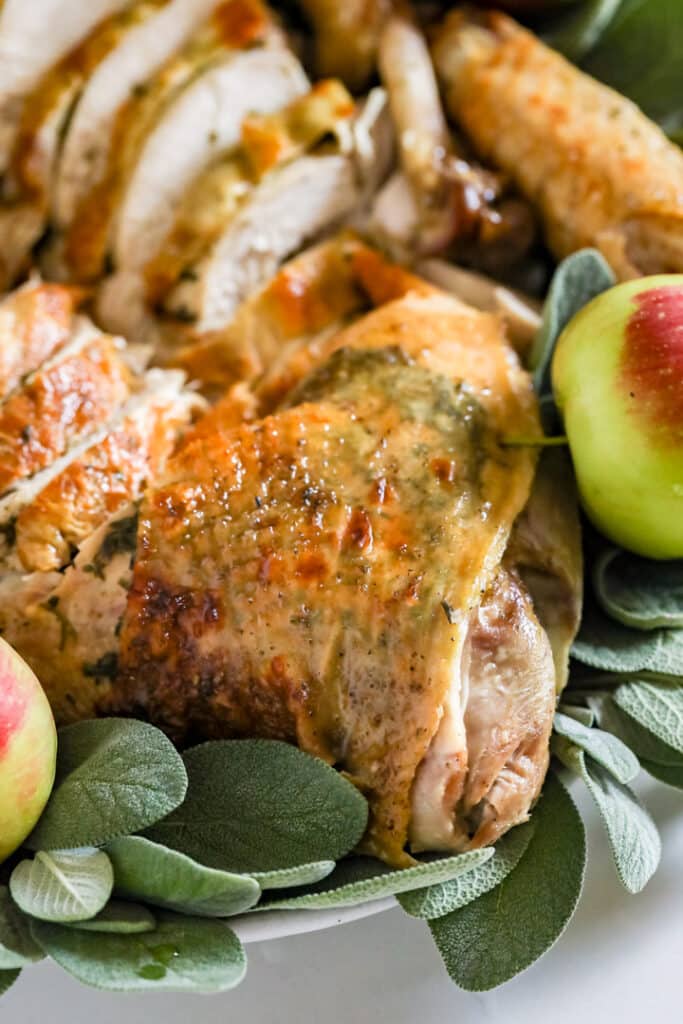
    A close up shot of a turkey thigh on a platter with sage and apples.

    Hosting Thanksgiving?

    Discover the secret to hosting Thanksgiving without all the stress! Prepsgiving is your FREE guide to making a delicious Thanksgiving feast the easy way.

    Love this recipe? Please leave a 5 star ⭐️⭐️⭐️⭐️⭐️ rating in the recipe card below ⬇️ and/or a review in the comment section further down. Check out my Amazon Store for all my favorite tools, including those used in this recipe. And follow @thelifejolie on Instagram and TikTok!

    An overhead image of a roasted whole turkey butterflied and laid out in a roasting pan on a orange and grey towel with apples on the side of it.

    Apple Cider Glazed Roast Turkey Recipe

    Jessy Freimann
    If you're looking for a quick and easy recipe for a whole roast turkey recipe, this is the one! Roasted to perfection with a delicious Apple Cider Glaze, this deliciously juicy bird will be a total showstopper this Thanksgiving.
    5 from 1 vote
    Print Recipe Pin Recipe
    Prep Time 1 hour hr
    Cook Time 1 hour hr 30 minutes mins
    Resting time 20 minutes mins
    Total Time 2 hours hrs 50 minutes mins
    Course Entree, Main, Main Course, Main dish
    Cuisine American
    Servings 12 servings
    Calories 259 kcal

    Equipment

    • 1 roasting pan
    • 1 cutting board
    • 1 chefs knife
    • 1 Measuring cups and spoons

    Ingredients
      

    Compound butter

    • ¾ cup salted butter, softened (1 ½ sticks)
    • 1 ½ Tablespoon fresh thyme, roughly chopped
    • 1 ½ Tablespoon fresh parsley, roughly chopped
    • 1 Tablespoon fresh sage, roughly chopped
    • ½ teaspoon kosher salt
    • ¼ teaspoon ground black pepper

    Turkey

    • 1 11-14 pound whole raw turkey, spatchcocked
    • 2 Tablespoons olive oil
    • 2 teaspoons kosher salt
    • ¾ teaspoon ground black pepper
    • Cooking spray
    • 2 pounds shallots, peeled and cut into chunks
    • 2 pounds apples, cored and cut into chunks
    • 4-5 sprigs fresh thyme
    • 4-5 sprigs fresh parsley
    • 4-6 sprigs fresh sage
    • ½ cup apple cider
    • 1 ½ cups water

    Apple Cider Glaze

    • 1 ½ cups apple cider
    • 3 Tablespoons brown sugar
    • 2 sprigs fresh thyme
    • 2 sprigs fresh parsley
    • 1 sprig fresh sage
    • 1 medium shallot, peeled and cut in half
    • 1 Tablespoon salted butter
    • ¼ teaspoon kosher salt
    • ⅛ teaspoon ground black pepper

    Instructions
     

    Make the compound butter

    • In a small bowl make the compound butter by mixing butter, minced herbs, salt, and pepper until well combined. Set aside.

    Prep the turkey

    • Remove spatchcocked turkey from refrigerator 1 hour prior to cooking to bring it closer to room temperature. Preheat the oven to 425 degrees F with the rack in the middle position.
    • In a large roasting pan place shallots, apples sprigs of fresh herbs, apple cider and water. Place rack on top of them and grease rack with cooking spray.
    • Place turkey breast-side-down onto the rack. Rub half the olive oil onto the bottom of the turkey and sprinkle evenly with half to salt and pepper.
    • Turn the turkey over so the breast side is facing up.
    • Take your hand and carefully push it under the skin of each part of the turkey, separating the skin from the meat. Evenly distribute the compound butter onto the meat under the skin of the turkey.
    • Rub with remaining olive oil and sprinkle evenly with remaining salt. Place the pointed part of the meat thermometer into the thickest part of the breast, making sure you don't touch the bone.

    Roast the turkey

    • Place the turkey into the preheated oven on the middle rack. Plan on checking the turkey every 30 minutes to make sure the skin isn't getting too brown and the liquid in the bottom of the pan hasn't evaporated.

    Make the glaze

    • Place apple cider, brown sugar, fresh herbs and shallot into a medium sauce pan. Stir until the sugar has dissolved into the cider and bring to a boil.
    • Boil for 15 minutes stirring periodically to reduce the cider- do not reduce the heat.
    • Remove from heat and herbs and shallots from the pot.
    • Stir in butter, salt and pepper until butter is melted. Set aside.

    Finish the turkey

    • Roast the turkey until the internal temperature of the thickest part of the breast meat is 130 degrees.
    • Remove from the oven and brush the glaze evenly over the turkey and return to the oven. Repeat this every 10 minutes until the internal temperature of the thickest part of the breast meat is 161 degrees F.
    • Remove the turkey from the oven and place on a large cutting board. Rest turkey for 20-30 minutes. Strain and mix pan juices into your gravy (optional)
    • Carve turkey and serve immediately.

    Notes

    Leftovers will last up to 5 days covered in the refrigerator.

    Nutrition

    Serving: 1servingCalories: 259kcalCarbohydrates: 32gProtein: 2gFat: 15gSaturated Fat: 8gPolyunsaturated Fat: 1gMonounsaturated Fat: 5gTrans Fat: 1gCholesterol: 33mgSodium: 647mgPotassium: 407mgFiber: 5gSugar: 21gVitamin A: 579IUVitamin C: 14mgCalcium: 56mgIron: 2mg
    Tried this recipe?Let us know how it was!
    An overhead image of a carved up turkey on a platter with sage and apples.

    Pumpkin Spice Cake

    Oct 11, 2021 · 4 Comments

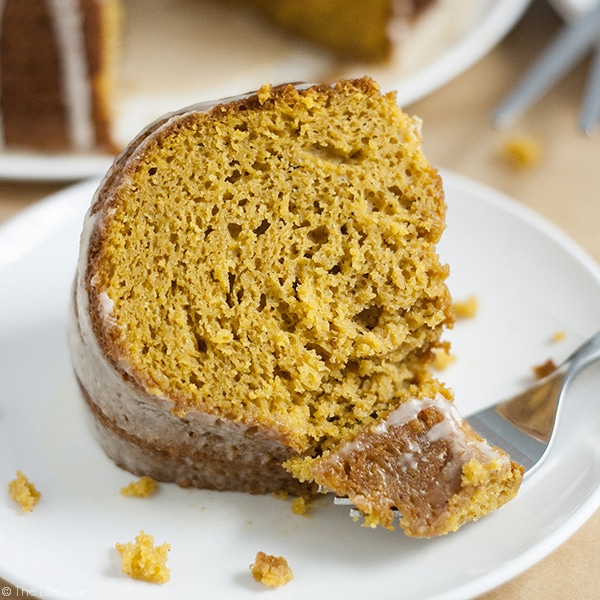
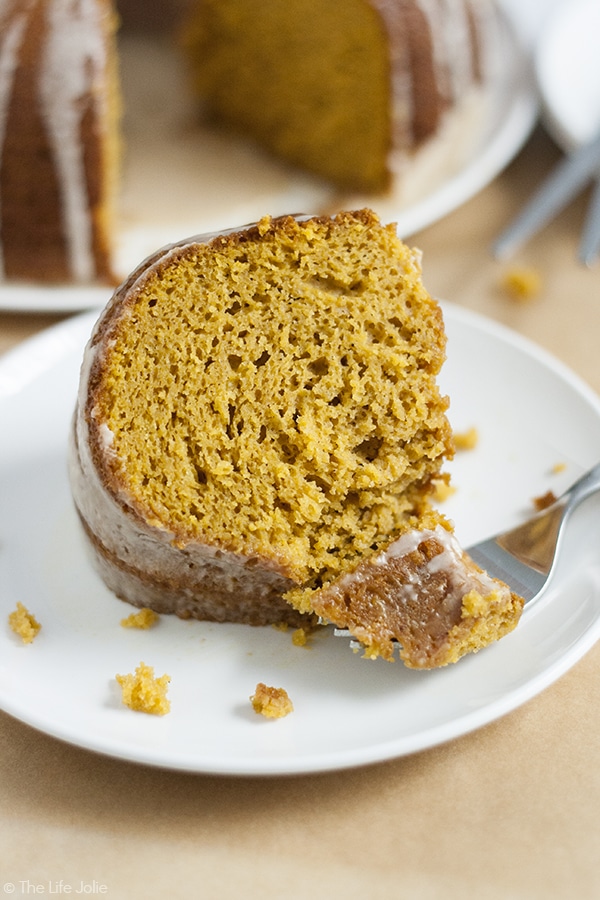
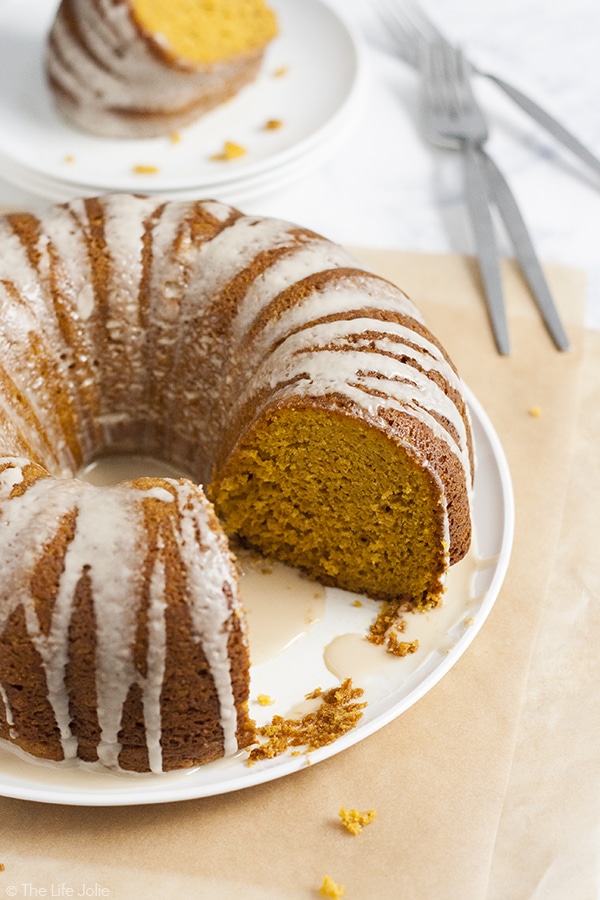
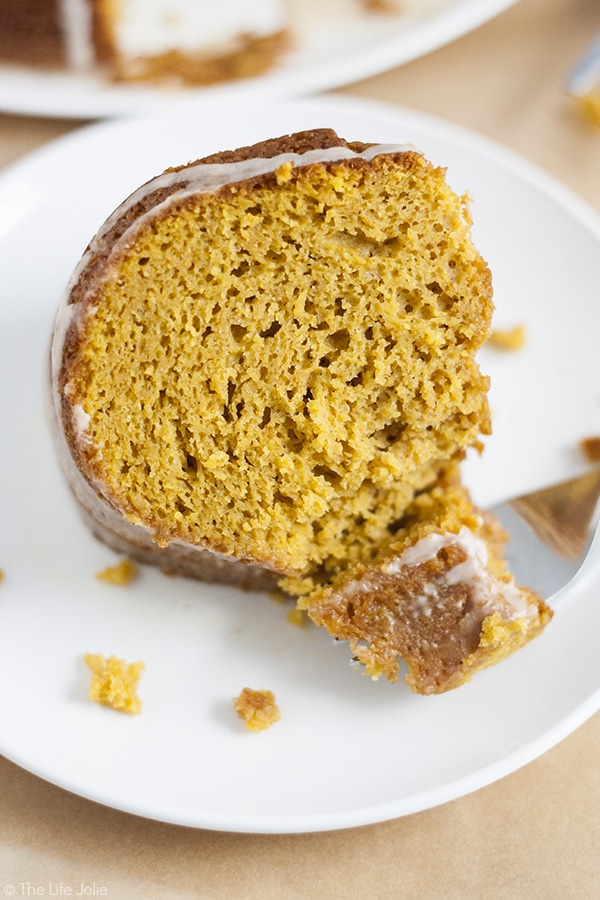
    An image of a slice of pumpkin cake with a fork in front of it holding a bite of the cake on it.

    This Pumpkin Spice Latte Cake recipe is the absolute best! Delicious pumpkin spice and subtle coffee flavor combine into the most moist, addictive cake you'll find.

    Check out these other great recipes featuring pecans: Pumpkin Crunch Cake, Caramel Pretzel Turtles

    An image of a slice of pumpkin cake with a fork in front of it holding a bite of the cake on it.

    Pumpkin Cake

    Have you seen that meme that circulates Facebook around this time each year? You know the one, a picture of Disney's Cinderella in her fancy carriage with the a blurb typed onto the picture about how at the stroke of midnight on August 31st everything turns into some form of pumpkin-spice-whatever?

    Well, here we are, smack dab in the middle of fall. It only seems fitting that I share my (amazing!!) recipe for Pumpkin Spiced Latte Cake.

    While pumpkin flavor really isn't my thing, I couldn't get the concept of pumpkin bundt cake out of my head. I mean, so many people love pumpkin spice lattes. They can't all be completely wrong.

    And sometimes it's nice to have a Thanksgiving option that is not a pie, but still embodies the flavors of the season. So I dove in head first, hacked my favorite cake hack recipe and thus, Pumpkin Spice Latte Cake was born. I must say, it is deliciously addictive. Super moist, minimal ingredients.

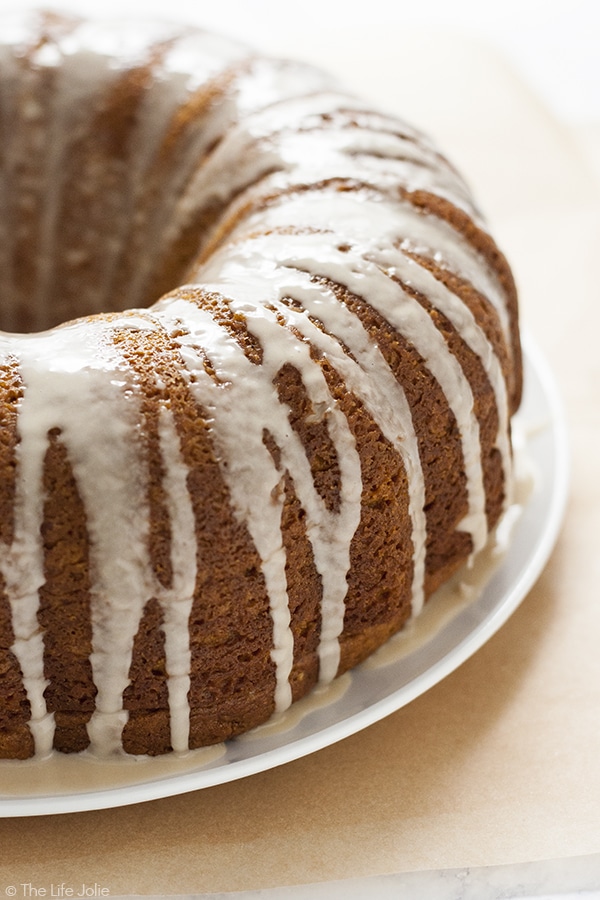
    An angle shot of the side of a pumpkin bundt cake with glaze on on the sides of it.

    Tips for making this pumpkin cake recipe

    • Be sure to grease your bundt pan to make it easier to get the cake out. I recommend using a non-stick pan as well
    • Don't over-mix your cake mix- you'll want it to mix until just combined.
    • Allow the cake to cool all the way before glazing so it doesn't absorb the glaze.
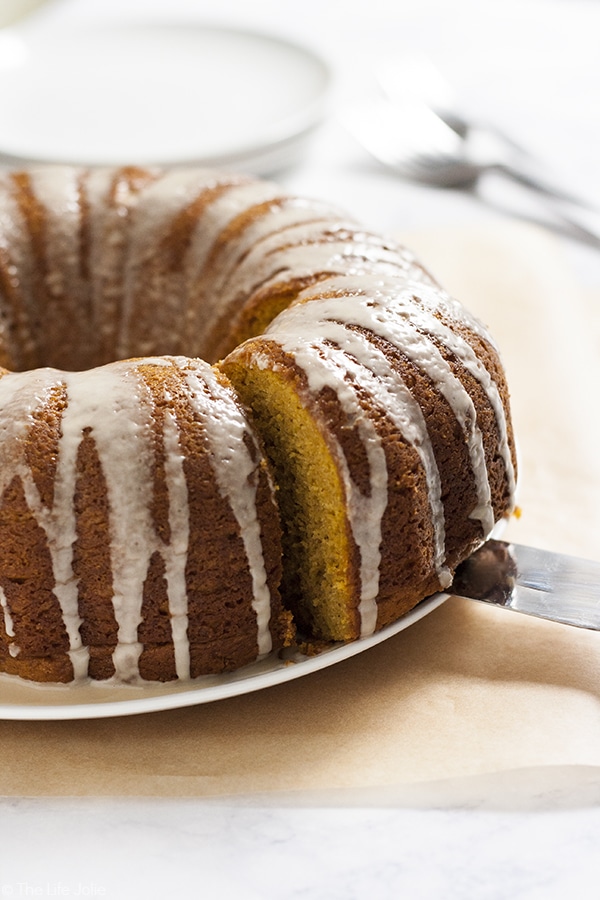
    A spatula beginning to pull a slice out a pumpkin coffee cake.

    Helpful ingredient information

    • Dry ingredients: First off, this recipe is a cake mix hack. Trust me when I say, your friends and family will never know and the results are excellent- I like to use Duncan Hines yellow cake mix for this. I also use 2 packages of instant vanilla pudding and a teaspoon of pumpkin spice for a delicious pumpkin flavor.
    • Wet ingredients: This recipe uses 5 eggs. I know that seems like a lot, but trust me, it'll give you the most moist, perfect cake! This also uses a combination of pumpkin puree, decaf coffee and vegetable or canola oil.
    • Glaze: For this I keep it simple with decaf coffee and confection's sugar.
    A pumpkin coffee cake with a slice cut out of it revealing the moist center of it.

    Can I make this recipe into cupcakes?

    Yes! Be sure to line the muffin tin with paper liners and fill them ¾ of the way (an ice cream scoop works great for this!). You'll bake at 325 degrees for 17-20 minutes (until a toothpick comes out clean). This will make around 20 cupcakes.

    Can I freeze this cake?

    Yes- wrap well and freeze for up to 6 months. Be sure to wait until thawed to glaze.

    Can I make this pumpkin cake recipe ahead?

    Yes- make it up to a day or two ahead.

    Leftovers and storage:

    This will last up to a week covered at room temperature.

    A close up image of a slice of pumpkin cake with a bite on a fork in front of it on the white plate.

    Helpful tools:

    1. Bundt Pan
    2. Mixing bowl
    3. Measuring cups
    4. Measuring spoons
    5. Stand mixer or Hand mixer
    6. Spatula

    Hosting Thanksgiving?

    Discover the secret to hosting Thanksgiving without all the stress! Prepsgiving is your FREE guide to making a delicious Thanksgiving feast the easy way.

    Love this recipe? Please leave a 5 star ⭐️⭐️⭐️⭐️⭐️ rating in the recipe card below ⬇️ and/or a review in the comment section further down. Check out my Amazon Store for all my favorite tools, including those used in this recipe. And follow @thelifejolie on Instagram and TikTok!

    An image of a slice of pumpkin cake with a fork in front of it holding a bite of the cake on it.

    Pumpkin Spice Latte Cake

    Jessy Freimann
    This Pumpkin Spice Latte Cake recipe is the absolute best! Delicious pumpkin spice and subtle coffee flavor combine into the most moist, addictive cake you'll find.
    No ratings yet
    Print Recipe Pin Recipe
    Prep Time 10 minutes mins
    Cook Time 1 hour hr
    Total Time 1 hour hr 10 minutes mins
    Course Dessert
    Cuisine Fall, Holiday, Thanksgiving
    Servings 8 servings
    Calories 563 kcal

    Equipment

    • 1 Bundt pan
    • 1 mixing bowl
    • 1 stand mixer
    • 1 Hand mixer
    • 1 Spatula
    • 1 Measuring cups and spoons

    Ingredients
      

    Cake:

    • 1 Yellow Cake Mix I like Duncan Hines
    • 6.8 ounces instant vanilla pudding
    • 1 teaspoon pumpkin pie seasoning
    • 5 large eggs
    • ¾ cup vegetable oil
    • ¾ cup pumpkin puree
    • ¼ cup decaffeinated coffee

    Glaze:

    • 1 ⅓ cup confectioner's sugar
    • 3 Tablespoons decaffeinated coffee Start with 2 and add additional Tablespoon if needed.

    Instructions
     

    Cake:

    • Preheat oven to 325 degrees F and grease bundt pan. Set aside.
    • In a medium bowl, combine the cake mix, pudding mixes and pumpkin pie spice.
    • In a mixing bowl combine eggs, oil, pumpkin, and coffee.
    • Add dry ingredients into the mixing bowl and mix until just combined.
    • Pour batter into the bundt pan and bake for 50 min - 1 hour.
    • Cool completely and drizzle with glaze. Serve immediately.
    Glaze:

    • Combine all ingredients and mix well. Add more coffee if needed for a thicker, pourable texture.
    • Drizzle over cake.

    Notes

    This can also be made into around 20 cupcakes- line muffin tin, fill each cup ¾ of the way full and bake at 325 degrees for 17-20 minutes.

    Nutrition

    Serving: 1servingCalories: 563kcalCarbohydrates: 99gProtein: 7gFat: 25gSaturated Fat: 5gPolyunsaturated Fat: 13gMonounsaturated Fat: 6gTrans Fat: 0.3gCholesterol: 116mgSodium: 669mgPotassium: 134mgFiber: 2gSugar: 48gVitamin A: 3744IUVitamin C: 1mgCalcium: 163mgIron: 2mg
    Tried this recipe?Let us know how it was!

    How to Roast Garlic

    Sep 27, 2021 · Leave a Comment

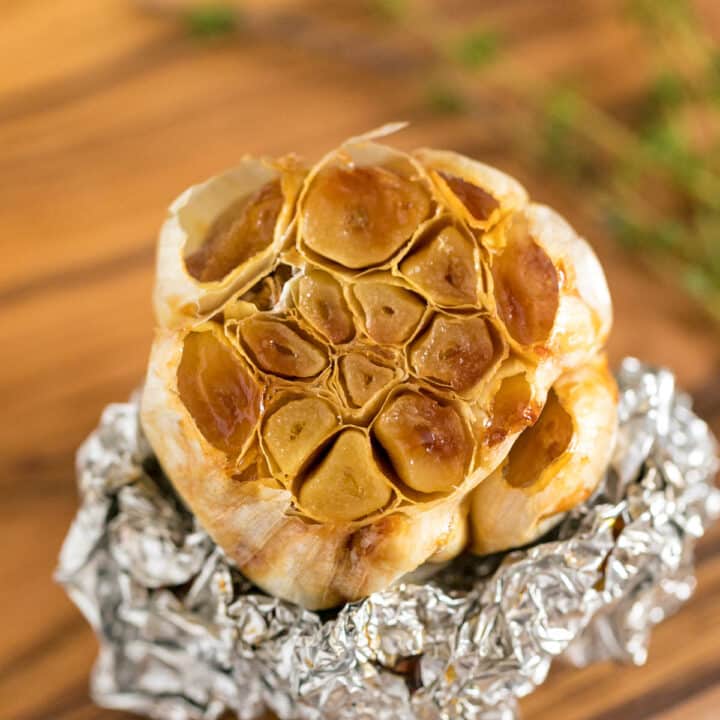
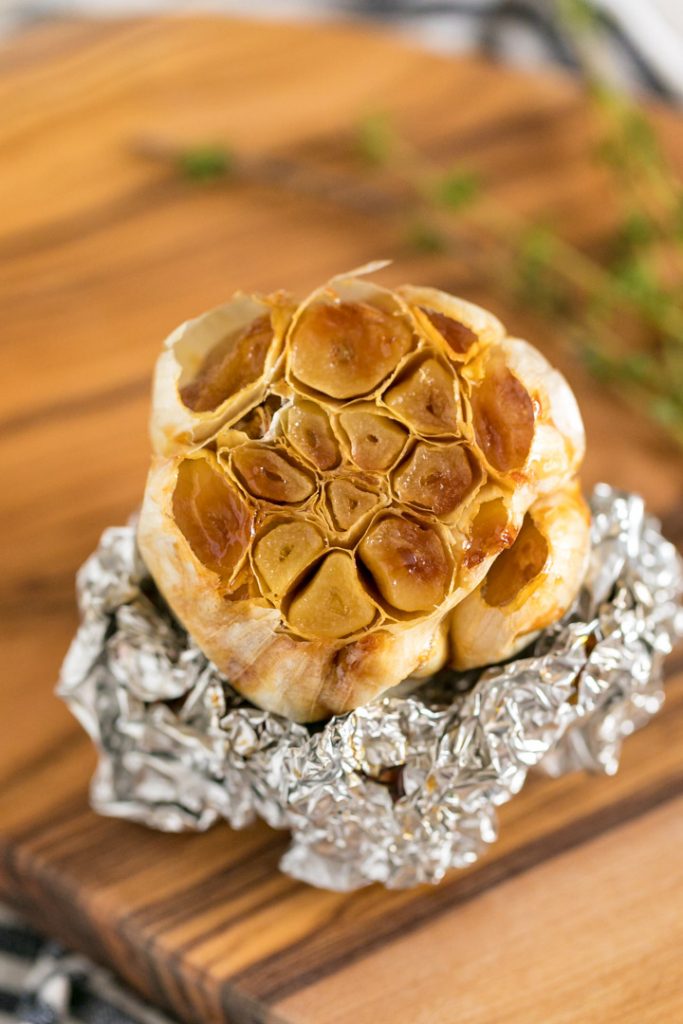
    A close up image of a bulb of roasted garlic revealing it inside on top of some tin foil on a cutting board.

    The way to get the best flavor from your garlic is by roasting it. So I wrote an entire post detailing how to roast garlic, and let me tell you- it couldn't be easier!

    Check out these other great recipes featuring pecans: Pumpkin Crunch Cake, Caramel Pretzel Turtles

    A close up image of a bulb of roasted garlic revealing it inside on top of some tin foil on a cutting board.

    Roasted Garlic

    Is it even possible not to love garlic? As an Italian-American, I say NO! Garlic cloves have a way of adding fantastic flavor to pretty much anything you add them to, which is why you'll find them in most recipes.

    But I think, the secret to getting the absolute best garlic flavor, is to roast it. Something about leaving it in the oven for an hour and letting it do its thing, allows the garlic cloves to get perfectly soft, spreadable and caramelized. And the best part is, it's SO easy to make!

    Tips for oven roasted garlic

    • You'll want to use a super sharp knife, as a dull knife makes it harder to cut through the papery skin on the garlic.
    • I find it easiest to cut the stem off first and then gently peel some of the papery skin off around the sides, but be careful- you want to leave enough that the bulb stays together and the cloves don't separate.
    • Try to use heavy duty foil so it doesn't spring a leak while cooking.

    Helpful ingredient information

    • Garlic: Be sure to buy whole garlic bulbs, not the individual cloves.
    • Olive oil: High-quality olive oil is key (this is really important for everything you're cooking).
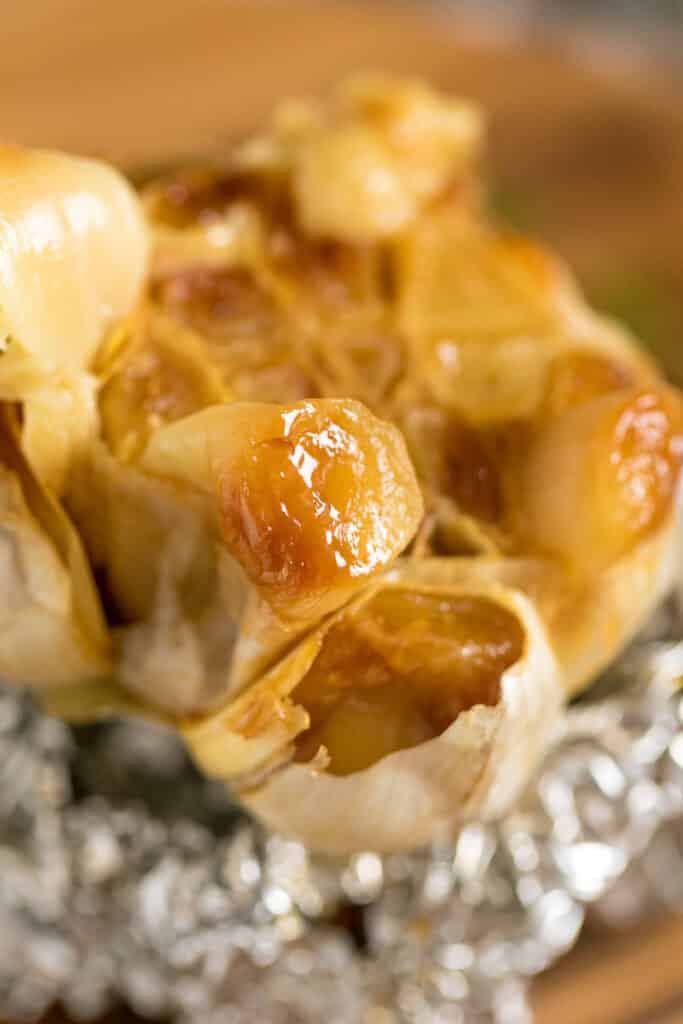
    A close up image of a piece of roasted garlic thats slightly squeezed out of the bulb revealing the texture of the garlic.

    Recipe FAQs

    Why do you roast garlic unpeeled?

    Not only does it keep everything together, it also helps prevent the individual cloves from burning.

    How does roasting garlic change the flavor?

    Raw garlic can be extremely overpowering and spicy. Roasting it mellows the flavor tremendously while still giving the delicious, savory flavor it brings to the table.

    Should you season the garlic before wrapping and roasting?

    You certainly can season it with whatever flavorings and spices you prefer. I chose not to for this recipe because I didn't want to alter the flavor of the garlic.

    What's the best way to get the garlic out of the skins once it's done roasting?

    Honestly, I like to place the open side over whatever I'll be using or storing it in and squeeze it out starting at the root (kind of like a tube of toothpaste). Works every time!

    What are some good ways to use roasted garlic?

    There are a ton of good way to use it- first of all, once it's roasted it becomes spreadable, so I highly encourage you to spread it on toasted baguette with whatever other toppings you like for a delicious appetizer or snack. It's the perfect addition to mashed potatoes, pasta sauce, roast chicken, salad dress- truly the possibilities are endless!

    Storage:

    This will last up to a week in an airtight container in the fridge and up to 6 months in the freezer.

    Helpful tools:

    1. A good Chef's Knife
    2. A Cutting Board
    A close up image of a piece of roasted garlic thats slightly squeezed out of the bulb revealing the texture of the garlic..

    Love this recipe? Please leave a 5 star ⭐️⭐️⭐️⭐️⭐️ rating in the recipe card below ⬇️ and/or a review in the comment section further down. Check out my Amazon Store for all my favorite tools, including those used in this recipe. And follow @thelifejolie on Instagram and TikTok!

    A close up image of a bulb of roasted garlic revealing it inside on top of some tin foil on a cutting board.

    How to Roast Garlic

    Jessy Freimann
    The way to get the best flavor from your garlic is by roasting it! So I wrote an entire post detailing how to roast garlic.
    No ratings yet
    Print Recipe Pin Recipe
    Prep Time 5 minutes mins
    Roasting time 1 hour hr
    Total Time 1 hour hr 5 minutes mins
    Course Condiment
    Cuisine American
    Servings 1 bulb

    Ingredients
      

    • 1 whole bulb garlic, unpeeled
    • 1 teaspoon olive oil
    • 1 sheet heavy duty tin foil

    Instructions
     

    • Preheat the oven to 400 degrees.
    • Begin by slicing off any excess roots hanging off the end while still leaving the root in place
    • Slice off the very top of the stem. Be careful not to cut off too much, only enough so that you expose the very tops of all the garlic cloves from within the skins.
    • Remove most of the papery skin from the outside of the bulb, except for the very first layer- leave that to help hold the cloves in place.
    • Place the bulb onto a sheet of foil, root side down.
    • Drizzle with olive oil and pull all the ends of the foil up to the top wrapping the garlic bulb tightly and securing the top shut by pressing together to seal.
    • Bake for 1 hour in a small oven safe pan.
    • Remove from the oven and cool. Use immediately or store in the refrigerator.

    Notes

    This lasts for up to 1 week in the fridge and up to 6 months in the freezer- store in an airtight container.
    Tried this recipe?Let us know how it was!

    One Pot Chicken and Pasta Florentine

    Jun 28, 2021 · 6 Comments

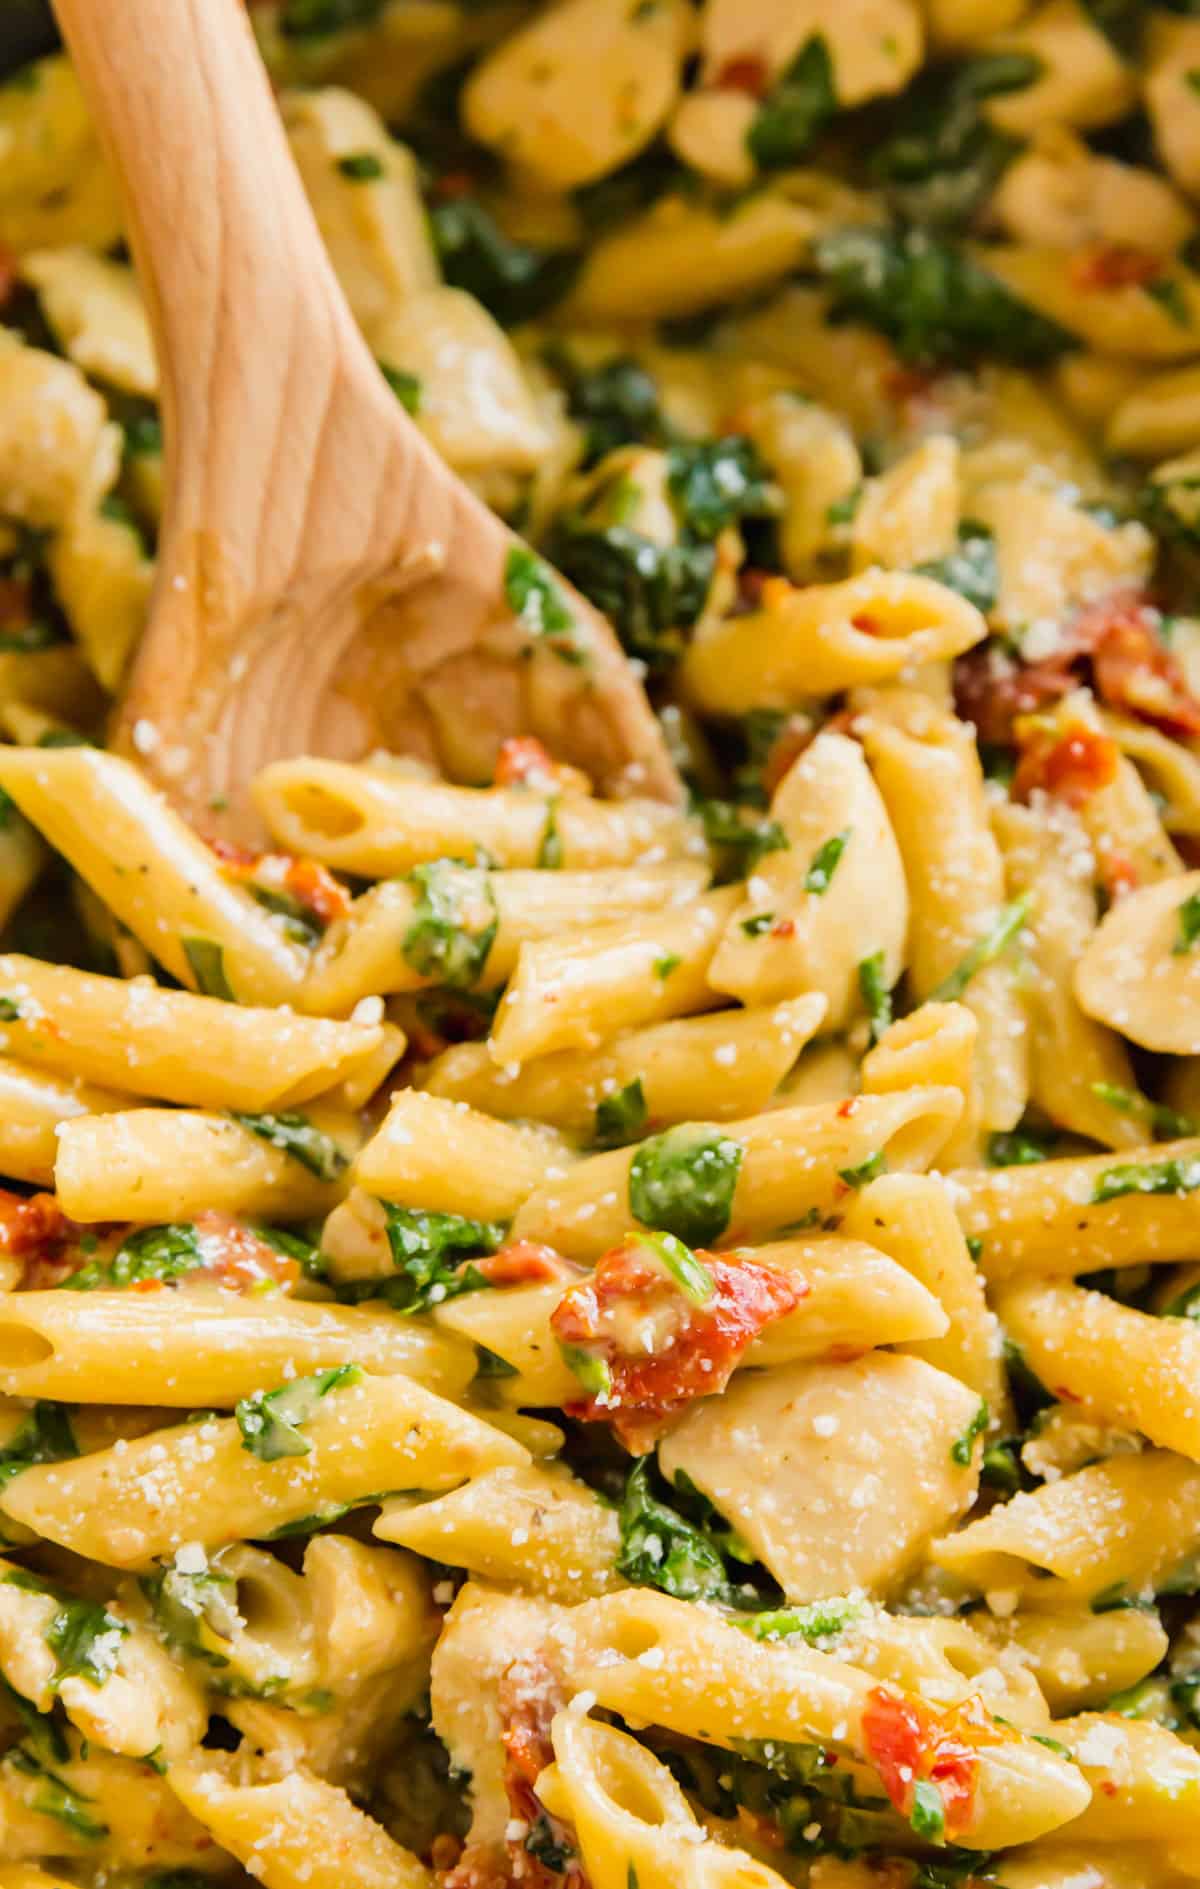
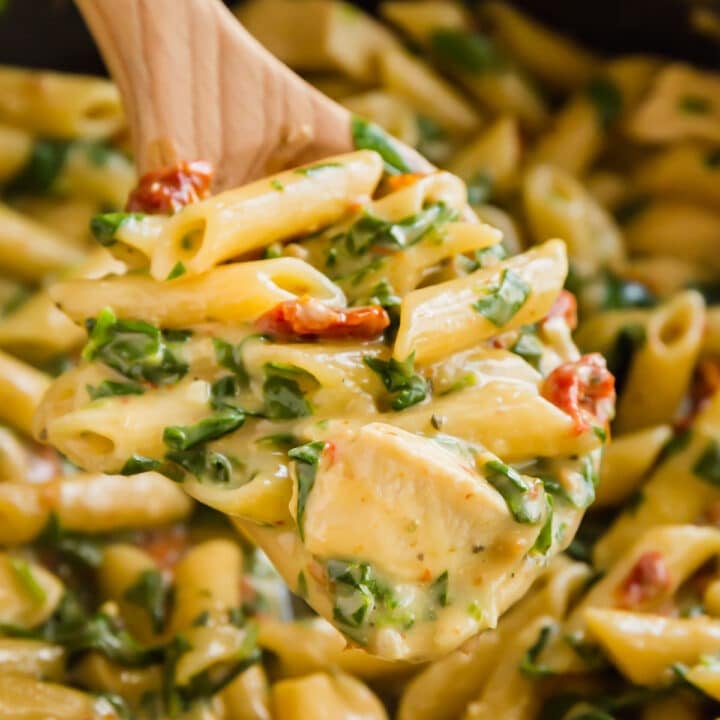
    A wooden spoon holding a scoop of creamy chicken Florentine pasta over the full pan of it.

    Chicken and Pasta Florentine is a seriously easy 30 minute meal that comes together into the most creamy, delicious pasta dinner your family will love! With spinach and sun-dried tomatoes, it's a one pot sensation that will satisfy every taste bud!

    A wooden spoon holding a scoop of creamy chicken Florentine pasta over the full pan of it.
    [feast_advanced_jump_to]

    Why You'll Love Pasta Florentine

    I believe that dinner should totally be simple but still totally delicious, and one pot pastas often deliver in this way! Chicken penne pasta is always a winning idea in our home. But I like to elevate it a bit with rich sun-dried tomatoes, fresh baby spinach, tender chicken, and a creamy sauce that will bring everyone back for seconds! I really love that this chicken florentine pasta is a quick meal that still feels extra special.

    Here are a few more reasons to love this recipe:

    • Ready in under 30 minutes
    • Everything cooks in one pot
    • Perfect for busy weeknights
    • Complete meal with meat and veggies
    • Easy to customize

    PS- If you want another great option for a one pot pasta, try this 30 Minute Taco Pasta.

    An overhead image zooming in on a pan of chicken and pasta Florentine in a pan with a wooden spoon in it.

    Ingredients Information and Substitutions

    • Chicken: I use boneless skinless chicken breast, but tenders are a great substitute. Try to cut the chicken into uniform-sized chunks for even cooking. Mine were around an inch in size.
    • Pasta: Penne pasta is my favorite for this pasta Florentine recipe, but other pasta shapes around the same size can be used — think rotini or cavatappi. Just keep an eye on the cooking time as it could vary.
    • Spinach: Fresh baby spinach provides the best texture for chicken Florentine pasta, in my opinion. If frozen is all that's available, then a 10 ounce package of frozen chopped spinach will work. Be sure to thaw it first and squeeze as much water out as possible.
    • Sun-dried Tomatoes: I prefer the dry variety, but if you use the ones in oil, reduce the olive oil at the start to 1 tablespoon instead of 2. I also like to purchase my sun-dried tomatoes chopped, but if pre-chopped aren't available, roughly chop them down a bit. If you'd rather keep them in the larger julienned chunks, that's fine too — it's all about personal preference.
    • Sauce: The liquid components of this sauce include chicken broth, heavy cream and water. A bit of flour is used to thicken it. Minced garlic, salt, pepper and Italian seasoning bring big flavors!
    An overhead image of the labeled ingredients in glass bowls.

    How To Make Creamy Chicken Spinach Pasta

    Step 1: Cook Chicken

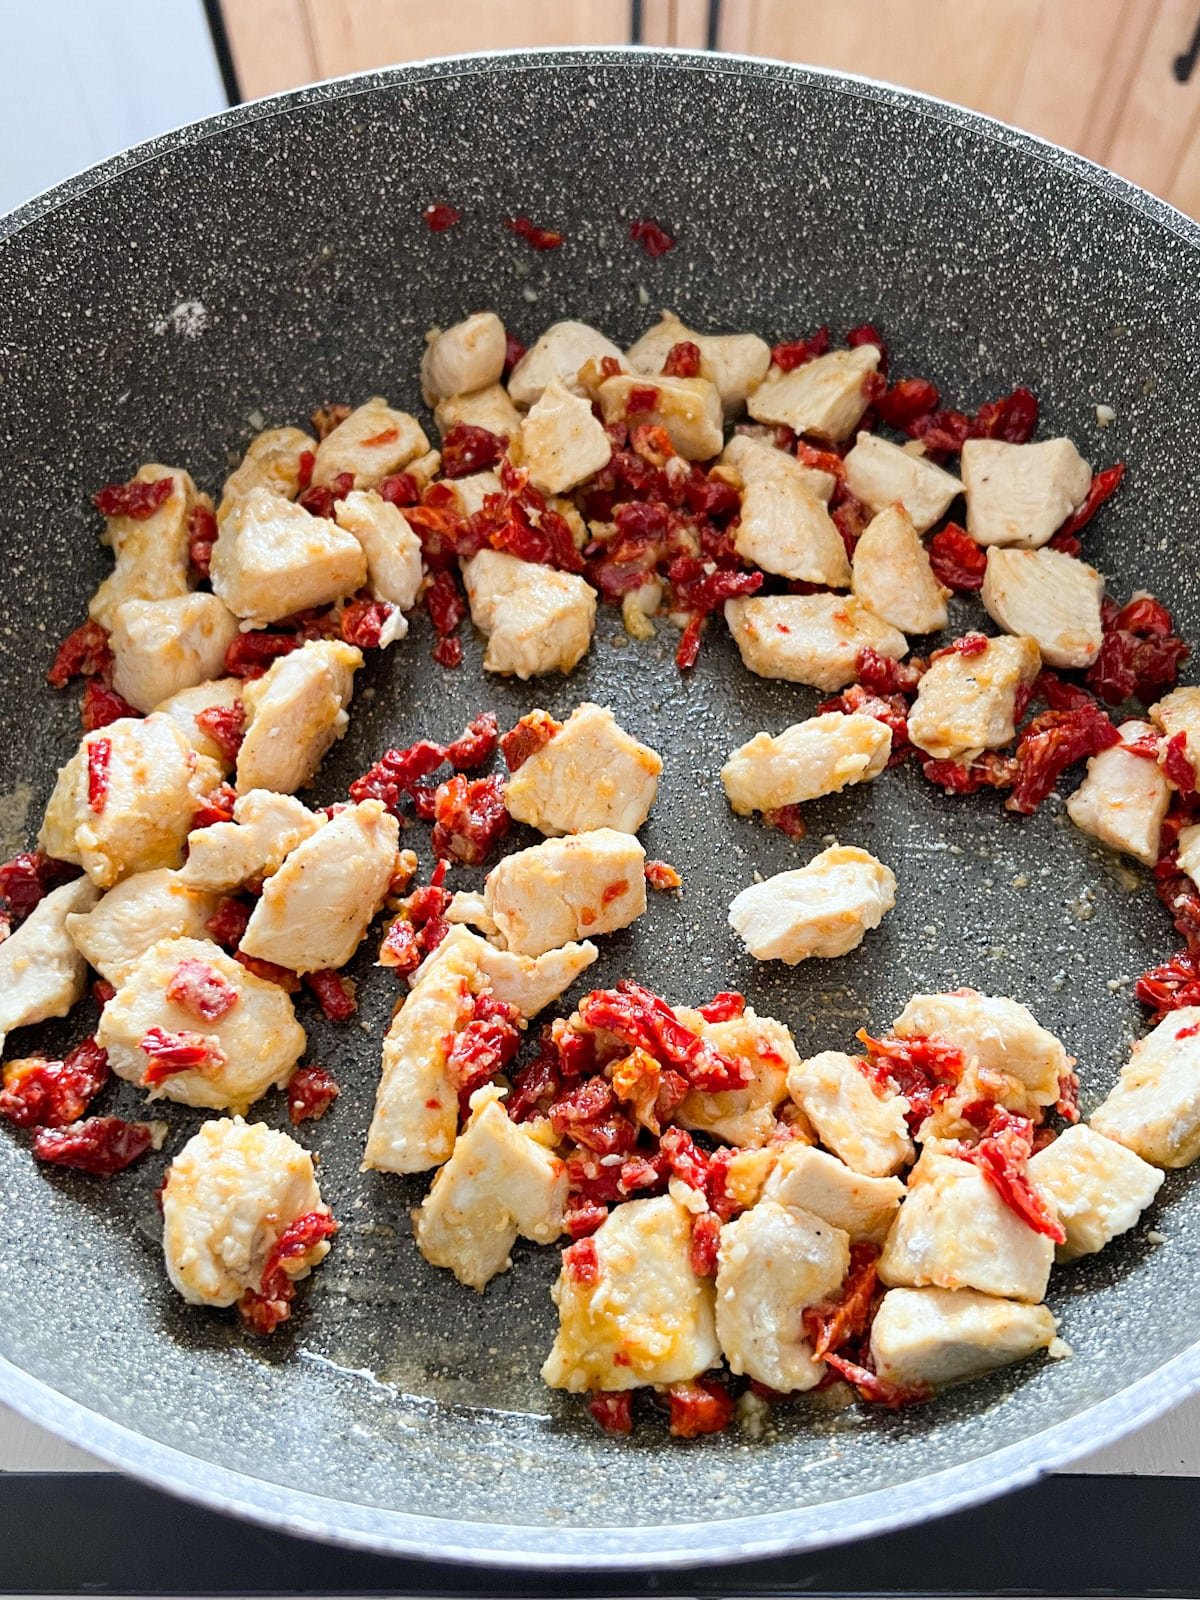
    Heat oil over medium high heat. Add chicken to a large non-stick pan and season with salt and pepper. Cook just until the chicken is browned, stirring often. Stir in minced garlic and sundried tomatoes, cooking until fragrant.

    Chicken cooking in oil in a skillet with salt and pepper on it.
    Cooked chicken in a skillet with sun-dried tomatoes and garlic.

    Step 2: Add flour and then liquids

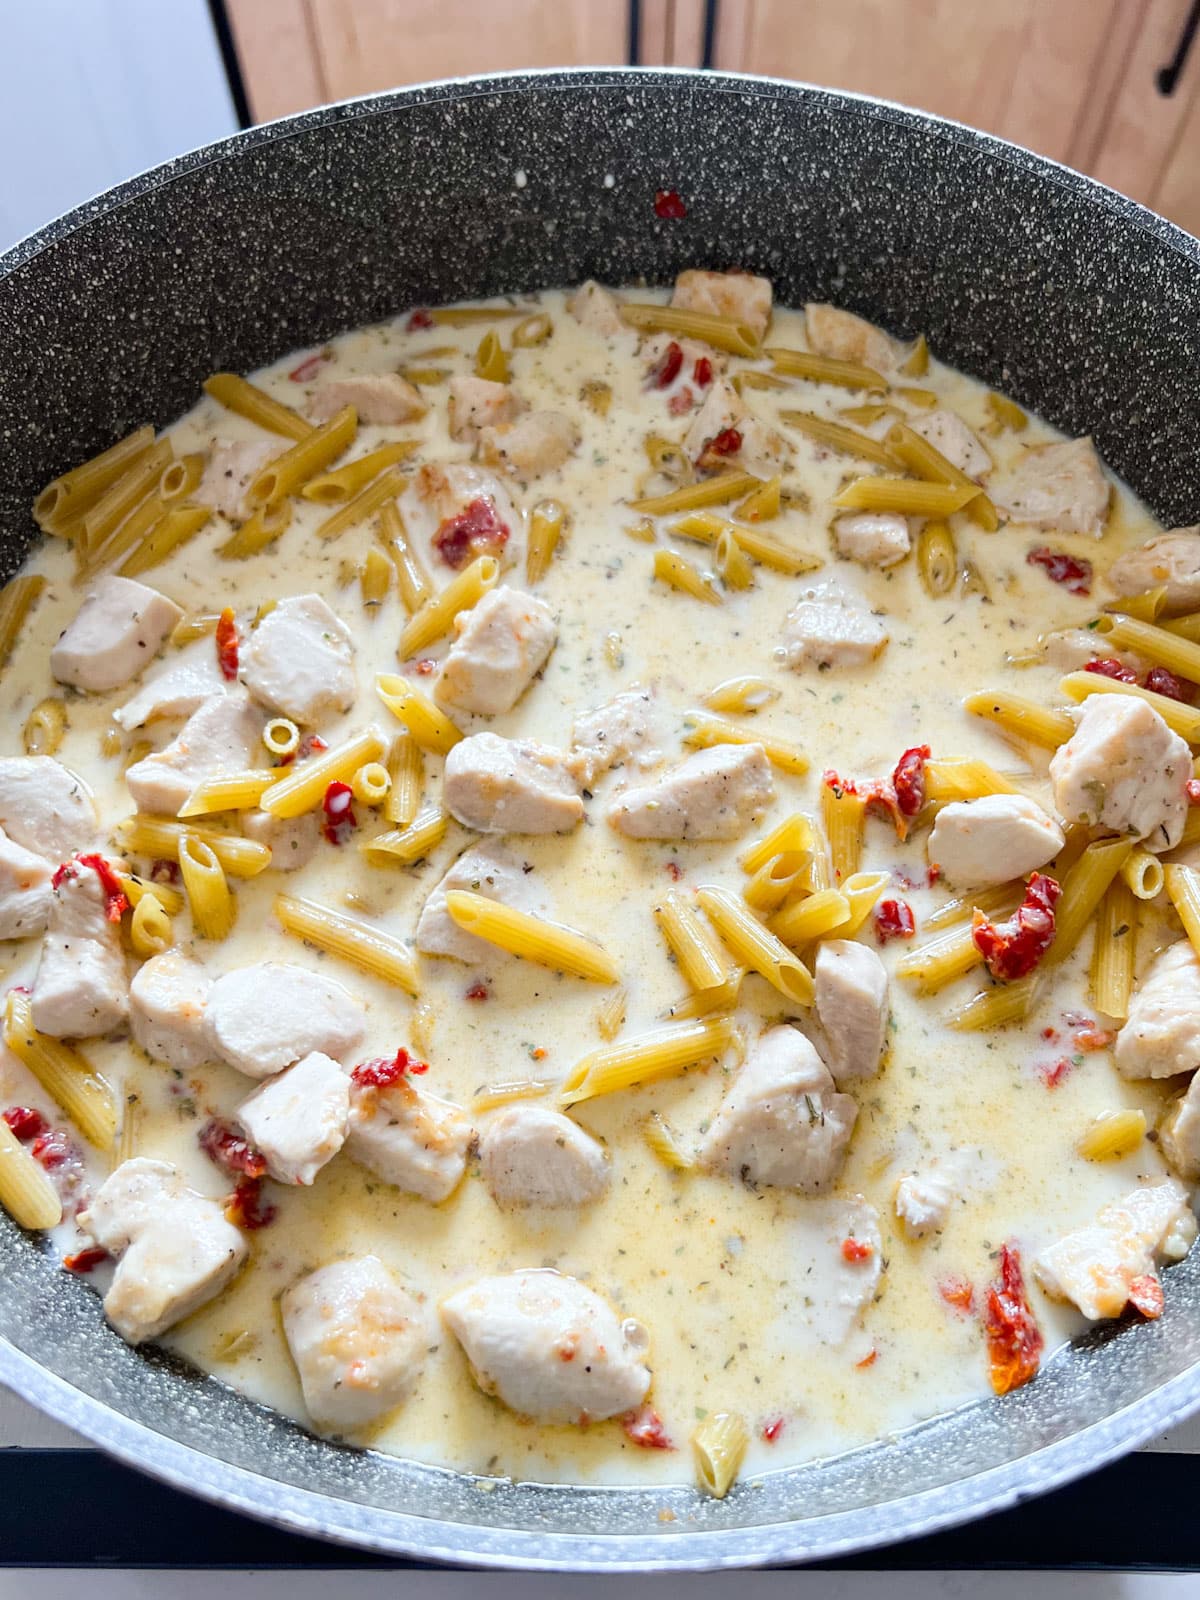
    Sprinkle flour over everything and stir until lump-free. Add chicken broth, cream, water, seasonings, and pasta and give everything a good stir.

    Liquid ingredients combined with the chicken, garlic and sun-dried tomatoes in the skillet.

    Step 3: Cook to al dente

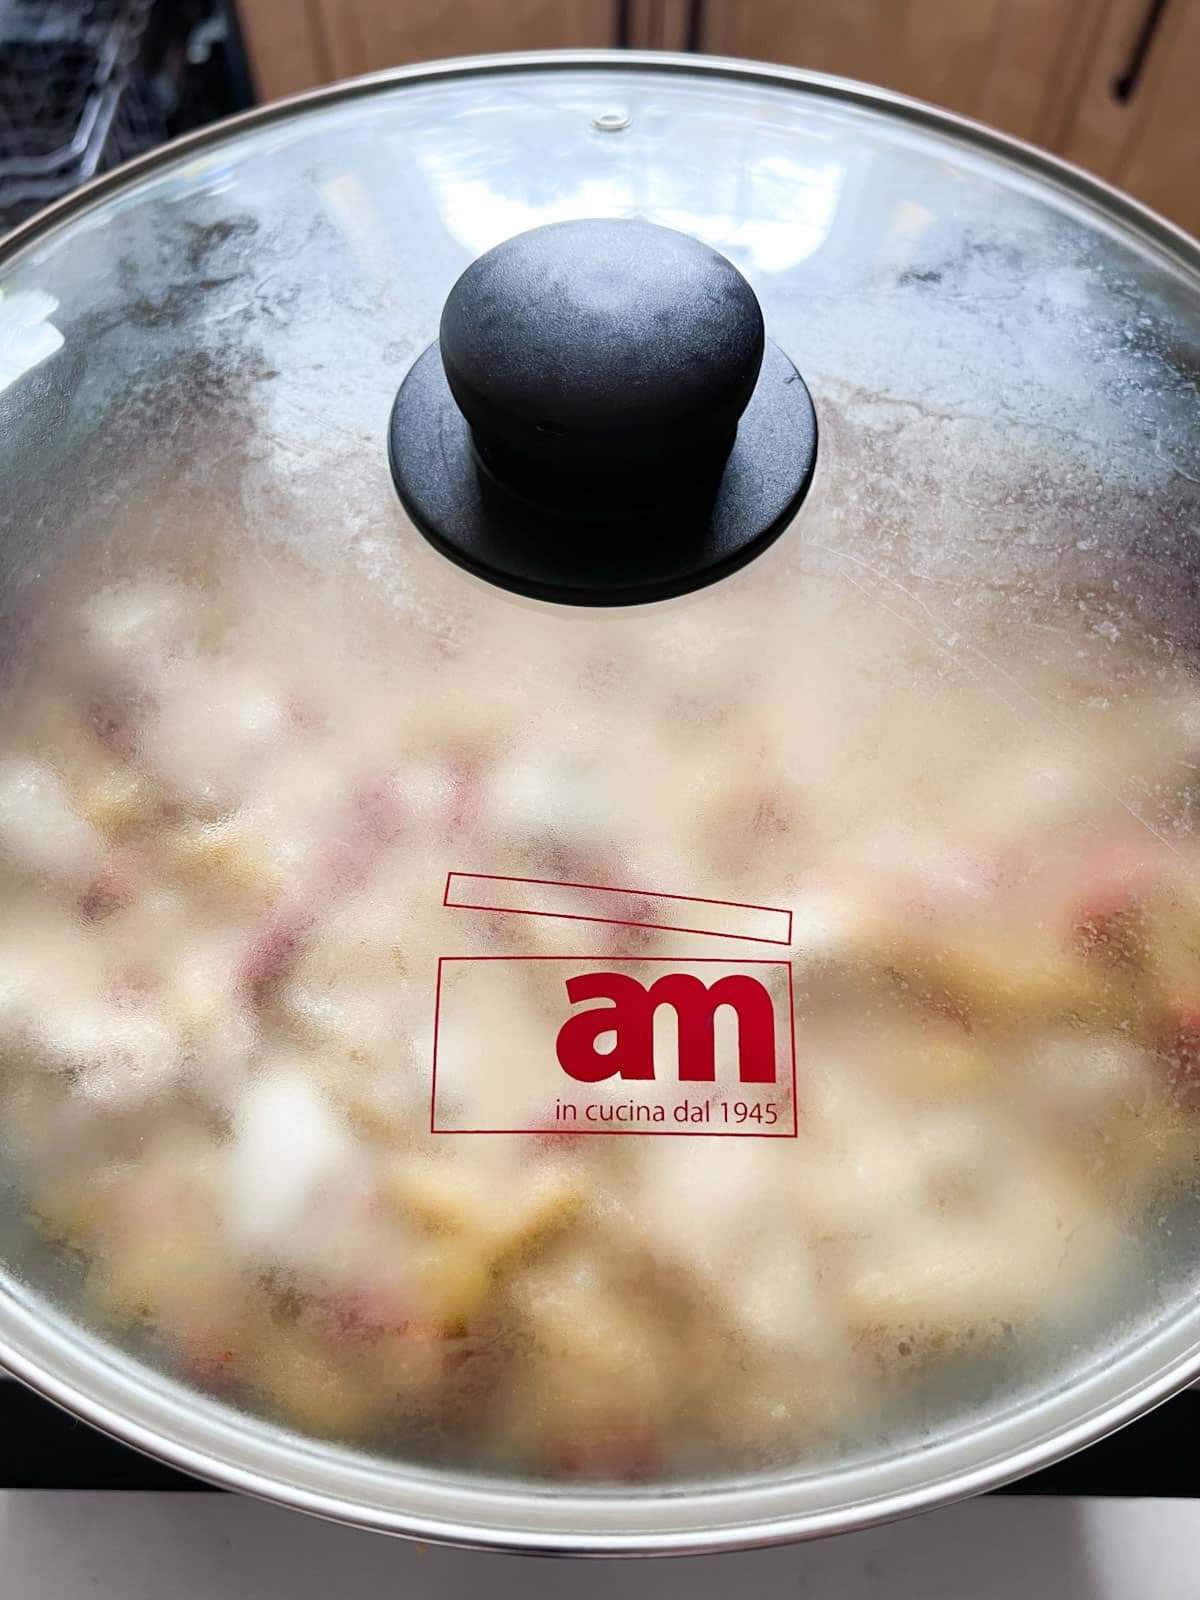
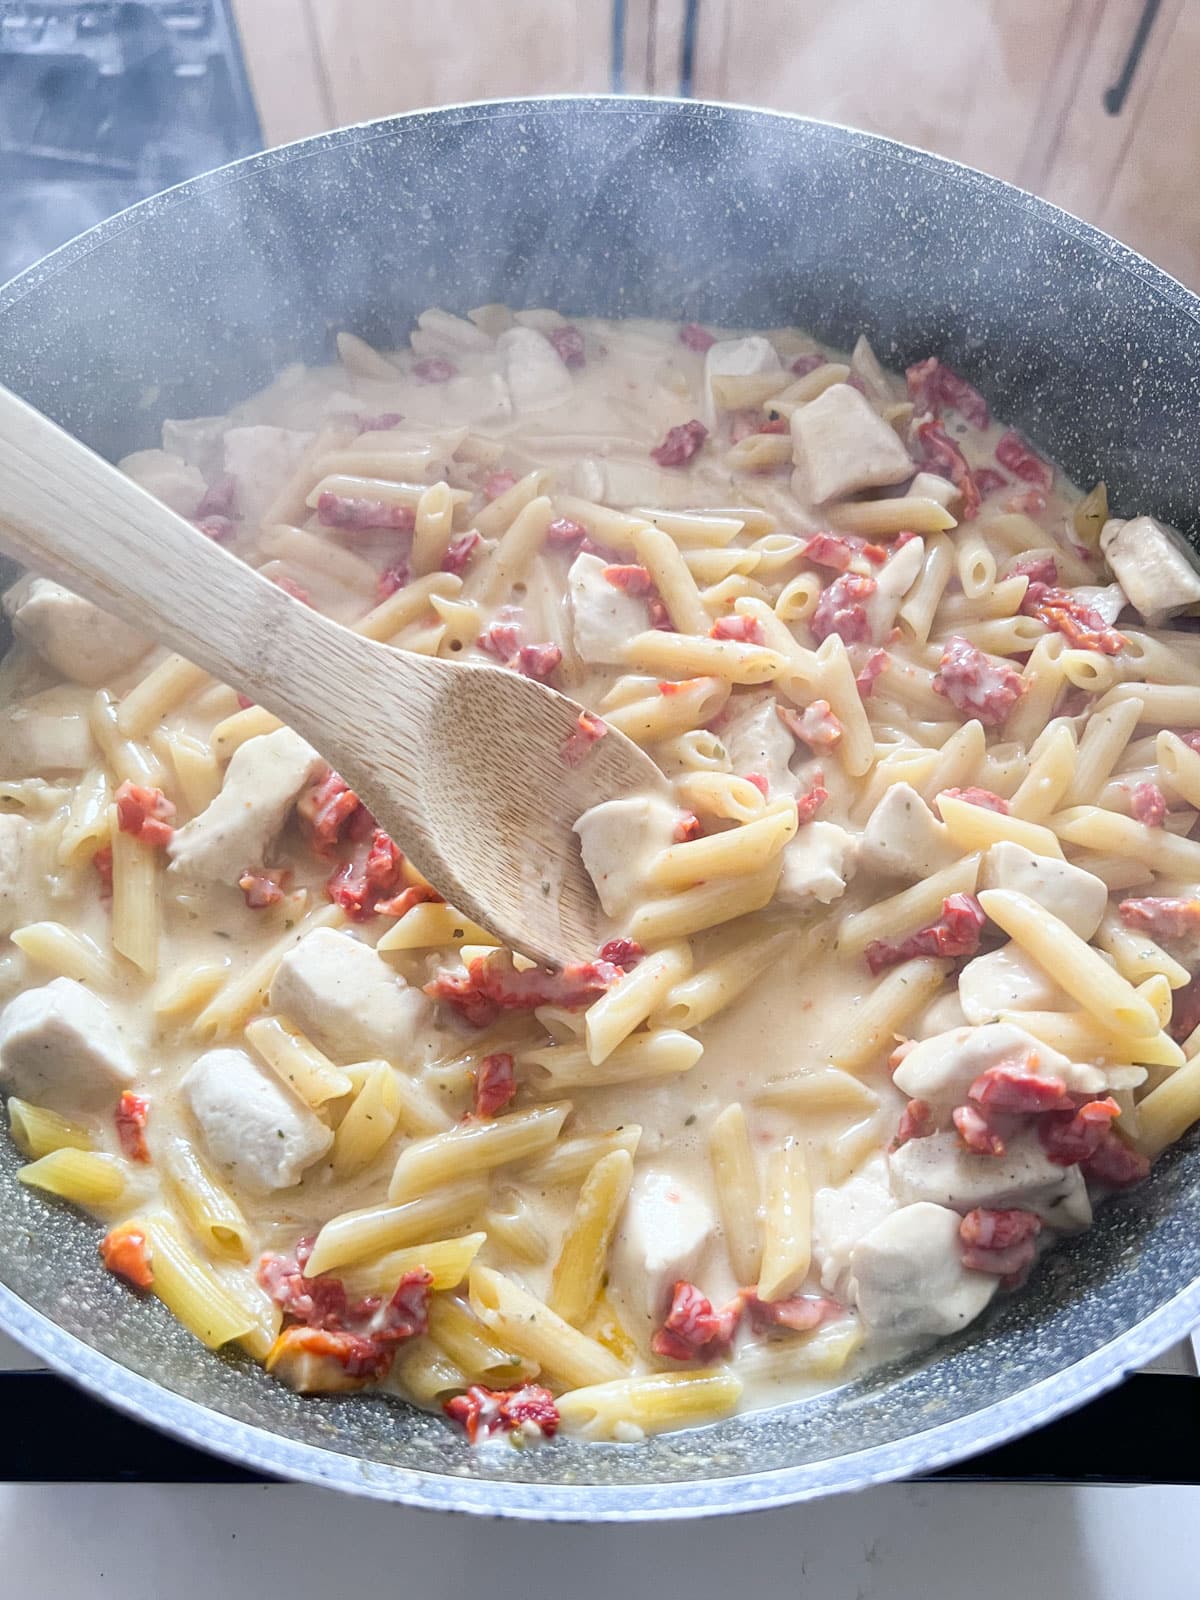
    Bring the mixture to a boil, then cover and cook for 10 minutes. Stir halfway through so the pasta doesn't stick to the bottom.

    The pasta mixture covered in the skillet.
    A wooden spoon stirring the pasta mixture half way through the cooking.

    Step 4: Add spinach

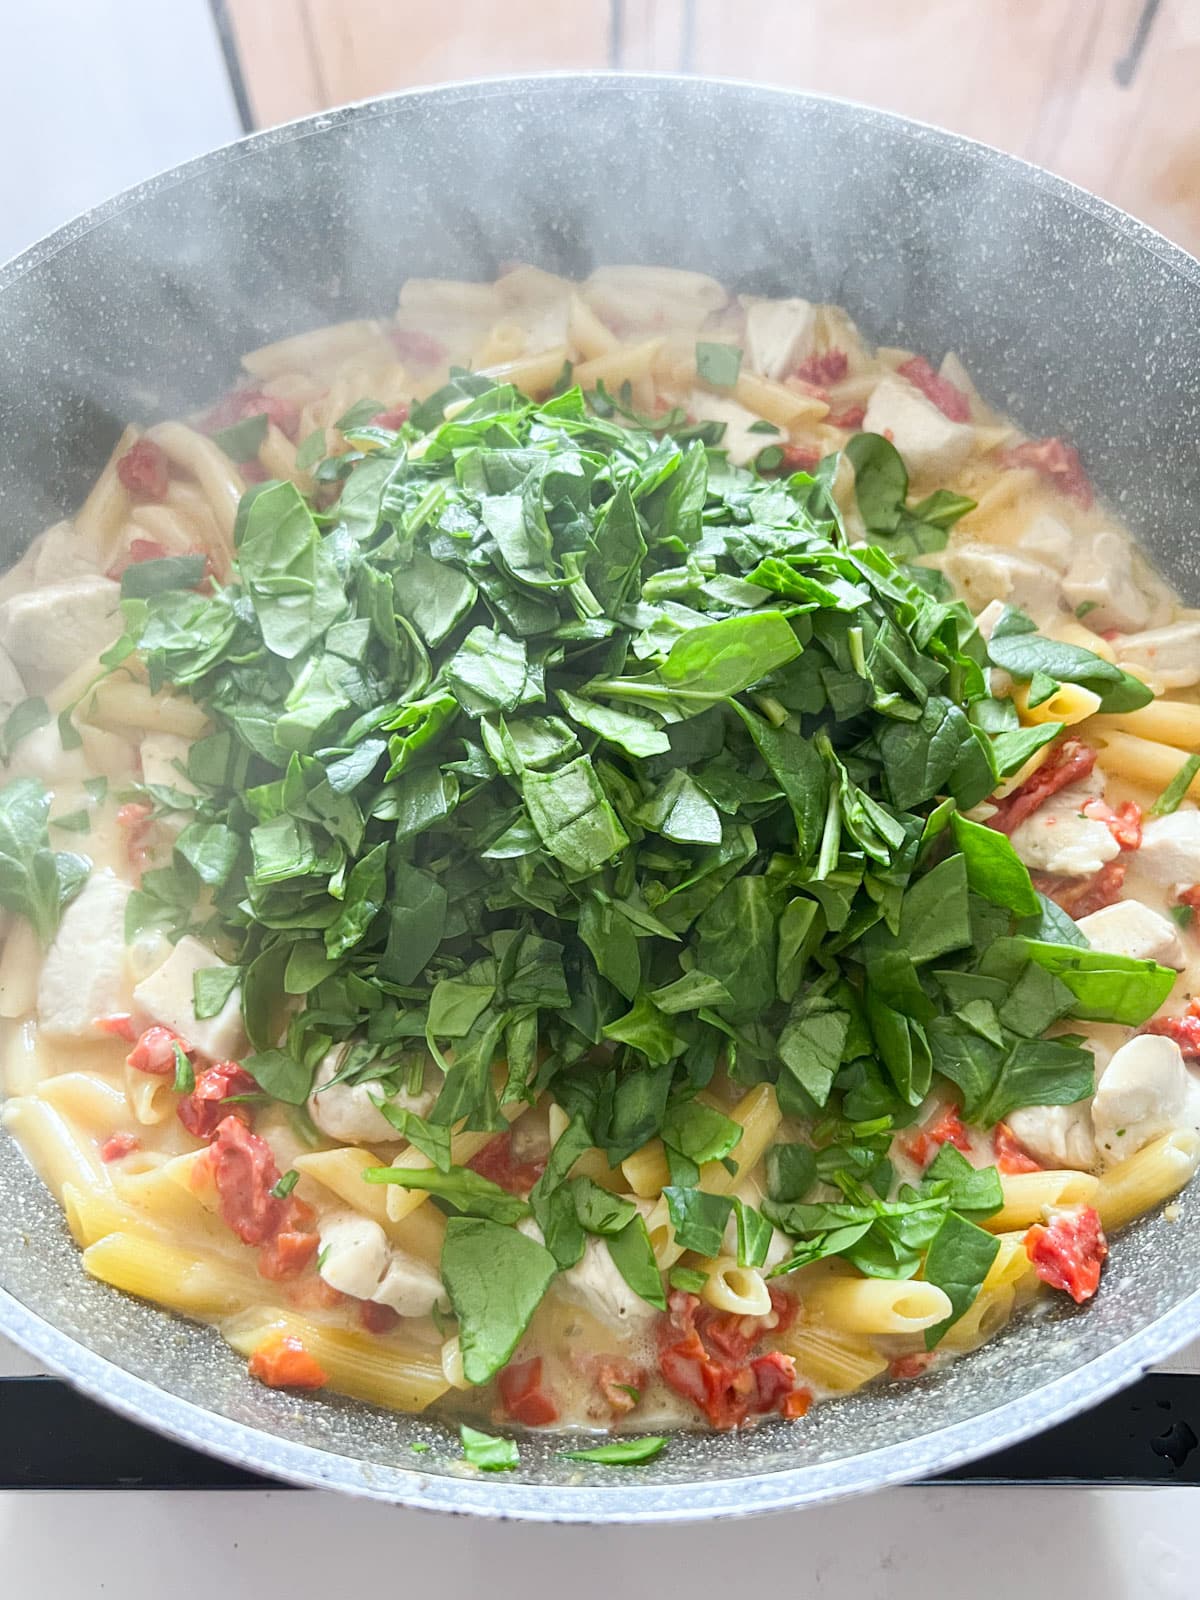
    Remove the lid and stir in the spinach, then cover and cook for another 5 minutes. Give it one last stir, checking that everything is cooked and the spinach is wilted. Serve with a sprinkle of Romano or Parmesan cheese.

    The cooked pasta mixture with chopped fresh spinach on top before stirring it in.

    Frequently Asked Questions

    What makes this pasta Florentine?

    Technically, Florentine is a dish served on a bed of butter spinach — more specifically with a Mornay sauce (a béchamel sauce with gruyere cheese). Many Americans hear Florentine and immediately think of spinach. So with that in mind, I strayed from the specifics of a traditional Florentine recipe and added my own twist. My chicken spinach pasta recipe is more loosely "inspired" by Florentine pasta with the spinach and Florentine sauce — without going full out with the technicalities.

    Can I make this recipe ahead of time?

    You can certainly prep the ingredients in advance! Cut the chicken into bite-sized pieces and chop the su-dried tomatoes. Clean the spinach leaves (rinse and spin or pat dry), then peel the garlic. Store everything in separate containers in the refrigerator until you're ready to cook your chicken Florentine pasta!

    How long will this last in the fridge?

    Leftovers will last 3-4 days covered in the refrigerator. That said, this this is is best served right away as the sauce tends to coagulate a bit once cooled.

    How do you reheat creamy Italian chicken pasta?

    While the microwave will do the job, the best way would be in a sauté pan over medium heat. For optimal results, add a little heavy cream or chicken broth to get the sauce to a nice, creamy consistency once again.

    A close up image of Florentine pasta in a skillet with a wooden spoon in the background.

    Tips For Making Chicken Spinach Pasta

    • Cut the chicken pieces to uniform size for even cooking. I aim for around 1 inch chunks.
    • It's ok if the chicken isn't cooked through at the beginning. Simply brown as directed, then move on to the other steps. It will continue cooking with the pasta.
    • There will be a lot of liquid at first, but that's good! The pasta will absorb a good amount of it while still having enough for a creamy sauce when the pasta is done.
    • Adjust the heat as you go. You'll start at medium-high, then reduce it to medium (or a bit below, depending on your stove) after the first time stirring. The higher heat at the beginning will also help cook the Florentine pasta to a perfect al dente.
    • Prevent the pasta from sticking. Use a timer and stir it every 5 minutes while it's covered and cooking.
    • Top with a little Romano cheese, plus some crushed red pepper if you want a little kick.
    • Prep these ingredients ahead- Cut the chicken, chop the sun-dried tomatoes, wash and dry the spinach and peel the garlic.
    • Leftovers and storage- Leftovers will last 3-4 days covered in the refrigerator.
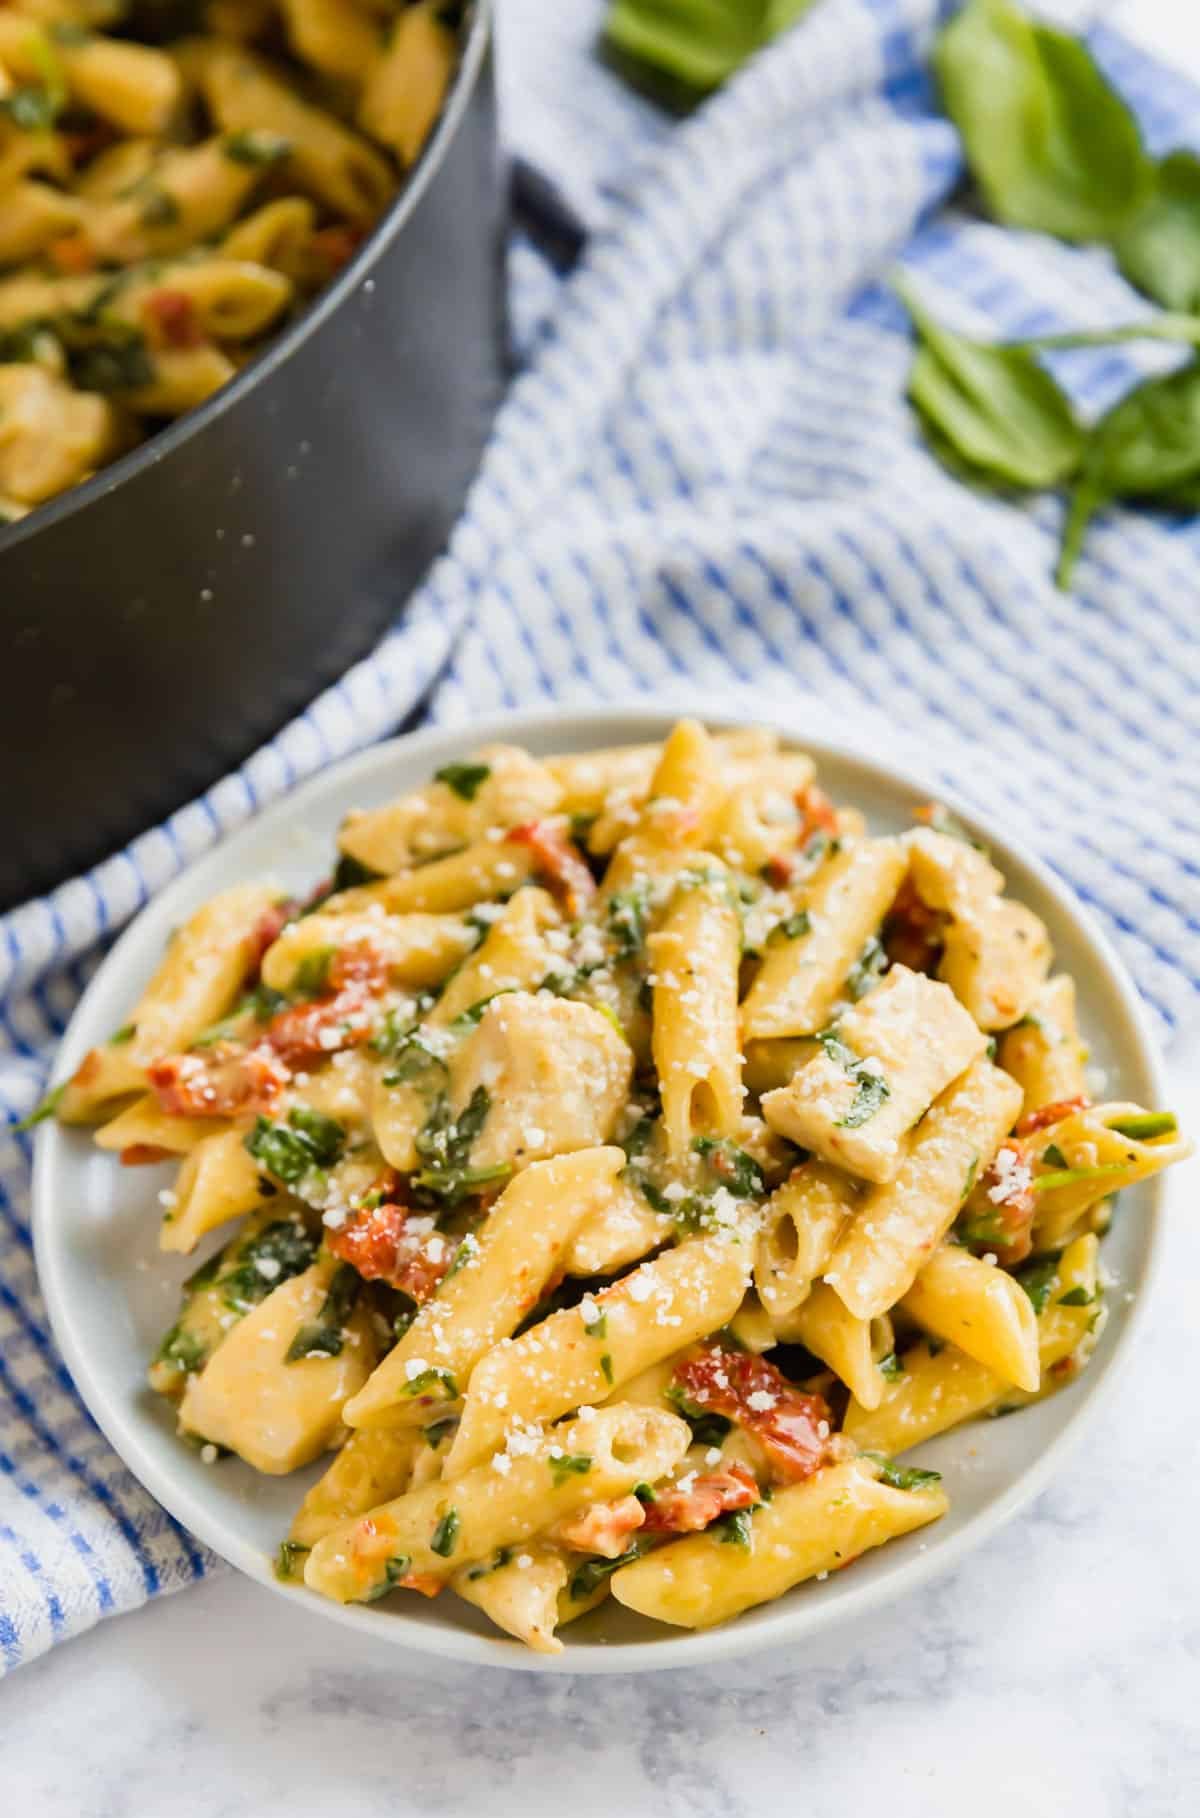
    A white plate of chicken spinach pasta with a blue nad white checked napkin behind it and the pan and some raw spinach in the background.

    What To Serve With Italian Chicken Pasta

    A few great recipes to round out this creamy Italian chicken pasta would be:

    • Homemade 3 Cheese Garlic Bread
    • Marinated Vegetable Salad
    • Sautéed Broccoli Rabe
    • Clementine and Fennel Salad
    • Lemon Pistachio Cake

    Other One Pot Pasta Recipes To Try...

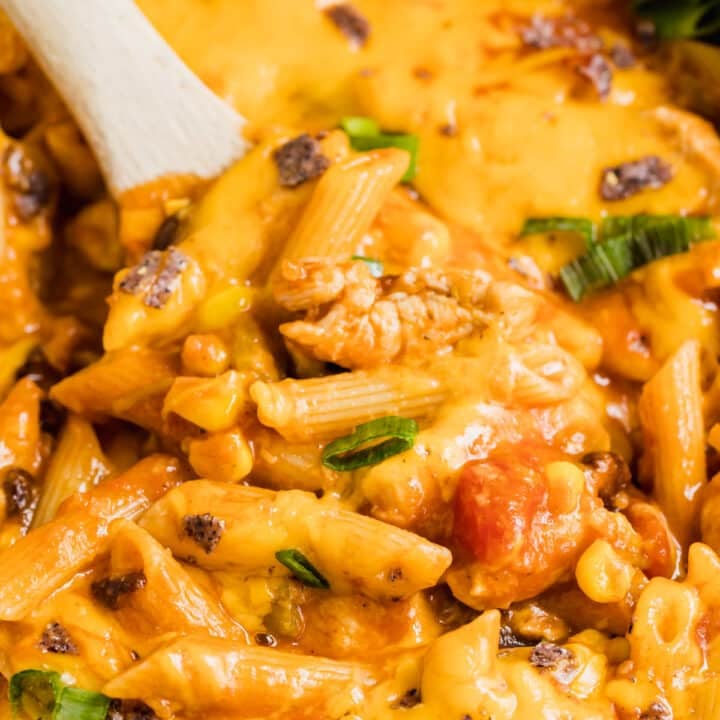
    • A close up of a wooden spoon in a pan of taco pasta.
      One Pan Taco Pasta With Chicken
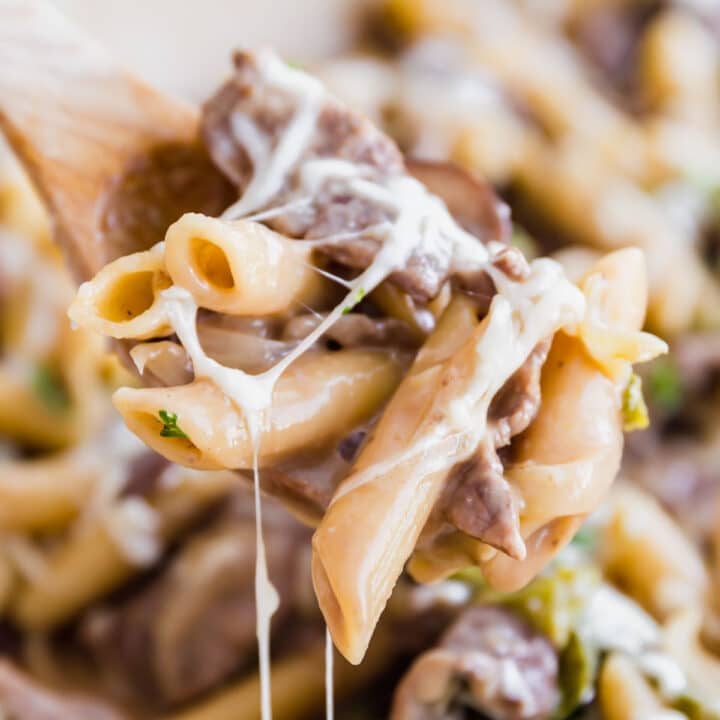
    • A wooden spoon holing a scoop of Philly steaks pasta with melty cheese all over it.
      One Pot Philly Cheesesteak Pasta
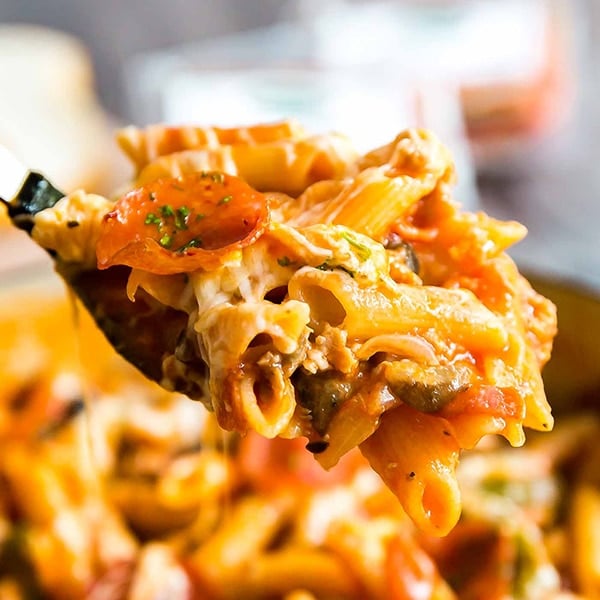
    • A square image of Supreme Pizza One Pot Pasta.
      Supreme Pizza One Pot Pasta
    • Chili Mac casserole in a white bowl.
      One Pot Chili Mac Casserole

    Love this recipe? Please leave a 5 star ⭐️⭐️⭐️⭐️⭐️ rating in the recipe card below ⬇️ and/or a review in the comment section further down. Check out my Amazon Store for all my favorite tools, including those used in this recipe. And follow @thelifejolie on Instagram and TikTok!

    A wooden spoon holding a scoop of creamy chicken Florentine pasta over the full pan of it.

    One Pot Chicken and Pasta Florentine

    Jessy Freimann
    Chicken and Pasta Florentine is a seriously easy 30 minute meal that comes together into the most creamy, delicious pasta dinner your family will love! With spinach and sun-dried tomatoes, it's a one pot sensation that will satisfy every taste bud!
    5 from 5 votes
    Print Recipe Pin Recipe
    Prep Time 10 minutes mins
    Cook Time 20 minutes mins
    Total Time 30 minutes mins
    Course Main Course
    Cuisine Italian
    Servings 6 servings
    Calories 227 kcal

    Equipment

    • Skillet
    • cutting board
    • chefs knife
    • Measuring cups and spoons
    • Liquid measuring cup
    • Garlic Press
    • Wooden Spoons

    Ingredients
      

    • 2 Tablespoons olive oil (reduce by 1 tablespoon if you use sundried tomatoes that are packed in oil)
    • 2 boneless skinless chicken breasts, cut into uniform 1 inch chunks
    • 1 teaspoon kosher salt, divided
    • ¼ teaspoon ground black pepper
    • 3 cloves garlic, minced
    • ½ cup sundried tomatoes, roughly chopped (I used ones without oil but see the note above if yours come packed in oil)
    • 2 Tablespoons flour
    • 2 ½ cups chicken broth
    • ¾ cup heavy cream
    • ½ cup water
    • ½ teaspoon Italian seasoning
    • 3 cups uncooked penne pasta
    • 2 gently packed cups fresh spinach, roughly chopped
    • Romano cheese for sprinkling
    • Crushed red pepper flakes for sprinkling (optional)

    Instructions
     

    • Heat the oil in a large non-stick saute pan over medium high heat.
    • Add the chicken and season with ½ teaspoon of salt and ground black pepper. Cook for 3-4 minutes stirring often until chicken is just browned (it won't be cooked through at this point).
    • Add minced garlic and sundried tomatoes. Saute stirring often for 1-2 minutes until fragrant.
    • Sprinkle with flour and stir until no lumps remain.
    • Add chicken broth, heavy cream, water, the other ½ teaspoon salt, Italian seasoning and penne pasta to the pan and stir.
    • Bring the liquid to a boil are around 2 minutes. Give the pasta one last stir and cover.
    • Cook for 5 minutes and remove the cover. Stir the pasta so that it doesn't stick to the bottom. Return the cover to the pan and reduce the heat to medium.
    • Cook for 5 minutes and remove the cover. Add the spinach into the pan and stir the pasta so that it doesn't stick to the bottom. Return the cover to the pan.
    • Cook for 5 more minutes and remove the cover. Give it one last stir and serve immediately with a sprinkle of Romano or Parmesan cheese (and crushed red pepper flakes if you want a spicy kick).

    Video

    Notes

      • Cut the chicken pieces to uniform size for even cooking. I aim for around 1 inch chunks.
      • It's ok if the chicken isn't cooked through at the beginning. Simply brown as directed, then move on to the other steps. It will continue cooking with the pasta.
      • There will be a lot of liquid at first, but that's good! The pasta will absorb a good amount of it while still having enough for a creamy sauce when the pasta is done.
      • Adjust the heat as you go. You'll start at medium-high, then reduce it to medium (or a bit below, depending on your stove) after the first time stirring. The higher heat at the beginning will also help cook the Florentine pasta to a perfect al dente.
      • Prevent the pasta from sticking. Use a timer and stir it every 5 minutes while it's covered and cooking.
      • Top with a little Romano cheese, plus some crushed red pepper if you want a little kick.
      • Prep these ingredients ahead- Cut the chicken, chop the sun-dried tomatoes, wash and dry the spinach and peel the garlic.
      • Leftovers and storage- Leftovers will last 3-4 days covered in the refrigerator.

    Nutrition

    Serving: 1.5cupCalories: 227kcalCarbohydrates: 9gProtein: 11gFat: 17gSaturated Fat: 8gPolyunsaturated Fat: 1gMonounsaturated Fat: 6gTrans Fat: 0.01gCholesterol: 60mgSodium: 814mgPotassium: 512mgFiber: 1gSugar: 5gVitamin A: 534IUVitamin C: 5mgCalcium: 43mgIron: 1mg
    Tried this recipe?Let us know how it was!

    Grilled Hawaiian Pork Chops

    Jun 1, 2021 · 36 Comments

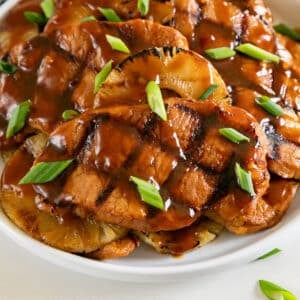
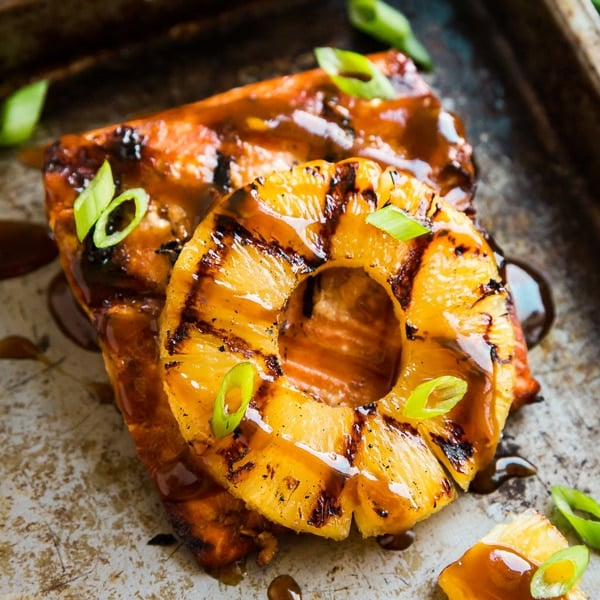
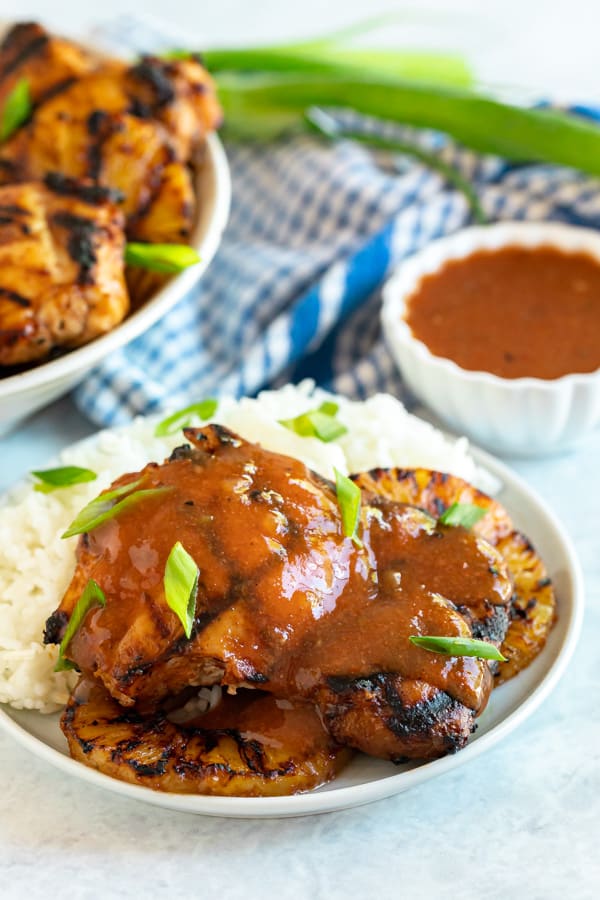
    A square image of the side of a pan focusing on pork chops and pineapple rings drizzled with Hawaiian BBQ sauce and topped with chopped scallions.

    These Grilled Hawaiian Pork Chops are an easy recipe for a quick weeknight dinner. This mouthwatering sweet and savory dish is the perfect summer meal!

    A man in a blue shirt holding a pan of grilled pork chops and pineapple.

    Try some other one pot pastas: Drunken Stove Top Pork Chops, Herb Grilled Pork Chops and Brown Sugar Bourbon Pork Chops.

    Hawaiian-Inspired Pork Chop recipe

    This post contains Affiliate Links. Please see the disclaimer here.

    I think it's super important to have some quick and delicious go-to recipes for those nights when 5 o'clock rolls around and you haven't even begun to think about dinner yet. And that's where these Hawaiian barbeque pork chops comes in. They're quick and easy to prepare but still versatile enough to to enjoy on a busy weeknight or a relaxed weekend dinner with friends.

    These Hawaiian Pork Chops are sweet and savory- while not authentic-Hawaiian cuisine, they're inspired by the delicious flavors and beautiful culture of Hawaii. The little bit of char you get from the grill goes perfectly with both the meat and the sweet pineapple. These are not to be missed!

    Tips for making grilled Hawaiian pork

    • You can marinate these for as little as 10 minutes but for best results give them at least a few hours.
    • Make sure you rest the chops for a good 5-10 minutes before serving to allow the juices to redistribute.
    • I’ve had a few people comment that this was a bit on the saltier side for their taste. While I tested this a few times and didn’t feel it was overly salty (make sure you use low sodium soy sauce!) I recognize that everyone has different palates. With that in mind, if your palate is a bit more sensitive to salt, consider replacing ¼ cup of the low sodium soy sauce with water.

    The side of a pan focusing on pork chops and pineapple rings drizzled with Hawaiian BBQ sauce and topped with chopped scallions.

    Can I use boneless pork chops?

    Yes- this recipe tastes great with either option!

    Can you freeze this recipe?

    Yes! Put the pork chops in the marinade and freeze them and then thaw when you’re ready to cook. The only thing I wouldn’t recommend freezing is the pineapple slices.

    How long to cook pork chops on the grill?

    Since so many grills are different (and the thickness of your pork chops also plays into this) I encourage you to determine doneness of the pork chops by temperature. The safe pork chop temperature for consumption is 145 degrees. A digital thermometer is best to assist with this. Remove the pork from the grill at 140 degrees and rest it tented in foil for 4 minutes. During that time it will keep cooking to 145 degrees and be perfectly juicy. This is not the case for ground pork, which should be cooked to 165.

    What goes well with these pork chops?

    A few great recipes to round out and complete this meal would be:

    • Rainbow Asian Chicken Salad
    • Crunch Ramen Coleslaw
    • Crunchy Red Cabbage Salad

    Leftovers and reheating:

    These last 3 days covered in the refrigerator once cooked. You can reheat in a frying pan or individually in the microwave.

    Helpful tools:

    1. Measuring spoons
    2. Measuring cups
    3. Whisk
    4. Instant Read Thermometer
    5. Grill tongs

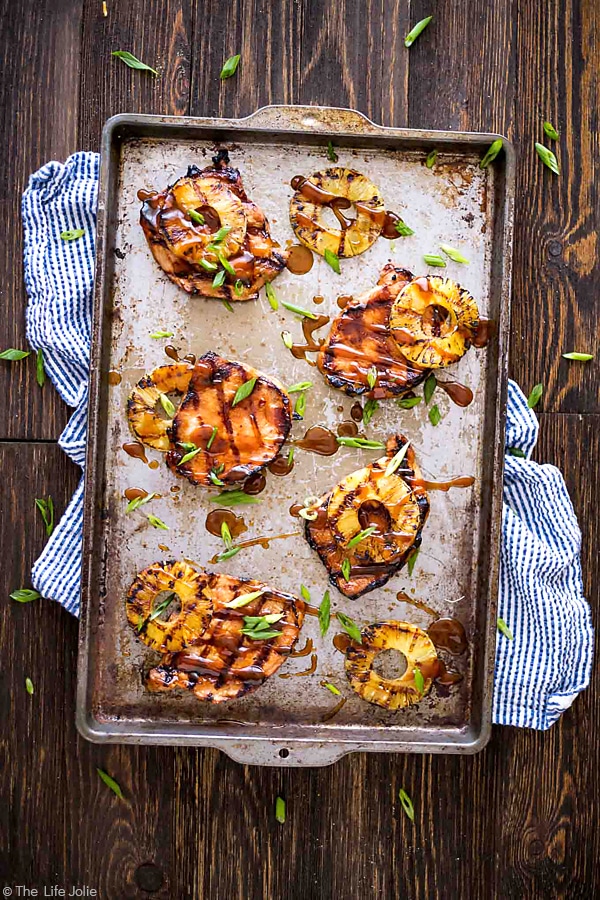
    An overhead image of a pan of grilled pork chops and pineapple on a blue and white striped towel with a wood background.

    If you tried this recipe please comment and rate it 🙂 I love hearing your feedback and answering your questions! And if you make this please tag me on Instagram with @thelifejolie so I can share it <3

    You can find a full index of my recipes here.

    Don’t forget to follow The Life Jolie on Pinterest for more recipe inspiration!

    Or if Pinterest isn’t your style, bookmark this post!

    Let’s keep the conversation going- join my Facebook group! 

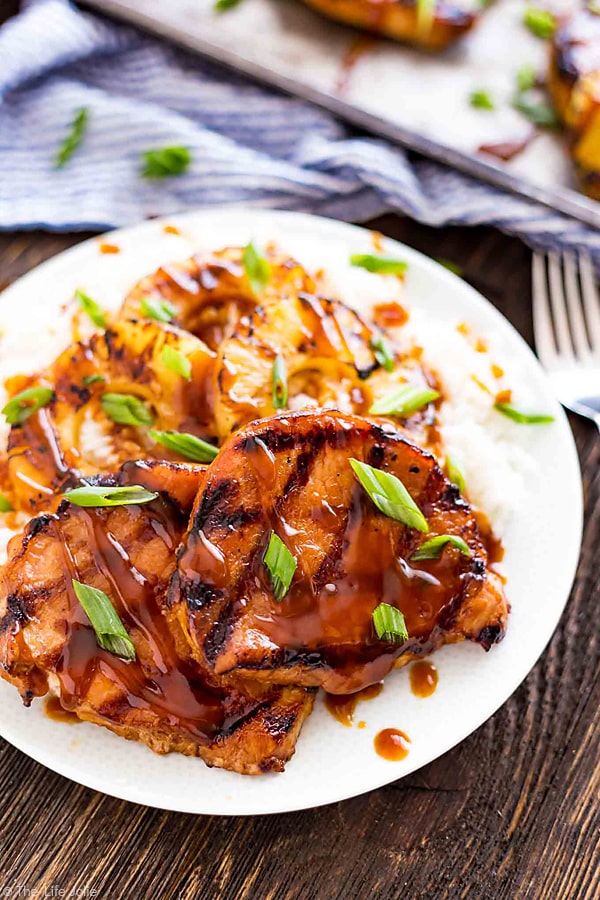
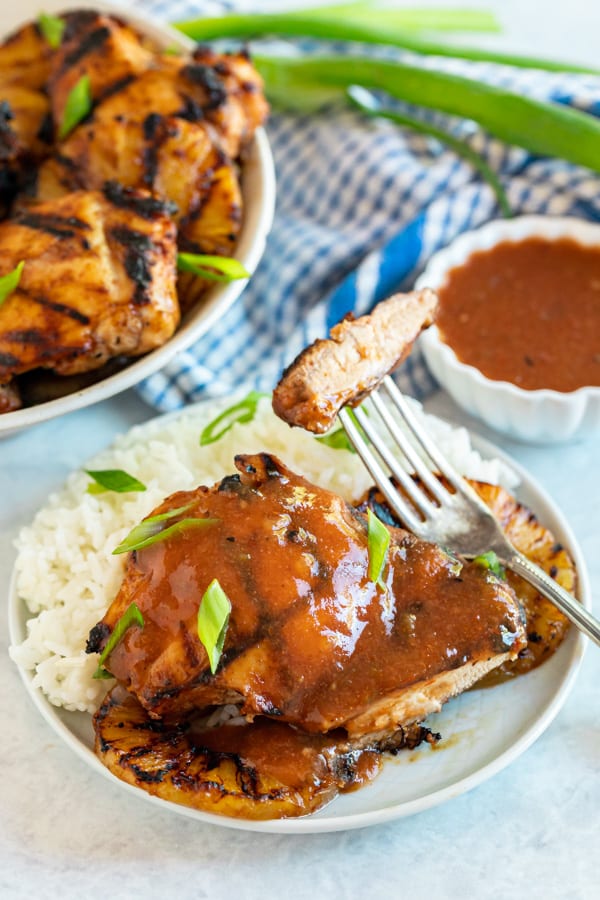
    A plate of Hawaiian pork chops and pineapple on white rice. with a blue and white striped towel behind it.

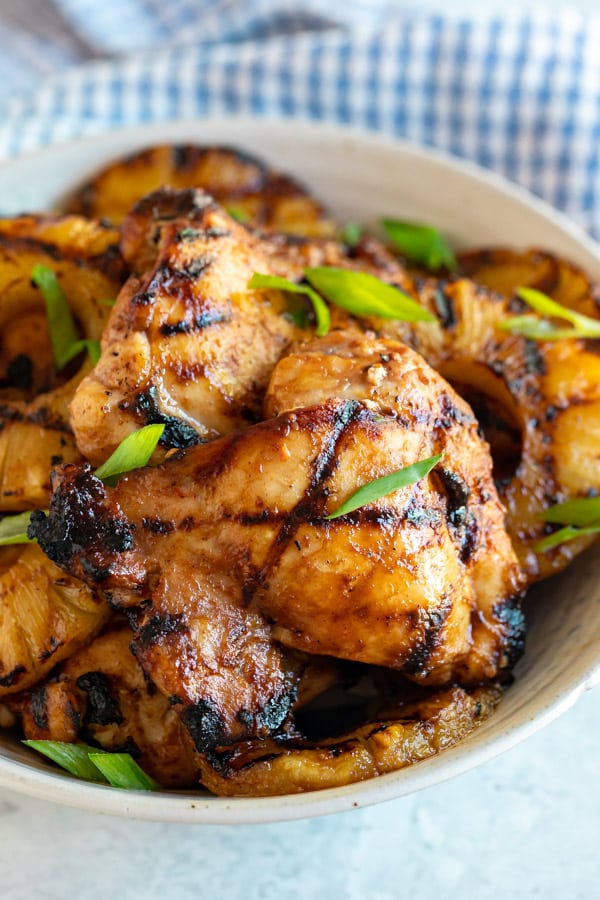
    A close up image of a plate of pork chops and pineapple with green onions all over it.

    Grilled Hawaiian Pork Chops

    Jessy Freimann
    Grilled Hawaiian Pork Chops are an easy recipe for a quick weeknight dinner. This mouthwatering sweet and savory dish is the perfect summer meal that cooks up in less than 30 minutes!
    4.97 from 26 votes
    Print Recipe Pin Recipe
    Prep Time 10 minutes mins
    Cook Time 20 minutes mins
    Rest time 5 minutes mins
    Total Time 30 minutes mins
    Course Main Course
    Cuisine American, Hawaiian
    Servings 4 servings
    Calories 151 kcal

    Equipment

    • measuring spoons
    • measuring cups
    • Whisk
    • Meat thermometer
    • Grill tongs
    • Small sauce pan

    Ingredients
      

    • ¾ cup low sodium soy sauce (you can also sub out ¼ cup of this for water if you're more sensitive to salt)
    • ¼ cup water (this is in addition to the soy sauce note above)
    • 1 Tablespoon sesame oil
    • ⅓ cup brown sugar, packed
    • ¼ teaspoon ground ginger
    • ½ teaspoon crushed red pepper flakes (or more if you want it to be spicy)
    • 3 large cloves of garlic, minced or pressed
    • 2 Tablespoons ketchup
    • 1 can of pineapple rings (reserve ½ cup of the juice for the marinade)
    • 8 pieces thin cut pork chops bone in or boneless
    • 2 Tablespoons corn starch
    • 2 Tablespoons Chopped scallions, for garnish

    Instructions
     

    • Whisk the low sodium soy sauce, water, sesame oil, brown sugar, ground ginger, red pepper flakes, garlic ketchup and pineapple juice until well combined.
    • Pour the marinade over the pork chops and let them sit for at least 10 minutes or overnight (you can also freeze them in the marinade and thaw them for later use).
    • When you're ready to cook, spray the grill with non-stick cooking spray and preheat it to medium-high.
    • Place the meat and pineapple rings on the grill and reserve the marinade to make the sauce (or dispose of it if not cooking into a sauce). 
    • Grill them for 3-4 minutes on each side. Rotate them a little bit midway through each side if you want a nice crosshatch grill mark (this is optional).
    • Once the internal temperature reaches 140 degrees (or longer if you want them well done) remove them from the grill and rest them for 4 minutes tented in foil.
    • While the meat cooks, heat remaining marinade over medium-high heat until it starts boiling. Let it boil for 3-5 minutes and then thicken with equal parts cornstarch mixed with water.
    • Drizzle the meat and pineapple with sauce, sprinkle with chopped scallions and serve immediately.

    Notes

    • You can marinate your pineapple pork chops for as little as 10 minutes, but for best results, give them at least a few hours.
    • Remember to add the nonstick cooking spray and preheat your grill before cooking. Both ensure proper searing and caramelization! Plus, you won't have to worry about the chops or the pineapple rings sticking to the grates.
    • Make sure you rest the chops for a good 4-5 minutes before serving to allow the juices to redistribute.
    • I’ve had a few people comment that this was a bit on the saltier side for their taste. While I tested this a few times and didn’t feel it was overly salty (make sure you use low-sodium soy sauce and the water I added!) I recognize that everyone has different palates. With that in mind, if your palate is a bit more sensitive to salt, consider replacing ¼ cup of the low-sodium soy sauce with water in addition the the water listed in the recipe.
    • Ingredients to prep ahead: You can prepare the marinade and marinate the pork chops a few hours ahead of time, or even the night before. You can also freeze them in the marinade.
    • Leftovers and storage: You can keep leftovers in an airtight container in the fridge for up to 3 or 4 days. Reheat in a frying pan on the stovetop until warmed through, or use your microwave for single servings.

    Nutrition

    Serving: 1servingCalories: 151kcalCarbohydrates: 26gProtein: 4gFat: 4gSaturated Fat: 1gPolyunsaturated Fat: 2gMonounsaturated Fat: 1gSodium: 1796mgPotassium: 216mgFiber: 0.4gSugar: 20gVitamin A: 39IUVitamin C: 0.3mgCalcium: 31mgIron: 1mg
    Tried this recipe?Let us know how it was!

    Easy Beef And Broccoli Recipe

    May 6, 2021 · 5 Comments

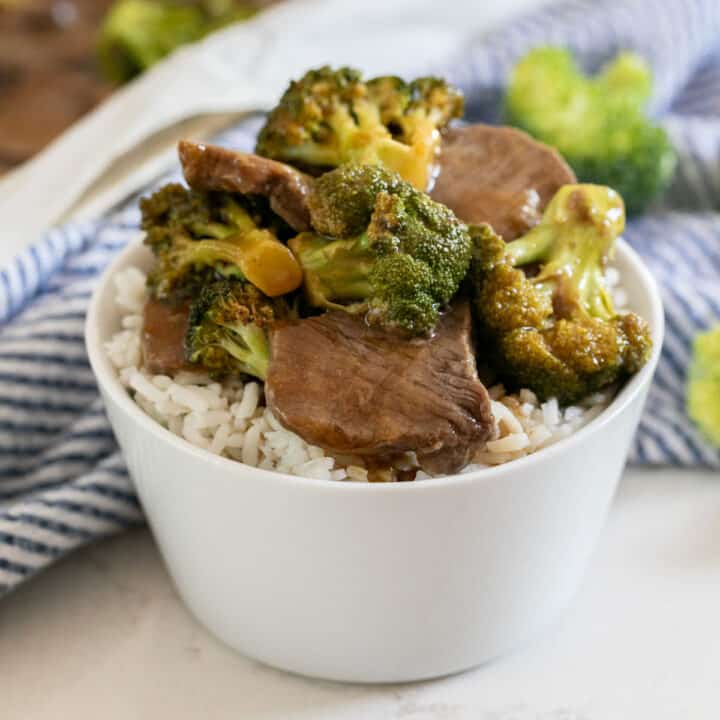
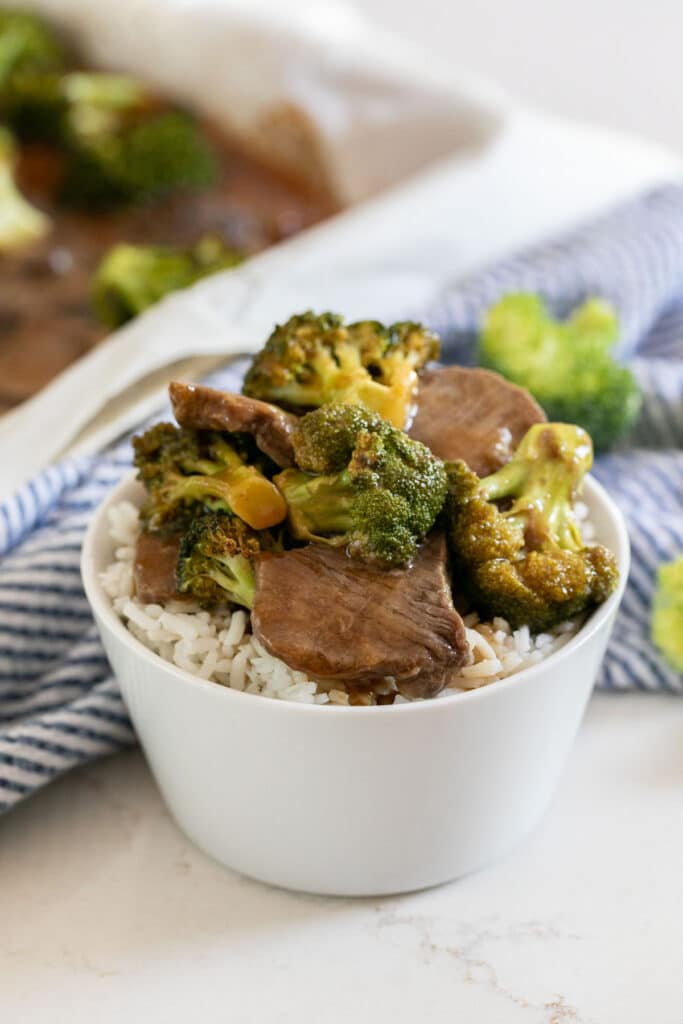
    A white bowl with white rice and beef and broccoli on top with a blue and white striped napkin next to it and the sheet pan in the background.

    This Easy Beef And Broccoli Recipe takes a classic take-out favorite and makes it super quick and easy to make at home. Made on one sheet pan and ready in under 30 minutes, this is a meal the whole family will love! 

    A white bowl with white rice and beef and broccoli on top with a blue and white striped napkin next to it and the sheet pan in the background.
    [feast_advanced_jump_to]

    Why You'll Love This Easy Recipe For Beef And Broccoli

    I love a good takeout fake-out! While this is NOT an authentic Chinese beef and broccoli recipe, you get the delicious flavor of your favorite take-out dish while controlling what goes into it! By the way, if you also love homemade take-out recipes, you should try my Shrimp Stir Fry with Snow Peas and Shrimp Fried Rice.

    And since my family loves beef with broccoli, I figured I should probably make my own variation. This was originally tested in the crockpot, but it didn't come out the way I had hoped.

    So, I pulled out a sheet pan and decided to give it a shot in the oven instead! I found that the flavor was there, but it was easier to make...and still super nutritious!

    But, before I get ahead of myself, here are some more reasons to love sheet pan beef and broccoli:

    • Better than take-out
    • Quick and easy to make
    • Loaded with flavor
    • Family-friendly
    • Cleanup is a breeze
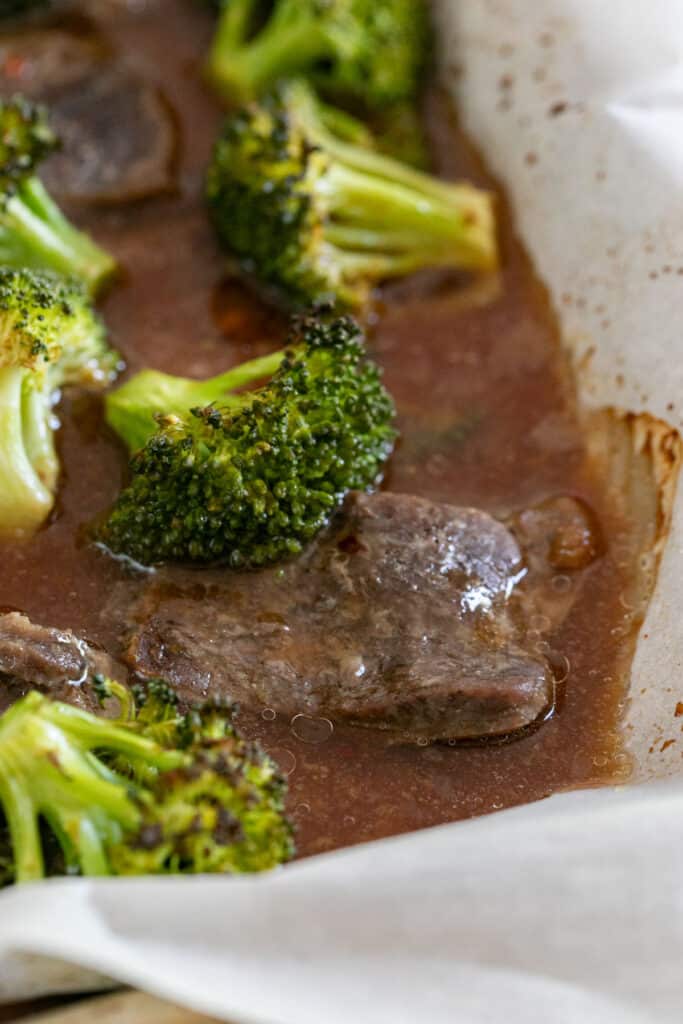
    A close up image of some sliced steak and broccoli with brown sauce on the side of a parchment lined sheet pan.

    Ingredient Information And Substitutions:

    • Beef - For this recipe I used sirloin steak, but you can also use flat iron steak. Slice it thin, against the grain.
    • Broccoli - Try to make all the broccoli florets the same size so they cook evenly (about 1 ½ inches).
    • Beef Broth - For added flavor — and serves as the base of the marinade.
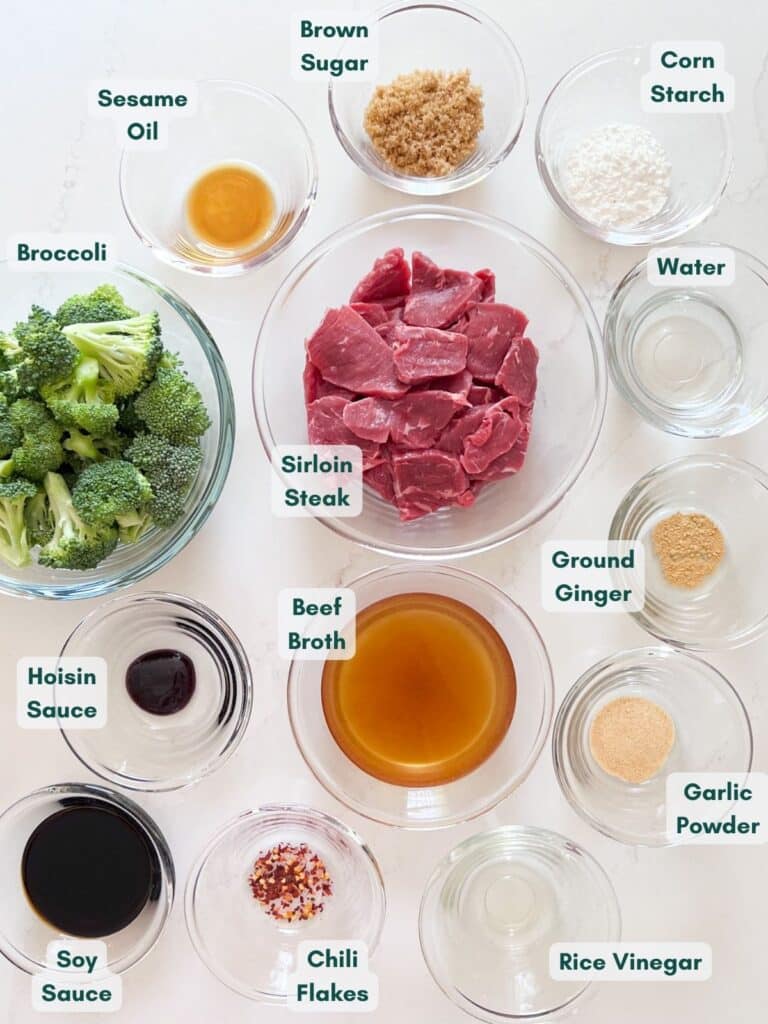
    • Sauces & Oil - You'll need soy sauce, hoisin sauce, sesame oil, and rice vinegar for your beef and broccoli marinade to round out the wet ingredients for this sauce.
    • Cornstarch - Acts as a thickening agent in the marinade to give you the perfect consistency and texture.
    • Seasonings - I'm using brown sugar, garlic powder, ground ginger, and crushed red pepper flakes to give you that better-than-takeout taste I keep talking about!
    • Cooked Rice - For serving. Feel free to use white or brown rice.
    An overhead image of all the broccoli and beef ingredients labeled.

    How to Cook Beef With Broccoli On A Sheet Pan

    Step 1: Mix the marinade

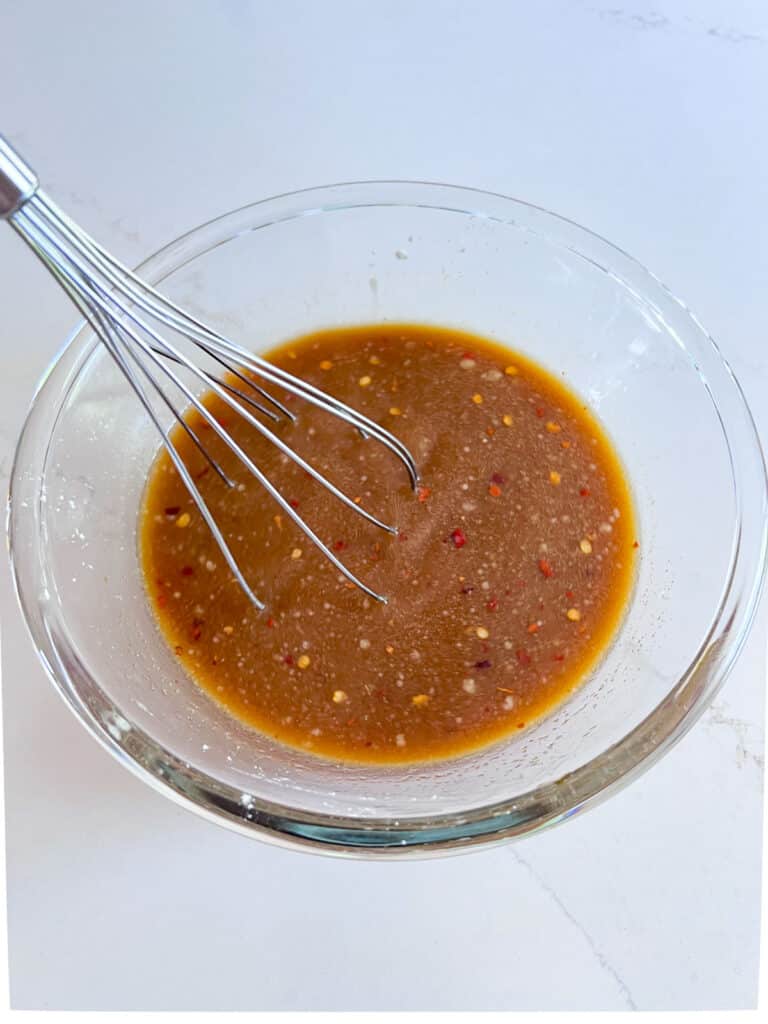
    Add the beef broth, soy sauce, hoisin sauce, sesame oil, water, rice vinegar, brown sugar, garlic powder, ginger, cornstarch, and red pepper flakes to a bowl and whisk well to combine.

    The beef and broccoli sauce mixed together in a clear bowl with a whisk in it.

    Step 2: Marinate the steak and broccoli

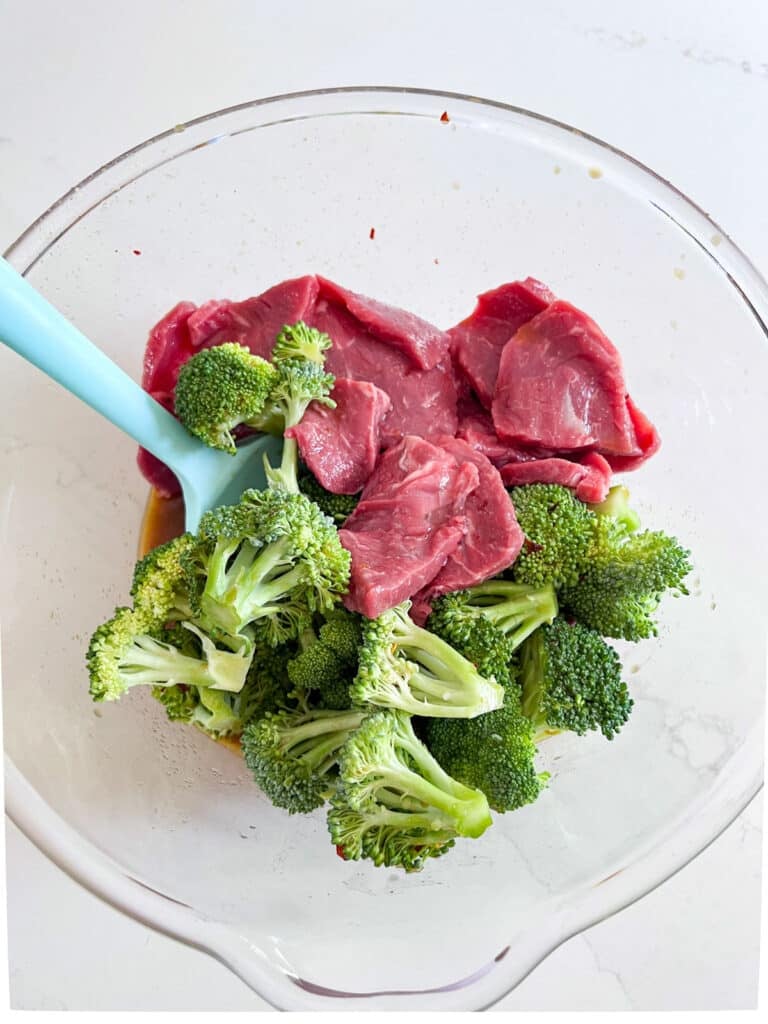
    Add the broccoli and beef slices to the bowl and toss to coat thoroughly. You can bake it right away, or you can let the meat and veggies marinate for 30 minutes or so. You could also toss everything in a zipper bag and freeze for later!

    Sliced steak and raw broccoli in a clear bowl with the marinade.

    Step 3: Bake

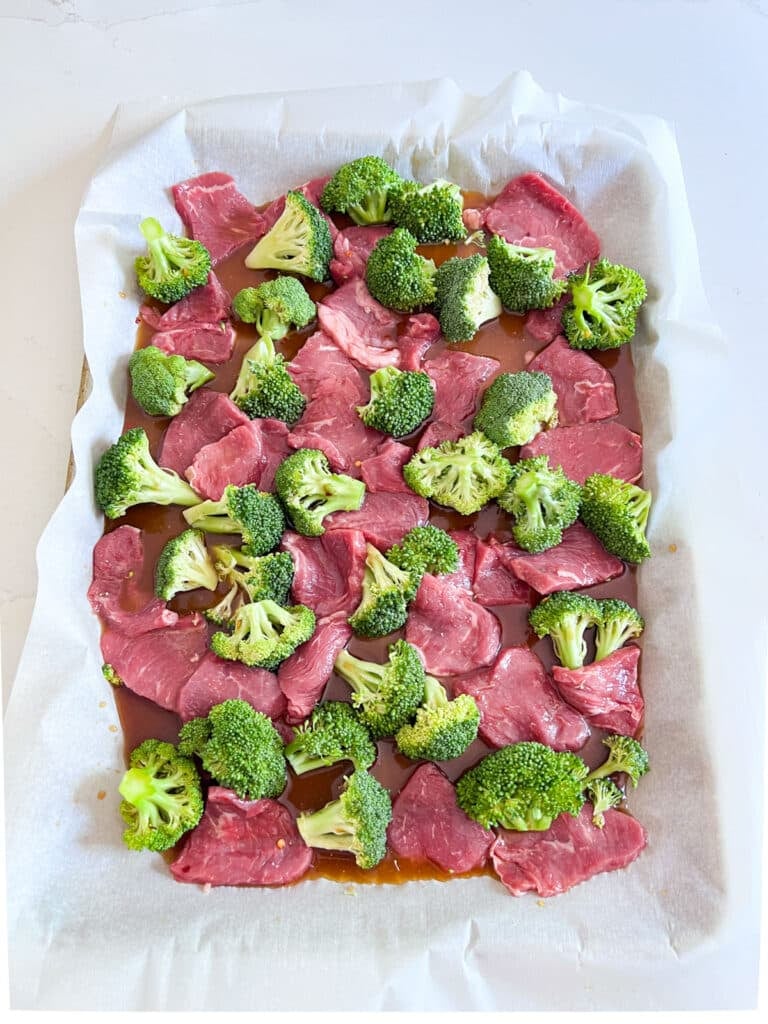
    Preheat your oven to 400 degrees F and line a baking sheet with parchment paper or foil. Arrange everything in a single layer on the pan, then pour the remaining marinade on top.

    Bake for 20-25 minutes, or until the broccoli is fork tender and the beef is fully cooked. Serve over rice with extra sauce and enjoy!

    Steak slices, broccoli and sauce on a parchment lined sheet pan.

    Frequently asked questions

    Can I substitute something else for the cornstarch?

    Yes, you can use arrowroot powder. Just be aware that leftovers may not reheat as well.

    Can I make this ahead of time?

    Yes! The uncooked meat will keep a few days in the fridge (provided it's not past the use-by date for the raw beef) and cut broccoli will stay fresh for about 4 days. I wouldn't suggest marinating until the day you plan to bake, or the meat and vegetables will start to break down, so store the sauce in a separate container from the meat and veggies.

    You can also simply prep the ingredients for this beef broccoli recipe an hour or two before you plan to make it.

    Can you freeze beef and broccoli?

    Yes, but I encourage you to freeze before cooking in a zipper freezer bag as mentioned above. The beef, broccoli, and marinade will be a lot easier to thaw that way, and you'll also be able to infuse the ingredients with all of that tasty flavor from the homemade marinade!

    How long do leftovers last?

    You can store any leftovers in an airtight container in the fridge for up to 4 days.

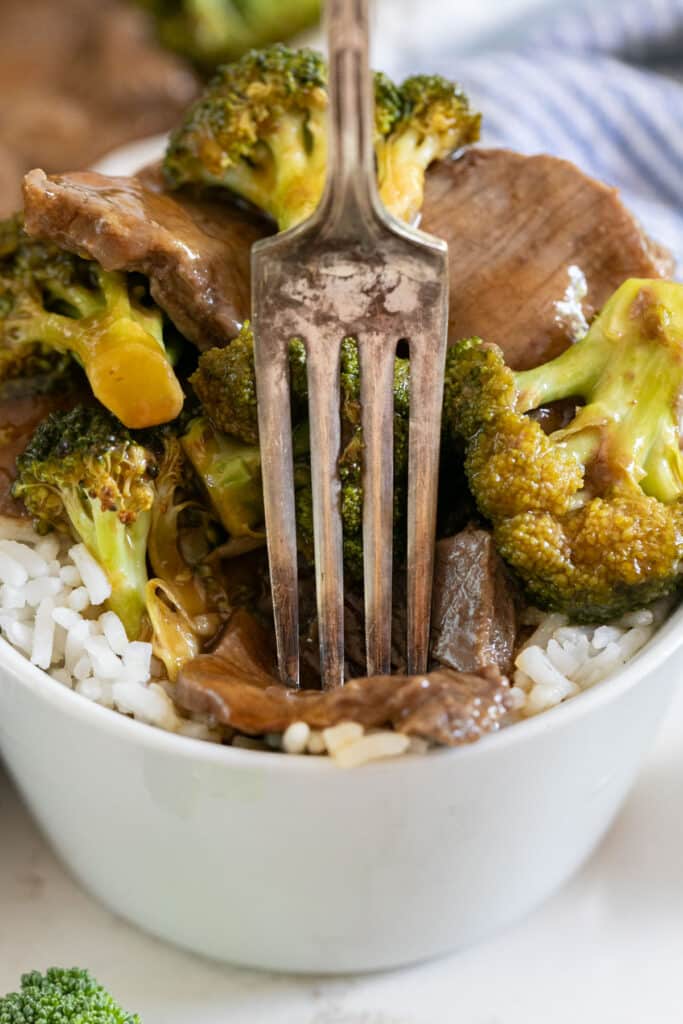
    A bowl of beef and broccoli over rice with a fork piercing into a piece of beef.

    Tips For Making This Healthy Beef and Broccoli Recipe

    • Slice the beef thin — I went with around ¼ inch slices. That way it cooks up quickly while still being tender. A little trick for easier slicing: place the steak in the freezer for 30 minutes prior to slicing.
    • And, be sure to slice against the grain.
    • Try and make the broccoli florets around the same size. I cut them so that they were around 1 ½ inch chunks. This helps them cook more evenly.
    • Don't leave out the cornstarch — it helps the sauce thicken.
    • Speaking of sauce, don't leave all that extra sauce that collects on the pan behind! I like to spoon it over my plate.
    • Prep ahead: slice the beef, clean and cut the broccoli and mix together the sauce. Or throw it all together a freeze before cooking.
    • Storage and leftovers: this lasts up to 4 days covered in the refrigerator and reheats well in a pan or in the microwave.

    Make It A Meal:

    Round out your dinner with these great recipes:

    • Rainbow Asian Chicken Salad
    • Crunchy Ramen Coleslaw
    • Cabbage and Pork Meatball Soup
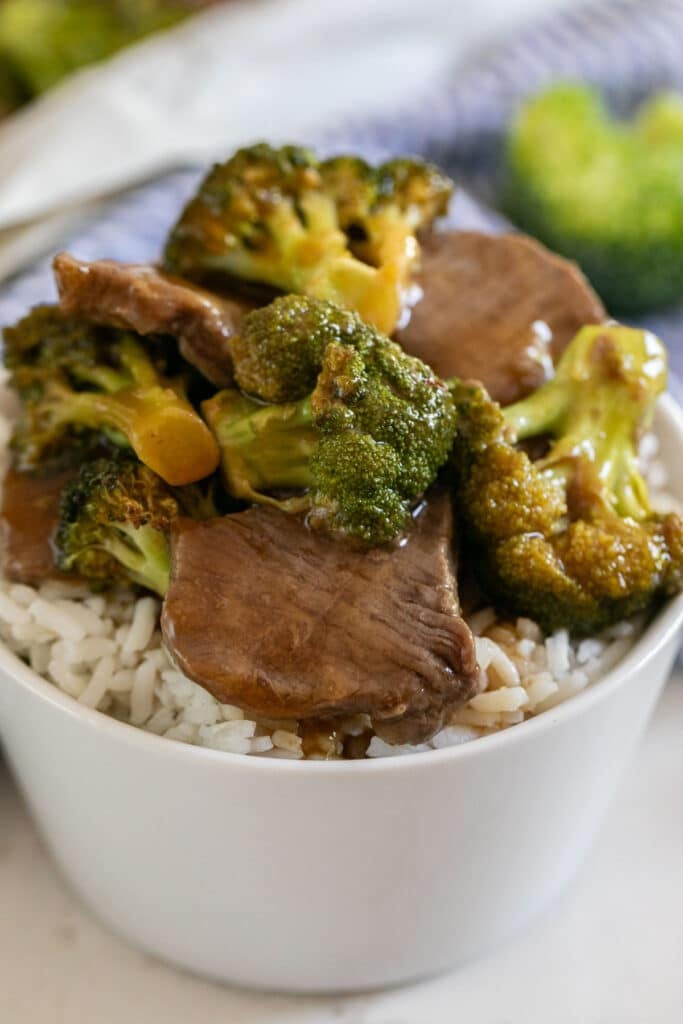
    A close up image of a bowl of beef and broccoli.

    Other Beef Recipes to Try...

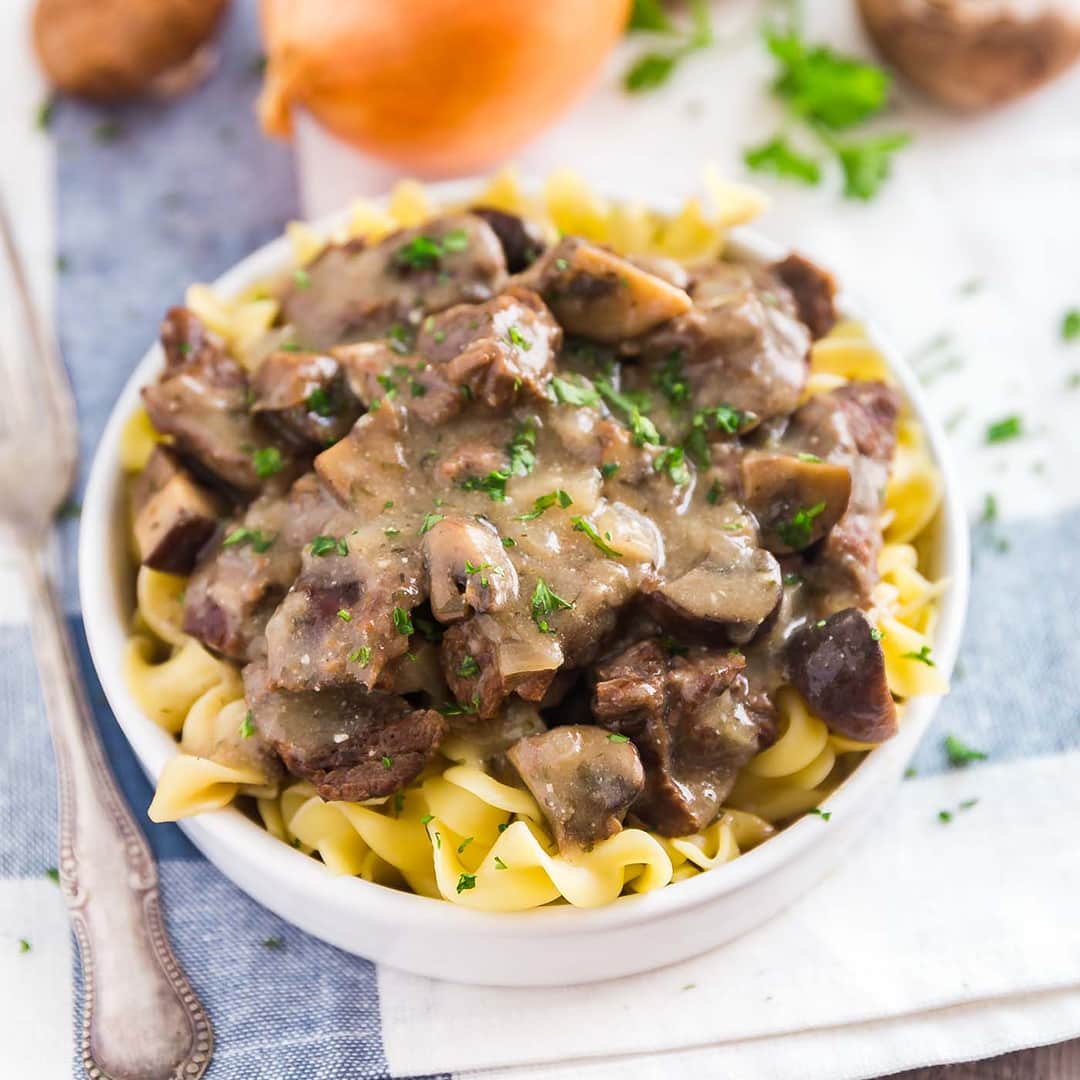
    • A square image of the Easy Beef Stroganoff Recipe.
      Easy Beef Stroganoff Recipe (Instant Pot and Slow Cooker)
    • A wooden spoon holing a scoop of Philly steaks pasta with melty cheese all over it.
      One Pot Philly Cheesesteak Pasta
    • An overhead image of beef stew in a bowl of polenta with a napkin near it and mushrooms.
      Beef Italian Stew
    • An overhead image of a beef burrito bowl with another next to it and limes and cilantro on the side.
      Beef Burrito Bowls

    Love this recipe? Please leave a 5 star ⭐️⭐️⭐️⭐️⭐️ rating in the recipe card below ⬇️ and/or a review in the comment section further down. Check out my Amazon Store for all my favorite tools, including those used in this recipe. And follow @thelifejolie on Instagram and TikTok!

    A white bowl with white rice and beef and broccoli on top with a blue and white striped napkin next to it and the sheet pan in the background.

    Easy Beef And Broccoli Recipe

    Jessy Freimann
    Easy Beef And Broccoli Recipe takes a classic take-out favorite and makes it super quick and easy to make at home. Made on one sheet pan and ready in under 30 minutes, this is a meal the whole family will love! 
    4.67 from 3 votes
    Print Recipe Pin Recipe
    Prep Time 10 minutes mins
    Cook Time 25 minutes mins
    Total Time 35 minutes mins
    Course Main Course
    Cuisine Chinese
    Servings 4 servings
    Calories 61 kcal

    Equipment

    • sheet pan
    • cutting board
    • Chef Knife
    • Measuring cups and spoons
    • Whisk
    • mixing bowl

    Ingredients
      

    • 1 cup beef broth
    • ¼ cup soy sauce
    • 1 teaspoon hoisin sauce
    • 1 teaspoon sesame oil
    • ¼ cup water
    • 1 teaspoon rice vinegar
    • 2 Tablespoons brown sugar
    • 1 teaspoon garlic powder
    • ¼ teaspoon ground ginger
    • 1 ½ Tablespoons corn starch
    • 1 pinch crushed red pepper flakes (optional)
    • 1 pound sirloin steak, sliced thin into ¼ inch thick slices against the grain (you can also use a flat iron steak)
    • 3 cups broccoli florets, cut to 2 inch pieces) cut to 2 inch pieces
    • Cooked rice for serving

    Instructions
     

    • In a bowl, whisk together broth, soy sauce, hoisin sauce, sesame oil, water, rice vinegar, brown sugar, garlic powder, ginger, corn starch and red pepper flakes until well combined.
    • Toss with steak slices and broccoli until everything is evenly coated. If freezing, place in zipper freezer bag and freeze. Thaw when ready to cook.
    • When ready to cook, preheat the oven to 400 degrees.
    • Line a sheet pan with a large piece of parchment (I like mine to come up over all sides) or foil.
    • Spread beef and broccoli into a single layer on the pan and pour all remaining marinade over the beef and broccoli.
    • Bake for 20-25 minutes until broccoli is fork tender, beef is cooked and sauce has slightly thickened. Serve immediately over rice and spoon sauce over as well.

    Video

    Notes

    • Slice the beef thin — I went with around ¼ inch slices. That way it cooks up quickly while still being tender. A little trick for easier slicing: place the steak in the freezer for 30 minutes prior to slicing.
    • And, be sure to slice against the grain.
    • Try and make the broccoli florets around the same size. I cut them so that they were around 1 ½ inch chunks. This helps them cook more evenly.
    • Don't leave out the cornstarch — it helps the sauce thicken.
    • Speaking of sauce, don't leave all that extra sauce that collects on the pan behind! I like to spoon it over my plate.
    • Prep ahead: slice the beef, clean and cut the broccoli and mix together the sauce. Or throw it all together a freeze before cooking.
    • Storage and leftovers: this lasts up to 4 days covered in the refrigerator and reheats well in a pan or in the microwave.

    Nutrition

    Serving: 1cupCalories: 61kcalCarbohydrates: 11gProtein: 2gFat: 1gSaturated Fat: 0.2gPolyunsaturated Fat: 0.5gMonounsaturated Fat: 0.5gCholesterol: 0.03mgSodium: 1053mgPotassium: 83mgFiber: 0.3gSugar: 6gVitamin A: 0.1IUVitamin C: 0.01mgCalcium: 13mgIron: 1mg
    Tried this recipe?Let us know how it was!

    Sheet Pan Lemon Dill Salmon

    Apr 1, 2021 · 29 Comments

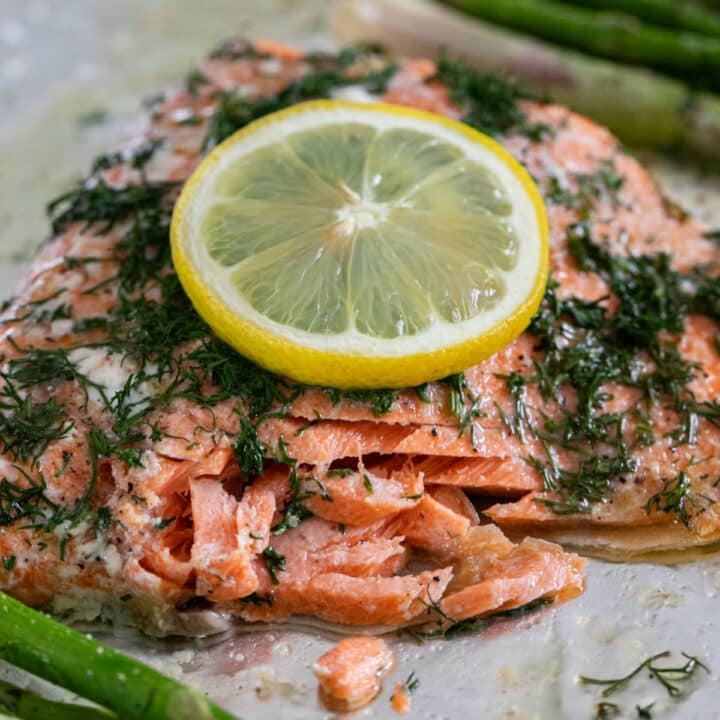
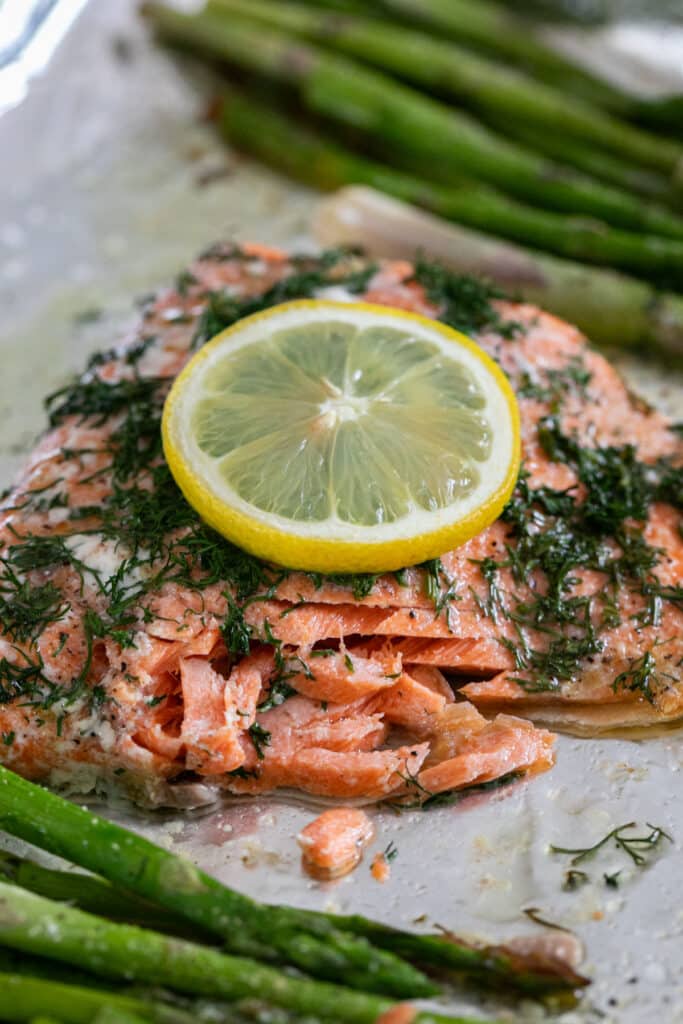
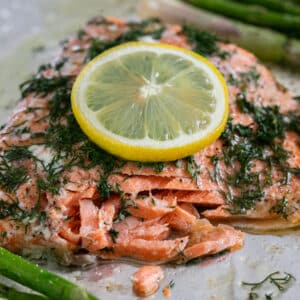
    A close up image of a piece of salmon on a pan with the front of it flaked to show the inside of the salmon.

    This Sheet Pan Lemon Dill Salmon Recipe is the best healthy weeknight meal! With minimal ingredients, this is an easy sheet pan dinner that's ready in just 20 minutes!

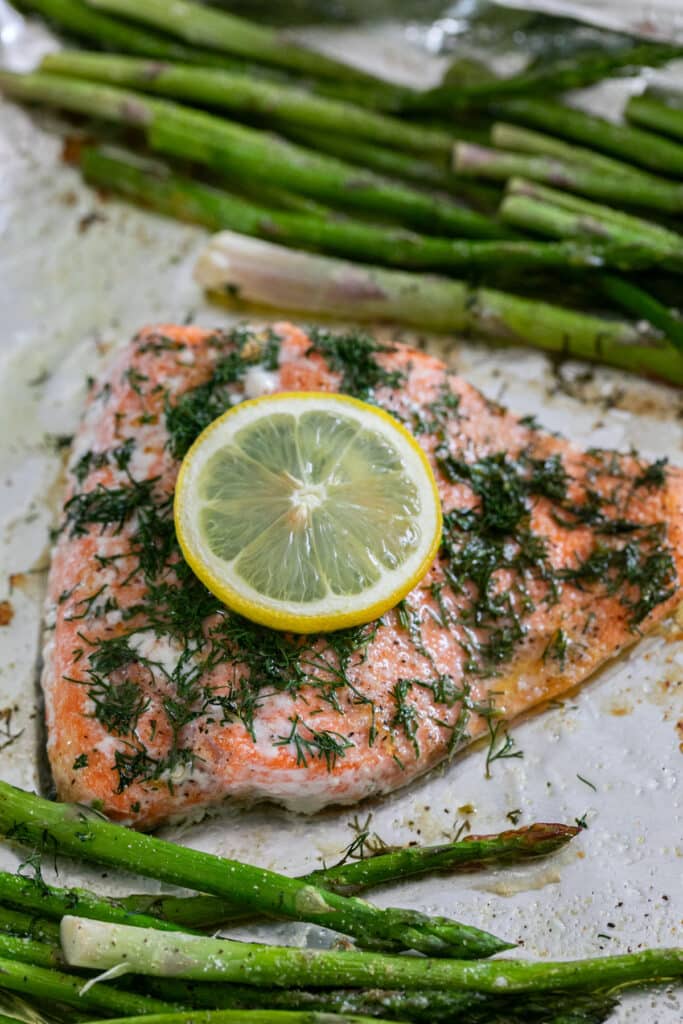
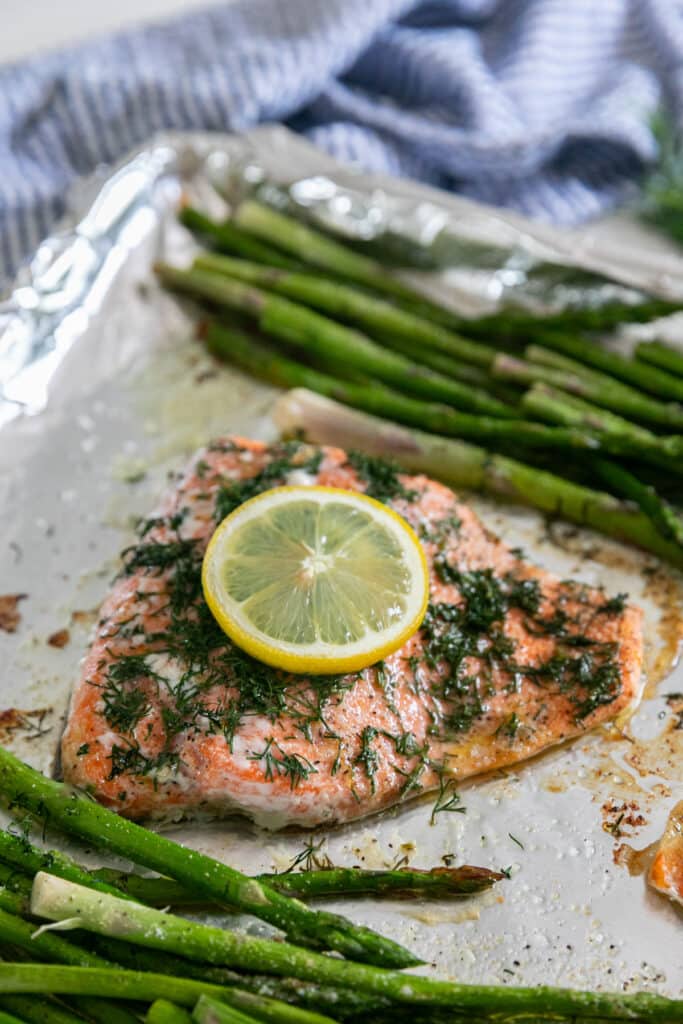
    A close up of a piece of dill salmon on a pan with asparagus next to it.
    [feast_advanced_jump_to]

    Why You'll Love Salmon With Lemon And Dill

    Sometimes you just need a quick, healthy meal that you can throw together really easily. This baked salmon with dill is one of those meals. I'm a person who loves dill and especially with fish! It is so refreshing and delicious.

    This would be tasty with any fish, although baked salmon is my favorite! Last week I made this dish with rainbow trout and it was also amazing! It comes together super quickly, which is perfect for a busy work night. If you love a quick baked fish recipe you should try this Parmesan Crusted Baked Tilapia (which works perfectly with any flaky white fish).

    This is a legit 20 minute meal (maybe 22 minutes if you really take your time in drizzling the oil and sprinkling the seasonings). Here's why I love it so much:

    • Only 8 ingredients
    • Tangy flavors
    • Easy recipe to add more fish into your diet
    • Sheet pan dinner (minimal dishes!)
    • Only 20 minutes
    A close up image of a piece of salmon on a pan with the front of it flaked to show the inside of the salmon.

    Ingredient Information And Substitutions:

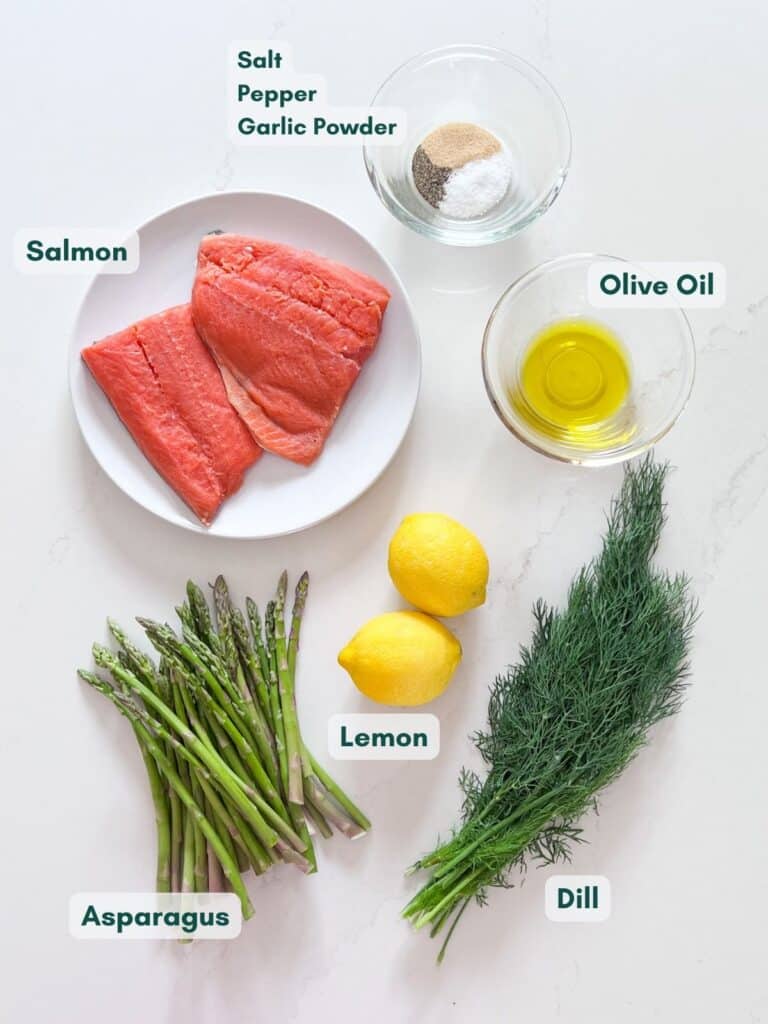
    • Salmon: There are a variety of different types of salmon. I prefer wild caught for flavor and added nutrition (sockeye is my favorite) but farmed is fine too. I use filets for this.
    • Dill: Fresh dill is preferred, but I've made this a ton of times with dried dill, and it's just as awesome.
    • Asparagus: I like using asparagus that is thin to medium thickness. If yours is super thin, maybe add it to the pan a couple of minutes into cooking (or if it's really thick, start it a couple of minutes before adding the salmon to the pan).
    • Oil: My oil of choice for this is olive oil because I love the flavor, but your favorite neutral flavored oil will also work as a substitute.
    • Seasonings: I like to keep it simple with Kosher salt, ground black pepper and garlic powder. You can always add your favorite seasonings in here.
    An overhead image of the ingredients labeled.

    How To Make Dill And Lemon Salmon

    Step 1: Prep the pan and add salmon and asparagus

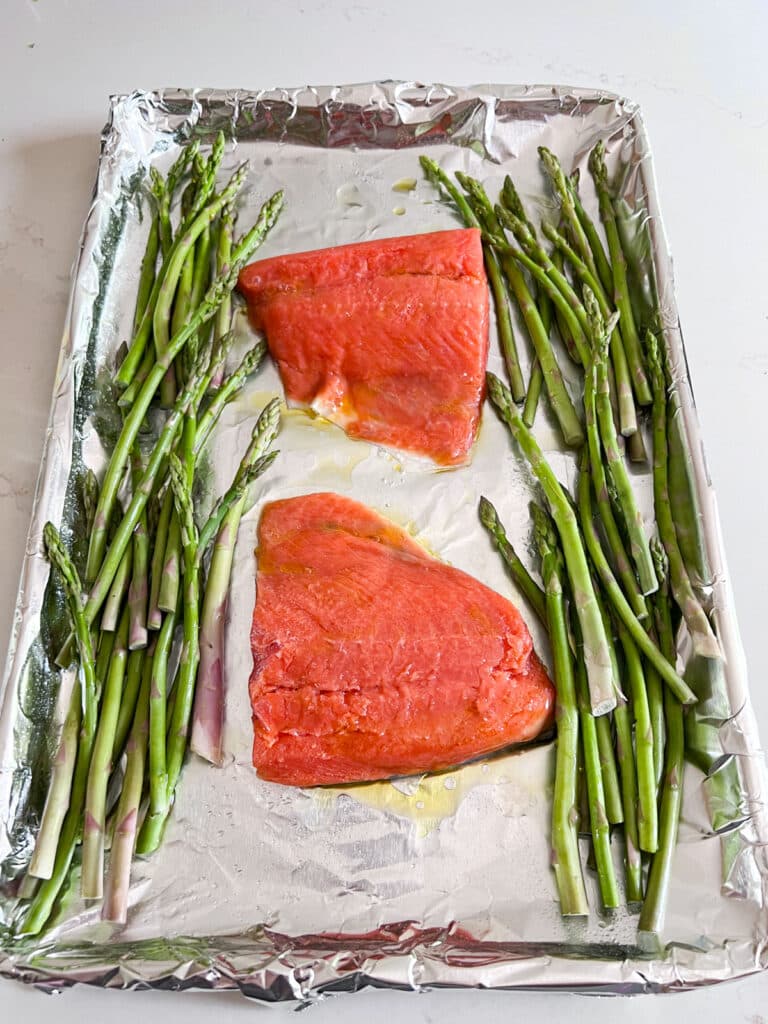
    Preheat the oven and drizzle the sheet pan with olive oil. Place the pieces of salmon in the center of the pan with the skin facing down. Then add the asparagus to the outside of the pan.

    Salmon and asparagus on a foil lined sheet pan.

    Step 2: Season

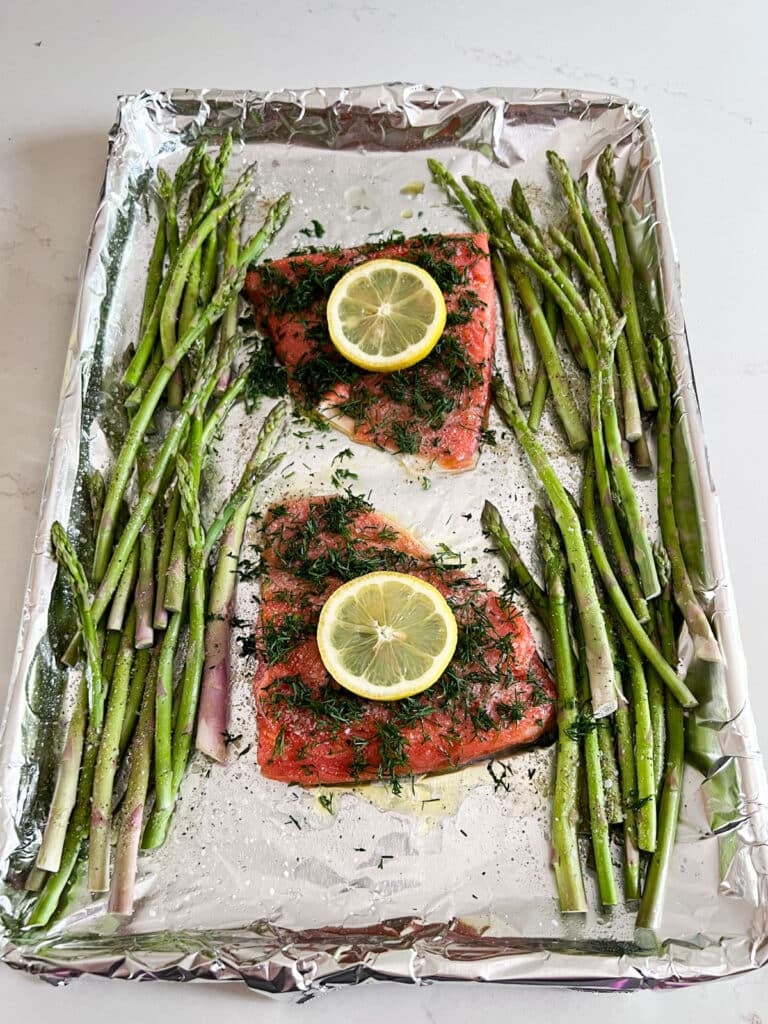
    Drizzle the asparagus and salmon with olive oil and lemon juice. Sprinkle with salt, pepper, garlic powder, and dill. Add a slice of lemon to each piece of fish.

    Salmon and asparagus seasoning with dill and lemon rounds on a foil lined sheet pan.

    Step 3: Bake & Serve

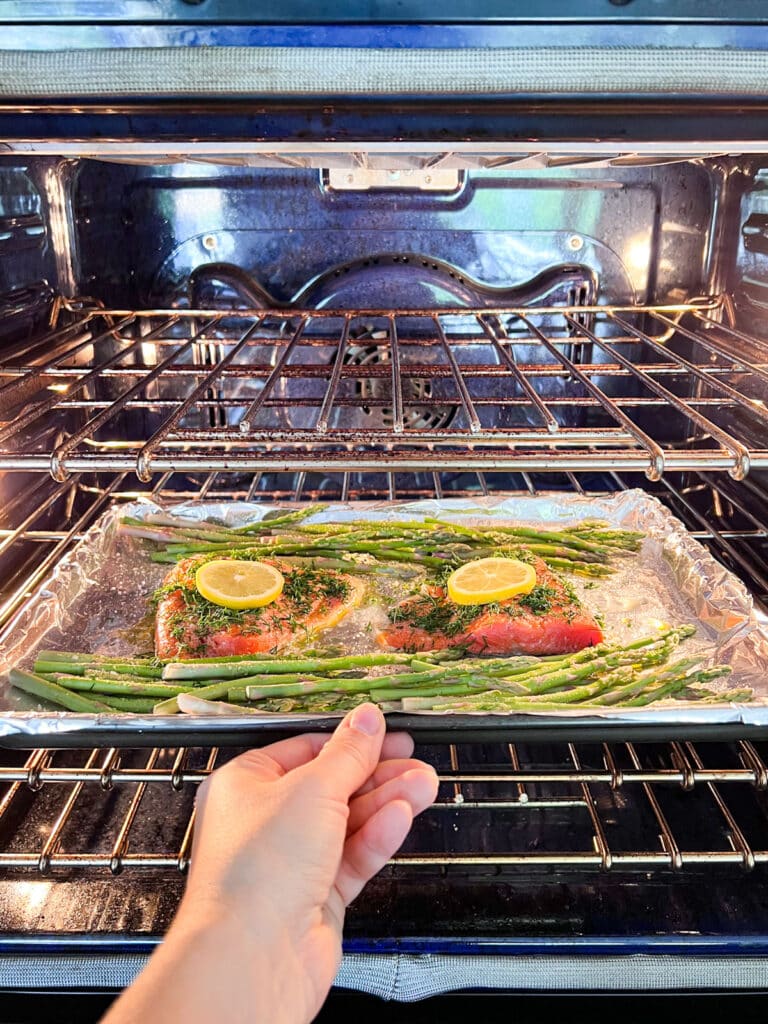
    Bake the lemon and dill salmon for 15-20 minutes at 400 degrees and serve with extra lemons. Enjoy!

    A hand placing the sheet pan of salmon and asparagus into the oven.

    Frequently Asked Questions

    How do you thaw frozen salmon?

    There are two ways that are considered safe- the first is thawing in the refrigerator overnight (place it into a bowl and try to place it in the back of the fridge on the bottom shelve to avoid cross contamination). The second is submerging in a bowl of cold water and changing the water every 30 minutes until thawed- it usually goes pretty quickly.

    Can I grill lemon and dill salmon?

    You can definitely grill this salmon dill recipe, and it tastes amazing that way. Here are some tips for grilling:

    - Be sure to grease the grill well.
    - Preheat the grill before cooking, so it's already hot.
    - Grill the lemon and dill salmon skin-side down.
    - You do not have to turn the salmon as it grills.
    - Add the asparagus directly to the grill halfway through the salmon cooking time (or a bit earlier if its thick).
    - If you really have your act together you can grill it on a cedar plank for even more robust flavor (make sure you soak the plank for a few hours first!).
    - If you're intimidated by putting the salmon directly on the grill, use a grill pan or a greased piece of heavy duty foil.

    How do you prep asparagus?

    Once you've washed the asparagus, gently start bending it at the woodsy end, and it will naturally break where it's meant to. You can lightly peel the stalk part of the asparagus if you prefer, but I typically don't unless it's super thick.

    How do you tell when the salmon is done?

    It's good to go when you test the salmon with a meat thermometer inserted in the thickest part and it reads 145 degrees. Let it rest for a couple of minutes and dive in!

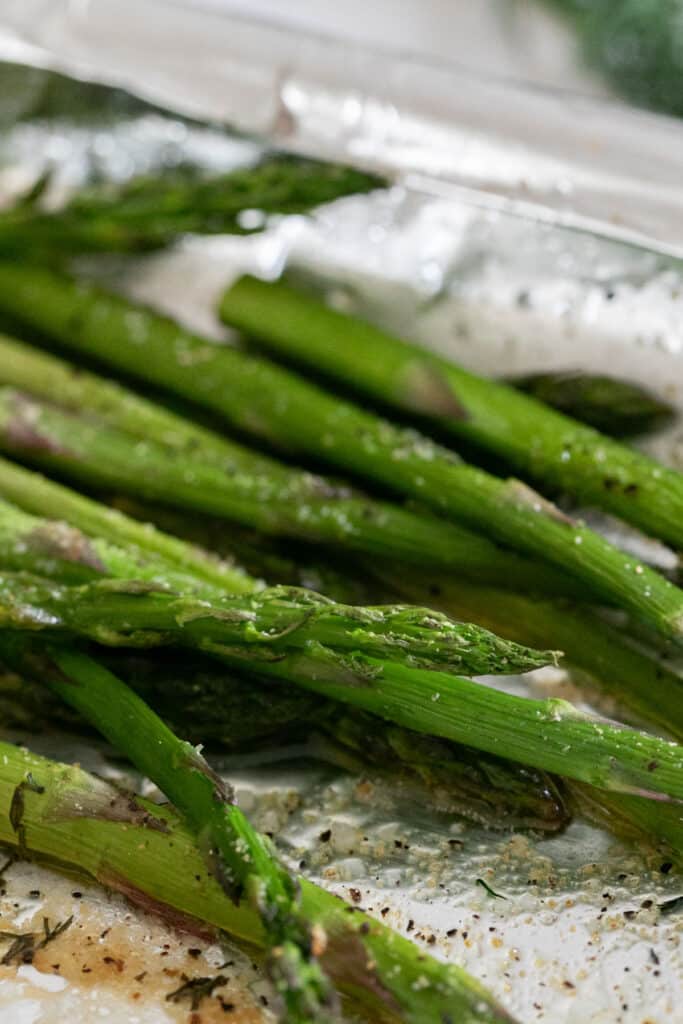
    A close up image of the asparagus on a foil lined sheet pan.

    Tips For Making Salmon With Dill And Lemon

    • Consider the ingredient amounts as a starting point. Since it's a quick "throw-together-meal" I don't even measure them out. I encourage you to season it to taste.
    • Line the pan with foil or parchment for easy clean up.
    • Pat the salmon dry before seasoning. This allows you to get a nice crust on the top of the salmon.
    • Line the salmon down the center of the sheet pan and then place the asparagus on the sides of it.
    • Ingredients to prep ahead: wash and trim asparagus, wash the fresh dill, thaw salmon (if frozen)
    • Storage and Leftovers: This lasts for 3 days in the fridge, making it an excellent salmon meal prep. The only downside is next day, asparagus can get a bit soggy. but it reheats well in the oven, microwave or stovetop.
    Salmon and asparagus on a foil lined sheet pan with a blue and white striped napkin behind it.

    Make it a meal

    Serve these tasty recipe with this salmon with dill and lemon:

    • French Onion Rice Pilaf
    • Blueberry Cucumber Salad
    • PB&J Brownies

    Try These Other Great Salmon Recipes

    Try Chili Lime Baked Salmon with Chunky Avocado Salsa,  Perfectly Seared Salmon and Grilled salmon with Summer Vegetable Relish.

    • One of my favorite summer dinners is Hawaiian Grilled Salmon. It's super easy to throw together in a seriously flavorful marinade. You'll be going back to this recipe again and again!
      Hawaiian Grilled Salmon
    • There is nothing better than perfectly seared salmon and I'm going to show you how to get it just right! It's so easy to pan sear fish and I'm sharing all my tips and tricks to get that nice crispy outside and skin and perfectly tender inside.
      How to Make Perfectly Seared Salmon | The Life Jolie Kitchen Basics
    • A filet of baked chili salmon with avocado salsa on top
      Baked Chili Salmon
    • This Grilled Salmon Recipe with Summer Vegetable Relish will make you want to grill all year around- it's super quick and easy to make for a fresh dinner you'll love!
      Grilled Salmon Recipe with Summer Vegetable Relish

    Love this recipe? Please leave a 5 star ⭐️⭐️⭐️⭐️⭐️ rating in the recipe card below ⬇️ and/or a review in the comment section further down. Check out my Amazon Store for all my favorite tools, including those used in this recipe. And follow @thelifejolie on Instagram and TikTok!

    A close up image of a piece of salmon on a pan with the front of it flaked to show the inside of the salmon.

    Sheet Pan Lemon Dill Salmon Recipe

    Jessy Freimann
    This Sheet Pan Lemon Dill Salmon Recipe is the best healthy weeknight meal! With minimal ingredients, this is an easy sheet pan dinner that's ready in just 20 minutes!
    5 from 2 votes
    Print Recipe Pin Recipe
    Prep Time 5 minutes mins
    Cook Time 15 minutes mins
    Total Time 20 minutes mins
    Course Main Course
    Cuisine American
    Servings 4 servings
    Calories 313 kcal

    Equipment

    • sheet pan
    • cutting board
    • chefs knife
    • Measuring cups and spoons
    • Citrus reamer

    Ingredients
      

    • 4 salmon filets
    • 1 bunch thin-medium width asparagus, ends trimmed
    • 2 Tablespoons Olive oil divided
    • 1-2 lemons (the juice from one lemon and the other lemon to cut into rounds for garnish and for extra lemon juice if you want)
    • 1 teaspoon Kosher salt or to taste
    • ¼ teaspoon Ground black pepper or to taste
    • ½ teaspoon Garlic powder or to taste
    • 2 Tablespoons Fresh Dill, chopped (or 1 teaspoon if using dry)

    Instructions
     

    • Preheat the oven to 400 degrees.
    • Drizzle olive oil on the bottom of a sheet pan (or spray it with cooking spray).
    • Line salmon up in the center of the pan. If there's skin, place the skin side down.
    • Place the asparagus around the outside of the salmon, down the sides of the pan.
    • Lightly drizzle olive oil and squeeze the lemon juice over the salmon and asparagus.
    • Sprinkle the salmon and asparagus with salt, pepper, garlic powder and dill to taste (I tend to be very liberal with the dill, because I love it). Place a lemon rounds onto the top of each piece of fish.
    • Bake for 15-20 minutes or until the internal temperature is 145 degrees and the asparagus is cooked through. Serve immediately with extra lemons on the side.

    Video

    Notes

    • Consider the ingredient amounts as a starting point. Since it's a quick "throw-together-meal" I don't even measure them out. I encourage you to season it to taste.
    • Line the pan with foil or parchment for easy clean up.
    • Pat the salmon dry before seasoning. This allows you to get a nice crust on the top of the salmon.
    • Line the salmon down the center of the sheet pan and then place the asparagus on the sides of it.
    • Ingredients to prep ahead: wash and trim asparagus, wash the fresh dill, thaw salmon (if frozen)
    • Storage and Leftovers: This lasts for 3 days in the fridge, making it an excellent salmon meal prep. The only downside is next day, asparagus can get a bit soggy. but it reheats well in the oven, microwave or stovetop.

    Nutrition

    Serving: 1pieceCalories: 313kcalCarbohydrates: 3gProtein: 34gFat: 18gSaturated Fat: 3gPolyunsaturated Fat: 5gMonounsaturated Fat: 9gCholesterol: 94mgSodium: 657mgPotassium: 878mgFiber: 1gSugar: 1gVitamin A: 90IUVitamin C: 14mgCalcium: 29mgIron: 2mg
    Tried this recipe?Let us know how it was!

    Spatchcocked Lemon Herb Roast Turkey

    Nov 2, 2020 · Leave a Comment

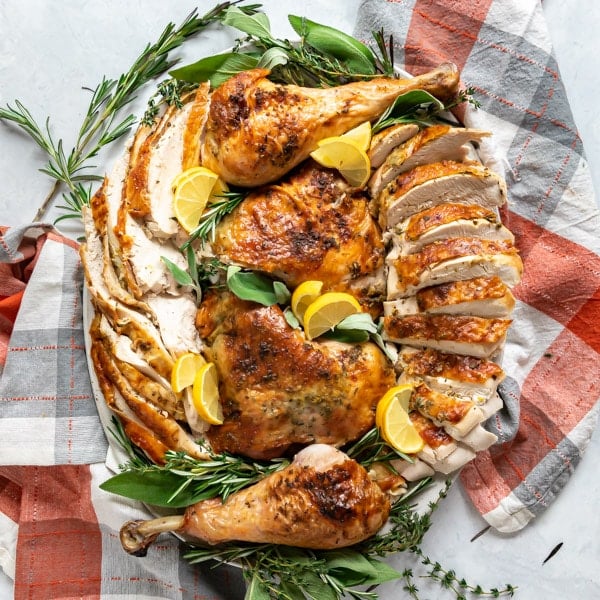
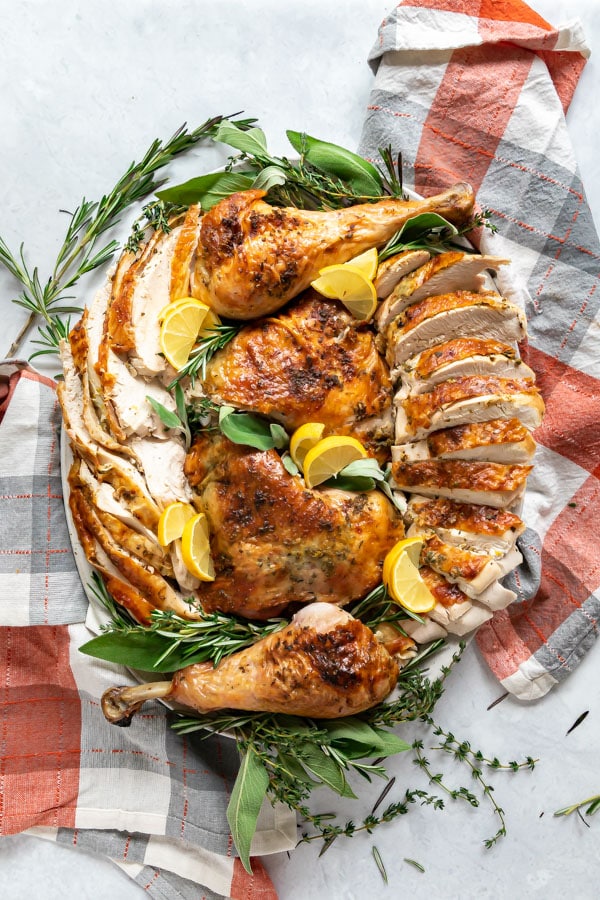
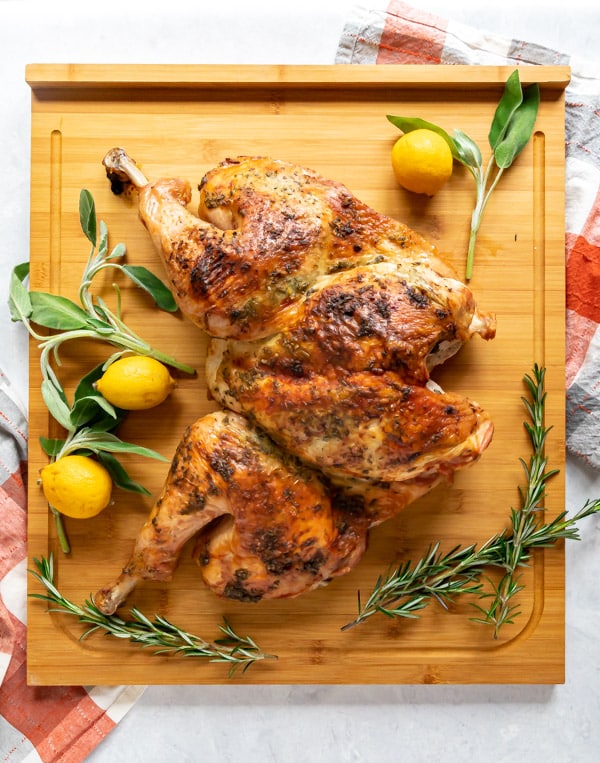
    An overhead image of a carved turkey arranged on a serving platter with fresh herbs and lemons surrounding it.
    Meet your new go-to Thanksgiving Turkey recipe! This Spatchcocked Lemon Herb Roast Turkey is probably my favorite way to prepare a whole turkey. It's super fast and fully of the most juicy, delicious flavor with very little effort! 
     
    An overhead image of a carved turkey arranged on a serving platter with fresh herbs and lemons surrounding it.

    Try some of my other awesome turkey recipes: Roast Turkey Thighs for Two, Orange Rosemary Whole Roast Turkey and Citrus Brown Sugar Smoked Turkey Breast.

    Spatchcocked Lemon Herb Roast Turkey

    This post contains Affiliate Links. Please see the disclaimer here.

    It's that time of year again, and I'm not sad about it at all. I feel like I don't cook Turkey enough throughout the year, because I love it. So when November rolls around, I'm ready to go. And I have to say, this may be my favorite turkey recipe yet! And that's difficult to say since choosing favorite recipes of mine is like choosing a favorite child- it's too hard to do!

    But seriously, this recipe brings all the best things about roasting a turkey to the table:

    • Tender, juicy meat that's evenly cooked.
    • Savory flavored meat and skin with a tiny bit of citrus to even things out.
    • Perfectly crispy skin all over.
    • Added bonus: quicker roasting time!

    Add this to this year's Thanksgiving menu, you will not regret it!

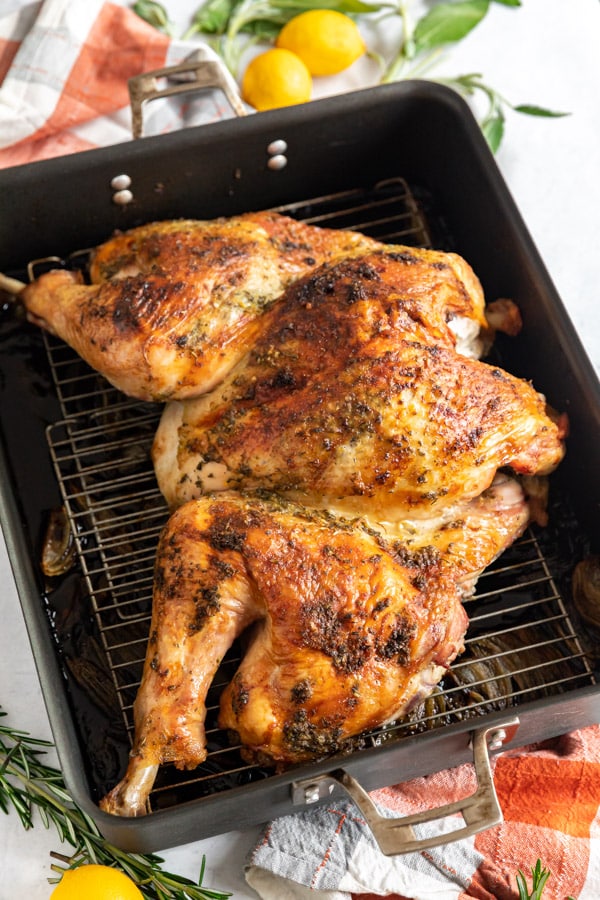
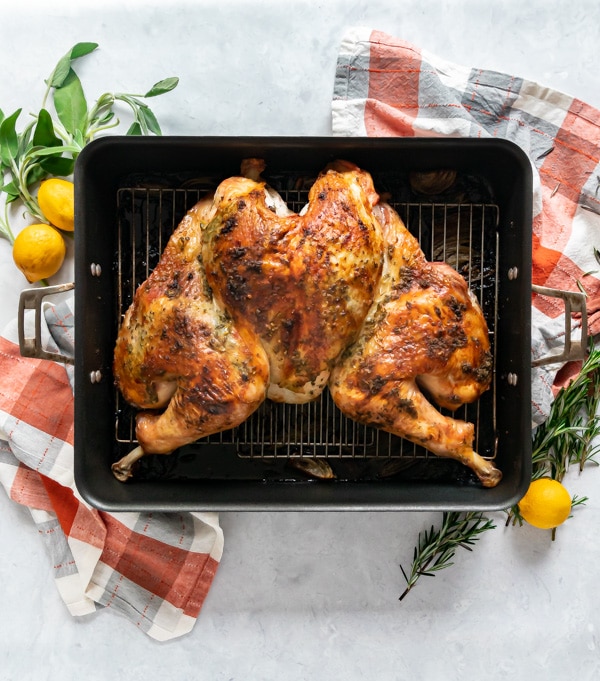
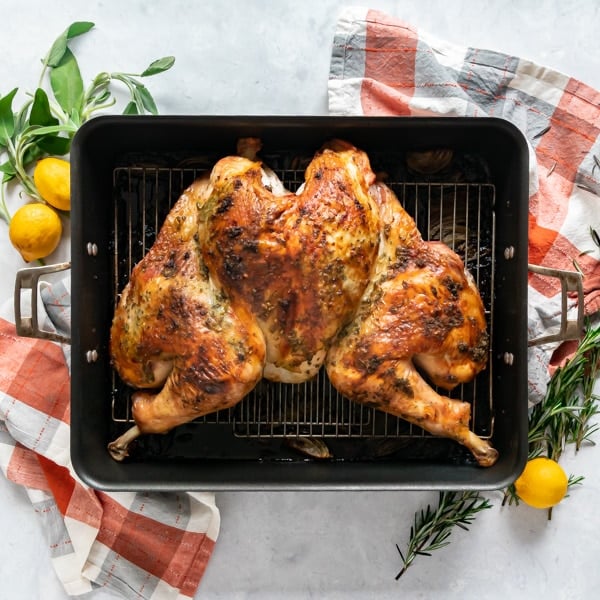
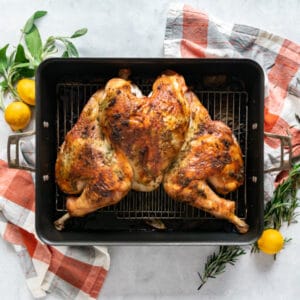
    A roasted spatchcocked turkey in a roasting pan with herbs and lemons surrounding it.

    Tips for how to roast a turkey the easy way

    • Spatchcock the turkey the day before. It will provide a much quicker roasting time and much more even cooking, so you can avoid overcooking it! I encourage you to have your butcher to it for you!
    • Save the backbone, wings, neck and giblets to make gravy!
    • Take the butter out the night before to soften to room temperature.
    • If you can, pat dry with paper towels and rest the turkey in the fridge uncovered the night before- this will help promote crispier skin.
    • Pull the turkey from the fridge 1 hour prior to roasting, to help it come closer to room temperature.
    • Rub the compound butter on the bottom and top of the bird, but also under the skin, that way your meat will have excellent flavor.
    • Place the bird on top of a greased metal rack in a large roasting pan.
    • Make sure you check the water in the bottom of the pan throughout roasting and add more if needed. You want the onions and garlic to caramelize, not burn! You can pour off the fat and add those drippings to your turkey gravy!
    • Keep an eye on the turkey and if any of the skin is getting dark too fast, cover that spot with aluminum foil.
    • Rest the turkey from the pan and place it on a large cutting board for 20-30 minutes before carving to redistribute the juices.
    • Check out this post with even more tips and tricks to cook a turkey.
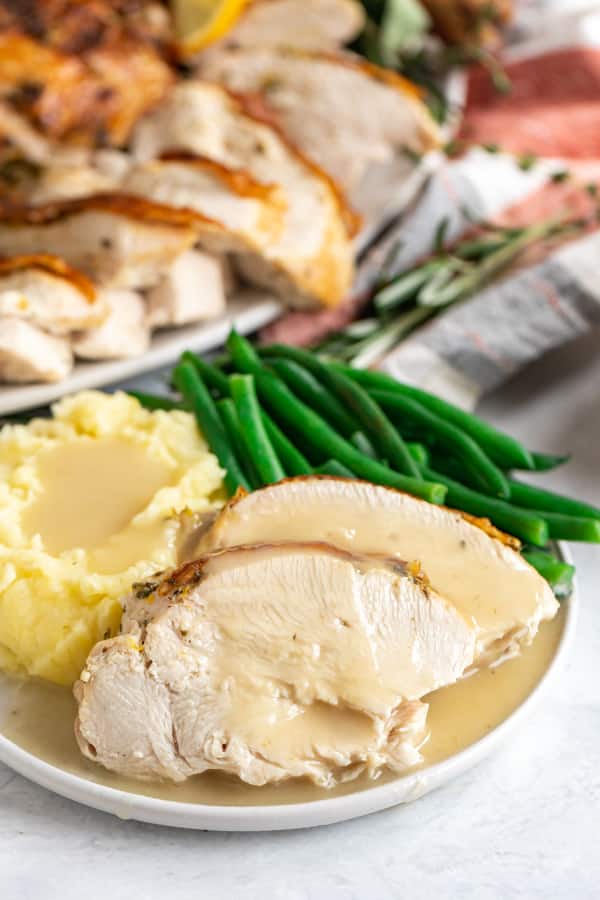
    Sliced turkey breast on a plate with gravy, mashed potatoes and green beans.

    Should I rinse my turkey?

    No! As per the FDA website, "Do not rinse raw meat and poultry before cooking. "Washing these foods makes it more likely for bacteria to spread to areas around the sink and countertops."

    How do you spatchcock a turkey?

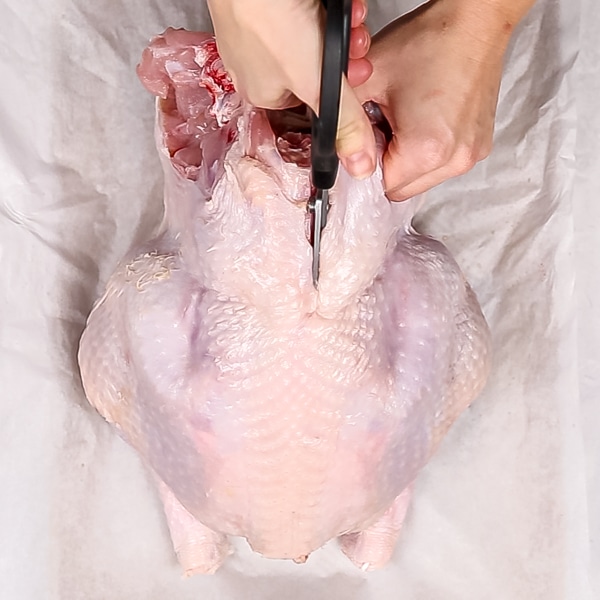
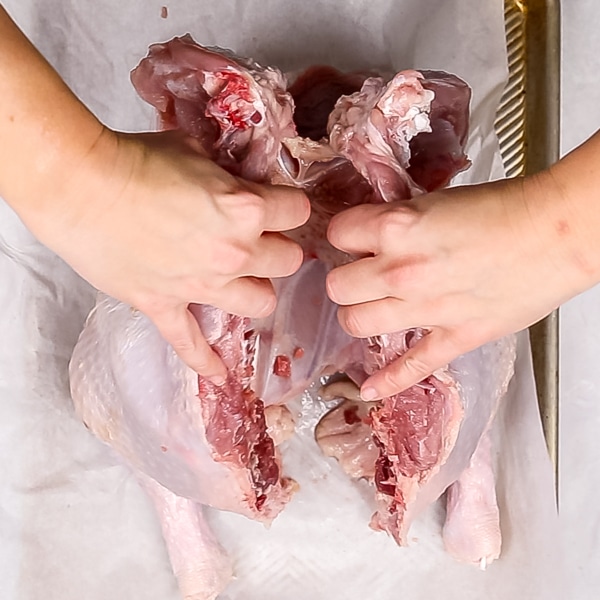
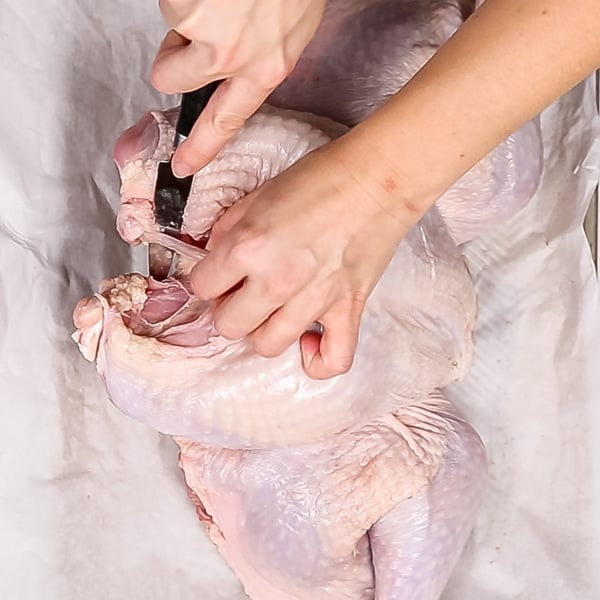
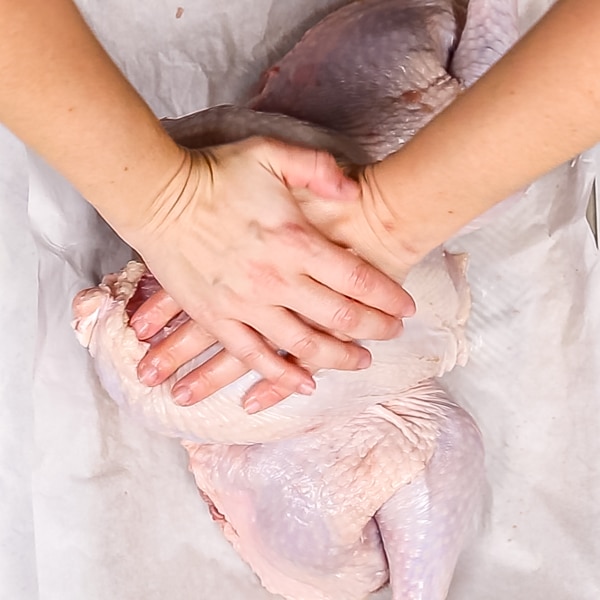
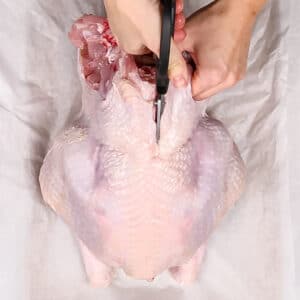
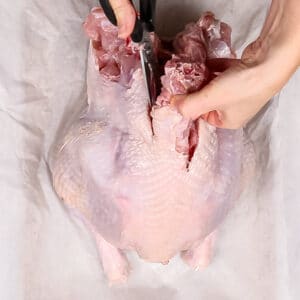
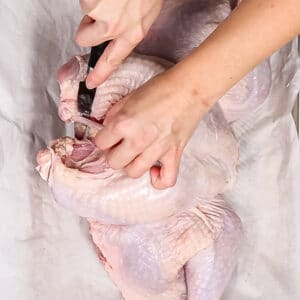
    I wrote an entire post explaining how to spatchcock turkey so you can do it yourself if you thaw your own frozen turkey.

    Can I brine my turkey first?

    You can, but I found that it wasn't necessary for this recipe. If you are looking for a good brine recipe, check out the brine recipe in this post.

    What if I want to keep the wings on the turkey instead of removing for gravy?

    No problem! Just make sure you tuck the wingtips before roasting.

    Do I really have to rest it before and after roasting?

    Yes, resting prior helps bring the turkey close to room temperature and resting after allows crossover cooking and for the juices to redistribute. If you carve it before resting the juices will end up on your cutting board, not in the meat where you want it.

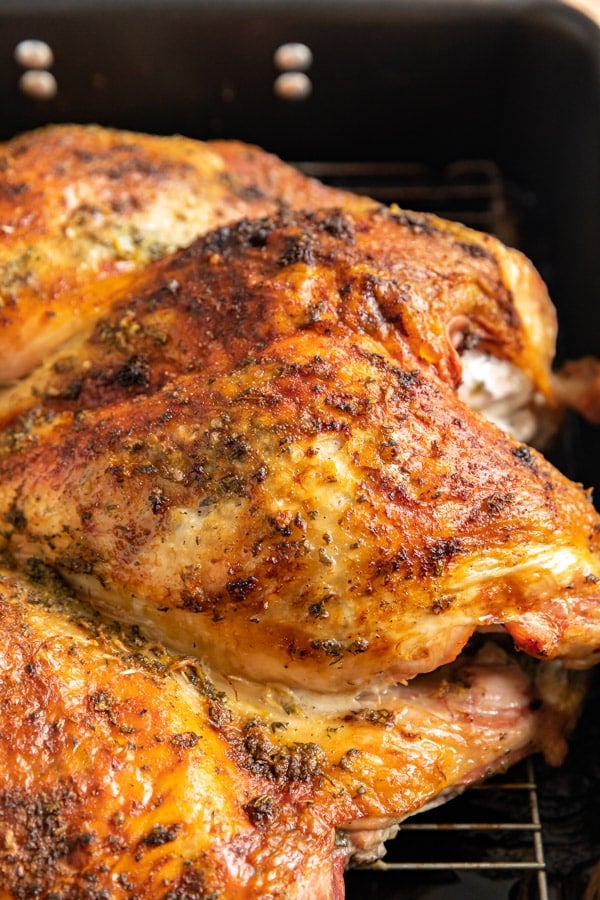
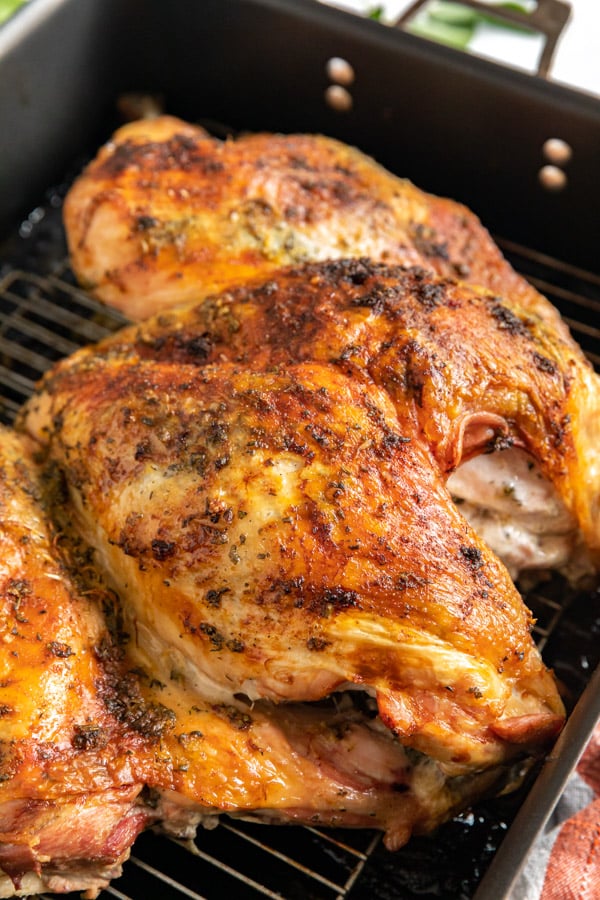
    A close up on a roast turkey breast in a spatchcocked turkey in a pan.

    How long to roast a turkey?

    Although this generally takes around 90 minutes (which will vary, as every bird is different,) I strongly encourage you to cook by temperature not cook times.

    How do you tell when the turkey is done?

    You'll want to cook it until the roast turkey temperature at the thickest part of the breast is 161 degrees. It will continue cooking as it rests and come up to 165 degrees. Use a digital thermometer and check the temperature a few times throughout cooking.

    Should I baste the turkey?

    I don't think it's necessary for this recipe.

    How do you thaw a turkey?

    Move the turkey into the refrigerator in advance to cooking based on the weight- you'll want to plan on 24 hours for every 5 pounds.

    How big of a turkey should I get?

    I always plan for around 1 pound of meat per person, since you're taking into account the amount of bones that add weight to the turkey.

    Can I use dried herbs?

    I encourage you to use fresh, but if dried are your only option you can add ¾ teaspoon of the dried herbs of your choice.

    How do I carve it?

    I have full directions for carving a turkey in this post.

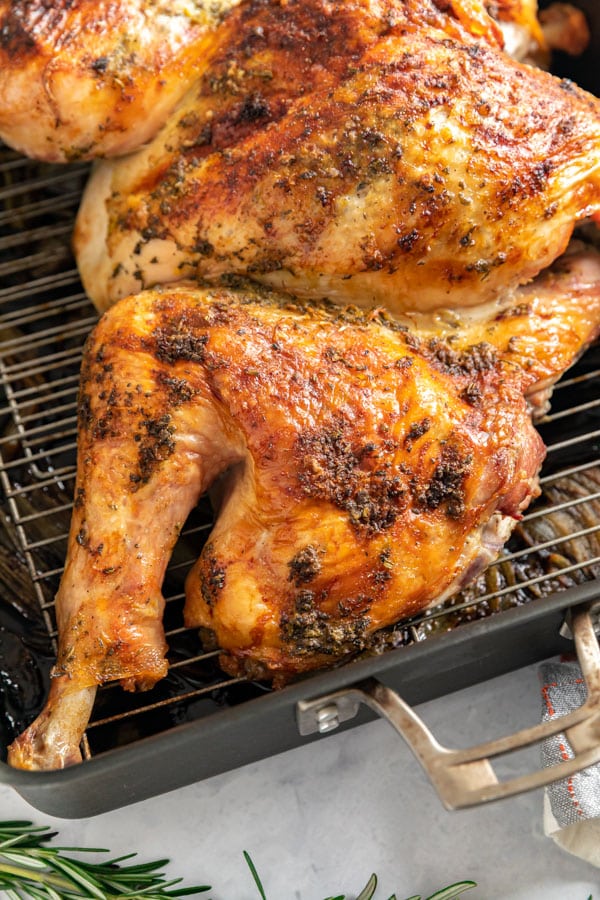
    A close up image of a turkey leg on a spatchcocked turkey in a roasting pan.

    Ingredients for this roast turkey recipe

    • Fresh turkey, spatchcocked
    • Butter
    • Lemon Zest
    • Kosher salt
    • Ground black pepper
    • Garlic powder
    • Onion Powder
    • Fresh poultry herbs (I used Thyme, Rosemary and Sage)
    • Onion
    • Garlic
    • Water
    The top aprt of a spatchcocked turkey in a roasting pan.

    Ingredients to prep ahead:

    • Spatchcock turkey
    • Cut onions
    • Peel garlic
    • Wash herbs

    Helpful tools:

    1. Chef's knife or Kitchen shears
    2. Cutting board
    3. Roasting Pan
    4. Thermometer

    Hosting Thanksgiving?

    Discover the secret to hosting Thanksgiving without all the stress! Prepsgiving is your FREE guide to making a delicious Thanksgiving feast the easy way.

    An overhead image of a roasted spatchcocked turkey in a roasting pan surrounded by fresh herbs and lemons and orange and grey plaid napkins.

    An overhead image of a carved turkey arranged on a serving platter with fresh herbs and lemons surrounding it.

    Spatchcocked Lemon Herb Roast Turkey

    Jessy Freimann
    Meet your new go-to Thanksgiving Turkey recipe! This Spatchcocked Lemon Herb Roast Turkey is probably my favorite way to prepare a whole turkey. It's super fast and fully of the most juicy, delicious flavor with very little effort! 
    5 from 8 votes
    Print Recipe Pin Recipe
    Prep Time 1 day d 10 minutes mins
    Cook Time 1 hour hr 30 minutes mins
    Resting time 1 hour hr 25 minutes mins
    Total Time 1 day d 3 hours hrs 5 minutes mins
    Course dinner, Main, Main Course, Main dish
    Cuisine American
    Servings 12 servings
    Calories 616 kcal

    Equipment

    • 1 roasting pan
    • 1 chefs knife
    • 1 cutting board
    • 1 Measuring cups and spoons

    Ingredients
      

    • 11-14 pound whole raw turkey spatchcocked
    • 1 cup salted butter, 2 sticks softened to room temperature
    • 1 large lemon zest (or two small lemons)
    • 1 teaspoon kosher salt
    • ½ teaspoon ground black pepper
    • ½ teaspoon onion powder
    • ½ teaspoon garlic powder
    • 2 Tablespoons minced fresh herbs (I used fresh sage, fresh thyme and fresh rosemary)
    • Cooking spray
    • 2 large onions cut into large chunks
    • 3-4 cloves garlic smashed
    • 1-2 sprigs fresh herbs I used fresh sage, fresh thyme and fresh rosemary

    Instructions
     

    • Remove spatchcocked turkey from refrigerator 1 hour prior to cooking to bring it closer to room temperature. Preheat the oven to 425 degrees F with the rack in the middle position.
    • In a small bowl mix butter, lemon zest, salt, pepper, onion powder, garlic powder and minced herbs until well combined. Set aside.
    • Place onions, garlic and sprigs of fresh herbs in the bottom of a roasting pan. Then pour in 2-3 cups water into the bottom of the pan (start with 2 and add another if needed- you want the water to cover the bottom of the pan without touching the turkey once it's on the rack).
    • Place a rack into the pan and spray with cooking spray.
    • Begin by rubbing ⅓ of the butter mixture onto the bottom of the spatchcock turkey.
    • Place the turkey, buttered side down onto the rack.
    • Use your hands to go under the turkey skin and carefully separate it from the meat underneath. Rub ⅓ of the butter mixture under the skin on the breast, thigh and drum meat.
    • Rub the remaining butter mixture all over the top of the turkey skin.
    • Place the turkey into the oven. Plan on checking the turkey every 30 minutes to make sure the skin isn't getting too brown and the liquid in the bottom of the pan hasn't evaporated.
    • Roast until the internal temperature of the thickest part of the breast meat is 161 degrees (the internal temperature of the thigh meat will be around 180 degrees). This usually takes around 1 ½ hours depending on the size, but go by temperature.
    • Once the turkey has reached 161 degrees F, remove from the oven and place on a large cutting board to rest for 25-30 minutes. You may cover with foil if you prefer, but the skin won't be as crispy if you do.
    • Carve the turkey and serve with gravy on the side.

    Notes

    If needed, add additional water to the pan. Add a piece of foil to cover spots on the skin if they are getting too brown.

    Nutrition

    Serving: 1servingCalories: 616kcalCarbohydrates: 4gProtein: 95gFat: 23gSaturated Fat: 12gPolyunsaturated Fat: 2gMonounsaturated Fat: 6gTrans Fat: 1gCholesterol: 319mgSodium: 808mgPotassium: 1041mgFiber: 1gSugar: 2gVitamin A: 664IUVitamin C: 8mgCalcium: 62mgIron: 4mg
    Tried this recipe?Let us know how it was!

    If you tried this recipe please comment and rate it 🙂 I love hearing your feedback and answering your questions! And if you make this please tag me on Instagram with @thelifejolie so I can share it <3

    You can find a full index of my recipes here.

    Don’t forget to follow The Life Jolie on Pinterest for more recipe inspiration!

    Or if Pinterest isn’t your style, bookmark this post!

    Let’s keep the conversation going- join my Facebook group! 

    How to Spatchcock Turkey

    Oct 30, 2020 · Leave a Comment

    An overhead image of a roasted spatchcocked turkey in a roasting pan surrounded by fresh herbs and lemons and orange and grey plaid napkins.
    I'm sharing step-by-step instructions along with tips and tricks for how to spatchcock turkey the easy way. The results are so juicy and delicious you'll never what to roast a whole turkey again!
     
    An overhead image of a roasted spatchcocked turkey in a roasting pan surrounded by fresh herbs and lemons and orange and grey plaid napkins.
     

    Try some of my other awesome turkey recipes: Roast Turkey Thighs for Two, Orange Rosemary Whole Roast Turkey and Citrus Brown Sugar Smoked Turkey Breast.

    This post contains Affiliate Links. Please see the disclaimer here.

    So you want to know about what it means to spatchcock a turkey! First off, good decision- it's seriously easy now that I've been converted, I'll never go back to roasting a whole bird! So I knew I had to write a blog post to share alllll the info and simplify it for you!

    What is a spatchcock turkey?

    A good place to start is first understanding what this means. Spatchcocking is a method where you  open up turkey (or other poultry) by removing the backbone so that it lies flat. This occurs prior to cooking. Some people also refer to it as butterfly-ing the turkey, which is a good descriptor (although technically the term butterfly with relation to cooking refers to cutting a through a chicken breast horizontally, almost all the way through, so that it opens like a book).

    An overhead image of hands beginning to remove the backbone from a turkey.

    Why should I spatchcock my turkey?

    The primary reason this method works so well is because it promotes more even cooking. When you're roasting a whole turkey, the breast tends to cook faster than the thighs, which often causes them to dry out. But when the bird is flattened it cooks more evenly, providing a perfectly cooked, juicier bird- even the light meat!

    Another benefit is that it cooks faster, so it allows you to get dinner on the table quicker by cutting the cooking time in half and frees up precious oven space for cooking other items in your Thanksgiving feast! Added bonus: since the skin is all on top, you get even more of that perfectly golden brown crispy skin that we all fight over! And the backbone can add even more delicious flavor to your gravy!

    An overhead image of hands cutting the backbone out of a turkey.

    Tips for this spatchcock turkey recipe

    • Often your butcher or meat counter employee with spatchcock the bird for you if you're buying a fresh bird- it never hurts to ask! Make sure they save the backbone, gizzards and neck for you to make gravy. I like to remove the wings as well to use in my gravy but you can also have them leave the wings on.
    • You'll want to use a really sharp knife, but I prefer super sharp kitchen shears.
    • Even though it's flat with the majority of the meat on top, make sure you season the bird on both sides and under the skin as well- and use butter! It make it even more moist since you're adding additional fat.
    • When cooking, keep an eye on it, and if any of the skin is browning too fast, cover only that part so it doesn't burn.
    • This will cook a lot faster than a whole turkey, so keep an eye on the temperature.
    • Be sure to let your bird rest for 20-30 minutes. This will all the bird to finish cooking and the juices to redistribute within the meat.
    An overhead image of a roasted spatchcocked turkey on a cutting board with hers and lemons surrounding it.

    How long does it take a spatchcock turkey to cook?

    Mine took around 90 minutes in the oven but always go by temperature, not time. You'll want to place a meat thermometer into the thickest part of the thigh to check the temperature. I remove the bird once it has reached 161 degrees, as it will continue cooking while it rests and reach 165 degrees.

    What is the safe temperature for consuming a turkey?

    165 degrees is considered the safe temperature for poultry. You'll want the breast to be this temperature. Don't be alarmed if the thigh is a lot higher in temp (around 180). It cooks faster but the meat is more tender. And when taking the temperature, insert the thermometer into the thickest past of the breast and make sure you aren't touching any bone.

    An overhead image of two hands opening up a turkey once the backbone is removed

    What about the wings?

    Many people leave them on and tuck them before cooking. I prefer to remove them and use them for gravy.

    Should I remove the wish bone?

    This is optional but it will make carving the breast meat easier later on, so I encourage it.

    An overhead image of cutting out the wishbone from a turkey.

    Helpful tools:

    1. Chef's knife or Kitchen shears
    2. Cutting board
    3. Roasting Pan
    4. Thermometer
    An overhead image of two hands pushing down on the turkey breasts to flatten the bird.

    Hosting Thanksgiving?

    Discover the secret to hosting Thanksgiving without all the stress! Prepsgiving is your FREE guide to making a delicious Thanksgiving feast the easy way.

    An overhead image of a roasted spatchcocked turkey in a roasting pan surrounded by fresh herbs and lemons and orange and grey plaid napkins.

    How to spatchcock turkey

    Jessy Freimann
    I'm sharing step-by-step instructions along with tips and tricks for how to spatchcock turkey the easy way. The results are so juicy and delicious you'll never what to roast a whole turkey again!
    No ratings yet
    Print Recipe Pin Recipe
    Prep Time 20 minutes mins
    Cook Time 1 hour hr 30 minutes mins
    Resting time 25 minutes mins
    Total Time 2 hours hrs 15 minutes mins
    Course dinner, Main, Main Course, Main dish
    Cuisine American

    Ingredients
      

    • A clean surface, I like to use a sheet pan covered in parchment
    • 11-14 pound turkey, any larger won't fit into a pan. If you're feeding more people, I recommend using 2 smaller turkeys.
    • Sharp kitchen shears, a sharp knife will also work, but I find shears easier to work with
    • Sharp paring knife

    Instructions
     

    • Begin by patting the turkey dry with a paper towel to make it easier to work with and less slippery.
    • Remove neck and gizzards from the carcass and set aside for gravy.
    • Optional- Use a sharp knife to remove the wings by cutting them at the joint for easy removal (go right around the "knuckle"). I like to use the wings for the gravy ,but if you'd like to leave the wings on, be sure to tuck the wing tips under the bird before roasting.
    • Flip the turkey breast-side down with the legs pointing away from you.
    • Use the kitchen shears or a sharp knife on one side of the back bone to carefully cut away, all the way down to the other end.
      An overhead image of hands beginning to remove the backbone from a turkey.
    • Repeat on the other side until you remove the back bone completely. Set the backbone aside for gravy.
      An overhead image of hands cutting the backbone out of a turkey.
    • Turn the turkey so that the legs are facing you. Gently run your knife down the center of the inside of the breast bone. This is optional but it makes flattening easier later.
      An overhead image of two hands opening up a turkey once the backbone is removed
    • This next step is optional but I highly recommend doing it for easier carving of the turkey breasts once cooked. You can remove the wishbone by carving along it with a paring knife and gently pulling it out. This is located at the front of the turkey (on the side that doesn't have the legs).
      An overhead image of cutting out the wishbone from a turkey.
    • Flip the turkey over so the breast side is up and lay it flat.
    • Take both hands and firmly push down on the breasts to fully flatten. You will hear a crack but don't be alarmed, this is supposed to happen.
      An overhead image of two hands pushing down on the turkey breasts to flatten the bird.
    • Season to your taste and bake at 425 degrees until the thickest part of the breast reaches 161 degrees, around 90 minutes. Remove from oven and rest for 20 minutes before carving. Serve immediately.
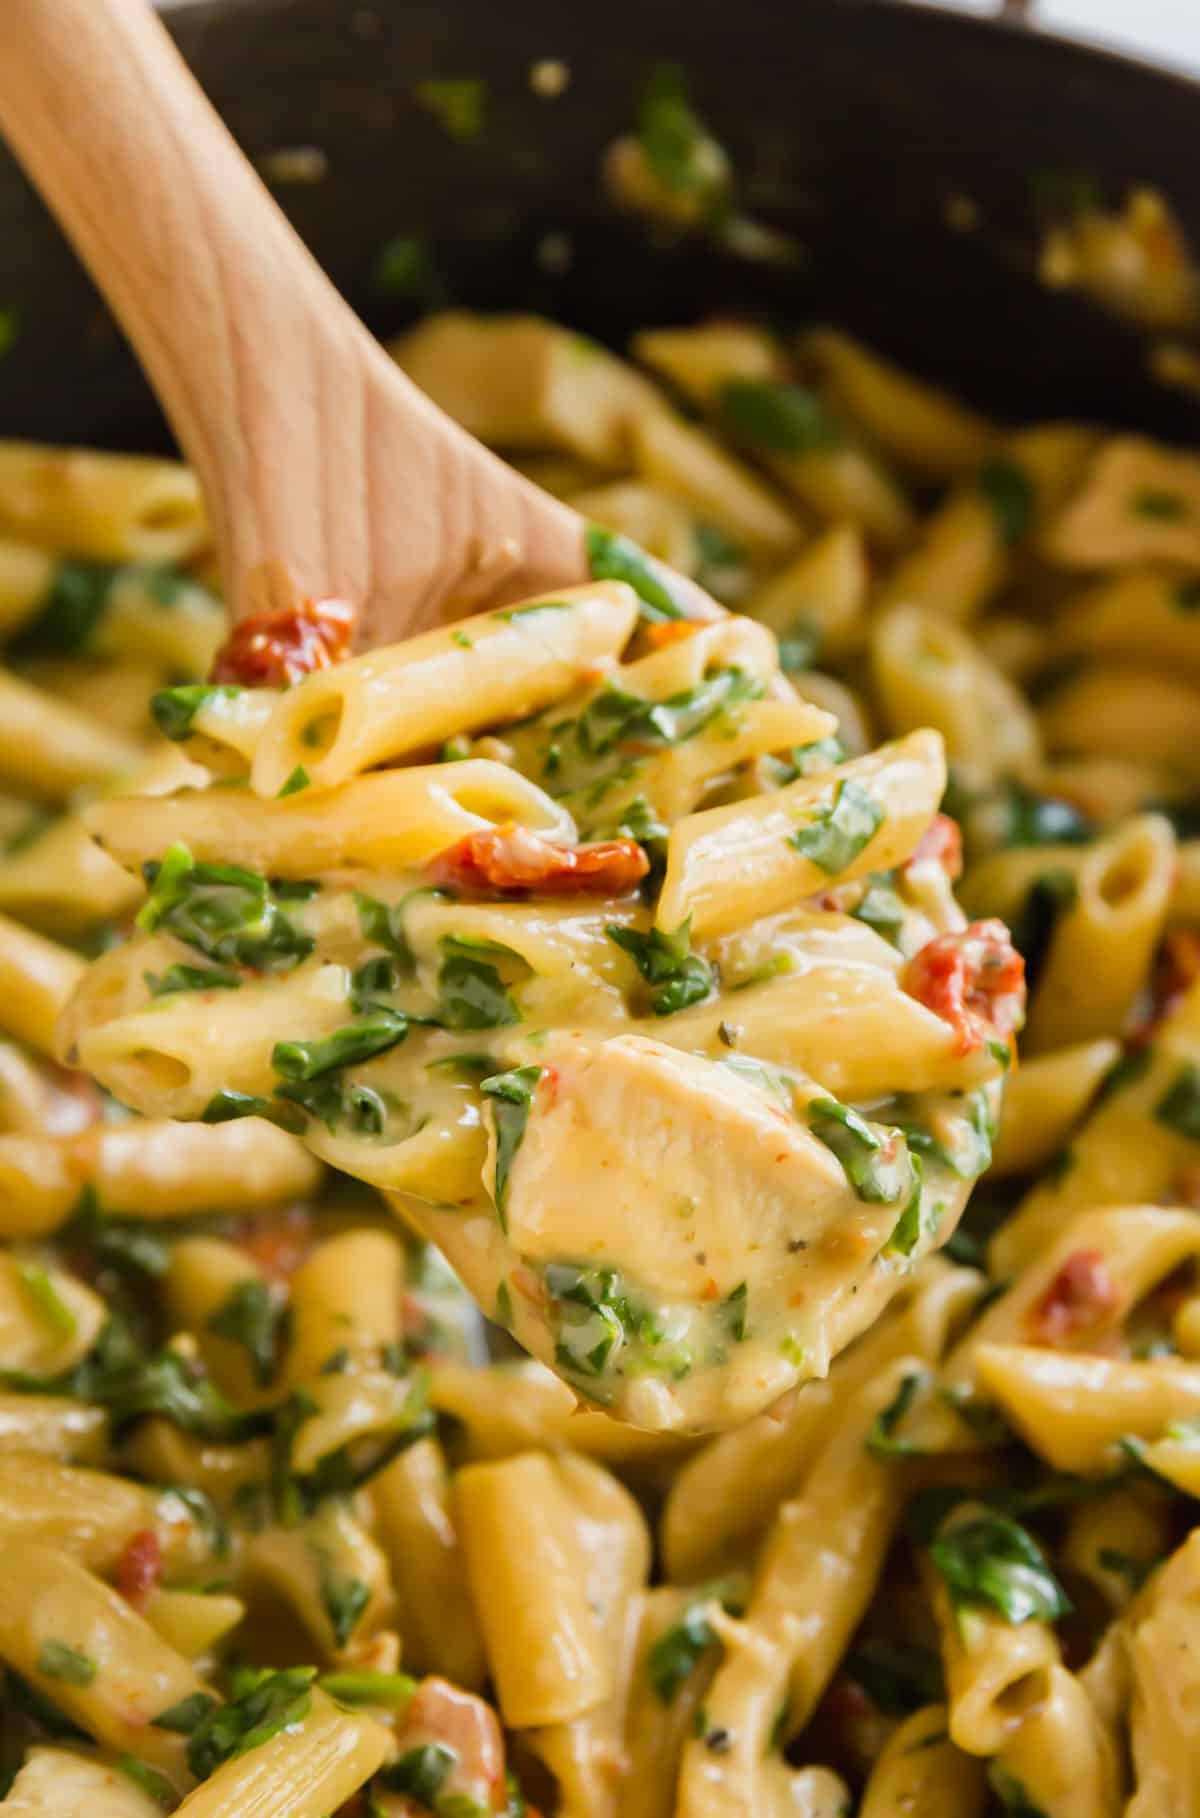
    Video

    Notes

    When removing the backbone be mindful of the thigh bone, which comes around the middle of the backbone. You want to be low enough and close to the center so that you can cut through that. Sometimes it's helpful to cut halfway down either side of the backbone before completing your cutting.
    Tried this recipe?Let us know how it was!

    If you tried this recipe please comment and rate it 🙂 I love hearing your feedback and answering your questions! And if you make this please tag me on Instagram with @thelifejolie so I can share it <3

    You can find a full index of my recipes here.

    Don’t forget to follow The Life Jolie on Pinterest for more recipe inspiration!

    Or if Pinterest isn’t your style, bookmark this post!

    Let’s keep the conversation going- join my Facebook group! 

    Grilled Shrimp Tacos

    Aug 3, 2020 · Leave a Comment

    These easy Grilled Shrimp Tacos are about to be your new favorite summertime dinner recipe! Topped with pineapple salsa and an avocado cream sauce, they're quick and easy to make with flavor that will keep you coming back for more.

    Grilled Shrimp Tacos are about to be your new favorite summertime dinner recipe! They're quick and easy to make with flavor that will keep you coming back for more.

    Check out some other awesome taco recipes like Slow Cooker Chicken Tacos, Beef Baked Tacos and BBQ Pulled Pork Tacos.

    Two tacos that are open on a plate with a bowl of pineapple salsa next to them.

    Shrimp Tacos

    This post contains Affiliate Links. Please see the disclaimer here.

    Raise your hand if you love Taco Tuesday! **raises both hands as high as possible** I feel like tacos are a universally loved food, and it makes sense. They offer the ability to customize it exactly to your tastes and are also pretty fun to eat! So today we're going the shrimp route!

    I've been meaning to put up an easy shrimp tacos recipe for a long time, and since it's summer, grilled shrimp tacos seemed like a natural next step. I love how fast the shrimp cooks and in general how quickly these come together. This is a light and delicious meal the whole family will love!

    A close up image of the fillings of a shrimp taco.

    Tips for how to make shrimp tacos

    • I keep it super simple with a marinade of fresh lime juice, taco seasoning and a little olive oil.
    • Seafood doesn't require a super long marinating time, 20 minutes or less is perfect!
    • I encourage you to use skewers to make turning the shrimp easier. I personally double up my skewers to keep the shrimp in place.
    • Be sure to grease your grill well- I use cooking spray.
    • Keep an eye on the shrimp, they go fast!
    • For added deliciousness, char the tortillas slightly.

    What is the best shrimp taco seasoning?

    I personally use taco seasoning packets that are premixed to keep things simple. But be sure you only use half of it, unless you're doubling the recipe.

    Can I use frozen shrimp?

    Sure! Just thaw it (this will only take 15 minutes in a bowl of cold water, just be sure to drain them well before marinating).

    How to tell when shrimp are done cooking?

    The shrimp will turn pink and firm up. Just be sure you don't overcook them, as they get a little rubbery (the optimal internal temperature is 145 degrees).

    What do you put on shrimp tacos?

    I like to top these with my Pineapple Salsa as well as avocado cream sauce which makes a fantastic cool and creamy shrimp taco sauce! And of course, some lime wedges.

    How long do shrimp tacos last?

    If you have any leftovers, pack each component separately in air tight containers and refrigerate- they'll last for 2-3 days.

    A folded shrimp taco

    Ingredients for making this Shrimp Taco Recipe

    • Shrimp
    • Lime juice
    • Olive oil
    • Taco seasoning
    • Flour tortillas (or corn tortillas)
    • Pineapple Salsa
    • Avocado
    • Sour cream
    • Kosher salt
    • Cilantro

    Ingredients to prep ahead:

    • Make Pineapple Salsa
    • Thaw shrimp

    Helpful tools

    1. Mixing bowl
    2. Wooden spoon
    3. Chef's knife
    4. Cutting board
    5. Measuring cups
    6. Measuring spoons
    7. Citrus reamer
    8. Instant Read Thermometer
    9. Grill tongs

    An overhead image of two shrimp tacos on a plate.

    A close up of a shrimp taco.

    Grilled Shrimp Tacos

    Jessy Freimann
    These grilled shrimp tacos are a light, fresh, and flavor-packed summer dinner that comes together in just 30 minutes. Pineapple salsa and avocado cream sauce put them over the top!
    No ratings yet
    Print Recipe Pin Recipe
    Prep Time 20 minutes mins
    Cook Time 6 minutes mins
    Course dinner, Main, Main Course, Main dish
    Cuisine Mexican
    Servings 4 servings
    Calories 369 kcal

    Equipment

    • mixing bowl
    • wooden spoon
    • chefs knife
    • cutting board
    • measuring cups
    • measuring spoons
    • Citrus reamer
    • instant read thermometer
    • Grill tongs

    Ingredients
      

    Tacos

    • 1 lime + extra for garnish
    • 1 Tablespoon Olive oil
    • 1 packet taco seasoning
    • 1 pound large raw shrimp, peeled, deveined and tails removed
    • Cooking spray
    • 8 Flour or corn tortillas
    • 1 ½ cups Pineapple salsa

    Avocado cream sauce

    • 1 whole ripe avocado, peeled and pit removed
    • 1 Tablespoon sour cream
    • 2 Tablespoons lime juice
    • 1 generous pinch kosher salt
    • 1 small handful cilantro

    Instructions
     

    Tacos

    • Mix olive oil, juice of 1 lime and taco seasoning and toss with shrimp.
    • Let sit for 20 minutes to marinate.
    • Spray grill with cooking spray and heat to medium (around 375 degrees F). While grill heats, place shrimp on skewers (I use two skewers so that the shrimp don't turn when flipping).
    • Place shrimp skewers on the grill and cook until cooked through and light pink turning once, about 2-3 minutes per side.
    • Remove from the grill and cool for a moment or two.
    • Assemble tacos by starting with tortillas. Top with shrimp, pineapple salsa and avocado cream sauce and serve immediately.

    Avocado cream sauce

    • Place all ingredients in the mini prep processor or food processor.
    • Process until well combined and creamy.

    Notes

    • Use double skewers. Threading the shrimp onto two parallel skewers keeps them from spinning when you flip. While not necessary, it makes the whole process so much easier.
    • Don't over-marinate. Seafood doesn't need a long marinating time, so 20 minutes is perfect. Any longer and the acid in the lime juice can start to break down the shrimp. I like to get my shrimp into the marinade and then spend that 20 minutes prepping the rest of the meal and heating the grill.
    • Grease your grill well. A good spray of cooking spray before heating prevents the shrimp from sticking.
    • Keep a close eye on the shrimp. It needs 2-3 minutes per side. They’re done when they turn pink and firm up. Overcooked shrimp turns rubbery quickly.
    • Char the tortillas. A quick pass over the grill flame gives the tortillas a slightly smoky, charred flavor that takes these tacos to the next level.
    • Ingredients to prep ahead- Make the pineapple salsa and avocado cream sauce ahead of time and store in the fridge. Thaw the shrimp in advance if using frozen.
    • Leftovers and storage- Store each component separately in airtight containers in the fridge for up to 2-3 days.

    Nutrition

    Serving: 1servingCalories: 369kcalCarbohydrates: 44gProtein: 29gFat: 10gSaturated Fat: 3gPolyunsaturated Fat: 2gMonounsaturated Fat: 4gTrans Fat: 0.01gCholesterol: 184mgSodium: 2021mgPotassium: 659mgFiber: 6gSugar: 8gVitamin A: 1354IUVitamin C: 13mgCalcium: 198mgIron: 4mg
    Tried this recipe?Let us know how it was!

    If you tried this recipe please comment and rate it 🙂 I love hearing your feedback and answering your questions! And if you make it please tag me on Instagram with @thelifejolie so I can share it <3

    You can find a full index of my recipes here.

    Don’t forget to follow The Life Jolie on Pinterest for more recipe inspiration!

    Or if Pinterest isn’t your style, bookmark this post!

    Let’s keep the conversation going- join my Facebook group! 

    How to make a meal plan: the smart way

    Jul 27, 2020 · Leave a Comment

    A woman cooking a pot of tomato sauce on the stove.

    Meal planning: whether you love it or hate it, it has the ability to make our weeknight's profoundly easier. So I'm going through my super easy and logical meal planning process so you can stop making your meal plan harder, and start planning smarter!

    Image of a happy woman cooking at a stove that says "How to meal plan the smart way"

    Why I make a meal plan around our life

    I thought hated meal planning- I felt like I had to adhere to the same strict schedule, no matter what was going on. But then I realized, it's not that I hated meal planning. I hated the way I was going about meal planning. Once I figured this out, it became clear that if I stopped trying to adapt to the plan and started adapting the plan to our life, it not only got easier to create- I actually stuck to it! So today, I'll show you how I put together a smart meal plan.

    Now I’m a big believer in working smarter, not harder and that is the driving force behind my meal planning. In most families, every week looks a little different. So it’s important to build your meal plan around what you have going on that week so that you’re setting yourself up to be successful in a realistic way that works with your family's unique situation.

    So often, we find ourselves in way over our heads with weeknight cooking because we get overly ambitious and try to be the hero. And while this comes from a good place, it’s just not realistic or sustainable. I mean, I know that if I had a really busy day at work or it’s a soccer night, that I’m not going to be able to cook a recipe that involves a ton of time or effort. And if I try to plan things without taking the schedule into account, most of the time I end up not achieving all the cooking I had hoped to for that week.

    Tools for creating a smarter meal plan

    I use 3 tools that most of us have on hand to create my meal plan:

    1. My phone: Whenever I get an appointment or commit to scheduling something, I always put it into my phone first.
    2. A day planner: Being able to write it all out helps me get my mind into the game for the coming week.
    3. A pencil: Fun fact, I'm a person who hates using pens, specifically in my planner. Call me a commitment-phobe but I like being able to erase things as they change.

    With change in mind, I only fill out my written planner on a week-to-week basis. This allows me to adapt to ever-changing and busy schedules without feeling like my whole planner exploded.

    Step 1: Look at your schedule for the upcoming week

    My first step is to look through my phone calendar and write in any commitments for the week. This includes appointments, important work projects and meetings, activities during the day and evening, events etc. So note both work and personal commitments and write them into the planner on their corresponding days of the week.

    By first looking at what we having going on for the coming, I'm able to use common sense in planning which nights to cook so that I'm not setting myself up to fail by planning a super labor intensive recipe for a night after a busy day or when we have activities scheduled. remember: you're more likely to cook on night's that come after easier, less busy days. Save the take out for crazy nights.

    Step 2: Decide which days you plan to cook

    Once I’ve written in the week’s schedule, I start filling in which nights I plan to dine out or eat leftovers and which night's I'll be cooking. This allows me to see exactly how many nights I plan to cook so that I can choose the recipes for those spots. It also allows me to choose recipes that make sense for that night based on our week.

    I encourage you to write in days to eat leftovers and days to dine out in your meal plan based on what you have going on that week so that not overwhelming yourself after a crazy day or on a busy night, because you'll be less likely to actually follow through with cooking on those days (ask me how I know that...). Remember: keep it simple, you don't always have to be a hero.

    Step 3: Choose the right recipes for the day's you'll be cooking

    Now it's time to choose the recipes that make them most sense with your overall schedule. This is why it's important to be specific in your commitments for the week. It allows you to choose recipes in a logical way and one that makes the most sense for the big picture of the overall week.

    For example, if we have a dinner at a steak house scheduled for a Wednesday night, then I probably won’t be scheduling a beef recipe for the very next day. Another example is if we plan to do leftovers for dinner on Tuesday night, then I won’t be planning to make a smaller recipe that doesn’t usually have leftovers on Monday night, or a recipe that won’t reheat well. Remember: common sense cooking: cook smarter, not harder.

    From there, I choose my recipes accordingly and plug them into my planner on the days I plan to cook. And with that, my meal plan is made  and I can create my grocery list and my prep list for when I prepare my ingredients (which for me is usually on Sundays).

    Here's a video I created where I show you exactly how I follow these steps, and the thought process behind it:


    View this post on Instagram


    A post shared by Jessy Freimann (@thelifejolie) on Jul 27, 2020 at 6:18am PDT

    I hope this was helpful! Comment below with any questions, so I can try and help you as best I can 🙂

    When you make your meal plan, please tag me on Instagram with @thelifejolie so I can share it <3

    You can find a full index of my recipes here.

    Don’t forget to follow The Life Jolie on Pinterest for more cooking inspiration!

    Or if Pinterest isn’t your style, bookmark this post!

    Let’s keep the conversation going- join my Facebook group! 

    Greek Yogurt Bites, 4 ways

    Jul 20, 2020 · Leave a Comment

    These frozen Greek Yogurt Bites are a seriously fun and easy snack and a cool treat for both kids and adults. I’ll show you how to make these 4 different ways with a variety of flavors like blueberry, cookies and cream, peanut butter banana and chocolate cherry!

    These Greek Yogurt Bites are a seriously fun snack and a cool treat that both kids and adults will love!

    An overhead image of the yogurt bites in their pan. A photo featuring all 4 yogurt bites on a plate.

    This is a sponsored conversation on behalf of Delta® Greek Yogurt. All opinions are mine. Thank you for supporting the brands who help support this blog.

    Yogurt Bites

    It's always fun to find new ways of using the ingredients you already have in your fridge. Today's recipe not only uses items we all tend to have on hand, but it gives you 4 flavor variations and is seriously fun to make as well. It's seriously so easy to take delicious and creamy Greek yogurt, add some of your favorite fresh fruit and sweets and freeze them into these cute little bites! The results are a healthy snack that feels like a special treat without all the guilt that usually comes with sweet treats.

    This is also a super fun way to get into the kitchen with your kids. They're easy enough that you don't have to worry about your kitchen being a total mess when you're done and who doesn't love a snack that tastes like you're eating frozen yogurt? You’ll want to eat these bite size treats all summer long!

    Choosing Delta® Greek Yogurt

    Delta® Greek Yogurt is an established brand being introduced in the U.S. for the first time. Originally available in Greece, they've been making Greek yogurt for 70 years using cultures from the island of Crete. This gives their Greek yogurt a delicious rich taste that is less sour than other Greek yogurts.

    Delta also makes their yogurt according to their own patented method, which gives it its thick, creamy texture, without any added thickening agents. So, you can enjoy an authentic, non-GMO Greek yogurt with no preservatives, no artificial growth hormones, no sweeteners, no artificial flavors that's all-natural and gluten free. Plus, it's a great way to get your protein--there's 30% of an adult's daily protein in a 5.3oz cup of plain Delta® Greek Yogurt.

    3 Delta Yogurt containers stacked on each other.

    Tips for making Frozen Yogurt Bites

    • Be sure to mix the wet ingredients well, so that you get an even flavor in each yogurt bite.
    • Line your mini muffin pan with mini muffin liners for easy removal.
    • I tested both paper and foil mini muffin liners (that seem to have parchment inside) and while both worked, I found the foil ones worked better. The paper was a bit more difficult to peel off the yogurt bites.
    • Freeze them for at least 2 hours to make sure they're frozen through.
    • When you remove the pan from the refrigerator, let them sit for 1-2 minutes to help make them easier to remove and peel.

    A close up of the berry yogurt bite on a plate. An overhead image of the 4 yogurt bites on a plate.

    Can I still make these if I don't have muffin liners?

    Yes. Just let them sit for 3-5 minutes once you remove from the freezer to make it easier to get them out of the muffin tin.

    How do I store yogurt bites?

    Once frozen they can be removed from the muffin tin and placed in an airtight container for up to 3 months.

    Can I make these in a regular size muffin tin?

    Yes- I'd still encourage you to line the pans, but only fill them ⅓ of the way. Keep in mind  you will make fewer yogurt bites this way.

    A close up image of the yogurt bites on a plate with the chocolate cherry up front.

    These frozen Greek Yogurt Bites are a seriously fun and easy snack and a cool treat for both kids and adults. I’ll show you how to make these 4 different ways with a variety of flavors like blueberry, cookies and cream, peanut butter banana and chocolate cherry!

    Greek Yogurt Bites, 4 ways

    Jessy Freimann
    These Greek Yogurt Bites are a seriously fun snack and a cool treat that both kids and adult will love!
    5 from 1 vote
    Print Recipe Pin Recipe
    Prep Time 10 minutes mins
    Freeze time 2 hours hrs
    Total Time 2 hours hrs 10 minutes mins
    Course Dessert, Snack
    Cuisine American
    Servings 24 pieces
    Calories 49 kcal

    Equipment

    • 1 mini muffin pan
    • 1 Whisk
    • 1 mixing bowl
    • 1 Measuring cups and spoons
    • 1 cutting board
    • 1 chefs knife

    Ingredients
      

    Chocolate Cherry Greek Yogurt Bites Ingredients

    • ½ cup Greek yogurt 
    • 3 Tablespoons chocolate sauce
    • 4 Maraschino cherries

    Peanut Butter Banana Yogurt Bites Ingredients

    • ½ cup Greek yogurt 
    • 3 Tablespoons creamy peanut butter
    • 1 banana, sliced

    Mixed Berry Yogurt Bites Ingredients

    • ½ cup blueberry Greek yogurt 
    • ½ teaspoon vanilla extract
    • ½ cup berries, any variety (dice larger berries)

    Cookies and Cream Yogurt Bites Ingredients

    • ½ cup Vanilla Greek yogurt 
    • ½ teaspoon vanilla extract
    • 4 Oreo cookies, broken up into small chunks

    Instructions
     

    Chocolate Cherry Greek Yogurt Bites instructions

    • Line a mini muffin pan with mini muffin liners and set aside.
    • In a medium bowl, whisk together Plain Delta® Greek Yogurt and chocolate sauce until well combined.
    • Spoon mixture into mini muffin pans filling them ¾ of the way full.
    • Press a maraschino cherry into each yogurt bite so that it's almost covered.
    • Freeze for at least two hours.
    • Remove from muffin pan and peel off liners. Store in an airtight container for up to 3 months.

    Peanut Butter Banana Yogurt Bites

    • Line a mini muffin pan with mini muffin liners and set aside.
    • Place peanut butter in a small bowl and microwave for 30 seconds - 1 minute to melt slightly so it's easier to stir.
    • In a medium bowl, whisk together Vanilla Delta® Greek Yogurt and melted peanut butter until well combined.
    • Spoon mixture into mini muffin pans filling them ¾ of the way full.
    • Place a banana slice on top of each yogurt bite and press in slightly.
    • Freeze for at least two hours.
    • Remove from muffin pan and peel off liners. Store in an airtight container for up to 3 months.

    Mixed Berry Yogurt Bites

    • Line a mini muffin pan with mini muffin liners and set aside.
    • In a medium bowl, whisk together 0% Blueberry on the Bottom Delta® Greek Yogurt and vanilla extract until well combined.
    • Spoon mixture into mini muffin pans filling them ¾ of the way full.
    • Sprinkle a few of the berries on top of each yogurt bite and press in slightly.
    • Freeze for at least two hours.
    • Remove from muffin pan and peel off liners. Store in an airtight container for up to 3 months.

    Cookies and Cream Yogurt Bites

    • Line a mini muffin pan with mini muffin liners and set aside.
    • In a medium bowl, whisk together 0% Vanilla Delta® Greek Yogurt and vanilla extract until well combined.
    • Sprinkle a few of the chocolate sandwich cookies on top of each yogurt bite and press in slightly.
    • Freeze for at least two hours.
    • Remove from muffin pan and peel off liners. Store in an airtight container for up to 3 months.

    Notes

    These last up to 3 months in an airtight container in the freezer.

    Nutrition

    Serving: 4piecesCalories: 49kcalCarbohydrates: 6gProtein: 2gFat: 2gSaturated Fat: 0.4gPolyunsaturated Fat: 0.3gMonounsaturated Fat: 1gTrans Fat: 0.003gCholesterol: 1mgSodium: 31mgPotassium: 64mgFiber: 0.5gSugar: 4gVitamin A: 6IUVitamin C: 1mgCalcium: 17mgIron: 0.3mg
    Tried this recipe?Let us know how it was!

    If you tried this recipe please comment and rate it 🙂 I love hearing your feedback and answering your questions! And if you make this please tag me on Instagram with @thelifejolie so I can share it <3

    Try these other recipes featuring Greek Yogurt:

    • Greek Yogurt Roasted Chicken Thighs 
    • Leftover Ham and Potato Soup
    • Mini Pumpkin Cheesecake Recipe

    You can find a full index of my recipes here.

    Don’t forget to follow The Life Jolie on Pinterest for more recipe inspiration!

    Or if Pinterest isn’t your style, bookmark this post!

    Let’s keep the conversation going- join my Facebook group! 

    This is a sponsored post written by me on behalf of Delta® Greek Yogurt.

    Grilled Artichokes

    Jun 29, 2020 · Leave a Comment

    Grilled Artichokes are the perfect summer snack or appetizer! They're extremely easy to make with minimal ingredients and served with a dipping sauce of creamy lemon garlic aioli that you're sure to love!

    Grilled Artichokes are the perfect summer snack or appetizer! They're extremely easy to make with minimal ingredients and served along side a creamy lemon garlic aioli sauce that you're sure to love!

    A close up overhead image of an artichoke half in the middle of a plate of them.

    Check out some other tasty artichoke recipes like Olive and Artichoke Tapenade, Baked Artichoke Hearts and Artichoke Asiago Dip.

    Grilled Artichokes

    This post contains Affiliate Links. Please see the disclaimer here.

    I love artichokes. Ever since I was a little girl and my Grandma made stuffed artichokes I was all in. I think it's because I loved the novelty of scraping the meat of the artichoke leaves with my teeth- needless to say I was hooked and have since gone out of my way to try all sorts of artichoke recipes.

    And while most involve artichoke hearts, I felt like it was time to share one using whole artichokes. And grilling seemed like a natural next step. Super easy and simple with ingredients we all have on hand- these are a total summer win.

    Artichokes on the grill.

    Tips for how to cook artichokes on the grill

    • To prep, trim and cut the artichokes in half (use a serrated knife).
    • I prefer to parcook these in boiling water first so that they are halfway cooked prior to hitting the grill and then stop the cooking with cold water. You want them to be lightly charred (and turning brown) without actually burning the heck out of them. Yes to grill marks!
    • Be sure to dry the artichoke halves well after draining. I line a sheet pan with paper towel and let the artichokes drain on those for a few while blotting to top with more paper towel.
    • I didn't give measurements for the oil and seasoning because they're meant to be added to taste. I got with a nice drizzle of oil and liberal salt and pepper.
    • Cook on a preheated grill to high and grease it with cooking spray.

    A close up image of the artichoke in the corner of a plate full of them.

    How do I trim artichokes?

    First thing to do is remove the tough outer leaves. Then gently cut the sharp tip off the remaining leaves. Next, cut the very end off the stem (if it's a thicker artichoke you can also peel it, but mine were smaller so I didn't bother). Then cut the artichoke in half using a sharp serrated knife. If they're really large, you can quarter them.

    What is the choke?

    The choke is the pointy fibers just above the heart which would normally bloom if left to grow. In larger artichokes these can be tough and not enjoyable to eat. In smaller artichokes and baby artichokes, they are more like soft, undeveloped leaves and are edible.

    Should I pull out the choke?

    If they are larger artichokes, you can scoop the choke out before cooking. Since mine were smaller, I didn't.

    Do I really have to cut them in half?

    Yes, they'll cook quicker and be easier to eat.

    Can I eat the artichoke stem?

    Yes, they're totally delicious!

    Can I make these ahead?

    These are best served just after grilling, although the leftovers are still tasty. I'd encourage you to boil and cool and let them drain ahead and then season and grill just before serving.

    What goes well with grilled artichokes?

    My super quick Lemon Garlic Aioli is the perfect dipping sauce (and of course a squeeze of lemon!).

    Can I make this recipe with baby artichokes?

    Totally! Just boil for 10 minutes instead of 15!

    An overhead image of a plate of grilled artichokes with garlic aioli.

    Ingredients for making this grilled artichoke recipe

    • Whole artichokes
    • Olive oil
    • Kosher salt
    • Black pepper
    • Cooking spray
    • Lemon
    • Mayonnaise
    • Garlic powder
    • Black pepper

    Ingredients to prep ahead:

    • Trim and boil artichokes

    Helpful tools:

    1. Wooden spoon
    2. Saucepan
    3. Sheet pan
    4. Grill tongs

    Grilled Artichokes are the perfect summer snack or appetizer! They're extremely easy to make with minimal ingredients and served with a dipping sauce of creamy lemon garlic aioli that you're sure to love!

    Grilled Artichokes

    Jessy Freimann
    Grilled Artichokes are the perfect summer snack or appetizer! They're extremely easy to make with minimal ingredients and served along side a creamy lemon garlic aioli sauce that you're sure to love!
    No ratings yet
    Print Recipe Pin Recipe
    Prep Time 15 minutes mins
    Cook Time 25 minutes mins
    Total Time 40 minutes mins
    Course Appetizer, Snack
    Cuisine American
    Servings 4 artichokes
    Calories 514 kcal

    Equipment

    • 1 mixing bowl
    • 1 cutting board
    • 1 chefs knife
    • 1 Grill tongs

    Ingredients
      

    Grilled Artichokes

    • 4 Whole artichokes, trimmed and halved
    • 2 Tablespoons Olive oil,
    • 1 teaspoon Kosher salt
    • ⅓ teaspoon ground black pepper
    • Cooking spray

    Lemon Garlic Aioli Sauce

    • 1 cup mayonnaise
    • 1 lemon
    • 1 teaspoon garlic powder
    • ¼ teaspoon black pepper

    Instructions
     

    Grilled Artichokes

    • Place artichokes in a pot of boiling water and boil for around 15 minutes.
    • Drain and rinse in cold water to stop cooking. Drain well on a paper towel lined sheet pan. Blot with paper towels to dry tops.
    • Drizzle artichokes on both sides with olive oil and season liberally with salt and pepper to taste.
    • Spray grill with cooking spray and preheat to medium high heat.
    • Place artichoke halves onto the grill, flat side down. Grill for 5-10 minutes or until you have some nice grill marks.
    • Turn and cook the other side for an additional 5-10 minutes depending on the size of the artichokes. remove to serving plate.
    • Serve immediately with Lemon Garlic Aioli and lemon wedges.

    Lemon Garlic Aioli

    • Mix all ingredients until well combined.
    • Refrigerate until ready to serve.

    Notes

    Leftovers last 4 days covered in the refrigerator.

    Nutrition

    Serving: 1servingCalories: 514kcalCarbohydrates: 17gProtein: 5gFat: 49gSaturated Fat: 8gPolyunsaturated Fat: 26gMonounsaturated Fat: 15gTrans Fat: 0.1gCholesterol: 24mgSodium: 1058mgPotassium: 535mgFiber: 8gSugar: 2gVitamin A: 61IUVitamin C: 29mgCalcium: 70mgIron: 2mg
    Tried this recipe?Let us know how it was!


    If you tried this recipe please comment and rate it 🙂 I love hearing your feedback and answering your questions! And if you make this please tag me on Instagram with @thelifejolie so I can share it <3

    You can find a full index of my recipes here.

    Don’t forget to follow The Life Jolie on Pinterest for more recipe inspiration!

    Or if Pinterest isn’t your style, bookmark this post!

    Let’s keep the conversation going- join my Facebook group! 

    Grilled Pineapple BBQ Chicken

    Jun 22, 2020 · Leave a Comment

    Grilled Pineapple BBQ Chicken is an easy and delicious dinner that's perfect for busy summer weeknights! You can use any cut of chicken you'd like- chicken thighs, chicken breast or a combo. This 4 ingredient grilled chicken with an easy marinade will have everyone fighting for seconds.

    Grilled Pineapple BBQ Chicken is an easy and delicious dinner that's perfect for busy summer weeknights! This 3 ingredient grilled chicken will have everyone fighting for seconds.

    A close up image of a grilled chicken thigh in a serving dish.

    Check out some other awesome grilled chicken recipes like Coconut Cilantro Lime Chicken, Hawaiian Chicken and Lemon Pepper Chicken Drumsticks.

    Pineapple BBQ Chicken Recipe

    This post contains Affiliate Links. Please see the disclaimer here.

    For years, I've been kicking around the concept of a Pineapple BBQ recipe. Literally, years. But I've never actually tried making it until now. And frankly, I'm not even sure what took me so long. Because this recipe is outrageously easy and tastes fantastic!

    I am all about recipes that use the bare-minimum ingredients for maximum flavor. Bonus points if the ingredients are items that already happen to be in your pantry and fridge. These check all the boxes and will instantly make their way onto your dinner rotation this summer!

    BBQ chicken on a plate with rice and sauce on top.

    Tips for making Grilled BBQ Chicken

    • I encourage you to marinate this for at least an hour but you can totally assemble it the night before.
    • Pull the chicken out of the fridge before you preheat the grill.
    • Be sure to grease the grill with cooking spray before you heat it up to prevent sticking (I like olive oil cooking spray, but any will work). If you forget to do it before heating, it's ok, just do it carefully on the preheated grill.
    • Don't throw out the marinade- Although I usually encourage people to dispose of marinades right away, this makes an excellent sauce. The important thing is to be sure it boils for at least 3 minutes before thickening it (to kill any bacteria from raw chicken.
    • Be sure to rest the chicken for a few minutes before serving to redistribute the juices.

    What kind of BBQ sauce should I use?

    Whatever store bought BBQ sauce is your favorite will work. You can also make my homemade BBQ sauce.

    Which cut of chicken is best?

    The cut shown is boneless chicken thighs, but truly any cut of chicken pieces will taste great. Just be sure to adapt your cooking time to the thickness and size of whichever cut you choose. I'll definitely be using this recipe to make grilled chicken breast soon- it's my husband's favorite cut.

    What's the best way to tell if barbecue chicken is cooked through?

    Use a meat thermometer. You want to cook it until 160 degrees and then rest it for a few minutes. During that resting time, it will continue cooking and the temperature will go up to an internal temperature 165 degrees which is considered the safe temperature for consuming poultry.

    How hot should the grill be?

    For this recipe, I usually heat it to around 375 degrees or around medium heat.

    How do you thicken the sauce?

    I use a slurry of corn starch and water. Your other option would be arrowroot powder and water.

    A close up image of bbq chicken thighs in a bowl

    Ingredients for making this BBQ Chicken Marinade

    • Chicken
    • BBQ sauce
    • 20 ounce can pineapple rings (don't drain!)
    • Corn starch

    Ingredients to prep ahead:

    • Marinate chicken

    Helpful tools:

    1. Instant Read Thermometer
    2. Grill tongs
    3. Wooden spoon
    4. Saucepan

    A plate of bbq chicken on rice.

    Grilled Pineapple BBQ Chicken is an easy and delicious dinner that's perfect for busy summer weeknights! You can use any cut of chicken you'd like- chicken thighs, chicken breast or a combo. This 4 ingredient grilled chicken with an easy marinade will have everyone fighting for seconds.

    Grilled Pineapple BBQ Chicken

    Jessy Freimann
    Grilled Pineapple BBQ Chicken is an easy and delicious dinner that's perfect for busy summer weeknights! This 3 ingredient grilled chicken will have everyone fighting for seconds.
    No ratings yet
    Print Recipe Pin Recipe
    Prep Time 10 minutes mins
    Cook Time 15 minutes mins
    Marinating time 1 hour hr
    Total Time 1 hour hr 25 minutes mins
    Course dinner, Main, Main Course, Main dish
    Cuisine American
    Servings 6 pieces
    Calories 672 kcal

    Equipment

    • 1 cutting board
    • 1 chefs knife
    • 1 mixing bowl
    • 1 Whisk
    • 1 Can opener
    • 1 Grill tongs

    Ingredients
      

    • 1 cup BBQ sauce
    • 120 ounces pineapple rings canned (do not drain)
    • 6 chicken pieces (any cut will work- I used boneless skinless chicken thighs for these photos)
    • 1 teaspoon cornstarch
    • 1 Tablespoon water

    Instructions
     

    • Place chicken and pineapple rings into a large bowl or gallon zipper bag.
    • Mix together BBQ sauce and all the juice from the pineapple can until well combined. Pour over chicken and pineapple rings.
    • Cover and refrigerate for at least and hour to overnight.
    • When ready to cook remove from refrigerator. Spray the grill grates with cooking spray and preheat grill to around 375 degrees F.
    • Place chicken on the grill cooking for around 5-7 minutes per side until there's a nice char (not burn!) and the internal temperature reaches 160 degrees and the pineapple until it has a slight char on each side.
    • While the chicken cooks, place the leftover marinade into a small saucepan and heat to a boil.
    • Boil for 3-4 minutes and then reduce heat and thicken with a slurry of cornstarch and water.
    • Remove chicken and pineapple to a plate and rest for a few minutes. Serve immediately with sauce on top.

    Notes

    Leftovers last up to 3 days covered in the refrigerator.

    Nutrition

    Serving: 2piecesCalories: 672kcalCarbohydrates: 108gProtein: 25gFat: 18gSaturated Fat: 5gPolyunsaturated Fat: 4gMonounsaturated Fat: 7gTrans Fat: 0.1gCholesterol: 87mgSodium: 578mgPotassium: 1032mgFiber: 8gSugar: 97gVitamin A: 552IUVitamin C: 55mgCalcium: 119mgIron: 3mg
    Tried this recipe?Let us know how it was!

    If you tried this recipe please comment and rate it 🙂 I love hearing your feedback and answering your questions! And if you make it please tag me on Instagram with @thelifejolie so I can share it <3

    You can find a full index of my recipes here.

    Don’t forget to follow The Life Jolie on Pinterest for more recipe inspiration!

    Or if Pinterest isn’t your style, bookmark this post!

    Let’s keep the conversation going- join my Facebook group! 

    Egg Salad Sandwich with Olives

    Apr 27, 2020 · 34 Comments

    An Egg Salad Sandwich with Olives is an excellent and healthy way to take a basic egg salad sandwich recipe and make it extra special. It’s quick and easy to make and a great way to use hardboiled eggs and make a tasty sandwich for lunch.

    An Egg Salad Sandwich with Olives is an excellent way to take a basic egg salad recipe and make it extra special. It’s quick and easy to make and a great way to use hardboiled eggs

    A close up, straight on image of two halves of an egg salad sandwich on top of each other.

    Check out my other great recipes using hard boiled eggs: Avocado Egg Salad, Jalapeno Popper Deviled Eggs and German Potato Salad.

    Egg Salad Sandwich with Olives

    This post contains Affiliate Links. Please see the disclaimer here.

    As I've said many times, I like simple food. I love being able to take a few ingredients and whip up something delicious. And nothing fits the bill quite like this Egg and Olive Salad.

    Since I have such a hot, passionate love affair with eggs, it's pretty much a given that on any given day you can open my fridge and find hard boiled eggs. I generally just eat these on their own as part of my breakfast, but I also love making a simple egg salad with them to eat as sandwiches.

    And sometimes, if I really want to kick it up a notch, I'll add olives into the mix to make Egg and Olive Salad. The delicious, brininess of the olives elevates the classic egg salad recipe, taking your whole sandwich to new heights (can you tell I love olives just as much as eggs?).

    A sandwich with the top off revealing egg salad

    Tips for how to make egg salad with olives

    • Be sure to chill your eggs in ice water right after you’ve boiled the eggs to stop the cooking process.
    • Peel the eggs under cold water to help the shells come off easier.
    • Don’t fret if the eggs don’t peel cleanly, they’re going to be chopped up anyway!
    • You can use a knife to chop the eggs to whatever texture you’d prefer, but an egg slicer or even better, a food chopper works so well!
    • For the olives, you can use any of the above methods, but my favorite is a mini prep processor.
    • I prefer yellow mustard for this, but if you favor dijon mustard, just use that!
    • Keep in mind all the added ingredient measurements that you mix with your chopped eggs and olives are suggestions- it’s best to taste it as you go and adjust them to your unique taste. 

    A bowl of this egg salad recipe.

    How do you boil eggs?

    Place the eggs in your pot and fill them with cool water so that they are fully covered with an inch above them. Place the pan over high heat and as soon as the water begins to boil, cover and reduce the heat to low. Simmer for 12-13 minutes and then drain the eggs and plunge them into an ice water bath to stop the cooking process. Store in the refrigerator until you're ready to use them.

    What other ideas for adding into egg salad?

    Honestly, anything your heart desires! Green onion and bell pepper would be tasty. A dash of apple cider vinegar for some zing. Perhaps some hot sauce or sriracha for some heat. Have fun with it!

    What can I substitute mayonnaise with?

    You can substitute yogurt or greek yogurt for this, just know that it will likely alter the flavor. There are also plenty of tasty vegan mayonnaise options available.

    What is the best bread for egg salad sandwiches?

    Any variety of bread is great- my personal favorite is rye bread. You can also serve this as lettuce wraps or over a green salad, in a tortilla wrap and also on crackers or rice cakes.

    Can I make egg salad ahead of time?

    Definitely, it just gets better as it sits and all the flavors meld together!

    How long does egg salad last?

    Depending on when you boil your eggs, about 4-5 days covered in the refrigerator.

    Egg salad sandwiches stacked on each other

    Ingredients for this egg salad sandwich recipe

    • Hard boiled eggs
    • Green olives with pimentos
    • Mayonnaise
    • Prepared yellow mustard
    • Kosher salt
    • Black pepper

    Ingredients to prep ahead:

    • Hard boil eggs
    • Chop olives

    Helpful tools:

    1. Measuring cups
    2. Measuring spoons
    3. Mixing bowl
    4. Spatula
    5. Chef's knife
    6. Cutting board
    7. Mini prep processor

    An open face egg salad sandwich

    An Egg Salad Sandwich with Olives is an excellent and healthy way to take a basic egg salad sandwich recipe and make it extra special. It’s quick and easy to make and a great way to use hardboiled eggs and make a tasty sandwich for lunch.

    Egg Salad Sandwich with Olives

    Jessy Freimann
    An Egg Salad Sandwich with Olives is an excellent way to take a basic egg salad recipe and make it extra special. It’s quick and easy to make and a great way to use hardboiled eggs
    5 from 4 votes
    Print Recipe Pin Recipe
    Prep Time 10 minutes mins
    Cook Time 15 minutes mins
    Total Time 25 minutes mins
    Course Main, Main Course, Main dish
    Cuisine American
    Servings 4 servings
    Calories 468 kcal

    Equipment

    • 1 saucepan
    • 1 mixing bowl
    • 1 Spatula
    • 1 chefs knife
    • 1 cutting board
    • 1 Measuring cups and spoons

    Ingredients
      

    • 8 large hard boiled eggs, peeled and roughly chopped
    • ¾ cups green olives with pimentos, roughly chopped
    • ⅔ cups mayonnaise
    • 1 Tablespoon prepared yellow mustard
    • ½ teaspoon Kosher salt, to taste
    • ¼ teaspoon Ground black pepper, to taste
    • 1 Bread
    • 4 pieces Lettuce
    • 2 tomatoes sliced

    Instructions
     

    • Boil eggs and plunge into an ice bath. Peel the eggs and roughly chop them. Add to a medium bowl.
    • Add chopped green olives, mayonnaise, mustard, salt and pepper and mix until well combined.
    • Taste and adjust seasonings to your liking.
    • Spread egg salad on bread and top with lettuce and tomato if you prefer. Serve immediately.
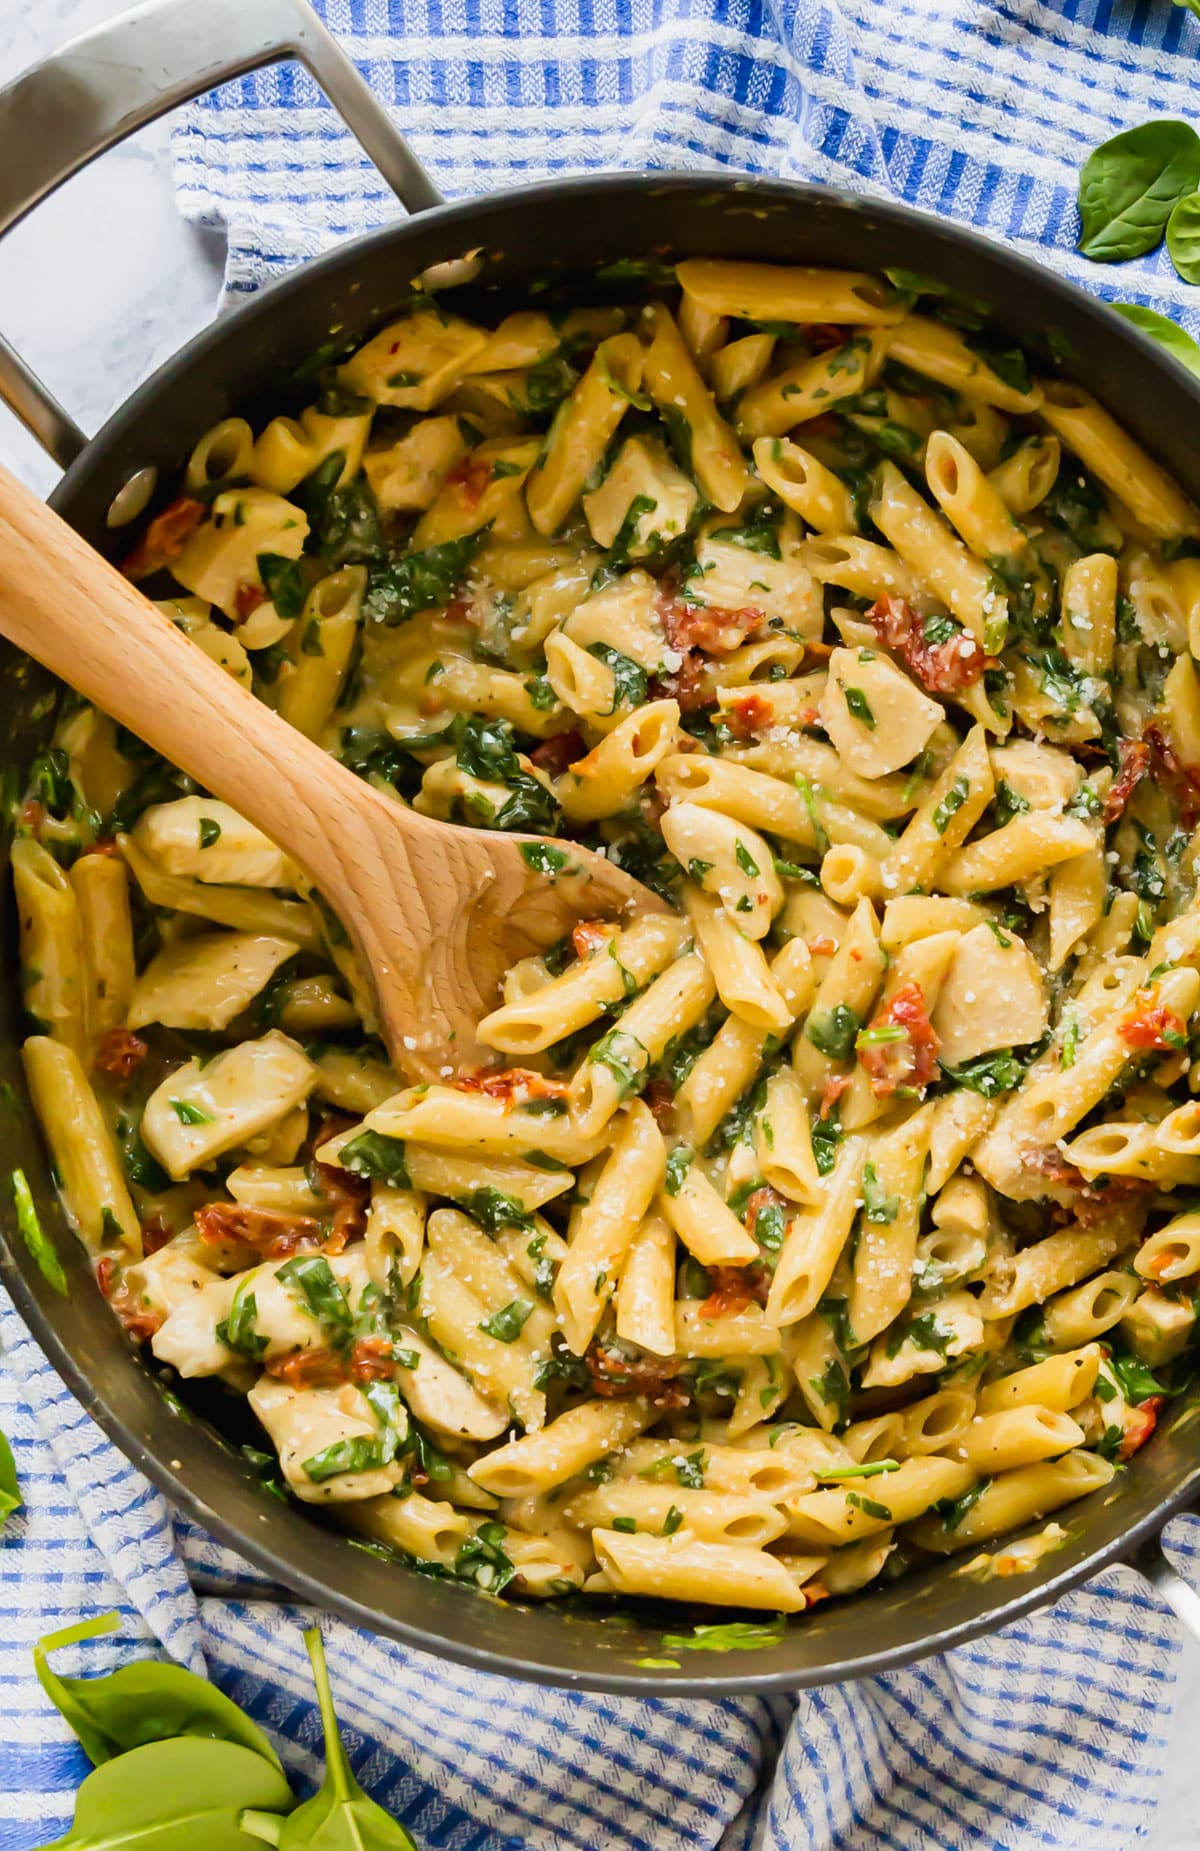
    Notes

    The egg salad lasts up to 3 days covered in the refrigerator.

    Nutrition

    Serving: 1servingCalories: 468kcalCarbohydrates: 7gProtein: 14gFat: 43gSaturated Fat: 8gPolyunsaturated Fat: 19gMonounsaturated Fat: 13gTrans Fat: 0.1gCholesterol: 389mgSodium: 1097mgPotassium: 378mgFiber: 2gSugar: 4gVitamin A: 1446IUVitamin C: 10mgCalcium: 86mgIron: 2mg
    Tried this recipe?Let us know how it was!

    If you tried this recipe please comment and rate it 🙂 I love hearing your feedback and answering your questions! And if you make it please tag me on Instagram with @thelifejolie so I can share it <3

    You can find a full index of my recipes here.

    Don’t forget to follow The Life Jolie on Pinterest for more recipe inspiration!

    Or if Pinterest isn’t your style, bookmark this post!

    Let’s keep the conversation going- join my Facebook group! 

    Make-Ahead Breakfast Burrito recipe

    Mar 11, 2020 · Leave a Comment

    This Make-Ahead Breakfast Burrito recipe is a quick grab-and-go healthy breakfast with sausage and bell pepper that's as delicious as it is easy. They're great to make ahead and freeze or serve right away as a satisfying brunch option.
    This Make-Ahead Breakfast Burrito recipe is a quick grab-and-go breakfast that's as delicious as it is easy. They're great to make ahead and freeze or serve right away as a satisfying brunch option.
    Two halves of a breakfast burrito stacked on tops of each other.

    Try some other grab-and-go breakfast recipes like Breakfast Cookies, Broccoli Cheddar Quiche and Puff Pastry Egg Muffins.

    Breakfast Burrito recipe

    This post contains Affiliate Links. Please see the disclaimer here.

    You know what we don't have enough of here in Western, NY? Mexican-inspired breakfast options. When we lived in Las Vegas right after we got married, we made a habit of going to the diners near our apartment pretty often. And there were always a variety of brunch options beyond your basic omelettes and pancakes. Naturally, I always found myself going for the burritos.

    Two kids and a business later, life is definitely busier around here in the best way possible. But I'm able to fulfill my craving with these freezer breakfast burritos I'm going to share with you today. They're easy to make ahead but are also great, served right away!

    Breakfast burritos in a bag ready to go in the freezer.

    Tips for how to make a breakfast burrito

    • If there seems to be a lot of grease once you've browned the sausage, drain it before moving forward. If not then don't worry about it.
    • Be sure to whisk the eggs, water really well and season with salt and pepper before adding to the pan to have nice, fluffy eggs.
    • Cool the egg mixture slightly before assembling the burritos.
    • Be sure to roll the burritos tightly so that they stay shut.

    An overhead image of plate of breakfast burritos.

    How many eggs are in a breakfast burrito?

    I use 6 large eggs for this particular recipes. I originally tested it with 8 eggs, but ended up with far too much filling.

    How do you fold a burrito?

    Start with a fajita-size (8 inch) flour tortilla on a clean surface like a cutting board. Once the filling and cheese are on the bottom half of the tortilla, take the left and right sides of the tortilla and fold them in over the filling (they don't have to reach all the way to the middle). Now fold the bottom of the tortilla up over the folded sides and carefully roll it forward towards the top of the tortilla, being careful to keep the sides closed and ending with the seam on the bottom.

    Can I change up some of the filling ingredient add-ins?

    Totally! Change up the breakfast sausage or use something else in place of the bell pepper. Just know that juicier veggies like tomatoes might leave you with a soggier burrito, specifically if you freeze then thaw them to cook.

    How do you freeze a burrito?

    Wrap each rolled burrito in parchment and place the burritos on a sheet pan, seam side down. Then freeze the burritos. Once they're frozen solid, place the frozen burritos in a plastic zipper bag and store in the freezer.

    How do you reheat a frozen burrito?

    You have two options to cook these directly from the freezer:

    • Place the burrito in the microwave for 1-2 minutes of high or until heated through.
    • Baked at 350 degrees for around 15 minutes or until heated through.

    Do I have to freeze these?

    No! You can also cook the burritos right after assembling them. I like them best in a large skillet over medium, browned on all sides.

    How do long can you keep a breakfast burrito?

    These last up to 3 months in the freezer. Once thawed (or if you don't freeze them) they last around 2-3 days in the refrigerator.

    A close up image of the inside of the burrito with eggs and sausage.

    Ingredients for making these Breakfast Burritos

    • Breakfast sausage
    • Red bell pepper
    • Green onion
    • Eggs
    • Water
    • Kosher salt
    • Ground black pepper
    • Tortillas
    • Cheese

    Ingredients to prep ahead:

    • Remove sausage from casings
    • Dice pepper
    • Wash green onions
    • Shred cheese

    Helpful tools:

    1. Large saute pan
    2. Wooden spoon
    3. Chef's knife
    4. Cutting board
    5. Measuring cups
    6. Measuring spoons

    A plate with a breakfast burrito, salsa and sour cream on it.

    This Make-Ahead Breakfast Burrito recipe is a quick grab-and-go healthy breakfast with sausage and bell pepper that's as delicious as it is easy. They're great to make ahead and freeze or serve right away as a satisfying brunch option.

    Make-Ahead Breakfast Burrito recipe

    Jessy Freimann
    This Make-Ahead Breakfast Burrito recipe is a quick grab-and-go breakfast that's as delicious as it is easy. They're great to make ahead and freeze or serve right away as a satisfying brunch option.
    No ratings yet
    Print Recipe Pin Recipe
    Prep Time 10 minutes mins
    Cook Time 12 minutes mins
    Freeze time 1 hour hr
    Total Time 1 hour hr 22 minutes mins
    Course Breakfast, Main
    Cuisine Mexican
    Servings 8 pieces
    Calories 168 kcal

    Equipment

    • 1 Fry pan
    • 1 cutting board
    • 1 chefs knife
    • 1 Measuring cups and spoons

    Ingredients
      

    • ½ pound breakfast sausage
    • ¾ cup diced red bell pepper
    • 4 green onions, chopped (dark and light green parts only)
    • 6 large eggs
    • ⅓ cup water
    • ½ teaspoon kosher salt
    • ¼ teaspoon ground black pepper
    • 8 fajita size (8 inch) tortillas
    • ½ cup Mexican blend shredded cheese

    Instructions
     

    • Combine sausage, peppers and onions in a large saute pan over medium heat.
    • Saute until the sausage is browned and the veggies have softened, using a wooden spoon to break up the sausage and stirring often, about 7 minutes. Drain and return to pan.
    • While sausage mixture cooks, whisk eggs, water, salt and pepper until really well combined and slightly foamy.
    • Add the eggs to the pan and cook stirring often until scrambled dry, about 5 minutes. remove from heat and cool slightly.
    •  Lay the tortillas on a clean surface. Spoon ⅛ of the egg mixture into the middle of the tortilla. Then sprinkle 1 Tablespoon of cheese onto the egg mixture. 
    • Take the left and right sides of the tortilla and fold them in over the filling (they don't have to reach all the way to the middle).
    • Now fold the bottom of the tortilla up over the folded sides and carefully roll it forward towards the top of the tortilla, being careful to keep the sides closed and ending with the seam on the bottom.
    • If you're not cooking right away, wrap each burrito in parchment and freeze until you're ready to eat. To reheat from the freezer, either microwave for 1-2 minutes on high or until heated through or bake at 350 degrees for 15 minutes or until heated through.
    • If cooking right away, brown on all sides in a large pan over medium heat (I grease the pan with cooking spray). Serve immediately.
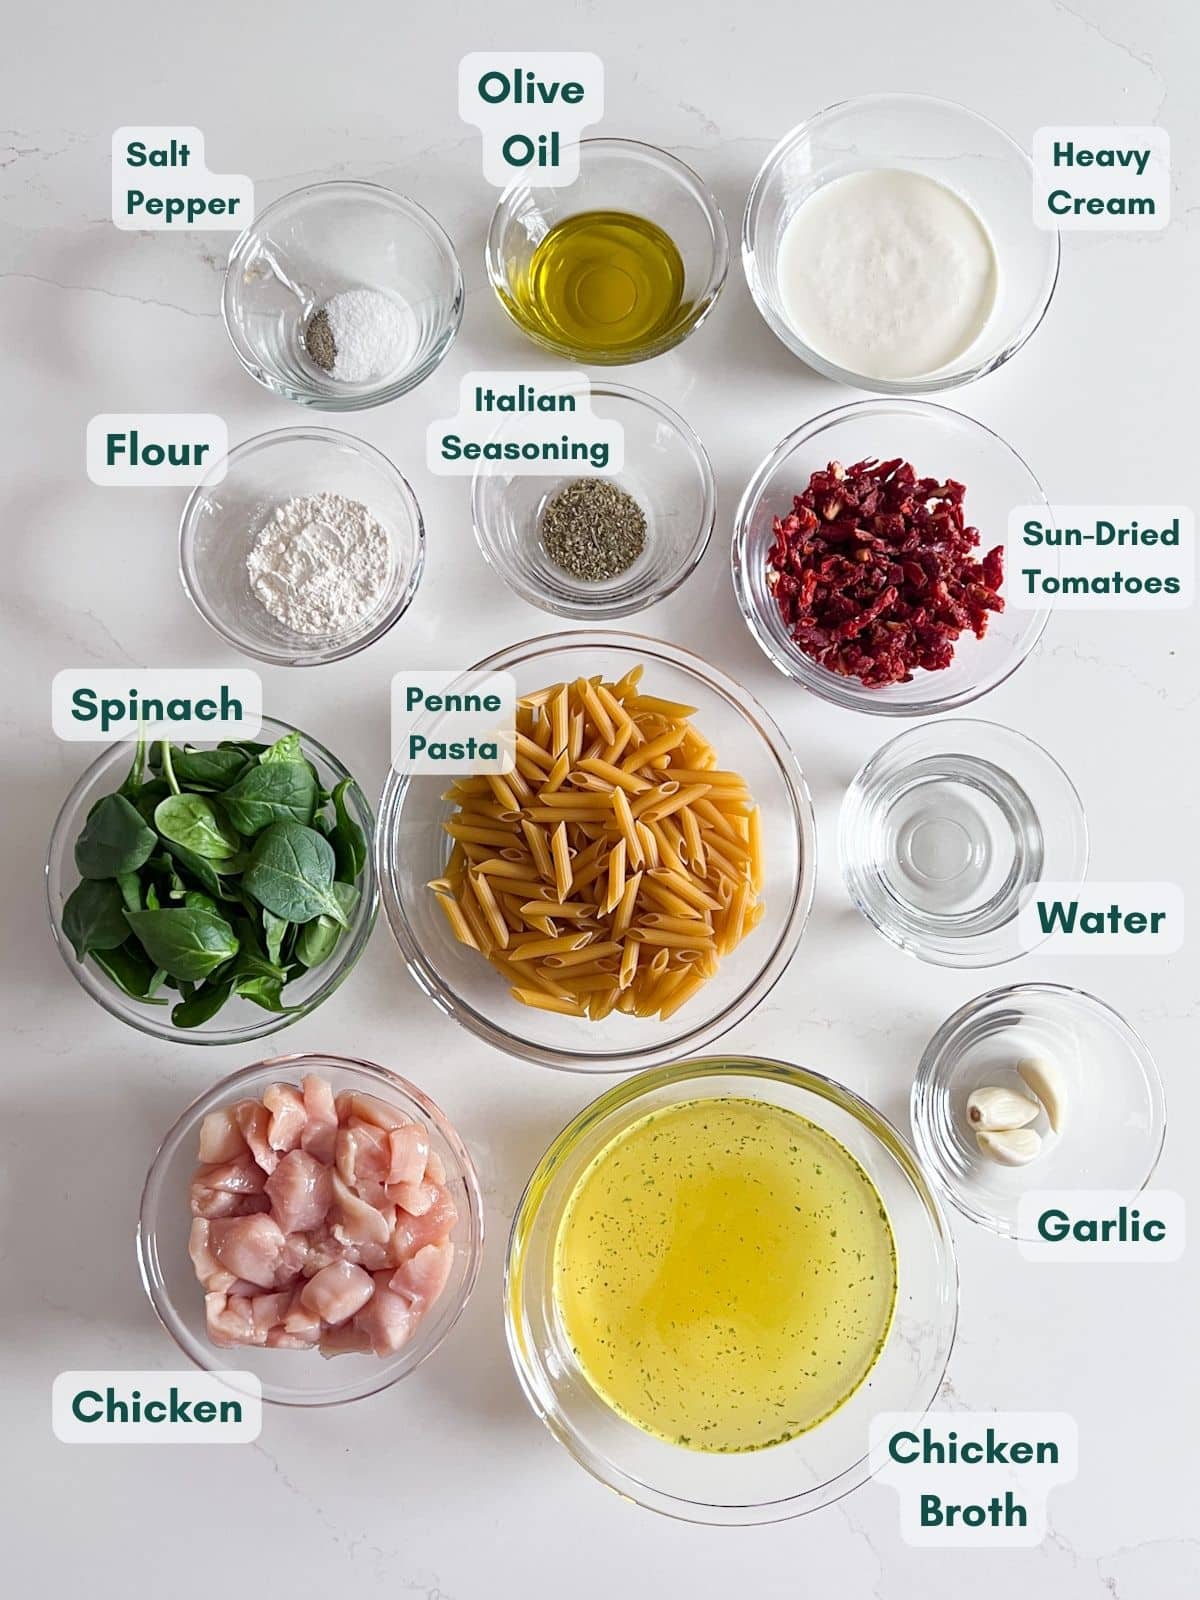
    Notes

    These freeze really well- thaw before reheating.

    Nutrition

    Serving: 1pieceCalories: 168kcalCarbohydrates: 2gProtein: 11gFat: 13gSaturated Fat: 5gPolyunsaturated Fat: 2gMonounsaturated Fat: 5gTrans Fat: 0.1gCholesterol: 164mgSodium: 443mgPotassium: 177mgFiber: 1gSugar: 1gVitamin A: 762IUVitamin C: 19mgCalcium: 111mgIron: 1mg
    Tried this recipe?Let us know how it was!

    If you tried this recipe please comment and rate it 🙂 I love hearing your feedback and answering your questions! And if you make this please tag me on Instagram with @thelifejolie so I can share it <3

    You can find a full index of my recipes here.

    Don’t forget to follow The Life Jolie on Pinterest for more recipe inspiration!

    Or if Pinterest isn’t your style, bookmark this post!

    Let’s keep the conversation going- join my Facebook group! 

    Introducing: 1 Hour to Quicker Dinners- simplifying meal prep to bring balance back to the kitchen

    Feb 3, 2020 · Leave a Comment

    Woman stirring sauce and smiling.

    Are you ready for a truth bomb? This is an unpopular opinion, for sure. But I’m going to put it out there. So here goes. I don’t like meal prep. 

    I know, a ton of people love all the meal prepping ideas out there. And don’t get me wrong, I gave it the college shot. Seriously, I tried it a few different times and each times I tried  to like it. And each time I couldn’t stand it. Here’s why:

    • Redundancy- I got sick of eating the same meals over and over.
    • Time consuming- who wants to throw away an entire day of their weekend cooking (and I say that as a person who loves cooking so much I made a career of it!).
    • The leftover factor- I felt like I was just eating leftovers every day (I mean, I basically was).
    • Waste- by day 3 or so I was so over eating the same thing I’d end up making something else and going out for something, so meal prep often ended in a lot of wasted food and money.

    Woman stirring sauce and smiling.

    But as I have talked about in so many of my Instagram videos, it doesn’t have to be an all-or-nothing-thing. So I started thinking about something an old boss once said to me, that really stuck with me.

    "Take a few minutes to do a thing right now that will prevent you from having to spend an hour fixing it later.”​

    Talk about an ah-ha moment! The light bulb immediately went on, the wheels started turning and they haven’t stopped since. I have come back to this train of thought in so many aspects of my life and when I started incorporating this philosophy into my cooking, it changed everything.

    Because here's the thing: Sunday meal prep doesn't have to be all-or-nothing. You don't have to lose an entire day of your weekend to prepping. You don't have to eat the same meal every single day or waste food because you got sick of eating the same meal every day. And you also dan't have to eat leftovers every day!

    So when I incorporated my previous boss' super smart saying into meal planning, the answer became very obvious. I thought to myself, "Why not take an hour each weekend to save myself a bunch of time cooking dinners on the busy weeknights?" It seemed like an interesting idea, but I wasn't sure it was realistic. So I began testing it.

    A woman cutting vegetables and smiling.

    For months, I would prep ingredients for the week on Sundays after the first of my weekly grocery trips (I do two trips each week due to a lack of fridge space and all the extra food I need to buy for our recipe video business). I'd list out my recipes, figure out what ingredients I could prep in advance and start the stopwatch app on my phone. I wouldn't stop it until I had cleaned up from prepping, because no one likes the old bait-and-switch.

    Let me just say, I was pretty amazed with the results. As in: prepping ingredients for an hour (or oftentimes less!) on the weekend was an absolute game changer for my weeknight dinners.

    For example, on video shoot days I will make and shoot around four different client recipes throughout the course of the day. Although I try to plan our dinners around my shoot schedule that isn't always possible (as much as my kids would love to eat cake for dinner!). By the time 5pm rolls around on those days the idea of cooking dinner sounds like the absolute worst ever!

    But once I started doing ingredient prep in advance, the prospect of cooking dinner after a long work day was no longer daunting. Because a lot of the heavy lifting was already done. Now I get to spend much more of my time on weeknights doing what matters to me the most: spending quality time with my family. And I'm still able to make them delicious, fresh meals on these nights.

    So naturally, I had to share all of this with you! I've been sharing bits and pieces on my Instagram stories for a while now and the response has been just amazing. So I knew I had to put together a series so I could dive deep into all the tips and tricks. And that's exactly what I did!

    Title document with women chopping and series name on it.

    Here's what you need to know:

    What is it? 1 Hour to Quicker Dinners is a free series to teach you how to save a ton of time on your weeknight cooking without sacrificing more than an hour of your weekends. 

    So what do I get? As part of this free series, you'll get:

    • Emails sent direct to your inbox sharing my process for ingredient prep that won't take up your whole weekend (less than an hour, every time).
    • All of my favorite tips and tricks for planning your meals for the week, choosing recipes, prepping ingredients, storing ingredients and simplifying it all.
    • A printable workbook to help you through the process with you.
    • Simple and actionable goals to help create great habits but without taking up too much of your time.

    When will the series run? The series will go from February 21st - February 24th

    Why are you doing this? Far and away, the biggest feedback I get from you guys is about struggling with finding the time to cook. And I get it. Life is busy no matter what phase of life you're in, especially on weeknights. My goal is to transform your cooking in a way that’s easy and fun so you can finally look forward to cooking and bring balance back into your weeknights! This was a total game changer for me and it will be for you too!

    If you’re ready to stop stressing about weeknight dinners. If you are raring to free up more time to do the things you WANT to instead of being stuck at the stove all night. If you’re yearning to make weeknight meals easier without losing your entire weekend. If you’re excited to streamline your cooking, you need to sign up below for 1 Hour to Quicker Dinners.


    Sign me up!

    Powered By ConvertKit

    I can't wait to transform your cooking!

    Image of a woman smiling and prepping ingredients

    You can find a full index of my recipes here.

    Don’t forget to follow The Life Jolie on Pinterest for more recipe inspiration!

    Or if Pinterest isn’t your style, bookmark this post!

    Let’s keep the conversation going- join my Facebook group! 

    Citrus and Fennel Pork Loin

    Dec 15, 2019 · Leave a Comment

    This baked Citrus and Fennel Pork Loin recipe is an extremely easy way to impress a crowd. After only a few minutes of prepping, you put it in the oven oven for a pork loin roast that’s tender, juicy and bursting with flavor! This is perfect for the holidays!


    This Citrus and Fennel Pork Loin recipe is an extremely easy way to impress a crowd. After only a few minutes of prepping, you let the oven do the rest for a pork loin roast that's tender, juicy and bursting with flavor!

    This is a sponsored conversation on behalf of the National Pork Board. As always, all opinions are my own. Thank you for supporting the organizations that help support this blog. This post contains Affiliate Links. Please see the disclaimer here.

    Slices of pork loin and fennel on a plate.

    Citrus and Fennel Pork Loin

    Around the holidays (and for dinner parties in general) I always find myself wanting to come up with delicious ways to impress and feed a crowd without losing my mind. There's so much that goes into hosting guests for a meal and we should be able to serve great food without the extra stress.

    A good pork loin roast recipe is a great thing to have up your sleeve and this Citrus and Fennel Pork Loin seriously delivers. The prep comes together in just under 10 minutes with simple ingredients we all typically have on hand. And the results are tender and juicy with the savory sweetness from the oranges and pork flavors and a bit of herby goodness from the Herbes de Provence. As an added bonus, you get a crazy delicious citrus roasted fennel and onion side dish along with it the pork!

    An overhead image of a roast pork loin

    Why choose pork loin for a holiday meal?

    I think that pork loin is a seriously excellent choice to wow your friends and family. Here's why:

    1. I love that you can make so many pork loin recipes in the oven to cut down on all the extra nonsense that so many other main dish choices bring.
    2. When cooked to an internal temperature of 145 degrees and rested for 3-4 minutes, your pork loin roast will be tender, juicy and perfectly cooked every time.
    3. Pork loin is a lean and nutritious option, so you can enjoy your meal without a side of guilt.
    4. I had the pleasure of touring a pork farm with the National Pork Board in October and learned a great deal about how sustainable the farmer's practices are and how much love, care and respect for the animals goes into their operation. I can confidently say that I feel good about serving pork to my family and you should too.

    A close up image of the inside of the pork loin roast.

    Tips for how to cook pork loin in the oven

    • Whenever I make pork loin, the first thing I do is remove the roast from the refrigerator and let it rest for 20 minutes while I preheat the oven and prepare the other ingredients for the recipe. This allows the pork to get a little closer to room temperature and cook evenly.
    • I don't do anything fancy when cutting my vegetables. I just cut them all into large chunks around the same size and smash the garlic cloves to save time.
    • You can absolutely adapt this recipe for a larger or smaller roast. The pork loin pictured was around 3 pounds because I have a smaller oven, but this is super easy to double.
    • I use a digital meat thermometer placed in the thickest part of the roast to make sure I don't overcook my pork.
    • Let you pork loin rest for 3-4 minutes to redistribute the juices before carving.

    A side shot of a roast pork loin

    What is the difference between pork loin and pork tenderloin?

    Both are lean cuts from the loin muscle but the pork loin is much wider and larger and has a layer of fat on the back on it. The tenderloin is smaller and a bit leaner. Both are delicious, just different.

    Can you make this pork loin roast ahead?

    Although I wouldn't encourage you to make the whole thing ahead of time, you can definitely prep the vegetables in advance. I'd encourage you to wait until the day you'll be serving it to assemble pour the sauce onto the pork loin as the citrus juice will act as a marinade and any more than a day could adversely affect the texture.

    How do you make sure the pork loin is tender?

    Your a digital meat thermometer and only cook the the pork to 145 degrees. Then rest it for 304 minutes to redistribute the juices.

    Can you serve pork loin a little pink in the middle?

    Yes, it's perfectly safe. As per the USDA website, for whole muscle cuts of pork the safe pork internal temp is 145 degrees with a 3 minute rest time after cooking.

    Do you cook pork loin fat side up or down?

    Definitely cook it fat side up because while it cooks the fat will render and add even more great flavor to the meat and the vegetables as it drips down.

    How long does pork loin last?

    Leftovers will stay good for 3-4 days covered in the refrigerator.

    Ingredients for making a Pork Loin Roast:

    • Pork Loin
    • Onion
    • Fennel
    • Clementine tangerines (or other variety of oranges)
    • Garlic
    • Olive oil
    • Kosher salt
    • Ground back pepper
    • Garlic powder
    • Herbes de Provence

    Ingredients to prep ahead:

    • Cut fennel
    • Cut onions
    • Peel garlic

    Helpful tools:

    1. Chef's knife
    2. Cutting board
    3. Roasting Pan

    This baked Citrus and Fennel Pork Loin recipe is an extremely easy way to impress a crowd. After only a few minutes of prepping, you put it in the oven oven for a pork loin roast that’s tender, juicy and bursting with flavor! This is perfect for the holidays!

    Citrus and Fennel Pork Loin

    Jessy Freimann
    This Citrus and Fennel Pork Loin recipe is an extremely easy way to impress a crowd. After only a few minutes of prepping, you let the oven do the rest for a pork loin roast thats tender, juicy and bursting with flavor!
    No ratings yet
    Print Recipe Pin Recipe
    Prep Time 10 minutes mins
    Cook Time 45 minutes mins
    Resting time 30 minutes mins
    Total Time 1 hour hr 25 minutes mins
    Course Main, Main Course, Main dish
    Cuisine American
    Servings 8 servings
    Calories 400 kcal

    Equipment

    • 1 roasting pan
    • 1 Measuring cups and spoons
    • 1 chefs knife
    • 1 cutting board

    Ingredients
      

    • Cooking spray
    • 4 bulbs fennel trimmed and cut into large chunks
    • 2 large onions peeled and cut into large chunks
    • 3 cloves garlic, peeled and smashed
    • 6 clementine tangerines, 4 cut into quarters and 2 juiced
    • 3 Tablespoons olive oil, divided
    • 2 ½ teaspoon kosher salt, divided
    • ¾ teaspoon ground black pepper, divided
    • 1 teaspoon garlic powder
    • 1 teaspoon Herbes de Provence
    • 4 pound boneless pork loin roast

    Instructions
     

    • Preheat the oven to 400 degrees F. Remove pork loin from the refrigerator and rest for 20 minutes while you prepare the rest of the ingredients.
    • Spray a roasting pan with cooking spray and spread fennel, onion, garlic and tangerine chunks evenly over the bottom the pan.
    • Drizzle vegetables with 1 tablespoon olive oil and sprinkle with 1 teaspoon salt and ¼ teaspoon pepper. Set aside.
    • In a small bowl, whisk remaining oil, juice from two clemantine tangerines, 1 ½ teaspoon salt, ½ teaspoon pepper, garlic powder and herbes de provence until well combined.
    • Place pork loin on top of vegetables, fat side down.
    • Pour half of the juice mixture over the pork loin and rub it in slightly.
    • Turn the pork loin over so that the fat side is up and pour remaining juoce mixture over it, rubbing in slightly. Roast for 20 minutes uncovered to brown.
    • Cover the roast with foil and continue cooking until the roast has reached an internal temperature of 145 degrees F in the thickest part.
    • Remove from the oven and rest of 3-4 minutes. Slice and serve immediately with fennel on the side.

    Notes

    Leftovers last up to 3 days covered in the refrigerator.

    Nutrition

    Serving: 1servingCalories: 400kcalCarbohydrates: 13gProtein: 52gFat: 15gSaturated Fat: 4gPolyunsaturated Fat: 2gMonounsaturated Fat: 7gCholesterol: 143mgSodium: 842mgPotassium: 1027mgFiber: 2gSugar: 9gVitamin A: 457IUVitamin C: 21mgCalcium: 51mgIron: 2mg
    Tried this recipe?Let us know how it was!

    Don't forget to get more information about all-things -pork from these locations:

    National Pork Board:

    Facebook | Twitter | Instagram | Pinterest | Youtube

    Real Pig Farming:

    Facebook | Twitter | Instagram | Youtube

    Try these other delicious pork recipes:

    • Smothered pork chops
    • Greek pork tenderloin
    • Drunken thin pork chops

    I love hearing your feedback and answering your questions, so please comment! And if you make this please tag me on Instagram with @thelifejolie so I can share it <3

    You can find a full index of my recipes here.

    Don’t forget to follow The Life Jolie on Pinterest for more recipe inspiration!

    Or if Pinterest isn’t your style, bookmark this post!

    Let’s keep the conversation going- join my Facebook group! 

    Classic Pumpkin Pie Recipe

    Nov 18, 2019 · Leave a Comment

    Is it even a holiday table without Pumpkin Pie? This classic pumpkin pie recipe is an easy and delicious way to get everyone's favorite holiday dessert onto the table without all the hassle!

    Is it even a holiday table without Pumpkin Pie? This classic pumpkin pie recipe is an easy and delicious way to get everyone's favorite holiday dessert onto the table without all the hassle!

    An overhead image of a pumpkin pie with a slice cut out of it!

    Try some other great pie recipes like Chocolate Pie, Cherry Cheese Pie and Peanut Butter Pie.

    Classic Pumpkin Pie Recipe

    This post contains Affiliate Links. Please see the disclaimer here.

    Confession time: Pumpkin Pie is not my fav. I'm not a huge pumpkin person, although over the years, I've learned not to hate it. That said, I can see why it's a popular holiday option. Sugar, spice and nostalgia all rolled into a flaky pie crust with a dollop of freshly whipped cream on top. It's feels like the holidays without feeling Christmas-y (although it would also be right at home on most Christmas dessert tables).

    But I'm trying to branch out and conquer some of the foods I don't really love, so I had to give pumpkin pie another shot. And I will say, although I will continue to gravitate towards the other dessert options available, I'd eat this pumpkin pie again (and all the ladies at my gal's daycare who do love pumpkin said that this pumpkin pie was a total winner, so there's that!). I can't tell you whether it's the best pumpkin pie recipe, but it definitely got a lot of love from all pumpkin-lovers who tried it- and my plate came back clean as a whistle!

    A slice of pumpkin pie on a plate

    Tips for how to make Pumpkin Pie

    • Use a premade crust. Work smarter, not harder.
    • Keep an eye on the crust and check it halfway through- if it's getting too dark, use a pie crust shield or small pieces of foil to cover the crust for the remainder of the cooking time.
    • Make sure you buy canned pure pumpkin (pumpkin puree) not pumpkin pie filling, or it will be too sweet.
    • You can brush an egg wash onto the crust if you want a slightly glossy finish, but I never bother.
    • I like to top mine with whipped cream- you can grab a can, or whip your own heavy cream with a little confectioner's sugar and some vanilla extract and pipe or dollop it on.
    A close up image of the filling in this pumpkin pie recipe

    What does pumpkin pie taste like?

    Sweet with a bit of spice and a texture of very thick pudding.

    Can you eat pumpkin pie warm?

    You're going to want to let it cool completely to set, but you can heat individual slices for 10-20 seconds in the microwave.

    What's the difference between pumpkin pie filling and pumpkin puree?

    Canned pumpkin pie filling has sugar and other flavorings in it where as pumpkin puree is just the pumpkin (or squash).

    What causes pumpkin pie to crack?

    Over baking causes the crust to crack. I begin checking around 40 minutes on the oven. You'll want the middle to be slightly wobbly because it will set up perfectly as it cools. But if it does crack, it's ok- it will still taste fantastic and a dollop of strategically placed whipped cram can fix it right up.

    Can you freeze pumpkin pie?

    Yes, but make sure you wrap it well in plastic wrap followed by a layer of foil. It will last around 3 months.

    Should pumpkin pie be refrigerated?

    It is a good idea to refrigerate the pie since it contains dairy and eggs.

    A close up image of a slice of pumpkin pie

    What goes into homemade pumpkin pie?

    • Pie crust
    • Pure pumpkin puree
    • Eggs
    • Brown sugar
    • Kosher salt
    • Cinnamon
    • Nutmeg
    • Cloves
    • Ginger
    • Evaporated milk
    • Bourbon
    • Vanilla extract

    Helpful tools:

    1. Pie plate
    2. Spatula
    3. Stand mixer or Hand mixer
    4. Mixing bowl
    5. Measuring cups
    6. Measuring spoons
    7. Pie crust shield
    A slice of pumpkin pie being lifted up.

    Hosting Thanksgiving?

    Discover the secret to hosting Thanksgiving without all the stress! Prepsgiving is your FREE guide to making a delicious Thanksgiving feast the easy way.

    Is it even a holiday table without Pumpkin Pie? This classic pumpkin pie recipe is an easy and delicious way to get everyone's favorite holiday dessert onto the table without all the hassle!

    Classic Pumpkin Pie Recipe

    Jessy Freimann
    Is it even a holiday table without Pumpkin Pie? This classic pumpkin pie recipe is an easy and delicious way to get everyone's favorite holiday dessert onto the table without all the hassle!
    No ratings yet
    Print Recipe Pin Recipe
    Prep Time 10 minutes mins
    Cook Time 50 minutes mins
    Cooling time 1 hour hr
    Total Time 2 hours hrs
    Course Dessert
    Cuisine American
    Servings 8 servings
    Calories 294 kcal

    Equipment

    • 1 Pie pan
    • 1 Pie shield
    • 1 mixing bowl
    • 1 Hand mixer
    • 1 stand mixer
    • 1 Measuring cups and spoons
    • 1 Spatula
    • 1 Rolling Pin

    Ingredients
      

    • 1 pie crust crimped in a 9.5 inch pan
    • 14 ounces pure pumpkin puree (not pie filling)
    • 3 large eggs slightly beaten
    • 1 cup brown sugar
    • ½ teaspoon kosher salt
    • 1 teaspoon ground cinnamon
    • ¼ teaspoon ground cloves
    • ¼ teaspoon ground nutmeg
    • ¼ teaspoon ground ginger
    • 1 cup evaporated milk
    • ½ teaspoon vanilla extract
    • 1 Tablespoon bourbon (optional)
    • Whipped cream, (optional garnish)

    Instructions
     

    • Preheat the oven to 450 degrees F. Roll out the pie crust and press the dough into pie plate and crimp the edges. Refrigerate while you make the filling.
    • In a large bowl or stand mixer, beat together eggs, sugar, salt and spices until well combined.
    • Add pumpkin puree and mix to combine.
    • Beat in milk until well combined.
    • Pour into prepared pie crust.
    • Bake for 10 minutes and reduce heat to 375 degrees F.
    • Bake for 30-40 more minutes, checking at 30 minutes. Cover crust if necessary. When the pie is mostly set (it'll be slightly wobbly in the middle but will set up as it cools) and remove from oven when done. Cool completely and serve with whipped cream.

    Notes

    Leftovers will last for 3 days refrigerated.

    Nutrition

    Serving: 1servingCalories: 294kcalCarbohydrates: 45gProtein: 6gFat: 10gSaturated Fat: 4gPolyunsaturated Fat: 1gMonounsaturated Fat: 4gTrans Fat: 0.01gCholesterol: 79mgSodium: 303mgPotassium: 284mgFiber: 2gSugar: 32gVitamin A: 7899IUVitamin C: 3mgCalcium: 136mgIron: 2mg
    Tried this recipe?Let us know how it was!
    And overhead image of a whole pumpkin pie

    If you tried this recipe please comment and rate it 🙂 I love hearing your feedback and answering your questions!

    You can find a full index of my recipes here.

    Don’t forget to follow The Life Jolie on Pinterest for more recipe inspiration!

    Or if Pinterest isn’t your style, bookmark this post!

    Let’s keep the conversation going- join my Facebook group! 

    Common Pork Cuts and How To Cook Them

    Nov 15, 2019 · Leave a Comment

    Whether you're making a weeknight dinner for your family or hosting guests for the holidays, choosing pork for your main dish is a delicious and budget-friendly option. And this guide to common pork cuts and how to cook them will help you every step of the way!

    Title image

    This is a sponsored conversation on behalf of the National Pork Board. As always, all opinions are my own. Thank you for supporting the organizations that help support this blog. This post contains Affiliate Links. Please see the disclaimer here.

    This past October I had the pleasure of joining the National Pork Board and a group of blogger friends in Springfield, Illinois to get a behind-the-scenes look at how pork makes its journey from the farm to your fork. I always prioritize connecting with the agriculture industry in my schedule each year because it's so important to bridge the gap between where our food comes from and when it makes it's way onto our plates. So I've put together this guide to share my experience and also what I learned about choosing and cooking with pork.

    A group of bloggers on the 2019 Pass The Pork tour.
    Photo credit: National Pork Board

    Pig Farming: what really goes on

    We spent our first day in Illinois seeing exactly how Market Pigs are raised starting with gestation all the way through finishing. Our first stop was Borgic Farms Inc. owned by Phil and Karen Borgic. This third generation family farm has over 10,000 sows (momma pigs) and partners with 50 other family farms who raise their pigs from weaning age until market.

    At the start of the tour, every single person who enter's the barn must shower in and then shower out when they leave. This means that we had to actually remove all of our clothes on one side, take a full shower and exit on another side where the provided all new clothes for us (including undergarments, socks and shoes). This is to protect the health of the sows and piglets from outside germs.  Now I know this might sound cumbersome, it's actually pretty easy. But more importantly, it was one of many things I saw and participated in that day that made me feel very good about where my pork comes from.

    A sleeping baby piglet.
    Photo credit: National Pork Board

    I was thrilled to be able to tour the farm with Phil as my guide. I was especially appreciative of the fact that Phil and the entire team at Borgic Farms are all about transparency. Phil made a point to tell us that if we have any questions or see anything we don't understand to ask about it. Nothing was off limits.

    At the start of the tour, once we were all showered in, Phil and Dr. Aaron Lower, their veterinarian talked us through their process and practices. At Borgic Farms the pig's well being is top priority. The animals are treated with the utmost respect and you could truly feel the love each team member has for the animal is everything they did. Every single thing they do throughout the pig's time on the farm is based on years and years of research that they've done on what helps the pigs thrive; and it shows in the end product. Pork Quality Assurance (PQA) is the ongoing education and certification program that ensures continued improvement in how they farm and the use of technology to streamline to process and make sure that the pigs are living in optimal conditions was simply amazing.

    The bloggers in a room learning from Phil Borgic about the operation at Borgic Farms.
    Photo credit: National Pork Board

    The mission statement at Borgic Farms
    Photo credit: National Pork Board

    The quality assurance posters at Borgic Farms
    Photo credit: National Pork Board

    We toured the farm and got to see the area for gestation (where the pregnant pigs live), farrowing (where the piglets are born) and nursery (where the piglets go after weaning before they eventually head to a different farm for finishing). A particular highlight for me was being allowed to birth a piglet! Throughout the tour it was plain to see that the animal were all extremely calm and very happy.

    After lunch we also spent some time at Dunkirk Farms, one of Borgic Farms partners in finishing. While there, we got to learn a little bit about sustainability which is the key to successful farming. This includes using manure  as a natural fertilizer for crops (there were definitely some smells on this trip!). These crops then become feed for the animals. Needless to say, the carbon footprint in minimal.

    Me holidng a baby piglet
    Photo credit: National Pork Board

    Baby piglets
    Photo credit: National Pork Board

    The bloggers at Dunkirk Farms in the field learning about sustainability
    Photo credit: National Pork Board

    Choosing pork cuts

    The second day was spent ing the kitchen. We got to join chefs Neel Sahni and Kurt Kwiatkowski to learn all about selecting pork and cooking pork. Neel actually broke down half a pig for us while Kurt prepared a variety of different pork recipes. As you can imagine, we ate really well!

    What to look for when choosing pork:

    When you're at your grocer's meat case, there are a few things to look for when choosing your pork cuts of choice.

    • Color: when choosing pork, prioritize color. The color determines water holding capacity so darker red means juicier, and lighter white means pork quality. And try to take it away from the lights in the meat case- they may make it look redder than it really is.
    • Feel: gently press the pork, it should spring back.
    • Liquid: you don't want to see a ton of liquid collecting up at the bottom of the package because if it's there that means it's out of the meat and the pork will be less juicy.
    • Marbling: keep your eyes open for nice marbling.

    5 pork chops on a plate illustrating the visual differences.between them.

    A few other things to know when at the meat case:

    • The term "solution enhanced" means that the pork has been injected with a mixture of water, salt and sodium phosphate to keep the meat tender.
    • The USDA stamp lets you know it's been inspected and is safe to eat.
    • The term "no hormones" is actually just a form of marketing. It's actually illegal to use hormones in raising pigs.
    • Pork is already a great value but if you can purchase a whole pig then it brings even more value (just know that you'll need someone to break it down for you).

    Bloggers learning about breaking down a half pig.
    Photo credit: National Pork Board

    Popular cuts of pork

    While there are many great cuts of pork, here are some of the more popular cuts you'll likely find at your local store and how to cook them:

    • Pork chops:
      • Other names: New York Chop (top loin), Ribeye (rib chop), Sirloin chop, Porterhouse (loin chop).
      • Best for: Grilling, saute, braising.
      • How to prepare: Season well and sear it on the grill or in a pan to 145 degrees. Rest.
      • The result: A tender and delicious cut of meat with a bit of pink in the middle
    • Pork roast:
      • Other names: Leg/fresh ham, Blade roast (shoulder), New York roast (top loin), Sirloin roast, Pork loin center roast, Crown roast, Rack of pork
      • Best for: Roast/bake, Barbeque, Braise (for the shoulder).
      • How to prepare: Season well and roast to 145 degrees and rest. Or roast low and slow until fall-apart-tender.
      • The result: A tender and delicious cut of meat. If roasted, there will be with a bit of pink in the middle
    • Pork ribs:
      • Other names: Back ribs, Country-style ribs, Spare ribs (St. Louis style).
      • Best for: Roast/bake, Barbeque, Braise.
      • How to prepare: Season well and  or barbeque low and slow until tender.
      • The result: A tender and delicious ribs.
    • Pork tenderloin:
      • Other names: Loin cubes (kabobs), Tenderloin
      • Best for: Roast/bake, Grill/broil
      • How to prepare: Season well and roast or grill to 145 degrees and rest.
      • The result: A tender and delicious cut of meat with a bit of pink in the middle

    Chef Neel Sahni teaching us about different cuts of pork.
    Photo credit: National Pork Board

    What is the ideal pork temperature to cook to?

    Although there's a popular misconception out there that pork should be cooked to 165 degrees, this is wrong in most cases (unless you like your meat extra tough). As per the USDA website, for whole muscle cuts of pork the safe pork internal temp is 145 degrees with a 3 minute rest time after cooking. Yes, there will be a small amount of pink in your pork. This is a good thing. It's will be super tender, juicy and delicious. I would still cook ground pork to 165 degrees.

    You also need to factor in crossover cooking. Basically, when you remove the pork from your heat source, you don't want to cut into it right then and there. It needs a good 3 minutes to rest and I like to put it on a plate and tent it with foil. It will cook a bit more as it rests and the juices will redistribute through the pork instead of immediately draining out. Trust, me, it's worth the wait!

    The group learning in the kitchen.
    Photo credit: National Pork Board

    Other tips for cooking pork:

    • Roast/bake: around 350 degrees, uncovered in a shallow pan unless otherwise noted.
    • Broil: about 4-5 inches from heat turning halfway through cooking time.
    • Grill: over direct, medium heat turning once halfway through cooking time.
    • Barbeque: around 325 degrees over indirect heat unless otherwise notes.
    • Saute: with a little oil over medium-high heat, turning once halfway through cooking time.
    • Braise: sear all sides until brown in a little oil over medium-high heat then add liquid halfway up the sides. Bring to a boil, cover and simmer until tender.
    • Stew: can be cooked covered, with liquid at a slow simmer until tender.
    • How much to buy: in general for a pork chop it's around 4 ounces per person and for a roast plan for around 6 ounces per person (or 8 if there's a bone)
    • Marinating: for as little as 30 minutes and up to a couple days. I prefer 6-8 hours. Be sure to dispose of leftover marinade for safety reasons.
    • Slicing: When slicing pork, make sure you cut across the grain!
    • Safely storing: 
      • Refrigerate or freeze as soon as possible and label with the original date if freezing.
      • If it's going to take longer that 30 minutes to get home, bring a cooler and some ice. Unless it's vacuum packed, it's best to remove the beef from it's original packaging if possible. That said you can still freeze it in it's original package, as long as there are no temperature fluctuation.
      • Cooked portions should be refrigerated within 2 hours of cooking.
      • Ground pork doesn't last as long as whole muscle cuts, typically only 1-2 days.
      • There are three safe ways to defrost meat: in the refrigerator, directly into the cooking vessel (with adjusted time for frozen meat) or fully submerged in a bowl of cold water that is changed every 30 minutes.
      • Use a separate cutting board and utensils for handling raw meat and wash your hands often to avoid cross contamination.
      • Don't hesitate to talk you your butcher, they're there to help and have so many amazing tips!

    Now go and make some awesome pork dishes! And don't for get to get more information about all-things pork from these locations:

    National Pork Board:

    Facebook | Twitter | Instagram | Pinterest | Youtube

    Real Pig Farming:

    Facebook | Twitter | Instagram | Youtube

    Here are some of my favorite pork recipes:

    • Pork stew
    • Easy pulled pork
    • Smothered pork chops
    • Hawaiian grilled pork chops
    • Greek pork tenderloin
    • Drunken thin pork chops

    I love hearing your feedback and answering your questions, so please comment! And if you make this please tag me on Instagram with @thelifejolie so I can share it <3

    You can find a full index of my recipes here.

    Don’t forget to follow The Life Jolie on Pinterest for more recipe inspiration!

    Or if Pinterest isn’t your style, bookmark this post!

    Let’s keep the conversation going- join my Facebook group! 

    Make Ahead Mashed Potatoes

    Nov 11, 2019 · 3 Comments

    Is it even a holiday dinner without mashed potatoes?! I say, ditch the hassle and make these easy Make Ahead Mashed Potatoes recipe. Made with cream cheese and sour cream, they're creamy, flavorful and totally delicious!

    Is it even a holiday dinner without mashed potatoes?! I say, ditch the hassle and make these easy Make Ahead Mashed Potatoes, they're creamy, flavorful and totally delicious!

    An overhead image of a pan of make ahead mashed potatoes.

    Try some other great potato recipes like Skillet Fried Potatoes, Cheesy Scalloped Potatoes, and Ranch Roasted Potato Wedges.

    Make Ahead Mashed Potatoes Recipe

    This post contains Affiliate Links. Please see the disclaimer here.

    In our family, it's not a holiday without homemade mashed potatoes. I can remember exactly one Thanksgiving without them and let me tell you, my husband never let any of us hear the end of it! At this point it's something of an inside joke but the message is the same: make sure there are mashed potatoes!

    Growing up, my Grandma Eve always made the best mashed potatoes. Deliciously creamy and full of flavor, without a lump in sight. While none of us have ever been able to replicate hers, these make ahead mashed potatoes are super tasty and I would like to think that if she were here today she'd be pretty proud of my efforts!

    A spoon lifting a scoop of this mashed potatoes recipe.

    Tips for how to make mashed potatoes

    • Before boiling, I try to cut the potatoes into uniform size chunks for even cooking.
    • Start with the cream cheese and sour cream at room temperature. If you're planning on serving these right away instead of making them ahead, it won't cool the hot potatoes down as much as cold ingredients would, but more importantly, this will help to mix everything together more evenly.
    • You'll notice I use melted butter in this recipe when mixing up the mashed potatoes. This is for the same reason above.
    • If making ahead, cool the potatoes down a bit before chilling.
    • Taste them as you're mixing and adjust the seasonings to your taste.
    • Use a stand mixer to mash- work smarter, not harder.
    • If making ahead- let it come to room temperature before heating.
    A bowl of mashed potatoes

    Can make ahead mashed potatoes be made the day before?

    Yes, up to 24 hours in advance.

    What is the best way to reheat mashed potatoes?

    I prefer by baking in the oven.

    Do mashed potatoes freeze well?

    While most potatoes don't, these tend to freeze better due to the high fat content.

    What are the best potatoes for mashed potatoes?

    I prefer to use Butter Potatoes. If those are not available, Yukon Gold are my next favorite option.

    How can you keep make ahead mashed potatoes warm?

    If you're not serving them right away after reheating, rub your slow cooker with a little butter and set it to warm. This will keep them warm for a few hours. And give them a stir once in a while.

    Can you lighten up mashed potatoes?

    Sure- the best way to lighten these up is by using low fat cream cheese and light sour cream.

    An overhead image of a pan of mashed potatoes with a spoon in it.

    Ingredients for making Mashed Potatoes

    • Potatoes
    • Cream cheese
    • Sour cream
    • Butter
    • Kosher salt
    • Ground black pepper
    • Garlic powder

    Helpful tools:

    1. Chef's knife
    2. Cutting board
    3. Measuring cups
    4. Measuring spoons
    5. Dutch oven
    6. Wooden spoon
    7. 9 x 13 pan
    8. Stand mixer or Hand mixer

    Hosting Thanksgiving?

    Discover the secret to hosting Thanksgiving without all the stress! Prepsgiving is your FREE guide to making a delicious Thanksgiving feast the easy way.

    Is it even a holiday dinner without mashed potatoes?! I say, ditch the hassle and make these easy Make Ahead Mashed Potatoes recipe. Made with cream cheese and sour cream, they're creamy, flavorful and totally delicious!

    Make Ahead Mashed Potatoes

    Jessy Freimann
    Is it even a holiday dinner without mashed potatoes?! I say, ditch the hassle and make these easy Make Ahead Mashed Potatoes, they're creamy, flavorful and totally delicious!
    5 from 1 vote
    Print Recipe Pin Recipe
    Prep Time 15 minutes mins
    Cook Time 1 hour hr 15 minutes mins
    Total Time 1 hour hr 30 minutes mins
    Course dinner, Side Dish
    Cuisine American
    Servings 10 servings
    Calories 306 kcal

    Equipment

    • 1 9 x 13 Pan
    • 1 cutting board
    • 1 chefs knife
    • 1 Measuring cups and spoons
    • 1 Potato masher
    • 1 Large pot

    Ingredients
      

    • 5 pounds butter potatoes (or yukon gold), peeled and cut into uniform 1 inch chunks
    • 8 ounces cream cheese, room temperature
    • 8 ounces sour cream room temperature
    • 6 Tablespoons butter, divided
    • 1 ½ teaspoons kosher salt
    • ¼ teaspoon ground black pepper
    • 1 teaspoon garlic powder

    Instructions
     

    • Boil potatoes until fork tender, around 10-15 minutes. Drain well. While potatoes drain melt 3 tablespoons butter.
    • Place potatoes into large bowl with cream cheese, sour cream, melted butter, salt, pepper and garlic powder.
    • Mix until well combined and no lumps remain (I use a stand mixer, but you can also use a hand masher). Taste and adjust seasonings to your taste. If serving right away, enjoy.
    • If making ahead, place potatoes into a greased 9" x 13" baking pan and cool. Then cover and refrigerate.
    • When you're ready to bake, bring potatoes to room temperature.
    • Take remaining 3 Tablespoons butter and cut into small chunks. Scatter chunks over the top of the potatoes.
    • Bake at 325 degrees F for 45 minutes to 1 hour or until warmed through. Serve immediately.
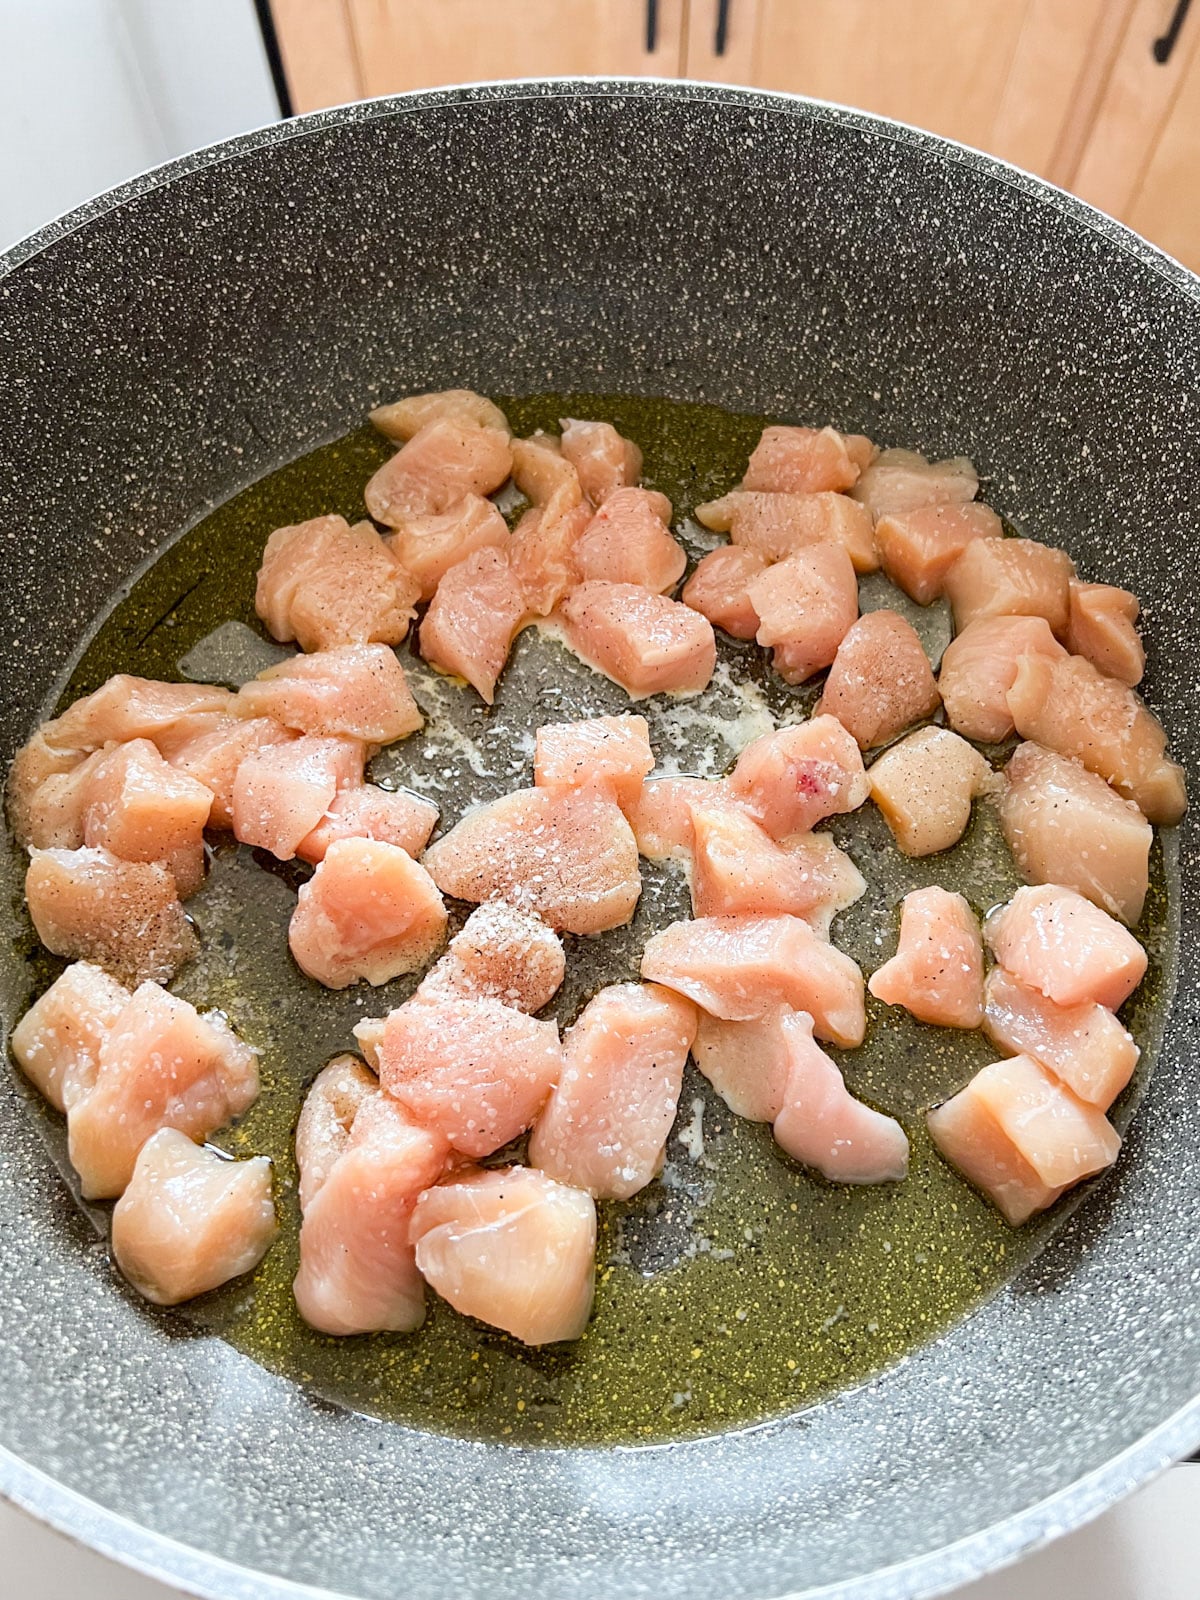
    Notes

    Leftovers last up to 3 days covered in the refrigerator.

    Nutrition

    Serving: 1servingCalories: 306kcalCarbohydrates: 43gProtein: 7gFat: 13gSaturated Fat: 7gPolyunsaturated Fat: 1gMonounsaturated Fat: 3gCholesterol: 37mgSodium: 450mgPotassium: 1030mgFiber: 5gSugar: 4gVitamin A: 466IUVitamin C: 45mgCalcium: 83mgIron: 2mg
    Tried this recipe?Let us know how it was!

    If you tried this recipe please comment and rate it 🙂 I love hearing your feedback and answering your questions! And if you make this please tag me on Instagram with @thelifejolie so I can share it <3

    You can find a full index of my recipes here.

    Don’t forget to follow The Life Jolie on Pinterest for more recipe inspiration!

    Or if Pinterest isn’t your style, bookmark this post!

    Let’s keep the conversation going- join my Facebook group! 

    Tips for Transporting Food

    Nov 7, 2019 · 1 Comment

    Transporting food doesn't have to be difficult. I've put together a post with all my tips and tricks for transporting all your favorite food items to make it as easy as possible!

    A woman in a doorway with a thanksgiving dish to pass

    Whether you're bringing a dish-to-pass for the holidays, a tasty side for a picnic or even a lunch for work, we all come across times where we need to transport food. It's important to do this the right way for a few reasons:

    • Food safety: No one wants food poisoning. If you haven't experienced it yourself, trust me when I say, you don't want to. It's the most miserable experience. These tips will help avoid it.
    • Fresh food always tastes better: Food always tastes better when it's served as intended, whether that be hot or cold. And properly transporting food will help protect your car from unnecessary spills (once again, speaking from experience).

    So let's go through all the basics.

    Temperature safety

    When food goes above or below certain temperatures for extended periods of time, it gets out of what is called the "temperature safety zone." When this happens, bacteria can grow very quickly in food, some of which can make you and your friends and family very sick. Cold foods should be kept below 40°F and hot foods should be kept above 140°F. You can read more about this at the USDA's website.

    Packing a cooler to keep cold food cold

    The best way to keep cold food cold, is by storing it in the refrigerator. But in most cases, refrigeration isn't available in vehicles (certainly not for average uses!). That's where your trusty cooler comes in. Any good cooler will be insulated and will help keep your food cold longer. Here are some great tips for loading your cooler properly:

    • Pre-chill the cooler first: If possible, add some ice or extra ice pack (not the ones you'll be using the day-of) into the cooler overnight. This will get it nice and chilly before the food actually goes in.
    • Pre-chill your food: This same rule goes for the food. If it's already chilled, it'll stay chilled longer.
    • Wrap the food in plastic wrap and then in newspaper: I know this sounds unconventional, but a family friend once told me that newspaper makes a surprisingly good insulator, especially for small containers. The plastic wrap also keeps things from shifting too much in transit.
    • Know where to place your ice packs: Line the bottom of the cooler with flat ice packs or bags of ice (smaller is better). If you can add some on top, even better!
    • Be mindful about what food you'll remove first: Try to pack things at the bottom that you will be using last. that way they stay colder longer. Also put foods that need to stay cooler (like mayonnaise-laden foods!) closer to the bottom.
    • Place the cooler in a safe place in the car: If possible, avoid the trunk. You'll have more control to prevent it from falling if it rides in the passenger seat or back seat (and avoid heat from the road). It's also a more temperature controlled environment in the car. You can also wrap it in blankets to keep it in place and provide additional insulation.
    • Be sure to clean the cooler between every use: to avoid any potential bacteria growth.

    Keeping hot food hot

    A cooler can also come in handy if you're transporting hot food (insulation is insulation, amitrite?). Now there are two options for how you can go about transporting hot food. You can cook it just before leaving or you can cook it in advance, cool it and refrigerate and reheat it at your destination just before serving. Cooking and cooling in advance is the optimal option, specifically for long trips, but either option works.

    • Choose your dish wisely: Ceramic baking dishes hold heat longer than metal, but if you're looking for a disposable, pan, foil pans work great.
    • Don't forget crossover cooking: Food continues to cook from residual heat, so take this into account if you're not serving it right away.
    • Insulate it well: A cooler or Insulated Casserole Carrier is great but in a pinch you can always wrap it a towel or blanket (the newspaper trick isn't optimal for hot foods because paper and heat aren't a good combo).
    • Use hot pads or dish towels: They're great to place between dishes and help you avoid burning your hands.
    • If possible, use a slow cooker: Slow cookers are great because even if you don't cook the recipe in there, you can heat them before adding the food and keep the food warm even after arriving.
    • If packing multiple dishes: Pack them tightly to keep them warm.

    Other tips and tricks for transporting food

    • If you're serving something cold can use frozen components (like frozen veggies in a salad) add the veggies frozen and they can thaw before serving.
    • Make note of items in the recipe that should be done just before serving like dressing a salad or adding certain ingredients. Bring those separately and do them just before serving.
    • Use quality containers with covers that actually stay on.
    • If you are using disposable foil pans, use chip clips or binder clips to secure it shut.
    • Be smart about the vessels in which you transport foods. Use muffin tins for cupcakes, egg cartons for deviled eggs etc.
    • If your slow cooker doesn't clamp at the top, place it in a towel-lined box to avoid spills- this rule goes for most containers- better safe than sorry!
    • For bite size foods or anything that can more around, place them on a sheet pan and wrap it tightly and completely with plastic wrap to hold them in place.

    Now go, cook and transport with confidence!

    You can find a full index of my recipes here.

    Don’t forget to follow The Life Jolie on Pinterest for more recipe inspiration!

    Or if Pinterest isn’t your style, bookmark this post!

    Let’s keep the conversation going- join my Facebook group! 

    The Ultimate Thanksgiving Dinner Recipe Guide

    Nov 5, 2019 · Leave a Comment

    Whether you're hosting Thanksgiving dinner or attending as a guest, there comes the time each year that we have to decide what to make for Thanksgiving. It may be the turkey, side dish, dessert or everything in between, this guide is a great starting point for recipe inspiration for the ultimate turkey day feast.

    Whether you're hosting Thanksgiving dinner or attending as a guest, there comes the time each year that we have to decide what to make for Thanksgiving. It may be the turkey, side dish, dessert or everything in between, this guide is a great starting point for recipe inspiration for the ultimate turkey day feast.

    A plate of thanksgiving dinner

    Thanksgiving Menu

    Here we are guys, in the crucial weeks approaching Thanksgiving. The dinner is fast approaching you are in the age-old-dilemma of "what to make?!" Well fear not, I've got you covered. Consider this post your go-to guide and starting point for choosing winning Thanksgiving recipes.

    I'll be breaking this post down by thanksgiving food type. In each section I'll start by expanding on some of my favorite options in that category, with certain tips and tricks and then at the end, I'll share a list of all the recipe on my site that I have in that section.

    NAVIGATION!

    Thanksgiving Appetizers

    Ahhhh, the classic debate! To have or not to have appetizers at Thanksgiving (that is the question!). Some people stand firmly on the side of not wanting hors d'oeuvres at the Thanksgiving Gather in fear that they might take away from the main event; the dinner. Others, like me say "the more the merrier!" and welcome a few apps to start their dinner off right.

    Whichever side you fall on, rest assured that when you need ideas for Thanksgiving appetizers, I've got you covered!

    Favorite overall Thanksgiving appetizer

    Apple Bacon Brie Bites- These are one of my most popular fall and with good reason. They have all the components that people live for: creamy cheese, smoky bacon, tart apples and a sweet drizzle of honey. Not only that, but they're seriously easy to assemble and taste great hot or cold. Expert tip: use pre-made phyllo cups for easy assembly.
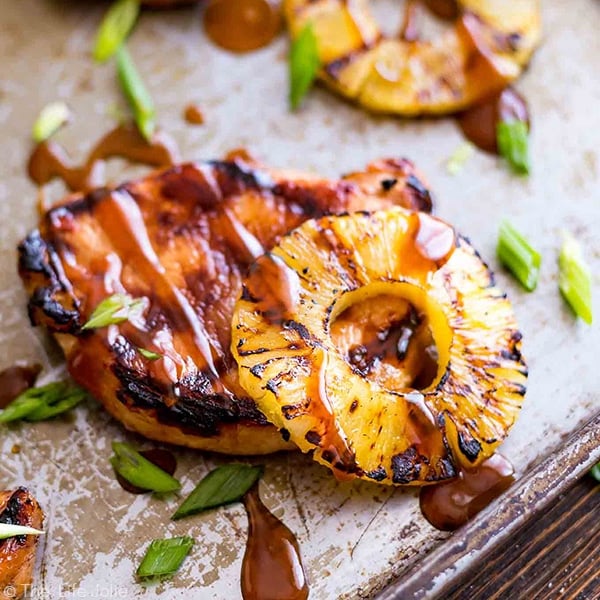
    These Apple Bacon Brie Bites are a quick and easy throw-together appetizer recipe. They're perfect for Thanksgiving or Christmas and are a great option for a last minute hors d'oeuvre this holiday season or for any special occasion!

    Favorite make-ahead appetizer

    Grandma's Shrimp Dip- This is a major family favorite for us! My Grandma Eve has made this for years and it's one of those apps that we all fight for. Rest assured that it's every man for himself: if you're late, you may miss out on the famous Shrimp Dip. This is completely make ahead so you can throw it together the day before and bring it with a bag of chips. Give it a quick stir and then watch with pride while your family devours it!

    shrimp dip

    Favorite appetizer that travels well

    Easiest Ever Artichoke Dip- Who doesn't love a Hot Artichoke Dip? This option is excellent to make-and-take because It tends to stay warm, and also tastes good warm without it having to be piping hot. I like to serve it with tortilla chips but you can also go with sliced and toasted baguette. Expert tips: you can totally bake this and put it in the crockpot and keep it on warm.

    A pan of Hot Artichoke Dip with chips around it.

    Thanksgiving Main Dish

    If you're one of the lucky one's who gets the job of hosting, don't worry, I've got you. You have a variety of options to make a successful Thanksgiving Turkey, and don't feel like you need to limit yourself to the whole bird!

    Favorite whole turkey recipe

    Orange Rosemary Roast Turkey- Not only is this a fantastic basic turkey recipe, it's also the best go-to guide for how to cook a turkey. Trust me when I say it answers every possible question that may come up and even has troubleshooting options.
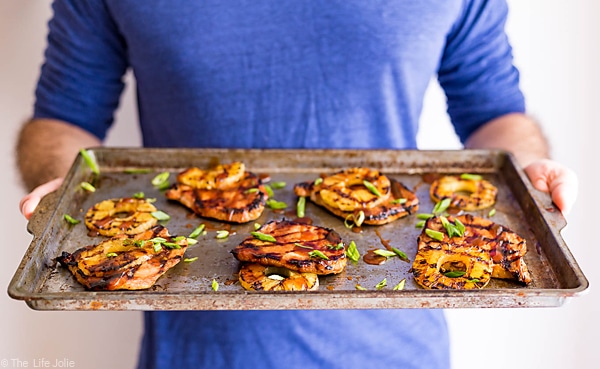
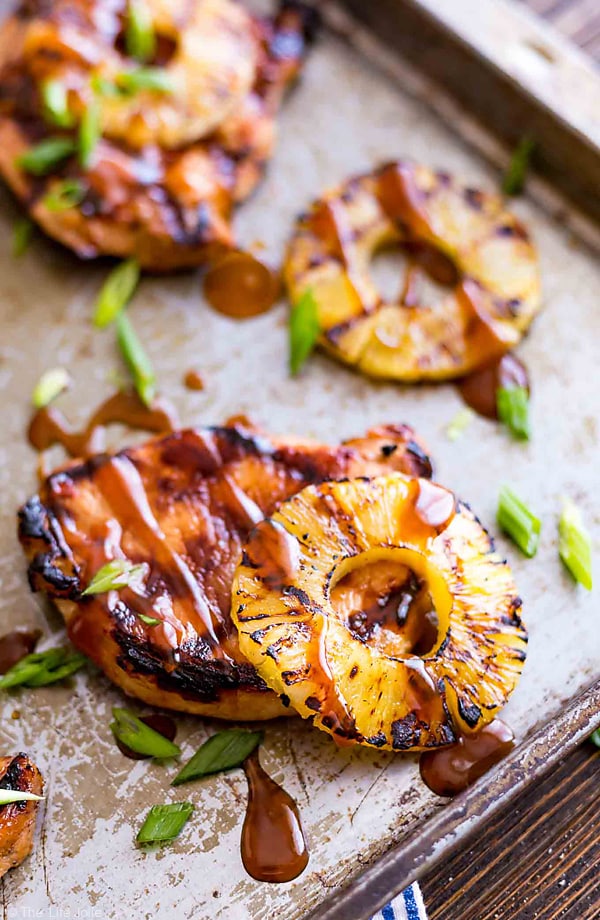
    turkey brine recipe

    Most tender turkey recipe

    Citrus Brown Sugar Smoked Turkey Breast- Why make a whole bird when a turkey breast (or a few) will feed a crowd? This smoked turkey breast recipe is by far the most render and juice turkey recipe I've every tasted! If you have a smoker, this recipe is for you (and if not, you can easily roast it in your oven for a different, but still delicious flavor). Expert tip: the big takeaway is to cook it until it's just under 165 degrees and then rest it for 10 minutes. Not only will the juices redistribute but the temperature will get up to 165 as it rests giving you a super juicy turkey that isn't over cooked.

    Tired of tough, dry turkey breast? Then you've got to try this Citrus Brown Sugar Smoked Turkey Breast. It's seriously easy to make and the most tender, juicy turkey breast you'll ever eat! From the brine to the rub you cannot go wrong!

    Best turkey options for 1-2 people

    Roast Turkey Thighs for Two- Now don't let the name fool you, this recipe is written in a way that you can easily double, triple or quadruple the recipe for as many people as you need. It's also an excellent option if you want a bit more dark meat to serve with your full bird (in my family we fight for the dark meat).

    turkey thighs

    Thanksgiving Side Dishes

    We all have that family member who is all, "I'm just here for the sides." I feel this deep in my soul, because Thanksgiving (out of all the eating holidays out there) tends to have the widest variety of different sides to sample and I'm all about variety!

    Favorite vegetable side dish

    Easy Garlic Green Beans- This recipe comes from my husband's Nanou and it is the stuff of legends in our family. This crowd pleaser can convert even the pickiest of eaters to a green bean lover (just ask my daughter Alice!) and uses the most . simple of ingredients.

    Garlic Green Beans is one of my favorite side dish recipes! It's easy to make and pretty healthy with Crispy Green Beans sauteed in a skillet. Fresh parley adds a great, herbaceous brightness with a little bit of butter and garlic. This is special enough food for Thanksgiving or any other holiday meal and also great in a pinch on a busy weeknight!

    Favorite starch side dish

    Italian Ciabatta Dressing- This is a recent addition to my site (as of 11/19) and as a person who doesn't really love dressing it's a total winner! Amazing flavor, moist on the inside with a perfectly crispy crust on top: everyone who tasted this when I was testing it begged for the recipe!

    A spoon in a pan of dressing for Thanksgiving

    Favorite Salad

    Beet Salad- I'm really not a fan of beets, but I'd eat this salad every day. It really is that good. Light and super fresh tasting with lemon and dill plus a great zing from the feta cheese! Expert tip: sprinkle the feta on top just before serving so that it doesn't turn purple!
    Try this Beet Salad Recipe with Feta and Dill: it's an easy side dish recipe and is a great alternative to the usual dinner sides. Served cold with citrus and olive oil as a dressing it is a healthy and fresh option for any season!

    Favorite make-ahead side dish

    Harvest Rice Salad- I know this sounds strange, but trust me when I say that once you try this, you'll want a rice salad at every family gathering. Full of the great flavors of fall- it's refreshing but still satisfying and tastes best when made ahead.

    A spoonful of Harvest Rice Salad with the bowl in the background.

    Favorite side dish that travels well

    Grandma's Baked Artichoke Hearts- Each year, people go crazy over this recipe! It's all the great flavor of a stuffed artichoke with out all the mess and hassle that goes into making and eating it. It's rare to come across a holiday meal in our family that doesn't feature this dish and it travels amazingly well!

    roasted artichoke

    Thanksgiving Desserts

    If you don't have desserts, is it even Thanksgiving?! Nothing caps off your thanksgiving feast like something sweet and I've got some tasty options to choose from!

    Best twist on a traditional Thanksgiving dessert

    Apple Cranberry Crisp with Gingersnap Topping- This is one of the recipes I'm most proud of. The flavor combo is unmatched and its super easy to make. Bonus points because the leftovers make a great excuse to eat dessert for breakfast (I won't tell if you don't).

    Best pie

    Cherry Cheese Pie- Now I know that I could have gone with a more traditional option, but I want you to have the best of the best and this my friends is the best. This actually won an award at the senior center when my Grandma made it, so you know it means business! Expert tip: place the cherries on one-by-one. It only takes slightly longer but that extra step ensures a delicious cherry in every single bite!

    Rosie's Award Winning Cherry Cheese Pie is a favorite family recipe- it is insanely easy and heavy cream, cream cheese, vanilla, confectioner's sugar and cherries make up the minimal ingredients. It looks gorgeous on any dessert tables, especially for the holidays and could not be more delicious! Get in the kitchen and make this now!

    Best non-pie dessert

    Cream Cheese Pumpkin Crunch Cake- Pumpkin cake and cheese cake and crunchy streusel topping? This is basically the cake of my dreams. And it's a cake mix hack, so it's totally easy to make. People will be begging for the recipe but I won't tell i you don't!

    Cream Cheese Pumpkin Crunch Cake is the seriously easy fall dessert that you'll want to bring to every party! This cake mix hack includes a pumpkin sheet cake, cheesecake layer and a crumbly streusel topping with pecans. Every single person who tries it goes crazy over it and begs for the recipe.

    Best show stopper

    Rice Krispie Treat Turkey- I couldn't possibly make this list without sharing this Rice Krispie Treat Turkey. The kids will love it and you'll look like a total boss. What they won't know is how easy it is to make!

    An image of a Rice Krispie Treat Turkey with Reese's Pieces stuffed in it.

    Best make ahead dessert

    Orange Cranberry Tort- This is adapted from a famous New York Times recipe and comes out incredible every single time. It's also seriously pretty which is never a bad thing. But most importantly (for this category) It actually tastes better if you make it ahead.

    An overhead image of the Orange Cranberry Torte.

    Pssst... are you Hosting Thanksgiving?

    Discover the secret to hosting Thanksgiving without all the stress! Prepsgiving is your FREE guide to making a delicious Thanksgiving feast the easy way.

    Thanksgiving Recipes

    In case that wasn't enough inspiration, I'll leave my full list of Thanksgiving-inspired recipes here for you to peruse. Be sure to bookmark or pin this and check back because it will get updated whenever I post a Thanksgiving-appropriate recipe!

    A close up of a potato stack in a muffin tin with cheese and bacon.

    Muffin Tin Potato Stacks

    A close up of roasted red potatoes on a pan.

    Roasted Red Potatoes Recipe

    A plate of dandelion greens with bread.

    Dandelion Greens Recipe

    An overhead image of a bowl of green peas and onions.

    Easy Green Peas Recipe

    The side of a slice of orange cake with chocolate ganache revealing the moist crumb.

    Chocolate Orange Cake Recipe

    A slice of poppyseed cake being lifted from the rest of the cake.

    Poppyseed Cake

    A close up image of a caramel blossom cookie on a pan.

    Caramel Blossom Cookies

    A stack of molasses cookies with a bite out of the top cookie.

    Chewy Ginger Molasses Cookies

    An overhead image of a cranberry cake with citrus on a plate.

    Orange Cranberry Cake

    An overhead image of apple pie filling in a raw pie crust with apples and cinnamon sticks around it.

    How To Make Apple Pie Filling

    A hand pulling a chip with artichoke dip out of a pan of it.

    Hot Artichoke Parmesan Dip

    A wheel of baked brie topped with pomegranates with the front cut off and the melty cheese flowing out.

    Baked Brie With Honey And Pomegranate

    A jar of turkey stock with an onion and carrots next to it.

    Turkey Broth Recipe

    A slice of bourbon apple pie with a fork on the plate.

    Bourbon Apple Pie

    A cranberry cheeseball with a portion taken off it revealing the creamy interior.

    Harvest Cranberry Cheeseball

    A close up image of a serving spoon holding a scoop of corn pudding in the pan of it.

    Corn Pudding Casserole

    A green gravy boat pouring gravy onto a plate of turkey and mashed potatoes.

    No Drippings Turkey Gravy

    A close up of a serving spoon in a pan of savory sweet potato casserole.

    Savory Sweet Potato Casserole

    A white bowl of apple cranberry chutney with a striped napkin behind it.

    Apple Cranberry Chutney

    A close up image of a Brie Apple Phyllo Cup on a pan.

    Brie Apple Phyllo Cups

    A slice of pumpkin crunch cake on a white plate with the whole cake behind it.

    Pumpkin Crunch Cake

    A stack of 4 Pumpkin White Chocolate chip cookies with other cookies behind it.

    Pumpkin White Chocolate Chip Cookies

    A close up image of a piece of cookie bar stacked on top of other cookie bars.

    Cherry Chocolate Cookie Bars

    A slice of peanut butter pie with a bite taken off revealing the silky interior of the pie

    No Bake Peanut Butter Pie

    An overhead image of a chicken tostada on the pan with sour cream and avocado on top.

    Chicken Tostadas

    A piece of cherry cheese pie being pulled up from the rest of the pie.

    Cherry Cheese Pie

    An overhead image of a dark blue bowl of carrot salad with carrots, green onion and a white napkin around it.

    French Carrot Salad

    A plate of broccoli rice casserole with the pan and raw broccoli florets in the background.

    Rice and Broccoli Casserole

    A bundt shaped orange monkey bread on a white plate with an orange and black and white checked napkin behind it.

    Orange Cinnamon Pull-Apart Bread

    A hot cocoa cupcake with others lined up behind and around it.

    Peppermint Hot Chocolate Cupcakes

    A jar of candied pecans with a striped Christmas towel and a pan of other pecans oin the back.

    Cinnamon Spiced Candied Pecans

    A close up of a bowl of chicken wild rice creamy soup with a spoon in it and another bowl in the background.

    Wild Rice Creamy Chicken Soup (Great with Turkey Too!)

    The corner of a pan of green bean casserole with a serving spoon in it.

    Green Bean Casserole Without Mushroom Soup

    An overhead image of a whole spatchcocked turkey cooked golden brown on a platter with limes and other thanksgiving sides and decorative leaves and garland around it.

    Cajun Turkey

    A sliced smoked turkey breast on a cutting board with the crispy skin on.

    Smoked Bone In Turkey Breast

    A serving spoon lifting a scoop of apple cranberry crisp from the corner of a white pan of it.

    Apple and Cranberry Crisp

    A close up of a serving spoon in a pan of dressing with some cornbread dressing on it.

    Jiffy Cornbread Dressing

    A close up overhead image of roasted autumn vegetables on a pan.

    Roasted Fall Vegetables

    A brownie bite on a white plate with the mini muffin warapper pulled down exposing the sides and other brownie bites in the background.

    Easy Candy Brownie Bites

    A plate of scalloped potatoes with a bowl of cheese and the pan of them in the background.

    Mom's Creamy Scalloped Potatoes

    A close up image of a pumpkin donut with cinnamon sugar on it and the rest in the background.

    Pumpkin Spice Donuts

    A plate of garlic green beans with a striped towel, garlic bulbs and parsley in the background.

    Garlic And Butter Green Beans

    An overhead image of beet salad topped with feta cheese with lemons, dill, onion and a white napkin around it.

    Roasted Beet Salad with Feta and Dill

    An overhead image of a strawberry cream pie with a striped napkin next to it.

    Strawberry Cream Cheese Pie

    A piece of lemon cake with whipped cram on a white plate with the rest of the cake and lemons in the background.

    Lemon Pistachio Cake

    A close up image of roasted potatoes on a sheet pan.

    Crispy Parmesan Potatoes

    A plate of artichoke hearts with a fork on it and a white and red napkin and garlic behind it.

    Grandma's Baked Artichoke Hearts

    A close up overhead image of the sauteed carrots in a pan.

    Garlic Butter Sautéed Carrots Recipe

    A white oval pan with roast turkey thighs in it and onions and a red and white napkin in the background.

    Roast Turkey Thighs for Two

    A close up image of sautéed veggies in a pan with a wooden turner in it.

    Easy Sautéed Vegetables

    A close up image of a slice of chocolate pudding pie on a white plate with the rest of the pie behind it.

    Old Fashioned Chocolate Pie

    A piece of chocolate cake being pulled from the whole cake revealing the moist inside of the cake.

    The BEST Chocolate Overload Cake

    A close up image of a white bowl of shrimp dip with a whole shrimp on top and chips and celery in the background.

    Grandma's Shrimp Dip Recipe

    A square photos of broccoli rabe with garlic on a plate.

    Broccoli Rabe Recipe with Garlic

    A side angle shot of Delicata squash with pomegranates and pepitas on top of it.

    Baked Delicata Squash With Herbed Yogurt

    A slice of pecan pie being pulled from the pie with plates and cinnamon sticks in the background.

    Old Fashioned Pecan Pie

    An overhead image of a thanksgiving table with the platter of carved turkey in the middle and green beans, dressing and cranberry sauce around it.

    Turkey with Oranges and Rosemary

    A bowl of squash soup with burrata and cilantro on top and chunks of squash and cilantro in the background.

    Savory Spiced Butternut Squash Soup

    An extreme close up of the ends and tips of skillet asparagus in a pan

    Sautéed Garlic Asparagus

    An overhead image of sliced turkey on a platter surrounded by fresh herbs in the middle of a Thanksgiving table.

    Roasted Spatchcock Glazed Turkey with Bourbon

    A close up image focusing on a snickerdoodle cookie in a pile of other snickerdoodle cookies.

    Coffee Snickerdoodle Cookies

    An overhead image of a bowl of mashed potatoes with melting pats of butter and chopped parsley on top with a head of garlic, grey napkin and sprigs of parsley round it.

    Roasted Garlic Mashed Potatoes

    An overhead image of a roasted whole turkey butterflied and laid out in a roasting pan on a orange and grey towel with apples on the side of it.

    Apple Cider Glazed Roast Turkey Recipe

    An image of a slice of pumpkin cake with a fork in front of it holding a bite of the cake on it.

    Pumpkin Spice Cake

    An overhead image of a carved turkey arranged on a serving platter with fresh herbs and lemons surrounding it.

    Spatchcocked Lemon Herb Roast Turkey

    An overhead image of a roasted spatchcocked turkey in a roasting pan surrounded by fresh herbs and lemons and orange and grey plaid napkins.

    How to Spatchcock Turkey

    Is it even a holiday table without Pumpkin Pie? This classic pumpkin pie recipe is an easy and delicious way to get everyone's favorite holiday dessert onto the table without all the hassle!

    Classic Pumpkin Pie Recipe

    Is it even a holiday dinner without mashed potatoes?! I say, ditch the hassle and make these easy Make Ahead Mashed Potatoes recipe. Made with cream cheese and sour cream, they're creamy, flavorful and totally delicious!

    Make Ahead Mashed Potatoes

    Tips for Transporting Food

    Tips for Transporting Food

    Whether you're hosting Thanksgiving dinner or attending as a guest, there comes the time each year that we have to decide what to make for Thanksgiving. It may be the turkey, side dish, dessert or everything in between, this guide is a great starting point for recipe inspiration for the ultimate turkey day feast.

    The Ultimate Thanksgiving Dinner Recipe Guide

    Cheesy Squash Casserole is the kind of side dish that will impress even the pickiest of eaters. Tender yellow squash and zucchini, savory bread crumbs and deliciously melty cheese make this side dish a total crowd pleaser!

    Cheesy Squash Casserole

    The corner of Italian bread stuffing in a white casserole dish with a spoon in it.

    Ciabatta Italian Bread Stuffing

    A woman holding a casserole.

    Make-and-Take Thanksgiving

    This French Onion Cheese Ball is a delicious savory appetizer that is sure to impress all your friends. It's also super easy to whip up!

    French Onion Cheese Ball

    This Pea Salad with Shrimp recipe is a super easy side dish that's perfect for any gathering! It's served cold because it's creamy with sweet green peas (I totally used frozen!), shrimp, and cashews and water chestnuts which make it crunchy. Make this if you need a tasty and light Thanksgiving side dish!

    Peas Salad with Shrimp

    Sautéed Kale with Mushrooms and Tomatoes is the best healthy side dish. It whips up super quickly and easily and tastes fantastic! This also makes a satisfying vegetable main dish.

    Sautéed Kale with Mushrooms and Tomatoes

    These Sautéed Shredded Brussel Sprouts and a festive holiday side dish recipe that's also super quick and easy to make! Made with Brussel Sprouts, Shallots, Pancetta, Holland House Sherry Cooking Wine and fresh Pomegranate Seeds.

    Sautéed Shredded Brussel Sprouts featuring Holland House Cooking Wines

    A square image of a Rice Krispie Treat Turkey

    Rice Krispie Treats Turkey

    These Almond Ginger Cookies are such an easy dessert to make! This crispy cookie is the best slice-and-bake option if you're looking for a spicy cookie that is that isn't overly sweet. They're great for Christmas!

    Almond Ginger Cookies

    A square image that is a close up of a plate of turkey tetrazzini with a fork in it

    Turkey Tetrazzini

    homemade 2 Ingredient Applesauce

    2 Ingredient Applesauce

    Make this Mini Pumpkin Cheesecake Recipe for the holidays- they're no-bake, seriously easy and totally delicious! Made with pumpkin yogurt, cream cheese, powdered sugar, pumpkin pie spice and vanilla in a graham cracker crust with candied pecans on top, these are sure to please the whole family!

    Mini Pumpkin Cheesecake Recipe

    This Salad with Shredded Brussel Sprouts Recipe is the perfect fall side dish. Made with apples and dried cherries and topped with a warm bacon dressing, this is the best way to make even the most avid Brussels Sprouts hater to change their minds!

    Salad with Shredded Brussel Sprouts Recipe

    Honey Soy Glazed Carrots and Parsnips are a sweet and savory vegetable side dish that will please even the pickiest of palates! Made with carrots, parsnips, shallots, honey and soy sauce. This is the perfect addition to any holiday table (hello thanksgiving and Christmas!).

    Honey Soy Glazed Carrots and Parsnips

    A square image of Grandma's Best Banana Cake recipe.

    Grandma's Best Banana Cake Recipe

    A square image of Sauteed Green Beans with Mushrooms, Shallots and Pancetta.

    Savory Sauteed Green Beans with Mushrooms, Shallots and Pancetta

    A square image of Clementine and Fennel Salad.

    Clementine and Fennel Salad Recipe

    A square image of French Onion Creamy Mashed Potatoes.

    French Onion Creamy Mashed Potatoes

    Homemade Cranberry Sauce with Dried Cherries and Shallots Recipe

    Homemade Cranberry Sauce with Dried Cherries and Shallots Recipe

    A squaer image of Apple Cinnamon Thumbprint Cookies.

    Apple Cinnamon Thumbprint Cookies

    A square image of Cheddar and Broccoli Twice Baked Potatoes

    Cheddar and Broccoli Twice Baked Potatoes Recipe

    A squaer image of Pumpkin Chocolate Chip Bread.

    Pumpkin Chocolate Chip Bread

    A square image of Harvest Rice Salad.

    Harvest Rice Salad

    This Black Forest Ice Cream Pie is a quick and easy no bake dessert recipe. Made with an Oreo Cookie crust, chocolate ice cream, maraschino cherries and whipped topping this pie is a pretty addition to any dessert table! It's perfect for the holidays or to keep in the freezer "just because"!

    Black Forest Ice Cream Pie

    These Peanut Butter Brownie Truffles are an easy chocolate dessert recipe and an excellent gift to give this for Valentine's Day. This simple recipe is made with rich, fudgy brownies and a peanut buttery surprise in the middle.

    Peanut Butter Brownie Truffles or The Great Mouse Debacle of 2017

    This Olive and Gruyere Puff Pastry Tartlets recipe is one of my new favorite easy appetizers to throw together! Just four simple ingredients (including frozen puff pastry dough, olives and cheese) and they come together quickly for the holidays or any parties you may be having!

    Olive and Gruyere Puff Pastry Tartlets

    These homemade German Cream Cheese Brownies are a delicious addition to any holiday cookie platter. This recipe is made from scratch but SO easy! Rich chocolate brownies swirled with sweet cream cheese helps make this a decadent treat your family will love!

    German Cream Cheese Brownies

    These homemade PB&J Brownies are an easy and delicious holiday dessert option. Chewy, fudgey chocolate brownies with a swirl of peanut butter and the fruit spread of your choice on top, these are made from scratch and would be great on a Thanksgiving of Christmas dessert table or just because you deserve a tasty dessert!

    PB&J Brownies

    Apple Spice Muffins are one of my favorite fall recipes. Made with tasty chunks of apple, applesauce with cinnamon, nutmeg and ginger, they're so easy to make and taste great as breakfast or as a dessert!

    Apple Spice Muffins

    This Bloomin' Baked Caramel Apples recipe is the perfect fall dessert! They're quick and easy to make and deliciously sweet!

    Bloomin' Baked Caramel Apples

    This Day After Thanksgiving Sandwich is one of my favorite recipes to enjoy leftovers! Tender turkey, sandwiched between halves of your favorite bun with tangy cranberry sauce, savory stuffing and mayonnaise. I love enjoying this for lunches or dinners around the holidays!

    Day After Thanksgiving Sandwich

    This BLT Bruschetta recipe is the perfect dish-to-pass for a last minute get together, party or game day celebration. Tomatoes, bacon, parsley and green onions come together in a creamy mixture and are spread atop crispy slices of baguette. This delicious flavor combination makes wonderful little appetizers that you won't be able to stop eating!

    BLT Bruschetta

    This Greek Couscous Salad recipe is a light and healthy side dish for lunch or dinner. It's quick and easy to make and is full of delicious flavors of Feta cheese, vegetables, olives and fresh herbs. Click on the photo to get the recipe!

    Greek Couscous Salad

    This Shrimp with Pesto and Prosciutto recipe is seriously easy and tastes delicious. It's super quick to make (10-15 minutes tops!!) and uses only 3 ingredients making it the perfect starter for a dinner party or a girls night! Click on the photo to get the recipe!

    Shrimp with Pesto and Prosciutto

    This Gluten-Free Peanut Butter Bar recipe are super quick and simple to make. It only has five ingredients and the bars are so rich and decadent with everyone's favorite flavor combination; peanut butter and chocolate!

    Gluten-Free Peanut Butter Bars

    You can find a full index of my recipes here.

    Don’t forget to follow The Life Jolie on Pinterest for more recipe inspiration!

    Or if Pinterest isn’t your style, bookmark this post!

    Let’s keep the conversation going- join my Facebook group! 

    • « Go to Previous Page
    • Page 1
    • Interim pages omitted …
    • Page 11
    • Page 12
    • Page 13
    • Page 14
    • Page 15
    • Interim pages omitted …
    • Page 21
    • Go to Next Page »

    Primary Sidebar

    Jessy in a kitchen holding a white casserole pan and smiling.
    Hi, I'm Jessy!

    Welcome to The Life Jolie! I share simple, delicious recipes and ingredient prep tips to make your weeknight cooking a breeze!

    More about me →

    Easy Dinner Recipes

    • An overhead image of a Mexican Shrimp Quinoa Bowl.
      Shrimp Quinoa Bowls
    • A bowl of asian soup with meatballs with a spoon and noodles in it.
      Asian Soup with Cabbage and Meatballs
    • A close up of roasted red potatoes on a pan.
      Roasted Red Potatoes Recipe
    • A spoon lifting up a scoop of eggplant parm bake with melt cheese trailing behind it.
      Eggplant Parm Bake
    • A close up of a drum chicken wing in a pile of other wings.
      Oven Baked Chicken Wings
    • An overhead image of a bowl of minestrone soup.
      Traditional Minestrone Soup Recipe

    Popular Recipes

    • A glass bowl of melted chocolate with a spatula dripping some back into the bowl.
      How To Melt Chocolate Chips In The Microwave
    • Italian Stuffed Zucchini Boats are the healthy weeknight meal you'll want to make again and again. This is a seriously easy recipe that's full of delicious flavor without all the guilt!
      Italian Stuffed Zucchini Boats
    • A close up shot of the side of a shallow bowl of shrimp mac salad.
      Shrimp Macaroni Salad
    • A white pan pouring cheese sauce over a bowl of steamed broccoli.
      Cheese Sauce for Broccoli Recipe
    • An overhead image of a plate of chicken lettuce wraps with peanut sauce next to it and all the fixings surrounding it.
      Copycat Cheesecake Factory Thai Chicken Lettuce Wraps
    • A close up image of a piece of greek marinated chicken on a white plate with lemons on the plate and in the background.
      Greek Yogurt Chicken
    Jessy in a kitchen holding a white casserole pan and smiling.
    Hi, I'm Jessy!

    Welcome to The Life Jolie! I share simple, delicious recipes and ingredient prep tips to make your weeknight cooking a breeze!

    More about me →

    Easy Dinner Recipes

    • A close up of a bagel pizza with mini pepperonis on a pan.
      Bagel Pizzas Recipe
    • A bowl of chicken and orzo soup with a spoon in it.
      Chicken and Orzo Soup
    • A bowl of Swedish meatballs and noodles.
      Swedish Meatballs And Noodles
    • A close up image of a piece of coconut shrimp on top of others.
      Coconut Shrimp With Sauce
    • An overhead image of taco soup in a bowl.
      Crockpot Taco Chicken Soup
    • A spoon pulling up a scoop of skillet lasagna with melted cheese stretching behind it.
      No Bake Lasagna Skillet

    Popular Recipes

    • A glass bowl of melted chocolate with a spatula dripping some back into the bowl.
      How To Melt Chocolate Chips In The Microwave
    • Italian Stuffed Zucchini Boats are the healthy weeknight meal you'll want to make again and again. This is a seriously easy recipe that's full of delicious flavor without all the guilt!
      Italian Stuffed Zucchini Boats
    • A close up shot of the side of a shallow bowl of shrimp mac salad.
      Shrimp Macaroni Salad
    • A white pan pouring cheese sauce over a bowl of steamed broccoli.
      Cheese Sauce for Broccoli Recipe
    • An overhead image of a plate of chicken lettuce wraps with peanut sauce next to it and all the fixings surrounding it.
      Copycat Cheesecake Factory Thai Chicken Lettuce Wraps
    • A close up image of a piece of greek marinated chicken on a white plate with lemons on the plate and in the background.
      Greek Yogurt Chicken

    Footer

    ↑ back to top

    About

    • About Me
    • Privacy Policy + Disclaimer

    Newsletter

    • Sign Up! for emails and updates

    Contact

    • Contact
    • Video Production

    As an Amazon Associate I earn from qualifying purchases.

    Copyright 2014-2021 - Jolie Ventures, LLC. All Rights Reserved. Privacy Policy.

    Rate This Recipe

    Your vote:


    A rating is required
    A name is required
    An email is required