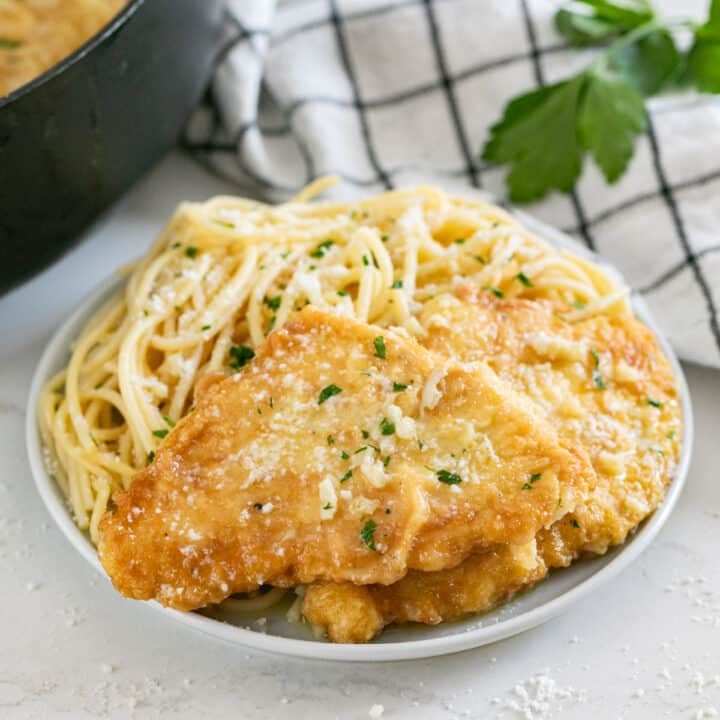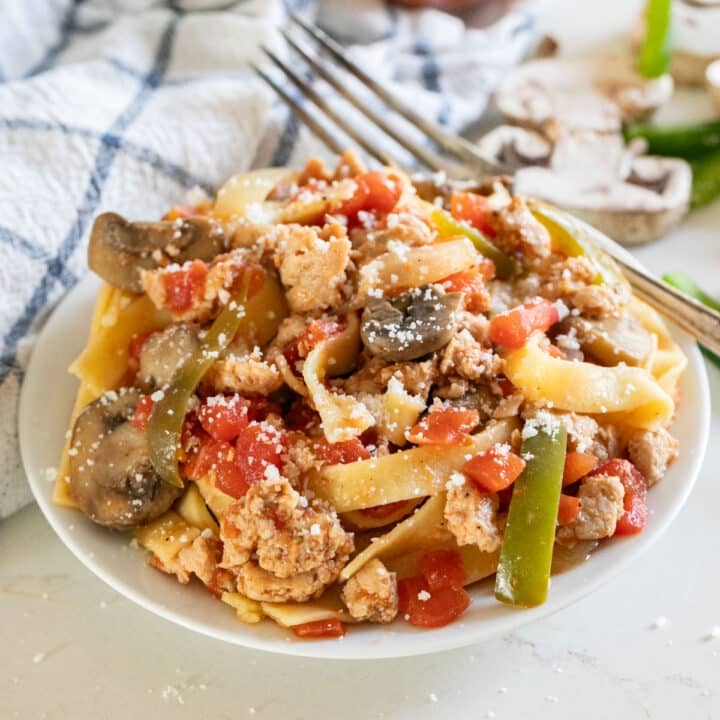

• Skip to primary navigation
  • Skip to main content
  • Skip to primary sidebar
The Life Jolie logo
  • Easy Dinner Recipes
  • Recipes
  • About
  • Contact
    • Work with me!
    • Video Production
  • Nav Social Menu

    • Email
    • Facebook
    • Instagram
    • Pinterest
    • Twitter
    • YouTube
menu icon
go to homepage
subscribe
search icon
Homepage link
  • Easy Dinner Recipes
  • Recipes
  • About
  • Contact
    • Work with me!
    • Video Production
    • Email
    • Facebook
    • Instagram
    • Pinterest
    • Twitter
    • YouTube
  • ×
    The Life Jolie » Page 6

    Veal Bolognese Sauce

    Veal Bolognese Sauce

    Apr 23, 2025 · 9 Comments

    A plate of curly pasta with veal bolognese on top.

    This simple veal bolognese sauce comes together in under 30 minutes and is bursting with rich, hearty flavor. Serve it over your favorite pasta or zucchini noodles for a delicious and satisfying meal!

    A plate of curly pasta with veal bolognese on top.
    [feast_advanced_jump_to]

    Why You'll Love This Easy Simple Bolognese Sauce

    If you’re craving comfort food that’s quick and nourishing, this recipe ticks all the boxes. It’s a simple version of the traditionally slow-simmered dish that still delivers that deep, savory flavor, thanks to the use of veal, fresh vegetables, and a perfectly balanced tomato base. Plus, it's naturally lighter and leaner, making it a great option when you're craving something hearty yet wholesome!

    My whole family goes nuts over it. After trying so many versions, everything from all-day simmered sauces to fast stovetop recipes, this one is easily the best bolognese sauce recipe I’ve ever made. Here’s why I keep coming back to it again and again:

    • Super versatile
    • Rich and flavorful
    • Incredibly satisfying
    • Ready in under 30 minutes
    • Packed with protein
    An overhead image of a plate of pasta and bolognese sauce with the pan and the pan of sauce.

    Ingredient Information and Substitutions

    • Veggies- Onion, carrot, and celery form a classic base (called a mirepoix) that adds depth of flavor to sauces and stews.
    • Garlic- Adds aromatic richness. Adjust quantity to taste.​
    • Ground veal- Ground veal is lean, tender, and ideal. Lean ground beef works as well.
    • Seasonings- Kosher salt, crushed red pepper flakes, dried basil, and Italian seasoning to enhance the sauce's flavor.​ You can also use fresh basil, parsley, or oregano.
    • Baking soda- It helps counteract the acidity while still letting the deliciously sweet tomato flavor shine through.
    • Olive oil- Used for sautéing the vegetables. You can substitute avocado oil if needed.​
    • White wine- Adds acidity and even more flavor depth. Substitute chicken broth for an alcohol-free sauce.
    • Milk- this unexpected but traditional bolognese ingredient helps mellow the acidity and keeps things silky. You can use any milk you have on hand, though whole milk gives the richest result.
    • Diced tomatoes and tomato paste- Help build the sauce’s rich flavor. Crushed tomatoes are a fine swap.
    An overhead image of labeled recipe ingredients.

    How to Make Traditional Bolognese Sauce

    Step 1- Sauté the vegetables.

    In a large sauté pan, heat olive oil over medium-high heat. Add finely diced onion, carrot, and celery and sauté until softened, about 4-5 minutes.​

    Step 2- Add garlic and meat.

    Add minced garlic to the pan and sauté until fragrant, about a minute or so. Then, add the ground veal and break it up with a wooden spoon as it cooks, about 5 minutes or until fully browned.

    Ground veal and veggies sautéing in a pan.

    Step 3- Stir in remaining ingredients.

    Add the wine, milk, diced tomatoes, tomato paste, baking soda, and seasonings to the pan. Stir, then bring to a boil.

    Step 4- Simmer.

    Reduce heat to medium and let simmer uncovered for 10 minutes, stirring occasionally.​

    Bolognese sauce simmering.

    Step 5- Serve.

    Serve the sauce over zucchini noodles or your choice of pasta, garnished with Romano or Parmesan cheese. 

    Frequently Asked Questions

    What is veal?

    Veal is the meat of young cattle, typically harvested before they reach full maturity. It’s a natural byproduct of the dairy industry since cows must give birth to keep producing milk. It’s lean, nutrient-dense, and a great option for a healthier meal without sacrificing flavor. But if you're not into it, just use lean ground beef.

    What gives bolognese its signature flavor?

    Bolognese gets its signature taste from the combination of meat, vegetables, tomatoes, wine, and milk. The meat provides a tender, flavorful base, while the milk helps to tenderize the meat and balance the acidity of the tomatoes and wine, creating a deep, hearty flavor. 

    Is this a authentic bolognese sauce?

    It’s a quick and modern take on the classic sauce, which traditionally simmers for hours. This version delivers on flavor in a fraction of the time.

    A close up of veal bolognese sauce on pasta.

    Tips For Making An Authentic Bolognese Sauce Recipe

    • Be careful not to burn the garlic. It can turn the dish bitter, and you’ll need to start over if that happens!
    • Taste as you go. Everyone’s taste buds are different, so be sure to taste your sauce while cooking and adjust the seasonings to your liking. 
    • No sugar in my sauce. Grandma would never approve it! Instead, I use a pinch of baking soda to balance the acidity, allowing the natural sweetness of the tomatoes to come through.
    • If you decide to use fresh herbs, add them at the end of cooking for the best flavor.
    • For a little extra heat, simply add more crushed red pepper flakes or even a dash of cayenne pepper.
    • Ingredients to prep ahead- Chop the veggies and mince the garlic, then store them in airtight containers in the fridge.
    • Leftovers and storage- Store leftovers in an airtight container in the fridge for 3-4 days, or freeze for up to 3 months.
    A white plate. of pasta bolognese with a tomato behind it.

    What To Serve With This Classic Bolognese Sauce

    Bolognese sauce is one of those classic comfort foods that just feels like home. I love to serve it over zoodles for a carb-conscious dinner, but you can also serve it over any pasta of your choice for a more traditional take. A few sides can turn this into a full, hearty meal. Here are a few great recipes to spark your imagination:

    • Homemade 3 Cheese Garlic Bread
    • Marinated Vegetable Salad
    • Sautéed Broccoli Rabe
    • Clementine and Pasta Salad
    • Lemon Pistachio Cake

    Other Italian Recipes to Try
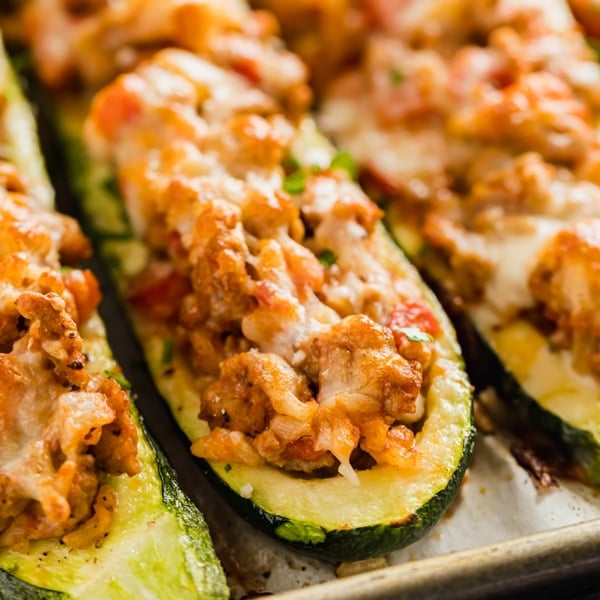
    • Italian Stuffed Zucchini Boats are the healthy weeknight meal you'll want to make again and again. This is a seriously easy recipe that's full of delicious flavor without all the guilt!
      Italian Stuffed Zucchini Boats
    • A close up overhead image of Italian Grinder Sandwiches.
      Baked Italian Grinder Recipe
    • Italian tuna on a lettuce wrap with lemon halves in the background.
      Italian Tuna
    • A close up image of a chunk of Italian sausage in red sauce on a white plate with a toothpick sticking out of it.
      Oven Baked Italian Sausage with Tomato Sauce

    Love this recipe? Please leave a 5 star ⭐️⭐️⭐️⭐️⭐️ rating in the recipe card below ⬇️ and/or a review in the comment section further down. Check out my Amazon Store for all my favorite tools, including those used in this recipe. And follow @thelifejolie on Instagram and TikTok!

    A plate of curly pasta with veal bolognese on top.

    Veal Bolognese Sauce

    Jessy Freimann
    This simple veal bolognese sauce comes together in under 30 minutes and is bursting with rich, hearty flavor. Serve it over your favorite pasta or zucchini noodles for a delicious and satisfying meal!
    5 from 5 votes
    Print Recipe Pin Recipe
    Prep Time 10 minutes mins
    Cook Time 20 minutes mins
    Total Time 30 minutes mins
    Course Main Course
    Cuisine Italian
    Servings 4 servings
    Calories 256 kcal

    Equipment

    • Large saute pan
    • wooden spoon
    • chefs knife
    • cutting board
    • measuring cups
    • measuring spoons
    • Spiralizer

    Ingredients
      

    • 2 teaspoons olive oil
    • ½ cup onion, finely diced
    • ½ cup carrots, finely diced
    • ½ cup celery, finely diced
    • 3 cloves garlic, minced
    • 1 pound ground veal (you can substitute with lean ground beef)
    • 1 teaspoon Kosher salt
    • ¼ teaspoon crushed red pepper flakes (or more if you want it spicy)
    • ½ teaspoon dried basil
    • ½ teaspoon dried Italian seasoning
    • 2 Tablespoons white wine
    • ¼ cup whole milk
    • 14.5 ounce petite diced tomatoes canned
    • 2 Tablespoons tomato paste
    • 1 pinch baking soda
    • Zucchini noodles or the pasta of your choice
    • Romano or Parmesan cheese, for sprinkling

    Instructions
     

    • In a large saute pan, heat the oil over medium high heat.
    • Add the onions, carrots and celery to the pan and sauté until softened stirring often, about 4-5 minutes.
    • Add garlic and sauté stirring often until fragrant, around 1 minute. 
    • Add the ground veal and sauté using wooden spoon to break up the meat as it cooks until the veal is fully browned, around 5 minutes.
    • Add salt, crushed red pepper, dried basil, dried Italian seasoning, wine, milk, diced tomatoes, tomato paste and baking soda and stir until well combined. 
    • Bring to a boil and reduce the heat to medium. 
    • Simmer uncovered for 10 minutes stirring periodically.
    • Serve immediately over zucchini noodles or pasta with a sprinkle of Romano or Parmesan cheese.

    Video

    Notes

    • Be careful not to burn the garlic. It can turn the dish bitter, and you’ll need to start over if that happens!
    • Taste as you go. Everyone’s taste buds are different, so be sure to taste your sauce while cooking and adjust the seasonings to your liking. 
    • No sugar in my sauce. Grandma would never approve it! Instead, I use a pinch of baking soda to balance the acidity, allowing the natural sweetness of the tomatoes to come through.
    • If you decide to use fresh herbs, add them at the end of cooking for the best flavor.
    • For a little extra heat, simply add more crushed red pepper flakes or even a dash of cayenne pepper.
    • Ingredients to prep ahead- Chop the veggies and mince the garlic, then store them in airtight containers in the fridge.
    • Leftovers and storage- Store leftovers in an airtight container in the fridge for 3-4 days, or freeze for up to 3 months.

    Nutrition

    Serving: 1servingCalories: 256kcalCarbohydrates: 15gProtein: 25gFat: 11gSaturated Fat: 4gPolyunsaturated Fat: 1gMonounsaturated Fat: 5gCholesterol: 95mgSodium: 970mgPotassium: 896mgFiber: 3gSugar: 8gVitamin A: 3103IUVitamin C: 15mgCalcium: 100mgIron: 3mg
    Tried this recipe?Let us know how it was!

    Buttermilk Banana Bread Recipe

    Apr 21, 2025 · 24 Comments

    Two slices of banana bread next to the loaf with a banana on the side.

    Transport yourself back to childhood with a warm, delicious buttermilk banana bread recipe. This moist and flavorful loaf comes together with simple ingredients and is perfect for cozy mornings or a sweet snack. 

    Two slices of banana bread next to the loaf with a banana on the side.
    [feast_advanced_jump_to]

    Why You’ll Love This Super Moist Banana Bread

    Some recipes just feel like a hug, and this banana bread is one of them. It’s one of those nostalgic comfort foods you’ll come back to again and again. Made with ripe bananas and buttermilk, this loaf has the perfect texture and rich flavor. Even better, it uses just a handful of everyday ingredients. 

    If you're craving a cozy treat, this moist loaf delivers rich flavor, a tender crumb, and plenty of comfort. It’s perfect on its own or topped with butter, cream cheese, or a little drizzle of honey. Plus, this easy banana bread recipe splits perfectly between two loaf pans — one to eat now and one to give to a friend or freeze for later.

    For those who love a strong banana flavor, this banana bread with three bananas is just the right choice. Here’s why this recipe is a keeper:

    • Easy to make in one bowl
    • Moist, tender texture every time 
    • Freezer-friendly and great for gifting
    • Easy to customize with mix-ins like chocolate chips or nuts
    • A great way to use up ripe bananas
    • Perfect balance of flavor and sweetness
    An overhead image of a loaf of banana bread on a  cutting board with a napkin and a banana next to it.

    Ingredient Information And Substitutions

    • All-purpose flour- I like to use plain old all-purpose white here, but if you’re gluten-free, a good 1:1 gluten-free baking blend usually works just fine.
    • Baking powder and baking soda- These help the loaf rise and stay light. Make sure they’re fresh!
    • Salt and nutmeg- The salt balances the sweetness, and the nutmeg adds a cozy hint of spice. Don’t have nutmeg? Cinnamon is a great backup.
    • Eggs- Large eggs at room temperature mix in more smoothly. 
    • Butter- I use salted butter, softened to room temp. You can sub in margarine or your favorite vegan butter.
    • Buttermilk- Adds moisture in the best way. No buttermilk? Mix a splash lemon juice or white vinegar with½ cup of milk and whisk well.
    • Sugar- I use granulated sugar.
    • Ripe bananas- Use spotted bananas for the best flavor- the riper the better! Not ripe yet? Bake them (in the peel) at 300 degrees F for 10 minutes, then cool and use as directed.
    An overhead image of labeled recipe ingredients.

    How To Make Cake Banana Bread 

    Step 1- Preheat and prep ingredients..

    Preheat your oven to 350 degrees F and line and grease a loaf pan with parchments and non-stick spray or butter.

    In a medium bowl sift together the flour, baking powder, baking soda, salt, and nutmeg. In another bowl, mash up the bananas.

    Dry ingredients in a bowl and then mashed bananas in another bowl.

    Step 2- Combine the wet ingredients.

    In a separate bowl, cream together butter and sugar for 2 minutes. Beat in the eggs, buttermilk, and mashed bananas until just smooth.

    Gradually mix in dry ingredients until just combined.

    Wet ingredients mixed together in the mixing bowl and then the batter with the dry ingredients mixed in.

    Step 4- Pour batter into the pan and bake.

    Pour the batter into the prepared pan and bake for around an hour until an inserted toothpick comes out clean.

    Batter poured into the prepared pan and the pan in the oven baking.

    Frequently Asked Questions

    Can I use frozen bananas for this banana bread?

    Yes! Frozen bananas work great in this recipe. Just thaw them completely and drain off any excess liquid before adding them to your batter.

    Can you freeze banana bread?

    This loaf freezes beautifully. You can freeze the whole loaf or individual slices — just wrap them tightly in plastic wrap and store in a freezer bag. They’ll keep for up to 3 months.

    How do you store banana bread?

    Once cooled, store your banana bread in an airtight container at room temperature. It usually stays fresh for 3-4 days.

    Why is my banana bread dry?

    It’s usually from overmixing or overbaking. Be sure to mix just until combined and keep an eye on it as it bakes – every oven is a little different. Making banana bread with 3 bananas is the secret to a deliciously moist loaf that doesn’t dry out, and be sure to use ripe bananas for the best results.

    A close up image of a slice of banana bread with butter and a bite taken out of it.

    Tips For Making Tasty Banana Bread

    • Disposable pans work, but for the best results, I recommend investing in a sturdy loaf pan. It helps bake the bread evenly.
    • Line the pan: for easier loaf removal. I spray with cooking spray, add parchment with an inch or two sticking out on each side and then spray again.
    • Take a moment to sift the flour, baking powder, baking soda, salt, and nutmeg before mixing with the wet ingredients. It helps everything blend together smoothly.
    • Don’t overmix the batter. Stir until just combined (no more streaks of flour) to avoid a tough or dense loaf. A few lumps are totally fine!
    • Use overripe bananas. The more spots, the better. They bring out the natural sweetness and give you that rich banana flavor.
    • Every oven is a little different, so test for doneness. Start checking around the 50 minute mark. A toothpick should come out mostly clean with just a few moist crumbs.
    • Try a few mix-ins! Fold in chocolate chips or chopped nuts.
    • Ingredients to prep ahead- Bananas can be mashed and refrigerated a day in advance. You can also sift your dry ingredients and store them in an airtight container until you're ready to bake.
    A loaf of banana bread with 3 slices next to it.

    What To Serve With Banana Bread

    I love enjoying a warm slice of banana bread with my morning coffee or as a sweet afternoon treat. It's perfect on its own, but you can easily make it part of a full breakfast or brunch spread. Here are a few of my favorite recipes to pair with your banana bread:

    • Bubble Up Breakfast Casserole
    • Crock Pot Ham
    • Homemade Scalloped Potatoes
    • Basic Deviled Eggs

    Other Tasty Banana Recipes To Try

    • 3 breakfast cookies stacked on each other with the other cookies around it.
      Breakfast Cookies Recipe
    • A square image of Strawberry Banana Split Cake
      Strawberry Banana Split Cake
    • A square image of Grandma's Best Banana Cake recipe.
      Grandma's Best Banana Cake Recipe
    • A close up image of a chocolate chip banana muffin inside a bowl of other muffins.
      Moist Banana Chocolate Chip Muffins

    Love this recipe? Please leave a 5 star ⭐️⭐️⭐️⭐️⭐️ rating in the recipe card below ⬇️ and/or a review in the comment section further down. Check out my Amazon Store for all my favorite tools, including those used in this recipe. And follow @thelifejolie on Instagram and TikTok!

    Two slices of banana bread next to the loaf with a banana on the side.

    Buttermilk Banana Bread Recipe

    Jessy Freimann
    Transport yourself back to childhood with a warm, delicious buttermilk banana bread recipe. This moist and flavorful loaf comes together with simple ingredients and is perfect for cozy mornings or a sweet snack. 
    5 from 2 votes
    Print Recipe Pin Recipe
    Prep Time 10 minutes mins
    Cook Time 1 hour hr
    Total Time 1 hour hr 10 minutes mins
    Course Breakfast, Dessert
    Cuisine American
    Servings 8 servings
    Calories 238 kcal

    Equipment

    • measuring cups
    • measuring spoons
    • mixing bowl
    • Spatula
    • Loaf Pan

    Ingredients
      

    • Cooking spray
    • 2 cups flour
    • 1 ½ teaspoon baking powder
    • ½ teaspoon baking soda
    • ½ teaspoon salt
    • ¼ teaspoon ground nutmeg
    • 3 ripe bananas, peeled and mashed (⅓ cup)
    • 1 cup sugar
    • ½ cup softened butter (1 stick)
    • 2 large eggs
    • ½ cup buttermilk (you can always whisk a couple tablespoons of lemon juice or white vinegar with milk if you don't have buttermilk on hand)

    Instructions
     

    • Preheat oven to 350 degrees and grease and line a loaf pan.
    • Sift flour, baking powder, baking soda, salt and ground nutmeg into a bowl and set aside. Mash up the bananas in another bowl.
    • In a separate bowl cream butter, and sugar for 2 minutes. Add eggs, buttermilk and bananas and continue mixing until well combined.
    • Gradually add dry ingredients to wet ingredients while mixing and mix until just combined.
    • Pour into prepared loaf pans and bake for 1 hour or until your cake tester comes out clean. Cool and serve.

    Video

    Notes

    • Disposable pans work, but for the best results, I recommend investing in a sturdy loaf pan. It helps bake the bread evenly.
    • Line the pan: for easier loaf removal. I spray with cooking spray, add parchment with an inch or two sticking out on each side and then spray again.
    • Take a moment to sift the flour, baking powder, baking soda, salt, and nutmeg before mixing with the wet ingredients. It helps everything blend together smoothly.
    • Don’t overmix the batter. Stir until just combined (no more streaks of flour) to avoid a tough or dense loaf. A few lumps are totally fine!
    • Use overripe bananas. The more spots, the better. They bring out the natural sweetness and give you that rich banana flavor.
    • Every oven is a little different, so test for doneness. Start checking around the 50 minute mark. A toothpick should come out mostly clean with just a few moist crumbs.
    • Try a few mix-ins! Fold in chocolate chips or chopped nuts.
    • Ingredients to prep ahead- Bananas can be mashed and refrigerated a day in advance. You can also sift your dry ingredients and store them in an airtight container until you're ready to bake.

    Nutrition

    Serving: 1servingCalories: 238kcalCarbohydrates: 50gProtein: 5gFat: 2gSaturated Fat: 1gPolyunsaturated Fat: 0.4gMonounsaturated Fat: 1gTrans Fat: 0.01gCholesterol: 48mgSodium: 328mgPotassium: 72mgFiber: 1gSugar: 26gVitamin A: 92IUVitamin C: 0.001mgCalcium: 73mgIron: 2mg
    Tried this recipe?Let us know how it was!

    Mushrooms in White Wine Sauce

    Apr 16, 2025 · 15 Comments

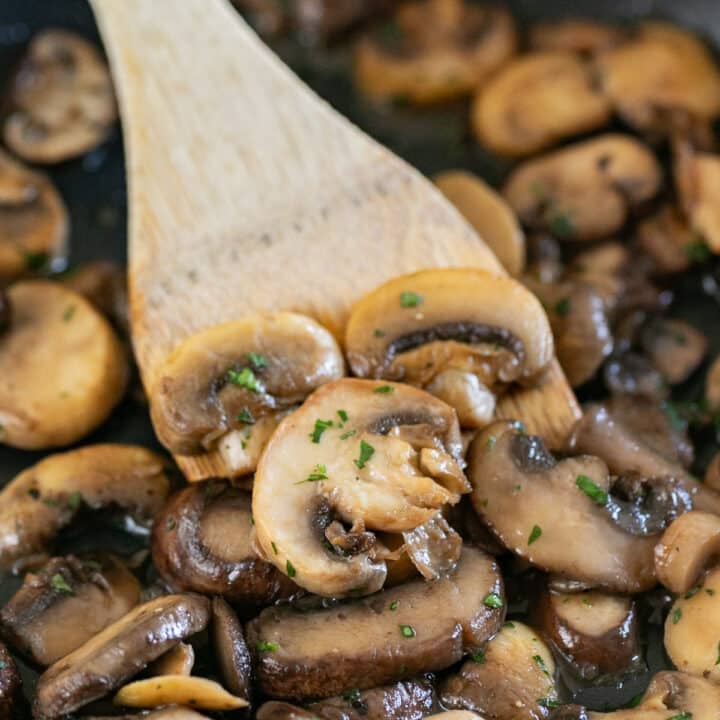
    A wooden spoon in a pan of sauteed mushrooms.

    These mushrooms in white wine sauce are buttery, savory, and the perfect comfort food. They're done in under 30 minutes and are so good you’ll want to put them on everything!

    A wooden spoon in a pan of sauteed mushrooms.
    [feast_advanced_jump_to]

    Why You’ll Love Sauteed Steakhouse Mushrooms

    This mushroom recipe is savory, tender, and full of flavor thanks to a simple reduction of wine and stock. It's a great way to use up that last bit of wine hanging around your fridge and make an easy side dish that feels a little fancy without any extra work. The combo of butter, oil, and wine makes these mushrooms taste rich, slightly tangy, and utterly satisfying. 

    What makes this recipe extra special for me is that it’s inspired by a family favorite. My mother-in-law makes her mushrooms this way, and it’s one of those no-measurement, cooked-from-the-heart kinds of dishes. She was kind enough to give me a rough idea of her process, and I’ve been making them this way ever since. Here are more reasons to love this recipe:

    • Crowd-pleasing
    • Quick, yet incredible
    • They go with everything
    • Pan-fried to golden perfection
    • A great way to use up leftover wine
    An overhead image of a pan of fried mushrooms with raw mushrooms, parsley and a striped napkin around it.

    Ingredient Information And Substitutions

    • Butter- For rich, comforting flavor. It also helps the mushrooms get nice and golden.
    • Olive oil- Keeps the butter from burning and helps everything cook evenly. Substitute with any neutral oil, like canola or avocado oil.
    • Mushrooms- I usually go for cremini (aka baby bella) mushrooms, but white button mushrooms also work in this fried mushrooms recipe. 
    • White wine- Adds a light, tangy depth of flavor. You can use red wine for a more robust flavor. For a non-alcoholic option, use chicken or beef broth.
    • Salt and black pepper- Adjust to taste.
    An overhead image of labeled recipe ingredients.

    How To Make Fried Mushrooms in White Wine Sauce

    Step 1- Heat the pan.

    In a large sauté pan, add the butter and olive oil over medium heat until the butter is fully melted and the oil is shimmering.

    Oil and butter meltin together in a pan and then a single layer of raw mushrooms in the pan.

    Step 2- Sauté the mushrooms.

    Add half the the sliced or quartered mushrooms to the pan. You want to make sure they stay in a single layer so the sear and not steam. Let them cook for about 2-3 minutes per side, allowing them to brown. Stir occasionally. Remove to a side bowl and brown the rest of the mushrooms.

    Step 3- Add the wine and simmer.

    Once all the mushrooms are browned, return all mushrooms to the pan and pour in the white wine (or red wine, if using), and season with salt and pepper to taste. Stir to combine and deglaze the pan, scraping up any browned bits from the bottom.

    Let the wine simmer and reduce for about 7-10 minutes, or until most of the liquid evaporates and the sauce thickens. This will concentrate the flavors. Taste, adjust seasonings as needed and serve.

    Browned mushrooms in the pan and then tall the mushrooms simmering in wine sauce.

    Frequently Asked Questions

    Do I have to use white wine? 

    Nope, this also tastes great with red wine. Avoid anything too sweet, like rose or dessert wines. Alternatively, substitute with beef or chicken broth. for a non-alcoholic version.

    What's the best way to clean mushrooms?

    Try to avoid submerging them in water, as mushrooms have really high moisture content to begin with. They sell mushroom brushes for cleaning them, but I’ve found that a damp paper towel does the trick.

    When do you season sautéed mushrooms?

    Since mushrooms release a lot of moisture, it’s best to wait on the salt and pepper. Let them brown first to get that nice sear, then season them after adding the wine and deglazing the pan.

    A close up of sauteed mushrooms in a pan.

    Tips for Making Steakhouse Sauteed Mushrooms

    • If you're short on time, grab a package of pre-cleaned, pre-sliced mushrooms from the store.
    • Add chopped shallots or onions to the pan before browning the mushrooms for extra depth.
    • Fresh herbs like thyme or parsley are great choices, adding a pop of color and a little freshness at the end.
    • Give the mushrooms space to brown. Overcrowding can cause them to steam, which means you won't get that golden-brown color. Avoid stirring too often as well. Definitely brown the mushrooms in batches.
    • Since wine is a main flavor here, using a decent-quality white (or red) wine makes a big difference. Choose something you like drinking by the glass, but there's no need to go above $10-15 for the bottle.
    • Ingredients to prep ahead- Clean and slice the mushrooms in advance. They’ll keep well in the fridge for a day or two- I store covered in a paper towel lined container.
    • Leftovers and storage- Store any leftovers in an airtight container in the fridge for up to 3 days. Reheat gently on the stovetop over medium-low heat.
    A pan of cooked mushrooms with parsley, raw mushrooms and a striped napkin around it.

    What to Serve with Fried Mushrooms

    This recipe is super versatile and packed with savory, wine-kissed flavors that can take any meal up a notch. Whether you're serving them as sautéed mushrooms for steak, tossing them over mashed potatoes, or pairing them with roasted veggies, they’ll fit in perfectly. It’s the kind of dish that makes everything taste just a little bit better. Here are a few more recipes that would make a great pairing: 

    • Drunken Steak
    • Easy Meatloaf and Potatoes Dinner
    • Roasted Beet Salad
    • Broccoli and Cheese Sauce
    • Four Ingredient Chocolate Mousse
    • Cherry Chocolate Oatmeal Cookie Bars

    Other Tasty Side Dishes To Try

    • A plate of garlic green beans with a striped towel, garlic bulbs and parsley in the background.
      Garlic And Butter Green Beans
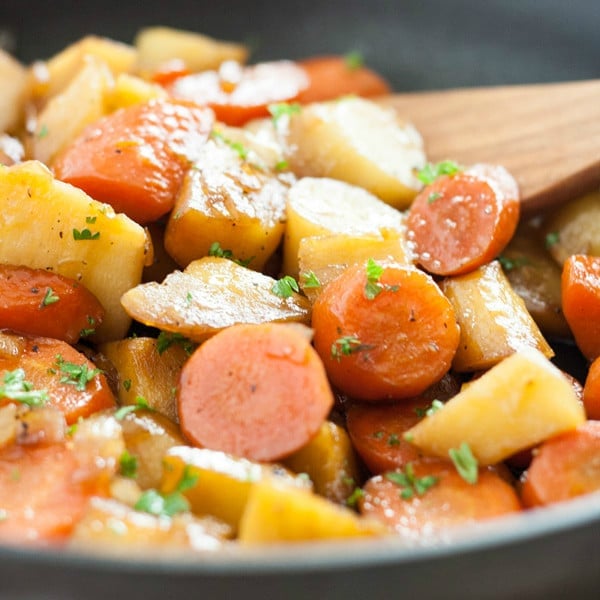
    • Honey Soy Glazed Carrots and Parsnips are a sweet and savory vegetable side dish that will please even the pickiest of palates! Made with carrots, parsnips, shallots, honey and soy sauce. This is the perfect addition to any holiday table (hello thanksgiving and Christmas!).
      Honey Soy Glazed Carrots and Parsnips
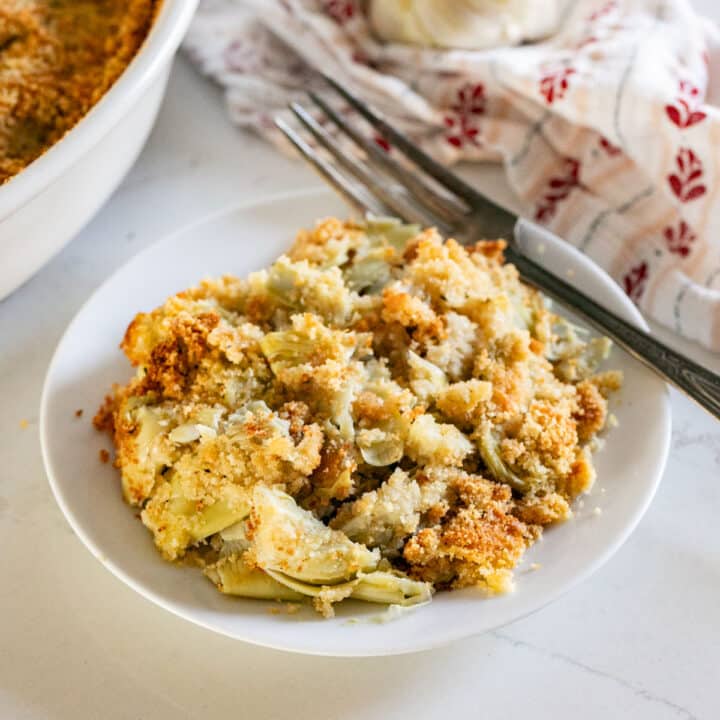
    • A plate of artichoke hearts with a fork on it and a white and red napkin and garlic behind it.
      Grandma's Baked Artichoke Hearts
    • These Sautéed Shredded Brussel Sprouts and a festive holiday side dish recipe that's also super quick and easy to make! Made with Brussel Sprouts, Shallots, Pancetta, Holland House Sherry Cooking Wine and fresh Pomegranate Seeds.
      Sautéed Shredded Brussel Sprouts featuring Holland House Cooking Wines

    Love this recipe? Please leave a 5 star ⭐️⭐️⭐️⭐️⭐️ rating in the recipe card below ⬇️ and/or a review in the comment section further down. Check out my Amazon Store for all my favorite tools, including those used in this recipe. And follow @thelifejolie on Instagram and TikTok!

    A wooden spoon in a pan of sauteed mushrooms.

    Mushrooms in White Wine Sauce

    Jessy Freimann
    These mushrooms in white wine sauce are buttery, savory, and the perfect comfort food. They're done in under 30 minutes and are so good you’ll want to put them on everything!
    4.67 from 3 votes
    Print Recipe Pin Recipe
    Prep Time 5 minutes mins
    Cook Time 15 minutes mins
    Total Time 20 minutes mins
    Course Side Dish
    Cuisine American
    Servings 4 servings
    Calories 131 kcal

    Equipment

    • Large saute pan
    • wooden spoon
    • chefs knife
    • cutting board

    Ingredients
      

    • 2 Tablespoons salted butter
    • 1 Tablespoon olive oil
    • 1 teaspoon Kosher salt (to taste)
    • ¼ teaspoon ground black pepper to taste
    • 1 pound mushrooms sliced
    • ½ cup white wine (you can also use red)

    Instructions
     

    • In a large sauté pan, melt 1 Tablespoon butter and the oil over medium heat.
    • Add half the mushrooms to make a single layer in the pan and let them brown about a 2-3 minutes per side. Remove from pan.
    • Melt the other Tablespoon of butter n the empty pan and fry the remaining mushrooms in a single layer.
    • When the last batch of mushrooms are nicely browned, add all the mushrooms back into the pan.
    • Add wine, salt and pepper and deglaze the pan. 
    • Let the wine simmer and reduce for 7-10 minutes or until most of the wine has evaporated. Serve immediately.

    Video

    Notes

    • If you're short on time, grab a package of pre-cleaned, pre-sliced mushrooms from the store.
    • Add chopped shallots or onions to the pan before browning the mushrooms for extra depth.
    • Fresh herbs like thyme or parsley are great choices, adding a pop of color and a little freshness at the end.
    • Give the mushrooms space to brown. Overcrowding can cause them to steam, which means you won't get that golden-brown color. Avoid stirring too often as well. Definitely brown the mushrooms in batches.
    • Since wine is a main flavor here, using a decent-quality white (or red) wine makes a big difference. Choose something you like drinking by the glass, but there's no need to go above $10-15 for the bottle.
    • Ingredients to prep ahead- Clean and slice the mushrooms in advance. They’ll keep well in the fridge for a day or two- I store covered in a paper towel lined container.
    • Leftovers and storage- Store any leftovers in an airtight container in the fridge for up to 3 days. Reheat gently on the stovetop over medium-low heat.

    Nutrition

    Serving: 1servingCalories: 131kcalCarbohydrates: 5gProtein: 4gFat: 10gSaturated Fat: 4gPolyunsaturated Fat: 1gMonounsaturated Fat: 4gTrans Fat: 0.2gCholesterol: 15mgSodium: 634mgPotassium: 385mgFiber: 1gSugar: 3gVitamin A: 176IUVitamin C: 2mgCalcium: 9mgIron: 1mg
    Tried this recipe?Let us know how it was!

    Jalapeno Deviled Eggs

    Apr 14, 2025 · 3 Comments

    A close up of a jalapeno deviled egg on a plate with others.

    These jalapeno deviled eggs are creamy, smoky, and perfectly spicy! Made with cream cheese, crispy bacon, and fresh jalapeños, they’re like a jalapeño popper in deviled egg form and are ready in just 30 minutes.

    A close up of a jalapeno deviled egg on a plate with others.
    [feast_advanced_jump_to]

    Why You’ll Love These Deviled Eggs With Bacon And Jalapeno

    No matter how much I’ve eaten, I always have room for deviled eggs. There’s just something about that creamy, flavorful bite that keeps me coming back for more. And the best part? There are a million ways to put a fun twist on this appetizer.

    This particular recipe is inspired by one of my favorite party snacks — jalapeño poppers. It really takes traditional deviled eggs to the next level! Each bite has the rich creaminess of cream cheese, the smoky crunch of bacon, and just the right amount of heat from fresh jalapeños.

    Make them for your next picnic, use up leftover Easter eggs, or add a little spice to brunch. You can even take them to a game day gathering or just snack on them at home! Here’s why you’ll love them:

    • Creamy, smoky, and a little spicy
    • A fun twist on a classic
    • Ready in just 30 minutes
    • Perfect for any occasion
    • A guaranteed crowd-pleaser
    A plate of deviled eggs with jalapeno peppers and bacon.

    Ingredient Information And Substitutions

    • Eggs- Large eggs work best for this recipe.
    • Cream cheese- Adds richness and creaminess to the filling. For a bolder flavor, try adding shredded sharp cheddar, Pepper Jack, or Gouda.
    • Mayonnaise- Helps create a smooth and creamy filling. If you don’t like mayo, try sour cream or Greek yogurt.
    • Apple cider vinegar- Adds a little tang! White vinegar or lemon juice works too.
    • Jalapeños- You’ll need two: one minced (with seeds removed for less heat) and one sliced for garnish. Swap with pickled jalapeños for a slightly tangy kick without too much heat.
    • Bacon- Crispy, crumbled bacon adds the perfect smoky touch. Turkey bacon is a good alternative, while smoked or peppered bacon adds an extra layer of flavor.
    • Salt & pepper- Adjust to taste.
    An overhead image of labeled recipe ingredients.

    How To Make Deviled Eggs With Jalapeño Peppers

    Step 1: Boil & peel the eggs.

    Place eggs in a pot, cover them with cold water, and bring to a boil. Once boiling, cover, reduce heat to low, and simmer for 13 minutes. Then, transfer them to an ice bath to cool completely before peeling.

    Step 2: Make the filling.

    Slice the eggs in half lengthwise and pop the yolks into a bowl. Mash them up with cream cheese, mayo, vinegar, minced jalapeño, and most of the crumbled bacon. Stir everything together until nice and smooth.

    Filling ingredients in a glass bowl and then all the ingredients mixed together until smooth.

    Step 3: Fill and garnish.

    Spoon or pipe the filling back into the egg whites. Sprinkle on the rest of the bacon and add a fresh jalapeño slice on top for a little extra kick.

    Egg halves being filled with creamy mixture, and then topped with bacon and jalapeño slices.

    Step 4: Chill and serve!

    Pop them in the fridge until you’re ready to serve. Then, dig in and enjoy!

    Frequently Asked Questions

    Why are they called deviled eggs?

    The term "deviled" dates back to the 18th century and was used to describe spicy or zesty foods. Since traditional deviled eggs often include mustard, vinegar, or other tangy ingredients, the name stuck!

    How do I make the filling extra smooth?

    For an ultra-creamy texture, use a hand mixer or food processor to blend the yolk mixture instead of mashing by hand. 

    Can I make these ahead of time?

    Yes! You can prep them up to 2 days in advance. Store the egg whites and yolk mixture separately, then fill them right before serving for the best texture.

    How long can deviled eggs sit out?

    No more than 2 hours! To be extra safe, keep them chilled on a plate set over ice, especially if serving at a party.

    A jalapeno popper deviled egg amid others on a white plate.

    Tips For Making Bacon Jalapeno Deviled Eggs

    • Eggs are easier to peel under cold running water. Using eggs that are a few days old (instead of super fresh ones) also makes peeling easier.
    • Want it milder? Remove the seeds and membranes from the jalapeños. Or, leave them in or add a dash of cayenne for more heat
    • Swap the jalapeño slices for chives, smoked paprika, or even crispy fried onions for a little crunch.
    • No one likes soggy bacon! Cook it until extra crispy, then let it drain on a paper towel before crumbling.
    • Use a piping bag for fancier presentation. It's less messy too! You can use a fancy piping tip if you have one, or simply snip the corner off a plastic baggie.
    • Garnish like a pro. A sprinkle of smoked paprika, chives, or even crispy fried onions can take these deviled eggs to the next level.
    • Ingredients to prep ahead- Boil and peel the eggs in advance.
    • Leftovers and storage- Store in an airtight container for up to 4 days, but note that they don’t freeze well.

    What To Serve With This Easy Deviled Eggs Recipe

    Deviled eggs are always a hit at any gathering, whether it’s a casual brunch, a game day party, or a holiday spread. These deviled eggs have a little extra spice, which makes them perfect alongside a mix of fresh, creamy, and savory dishes. If you’re serving them as part of a party spread, pair them with other finger foods and dips. For a bigger meal, the jalapeño deviled eggs make a fantastic appetizer before grilled meats, salads, or even a cozy bowl of soup. Here are a few of my favorite pairings:

    • Brown Sugar Bacon Wrapped Lil Smokies
    • Crescent Roll Veggie Pizza
    • Easy Slow Cooker Pulled Pork
    • Mom's Creamy Scalloped Potatoes

    Other Tasty Appetizer Recipes To Try

    • A hand putting a tortilla chip up with taco dip on it.
      7 Layer Taco Dip
    • What to do with that bumper crop of zucchini? Zucchini Pancakes! Made with Bisquick, Romano cheese, shredded zucchini, butter, garlic powder and onion, they are a super easy savory breakfast and are also a great make-ahead appetizer for a party!
      Zucchini Pancakes
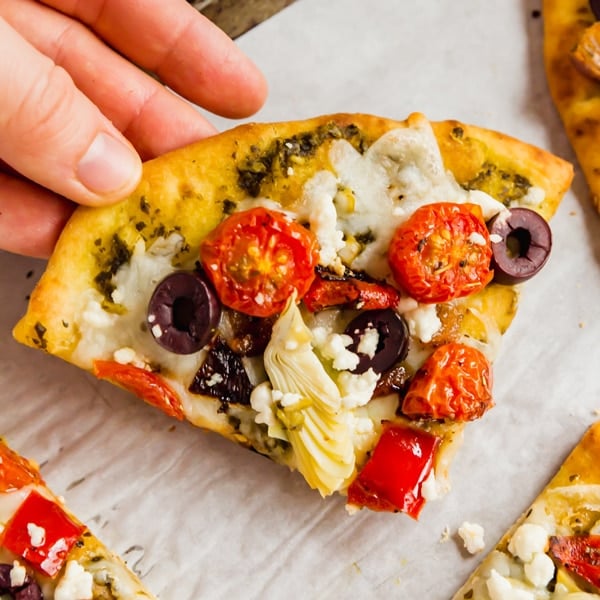
    • Need a good, meatless dinner or appetizer? This Roasted Vegetable Flatbread delivers! It's super easy to throw together and tastes fantastic.
      Roasted Vegetable Flatbread
    • A hand holding up a chip with pineapple salsa on it over the bowl.
      Jalapeno Pineapple Salsa

    Love this recipe? Please leave a 5 star ⭐️⭐️⭐️⭐️⭐️ rating in the recipe card below ⬇️ and/or a review in the comment section further down. Check out my Amazon Store for all my favorite tools, including those used in this recipe. And follow @thelifejolie on Instagram and TikTok!

    A close up of a jalapeno deviled egg on a plate with others.

    Jalapeno Deviled Eggs

    Jessy Freimann
    These jalapeno deviled eggs are creamy, smoky, and perfectly spicy! Made with cream cheese, crispy bacon, and fresh jalapeños, they’re like a jalapeño popper in deviled egg form and are ready in just 30 minutes.
    5 from 2 votes
    Print Recipe Pin Recipe
    Prep Time 15 minutes mins
    Cook Time 15 minutes mins
    Inactive Time 15 minutes mins
    Total Time 30 minutes mins
    Course Appetizer
    Cuisine American
    Servings 12 deviled eggs
    Calories 122 kcal

    Equipment

    • chefs knife
    • cutting board
    • Fry pan
    • saucepan
    • measuring spoons
    • wooden spoon
    • Strainer

    Ingredients
      

    • 6 large eggs, hard boiled and peeled
    • 2 ounces cream cheese
    • 3 Tablespoons mayonaisse
    • 1 teaspoon apple cider vinegar
    • 2 large jalapeno peppers, one sliced and one with the seeds removed, minced and divided (you can also leave the seeds if you want it to be extra spicy)
    • 6 slices bacon, cooked, crumbled and divided

    Instructions
     

    • Carefully slice the eggs in half the long way and place the yolks into medium mixing bowl. 
    • Rinse and pat dry the egg whites and set aside.
    • Into the bowl off egg yolks add cream cheese, mayonnaise, vinegar, all of the minced jalapeno, and all of the bacon except for 1 Tablespoon. Mix well until fully combined.
    • Place the mixture into a sandwich size plastic zipper bag and snip off the end. Use that to "pipe" the mixture into the egg whites.
    • Sprinkle on remaining bacon and place a slice of the other jalapeno pepper into the top of each yolk. Refridgerate until you're ready to serve.

    Video

    Notes

    • Eggs are easier to peel under cold running water. Using eggs that are a few days old (instead of super fresh ones) also makes peeling easier.
    • Want it milder? Remove the seeds and membranes from the jalapeños. Or, leave them in or add a dash of cayenne for more heat
    • Swap the jalapeño slices for chives, smoked paprika, or even crispy fried onions for a little crunch.
    • No one likes soggy bacon! Cook it until extra crispy, then let it drain on a paper towel before crumbling.
    • Use a piping bag for fancier presentation. It's less messy too! You can use a fancy piping tip if you have one, or simply snip the corner off a plastic baggie.
    • Garnish like a pro. A sprinkle of smoked paprika, chives, or even crispy fried onions can take these deviled eggs to the next level.
    • Ingredients to prep ahead- Boil and peel the eggs in advance.
    • Leftovers and storage- Store in an airtight container for up to 4 days, but note that they don’t freeze well.

    Nutrition

    Serving: 2deviled eggsCalories: 122kcalCarbohydrates: 1gProtein: 5gFat: 11gSaturated Fat: 4gPolyunsaturated Fat: 3gMonounsaturated Fat: 4gTrans Fat: 0.03gCholesterol: 107mgSodium: 145mgPotassium: 64mgSugar: 0.3gVitamin A: 205IUCalcium: 19mgIron: 0.5mg
    Tried this recipe?Let us know how it was!

    French Carrot Salad

    Apr 11, 2025 · Leave a Comment

    An overhead image of a dark blue bowl of carrot salad with carrots, green onion and a white napkin around it.

    This French carrot salad is a light, refreshing, and simple dish that comes together in just 10 minutes! With crisp carrots tossed in a tangy Dijon vinaigrette, it’s a perfect side for busy nights.

    An overhead image of a dark blue bowl of carrot salad with carrots, green onion and a white napkin around it.
    [feast_advanced_jump_to]

    Why You’ll Love This Raw Carrot Salad

    This salad is not only quick and easy to make but also packed with flavor. Inspired by classic French cuisine, it highlights the natural sweetness of carrots balanced by a zesty dressing. It’s great for meal prep, pairs well with various dishes, and is naturally gluten-free and vegan-friendly.

    Another reason to love this salad is its incredible versatility. While it shines as a side dish, it can also be served as a light lunch with some protein added in. Try tossing in some toasted nuts for crunch, crumbled feta for creaminess, or even chickpeas for extra protein.

    The vinaigrette brings everything together, making it a well-balanced dish that works for any occasion. And since it’s made with simple, wholesome ingredients, you can feel good about serving it to your family or guests. So, if you're looking for fresh and easy carrot salad recipes, this one is a must-try! Here are more reasons to love it:

    • Crunchy and satisfying
    • Ready in just 10 minutes
    • Versatile and make-ahead friendly 
    • Healthy, light, and fresh 
    An extreme close up  of raw shredded carrots chopped green onions and dressing all mixed together.

    Ingredient Information And Substitutions

    • Carrots- You can shred them yourself using a box grater or the shredding blade of your food processor. Or you can purchase them pre-shredded.
    • Green onions- Adds a mild, fresh onion flavor. If you don’t have them, chives or finely minced red onion will do the trick.
    • Olive oil- A high-quality extra virgin olive oil gives the best flavor.
    • White wine vinegar- Red wine vinegar, apple cider vinegar, or even fresh lemon juice can also work.
    • Pure maple syrup- Just a little bit balances out the acidity. You can swap in honey if needed.
    • Dijon mustard- A must for that classic French vinaigrette. Whole grain mustard works too if you want a little more texture and bite.
    • Herbes de Provence- Adds that signature French flavor. If you don’t have it, dried thyme or oregano are good alternatives.
    • Salt & pepper- Adjust to taste!
    An overhead image of labeled recipe ingredients.

    How To Make Carrot Salad

    Step 1- Make the vinaigrette.

    whisk together olive oil, white wine vinegar, maple syrup, Dijon mustard, salt, pepper, and Herbes de Provence until smooth.

    A hand whisking dressing ingredients in a liquid measuring cup.

    Step 2- Assemble the veggies and add the vinaigrette.

    Place shredded carrots and sliced green onions into a large mixing bowl. Drizzle half the dressing over the veggies.

    Dressing being poured over the the carrots and onions in a glass bowl.

    Step 3- Toss and serve.

    Toss the veggies and dressing until well coated. If making ahead, cover and refrigerate. Before serving, toss with the remaining dressing.

    Hands with wooden salad servers tossing the raw carrot salad.

    Frequently Asked Questions

    Can I use pre-shredded carrots? 

    Yes. They will save you time, but they tend to be a bit drier and less flavorful than freshly grated ones. If using store-bought pre-shredded ones, consider soaking them in cold water for 5-10 minutes to help refresh their texture.

    What can I add to make it heartier?

    Mix in chickpeas or even shredded rotisserie chicken for some protein. Sunflower seeds or almonds add extra crunch, while a handful of raisins or dried cranberries adds just the right pop of sweetness to balance the tangy vinaigrette! This is also awesome as a sandwich topping.

    Can I serve this salad warm?

    While it’s traditionally served cold, you can lightly sauté the shredded carrot for a few minutes in olive oil before tossing it with the vinaigrette for a slightly different take on the dish.

    Wooden salad servers pulling up a scoop of carrot salad from a bowl.

    Tips For Making A Shredded Carrot Salad

    • Use fresh carrots. The fresher the carrots, the sweeter and crunchier they’ll be. That said, pre-shredded also works just fine.
    • Whisk the vinaigrette well. This helps the dressing emulsify and coat the carrots evenly.
    • Let it sit! This gives the carrots a chance to soak up some of those flavors. A quick rest for 10-15 minutes should do it.
    • Adjust the dressing to taste. If you like a tangier flavor, add an extra splash of vinegar. If you prefer it a little sweeter, add a touch more maple syrup.
    • Add texture. If you love a bit of crunch, toss in some chopped nuts, pumpkin seeds, or even pomegranate arils for a fun twist.
    • Ingredients to prep ahead- You can shred the carrots and make the dressing in advance. Store in separate containers.
    • Leftovers and storage- Store in an airtight container in the fridge for up to 3 days. If the salad seems dry, add a little extra dressing before serving.

    What To Serve With This Raw Carrot Salad Recipe

    This fresh and crunchy salad is the perfect addition to any meal! It’s light, zesty, and pairs beautifully with various dishes. I love serving it as a refreshing side to balance out richer mains, but it also works well as part of a simple, casual lunch. Whether you’re planning a weeknight dinner or putting together a spread for guests, here are some delicious ideas to complete your meal:

    • Greek Yogurt Chicken
    • Eggplant Rollatini
    • Crispy Fried Potatoes
    • Lemon Parfait Cups Dessert

    Other Tasty Salad Recipes To Try

    • An overhead image of this salad with peaches and burrata on a plate with basil and a blue and white striped napkin around it.
      Grilled Peach and Burrata Salad
    • A bowl of pasta salad with a white towel behind it and tomatoes and basil around it.
      Zesty Italian Pasta Salad
    • A spoon holding a spoonful of Asian Coleslaw Ramen over a blue bowl of it.
      Ramen Asian Coleslaw Recipe
    • A side view of a clear glass trifle dish with a layered taco salad with the dressing and salsa in jars on the side.
      7 Layer Taco Salad Recipe

    Love this recipe? Please leave a 5 star ⭐️⭐️⭐️⭐️⭐️ rating in the recipe card below ⬇️ and/or a review in the comment section further down. Check out my Amazon Store for all my favorite tools, including those used in this recipe. And follow @thelifejolie on Instagram and TikTok!

    An overhead image of a dark blue bowl of carrot salad with carrots, green onion and a white napkin around it.

    French Carrot Salad

    Jessy Freimann
    This French carrot salad is a light, refreshing, and simple dish that comes together in just 10 minutes! With crisp carrots tossed in a tangy Dijon vinaigrette, it’s a perfect side for busy nights.
    5 from 1 vote
    Print Recipe Pin Recipe
    Prep Time 10 minutes mins
    Total Time 10 minutes mins
    Course Salad, Side Dish
    Cuisine French
    Servings 6 servings
    Calories 117 kcal

    Equipment

    • chefs knife
    • cutting board
    • Spatula
    • measuring cups
    • measuring spoons

    Ingredients
      

    • 5 cups shredded carrots a little less than 2 pounds, depending on thickness
    • 1 bunch green onions sliced (around ¾ cup)
    • ⅓ cup olive oil
    • 3 Tablespoons white wine vinegar you can also use red wine vinegar
    • 1 Tablespoon maple syrup
    • 1 Tablespoon prepared Dijon mustard
    • ½ teaspoon kosher salt
    • ¼ teaspoon ground black pepper
    • ½ teaspoon Herbes de Provence

    Instructions
     

    • Place shredded carrots and sliced green onions into a large bowl. Set aside.
    • In a smaller bowl, whisk oil, vinegar, maple syrup, mustard, salt, pepper and Herbes de Provence until well combined.
    • Toss salad in half the dressing. If making in advance cover and refrigerate until ready to serve.
    • When ready to serve, toss with remaining dressing.

    Video

    Notes

    • Use fresh carrots. The fresher the carrots, the sweeter and crunchier they’ll be. That said, pre-shredded also works just fine.
    • Whisk the vinaigrette well. This helps the dressing emulsify and coat the carrots evenly.
    • Let it sit! This gives the carrots a chance to soak up some of those flavors. A quick rest for 10-15 minutes should do it.
    • Adjust the dressing to taste. If you like a tangier flavor, add an extra splash of vinegar. If you prefer it a little sweeter, add a touch more maple syrup.
    • Add texture. If you love a bit of crunch, toss in some chopped nuts, pumpkin seeds, or even pomegranate arils for a fun twist.
    • Ingredients to prep ahead- You can shred the carrots and make the dressing in advance. Store in separate containers.
    • Leftovers and storage- Store in an airtight container in the fridge for up to 3 days. If the salad seems dry, add a little extra dressing before serving.

    Nutrition

    Serving: 1servingCalories: 117kcalCarbohydrates: 2gProtein: 0.02gFat: 12gSaturated Fat: 2gPolyunsaturated Fat: 1gMonounsaturated Fat: 9gSodium: 195mgPotassium: 12mgFiber: 0.1gSugar: 2gVitamin A: 4IUVitamin C: 0.1mgCalcium: 6mgIron: 0.2mg
    Tried this recipe?Let us know how it was!

    Greek Pork Tenderloin

    Apr 7, 2025 · Leave a Comment

    A close up image of sliced pork on a plate with green beans.

    This Greek Pork Tenderloin is infused with bold, fresh flavors from a delicious homemade marinade. It comes together in minutes and makes for a juicy, flavorful meal that’s perfect for grilling season.

    A close up of sliced pork tenderloin in a baking dish.
    [feast_advanced_jump_to]

    Why You’ll Love This Tenderloin Pork Marinade

    If you’re anything like me, you love a dinner that’s packed with flavor but doesn’t take a ton of effort. That’s exactly what this Greek pork marinade delivers! With just a handful of simple ingredients, you can transform plain pork tenderloin into something bold, juicy, and irresistible. The bright citrus, savory garlic, and aromatic Greek herbs come together in a way that makes every bite delicious — perfect for grilling season or even a quick weeknight meal.

    And the best part? This marinade isn’t just for pork! It works beautifully on chicken, shrimp, or veggies, making it a versatile recipe to keep in your back pocket. Plus, you can mix it up ahead of time, making dinner prep even easier. It’s the kind of recipe that you’ll make once and then wonder how you ever grilled without it. Here’s why this marinade for souvlaki pork is a total game-changer:

    • Minimal effort, big flavor
    • Bold, zesty Greek flavors
    • Keeps pork extra juicy
    • Works great on chicken, shrimp, or veggies
    • Great for make-ahead meals 
    A close up image of sliced pork on a plate with green beans.

    Ingredient Information And Substitutions

    • Pork tenderloin- This recipe is written for pork tenderloin, but you can swap in pork chops or even chicken.
    • Olive oil- It helps the marinade coat the meat evenly. Avocado oil is a great substitute.
    • Lemon juice- Adds brightness and helps tenderize the meat. Fresh is best. 
    • Greek seasoning- A blend of oregano, basil, garlic, and other herbs. Use homemade or store-bought.
    • Garlic salt- Enhances flavor, but you can use regular salt and fresh garlic instead.
    • Black pepper- Adds a hint of spice. Adjust to taste.
    An overhead image of labeled recipe ingredients.

    How To Make Greek Pork

    Step 1- Whisk the marinade and marinate the pork. 

    Grab a large bowl and whisk together the olive oil, lemon juice, Greek seasoning, garlic salt, and black pepper.

    Pop the pork tenderloin into a sealable bag or shallow dish, making sure it’s fully coated in that flavorful marinade. Let it chill in the fridge for at least an hour (or overnight for maximum flavor).

    A pork marinade being whisked in a glass bowl and then the pork tenderloin dded to the bowl to marinade.

    Step 2- Grill the pork.

    Take the pork out of the fridge about 10-15 minutes before cooking. Preheat your grill to medium-high and grease the grates so nothing sticks.

    Toss the pork on the grill and cook, turning every so often, until the internal temp hits just under 145 degrees F. You want that juicy, tender goodness!

    Move the pork to a clean plate and let it rest for 5-10 minutes — this keeps all those delicious juices inside. Slice against the grain and enjoy.

    The pork tenderloin cooking on the grill and then covered in foil resting on a plate.

    Frequently Asked Questions

    How long should you marinate pork tenderloin?

    While it’s safe to marinate pork in the refrigerator for 3-5 days, the texture can get mushy. For the best results, marinate it for at least 1 hour and up to 24 hours.

    What’s the difference between pork loin and pork tenderloin?

    Pork loin is larger, thicker, and has a fat cap, making it great for roasting. Pork tenderloin is smaller, leaner, and one of the most tender cuts. It cooks faster and is usually pricier. Since they have different textures and cook times, they can’t be swapped in recipes.

    How do you know when pork tenderloin is done?

    Pork is perfectly cooked at 145 degrees F, even with a little pink in the center. Just be sure to let it rest before slicing to lock in those juices.

    An overhead image of sliced pork tenderloin in a serving pan.

    Tips for Making Marinade For Pork Tenderloin

    • Use fresh lemon juice and garlic to give the best flavor. Bottled juice just won’t cut it!
    • Know your grill. Keep an eye on the hot spots on your grill to help it cook evenly.
    • Avoid overcooking to keep it juicy! Use a meat thermometer and pull it off the grill just before 145 degrees F in the thickest part of the meat.
    • Cutting too soon lets the juices run out — let it rest for 5 minutes before slicing!
    • Slice against the grain. This makes the meat more tender and easier to chew.
    • Try it with other proteins. This marinade works great on chicken, shrimp, or even veggies!
    • Ingredients to prep ahead- Whisk the marinade together and store it in the fridge until ready to use.
    • Leftovers and storage- Store cooked pork in an airtight container in the fridge for 3-4 days. Freeze raw pork in the marinade or freeze cooked pork once cooled — either are good for 1-2 months.

    What To Serve With Pork Tenderloin Marinade

    This flavorful recipe is a standout main dish, but pairing it with the right sides takes it to the next level! I love serving it with fresh, vibrant sides that complement those bright Mediterranean flavors. Whether you're going for something light and refreshing or a heartier option, here are a few great recipes to round out and complete this meal:

    • Pesto Tortellini Salad
    • Crunchy Red Cabbage Salad
    • Grilled Peach and Burrata Salad
    • Roasted Beet Salad with Feta and Dill

    Other Pork Recipes To Try

    • A close up image of the side of a blue bowl of pork stew and mashed potatoes.
      Pork Chop Stew
    • A close up image of a loaded BBQ baked potato on a sheet pan with another in the background.
      BBQ Baked Potato Recipe with Pulled Pork
    • A sandwich with the top off revealing pulled pork with BBQ sauce on top of it and another sandwich in the background.
      Easy Slow Cooker Pulled Pork BBQ
    • A Bourbon pork chop on a white plate with a green salad.
      Brown Sugar Bourbon Pork Chops

    Love this recipe? Please leave a 5 star ⭐️⭐️⭐️⭐️⭐️ rating in the recipe card below ⬇️ and/or a review in the comment section further down. Check out my Amazon Store for all my favorite tools, including those used in this recipe. And follow @thelifejolie on Instagram and TikTok!

    A close up image of sliced pork on a plate with green beans.

    Greek Pork Tenderloin

    Jessy Freimann
    This Greek Pork Tenderloin is infused with bold, fresh flavors from a delicious homemade marinade. It comes together in minutes and makes for a juicy, flavorful meal that’s perfect for grilling season.
    No ratings yet
    Print Recipe Pin Recipe
    Prep Time 1 hour hr 10 minutes mins
    Cook Time 20 minutes mins
    Resting time 20 minutes mins
    Course Main Course
    Cuisine American
    Servings 4 servings

    Equipment

    • Gallon freezer zipper bags
    • measuring spoons
    • measuring cups
    • chefs knife
    • cutting board
    • Whisk
    • mixing bowl
    • Citrus reamer
    • Grill tongs
    • Meat thermometer

    Ingredients
      

    • 1 pound pork tenderloin
    • ¼ cup olive oil
    • 2-3 Tablespoons lemon juice
    • 2 teaspoons greek seasoning (I use McCormack Organic)
    • 1 teaspoon garlic salt
    • ¼ teaspoon ground black pepper,
    • Cooking spray

    Instructions
     

    • In a large bowl, whisk oil, lemon juice, Greek seasoning, garlic salt and black pepper until well combined.
    • Submerge pork tenderloin in marinade and refrigerate until you're ready to cook (or freeze).
    • When you're ready to cook, remove pork from the refrigerator. Spray grill with cooking spray and preheat to medium high.
    • Place pork tenderloin on grill turning periodically. Discard leftover marinade.
    • Cook until it reaches an internal temperature of just before 145 degrees, around 15 minutes depending on thickness.
    • Remove from heat to a clean plate and rest for 5 minutes. Carve and serve.

    Video

    Notes

    • Use fresh lemon juice and garlic to give the best flavor. Bottled juice just won’t cut it!
    • Know your grill. Keep an eye on the hot spots on your grill to help it cook evenly.
    • Avoid overcooking to keep it juicy! Use a meat thermometer and pull it off the grill just before 145 degrees F in the thickest part of the meat.
    • Cutting too soon lets the juices run out — let it rest for 5 minutes before slicing!
    • Slice against the grain. This makes the meat more tender and easier to chew.
    • Try it with other proteins. This marinade works great on chicken, shrimp, or even veggies!
    • Ingredients to prep ahead- Whisk the marinade together and store it in the fridge until ready to use.
    • Leftovers and storage- Store cooked pork in an airtight container in the fridge for 3-4 days. Freeze raw pork in the marinade or freeze cooked pork once cooled — either are good for 1-2 months.
    Tried this recipe?Let us know how it was!

    Bacon Egg And Cheese Muffins

    Apr 2, 2025 · 3 Comments

    A close up of a bacon egg and cheese muffin on a plate with the other ones.

    Quick, easy, and flavorful, these bacon egg and cheese muffins are perfect for a stress-free brunch or grab-and-go breakfast. Fluffy eggs, crispy bacon, and melty cheese bake inside golden puff pastry for a delicious bite with minimal effort.

    A close up of a bacon egg and cheese muffin on a plate with the other ones.
    [feast_advanced_jump_to]

    Why You’ll Love Egg Muffins With Bacon And Cheese

    If you're anything like me, breakfast needs to be easy, delicious, and satisfying — and these muffins check all the boxes! They’re perfect for busy mornings when you need something hearty and portable. I’ve always loved puff pastry recipes because they feel fancy but require minimal effort. 

    And let’s be honest, bacon, eggs, and cheese are a classic combination that never gets old. These muffins bake up flaky, cheesy, and full of flavor, and they’re ridiculously simple to make. Here’s why you’ll love them:

    • Super quick and easy
    • Perfect for meal prep or busy mornings
    • Customize with your favorite fillings
    • Crispy, cheesy, and fluffy all in one bite
    • Freezer-friendly
    An overhead image of egg muffins in a bowl with a napkin, forks and strawberries around it.

    Ingredient Information And Substitutions

    • Puff pastry- Use frozen puff pastry, thawed. If needed, substitute with crescent dough.
    • Bacon- Crispy cooked bacon adds a smoky crunch. Swap with chopped ham, sausage, or turkey bacon.
    • Cheese- Sharp cheddar works great, but feel free to try Swiss, mozzarella, feta, or Pepper Jack for different flavor profiles.
    • Eggs- Provide structure and help create a light, fluffy texture.
    • Milk- Adds moisture and softness to the eggs. For extra richness, substitute with heavy cream.
    • Seasonings- A simple sprinkle of kosher salt and ground black pepper to enhance the flavors.
    An overhead image of labeled recipe ingredients.

    How To Make Bacon Cheese Puff Pastry

    Step 1- Prep the filling.

    Fry and crumble 6 slices of cooked bacon.

    In a bowl, whisk together the eggs, milk, salt, and pepper.

    Bacon frying in a pan and eggs beaten in a blue bowl.

    Step 2- Prep the puff pastry.

    Preheat the oven to 400 degrees F and generously spray a muffin pan with cooking spray to prevent sticking.

    Cut each puff pastry sheet into 9 squares, press them into muffin cups, and lightly poke the bottoms with a fork to keep them from puffing too much.

    Puff pastry sheet cut into  squares and then the squares pressed into the cups of a muffin tin.

    Step 3- Fill the cups.

    Take half the crumbled bacon and divide evenly between the puff pastry cups then add shredded cheese. Then, pour the egg mixture evenly into the muffin cups.

    Cheese and bacon added into the puff pastry cups and then the egg mixture poured into each one.

    Step 5- Bake to perfection.

    Top with the remaining crumbled bacon and bake for 15-20 minutes, until the puff pastry is golden brown and the eggs are set. Dig in while they're warm!

    More bacon added to the top of each filled muffin cup and then the muffin tin in the oven.

    Frequently Asked Questions

    Can I make these ahead of time?

    Yes, although these are best served right away, so I encourage you to stick to prepping ahead and baking just before serving. Just prep them the day before and refrigerate. Pop them in the oven in the morning for a fresh and easy breakfast.

    How do I prevent the puff pastry from getting soggy?

    Make sure to give the puff pastry a few gentle pokes with a fork before filling. This helps release steam and keeps it nice and crispy.

    Do I need to thaw the puff pastry first?

    Yes. Let the puff pastry thaw according to package instructions (usually about 30-40 minutes at room temperature) so it’s easy to work with.

    Can I add vegetables to these muffins?

    Sure! Diced bell peppers, spinach, mushrooms, or onions all work well. Just sauté them first to remove excess moisture.

    A close up of an egg muffin with a bite out of it on a plate of other egg muffins.

    Tips for Making This Bacon Egg and Cheese Muffin Recipe

    • Keep puff pastry chilled for easy handling. If it gets too warm and sticky, just pop it back in the fridge for a few minutes.
    • Use a pizza cutter to slice puff pastry into neat squares.
    • For the fluffiest egg muffins, give the eggs and milk a really good whisk! The more air you whip in, the lighter and fluffier they’ll be.
    • For the best texture, cook the bacon until crispy. Prefer it a little chewy? Just take it off the heat a bit earlier.
    • Don’t overfill the muffin cups. The eggs will expand as they cook, so fill the muffin cups only ¾ of the way full to prevent overflow. Overflow won't hurt the egg muffins but it does cause them to stick to the pan.
    • Puff pastry should be light and crispy with a beautiful golden color when done. If it looks too pale, give it a couple more minutes in the oven.
    • Let the egg muffins sit in the pan for 5 minutes before carefully removing them to avoid breaking the flaky crust.
    • Ingredients to prep ahead- Cook and crumble the bacon, shred the cheese, and cut the puff pastry squares in advance. Store them separately in the fridge to save time when assembling.
    • Leftovers and storage- Keep in an airtight container in the fridge for up to 3 days or freeze for up to 2 months. Reheat in the microwave or a toaster oven for a crispier texture.
    A plate of egg muffin stacked on each other.

    What To Serve With Muffin Pan Baked Eggs

    These muffins are a fantastic grab-and-go breakfast, but they also make a great addition to a full brunch spread! Whether you're serving them for a weekend family breakfast, a holiday brunch, or even a quick weekday meal, pairing them with a few complementary dishes makes for a satisfying and well-rounded meal. Here are a few of my favorite pairings:

    • Zucchini Pancakes
    • Asparagus Leek Tart
    • Chorizo and Sweet Potato Breakfast Hash
    • Peanut Butter and Banana Breakfast Cookies

    Other Puff Pastry Breakfast Recipes To Try

    • A slice of breakfast pizza on parchment and a cutting board with a bite taken out of it and the rest of the pizza in the background.
      Puff Pastry Breakfast Pizza
    • An overhead image of the asparagus puff pastry tart on a parchment lined cutting board with sprigs of thyme around it.
      Asparagus Leek Tart
    • Spinach and Feta Breakfast Puff Pastry Pizza
      Spinach and Feta Breakfast Puff Pastry Pizza
    • The Strawberry Goat Cheese Tart recipe is great for a brunch or a low-key get-together. It’s quick and easy to make using frozen puff pastry and tastes delicious! Click on the photo to get the recipe!
      Strawberry Goat Cheese Tart

    Love this recipe? Please leave a 5 star ⭐️⭐️⭐️⭐️⭐️ rating in the recipe card below ⬇️ and/or a review in the comment section further down. Check out my Amazon Store for all my favorite tools, including those used in this recipe. And follow @thelifejolie on Instagram and TikTok!

    A close up of a bacon egg and cheese muffin on a plate with the other ones.

    Bacon Egg And Cheese Muffins

    Jessy Freimann
    Quick, easy, and flavorful, these bacon egg and cheese muffins are perfect for a stress-free brunch or grab-and-go breakfast. Fluffy eggs, crispy bacon, and melty cheese bake inside golden puff pastry for a delicious bite with minimal effort.
    5 from 2 votes
    Print Recipe Pin Recipe
    Prep Time 10 minutes mins
    Cook Time 20 minutes mins
    Total Time 30 minutes mins
    Course Breakfast
    Cuisine American
    Servings 18 pieces
    Calories 235 kcal

    Equipment

    • muffin pan
    • Pizza Cutter
    • measuring cups
    • mixing bowl
    • Whisk
    • Rolling Pin
    • chefs knife
    • cutting board
    • Fry pan
    • Tongs

    Ingredients
      

    • Cooking spray
    • 2 puff pastry sheets thawed (there are 2 sheets per package)
    • 10 slices bacon, fried until crispy
    • 1 cup sharp cheddar cheese, shredded
    • 8 large eggs
    • ¼ cup milk
    • kosher salt, to taste
    • ground black pepper, to taste

    Instructions
     

    • Preheat the oven to 400 degrees and spray the muffin cups really well.
    • Using a pizza wheel, cut each puff pastry sheet into 9 squares.
    • Place the puff pastry dough into the cups. The corners will come up a little. Lightly poke the bottom with a fork, being careful not to poke all the way through.
    • Crumble 6 pieces of bacon and divide between the muffin cups (crumble the remaining pieces and set aside for later).
    • Divide cheese between all muffin cups.
    • In a separate bowl whisk together eggs, milk and salt and pepper to taste.
    • Divide the egg mixture evenly between the muffin cups.
    • Top the muffin cups with remaining bacon crumbles. 
    • Bake for 15-20 minutes of until the puff pastry is golden brown. Serve immediately.

    Video

    Notes

    • Keep puff pastry chilled for easy handling. If it gets too warm and sticky, just pop it back in the fridge for a few minutes.
    • Use a pizza cutter to slice puff pastry into neat squares.
    • For the fluffiest egg muffins, give the eggs and milk a really good whisk! The more air you whip in, the lighter and fluffier they’ll be.
    • For the best texture, cook the bacon until crispy. Prefer it a little chewy? Just take it off the heat a bit earlier.
    • Don’t overfill the muffin cups. The eggs will expand as they cook, so fill the muffin cups only ¾ of the way full to prevent overflow. Overflow won't hurt the egg muffins but it does cause them to stick to the pan.
    • Puff pastry should be light and crispy with a beautiful golden color when done. If it looks too pale, give it a couple more minutes in the oven.
    • Let the egg muffins sit in the pan for 5 minutes before carefully removing them to avoid breaking the flaky crust.
    • Ingredients to prep ahead- Cook and crumble the bacon, shred the cheese, and cut the puff pastry squares in advance. Store them separately in the fridge to save time when assembling.
    • Leftovers and storage- Keep in an airtight container in the fridge for up to 3 days or freeze for up to 2 months. Reheat in the microwave or a toaster oven for a crispier texture.

    Nutrition

    Serving: 3piecesCalories: 235kcalCarbohydrates: 13gProtein: 6gFat: 17gSaturated Fat: 5gPolyunsaturated Fat: 3gMonounsaturated Fat: 9gTrans Fat: 0.02gCholesterol: 91mgSodium: 182mgPotassium: 77mgFiber: 0.4gSugar: 0.4gVitamin A: 130IUCalcium: 20mgIron: 1mg
    Tried this recipe?Let us know how it was!

    Rice and Broccoli Casserole

    Mar 31, 2025 · 2 Comments

    A plate of broccoli rice casserole with the pan and raw broccoli florets in the background.

    This rice and broccoli casserole is the ultimate comfort food. Rich, cheesy, and loaded with tender broccoli, it’s a crowd-pleaser for any occasion from weeknight dinners to holiday feasts. Plus, it tastes just as amazing the next day — if there’s any left!

    A plate of broccoli rice casserole with the pan and raw broccoli florets in the background.
    [feast_advanced_jump_to]

    Why You’ll Love This Broccoli Cheese Rice Casserole

    There’s nothing quite like a warm, cheesy casserole fresh out of the oven, and this broccoli and rice casserole is one of my favorites! It’s rich, creamy, and packed with delicious flavor, making it a dish that both kids and adults will love. Whether you’re making it for a weeknight dinner, a potluck, or a holiday gathering, this casserole is always a crowd-pleaser.

    The only downside is this isn't a particularly quick recipe. You guys all know I love foods that are quick and easy. But trust me when I say, this casserole is worth the wait.

    A mix of creamy cheese, soft broccoli, and fluffy rice come together perfectly for a satisfying and comforting dish. It's also super versatile! Serve it as a side with roasted meats, or add shredded chicken to turn it into a hearty main dish. Here are some of my favorite parts of this meal:

    • Cheesy and comforting
    • Rich and loaded with flavor
    • Great for making ahead
    • Leftovers reheat beautifully 
    An overhead image of a pan of rice and broccoli casserole with raw broccoli and a napkin next to it.

    Ingredient Information and Substitutions

    • Butter- Adds richness to the dish. You can use vegan butter if you prefer.
    • Onion- Provides a subtle sweetness and depth of flavor. Use yellow or white onions for the best taste.
    • Broccoli- Fresh or frozen both work great! If using frozen add to the pan halfway through the onion cooking time.
    • Instant Rice- Speeds up the cooking process. I haven't tested this with regular or fully cooked rice, so stick with instant for the best results.
    • Cream of Celery Soup- Gives a creamy, savory base. You can substitute with cream of mushroom or cream of chicken
    • Cheddar Cheese Soup- Enhances the cheesy flavor.
    • Milk- Helps create the perfect sauce consistency. Use whole milk for extra creaminess.
    • Seasonings- A simple mix of salt and pepper enhances the flavor, but you can add garlic powder or paprika for a little extra depth.
    An overhead image of labeled recipe ingredients.

    How to Make Broccoli Rice and Cheese Casserole

    Step 1- Sauté the vegetables.

    Preheat your oven to 350°F and grease a casserole dish. In a pan, melt the butter over medium heat, then add the onions and broccoli. Sauté for 5-7 minutes until they soften.

    Butter melting in a pan and then broccoli and onions sautéing in the butter.

    Step 2- Prepare the sauce.

    In a separate bowl, whisk together the cream of celery soup, cheddar cheese soup, and milk until well combined.

    Sauce ingredients in a glass bowl and then the ingredients fully mixed together.

    Step 3- Layer the ingredients.

    In the greased casserole dish, layer half of the broccoli mixture, then add the rice in an even layer. Top with the remaining broccoli and pour the soup mixture over everything.

    Broccoli and rice layered in the baking dish and then covered with the sauce mixture.

    Step 4- Bake to perfection.

    Cover with foil and bake for 30 minutes. Then, uncover, give it a good stir and bake for another 15-20 minutes until thickened and bubbly. Serve hot!

    The pan covered in foil and then put in the oven.
    The casserole being stirred and then in the oven uncovered.

    Frequently Asked Questions

    Can I make this casserole ahead of time?

    Absolutely! Assemble the broccoli rice cheese casserole, cover it tightly, and refrigerate for up to 24 hours before baking. 

    How do I add protein to this dish?

    This recipe can be made heartier by stirring in cooked chickpeas, white beans, or shredded chicken before baking.

    A serving spoon in the casserole dish with the casserole on it.

    Tips for Making This Broccoli Rice and Cheese Casserole

    • Don't overcook the broccoli. You don't want it to be mush- sauté until tender-crisp.
    • Stir the casserole well once uncovered. This mixes everything so that it's perfectly combined.
    • Stick with Instant Rice. I haven't tried it with regular or fully cooked rice, but I have perfected it with instant, so stick with what works.
    • Ingredients to prep ahead- Chop the broccoli and onion and store in the fridge. 
    • Leftovers and storage- Store in an airtight container for up to 4 days in the refrigerator. Reheat in the microwave or oven.
    A close up of a plate of cheddar broccoli casserole.

    What to Serve with Broccoli Rice Casserole

    This cheddar broccoli casserole rice makes a delicious side dish but can also be turned into a complete meal with the right pairings. It goes perfectly with roasted vegetables, sautéed greens, or a fresh salad. A warm bowl of soup or crusty bread also makes a great addition and can help balance the richness. Looking for more ideas? Here are a few favorites:

    • Crispy Chicken Cutlet
    • Fall Apart Slow Cooker Pork Chops
    • Grilled Artichokes
    • Moroccan Chickpea Stew
    • Savory Spiced Butternut Squash Soup

    Other Tasty Casserole Recipes to Try

    • A close up image of a serving spoon holding a scoop of corn pudding in the pan of it.
      Corn Pudding Casserole
    • The corner of a pan of green bean casserole with a serving spoon in it.
      Green Bean Casserole Without Mushroom Soup
    • A hand lifting a a piece of biscuit casserole with eggs from the pan.
      Bubble Up Biscuit Breakfast Casserole
    • Cheesy Squash Casserole is the kind of side dish that will impress even the pickiest of eaters. Tender yellow squash and zucchini, savory bread crumbs and deliciously melty cheese make this side dish a total crowd pleaser!
      Cheesy Squash Casserole

    Hosting Thanksgiving?

    Discover the secret to hosting Thanksgiving without all the stress! Prepsgiving is your FREE guide to making a delicious Thanksgiving feast the easy way.

    Love this recipe? Please leave a 5 star ⭐️⭐️⭐️⭐️⭐️ rating in the recipe card below ⬇️ and/or a review in the comment section further down. Check out my Amazon Store for all my favorite tools, including those used in this recipe. And follow @thelifejolie on Instagram and TikTok!

    A plate of broccoli rice casserole with the pan and raw broccoli florets in the background.

    Rice and Broccoli Casserole

    Jessy Freimann
    This rice and broccoli casserole is the ultimate comfort food - rich, cheesy, and loaded with tender broccoli. It’s a crowd-pleaser for any occasion, from weeknight dinners to holiday feasts. Plus, it tastes just as amazing the next day - if there’s any left!
    No ratings yet
    Print Recipe Pin Recipe
    Prep Time 10 minutes mins
    Cook Time 1 hour hr 30 minutes mins
    Total Time 1 hour hr 40 minutes mins
    Course Side Dish
    Cuisine American
    Servings 8 servings
    Calories 121 kcal

    Equipment

    • saute pan
    • wooden spoon
    • measuring spoon
    • measuring cups

    Ingredients
      

    • ½ salted butter 1 stick
    • ½ cup diced onion
    • 3 cups broccoli florets
    • 10 ounces cream of celery soup
    • 10 ouncees cheddar cheese soup
    • 10 ounces whole milk
    • ½ teaspoon Kosher salt
    • ¼ teaspoon ground black pepper
    • 1 ½ cups instant rice

    Instructions
     

    • Preheat the oven to 350 degrees and spray pan with cooking spray. Set aside. Melt butter in a pan over medium heat.
    • Add onions and broccoli to the pan and saute stirring often until they've softened, about 5-7 minutes.
    • While the vegetables cook, whisk together both cans of soup, milk, salt and pepper in a separate bowl until well combined.
    • In the prepared pan, start by placing half the vegetables in a single layer on the bottom
    • Next place the rice on top of it in a single layer.
    • Now add the rest of the vegetables in another single layer.
    • Cover all of this with the soup mixture. Cover in foil.
    • Bake 30 minutes covered. Remove from the oven and stir.
    • Bake uncovered for another 15-20 minutes or until thickened. Serve immediately.

    Video

    Notes

    • Don't overcook the broccoli. You don't want it to be mush- sauté until tender-crisp.
    • Stir the casserole well once uncovered. This mixes everything so that it's perfectly combined.
    • Stick with Instant Rice. I haven't tried it with regular or fully cooked rice, but I have perfected it with instant, so stick with what works.
    • Ingredients to prep ahead- Chop the broccoli and onion and store in the fridge. 
    • Leftovers and storage- Store in an airtight container for up to 4 days in the refrigerator. Reheat in the microwave or oven.

    Nutrition

    Serving: 1servingCalories: 121kcalCarbohydrates: 20gProtein: 4gFat: 3gSaturated Fat: 1gPolyunsaturated Fat: 1gMonounsaturated Fat: 1gTrans Fat: 0.003gCholesterol: 8mgSodium: 362mgPotassium: 207mgFiber: 1gSugar: 3gVitamin A: 377IUVitamin C: 31mgCalcium: 75mgIron: 1mg
    Tried this recipe?Let us know how it was!

    Beef Burrito Bowls

    Mar 28, 2025 · Leave a Comment

    An overhead image of a beef burrito bowl with another next to it and limes and cilantro on the side.

    These beef burrito bowls are packed with bold flavors and require minimal effort! It’s the kind of meal that’s hearty, customizable, and perfect for busy nights — or meal prep for the week.

    An overhead image of a beef burrito bowl with another next to it and limes and cilantro on the side.
    [feast_advanced_jump_to]

    Why You’ll Love This Beef Burrito Bowl Recipe

    It’s tough to pick a favorite, but this recipe is definitely up there! It’s full of flavors I love and is one of those meals I could eat for days without getting sick of it. One of the best things about this dish is how easy it is to make — just toss everything in and let it cook while you go about your day. Whether you use a slow cooker or an Instant Pot, the result is always the same: tender, juicy, perfectly seasoned shredded beef. 

    Another thing I love about this beef burrito meat recipe? You can make this bowl exactly how you like it. I pile on every topping in my fridge, while my husband keeps it simple with just a few. And for the kids? We keep things separate — beef, rice, and cheese on their own sides — because, well, you never know when an onion might accidentally ruin dinner. Here’s what makes it a must-try:

    • Minimal prep, no pre-cooking required
    • Slow cooker or Instant Pot options
    • Totally customizable
    • Melt-in-your-mouth beef 
    A close up image of shredded beef with poblanos and onions in a the pot of a slow cooker.

    Ingredient Information And Substitutions

    • Beef- A six-pound chuck roast works best. If you prefer, you can substitute it with brisket or even a top or bottom round.
    • Seasonings- A packet of taco seasoning and a bit of kosher salt bring the perfect spice blend. Want a homemade option? Try a mix of chili powder, cumin, paprika, garlic powder, and oregano.
    • Vegetables- Sliced onions and poblano peppers add sweetness and mild heat. Bell peppers work too.
    • Salsa- Adds moisture and flavor. Use your favorite jarred salsa or homemade salsa for extra freshness.
    • Oil- Vegetable or canola oil helps keep the beef tender. Avocado oil is a great alternative.
    • Bowl toppings- Serve with yellow rice, black beans, corn, avocado, cheese, sour cream, tortilla chips, lime, and fresh cilantro. Pick your favorites!
    An overhead image of labeled recipe ingredients.

    How To Make A Beef Burrito Bowl

    Step 1- Load up the pot.

    Place the chuck roast in your slow cooker or Instant Pot, surrounded by sliced onions and poblano peppers. Sprinkle the beef with taco seasoning and kosher salt. Pour the salsa and oil over the top to lock in all that bold flavor.

    Raw chuck roast in the slow cooker pot with onions and peppers on top of it and then with the seasonings and liquids poured on top.

    Step 2- Let it cook. 

    If you’re using a slow cooker, let it work its magic on low for 8-9 hours until the beef is melt-in-your-mouth tender. If you’re using an Instant Pot, cook on high pressure for 90 minutes, then do a natural release for 15 minutes before releasing any remaining pressure.

    The slow cooker covered and cooking and then the beef and veggies cooked and uncovered.

    Step 3- Shred and serve.

    Once the beef is tender, shred it with forks, discarding any excess fat. Spoon it over rice, pile on your favorite toppings, and dig in!

    The beef removed from the pot and in a baking dish and then the beef all shredded up.

    Frequently Asked Questions

    What goes into a burrito bowl?

    Anything you love! Some of my go-to toppings include yellow rice, avocado, shredded cheese, sour cream, tomatoes, corn, black beans, peppers, onions, fresh lime juice, crumbled tortilla chips, and plenty of cilantro. But the beauty of this dish is that you can mix and match ingredients to suit your taste.

    What’s the best way to reheat the beef? 

    Warm it in a pan with a little broth or water to keep it juicy, or microwave it in short bursts, stirring in between.

    Is a burrito bowl healthy?

    The great thing about a burrito bowl is that you get to pick the toppings, so you can make it as nutritious (or indulgent) as you want. Want to keep it light? Load up on fresh veggies and skip the cheese. If you’re cutting carbs, the beef is delicious over a salad instead of rice.

    An overhead image of two burrito bowls with avocados, limes and cilantro around them and a grey towel next to them.

    Tips For The Beef Burrito Bowls Recipe

    • When shredding, remove as much fat as possible and be careful not to over-shred. It should be tender but still have some texture.
    • For extra moisture, mix in some of the cooking juices after shredding.
    • If using an Instant Pot, stick to a smaller chuck roast and cut it in half before cooking for the best results.
    • Spice it up with jalapeños or add a smoky kick with chipotle powder.
    • Ingredients to prep ahead- Chop the onions and peppers in advance. Keep all toppings separate and assemble fresh.
    • Leftovers and storage- Store beef apart from toppings — it stays fresh for 4 days in the fridge. Freeze the meat raw or cooked for an easy meal later.
    mexican shredded beef

    What to Serve With This Meal Prep Burrito Bowls

    This burrito bowl is already loaded with flavor, but adding the right sides can take it to the next level! Whether you're keeping it light or going all out with a full spread, there are plenty of delicious options to round out your meal. Here are a few of my go-to sides: 

    • Mexican Bean Salad
    • 7 Layer Taco Dip
    • Cajun Black Bean and Corn Salad
    • Guacamole
    A side angle shot of a burrito bowl with another behind it.

    Other Tasty Beef Recipes To Try

    • An overhead image of a plate of baked ziti with herbs, garlic and a blue striped napkin next to it.
      Pasta al Forno
    • An overhead image of a blue and white bowl of beef tips over rice with parsley and mushrooms around it.
      Instant Pot Beef Tips and Gravy
    • A plate of stuffed meatballs with one cut open revealing the mozzarella cheese inside.
      Cheesy Stuffed Meatballs
    • Corned beef and potatoes, cabbage and carrot on a white plate.
      Instant Pot Corned Beef and Cabbage

    Love this recipe? Please leave a 5 star ⭐️⭐️⭐️⭐️⭐️ rating in the recipe card below ⬇️ and/or a review in the comment section further down. Check out my Amazon Store for all my favorite tools, including those used in this recipe. And follow @thelifejolie on Instagram and TikTok!

    An overhead image of a beef burrito bowl with another next to it and limes and cilantro on the side.

    Beef Burrito Bowls

    Jessy Freimann
    These beef burrito bowls are packed with bold flavors and require minimal effort! It’s the kind of meal that’s hearty, customizable, and perfect for busy nights - or meal prep for the week.
    No ratings yet
    Print Recipe Pin Recipe
    Prep Time 10 minutes mins
    Cook Time 8 hours hrs
    Total Time 8 hours hrs 10 minutes mins
    Course Main Course
    Cuisine Mexican
    Servings 8 servings
    Calories 661 kcal

    Equipment

    • slow. cooker
    • instant pot
    • Gallon freezer zipper bags
    • slow cooker liners
    • measuring spoons
    • measuring cups
    • chefs knife
    • cutting board

    Ingredients
      

    • 6 pound chuck roast
    • 1 packet taco seasoning
    • ½ teaspoon kosher salt
    • 1 ½ cups sliced onions
    • 1 ½ cups poblano peppers seeds removed and sliced
    • ½ cup salsa
    • 2 tablespoons vegetable oil or canola oil

    Instructions
     

    Slow Cooker Instructions:

    • Place chuck roast into slow cooker surrounded by onions and poblano peppers.
    • Sprinkle with taco seasoning and salt. Top with salsa and oil.
    • Cover and cook for 8-9 hours on low.
    • Shred beef, discard fat and serve over rice with the toppings of your choice.

    Instant Pot Instructions:

    • Place chuck roast into Instant Pot surrounded by onions and poblano peppers.
    • Sprinkle with taco seasoning and salt. Top with salsa and oil.
    • Cover and cook for 90 minutes on high pressure followed by a 15 minute Natural Pressure Release.
    • Shred beef, discard fat and serve over rice with the toppings of your choice.

    Video

    Notes

    • When shredding, remove as much fat as possible and be careful not to over-shred. It should be tender but still have some texture.
    • For extra moisture, mix in some of the cooking juices after shredding.
    • If using an Instant Pot, stick to a smaller chuck roast and cut it in half before cooking for the best results.
    • Spice it up with jalapeños or add a smoky kick with chipotle powder.
    • Ingredients to prep ahead- Chop the onions and peppers in advance. Keep all toppings separate and assemble fresh.
    • Leftovers and storage- Store beef apart from toppings — it stays fresh for 4 days in the fridge. Freeze the meat raw or cooked for an easy meal later.

    Nutrition

    Serving: 1servingCalories: 661kcalCarbohydrates: 5gProtein: 66gFat: 43gSaturated Fat: 18gPolyunsaturated Fat: 5gMonounsaturated Fat: 21gTrans Fat: 2gCholesterol: 235mgSodium: 881mgPotassium: 1220mgFiber: 2gSugar: 2gVitamin A: 636IUVitamin C: 25mgCalcium: 65mgIron: 8mg
    Tried this recipe?Let us know how it was!

    Greek Lamb Meatballs

    Mar 26, 2025 · Leave a Comment

    A bowl of lamb meatballs with tzatziki and couscous.

    These juicy Greek lamb meatballs are packed with spices and tangy feta cheese for bold, Mediterranean flavor. Made with just a few simple ingredients, they come together easily and are ready in 40 minutes or less!

    An overhead image of a blue and white bowl with couscous, tzatziki sauce and Greek lamb meatballs.
    [feast_advanced_jump_to]

    Why You’ll Love These Lamb Meatballs

    If you’re looking for an easy and flavorful dinner, these meatballs are just what you need. Juicy, tender, and packed with Mediterranean spices, each bite is bursting with rich, savory goodness. Plus, they pair perfectly with tzatziki sauce for a fresh and creamy balance.

    In my house, we’re big fans of easy meals with great flavors, and this recipe is always a hit. Whether you’re making them for a casual weeknight dinner or serving them up for guests, they’re always a crowd-pleaser. And the best part? They’re super easy to make — just mix, roll and bake! Here’s why you need these on your dinner table ASAP:

    • Big flavor with little effort
    • Perfectly tender and juicy
    • Made with simple ingredients
    • Great for meal prep

    Ingredient Information And Substitutions

    • Ground lamb- The star of the show! Ground beef or turkey can also work, but lamb gives the best flavor.
    • Panko bread crumbs- Helps bind the meatballs and keep them moist. Regular breadcrumbs work too.
    • Egg- Essential for adding moisture and richness, and for holding everything together.
    • Feta cheese- Adds a creamy, salty bite. If needed, swap for shredded Parmesan.
    • Garlic- Fresh is best, but 1 teaspoon of garlic powder will do the trick if you’re out.
    • Seasonings- These meatballs have a warm, aromatic flavor from a mix of cumin, coriander, black pepper, and Kosher salt.
    An overhead image of labeled recipe ingredients.

    How To Make This Lamb Meatballs Recipe

    Step 1- Mix the ingredients.

    Preheat your oven to 375 degrees F and line a baking sheet with parchment paper.

    In a large bowl, combine the ground lamb, panko, egg, seasonings, crumbled feta, and minced garlic. Mix well, but don’t go overboard — we want tender meatballs!

    Meatball ingredients in a glass bowl.

    Step 2- Shape the meatballs.

    Gently roll the mixture into golf-ball-sized balls. No need to be perfect since we’re going for a bit of a rustic vibe here. Add each meatball to the baking sheet, leaving a little space between them.

    A hand holding a meatball over the bowl.

    Step 3- Bake to perfection.

    Place the meatballs in the oven and bake for 20-30 minutes, or until they develop a golden brown crust and are fully cooked through. 

    Serve your meatballs warm with a generous dollop of tzatziki, over a bed of rice, or stuffed into a pita wrap with fresh veggies. No matter how you serve them, they’re sure to disappear fast!

    Meatballs on a sheet pan being pushed into an oven to cook.

    Frequently Asked Questions

    Can I make these meatballs ahead of time?

    Yes. You can mix and shape the meatballs ahead of time, then store them in the fridge for up to a day before baking. This makes dinner prep even easier! The leftovers also taste great.

    How do I know when the meatballs are fully cooked?

    Use a meat thermometer. These should reach an internal temperature of 160 degrees F. If you don't have a thermometer, cut one open. It’s ready when the meat is browned through with no pink and the juices run clear.

    What’s the best way to keep meatballs from falling apart?

    The key is to not overwork the meat when mixing and to use a good binder, like the egg and panko in this recipe. If your mixture feels too wet, add a little more panko or even refrigerate for an hour.

    A bowl of lamb meatballs with tzatziki and couscous.

    Tips For Making This Lamb Meatball Recipe

    • Don’t over mix the meat. Overworking the lamb can make your meatballs tough instead of tender. Just mix until everything is combined.
    • Roll your meatballs to roughly the same size. This ensures that they cook evenly. A cookie scoop works great for this.
    • When baking, don’t crowd the meatballs. A little breathing room helps them cook evenly and develop a nice golden exterior. I leave around 1-2 inches between them.
    • Want extra crispy meatballs? After baking, pop them under the broiler for a minute or two to get a little extra browning. Just keep an eye on them so they don’t burn.
    • Resting the meatballs for a few minutes after baking helps keeps them juicy.
    • Ingredients to prep ahead- Mince garlic, crumble feta, and mix your dry ingredients in advance to speed things up.
    • Leftovers and storage- Keep extra lamb meatballs in an airtight container in the fridge for up to 4 days, or freeze for up to 3 months. Reheat in the oven until warmed through.

    What To Serve With This Greek Lamb Meatballs Recipe

    Serve these meatballs as an appetizer, tuck them into a pita, or turn them into a full Mediterranean-style meal. I usually go the full spread route because who doesn’t love a table filled with fresh, flavorful sides? If you’re looking for the perfect pairings, here are a few ideas:

    • Greek Couscous Salad
    • Roasted Beet Salad with Feta and Dill
    • Sauteed Garlic Asparagus
    • Cheesy Squash Casserole

    Other Tasty Meatball Recipes To Try

    • A bowl of Swedish meatballs and noodles.
      Swedish Meatballs And Noodles
    • A spoon holding up a porcupine meatball and sauce over the pan of them.
      Porcupine Meatballs With Tomato Soup
    • A close up image of a bowl of meatballs in BBQ with a toothpick in the focus meatball.
      Slow Cooker BBQ Meatballs
    • A plate of stuffed meatballs with one cut open revealing the mozzarella cheese inside.
      Cheesy Stuffed Meatballs

    Love this recipe? Please leave a 5 star ⭐️⭐️⭐️⭐️⭐️ rating in the recipe card below ⬇️ and/or a review in the comment section further down. Check out my Amazon Store for all my favorite tools, including those used in this recipe. And follow @thelifejolie on Instagram and TikTok!

    A bowl of lamb meatballs with tzatziki and couscous.

    Greek Lamb Meatballs

    Jessy Freimann
    These juicy Greek lamb meatballs are packed with spices and tangy feta cheese for bold, Mediterranean flavor. Made with just a few simple ingredients, they come together easily and are ready in 40 minutes or less!
    No ratings yet
    Print Recipe Pin Recipe
    Prep Time 10 minutes mins
    Cook Time 30 minutes mins
    5 minutes mins
    Total Time 45 minutes mins
    Course dinner, Main, Main Course, Main dish
    Cuisine Greek
    Servings 6 servings
    Calories 218 kcal

    Equipment

    • 1 mixing bowl
    • 1 Garlic Press
    • 1 Spatula
    • 1 chefs knife
    • 1 cutting board
    • 1 sheet pan
    • 1 cookie scoop

    Ingredients
      

    • 1 pound ground lamb
    • ½ cup seasoned Panko bread crumbs
    • 1 egg large
    • ½ teaspoon Kosher salt
    • ½ teaspoon ground cumin
    • ½ teaspoon ground coriander
    • ¼ teaspoon ground black pepper
    • ½ cup crumbled feta cheese
    • 4 cloves garlic minced

    Instructions
     

    • Preheat the oven to 375 degrees F. Line a sheet pan with parchment and set aside.
    • Mix all ingredients until just combined. Gently form into balls the size of a golf ball.
    • Place the meatballs onto the sheet pan an inch or two apart and bake for 20-30 minutes until cooked though to an internal temperature of 165 degrees F.
    • Serve immediately with your favorite rice or grain mix and Tzatziki sauce.

    Video

    Notes

    • Don’t over mix the meat. Overworking the lamb can make your meatballs tough instead of tender. Just mix until everything is combined.
    • Roll your meatballs to roughly the same size. This ensures that they cook evenly. A cookie scoop works great for this.
    • When baking, don’t crowd the meatballs. A little breathing room helps them cook evenly and develop a nice golden exterior. I leave around 1-2 inches between them.
    • Want extra crispy meatballs? After baking, pop them under the broiler for a minute or two to get a little extra browning. Just keep an eye on them so they don’t burn.
    • Resting the meatballs for a few minutes after baking helps keeps them juicy.
    • Ingredients to prep ahead- Mince garlic, crumble feta, and mix your dry ingredients in advance to speed things up.
    • Leftovers and storage- Keep extra lamb meatballs in an airtight container in the fridge for up to 4 days, or freeze for up to 3 months. Reheat in the oven until warmed through.

    Nutrition

    Serving: 1servingCalories: 218kcalCarbohydrates: 1gProtein: 13gFat: 18gSaturated Fat: 8gPolyunsaturated Fat: 1gMonounsaturated Fat: 7gCholesterol: 55mgSodium: 239mgPotassium: 182mgFiber: 0.1gSugar: 0.04gVitamin A: 3IUVitamin C: 1mgCalcium: 19mgIron: 1mg
    Tried this recipe?Let us know how it was!

    Eggplant Rollatini

    Mar 24, 2025 · 5 Comments

    Two pieces of eggplant rollatini on white plate.

    Eggplant Rollatini is a cozy Italian dish that's surprisingly simple to make! Tender eggplant rolls are filled with creamy cheese and baked in a rich, meaty tomato sauce for a hearty, family-friendly meal.

    Two pieces of eggplant rollatini on white plate.
    [feast_advanced_jump_to]

    Why You’ll Love This Recipe For Eggplant Rollatini

    The ultimate cozy, cheesy, and satisfying dinner to make! It takes the best parts of classic Italian dishes — tender eggplant, creamy cheese, and a rich, meaty tomato sauce — and rolls them into one irresistible meal. Each bite is packed with flavor, from the tender roasted eggplant to the gooey, melty cheese filling. 

    And let’s not forget the veal sauce: savory, hearty, and the perfect finishing touch! Whether you're making this recipe for eggplant rollantini as a family dinner or meal-prepping for the week, it is guaranteed to be a hit. Plus, it’s surprisingly simple to put together, making it a great option even on busy nights. Here’s why you’ll love this dish:

    • Comforting & cheesy 
    • Rich and creamy filling   
    • Lighter than fried versions  
    • Perfect for prepping ahead  
    • A fun twist on a classic 
    An overhead image of a white baking pan full of eggplant rollantini.

    Ingredient Information And Substitutions

    • Eggplant- I used standard larger eggplant, also known as American eggplant, for its firm texture and mild flavor.
    • Onion & garlic- Build flavor in the sauce. Swap fresh garlic for 1 teaspoon each of garlic and onion powder if needed.
    • Ground beef- Mild and tender, soaking up the seasonings well. Can be substituted with ground veal.
    • Cooking spray- Helps prevent sticking while keeping the dish lighter. You can also brush the eggplant and pan with olive oil.
    • Marinara sauce- I love using my homemade marinara, but a good-quality store-bought one works too. If you prefer a chunkier sauce, add diced tomatoes.
    • Cheese filling- A creamy blend of ricotta, Romano (or Parmesan), and melty mozzarella, tied together with an egg and seasoned with black pepper, garlic, and parsley.
    An overhead image of labeled recipe ingredients.

    How To Make Aubergine Rollatini

    Step 1- Prepare the eggplant.

    Preheat the oven to 350 degrees F. Line two baking sheets with foil, give them a good spray, and lay out the eggplant slices. Sprinkle with kosher salt and let them sit for 10 minutes to draw out extra moisture. Pat dry, then season with black pepper, spray again, and bake for 20 minutes. Once the eggplant is out of the oven, set the eggplant aside to cool and turn the oven up to 400 degrees F.

    A hand patting moisture with a paper towel from a pan of salted eggplant slices. and then the pan in the oven.

    Step 2- Make the veal sauce.

    While the eggplant bakes, heat a large pan over medium-high heat. Spray with cooking spray, then sauté onions and garlic for about 3 minutes. Add the ground veal, breaking it up as it cooks, and let it brown for 6-7 minutes. Drain any extra grease, season to taste, then stir in the marinara. Turn the heat to low and let it simmer.

    Onions and garlic cooking in a skillet and then cooked beef in with the veggies.

    Step 3- Make the cheese filling.

    In a bowl, stir together the ricotta, ½ cup Romano, ½ cup mozzarella, black pepper, dried parsley, garlic powder, and an egg until everything’s well combined and creamy.

    Marinara sauce added to the skillet of meat and then a ricotta cheese mixture in a glass bowl.

    Step 4- Assemble the eggplant roll ups.

    Spread a thin layer of sauce in the bottom of a 9x13-inch pan. Place about 2 tablespoons of cheese filling on the wider side of each eggplant slice. Then, roll them up and place them seam-side down in the pan.

    A close up of a slice of eggplant with the cheese mixture added on one side of it and then the eggplant sliced rolled up around the cheese mixture being held up by a female hand.

    Pour the rest of the sauce evenly over the top.

    Eggplant rolls lined up in a clear baking dish on top of some of the sauce and then the remaining sauce spread atop the eggplant rolls.

    Step 5- Bake and serve.

    Bake for 35-40 minutes, or until the internal temperature reaches 165 degrees F. Sprinkle on the remaining Romano and mozzarella, pop it back in for a few more minutes to melt, and serve hot. Enjoy!

    Eggplant rollatini in the oven baking and then back in the oven after being topped with shredded mozzarella.

    Frequently Asked Questions

    Should I peel my eggplant?

    I don't peel my eggplant for this recipe because the skin softens as it bakes. Plus, it adds a little extra texture and loads of nutrients!

    What’s the best way to cut eggplant?

    Trim off the top and bottom then slice it lengthwise. Stand one eggplant half upright and carefully cut it into ¼-inch slices. Repeat with the other half.

    Is eggplant rollatini fried?

    Sometimes, yes, but this version skips the frying for a simpler and lighter approach.

    Can this be made ahead?

    I personally like it best made and served right away, but it can be made ahead.

    A close up image of an eggplant rollatini cut in half exposing the the cheesy filling inside the eggplant roll.

    Tips For Making Eggplant Rolls

    • Salt and pat dry. Don’t skip this step! It removes bitterness and keeps the eggplant from becoming soggy. I add a little pepper after patting.
    • Evenly divide the cheese. Aim for about 2 tablespoons per slice, adjusting based on size. Larger slices get a bit more, smaller ones a little less.
    • Roll carefully from the wide side. Place the filling on the wider end of each slice and roll gently. This keeps the filling secure and prevents spills.
    • Place the rolls seam-side down to help keep the rolls closed.
    • Bake uncovered. Eggplant releases liquid as it cooks, so leaving it uncovered helps excess moisture evaporate and prevents a watery dish.
    • Ingredients to prep ahead- Chop onions, peel garlic, make marinara sauce, grate cheese, and mix the cheese filling in advance.
    • Leftovers and storage- Keeps in the fridge for 3-4 days. Reheat in the oven or microwave until hot and bubbly. Freezing eggplant isn’t ideal (it gets soggy), but you can freeze the sauce.
    A close up overhead of an eggplant roll cut in half with the mozzarella cheese stretching between both pieces.

    What To Serve With An Eggplant Roll Up

    This dish is rich, cheesy, and full of flavor, so I like to keep the sides simple and fresh. A crisp salad, some warm, crusty bread, or a lighter pasta dish balances everything out perfectly. Whether you're serving it for a cozy family dinner or a special occasion, here are some great sides to pair with it:

    • Pasta and Peas Recipe
    • Garlic Butter Sautéed Carrots Recipe
    • Garlic Parmesan Roasted Broccoli
    • Tomato Bisque Soup Recipe

    Other Tasty Eggplant Recipes To Try

    • A close up of a wooden spoon in a pan of Ratatouille.
      Nanou's Authentic Ratatouille
    • What's the best way to enjoy this gorgeous summer weather? A girl's night on the deck of course! So grab your best girlfriends and enjoy this Summer Antipasto Platter. Full of cheese, meat, olives and plenty of delicious grilled vegetables it's SO easy to make and crazy delicious!
      Summer Antipasto Platter
    • A spoon lifting up a scoop of eggplant parm bake with melt cheese trailing behind it.
      Eggplant Parm Bake

    Love this recipe? Please leave a 5 star ⭐️⭐️⭐️⭐️⭐️ rating in the recipe card below ⬇️ and/or a review in the comment section further down. Check out my Amazon Store for all my favorite tools, including those used in this recipe. And follow @thelifejolie on Instagram and TikTok!

    Two pieces of eggplant rollatini on white plate.

    Eggplant Rollatini

    Jessy Freimann
    Eggplant Rollatini is a cozy Italian dish that's surprisingly simple to make! Tender eggplant rolls are filled with creamy cheese and baked in a rich, meaty tomato sauce for a hearty, family-friendly meal.
    5 from 2 votes
    Print Recipe Pin Recipe
    Prep Time 20 minutes mins
    Cook Time 1 hour hr 10 minutes mins
    Eggplant resting time 10 minutes mins
    Total Time 1 hour hr 30 minutes mins
    Course Main Course
    Cuisine Italian
    Servings 8 servings
    Calories 337 kcal

    Equipment

    • chefs knife
    • cutting board
    • Large saute pan
    • measuring cups
    • measuring spoons
    • sheet pan
    • Silpat
    • 9 x 13 Pan

    Ingredients
      

    Eggplant

    • Cooking spray
    • 2 eggplants Tops and bottoms cut off and sliced length-wise into ¼ inch thick slices (each eggplant should make around 6-7 slices)
    • kosher salt, to taste
    • ground black pepper, to taste

    Veal sauce

    • ½ cup onion, chopped
    • 1 Tablespoon minced garlic, 2-3 cloves
    • 1 pound ground beef 90/10 or ground veal
    • kosher salt, to taste
    • ground black pepper, to taste
    • 2 ½ cups marinara sauce, (I use this easy recipe to make it myself)

    Cheese filling

    • 16 ounces Ricotta cheese
    • 1 cup grated Romano cheese (or parmesan) divided
    • 1 cup shredded mozzarella cheese divided
    • ¼ teaspoon ground black pepper
    • 1 teaspoon dried parsley
    • 1 teaspoon garlic powder
    • 1 large egg

    Instructions
     

    Preparing the eggplant

    • Preheat the oven to 350 degrees F and line 2 sheet pans with foil. Spray with cooking spray and lay eggplant slices in a single layer on the pans.
    • Sprinkle kosher salt onto the eggplant to taste and rest for 10 minutes.
    • Pat the eggplant slices with a dry paper towel to absorb any moisture. Sprinkle with black pepper to taste, spray with cooking spray and bake for 20 minutes. Once baked, set aside to cool and turn the oven up to 400 degrees F.

    Making the veal sauce

    • While the eggplant slices bake, heat a large skillet over medium high heat and spray with cooking spray.
    • Add onions and garlic to the pan and sauté stirring often for around 3 minutes to soften.
    • Add ground beef to the pan and break up with a wooden spoon.
    • Sauté until brown, around 6-7 minutes stirring often. Drain any excess grease.
    • Season to taste with salt and pepper and add marinara sauce.
    • Once the sauce begins bubbling reduce heat to low and hold at the lower temperature until you're ready to use the sauce.

    Making the cheese filling

    • In a large mixing bowl combine ricotta cheese, ½ cup shredded Romano cheese, ½ cup shredded mozzarella cheese, black pepper, dried parsley, 1 teaspoon garlic powder, and the egg and stir well until fully combined.
    • While the eggplant cools, spread 1-2 ladles of sauce in a thin even layer in the bottom of a 9" x 13" pan.

    Assembling the Rollatini

    • Divide cheese between each eggplant slice, placing around 2 Tablespoons on the wider side of the slice.
    • Roll the eggplant slices starting on the cheese side and carefully place them into the prepared 9" x 13" pan, lining them in on each side of the pan seam side down.
    • When the pan is full, ladle remaining sauce evenly over the rolls. 
    • Bake for 35-40 minutes or until they reach an internal temperature of 165 degrees.
    • Top with remaining Romano and mozzarella cheeses and return to the oven for a few minutes to melt the cheese. Serve immediately.

    Video

    Notes

    • Salt and pat dry. Don’t skip this step! It removes bitterness and keeps the eggplant from becoming soggy. I add a little pepper after patting.
    • Evenly divide the cheese. Aim for about 2 tablespoons per slice, adjusting based on size. Larger slices get a bit more, smaller ones a little less.
    • Roll carefully from the wide side. Place the filling on the wider end of each slice and roll gently. This keeps the filling secure and prevents spills.
    • Place the rolls seam-side down to help keep the rolls closed.
    • Bake uncovered. Eggplant releases liquid as it cooks, so leaving it uncovered helps excess moisture evaporate and prevents a watery dish.
    • Ingredients to prep ahead- Chop onions, peel garlic, make marinara sauce, grate cheese, and mix the cheese filling in advance.
    • Leftovers and storage- Keeps in the fridge for 3-4 days. Reheat in the oven or microwave until hot and bubbly. Freezing eggplant isn’t ideal (it gets soggy), but you can freeze the sauce.

    Nutrition

    Serving: 1servingCalories: 337kcalCarbohydrates: 14gProtein: 21gFat: 22gSaturated Fat: 11gPolyunsaturated Fat: 1gMonounsaturated Fat: 8gTrans Fat: 1gCholesterol: 80mgSodium: 539mgPotassium: 733mgFiber: 5gSugar: 8gVitamin A: 706IUVitamin C: 9mgCalcium: 222mgIron: 2mg
    Tried this recipe?Let us know how it was!

    Braised Steak and Onions

    Mar 21, 2025 · 9 Comments

    A wooden spoon resting on the side of a pan with steak and onions on it.

    This braised steak and onions recipe is the perfect blend of simplicity and bold flavor. Slow-cooked until tender, the steaks absorb the rich, savory sauce, making every bite melt in your mouth. It’s a cozy, no-fuss meal, ready in about an hour!

    A wooden spoon resting on the side of a pan with steak and onions on it.
    [feast_advanced_jump_to]

    Why You’ll Love Braised Beef Steak 

    This recipe is the definition of comfort food — simple ingredients, slow-cooked to perfection, and packed with rich, savory flavor. The beef cutlets become incredibly tender as they simmer with onions, creating a delicious sauce that’s perfect for drizzling over mashed potatoes or soaking up with crusty bread.

    My Grandma once referring to them as Pepper Steaks, but I can't be completely sure she was actually referring to this recipe. Over the years we alway called them sandwich steaks, even though we don't typically eat them on sandwiches.

    They're a fantastic option for a no fuss dinner, whether you’re feeding the family or prepping meals ahead of time. With just a little hands-on time, you’ll have a hearty, satisfying dish that tastes like it’s been cooking all day. Here’s why you should make it:

    • Just a few pantry staples
    • Tender, fall-apart beef
    • Rich, savory sauce
    • Simple steps with big flavor payoff
    • Tastes even better the next day
    An overhead image of a pan of braised beefsteaks and onions with a red and white napkin next to it.

    Ingredient Information And Substitutions

    • Beef- Use cutlets or thin cut steak for the best results. My grandma used to get top round steak and butterfly them several times until they were ⅛ inch think.
    • Onions- Add sweetness and depth. Yellow is best, but white or sweet work too.
    • Olive oil- Helps brown the meat and develop flavor. Use vegetable oil or butter as alternatives.
    • Salt & pepper- Adjust to taste. Kosher salt enhances the flavor best.
    • Water- Keeps the meat tender. Add more as it reduces so they don't dry out.
    An overhead image of labeled recipe ingredients.

    How To Cook Braised Beef Steaks

    Step 1- Brown the steaks.

    Thinly slice the onions and season the sliced stea with salt and pepper on both sides. If the steaks are too large, cut them down to a few inches size, keeping in mind they will shrink while cooking.

    Heat olive oil in a large skillet over medium-high heat. Add the thinly sliced been in a single layer and sear in batches, browning them on both sides. Avoid overcrowding the pan to ensure they develop a good crust. Set them aside in a bowl.

    Raw beef cutlets on a cutting board with salt and pepper on them and then the steak slices searing in a skillet with olive oil.

    Step 2- Cook the onions.

    In the same skillet, add the onions, season with salt and pepper, and cook until softened, stirring occasionally. Cover with a few inches of water.

    Onions sautéing in the same pan and then water added to the pan.

    Step 4- Simmer everything together.

    Return the steaks to the pan and stir to combine, making sure they're all just covered in water. Bring to a boil, then reduce to a simmer. Cover and cook for about an hour until the braised beef is tender and nearly falling apart. Check periodically and add more water as needed.

    Once done, the onions will have melted into a flavorful sauce. Serve hot with crusty bread or mashed potatoes to soak up the delicious juices!

    Beef added back to the pan and then the pan covered and simmering.

    Frequently Asked Questions

    What is braised steak?

    Braising steak is easy and cooked low and slow. It’s first seared for flavor, then simmered in liquid until tender — perfect for stews and fall-apart-tender meat.

    What’s the best cut of beef for this recipe?

    Thinly sliced steak cutlets or round butterflied top round steak works best. These cuts have enough connective tissue to break down during slow cooking, making them tender and flavorful.

    Why isn’t my steak tender? 

    If your steak is still tough after an hour, let it simmer longer. Some cuts need more time to fully break down. Keep it covered and check every 15 minutes until it reaches that perfect melt-in-your-mouth texture.

    Can I add other veggies? 

    Yes. My mom has been known to make this recipe with garlic and bell papers instead of onions. I think mushrooms could bring depth and carrots would be delicious too!

    Sandwich steaks on a wooden spoon with onions in a pan.

    Tips For Making Braised Steak And Onion

    • Choose the right pan. A heavy-bottomed skillet or Dutch oven will keep the heat even and consistent.
    • Don’t rush the browning. Searing the beef adds incredible depth to the flavor. Honestly, it usually goes pretty quickly anyway.
    • For extra tenderness, simmer longer. My grandma always had them perfect in an hour, but I sometimes let them go a bit longer.
    • Let beef rest before serving. This helps the juices redistribute, keeping the steak tender and flavorful. Just a coulpe minutes works.
    • Add a flavor boost. Try seasoning with garlic salt, smoked paprika, Worcestershire sauce, thyme, or a splash of red wine for extra depth. 
    • Make it ahead. This dish tastes even better the next day!
    • Try a slow cooker version by browning the meat first, then cooking on low for 4 hours. 
    • Ingredients to prep ahead- Slice the onions and beef.
    • Leftovers and storage- Keep in an airtight container for up to 3 days or freeze for up to 3 months. Reheat on the gently on the stovetop or in the microwave.

    braised beef steak

    What To Serve With This Braised Steak Recipe

    This hearty dish is perfect for pairing with classic comfort sides! Serve it over mashed potatoes, rice, or buttered noodles to soak up all that rich, savory sauce. If you love a good crunch, crusty bread is another great option for dipping. For a balanced meal, add a simple side salad, roasted vegetables, or steamed greens like broccoli or green beans. Here are some of my favorite pairings:

    • Crispy Fried Potatoes
    • Easy Sautéed Vegetables
    • Sautéed Garlic Asparagus
    • Grilled Artichokes

    Other Quick Dinner Recipes To Try

    • Overhead close up image of cooked steak and potatoes.
      Steak Bites And Potatoes
    • A flank steak with slices cut and lined up in front of it and fresh thyme around it.
      Red Wine Flank Steak Marinade
    • A wooden spoon holing a scoop of Philly steaks pasta with melty cheese all over it.
      One Pot Philly Cheesesteak Pasta
    • Steak Fajitas are good, but Grilled Steak Fajitas are better! Tender flank steak makes a great fajita protein with charred peppers and onions- this is an easy dinner that's perfect for a summer get-together.
      Grilled Steak Fajitas

    Love this recipe? Please leave a 5 star ⭐️⭐️⭐️⭐️⭐️ rating in the recipe card below ⬇️ and/or a review in the comment section further down. Check out my Amazon Store for all my favorite tools, including those used in this recipe. And follow @thelifejolie on Instagram and TikTok!

    A wooden spoon resting on the side of a pan with steak and onions on it.

    Braised Steak and Onions

    Jessy Freimann
    This braised steak and onions recipe is the perfect blend of simplicity and bold flavor. Slow-cooked until tender, the steaks absorb the rich, savory sauce, making every bite melt in your mouth. It’s a cozy, no-fuss meal, ready in about an hour!
    5 from 3 votes
    Print Recipe Pin Recipe
    Prep Time 10 minutes mins
    Cook Time 1 hour hr
    Total Time 1 hour hr 10 minutes mins
    Course dinner, Entree, Main
    Cuisine American, beef, dinner, Italian
    Servings 4 servings
    Calories 393 kcal

    Equipment

    • cutting board
    • chefs knife
    • saute pan
    • Spatula
    • measuring spoons
    • measuring cups

    Ingredients
      

    • 1 Tablespoon olive oil
    • 1 ½ pounds steak cutlets- sliced ⅛ inch thickness
    • ½ cup onion thinly sliced
    • 1 teaspoon Kosher salt
    • ¼ teaspoon Ground black pepper
    • Water

    Instructions
     

    • Heat oil in a large skillet over medium-high heat.
    • Pat dry and season both sides of your steaks with salt and pepper to taste. If they're too big, cut them down a bit (keep in mind that they shrink, mine usually start around 3 inches each way).
    • Add beef to the pan in a single layer, brown the steaks on each side. Work in batches so they don't steam. Once browned on each side, remove the beef from the pan and set aside.
    • Add the onions to the pan and season with salt and pepper to taste.
    • Sweat the onions for a couple minutes, stirring often until they soften. Add steak back to the pan and cover with water.
    • Bring to a boil and reduce heat to medium low. Simmer covered for about an hour, maybe a bit more, until they are tender and almost falling apart. Add water as need so it doesn't dry out. Serve immediately.

    Video

    Notes

    • Choose the right pan. A heavy-bottomed skillet or Dutch oven will keep the heat even and consistent.
    • Don’t rush the browning. Searing the beef adds incredible depth to the flavor. Honestly, it usually goes pretty quickly anyway.
    • For extra tenderness, simmer longer. My grandma always had them perfect in an hour, but I sometimes let them go a bit longer.
    • Let beef rest before serving. This helps the juices redistribute, keeping the steak tender and flavorful. Just a coulpe minutes works.
    • Add a flavor boost. Try seasoning with garlic salt, smoked paprika, Worcestershire sauce, thyme, or a splash of red wine for extra depth. 
    • Make it ahead. This dish tastes even better the next day!
    • Try a slow cooker version by browning the meat first, then cooking on low for 4 hours. 
    • Ingredients to prep ahead- Slice the onions and beef.
    • Leftovers and storage- Keep in an airtight container for up to 3 days or freeze for up to 3 months. Reheat on the gently on the stovetop or in the microwave.

    Nutrition

    Serving: 1servingCalories: 393kcalCarbohydrates: 2gProtein: 34gFat: 28gSaturated Fat: 11gPolyunsaturated Fat: 2gMonounsaturated Fat: 14gCholesterol: 104mgSodium: 671mgPotassium: 487mgFiber: 0.4gSugar: 1gVitamin A: 27IUVitamin C: 1mgCalcium: 17mgIron: 3mg
    Tried this recipe?Let us know how it was!

    Cheesy Stuffed Meatballs

    Mar 19, 2025 · Leave a Comment

    A plate of stuffed meatballs with one cut open revealing the mozzarella cheese inside.

    Juicy, flavorful, and gooey, these cheesy stuffed meatballs are the ultimate comfort food. They’re easy to make, packed with delicious Italian flavors, ready in 45 minutes, and perfect for a weeknight dinner or a crowd-pleasing meal!

    A plate of stuffed meatballs with one cut open revealing the mozzarella cheese inside.
    [feast_advanced_jump_to]

    Why You’ll Love Meatballs Stuffed With Mozzarella Balls

    Meatballs have always been a go-to comfort food in our house. They never disappoint, whether they’re piled on spaghetti, stuffed into a sub, or served as a party appetizer. But when you take a classic meatball and tuck a piece of melty mozzarella inside? That’s just next-level deliciousness. 

    The first time I made these, I wasn’t sure what to expect: would the cheese stay inside? Would they hold together? Would they be as good as the ones from my favorite Italian restaurant? Turns out, they were everything I hoped for - juicy, flavorful, and filled with the perfect amount of melty cheese. These meatballs have since become a family favorite, and I love how versatile they are. Here’s why you’ll love them:

    • Easy and quick to make
    • Oozing with melty cheese
    • Crispy outside, juicy inside
    • Crowd-pleaser and family-approved
    An overhead image of the bottom part of a baking pan with stuffed meatballs and sauce in it.

    Ingredient Information And Substitutions

    • Cooking spray- Helps prevent the meatballs from sticking to the pan. A drizzle of olive oil can also be used.
    • Ground beef- Provides a juicy and rich base for the meatballs. Ground turkey or chicken is a leaner option.
    • Marinara sauce- Use homemade marinara sauce for the best choice, or swap for store-bought.
    • Romano or Parmesan cheese- To add a salty, savory depth to the meatballs. 
    • Mozzarella cheese sticks- To create the gooey, melty center. If you don’t have sticks, use fresh mozzarella cut into 1.5 inch cubes. 
    • Egg- To bind the ingredients together.
    • Warm Water- Helps keep the meatballs moist and tender. Do it by feel- start with less and add more as you need it.
    • Seasoned Breadcrumbs- Helps absorb moisture and keep the meatballs tender while adding extra flavor.
    • Seasonings- A mix of kosher salt, black pepper, garlic powder, and onion powder to enhance the flavor. Feel free to adjust to taste.  
    An overhead image of labeled recipe ingredients.

    How To Make Mozzarella Stuffed Meatballs

    Step 1- Mix the meatball ingredients.

    Preheat your oven to 400F. In a large bowl, combine the ground beef, Romano cheese, bread crumbs, egg, water, and spices. Mix until combined, but avoid overmixing to keep the meatballs tender.

    THe meatball ingredinets in a glass bowl and then all the ingredients mixed together.

    Step 2- Shape the meatballs and stuff with cheese.

    Slice each mozzarella stick into quarters and set aside.

    Form 12 meatballs, slightly larger than golf balls. Use your finger to create a small divot in each, then place a mozzarella piece inside. Gently roll the meat around the cheese to fully encase it.

    Mozzarella cheese sticks on a cutting board cut in to quarters. and then a hand holding up a meatball with a piece of the mozzarella pushed into the middle of it.

    Step 3- Brown the meatballs.

    Heat a large frying pan over medium heat and brown the meatballs on all sides. This helps lock in the flavor and gives them a nice crust.

    Raw meatballs in a skillet and then the same meatballs browned on the skillet.

    Step 4- Bake in marinara sauce.

    Transfer the browned meatballs to a baking dish in a single layer. Pour the marinara sauce over and bake uncovered for 30 minutes. Serve hot! 

    Browned meatballs in a baking dish and then the meatballs covered in sauce in the oven.

    Frequently Asked Questions

    How can I prevent the cheese from leaking out?

    Be aware that there will still be a little cheese leakage- that's part of this recipe's charm- embrace it! To try and minimize leakage, make sure the meat is fully sealed around the cheese and press the edges together tightly.

    How to keep them tender?

    When I'm mixing the meat, I add small palmfuls of warm water as needed. While you don't want the meat to be a soupy mess, you want it to be nice and moist. Also, don’t overwork the meat mixture and avoid overcooking the meatballs.

    Can I bake in a different sauce?

    I don’t see why not. Try Alfredo for a creamy twist, pesto for a fresh herby flavor, or arrabbiata for a spicy kick.

    A spoon holding up a sauce covered stuffed meatball above the pan.

    Tips For Making Stuffed Meatballs

    • For a spicier kick, add red pepper flakes, and a drizzle of hot sauce, or swap some of the beef for spicy Italian sausage to bring the heat.
    • Try different cheese for a unique twist, such as provolone or fontina.
    • Lightly dampen your hands with water or oil to prevent sticking and create smooth, evenly sized meatballs.
    • Don't overwork the meat or you'll get tough meatballs.
    • Add palmfuls of warm water- to help moisten the meat while mixing. I like it moderately moist.
    • If you prefer softer meatballs, skip the browning step and bake them directly in the sauce- just make sure you use a thermometer to make sure they reach 165 degrees F in the thickest part and adjust baking time accordingly.
    • Ingredients to prep ahead- Chop the mozzarella, mix the meatball ingredients, and portion them out for easier assembly.
    • Leftovers and storage- Store leftovers in an airtight container in the fridge for up to 4 days or freeze them for up to 3 months. To keep them moist, gently reheat them in marinara sauce.
    A stuffed meatball in the baking dish with melted mozzarella cheese leaking out.

    What To Serve With Cheese Stuffed Meatballs

    Whether you’re serving these rich, hearty meatballs over pasta, or enjoying them on their own, they pair well with a variety of sides. I love having them with something extra to round out the meal. Here are some of my favorite pairings:

    • Roasted Vegetable Flatbread
    • Easy Sautéed Vegetables
    • Italian Tuna
    • Tomato Bisque Soup Recipe

    Other Tasty Meatball Recipes To Try

    • A bowl of Swedish meatballs and noodles.
      Swedish Meatballs And Noodles
    • A spoon holding up a porcupine meatball and sauce over the pan of them.
      Porcupine Meatballs With Tomato Soup
    • Greek Baked Turkey Meatballs are a tasty appetizer or an excellent main dish. They're insanely easy to whip up and a healthy option as well! Ground turkey, lemon juice and greek spices make a delicious and flavorful meatball that tastes awesome with tzatziki sauce!
      Greek Baked Turkey Meatballs Recipe
    • A close up image of a bowl of meatballs in BBQ with a toothpick in the focus meatball.
      Slow Cooker BBQ Meatballs

    Love this recipe? Please leave a 5 star ⭐️⭐️⭐️⭐️⭐️ rating in the recipe card below ⬇️ and/or a review in the comment section further down. Check out my Amazon Store for all my favorite tools, including those used in this recipe. And follow @thelifejolie on Instagram and TikTok!

    A plate of stuffed meatballs with one cut open revealing the mozzarella cheese inside.

    Cheesy Stuffed Meatballs

    Jessy Freimann
    Juicy, flavorful, and gooey, these cheesy stuffed meatballs are the ultimate comfort food. They’re easy to make, packed with delicious Italian flavors, ready in 45 minutes, and perfect for a weeknight dinner or a crowd-pleasing meal!
    No ratings yet
    Print Recipe Pin Recipe
    Prep Time 5 minutes mins
    Cook Time 40 minutes mins
    Total Time 45 minutes mins
    Course dinner, Main, Main Course, Main dish
    Cuisine Italian
    Servings 6 servings
    Calories 321 kcal

    Equipment

    • 1 mixing bowl
    • 1 Measuring cups and spoons
    • 1 Skillet
    • 1 11" x 7" baking dish
    • 1 Tongs

    Ingredients
      

    • Cooking spray
    • 1 pound ground beef
    • ¾ teaspoon kosher salt
    • ¼ teaspoon black pepper
    • ½ teaspoon garlic powder
    • ½ teaspoon onion powder
    • ½ cup Romano cheese or Parmesan cheese
    • ⅓ cup seasoned bread crumbs
    • 1 large egg
    • 2-3 Tablespoons water
    • 3 mozzarella cheese sticks cut into quarters
    • 3 cups marinara sauce

    Instructions
     

    • Preheat the oven to 400 degrees F. Mix together beef, salt, pepper, garlic powder, onion powder, Romano cheese, bread crumbs, egg and water until just combined.
    • Make 12 meatballs that are a little bigger than a golf ball. Use your finger to make a divot in each meatball and place a piece of the cheese stick into each divot. Use your hands to roll the meat around it completely.
    • Brown the meatballs on all sides in a large skillet and place in a baking dish in a single layer.
    • Top with marinara sauce and bake for 30 minutes uncovered. Serve immediately.

    Video

    Notes

    • For a spicier kick, add red pepper flakes, and a drizzle of hot sauce, or swap some of the beef for spicy Italian sausage to bring the heat.
    • Try different cheese for a unique twist, such as provolone or fontina.
    • Lightly dampen your hands with water or oil to prevent sticking and create smooth, evenly sized meatballs.
    • Don't overwork the meat or you'll get tough meatballs.
    • Add palmfuls of warm water- to help moisten the meat while mixing. I like it moderately moist.
    • If you prefer softer meatballs, skip the browning step and bake them directly in the sauce- just make sure you use a thermometer to make sure they reach 165 degrees F in the thickest part and adjust baking time accordingly.
    • Ingredients to prep ahead- Chop the mozzarella, mix the meatball ingredients, and portion them out for easier assembly.
    • Leftovers and storage- Store leftovers in an airtight container in the fridge for up to 4 days or freeze them for up to 3 months. To keep them moist, gently reheat them in marinara sauce.

    Nutrition

    Serving: 1servingCalories: 321kcalCarbohydrates: 12gProtein: 21gFat: 21gSaturated Fat: 9gPolyunsaturated Fat: 1gMonounsaturated Fat: 7gTrans Fat: 1gCholesterol: 70mgSodium: 1222mgPotassium: 596mgFiber: 2gSugar: 5gVitamin A: 580IUVitamin C: 9mgCalcium: 143mgIron: 3mg
    Tried this recipe?Let us know how it was!

    Buffalo Chicken Taquitos

    Mar 17, 2025 · Leave a Comment

    Buffalo taquitos cut in half and stacked on each other.

    Looking for a crispy, cheesy, and flavor-packed appetizer? These buffalo chicken taquitos are the perfect solution! With just a few ingredients and 30 minutes, you can whip up a delicious snack that’s sure to be a crowd favorite.

    A stack of Buffalo Taquitos on a bed of lettuce.
    [feast_advanced_jump_to]

    Why You’ll Love These Chicken Taquitos

    I don’t know about you, but when it comes to party appetizers, I’m all about something crispy, cheesy, and bursting with flavor. And that’s exactly what these buffalo taquitos bring to the table. 

    They’ve got a perfectly crunchy shell, a creamy, melty filling, and that bold, irresistible buffalo chicken kick in every bite. Every time I make them, they vanish almost instantly — so don’t expect leftovers. Here’s why you’ll love them just as much as I do:

    • Simple, no-fuss recipe
    • Seriously addictive flavors
    • Ready in just 30 minutes
    • Baked, not fried, but still crispy
    A hand breaking a buffalo chicken taquito in half.

    Ingredient Information And Substitutions

    • Cooked chicken- Shredded rotisserie chicken works great, but you can also use leftover grilled or my super easy recipe for shredded chicken. If you’re short on time, canned chicken can work, though the texture will be softer.
    • Ranch seasoning- Adds a tangy, herby flavor. If you don’t have it, use a mix of dried dill, garlic powder, onion powder, and a pinch of salt.
    • Buffalo wing sauce- Adds the signature kick. Just be sure to use wing sauce, not plain hot sauce. For a milder taste, mix with melted butter or swap for barbecue sauce. 
    • Mozzarella cheese- Melts beautifully and adds creaminess. You can substitute with Monterey Jack, cheddar, or even Pepper Jack for extra spice.
    • Flour tortillas- I prefer these to be on the larger side, so I use Fajita-size tortillas, but you can also use a smaller flour option or corn tortillas for a more traditional feel.  
    • Cooking spray- Helps the taquitos crisp up in the oven. If you don’t have cooking spray, lightly brush them with olive oil or melted butter for a similar effect.
    An overhead image of labeled recipe ingredients.

    How To Make Taquitos

    Step 1- Preheat the oven and mix the filling.

    Start by preheating your oven to 425 degrees F and greasing or lining a sheet pan to prevent sticking.

    In a large mixing bowl, combine the shredded chicken, ranch seasoning, buffalo wing sauce, and mozzarella cheese. Stir until everything is well coated and evenly mixed.

    Chicken filling ingredients added to a glass bowl and then a shot of them all mixed together.

    Step 2- Assemble the taquitos.

    Scoop about 4 tablespoons of the chicken mixture onto a fajita-sized flour tortilla. Roll it up tightly and place it seam-side down on the baking sheet. Repeat with the remaining tortillas.

    Buffalo chicken spread down the center of a flour tortilla and then the tortilla all rolled up into a taquito.

    Step 3- Bake to perfection.

    Lightly spray the tops of the taquitos with cooking spray, then sprinkle with kosher salt. Bake for 12-15 minutes, or until they are golden brown and crispy.

    Cut each in half and pair this delicious recipe for taquitos with ranch dressing, extra buffalo sauce, and celery for the ultimate party snack.

    Buffalo taquitos lined up on a sheet pan and then the pan in the oven.

    Frequently Asked Questions

    What’s the best way to cook chicken?

    Leftover or rotisserie chicken works great, but my favorite way to make shredded chicken is in the slow cooker — it’s tender, flavorful, and perfect for this recipe.

    Can I use previously cooked frozen chicken?

    Yes, just make sure to thaw it properly, either in the fridge overnight or submerged in a bowl of cold water (changed every 30 minutes) before using.

    How can I make them spicier?

    Simply add more buffalo sauce to the chicken mixture for extra heat. If you’re serving a mixed crowd, keep the filling milder and offer extra buffalo sauce for dipping.

    Can you freeze buffalo chicken roll ups?

    Yes. Assemble them and freeze before baking — it works best if you flash freeze, then transfer to a freezer bag once solid. When you're ready to eat, just thaw and bake! Or bake from frozen, adding a little extra time.

    What’s the best dipping sauce?

    These taquitos pair perfectly with ranch dressing, extra buffalo sauce, and celery sticks for a classic Buffalo chicken experience. If you prefer, you can also serve them with blue cheese dressing or even a creamy jalapeño sauce.

    Are these authentic taquitos?

    Nope! The is idea is inspired by Mexican Taquitos, but first of all the flavor profile is quite different. Additionally, traditional Taquitos are made with small corn tortillas and fried. These are made with larger flour tortillas and baked. So really, they might be a Flauta, but whatever they are, they're delicious!

    Buffalo taquitos cut in half and stacked on each other.

    Tips For Making Buffalo Taquitos

    • Use parchment paper or a baking mat, to prevent sticking and to ensure even browning.
    • Roll tightly to keep the filling secure while baking, preventing it from oozing out.
    • Don’t overstuff. If I have any leftover filling, I'll usually press it gently into the open sides of the taquitos.
    • Place the seam side down to keep it rolled tightly.
    • Brush or spray with oil. A light coating of oil helps them crisp up beautifully without frying.
    • Ingredients to prep ahead- Cook and shred the chicken in advance. 
    • Leftovers and storage- Store in an airtight container in the fridge for up to 3 days or freeze for up to 3 months.
    A hand dipping a buffalo taquito into ranch dressing.

    What To Serve With Baked Taquitos

    I love serving these taquitos with a mix of fresh, creamy, and crunchy dishes to balance out the bold buffalo flavor. Whether you're making them for game day, a family dinner, or just because, here are some of my favorite pairings:

    • Grilled Balsamic Asparagus
    • Asparagus Leek Tart
    • Crispy Parmesan Potatoes
    • Sautéed Zucchini and Tomatoes

    Other Tasty Appetizer Recipes To Try

    • A close up image of the corner of the pan of corn salsa.
      Roasted Corn Salsa
    • Need a good, meatless dinner or appetizer? This Roasted Vegetable Flatbread delivers! It's super easy to throw together and tastes fantastic.
      Roasted Vegetable Flatbread
    • A hand holding up a chip with pineapple salsa on it over the bowl.
      Jalapeno Pineapple Salsa
    • A hand holding a chip with avocado salsa.
      Avocado Salsa

    Love this recipe? Please leave a 5 star ⭐️⭐️⭐️⭐️⭐️ rating in the recipe card below ⬇️ and/or a review in the comment section further down. Check out my Amazon Store for all my favorite tools, including those used in this recipe. And follow @thelifejolie on Instagram and TikTok!

    Buffalo taquitos cut in half and stacked on each other.

    Buffalo Chicken Taquitos

    Jessy Freimann
    Looking for a crispy, cheesy, and flavor-packed appetizer? These buffalo chicken taquitos are the perfect solution! With just a few ingredients and 30 minutes, you can whip up a delicious snack that’s sure to be a crowd favorite.
    No ratings yet
    Print Recipe Pin Recipe
    Prep Time 10 minutes mins
    Cook Time 15 minutes mins
    Total Time 25 minutes mins
    Course Appetizer
    Cuisine American
    Servings 8 pieces
    Calories 130 kcal

    Equipment

    • mixing bowl
    • Spatula
    • sheet pan
    • Silpat
    • chefs knife
    • cutting board

    Ingredients
      

    • 2 cups cooked chicken, shredded
    • 1 Tablespoon ranch seasoning
    • ½ cup buffalo wing sauce, add more depending on your taste (make sure it's the wing sauce and not hot sauce)
    • 1 ½ cups mozzarella cheese, shredded
    • 8 fajita-size flour tortillas
    • Cooking spray
    • Ranch dressing for dipping

    Instructions
     

    • Preheat the oven to 425 degrees F and grease or line a sheet pan.
    • In a large bowl mix the chicken, ranch seasoning, buffalo wing sauce and mozzarella cheese until well combined.
    • Divide the chicken mixture between each tortilla and roll it tightly.
    • Place each Taquito on the baking sheet, seam side down.
    • Spray the Taquitos lightly with cooking spray. Bake for 12-15 minutes until golden brown.
    • Cut in half and serve immediately with Ranch dressing.

    Video

    Notes

    • Use parchment paper or a baking mat, to prevent sticking and to ensure even browning.
    • Roll tightly to keep the filling secure while baking, preventing it from oozing out.
    • Don’t overstuff. If I have any leftover filling, I'll usually press it gently into the open sides of the taquitos.
    • Place the seam side down to keep it rolled tightly.
    • Brush or spray with oil. A light coating of oil helps them crisp up beautifully without frying.
    • Ingredients to prep ahead- Cook and shred the chicken in advance. 
    • Leftovers and storage- Store in an airtight container in the fridge for up to 3 days or freeze for up to 3 months.

    Nutrition

    Serving: 1pieceCalories: 130kcalCarbohydrates: 2gProtein: 13gFat: 7gSaturated Fat: 3gPolyunsaturated Fat: 1gMonounsaturated Fat: 2gCholesterol: 43mgSodium: 306mgPotassium: 97mgFiber: 0.04gSugar: 0.3gVitamin A: 156IUCalcium: 112mgIron: 1mg
    Tried this recipe?Let us know how it was!

    Italian Tuna

    Mar 14, 2025 · 4 Comments

    Italian tuna on a lettuce wrap with lemon halves in the background.

    This Italian tuna is a fresh and flavorful dish that makes the perfect light salad. Ready in just 10 minutes, it's a healthy and satisfying meal made with canned tuna, beans, tomatoes, and fresh herbs, all brought together with a bright splash of lemon and a drizzle of olive oil.

    Italian tuna on a lettuce wrap with lemon halves in the background.
    [feast_advanced_jump_to]

    Why You’ll Love This Italian Tuna Salad

    Growing up, tuna salad was always a favorite in my house. My mom made hers super simple — just tuna and mayo, maybe some celery if she was feeling fancy. But as much as I love a classic, I wanted to create a healthier twist: a tuna salad without mayo that still had all the bold flavors I crave.

    This easy, no-mayo tuna salad is light, satisfying, and bursting with flavor, and inspired by fresh Italian flavors and ingredients. Whether you serve it in lettuce wraps, on a sandwich, or over a bed of greens, it’s a light and refreshing way to enjoy tuna salad without the heaviness of mayonnaise. Here’s why you’ll love it:

    • So much flavor
    • Light and healthy
    • Super quick 
    • Incredibly versatile 
    A close up of a no-mayo tuna salad in a bowl with wooden a wooden spoon in it.

    Ingredient Information And Substitutions

    • Tuna- The star of the dish! Use tuna packed in water for a light option. Albacore or yellowfin tuna both work well.
    • Beans- I like to use Great Northern beans. They add a creamy texture and extra protein. You can swap them with cannellini beans, chickpeas, or kidney beans for a slightly different flavor. Be sure to rinse them!
    • Tomatoes- Fresh, juicy tomatoes add sweetness and balance. Chopped Cherry tomatoes, Roma tomatoes, or even sun-dried tomatoes can be used too.
    • Green onions- Provide a mild onion flavor without overpowering the dish. Substitute with chopped red onion, shallots, or chives.
    • Olive oil- Adds richness and helps blend the flavors. Extra virgin olive oil is best, but avocado oil can be used as an alternative.
    • Lemon juice- Enhances freshness and acidity, balancing the flavors. If you don’t have lemons, use a splash of white wine vinegar or red wine vinegar.
    • Fresh oregano- Brings an earthy, slightly peppery taste. Dried oregano works in a pinch, but fresh gives the best flavor.
    • Fresh basil- Adds a bright, aromatic touch. If fresh basil isn’t available, use dried basil (up to 2 teaspoons) or swap with fresh parsley.
    • Garlic powder- Provides a mild garlic flavor without overpowering the dish. Fresh minced garlic can be used for a stronger taste.
    • Kosher salt- Helps bring out the flavors. If using table salt, reduce the amount slightly.
    • Ground black pepper- Adds a hint of spice and depth. Freshly ground black pepper is ideal for the best flavor.
    An overhead image of labeled recipe ingredients.

    How To Make Tuna Salad Without Mayo

    Step 1- Drain the tuna and place ingredients into the bowl.

    Be sure to drain your canned tuna well to avoid excess moisture and add the ingredients into a large bowl.

    Tuna ingredients in the bowl.

    Step 2- Mix everything.

    Break up larger chunks of tuna as you stir until well combined.

    Ingredients mixed together in the bowl.

    Step 3- Adjust seasoning.

    Give it a taste and adjust the seasonings as needed.

    Serve in lettuce wraps, over greens, or on toasted bread for an easy and delicious no mayo tuna salad.

    Tuna salad in lettuce wraps.

    Frequently Asked Questions

    Can I make this in advance?

    Yes. This salad keeps well for up to 4 days in the refrigerator. Wait to add the basil until just before serving to keep it fresh and prevent it from wilting.

    Can you freeze tuna salad?

    Since it's mayo-free, you can freeze the tuna and beans for up to 2 months. However, tomatoes and fresh herbs may become mushy when thawed, so I probably wouldn't.

    What’s the best dressing for tuna salad?

    A simple mix of olive oil, lemon juice, salt, and pepper is perfect. You can also add balsamic vinegar or Dijon mustard for extra flavor. If you prefer a creamier option, try Greek yogurt or mashed avocado.

    A hand holding a lettuce leaf with Italian Tuna in it.

    Tips For Making Canned Tuna Salad

    • Try different tuna varieties. I typically use yellowfin tuna in water, but albacore is great too. My mom said she thought it would be fantastic with tuna packed in oil. I haven't tried this, but I'm sure it would be tasty — although a bit more oily, so perhaps cut down the oil in the recipe if your tuna is packed in oil.
    • Press out as much liquid as possible from canned tuna before mixing. If using oil-packed tuna, you can leave the oil for extra flavor.
    • Avoid over-mixing. You'll need to break up the tuna for a more consistent texture, but stop stirring as soon as everything is combined. Otherwise, the tuna will start to get stringy and the overall texture will be a bit mushy.
    • Different brands of tuna and beans vary in salt content, so be sure to taste the salad as you mix. Add more lemon juice, salt, or olive oil as needed.
    • Ingredients to prep ahead- Chop the tomatoes, green onions, and herbs. Store them separately in the fridge until you're ready to assemble the salad.
    • Leftovers and storage- Store in an airtight container in the fridge for 4 days.

    What to Serve with Bean And Tuna Salad

    This no mayo tuna is light, refreshing, and packed with flavor and can be served on crusty bread, in lettuce wraps, or over mixed greens. But if you're looking to pair it with something extra, there are plenty of delicious options! From crusty bread to hearty soups, here are some of my favorite ways to enjoy this dish:

    • Roasted Fall Vegetables
    • Avocado Egg Salad
    • Greek Couscous Salad
    • Roasted Vegetable Flatbread

    Other Tasty Salad Recipes To Try

    • A bowl of pasta salad with a white towel behind it and tomatoes and basil around it.
      Zesty Italian Pasta Salad
    • A bowl of crab mac salad on top of a second bowl with celery and an onion behind it.
      Crab Pasta Salad
    • A white bowl full of classic tuna macaroni salad.
      Tuna Macaroni Salad
    • A hand holding a half sandwich revealing the egg salad in the center.
      Avocado Egg Salad

    Love this recipe? Please leave a 5 star ⭐️⭐️⭐️⭐️⭐️ rating in the recipe card below ⬇️ and/or a review in the comment section further down. Check out my Amazon Store for all my favorite tools, including those used in this recipe. And follow @thelifejolie on Instagram and TikTok!

    Italian tuna on a lettuce wrap with lemon halves in the background.

    Italian Tuna

    Jessy Freimann
    This Italian tuna is a fresh and flavorful dish that makes the perfect light salad. Ready in just 10 minutes, it's a healthy and satisfying meal made with canned tuna, beans, tomatoes, and fresh herbs, all brought together with a bright splash of lemon and a drizzle of olive oil.
    4.58 from 7 votes
    Print Recipe Pin Recipe
    Prep Time 10 minutes mins
    Total Time 10 minutes mins
    Course Lunch, Main, Salad
    Cuisine Italian
    Servings 6 servings
    Calories 68 kcal

    Equipment

    • mixing bowl
    • wooden spoon
    • chefs knife
    • cutting board
    • Citrus reamer

    Ingredients
      

    • 12 ounces tuna in water, well drained and broken up (2 cans)
    • 14 ounces Great Northern Beans, rinsed and drained
    • 1 medium tomato, diced
    • 1 bunch green onions, chopped (green parts only)
    • 1 teaspoon fresh oregano, chopped
    • 2 Tablespoons fresh basil, chiffonade
    • 2 Tablespoons lemon juice
    • 3 Tablespoons olive oil
    • ½ teaspoon garlic powder
    • ½ teaspoon kosher salt
    • ¼ teaspoon ground black pepper
    • Lettuce Wraps for serving

    Instructions
     

    • In a large mixing bowl combine all ingredients.
    • Mix well and taste.
    • Adjust seasonings to your taste. Serve immediately.

    Video

    Notes

    • Try different tuna varieties. I typically use yellowfin tuna in water, but albacore is great too. My mom said she thought it would be fantastic with tuna packed in oil. I haven't tried this, but I'm sure it would be tasty — although a bit more oily, so perhaps cut down the oil in the recipe if your tuna is packed in oil.
    • Press out as much liquid as possible from canned tuna before mixing. If using oil-packed tuna, you can leave the oil for extra flavor.
    • Avoid over-mixing. You'll need to break up the tuna for a more consistent texture, but stop stirring as soon as everything is combined. Otherwise, the tuna will start to get stringy and the overall texture will be a bit mushy.
    • Different brands of tuna and beans vary in salt content, so be sure to taste the salad as you mix. Add more lemon juice, salt, or olive oil as needed.
    • Ingredients to prep ahead- Chop the tomatoes, green onions, and herbs. Store them separately in the fridge until you're ready to assemble the salad.
    • Leftovers and storage- Store in an airtight container in the fridge for 4 days.

    Nutrition

    Serving: 1servingCalories: 68kcalCarbohydrates: 1gProtein: 0.3gFat: 7gSaturated Fat: 1gPolyunsaturated Fat: 1gMonounsaturated Fat: 5gSodium: 195mgPotassium: 60mgFiber: 0.3gSugar: 1gVitamin A: 207IUVitamin C: 5mgCalcium: 4mgIron: 0.1mg
    Tried this recipe?Let us know how it was!

    Tortellini Baked Pasta

    Mar 12, 2025 · Leave a Comment

    A spoon pulling a scoop of baked tortellini from the pan with melted cheese stretching.

    This tortellini baked pasta is the ultimate comfort food, packed with cheesy goodness and rich sauce. With minimal prep and just 30 minutes from start to finish, it’s a quick and satisfying dinner the whole family will enjoy.

    A spoon pulling a scoop of baked tortellini from the pan with melted cheese stretching.

    Why You’ll Love Creamy Tortellini Pasta

    If you can’t get enough of simple, no-fuss dinners that deliver big on flavor, this baked tortellini dish is for you. It’s a perfect way to turn store-bought tortellini into a delicious hearty meal with minimal effort. Plus, it’s a great recipe for using pantry staples like canned tomato sauce, herbs, and cheese. 

    Similar to my classic Pasta al Forno (Baked Ziti), this casserole is flavorful, gooey, and incredibly hearty. It’s easily customizable, and requires just one baking dish, making cleanup a breeze. 

    Whether you’re cooking for a crowd, craving a cozy homemade meal, or looking for an easy meal prep option, this tortellini bake is a comforting choice that everyone will love. Here’s why this recipe is a must-try:

    • Perfect for busy weeknights
    • Cheesy, nourishing, and packed with flavor
    • Customize it with your favorite ingredients
    • Great for meal prep
    A plate of baked tortellini pasta.

    Ingredient Information And Substitutions

    • Ground beef- A hearty protein that makes the dish satisfying. Swap with ground turkey or chicken for a lighter version.
    • Seasonings- Onion and garlic powders add depth of flavor to the sauce. Dried basil adds a subtle herbal note and of course, salt and pepper enhance the dish's flavors. Adjust all to taste.
    • Tomato sauce- The base of the dish, giving it a rich and tangy flavor. Marinara sauce is my go-to, I always have some in my freezer.
    • Tortellini- Cheese tortellini works great, but you can use spinach, mushroom, or meat-filled tortellini for a different spin. 
    • Mozzarella cheese- Melts beautifully on top, creating a gooey, golden crust. Swap with smoked mozzarella for a bolder taste.
    An overhead image of labeled recipe ingredients.

    How to Cook Baked Cheese Tortellini

    Step 1- Brown the beef and add seasoning.

    Preheat the oven to 400 degrees F.

    Add the ground beef. Break up and brown until cooked, about 5 minutes. Add all seasonings and stir in to coat the meat evenly. Stir in marinara sauce.

    Browning ground beef with seasonings in a pan and then marinara sauce added to the pan.

    Step 2- Simmer the sauce.

    Simmer the sauce for at least 10 minutes to develop flavor. Stir in frozen tortellini and pour the mixture into a 9" x 9" baking pan.

    Tortellini mixed into the pan and then the mixture poured into a white baking pan.

    Step 3- Bake the pasta.

    Cover and bake for 30 minutes.

    Uncover the dish, sprinkle shredded mozzarella on top, and bake uncovered for 10 more minutes, or until the cheese is melted and slightly golden. Let it cool for a few minutes, then dig in! 

    Foil covered baking dish in the oven and then the uncovered baking dish with shredded cheese on top in the oven.

    Frequently Asked Questions

    Can I make this ahead of time?

    I'd encourage you to make the sauce ahead and cool before refrigerating. Reheat it before assembling and baking.

    Do I need to cook the tortellini before baking?

    I do not boil the frozen tortellini before baking. I wouldn't suggest using other types tortellini- the texture never came out right with fresh or shelf stable tortellini when I tested with those options.

    How do I prevent the pasta from getting mushy?

    This is exactly why I don't cook the frozen tortellini before adding it to the dish.

    A spoon in a pan of baked tortellini in the pan.

    Tips For Making Tortellini Casserole

    • Use frozen for the best texture. I tested this recipe with fresh and shelf stable and the texture just wasn't right.
    • Make it creamy. Stir in a spoonful of ricotta or a splash of heavy cream for a richer sauce. 
    • Give it some spice by adding a pinch of red pepper flakes for heat.
    • Shred your own cheese. It melts so much better than the pre-shredded kind!
    • Ingredients to prep ahead- Make the sauce in advance and shred the cheese.
    • Leftovers and storage- Store leftovers in the fridge for 3 days. Reheat in the oven, covered with foil or in individual servings in the microwave.
    A plate of baked tortellini recipe with fresh parsley behind it.

    What To Serve With Tortellini Pasta

    This is a rich and comforting dish on its own, but adding the right sides can really complete the meal. A crisp, refreshing salad or lightly sautéed vegetables help to balance it, while a cozy bowl of soup can make it even more comforting. And, of course, no meal is complete without a little something sweet at the end! Here are some of my favorite dishes to serve alongside this cheesy casserole:

    • Sautéed Zucchini and Tomatoes
    • Savory Spiced Butternut Squash Soup
    • Garlic Butter Sautéed Carrots Recipe
    • Old Fashioned Chocolate Pie

    Other Pasta Recipes To Try

    • A white plate of rapini and sausage pasta with the pan and a blue napkin in the background.
      Sausage and Rapini Pasta
    • A plate of vodka pasta with fresh basil, Italian bread and a striped towel in the background.
      Creamy Vodka Pasta
    • A wooden spoon scooping up creamy taco pasta from the pan.
      One Pot Cheesy Taco Pasta
    • A wooden spoon holding a scoop of creamy chicken Florentine pasta over the full pan of it.
      One Pot Chicken and Pasta Florentine

    Love this recipe? Please leave a 5 star ⭐️⭐️⭐️⭐️⭐️ rating in the recipe card below ⬇️ and/or a review in the comment section further down. Check out my Amazon Store for all my favorite tools, including those used in this recipe. And follow @thelifejolie on Instagram and TikTok!

    A spoon pulling a scoop of baked tortellini from the pan with melted cheese stretching.

    Tortellini Baked Pasta

    Jessy Freimann
    This tortellini baked pasta is the ultimate comfort food, packed with cheesy goodness and rich sauce. With minimal prep and just an hour from start to finish, it’s a satisfying dinner the whole family will enjoy.
    No ratings yet
    Print Recipe Pin Recipe
    Prep Time 5 minutes mins
    Cook Time 50 minutes mins
    Cooling time 5 minutes mins
    Total Time 1 hour hr
    Course dinner, Main, Main Course, Main dish, pasta
    Cuisine Italian
    Servings 6 servings
    Calories 307 kcal

    Equipment

    • 1 Skillet
    • 1 9 inch Baking dish
    • 1 Measuring cups and spoons
    • 1 Wooden Spoons
    • 1 Box grater

    Ingredients
      

    • 1 pound ground beef 90/10
    • 1 teaspoon Kosher salt
    • ¼ teaspoon ground black pepper,
    • ½ teaspoon dried basil
    • ½ teaspoon garlic powder
    • ½ teaspoon onion powder
    • 3 cups marinara sauce
    • 16 ounces frozen tortellini pasta
    • 1 ½ cup shredded mozzarella

    Instructions
     

    • Preheat the oven to 400 degrees. Brown beef in a large skillet over medium-high heat, breaking it up as it cooks unto fully browned, about 5 minutes.
    • Stir in salt, pepper, basil, garlic powder and onion powder until beef is fully coated.
    • Stir in marinara sauce and simmer for 10 minutes.
    • Add tortellini and stir to combine. Pour into a a 9" x 9" baking dish. Cover in foil.
    • Bake covered for 30 minutes.
    • Remove the foil and sprinkle with shredded mozzarella cheese. Bake uncovered for another 10 minutes to melt the cheese. Cool 5 minutes and serve.

    Video

    Notes

    • Use frozen for the best texture. I tested this recipe with fresh and shelf stable and the texture just wasn't right.
    • Make it creamy. Stir in a spoonful of ricotta or a splash of heavy cream for a richer sauce. 
    • Give it some spice by adding a pinch of red pepper flakes for heat.
    • Shred your own cheese. It melts so much better than the pre-shredded kind!
    • Ingredients to prep ahead- Make the sauce in advance and shred the cheese.
    • Leftovers and storage- Store leftovers in the fridge for 3 days. Reheat in the oven, covered with foil or in individual servings in the microwave.

    Nutrition

    Serving: 1servingCalories: 307kcalCarbohydrates: 8gProtein: 21gFat: 22gSaturated Fat: 10gPolyunsaturated Fat: 1gMonounsaturated Fat: 9gTrans Fat: 1gCholesterol: 76mgSodium: 1195mgPotassium: 597mgFiber: 2gSugar: 5gVitamin A: 721IUVitamin C: 9mgCalcium: 175mgIron: 3mg
    Tried this recipe?Let us know how it was!

    Old Fashioned Tuna Casserole

    Mar 11, 2025 · 2 Comments

    A bowl of tuna casserole with the pan behind it.

    This old fashioned tuna casserole, or as we call it, Tuna Wiggle, is a rich, creamy, and cheesy classic that’s pure comfort in every bite. Made with simple pantry staples like tuna, pasta, and cheese, this recipe makes a nostalgic meal the whole family will love. 

    A wooden spoon in a pan of tuna casserole with a scoop on it.
    [feast_advanced_jump_to]

    Why You’ll Love The Easy Tuna Casserole

    This creamy tuna pasta casserole isn’t just a comforting meal — it’s packed with nostalgia. Growing up, my mom made a fantastic tuna casserole, and it was always a staple in our dinner rotation. One Christmas, my Aunt Mimi gave us a kids’ cookbook with fun recipe names, and that’s where we first saw "Tuna Wiggle." Whether we ever actually made that version, I don’t remember, but the name stuck. 

    Now as adults, we’ve even shortened it to just "Wiggle," and it remains a family favorite. Even my extra-picky, seafood-hating husband enjoys this meal. It’s the kind of dinner that’s cozy, familiar, and always a hit at the table. Here are a few more reasons why you’ll love this tuna casserole with cream of mushroom soup:

    • Simple pantry ingredients
    • The ultimate rich and creamy comfort food
    • A quick, fuss-free dinner
    • Feeds a crowd easily
    • Makes plenty for leftovers
    A bowl of tuna casserole with the pan behind it.

    Ingredient Information And Substitutions

    • Cream of chicken soup- Adds a rich, creamy flavor to the sauce. I use the healthy request version, but any will work.
    • Cream of mushroom soup- A classic ingredient in old-fashioned tuna casserole that gives it that nostalgic taste- once again, I like healthy request.
    • Milk- Helps create a smooth sauce. Use whole milk for extra creaminess or substitute with broth.
    • Mayonnaise- Adds an extra velvety texture. Greek yogurt works as a lighter option.
    • Chunk light tuna in water- Be sure to drain it well. Albacore can be used for a more firm texture.
    • Sharp cheddar cheese- Gives the casserole its cheesy topping. Colby also works well.
    • Frozen peas- Adds color and sweetness. Swap with mixed veggies for variety.
    • Elbow macaroni- Cooked al dente. While some prefer egg noodles, our family always makes tuna casserole with elbow macaroni for that perfect bite.
    • Seasoned bread crumbs- For a crispy, golden topping. Crushed crackers or panko are great alternatives. Or for a little fun, crush up potato chips (this was my mom's signature move)!
    An overhead image of labeled recipe ingredients.

    How To Make Tuna Casserole

    Step 1- Mix the soups and milk.

    Preheat oven to 350 degrees F. Start a pot of water boiling on the stove.

    In a medium pan, whisk together cream of chicken soup and cream of mushroom soup with the milk until well combined.

    Cream of mushroom and cream of chicken soups and milk in a pan on the stove and then combined.

    Step 2- Add flavor.

    Whisk in the mayonnaise, ½ cup of shredded cheddar cheese, and salt and pepper to taste. Mix until the cheese is melted and everything is well combined. Stir frequently until smooth and to prevent burning.

    Cheese, seasonings and mayonnaise added to the pan and whisked in an combined.

    Step 3- Mix in tuna and peas.

    Gently fold in the drained tuna and frozen peas, breaking up the tuna slightly while keeping some chunks intact. Reduce the heat to low and simmer for about 10 minutes, stirring occasionally.

    Peas and tuna added to the pan and then mixed in.

    Step 4- Combine with pasta and assemble.

    While the sauce simmers, cook elbow macaroni according to package instructions until just al dente, then drain and set aside.

    Mix the cooked macaroni into the sauce, stirring until evenly coated. Then, pour everything into a 9x13-inch baking dish.

    Cooked and drained elbow pasta in a pot and then mixed with the sauce in a baking pan.

    Step 5- Top and bake.

    Sprinkle the remaining cheddar cheese on top, followed by an even layer of seasoned bread crumbs. Bake uncovered for 30 minutes or until bubbly and golden brown on top.

    Let the casserole cool for a few minutes before serving. Dig in and enjoy this old-fashioned tuna noodle casserole with your favorite sides! 

    Shredded cheese and bread crumbs added to the baking dish and then the baking dish in the oven.

    Frequently Asked Questions

    Can I use fresh vegetables instead of frozen peas?

    Absolutely. Fresh carrots, green beans, or bell peppers are great alternatives. Be sure to sauté them before adding them to the casserole so they are soft and not crunchy.

    Can I make this ahead of time?

    Yes! Assemble the casserole, cover it tightly, and refrigerate for up to 24 hours before baking. You may need to add 5 extra minutes to the baking time.

    Can I use fresh tuna instead of canned?

    Yes! Fully cook and flake fresh tuna before adding it to the casserole the same as canned.

    How do I prevent the casserole from drying out?

    Don’t overbake it, and if reheating, add a splash of milk to keep it creamy.

    An overhead image of a pan of tuna noodle casserole with a wooden spoon in it.

    Tips For The Old Fashioned Tuna Noodle Casserole

    • Use al dente pasta. It will soften more while baking, so don’t overcook it to start or it will turn to mush.
    • Swap elbow macaroni with another similar size noodle. Egg noodles and small shells are some other popular choices!
    • Drain the tuna well. Extra liquid can make the casserole watery.
    • Add crunch. Try crushed potato chips, crushed Ritz crackers, or panko bread crumbs for the topping.
    • Ingredients to prep ahead- Cook and drain the elbow macaroni. Mix the soup, milk, mayo, and cheese in advance for quick assembly.
    • Leftovers and storage- Store tuna casserole in an airtight container in the fridge for up to 4 days. Freeze for up to 3 months. To reheat, warm in the oven at 350 degrees F until warmed through and bubbly.
    A close up of a bowl of tuna casserole with cheese on it.

    What To Serve With Tuna Macaroni Casserole

    This makes a cozy, satisfying meal on its own, but pairing it with the right sides makes it even better! I love serving it with something fresh or crunchy to balance out the creamy, cheesy goodness. Here are a few of my favorite sides to try: 

    • Clementine and Fennel Salad Recipe
    • Green Bean Salad
    • Green Bean Casserole Without Mushroom Soup
    • Grandma’s Baked Artichoke Hearts

    More Tasty Comfort Food Recipes

    • This is my mom's meatloaf recipe- it is seriously the best meatloaf I've ever had- it's super simple and really easy to make. It's the ultimate of comfort foods and one of my favorite dinners!
      Mom's Meatloaf Recipe
    • Say goodbye to dry and tough pork chops: these Smothered Crock Pot Pork Chops are the ultimate fall-apart tender comfort food. With just 4 ingredients, this easy dinner will be your new go-to dump dinner!
      Fall Apart Slow Cooker Pork Chops
    • A pile of homemade meatballs in tomato sauce.
      Homemade Meatballs In Sauce
    • A spoon holding up a porcupine meatball and sauce over the pan of them.
      Porcupine Meatballs With Tomato Soup

    Love this recipe? Please leave a 5 star ⭐️⭐️⭐️⭐️⭐️ rating in the recipe card below ⬇️ and/or a review in the comment section further down. Check out my Amazon Store for all my favorite tools, including those used in this recipe. And follow @thelifejolie on Instagram and TikTok!

    A bowl of tuna casserole with the pan behind it.

    Old Fashioned Tuna Casserole

    Jessy Freimann
    This old fashioned tuna casserole, or as we call it, Tuna Wiggle, is a rich, creamy, and cheesy classic that’s pure comfort in every bite. Made with simple pantry staples like tuna, pasta, and cheese, this makes a nostalgic meal the whole family will love.
    No ratings yet
    Print Recipe Pin Recipe
    Prep Time 20 minutes mins
    Cook Time 30 minutes mins
    Cooling time 5 minutes mins
    Total Time 55 minutes mins
    Course dinner, Entree, Main
    Cuisine Comfort food, Easy, Family, weeknight
    Servings 8 servings
    Calories 297 kcal

    Equipment

    • 1 Small sauce pan
    • 1 Sauce pan
    • 1 9 x 13 Pan
    • 1 Measuring cups and spoons
    • 1 Whisk

    Ingredients
      

    • 10 ounces cream of chicken soup healthy request
    • 20 ounces cream of mushroom soup healthy request
    • 10 ounces whole milk
    • 2 Tablespoons mayonnaise
    • 10 ounces chunk light tuna in water well drained (2 cans)
    • 2 cups shredded sharp cheddar cheese divided
    • 1 cup frozen peas
    • 2 ½ cups elbow pasta cooked to aldente as per the package directions
    • ½ teaspoon Kosher salt to taste
    • ¼ teaspoon ground black pepper to taste
    • ¼ cup seasoned bread crumbs

    Instructions
     

    • Preheat the oven to 350 degrees. Gently whisk the cans of cream of mushroom and cream of chicken soups with the milk over medium heat until well combined. Stir frequently so that it doesn't burn.
    • Once they are well combined, whisk in the mayonnaise, ½ cup of the shredded cheddar and salt and pepper to taste.
    • Add the tuna and peas and break up the tuna with your spoon.
    • Reduce the heat to low and allow it to simmer for around 10 minutes, stirring periodically.
    • Mix in the pasta and transfer the mixture to a 9 x 13 baking pan.
    • Top with the remaining cheese and sprinkle with bread crumbs.
    • Bake uncovered for 30 minutes until bubbling. Cool for 5 minutes and serve immediately.

    Video

    Notes

    • Use al dente pasta. It will soften more while baking, so don’t overcook it to start or it will turn to mush.
    • Swap elbow macaroni with another similar size noodle. Egg noodles and small shells are some other popular choices!
    • Drain the tuna well. Extra liquid can make the casserole watery.
    • Add crunch. Try crushed potato chips, crushed Ritz crackers, or panko bread crumbs for the topping.
    • Ingredients to prep ahead- Cook and drain the elbow macaroni. Mix the soup, milk, mayo, and cheese in advance for quick assembly.
    • Leftovers and storage- Store tuna casserole in an airtight container in the fridge for up to 4 days. Freeze for up to 3 months. To reheat, warm in the oven at 350 degrees F until warmed through and bubbly.

    Nutrition

    Serving: 1servingCalories: 297kcalCarbohydrates: 43gProtein: 12gFat: 8gSaturated Fat: 3gPolyunsaturated Fat: 2gMonounsaturated Fat: 2gTrans Fat: 0.01gCholesterol: 12mgSodium: 985mgPotassium: 268mgFiber: 2gSugar: 3gVitamin A: 132IUVitamin C: 0.1mgCalcium: 68mgIron: 2mg
    Tried this recipe?Let us know how it was!


    Tomato Bisque Soup Recipe

    Mar 7, 2025 · 2 Comments

    A bowl of tomato soup on a plate with a spoon and grilled cheese.

    This simple tomato bisque soup recipe makes a rich and creamy dish that's packed with flavor. It comes together in under an hour and freezes beautifully, making it perfect for meal prep.

    A bowl of tomato soup on a plate with a spoon  and grilled cheese.
    [feast_advanced_jump_to]

    Why This Is The Best Tomato Soup And Grilled Cheese

    This recipe is inspired by a local diner I used to love and miss so much, Union Street Eatery. When my gals were babies, we would eat there at least once a week, and every time their tomato bisque soup was on the specials, I had to order it. I’ve always been picky about tomato soup — too acidic, too saucy, or just not creamy enough.

    But their version? Pure perfection. So when Peter, one of the owners, shared his recipe with me, I was beyond excited!

    It's perfect for a cozy meal, especially the unbeatable comfort food duo that is a crispy grilled cheese sandwich with tomato soup. Here are some of my favorite parts of this recipe:

    • Simple, wholesome ingredients
    • Minimal prep work
    • Creamy and comforting without feeling too heavy
    • Easy enough for busy weeknights
    • Make a big batch and save some for later
    A spoon with tomato soup holding it up from the bowl.

    Ingredient Information And Substitutions

    • Butter- For cooking the onions, though it adds rich flavor too. Substitute with olive oil.
    • Onion- Yellow or white onions work best.
    • Flour- Helps thicken the soup. Use gluten-free 1:1 flour if needed (I like King Arthur or Bob's Red Mill).
    • Chicken stock- Much more flavorful than water! Feel free to swap in vegetable stock to make this recipe vegetarian.
    • Canned whole tomatoes- Not all canned tomatoes are alike! Choose a high-quality brand for the best flavor. San Marzano are less acidic than others if you happen to be sensitive.
    • Seasonings- I love the flavor of thyme and dill in this soup, but you can certainly swap in others like oregano or basil.
    • Heavy cream- Makes this silky and creamy. Substitute with half-and-half for a lighter option, or full-fat coconut milk for a dairy-free version.
    • Sugar- Just a pinch to balance the acidity of the tomatoes.

    How To Make Tomato Soup With Canned Tomatoes

    Step 1- Sauté the onion.

    Melt butter in a large pan over medium-high heat. Add diced onion and sauté for 5 minutes until softened.

    Butter melting in a large pot and then onions sautéing in the butter.

    Step 2- Create a roux and add the broth.

    Mix in the flour and cook for another 5 minutes, stirring frequently.

    Pour in the chicken stock and cook for 10 minutes, until slightly thickened.

    Flour mixed in with the onions and then broth being stirred in with it.

    Step 3- Simmer the soup.

    Add canned tomatoes, thyme, and dill. Reduce heat to medium-low and let simmer for 45 minutes.

    Broth thickened  in the pot and then canned tomatoes and spices added.

    Step 4- Blend until smooth and finish with cream.

    Use an immersion blender (or a regular blender) to purée the soup until smooth.

    Stir in heavy cream, plus a pinch of sugar and as much salt and pepper as you'd like. Serve warm!

    A immersion blended blending up the soup and then a wooden spoon stirring in heavy cream.

    Frequently Asked Questions

    Is tomato bisque vegetarian?

    Many times, no — and that goes for this recipe too. Chicken stock is the most common choice (especially in restaurants) because of how much flavor it adds to the dish. That said, you can use vegetable stock when making it to give yourself a meatless option. And swapping vegan butter and coconut milk to this will make this vegan.

    What is the best tomato for tomato soup?

    Canned whole peeled plum tomatoes, like Roma, are the way to go! They’re rich in flavor, low in water, and break down beautifully for a smooth, delicious soup.

    Can I use fresh tomatoes instead of canned?

    You can use fresh tomatoes, but you’ll need to peel and crush them first. You’ll also want to cook them down longer to reach the same flavor and consistency as canned tomatoes. That's why I prefer to just use canned — easy, less prep, and consistent flavor you can count on.

    Is tomato soup good for you?

    Yep! Tomatoes are loaded with vitamin C and lycopene, and the onions and herbs add extra nutrients too. Now, not everyone will agree that the heavy cream is good for you, but everything in moderation! And for a lighter version, you can always skip it.

    An overhead image of tomato bisque soup on a plate with a grilled cheese sandwich and a black and white striped napkin next to it.

    Tips For Making Quick Tomato Soup From Canned Tomatoes

    • Use good quality canned tomatoes for the best flavor. Whole peeled tomatoes also guarantee the perfect texture, so don't try to swap those with crushed or diced versions.
    • Simmer for the full 45 minutes. This allows the flavors to meld and creates rich, deep flavor. It really is worth the extra patience!
    • Don’t skip the seasoning! A pinch of sugar can balance acidity, and the herbs really bring it all together. Salt and pepper are important too — they enhance all the flavors and add the perfect touch of heat.
    • Add some crunch. Try roasted chickpeas for a protein-packed, crispy topping, or toss in some crunchy croutons for the ultimate comfort food experience.
    • To achieve that perfect velvety texture, use an immersion blender to purée the soup. It’s so much easier than transferring back and forth from a regular blender!
    • Ingredients to prep ahead- Dice the onion and measure out your ingredients.
    • Leftovers and storage- Keep leftovers in an airtight container in the fridge for up to 3 days. You can also freeze it for up to 3 months, making it a great make-ahead option for busy weeknights.
    Tomato bisque in a bowl with grilled cheese and a spoon.

    What To Serve With Tomato Soup

    If you're wondering what to eat with tomato soup (beyond grilled cheese of course), I've got you! Whether you’re craving something savory, crunchy, or even a light salad, any one of these sides will transform it into a hearty and satisfying meal:

    • Italian Stuffed Zucchini Boats
    • Roasted Beet Salad with Feta and Dill
    • Roasted Vegetable Flatbread
    • Cheesy Ranch Potato Wedges Recipe

    Other Delicious Soup Recipes To Try

    • An overhead image of a bowl of cabbage and beans with bread and a blue checked towel around it and topped with grated Romano cheese.
      Cabbage and Beans
    • A spoon holding up a scoop of lentil soup with ham from a black bowl of it.
      Carrot and Lentil Soup
    • A bowl of squash soup with burrata and cilantro on top and chunks of squash and cilantro in the background.
      Savory Spiced Butternut Squash Soup
    • A close up of a bowl of chicken wild rice creamy soup with a spoon in it and another bowl in the background.
      Wild Rice Creamy Chicken Soup (Great with Turkey Too!)

    Love this recipe? Please leave a 5 star ⭐️⭐️⭐️⭐️⭐️ rating in the recipe card below ⬇️ and/or a review in the comment section further down. Check out my Amazon Store for all my favorite tools, including those used in this recipe. And follow @thelifejolie on Instagram and TikTok!

    A bowl of tomato soup on a plate with a spoon and grilled cheese.

    Tomato Bisque Soup Recipe

    Jessy Freimann
    This quick tomato bisque soup recipe with canned tomatoes is rich, creamy, and packed with flavor. It comes together in under an hour and freezes beautifully, making it perfect for meal prep.
    No ratings yet
    Print Recipe Pin Recipe
    Prep Time 20 minutes mins
    Cook Time 45 minutes mins
    Course dinner, Lunch, Main, Main Course, Soup
    Cuisine American
    Servings 6 servings
    Calories 128 kcal

    Equipment

    • 1 Dutch oven
    • 1 cutting board
    • 1 chefs knife
    • 1 Measuring cups and spoons
    • 1 Immersion Blender

    Ingredients
      

    • 3 Tablespoons butter
    • 1 cup onion diced,
    • 3 Tablespoons all-purpose flour
    • 5 cups chicken stock
    • 56 ounces whole peeled plum tomatoes (2 large cans)
    • 1 teaspoon thyme
    • ½ teaspoon dill
    • 3 Tablespoons heavy cream
    • 1 pinch sugar
    • ½ teaspoon Kosher salt
    • ¼ teaspoon ground black pepper to taste

    Instructions
     

    • In a large pan, melt the butter over medium-high heat.
    • Once the butter is melted, sauté the onion for 5 minutes or until softened. Mix in the flour and cook for 5 more minutes.
    • Add the broth and cook for around 10 minutes or until slightly thickened.
    • Add the cans of tomatoes, thyme, and dill, and reduce the heat to medium-low. Simmer for 45 minutes.
    • Purée the mixture with an immersion blender until smooth.
    • Stir in the salt, pepper, sugar, and heavy cream. Serve immediately.

    Video

    Notes

    • Use good quality canned tomatoes for the best flavor. Whole peeled tomatoes also guarantee the perfect texture, so don't try to swap those with crushed or diced versions.
    • Simmer for the full 45 minutes. This allows the flavors to meld and creates rich, deep flavor. It really is worth the extra patience!
    • Don’t skip the seasoning! A pinch of sugar can balance acidity, and the herbs really bring it all together. Salt and pepper are important too — they enhance all the flavors and add the perfect touch of heat.
    • Add some crunch. Try roasted chickpeas for a protein-packed, crispy topping, or toss in some crunchy croutons for the ultimate comfort food experience.
    • To achieve that perfect velvety texture, use an immersion blender to purée the soup. It’s so much easier than transferring back and forth from a regular blender!
    • Ingredients to prep ahead- Dice the onion and measure out your ingredients.
    • Leftovers and storage- Keep leftovers in an airtight container in the fridge for up to 3 days. You can also freeze it for up to 3 months, making it a great make-ahead option for busy weeknights.

    Nutrition

    Serving: 1servingCalories: 128kcalCarbohydrates: 13gProtein: 6gFat: 5gSaturated Fat: 3gPolyunsaturated Fat: 1gMonounsaturated Fat: 2gCholesterol: 15mgSodium: 491mgPotassium: 273mgFiber: 1gSugar: 5gVitamin A: 146IUVitamin C: 3mgCalcium: 28mgIron: 1mg
    Tried this recipe?Let us know how it was!

    Instant Pot Beef Tips and Gravy

    Mar 3, 2025 · 4 Comments

    An overhead image of a blue and white bowl of beef tips over rice with parsley and mushrooms around it.

    Making Instant Pot beef tips and gravy has never been easier! Whether you use your slow cooker or Instant Pot, this recipe gives you tender, juicy meat in a rich brown gravy. Serve over rice, noodles, or mashed potatoes for a meal the whole family will love!

    An overhead image of a blue and white bowl of beef tips over rice with parsley and mushrooms around it.
    [feast_advanced_jump_to]

    Why You'll Love Slow Cooker Beef Tips With Gravy

    In our house, we’re all about cozy, comforting meals — especially when they come together with minimal effort. This recipe for Instant Pot beef tips delivers tender, juicy meat in a rich, flavorful gravy that always hits the spot. And you can make it in a slow cooker too!

    Whether it’s a busy weeknight or a chilly Sunday dinner, this is one of those meals that always gets a thumbs-up from everyone. And the best part? The slow cooker or Instant Pot does all the hard work for you! Just toss everything in, let it do its thing, and come back to the most delicious, fall-apart-tender beef. Here’s why you’re going to love this recipe:

    • Minimal prep, no stress
    • Every bite melts in your mouth
    • Perfect gravy for soaking into rice or noodles
    • A real crowd-pleaser
    • Freezer-friendly and perfect for busy nights
    A spoon pouring gravy over beef tips.

    Ingredient Information And Substitutions

    • Beef- Sirloin steak, trimmed of fat and cut into 1 ½-inch chunks. You can also use stew meat or chuck roast for a more budget-friendly option.
    • Vegetables- Onion, garlic, and mushrooms add depth of flavor. Feel free to swap mushrooms for carrots or bell peppers.
    • Beef broth- The base of your gravy. For a more intense beef flavor, use bone broth. If needed, substitute with chicken or vegetable broth, but the taste will be slightly different.
    • Red wine- Enhances the gravy with a deep, rich flavor. A dry red wine like Cabernet or Red Zinfandel works best. If you don’t cook with alcohol, replace it with extra beef broth..
    • Worcestershire sauce- Adds umami and a slightly tangy depth.
    • Soy sauce- Brings a savory, slightly salty richness to the gravy. Coconut aminos or tamari work too.
    • Water- Helps balance the consistency of the gravy and ensures the beef stays moist during cooking.
    • Seasonings- Thyme, kosher salt, and black pepper to enhance the taste.
    • Thickener- A cornstarch slurry helps achieve the perfect gravy consistency. Use arrowroot powder or flour as an alternative.
    • Rice- Served as the base to soak up all the rich flavors. You can also spoon this dish over egg noodles or mashed potatoes.
    An overhead image of labeled recipe ingredients.

    How To Make Beef Tips

    Step 1- Add the ingredients to the Instant Pot (or Slow Cooker).

    Add the beef, onion, garlic, mushrooms, beef broth, red wine, Worcestershire sauce, soy sauce, water, thyme, salt, and pepper to your slow cooker or Instant Pot. Stir well to combine.

    Veggies and beef in the instant pot and then liquids and seasonings added.

    Step 2- Cook.

    Place all the ingredients into the slow cooker or Instant Pot, then cover and cook for the allotted time.

    For the Instant Pot- 20 minutes on manual high pressure and then do a natural release for 15 minutes.

    For the Slow Cooker- Cook on low for 7.5 hours, add the cornstarch slurry and cook on high for 30 more minutes.

    The Instant Pot closed and cooking and then a view into the instant pot once it's cooked.

    Step 4- Thicken the gravy.

    Once the beef is tender, cornstarch and a little water to create a slurry. Pour it back into the pot and stir well. If using the Instant pot do this on the sauté setting until thickened and for the Slow Cooker turn the heat to High and cook 30 more minutes to thicken.

    Serve this sirloin beef tips recipe over rice, mashed potatoes, or even egg noodles for a comforting, satisfying meal! 

    A corn starch slurry and then the slurry being whisked into the Instant Pot.

    Frequently Asked Questions

    What are beef tips?

    Traditionally, beef tips come from small cuts of sirloin or tenderloin that aren’t quite large enough to be used for full steaks. For this recipe, we’re using sirloin steak, cutting it into bite-sized chunks, and letting it simmer in a rich, flavorful brown gravy.

    What’s the best meat for beef tips?

    For the most tender results, use sirloin steak. However, stew meat or chuck roast can also be used.

    How do I make beef tips extra tender?

    Using a slow cooker or pressure cooker ensures fall-apart-tender meat every time. A natural pressure release in the Instant Pot also helps lock in moisture.

    Can I make this Gluten Free?

    Yes! Just make sure the soy sauce (or alternative) and Worcestershire sauces you use are GF and you'll be set.

    A close up image of beef tips and mushrooms in gravy.

    Tips For Making Beef Tips And Gravy

    • Before cooking, trim excess fat and gristle from the meat. Cutting the beef into chunks helps ensure even cooking. When slicing, try to cut against the grain to make the beef even more tender.
    • For an even richer, more savory flavor, quickly brown the beef chunks before adding them to your slow cooker. If you're using an Instant Pot, you can do this directly on the Sauté setting to lock in those delicious juices.
    • If your gravy is too thin, add more cornstarch slurry and let it cook a bit longer. If it’s too thick, stir in a little extra beef broth until you reach your desired consistency.
    • Ingredients to prep ahead- Chop the onion, garlic, and mushrooms in advance to save time.
    • Leftovers and storage- Store slow cooker beef tips and gravy in an airtight container in the fridge for up to 3 days, or freeze for up to 3 months.
    A bowl of beef tips and mushrooms over rice.

    What To Serve With Beef Tips And Rice Recipe

    There’s nothing better than a comforting plate of beef tips with gravy served over fluffy white rice. But if you want to round out your meal with some delicious sides, here are a few great options:

    • Sautéed Garlic Asparagus Recipe
    • Peas and Shrimp Salad
    • Spicy Dandelion Greens
    • Lemon Pound Cake

    Other Tasty Beef Recipes To Try

    • An overhead image of beef stew in a bowl of polenta with a napkin near it and mushrooms.
      Beef Italian Stew
    • A square image of the Easy Beef Stroganoff Recipe.
      Easy Beef Stroganoff Recipe (Instant Pot and Slow Cooker)
    • An overhead image of a beef burrito bowl with another next to it and limes and cilantro on the side.
      Beef Burrito Bowls
    • A white bowl with white rice and beef and broccoli on top with a blue and white striped napkin next to it and the sheet pan in the background.
      Easy Beef And Broccoli Recipe

    Love this recipe? Please leave a 5 star ⭐️⭐️⭐️⭐️⭐️ rating in the recipe card below ⬇️ and/or a review in the comment section further down. Check out my Amazon Store for all my favorite tools, including those used in this recipe. And follow @thelifejolie on Instagram and TikTok!

    An overhead image of a blue and white bowl of beef tips over rice with parsley and mushrooms around it.

    Instant Pot Beef Tips and Gravy

    Jessy Freimann
    Making Instant Pot beef tips and gravy has never been easier! Whether you use your slow cooker or Instant Pot, this recipe gives you tender, juicy meat in a rich brown gravy. Serve over rice, noodles, or mashed potatoes for a meal the whole family will love!
    No ratings yet
    Print Recipe Pin Recipe
    Prep Time 10 minutes mins
    Cook Time 8 hours hrs
    Course dinner, Main, Main Course, Main dish
    Cuisine American
    Servings 4 servings
    Calories 393 kcal

    Equipment

    • slow. cooker
    • instant pot
    • Whisk
    • Gallon freezer zipper bags
    • slow cooker liners
    • measuring spoons
    • measuring cups
    • chefs knife
    • cutting board

    Ingredients
      

    • 2 pounds Sirloin steak trimmed of fat and cut into 1 ½ inch chunks
    • 1 cup onion, diced
    • 2 cloves garlic, minced or pressed
    • 8 ounces mushrooms, sliced
    • 1 14 ounce can beef broth
    • ½ cup red wine
    • 2 Tablespoons Worcestershire sauce
    • 3 Tablespoons soy sauce
    • ¼ cup water
    • ½ teaspoon dried thyme
    • ½ teaspoon kosher salt
    • ¼ teaspoon ground black pepper
    • 2-3 Tablespoons cornstarch
    • Cooked white rice, for serving
    • Fresh parsley for garnish, chopped (optional)

    Instructions
     

    Slow cooker instructions

    • Place steak tips, onion, garlic, mushrooms, broth, wine, Worcestershire sauce, soy sauce, water, thyme, salt and pepper into slow cooker pot.
    • Stir well to combine.
    • Cover pot and turn heat to low.
    • Cook for 7 ½ hours.
    • Remove cover and take around ¼ cup of broth into a small bowl on the side. Whisk in cornstarch to make a slurry.
    • Stir the slurry into the pot and cover. Turn the heat to high and cook for an additional 30 minutes to thicken.
    • Stir and serving immediately over white rice with a sprinkle of chopped parsley.

    Instant Pot instructions

    • Place steak tips, onion, garlic, mushrooms, broth, wine, Worcestershire sauce, soy sauce, water, thyme, salt and pepper into instant pot.
    • Stir well to combine.
    • Cover pot and turn heat to manual high pressure and set it for 20 minutes.
    • When the cook time is up, do a natural pressure release for 10-15 minutes. Then do a quick release. Remove cover and turn off the manual high pressure setting. Turn on the saute setting.
    • Take around ¼ cup of broth into a small bowl on the side. Whisk in cornstarch to make a slurry.
    • Stir the slurry into the pot and simmer for 5 minutes or until the gravy has thickened.
    • Stir and serving immediately over white rice with a sprinkle of chopped parsley.

    Video

    Notes

    • Before cooking, trim excess fat and gristle from the meat. Cutting the beef into chunks helps ensure even cooking. When slicing, try to cut against the grain to make the beef even more tender.
    • For an even richer, more savory flavor, quickly brown the beef chunks before adding them to your slow cooker. If you're using an Instant Pot, you can do this directly on the Sauté setting to lock in those delicious juices.
    • If your gravy is too thin, add more cornstarch slurry and let it cook a bit longer. If it’s too thick, stir in a little extra beef broth until you reach your desired consistency.
    • Ingredients to prep ahead- Chop the onion, garlic, and mushrooms in advance to save time.
    • Leftovers and storage- Store slow cooker beef tips and gravy in an airtight container in the fridge for up to 3 days, or freeze for up to 3 months.

    Nutrition

    Serving: 1servingCalories: 393kcalCarbohydrates: 13gProtein: 53gFat: 11gSaturated Fat: 4gPolyunsaturated Fat: 1gMonounsaturated Fat: 4gCholesterol: 138mgSodium: 1293mgPotassium: 1158mgFiber: 2gSugar: 4gVitamin A: 14IUVitamin C: 6mgCalcium: 95mgIron: 5mg
    Tried this recipe?Let us know how it was!

    Instant Pot Corned Beef and Cabbage

    Feb 28, 2025 · 14 Comments

    Corned beef and potatoes, cabbage and carrot on a white plate.

    Instant pot corned beef and cabbage delivers tender, flavorful results in a fraction of the time. This one-pot meal is simple, efficient, and ready in about 90 minutes — perfect for a stress-free dinner!

    Corned beef and potatoes, cabbage and carrot on a white plate.
    [feast_advanced_jump_to]

    Why You’ll Love This Pressure Cooker Corned Beef And Cabbage

    March always gets me excited because I know I’ll be enjoying a big plate of tender, flavorful corned beef and cabbage. I didn’t grow up eating it often, but when I lived in NYC, I worked at an Irish pub. One St. Patrick’s Day, I spent my entire shift sneaking bites of homemade corned beef between serving drinks. It was love at first bite!

    Since then, I’ve perfected my method, and now I make it in the Instant Pot for maximum flavor with minimal effort. No more waiting all day for tender beef—it’s ready in just 90 minutes, and the veggies cook perfectly in the same pot!

    If you don't have a pressure cooker, don’t worry — I’ve also included instructions for slow cooker corned beef brisket in the recipe card below. Either way, you’ll have an easy, delicious meal that practically cooks itself! Here’s why you’ll love this recipe as much as I do:

    • Quicker than traditional methods
    • The perfect balance of savory, salty, and slightly sweet
    • Easy cooking with minimal cleanup
    • Let the Instant Pot do the work
    • Delicious as leftovers
    An overhead image of sliced corned beef surrounded by veggies.

    Ingredient Information And Substitutions

    • Garlic and onion- Because everything is better with these flavor makers!
    • Corned beef brisket- Grab one that comes with a corned beef seasoning packet, or make your own spice mix.
    • Vegetables- Carrots, red skin potatoes, and cabbage soak up all the rich flavors. Swap in parsnips or turnips if you’re feeling adventurous.
    • Broth- Beef broth gives extra depth. You may also need to add some water to the Instant Pot, but you don't need the extra liquid if you're making the corned beef slow cooker recipe. I prefer low sodium.
    • Beer- Adds extra richness, but you can replace it with more beef broth for an alcohol-free option.
    An overhead image of labeled recipe ingredients.

    How To Make Insta Pot Corned Beef And Cabbage

    Step 1- Cook the beef.

    Place onions and garlic in the Instant Pot, then add the corned beef fat side up. Pour in beer, broth, and corned beef spices from the seasoning packet. Add water if needed to cover the beef. Cook on Manual High Pressure for 90 minutes, then naturally release for 10-15 minutes before manually releasing any remaining pressure.

    Corned beef with liquid and seasonings and onions in an instant pot.

    Step 2- Cook the vegetables.

    Remove the beef from the pot, then slice and place it in the oven to keep warm. Add the potatoes, carrots, and cabbage to the pot with the leftover liquid and seal. Set to Manual High Pressure for 5 minutes. Once done, do a quick release.

    Veggies in an instant pot.

    Step 3- Serve.

    Once everything is ready, serve sliced corned beef with the veggies and ladle some broth over the top for extra moisture and flavor.

    A close up image of sliced corned beef and veggies.

    Frequently Asked Questions

    What is the seasoning for corned beef?

    Most store-bought corned beef comes with a corned beef seasoning packet, which typically includes mustard seeds, bay leaves, peppercorns, coriander, and cloves. If your brisket doesn’t include a seasoning packet, you can use pickling spice or create your own blend of corned beef spices with these same ingredients.

    Can you freeze corned beef?

    Yes! Wrap it tightly in plastic wrap or aluminum foil, then store it in an airtight container or freezer bag. Cooked corned beef can be frozen for up to 3 months, while uncooked corned beef can last up to 6 months in the freezer.

    What is the best cut of corned beef?

    Corned beef comes in two cuts of brisket: flat cut and point cut. The flat cut is leaner and slices more evenly, making it ideal for serving. The point cut has more marbling and is extra tender, perfect for shredding.

    Why is corned beef pink?

    The pink color comes from curing with sodium nitrate, which helps preserve the meat and gives it the signature look.

    Is is safe to use beer in the Instant Pot?

    Some people say the mix of carbonation and high pressure could have bad results. I personally have done it without issue, but if you’re worried, use flat beer.

    An overhead image of corned beef and veggies on a plate

    Tips For Making Instapot Corned Beef And Cabbage

    • Cut veggies into larger chunks so they don’t break down to nothing in the slow cooker or Instant Pot. It also helps if they are all a similar size.
    • Open the package of meat carefully. It often contains a spice packet, which you'll need to make this recipe!
    • Don't forget to do a natural release first. That extra 15 minutes really helps tenderize the meat. You can do a quick release for the veggies, though.
    • If you’re using a slow cooker, you may want to cook the cabbage separately. It gets very soft when slow cooked, so consider roasting in 1 inch wedges at 400 degrees F for 20 minutes if you like yours a little more crisp.
    • Ingredients to prep ahead- Clean and chop all the veggies up to a day in advance, then store in the fridge until you're ready to cook. I'll usually peel the garlic too!
    • Leftovers and storage- Use leftover corned beef for sandwiches, hash, or even in soups! Keep in the fridge for up to 4 days or freeze for later, then reheat in the oven or microwave.
    sliced corned beef on a large platter surrounded by vegetables

    What To Serve With Corned Beef And Cabbage

    We serve our corned beef with a fresh loaf of rye bread and brown mustard (Gulden's is best, but Dijon works too). You could also go with Irish soda bread. And don't forget to sprinkle a little apple cider vinegar onto the cabbage! Whether you're making this for St. Patrick’s Day or just a cozy dinner, here are some more perfect pairings to round out your meal:

    • Nanou's Authentic Ratatouille
    • Beans and Greens
    • Grilled Artichokes
    • Roasted Fall Vegetables

    Other Delicious Instant Pot Recipes To Try

    • Easy Instant Pot Chili will knock your socks off. Ready in around 30 minutes and full of mouthwatering flavor! Full of ground beef, ground pork, tons of chili seasonings, vegetables and beans it's quick and easy to make on a week night or for a party (game day anyone?!).
      Easy Instant Pot Chili Recipe
    • A square image of the Easy Beef Stroganoff Recipe.
      Easy Beef Stroganoff Recipe (Instant Pot and Slow Cooker)
    • A bowl of squash soup with burrata and cilantro on top and chunks of squash and cilantro in the background.
      Savory Spiced Butternut Squash Soup
    • A ladle holding chicken minestrone with the rest of the pot behind it.
      Chicken Minestrone Soup (Slow Cooker + Instant Pot)

    Love this recipe? Please leave a 5 star ⭐️⭐️⭐️⭐️⭐️ rating in the recipe card below ⬇️ and/or a review in the comment section further down. Check out my Amazon Store for all my favorite tools, including those used in this recipe. And follow @thelifejolie on Instagram and TikTok!

    Corned beef and potatoes, cabbage and carrot on a white plate.

    Instant Pot Corned Beef and Cabbage

    Jessy Freimann
    Instant Pot Corned Beef and Cabbage delivers tender, flavorful results in a fraction of the time. This one-pot meal is simple, efficient, and ready in about 90 minutes - perfect for a stress-free dinner!
    5 from 12 votes
    Print Recipe Pin Recipe
    Prep Time 10 minutes mins
    Cook Time 2 hours hrs 30 minutes mins
    Total Time 2 hours hrs 40 minutes mins
    Course dinner, Main, Main Course, Main dish
    Cuisine Irish
    Servings 6 servings
    Calories 12 kcal

    Equipment

    • slow. cooker
    • instant pot
    • measuring cups
    • chefs knife
    • cutting board

    Ingredients
      

    • 1 large onion cut into 1-2 inch chunks
    • 2 large cloves garlic smashed
    • 1 12 ounces beer
    • 1 14 ounce can low sodium beef broth
    • 1 cup water to cover beef- only use if necessary
    • 4 pound corned beef brisket flat + flavor packet
    • 4 thick carrots cut into 3 inch chunks
    • 1 pound baby red skin potatoes
    • 1 small head of cabbage you can use more, it just depends on how much fits into your pot

    Instructions
     

    Instant pot instructions:

    • Place the onions and garlic into the pot.
    • Next place the brisket into the pot.
    • Pour the beer, both, seasoning packet and water over the brisket. It should be just covered with liquid- if necessary, add more water.
    • Secure the cover onto the instant pot and set the instant pot to Manual High Pressure for 90 minutes.
    • When the cook time is up, let the pressure naturally release for 10-15 minutes (or longer if you have the time) and then do a quick release.
    • Remove the beef from the pot and leave the liquid in there. Slice the beef and place it into a warm oven while you cook the vegetables.
    • Add the vegetables into the pot with the liquid and set the instant pot to Manual High pressure for 5 minutes.
    • Once the cooking time is up, carefully do a quick release.
    • Serve immediately.

    Slow cooker instructions:

    • Place all the vegetables into the slow cooker.
    • Next add the brisket.
    • Top this with the beer, broth, spice packet and water to just cover the beef (add a little more water to cover if necessary).
    • Cover and cook on low for 7-8 hours. Slice and serve immediately.

    Video

    Notes

    • Cut veggies into larger chunks so they don’t break down to nothing in the slow cooker or Instant Pot. It also helps if they are all a similar size.
    • Open the package of meat carefully. It often contains a spice packet, which you'll need to make this recipe!
    • Don't forget to do a natural release first. That extra 10 minutes really helps tenderize the meat. You can do a quick release for the veggies, though.
    • If you’re using a slow cooker, you may want to cook the cabbage separately. It gets very soft when slow cooked, so consider roasting 1 linch wedges for 20 minutes at 400 degrees F.
    • Ingredients to prep ahead- Clean and chop all the veggies up to a day in advance, then store in the fridge until you're ready to cook. I'll usually peel the garlic too!
    • Leftovers and storage- Use leftover corned beef for sandwiches, hash, or even in soups! Keep in the fridge for up to 4 days or freeze for later, then reheat in the oven or microwave.

    Nutrition

    Serving: 1servingCalories: 12kcalCarbohydrates: 3gProtein: 0.3gFat: 0.03gSaturated Fat: 0.01gPolyunsaturated Fat: 0.01gMonounsaturated Fat: 0.003gSodium: 4mgPotassium: 43mgFiber: 0.5gSugar: 1gVitamin A: 112IUVitamin C: 2mgCalcium: 9mgIron: 0.1mg
    Tried this recipe?Let us know how it was!


    Seafood Fra Diavolo

    Feb 26, 2025 · Leave a Comment

    An overhead image of a pan of seafood fra diavalo with a striped napkin and fresh basil.

    This seafood fra diavolo is a spicy, flavor-packed Italian classic that comes together in just 30 minutes! With tender shrimp, a savory seafood mix, and a light, garlicky tomato sauce, it’s a bold and delicious meal without the hassle. 

    An overhead image of a pan of seafood fra diavalo with a striped napkin and fresh basil.
    [feast_advanced_jump_to]

    Why You’ll Love Fra Diavolo Pasta

    If there’s one thing I can never say no to, it’s a big bowl of pasta — especially when it's loaded with a flavorful seafood mix and a spicy tomato sauce. It’s the kind of meal that feels like a special occasion but comes together in just 30 minutes, making it perfect for both weeknights and dinner parties. 

    And don’t even get me started on that fiery kick! There’s just enough heat to wake up your taste buds without overpowering the fresh seafood flavors. Here’s why you’ll love this Italian seafood pasta recipe as much as I do:

    • Packed with flavor from the incredible sauce
    • Versatile and customizable
    • A beautifully balanced, chef-worthy meal at home
    • So much easier to make than it looks!
    A plate for fra diavolo with grated cheese on it.

    Ingredient Information And Substitutions

    • Shrimp- Use raw, peeled, and deveined medium shrimp for the best texture. If opting for frozen shrimp, make sure they’re fully thawed.
    • Seafood mix- A pre-cooked mixed seafood blend is a great time-saver, but you can swap it for your favorite shellfish, just make sure all the shell open (dispose of any that don't).
    • Linguine- This long, flat pasta is ideal for soaking up the sauce, but spaghetti, fettuccine, or even bucatini work just as well.
    • Crushed tomatoes- To create a rich velvety sauce. If you only have whole canned tomatoes, crush them by hand, or blend them lightly before adding them to the pan. 
    • White wine- Adds depth to the sauce. A dry white wine like Pinot Grigio or Sauvignon Blanc works best. If you prefer to skip the alcohol, chicken or seafood broth makes a great substitute. 
    • Olive oil- To sauté the shrimp, but it also builds the sauce and adds great depth of flavor. Use any neutral oil as a substitute.
    • Garlic- Fresh, finely minced, to bring a bold, aromatic flavor. 
    • Crushed red pepper flakes- Brings the signature spicy “Fra Diavolo” kick to the dish. You can swap it for Calabrian chili paste for a slightly smoky heat.
    • Kosher salt- Enhances the flavors of the dish.  
    • Fresh herbs- Chopped parsley and basil add freshness to balance the rich sauce. If you don’t have fresh herbs, dried parsley and basil can work — just reduce the amount by half.
    • Romano cheese- A salty and tangy touch, to finish up the dish beautifully. You can substitute with Parmesan.
    An overhead image of labeled ingredients.

    How To Make Italian Seafood Pasta

    Step 1- Season and sear the shrimp.

    Pat the shrimp dry, season with salt and crushed red pepper, and quickly sear them in a hot skillet for one minute per side. Remove and set aside.

    Raw shrimp in a bowl being seasoning and then the shrimp sautéing in oil in a large skillet.

    Step 2- Sauté the galric and deglaze.

    Sauté garlic and red pepper flakes in olive oil until fragrant. Deglaze with white wine, letting it simmer for a couple of minutes to reduce slightly.

    Garlic powder and chili flakes sautéing in oil and then white wine deglazing the pan.

    Step 4- Simmer the sauce and add the seafood.

    Stir crushed tomatoes into the skillet and bring to a gentle boil. Reduce heat and let simmer for about five minutes. While the sauce is simmering, salt a big pot of boiling water and cook the linguine until it’s perfectly al dente.

    Return the shrimp to the pan, along with the seafood mix, fresh parsley, and basil. Stir it all together and let it simmer for another 5 minutes until the seafood is tender and infused with flavor.

    Tomatoes dded to the pan and then seafood and fresh herbs added.

    Step 6- Combine and serve.

    Add the cooked linguine directly to the skillet, tossing everything together so the pasta soaks up the sauce. Stir in a splash of reserved pasta water to help bring it all together, then serve immediately with a generous sprinkle of Romano cheese on top.

    Seafood mixed into the sauce and then the cooked linguine mixed into the sauce and seafood.

    Frequently Asked Questions

    What does fra diavolo mean?

    Fra diavolo translates to “Brother Devil” in Italian — fitting for a dish known for its bold, spicy kick! This classic sauce, made with tomatoes, garlic, and crushed red pepper, brings just the right amount of heat to complement the fresh seafood perfectly.

    How spicy is the dish? 

    The crushed red pepper gives the sauce its signature heat, but you can easily adjust the spice level to your preference. If you like things milder, simply reduce the amount of red pepper or leave it out altogether.

    Can I use different types of seafood?

    Absolutely! Mussels, clams, scallops, or even lobster tails work beautifully. Just be sure to adjust cooking times as needed. Shellfish should be steamed until the shells open while the sauce simmers, while raw seafood should be lightly seared like the shrimp before adding it to the sauce.

    An overhead image of Italian seafood pasta with a striped napkin and basil next to it.

    Tips For Making Mixed Seafood Pasta

    • Add a bit of starchy pasta water to the sauce to create a silky texture that coats the pasta beautifully. 
    • And don’t be afraid to simmer for a few extra minutes to help develop a richer, more well-rounded flavor.
    • Seafood and pasta taste best fresh, so serve right away for optimal texture and flavor.
    • Use a large skillet. This ensures the seafood cooks evenly and there’s enough room to toss everything together without overcrowding. 
    • Pair it right! Serve with crusty bread to soak up the extra sauce and a glass of wine for the ultimate restaurant-worthy experience.
    • Change up the seafood- Shellfish should be steamed until the shells open while the sauce simmers (be sure to remove any that don't open, those are no good) while raw seafood should be lightly seared like the shrimp before adding it to the sauce.
    • Ingredients to prep- If you’re using frozen seafood, make sure to thaw them ahead of time, peel garlic, and clean herbs.
    • Leftover and storage- Store leftovers in an airtight container in the fridge for up to 2 days. For longer storage, freeze the dish for up to a month but keep the sauce and seafood separate. Reheat gently on the stovetop.

    What To Serve With Pasta Diavolo

    Since the pasta itself is the star of the show, consider serving it with a few light and fresh sides to round out the meal. Here are some of my favorites: 

    • Grilled Peach and Burrata Salad
    • Italian Stuffed Zucchini Boats
    • Sautéed Garlic Asparagus
    • Grilled Artichokes

    Other Pasta Recipes To Try

    • A white plate of rapini and sausage pasta with the pan and a blue napkin in the background.
      Sausage and Rapini Pasta
    • A close up of a bowl of pasta with peas with a spoon in it and the larger blue pan of it in the background.
      Pasta and Peas Recipe
    • A plate of vodka pasta with fresh basil, Italian bread and a striped towel in the background.
      Creamy Vodka Pasta
    • A wooden spoon holing a scoop of Philly steaks pasta with melty cheese all over it.
      One Pot Philly Cheesesteak Pasta

    Love this recipe? Please leave a 5 star ⭐️⭐️⭐️⭐️⭐️ rating in the recipe card below ⬇️ and/or a review in the comment section further down. Check out my Amazon Store for all my favorite tools, including those used in this recipe. And follow @thelifejolie on Instagram and TikTok!

    An overhead image of a pan of seafood fra diavalo with a striped napkin and fresh basil.

    Seafood Fra Diavolo

    Jessy Freimann
    This seafood fra diavolo is a spicy, flavor-packed Italian classic that comes together in just 30 minutes! With tender shrimp, a savory seafood mix, and a light, garlicky tomato sauce, it’s a bold and delicious meal without the hassle. 
    No ratings yet
    Print Recipe Pin Recipe
    Prep Time 5 minutes mins
    Cook Time 25 minutes mins
    Total Time 30 minutes mins
    Course dinner, Main, Main Course, Main dish
    Cuisine Italian
    Servings 6 servings
    Calories 450 kcal

    Equipment

    • 1 Skillet
    • 1 Wooden Spoons
    • 1 chefs knife
    • 1 cutting board
    • 1 Measuring cups and spoons

    Ingredients
      

    • 1 pound Medium Shrimp thawed- Raw, Peeled & Deveined
    • 1 ¼ teaspoon crushed red pepper flakes divided
    • 1 teaspoon Kosher salt + more for pasta water
    • 2 Tablespoons olive oil
    • 5 cloves garlic minced
    • ½ cup white wine
    • 28 ounces crushed tomatoes
    • 1 pound linguine
    • 1 pound cooked seafood mix thawed
    • 2 Tablespoons chopped fresh parsley
    • 10 basil leaves chopped
    • Romano Cheese for garnish

    Instructions
     

    • Pat dry shrimp and season with salt and ½ teaspoon crushed red pepper flakes. Start a large pot of water boiling.
    • Heat oil in a large skillet until shimmering. Add shrimp in a single layer cooking for one minute per side and then remove from pan and set aside (it will not be fully cooked, this is ok- it will finish cooking later).
    • Add garlic and remaining crushed red pepper flakes to pan and sauté, stirring often for one minute until fragrant. Deglaze with wine and cook for 2 minutes to reduce slightly. While the wine reduces, salt the boiling water and add the linguine to the water. Cook per package directions for al dente.
    • Add crushed tomatoes to the skillet and stir to combine. Bring to a boil and reduce to medium heat. Simmer for 5 minutes.
    • Add the seafood mix, shrimp, parsley and basil and stir to combine. Simmer for 5 more minutes.
    • When the linguine is al dente, scoop it directly into the skillet and stir to combine. Ladle in ½ cup of of pasta water and stir to combine. Serve immediately with Romano cheese on top.

    Video

    Notes

    • Add a bit of starchy pasta water to the sauce to create a silky texture that coats the pasta beautifully. 
    • And don’t be afraid to simmer for a few extra minutes to help develop a richer, more well-rounded flavor.
    • Seafood and pasta taste best fresh, so serve right away for optimal texture and flavor.
    • Use a large skillet. This ensures the seafood cooks evenly and there’s enough room to toss everything together without overcrowding. 
    • Pair it right! Serve with crusty bread to soak up the extra sauce and a glass of wine for the ultimate restaurant-worthy experience.
    • Change up the seafood- Shellfish should be steamed until the shells open while the sauce simmers (be sure to remove any that don't open, those are no good) while raw seafood should be lightly seared like the shrimp before adding it to the sauce.
    • Ingredients to prep- If you’re using frozen seafood, make sure to thaw them ahead of time, peel garlic, and clean herbs.
    • Leftover and storage- Store leftovers in an airtight container in the fridge for up to 2 days. For longer storage, freeze the dish for up to a month but keep the sauce and seafood separate. Reheat gently on the stovetop.

    Nutrition

    Serving: 1servingCalories: 450kcalCarbohydrates: 83gProtein: 16gFat: 6gSaturated Fat: 1gPolyunsaturated Fat: 1gMonounsaturated Fat: 4gSodium: 1051mgPotassium: 1536mgFiber: 8gSugar: 18gVitamin A: 2053IUVitamin C: 30mgCalcium: 71mgIron: 5mg
    Tried this recipe?Let us know how it was!

    Unstuffed Peppers Skillet

    Feb 24, 2025 · 2 Comments

    A wooden spoon pulling a a scoop of unstuffed peppers from the skillet.

    This unstuffed peppers skillet is a delicious one pot meal and a great way to use leftover rice. It’s ready in 30 minutes and takes all the work out of traditional stuffed peppers which makes it an easy option for a weeknight dinner!

    A wooden spoon pulling a a scoop of unstuffed peppers from the skillet.
    [feast_advanced_jump_to]

    Why You'll Love This Unstuffed Bell Peppers

    This recipe was born out of pure pregnancy cravings. When I was expecting my youngest, I visited my parents on Halloween, and my mom was making stuffed peppers. She had just prepped the filling and set it on the table, and let’s just say… I could not stop eating it.

    It was so good that I knew I had to recreate it — minus the hassle of stuffing and baking. This recipe captures all the comforting, cheesy, tomato-y goodness of the classic dish into a quick and easy one-pan meal. Here’s why this recipe is a total win:

    • No stuffing, no baking — just one pan and 30 minutes
    • Make extra and enjoy leftovers all week
    • Even picky eaters will love it
    • Easy to customize and adjust to fit your preferences
    A bowl of stuffed peppers skillet with the pan and some red bell peppers behind it.

    Ingredient Information And Substitutions

    • Italian sausage- Adds tons of flavor! Use spicy Italian sausage for a little kick, or swap for poultry sausage for a lighter option..
    • Onion- For sweetness and depth. Yellow or white onions work best.
    • Bell peppers- I use red bell peppers for their natural sweetness, but you can use any color.
    • Cooked rice- Use any kind you'd like (or leftovers!).
    • Olive oil- Used to sauté the sausage and veggies. You can swap with any vegetable oil or avocado oil for a mild flavor.
    • Tomato sauce & diced tomato- A mix of fresh tomatoes and canned tomato sauce creates a rich, flavorful base. You can substitute with crushed tomatoes or a jar of marinara sauce.
    • Garlic- Fresh is best, but jar-lic works in a pinch.
    • Italian seasoning- A classic blend that enhances the dish’s savory, herby flavors.
    • Mozzarella cheese- Melts beautifully on top for the ultimate cheesy finish.
    • Romano cheese- Adds a salty, nutty kick. You can sub with Parmesan.
    An overhead image of a labeled recipe ingredients.

    How to Make Unstuffed Pepper Skillet

    Step 1- Brown the sausage.

    Heat 1 tablespoon olive oil in a large skillet over medium-high heat. Add Italian sausage (casings removed) and cook for about 4 minutes, breaking it into pieces as it browns. Remove from the pan and set aside.

    Raw sausage in a skillet and then browned and broken up sausage in a skillet.

    Step 2- Sauté the veggies.

    In the same pan, add the onions, bell peppers, garlic, salt, and pepper. Cook for 6 minutes, stirring often, until the veggies soften.

    Raw chopped veggies in a skillet and then mixed together and softened.

    Step 3- Build the sauce.

    Stir in the diced tomato, tomato sauce, ½ can of water (using the tomato sauce can), and Italian seasoning. Let it simmer for 2-3 minutes.

    Return the browned sausage to the pan along with the cooked rice and Romano cheese. Let everything cook together for another 5 minutes, stirring periodically.

    Sauce ingredients, rice and sausage added back into the pan and then all mixed together.

    Step 4- Melt the cheese.

    Sprinkle mozzarella cheese on top, cover the skillet, and let it melt for about 2 minutes. Serve and enjoy your unstuffed pepper skillet!

    Shredded mozzarella sprinkled onto the pan and then covered to melt.

    Frequently Asked Questions

    Can I use spicy sausage?

    Absolutely! Feel free to swap in hot Italian sausage for a little extra kick and flavor.

    Can this be made ahead?

    For the best taste and texture, it's recommended to make this just before serving. However, you can cook the rice ahead of time to make everything go a bit faster.

    Can I add more vegetables?

    Of course! This recipe is super versatile. You can easily add extra veggies like zucchini, mushrooms, or spinach for more color and flavor.

    An overhead image of a skillet full of unstuffed peppers.

    Tips for Making Unstuffed Pepper Casserole

    • Use leftover rice to cut the cooking time in half! Any cooked rice will work, whether it's brown rice, white rice, or even cauliflower rice for a low-carb option.
    • To make removing the sausage from its casings easier, simply cut a slit down the middle lengthwise, then peel it out. I try to look for bulk sausage to skip this step.
    • Chop veggies evenly. This ensures even cooking and the best texture.
    • Taste as you go and adjust the seasoning to your liking.
    • Make it spicy. Add red pepper flakes or diced jalapeños for extra heat.
    • Ingredients to prep ahead- Dice the onions, bell peppers, and garlic in advance.
    • Leftovers and storage- Store in an airtight container in the fridge for up to 4 days or freeze for up to 2 months. To reheat, simply microwave individual servings until hot.
    A fork taking a bite out of a bowl of unstuffed peppers with the cheese stretching.

    What to Serve With Unstuffed Bell Pepper Casserole

    This is a hearty and satisfying meal on its own, but it’s also perfect as part of a bigger spread. Whether you're hosting a family dinner or prepping for a cozy weeknight meal, here are some great side dishes to pair with this unstuffed peppers skillet:

    • Easy Garlic Green Beans
    • Summer Bounty Strawberry Salad
    • Grandma's Best Banana Cake
    • Quick and Easy Chocolate Pudding Cake

    Other Easy Dinner Recipes to Try

    • A side view of a clear glass trifle dish with a layered taco salad with the dressing and salsa in jars on the side.
      7 Layer Taco Salad Recipe
    • Veal scallopini on a bed of dressed arugula with lemon wedges on a white plate.
      Veal Scallopini Recipe
    • A serving spoon holding up a scoop of broccoli mac and cheese from the pan.
      Baked Broccoli Mac and Cheese
    • A close up of a bowl of chicken wild rice creamy soup with a spoon in it and another bowl in the background.
      Wild Rice Creamy Chicken Soup (Great with Turkey Too!)

    Love this recipe? Please leave a 5 star ⭐️⭐️⭐️⭐️⭐️ rating in the recipe card below ⬇️ and/or a review in the comment section further down. Check out my Amazon Store for all my favorite tools, including those used in this recipe. And follow @thelifejolie on Instagram and TikTok!

    A wooden spoon pulling a a scoop of unstuffed peppers from the skillet.

    Unstuffed Peppers Skillet

    Jessy Freimann
    This unstuffed bell peppers skillet is a delicious one-pot meal and a great way to use leftover rice. It’s ready in 30 minutes and takes all the work out of traditional stuffed peppers which makes it an easy option for a weeknight dinner!
    No ratings yet
    Print Recipe Pin Recipe
    Prep Time 10 minutes mins
    Cook Time 30 minutes mins
    Total Time 40 minutes mins
    Course dinner, Main, Main Course, Main dish
    Cuisine Italian
    Servings 6 servings
    Calories 191 kcal

    Equipment

    • Large saute pan
    • wooden spoon
    • chefs knife
    • cutting board
    • measuring cups
    • measuring spoons

    Ingredients
      

    • 2 Tablespoons olive oil, divided
    • 1 pound Italian sausage, casings removed (you can also use spicy sausage)
    • 1 cup diced onion,
    • 1 ½ cups diced red bell pepper,
    • 3 cloves garlic, minced or pressed
    • 1 teaspoon Kosher salt to taste
    • ¼ teaspoon ground black pepper to taste
    • 1 medium tomato seeded and diced
    • 8 ounces tomato sauce
    • 4 ounces water (use the sauce can, filled half way)
    • 1 teaspoon Italian seasoning
    • 3 Tablespoons Romano cheese or Parmesan
    • 2 cups cooked rice
    • 1 cup shredded mozzarella cheese,

    Instructions
     

    • Heat 1 Tablespoon olive oil in large saute pan over medium high heat.
    • Add Italian sausage and brown, using a wooden spoon to break into pieces, about 4 minutes. Remove from the pan leaving oil and juices in the pan and set it aside.
    • Add other Tablespoon oil, onions, peppers, garlic and salt and pepper to taste. Sauté for about 6 minutes to soften, stirring often.
    • Add the tomato, the sauce, ½ a can of water (use the can that the sauce was in), Italian seasoning, Romano cheese, rice and the meat into the pan. Sauté for 5 more minutes, stirring periodically.
    • Top with the mozzarella cheese and cover for 2 minutes until it's melted. Serve immediately.

    Video

    Notes

    • Use leftover rice to cut the cooking time in half! Any cooked rice will work, whether it's brown rice, white rice, or even cauliflower rice for a low-carb option.
    • To make removing the sausage from its casings easier, simply cut a slit down the middle lengthwise, then peel it out. I try to look for bulk sausage to skip this step.
    • Chop veggies evenly. This ensures even cooking and the best texture.
    • Taste as you go and adjust the seasoning to your liking.
    • Make it spicy. Add red pepper flakes or diced jalapeños for extra heat.
    • Ingredients to prep ahead- Dice the onions, bell peppers, and garlic in advance.
    • Leftovers and storage- Store in an airtight container in the fridge for up to 4 days or freeze for up to 2 months. To reheat, simply microwave individual servings until hot.

    Nutrition

    Serving: 1servingCalories: 191kcalCarbohydrates: 19gProtein: 7gFat: 10gSaturated Fat: 4gPolyunsaturated Fat: 1gMonounsaturated Fat: 5gCholesterol: 17mgSodium: 717mgPotassium: 207mgFiber: 1gSugar: 2gVitamin A: 477IUVitamin C: 6mgCalcium: 143mgIron: 1mg
    Tried this recipe?Let us know how it was!

    Chicken French Recipe

    Feb 19, 2025 · Leave a Comment

    Chicken french on a plate with spaghetti.

    If you’re looking for a dish that’s easy and impressive, this Chicken French Recipe is a must-try! With its tender chicken cutlets and buttery wine sauce, it’s ready in under 30 minutes, making it ideal for busy weeknights.

    Chicken french on a plate with spaghetti.
    [feast_advanced_jump_to]

    Why You’ll Love Chicken French

    If you’re anything like me, you love a good, no-fuss meal that feels a little fancy but doesn’t take much effort. That’s exactly why this recipe is always a winner in my house. It starts with thin, tender chicken cutlets, coated in a light egg batter and pan-fried to golden perfection.

    Then comes the real magic — the rich buttery sauce with garlic, lemon, and a splash of dry sherry that gives it just the right balance of tangy, sweet, and savory. The flavors are next-level delicious, and the best part is that it all comes together in under 30 minutes! Here are a few more reasons to love this recipe:

    • Incredibly tasty lemon garlic sauce
    • The whole family will love it, picky eaters included
    • Impressive presentation but is really simple to make
    • Easy to tweak ingredients based on what you have
    An overhead close up image of a piece of chicken francese inside a pan full of wine butter sauce.

    Ingredient Information And Substitutions

    • Chicken- Boneless, skinless chicken breast works best. If cutlets are available, that will save you a step!
    • Flour- All-purpose is ideal for dredging the chicken. For a gluten-free option, a gluten-free 1:1 flour blend.
    • Kosher salt & black pepper- Essential for seasoning and bringing out the flavors. If using table salt instead, reduce the amount slightly.
    • Olive oil- To fry the chicken and get that crispy, golden crust. You can substitute avocado oil if you don’t have olive oil.
    • Salted butter- Adds richness to the sauce. If using unsalted, adjust the salt in the recipe to taste.
    • Eggs- Used to coat the chicken.
    • Sherry wine- Dry sherry is used in the sauce for depth of flavor. If you don’t have it, you can substitute it with white wine or even chicken broth for a non-alcoholic version.
    • Better Than Bouillon- This chicken broth concentrate adds richness to our chicken French recipe. Bouillon cubes are a good swap.
    • Lemon juice- Adds just the right tang!
    An overhead image of labeled recipe ingredients.

    How To Make Chicken Francese

    Step 1- Prepare the chicken.

    Heat oil in a large skillet over medium high heat.

    Cut each chicken breast through the center to make two thinner cutlets. Then, pound them to about ⅛ inch thick and season both sides with salt and pepper.

    Chicken cutlets pounded thin and seasoned on a white cutting board and then a cutlet in a glass bowl dredged in flour.

    Step 2- Dredge the chicken.

    Place flour and eggs in separate shallow bowls. Coat each chicken piece first in the flour, tapping off any excess, and then in the beaten eggs, shaking off any extra.

    Add the chicken pieces in a single layer (work in batches if needed).

    A hand dipping the floured chicken cutlet in beaten egg in a glass bowl and the egg battered chicken frying in oil in the skillet.

    Step 3- Cook the chicken.

    Cook the chicken for about 2 minutes on each side, until golden brown. Remove from the pan and set aside.  In the same pan, melt the butter butter.

    The golden brown cooked chicken pieces finishing cooking in the skillet of oil and then the skillet with the chicken removed and butter melting in it.

    Step 4- Make the sauce.

    Add minced garlic and sauté for 1 minute. Then, pour in the dry sherry to deglaze the pan and cook for about 2 minutes to reduce slightly.

    Add the chicken base and water to the pan, then stir to dissolve and mix everything. Bring the mixture to a boil and reduce to a simmer for 10 minutes.

    Garlic added to the pan and being deglazed with sherry wine and then remaining sauce ingredients added and simmering.

    Step 5- Add the chicken back to the pan.

    Add the chicken back to the pan and simmer for 5 more minutes. Then, serve immediately and enjoy!

    An overhead image of chicken french on a plate with spaghetti and some fresh parsley and a check napkin next to it.

    Frequently Asked Questions

    What is chicken francese?

    Also known as Chicken French, it’s a classic Italian-American dish that originated in New York, inspired by a traditional Italian veal recipe. It features tender, lightly battered chicken cutlets sautéed until golden brown and served in a rich, tangy sauce made with lemon, butter, and wine.

    Can I make it ahead of time?

    Yes- make it a day in advance and slowly reheat covered in a moderate oven.

    Can I use chicken thighs instead of chicken breasts?

    Yes, you can swap out chicken breasts for thighs. Chicken thighs will add a richer, juicier flavor to the dish. I recommend using boneless, skinless chicken thighs, or even veal or pork cutlets.

    A close up image of a fork holding a cut piece of chicken french revealing the perfectly tender cooked inside of the cihcken.

    Tips For Making This Chicken Francese Recipe

    • Top with a little Romano or Parmesan cheese just before serving.
    • Pound the chicken for quick, even cooking to help keep the meat tender and juicy inside.
    • If you prefer a thicker chicken francese sauce, whisk in cornstarch slurry (cornstarch mixed with water in equal parts) or let the sauce simmer longer to reduce. 
    • For a burst of flavor, you can add fresh herbs like chopped parsley or basil. They complement the buttery, tangy sauce perfectly.
    • Ingredients to prep ahead- Pound the chicken breasts and chop the garlic, then store them in the fridge until you’re ready to make this chicken French recipe.
    • Leftovers and storage- Keep leftovers in an airtight container in the fridge for up to 3 days. Reheat in the pan to get back the crispy texture. To freeze, store the sauce and the chicken separately in airtight containers for up to 2 months.
    A close up image of a piece of chicken french on a plate with spaghetti.

    What To Serve With Chicken French Recipe

    A comforting, well-rounded dinner that includes a bit of everything: something hearty, something fresh, and of course, a little something sweet to finish off. This chicken French recipe goes well with sides that balance the richness of the dish. Here’s what I suggest to make your dinner feel complete:

    • Savory Spiced Butternut Squash Soup
    • Crispy Fried Potatoes
    • Roasted Fall Vegetables
    • Lemon Pistachio Cake

    Other Delicious Chicken Recipes To Try

    • A close up image of chicken in wine sauce in the pan.
      Wine Braised Chicken Breast Recipe
    • A close up of a bowl of chicken wild rice creamy soup with a spoon in it and another bowl in the background.
      Wild Rice Creamy Chicken Soup (Great with Turkey Too!)
    • A close up image of a chicken cutlet cut in half revealing the perfectly cooked center.
      Chicken Cutlets
    • A close up image of a piece of greek marinated chicken on a white plate with lemons on the plate and in the background.
      Greek Yogurt Chicken

    Love this recipe? Please leave a 5 star ⭐️⭐️⭐️⭐️⭐️ rating in the recipe card below ⬇️ and/or a review in the comment section further down. Check out my Amazon Store for all my favorite tools, including those used in this recipe. And follow @thelifejolie on Instagram and TikTok!

    Chicken french on a plate with spaghetti.

    Chicken French Recipe

    Jessy Freimann
    If you’re looking for a dish that’s easy and impressive, this Chicken French Recipe is a must-try! With its tender chicken cutlets and buttery wine sauce, it’s ready in under 30 minutes, making it ideal for busy weeknights.
    No ratings yet
    Print Recipe Pin Recipe
    Prep Time 2 minutes mins
    Cook Time 25 minutes mins
    Course dinner, Main, Main Course, Main dish
    Cuisine Italian
    Servings 6 servings
    Calories 319 kcal

    Equipment

    • 1 Skillet
    • 1 Wooden Spoons
    • 1 cutting board
    • 1 chefs knife
    • 1 Meat mallet

    Ingredients
      

    • 3 boneless skinless chicken breasts filet each into 2 pieces
    • ½ teaspoon Kosher salt
    • ¼ teaspoon ground black pepper
    • ½ cup flour
    • 3 large eggs beaten
    • 2 Tablespoons olive oil
    • ½ cup salted butter 1 stick cut into chunks
    • 4 cloves garlic minced
    • ¼ cup dry sherry wine
    • 2 teaspoons Better Than Bouillon roast chicken concentrate
    • 2 cups water
    • 2 Tablespoons lemon juice

    Instructions
     

    • Place the chicken pieces in a single layer on a cutting board. Pound thin to ⅛ inch thickness. Season both sides with salt and pepper.
    • Heat a large skillet over medium high heat and add the olive oil. While the oil heat, place flour and eggs into separate shallow bowls.
    • Dredge each chicken piece in the flour until fully covered and gently tap off the excess and then in the beaten eggs until fully covered and gently shake off the excess.
    • Place each chicken piece directly into the pan in a single layer (work in batches if necessary). Brown 2 minutes per side until golden and remove to a side plate covered in foil.
    • Once all the chicken is out of the pan add the butter to the pan. Once melted, add the garlic and sauté for 1 minute until aromatic.
    • Add sherry wine and deglaze the pan. Cook to reduce slightly, about 2 minutes.
    • Add the bouillon concentrate, water and lemon juice and stir well until the concentrate is dissolved. Bring to a boil and reduce heat to medium low. Simmer 10 minutes.
    • Add chicken back to the pan and simmer 5 more minutes and serve immediately.

    Video

    Notes

    • Top with a little Romano or Parmesan cheese just before serving.
    • Pound the chicken for quick, even cooking to help keep the meat tender and juicy inside.
    • If you prefer a thicker chicken francese sauce, whisk in cornstarch slurry (cornstarch mixed with water in equal parts) or let the sauce simmer longer to reduce. 
    • For a burst of flavor, you can add fresh herbs like chopped parsley or basil. They complement the buttery, tangy sauce perfectly.
    • Ingredients to prep ahead- Pound the chicken breasts and chop the garlic, then store them in the fridge until you’re ready to make this chicken French recipe.
    • Leftovers and storage- Keep leftovers in an airtight container in the fridge for up to 3 days. Reheat in the pan to get back the crispy texture. To freeze, store the sauce and the chicken separately in airtight containers for up to 2 months.

    Nutrition

    Serving: 1servingCalories: 319kcalCarbohydrates: 9gProtein: 17gFat: 24gSaturated Fat: 11gPolyunsaturated Fat: 2gMonounsaturated Fat: 9gTrans Fat: 1gCholesterol: 170mgSodium: 421mgPotassium: 274mgFiber: 0.4gSugar: 0.3gVitamin A: 626IUVitamin C: 3mgCalcium: 30mgIron: 1mg
    Tried this recipe?Let us know how it was!

    Pasta al Forno

    Feb 17, 2025 · 2 Comments

    An overhead image of a plate of baked ziti with herbs, garlic and a blue striped napkin next to it.

    Pasta al forno (or Baked Ziti) is a hearty Italian classic perfect for family gatherings! With tender pasta, rich tomato sauce, savory beef, creamy ricotta, and melty mozzarella. It bakes to golden perfection — all in under an hour!

    An overhead image of a plate of baked ziti with herbs, garlic and a blue striped napkin next to it.
    [feast_advanced_jump_to]

    Why You’ll Love This Pasta Forno

    If you come from an Italian family, you know that no gathering is complete without a big dish of oven baked pasta. There’s something special about tender pasta coated in a rich, chunky tomato sauce, layered with savory ground beef, creamy ricotta, and melty mozzarella, all baked to perfection with a golden brown crust. It’s pure comfort food!

    This pasta is not only incredibly easy to make, but it’s also the perfect dish for feeding a crowd. Whether you’re making it for a Sunday dinner, a holiday meal, or a cozy weeknight, it’s a go-to recipe that can easily be doubled or tripled to serve more people.

    Plus, it’s a great make-ahead dish. Assemble it in advance and pop it in the oven when you’re ready! Here’s why you’ll love making this ziti al forno recipe:

    • Nothing fancy — just classic, delicious Italian flavors
    • Makes enough for 8-10 people
    • Leftovers are just as good the next day
    • Assemble in advance for stress-free entertaining.
    A close up of a spoon holding a big scoop of pasta al forno.

    Ingredient Information and Substitutions

    • Olive oil- Used to sauté the meat and garlic, adding richness to the sauce.
    • Garlic & onion- The flavorful base of the sauce! Chop these up really small for a smoother sauce.
    • Ground beef- Adds heartiness, but you can swap it with Italian sausage for a richer flavor or use ground turkey for a leaner option. For a vegetarian version, omit the meat or replace it with sautéed mushrooms or lentils.
    • Crushed Tomatoes- Crushed tomatoes are my choice for this but tomato puree or my homemade marinara sauce all work well.
    • Baking soda- This helps mellow out the acidity in the tomatoes, and I like it better than using sugar. Omit if using homemade marinara sauce.
    • Pasta- Traditionally made with ziti, but penne or rigatoni work just as well.
    • Ricotta cheese- Adds a delicious creamy texture. If you don’t have ricotta, use cottage cheese or leave it out for a less creamy dish.
    • Mozzarella & Romano- Extra gooey, cheesy goodness in the ricotta mixture, plus more on top of the pasta for a delicious crust! Feel free to swap the Romano with Parmesan.
    • Egg- Helps bind the ricotta mixture, making the texture smoother and creamier.
    • Seasonings- Add salt and pepper to the sauce, then mix Italian seasoning and garlic powder into the cheese blend. I'll usually add a little black pepper there too. For some heat, consider a dash of red pepper flakes!
    An overhead image of labeled recipe ingredients.

    How to Make Pasta alla Forno

    Step 1- Prepare for baking and start the meat.

    Preheat the oven to 400 degrees F. Also, bring a large pot of water to boil.

    Heat the oil in a large skillet, then sauté the onions and garlic for a few minutes. Add the ground beef and break it into pieces as it browns. Drain off any grease if needed.

    Onions and garlic cooking in a skillet and then browned ground beef in the skillet with them.

    Step 2-Add the tomatoes and cook the pasta.

    Stir in the crushed tomatoes, baking soda, salt, and pepper. Reduce heat and simmer for 10 minutes.

    While the sauce simmers, cook the pasta 3 minutes shy of the package directions. It will finish cooking in the oven. Be sure to salt the water once it's boiling but before adding the pasta.

    Sauce added to the skillet and pasta cooking in boiling water.

    Step 3- Mix pasta with sauce.

    Drain pasta once cooked, then return to the pot and mix with ¾ of the sauce. Spread some of the remaining sauce in the bottom of your baking dish.

    Sauce mixed with pasta in a pot and a baking dish  with a layer of sauce at the bottom.

    Step 4- Make ricotta mixture and assemble dish.

    If using, mix together the ricotta with mozzarella, Romano cheese, Italian seasoning, garlic powder and black pepper. Taste, adjust seasoning and stir in egg.

    Add half of the pasta, then dollop the ricotta mixture evenly over the top. Layer the rest of the pasta into the dish and top with the rest of the sauce.

    Pasta mixture in the baking pan and then covered in foil in the oven.

    Step 4- Bake.

    Cover with foil and bake for 30 minutes. Remove from oven, sprinkle with parmesan and Romano cheese, and baked uncovered for another 20-30 minutes. Serve immediately.

    Mozzarella and ROmano cheese sprinkled on the baking dish and then back in the oven uncovered.

    Frequently Asked Questions

    What does al forno mean?

    "Al forno" is Italian for "baked." Basically, any dish that's cooked in the oven!

    Can I make this recipe ahead of time?

    Yes! I’d assemble it all ahead and refrigerate, then bake it just before you want to serve it. You may need to bake it a bit longer to make sure it is heated through (above 145 degrees F).

    How do I prevent the pasta from getting mushy?

    Make sure to undercook the pasta slightly before baking. It will continue cooking in the oven and soften even more as it absorbs the sauce!

    A close up image of a plate of baked ziti.

    Tips for Making This Pasta Al Forno Recipe

    • Skip the sugar and use baking soda instead. To cut back on the natural acid that that tomatoes bring to the table, I add ¼ teaspoon of baking soda. I know that might sound weird, but this was my Grandma’s secret tip to making the perfect sauce. Trust me, it works! (note- skip this step if you're using my homemade marinara for this)
    • Cook your pasta slightly al dente. Follow the package instructions, but reduce the cooking time by about 3 minutes. This prevents the pasta from overcooking, as it will continue to cook while baking.
    • Don’t rinse the pasta! The starch left on the pasta helps the sauce stick better, making each bite extra flavorful.
    • Bake this covered for the first part of the cooking time to help bring it to temp quicker, then remove the cover and add the shredded cheese for the remaining cooking time so it still gets that amazing crust we all fight over.
    • The ricotta is an optional addition. I like it because it adds a creamy quality. You can also mix it right in with the sauce and pasta, but feel free to omit it if you don’t want the creaminess. Personally, I think it make it so much better!
    • Ingredients to prep ahead- Chop onion, peel garlic, shred the cheese, and even cook the sauce a day ahead to save time when assembling.
    • Leftovers and storage- Store leftovers in an airtight container in the fridge for up to 4 days. To reheat, cover with foil and bake at 350 degrees F until warmed through, or microwave individual portions.
    An overhead image of a pan of baked ziti with herbs, garlic and a blue striped towel next to it.

    What To Serve With Baked Ground Beef Pasta

    Pasta al forno is a hearty, comforting dish that can easily stand on its own, but adding a few sides will turn it into a full Italian-inspired meal! I love serving it family-style with a fresh green salad, garlic bread, and of course, something sweet to finish things off. Whether you’re making this for a cozy Sunday dinner or a special occasion, here are some perfect pairings:

    • Three Cheese Garlic Bread
    • Roasted Beet Salad
    • Summer Bounty Strawberry Salad
    • Four Ingredient Chocolate Mousse
    • Cherry Chocolate Oatmeal Cookie Bars

    Other Delicious Pasta Recipes To Try

    • A white plate of rapini and sausage pasta with the pan and a blue napkin in the background.
      Sausage and Rapini Pasta
    • A plate of ravioli casserole with the pan behind it.
      Ravioli Casserole
    • Sausage and peppers pasta on a white plate with a napkin, onion and mushrooms in the background and a fork across the back of the plate.
      Pasta With Sausage Peppers And Onions
    • A wooden spoon scooping up creamy taco pasta from the pan.
      One Pot Cheesy Taco Pasta

    Love this recipe? Please leave a 5 star ⭐️⭐️⭐️⭐️⭐️ rating in the recipe card below ⬇️ and/or a review in the comment section further down. Check out my Amazon Store for all my favorite tools, including those used in this recipe. And follow @thelifejolie on Instagram and TikTok!

    An overhead image of a plate of baked ziti with herbs, garlic and a blue striped napkin next to it.

    Pasta al Forno

    Jessy Freimann
    Pasta al forno (or ziti al forno) is a hearty Italian classic perfect for family gatherings! With tender pasta, rich tomato sauce, savory beef, creamy ricotta, and melty mozzarella. It bakes to golden perfection — all in under an hour!
    No ratings yet
    Print Recipe Pin Recipe
    Prep Time 10 minutes mins
    Cook Time 3 hours hrs
    Total Time 3 hours hrs 10 minutes mins
    Course dinner, Main, Main Course, Main dish
    Cuisine Italian
    Servings 8 servings
    Calories 523 kcal

    Equipment

    • Large saute pan
    • wooden spoon
    • chefs knife
    • cutting board
    • measuring cups
    • measuring spoons
    • Large pot
    • 9 x 13 Pan

    Ingredients
      

    • 1 Tablespoon olive oil
    • ½ cip onion, finely diced (1 small onion)
    • 2 large cloves garlic, minced
    • 1 pound ground beef
    • 2 28 ounce cans Crushed Tomatoes
    • ¼ teaspoon baking soda
    • ½ teaspoon Kosher salt
    • ¼ teaspoon ground black pepper
    • 1 pound ziti pasta
    • 1 ¼ cup shredded mozzarella cheese, shredded
    • ⅓ cup Romano cheese, grated or shredded, or Parmesan

    Optional ricotta mixture

    • 8 ounces Ricotta cheese
    • ½ cup mozzarella cheese, shredded
    • ¼ cup Romano cheese, grated or shredded, or Parmesan
    • ½ teaspoon Italian seasoning
    • ½ teaspoon garlic powder
    • Ground black pepper, to taste

    Instructions
     

    • Preheat the oven to 400 degrees. Heat olive oil in a large saute pan over medium heat and bring a large pot of hot water to a boil and salt the water liberally once boiling.
    • Once heated add onions and a garlic to the pan with the oil and saute stirring often for 2-3 minutes stirring often to soften it- be careful not to burn the garlic.
    • Add ground beef and saute until brown, using a wooden spoon to break it up, around 5 minutes. Drain if needed.
    • Add 2 cans Tuttorosso Crushed Tomatoes Chunky with Basil, baking soda, salt and pepper. Reduce heat to medium low and simmer for 10 minutes.
    • While sauce simmers, boil ziti 3 minutes less than the package directions for al dente and drain. Immediately return to the pot.
    • Place a couple spoonfuls of sauce at the bottom of a 9" x 13" pan. 
    • Mix ¾ of the sauce with the pasta until well combined. If using ricotta, mix all ricotta mixture ingredients in a medium bowl.
    • Place ½ the pasta mixture into the 9" x 13" baking pan. If using ricotta, add dollops of ricotta mixture evenly over the top of the pasta.
    • Layer the remaining pasta evenly over the pan and top with remaining sauce.
    • Cover and bake for 30 minutes.
    • Remove from the oven and top with mozzarella and parmesan cheeses. Bake uncovered for another 20-30 minutes or until hot and bubble. Serve immediately.

    Video

    Notes

    • Skip the sugar and use baking soda instead. To cut back on the natural acid that that tomatoes bring to the table, I add ¼ teaspoon of baking soda. I know that might sound weird, but this was my Grandma’s secret tip to making the perfect sauce. Trust me, it works! (note- skip this step if you're using my homemade marinara for this)
    • Cook your pasta slightly al dente. Follow the package instructions, but reduce the cooking time by about 3 minutes. This prevents the pasta from overcooking, as it will continue to cook while baking.
    • Don’t rinse the pasta! The starch left on the pasta helps the sauce stick better, making each bite extra flavorful.
    • Bake this covered for the first part of the cooking time to help bring it to temp quicker, then remove the cover and add the shredded cheese for the remaining cooking time so it still gets that amazing crust we all fight over.
    • The ricotta is an optional addition. I like it because it adds a creamy quality. You can also mix it right in with the sauce and pasta, but feel free to omit it if you don’t want the creaminess. Personally, I think it make it so much better!
    • Ingredients to prep ahead- Chop onion, peel garlic, shred the cheese, and even cook the sauce a day ahead to save time when assembling.
    • Leftovers and storage- Store leftovers in an airtight container in the fridge for up to 4 days. To reheat, cover with foil and bake at 350 degrees F until warmed through, or microwave individual portions.

    Nutrition

    Serving: 1servingCalories: 523kcalCarbohydrates: 45gProtein: 28gFat: 25gSaturated Fat: 12gPolyunsaturated Fat: 1gMonounsaturated Fat: 10gTrans Fat: 1gCholesterol: 82mgSodium: 488mgPotassium: 345mgFiber: 2gSugar: 2gVitamin A: 328IUVitamin C: 0.3mgCalcium: 286mgIron: 2mg
    Tried this recipe?Let us know how it was!
    • « Go to Previous Page
    • Page 1
    • Interim pages omitted …
    • Page 4
    • Page 5
    • Page 6
    • Page 7
    • Page 8
    • Interim pages omitted …
    • Page 21
    • Go to Next Page »

    Primary Sidebar

    Jessy in a kitchen holding a white casserole pan and smiling.
    Hi, I'm Jessy!

    Welcome to The Life Jolie! I share simple, delicious recipes and ingredient prep tips to make your weeknight cooking a breeze!

    More about me →

    Easy Dinner Recipes

    • An overhead image of a Mexican Shrimp Quinoa Bowl.
      Shrimp Quinoa Bowls
    • A bowl of asian soup with meatballs with a spoon and noodles in it.
      Asian Soup with Cabbage and Meatballs
    • A close up of roasted red potatoes on a pan.
      Roasted Red Potatoes Recipe
    • A close up of a drum chicken wing in a pile of other wings.
      Oven Baked Chicken Wings
    • An overhead image of a bowl of minestrone soup.
      Traditional Minestrone Soup Recipe
    • A close up of a bagel pizza with mini pepperonis on a pan.
      Bagel Pizzas Recipe

    Popular Recipes

    • A glass bowl of melted chocolate with a spatula dripping some back into the bowl.
      How To Melt Chocolate Chips In The Microwave
    • Italian Stuffed Zucchini Boats are the healthy weeknight meal you'll want to make again and again. This is a seriously easy recipe that's full of delicious flavor without all the guilt!
      Italian Stuffed Zucchini Boats
    • A close up shot of the side of a shallow bowl of shrimp mac salad.
      Shrimp Macaroni Salad
    • A white pan pouring cheese sauce over a bowl of steamed broccoli.
      Cheese Sauce for Broccoli Recipe
    • An overhead image of a plate of chicken lettuce wraps with peanut sauce next to it and all the fixings surrounding it.
      Copycat Cheesecake Factory Thai Chicken Lettuce Wraps
    • A close up image of a piece of greek marinated chicken on a white plate with lemons on the plate and in the background.
      Greek Yogurt Chicken
    Jessy in a kitchen holding a white casserole pan and smiling.
    Hi, I'm Jessy!

    Welcome to The Life Jolie! I share simple, delicious recipes and ingredient prep tips to make your weeknight cooking a breeze!

    More about me →

    Easy Dinner Recipes

    • A bowl of chicken and orzo soup with a spoon in it.
      Chicken and Orzo Soup
    • A close up image of a piece of coconut shrimp on top of others.
      Coconut Shrimp With Sauce
    • An overhead image of taco soup in a bowl.
      Crockpot Taco Chicken Soup
    • A spoon pulling up a scoop of skillet lasagna with melted cheese stretching behind it.
      No Bake Lasagna Skillet
    • A bowl of hearty lamb stew.
      Easy Lamb Stew Recipe
    • A close up of a wooden spoon in a pan of taco pasta.
      One Pan Taco Pasta With Chicken

    Popular Recipes

    • A glass bowl of melted chocolate with a spatula dripping some back into the bowl.
      How To Melt Chocolate Chips In The Microwave
    • Italian Stuffed Zucchini Boats are the healthy weeknight meal you'll want to make again and again. This is a seriously easy recipe that's full of delicious flavor without all the guilt!
      Italian Stuffed Zucchini Boats
    • A close up shot of the side of a shallow bowl of shrimp mac salad.
      Shrimp Macaroni Salad
    • A white pan pouring cheese sauce over a bowl of steamed broccoli.
      Cheese Sauce for Broccoli Recipe
    • An overhead image of a plate of chicken lettuce wraps with peanut sauce next to it and all the fixings surrounding it.
      Copycat Cheesecake Factory Thai Chicken Lettuce Wraps
    • A close up image of a piece of greek marinated chicken on a white plate with lemons on the plate and in the background.
      Greek Yogurt Chicken

    Footer

    ↑ back to top

    About

    • About Me
    • Privacy Policy + Disclaimer

    Newsletter

    • Sign Up! for emails and updates

    Contact

    • Contact
    • Video Production

    As an Amazon Associate I earn from qualifying purchases.

    Copyright 2014-2021 - Jolie Ventures, LLC. All Rights Reserved. Privacy Policy.

    Rate This Recipe

    Your vote:


    A rating is required
    A name is required
    An email is required