
• Skip to primary navigation
  • Skip to main content
  • Skip to primary sidebar
The Life Jolie logo
  • Easy Dinner Recipes
  • Recipes
  • About
  • Contact
    • Work with me!
    • Video Production
  • Nav Social Menu

    • Email
    • Facebook
    • Instagram
    • Pinterest
    • Twitter
    • YouTube
menu icon
go to homepage
subscribe
search icon
Homepage link
  • Easy Dinner Recipes
  • Recipes
  • About
  • Contact
    • Work with me!
    • Video Production
    • Email
    • Facebook
    • Instagram
    • Pinterest
    • Twitter
    • YouTube
  • ×
    The Life Jolie » Page 7

    Pasta al Forno

    Pasta al Forno

    Feb 17, 2025 · 2 Comments

    An overhead image of a plate of baked ziti with herbs, garlic and a blue striped napkin next to it.

    Pasta al forno (or Baked Ziti) is a hearty Italian classic perfect for family gatherings! With tender pasta, rich tomato sauce, savory beef, creamy ricotta, and melty mozzarella. It bakes to golden perfection — all in under an hour!

    An overhead image of a plate of baked ziti with herbs, garlic and a blue striped napkin next to it.
    [feast_advanced_jump_to]

    Why You’ll Love This Pasta Forno

    If you come from an Italian family, you know that no gathering is complete without a big dish of oven baked pasta. There’s something special about tender pasta coated in a rich, chunky tomato sauce, layered with savory ground beef, creamy ricotta, and melty mozzarella, all baked to perfection with a golden brown crust. It’s pure comfort food!

    This pasta is not only incredibly easy to make, but it’s also the perfect dish for feeding a crowd. Whether you’re making it for a Sunday dinner, a holiday meal, or a cozy weeknight, it’s a go-to recipe that can easily be doubled or tripled to serve more people.

    Plus, it’s a great make-ahead dish. Assemble it in advance and pop it in the oven when you’re ready! Here’s why you’ll love making this ziti al forno recipe:

    • Nothing fancy — just classic, delicious Italian flavors
    • Makes enough for 8-10 people
    • Leftovers are just as good the next day
    • Assemble in advance for stress-free entertaining.
    A close up of a spoon holding a big scoop of pasta al forno.

    Ingredient Information and Substitutions

    • Olive oil- Used to sauté the meat and garlic, adding richness to the sauce.
    • Garlic & onion- The flavorful base of the sauce! Chop these up really small for a smoother sauce.
    • Ground beef- Adds heartiness, but you can swap it with Italian sausage for a richer flavor or use ground turkey for a leaner option. For a vegetarian version, omit the meat or replace it with sautéed mushrooms or lentils.
    • Crushed Tomatoes- Crushed tomatoes are my choice for this but tomato puree or my homemade marinara sauce all work well.
    • Baking soda- This helps mellow out the acidity in the tomatoes, and I like it better than using sugar. Omit if using homemade marinara sauce.
    • Pasta- Traditionally made with ziti, but penne or rigatoni work just as well.
    • Ricotta cheese- Adds a delicious creamy texture. If you don’t have ricotta, use cottage cheese or leave it out for a less creamy dish.
    • Mozzarella & Romano- Extra gooey, cheesy goodness in the ricotta mixture, plus more on top of the pasta for a delicious crust! Feel free to swap the Romano with Parmesan.
    • Egg- Helps bind the ricotta mixture, making the texture smoother and creamier.
    • Seasonings- Add salt and pepper to the sauce, then mix Italian seasoning and garlic powder into the cheese blend. I'll usually add a little black pepper there too. For some heat, consider a dash of red pepper flakes!
    An overhead image of labeled recipe ingredients.

    How to Make Pasta alla Forno

    Step 1- Prepare for baking and start the meat.

    Preheat the oven to 400 degrees F. Also, bring a large pot of water to boil.

    Heat the oil in a large skillet, then sauté the onions and garlic for a few minutes. Add the ground beef and break it into pieces as it browns. Drain off any grease if needed.

    Onions and garlic cooking in a skillet and then browned ground beef in the skillet with them.

    Step 2-Add the tomatoes and cook the pasta.

    Stir in the crushed tomatoes, baking soda, salt, and pepper. Reduce heat and simmer for 10 minutes.

    While the sauce simmers, cook the pasta 3 minutes shy of the package directions. It will finish cooking in the oven. Be sure to salt the water once it's boiling but before adding the pasta.

    Sauce added to the skillet and pasta cooking in boiling water.

    Step 3- Mix pasta with sauce.

    Drain pasta once cooked, then return to the pot and mix with ¾ of the sauce. Spread some of the remaining sauce in the bottom of your baking dish.

    Sauce mixed with pasta in a pot and a baking dish  with a layer of sauce at the bottom.

    Step 4- Make ricotta mixture and assemble dish.

    If using, mix together the ricotta with mozzarella, Romano cheese, Italian seasoning, garlic powder and black pepper. Taste, adjust seasoning and stir in egg.

    Add half of the pasta, then dollop the ricotta mixture evenly over the top. Layer the rest of the pasta into the dish and top with the rest of the sauce.

    Pasta mixture in the baking pan and then covered in foil in the oven.

    Step 4- Bake.

    Cover with foil and bake for 30 minutes. Remove from oven, sprinkle with parmesan and Romano cheese, and baked uncovered for another 20-30 minutes. Serve immediately.

    Mozzarella and ROmano cheese sprinkled on the baking dish and then back in the oven uncovered.

    Frequently Asked Questions

    What does al forno mean?

    "Al forno" is Italian for "baked." Basically, any dish that's cooked in the oven!

    Can I make this recipe ahead of time?

    Yes! I’d assemble it all ahead and refrigerate, then bake it just before you want to serve it. You may need to bake it a bit longer to make sure it is heated through (above 145 degrees F).

    How do I prevent the pasta from getting mushy?

    Make sure to undercook the pasta slightly before baking. It will continue cooking in the oven and soften even more as it absorbs the sauce!

    A close up image of a plate of baked ziti.

    Tips for Making This Pasta Al Forno Recipe

    • Skip the sugar and use baking soda instead. To cut back on the natural acid that that tomatoes bring to the table, I add ¼ teaspoon of baking soda. I know that might sound weird, but this was my Grandma’s secret tip to making the perfect sauce. Trust me, it works! (note- skip this step if you're using my homemade marinara for this)
    • Cook your pasta slightly al dente. Follow the package instructions, but reduce the cooking time by about 3 minutes. This prevents the pasta from overcooking, as it will continue to cook while baking.
    • Don’t rinse the pasta! The starch left on the pasta helps the sauce stick better, making each bite extra flavorful.
    • Bake this covered for the first part of the cooking time to help bring it to temp quicker, then remove the cover and add the shredded cheese for the remaining cooking time so it still gets that amazing crust we all fight over.
    • The ricotta is an optional addition. I like it because it adds a creamy quality. You can also mix it right in with the sauce and pasta, but feel free to omit it if you don’t want the creaminess. Personally, I think it make it so much better!
    • Ingredients to prep ahead- Chop onion, peel garlic, shred the cheese, and even cook the sauce a day ahead to save time when assembling.
    • Leftovers and storage- Store leftovers in an airtight container in the fridge for up to 4 days. To reheat, cover with foil and bake at 350 degrees F until warmed through, or microwave individual portions.
    An overhead image of a pan of baked ziti with herbs, garlic and a blue striped towel next to it.

    What To Serve With Baked Ground Beef Pasta

    Pasta al forno is a hearty, comforting dish that can easily stand on its own, but adding a few sides will turn it into a full Italian-inspired meal! I love serving it family-style with a fresh green salad, garlic bread, and of course, something sweet to finish things off. Whether you’re making this for a cozy Sunday dinner or a special occasion, here are some perfect pairings:

    • Three Cheese Garlic Bread
    • Roasted Beet Salad
    • Summer Bounty Strawberry Salad
    • Four Ingredient Chocolate Mousse
    • Cherry Chocolate Oatmeal Cookie Bars

    Other Delicious Pasta Recipes To Try

    • A white plate of rapini and sausage pasta with the pan and a blue napkin in the background.
      Sausage and Rapini Pasta
    • A plate of ravioli casserole with the pan behind it.
      Ravioli Casserole
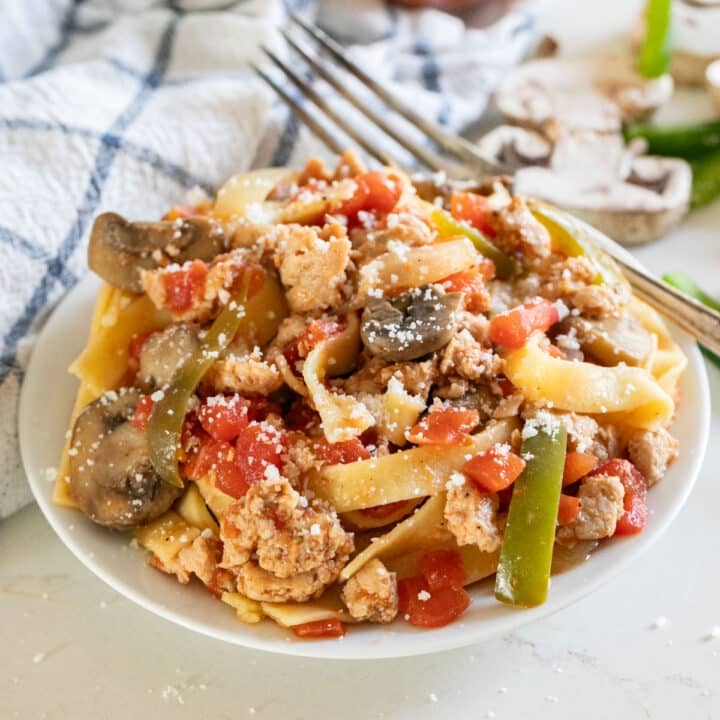
    • Sausage and peppers pasta on a white plate with a napkin, onion and mushrooms in the background and a fork across the back of the plate.
      Pasta With Sausage Peppers And Onions
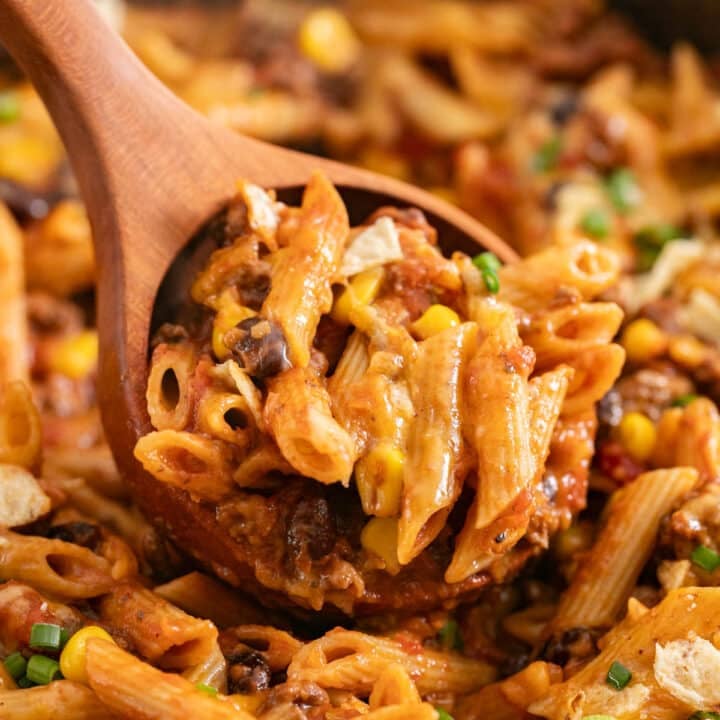
    • A wooden spoon scooping up creamy taco pasta from the pan.
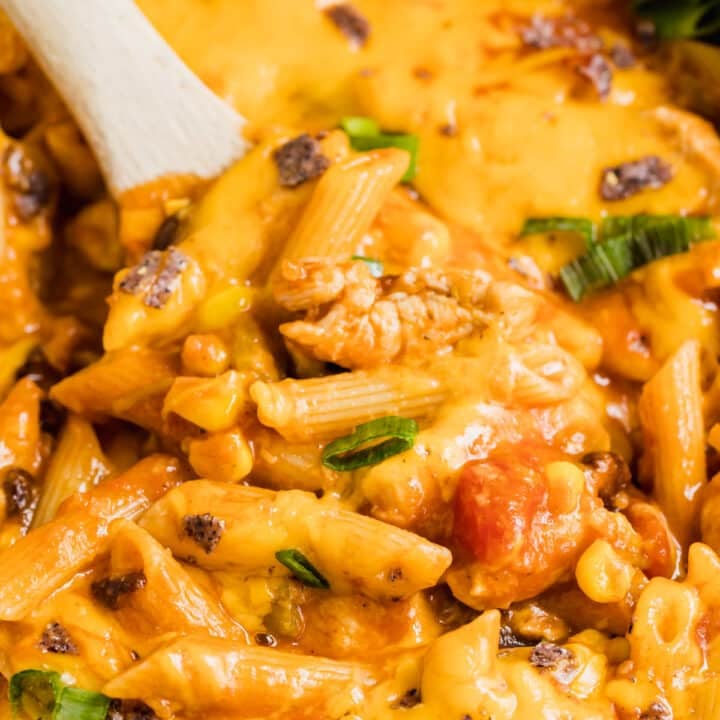
      One Pot Cheesy Taco Pasta

    Love this recipe? Please leave a 5 star ⭐️⭐️⭐️⭐️⭐️ rating in the recipe card below ⬇️ and/or a review in the comment section further down. Check out my Amazon Store for all my favorite tools, including those used in this recipe. And follow @thelifejolie on Instagram and TikTok!

    An overhead image of a plate of baked ziti with herbs, garlic and a blue striped napkin next to it.

    Pasta al Forno

    Jessy Freimann
    Pasta al forno (or ziti al forno) is a hearty Italian classic perfect for family gatherings! With tender pasta, rich tomato sauce, savory beef, creamy ricotta, and melty mozzarella. It bakes to golden perfection — all in under an hour!
    No ratings yet
    Print Recipe Pin Recipe
    Prep Time 10 minutes mins
    Cook Time 3 hours hrs
    Total Time 3 hours hrs 10 minutes mins
    Course dinner, Main, Main Course, Main dish
    Cuisine Italian
    Servings 8 servings
    Calories 523 kcal

    Equipment

    • Large saute pan
    • wooden spoon
    • chefs knife
    • cutting board
    • measuring cups
    • measuring spoons
    • Large pot
    • 9 x 13 Pan

    Ingredients
      

    • 1 Tablespoon olive oil
    • ½ cip onion, finely diced (1 small onion)
    • 2 large cloves garlic, minced
    • 1 pound ground beef
    • 2 28 ounce cans Crushed Tomatoes
    • ¼ teaspoon baking soda
    • ½ teaspoon Kosher salt
    • ¼ teaspoon ground black pepper
    • 1 pound ziti pasta
    • 1 ¼ cup shredded mozzarella cheese, shredded
    • ⅓ cup Romano cheese, grated or shredded, or Parmesan

    Optional ricotta mixture

    • 8 ounces Ricotta cheese
    • ½ cup mozzarella cheese, shredded
    • ¼ cup Romano cheese, grated or shredded, or Parmesan
    • ½ teaspoon Italian seasoning
    • ½ teaspoon garlic powder
    • Ground black pepper, to taste

    Instructions
     

    • Preheat the oven to 400 degrees. Heat olive oil in a large saute pan over medium heat and bring a large pot of hot water to a boil and salt the water liberally once boiling.
    • Once heated add onions and a garlic to the pan with the oil and saute stirring often for 2-3 minutes stirring often to soften it- be careful not to burn the garlic.
    • Add ground beef and saute until brown, using a wooden spoon to break it up, around 5 minutes. Drain if needed.
    • Add 2 cans Tuttorosso Crushed Tomatoes Chunky with Basil, baking soda, salt and pepper. Reduce heat to medium low and simmer for 10 minutes.
    • While sauce simmers, boil ziti 3 minutes less than the package directions for al dente and drain. Immediately return to the pot.
    • Place a couple spoonfuls of sauce at the bottom of a 9" x 13" pan. 
    • Mix ¾ of the sauce with the pasta until well combined. If using ricotta, mix all ricotta mixture ingredients in a medium bowl.
    • Place ½ the pasta mixture into the 9" x 13" baking pan. If using ricotta, add dollops of ricotta mixture evenly over the top of the pasta.
    • Layer the remaining pasta evenly over the pan and top with remaining sauce.
    • Cover and bake for 30 minutes.
    • Remove from the oven and top with mozzarella and parmesan cheeses. Bake uncovered for another 20-30 minutes or until hot and bubble. Serve immediately.

    Video

    Notes

    • Skip the sugar and use baking soda instead. To cut back on the natural acid that that tomatoes bring to the table, I add ¼ teaspoon of baking soda. I know that might sound weird, but this was my Grandma’s secret tip to making the perfect sauce. Trust me, it works! (note- skip this step if you're using my homemade marinara for this)
    • Cook your pasta slightly al dente. Follow the package instructions, but reduce the cooking time by about 3 minutes. This prevents the pasta from overcooking, as it will continue to cook while baking.
    • Don’t rinse the pasta! The starch left on the pasta helps the sauce stick better, making each bite extra flavorful.
    • Bake this covered for the first part of the cooking time to help bring it to temp quicker, then remove the cover and add the shredded cheese for the remaining cooking time so it still gets that amazing crust we all fight over.
    • The ricotta is an optional addition. I like it because it adds a creamy quality. You can also mix it right in with the sauce and pasta, but feel free to omit it if you don’t want the creaminess. Personally, I think it make it so much better!
    • Ingredients to prep ahead- Chop onion, peel garlic, shred the cheese, and even cook the sauce a day ahead to save time when assembling.
    • Leftovers and storage- Store leftovers in an airtight container in the fridge for up to 4 days. To reheat, cover with foil and bake at 350 degrees F until warmed through, or microwave individual portions.

    Nutrition

    Serving: 1servingCalories: 523kcalCarbohydrates: 45gProtein: 28gFat: 25gSaturated Fat: 12gPolyunsaturated Fat: 1gMonounsaturated Fat: 10gTrans Fat: 1gCholesterol: 82mgSodium: 488mgPotassium: 345mgFiber: 2gSugar: 2gVitamin A: 328IUVitamin C: 0.3mgCalcium: 286mgIron: 2mg
    Tried this recipe?Let us know how it was!

    Chocolate Cake Trifle

    Feb 14, 2025 · Leave a Comment

    A tall glass bowl of chocolate trifle showing the layers with chocolate toffee candies scattered around it.

    This chocolate cake trifle is a rich, indulgent dessert that’s surprisingly easy to make. With layers of moist chocolate cake, creamy pudding, and fluffy whipped topping, it comes together in just 30 minutes!

    A tall glass bowl of chocolate trifle showing the layers with chocolate toffee candies scattered around it.
    [feast_advanced_jump_to]

    Why You’ll Love This Simple Trifle Recipe

    I love the ease of a good trifle. It’s one of those desserts that looks fancy but is secretly one of the easiest things you can throw together. And honestly, who can resist layers of rich chocolate cake, creamy pudding, and fluffy whipped topping? This recipe is perfect for a last-minute dessert that will impress your guests. 

    Whether making it for a family gathering, a holiday party, or just because you need a little chocolate fix, this chocolate trifle is always a winner. And the best part? It tastes even better after sitting in the fridge for a few hours, making it a total make-ahead dream. If you’re not already convinced, here are a few more reasons why this simple trifle deserves a spot on your dessert table:

    • Rich layers of chocolate cake, pudding, and whipped topping
    • No complicated steps or baking skills needed
    • Great for parties, potlucks, or sharing
    • Tastes even better after sitting — perfect to make ahead
    • Easy to customize with nuts, berries, or toffee
    Trifle dessert in a decorative sundae dish with the rest of the trifle in the background.

    Ingredient Information and Substitutions

    • Devil’s Food cake mix- A boxed mix makes this chocolate cake trifle super easy. Just prepare it according to the package instructions. If you prefer homemade, any rich chocolate cake recipe will work. 
    • Instant vanilla pudding- Avoid the cook-and-serve kind since it takes longer to set. For a different flavor, swap it with chocolate or caramel pudding. 
    • Milk- Helps the pudding set properly. Whole milk works best, but you can use 2% if needed.
    • Kahlua- Adds a subtle coffee flavor that enhances the chocolate. If you want to keep it alcohol-free, substitute it with strong brewed coffee or espresso. If you prefer to skip the coffee flavor altogether, swap with an equal amount of milk.
    • Whipped topping- The large 16-ounce container is needed for this recipe. You can also use homemade whipped cream, but be sure it’s stabilized if making this ahead of time.
    • Skor or heath bars- These toffee candy bars add the perfect crunchy contrast to the creamy layers. If you can’t find them, try crushed Butterfingers, chocolate-covered pretzels, or chopped nuts for a similar effect.
    An overhead image of labeled recipe ingredients.

    How to Make This Chocolate Trifle Recipe

    Step 1- Prep the trifle ingredients.

    Prepare the cake mix according to the package instructions, baking it in two 8-inch round cake pans. Let the cakes cool completely before slicing each one length-wish in half to create four total layers.

    In a medium bowl, whisk together the instant vanilla pudding mix, milk, and Kahlua until smooth. Refrigerate for a few minutes until thickened.

    Place the Skor or Heath bars in a zip-top bag and use a meat mallet or rolling pin to break them into small pieces. Set them aside for layering.

    Pudding mix combined with Kahlua and milk in a glass bowl and chocolate toffee candies crushed up in a plastic zipper bag.

    Step 2- Assemble the trifle.

    In a large trifle dish, add a layer of chocolate cake and a generous spoonful of pudding mixture.

    The first layer of chocolate cake in the trifle dish and then the pudding on top of it.

    Next add a layer of whipped topping, and a sprinkle of crushed toffee bars.

    A layer of whipped topping added to the trifle dish and then a layer of crushed toffee candies.

    Repeat the layers until you reach the top of the dish, finishing with whipped topping and extra toffee pieces for garnish.

    Additional layers added to the trifle dish and then a view of the top of the trifle covered with crushed toffee candies.

    Step 5- Chill and serve.

    Refrigerate the trifle for at least overnight, but 24 hours is best to let the flavors meld together. Serve chilled and enjoy every chocolatey, creamy bite! 

    A close up image of a the layers of trifle in a glass trifle dish.

    Frequently Asked Questions

    What is a trifle cake?

    Trifle is a classic English dessert made with layers of cake, custard, and sometimes fruit or whipped topping. While traditionally made with sponge cake, this version of an English trifle recipe is made with chocolate cake offers a richer, more indulgent twist. It’s typically served in a glass bowl to highlight its layers.

    Can I use a different type of cake?

    Absolutely! Brownies, pound cake, or even store-bought chocolate sponge cake work well. Just make sure it's sturdy enough to withstand the pudding and whipped topping without getting too soggy.

    Can I use homemade cake instead of a boxed mix?

    While a boxed Devil’s Food cake keeps things quick and easy, you can use a homemade chocolate cake recipe. Just make sure it’s rich and sturdy enough to hold up to the pudding and whipped topping layers.

    Can I make this in individual servings?

    Yes! Instead of layering everything in a large trifle dish, you can assemble smaller portions in mason jars, dessert glasses, or even stemless wine glasses. It makes for a fun and elegant presentation.

    A view of the top of a sundae dish full of trifle with another behind it and a spoon on the side.

    Tips for Making This Trifle Recipe

    • This is a make-ahead dessert that tastes even better after sitting for at least a few hours. You can make it up to 2 days in advance.
    • Use instant pudding- Regular stovetop pudding takes longer to make and may not set up as well for layering.
    • Add some fruit! Raspberries or strawberries can add a refreshing contrast to the rich chocolate layers. Dry the berries well so your trifle doesn't get soggy.
    • Clear, glass trifle dishes are best, but you can also serve this recipe in a large bowl or even individual serving cups.
    • Ingredients to prep ahead- Bake the cake and prepare the pudding in advance so assembling the trifle is quick and easy. But really this is best totally made ahead.
    • Leftovers and storage- Keep the dessert covered in the fridge for up to 4 days. The texture stays delicious without getting too soggy. For an extra crunch, sprinkle fresh toffee bits on top before serving. Freezing isn’t recommended as the pudding and whipped topping don’t thaw well. 

    What to Serve With This Classic Trifle Recipe.

    Whether you’re making it for a holiday, a dinner party, or just because, this recipes pairs beautifully with a variety of sweet treats. I love serving it alongside lighter desserts to balance out the richness, or even a warm drink for the ultimate cozy indulgence. Here are some of my favorite pairings: 

    • Bloomin' Baked Caramel Apples
    • Black Cherry Lemonade Bourbon Slush
    • Chocolate Mousse Cups
    • Blueberry Lemon Dump Cake

    Other Tasty Dessert Recipes to Try

    • A wooden bowl of caramel pretzel turtles with a pan of them and a red and green towel in the background.
      Rolo Pretzel Bites
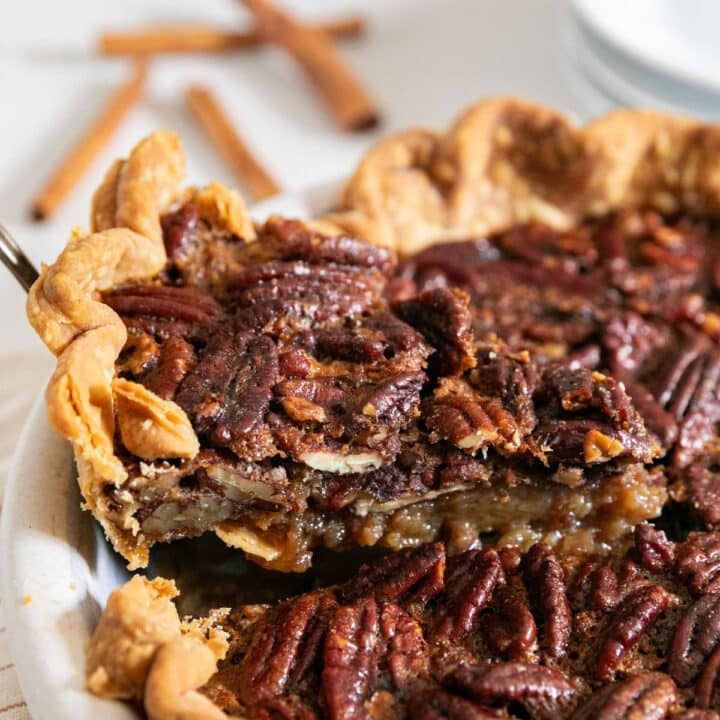
    • A slice of pecan pie being pulled from the pie with plates and cinnamon sticks in the background.
      Old Fashioned Pecan Pie
    • A brownie bite on a white plate with the mini muffin warapper pulled down exposing the sides and other brownie bites in the background.
      Easy Candy Brownie Bites
    • 3 s'mores bars stacked on top of each other with more bars in the background.
      No Bake S'more Bars

    Love this recipe? Please leave a 5 star ⭐️⭐️⭐️⭐️⭐️ rating in the recipe card below ⬇️ and/or a review in the comment section further down. Check out my Amazon Store for all my favorite tools, including those used in this recipe. And follow @thelifejolie on Instagram and TikTok!

    A tall glass bowl of chocolate trifle showing the layers with chocolate toffee candies scattered around it.

    Chocolate Cake Trifle

    Jessy Freimann
    This chocolate cake trifle is a rich, indulgent dessert that’s surprisingly easy to make. With layers of moist chocolate cake, creamy pudding, and fluffy whipped topping, it comes together in just 30 minutes!
    No ratings yet
    Print Recipe Pin Recipe
    Prep Time 10 minutes mins
    Resting time 1 day d
    Course Dessert
    Cuisine American
    Servings 8 servings
    Calories 457 kcal

    Equipment

    • trifle dish
    • Meat mallet
    • Spatulas
    • mixing bowl
    • Whisk

    Ingredients
      

    • 1 Devil's Food cake mix + the ingredients that the mix calls for
    • 3 ounces instant vanilla pudding
    • 1 ⅓ cups milk
    • ⅓ cup Kahlua
    • 5 chocolate toffee candy bars (like Skor or Heath bars or any other toffee candy bars)
    • 16 ounces whipped topping (make sure you get the large one, not the regular size)

    Instructions
     

    • Bake the cake as directed on the packaging in two 8 inch round cake pans.
    • Let the cakes cool completely and slice each hake in half so you have a total of 4 round layers.
    • While the cakes cool, combine the pudding mix with milk and Kahlua. Refrigerate to thicken.
    • Break the toffee candy bars into small pieces with a meat mallet or rolling pin. Set aside.
    • When you're ready to assemble, layer cake, pudding, whipped topping and toffee candy bar pieces until you've reached the top (you should have around 4 layers).
    • Refrigerate overnight until you're ready to serve. 

    Video

    Notes

    • This is a make-ahead dessert that tastes even better after sitting for at least a few hours. You can make it up to 2 days in advance.
    • Use instant pudding- Regular stovetop pudding takes longer to make and may not set up as well for layering.
    • Add some fruit! Raspberries or strawberries can add a refreshing contrast to the rich chocolate layers. Dry the berries well so your trifle doesn't get soggy.
    • Clear, glass trifle dishes are best, but you can also serve this recipe in a large bowl or even individual serving cups.
    • Ingredients to prep ahead- Bake the cake and prepare the pudding in advance so assembling the trifle is quick and easy. But really this is best totally made ahead.
    • Leftovers and storage- Keep the dessert covered in the fridge for up to 4 days. The texture stays delicious without getting too soggy. For an extra crunch, sprinkle fresh toffee bits on top before serving. Freezing isn’t recommended as the pudding and whipped topping don’t thaw well. 

    Nutrition

    Serving: 1servingCalories: 457kcalCarbohydrates: 69gProtein: 6gFat: 17gSaturated Fat: 9gPolyunsaturated Fat: 3gMonounsaturated Fat: 4gCholesterol: 6mgSodium: 570mgPotassium: 299mgFiber: 1gSugar: 49gVitamin A: 109IUCalcium: 172mgIron: 2mg
    Tried this recipe?Let us know how it was!

    Veal Scallopini Recipe

    Feb 10, 2025 · Leave a Comment

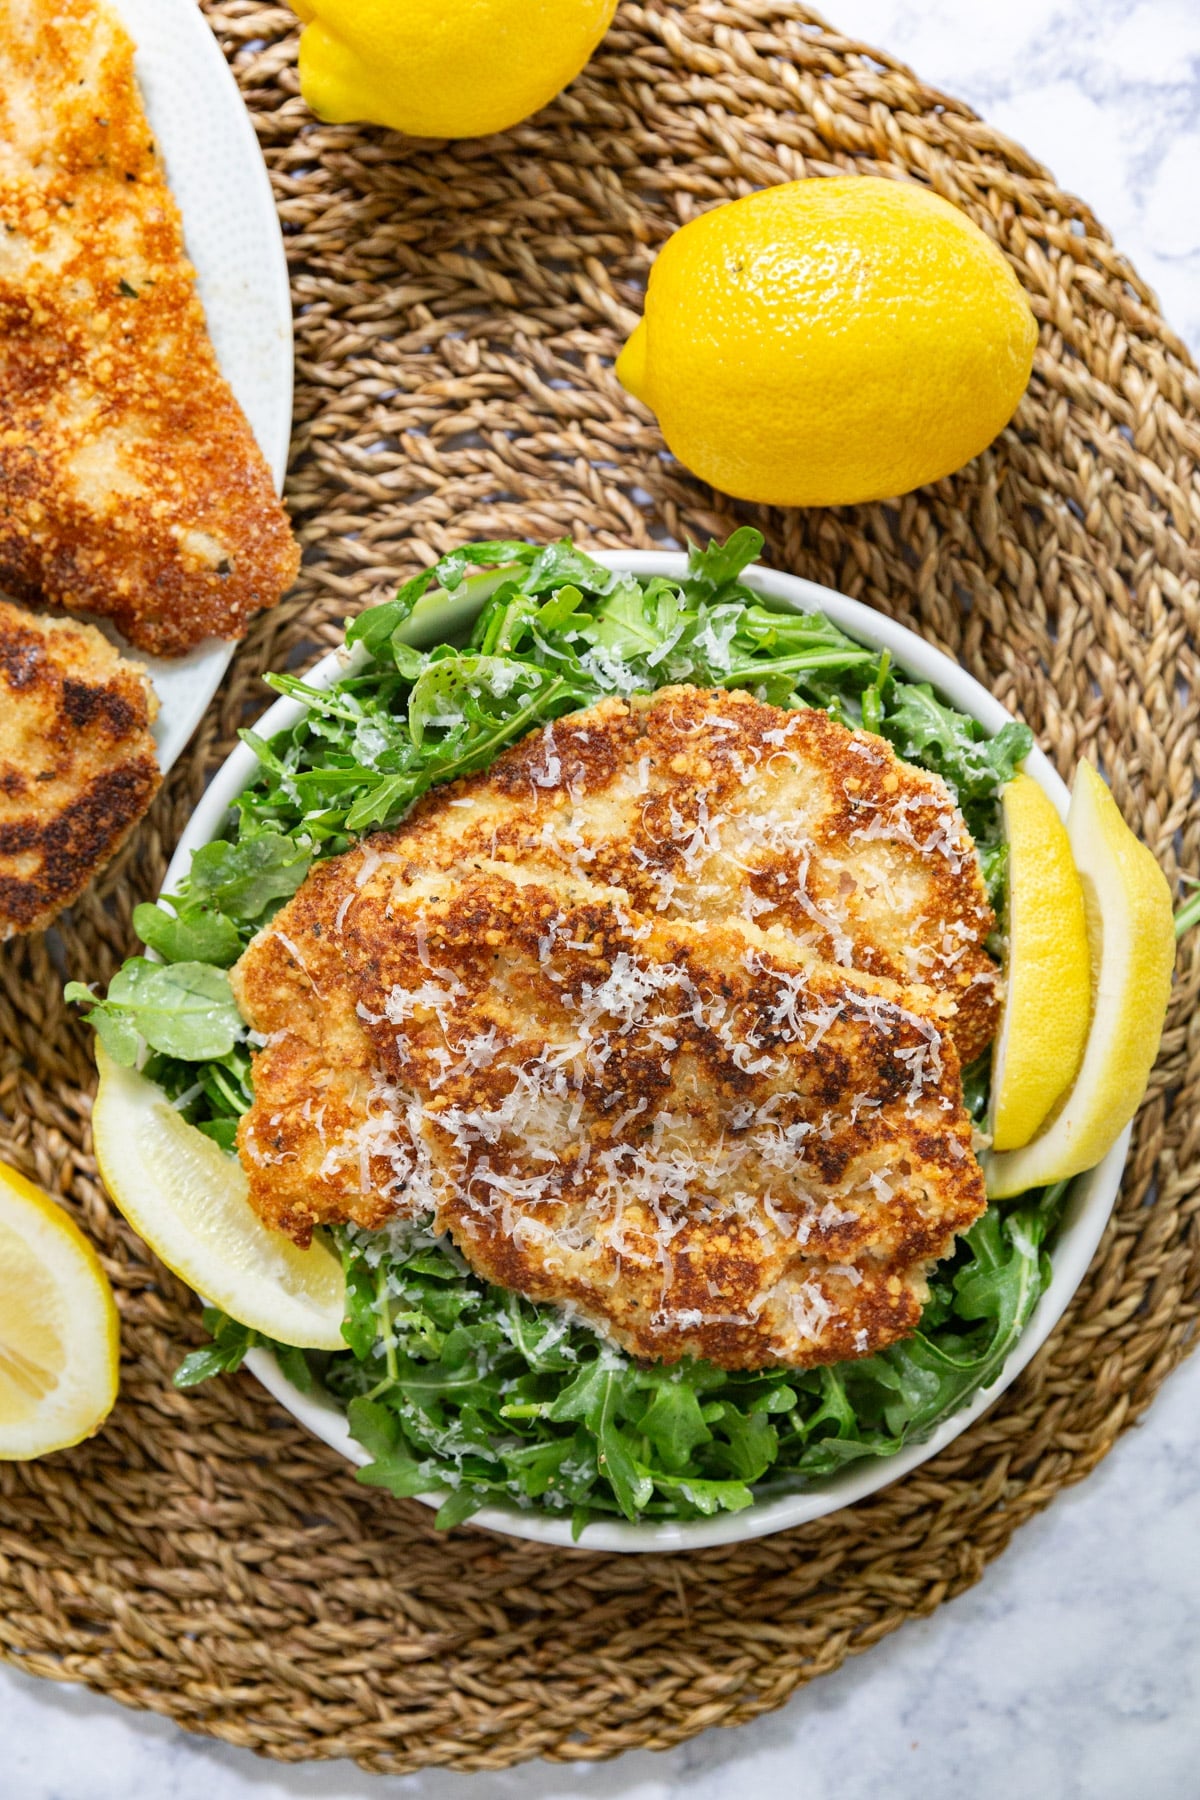
    Veal scallopini on a bed of dressed arugula with lemon wedges on a white plate.

    This veal scallopini recipe makes a quick and delicious meal that comes together in under 30 minutes! With crispy, golden-breaded veal cutlets over a bed of dressed arugula, this dish feels restaurant-worthy without the hassle.

    Veal scallopini on a bed of dressed arugula with lemon wedges on a white plate.
    [feast_advanced_jump_to]

    Why You’ll Love This Recipe for Veal Scallopini

    If there’s one thing I love, it’s a meal that feels fancy but takes almost no effort. And that’s exactly what this recipe delivers! Thin, tender veal gets coated in crispy, golden breadcrumbs, and then served up with a bright, lemony finish. It’s light, flavorful, and just the right amount of indulgent.

    Plus, veal soaks up flavors like a dream so every bite is packed with richness without needing a heavy sauce. I serve it Milanese-style, which is over a bed of lightly dressed fresh Arugula. And the best part? It comes together in minutes! The veal stays juicy on the inside while crisping up beautifully on the outside. Here’s why you’ll love this recipe for veal scallopini:

    • Tender when cooked the right way
    • Ready in under 30 minutes for a quick dinner
    • Impressive enough for guests
    • Easily get creative with seasonings
    A close up image of a pile of breaded veal cutlets.

    Ingredient Information And Substitutions

    • Veal cutlets- Opt for fresh, high-quality veal cutlets that are pale pink with a fine texture and minimal fat. If veal isn’t available, you can substitute it with chicken or pork.
    • Flour- All-purpose works best for veal scallopini recipes. For a gluten-free option, you can substitute with 1:1 GF flour. 
    • Seasoned bread crumbs- Adds additional crunch and flavor. Use plain breadcrumbs mixed with Italian seasoning and garlic powder as a substitute.
    • Salt and pepper- Enhances the flavor and helps create a delicious crust. Use sea salt and freshly ground black pepper for the best taste. 
    • Eggs- Helps the breading stick to the meat. For an egg-free version, use buttermilk.
    • Olive oil- Used for both frying and dressing the arugula. Avocado oil is a great alternative. 
    • Lemon- Adds a zesty freshness!
    • Romano cheese- Gives a savory, nutty flavor. Parmesan is a great alternative for this.
    • Fresh arugula- Adds a peppery kick to the salad base. If arugula isn’t your thing, try spinach or mixed greens instead.

    How To Make Veal Scallopini

    Step 1- Prepare the veal.

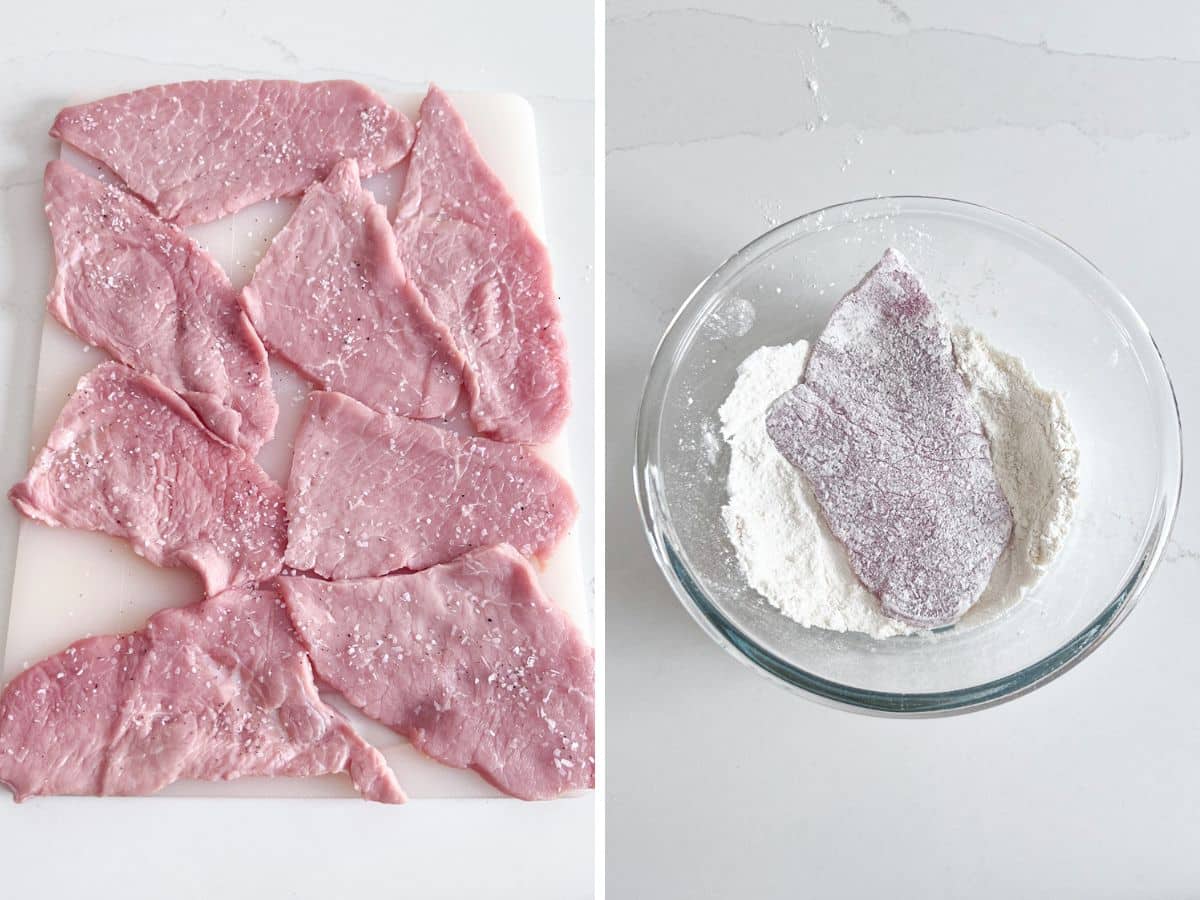
    If your veal isn’t already thin, place the cutlets between plastic wrap and gently pound them to about ⅛-inch thickness. Pat them dry with paper towels and season them well with salt and pepper.

    Veal cutlets pounded thin on a cutting board and a cutlet in a bowl of flour.

    Step 2- Bread the cutlets.

    Place three shallow bowls on your counter: one with flour, one with beaten eggs, and one with a mixture of bread crumbs and Romano cheese.

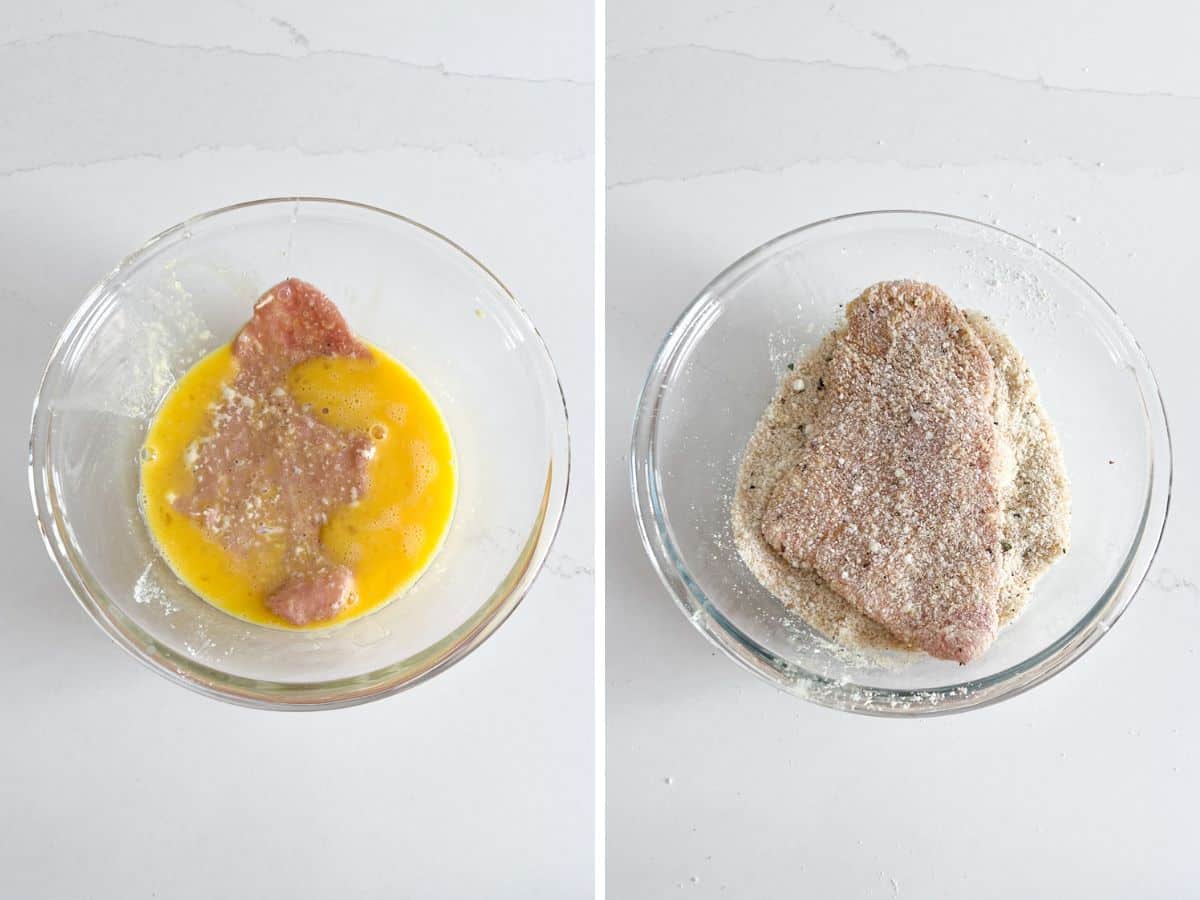
    Coat each cutlet evenly in the flour and shake off any excess. Then, dip it into the beaten egg, allowing any extra to drip off before coating the cutlet with the breadcrumb-cheese mixture. Press lightly so the breading sticks well. It should be nice and even. 

    A veal cutlet in a bowl of beaten egg and then dredged in a bowl of bread crumbs mixed with Romano cheese.

    Step 3- Fry the cutlets.

    Heat olive oil in a large skillet over medium-high heat until it shimmers. Add the veal cutlets and fry them on each side, until golden brown. They cook quickly, typically in about 1-2 minutes per side.

    Raw breaded veal cutlets added to a pan of hot oil and then the same cutlets cooked to a golden brown in that skillet.

    Step 5- Rest meat and serve with dressed arugula. 

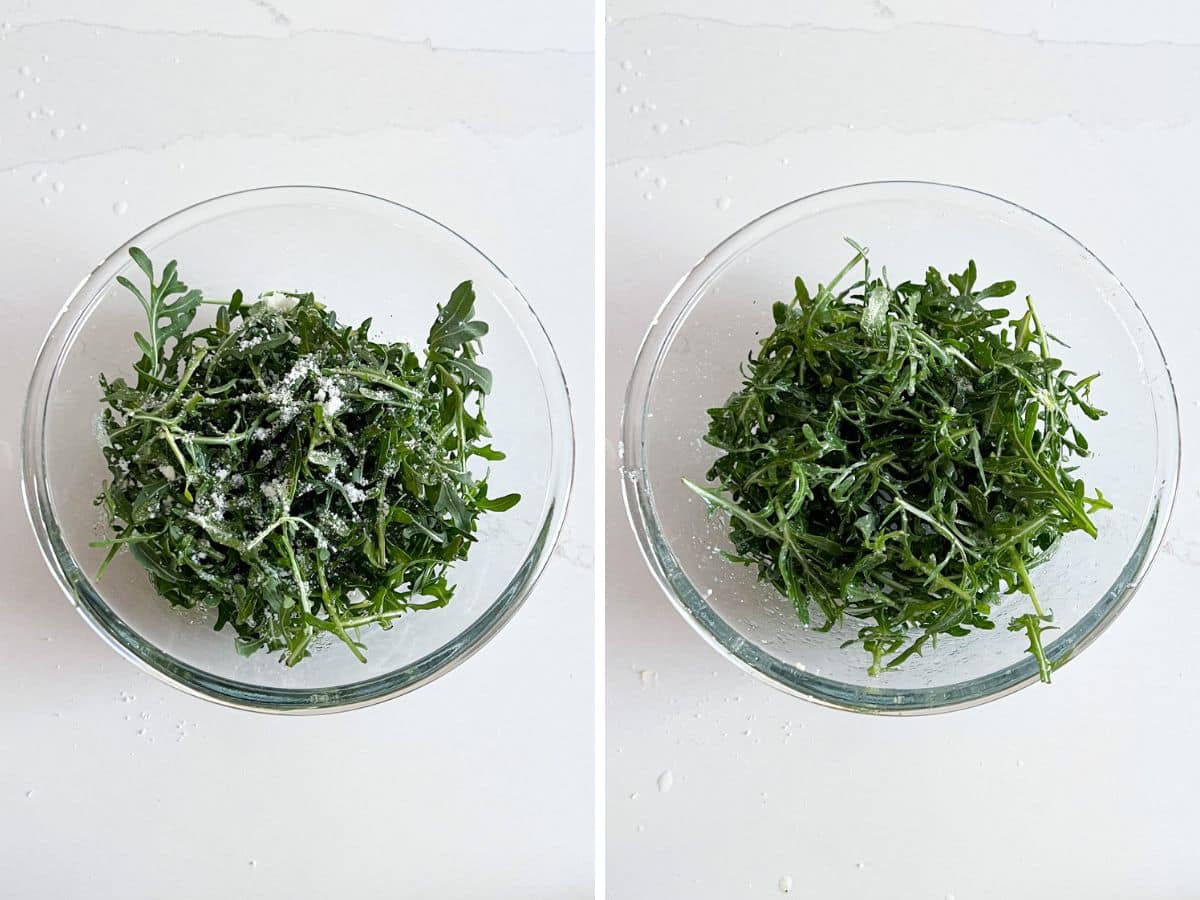
    After frying, transfer the veal to a plate and let it rest for a few minutes. While it’s resting, toss the arugula with olive oil, lemon juice, a bit of black pepper, and freshly grated Parmesan. Serve the veal scallopini over the salad, and finish it off with a squeeze of fresh lemon juice.

    Arugula in a glass bowl with the dressing ingredients over the top and then the arugula with the dressing mixed in.

    Frequently Asked Questions

    What is veal?

    Veal is the meat of young cattle, typically harvested before they reach full maturity. It’s a natural byproduct of the dairy industry since cows must give birth to keep producing milk.  

    Can I make scallopini with another type of meat?

    Absolutely! Turkey, pork, and chicken are all great alternatives that still give you the same deliciously crispy and tender- pork scallopini, anyone?

    How do you cook veal so it’s tender?

    Veal is naturally tender. To keep it that way, cook it quickly. Pounding the meat thin and frying over higher heat ensures it stays juicy and tender.

    Why is my veal tough?

    Tough veal often results from overcooking, using the wrong cut, or not pounding it thin enough.

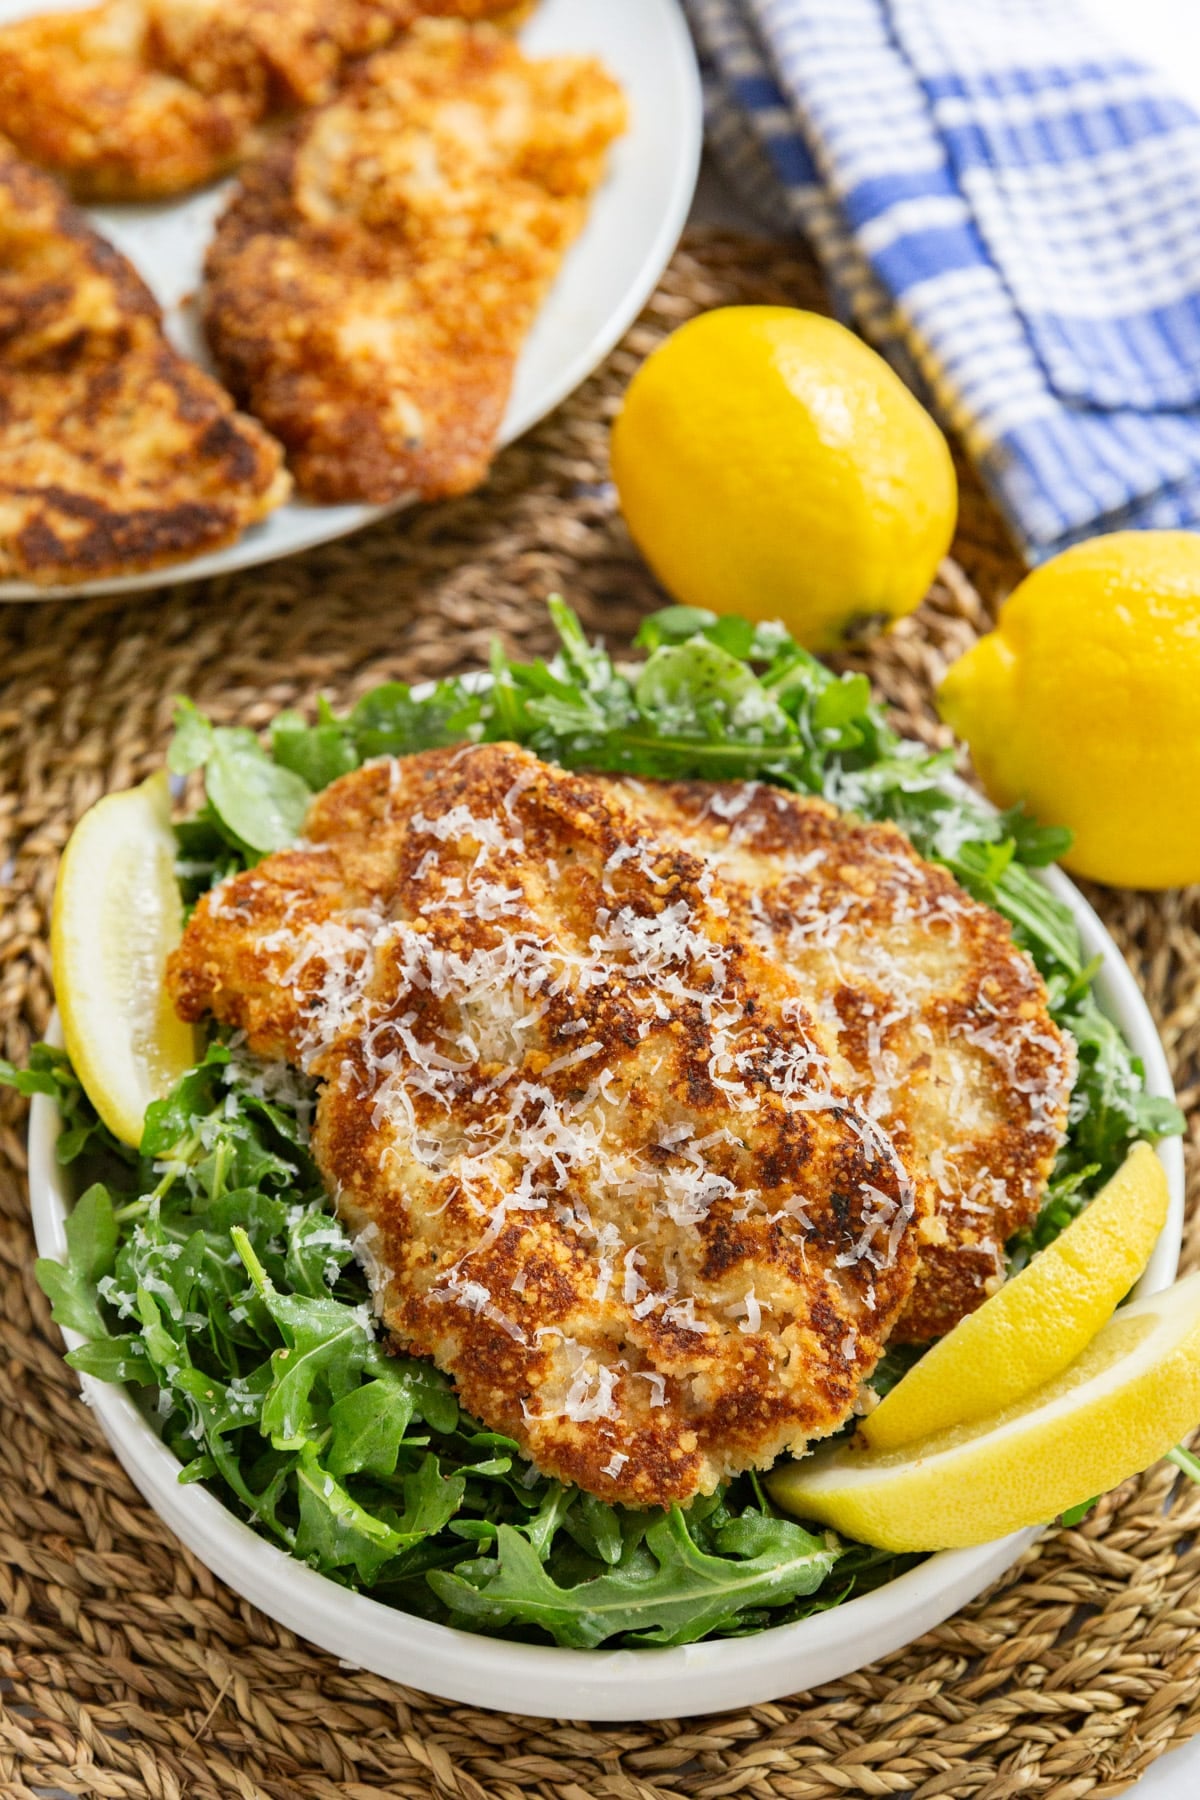
    An overhead image of scallopini veal on a bed of arugula with lemons.

    Tips For Making Scallopini

    • Make sure the oil is screaming hot. I heat the pan over medium high and wait until the oil is shimmering. Usually, I'll carefully add one drop of water to the pan and if it sizzles, it's hot enough.
    • Don’t overcrowd the pan. Work in batches if needed to avoid soggy breading. If you find that the oil gets absorbed too quickly, just add a bit more between batches.
    • Overcooking can make veal tough. One of the secrets to this recipe is flash-searing the veal right after it’s coated in the breading, which gives it that crispy and tender texture.
    • After cooking the veal with the sauce, allow it to rest for a few minutes to redistribute the juices before serving.
    • Ingredients to prep ahead- Cut and pound the veal cutlets
    • Leftovers and storage- Leftovers last up to 2 days in the fridge. Reheat them in a skillet or an air fryer to maintain crispiness. Reheat in a pan or oven until hot.
    A plate of veal scallopini on a bed of dressed arugula with the rest of the veal on a platter behind it.

    What To Serve With Veal Cutlets

    You'll want a crusty loaf of Italian bread for sopping up any leftover sauce! This dish is also delicious with some pasta instead of the arugula. Here are a few more of my favorite sides for scallopini:

    • Rice Pilaf
    • Garlic Green Beans
    • Easy Sautéed Vegetables
    • Baked Delicata Squash With Herbed Yogurt

    Other Italian Recipes To Try

    • A bowl of pasta salad with a white towel behind it and tomatoes and basil around it.
      Zesty Italian Pasta Salad
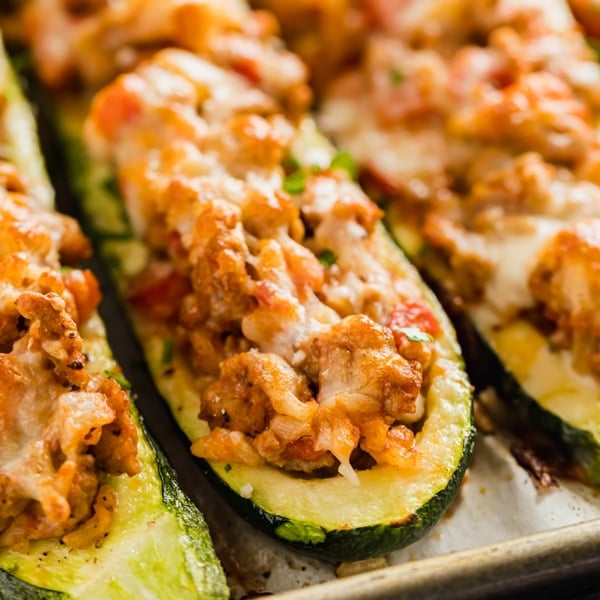
    • Italian Stuffed Zucchini Boats are the healthy weeknight meal you'll want to make again and again. This is a seriously easy recipe that's full of delicious flavor without all the guilt!
      Italian Stuffed Zucchini Boats
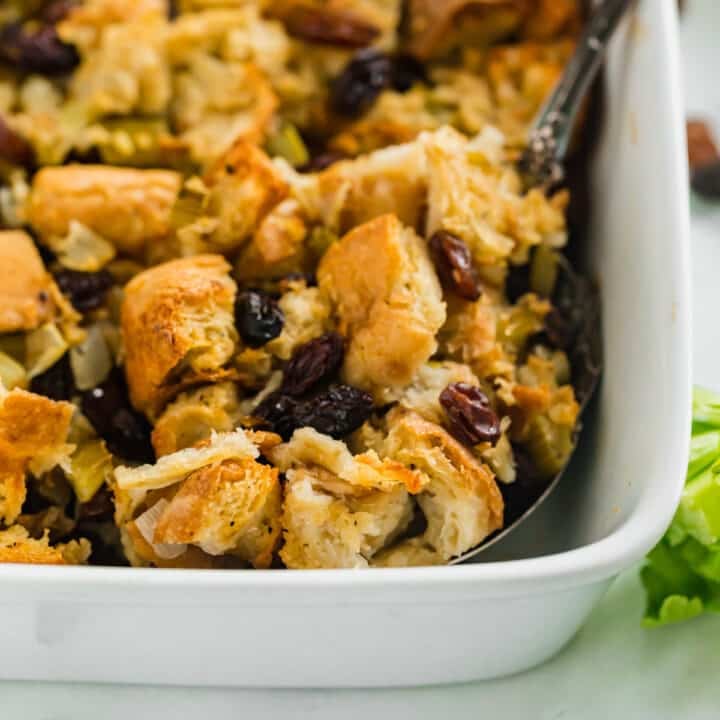
    • The corner of Italian bread stuffing in a white casserole dish with a spoon in it.
      Ciabatta Italian Bread Stuffing
    • A close up image of a chunk of Italian sausage in red sauce on a white plate with a toothpick sticking out of it.
      Oven Baked Italian Sausage with Tomato Sauce

    Love this recipe? Please leave a 5 star ⭐️⭐️⭐️⭐️⭐️ rating in the recipe card below ⬇️ and/or a review in the comment section further down. Check out my Amazon Store for all my favorite tools, including those used in this recipe. And follow @thelifejolie on Instagram and TikTok!

    Veal scallopini on a bed of dressed arugula with lemon wedges on a white plate.

    Veal Scallopini Recipe

    Jessy Freimann
    This veal scallopini recipe is a quick and delicious meal that comes together in under 30 minutes! With crispy, golden-breaded veal cutlets and a flavorful sauce, this dish feels restaurant-worthy without the hassle.
    No ratings yet
    Print Recipe Pin Recipe
    Prep Time 10 minutes mins
    Cook Time 3 minutes mins
    Resting time 5 minutes mins
    Total Time 13 minutes mins
    Course dinner, Main, Main Course, Main dish
    Cuisine Italian
    Servings 4 servings
    Calories 401 kcal

    Equipment

    • Large saute pan
    • chefs knife
    • cutting board
    • measuring cups
    • Meat mallet

    Ingredients
      

    • 1 pound veal cutlets (around 5 cutlets)
    • ½ teaspoon Kosher salt
    • ¼ teaspoon ground black pepper
    • ½ cup flour
    • 2 large eggs, beaten
    • ½ cup seasoned bread crumbs
    • ½ cup Romano cheese, or Parmesan, finely grated
    • 2 Tablespoons olive oil + extra for dressing the arugula
    • 2 cups Fresh arugula
    • 1 lemon + some extra lemon wedges for serving
    • Freshly grated Romano or parmesan cheese for garnish

    Instructions
     

    • Pound cutlets to uniform thickness (⅛ of an inch). Pat dry with paper towel and season well with salt and pepper on both sides.
    • Place 3 shallow bowls out. Fill the first with flour, the second with the beaten eggs, and in the third combine bread crumbs and Romano cheese.
    • Coat each cutlet in flour and tap off any excess.
    • Coat each cutlet with egg and tap off any excess.
    • Coat each cutlet with the bread crumb mixture and tap off any excess. Place them onto a plate.
    • Heat 2 Tablespoons oil in a large pan over medium high until it's shimmering. You can test it by adding one drop of water to the pan and if it sizzles, it's hot enough.
    • Cooking in batches so as not to overload the pan, place some of the cutlets into the pan and cook for 1-1 ½ minutes (time this and be careful to manage the heat- you want them brown, not black). Between batches, add an additional Tablespoon of oil if needed.
    • Turn the cutlets and fry the other side for another 1-1 ½ minutes and move to a clean plate. Rest for 5 minutes.
    • While the meat rests, lightly dress fresh arugula with olive oil, fresh lemon juice, coarsely ground black pepper and freshly grated Romano cheese. 
    • Divide the salad between plates and top with with cutlets. Sprinkle with a little more grated cheese and a squeeze of lemon juice and serve immediately.

    Video

    Notes

    • Make sure the oil is screaming hot. I heat the pan over medium high and wait until the oil is shimmering. Usually, I'll carefully add one drop of water to the pan and if it sizzles, it's hot enough.
    • Don’t overcrowd the pan. Work in batches if needed to avoid soggy breading. If you find that the oil gets absorbed too quickly, just add a bit more between batches.
    • Overcooking can make veal tough. One of the secrets to this recipe is flash-searing the veal right after it’s coated in the breading, which gives it that crispy and tender texture.
    • After cooking the veal with the sauce, allow it to rest for a few minutes to redistribute the juices before serving.
    • Ingredients to prep ahead- Cut and pound the veal cutlets
    • Leftovers and storage- Leftovers last up to 2 days in the fridge. Reheat them in a skillet or an air fryer to maintain crispiness. Reheat in a pan or oven until hot.

    Nutrition

    Serving: 1servingCalories: 401kcalCarbohydrates: 25gProtein: 35gFat: 17gSaturated Fat: 5gPolyunsaturated Fat: 2gMonounsaturated Fat: 8gTrans Fat: 0.01gCholesterol: 195mgSodium: 749mgPotassium: 552mgFiber: 2gSugar: 2gVitamin A: 222IUVitamin C: 15mgCalcium: 190mgIron: 3mg
    Tried this recipe?Let us know how it was!

    Brown Sugar Bacon Wrapped Lil Smokies

    Feb 7, 2025 · 4 Comments

    A hand holding up a bacon wrapped sausage on a toothpick.

    The savory and sweet combination of brown sugar bacon wrapped lil smokies creates an irresistible appetizer that’s always a crowd-pleaser. Easy, sweet, savory, and ready in under an hour.

    Bacon wrapped lil smokies with tooth picks on them in a pan.
    [feast_advanced_jump_to]

    Why You’ll Love Brown Sugar Bacon Wrapped Little Smokies

    There’s something about these bacon wrapped appetizers that makes them irresistible. The combination of smoky, salty bacon and the rich sweetness of brown sugar creates the ultimate bite-sized treat. If you’ve ever had the joy of biting into one of these, you’ll know just how addictive they are!

    It's slightly chewy but also crispy, almost like candied bacon. These bacon wrapped smokies are decadent, easy to make, and perfect for any occasion- I also made a variation with bacon wrapped chicken bites if you want a different option! Here’s what makes this recipe a winner:

    • Only three simple ingredients
    • Crowd-pleasing and addictive
    • Budget-friendly with minimal ingredients
    • Great balance of sweet, savory, and smoky
    • Easy to make in bulk and perfect for gatherings
    A hand holding up a bacon wrapped sausage on a toothpick.

    Ingredient Information And Substitutions

    • Cocktail Wienies or Lil Smokies- Use your favorite brand of mini-smoked sausages. Basically, little hot dogs!
    • Bacon- Regular-cut bacon works best as it crisps up nicely.
    • Brown Sugar- Light or dark brown sugar both work, but the dark brown sugar adds a richer molasses flavor.
    An overhead image of labeled recipe ingredients.

    How To Make Bacon Wrapped Little Smokies 

    Step 1- Preheat the oven and meat.

    Preheat your oven to 325°F and line a baking sheet with foil or parchment paper for easy cleanup.

    Cut the bacon strips into quarters. Each piece should be just long enough to wrap around a cocktail wienie. Take each sausage and wrap it snugly with a piece of bacon, then secure it with a toothpick.

    Bacon strips cut into thirds and then a cocktail wienie with bacon wrapped around it and a toothpick through it holding it all together.

    Step 2- Coat brown sugar and bake. 

    This is where the magic happens! Arrange the prepared smokies in a single layer on the prepared baking sheet. Sprinkle the bacon wrapped lil smokies generously with brown sugar, making sure each piece gets a nice coating. 

    Pop them into the oven and bake for 50 minutes to 1 hour, flipping them halfway through so they cook evenly. They should be bubbly, caramelized, and slightly crisp when done. 

    Once baked, transfer brown sugar bacon wrapped little smokies to a serving dish, leaving behind excess grease. Serve them warm and watch them disappear!

    Bacon wrapped smokies on a lined sheet pan with brown sugar on them and then the pan in the oven.

    Frequently Asked Questions

    Can I make these in the air fryer?

    Yes! Cook them at 375°F for about 10-12 minutes, flipping halfway through. Keep an eye on them since air fryers cook differently.

    What should I do if the bacon isn’t crispy enough?

    Pop them under the broiler on high for a minute or two on each side, but keep the pan in on the center rack so the parchment doesn't catch fire and watch closely to avoid burning.

    What’s the best way to keep them warm for a party?

    Once they’re baked, transfer bacon wrapped little smokies to a slow cooker in the "warm" setting. That way, they stay hot and caramelized without overcooking.

    A close up image of bacon wrapped lil smokies on a pan.

    Tips For Making Bacon Wrapped Lil Smokies

    • Use regular bacon. Avoid thick-cut bacon to ensure it crisps up properly.
    • Don’t skip the toothpicks! They hold the bacon wrapped lil smokies together and make serving easier.
    • If you love a little spice, sprinkle on some cayenne pepper before baking. This will give the brown sugar bacon wrapped lil smokies an extra kick!
    • Keep them warm- Transfer bacon wrapped little smokies to a slow cooker in the "warm" setting.
    • Ingredients to prep ahead- Cut the bacon and assemble the smokies the night before baking. You can totally do this the night before.
    • Leftovers and storage- Store brown sugar bacon wrapped smokies in an airtight container in the fridge for up to 3 days. Reheat in the oven or microwave for best results.
    Lil smokies wrapped in bacon on a baking sheet.

    What To Serve With Bacon Wrapped Little Smokies With Brown Sugar

    If you’re hosting a gathering, planning a well-rounded spread, or just craving variety, the right sides can take these sausages to the next level. Whether it’s a casual get-together or a more elaborate meal, these pairings will enhance the flavors and make your brown sugar bacon wrapped lil smokies even more irresistible:

    • Artichoke Asiago Dip
    • Jalapeno Popper Pull Apart Bread
    • Sweet and Spicy Kielbasa Bites
    • Meat Lover's Pizza Bites

    Other Appetizer Recipes To Try

    • This BLT Bruschetta recipe is the perfect dish-to-pass for a last minute get together, party or game day celebration. Tomatoes, bacon, parsley and green onions come together in a creamy mixture and are spread atop crispy slices of baguette. This delicious flavor combination makes wonderful little appetizers that you won't be able to stop eating!
      BLT Bruschetta
    • A bloody mary cheeseball with crackers and celery in the background.
      Bloody Mary Spicy Cheeseball
    • These Salami Chips are killer party snack and taste even better with a Honey Mustard dipping sauce. You won't believe how easy they are to make!
      Salami Chips with a Honey Mustard Dipping Sauce
    • The side of a sheet pan of chicken nachos with all the fixings.
      Loaded Chicken Nachos

    Love this recipe? Please leave a 5 star ⭐️⭐️⭐️⭐️⭐️ rating in the recipe card below ⬇️ and/or a review in the comment section further down. Check out my Amazon Store for all my favorite tools, including those used in this recipe. And follow @thelifejolie on Instagram and TikTok!

    A hand holding up a bacon wrapped sausage on a toothpick.

    Brown Sugar Bacon Wrapped Lil Smokies

    Jessy Freimann
    The savory and sweet combination of brown sugar bacon wrapped lil smokies creates an irresistible appetizer that’s always a crowd-pleaser. Easy, sweet, savory, and ready in under an hour.
    5 from 8 votes
    Print Recipe Pin Recipe
    Prep Time 10 minutes mins
    Cook Time 1 hour hr
    Total Time 1 hour hr 10 minutes mins
    Course Appetizer, Snack
    Cuisine American, appetizer, Game day, party, snacks
    Servings 8 servings
    Calories 341 kcal

    Equipment

    • 1 sheet pan
    • 1 cutting board
    • 1 chefs knife
    • 1 Measuring cups and spoons

    Ingredients
      

    • 24 ounces Cocktail Wieners or Lil Smokies
    • 1 pound bacon
    • 1 cup brown sugar

    Instructions
     

    • Preheat the oven to 325 degrees and line a sheet pan with parchment.
    • Cut bacon into thirds. Wrap each sausage with a third of a piece of bacon and secure with a tooth pick.
    • Place the Lil Smokies in a single layer on the prepared pan and sprinkle with brown sugar.
    • Bake for 50 minute to 1 hour, turning once half way through. When they're finished the sugar should be bubbly.
    • Remove them from their baking pan into your serving dish to help eliminate excess grease. Serve immediately.

    Video

    Notes

    • Use regular bacon. Avoid thick-cut bacon to ensure it crisps up properly.
    • Don’t skip the toothpicks! They hold the bacon wrapped lil smokies together and make serving easier.
    • If you love a little spice, sprinkle on some cayenne pepper before baking. This will give the brown sugar bacon wrapped lil smokies an extra kick!
    • Keep them warm- Transfer bacon wrapped little smokies to a slow cooker in the "warm" setting.
    • Ingredients to prep ahead- Cut the bacon and assemble the smokies the night before baking. You can totally do this the night before.
    • Leftovers and storage- Store brown sugar bacon wrapped smokies in an airtight container in the fridge for up to 3 days. Reheat in the oven or microwave for best results.

    Nutrition

    Serving: 1servingCalories: 341kcalCarbohydrates: 28gProtein: 7gFat: 23gSaturated Fat: 8gPolyunsaturated Fat: 4gMonounsaturated Fat: 10gTrans Fat: 0.1gCholesterol: 37mgSodium: 383mgPotassium: 149mgSugar: 27gVitamin A: 21IUCalcium: 26mgIron: 0.4mg
    Tried this recipe?Let us know how it was!

    Homemade Cheesy Hamburger Helper

    Feb 5, 2025 · 1 Comment

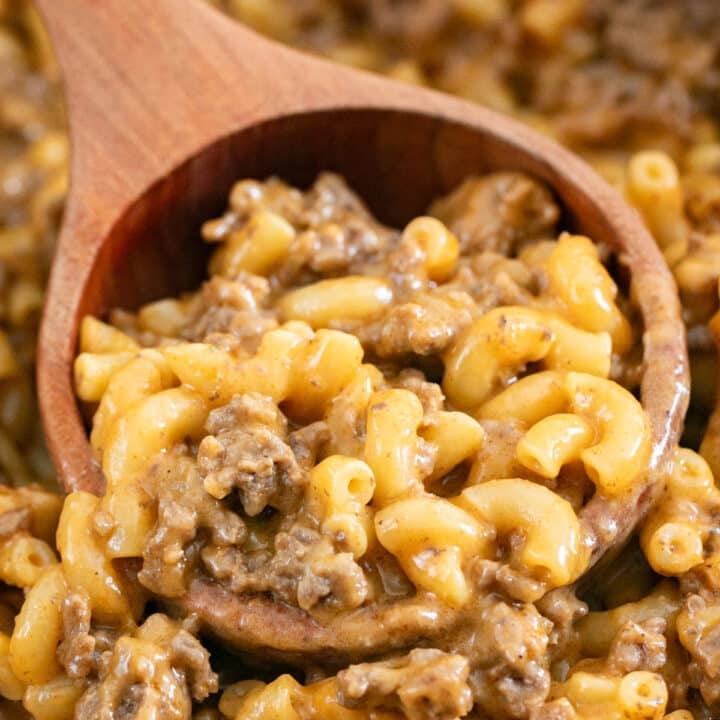
    A close up image of a wooden spoon in a pan of homemade hamburger helper.

    If you love comfort food, this cheesy hamburger helper is a must-try. It's a quick and easy dinner recipe that combines savory beef, tender macaroni, and a rich, creamy cheese sauce. Ready in 30 minutes!

    A close up image of a wooden spoon in a pan of homemade hamburger helper.
    [feast_advanced_jump_to]

    Why You’ll Love This Beef Hamburger Helper Recipe

    This is a recipe I’ve been whipping up for years, and let me tell you — it always hits the spot. With minimal prep and just one skillet, this hamburger helper cheeseburger macaroni delivers big on flavor with minimal cleanup.  

    This is a major upgrade from the boxed version, giving you full control over the ingredients. The combination of savory beef, tender macaroni, and rich cheese sauce creates a hearty, satisfying meal. Here’s what makes my diy hamburger helper so special: 

    • Ready in just 30 minutes 
    • Uses simple pantry staples you likely already have
    • One skillet means fewer dishes (yes, please!)
    • Irresistible creamy goodness in every bite
    • A crowd-pleaser for kids and adults
    A white bowl of cheesy hamburger helper with a white napkin and the pan behind it and shredded cheddar cheese around it.

    Ingredient Information And Substitutions

    • Ground Beef- I like to use 80/20 ground beef because it has a nice balance of flavor and fat. You can swap it for ground turkey or chicken to make a lighter version of this recipe.
    • Tomato Paste- Adds a subtle tang and depth to the sauce.
    • Chicken Broth & Milk- These form the creamy but light base. Beef broth is also a good substitute. And you can use whatever milk you have in the fridge, I prefer whole milk.
    • Elbow Macaroni- Small shells or Ditalini would also work. The key is to use small pasta that cooks quickly. 
    • Cheddar Cheese- Freshly shredded sharp cheddar because it melts beautifully and adds bold flavor, but pre-shredded also works well. You can also mix it up with Colby for something different. 
    • Seasonings- A mix of onion powder, garlic powder, sweet paprika, chili powder, Kosher salt, and black pepper gives hamburger helper cheeseburger macaroni its signature savory flavor. Adjust the amounts to your taste as needed.
    • Flour- For thickening the sauce.
    An overhead image of labeled recipe ingredients.

    How To Make Hamburger Helper

    Step 1- Brown the ground beef.

    Heat a large skillet over medium heat and brown the ground beef, breaking it up into smaller pieces as it cooks. Stir occasionally to ensure it cooks evenly. 

    Once the beef is browned, stir in the onion powder, garlic powder, paprika, salt, and pepper. Sprinkle in the flour and cook for 2 minutes — this helps thicken the sauce later.  

    Raw ground beef in a skillet and then cooked, broken up ground beef in the skillet.

    Step 2- Add the tomato paste.

    Push the beef mixture to the sides of the pan. Add the tomato paste into the center of the pan and let it cook for 2 minutes. Then, stir it into the beef mixture, ensuring everything is well-coated.

    The cooked and seasoned beef pushed to the edges of the pan with the tomato paste in the middle of the pan and then the tomato paste mixed into with the seasoned meat.

    Step 3-  Add the liquids and macaroni.

    Pour in the chicken broth, whole milk, and macaroni and stir until well combined. Gently press the pasta to submerge it in the liquid so it cooks evenly. Bring the mixture to a boil, then reduce the heat to medium.

    Liquids and dry pasta added to the skillet and then all of it mixed together in the skillet and starting to bubble.

    Step 4- Cook the macaroni.

    Cover and let the pasta simmer for 10-12 minutes, until the pasta is tender and the sauce has thickened. Stir 2-3 times through this to keep anything from sticking to the bottom of the pan.

    THe skittlet covered and cooking and a wooden spoon stirring it periodically.

    Step 5- Stir in the cheese.
    Once the pasta is cooked, turn off the heat. Mix in the shredded cheddar until it’s fully melted and the sauce is creamy. Serve your cheesy hamburger helper straight away! 

    Shredded cheese added to the skillet and then stirred and melted into the hamburger helper.

    Frequently Asked Questions

    How can I add more veggies?

    Diced bell peppers or mushrooms are easy to add while cooking the beef. You could also toss some fresh spinach or frozen peas into your cheesy hamburger helper right at the end. Just keep an eye on the liquid levels as you cook to make sure it isn't drying out and add a splash of milk as needed.

    Can I make this with gluten-free pasta?

    Yes! You can use your favorite gluten-free pasta, but be sure to adjust the cooking time. You may also need to adjust the amount of milk and broth as gluten-free pasta absorbs liquid differently. Be sure to also swap out the flour with GF 1:1 Flour (I like King Arthur brand) so that it's totally gluten free.

    How do I make it extra creamy?

    Stir in a Tablespoon of heavy cream or an extra handful of shredded cheese into your cheesy hamburger helper at the end.

    A close up image of a white bowl of homemade hamburger helper recipe.

    Tips For Making Cheeseburger Hamburger Helper

    • Don’t drain any excess grease from the ground beef. The grease combined with the flour helps create a roux to thicken the sauce.
    • Cook the pasta to al dente so it doesn’t turn mushy. If you’re unsure, scoop out a noodle and give it a taste!
    • Add some heat! Spice up your hamburger helper beef pasta with red pepper flakes, a dash of hot sauce, or even some diced jalapeños.
    • Use freshly shredded cheese. The pre-shredded stuff is coated with anti-caking ingredients to prevent clumping, but that also keeps the cheese from melting down really smooth. That said, it still works with pre-shredded cheese, it just melts more smoothly with freshly shredded.
    • Double for a crowd. This beef hamburger helper recipe is easily doubled or tripled, perfect for feeding a larger family or group, just use a bigger pot!
    • Ingredients to prep ahead- Measure out the milk first so it can warm a bit on the counter. Shred the cheese and mix your spices together too.
    • Leftover and storage- Store leftovers in the fridge for up to 3 days or in the freezer for up to 3 months. Thaw in the fridge overnight, then reheat in the microwave or on the stovetop. Add a splash of milk to restore the creamy texture.

    What To Serve With Cheeseburger Mac Hamburger Helper

    Whether you want to add something light to balance the richness or something extra cheesy to complement the flavors, I’ve got you covered! Here are a few of my favorites to pair with cheesy hamburger helper: 

    • Garlic and Butter Green Beans
    • Easy Sautéed Vegetables
    • Homemade 3 Cheese Garlic Bread
    • Sour Cream Cookies

    Other One Pot Dinner Recipes To Try

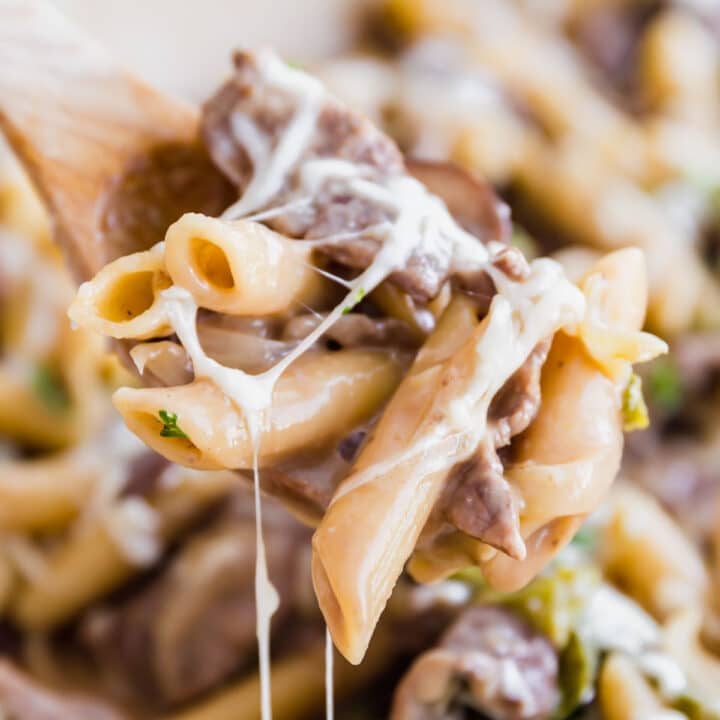
    • A wooden spoon holing a scoop of Philly steaks pasta with melty cheese all over it.
      One Pot Philly Cheesesteak Pasta
    • A close up overhead image of the chicken breast nestled in a skillet of green beans, peppers and mushrooms.
      One Pot Balsamic Chicken
    • A wooden spoon scooping up creamy taco pasta from the pan.
      One Pot Cheesy Taco Pasta
    • An overhead image of a pan of chicken and biscuits with a spoon in it.
      Chicken and Biscuits

    Love this recipe? Please leave a 5 star ⭐️⭐️⭐️⭐️⭐️ rating in the recipe card below ⬇️ and/or a review in the comment section further down. Check out my Amazon Store for all my favorite tools, including those used in this recipe. And follow @thelifejolie on Instagram and TikTok!

    A close up image of a wooden spoon in a pan of homemade hamburger helper.

    Homemade Cheesy Hamburger Helper Recipe

    Jessy Freimann
    If you love comfort food, this cheesy hamburger helper is a must-try. It's a quick and easy dinner recipe that combines savory beef, tender macaroni, and a rich, creamy cheese sauce. Ready in 30 minutes!
    5 from 1 vote
    Print Recipe Pin Recipe
    Prep Time 5 minutes mins
    Cook Time 25 minutes mins
    Course dinner, Main, Main Course, Main dish
    Cuisine American
    Servings 6 servings
    Calories 456 kcal

    Equipment

    • 1 Skillet
    • 1 Box grater
    • 1 Wooden Spoons
    • 1 Measuring cups and spoons
    • 1 Liquid measuring cup

    Ingredients
      

    • 1 pound ground beef
    • ½ teaspoon onion powder
    • ½ teaspoon garlic powder
    • ½ teaspoon sweet paprika
    • 1 teaspoon chili powder
    • 1 teaspoon Kosher salt
    • ¼ teaspoon ground black pepper
    • 2 Tablespoons flour
    • 2 Tablespoons tomato paste
    • 2 cups chicken broth
    • 1 ½ cups milk
    • 2 cups elbow macaroni
    • 1 cup shredded cheddar cheese

    Instructions
     

    • Brown ground beef into a large skillet over medium high heat, stirring and breaking up as it browns.
    • Add onion powder, garlic powder, chili powder, paprika, chili powder, salt, black pepper and flour and mix until well combined. Cook 2 minutes.
    • Move the meat mixture to the sides of the pan and place the tomato paste in the empty center of the pan. Cook for 2 minutes, stirring often and then mix with the beef until well coated.
    • Add broth, milk and macaroni and stir to combine. Bring to a boil. Reduce heat to medium and cover.
    • Cook covered 10-12 min stirring 2-3 times until pasta is al dente.
    • Uncover, turn off the heat and stir in cheese until melted. Serve immediately.

    Video

    Notes

    • Don’t drain any excess grease from the ground beef. The grease combined with the flour helps create a roux to thicken the sauce.
    • Cook the pasta to al dente so it doesn’t turn mushy. If you’re unsure, scoop out a noodle and give it a taste!
    • Add some heat! Spice up your hamburger helper beef pasta with red pepper flakes, a dash of hot sauce, or even some diced jalapeños.
    • Use freshly shredded cheese. The pre-shredded stuff is coated with anti-caking ingredients to prevent clumping, but that also keeps the cheese from melting down really smooth. That said, it still works with pre-shredded cheese, it just melts more smoothly with freshly shredded.
    • Double for a crowd. This beef hamburger helper recipe is easily doubled or tripled, perfect for feeding a larger family or group, just use a bigger pot!
    • Ingredients to prep ahead- Measure out the milk first so it can warm a bit on the counter. Shred the cheese and mix your spices together too.
    • Leftover and storage- Store cheeseburger mac hamburger helper in the fridge for up to 3 days or in the freezer for up to 3 months. Thaw in the fridge overnight, then reheat in the microwave or on the stovetop. Add a splash of milk to restore the creamy texture.

    Nutrition

    Serving: 1servingCalories: 456kcalCarbohydrates: 42gProtein: 27gFat: 19gSaturated Fat: 8gPolyunsaturated Fat: 1gMonounsaturated Fat: 8gTrans Fat: 1gCholesterol: 67mgSodium: 918mgPotassium: 499mgFiber: 2gSugar: 5gVitamin A: 402IUVitamin C: 1mgCalcium: 185mgIron: 3mg
    Tried this recipe?Let us know how it was!

    Pepperoni Dip

    Feb 3, 2025 · Leave a Comment

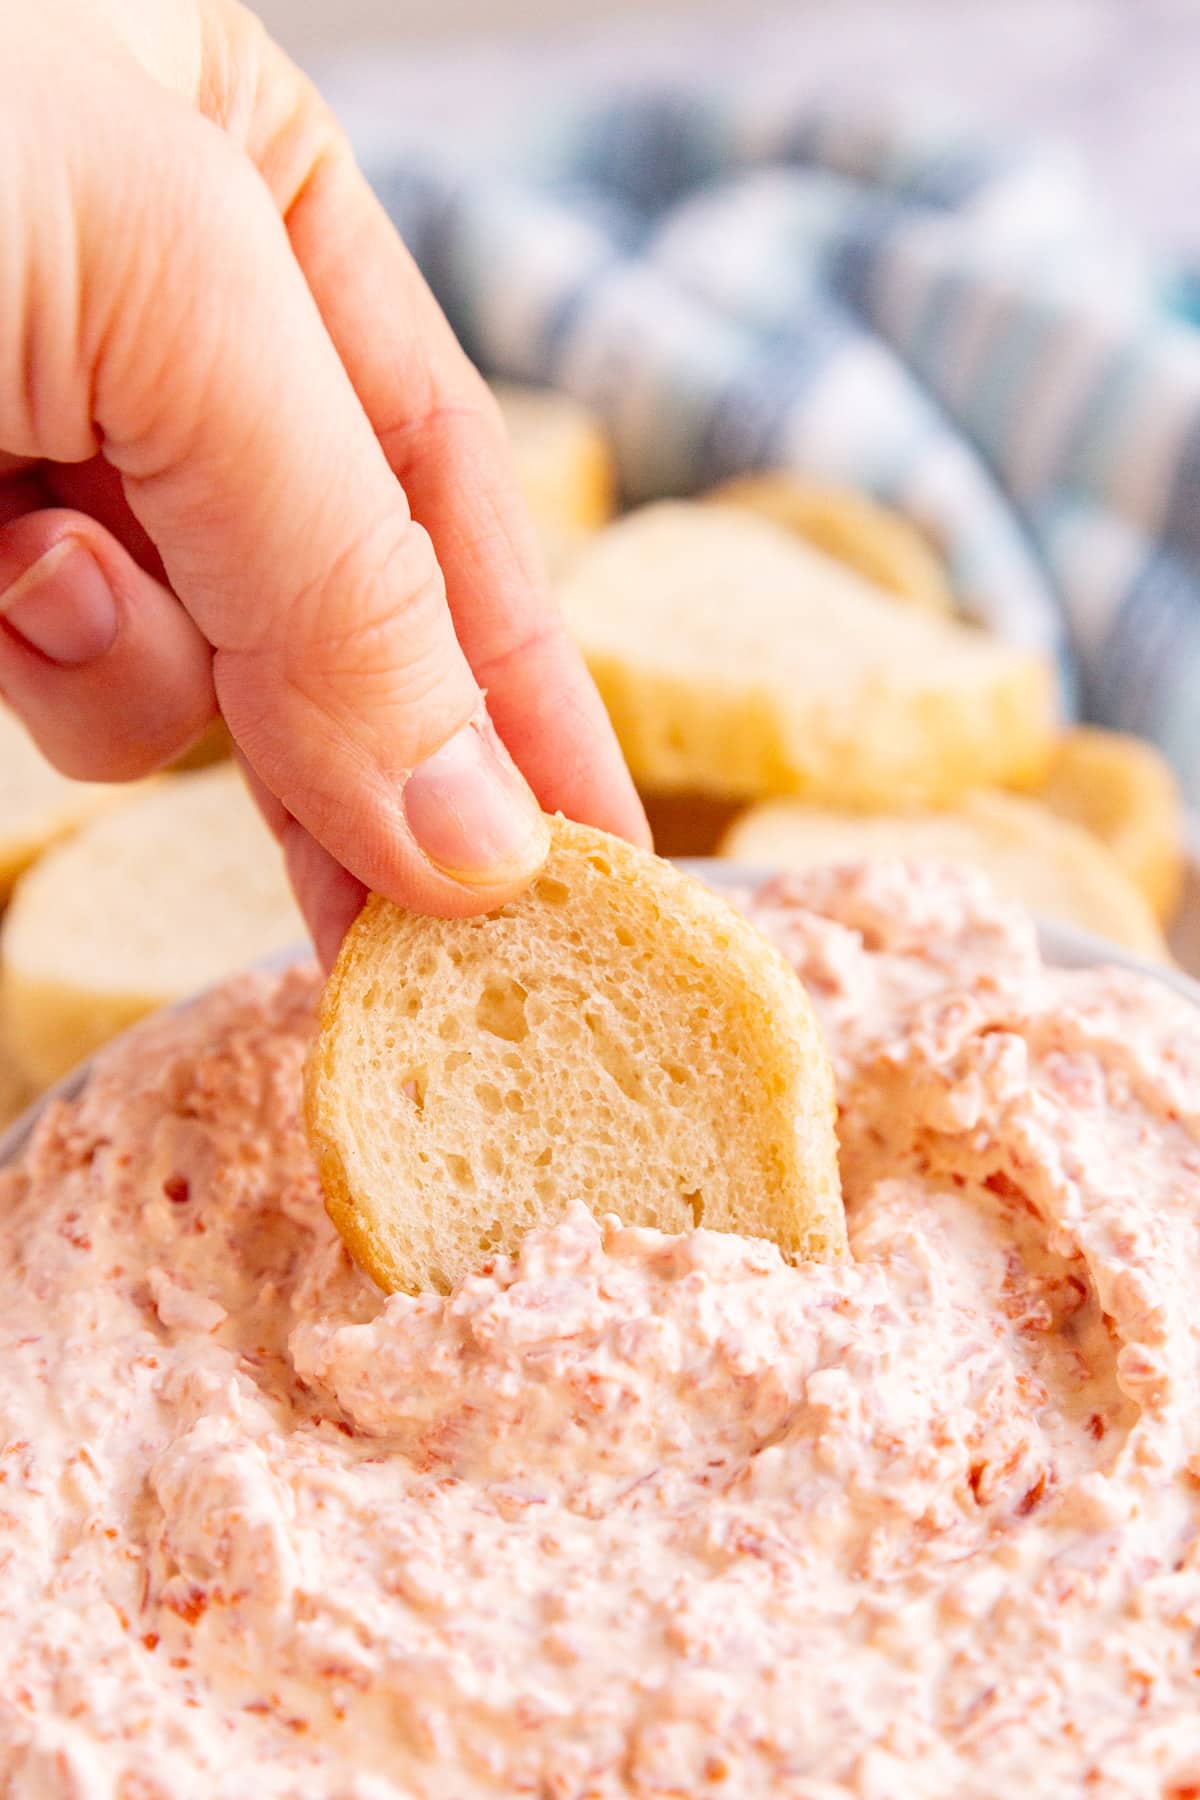
    A hand dipping a slice of baguette into pepperoni dip.

    Pepperoni dip is a quick, two-ingredient appetizer ready in under 5 minutes. Creamy, flavorful, and perfect for any gathering, it’s great with chips, baguette slices, or fresh veggies.

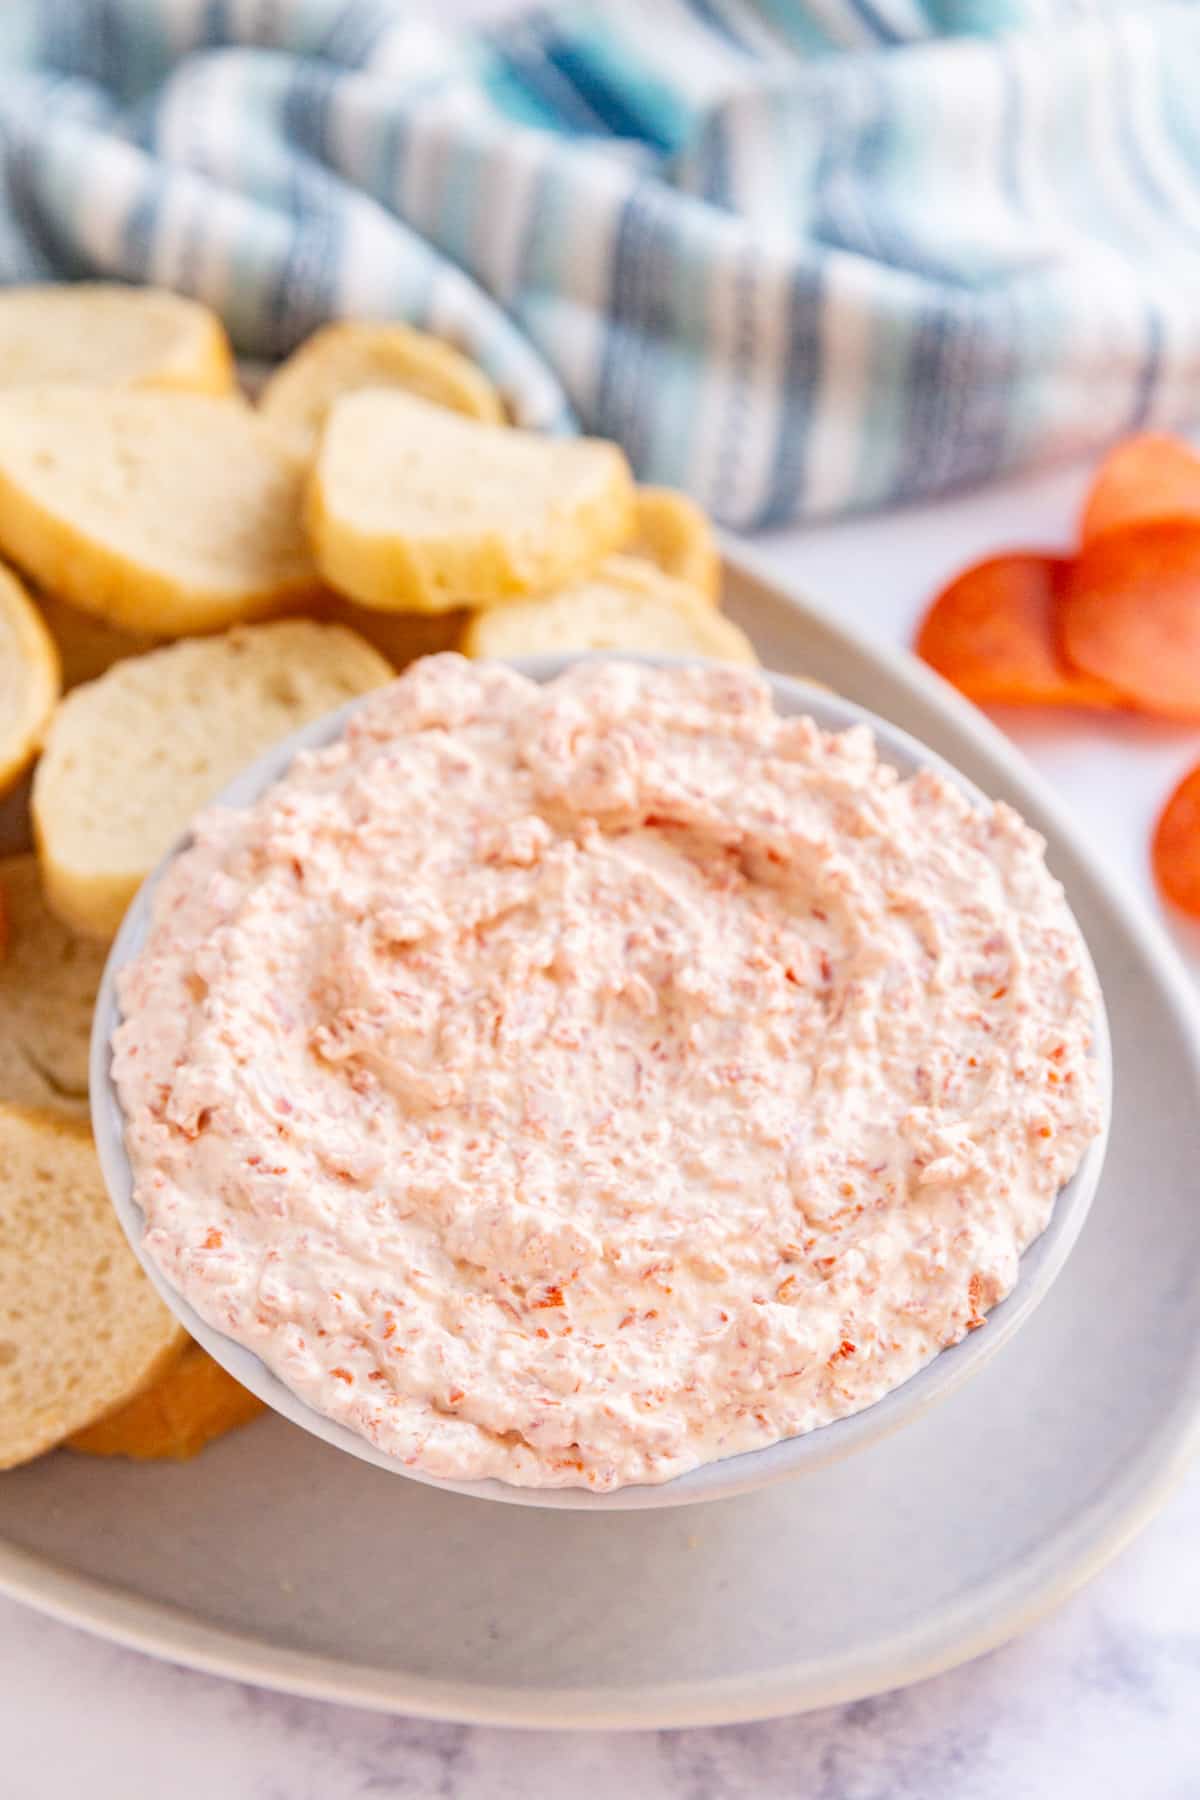
    A close up image of a bowl of pepperoni dip on a plate with baguette slices on it.
    [feast_advanced_jump_to]

    Why You’ll Love This Easy Chip Dip

    What makes this pepperoni dip so special is that it’s delicious and super easy to make! I actually tried this dip a number of years ago at an old job. It was basically a humdrum telemarketing job, so to try to make things more fun, they would frequently do things in the office like food days, where everyone would bring in a dish to pass.

    A coworker brought this creamy, savory potato chip dip, and I was curious about it. And then I tried it and couldn't stop eating it, so I begged my coworker for the recipe.

    Since then, it’s become my go-to easy chip dip for parties, and I love that it only takes 5 minutes to prep. Best of all, it’s even better when made ahead, making it the perfect choice for game days or any casual get-together. Here’s why this recipe is worth trying:

    • Even better when made ahead!
    • Quick and easy — ready in 5 minutes
    • Creamy, savory, and so satisfying
    • Perfect for game days or parties
    • The ultimate dip for tortilla chips, bread, or veggies 
    A hand dipping a slice of baguette into pepperoni dip.

    Ingredient Information And Substitutions

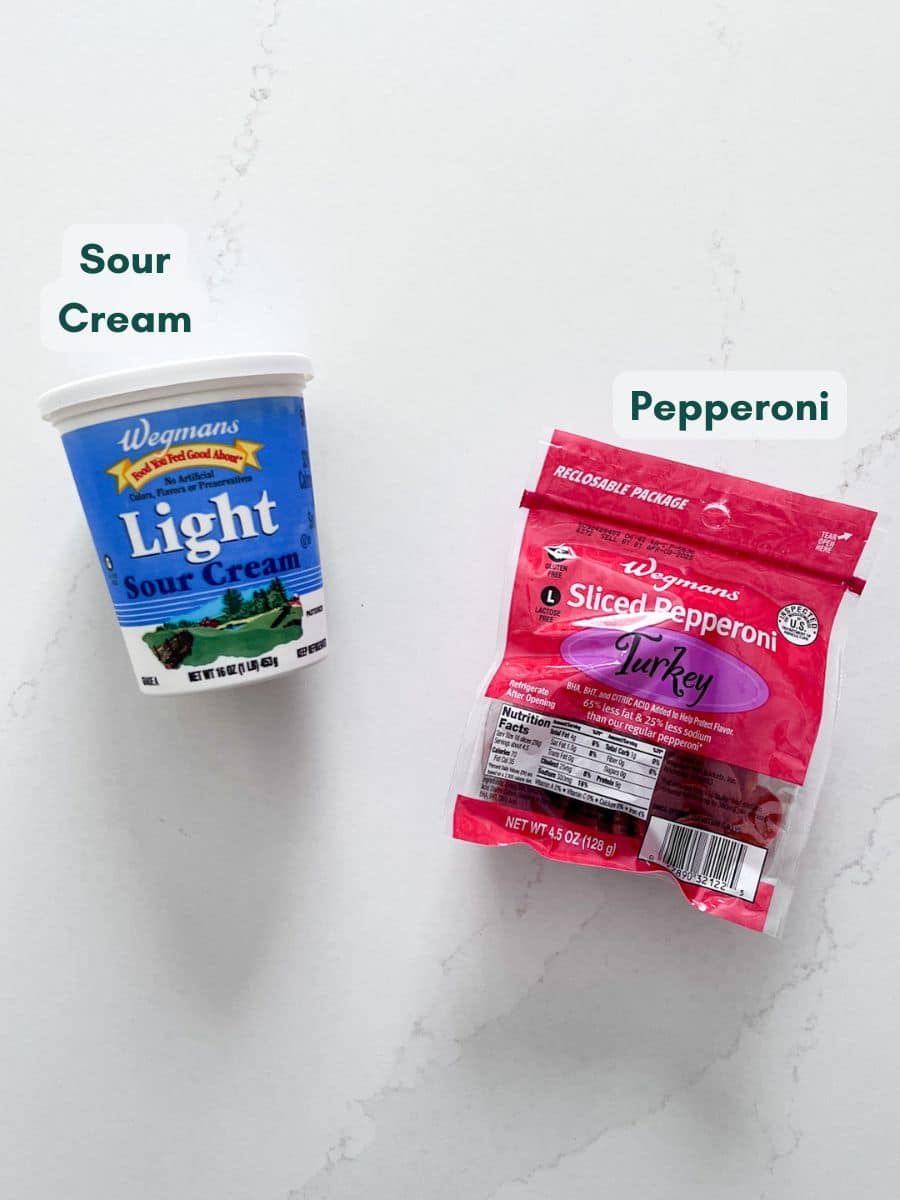
    • Sour Cream- Use regular, light, or fat-free sour cream. Greek yogurt works too if you want a lighter alternative, but the flavor will be slightly different.
    • Pepperoni- For the best texture, mince the pepperoni into small "crumbs." A food processor makes this easy and is preferable, but you can use a knife too.
    An overhead image of labeled recipe ingredients.

    How To Make Sour Cream Chip Dip

    Step 1- Chop the pepperoni.

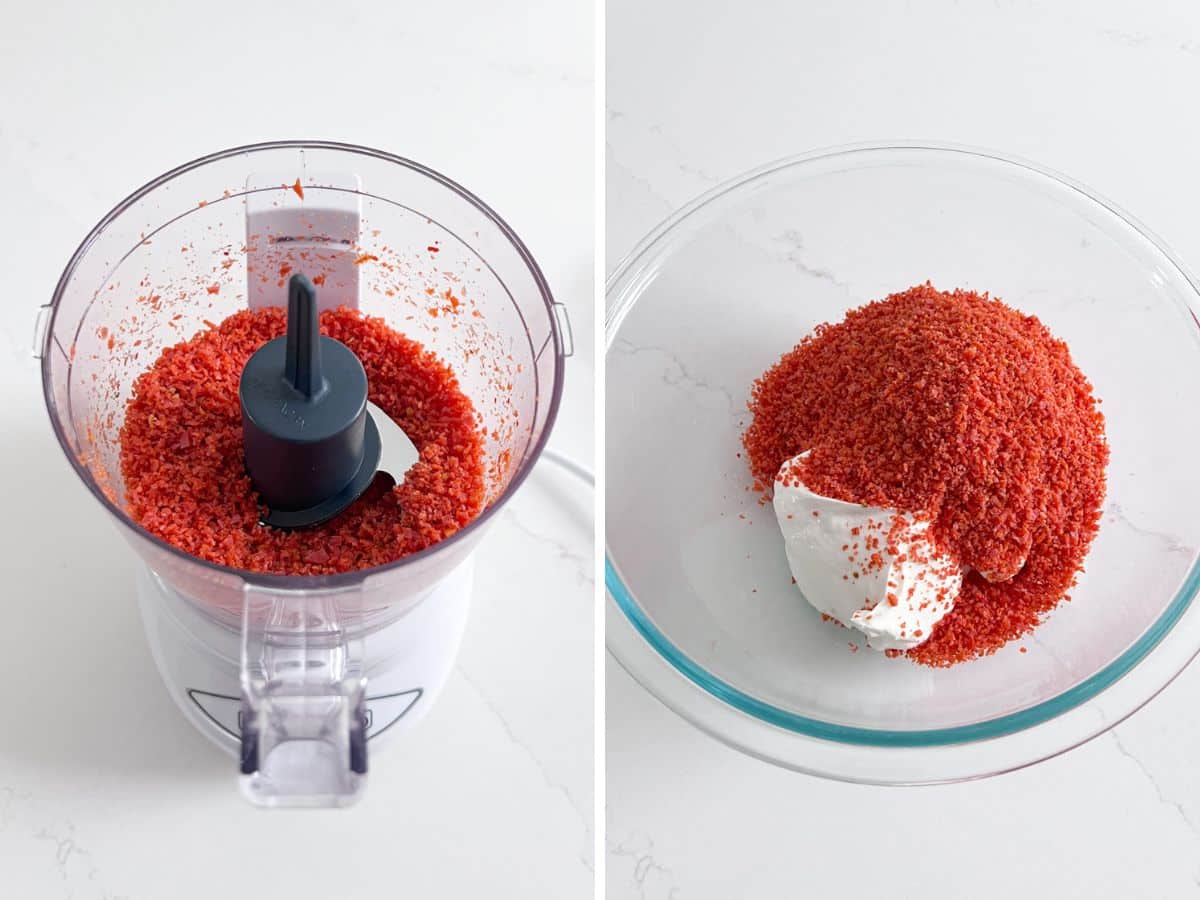
    Start by chopping your pepperoni into teeny-tiny pieces. The easiest way to do this is by using a food processor or mini prep processor. If using a knife, chop as finely as possible. 

    Place the pepperoni crumbs into a bowl with the sour cream.

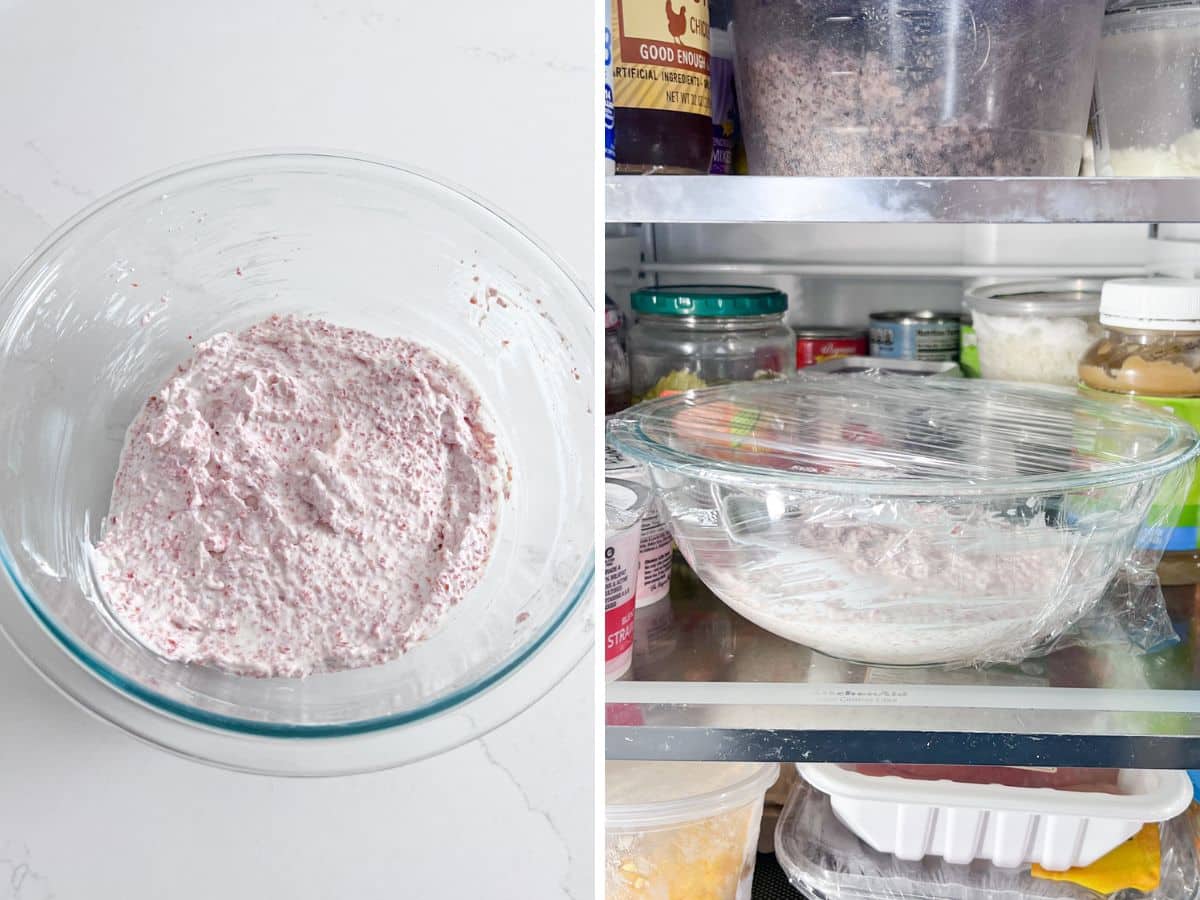
    Crumb-size chopped pepperoni in a food processor and the pepperoni crumbs added to a bowl with sour cream.

    Step 2- Mix it up and chill.

    Stir until the ingredients are evenly combined.

    Cover the bowl and pop it in the fridge. It’s best when made ahead, so let it sit overnight if possible. This helps all the flavors to meld together, making the pepperoni dip even tastier.

    The pepperoni crumbs and sourcream mixed together in the glass bowl and then the bowl chilling in the fridge.

    Step 3- Stir and serve.

    When you’re ready to serve, give it a quick stir to make sure everything is mixed well. Spread onto your favorite chips, crackers or bread.

    Frequently Asked Questions

    Can I customize this dip with other ingredients?

    Absolutely! A pinch of garlic powder, smoked paprika, sun-dried tomatoes, chopped green onions, shredded cheese, or liquid smoke can take this dip to the next level. Feel free to experiment and make it your own!

    Can I make it the day of?

    You can make it on the same day, but it gets much more flavorful if it has some time to sit in the fridge, ideally overnight. I wouldn't serve it right after making it.

    Can I double the recipe for a party?

    This is a great recipe for scaling up. Double or triple the ingredients, and you’ll be set to feed a crowd.

    What are some creative serving ideas?

    You can use this dip as a spread on sandwiches, a topping for baked potatoes, or even stir it into pasta for a creamy sauce.

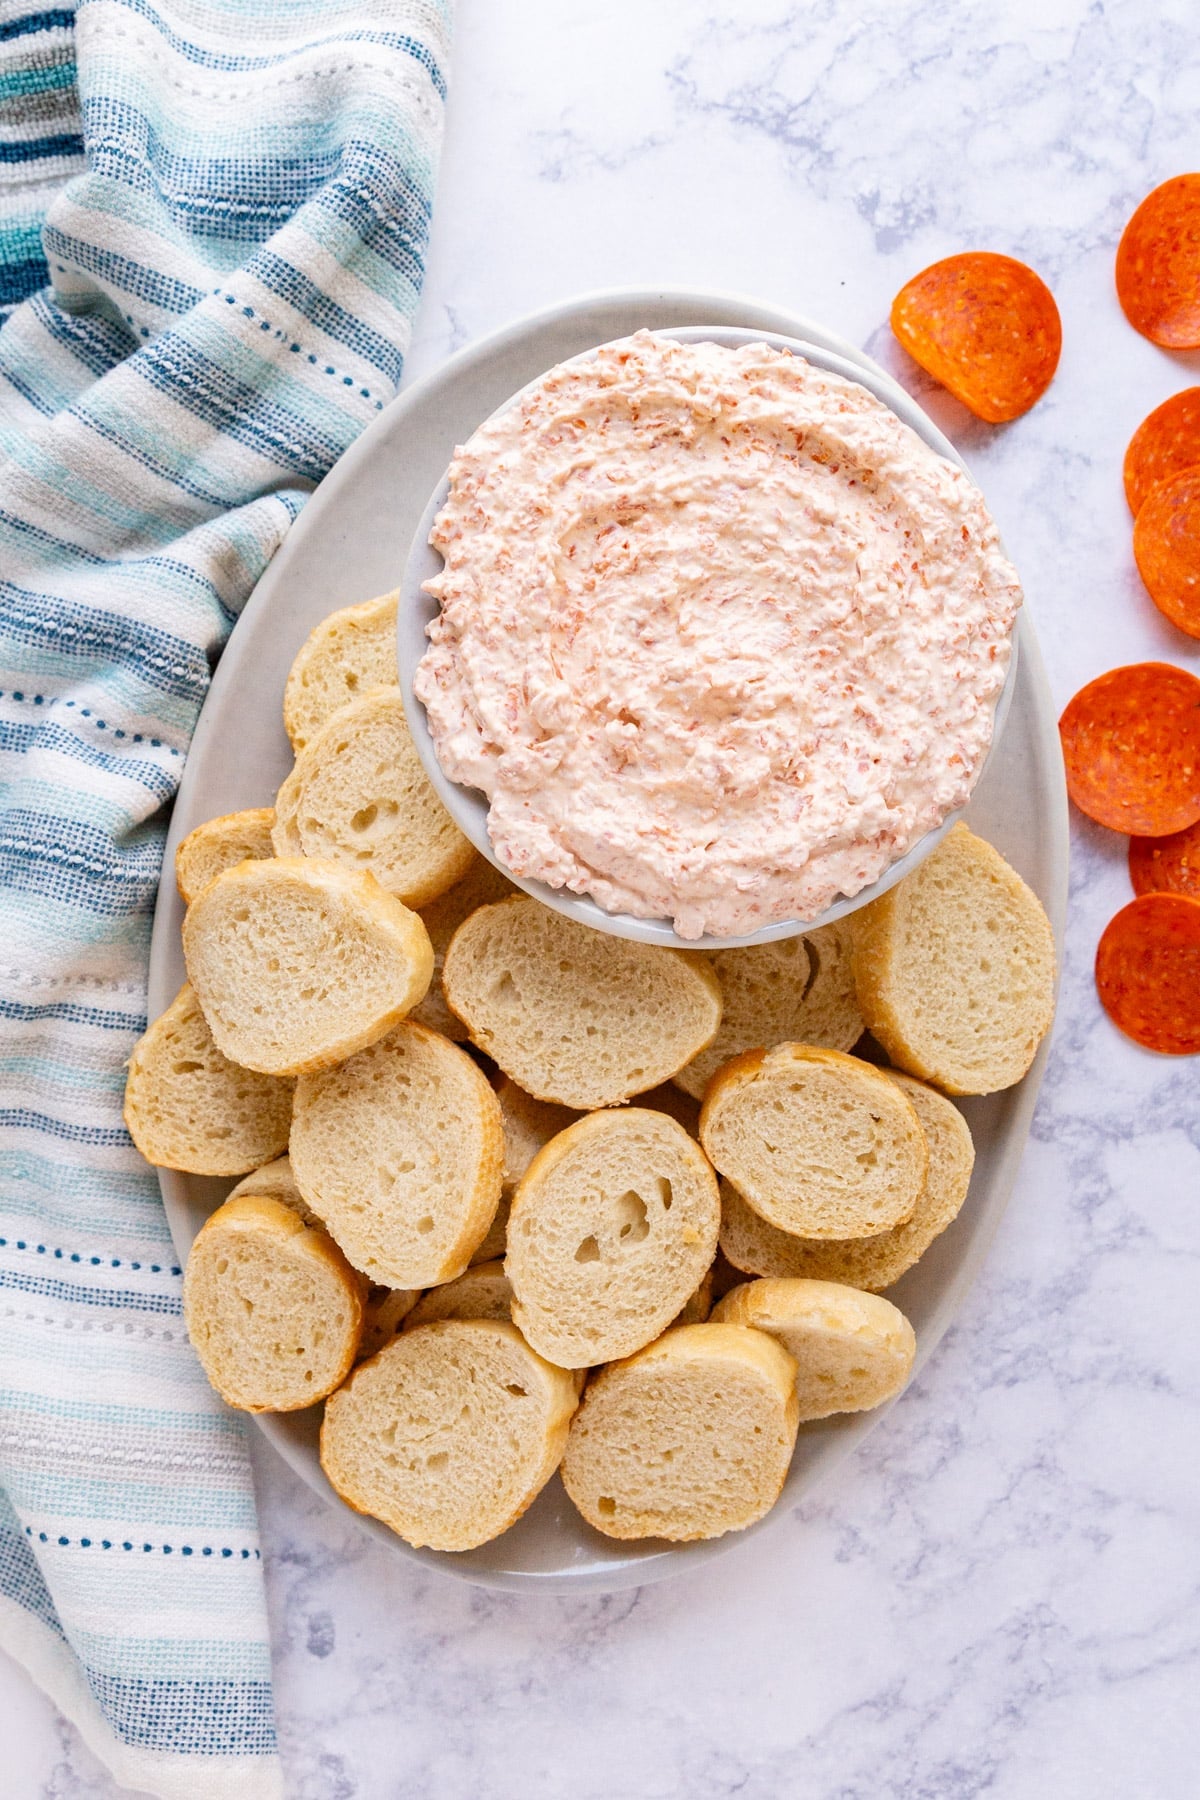
    An overhead image of pepperoni dip in a bowl on a platter with baguette and some pepperoni slices and a blue striped napkin around it.

    Tips For Making Dip For Tortilla Chips

    • Chill, chill, chill! The dip needs to sit in the fridge for at least a few hours before serving, but overnight is much better. This allows the sour cream and pepperoni flavors to really meld together, creating that creamy, savory goodness. Trust me, it’s worth the wait!
    • The best chips for dip are the ones that won’t crumble. I highly recommend sturdy tortilla chips or ruffled or kettle cooked potato chips. They’re perfect for scooping and won’t break apart easily.
    • If you want to amp up the flavor, try a sour cream base with added chives, onion, or jalapeño for extra zest.
    • Make it spicy. Add a few dashes of hot sauce, red pepper flakes, or finely diced jalapeños for a fiery kick.
    • Mix in shredded cheddar, mozzarella, or parmesan for added richness. You can also sprinkle some cheese on top as a garnish.
    • Ingredients to prep ahead- Chop the pepperoni ahead of time and store it in the fridge so you can quickly assemble the dip later.
    • Leftovers and storage- Store any leftover dip in an airtight container in the fridge for up to a week.
    A bowl of pepperoni dip on a plate with sliced baguettes and a blue striped towel and sliced pepperoni in the background.

    What To Serve With Pepperoni Chips Dip

    This creamy, savory sour cream chip dip stands strong on its own, but when paired with a few other easy dishes, it transforms into the perfect appetizer spread or light meal.

    Whether you're prepping for a party or need a simple yet satisfying game-day snack, this dip will quickly become a fan favorite. Serve it alongside these tasty dishes to round out your meal:

    • Bloody Mary Cheeseball
    • BBQ Crock Pot Meatballs
    • Easy Instant Pot Chili
    • Garbage Plate
    • BLT Ranch Flatbread Pizza
    • No Bake Peanut Butter Pie

    Other Delicious Dip Recipes To Try

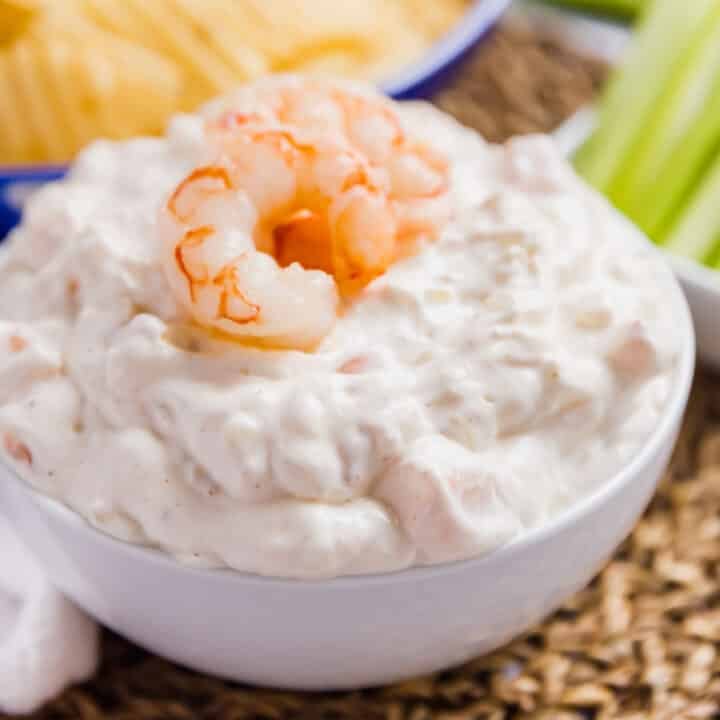
    • A close up image of a white bowl of shrimp dip with a whole shrimp on top and chips and celery in the background.
      Grandma's Shrimp Dip Recipe
    • A square image of Chicken Swiss Dip.
      Chicken Swiss Dip
    • A hand pulling a chip with hot bean dip from the pan with cheese stretching.
      Hot Bean Dip Recipe
    • A hand pulling a chip with artichoke dip out of a pan of it.
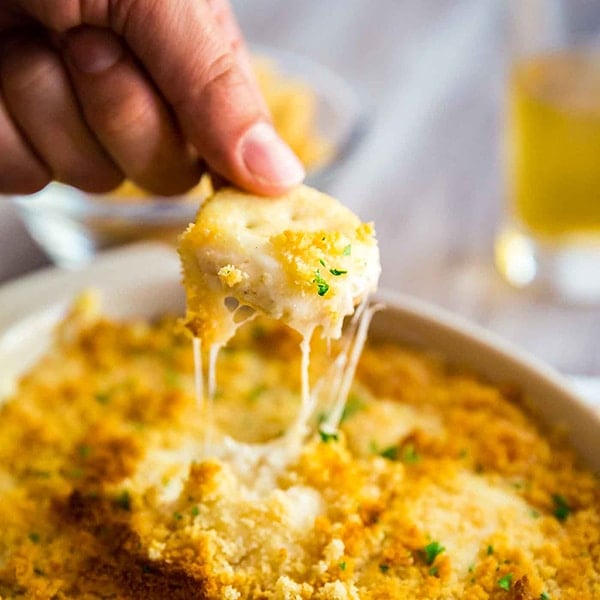
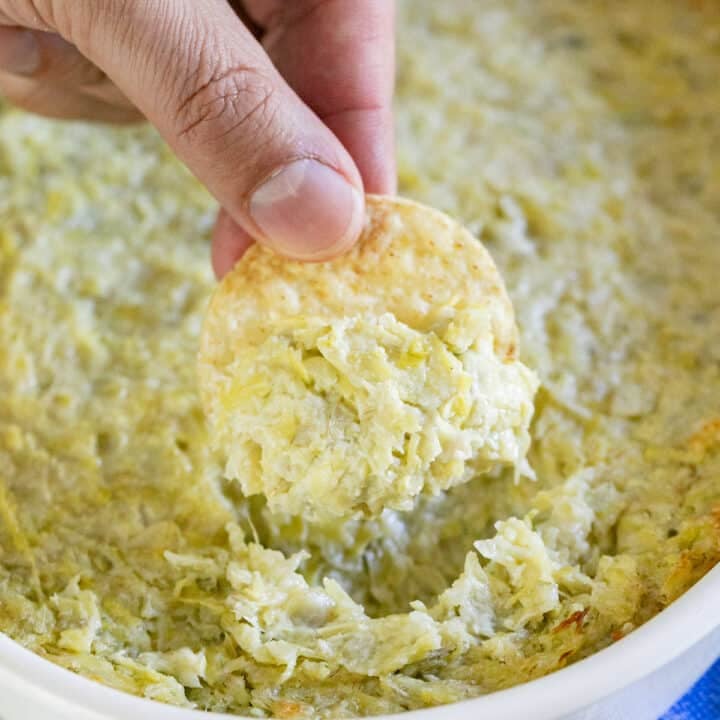
      Hot Artichoke Parmesan Dip

    Love this recipe? Please leave a 5 star ⭐️⭐️⭐️⭐️⭐️ rating in the recipe card below ⬇️ and/or a review in the comment section further down. Check out my Amazon Store for all my favorite tools, including those used in this recipe. And follow @thelifejolie on Instagram and TikTok!

    A hand dipping a slice of baguette into pepperoni dip.

    Pepperoni Dip Recipe

    Jessy Freimann
    Pepperoni dip is a quick, two-ingredient appetizer ready in under 5 minutes. Creamy, flavorful, and perfect for any gathering, it’s great with chips, baguette slices, or fresh veggies.
    No ratings yet
    Print Recipe Pin Recipe
    Prep Time 5 minutes mins
    Chill time 8 hours hrs
    Total Time 5 minutes mins
    Course Appetizer
    Cuisine American
    Servings 10 servings
    Calories 208 kcal

    Equipment

    • food processor
    • mixing bowl
    • Spatula

    Ingredients
      

    • 8 ounces pepperoni, sliced
    • 1 pint sour cream
    • Bread or chips for dipping

    Instructions
     

    • Place the pepperoni slices into a food processor (or do it in batches in a mini prep processor). Chop until the pepperoni is around the size of crumbs.
    • In a large bowl, mix the pepperoni with the sour cream until well combined.
    • Cover and refrigerate overnight.
    • Stir and serve with bread or chips.

    Video

    Notes

    • Chill, chill, chill! The dip needs to sit in the fridge for at least a few hours before serving, but overnight is much better. This allows the sour cream and pepperoni flavors to really meld together, creating that creamy, savory goodness. Trust me, it’s worth the wait!
    • The best chips for dip are the ones that won’t crumble. I highly recommend sturdy tortilla chips or ruffled or kettle cooked potato chips. They’re perfect for scooping and won’t break apart easily.
    • If you want to amp up the flavor, try a sour cream base with added chives, onion, or jalapeño for extra zest.
    • Make it spicy. Add a few dashes of hot sauce, red pepper flakes, or finely diced jalapeños for a fiery kick.
    • Mix in shredded cheddar, mozzarella, or parmesan for added richness. You can also sprinkle some cheese on top as a garnish.
    • Ingredients to prep ahead- Chop the pepperoni ahead of time and store it in the fridge so you can quickly assemble the dip later.
    • Leftovers and storage- Store any leftover dip in an airtight container in the fridge for up to a week.

    Nutrition

    Serving: 1servingCalories: 208kcalCarbohydrates: 2gProtein: 6gFat: 20gSaturated Fat: 9gPolyunsaturated Fat: 1gMonounsaturated Fat: 7gTrans Fat: 0.4gCholesterol: 50mgSodium: 373mgPotassium: 121mgSugar: 2gVitamin A: 295IUVitamin C: 0.4mgCalcium: 52mgIron: 0.3mg
    Tried this recipe?Let us know how it was!

    Sausage and Rapini Pasta

    Feb 2, 2025 · 6 Comments

    A white plate of rapini and sausage pasta with the pan and a blue napkin in the background.

    This sausage and rapini pasta is a flavorful, hearty dinner that comes together in just 30 minutes! Featuring rigatoni, spicy Italian sausage, and tender rapini, this easy meal is perfect for any night of the week.

    A white plate of rapini and sausage pasta with the pan and a blue napkin in the background.
    [feast_advanced_jump_to]

    Why You’ll Love This Rapini Sausage Pasta

    If you’re craving a hearty meal with bold, robust flavors, this pasta is just what you need! Featuring al dente rigatoni, spicy sausage, and a leafy-green bite of broccoli rabe, this dish achieves the perfect balance of textures and flavors. Packed with richness and ready in no time, it’s the ultimate comfort food for busy evenings when you want something satisfying without spending hours in the kitchen.

    I’m particularly excited to share this flavorful sausage pasta broccoli rabe because whether it’s for a busy weeknight or a special gathering, this pasta dish is sure to satisfy your cravings for hearty, flavorful comfort food. Here are even more reasons to give this recipe a try:

    • Quick and simple to prepare, perfect for busy weeknights
    • Bursting with bold, hearty flavors
    • A one-pan wonder for easy cleanup
    • Easily adaptable to suit any taste preference
    • Perfect for both casual dinners and entertaining guests
    A close up overhead image of rigatoni pasta in tomato sauce with Italian sausage chunks and borccoli rabe.

    Ingredient Information And Substitutions

    • Pasta- Rigatoni is ideal as it holds the sauce well, but penne or ziti are also goo.
    • Olive Oil- Use this for sautéing. It's an Italian staple, after all! There's really no good substitute for the flavor, but neutral oil will also work in a pinch.
    • Garlic and Onion- Builds the base of flavor for the sauce.
    • Spicy Italian Sausage- Bold and savory with the right amount of heat. For something milder, use sweet Italian sausage and add a pinch of red pepper flakes. Go with poultry sausage if you want it to be a bit lighter.
    • San Marzano Tomatoes- High-quality canned tomatoes are key for the best sauce. I love crushed tomatoes or chopped tomatoes in puree.
    • Red Wine- Adds so much depth to the sauce. If you need an alcohol-free substitute, use beef broth with a little splash of red wine vinegar for acidity.
    • Broccoli Rabe (Rapini)- Adds a slightly bitter contrast. I trim off a the bottom of the stems and wash them well before chopping into 1 inch chunks. Escarole or dandelion greens also work.
    • Romano Cheese- Grate this over the top of your pasta with rapini and sausage for a salty, nutty finish. Parmesan is a good alternative.
    An overhead image of labeled recipe ingredients.

    How To Make Rapini With Sausage And Pasta

    Step 1- Sauté the aromatics and sausage.

    In a large sauté pan, heat olive oil over medium-high heat. Add diced onion and minced garlic. Cook until they soften, about 2 minutes.

    Add the Italian sausage to the pan, breaking it into bite-sized pieces. Cook until browned, about 6-7 minutes. While the sausage cooks, bring a large pot of salted water to a boil.

    An image of onions and garlic sautéing in olive oil and then raw Italian sausage added to the skillet with the veggies.

    Step 2- Deglaze the pan and make sauce.

    Pour in the red wine and deglaze the pan, scraping up any browned bits. Simmer for 1-2 minutes. Stir in the tomatoes and rapini. Bring the mixture to a boil, then reduce heat to medium-low. Simmer for 15 minutes, stirring occasionally.

    Cook the rigatoni until al dente according to package instructions. Drain and set aside.

    An image of cooked Italian sausage in a skillet  with red wine being deglazed with a wooden spoon and then an image of tomatoes and rapini added to the pan.

    Step 3- Combine sausage and rapini with pasta
    Add the cooked pasta to the sauce, tossing to coat evenly. Taste and adjust seasoning with salt if needed.

    Divide the rapini with sausage and pasta into bowls and top with freshly grated Romano cheese. Serve right away.

    Sauce with rapini simmering in a skillet and then pasta stirred into the skillet of sauce.

    Frequently Asked Questions

    What if I don’t eat spicy foods?

    No problem! Sweet Italian sausage is a great alternative. I'd still encourage you to add a pinch of crushed red pepper or freshly cracked black pepper.
    This way, you can still enjoy the tasty combo of pasta, sausage and broccoli rabe without overwhelming heat.

    How can I make this a little lighter?

    Instead of using pork sausage you can use spicy Italian Turkey (or poultry) sausage. You could also serve it over zoodles instead of pasta, although be sure to add those raw at the very last second so that they don't get mushy.

    Does this reheat well?

    Yes, it does! I ate this rapini pasta for lunch the next day and brought some to a dear friend as well.

    Can I freeze this dish?

    I wouldn't recommend it. The pasta can become mushy once thawed and reheated. You can certainly cook the sauce and freeze that- it will last for 3 months in an airtight container.

    A skillet of rapini pasta with a a wooden spoon holding a scoop of the pasta, sausage and rapini.

    Tips For Making Broccoli Rabe Pasta with Sausage

    • Use high-quality ingredients. Always cook with a good wine that you would also drink! And always opt for authentic San Marzano tomatoes — they're less acidic and have a rich, robust flavor.
    • Cook pasta to al dente to ensure it holds its shape and has a slight bite, preventing it from becoming mushy. Plus, it'll absorb the sauce better, making each bite more flavorful.
    • If you want your pasta to be really spicy, you can add a little crushed red pepper at the beginning with the onions and garlic and it will infuse the spicy flavor into the oil (I personally didn't do this because the spicy sausage is just the right amount of heat for me but if you love the heat, have at it!).
    • Easily remove sausage casings- Use a sharp knife to slice into the casing all the way down the side of the sausage and peel back the casing while squeezing out the sausage. Then I use a wooden spoon to break it up as it cooks. 
    • Ingredients to prep ahead- Dice the onions, peel the garlic, and trim and wash the rapini before starting. Remove the sausage casings, and measure out your red wine and other ingredients before you start cooking to keep things moving smoothly. 
    • Leftovers and storage- This keeps covered in the fridge for up to 3-4 days. To reheat, warm gently on the stovetop or in the microwave, adding a splash of water to loosen the sauce if needed. 
    A close up image of pasta with sausage and rapini in a white plate.

    What To Serve Alongside Pasta With Rapini And Sausage

    I strongly encourage you to serve this with plenty of grated Romano cheese, a nice crusty loaf of Italian bread for sopping. This is also fantastic with a side of grilled vegetables or a simple salad. Here are a few tasty options to try:

    • Green Bean Salad
    • Marinated Vegetable Salad
    • Grilled Balsamic Asparagus
    • Garlic Butter Sautéed Carrots

    Other Delicious Pasta Recipes To Try

    • A close up of a wooden spoon in a pan of taco pasta.
      One Pan Taco Pasta With Chicken
    • A plate of vodka pasta with fresh basil, Italian bread and a striped towel in the background.
      Creamy Vodka Pasta
    • A wooden spoon holing a scoop of Philly steaks pasta with melty cheese all over it.
      One Pot Philly Cheesesteak Pasta
    • A wooden spoon scooping up creamy taco pasta from the pan.
      One Pot Cheesy Taco Pasta

    Love this recipe? Please leave a 5 star ⭐️⭐️⭐️⭐️⭐️ rating in the recipe card below ⬇️ and/or a review in the comment section further down. Check out my Amazon Store for all my favorite tools, including those used in this recipe. And follow @thelifejolie on Instagram and TikTok!

    A white plate of rapini and sausage pasta with the pan and a blue napkin in the background.

    Sausage and Rapini Pasta Recipe

    Jessy Freimann
    This sausage and rapini pasta is a flavorful, hearty dinner that comes together in just 30 minutes! Featuring rigatoni, spicy Italian sausage, and tender rapini, this easy meal is perfect for any night of the week.
    5 from 5 votes
    Print Recipe Pin Recipe
    Prep Time 10 minutes mins
    Cook Time 25 minutes mins
    Total Time 30 minutes mins
    Course dinner, Main, Main Course
    Cuisine Italian
    Servings 6 servings
    Calories 278 kcal

    Equipment

    • Large saute pan
    • wooden spoon
    • chefs knife
    • cutting board
    • measuring cups
    • measuring spoons

    Ingredients
      

    • 2 Tablespoons olive oil
    • ½ cup diced onion
    • 1 Tablespoon minced garlic, about 2 large cloves
    • 1 pound spicy Italian sausage, casings removed
    • ½ cup red wine (if you don't cook with alcohol you can substitute broth)
    • 28 ounces crushed tomatoes from a can or chopped tomatoes in puree, undrained
    • 1 bunch rapini, cleaned, trimmed of thicker stems and cut into 1 inch pieces
    • 3 cups rigatoni pasta
    • Kosher salt (optional)
    • Romano cheese, to taste

    Instructions
     

    • Fill a large pot with water and begin heating to a boil on one of the side burners. Heat oil in a large sauté pan on your main burner over medium-high heat.
    • Add onions and garlic and sauté stirring often until they begin to soften, about 2 minutes. 
    • Add sausage to the pan and use a wooden spoon to break it into bite-size pieces. Stir often until brown, around 6-7 minutes.
    • Add ½ cup red wine and deglaze the pan. Simmer for 1-2 minutes.
    • Add can of tomatoes and stir in rapini. 
    • Bring the sauce to a boil and then reduce the heat to medium-low and simmer for 15 minutes, stirring periodically. While the sauce simmers, boil the pasta to al dente as per the package directions and drain when finished.
    • Add the drained pasta into the pan with the sauce and stir well to combine. Taste the sauce for flavor and if necessary add a little salt. Serve immediately with a sprinkle of Romano cheese.

    Video

    Notes

    • Use high-quality ingredients. Always cook with a good wine that you would also drink! And always opt for authentic San Marzano tomatoes — they're less acidic and have a rich, robust flavor.
    • Cook pasta to al dente to ensure it holds its shape and has a slight bite, preventing it from becoming mushy. Plus, it'll absorb the sauce better, making each bite more flavorful.
    • If you want your pasta to be really spicy, you can add a little crushed red pepper at the beginning with the onions and garlic and it will infuse the spicy flavor into the oil (I personally didn't do this because the spicy sausage is just the right amount of heat for me but if you love the heat, have at it!).
    • Easily remove sausage casings- Use a sharp knife to slice into the casing all the way down the side of the sausage and peel back the casing while squeezing out the sausage. Then I use a wooden spoon to break it up as it cooks. 
    • Ingredients to prep ahead- Dice the onions, peel the garlic, and trim and wash the rapini before starting. Remove the sausage casings, and measure out your red wine and other ingredients before you start cooking to keep things moving smoothly. 
    • Leftovers and storage- This keeps covered in the fridge for up to 3-4 days. To reheat, warm gently on the stovetop or in the microwave, adding a splash of water to loosen the sauce if needed. 

    Nutrition

    Serving: 1servingCalories: 278kcalCarbohydrates: 48gProtein: 10gFat: 6gSaturated Fat: 1gPolyunsaturated Fat: 1gMonounsaturated Fat: 4gSodium: 1048mgPotassium: 1434mgFiber: 6gSugar: 17gVitamin A: 2018IUVitamin C: 29mgCalcium: 56mgIron: 4mg
    Tried this recipe?Let us know how it was!

    Crescent Roll Pizza Braid

    Jan 22, 2025 · Leave a Comment

    A close up image of the side of a slice of pizza bread revealing the melty cheese and pepperoni inside, on top of the rest of the pizza roll.

    This crescent roll pizza braid is the perfect appetizer to bring to a gathering or game-day party! My easy recipe comes together quickly, and you can add whatever fillings you like.

    A pizza braid on a cutting board with parchment and a side of tomato sauce.
    [feast_advanced_jump_to]

    Why You'll Love Bread Pizza:

    I'm totally here for crescent roll recipes! They make life so much easier and much more delicious, especially since they now make crescent roll sheets (genius!).

    I always go out of my way to share super easy snacks because they're great to keep on hand to throw together for a last-minute party. And since everyone loves pizza, this is the perfect option to please a crowd.

    Carb-y, cheesy, and totally savory, my rolled pizza bread is the appetizer winner we've all been waiting for! Here are a few more reasons to try it:

    • Ready in just 40 minutes
    • Made with simple ingredients
    • No need to make the dough from scratch!
    • Customizable — use your favorite fillings and toppings
    • Family-friendly and kid-approved
    An overhead imae of crescent roll pizza bread on a cuttin g board with parchment cut into slices with tomato sauce on the side.

    Ingredient Information And Substitutions

    • Crescent Roll Sheet- Definitely the easiest option! You could also use regular crescent rolls — simply use a rolling pin to roll them out, then shape into a rectangle.
    • Pizza Sauce- You can opt for store-bought to make pizza with bread dough if you're short on time, or try my easy pizza sauce recipe instead. It's my favorite alternative to jarred sauce and is ready in about 1 hour.
    • Mozzarella Cheese- I can't say enough good things about shredding the cheese yourself. It melts easy. But pre-shredded works fine as well.
    • Pepperoni- In our house, it wouldn't be bread pizza without some pepperoni! Feel free to sub with ham, or omit the meat completely to make it vegetarian-friendly.
    • Butter, Italian Seasoning, Romano Cheese- The herby, cheesy topping. It adds extra flavor and helps the crescent dough become golden brown as it bakes in the oven — don't skip it! You could also use Parmesan cheese.
    An overhead image of labeled recipe ingredients.

    How To Make Rolled Pizza With Bread Dough

    Step 1- Recipe prep.

    Preheat the oven to 350 degrees F and line a baking sheet with parchment paper. Arrange the crescent sheet on top and roll it slightly to flatten.

    Cut the dough into strips about 1.5 inches into each side, making sure to leave about 3-4 inches of uncut dough in the center. Spoon the sauce onto the center of the dough and spread evenly.

    A rolled out crescent sheet on parchment with 1.5 inch cuts along each side next to an image of the dough and parchment transferred to a sheet pan with tomato sauce down the middle.

    Step 2- Add the fillings and braid the dough.

    Top the middle with mozzarella and pepperoni.

    Fold the dough strips over each other toward the center, pressing lightly in the middle to create the braid. Fold the ends in so the filling doesn't leak out when baked.

    Cheese and pepperoni layered down the middle of the dough next to an image of the dough half way braided.

    Step 3- Add butter topping and bake.

    Add the melted butter, Italian seasoning, and Romano cheese to a small bowl and mix until well combined. Brush on top of the braided dough.

    Bake the crescent roll pizza for 30-35 minutes or until golden brown. Enjoy!

    The melted butter, Italian seasoning and Romano cheese mixture in a bowl next to an image of the pizza braid in the oven.

    Frequently Asked Questions

    Is crescent dough the same as pizza dough?

    It's not exactly the same thing as pizza dough, but it's a great substitute! Crescent dough is lighter, flakier, and has a slight buttery flavor.

    Can you use other cheeses?

    I prefer mozzarella cheese for its mild flavor and great melt-ability! But you totally switch it up if you prefer. Provolone or fontina are some options.

    What are some of your other favorite toppings to use?

    While I enjoy bread pizza with cheese and pepperoni, any other of your favorite pizza toppings will work. Cooked sausage, peppers, onions, olives, mushrooms — even pineapple bits (I said what I said!) would be tasty.

    How long do you cook crescent roll pizza?

    Shoot for about 30-35 minutes or until golden brown. I usually start checking for doneness around the 30-minute mark to prevent burning.

    Can I make this bread pizza recipe ahead of time?

    You technically can... but in that case, I encourage you to assemble it ahead of time and then bake it just before serving. You'll get the best flavor and texture.

    Does this have to be served warm?

    I prefer pizza roll bread warm, but it's also tasty at room temperature.

    A close up image of the side of a slice of pizza bread revealing the melty cheese and pepperoni inside, on top of the rest of the pizza roll.

    Tips For Making A Crescent Pizza Roll

    • Using crescent rolls if a sheet isn't available- Remember, if a crescent roll sheet isn't available you can totally use crescent rolls! Carefully unroll the dough, leaving it in a rectangle. Use a rolling pin to smooth out the perforations and make it one sheet. Make sure to be extra careful when braiding the dough.
    • Don't forget the parchment paper for easier cleanup and to prevent sticking.
    • I use a pizza wheel or a knife to cut the dough strips. The sharper the better, but be careful!
    • I use the back of my spoon to spread the pizza sauce evenly down the center of the dough. A spatula would also work!
    • Don't cut the baking time short. You want to make sure all the dough is baked through!
    • I like to serve this with extra marinara sauce for dipping. Or, copy your favorite pizza joint and pair it with some blue cheese or ranch dressing.
    • Ingredients to prep ahead- Shred cheese and make the pizza sauce to save on assembly time.
    • Leftovers and storage- Store any leftovers in an airtight container in the refrigerator for up to 4 days. I personally love cold rolled pizza bread, or you could reheat it in an air fryer or toaster oven at 350 degrees F for 5-10 minutes until crispy.
    A pizza bread roll on a parchment lined cutting board cut into pieces.

    What To Serve With My Bread Pizza Recipe

    I love pairing this with other tasty appetizers to create a big spread for parties and football Sundays. Some of my favorites include:

    • 7 Layer Taco Dip
    • Bloody Mary Spicy Cheeseball
    • Sheet Pan Chicken Nachos
    • Sweet and Spicy Baked Chicken Wings

    Other Fun Crescent Roll Recipes To Try

    • Crescent roll pizza slices lined up on a cutting board with veggies around it.
      Crescent Roll Veggie Pizza
    • A square image of a hand pulling apart a Philly Cheese Steak Stuffed Bread Roll.
      Philly Cheese Steak Stuffed Bread Rolls aka Philly Cheese Steak Bombs
    • A square image of Buffalo Chicken Braid .
      Buffalo Chicken Braid Recipe
    • These Bacon Jalapeno Ranch Crescents are a super easy and delicious appetizer- they come together so quickly and taste awesome!
      Bacon Jalapeno Ranch Crescents

    Love this recipe? Please leave a 5 star ⭐️⭐️⭐️⭐️⭐️ rating in the recipe card below ⬇️ and/or a review in the comment section further down. Check out my Amazon Store for all my favorite tools, including those used in this recipe. And follow @thelifejolie on Instagram and TikTok!

    A close up image of the side of a slice of pizza bread revealing the melty cheese and pepperoni inside, on top of the rest of the pizza roll.

    Crescent Roll Pizza Braid

    Jessy Freimann
    This crescent roll pizza braid is the perfect appetizer to bring to a gathering or game-day party! My easy recipe comes together quickly and you can add whatever fillings you like.
    No ratings yet
    Print Recipe Pin Recipe
    Prep Time 10 minutes mins
    Cook Time 30 minutes mins
    Total Time 40 minutes mins
    Course Appetizer, Snack
    Cuisine American, Italian
    Servings 8 servings
    Calories 118 kcal

    Equipment

    • 1 sheet pan
    • 1 Pizza Cutter
    • 1 Spatula
    • 1 Rolling Pin

    Ingredients
      

    • 1 crescent roll sheet (or package of crescent rolls- use a rolling pin to roll them out and adhere together into a rectangular sheet on a piece of parchment.
    • 5 Tablespoons pizza sauce
    • 2 cups mozzarella cheese shredded
    • 20 slices pepperoni
    • 3 Tablespoons butter, melted
    • 1 teaspoon Italian seasoning
    • 1 Tablespoon Romano cheese

    Instructions
     

    • Preheat the oven to 350 degrees and line a sheet pan with parchment.
    • Place the crescent sheet onto the parchment paper and roll it slightly to flatten (you don't want it too thin).
    • Using a pizza wheel or knife, cut strips about 1 ½ inches into each side, leaving around 3-4 inches of dough uncut on the inside.
      Raw pizza braid that shasnt been braided on a parchment lined sheet pan.
    • Place spoonfuls of pizza sauce down the center of the dough.
    • Top with mozzarella and the pepperoni
    • Take the strips and fold them over each other, pressing lightly in the middle to create the braid. Fold the ends in to hold in the filling.
      A raw pizza braid on a parchment lined sheet pan with the first couple of dough strips braided.
    • In a small bowl, mix melted butter, Italian seasoning and Romano or Parmesan cheese until well combined. Brush onto the top of the braid.
    • Bake for around 30-35 minutes or until golden brown. Serve immediately or refrigerate and reheat when ready to serve.

    Video

    Notes

    • Using crescent rolls if a sheet isn't available- Remember, if a crescent roll sheet isn't available you can totally use crescent rolls! Carefully unroll the dough, leaving it in a rectangle. Use a rolling pin to smooth out the perforations and make it one sheet. Make sure to be extra careful when braiding the dough.
    • Don't forget the parchment paper for easier cleanup and to prevent sticking.
    • I use a pizza wheel or a knife to cut the dough strips. The sharper the better, but be careful!
    • I use the back of my spoon to spread the pizza sauce evenly down the center of the dough. A spatula would also work!
    • Don't cut the baking time short. You want to make sure all the dough is baked through!
    • I like to serve this with extra marinara sauce for dipping. Or, copy your favorite pizza joint and pair it with some blue cheese or ranch dressing.
    • Ingredients to prep ahead- Shred cheese and make the pizza sauce to save on assembly time.
    • Leftovers and storage- Store any leftovers in an airtight container in the refrigerator for up to 4 days. I personally love cold rolled pizza bread, or you could reheat it in an air fryer or toaster oven at 350 degrees F for 5-10 minutes until crispy.

    Nutrition

    Serving: 1servingCalories: 118kcalCarbohydrates: 2gProtein: 8gFat: 9gSaturated Fat: 5gPolyunsaturated Fat: 0.5gMonounsaturated Fat: 3gTrans Fat: 0.1gCholesterol: 28mgSodium: 312mgPotassium: 74mgFiber: 0.2gSugar: 1gVitamin A: 246IUVitamin C: 1mgCalcium: 161mgIron: 0.4mg
    Tried this recipe?Let us know how it was!

    How to Make Shredded Chicken in a Crockpot (and Instant Pot)

    Jan 21, 2025 · 4 Comments

    An overhead image of shredded chicken breast in a glass bowl with a blue checked towel next to it and a couple of forks in it.

    Learn how to make shredded chicken in a crockpot and an Instant Pot with my super easy recipe. Whether you prefer to cook it low and slow or hot and quick, it's perfect for meal prep and weeknight dinners.

    An overhead image of shredded chicken breast in a glass bowl with a blue checked towel next to it and a couple of forks in it.
    [feast_advanced_jump_to]

    Why You'll Love Shredded Chicken In A Slow Cooker:

    When life gets busy, I like to use one of my favorite kitchen hacks to make chicken breast recipes come together much more quickly. Unless a recipe specifically calls for cut-up chunks of chicken, I always make it with shredded chicken because I prefer the texture.

    My love for my slow cooker and Instant Pot runs deep because anything that lets me throw ingredients into a pot and then does all the work for me during the day is a definite win as far as I’m concerned. Here are just a few more reasons to learn how to make shredded chicken in a crockpot and Instant Pot:

    • Can be used in a variety of recipes
    • Only 2 ingredients
    • So, so easy
    • Perfectly cooked results every time
    • Can be stored in the fridge or frozen
    • Ideal for busy parents!

    Ingredient Information And Substitutions

    • Chicken Breast- I use boneless, skinless chicken breast — it's lean and has a mild flavor so it works super well in so many different dishes. You could also use chicken thighs or drumsticks. If you go for bone-in cuts, make sure to remove the bone before shredding.
    • Water- I generally use water for slow cooker and pressure cooker shredded chicken so I can use it in any recipe that calls for chicken. You could also use broth, salsa, or anything liquid-based if you wanted to add a specific flavor.

    How To Make Slow Cooker Shredded Chicken

    Step 1- Slow cook.

    Add the chicken breasts to your slow cooker and cover with water. Add the lid and cook on High for 4-6 hours.

    Raw chicken breasts and water in the pot of a slow cooker

    Step 2- Shred.

    Remove the cooked chicken from the pot and add it to a large bowl. Use 2 forks to lightly shred it, being careful not to over-shred the meat. Use right away or store for later.

    Cooked chicken breasts in a glass bowl.

    How To Make Instant Pot Shredded Chicken Breasts

    Step 1- Pressure cook.

    Place the chicken breasts in the Instant Pot and cover with water. Add the lid and set the IP to manual High Pressure for 10 minutes. Double-check that the steam release is sealed.

    Raw chicken breasts on a metal rack in an instant pot with water at the bottom.

    Step 2- Release the pressure.

    Perform a natural pressure release for 10-15 minutes, then do a quick release.

    Step 3- Shred.

    Transfer the chicken breast to a large bowl and gently shred it with 2 forks. Again, don't over-shred! Use right away or store in the fridge or freezer for later.

    A close up image of shredded chicken breast in a glass bowl.

    Frequently Asked Questions

    Can you freeze shredded chicken?

    Yes! It can be used right away or can be frozen for later. When freezing, I usually measure out a few cups at a time into zipper bags to make things easier. It will keep up to 4 months when stored properly. Be sure to label them with the amount and date. Let each bag thaw overnight in the fridge before reheating.

    What is the best way to shred chicken?

    Some people use their kitchen stand mixers and blenders, while others use two forks (my method of choice). Or, you can use handheld “meat shredder claws” if you’re feeling fancy. I find the machines tend to over-shred.

    Can you shred raw chicken?

    It would be pretty difficult! It's much easier to shred when cooked.

    How do you shred cold chicken?

    The same way you would shred warm chicken! That said, I find it a little easier to do it just after it's been cooked. It falls right apart.

    How much shredded chicken is in a cup?

    There is around 1 boneless, skinless chicken breast in 1 cup, meaning you'll get about 3 cups out of this recipe. Remember they do vary in size, so this is an approximation.

    How to use shredded chicken?

    There are so many things to make with shredded chicken! Add it to soup, pasta, and salads, use it in sandwiches or tacos, on top of pizza, in casseroles and bakes, in bowls, on nachos... You can even enjoy it on its own with a drizzle of olive oil and some salt and pepper for a quick snack.

    Tips For Making Crock Pot Shredded Chicken

    • Don't over-shred. You'll notice I've mentioned this a few times — yes, it's that important. Over-shredding makes it stringy and tough and can even make it a bit mushy, especially if you want to use the chicken in soups or casseroles.
    • Spice up the water. You can totally add a pinch of salt to enhance the flavor, but you could also toss in a bay leaf, garlic clove, or a piece of onion. The world is your oyster!
    • There are a variety of ways to season shredded chicken in a slow cooker. I like to keep it simple and don't add extra spices until I use it in whatever recipe I'm planning to make. That said, feel free to experiment if you'd like!
    • The cooking water makes a great base for chicken stock. Strain it and save it for soups, stews, or simply to use as stock.
    • For the Instant Pot, don't skip the natural release. This step is what makes it easier to shred. The slow release of the pressure causes the chicken to tenderize so it falls apart really easily.
    • When freezing, shred the chicken minimally or it may end up mealy. It tends to shred up a little bit more when mixed into other recipes. Go easy on the first go-around just in case.
    • Ingredients to prep ahead- Thaw chicken breast overnight in the fridge if working from frozen.
    • Leftovers and storage- Slow cooker and Instant Pot shredded chicken breast will keep for around 3-4 days in an airtight container in the fridge and up to 4 months in the freezer.
    A bowl of shredded chicken with two forks sticking out and a blue checked towel behind it.

    What To Serve With Instapot Shredded Chicken

    I can't express enough how versatile IP and shredded crockpot chicken is. Whether you want to learn how to make shredded chicken in a crockpot for sandwiches, soups, or salads, treat it like a blank canvas and add it to your favorite recipes! It would work so well in:

    • Buffalo Chicken Braid
    • Buffalo Chicken Sliders
    • Buffalo Chicken Taquitos
    • Chicken and Parmesan Soup
    • Chicken Swiss Dip
    • Chicken Salad Stuffed Tomatoes
    • Weeknight Oven Quesadillas

    More Meal Prep Hacks To Try

    • Woman stirring sauce and smiling.
      Introducing: 1 Hour to Quicker Dinners- simplifying meal prep to bring balance back to the kitchen
    • I'm excited to share some great tips, tricks and hacks for making preparing dump recipes and make ahead meals easier and more efficient! Check these out to make dinner preparation a breeze (plus tons of info about freezer cooking too!)
      Tips to make dump recipes and make ahead meals easier
    • A woman cooking a pot of tomato sauce on the stove.
      How to make a meal plan: the smart way
    • I put together a list of the best tools to get easy dump dinners onto your table. They make the recipe prep as efficient as possible.
      Best tools for prepping dump recipes

    Love this recipe? Please leave a 5 star ⭐️⭐️⭐️⭐️⭐️ rating in the recipe card below ⬇️ and/or a review in the comment section further down. Check out my Amazon Store for all my favorite tools, including those used in this recipe. And follow @thelifejolie on Instagram and TikTok!

    An overhead image of shredded chicken breast in a glass bowl with a blue checked towel next to it and a couple of forks in it.

    How to Make Shredded Chicken in a Crockpot (and Instant Pot)

    Jessy Freimann
    Learn how to make shredded chicken in a crockpot and an Instant Pot with my super easy recipe. Whether you prefer to cook it low and slow or hot and quick, it's perfect for meal prep and weeknight dinners.
    No ratings yet
    Print Recipe Pin Recipe
    Prep Time 5 minutes mins
    Cook Time 6 hours hrs
    Total Time 6 hours hrs 5 minutes mins
    Course Main Course
    Cuisine American
    Servings 6 servings
    Calories 64 kcal

    Equipment

    • 1 slow. cooker
    • 1 instant pot
    • 1 mixing bowl

    Ingredients
      

    • 3 Boneless skinless chicken breasts frozen or thawed
    • 1 cup Water

    Instructions
     

    Slow Cooker Instructions

    • Place the chicken breasts into slow cooker pot.
    • Pour water into the pot.
    • Cover and cook on high for 4-6 hours.
    • Remove the chicken from the water and lightly shred (make sure you don’t over-shred the meat!).
    • Freeze or add it to whatever recipe you’re making.

    Instant Pot instructions

    • Place the chicken breasts into the Instant Pot onto the rack that comes with it.
    • Pour water into the pot.
    • Cover and set the Instant Pot to manual high pressure for 15 minutes. Make sure the steam release is set to sealing.
    • When the time is up, allow it to natural pressure release for 15 minutes and then do a quick release.
    • Remove the chicken from the water and lightly shred (make sure you don’t over-shred the meat!).
    • Freeze or add it to whatever recipe you’re making.

    Video

    Notes

    • Don't over-shred. You'll notice I've mentioned this a few times — yes, it's that important. Over-shredding makes it stringy and tough and can even make it a bit mushy, especially if you want to use the chicken in soups or casseroles.
    • Spice up the water. You can totally add a pinch of salt to enhance the flavor, but you could also toss in a bay leaf, garlic clove, or a piece of onion. The world is your oyster!
    • There are a variety of ways to season shredded chicken in a slow cooker. I like to keep it simple and don't add extra spices until I use it in whatever recipe I'm planning to make. That said, feel free to experiment if you'd like!
    • The cooking water makes a great base for chicken stock. Strain it and save it for soups, stews, or simply to use as stock.
    • For the Instant Pot, don't skip the natural release. This step is what makes it easier to shred. The slow release of the pressure causes the chicken to tenderize so it falls apart really easily.
    • When freezing, shred the chicken minimally or it may end up mealy. It tends to shred up a little bit more when mixed into other recipes. Go easy on the first go-around just in case.
    • Ingredients to prep ahead- Thaw chicken breast overnight in the fridge if working from frozen.
    • Leftovers and storage- Slow cooker and Instant Pot shredded chicken breast will keep for around 3-4 days in an airtight container in the fridge and up to 4 months in the freezer.

    Nutrition

    Serving: 1servingCalories: 64kcalProtein: 12gFat: 1gSaturated Fat: 0.3gPolyunsaturated Fat: 0.2gMonounsaturated Fat: 0.4gTrans Fat: 0.01gCholesterol: 36mgSodium: 68mgPotassium: 209mgVitamin A: 17IUVitamin C: 1mgCalcium: 4mgIron: 0.2mg
    Tried this recipe?Let us know how it was!

    7 Layer Taco Dip

    Jan 16, 2025 · 1 Comment

    A hand putting a tortilla chip up with taco dip on it.

    It's not a party without this classic 7 layer taco dip — it's one of those epic appetizers that people won't be able to resist! Make this for your next get-together in just 15 minutes.

    A hand putting a tortilla chip up with taco dip on it.
    [feast_advanced_jump_to]

    Why You'll Love 7 Layer Dip (Taco Dip):

    Everyone has their own version of 7 layer bean dip, amirite? At least they do around here. I can't think of a potluck or party that I've gone to where there hasn't been some variation of this fantastic recipe, and I'm not even a little bit sad about it.

    Now, if you're a long-time reader, you know that I'm a 7 layer enthusiast and have probably checked out or even made my hot 7 layer bean dip and my 7 layer taco salad (both amazing, strongly encourage you to make them!). And what's not to like? A bunch of fantastic flavors that all complement each other in one (or many) perfect bite(s).

    This particular seven layer bean dip recipe comes from Wendy, who has been a neighbor of my parents for basically my entire life. I was thrilled when it found its way into the cookbook of recipes from friends and family that my mom and aunt made for me as a bridal shower gift! Here's a few more reasons to make it:

    • Full of Mexican-inspired flavors
    • Super easy to make, even easier to eat
    • Ultimate crowd-pleaser
    • No need to turn on the oven
    • Customizable
    A close up image of the side of a glass pan of 7 layer taco dip, showing all the colorful layers.

    Ingredient Information And Substitutions

    • Bean Dip- Head to the chip aisle to find This. I used Frito Lays brand, but you can use whatever you find that looks good! The original recipes calls for Jalapeño Bean Dip but it's not always available and still tastes great with regular bean dip.
    • Guacamole- For creaminess, a rich texture, and some yummy healthy fats. Honestly, it wouldn't be 7 layer Mexican taco dip without it. My local grocery store has an excellent pre-made guacamole, but you can also use my killer guacamole recipe, or even mash up whole avocados with lime juice and a little salt and pepper.
    • Sour Cream & Mayonnaise- For another creamy layer, but this time with some tang. Sour cream is another one of those ingredients that's just so synonymous with taco dip.
    • Green Onions- For a touch of crunch and pop of color.
    • Tomatoes- I like Roma tomatoes best, but you can use your favorite. I recommend removing the seeds too — you don't need all that excess moisture.
    • Black Olives- I know there are a few different camps when it comes to olives on seven layer bean dip... I for one think they add a nice salty flavor that contrasts well with the creamier components.
    • Shredded Cheddar- The cheesy topping that ties everything together! If you have time, I encourage you to buy a big block of cheddar to shred yourself.
    • Seasonings- Kosher salt, black pepper, and a packet taco seasoning is all you need.
    • Chips- I like Doritos or regular tortilla chips for serving.
    An overhead image of labeled recipe ingredients.

    How To Make 7 Layer Mexican Taco Dip

    Step 1- Prepare the bean dip and guacamole layers.

    Spread the canned bean dip in an even layer on the bottom of a pie plate to create the first layer.

    Bean dip spread along the bottom of the glass pie plate and then a layer of guacamole spread as the next layer.

    Step 2- Add the creamy layer and the green onion layer.

    In a separate bowl, combine the sour cream with the mayonnaise and taco seasoning, then spread over the avocado to create the third layer. Sprinkle the chopped green onions on top for the fourth layer.

    The mayo/sour cream/taco seasoning layer spread on top of the guac and then the green onions sprinkles over the top in the next shot.

    Step 4- Add the tomatoes & black olives.

    Arrange the chopped tomatoes on top of the green onions, then sprinkle the black olives evenly on top. Those are fifth and sixth layers!

    Tomatoes layered onto the green onion layer and the next shot is black olives layered over the tomato.

    Step 5- Top with shredded cheese.

    Add the cheddar on top of the pie plate for seventh layer. Chill the dip in the refrigerator for at least an hour or overnight before serving with Doritos or tortilla chips.

    Shredded cheddar sprinkled over the top of the 7 layer dip.

    Frequently Asked Questions

    Are you supposed to heat a 7 layer dip?

    Not this particular one. If you'd rather make a hot dip, I also have an awesome hot 7 layer bean dip!

    How long does taco dip last in the fridge?

    I'd say 3 days tops. This is one of those recipes that's best served the day after you make it.

    How long can this sit out?

    I wouldn't leave 7 layer dip (taco dip) out for more than 2 hours. It could be okay for longer, but I say better safe than sorry with all of that sour cream and mayo.

    Can 7 layer dip be made the night before?

    Yes, and this particular recipe is meant to be made the night before. That said, it still tastes great if you dig in after assembling.

    An overhead image of 7 layer dip with green onions, shredded cheese and a black and white checked towel.

    Tips For Making Old Fashioned 7 Layer Dip

    • This is best made the night before. In my opinion, this actually tastes better if you make it the night before you plan to serve it! That extra time in the fridge gives the flavors a chance to really meld together.
    • Make sure you remove all the seeds and dry the tomatoes as well as you can. I like using Roma tomatoes as they tend to have fewer seeds.
    • An offset spatula is really helpful for spreading the wet ingredients evenly.
    • The jalapeño bean dip can be tricky to find if you don't know where to look. Remember to check the chip aisle! In my store, it's kept with the salty snacks, not in the international food aisle. Regular bean dip works great as well.
    • Ingredients to prep ahead- It pays to prepare almost all of the ingredients before you get started to make the assembly process seamless. Mix the sour cream with the mayo and taco seasoning, chop the veggies, and shred the cheese before you start layering.
    • Leftovers and storage- Store any leftovers in an airtight container in the fridge. Remember that this dip is best enjoyed fresh, or at least within 2-3 days. Any longer and the layers will begin to separate and become watery.

    What To Serve With Seven Layer Dip

    I love serving 7 layer dip (taco dip) as an appetizer for the holidays, birthdays, cookouts, game days... whenever I'm expecting company or invited anywhere, people seriously always request it! I've also served it at home as a part of a larger Mexican-inspired feast. A few other great recipes to pair it with include:

    • Mexican Lasagna Roll-ups
    • Mexican Bean Salad
    • Ground Beef Oven Baked Tacos
    • Cajun Black Bean and Corn Salad

    Other Delicious Dip Recipes To Try

    • A close up image of a white bowl of shrimp dip with a whole shrimp on top and chips and celery in the background.
      Grandma's Shrimp Dip Recipe
    • A hand pulling a chip with artichoke dip out of a pan of it.
      Hot Artichoke Parmesan Dip
    • A square image of Chicken Swiss Dip.
      Chicken Swiss Dip
    • Baked Lasagna Dip is a tasty twist on a classic lasagna recipe. With all the flavors we love in traditional lasagna, this hot dip is sure to please!
      Baked Lasagna Dip

    Love this recipe? Please leave a 5 star ⭐️⭐️⭐️⭐️⭐️ rating in the recipe card below ⬇️ and/or a review in the comment section further down. Check out my Amazon Store for all my favorite tools, including those used in this recipe. And follow @thelifejolie on Instagram and TikTok!

    A hand putting a tortilla chip up with taco dip on it.

    7 Layer Taco Dip

    Jessy Freimann
    It's not a party without this classic 7 layer taco dip — it's one of those epic appetizers that people won't be able to resist! Make this for your next get-together in just 15 minutes.
    5 from 1 vote
    Print Recipe Pin Recipe
    Prep Time 15 minutes mins
    Chill time 12 hours hrs
    Total Time 15 minutes mins
    Course Appetizer
    Cuisine Mexican
    Servings 8 servings
    Calories 272 kcal

    Equipment

    • pie plate
    • mixing bowl
    • chefs knife
    • cutting board
    • measuring cups
    • measuring spoons
    • Offset spatula

    Ingredients
      

    • 9 ounces bean dip (the one in the can near the chips- I used Frito Lays brand)
    • 12 ounces guacamole
    • 8 ounces sour cream
    • ½ cup mayonnaise
    • ½ ounce taco seasoning (½ a packet)
    • ¾ cup green onion chopped (green parts only)
    • 2 Roma tomatoes seeded and chopped
    • 3.8 ounces black olives chopped
    • 1 cup shredded cheddar cheese
    • Doritos or tortilla chips for serving

    Instructions
     

    Layer 1

    • Spread the bean dip in an even layer on the bottom of the pie plate.

    Layer 2

    • Spread the guacamole in an even layer on the bean dip layer.

    Layer 3

    • In a medium bowl combine sour cream, mayonnaise and taco seasoning.
    • Spread in a single layer on top of the guacamole layer.

    Layer 4

    • Sprinkle the green onions on top of the sour cream mixture layer.

    Layer 5

    • Sprinkle to tomatoes over the green onion layer.

    Layer 6

    • Sprinkle the black olives over the tomato layer.

    Layer 7

    • Sprinkle to the cheese over the top of the dip on the pie plate.
    • Refrigerate for several hours before serving. Serve with Doritos or tortilla chips.

    Video

    Notes

    • This is best made the night before. In my opinion, this actually tastes better if you make it the night before you plan to serve it! That extra time in the fridge gives the flavors a chance to really meld together.
    • Make sure you remove all the seeds and dry the tomatoes as well as you can. I like using Roma tomatoes as they tend to have fewer seeds.
    • An offset spatula is really helpful for spreading the wet ingredients evenly.
    • The jalapeño bean dip can be tricky to find if you don't know where to look. Remember to check the chip aisle! In my store, it's kept with the salty snacks, not in the international food aisle. Regular bean dip works great as well.
    • Ingredients to prep ahead- It pays to prepare almost all of the ingredients before you get started to make the assembly process seamless. Mix the sour cream with the mayo and taco seasoning, chop the veggies, and shred the cheese before you start layering.
    • Leftovers and storage- Store any leftovers in an airtight container in the fridge. Remember that this dip is best enjoyed fresh, or at least within 2-3 days. Any longer and the layers will begin to separate and become watery.

    Nutrition

    Serving: 1servingCalories: 272kcalCarbohydrates: 8gProtein: 6gFat: 25gSaturated Fat: 6gPolyunsaturated Fat: 7gMonounsaturated Fat: 10gTrans Fat: 0.03gCholesterol: 26mgSodium: 542mgPotassium: 322mgFiber: 4gSugar: 2gVitamin A: 719IUVitamin C: 9mgCalcium: 109mgIron: 1mg
    Tried this recipe?Let us know how it was!

    Chicken Cutlets

    Jan 14, 2025 · 12 Comments

    A close up image of a chicken cutlet cut in half revealing the perfectly cooked center.

    These chicken cutlets are just like grandma used to make! So simple to make and SO delicious, you'll never need another cutlet recipe again. Plus, it's ready in just 35 minutes!

    A close up of chicken cutlets laid next to each other on parchment with a couple sprigs of parsley.
    [feast_advanced_jump_to]

    Why You'll Love Italian Chicken Cutlets:

    I think everyone has their own unique recipe for thin chicken cutlets. Amiright? Maybe it's just that everyone I grew up around had their own variation of this popular and tasty dish. I mean, it's breaded chicken — what's not to like? They're pan-fried until golden in breadcrumbs and Romano cheese and full of awesome flavor! This is my version of my Grandma Rosie's thin chicken cutlets.

    My husband requests this dish quite a bit. It's a simple dinner full of delicious flavor and doesn't require too much work, so it's totally doable for a weeknight dinner. The best part is, they are completely addictive. Seriously, you're not going to want to stop eating these crispy chicken cutlets once you start! My grandma's recipe is:

    • Perfectly crispy
    • Versatile — enjoy as a main dish or in a sandwich
    • Super easy to make
    • Impressive (and delicious) enough to serve to guests
    • Minimal ingredients
    • An Italian-American classic!

    Ingredient Information And Substitutions

    • Chicken Breasts- Rosie always made these with breast meat and so I do too. Make sure to pound them thin after cutting them into smaller slices.
    • Olive Oil- For frying. Is it really an Italian recipe without olive oil? If you don't have any... run out to the store to grab some. Otherwise, whatever oil you usually use for pan-frying will work (but don't tell grandma).
    • Flour- Needed to help the breading stick the cutlets before you fry them! I use simple all-purpose.
    • Mayonnaise- In my family, we use mayonnaise instead of egg to add moisture and help the breadcrumbs stick. You can use whatever you prefer, but I have to say mayo keeps the chicken even juicier.
    • Seasoned Breadcrumbs- Italian seasoned breadcrumbs are my go-to for breading for chicken cutlets, but seasoned panko will give you more crunchy chicken cutlets.
    • Romano or Parmesan Cheese- Goes directly in with the breadcrumbs to give the cutlets excellent flavor! It's one of my grandma's secrets that I'm now sharing with all of you.
    • White Wine- Optional, but we usually add a small splash of wine before baking for extra flavor.
    An overhead image of labeled recipe ingredients.

    How To Cook Chicken Cutlets

    Step 1- Recipe prep.

    Preheat the oven to 350 degrees F, then set up your dredging station. Cut the chicken breast into smaller pieces across the grain and then pound them thin. Season with salt and pepper.

    Step 2- Dip each cutlet in flour.

    Cover each piece of chicken in flour and gently tap off the excess.

    Step 3- Cover each cutlet in mayonnaise.

    Next place each cutlet in mayonnaise. Use your fingers to lightly rub a thin coating evenly over each cutlet.

    Step 4- Cover each cutlet in bread crumbs.

    Now place each cutlet in the mixture of bread crumbs and Romano cheese. turn it to coat evenly, gently pressing the breadcrumbs into each cutlet before gently tapping off the excess.

    Step 5- Fry the cutlets.

    Heat a large pan with a couple tablespoons of oil until the oil shimmers. Place the breaded chicken cutlets in a single layer the pan with the oil, being careful not to overload it. Fry for a few minutes on each side until golden brown. You may need to add more oil as you go.

    Step 4- Bake.

    Transfer the fried cutlets to a baking dish and add a small splash of white wine. Bake for around 10 minutes, serve immediately, and enjoy!

    Frequently Asked Questions

    What are chicken cutlets?

    Chicken cutlets are usually made from chicken breast that has been pounded out thin, breaded, and then fried. Many people use them to make chicken Parmesan. I also love to use leftovers for sandwiches!

    Can I bake these?

    I wouldn't encourage you to only bake these. While they will still be tasty, they really do benefit from being fried in oil first.

    How do you know when chicken cutlets are done?

    The safe temperature for consuming poultry is 165 degrees. I like to pull them at 161 degrees and rest them for 5 minutes — they continue cooking during the rest time to reach 165 degrees.

    Do I have to use mayonnaise?

    I know it's a teeny bit more labor intensive, but the flavor cannot be beat! I like to use my fingers to rub on a thin layer of mayo before covering the cutlets in the breadcrumb mixture. If you’re in a super rush or don’t want to deal with the mayo, you can always beat a few eggs to use and they'll till be fabulous.

    Is there a substitute for white wine?

    You can omit it entirely or sub in a splash of chicken broth.

    How can you use fried chicken cutlets?

    This makes an excellent base recipe! From here you can take it in so many directions. You could make a really tasty lemon-cream pan sauce to serve over them. Or, turn them into chicken Parmesan with some marinara sauce and some mozzarella cheese. I've also cut them up and served them over pasta Pomodoro. They taste great on a salad too!

    A close up image of a chicken cutlet cut in half revealing the perfectly cooked center.

    Tips For Making Chicken Breast Cutlets:

    • Dredging- Before you get started, place the breading ingredients into shallow bowls and line them up in this order: flour, mayonnaise, and breadcrumbs. When dipping the chicken pieces, be sure to turn them to coat evenly. Remember, you'll need to use your fingers to evenly coat the chicken in the mayo.
    • When breading the chicken, have one hand for wet ingredients and one hand for dry ingredients. This will make it go faster with less mess!
    • Make sure you get your oil nice and hot before adding the cutlets to the pan. It should shimmer.
    • Fry over medium-high heat. Don't be shy about adding more to the pan when you need it.
    • When finished frying, your breaded chicken cutlets should be golden brown and cooked almost all the way through. That's why we finish them off in the oven.
    • If you’re using the optional splash of wine (please do it! The alcohol totally cooks off, and the flavor is amazing!), make sure it’s really just a teeny splash because any more than that will make the bottoms soggy.
    • Ingredients to prep ahead- You can cut and pound out your chicken breasts in advance to make these even quicker. Pound them between pieces of plastic wrap with a meat mallet for easier cleanup.
    • Leftovers and storage- Store leftover chicken cutlets in an airtight container in the fridge for up to 3-4 days. You can also freeze them for up to 2-3 months. Thaw in the fridge overnight before reheating in the oven at 350 degrees F until warm and crispy.
    A close up image of the side of chicken cutlets and some parsley.

    What To Serve With Chicken Cutlets

    I personally like these on their own served alongside my roasted potatoes and peas with onions. Or, pair them with pasta and marinara for an Italian-American-inspired meal. Here are some other tasty sides to try:

    • Roasted Garlic Mashed Potatoes
    • French Onion Rice Pilaf
    • Garlic Parmesan Roasted Broccoli
    • Savory Sautéed Green Beans

    Other Delicious Chicken Recipes To Try

    • A close up overhead image of grilled chicken thighs on a plate with lemons.
      Grilled Chicken Thighs Recipe
    • An overhead image of a plate of chicken tenders on a blue and white towel.
      Baked Chicken Tenders Recipe
    • This is the Chicken Casserole to end all chicken casserole recipes! Creamy and delicious but also so easy to make- this is the perfect way to feed a crowd!
      Fernie's Famous Chicken Casserole
    • A close up image of chicken in wine sauce in the pan.
      Wine Braised Chicken Breast Recipe

    Love this recipe? Please leave a 5 star ⭐️⭐️⭐️⭐️⭐️ rating in the recipe card below ⬇️ and/or a review in the comment section further down. Check out my Amazon Store for all my favorite tools, including those used in this recipe. And follow @thelifejolie on Instagram and TikTok!

    A close up image of a chicken cutlet cut in half revealing the perfectly cooked center.

    Chicken Cutlets Recipe

    Jessy Freimann
    These chicken cutlets are just like grandma used to make! So simple to make and SO delicious, you'll never need another cutlet recipe again. Plus, it's ready in just 35 minutes!
    5 from 1 vote
    Print Recipe Pin Recipe
    Prep Time 10 minutes mins
    Cook Time 25 minutes mins
    Total Time 35 minutes mins
    Course Main Course
    Cuisine Italian
    Servings 4 Servings
    Calories 554 kcal

    Equipment

    • Large saute pan
    • wooden spoon
    • chefs knife
    • cutting board
    • measuring spoons
    • measuring cups

    Ingredients
      

    • ¼ cup Olive oil
    • ¼ cup flour
    • ½ teaspoon Kosher salt, to taste
    • ¼ teaspoon Ground black pepper, to taste
    • ½ cup mayonnaise or 3 eggs, beaten
    • ¾ cup seasoned bread crumbs
    • ⅓ cup Romano cheese (or parmesan cheese)
    • 3 boneless skinless chicken breasts slices 1 inch wide slices and pounded thin
    • 1 splash white wine (optional)

    Instructions
     

    • Preheat the oven to 350 degrees. Mix the bread crumbs with the cheese and set aside.
    • Place a couple tablespoons of oil into the pan and heat over medium to medium-high heat. Season cutlets with salt and pepper.
    • Cover each cutlet in flour and shake off the excess so that it's lightly coated.
    • Turn the chicken pieces over in mayonnaise or egg to coat evenly. If you're using mayonnaise, use your fingers to gently rub a thin, even layer on each side of the chicken.
    • Cover each piece of chicken in the breadcrumb mixture, gently pressing with your fingers. Tap off the excess.
    • Place breaded cutlets into the hot oil in a single layer, working in batches so as not to overload the pan.
    • Fry the chicken for a couple minutes on each side, turning when they're golden brown (manage the heat and the oil in the pan- adding more or less as needed).
    • Once all the chicken is golden on each side, move them all into an oven-safe pan. Add a small splash of white wine over them (don't use too much or the bottom ones will get soggy).
    • Place in the oven for around 10 minutes to finish cooking. Serve immediately or refrigerate and reheat.

    Video

    Notes

    • Dredging- Before you get started, place the breading ingredients into shallow bowls and line them up in this order: flour, mayonnaise, and breadcrumbs. When dipping the chicken pieces, be sure to turn them to coat evenly. Remember, you'll need to use your fingers to evenly coat the chicken in the mayo.
    • When breading the chicken, have one hand for wet ingredients and one hand for dry ingredients. This will make it go faster with less mess!
    • Make sure you get your oil nice and hot before adding the cutlets to the pan. It should shimmer.
    • Fry over medium-high heat. Don't be shy about adding more to the pan when you need it.
    • When finished frying, your breaded chicken cutlets should be golden brown and cooked almost all the way through. That's why we finish them off in the oven.
    • If you’re using the optional splash of wine (please do it! The alcohol totally cooks off, and the flavor is amazing!), make sure it’s really just a teeny splash because any more than that will make the bottoms soggy.
    • Ingredients to prep ahead- You can cut and pound out your chicken breasts in advance to make these even quicker. Pound them between pieces of plastic wrap with a meat mallet for easier cleanup.
    • Leftovers and storage- Store leftover chicken cutlets in an airtight container in the fridge for up to 3-4 days. You can also freeze them for up to 2-3 months. Thaw in the fridge overnight before reheating in the oven at 350 degrees F until warm and crispy.

    Nutrition

    Serving: 1servingCalories: 554kcalCarbohydrates: 22gProtein: 25gFat: 40gSaturated Fat: 7gPolyunsaturated Fat: 15gMonounsaturated Fat: 16gTrans Fat: 0.1gCholesterol: 75mgSodium: 968mgPotassium: 389mgFiber: 1gSugar: 2gVitamin A: 122IUVitamin C: 2mgCalcium: 138mgIron: 2mg
    Tried this recipe?Let us know how it was!

    Cabbage and Beans

    Jan 7, 2025 · 2 Comments

    An overhead image of a bowl of cabbage and beans with bread and a blue checked towel around it and topped with grated Romano cheese.

    Minimal ingredients with maximum behavior are what you'll find in cabbage and beans! This healthy and delicious meal option is perfect if you're on a budget. Ready in just 30 minutes.

    A close up image of a spoon in a bowl of cabbage and beans.
    [feast_advanced_jump_to]

    Why You'll Love Beans And Cabbage:

    Our family has a few different uses for marinara sauce, and cabbage and beans is one of them. If you're looking for a cheap meal that's just as delicious as it is comforting, I've got you covered!

    Now, I know it sounds kind of weird — I get it. As a kid, if you had told me I was going to eat soup with cabbage and beans for dinner, I would have turned my nose up at the mere thought. But... if you had put a bowl of this stuff in front of me, I'd devour it and ask for more.

    I like to sprinkle a little grated Romano cheese on top, and if I'm feeling especially spicy, some crushed red pepper. You can even add shredded chicken to throw some additional protein into the mix to make lunch for the week! Here are just a few more reasons to try this super simple dish:

    • Low-cost ingredients
    • Perfect for budget meal prepping
    • Customizable
    • Serve it for lunch or dinner
    • Italian-American homestyle classic
    A grey bowl of beans and cabbage with bread and a blue checked towel behind it.

    Ingredients And Substitutions

    • Marinara Sauce- Use as little or as much as you'd like. I prefer this dish when it's a bit more on the soupy side (as seen in the photos) so I use about 2 cups and a little water to loosen if necessary. I love my homemade marinara, but you could totally use store-bought if you prefer.
    • Cabbage- I usually grab a medium head of cabbage from the produce section. I know the pre-shredded bags are tempting but I chop mine myself. When doing your shopping, opt for a cabbage that feels heavy and doesn't have too many blemishes. Skip ones with leaves that have started separating from the stem — that means they've been sitting out longer!
    • Beans- I like making this with cannellini beans, but you could also use Great Northern beans instead.
    An overhead of labeled recipe ingredients.

    How To Make Cabbage Soup With Cannellini Beans

    Step 1- Prepare the cabbage.

    Bring a large pot of water to a boil and add the chopped cabbage. Boil for 5-10 minutes or until softened, then drain well.

    Cabbage boiling in a large pot of water.

    Step 2- Place cabbage and beans in a large skillet.

    Drain and then add the softened cabbage, beans to a large skillet.

    Cabbage and beans in a large sauté pan.

    Step 3- Add sauce and cook.

    Add sauce and cook over medium until heated through. Garnish with a sprinkle of Romano cheese and crushed red pepper flakes if you'd like, and enjoy!

    MArinara sauce combined with the cabbage and beans in the skillet.

    Frequently Asked Questions

    Should you boil cabbage before cooking?

    Yes, it's important to boil the cabbage for 5-10 minutes before cooking it with the beans and marinara. Cabbage is notoriously very tough — par-boiling it before cooking it with the other ingredients softens the texture, making it a lot more enjoyable to eat!

    Do cannellini beans need to be soaked before cooking?

    Canned beans (like I used here) don't need to be soaked. Simply drain and rinse them before adding them to the pot. If you choose dried beans, you'll have to soak them for several hours before cooking them separately. It's a lot more labor-intensive, so I recommend using canned.

    What kind of cabbage is best for soup?

    I usually use green cabbage, and if I can't find that, savoy works as a good substitute. Both are sturdy enough for soup.

    Why is my cabbage soup bland?

    I find that the marinara sauce adds a ton of flavor to cabbage and beans, but remember that you can always spice it up — literally. Red pepper flakes are my go-to because I like spicy food. I always garnish with a very generous sprinkle of Romano cheese which adds a more salty and saovry flavor.

    A spoon holding up a scoop of cabbage and beans over a bowl of it.

    Tips For Making Soup With Cabbage And Beans:

    • Ingredient amounts are more suggestions for this. It's all about the ratio that you like best. If you like more beans, add more beans. If you prefer it saucier, go heavy on the sauce. Don't forget that this also tastes great with shredded chicken breast added for additional protein.
    • It's important to par-boil the cabbage, but don't overdo it. Boil just until softened, but not mushy. Start checking on it around the 5-minute mark and taste test to make sure it still has a bit of a bite.
    • For a thicker consistency, let the beans and cabbage simmer uncovered for a few extra minutes to allow excess liquid to evaporate.
    • And to thin it out, add more marinara, a splash of water, or some broth during cooking. My favorite thing is rinsing the container that held the marinara with some water and then pouring that into the pan.
    • Ingredients to prep ahead- Chop the cabbage, and drain and rinse the beans in advance to save time. and if you're making marinara sauce, do that in advance (I typically make a large batch of sauce and then freeze it in smaller batches to pull out as needed).
    • Leftovers and storage- Let any leftovers cool completely before storing them in an airtight container in the fridge for up to 3-4 days. I like to reheat single servings in the microwave in 30-second bursts until warmed through, or larger portions over medium-low on the stove.

    Here are some Marinara variations and other sauce recipes as well:

    • Marinara Sauce
    • Best Ever Skillet Lasagna
    • Spanish Rice
    • Authentic Meatballs
    • Sunday Sauce
    • Grandma’s Easy Chicken Cacciatore
    An overhead image of a bowl of cabbage and beans with bread and a blue checked towel around it and topped with grated Romano cheese.

    What To Serve With Cabbage Soup With White Beans

    Crusty, rustic bread or my famous three cheese garlic bread pairs so well with beans and cabbage! You can enjoy it as is, or serve it over pasta, rice, or even mashed potatoes.

    It would even work well as a side to roasted chicken, or with my authentic Italian-American meatballs and sauce. Honestly, cabbage soup with cannellini beans would taste great alongside any Italian dish!

    Other Delicious Cabbage Recipes To Try

    • Corned beef and potatoes, cabbage and carrot on a white plate.
      Instant Pot Corned Beef and Cabbage
    • A white bowl of red cabbage salad with a large glass bowl of it and a chunk of red onion in the background.
      Red Cabbage Salad
    • A bowl of asian soup with meatballs with a spoon and noodles in it.
      Asian Soup with Cabbage and Meatballs
    • An overhead image of a bow of cabbage soup with a spoon in it.
      Cabbage Soup with Hamburger

    Love this recipe? Please leave a 5 star ⭐️⭐️⭐️⭐️⭐️ rating in the recipe card below ⬇️ and/or a review in the comment section further down. Check out my Amazon Store for all my favorite tools, including those used in this recipe. And follow @thelifejolie on Instagram and TikTok!

    An overhead image of a bowl of cabbage and beans with bread and a blue checked towel around it and topped with grated Romano cheese.

    Cabbage and Beans

    Jessy Freimann
    Minimal ingredients with maximum behavior are what you'll find in cabbage and beans! This healthy and delicious meal option is perfect if you're on a budget. Ready in just 30 minutes.
    4 from 1 vote
    Print Recipe Pin Recipe
    Prep Time 10 minutes mins
    Cook Time 20 minutes mins
    Total Time 30 minutes mins
    Course dinner, Lunch
    Cuisine budget, Easy, Family, Italian
    Servings 6
    Calories 176 kcal

    Equipment

    • Large pot
    • Skillet
    • Wooden Spoons
    • cutting board
    • chefs knife

    Ingredients
      

    • 2 cups green cabbage roughly chopped
    • 28 ounces canned Canellini beans rinsed and drained
    • 2 cups marinara sauce depending on how liquid-y you want it (you can always add water if needed)

    Instructions
     

    • Boil the cabbage for 5-10 minutes until it's softened. Drain it well.
    • Combine in a large skillet with beans and stir in sauce.
    • Cook over medium high heat until heated through, about 10 minutes. Stir periodically.
    • Serve immediately with a sprinkle of Romano cheese and crushed red pepper.

    Video

    Notes

    • Ingredient amounts are more suggestions for this. It's all about the ratio that you like best. If you like more beans, add more beans. If you prefer it saucier, go heavy on the sauce. Don't forget that this also tastes great with shredded chicken breast added for additional protein.
    • It's important to par-boil the cabbage, but don't overdo it. Boil just until softened, but not mushy. Start checking on it around the 5-minute mark and taste test to make sure it still has a bit of a bite.
    • For a thicker consistency, let the beans and cabbage simmer uncovered for a few extra minutes to allow excess liquid to evaporate.
    • And to thin it out, add more marinara, a splash of water, or some broth during cooking. My favorite thing is rinsing the container that held the marinara with some water and then pouring that into the pan.
    • Ingredients to prep ahead- Chop the cabbage, and drain and rinse the beans in advance to save time. and if you're making marinara sauce, do that in advance (I typically make a large batch of sauce and then freeze it in smaller batches to pull out as needed).
    • Leftovers and storage- Let any leftovers cool completely before storing them in an airtight container in the fridge for up to 3-4 days. I like to reheat single servings in the microwave in 30-second bursts until warmed through, or larger portions over medium-low on the stove.

    Nutrition

    Serving: 1servingCalories: 176kcalCarbohydrates: 34gProtein: 11gFat: 1gSaturated Fat: 0.1gPolyunsaturated Fat: 0.3gMonounsaturated Fat: 0.1gSodium: 398mgPotassium: 883mgFiber: 8gSugar: 4gVitamin A: 376IUVitamin C: 14mgCalcium: 117mgIron: 5mg
    Tried this recipe?Let us know how it was!


    Chorizo and Sweet Potato Breakfast Hash

    Dec 26, 2024 · 14 Comments

    A plate of sweet potato hash with an egg in it and onions and a green napkin behind it.

    This chorizo and sweet potato breakfast hash is incredibly delicious and made with wholesome ingredients! The spicy chorizo and sweet potatoes complement each other beautifully and taste even better with eggs. Ready in 35 minutes.

    A plate of sweet potato hash with an egg in it and onions and a green napkin behind it.
    [feast_advanced_jump_to]

    Why You'll Love Sweet Potato Hash And Eggs

    Sometimes, the most random things will inspire me. Like when I'm walking around our Public Market and I stumble upon some of the most gorgeous sweet potatoes at pretty much every stand. I had to get some, and by some, I mean way too many!

    So I thought to myself, "What can I do with all these sweet potatoes that's a little bit outside of the obvious, baked/roasted/grilled potato side dishes?" Then I opened my freezer and noticed some leftover chorizo, and it occurred to me: chorizo and sweet potato breakfast hash.

    The combination of the sweet potatoes with the spicy chorizo creates the most beautiful sweet and spicy harmony. Diced bell pepper and onion add great texture while the seasonings kick it up a notch, especially the steak seasoning.

    And while it tastes great on its own, it is fantastic with eggs on top. It's such an easy breakfast option that reheats really well too! Sweet potato breakfast potatoes with chorizo are also:

    • Hearty and satisfying
    • The ultimate comfort food breakfast
    • Minimal ingredients
    • Simple recipe
    • Perfect for meal prep
    A close up image of sweet potato hash in a pan with the egg in the background.

    Ingredient Information and Substitutions

    • Sweet Potato- I used 1 very large sweet potato for this recipe! Try to grab the biggest one you can find at the store, otherwise use 2 medium.
    • Chorizo- Just a few links are all you'll need. Chorizo often comes in differing levels of spice... I like hot myself, but you can use your preference.
    • Onion- To get the flavor going! If you don't have an onion, shallots have a similar taste.
    • Green Bell Pepper- For a bit of extra color and flavor. You can grab any kind of bell pepper — green is what I had on hand!
    • Coconut Oil- I like sautéing with coconut oil but you can use your go-to.
    • Seasonings- I added salt, pepper, chili powder, cumin, and my favorite steak seasoning.

    How To Make Sweet Potato And Sausage Hash

    Step 1- Cook the potatoes & veggies.

    Add the coconut oil to a large sauté pan and melt over medium-high heat. Add the diced sweet potatoes, onion, bell pepper, and seasonings to the pan and sauté for about 12 minutes.

    Raw veggies cooking in a skillet then the cooked veggies with spices sprinkled on in the skillet.

    Step 2- Add the chorizo.

    Introduce the chorizo to the pan and reduce the heat. Cook for an additional 14 minutes until well browned.

    Top your chorizo and sweet potato hash with a few fried eggs if desired, serve, and enjoy!

    Chorizo added to the skillet of vegetables and then the skillet of cooked chorizo and veggies.

    Frequently Asked Questions

    Is sweet potato good for morning breakfast?

    I think so! It's a more wholesome option than regular potatoes — sweet potatoes have tons of vitamins and nutrients. The chorizo adds protein too, making these sweet potato home fries a great morning breakfast.

    What is breakfast hash made of?

    Traditional breakfast hash recipes are made with corned beef, onions, and potatoes — but you can really use whatever you'd like! I switched up the corned beef for chorizo in my sweet potato breakfast hash, and it came out so good.

    Can I substitute the chorizo?

    Sure! Other protein options include spicy Italian sausage or even ground beef.

    What other toppings can I add to sweet potato and chorizo hash?

    In addition to eggs, I usually top my breakfast hash with avocado, sour cream, and a few dashes of hot sauce. I also like to use fresh herbs like cilantro or parsley when I have them on hand.

    A fork with a bite of hash and egg on a plate of sweet potato hash.

    Tips For Making Sweet Potato And Egg Hash

    • Don't overcrowd the pan. Otherwise, you'll steam the potatoes instead of brown them. Cook in batches if you have to for the best texture.
    • Keep an eye on the heat. You want the temperature to be high enough to brown the potatoes, veggies, and chorizo without burning them.
    • Taste test as you go and adjust the seasonings if needed.
    • Breakfast for dinner- While sweet potato breakfast potatoes definitely taste great in the morning, nothing is stopping you from serving this for dinner! It would pair great with a big garden salad, crusty bread, and those fried eggs I keep mentioning.
    • Ingredients to prep ahead- This recipe moves super quickly once you get going! Peel and dice the sweet potatoes, chop the onion and green pepper, and slice the chorizo to make things easier.
    • Leftovers and storage- You can store leftovers in an airtight container in the fridge for up to 4-5 days. I find these are just as great the next day as a fresh batch — possibly even better because the potatoes crisp up a bit better the second time!
    A close up image of sweet potato hash and eggs in a skillet.

    What To Serve With Sweet Potato Home Fries With Chorizo

    I love serving sweet potato hash for a simple breakfast at home with the family — I add eggs, toast, and a side of avocado to make it a meal. It would also work well for brunch with:

    • Broccoli Cheddar Cheese Quiche
    • Almond Croissant Baked French Toast
    • Zucchini Pancakes
    • Super Quick Cheese Danish

    Other Delicious Breakfast Recipes To Try

    • This Egg Stuffed Bread recipe is a delicious, easy brunch or breakfast option. Imagine crusty loaves of french bread, stuffed with your favorite omelette fillings, cheese and eggs. It's quick and delicious to serve during the holidays and is sure to be a family favorite!
      Egg Stuffed Bread
    • A square image of plums with goat cheese and walnuts.
      Plums with Goat Cheese and Walnuts
    • A slice of breakfast pizza on parchment and a cutting board with a bite taken out of it and the rest of the pizza in the background.
      Puff Pastry Breakfast Pizza
    • a square image of Baked French Toast.
      Baked French Toast with Mixed Berries

    Love this recipe? Please leave a 5 star ⭐️⭐️⭐️⭐️⭐️ rating in the recipe card below ⬇️ and/or a review in the comment section further down. Check out my Amazon Store for all my favorite tools, including those used in this recipe. And follow @thelifejolie on Instagram and TikTok!

    A plate of sweet potato hash with an egg in it and onions and a green napkin behind it.

    Chorizo and Sweet Potato Breakfast Hash

    Jessy Freimann
    This chorizo and sweet potato breakfast hash is incredibly delicious and made with wholesome ingredients! The spicy chorizo and sweet potatoes complement each other beautifully and taste even better with eggs. Ready in 35 minutes.
    No ratings yet
    Print Recipe Pin Recipe
    Prep Time 5 minutes mins
    Cook Time 30 minutes mins
    Total Time 35 minutes mins
    Course Breakfast
    Cuisine American
    Servings 4 servings
    Calories 219 kcal

    Equipment

    • cutting board
    • chefs knife
    • Large saute pan
    • measuring spoons
    • wooden spoon

    Ingredients
      

    • 1 Tablespoon coconut oil canola oil is just fine if you don't have coconut oil
    • 2 cups sweet potato 1 large potato peeled and diced (or 2 regular size sweet potatoes)
    • ½ cup onion diced
    • 1 cup green bell pepper diced
    • ¾ teaspoon Kosher salt
    • ¼ teaspoon ground black pepper
    • ¾ teaspoon chili powder
    • 1 teaspoon cumin
    • ½ teaspoon grill seasoning
    • 3 links Chorizo sausage diced

    Instructions
     

    • Melt coconut oil over medium-high heat in a large skillet.
    • Add the sweet potato, onion, peppers and spices to the pan and sauté for around 12 minutes, stirring periodically.
    • Add chorizo to the pan and reduce the heat to around medium/medium-low.
    • Cook 14 more minutes, still stirring frequently until well browned. Serve with eggs on top if desired and enjoy!

    Video

    Notes

    • Don't overcrowd the pan. Otherwise, you'll steam the potatoes instead of brown them. Cook in batches if you have to for the best texture.
    • Keep an eye on the heat. You want the temperature to be high enough to brown the potatoes, veggies, and chorizo without burning them.
    • Taste test as you go and adjust the seasonings if needed.
    • Breakfast for dinner- While sweet potato breakfast potatoes definitely taste great in the morning, nothing is stopping you from serving this for dinner! It would pair great with a big garden salad, crusty bread, and those fried eggs I keep mentioning.
    • Ingredients to prep ahead- This recipe moves super quickly once you get going! Peel and dice the sweet potatoes, chop the onion and green pepper, and slice the chorizo to make things easier.
    • Leftovers and storage- You can store leftovers in an airtight container in the fridge for up to 4-5 days. I find these are just as great the next day as a fresh batch — possibly even better because the potatoes crisp up a bit better the second time!

    Nutrition

    Serving: 1servingCalories: 219kcalCarbohydrates: 18gProtein: 8gFat: 13gSaturated Fat: 9gPolyunsaturated Fat: 0.1gMonounsaturated Fat: 0.3gCholesterol: 50mgSodium: 482mgPotassium: 338mgFiber: 3gSugar: 5gVitamin A: 10053IUVitamin C: 46mgCalcium: 52mgIron: 2mg
    Tried this recipe?Let us know how it was!

    Slow Cooker BBQ Meatballs

    Dec 25, 2024 · 1 Comment

    A close up image of a bowl of meatballs in BBQ with a toothpick in the focus meatball.

    My slow cooker BBQ meatballs come together with just 5 ingredients and require minimal effort for maximum flavor. Prepped, cooked, and ready to serve in the crockpot in just over 2 hours!

    BBQ Meatballs in a blue bowl with a blue and white striped napkin behind it and fancy toothpicks next to it.
    [feast_advanced_jump_to]

    Why You'll Love My BBQ Crock Pot Meatballs

    You know what I love on game day? A big batch of BBQ meatballs in the crock pot! In my family, we love to make a bunch of delicious appetizers to enjoy while we watch football on Sundays. And as you probably know, I'm not a huge football fan. I'm kind of just there for the food!

    I love recipes that don't take a lot of time or effort but are still super addictive — the kind of snack you'd happily chow down on along with the rest of your game day spread.

    And of course, the last thing I want to be doing on a Sunday morning is rolling ground beef into homemade meatballs — that's too much work. So this slow cooker BBQ meatballs recipe is made with frozen, pre-made ones instead! That's not all there is to love:

    • Set-it-and-forget-it recipe
    • Super portable in the slow cooker
    • Minimal ingredients
    • Less than 10 minutes of prep
    • Perfect for game day, parties, and other special occasions!
    A close up image of a bowl of meatballs in BBQ with a toothpick in the focus meatball.

    Ingredient Information And Substitutions

    • Frozen Meatballs- Look, I love homemade meatballs (check out my Grandma's real-deal Italian meatballs!). But I promise these will still taste great and be totally easy for you!
    • Ketchup- The liquid base of the sauce, ketchup adds sweetness, color, and acidity.
    • Liquid Smoke- Gives your slow cooker BBQ meatballs a smoky flavor without any actual smoking. It also provides most of that "barbecue" flavor. Soy sauce is the best sub.
    • Brown Sugar- Helps to balance out the tart ketchup and injects more sweetness.
    • Onion- Adds even more flavor to this BBQ meatballs crockpot recipe. You could use dried minced onions instead if you don't want to use fresh.
    An overhead image of labeled recipe ingredients.

    How To Make Meatballs Crockpot BBQ

    Step 1- Prep the Crockpot.

    Add the ketchup, liquid smoke, and brown sugar to your slow cooker and whisk to combine. Stir in the minced onions and meatballs.

    Sauce ingredients in the crockpot and the sauce mixed together in the pot.

    Step 2- Slow cook.

    Cover your slow cooker and set to High. Cook the BBQ meatballs in crockpot for 2 hours, or until hot and bubbly, stirring a couple times.

    Set your slow cooker to Warm and serve your crockpot meatballs with BBQ sauce while they're piping hot. Enjoy!

    Meatballs and onions mixed into the sauce and then the slow cooker covered and cooking.

    Frequently Asked Questions

    Can I make the meatballs from scratch?

    Totally! My all-time favorite recipe is my Grandma's real-deal Italian meatballs.

    Can this BBQ meatballs crockpot recipe be made gluten free?

    Yes, just be sure to choose a brand of prepared meatballs that are gluten free.

    Do you have to cook the meatballs before putting them in a crockpot?

    The ones I purchased were precooked. If using raw, either brown them first or extend the cook time by an hour or two.Be sure to make sure the center of the meatballs is 165 degrees F.

    Why do my meatballs fall apart in the slow cooker?

    Homemade meatballs may fall apart if you don't use a binder (eggs, breadcrumbs, or bread). But because we're using precooked meatballs for this recipe, you won't have to worry about that.

    How long do you cook BBQ meatballs in a crock pot?

    I went with 2 hours on High. If you'd rather do low heat, I'd encourage you to go more like 3.5-4 hours.

    Are BBQ meatballs healthy?

    Not really. There's a lot of processed sugar. But these are not meant to be eaten as an entree, they're designed to be an appetizer. So in theory, you're only eating a few.

    An overhead image of a bowl of BBQ Meatballs with a blue and white striped napkin and fancy toothpicks around it.

    Tips For Making This BBQ Meatballs Recipe

    • Mix the sauce right in the pot of the slow cooker! No need to dirty any extra dishes.
    • When you add the meatballs and onions, be sure to stir well so everything is evenly coated.
    • Don't worry about touching the meatballs as they cook. I usually stir a couple times, but you don't have to.
    • I like to serve these directly from the crockpot. I simply set it to Warm after they're done cooking.
    • I wanted to keep these slow cooker BBQ meatballs as simple as possible. But that doesn't mean you can experiment with extra ingredients! Sometimes I'll add a pinch of cayenne for some heat or a blend of Italian seasonings. You can even substitute soy sauce for liquid smoke.
    • Ingredients to prep ahead- This recipe is super hands-off once you load up your crockpot, so there isn't much to prep! You could always mince the onions in advance.
    • Leftovers and storage- Store any leftovers in an airtight container in the refrigerator for up to 3-4 days. To reheat, pop the meatballs in the microwave and heat in 30-second bursts until warmed through, or on the stovetop.
    A close up image of a meatball on a toothpick that's been cut in half exposing the inside of the meatball on a pile of other meatballs.

    What To Serve With Crockpot Meatballs with BBQ Sauce

    This is one of our game-day appetizer specials! I'll usually pair them with another app or two, plus some more substantial main dishes. Here are a few of my favorite options:

    • Crescent Roll Veggie Pizza
    • Oven Fried Pickles
    • Sweet and Spicy Baked Chicken Wings
    • BBQ Baked Potato with Pulled Pork

    Other Delicious Slow Cooker Recipes To Try

    • Pulled bbq chicken in a bun on a white plate.
      Pulled BBQ Chicken Recipe
    • A square image of the Easy Beef Stroganoff Recipe.
      Easy Beef Stroganoff Recipe (Instant Pot and Slow Cooker)
    • Say goodbye to dry and tough pork chops: these Smothered Crock Pot Pork Chops are the ultimate fall-apart tender comfort food. With just 4 ingredients, this easy dinner will be your new go-to dump dinner!
      Fall Apart Slow Cooker Pork Chops
    • An overhead image of tortillas topped with taco meat, lettuce, tomatoes and cheese with limes and sour cream on the sides.
      Slow Cooker Taco Meat (and Instant Pot!)

    Love this recipe? Please leave a 5 star ⭐️⭐️⭐️⭐️⭐️ rating in the recipe card below ⬇️ and/or a review in the comment section further down. Check out my Amazon Store for all my favorite tools, including those used in this recipe. And follow @thelifejolie on Instagram and TikTok!

    A close up image of a bowl of meatballs in BBQ with a toothpick in the focus meatball.

    Slow Cooker BBQ Meatballs Recipe

    Jessy Freimann
    My slow cooker BBQ meatballs come together with just 5 ingredients and require minimal effort for maximum flavor. Prepped, cooked, and ready to serve in the crockpot in just over 2 hours!
    5 from 9 votes
    Print Recipe Pin Recipe
    Prep Time 5 minutes mins
    Cook Time 2 hours hrs
    Inactive time 2 hours hrs
    Total Time 2 hours hrs 5 minutes mins
    Course Appetizer
    Cuisine American
    Servings 10 servings
    Calories 356 kcal

    Equipment

    • slow. cooker
    • Whisk
    • chefs knife
    • cutting board
    • measuring cups

    Ingredients
      

    • 2 cups tomato ketchup
    • 2 tablespoons liquid smoke (you can also substitute soy sauce)
    • 1 ½ cups brown sugar
    • ½ cup onion minced
    • 24 ounces meatballs pre-made and cooked from the freezer section

    Instructions
     

    • In the bowl of the slow cooker, whisk together the ketchup, liquid smoke (or soy sauce) and brown sugar until well combined.
    • Stir in onions and meatballs until evenly coated.
    • Cover the slow cooker and set to High.
    • Cook for 2 hours until hot and bubbly.
    • Set the slow cooker to Warm and serve hot.

    Video

    Notes

    • Mix the sauce right in the pot of the slow cooker! No need to dirty any extra dishes.
    • When you add the meatballs and onions, be sure to stir well so everything is evenly coated.
    • Don't worry about touching the meatballs as they cook. I usually stir a couple times, but you don't have to.
    • I like to serve these directly from the crockpot. I simply set it to Warm after they're done cooking.
    • I wanted to keep these slow cooker BBQ meatballs as simple as possible. But that doesn't mean you can experiment with extra ingredients! Sometimes I'll add a pinch of cayenne for some heat or a blend of Italian seasonings. You can even substitute soy sauce for liquid smoke.
    • Ingredients to prep ahead- This recipe is super hands-off once you load up your crockpot, so there isn't much to prep! You could always mince the onions in advance.
    • Leftovers and storage- Store any leftovers in an airtight container in the refrigerator for up to 3-4 days. To reheat, pop the meatballs in the microwave and heat in 30-second bursts until warmed through, or on the stovetop.

    Nutrition

    Serving: 1servingCalories: 356kcalCarbohydrates: 46gProtein: 12gFat: 14gSaturated Fat: 5gPolyunsaturated Fat: 1gMonounsaturated Fat: 6gCholesterol: 49mgSodium: 490mgPotassium: 386mgFiber: 0.3gSugar: 43gVitamin A: 251IUVitamin C: 3mgCalcium: 46mgIron: 1mg
    Tried this recipe?Let us know how it was!

    This recipe was originally posted on Easy Good Ideas.

    Stuffed Clams (Clams Casino)

    Dec 23, 2024 · 18 Comments

    A plate of baked clams with a cocktail fork and lemon wedge on it with the pan, a striped napkin, lemon and parsley behind it.

    This stuffed clams recipe is such a classic! Also known as clams casino, they're dangerously addictive in the best way, a make-ahead appetizer that's easy to make!

    A close up image of a stuffed clam on a white plate with others behind it.
    [feast_advanced_jump_to]

    Why You'll Love Baked Clams

    In some parts of the country, these are called stuffies, baked stuffed clams, or simply stuffed clams. Whatever you call them, my Uncle Richard's clams casino recipe is incredibly delicious!

    He was a fantastic cook, and one thing that brought him great joy was cooking food, especially for the ones he loved. If he knew you liked seafood, he would prepare some of the best seafood dishes and bring them to you.

    All the Italian restaurants around here have their own stuffed clams recipe. Uncle Richard always said this one was from one of the most popular places, but I have to imagine he added his own amazing spin to it. Either way, it's beyond easy to make. Are they healthy? Not really, but celebratory foods often aren't. These are decadent and delicious and the perfect way to wow your friends and family on a special occasion. They're also:

    • Made with simple, pantry ingredients
    • Prepped and ready to freeze in 10 minutes
    • Salty, buttery, and a little spicy
    • Impressive presentation
    • Wonderful for the holidays
    An overhead image of clams casino on a white plate with a cocktail fork and lemon wedge with a striped napkin next to it, a lemon and the pan of clams.

    Ingredient Information And Substitutions

    • Canned Clams- I went with a combination of chopped and minced canned clams to make things easier! Make sure you head to the seafood counter for the shells though. You can also make your own steamed clams if you prefer to put in the work, go with a few dozen.
    • Breadcrumbs- I usually use seasoned breadcrumbs to add more flavor to the "stuffing."
    • Butter- Adds flavor and helps hold all of the filling ingredients together.
    • Pimentos- These sweet roasted peppers are a traditional addition that's perfect. I usually find them with the Goya products.
    • Onion & Celery- For even more flavor (and color) and to add some substance to the filling.
    • Cheese- You can use either Romano or Parmesan cheese here!
    An overhead image of labeled recipe ingredients.

    How To Make This Baked Clams Recipe

    Step 1- Chop the veggies.

    Melt the butter on the stovetop or in the microwave. In the meantime, add the pimentos, celery, and onion to a food processor and pulse until finely chopped.

    Chopped celery, onion and pimentos in a food processor and then all of those very finely chopped in the food processor.

    Step 2- Mix the filling.

    Pour the melted butter, vegetable mixture, clams, breadcrumbs, and cheese into a large mixing bowl and stir until well combined.

    Filling ingredients in a glass bowl and then the ingredients well combined in the bowl.

    Step 3- Assemble & freeze (or cook).

    Divide the filling evenly into the clam shells and pat to smooth the tops. Flash freeze on a sheet pan until frozen solid, then store in a zip-top bag in the freezer until ready to use.

    If cooking right away cook at 400 degrees F for 10 minutes and then place under broiler for a minute or two to brown tops.

    A clam shell stuffed with the filling in a hand and some stuffed clams on a foil lined sheet pan in the oven.

    To cook from frozen, place the frozen stuffed clams recipe on a baking sheet and bake at 400 degrees F for for around 20 minutes and finish for a minute or two under the broiler until golden brown.. Enjoy!

    A close up overhead image of stuffed clams tightly next to each other.

    Frequently Asked Questions

    What kind of clams to make clams casino?

    My clams casino recipe calls for canned clams — each 6.5-ounce can has ½ cup chopped clams once drained. If you are using fresh clams for the shells, I'd encourage you to buy around 30 and supplement the remaining clams with canned ones.

    Where do you get the clam shells?

    You can purchase littleneck clams (the shells are the perfect size!) from your local seafood counter. Some stores will sell you the shells on their own. When making clam recipes throughout the year, I always make a point to save the shells for future clam casinos.

    Do I have to clean whole clams?

    Yes, even if a store tells you they're clean, it's still a good idea to clean them on your own to avoid any unwanted grit. Soak them in a bowl of cold water with a handful of salt for 10-15 minutes to purge any sand inside them, then give each clam a quick scrub where the shells meet. Discard any that won't close or broken clams.

    What's the best way to cook whole clams?

    Canned clams come already cooked, but if you're using fresh, I recommend steaming them. Place an inch of water in the bottom of a pot, cover, and heat over medium. Add the cleaned clams and cover. It will only take a few minutes to cook, and you'll know they're done when the shells open. Discard any with broken shells or unopened clams — those are bad and you don't want to eat them.

    What if I can't get clam shells?

    No problem! Just spread the filling in a large enough casserole dish so it's a thin layer (around 1 inch). If necessary, split between two casserole dishes.

    Do I have to freeze stuffed clams?

    The original recipe is meant to be made ahead and frozen, but you can totally pop these directly under the broiler. I'd put them into the middle rack for 10 minutes to het through and then move them up top to brown. Just watch them so they don't burn.

    How do I clean the half shells after eating my clams casino?

    I always save my shells since I make these each year during the holidays. When I serve them, I put a big bowl in the middle of the table to discard the shells. Then, I fill the bowl with hot soapy water and soak them for a bit to loosen anything stuck on them. Once they've sat for a good 10 minutes, I wash them in hot soapy water, scrubbing each shell to remove anything that didn't come off during soaking. Then, I rinse them and place them open-side down on a paper towel-lined sheet pan to dry. I store them in a zipper bag when I'm not using them and give them a quick rinse before cooking next time.

    Why do they call it Clams Casino?

    There are lots of different theories out there, but many say this dish originated at the Narragansett Pier Casino resort in Rhode Island in the early 20th century. They're often called stuffies in the area now, but some restaurants do still call them Clams Casino!

    A plate of baked clams with a cocktail fork and lemon wedge on it with the pan, a striped napkin, lemon and parsley behind it.

    Tips For Making This Stuffed Clams Recipe

    • Don't worry about chopping your onions and celery to be perfectly uniform, they're being thrown in the food processor.
    • Make sure you're using seasoned breadcrumbs — they add great flavor!
    • For the cans of clams, I use a mix of minced and chopped. I encourage you to use at least some chopped so you get some nice chunks of clam in there.
    • These are typically served in the half shells of littleneck clams. If you can't find any shells, 2 medium or 1 large casserole dish also work.
    • When prepping this clams casino recipe for the freezer, I like to flash freeze first. Once frozen, I transfer them to a freezer zipper bag and store for up to 3 months.
    • As the clams cook, keep a very close eye on them. They should get a nice brown color without actually burning. The original recipe was only under the broiler but to avoid burning, I bake first to heat them through and then move them up to brown them. You may need to move them around on the sheet pan during broiling, depending on your oven's hot spots.
    • Ingredients to prep ahead- You can make the filling for your clams up to 24 hours in advance — just store it in the fridge until ready to assemble. But this recipe is meant to be completely made ahead and frozen.
    • Leftovers and storage- As mentioned, I store these in the freezer for up to 3 months. It's a great way for me to get ahead on all the end-of-year holiday party prep! Otherwise, if you have any cooked clams left over, they'll keep in the fridge for 3 days. Broil to reheat.
    A close up image of baked clams on the side of a plate.

    What To Serve With Baked Clams Recipe

    Now that you know how to make clams casino, it's time to work them into your next party's menu. I serve them on the half shell with a generous squeeze of lemon directly from the sheet pan — they're best enjoyed piping hot. You could pair them with:

    • Whole Roasted Chicken
    • Crockpot Spiral Ham
    • Roasted Garlic Mashed Potatoes
    • Old Fashioned Chocolate Pie

    Other Delicious Appetizer Recipes To Try

    • A hand pulling a chip with artichoke dip out of a pan of it.
      Hot Artichoke Parmesan Dip
    • A close up image of a Brie Apple Phyllo Cup on a pan.
      Brie Apple Phyllo Cups
    • This Shrimp with Pesto and Prosciutto recipe is seriously easy and tastes delicious. It's super quick to make (10-15 minutes tops!!) and uses only 3 ingredients making it the perfect starter for a dinner party or a girls night! Click on the photo to get the recipe!
      Shrimp with Pesto and Prosciutto
    • A close up image of a chunk of Italian sausage in red sauce on a white plate with a toothpick sticking out of it.
      Oven Baked Italian Sausage with Tomato Sauce

    Love this recipe? Please leave a 5 star ⭐️⭐️⭐️⭐️⭐️ rating in the recipe card below ⬇️ and/or a review in the comment section further down. Check out my Amazon Store for all my favorite tools, including those used in this recipe. And follow @thelifejolie on Instagram and TikTok!

    A plate of baked clams with a cocktail fork and lemon wedge on it with the pan, a striped napkin, lemon and parsley behind it.

    Stuffed Clams (Clams Casino) Recipe

    Jessy Freimann
    This stuffed clams recipe is such a classic! Also known as clams casino, they're dangerously addictive in the best way, a make-ahead appetizer that's easy to make!
    5 from 6 votes
    Print Recipe Pin Recipe
    Prep Time 10 minutes mins
    Cook Time 20 minutes mins
    Total Time 30 minutes mins
    Course Appetizer, Snack
    Cuisine American, Italian
    Servings 50 pieces
    Calories 56 kcal

    Equipment

    • sheet pan
    • chefs knife
    • cutting board
    • measuring spoons
    • measuring cups
    • food processor

    Ingredients
      

    • 1 cup salted butter, 2 sticks
    • 6.5 ounces pimentos in a jar, drained
    • 2 medium onions, chopped
    • 4 stalks celery, chopped
    • 1 ½ cups seasoned breadcrumbs
    • 32.5 ounces clams canned- a combination off chopped and minced clams- 5 cans, drained
    • ½ cup Romano cheese or Parmesan, grated

    Instructions
     

    • Melt butter over medium heat on stove or in microwave.
    • While butter melts, add pimentos, onions, and celery to food processor until they are well combined (they should make a wet mixture and be very finely chopped).
    • Add your melted butter, vegetable mixture clams, breadcrumbs, and cheese to a mixing bowl and stir until well combined.
    • Spoon the mixture into clam shells so that they slightly heap, and pat to smooth the tops.
    • Place clams on a sheet pan and freeze. Once solid transfer to zipper freezer bag and freeze for up to 3 months.
    • When ready to cook, preheat the oven to 400 degrees F. Place clams on a lined sheet pan, filled side up.
      If cooking right away, bake in the middle rack for around 10 minutes and then broil for 1-2 minutes up top, watching them closely so they don't burn.
      If cooking from frozen, bake in the middle rack for around 20 minutes and then broil for 1-2 minutes up top, watching them closely so they don't burn.

    Video

    Notes

    • Don't worry about chopping your onions and celery to be perfectly uniform, they're being thrown in the food processor.
    • Make sure you're using seasoned breadcrumbs — they add great flavor!
    • For the cans of clams, I use a mix of minced and chopped. I encourage you to use at least some chopped so you get some nice chunks of clam in there.
    • These are typically served in the half shells of littleneck clams. If you can't find any shells, 2 medium or 1 large casserole dish also work.
    • When prepping this clams casino recipe for the freezer, I like to flash freeze first. Once frozen, I transfer them to a freezer zipper bag and store for up to 3 months.
    • As the clams cook, keep a very close eye on them. They should get a nice brown color without actually burning. The original recipe was only under the broiler but to avoid burning, I bake first to heat them through and then move them up to brown them. You may need to move them around on the sheet pan during broiling, depending on your oven's hot spots.
    • Ingredients to prep ahead- You can make the filling for your clams up to 24 hours in advance — just store it in the fridge until ready to assemble. But this recipe is meant to be completely made ahead and frozen.
    • Leftovers and storage- As mentioned, I store these in the freezer for up to 3 months. It's a great way for me to get ahead on all the end-of-year holiday party prep! Otherwise, if you have any cooked clams left over, they'll keep in the fridge for 3 days. Broil to reheat.

    Nutrition

    Serving: 6piecesCalories: 56kcalCarbohydrates: 3gProtein: 1gFat: 4gSaturated Fat: 3gPolyunsaturated Fat: 0.2gMonounsaturated Fat: 1gTrans Fat: 0.1gCholesterol: 12mgSodium: 94mgPotassium: 33mgFiber: 0.4gSugar: 1gVitamin A: 245IUVitamin C: 4mgCalcium: 22mgIron: 0.3mg
    Tried this recipe?Let us know how it was!

    Orange Cinnamon Pull-Apart Bread

    Dec 20, 2024 · 19 Comments

    A bundt shaped orange monkey bread on a white plate with an orange and black and white checked napkin behind it.

    Orange Cinnamon Pull-Apart Bread is an easy and delicious twist on a family favorite! Full of warm cinnamon and zesty orange, it can totally be made ahead and is perfect for brunch... or any family gathering! Made with Pillsbury Orange Rolls in under 1 hour.

    A bundt shaped orange monkey bread on a white plate with an orange and black and white checked napkin behind it.
    [feast_advanced_jump_to]

    Why You'll Love Cinnamon Pull Apart Bread

    The Pillsbury Monkey Bread recipe is a favorite in many American families, both for its easy preparation and ooey-gooey cinnamon-sugary goodness! Also known as pull apart bread, it's made with cut-up refrigerated biscuits. When ready, you can reach in and pull each sticky delicious piece apart, which makes it fun for kids.

    Though I tend to be more of a traditional cinnamon roll kind of gal, I'm not one to turn down an orange roll — and neither is my husband. Throwing a can of those puppies in the oven became a quick and easy way to let this man know I loved him, particularly in the early part of our relationship.

    So, not only is this orange monkey bread delicious, but it's also so nostalgic for me! You still have the same ooey-gooey goodness but with the most delicious and distinct orange flavor. Not to mention, this is:

    • Incredibly easy
    • Made with a handful of ingredients
    • Elevated with orange zest and juice
    • Perfectly sweet
    • Special enough for Christmas (or any holiday) morning
    • Family-friendly
    A close up image of the side of orange pull apart bread with a checkered napkin behind it..

    Ingredient Information And Substitutions

    • Pillsbury Orange Cinnamon Rolls- The star ingredient! And no, this post is not sponsored by Pillsbury... I just love these so much. Make sure to grab the Orange Rolls if they're available and if not, go with the regular cinnamon rolls from your refrigerated dairy section.
    • Sugar- Both white granulated sugar and brown sugar are needed for monkey bread with orange rolls! You could use only granulated if that's all you have, but I really like the added caramel taste of brown sugar.
    • Orange- For freshly squeezed orange juice and some zest! 1 orange should be more than enough.
    • Butter- I combine a stick of melted butter along with the orange juice, plus some brown sugar. The cinnamon roll dough will soak it up as it bakes, resulting in the best texture and flavor.
    • Cinnamon- I add an extra teaspoon of cinnamon to the mix for even more warm and spicy flavor!
    An overhead image of labeled recipe ingredients.

    How To Make Pull Apart Bread With Cinnamon Rolls

    Step 1- Prepare the cinnamon rolls.

    Preheat your oven to 350 degrees F and spray a bundt pan with cooking spray.

    Slice each orange roll into quarters and lightly roll each one into a ball so it doesn't fall apart. Set aside.

    An orange roll cut into quarters on a cutting board and then each quarter rolled into balls.

    Step 2- Make the butter mixture.

    Add the melted butter, brown sugar, and orange juice to a bowl and whisk until fully combined. Set aside.

    Butter ingredients in a bowl and then those ingredients whisked together.

    Step 3- Coat the cinnamon rolls.

    Add the granulated sugar, cinnamon, and orange zest to a plastic zipper bag and shake until well combined.

    Add the pieces to the zip-top bag with the sugar mixture, seal, and shake to coat fully.

    Sugar ingredients in a zipper bag and then the ingredients mixed together

    Step 4- Assemble & bake.

    Pour the contents of the bag into your prepared bundt pan then top with the butter mixture. Bake the orange cinnamon bread for 30-40 minutes.

    Let the bread cool for 10-15 minutes then turn it out onto a plate for serving. Enjoy!

    Coated cinnamon roll balls in the prepared bundt pan with the butter mixture poured on next to the bundt pan in the oven.

    Frequently Asked Questions

    Why is it called monkey bread

    The exact origin is a bit of a mystery! Some people say it's because of the way it's eaten — it's finger food that you pull apart with your hands, similar to how a monkey might do it.

    What is monkey bread sauce made of?

    It depends on the recipe. Some are made with margarine and brown sugar, while others, like mine, are made with butter instead. This one is unique because it includes orange juice for extra delicious flavor.

    Can I use a different type of pan?

    A bundt pan is ideal for this Pillsbury orange rolls recipe but you could also use a 9x13 inch baking pan! You may need to adjust the baking time slightly. Keep an eye on your bread and start checking on it around the 25-minute mark to prevent it from burning.

    Can I make orange monkey bread ahead of time?

    Yes! You can prep and assemble your bread then store it in the fridge for up to 24 hours before baking. This would be really helpful if you plan on serving it up for holiday brunch.

    A close up image of a slice of pull apart bread focusing on the soft inside with the rest of it in the background.

    Tips For Making This Cinnamon Biscuit Monkey Bread Recipe

    • Great sweet main dish option for brunch. This is versatile enough to serve as the primary component for a light breakfast, or among many delicious dishes if you're planning a larger brunch with family.
    • Make it sweeter. If you have an extreme sweet tooth, you can totally drizzle the finished orange monkey bread with the glaze that comes with the roll. I found it to already be quite sweet so I didn't do this.
    • Be sure to spray the bundt pan with cooking spray to prevent sticking when you invert it.
    • Sugar mixture- When you shake up the granulated sugar, cinnamon, and orange zest, don't be afraid to use your fingers. You really want to break up and evenly distribute that zest.
    • If you find the butter, sugar, and orange juice mixture starts to separate after whisking, give it another good stir before adding it to the orange rolls.
    • Your cinnamon orange bread may look too liquidy once you add the butter mixture, but don't worry — the dough will absorb it while it bakes.
    • Baking times can vary depending on your oven! Keep a close eye on the bread. I usually check for doneness with a toothpick inserted into the center. If it comes out clean, it's ready.
    • Ingredients to prep ahead- You can prep and assemble your bread the night before if you'd like! That said, this recipe does come together so quickly and easily that it may not be necessary.
    • Leftovers and storage- Store any leftovers in an airtight container at room temperature for up to 3 days, or in the fridge for 4-5 days. Though, keep in mind it will likely become denser after being refrigerated. You can reheat in the microwave in 30-second bursts.
    A side angle shot of the side half of orange monkey bread  with an orange and a checkered napkin in the background.

    What To Serve With Pull Apart Monkey Bread

    Monkey bread with orange rolls has become a staple at all of my family brunches! I usually pair it with a few other sweets plus some savory dishes to balance everything out. Below are my favorites as well as a few others at the bottom of this post:

    • Broccoli Cheddar Quiche
    • Super Quick Cheese Danish
    • Puff Pastry Breakfast Pizza
    • Baked French Toast with Mixed Berries

    Other Delicious Brunch Recipes To Try

    • Grandma Hinz's Apple Pancakes | The Life Jolie
      Grandma Hinz's Apple Pancakes
    • This Egg Stuffed Bread recipe is a delicious, easy brunch or breakfast option. Imagine crusty loaves of french bread, stuffed with your favorite omelette fillings, cheese and eggs. It's quick and delicious to serve during the holidays and is sure to be a family favorite!
      Egg Stuffed Bread
    • A plate of sweet potato hash with an egg in it and onions and a green napkin behind it.
      Chorizo and Sweet Potato Breakfast Hash
    • Spinach and Feta Breakfast Puff Pastry Pizza
      Spinach and Feta Breakfast Puff Pastry Pizza

    Love this recipe? Please leave a 5 star ⭐️⭐️⭐️⭐️⭐️ rating in the recipe card below ⬇️ and/or a review in the comment section further down. Check out my Amazon Store for all my favorite tools, including those used in this recipe. And follow @thelifejolie on Instagram and TikTok!

    A bundt shaped orange monkey bread on a white plate with an orange and black and white checked napkin behind it.

    Orange Cinnamon Pull-Apart Bread Recipe

    Jessy Freimann
    Orange Cinnamon Pull-Apart Bread is an easy and delicious twist on a family favorite! Full of warm cinnamon and zesty orange, it can totally be made ahead and is perfect for brunch... or any family gathering! Made with Pillsbury Orange Rolls in under 1 hour.
    No ratings yet
    Print Recipe Pin Recipe
    Prep Time 10 minutes mins
    Cook Time 40 minutes mins
    Rest time 10 minutes mins
    Total Time 50 minutes mins
    Course Breakfast, Brunch
    Cuisine American
    Servings 8 servings
    Calories 530 kcal

    Equipment

    • measuring cups
    • measuring spoons
    • mixing bowl
    • Spatula
    • Bundt pan

    Ingredients
      

    • Cooking spray
    • ½ cup granulated sugar
    • 1 teaspoon cinnamon
    • 1 orange you'll use the zest and ½ cup of the juice)
    • 2 packages Cinnamon Rolls The orange flavor- from the refrigerated section
    • ½ cup salted butter melted (1 stick)
    • ½ cup brown sugar packed

    Instructions
     

    • Preheat the oven to 350 degrees F and spray the bundt pan with cooking spray. Set aside.
    • Cut each orange roll into quarters and lightly roll each quarter into a ball so that it doesn't fall apart.
    • In a separate bowl whisk together butter, brown sugar and orange juice until fully combined. Set aside (keep the whisk with it because it might separate and you can whisk it again before adding it later).
    • In a plastic zipper bag combine granulated sugar, cinnamon and orange zest. Shake until well combined (I also used my fingers to break up and evenly distribute the orange zest).
    • Place all the orange roll pieces into the zipper bag with the sugar mixture. Seal it well and shake until each piece of dough is fully coated in the sugar mixture.
    • Place the entire contents of the bag into the prepared bundt pan.
    • Pour the butter mixture evenly over the contents of the bundt pan.
    • Bake for 30-40 minutes. Allow it to cool for around 10-15 minutes and then turn it onto a plate and serve immediately. If not serving right away, cool completely and cover with plastic wrap until you're ready to serve.

    Video

    Notes

    • Great sweet main dish option for brunch. This is versatile enough to serve as the primary component for a light breakfast, or among many delicious dishes if you're planning a larger brunch with family.
    • Make it sweeter. If you have an extreme sweet tooth, you can totally drizzle the finished orange monkey bread with the glaze that comes with the roll. I found it to already be quite sweet so I didn't do this.
    • Be sure to spray the bundt pan with cooking spray to prevent sticking when you invert it.
    • Sugar mixture- When you shake up the granulated sugar, cinnamon, and orange zest, don't be afraid to use your fingers. You really want to break up and evenly distribute that zest.
    • If you find the butter, sugar, and orange juice mixture starts to separate after whisking, give it another good stir before adding it to the orange rolls.
    • Your cinnamon orange bread may look too liquidy once you add the butter mixture, but don't worry — the dough will absorb it while it bakes.
    • Baking times can vary depending on your oven! Keep a close eye on the bread. I usually check for doneness with a toothpick inserted into the center. If it comes out clean, it's ready.
    • Ingredients to prep ahead- You can prep and assemble your bread the night before if you'd like! That said, this recipe does come together so quickly and easily that it may not be necessary.
    • Leftovers and storage- Store any leftovers in an airtight container at room temperature for up to 3 days, or in the fridge for 4-5 days. Though, keep in mind it will likely become denser after being refrigerated. You can reheat in the microwave in 30-second bursts.

    Nutrition

    Serving: 1servingCalories: 530kcalCarbohydrates: 74gProtein: 4gFat: 26gSaturated Fat: 13gPolyunsaturated Fat: 0.4gMonounsaturated Fat: 3gTrans Fat: 1gCholesterol: 31mgSodium: 755mgPotassium: 53mgFiber: 1gSugar: 47gVitamin A: 392IUVitamin C: 9mgCalcium: 24mgIron: 2mg
    Tried this recipe?Let us know how it was!

    Italian Pizzelles

    Dec 18, 2024 · Leave a Comment

    A close up overhead image of a pizzelle cookie on top of other ones.

    These Italian pizzelles are the classic Christmas cookies we all know and love. They're super easy to make with a light and slightly crisp texture you won't be able to get enough of! Prepped and ready in 30 minutes total.

    A close up overhead image of a pizzelle cookie on top of other ones.
    [feast_advanced_jump_to]

    Why You'll Love This Pizzelle Recipe:

    My dad's side of the family is Italian-American. My grandparents were first-generation and made a point to hold on to the traditions that their ancestors embraced. So every year around Christmastime, I knew that if I was going to Grandma's house, there would be a big plate of Italian pizzelles ready to eat (along with a slew of other fantastic cookies).

    These light, thin, and crispy cookies are a tradition in many Italian-American families around the holiday season. They're fun to eat and look gorgeous on any cookie platter — even for all their imperfections when I make them! Like most recipes that are beloved in their cultures, each family has their own variation and trick for how to make the best version. Here are a few reasons to try my family's pizzelle cookie recipe this year:

    • A nostalgic recipe for the holidays
    • Sweet and buttery
    • Gorgeous presentation
    • Simple batter
    • Fun to make with the kids
    • A family favorite!
    A pizzelle cookie on the corner of a cooling wrap with others behind it.

    Ingredient Information And Substitutes

    • Butter- Adds richness and flavor, plus it creates that crispy texture I mentioned.
    • Eggs- Bind the ingredients together and add moisture.
    • Granulated Sugar- Sweetens the batter and helps with browning.
    • Flour- Provides structure! Regular all-purpose flour works well.
    • Baking Powder- To help the cookies rise ever so slightly. They are very flat, especially compared to other types of cookies, but you do still need a leavening agent.
    • Vanilla or Anise Extract- In our family, there has always been a debate about whether to flavor them with vanilla or anise extract. I personally love them both, so I left either one as an option. If you want to use an oil version, reduce it to a ½ teaspoon as the flavor is much more concentrated.
    • Confectioner's Sugar- The gorgeous garnish in every good pizzelle recipe! This is technically optional, but it looks SO pretty.
    An overhead image of labeled ingredients.

    How To Make This Pizzelle Cookie Recipe

    Step 1- Combine the wet ingredients.

    Melt the butter and set aside to cool. Place the eggs, sugar, and vanilla or anise extract in another bowl and beat until light and creamy. Slowly pour in some of the butter, mix well, then add more butter while continuing to stir. Repeat until none remains.

    Wet ingredients in a glass bowl and then all of them mixed together.

    Step 2- Mix dry ingredients.

    Combine the flour and baking powder in a separate bowl. Add the flour and baking powder to the wet mixture and mix again until well combined.

    Dry ingredients and then the wet and dry ingredients fully combined.

    Step 3- Cook.

    Add a small amount of vegetable oil to the iron using a brush or oiled paper towel. Close and heat fully.

    Pour 1-2 teaspoons of batter in the middle of each cookie press, then spread slightly. Close the iron tightly for around 30 seconds to minute. Steam will come out of the pizzelle press and will lessen once they're ready. Once golden, use a small fork to carefully remove the cookies from the iron.

    Place the pizzelles on a cooling rack in a single layer to cool and harden. Serve immediately or store at room temperature. Enjoy!

    A Hand spreading oil with a papertowel on the pizzelle press and then the hot press with batter in the middle of each section.

    Frequently Asked Questions

    How thick should my pizzelle batter be?

    Your batter should be thick but not overly thick — ideally, it will coat the back of a spoon without dripping off immediately. If it's too thick, it won't cook evenly. If it's too thin, the pizzelles will be too delicate to handle and eat.

    Should I spray my pizzelle maker?

    I usually add some vegetable oil to a clean paper towel and then apply it to the pizzelle iron before heating it. This keeps the batter from sticking! You won't technically need it if your pizzelle maker is nonstick, but I would add a touch of oil or spray just in case.

    How do you store pizzelles?

    Make sure to let them cool and harden completely before storing at room temperature in a cool, dark place! I usually store them in a clean clothing gift box lined in parchment. It's not a good idea to store in an airtight container because you want them to stay crispy.

    How far in advance you can make pizzelles?

    You can make my pizzelle recipe up to 1 day in advance. Prepare the batter as instructed and then store as indicated above.

    How do you clean a pizzelle iron?

    I usually heat up the iron, then add a few layers of wet paper towels. Close like you're making a cookie so that it steams for a minute or two, then remove the paper towels and wipe the iron clean. It's easy!

    Tips For Making Italian Pizzelles

    • Add the warm butter slowly. This is called "tempering" the batter and prevents the hot liquid from cooking the eggs. If you do find that you've scrambled the eggs, don't worry. Just run the batter through a strainer to remove the chunks
    • To grease the pizzelle iron, I put a small amount of vegetable oil onto a folded paper towel and carefully rub it all over before heating. You don't need much. The first cookie or two may be a tiny bit greasier than the others, but then they'll be good.
    • Don't skip the preheat. This is crucial for getting that crispy texture! Allow your pizzelle iron to heat while you prepare my pizzelle recipe so it is fully heated before adding the batter.
    • Every pizzelle maker is different. You'll need around 1-2 teaspoons of batter for each cookie part of the iron. After the first couple of cookies, you'll figure out the best amount.
    • I place the batter in the middle of each cookie iron, or slightly above the middle, and carefully and quickly spread it a little bit. Once the batter is in, close it and keep it closed for around 30 seconds to a minute. Again, this will vary by machine, but you want the cookies just a touch golden.
    • Keep your eyes on the steam- After around 10 seconds, you'll start to see steam coming from the machine- this is good! It means the pizzelles are cooking. Once the steam starts to slow down, check it for doneness.
    • Use a small fork to remove the cookies. Do so carefully and place them on a cooling rack with parchment underneath. The texture may be soft at first but will harden a bit once the cookies have been sitting for a few minutes. Don't stack them until cool or they won't harden up as nicely. Just leave them alone and let them do their thing.
    • Ingredients to prep ahead- You can make the batter for this pizzelle cookie recipe up to 1 day in advance if you'd like to get ahead on party prep. Store it in the refrigerator until ready to use. Or you can just make the cookies ahead.
    • Leftovers and storage- We usually store ours in the cardboard gift boxes that you would put clothing in before wrapping it. Be sure you don't stack them until they're cooled completely. Pizzelles will keep for up to two weeks at room temperature.
    An overhead image of a bunch of pizzelles stacked on a cooling rick.

    What To Serve With This Pizzelle Cookies Recipe

    I really only make my pizzelles recipe for the holidays! It's such a classic Italian-American cookie option. I love setting up the iron right on the kitchen island so my family can watch while I do it — it's so fun for Christmas Eve and Christmas Day! Some of my other favorite cookies to pair with them include:

    • Chewy Molasses Cookies
    • Chocolate Crinkles
    • Italian Rainbow Cookies
    • Sour Cream Cookies

    Other Delicious Cookie Recipes To Try

    • These Almond Ginger Cookies are such an easy dessert to make! This crispy cookie is the best slice-and-bake option if you're looking for a spicy cookie that is that isn't overly sweet. They're great for Christmas!
      Almond Ginger Cookies
    • A stack of 4 double chocolate peanut butter chip cookies.
      Double Chocolate Peanut Butter Chip Cookies
    • A square image of Monster (Edible) Cookie Dough Truffles.
      Monster (Edible) Cookie Dough Truffles Recipe
    • A squaer image of Apple Cinnamon Thumbprint Cookies.
      Apple Cinnamon Thumbprint Cookies

    Love this recipe? Please leave a 5 star ⭐️⭐️⭐️⭐️⭐️ rating in the recipe card below ⬇️ and/or a review in the comment section further down. Check out my Amazon Store for all my favorite tools, including those used in this recipe. And follow @thelifejolie on Instagram and TikTok!

    A close up overhead image of a pizzelle cookie on top of other ones.

    Italian Pizzelles

    Jessy Freimann
    These Italian pizzelles are the classic Christmas cookies we all know and love. They're super easy to make with a light and slightly crisp texture you won't be able to get enough of! Prepped and ready in 30 minutes total.
    No ratings yet
    Print Recipe Pin Recipe
    Prep Time 10 minutes mins
    Cook Time 20 minutes mins
    Course Dessert
    Cuisine Italian
    Servings 48 cookies
    Calories 65 kcal

    Equipment

    • mixing bowl
    • Spatula
    • stand mixer or
    • Hand mixer
    • measuring cups
    • measuring spoons
    • Cooling rack
    • pizzelle press

    Ingredients
      

    • 1 ½ cups butter (2 ½ sticks)
    • 6 eggs
    • 1 ¼ cups granulated sugar
    • 2 Tablespoons vanilla extract or anise extract
    • 3 ¼ cups flour
    • 4 teaspoons baking powder
    • Confectioner's sugar for garnish (optional)

    Instructions
     

    • Melt the butter in the microwave or on the stove and set aside to cool.
    • Combine flour and baking powder in a medium bowl and set aside.
    • While the butter cools, beat eggs, sugar and vanilla or anise extract until light and creamy, about 2-3 minutes.
    • Add a small amount of the butter to the batter and mix it well and then slowly add butter more while mixing until well combined to prevent the butter from cooking the egg.
    • Add flour and baking powder mixture to the batter and mix until well combined, scraping down the sides.
    • Dip a folded paper towel into a very small amount of vegetable oil and carefully rub it over the pizzelle iron. Close the iron and heat fully.
    • Once heated, place a 1-2 teaspoons of batter around the middle of each cookie press on the iron and quickly spread it slightly. Every machine is different, so it'll be around a couple teaspoons of batter into each cookie part of the iron and after the first couple cookies, you'll figure out the best amount.
    • Once the batter is in, close the iron tightly and keep it closed for around 30 seconds to a minute. Again, this will vary by machine, but you want the cookies to be just starting to get a tiny bit golden and the steam begins to slow.
    • Using a small fork, carefully remove the cookies and place them on a cooling rack with parchment underneath in a single layer until fully cooled. The cookies will be soft at first but will harden a bit once they've been sitting for a few minutes.
    • Serve immediately or store in a cardboard clothing gift box at room temperature for up to two weeks.

    Video

    Notes

    • Add the warm butter slowly. This is called "tempering" the batter and prevents the hot liquid from cooking the eggs. If you do find that you've scrambled the eggs, don't worry. Just run the batter through a strainer to remove the chunks
    • To grease the pizzelle iron, I put a small amount of vegetable oil onto a folded paper towel and carefully rub it all over before heating. You don't need much. The first cookie or two may be a tiny bit greasier than the others, but then they'll be good.
    • Don't skip the preheat. This is crucial for getting that crispy texture! Allow your pizzelle iron to heat while you prepare my pizzelle recipe so it is fully heated before adding the batter.
    • Every pizzelle maker is different. You'll need around 1-2 teaspoons of batter for each cookie part of the iron. After the first couple of cookies, you'll figure out the best amount.
    • I place the batter in the middle of each cookie iron, or slightly above the middle, and carefully and quickly spread it a little bit. Once the batter is in, close it and keep it closed for around 30 seconds to a minute. Again, this will vary by machine, but you want the cookies just a touch golden.
    • Keep your eyes on the steam- After around 10 seconds, you'll start to see steam coming from the machine- this is good! It means the pizzelles are cooking. Once the steam starts to slow down, check it for doneness.
    • Use a small fork to remove the cookies. Do so carefully and place them on a cooling rack with parchment underneath. The texture may be soft at first but will harden a bit once the cookies have been sitting for a few minutes. Don't stack them until cool or they won't harden up as nicely. Just leave them alone and let them do their thing.
    • Ingredients to prep ahead- You can make the batter for this pizzelle cookie recipe up to 1 day in advance if you'd like to get ahead on party prep. Store it in the refrigerator until ready to use. Or you can just make the cookies ahead.
    • Leftovers and storage- We usually store ours in the cardboard gift boxes that you would put clothing in before wrapping it. Be sure you don't stack them until they're cooled completely. Pizzelles will keep for up to two weeks at room temperature.

    Nutrition

    Serving: 3cookiesCalories: 65kcalCarbohydrates: 12gProtein: 2gFat: 1gSaturated Fat: 0.3gPolyunsaturated Fat: 0.2gMonounsaturated Fat: 0.3gTrans Fat: 0.002gCholesterol: 21mgSodium: 51mgPotassium: 28mgFiber: 0.2gSugar: 6gVitamin A: 42IUCalcium: 33mgIron: 1mg
    Tried this recipe?Let us know how it was!

    Bubble Up Biscuit Breakfast Casserole

    Dec 16, 2024 · 2 Comments

    A hand lifting a a piece of biscuit casserole with eggs from the pan.

    If you're tired of soggy breakfast strata and casseroles, then you've got to try my bubble up biscuit breakfast casserole! It's easy, delicious, and can even be made ahead. Baked in just 45 minutes!

    A piece of biscuit breakfast casserole on a white plate with the pan behind it and a blue and white striped napkin.
    [feast_advanced_jump_to]

    Why You'll Love Breakfast Casserole With Biscuits:

    Brunch is, without a doubt, my favorite meal of the day. It's in the morning, but generally not early enough to make it tough to wake up. You typically get a great combination of breakfast and lunch foods and still have a great excuse to eat dessert in the morning. And then you often have the rest of the day to do what you please!

    I've been getting a ton of requests for more brunch options, so I knew an easy breakfast casserole recipe needed to happen! This one is certainly easy — you totally have the option of throwing it together the night before and then baking it up fresh in the morning. It's made with my all-time favorite chicken breakfast sausage (so much lighter than beef or pork!), veggies, cheese, and refrigerated biscuits. I call it a "bubble up" casserole because the biscuits bubble up when baked. SO tasty!

    In case you need more reasons to try it out at your next at-home brunch:

    • Hearty and satisfying
    • Customizable
    • Incredibly easy thanks to the refrigerated biscuits
    • Great for entertaining after the holidays
    • Family-friendly
    • Full of fresh ingredients
    An overhead image of a breakfast casserole with biscuits in a white casserole dish with a blue and white striped napkin next to it.

    Ingredient Information And Substitutions

    • Chicken Breakfast Sausage- I went with precooked chicken sausage with for this. They're full of fantastic flavor while also being healthy. Use your preferred sausage and make sure you cook it fully before adding to the casserole.
    • Refrigerated Biscuits- The flaky base of your casserole! You can use whatever brand you usually use, just make sure they're regular size, not Grands.
    • Eggs- You'll need 7 large eggs in total. I used large.
    • Cheddar Cheese- To make breakfast casserole with biscuits nice and cheesy. Other options like Monterey Jack, Pepper Jack, or Swiss would also taste great!
    • Half-and-Half- I like using half-and-half instead of plain milk to make things even more rich and creamy. That said, you could use whole milk instead.
    • Vegetables- All you need are onion and bell pepper! Feel free to substitute some of your other favorite veggies if you'd like, just make sure you chop them small.
    • Seasonings- I added kosher salt, ground black pepper, paprika, garlic powder, and a pinch of ground nutmeg directly to the casserole and garnish with fresh parsley.
    An overhead image of labeled recipe ingredients.

    How To Make Sausage And Egg And Cheese Breakfast Casserole

    Step 1- Sauté the chicken sausage and veggies.

    Coat a large sauté pan and a 9 x 13-inch baking pan with cooking spray. Set the baking dish aside, and place the sauté pan over medium-high heat. Preheat your oven to 350 degrees F if you plan on baking your bubble up breakfast casserole right away.

    Add the onion, bell pepper, and chicken breakfast sausage to the pan. Sauté until the vegetables have softened and the sausage starts to brown. Remove the pan from heat to cool.

    Sausage, peppers and onions cooking in a skillet early in the cooking process and then later in the process.

    Step 2- Make the egg mixture.

    In the meantime, add the eggs, half-and-half, and seasonings to a bowl and whisk to combine.

    Egg and liquid ingredients in a bowl and then mixed together.

    Step 3- Assemble.

    Drop the biscuit pieces into the bottom of the baking pan and top with the cooled chicken sausage and veggies. Sprinkle with cheddar then pour the egg mixture on top.

    Raw biscuit pieces in a baking pan and then the sausage and veggie mixture added to it.

    Step 4- Bake.

    Place the breakfast casserole with biscuits in the preheated oven and bake uncovered for 45 minutes. Cool slightly, garnish, and serve!

    Cheese sprinkled over the pan and then the pan in the oven after the egg mixture has been poured in.

    Frequently Asked Questions

    Why is my breakfast casserole soupy?

    If your breakfast casserole with biscuits comes out soup or soggy, you likely added too much liquid! The biscuit layer is there to soak up the filling slightly, but if you add too many eggs or too much half-and-half, the entire thing will go mushy. Follow the quantities on the recipe card and you should be fine.

    Can you make a biscuit breakfast casserole in advance?

    Yes! My recipe can be made the night before and refrigerated until you're ready to bake. You can also bake it right away and serve, or refrigerate and reheat later.

    How do you know when a breakfast casserole is done?

    You'll know your breakfast biscuit casserole is ready to pull out of the oven when it's firm to the touch and a knife inserted into the center comes out clean. Mine usually takes about 45 minutes, but start checking on yours around the 40-minute mark to prevent any burning.

    How to reheat breakfast casserole?

    You can reheat single servings in the microwave in 30-second bursts until warmed through, or use your oven for larger portions. Cover with foil and heat at 350 degrees F until hot.

    Can you freeze breakfast casseroles?

    Yes, but I'd recommend freezing after baking and slicing. When properly stored — wrapped tightly in plastic wrap and foil in a freezer-safe bag — it will keep for up to 2-3 months in the freezer.

    A hand lifting a a piece of biscuit casserole with eggs from the pan.

    Tips For Making Sausage Egg And Cheese Breakfast Casserole

    • I like to dice the onion up pretty fine for this.
    • For the sausage, I slice it down the middle lengthwise and then cut it into slices.
    • I know it's tempting to skip the sautéing step, but please don't. It helps soften the veggies up a tad and deepens the great sausage flavor.
    • Be sure to cool the veggies and sausage before adding to other ingredients so you don't mistakenly pre-cook the eggs.
    • Coat the baking pan with non-stick cooking spray to prevent sticking.
    • Biscuit prep- I usually cut each refrigerated biscuit into quarters to make scattering them over the bottom of the pan easier.
    • Be sure to whisk the egg mixture really well before pouring it on top of the biscuit layer.
    • Remember that you can always cover the assembled biscuit breakfast casserole and refrigerate overnight until ready to bake. This is super helpful if you plan on serving this to guests!
    • Ingredients to prep ahead- You can dice the onion and bell pepper and slice the sausage in advance. You could even sauté them and store in the fridge for up to 48 hours before using.
    • Leftovers and storage- Store any leftover casserole in an airtight container or covered in the fridge for up to 3-4 days. Refer to the reheat instructions above!
    A piece of breakfast casserole on a white plate with a bite taken from it and the fork next to it.

    What To Serve With Breakfast Biscuit Casserole

    My easy breakfast casserole with biscuits is a great standalone meal — it features protein, veggies, and a carb! But, if you want to round everything out to make the ultimate brunch spread, try serving it with:

    • Baked French Toast with Mixed Berries
    • Caprese Quiche
    • Zucchini Pancakes
    • Chocolate Chip Banana Bread Muffins

    Other Delicious Brunch Recipes To Try

    • A slice of breakfast pizza on parchment and a cutting board with a bite taken out of it and the rest of the pizza in the background.
      Puff Pastry Breakfast Pizza
    • An overhead image of the asparagus puff pastry tart on a parchment lined cutting board with sprigs of thyme around it.
      Asparagus Leek Tart
    • A close up of a bacon egg and cheese muffin on a plate with the other ones.
      Bacon Egg And Cheese Muffins
    • A slice of quiche been pulled up and out of a broccoli quiche with broccoli and a cloth napkin in the background.
      Broccoli Cheddar Cheese Quiche

    Love this recipe? Please leave a 5 star ⭐️⭐️⭐️⭐️⭐️ rating in the recipe card below ⬇️ and/or a review in the comment section further down. Check out my Amazon Store for all my favorite tools, including those used in this recipe. And follow @thelifejolie on Instagram and TikTok!

    A hand lifting a a piece of biscuit casserole with eggs from the pan.

    Bubble Up Biscuit Breakfast Casserole

    Jessy Freimann
    If you're tired of soggy breakfast strata and casseroles, then you've got to try my bubble up biscuit breakfast casserole! It's easy, delicious, and can even be made ahead. Baked in just 45 minutes!
    5 from 2 votes
    Print Recipe Pin Recipe
    Prep Time 10 minutes mins
    Cook Time 50 minutes mins
    Total Time 1 hour hr
    Course Breakfast
    Cuisine American
    Servings 8 servings

    Equipment

    • chefs knife
    • cutting board
    • measuring cups
    • measuring spoons
    • Whisk
    • mixing bowl
    • 9 x 13 Pan
    • Large saute pan

    Ingredients
      

    • Cooking spray
    • ½ cup onion, finely diced
    • 1 cup red bell pepper, diced
    • 1 package Chicken Sausage Breakfast sausage- cut in half length-wise and then sliced
    • 2 packages biscuits, from the refrigerated section, each biscuit cut into quarters
    • 1 cup cheddar cheese, shredded
    • 7 large eggs
    • ⅔ cup half and half
    • 1 teaspoon kosher salt
    • ¼ teaspoon ground black pepper
    • ¼ teaspoon paprika
    • ½ teaspoon garlic powder
    • 1 pinch ground nutmeg
    • fresh parsley, chopped (optional- garnish)

    Instructions
     

    • Spray a large saute pan and a 9" x 13" baking pan with cooking spray. Set the baking pan aside and heat the saute pan over medium high heat.
    • Add onion, bell pepper and al fresco All Natural Country Style Chicken Breakfast Sausage to the pan and saute stirring frequently until vegetables have softened a bit and sausage pieces are just starting to brown, about 5-7 minutes. Remove from heat and cool.
    • While the sausage mixture cools, whisk together eggs, half and half, salt, pepper, paprika, garlic powder and nutmeg until well combined. Set aside.
    • Scatter the biscuit pieces over the bottom of the baking pan and top in an even layer with the cooled sausage mixture. 
    • Sprinkle with shredded cheddar evenly over the pan.
    • Pour the egg mixture over the top of the baking pan. If making ahead, cover and chill over night in the refrigerator.
    • When you're ready to bake, preheat the oven to 350 degrees. Bake uncovered for 45 minutes.
    • Cool slightly and serve immediately with a sprinkle of chopped parsley.

    Video

    Notes

    • I like to dice the onion up pretty fine for this.
    • For the sausage, I slice it down the middle lengthwise and then cut it into slices.
    • I know it's tempting to skip the sautéing step, but please don't. It helps soften the veggies up a tad and deepens the great sausage flavor.
    • Be sure to cool the veggies and sausage before adding to other ingredients so you don't mistakenly pre-cook the eggs.
    • Coat the baking pan with non-stick cooking spray to prevent sticking.
    • Biscuit prep- I usually cut each refrigerated biscuit into quarters to make scattering them over the bottom of the pan easier.
    • Be sure to whisk the egg mixture really well before pouring it on top of the biscuit layer.
    • Remember that you can always cover the assembled biscuit breakfast casserole and refrigerate overnight until ready to bake. This is super helpful if you plan on serving this to guests!
    • Ingredients to prep ahead- You can dice the onion and bell pepper and slice the sausage in advance. You could even sauté them and store in the fridge for up to 48 hours before using.
    • Leftovers and storage- Store any leftover casserole in an airtight container or covered in the fridge for up to 3-4 days. Refer to the reheat instructions above!

    Nutrition

    Serving: 1serving
    Tried this recipe?Let us know how it was!

    Grandma Rose's Pecan Tassies

    Dec 13, 2024 · 12 Comments

    A plate of mini pecan tarts with a mini muffin tin of them i nthe background, a red and green striped towel and some broken pieces of it.

    My Grandma Rose's pecan tassies are a family favorite! They look (and taste) like mini pecan pies and are surprisingly easy to make. With a few simple ingredients and a flakey cream cheese pastry crust, they look so pretty on a holiday cookie tray!

    A plate of mini pecan tarts with a mini muffin tin of them i nthe background, a red and green striped towel and some broken pieces of it.
    [feast_advanced_jump_to]

    Why You'll Love Pecan Pie Tarts

    My beautiful Grandma Rose had a business making cookies and baked goods for special events out of her own, not-extremely-large kitchen. I've heard many stories of all-nighters in that glorious kitchen and I can only imagine the whole kitchen as well as the dining room covered in her delicious cookies.

    Of all the cookies she made, her pecan tarts are by far my favorite to eat. The process of putting them together can be tedious — but I love them so much that I can't not make them. I even made them when I was pregnant (and tired) because even in their tedium, Grandma Rosie's pecan tart recipe is still very easy to make! They also:

    • Taste like mini pecan pies
    • Are perfect for Christmas cookie trays
    • Freeze beautifully
    • Make for a great handheld dessert option
    • Feel so nostalgic
    A close up overhead image of pecan tassies.

    Ingredient Information And Substitutions

    • Cream Cheese & Flour- The base of the cream cheese crust! I usually favor full-fat cream cheese for baking recipes. Make sure it's softened first too. For the flour, all-purpose is fine.
    • Butter- I use butter in the crust and the tassies filling, but you could use vegan butter if you prefer.
    • Pecans- They need to be chopped! I ran my pecan halves through my food processor and pulsed until they were chopped finely.
    • Eggs- Needed for the filling. Eggs help bind all of the ingredients together and provide a bit of structure.
    • Brown Sugar- Pairs so well with the pecans and crust! I like brown sugar because it tastes almost like molasses, but you could use regular granulated sugar in a crunch.
    • Vanilla Extract- For a touch of warm flavor! Vanilla also complements the pecans and brown sugar wonderfully.
    An overhead image of labeled recipe ingredients.

    How To Make Pecan Butter Tarts

    Step 1- Prepare the crust and add to the mini muffin tins.

    Preheat your oven to 350 degrees F. Add the cream cheese and butter to a large bowl and beat with a hand mixer to combine. Add the flour, mix, and refrigerate for at least 1 hour.

    Grease each tin with nonstick cooking spray. Roll the crust dough into nut-sized balls and use your index finger to press it into each cavity. Refrigerate while you work on the filling.

    Pastry ingredients in the stand mixer bowl and the pastry dough pressed into the cups of a mini muffin tin.

    Step 2- Make the filling.

    Add the brown sugar, butter, eggs, and vanilla to a bowl and mix to combine. Add a small amount of the chopped pecans to the bottom of each tart shell, top with the brown sugar mixture, then add more pecans.

    Filling ingredients in a stand mixer bowl and a spoon placing filling into pastry dough with some crushed pecans at the bottom.

    Step 3- Bake.

    Bake at 350 degrees F for 20-25 minutes, cool slightly, and enjoy!

    A hand placing more crushed pecans on top of the filled pastry and the pan in the oven.

    Frequently Asked Questions

    What is a tassie?

    There are a few meanings! Pecan tassies like these are very similar to mini pecan pies — the word u0022tassiesu0022 likely stemmed from the French word tartlette, which means mini tart or pie. In Scotland, a tassie is another word for a cup, which interestingly enough also comes from the French word for cup, tasse.

    What is pecan filling made of?

    Mine is super simple. I combine eggs, brown sugar, butter, and vanilla, plus a sprinkling of chopped pecans, on the bottom and top. Some others may include additional ingredients like corn syrup and cinnamon, but my Grandma didn't use those in her pecan tart recipe.

    How do you keep pecan tarts from sticking to the pan?

    There are a few things you can do! First, make sure to add the nonstick cooking spray to your muffin tin. And make sure you don't overfill the tins, as it will cause them to stick to the pan. I use a butter knife to gentle go around the edge and help remove them. Just be careful, the crust is super flakey!

    A close up image of a pecan tart cut open revealing the inside of it.

    Tips For Making Mini Pecan Tarts

    • Use a mini muffin tin. I know this is a pretty specific piece of equipment, but it really will give you perfectly sized tassies. A full-sized muffin tin is too large.
    • Extra chilling time- My grandmother always used to chill the cream cheese dough overnight before adding it to the muffin tins. But if you're impatient like me, you could chill yours for an hour.
    • Adding the crust- I did this by poking my finger into the middle of each ball and using that as my guide to press it into place. I'm pretty sure if Rosie were here she'd have a lot to say about their size. Specifically, they are a bit too thick because you want the crust to be on the thinner side. I could never get this as well as she could, so I do it the best I can!
    • Don't overfill the tarts. The filling expands while it bakes and you don't want any overflow. A little under the top is perfect.
    • Watch carefully for browning. Keep a close eye on the mini tarts toward the end of the baking time. When the crust is golden brown and the filling is set, pull them out of the oven.
    • Ingredients to prep ahead- If you have the time to chill the crust, you could make it up to 24 hours before assembling and baking the tarts. You could also chop the pecans in advance.
    • Leftovers and storage- You can store leftovers in an airtight container in the refrigerator for up to 3 days. They can also be frozen for up to 3 months! Flash freeze on a baking sheet, then transfer to an airtight container for the best results.
    An overhead image of a plate of pecan tassies with pieces of cookies, a pan of them and a red and green towel around it.

    What To Serve Pecan Pie Tartlets

    I always make this pecan tassies recipe for Christmas. They make for the perfect dessert after a holiday meal! Some of my other favorites include:

    • Turkey with Oranges and Rosemary
    • Crockpot Spiral Ham
    • Homemade Green Bean Casserole
    • Roasted Garlic Mashed Potatoes
    • Classic Pumpkin Pie

    Other Delicious Christmas Cookie Recipes To Try

    • A plate of Neapolitan cookies stacked into a pyramid shape.
      Italian Rainbow Cookie Recipe
    • A stack of cranberry shortbread cookies.
      Citrus Cranberry Shortbread Cookies
    • A stack of crinkle chocolate cookies with a bite taken out of the top cookie.
      Crinkle Chocolate Cookies
    • A pile of sour cream cookies where the one in the middle has a bite out of it exposing the cakey center of the cookie.
      Sour Cream Cookies
    A close up image of pecan tassies on the side of a white plate.

    Love this recipe? Please leave a 5 star ⭐️⭐️⭐️⭐️⭐️ rating in the recipe card below ⬇️ and/or a review in the comment section further down. Check out my Amazon Store for all my favorite tools, including those used in this recipe. And follow @thelifejolie on Instagram and TikTok!

    A plate of mini pecan tarts with a mini muffin tin of them i nthe background, a red and green striped towel and some broken pieces of it.

    Grandma Rose’s Pecan Tassies

    Jessy Freimann
    My Grandma Rose's pecan tassies are a family favorite! They look (and taste) like mini pecan pies and are surprisingly easy to make. With a few simple ingredients and a flakey cream cheese pastry crust, they look so pretty on a holiday cookie tray!
    5 from 2 votes
    Print Recipe Pin Recipe
    Prep Time 2 hours hrs
    Cook Time 25 minutes mins
    Total Time 2 hours hrs 25 minutes mins
    Course Dessert
    Cuisine American
    Servings 24 cookies
    Calories 318 kcal

    Equipment

    • mini muffin pan
    • mini prep processor
    • Hand mixer
    • mixing bowl

    Ingredients
      

    Crust:

    • 8 ounces cream cheese softened
    • 1 ½ cups salted butter softened (2 ½ sticks)
    • 2 ⅔ cups all purpose flour

    Filling:

    • 3 eggs
    • 2 cups brown sugar
    • 1 ½ Tablespoons salted butter
    • 1 ½ teaspoon pure vanilla extract
    • 8 ounces chopped pecans

    Instructions
     

    For the crust:

    • Beat together the cream cheese and the butter; add flour and mix. Refrigerate for at least an hour to overnight.
    • Spray mini muffin tins with cooking spray.
    • Roll into nut-sized balls and press into the mini muffin tins. I did this by poking my finger into the middle of each ball and using that as my guide to press it into place.
    • At this point the recipe says to refrigerate the tins all night but I just put it into the fridge while I prepare the filling.

    Make the filling:

    • Mix the brown sugar, remaining butter, eggs and vanilla until combined.

    Assembly:

    • Preheat the oven to 350 degrees F. Take a small amount of nuts and put them at the bottom of each tart shell.
    • Next put a small amount of the brown sugar mixture (don't fill them up to the top, as the filling expands a bit while baking). Top with a bit more nuts.
    • Bake for 20-25 minutes. Cool completely and serve.

    Video

    Notes

    • Use a mini muffin tin. I know this is a pretty specific piece of equipment, but it really will give you perfectly sized tassies. A full-sized muffin tin is too large.
    • Extra chilling time- My grandmother always used to chill the cream cheese dough overnight before adding it to the muffin tins. But if you're impatient like me, you could chill yours for an hour.
    • Adding the crust- I did this by poking my finger into the middle of each ball and using that as my guide to press it into place. I'm pretty sure if Rosie were here she'd have a lot to say about their size. Specifically, they are a bit too thick because you want the crust to be on the thinner side. I could never get this as well as she could, so I do it the best I can!
    • Don't overfill the tarts. The filling expands while it bakes and you don't want any overflow. A little under the top is perfect.
    • Watch carefully for browning. Keep a close eye on the mini tarts toward the end of the baking time. When the crust is golden brown and the filling is set, pull them out of the oven.
    • Ingredients to prep ahead- If you have the time to chill the crust, you could make it up to 24 hours before assembling and baking the tarts. You could also chop the pecans in advance.
    • Leftovers and storage- You can store leftovers in an airtight container in the refrigerator for up to 3 days. They can also be frozen for up to 3 months! Flash freeze on a baking sheet, then transfer to an airtight container for the best results.

    Nutrition

    Serving: 3cookiesCalories: 318kcalCarbohydrates: 30gProtein: 4gFat: 21gSaturated Fat: 9gPolyunsaturated Fat: 3gMonounsaturated Fat: 8gTrans Fat: 0.4gCholesterol: 57mgSodium: 125mgPotassium: 101mgFiber: 1gSugar: 19gVitamin A: 479IUVitamin C: 0.1mgCalcium: 39mgIron: 1mg
    Tried this recipe?Let us know how it was!

    Rolo Pretzel Bites

    Dec 9, 2024 · 2 Comments

    A wooden bowl of caramel pretzel turtles with a pan of them and a red and green towel in the background.

    Rolo Pretzel Bites, also called Turtles, are the perfect salty and sweet treat! Keep them for yourself or offer as a gift — with just 3 ingredients and very little work, this incredibly delicious homemade candy is prepped and ready in 20 minutes.

    A wooden bowl of caramel pretzel turtles with a pan of them and a red and green towel in the background.
    [feast_advanced_jump_to]

    Why You'll Love Rolo Pretzels With Pecans:

    While my first inclination was to ask who here has made turtles with pretzels and Rolos, I think the better question is, who hasn't made these? They're such an easy treat to make and gift to give.

    My mom has been making these for as long as I can remember. And really, what's not to love? They're made with just 3 ingredients and require 20 minutes of minimal work to create treats that look so pretty and are downright addictive.

    One thing that I think makes these so good is the combo of great flavors and textures. You've got the crispy pretzels and pecans. The creamy caramel and rich chocolate also give this a fantastic salty-sweetness that leaves everyone coming back for more.

    They look seriously impressive on a cookie tray and keep very well in the fridge for a couple of weeks. That is... if they last that long! Here are a few more reasons to try this pretzel Rolo recipe:

    • So, so easy!
    • Baked in just 4 minutes
    • Such a crowdpleaser
    • Can be made ahead
    • A fun project to do with kids
    • Perfect to leave out on the table during the holidays
    A close up image of a pecan turtle on a parchment lined sheet pan with others around it.

    Ingredient Information And Substitutions

    • Pretzels- I like the mini squares for chocolate turtles with pretzels! As you can see in the images, they're the perfect size for the Rolos and pecans. You could also use regular-shaped minis if that's all you can find.
    • Rolo Chocolate Caramels- Such a great hack for getting that chocolate and caramel flavor all in one. I like Rolo best, but you can use a different brand if you prefer.
    • Pecans- Make your life easier and grab a bag of pecan halves!
    An overhead image of labeled recipe ingredients.

    How To Make Rolo And Pretzel Turtles

    Step 1- Arrange.

    Arrange the mini pretzels on the prepared baking sheet in a single layer, and top each one with a chocolate caramel candy.

    A parchment lined sheet pan with pretzels arranged on it with a Rolo candy on top of each.

    Step 2- Bake.

    Bake the Rolo pretzel turtles for 4 minutes.

    The pan of pretzels topped with Rolos in the oven.

    Step 3- Add the pecans & chill.

    Gently press a pecan half on each pretzel immediately after they come out of the oven and refrigerate for at least 1 hour to set. Enjoy!

    Pecan halves pressed into each pretzel with Rolo candy on it.

    Frequently Asked Questions

    What can I use in place of Rolos?

    You can use any brand of chocolate covered caramels! I also know Hershey's makes Kisses with a caramel center, making them another good option.

    Why do I need to refrigerate the turtles after baking?

    That time in the fridge is key to getting your pretzel turtles to set properly! If they're not refrigerated, they can sometimes stay soft and gooey... especially if your kitchen is warm.

    Can I use full-sized pretzels?

    You can, but you'll likely need to add a few Rolo candies instead of just one, and they'll need a tiny bit more time in the oven. I've never used full-sized pretzels because they would be very rich, but feel free to experiment and let me know how you make out!

    Can I use a different type of nut?

    Sure! Pecans are the traditional choice for Rolo pretzel turtles, but walnuts, almonds, or macadamia nuts would work too.

    A close up image of a Rolo pretzel turtle with a bite taken out of it revealing the inside of the candy.

    Tips For Making Pretzel Rolo Pecan Turtles:

    • Leave enough room on the baking sheet. If you're making a big old batch of chocolate turtles with pretzels, trying to squish in as many as you can will be tempting... but it's crucial to leave space between each turtle. That way they don't all melt into each other.
    • Under 5 minutes is all you need. Over-baking will cause your these to become hard and brittle or even melt into each other.
    • Use a gentle hand when pressing the pecans onto the caramels. If you press too hard, the Rolo will leak out onto the other side of the pretzel.
    • Fun extras- Top your cooled pretzel turtles with sea salt, a chocolate drizzle, or some colored sprinkles to make these even more festive for gifts.
    • Packaging ideas- I usually add them to a clear cellophane bag and then wrap them with red and green ribbons! Small gift boxes or mason jars would also make for a great presentation.
    • Ingredients to prep ahead- Make sure to unwrap the Rolos before getting started! You could also prepare your baking pan with parchment paper to save a little time.
    • Leftovers and storage- Pretzel turtles with Rolos typically stay fresh for about 2-3 days at room temperature in an airtight container. They'll keep for a few weeks in the fridge... if they last that long! For even longer storage, you can freeze them for up to 2 months (my girls love to eat them right out of the freezer!).

    Other Delicious Homemade Treats To Try

    • 2 jars with chocolate almonds with a red and green towel and more almonds in the background on a sheet pan.
      Dark Chocolate Covered Almonds (2 Ways!)
    • This PMS Bark is the ultimate treat to fulfill both your sweet and salty cravings! Made with rich dark chocolate, salty potato chips and pretzels, peanut butter chips and buttery toffee bits, this recipe is SO easy to make and really addictive- you won't be able to get enough!!
      PMS Bark
    • These Peanut Butter Brownie Truffles are an easy chocolate dessert recipe and an excellent gift to give this for Valentine's Day. This simple recipe is made with rich, fudgy brownies and a peanut buttery surprise in the middle.
      Peanut Butter Brownie Truffles or The Great Mouse Debacle of 2017
    • A jar of candied pecans with a striped Christmas towel and a pan of other pecans oin the back.
      Cinnamon Spiced Candied Pecans

    Love this recipe? Please leave a 5 star ⭐️⭐️⭐️⭐️⭐️ rating in the recipe card below ⬇️ and/or a review in the comment section further down. Check out my Amazon Store for all my favorite tools, including those used in this recipe. And follow @thelifejolie on Instagram and TikTok!

    A wooden bowl of caramel pretzel turtles with a pan of them and a red and green towel in the background.

    Rolo Pretzel Bites

    Jessy Freimann
    Rolo Pretzel Bites, also called Turtles, are the perfect salty and sweet treat! Keep them for yourself or offer as a gift — with just 3 ingredients and very little work, this incredibly delicious homemade candy is prepped and ready in 20 minutes.
    No ratings yet
    Print Recipe Pin Recipe
    Prep Time 15 minutes mins
    Cook Time 4 minutes mins
    Total Time 19 minutes mins
    Course Dessert
    Cuisine American
    Servings 40 candies
    Calories 28 kcal

    Equipment

    • mixing bowl
    • Spatula
    • sheet pan
    • airtight container

    Ingredients
      

    • 40 mini pretzels square or regular
    • 40 chocolate covered caramel candies unwrapped (I used Rolo)
    • 40 pecan halves

    Instructions
     

    • Preheat the oven to 300 degrees and line a sheet pan with foil or parchment for easy clean up.
    • Spread the pretzels in a single layer on the pan.
    • Top each pretzel with a chocolate covered caramel candy.
    • Bake for 4 minutes.
    • Right after the candy comes out of the oven, lightly press a pecan half onto the top of each chocolate covered caramel candy (which will be softened from the oven).
    • Refrigerate right away for at least an hour to cool and set.

    Video

    Notes

    • Leave enough room on the baking sheet. If you're making a big old batch of chocolate turtles with pretzels, trying to squish in as many as you can will be tempting... but it's crucial to leave space between each turtle. That way they don't all melt into each other.
    • Under 5 minutes is all you need. Over-baking will cause your these to become hard and brittle or even melt into each other.
    • Use a gentle hand when pressing the pecans onto the caramels. If you press too hard, the Rolo will leak out onto the other side of the pretzel.
    • Fun extras- Top your cooled pretzel turtles with sea salt, a chocolate drizzle, or some colored sprinkles to make these even more festive for gifts.
    • Packaging ideas- I usually add them to a clear cellophane bag and then wrap them with red and green ribbons! Small gift boxes or mason jars would also make for a great presentation.
    • Ingredients to prep ahead- Make sure to unwrap the Rolos before getting started! You could also prepare your baking pan with parchment paper to save a little time.
    • Leftovers and storage- Pretzel turtles with Rolos typically stay fresh for about 2-3 days at room temperature in an airtight container. They'll keep for a few weeks in the fridge... if they last that long! For even longer storage, you can freeze them for up to 2 months (my girls love to eat them right out of the freezer!).

    Nutrition

    Serving: 5candiesCalories: 28kcalCarbohydrates: 4gProtein: 0.3gFat: 1gSaturated Fat: 1gPolyunsaturated Fat: 0.02gMonounsaturated Fat: 0.1gCholesterol: 1mgSodium: 11mgPotassium: 11mgFiber: 0.1gSugar: 4gVitamin A: 7IUVitamin C: 0.1mgCalcium: 9mgIron: 0.03mg
    Tried this recipe?Let us know how it was!

    Peppermint Hot Chocolate Cupcakes

    Dec 5, 2024 · Leave a Comment

    A hot cocoa cupcake with others lined up behind and around it.

    My rich and delicious Peppermint Hot Chocolate Cupcakes are so tasty no one will ever know they're made with a cake mix hack! Perfectly festive for the holidays, they're easy to make and ready in just 35 minutes.

    A hot cocoa cupcake with others lined up behind and around it.
    [feast_advanced_jump_to]

    Why You'll Love Hot Cocoa Cupcakes

    You know I love a good cake mix hack! As far as I'm concerned, there's nothing better than working smarter, not harder. Doctoring up a cake mix to achieve a super moist and flavorful cake is definitely smart — and much easier than making it from scratch.

    I decided to take my favorite cake mix hack recipe and turn it from basic chocolate cupcakes to make these fantastic easy cupcakes for Christmas- it's a flavor combo that I cannot seem to get enough of! They go together so deliciously and feel especially festive around the holidays. In case that's not enough reason to try them, they are also:

    • Adorable handheld dessert option
    • Festive
    • Perfect to bring to parties
    • Incredibly easy
    • Kid-friendly (and approved by my daughter)
    A cupcake cut in half exposing the perfectly baked inside.

    Ingredient Information And Substitutions

    • Chocolate Cake Mix- You can use your preferred brand of chocolate cake mix. Sometimes I'll also use dark chocolate for an even more intense flavor. You'll also need whatever ingredients the mix calls for. I also use
    • Hot Chocolate Mix- I added hot cocoa into the cake mix to make it extra chocolatey and delicious!
    • Peppermint Extract- An excellent way to add it bit of minty goodness without overwhelming the entire recipe.
    • Other Cake Mix Ingredients- Round out this cake mix hack with water, vegetable oil, eggs (5 eggs to be exact, and yes this is totally necessary).
    • Andes Creme de Menthe Baking Chips- I add these directly into the cake batter to add some nice texture and even more minty flavor.
    • Heavy Cream & Powdered Sugar- To make your homemade whipped cream frosting. It's the perfect topping and fits so well with the theme. This is modeled after a comforting mug of hot chocolate after all!
    • Garnish- I opted to top the mint chocolate cupcakes with sugar sprinkles and festive paper straws, but you could also go with mini marshmallows if you'd like.
    An overhead image of labeled recipe ingredients.

    How To Make This Hot Cocoa Cupcake Recipe

    Step 1- Prepare the cake batter.

    Preheat your oven to 325 degrees F and line a muffin tin with paper liners.

    Add the cake mix, hot chocolate mix, water, oil, eggs, and peppermint extract and mix until combined. Fold in the peppermint baking chips and mix.

    2 photos of cake mix ingredients and then all the ingredients mixed together in a stand mixer bowl.

    Step 2- Bake.

    Evenly distribute the chocolate peppermint cupcake batter into the muffin tin so each cup is ¾ full and bake for 17-20 minutes. Allow them to cool completely.

    Cupcake batter in the lined pan and then the pan placed into the oven.

    Step 4- Make the whipped cream.

    Add the heavy cream, powdered sugar, and remaining peppermint extract to a very cold metal bowl. Use an electric mixer to beat the mixture until fluffy slightly stiff peaks form.

    Whipped cream ingredients in a mixing bowl and then the ingredients mixed together into whipped cream.

    Step 5- Decorate.

    Use a piping bag and tip to top your mint chocolate cupcakes with the whipped cream. Add sprinkles and a straw as a garnish and enjoy!

    Cupcakes with whipped cream piped on top of them and then with red and green sugar sprinkles and straws.

    Frequently Asked Questions

    Can I use different baking chips?

    Sure! I love the Andes chips but I know they can sometimes be difficult to find. You can always use any kind of peppermint-flavored chocolate chips, or even regular chocolate chips in a pinch. Or just chop up Andes mints.

    Why did my whipped cream deflate?

    The key is to use a very cold metal bowl, and to make sure it's clean and dry before you add the ingredients! Any excess moisture will throw the whole thing off.

    Can I make chocolate peppermint cupcakes ahead of time?

    Yes — which is especially helpful for party prep! You can make the cupcakes up to 2 days in advance. Follow the instructions on the recipe card, but hold off on frosting and decorating until just before serving.

    Can I use a different cake mix?

    While you can use whatever cake mix you'd like, I wouldn't recommend deviating too far from chocolate if you want the same flavors. Some fun chocolatey options would be dark chocolate, Devil's Food, German chocolate, or triple chocolate.

    A cupcake cut in half exposing the perfectly baked inside.

    Tips For Making Chocolate And Mint Cupcakes

    • Don't overmix. Once your cake mix ingredients are just combined, stop mixing — if you overdo it, your cupcakes will come out tough.
    • Use an ice cream scoop. It's the best way to fill the cupcake cups evenly! Remember to fill them just ¾ of the way to prevent overflow.
    • Cool completely. If you try to frost your chocolate and peppermint cupcakes when they're still warm, the whipped cream will slide off.
    • Play with the minty flavor. Definitely feel free to adjust the amount of peppermint extract and Andes baking chips you use. More will of course make the mint more pronounced, while using less will give you a more subtle flavor.
    • It's best to serve these right away. Freshly whipped cream holds up decently in the refrigerator for a few days, but it has the best texture right after you make it.
    • Ingredients to prep ahead- You can pull the eggs out of the fridge about 30 minutes before getting started to make mixing easier. You can also make and freeze the cupcakes and then thaw and frost when you are ready to serve.
    • Leftovers and storage- Store any leftover cupcakes in a single layer in an airtight container in the fridge for up to 2-3 days.
    Rows of chocolate cupcakes topped with whipped cream.

    What To Serve With Mint Chocolate Cupcakes

    If you want to serve your chocolate peppermint cupcakes alongside some other festive desserts, I've got you covered! Be sure to check out my recipes for:

    • Easy Candy Brownie Bites
    • Sour Cream Cookies
    • Cinnamon Sugar Coated Pecans
    • Italian Neapolitan Cookies

    Other Delicious Cupcake Recipes To Try

    • These are the best Vanilla Cupcakes! They're really easy to make from scratch and taste great with Fresh Strawberry Buttercream Frosting (also homemade!). This recipe makes moist and delicious cupcakes with the most light and fluffy frosting!
      The Best Vanilla Cupcakes with Fresh Strawberry Buttercream Frosting
    • A square image of Mai Tai Cupcakes.
      Mai Tai Cupcakes
    • These Melted Ice Cream Cone Cupcakes are such a fun and easy dessert recipe. This tutorial is a delicious combination of moist vanilla cupcakes, strawberry frosting, chocolate and sprinkles! They are perfect to serve at your next party!
      Melted Ice Cream Cone Cupcakes
    • A square image of
      Monster Peanut Butter Cup Stuffed Cupcakes

    Love this recipe? Please leave a 5 star ⭐️⭐️⭐️⭐️⭐️ rating in the recipe card below ⬇️ and/or a review in the comment section further down. Check out my Amazon Store for all my favorite tools, including those used in this recipe. And follow @thelifejolie on Instagram and TikTok!

    A hot cocoa cupcake with others lined up behind and around it.

    Peppermint Hot Chocolate Cupcakes

    Jessy Freimann
    My rich and delicious Peppermint Hot Chocolate Cupcakes are so tasty no one will ever know they're made with a cake mix hack! Perfectly festive for the holidays, they're easy to make and ready in just 35 minutes.
    No ratings yet
    Print Recipe Pin Recipe
    Prep Time 15 minutes mins
    Cook Time 20 minutes mins
    Total Time 35 minutes mins
    Course Dessert, holidays
    Cuisine American
    Servings 20 cupcakes
    Calories 231 kcal

    Equipment

    • muffin pan
    • large bowl
    • stand mixer or
    • Hand mixer
    • Spatula
    • measuring cups
    • measuring spoons

    Ingredients
      

    • 1 box chocolate cake mix
    • 6 ounces hot chocolate mix
    • 1 cup warm water
    • ¾ cup vegetable oil
    • 5 eggs large
    • 2 teaspoons peppermint extract divided
    • 1 cup Andes Creme de Menthe baking chips
    • 1 pint heavy cream
    • 2 Tablespoons powdered sugar add an additional Tablespoon if needed
    • Red and green sugar sprinkles for garnish
    • Red and white paper straws cut into thirds (optional)

    Instructions
     

    • Preheat the oven to 325 degrees and line a muffin tin with paper cupcake liners.
    • In a large bowl with an electric mixer, beat together cake mix, hot chocolate mix, water, oil, eggs and 1 ½ teaspoons peppermint extract until just combined.
    • Fold in the peppermint baking chips.
    • Fill the cupcake cups ¾ of the way (an ice cream scoop works great for this).
    • Bake 17-20 minutes or until a toothpick inserted into the center of a cupcake comes out clean. Cool completely.
    • In a large, cold metal bowl and using an electric mixer, whip together heavy cream, powdered sugar and remaining peppermint extract until it forms fluffy, slightly stiff peaks.
    • Pipe whipped cream onto the tops of the cupcakes.
    • Sprinkle with red and green sugar sprinkles and place a straw into each cupcake at a diagonal angle. Serve immediately.

    Video

    Notes

    • Don't overmix. Once your cake mix ingredients are just combined, stop mixing — if you overdo it, your cupcakes will come out tough.
    • Use an ice cream scoop. It's the best way to fill the cupcake cups evenly! Remember to fill them just ¾ of the way to prevent overflow.
    • Cool completely. If you try to frost your chocolate and peppermint cupcakes when they're still warm, the whipped cream will slide off.
    • Play with the minty flavor. Definitely feel free to adjust the amount of peppermint extract and Andes baking chips you use. More will of course make the mint more pronounced, while using less will give you a more subtle flavor.
    • It's best to serve these right away. Freshly whipped cream holds up decently in the refrigerator for a few days, but it has the best texture right after you make it.
    • Ingredients to prep ahead- You can pull the eggs out of the fridge about 30 minutes before getting started to make mixing easier. You can also make and freeze the cupcakes and then thaw and frost when you are ready to serve.
    • Leftovers and storage- Store any leftover cupcakes in a single layer in an airtight container in the fridge for up to 2-3 days.

    Nutrition

    Serving: 1cupcakeCalories: 231kcalCarbohydrates: 24gProtein: 4gFat: 15gSaturated Fat: 7gPolyunsaturated Fat: 2gMonounsaturated Fat: 4gTrans Fat: 1gCholesterol: 79mgSodium: 277mgPotassium: 114mgFiber: 1gSugar: 15gVitamin A: 425IUVitamin C: 1mgCalcium: 64mgIron: 1mg
    Tried this recipe?Let us know how it was!

    Dark Chocolate Covered Almonds (2 Ways!)

    Dec 2, 2024 · Leave a Comment

    2 jars with chocolate almonds with a red and green towel and more almonds in the background on a sheet pan.

    Dark Chocolate Covered Almonds are a DIY gift your friends and family will actually want to receive! Chocolaty, nutty, and perfectly poppable, I've got a few variations for you to choose from. Ready in about 20 minutes.

    2 jars with chocolate almonds with a red and green towel and more almonds in the background on a sheet pan.
    [feast_advanced_jump_to]

    Why You'll Love Chocolate Almonds:

    I once did a poll in my Instagram stories, and you guys indicated that you wanted more DIY holiday gifts. So, I've got you covered with my chocolate covered almonds recipe! By the way, if you don't follow me on there already, you totally should.

    Anyway, I don't know about you, but I seriously love those fantastic chocolate covered almonds you can find at Trader Joe's. They're kind of dangerous as I always end up eating the whole container in one day- I mean who doesn't love a combo of dark chocolate and almonds? So, I figured they'd be a great gift to make and give.

    I wanted to give you all a few variations to keep things interesting. One boasts a slight zing from added chili powder and is a nice unexpected twist to your usual chocolate almond candy. The second has more of a salty and sweet vibe — I sprinkled a little coarse salt on top before they set which adds a nice bit of savory flavor to the candy sweetness. So yummy.

    And, in case you need more reasons to learn how to make chocolate covered almonds:

    • Great for gifts
    • Super easy with impressive results
    • Customizable
    • Perfect for snacking or parties
    • Will keep for several weeks
    • Much better than storebought!
    A close up image of a jar of chocolate almonds covered in chili cocoa powder with a green and red towel behind it.

    Ingredient Information And Substitutions

    • Almonds- Make sure to grab dry roasted unsalted almonds. Ones with salt, honey, or other toppings won't work well as those extras can prevent the chocolate from sticking.
    • Dark Chocolate- Use dark chocolate chunks or chips. The better quality they are, the better your almonds will taste.
    • Unsweetened Cocoa Powder- It's important to choose unsweetened cocoa powder for my chocolate covered almonds! One of the nut variations is more savory than sweet, so we don't need any additional sugar.
    • Kosher Salt: I used coarse kosher salt for the sweet and salty version, but coarse sea salt or even Malden salt flakes would work. Regular table salt or fine salt will give you a candy that is way over-salted. It's all about balance.
    • Chili Powder: I used Ancho chili powder for a nice kick. I'm not linking it here because it's crazy expensive on Amazon, but the one I used is featured in this recipe. The amount can vary based on how spicy you want them.
    An overhead image of labeled ingredients.

    How To Make Dark Chocolate Almonds

    Step 1- Melt the chocolate.

    Place the chocolate chips or chunks in double boiler oven medium low heat (or a glass bowl over simmering water). Stir until fully melted and remove from heat.

    Chocolate chips in a double boiler on the stove.

    Step 2- Coat the almonds in chocolate.

    Pour the almonds, a couple at a time, into the melted chocolate and stir to fully coat.

    Almonds in melted chocolate with a parchment lined sheet pan behind it.

    Step 3- Refrigerate.

    Tap off excess chocolate and do one of the below variations before placing on the parchment lined sheet pan. Place in the fridge and chill for at least 1 hour to set before storing.

    Pan of chocolate almonds in the refrigerator.

    Chili Chocolate Dusted Almonds Variation

    Step 1- Coat in chocolate.

    Follow the same instructions as above to cover the almonds in dark chocolate.

    Step 2- Add the chili cocoa powder.

    Combine the cocoa powder, salt, and chili powder in a separate bowl with a whisk. Working one at a time, use a fork to dunk each almond into the cocoa mixture — don't do them all at once or you'll have a big, sticky mess! Gently tap any excess powder off.

    Chili powder, salt and cocoa powder in a glass bowl.

    Step 3- Refrigerate.

    Place the almonds on a parchment-lined baking sheet and refrigerate for at least 1 hour to set.

    Sweet and Salty Variation

    Step 1- Coat in chocolate.

    Refer to the same directions as above to coat the almonds in chocolate, then use your fork to add them to a parchment-lined baking sheet.

    Step 2- Add sea salt.

    While the chocolate is still wet, top evenly with coarse salt.

    Step 3- Refrigerate.

    Transfer the baking sheet to the fridge and chill for at least 1 hour to set.

    A close up image of dark chocolate almonds with flaky sea salt on them in a jar.

    Frequently Asked Questions

    What makes chocolate covered almonds shiny?

    The chocolate will stay shiny as long as it's properly tempered when melting. This means keeping it in the proper melting temperature which is done by slowly melting at a low temperature. You can also add a small knob of butter or coconut oil while melting if you prefer.

    How long will chocolate almonds last?

    When properly stored in an airtight container in the refrigerator, these should keep well for up to 2 weeks.

    Why did my chocolate almond candy turn white?

    Chocolate can turn white (called a fat bloom or sugar bloom) when the cocoa butter or sugar used to make it reacts with moisture, or if there are any sudden temperature changes. While it may not look pretty, it's still edible! To prevent blooming, be sure to store your almonds in an airtight container and let them cool slightly before chilling them in the fridge.

    What are the best nuts to cover in chocolate?

    I love almonds, of course, and find they are one of the best nuts to cover in chocolate! That said you could also make chocolate covered walnuts, pistachios, pecans, or cashews too.

    Can I use a different type of chocolate?

    Sure! These would be great as milk chocolate almonds. Just know that white chocolate is even more temperamental when melting and keep the heat low and slow stirring often.

    An overhead image of chocolate salted almonds and chocolate cocoa almonds in jars with a red and green towel.

    Tips For Making Chocolate Coated Almonds

    • Line your pan. I've used my Silpats and parchment or wax paper- all options work great to keep them for sticking and make clean-up a breeze!
    • Don't rush the process. These come out much prettier if you take your time. You'll also make less of a mess overall.
    • Coat a few nuts at a time. When making the cocoa and chili variation, put each almond into the cocoa/chili powder mixture a couple at a time so they don't stick together. Make sure to aim for different spots in the bowl so they don't stick together. And make sure you use a big enough bowl — I used this one.
    • Make both variations in one batch. Simply halve the amount of cocoa, chili, and pinches of salt from the spicy variation, then follow the instructions as written for each.
    • Let the chocolate coating set before storing. This will keep them from becoming a big sticky mess.- I like to set them in the fridge to save time.
    • Ingredients to prep ahead- You can combine the cocoa powder, chili powder, and salt before you get started. Otherwise, this recipe moves very quickly without any prep work!
    • Leftovers and storage- Keep your chocolate covered almonds recipe in an airtight container in the fridge for up to 2 weeks. They'll last longer instead of melting into each other at room temperature.
    A jar of cocoa coated almonds with dark chocolate ones behind it.

    Other Delicious DIY Gifts To Try

    • A jar of candied pecans with a striped Christmas towel and a pan of other pecans oin the back.
      Cinnamon Spiced Candied Pecans
    • These M&M's Brownie Truffles are an easy chocolate dessert recipe and an excellent gift to give this holiday season. It's a super-simple recipe made with rich, fudgy brownies and a surprise in the middle. These are a pretty addition to any Christmas cookie platter that the whole family will love!
      M&M’S® Brownie Truffles
    • These Peanut Butter Brownie Truffles are an easy chocolate dessert recipe and an excellent gift to give this for Valentine's Day. This simple recipe is made with rich, fudgy brownies and a peanut buttery surprise in the middle.
      Peanut Butter Brownie Truffles or The Great Mouse Debacle of 2017
    • These Almond Ginger Cookies are such an easy dessert to make! This crispy cookie is the best slice-and-bake option if you're looking for a spicy cookie that is that isn't overly sweet. They're great for Christmas!
      Almond Ginger Cookies

    Love this recipe? Please leave a 5 star ⭐️⭐️⭐️⭐️⭐️ rating in the recipe card below ⬇️ and/or a review in the comment section further down. Check out my Amazon Store for all my favorite tools, including those used in this recipe. And follow @thelifejolie on Instagram and TikTok!

    2 jars with chocolate almonds with a red and green towel and more almonds in the background on a sheet pan.

    Dark Chocolate Covered Almonds (2 Ways!)

    Jessy Freimann
    Dark Chocolate Covered Almonds are a DIY gift your friends and family will actually want to receive! Chocolaty, nutty, and perfectly poppable, I've got a few variations for you to choose from. Ready in about 20 minutes.
    No ratings yet
    Print Recipe Pin Recipe
    Prep Time 20 minutes mins
    Cook Time 2 minutes mins
    Total Time 22 minutes mins
    Course Dessert
    Cuisine American, Dessert, gift, holidays, Snack
    Servings 8 servings
    Calories 455 kcal

    Equipment

    • mixing bowl
    • large bowl
    • Spatula
    • Fork
    • sheet pan
    • Parchment paper
    • Silpat

    Ingredients
      

    Standard chocolate covered almonds

    • 10 ounces dark chocolate chips (good quality)
    • 12 ounces almonds whole, unsalted and dry roasted

    Cocoa and Chili variation

    • ⅔ cup unsweetened cocoa powder (good quality)
    • 2-4 teaspoons chili powder I used Ancho chili powder and the amount can vary based on how spicy you want them
    • 2 pinches Kosher salt

    Sweet and Salty variation

    • 2 pinches flaky salt Malden Salt flakes work great or coarse kosher salt

    Instructions
     

    Standard chocolate covered almonds

    • Place the chocolate chips into double boiler over medium-low heat.
    • Stir often until the chocolate is fully melted.
    • Pour the almonds, a few at a time into the melted chocolate and stir until all the almonds are fully coated.
    • Tap off excess chocolate and transfer to a parchment-lined baking sheet and refrigerate for 1 hour to set.

    Cocoa and Chili variation

    • Add cocoa powder, chili powder and salt in a small bowl.
    • Whisk well until fully combined.
    • While the chocolate is still wet, use a fork to take each chocolate coated almond and roll it in the cocoa mixture (don't pour them all into the cocoa at once, it will be a big, sticky mess!).
    • Gently tap the excess cocoa mixture off the almonds and place them on a lined baking sheet.
    • Refrigerate for 1 hour to set. Store in the refrigerator for up to a couple of weeks, if they last that long!

    Sweet and Salty variation

    • Use a fork to take each almond out of the bowl of chocolate and place them onto a lined baking sheet (do them one at a time so they don't all stick together!).
    • While the chocolate is still wet, sprinkle course salt evenly over the top to taste (place your hand higher above the pan for more even distribution).
    • Refrigerate for 1 hour to set. Store in the refrigerator for up to a couple of weeks, if they last that long!

    Video

    Notes

    • Line your pan. I've used my Silpats and parchment or wax paper- all options work great to keep them for sticking and make clean-up a breeze!
    • Don't rush the process. These come out much prettier if you take your time. You'll also make less of a mess overall.
    • Coat a few nuts at a time. When making the cocoa and chili variation, put each almond into the cocoa/chili powder mixture a couple at a time so they don't stick together. Make sure to aim for different spots in the bowl so they don't stick together. And make sure you use a big enough bowl — I used this one.
    • Make both variations in one batch. Simply halve the amount of cocoa, chili, and pinches of salt from the spicy variation, then follow the instructions as written for each.
    • Let the chocolate coating set before storing. This will keep them from becoming a big sticky mess.- I like to set them in the fridge to save time.
    • Ingredients to prep ahead- You can combine the cocoa powder, chili powder, and salt before you get started. Otherwise, this recipe moves very quickly without any prep work!
    • Leftovers and storage- Keep your chocolate covered almonds recipe in an airtight container in the fridge for up to 2 weeks. They'll last longer instead of melting into each other at room temperature.

    Nutrition

    Serving: 1servingCalories: 455kcalCarbohydrates: 34gProtein: 13gFat: 33gSaturated Fat: 12gPolyunsaturated Fat: 5gMonounsaturated Fat: 14gTrans Fat: 0.01gCholesterol: 0.4mgSodium: 145mgPotassium: 655mgFiber: 9gSugar: 14gVitamin A: 152IUVitamin C: 0.2mgCalcium: 233mgIron: 3mg
    Tried this recipe?Let us know how it was!


    Italian Rainbow Cookie Recipe

    Nov 25, 2024 · 17 Comments

    A plate of Neapolitan cookies stacked into a pyramid shape.

    You'll love this authentic Italian Rainbow Cookie Recipe. Also called tricolor cookies, or Neapolitan cookies, they are so delicious and are a gorgeous addition to any sweet treat platter! These are perfect for Christmas or any other holidays and special occasions. Plus, they're baked in just 12 minutes! 

    A plate of Neapolitan cookies stacked into a pyramid shape.
    [feast_advanced_jump_to]

    Why You'll Love My Grandma's Rainbow Cookies

    It’s rare that I post a recipe that is labor-intensive. I’m all about keeping things simple, but some are too good not to share — and this is one where your hard work pays off!

    You may recognize this Neapolitan cookies recipe from those lovely trays of Italian cookies that seem to make their way onto every wedding dessert table. Or maybe that's just around here (we have a large Italian population in these parts!).

    These were always a fixture on my family's Christmas dessert table. They are another of my Grandma Rose's confections and a favorite of almost everyone who tries them. I totally get why!

    These Italian rainbow cookies truly are a beautiful addition to any holiday or celebratory table and I encourage you to give it a shot! Here are a few more reasons why:

    • Super impressive presentation
    • Rich almond flavor
    • Topped with chocolate
    • Traditional & nostalgic dessert
    • Perfect for special occasions
    • Worth all the effort!
    An overhead image of the tops of rainbow cookies with the middle one turned on its side revealing the rainbow center.

    Ingredient Information And Substitutions

    • Almond Paste- Provides that signature almond flavor and texture. You should be able to find it in the baking aisle at your local supermarket. This recipe has more almond paste than most other rainbow cookie recipes I've seen, but I like the texture and flavor it adds.
    • Butter- For richness and flavor.
    • Granulated Sugar- Our sweetener!
    • Eggs- Bind the ingredients together and also add structure. Plus, the separated whites help create a nice airy texture.
    • Flour- The base of the dry ingredients. All-purpose works great.
    • Jam- I used seedless raspberry jam and apricot jam in between each cookie layer.
    • Chocolate Chips- I melt these down with coconut oil to make a shiny chocolate topping.
    • Food Coloring- Adds the colors that are so synonymous with Neapolitan cookies. You'll need red and green — I don't add yellow and instead just leave one layer uncolored but you can add it if you prefer a more vivid yellow layer. Gel food coloring is also an option if you want extra vibrant results.
    An overhead image of the labeled recipe ingredients.

    How To Make Neapolitan Cookies

    Step 1- Whip the egg whites.

    Preheat your oven to 350 degrees F and grease three baking bans, then line them with wax or parchment paper. Grease the top of the paper as well and set aside. You want to make sure nothing sticks!

    Add the egg whites to a separate bowl. Use an electric hand mixer with the whisk attachment to whip them until they've doubled in size and are fluffy.

    Egg whites in a glass bowl and then the egg whites whipped and doubled in size.

    Step 2- Combine the ingredients.

    Cream and butter and sugar until well combined and fluffy. Add the egg yolks and mix. Incorporate the almond paste and flour and stir until just combined.

    Gently fold the whites into the almond paste mixture until just combined.

    Neapolitan cookie dough in a large bowl and then those ingredients combined with the fluffy whipped egg whites added to it.

    Step 3- Add the food coloring and bake.

    Split the batter into 3 separate bowls. Add the red food coloring to one bowl, the green to another, and leave the last one plain (or add yellow to the third bowl). I added about 10 drops to each bowl.

    Spread the cookie batter evenly onto the pans in a thin layer (a different pan for each color) and bake for 10-12 minutes. Let them cool completely.

    The combined batter in a bowl and then a third of the batter after red food coloring is added turning it pink.

    Step 4- Assemble.

    Line a large pan with parchment paper and flip the green cookie onto it first. Spread the raspberry jam on top. Next, add the yellow layer and spread with apricot jam. Finally, top with the pink layer.

    Place some more parchment paper on top of the assembled layers, then add another pan on top. Weigh it down with a heavy book, and chill in the fridge overnight.

    The green layer with raspberry jam on it and the yellow layer with apricot preserves on it.

    Step 5- Make the chocolate layer.

    Melt the chocolate chips in a double boiler over low heat, or in the microwave. When almost melted, add the coconut oil and continue to heat until fully smooth.

    Spread the melted chocolate on top and use a knife to score it into 1-inch squares before it hardens. Chill until the chocolate is hard, then cut into the scored marks. Refrigerate until serving and enjoy!

    A close up of some rainbow cookies stacked on top of each other.

    Frequently Asked Questions

    What three flavors are in Neapolitan?

    Neapolitan ice cream usually consists of vanilla, chocolate, and strawberry. My Neapolitan cookies feature chocolate, raspberry, and apricot.

    Is this a cake or a cookie recipe?

    While the layers in my Italian rainbow cookies recipe are made from an almond sponge cake, these are considered cookies.

    What if one of the colored layers breaks?

    That’s totally ok! As you can see in my video tutorial below, my pink layer broke. I simply pressed the cracks together. This works out fine because when the large books weigh down the layers, it pushes them together and helps to fix the cracks.

    Do I really need that much almond paste?

    Yes! I know 20 ounces may seem like a lot, but it’s part of what makes this cookie so rich and delicious!

    Can I freeze this recipe?

    Yes, these freeze very well! I typically make these shortly after Thanksgiving and then freeze until Christmas in an airtight container.

    How long do rainbow Italian cookies last?

    They last around a week in the refrigerator but for several months in the freezer.

    A plate piled up with rainbow cookies with chocolates in a Christmas jar and a red towel behind it.

    Tips For Making Rainbow Italian Cookies:

    • I use a 15.5x10.5 inch pan and have not tested this Italian rainbow cookie recipe with another size. That said, most people do have at least one pan this size in their kitchen. I actually have 4 and didn’t even realize it!
    • Cooking spray and liners are your friends! My Grandma used wax paper, but I’ve had excellent results with parchment. I lightly spray down the pan first, which acts as a sort of “adhesive” and helps the parchment stick to the pan.
    • Best way to separate the eggs- I wrote a whole post on it!
    • Whip separately- Whip the whites in a separate bowl with separate mixer attachments. They can be temperamental.
    • Adjust the baking time if needed. All ovens are different. Mine were perfect at 12 minutes, but yours could go quicker. You want them cooked through, but not browned. That said, if they brown a touch on the edges, it’s ok because they get trimmed off.
    • Weigh down the layers well once they’re assembled. We always used phone books, but since they don’t really make those too much anymore, I use heavy cookbooks and weigh them down overnight.
    • Melting chocolate can be tricky- Chocolate is temperamental too, which is why I created another post on the best way to melt chocolate chips. In my opinion, the microwave is easiest!
    • I add coconut to the chocolate to add a little shine. Don't add it at the beginning or the chocolate might seize. You can also use butter or vegetable oil.
    • Be sure to score the chocolate while it is still wet. This will make it easier to get cleaner cuts later.
    • The recipe makes quite a few cookies. I encourage you to cut them into smaller pieces, as they are pretty rich.
    • Ingredients to prep ahead- You can grate the almond paste and separate the eggs before getting started.
    • Leftovers and storage- Store your cookies in an airtight container in the fridge for the best results. They'll keep for up to 3-5 days, or you can freeze for up to 3 months.
    A side view close up of a stack of rainbow cookies.

    What To Serve With This Rainbow Cookie Recipe

    As mentioned, this is a mainstay on our holiday tables. I often serve them as a part of a larger cookie spread for dessert, like one does when you're American-Italian! Here are just a few of my favorites:

    • Italian Pizzelle Recipe
    • Sour Cream Cookies
    • Chocolate Crinkle Cookies
    • Almond Ginger Cookies

    Other Delicious Cookie Recipes To Try

    • A plate of mini pecan tarts with a mini muffin tin of them i nthe background, a red and green striped towel and some broken pieces of it.
      Grandma Rose's Pecan Tassies
    • A stack of cranberry shortbread cookies.
      Citrus Cranberry Shortbread Cookies
    • A close up image focusing on a snickerdoodle cookie in a pile of other snickerdoodle cookies.
      Coffee Snickerdoodle Cookies
    • A plate of chocolate dipper shortbread cookies on striped towel with a cup of coffee.
      Almond Shortbread Cookies

    Love this recipe? Please leave a 5 star ⭐️⭐️⭐️⭐️⭐️ rating in the recipe card below ⬇️ and/or a review in the comment section further down. Check out my Amazon Store for all my favorite tools, including those used in this recipe. And follow @thelifejolie on Instagram and TikTok!

    A plate of Neapolitan cookies stacked into a pyramid shape.

    Italian Rainbow Cookie Recipe

    Jessy Freimann
    You'll love this authentic Italian Rainbow Cookie Recipe. Also called tricolor cookies, or Neapolitan cookies, they are so delicious and are a gorgeous addition to any sweet treat platter! These are perfect for Christmas or any other holidays and special occasions. Plus, they're baked in just 12 minutes! 
    5 from 16 votes
    Print Recipe Pin Recipe
    Prep Time 30 minutes mins
    Cook Time 12 minutes mins
    Setting time 1 day d
    Total Time 42 minutes mins
    Course Dessert
    Cuisine Italian
    Servings 96 cookies
    Calories 50 kcal

    Equipment

    • 15.5x10.5 inch pan
    • mixing bowl
    • Spatula
    • Offset spatula
    • stand mixer or
    • Hand mixer
    • measuring cups
    • measuring spoons

    Ingredients
      

    • 20 ounces almond paste, grated
    • 2 ½ sticks butter
    • 1 ¼ cups granulated sugar
    • 5 eggs, separated
    • 2 ½ cups flour
    • Food coloring
    • 10 ounces seedless raspberry jam
    • 10 ounces apricot jam
    • 12 ounces chocolate chips
    • 1 teaspoon coconut oil (or you can use butter or vegetable oil)

    Instructions
     

    • Preheat oven to 350 degrees. Grease 15.5" x 10.5" pans and line them with wax or parchment paper. Grease the top of the wax paper as well and set aside.
    • Mix the butter and sugar until well combined and fluffy. Add egg yolks and mix well to fully incorporate.
    •  Add almond paste and flour and mix until just combined.
    • In a separate bowl with separate whisk attachments, whip egg whites until they've doubled in size and are fluffy.
    • Gently fold egg whites into the almond paste mixture until combined. 
    • Split the mixture into three separate bowls and add red food coloring to one bowl and green food coloring to another bowl leaving the last one plain. Use your judgement on drops, but I used around 10 drops each.
    • Spread the batter evenly into the pans (be aware it will be quite thin) and bake for 10-12 minutes- keep an eye on them, they may need to go a bit longer if you put them in together. Be aware, the cakes will be thin- this is ok, and exactly how you want them.
    • Once they've cooled, line a large pan with wax or parchment paper. Flip the green cake onto the pan first and evenly spread the raspberry jam on top.
    • Next flip the yellow cake on top of this. Spread apricot jam evenly over the top of the yellow layer.
    • Finally top it with the pink layer.
    • Place some wax or parchment paper on top of the cakes followed by another pan. Weigh the cake down with a phone book (or a pile of books, which is what I had on hand) and chill overnight.
    • The next day, uncover the cake.
    • Melt the chocolate chips. You can do this in a double boiler over low heat stirring often or in the microwave in 30 second increments stirring between. When the chocolate is mostly melted add the coconut oil (or butter or vegetable oil if you're using that) and finish meting. Stir to combine.
    • Spread this evenly on the top of the cake and score it with a knife into one inch squares before it hardens. I also score around the edges so that everything would have nice clean cuts on each side and so that I would have plenty of scraps to snack on. ?
    • Chill this until the chocolate has hardened. Cut where they are scored and refrigerate until serving.

    Video

    Notes

    • I use a 15.5x10.5 inch pan and have not tested this Italian rainbow cookie recipe with another size. That said, most people do have at least one pan this size in their kitchen. I actually have 4 and didn’t even realize it!
    • Cooking spray and liners are your friends! My Grandma used wax paper, but I’ve had excellent results with parchment. I lightly spray down the pan first, which acts as a sort of “adhesive” and helps the parchment stick to the pan.
    • Best way to separate the eggs- I wrote a whole post on it!
    • Whip separately- Whip the whites in a separate bowl with separate mixer attachments. They can be temperamental.
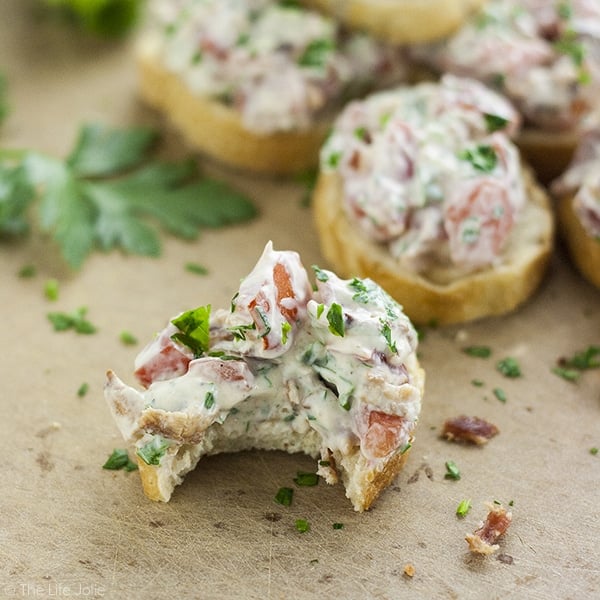
    • Adjust the baking time if needed. All ovens are different. Mine were perfect at 12 minutes, but yours could go quicker. You want them cooked through, but not browned. That said, if they brown a touch on the edges, it’s ok because they get trimmed off.
    • Weigh down the layers well once they’re assembled. We always used phone books, but since they don’t really make those too much anymore, I use heavy cookbooks and weigh them down overnight.
    • Melting chocolate can be tricky- Chocolate is temperamental too, which is why I created another post on the best way to melt chocolate chips. In my opinion, the microwave is easiest!
    • I add coconut to the chocolate to add a little shine. Don't add it at the beginning or the chocolate might seize. You can also use butter or vegetable oil.
    • Be sure to score the chocolate while it is still wet. This will make it easier to get cleaner cuts later.
    • The recipe makes quite a few cookies. I encourage you to cut them into smaller pieces, as they are pretty rich.
    • Ingredients to prep ahead- You can grate the almond paste and separate the eggs before getting started.
    • Leftovers and storage- Store your cookies in an airtight container in the fridge for the best results. They'll keep for up to 3-5 days, or you can freeze for up to 3 months.

    Nutrition

    Serving: 3cookiesCalories: 50kcalCarbohydrates: 9gProtein: 1gFat: 1gSaturated Fat: 1gPolyunsaturated Fat: 0.1gMonounsaturated Fat: 0.1gTrans Fat: 0.001gCholesterol: 9mgSodium: 5mgPotassium: 19mgFiber: 0.1gSugar: 6gVitamin A: 18IUVitamin C: 0.3mgCalcium: 5mgIron: 0.2mg
    Tried this recipe?Let us know how it was!

    Bloody Mary Spicy Cheeseball

    Nov 21, 2024 · 25 Comments

    A bloody mary cheeseball with crackers and celery in the background.

    This Bloody Mary Spicy Cheeseball is one of the best easy appetizer options for entertaining. Made with many of the same ingredients and toppings as a traditional Blood Mary but without the alcohol, it's an all-age-appropriate hors d'oeuvre that's full of great flavor! Prepped in just 10 minutes.

    A bloody mary cheeseball with crackers and celery in the background.
    [feast_advanced_jump_to]

    Why You'll Love This Bloody Mary Olive Cheeseball

    With my great love for all things hors d'oeuvre-y, I figured it was probably a good time to brainstorm some new and delicious appetizer options that are easy to whip up and look pretty and festive for holiday entertaining.

    So, I began brainstorming a cream cheese ball concept. Though I had never made my own cheese ball, I have tasted several at various events throughout my life. I try not to ever turn down the opportunity to try various cheesy recipes, especially if they're mixed with other tasty offerings!

    Being the scrappy gal I am, I thought to myself, "Why not remove the vodka and use all of the other zesty, savory ingredients that you typically find in a Bloody Mary to make a festive and easy cheese ball recipe?" Along with the cream cheese, I incorporate some white cheddar, plenty of bacon, green olives, and so much more. And the rest, as they say, was history. Here are just a few other reasons to try this:

    • So easy — only 10 minutes of prep work!
    • Full of fun and unique flavors
    • Customizable
    • Festive enough for end-of-year holidays
    • Made with zero alcohol
    • It's incredibly tasty!
    A cracker with some of the cheeseball on it with the rest of the cheeseball and a green napkin in the background.

    Ingredient Information And Substitutions

    • Cream Cheese- Our creamy base! I recommend going with full fat here as it will have the best flavor — though low fat would also work if that's what you prefer.
    • White Cheddar Cheese- Adds a sharp and tangy flavor that complements the creamy cheese in the best way.
    • Tomato Paste- The tomato portion of your cream cheese and tomato app. Tomato is such a key part of a Bloody Mary!
    • Bacon- You can use store-bought bacon crumbles or bacon bits, or cook up your own bacon and use that instead. Just make sure the pieces are small so you get a little bit in every bite.
    • Sauces- I added Worcestershire sauce for a hint of umami and some hot sauce for some heat- if you want a spicier cheese ball, add more hot sauce!
    • Horseradish- Sharp and almost spicy in a way, I like my Bloody Mary loaded up with horseradish, so I had to include it here! If you don't like it, you can leave it out. Or If you love spiciness, add more.
    • Green Olives- I grabbed the ones that are stuffed with pimentos.
    • Seasonings- All you'll need is celery salt and ground black pepper to taste, as well as some fresh parsley for a garnish.
    • Dippers- I like crackers and celery! Baguette is also tasty. Use your favorites.

    How To Make My Easy Cheese Ball Recipe

    Step 1- Combine the cheeses.

    Place the cream cheese and cheddar in a large bowl and combine with a hand mixer.

    Cream cheese and shredded white cheddar in a glass bowl and then the cheeses mixed together in the bowl.

    Step 2- Add the other ingredients.

    Incorporate the tomato paste, Worcestershire, hot sauce, horseradish, celery salt, black pepper, and chopped green olive with the cheese mixture until fully combined.

    Other ingredients added to the cheese mixture and then all of it mixed together.

    Step 3- Chill.

    Use a spatula to scrape the cream cheese and tomato mixture to the center of the bowl, then cover with plastic wrap and chill in the refrigerator for a good 10 minutes. While you wait, combine the bacon bits and fresh parsley in a small bowl.

    Bacon and parsley mixed together and then the cheeseball added to the bacon mixture.

    Step 4- Form the ball.

    Use your clean hands to form your Bloody Mary cheese ball, then carefully roll it in the herb and bacon mixture. Wrap in plastic and store in the fridge until ready to serve. Enjoy!

    The cheese ball covered in bacon on some plastic wrap and then wrapped in plastic wrap.

    Frequently Asked Questions

    What's the best way to combine the cheeses?

    I use a stand mixer or hand mixer because I found it to be easier, but you can also do it by hand.

    Can I turn this into cheese ball bites?

    Sure! Just roll the cheese ball mixture into smaller balls, and pop a pretzel stick into them just before serving to create an edible handle. Boom- easy cheese balls!

    Can I make this in advance?

    Absolutely! This will will taste even better (and keep its shape) if you leave it to fully set in the fridge before serving. You can make it up to 2 days in advance.

    How long should I chill this before serving?

    For the best results, I would leave it in the fridge for at least 1 hour. You need to allow it to firm up so that it's easier to eat.

    A close up image of a cheeseball with some removed exposing the inside of the cheese ball.

    Tips For Making My Cream Cheese Ball Recipe

    • You can use bacon bits for your cheese ball, just try to buy the ones that are actually real bacon.
    • Be sure to soften the cream cheese to make it easier to mix. You can do this by leaving it out a couple of hours in advance. Or in a pinch, zap it in the microwave for 30 seconds or so.
    • I like to use my mini prep processor to chop the olives to save time.
    • Refrigerate the cheese for a good 10 minutes before rolling it into a ball to make the rolling process easier.
    • When rolling in the bacon and parsley mixture, press down ever so slightly so that it sticks even when you remove the plastic.
    • Ingredients to prep ahead- Before you get started, cook and cool the bacon (if making from scratch), pull the cream cheese out of the fridge to soften, and chop the olives and parsley.
    • Leftovers and storage- You can store leftovers wrapped in plastic in the refrigerator for up to 1 week.
    Overhead image of a cheeseball with a green towel and crackers around it.

    What To Serve With My Homemade Cheeseball

    I love crackers and celery sticks for my dippers, or as mentioned, you could serve baguette or even pretzels with your dip! And while this will certainly go a long way (it serves 8), I like to pair it alongside some of my other favorite apps when I'm expecting a crowd:

    • Crescent Roll Veggie Pizza
    • Classic 7 Layer Dip
    • Baked Brie Phyllo Cups
    • Uncle Richard's Clams Casino

    Other Delicious Cheesy Appetizers To Try

    • A cranberry cheeseball with a portion taken off it revealing the creamy interior.
      Harvest Cranberry Cheeseball
    • A wheel of baked brie topped with pomegranates with the front cut off and the melty cheese flowing out.
      Baked Brie With Honey And Pomegranate
    • A close up image of a buffalo chicken slider.
      Buffalo Chicken Sliders
    • A square image of a hand pulling apart a Philly Cheese Steak Stuffed Bread Roll.
      Philly Cheese Steak Stuffed Bread Rolls aka Philly Cheese Steak Bombs

    Love this recipe? Please leave a 5 star ⭐️⭐️⭐️⭐️⭐️ rating in the recipe card below ⬇️ and/or a review in the comment section further down. Check out my Amazon Store for all my favorite tools, including those used in this recipe. And follow @thelifejolie on Instagram and TikTok!

    A bloody mary cheeseball with crackers and celery in the background.

    Bloody Mary Spicy Cheeseball

    Jessy Freimann
    This Bloody Mary Spicy Cheeseball is one of the best easy appetizer options for entertaining. Made with many of the same ingredients and toppings as a traditional Blood Mary but without the alcohol, it's an all-age-appropriate hors d'oeuvre that's full of great flavor! Prepped in just 10 minutes.
    5 from 5 votes
    Print Recipe Pin Recipe
    Prep Time 10 minutes mins
    Chill time 40 minutes mins
    Total Time 10 minutes mins
    Course Appetizer, Snack
    Cuisine American
    Servings 8 servings
    Calories 201 kcal

    Equipment

    • chefs knife
    • cutting board
    • measuring cups
    • measuring spoons
    • mixing bowl
    • mini prep processor

    Ingredients
      

    • 16 ounces cream cheese
    • ¾ cup white cheddar cheese, shredded
    • 1 Tablespoon tomato paste
    • 1 teaspoon Worcestershire sauce
    • 2 teaspoons hot sauce
    • 1 teaspoon prepared horseradish
    • ½ teaspoon celery salt
    • ¼ teaspoon ground black pepper
    • ½ cup green olives stuffed with pimentos, chopped
    • ¾ cup crumbled bacon or bacon bits (try to find ones that are real bacon)
    • 1 Tablespoon fresh parsley, chopped
    • crackers
    • Cut up celery

    Instructions
     

    • In a large bowl, use a mixer to combine cream cheese and white cheddar.
    • Add tomato paste, Worcestershire sauce, hot sauce, horseradish, celery salt, black pepper and chopped green olives and mix well until fully combined.
    • Use a spatula to scrape all the cheese mixture in to the middle of the bowl and pop it into the refrigerator to chill for a good 10 minutes (to make it easier to roll into a ball).
    • Mix bacon crumbles and parsley in a bowl until fully combined. Using your (clean) hands, roll the cheese into a ball and carefully roll it in the bacon and parsley mixture.
    • Wrap the cheese ball in plastic wrap and place it into the refrigerator to chill for at least and hour or until you're ready to serve it. 

    Video

    Notes

        • You can use bacon bits for your cheese ball, just try to buy the ones that are actually real bacon.
        • Be sure to soften the cream cheese to make it easier to mix. You can do this by leaving it out a couple of hours in advance. Or in a pinch, zap it in the microwave for 30 seconds or so.
        • I like to use my mini prep processor to chop the olives to save time.
        • Refrigerate the cheese for a good 10 minutes before rolling it into a ball to make the rolling process easier.
        • When rolling in the bacon and parsley mixture, press down ever so slightly so that it sticks even when you remove the plastic.
        • Ingredients to prep ahead- Before you get started, cook and cool the bacon (if making from scratch), pull the cream cheese out of the fridge to soften, and chop the olives and parsley.
        • Leftovers and storage- You can store leftovers wrapped in plastic in the refrigerator for up to 1 week.

    Nutrition

    Serving: 1servingCalories: 201kcalCarbohydrates: 4gProtein: 4gFat: 20gSaturated Fat: 11gPolyunsaturated Fat: 1gMonounsaturated Fat: 5gCholesterol: 57mgSodium: 378mgPotassium: 108mgFiber: 0.1gSugar: 3gVitamin A: 837IUVitamin C: 2mgCalcium: 58mgIron: 0.2mg
    Tried this recipe?Let us know how it was!

    Hosting Thanksgiving?

    Discover the secret to hosting Thanksgiving without all the stress! Prepsgiving is your FREE guide to making a delicious Thanksgiving feast the easy way.

    • « Go to Previous Page
    • Page 1
    • Interim pages omitted …
    • Page 5
    • Page 6
    • Page 7
    • Page 8
    • Page 9
    • Interim pages omitted …
    • Page 21
    • Go to Next Page »

    Primary Sidebar

    Jessy in a kitchen holding a white casserole pan and smiling.
    Hi, I'm Jessy!

    Welcome to The Life Jolie! I share simple, delicious recipes and ingredient prep tips to make your weeknight cooking a breeze!

    More about me →

    Easy Dinner Recipes

    • An overhead image of a Mexican Shrimp Quinoa Bowl.
      Shrimp Quinoa Bowls
    • A close up of roasted red potatoes on a pan.
      Roasted Red Potatoes Recipe
    • A spoon lifting up a scoop of eggplant parm bake with melt cheese trailing behind it.
      Eggplant Parm Bake
    • A close up of a drum chicken wing in a pile of other wings.
      Oven Baked Chicken Wings
    • An overhead image of a bowl of minestrone soup.
      Traditional Minestrone Soup Recipe
    • A close up of a bagel pizza with mini pepperonis on a pan.
      Bagel Pizzas Recipe

    Popular Recipes

    • A glass bowl of melted chocolate with a spatula dripping some back into the bowl.
      How To Melt Chocolate Chips In The Microwave
    • Italian Stuffed Zucchini Boats are the healthy weeknight meal you'll want to make again and again. This is a seriously easy recipe that's full of delicious flavor without all the guilt!
      Italian Stuffed Zucchini Boats
    • A close up shot of the side of a shallow bowl of shrimp mac salad.
      Shrimp Macaroni Salad
    • A white pan pouring cheese sauce over a bowl of steamed broccoli.
      Cheese Sauce for Broccoli Recipe
    • An overhead image of a plate of chicken lettuce wraps with peanut sauce next to it and all the fixings surrounding it.
      Copycat Cheesecake Factory Thai Chicken Lettuce Wraps
    • A close up image of a piece of greek marinated chicken on a white plate with lemons on the plate and in the background.
      Greek Yogurt Chicken
    Jessy in a kitchen holding a white casserole pan and smiling.
    Hi, I'm Jessy!

    Welcome to The Life Jolie! I share simple, delicious recipes and ingredient prep tips to make your weeknight cooking a breeze!

    More about me →

    Easy Dinner Recipes

    • A bowl of chicken and orzo soup with a spoon in it.
      Chicken and Orzo Soup
    • A bowl of Swedish meatballs and noodles.
      Swedish Meatballs And Noodles
    • A close up image of a piece of coconut shrimp on top of others.
      Coconut Shrimp With Sauce
    • An overhead image of taco soup in a bowl.
      Crockpot Taco Chicken Soup
    • A spoon pulling up a scoop of skillet lasagna with melted cheese stretching behind it.
      No Bake Lasagna Skillet
    • A bowl of hearty lamb stew.
      Easy Lamb Stew Recipe

    Popular Recipes

    • A glass bowl of melted chocolate with a spatula dripping some back into the bowl.
      How To Melt Chocolate Chips In The Microwave
    • Italian Stuffed Zucchini Boats are the healthy weeknight meal you'll want to make again and again. This is a seriously easy recipe that's full of delicious flavor without all the guilt!
      Italian Stuffed Zucchini Boats
    • A close up shot of the side of a shallow bowl of shrimp mac salad.
      Shrimp Macaroni Salad
    • A white pan pouring cheese sauce over a bowl of steamed broccoli.
      Cheese Sauce for Broccoli Recipe
    • An overhead image of a plate of chicken lettuce wraps with peanut sauce next to it and all the fixings surrounding it.
      Copycat Cheesecake Factory Thai Chicken Lettuce Wraps
    • A close up image of a piece of greek marinated chicken on a white plate with lemons on the plate and in the background.
      Greek Yogurt Chicken

    Footer

    ↑ back to top

    About

    • About Me
    • Privacy Policy + Disclaimer

    Newsletter

    • Sign Up! for emails and updates

    Contact

    • Contact
    • Video Production

    As an Amazon Associate I earn from qualifying purchases.

    Copyright 2014-2021 - Jolie Ventures, LLC. All Rights Reserved. Privacy Policy.

    Rate This Recipe

    Your vote:


    A rating is required
    A name is required
    An email is required