
• Skip to primary navigation
  • Skip to main content
  • Skip to primary sidebar
The Life Jolie logo
  • Easy Dinner Recipes
  • Recipes
  • About
  • Contact
    • Work with me!
    • Video Production
  • Nav Social Menu

    • Email
    • Facebook
    • Instagram
    • Pinterest
    • Twitter
    • YouTube
menu icon
go to homepage
subscribe
search icon
Homepage link
  • Easy Dinner Recipes
  • Recipes
  • About
  • Contact
    • Work with me!
    • Video Production
    • Email
    • Facebook
    • Instagram
    • Pinterest
    • Twitter
    • YouTube
  • ×
    The Life Jolie » Page 5

    Cheesy Chicken Enchiladas

    Cheesy Chicken Enchiladas

    Jul 10, 2025 · 2 Comments

    Chicken enchiladas on a white plate.

    These cheesy chicken enchiladas may not be traditional, but they’re packed with flavor, done in under an hour, and the perfect way to turn leftover chicken into a cozy, crowd-pleasing dinner.

    Chicken enchiladas on a white plate.
    [feast_advanced_jump_to]

    Why You’ll Love This Creamy Cheese Chicken Enchiladas

    I married a man who’s obsessed with Mexican food, so enchiladas quickly became a staple in our house. Before I get any side eyes... I know this isn't an authentic chicken enchiladas recipe. It’s all about keeping things simple without sacrificing flavor, and it’s become one of our absolute favorites!

    Whether you're using up leftover chicken or just want a cozy, low-prep dinner, this one checks all the boxes. It’s easy to make, packed with flavor, and comes together with simple ingredients you probably already have on hand. Here’s why this recipe’s a keeper:

    • Comforting, flavorful, and satisfying
    • Ready in under an hour
    • Customizable spice level
    • A total crowd-pleaser
    • Makes delicious leftovers
    An overhead image of a pan of chicken enchiladas.

    Ingredient Information And Substitutions

    • Shredded cooked chicken- Leftover or rotisserie chicken works perfectly. You can also use cooked turkey or even pulled pork. 
    • Red enchilada sauce- Use your favorite store-bought kind or homemade, and choose from mild to hot depending on how spicy you like it.
    • Corn tortillas- Flour tortillas will also work if that’s what you have, but they’ll change the texture a bit.
      Pantry spices- Onion powder, garlic powder, cumin, chili powder, ground coriander, salt, and cayenne pepper, for adding depth and a subtle smoky warmth. You can omit cayenne to keep it mild.
    • Shredded cheddar cheese- Sharp classic cheesy bite, but Monterey Jack or a Mexican blend are good swaps, if you want a milder flavor. 
    An overhead image of labeled recipe ingredients.

    How To Make Creamy Chicken Enchiladas

    Step 1- Prepare the sauce.

    Preheat your oven to 375 degrees F. Meanwhile, heat a medium non-stick frying pan over medium-high heat.

    While the pan heats, whisk the enchilada sauce with the spices until smooth. Spread about ¼ cup evenly over the bottom of an 11" x 7" baking dish to prevent sticking and add extra moisture. 

    Spices added to the enchilada sauce and then mixed in.

    Step 2- Make the filling.

    Take ⅓ cup of the sauce mixture and combine it with the shredded chicken and 1 cup of shredded cheese in a large bowl. Stir until everything is well coated. Set aside the remaining sauce for later.

    Chicken ingredients in a glass bowl and then the chicken cheese filling all mixed together.

    Step 3- Warm the tortillas.

    Once the frying pan is hot, start warming each tortilla, one at a time, for 15-20 seconds per side to make them pliable and easy to roll.

    A corn tortilla heating in a fry pan and a thin layer of enchilada sauce on the bottom of the pan.

    Step 4- Assemble the enchiladas. 

    Place about 2 tablespoons of the chicken mixture onto each warmed tortilla. Roll each tortilla tightly and lay seam-side down in the prepared baking dish. Continue until all the filling is used.  

    Chicken filling in the warmed corn tortilla and then the tortilla rolled tightly.

    Step 5- Bake.

    Lightly spray the tops of the enchiladas with cooking spray, which helps them get nice and crispy. Bake uncovered for 30 minutes.

    Enchiladas in a single layer in the baking pan and then the pan in the oven.

    Step 6- Add sauce and cheese.

    Remove the pan from the oven. Pour the remaining sauce evenly over the enchiladas, then top with the rest of the cheese.

    Return the dish to the oven and bake for another 10 minutes, until the cheese is melted and bubbly. Serve creamy chicken and cheese enchiladas immediately with your favorite toppings.

    Enchilada sauce on top of the partially baked enchiladas and then the pan back in the oven with cheese on top.

    Frequently Asked Questions

    How spicy is this recipe?

    It has a mild to medium heat, but you can adjust the cayenne pepper to make it milder or spicier depending on your taste.

    Can I make these ahead of time?

    Yes! You can assemble this creamy chicken enchiladas recipe up to the baking step, then pop the pan in the fridge overnight. Just pull it out about 30 minutes before baking to come to room temp.

    What if I don’t have chicken?

    You can leave it out and use more cheese instead. Try adding sautéed veggies or beans for extra bulk. Or, use a different kind of meat!

    Is this an authentic chicken enchiladas recipe?

    It is not authentic, but it is delicious.

    A close up image of an enchilada cut in half revealing the creamy chicken inside.

    Tips For Making Chicken Enchiladas With Red Sauce

    • Make sure to warm the tortillas before rolling. It really helps keep them from cracking and makes them more pliable. 
    • Try not to overstuff each tortilla. About two tablespoons of filling is just right to keep things neat and easy to roll.
    • For extra flavor and texture, try mixing in sautéed peppers, onions, or corn. It is a delicious way to enhance the flavor and add some extra texture.
    • After baking, let your enchiladas rest for a few minutes before serving. It helps everything settle and makes them easier to cut.
    • Ingredients to prep ahead- Cook and shred the chicken, shred the cheese, and whisk together the enchilada sauce.
    • Leftovers and storage- Store leftovers in an airtight container in the fridge for 2-3 days. Reheat in the microwave or oven. Freeze unbaked enchiladas for up to 3 months. 
    A close up of a bite of enchiladas on the plate next to the rest of them.

    What To Serve With Chicken Enchiladas In Red Sauce

    While this dish is flavorful and satisfying on its own, serving it alongside a few classic sides can elevate the meal and add more variety. I like my enchiladas topped with sour cream, avocado, and plenty of fresh cilantro, but my family prefers them plain. Here are some of our favorite sides to round out the dinner: 

    • Rice and Broccoli Casserole
    • Chunky Avocado Salsa Recipe
    • Jalapeno Deviled Eggs
    • Beans and Greens

    Other Chicken Recipes To Try

    • A close up image of a roasted balsamic chicken thigh in the pan.
      Balsamic Chicken Marinade
    • An overhead image of a chicken tostada on the pan with sour cream and avocado on top.
      Chicken Tostadas
    • An overhead image of a bowl of chicken chili.
      Easy Chili Chicken
    • A close up of a bowl of chicken wild rice creamy soup with a spoon in it and another bowl in the background.
      Wild Rice Creamy Chicken Soup (Great with Turkey Too!)

    Love this recipe? Please leave a 5 star ⭐️⭐️⭐️⭐️⭐️ rating in the recipe card below ⬇️ and/or a review in the comment section further down. Check out my Amazon Store for all my favorite tools, including those used in this recipe. And follow @thelifejolie on Instagram and TikTok!

    Chicken enchiladas on a white plate.

    Cheesy Chicken Enchiladas

    Jessy Freimann
    These cheesy chicken enchiladas may not be traditional, but they’re packed with flavor, done in under an hour, and the perfect way to turn leftover chicken into a cozy, crowd-pleasing dinner.
    5 from 1 vote
    Print Recipe Pin Recipe
    Prep Time 10 minutes mins
    Cook Time 45 minutes mins
    Total Time 55 minutes mins
    Course dinner, Main, Main Course, Main dish
    Cuisine Mexican
    Servings 6 servings
    Calories 295 kcal

    Equipment

    • measuring spoons
    • measuring cups
    • 11" x 7" baking pan
    • Fry pan

    Ingredients
      

    • 12 ounces red enchilada sauce
    • ½ teaspoon onion powder
    • ½ teaspoon garlic powder
    • ¼ teaspoon cumin
    • ¼ teaspoon chili powder
    • ¼ teaspoon ground coriander
    • ¼ teaspoon kosher salt
    • ¼ teaspoon cayenne pepper (optional- taste the sauce first and if you feel it's not spicy enough add this)
    • 2 cups shredded cooked chicken
    • 2 ½ cups cheddar cheese shredded
    • 12 corn tortillas
    • Cooking spray

    Instructions
     

    • Preheat the oven to 375 degrees. Heat a medium non-stick frying pan over medium high heat.
    • While the pan heats, whisk together enchilada sauce, onion powder, garlic powder, cumin, chili powder, ground coriander, kosher sauce and cayenne pepper (if using) until well combined. Place a thin la.yer of the enchilada sauce over the bottom of an 11" x 7" baking pan (around ¼ cup).
    • Take ⅓ cup of the enchilada sauce and combine in a large bowl with chicken and 1 cup shredded cheese. Mix until evenly distributed. Set remaining sauce aside for later.
    • When the pan is hot, heat each corn tortilla for 15-30 seconds per side to keep them from cracking.
    • Once heated, remove to a plate and place around 2 Tablespoons of the chicken mixture onto the tortilla.
    • Roll tightly and place into the prepared baking pan. Repeat this process until the pan is full and you've used all of the chicken mixture.
    • Spray the tops of the enchilada with cooking spray and bake uncovered for 30 minutes.
    • Remove from oven and top evenly with remaining enchilada sauce and remaining cheese.
    • Return to the oven and bake for 10 more minutes. Serve immediately with the toppings of your choice.

    Video

    Notes

    • Make sure to warm the tortillas before rolling. It really helps keep them from cracking and makes them more pliable. 
    • Try not to overstuff each tortilla. About two tablespoons of filling is just right to keep things neat and easy to roll.
    • For extra flavor and texture, try mixing in sautéed peppers, onions, or corn. It is a delicious way to enhance the flavor and add some extra texture.
    • After baking, let your enchiladas rest for a few minutes before serving. It helps everything settle and makes them easier to cut.
    • Ingredients to prep ahead- Cook and shred the chicken, shred the cheese, and whisk together the enchilada sauce.
    • Leftovers and storage- Store leftovers in an airtight container in the fridge for 2-3 days. Reheat in the microwave or oven. Freeze unbaked enchiladas for up to 3 months. 

    Nutrition

    Serving: 1servingCalories: 295kcalCarbohydrates: 6gProtein: 24gFat: 19gSaturated Fat: 10gPolyunsaturated Fat: 1gMonounsaturated Fat: 5gCholesterol: 82mgSodium: 933mgPotassium: 154mgFiber: 1gSugar: 4gVitamin A: 930IUVitamin C: 1mgCalcium: 341mgIron: 1mg
    Tried this recipe?Let us know how it was!

    Raspberry Lemon Icebox Pie Recipe

    Jul 7, 2025 · 4 Comments

    A slice of lemon icebox pie being pulled from the rest of the pie.

    This raspberry lemon icebox pie recipe is a seriously easy, no-bake summer dessert that will have everyone fighting for seconds! Made with vanilla wafers, lemon pie filling, fresh raspberries, and whipped topping, it's a delicious way to make a killer dessert without having to turn on your oven.

    A slice of lemon icebox pie being pulled from the rest of the pie.
    [feast_advanced_jump_to]

    Why You'll Love This Recipe For Lemon Icebox Pie

    I love doing polls on my Instagram stories. It's so much fun to learn about you guys and also to find out what kind of recipes you want. And one thing that I love the most about this crazy job of mine is being able to connect directly with you — because you're the reason I do this!

    In a recent poll, you all let me know by a landslide that you wanted no-bake desserts for summer. So I immediately got to work. I love a good icebox lemon cake, so I figured an icebox pie would be an even better option! They tend to be crazy easy to put together and don't involve turning on an oven.

    Well, this recipe definitely took a few more tests than usual! Don't get me wrong, it tasted fantastic from the get-go. That was never a concern. But from an execution standpoint, it needed a little more attention.

    My initial attempts involved me making it in a pie plate, like any other pie. But getting a piece out was a nightmare. Buh-bye wow-factor! But don't you worry, I've devised a way to maintain the pie's beauty while still enjoying all the great flavors, and that's not the only reason to try it!

    • Full of bright, fruity flavor
    • Light and refreshing
    • Make-ahead recipe
    • Great for any occasion
    • Just 4 ingredients
    An overhead image of an icebox pie with raspberries on top of it.

    Ingredient Information And Substitutions

    • Cool Whip- Or whatever whipped topping you prefer, including the dairy-free kind. Make sure to grab the large tub and thaw it in the fridge the night before.
    • Vanilla wafers- These little cookies taste just like a cake layer when they soften, making them perfect for icebox desserts!
    • Lemon pie filling- This recipe is all about EASY. If you want to make your own lemon curd, go for it. I like that I can keep a can in the pantry as a last-minute option.
    • Fresh raspberries- Add another layer of flavor and gorgeous pops of color. Strawberries would be too juicy for this dessert, but blueberries or blackberries would be yummy!
    An overhead image of labeled recipe ingredients.

    How To Make Lemonade Icebox Pie

    Step 1- Getting started.

    Line a pie plate with plastic wrap to make it easier to get the dessert out later. Use two long pieces that cross in the middle so the entire pie plate is covered with lots of extra hanging over the side. Spread a thin layer of whipped topping inside the pan — it should completely cover the plastic wrap. Use vanilla wafers to line the entire bottom and up the sides in a single layer.

    I also like to pick out a few of the nicest-looking raspberries to go on top of the finished dessert. Save those in the fridge for later.

    A thin layer of cool whip spread on a plastic wrap covered pie plate and then a single layer of Nilla wafers lining the pie plate.

    Step 2- Layer more ingredients.

    Carefully spread half a can of lemon filling over the cookies, then sprinkle half the raspberries over the top. Add more whipped topping, then another layer of wafers, followed by the rest of the lemon filling.

    Finish with the last of the raspberries, more of the whipped topping, and the last of the vanilla wafers.

    Layers of pie filling and raspberries added to the pie plate and then a layer of whipped topping.
    More Nilla wafers added and then layer of pie filling and raspberries.
    A final layer of lemon pie filling and then a final layer of cool whip added on top.

    Step 3- Cover and chill.

    Grab the plastic wrap hanging outside of the pie plate and fold it over the top of the dessert, one piece at a time. Pop the dessert in the fridge for at least 4 hours.

    Final layer of Nilla wafers and then plastic wrap covering it all to putt in the fridge and chill.

    Step 4- Remove and serve.

    Peel back the plastic wrap, then carefully invert the pie onto a serving dish. Remove all of the plastic and frost the outside with the remaining whipped topping. Top with reserved raspberries and enjoy!

    Chilled icebox pie with plastic wrap removed and inverted onto a serving plate and then the final icebox pie covered with remaining cool whip and topped with raspberries.

    Frequently Asked Questions

    Can I use fresh whipped cream instead of Cool Whip?

    I wouldn't recommend it. Tubs of whipped topping are stabilized, meaning they won't deflate as quickly as freshly whipped cream. If you really want to go DIY, add cornstarch, extra powdered sugar, or Jello pudding powder to the heavy cream once you reach the soft peak stage- although I haven't tested this, so I cannot confirm if it'll work out well.

    Why do they call it icebox pie?

    Before modern refrigeration, households had an icebox to keep things cool. People figured out how to make cakes and pies with little to no baking, then stored them in their iceboxes until it was time to serve.

    Can you freeze lemon icebox pie?

    Yes, but be sure to wrap it really well in plastic and foil. Best to do so after assembling but before inverting and frosting it. Thaw slowly in the refrigerator so it doesn't weep.

    A slice of icebox pie with a bite taken off the front.

    Tips For Making Lemon Ice Box Pie

    • Before starting to assemble the pie, pull a few of the prettiest raspberries aside to decorate the top of this ice box dessert once you've frosted it with the whipped topping.
    • Plastic wrap is your friend for this recipe. It's the only way to get the pie cleanly out of the pan, and the excess pieces hanging off the sides keep the dessert well covered as it chills.
    • Don't forget that first layer of whipped topping. It helps hold the nilla wafers in place so they don't slide around or fall into the middle.
    • Spread the filling gently so you don't pull up the wafers or mix everything together.
    • Give this pie at least four hours to set, although overnight is ideal. Much like lemon icebox cake, it's the perfect make-ahead recipe!
    • Work smarter, not harder! Place your serving plate upside down on top of the pie, then hold it in place while you flip. Give the pie plate a little jiggle, and the dessert should slide right out.
    • Ingredients to prep ahead- Clean the raspberries and thaw the whipped topping.
    • Leftovers and storage- Keep ice box pie covered in the refrigerator for 2-3 days. The wafers will continue to soften, it'll still taste yummy.
    A close up image of the side layers of lemonade icebox pie.

    What To Serve With Lemon Icebox Pie

    If you're looking for no bake desserts, then you're probably also looking for no bake dinner options! Here are some of my favorite summer recipes to make on the stovetop or grill (or neither!) so the kitchen stays nice and cool.

    • Hawaiian Burger Recipe
    • Italian Tuna
    • One Pot Philly Cheesesteak Pasta
    • 7 Layer Taco Salad Recipe

    Other Delicious No Bake Desserts To Try

    • A straight-on image of 3 lemon parfait cups with the center one in the front.
      Lemon Parfait Cups Dessert
    • A slice of peanut butter pie with a bite taken off revealing the silky interior of the pie
      No Bake Peanut Butter Pie
    • Easy Grilled Peaches are the quintessential summer dessert. Light and refreshing with the perfect scoop of vanilla ice cream, this simple dessert is sure to please!
      Easy Grilled Peaches
    • 3 s'mores bars stacked on top of each other with more bars in the background.
      No Bake S'more Bars

    Love this recipe? Please leave a 5 star ⭐️⭐️⭐️⭐️⭐️ rating in the recipe card below ⬇️ and/or a review in the comment section further down. Check out my Amazon Store for all my favorite tools, including those used in this recipe. And follow @thelifejolie on Instagram and TikTok!

    A slice of lemon icebox pie being pulled from the rest of the pie.

    Lemon Icebox Pie Recipe

    Jessy Freimann
    This raspberry lemon icebox pie recipe is a seriously easy, no-bake summer dessert that will have everyone fighting for seconds! Made with vanilla wafers, lemon pie filling, fresh raspberries, and whipped topping, it's a delicious way to make a killer dessert without having to turn on your oven.
    5 from 1 vote
    Print Recipe Pin Recipe
    Prep Time 10 minutes mins
    Resting Time 4 hours hrs
    Total Time 4 hours hrs 10 minutes mins
    Course Dessert
    Cuisine American
    Servings 8 servings
    Calories 400 kcal

    Equipment

    • pie plate
    • Spatula
    • Offset spatula
    • Can opener

    Ingredients
      

    • 16 ounce whipped topping, thawed (the large container not the normal size one)
    • 12 ounces vanilla wafers
    • 16 ounces lemon pie filling
    • 12 ounces fresh raspberries, rinsed and dried

    Instructions
     

    • Remove a few of the nicest looking raspberries from the container and set aside.
    • Take two pieces of saran wrap and line the pie plate with them, so that they cross in the middle like a lowercase T (they should all be right up against the whole pan with extra wrap coming out of the pan).
    • Take a small scoop of whipped topping and spread it into a very thin layer to completely cover the plastic wrap inside of the pan. You don't need much, it's just a tiny amount to adhere the first layer of vanilla wafers.
    • Line the bottom and up the sides of the pan in a single layer of vanilla wafers. This will vary based on the exact size of your pie pan (mine was 9.5 inches) but for me it ended up being around 37 vanilla wafers.
    • Gently spread half the can of lemon pie filling to completely cover the layer of wafers in an even layer.
    • Take half of the raspberries and spread them on top in a even layer.
    • Spread on an even layer of whipped topping. This ends up being around ¼ of the container.
    • Now add another layer of vanilla wafers. This ended up being around 30 wafers.
    • Spread the remaining lemon pie filling in an even layer over the wafers.
    • Place the remaining raspberries (except for the ones you pulled aside) in a layer over the lemon pie filling.
    • Spread another quarter of the whipped topping container over the raspberries. Make another layer with the remaining vanilla wafers.
    • Pull the excess sides of plastic wrap over the top of the pie plate to cover it up and refrigerate for at least 4 hours or overnight.
    • Prior to serving, unwrap the top of the pie plate and invert the pie plate onto your serving plate. 
    • Carefully remove the plastic wrap from the icebox pie and frost it with the remaining whipped topping and decorate with remaining raspberries. Refrigerate until you're ready to serve or serve immediately.

    Video

    Notes

    • Before starting to assemble the pie, pull a few of the prettiest raspberries aside to decorate the top of this ice box dessert once you've frosted it with the whipped topping.
    • Plastic wrap is your friend for this recipe. It's the only way to get the pie cleanly out of the pan, and the excess pieces hanging off the sides keep the dessert well covered as it chills.
    • Don't forget that first layer of whipped topping. It helps hold the nilla wafers in place so they don't slide around or fall into the middle.
    • Spread the filling gently so you don't pull up the wafers or mix everything together.
    • Give this pie at least four hours to set, although overnight is ideal. Much like lemon icebox cake, it's the perfect make-ahead recipe!
    • Work smarter, not harder! Place your serving plate upside down on top of the pie, then hold it in place while you flip. Give the pie plate a little jiggle, and the dessert should slide right out.
    • Ingredients to prep ahead- Clean the raspberries and thaw the whipped topping.
    • Leftovers and storage- Keep ice box pie covered in the refrigerator for 2-3 days. The wafers will continue to soften, it'll still taste yummy.

    Nutrition

    Serving: 1servingCalories: 400kcalCarbohydrates: 63gProtein: 3gFat: 15gSaturated Fat: 9gPolyunsaturated Fat: 3gMonounsaturated Fat: 2gTrans Fat: 0.1gCholesterol: 11mgSodium: 352mgPotassium: 93mgFiber: 1gSugar: 43gVitamin A: 42IUCalcium: 40mgIron: 0.1mg
    Tried this recipe?Let us know how it was!

    Strawberry Shortcake Crumb Cake

    Jul 2, 2025 · Leave a Comment

    Strawberry Cake on a plate with a bite taken out revealing the inside of the cake.

    This strawberry shortcake crumb cake is the ultimate way to make the most of strawberry season. It's very easy to make from scratch and comes out delicious every single time. Plus, the crumb topping can't be beat!

    Strawberry Cake on a plate with a bite taken out revealing the inside of the cake.

    Why You'll Love This Strawberry Vanilla Cake

    I don't know about you, but I love a good snacking cake. Especially one with fruit in it. It's always nice with a cup of coffee, and dare I say, it's a great excuse to eat cake for breakfast.

    Other strawberry crunch cake recipes are often made with boxed cake mix or even Jello for the flavoring, but this recipe is au natural, baby! Gorgeous fresh strawberries and simple pantry ingredients are all you need to make a delicious treat from scratch.

    I love that this is the kind of cake you'll constantly find yourself going back to for just one more bite. It's perfect to bring to a summer gathering for great strawberry flavor and whips up in no time at all. There are so many reasons to love this recipe!

    • No artificial flavors
    • Easy to make from scratch
    • Delicious anytime, from breakfast to dessert
    • Freezes beautifully
    An overhead image of a strawberry crumb cake showing the streusel topping.

    Ingredient Information And Substitutions

    • Flour- The base of the batter. Regular AP flour works perfectly, and you'll need extra for the crumb topping.
    • Sugar- Use granulated sugar for the batter but brown sugar for the crumb topping.
    • Baking powder- The cake won't rise without it!
    • Kosher salt- My favorite for cooking and baking. Fine sea salt works too.
    • Egg & milk- For moisture, rich flavor, and to bind everything together.
    • Oil- Just a smidge of canola, vegetable, or another neutral oil.
    • Vanilla extract- Adds warmth and brings out the berry flavor.
    • Fresh strawberries- Nothing fake here! Choose berries that are a similar size so the slices are even too.
    • Cold butter- This part's important! Cut the stick into cubes, then pop them back in the fridge until you're ready to make the crumb topping.
    • Chopped walnuts- For plenty of crunch and delicious nutty flavor. Pecans are a good alternative.
    An overhead image of labeled recipe images.

    How To Make Strawberry Crunch Cake

    Step 1- Mix the batter.

    Preheat the oven to 350 degrees F. Spray baking pan with cooking spray, then line with parchment paper. Clean and slice strawberries.

    In a large bowl, whisk together the dry ingredients (including granulated sugar). In a smaller bowl, beat the wet ingredients with an electric mixer until well combined.

    Wet ingredients being mixed together with a hand mixer and dry ingredients in a glass bowl withe spatula making a hole in the middle.

    Then, make a well in the dry ingredients and pour in the wet. Stir to combine.

    Wet ingredients being poured into the well in the dry ingredients ands then all of it stirred together.

    Step 3- Add batter to the pan.

    Spoon the batter into the center of the pan, then smooth the surface. Place the slices of strawberries on top in a single layer.

    Batter in the cake pan and then strawberries added on top. Then a hand cutting together the crumb topping.

    Step 4- Make crumb topping.

    In another bowl, stir together the flour and brown sugar. Cut cold butter into the mixture with a pastry cutter or fork, then add the chopped nuts. Sprinkle over the strawberries.

    Carefully place the pan in the oven and bake for about 40 minutes, or until a toothpick comes out clean. Remove and cool before serving.

    Nuts and crumb topping being sprinkled onto the cake and then the spring form pan being removed from the baked cake.

    Frequently Asked Questions

    Can I use frozen strawberries?

    Yes, but be sure to thaw and drain them really well.

    Can I make the crumb topping without nuts?

    Yes, you can use a different type of nut or omit them entirely for a nut-free option.

    How do you know when crumb cake is done?

    You'll know it's done because a toothpick inserted into the middle will come out clean.

    A bite of strawberry cake on a fork.

    Tips For Making This Strawberry Crunch Cake Recipe

    • Use whatever pan you have. Although the original recipe calls for an 8x8 square pan, I like to use an 8-inch springform pan for easiest removal. If that's not available, any 8-inch cake pan (square or round) will work fine.
    • Line the pan for easy removal. Spray it with cooking spray first, then add the parchment paper.
    • Combine ingredients in the correct order. Mix the wet and dry ingredients separately first, then combine making a well in the dry ingredients. It will make mixing easier and also prevent over-mixing the batter.
    • Speaking of over-mixing... don't do it! Mix the batter just until combined, or your cake will come out tough and dry.
    • Smooth out the batter before adding the toppings. It will rise and bake more evenly this way.
    • Ingredients to prep ahead- Clean and slice strawberries. Cut cold butter into cubes.
    • Leftovers and storage- I kept this strawberry coffee cake wrapped on my counter for a few days, and it worked out well. You can also freeze it for around 3 months.
    A slice of strawberry coffee cake on a white plate.

    What To Serve With Strawberry Shortcake Crunch Cake

    Enjoy a slice in the morning with coffee, or add a scoop of vanilla ice cream for dessert. This cake is even delicious as part of a larger breakfast or brunch spread. Here are a few ideas to get you started!

    • Brocolli Cheddar Cheese Quiche
    • Zucchini Pancakes
    • Super Easy Baked Breakfast Tostadas
    • Parmesan Roasted Asparagus with Fried Eggs

    More Delicious Cake Recipes To Try

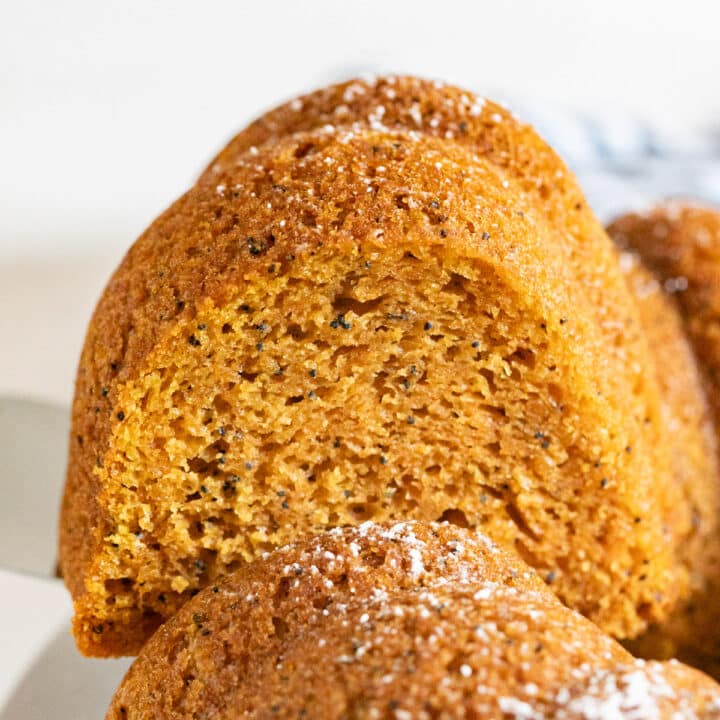
    • A slice of poppyseed cake being lifted from the rest of the cake.
      Poppyseed Cake
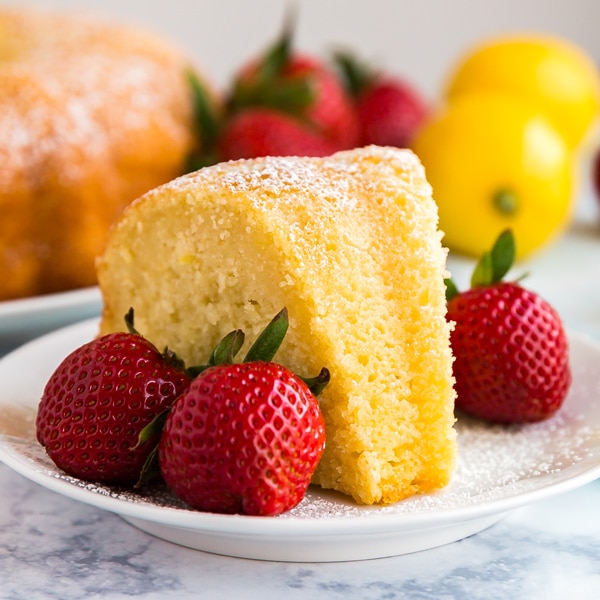
    • My Great Grandma's Lemon Pound Cake Recipe is a serious keeper! Easy to make, subtly sweet with a light and moist crumb that no one can resist.
      Great Grandma Hinz's Lemon Pound Cake Recipe
    • A slice of coffee cake on a white plate.
      Coffee Cake with Cinnamon Streusel
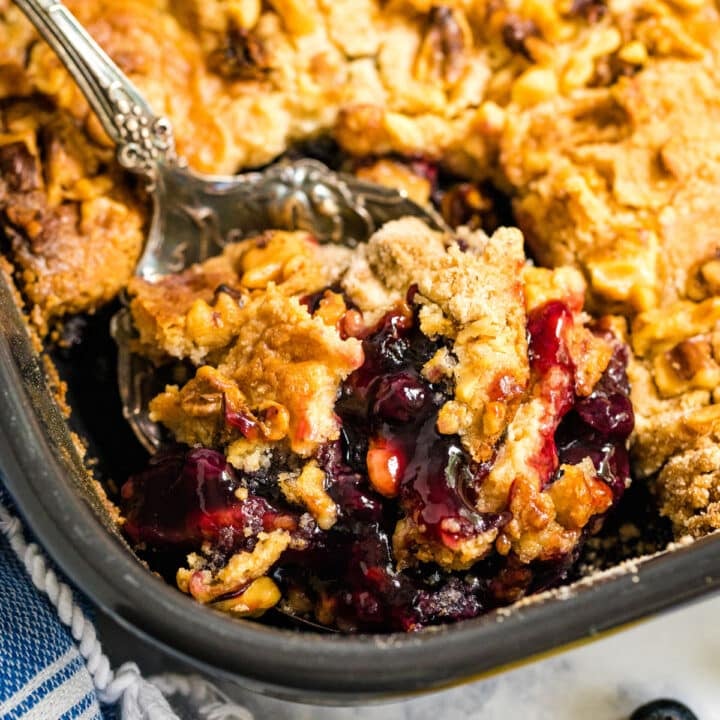
    • The corner of a pan of blueberry dump cake with a spoon in it revealing the berry mixture along with the crust.
      Blueberry Lemon Dump Cake

    Love this recipe? Please leave a 5 star ⭐️⭐️⭐️⭐️⭐️ rating in the recipe card below ⬇️ and/or a review in the comment section further down. Check out my Amazon Store for all my favorite tools, including those used in this recipe. And follow @thelifejolie on Instagram and TikTok!

    Strawberry Cake on a plate with a bite taken out revealing the inside of the cake.

    Strawberry Shortcake Crumb Cake

    Jessy Freimann
    This strawberry shortcake crumb cake is the ultimate way to make the most of strawberry season. It's very easy to make from scratch and comes out delicious every single time. Plus, the crumb topping can't be beat!
    No ratings yet
    Print Recipe Pin Recipe
    Prep Time 10 minutes mins
    Cook Time 40 minutes mins
    Total Time 50 minutes mins
    Course Dessert, Snack
    Cuisine American
    Servings 8 servings
    Calories 225 kcal

    Equipment

    • measuring cups
    • measuring spoons
    • mixing bowl
    • Spatula
    • stand mixer
    • OR Hand mixer
    • 8 inch springform pan
    • OR 8 inch cake pan

    Ingredients
      

    Cake

    • 1 ¼ cups flour
    • ½ cup granulated sugar
    • 2 teaspoons baking powder
    • ¼ teaspoon kosher salt
    • 1 large egg
    • ½ cup milk
    • 2 Tablespoons canola or vegetable oil
    • ½ teaspoon vanilla extract
    • 1 ½ cups sliced fresh strawberries

    Crumb topping

    • ½ cup flour
    • ⅓ cup brown sugar
    • ¼ cup cold butter, cut into cubes (½ stick)
    • ⅓ cup chopped walnuts

    Instructions
     

    • Preheat oven to 350 degrees and prepare 8 inch spring form pan by spraying with cooking spray and lining with parchment paper.
    • In a large bowl, whisk together flour, sugar, baking powder and kosher salt to combine.
    • In a smaller bowl, whisk together egg, milk, oil and vanilla extract until well combined.
    • Make a well in the center of the dry ingredients and add wet ingredients into the well.
    • Mix until just combined..
    • Spoon batter into prepared pan and smooth into an even layer.
    • Arrange strawberries over the top of the batter in a single layer.
    • In a medium bowl combine flour and brown sugar.
    • Add cold butter use a pastry cutter or fork to cut the butter until crumbly.
    • Sprinkle the crumb mixture evenly over the top of the strawberries.
    • Bake for around 40 minutes or until a tooth pick inserted into the middle comes out clean. Cool and serve.

    Video

    Notes

    • Use whatever pan you have. Although the original recipe calls for an 8x8 square pan, I like to use an 8-inch springform pan for easiest removal. If that's not available, any 8-inch cake pan (square or round) will work fine.
    • Line the pan for easy removal. Spray it with cooking spray first, then add the parchment paper.
    • Combine ingredients in the correct order. Mix the wet and dry ingredients separately first, then combine making a well in the dry ingredients. It will make mixing easier and also prevent over-mixing the batter.
    • Speaking of over-mixing... don't do it! Mix the batter just until combined, or your cake will come out tough and dry.
    • Smooth out the batter before adding the toppings. It will rise and bake more evenly this way.
    • Ingredients to prep ahead- Clean and slice strawberries. Cut cold butter into cubes.
    • Leftovers and storage- I kept this strawberry coffee cake wrapped on my counter for a few days, and it worked out well. You can also freeze it for around 3 months.

    Nutrition

    Serving: 1servingCalories: 225kcalCarbohydrates: 44gProtein: 4gFat: 4gSaturated Fat: 1gPolyunsaturated Fat: 2gMonounsaturated Fat: 1gCholesterol: 2mgSodium: 188mgPotassium: 87mgFiber: 1gSugar: 22gVitamin A: 26IUVitamin C: 0.1mgCalcium: 94mgIron: 2mg
    Tried this recipe?Let us know how it was!

    Fourth of July Fruit Pizza

    Jun 30, 2025 · 2 Comments

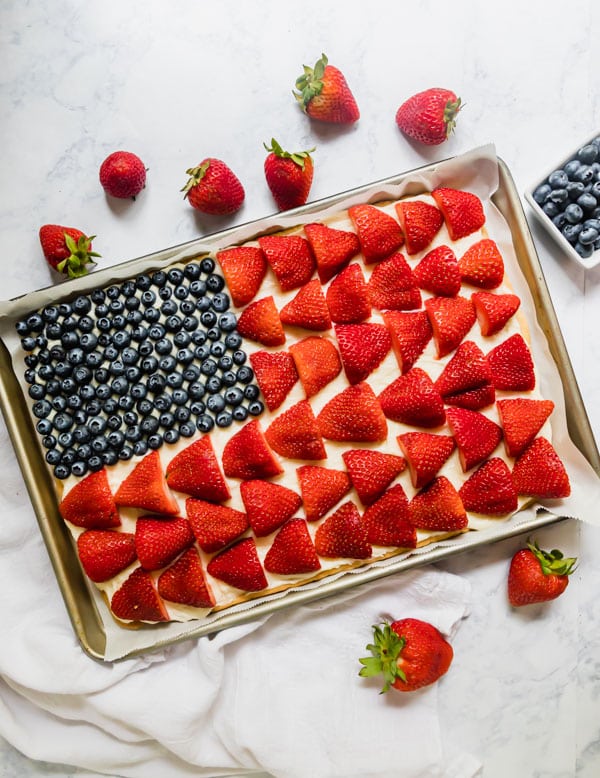
    An overhead image of an American Flag Pizza with berries around it.

    This Fourth of July fruit pizza is a festive dessert to bring to your patriotic celebration! It's light, fresh, and seriously easy to throw together with a sugar cookie base and a sweet cream cheese spread.

    An overhead image of a whole American Flag fruit pizza.
    [feast_advanced_jump_to]

    Why You'll Love 4th of July Fruit Pizza

    In my opinion, one of the best picnic desserts is a fruit pizza! It's light, fresh, and delicious on a hot day. In fact, I generally prefer fruity sweets, and this treat is like a fruit tart without all the hassle!

    I decided to add a patriotic twist to this particular cookie fruit pizza by shaping and decorating it to make it look like an American flag. With all the patriotic holidays that come up throughout the summer, this will be your new go-to dessert.

    And the hardest part is placing the berries one by one for the design. Seriously, the kids even help make this sometimes — it's that easy! Here are a few more reasons to love this fruit dessert:

    • Light and refreshing
    • Not too sweet
    • Ready in under 30 minutes
    • Easy to make ahead
    • Versatile recipe
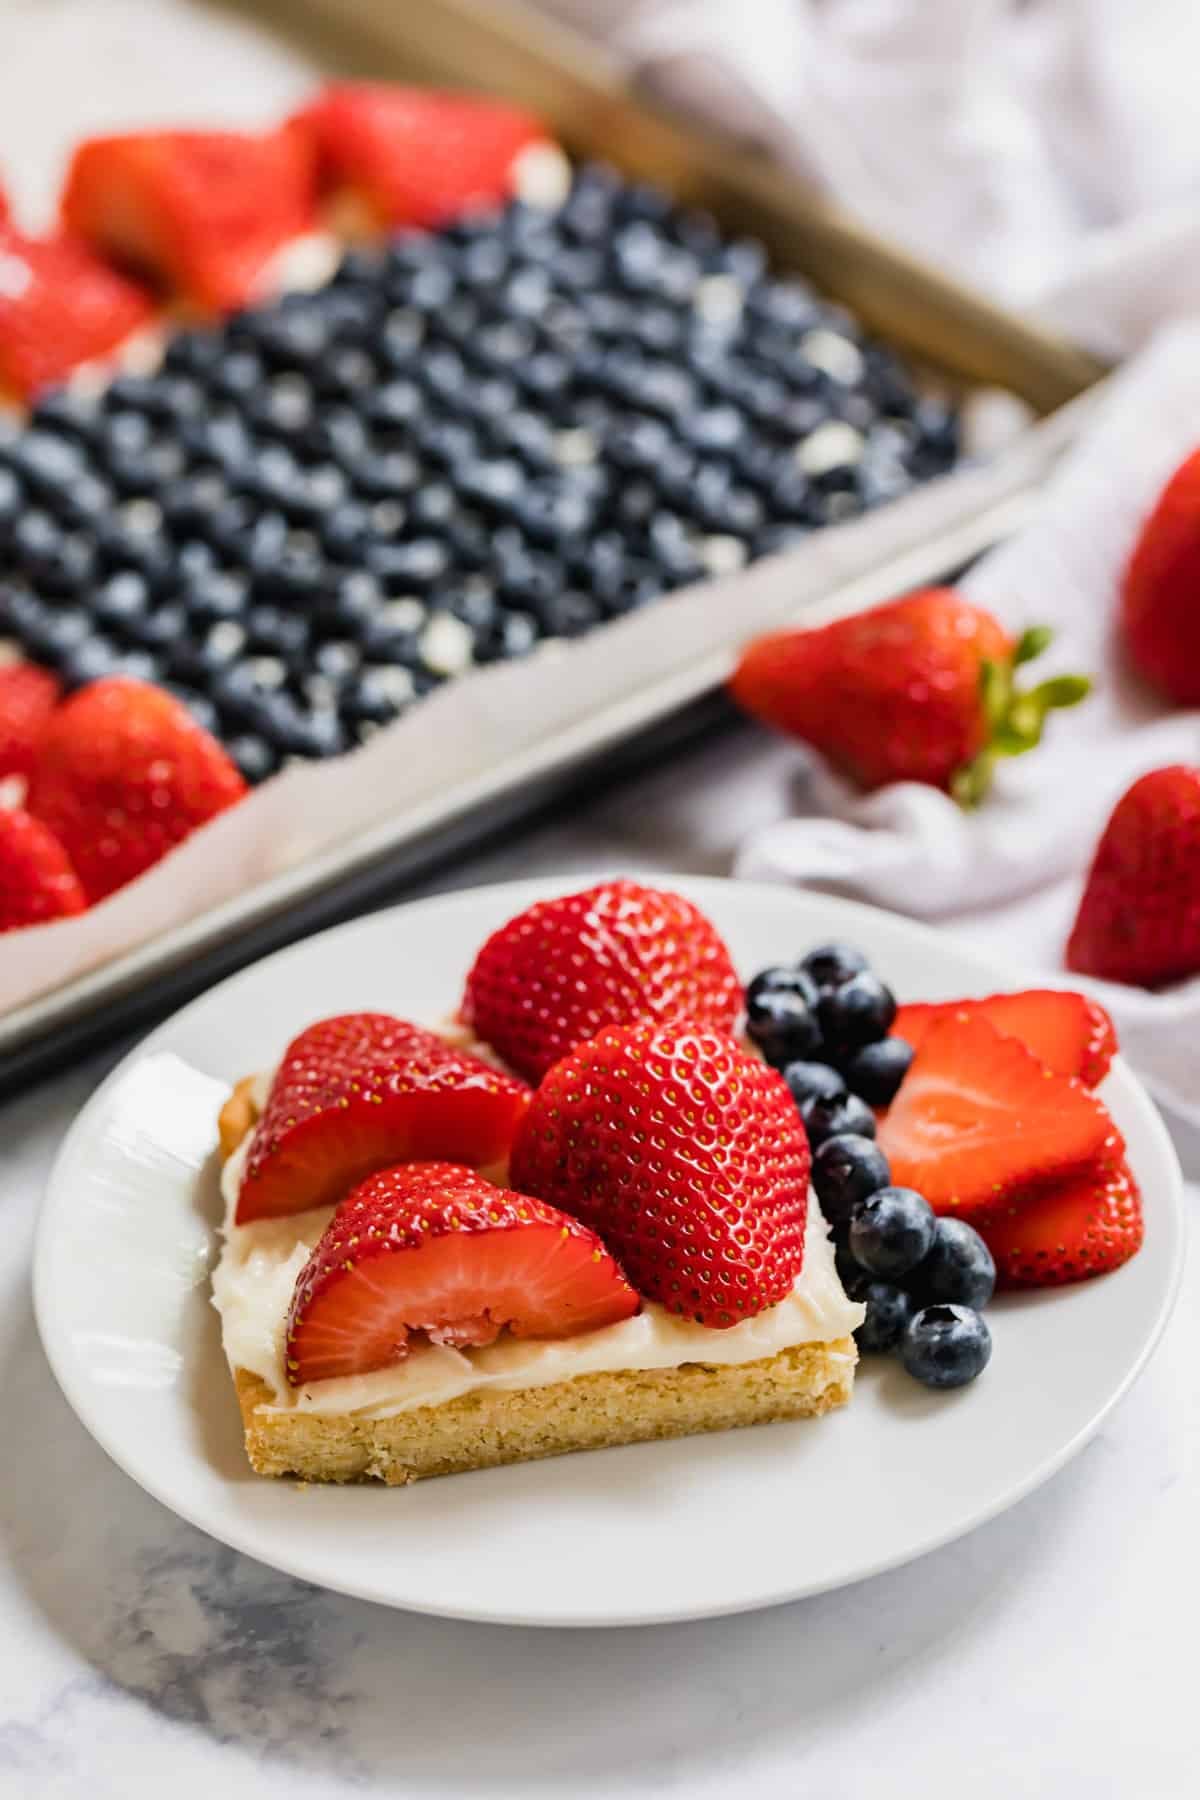
    A piece of fruit pizza on a plate with the rest of it in the background.

    Ingredient Information And Substitutions

    • Sugar cookie mix- This is the powdered mix that comes in a pouch — find it in the baking aisle near the cake and brownie mix. I like to use Betty Crocker.
    • Egg- To make the dough!
    • Salted butter- One stick for the cookie dough and another for the spread. I especially like to use salted butter in cream cheese frosting for fruit pizza to help balance the sweetness.
    • Flour- This is listed on the package for cutout cookies. It will make the crust a bit sturdier. Regular AP flour is perfect.
    • Cream cheese- Delicously tangy and a perfect contrast to the sweetness of the crust and the fresh berries.
    • Confectioner's sugar- AKA powdered sugar. Sweetens up the cream cheese and helps make it a little fluffy.
    • Vanilla extract- Adds flavor and warmth to the frosting. For a twist, swap it with some lemon extract.
    • Strawberries- To make the stripes! Choose fully ripe berries that are a similar color and size so everything stays (mostly) even.
    • Blueberries- For the "stars" portion of the flag. Pick through and remove any stems before rinsing.
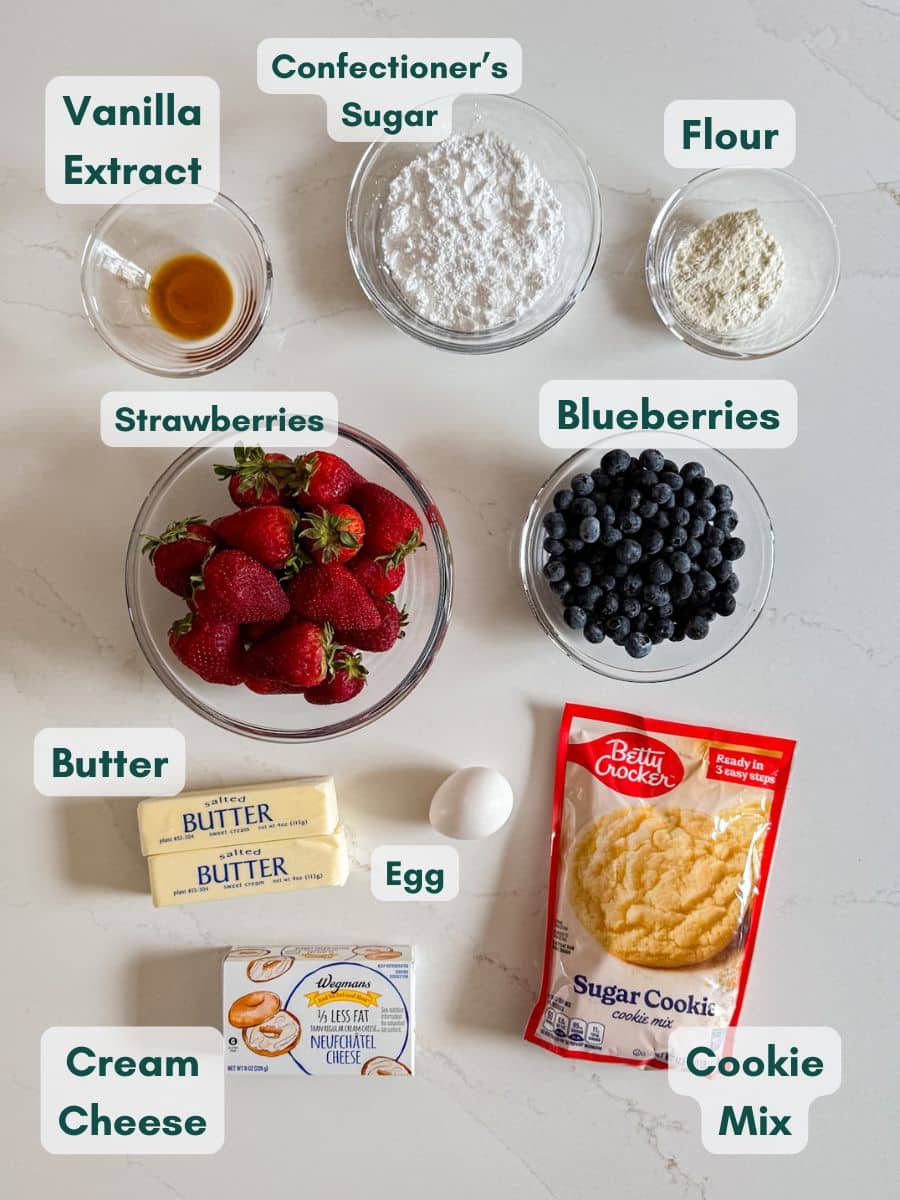
    An overhead image of labeled recipe ingredients.

    How To Make Sugar Cookie Fruit Pizza

    Step 1- Mix and bake the dough.

    Preheat the oven to 350 degrees F (or whatever is listed on the cookie dough package) and line a large sheet pan with parchment paper.

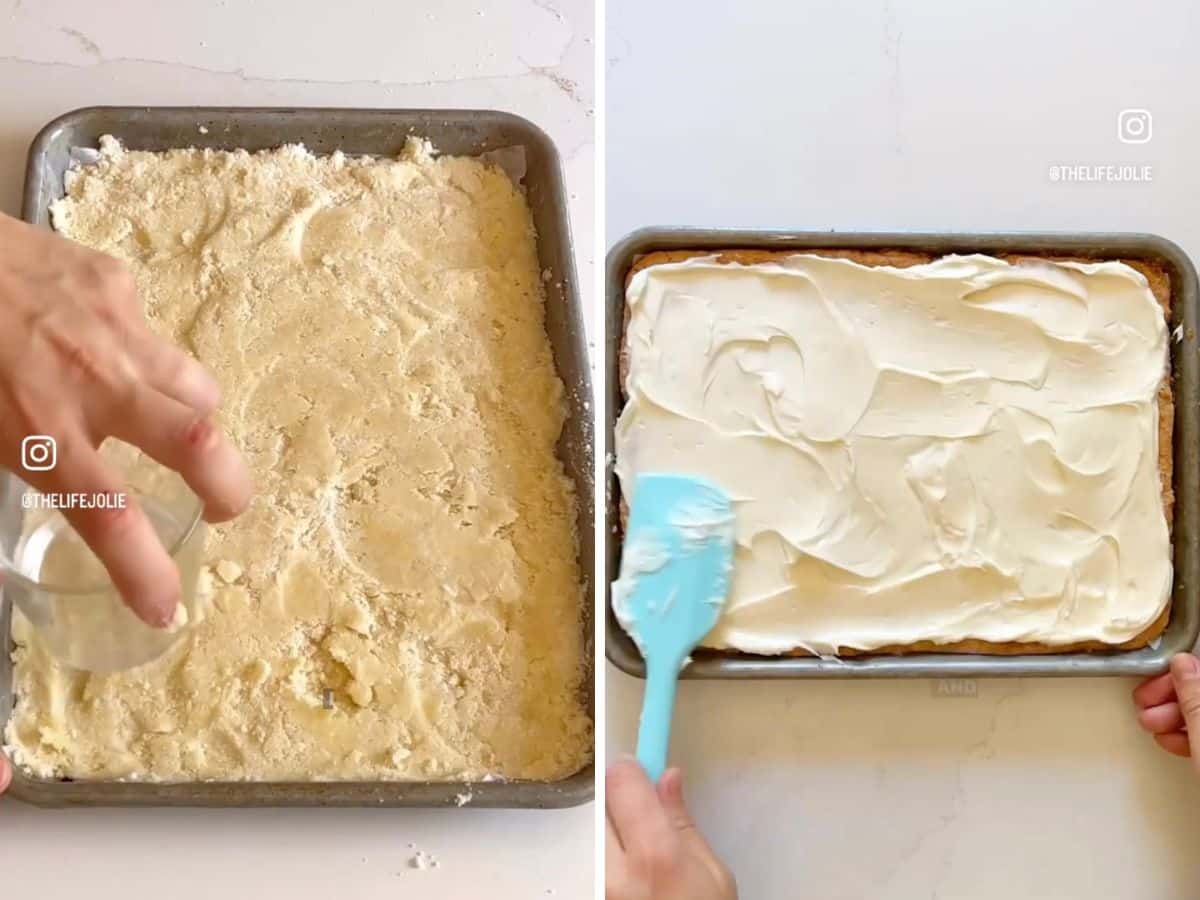
    Mix the dough ingredients per the cookie mix package until well combined. Spread the dough out onto the lined baking sheet, gently pressing it into a rectangle shape.

    Bake for 11-13 minutes, until the edges start to turn golden. Remove and cool completely while you work on the toppings.

    Baked cookie crus in a pan and then the cream cheese mixture being spread on top.

    Step 2- Make the cream cheese spread and add toppings.

    In a stand mixer (or large bowl with hand mixer), combine the softened cream cheese and remaining stick of butter with the confectioner's sugar and vanilla. Beat the mixture until smooth and creamy.

    Once the cookie crust is completely cool, spread the cream cheese frosting evenly on top, all the way to the edges. Make a rectangle in the top left corner with rows of blueberries, then use the halved strawberries to make rows for the "stripes" of the flag. Enjoy right away or chill until serving!

    Blueberries lining the upper left corner making the stars of the flag and then strawberries making the stripes.

    Frequently Asked Questions

    Can I use refrigerated cookie dough instead of the dry mix?

    You can, but I tested this with the refrigerated mix, and it came out in a strange shape. If you do go this route, shape the dough onto the sheet pan and chill for an hour before baking.

    How do you decorate fruit pizza?

    When making a flag design, I find it easiest to start with the blueberries. I make the outside of that rectangle in the upper left corner, then fill it in with blueberries. After that, I use the strawberries to make stripes.

    Can I use different fruits?

    You bet! Blackberries (halved) can be used for the blue section, and raspberries work for the stripes. Or you can make any design you'd like with whatever fresh fruits you like!

    Can you make fruit pizza in advance?

    You can make the cookie crust the day before. Cool it completely and then cover it tightly in plastic wrap and store overnight on your counter. I'd encourage you to make the frosting and decorate with fruit within a few hours of serving so that everything is as fresh as possible.

    A close up image of a slice of flag fruit pizza on a plate.

    Tips For Making Fruit Cookie Pizza

    • Soften the cream cheese and butter before getting started. It's a key step to getting a smooth dough and frosting.
    • Instead of battling it out with a rolling pin, I used my hands to spread the dough out to fit perfectly into the sheet pan. Try to make sure it's even and level - a cup or bowl with a flat bottom helps with this..
    • Wash the fruit the day before if you can- or dry it super well- you want to avoid putting wet fruit on the frosting and making a soggy fruit pizza.
    • Let the dough cool completely. Otherwise, the cream cheese frosting will melt, and you'll have a goopy mess on your hands!
    • If your strawberries are all different sizes, you may need to trim the sides slightly or even quarter them. Whatever gets you the most even-looking stripes!
    • Multi-tasking is your friend. I like to slice the strawberries while the crust is in the oven, then mix up the frosting while it cools.
    • Ingredients to prep ahead- Mix and bake the cookie crust. Store at room temperature or freeze for up to 3 months. You can also wash the berries and slice the strawberries a day in advance.
    • Leftovers and storage- Leftovers will keep covered for a few days in the refrigerator. It's best to store fruit pizza in a single layer, as cutting and stacking could affect the texture.

    What To Serve With American Flag Fruit Pizza

    This dessert is the perfect ending to any barbecue or cookout, but you could easily serve it for breakfast or brunch too! Balance the sweetness with plenty of savory options. Here are a few ideas to round out your meal:

    • Chicken Caesar Wrap Pinwheels
    • Easy Slow Cooker Pulled Pork BBQ
    • Garbage Plate Recipe
    • Zesty Italian Pasta Salad
    • Firecracker Vanilla Cupcakes

    Other Delicious Fruit Dessert Recipes To Try

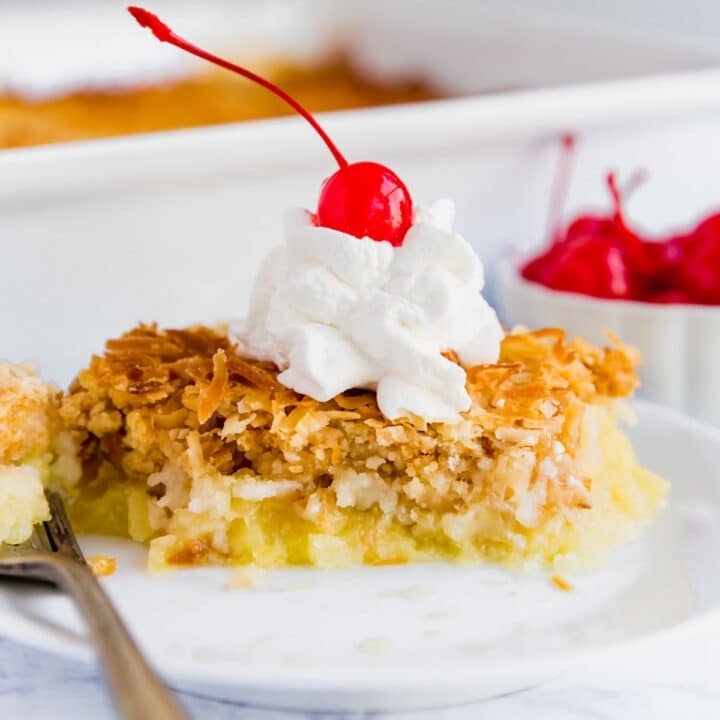
    • A close up image of Piña Colada dump cake on a plate with whipped cram and a cherry on top on a white plate with a fork.
      Piña Colada Pineapple Dump Cake
    • A piece of cherry cheese pie being pulled up from the rest of the pie.
      Cherry Cheese Pie
    • A slice of lemon icebox pie being pulled from the rest of the pie.
      Raspberry Lemon Icebox Pie Recipe
    • A square image of Chocolate Cheesecake Stuffed Strawberries.
      Chocolate Cheesecake Stuffed Strawberries Recipe

    Love this recipe? Please leave a 5 star ⭐️⭐️⭐️⭐️⭐️ rating in the recipe card below ⬇️ and/or a review in the comment section further down. Check out my Amazon Store for all my favorite tools, including those used in this recipe. And follow @thelifejolie on Instagram and TikTok!

    An overhead image of an American Flag Pizza with berries around it.

    Fourth of July Fruit Pizza

    Jessy Freimann
    This Fourth of July fruit pizza is a festive dessert to bring to your patriotic celebration! It's light, fresh, and seriously easy to throw together with a sugar cookie base and a sweet cream cheese spread.
    5 from 1 vote
    Print Recipe Pin Recipe
    Prep Time 15 minutes mins
    Cook Time 12 minutes mins
    Total Time 27 minutes mins
    Course Dessert
    Cuisine American
    Servings 12 servings
    Calories 235 kcal

    Equipment

    • 15.5x10.5 inch pan
    • mixing bowl
    • Spatula
    • Offset spatula
    • stand mixer
    • OR Hand mixer
    • measuring cups
    • measuring spoons
    • chefs knife
    • cutting board

    Ingredients
      

    • 1 package dry sugar cookie mix (I used Betty Crocker)
    • 1 cup salted butter, 2 sticks- softened and divided (one is as per the cookie package directions)
    • 1 large egg (as per cookie package directions)
    • 3 Tablespoons flour (as per cookie package directions)
    • 8 ounces cream cheese, softened
    • 1 cup confectioner's sugar
    • 1 teaspoon vanilla extract
    • 1 ½ pounds strawberries, stems removed and halved
    • 1 cup blueberries

    Instructions
     

    • Preheat the as per package directions (mine was 350 degrees) and line a 15.5" x 10.5" sheet pan with parchment. Set aside.
    • In a large bowl mix cookie mix, 1 stick butter, egg and flour until well combined.
    • Spread evenly over sheet pan to form crust.
    • Bake 11-13 minutes until the edges are starting to turn golden.
    • Remove from oven and cool completely.
    • While the crust cools mix remaining stick butter, cream cheese, confectioner's sugar and vanilla until smooth and creamy.
    • Spread evenly over cooled crust.
    • Use the blueberries to form a rectangle in the upper left corner of the the pizza.
    • Line up rows of strawberries on the remaining pizza to form the stripes. Refrigerate until serving.

    Video

    Notes

    • Soften the cream cheese and butter before getting started. It's a key step to getting a smooth dough and frosting.
    • Instead of battling it out with a rolling pin, I used my hands to spread the dough out to fit perfectly into the sheet pan. Try to make sure it's even and level - a cup or bowl with a flat bottom helps with this..
    • Wash the fruit the day before if you can- or dry it super well- you want to avoid putting wet fruit on the frosting and making a soggy fruit pizza.
    • Let the dough cool completely. Otherwise, the cream cheese frosting will melt, and you'll have a goopy mess on your hands!
    • If your strawberries are all different sizes, you may need to trim the sides slightly or even quarter them. Whatever gets you the most even-looking stripes!
    • Multi-tasking is your friend. I like to slice the strawberries while the crust is in the oven, then mix up the frosting while it cools.
    • Ingredients to prep ahead- Mix and bake the cookie crust. Store at room temperature or freeze for up to 3 months. You can also wash the berries and slice the strawberries a day in advance.
    • Leftovers and storage- Leftovers will keep covered for a few days in the refrigerator. It's best to store fruit pizza in a single layer, as cutting and stacking could affect the texture.

    Nutrition

    Serving: 1servingCalories: 235kcalCarbohydrates: 19gProtein: 2gFat: 22gSaturated Fat: 14gPolyunsaturated Fat: 1gMonounsaturated Fat: 6gTrans Fat: 1gCholesterol: 60mgSodium: 182mgPotassium: 128mgFiber: 1gSugar: 5gVitamin A: 740IUVitamin C: 35mgCalcium: 33mgIron: 0.4mg
    Tried this recipe?Let us know how it was!

    Crescent Roll Cheese Danish

    Jun 23, 2025 · Leave a Comment

    A piece of cheese danish on a white plate with the rest behind it.

    Need a fast and easy brunch option? This crescent roll cheese danish is a total crowd pleaser. With minimal ingredients and maximum flavor, you'll make this again and again!

    A piece of cheese danish on a white plate with the rest behind it.
    [feast_advanced_jump_to]

    Why You'll Love Cream Cheese Danish Made With Crescent Rolls

    We all need that quick, throw-together option for events and holidays calling for a brunch dish-to-pass. Christmas morning. Easter Sunday. Mother's Day. That random Sunday morning when you planned to entertain and accidentally overslept. It happens!

    This cream cheese danish pastry is outrageously quick and easy to throw together. It's got delicious but logical shortcuts, so you can work smarter, not harder. And the results are a beautifully braided, flaky, golden-brown crust filled with sweet and creamy cheese.

    Whip it up in as little as 10 minutes, pop it into the oven, and you've got a delicious danish that is sure to impress! It's just one of many reasons to love this recipe.

    • Made with ingredients you can keep on hand
    • Light and sweet
    • Super flaky
    • Perfect for sharing
    A close up image of the top of a crescent roll cheese danish.

    Ingredient Information And Substitutions

    • Cream cheese- Make sure to soften it first! It only takes about 20 minutes on the counter, maybe less if you unwrap the block.
    • Eggs- Use 1 egg yolk in the filling, then a whole egg whisked with water for the egg wash.
    • Sugar- Also split. Use granulated sugar to sweeten the cream cheese mixture, then turbinado sugar (AKA raw sugar) on top for a little added sparkle and texture.
    • Almond extract- For a hint of flavor. You can substitute with the same amount of vanilla extract or any other flavored pure extract of your choice.
    • Refrigerated crescent roll sheet- This also comes in a tube, but it's a solid sheet of dough without the perforations to make rolls. If the sheet isn't available, buy crescent rolls and use a rolling pin to help them stick together in a rectangle.
    An overhead image of labeled recipe ingredients.

    How To Make Cream Cheese Danish Using Crescent Rolls

    Step 1- Make cheese filling and prep dough.

    Line a sheet pan with parchment paper and preheat the oven to 350 degrees F.

    Add softened cream cheese, egg yolk, granulated sugar, and almond extract to the bowl of your mixer. Beat until well combined and smooth, scraping down the sides as you go.

    Gently flatten the sheet dough onto the parchment-lined pan. Cut 1-inch strips along both sides, about 1 ½ inches into the dough. There should be a column of uncut dough down the middle, about 3-4 inches across.

    Cheese mixture ingredients in a stand mixer bowl and the crescent roll sheet spread on a lined sheet pan with 1 inch slits cut into each side.

    Step 2- Add filling and braid.

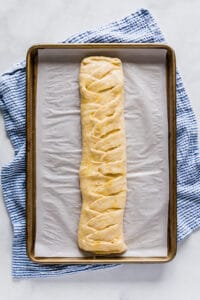
    Spread the cheese filling evenly down the center of the dough. Fold the outer strips over each other to make a simple braid, pressing lightly in the center to hold them in place. Then, fold the top and bottom ends in so the filling doesn't leak out.

    Filling in the center of the dough and then the top one inch pieces up to being braided down the center.

    Step 3- Bake.

    Whisk together one whole egg with water, then lightly brush the mixture over the dough. Sprinkle with turbinado sugar before baking for 30 minutes, or until golden brown.

    Let the braided danish cool on the baking sheet for 10 minutes, then slice and serve immediately.

    Fully braided danish with egg wash and turbinado sugar sprinkled on it and then the same danish baked to the perfect golden brown.

    Frequently Asked Questions

    Is a danish a donut?

    No. While they're both breakfast pastries, danishes are typically baked while donuts are often fried (although also sometimes baked). Donuts are usually a different shape and not all pastry used in donuts contains yeast.

    What if I forget to soften the cream cheese in advance?

    It's totally ok! Just place the (unwrapped) cream cheese in a microwave-safe bowl and zap it for 30 seconds to soften, then whip it extra well.

    Can you make cheese danish ahead of time?

    Once baked, danishes are best eaten the same day, though you can save leftovers and reheat them later.

    A close up image of a bite in the danish revealing the filling.

    Tips For Making Danish With Cream Cheese

    • No need to make the dough from scratch. A refrigerated crescent dough sheet saves you loads of time, and honestly, no one will be able to tell the difference.
    • Soften the cream cheese for the best texture. This will help all the ingredients combine evenly and be nice and creamy.
    • Use an electric mixer for the filling. Trust me, it takes way too long to get the same creamy, whipped texture by hand.
    • Trim the edges of the dough into strips (that you'll be braiding) with a sharp pizza cutter. Or if you don't have one, just use a sharp knife.
    • Don't forget the egg wash! It keeps the top of the pastry brown and crisp, and helps the sugar crystals stick to the surface.
    • Ingredients to prep ahead- Soften the cream cheese and mix the filling. Filling will keep for up to 3 days in the fridge.
    • Leftovers and storage- Around 3-4 days covered in the refrigerator. Reheat in the oven (or air fryer, if you have one) to get the pastry flaky again.
    A piece of cheese danish on a white plate with the rest behind it.

    What To Serve With Crescent Roll Cream Cheese Danish

    I love to nibble on one of these with a hot cup of coffee on the weekends, but this cream cheese danish recipe is fabulous as part of a full brunch spread! Here are a few ideas to round out your meal:

    • Blueberry Buckle
    • Crispy Parmesan Potatoes
    • Grandma Hinz's Apple Pancakes
    • Chorizo and Sweet Potato Breakfast Hash
    • Grapefruit Sparkler
    A cheese danish on a plate with a bite in it.

    More Brunch Recipes To Try

    • A close up image of the croissant French toast on white plate with a piece cut off exposing the inside of it.
      Almond Croissant Baked French Toast
    • A hand lifting a a piece of biscuit casserole with eggs from the pan.
      Bubble Up Biscuit Breakfast Casserole
    • An overhead image of the asparagus puff pastry tart on a parchment lined cutting board with sprigs of thyme around it.
      Asparagus Leek Tart
    • Two slices of banana bread next to the loaf with a banana on the side.
      Buttermilk Banana Bread Recipe

    Love this recipe? Please leave a 5 star ⭐️⭐️⭐️⭐️⭐️ rating in the recipe card below ⬇️ and/or a review in the comment section further down. Check out my Amazon Store for all my favorite tools, including those used in this recipe. And follow @thelifejolie on Instagram and TikTok!

    A piece of cheese danish on a white plate with the rest behind it.

    Crescent Roll Cheese Danish

    Jessy Freimann
    Need a fast and easy brunch option? This crescent roll cheese danish is a total crowd pleaser! With minimal ingredients and maximum flavor, you'll make this again and again!
    No ratings yet
    Print Recipe Pin Recipe
    Prep Time 10 minutes mins
    Cook Time 30 minutes mins
    Cooling time 10 minutes mins
    Total Time 50 minutes mins
    Course Breakfast, Dessert
    Cuisine American
    Servings 8 servings
    Calories 151 kcal

    Equipment

    • sheet pan
    • chefs knife
    • cutting board
    • measuring spoons
    • stand mixer
    • OR Hand mixer
    • silicone brush

    Ingredients
      

    • 8 ounces cream cheese, softened
    • 1 egg yolk
    • ½ cup granulated sugar
    • 1 teaspoon almond extract
    • 1 package crescent roll dough sheet (or use a rolling pin to adhere crescent rolls together into a rectangle)
    • 1 large egg
    • 1 Tablespoon water
    • 1-2 teaspoons Turbinado sugar

    Instructions
     

    • Preheat the oven to 350 degrees and line a sheet pan with parchment, set aside.
    • In a the bowl of your mixer (or a large bowl with a hand mixer) mix the cream cheese, egg yolk, sugar and almond extract until smooth and well combined, scrapping down the sides as you go. Set aside.
    • Place the crescent sheet onto the lined sheet pan and slightly flatten it (you don't want it too thin).
    • Using a pizza wheel or knife, cut 1 inch strips about 1 ½ inches into each side, leaving around 3-4 inches of dough uncut on the inside.
      A raw cheese danish with the sides cut to braid
    • Place the cream cheese mixture down the center where the dough is not cut.
      A raw cheese danish being braided
    • Take the strips and fold them over each other, pressing lightly in the middle to create the braid.
      A raw cheese danish with the braid going further down
    • Fold the ends in to hold in the filling.
      A braided raw cheese danish
    • In a small bowl, whisk egg and water together to make an egg wash. Lightly brush the egg wash over the braided pastry and sprinkle with turbinado sugar.
    • Bake uncovered for around 30 minutes or until golden brown.
    • Cool for 10 minutes and then slice and serve immediately.

    Video

    Notes

    • No need to make the dough from scratch. A refrigerated crescent dough sheet saves you loads of time, and honestly, no one will be able to tell the difference.
    • Soften the cream cheese for the best texture. This will help all the ingredients combine evenly and be nice and creamy.
    • Use an electric mixer for the filling. Trust me, it takes way too long to get the same creamy, whipped texture by hand.
    • Trim the edges of the dough into strips (that you'll be braiding) with a sharp pizza cutter. Or if you don't have one, just use a sharp knife.
    • Don't forget the egg wash! It helps the top of the pastry brown and crisp, and it helps the sugar crystals stick to the surface.
    • Ingredients to prep ahead- Soften the cream cheese and mix the filling. Filling will keep for up to 3 days in the fridge.
    • Leftovers and storage- Around 3-4 days covered in the refrigerator. Reheat in the oven (or air fryer, if you have one) to get the pastry flaky again.

    Nutrition

    Serving: 1servingCalories: 151kcalCarbohydrates: 15gProtein: 2gFat: 10gSaturated Fat: 6gPolyunsaturated Fat: 0.4gMonounsaturated Fat: 3gCholesterol: 30mgSodium: 89mgPotassium: 39mgSugar: 14gVitamin A: 383IUVitamin C: 0.001mgCalcium: 28mgIron: 0.04mg
    Tried this recipe?Let us know how it was!

    Avocado Corn and Black Bean Salad

    Jun 20, 2025 · 2 Comments

    An overhead image of a bowl of corn sand black bean salad.

    Need an excellent no-mayo salad option to bring to a picnic? This avocado, corn and black bean salad is a new family favorite recipe that's also a great meal prep option for a light lunch you can eat all week!

    A white bowl of corn salad with a striped napkin behind it.
    [feast_advanced_jump_to]

    Why You'll Love Charred Corn Salad

    One of the things my family loves to eat most in the summer is fresh corn on the cob. The corn around here is especially sweet and delicious, and my girls go crazy for it! As you can imagine, it makes its way onto our weekly dinner menus quite frequently.

    So, I'm constantly in search of fun ways to mix things up with the ingredients we use frequently. Don't get me wrong, we're still frequent flyers with plain and simple corn on the cob, but variety is the spice of life. And I figured a summer corn salad would be a tasty option!

    This particular corn & tomato salad is full of delicious veggies, plus black beans for protein. I don't work enough with Cajun seasoning, but it's so darn good that I figured I'd build the flavor profile around it.

    This is the perfect salad to bring to a summer picnic because there is no mayonnaise in it, so it can sit outside without being refrigerated (although I personally love it cold!). And that's not the only reason to love this recipe!

    • Can be made ahead of time
    • Packed with fresh flavor
    • Great as a side, dip, or topping
    • Easy to customize
    An overhead image of a bowl of corn sand black bean salad.

    Ingredient Information And Substitutions

    • Corn on the cob- If fresh corn isn't in season, just use frozen (thawed first). And in a pinch, well-drained cans of fire-roasted corn kernels would work!
    • Black beans- Drain and rinse the beans under cool water so the salad isn't too soggy.
    • Grape tomatoes- Perfect for salads due to their lower water content. Swap with cherry tomatoes or the heirloom ones for more color and flavor variety.
    • Fresh peppers- Some people love spicy foods, while others don't. For this reason, I've given two options for peppers. Serrano is on the spicier side, while Anaheim has a tiny kick but is milder.
    • Cilantro & green onion- Both add loads of freshness. Give both a rough chop, but only use the green parts from the onions. Or, swap with red onion for a stronger onion flavor.
    • Avocado- You want these to be ripe enough for flavor and softness, but still firm so the chunks hold their shape.
    • Dressing- A simple mixture of EVOO, fresh lime juice, honey, and Cajun seasoning. Add salt and pepper as well, to taste.
    Labeled recipe ingredients in bowls.

    How To Make Black Bean, Avocado And Corn Salad

    Step 1- Prep the ingredients and mix dressing.

    Grill corn on the cob, then cool and slice off all the kernels. Rinse and drain the black beans, then halve the grape tomatoes. Chop the green onion and cilantro, and cut the avocado into chunks. Remove the seeds and ribs from the peppers before dicing.

    Mix dressing ingredients in a medium bowl until well combined.

    Corn grilling on the grill and dressing mixed together in a bowl.

    Step 2- Mix it all together.

    Add everything to a large mixing bowl, saving the avocado chunks for last. Pile them on top in the middle.

    Vegetable ingredients in a large bowl and all ingredients and dressing tossed together in a bowl.

    Step 3- Finish and chill.

    Give it a quick taste and adjust any seasonings if needed. Place in the refrigerator until you're ready to serve.

    Frequently Asked Questions

    How do you char corn on the grill?

    The key is to clean and oil the grates, not coat the corn itself with oil. Preheat the grill to medium-high heat, then cook whole corn on the cob for about 10 minutes, turning every few minutes so it chars on all sides.

    What else can I add to corn and black bean salad?

    Diced bell peppers would be yummy — either in place of or in addition to the spicy peppers. Add canned chickpeas for more protein (or use instead of black beans). Zucchini or English cucumber would add some more crunch. You could even mix in some crumbled cotija or queso fresco!

    How to get more juice out of limes?

    I usually roll them under my hand, applying a little pressure as I do. It also helps if they are room temperature instead of cold. You can even heat them in the microwave for 20 seconds or so, although I've found that rolling does the trick nicely.

    A large glass bowl of cajun corn salad with wooden salad servers in it.

    Tips For Making Corn Black Bean Salad

    • Keep it simple and use canned black beans. While using dried beans can be slightly more economical, you have to soak them for a while and then cook them. Or you can open a can, drain and rinse the beans, and be ready to go!
    • I prefer to grill the corn because it adds fabulous flavor and color, but if that's not possible for you, just blanch and cool it.
    • Manage the level of spiciness to your taste. Use the measurement for the Cajun seasoning that I've included, then once it's all mixed together, taste it and add more if you want it spicier. I always recommend tasting food as you're making it anyway, to make sure it's got plenty of flavor.
    • Avoid brown avocado chunks. I added the avocados to the bowl last and kept them in a pile, then poured the dressing directly on top of them before mixing everything. I was shocked when days later, my avocados were still green!
    • Ingredients to prep ahead- The whole thing! Or grill the corn, chop the veggies (except avocado), and mix the dressing, then assemble closer to serving.
    • Leftovers and storage- Refrigerate in an airtight container for 2-3 days. Give it a good stir before serving, and add an extra squeeze of lime if it seems dry.
    A close up image of a black bean and corn salad in white bowl with a striped napkin behind it.

    What To Serve With Corn & Black Bean Salad

    You can enjoy it as salsa with your favorite tortilla chips or served over grilled fish or another protein. It's a great light lunch option to make at the beginning of the week and portion out for a grab-and-go meal prep. Bonus points if you add grilled chicken to make it a black bean corn salad with chicken! Here are a few more ideas to get you started:

    • Jalapeno Deviled Eggs
    • Cilantro Lime Chicken Marinade
    • Old Fashioned Salmon Patties
    • Brown Sugar Bourbon Pork Chops
    • Peach Cobbler

    More Delicious Summer Salad Recipes To Try

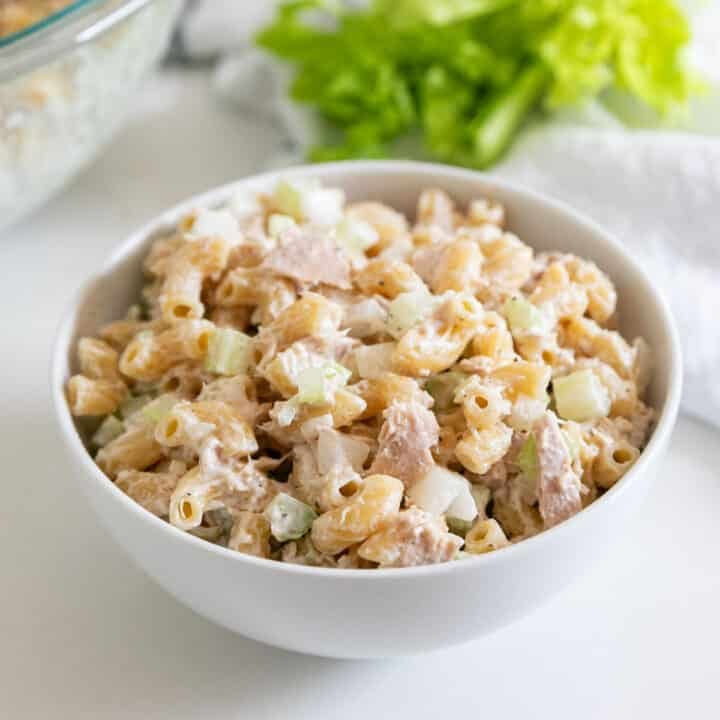
    • A white bowl full of classic tuna macaroni salad.
      Tuna Macaroni Salad
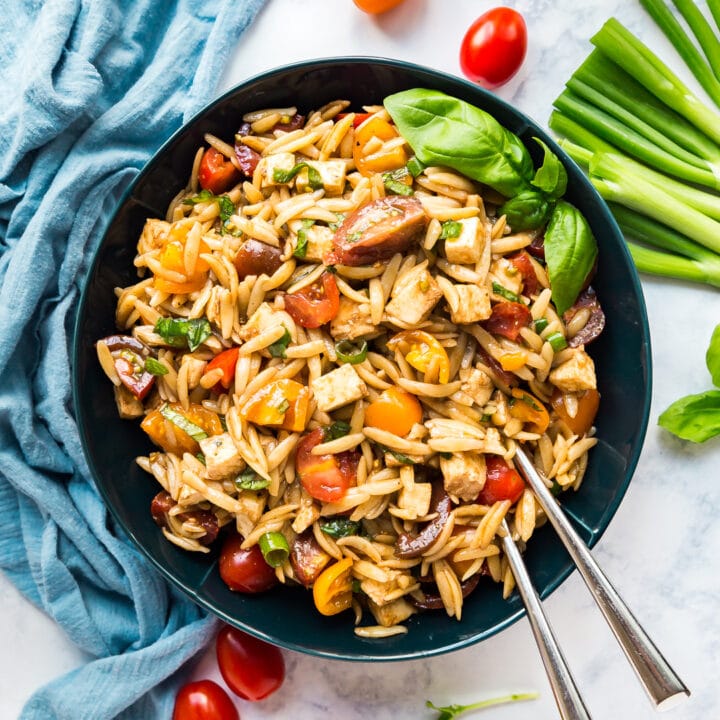
    • We all love a Caprese salad, but what's even better? Caprese Pasta Salad! Sweet tomatoes and basil, tender fresh mozzarella cheese and orzo pasta make a salad that you won't be able to stop eating!
      Caprese Pasta Salad Recipe
    • This Pea Salad with Shrimp recipe is a super easy side dish that's perfect for any gathering! It's served cold because it's creamy with sweet green peas (I totally used frozen!), shrimp, and cashews and water chestnuts which make it crunchy. Make this if you need a tasty and light Thanksgiving side dish!
      Peas Salad with Shrimp
    • A side view of a clear glass trifle dish with a layered taco salad with the dressing and salsa in jars on the side.
      7 Layer Taco Salad Recipe

    Love this recipe? Please leave a 5 star ⭐️⭐️⭐️⭐️⭐️ rating in the recipe card below ⬇️ and/or a review in the comment section further down. Check out my Amazon Store for all my favorite tools, including those used in this recipe. And follow @thelifejolie on Instagram and TikTok!

    An overhead image of a bowl of corn sand black bean salad.

    Avocado Corn and Black Bean Salad

    Jessy Freimann
    Need an excellent no-mayo salad option to bring to a picnic? This avocado corn and black bean salad is a new family favorite recipe that's also a great meal prep option for a light lunch you can eat all week!
    5 from 2 votes
    Print Recipe Pin Recipe
    Prep Time 10 minutes mins
    Cook Time 15 minutes mins
    Total Time 25 minutes mins
    Course Salad, Side Dish
    Cuisine American, Mexican
    Servings 8 servings
    Calories 140 kcal

    Equipment

    • Grill tongs
    • mixing bowl
    • wooden spoon
    • chefs knife
    • cutting board
    • Citrus reamer

    Ingredients
      

    Salad:

    • 6 ears corn on the cob, grilled (this ends up being 2 ¼ cups of corn if you're using frozen)
    • 14.5 ounces black beans, rinsed and drained
    • 1 pint grape tomatoes, halved
    • 1 bunch green onions, chopped- green parts only
    • 1 Anaheim pepper, seeded and diced (if you want a spicier salad you can use 2-3 serrano peppers seeded and diced)
    • 3 Tablespoons fresh cilantro, roughly chopped
    • 1 ripe avocado, diced

    Dressing:

    • ½ cup fresh squeezed lime juice (around 3-4 limes)
    • ¼ cup extra virgin olive oil
    • ½ teaspoon honey
    • 1 teaspoon cajun seasoning
    • 1 teaspoon kosher salt
    • ¼ teaspoon ground black pepper

    Instructions
     

    • Add all salad ingredients into a large mixing bowl, with the avocado chunks together on the very top of the pile.
    • In a small bowl (or your measuring cup) whisk together all dressing ingredients until well combined.
    • Pour the dressing into the bowl aiming for the top of the avocado chunks.
    • Use a large spoon to mix the salad until well combined and fully coated with dressing.
    • Taste and adjust seasonings to your liking. Refrigerate until you're ready to serve.

    Video

    Notes

    • Keep it simple and use canned black beans. While using dried beans can be slightly more economical, you have to soak them for a while and then cook them. Or you can open a can, drain and rinse the beans, and be ready to go!
    • I prefer to grill the corn because it adds fabulous flavor and color, but if that's not possible for you, just blanch and cool it.
    • Manage the level of spiciness to your taste. Use the measurement for the Cajun seasoning that I've included, then once it's all mixed together, taste it and add more if you want it spicier. I always recommend tasting food as you're making it anyway, to make sure it's got plenty of flavor.
    • Avoid brown avocado chunks. I added the avocados to the bowl last and kept them in a pile, then poured the dressing directly on top of them before mixing everything. I was shocked when days later, my avocados were still green!
    • Ingredients to prep ahead- The whole thing! Or grill the corn, chop the veggies (except avocado), and mix the dressing, then assemble closer to serving.
    • Leftovers and storage- Refrigerate in an airtight container for 2-3 days. Give it a good stir before serving, and add an extra squeeze of lime if it seems dry.

    Nutrition

    Serving: 1servingCalories: 140kcalCarbohydrates: 15gProtein: 5gFat: 7gSaturated Fat: 1gPolyunsaturated Fat: 1gMonounsaturated Fat: 5gSodium: 295mgPotassium: 330mgFiber: 5gSugar: 2gVitamin A: 629IUVitamin C: 8mgCalcium: 21mgIron: 1mg
    Tried this recipe?Let us know how it was!

    Red Wine Flank Steak Marinade

    Jun 16, 2025 · Leave a Comment

    A flank steak with slices cut and lined up in front of it and fresh thyme around it.

    My red wine flank steak marinade will be your new favorite on hot summer nights. A little boozy. Totally savory. Crazy delicious! Learn how to grill the perfect flank steak too.

    A flank steak with slices cut and lined up in front of it and fresh thyme around it.
    [feast_advanced_jump_to]

    Why You'll Love This Simple Flank Steak Marinade

    I’ve been thinking about this steak marinade for a long time, kicking it around in my brain. Does anyone else do that? Where you get an idea in your head about food, and your brain keeps going back to it until you finally make it?

    Well, it seemed like a clear sign that I needed to test it out when my mother-in-law made an incredible marinade for flank steak with red wine — and it was almost exactly what I had been imagining!

    I watched her closely, because moms and mother-in-laws are generally among the best people to learn different cooking methods from, especially mine. And then I went home and duplicated it to test it again. I was not sad to eat this flank steak over and over again, because it is super delicious and perfect for an intimate summer dinner party with close friends and family.

    Trust me, once you learn how to cook steaks on the grill, you're set! And when you add a flavorful marinade to the mix, your friends will be begging to come over. Here are just a few more reasons to love this recipe:

    • Made with simple ingredients
    • Great way to use up leftover wine
    • Easy to throw together or prep ahead
    • Pairs with tons of sides
    • Loved by all ages
    An overhead image of sliced flank steak on a cutting board.

    Ingredient Information and Substitutions

    • Red Wine- Quality matters here, so choose a dry red wine that you enjoy drinking. Doesn't have to be crazy expensive, but bad wine won't cover it.The flavor really comes through!
    • Olive Oil- This helps all those yummy flavors coat the meat and keeps it from sticking to the grill too.
    • Dijon Mustard- For a little tang. Stone ground mustard is a close second, though a bit milder.
    • Salt & Pepper- Sea salt is my favorite, but kosher salt will work well. Use freshly ground black pepper whenever possible.
    • Fresh Garlic- Instead of using minced, which will stick to the steak and burn, smash fresh cloves so they can infuse the marinade with flavor. Then, they'll stay in the bag when it's time to grill!
    • Sprigs of Thyme- Again, we want to infuse flavor into the soak without leaving behind anything that will burn. Other herbs like rosemary, oregano, and marjoram would be equally tasty.
    • Flank Steak- The real star of the show! It has a rich flavor, takes to marinades really well, and is perfect for grilling. If flank steak isn’t available, this would also be delicious with skirt steak, tri-tip, or even sirloin.
    An overhead image of labeled recipe ingredients.

    How To Make The Best Flank Steak Marinade

    Step 1- Combine the ingredients.

    Add wine, olive oil, mustard, salt, and pepper to a bowl and whisk until well combined. Pour the mixture into a large zippered bag, then add the garlic, thyme, and steak.

    Marinade ingredients being whisked together in a bowl and then the garlic, thyme and flank steak in a zipper bag.

    Step 2- Marinate the steak.

    Squeeze out all the air before sealing shut, then flip the bag a few times so the meat is well coated. Place in the refrigerator for at least 1 hour.

    Marinade in the bag and coating the steak and then the marinated steak on the grill.

    Step 3- Grill.

    Let the bag sit on the counter for about 20 minutes before grilling. Meanwhile, spray your grill with oil and preheat to 400 degrees F.

    Remove the steak from the bag, shaking off any excess marinade. Grill for about 5 minutes per side for medium rare. Remove from the grill and tent in foil, letting it rest for 10 minutes.

    Cooked steak in the grill with crosshatch grill marks and then the steak tented in foil on a plate.

    Step 5- Slice and serve.

    Slice flank steak thinly — usually at an angle — against the grain. Serve with your favorite sides and enjoy!

    Frequently Asked Questions

    What is the best red wine for steak marinade?

    One you like to drink by itself! Go for a bottle with deep, bold flavor- and make sure it's dry! Merlot, Cabernet Sauvignon, Pinot Noir, and Malbec are all popular choices, and I've even used a red blend before.

    How long to grill flank steak?

    That all depends on the size of the steak and how well you like it done. A 1.5 pound flank steak takes about 5 minutes per side for medium rare, which is an internal temp of 135-140 degrees F. Adjust for smaller or larger steaks, or if you'd prefer a different level of doneness.

    What does it mean to slice against the grain?

    Look at the steak and notice the lines running through it — this is called the grain. Those lines are muscle fibers that make the meat chewy, so slicing across them (or "against the grain") breaks them up into smaller sections, making the meat more tender.

    Should you bring steak to room temperature before grilling?

    Yes! When proteins go from cold to hot really fast, they tend to seize up and become tough. Be sure to let the beef rest on the counter for about 20 minutes before tossing it on the grill.

    A close up image of sliced flank steak.

    Tips For Making A Great Flank Steak Marinade

    • Use good wine. First, make sure it's dry. And as a general rule, if you wouldn’t drink it, you probably shouldn’t be cooking with it. Plus, you’ll need to do something with that leftover wine.
    • If fresh thyme isn’t your cup of tea, use a different fresh herb that you love. I bet rosemary would be fantastic in this red wine marinade for steak!
    • Whisk together the wine, oil, and mustard first. This helps to emulsify the marinade so it doesn't separate, way better than trying to mix it in the bag.
    • Marinate longer for more flavor. An hour gets the job done, but sometimes I'll leave it in the fridge overnight!
    • Throw a little more salt and pepper on before grilling. It gives the beef an extra boost of flavor.
    • If you want to get the crosshatch grill marks, rotate (not flip!) the steak 45 degrees halfway through cooking each side.
    • Rest the steak twice! First, before grilling to bring it closer to room temperature. Then again, after grilling, to help redistribute the juices for a nice, juicy steak.
    • Ingredient to prep ahead- Make the marinade, then marinate for at least 1 hour (up to a full day).
    • Leftovers and storage- Refrigerate grilled flank steak in an airtight container for 3-4 days. Reheat slices in the oven or over low heat on the stove.
    A partially sliced flank steak on a cutting board with parchment and fresh thyme.

    What To Serve With Red Wine Steak Marinade

    Honestly, there isn't much that won't taste amazing alongside this juicy, savory meat! I like to simplify my grilling by either cooking everything together or prepping a few sides ahead of time. More time with family and less time stuck in the kitchen is always my top choice. Here are a few great sides to round out your meal:

    • Grilled Artichokes
    • Tortellini Pesto Pasta Salad
    • Grilled Peach and Burrata Salad
    • Make Ahead Mashed Potatoes
    • Cherry Cheese Pie

    Other Grilling Recipes To Try

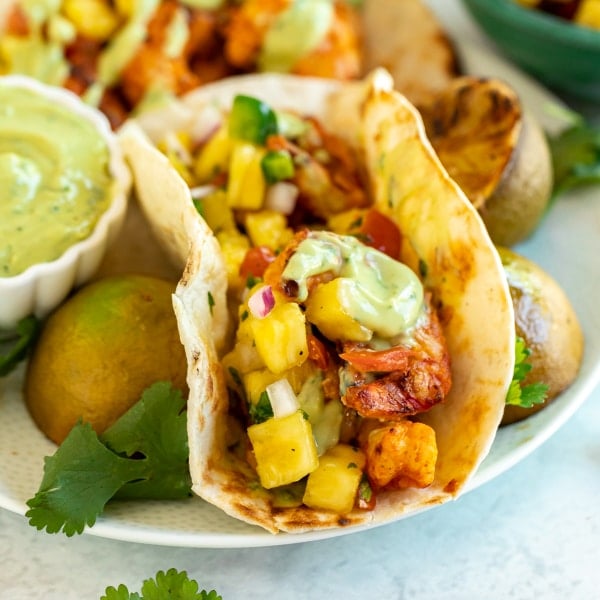
    • These easy Grilled Shrimp Tacos are about to be your new favorite summertime dinner recipe! Topped with pineapple salsa and an avocado cream sauce, they're quick and easy to make with flavor that will keep you coming back for more.
      Grilled Shrimp Tacos
    • A close up image of a drumstick within the pile of grilled drumsticks.
      BBQ Lemon Pepper Chicken
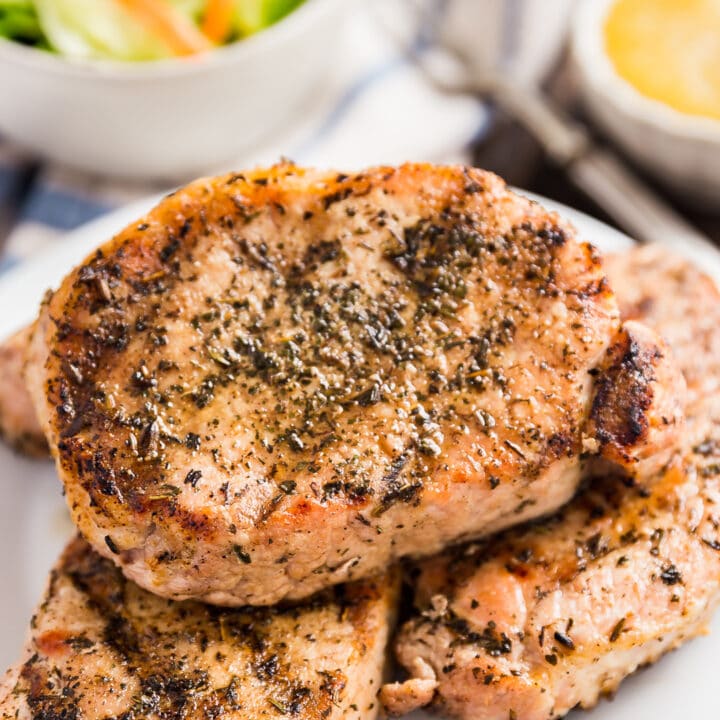
    • Herb Grilled Pork Chops are my absolute favorite way to enjoy grilled pork chops. Super quick and easy to make and mouthwateringly delicious (especially when dipped in applesauce!).
      Herb Grilled Pork Chops Recipe
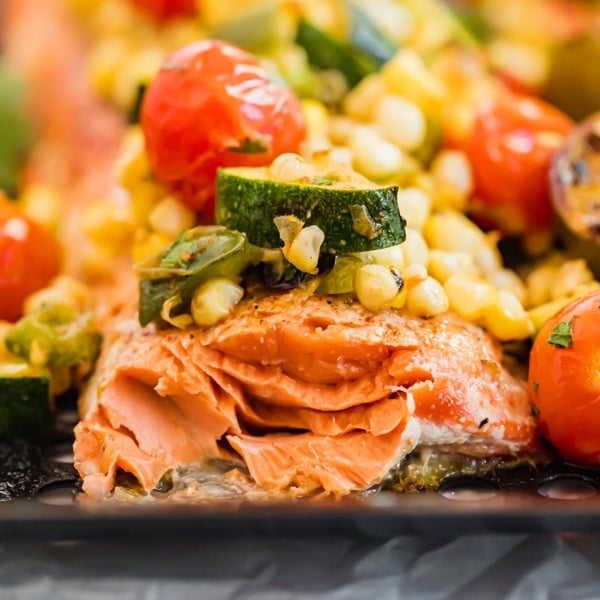
    • This Grilled Salmon Recipe with Summer Vegetable Relish will make you want to grill all year around- it's super quick and easy to make for a fresh dinner you'll love!
      Grilled Salmon Recipe with Summer Vegetable Relish

    Love this recipe? Please leave a 5 star ⭐️⭐️⭐️⭐️⭐️ rating in the recipe card below ⬇️ and/or a review in the comment section further down. Check out my Amazon Store for all my favorite tools, including those used in this recipe. And follow @thelifejolie on Instagram and TikTok!

    A flank steak with slices cut and lined up in front of it and fresh thyme around it.

    Flank Steak Marinade

    Jessy Freimann
    My red wine flank steak marinade will be your new favorite on hot summer nights. A little boozy. Totally savory. Crazy delicious! Learn how to grill the perfect flank steak too.
    No ratings yet
    Print Recipe Pin Recipe
    Prep Time 10 minutes mins
    Cook Time 15 minutes mins
    Marinating time 1 hour hr
    Total Time 1 hour hr 15 minutes mins
    Course Main Course
    Cuisine American
    Servings 4 servings
    Calories 355 kcal

    Equipment

    • instant read thermometer
    • Grill tongs
    • mixing bowl
    • Whisk
    • measuring cups
    • measuring spoons

    Ingredients
      

    • 1 cup good red wine
    • ¼ cup olive oil
    • 2 teaspoons dijon mustard
    • 1 ½ teaspoons kosher salt
    • ½ teaspoon black pepper
    • 4 cloves fresh garlic, smashed
    • 3 sprigs fresh thyme, or your favorite fresh herbs
    • 1 ½ pound flank steak

    Instructions
     

    • Whisk together wine, oil, mustard, salt and pepper until well combined.
    • Pour the mixture into a plastic zipper bag. 
    • Add smashed garlic, thyme and flank steak the bag. 
    • Carefully press out the air and seal well. Turn the bag a few times until the beef is well coated.
    • Refrigerate for at least and hour and up to a day turning the bag periodically.
    • 20 minutes before you're ready to cook, remove the beef from the refrigerator.
    • Spray to grill will olive oil cooking spray and preheat it to medium-high (around 400 degreesF ).
    • Grill for around 5 minutes on each side (this well vary based on the size of the steak) until the steak reaches an internal temperature of 135-140 for medium rare (or more if you want it more well done).
    • Remove the steak from the grill, tent in foil and rest for 10 minutes.
    • Slice thin against the grain and serve immediately.

    Video

    Notes

    • Use good wine. First, make sure it's dry. And as a general rule, if you wouldn’t drink it, you probably shouldn’t be cooking with it. Plus, you’ll need to do something with that leftover wine.
    • If fresh thyme isn’t your cup of tea, use a different fresh herb that you love. I bet rosemary would be fantastic in this red wine marinade for steak!
    • Whisk together the wine, oil, and mustard first. This helps to emulsify the marinade so it doesn't separate, way better than trying to mix it in the bag.
    • Marinate longer for more flavor. An hour gets the job done, but sometimes I'll leave it in the fridge overnight!
    • Throw a little more salt and pepper on before grilling. It gives the beef an extra boost of flavor.
    • If you want to get the crosshatch grill marks, rotate (not flip!) the steak 45 degrees halfway through cooking each side.
    • Rest the steak twice! First, before grilling to bring it closer to room temperature. Then again, after grilling, to help redistribute the juices for a nice, juicy steak.
    • Ingredient to prep ahead- Make the marinade, then marinate for at least 1 hour (up to a full day).
    • Leftovers and storage- Refrigerate grilled flank steak in an airtight container for 3-4 days. Reheat slices in the oven or over low heat on the stove.

    Nutrition

    Serving: 1servingCalories: 355kcalCarbohydrates: 0.5gProtein: 37gFat: 22gSaturated Fat: 5gPolyunsaturated Fat: 2gMonounsaturated Fat: 13gCholesterol: 102mgSodium: 990mgPotassium: 592mgFiber: 0.3gSugar: 0.04gVitamin A: 39IUVitamin C: 1mgCalcium: 42mgIron: 3mg
    Tried this recipe?Let us know how it was!

    Ranch Potatoes Recipe

    Jun 13, 2025 · Leave a Comment

    The corner of a pan of cheesy ranch potatoes.

    This ranch potatoes recipe is downright addictive — crispy outside, tender inside, and loaded with zesty ranch flavor and melty cheddar. An easy side dish that’s big on flavor with minimal effort.

    The corner of a pan of cheesy ranch potatoes.
    [feast_advanced_jump_to]

    Why You’ll Love These Hidden Valley Ranch Potatoes

    These crispy, cheesy potatoes were a happy accident. I was testing a chicken recipe that didn’t quite work out, but I had some extra ranch seasoning and cheese on hand and needed a quick side for dinner. I tossed it all with some potatoes, got them baking, and the result? A kind of side dish that accidentally steals the show!

    Made with just a handful of pantry staples, the potatoes crisp up beautifully in the oven while soaking in all the buttery ranch seasoning. The final touch is a generous layer of melted cheddar that turns it into the ultimate comfort food. It’s the kind of easy side dish you can throw together without overthinking — just pop them in the oven and get on with the rest of dinner. Here’s why you’ll love this recipe:

    • Perfect for sides, snacks, or appetizers
    • Made with simple pantry staples
    • Crispy outside, tender inside
    • Packed with bold ranch flavor
    • Topped with melty cheddar
    A close up overhead shot of this ranch potatoes recipe

    Ingredient Information And Substitutions

    • Red potatoes- These hold their shape nicely and give the best creamy texture inside with crisp edges. You can sub with Yukon golds or russets.
    • Salted butter- Unsalted butter works fine. Just add a pinch more salt to taste.
    • Ranch seasoning packet- Store-bought works well here, but if you have a homemade ranch mix you love, go for it!
    • Sharp cheddar cheese- For the best melt and flavor, freshly shredded cheddar is your best bet. For something milder, try Monterey Jack or a cheese blend.
    An overhead image of labeled recipe ingredients.

    How To Make Ranch Roasted Potatoes

    Step 1- Season the potatoes.

    Preheat your oven to 400 degrees F and grease or line a sheet pan with parchment to prevent sticking.

    In a large bowl, toss together the potato wedges, melted butter, and ranch seasoning until everything is well coated.

    Potato wedges in a glass bowl and then the same potatoes mixed with seasoning and melted butter.

    Step 2- Start baking.

    Spread the seasoned wedges in an even layer on your prepared sheet pan. Bake for 15 minutes, then remove and flip them.

    Raw seasoned potatoes on a sheet pan and the pan in the oven.

    Step 3- Continue roasting.

    Return the pan to the oven and bake for another 15 minutes. Remove and flip the ranch potatoes again.

    Flipped par-roasted potatoes in a sheet pan and the pan back in the oven.

    Step 4- Final roast!

    Bake for 10 more minutes, then take them out and gently loosen the potatoes with a spatula.

    Potatoes further cooked on the pan and the pan in the oven.

    Step 4- Melt the cheese.

    Sprinkle the shredded cheddar evenly over the wedges and bake for a final 5-10 minutes, until the cheese is melted and bubbly. Serve right away!

    Cheese sprinkled on the slipped potatoes and the pan back in the oven.

    Frequently Asked Questions

    Can I make these ahead of time?

    They’re best baked fresh for that crispy texture, but you can bake them ahead of time and then melt the cheese over them and reheat before serving.

    Do I need to peel the potatoes?

    Nope! The skins get nice and crispy in the oven, plus they add great texture. Just give the potatoes a good scrub before slicing.

    How do I make them extra crispy?

    Make sure the pan is well-greased or lined, don’t overcrowd the potatoes, and bake them in a single layer.

    A close up of cheesy potatoes on a pan

    Tips For Making Hidden Valley Ranch Roasted Potatoes

    • Cut potatoes evenly. Uniform wedges help everything cook at the same rate.
    • Line your pan. These can stick, so use parchment or a silicone mat to make cleanup easy.
    • Be sure the ranch and potatoes are mixed well. You want every wedge to be fully coated in melted butter and ranch seasoning so the flavor bakes into every bite.
    • Watch your oven. Cooking times may vary, so keep an eye on the wedges to avoid burning or undercooking. 
    • For a flavor boost, add a pinch of garlic powder, smoked paprika, or Italian herbs alongside the ranch seasoning.
    • Don’t crowd the pan. Give the wedges space on the sheet pan — this helps them crisp instead of steam.
    • Ingredients to prep ahead- Clean your potatoes and shred the cheese.
    • Leftovers and storage- Store in an airtight container in the fridge for up to 3 days. Reheat in the oven or air fryer to bring the crisp back.
    An overhead image of a pan of cheesy potatoes

    What To Serve With Ranch Baked Potatoes

    Whether you're planning a quick weeknight dinner or putting together a laid-back weekend meal, these crunchy potatoes are an easy win. You can serve them as a casual side, or even build a fun spread for entertaining. Either way, they’re guaranteed to disappear fast. Try pairing them with:

    • Chicken Cutlets
    • Red Cabbage Salad
    • Egg Salad Sandwich with Olives
    • Almond Shortbread Cookies

    Other Potato Recipes To Try

    • A plate of scalloped potatoes with a bowl of cheese and the pan of them in the background.
      Mom's Creamy Scalloped Potatoes
    • A close up image of roasted potatoes on a sheet pan.
      Crispy Parmesan Potatoes
    • A square image of Cheddar and Broccoli Twice Baked Potatoes
      Cheddar and Broccoli Twice Baked Potatoes Recipe
    • A square image of French Onion Creamy Mashed Potatoes.
      French Onion Creamy Mashed Potatoes

    Love this recipe? Please leave a 5 star ⭐️⭐️⭐️⭐️⭐️ rating in the recipe card below ⬇️ and/or a review in the comment section further down. Check out my Amazon Store for all my favorite tools, including those used in this recipe. And follow @thelifejolie on Instagram and TikTok!

    The corner of a pan of cheesy ranch potatoes.

    Ranch Potatoes Recipe

    Jessy Freimann
    This ranch potatoes recipe is downright addictive — crispy outside, tender inside, and loaded with zesty ranch flavor and melty cheddar. An easy side dish that’s big on flavor with minimal effort.
    No ratings yet
    Print Recipe Pin Recipe
    Prep Time 10 minutes mins
    Cook Time 45 minutes mins
    Inactive time 40 minutes mins
    Total Time 55 minutes mins
    Course Side Dish
    Cuisine American
    Servings 6 servings
    Calories 196 kcal

    Equipment

    • chefs knife
    • cutting board
    • measuring cups
    • sheet pan
    • Silpat
    • Spatula
    • wooden spoon

    Ingredients
      

    • 6 cups red potatoes, cut into wedges
    • 4 Tablespoons salted butter, melted
    • 1 Ranch seasoning packet
    • 1 cup sharp cheddar cheese shredded

    Instructions
     

    • Preheat the oven to 400 degrees F and grease or line a sheet pan.
    • In a large bowl, combine potato wedges, melted butter and Ranch seasoning packet. 
    • Mix well until all potatoes are evenly coated.
    • Spread the potatoes into an even layer onto the sheet pan.
    • Bake for 15 minutes. Remove the pan from the oven and turn the potatoes.
    • Bake for 15 more minutes. Remove the pan from the oven and turn the potatoes.
    • Bake for 10 more minutes. Remove the pan from the oven and loosen the potatoes with a spatula. 
    • Sprinkle shredded cheddar cheese in an even layer over the top of the potatoes.
    • Return the pan to the oven and bake for another 5-10 minutes or until the cheese is melted. Serve immediately.

    Video

    Notes

      • Cut potatoes evenly. Uniform wedges help everything cook at the same rate.
      • Line your pan. These can stick, so use parchment or a silicone mat to make cleanup easy.
      • Be sure the ranch and potatoes are mixed well. You want every wedge to be fully coated in melted butter and ranch seasoning so the flavor bakes into every bite.
      • Watch your oven. Cooking times may vary, so keep an eye on the wedges to avoid burning or undercooking. 
      • For a flavor boost, add a pinch of garlic powder, smoked paprika, or Italian herbs alongside the ranch seasoning.
      • Don’t crowd the pan. Give the wedges space on the sheet pan — this helps them crisp instead of steam.
      • Ingredients to prep ahead- Clean your potatoes and shred the cheese.
      • Leftovers and storage- Store in an airtight container in the fridge for up to 3 days. Reheat in the oven or air fryer to bring the crisp back.

    Nutrition

    Serving: 1servingCalories: 196kcalCarbohydrates: 12gProtein: 6gFat: 14gSaturated Fat: 8gPolyunsaturated Fat: 1gMonounsaturated Fat: 3gTrans Fat: 0.3gCholesterol: 39mgSodium: 197mgPotassium: 358mgFiber: 1gSugar: 1gVitamin A: 427IUVitamin C: 6mgCalcium: 143mgIron: 1mg
    Tried this recipe?Let us know how it was!

    Tomato Onion Salad

    Jun 12, 2025 · 2 Comments

    A bowl of tomato salad with onions and cucumbers with a checked towel and fresh tomatoes in the background.

    This tomato onion salad is light, zesty, slightly spicy, and ready in just 10 minutes! The ingredients are super simple but it's all about the tomato juice in the dressing, so make sure you have crusty bread for dipping! This is a perfect make-ahead side that pairs perfectly with everything from weeknight casseroles to summer BBQs.

    A bowl of tomato salad with onions and cucumbers  with a checked towel and fresh tomatoes in the background.
    [feast_advanced_jump_to]

    Why You’ll Love This Italian Tomato Salad

    This tomato salad is one of those simple dishes where the sum is so much greater than the parts. At first glance, it might seem too basic — just tomatoes, cucumbers, onions, and a few pantry staples. No fancy herbs, nothing fussy. But that’s exactly where the magic lies.

    The tomatoes take center stage here, and more specifically, their juices. Combined with tangy red wine vinegar, a touch of olive oil, and just the right amount of salt and pepper, those juices create a bold, flavorful dressing all on their own. Growing up, Grandma would actually add more tomatoes to the juices a few days after making it when much of the salad had been eaten because it was that good.

    It’s the kind of salad you’ll want to scoop up with a piece of crusty bread to soak up every last drop. Here is why you’ll love this tomato and cucumber salad recipe:

    • Quick and easy
    • Pairs with almost any meal
    • Great for make ahead
    • Bold, fresh, and bursting flavor
    A close up shot of a glass dish with Italian tomato salad.

    Ingredient Information And Substitutions

    • Tomatoes- Use ripe, in-season tomatoes like heirloom, vine-ripened, and homegrown for the best flavor and juiciness.
    • Cucumbers- Seedless or English cucumbers are ideal. You can leave the peel on or off — your choice!
    • Onions- A regular yellow or red onion works. For a milder bite, soak the sliced onions in cold water for 10 minutes.
    • Jalapeños- Optional, but add a nice heat. You can omit them entirely or swap them for a Serrano pepper.
    • Olive oil & red wine vinegar- These make up the light dressing. Don't be heavy handed on these- it's all about the tomato juice.
    • Salt & pepper- Adjust to taste. Start light, you can always add more.
    An overhead image of labeled recipe ingredients.

    How To Make This Cucumber And Tomato Salad

    Step 1- Combine the veggies.
    Add the tomatoes, onions, cucumbers, and jalapeños to a large bowl. Season with salt and pepper to taste. Lightly drizzle with olive oil and red wine vinegar.

    Tomatoes in a glass mixing bowl and then cucumbers, onion and sliced jalapeño pepper added.

    Step 2- Chill and Press.
    Cover and refrigerate for at least one hour. Occasionally press down gently with a large spoon to squeeze out more juice.

    Serve chilled, ideally with crusty Italian bread to soak up all that flavorful juice!

    The tomato salad dressed and mixed together and then a spoon pushing down the salad once it's been chilling.

    Frequently Asked Questions

    How to cut tomatoes for a salad? 

    I like to cut tomatoes into wedges to keep them juicy and easy to eat. They hold their shape and release just enough juice to help create that delicious, light dressing.  

    What are the best tomatoes for salads?

    Look for ripe, juicy varieties like heirloom or vine-ripened tomatoes. Homegrown tomatoes bring unbeatable flavor, but store-bought ripe ones work beautifully too. Probably best to skip cherry tomatoes for this one.

    What cucumber and tomato salad dressing should I use?

    For this simple cucumber tomato salad, use a light drizzle of olive oil and red wine vinegar with salt and pepper. The real magic comes from the tomato juices that develop as it rests and as you press on the tomatoes periodically.

    A close up image of a bowl of cucumber tomato salad.

    Tips For Making This Tomato And Cucumber Salad Recipe

    • Use ripe, juicy tomatoes. They’re the heart of this salad and the source of that delicious, flavor-packed juice! Ripe tomatoes are firm with a slight give when squeezed and heavy for their size.
    • Let it rest before serving. This salad tastes best after sitting for a few hours — or even overnight — so the flavors can fully meld together.
    • Press the salad for more juice. Just like Grandma did, use the back of a spoon to gently press down on the salad in the bowl a few times as it rests. This helps release more tomato juice into the dressing.
    • Adjust the spice level. If you don’t love spicy food, feel free to remove the jalapeño seeds or skip them entirely. One jalapeño adds a mild kick, while two make it pretty spicy!
    • Don't overdress. A light hand with oil and vinegar is key to letting the tomatoes shine.
    • Ingredients to prep ahead- Slice the onions and cucumbers, and store them separately to mix just before serving. 
    • Leftovers and storage- Store this fresh veggie salad in an airtight container in the fridge up to 5 days. Freezing isn’t recommended, as the tomatoes and cucumbers become watery and lose their texture.
    A large bowl of tomato salad with a spoon in it and a checked towel in the background.

    What To Serve With Cucumber Tomato And Onion Salad

    This crisp, refreshing salad is one of those side dishes that works with just about anything. Whether you're firing up the grill, pulling together a cozy weeknight dinner, or hosting a summer potluck, this tomato cucumber salad recipe fits right in. If you want to turn this salad into a complete meal, try serving it alongside these delicious recipes: 

    • Vicky's Tabouli
    • Summer Antipasto Platter
    • Herb Grilled Pork Chops
    • Baked Beans
    • Dessert Crostini

    Other Salad Recipes To Try

    • An overhead image of this salad with peaches and burrata on a plate with basil and a blue and white striped napkin around it.
      Grilled Peach and Burrata Salad
    • A white bowl of red cabbage salad with a large glass bowl of it and a chunk of red onion in the background.
      Red Cabbage Salad
    • An overhead image of a bowl of corn sand black bean salad.
      Avocado Corn and Black Bean Salad
    • A side view of a clear glass trifle dish with a layered taco salad with the dressing and salsa in jars on the side.
      7 Layer Taco Salad Recipe

    Love this recipe? Please leave a 5 star ⭐️⭐️⭐️⭐️⭐️ rating in the recipe card below ⬇️ and/or a review in the comment section further down. Check out my Amazon Store for all my favorite tools, including those used in this recipe. And follow @thelifejolie on Instagram and TikTok!

    A bowl of tomato salad with onions and cucumbers with a checked towel and fresh tomatoes in the background.

    Tomato Onion Salad

    Jessy Freimann
    This tomato onion salad is light, zesty, slightly spicy, and ready in just 10 minutes! The ingredients are super simple but it's all about the tomato juice in the dressing, so make sure you have crusty bread for dipping! This is a perfect make-ahead side that pairs perfectly with everything from weeknight casseroles to summer BBQs.
    No ratings yet
    Print Recipe Pin Recipe
    Prep Time 10 minutes mins
    Resting time 1 hour hr
    Total Time 1 hour hr 10 minutes mins
    Course Salad, Side Dish
    Cuisine Italian
    Servings 8 servings
    Calories 249 kcal

    Equipment

    • chefs knife
    • cutting board
    • mixing bowl

    Ingredients
      

    • 3 pounds tomatoes, cut into small wedges
    • 1 onion, thinly sliced
    • 1 large seedless cucumber peeled and sliced
    • 1 jalapeño sliced
    • 2 Tabelspoons Extra virgin olive oil, to taste
    • 1 Tablespoon Red wine vinegar, to taste
    • ½ teaspoon Kosher salt, to taste
    • ¼ teaspoon Ground black pepper, to taste

    Instructions
     

    • Combine the tomatoes, onions, cucumbers and jalapeños in a large bowl.
    • Season with salt and pepper to taste and dress lightly with oil and vinegar. Use a light hand with the oil and vinegar (remember, the idea is for the juice to be the center of the dressing, not the vinegar!).
    • Cover and refrigerate for at least an hour, periodically use a large spoon to lightly press down and squeeze more juice out. 
    • Serve with plenty of crusty Italian bread to sop up the juice!

    Video

    Notes

    • Use ripe, juicy tomatoes. They’re the heart of this salad and the source of that delicious, flavor-packed juice! Ripe tomatoes are firm with a slight give when squeezed and heavy for their size.
    • Let it rest before serving. This salad tastes best after sitting for a few hours — or even overnight — so the flavors can fully meld together.
    • Press the salad for more juice. Just like Grandma did, use the back of a spoon to gently press down on the salad in the bowl a few times as it rests. This helps release more tomato juice into the dressing.
    • Adjust the spice level. If you don’t love spicy food, feel free to remove the jalapeño seeds or skip them entirely. One jalapeño adds a mild kick, while two make it pretty spicy!
    • Don't overdress. A light hand with oil and vinegar is key to letting the tomatoes shine.
    • Ingredients to prep ahead- Slice the onions and cucumbers, and store them separately to mix just before serving. 
    • Leftovers and storage- Store this fresh veggie salad in an airtight container in the fridge up to 5 days. Freezing isn’t recommended, as the tomatoes and cucumbers become watery and lose their texture.

    Nutrition

    Serving: 1servingCalories: 249kcalCarbohydrates: 54gProtein: 12gFat: 3gSaturated Fat: 0.4gPolyunsaturated Fat: 1gMonounsaturated Fat: 1gSodium: 243mgPotassium: 3170mgFiber: 16gSugar: 36gVitamin A: 10935IUVitamin C: 181mgCalcium: 140mgIron: 4mg
    Tried this recipe?Let us know how it was!

    BBQ Chicken Flatbread

    Jun 9, 2025 · 8 Comments

    A bbq chicken flatbread on a pan with another behind it.

    This BBQ chicken flatbread is the perfect weeknight meal. It is really quick and easy to make with juicy grilled chicken, melty cheese, tangy BBQ sauce, and crunchy fried onions. A meal your whole family will enjoy! 

    A bbq chicken flatbread on a pan with another behind it.
    [feast_advanced_jump_to]

    Why You'll Love Barbecue Chicken Flatbread

    I am totally in the easy-to-throw-together-meal zone right now. Between my insanely delicious pork chops and my stuffed peppers rice skillet, there is nothing standing between me and a quick, delicious dinner (except a hundred million other things I need to get done, and more importantly, spending time with my favorite girls!).

    This recipe was inspired by a pretty killer flatbread pizza I had at a local restaurant during my maternity leave. There was tons of crunch from the cut-up chicken fingers and crispy fried onion strings, plus plenty of smoky barbecue sauce, which was exactly what I was craving!

    I decided to lighten up my homemade version with grilled chicken and sub in those tasty French fried onions (ya know, the ones that go on green bean casserole at Thanksgiving?), which are kind of my new addiction. But honestly, the only requirement is thick and fluffy naan for the base.

    This flatbread bakes up in well under 30 minutes and was such a hit with everyone in our home. It's another excellent weeknight option, particularly for those busy nights when you're shuffling the kids between school and activities. Serve it with a green salad and you're set for a delicious meal the whole family will enjoy! Here are just a few more reasons you'll love using naan bread for pizza:

    • No mixing or rolling out dough
    • Throw everything on top and bake
    • Easy to customize
    • Kids-approved
    • Fairly hands-off preparation
    A wedge of chicken flatbread with BBQ  on a pan with other slices behind it.

    Ingredient Information and Substitutions

    • Naan- Grab this fluffy flatbread from your local bakery or store. Sometimes there are two sizes — I use the large kind when I make this, but you can make everyone their own cute baby pizzas with mini naan.
    • Grilled chicken- Use leftovers from the night before or cook this earlier in the day so it's ready to go. In a pinch, rotisserie chicken works too.
    • BBQ sauce- Use your favorite bottled BBQ sauce!
    • Shredded cheese- Colby has a good balance of flavor and meltability. Mozzarella, Monterey Jack, or even Pepper Jack are good substitutes.
    • French fried onions- I can't be the only one who always has some in the pantry! Just one more thing that makes this recipe so easy.
    An overehead image of labeled recipe ingredients.

    How To Make Naan Flatbread Pizza

    Step 1- Prep for baking and pre-bake flatbread.

    Preheat the oven to 400 degrees F and line a sheet pan with parchment paper for quick cleanup.

    Place naan on the baking sheet and bake for 10 minutes to get it toasty.

    Naan bread on a lined sheet pan and then the pan in the oven.

    Step 2- Assemble pizzas.

    Spread a thin layer of BBQ sauce on each flatbread, then top with shredded cheese and chicken.

    Place the sheet pan back in the oven and bake until the cheese has melted, about 7-10 minutes.

    BBQ sauce spread on the pre-baked flatbreads and then cheese and diced chicken added to it.

    Step 3- Slice and serve.

    Remove pizzas from the oven and sprinkle with crispy onions. Slice each flatbread into 6 pieces (or 4 pieces if using mini naan) and enjoy!

    BBQ Chicken pizzas back in the oven and then out with the cheese melted and crispy onions sprinkled on.

    Frequently Asked Questions

    How do you make naan bread crispy?

    Baking the naan by itself first creates a crispy base for all your pizza toppings. You can also toast it in a dry skillet for a faster option — and you'll be able to turn your oven off sooner!

    What else can I add to BBQ chicken pizza?

    Green onions or cilantro are popular toppings — sprinkle them on just before serving. You can always swap the French fried onions for red onion slices instead (though you'll want to add those before baking). And I know it's controversial, but pineapple would taste pretty good with these flavors too!

    Can I use a different type of bread?

    Yes! Pita is another popular option for flatbread pizza, and lavash will work in a pinch. The key is to use varieties that are fluffy and thick instead of thin (like a tortilla) so they're sturdy enough for slicing and eating.

    An overhead image of a naan pizza with bbq chicken on a lined sheet pan.

    Tips For Making This Naan Pizza Recipe

    • Have everything prepped and ready to go. When it's time for dinner, all you need to do is load up the flatbread and pop it in the oven.
    • Sure, freshly shredded cheese is best, but I won't judge if you grab a pre-shredded bag from the store (I often do!). This recipe is all about quick and easy cooking after all!
    • Add the fried onions after baking. Otherwise, they could end up burning.
    • Don't overdo it with the toppings! You just need a thin layer of sauce and a handful of cheese and chicken.
    • Ingredients to prep ahead- Cut up chicken (and grill first, if needed). Shred cheese if using fresh.
    • Leftovers and storage- Transfer slices to an airtight container and refrigerate for 2-3 days. Reheat in the oven until warmed through.
    A close up image of a bite taken out of a slice of bbq chicken pizza.

    What To Serve With Naan Bread Pizza

    This artisan flatbread is loaded with meat, cheese, and veggies, so it's basically a complete meal! That said, you can never go wrong with a fresh green salad or your favorite veggies as a side. Here are a few more ways to round out your meal:

    • Garlic Parmesan Roasted Broccoli
    • Red Cabbage Salad
    • Strawberry Cream Cheese Pie
    • Easy Grilled Peaches

    Other Pizza Recipes To Try

    • Need a good, meatless dinner or appetizer? This Roasted Vegetable Flatbread delivers! It's super easy to throw together and tastes fantastic.
      Roasted Vegetable Flatbread
    • Crescent roll pizza slices lined up on a cutting board with veggies around it.
      Crescent Roll Veggie Pizza
    • A square image of BLT Ranch Flatbread Pizza.
      BLT Ranch Flatbread Pizza Recipe
    • A slice of breakfast pizza on parchment and a cutting board with a bite taken out of it and the rest of the pizza in the background.
      Puff Pastry Breakfast Pizza

    Love this recipe? Please leave a 5 star ⭐️⭐️⭐️⭐️⭐️ rating in the recipe card below ⬇️ and/or a review in the comment section further down. Check out my Amazon Store for all my favorite tools, including those used in this recipe. And follow @thelifejolie on Instagram and TikTok!

    A bbq chicken flatbread on a pan with another behind it.

    BBQ Chicken Flatbread

    Jessy Freimann
    This BBQ chicken flatbread is the perfect weeknight meal. It is really quick and easy to make with juicy grilled chicken, melty cheese, tangy BBQ sauce, and crunchy fried onions. A meal your whole family will enjoy! 
    No ratings yet
    Print Recipe Pin Recipe
    Prep Time 5 minutes mins
    Cook Time 20 minutes mins
    Total Time 25 minutes mins
    Course dinner, Main, Main Course, Main dish
    Cuisine weeknight
    Servings 2 servings
    Calories 119 kcal

    Equipment

    • 1 sheet pan
    • 1 chefs knife
    • 1 cutting board
    • 1 Measuring cups and spoons
    • 1 Spatula
    • 1 Box grater

    Ingredients
      

    • 2 Premade flat breads used Naan from our local grocery store
    • 4 Tablespoons BBQ sauce divided
    • ½ cup Shredded Colby cheese divided
    • ½ cup grilled chicken cut into bite-size pieces
    • 4 Tablespoons French fried onions divided

    Instructions
     

    • Preheat oven to 400 degrees F and line a sheet pan with parchment.
    • Place flatbreads on the pan and bake for 10 minutes
    • Remove flatbreads from the oven an spread 2 Tablespoons BBQ sauce on each flatbread.
    • Sprinkle with ¼ cup cheese on each flatbread and top with grilled chicken ¼ cup chicken on each flatbread.
    • Return to the oven and bake for 7-10 minutes (until cheese is melted).
    • Remove from oven, sprinkle each flatbread with 2 Tablespoons french fried onions and serve immediately.

    Video

    Notes

    • Have everything prepped and ready to go. When it's time for dinner, all you need to do is load up the flatbread and pop it in the oven.
    • Sure, freshly shredded cheese is best, but I won't judge if you grab a pre-shredded bag from the store (I often do!). This recipe is all about quick and easy cooking after all!
    • Add the fried onions after baking. Otherwise, they could end up burning.
    • Don't overdo it with the toppings! You just need a thin layer of sauce and a handful of cheese and chicken.
    • Ingredients to prep ahead- Cut up chicken (and grill first, if needed). Shred cheese if using fresh.
    • Leftovers and storage- Transfer slices to an airtight container and refrigerate for 2-3 days. Reheat in the oven until warmed through.

    Nutrition

    Serving: 1servingCalories: 119kcalCarbohydrates: 14gProtein: 9gFat: 3gSaturated Fat: 1gPolyunsaturated Fat: 1gMonounsaturated Fat: 1gCholesterol: 26mgSodium: 387mgPotassium: 161mgFiber: 0.3gSugar: 12gVitamin A: 93IUVitamin C: 0.2mgCalcium: 16mgIron: 1mg
    Tried this recipe?Let us know how it was!

    Pulled BBQ Chicken Recipe

    Jun 2, 2025 · 6 Comments

    Pulled bbq chicken in a bun on a white plate.

    This pulled BBQ chicken recipe couldn't get any easier. Made with 3 simple ingredients in the Crockpot or Instant Pot, it's the ultimate hands-off meal. This is serious dinner goals!

    Pulled bbq chicken in a bun on a white plate.
    [feast_advanced_jump_to]

    Why You'll Love BBQ Shredded Chicken

    When it comes to slow cooker dinners, I prefer the recipes that don't involve too much work besides mixing a few ingredients in a pot. I mean, if I wanted to be browning things and all sorts of extra tasks, I'd be cooking a meal stovetop, amirite?! 

    This easy and delicious slow cooker BBQ chicken recipe is just that. Three simple ingredients that you can mix right in the pot, then cover it and let it go so you can focus on other things. After a few hours on high, give it a quick shred and it's ready to serve!

    It's the stuff that slow cooking weeknight dreams are made of. And I even include Instant Pot directions, in case you forget to plan ahead (as we sometimes do!). The results are consistently fall-apart tender meat with a light coat of a sweet and tangy sauce, perfect for pulled chicken sandwiches and more! Here are just a few more reasons you'll love this recipe:

    • Hands-off cooking
    • Makes a big batch
    • Great for meal prep
    • Kid-approved
    • Easy for parties
    A close up image of shredded bbq chicken.

    Ingredient Information and Substitutions

    • Chicken- I love using boneless, skinless breasts for this recipe, but it would be just as delicious with boneless, skinless chicken thighs!
    • BBQ Sauce- Use your favorite bottled BBQ Sauce. I'd say aim for smoky or hickory flavors over anything too sweet.
    • Apple Cider- You can totally substitute an equal amount of apple juice for the same delicious results.
    An overhead image of labeled recipe ingredients.

    How To Make BBQ Chicken Sandwiches

    Step 1- Mix the sauce and cider and add the chicken.

    Pour the BBQ sauce and apple cider into the Crockpot, then whisk together until well combined.

    Place one breast at a time into the crock, coating it all over in the sauce mixture. Tongs make this easy!

    BBQ sauce and apple cider mixed together in a slow cooker bowl and then pieces of raw chicken breast added to the bowl.

    Step 3- Cover and cook.

    Cover the slow cooker and set it to High for 4-6 hours.

    The slow cooker covered and cooking and then the cover off with the cooked chicken in the pot.

    Step 4- Shred and serve.

    Remove the chicken and shred. Spoon some of the leftover sauce over the top and toss to coat, then pile onto buns!

    Cooked chicken pieces in a pan and then the shredded chicken with a ladle spooning sauce over it.

    Frequently Asked Questions

    Can I cook this on Low instead of High?

    Yes, but you'll need to increase the cooking time to about 8 hours.

    What do I do if there isn't much sauce when it's done?

    This means the cover may not have been secured (this happened to me In my experience, the chicken releases liquid and there tends to be a more liquid-y juices at the bottom. But either way, don't worry! Just add more BBQ sauce.

    Can I use frozen chicken breasts?

    Yes, just be sure to cook them for more like 6 hours (this is exactly why I give a range).

    What's the easiest way to shred chicken breasts?

    I find that using two forks gets the job done easily and quickly, without adding too many more dishes. You can use meat claws if you have them, or toss the chicken in your stand mixer (with the paddle attachment) if you're shredding a big batch! The key is, don't over-shred. It'll shred up a little more when you mix in sauce.

    A bun with the top off and shredded bbq chicken with more bbq sauce drizzled on top.

    Tips For Making This BBQ Chicken Sandwich Recipe

    • Don't even think about dirtying up another dish! Mix your favorite barbecue sauce and apple cider right in the pot. It's what makes this recipe so easy!
    • Turn the chicken in the sauce to coat before covering and cooking. It guarantees every bite is infused with flavor.
    • Add some onion to stretch the meat even further! Thinly slice a yellow or white onion, then nestle the slices around and under the chicken breasts.
    • Don't over-shred the chicken, or it will become stringy. It will naturally shred more when you toss it with the sauce.
    • Go slow when adding the sauce that's left in the pot. You want to moisten the chicken slightly, not drench it. You can always add more later.
    • Ingredients to prep ahead- You can mix the BBQ sauce and cider together if you want, but I don't see a reason to!
    • Leftovers and storage- Shredded chicken will keep for 3-4 days in the refrigerator or up to 4 months in the freezer.
    A close up image of the side of a bbq chicken sandwich.

    What To Serve With Shredded BBQ Chicken

    This is obviously great on a sandwich, but I'll sometimes add shredded chicken to salads or rice bowls depending on my mood. You can't go wrong with some crunchy coleslaw or grilled veggies, and a big pasta salad is perfect when feeding a crowd. Here are a few more ideas to pair with your BBQ shredded chicken sandwich:

    • Cheesy Ranch Potato Wedges
    • Stovetop Mac and Cheese
    • Grilled Peach and Burrata Salad
    • Piña Colada Pineapple Dump Cake

    Other Shredded Chicken Recipes To Try

    • An overhead image of tortillas topped with taco meat, lettuce, tomatoes and cheese with limes and sour cream on the sides.
      Slow Cooker Taco Meat (and Instant Pot!)
    • A ladle holding chicken minestrone with the rest of the pot behind it.
      Chicken Minestrone Soup (Slow Cooker + Instant Pot)
    • pineapple chicken and rice in a blue bowl with cilantro behind it.
      Slow Cooker Chicken With Pineapple
    • An overhead image of chicken and rice stew in a blue bowl with a napkin and veggies around it.
      Italian Chicken and Rice Stew

    Love this recipe? Please leave a 5 star ⭐️⭐️⭐️⭐️⭐️ rating in the recipe card below ⬇️ and/or a review in the comment section further down. Check out my Amazon Store for all my favorite tools, including those used in this recipe. And follow @thelifejolie on Instagram and TikTok!

    Pulled bbq chicken in a bun on a white plate.

    Pulled BBQ Chicken Recipe

    Jessy Freimann
    This pulled BBQ chicken recipe couldn't get any easier. Made with 3 simple ingredients in the Crockpot or Instant Pot, it's the ultimate hands-off meal. This is serious dinner goals!
    5 from 4 votes
    Print Recipe Pin Recipe
    Prep Time 5 minutes mins
    Cook Time 6 hours hrs
    Inactive time 6 hours hrs
    Total Time 6 hours hrs 5 minutes mins
    Course Main, Main Course, Main dish
    Cuisine American
    Servings 4 servings
    Calories 201 kcal

    Equipment

    • slow. cooker
    • OR instant pot
    • Whisk

    Ingredients
      

    • 1 cup BBQ sauce + more for drizzling
    • ½ cup apple cider (or apple juice)
    • 2 large boneless skinless chicken breasts

    Instructions
     

    Slow Cooker:

    • Pour BBQ sauce and apple cider into the slow cooker and whisk together to combine.
    • Turn each chicken piece in the sauce to coat and place them in the pot.
    • Cover and cooking on high for 4-6 hours.
    • Remove chicken from the pot and shred.
    • Add some of the sauce left in the pot to the chick and toss to coat. Serve immediately.

    Instant Pot:

    • Pour BBQ sauce and apple cider into the Instant Pot and whisk together to combine.
    • Turn each chicken piece in the sauce to coat and place them in the pot.
    • Cover and turn set to "sealing." Set the Instant Pot to Manual High Pressure for 15 minutes
    • Once the 15 minutes is up, allow a 10 minute natural release and then do a quick release and remove the cover.
    • Remove chicken from the pot and shred.
    • Add some of the sauce left in the pot to the chick and toss to coat. Serve immediately.

    Video

    Notes

    • Don't even think about dirtying up another dish! Mix your favorite barbecue sauce and apple cider right in the pot. It's what makes this recipe so easy!
    • Turn the chicken in the sauce to coat before covering and cooking. It guarantees every bite is infused with flavor.
    • Add some onion to stretch the meat even further! Thinly slice a yellow or white onion, then nestle the slices around and under the chicken breasts.
    • Don't over-shred the chicken, or it will become stringy. It will naturally shred more when you toss it with the sauce.
    • Go slow when adding the sauce that's left in the pot. You want to moisten the chicken slightly, not drench it. You can always add more later.
    • Ingredients to prep ahead- You can mix the BBQ sauce and cider together if you want, but I don't see a reason to!
    • Leftovers and storage- Shredded chicken will keep for 3-4 days in the refrigerator or up to 4 months in the freezer.

    Nutrition

    Serving: 1servingCalories: 201kcalCarbohydrates: 33gProtein: 13gFat: 2gSaturated Fat: 0.4gPolyunsaturated Fat: 0.3gMonounsaturated Fat: 0.5gTrans Fat: 0.01gCholesterol: 36mgSodium: 803mgPotassium: 405mgFiber: 1gSugar: 27gVitamin A: 177IUVitamin C: 1mgCalcium: 29mgIron: 1mg
    Tried this recipe?Let us know how it was!

    Strawberry Salad With Goat Cheese

    May 30, 2025 · Leave a Comment

    Summer Bounty Strawberry Salad with Fresh Strawberry Vinaigrette is a light and fresh lunch! Made with some unexpected ingredients like greens, strawberries, white cheddar, sunflower seeds and dried cherries this salad is as healthy as it is delicious!

    Make Strawberry Salad With Goat Cheese and grilled chicken and crunchy sunflower seeds. Drizzled with a homemade strawberry vinaigrette, it's a light and fresh lunch that's as healthy as it is delicious!

    Strawberry salad in a bowl with dressing and a light blue napkin behind it.
    [feast_advanced_jump_to]

    Why You'll Love Goat Cheese And Strawberry Salad

    I can't lie — this recipe was actually inspired by a pre-made salad at Wegmans! Isn't it crazy the places where we're able to find inspiration? I was a little skeptical at first, mostly because it had shredded white cheddar instead of feta cheese or even crumbly blue.

    While that version was certainly delicious, I decided to change things up entirely by using goat cheese! It's the best of both worlds with creamy and tangy goodness. Another thing that really takes this from good to great is the fresh strawberry vinaigrette. Just as the name implies, it's made with fresh strawberries that are puréed using my mini prep processor (which is by far one of my favorite kitchen tools to chop and puree things super quickly!). I can't wait to try it on a variety of summer salads!

    This one in particular is a super awesome way to use up leftover grilled chicken (which is exactly what you'll see in my photos — last night's chicken!) and makes a super light, fresh lunch or dinner. Here are a few more reasons to love this recipe:

    • Simple, fresh ingredients
    • Ready in 25 minutes or less
    • Easy to customize
    • Serves 2 (but can be doubled or tripled)
    • Can be made ahead
    An overhead image of a strawberry goat cheese salad with dressing on the side and a blue towel.

    Ingredient Information and Substitutions

    • Fresh Strawberries- These go in both the salad and the dressing. Only fresh will work here!
    • White Balsamic Vinegar- This is lighter in both color and flavor compared to classic balsamic, so it really lets the taste of the berries shine. If you prefer a deeper, tangier flavor, regular balsamic vinegar is just fine.
    • Extra Virgin Olive Oil- Make sure it's extra virgin for the best flavor! Avocado oil will work in a pinch.
    • Honey- For sweetness and to balance the tang of the vinegar.
    • Salt and Pepper- Enhance all the other flavors in the dressing. Season to taste!
    • Mixed Greens- This strawberry fields salad would be yummy with baby spinach too.
    • Grilled Chicken- As mentioned, I usually use leftovers from the night before. Any grilled (or baked) chicken will work. You can even use the pre-made kind from the store or slice up a rotisserie bird.
    • Dried Cherries- Adds a sweet/tart chewiness to this salad that I just love. Dried cranberries are a great alternative, or leave them out entirely.
    • Goat Cheese- Tangy, creamy, and crumbly, this cheese has an earthy flavor that is just incredible. Swap with feta cheese for a saltier, tangier bite.
    • Sunflower Seeds - For crunch! Pecans or walnuts would be good too.
    Overhead images of labeled recipe ingredients.

    How To Make Strawberry Goats Cheese Salad

    Step 1- Prep the ingredients and blend the dressing.

    If you haven't already, grill the chicken and slice it into strips. Wash and dry the strawberries, then dice up 1 cup's worth (for the dressing) and slice another cup's worth (for the salad).

    Add the diced strawberries to a blender or food processor (I like to use my mini prep processor) with the white balsamic vinegar, EVOO, honey, salt, and pepper. Pulse until smooth and combined.

    Strawberry dressing ingredients in a bowl and then the dressing in the same bowl once blended.

    Step 2- Assemble the salad.

    Add the greens to a large bowl, then top with dried cherries, sunflower seeds, and crumbled cheese. Toss everything together, then add the chicken and strawberries and toss again.

    Give the dressing a quick whisk before drizzling it over the salad. Toss until everything is evenly coated, then divide between two bowls and serve.

    Salad greens in a bowl and then salad toppings added.

    Frequently Asked Questions

    What fruit goes best with goat cheese?

    I think the real question is what fruit doesn't go well with goat cheese, amirite?! Obviously, it's yummy with fresh summer berries, but it's just as tasty with figs, apples, pears, and stone fruit too.

    How long can goat cheese last out of the fridge?

    The max is 2-3 hours, just like most cheeses. It's fine to have it out on the counter while you put this salad together, but I usually crumble it straight out of the fridge.

    What else can I add to this salad?

    Cucumbers are always yummy in salad and add a juicy crunch. Avocado is a great creamy element, while red onion slices bring extra tang. You can include other berries too! Blueberries would be best, or sprinkle raspberries on top so they don't get smushed.

    Close up image of a salad with strawberries and goat cheese with dressing drizzled over the top.

    Tips For Making Strawberry and Goat Cheese Salad

    • Blend or whisk the dressing again before serving. It might separate depending on how long it takes to assemble your salad.
    • If using an immersion blender- blend in a high-sided container, or it will splatter everywhere.
    • I prefer to at least make the chicken ahead and serve it over the salad cold. Better yet, this is a great way to repurpose leftover chicken from last night's dinner! If you're grilling it fresh, let it cool so it doesn't wilt the greens.
    • Perfect for meal prep. Just divide the ingredients between several airtight containers, then pour the dressing into smaller containers and nestle those inside. Grab and go as needed!
    • Make this recipe your own! I love the combo of flavors and textures in this salad, but please feel free to change the ingredients up to your liking.
    • Ingredients to prep ahead- Grill and slice chicken. Wash and dry salad greens and strawberries, then slice/dice the fruit. Crumble goat cheese.
    • Leftovers and storage- Refrigerate greens, berries, chicken, and cheese in separate containers, then assemble fresh. The summer salad strawberry dressing will keep for up to 1 week in a jar. Shake well before using. Once assembled, leftovers will only keep for a day or so before becoming soggy.
    A close up image of strawberry vinaigrette in a silver container with the salad in the background.

    What To Serve With Strawberry Goat Cheese Salad

    This is hearty enough for a full meal, thanks to the chicken, but it's just as delicious as a side dish too. Skip the meat on top and pair the berry salad with steak, pork, or burgers — anything you like to grill during the summer! Here are a few more ideas to round out your menu:

    • Brown Sugar Bourbon Pork Chops
    • Drunken Steak
    • Grilled Artichokes
    • Lemon Parfait Cups

    Other Salad Recipes To Try

    • A square shot of the Summer Berry and Burrata Salad.
      Summer Berry and Burrata Salad
    • A bowl of BBQ chicken salad with a striped napkin, half red onion and fried onions around it.
      Copycat Panera Chicken BBQ Salad
    • A square image of Clementine and Fennel Salad.
      Clementine and Fennel Salad Recipe
    • An overhead image of a crunchy asian salad with lines, blue napkin and dressing around it.
      Asian-Inspired Rainbow Salad

    Love this recipe? Please leave a 5 star ⭐️⭐️⭐️⭐️⭐️ rating in the recipe card below ⬇️ and/or a review in the comment section further down. Check out my Amazon Store for all my favorite tools, including those used in this recipe. And follow @thelifejolie on Instagram and TikTok!

    An overhead image of a strawberry goat cheese salad with dressing on the side and a blue towel.

    Strawberry Salad With Goat Cheese

    Jessy Freimann
    Make goat cheese and strawberry salad with grilled chicken and crunchy sunflower seeds. Drizzled with a homemade strawberry vinaigrette, it's a light and fresh lunch that's as healthy as it is delicious!
    No ratings yet
    Print Recipe Pin Recipe
    Prep Time 10 minutes mins
    Cook Time 15 minutes mins
    Total Time 25 minutes mins
    Course Salad
    Cuisine American
    Servings 2 servings
    Calories 401 kcal

    Equipment

    • mixing bowl
    • wooden spoon
    • chefs knife
    • cutting board
    • mini prep processor
    • measuring cups
    • measuring spoons

    Ingredients
      

    Fresh Strawberry Vinaigrette

    • 1 cup fresh strawberries, diced
    • 1 Tablespoon white balsamic vinegar
    • 2 Tablespoons extra virgin olive oil
    • 1 teaspoon honey
    • ½ teaspoon kosher salt
    • ¼ teaspoon ground black pepper

    Strawberry Salad

    • 4 cups mixed baby greens
    • 2 grilled chicken breasts, sliced
    • 1 cup fresh strawberries, sliced
    • ½ cup goat cheese, crumbled
    • 4 Tablespoons dried cherries
    • 4 Tablespoons unsalted sunflower seeds

    Instructions
     

    Fresh Strawberry Vinaigrette

    • Combine all ingredients in a small bowl.
    • Whisk well until fully combined and set aside (you will likely have to whisk it once more before dressing the salad as it may separate).

    Strawberry Salad

    • Combine all ingredients in a large mixing bowl.
    • Give the vinaigrette a quick whisk and drizzle over the salad.
    • Toss until everything is mixed together and lightly coated in the dressing.
    • Divide the salad between two large bowls and serve immediately.

    Video

    Notes

    • Blend or whisk the dressing again before serving. It might separate depending on how long it takes to assemble your salad.
    • If using an immersion blender- blend in a high-sided container, or it will splatter everywhere.
    • I prefer to at least make the chicken ahead and serve it over the salad cold. Better yet, this is a great way to repurpose leftover chicken from last night's dinner! If you're grilling it fresh, let it cool so it doesn't wilt the greens.
    • Perfect for meal prep. Just divide the ingredients between several airtight containers, then pour the dressing into smaller containers and nestle those inside. Grab and go as needed!
    • Make this recipe your own! I love the combo of flavors and textures in this salad, but please feel free to change the ingredients up to your liking.
    • Ingredients to prep ahead- Grill and slice chicken. Wash and dry salad greens and strawberries, then slice/dice the fruit. Crumble goat cheese.
    • Leftovers and storage- Refrigerate greens, berries, chicken, and cheese in separate containers, then assemble fresh. The summer salad strawberry dressing will keep for up to 1 week in a jar. Shake well before using. Once assembled, leftovers will only keep for a day or so before becoming soggy.

    Nutrition

    Serving: 1servingCalories: 401kcalCarbohydrates: 29gProtein: 14gFat: 26gSaturated Fat: 10gPolyunsaturated Fat: 2gMonounsaturated Fat: 13gCholesterol: 27mgSodium: 819mgPotassium: 170mgFiber: 3gSugar: 20gVitamin A: 2562IUVitamin C: 19mgCalcium: 121mgIron: 2mg
    Tried this recipe?Let us know how it was!

    French Onion Rice Pilaf with Orzo

    May 28, 2025 · 5 Comments

    A spoon holding up a scoop of rice pilaf.

    Rice pilaf with orzo is full of delicious French onion flavor! It's a side dish that's just as easy to make as it is tasty. With only a little bit of prep work required, let your stove do its thing so you can get to the rest of your meal!

    An overhead image of a white bowl of rice pilaf with a red and white napkin next to it.
    [feast_advanced_jump_to]

    Why You'll Love Rice Pilaf With Orzo Pasta

    I'll be honest, we are totally a rice packet family.

    Up until very recently, I've never actually made rice pilaf on my own. I always just made the packets because they were so darn easy and pretty tasty.

    But I finally decided that it's time I made my own rice pilaf. Now, you'll notice I used one of those tasty French onion soup mix packets... gimme a break on this. I'm already giving up my rice packets, let me keep my soup!

    They're an excellent shortcut for getting tons of flavor with minimal effort, which is exactly what happened here. Combined with rice, orzo pasta, butter, and broth, it came out so good! Still need some reasons to try it?

    • Incredibly easy recipe
    • Made with only 5 ingredients
    • Fluffy and flavorful
    • I pair rice with orzo pasta to bulk it up
    • Can be served with a variety of mains
    A close up image of rice pilaf with orzo in a black pan with a wooden spoon in it.

    Ingredient Information And Substitutions

    • Salted Butter- The fat needed to sauté the rice and orzo. I went with butter because it takes on a wonderful, almost nutty flavor when heated. Olive oil is the best sub, but it does have a different flavor.
    • Long-Grain White Rice- Ideal for rice pilaf because it doesn't stick together and stays fluffy when cooked.
    • Orzo Pasta- Adds texture and flavor that complements the rice really nicely. It also makes the whole thing heartier.
    • Beef Broth- Provides the liquid necessary for cooking the rice without watering everything down. I love the umami flavor of beef broth, but chicken or even vegetable broth could be used instead.
    • French Onion Soup Seasoning- For that savory onion flavor I mentioned! You could create your own by sautéing some diced onions with garlic and onion powder, beef bouillon, and some herbs. Or, use a different seasoning packet — an onion dip mix or Lipton's Beefy Onion Soup mix would also taste great.
    An overhead image of labeled recipe ingredients.

    How To Make Homemade Rice Pilaf

    Step 1- Toast the rice and orzo.

    Add the butter to a medium pot over medium-high heat. Once melted, add the rice and orzo pasta and cook until golden-brown, stirring often as you go.

    Butter melting in a pan and then rice and orzo toasting.

    Step 2- Boil the broth and season the rice.

    In the meantime, bring the beef broth to a boil in a separate pot.

    Once the rice and orzo have cooked for about 5-7 minutes, sprinkle in the French onion soup packet and stir to combine.

    Toasted rice in a pan and then seasoning added.

    Step 3- Add broth and simmer.

    Slowly pour the boiling broth over the rice, then cover and reduce the heat to medium-low. Simmer for 20 minutes. Turn off the heat and let the pot sit, covered, on the hot burner for 10 more minutes to finish the cooking process.

    Rice simmering in broth within cover on it and then the rice after cooking with the broth absorbed and still covered.

    Step 5- Fluff and serve.

    Use a fork to fluff the rice, serve immediately, and enjoy!

    A spoon holding up a scoop of rice pilaf.

    Frequently Asked Questions

    What is rice pilaf?

    Traditionally, rice pilaf is rice cooked in seasoned broth. It's often fried in oil first until golden. You can add various veggies and spices.

    Is orzo rice?

    No, orzo is a short-cut pasta that goes well in rice pilaf due to the similar shape and size. You can also use vermicelli, just make sure you cut it down first.

    Is this rice pilaf gluten free?

    No, my recipe for rice pilaf is not gluten free, as orzo pasta contains gluten. The onion soup packet is also not certified GF. But I'm sure with a few careful swaps, like a GF orzo and GF soup mix could make this gluten free.

    Why toast the rice and orzo first?

    Toasting gives the entire dish a deeper and nuttier flavor and helps keep the grains from sticking together. It's a simple step that makes a big difference — don't skip it!

    How long does rice pilaf take to cook?

    Recipes will vary, but mini takes around 35-40 minutes total. Don't worry, 30 minutes of that is inactive time for you.

    Can I make this ahead of time?

    Yes! Feel free to make it up to 1 day in advance and reheat it on the stove or in the microwave when ready to serve. Add a splash of broth before reheating to keep it from drying out.

    A close up overhead image of rice pilaf.

    Tips For Making Rice Pilaf Recipes

    • Stir constantly when toasting the rice and orzo. The second half of my recipe is very hands-off, but you really need to stay in front of the stove during the toasting step — rice and orzo can go from golden to burnt super quickly!
    • Boil the broth separately. I know it seems like an extra step (and pot), but trust the process! Pouring the hot liquid into the toasted grains keeps the temperature consistent and keeps the rice from cooking unevenly.
    • Use a pot with a tight-fitting lid to trap the steam during simmering. If too much escapes, the pilaf will come out dry and undercooked!
    • Don't skip the 10-minute rest. It allows the rice to finish steaming and absorb any leftover broth — and prevents any leftover soggy or crunchy pieces.
    • Want to make brown pilaf rice instead? Use 1 ¼ cups of broth per 1 cup of brown rice, and leave it to simmer for 40-45 minutes instead of 20 minutes.
    • Ingredients to prep ahead- Rinse the rice if desired, and carefully measure out all of the ingredients.
    • Leftovers and storage- You can place any leftover rice pilaf in an airtight container and store it in the fridge for up to 4 days. When reheating, add a splash of water or broth to help loosen it up and bring back its fluffy texture! I typically reheat on the stovetop over medium-low heat, or in the microwave in 30-second bursts.
    A close up image of a white bowl of rice pilaf wit a spoon in it.

    What To Serve With My Rice Pilaf Recipe

    Rice pilaf pairs well with so many different main dishes and vegetable sides! You could keep things on the lighter side (perfect if making brown rice pilaf), or choose something a little more indulgent for a comfort food feast. Here are a few ideas to make it a meal:

    • Whole Roasted Chicken
    • Grilled Steak
    • Sheet Pan Lemon Dill Salmon
    • Mushrooms in White Wine Sauce
    • Salad with Shredded Brussel Sprouts

    Other Delicious Rice Recipes To Try

    • A plate of broccoli rice casserole with the pan and raw broccoli florets in the background.
      Rice and Broccoli Casserole
    • A square image of Harvest Rice Salad.
      Harvest Rice Salad
    • A serving spoon holding a scoop of the turkey rice mixture over the pan of it.
      Southwest Rice and Ground Turkey Skillet
    • A close up of a bowl of chicken wild rice creamy soup with a spoon in it and another bowl in the background.
      Wild Rice Creamy Chicken Soup (Great with Turkey Too!)

    Love this recipe? Please leave a 5 star ⭐️⭐️⭐️⭐️⭐️ rating in the recipe card below ⬇️ and/or a review in the comment section further down. Check out my Amazon Store for all my favorite tools, including those used in this recipe. And follow @thelifejolie on Instagram and TikTok!

    A spoon holding up a scoop of rice pilaf.

    Rice Pilaf with Orzo

    Jessy Freimann
    Rice pilaf with orzo is full of delicious French onion flavor! It's a side dish that's just as easy to make as it is tasty. With only a little bit of prep work required, let your stove do its thing so you can get to the rest of your meal!
    5 from 9 votes
    Print Recipe Pin Recipe
    Prep Time 5 minutes mins
    Cook Time 35 minutes mins
    Inactive time 30 minutes mins
    Total Time 40 minutes mins
    Course Side Dish
    Cuisine American
    Servings 4 servings
    Calories 323 kcal

    Equipment

    • Sauce pan
    • measuring spoons
    • measuring cups
    • wooden spoon

    Ingredients
      

    • 4 Tablespoons salted butter
    • 1 cup long grain white rice
    • ⅓ cup orzo pasta
    • 14.5 ounces beef broth (you can also use chicken broth if you prefer)
    • 1 packet French onion soup seasoning

    Instructions
     

    • Melt butter in a medium pot over medium high heat. 
    • Add rice and orzo and cook until they start to get golden stirring often, about 5-7 minutes.
    • While the rice cooks, bring the broth to a boil in another pan.
    • Add the onion soup seasoning to the rice and stir to combine.
    • Slow pour the boil broth into the rice (be careful because it bubbles up quite a bit).
    • Cover and reduce heat to medium low.
    • Simmer for 20 minutes and then turn off the heat and let the covered pot sit on the hot burner for another 10 minutes.
    • Remove the cover and fluff the rice with a spoon. Serve immediately.

    Video

    Notes

    • Stir constantly when toasting the rice and orzo. The second half of my recipe is very hands-off, but you really need to stay in front of the stove during the toasting step — rice and orzo can go from golden to burnt super quickly!
    • Boil the broth separately. I know it seems like an extra step (and pot), but trust the process! Pouring the hot liquid into the toasted grains keeps the temperature consistent and keeps the rice from cooking unevenly.
    • Use a pot with a tight-fitting lid to trap the steam during simmering. If too much escapes, the pilaf will come out dry and undercooked!
    • Don't skip the 10-minute rest. It allows the rice to finish steaming and absorb any leftover broth — and prevents any leftover soggy or crunchy pieces.
    • Want to make brown pilaf rice instead? Use 1 ¼ cups of broth per 1 cup of brown rice, and leave it to simmer for 40-45 minutes instead of 20 minutes.
    • Ingredients to prep ahead- Rinse the rice if desired, and carefully measure out all of the ingredients.
    • Leftovers and storage- You can place any leftover rice pilaf in an airtight container and store it in the fridge for up to 4 days. When reheating, add a splash of water or broth to help loosen it up and bring back its fluffy texture! I typically reheat on the stovetop over medium-low heat, or in the microwave in 30-second bursts.

    Nutrition

    Serving: 1servingCalories: 323kcalCarbohydrates: 46gProtein: 6gFat: 12gSaturated Fat: 7gPolyunsaturated Fat: 1gMonounsaturated Fat: 3gTrans Fat: 0.5gCholesterol: 30mgSodium: 475mgPotassium: 140mgFiber: 1gSugar: 0.4gVitamin A: 350IUCalcium: 25mgIron: 1mg
    Tried this recipe?Let us know how it was!

    Shishito Peppers Recipe

    May 26, 2025 · 2 Comments

    A close up overhead image of blistered shishito peppers in a pan.

    This shishito peppers recipe is the ultimate quick and easy snack. With just three ingredients made on the grill or in a pan in under 15 minutes, you’ll have a delicious, slightly smoky appetizer or side dish!

    A close up overhead image of blistered shishito peppers in a pan.
    [feast_advanced_jump_to]

    Why You’ll Love These Blistered Shishito Peppers

    I never used to love peppers — they just weren’t my thing. But over time, I’ve totally come around, and shishito peppers are now my go-to. They are small, thin-skinned chili peppers usually harvested while still green. The peppers are used in Asian-style dishes, but honestly, they really shine as a simple snack or appetizer.

    Their slightly sweet flavor is mild with a hint of smokiness, though every now and then you’ll bite into one with a little surprise heat. That unpredictability makes them kind of fun to eat. While they work well in all sorts of dishes, my favorite way to enjoy them is blistered in a hot pan or on the grill with just a sprinkle of salt. Simple, quick, and so good. Here are a few reasons to love them:

    • Versatile and crowd-pleasing
    • Done in less than 15 minutes
    • Just three basic ingredients
    • Mild with a surprise kick
    An overhead image of a pa with shishito peppers in it and a blue striped napkin.

    Ingredient Information And Substitutions

    • Shishito peppers- Personal favorite! You can find them in many grocery stores or Asian markets. If unavailable, Padron peppers are a similar substitute.
    • Olive oil or coconut oil- Either works great here. Avocado oil would also be a solid option.
    • Kosher salt- Adds great texture and flavor. Flaky salt can also be used.
    An overhead image of labeled recipe ingredients.

    How To Make Stovetop Or Grilled Shishito Peppers

    Step 1- Get things hot and prep the peppers.

    If you're cooking on the stove, heat a bit of oil in a large skillet over medium-high heat until it shimmers. If you're grilling, preheat your grill to medium-high and toss the peppers in oil so they don’t stick.

    Peppers in a green bowl tossed in oil.
    Oil heating in a pan.

    Step 2- Blister the peppers.

    Toss the shishitos into the hot skillet or right onto the grill — just give the grill a quick spray first. Cook, turning them every couple of minutes, until they’re softened and nicely blistered. About 5-10 minutes on the stove or 3-5 per side on the grill.

    Raw shishito peppers in a pan.

    Step 3- Salt and serve.

    Once the peppers are blistered to perfection, remove them from the heat. Sprinkle with kosher salt to taste and serve them immediately. They're best enjoyed hot!

    Blistered shishito peppers on the grill being turned and blistered.
    Blistered shishito peppers in a pan on the stove.

    Frequently Asked Questions

    Are shishito peppers hot?

    Not usually! Most are super mild, but every once in a while, you’ll bite into one with a bit of heat. It’s a fun twist, though nothing near as spicy as a jalapeño or serrano. It's my favorite game of edible Russian roulette.

    Can you eat a shishito pepper raw?

    Yes, you can, though I personally think they taste better cooked. Blistering them brings out this amazing smoky flavor that makes them hard to resist.

    Do shishito peppers turn red?

    Shishitos are typically harvested when they’re green, but they can turn red if left on the plant longer. Though you can eat them when red, they’re generally better enjoyed when green.

    Can you eat them whole?

    Pretty much, just skip the stem. I usually serve them with a little dish on the side so everyone can toss their stems in after snacking.

    A close up of a blistered shishito pepper in a pan.

    Tips For Making Shishito Peppers

    • Get the pan or grill really hot! This helps them blister quickly, giving them that perfect char and smoky flavor.
    • Use just enough oil. This will help with blistering and prevent the peppers from sticking.
    • Season at the end. Adding salt after cooking helps bring out the best flavor and texture without sucking moisture out of the peppers.
    • Serve with a dip! Sriracha ranch or sweet and sour sauce work great! Garlic lemon aioli is also a great option.
    • Serve them right away. They’re at their best when hot and slightly crisp, so don’t wait too long to dig in!
    • Ingredients to prep ahead- Rinse and dry the peppers in advance.
    • Leftovers and storage- They're best served right away but last a couple days in the fridge.

    Shishito Peppers Dipping Sauce And Other Serving Suggestions

    These blistered peppers make a great starter or side for a casual meal. Try dipping them in a sauce like spicy mayo, garlic lemon dip, or something else creamy. Or, serve them alongside grilled meats, seafood, or a fresh salad to round out your meal. They’re an excellent appetizer or side dish for any occasion! A few great recipes to round out and complete this meal would be:

    • Hawaiian Burger Recipe
    • Salami Chips with a Honey Mustard Dipping Sauce
    • Pesto Tortellini Salad
    • Balsamic Grilled Asparagus
    • No Bake S'mores Bars
    Shishito peppers salted in a pan.

    Other Pepper Recipes To Try

    • Balsamic Caramelized Onions and Peppers are the perfect addition to a spicy Italian Sausage sandwich. They're super easy to whip up with just a few ingredients!
      Balsamic Caramelized Onions and Peppers with Hot Italian Sausage
    • A wooden spoon pulling a a scoop of unstuffed peppers from the skillet.
      Unstuffed Peppers Skillet
    • Sausage and peppers pasta on a white plate with a napkin, onion and mushrooms in the background and a fork across the back of the plate.
      Pasta With Sausage Peppers And Onions
    • This Peppers and Eggs recipe is such a simple, delicious dinner or lunch. It combines a few basic ingredients and is very cost-efficient. I like to serve it hot or cold over fresh Italian bread. Click on the photo to learn more...
      Peppers and Eggs

    Love this recipe? Please leave a 5 star ⭐️⭐️⭐️⭐️⭐️ rating in the recipe card below ⬇️ and/or a review in the comment section further down. Check out my Amazon Store for all my favorite tools, including those used in this recipe. And follow @thelifejolie on Instagram and TikTok!

    A close up overhead image of blistered shishito peppers in a pan.

    Shishito Peppers Recipe

    Jessy Freimann
    This shishito peppers recipe is the ultimate quick and easy snack. With just three ingredients made on the grill or in a pan in under 15 minutes, you’ll have a delicious, slightly smoky appetizer or side dish!
    3 from 1 vote
    Print Recipe Pin Recipe
    Prep Time 2 minutes mins
    Cook Time 10 minutes mins
    Total Time 12 minutes mins
    Course Appetizer, Snack
    Cuisine American, Asian
    Servings 6 servings
    Calories 21 kcal

    Equipment

    • Grill tongs
    • Large saute pan
    • wooden spoon

    Ingredients
      

    • 1 Tablespoon olive oil or coconut oil
    • 8 ounces shishito peppers
    • ½ teaspoon Kosher salt to taste

    Instructions
     

    Stove Top instructions:

    • Heat oil in a large saute pan until shimmering over medium high heat.
    • Add shishito peppers to pan.
    • Cook for 5-10 minutes until well blistered and softened, stirring often.
    • Season to taste with salt and serve immediately.

    Grilling instructions:

    • Toss shishito peppers in olive oil until everything is evenly coated.
    • Heat grill to medium high heat (and if you can spray with cooking spray before heating).
    • Carefully place shishito peppers on the grill.
    • Cook for around 3-5 minutes per side or until each side is well blistered turning periodically.
    • Remove from the grill, season to taste with salt and serve immediately.

    Video

    Notes

    • Get the pan or grill really hot! This helps them blister quickly, giving them that perfect char and smoky flavor.
    • Use just enough oil. This will help with blistering and prevent the peppers from sticking.
    • Season at the end. Adding salt after cooking helps bring out the best flavor and texture without sucking moisture out of the peppers.
    • Serve with a dip! Sriracha ranch or sweet and sour sauce work great! Garlic lemon aioli is also a great option.
    • Serve them right away. They’re at their best when hot and slightly crisp, so don’t wait too long to dig in!
    • Ingredients to prep ahead- Rinse and dry the peppers in advance.
    • Leftovers and storage- They're best served right away but last a couple days in the fridge.

    Nutrition

    Serving: 1servingCalories: 21kcalFat: 2gSaturated Fat: 0.3gPolyunsaturated Fat: 0.2gMonounsaturated Fat: 2gSodium: 194mgPotassium: 0.1mgCalcium: 0.1mgIron: 0.01mg
    Tried this recipe?Let us know how it was!

    Balsamic Chicken Marinade

    May 19, 2025 · 1 Comment

    A close up image of a roasted balsamic chicken thigh in the pan.

    Balsamic chicken marinade makes a flavorful, fuss-free dinner that turns out amazing whether roasted or grilled. With just a few pantry staples, it’s on the table in 45 minutes — and perfect to prep ahead for busy days!

    A close up image of a roasted balsamic chicken thigh in the pan.
    [feast_advanced_jump_to]

    Why You’ll Love This Balsamic Vinegar Chicken

    This recipe is the perfect balance of simplicity and flavor. Whether you roast your chicken or throw it on the grill, it comes out juicy, tender, and coated in a sweet, tangy glaze. My balsamic vinegar marinade for chicken is a total crowd-pleaser for busy weeknights when you need something quick and delicious.

    And here's the best part: the meat is super versatile. Serve it with rice and a green veggie on the side, or slice it up and toss it in wraps or salads. Trust me, it’s the kind of recipe that’s just as easy to make as it is to love! Plus, it's perfect for freezing for later, making life just a little bit easier. Here are more reasons to love it:

    • Cook it your way: oven or grill
    • Quick prep, big taste
    • Minimal effort, maximum flavor
    • Use simple, pantry ingredients
    • Perfect for meal prep
    An overhead image of roasted balsamic chicken in a white pan with a cloth napkin.

    Ingredient Information And Substitutions

    • Bone-in chicken thighs- Juicy and flavorful. Boneless thighs or chicken breasts will also work, just adjust the cooking time to cook to a safe temperature (165 degrees F in the thickest part of the meat).
    • Garlic- Fresh is best, but you can use garlic powder if needed.
      Olive oil- Adds richness and helps the marinade coat the chicken. Avocado oil is a fine substitute.
    • Balsamic vinegar- Key for that tangy depth of flavor. Red wine vinegar can work too, though the flavor will be sharper.
      Honey- Balances the acidity with a touch of sweetness. Maple syrup or brown sugar can be swapped in.
    • Italian seasoning- Adds herb flavor. Use a blend of basil, oregano, and thyme if you don’t have a mix.
    • Kosher salt & ground black pepper- Essential for developing all the other flavors. Adjust to taste.
    An overhead image of labeled recipe ingredients.

    How To Make Balsamic And Honey Chicken

    Step 1- Make the marinade.

    In a large bowl, whisk together the olive oil, balsamic vinegar, honey, Italian seasoning, salt, pepper, and garlic until well combined.

    A bowl with the marinade and a whisk in it and then the chicken pieces placed in a plastic zipper bag.

    Step 2- Marinate the chicken.

    Place the chicken in a large zipper bag and pour in the marinade. Seal and refrigerate until ready to cook. If freezing, do so at this stage.

    Marinade added to the plastic zipper bag and the bag sealed with the marinade coating the chicken.

    Step 3- Cook the chicken.

    For the oven, bake at 425 degrees F in a 9x13-inch dish, skin-side down. Flip after 20 minutes and bake another 20, or until the chicken reaches an internal temperature of 165 degrees F.

    For the grill, cook over medium-high heat for 5-7 minutes per side, until the chicken is cooked through.

    Chicken in the baking dish and then in the oven to bake.

    Step 5- Rest and serve.

    Let the chicken rest for 5 minutes before serving. Enjoy!

    The chicken pieces flipped half way through and back in the oven to finish baking.

    Frequently Asked Questions

    Can I marinate the chicken overnight?

    Yes! While 30 or so minutes of marinating gets the job done, giving it a few hours overnight in the fridge really lets the flavors soak in for a deeper, richer taste.

    Can I make this in advance?

    Yes, balsamic chicken is great for meal prep. You can marinate and freeze it, or cook it and reheat it during the week.

    What should I do if my chicken is browning too fast in the oven?

    Tent it loosely with foil so it can keep cooking without burning the top.

    A close up image of a chicken thigh on a plate with asparagus.

    Tips For Making Balsamic Vinegar Marinade 

    • Whisk the balsamic vinegar chicken marinade really well. This helps the oil and vinegar blend together and evenly coat the chicken. You could even use an immersion blender!
    • If grilling, discard the marinade. Want to turn it into a sauce? Boil it for a few minutes to make it safe, then simmer to reduce.
    • Keeping the skin on helps lock in moisture and gives you crispier, more flavorful results. Of course, you can remove it if that’s more your style.
    • Don't marinate too long. Unless you're freezing, cook the chicken within 24 hours. Any longer and it will start to break down and become tough.
    • Use a meat thermometer. It’s the easiest way to make sure your chicken is perfectly cooked. Look for 165 degrees F at the thickest part.
    • Rest the chicken for 5 minutes after cooking to keep all the juices where they belong — inside the meat!
    • Ingredients to prep ahead- Mince the garlic and mix the marinade the day before.
    • Leftovers and storage- Store in the fridge for up to 4 days or freeze cooked portions for later meals. Reheat in the microwave or oven at 350 degrees F until warmed through.
    An overhead image of a corner of the pan of balsamic chicken

    What To Serve With This Chicken Marinated With Balsamic Vinegar

    To make this meal even more satisfying, pair it with some easy sides and a delicious dessert. Whether you’re looking for something fresh, savory, or indulgent, these sides complement the tangy sweetness of the balsamic chicken perfectly:

    • Peas with Onions
    • Easy Garlic Green Beans
    • French Onion Mashed Potatoes
    • Quick and Easy Chocolate Pudding Cake

    Other Chicken Recipes To Try

    • A close up of a bowl of chicken wild rice creamy soup with a spoon in it and another bowl in the background.
      Wild Rice Creamy Chicken Soup (Great with Turkey Too!)
    • An overhead image of a bowl of chicken chili.
      Easy Chili Chicken
    • Buffalo taquitos cut in half and stacked on each other.
      Buffalo Chicken Taquitos
    • An overhead image of a chicken tostada on the pan with sour cream and avocado on top.
      Chicken Tostadas

    Love this recipe? Please leave a 5 star ⭐️⭐️⭐️⭐️⭐️ rating in the recipe card below ⬇️ and/or a review in the comment section further down. Check out my Amazon Store for all my favorite tools, including those used in this recipe. And follow @thelifejolie on Instagram and TikTok!

    A close up image of a roasted balsamic chicken thigh in the pan.

    Balsamic Chicken Marinade

    Jessy Freimann
    Balsamic chicken marinade makes a flavorful, fuss-free dinner that turns out amazing whether roasted or grilled. With just a few pantry staples, it’s on the table in 45 minutes — and perfect to prep ahead for busy days!
    5 from 1 vote
    Print Recipe Pin Recipe
    Prep Time 5 minutes mins
    Cook Time 40 minutes mins
    Total Time 45 minutes mins
    Course Main Course
    Cuisine American
    Servings 4 servings
    Calories 434 kcal

    Equipment

    • chefs knife
    • cutting board
    • measuring cups
    • measuring spoons
    • Whisk
    • Gallon freezer zipper bags
    • 9 x 13 Pan
    • Grill tongs
    • Meat thermometer

    Ingredients
      

    • 2 Tablespoons olive oil
    • ¾ cup balsamic vinegar
    • 1 Tablespoon honey
    • 1 teaspoon Italian seasoning
    • 1 teaspoon kosher salt
    • ¼ teaspoon ground black pepper
    • 3 cloves garlic, minced or pressed
    • 5 chicken thighs bone-in

    Instructions
     

    Oven instructions:

    • In a large bowl, whisk together olive oil, balsamic vinegar, honey, Italian seasoning, salt pepper and garlic until well combined.
    • Place chicken into large zipper bag and pour marinade over the chicken into the bag. If freezing, freeze now. Otherwise place bag into the refrigerator until you’re ready to cook.
    • Preheat the oven to 425 degrees.
    • Pour contents of bag into 9” x 13” baking pan and make sure chicken is skin-side down.
    • Bake for 20 minutes.
    • Turn chicken pieces and bake for 20 more minutes or until the chicken reaches an internal temperature of 165 degrees.
    • Rest chicken for 5 minutes and serve immediately.

    Grilling instructions:

    • In a large bowl, whisk together olive oil, balsamic vinegar, honey, Italian seasoning, salt pepper and garlic until well combined.
    • Place chicken into large zipper bag and pour marinade over the chicken into the bag. If freezing, freeze now. Otherwise place bag into the refrigerator until you’re ready to cook.
    • Heat grill to medium high heat (and if you can, spray with cooking spray before heating).
    • Place chicken pieces onto the grill.
    • Cook for around 5-7 minutes per side or until the chicken reaches an internal temperature of 165 degrees.
    • Remove from the grill and rest for 5 minutes. Serve immediately.

    Video

    Notes

    • Whisk the balsamic vinegar chicken marinade really well. This helps the oil and vinegar blend together and evenly coat the chicken. You could even use an immersion blender!
    • If grilling, discard the marinade. Want to turn it into a sauce? Boil it for a few minutes to make it safe, then simmer to reduce.
    • Keeping the skin on helps lock in moisture and gives you crispier, more flavorful results. Of course, you can remove it if that’s more your style.
    • Don't marinate too long. Unless you're freezing, cook the chicken within 24 hours. Any longer and it will start to break down and become tough.
    • Use a meat thermometer. It’s the easiest way to make sure your chicken is perfectly cooked. Look for 165 degrees F at the thickest part.
    • Rest the chicken for 5 minutes after cooking to keep all the juices where they belong — inside the meat!
    • Ingredients to prep ahead- Mince the garlic and mix the marinade the day before.
    • Leftovers and storage- Store in the fridge for up to 4 days or freeze cooked portions for later meals. Reheat in the microwave or oven at 350 degrees F until warmed through.

    Nutrition

    Serving: 1servingCalories: 434kcalCarbohydrates: 14gProtein: 23gFat: 31gSaturated Fat: 7gPolyunsaturated Fat: 6gMonounsaturated Fat: 15gTrans Fat: 0.1gCholesterol: 138mgSodium: 702mgPotassium: 363mgFiber: 0.3gSugar: 12gVitamin A: 120IUVitamin C: 1mgCalcium: 38mgIron: 2mg
    Tried this recipe?Let us know how it was!

    No Bake Peanut Butter Pie

    May 16, 2025 · 8 Comments

    A slice of peanut butter pie with a bite taken off revealing the silky interior of the pie

    My no bake peanut butter pie is the dessert that dreams are made of! Featuring an Oreo cookie crust, creamy center, and mini PB cups on top, you'll want to make this again and again. Plus, it's all prepped in just 15 minutes!

    A slice of peanut butter pie with a bite taken off revealing the silky interior of the pie
    [feast_advanced_jump_to]

    Why You'll Love My Reeses Peanut Butter Cup Pie

    You guys, this no bake peanut butter pie recipe is no joke. Like, a serious game changer. Rich, creamy, dreamy, peanut-buttery, Oreo-cookie-crusty happiness (crusty?! I don't know, just bear with me haha!). I can barely handle it. And then, to bring it over the top, I've added mini Reese's Peanut Butter Cups. I know.

    If you love chocolate and peanut butter, this is the perfect dessert for you! It's super rich, so you don't need a huge piece, which is great because you can feed more people that way. And best of all, you don't even need to turn on your oven! Here are a few other reasons to try it: 

    • Easy recipe
    • Chocolate and peanut butter lovers' dream
    • Perfect for parties and the holidays
    • Made with simple ingredients — nothing fancy needed!
    • A fun twist on a no bake cheesecake
    An overhead image of a peanut butter pie with mini peanut butter cups and milk on the side.

    Ingredient Information And Substitutions

    • Creamy Peanut Butter- For that rich and creamy filling — that's also why I went with creamy PB! If you don't mind a little texture, crunchy can be used instead. I would skip any "all-natural" options as those are a bit too oily.
    • Confectioner's Sugar- Adds sweetness to the filling while keeping it nice and smooth.
    • Cream Cheese- We need some tang to balance out the sweetness! It also adds structure and helps firm up the filling. Mascarpone is the best sub — skip Greek yogurt or sour cream as the consistency just isn't right.
    • Vanilla Extract- Adds warmth and enhances the flavor of the PB.
    • Kosher Salt- Also enhances the flavor of the other ingredients.
    • Whipped Topping- Gives the filling a mousse-like texture without having to bake! Cool Whip is my favorite, but feel free to go for the generic brand if preferred.
    • Oreo Cookie Crust- I took the easy way out and went with a pre-made Oreo crust to keep it no-bake. If you want to make it from scratch with crushed cookies and melted butter... go for it I like Sally's Baking Addiction Oreo Crust recipe, just know that it will no longer be a no-bake recipe.
    • Chocolate Sauce- For that gorgeous swirl on top that you see in the photos.
    • Mini Reese's Peanut Butter Cups- The ultimate peanut butter cup pie wouldn't be complete without some PB cups! I halve them and arrange them on top like a sort of crust.
    An overhead image of labeled recipe ingredients.

    How To Make Reese’s Peanut Butter Cup Pie

    Step 1- Combine filling ingredients.

    Place the peanut butter in a microwave-safe dish and heat in 30-second bursts until melted.

    Pour the melted peanut butter into a mixing bowl with the confectioner's sugar, cream cheese, vanilla extract, and salt. Beat with a hand mixer for 1-2 minutes or until well-combined. Then, incorporate the whipped topping.

    Peanut butter mixed with sugar in a mixing bowl and then with the creamy ingredients mixed in.

    Step 2- Assemble the pie.

    Transfer the filling mixture into the Oreo crust and smooth with a spatula. Squeeze some chocolate sauce on top and use a toothpick to swirl in that chocolate sauce (less is more here!). Arrange the Reese's cups along the edge of the pie near the crust.

    Peanut butter filling in the oreo crust and then chocolate sauce on top.

    Step 3- Refrigerate.

    Place the assembled pie in the fridge to chill for at least 1 hour before serving. Enjoy!

    chocolate sauce swirled into the peanut butter filling and then chopped Reeses peanut butter cups around the edge of the crust.

    Frequently Asked Questions

    Can I make this pie ahead of time?

    Absolutely — I find it tastes even better as it chills. You can make it up to 2 days in advance and simply store it in the fridge. I do recommend holding off on adding the Reese's cups until the day you're ready to serve so they look nice and fresh.

    Why is my filling so runny?

    This can happen if you use natural PB (a no-no here!) or slightly frozen whipped topping, or if you didn't let it chill for long enough. Try to follow my recipe exactly as written, and leave the pie to set in the fridge for at least a few hours!

    Can I freeze peanut butter pie?

    Yes! You can freeze the pie (again, hold off on the peanut butter cup topping) wrapped tightly in plastic wrap and foil for up to 1 month. Be sure to let it thaw in the fridge overnight, or at least a few hours, before serving.

    Can I make this gluten free?

    Yes- just use a gluten free crust. I've yet to find a premade option, but if you're open to baking, you can use this recipe with gluten free oreos.

    A slice of peanut butter pie on a plate with a fork and the rest of the pie behind it.

    Tips For Making No-Bake Peanut Butter Pie

    • I went the pre-made route for the pie crust because I never seem to have good luck making my own crumb crusts. It's also a huge time saver!
    • Be sure to melt that peanut butter a bit before adding it to the mixing bowl. I tested it both ways, and while the unmelted version was still delicious, melting the peanut butter makes for a much smoother filling.
    • Soften the cream cheese too. I always try to when I think of it! Too-cold cream cheese will cause lumps in the filling.
    • Fold in the whipped topping gently. It's meant to add a light and fluffy texture, and you don't want it to deflate due to overmixing.
    • Allow the pie to set for an hour or more. In my opinion, it also tastes better chilled.
    • When you're swirling the chocolate sauce, less is more. It's very forgiving in general, but I've found that a minimal amount yields the prettiest swirls.
    • Don't skimp on the Reese's peanut butter cups! Because who doesn't love them?!
    • Speaking of PB cups, the tiny Reese's can usually be found in bags with the ice cream toppings near the freezer section. They're smaller than the mini cups that come wrapped, which are usually sold in the candy section. If the little ones aren't available, you can always buy a bag of the wrapped ones and just quarter them.
    • Ingredients to prep ahead- Take the cream cheese out of the fridge, thaw the whipped topping if frozen, chop the Reese's cups, and melt the peanut butter.
    • Leftovers and storage- You can store leftovers in an airtight container in the fridge for up to 4-5 days. The texture may change slightly, but it will still taste delicious! Remember, you can also freeze the pie for up to 1 month.
    A close up of a bite of peanut butter pie on a fork next to the rest of the slice.

    What To Serve With Reese's Peanut Butter Pie

    When I'm feeling indulgent, I like to serve this with whipped cream and ice cream to the side, otherwise it tastes great as is! It works as a wonderful dessert after:

    • Easy Slow Cooker Pulled Pork BBQ
    • Baked Broccoli Mac and Cheese
    • Zesty Italian Pasta Salad
    • French Carrot Salad

    Other Delicious Pie Recipes To Try

    • This Black Forest Ice Cream Pie is a quick and easy no bake dessert recipe. Made with an Oreo Cookie crust, chocolate ice cream, maraschino cherries and whipped topping this pie is a pretty addition to any dessert table! It's perfect for the holidays or to keep in the freezer "just because"!
      Black Forest Ice Cream Pie
    • A piece of cherry cheese pie being pulled up from the rest of the pie.
      Cherry Cheese Pie
    • Make this Mini Pumpkin Cheesecake Recipe for the holidays- they're no-bake, seriously easy and totally delicious! Made with pumpkin yogurt, cream cheese, powdered sugar, pumpkin pie spice and vanilla in a graham cracker crust with candied pecans on top, these are sure to please the whole family!
      Mini Pumpkin Cheesecake Recipe
    • A piece of mint chip ice cream cake being lifted out of the pan.
      Mint Chip Ice Cream Cake

    Love this recipe? Please leave a 5 star ⭐️⭐️⭐️⭐️⭐️ rating in the recipe card below ⬇️ and/or a review in the comment section further down. Check out my Amazon Store for all my favorite tools, including those used in this recipe. And follow @thelifejolie on Instagram and TikTok!

    A slice of peanut butter pie with a bite taken off revealing the silky interior of the pie

    No Bake Peanut Butter Pie

    Jessy Freimann
    My no bake peanut butter pie is the dessert that dreams are made of! Featuring an Oreo cookie crust, creamy center, and mini PB cups on top, you'll want to make this again and again. Plus, it's all prepped in just 15 minutes!
    5 from 4 votes
    Print Recipe Pin Recipe
    Prep Time 10 minutes mins
    Inactive time 1 hour hr
    Total Time 10 minutes mins
    Course Dessert
    Cuisine American
    Servings 8 servings
    Calories 282 kcal

    Equipment

    • stand mixer or hand mixer
    • mixing bowl
    • measuring spoons
    • measuring cups
    • Spatula
    • chefs knife
    • cutting board

    Ingredients
      

    • 1 cup creamy peanut butter
    • ½ cup confectioner's sugar
    • 2 ounces cream cheese, softened
    • 1 teaspoon vanilla extract
    • 1 pinch kosher salt
    • 8 ounces whipped topping, thawed
    • 1 Oreo cookie crust premade is my preference
    • Chocolate sauce
    • ½ bag mini Reese's peanut butter cups, halved or quartered

    Instructions
     

    • Warm the peanut butter in the microwave for around 30 seconds to melt a bit (you can always go longer if it's not pourable).
    • Add the peanut butter into the mixing bowl along with confectioner's sugar, cream cheese, vanilla extract and salt.
    • Beat well for 1-2 minutes until everything is well combined.
    • Beat in the whipped topping until well combined and creamy.
    • Pour the mixture into the Oreo cookie crust and smooth the top with a spatula.
    • Squeeze some chocolate sauce onto the top of the pie (I squeezed it in a swirl) and then take a toothpick and lightly swirl it for a marbling effect. Less is more when it comes to swirling.
    • Put the cut up mini peanut butter cups all around the edges of the pie, near the crust.
    • Refrigerate for at least an hour before serving.

    Video

    Notes

    • I went the pre-made route for the pie crust because I never seem to have good luck making my own crumb crusts. It's also a huge time saver!
    • Be sure to melt that peanut butter a bit before adding it to the mixing bowl. I tested it both ways, and while the unmelted version was still delicious, melting the peanut butter makes for a much smoother filling.
    • Soften the cream cheese too. I always try to when I think of it! Too-cold cream cheese will cause lumps in the filling.
    • Fold in the whipped topping gently. It's meant to add a light and fluffy texture, and you don't want it to deflate due to overmixing.
    • Allow the pie to set for an hour or more. In my opinion, it also tastes better chilled.
    • When you're swirling the chocolate sauce, less is more. It's very forgiving in general, but I've found that a minimal amount yields the prettiest swirls.
    • Don't skimp on the Reese's peanut butter cups! Because who doesn't love them?!
    • Speaking of PB cups, the tiny Reese's can usually be found in bags with the ice cream toppings near the freezer section. They're smaller than the mini cups that come wrapped, which are usually sold in the candy section. If the little ones aren't available, you can always buy a bag of the wrapped ones and just quarter them.
    • Ingredients to prep ahead- Take the cream cheese out of the fridge, thaw the whipped topping if frozen, chop the Reese's cups, and melt the peanut butter.
    • Leftovers and storage- You can store leftovers in an airtight container in the fridge for up to 4-5 days. The texture may change slightly, but it will still taste delicious! Remember, you can also freeze the pie for up to 1 month.

    Nutrition

    Serving: 1servingCalories: 282kcalCarbohydrates: 22gProtein: 9gFat: 23gSaturated Fat: 8gPolyunsaturated Fat: 4gMonounsaturated Fat: 9gCholesterol: 8mgSodium: 186mgPotassium: 221mgFiber: 2gSugar: 10gVitamin A: 116IUCalcium: 43mgIron: 1mg
    Tried this recipe?Let us know how it was!

    Vegetarian Italian Stuffed Peppers

    May 14, 2025 · 1 Comment

    A fork pulling a bite from a stuffed pepper with cheese stretching from the pull.

    These vegetarian Italian stuffed peppers are a hearty, delicious dinner ready in just over an hour. Filled with rice, beans, veggies, and melty cheese, they’re the perfect meatless meal for any day of the week!

    A fork pulling a bite from a stuffed pepper with cheese stretching from the pull.
    [feast_advanced_jump_to]

    Why You’ll Love This Italian Stuffed Peppers Recipe

    Stuffed peppers are one of those cozy meals that feel like a hug in dinner form. This version is totally meatless but still super satisfying thanks to the combination of hearty rice, creamy beans, melty cheese, and savory vegetables. Even the most devout meat-eaters at my table love them!

    They're easy to make, and the leftovers reheat beautifully, making them great for meal prep or a next-day lunch. Plus, you can prep parts of the recipe ahead of time to make dinner even quicker. Here’s why you’ll love this recipe:

    • Flavorful, cheesy goodness
    • Really satisfying
    • Uses pantry staples
    • Easily customizable
    • Great for leftovers
    An overhead image of stuffed peppers in a white pan with a striped napkin.

    Ingredient Information And Substitutions

    • Olive oil- For sautéing. Can sub with avocado oil or canola oil.
    • Mushrooms- Bring umami flavor! Any variety works — cremini or white buttons are great options.
    • Onion- Adds savory depth. Yellow or white onion both work.
    • Garlic- Boosts aroma and taste. Fresh cloves are best, but garlic powder works in a pinch.
    • Seasonings- Kosher salt, black pepper, crushed red pepper (optional), and Italian seasoning.
    • Grated Romano cheese-  For a salty, cheesy bite. Parmesan is the best substitute.
    • Roma tomatoes- These hold up well, but any diced tomato will work.
    • Great Northern beans- They add protein and creaminess. Cannellini or navy beans are good substitutes.
    • Tomato sauce and water- The water helps rinse out every last bit from the can.
    • Cooked rice- Hearty filler that soaks up flavor. White, brown, or even quinoa can be used.
    • Fresh spinach- You can also use kale or chopped swiss chard.
    • Bell peppers- Use any color! Red tends to be the sweetest, green are slightly bitter, and yellow and orange fall somewhere in the middle.
    • Shredded mozzarella cheese- Melty, cheesy topping. Feel free to try a blend with provolone or cheddar.
    An overhead image of labeled recipe ingredients.

    How To Make Italian Stuffed Peppers

    Step 1- Sauté the veggies.

    Preheat your oven to 400 degrees F. Heat olive oil in a large sauté pan over medium-high heat. Add the diced onion and cook for about 3 minutes, then stir in the mushrooms and cook for another 3 minutes. Add the garlic and cook for another minute, just until it smells amazing.

    Onions sautéing in a pan and then mushrooms and garlic added.

    Step 2- Build the filling.

    Add salt, black pepper, red pepper flakes (if using), Italian seasoning, grated cheese, tomatoes, beans, tomato sauce, and water. Cook everything together for about 5-7 minutes, stirring occasionally. Then, stir in the cooked rice and spinach. Cook for 2 more minutes until the spinach is wilted and everything is nice and warm.

    The filling simmering and then spinach and rice added to the pan.

    Step 3- Fill the peppers.

    Cut the bell peppers in half (through the stem) and remove the ribs and seeds. Spoon the filling into each half, gently pressing down so they’re full. Nestle into the baking pan so they are snug.

    Seasoned pepper halves in a pan and then the pepper halves with the filling in them.

    Step 4- Bake and add the cheesy topping.

    Cover the dish, pop it in the oven, and bake for 45 minutes. Next, sprinkle mozzarella cheese on top of each pepper and bake uncovered for another 10 minutes until the cheese is melted and bubbly. Serve them up warm and enjoy!

    Pan covered in foil and then in the oven.
    Shredded mozzarella sprinkled on the peppers and then back in the oven to melt.

    Frequently Asked Questions

    What’s the best cheese for stuffed peppers?

    Mozzarella is a classic choice because it melts beautifully and adds that gooey, cheesy finish we all love. But feel free to switch it up! Cheddar, Monterey Jack, or even a little Pepper Jack for a kick would work great.

    Can I make these ahead of time?

    Absolutely. You can stuff the peppers and refrigerate them until you’re ready to bake. Just let them sit out for about 30 minutes before putting them in the oven — I usually do this while I preheat the oven.

    Do I need to par-bake the peppers first?

    I don’t usually par-bake them as I like a little bite left in the pepper. But if you prefer a softer texture, you can pop them in the oven for 5-10 minutes while you prep the filling.

    A close up image of a stuffed pepper in the pan with others.

    Tips For Making Vegetarian Stuffed Peppers With Rice

    • The number of peppers you’ll need depends on their size. Just make sure they fit snugly in your baking dish.
    • Instead of cutting off the tops, slice them in half from stem to bottom. They’re easier to fill and even easier to eat this way.
    • Don’t forget to scoop out the seeds and ribs inside each pepper so they’re ready for filling.
    • Don’t skimp on the filling. When you spoon it in, press it down gently before adding more to really fill those peppers up.
    • You can use leftover rice! This vegetarian stuffed peppers recipe is perfect if you’ve got some cooked rice sitting in the fridge.
    • Got extra stuffing? Spread it on the bottom of the pan before placing the peppers inside.
    • Ingredients to prep ahead- Dice the onions and mushrooms, cook the rice, and shred the cheese.
    • Leftovers and storage- Store leftovers in an airtight container in the fridge for up to 3 days. Reheat in the oven or microwave. You can also freeze the stuffed (but unbaked) peppers for up to 3 months.
    A plate with 2 stuffed peppers on it and the pan in the background.

    What To Serve With These Vegetarian Stuffed Bell Peppers

    This hearty meal is filling on its own, but you can easily turn dinner into something extra special. Whether you're looking to round things out with a veggie side or a sweet treat to finish, these recipes make the perfect companions to your classic stuffed peppers:

    • Crispy Fried Potatoes
    • French Carrot Salad
    • Mushrooms in White Wine Sauce
    • Orange Cake with Chocolate Ganache Glaze

    Other Tasty Vegetarian Recipes To Try

    • A close up of a potato stack in a muffin tin with cheese and bacon.
      Muffin Tin Potato Stacks
    • A close up image of the corner of the pan of corn salsa.
      Roasted Corn Salsa
    • A close up image of a meat lovers pizza bite on a pan.
      Meat Lover's Mini Pizza Bites
    • An overhead image of green bean salad in a wooden bowl.
      Green Bean Salad Recipe

    Love this recipe? Please leave a 5 star ⭐️⭐️⭐️⭐️⭐️ rating in the recipe card below ⬇️ and/or a review in the comment section further down. Check out my Amazon Store for all my favorite tools, including those used in this recipe. And follow @thelifejolie on Instagram and TikTok!

    A fork pulling a bite from a stuffed pepper with cheese stretching from the pull.

    Vegetarian Italian Stuffed Peppers

    Jessy Freimann
    These vegetarian Italian stuffed peppers are a hearty, delicious dinner ready in just over an hour. Filled with rice, beans, veggies, and melty cheese, they’re the perfect meatless meal for any day of the week!
    5 from 2 votes
    Print Recipe Pin Recipe
    Prep Time 10 minutes mins
    Cook Time 1 hour hr 5 minutes mins
    Total Time 1 hour hr 15 minutes mins
    Course dinner, Main, Main Course, Main dish
    Cuisine American, Italian
    Servings 8 servings
    Calories 199 kcal

    Equipment

    • 9 x 13 Pan
    • chefs knife
    • cutting board
    • Large saute pan
    • wooden spoon
    • measuring cups
    • measuring spoons

    Ingredients
      

    • 1 Tablespoon Olive oil
    • 1 cup diced onion
    • 8 ounces mushrooms, diced
    • 3 large cloves garlic, minced or pressed
    • 1 ½ teaspoon kosher salt
    • ¼ teaspoon ground black pepper,
    • ¼ teaspoon Crushed red pepper (optional)
    • 1 teaspoon Italian seasoning
    • 3 Tablespoons grated Romano cheese (or Parmesan cheese)
    • 1 cup Roma tomatoes, seeded and diced
    • 14 ounces Great Northern beans drained and rinsed
    • 8 ounces Tomato sauce
    • 4 ounces water (fill empty sauce can half way to get out residual sauce)
    • 1 cup cooked rice
    • 1 cup roughly shopped fresh spinach.
    • 4-5 bell peppers sliced in half down the middle and hollowed out
    • 1 ½ cups shredded mozzarella cheese

    Instructions
     

    • Preheat the oven to 400 degrees F. In a large sauté pan, heat olive oil over medium high heat until shimmering.
    • Add onion and cook for 3 minutes to soften, stirring often.
    • Add mushrooms and and saute for 3 minutes, stirring often.
    • Add garlic and saute for another minute until fragrant.
    • Combine salt, black pepper, crushed red pepper (if using), Italian seasoning, Romano cheese, tomatoes, beans, tomato sauce and water. Cook for 5-7 minutes until well combined, stirring periodically.
    • Stir in rice and spinach and cook for 2 minutes until spinach is wilted and rice is heated through.
    • Stuff the filling into the pepper halves, gently pressing in so they're nice and full (the peppers should be snug in the pan).
    • Cover and bake for 45 minutes.
    • Remove cover and sprinkle evenly with mozzarella cheese.
    • Return to the oven and bake for 10 more minutes to melt the cheese. Serve immediately.

    Video

    Notes

    • The number of peppers you’ll need depends on their size. Just make sure they fit snugly in your baking dish.
    • Instead of cutting off the tops, slice them in half from stem to bottom. They’re easier to fill and even easier to eat this way.
    • Don’t forget to scoop out the seeds and ribs inside each pepper so they’re ready for filling.
    • Don’t skimp on the filling. When you spoon it in, press it down gently before adding more to really fill those peppers up.
    • You can use leftover rice! This vegetarian stuffed peppers recipe is perfect if you’ve got some cooked rice sitting in the fridge.
    • Got extra stuffing? Spread it on the bottom of the pan before placing the peppers inside.
    • Ingredients to prep ahead- Dice the onions and mushrooms, cook the rice, and shred the cheese.
    • Leftovers and storage- Store leftovers in an airtight container in the fridge for up to 3 days. Reheat in the oven or microwave. You can also freeze the stuffed (but unbaked) peppers for up to 3 months.

    Nutrition

    Serving: 1servingCalories: 199kcalCarbohydrates: 24gProtein: 11gFat: 7gSaturated Fat: 3gPolyunsaturated Fat: 1gMonounsaturated Fat: 3gCholesterol: 17mgSodium: 711mgPotassium: 597mgFiber: 6gSugar: 5gVitamin A: 2398IUVitamin C: 84mgCalcium: 161mgIron: 2mg
    Tried this recipe?Let us know how it was!

    Almond Shortbread Cookies

    May 12, 2025 · 10 Comments

    A plate of chocolate dipper shortbread cookies on striped towel with a cup of coffee.

    With their melt-in-your-mouth texture and a touch of dark chocolate, these almond shortbread cookies are a simple yet satisfying treat. They’re ideal for making ahead and enjoying a little sweet moment whenever you need it.

    A plate of chocolaate dipper shortbread cookies on striped towel with a cup of coffee.
    [feast_advanced_jump_to]

    Why You’ll Love This Almond Butter Cookies Recipe

    If you’re a fan of buttery shortbread with a little something extra, this recipe is for you! These cookies are rich without being overly sweet, thanks to the balance of almond extract and dark chocolate. They pair beautifully with a hot cup of coffee or tea — ideal for a mid-day treat or simple dessert.

    What makes this recipe especially nice is the make-ahead dough. You can chill it for an hour or freeze it for a slice-and-bake situation whenever you're ready. The chocolate dip takes the buttery almond cookies recipe from simple to special, making them great for gifting, holiday trays, or just a treat-yourself moment. Here’s why these cookies are a must-make:

    • Buttery and perfectly crumbly texture
    • Simple ingredients
    • Freezer-friendly dough
    • Chocolate-dipped for that extra indulgence
    • Pairs perfectly with coffee or tea
    A stack of butter cookies dipped in chocolate.

    Ingredient Information And Substitutions

    • Butter- Salted butter works well here, but unsalted is fine too — just add an extra pinch of salt. 
    • Confectioners sugar- AKA powdered sugar. This gives the cookies that smooth, melt-in-your-mouth texture.
    • Egg yolks- Adds richness and a buttery texture to the dough. 
    • Kosher salt- Balances the sweetness. You can use sea salt if you prefer.
    • Almond extract- Key for flavor. If you’re out, you could swap in vanilla or even try orange extract for a fun twist. 
    • Flour- All-purpose flour is perfect here. You can use a gluten-free flour blend for a gluten-free option.
    • Chopped almonds- Adds crunch and brings out the almond flavor. Pecans or walnuts would also work in a pinch.
    • Chocolate chips- I prefer dark chocolate, but you can use milk or semi-sweet, depending on how rich you want the flavor.
    An overhead image of labeled recipe ingredients.

    How To Make Almond Cookies 

    Step 1- Cream the butter and mix in the other ingredients. 

    Beat the butter until it's completely smooth and fluffy. Stir in everything else except the flour. Gradually mix in the flour at the end, just until incorporated. It’ll look a bit crumbly, and that’s totally fine.

    Butter and sugar creamed together  and then with the remaining cookie ingredients mixed in.

    Step 2- Shape & chill the dough.

    On a piece of wax paper, shape the dough into two logs about 1¼ inches thick. Wrap them tightly and chill for at least an hour.

    The doughb ball on parchment paper and then rolled into a log inside the parchment.

    Step 4- Slice and bake.

    Preheat your oven to 350 degrees F. Slice the chilled dough into rounds about ⅓ inch thick and place on a parchment-lined baking sheet. Bake for 12-14 minutes, just until the edges start to turn golden. Keep an eye so they don’t over-bake.

    THe dough log with cookies slice and then the cookies on a sheet pan in the oven.

    Step 5- Dip in chocolate (optional but amazing). 

    Melt some chocolate in the microwave, stirring every 30 seconds, or use a double boiler on low heat. Dip half of each cooled cookie in the melted chocolate and let them set on wax paper. Then, enjoy!

    Baked cookies on. asheet pan and then those same cookies each half dipped in chocolate on the pan.

    Frequently Asked Questions

    Can I make the almond shortbread dough ahead of time?

    Yes! This dough holds up really well in the fridge. You can prep it a day or two in advance and keep it wrapped until you're ready to slice and bake. You can also freeze it for up to 3 months.

    Can I use almond flour instead of chopped almonds?

    I haven't tested it with almond flour but I suspect it won’t provide the same crunch or texture. If you’re aiming for that classic shortbread bite, stick with the regular dough and chopped almonds.

    Why is my dough so crumbly?

    Shortbread dough is naturally crumbly due to the high butter content. It should come together once chilled and shaped — just don’t overmix.

    A plate of cookies with cups of coffee behind them.

    Tips For Making This Almond Cookies Recipe

    • Don’t over-mix the dough! It should be crumbly, not overly smooth.
    • Chill the dough well. Cold dough slices more neatly and bakes without spreading too much, helping the cookies to hold their shape.
    • Instead of buying pre-chopped almonds, try chopping them yourself. This can bring out more flavor and give the cookies a better bite.
    • Use room temperature butter. Softened butter blends more smoothly and helps create that classic shortbread texture without overmixing.
    • Toast the almonds for extra flavor. Giving the almonds a quick toast before mixing them into the dough adds a subtle nuttiness and crunch.
    • Customize with mix-ins. Mini chocolate chips, finely chopped dried fruit, or a sprinkle of sea salt on top can add fun variety. 
    • Ingredients to prep ahead- You can cream the butter and mix the dough in advance, then chill or freeze until ready to bake.
    • Leftovers and storage- Store in an airtight container at room temperature for 4-5 days, or freeze for up to 6 months. Both the dough and baked cookies freeze well.
    A close up of chocolate dipped shortbread cookies on a plate.

    What To Serve With Almond Butter Cookies

    These buttery cookies are a favorite whenever I need something sweet but not too heavy. I love serving them as an afternoon treat with a warm cup of coffee or tea. If you’re looking to make it a more complete dessert spread, here are a few of my favorite recipes to serve alongside: 

    • Lemon Pistachio Cake
    • Chocolate Chip Banana Bread Muffins
    • Blueberry Lemon Dump Cake
    • Buttermilk Banana Bread Recipe

    Other Tasty Cookie Recipes To Try

    • A plate of chocolate dipper shortbread cookies on striped towel with a cup of coffee.
      Almond Shortbread Cookies
    • These Chocolate Peppermint Crinkles are an easy way to add a fun spin to a traditional recipe. These cookies are chewy and fudgy but they also have a delicious mint flavor. They are the best Christmas cookie for kids to make and eat!
      Chocolate Peppermint Crinkles
    • A squaer image of Apple Cinnamon Thumbprint Cookies.
      Apple Cinnamon Thumbprint Cookies
    • A square image of the Toll House Cookie Recipe
      Easiest Chocolate Chip Cookies

    Love this recipe? Please leave a 5 star ⭐️⭐️⭐️⭐️⭐️ rating in the recipe card below ⬇️ and/or a review in the comment section further down. Check out my Amazon Store for all my favorite tools, including those used in this recipe. And follow @thelifejolie on Instagram and TikTok!

    A plate of chocolate dipper shortbread cookies on striped towel with a cup of coffee.

    Almond Shortbread Cookies

    Jessy Freimann
    With their melt-in-your-mouth texture and a touch of dark chocolate, these almond shortbread cookies are a simple yet satisfying treat. They’re ideal for making ahead and enjoying whenever you need a little sweet moment.
    5 from 8 votes
    Print Recipe Pin Recipe
    Prep Time 10 minutes mins
    Cook Time 12 minutes mins
    Chill time 1 hour hr
    Total Time 1 hour hr 22 minutes mins
    Course Dessert
    Cuisine American
    Servings 24 cookies
    Calories 147 kcal

    Equipment

    • stand mixer
    • Spatula
    • measuring cups
    • measuring spoons
    • sheet pan

    Ingredients
      

    • 1 cup salted butter softened- 2 sticks
    • ⅔ cup confectioners sugar sifted
    • 2 large egg yolks
    • 1 pinch Kosher salt
    • 1 teaspoon almond extract
    • 2 cups flour
    • ½ cup chopped almonds
    • 1 ½ cups chocolate chips optional

    Instructions
     

    • Cream the butter until smooth and then mix in the sugar until fully combined.
    • Add the remaining ingredients except the flour which will be added add slowly until everything is just combined. The mixture will look a little "crumbly"; this is ok.
    • On a wax paper covered surface, form two logs with your dough, around 1 ¼ inches thick. Wrap them in wax paper.
    • Chill the dough logs in the refrigerator for at least an hour.
    • Preheat the oven to 350 degrees.
    • Unwrap the dough logs and slice to a desired thickness (I did around ⅓ of an inch) and place the slices on a baking pan lined with parchment or silicone baking mat.
    • Bake for 12 to 14 minutes or until they are just barely brown along the edges.
    • If you want- dip these into melted chocolate (you can melt in the microwave stirring every 30 seconds or with a double boiler over low heat stirring often).

    Video

    Notes

    • Don’t over-mix the dough! It should be crumbly, not overly smooth.
    • Chill the dough well. Cold dough slices more neatly and bakes without spreading too much, helping the cookies to hold their shape.
    • Instead of buying pre-chopped almonds, try chopping them yourself. This can bring out more flavor and give the cookies a better bite.
    • Use room temperature butter. Softened butter blends more smoothly and helps create that classic shortbread texture without overmixing.
    • Toast the almonds for extra flavor. Giving the almonds a quick toast before mixing them into the dough adds a subtle nuttiness and crunch.
    • Customize with mix-ins. Mini chocolate chips, finely chopped dried fruit, or a sprinkle of sea salt on top can add fun variety. 
    • Ingredients to prep ahead- You can cream the butter and mix the dough in advance, then chill or freeze until ready to bake.
    • Leftovers and storage- Store in an airtight container at room temperature for 4-5 days, or freeze for up to 6 months. Both the dough and baked cookies freeze well.
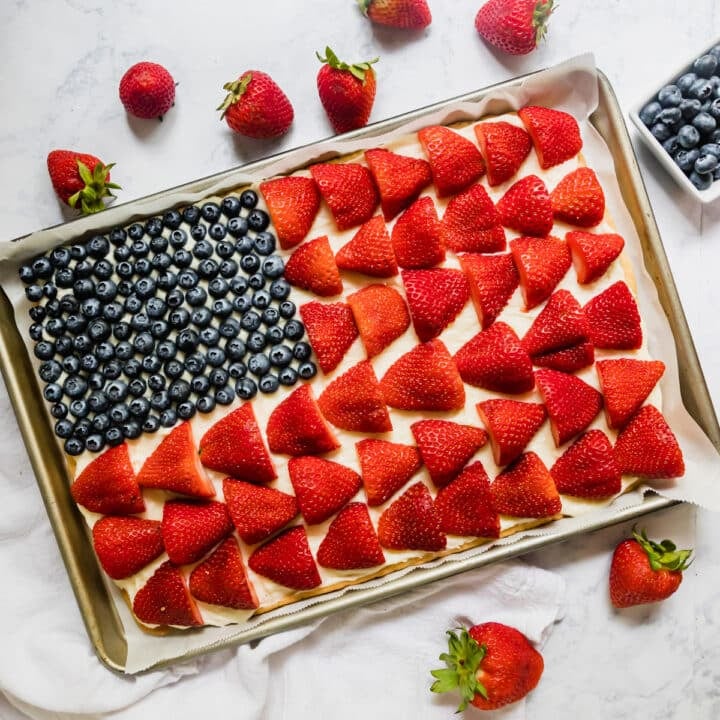
    Nutrition

    Serving: 4cookiesCalories: 147kcalCarbohydrates: 16gProtein: 1gFat: 10gSaturated Fat: 6gPolyunsaturated Fat: 1gMonounsaturated Fat: 2gTrans Fat: 1gCholesterol: 38mgSodium: 66mgPotassium: 15mgFiber: 1gSugar: 4gVitamin A: 257IUCalcium: 6mgIron: 1mg
    Tried this recipe?Let us know how it was!

    Tortellini Pesto Pasta Salad

    May 9, 2025 · Leave a Comment

    A white bowl of tortellini salad with the main bowl in the background.

    Tortellini pesto pasta salad is a quick and fresh dish that comes together in just 20 minutes! Packed with bold flavors and cheese-stuffed pasta, it’s perfect for potlucks, BBQs, or a no-fuss family dinner.

    A white bowl of tortellini salad with the main bowl in the background.
    [feast_advanced_jump_to]

    Why You’ll Love This Tortellini Pasta Salad With Pesto

    Pasta salad season is upon us, and I'm here for it! Although honestly, I don't think you need to wait for summer to enjoy a cold pasta salad. I’ll happily eat it all year round — and when it’s this easy, how could you not?

    This isn’t your average pasta salad. Tortellini gives it a heartier, more satisfying bite, cherry tomatoes add a burst of sweetness, and bocconcini brings the perfect creamy contrast. A handful of black olives and marinated artichoke hearts add just the right touch of briny flavor without being too much.

    And of course, pesto sauce ties it all together with that bold, herby punch of summer, any time of year. Whether you’re making it ahead for a party or just craving a no-fuss meal, this one is a keeper. Here’s why you’ll love this recipe:

    • Ready in about 20 minutes
    • Loaded with fresh, vibrant flavors
    • Customizable with your favorite add-ins
    • Great for make-ahead meals 
    A noverhead image of a blue and white bowl with a white napkin and tomatoes and black olives around it.

    Ingredient Information And Substitutions

    • Pesto sauce- Packs all the herby, garlicky goodness that ties the salad together. Use your favorite jarred pesto sauce or make your own if you're feeling fancy.
    • Tortellini pasta- Use refrigerated or frozen tortellini- I prefer frozen but both work. Cheese-filled is classic, but spinach or meat varieties work too.
    • Cherry tomatoes- Add a juicy sweetness and fresh flavor. Grape tomatoes work too.
    • Black olives- Give a briny, salty kick. Kalamata olives are a great swap.
    • Marinated artichoke hearts- Add a tangy, slightly briny bite without being overpowering. Plain canned artichokes also work.
    • Bocconcini- Brings a creamy, mild flavor that pairs perfectly with pesto. You can cut up regular fresh mozzarella into bite-sized pieces if you can't find mozzarella pearls.
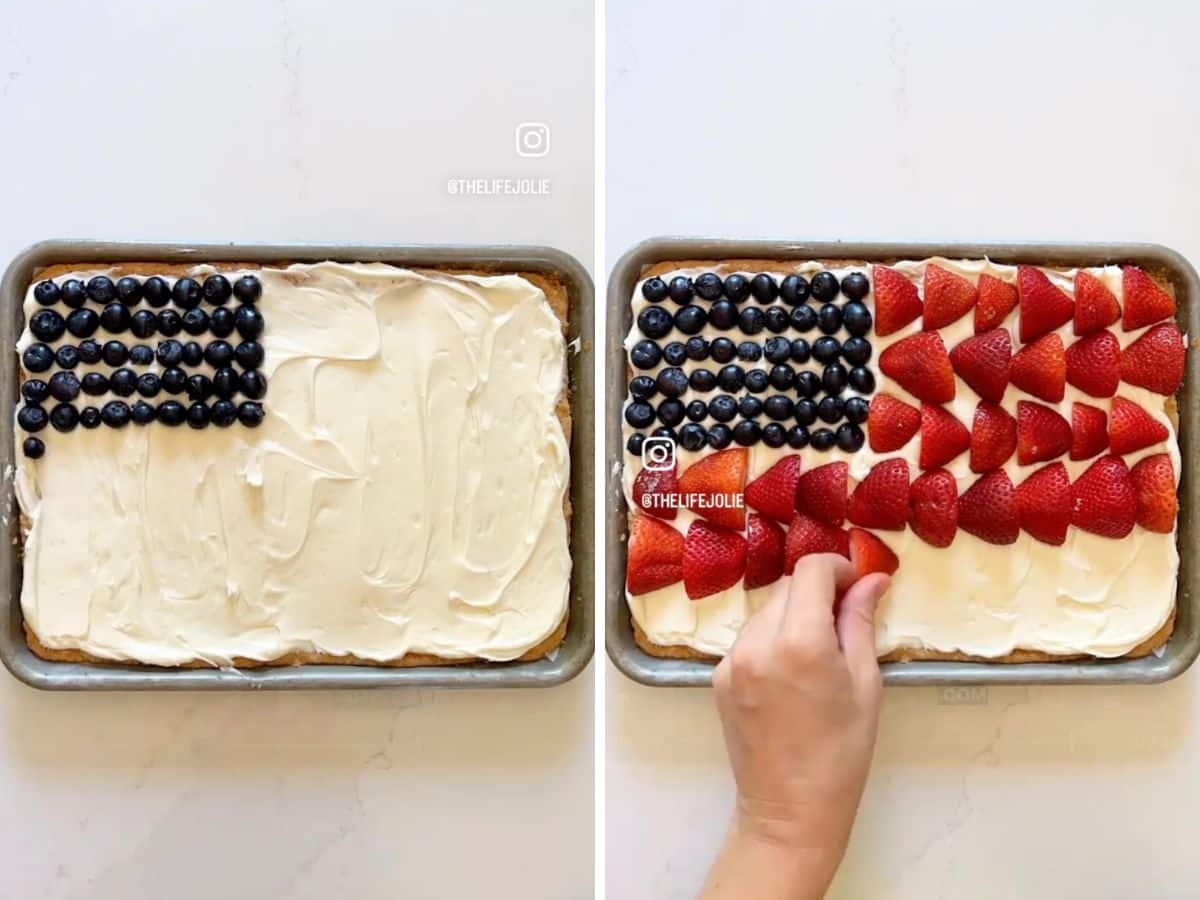
    An overhead image of labeled recipe ingredients.
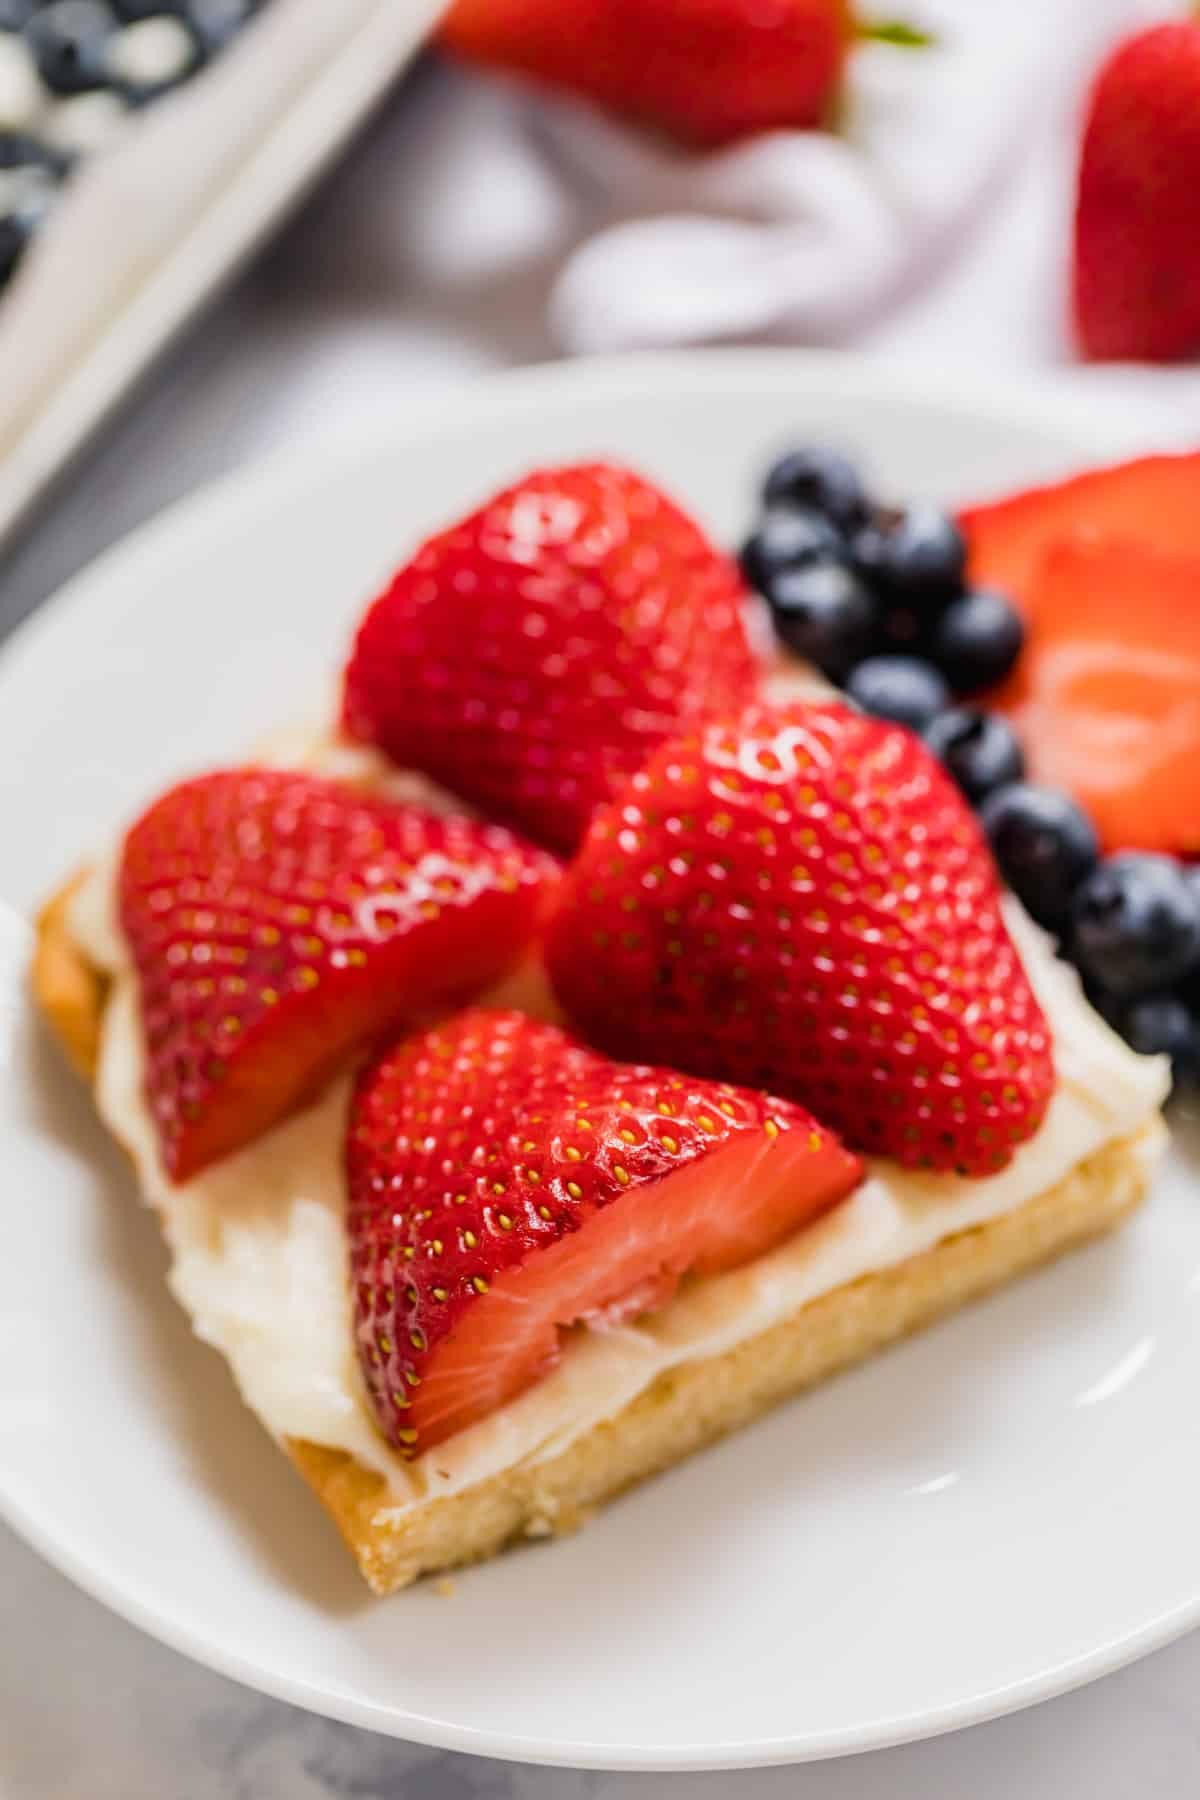
    How To Make Pesto Tortellini Pasta Salad

    Step 1- Prep the ingredients.

    Cook the tortellini according to package directions, then drain and cool completely. Place tortellini and then toppings into a large bowl.

    Cooked tortellini in a glass bowl and then olives, artichokes and tomatoes added.

    Step 2- Toss everything together.

    In a large mixing bowl, combine the cooled tortellini, cherry tomatoes, black olives, marinated artichoke hearts, bocconcini, and pesto. Toss gently until everything is evenly coated.

    Pesto added into the bowl of salad fixings and then everything tossed together and fully coated.

    Step 3- Chill before serving.

    Cover and refrigerate the salad for at least an hour before serving to let the flavors come together.

    A spoon holding up a scoop of pesto pasta salad over the bowl of it.

    Frequently Asked Questions

    Can I make pesto with tortellini ahead of time?

    Yes! You can make it a day ahead. Just keep some extra pesto on hand in case the pasta absorbs too much and you need to stir a little more in before serving.

    Can I serve it warm instead of cold?

    While it's usually served chilled, you can serve it right after tossing everything together for a slightly warm version.

    How do I keep the salad from drying out?

    If the pasta soaks up the pesto while chilling, just toss in a little extra pesto or a splash of olive oil right before serving.

    Can I make this a full meal?

    Yes, you can add grilled chicken, shrimp, or even chickpeas to make it more filling.

    A close up image of tortellini with pesto, olives and tomatoes.

    Tips For Making This Pesto Tortellini Recipe

    • Cool the pasta completely. Warm tortellini will absorb too much of the pesto and can cause the salad to turn mushy. Cooling it first keeps everything fresh — rinse with cold water to speed up the process!
    • Cutting the tomatoes, artichokes, and mozzarella helps them mix better with the pasta, but it’s okay to leave them whole if you’re in a rush.
    • Feel free to switch up the veggies depending on what you have. Diced cucumbers, bell peppers, or red onions are great additions if you're looking for extra crunch.
    • A little sprinkle of fresh basil or parsley right before serving adds a nice touch of color and extra flavor.
    • This tortellini pasta salad tastes best chilled, so plan to refrigerate it for at least an hour before serving.
    • Ingredients to prep ahead- Cook and cool the tortellini, and chop the veggies and cheese in advance to speed up the assembly process.
    • Leftovers and storage- Store any leftovers in an airtight container in the fridge for up to 5 days. Freezing isn’t recommended as it can affect the texture of the pasta and fresh ingredients.
    An overhead image of a close up of half the bowl of tortellini pasta salad with pesto.

    What To Serve With Cheese Tortellini Pasta Salad

    This bright and flavorful pasta salad pairs with just about anything! Serve it alongside grilled meats for a hearty meal or with fresh veggie sides for a lighter touch. Add a sweet dessert to complete the experience. Whether it’s a casual weeknight dinner or a BBQ, this salad will complement nearly any dish. A few great recipes to round out this meal would be:

    • Grilled Lemon Pepper Chicken Drumsticks
    • Crunchy Red Cabbage Salad
    • Balsamic Grilled Asparagus
    • Black Cherry Lemonade Bourbon Slush
    • Raspberry Lemon Icebox Pie

    Other Tasty Pasta Recipes To Try

    • An overhead image of a plate of baked ziti with herbs, garlic and a blue striped napkin next to it.
      Pasta al Forno
    • A bowl of pasta salad with a white towel behind it and tomatoes and basil around it.
      Zesty Italian Pasta Salad
    • A plate of vodka pasta with fresh basil, Italian bread and a striped towel in the background.
      Creamy Vodka Pasta
    • A close up of a bowl of pasta with peas with a spoon in it and the larger blue pan of it in the background.
      Pasta and Peas Recipe

    Love this recipe? Please leave a 5 star ⭐️⭐️⭐️⭐️⭐️ rating in the recipe card below ⬇️ and/or a review in the comment section further down. Check out my Amazon Store for all my favorite tools, including those used in this recipe. And follow @thelifejolie on Instagram and TikTok!

    A white bowl of tortellini salad with the main bowl in the background.

    Tortellini Pesto Pasta Salad

    Jessy Freimann
    Tortellini pesto pasta salad is a quick and fresh dish that comes together in just 20 minutes! Packed with bold flavors and cheese-stuffed pasta, it’s perfect for potlucks, BBQs, or a no-fuss family dinner.
    No ratings yet
    Print Recipe Pin Recipe
    Prep Time 10 minutes mins
    Cook Time 10 minutes mins
    Resting time 1 hour hr
    Total Time 20 minutes mins
    Course Salad, Side Dish
    Cuisine American, Italian
    Servings 10 servings
    Calories 262 kcal

    Equipment

    • mixing bowl
    • Spatula
    • measuring cups
    • measuring spoons
    • Dutch oven
    • wooden spoon
    • chefs knife
    • cutting board

    Ingredients
      

    • 20 ounces tortellini pasta, boiled as per package directions and cooled completely
    • 1 ½ cups cherry tomatoes, halved
    • 14 ounces black olives, sliced
    • 14 ounces quartered marinated artichoke hearts, halved
    • 8 ounces bocconcini (or regular fresh mozzarella cut into bite-size pieces
    • 1 ½ cups pesto sauce + a little extra in case the salad dries out

    Instructions
     

    • Toss all ingredients until well combined.
    • Refrigerate until serving (at least an hour).

    Video

    Notes

    • Cool the pasta completely. Warm tortellini will absorb too much of the pesto and can cause the salad to turn mushy. Cooling it first keeps everything fresh — rinse with cold water to speed up the process!
    • Cutting the tomatoes, artichokes, and mozzarella helps them mix better with the pasta, but it’s okay to leave them whole if you’re in a rush.
    • Feel free to switch up the veggies depending on what you have. Diced cucumbers, bell peppers, or red onions are great additions if you're looking for extra crunch.
    • A little sprinkle of fresh basil or parsley right before serving adds a nice touch of color and extra flavor.
    • This tortellini pasta salad tastes best chilled, so plan to refrigerate it for at least an hour before serving.
    • Ingredients to prep ahead- Cook and cool the tortellini, and chop the veggies and cheese in advance to speed up the assembly process.
    • Leftovers and storage- Store any leftovers in an airtight container in the fridge for up to 5 days. Freezing isn’t recommended as it can affect the texture of the pasta and fresh ingredients.

    Nutrition

    Serving: 1servingCalories: 262kcalCarbohydrates: 5gProtein: 6gFat: 25gSaturated Fat: 5gPolyunsaturated Fat: 1gMonounsaturated Fat: 4gCholesterol: 11mgSodium: 986mgPotassium: 65mgFiber: 2gSugar: 2gVitamin A: 1015IUVitamin C: 5mgCalcium: 164mgIron: 1mg
    Tried this recipe?Let us know how it was!

    Chicken Tostadas

    May 7, 2025 · 2 Comments

    An overhead image of a chicken tostada on the pan with sour cream and avocado on top.

    These chicken tostadas are the most deliciously crunchy open-faced taco you'll ever try! Perfect for leftovers, they're seriously easy and totally customizable too. Ready in a very quick 20 minutes

    A chicken tostada on a white plate with a green napkin behind it.
    [feast_advanced_jump_to]

    Why You'll Love My Chicken Tostadas Recipe

    I'm always looking for new ways to repurpose leftover chicken, and especially leftover turkey when the holidays roll around. I've been sitting on this tostada recipe for a while. It may not be authentic Mexican tostadas, but it's definitely tasty!

    I love that you can really take it in whatever direction you want based on your taste and what you have on hand. These are quick, easy, and perfect for a weeknight dinner. I also love that they're:

    • Filling and hearty enough for a meal
    • SO simple to throw together. Like, incredibly so.
    • Made with minimal ingredients
    • Full of contrasting textures (in the best way)
    • 100% customizable!
    An overhead image of a pan with 3 tostadas on it with limes and avocado.

    Ingredient Information And Substitutions

    • Chicken- You can use any cut of chicken for tostadas — just shred or chop it up. This also works great with leftover turkey. If you don't have leftovers, I've found the most budget-friendly option is to pick up a rotisserie chicken from the store. You can also make your own shredded chicken in the crockpot or Instant Pot.
    • Salsa- Choose your favorite salsa for this! Spicy, mild, or extra hot... anything goes.
    • Tortillas- I find corn tortillas work best for tostada shells, but if you prefer flour, then go for it!
    • Beans- My beans of choice are either canned refried beans or black beans.
    • Cheese- Typically, I use shredded sharp cheddar because I always have it on hand. A taco mix or other shredded cheese of choice works well too!
    • Toppings- Here's your chance to get super creative! I like to top these with sour cream, green onion, and avocado... but any topping will be great!
    An overhead image of labeled recipe ingredients.

    How To Make Baked Tostadas

    Step 1- Toast the tortillas and make the filling.

    Preheat your oven to 400 degrees F. Line a baking sheet with parchment paper or foil, then grease with nonstick cooking spray. Place the tortillas in a single layer on the prepared baking sheet and apply more cooking spray. Bake for 5-7 minutes or until crispy.

    Add the shredded chicken and ½ cup of salsa to a large bowl and mix to combine.

    Chicken in a bowl with salsa and corn tortillas on a baking pan being sprayed with cooking spray.

    Step 2- Assemble.

    When the tortillas are nice and crispy, top each with 2 tablespoons of beans followed by 2 tablespoons of the remaining salsa. Add the chicken mixture, then sprinkle the shredded cheddar on top.

    Hands spreading refried beans onto the baked corn tortillas and then salsa on top of that.

    Step 5- Bake & serve.

    Place the sheet back in the oven and bake for another 5-7 minutes until heated through and the cheese has melted. Serve immediately with your favorite toppings and enjoy!

    Chicken added to the top of the tostadas and then shredded cheese.

    Frequently Asked Questions

    What is a tostada?

    Traditionally, tostadas are flat, crispy tortillas topped with refried beans, protein (like chicken), lettuce, onions, crema cheese, and salsa. Tostada means 'toast' in Spanish, so that crispy base is key!

    How do you eat a tostada?

    This is totally up to you. I use a fork and knife, but no judgment if you pick them up with your hands and get after them!

    What's the difference between a taco and a tostada?

    Tostadas are typically flat and crispy shells. Tacos are folded and are often served on softer shells (but not always).

    Can I fry the tortilla instead?

    You totally can, but I choose to bake because it's easier and calls for much less oil.

    Can I freeze leftovers?

    While you can totally mix and freeze the chicken, I'd encourage you to hold off on freezing the tortilla shells. They may not thaw to the right texture.

    Can I make these ahead of time?

    You can prep all of the components — bake the tortillas, mix the filling, shred the cheese, and open the beans — but wait to assemble just before baking so that the tortilla base stays as crispy as possible!

    An overhead image of a chicken tostada on the pan with sour cream and avocado on top.

    Tips For Making Mexican Tostadas

    • Make sure you don't over-shred your chicken. It'll naturally shred up more as you stir in the salsa, and you don't want it to get stringy or mushy.
    • I like to spray my tortillas with cooking spray to help them crisp and brown up even more.
    • Don't overcrowd the baking sheet! Remember, one of the key components of this recipe is the crunchy tortilla. If you add too many at a time, they may steam instead of crisp up.
    • Warm up the beans to make spreading easier. Refried beans can be kind of stiff straight from the can. Popping them in a bowl and then microwaving in 30-second increments will make them much easier to layer on.
    • Shredding the cheese yourself will give you a better melt. Listen, I'm all for convenience, so if a preshredded bag is all you have, that's totally fine — but I encourage you to try shredding from the block at least once!
    • Honestly, the measurements I gave for this are suggestions. For this recipe, it's perfectly fine to measure with your heart.
    • Ingredients to prep ahead- Get ahead and cook and shred the chicken, make the salsa if using homemade, shred the cheese, and chop or dice any other toppings before getting started.
    • Leftovers and storage- Leftovers for this are great, but I encourage you to pack things up separately instead of assembled for the best results. These will last up to 3 days covered in the fridge.
    A side angle image of a dressed chicken tostada on a pan with more behind it.

    What To Serve With Tostadas

    These are super versatile when it comes to sides. Since they're pretty hearty on their own, I like to pair them with other light, fresh, Mexican-inspired dishes. Some favorites include:

    • Homemade Guacamole and Tortilla Chips
    • Mexican Bean Salad
    • 7 Layer Taco Salad
    • Pineapple Salsa

    Other Delicious Leftover Chicken Recipes To Try

    • A bowl of BBQ chicken salad with a striped napkin, half red onion and fried onions around it.
      Copycat Panera Chicken BBQ Salad
    • Chicken enchiladas on a white plate.
      Cheesy Chicken Enchiladas
    • An overhead image of a plate of chicken shepherd's pie with carrots, onion and a blue and white kitchen towel around it.
      Chicken Shepherd's Pie Recipe
    • A close up of a bowl of chicken wild rice creamy soup with a spoon in it and another bowl in the background.
      Wild Rice Creamy Chicken Soup (Great with Turkey Too!)

    Hosting Thanksgiving?

    Discover the secret to hosting Thanksgiving without all the stress! Prepsgiving is your FREE guide to making a delicious Thanksgiving feast the easy way.

    Love this recipe? Please leave a 5 star ⭐️⭐️⭐️⭐️⭐️ rating in the recipe card below ⬇️ and/or a review in the comment section further down. Check out my Amazon Store for all my favorite tools, including those used in this recipe. And follow @thelifejolie on Instagram and TikTok!

    An overhead image of a chicken tostada on the pan with sour cream and avocado on top.

    Chicken Tostadas

    Jessy Freimann
    These chicken tostadas are the most deliciously crunchy open-faced taco you'll ever try! Perfect for leftovers, they're seriously easy and totally customizable too. Ready in a very quick 20 minutes.
    5 from 2 votes
    Print Recipe Pin Recipe
    Prep Time 10 minutes mins
    Cook Time 10 minutes mins
    Total Time 20 minutes mins
    Course Entree, Main, Main Course, Main dish
    Cuisine Mexican
    Servings 6 servings
    Calories 230 kcal

    Equipment

    • measuring spoons
    • measuring cups
    • chefs knife
    • cutting board
    • sheet pan
    • mixing bowl

    Ingredients
      

    • Cooking spray
    • 6 corn tortillas
    • 2 cups cooked shredded chicken
    • 1 ½ cups salsa, divided
    • 1 can refried beans (or well drained black beans if you prefer)
    • 1 ½ cups shredded cheddar cheese
    • The toppings of your choice

    Instructions
     

    • Preheat the oven to 400 degrees F. Line a sheet pan with foil and spray with cooking spray.
    • Place tortillas on sheet pan in a single layer and spray with cooking spray. Bake for 5-7 minutes until crispy.
    • While the tortillas bake, mix chicken with ½ cup salsa until well combined.
    • When tostadas are out of the oven top with 2 Tablespoons of beans per tostada.
    • Then top with 2 Tablespoons of salsa per tostada.
    • Divide chicken mixture between the tostadas.
    • Divide shredded cheddar between the tostadas
    • Return to the oven and bake for 7-10 more minutes until heated through and cheese is melted. Serve immediately with the toppings of your choice.

    Video

    Notes

    • Make sure you don't over-shred your chicken. It'll naturally shred up more as you stir in the salsa, and you don't want it to get stringy or mushy.
    • I like to spray my tortillas with cooking spray to help them crisp and brown up even more.
    • Don't overcrowd the baking sheet! Remember, one of the key components of this recipe is the crunchy tortilla. If you add too many at a time, they may steam instead of crisp up.
    • Warm up the beans to make spreading easier. Refried beans can be kind of stiff straight from the can. Popping them in a bowl and then microwaving in 30-second increments will make them much easier to layer on.
    • Shredding the cheese yourself will give you a better melt. Listen, I'm all for convenience, so if a preshredded bag is all you have, that's totally fine — but I encourage you to try shredding from the block at least once!
    • Honestly, the measurements I gave for this are suggestions. For this recipe, it's perfectly fine to measure with your heart.
    • Ingredients to prep ahead- Get ahead and cook and shred the chicken, make the salsa if using homemade, shred the cheese, and chop or dice any other toppings before getting started.
    • Leftovers and storage- Leftovers for this are great, but I encourage you to pack things up separately instead of assembled for the best results. These will last up to 3 days covered in the fridge.

    Nutrition

    Serving: 1servingCalories: 230kcalCarbohydrates: 21gProtein: 23gFat: 6gSaturated Fat: 2gPolyunsaturated Fat: 1gMonounsaturated Fat: 2gCholesterol: 41mgSodium: 886mgPotassium: 342mgFiber: 5gSugar: 4gVitamin A: 425IUVitamin C: 1mgCalcium: 176mgIron: 2mg
    Tried this recipe?Let us know how it was!

    Jalapeno Pineapple Salsa

    May 5, 2025 · Leave a Comment

    A hand holding up a chip with pineapple salsa on it over the bowl.

    Jalapeno pineapple salsa is a fresh, sweet-and-spicy dip that comes together in just 10 minutes! It’s perfect for scooping with chips or adding flavor to grilled chicken, fish, tacos, or salads.

    Pineapple salsa in a bowl with chips.

    Why You’ll Love This Pineapple Jalapeno Salsa

    Sure, salsa is good. But pineapple salsa? Better. I said what I said. There’s just something about bringing a sweet, juicy fruit into a savory dish that makes it pop, and pineapple was made for this recipe. I love how the natural sweetness plays so nicely with the heat from jalapeño, the bite of red onion, and the brightness from lime.

    It’s fresh, fun, and feels fancy… but it’s super quick and easy to throw together. And let's talk versatility — because this stuff works with everything. Spoon it over grilled chicken or fish. Add it to tacos or just kick back with tortilla chips, a bowl of this salsa, and a glass of sangria. Here’s why this recipe is a must-make:

    • Takes 10 minutes
    • Sweet, spicy, and tangy
    • Bright, fresh flavor
    • Totally customizable
    An overhead image of pineapple salsa and chips with a blue towel.

    Ingredient Information And Substitutions

    • Fresh pineapple- The star of the show! Use ripe pineapple for the best flavor. Precut pineapple works too — just avoid canned or frozen.
    • Tomato- Adds juiciness and a hint of acidity. Roma or vine-ripened work well here.
    • Red onion- Adds a sharp, peppery bite that balances the sweetness of the pineapple. You can also swap it for white or sweet onion.
    • Jalapeño- Adds a nice kick of heat. To make it less spicy, swap for a milder pepper like poblano.
    • Lime juice- Brightens everything up. Bottled works in a pinch, but fresh is best.
    • Cilantro- Gives that classic salsa flavor. Not a fan? Leave it out or sub in parsley.
    • Kosher salt & black pepper- Season to your taste.

    How To Make Pineapple Salsa

    Step 1- Combine all the ingredients.

    In a large bowl, add the diced pineapple, tomato, red onion, jalapeños, and chopped cilantro. Stir to combine everything.

    Salsa ingredients in a glass bowl.

    Step 2- Add lime and season.

    Squeeze the juice from one or two limes over the mixture, depending on how tangy you like it. Sprinkle in a little salt and pepper to start, then give it a taste and adjust the seasonings as needed.

    Pineapple salsa mixed together.

    Step 3- Chill and serve.

    Pop the salsa into the fridge to let the flavors mingle. It’s ready to enjoy whenever you are!

    Frequently Asked Questions

    How do I know if a pineapple is ripe? 

    Look for bright green leaves, mostly yellow skin, and a sweet smell. Avoid any soft spots. If it’s not quite ready, leave it on the counter for a few days — ideally next to some bananas or apples. Once ripe, store it in the fridge if you’re not cutting it right away.

    What’s the easiest way to cut a pineapple?

    Slice off the top and bottom, then stand it up and shave off the skin. Cut around the fibrous core and chop the fruit into bite-sized pieces.

    Can I make it in a blender or food processor?

    You can, but keep it chunky! Just pulse a few times to avoid making a puree.

    How spicy is this salsa?

    That’s totally up to you. Removing the seeds from the jalapeño will tone it down. Want more heat? Leave them in or add an extra pepper.

    A hand holding up a chip with pineapple salsa on it over the bowl.

    Tips For Making This Pineapple Salsa Recipe

    • A chunky salsa is the way to go, but try not to cut the pieces too big. It makes it harder to scoop with chips.
    • For a smoky and bold flavor, try making grilled pineapple salsa! Simply grill the pineapple before dicing it and mixing it with the other ingredients for a deeper, caramelized taste that’s perfect on fish!
    • The seasoning is kept super simple on purpose. The real stars here are the fruits and veggies, so they don’t need much else.
    • If raw onion is a bit strong for you, soak the diced onion in cold water for 10-15 minutes. Drain well before mixing it in. 
    • Let it chill. A little fridge time helps the flavors come together beautifully.
    • For a pretty presentation, try serving your pineapple salsa in a pineapple! Slice lengthwise through the stem and hollow out one half. It’s a super easy way to make it feel extra festive for parties or BBQs.
    • Ingredients to prep ahead- Dice the pineapple, onion, and jalapeño ahead of time for easy assembly.
    • Leftovers and storage- Store in an airtight container in the fridge for up to 5-7 days.
    Chips with a bowl of pineapple salsa.

    What To Serve With Pineapple Jalapeno Salsa 

    This makes a great topper for your favorite mains or sandwiches. It's a great condiment for salads, sandwiches, and tacos, and it makes a killer dip with chips for a snack or get-together. My favorite is using pineapple slasa for fish! Make it a full meal by pairing this salsa with your favorite protein and a few simple sides:

    • Grilled Balsamic Asparagus
    • Cheesy Corn Casserole Recipe
    • Rice and Broccoli Casserole
    • Beans and Greens

    Other Salsa Recipes To Try

    • You've got to try this easy Peach Salsa! Made with just a few simple ingredients, this versatile dip adds a unique and delicious twist on a traditional salsa recipe and it really lets the peaches shine.
      Easy Peach Salsa
    • Greek Salsa
      Greek Salsa
    • A hand holding a chip with avocado salsa.
      Avocado Salsa
    • A close up image of the corner of the pan of corn salsa.
      Roasted Corn Salsa

    Love this recipe? Please leave a 5 star ⭐️⭐️⭐️⭐️⭐️ rating in the recipe card below ⬇️ and/or a review in the comment section further down. Check out my Amazon Store for all my favorite tools, including those used in this recipe. And follow @thelifejolie on Instagram and TikTok!

    A hand holding up a chip with pineapple salsa on it over the bowl.

    Jalapeno Pineapple Salsa

    Jessy Freimann
    Jalapeno pineapple salsa is a fresh, sweet-and-spicy dip that comes together in just 10 minutes! It’s perfect for scooping with chips or adding flavor to grilled chicken, fish, tacos, or salads.
    No ratings yet
    Print Recipe Pin Recipe
    Prep Time 10 minutes mins
    Total Time 10 minutes mins
    Course Appetizer, Condiment, Snack
    Cuisine Mexican
    Servings 8 servings
    Calories 8 kcal

    Equipment

    • mixing bowl
    • wooden spoon
    • chefs knife
    • cutting board
    • measuring cups
    • measuring spoons
    • Citrus reamer

    Ingredients
      

    • 3 cups diced pineapple
    • 1 cup diced tomato
    • 1 cup diced red onion
    • 1-2 jalapeno peppers, diced
    • ½ cup chopped fresh cilantro
    • 1-2 limes
    • Kosher salt, to taste
    • Ground black pepper, to taste

    Instructions
     

    • In a large bowl combine pineapple, tomato, onion, peppers and cilantro.
    • Squeeze in juice from 1-2 limes and season to taste with salt and pepper. Taste and adjust seasonings if necessary.
    • Refrigerate until serving.

    Video

    Notes

    • A chunky salsa is the way to go, but try not to cut the pieces too big. It makes it harder to scoop with chips.
    • For a smoky and bold flavor, try making grilled pineapple salsa! Simply grill the pineapple before dicing it and mixing it with the other ingredients for a deeper, caramelized taste that’s perfect on fish!
    • The seasoning is kept super simple on purpose. The real stars here are the fruits and veggies, so they don’t need much else.
    • If raw onion is a bit strong for you, soak the diced onion in cold water for 10-15 minutes. Drain well before mixing it in. 
    • Let it chill. A little fridge time helps the flavors come together beautifully.
    • For a pretty presentation, try serving your pineapple salsa in a pineapple! Slice lengthwise through the stem and hollow out one half. It’s a super easy way to make it feel extra festive for parties or BBQs.
    • Ingredients to prep ahead- Dice the pineapple, onion, and jalapeño ahead of time for easy assembly.
    • Leftovers and storage- Store in an airtight container in the fridge for up to 5-7 days.

    Nutrition

    Serving: 1servingCalories: 8kcalCarbohydrates: 2gProtein: 0.3gFat: 0.1gSaturated Fat: 0.01gPolyunsaturated Fat: 0.02gMonounsaturated Fat: 0.01gSodium: 3mgPotassium: 65mgFiber: 1gSugar: 1gVitamin A: 39IUVitamin C: 5mgCalcium: 12mgIron: 0.3mg
    Tried this recipe?Let us know how it was!

    Cherry Cheese Pie

    May 2, 2025 · 30 Comments

    A piece of cherry cheese pie being pulled up from the rest of the pie.

    Grandma Rosie's award winning cherry cheese pie is a favorite family recipe — it's incredibly easy to make and impossible to screw up. If cherry cheesecake and pie had a baby, this would be it! It is so good it will blow your mind... and it's prepped and ready in just 30 minutes.

    A piece of cherry cheese pie being pulled up from the rest of the pie.
    [feast_advanced_jump_to]

    Why You'll Love Cheesecake Pie

    This cherry cheese pie has been making its way to dessert tables at many of our family gatherings for as long as I can remember. For years, Grandma Rose guarded this recipe with her life, only sharing it with her innermost circle.

    Luckily, in her later years, she began sharing it freely, especially after she won an award for it at her local senior center! And thank goodness because you guys, this pie is no joke! I need you to drop everything you're doing and make it. This is not a drill. It really is that good!

    I mean, think about it. It's essentially two of the most magical things on earth combined: cherry pie and cheesecake. You're setting yourself up for a win from the get-go. Here are just a few more reasons to try it:

    • Full of fruity and creamy flavors
    • Made with simple ingredients
    • Impressive presentation
    • Perfect for the holidays or any dessert table!
    • It's pretty hard to screw up (and as we all know, I'm really good at screwing up pies)
    An overhead image of cherry cheese pie with a striped napkin next to it.

    Ingredient Information And Substitutions

    • Cream Cheese- The main component for the filling. It adds tangy flavor and a velvety texture — soften it first to make it easier to mix.
    • Heavy Cream- Also important for that creamy filling- you'll use this to make freshly whipped cream. This also helps create a light and fluffy texture that balances out the cream cheese.
    • Confectioner's Sugar- Or powdered sugar, whatever you want to call it! I use it over granulated sugar for the filling to avoid any grittiness.
    • Pure Vanilla Extract- Adds a light, warm flavor to the entire pie.
    • Pie Crust- I almost always use a store-bought frozen crust. This recipe makes enough cheese filling for a 10-inch pie, but if you make a smaller one, I encourage you to enjoy the leftover filling with graham crackers and the cherry syrup.
    • Cherry Pie Filling- Where all of the cherry goodness comes from! I like the cans that say "extra fruit." Please note: In the past few years, the canned cherry pie filling has gone through a bit of "shrink-flation" and I've found myself needing 3 cans to completely cover the pie.
    An overhead image of labeled recipe ingredients.

    How To Make Cherry Cream Pie

    Step 1- Whip the cream.

    Add the heavy cream to a large bowl and beat on high until fluffy peaks form. Scrape it all into another bowl and set aside.

    Heavy cream in the stand mixer bowl and then whipped cream in the second bowl.

    Step 2- Combine with the cream cheese mixture.

    In the same bowl, beat the cream cheese, confectioner's sugar, and vanilla extract together until well combined.

    Cream cheese, powdered sugar and vanilla in the stand mixer and then all of it whipped together.

    Step 3- Combine the cream cheese mixture and whipped cream.

    Next, gently fold the cheese mixture into the whipped cream.

    Whipped cream added to the cream cheese mixture and then all of it mixed together.

    Step 3- Assemble & chill.

    Pour the filling into the baked and cooled pie crust and smooth the top with a spatula. Place each cherry from the cherry pie filling one-by-on until the entire pie is covered. Place the pie in the refrigerator to chill until ready to serve. Enjoy!

    Baked pie crust and then cream filling in the pie crust.
    Cherries around the edge of the filled pie crust and then fully covering the pie.

    Frequently Asked Questions

    How is this different from cheesecake?

    Most traditional cheesecake recipes are baked (unless it's a no bake, of course), while the only thing that needs baking here is the crust.

    Can I use store-bought whipped topping instead of heavy cream?

    Homemade really does have the best flavor and texture. I wouldn't encourage you to stray from this as most store-bought whipped cream has sugar added to it and the whole pie will end up being too sweet.

    Do I need to bake the filling?

    Nope, this is a no bake cream cheese pie! Start with a pre-baked pie crust, then all that's left to do is add the filling and topping before you chill.

    Can I make this pie ahead of time?

    Absolutely! I like to bake off the crust and make the cheese mixture the night before so that all I have to do is assemble it in the morning. That said, the pie will be just fine if you've made it the night before!

    How do I prevent lumps in the filling?

    Starting with softened cream cheese will be really helpful. And make sure to fully combine it with the sugar and vanilla before folding it into the whipped cream for the smoothest texture.

    A slice of cherry cheese pie on a white plate with the pie behind it.

    Tips For Making This Cheesecake Pie Recipe

    • Work smarter, not harder, and buy a frozen pre-made pie crust. Spend the time you would have spent battling with homemade pie crust watching The Office on Netflix and marveling at how it never stops being funny.
    • I've found that the only really labor-intensive part of assembling this pie is putting the cherries on. Now you may be tempted to just dump a can of cherries on top and call it a day. I was. And one time, many years ago, I actually did. Let me tell you, Rosie had some choice words for me, expressed in a way that only Rosie could (let's just say she really wasn't one to mince words!). She was clear that you must put the cherries on top one by one so that each and every piece of pie was fully covered in all of those delicious cherries.
    • For placing the cherries, some people find it easiest to start in the middle and build the rest of them around that middle cherry, removing extra syrup before adding each cherry. My mom goes from the outside-in, but it's fine either way.
    • This pie is meant to have a soft texture, so don't stress if it doesn't fully set in the fridge! That said, popping it into the fridge for an hour or two will help.
    • Try other flavored pie fillings. I won't tell Rosie if you don't. Blueberry would be insanely good!
    • Ingredients to prep ahead- Remember you can fully prep this pie the night before, or go so far as to assemble it! Refer to my tips in the FAQ section for more specific instructions.
    • Leftovers and storage- Consider yourself lucky if you have leftovers — we usually don't! They'll keep well in an airtight container in the fridge for about 3 days. The cherries may start to bleed into the filling over time, but it will still taste great!
    A close up image of the top side of the cherries on this pie.

    What To Serve With Rosie's Cream Cheese Pie Recipe

    I love this pie for almost any holiday you can think of. Seriously, it works super well in the summer for things like Memorial Day or the Fourth of July, but it's just as good at Thanksgiving and Christmas! For cookouts, I usually pair it with:

    • 7 Layer Taco Dip
    • Hawaiian Burgers or Black Bean Burgers
    • Hot Dogs with Meat Sauce
    • Caprese Pasta Salad
    A slice of cream cheese pie with cherries with a bite taken out of it.

    Other Easy Pie Recipes To Try

    • A slice of lemon icebox pie being pulled from the rest of the pie.
      Raspberry Lemon Icebox Pie Recipe
    • A slice of peanut butter pie with a bite taken off revealing the silky interior of the pie
      No Bake Peanut Butter Pie
    • This Black Forest Ice Cream Pie is a quick and easy no bake dessert recipe. Made with an Oreo Cookie crust, chocolate ice cream, maraschino cherries and whipped topping this pie is a pretty addition to any dessert table! It's perfect for the holidays or to keep in the freezer "just because"!
      Black Forest Ice Cream Pie
    • A piece of mint chip ice cream cake being lifted out of the pan.
      Mint Chip Ice Cream Cake

    Love this recipe? Please leave a 5 star ⭐️⭐️⭐️⭐️⭐️ rating in the recipe card below ⬇️ and/or a review in the comment section further down. Check out my Amazon Store for all my favorite tools, including those used in this recipe. And follow @thelifejolie on Instagram and TikTok!

    A piece of cherry cheese pie being pulled up from the rest of the pie.

    Cherry Cheese Pie

    Jessy Freimann
    Grandma Rosie's award winning cherry cheese pie is a favorite family recipe — it's incredibly easy to make and impossible to screw up. If cherry cheesecake and pie had a baby, this would be it! It is so good it will blow your mind... and it's prepped and ready in just 30 minutes.
    5 from 6 votes
    Print Recipe Pin Recipe
    Prep Time 10 minutes mins
    Cook Time 20 minutes mins
    Total Time 30 minutes mins
    Course Dessert
    Cuisine American
    Servings 8 servings
    Calories 654 kcal

    Equipment

    • mixing bowl
    • measuring cups
    • measuring spoons
    • stand mixer or hand mixer
    • Spatula

    Ingredients
      

    • 1 pint heavy cream
    • 8 ounces cream cheese, softened
    • 1 cup confectioner's sugar
    • 1 teaspoon pure vanilla extract
    • 1 pie crust, baked and cooled (this makes enough cheese filling for a 10 inch pie, but if you make a smaller one, I encourage you to enjoy the leftover filling with graham crackers and the cherry syrup)
    • 3 cans cherry pie filling (I like the Duncan Hines Comstock cans that say "extra fruit"- please note that Duncan Hines did not pay me to say that, and they probably don't even know that I mentioned their product. I just really like it)

    Instructions
     

    • In one bowl, beat the heavy cream until it becomes whipped cream, forming nice, fluffy peaks. Set aside.
    • In another bowl, beat together the cream cheese, confection's sugar and vanilla extract until well combined.
    • Gently fold the cheese mixture into the whipped cream to combine.
    • Pour the cheese mixture into the baked and cooled pie crust and smooth the top.
    • Arrange the cherries on top of the cheese mixture in concentric circles until the top is fully covered. 
    • Refrigerate until you're ready to serve.

    Video

    Notes

    • Work smarter, not harder, and buy a frozen pre-made pie crust. Spend the time you would have spent battling with homemade pie crust watching The Office on Netflix and marveling at how it never stops being funny.
    • I've found that the only really labor-intensive part of assembling this pie is putting the cherries on. Now you may be tempted to just dump a can of cherries on top and call it a day. I was. And one time, many years ago, I actually did. Let me tell you, Rosie had some choice words for me, expressed in a way that only Rosie could (let's just say she really wasn't one to mince words!). She was clear that you must put the cherries on top one by one so that each and every piece of pie was fully covered in all of those delicious cherries.
    • For placing the cherries, some people find it easiest to start in the middle and build the rest of them around that middle cherry, removing extra syrup before adding each cherry. My mom goes from the outside-in, but it's fine either way.
    • This pie is meant to have a soft texture, so don't stress if it doesn't fully set in the fridge! That said, popping it into the fridge for an hour or two will help.
    • Try other flavored pie fillings. I won't tell Rosie if you don't. Blueberry would be insanely good!
    • Ingredients to prep ahead- Remember you can fully prep this pie the night before, or go so far as to assemble it! Refer to my tips in the FAQ section for more specific instructions.
    • Leftovers and storage- Consider yourself lucky if you have leftovers — we usually don't! They'll keep well in an airtight container in the fridge for about 3 days. The cherries may start to bleed into the filling over time, but it will still taste great!

    Nutrition

    Serving: 1servingCalories: 654kcalCarbohydrates: 91gProtein: 6gFat: 37gSaturated Fat: 21gPolyunsaturated Fat: 2gMonounsaturated Fat: 11gCholesterol: 95mgSodium: 232mgPotassium: 348mgFiber: 2gSugar: 3gVitamin A: 1706IUVitamin C: 8mgCalcium: 95mgIron: 1mg
    Tried this recipe?Let us know how it was!

    Hosting Thanksgiving?

    Discover the secret to hosting Thanksgiving without all the stress! Prepsgiving is your FREE guide to making a delicious Thanksgiving feast the easy way.

    Easy Chili Chicken

    May 1, 2025 · Leave a Comment

    An overhead image of a bowl of chicken chili.

    This easy chili chicken is cozy, flavorful, and super simple to make. Just toss it all in the Instant Pot or crock pot, and you’re good to go. Packed with flavor, veggies, and protein, it's a delicious and satisfying meal.

    An overhead image of a bowl of chicken chili.
    [feast_advanced_jump_to]

    Why You’ll Love This Instant Pot Chicken Chili

    When the weather starts to cool, there’s nothing better than cozying up with a hearty bowl of something warm. And nothing hits the spot quite like a flavor-packed chicken chili. It’s hearty enough to be a full meal, easy to make, and perfect for feeding a crowd. And the leftovers? Just as good, if not better.

    The first time I tested this was on a Sunday during football, and it was a total crowd-pleaser. Everyone loved it right away — no tweaks needed. It’s been on repeat in my meal plan ever since. This crockpot chili chicken (or Instant Pot version!) is one of those recipes you won’t get tired of! Here are more reasons to love it:

    • Great for meal prep
    • Hearty and satisfying
    • Perfect for lazy weekends
    • Kid-approved and not too spicy
    A close up image of the side of a bowl of chicken chili.

    Ingredient Information And Substitutions

    • Onion- Yellow or white, both work. Red adds a little extra sweetness.
    • Green bell pepper- Adds crunch and color. Swap for red or yellow.
    • Jalapeño pepper- Remove the ribs and seeds for mild heat. 
    • Garlic- Fresh garlic gives the best flavor, but 1 teaspoon garlic powder works in a pinch.
    • Beer- Use any light beer or sub with chicken broth.
    • Spices and seasonings – A flavorful mix of chili powder, cumin, smoked paprika, cayenne, coriander, oregano, and salt. Feel free to adjust amounts to your liking.
    • Canned diced tomatoes- Gotta have tomatoes!
    • Tomato paste- To thicken the chili. Adjust based on how thick you like it.
    • Olive oil- Used if sautéing veggies. You can also use avocado oil or skip if you’re going the hands-off, dump-and-go way.
    • Boneless skinless chicken breasts- Swap with boneless thighs for a richer flavor.
    • Black beans- Drained and rinsed. Pinto beans are a fine sub.
    • Kidney beans- Also drained and rinsed. You can double up on black beans if you don’t have these.
    • Frozen corn- Adds sweetness and color. You can use fresh or canned (drained) corn.
    An overhead image of labeled recipe ingredients.

    How To Make Instapot Chicken Chili

    Step 1- Sauté the veggies. (optional)

    Heat a little oil in a pan (or right in your Instant Pot on Sauté) and cook the onion, bell pepper, jalapeño, and garlic for 5 minutes, until softened. Then, pour in the beer to deglaze, scraping up any browned bits.

    Veggies cooking in an instant pot and then with beer added.

    Step 2- Combine the main ingredients and cook.

    Stir in the chicken, diced tomatoes, and all of the spices.

    If you're using a crockpot, cover and cook on high for 5-6 hours.

    If you're using the Instant Pot, seal and cook on Manual High Pressure for 15 minutes. Let it naturally release for 15 minutes before finishing with a quick release.

    Other ingredients added to the pot and then chicken thrown in.

    Step 4- Add the rest of the ingredients. 

    Stir in the black beans, kidney beans, frozen corn, and tomato paste. For the crockpot, let it all cook together for another 30 minutes.

    With the Instant Pot, switch it to Sauté and let it simmer for 5-10 minutes to warm everything and thicken it up a bit.

    Corn and beans added to the cooked chili and then shredded chicken.

    Step 5- Serve it up!

    Ladle into bowls, pile on your favorite toppings, and dig in.

    Frequently Asked Questions

    Is this chili spicy?

    It has just a little heat, but not too much. Both my kids ate it with no problem. You can tone it down further by skipping the jalapeño and cayenne or bump it up with extra cayenne.

    How do I thicken the chili?

    Tomato paste is your best friend here. Add it near the end and stir in until you reach your desired consistency. Be aware that if you're making this ahead, it will thicken up in the fridge.

    Can I make this without a pressure cooker or slow cooker?

    Absolutely! You can make it on the stovetop in a large pot. Just simmer everything together for about 45 minutes or until the chicken is cooked through and tender.

    Can I make this a soup?

    Sure! Add a cup or two of broth and you'll have a delicious chicken chili soup.

    A spoon holding up a scoop of chili.

    Tips For Making Instantpot Chicken Chili

    • Sauté the veggies first (especially in the Instant Pot)- this gives the chili a richer, deeper flavor. Totally optional and only if you’ve got the time, but worth it.
    • Don’t skip the tomato paste if you want a thicker, hearty texture.
    • Adjust the spices to match your heat vibe. As written, it’s got just a little kick, but nothing too spicy.
    • Stir in the beans and corn at the end to keep them from getting mushy — either during the last 30 minutes in the crockpot, or once you’ve released the pressure and switched the Instant Pot to sauté for the final steps.
    • Ingredients to prep ahead- Chop all the veggies and measure out the spices. 
    • Leftovers and storage- this keeps well in the fridge in an airtight container for 4-5 days and freezes like a dream. Use within 3 months if frozen, and thaw before reheating.
    Two bowls of chicken chili with cilantro and limes around them.

    What To Serve With Chili Con Carne With Chicken

    I like to top my bowl with tortilla strips, cheese, cilantro, and lime wedges. But this would be tasty with any of your favorite chili toppings! As far as sides, here’s a list of my favorite pairings to make it a full meal:

    • Crispy Fried Potatoes
    • Everything Pita Chips Recipe
    • Sautéed Asparagus with Parmesan Gremolata
    • Roasted Vegetable Flatbread
    • Green Bean Salad

    Other Tasty Chili Recipes To Try

    • Vegetarian Chili (Crockpot + IP)
    • A bowl of chili with cheese and sour cream on top.
      Black Bean Turkey Chili
    • Easy Instant Pot Chili will knock your socks off. Ready in around 30 minutes and full of mouthwatering flavor! Full of ground beef, ground pork, tons of chili seasonings, vegetables and beans it's quick and easy to make on a week night or for a party (game day anyone?!).
      Easy Instant Pot Chili Recipe
    • An overhead image of a bowl of chicken chili.
      Easy Chili Chicken

    Love this recipe? Please leave a 5 star ⭐️⭐️⭐️⭐️⭐️ rating in the recipe card below ⬇️ and/or a review in the comment section further down. Check out my Amazon Store for all my favorite tools, including those used in this recipe. And follow @thelifejolie on Instagram and TikTok!

    An overhead image of a bowl of chicken chili.

    Easy Chili Chicken

    Jessy Freimann
    This easy chili chicken is cozy, flavorful, and super simple to make. Just toss it all in the Instant Pot or crock pot, and you’re good to go. Packed with flavor, veggies, and protein, it's a delicious and satisfying meal.
    No ratings yet
    Print Recipe Pin Recipe
    Prep Time 10 minutes mins
    Cook Time 6 hours hrs
    Total Time 6 hours hrs 10 minutes mins
    Course Main, Main Course, Main dish
    Cuisine American, Mexican
    Servings 6 servings
    Calories 261 kcal

    Equipment

    • wooden spoon
    • chefs knife
    • cutting board
    • measuring cups
    • measuring spoons
    • slow. cooker
    • instant pot

    Ingredients
      

    • 1 teaspoon olive oil (optional- only use if you're sautéing the veggies first)
    • 1 cup chopped onion
    • 1 cup chopped green bell pepper
    • 1 jalapeno pepper, seeds removed and diced (you can also include the seeds if you want a spicier chili)
    • 3 cloves garlic, minced
    • 1 cup beer (or chicken stock if you don't cook with alcohol)
    • 1 Tablespoon ground cumin
    • 2 Tablespoons chili powder
    • ½ teaspoon smoked paprika
    • ⅛ teaspoon ground cayenne pepper
    • ½ teaspoon ground coriander seed
    • 1 teaspoon kosher salt
    • ½ teaspoon dried oregano
    • 28 ounces diced tomatoes canned
    • 2 large raw boneless skinless chicken breasts (or 3 small)
    • 14 ounces black beans, canned- drained and rinsed
    • 14 ounces kidney beans canned- drained and rinsed
    • 1 cup frozen corn
    • 1-3 Tablespoons tomato paste

    Instructions
     

    Crockpot instructions

    • (Optional first step) Heat oil in a pan over medium high heat and saute onion, bell pepper, jalapeno and garlic for 5 minutes or until softened. Deglaze the pan with beer and add mixture to crockpot.
    • Combine all ingredients except for the beans, corn and tomato paste into the crockpot.
    • Cover and cook on high for 5-6 hours.
    • Stir in both beans, corn and tomato paste for the last 30 minutes of cooking.
    • Serve immediately with your favorite toppings.

    Instant Pot instructions

    • (Optional first step) Switch Instant Pot to the Saute setting and heat oil. Saute onion, bell pepper, jalapeno and garlic for 5 minutes or until softened. Deglaze the pan with beer.
    • Combine all ingredients except for the beans, corn and tomato paste into the Instant Pot.
    • Cover and make change the valve to Sealing. Change the setting to Manual High Pressure for 15 minutes.
    • When the time is up, do a natural release for 10 minutes and then do a quick release.
    • Remove the cover and change the settings to saute.
    • Stir in both beans, corn and tomato paste and simmer for 5-10 minutes to heat beans and corn and thicken the chili.
    • Serve immediately with your favorite toppings.

    Video

    Notes

    • Sautéing the veggies first (especially in the Instant Pot) gives the chili a richer, deeper flavor. Totally optional and only if you’ve got the time, but worth it.
    • Don’t skip the tomato paste if you want a thick, hearty texture.
    • Adjust the spices to match your heat vibe. As written, it’s got just a little kick, but nothing too spicy.
    • Stir in the beans and corn at the end to keep them from getting mushy — either during the last 30 minutes in the crockpot, or once you’ve released the pressure and switched the Instant Pot to sauté.
    • Ingredients to prep ahead- Chop all the veggies and measure out the spices. 
    • Leftovers and storage- Instantpot chicken chili keeps well in the fridge in an airtight container for 4-5 days and freezes like a dream. Use within 3 months if frozen, and thaw before reheating.

    Nutrition

    Serving: 1servingCalories: 261kcalCarbohydrates: 47gProtein: 15gFat: 2gSaturated Fat: 0.4gPolyunsaturated Fat: 1gMonounsaturated Fat: 1gSodium: 473mgPotassium: 957mgFiber: 14gSugar: 4gVitamin A: 1129IUVitamin C: 19mgCalcium: 104mgIron: 6mg
    Tried this recipe?Let us know how it was!

    Slow Cooker Italian Sausage

    Apr 28, 2025 · 4 Comments

    An overhead image of a bowl of Italian sausage and peppers with buns and a napkin next to it.

    This slow cooker Italian sausage recipe is the ultimate easy and delicious way to make some fantastic sausage sandwiches. It’s perfect for busy weeknights — just toss everything into your slow cooker (or Instant Pot) and let it do the work! 

    [feast_advanced_jump_to]
    An overhead image of a bowl of Italian sausage and peppers with buns and a napkin next to it.

    Why You’ll Love This Slow Cooker Sausage And Peppers

    It never occurred to me to make an Italian sausage recipe for the crockpot until my sister told me about it. She said it was crazy easy and so good, so naturally, I had to try it. Once I saw how little prep it needed, I knew it’d be a new favorite. Just throw everything in, cover it up, and let the slow cooker do its thing.

    The sausage comes out juicy and tender, and the peppers and onions get soft and sweet as they cook down. Everything comes together in one pot, which means fewer dishes to clean up later. There’s almost no prep, and it works equally well on its own or loaded into a toasted roll with melty cheese. Here’s why this slow cooker sausage peppers recipe is a keeper:

    • Super quick prep 
    • Make it in the slow cooker or Instant Pot
    • Minimal cleanup 
    • Great for feeding a crowd 
    • Tastes amazing every single time
    A sausage on a bun covered in cheese, peppers and onions.

    Ingredient Information And Substitutions

    • Italian sausage links- Classic pork sausage is the go-to, but if you're looking for a lighter option, poultry sausage is an easy and tasty alternative.
    • Bell peppers- Red peppers are my personal favorite for their sweet flavor, but any variety works well. Just go with your favorite!
    • Onions- Yellow or white onions are great. Red onions can add a touch of sweetness and color.
    • White wine- Adds depth of flavor. You can swap in chicken broth if you aren't into cooking with alcohol.
    • Hero rolls- Choose from hoagies, sub rolls, or even crusty Italian bread.
    • Cheese- Provolone or mozzarella both melt beautifully and pair perfectly with the sausage and peppers.
    An overhead image of labeled recipe ingredients.

    How To Make Sausage And Peppers In The Slow Cooker

    Step 1- Place veggies into the pot.

    Toss your sliced peppers, and onions right into the slow cooker. Feel free to sprinkle a little salt and pepper on the veggies.

    Peppers and onions in a slow cooker.

    Step 2- Add the sausage and wine.

    Place the sausage onto top of the veggies and pour the wine over it all.

    Sausage and veggies in a slow cooker.

    Step 3- Cover and cook.

    Cover the slow cooker and let everything cook on low heat for about 4 hours.

    When the time is up, dig in right away or make some sandwiches! Toast your rolls at 350°F for 5 minutes. Pile on the sausage, peppers, and onions, top with cheese, and pop them back in the oven for 5-10 more minutes until the cheese is melty.

    The slow cooker covered, cooking the sausage and veggies.

    Frequently Asked Questions

    Can you put raw sausage in a slow cooker?

    Yep, raw sausage works perfectly here! No need to brown it first — just throw it in and let the slow cooker work its magic.

    Can I use precooked sausage?

    I wouldn’t recommend it for this recipe. The flavors develop better when raw sausage cooks low and slow, and precooked links may become too tough or dry.

    Is this dish spicy?

    Totally depends on what you like! Mild Italian sausage keeps it family-friendly, while hot sausage adds a little kick. If you’re into spice, go for the hot one. And if you want spicier veggies, throw some chili flakes in as well!

    A close up image of cooked sausage, peppers and onions.

    Tips For Making Slow Cooker Sausage Peppers And Onions

    • Slice the peppers and onions on the thicker side so that they don't cook down to nothing and disappear into the sauce.
    • Want to prep ahead? Toss all the raw ingredients in a zipper bag and freeze them. Then, thaw in the fridge overnight and dump it in the slow cooker the next day.
    • I prefer to cut sausage links in half to make them easier to serve and eat, but feel free to leave them whole if that’s your preference.
    • Stick with low heat for best results. Cooking on high can affect the texture of the sausage, and not in a good way. 
    • Making it in the Instant Pot? Add ½ cup of water or chicken broth, cook on manual high pressure for 20 minutes, and quick-release the pressure. Serve right away!
    • Ingredients to prep ahead- Slice your peppers and onions and halve the sausage links. Store them in the fridge.
    An overhead image of sausage and peppers on buns with cheese.

    What To Serve With Slow Cooker Sausage

    I like to serve sausages on a hoagie roll or bun with provolone or mozzarella cheese, but you can also eat them with a fork and knife and the sides of your choice! A few great recipes to round out and complete this meal would be:

    • Baked Oven Fries
    • Mexican Bean Salad
    • Greens and Beans
    • Marinated Vegetable Salad
    • Tuna Macaroni Salad
    • Peanut Butter No-Bake Cookies
    • Easy Chocolate Pie

    Other Tasty Sausage Recipes To Try

    • An overhead image of a bowl of bean soup with Italian sausage.
      Italian Bean Soup With Sausage
    • Balsamic Caramelized Onions and Peppers are the perfect addition to a spicy Italian Sausage sandwich. They're super easy to whip up with just a few ingredients!
      Balsamic Caramelized Onions and Peppers with Hot Italian Sausage
    • Sausage and peppers pasta on a white plate with a napkin, onion and mushrooms in the background and a fork across the back of the plate.
      Pasta With Sausage Peppers And Onions
    • A white plate of rapini and sausage pasta with the pan and a blue napkin in the background.
      Sausage and Rapini Pasta

    Love this recipe? Please leave a 5 star ⭐️⭐️⭐️⭐️⭐️ rating in the recipe card below ⬇️ and/or a review in the comment section further down. Check out my Amazon Store for all my favorite tools, including those used in this recipe. And follow @thelifejolie on Instagram and TikTok!

    An overhead image of a bowl of Italian sausage and peppers with buns and a napkin next to it.

    Slow Cooker Italian Sausage

    Jessy Freimann
    This slow cooker Italian sausage recipe is the ultimate easy and delicious way to make some fantastic sausage sandwiches. It’s perfect for busy weeknights — just toss everything into your slow cooker (or Instant Pot) and let it do the work! 
    5 from 1 vote
    Print Recipe Pin Recipe
    Prep Time 5 minutes mins
    Cook Time 4 hours hrs
    Total Time 4 hours hrs 5 minutes mins
    Course dinner, Main, Main Course, Main dish
    Cuisine American
    Servings 6 servings
    Calories 23 kcal

    Equipment

    • slow. cooker
    • instant pot
    • Gallon freezer zipper bags
    • slow cooker liners

    Ingredients
      

    • 1 pound pork Italian sausage links, halved
    • 2 cups bell pepper, sliced on the thicker side (any color you'd like)
    • 2 cups onions sliced on the thicker side
    • 1 splash white wine (optional)
    • ½ cup chicken broth (only if using Instant Pot)

    Optional extras for serving

    • Hero rolls
    • Provolone or mozzarella cheese, sliced

    Instructions
     

    • Place sausage, peppers and onion into the slow cooker and top with a splash of wine (or place the ingredients into a zipper bag and freeze- thaw before cooking).
    • Cover the slow cooker and cook for 4 hours on low heat.
    • Serve immediately.

    Video

    Notes

    • Slice the peppers and onions on the thicker side so that they don't cook down to nothing and disappear into the sauce.
    • Want to prep ahead? Toss all the raw ingredients in a zipper bag and freeze them. Then, thaw in the fridge overnight and dump it in the slow cooker the next day.
    • I prefer to cut sausage links in half to make them easier to serve and eat, but feel free to leave them whole if that’s your preference.
    • Stick with low heat for best results. Cooking on high can affect the texture of the sausage, and not in a good way. 
    • Making it in the Instant Pot? Add ½ cup of water or chicken broth, cook on manual high pressure for 20 minutes, and quick-release the pressure. Serve right away!
    • Ingredients to prep ahead- Slice your peppers and onions and halve the sausage links. Store them in the fridge.
    • Leftovers and storage- Store leftovers in an airtight container in the fridge for up to 3-4 days. Reheat in the microwave or on the stovetop.

    Nutrition

    Serving: 1servingCalories: 23kcalCarbohydrates: 5gProtein: 1gFat: 0.1gSaturated Fat: 0.02gPolyunsaturated Fat: 0.01gMonounsaturated Fat: 0.01gCholesterol: 0.4mgSodium: 75mgPotassium: 82mgFiber: 1gSugar: 2gVitamin A: 1IUVitamin C: 4mgCalcium: 13mgIron: 0.1mg
    Tried this recipe?Let us know how it was!
    • « Go to Previous Page
    • Page 1
    • Interim pages omitted …
    • Page 3
    • Page 4
    • Page 5
    • Page 6
    • Page 7
    • Interim pages omitted …
    • Page 21
    • Go to Next Page »

    Primary Sidebar

    Jessy in a kitchen holding a white casserole pan and smiling.
    Hi, I'm Jessy!

    Welcome to The Life Jolie! I share simple, delicious recipes and ingredient prep tips to make your weeknight cooking a breeze!

    More about me →

    Easy Dinner Recipes

    • An overhead image of a Mexican Shrimp Quinoa Bowl.
      Shrimp Quinoa Bowls
    • A bowl of asian soup with meatballs with a spoon and noodles in it.
      Asian Soup with Cabbage and Meatballs
    • A close up of roasted red potatoes on a pan.
      Roasted Red Potatoes Recipe
    • A spoon lifting up a scoop of eggplant parm bake with melt cheese trailing behind it.
      Eggplant Parm Bake
    • A close up of a drum chicken wing in a pile of other wings.
      Oven Baked Chicken Wings
    • An overhead image of a bowl of minestrone soup.
      Traditional Minestrone Soup Recipe

    Popular Recipes

    • A glass bowl of melted chocolate with a spatula dripping some back into the bowl.
      How To Melt Chocolate Chips In The Microwave
    • Italian Stuffed Zucchini Boats are the healthy weeknight meal you'll want to make again and again. This is a seriously easy recipe that's full of delicious flavor without all the guilt!
      Italian Stuffed Zucchini Boats
    • A close up shot of the side of a shallow bowl of shrimp mac salad.
      Shrimp Macaroni Salad
    • A white pan pouring cheese sauce over a bowl of steamed broccoli.
      Cheese Sauce for Broccoli Recipe
    • An overhead image of a plate of chicken lettuce wraps with peanut sauce next to it and all the fixings surrounding it.
      Copycat Cheesecake Factory Thai Chicken Lettuce Wraps
    • A close up image of a piece of greek marinated chicken on a white plate with lemons on the plate and in the background.
      Greek Yogurt Chicken
    Jessy in a kitchen holding a white casserole pan and smiling.
    Hi, I'm Jessy!

    Welcome to The Life Jolie! I share simple, delicious recipes and ingredient prep tips to make your weeknight cooking a breeze!

    More about me →

    Easy Dinner Recipes

    • A close up of a bagel pizza with mini pepperonis on a pan.
      Bagel Pizzas Recipe
    • A bowl of chicken and orzo soup with a spoon in it.
      Chicken and Orzo Soup
    • A bowl of Swedish meatballs and noodles.
      Swedish Meatballs And Noodles
    • A close up image of a piece of coconut shrimp on top of others.
      Coconut Shrimp With Sauce
    • An overhead image of taco soup in a bowl.
      Crockpot Taco Chicken Soup
    • A spoon pulling up a scoop of skillet lasagna with melted cheese stretching behind it.
      No Bake Lasagna Skillet

    Popular Recipes

    • A glass bowl of melted chocolate with a spatula dripping some back into the bowl.
      How To Melt Chocolate Chips In The Microwave
    • Italian Stuffed Zucchini Boats are the healthy weeknight meal you'll want to make again and again. This is a seriously easy recipe that's full of delicious flavor without all the guilt!
      Italian Stuffed Zucchini Boats
    • A close up shot of the side of a shallow bowl of shrimp mac salad.
      Shrimp Macaroni Salad
    • A white pan pouring cheese sauce over a bowl of steamed broccoli.
      Cheese Sauce for Broccoli Recipe
    • An overhead image of a plate of chicken lettuce wraps with peanut sauce next to it and all the fixings surrounding it.
      Copycat Cheesecake Factory Thai Chicken Lettuce Wraps
    • A close up image of a piece of greek marinated chicken on a white plate with lemons on the plate and in the background.
      Greek Yogurt Chicken

    Footer

    ↑ back to top

    About

    • About Me
    • Privacy Policy + Disclaimer

    Newsletter

    • Sign Up! for emails and updates

    Contact

    • Contact
    • Video Production

    As an Amazon Associate I earn from qualifying purchases.

    Copyright 2014-2021 - Jolie Ventures, LLC. All Rights Reserved. Privacy Policy.

    Rate This Recipe

    Your vote:


    A rating is required
    A name is required
    An email is required