
• Skip to primary navigation
  • Skip to main content
  • Skip to primary sidebar
The Life Jolie logo
  • Easy Dinner Recipes
  • Recipes
  • About
  • Contact
    • Work with me!
    • Video Production
  • Nav Social Menu

    • Email
    • Facebook
    • Instagram
    • Pinterest
    • Twitter
    • YouTube
menu icon
go to homepage
subscribe
search icon
Homepage link
  • Easy Dinner Recipes
  • Recipes
  • About
  • Contact
    • Work with me!
    • Video Production
    • Email
    • Facebook
    • Instagram
    • Pinterest
    • Twitter
    • YouTube
  • ×
    The Life Jolie » Page 8

    Cinnamon Spiced Candied Pecans

    Cinnamon Spiced Candied Pecans

    Nov 18, 2024 · 12 Comments

    A jar of candied pecans with a striped Christmas towel and a pan of other pecans oin the back.

    These cinnamon spiced candied pecans are the best I've tasted! They make a great snack or salad topper and are excellent homemade gifts as well. All you need are a handful of ingredients and about 40 minutes to make them!

    A jar of candied pecans with a striped Christmas towel and a pan of other pecans oin the back.
    [feast_advanced_jump_to]

    Why You'll Love Candied Spiced Pecans:

    There are certain textures that I tend to gravitate towards. For me, it's crunch. Potato chips. Dill pickles. French fries. Crispy foods that have a winning crunch are right in my wheelhouse. So as you can imagine, sugar coated pecans are also right up my alley. I mean, what's not to love about a crispy, sugary shell around a delicious pecan?

    Another thing I really love about these is how easy they are to make. Prep time takes a whopping 5 minutes, and then I simply let the oven work its magic. It really is that easy! I couldn't be more excited to add this recipe to my go-to list.

    I have a big bag of them hanging out in my pantry right now, though I can't tell you how long they'll last because I keep eating them! Good thing there are a ton of reasons to whip up a batch whenever the mood strikes:

    • The perfect mixture of crispy cinnamon sugar and tender nuts
    • Festive for the holidays
    • Wonderfully addictive
    • Such a crowd pleaser — everyone always loves them!
    • Seriously SO easy to make
    A close up overhead image of candied pecans on a lined sheet pan.

    Ingredient Information And Substitutions

    • Pecans- I used shelled pecan halves that I found in the baking section at my grocery store for this recipe. It's your easiest (and most affordable — I know nuts can be expensive!) option, aside from bulk bins.
    • Egg White- This works as a binder to help the dry ingredients stick to the nuts. It also hardens in the oven, keeping everything nice and crunchy.
    • Sweeteners- I like a combination of granulated and light brown sugar for this, plus a touch of vanilla extract for more sweetness and warm flavor.
    • Spices- My spices of choice for sugar coated pecans are kosher salt, ground cinnamon, and ground nutmeg.
    An overhead image of labeled recipe ingredients.

    How To Make Cinnamon Sugar Coated Pecans

    Step 1- Whip the egg white.

    Preheat your oven to 275 degrees F and line a sheet pan with parchment paper. Pour the egg white into a large bowl and beat well until foamy.

    Foamy beaten egg white in a glass bowl.

    Step 2- Coat the pecans.

    Add the vanilla, whisk, and set aside. In a separate bowl, combine the brown sugar, granulated sugar, salt, cinnamon, and nutmeg.

    Add the pecans to the egg white mixture and toss to coat evenly. Pour the cinnamon sugar on top and toss to coat again.

    Cinnamon sugar mixture poured on the egg white coated pecans in a glass bowl.

    Step 4- Bake.

    Place in a single layer on your prepared baking sheet and bake for 30-40 minutes, turning once halfway through. Let your candied pecans cool before serving or storing. Enjoy!

    A pan of candied pecans being pushed into the oven.

    Frequently Asked Questions

    Are candied pecans healthy?

    The pecans themselves are quite healthy, but the processed sugar is not. So you have a little bit of both in there.

    How do you keep candied pecans from sticking together?

    They will come out sticking together but once cooled, they'll break apart easily.

    What is the best way to store candied pecans?

    An airtight container at room temperature or in the refrigerator is your best bet! You want to make sure they aren't exposed to air as that will make them go stale. These also freeze really well and last up to 3 months in an airtight container in the freezer.

    Why aren't my candied pecans crunchy?

    The added egg whites are key, so don't skip them! Remember that not only do they help bind everything together, but those whites also create a nice and crispy coating when baked.

    What can I do with sugar coated pecans?

    There are so many options! They're excellent on their own when you're in the mood for a sweet snack, and make for a festive holiday salad topper as well. And while I'm on the topic of the holidays, wouldn't making this recipe be an easy homemade gift? I know I'd be thrilled to receive these sweet confections! They would also be a great addition to add a bit of crunch to baked goods like pies (spoiler alert: I use them as a pretty and delicious topper for my Mini Pumpkin Cheesecakes!).

    An overhead image of a parchment lined sheet pan with candied pecans on it.

    Tips For Making Candied Cinnamon Pecans

    • Be sure to line your pan with parchment or a silicone pan liner to prevent sticking. If you’re still worried, you can also give the liner a light coat of cooking spray (although it shouldn’t need it).
    • Make sure you whisk the egg white until it’s nice and foamy. If you’re not in the mood for arm day, you can always use a mixer with the whisk attachment. Just make sure you don’t overdo it and accidentally make meringue.
    • I like to mix all the dry ingredients in a separate bowl. After fully coating the pecans, I sprinkle the mixture on top and toss it well. This way each pecan gets all of the flavors.
    • Make sure you turn them once halfway through the cooking process.
    • Keep a watchful eye on the oven. Remember that all ovens are different! I recommend checking in on your cinnamon candy pecans recipe after about 30 minutes in the oven to avoid burning — or undercooking — them.
    • Ingredients to prep ahead- There isn't much you can do to prep here... this recipe moves super quickly once you get going. That said, if you purchase pecans in their shells, remove them before you begin.
    • Leftovers and storage- Make sure to let the pecans cool completely before storing to keep them from sticking together. They'll keep for about a month in an airtight container at room temperature and even longer in the refrigerator. You could also freeze them for up to 3 months.
    A close up image of candied pecans in a jar.

    What To Serve With Simple Candied Pecans

    I often keep a bowl of cinnamon candied pecans out on the table during the holidays so people can snack on them as they please. Or, I add them to a larger dessert spread, often with other pecan recipes. They're so versatile, so I usually buy a big old bag of them that I like to use up! Here are a few ideas:

    • Pumpkin Crunch Cake
    • Caramel Pretzel Turtles
    • Old Fashioned Chocolate Pie
    • Pecan Tassies

    Other Delicious Holiday Desserts To Try

    • A plate of Neapolitan cookies stacked into a pyramid shape.
      Italian Rainbow Cookie Recipe
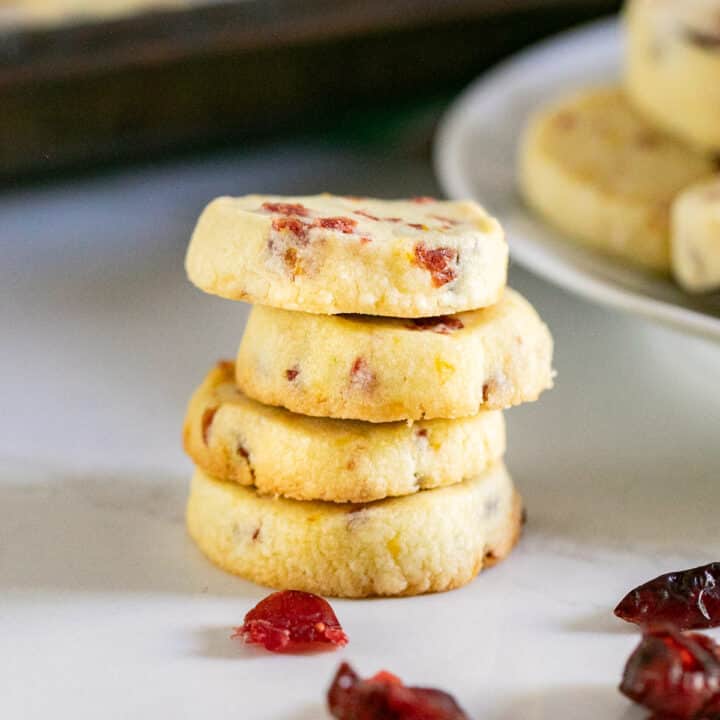
    • A stack of cranberry shortbread cookies.
      Citrus Cranberry Shortbread Cookies
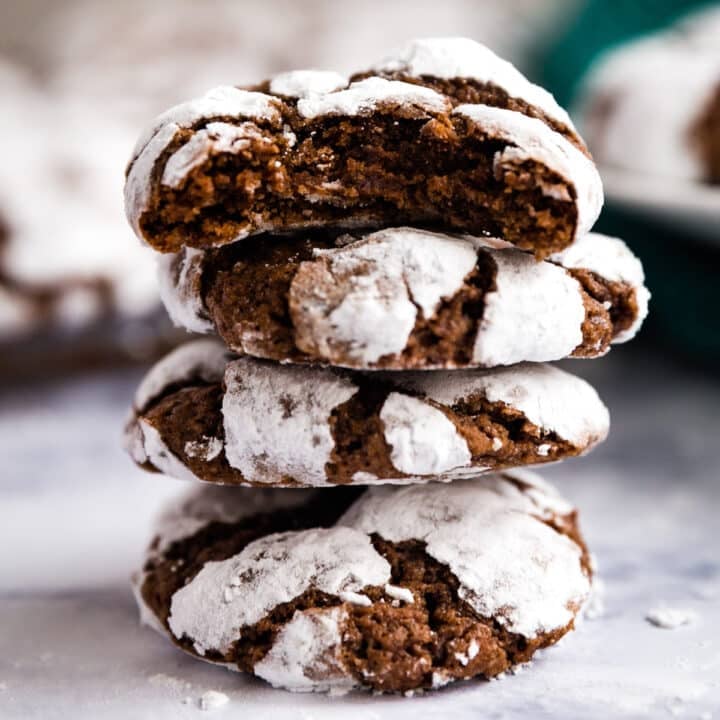
    • A stack of crinkle chocolate cookies with a bite taken out of the top cookie.
      Crinkle Chocolate Cookies
    • A plate of mini pecan tarts with a mini muffin tin of them i nthe background, a red and green striped towel and some broken pieces of it.
      Grandma Rose's Pecan Tassies

    Love this recipe? Please leave a 5 star ⭐️⭐️⭐️⭐️⭐️ rating in the recipe card below ⬇️ and/or a review in the comment section further down. Check out my Amazon Store for all my favorite tools, including those used in this recipe. And follow @thelifejolie on Instagram and TikTok!

    A jar of candied pecans with a striped Christmas towel and a pan of other pecans oin the back.

    Cinnamon Spiced Candied Pecans

    Jessy Freimann
    These cinnamon spiced candied pecans are the best I've tasted! They make a great snack or salad topper and are excellent homemade gifts as well. All you need are a handful of ingredients and about 40 minutes to make them!
    No ratings yet
    Print Recipe Pin Recipe
    Prep Time 5 minutes mins
    Cook Time 40 minutes mins
    Total Time 40 minutes mins
    Course Dessert, Snack
    Cuisine American
    Servings 10 servings
    Calories 345 kcal

    Equipment

    • sheet pan
    • mixing bowl
    • Whisk
    • measuring cups
    • measuring spoons
    • Spatula

    Ingredients
      

    • 1 large egg white
    • 1 teaspoon pure vanilla extract
    • 4 cups pecans halves
    • ⅓ cup light brown sugar
    • ½ cup granulated sugar
    • 1 teaspoon Kosher salt
    • 1 Tablespoon ground cinnamon
    • ¼ teaspoon ground nutmeg

    Instructions
     

    • Preheat the oven to 275 degrees and line a sheet pan with parchment paper or a silicone baking mat.
    • Put the egg white into a mixing bowl and whisk until foamy.
    • Add the vanilla extract to the egg white and whisk to combine. Set aside.
    • In small bowl mix brown sugar, granulated sugar, salt, cinnamon and nutmeg until really well combined.
    • Add the pecans to the egg white mixture. Toss until evenly coated.
    • Pour the sugar mixture over the pecans and toss them again until they're evenly coated in the sugar mixture.
    • Spread the pecans onto your sheet pan in a single layer. Bake for 30-40 minutes, turning once half way through. Cool and serve or store in an airtight container.

    Video

    Notes

    • Be sure to line your pan with parchment or a silicone pan liner to prevent sticking. If you’re still worried, you can also give the liner a light coat of cooking spray (although it shouldn’t need it).
    • Make sure you whisk the egg white until it’s nice and foamy. If you’re not in the mood for arm day, you can always use a mixer with the whisk attachment. Just make sure you don’t overdo it and accidentally make meringue.
    • I like to mix all the dry ingredients in a separate bowl. After fully coating the pecans, I sprinkle the mixture on top and toss it well. This way each pecan gets all of the flavors.
    • Make sure you turn them once halfway through the cooking process.
    • Keep a watchful eye on the oven. Remember that all ovens are different! I recommend checking in on your cinnamon candy pecans recipe after about 30 minutes in the oven to avoid burning — or undercooking — them.
    • Ingredients to prep ahead- There isn't much you can do to prep here... this recipe moves super quickly once you get going. That said, if you purchase pecans in their shells, remove them before you begin.
    • Leftovers and storage- Make sure to let the pecans cool completely before storing to keep them from sticking together. They'll keep for about a month in an airtight container at room temperature and even longer in the refrigerator. You could also freeze them for up to 3 months.

    Nutrition

    Serving: 1servingCalories: 345kcalCarbohydrates: 23gProtein: 4gFat: 29gSaturated Fat: 2gPolyunsaturated Fat: 9gMonounsaturated Fat: 16gSodium: 240mgPotassium: 182mgFiber: 4gSugar: 19gVitamin A: 25IUVitamin C: 0.5mgCalcium: 42mgIron: 1mg
    Tried this recipe?Let us know how it was!

    Wild Rice Creamy Chicken Soup (Great with Turkey Too!)

    Nov 14, 2024 · 7 Comments

    A close up of a bowl of chicken wild rice creamy soup with a spoon in it and another bowl in the background.

    My Wild Rice Creamy Chicken Soup is an easy and tasty way to use leftover chicken or turkey. Made on the stovetop, it whips up in no time and is as comforting as it is delicious! Ready in under 1 hour!

    An overhead image of chicken soup with rice with celery and a black towel next to it.
    [feast_advanced_jump_to]

    Why You'll Love Chicken Wild Rice Creamy Soup

    You can never have enough chicken soup recipes, amirite?! I hate food waste, so I love dishes that allow you to repurpose leftovers. That's one of the reasons I was excited to put together this creamy chicken and wild rice soup. We eat a ton of chicken all year round, and since I host Thanksgiving each year, I always have a ton of turkey leftovers too. And then this turns into turkey wild rice soup!

    The added heavy cream makes the whole thing super comforting, and the wild rice adds some fantastic texture. This is one of those soups I can make and enjoy for lunch or dinner for several days without getting sick of it. My whole family adored it! If you need more reasons to try it, creamy wild rice soup with chicken is also:

    • Packed with flavor
    • Hearty and satisfying
    • A wonderful way to use up leftover poultry
    • Perfect for cold and rainy weather
    • Family-tested and approved!
    A close up of a bowl of chicken wild rice creamy soup with a spoon in it and another bowl in the background.

    Ingredient Information And Substitutions

    • Cooked Chicken or Turkey- Remember that you can use this recipe to make chicken or turkey and wild rice soup! Leftovers work best as you need to start with cooked poultry. Rotisserie chicken is another option.
    • Wild Rice- Also needs to be cooked. You could use a wild rice blend or even cooked white or brown rice if that's all you have.
    • Vegetables & Aromatics- This soup is also packed with a ton: diced onion, carrot, and celery, plus a few minced garlic cloves for good measure.
    • Butter- To soften the aromatics and veggies. I like butter for the added flavor and richness, but you could use oil if you'd like.
    • Flour- Helps thicken the soup. You could also use GF flour if you're gluten-free.
    • Chicken Broth- I add a mixture of broth and water to add the liquid here for more flavor! You could also use turkey broth or vegetable broth instead.
    • Heavy Cream- You don't need much — only 2 tablespoons — so feel free to add more to make it even richer and creamier.
    • Seasonings- I added a poultry seasoning blend, salt, and pepper to keep things simple.
    An overhead image of labeled recipe ingredients.

    How To Make Creamy Chicken And Wild Rice Soup

    Step 1- Soften the veggies.

    Add the butter to your Dutch oven over medium-high heat to melt. Introduce the onion, carrots, and celery to the pot and sauté to soften. After about 5 minutes, add the garlic and poultry seasoning and cook for another minute.

    Butter melting in a pot and veggies sautéing in the butter.

    Step 2- Thicken & simmer.

    Stir in the flour until no lumps remain. After a minute, add the broth, water, and chicken or turkey and bring the mixture to a boil. reduce the heat and allow the soup to simmer for 30 minutes.

    Veggies with the flour stirred into it and the liquid added to the pot.

    Step 3- Assemble & serve.

    Add the wild rice and heavy cream to the pot and stir to combine. Season with salt and pepper, serve immediately, and enjoy!

    Rice and heavy cream added into the pot.

    Frequently Asked Questions

    How do you thicken wild rice soup?

    Sautéing the veggies and aromatics with butter like I do is a good start! The added flour becomes a roux when mixed with the other ingredients which also helps thicken the broth. The added heavy cream makes the whole thing a touch thicker too.

    Can you make this wild rice soup recipe without cream?

    It's optional but it really is what makes this creamy chicken and wild rice soup, well, creamy. You could also use full fat coconut milk.

    Can you make wild rice soup gluten free?

    Yes! As mentioned, you can replace the flour with 2 tablespoons of GF flour

    How do you make rice soup without it getting mushy?

    The key is to start with cooked rice or to cook it separately from the rest of the soup. You'll also note that I add the cooked rice at the very end of the cooking time — this helps keep it from getting too mushy!

    Can I freeze chicken wild rice soup?

    Yes! Let it cool completely, then transfer it to an airtight container. It will keep in the freezer for up to 3 months. When ready to serve, let it thaw in the fridge overnight before reheating gently on the stovetop.

    Tips For Making Chicken Cream Of Wild Rice Soup

    • Leftover turkey or chicken really is best for this soup. If you don't have any leftovers to work with, a rotisserie chicken is a great option. Otherwise, you could cook up some chicken or turkey breast from scratch and use that — just be sure to shred or chop it before adding it to your chicken or turkey wild rice soup.
    • Prevent mushy results- It's super important to cook the wild rice separately from the soup and add it in at the end so that it doesn't suck up all the broth.
    • Mix thoroughly- When you add the flour, keep stirring until there are no longer any lumps.
    • Tasty extras- You can really go crazy with the seasonings here. Cayenne or red pepper flakes are great for spice lovers, while fresh herbs like chopped parsley or dill as a garnish would add a pop of herbaceous flavor. Get creative!
    • Ingredients to prep ahead- To save time, dice the carrots, celery, and onion, peel the garlic, shred the chicken or turkey, and cook the wild rice as per the package instructions.
    • Leftovers and storage- You can store any leftovers in an airtight container in the refrigerator for up to 3 days. I like to reheat soup over medium on the stovetop, or you could use your microwave.
    An overhead imae of 3 blue bowls of chicken wild rice soup with a black towel, celery and wild rice around it.

    What To Serve With Creamy Chicken Wild Rice Soup

    I've often enjoyed this soup on its own (with some crusty bread on the side, of course) for a light lunch! If you'd like to serve it for dinner, or simply want to make more of a meal out of it, here are some ideas:

    • Marinated Vegetable Salad
    • Red Cabbage Salad
    • Easy Grilled Chicken Thighs
    • Perfectly Seared Salmon

    Other Delicious Soup Recipes To Try

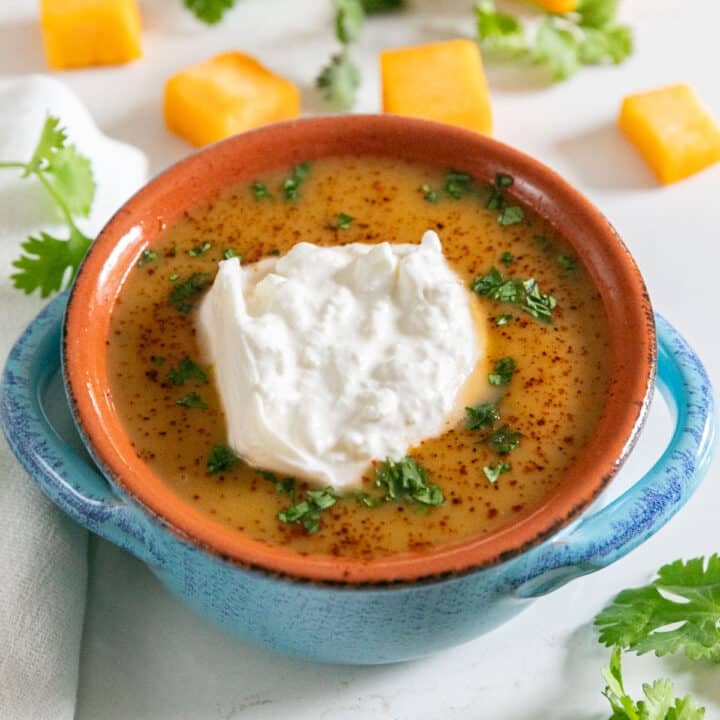
    • A bowl of squash soup with burrata and cilantro on top and chunks of squash and cilantro in the background.
      Savory Spiced Butternut Squash Soup
    • An overhead image of a bowl of bean soup with Italian sausage.
      Italian Bean Soup With Sausage
    • An overhead image of taco soup in a bowl.
      Crockpot Taco Chicken Soup
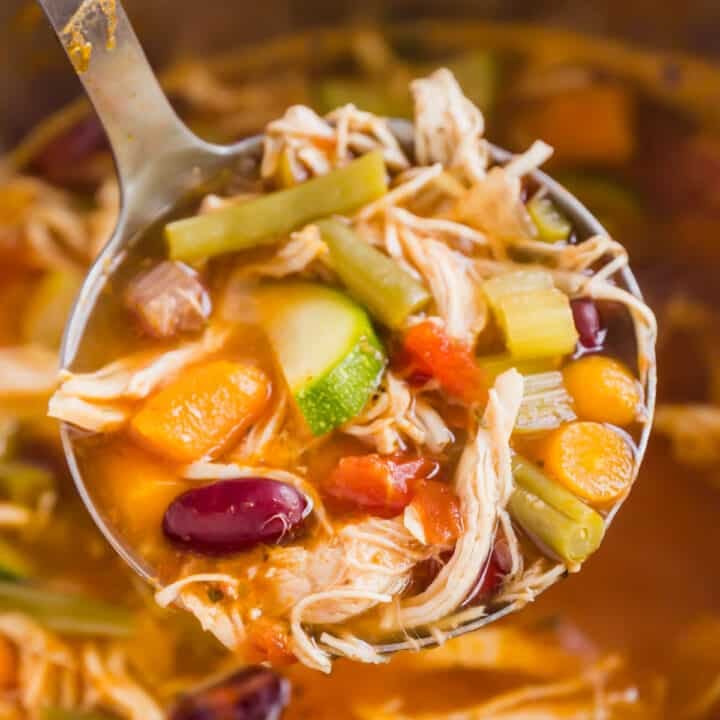
    • A ladle holding chicken minestrone with the rest of the pot behind it.
      Chicken Minestrone Soup (Slow Cooker + Instant Pot)

    Love this recipe? Please leave a 5 star ⭐️⭐️⭐️⭐️⭐️ rating in the recipe card below ⬇️ and/or a review in the comment section further down. Check out my Amazon Store for all my favorite tools, including those used in this recipe. And follow @thelifejolie on Instagram and TikTok!

    A close up of a bowl of chicken wild rice creamy soup with a spoon in it and another bowl in the background.

    Wild Rice Creamy Chicken Soup Recipe

    Jessy Freimann
    My Wild Rice Creamy Chicken Soup is an easy and tasty way to use leftover chicken or turkey. Made on the stovetop, it whips up in no time and is as comforting as it is delicious! Ready in under 1 hour!
    5 from 6 votes
    Print Recipe Pin Recipe
    Prep Time 10 minutes mins
    Cook Time 40 minutes mins
    Total Time 50 minutes mins
    Course dinner, Main, Main Course, Soup
    Cuisine American
    Servings 8 servings
    Calories 145 kcal

    Equipment

    • measuring cups
    • measuring spoons
    • wooden spoon
    • Dutch oven
    • chefs knife
    • cutting board

    Ingredients
      

    • 4 Tablespoons butter
    • 1 cup diced onion
    • 1 cup diced carrot
    • 1 cup diced celery
    • 3 cloves garlic, minced
    • ½ teaspoon poultry seasoning
    • ¼ cup flour
    • 1 quart chicken broth
    • 2 cups water
    • 2 ½ cups cooked chicken or turkey, chopped
    • 1 ½ cups cooked wild rice (or you can use white or brown cooked rice)
    • 2 Tablespoons heavy cream
    • Kosher salt, to taste
    • Back pepper, to taste

    Instructions
     

    • In a Dutch oven, melt butter over medium-high heat.
    • Add onion, carrots and celery and saute to soften stirring periodically, about 5 minutes.
    • Stir in minced garlic and poultry seasoning and saute 1 more minute.
    • Add flour and stir until no more lumps remain. Cook for 1 minute.
    • Add broth, water and chicken (or turkey) and bring to a boil.
    • Reduce heat and simmer for 30 minutes.
    • Stir in wild rice and heavy cream and season to taste with salt and pepper. Serve immediately.

    Video

    Notes

        • Leftover turkey or chicken really is best for this soup. If you don't have any leftovers to work with, a rotisserie chicken is a great option. Otherwise, you could cook up some chicken or turkey breast from scratch and use that — just be sure to shred or chop it before adding it to your chicken or turkey wild rice soup.
        • Prevent mushy results- It's super important to cook the wild rice separately from the soup and add it in at the end so that it doesn't suck up all the broth.
        • Mix thoroughly- When you add the flour, keep stirring until there are no longer any lumps.
        • Tasty extras- You can really go crazy with the seasonings here. Cayenne or red pepper flakes are great for spice lovers, while fresh herbs like chopped parsley or dill as a garnish would add a pop of herbaceous flavor. Get creative!
        • Ingredients to prep ahead- To save time, dice the carrots, celery, and onion, peel the garlic, shred the chicken or turkey, and cook the wild rice as per the package instructions.
        • Leftovers and storage- You can store any leftovers in an airtight container in the refrigerator for up to 3 days. I like to reheat soup over medium on the stovetop, or you could use your microwave.

    Nutrition

    Serving: 1servingCalories: 145kcalCarbohydrates: 11gProtein: 14gFat: 5gSaturated Fat: 2gPolyunsaturated Fat: 1gMonounsaturated Fat: 2gCholesterol: 40mgSodium: 485mgPotassium: 176mgFiber: 1gSugar: 1gVitamin A: 92IUVitamin C: 0.4mgCalcium: 28mgIron: 1mg
    Tried this recipe?Let us know how it was!

    Hosting Thanksgiving?

    Discover the secret to hosting Thanksgiving without all the stress! Prepsgiving is your FREE guide to making a delicious Thanksgiving feast the easy way.

    Green Bean Casserole Without Mushroom Soup

    Nov 11, 2024 · 1 Comment

    The corner of a pan of green bean casserole with a serving spoon in it.

    My Green Bean Casserole Without Mushroom Soup gives you all the creamy, crispy goodness of a traditional holiday green bean dish without any canned soup. You'll never make it the old way again! Prepped and baked in just under 1 hour.

    The corner of a pan of green bean casserole with a serving spoon in it.
    [feast_advanced_jump_to]

    Why You'll Love This Green Bean Casserole Without Cream Of Mushroom Soup

    Is it even Thanksgiving without a classic green bean casserole with french fried onions? I feel like this is a fixture on every holiday table — and I get it. We Americans love a good casserole, and the crispy onions on top add the very best crunch. It truly is one of our favorite side dishes for a holiday. Now I appreciate Campbell's green bean casserole recipe, but I really felt like I could do it better on my own.

    So, I decided to make mine completely from scratch instead! It's the perfect way to take all of the great things about this side dish and make it way better by using fresh ingredients. The results are an even better Thanksgiving Day (or any day, why not?) side. Here are some more reasons to try it:

    • Zero canned soup
    • Tender on the inside, crunchy on top
    • Classic and nostalgic dish made better
    • Perfect for the holidays or a family dinner
    • Prepped in just 2 pans
    • Tastes great reheated
    An overhead image of a pan of green bean casserole with a striped towel and fried onions next to it.

    Ingredient Information And Substitutions

    • Vegetables- You'll need green beans, of course, as well as mushrooms and shallots. I prefer fresh green beans a for a better texture. If you prefer to use frozen, just skip the blanching step.
    • All-Purpose Flour- Used to create your roux, which thickens the casserole.
    • Butter- Starts the recipe off — you'll sauté the mushrooms and shallots in butter before adding the flour to make the roux.
    • Creamy Factor- I'm using half-and-half, milk, and a healthy helping of Romano cheese to make a perfectly creamy green bean casserole!
    • French Fried Onions- The crispy and crunchy topping. You should be able to find them in the condiment aisle at your local grocery store.
    • Salt & Pepper- To season the mushrooms and shallots to taste.
    An overhead image of labeled recipe ingredients.

    How To Make Green Bean Casserole Without Cream Of Mushroom

    Step 1- Blanch the green beans and melt butter.

    Place a large sauté pan over medium heat. Melt the butter. While the butter melts, blanch the green beans for 5 minutes and then transfer to an ice bath.

    An image of green beans getting blanched next to an image of butter melting in a sauté pan.

    Step 2- Sauté the mushrooms and shallots.

    Add the shallots and mushrooms to the melted butter and cook until softened. Season with salt and pepper and sprinkle with flour. Allow the roux to cook for 1-2 minutes.

    Mushrooms and shallots sautéing in a pan and then flour added to it.

    Step 3- Make the sauce.

    Whisk in the half-and-half, milk, and cheese and reduce the heat to low. Cook until thickened while stirring often. Remove from the heat after about 4 minutes. Combine the blanched green beans with the mushroom sauce and toss to mix thoroughly.

    Liquids added to the pan of veggies and once it's thickened, green beans added.

    Step 4- Assemble & bake.

    Pour the mixture into a prepared 9x13-inch baking dish and cover with aluminum foil. Bake for 20 minutes.

    Green bean mixture added to the casserole dish and then covered with foil.

    Step 5- Add the fried onions.

    Sprinkle the top of your simple green bean casserole recipe with the French fried onions and bake, uncovered, for 10 more minutes. Serve immediately and enjoy!

    Covered casserole in the oven and then the casserole dish uncovered with fried onions on top and back in the oven.

    Frequently Asked Questions

    Can I make green bean casserole without canned soup?

    Absolutely — you won't find any canned soup here! I use fresh mushrooms that I sauté with shallots and then combine with half-and-half, milk, and cheese to get a similar texture. In fact, I find that the texture is even better, and the flavor is improved too!

    Can I use frozen green beans?

    Yes! If working from frozen, you can skip the blanching step and simply toss the green beans in the sauce before assembling.

    Can I use onions instead of shallots?

    Yes, but note that the casserole will have a slightly different flavor. I prefer shallots because I like their taste better, but regular onions will work in a pinch.

    Can I do this as make ahead green bean casserole?

    Yes! You can assemble your classic green bean casserole up until the baking step and then store it in the fridge for up to 1-2 days. Bake it just before serving for the best results!

    How long do you cook green bean casserole?

    The sauce takes about 10 minutes on the stovetop (you'll blanch the green beans at the same time), then the casserole bakes for a total of 30 minutes. Green bean casserole without mushroom soup takes a bit longer to prepare than recipes with soup, but it's worth the extra time!

    A close up image of green bean casserole on a white plate with a fork in the background.

    Tips For Making French Fried Onion Green Bean Casserole

    • Try to dice the shallots and mushrooms around the same size. It's okay if they aren't completely uniform, but it helps if they're at least a similar size so they cook evenly.
    • Make sure you stir the roux often so it doesn't burn.
    • Reduce the heat to low when you add the half-and-half and the milk so that it doesn't scald and be sure to stir often.
    • You'll know it's thickened enough when it coats the back of a spoon.
    • Be sure to taste the sauce and adjust the seasonings to your preference.
    • Try to trim and cut the green beans into about 1 ½ inch pieces to make it easier to eat.
    • Don't overcook the beans. Blanching for exactly 5 minutes helps them keep their shape, color, and crisp texture. Overcooking will cause them to go mushy, so don't skip the ice bath step!
    • Cover the casserole for the first portion of baking. You'll uncover and sprinkle with French fried onions for the last 10 minutes of cooking.
    • Ingredients to prep ahead- You can trim the green beans, dice the shallots, and dice the mushrooms (only if making within 2 days or they will go bad) to get ahead on this recipe! It could be really helpful for holiday party prep.
    • Leftovers and storage- Store any leftovers in an airtight container in the fridge for up to 3 days. To reheat, pop the casserole back in the oven at 350 degrees F and heat for 5-10 minutes or until warmed through. You can add a splash of milk or water if it starts to look dry.
    A plate of green bean casserole with a fork on the back of the plate and the pan of casserole behind it.

    What To Serve With Creamy Green Bean Casserole

    This is such a classic holiday side dish! Though, I have to say, sometimes I'll randomly make it for dinner at some point during the fall or winter months — my family loves it that much. Here are some recipes I like to pair it with:

    • Roasted Spatchcock Glazed Turkey with Bourbon
    • Whole Roasted Chicken
    • Garlic Butter Sautéed Carrots
    • Gouda Cheese Mashed Potatoes
    • Quick and Easy Roasted Potatoes
    • Old Fashioned Pecan Pie
    • Classic Pumpkin Pie

    Other Delicious Recipes With Beans To Try

    • A plate of garlic green beans with a striped towel, garlic bulbs and parsley in the background.
      Garlic And Butter Green Beans
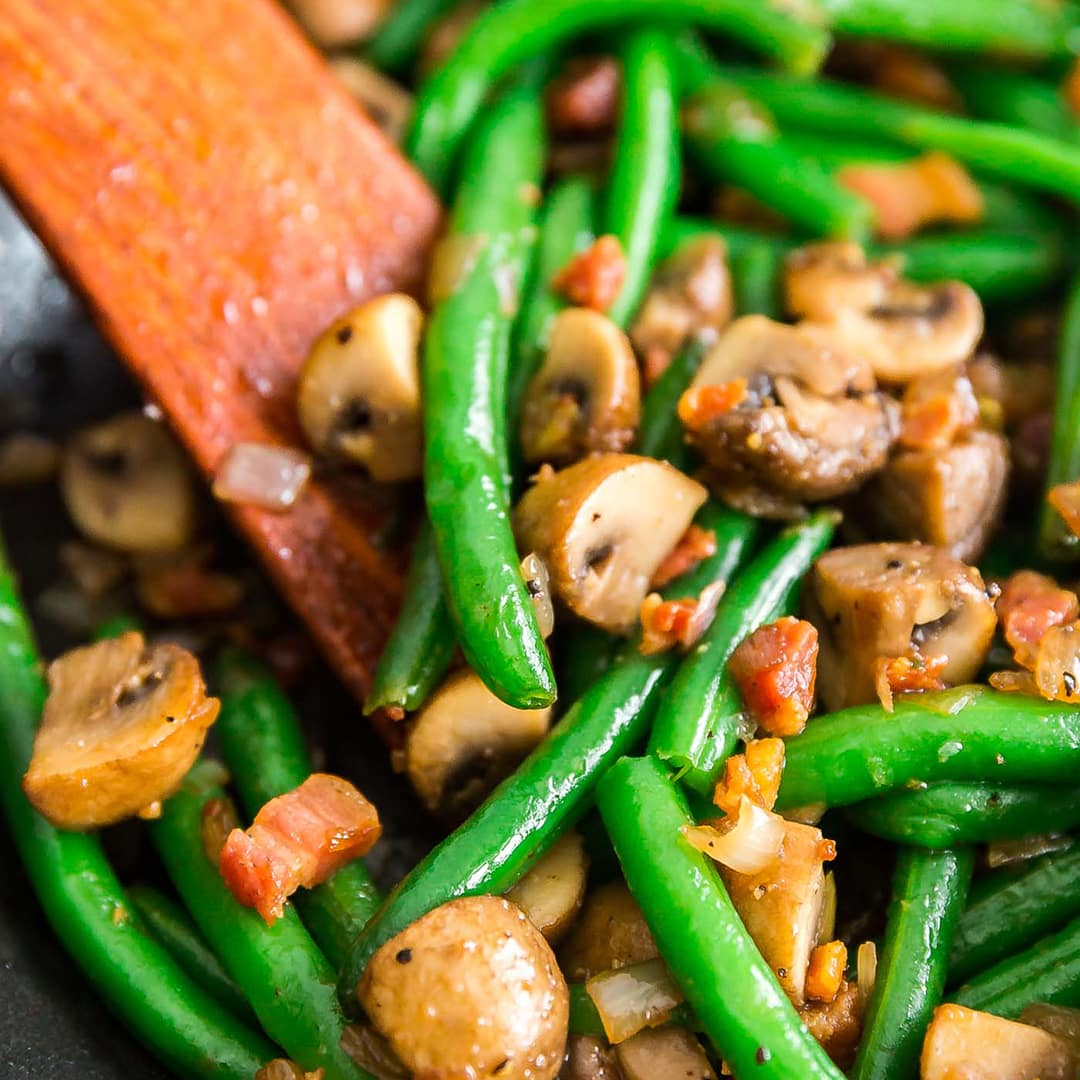
    • A square image of Sauteed Green Beans with Mushrooms, Shallots and Pancetta.
      Savory Sauteed Green Beans with Mushrooms, Shallots and Pancetta
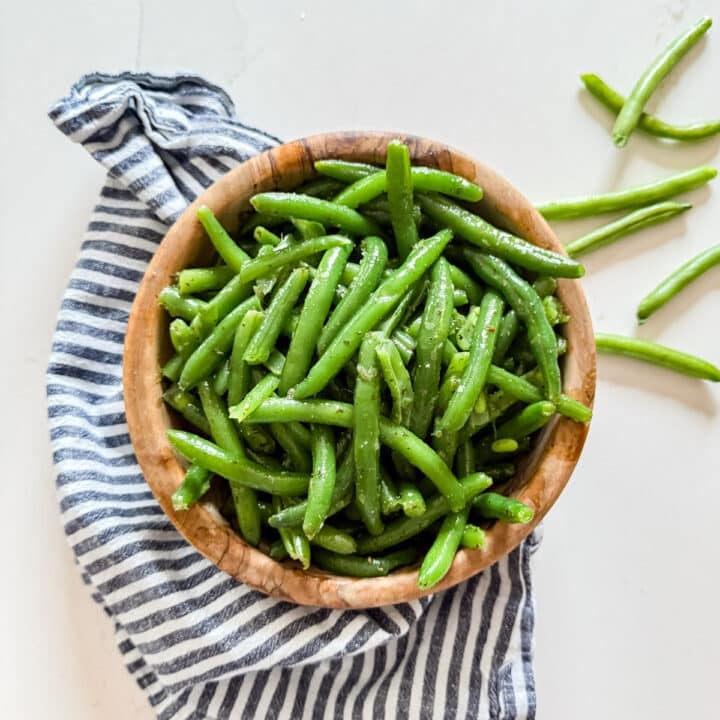
    • An overhead image of green bean salad in a wooden bowl.
      Green Bean Salad Recipe
    • A wooden holding up a spoonful of greens and beans from the pan.
      Greens and Beans Recipe

    Love this recipe? Please leave a 5 star ⭐️⭐️⭐️⭐️⭐️ rating in the recipe card below ⬇️ and/or a review in the comment section further down. Check out my Amazon Store for all my favorite tools, including those used in this recipe. And follow @thelifejolie on Instagram and TikTok!

    The corner of a pan of green bean casserole with a serving spoon in it.

    Green Bean Casserole Without Mushroom Soup Recipe

    Jessy Freimann
    My Green Bean Casserole Without Mushroom Soup gives you all the creamy, crispy goodness of a traditional holiday green bean dish without any canned soup. You'll never make it the old way again! Prepped and baked in just under 1 hour.
    5 from 1 vote
    Print Recipe Pin Recipe
    Prep Time 10 minutes mins
    Cook Time 40 minutes mins
    Total Time 50 minutes mins
    Course dinner, Side Dish, Thanksgiving
    Cuisine American
    Servings 8 servings
    Calories 291 kcal

    Equipment

    • Large saute pan
    • wooden spoon
    • chefs knife
    • cutting board
    • measuring cups
    • measuring spoons
    • Large pot
    • 9 x 13 Pan

    Ingredients
      

    • 5 Tablespoons salted butter
    • 1 cup finely diced shallots
    • 1 cup finely diced mushrooms
    • ½ teaspoon kosher salt
    • ¼ teaspoon ground black pepper
    • 4 Tablespoons flour
    • 1 ½ cups half and half
    • 1 ½ cups milk
    • 2 Tablespoons Romano cheese
    • 32 ounces green beans, trimmed and cut into 1 ½ inch pieces
    • 2 cups fried onions (like French's fried onions)

    Instructions
     

    • Preheat the oven to 350 degrees. Melt butter in a large saute pan over medium heat. Bring a medium pot of water to a boil on a different burner.
    • Add shallots and mushrooms to the saute pan and cook for about 5 minutes until softened, stirring often.
    • Season with salt and pepper. Sprinkle with flour and stir until there are no lumps remaining.
    • Cook roux for 1-2 minutes stirring often.
    • Whisk in half and half, milk and Romano cheese and reduce heat to low.
    • Cook until thickened stirring often, around 2-4 minutes and remove from heat.
    • While the sauce cooks, blanch green beans for 5 minutes and plunge into an ice bath to stop the cooking once drained.
    • Combine beans with sauce and pour into an even layer in a 9" x 13" pan.
    • Cover and bake for 20 minutes.
    • Remove cover and sprinkle evenly with French fried onions.
    • Bake uncovered for 10 more minutes and serve immediately.

    Video

    Notes

    • Try to dice the shallots and mushrooms around the same size. It's okay if they aren't completely uniform, but it helps if they're at least a similar size so they cook evenly.
    • Make sure you stir the roux often so it doesn't burn.
    • Reduce the heat to low when you add the half-and-half and the milk so that it doesn't scald and be sure to stir often.
    • You'll know it's thickened enough when it coats the back of a spoon.
    • Be sure to taste the sauce and adjust the seasonings to your preference.
    • Try to trim and cut the green beans into about 1 ½ inch pieces to make it easier to eat.
    • Don't overcook the beans. Blanching for exactly 5 minutes helps them keep their shape, color, and crisp texture. Overcooking will cause them to go mushy, so don't skip the ice bath step!
    • Cover the casserole for the first portion of baking. You'll uncover and sprinkle with French fried onions for the last 10 minutes of cooking.
    • Ingredients to prep ahead- You can trim the green beans, dice the shallots, and dice the mushrooms (only if making within 2 days or they will go bad) to get ahead on this recipe! It could be really helpful for holiday party prep.
    • Leftovers and storage- Store any leftovers in an airtight container in the fridge for up to 3 days. To reheat, pop the casserole back in the oven at 350 degrees F and heat for 5-10 minutes or until warmed through. You can add a splash of milk or water if it starts to look dry.

    Nutrition

    Serving: 1servingCalories: 291kcalCarbohydrates: 21gProtein: 6gFat: 21gSaturated Fat: 12gPolyunsaturated Fat: 1gMonounsaturated Fat: 4gTrans Fat: 0.3gCholesterol: 41mgSodium: 385mgPotassium: 376mgFiber: 3gSugar: 8gVitamin A: 1241IUVitamin C: 14mgCalcium: 163mgIron: 1mg
    Tried this recipe?Let us know how it was!

    Hosting Thanksgiving?

    Discover the secret to hosting Thanksgiving without all the stress! Prepsgiving is your FREE guide to making a delicious Thanksgiving feast the easy way.

    Cajun Turkey

    Nov 8, 2024 · Leave a Comment

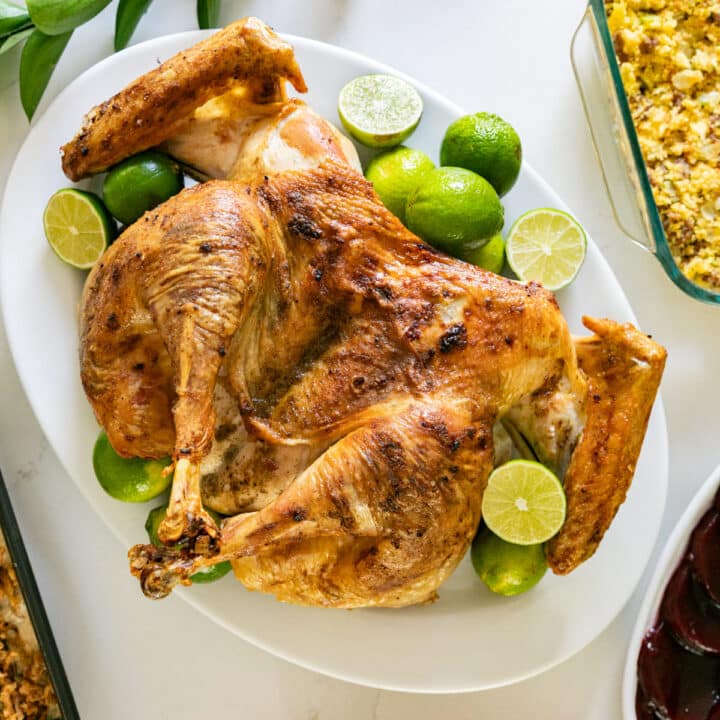
    An overhead image of a whole spatchcocked turkey cooked golden brown on a platter with limes and other thanksgiving sides and decorative leaves and garland around it.

    This Cajun Turkey adds a flavorful twist to your holiday table- it's easy to make and comes together quickly for a tender, juicy turkey dinner the whole family will love!

    An overhead image of a whole spatchcocked turkey cooked golden brown on a platter with limes and other thanksgiving sides and decorative leaves and garland around it.
    [feast_advanced_jump_to]

    Why You'll Love This Cajun Turkey Recipe

    I absolutely love hosting Thanksgiving - so much so, that I insist on hosting each year and have created a guide that I put out each year about hosting Thanksgiving (get yours here!).

    My favorite part is making the turkey- which I think can be super intimidating for people. I can totally see why that is, it's a pretty large bird, considering the size of most cuts of meat people are cooking with on a daily basis.

    This particular turkey recipe adds a delicious twist on your traditional turkey. The Cajun seasoning adds a flavorful kick with a nice freshness brought by the lime zest. Here's why you'll love it:

    • Easy to make
    • Minimal ingredients
    • Cooks quickly
    • Tender and juicy
    A close up image of a golden brown turkey thigh on a plate of cut up turkey with limes on it.

    Ingredient Information and Substitutions

    • Turkey- This recipe was created for an 11-14 pound turkey. You can go bigger but you'll want to double the compound butter recipe and extend the cooking time. You also may not be able to spatchcock the bird as it might not fit into the typical roasting pan. I'd instead encourage you to make two smaller birds instead of one huge bird.
    • Butter- I like salted butter for even more flavor. I've also tested this with vegan butter and it tasted great!
    • Seasonings- Cajun seasoning is the base of it all along with Kosher salt, black pepper, garlic powder and onion powder.
    • Lime Zest- Don't skip this- it adds the perfect punch of freshness!
    • Veggies- I always put plenty of chunks of onions and smashed garlic at the bottom of my pan for nice flavorful juices to add to my gravy.
    • Gravy- In addition to the pan juices, I make a roux with butter and flour and use turkey broth (I make this ahead- try my easy turkey stock recipe and freeze it for the holiday!).
    An overhead image of labeled recipe ingredients.

    How To Make Roast Cajun Turkey

    Step 1- Spatchcock your bird.

    Cut the backbone out of the turkey, flip it over and press down hard on it until you hear a crack and the turkey lays flat (I wrote an entire post on how to spatchcock a turkey if you need more details). Please the turkey in the back of the fridge (uncovered if possible) and let it chill overnight.

    A spatchcocked raw turkey in a parchment lined pan.

    Step 2- Prep the pan.

    The day of cooking, spray the roasting pan with cooking spray and add chunks of onions, smashed garlic cloves, salt and pepper. Pour in 2 cups of water and place a metal rack on top of the veggies. Spray the rack with cooking spray and set aside.

    A prepared baking pan with veggies in it and a rack.

    Step 3- Make the compound butter.

    Place softened butter, cajun seasoning, salt, pepper, garlic powder, onion powder and lime zest in a medium bowl and mix until well combined.

    Compound butter in a medium glass bowl.

    Step 4- Prepare the turkey.

    Remove the turkey from the refrigerator 1 hour prior to cooking and preheat the oven to 425 degrees F.

    Rub ⅓ of the compound butter on the underside of the turkey, ⅓ of the butter under the turkey skin and the remaining ⅓ of the butter on the outside of the skin on top of the turkey and place the turkey bone-side down into the prepared pan. Tuck the wing tips under the bird. Place an oven-safe thermometer probe into the thickest part of the breast, being careful not to hit any bone.

    A butter rubbed raw turkey in the prepared roasting pan.

    Step 5- Roast the turkey.

    Place the turkey into the oven and check every 30 minutes to make sure it's not browning too quickly. If it is, cover the spots with foil to avoid burning. Add more water into the bottom of the pan if it's drying up.

    The turkey in a roasting pan in the oven ready to bake.

    Step 6- Rest the turkey and make the gravy. Carve the turkey.

    Once the turkey reaches an internal temperature on 160 degrees F at the thickest part of the breast, remove it from the oven and place on a large cutting board to rest for 20-30 minutes.

    While the turkey rests, strain the pan juices and run through a fat separator. Add to the turkey broth. Make a roux in a large sauce pan and whisk in the broth and pan juices. Stir often over medium until thickened. Taste and adjust seasonings as needed.

    Carve the turkey after resting time is over and serve immediate with gravy.

    An overhead image of a serving platter with the carved roasted turkey and limes on it.

    Frequently Asked Questions

    Do I have to spatchcock the turkey?

    You don't, but I prefer to because it cooks quicker and much more evenly, resulting in a juicier, more perfectly cooked bird.

    If cooking it whole, plan for a longer cooking time and instead place the probe into the thickest part of the turkey thigh without touching any bone.

    Will Cajun seasoning make the turkey spicy?

    We did not find it to be spicy- my kids loved it and they do not like spicy food! We used the McCormack brand cajun seasoning. If you prefer more of a kick, you can always add some cayenne pepper or even a little more cajun seasoning.

    How long does it take to thaw a turkey?

    As a general rule, allow 24 hours of thaw time in the refrigerator for every 4 pounds of meat.

    Should you cook a turkey covered or uncovered?

    Uncovered so you get perfectly crispy skin. If you find certain spots are getting too dark too fast, cover those spots with foil as the bird is cooking.

    How do I avoid a dry turkey?

    The biggest thing is to make sure you cook by temperature and not time. Spatchcocking the bird will make it easier for it to cook more evenly and I always take it out at 160 degrees F and then rest for 20-30 minutes. During the resting time the temp will go up to 165 degrees F and the juices will redistribute throughout the bird resulting in a tender, juicy turkey.

    The side angle view of the cooked spatchcocked turkey with leaves and cranberry jelly in the background.

    Tips For Making This Cajun Recipe For Turkey

    • Spatchcock the bird- seriously- this is the best and easiest way to get a perfectly cooked bird every time and it cooks faster! I wrote an entire post on how to spatchcock a turkey.
    • Leave the turkey uncovered over night in your fridge- if there's the space to do this safely (and avoid cross contamination by touching other things). This allows the skin to dry out and become crispier as a roasts.
    • Remove your turkey from the fridge 1 hour prior to cooking- This helps remove the chill of the fridge and allows for more even cooking and easier spreading of the compound butter.
    • Check the bird periodically throughout cooking- if the water in the bottom of the pan has dried out, add more. If any spots get too dark, cover with foil.
    • Cook by temperature, not by time- to avoid overcooking. Place the probe in the thickest part of the breast (or thigh if the bird is not spatchcocked) and make sure it doesn't touch any bone.
    • Rest the turkey after roasting- for a more juicy turkey and crossover cooking. 20-30 minutes works great!
    • Don't throw out the pan juices- they add amazing flavor to your gravy! Strain and run through a fat separator.
    • Ingredients to prep ahead- Spatchcock the turkey, make the compound butter, cut the onion and smash garlic.
    • Leftovers and storage- This makes awesome leftovers that last for 4-5 days covered in the fridge. Reheat in the microwave or in the oven- a little turkey stock or chicken stock while reheating helps avoid drying out. The cooked turkey also freezes well in an airtight container for up to 3 months.
    The side of a cooked turkey focusing on the drumstick with dressiing in the background.

    What To Serve With Roasted Cajun Turkey

    Round out your holiday feast with these amazing recipes:

    • Smoked Gouda Mashed Potatoes
    • Garlic Green Beans
    • Savory Sweet Potato Casserole
    • Ciabatta Dressing
    • Pumpkin Pie

    Other Tasty Roast Turkey Recipes

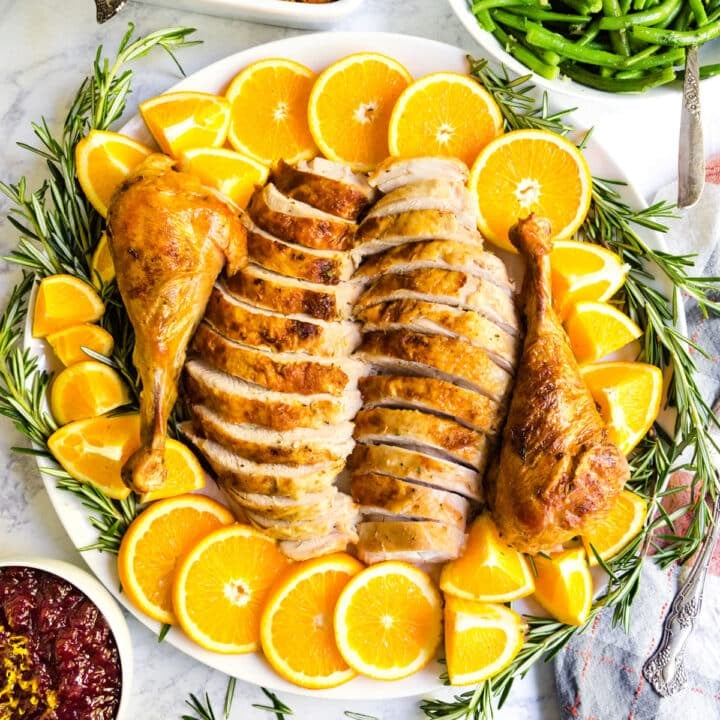
    • An overhead image of a thanksgiving table with the platter of carved turkey in the middle and green beans, dressing and cranberry sauce around it.
      Turkey with Oranges and Rosemary
    • An overhead image of sliced turkey on a platter surrounded by fresh herbs in the middle of a Thanksgiving table.
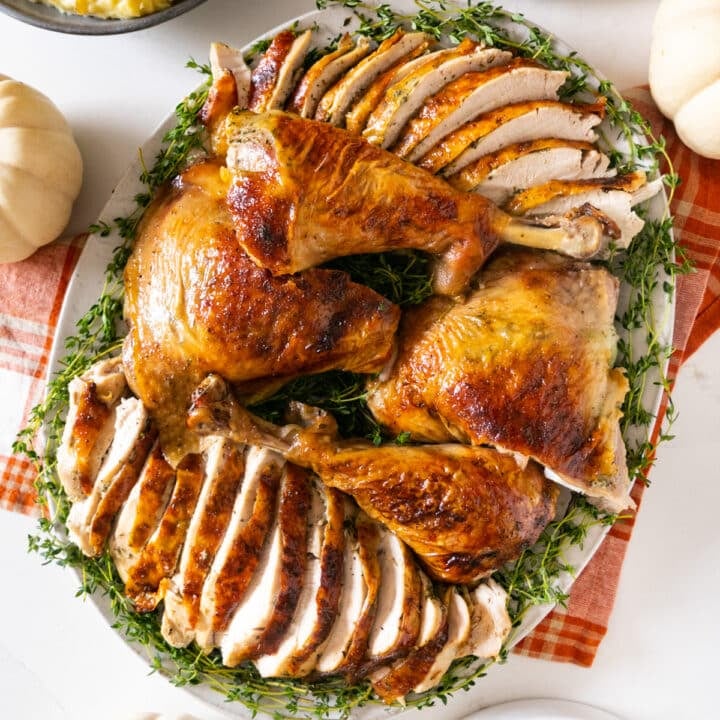
      Roasted Spatchcock Glazed Turkey with Bourbon
    • An overhead image of a roasted whole turkey butterflied and laid out in a roasting pan on a orange and grey towel with apples on the side of it.
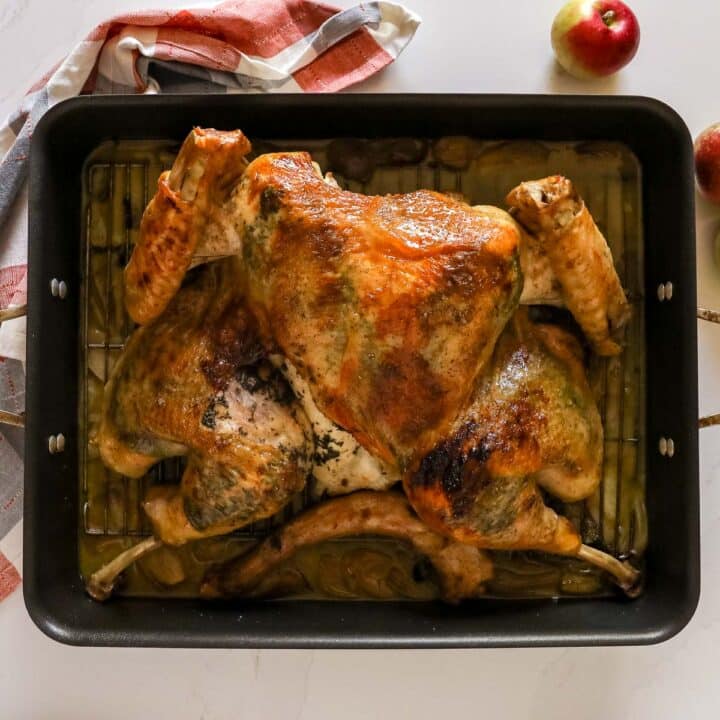
      Apple Cider Glazed Roast Turkey Recipe
    • An overhead image of a carved turkey arranged on a serving platter with fresh herbs and lemons surrounding it.
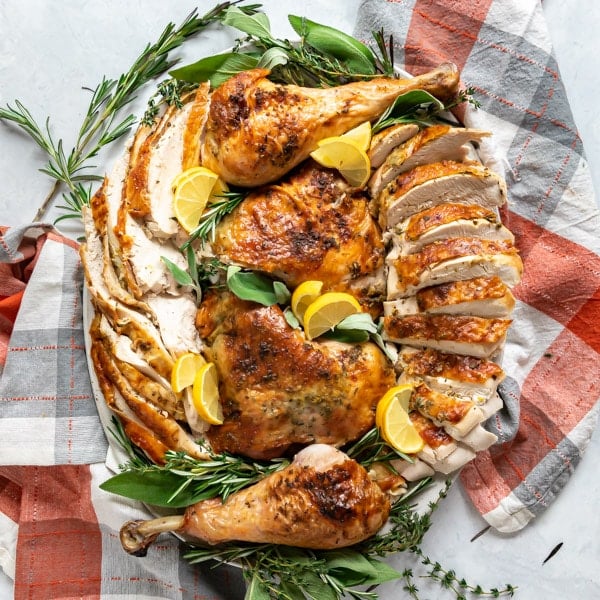
      Spatchcocked Lemon Herb Roast Turkey

    Hosting Thanksgiving?

    Discover the secret to hosting Thanksgiving without all the stress! Prepsgiving is your FREE guide to making a delicious Thanksgiving feast the easy way.

    Love this recipe? Please leave a 5 star ⭐️⭐️⭐️⭐️⭐️ rating in the recipe card below ⬇️ and/or a review in the comment section further down. Check out my Amazon Store for all my favorite tools, including those used in this recipe. And follow @thelifejolie on Instagram and TikTok!

    An overhead image of a whole spatchcocked turkey cooked golden brown on a platter with limes and other thanksgiving sides and decorative leaves and garland around it.

    Cajun Turkey Recipe

    Jessy Freimann
    This Cajun Turkey adds a flavorful twist to your holiday table- it's easy to make and comes together quickly for a tender, juicy turkey dinner the whole family will love!
    No ratings yet
    Print Recipe Pin Recipe
    Prep Time 1 hour hr
    Cook Time 1 hour hr 30 minutes mins
    Resting time 30 minutes mins
    Total Time 3 hours hrs
    Course dinner, Main, Main Course, Main dish
    Cuisine American, Thanksgiving
    Servings 10 servings
    Calories 880 kcal

    Equipment

    • 1 roasting pan
    • 1 cutting board
    • 1 chefs knife
    • 1 Measuring cups and spoons
    • 1 mixing bowl
    • 1 Meat thermometer

    Ingredients
      

    Compound Butter:

    • 1 cup salted butter 2 sticks
    • 2 teaspoons cajun seasoning
    • ¾ teaspoon kosher salt
    • ¾ teaspoon onion powder
    • ¾ teaspoon garlic powder
    • ½ teaspoon ground black pepper
    • 2 limes

    Turkey

    • Cooking spray
    • 3 large onions cut into large chunks
    • 5 cloves garlic peeled and smashed
    • 1 teaspoons kosher salt
    • ¼ teaspoon ground black pepper
    • 14 pound whole turkey (11-14 pounds)
    • 2 cups water

    Gravy

    • 8 Tablespoons butter
    • 8 Tablespoons flour
    • 3 cups turkey stock warmed
    • 1 cup pan drippings

    Instructions
     

    Make the compound butter:

    • In a small bowl, make the compound butter by mixing butter, cajun seasoning, onion powder, garlic powder, salt, pepper and zest of 2 limes until well combined. Set aside.

    Prep the turkey:

    • Remove spatchcocked turkey from refrigerator 1 hour prior to cooking to bring it closer to room temperature.
    • Preheat the oven to 425 degrees with the rack in the middle position.
    • In a large roasting pan place onions and garlic cloves and sprinkle with salt and pepper and pour in water. Place a rack on top of them and grease rack with cooking spray.
    • Place turkey breast-side-down onto the rack. Rub ⅓ of the compound butter onto the bottom of the turkey.
    • Turn the turkey over so the breast side is facing up. Take your hand and carefully push it under the skin of each part of the turkey, separating the skin from the meat. Evenly distribute another ⅓ of the compound butter onto the meat under the skin of the turkey.
    • Rub the last ⅓ of the compound butter all over the top of the skin of the turkey so that the full turkey is covered.
    • Gently tuck the wing tips under the to of the turkey breasts to prevent burning and place the pointed part of the meat thermometer into the thickest part of the breast, making sure you don't touch the bone (if you have duel probes, place the other into the thickest part of one of the thighs, making sure you don't touch the bone).

    Roast the turkey:

    • Place the turkey into the preheated oven on the middle rack. Plan on checking the turkey every 30 minutes to make sure the skin isn't getting too brown and the liquid in the bottom of the pan hasn't evaporated.
    • Roast the turkey until the internal temperature of the thickest part of the breast meat is 160 degrees.
    • Remove the turkey from the oven and place on a large cutting board. Rest turkey for 20-30 minutes.
    • While turkey rests, strain 1 cup pan juices for gravy and run. through a fat separator if you have one and make the gravy (directions below).
    • Once fully rested, carve turkey and serve immediately.

    Make gravy:

    • Melt butter in a medium sauce pan over medium heat.
    • Whisk in flour until no lumps remain. Cook 2 minutes, whisking frequently.
    • Slowly whisk in warmed broth and pan juices.
    • Simmer until thickened, whisking periodically. Hold at low heat stirring periodically until ready to serve. Taste and adjust seasonings if necessary.

    Video

    Notes

    • Spatchcock the bird- seriously- this is the best and easiest way to get a perfectly cooked bird every time and it cooks faster! I wrote an entire post on how to spatchcock a turkey.
    • Leave the turkey uncovered over night in your fridge- if there's the space to do this safely (and avoid cross contamination by touching other things). This allows the skin to dry out and become crispier as a roasts.
    • Remove your turkey from the fridge 1 hour prior to cooking- This helps remove the chill of the fridge and allows for more even cooking and easier spreading of the compound butter.
    • Check the bird periodically throughout cooking- if the water in the bottom of the pan has dried out, add more. If any spots get too dark, cover with foil.
    • Cook by temperature, not by time- to avoid overcooking. Place the probe in the thickest part of the breast (or thigh if the bird is not spatchcocked) and make sure it doesn't touch any bone.
    • Rest the turkey after roasting- for a more juicy turkey and crossover cooking. 20-30 minutes works great!
    • Don't throw out the pan juices- they add amazing flavor to your gravy! Strain and run through a fat separator.
    • Ingredients to prep ahead- Spatchcock the turkey, make the compound butter, cut the onion and smash garlic.
    • Leftovers and storage- This makes awesome leftovers that last for 4-5 days covered in the fridge. Reheat in the microwave or in the oven- a little turkey stock or chicken stock while reheating helps avoid drying out. The cooked turkey also freezes well in an airtight container for up to 3 months.

    Nutrition

    Serving: 1servingCalories: 880kcalCarbohydrates: 14gProtein: 101gFat: 45gSaturated Fat: 19gPolyunsaturated Fat: 8gMonounsaturated Fat: 14gTrans Fat: 1gCholesterol: 377mgSodium: 1177mgPotassium: 1213mgFiber: 2gSugar: 4gVitamin A: 1047IUVitamin C: 8mgCalcium: 93mgIron: 5mg
    Tried this recipe?Let us know how it was!

    Smoked Bone In Turkey Breast

    Nov 7, 2024 · Leave a Comment

    A sliced smoked turkey breast on a cutting board with the crispy skin on.

    If you're tired of tough, dry turkey breast, then you've got to try this smoked bone in turkey breast with brown sugar and citrus. It's seriously easy to make and will give you the most tender, juicy turkey breast you'll ever eat. Smoked in just 2 hours!

    A sliced smoked turkey breast on a cutting board with the crispy skin on.
    [feast_advanced_jump_to]

    Why You'll Love My Smoked Turkey Breast Recipe:

    A long time ago, I worked as a manager at a BBQ restaurant. While it wasn't my favorite job by any stretch of the imagination, I seriously enjoyed the first couple weeks of training when they trained me in the kitchen and smokehouse.

    Every day, I was basically elbow-deep in raw meat while I learned how to use these huge smokers. It was a pretty incredible introduction to smoking foods, and my biggest takeaway from this job was a love for all things smoked.

    Now, I tend to be a give-me-all-the-dark-meat kind of gal. But smoked turkey breast is different. I'm talking about the most tender, juicy turkey breast you'll ever taste! I mean, smoked turkey in general is a total win. It's one of the easiest ways to get meat that everyone will fight over! Need some more reasons to try it? Say no more:

    • A unique way to cook turkey
    • So fun for the holidays
    • Tender and juicy results every time
    • Full of flavor thanks to the citrus brown sugar brine
    • More affordable than a whole turkey
    • The ultimate Thanksgiving main dish!
    An overhead image of sliced turkey breast on a cutting board.

    Ingredient Information And Substitutions

    • Turkey Breast- I usually pick up around 2 ½ pounds of bone-in turkey breast for this recipe. A general rule of thumb is to plan for about half a pound of meat per person.
    • Salted Butter- Once the turkey is brined, you'll combine salted butter with a handful of seasonings to rub all over the meat before you smoke it. This butter and seasonings mixture will give you the most tender and juicy results.
    • Seasonings- You'll need onion powder, poultry seasoning, and lemon zest for the butter rub.
    • Wood Pellets- I like Traeger's apple or hickory wood pellets for my smoked turkey breast recipe! If you have a preference, feel free to go with your favorite.
    An overhead image of labeled recipe ingredients.

    How To Make Traeger Smoked Turkey Breast

    Step 1- Prep the turkey.

    Remove the turkey breast from the refrigerator 30 minutes prior to cooking. While you wait, combine the butter, onion powder, poultry seasoning, lemon zest, and brown sugar in a bowl. When the turkey is done resting, apply the butter rub all over — if there's skin, apply it underneath.

    Fill your smoker with the wood pellets and set the dial to Smoke with the lid open. When you start to see smoke, close the lid and preheat to 300 degrees F.

    An image of compound butter ingredients in a bowl and an image of them mixed together in the bowl.

    Step 2- Smoke the turkey breast.

    Place the turkey breast on the rack, bone-side down and insert the probe. Close the lid and smoke for about 2 hours or until the internal temperature reaches 160 degrees F.

    Remove the smoked turkey breast from the grill and let it rest under tented foil for about 10-15 minutes before slicing and serving. Enjoy!

    An image of the raw turkey breast with the compound butter all over it and an image of the prepared turkey on the smoker.

    Frequently Asked Questions

    How long does it take to smoke turkey breast?

    It typically takes about 35 minutes per pound to make pellet grill smoked turkey breast. I found that my 2 ½ pounds worth took about 2 hours — I recommend that you start checking for doneness around 1 hour and 45 minutes to keep things from drying out.

    How do you keep a turkey breast moist while smoking?

    The key is to keep a close eye on the temperature and then pull it off the heat just before it reaches the safe temperature (I pull it around 160 degrees F). Then rest it for 15 minutes, during which time the juices will redistribute and the turkey will come to full temp (165 degrees F).

    What is a good smoke flavor for turkey?

    I love apple, hickory, or maple pellets for my smoked turkey breast recipe! Lighter woods are generally best for white meat like turkey breast. You could also opt for one of those special turkey blend pellets too... I know Traeger makes one!

    Should I season my turkey before smoking?

    Yes — rub it down with the butter and seasoning mixture for the best flavor and texture.

    Do I need to brine the turkey?

    I've made this recipe with and without a brine and have had very similar results. I'm putting my brine recipe in the recipe notes.

    Can I make this recipe with a boneless Turkey Breast?

    Yes! Follow the same directions but keep a close eye on the temperature, it will likely cook quicker without the bone.

    An image of a whole, un cut smoked turkey breast.

    Tips For Making Bone In Smoked Turkey Breast

    • Rub it down well. I rub the butter mixture it all over the outside of the split turkey breast, but I also made a point to rub it under the skin as well. It's so easy — just pull the skin up, get some of the butter/spice rub mixture on your fingers, and get them all up in there. Trust me. Extra flavor is always a good idea!
    • Rest the meat before cooking. Although you don't need to bring the meat to room temperature, I like to take it out of the fridge a good 20-30 minutes before cooking to take the extra chill off.
    • Split turkey breast will cook faster. This is also a great option if you're cooking for fewer people or want to have some extra smoked meat to supplement a smaller whole turkey (hello Thanksgiving!).
    • Monitor your temperature. Even though I've found the temperatures to be pretty much spot on, I love being able to use the probes that came with my Traeger. They plug right into the grill and stay in the meat the entire time. With the push of a button, you're able to see the correct internal temperature without having to open the grill and risk losing heat. You can also use a probe thermometer.
    • Rest the meat after cooking too. This is so important because it allows for crossover cooking and a juicy bird. I pull the turkey breast off before 160 degrees F and I let it sit for 15 minutes before carving. By the end of that time the juices will have redistributed and the temp will reach 165 degrees F.
    • Don't fear the pink ring! One thing I remember from my short time in the BBQ industry was that people would often be concerned that they would bite into their meat and it would look pink. Now, I'm not talking about raw chicken or in this case, turkey. But when meat is properly smoked, it gets what's called "the pink ring" or a "smoke ring" This ring of pink is a chemical reaction caused by the gasses from the wood pellets and the pigment in the meat. It's a sign of moist meat and good smoking! Consider it your badge of smoked meat honor.
    • Ingredients to prep ahead- You can make the butter up to 1-2 days in advance, just make sure to store it in the fridge and pull out 30 minutes prior to using so it can soften.
    • Leftovers and storage- Store any leftover smoked turkey breast in an airtight container for up to 3-4 days. I usually reheat in 30-second bursts in the microwave, or in the oven at 350 degrees F for 5-10 minutes until heated through.
    Sliced turkey breast on a cutting board with a towel in the background.

    What To Serve With Smoked Turkey Breasts

    Whether you plan on making smoked turkey breast on a pellet grill for a holiday feast or simply family night dinner, here are a few other dishes to make it a meal:

    • French Onion Mashed Potatoes
    • Garlic Green Beans
    • Cranberry Sauce with Diced Cherries and Shallots
    • Cheesy Garlic Knots

    Other Delicious Turkey Recipes To Try

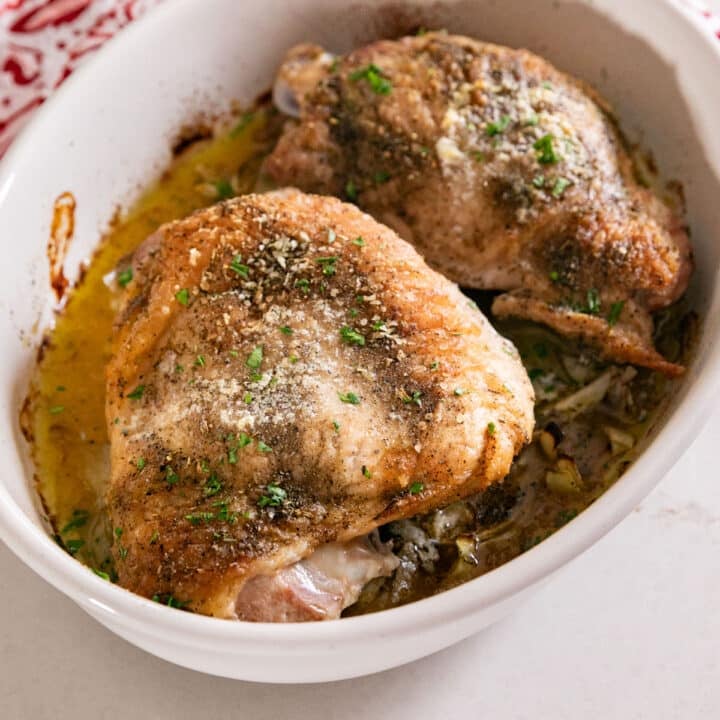
    • A white oval pan with roast turkey thighs in it and onions and a red and white napkin in the background.
      Roast Turkey Thighs for Two
    • An overhead image of a thanksgiving table with the platter of carved turkey in the middle and green beans, dressing and cranberry sauce around it.
      Turkey with Oranges and Rosemary
    • An overhead image of sliced turkey on a platter surrounded by fresh herbs in the middle of a Thanksgiving table.
      Roasted Spatchcock Glazed Turkey with Bourbon
    • An overhead image of a carved turkey arranged on a serving platter with fresh herbs and lemons surrounding it.
      Spatchcocked Lemon Herb Roast Turkey

    Love this recipe? Please leave a 5 star ⭐️⭐️⭐️⭐️⭐️ rating in the recipe card below ⬇️ and/or a review in the comment section further down. Check out my Amazon Store for all my favorite tools, including those used in this recipe. And follow @thelifejolie on Instagram and TikTok!

    A sliced smoked turkey breast on a cutting board with the crispy skin on.

    Smoked Bone In Turkey Breast

    Jessy Freimann
    If you're tired of tough, dry turkey breast, then you've got to try this smoked bone in turkey breast with brown sugar and citrus. It's seriously easy to make and will give you the most tender, juicy turkey breast you'll ever eat. Smoked in just 2 hours!
    No ratings yet
    Print Recipe Pin Recipe
    Prep Time 30 minutes mins
    Cook Time 2 hours hrs
    Resting time 20 minutes mins
    Total Time 2 hours hrs 50 minutes mins
    Course dinner, Main, Main Course, Main dish
    Cuisine American, smoked turkey breast
    Servings 6 servings
    Calories 82 kcal

    Equipment

    • smoker
    • saucepan
    • measuring cups
    • measuring spoons
    • chefs knife
    • cutting board
    • Meat thermometer

    Ingredients
      

    • 1 split turkey breast, around 2 ½ pounds
    • 4 Tablespoons salted butter, softened
    • 1 teaspoon onion powder
    • 1 teaspoon poultry seasoning
    • 1 lemon (zest only)
    • 1 Tablespoon brown sugar

    Instructions
     

    • Remove the turkey breast from the fridge and dry with paper towel. Set aside to rest for 20 minutes.
    • While the split turkey breast rests, combine salted butter, onion powder, poultry seasoning, lemon zest and 1 Tablespoon brown sugar. Mix well.
    • Rub the butter mixture all over outside of the split turkey breast and if there is skin, pull up the skin and rub it underneath as well.
    • Fill the hopper of the Traeger Wood Fired Grill with your wood pellets of choice (I tested this with both apple and hickory and both were fantastic!) and set the dial to Smoke with the lid open. After 10 minutes you should see smoke.
    • Close the lid and set the dial to 300 degrees to preheat. It should take around 10 minutes.
    • Once the grill has reached the temperature, place the split turkey breast onto the rack. 
    • Plug the probe into the grill (below the dials) bring it through the slot to the right of the dials and place the probe into the thickest part of the turkey breast, being careful not to touch the bone. 
    • Close the lid and smoke for approximately 2 hours, or until the internal temperature reaches between 160-165 degrees. Keep a close eye on this as it could go quicker and start checking the temperature after an hour and a half. 
    • Remove the split turkey breast from the grill and place it on your cutting board, tented in foil. Rest for 10-15 minutes.
    • While the turkey breast rests, close the lid and switch the dial to Shut Down Mode. After 10 minutes turn it off and unplug it. Cool completely before cleaning and covering.
    • Once rested, slice the turkey breast and serve immediately.

    Video

    Notes

      • Rub it down well. I rub the butter mixture it all over the outside of the split turkey breast, but I also made a point to rub it under the skin as well. It's so easy — just pull the skin up, get some of the butter/spice rub mixture on your fingers, and get them all up in there. Trust me. Extra flavor is always a good idea!
      • Rest the meat before cooking. Although you don't need to bring the meat to room temperature, I like to take it out of the fridge a good 20-30 minutes before cooking to take the extra chill off.
      • Split turkey breast will cook faster. This is also a great option if you're cooking for fewer people or want to have some extra smoked meat to supplement a smaller whole turkey (hello Thanksgiving!).
      • Monitor your temperature. Even though I've found the temperatures to be pretty much spot on, I love being able to use the probes that came with my Traeger. They plug right into the grill and stay in the meat the entire time. With the push of a button, you're able to see the correct internal temperature without having to open the grill and risk losing heat. You can also use a probe thermometer.
      • Rest the meat after cooking too. This is so important because it allows for crossover cooking and a juicy bird. I pull the turkey breast off before 160 degrees F and I let it sit for 15 minutes before carving. By the end of that time the juices will have redistributed and the temp will reach 165 degrees F.
      • Don't fear the pink ring! One thing I remember from my short time in the BBQ industry was that people would often be concerned that they would bite into their meat and it would look pink. Now, I'm not talking about raw chicken or in this case, turkey. But when meat is properly smoked, it gets what's called "the pink ring" or a "smoke ring" This ring of pink is a chemical reaction caused by the gasses from the wood pellets and the pigment in the meat. It's a sign of moist meat and good smoking! Consider it your badge of smoked meat honor.
      • Ingredients to prep ahead- You can make the butter up to 1-2 days in advance, just make sure to store it in the fridge and pull out 30 minutes prior to using so it can soften.
      • Leftovers and storage- Store any leftover smoked turkey breast in an airtight container for up to 3-4 days. I usually reheat in 30-second bursts in the microwave, or in the oven at 350 degrees F for 5-10 minutes until heated through.
    Brine Recipe:
    Although brining isn't necessary, if you want to brine your turkey breast follow these directions:
    1. On the day before cooking, combine 4 cups water, ½ cup apple cider vinegar, 1 cup brown sugar, ⅓ cup kosher salt, 1 orange, cut into eighths, 1 lemon, cut into quarters, 2-3 sprigs fresh thyme, 1 bay leaf in a large dutch oven and bring to a simmer.
    2. Simmer for 5 minutes stirring periodically until the sugar and salt have dissolved.
    3. Remove from heat and stir in 4 cups ice water. Cool completely at room temperature.
    4. Once it's almost cool, remove the split turkey breast from it's packaging and submerge it in the brine. Cover and refrigerate over night.
    5. 30 minutes prior to cooking, drain and rinse the turkey breast well. Dry completely and follow the recipe above.

    Nutrition

    Serving: 1servingCalories: 82kcalCarbohydrates: 4gProtein: 0.3gFat: 8gSaturated Fat: 5gPolyunsaturated Fat: 0.3gMonounsaturated Fat: 2gTrans Fat: 0.3gCholesterol: 20mgSodium: 61mgPotassium: 35mgFiber: 1gSugar: 2gVitamin A: 246IUVitamin C: 10mgCalcium: 13mgIron: 0.3mg
    Tried this recipe?Let us know how it was!

    Hosting Thanksgiving?

    Discover the secret to hosting Thanksgiving without all the stress! Prepsgiving is your FREE guide to making a delicious Thanksgiving feast the easy way.

    Apple and Cranberry Crisp

    Nov 4, 2024 · Leave a Comment

    A serving spoon lifting a scoop of apple cranberry crisp from the corner of a white pan of it.

    This apple and cranberry crisp with oatmeal gingersnap topping is a surprisingly easy twist to an old-fashioned favorite! Made with sweet apples, tart cranberries, cookie crumbles, and oats in just over 1 hour.

    A serving spoon lifting a scoop of apple cranberry crisp from the corner of a white pan of it.
    [feast_advanced_jump_to]

    Why You'll Love Apple Cranberry Crisp:

    Now, I love some classic apple crisp as much as the next fruity dessert lover. But, it's always fun to shake things up a bit. Tart cranberries break through the sweetness of the apples and sugar, but the sugar and spices help tone down the overall tartness making it much more subtle and enjoyable.

    To make the topping extra special and just a dash of spicy — not like hot sauce but full of great spiced flavor — I made it with gingersnap cookies and oats. It's an apple crisp... with a twist! It almost tastes a little bit like apple oatmeal but in the best way possible.

    I almost considered making this as a pie instead of a crisp. That's right, after previously crying all the pie tears, I thought about going back in. But then I decided to keep it simple. And stress-free. Toss a few things with your apples and cranberries and then into the pan. Cut some butter in with a few other tasty things and sprinkle over your fruit. Bake it off and bam! An excellent and easy seasonal dessert. Here are a few other reasons to make this apple cranberry crisp recipe:

    • Simple and stress-free dessert option
    • Perfect for end-of-year holidays
    • Fruity, tart, and sweet
    • Unique topping
    • Crunchy on the outside, juicy and tender on the inside
    • Family-friendly
    An overhead image of a white baking dish of Cranberry Apple Crisp with a black and white towel next to it and broken pieces of gingersnap cookies.

    Ingredient Information And Substitutions

    • Apples- You can use any baking-friendly apple for apple cranberry crisp. I like Granny Smith, Cortland, and Braeburn are some of the best apples for apple crisp, but 20 Ounce apples are my favorite for their large size and great flavor.
    • Cranberries- Add that tart flavor I mentioned plus a pop of color. If you don't have any, raspberries can be used in a pinch for a similar taste.
    • Granulated Sugar- Sweetens the filling.
    • Cinnamon- For a touch of warm and cozy spice. You could also use nutmeg, ginger, allspice, or an apple pie spice blend.
    • Lemon Juice- Keeps the fruit from browning too much.
    • Cornstarch- Needed to thicken the filling and prevent the apple and cranberry crisp from getting too runny.
    • Topping- Made with gingersnap cookies, light brown sugar, rolled oats, cinnamon, salted butter, and a pinch of salt.
    Overhead images of labeled recipe ingredients.

    How To Make Cranberry Apple Crisp

    Step 1- Make the filling.

    Add the apples, cranberries, granulated sugar, cinnamon, lemon juice, cornstarch, and salt to a large bowl and mix to combine. Pour the mixture into a 9x13-inch baking pan and set aside.

    An image of filling ingredients in glass bowl next to an image of filling ingredients mixed together in the same bowl.

    Step 2- Prepare the topping.

    In a separate bowl, add the gingersnap cookie crumbs, brown sugar, rolled oats, cinnamon, and salt. Use a pastry cutter or fork to cut in the butter, and combine until the topping has a gravelly texture and the pieces of butter are pea-sized.

    Topping ingredients in a clear bowl next to an image of the butter added to the topping ingredients.

    Step 3- Assemble & bake.

    Sprinkle the topping mixture on top of the filling and bake your apple cranberry crisp until bubbling and the top is golden brown. Let cool slightly before serving and enjoy!

    Filling in a white baking dish next to an image of the topping added to the baking dish.

    Frequently Asked Questions

    What's the difference between apple crumble and apple crisp?

    It's all about the topping. An apple crumble boasts a streusel topping made with butter flour and sugar. A crisp, like my cranberry apple crisp, features oats (and sometimes nuts) in the topping, making it a lot "crisper" than a crumble!

    Can I use frozen cranberries?

    Absolutely! I've made it with both frozen and fresh cranberries and it came out great both times without any other changes.

    What is the best apple for apple crisp?

    Any of the baking apples I mentioned above — Granny Smith, Cortland, or Braeburn — would all work great in apple cranberry oatmeal crisp. My favorite is 20 Ounce Apples since they're really large and still have great flavor (less peeling!). You could even combine a few different varieties for an even more unique flavor.

    How do you keep apple crisp from getting soggy?

    Don't skip the butter in your topping! You really do need a full stick to prevent the whole dish from getting mushy. It will melt as your apple cranberry crisp bakes, which, along with the added cornstarch, helps the fruity filling thicken. Be aware that it will get a bit soggy after the first couple days, though still delicious.

    Does apple crisp need to be refrigerated?

    Technically room temperature is ok for the first couple days, but it will last longer if covered and refrigerated.

    A close up image of a white plate with cranberry apple crisp ala mode.

    Tips For Making My Gingersnap Oatmeal Apple Crisp Recipe

    • Prep all the ingredients before you get started. That means peel, core, and slice the apples, crumble the gingersnaps, and cut the butter into small cubes. This will make the whole process a lot smoother... and faster!
    • When you pour the filling into the baking pan, make sure to spread it evenly so that the bottom of the dish is covered. You'll help ensure that the apple and cranberry crisp bakes evenly and the apples come up perfectly tender.
    • Use a fork to cut in the butter. Or, if you want it to be a bit easier, a pastry cutter works wonders.
    • Check for doneness after around 50 minutes in the oven. You'll know the crisp is ready when the filling is nice and bubbly and the topping is golden brown. Over-baking will lead to dry results!
    • A food processor helps crumble the cookies, but you could also use a meat mallet or rolling pin.
    • Ingredients to prep ahead- As mentioned, you can clean the apples, crush cookies, and dice butter for easier cutting before you get started.
    • Leftovers and storage- Leftovers will keep for 3-4 days in an airtight container in the refrigerator. For the best texture, I recommend reheating covered in the oven at 350 degrees F for 5-10 minutes.
    A close up image of a fork with apple crisp on it next to the plate of it with ice cream on top.

    What To Serve With Cranberry Apple Crisp With Oatmeal

    This dessert just screams fall to me, so I'll often make it during the colder months or for the holidays! I always serve it with some vanilla ice cream. Here are a few other cozy dishes to pair with it:

    • Whole Roasted Chicken
    • Chicken Shepherd's Pie
    • Cheesy Squash Casserole
    • Crispy Parmesan Potatoes
    • Easy Sautéed Vegetables

    Other Delicious Apple Recipes To Try

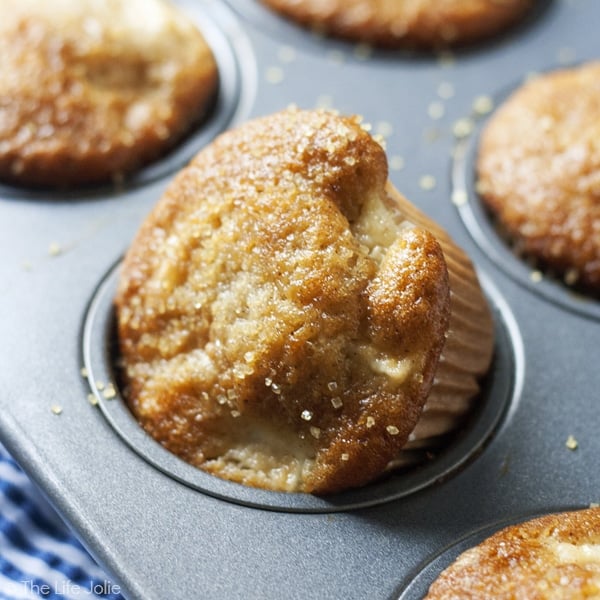
    • Apple Spice Muffins are one of my favorite fall recipes. Made with tasty chunks of apple, applesauce with cinnamon, nutmeg and ginger, they're so easy to make and taste great as breakfast or as a dessert!
      Apple Spice Muffins
    • A close up image of a Brie Apple Phyllo Cup on a pan.
      Brie Apple Phyllo Cups
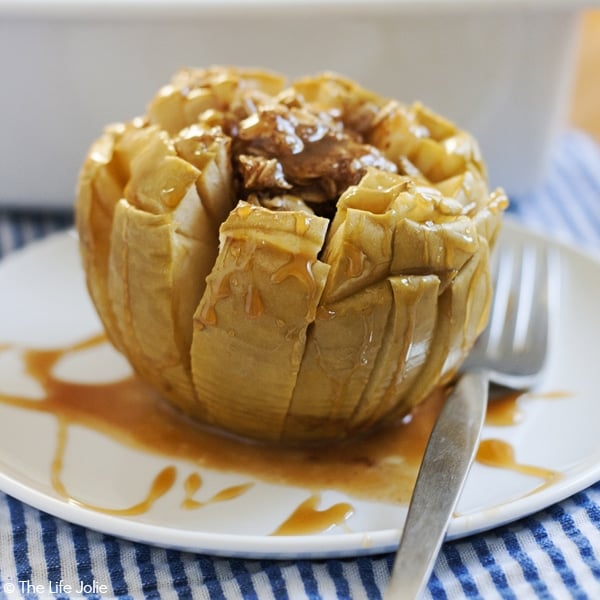
    • This Bloomin' Baked Caramel Apples recipe is the perfect fall dessert! They're quick and easy to make and deliciously sweet!
      Bloomin' Baked Caramel Apples
    • homemade 2 Ingredient Applesauce
      2 Ingredient Applesauce

    Love this recipe? Please leave a 5 star ⭐️⭐️⭐️⭐️⭐️ rating in the recipe card below ⬇️ and/or a review in the comment section further down. Check out my Amazon Store for all my favorite tools, including those used in this recipe. And follow @thelifejolie on Instagram and TikTok!

    A serving spoon lifting a scoop of apple cranberry crisp from the corner of a white pan of it.

    Apple and Cranberry Crisp

    Jessy Freimann
    This apple and cranberry crisp with oatmeal gingersnap topping is a surprisingly easy twist to an old-fashioned favorite! Made with sweet apples, tart cranberries, cookie crumbles, and oats in just over 1 hour.
    5 from 1 vote
    Print Recipe Pin Recipe
    Prep Time 15 minutes mins
    Cook Time 1 hour hr
    Total Time 1 hour hr 15 minutes mins
    Course Dessert
    Cuisine American, Christmas, holidays, seasonal, Thanksgiving
    Servings 10 servings
    Calories 82 kcal

    Equipment

    • 9 x 13 Pan
    • chefs knife
    • cutting board
    • Peeler
    • food processor or meat mallet or rolling pin
    • mixing bowl
    • Spatula
    • wooden spoon
    • Pastry cutter

    Ingredients
      

    Filling:

    • 8 cups sliced apples cored and peeled (I used 20 oz. apples. Any baking-friendly apples will work.)
    • 2 cups fresh cranberries
    • ½ cup granulated sugar
    • 1 teaspoon ground cinnamon
    • 1 Tablespoon lemon juice
    • 2 Tablespoons corn starch
    • 1 pinch Kosher salt

    Topping:

    • 1 ¼ cups gingersnap cookie crumbs around 30 cookies ground up
    • ¼ cup light brown sugar
    • ½ cup old fashioned rolled oats
    • 1 teaspoon cinnamon
    • ½ teaspoon Kosher salt
    • ½ cup cold salted butter cut into small cubes (1 stick)

    Instructions
     

    Filling:

    • Preheat the oven to 350 degrees. In a large mixing bowl, combine sliced apples, cranberries, granulated sugar, cinnamon, lemon juice, corn starch and salt.
    • Mix well and pour into a 9x13 baking pan and set aside.

    Topping:

    • In a medium mixing bowl, combine cookie crumbs, brown sugar, rolled oats, cinnamon and salt.
    • Cut in the butter until it has a gravelly texture and the butter is in pieces the size of peas.
    • Sprinkle this mixture evenly on top of the fruit filling.
    • Bake for 50 minutes to 1 hour or until its bubbling and the top is golden brown. Cool for at least an hour and enjoy.

    Video

    Notes

    • Prep all the ingredients before you get started. That means peel, core, and slice the apples, crumble the gingersnaps, and cut the butter into small cubes. This will make the whole process a lot smoother... and faster!
    • When you pour the filling into the baking pan, make sure to spread it evenly so that the bottom of the dish is covered. You'll help ensure that the apple and cranberry crisp bakes evenly and the apples come up perfectly tender.
    • Use a fork to cut in the butter. Or, if you want it to be a bit easier, a pastry cutter works wonders.
    • Check for doneness after around 50 minutes in the oven. You'll know the crisp is ready when the filling is nice and bubbly and the topping is golden brown. Over-baking will lead to dry results!
    • A food processor helps crumble the cookies, but you could also use a meat mallet or rolling pin.
    • Ingredients to prep ahead- As mentioned, you can clean the apples, crush cookies, and dice butter for easier cutting before you get started.
    • Leftovers and storage- Leftovers will keep for 3-4 days in an airtight container in the refrigerator. For the best texture, I recommend reheating covered in the oven at 350 degrees F for 5-10 minutes.

    Nutrition

    Serving: 1servingCalories: 82kcalCarbohydrates: 20gProtein: 1gFat: 0.3gSaturated Fat: 0.05gPolyunsaturated Fat: 0.1gMonounsaturated Fat: 0.1gSodium: 122mgPotassium: 26mgFiber: 1gSugar: 15gVitamin A: 1IUVitamin C: 1mgCalcium: 11mgIron: 0.3mg
    Tried this recipe?Let us know how it was!

    Hosting Thanksgiving?

    Discover the secret to hosting Thanksgiving without all the stress! Prepsgiving is your FREE guide to making a delicious Thanksgiving feast the easy way.

    Jiffy Cornbread Dressing

    Oct 31, 2024 · 1 Comment

    A close up of a serving spoon in a pan of dressing with some cornbread dressing on it.

    Whether you call it dressing or stuffing, classic Jiffy Cornbread Dressing recipe is a surefire way to turn a non-believer into a stuffing lover. This easy side dish is a must-have at any Thanksgiving table!

    A close up of a serving spoon in a pan of dressing with some cornbread dressing on it.
    [feast_advanced_jump_to]

    Why You'll Love Cornbread Dressing With Sausage

    I've never been much of a dressing fan. I find most recipes to be a bit too mushy for my taste, and I'd generally rather have an extra helping of mashed potatoes. But I have to say, this cornbread stuffing recipe that I'm about to share with you today has totally changed my mind about stuffing.

    Now admittedly, it took me several tests to get this recipe just right. The flavor was there from the start, but I just couldn't get my texture the way I wanted it, which is a slightly crispy top and soft and fluffy in the middle, without being mushy.

    After four tests and a whole lot of stuffing later, I feel confident that I (finally) nailed it. Here are just a few reasons to try it yourself:

    • Perfect for the holidays
    • Crispy on the outside, fluff on the inside
    • Full of savory flavors
    • Hearty and comforting
    • Classic and nostalgic recipe
    • Family-friendly
    An overhead image of a pan of cornbread dressing with a serving spoon in it and a plaid towel and herbs around it.

    Ingredient Information And Substitutions

    • Cornbread- I like to use Jiffy cornbread mixes because they're super easy! If you would rather use one of your favorites, just know that this recipe calls for two 8-inch pans of cornbread. Day-old cornbread will give you the best texture!
    • Sausage- I like pork sausage for this, but if you want to make it healthier, feel free to use poultry sausage.
    • Vegetables- Onions and celery add delicious flavor and texture. I sauté them in the grease from the sausage and a little butter to really maximize the flavor.
    • Seasonings- The combination of ground sage, dried thyme, kosher salt, and black pepper really brings it all together!
    • Chicken or Turkey Broth- I don't use dressing to stuff my turkey so I add some broth for moisture.
    An overhead image of labeled recipe ingredients.

    How To Make Cornbread And Sausage Stuffing

    Step 1- Cook the sausage and veggies.

    Preheat your oven to 350 degrees F and grease a 9x13-inch pan.

    Place a large sauté pan over medium-high heat. Add the sausage and break it up into smaller pieces with a wooden spoon as it cooks. When browned, remove from the pan and set aside.

    Add some butter to the same pan and cook the onion and celery with the sage, thyme, salt, and pepper until softened.

    THe first image is browned sausage in a sauté pan and the second is onions and celery sautéing in the sausage grease and butter.

    Step 3- Assemble the dressing.

    Add the cooked sausage back into the pan and then crumble in both cornbreads. Pour in the broth and gently mix everything together until just combined. Be careful not to over mix as the corn bread with continue to break down the more you mix it.

    Sausage added back to the pan of vegetables next to a second image of crumbled cornbread added to the pan.

    Step 5- Add to the pan and bake.

    Pour the cornbread mixture into the prepared baking pan. Cover the baking dish with foil and bake for 30 minutes. Remove the cover and bake your cornbread stuffing with sausage for another 15 minutes. Serve immediately and enjoy!

    An image of the mixed together dressing in the baking pan next to an image of the foil covered baking pan in the oven.

    Frequently Asked Questions

    What is the difference between stuffing and dressing? 

    Technically speaking, stuffing is stuffed into another food (like a turkey) and dressing is baked in a pan. But... so many use the words interchangeably, including myself. For all intents and purposes of this recipe, there is no difference!

    Do I have to dry out cornbread for stuffing?

    No, you don't have to. I like to dry mine out because I feel it creates the very best texture — speaking as someone who cannot stand mushy stuffing. If you don't mind a softer look and feel, you can skip that step and mix it together even more in the sauté pan to break it down more.

    How long do I cook cornbread sausage stuffing in the oven?

    I bake mine for a total of 45 minutes — 30 minutes covered and then another 15 minutes without the cover. Your oven may be different than mine, so start checking for doneness in the last 5 minutes of cooking to prevent burning.

    Can I make stuffing ahead of time?

    Yes! You have two options. Follow the recipe as written, but hold off on baking until ready to serve — store it covered in the refrigerator in the meantime. You may need to adjust the cooking time to make sure it warms through. The other option is to prepare it fully and then reheat before serving this second option could be slightly drier.

    Can I stuff my turkey with this instead of baking it in a pan? 

    Absolutely! As a note, this recipe makes enough cornbread and sausage stuffing to fill one 12-14 pound turkey. Just make sure that the stuffing cooks to an internal temperature of 165 degrees F in addition to the turkey to avoid food borne illness.

    A close up image showing the texture of the sausage cornbread stuffing.

    Tips For Making Old Fashioned Cornbread Dressing

    • I always make the cornbread the night before and leave it out all night. It becomes slightly stale, which helps prevent the stuffing from getting mushy.
    • Cook the sausage until it's no longer pink. You want it to be completely browned for the best flavor.
    • But... don't overcook the veggies. Sauté the onion and celery until they're softened but still have a bit of crunch. As you can tell, texture is super important here!
    • Remember to remove the foil for the last 15 minutes of baking time. It really helps the whole thing crisp up!
    • Make-Ahead Instructions: You have two options. Follow the recipe as written, but hold off on baking until ready to serve — store it covered in the refrigerator in the meantime. You may need to adjust the cooking time to make sure it warms through. The other option is to prepare it fully and then reheat before serving this second option could be slightly drier.
    • If using this dressing to stuff inside your turkey: this makes enough stuffing to fill one 12-14 pound turkey. Just make sure that the stuffing cooks to an internal temperature of 165 degrees F in addition to the turkey to avoid food borne illness.
    • Ingredients to prep ahead- If you want to make extra progress on your Thanksgiving Day prep, you can make the cornbread and chop the onions and celery in advance. And remember to refer to my make-ahead instructions above to really get ahead!
    • Leftovers and storage- Cornbread sausage stuffing will keep for 3-4 days in the refrigerator after it's been cooked. To reheat, use your microwave or your oven to crisp it back up.
    An overhead close up image of a spoonful of dressing in the pan of it.

    What To Serve With Cornbread With Sausage Dressing

    I typically only make cornbread sausage dressing for Thanksgiving, but sometimes I'll whip up a batch for Christmas too! Here are some more of my favorite holiday dishes to pair with it:

    • Baked Brie Phyllo Cups
    • Turkey with Oranges and Rosemary
    • Roasted Garlic Mashed Potatoes
    • Cheesy Corn Casserole
    • Old Fashioned Pecan Pie
    • Classic Pumpkin Pie

    Other Delicious Holiday Side Dish Recipes To Try

    • This Salad with Shredded Brussel Sprouts Recipe is the perfect fall side dish. Made with apples and dried cherries and topped with a warm bacon dressing, this is the best way to make even the most avid Brussels Sprouts hater to change their minds!
      Salad with Shredded Brussel Sprouts Recipe
    • A plate of artichoke hearts with a fork on it and a white and red napkin and garlic behind it.
      Grandma's Baked Artichoke Hearts
    • A plate of garlic green beans with a striped towel, garlic bulbs and parsley in the background.
      Garlic And Butter Green Beans
    • A close up of a serving spoon in a pan of savory sweet potato casserole.
      Savory Sweet Potato Casserole

    Love this recipe? Please leave a 5 star ⭐️⭐️⭐️⭐️⭐️ rating in the recipe card below ⬇️ and/or a review in the comment section further down. Check out my Amazon Store for all my favorite tools, including those used in this recipe. And follow @thelifejolie on Instagram and TikTok!

    A close up of a serving spoon in a pan of dressing with some cornbread dressing on it.

    Jiffy Cornbread Dressing

    Jessy Freimann
    Whether you call it dressing or stuffing, classic Jiffy Cornbread Dressing recipe is a surefire way to turn a non-believer into a stuffing lover. This easy side dish is a must-have at any Thanksgiving table!
    5 from 6 votes
    Print Recipe Pin Recipe
    Prep Time 10 minutes mins
    Cook Time 1 hour hr
    Total Time 1 hour hr 10 minutes mins
    Course side, Side Dish
    Cuisine American
    Servings 10 servings
    Calories 161 kcal

    Equipment

    • chefs knife
    • cutting board
    • measuring cups
    • measuring spoons
    • Large saute pan
    • wooden spoon
    • 9 x 13 Pan

    Ingredients
      

    • Cooking spray
    • 1 pound pork sausage
    • 1 Tablespoon salted butter
    • 2 cups onion, finely diced (around 2 medium onions)
    • 3 large celery ribs, finely diced
    • ½ teaspoon ground sage
    • ½ teaspoon dried thyme
    • 1 teaspoon kosher salt
    • ¼ teaspoon ground black pepper
    • 2 8 inch pans prepared, day-old corn bread, (I made 2 pans of Jiffy corn bread the day before and left it out all night)
    • 1 14.5 ounce can chicken broth (omit this if you're using this as stuffing- it makes enough to stuff a 12-14 pound bird)

    Instructions
     

    • Preheat the oven to 350 degrees. Grease a 9" x 13" pan with cooking spray and set aside.
    • In a large saute pan, saute the sausage over medium-high heat using a wooden spoon to break it up into bite-size pieces, stirring often until brown, about 10 minutes.
    • Remove the sausage crumbles from the pan, into a side bowl and melt butter in the empty pan.
    • Add onions and celery and season with sage, thyme, salt and pepper. Saute stirring often until soft, about 5 minutes.
    • Stir sausage back into the pan and crumble both corn breads into the pan. Add broth and stir until just combined.
    • Pour the corn bread mixture into the greased 9" x 13" pan and cover with foil.
    • Bake for 30 minutes. Uncover and bake for another 15 minutes. Serve immediately.

    Video

    Notes

    • I always make the cornbread the night before and leave it out all night. It becomes slightly stale, which helps prevent the stuffing from getting mushy.
    • Cook the sausage until it's no longer pink. You want it to be completely browned for the best flavor.
    • But... don't overcook the veggies. Sauté the onion and celery until they're softened but still have a bit of crunch. As you can tell, texture is super important here!
    • Remember to remove the foil for the last 15 minutes of baking time. It really helps the whole thing crisp up!
    • Make-Ahead Instructions: You have two options. Follow the recipe as written, but hold off on baking until ready to serve — store it covered in the refrigerator in the meantime. You may need to adjust the cooking time to make sure it warms through. The other option is to prepare it fully and then reheat before serving this second option could be slightly drier.
    • If using this dressing to stuff inside your turkey: this makes enough stuffing to fill one 12-14 pound turkey. Just make sure that the stuffing cooks to an internal temperature of 165 degrees F in addition to the turkey to avoid food borne illness.
    • Ingredients to prep ahead- If you want to make extra progress on your Thanksgiving Day prep, you can make the cornbread and chop the onions and celery in advance. And remember to refer to my make-ahead instructions above to really get ahead!
    • Leftovers and storage- Cornbread sausage stuffing will keep for 3-4 days in the refrigerator after it's been cooked. To reheat, use your microwave or your oven to crisp it back up.

    Nutrition

    Serving: 1servingCalories: 161kcalCarbohydrates: 3gProtein: 7gFat: 13gSaturated Fat: 5gPolyunsaturated Fat: 2gMonounsaturated Fat: 6gTrans Fat: 0.1gCholesterol: 36mgSodium: 532mgPotassium: 161mgFiber: 1gSugar: 1gVitamin A: 72IUVitamin C: 3mgCalcium: 13mgIron: 1mg
    Tried this recipe?Let us know how it was!

    Hosting Thanksgiving?

    Discover the secret to hosting Thanksgiving without all the stress! Prepsgiving is your FREE guide to making a delicious Thanksgiving feast the easy way.

    Roasted Fall Vegetables

    Oct 28, 2024 · 2 Comments

    A close up overhead image of roasted autumn vegetables on a pan.

    Roasted fall vegetables, but make them fancy! This recipe takes all your fall favorites and kicks them up a notch with olive oil, apple cider vinegar, and a seriously delicious mix of spices. Roasted fall veggies are simple enough to make on a weeknight (and ready in under 1 hour!) but special enough for any holiday table.

    A close up image of roasted vegetables on a pan.
    [feast_advanced_jump_to]

    Why You'll Love Autumn Roasted Vegetables:

    I'd be lying if I said that roasted veggies are super exciting. What a way to start a post about them, huh? I think we can get our five-a-day in much more delicious ways, so naturally, I had to make a recipe of my own.

    I decided to go with some killer fall (or autumn... however you like to say it!) options and am thrilled with how they came out. It's the perfect combination of cozy veggies that have the right texture with a bit of brown to them.

    If you're not convinced, there's so much more to love about this rfall roasted veggies recipe:

    • Perfectly browned every time
    • Versatile side dish
    • Wholesome and hearty
    • Family-friendly
    • Affordable
    • Customizable — choose your favorite veg!
    An overhead image of a sheet pan of roasted veggies with a green towel next to it.

    Ingredient Information And Substitutions

    • Vegetables- I chose red onion, Brussels sprouts, carrots, parsnips, and buttercup squash, which is a smaller, sweeter version of butternut squash that doesn't even need to be peeled. You can always substitute butternut instead, but be sure to peel it if you do. Honestly, any heavier root veggie cut to similar size is a great option in this.
    • Olive Oil- I like olive oil for roasted fall veggies — it has a light flavor and it's one of my favorite ways to get more healthy fats in my diet.
    • Apple Cider Vinegar- I also use apple cider vinegar. Don't skip it, as it helps balance everything out!
    • Seasonings- The combination of salt, black pepper, garlic powder, dried thyme, sweet paprika, and ground cinnamon gives these a great flavor. You can totally use fresh chopped thyme if you prefer (double the amount for fresh thyme). I used dried to keep things as simple as possible.
    An overhead image of labeled recipe ingredients.

    How To Make Roasted Autumn Vegetables

    Step 1- Recipe prep.

    Preheat your oven to 400 degrees F and line two baking sheets with parchment paper. If you haven't chopped the veggies yet, do it now and mix together in a large bowl.

    Root veggies mixed together in a glass bowl.

    Step 2- Season veggies.

    Add all of the veggies to the baking sheets and drizzle with olive oil and vinegar, then add the seasonings. Gently toss to coat and spread in a single layer.

    Seasoned veggies spread out in a single layer on a lined sheet pan.

    Step 3- Bake.

    Roast for 20 minutes uncovered, then flip veggies before cooking for 20 minutes more. Serve immediately and enjoy!

    A pan of veggies in the oven.

    Frequently Asked Questions

    What temperature is best for roasting vegetables?

    I wrote this recipe for 400 degrees F — definitely don't go below that! Higher heats tend to yield the best texture, but 400 is manageable so you don't overcook them.

    Do you roast vegetables in the oven covered or uncovered?

    Bake your autumn roasted veggies uncovered. Covering them will cause them to steam, and they'll soften too quickly.

    Can I make roasted vegetables ahead?

    Yes! If you want to make these in advance, remove them from the oven 10 minutes early. Bring them to room temperature before reheating until warmed through.

    Should I salt the vegetables before roasting?

    Yes, I encourage you to season them well before roasting.

    Why won't my roast veggies go crispy?

    Remember to set the oven to at least 400 degrees F for the best texture. Also, leave them in the oven for the full baking time. If you find the vegetables need more time, please do leave them for longer! All ovens are different, so feel free to adjust. Also, better browning occurs if you don't line the pan- just be sure to grease the pan first so they don't stick..

    Do you put oil on vegetables before roasting?

    Yes! Toss the veggies in oil before you roast them. Don't skip that important fat — it adds flavor and helps with texture and browning, which obviously won't happen if you add it after they're already cooked.

    Can you freeze roasted vegetables?

    Yes- but I say that with a caveat. If you can, I'd encourage you to take the bake the veggies for half the time and then finish them in the oven once thawed. This is to protect the texture.

    A very close up image ot roasted root veggies on a parchment lined sheet pan.

    Tips For Making Roasted Fall Veggies

    • Be sure to cut the veggies into equal-sized chunks so they cook evenly.
    • Line the sheet pans with parchment. You'll see a bit less browning but you'll get easier clean up.
    • I split the vegetables between two sheet pans. This gives me enough room to spread them out in a single layer. If they're piled on top of each other, they will steam and soften up too much.
    • Flip once halfway through cooking so they have a chance to start to brown on each side.
    • Ingredients to prep ahead- Lots of peeling and cutting can be done ahead of time! Cut the onion, peel and cut the carrots, clean and cut the squash (and peel if using butternut), clean, trim, and cut the Brussels sprouts, and peel and cut the parsnips. You can store the chopped veggies in water with a squeeze of lemon to keep them from oxidizing and turning brown.
    • Leftovers and storage- I love using these leftovers in salads and wraps the next day! They'll keep for up to 4 days in an airtight container in the fridge. To reheat, use an air fryer or your oven for the best texture. Microwaving could cause them to go mushy.
    A close up overhead image of roasted autumn vegetables on a pan.

    What To Serve With Roasted Vegetables

    I usually serve roasted fall vegetables as part of a larger cozy and comforting meal! They pair great with a variety of mains and other sides. Here are a few options to inspire you:

    • Whole Roasted Chicken
    • Chicken Shepherd's Pie
    • Grilled Steak
    • Crispy Fried Potatoes
    • Pasta Pomodoro

    Other Delicious Veggie Recipes To Try

    • A close up image of sautéed veggies in a pan with a wooden turner in it.
      Easy Sautéed Vegetables
    • Garlic Parmesan Roasted Broccoli is a seriously easy side dish with a tasty kick of flavor. Just toss your broccoli florets with a few simple ingredients, pop them in the oven and you've go a deliciously addictive side dish!
      Garlic Parmesan Roasted Broccoli
    • These Sautéed Shredded Brussel Sprouts and a festive holiday side dish recipe that's also super quick and easy to make! Made with Brussel Sprouts, Shallots, Pancetta, Holland House Sherry Cooking Wine and fresh Pomegranate Seeds.
      Sautéed Shredded Brussel Sprouts featuring Holland House Cooking Wines
    • A wooden spoon stirring a pan of zucchini and tomatoes.
      Sautéed Zucchini And Tomatoes

    Hosting Thanksgiving?

    Discover the secret to hosting Thanksgiving without all the stress! Prepsgiving is your FREE guide to making a delicious Thanksgiving feast the easy way.

    Love this recipe? Please leave a 5 star ⭐️⭐️⭐️⭐️⭐️ rating in the recipe card below ⬇️ and/or a review in the comment section further down. Check out my Amazon Store for all my favorite tools, including those used in this recipe. And follow @thelifejolie on Instagram and TikTok!

    A close up overhead image of roasted autumn vegetables on a pan.

    Roasted Fall Vegetables

    Jessy Freimann
    Roasted fall vegetables, but make them fancy! This recipe takes all your fall favorites and kicks them up a notch with olive oil, apple cider vinegar, and a seriously delicious mix of spices. Roasted fall veggies are simple enough to make on a weeknight (and ready in under 1 hour!) but special enough for any holiday table.
    4.84 from 6 votes
    Print Recipe Pin Recipe
    Prep Time 10 minutes mins
    Cook Time 40 minutes mins
    Total Time 50 minutes mins
    Course side, Side Dish, Vegetarian
    Cuisine American
    Servings 8 servings
    Calories 181 kcal

    Equipment

    • measuring spoons
    • measuring cups
    • chefs knife
    • cutting board
    • sheet pan

    Ingredients
      

    • 1 large red onion, peeled and cut into 1 ½ inch chunks
    • 4 medium carrots, peeled and cut into 1 ½ inch chunks
    • 1 medium butternut squash peeled and cut into 1 ½ inch chunks (or 2 small buttercup squash- if using buttercup squash, no need to peel)
    • 12 large brussels sprouts, trimmed and halved
    • 3 medium parsnips peeled and cut into 1 ½ inch chunks
    • ¼ cup olive oil
    • 2 Tablespoons apple cider vinegar
    • 3 teaspoons kosher salt
    • ¾ teaspoon ground black pepper
    • 1 ½ teaspoons garlic powder
    • 1 ½ teaspoons dried thyme
    • 1 teaspoon paprika
    • ¾ teaspoon ground cinnamon

    Instructions
     

    • Preheat the oven to 400 degrees and line 2 sheet pans with parchment.
    • Mix the veggies and place onto one of the sheet pans.
    • Drizzle vegetables with oil, vinegar and all spices and seasonings. Use your hands to gently toss vegetables until evenly coated.
    • Place half the vegetables on the other sheet pan and spread veggies out into a single layer on each pan.
    • Bake for 20 minutes uncovered. Remove from oven and turn vegetables.
    • Bake for 20 more minutes. Serve immediately.

    Video

    Notes

    • Be sure to cut the veggies into equal-sized chunks so they cook evenly.
    • Line the sheet pans with parchment. You'll see a bit less browning but you'll get easier clean up.
    • I split the vegetables between two sheet pans. This gives me enough room to spread them out in a single layer. If they're piled on top of each other, they will steam and soften up too much.
    • Flip once halfway through cooking so they have a chance to start to brown on each side.
    • Ingredients to prep ahead- Lots of peeling and cutting can be done ahead of time! Cut the onion, peel and cut the carrots, clean and cut the squash (and peel if using butternut), clean, trim, and cut the Brussels sprouts, and peel and cut the parsnips. You can store the chopped veggies in water with a squeeze of lemon to keep them from oxidizing and turning brown.
    • Leftovers and storage- I love using these leftovers in salads and wraps the next day! They'll keep for up to 4 days in an airtight container in the fridge. To reheat, use an air fryer or your oven for the best texture. Microwaving could cause them to go mushy.

    Nutrition

    Serving: 1servingCalories: 181kcalCarbohydrates: 29gProtein: 3gFat: 7gSaturated Fat: 1gPolyunsaturated Fat: 1gMonounsaturated Fat: 5gSodium: 911mgPotassium: 797mgFiber: 7gSugar: 8gVitamin A: 15408IUVitamin C: 57mgCalcium: 99mgIron: 2mg
    Tried this recipe?Let us know how it was!

    Baked Broccoli Mac and Cheese

    Oct 24, 2024 · Leave a Comment

    A serving spoon holding up a scoop of broccoli mac and cheese from the pan.

    This Baked Broccoli Mac and Cheese recipe is about to be your new favorite recipe for Meatless Monday! It's creamy, delicious and seriously easy to make- and best of all, ready in under an hour!

    A serving spoon holding up a scoop of broccoli mac and cheese from the pan.
    [feast_advanced_jump_to]

    Why You'll Love Baked Broccoli Macaroni And Cheese

    As far as I'm concerned, you can give me alllllll the homemade mac and cheese recipes and I will happily try them all! Variety is the spice of life and with that in mind, I figured why not make an easy variation of my Baked Mac and Cheese recipe?

    This is seriously creamy with tender/crisp (but not overcooked) broccoli and a deliciously crispy crust with a little bit of crunch. And best of all, the only real work is making the cheese sauce- and even that is super simple! Here's why I love it:

    • Simple ingredients
    • Ready in under 1 hour
    • Family-friendly- a great way to get kids to eat veggies
    • Cozy and Comforting
    • Creamy and decadent without being too heavy
    An overhead image of the pan of mac and cheese with broccoli, raw pasta and a blue and white towel next to it.

    Ingredient Information And Substitutions

    • Pasta- My pasta of choice for this is medium shells, but any small pasta works- like elbows!
    • Broccoli- I used frosh but if you plan to use frozen then you can skip the blanching step.
    • Roux- You'll make a roux with butter and flour to thicken your cheese sauce. I prefer salted butter for added flavor.
    • Milk- I used milk as the sauce base to make this creamy without being overly rich. I prefer whole milk. You can use half and half or heavy cream if you want, but it'll be much richer.
    • Seasonings- A combination of Kosher salt, ground black pepper, garlic powder and nutmeg round out the flavors.
    • Cheese- It's not mac and cheese without a healthy dose of shredded cheese. I prefer sharp cheddar for this but you could also use Colby, Monterey jack, mozzarella or any combo of these. If you grate it yourself, it melts easier, but pre-grated works just fine as well.
    • Seasoned Panko- Any great baked macaroni and cheese needs a deliciously crispy topping, so seasoned Panko adds just the right amount of crunch and flavor.
    An overhead image of labeled recipe ingredients.

    How To Make Mac And Cheese With Broccoli

    Step 1- Blanch broccoli and melt butter.

    Preheat the oven to 350 degrees F. In a small pan of boiling water, blanch broccoli for 2 minutes before draining and plunging into an ice bath to stop the cooking. Drain well and set aside.

    While you blanch the broccoli, melt the butter over medium heat in a medium size saucepan.

    An image of broccoli cooking in boiling water next to a picture of butter melting in a pan.

    Step 2- Make a roux.

    Once the butter is melted, whisk in the flour until no lumps remain. Cook the roux, whisking often for 2 minutes.

    A picture of flour added to the butter and a picture of it all whisked in as a roux.

    Step 3- Make the sauce.

    Whisk in the milk and all the seasonings and stir continuously until the sauce is thickened and coats the back of a spoon.

    While you make the sauce, boil the pasta in salted water 2 minutes less than package directions for al dente. Drain well.

    A picture of pasta cooking in boiling water next to a a picture of the sauce thickening with a whisk stirring it.

    Step 4- Add the cheese to the sauce.

    Turn off the heat and stir 2 cups of shredded cheese into the sauce until it's fully melted and smooth.

    Shredded cheddar added to the sauce next to a picture of the cheese fully melted into the sauce.

    Step 5- Add the pasta and broccoli.

    Add the drained pasta and broccoli to the cheese sauce and stir to combine. Pour the mixture into the baking pan.

    pasta and broccoli mixed into the cheese sauce next to a picture of the mixture once it's been poured into the baking pan.

    Step 6- Top and bake.

    Sprinkle remaining cheese and seasoned Panko in an even layer on top of the mac and cheese and bake for 20 minutes until golden brown and bubbly. Cool for a few minutes and devour.

    Cheese and panko on top of the mac and cheese next to an image of the pan in the oven.

    Frequently Asked Questions

    How do you store mac and cheese?

    In an airtight container in the refrigerator for up to 5 days. This can be reheated in the oven or microwave but is best served right away.

    What size baking dish do you use?

    I use an 11" x 7" or a 2 quart casserole dish.

    Can I use frozen broccoli instead of fresh?

    Sure, just skip the blanching step and add it frozen so it doesn't overcook and get mushy.

    Can mac and cheese be frozen?

    Yes, I'd encourage you to freeze this before baking. You can freeze it for up to 3 months, well-covered. When you're ready to make it, thaw over night and bake. Be aware, the pasta could get a mushy texture.

    A bowl of broccoli shells and cheese with the pan behind it.

    Tips For Making Broccoli And Cheese Pasta

    • Cook the pasta a bit less than al dente- which is about 2 minutes less than the al dente cooking time listed on the package to prevent your cooked macaroni from getting mushy.
    • Cook the roux for a couple minutes- you want to make sure to cook the raw flour flavor out before adding the liquid.
    • until smooth and the cheese is melted.
    • Don't use too high heat for the sauce- make sure you cook the sauce over medium heat because the milk will scald if the heat is too high.
    • You'll know the sauce is ready for the cheese because it will coat the back of a spoon. Then you'll turn off the heat, add the shredded cheese and whisk
    • Shredding cheese yourself is the best way to get it to melt nicely, but store bought pre shredded cheese works fine too.
    • If you don't want a crispy topping just hold off from adding the cheese and panko topping until 5 minutes before the end of the total cooking time.
    • Ingredients to prep ahead- shred the cheese, blanch the broccoli.
    • Leftovers and storage- This is best served right away, but will last up to 5 days covered in the fridge. Reheat individual potions in the microwave.
    A close up image of the bowl of broccoli mac and cheese.

    What To Serve With Broccoli Cheddar Pasta

    I love to serve this along side a green salad and these recipes also pair nicely with it:

    • Marinated Vegetable Salad
    • BLT Ranch Flat Bread
    • Savory Sautéed Green Beans
    • Candy Brownie Bites

    Other Delicious Mac and Cheese Recipes

    • A close up of a pan of baked mac and cheese with a spoon in it.
      Old Fashioned Baked Macaroni and Cheese
    • A bowl of bacon mac and cheese.
      Baked Mac And Cheese With Bacon
    • A bowl of stovetop mac and cheese with a spoon in it.
      Stove Top Creamy Mac and Cheese

    Love this recipe? Please leave a 5 star ⭐️⭐️⭐️⭐️⭐️ rating in the recipe card below ⬇️ and/or a review in the comment section further down. Check out my Amazon Store for all my favorite tools, including those used in this recipe. And follow @thelifejolie on Instagram and TikTok!

    A serving spoon holding up a scoop of broccoli mac and cheese from the pan.

    Baked Broccoli Mac and Cheese Recipe

    Jessy Freimann
    This Baked Broccoli Mac and Cheese recipe is about to be your new favorite recipe for Meatless Monday! It's creamy, delicious and seriously easy to make- and best of all, ready in under an hour!
    5 from 1 vote
    Print Recipe Pin Recipe
    Prep Time 10 minutes mins
    Cook Time 35 minutes mins
    Total Time 45 minutes mins
    Course dinner, Main, Main Course, Main dish
    Cuisine American
    Servings 8 servings
    Calories 120 kcal

    Equipment

    • 1 Small sauce pan
    • 1 Sauce pan
    • 1 11" x 7" baking dish
    • 1 Whisk
    • 1 Box grater
    • 1 Measuring Spoons and Cups

    Ingredients
      

    • 2 cups medium shell pasta, cooked 2 minutes less than the al dente cooking time on the package
    • 2 cups diced fresh broccoli
    • 4 Tablespoons salted butter
    • ¼ cup flour
    • 3 cups whole milk
    • ½ teaspoon kosher salt
    • ¼ teaspoon ground black pepper,
    • ¼ teaspoon garlic powder
    • 1 Pinch ground nutmeg
    • 3 cups shredded sharp cheddar, divided
    • ⅓ cup seasoned panko bread crumbs

    Instructions
     

    • Preheat oven to 350 degrees. Place broccoli into boiling water and cook for 2 minutes before draining and plunging into an ice bath to stop the cooking process. Drain well and set aside.
    • In a medium pot, melt butter over medium heat. Add flour and whisk until no lumps remain. Cook for 2 minutes, whisking often.
    • Whisk in milk, salt, pepper, garlic powder and nutmeg. Cook for 5-7 minutes continuously whisking (to prevent the milk from scalding) until thickened.
    • Turn off the heat and add 2 cups shredded cheese. Whisk until smooth and the cheese is melted. Mix well with cooked pasta and broccoli.
    • Pour the pasta mixture into an 11" x 7" baking pan. Sprinkle the top with remaining cheddar cheese and panko bread crumbs.
    • Bake uncovered for 20 minutes, cool for a few minutes and serve immediately.

    Video

    Notes

    • Cook the pasta a bit less than al dente- which is about 2 minutes less than the al dente cooking time listed on the package to prevent your cooked macaroni from getting mushy.
    • Cook the roux for a couple minutes- you want to make sure to cook the raw flour flavor out before adding the liquid.
    • until smooth and the cheese is melted.
    • Don't use too high heat for the sauce- make sure you cook the sauce over medium heat because the milk will scald if the heat is too high.
    • You'll know the sauce is ready for the cheese because it will coat the back of a spoon. Then you'll turn off the heat, add the shredded cheese and whisk
    • Shredding cheese yourself is the best way to get it to melt nicely, but store bought pre shredded cheese works fine too.
    • If you don't want a crispy topping just hold off from adding the cheese and panko topping until 5 minutes before the end of the total cooking time.
    • Ingredients to prep ahead- shred the cheese, blanch the broccoli.
    • Leftovers and storage- This is best served right away, but will last up to 5 days covered in the fridge. Reheat individual potions in the microwave.

    Nutrition

    Serving: 1servingCalories: 120kcalCarbohydrates: 7gProtein: 3gFat: 9gSaturated Fat: 5gPolyunsaturated Fat: 0.3gMonounsaturated Fat: 2gTrans Fat: 0.2gCholesterol: 26mgSodium: 225mgPotassium: 146mgFiber: 0.2gSugar: 4gVitamin A: 324IUVitamin C: 0.01mgCalcium: 115mgIron: 0.2mg
    Tried this recipe?Let us know how it was!

    Bacon Cheeseburger Tater Tot Casserole

    Oct 21, 2024 · 6 Comments

    An overhead image of a cheeseburger casserole covered in tater tots on a green towel with shredded cheddar cheese next to it.

    My kids do not stop requesting this Bacon Cheeseburger Tater Tot Casserole Recipe; it's simple comfort food at it's finest and perfect for busy weeknights. Best of all: it's ready in under an hour!

    A spoon holding up a school of cheeseburger tater tot casserole from the pan.
    [feast_advanced_jump_to]

    Why You'll Love This Cheese Burger Tater Tot Casserole Recipe

    Sometimes you just need a good casserole. Or in this case, a good tater tot casserole. I don't care how refined you are, it's impossible not to love tots. And on a busy weeknight, especially in chilly winter weather, there is nothing like a stick-to-your-bones casserole to warm you up!

    This recipe for tater tot casserole was inspired by another time-honored American tradition; a classic cheeseburger and fries. But made that much more comforting by putting it in casserole form. What's not to like?

    I think in the midwest this is called a Hot Plate. Please feel free to correct me if I'm wrong. I am a born-and-bred Western, NY gal after all. Here's why it's amazing:

    • Ready in under 1 hour
    • Very kid-friendly
    • Warm and cozy for a chilly night
    • Simple, easy-to-find ingredients
    An overhead image of a cheeseburger casserole covered in tater tots on a green towel with shredded cheddar cheese next to it.

    Ingredient Information and Substitutions

    • Meat- Putting the "bacon" and "burger" into this recipe you have ground beef and bacon. I use 80/20 ground beef but you can totally use a leaner mix if you prefer.
    • Veggies- Chopped onion brings tons of flavor and peas are also a tasty addition and add a little extra nutrition.
    • Cheese- Shredded sharp cheddar is my preferred cheese for this. You can do American cheese if that's your preference or even pepper jack to give it a little kick.
    • Liquid- The liquid components of this are cream of mushroom soup and beef broth. This is thickened with cornstarch.
    • Seasoning- I seasoned this with a combination of Kosher salt, ground black pepper and plenty of chili powder.
    • Tater Tots- Tots line the top of the casserole for the perfect, crispy golden-brown potatoes in every bite! The exact amount will vary by the shape of your baking dish, but it's somewhere around 60 aka a regular size bag will be fine.
    An overhead image of the labeled recipe ingredients.

    How To Make Tater Tot Casserole

    Step 1- Cook the bacon and onion

    Cook up 3 slices of bacon in a large sauté pan and drain on a paper towel lined plate. Once cooled crumble or chop the bacon and set aside.

    Sauté onions in the leftover bacon grease.

    2 Images of a sauté- the first is bacon cooking in the pan, the second is onions cooking in the grease left from the bacon.

    Step 2- Cook and season the beef

    Add the ground beef to the pan and break it up with a wooden spoon. Once cooked add in the seasonings and cornstarch and mix well.

    An image of ground beef browning in the pan with onions and an image of the seasonings added in with the cooked beef.

    Step 3- Add liquids and simmer

    Stir in the broth and cream of mushroom soup and simmer for 10 minutes to thicken and then stir in the peas.

    The first image is broth and cream of mushroom soup mixed into the pan and simmering and the second is peas added to the thickened casserole base.

    Step 4- Assemble the casserole

    Pour the beef mixture into a casserole dish and sprinkle shredded cheddar and crumbled bacon evenly over the top.

    The first image is a white square casserole dish with the beef mixture poured into it and the second is cheddar cheese and crumbled bacon sprinkled on top of the casserole.

    Step 5- Add tater tots and bake

    Place the tater tots on top in a single layer until full covered and bake at 400 degrees F for 30 minutes. Cool for a couple minutes and devour!

    The first image is the tater tots placed on top of the casserole in a single layer and the second is the casserole going into the oven to bake.

    Frequently Asked Questions

    Are tater tots potatoes?

    Yes! They're grated and formed into the cute "tot" shape we all know and love!

    Whats the best brand of tater tots?

    I don't have a preference- I love them all!

    Can I freeze bacon cheeseburger tater tot casserole?

    I wouldn't encourage you to freeze it before baking but you can freeze it after baking- cool completely, wrap well and thaw before reheating. It will last up to 3 months in the freezer.

    Can I make it ahead?

    Yes- my best advice is to assemble but don't bake until you're ready to serve.

    A bowl of tater tot casserole with the pan behind it, a green towel and shredded cheese in the background.

    Tips For Making Cheesy Tater Tot Casserole

    • Don't skip the bacon! The grease really brings it all together.
    • If your kids aren't big onion fans, mince the onion extra small for great flavor but minimal texture.
    • Let the meat cook a tad more after you add the seasonings. It'll deepen the flavor.
    • Make tight rows of tater tots and try not to press them in too much. You want them to gently rest on top of the filling so that as much of the tater tot tops is exposed to get perfectly golden brown.
    • Ingredients to prep ahead- Dice onion and grate the cheese
    • Leftovers and storage- Store any leftovers in an airtight container in the refrigerator for up to 3-4 days. To reheat, microwave in 30-second bursts.
    A close up image of the tater tots on top of the casserole.

    What To Serve With Tater Tot Casserole Recipe

    I love to serve this alongside a green salad, like my BBQ Salad or my Summer Bounty Salad if you like a bit of sweetness in your salad. For cooked veggie sides, Garlic Green Beans are so darn delicious as well as these Roasted Fall Veggies.

    Other Awesome Casserole Recipes

    • This is the Chicken Casserole to end all chicken casserole recipes! Creamy and delicious but also so easy to make- this is the perfect way to feed a crowd!
      Fernie's Famous Chicken Casserole
    • A hand lifting a a piece of biscuit casserole with eggs from the pan.
      Bubble Up Biscuit Breakfast Casserole
    • A plate of ravioli casserole with the pan behind it.
      Ravioli Casserole
    • A bowl of tuna casserole with the pan behind it.
      Old Fashioned Tuna Casserole

    Love this recipe? Please leave a 5 star ⭐️⭐️⭐️⭐️⭐️ rating in the recipe card below ⬇️ and/or a review in the comment section further down. Check out my Amazon Store for all my favorite tools, including those used in this recipe. And follow @thelifejolie on Instagram and TikTok!

    An overhead image of a cheeseburger casserole covered in tater tots on a green towel with shredded cheddar cheese next to it.

    Bacon Cheeseburger Tater Tot Casserole Recipe

    Jessy Freimann
    My kids do not stop requesting this Bacon Cheeseburger Tater Tot Casserole Recipe; it's simple comfort food at it's finest and perfect for busy weeknights. Best of all: it's ready in under an hour!
    5 from 3 votes
    Print Recipe Pin Recipe
    Prep Time 10 minutes mins
    Cook Time 50 minutes mins
    Inactive time 30 minutes mins
    Total Time 1 hour hr
    Course dinner, Main, Main Course, Main dish
    Cuisine American
    Servings 8 Servings
    Calories 212 kcal

    Equipment

    • 1 Skillet
    • 1 cutting board
    • 1 chefs knife
    • 1 Wooden Spoons
    • 1 Measuring cups and spoons
    • 1 9 inch Baking dish

    Ingredients
      

    • 3 slices bacon
    • 1 cup diced onion
    • 1 pound ground beef, 80/20
    • 1 Tablespoon chili powder
    • ¼ teaspoon Kosher salt
    • ¼ teaspoon ground black pepper
    • 1 Tablespoon cornstarch
    • 14.5 ounces beef broth
    • 10.75 ounces cream of mushroom soup
    • 1 cup frozen peas
    • 1 ⅓ cups shredded sharp cheddar cheese
    • 60 frozen tater tots, this will vary based on your pan but it ends up being around ½ a regular size package

    Instructions
     

    • Preheat the oven to 400 degrees.
    • Cook bacon in a sauté pan over medium heat until crispy, around 5 minutes. Remove from the pan and drain on a paper towel lined plate.
    • Add onions to the pan and sauté stirring frequently for 2-3 minutes to soften.
    • Add ground beef to the pan and use a wooden spoon to break it up. Sauté for 5 minutes or until brown, stirring often. Drain well.
    • Add chili powder, salt, pepper and cornstarch to the ground beef mixture and stir to combine.
    • Add beef broth and cream of mushroom soup to the pan and mix until well combined.
    • Simmer for 5-10 minutes to reduce slightly, stirring often. Stir in peas.
    • Transfer to a 9" x 9" baking pan.
    • Top with shredded sharp cheddar cheese and then crumble the bacon on top.
    • Line the top of the casserole with a single layer of frozen tater tots to cover.
    • Bake for 25-30 minutes until tater tots are golden brown and and the casserole is bubbly. Serve immediately.

    Video

    Notes

    • Don't skip the bacon! The grease really brings it all together.
    • If your kids aren't big onion fans, mince the onion extra small for great flavor but minimal texture.
    • Let the meat cook a tad more after you add the seasonings. It'll deepen the flavor.
    • Make tight rows of tater tots and try not to press them in too much. You want them to gently rest on top of the filling so that as much of the tater tot tops is exposed to get perfectly golden brown.
    • Ingredients to prep ahead- Dice onion and grate the cheese
    • Leftovers and storage- Store any leftovers in an airtight container in the refrigerator for up to 3-4 days. To reheat, microwave in 30-second bursts.

    Nutrition

    Serving: 1servingCalories: 212kcalCarbohydrates: 4gProtein: 13gFat: 16gSaturated Fat: 6gPolyunsaturated Fat: 1gMonounsaturated Fat: 7gTrans Fat: 1gCholesterol: 48mgSodium: 643mgPotassium: 266mgFiber: 0.4gSugar: 0.1gVitamin A: 300IUVitamin C: 0.01mgCalcium: 19mgIron: 2mg
    Tried this recipe?Let us know how it was!

    Shrimp and Chicken Fried Rice

    Oct 14, 2024 · 1 Comment

    A close up of shrimp and chicken fried rice in a pan with a wooden spoon in it.

    Shrimp and Chicken Fried Rice is a quick and easy weeknight dinner option to try! This delicious dish is a great way to repurpose leftover rice and is so simple. Ready in just under 30 minutes, it will quickly become a staple in your recipe rotation.

    A close up of shrimp and chicken fried rice in a pan with a wooden spoon in it.
    [feast_advanced_jump_to]

    Why You'll Love Fried Rice With Chicken And Shrimp:

    While I love takeout from my favorite Chinese restaurant, I love making my own versions of takeout even more! It's always good to have a fried rice recipe up your sleeve. It can be a delicious side dish or a super tasty main dish when you add protein. For this particular variation, I went with chicken and shrimp because I feel like it makes it a little extra special. But you could totally go in any direction you'd like for a protein.

    I also love that this is the perfect way to repurpose leftover rice. In fact, I'd say shrimp fried rice with chicken actually comes out better when the rice is a day old! There's nothing better than making a big batch of something and enjoying it twice without feeling like you're stuck with yesterday's leftovers. Allow me to show you how I turn it into something completely new! Here are some other reasons to give my chicken shrimp fried rice a try:

    • Ready in under 30 minutes
    • Perfect for busy weekdays
    • More affordable than takeout
    • Plus, you choose exactly what you put in it
    • Versatile — follow my recipe as written or add your own twist!
    An overhead image of a pan of fried rice with a wooden spoon in it and a blue and white striped napkin next to it.

    Ingredient Information And Substitutions

    • Shrimp- You can use fresh or frozen for this recipe, just make sure that the shrimp is peeled and deveined and the tails have been removed. I use medium size shrimp.
    • Chicken- I went for skinless boneless chicken breast for chicken shrimp fried rice — I almost always have a pack in the freezer, and it's easy to work with. You could alternatively use leftover cooked chicken instead.
    • Rice- Remember, cooked rice only! Like I said... day-old rice is best. It fries up a lot better than fresh.
    • Butter & Oil- I'm using butter and vegetable oil to sauté everything for shrimp chicken fried rice. The oil keeps the butter from burning.
    • Vegetables- Grab a pack of frozen peas and carrots from the supermarket to make things easier. Or, you can use fresh veggies if you'd like. You'll also need an onion.
    • Eggs- It wouldn't be a fried rice recipe without some eggs! I love the added protein and flavor, but you can omit them if allergies are a concern.
    • Seasonings- Ground ginger and garlic powder are all you'll need! You could also use fresh versions of both if preferred. I also added a touch of salt and pepper when cooking the proteins.
    • Sauces & Other Oils- Soy sauce, sesame oil, and rice vinegar finish everything off with plenty of Asian-inspired flavor!
    An overhead image of labeled recipe ingredients.

    How To Make Shrimp Chicken Fried Rice

    Step 1- Cook the veggies

    Add the butter and oil to a large skillet or wok and melt over medium-high heat. Now add the onion to the pan and sauté until softened. Next, add the peas and carrots and cook for a few minutes.

    Onions sautéing in butter and oil.
    Peas and carrots added to the pan with the onions.

    Step - Add the eggs.

    Move the vegetables to one side of the pan and add a little bit more butter to the empty side. Add the eggs, stir until cooked through, and push to the side with the veggies.

    Veggies pushed to the side of the pan and scrambled eggs cooking on the empty side.

    Step 4- Sauté the shrimp and chicken.

    Move the eggs to the side of the pan with the veggies and the chicken. After a few minutes when they're beginning to cook, add the shrimp to the pan. Sprinkle proteins with a pinch of salt and pepper and cook a few more minutes until they're almost cooked through but not fully.

    Chicken added to the pan and cooking.
    Shrimp and chicken sautéing in the pan.

    Step 5- Add the rice and assemble.

    Combine the soy sauce, sesame oil, rice vinegar, ground ginger, and garlic powder in a small bowl. Add the rice and sauce mixture to the pan and cook for a few more minutes until heated through. Enjoy!

    Rice and sauce mixed into the pan.

    Frequently Asked Questions

    How do you peel and devein shrimp?

    I prefer to use fresh shrimp that's already been peeled and deveined (or frozen and thawed). If you need to do those things yourself, use a paring knife to make a shallow cut down the back from the top to the tail. You can use the tip of the knife to remove the "vein." Remove the shell by carefully pulling on the legs — since you sliced the shell in half on top, it should come right off — then gently remove the tail.

    Can I make gluten-free and soy-free fried rice?

    Absolutely! Simply replace the soy sauce with coconut aminos. Tamari is another gluten-free option, but know that it's not soy-free.

    What gives fried rice its flavor?

    The key is to add soy sauce and sesame oil in the last few minutes of cooking! Both ingredients will give you the fried rice flavor you know and love. I also add ground ginger and garlic powder.

    Do you put egg before or after rice for fried rice?

    I always cook the eggs before I add the rice. If you add the rice first it will soak up too much of the eggs, which will cause your chicken and shrimp fried rice to go soggy.

    Do Chinese restaurants use butter in fried rice?

    It depends on the restaurant. I like using butter and oil — you'll end up with a better texture and richer flavor. If you'd prefer it dairy-free, you can use only oil or substitute ghee.

    A white bowl of chicken and shrimp fried rice with a blue and white striped napkin in the background.

    Tips For Making Chicken Shrimp Fried Rice:

    • Be sure to use a large skillet or wok. Remember that you have to move the veggies to the side to cook shrimp and the eggs, so you want enough room.
    • I prefer to use sweet onion. If you want a milder onion flavor, you could always substitute with green onions.
    • Be sure to gather and prepare all your ingredients in advance. Like any stir fry, this chicken and shrimp fried rice moves quickly, so it's important to have your mise en place set.
    • Use frozen peas and carrots to cut down on the prep.
    • Season the rice. It's important to add the soy sauce mixture to the skillet at the same time as the rice to infuse the entire dish with flavor.
    • Add extra vegetables like mushrooms or broccoli if you'd like.
    • Taste and adjust as you go. The ingredients listed are what my family and I love, so don't be afraid to taste test as you go along. Add more seasonings, sauces, and oils if you need to!
    • Ingredients to prep ahead- To save on time, cook the rice, dice the onion, and thaw and prep the shrimp in advance.
    • Leftovers and storage- Shrimp and chicken fried rice will keep for up to 2-3 days covered in the refrigerator. You can reheat single servings in the microwave, or larger portions on the stovetop. Add a bit of chicken broth so it doesn't dry out.
    A spoon holding up a scoop of fried rice with shrimp and chicken.

    What To Serve With Fried Rice With Shrimp And Chicken

    Chicken and shrimp fried rice has all the makings of a meal on its own — you've got a protein, a carb, and veggies all inside. But, don't let that stop you from pairing it with some yummy sides! In the past, I've served it with:

    • Marinated Vegetable Salad
    • Ramen Asian Coleslaw
    • Red Cabbage Salad
    • Asian Cucumber Salad

    Other Delicious Rice Recipes To Try

    • A serving spoon holding a scoop of the turkey rice mixture over the pan of it.
      Southwest Rice and Ground Turkey Skillet
    • A spoon holding up a scoop of rice pilaf.
      French Onion Rice Pilaf with Orzo
    • A plate of broccoli rice casserole with the pan and raw broccoli florets in the background.
      Rice and Broccoli Casserole
    • This easy Spanish Rice recipe has been a mainstay in my family for as long as I can remember. It's a really quick recipe which makes it perfect to make on a weeknight and is great for back-to-school. Delicious tomato sauce combines so well with ground beef and rice- the whole family will love this homemade, healthy meal!
      Spanish Rice

    Love this recipe? Please leave a 5 star ⭐️⭐️⭐️⭐️⭐️ rating in the recipe card below ⬇️ and/or a review in the comment section further down. Check out my Amazon Store for all my favorite tools, including those used in this recipe. And follow @thelifejolie on Instagram and TikTok!

    A close up of shrimp and chicken fried rice in a pan with a wooden spoon in it.

    Shrimp and Chicken Fried Rice

    Jessy Freimann
    Shrimp and Chicken Fried Rice is a quick and easy weeknight dinner option to try! This delicious dish is a great way to repurpose leftover rice and is so simple. Ready in just under 30 minutes, it will quickly become a staple in your recipe rotation.
    5 from 1 vote
    Print Recipe Pin Recipe
    Prep Time 10 minutes mins
    Cook Time 15 minutes mins
    Total Time 25 minutes mins
    Course dinner, Main, Main Course, Main dish
    Cuisine Asian
    Servings 4 servings
    Calories 410 kcal

    Equipment

    • Large saute pan
    • wooden spoon
    • chefs knife
    • cutting board
    • measuring cups
    • measuring spoons

    Ingredients
      

    • 2 tablespoons butter, divided
    • 1 tablespoon vegetable oil
    • ½ cup soy sauce (can also substitute coconut aminos or tamari)
    • 2 teaspoons sesame oil
    • 2 teaspoons rice vinegar
    • ½ teaspoon ground ginger
    • ¾ teaspoon garlic powder
    • ½ cup finely diced onion
    • 1 ½ cups frozen peas and carrots
    • 3 large eggs, beaten
    • 1 pinch Kosher salt
    • 1 pinch ground black pepper,
    • 1 pound boneless skinless chicken breasts, cut into small pieces
    • 1 pound medium shrimp, peeled, deveined and tails removed
    • 3 cups cooked rice (day old is best)

    Instructions
     

    • In a large skillet or wok, melt 1 tablespoon of butter and oil over medium-high heat.
    • While the butter melts, whisk together soy sauce, sesame oil, rice vinegar, ground ginger and garlic powder until well combined. Set aside.
    • Add onion to the pan and sauté stirring often until softened, about 5 minutes.
    • Add frozen peas and carrots and cook for another two minutes stirring often.
    • Push the vegetables to one side of a pan and melt ½ tablespoon of butter on the empty side.
    • Add eggs to the empty side of the pan and cook stirring often until cooked through. Move eggs to the side of the pan with the vegetables.
    • Melt remaining ½ tablespoon of butter on the empty side of the pan.
    • Add the chicken and cook for 2 minutes and then turn.
    • Add shrimp and sprinkle chicken and shrimp with a pinch of salt and pepper. Cook for about 2 minutes per side until it's almost cooked though (pink).
    • Add rice and sauce mixture and stir well to combine.
    • Cook 2-3 more minutes until heated through. Serve immediately.

    Video

    Notes

    • Be sure to use a large skillet or wok. Remember that you have to move the veggies to the side to cook shrimp and the eggs, so you want enough room.
    • I prefer to use sweet onion. If you want a milder onion flavor, you could always substitute with green onions.
    • Be sure to gather and prepare all your ingredients in advance. Like any stir fry, this chicken and shrimp fried rice moves quickly, so it's important to have your mise en place set.
    • Use frozen peas and carrots to cut down on the prep.
    • Season the rice. It's important to add the soy sauce mixture to the skillet at the same time as the rice to infuse the entire dish with flavor.
    • Add extra vegetables like mushrooms or broccoli if you'd like.
    • Taste and adjust as you go. The ingredients listed are what my family and I love, so don't be afraid to taste test as you go along. Add more seasonings, sauces, and oils if you need to!
    • Ingredients to prep ahead- To save on time, cook the rice, dice the onion, and thaw and prep the shrimp in advance.
    • Leftovers and storage- Shrimp and chicken fried rice will keep for up to 2-3 days covered in the refrigerator. You can reheat single servings in the microwave, or larger portions on the stovetop. Add a bit of chicken broth so it doesn't dry out.

    Nutrition

    Serving: 1servingCalories: 410kcalCarbohydrates: 36gProtein: 35gFat: 13gSaturated Fat: 3gPolyunsaturated Fat: 4gMonounsaturated Fat: 4gTrans Fat: 0.1gCholesterol: 213mgSodium: 1824mgPotassium: 595mgFiber: 1gSugar: 1gVitamin A: 249IUVitamin C: 1mgCalcium: 54mgIron: 2mg
    Tried this recipe?Let us know how it was!

    Easy Candy Brownie Bites

    Oct 10, 2024 · 14 Comments

    A brownie bite on a white plate with the mini muffin warapper pulled down exposing the sides and other brownie bites in the background.

    No one will ever know you didn't make these candy brownie bites — they're so good that everyone will be fighting for seconds! Made from boxed brownie mix in just 30 minutes.

    A brownie bite on a white plate with the mini muffin warapper pulled down exposing the sides and other brownie bites in the background.
    [feast_advanced_jump_to]

    Why You'll Love Mini Peanut Butter Cup Brownies

    Sometimes, it's important to have a dish in your arsenal that is extremely easy to make but still manages to be the crowd-pleaser to end all crowd-pleasers. This is also a great way to use leftover halloween candy (which is not my strong suit!).

    I'm a person who loves a good doctored-up-baking-mix-recipe. And really, who doesn't like to be the person who brings the crowd-pleasing dish to the party? I whipped these particular ones up with peanut butter cups because peanut butter and chocolate are irresistible to football-watching husbands like mine (or, you know, human beings in general) or really anyone at a gathering. Not to mention my girls adore them! These mini muffin brownies are also:

    • Made from brownie mix
    • Perfect for the holidays, game day, birthday parties, bake sales, you name it
    • Full of chocolate and peanut butter flavor
    • Kid-friendly
    • Baked in just 15 minutes
    • SO easy... seriously!
    A close up image of brownie bites with candy in them in a mini muffin tin.

    Ingredient Information And Substitutions

    • Brownie Mix- That's right, we're taking a major shortcut here! You can use your preferred boxed brownies. You'll also need whatever ingredients the box calls for, such as eggs, water, and oil.
    • Mini Peanut Butter Cups- I usually use Reese's for stuffed brownie cups, but feel free to mix it up. Any miniature chocolate candy cut to a small size will work.
    An overhead image of labeled recipe ingredients.

    How To Make Mini Brownie Bites

    Step 1- Recipe prep.

    Preheat your oven to 325 degrees F and line a mini muffin tin with mini muffin liners. Grease with cooking spray. Follow the package instructions to make the brownie batter.

    Brownie mix ingredients in a blue bowl with a handle.
    Brownie ingredients mixed together in a blue bowl with a handle.

    Step 2- Bake.

    Fill each muffin cup with the batter ¾ of the way full, then bake for 15 minutes.

    Mini muffin tin with liners and each cup filled ¾ of the way up.
    Brownie batter filled mini muffin tin in the oven.

    Step 3- Add the peanut butter cups.

    Remove from the oven and place one of the halved peanut butter cups in the brownies while they're still setting. Let them cool and enjoy!

    Baked brownie bites with the peanut butter cup halves pressed into the middle.

    Frequently Asked Questions

    Will the peanut butter cups make the brownies sink?

    Nope! I'm using mini peanut butter cups that I cut in half for this recipe so it doesn't overwhelm the brownie and cause it to sink. If sinking is a real concern, let the brownies cool ever so slightly before adding the candy- but don't wait too long!

    Can I use full-size peanut butter cups instead?

    Yes, but make sure you cut them into quarters, not halves.

    How do you keep brownies from sticking to muffin pans?

    The key is to add the liners into the muffin tin and then apply a nonstick cooking spray directly to the liners. It's like double protection against sticking!

    A close up image of a brownie biter with peanut butter cup that's been cut in half removing the perfectly baked inside of the brownie.

    Tips For Making This Brownie Bites Recipe

    • Make sure you use mini muffin liners. When I made them without liners, they stuck to the bottom of the pan since they're so small. While still delicious, they were a bit of a nightmare to remove!
    • When filling the muffin cups, use a cookie scoop for even amounts. Or put the batter into a Ziploc bag with the tip of a corner cut off to make things easier.
    • Timing is key, and all ovens are different! Baking times can vary depending on your oven. Keep a close eye on your mini muffin brownies, especially toward the end of baking.
    • I have also made these with peppermint patties. They were pretty awesome too! You really can take these in any direction with whatever candy you like, but make sure they're cut small enough that they fit into the middle of each brownie bite.
    • Ingredients to prep ahead- Make sure you have everything you need for the boxed mix, and slice the mini peanut butter cups in half.
    • Leftovers and storage- Store any leftover peanut butter brownie bites in an airtight container at room temperature for up to 3-4 days.
    A plate of peanut butter brownie bites with the pan behind them.

    What To Serve With Miniature Brownie Bites

    I love the idea of pairing these peanut butter cup brownies with a few other miniature, handheld, bite-sized desserts for a fun spread for the holidays! It would also work for barbecues, birthday parties, and everything in between. Here are a few ideas:

    • Mini Pumpkin Cheesecake Recipe
    • No Bake S'more Bars
    • Sour Cream Cookies
    • Lemon Parfait Cups Dessert
    • Greek Yogurt Bites

    Other Jazzed Up Boxed Mix Recipes To Try

    • A piece of chocolate cake being pulled from the whole cake revealing the moist inside of the cake.
      The BEST Chocolate Overload Cake
    • A piece of lemon cake with whipped cram on a white plate with the rest of the cake and lemons in the background.
      Lemon Pistachio Cake
    • The side of a slice of orange cake with chocolate ganache revealing the moist crumb.
      Chocolate Orange Cake Recipe
    • An image of a slice of pumpkin cake with a fork in front of it holding a bite of the cake on it.
      Pumpkin Spice Cake

    Love this recipe? Please leave a 5 star ⭐️⭐️⭐️⭐️⭐️ rating in the recipe card below ⬇️ and/or a review in the comment section further down. Check out my Amazon Store for all my favorite tools, including those used in this recipe. And follow @thelifejolie on Instagram and TikTok!

    A brownie bite on a white plate with the mini muffin warapper pulled down exposing the sides and other brownie bites in the background.

    Easy Candy Brownie Bites Recipe

    Jessy Freimann
    No one will ever know you didn't make these candy brownie bites — they're so good that everyone will be fighting for seconds! Made from boxed brownie mix in just 30 minutes.
    No ratings yet
    Print Recipe Pin Recipe
    Prep Time 15 minutes mins
    Cook Time 15 minutes mins
    Total Time 30 minutes mins
    Course Dessert
    Cuisine Christmas, Game day
    Servings 10 servings
    Calories 99 kcal

    Equipment

    • mixing bowl
    • Hand mixer
    • mini muffin pan
    • mini muffin liners

    Ingredients
      

    • 18.3 ounce boxed brownie mix and whatever ingredients they call for (usually eggs, water and vegetable oil)
    • 6 ounces mini peanut butter cups sliced in half

    Instructions
     

    • Preheat the oven to 325 degrees, line the mini muffin pan with the liners and grease them with cooking spray.
    • Mix the brownie mix as per the directions on the box.
    • Fill the muffin cups ¾ of the way full.
    • Bake for about 15 minutes (keep an eye on them as ovens vary).
    • Right after you remove them from the oven, before they've fully set, press a half of peanut butter cup into each brownie.
    • Serve when cooled or within a few days (these also freeze really well).

    Video

    Notes

    • Make sure you use mini muffin liners. When I made them without liners, they stuck to the bottom of the pan since they're so small. While still delicious, they were a bit of a nightmare to remove!
    • When filling the muffin cups, use a cookie scoop for even amounts. Or put the batter into a Ziploc bag with the tip of a corner cut off to make things easier.
    • Timing is key, and all ovens are different! Baking times can vary depending on your oven. Keep a close eye on your mini muffin brownies, especially toward the end of baking.
    • I have also made these with peppermint patties. They were pretty awesome too! You really can take these in any direction with whatever candy you like, but make sure they're cut small enough that they fit into the middle of each brownie bite.
    • Ingredients to prep ahead- Make sure you have everything you need for the boxed mix, and slice the mini peanut butter cups in half.
    • Leftovers and storage- Store any leftover peanut butter brownie bites in an airtight container at room temperature for up to 3-4 days.

    Nutrition

    Serving: 1servingCalories: 99kcalCarbohydrates: 9gProtein: 2gFat: 5gSaturated Fat: 2gPolyunsaturated Fat: 1gMonounsaturated Fat: 2gCholesterol: 1mgSodium: 61mgPotassium: 58mgFiber: 1gSugar: 8gVitamin A: 10IUVitamin C: 0.1mgCalcium: 13mgIron: 0.2mg
    Tried this recipe?Let us know how it was!

    Pork Chop Stew

    Oct 7, 2024 · 24 Comments

    A close up image of the side of a blue bowl of pork stew and mashed potatoes.

    Pork chop stew is a super easy and totally cozy dinner. Made on the stovetop or in the slow cooker or Instant Pot, it packs in some serious flavor without any hassle. Comforting and hearty, it's perfect for dinner!

    A close up image of the side of a blue bowl of pork stew and mashed potatoes.
    [feast_advanced_jump_to]

    Why You'll Love This Pork Stew Recipe

    I love a good stew recipe. There’s nothing like a warm and cozy meal to warm you up on a chilly night. And while beef stew is always a tasty option (try this Italian Beef Stew!), a pork stew recipe sounded like a delicious idea as well!

    I used pork chops because they’re super budget-friendly and end up fall-apart tender when slow cooked. This dish is totally packed with tasty veggies, all in a savory gravy. It's a satisfying twist on a traditional stew that the whole family will love. What's more, making pork stew is super easy! It's also:

    • Full of comforting flavors
    • Dump it and go recipe
    • Packed with vegetables and pork
    • Savory and delicious
    • Family-friendly
    • Affordable
    An overhead image of a blue bowl of pork stew with fresh herbs, an onion, a fork and an onion around it.

    Ingredients And Substitutions

    • Pork Chops- Make sure to trim and cut into 1-inch pieces before you get started.
    • Vegetables & Aromatics- This stew is packed with vegetables too! I add carrots, celery, and frozen peas, plus some onion and garlic for even more flavor.
    • Chicken Broth- Adds liquid and moisture without watering down any of the other flavors. If you don't have chicken, beef or vegetable broth is a good substitute.
    • White Wine- Optional, but adds depth of flavor to the stew — it cuts through the richness of the meat and broth and the alcohol cooks out. If you prefer not to cook with alcohol, additional broth is a good option.
    • Cornstarch- To thicken the whole thing.
    • Seasonings- Nothing too elaborate here: salt, pepper, and dried thyme.
    An overhead image of labeled recipe ingredients.

    How To Cook Pork Stew

    Note: there are Instant Pot directions- stovetop and Slow Cooker directions are also available in the recipe card below.

    Step 1- Add ingredients into the Instant Pot and cook.

    Add the pork, broth, wine, salt, pepper, thyme, onion, and garlic to the Instant Pot. Cover, turn the gasket to sealing and cook for 15 minutes on manual high pressure and then do a 10 minute pressure release. Then quick release to release the remaining pressure.

    Raw meat, veggies and broth in the instant pot.

    Step 2- Add veggies.

    Open the Instant Pot, give it a stir and add the carrots and celery. Close, seal and cook on manual high pressure for another 5 minutes and then do a quick release.

    Cooked pork chunks in broth in the Instant Pot.
    Celery and carrots added to the Instant Pot.

    Step 3- Thicken the stew.

    Open the Instant Pot. Change the setting to the Sauté setting. Add a cornstarch slurry and frozen peas to the Instant P and simmer for a few minutes to thicken and cook the peas. Serve immediately over mashed potatoes.

    Peas added to the instant pot.
    The thickened stew in the Instant Pot with a wooden spoon in it.

    Frequently Asked Questions

    Can I freeze this stew?

    Yes! You can freeze it either before cooking or after. For the best taste and texture, let it thaw in the fridge overnight before reheating gently on the stove.

    What cut of pork is best for pork stew?

    I use pork chops, but you could also use half of a pork shoulder (or pork butt) cut into 2-inch chunks instead if you'd like. Pork tenderloin is another option, but I prefer a little more fat.

    Do I have to add white wine?

    No, the white wine is optional — I know not everyone likes to cook with alcohol. You can replace it with some additional broth.

    How do you soften the stew meat?

    I don't find that the pork chops really need much softening — they cook up nice and tender as the stew simmers. If you're working with thicker pieces, you may want to cut them down a bit with a meat tenderizer.

    A fork holding up a fall apart tender piece of pork chop from a bowl of stew.

    Tips For Making Pork Stew:

    • Cut with care. I try not to cut the vegetables too small as they will break down as they cook.
    • For the slow cooker pork stew- Remember to add the peas and slurry during the last 30 minutes of cooking and increase the heat to High.
    • For the Instant Pot- Don't skip that Sauté setting finish once the stew is done cooking and de-pressurizing. It's essential for thickening!
    • Natural release- Do a 10-minute natural release in the IP to help tenderize the meat even further.
    • Sear the pork chunks before placing them in the slow cooker for even more flavor. If you're using your Instant Pot, you can do this on the Sauté setting! This is optional but never a bad idea.
    • Ingredients to prep ahead- Slice, dice, mince, and chop the vegetables, onion and pork before you get started.
    • Leftovers and storage- Store any leftovers in an airtight container in the refrigerator for up to 3-4 days. To reheat, microwave in 30-second bursts, or heat gently over medium-low on the stovetop until warmed through.
    A bowl of pork stew with herbs, onion and a white napkin in the background.

    What To Serve With My Pork Stew Recipe

    I love serving this over boiled or mashed potatoes with a crusty piece of Italian bread to the side to soak up all that yummy broth. If you want some other side dish options, plus dessert, any of the following would be delicious:

    • Peas with Onions
    • Easy Garlic Green Beans
    • French Onion Mashed Potatoes
    • Summer Bounty Strawberry Salad
    • Grandma's Best Banana Cake
    • Quick and Easy Chocolate Pudding Cake

    Other Delicious Stew Recipes To Try

    • A square image of Moroccan Chickpea Vegetarian Stew.
      Moroccan Chickpea Stew
    • A bowl of hearty lamb stew.
      Easy Lamb Stew Recipe
    • An overhead image of chicken and rice stew in a blue bowl with a napkin and veggies around it.
      Italian Chicken and Rice Stew
    • An overhead image of beef stew in a bowl of polenta with a napkin near it and mushrooms.
      Beef Italian Stew

    Love this recipe? Please leave a 5 star ⭐️⭐️⭐️⭐️⭐️ rating in the recipe card below ⬇️ and/or a review in the comment section further down. Check out my Amazon Store for all my favorite tools, including those used in this recipe. And follow @thelifejolie on Instagram and TikTok!

    A close up image of the side of a blue bowl of pork stew and mashed potatoes.

    Pork Chop Stew Recipe

    Jessy Freimann
    Pork chop stew is a super easy and totally cozy dinner. Made on the stovetop or in the slow cooker or Instant Pot, it packs in some serious flavor without any hassle. Comforting and hearty, it's perfect for dinner!
    5 from 6 votes
    Print Recipe Pin Recipe
    Prep Time 10 minutes mins
    Cook Time 8 hours hrs
    Total Time 8 hours hrs 10 minutes mins
    Course Main Course
    Cuisine American
    Servings 6 servings
    Calories 94 kcal

    Equipment

    • slow. cooker
    • instant pot
    • Whisk
    • Gallon freezer zipper bags
    • slow cooker liners
    • measuring spoons
    • measuring cups
    • chefs knife
    • cutting board

    Ingredients
      

    • 2 Tablespoons olive oil Only if making on the stovetop
    • 3 large carrots, sliced
    • 2 ribs celery, sliced
    • 1 onion, diced
    • 3 cloves garlic, minced
    • 4-5 boneless pork chops, trimmed and cut into 1 inch pieces
    • 2 cans chicken broth
    • 3 Tablespoons white wine (optional)
    • ½ teaspoon kosher salt
    • ¼ teaspoon ground pepper
    • ¼ teaspoon dried thyme
    • 4-6 tablespoon corn starch
    • 2-3 Tablespoons water
    • 1 cup frozen peas

    Instructions
     

    Crockpot instructions

    • In crockpot combine carrots, celery, onion, garlic, pork chunks, broth, wine, salt pepper and thyme until well combined.
    • Cover and cook on low for 7 hours.
    • Towards the end of the cooking time, combine corn starch and water to make a slurry.
    • Stir slurry and peas into the crockpot. Taste for seasoning and adjust seasonings if needed.
    • Cover and increase the crockpot to high heat.
    • Cook for an additional 30 minutes to thicken. Serve immediately.

    Instant Pot instructions

    • In Instant Pot combine onion, garlic, pork chunks, broth, wine, salt pepper and thyme until well combined.
    • Cover and cook on high pressure for 15 minutes with a 10 minute natural release.
    • Open the Instant Pot and add carrots and celery.
    • Cover and cook on high pressure for 5 minutes and end with a quick release.
    • Towards the end of the cooking time, combine corn starch and water to make a slurry.
    • Uncover and turn the Instant Pot to the Saute setting.
    • Add slurry and peas to the stew and simmer until stew has thickened and peas are tender. Taste for seasoning and adjust seasonings if needed. Serve immediately.

    Stovetop instructions

    • Coat a thick-bottom pan with one tablespoon of olive oil and sweat out carrots, onions and garlic over medium heat for 5-10 minute or until they've softened a bit. Remove from pot and set aside.
    • While vegetables cook, sprinkle pork with salt and pepper.
    • Once vegetables are out of the pan, add the other tablespoon of oil and sear pork chunks on each side. Be careful not to crowd the pan.
    • Once all pork is seared, add vegetables back into the pot and the chicken broth along with the peas, salt, pepper and thyme. Stir well and raise the heat a bit to bring to a boil. Once it's boiling, reduce the heat and simmer for an hour on low heat, stirring periodically.
    • In the last 10 minutes of that hour, mix cornstarch with a small amount of water (a slurry) and stir into the stew to thicken. Serve immediately.

    Video

    Notes

    • Cut with care. I try not to cut the vegetables too small as they will break down as they cook.
    • For the slow cooker pork stew- Remember to add the peas and slurry during the last 30 minutes of cooking and increase the heat to High.
    • For the Instant Pot- Don't skip that Sauté setting finish once the stew is done cooking and de-pressurizing. It's essential for thickening!
    • Natural release- Do a 10-minute natural release in the IP to help tenderize the meat even further.
    • Sear the pork chunks before placing them in the slow cooker for even more flavor. If you're using your Instant Pot, you can do this on the Sauté setting! This is optional but never a bad idea.
    • Ingredients to prep ahead- Slice, dice, mince, and chop the vegetables, onion and pork before you get started.
    • Leftovers and storage- Store any leftovers in an airtight container in the refrigerator for up to 3-4 days. To reheat, microwave in 30-second bursts, or heat gently over medium-low on the stovetop until warmed through.

    Nutrition

    Serving: 1servingCalories: 94kcalCarbohydrates: 11gProtein: 1gFat: 5gSaturated Fat: 1gPolyunsaturated Fat: 1gMonounsaturated Fat: 3gCholesterol: 2mgSodium: 602mgPotassium: 202mgFiber: 2gSugar: 3gVitamin A: 6079IUVitamin C: 4mgCalcium: 30mgIron: 0.4mg
    Tried this recipe?Let us know how it was!

    Nanou's Authentic Ratatouille

    Oct 3, 2024 · Leave a Comment

    A close up of a wooden spoon in a pan of Ratatouille.

    If you want an authentic ratatouille recipe, this is the one you're looking for! This classic French vegetable stew is outrageously delicious and healthy — perfect for a meatless Monday meal or an easy side dish. Ready in under 1 hour!

    A close up of a wooden spoon in a pan of Ratatouille.
    [feast_advanced_jump_to]

    Why You'll Love This Traditional Ratatouille Recipe:

    Before last year, whenever someone would use the word ratatouille, I would immediately think of the Disney Pixar movie, which is one of my faves! But I had never tried the dish until my mother-in-law decided to make it for me.

    Turns out, this was one of her mother, Sylviane's (amazing!) recipes that she'd been eating for as long as she could remember. Over the years, I've been lucky enough to enjoy many of her recipes and I'm so glad I get to add this one to that list because this traditional ratatouille recipe is a keeper.

    Like many French recipes, it takes simple ingredients and puts them together in a way that really makes them sing in perfect harmony. This is as healthy as it is delicious and a dish you'll find yourself coming back to and so easy. Needless to say, anyone can cook ratatouille (see what I did there?). And in case that's not enough reason to try it:

    • Authentic ratatouille like they make it in France
    • Made with 4 different vegetables
    • Hearty and comforting
    • Special enough for holidays and dinner parties to really "wow" your guests!
    • But also great for everyday eating
    • Budget-friendly
    A white bowl full of ratatouille with a blue towel and fresh basil behind it.

    Ingredients And Substitutions

    • Vegetables- This recipe is every vegetarian's dream! It's made with eggplant, bell peppers, zucchini, yellow squash (pattypan squash is preferable if available), and Roma tomatoes.
    • Olive Oil- For sautéing. I love olive oil here for the flavor.
    • Onion & Garlic- These aromatics add a ton of flavor. Honestly, I don't make many savory dishes without them!
    • Herbs & Seasonings- You'll need fresh thyme, parsley, and basil, as well as salt, pepper, and optional crushed red pepper if you like a little heat.
    An overhead image of labeled recipe ingredients.

    How To Make This French Ratatouille Recipe

    Step 1- Sauté the eggplant and zucchini.

    Pour the olive oil into a large sauté pan and heat over medium-high. Add the eggplant and sauté just until it starts to brown, then remove it from the pan. Add a touch more oil if needed, then cook the zucchini for 5 minutes.

    Chunks of eggplant sautéing in a pan.
    Zucchini and summer squash cooking in the pan.

    Step 2- Add the onions and peppers.

    When the zucchini is done, remove it from the pan as well. Add more oil if needed, then the onions and peppers. Cook to soften, then introduce the tomatoes, thyme, garlic, salt, pepper, and red pepper flakes to the pan and stir. Allow to cook for 5 more minutes.

    Onions and peppers cooking in the pan.
    Tomatoes and seasonings added to the pan of peppers and onions.

    Step 3- Assemble and simmer.

    Return the eggplant and zucchini to the pan and partially cover. Reduce the heat to low and let the vegetable stew simmer for about 30-40 more minutes.

    Stir in the basil and parsley just before serving and enjoy your traditional ratatouille recipe!

    All veggies added back into the pan and cooking.
    Veggies covered and simmering.

    Frequently Asked Questions

    What is ratatouille?

    Ratatouille is a vegetable stew that originated in Provence, France. It's traditionally made on the stovetop, starting by cooking each vegetable separately in olive oil before combining them and simmering together.

    What size should I cut the vegetables?

    Around 1-2 inches. Some recipes call to chop them much smaller or slice and bake but we prefer larger chunks.

    Do I need to peel the eggplant?

    We prefer it that way in my house, but feel free to leave the skin on yours if you prefer.

    Shouldn't real ratatouille be sliced and stacked like in the movie?

    I've seen some French ratatouille recipes cook it that way (usually in the oven), but that's not how our family does it.

    Can I make this ahead of time?

    Yes! Like soups and stews, this recipe gets even better as it sits. You can make it up to a couple of days ahead — it reheats very well.

    What's the secret of good ratatouille?

    Fresh ingredients! The best ratatouilles are made with high-quality fresh vegetables, olive oil, and herbs.

    An overhead image of a pan full of Ratatouille with a blue and white towel next to it and fresh basil.

    Tips For Making French Ratatouille:

    • Like most great grandma recipes, the amounts are just approximate — cook and season with your heart.
    • Chop the veggies evenly. Try your best to cut all of the vegetables into similar-sized pieces. This will help them cook evenly.
    • Cook in batches. The cooking is done in the order of what takes the longest to shortest to cook. Remember to remove each item from the pan before adding the next vegetable.
    • Stir periodically. Be sure to stir the stew as it simmers to keep it from sticking. But don't overdo it either — lifting up the cover too much will cause it to cook more slowly.
    • Taste test. Always taste before serving and adjust the seasonings as needed!
    • Ingredients to prep ahead- Chop the onions, peppers, and zucchini. You can also clean the fresh herbs.
    • Leftovers and storage- Store leftovers in an airtight container in the fridge for up to 5 days. You can reheat single servings in the microwave in 30-second bursts, or larger portions gently in a pan over medium-low.
    A close up image of the side of a white bowl of ratatouillr.

    What To Serve With This Ratatouille Recipe

    In my house, we typically enjoy this classic ratatouille recipe on its own, but it would also be great over rice or pasta. And make sure you have a nice crusty piece of bread to soak up all those delicious juices.

    For dessert, try a blueberry lemon dump cake or my easy coconut cake!

    Other Delicious Vegetarian Recipes To Try

    • A square image of Moroccan Chickpea Vegetarian Stew.
      Moroccan Chickpea Stew
    • An overhead image of the asparagus puff pastry tart on a parchment lined cutting board with sprigs of thyme around it.
      Asparagus Leek Tart
    • A slice of quiche been pulled up and out of a broccoli quiche with broccoli and a cloth napkin in the background.
      Broccoli Cheddar Cheese Quiche
    • A fork pulling a bite from a stuffed pepper with cheese stretching from the pull.
      Vegetarian Italian Stuffed Peppers

    Love this recipe? Please leave a 5 star ⭐️⭐️⭐️⭐️⭐️ rating in the recipe card below ⬇️ and/or a review in the comment section further down. Check out my Amazon Store for all my favorite tools, including those used in this recipe. And follow @thelifejolie on Instagram and TikTok!

    A close up of a wooden spoon in a pan of Ratatouille.

    Nanou's Authentic Ratatouille Recipe

    Jessy Freimann
    If you want an authentic ratatouille recipe, this is the one you're looking for! This classic French vegetable stew is outrageously delicious and healthy — perfect for a meatless Monday meal or an easy side dish. Ready in under 1 hour!
    5 from 3 votes
    Print Recipe Pin Recipe
    Prep Time 10 minutes mins
    Cook Time 40 minutes mins
    Total Time 50 minutes mins
    Course Entree, Main, Main Course, Main dish, Side Dish
    Cuisine French
    Servings 6 servings
    Calories 103 kcal

    Equipment

    • chefs knife
    • cutting board
    • measuring cups
    • measuring spoons
    • wooden spoon
    • Large saute pan

    Ingredients
      

    • 3 Tablespoons olive oil + a little more only if you need it
    • 1 large eggplant, peeled and cut to 2 inch chunks
    • 2 red or green bell peppers, seeds removed and cut into 1 inch chunks
    • 2 medium zucchini or yellow squash, sliced and cubed
    • 1 large onion, large dice
    • 4 roma tomatoes, seeded and large dice
    • 5 cloves garlic, minced or pressed
    • 1 Tablespoon chopped fresh thyme
    • 1 ½ teaspoons kosher salt
    • ¼ teaspoon ground black pepper
    • ¼ teaspoon crushed red pepper (optional for heat)
    • 2 Tablespoon chopped fresh parley
    • 2 Tablespoon chopped fresh basil

    Instructions
     

    • Heat 2 Tablespoons oil in large saute pan over medium high heat.
    • Add eggplant and saute until just starting to brown, stirring often- about 5-7 minutes. Remove from pan.
    • Add remaining Tablespoon oil and saute zucchini for 5 minutes and remove from pan.
    • Add a tiny bit more oil (only if needed) then add onions and peppers, Saute to soften about 5 minutes. Add tomatoes and thyme and cook about 3 minutes.
    • Add tomatoes, garlic, salt and black pepper and red pepper flakes and stir to combine. Cook 5 more minutes..
    • Add eggplant and zucchini back into pan. Partially cover and reduce heat to low and cook around 30-40 more minutes, stirring periodically.
    • Stir in parsley and basil 2 minutes before you finish cooking. Taste and adjust seasonings and serve immediately.

    Video

    Notes

    • Like most great grandma recipes, the amounts are just approximate — cook and season with your heart.
    • Chop the veggies evenly. Try your best to cut all of the vegetables into similar-sized pieces. This will help them cook evenly.
    • Cook in batches. The cooking is done in the order of what takes the longest to shortest to cook. Remember to remove each item from the pan before adding the next vegetable.
    • Stir periodically. Be sure to stir the stew as it simmers to keep it from sticking. But don't overdo it either — lifting up the cover too much will cause it to cook more slowly.
    • Taste test. Always taste before serving and adjust the seasonings as needed!
    • Ingredients to prep ahead- Chop the onions, peppers, and zucchini. You can also clean the fresh herbs.
    • Leftovers and storage- Store leftovers in an airtight container in the fridge for up to 5 days. You can reheat single servings in the microwave in 30-second bursts, or larger portions gently in a pan over medium-low.

    Nutrition

    Serving: 1servingCalories: 103kcalCarbohydrates: 9gProtein: 2gFat: 7gSaturated Fat: 1gPolyunsaturated Fat: 1gMonounsaturated Fat: 5gSodium: 588mgPotassium: 322mgFiber: 3gSugar: 5gVitamin A: 388IUVitamin C: 10mgCalcium: 22mgIron: 0.4mg
    Tried this recipe?Let us know how it was!

    Crescent Roll Veggie Pizza

    Sep 30, 2024 · 2 Comments

    Crescent roll pizza slices lined up on a cutting board with veggies around it.

    Crescent roll veggie pizza is a classic appetizer that is a fresh and delicious mainstay at any party! Made with 4 different vegetables, cheese, and crescent roll sheets, it's super easy to throw together in just under 20 minutes.

    Cold veggie pizza slices lined up at an angle.
    [feast_advanced_jump_to]

    Why You'll Love My Veggie Pizza Recipe With Crescent Rolls

    So, I recently had a thought. If you haven't been to a party with crescent roll veggie pizza, was it even a party? I didn't think so. I feel like this fresh and tasty appetizer, also called cold veggie pizza, is a mainstay dish to pass at any party or get-together.

    And why not? Making this is seriously quick and easy. It adds a really nice freshness next to all the typically heavier party and game day fare you find at the apps and snacks table.

    Whenever I make it, people always come back for seconds, so you know it's going to be a popular option. Naturally, I had to share my take on this classic recipe so that you can get in on the fun! Here are a few more reasons why I love it:

    • Full of fresh flavor
    • Customizable — add whatever toppings you like
    • A fun take on classic veggie pizzas
    • Incredibly easy thanks to the crescent rolls
    • Kid-friendly
    • Perfect for all sorts of parties and get-togethers!
    An overhead image of crescent roll pizza slices lined up with pieces of the veggies around it.

    Ingredient Information And Substitutions

    • Crescent Rolls- If available at your store, get the crescent roll sheets. It will save you the hassle of having to carefully separate each roll. If not available, get regular crescent rolls and roll them out trying to keep them attached as much as possible to make one big rectangular sheet and press together the edges that come apart.
    • Creamy Sauce- Your "sauce" isn't really a sauce at all! At least, it's not a traditional pizza sauce. You'll need cream cheese, mayonnaise, ranch seasoning, and dried dill to make it.
    • Toppings- This is where it gets fun — you can totally mix it up and add whatever veggie pizza toppings are your favorite. I typically go with broccoli, grape tomatoes, shredded carrots, black olives, and shredded cheddar cheese. But, be creative and add what you love to your crescent roll veggie pizza!
    An overhead image of labeled recipe ingredients.

    How To Make Crescent Dough Veggie Pizza

    Step 1- Bake the crescent rolls.

    Place the crescent roll sheets on a prepared baking sheet and follow the package instructions as directed to bake.

    A baked crescent roll sheet on a lined sheet pan.
    A raw crescent dough roll spread out on a lined baking sheet.

    Step 2- Make the sauce.

    Add the cream cheese, mayonnaise, ranch seasoning, and dried dill to a large bowl and mix until well combined. Spread the sauce in an even layer on top of the crescent roll sheet.

    Cream cheese topping  ingredients mixed together in a glass bowl.
    Cream cheese topping spread on the crescent sheet

    Step 3- Top the pizza.

    Add your prepared toppings of choice and gently press them onto the topping. refrigerate until ready to serve. Slice and enjoy!

    Cheese sprinkled on the crescent roll pizza.
    A hand gently pushing toppings into the pizza.

    Frequently Asked Questions

    Can I make veggie pizza with crescent rolls ahead of time?

    Yes! To get ahead on party prep, you can make your pizza up to 24 hours in advance. Remember to store it in the fridge to keep it fresh.

    Do I have to use dill?

    No, you don't have to, but I do suggest adding another seasoning along with the ranch. If you have another herb that you like better, you can use that.

    How do you make veggie pizza not soggy?

    It's crucial to bake the crescent rolls before you add the sauce and the toppings! And the close you make it to your even, the less soggy it will be.

    Is crescent dough the same as pizza dough?

    No, crescent roll dough isn't exactly the same as pizza, but you can definitely use it as pizza dough if you prefer.

    Should you cook veggies before putting on pizza?

    Nope! This recipe is served cold and calls for raw veggies.

    A hand picking up a slice of veggie pizza.

    Tips For Making Veggie Pizza Using Crescent rolls

    • Soften the cream cheese. It makes it easier to combine smoothly with the other ingredients.
    • If you like spicy food, add red pepper flakes, hot sauce, or a pinch of cayenne pepper to the cream cheese mixture along with the ranch.
    • I usually cut the veggie pizza crescent roll sheet after I add the sauce and toppings.
    • If you plan to serve a lot of people, you can always cut the pieces smaller to feed more.
    • Feel free to mix up the toppings based on your tastes! Have fun with your veggie pizza recipe with crescent rolls. Try to use multi-colored vegetables for a better presentation.
    • Make sure to chop the toppings into bite-sized pieces. You want them to be manageable enough for eating, but still big enough that you're not serving up crumbs.
    • Ingredients to prep ahead- You can bake the crescent roll dough, make the sauce, and chop up the veggies up to 24 hours in advance. All that will be left to do is assemble!
    • Leftovers and storage- Store any leftover crescent roll veggie pizza in an airtight container in the fridge for up to 3 days. If you leave it for longer the crust will go soggy.
    Crescent roll pizza slices lined up on a cutting board with veggies around it.

    What To Serve With Cream Cheese Veggie Pizza

    I usually make this for parties, but sometimes my kids request it for lunch, and I happily oblige! If you do want to serve yours as a part of a larger appetizer spread, I would pair it with:

    • Oven Fried Pickles
    • Harvest Cream Cheese Ball
    • Grilled Artichokes
    • Baked Lasagna Dip

    Other Delicious Appetizer Recipes To Try

    • A close up image of a white bowl of shrimp dip with a whole shrimp on top and chips and celery in the background.
      Grandma's Shrimp Dip Recipe
    • A bloody mary cheeseball with crackers and celery in the background.
      Bloody Mary Spicy Cheeseball
    • Greek Salsa
      Greek Salsa
    • A bowl or artichoke and olive spread surrounded by toasted baguette.
      Artichoke and Olive Spread

    Love this recipe? Please leave a 5 star ⭐️⭐️⭐️⭐️⭐️ rating in the recipe card below ⬇️ and/or a review in the comment section further down. Check out my Amazon Store for all my favorite tools, including those used in this recipe. And follow @thelifejolie on Instagram and TikTok!

    Crescent roll pizza slices lined up on a cutting board with veggies around it.

    Crescent Roll Veggie Pizza

    Jessy Freimann
    Crescent roll veggie pizza is a classic appetizer that is a fresh and delicious mainstay at any party! Made with 4 different vegetables, cheese, and crescent roll sheets, it's super easy to throw together in just under 20 minutes.
    No ratings yet
    Print Recipe Pin Recipe
    Prep Time 10 minutes mins
    Cook Time 12 minutes mins
    Total Time 22 minutes mins
    Course Appetizer
    Cuisine American
    Servings 10 servings
    Calories 190 kcal

    Equipment

    • mixing bowl
    • Spatula
    • stand mixer or hand mixer
    • chefs knife
    • cutting board
    • measuring cups
    • measuring spoons
    • sheet pan
    • Silpat

    Ingredients
      

    • 2 packages crescent roll sheets (or 2 packages crescent rolls)
    • 11 ounces cream cheese, softened
    • ⅓ cup mayonnaise
    • ½ packet ranch seasoning
    • 1 teaspoon dried dill

    Toppings

    • 1 cup shredded cheddar cheese or mozzarella cheese
    • 1 cup Grape tomatoes, halved
    • ½ cup carrot grated
    • ½ cup Black olives, sliced
    • ½ cup Broccoli florets, diced

    Instructions
     

    • Spread crescent roll sheets onto lined sheet pans and bake as per package directions (if you're using crescent rolls, push them together at the seams to make one crust). Cool completely.
    • Mix cream cheese, mayonnaise, ranch seasoning and dried dill until well combined and smooth.
    • Spread cream cheese mixture in an even layer over the crusts.
    • Sprinkle with the toppings and gently press into the pizza with clean hands. Slice into pieces and refrigerate until serving.

    Video

    Notes

    • Soften the cream cheese. It makes it easier to combine smoothly with the other ingredients.
    • If you like spicy food, add red pepper flakes, hot sauce, or a pinch of cayenne pepper to the cream cheese mixture along with the ranch.
    • I usually cut the veggie pizza crescent roll sheet after I add the sauce and toppings.
    • If you plan to serve a lot of people, you can always cut the pieces smaller to feed more.
    • Feel free to mix up the toppings based on your tastes! Have fun with your veggie pizza recipe with crescent rolls. Try to use multi-colored vegetables for a better presentation.
    • Make sure to chop the toppings into bite-sized pieces. You want them to be manageable enough for eating, but still big enough that you're not serving up crumbs.
    • Ingredients to prep ahead- You can bake the crescent roll dough, make the sauce, and chop up the veggies up to 24 hours in advance. All that will be left to do is assemble!
    • Leftovers and storage- Store any leftover crescent roll veggie pizza in an airtight container in the fridge for up to 3 days. If you leave it for longer the crust will go soggy.

    Nutrition

    Serving: 1servingCalories: 190kcalCarbohydrates: 4gProtein: 5gFat: 17gSaturated Fat: 8gPolyunsaturated Fat: 4gMonounsaturated Fat: 4gTrans Fat: 0.01gCholesterol: 37mgSodium: 326mgPotassium: 124mgFiber: 0.5gSugar: 2gVitamin A: 1675IUVitamin C: 7mgCalcium: 85mgIron: 0.2mg
    Tried this recipe?Let us know how it was!

    Creamy Vodka Pasta

    Sep 26, 2024 · Leave a Comment

    A plate of vodka pasta with fresh basil, Italian bread and a striped towel in the background.

    This creamy vodka pasta is a classic American-Italian family favorite! My recipe is a quick and easy version that is sure to make your weeknight dinners way more delicious. Prepped and ready in 40 minutes.

    A plate of vodka pasta with fresh basil, Italian bread and a striped towel in the background.
    [feast_advanced_jump_to]

    Why You'll Love Pink Vodka Sauce:

    Let's talk about "penne vodka," as we sometimes call it around here for a minute. This recipe has a really special place in my heart because of my beloved husband, who did not come from an Italian-American family like I did.

    He likes tomato sauce and pasta just as much as any average person, but he doesn't have that red-sauce-every-day gene in him like most friends and family of mine who grew up in this culture. He'll be happy to eat it for dinner and maybe enjoy some leftovers for lunch the next day. Whereas I would happily eat it every single day.

    While he enjoys most tomato sauces (and I'm proud to say has developed his palate over the years to prefer my family's meat sauce and marinara sauce recipes over all others), the one that really has his heart is creamy vodka sauce. It was also always his go-to on our dates in Little Italy in our early days — so nostalgic!

    Convinced yet? In case you need more reasons to try this recipe:

    • Made with simple, high-quality ingredients
    • The sauce fills the nooks and crannies in the penne
    • Creamy, rich, and flavorful
    • Family-friendly
    • A fun update to regular red sauce
    • Incredibly delicious
    A close up on penne vodka in a pan of pasta with a wooden spoon in it.

    Ingredient Information And Substitutions

    • Crushed Tomatoes- A 28 ounce can of crushed tomatoes add awesome flavor and just the right amount of texture.
    • Heavy Cream- Puts the "cream" in your vodka sauce. It makes the whole thing a lot richer and more flavorful too.
    • Pancetta- Italian cured pork called pancetta gets everything going in this recipe. It's full of salty and smoky flavors that I love. You can totally substitute chopped bacon.
    • Onion, Garlic, & Red Pepper Flakes- Once the pancetta is nicely browned, you'll add your other flavor-making aromatics: onion and garlic, plus some red pepper flakes for a slight pop of heat (add more if you want it to be spicy).
    • Vodka- Adds such a unique flavor here! It also helps keep the cream from curdling. Don't worry, all of the alcohol content gets burned off when it's cooked.
    • Penne- The vehicle for your pink vodka sauce! If you don't have any penne, make sure to use pasta with ridges — it will soak up that sauce better.
    • Basil & Parmesan- I add fresh basil and Romano (or Parmesan) at the very end to pull everything together. I also serve it with extra cheese on top of course!
    An overhead image of labeled recipe ingredients,

    How To Make Vodka Sauce

    Step 1- Brown the pancetta and aromatics.

    Add the pancetta to a hot skillet with oil and sauté until it starts to brown, or about 3-4 minutes. Then introduce the onion, garlic, and red pepper flakes to the pan and cook until softened.

    Pancetta browning in a skillet with olive oil.
    Onions, garlic and red pepper flakes added to the pancetta in the pan.

    Step 2- Deglaze the pan & start the pasta.

    Pour the vodka into the pan and cook for a few minutes. Use a wooden spoon to scrape up any browned bits that are stuck to the bottom of the pan. Bring a large pot of salted water to a boil and cook the pasta according to the package instructions.

    A wooden spoon deglazing the pan with vodka.
    Penne pasta boiling in a pot of water.

    Step 3- Finish the sauce.

    Add the canned tomatoes to the skillet and stir to combine. Reduce the heat and simmer for 10 minutes. Stir in the heavy cream and allow the sauce to cook for 2 more minutes before adding the basil and Parmesan.

    Crushed tomatoes added to the skillet.
    Heavy cream added to the sauce making it pink.

    Step 4- Toss and serve.

    Add the penne to the skillet and toss to coat. Cook for a few more minutes before serving. Enjoy!

    Penne pasta added into the pan and coated with sauce.

    Frequently Asked Questions

    Can I make vodka sauce without vodka?

    As mentioned, no. The vodka is vital to this recipe. Not only does it add flavor, but it also helps keep the cream and tomato sauce from curdling when combined. If you're looking for a creamy sauce without any alcohol, try my one pot chicken Florentine pasta instead.

    Can I use half-and-half or milk instead of cream?

    I wouldn't recommend it for this recipe as you want the higher fat content.

    Can I make this ahead?

    Yes, you can make the sauce ahead of time and then cook the pasta right before serving. I suggest that you reheat the sauce on its own over medium before adding the penne. You can always add a little pasta water to loosen it up without losing the creaminess, if needed.

    Can I freeze vodka sauce?

    Yes, this recipe is very freezer-friendly. If you do plan on freezing, hold off on adding the penne. Once the sauce has cooled completely, you can freeze it in an airtight container for up to 3-6 months. Let it thaw overnight in the refrigerator before reheating for the best texture.

    Is vodka sauce just alfredo and marinara?

    No. Vodka sauce is made with tomatoes, vodka, heavy cream, and a handful of other ingredients. There is no Alfredo sauce involved.

    An overhead image of a pan of penne alla vodka with a wooden spoon in it and a striped napkin, fresh basil and bread around it.

    Tips For Making This Easy Vodka Sauce Recipe

    • Buy your pancetta already diced if possible to make things easier.
    • I like to finely dice my onions so they cook down and soften quicker in the olive oil and melt into the sauce.
    • When you add the vodka it will bubble up quite a bit- this is a good sign! Use a wooden spoon to scrap all the delicious brown bits from the bottom of the pan. The vodka reduces and the alcohol cooks out to add even more great flavor to your sauce.
    • Once I add the tomatoes, I like to let it simmer for 10 minutes while stirring occasionally to let all the flavors come together.
    • Cook the penne pasta 1 minute less than package directions for al dente. It will finish cooking in the pan while the flavor of the sauce infuses the pasta. And don't forget to season the water with salt (like the sea!).
    • Make sure you don't rinse the drained pasta before adding it to the sauce. That starch from the pasta water helps the sauce stick to the pasta. Honestly, if you can, use a large slotted spoon to scoop the pasta from the water directly into the sauce instead of draining it in a colander.
    • Ingredients to prep ahead- Cut the pancetta if it isn't already, then dice and mince the onion and peel the garlic. The rest of my penne vodka pasta recipe moves really quickly, so there isn't any else you could prep.
    • Leftovers and storage- You can store any leftovers in an airtight container in the refrigerator for up to 4 days. Reheat gently on the stovetop with a splash of cream to liven it back up.
    A close up image of a plate of penne vodka with fresh basil in the background.

    What To Serve With My Easy Recipe For Vodka Sauce

    This dish is pretty substantial on their own — but would taste great with a big garden salad and a side of garlic bread! If you'd like to add a vegetable, here are some easy options:

    • Sautéed Zucchini and Tomatoes
    • Garlic Parmesan Roasted Broccoli
    • Garlic and Butter Green Beans

    For dessert, keep things Italian-inspired and serve up some pizelles, rainbow cookies, or lemon pistachio cake!

    Other Delicious Pasta Recipes To Try

    • An overhead image of a plate of pasta pomodoro with basil, a checked napkin and the rest of the pan around it.
      Pasta Pomodoro Recipe
    • Sausage and peppers pasta on a white plate with a napkin, onion and mushrooms in the background and a fork across the back of the plate.
      Pasta With Sausage Peppers And Onions
    • An overhead image of a plate of baked ziti with herbs, garlic and a blue striped napkin next to it.
      Pasta al Forno
    • A white plate of rapini and sausage pasta with the pan and a blue napkin in the background.
      Sausage and Rapini Pasta

    Love this recipe? Please leave a 5 star ⭐️⭐️⭐️⭐️⭐️ rating in the recipe card below ⬇️ and/or a review in the comment section further down. Check out my Amazon Store for all my favorite tools, including those used in this recipe. And follow @thelifejolie on Instagram and TikTok!

    A plate of vodka pasta with fresh basil, Italian bread and a striped towel in the background.

    Creamy Vodka Pasta

    Jessy Freimann
    This creamy vodka sauce with penne is a classic American-Italian family favorite! My recipe is a quick and easy version that is sure to make your weeknight dinners way more delicious. Prepped and ready in 40 minutes.
    No ratings yet
    Print Recipe Pin Recipe
    Prep Time 10 minutes mins
    Cook Time 30 minutes mins
    Total Time 40 minutes mins
    Course dinner, Main, Main Course, Main dish
    Cuisine Italian
    Servings 6 servings
    Calories 273 kcal

    Equipment

    • chefs knife
    • cutting board
    • Large saute pan
    • wooden spoon
    • measuring cups
    • measuring spoons

    Ingredients
      

    • 1 tablespoon Olive oil
    • 4 ounces pancetta, diced
    • 1 cup finely diced onion
    • 4 large garlic cloves minced or pressed
    • ¼ teaspoon crushed red pepper flakes
    • ¾ cup vodka
    • 28 ounce can crushed Tomatoes
    • 1 pound penne pasta, boiled 1 minute less than package directions for al dente
    • ¾ cup heavy cream
    • 2 Tablespoons roughly chopped basil
    • 2 Tablespoons grated Romano cheese or Parmesan cheese

    Instructions
     

    • Heat oil in large skillet over medium high heat. On a different burner, bring large pot of water to a boil.
    • Add pancetta to skillet and sauté stirring often until almost crispy and beginning to brown, about 3-4 minutes.
    • Add onions, garlic and crushed red pepper to pan and continue sautéing stirring often until onions have softened, about 3 minutes.
    • Add vodka to the pan and cook for 2 minutes, scraping the brown bit from the bottom of the pan with a wooden spoon. Salt pasta water and add pasta to the pot of boiling water cooking to one minute under package directions.
    • Add crushed tomatoes to the pan and stir to combine.
    • Reduce heat to just below medium and simmer for 10 minutes, stirring periodically.
    • Stir in heavy cream and cook for 2 more minutes stirring periodically.
    • Add fresh basil and cheese and then use a slotted spoon to scoop pasta directly from the water into the pan of sauce.
    • Stir to combine and cook about 2 more minutes. Serve immediately.

    Video

    Notes

    • Buy your pancetta already diced if possible to make things easier.
    • I like to finely dice my onions so they cook down and soften quicker in the olive oil and melt into the sauce.
    • When you add the vodka it will bubble up quite a bit- this is a good sign! Use a wooden spoon to scrap all the delicious brown bits from the bottom of the pan. The vodka reduces and the alcohol cooks out to add even more great flavor to your sauce.
    • Once I add the tomatoes, I like to let it simmer for 10 minutes while stirring occasionally to let all the flavors come together.
    • Cook the penne pasta 1 minute less than package directions for al dente. It will finish cooking in the pan while the flavor of the sauce infuses the pasta. And don't forget to season the water with salt (like the sea!).
    • Make sure you don't rinse the drained pasta before adding it to the sauce. That starch from the pasta water helps the sauce stick to the pasta. Honestly, if you can, use a large slotted spoon to scoop the pasta from the water directly into the sauce instead of draining it in a colander.
    • Ingredients to prep ahead- Cut the pancetta if it isn't already, then dice and mince the onion and peel the garlic. The rest of my penne vodka pasta recipe moves really quickly, so there isn't any else you could prep.
    • Leftovers and storage- You can store any leftovers in an airtight container in the refrigerator for up to 4 days. Reheat gently on the stovetop with a splash of cream to liven it back up.
    A close up image of a plate of penne vodka with fresh basil in the background.

    Nutrition

    Serving: 1servingCalories: 273kcalCarbohydrates: 2gProtein: 3gFat: 21gSaturated Fat: 10gPolyunsaturated Fat: 2gMonounsaturated Fat: 8gTrans Fat: 0.02gCholesterol: 46mgSodium: 134mgPotassium: 74mgFiber: 0.04gSugar: 1gVitamin A: 444IUVitamin C: 1mgCalcium: 24mgIron: 0.2mg
    Tried this recipe?Let us know how it was!

    Old Fashioned Salmon Patties Recipe

    Sep 23, 2024 · Leave a Comment

    An overhead image of 2 salmon patties on a plate with mixed greens and tartar sauce.

    My old fashioned salmon patties recipe is a tasty light lunch option that is also great for brunch with the family! Quick and easy to make in under 20 minutes, this recipe is also an excellent way to use up any leftover salmon.

    A close up image of two salmon patties on a white plate with with lemons and a green salad next to it.
    [feast_advanced_jump_to]

    Why You'll Love Fried Salmon Patties:

    In my annual survey, I had a few requests for some easy salmon cakes, as well as one for ways to use leftover salmon. So, it became obvious that it was time to share my salmon cakes recipe with all of you!

    My favorite part about this one is that it uses ingredients that we likely all have around the house or in the pantry and fridge. These aren't made with too much of filler, either. I added a ton of cooked salmon and just enough filling to add delicious flavor and texture. Some other reasons I love this easy salmon patty recipe are:

    • So versatile — enjoy on their own or in a sandwich
    • Reduces food waste
    • Full of great flavor
    • Just a touch of spiciness to play off the delicate fish
    • Ready super quickly
    An overhead image of a plate of salmon cakes with salad and a blue and white striped napkin and lemons on the side.

    Ingredient Information And Substitutions

    • Cooked Salmon- This recipe uses 1 ½ cups of cooked salmon that has been shredded. This amounts to around 1-2 salmon filets (depending on the size of the filet). You can also use canned salmon in which case it adds up to three 4 ounce cans
    • Breadcrumbs- I like panko breadcrumbs best as I find they have such a nice texture, perfect for forming patties like these.
    • Egg- 1 large egg is needed to bind everything together.
    • Hot Sauce- Just a touch is needed! I love pairing seafood with hot sauce. I like Frank's Red Hot, but you can use your favorite.
    • Lemon- Citrus goes so well with seafood too. You'll need the juice of half a lemon — go for fresh when you can, but store-bought works too. I always add some extra lemon wedges on the side for an addition bright splash of flavor.
    • Mayonnaise- To add moisture to the patties so they don't dry out when cooked. It also helps bind everything together along with the egg.
    • Seasonings- Much of the flavor here comes from the added seasonings! I used dried dill, paprika, seasoned salt, black pepper, and garlic powder.
    An overhead image of the labeled recipe ingredients.

    How To Make Salmon Cakes

    Step 1- Make the salmon cake mixture.

    Add the cooked salmon, breadcrumbs, egg, seasonings, hot sauce, lemon juice, and mayonnaise to a large bowl and mix to combine.

    Salmon cake ingredients in a glass bowl.
    Salmon cake ingredients mixed together in the bowl.

    Step 2- Form the patties.

    Divide the mixture into 4 evenly sized portions and shape into patties with your (clean) hands.

    4 raw salmon patties frying in a pan with oil.

    Step 3- Cook.

    Place a large sauté pan with oil over medium-high heat. When the oil is hot, add the patties and cook for 3-4 minutes on each side. Place on a paper towel-lined plate to drain before serving, and enjoy!

    Cooked salmon patties frying in a pan of oil.

    Frequently Asked Questions

    How do you serve salmon patties?

    I like to squeeze a little more lemon juice over the top and serve with tartar sauce. They taste great with a side of greens, or with potatoes and a roasted vegetable for something a little more substantial.

    Can I freeze this salmon cakes recipe?

    Yes! Once cooled completely, place fish cakes on a parchment-lined baking sheet in the freezer to flash freeze. When solid, you can store them in an airtight container in the freezer for up to 3 months. That said, the texture and flavor will be better if you freeze the patties before cooking. Either way, be sure to thaw before reheating.

    Can I use canned salmon instead?

    Yes, although keep in mind it's not as flavorful. Each 4 ounce can contains around ½ cup of meat, so use around 3 cans. Drain them well before getting started for the best results.

    How many patties does this recipe make?

    My easy salmon patty recipe makes a total of 4 patties or 2 servings. It can easily be doubled or tripled for a crowd if needed!

    How do you keep salmon patties from falling apart?

    By adding an egg and some mayonnaise to the mixture before forming your patties. I don't recommend skipping either ingredient here.

    What can I use instead of breadcrumbs in salmon patties?

    Crushed Ritz crackers make for a great substitution for breadcrumbs! They have the same consistency in addition to a yummy buttery flavor.

    An overhead image of 2 salmon patties on a plate with mixed greens and tartar sauce.

    Tips For Making Salmon Fish Cakes

    • When prepping the salmon, check to see if the skin is still on. If it is, be sure to remove it before shredding.
    • If you need to cook the salmon- bake at 400 degrees F for 15-20 minutes and cool.
    • Be sure to pack the patties tightly when you form them. Try to keep them at the same thickness too — around ¾ inch is best. I gently push in the edges as well to try and prevent them from coming apart during cooking.
    • Make sure the oil is super hot before adding the cakes to the pan. I generally rotate them once or twice during cooking so the whole side is evenly browned.
    • Be gentle when turning them so they don't come apart.
    • Have a paper towel-lined plate handy for draining. There will be a little excess grease when you transfer them from the pan to the plate.
    • Ingredients to prep ahead- Cook the salmon if you haven't yet, then shred it. You could even form the patties up to an hour in advance. Store in the fridge until you're ready to use.
    • Leftovers and storage- These simple salmon patties last for up to 3 days covered in the refrigerator. I usually reheat single servings in 30-second bursts in the microwave, or I'll use my oven for larger portions. About 10 minutes in a 375-degree F oven is all they'll need.
    A close up image of a bite of salmon cake on fork over mixed greens.

    What To Serve With This Easy Salmon Cakes Recipe

    As I mentioned, this old fashioned salmon patties recipe is incredibly versatile — it pairs with so many great sides. Below you'll find some of my favorite salads and veggies, plus some yummy dessert options:

    • Shredded Brussels Sprouts Salad
    • Roasted Beet Salad
    • Artichoke and Olive Tapenade
    • Crescent Roll Veggie Pizza
    • Coconut Cake
    • Chocolate Chip Banana Bread Muffins

    Other Delicious Salmon Recipes To Try

    • A close up image of a piece of salmon on a pan with the front of it flaked to show the inside of the salmon.
      Sheet Pan Lemon Dill Salmon
    • There is nothing better than perfectly seared salmon and I'm going to show you how to get it just right! It's so easy to pan sear fish and I'm sharing all my tips and tricks to get that nice crispy outside and skin and perfectly tender inside.
      How to Make Perfectly Seared Salmon | The Life Jolie Kitchen Basics
    • A filet of baked chili salmon with avocado salsa on top
      Baked Chili Salmon
    • Seared salmon on a white plate with tomatoes and capers on top with the pan, a blue napkin, a piece of red onion and fresh basil behind it.
      Salmon With Capers and Tomatoes

    Love this recipe? Please leave a 5 star ⭐️⭐️⭐️⭐️⭐️ rating in the recipe card below ⬇️ and/or a review in the comment section further down. Check out my Amazon Store for all my favorite tools, including those used in this recipe. And follow @thelifejolie on Instagram and TikTok!

    An overhead image of 2 salmon patties on a plate with mixed greens and tartar sauce.

    Old Fashioned Salmon Patties Recipe

    Jessy Freimann
    My old fashioned salmon patties recipe is a tasty light lunch option that is also great for brunch with the family! Quick and easy to make in under 20 minutes, this recipe is also an excellent way to use up any leftover salmon.
    No ratings yet
    Print Recipe Pin Recipe
    Prep Time 10 minutes mins
    Cook Time 8 minutes mins
    Total Time 18 minutes mins
    Course Main Course
    Cuisine American
    Servings 2 servings
    Calories 118 kcal

    Equipment

    • Large saute pan
    • turner
    • chefs knife
    • cutting board
    • measuring cups
    • measuring spoons
    • mixing bowl

    Ingredients
      

    • 1 ½ cups cooked salmon, shredded
    • ½ cup panko bread crumbs
    • 1 large egg
    • ½ teaspoon dried dill
    • ¼ teaspoon paprika
    • ½ teaspoon seasoned salt
    • ¼ teaspoon ground black pepper
    • ¼ teaspoon garlic powder
    • 2-3 dashes hot sauce, I used franks Red Hot
    • ½ lemon (juice only) + more for serving
    • 1 Tablespoon mayonnaise
    • Tartar sauce for serving

    Instructions
     

    • Place all ingredients except for the oil and tartar sauce in a mixing bowl and stir until well combined.
    • Divide the mixture into 4 portions and shape tightly into ½ inch patties.
    • Heat 2-3 Tablespoons oil over medium high heat in a large sauté pan.
    • Once oil is hot, add patties to the pan.
    • Cook for 3-4 minutes per side until nicely browned, rotating if necessary for even cooking, turning once.
    • Remove patties to paper towel-lined plate to drain excess oil. Serve immediately with lemon wedges and tartar sauce.

    Video

    Notes

    • When prepping the salmon, check to see if the skin is still on. If it is, be sure to remove it before shredding.
    • If you need to cook the salmon- bake at 400 degrees F for 15-20 minutes and cool.
    • Be sure to pack the patties tightly when you form them. Try to keep them at the same thickness too — around ¾ inch is best. I gently push in the edges as well to try and prevent them from coming apart during cooking.
    • Make sure the oil is super hot before adding the cakes to the pan. I generally rotate them once or twice during cooking so the whole side is evenly browned.
    • Be gentle when turning them so they don't come apart.
    • Have a paper towel-lined plate handy for draining. There will be a little excess grease when you transfer them from the pan to the plate.
    • Ingredients to prep ahead- Cook the salmon if you haven't yet, then shred it. You could even form the patties up to an hour in advance. Store in the fridge until you're ready to use.
    • Leftovers and storage- These simple salmon patties last for up to 3 days covered in the refrigerator. I usually reheat single servings in 30-second bursts in the microwave, or I'll use my oven for larger portions. About 10 minutes in a 375-degree F oven is all they'll need.

    Nutrition

    Serving: 1servingCalories: 118kcalCarbohydrates: 14gProtein: 3gFat: 6gSaturated Fat: 1gPolyunsaturated Fat: 3gMonounsaturated Fat: 1gTrans Fat: 0.01gCholesterol: 3mgSodium: 740mgPotassium: 91mgFiber: 2gSugar: 2gVitamin A: 151IUVitamin C: 15mgCalcium: 42mgIron: 1mg
    Tried this recipe?Let us know how it was!

    Chicken Caesar Wrap Pinwheels

    Sep 19, 2024 · Leave a Comment

    Close up image of Caesar pinwheels on a cutting board.

    What should you do with that leftover chicken? Make Chicken Caesar Wrap Pinwheels, of course! Featuring crunchy lettuce, tender chicken, and flavorful Caesar dressing, they're super easy. Ready in just 20 minutes, this recipe is a seriously delicious lunch or healthy appetizer.

    Close up image of Caesar pinwheels on a cutting board.
    [feast_advanced_jump_to]

    Why You'll Love My Chicken Pinwheels

    Do you ever find inspiration in the most unexpected places? I know I do. For example, I used to fly out of JFK often and they always had these chicken Caesar wraps that were cut into pieces, resembling little pinwheel sandwiches. They were super light and full of tasty flavor, and although they were way expensive (hello airport food!), they were a good way to hold me over until I made it home to all that great home cooking!

    Other than nostalgia, here are a few more reasons why I love this easy chicken pinwheels recipe:

    • A great option for parties, barbecues, or potlucks
    • You only need 4 ingredients
    • Perfectly handheld
    • Can make with leftovers
    • Flavorful and fresh
    An overhead image of chicken pinwheels on a cutting board with a dark green towel under it and romaine lettuce leaves  on the side of it.

    Ingredient Information And Substitutions

    • Chicken- This is a great one for any leftover chicken! And if you don't have any on hand, grab a rotisserie bird from the supermarket to make life easier. Otherwise, you can quickly grill up some chicken breast.
    • Flour Tortillas- Make sure to get the large, burrito-style tortillas for this recipe. You need it big enough for all of the fillings.
    • Lettuce- Romaine is a classic choice — and what I'm using here — but you could use your preferred greens.
    • Caesar Dressing- Keep it simple and use your favorite brand!
    An overhead image of the labeled recipe ingredients.

    How To Make My Chicken Caesar Salad

    Step 1- Dress the tortillas.

    Place the tortillas on a clean work surface. Spread a thin, even layer of Caesar dressing on each one.

    A tortilla on a cutting board with caesar dressing spread on it.

    Step 2- Add toppings.

    Add the lettuce and chicken in an even layer over the dressed tortilla.

    Chopped chicken and romaine lettuce spread over the tortilla on a cutting board.

    Step 3- Roll and Slice.

    Carefully roll the wrap up and away from you and secure it as tightly as you can without ripping it. Leave the seam side down and repeat with the second tortilla.

    Cut the wraps into 1-inch thick pieces then insert a toothpick into the seam of each chicken pinwheel to keep them together. Keep them in the fridge until you're ready to serve, and enjoy!

    The caesar wrap rolled up tightly on the cutting board.

    Frequently Asked Questions

    How long do you cook chicken pinwheels for?

    This is a no cook, no bake meal! So no need to worry about cooking your pinwheels. You will need to have some cooked chicken ready and available before you get started, but that's the only thing that needs to be cooked here.

    How do you get pinwheels to stick together?

    A toothpick is your friend! Some other recipes note to wrap the tortillas (before slicing) in plastic wrap, storing in the fridge for a while to chill, then slicing them. That wouldn't work that well with my chicken pinwheel recipe — after slicing, the pinwheels would ultimately fall apart as they aren't made with creamier fillings like cream cheese or sour cream. Use the toothpicks and you should be fine.

    Why are my pinwheels soggy?

    You likely added a bit too much dressing. Remember to add just enough to evenly cover the tortilla. Anything more and all of that excess moisture will make things go mushy.

    An overhead image of a chicken caesar pinwheel on a cutting board revealing the meat and lettuce inside it.

    Tips For Making This Chicken Caesar Wrap Recipe:

    • Use leftover chicken- I can't stand food waste. This recipe is a delicious and healthy way to repurpose leftover grilled or rotisserie chicken.
    • Spread the dressing in a thin layer over the whole tortilla- Not only is it delicious, but it also helps hold the chicken pinwheels together.
    • Lightly shred the lettuce and chop the chicken into small pieces- This makes for easier cutting (to take it from a wrap to actual pinwheels) and cleaner eating.
    • Feel free to throw in your favorite add-ons- I kept these pretty simple, but there are so many extras that would be awesome additions. Tomatoes, red onion, pepperoncini, Kalamata olives, mushroom... the world is your oyster!
    • Make sure you wrap tightly- You don't want your chicken pinwheels to fall apart on you.
    • Use toothpicks for easier cutting- They'll keep everything rolled up nice and tight and allow you to space them cutting thckness for yourself. Plus they're so festive for parties.
    • Ingredients to prep ahead- If you don't have any leftovers to work with, you can cook the chicken in advance. Once cooled, chop it up into small pieces and refrigerate until you're ready to use. You can also wash and chop the lettuce.
    • Leftovers and storage- You can store leftovers in the fridge in an airtight container for up to 2-3 days. I do suggest eating them sooner rather than later as the dressing will cause the wraps to go soft over time.
    A side angle image of chicken caesar wrap pinwheels  on a cutting board with a dark green towel under it.

    What To Serve With Grilled Chicken Caesar Wrap Pinwheels

    I'm usually making chicken Caesar pinwheels for parties these days — I don't fly back and forth out of JFK too often now that I'm married with kids! They work great as a part of a larger appetizer spread alongside my crescent roll veggie pizza and some classic 7 layer dip.

    If you'd like to enjoy them for lunch, pair them with your favorite potato chips (or my everything pita chips) and a simple cucumber and tomato salad!

    Other Delicious Lunch Recipes To Try

    • A hand holding a half chicken salad sandwich revealing the inside of it
      Copycat Panera Chicken Salad Recipe
    • Is there anything better than a Classic Quiche Lorraine recipe? Simple ingredients, minimal steps and a delicious quiche to elevate any brunch! Made with eggs, cream, bacon, and gruyere cheese these are seriously easy and delicious!
      Classic Quiche Lorraine Recipe
    • A bowl of chicken and egg noodles soup with sliced bread and another bowl behind it.
      Dutch Oven Chicken Noodle Soup
    • A hand holding a half sandwich revealing the egg salad in the center.
      Avocado Egg Salad

    Love this recipe? Please leave a 5 star ⭐️⭐️⭐️⭐️⭐️ rating in the recipe card below ⬇️ and/or a review in the comment section further down. Check out my Amazon Store for all my favorite tools, including those used in this recipe. And follow @thelifejolie on Instagram and TikTok!

    Close up image of Caesar pinwheels on a cutting board.

    Chicken Caesar Wrap Pinwheels

    Jessy Freimann
    What should you do with that leftover chicken? Make Chicken Caesar Wrap Pinwheels, of course! Featuring crunchy lettuce, tender chicken, and flavorful Caesar dressing, they're super easy. Ready in just 20 minutes, this recipe is a seriously delicious lunch or healthy appetizer.
    5 from 1 vote
    Print Recipe Pin Recipe
    Prep Time 10 minutes mins
    Cook Time 10 minutes mins
    Total Time 20 minutes mins
    Course Appetizer, Main Course
    Cuisine American
    Servings 2 servings
    Calories 211 kcal

    Equipment

    • chefs knife
    • cutting board
    • measuring spoons
    • mixing bowl

    Ingredients
      

    • 2 large flour tortillas (burrito size)
    • 3 Tablespoons Caesar dressing to taste
    • 2 cups diced cooked chicken
    • 2 cups shredded Romaine lettuce

    Instructions
     

    • Lay the tortillas out on a cutting board.
    • Spread a thin layer of Caesar dressing onto each tortilla, to completely cover it.
    • Scatter chicken and Romaine lettuce evenly over the tortilla.
    • Carefully and tightly roll the tortilla up and away from you, leaving the seam side down.
    • Cut the wraps into 1 inch thick slices.
    • Carefully insert a toothpick into the seam of each slice to hold it together.
    • Refrigerate until you're ready to eat. 

    Video

    Notes

    • Use leftover chicken- I can't stand food waste. This recipe is a delicious and healthy way to repurpose leftover grilled or rotisserie chicken.
    • Spread the dressing in a thin layer over the whole tortilla- Not only is it delicious, but it also helps hold the chicken pinwheels together.
    • Lightly shred the lettuce and chop the chicken into small pieces- This makes for easier cutting (to take it from a wrap to actual pinwheels) and cleaner eating.
    • Feel free to throw in your favorite add-ons- I kept these pretty simple, but there are so many extras that would be awesome additions. Tomatoes, red onion, pepperoncini, Kalamata olives, mushroom... the world is your oyster!
    • Make sure you wrap tightly- You don't want your chicken pinwheels to fall apart on you.
    • Use toothpicks for easier cutting- They'll keep everything rolled up nice and tight and allow you to space them cutting thckness for yourself. Plus they're so festive for parties.
    • Ingredients to prep ahead- If you don't have any leftovers to work with, you can cook the chicken in advance. Once cooled, chop it up into small pieces and refrigerate until you're ready to use. You can also wash and chop the lettuce.
    • Leftovers and storage- You can store leftovers in the fridge in an airtight container for up to 2-3 days. I do suggest eating them sooner rather than later as the dressing will cause the wraps to go soft over time.

    Nutrition

    Serving: 1servingCalories: 211kcalCarbohydrates: 16gProtein: 3gFat: 15gSaturated Fat: 3gPolyunsaturated Fat: 8gMonounsaturated Fat: 4gCholesterol: 9mgSodium: 488mgPotassium: 44mgFiber: 1gSugar: 2gVitamin A: 7IUVitamin C: 0.1mgCalcium: 54mgIron: 1mg
    Tried this recipe?Let us know how it was!

    Crispy Fried Potatoes

    Sep 16, 2024 · Leave a Comment

    A close up of fried potatoes in a pan with a wooden spoon in it.

    If the perfect potato is crunchy on the outside and light and fluffy on the inside, these crispy fried potatoes definitely deliver. They're quick and easy — prepped, cooked, and ready in 40 minutes — and are packed with some seriously delicious flavor!

    A close up of fried potatoes in a pan with a wooden spoon in it.
    [feast_advanced_jump_to]

    Why You'll Love Fried Potatoes Recipe:

    My kids are weird about potatoes. I'm not sure who they got this trait from because their father and I agree that potatoes are delicious, but the battle rages on. Outside of French fries, getting them to eat a potato is hit-or-miss at best.

    When I was a kid, potatoes of all sorts were totally my jam! I still remember my mom at the stove cooking fried potatoes. They always seemed to come out perfectly cooked and seasoned and everyone fought for seconds.

    So, I decided to throw together my own version. In the past, I've had a spotty history of frying potatoes... but I had to give it a shot. I kept the seasonings simple and cooked them over moderate heat so the potatoes could slowly crisp up without burning. The results were so delicious — even my little ones enjoyed this fried tater recipe! Here are a few reasons why:

    • Perfect taste and texture
    • Simple but flavorful
    • Can be made with any variety of potato
    • Customizable
    • Enjoy at breakfast, lunch, or dinner
    An overhead image of a pan of fried potatoes with a wooden spoon in it and potatoes and a towel on the side.

    Ingredient Information And Substitutions

    • Potatoes- As mentioned, you can use whatever kind of potatoes you'd like. I've used butter potatoes and red potatoes.
    • Fat- I make pan fried potatoes with oil and butter. The oil prevents the butter from burning.
    • Seasonings- Nothing too fancy here. I used kosher salt, ground black pepper, onion powder, garlic powder, and paprika to flavor the spuds.
    • Fresh Herbs- Garnish with fresh chopped parsley for a pop of color. You could use any fresh herb you love. Or, skip it if you don't have any.

    How To Cook Fried Potatoes

    Step 1- Prep the pan.

    Place a large skillet over medium heat. Introduce the butter and oil into the pan and heat until melted and hot.

    Butter and oil melting in a hot pan.

    Step 2- Add the potatoes.

    Place the chopped potatoes into the pan and use a spatula to spread them into an even layer. Season with paprika, garlic powder, and onion powder.

    Raw potatoes cooking in a pan.

    Step 3- Cook.

    Allow the potatoes to cook for 20 minutes, making sure to stir them often.

    Potatoes starting to brown in a large pan.

    Step 4- Season again.

    Season the fried potatoes with salt and pepper and allow them to cook for 20 more minutes. Remove from heat when they're golden brown and crispy and garnish with fresh parsley. Enjoy!

    A pepper grinder grinding black pepper in to the pan of potatoes.

    Frequently Asked Questions

    What variety of potato is best for this pan fried potatoes recipe?

    As mentioned, any variety will work! I used red potatoes here, but Yukon Gold or Russet are some other options. Fingerling would be tasty too.

    Do you have to peel the potatoes?

    No, you don't have to! I do so that my kids will eat them, but fried potatoes are just as delicious with the skin on. If you do decide to leave it on, just remember to scrub the taters thoroughly first to remove any debris.

    Do you have to boil potatoes before frying them?

    Some people prefer to, but it's not necessary for pan frying potatoes. If you chop them up small enough, they will cook through without the need to boil them first.

    How do you tell if potatoes are done frying?

    You can tell they're done when they turn golden brown and are fork-tender.

    Is it better to fry potatoes in butter or oil?

    Why choose when you can use both? I find that using butter and oil at the same time gives me the best texture. Plus, butter has a lower smoke point than oil, so the oil actually prevents it from burning.

    A close up image of fried potatoes.

    Tips For My Recipe For Fried Potatoes

    • Try to cut the potatoes around the same size so that they cook evenly. I prefer 1-inch chunks for this pan fried potatoes recipe.
    • Dry the potato cubes thoroughly before you add them to the pan. Any excess moisture will keep them from browning properly!
    • Use a nonstick skillet. You shouldn't have too many issues with sticking thanks to the oil and butter. Use a nonstick skillet for double the protection just in case.
    • Add the spuds in a single layer. Don't overcrowd the pan or your pan fried potatoes will turn into pan steamed ones.
    • Be sure to stir and turn the taters often to prevent burning. You want your fried potatoes crispy, not burnt!
    • These are best served right away for optimal crispiness.
    • Ingredients to prep ahead- You can clean the potatoes in advance.
    • Leftovers and storage- Although these are best served right away, they will keep for up to 3 days covered in the fridge. To reheat, pop them back in the skillet with a bit of oil. Or, use your air fryer if you have one. 3-5 minutes at 400 degrees F should do the trick.

    What To Serve With My Southern Fried Potatoes

    One of the best parts about this recipe is that you can serve it up any time of day! I love them at breakfast with a piece of rye toast, bacon, and some scrambled eggs, or to the side of a cheesy bodega-style breakfast sandwich.

    Sometimes I'll add them to the top of a salad for lunch to make the whole thing more filling, or as a side to a soup or ham and cheese sandwich.

    For dinner, you could try them with grilled steak, my one-pot balsamic chicken, or some citrus-packed fish if that's more your style. Paired with roasted vegetables and some sort of sauce or gravy on top, you'll have a well-rounded meal.

    Other Delicious Potato Recipes To Try

    • A plate of scalloped potatoes with a bowl of cheese and the pan of them in the background.
      Mom's Creamy Scalloped Potatoes
    • The corner of a pan of cheesy ranch potatoes.
      Ranch Potatoes Recipe
    • A close up image of roasted potatoes on a sheet pan.
      Crispy Parmesan Potatoes
    • An overhead image of mashed potatoes with melting butter and chives on top.
      Gouda Cheese Mashed Potatoes

    Love this recipe? Please leave a 5 star ⭐️⭐️⭐️⭐️⭐️ rating in the recipe card below ⬇️ and/or a review in the comment section further down. Check out my Amazon Store for all my favorite tools, including those used in this recipe. And follow @thelifejolie on Instagram and TikTok!

    A close up of fried potatoes in a pan with a wooden spoon in it.

    Crispy Fried Potatoes

    Jessy Freimann
    If the perfect potato is crunchy on the outside and light and fluffy on the inside, these crispy fried potatoes definitely deliver. They're quick and easy — prepped, cooked, and ready in 40 minutes — and are packed with some seriously delicious flavor!
    No ratings yet
    Print Recipe Pin Recipe
    Prep Time 10 minutes mins
    Cook Time 30 minutes mins
    Total Time 40 minutes mins
    Course Side Dish
    Cuisine American
    Servings 4 servings
    Calories 244 kcal

    Equipment

    • chefs knife
    • cutting board
    • measuring cups
    • measuring spoons
    • mixing bowl
    • stand mixer or hand mixer
    • Large saute pan
    • wooden spoon

    Ingredients
      

    • 1 Tablespoon vegetable oil
    • 2 Tablespoons salted butter
    • 4 cups potatoes peeled and diced into 1 inch pieces
    • ½ teaspoon onion powder
    • ¼ teaspoon garlic powder
    • ¼ teaspoon paprika
    • ½ teaspoon kosher salt
    • ¼ teaspoon ground black pepper
    • Fresh parsley chopped (optional garnish)

    Instructions
     

    • Melt oil and butter together in a large skillet over medium heat.
    • Add potatoes to the skillet and spread them into a single layer.
    • Season with onion powder, garlic powder and paprika.
    • Cook for 20 minutes, stirring and turning often.
    • Season with salt and pepper.
    • Cook another 10 minutes, stirring and turning often or until golden brown.
    • Remove from heat and garnish with fresh chopped parsley. Serve immediately.

    Video

    Notes

    • Try to cut the potatoes around the same size so that they cook evenly. I prefer 1-inch chunks for this pan fried potatoes recipe.
    • Dry the potato cubes thoroughly before you add them to the pan. Any excess moisture will keep them from browning properly!
    • Use a nonstick skillet. You shouldn't have too many issues with sticking thanks to the oil and butter. Use a nonstick skillet for double the protection just in case.
    • Add the spuds in a single layer. Don't overcrowd the pan or your pan fried potatoes will turn into pan steamed ones.
    • Be sure to stir and turn the taters often to prevent burning. You want your fried potatoes crispy, not burnt!
    • These are best served right away for optimal crispiness.
    • Ingredients to prep ahead- You can clean the potatoes in advance.
    • Leftovers and storage- Although these are best served right away, they will keep for up to 3 days covered in the fridge. To reheat, pop them back in the skillet with a bit of oil. Or, use your air fryer if you have one. 3-5 minutes at 400 degrees F should do the trick.

    Nutrition

    Serving: 1servingCalories: 244kcalCarbohydrates: 37gProtein: 4gFat: 9gSaturated Fat: 4gPolyunsaturated Fat: 2gMonounsaturated Fat: 2gTrans Fat: 0.3gCholesterol: 15mgSodium: 349mgPotassium: 895mgFiber: 5gSugar: 2gVitamin A: 241IUVitamin C: 41mgCalcium: 29mgIron: 2mg
    Tried this recipe?Let us know how it was!

    Baked Chicken Tenders Recipe

    Sep 12, 2024 · Leave a Comment

    An overhead image of a plate of chicken tenders on a blue and white towel.

    Why order takeout when you can make a much better (and healthier!) version at home? This homemade baked chicken tenders recipe makes a fantastic easy weeknight dinner! Made with 4 main ingredients in just 30 minutes.

    A hand dipping a chicken tender in a bowl of BBQ sauce with other tenders and asparagus in the background.
    [feast_advanced_jump_to]

    Why You'll Love Homemade Chicken Fingers

    I was pretty excited when I got a request from a reader for baked chicken tenderloins. I live in a home with a super picky husband and two young kids whose tastes in food change every hour (or so it seems!), so I never know how a new recipe will go over. But, I knew that a baked panko chicken tenders was bound to be a hit, and I was right!

    I did quite a few tests on this recipe to get the flavor right where I wanted it to be. Ultimately, it was the addition of the ranch seasoning that really took it to the place I wanted it! Panko bread crumbs make give these a nice crispiness without the need for frying. You end up with homemade oven baked chicken tenders that are juicy on the inside with a subtle crunch on the outside. And in case you need some more reasons to try it, this recipe is also:

    • Incredibly simple to make
    • Freezer-friendly — perfect for weeknight dinner prep
    • Perfectly cooked in the oven
    • No excess oil or deep fryer needed
    • Kid-tested and approved
    An overhead image of baked chicken tenders on a baking sheet with a metal rake on it.

    Ingredients And Substitutions

    • Chicken Breast- I like making homemade tenders out of boneless skinless chicken breast or chicken tenderloins. I almost always have a pack in the freezer, and it's easiest to slice into strips.
    • Flour & Eggs- Regular all-purpose flour is perfectly fine for your dredging station. You'll need eggs too — they help the seasoned breadcrumb mixture stick to the chicken.
    • Panko Breadcrumbs- Panko is by far my favorite breadcrumb for this baked chicken tenders recipe. It adds the perfect amount of crunch without being too heavy!
    • Seasonings- I usually lightly season the chicken breast with salt and pepper, plus add seasoning salt and ranch directly with the panko. Like I said... the ranch really pulled everything together!
    An overhead image of labeled recipe ingredients.

    How To Make Baked Chicken Tenderloins In The Oven

    Step 1- Recipe prep

    Preheat your oven to 400 degrees F and line a sheet pan with parchment paper. Place a wire rack on top and grease with nonstick cooking spray. Pat the chicken breast dry and slice into tenders. Season both sides with salt and pepper.

    Sliced and seasoned raw chicken tenders on a cutting board.

    Step 2- Bread the chicken

    Set up your dredging stations beginning with the flour. Beat the eggs in a second, separate bowl, and finally mix the panko with the seasonings in a separate third bowl.

    Dredge each piece of chicken in the flour, then the eggs, then the panko mixture. Carefully tap off any excess.

    A hand dipping a raw piece of chicken in a bowl of flour.
    A hand dipping a floured piece of chicken in a bowl of beaten egg.
    Panko and seasonings in a glass bowl.
    A hand dredging egg covered chicken piece in the panko mixture.

    Step 3- Bake

    Place the breaded tenders on the prepared wire rack. Spray lightly the tops with cooking spray. Bake for 15 minutes, then turn on the broiler for a few minutes to give the tenders a nice golden brown crust. Serve your baked chicken breast tenders with your favorite dipping sauces and enjoy!

    Breaded raw chicken tenders on the wire rack and backing sheet.
    The pan of chicken tenders in the oven.

    Frequently Asked Questions

    What cut of chicken should I use?

    As mentioned, I like to make baked chicken breast tenders. You could also use chicken tenderloins right off the bat to eliminate the slicing step.

    How long to cook chicken tenders in the oven?

    You can bake them for around 15 minutes until they're just about cooked through. Then, give them a couple of minutes under the broiler to crisp up a little more.

    Should I cover my chicken when I bake it in the oven?

    These only need to be baked for around 15 minutes, so you don't need to worry about covering them. I also find that keeping them uncovered helps them come out crispier.

    How do you make baked chicken tenders crispy?

    I find that spraying the tenders lightly in cooking spray before baking helps a lot. I also use a baking rack to crisp both sides and finish baking the last couple minutes under the broiler.

    What dip should I use?

    It's totally up to you. I prefer BBQ sauce or honey mustard. My husband is all about ranch dressing, while my daughters love tomato ketchup. Do you!

    What is the breading on chicken tenders made of?

    It depends on the recipe — mine are panko chicken tenders with some extra seasoning added in with the breadcrumbs. Other variations may use traditional breadcrumbs or even a flavored blend like Italian, but I think the panko helps them come out crispier.

    A plate of baked chicken fingers on a blue and white towel with BBQ sauce and asparagus in the background.

    Tips For Making Crispy Baked Chicken Tenders

    • Before breading, I like to season the chicken with salt and pepper to taste for a little extra flavor.
    • When cutting the chicken breast, try to cut it into uniform pieces so that they cook evenly.
    • For optimal crispiness, place a baking rack onto the lined sheet pan. This allows the tenders to crisp up on both sides without the need for turning them. If a baking rack isn't available, remember to turn them about halfway through.
    • Use a meat thermometer to test for doneness. You can turn off the oven just before the tenders hit an internal temperature of 165 degrees. Be sure to let them rest for a couple of minutes before serving.
    • Make a double batch and freeze half for later. This is such a great recipe for future meal prep. Simply bake as directed, let them cool completely, and then place on a baking sheet. Flash freeze until solid, then place in an airtight container in the freezer for up to 3-4 months. Thaw completely before baking.
    • Ingredients to prep ahead- Slice the chicken breast into strips.
    • Leftovers and storage- Homemade tenders will keep for up to 3-4 days in an airtight container in the fridge. You can reheat them in your oven (or air fryer!) or in the microwave.
    An overhead image of a plate of chicken tenders on a blue and white towel.

    What To Serve With Oven Baked Panko Chicken Tenders

    Pair your oven baked chicken tenders alongside some vegetables and a carb and dinner is served! In my house we love peas with onions and garlic green beans, plus some baked French fries. Oh, and don't forget those dipping sauces.

    For dessert, why not some chocolate pudding cake or blueberry lemon dump cake? Or, if you're in the mood for something else, I have plenty of other sweet treats to choose from.

    Other Delicious Chicken Recipes To Try

    • A close up image of a chicken cutlet cut in half revealing the perfectly cooked center.
      Chicken Cutlets
    • This is the Chicken Casserole to end all chicken casserole recipes! Creamy and delicious but also so easy to make- this is the perfect way to feed a crowd!
      Fernie's Famous Chicken Casserole
    • A close up image of a roasted balsamic chicken thigh in the pan.
      Balsamic Chicken Marinade
    • A piece of pineapple chicken breast with a grilled pineapple slice on a pan with other pieces behind it.
      Aloha Chicken Recipe

    Love this recipe? Please leave a 5 star ⭐️⭐️⭐️⭐️⭐️ rating in the recipe card below ⬇️ and/or a review in the comment section further down. Check out my Amazon Store for all my favorite tools, including those used in this recipe. And follow @thelifejolie on Instagram and TikTok!

    An overhead image of a plate of chicken tenders on a blue and white towel.

    Baked Chicken Tenders Recipe

    Jessy Freimann
    Why order takeout when you can make a much better (and healthier!) version at home? This homemade baked chicken tenders recipe makes a fantastic easy weeknight dinner! Made with 4 main ingredients in just 30 minutes.
    No ratings yet
    Print Recipe Pin Recipe
    Prep Time 10 minutes mins
    Cook Time 20 minutes mins
    Total Time 30 minutes mins
    Course Main Course
    Cuisine American
    Servings 4 servings
    Calories 335 kcal

    Equipment

    • sheet pan
    • Silpat
    • chefs knife
    • cutting board
    • Cooling rack
    • measuring cups
    • measuring spoons

    Ingredients
      

    • Cooking spray
    • 1 pound boneless skinless chicken breasts
    • ½ teaspoon Kosher salt to taste
    • ¼ teaspoon Ground black pepper to taste
    • ½ cup flour
    • 3 large eggs beaten (start with two and beat a third if needed)
    • 1 ¼ cup panko bread crumbs
    • ¾ teaspoon seasoning salt
    • 2 Tablespoons ranch seasoning

    Instructions
     

    • Preheat the oven to 400 degrees and line a sheet pan. Top it with a baking rack if you have one and spray the baking rack (or pan) with cooking spray.
    • Pat the chicken dry with a paper towel and cut into equal size slices. Sprinkle with salt and pepper to taste.
    • In 3 shallow bowls, place the following: flour in the first, beaten eggs in the second and in the third stir together the panko bread crumbs, seasoned salt and ranch seasoning until fully combined.
    • Dredge each chicken piece in flour and tap off the excess. 
    • Then submerge each chicken piece in the egg making sure it's fully covered before gently tapping of the excess.
    • Finally, cover each chicken piece in the panko mixture. Once fully covered carefully tap off the excess and place onto the baking rack or pan so they're not touching.
    • Bake for 15 minutes and then turn the oven onto broil couple of minutes to brown (watch them carefully- you want them to brown, not burn). If not using a baking rack, flip the chicken tenders midway through the cooking time. Serve immediately with your dipping sauce of choice. 

    Video

    Notes

    • Before breading, I like to season the chicken with salt and pepper to taste for a little extra flavor.
    • When cutting the chicken breast, try to cut it into uniform pieces so that they cook evenly.
    • For optimal crispiness, place a baking rack onto the lined sheet pan. This allows the tenders to crisp up on both sides without the need for turning them. If a baking rack isn't available, remember to turn them about halfway through.
    • Use a meat thermometer to test for doneness. You can turn off the oven just before the tenders hit an internal temperature of 165 degrees. Be sure to let them rest for a couple of minutes before serving.
    • Make a double batch and freeze half for later. This is such a great recipe for future meal prep. Simply bake as directed, let them cool completely, and then place on a baking sheet. Flash freeze until solid, then place in an airtight container in the freezer for up to 3-4 months. Thaw completely before baking.
    • Ingredients to prep ahead- Slice the chicken breast into strips.
    • Leftovers and storage- Homemade tenders will keep for up to 3-4 days in an airtight container in the fridge. You can reheat them in your oven (or air fryer!) or in the microwave.

    Nutrition

    Serving: 1servingCalories: 335kcalCarbohydrates: 30gProtein: 33gFat: 8gSaturated Fat: 2gPolyunsaturated Fat: 2gMonounsaturated Fat: 2gTrans Fat: 0.03gCholesterol: 212mgSodium: 1612mgPotassium: 527mgFiber: 1gSugar: 1gVitamin A: 237IUVitamin C: 1mgCalcium: 64mgIron: 3mg
    Tried this recipe?Let us know how it was!

    Mini Turkey Meatloaf Muffins

    Sep 9, 2024 · Leave a Comment

    A meatloaf and potatoes muffin on a plate with another behind it as well as green beans.

    My mini turkey meatloaf with sweet potatoes offers a lighter meat and potatoes option for an easy weeknight dinner. Just a little over 30 minutes and a few basic ingredients, and you've got a simple meal the whole family will love!

    A meatloaf and potatoes muffin on a plate with another behind it as well as green beans.
    [feast_advanced_jump_to]

    Why You'll Love Turkey Meatloaf Muffins:

    Remember my mini meatloaf and potatoes dinner that you guys went crazy over? Well, I figured I should make a lightened-up version of it for those who aren't into beef and white potatoes or just want a fun and different variation!

    So, I've taken my favorite meatloaf recipe and turned it into a lighter 30-minute meal. I updated the seasonings a bit to make sure it's full of great flavor since there's not as much fat in ground turkey. And then I topped it with tender sweet potatoes for lighter and delicious turkey meatloaf muffins.

    They came out so well! Here's what I love most about meatloaf muffins:

    • So easy to make
    • Simple ingredients
    • Family-friendly
    • Perfect for busy weeknights
    • All you need is an extra veggie and dinner is served!
    A close up image of a mini turkey meatloaf with sweet potatoes on top on the side of a white plate.

    Ingredient Information And Substitutions

    • Ground Turkey- The best option for turkey meatloaf on with a bit more fat content in the ground turkey. A bit of fat will keep everything moist and flavorful — my store only has 94% lean (the other is 99% which is not preferable) but even 90% or 85% work.
    • Sauces- Like most meatloaf recipes, Worcestershire and ketchup are needed here! Both add extra flavor and moisture.
    • Cheese- I usually use Parmesan or Romano cheese.
    • Breadcrumbs- Seasoned is best for great flavor.
    • Egg- To bind everything together.
    • Sweet Potatoes- Peel and slice them thin before you get started!
    • Seasonings- For the meatloaf itself, grab some garlic powder, kosher salt, and ground black pepper. For the potatoes, I seasoned them with salt, pepper, garlic powder, paprika, and thyme. Feel free to change them up to your taste.

    How To Make Turkey Mini Meatloaf Muffins

    Step 1- Make the meatloaf

    Preheat your oven to 400 degrees F and grease a muffin tin with nonstick cooking spray.

    Add the ground turkey, sauces, cheese, breadcrumbs, egg, salt, pepper, and garlic powder to a large bowl and mix until combined. Divide the mixture evenly between each muffin cup.

    Meatloaf ingredients in a glass bowl.
    Meatloaf ingredients divided between 12 prepared muffin cups.

    Step 3- Prepare the sweet potatoes.

    Place the potato slices in a large bowl and toss with olive oil, salt, pepper, garlic powder, paprika, and thyme. Place about 4-5 slices on top of each muffin cup.

    Sweet potato ingredients in a glass bowl.
    Sweet potato slices on top of each muffin cup.

    Step 4-Bake.

    Cover the muffin tin with foil and bake for 20 minutes. Remove the foil and bake uncovered for 6-8 more minutes. Turn on the broiler and broil for 2-3 minutes to brown the sweet potatoes.

    Let your sweet potato turkey meatloaf cups cool for about 5 minutes before serving, and enjoy!

    A turkey meatloaf muffin with sweet potatoes cutdown the middle to reveal the perfectly cooked inside of the meat.

    Frequently Asked Questions

    Is turkey meatloaf good for you?

    I'm not a nutritionist or medical professional, but this recipe is definitely a lighter version of a family favorite.

    How do you know if turkey meatloaf is done?

    You can use a meat thermometer to check for doneness. Once it reaches an internal temperature of 165 degrees F and is no longer pink, it's ready.

    How do you keep turkey meatloaf moist?

    As mentioned, turkey is a drier meat compared to beef. But, there are a few ways you can keep it moist! First, don't overwork the meat — mix the meatloaf ingredients until just combined for the best results. Don't skip that added egg either. It binds everything together and adds moisture. Also, if you find that the raw meat mixture feels dry, you can always add a tablespoon or two of warm water to the meat mixture. Just be sure you don't go overboard, or it will be soggy.

    How long is turkey meatloaf good for in the fridge?

    Once it's cooked, it will keep for around 3-4 days in an airtight container in the refrigerator.

    How to reheat turkey meatloaf?

    I like to reheat it covered in the oven with a tiny bit of water in the bottom of the pan. You can also reheat individual portions in the microwave — cover it lightly with a damp paper towel to keep it moist.

    Can you freeze turkey meatloaf?

    Yes, you have two options: freeze your turkey mini meatloaf once cooked, or flash-freeze them uncooked. For the latter, form 12 even portions of the meat and freeze on a parchment-lined sheet pan. Once frozen, transfer to a plastic zipper bag and thaw when you're ready to bake. If you went with the first option, let them thaw in the fridge overnight before gently reheating as instructed above.

    A plate of turkey meatloaf minis with sweet potatoes on top and green beans with the pan of other meatloaf and potatoes behind it.

    Tips For Making Turkey Meatloaf Muffins

    • The best way to prevent these from sticking is to use a non-stick muffin pan and spray it well with non-stick cooking spray.
    • Once all the ingredients are combined, smell the mixture. Although this sounds strange, it should smell flavorful. If it doesn’t, add more of the seasonings. This is especially important because you're using ground turkey, which has a lower fat content than beef and is therefore less flavor.
    • Be sure to slice the potatoes super thin as if you were slicing them for scalloped potatoes. This will ensure that they cook through. A mandoline is super helpful for this.
    • I cover these for the first 20 minutes of baking to make sure that the potatoes cook through. Then, I'll remove the foil and bake again before blasting the mini turkey meatloaf muffins under the broiler for 2-3 minutes. I find this gives them the best color!
    • Cool them for 5 minutes, then use a butter knife to cut around the edge of each muffin and around the bottom to carefully remove each one. They do stick a little, so be careful.
    • Ingredients to prep ahead- You can wash, peel, and slice the sweet potatoes in advance if you want to get ahead.
    • Leftovers and storage- As mentioned, these will keep for 3-4 days covered in the fridge. Reheat gently as instructed above — go easy as these will dry out very easily if heated too quickly.

    What To Serve With Mini Turkey Meatloaves

    You already have the protein and carb piece of your meal taken care of with these turkey meatloaf muffins. All you really need to round everything out is a veggie and dessert option. I love peas with onions and easy garlic green beans, or a fresh strawberry salad.

    For dessert, try my Grandma's best banana cake or a quick and easy chocolate pudding cake!

    Other Delicious Meatloaf Recipes To Try

    • A close up of a meatloaf muffin topped with cheesy potatoes on a white plate.
      Mini Meatloaf Recipe with Potatoes
    • A spoon holding up a porcupine meatball and sauce over the pan of them.
      Porcupine Meatballs With Tomato Soup
    • A close up image of chicken parm muffin pan meatloaf on the side of a white dish with another below it and some spaghetti in the background.
      Chicken Parm Mini Meatloaf Muffins
    • This is my mom's meatloaf recipe- it is seriously the best meatloaf I've ever had- it's super simple and really easy to make. It's the ultimate of comfort foods and one of my favorite dinners!
      Mom's Meatloaf Recipe

    Love this recipe? Please leave a 5 star ⭐️⭐️⭐️⭐️⭐️ rating in the recipe card below ⬇️ and/or a review in the comment section further down. Check out my Amazon Store for all my favorite tools, including those used in this recipe. And follow @thelifejolie on Instagram and TikTok!

    A meatloaf and potatoes muffin on a plate with another behind it as well as green beans.

    Mini Turkey Meatloaf Muffins

    Jessy Freimann
    My mini turkey meatloaf muffins offer a lighter meat and potatoes option for an easy weeknight dinner. Just a little over 30 minutes and a few basic ingredients, and you've got a simple meal the whole family will love!
    No ratings yet
    Print Recipe Pin Recipe
    Prep Time 10 minutes mins
    Cook Time 30 minutes mins
    Total Time 40 minutes mins
    Course Main Course
    Cuisine American
    Servings 4 servings
    Calories 297 kcal

    Equipment

    • mixing bowl
    • chefs knife
    • cutting board
    • measuring cups
    • measuring spoons
    • Mandoline
    • muffin pan

    Ingredients
      

    Meatloaf

    • Cooking spray
    • 1 pound ground turkey
    • ¾ teaspoon garlic powder
    • ¾ teaspoon kosher salt
    • ¼ teaspoon ground black pepper
    • 1 teaspoon Worcestershire sauce
    • 3 Tablespoons tomato ketchup
    • ½ cup Romano or Parmesan cheese
    • ⅓ cup seasoned breadcrumbs
    • 1 large egg
    • Warm water (optional- this is only necessary if your mixture feels to dry- start with a little if you need it)

    Potatoes

    • 2 medium sweet potatoes peeled and sliced thin
    • 2 teaspoons olive oil
    • ½ teaspoon kosher salt
    • ¼ teaspoon ground black pepper
    • ¼ teaspoon garlic powder
    • ¼ teaspoon paprika
    • ¼ teaspoon dried thyme

    Instructions
     

    • Preheat the oven to 400 degrees and spray a 12 cup non-stick muffin time with cooking spray. Set aside.
    • In a large bowl, mix all meatloaf ingredients until combined. Be sure you don't over work the meat. If it feels dry add a little warm water. If it feels too wet add a little more bread crumbs.
    • Divide the meat between each muffin cup and press into the tin to evenly cover it (it should come up right around half way).
    • Place the potato slices in a large bowl. Drizzle with oil and sprinkle with salt, pepper, garlic powder, paprika and thyme. Toss until each slice is evenly coated.
    • Place about 4-5 slices onto the tops of the meatloaf in the muffin pan.
    • Cover and bake for 20 minutes.
    • Remove the pan from the oven and uncover.
    • Return the pan to the oven un covered for an additional 6-8 minutes and then turn the broiler onto high without moving the pan. Broil for 2-3 minutes to slightly brown the potatoes. Remove from the oven.
    • Let them cool for 5 minutes. Use a butter knife to cut around the outside where each meatloaf meets the sides of the muffin tin to keep it from sticking and around the bottom of the meatloaf muffins to carefully remove them from the tin (they do stick a bit so do this carefully). Serve immediately.

    Video

    Notes

    • The best way to prevent these from sticking is to use a non-stick muffin pan and spray it well with non-stick cooking spray.
    • Once all the ingredients are combined, smell the mixture. Although this sounds strange, it should smell flavorful. If it doesn’t, add more of the seasonings. This is especially important because you're using ground turkey, which has a lower fat content than beef and is therefore less flavor.
    • Be sure to slice the potatoes super thin as if you were slicing them for scalloped potatoes. This will ensure that they cook through. A mandoline is super helpful for this.
    • I cover these for the first 20 minutes of baking to make sure that the potatoes cook through. Then, I'll remove the foil and bake again before blasting the mini turkey meatloaf muffins under the broiler for 2-3 minutes. I find this gives them the best color!
    • Cool them for 5 minutes, then use a butter knife to cut around the edge of each muffin and around the bottom to carefully remove each one. They do stick a little, so be careful.
    • Ingredients to prep ahead- You can wash, peel, and slice the sweet potatoes in advance if you want to get ahead.
    • Leftovers and storage- As mentioned, these will keep for 3-4 days covered in the fridge. Reheat gently as instructed above — go easy as these will dry out very easily if heated too quickly.

    Nutrition

    Serving: 1servingCalories: 297kcalCarbohydrates: 34gProtein: 30gFat: 5gSaturated Fat: 1gPolyunsaturated Fat: 1gMonounsaturated Fat: 2gTrans Fat: 0.02gCholesterol: 63mgSodium: 1103mgPotassium: 798mgFiber: 4gSugar: 8gVitamin A: 16204IUVitamin C: 4mgCalcium: 63mgIron: 2mg
    Tried this recipe?Let us know how it was!

    Mom's Creamy Scalloped Potatoes

    Sep 5, 2024 · 36 Comments

    A plate of scalloped potatoes with a bowl of cheese and the pan of them in the background.

    My mom's creamy scalloped potatoes are the perfect comforting side dish for a family dinner — everyone will be back for seconds! Made with 5 main ingredients and baked to perfection in 1 hour.

    A plate of scalloped potatoes with a bowl of cheese and the pan of them in the background.
    [feast_advanced_jump_to]

    Why You'll Love Homemade Scalloped Potatoes Recipe

    I don't know about you, but when I think of a spiral ham, I immediately think of scalloped potatoes. Some things are just meant to be together. Peas and carrots. Grilled cheese and tomato soup. Peanut butter and Jelly. Cookies and milk.

    So today, I'm really excited to share my Mom's scalloped potatoes recipe. It's crazy simple to make and uses really minimal ingredients for maximum flavor. It's a classic dish that is comforting and perfect for feeding a crowd. You could even make a smaller version if you're expecting fewer people.

    There is nothing more comforting than creamy, savory potatoes that are cooked until fork tender and golden brown on top, right? In case you need more convincing, this recipe is:

    • Full of cheesy flavor
    • Creamy without any heavy cream needed
    • Family-friendly
    • Affordable
    • Perfect for the holidays
    • Leftovers are delish!
    An overhead image of a pan of scalloped potatoes on a white and black checked towel.

    Ingredient Information And Substitutions

    • Potatoes- I usually use russets — they have a mild flavor and a good amount of starch (starchy = creamy). Some other options include Yukon Gold and red potatoes.
    • Onions- You can honestly opt for whatever onions you have on hand. I almost always have yellow ones at home, so that's what I used here.
    • Milk- Here's where the creaminess comes from without being overly rich! I can't recommend whole milk enough. It has just the amount of richness you'll need. Don't use skim.
    • Flour- Works as a thickener along with the milk. You'll essentially use both to create a slurry that you'll pour over the pan of potatoes before baking.
    • Salt & Pepper- To taste.
    • Grated Cheese- Technically optional, but I never say no to cheese. I like grated Romano, but you could also use Parmesan... or your personal favorite.
    An overhead image of the labeled recipe ingredients.

    How Do You Make Scalloped Potatoes

    Step 1- Create the "scalloped" layers

    If you plan on baking your old fashioned scalloped potatoes right away, preheat your oven to 400 degrees F and prepare the pan. Otherwise, simply spray your baking pan with cooking spray and set aside.

    Cover the bottom of the baking pan with the sliced potatoes — it's okay if they overlap. Next, add half of the sliced onions then season with salt and pepper. Repeat with another layer of potatoes, then the onion, and finally season. Layer the rest of the potatoes on top and season one more time.

    Thin sliced potatoes shingled into a single later in a baking pan.
    Thin sliced onions and salt and pepper added to the potatoes in the pan.

    Step 3- Add the milk.

    Create your slurry with the milk and flour. Pour the mixture all over the potatoes and onions, then sprinkle with grated cheese if using.

    The milk and flour mixture being poured over the potatoes in the pan.
    Romano cheese sprinkled on top of the potato mixture in the pan.

    Step 4- Bake (or chill).

    Bake uncovered at 400 degrees F for 1 hour, or until golden brown and crispy on top.

    If you don't plan on serving your creamy scalloped potatoes right away, cover the baking dish with foil and store in the fridge until you're ready. Enjoy!

    A close up image of the perfectly browned top of the scalloped potatoes.

    Frequently Asked Questions

    What is the difference between scalloped potatoes and au gratin potatoes?

    Au gratin potatoes typically include cheese. That being said, I included the option to top my creamy scalloped potatoes recipe with Romano cheese for a little added flavor.

    How do you cut potatoes for scalloped potatoes?

    The easiest way is to use a mandoline because you'll get a more uniform cut. But you can just as easily take your time and use a really sharp knife. The key is to get them nice and thin.

    Can you make scalloped potatoes ahead of time?

    Yes! You can assemble the entire dish and refrigerate until you're ready to serve. It will keep for a day or two, and you can bake just before serving.

    Are scalloped potatoes supposed to be hard or soft?

    A little of both. The overall texture should be creamy thanks to the milk and the starchy spuds. The potatoes should be soft but still have a bit of a bite. Otherwise, they'd taste and feel like mashed potatoes!

    Can I make gluten-free scalloped potatoes?

    Yes! Swap out the flour of 1:1 gluten free flour- I like Bob's Red Mill or King Arthur brands.

    A spoon holding up a scoop of scalloped potatoes over the full pan.

    Tips For Making Cheese Scalloped potatoes recipe

    • Try to slice the potatoes as thin as possible. Your goal should be to get them to around ⅛-¼-inch in thickness.
    • Slice the onions as thinly as possible too, and they’ll melt right into the dish!
    • Spray down the baking pan with nonstick cooking spray to help prevent sticking. You could also apply olive oil with a clean paper towel.
    • When creating the layers of potatoes, try to make it as even but slightly shingled.
    • You want the milk to almost cover the potatoes, but not completely. Start with 2.5 cups. If you need a little more, go for it.
    • Bake uncovered so that they get nice and golden brown on top. Adding the cheese also helps with this!
    • Ingredients to prep ahead- You can clean the potatoes and slice the onions ahead of time.
    • Leftovers and storage- Let the potatoes cool completely before adding any leftovers to an airtight container. You can store them in the refrigerator for up to 4 days. Reheat in 30-second bursts in the microwave, or covered in the oven at 350 degrees F until heated through.
    The corner of a pan of scalloped potatoes.

    What To Serve With This Scalloped Potato Recipe:

    Easy cheesy scalloped potatoes are incredibly versatile and pair with so many other recipes. Some obvious choices for the holidays would be my crock pot ham or orange rosemary roast turkey.

    Other side options include peas with onions, garlic green beans, broccoli with cheese sauce, and my Grandma's baked artichoke hearts. For dessert? I love my coconut cake or cherry cheese pie!

    Other Delicious Potato Recipes To Try

    • A close up image of roasted potatoes on a sheet pan.
      Crispy Parmesan Potatoes
    • A square image of Cheddar and Broccoli Twice Baked Potatoes
      Cheddar and Broccoli Twice Baked Potatoes Recipe
    • A close up of a serving spoon in a pan of savory sweet potato casserole.
      Savory Sweet Potato Casserole
    • The corner of a pan of cheesy ranch potatoes.
      Ranch Potatoes Recipe

    Hosting Thanksgiving?

    Discover the secret to hosting Thanksgiving without all the stress! Prepsgiving is your FREE guide to making a delicious Thanksgiving feast the easy way.

    Love this recipe? Please leave a 5 star ⭐️⭐️⭐️⭐️⭐️ rating in the recipe card below ⬇️ and/or a review in the comment section further down. Check out my Amazon Store for all my favorite tools, including those used in this recipe. And follow @thelifejolie on Instagram and TikTok!

    A plate of scalloped potatoes with a bowl of cheese and the pan of them in the background.

    Mom’s Creamy Scalloped Potatoes

    Jessy Freimann
    My mom's creamy scalloped potatoes are the perfect comforting side dish for a family dinner — everyone will be back for seconds! Made with 5 main ingredients and baked to perfection in 1 hour.
    4.91 from 60 votes
    Print Recipe Pin Recipe
    Prep Time 10 minutes mins
    Cook Time 1 hour hr
    Total Time 1 hour hr 10 minutes mins
    Course Side Dish
    Cuisine American
    Servings 8 servings
    Calories 74 kcal

    Equipment

    • 9 x 13 Pan
    • chefs knife
    • cutting board
    • Mandoline
    • measuring cups
    • Whisk

    Ingredients
      

    • Cooking spray
    • 5-6 cups thinly sliced potatoes sliced to around ⅛-1/4 inch thickness
    • 2 cups thin sliced onions
    • 3 cups whole milk
    • ⅓ cup flour
    • 3 teaspoons Kosher salt
    • ¾ teaspoons ground black pepper
    • ¼ cup grated Romano cheese optional

    Instructions
     

    • Preheat the oven to 400 degrees. Spray a 9" x 13" baking pan with cooking spray. Spread a layer of potatoes along the bottom of the pan to cover it (they can and will overlap a bit).
    • Sprinkle half of the onions, 1 teaspoon of salt and ¼ teaspoon of pepper onto the potatoes.
    • Spread a layer of potatoes onto this.
    • Sprinkle half of the onions, 1 teaspoon of salt and ¼ teaspoon of pepper on top.
    • Layer the remaining potatoes on top and sprinkle with the remaining salt and pepper.
    • Whisk together the flour and milk and pour it over the layers of potatoes. It should almost but not completely cover them and you can add a little more milk if needed.
    • If using Romano cheese sprinkle it on top of the potato mixture.
    • Bake for 1 hour until golden brown and crispy on top (if not using the Romano cheese, these won't get as brown). Cool for 10 minutes and serve immediately.

    Video

    Notes

    • Try to slice the potatoes as thin as possible. Your goal should be to get them to around ⅛-¼-inch in thickness.
    • Slice the onions as thinly as possible too, and they’ll melt right into the dish!
    • Spray down the baking pan with nonstick cooking spray to help prevent sticking. You could also apply olive oil with a clean paper towel.
    • When creating the layers of potatoes, try to make it as even but slightly shingled.
    • You want the milk to almost cover the potatoes, but not completely. Start with 2.5 cups. If you need a little more, go for it.
    • Bake uncovered so that they get nice and golden brown on top. Adding the cheese also helps with this!
    • Ingredients to prep ahead- You can clean the potatoes and slice the onions ahead of time.
    • Leftovers and storage- Let the potatoes cool completely before adding any leftovers to an airtight container. You can store them in the refrigerator for up to 4 days. Reheat in 30-second bursts in the microwave, or covered in the oven at 350 degrees F until heated through.

    Nutrition

    Serving: 1servingCalories: 74kcalCarbohydrates: 8gProtein: 4gFat: 3gSaturated Fat: 2gPolyunsaturated Fat: 0.1gMonounsaturated Fat: 1gCholesterol: 11mgSodium: 907mgPotassium: 145mgFiber: 0.2gSugar: 4gVitamin A: 149IUCalcium: 115mgIron: 0.3mg
    Tried this recipe?Let us know how it was!

    Oven Fried Pickles Recipe

    Sep 3, 2024 · 3 Comments

    A white bowl of fried pickles with the pan behind it and a blue and white towel in the background.

    This oven fried pickles recipe is the game-day snack that dreams are made of! Perfectly crispy and seriously easy to make, all you need are 4 main ingredients and about 20 minutes in the oven.

    A close up image of a bowl of oven fried pickles with a blue and white towel in the background.
    [feast_advanced_jump_to]

    Why You'll Love Oven Fried Pickles:

    I'm not sure when fried pickles became a thing, but can I just take a moment to say that I am totally on board with them?! I once had the most incredible fried pickle spears on a trip to Toronto, a few days before I found out I was pregnant with T (although I totally suspected it the entire trip!).

    They were crispy, crunchy breaded goodness on the outside and the perfectly briny tang of a dill pickle on the inside. It's like someone leaped into the snacks of my dreams and made them a reality.

    And if they're not fried, then they're automatically healthy. So you can eat as many as you want. That's obviously how it works. Figuring out how to make these actually ended up being a fun and slightly messy afternoon. Here are just a few more reasons to try them:

    • Such a fun and unique appetizer option
    • Less oil than deep frying
    • Crunchy on the outside, juicy on the inside
    • Can be paired with your favorite sauces
    • Super easy to make
    A close up image of fried pickles on a baking rack on a sheet pan.

    Ingredient Information And Substitutions

    • Dill Pickle Chips- You could certainly cut your own pickle chips out of full-sized dill pickles — but buying the pre-sliced chips is so much easier! Make sure you remove any broken pieces before you get started and drain well (expert tip: throw some thinly sliced carrots or onions into the pickle juice and thank me later!).
    • Breading- Create your standard dredging stations to add the breading. Flour, eggs, panko breadcrumbs, seasoned salt, and dried dill are all needed.
    • BBQ Sauce & Ranch- I love combining the two to create a fun and tasty BBQ ranch dipping sauce. You can use your preferred sauce if you'd like — I bet sriracha ranch would be amazing!
    • Cooking Spray- To keep things from sticking.
    An over head image of the labeled recipe ingredients.

    How To Make Fried Pickles In The Oven

    Step 1- Recipe prep.

    Preheat your oven to 425 degrees F and line a baking sheet with parchment paper. Add a wire rack on top and spray with nonstick cooking spray.

    Step 2- Make your dredging stations and bread the pickles.

    Place the flour in the first bowl, beat the eggs in a second bowl, and combine the panko, seasoned salt, and dill in a third bowl.

    Dip a pickle chip in the flour, then the eggs, then the breadcrumb mixture. Place on the wire rack and repeat with the rest of the pickle chips. Apply with cooking spray before transferring to the oven.

    Panko mixture ingredients in a glass bowl.
    A hand dipping a pickle chip in a flour.
    A hand dipping a flour dredged pickle chip into a bowl of beaten egg.
    A hand dipping an egg covered pickle chip into a bowl of the panko bread crumb mixture.

    Step 4- Bake.

    Bake for 15-20 minutes or until golden brown and crispy. While they bake, mix your BBQ sauce and ranch dressing in a small bowl.

    Let the baked pickle chips cool slightly before serving with the sauce and enjoy!

    A pan of breaded pickle chips.
    Breaded pickles in the oven read to bake.

    Frequently Asked Questions

    How do you keep breading from falling off oven fried pickles?

    To keep the breading from falling off your pickles, dry them thoroughly before you dredge them and don't skip the flour step — it helps the breading stick. You'll also want to avoid overcrowding the baking sheet so the hot air has room to circulate. Finally, let the baked pickles cool slightly before serving to give the breading a chance to set.

    Can I put pickles in the oven?

    Absolutely — that's what this baked pickle chips recipe is all about! I don't know if I would bake them without adding the breading, as I'm certain the hot heat would dry them out. Bread the pickle chips first and you should be fine.

    How can I make baked fried pickles crispier?

    Make sure you're using panko bread crumbs and not regular — they add a ton of crunch. Also, the baking rack helps them be crispier since it allows the air to circulate all around each pickle without creating a soggy part from some of it touching the pan.

    A hand dipping a fried pickle into a bowl of BBQ ranch sauce.

    Tips For Making Oven Fried Dill Pickle Recipe

    • I line my pan with a wire cooling rack to help with the crispiness. I also add a layer of foil under the rack for easier cleanup.
    • Because I wanted them to be super crispy, I opted to use a combination of panko breadcrumbs, cooking spray, and high heat to get the perfect golden brown crust we all know and love.
    • Speaking of cooking spray, make sure to spray your wire rack as well as the tops of the pickles right before you put them into the oven for optimal browning.
    • I love a good dipping sauce and the perfect option was the BBQ ranch dip that I use as dressing on my copycat Panera Bread BBQ chicken salad (which, by the way, is my most popular salad recipe).
    • Ingredients to prep ahead- Remove any broken pickle chips from the jar. Drain well and dry all of the remaining chips with paper towels.
    • Leftovers and storage- Fried baked pickles are definitely best served right away. The leftovers aren't bad, but refrigerating never really does good things to crispy food. If you do have some left over, store in an airtight container in the fridge for up to 2-3 days. You can bring them back to life in the oven — or an air fryer would work fabulously.
    A white bowl of fried pickles with the pan behind it and a blue and white towel in the background.

    What To Serve With Fried Baked Pickles

    Don't forget to make my quick BBQ ranch dipping sauce for these! You also serve them with whatever sauce strikes your fancy. Regular ranch dressing would be great. Or a dill veggie dip.

    Oven fried pickles would make for the perfect addition to a larger appetizer spread, especially around the holidays or football Sunday! I would serve them alongside my baked lasagna dip, BBQ little smokies, sweet and spicy baked chicken wings, a classic 7 layer dip, and plenty of chips!

    Other Game Day Snack Recipes To Try

    • A close up image of a bowl of meatballs in BBQ with a toothpick in the focus meatball.
      Slow Cooker BBQ Meatballs
    • A close up image of a buffalo chicken slider.
      Buffalo Chicken Sliders
    • A square image of a hand pulling apart a Philly Cheese Steak Stuffed Bread Roll.
      Philly Cheese Steak Stuffed Bread Rolls aka Philly Cheese Steak Bombs
    • A hand holding up a bacon wrapped sausage on a toothpick.
      Brown Sugar Bacon Wrapped Lil Smokies

    Love this recipe? Please leave a 5 star ⭐️⭐️⭐️⭐️⭐️ rating in the recipe card below ⬇️ and/or a review in the comment section further down. Check out my Amazon Store for all my favorite tools, including those used in this recipe. And follow @thelifejolie on Instagram and TikTok!

    A white bowl of fried pickles with the pan behind it and a blue and white towel in the background.

    Oven Fried Pickles Recipe

    Jessy Freimann
    This oven fried pickles recipe is the game-day snack that dreams are made of! Perfectly crispy and seriously easy to make, all you need are 4 main ingredients and about 20 minutes in the oven.
    4.50 from 2 votes
    Print Recipe Pin Recipe
    Prep Time 10 minutes mins
    Cook Time 20 minutes mins
    Total Time 30 minutes mins
    Course Appetizer
    Cuisine American
    Servings 6 servings
    Calories 181 kcal

    Equipment

    • measuring cups
    • measuring spoons
    • sheet pan
    • Silpat
    • chefs knife
    • cutting board
    • Whisk

    Ingredients
      

    • Cooking spray
    • 16 ounces dill pickle chips, drained well with broken pieces removed
    • ½ cup flour
    • 3 large eggs (start with two and add a third if needed)
    • 1 ½ cups panko bread crumbs
    • 1 teaspoon seasoned salt
    • 1 teaspoon dried dill
    • 3 Tablespoons BBQ sauce
    • 3 Tablespoons Ranch dressing

    Instructions
     

    • Preheat the oven to 425 degrees F and line a sheet pan with parchment or a silicone liner and a metal wire cooling rack. Spray with cooking spray and set aside.
    • Pull out 3 shallow bowls. Place the flour in the first bowl. Beat the eggs in the second bowl. Mix the Panko, seasoned salt and dill until well combined.
    • Dredge each pickle slice in the flour and tap off the excess.
    • Using that same hand, submerge each pickle slice in the egg to fully cover and tap off the excess.
    • Using the other hand, cover the egg-soaked pickle slice in bread crumbs and gently tap off the excess. Place the pickle slices on the rack. They can be pretty close, just not touching.
    • Spray the tops with cooking spray and bake for 15-20 minutes or until golden brown.
    • While the pickles bake, combine equal parts BBQ sauce and ranch dressing. Refrigerate until you're ready to serve.
    • Once they're done baking, remove the pickles from the oven and let them cool for a couple minutes before serving.

    Video

    Notes

    • I line my pan with a wire cooling rack to help with the crispiness. I also add a layer of foil under the rack for easier cleanup.
    • Because I wanted them to be super crispy, I opted to use a combination of panko breadcrumbs, cooking spray, and high heat to get the perfect golden brown crust we all know and love.
    • Speaking of cooking spray, make sure to spray your wire rack as well as the tops of the pickles right before you put them into the oven for optimal browning.
    • I love a good dipping sauce and the perfect option was the BBQ ranch dip that I use as dressing on my copycat Panera Bread BBQ chicken salad (which, by the way, is my most popular salad recipe).
    • Ingredients to prep ahead- Remove any broken pickle chips from the jar. Drain well and dry all of the remaining chips with paper towels.
    • Leftovers and storage- Fried baked pickles are definitely best served right away. The leftovers aren't bad, but refrigerating never really does good things to crispy food. If you do have some leftover, store in an airtight container in the fridge for up to 2-3 days. You can bring them back to life in the oven — or an air fryer would work fabulously.

    Nutrition

    Serving: 1servingCalories: 181kcalCarbohydrates: 23gProtein: 6gFat: 7gSaturated Fat: 2gPolyunsaturated Fat: 3gMonounsaturated Fat: 2gTrans Fat: 0.01gCholesterol: 95mgSodium: 691mgPotassium: 106mgFiber: 1gSugar: 4gVitamin A: 167IUVitamin C: 0.1mgCalcium: 51mgIron: 2mg
    Tried this recipe?Let us know how it was!

    Pumpkin Spice Donuts

    Aug 29, 2024 · 30 Comments

    A close up image of a pumpkin donut with cinnamon sugar on it and the rest in the background.

    You've got to make these baked pumpkin spice donuts! They're the lightest and fluffiest donuts that are perfect for your morning coffee. Full of fall flavor too — and ready in 25 minutes!

    A close up image of a pumpkin donut with cinnamon sugar on it and the rest in the background.
    [feast_advanced_jump_to]

    Why You'll Love These Spiced Pumpkin Donuts

    Do you know that I never actually made donuts until the past couple of years? I have my Fried Donuts Recipe (which is awesome!), but besides that, I never really tried. After I acquired a donut pan for our video business, I figured I should probably make some homemade donuts to share with you guys!

    There's so much to love about this baked pumpkin donut recipe. The donuts have a super light crumb and a delicious pumpkin flavor that is super tasty without being overwhelming. It's the perfect compliment to your morning coffee — and for a relaxing brunch with family and friends.

    Don't have a donut pan? One of our brilliant readers left a comment that they used mini-muffin pans and sprinkled cinnamon sugar on top before baking. Genius! Aside from being versatile, this recipe is:

    • Made with simple, pantry ingredients
    • Ready in 25 minutes
    • Perfect for breakfast or dessert
    • Boasting sweet, fall flavor
    • Easy to halve or double as needed
    An overhead image of the side of a plate of spiced pumpkin dinuts on an orange plaid napkin with a cup of coffee beside it.

    Ingredient Information and Substitutions

    • Vegetable Oil- For the donut dough, not for frying!
    • Pumpkin Purée- Not pie filling — that has added flavoring and sweeteners. I usually have a can or two in the pantry, but you can make your own from pie pumpkins too!
    • Sugar- Regular granulated sugar helps keep these pumpkin baked donuts light and fluffy. You'll need some for the batter and some for the topping.
    • Eggs- Large eggs are the way to go!
    • Flour- Another baking staple for this baked pumpkin donut recipe is all-purpose flour. A 1:1 gluten-free blend should work too.
    • Baking Soda & Baking Powder- These provide lift so the donuts bake up fluffy with a tender crumb. You must use both.
    • Kosher Salt- Just a touch to balance the sweetness and enhance the flavors.
    • Cinnamon- This goes in the batter and topping too. Since we're using pumpkin pie spice too, I wouldn't swap this with anything else.
    • Pumpkin Pie Spice- A mixture of cinnamon, nutmeg, clove, and ginger that is used in every pumpkin pie recipe. If you don't have any, it's easy to make your own and store the extra in the pantry for next time.
    An overhead image of labeled recipe ingredients.

    How To Make Spiced Pumpkin Donuts

    Step 1- Mix the batter.

    While you preheat the oven, whisk the oil, pumpkin purée, eggs, and 1 cup of the sugar in a large bowl until well combined.

    Add the dry ingredients — just ¾ teaspoon of the cinnamon — and whisk just until there are no more streaks of flour.

    Wet ingredients for pumpkin donuts combined in a glass bowl.
    Dry ingredients added to the bowl of wet ingredients.

    Step 2- Fill donut pans and bake.

    Add the batter to the greased pans, filling each well ¾ of the way full. Bake for 15 minutes, then cool for 5 minutes.

    Wet and dry ingredients combined into a batter.
    Batter being piped into the donut pan from a sandwich bag with the corner cut off.

    Step 3- Coat with cinnamon sugar.

    While the donuts are in the oven, combine the remaining sugar and cinnamon in a bowl or zippered bag.

    Once cooled, toss baked pumpkin donuts in the cinnamon sugar mixture until coated on all sides.

    A hand pushing filled donut pans into a hot oven.
    A hand holding a baked donut up that was just tossed in a cinnamon sugar mixture.

    Frequently Asked Questions

    Are these healthy?

    No. Let's keep it real here: these baked pumpkin donuts are basically cake in donut form. But everything in moderation, right?

    What if I want them glazed?

    I opted to top them with cinnamon and sugar because it's my daughter's favorite combo, especially on a donut. You could just as easily make a simple glaze for your baked pumpkin donuts with confectioner's sugar, water, and a little vanilla extract until it reaches the consistency you like..

    Can pumpkin baked donuts be frozen?

    I haven't tried freezing them, but I bet they would freeze well if you wrap them individually in plastic wrap after cooling them completely. Store them in a plastic zipper bag too.

    Two donuts stacked in a plate with a bite taken from the top on e revealing the inside of the donut.

    Tips For Making Pumpkin Donuts

    • Mix the wet ingredients first, then add the dry ingredients- and don't over mix the batter!
    • I always coat my donut pans lightly with cooking spray, even though they are non-stick. Just an extra precaution for easy removal.
    • You have two options when filling the pans- you can spoon the batter into the pans, or you can place the batter into a plastic zipper bag, snip off the bottom corner, and use it like a pastry bag.
    • Coat each baked pumpkin donut in cinnamon sugar while hot to make sure it sticks. I usually give them 5 minutes to cool so they're easier to handle. Toss them in a medium bowl, or add the cinnamon sugar to a zipper bag and shake to coat.
    • Easily halve the recipe if you want a smaller batch. As written, this recipe for baked pumpkin donuts makes around 13-15 donuts depending on how much you fill your pans. I always fill mine ¾ of the way full.
    • Ingredients to prep ahead- you can mix the cinnamon sugar in advance, but there's also plenty of time to do it while the donuts are in the oven.
    • Leftovers and storage- I should start by saying pumpkin baked donuts are best eaten shortly after baking. That said, they last up to a week at room temperature. I encourage you to cool them completely and store in an airtight container.
    A male hand holding up a pumpkin donut to the camera from a plateful.

    What To Serve With This Pumpkin Donut Recipe

    I love munching on a baked pumpkin donut while I sip a cup of coffee in the morning, but these are sweet enough for dessert too. Here are a few more fall recipes to pair with your treats:

    • Bubble Up Breakfast Casserole
    • Citrus Cranberry Chutney
    • Savory Sweet Potato Casserole
    • Brown Sugar Bacon Wrapped Chicken Bites
    • Cream Cheese Pumpkin Crunch Cake

    Other Breakfast Recipes To Try

    • Spinach and Feta Breakfast Puff Pastry Pizza
      Spinach and Feta Breakfast Puff Pastry Pizza
    • a square image of Baked French Toast.
      Baked French Toast with Mixed Berries
    • What to do with that bumper crop of zucchini? Zucchini Pancakes! Made with Bisquick, Romano cheese, shredded zucchini, butter, garlic powder and onion, they are a super easy savory breakfast and are also a great make-ahead appetizer for a party!
      Zucchini Pancakes
    • Caprese Quiche is an easy breakfast or brunch recipe. This is simple, feel-good food at it's finest with mouthwatering tomatoes, mozzarella and basil. It's great to make ahead or eat right away and perfect to whip up for Easter, Mother's Day or Christmas Morning!
      Caprese Quiche

    Hosting Thanksgiving?

    Discover the secret to hosting Thanksgiving without all the stress! Prepsgiving is your FREE guide to making a delicious Thanksgiving feast the easy way.

    Love this recipe? Please leave a 5 star ⭐️⭐️⭐️⭐️⭐️ rating in the recipe card below ⬇️ and/or a review in the comment section further down. Check out my Amazon Store for all my favorite tools, including those used in this recipe. And follow @thelifejolie on Instagram and TikTok!

    A close up image of a pumpkin donut with cinnamon sugar on it and the rest in the background.

    Pumpkin Spice Donuts

    Jessy Freimann
    You've got to make these baked pumpkin spice donuts! They're the lightest and fluffiest donuts that are perfect for your morning coffee. Full of fall flavor too — and ready in 25 minutes!
    4.78 from 9 votes
    Print Recipe Pin Recipe
    Prep Time 10 minutes mins
    Cook Time 15 minutes mins
    Total Time 25 minutes mins
    Course Breakfast, Dessert
    Cuisine American
    Servings 15 donuts

    Equipment

    • Donut pans
    • Measuring cups and spoons
    • mixing bowl
    • Spatula
    • Whisk

    Ingredients
      

    • Cooking spray
    • ½ cup vegetable or canola oil
    • 1 cup real pumpkin puree, (not pie filling)
    • 1 ¼ cups granulated sugar, divided
    • 2 large eggs
    • 1 ½ cups flour
    • 1 teaspoon baking soda
    • 1 teaspoon baking powder
    • ¼ teaspoon kosher salt
    • 1 ¾ teaspoon ground cinnamon, divided
    • ½ teaspoon pumpkin pie seasoning

    Instructions
     

    • Preheat the oven to 350 degrees. Grease the donut pans with cooking spray and set aside.
    • In a large bowl, whisk together oil, pumpkin puree, 1 cup granulated sugar and eggs until well combined.
    • Add flour, baking soda, baking powder, salt, ¾ teaspoon cinnamon and pumpkin pie seasoning and whisk until just combined.
    • Fill donut pans ¾ of the way.
    • Bake for 15 minutes. While the donuts bake, fill a medium bowl or zipper sandwich bag with ¼ cup sugar and 1 teaspoon ground cinnamon. Stir or shake until well combined.
    • Let the donuts cool for 5 minutes and then one by one cover them in the cinnamon sugar mixture. Serve warm.

    Video

    Notes

    • Mix the wet ingredients first, then add the dry ingredients- and don't over mix the batter!
    • I always coat my donut pans lightly with cooking spray, even though they are non-stick. Just an extra precaution for easy removal.
    • You have two options when filling the pans- you can spoon the batter into the pans, or you can place the batter into a plastic zipper bag, snip off the bottom corner, and use it like a pastry bag.
    • Coat each baked pumpkin donut in cinnamon sugar while hot to make sure it sticks. I usually give them 5 minutes to cool so they're easier to handle. Toss them in a medium bowl, or add the cinnamon sugar to a zipper bag and shake to coat.
    • Easily halve the recipe if you want a smaller batch. As written, this recipe for baked pumpkin donuts makes around 13-15 donuts depending on how much you fill your pans. I always fill mine ¾ of the way full.
    • Ingredients to prep ahead- you can mix the cinnamon sugar in advance, but there's also plenty of time to do it while the donuts are in the oven.
    • Leftovers and storage- I should start by saying pumpkin baked donuts are best eaten shortly after baking. That said, they last up to a week at room temperature. I encourage you to cool them completely and store in an airtight container.
    Tried this recipe?Let us know how it was!
    • « Go to Previous Page
    • Page 1
    • Interim pages omitted …
    • Page 6
    • Page 7
    • Page 8
    • Page 9
    • Page 10
    • Interim pages omitted …
    • Page 21
    • Go to Next Page »

    Primary Sidebar

    Jessy in a kitchen holding a white casserole pan and smiling.
    Hi, I'm Jessy!

    Welcome to The Life Jolie! I share simple, delicious recipes and ingredient prep tips to make your weeknight cooking a breeze!

    More about me →

    Easy Dinner Recipes

    • An overhead image of a Mexican Shrimp Quinoa Bowl.
      Shrimp Quinoa Bowls
    • A bowl of asian soup with meatballs with a spoon and noodles in it.
      Asian Soup with Cabbage and Meatballs
    • A close up of roasted red potatoes on a pan.
      Roasted Red Potatoes Recipe
    • A spoon lifting up a scoop of eggplant parm bake with melt cheese trailing behind it.
      Eggplant Parm Bake
    • A close up of a drum chicken wing in a pile of other wings.
      Oven Baked Chicken Wings
    • An overhead image of a bowl of minestrone soup.
      Traditional Minestrone Soup Recipe

    Popular Recipes

    • A glass bowl of melted chocolate with a spatula dripping some back into the bowl.
      How To Melt Chocolate Chips In The Microwave
    • Italian Stuffed Zucchini Boats are the healthy weeknight meal you'll want to make again and again. This is a seriously easy recipe that's full of delicious flavor without all the guilt!
      Italian Stuffed Zucchini Boats
    • A close up shot of the side of a shallow bowl of shrimp mac salad.
      Shrimp Macaroni Salad
    • A white pan pouring cheese sauce over a bowl of steamed broccoli.
      Cheese Sauce for Broccoli Recipe
    • An overhead image of a plate of chicken lettuce wraps with peanut sauce next to it and all the fixings surrounding it.
      Copycat Cheesecake Factory Thai Chicken Lettuce Wraps
    • A close up image of a piece of greek marinated chicken on a white plate with lemons on the plate and in the background.
      Greek Yogurt Chicken
    Jessy in a kitchen holding a white casserole pan and smiling.
    Hi, I'm Jessy!

    Welcome to The Life Jolie! I share simple, delicious recipes and ingredient prep tips to make your weeknight cooking a breeze!

    More about me →

    Easy Dinner Recipes

    • A close up of a bagel pizza with mini pepperonis on a pan.
      Bagel Pizzas Recipe
    • A bowl of chicken and orzo soup with a spoon in it.
      Chicken and Orzo Soup
    • A bowl of Swedish meatballs and noodles.
      Swedish Meatballs And Noodles
    • A close up image of a piece of coconut shrimp on top of others.
      Coconut Shrimp With Sauce
    • A spoon pulling up a scoop of skillet lasagna with melted cheese stretching behind it.
      No Bake Lasagna Skillet
    • A close up of a wooden spoon in a pan of taco pasta.
      One Pan Taco Pasta With Chicken

    Popular Recipes

    • A glass bowl of melted chocolate with a spatula dripping some back into the bowl.
      How To Melt Chocolate Chips In The Microwave
    • Italian Stuffed Zucchini Boats are the healthy weeknight meal you'll want to make again and again. This is a seriously easy recipe that's full of delicious flavor without all the guilt!
      Italian Stuffed Zucchini Boats
    • A close up shot of the side of a shallow bowl of shrimp mac salad.
      Shrimp Macaroni Salad
    • A white pan pouring cheese sauce over a bowl of steamed broccoli.
      Cheese Sauce for Broccoli Recipe
    • An overhead image of a plate of chicken lettuce wraps with peanut sauce next to it and all the fixings surrounding it.
      Copycat Cheesecake Factory Thai Chicken Lettuce Wraps
    • A close up image of a piece of greek marinated chicken on a white plate with lemons on the plate and in the background.
      Greek Yogurt Chicken

    Footer

    ↑ back to top

    About

    • About Me
    • Privacy Policy + Disclaimer

    Newsletter

    • Sign Up! for emails and updates

    Contact

    • Contact
    • Video Production

    As an Amazon Associate I earn from qualifying purchases.

    Copyright 2014-2021 - Jolie Ventures, LLC. All Rights Reserved. Privacy Policy.

    Rate This Recipe

    Your vote:


    A rating is required
    A name is required
    An email is required