
• Skip to primary navigation
  • Skip to main content
  • Skip to primary sidebar
The Life Jolie logo
  • Easy Dinner Recipes
  • Recipes
  • About
  • Contact
    • Work with me!
    • Video Production
  • Nav Social Menu

    • Email
    • Facebook
    • Instagram
    • Pinterest
    • Twitter
    • YouTube
menu icon
go to homepage
subscribe
search icon
Homepage link
  • Easy Dinner Recipes
  • Recipes
  • About
  • Contact
    • Work with me!
    • Video Production
    • Email
    • Facebook
    • Instagram
    • Pinterest
    • Twitter
    • YouTube
  • ×
    The Life Jolie » Page 3

    Caramel Blossom Cookies

    Caramel Blossom Cookies

    Dec 8, 2025 · 4 Comments

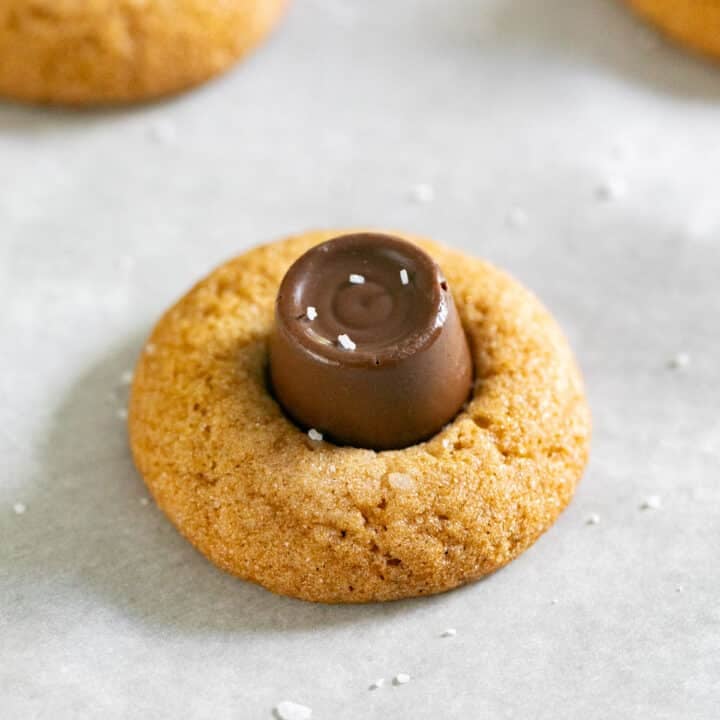
    A close up image of a caramel blossom cookie on a pan.

    These caramel blossom cookies are a sweet-salty twist on a classic! Soft, chewy, and topped with melty Rolos and sea salt, they’re easy to make and perfect for any occasion.

    A close up image of a pile of caramel blossom cookies with a bite taen out of one revealing the chewy cookie interior and the melty caramel.
    [feast_advanced_jump_to]

    Why You’ll Love These Chocolate And Caramel Cookies

    If you’re a fan of that dreamy chocolate-meets-caramel combo, this recipe will hit the spot. They’ve got the chewy texture you love in a cookie, the gooey caramel center from the Rolos, and a light sprinkle of sea salt that makes every bite pop. 

    This recipe came from my love of the classic peanut butter blossoms my mom makes every Christmas. I wanted to take that same idea and give it a sweet-salty twist. Enter: caramel, chocolate, and a sprinkle of flaky salt. The result? A cookie that’s chewy, gooey, and disappears fast. Trust me, you might want to make a double batch! You’ll love them because:

    • Chewy, buttery base with melty caramel centers
    • Simple ingredients and easy to make
    • Irresistible sweet and salty flavor
    • Perfect for gifting or sharing
    An overhead image of caramel and chocolate cookies on a sheet pan.

    Ingredient Information And Substitutions

    • All-purpose flour- The base that gives the cookies structure. You can sub with a 1:1 gluten-free blend if needed.
    • Butter- Use salted butter for balance. If using unsalted, add an extra pinch of salt.
    • Egg- Binds the dough and keeps it soft.
    • Milk- Adds moisture and helps the texture stay tender. Any milk works here.
    • Caramel sauce- A good-quality store-bought works great. If you use homemade, make sure it’s thick enough.
    • Granulated sugar- Helps with structure and adds that light sweetness. You'll need a little extra for rolling the dough before baking to give a light crunch.
    • Light brown sugar- Adds moisture and a hint of caramel flavor. Dark brown sugar works too for a deeper caramel flavor.
    • Vanilla extract- Brings warmth and depth to the flavor. Try almond extract or caramel extract for a fun twist.
    • Baking soda- Helps the cookies rise just enough.
    • Rolos- For that chocolate-caramel center. You can swap with Hershey’s Kisses, Dove Caramels, or even mini peanut butter cups.
    • Kosher salt- Balances the sweetness and enhances flavor.
    • Maldon flake salt- Sprinkle on top for a touch of crunch and that perfect salty finish.
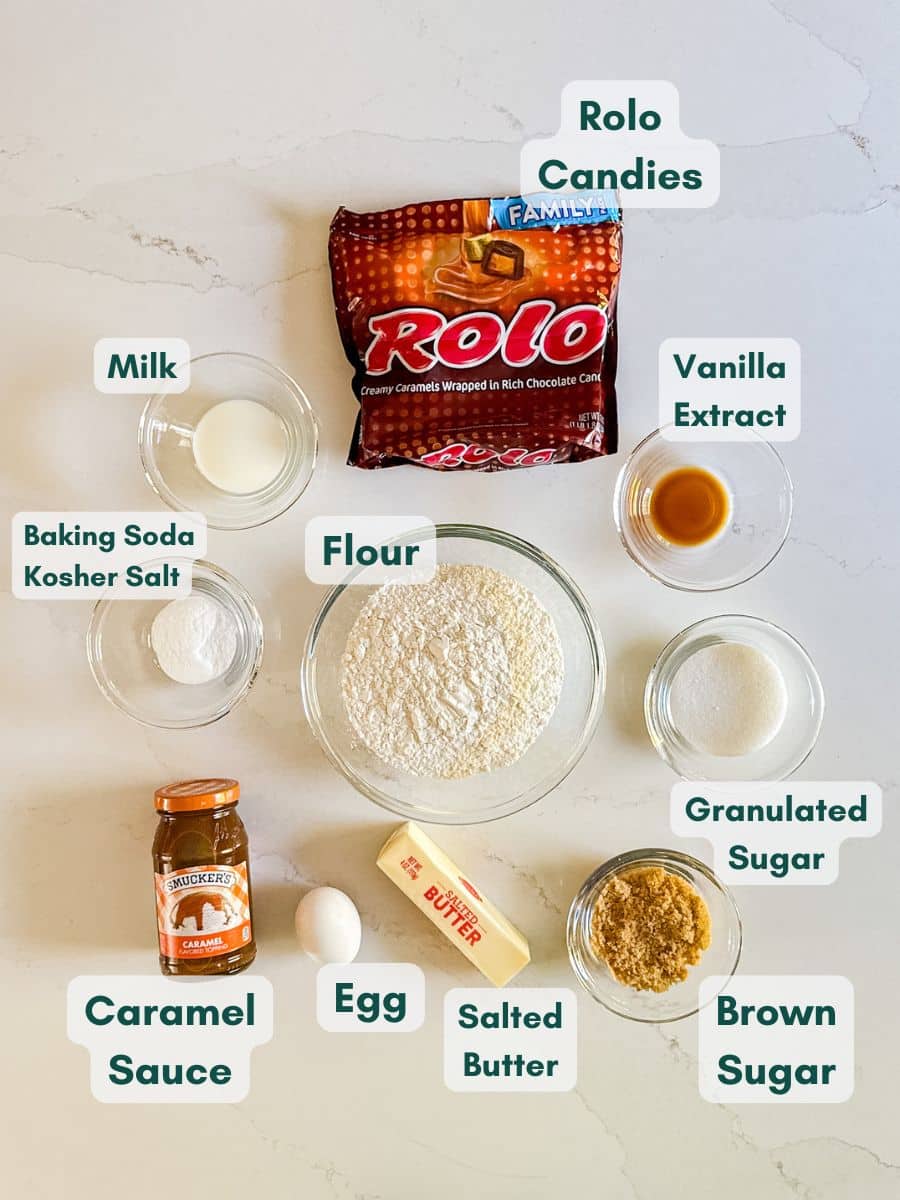
    An overhead image of labeled recipe ingredients.

    How To Make Cookies With Caramels

    Step 1- Prep the oven and pan.

    Preheat the oven to 375 degrees F and line a baking sheet with parchment paper or a silicone mat. Mix together flour, baking soda, and salt and set aside.
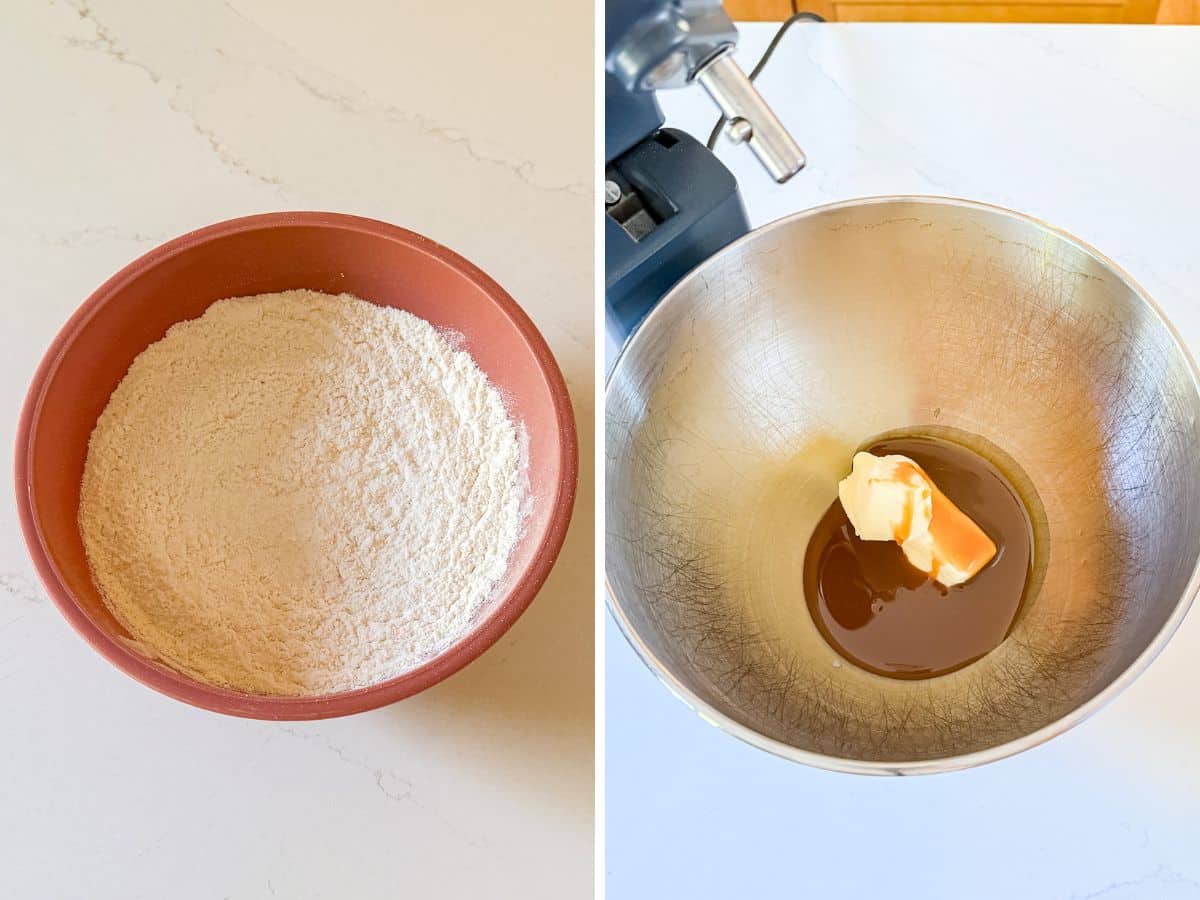
    Dry ingredients mixed together and then butter and caramel sauce in the mixing bowl.

    Step 2- Make the dough.

    In a large bowl, beat together the softened butter and caramel sauce until smooth and combined. Add both sugars and beat until light and fluffy. Mix in the egg, milk, and vanilla until everything’s well blended.
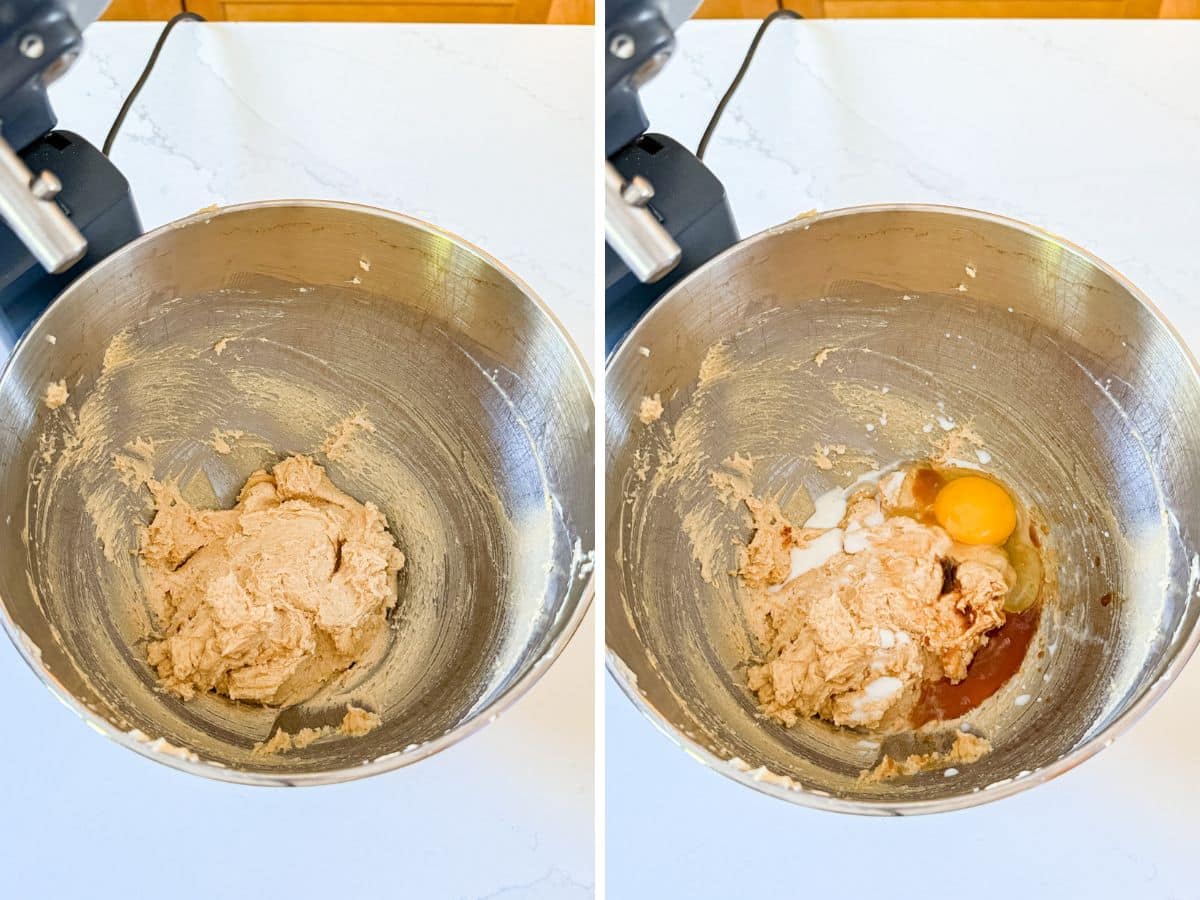
    Egg and vanilla and sugars mixed into the bowl.

    Step 3- Add the dry ingredients.

    Gradually add the dry ingredients to the wet mixture, mixing just until the dough comes together.
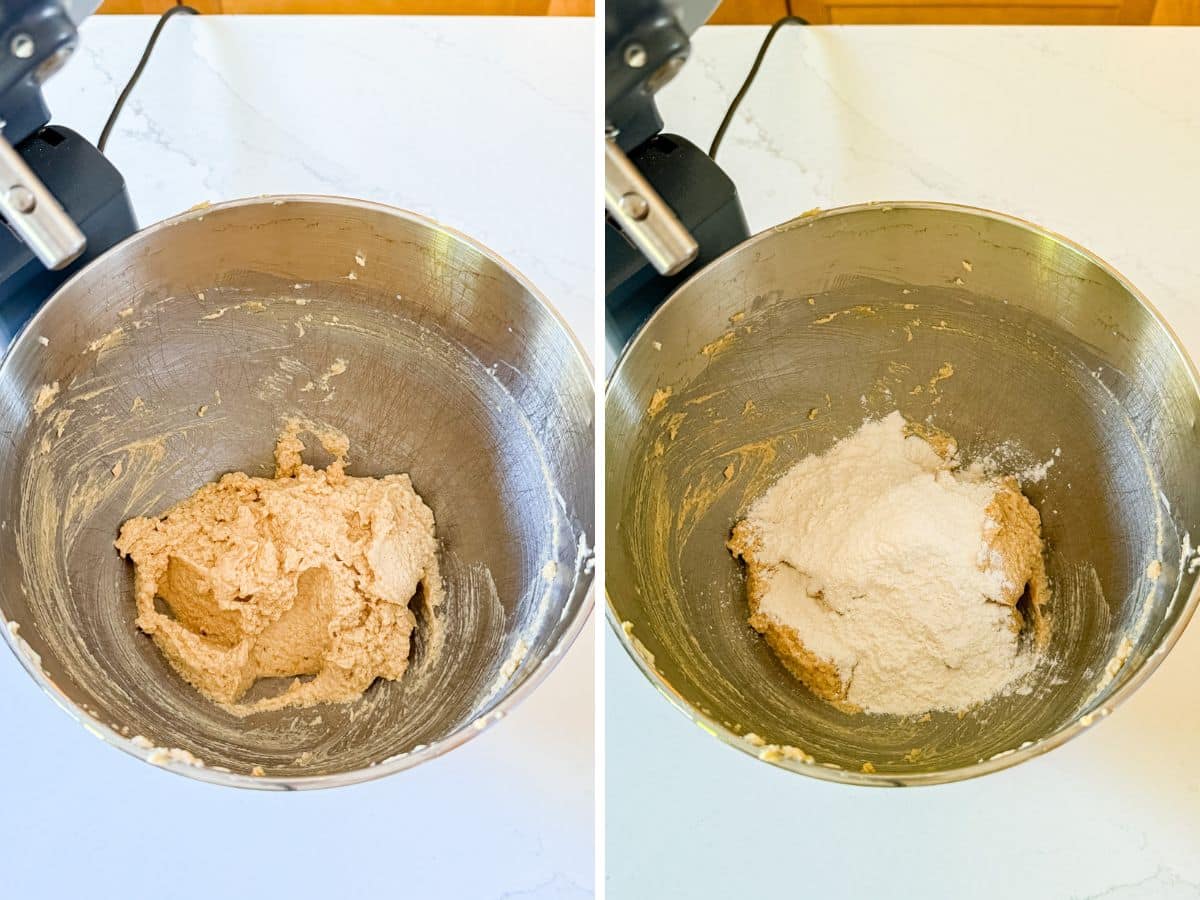
    Flour added to the cookie dough.

    Step 4- Chill the dough.

    Cover and refrigerate for at least 1 hour (or overnight if you have time). This helps the cookies bake up thick and chewy.
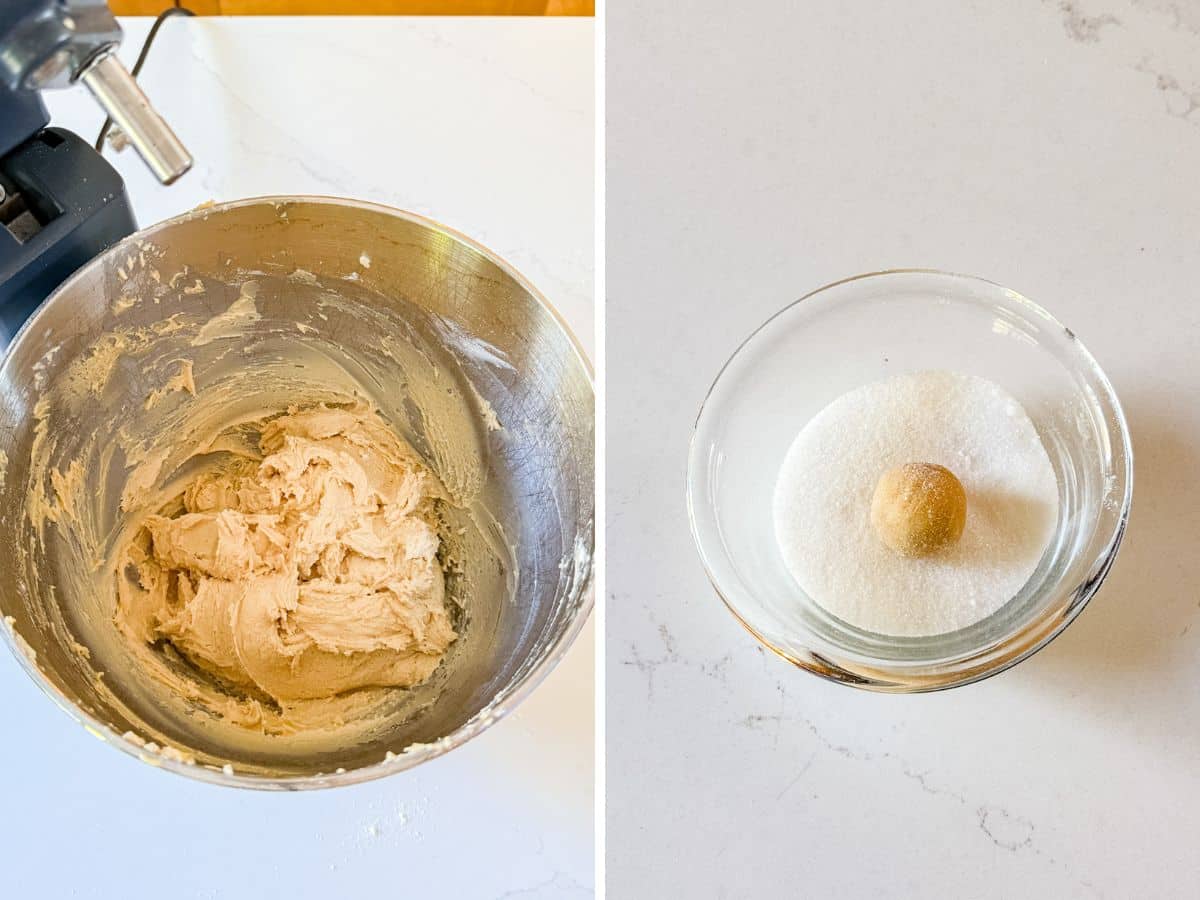
    Chilled cookie dough and then a dough ball rolled in granulated sugar.

    Step 5- Shape the cookies.

    Roll the chilled dough into 1-inch balls, then coat each one in a little extra granulated sugar. Place them a few inches apart on the prepared baking sheet.
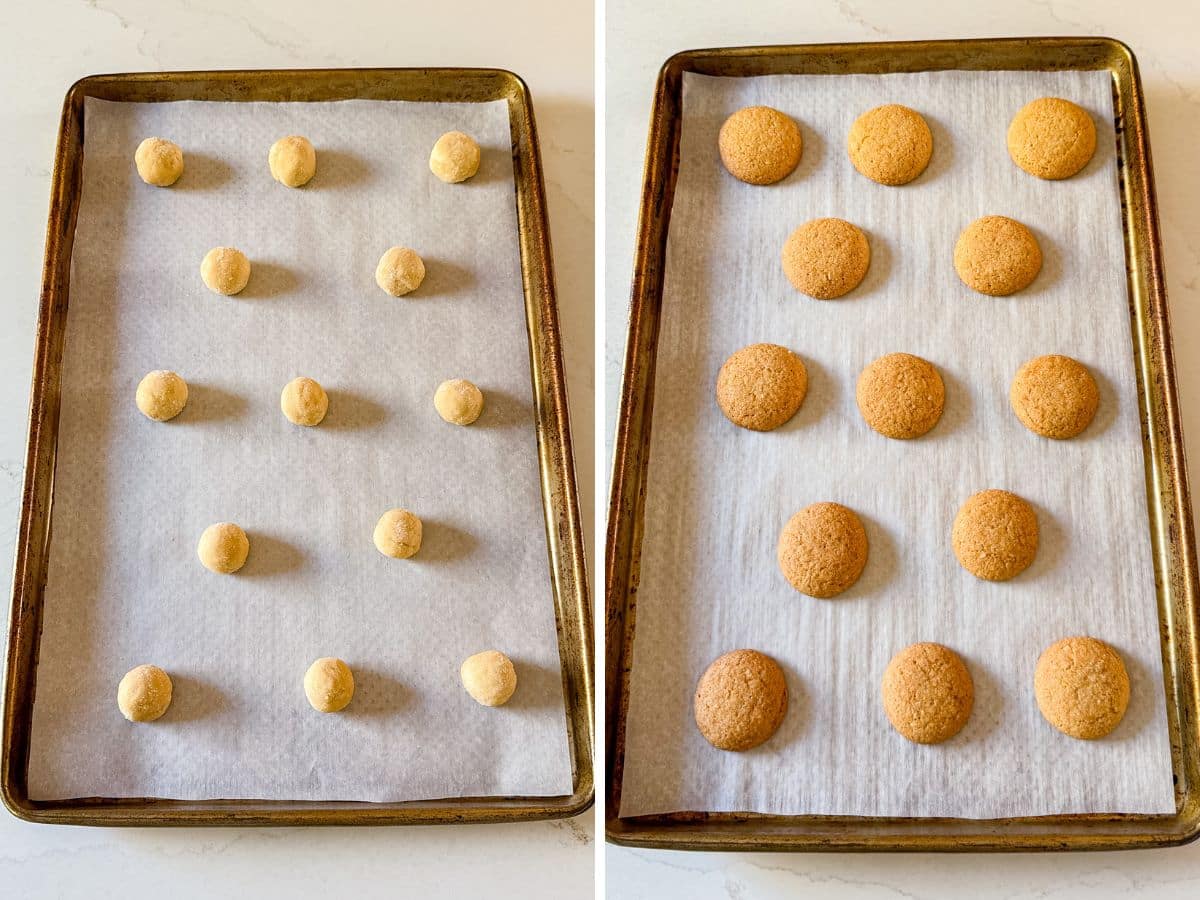
    Dough balls on the pan ad then the baked cookies.

    Step 6- Bake and finish.

    Bake for 8-10 minutes, just until golden around the edges. While the cookies are still hot, press a Rolo into the center of each one and sprinkle lightly with Maldon flake salt. Let cool, then enjoy.
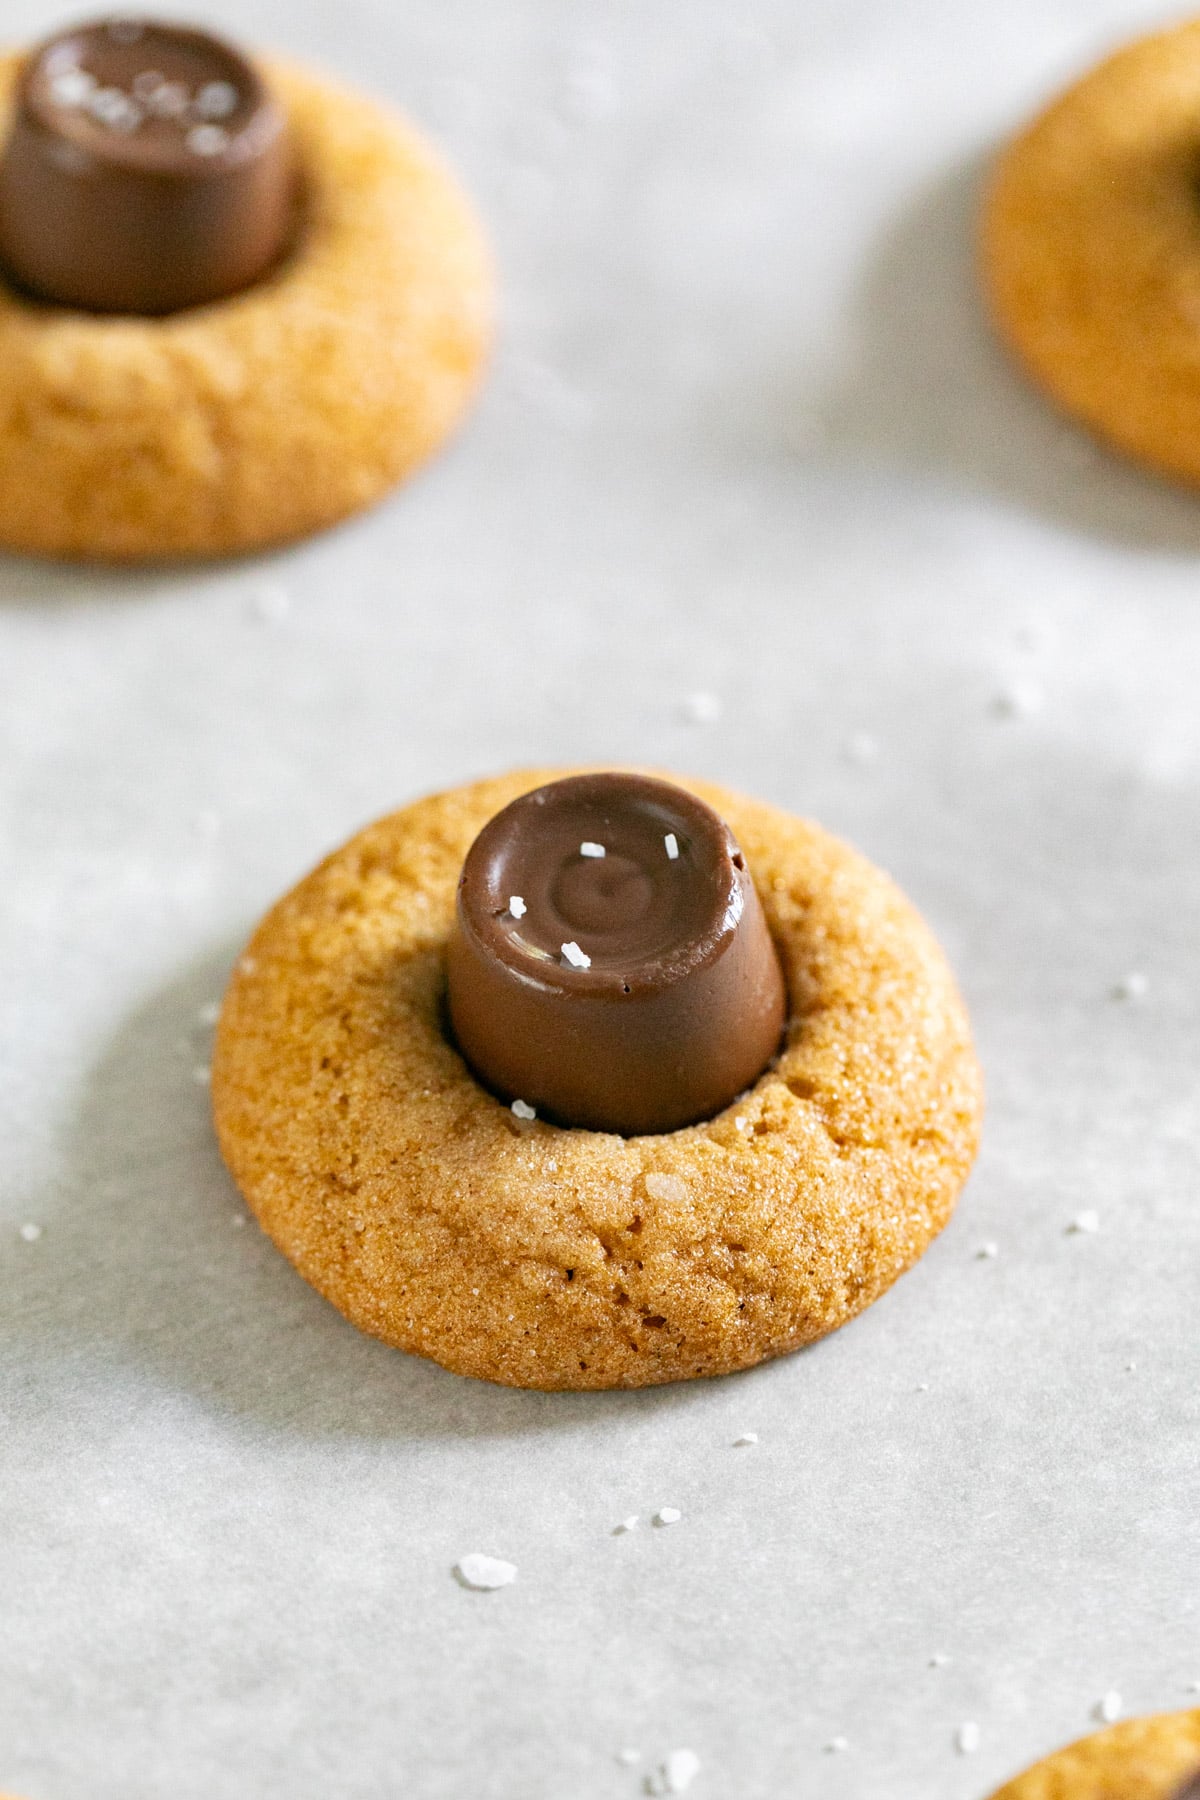
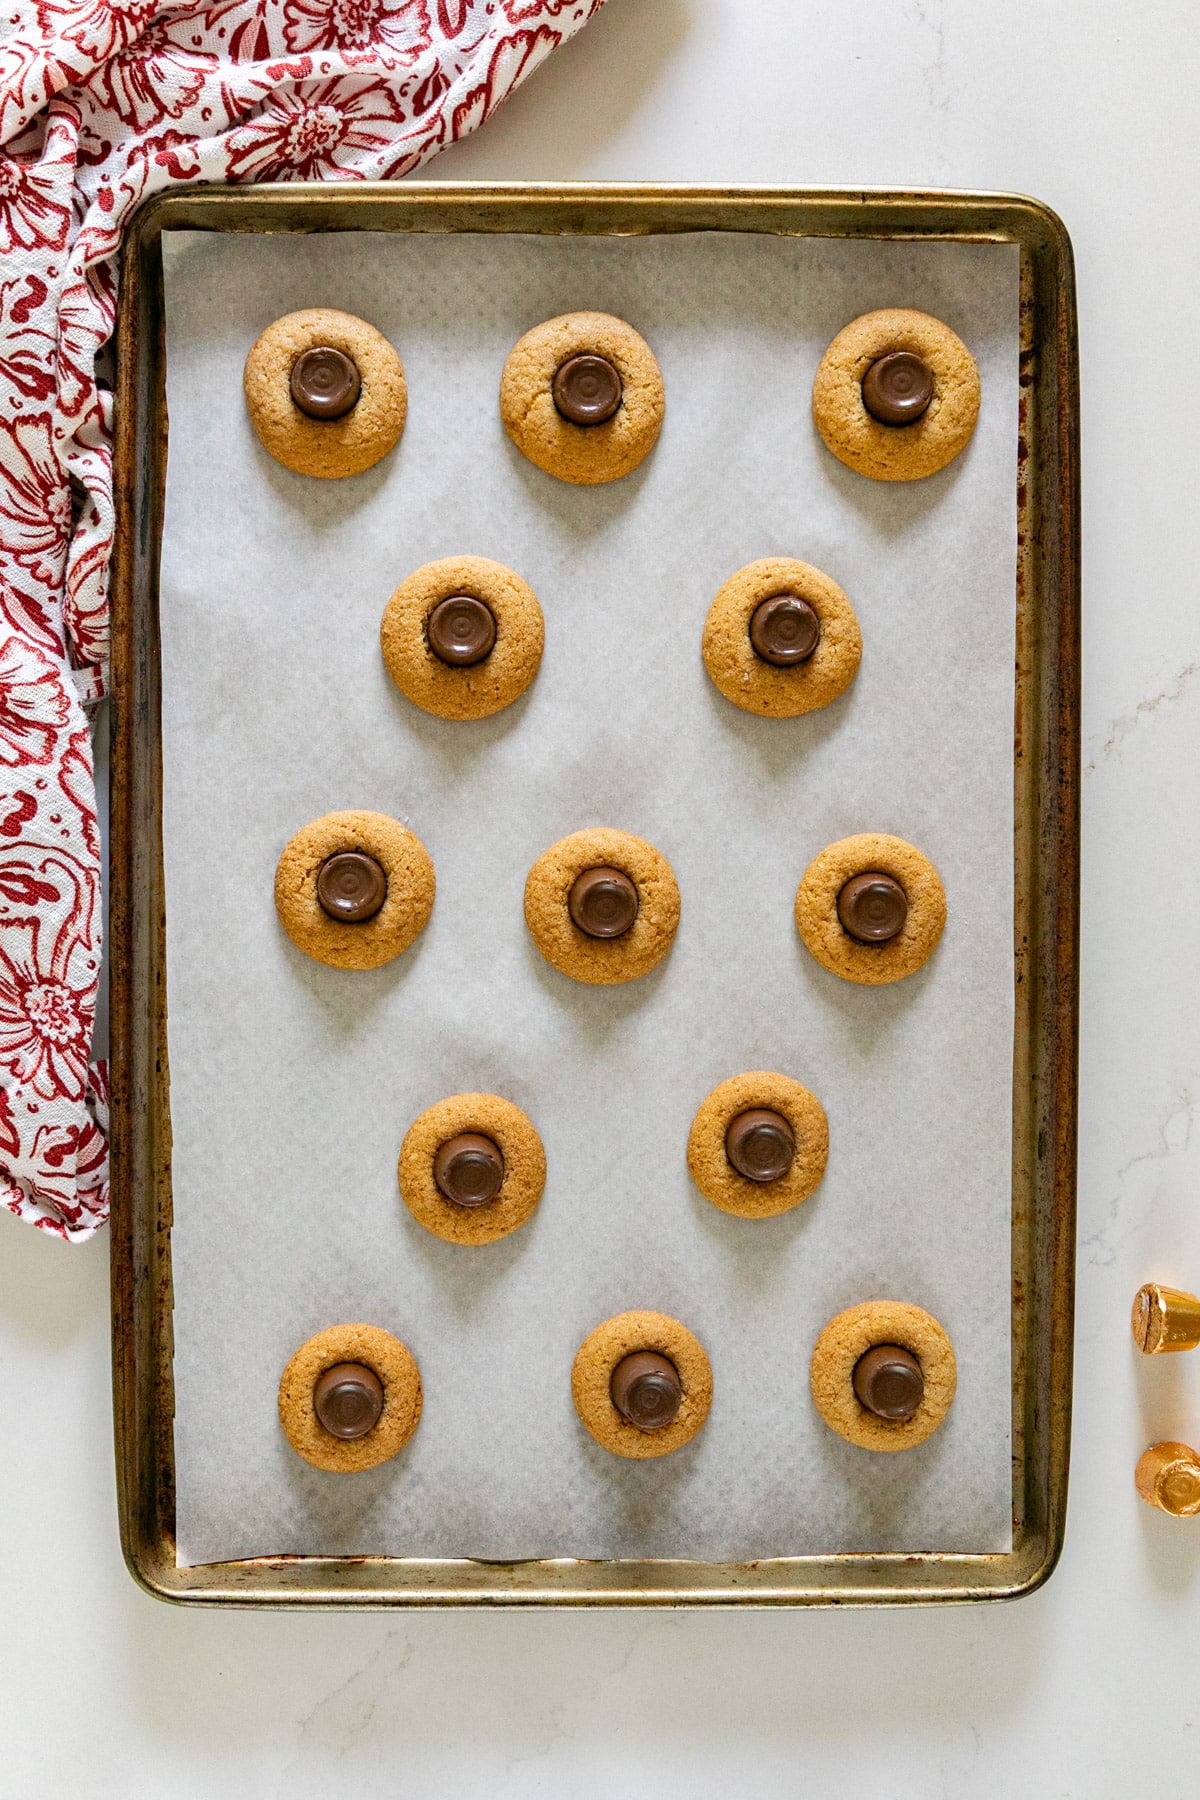
    A close up image of a caramel blossom cookie on a pan.

    Frequently Asked Questions

    Can I make the dough ahead of time?

    Definitely! Chill the dough for up to 2 days, then roll and bake when you’re ready. You can also freeze it for longer storage.

    Can I make these smaller or larger?

    Sure! Just adjust the baking time. Smaller cookies need about 7-8 minutes, while larger ones need about 10-11 minutes.

    How can I tell when the cookies are done? 

    They should look slightly golden at the edges and just set in the center. Don’t over-bake! They’ll finish setting as they cool.

    Tips For Making Chocolate Caramel Cookies

    • Chill the dough before baking. It keeps the cookies from spreading and gives them that thick, chewy texture everyone loves.
    • Unwrap all your Rolos first. It makes assembling way faster once the cookies come out of the oven.
    • Press the Rolos in right after baking. The heat from the cookies melts them just enough for that gooey center, so don't delay this step!
    • Don’t skip the salt! A tiny sprinkle of flake salt brings out the caramel and chocolate flavors perfectly.
    • Use a cookie scoop for even sizes. This helps them bake consistently and look picture-perfect on the tray.
    • Let them cool completely before storing. This keeps the tops shiny and prevents condensation in your container.
    • Ingredients to prep ahead- Measure your dry ingredients, unwrap Rolos, and soften the butter a bit before you start mixing.
    • Leftovers and storage- Store with a slice of bread or in a container for 3-4 days at room temperature, or refrigerate for up to 5 days. Freeze for up to 2 months.
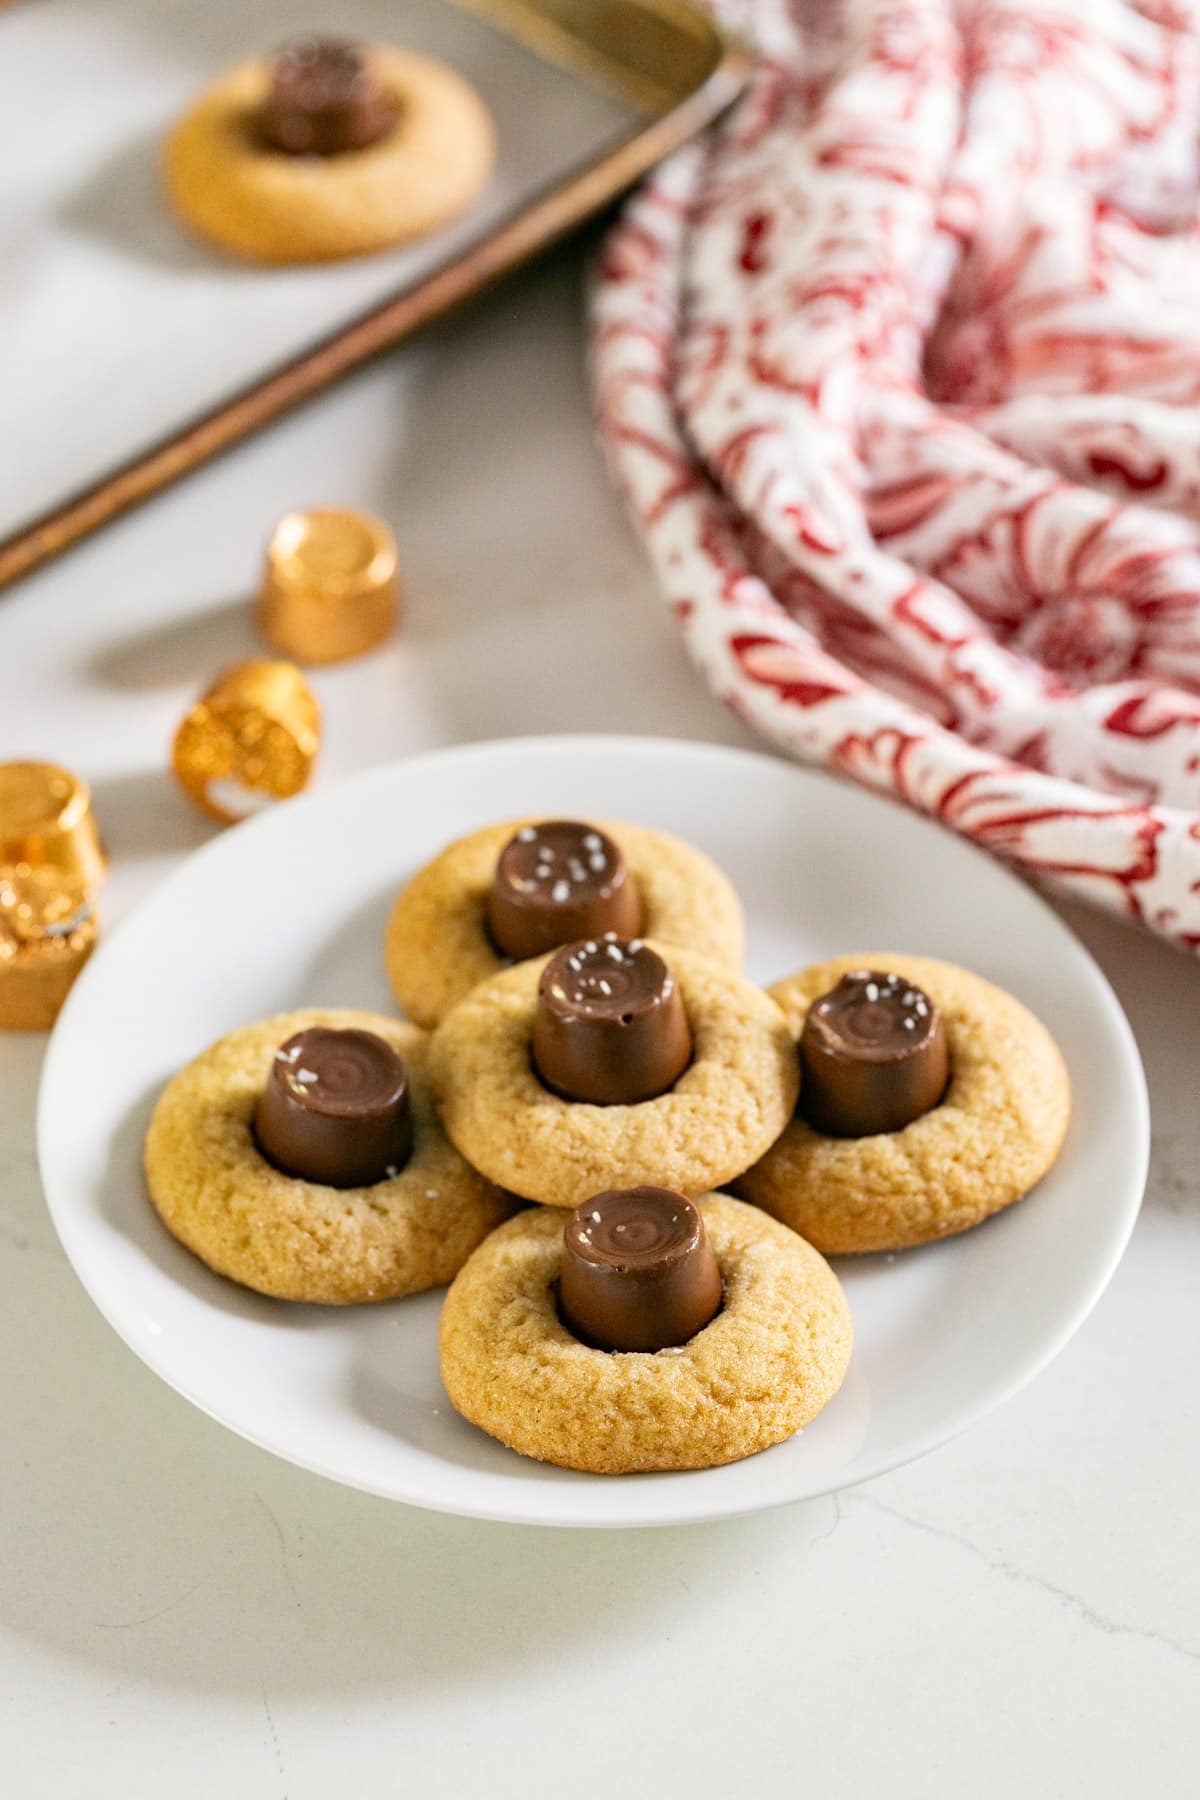
    A plate of caramel blossom cookies with a red and white napkin behind it and the candies and pan behind it.

    What To Serve With Salted Caramel Cookies Recipe

    Turn these cookies into part of a full dessert spread! They pair perfectly with warm or cool treats like:

    • Pumpkin Chocolate Chip Bread
    • Easy Candy Brownie Bites
    • Chocolate Mousse Cups
    • Moist Banana Chocolate Chip Muffins

    Other Cookie Recipes To Try

    • A plate of chocolate dipper shortbread cookies on striped towel with a cup of coffee.
      Almond Shortbread Cookies
    • 3 breakfast cookies stacked on each other with the other cookies around it.
      Breakfast Cookies Recipe
    • A stack of 4 Pumpkin White Chocolate chip cookies with other cookies behind it.
      Pumpkin White Chocolate Chip Cookies
    • A stack of 4 double chocolate peanut butter chip cookies.
      Double Chocolate Peanut Butter Chip Cookies

    Love this recipe? Please leave a 5 star ⭐️⭐️⭐️⭐️⭐️ rating in the recipe card below ⬇️ and/or a review in the comment section further down. Check out my Amazon Store for all my favorite tools, including those used in this recipe. And follow @thelifejolie on Instagram and TikTok!

    A close up image of a caramel blossom cookie on a pan.

    Caramel Blossom Cookies

    Jessy Freimann
    These caramel blossom cookies are a sweet-salty twist on a classic! Soft, chewy, and topped with melty Rolos and sea salt, they’re easy to make and perfect for any occasion.
    No ratings yet
    Print Recipe Pin Recipe
    Prep Time 1 hour hr 10 minutes mins
    Cook Time 10 minutes mins
    Total Time 1 hour hr 20 minutes mins
    Course Dessert
    Cuisine American, Christmas, Cookies, holidays
    Servings 36 cookies
    Calories 80 kcal

    Equipment

    • sheet pan
    • Parchment paper
    • Silpat
    • stand mixer
    • cookie scoop
    • measuring cups
    • measuring spoons

    Ingredients
      

    • ½ cup salted butter softened but NOT melted
    • ½ cup caramel sauce
    • ⅓ cup granulated sugar
    • ⅓ cup light brown sugar packed
    • 1 large egg
    • 1 Tablespoon milk
    • 1 tsp. vanilla extract
    • 2 ½ cups flour
    • 1 tsp. baking soda
    • ¾ tsp. kosher salt
    • 3 Tablespoons granulated sugar for rolling cookie dough
    • 3 pinches Malden salt
    • 36 Rolo candies wrappers removed

    Instructions
     

    • Combine flour, baking soda and salt and set aside.
    • Beat butter and caramel until well combined.
    • Add granulated sugar and brown sugar and beat until fluffy, about 2 minutes.
    • Beat in egg, milk and vanilla until well combined.
    • Gradually mix in dry ingredients until it all comes together.
    • Cover and refrigerate for at least an hour, preferably overnight.
    • Preheat the oven to 375 degrees F and line sheet pan with parchment paper. Shape dough into 1 inch balls and roll in additional granulated sugar.
    • Bake 8-10 minutes or until golden.
    • Immediately after the cookies come out of the oven (while they are still hot) press a Rolo candy into the middle of each cookie and sprinkle lightly with Malden salt.
    • Cool completely and serve.

    Video

    Notes

    • Chill the dough before baking. It keeps the cookies from spreading and gives them that thick, chewy texture everyone loves.
    • Unwrap all your Rolos first. It makes assembling way faster once the cookies come out of the oven.
    • Press the Rolos in right after baking. The heat from the cookies melts them just enough for that gooey center, so don't delay this step!
    • Don’t skip the salt! A tiny sprinkle of flake salt brings out the caramel and chocolate flavors perfectly.
    • Use a cookie scoop for even sizes. This helps them bake consistently and look picture-perfect on the tray.
    • Let them cool completely before storing. This keeps the tops shiny and prevents condensation in your container.
    • Ingredients to prep ahead- Measure your dry ingredients, unwrap Rolos, and soften the butter a bit before you start mixing.
    • Leftovers and storage- Store with a slice of bread or in a container for 3-4 days at room temperature, or refrigerate for up to 5 days. Freeze for up to 2 months.

    Nutrition

    Serving: 3cookiesCalories: 80kcalCarbohydrates: 13gProtein: 1gFat: 3gSaturated Fat: 2gPolyunsaturated Fat: 0.1gMonounsaturated Fat: 1gTrans Fat: 0.1gCholesterol: 7mgSodium: 109mgPotassium: 16mgFiber: 0.2gSugar: 7gVitamin A: 82IUVitamin C: 0.02mgCalcium: 6mgIron: 0.4mg
    Tried this recipe?Let us know how it was!

    Chewy Ginger Molasses Cookies

    Dec 4, 2025 · 1 Comment

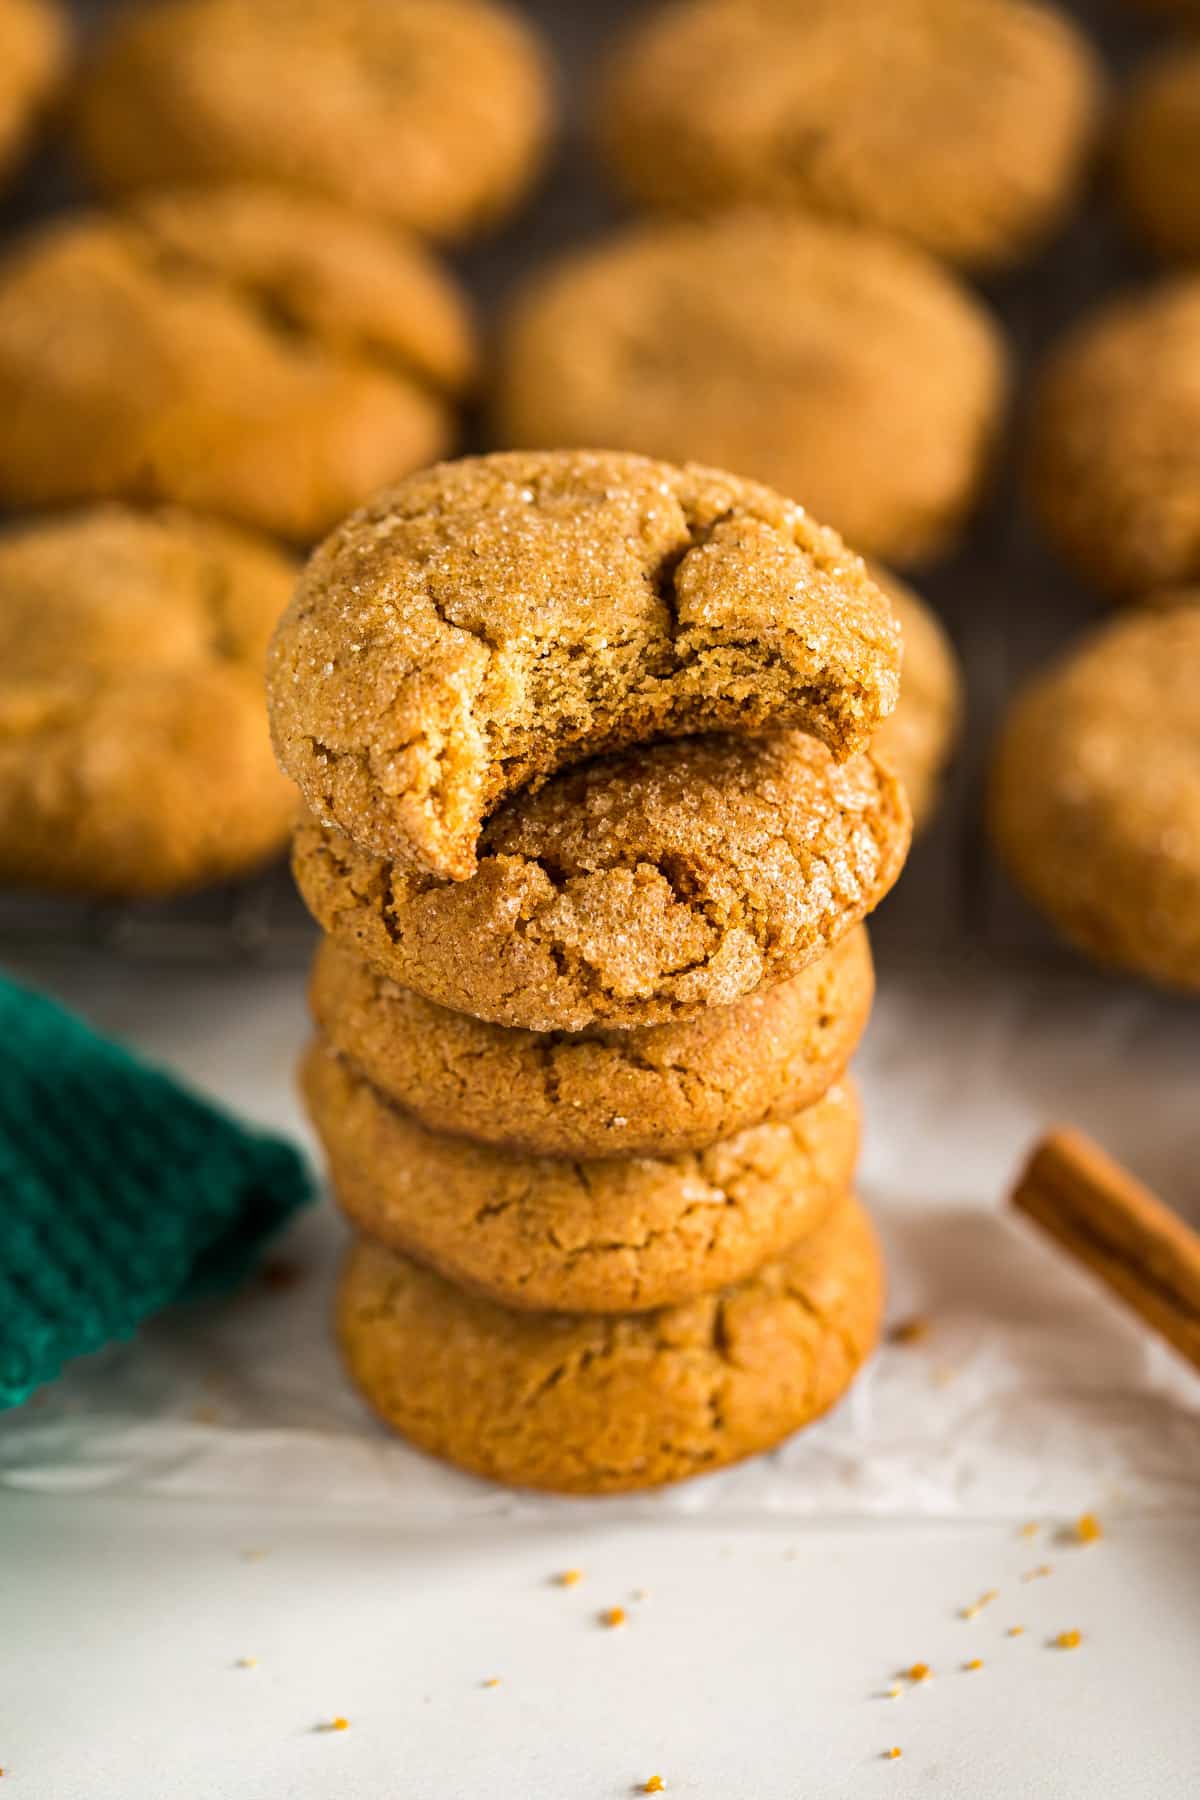
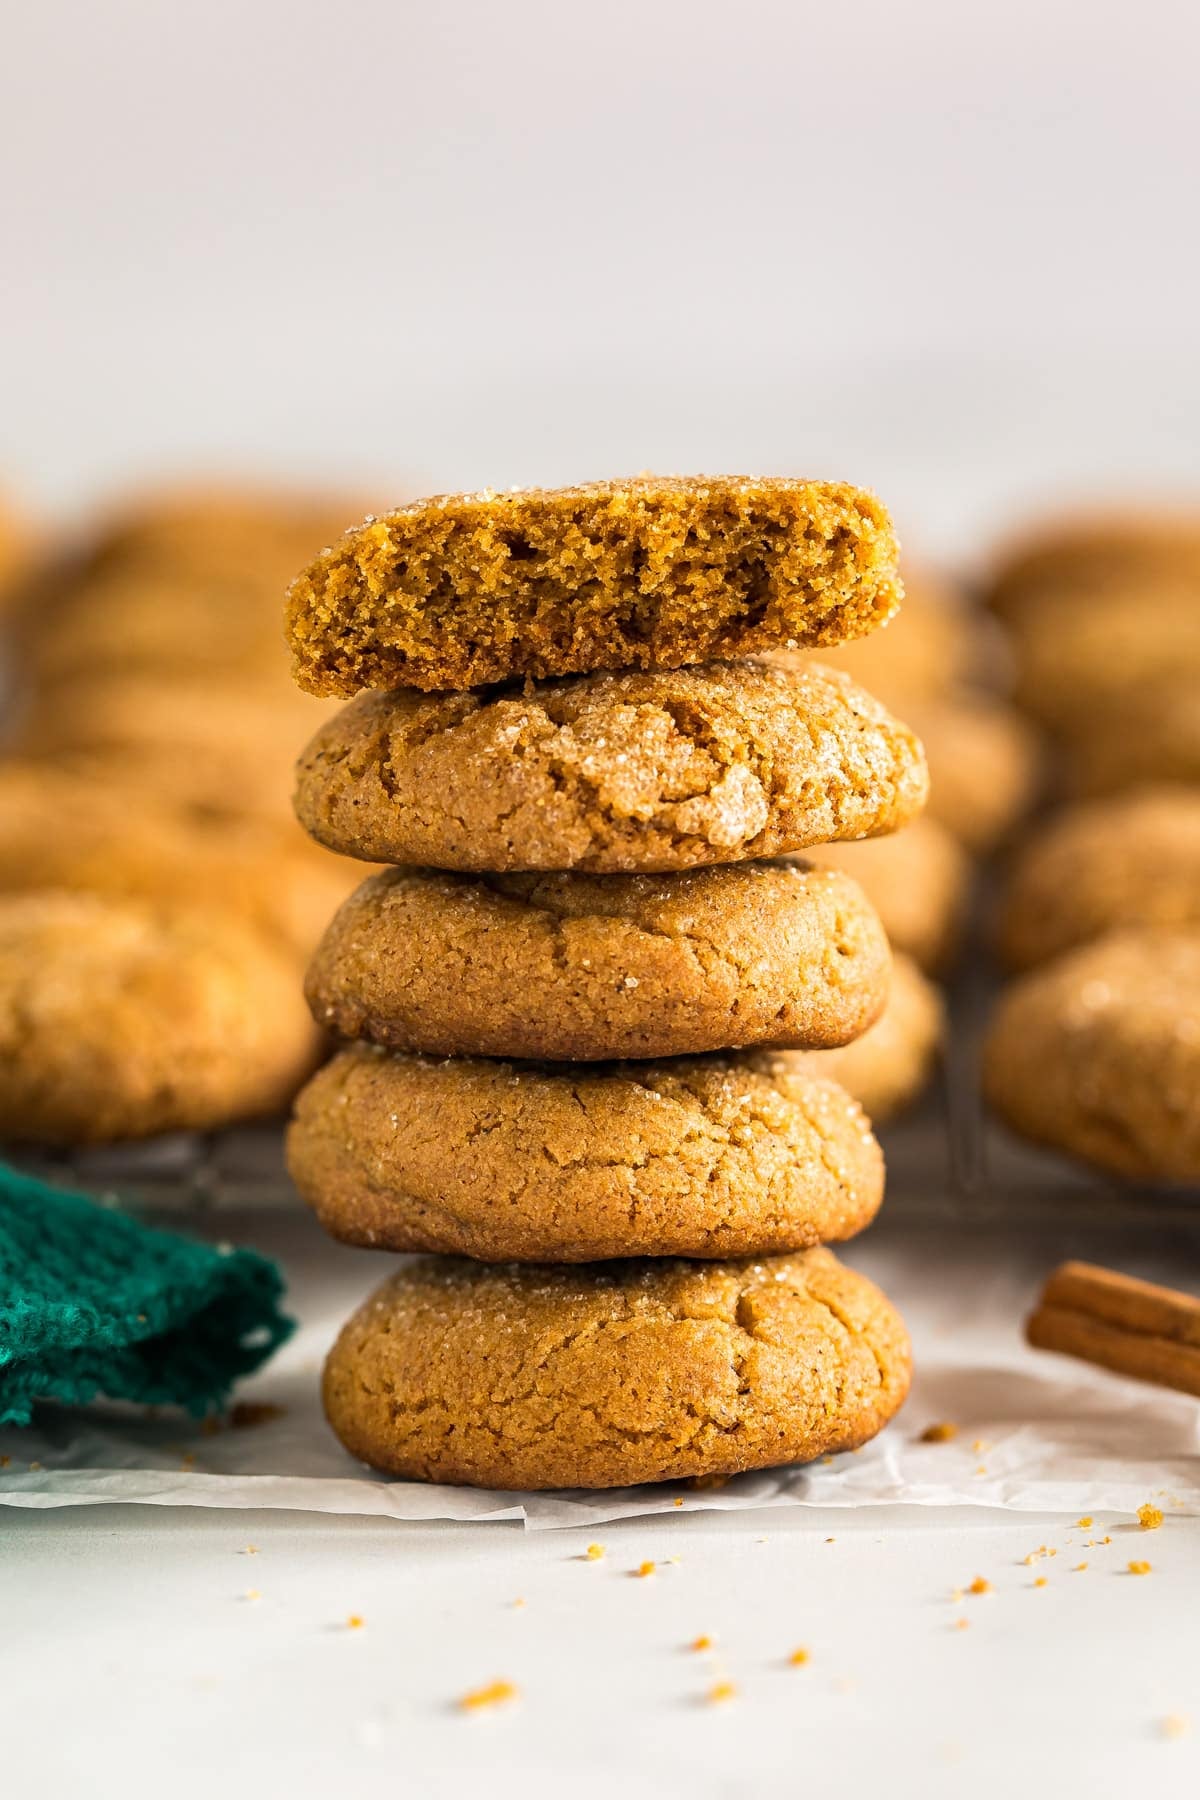
    A stack of molasses cookies with a bite out of the top cookie.

    These chewy ginger molasses cookies are soft, perfectly spiced, and ready in under an hour! With crisp edges, crackly tops, and that classic holiday aroma, they’re a must-bake treat.

    A stack of molasses cookies with a bite out of the top cookie.
    [feast_advanced_jump_to]

    Why You’ll Love Chewy Molasses Ginger Cookies

    One of the best parts of the holiday season is baking cookies with a little spice. But not the kind that burns… the warm, cozy kind that makes your kitchen smell amazing. These chewy molasses cookies may seem a bit old fashioned, but they’re the kind that disappear fast.

    They’ve got all those spice cabinet favorites: cinnamon, ginger, cloves, and a good splash of molasses for that deep, rich flavor. The texture is perfectly chewy, with just a hint of crunch from the sugar on top. Here’s why you’ll love them:

    • Soft, chewy texture
    • Warm, cozy spice flavor
    • Easy, no-fuss dough
    • Crackly sugar tops
    • Freezer-friendly
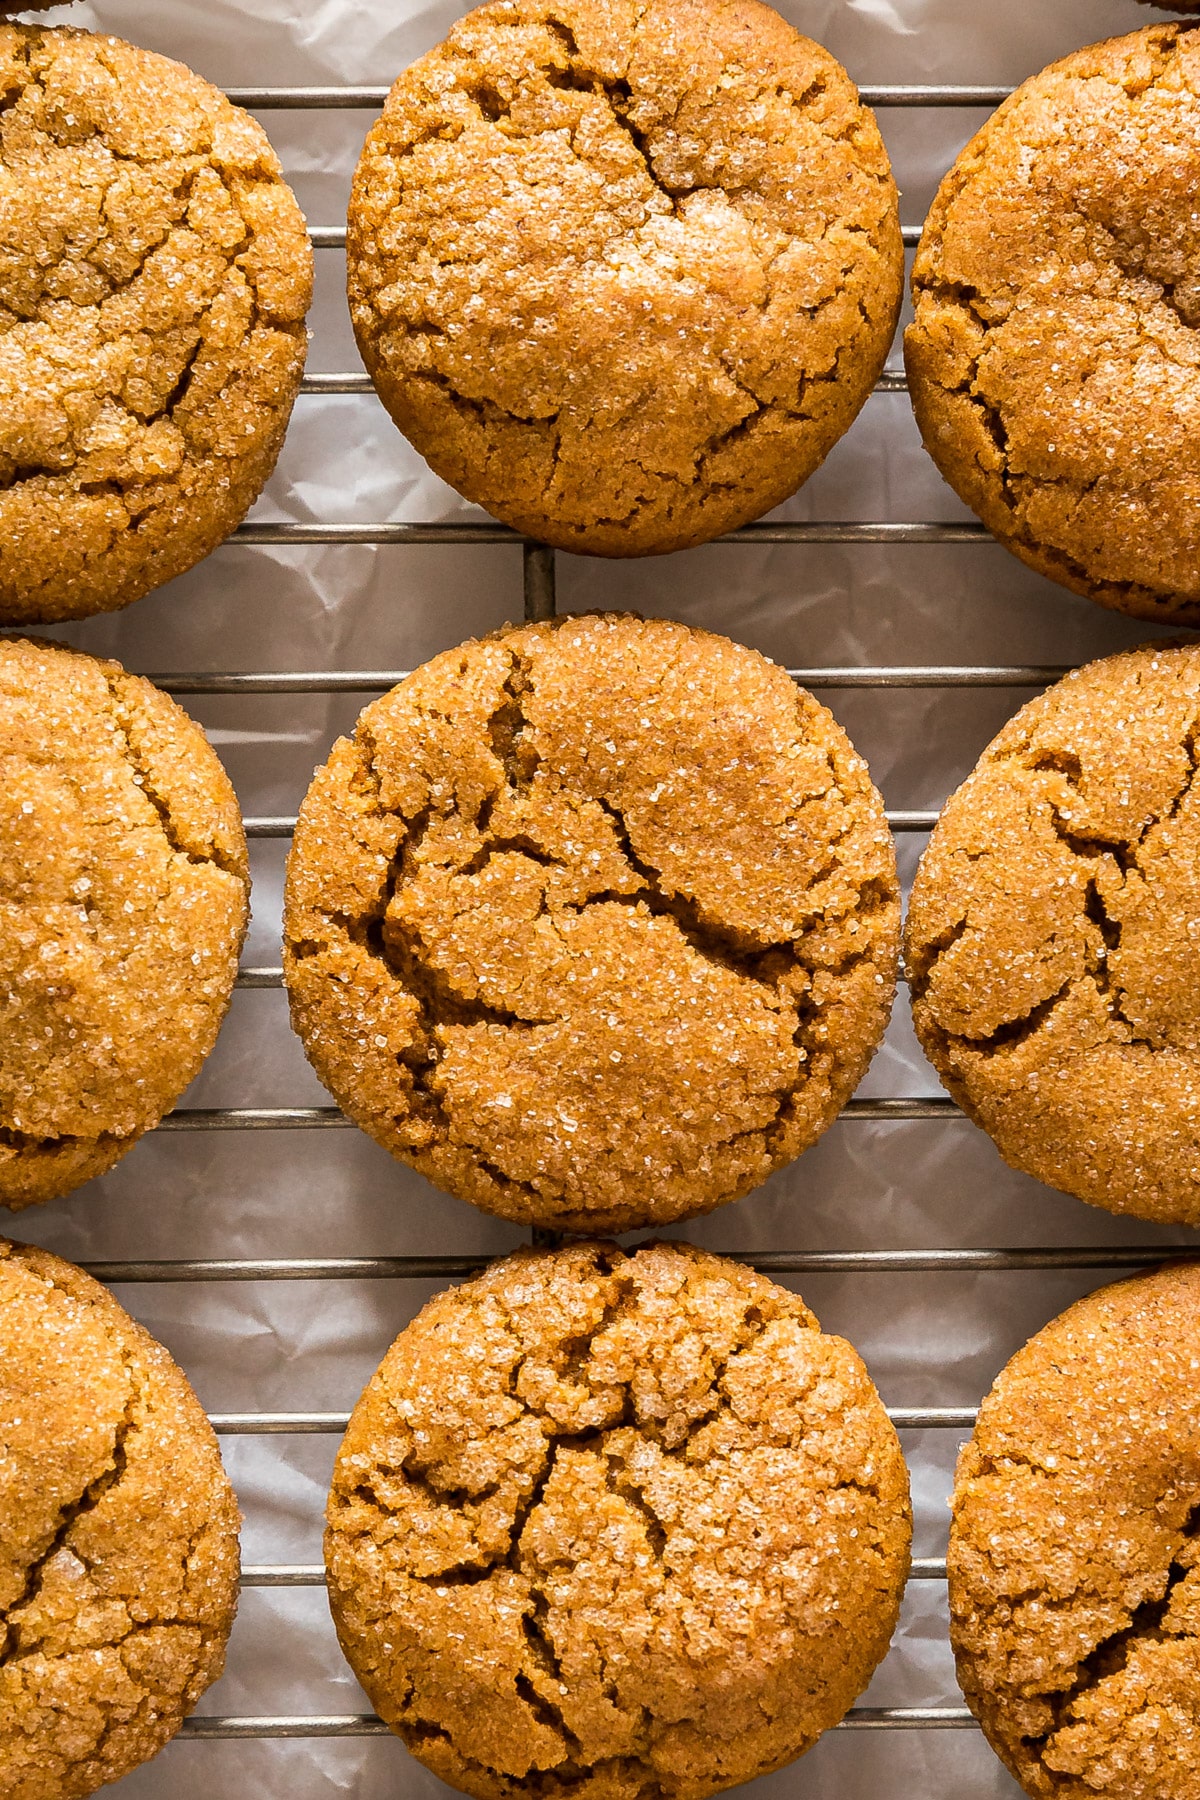
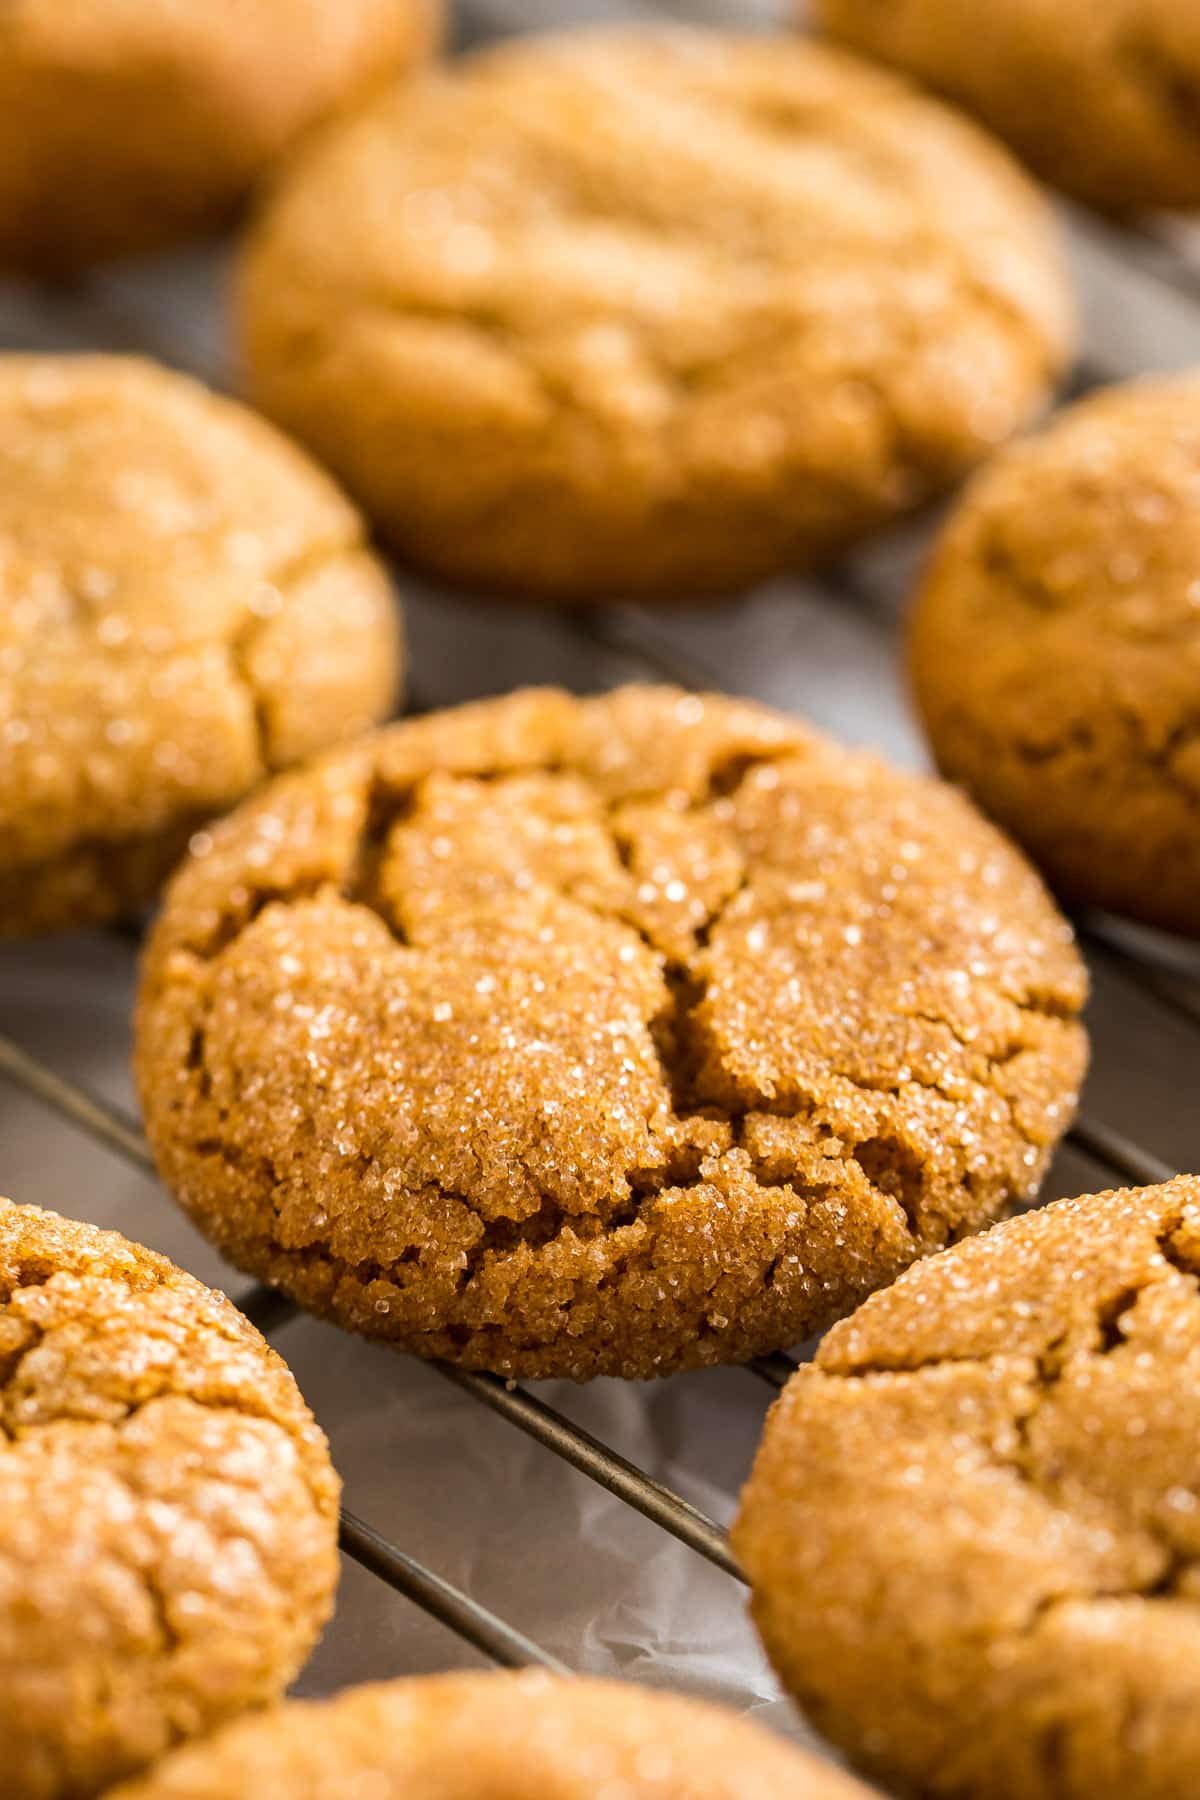
    A close up overhead image of ginger molasses cookies on a cooling rack.

    Ingredient Information And Substitutions

    • All-purpose flour- Gives the cookies structure. There isn’t really an ideal substitute here, but a 1:1 gluten-free blend will work in a pinch. 
    • Brown sugar- Adds moisture and a caramel flavor. Dark brown sugar gives a deeper taste, but light works too.
    • Granulated sugar- For finishing! Gives the cookies a little sparkle and a crisp edge. 
    • Unsulfured molasses- Use dark unsulfured for the best flavor. Avoid blackstrap, which is too bitter.
    • Shortening- Key for that chewy texture. 
    • Egg- Binds everything together and helps the cookies stay soft.
    • Water- A couple of drops on each dough ball helps create those signature crackly tops. 
    • Baking soda- Helps the cookies rise slightly and stay soft.
    • Kosher salt- Balances the sweetness and enhances flavor. 
    • Ground cloves- Adds deep, aromatic warmth. Use less if you prefer a milder flavor or skip for a softer spice profile.
    • Ground cinnamon- Brings that cozy sweetness. Pumpkin pie spice can stand in if you’re out. 
    • Ground ginger- Gives the cookies their signature bite. You can substitute fresh-grated ginger for a brighter flavor.
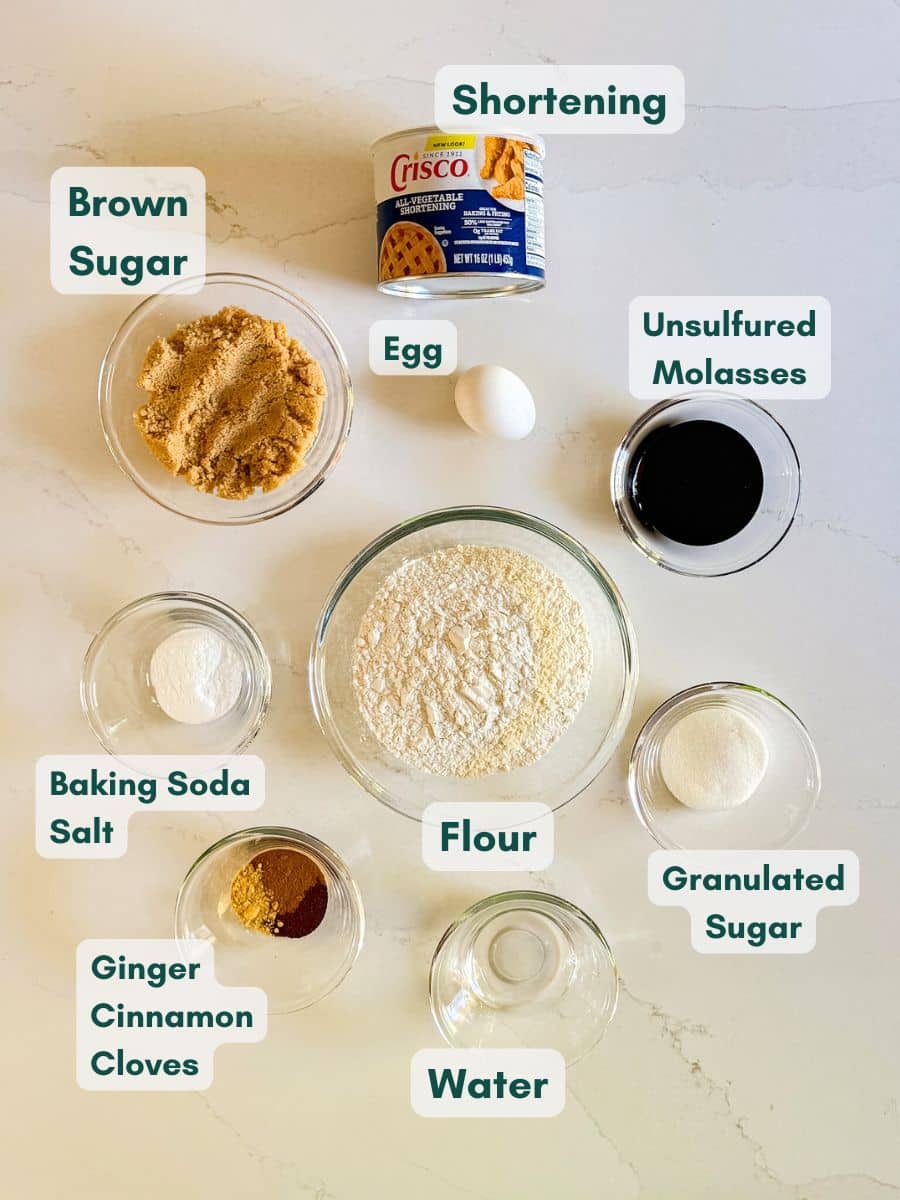
    An overhead image of labeled recipe ingredients.

    How To Make Old Fashioned Molasses Cookies

    Step 1- Mix the dry ingredients.

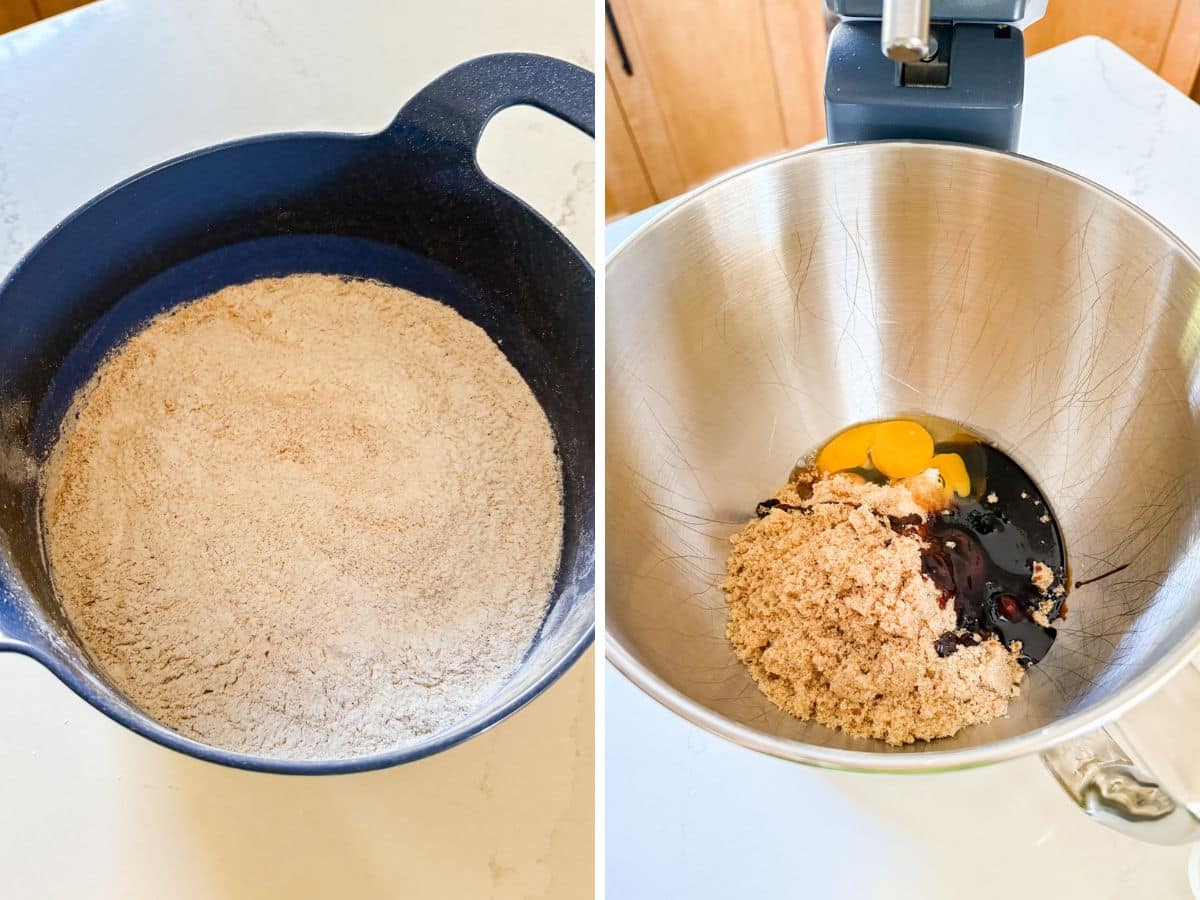
    In a medium bowl, whisk together the flour, baking soda, salt, and all the spices until everything is combined. Set aside.

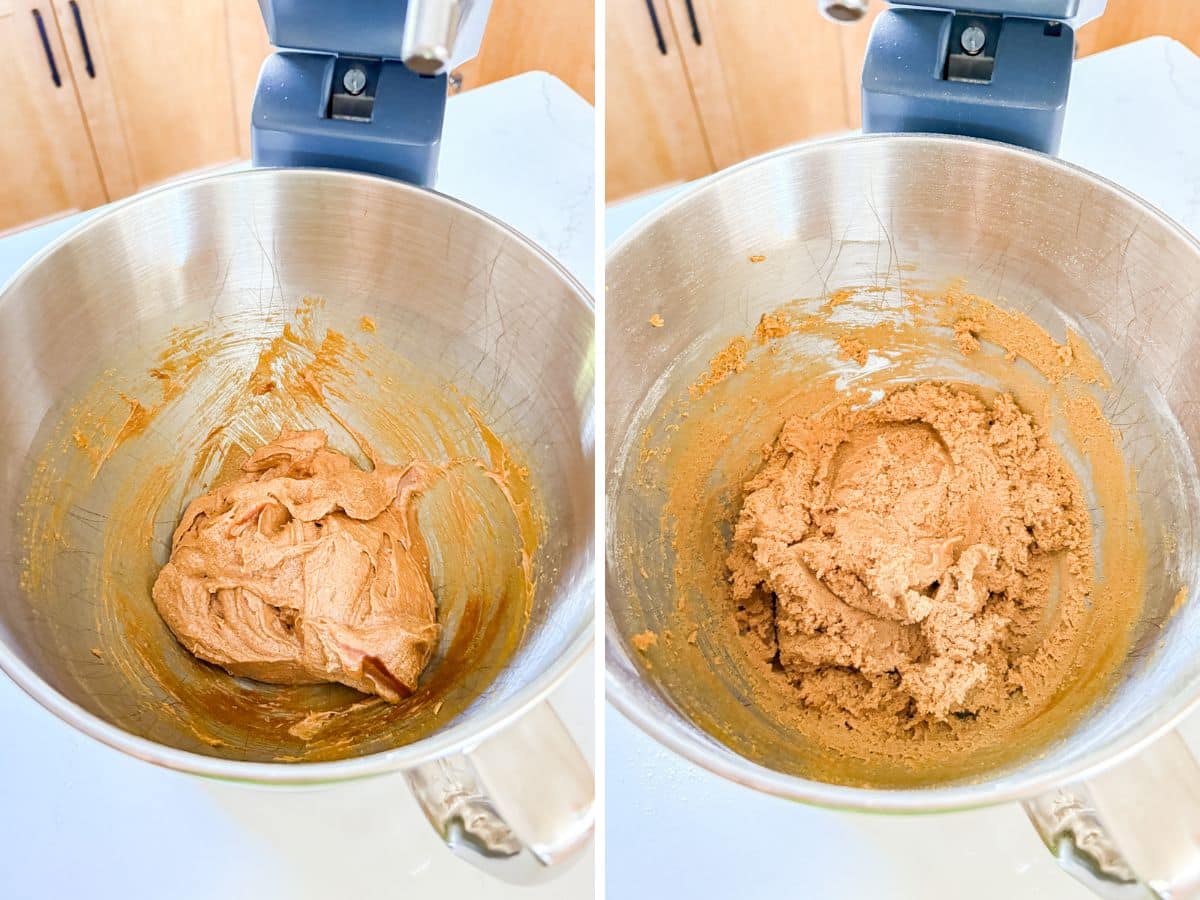
    Dry ingredients in a blue bowl and then the wet ingredients in a metal mixing bowl.

    Step 2-  Cream the wet ingredients. 

    In a large mixing bowl or stand mixer, beat the shortening, brown sugar, egg, and molasses until smooth. 

    Step 3- Combine and chill. 

    Add the dry ingredients to the wet mixture and stir until a dough forms. Cover and chill for about 30 minutes. 

    Wet ingredients mixed together and then with the flour mixed in.

    Step 4- Shape and coat. 

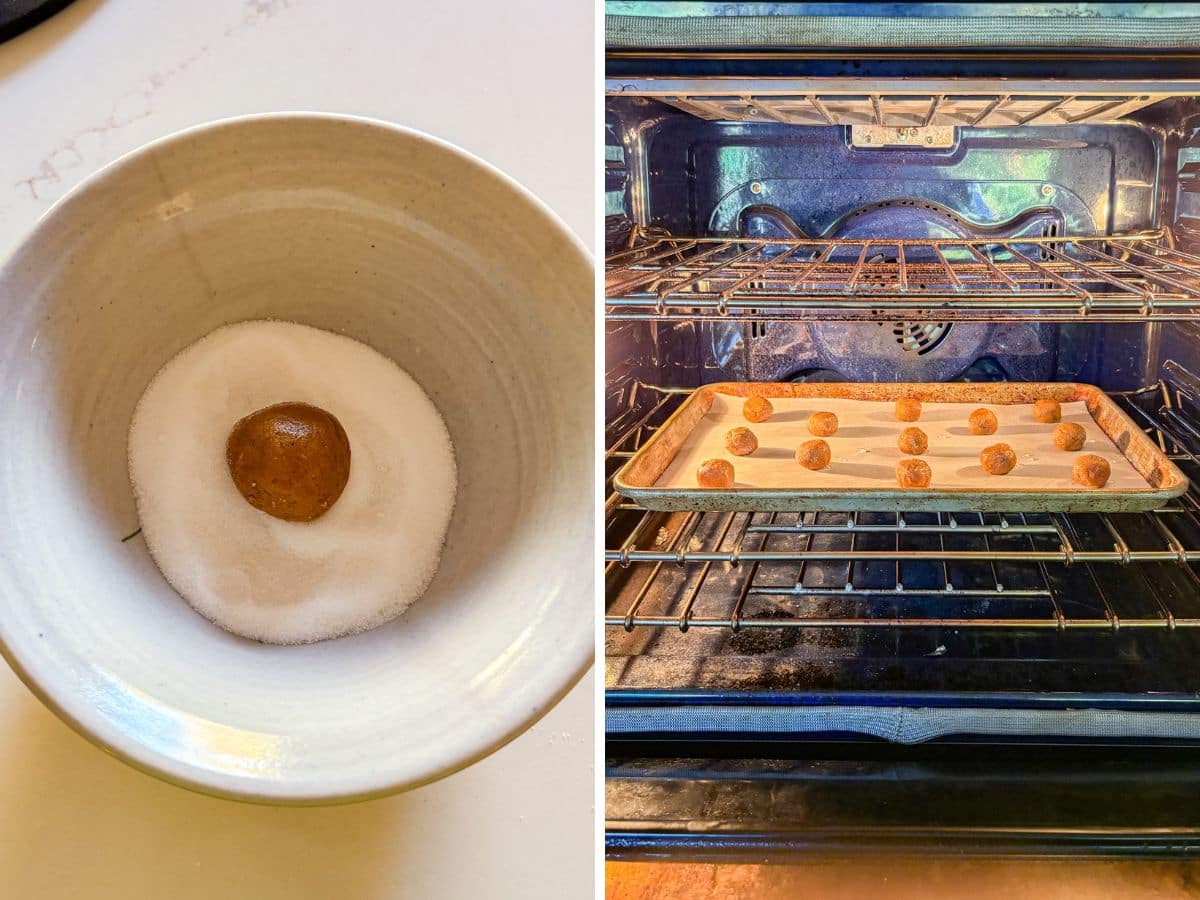
    Preheat your oven to 375 degrees F and line a baking sheet with parchment paper. Roll the dough into 1 ¼-inch balls and dip just the tops in granulated sugar. Place them on the sheet, sugar side up, about 3 inches apart.

    A ball of cookie dough in a bowl of sugar and the prepared dough balls on a sheet pan in the oven.

    Step 5- Add water drops and bake.

    Lightly sprinkle a few drops of water over each dough ball. Bake for 10-12 minutes, until the edges are set but the centers are still soft. Cool, then transfer to a rack.

    A stack of molasses cookies with a bite out of the top one revealing the inside of the cookie.

    Frequently Asked Questions

    What does molasses do in cookies?

    Molasses adds rich flavor and moisture, giving the cookies that chewy texture and caramel-like sweetness, without making them overly sweet.

    What’s the difference between molasses cookies and gingerbread cookies?

    Gingerbread (or gingersnaps) are usually crisp and crunchy, while molasses cookies are soft and chewy. 

    Can I make the dough ahead of time?

    Yes. The dough actually gets even better after a chill. You can make it up to 2 days in advance. Just keep it covered in the fridge. 

    A close up of a cookie on a cooling rack with other cookies around it.

    Tips For Making Ginger Molasses Cookies Recipe

    • I know it’s tempting to swap the shortening for butter, but for these cookies, don’t do it. The shortening is what keeps them soft and chewy.
    • Make sure to chill the dough before baking. It helps the cookies keep their shape and gives the flavors time to meld. 
    • Pack your brown sugar firmly into the measuring cup. That moisture helps give the cookies their perfect texture.
    • Measure your flour by spooning it into the cup and leveling it off. Too much flour can make them cakey instead.
    • Keep an eye on the bake time. You want the edges just set and the centers still soft. They’ll finish baking as they cool.
    • Let the cookies cool right on the pan for a few minutes before moving them to a rack. They’re super tender when warm. 
    • Ingredients to prep ahead- Mix dry ingredients and measure the wet ingredients ahead of time for faster prep.
    • Leftovers and storage- Store in an airtight container at room temp up to 4 days. Add a slice of bread to keep them soft, or freeze for up to 6 months. 
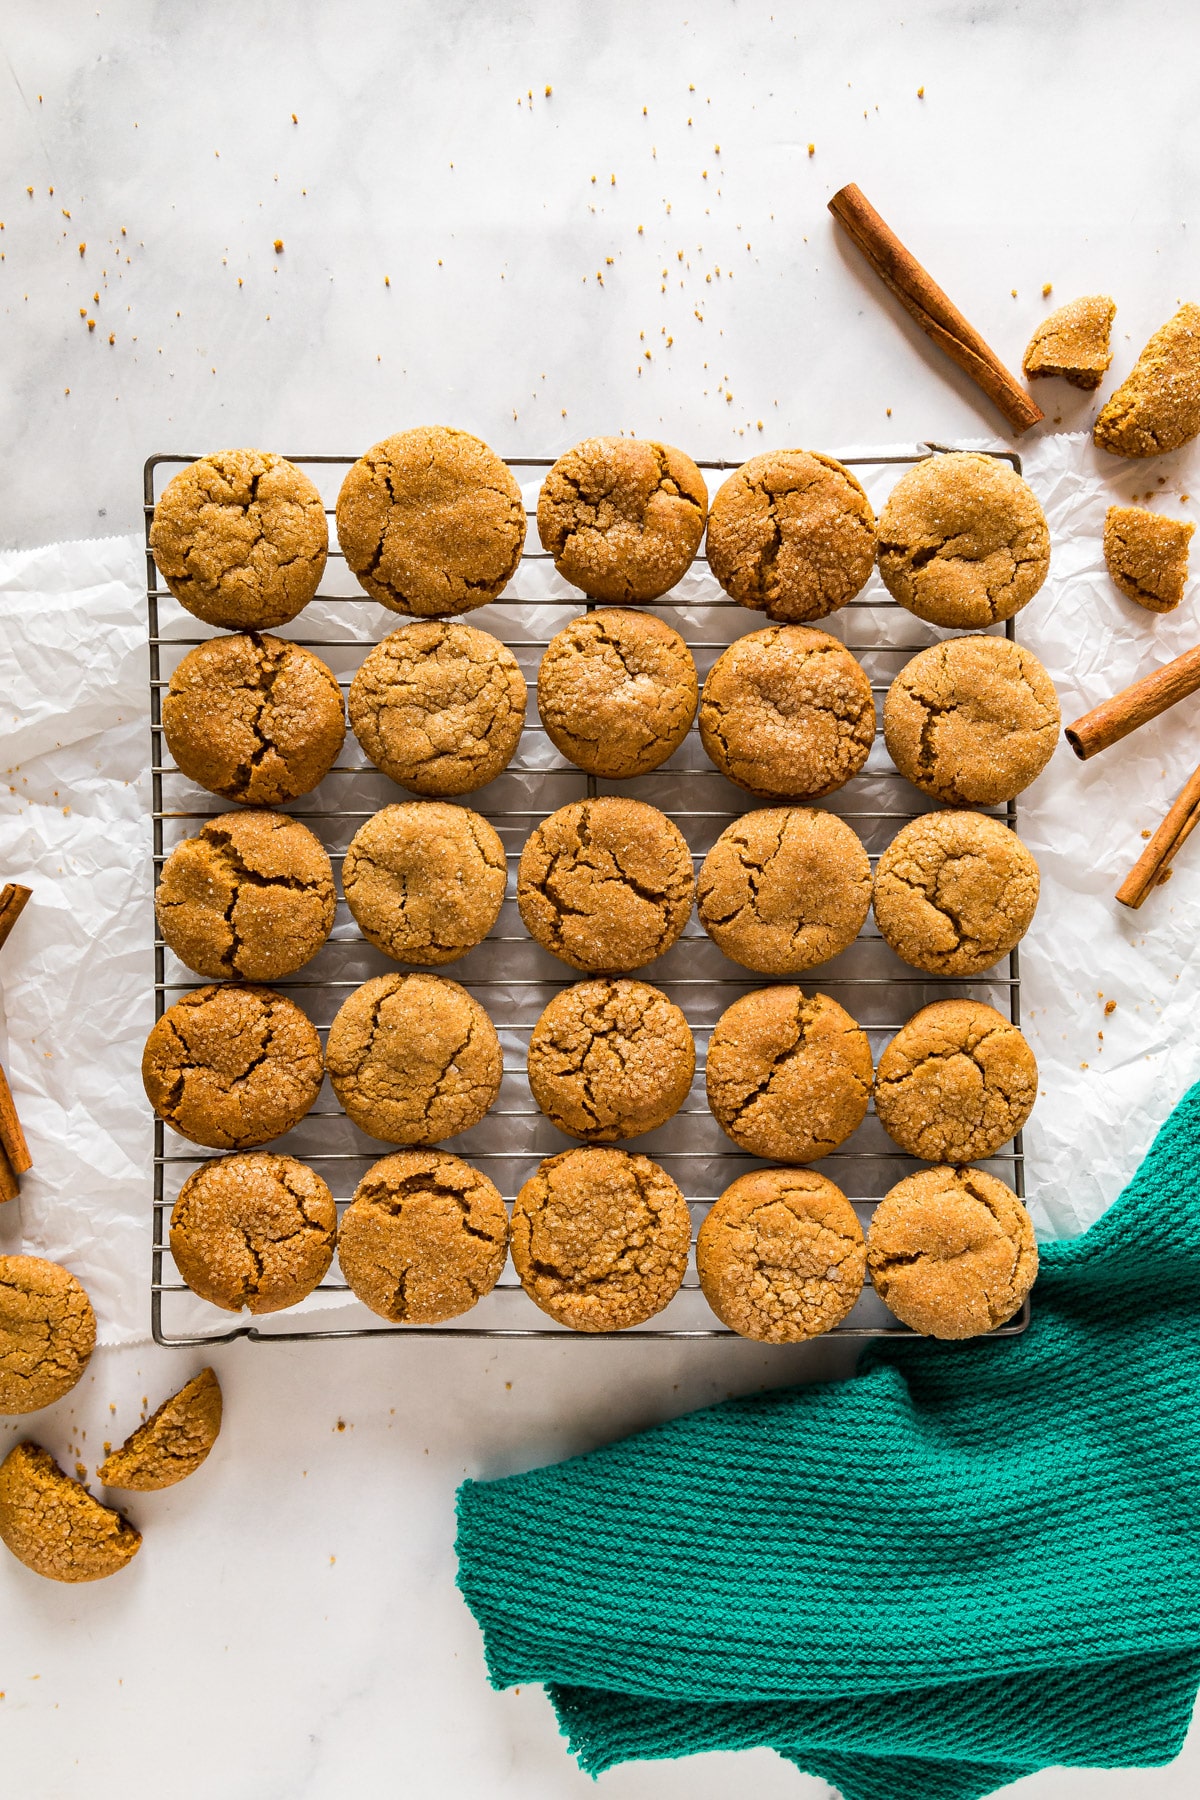
    An overhead image of cookies cooling on a square rack with a green towel and cinnamon sticks around it.

    What To Serve With Molasses Ginger Cookies

    These cookies are wonderful on their own, but they make an even better dessert spread when paired with a few cozy favorites: 

    • Orange Cinnamon Pull-Apart Bread
    • Cinnamon Spiced Candied Pecans
    • Chocolate Mousse Cups
    • No Bake S'more Bars

    Other Cookie Recipes To Try

    • A plate of Neapolitan cookies stacked into a pyramid shape.
      Italian Rainbow Cookie Recipe
    • A stack of 4 Pumpkin White Chocolate chip cookies with other cookies behind it.
      Pumpkin White Chocolate Chip Cookies
    • Oatmeal Raisin Cookies are a total blast from the past. Take one bite and you'll immediately be transported to those soft, delicious oatmeal cookies your mom used to make for after school snacks! They're an easy and delicious treat for the whole family.
      Oatmeal Raisin Cookies
    • A pile of sour cream cookies where the one in the middle has a bite out of it exposing the cakey center of the cookie.
      Sour Cream Cookies

    Love this recipe? Please leave a 5 star ⭐️⭐️⭐️⭐️⭐️ rating in the recipe card below ⬇️ and/or a review in the comment section further down. Check out my Amazon Store for all my favorite tools, including those used in this recipe. And follow @thelifejolie on Instagram and TikTok!

    A stack of molasses cookies with a bite out of the top cookie.

    Chewy Ginger Molasses Cookies

    Jessy Freimann
    These chewy ginger molasses cookies are soft, perfectly spiced, and ready in under an hour! With crisp edges, crackly tops, and that classic holiday aroma, they’re a must-bake treat.
    No ratings yet
    Print Recipe Pin Recipe
    Prep Time 20 minutes mins
    Cook Time 12 minutes mins
    Chill time 20 minutes mins
    Total Time 52 minutes mins
    Course Dessert
    Cuisine American
    Servings 48 cookies
    Calories 74 kcal

    Equipment

    • sheet pan
    • Silpat
    • mixing bowl
    • Spatula
    • stand mixer
    • Hand mixer
    • measuring cups
    • measuring spoons
    • cookie scoop

    Ingredients
      

    • 2 ¼ cups all-purpose flour
    • 2 teaspoons baking soda
    • ¼ teaspoon Kosher salt
    • ½ teaspoon ground cloves
    • 1 teaspoon ground cinnamon
    • 1 teaspoon ground ginger
    • ¾ cup shortening
    • 1 cup brown sugar, packed
    • 1 large egg
    • ¼ cup unsulfured molasses
    • 2 Tablespoons granulated sugar
    • Water

    Instructions
     

    • In a medium bowl, whisk together all dry ingredients. Set aside.
    • In a mixer or large bowl, mix shortening, brown sugar, egg and molasses until well combined.
    • Add dry ingredients and mix until combined. Chill for at least 30 minutes.
    • Preheat the oven to 375 degrees F and line a pan with parchment or a silicone liner.
    • Roll dough into 1 ¼ inch balls and dip the top of the ball into the sugar.
    • Place dough balls onto the pan, sugar side up about 3 inches apart.
    • Dip your fingers in the water and and sprinkle a couple drops onto each dough ball (don't skip this step!).
    • Bake for 10-12 minutes (you want them set but not hard). Cool and serve.

    Video

    Notes

    • I know it’s tempting to swap the shortening for butter, but for these cookies, don’t do it. The shortening is what keeps them soft and chewy.
    • Make sure to chill the dough before baking. It helps the cookies keep their shape and gives the flavors time to meld. 
    • Pack your brown sugar firmly into the measuring cup. That moisture helps give the cookies their perfect texture.
    • Measure your flour by spooning it into the cup and leveling it off. Too much flour can make them cakey instead.
    • Keep an eye on the bake time. You want the edges just set and the centers still soft. They’ll finish baking as they cool.
    • Let the cookies cool right on the pan for a few minutes before moving them to a rack. They’re super tender when warm. 
    • Ingredients to prep ahead- Mix dry ingredients and measure the wet ingredients ahead of time for faster baking.
    • Leftovers and storage- Store in an airtight container at room temp up to 4 days. Add a slice of bread to keep them soft, or freeze for up to 6 months. 

    Nutrition

    Serving: 3cookiesCalories: 74kcalCarbohydrates: 11gProtein: 1gFat: 3gSaturated Fat: 1gPolyunsaturated Fat: 1gMonounsaturated Fat: 1gTrans Fat: 0.4gCholesterol: 0.01mgSodium: 60mgPotassium: 39mgFiber: 0.2gSugar: 6gVitamin A: 0.2IUVitamin C: 0.002mgCalcium: 9mgIron: 0.4mg
    Tried this recipe?Let us know how it was!

    Antipasto Appetizer Platter

    Nov 28, 2025 · Leave a Comment

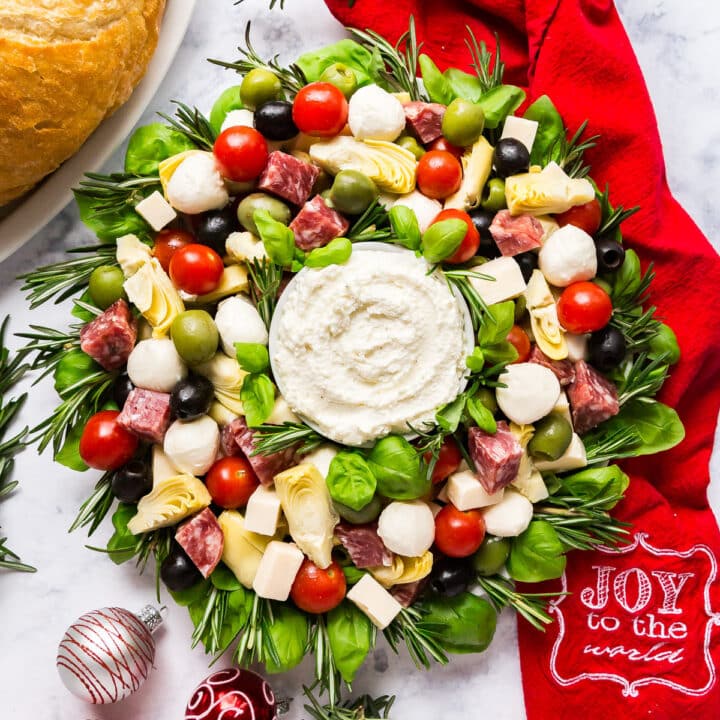
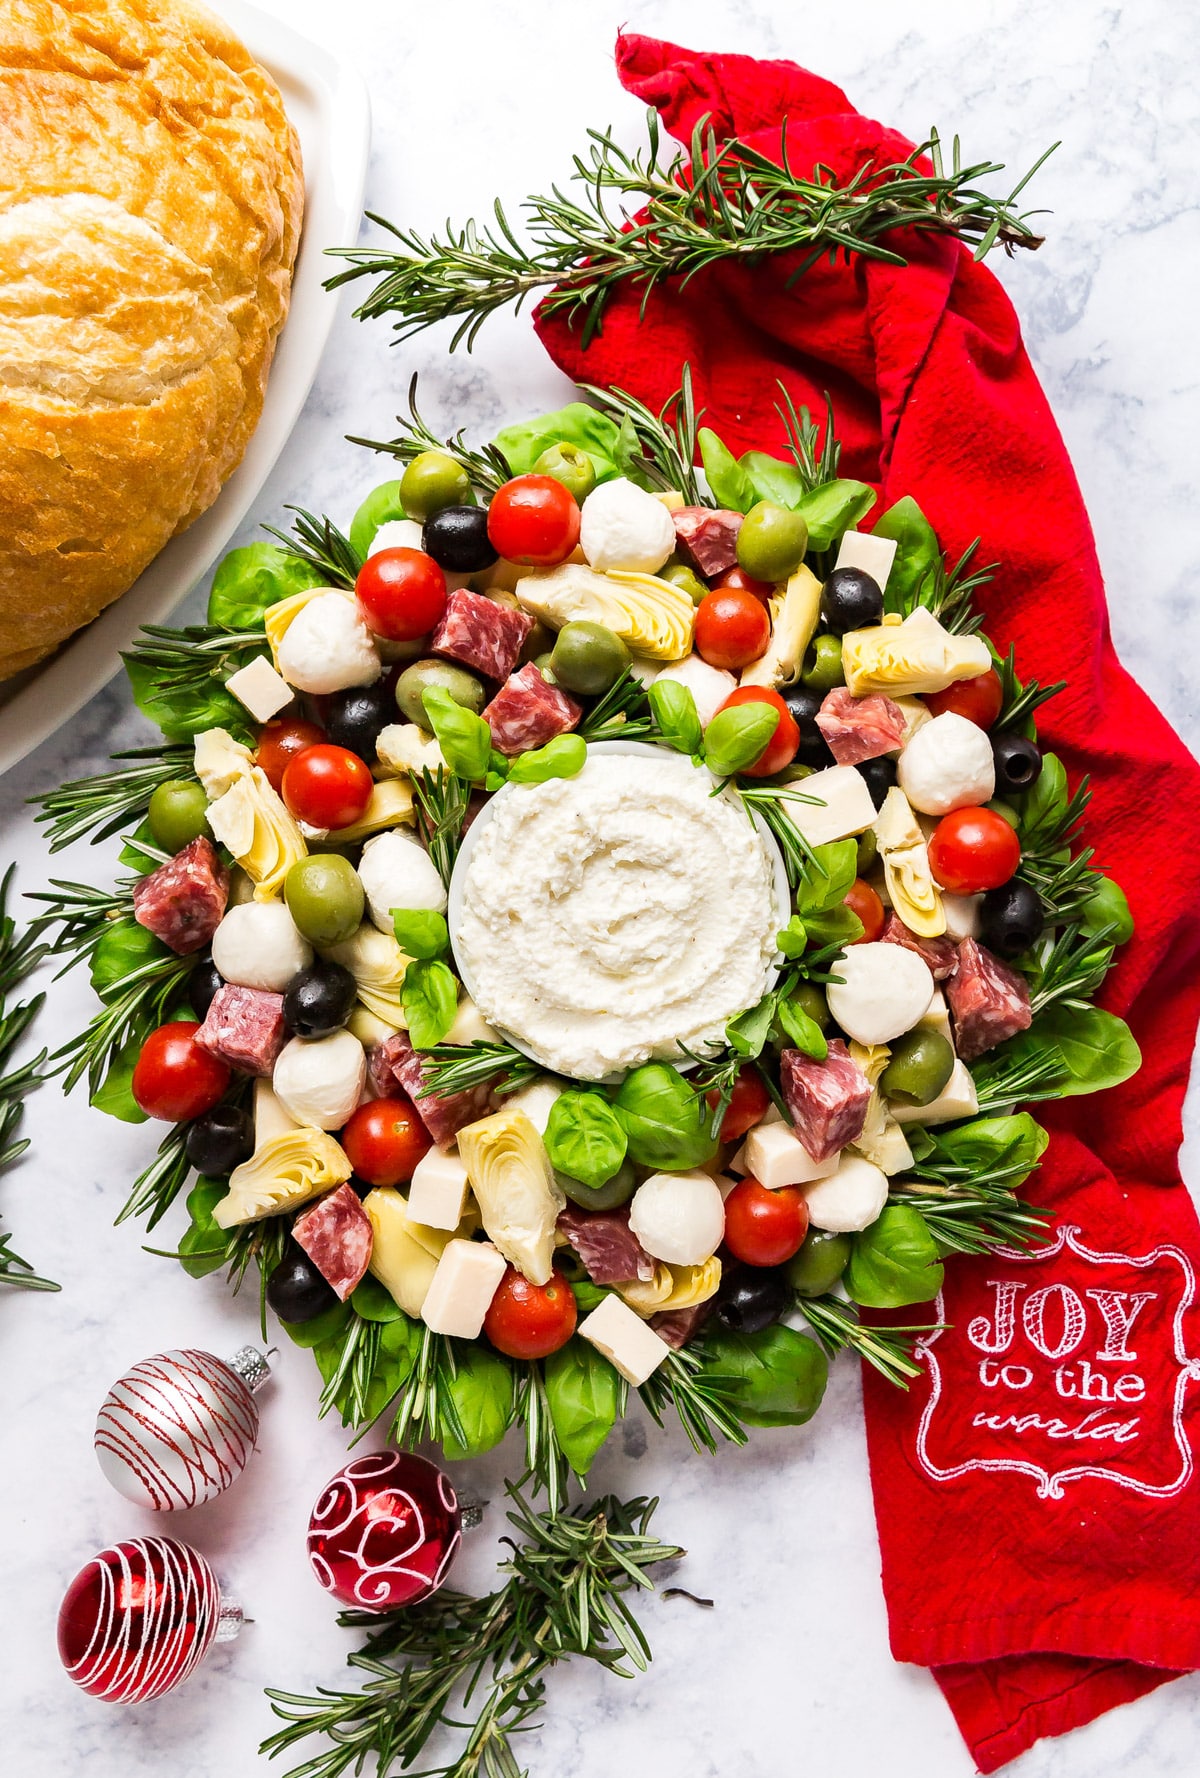
    An overhead image of an Antipasto Appetizer recipe in the shape of a Christmas wreath.

    This antipasto appetizer platter is a stunning, no-cook party starter loaded with savory meats, creamy cheeses, and marinated veggies. All ready in just 20 minutes and perfect for the holidays as it looks like a festive Christmas wreath!

    An overhead image of an Antipasto Appetizer recipe in the shape of a Christmas wreath.
    [feast_advanced_jump_to]

    Why You’ll Love This Antipasto Board

    One of the mainstays at our holiday celebrations (and honestly, most get-togethers in general) is a good antipasto platter. It’s light and delicious without being overly filling, making it an excellent appetizer for a crowd or even a fun meal. Best of all, it’s seriously easy to assemble with no extra cooking. 

    A great antipasto is all about variety: sweet cherry tomatoes, briny olives, and marinated artichoke hearts for brightness, plus creamy mozzarella, sharp provolone, and savory soppressata for richness. To make it extra festive, I love adding sprigs of fresh rosemary and basil to resemble a wreath with a creamy bowl of whipped ricotta in the center. Here’s why you’ll love it:

    • Looks stunning with minimal effort
    • No cooking or baking required
    • Easy to customize for any crowd size
    • Bursting with flavor and texture
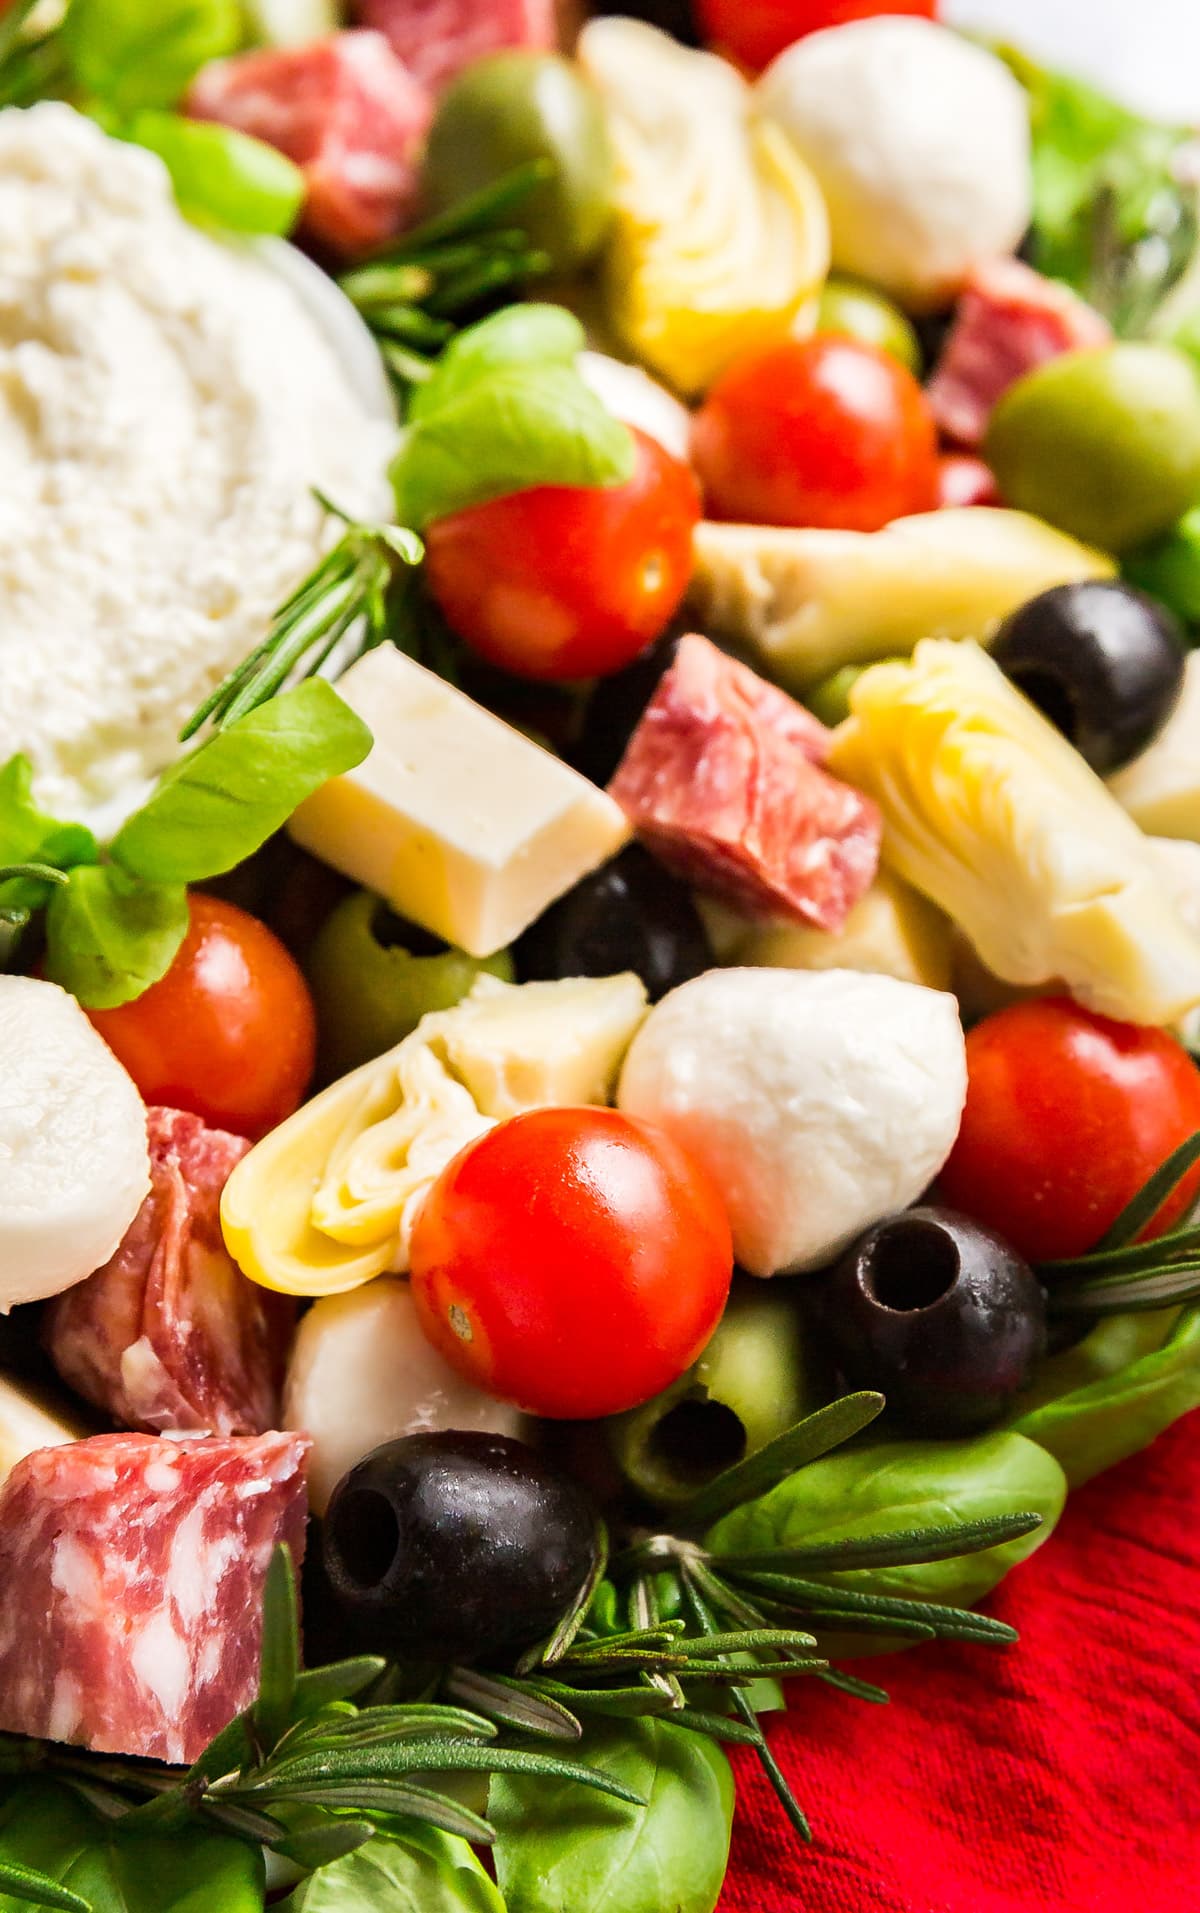
    A close up of the salad on this antipasto board.

    Ingredient Information and Substitutions

    • Fresh mozzarella balls- Mild and creamy. You can use cubed mozzarella or bocconcini.
    • Sharp provolone- Adds a bold, tangy bite. Swap with aged Asiago or fontina if you prefer something milder.
    • Ricotta cheese- Whipped this into a creamy dip for the center. Use full-fat for the best texture.
    • Romano or Parmesan cheese- Adds a salty, nutty depth to the whipped ricotta. Either works beautifully. 
    • Soppressata- Classic Italian salami. Substitute with Genoa salami or pepperoni.
    • Cherry tomatoes- Sweet and juicy. Grape tomatoes work too.
    • Olives- A mix of green and black adds great briny contrast. Try Castelvetrano for a buttery flavor.
    • Marinated artichoke hearts- Tangy and flavorful, these will also infuse extra deliciousness into the other veggies. Canned or jarred both work fine.
    • Vinaigrette dressing (optional)- I don't typically add this, but a light toss when combining the ingredients adds extra flavor. Just don't overdo it! 
    • Fresh rosemary sprigs- Adds a hint of piney aroma and a festive touch.
    • Fresh basil- Brings color and freshness.
    • Salt and pepper- Season to taste. A little freshly cracked pepper brings out the best flavor in the whipped ricotta.
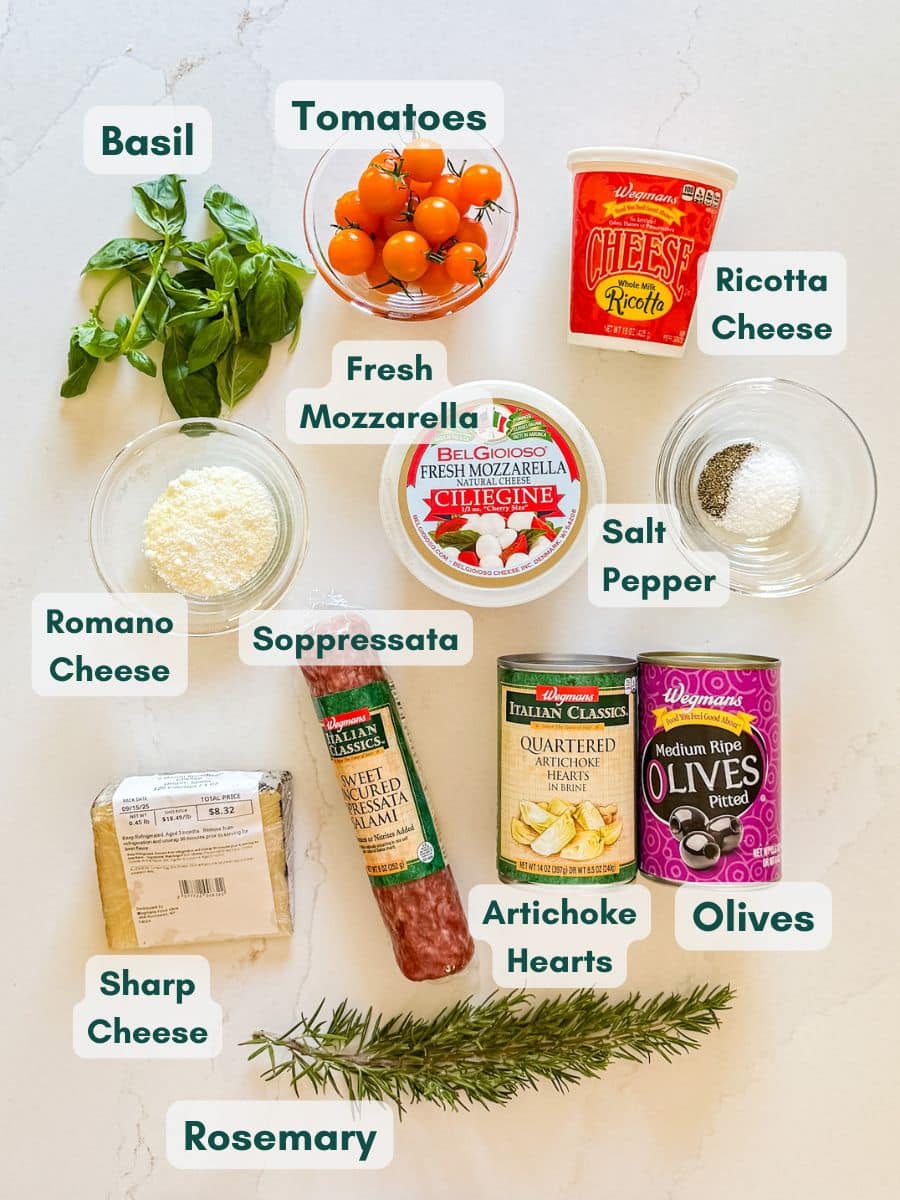
    An overhead image of labeled recipe ingredients.

    How To Make Antipasti

    Step 1- Make the whipped ricotta.

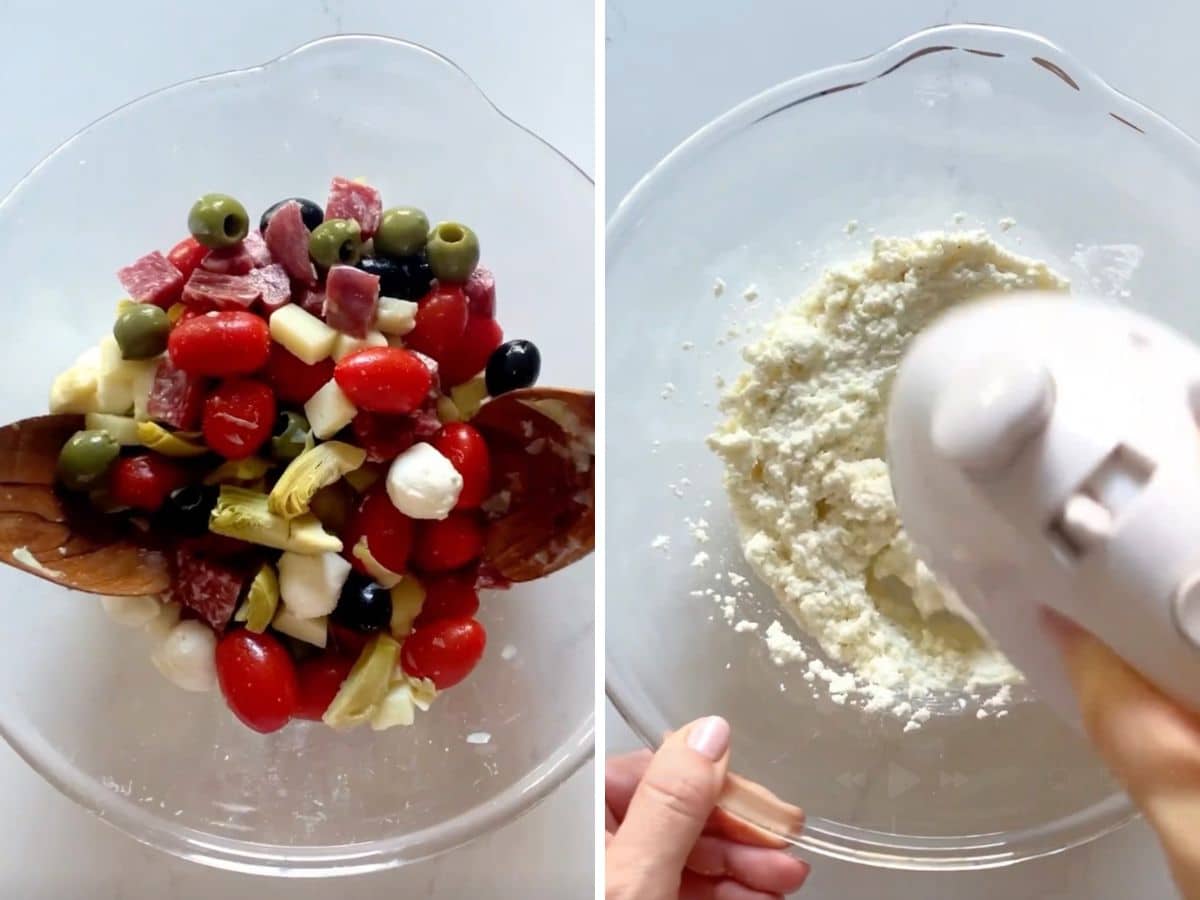
    In a bowl, mix ricotta with Romano (or Parmesan) cheese, salt, and pepper. Beat until smooth and creamy, then spoon into a small bowl. Place it in the center of your platter.

    Step 2- Combine the antipasto ingredients.

    In a large bowl, toss the mozzarella, provolone, soppressata, tomatoes, olives, and artichoke hearts until well mixed.

    Antipasto salad ingredients in a glass bowl and a mixer making whipped ricotta in a different bowl.

    Step 3- Assemble the platter.

    Place sprigs of rosemary and basil around the bowl, with the leafy ends facing outward. Add sections of the antipasto mixture on top to hold the herbs in place, working around the platter until it forms a full wreath.

    Step 4- Chill and serve.

    Add a few small herb sprigs around the ricotta for a fresh, festive finish, then cover lightly with plastic wrap and refrigerate until serving. 

    Antipasto ingredients being placed in a plate with the whipped ricotta bowl in the middle- first phot is ⅓ of the way done and the other photo is the whole plate covered.

    Frequently Asked Questions

    Why is it called antipasto?

    The word “antipasto” comes from Latin. “Anti” means “before” and “pastus” means “meal”. It’s traditionally served as the first course in an Italian meal.

    Can I make this ahead of time?

    Yes, you can prep all the ingredients a day in advance. Keep them chilled and mix right before assembling the platter so everything stays fresh.

    How do I make the whipped ricotta?

    Simply whip ricotta with Romano or Parmesan, salt, and pepper until smooth and fluffy. It’s the same easy method I use in my Broccoli Rabe and Ricotta Crostini.

    An overhead close up of the whipped ricotta in the middle of the antipasti platter.

    Tips For Making Antipasto

    • Adjust for your crowd. This platter is easy to scale. Just add more or less for each ingredient depending on how many people you’re serving.
    • Use a flat platter. A large, flat plate or board works and a round one is best so you can really show off that pretty wreath shape.
    • Customize it your way. This platter is super flexible and always delicious, and you can easily swap in your favorite cheeses, meats, or veggies.
    • Mix before assembling. Combine all your ingredients in a big bowl first so every bite has a bit of everything.
    • Dress lightly (or not at all). I usually skip the dressing since there’s already so much flavor, but if you like it dressed, toss lightly before assembling. 
    • Ingredients to prep ahead- Cut cheeses and meats, and drain olives and artichokes up to a day in advance.
    • Leftover and storage- Cover and refrigerate up to 3 days. The flavors get even better as they mingle. 
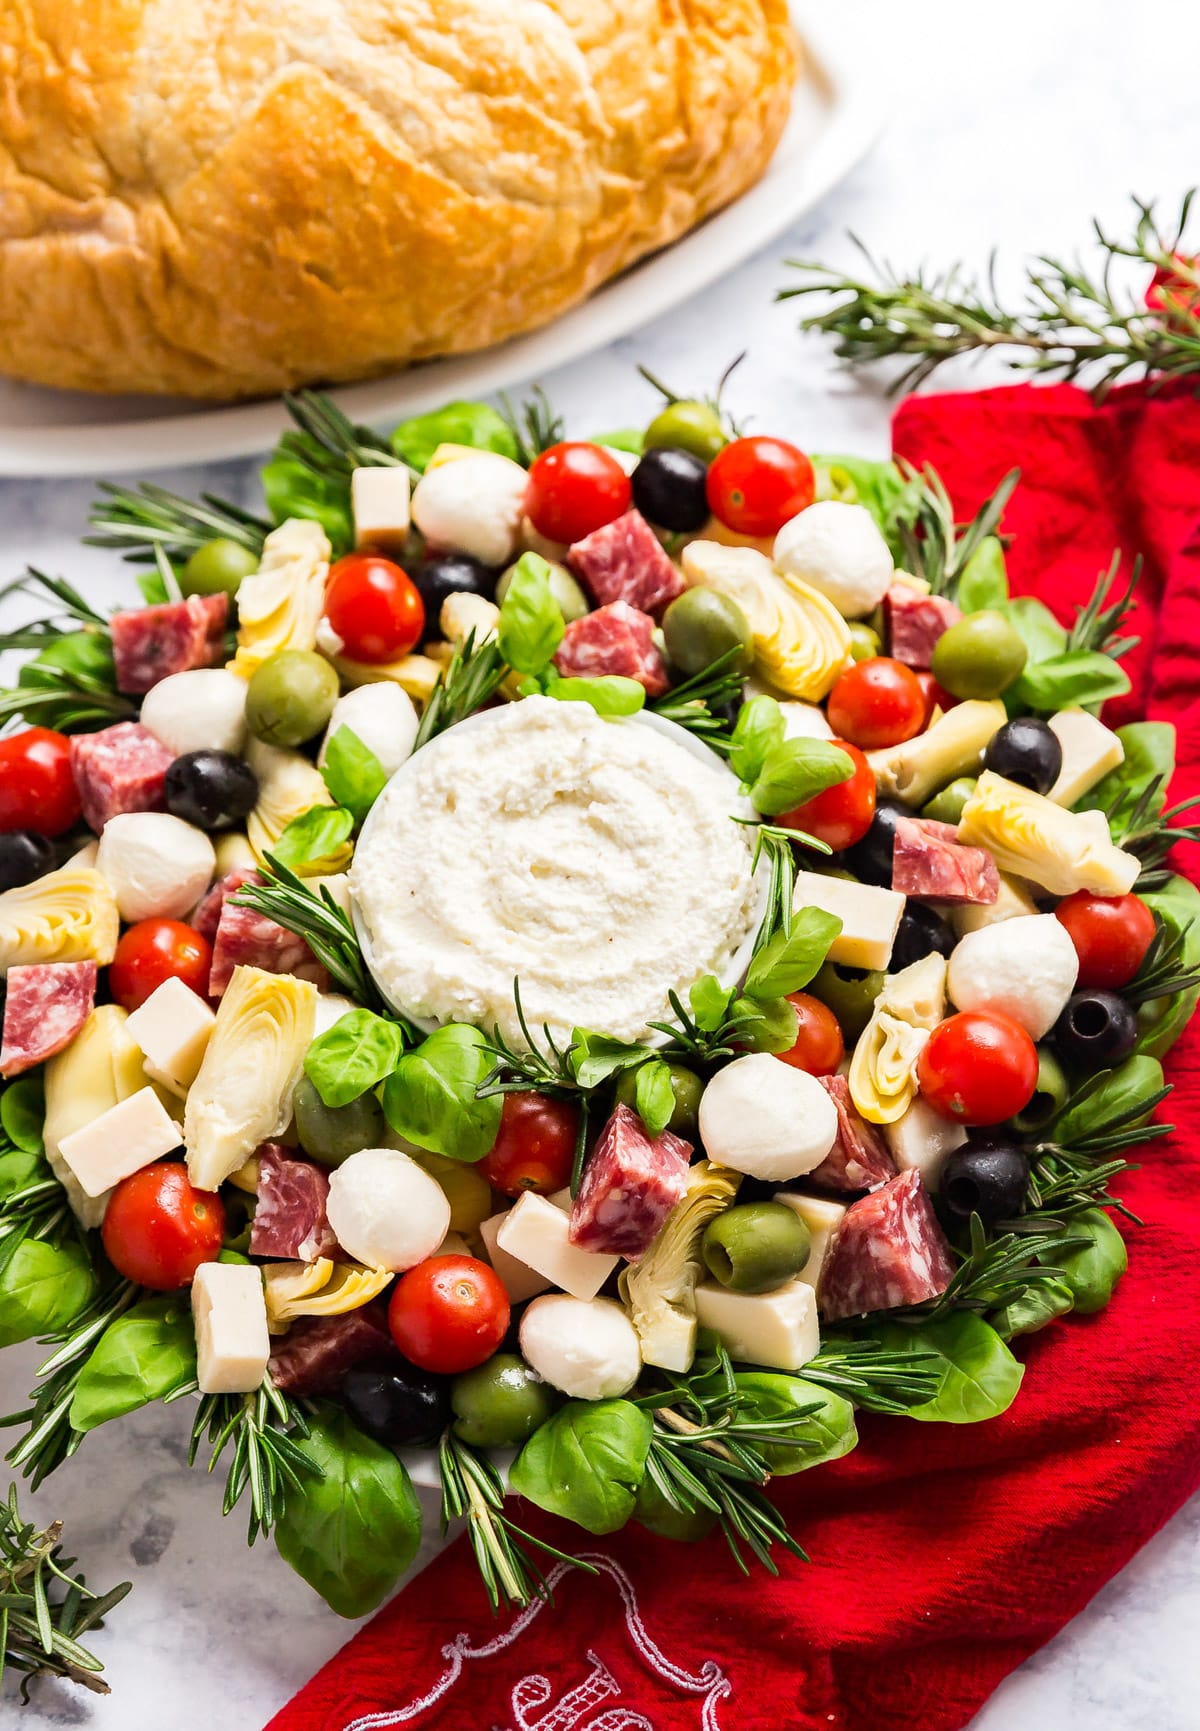
    An antipasto wreath with bread behind it and a red towel next to it.

    What To Serve With Antipasto Appetizers

    This platter pairs beautifully with crusty bread or crostini and a good glass of wine. To make it a part of a full spread, try serving it alongside:

    • Grilled Chicken Thighs Recipe
    • Zesty Italian Pasta Salad
    • Apple Cranberry Chutney
    • Sour Cream Cookies

    Other Appetizer Recipes To Try

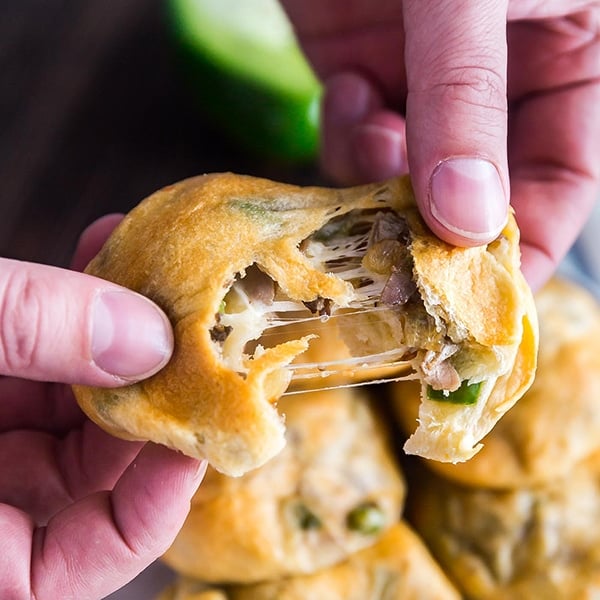
    • A square image of a hand pulling apart a Philly Cheese Steak Stuffed Bread Roll.
      Philly Cheese Steak Stuffed Bread Rolls aka Philly Cheese Steak Bombs
    • A close up image of a buffalo chicken slider.
      Buffalo Chicken Sliders
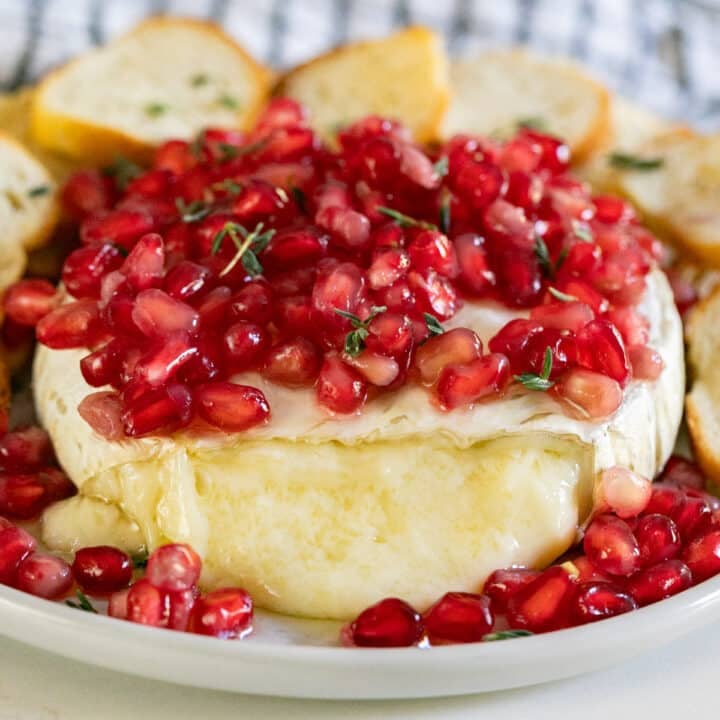
    • A wheel of baked brie topped with pomegranates with the front cut off and the melty cheese flowing out.
      Baked Brie With Honey And Pomegranate
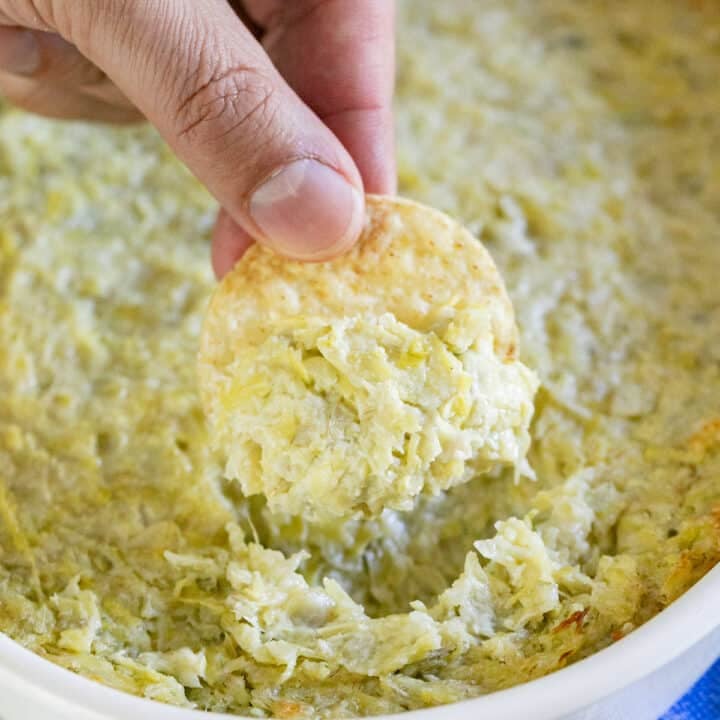
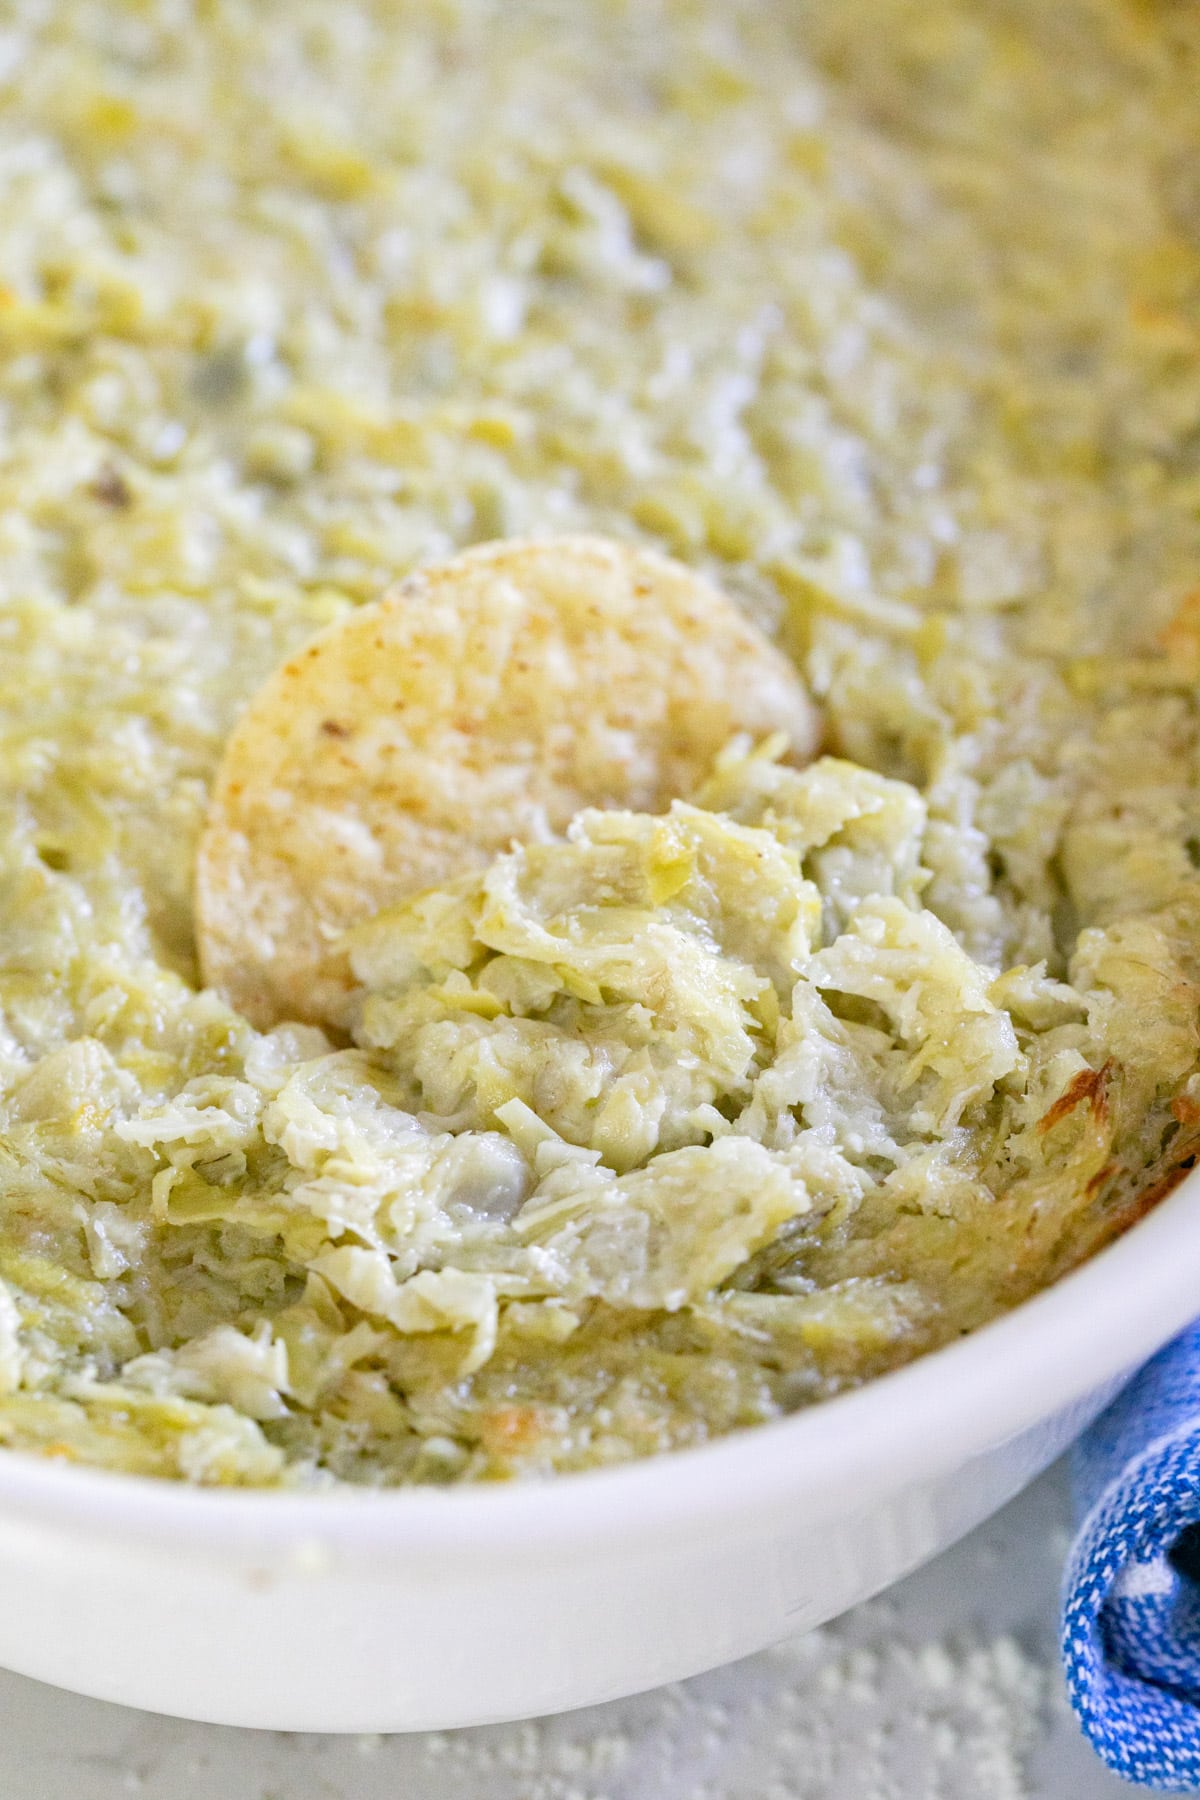
    • A hand pulling a chip with artichoke dip out of a pan of it.
      Hot Artichoke Parmesan Dip

    Love this recipe? Please leave a 5 star ⭐️⭐️⭐️⭐️⭐️ rating in the recipe card below ⬇️ and/or a review in the comment section further down. Check out my Amazon Store for all my favorite tools, including those used in this recipe. And follow @thelifejolie on Instagram and TikTok!

    An overhead image of an Antipasto Appetizer recipe in the shape of a Christmas wreath.

    Antipasto Appetizer Platter

    Jessy Freimann
    This antipasto appetizer platter is a stunning, no-cook party starter loaded with savory meats, creamy cheeses, and marinated veggies. All ready in just 20 minutes and perfect for the holidays as it looks like a festive Christmas wreath!
    No ratings yet
    Print Recipe Pin Recipe
    Prep Time 20 minutes mins
    Total Time 20 minutes mins
    Course Appetizer
    Cuisine Italian
    Servings 10 servings
    Calories 223 kcal

    Equipment

    • mixing bowl
    • wooden spoon
    • stand mixer
    • measuring cups
    • measuring spoons

    Ingredients
      

    Whipped Ricotta

    • 16 ounces ricotta cheese
    • 3 Tablespoons Romano cheese
    • ½ teaspoon Kosher salt to taste
    • ¼ teaspoon ground black pepper

    Antipasto Salad

    • 1 ½ cups Fresh mozzarella diced or bocconcini
    • 1 cup Sharp provolone cheese, cut into bite-size chunks
    • 1 ½ cups soppressata, cut into bite-size chunks
    • 18 ounces cherry tomatoes
    • 2 ½ cups olives, I used black and green
    • 14 ounces artichoke hearts in brine, quartered
    • You favorite bottle vinaigrette dressing optional (I didn't use dressing)
    • 4-5 bunches fresh rosemary sprigs (ours come 4 to a bunch)
    • 1 bunch fresh basil

    Instructions
     

    • In a large bowl, whip together the ricotta, Romano cheese, salt and pepper until smooth and creamy. Place into small bowl and put the bowl into the middle of platter.
    • In another large bowl, combine all antipasto ingredients except for the herbs in mix until well combined.
    • Working in small sections at a time, place some sprigs of fresh rosemary and alternating it with pretty basil leaves. Placing the herbs so that the pretty ends stick out a bit and the cut ends are on the plate. Then place some of the antipasto salad onto that section to hold the herbs in place. 
    • Slowly make your way around until the platter is full and the herbs on the outside of the plate make it all the way around. 
    • Carefully place smaller sprigs of the herbs around the whipped ricotta bowl. Cover and refrigerate until serving.

    Video

    Notes

    • Adjust for your crowd. This platter is easy to scale. Just add more or less for each ingredient depending on how many people you’re serving.
    • Use a flat platter. A large, flat plate or board works and a round one is best so you can really show off that pretty wreath shape.
    • Customize it your way. This platter is super flexible and always delicious, and you can easily swap in your favorite cheeses, meats, or veggies.
    • Mix before assembling. Combine all your ingredients in a big bowl first so every bite has a bit of everything.
    • Dress lightly (or not at all). I usually skip the dressing since there’s already so much flavor, but if you like it dressed, toss lightly before assembling. 
    • Ingredients to prep ahead- Cut cheeses and meats, and drain olives and artichokes up to a day in advance.
    • Leftover and storage- Cover and refrigerate up to 3 days. The flavors get even better as they mingle. 

    Nutrition

    Serving: 1servingCalories: 223kcalCarbohydrates: 6gProtein: 14gFat: 16gSaturated Fat: 8gPolyunsaturated Fat: 1gMonounsaturated Fat: 6gCholesterol: 51mgSodium: 813mgPotassium: 240mgFiber: 1gSugar: 2gVitamin A: 614IUVitamin C: 12mgCalcium: 204mgIron: 1mg
    Tried this recipe?Let us know how it was!

    Orange Cranberry Cake

    Nov 24, 2025 · 24 Comments

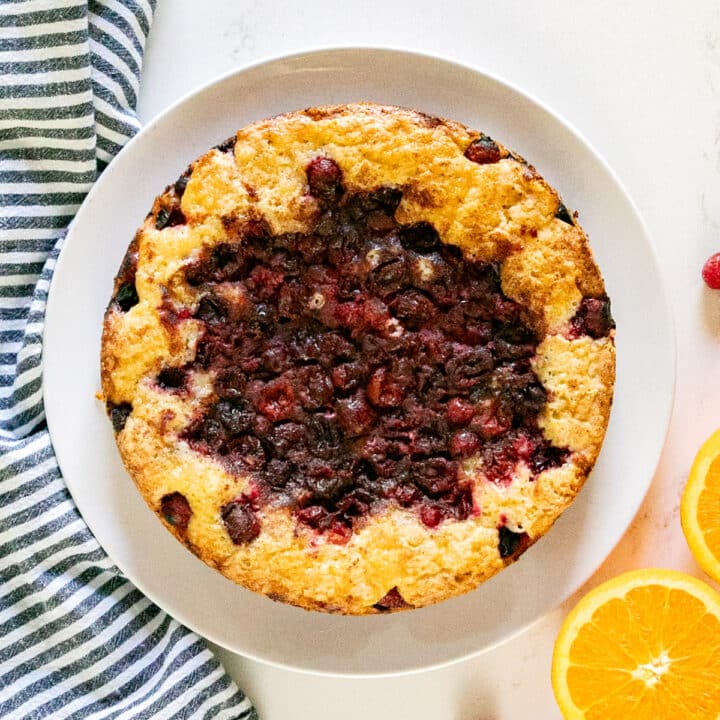
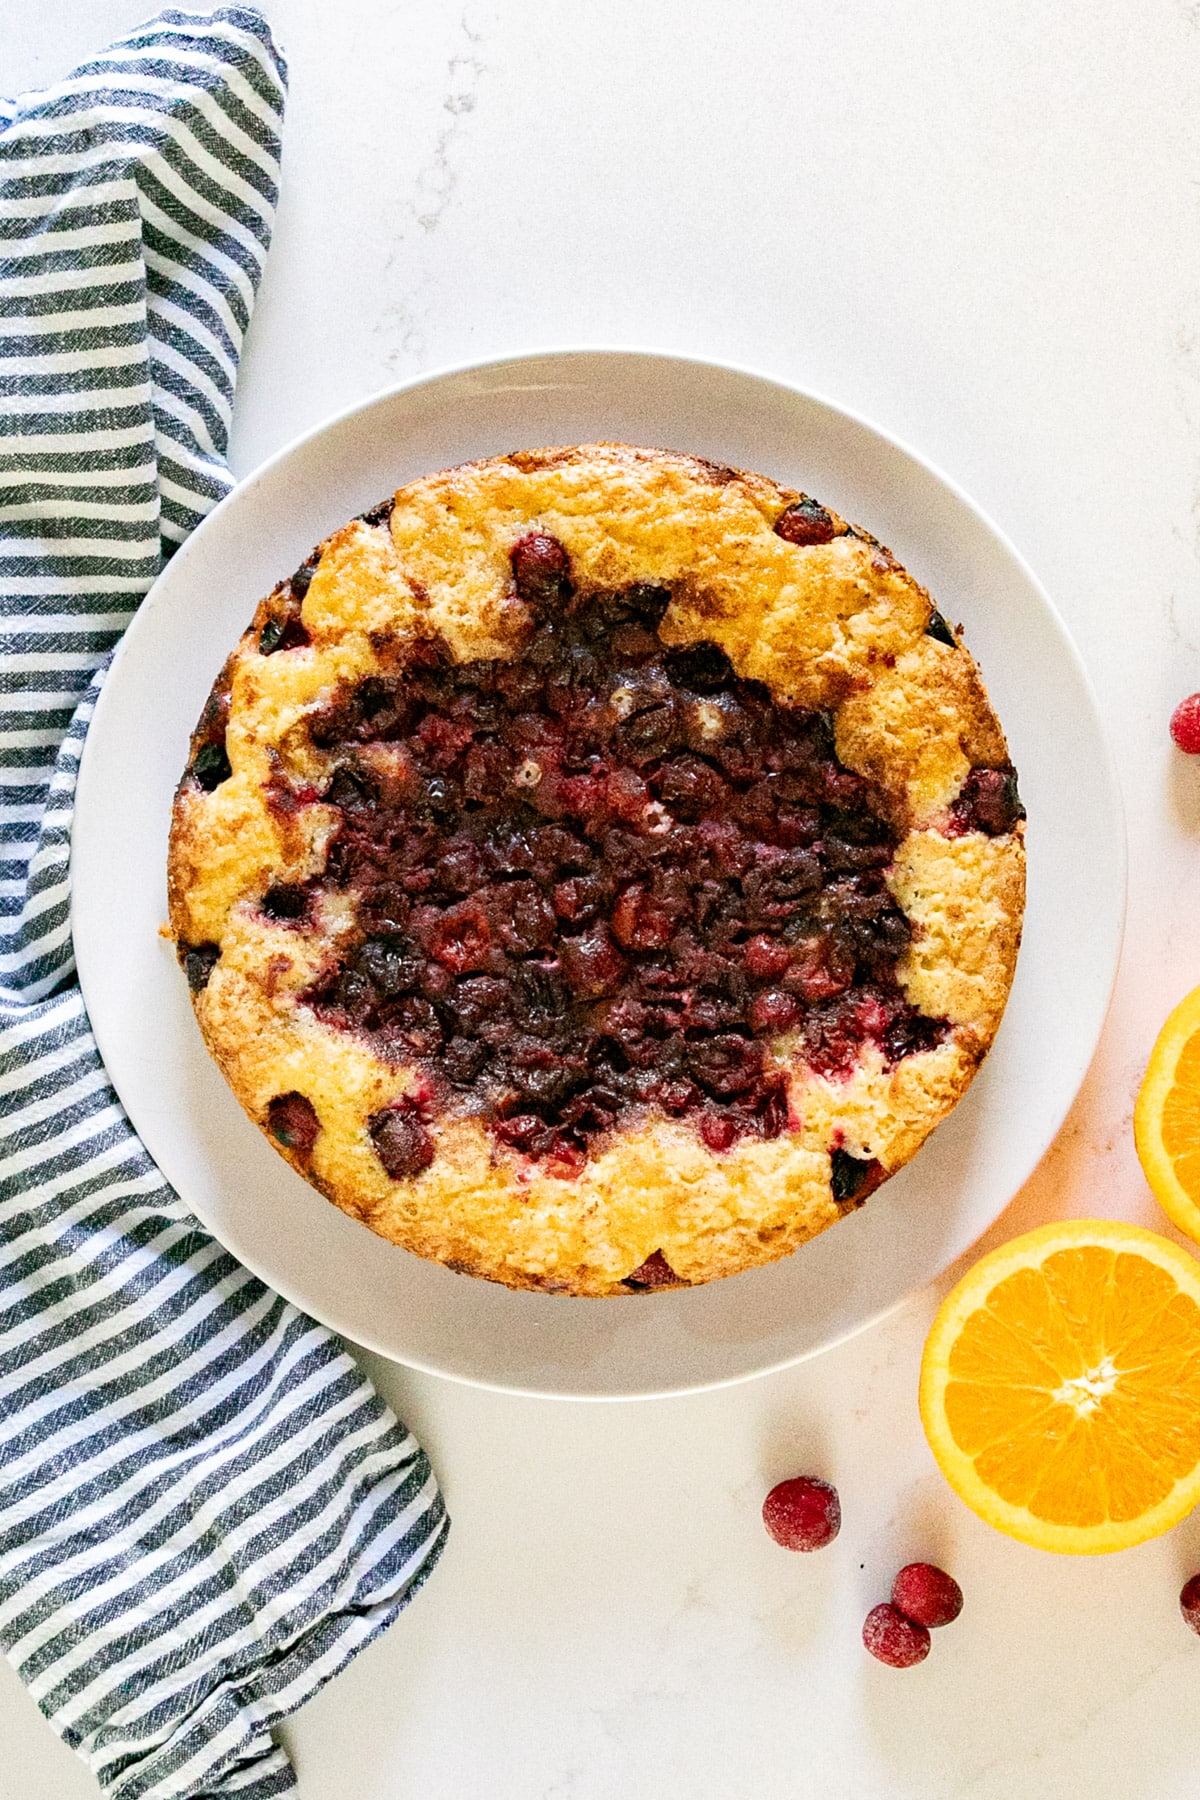
    An overhead image of a cranberry cake with citrus on a plate.

    This orange cranberry cake is light, buttery, and bursting with tart cranberries and bright citrus. It comes together easily and is perfect for Thanksgiving, Christmas, or any holiday celebration!

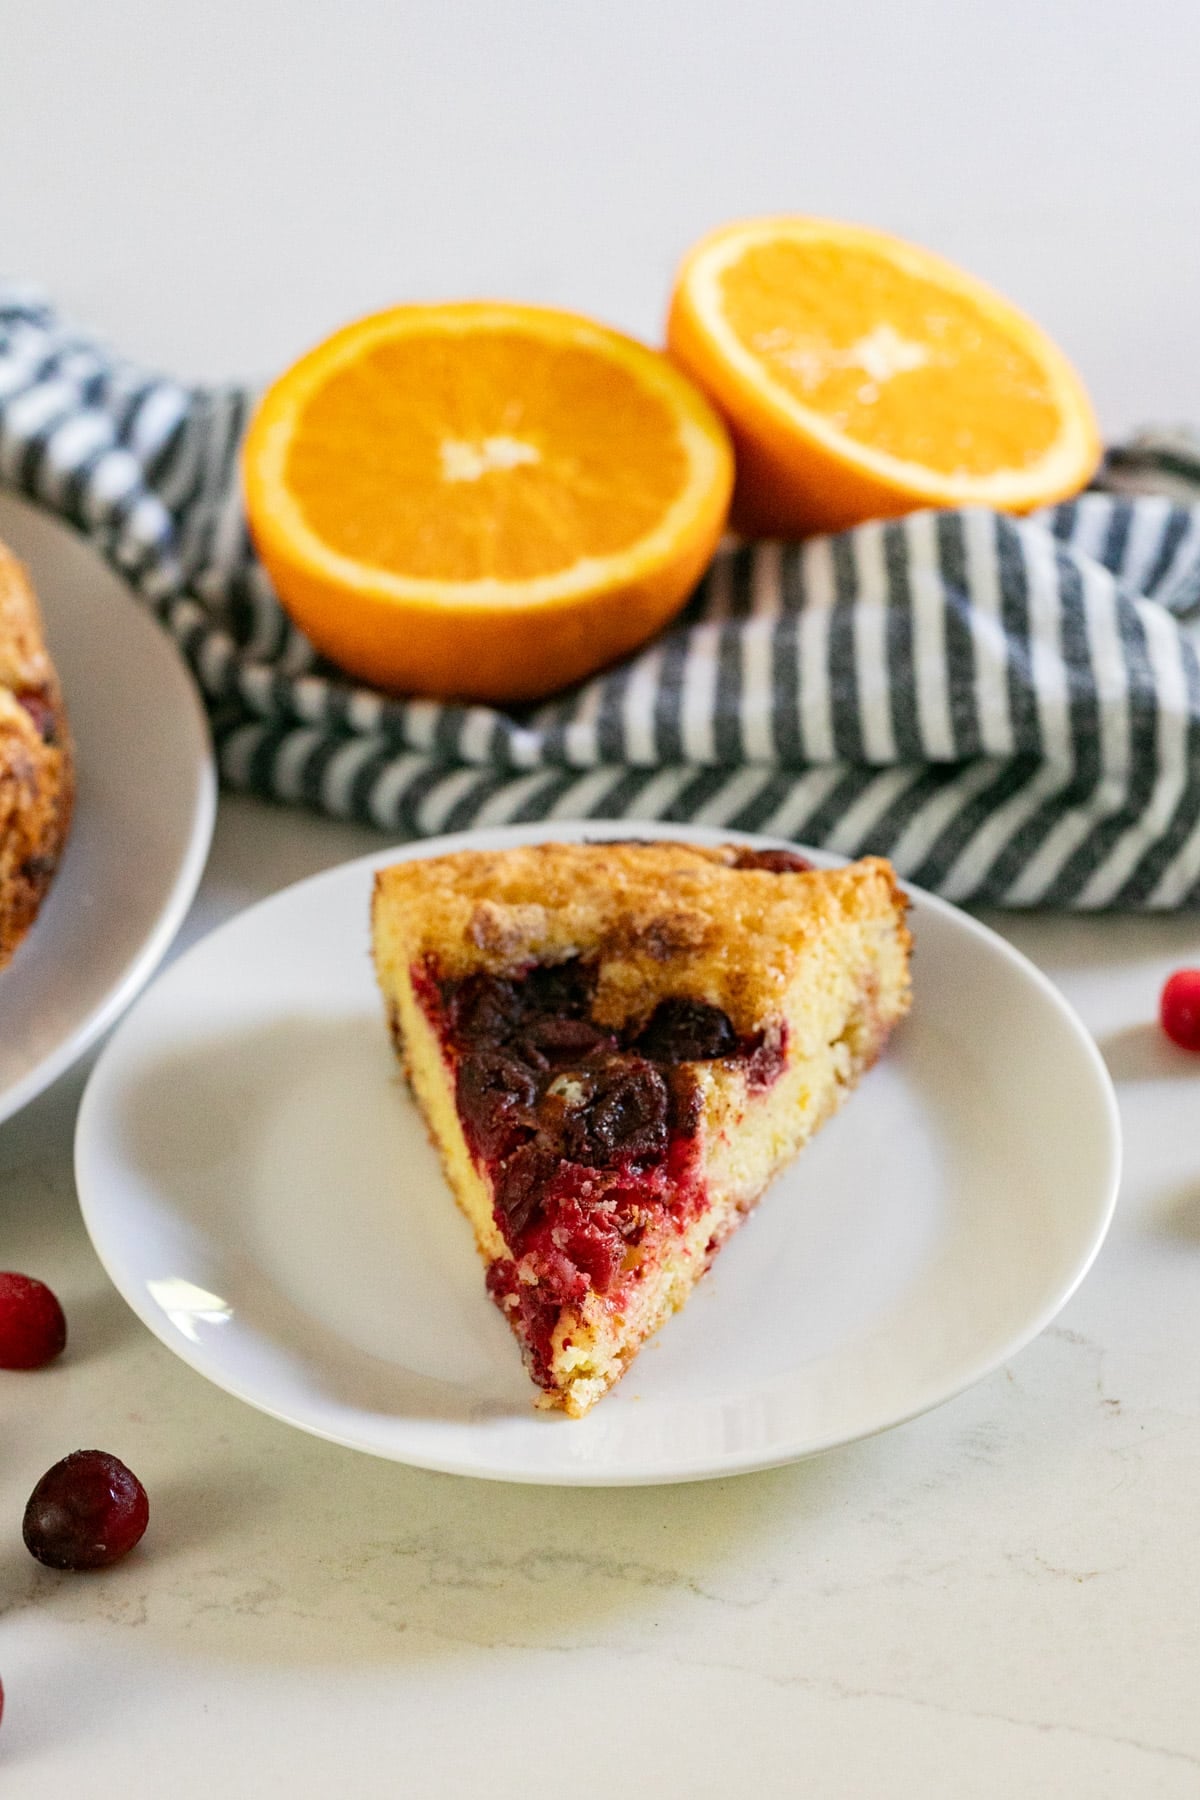
    A slice of cranberry cake on a white plate with oranges behind it.
    [feast_advanced_jump_to]

    Why You’ll Love This Cranberry And Orange Cake

    This cake came about when I was craving something every bit as comforting as pie, but without the fuss of making a crust. I’ve always loved the classic New York Times plum torte and wanted to give it a holiday spin. Since plums aren’t around in November, I swapped them for cranberries and fresh orange... a combination that feels so festive and tastes like winter in the best possible way. 

    Every bite is sweet and buttery, with pops of tart cranberry and a hint of citrus zest that brightens everything up. This recipe has become a holiday tradition in my home, and it’s one I make year after year because it never fails. Whether you’re bringing dessert to a family dinner or just baking for fun, this cake hits that sweet spot between elegant and effortless. Here’s why you’ll love it:

    • Sweet and tart in every bite
    • Ready in less than an hour
    • No crust or special tools needed
    • Festive, easy, and stress-free
    An overhead image of a cranberry cake with citrus on a plate.

    Information And Substitutions

    • Flour- All-purpose flour gives the cake a soft crumb. You can swap in a 1:1 gluten-free blend with great results.
    • Butter- Adds rich flavor and moisture. Substitute vegan butter if needed.
    • Sugar- Sweetens the cake and balances the tart cranberries. Light brown sugar can be used for a warmer flavor.
    • Eggs- Bind the ingredients and add moisture. Use large eggs at room temperature.
    • Orange juice- Keeps the cake moist and boosts the orange flavor. Use lemon juice for a different twist or even a splash of orange liqueur for added depth.
    • Orange zest- Adds fresh citrus aroma and brightness. Always zest before juicing.
    • Cranberries- Give the perfect tart contrast. Use fresh or frozen (no need to thaw).
    • Baking powder- Helps the cake rise and stay light.
    • Salt- Enhances flavor and balances the sweetness.
    • Cinnamon- Adds warmth and pairs beautifully with the cranberries.
    • Extra sugar (for topping)- Sprinkled over the top with cinnamon for a light, sweet crust.
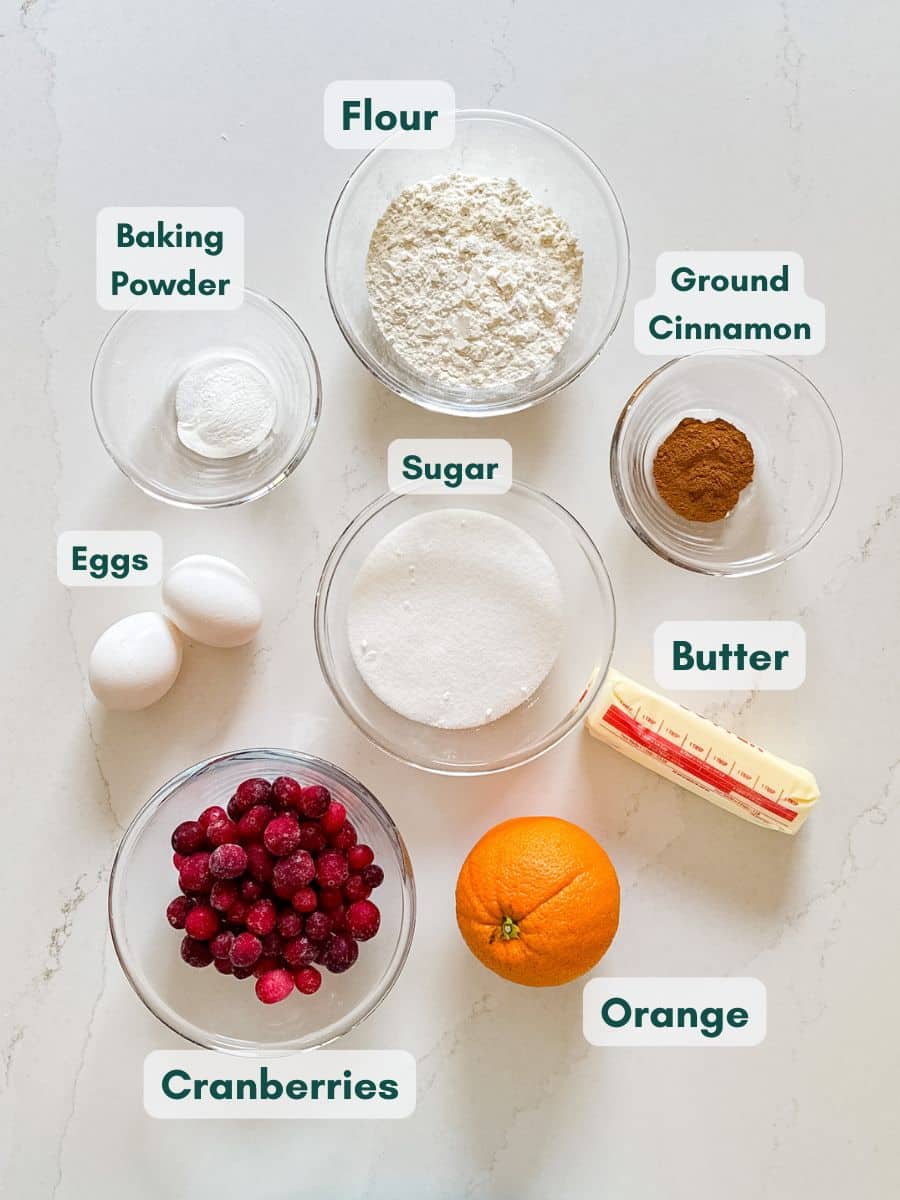
    An overhead image of labeled recipe ingredients.

    How To Make This Recipe For Cranberry Cake 

    Step 1- Prep the pan.

    Preheat the oven to 350 degrees F. Spray an 8-inch round cake pan with nonstick spray and line the bottom with parchment paper.

    Step 2- Cream butter and sugar.

    In a mixing bowl, beat the butter with 1 cup of sugar until light and fluffy.

    Butter and sugar in a stand mixer bowl and then all creamed together.

    Step 3- Add eggs and dry ingredients.

    Mix in the eggs until smooth, then add flour, baking powder, salt, and orange zest. Stir until just combined. The batter will be sticky.

    Wet ingredients added to the bowl and mixed in.

    Step 4- Assemble the cake.

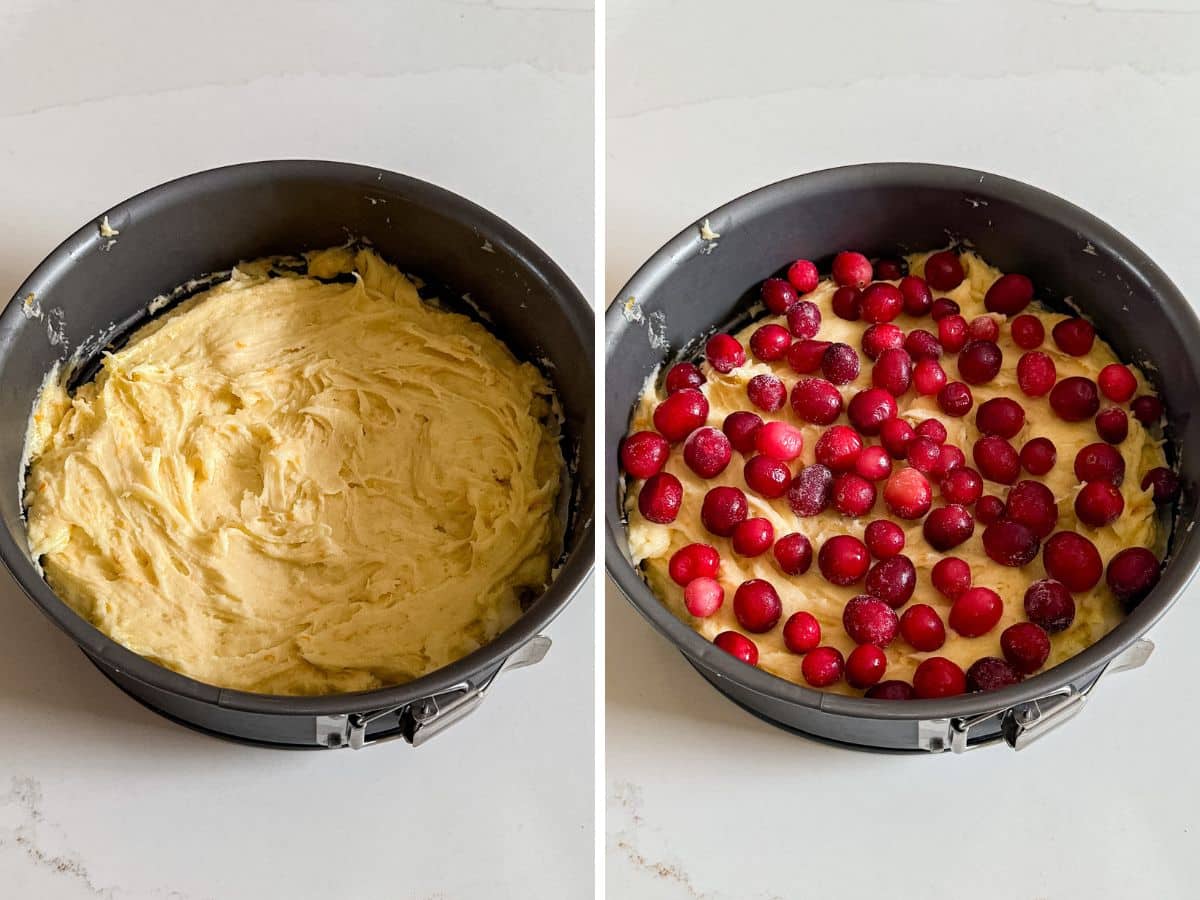
    Spread the batter evenly in the prepared pan. Scatter cranberries on top and drizzle with fresh orange juice.

    Cake batter spread in a pan and then cranberries sprinkled over the top.

    Step 5- Add the topping.

    Stir together 1 tablespoon of sugar and the cinnamon, then sprinkle evenly over the top. Lightly spray the top with cooking spray.

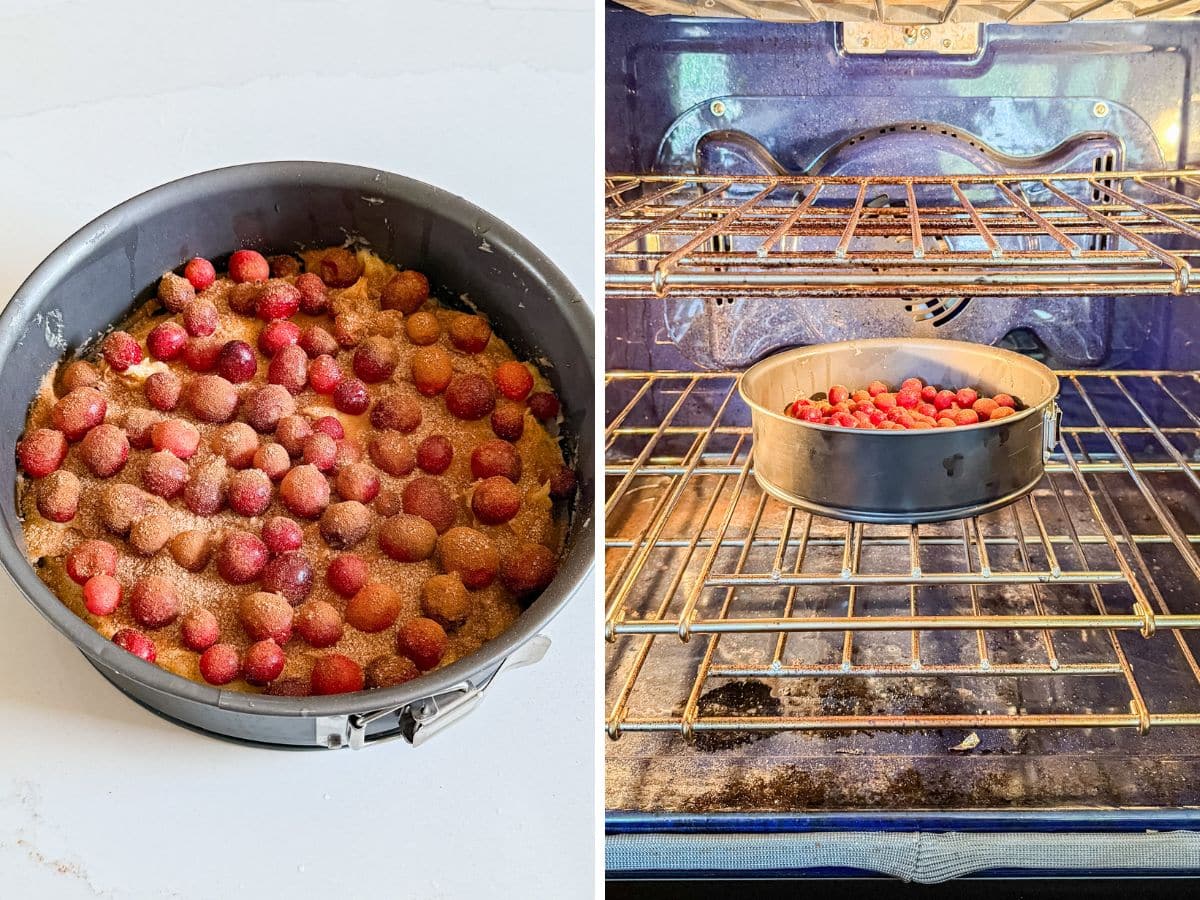
    Cinnamon sugar sprinkled onto the cranberries and batter and then the cake pan in the oven.

    Step 6- Bake and cool.

    Bake until golden, for 45 minutes or until a toothpick inserted in the center comes out clean. Let the cake cool before serving.

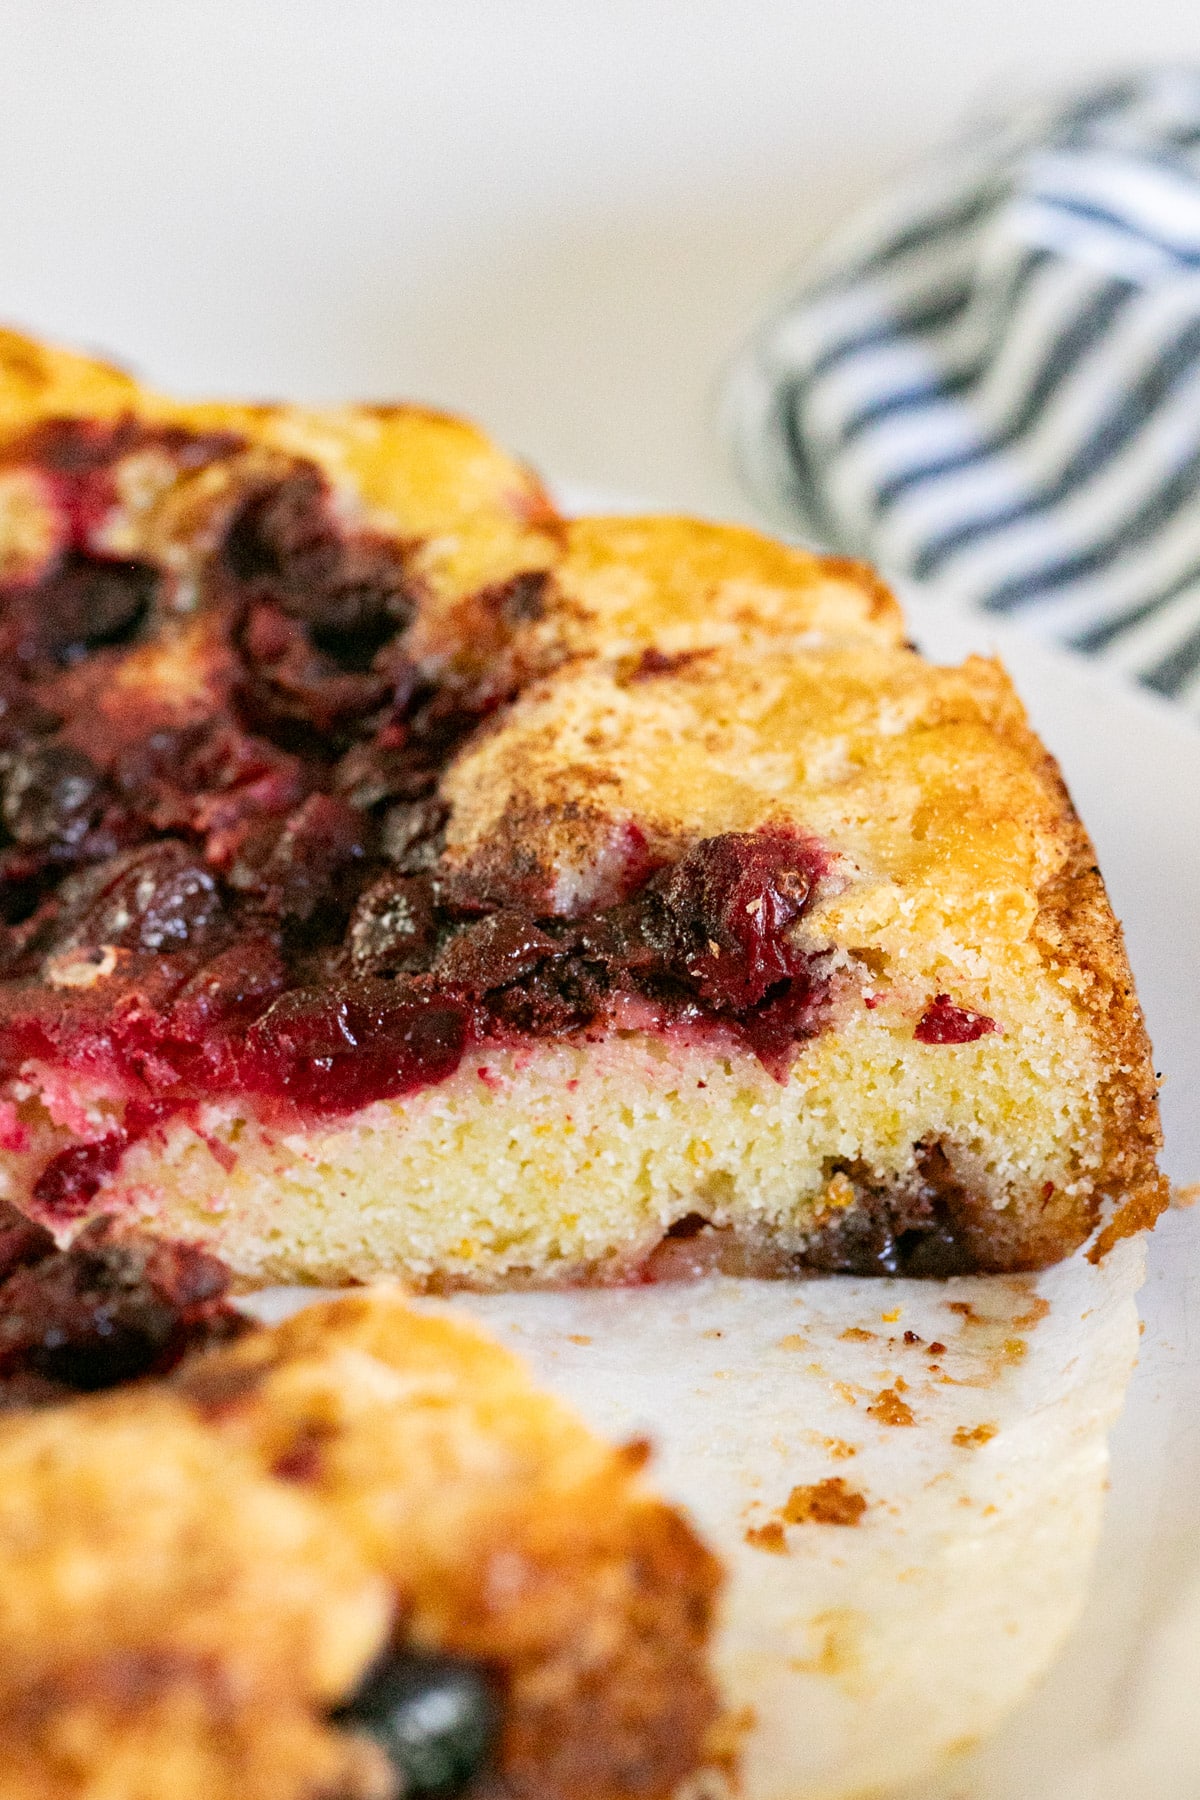
    A close up of the cut side of a cake revealing the moist crumb.

    Frequently Asked Questions

    Can I make this cake ahead of time?

    Definitely. This cake actually gets better after sitting overnight, so it’s perfect for prepping ahead of the holidays.

    Do I need a springform pan?

    Nope! A standard 8-inch round cake pan works great. Just grease and line it with parchment for easy removal.

    Can I make this into muffins or mini cakes?

    Absolutely. Divide the batter evenly among muffin tins and bake for about 20-25 minutes.

    A slice of cake with the front bite removed revealing the interior.

    Tips For Making This Orange And Cranberry Cake 

    • Don’t overmix the batter. Once the dry ingredients are added, stir just until everything is combined. Overmixing can make the cake too dense.
    • Spread the batter evenly. It’s thick, so use a spatula to smooth it out before adding the cranberries.
    • Use fresh orange juice if possible. It gives a brighter flavor than bottled juice.
    • Switch up the fruit. Swap the cranberries for blueberries, raspberries, or chopped apples for an easy twist that keeps the cake just as delicious.
    • Add some crunch or sweetness. Stir in chopped pecans, walnuts, or even a handful of white chocolate chips for extra texture and flavor. 
    • Let it cool before removing from the pan. It helps the cake set and keeps the top from tearing.
    • Make it a day ahead. The orange and cranberry flavors deepen overnight, making this cake even better the next day.
    • Ingredients to prep ahead- Zest and juice the orange, and measure dry ingredients.
    • Leftovers and storage- Keep covered at room temperature for up to 2 days, or refrigerate for 4-5 days. To freeze, wrap tightly and store up to 2 months.
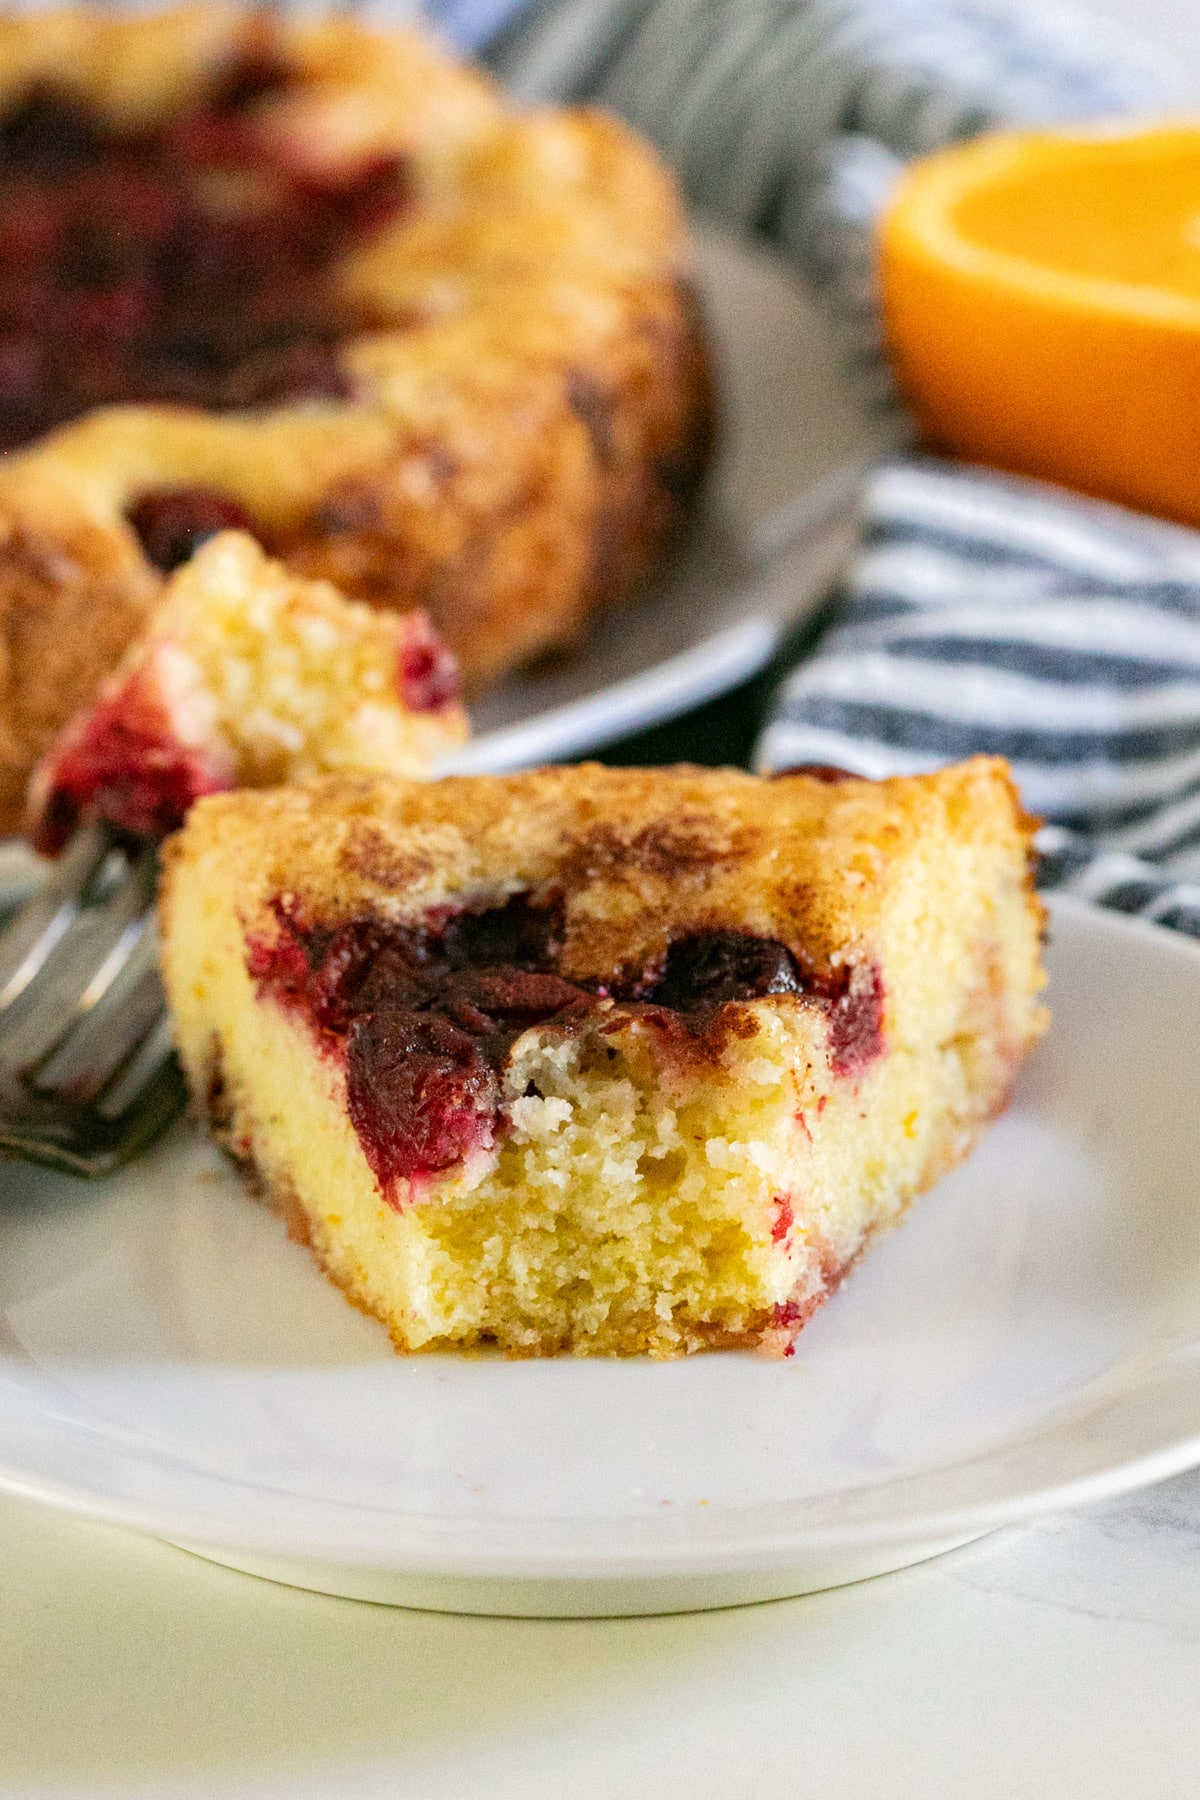
    A close up of a bite of cake on a fork.

    What To Serve With Cranberry Coffee Cake

    Turn dessert into a full holiday spread! This cake pairs beautifully with cozy, seasonal dishes like:

    • Sauteed Mushrooms in a Wine Reduction
    • Glazed Carrots and Parsnips
    • Sauteed Kale with Tomatoes and Mushrooms
    • Harvest Rice Salad

    Other Cake Recipes To Try

    • A slice of coconut cake on a place with the full cake behind it.
      Easy Coconut Cake Recipe
    • A slice of coffee cake on a white plate.
      Coffee Cake with Cinnamon Streusel
    • Strawberry Cake on a plate with a bite taken out revealing the inside of the cake.
      Strawberry Shortcake Crumb Cake
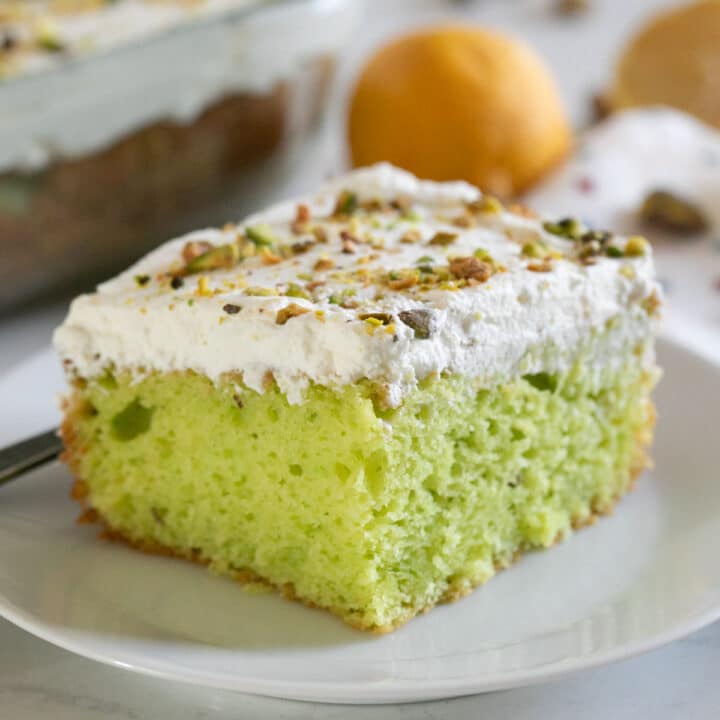
    • A piece of lemon cake with whipped cram on a white plate with the rest of the cake and lemons in the background.
      Lemon Pistachio Cake

    Hosting Thanksgiving?

    Discover the secret to hosting Thanksgiving without all the stress! Prepsgiving is your FREE guide to making a delicious Thanksgiving feast the easy way.

    Love this recipe? Please leave a 5 star ⭐️⭐️⭐️⭐️⭐️ rating in the recipe card below ⬇️ and/or a review in the comment section further down. Check out my Amazon Store for all my favorite tools, including those used in this recipe. And follow @thelifejolie on Instagram and TikTok!

    An overhead image of a cranberry cake with citrus on a plate.

    Orange Cranberry Cake

    Jessy Freimann
    This orange cranberry cake is light, buttery, and bursting with tart cranberries and bright citrus. It comes together easily and is perfect for Thanksgiving, Christmas, or any holiday celebration!
    No ratings yet
    Print Recipe Pin Recipe
    Prep Time 10 minutes mins
    Cook Time 45 minutes mins
    Total Time 55 minutes mins
    Course Dessert
    Cuisine American, Christmas, Holiday, Thanksgiving
    Servings 8 servings
    Calories 288 kcal

    Equipment

    • 1 8 inch springform pan
    • 1 stand mixer or hand mixer
    • 1 mixing bowl
    • 1 Spatula
    • 1 Measuring cups and spoons

    Ingredients
      

    • 1 cup granulated sugar + 1 Tablespoon, divided
    • ½ cup salted butter softened
    • 2 large eggs
    • 1 cup all purpose flour
    • 1 teaspoon baking powder
    • 1 pinch Kosher salt
    • 1 orange zested and juice squeezed (see below)
    • 1 cup cranberries fresh or frozen, not dried
    • 2 teaspoons orange juice use the orange you zested and then eat the rest!
    • 1 teaspoon ground cinnamon

    Instructions
     

    • Preheat the oven to 350 degrees F. Spray down the pan with cooking spray and then line the bottom with parchment paper.
    • Cream the butter and 1 cup sugar together until fluffy, about 2 minutes.
    • Add the eggs and mix until well combined.
    • Add flour, baking powder, salt and orange zest and mix until just combined. Do not over mix. The batter will be sticky and that's ok.
    • Spread the batter along the bottom of your prepared pan and smooth until even.
    • Place the cranberries evenly over the top
    • Drizzle the orange juice on the top of the cranberries
    • Mix the cinnamon and sugar together. Sprinkle this mixture over the top of the cake.
    • Give it a quick spray of the cooking spray on top.
    • Bake uncovered for 45 minutes or until your cake tester comes out clean.
    • Cool completely and serve.

    Video

    https://www.dropbox.com/scl/fo/v99ivi4hf14ogv8tat3op/AFn5aB5gOBaFEe58nO3WpLY?rlkey=1il0leh8bz8ebzc2cir5vqgu0&st=bj49bfy4&dl=0

    Notes

    • Don’t overmix the batter. Once the dry ingredients are added, stir just until everything is combined. Overmixing can make the cake too dense.
    • Spread the batter evenly. It’s thick, so use a spatula to smooth it out before adding the cranberries.
    • Use fresh orange juice if possible. It gives a brighter flavor than bottled juice.
    • Switch up the fruit. Swap the cranberries for blueberries, raspberries, or chopped apples for an easy twist that keeps the cake just as delicious.
    • Add some crunch or sweetness. Stir in chopped pecans, walnuts, or even a handful of white chocolate chips for extra texture and flavor. 
    • Let it cool before removing from the pan. It helps the cake set and keeps the top from tearing.
    • Make it a day ahead. The orange and cranberry flavors deepen overnight, making this cake even better the next day.
    • Ingredients to prep ahead- Zest and juice the orange, and measure dry ingredients.
    • Leftovers and storage- Keep covered at room temperature for up to 2 days, or refrigerate for 4-5 days. To freeze, wrap tightly and store up to 2 months.

    Nutrition

    Serving: 1servingCalories: 288kcalCarbohydrates: 41gProtein: 4gFat: 13gSaturated Fat: 8gPolyunsaturated Fat: 1gMonounsaturated Fat: 3gTrans Fat: 0.5gCholesterol: 77mgSodium: 168mgPotassium: 82mgFiber: 1gSugar: 27gVitamin A: 471IUVitamin C: 11mgCalcium: 53mgIron: 1mg
    Tried this recipe?Let us know how it was!


    How To Make Apple Pie Filling

    Nov 21, 2025 · 18 Comments

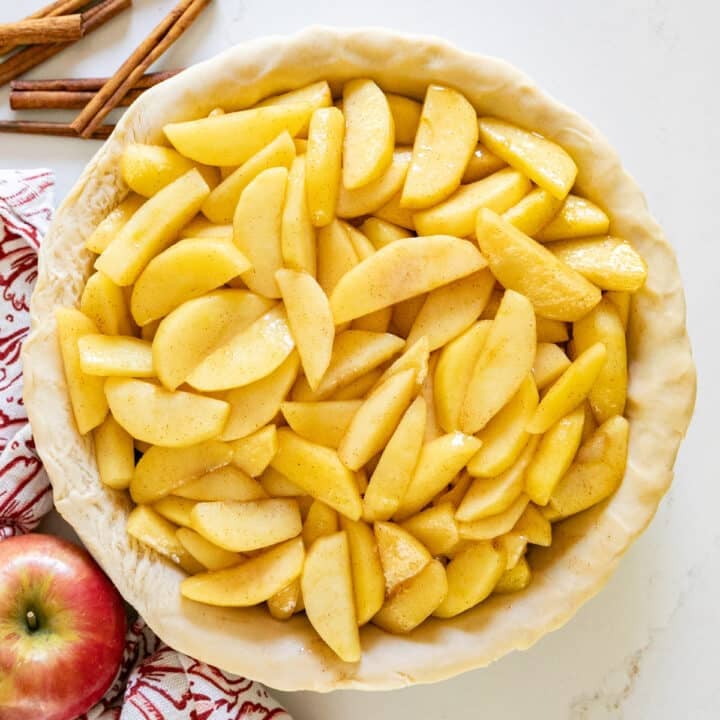
    An overhead image of apple pie filling in a raw pie crust with apples and cinnamon sticks around it.

    I'm going to show you how to make apple pie filling that is warm, cozy, and packed with cinnamon-spiced flavor. It comes together in under 25 minutes and brings that homemade, nostalgic touch to every bite. Simple, sweet, and perfect for fall.

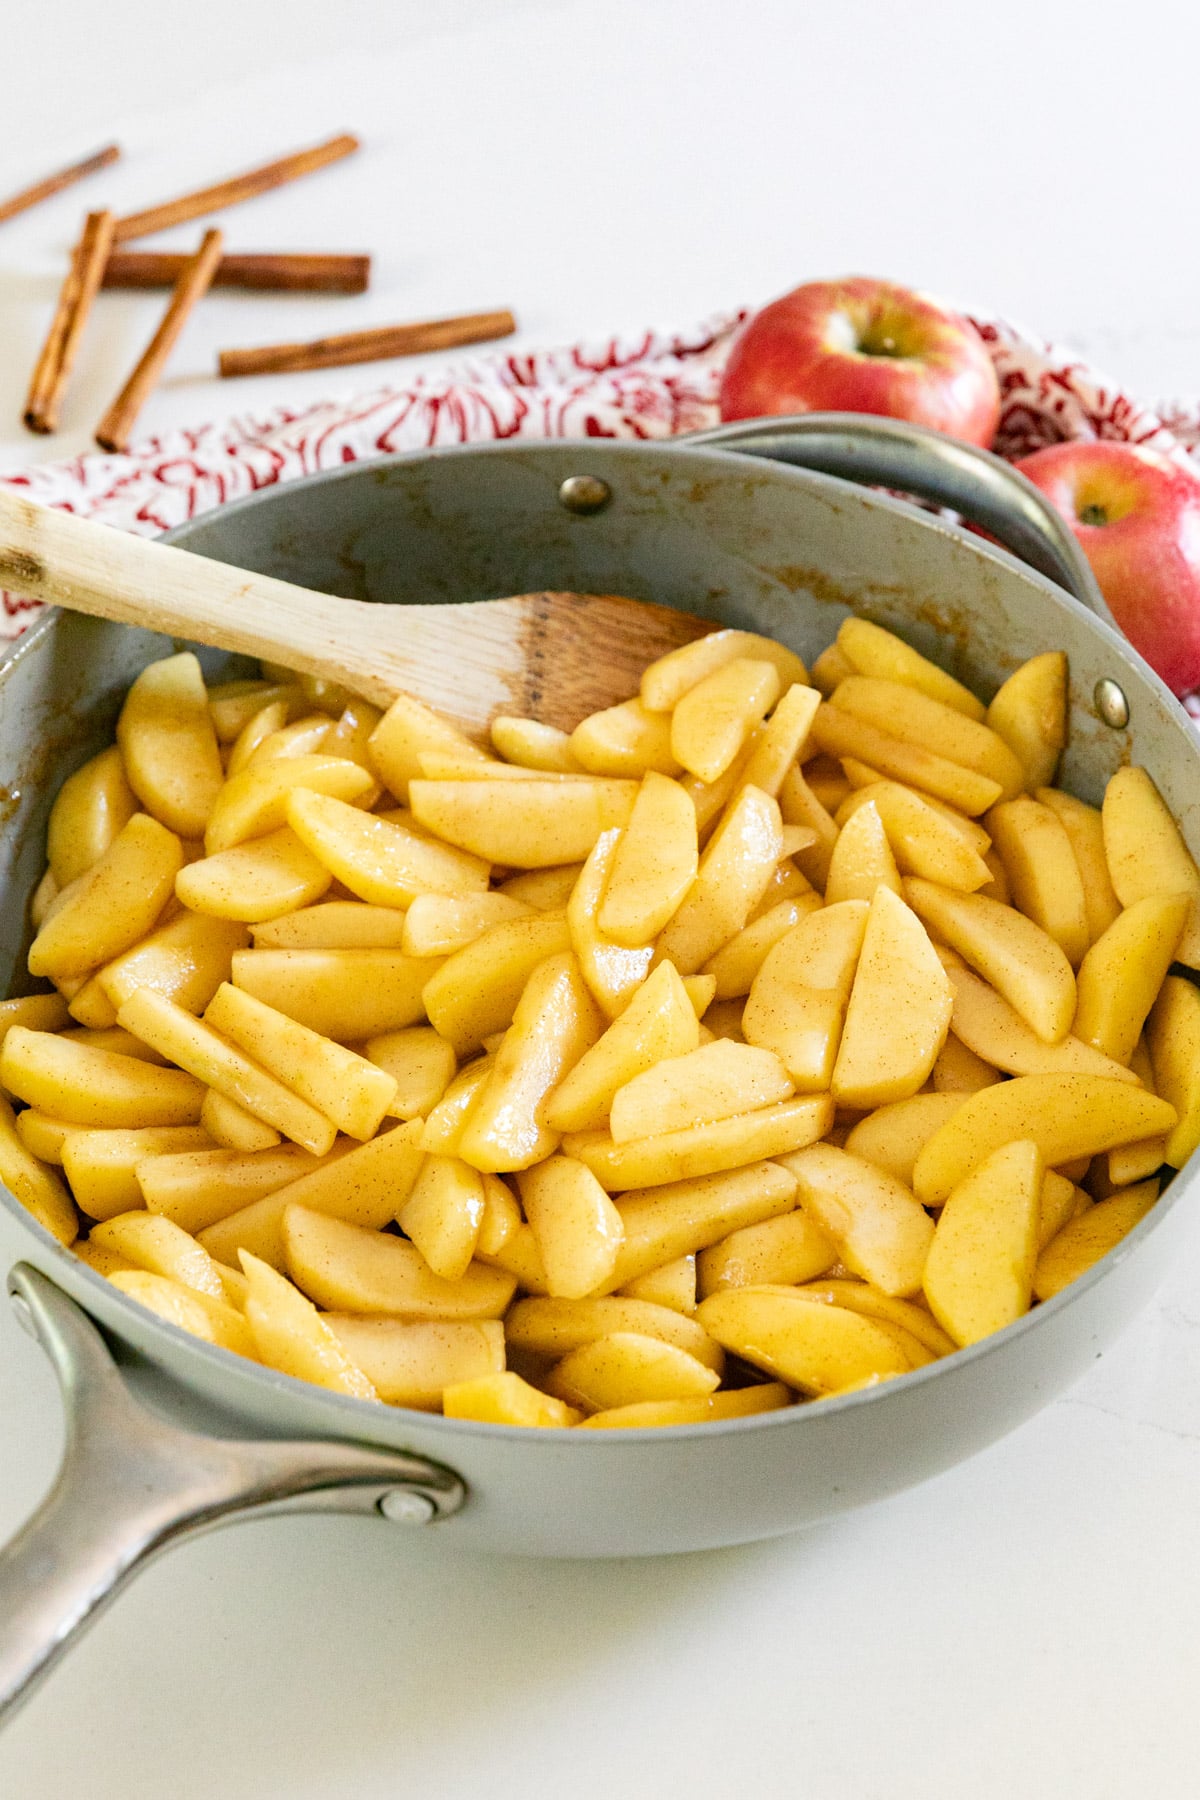
    A pan of apple pie filling with a wooden spoon in it.
    [feast_advanced_jump_to]

    Why You’ll Love This Easy Apple Pie Filling

    This recipe and I go way back. It started with what was supposed to be a batch of cute little caramel apple hand pies. In my mind, they were going to be perfect. In reality? Let’s just say there were leaks, cracks, and maybe a few tears. I’ve accepted that pastry dough and I are not best friends.

    But here’s the thing... even when the crust fell apart, the filling was absolute perfection. The kind that instantly earns a spot among my favorite apple pie filling recipes. Now, this is my go-to whenever I need an easy fruit filling that always tastes amazing, no fancy pastry skills required. Here’s why you’ll love it:

    • Comes together in just 25 minutes
    • Uses simple pantry ingredients
    • Works for pies, hand pies, or dessert toppings
    • Freezes beautifully 
    An overhead image of apple pie filling in a raw pie crust with apples and cinnamon sticks around it.

    Ingredient Information And Substitutions

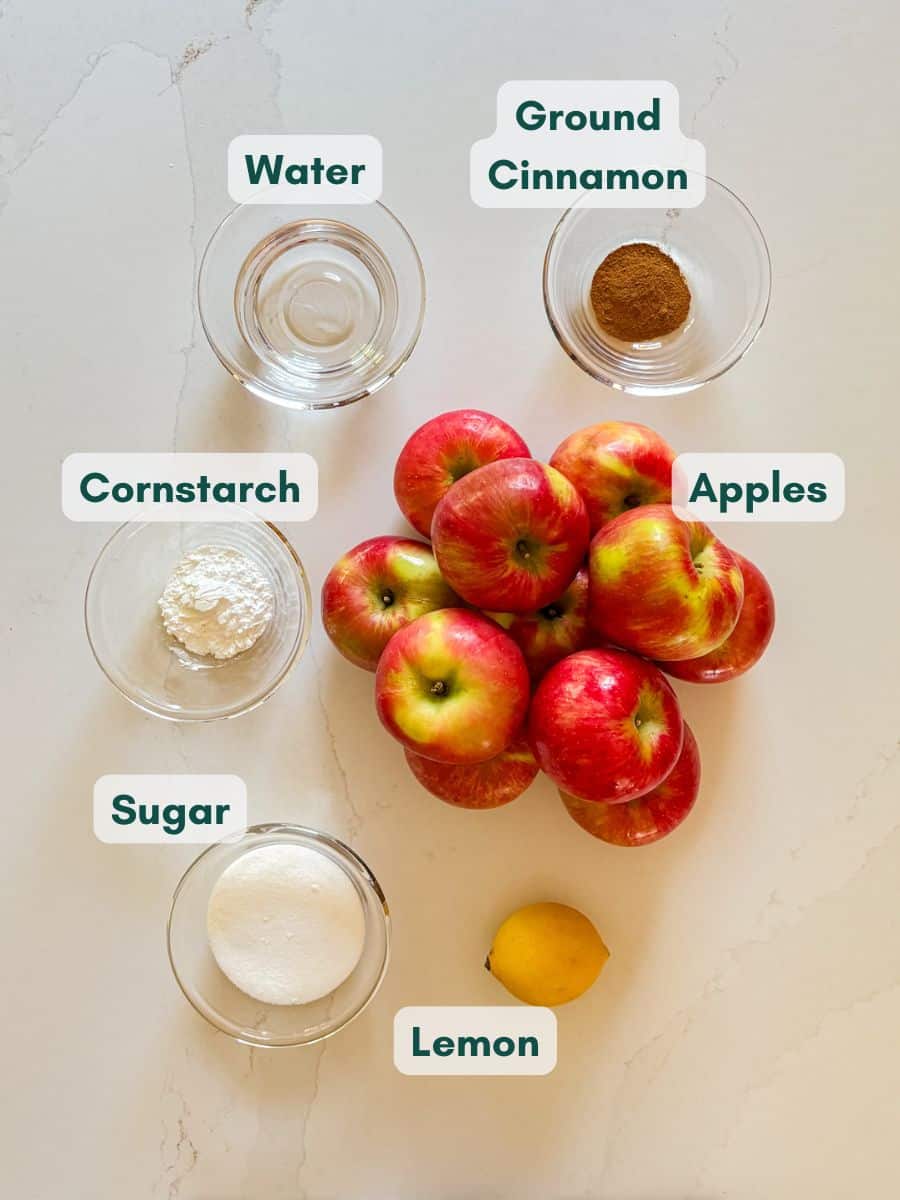
    • Apples- Choose firm ones that hold their shape and don’t get mushy. RubyFrost apples are my favorite. Cortland, Granny Smith, or Fuji are all good options as well.
    • Sugar- Regular granulated sugar keeps things sweet and classic. You can use brown sugar for a deeper caramel flavor.
    • Cinnamon- Warm spice that defines apple pie. Add a touch of nutmeg or allspice if you like extra cozy spice.
    • Cornstarch- Thickens the filling.
    • Lemon juice- Adds brightness and prevents the apples from browning. Lime juice or a splash of apple cider vinegar works in a pinch.
    • Water- Helps the cornstarch dissolve and creates that glossy, syrupy texture.
    An overhead image of labeled recipe ingredients.

    How To Make This Apple Pie Filling Recipe

    Step 1- Combine Ingredients.

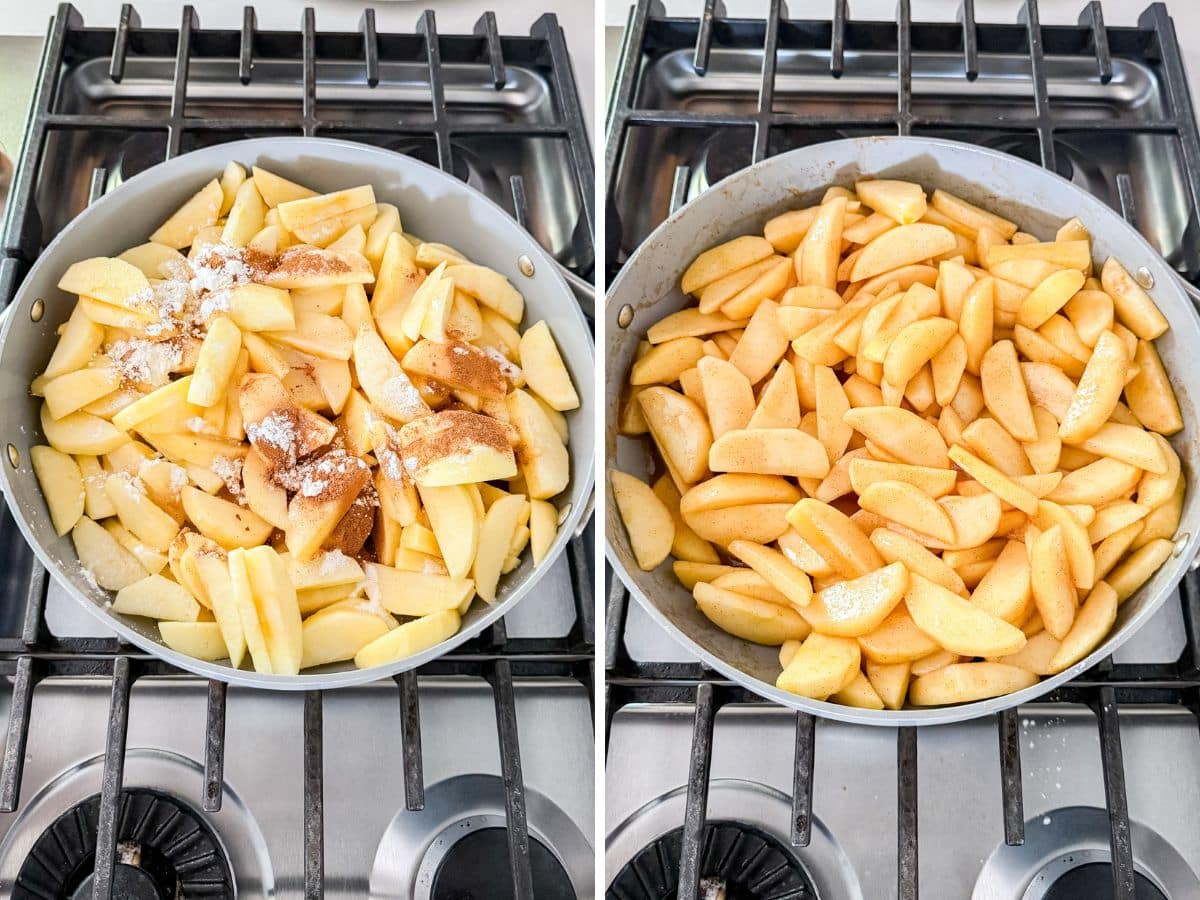
    Add the sliced apples, lemon juice, sugar, cinnamon, water, and cornstarch to a medium pot. Stir until everything is evenly coated.

    Pie filling ingredients in a skillet on the stove and then all mixed together.

    Step 2- Cook the apples.

    Bring the mixture to a boil over medium-high heat, stirring often. Once it starts simmering, reduce to medium and cook for about 10 minutes, until the apples begin to soften but still hold their shape.

    Step 3- Cool the filling. 

    Remove the pot from the heat and let the filling cool slightly before using. It will thicken a bit more as it cools. Use it right away or store it for later.

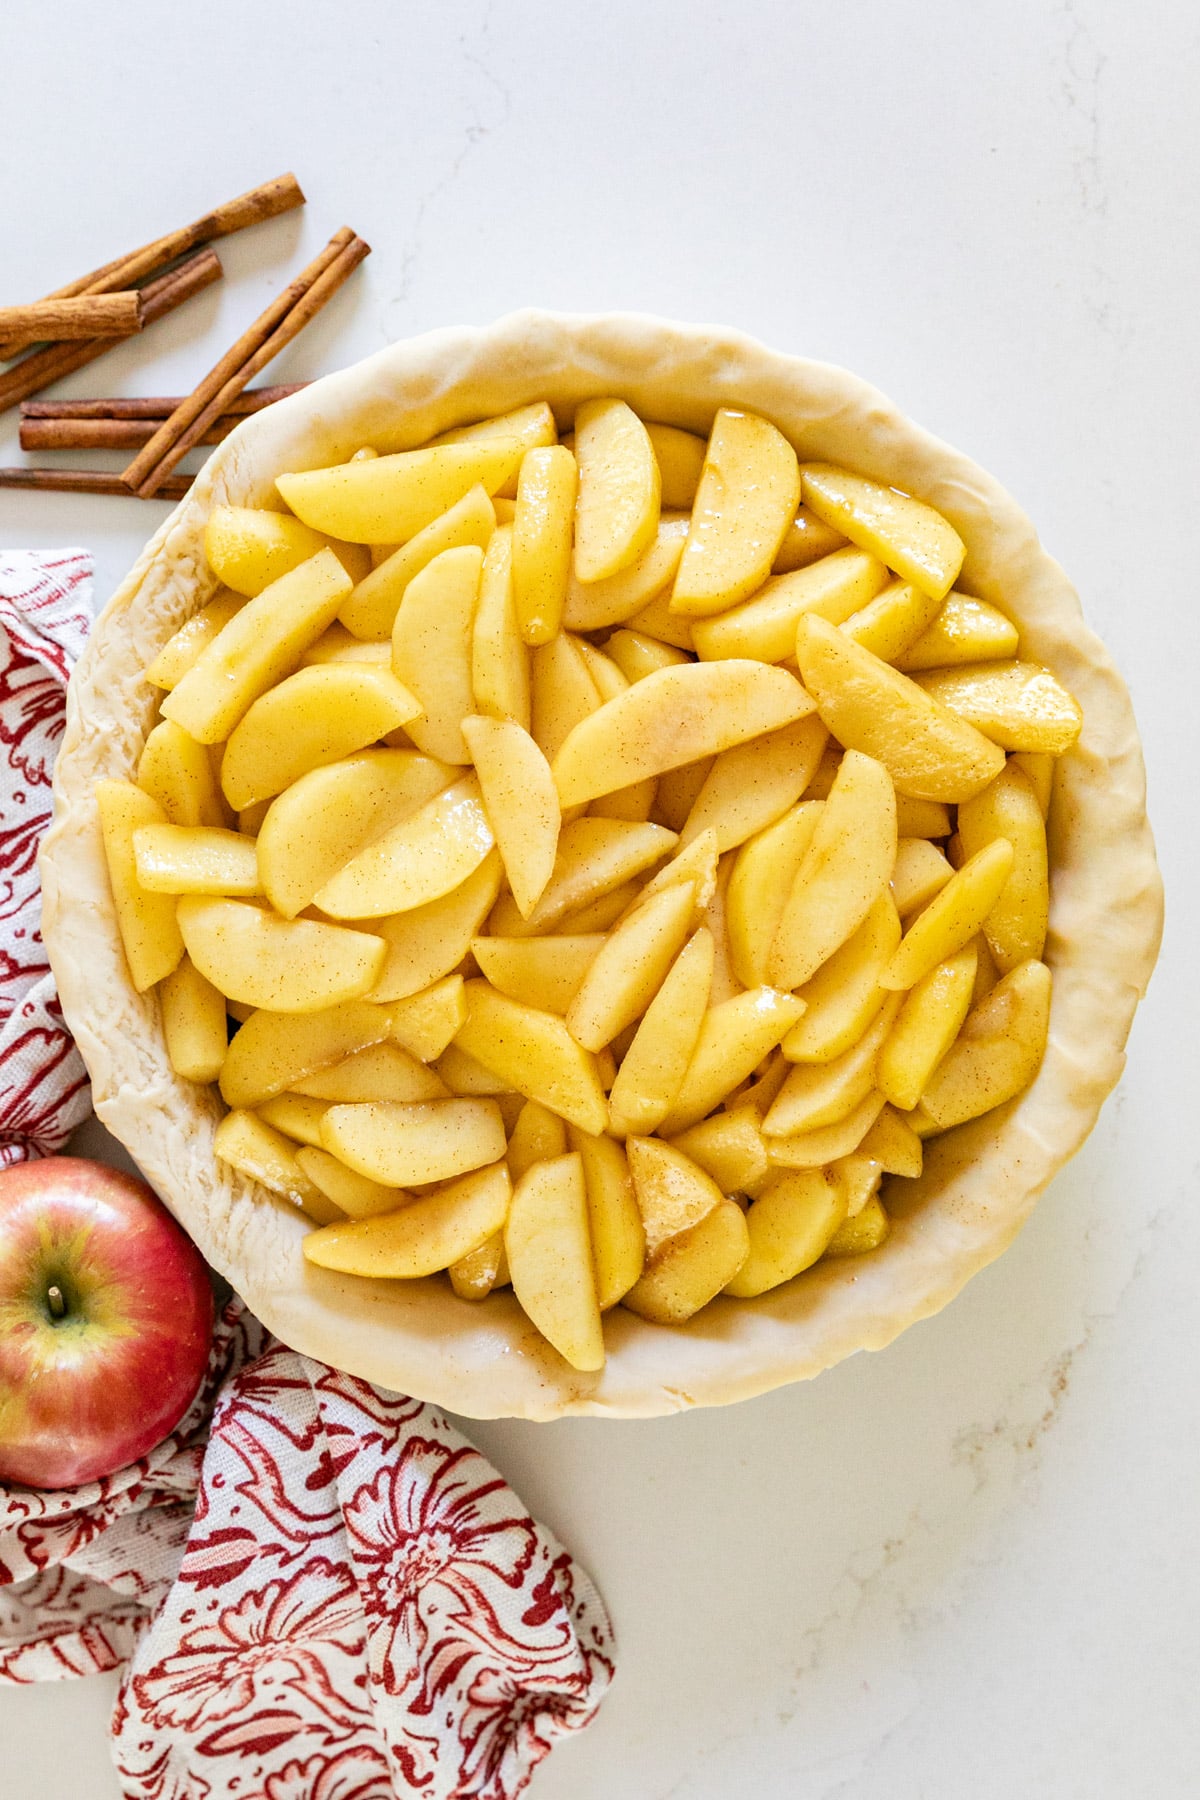
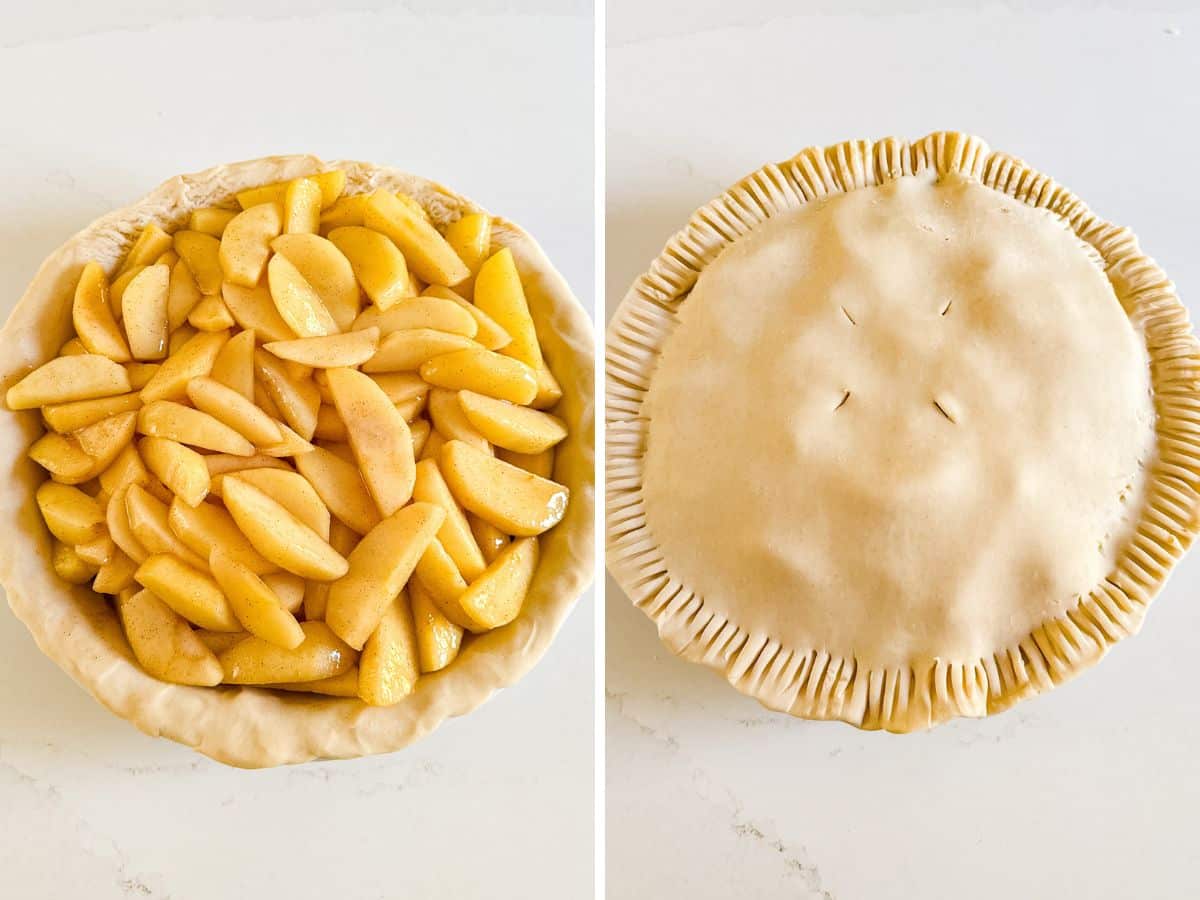
    Pie filling in the pic crust and then the top crust added.

    Frequently Asked Questions

    How do you make apple pie filling?

    It’s as easy as cooking apples with sugar, cinnamon, and a little cornstarch for thickening. Everything comes together in one pot on the stovetop, prepped and ready in under 25 minutes.

    What are some desserts with apple pie filling?

    This filling isn’t just for pies! Try it in hand pies, galettes, crisps, cobblers, or even folded into crepes or layered with yogurt for a quick dessert. It’s also amazing over vanilla ice cream or waffles.

    What is the process for freezing apple pie filling?

    Let the filling cool completely, then transfer it to freezer-safe bags or containers. Flatten the bags for easy stacking and freeze for up to 3 months. Thaw in the fridge overnight before using.

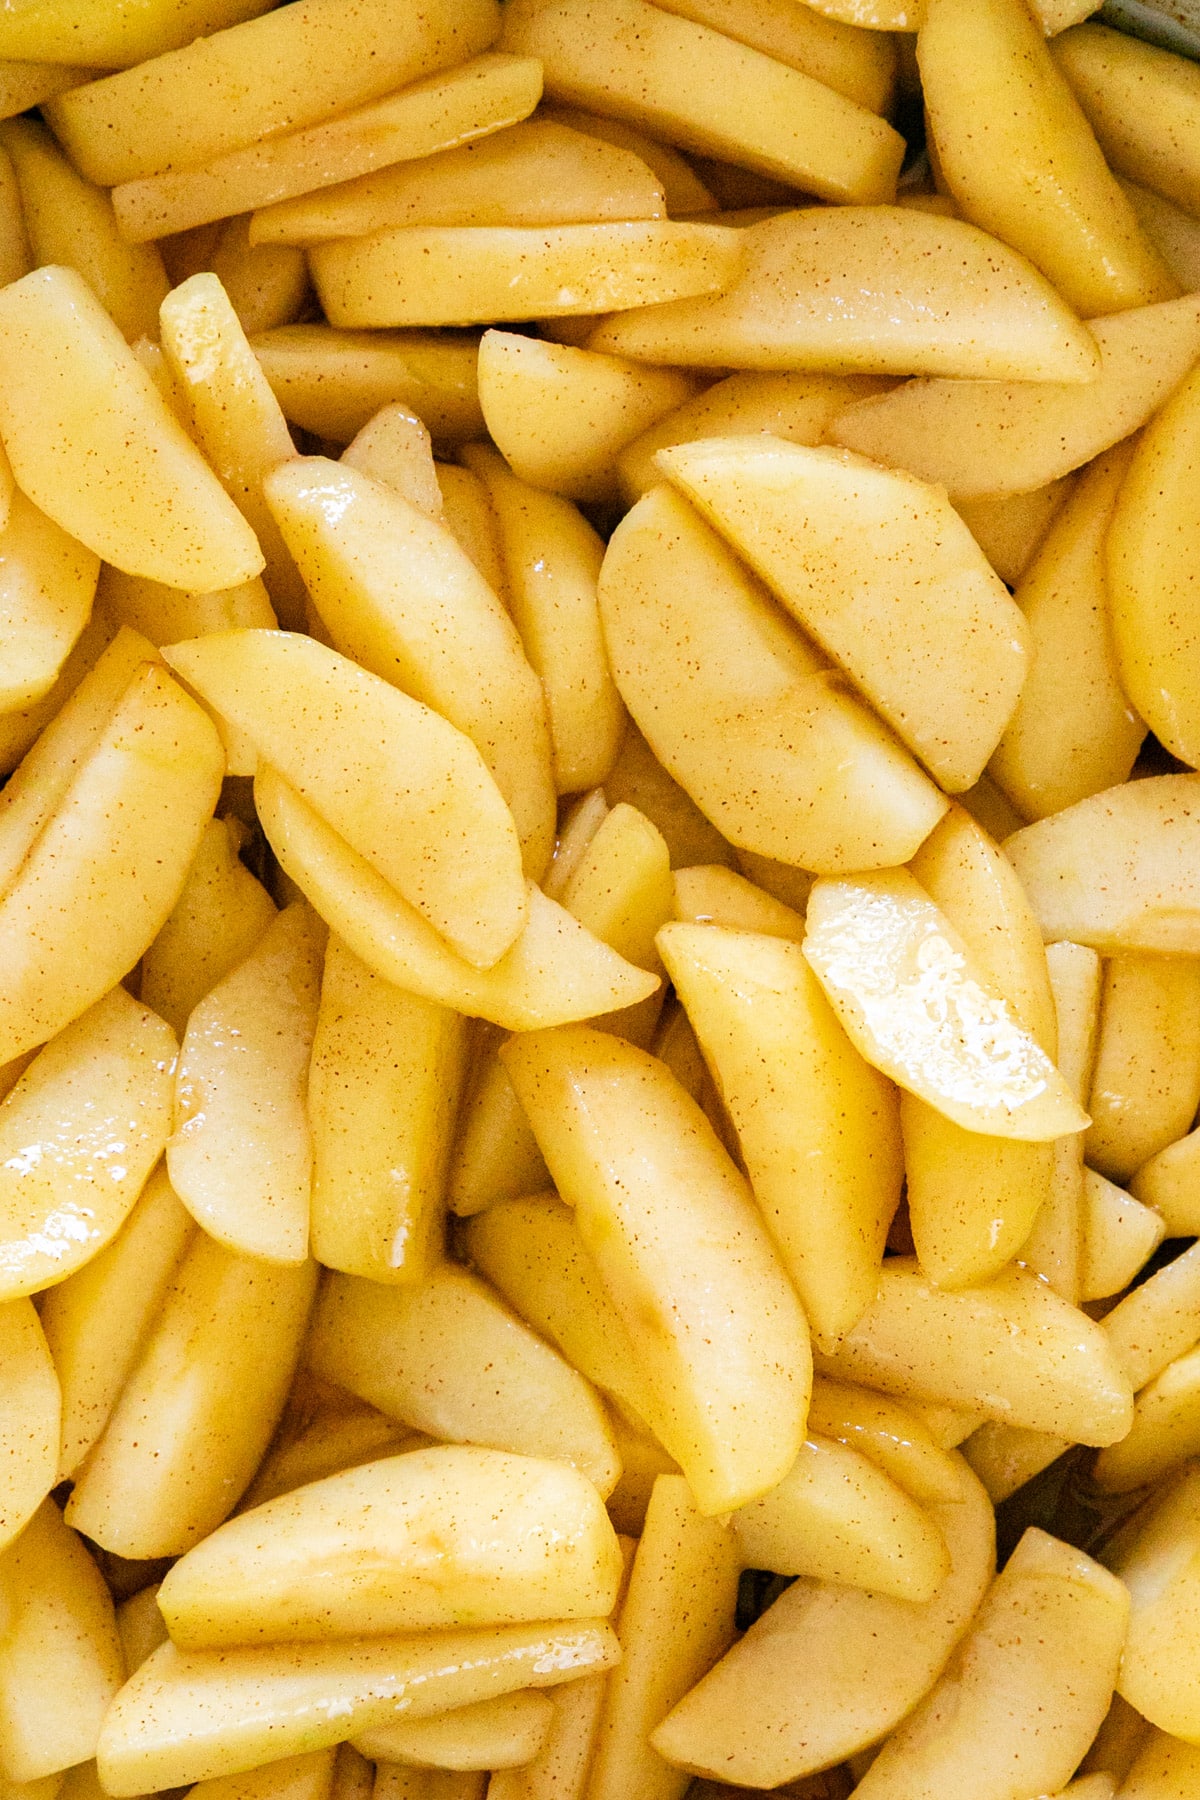
    A close up overhead image of apple pie filling.

    Tips For Making The Apple Pie Filling

    • Use firm apples. Softer apples can break down too much, so stick with baking varieties that hold their shape.
    • Cut apples evenly. Slices that are roughly the same thickness will cook at the same rate and give you a perfect texture.
    • Don’t skip the lemon juice. It keeps the apples bright and balances the sweetness.
    • Go big on cinnamon. If you love that warm spice, don’t be shy… a little extra never hurts. That cozy flavor makes this the best apple pie filling recipe in my book.
    • Add a buttery touch. Top the filling with small pieces of salted butter before adding the top crust and baking for extra richness.
    • Slightly cooled filling prevents soggy crust, whether you’re using homemade dough, frozen pie crust, or puff pastry.
    • Ingredients to prep ahead- Peel and slice the apples, and measure your sugar and spices in advance for quick assembly.
    • Leftovers and storage- Store in an airtight container in the fridge for up to 4 days or freeze for up to 3 months.
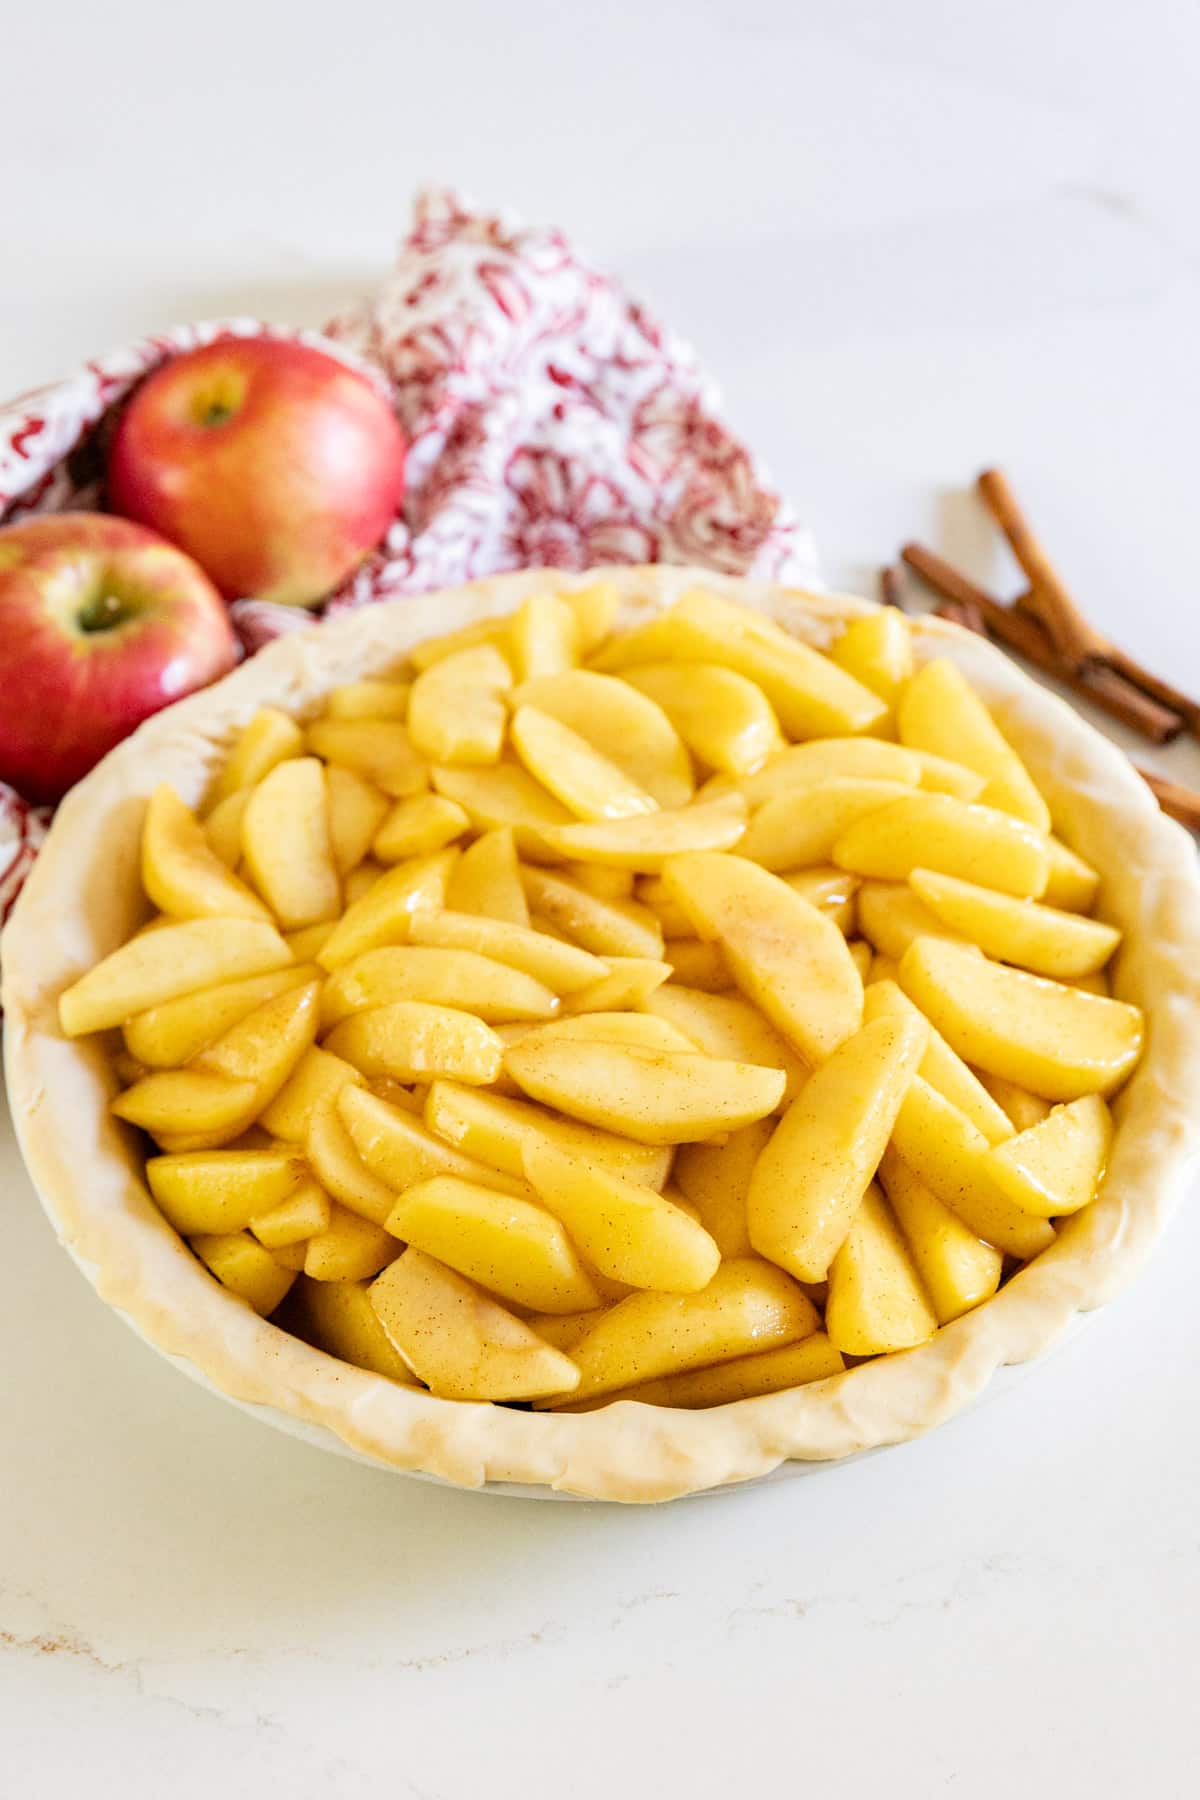
    Apple pie filling in a raw pie crust with apples and cinnamon sticks behind it.

    What To Serve With This Homemade Apple Pie Filling

    Whether it’s a family brunch, Thanksgiving dessert buffet, or just a lazy Sunday treat, here’s what works beautifully with spiced apple filling:

    • Oatmeal Raisin Cookies
    • Rolo Pretzel Bites
    • Apple Spice Muffins
    • Lemon Pistachio Cake

    Other Pie Recipes To Try

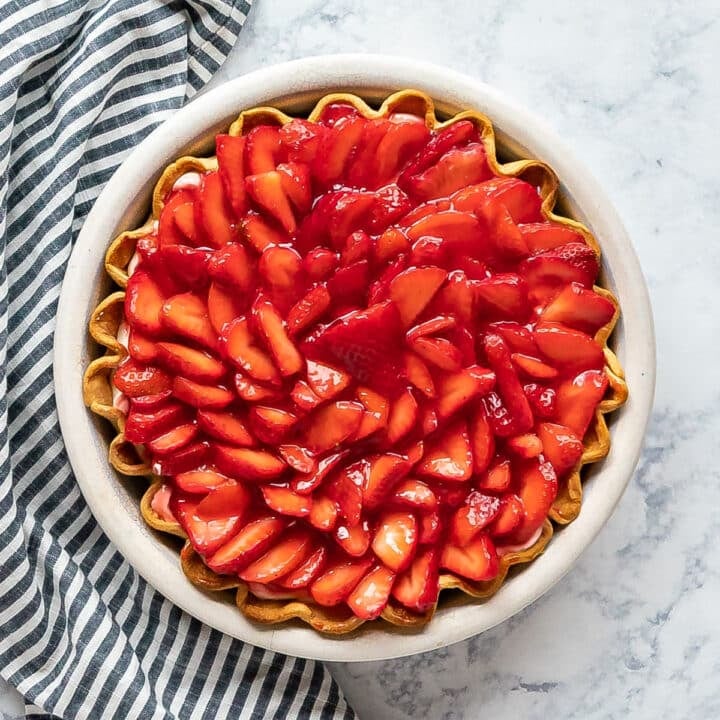
    • An overhead image of a strawberry cream pie with a striped napkin next to it.
      Strawberry Cream Cheese Pie
    • A piece of cherry cheese pie being pulled up from the rest of the pie.
      Cherry Cheese Pie
    • A close up image of a slice of chocolate pudding pie on a white plate with the rest of the pie behind it.
      Old Fashioned Chocolate Pie
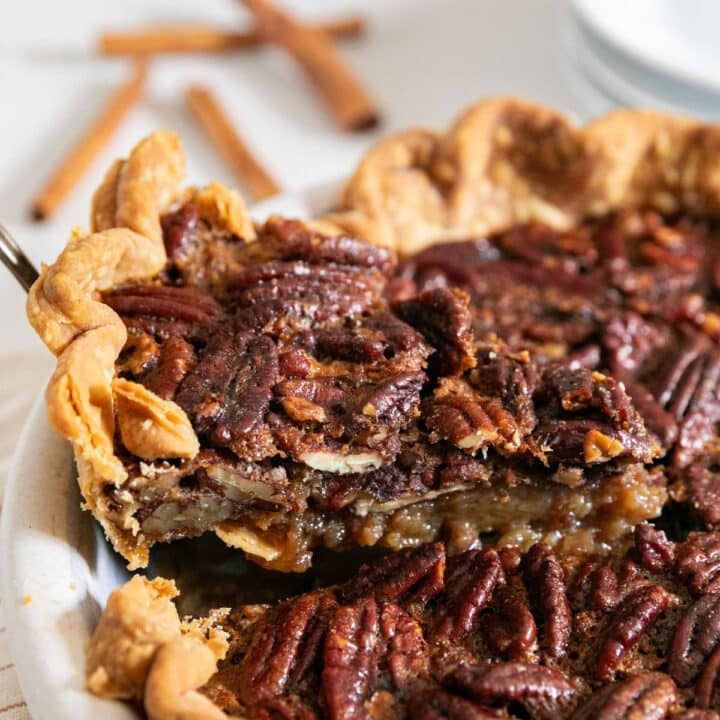
    • A slice of pecan pie being pulled from the pie with plates and cinnamon sticks in the background.
      Old Fashioned Pecan Pie

    Hosting Thanksgiving?

    Discover the secret to hosting Thanksgiving without all the stress! Prepsgiving is your FREE guide to making a delicious Thanksgiving feast the easy way.

    Love this recipe? Please leave a 5 star ⭐️⭐️⭐️⭐️⭐️ rating in the recipe card below ⬇️ and/or a review in the comment section further down. Check out my Amazon Store for all my favorite tools, including those used in this recipe. And follow @thelifejolie on Instagram and TikTok!

    An overhead image of apple pie filling in a raw pie crust with apples and cinnamon sticks around it.

    How To Make Apple Pie Filling

    Jessy Freimann
    I'm going to show you how to make apple pie filling that is warm, cozy, and packed with cinnamon-spiced flavor. It comes together in under 25 minutes and brings that homemade, nostalgic touch to every bite. Simple, sweet, and perfect for fall.
    No ratings yet
    Print Recipe Pin Recipe
    Prep Time 10 minutes mins
    Cook Time 12 minutes mins
    Cooling time 10 minutes mins
    Total Time 22 minutes mins
    Course Dessert
    Cuisine American
    Servings 8 servings
    Calories 118 kcal

    Equipment

    • chefs knife
    • cutting board
    • wooden spoon
    • Skillet

    Ingredients
      

    • 8 cups apples peeled, cored and sliced- about 5 pounds- I prefer RubyFrost.
    • 1 teaspoon lemon juice
    • ½ cup granulated sugar
    • 1 teaspoon ground cinnamon
    • ½ cup water
    • 1 Tablespoon cornstarch

    Instructions
     

    • Place apples, lemon juice, sugar, cinnamon water and cornstarch into a skillet over medium high heat. Stir well to combine.
    • Once the mixture starts bubbling, reduce heat to low and cook for 10 minutes or until the apples have softened a bit (be aware, they will soften a bit more during baking).
    • Remove from heat and allow the filling to cool a bit before assembling your pie and bake per pie crust package directions. Cool fully and serve.

    Video

    Notes

    • Use firm apples. Softer apples can break down too much, so stick with baking varieties that hold their shape.
    • Cut apples evenly. Slices that are roughly the same thickness will cook at the same rate and give you a perfect texture.
    • Don’t skip the lemon juice. It keeps the apples bright and balances the sweetness.
    • Go big on cinnamon. If you love that warm spice, don’t be shy… a little extra never hurts. That cozy flavor makes this the best apple pie filling recipe in my book.
    • Add a buttery touch. Top the filling with small pieces of salted butter before adding the top crust and baking for extra richness.
    • Slightly cooled filling prevents soggy crust, whether you’re using homemade dough, frozen pie crust, or puff pastry.
    • Ingredients to prep ahead- Peel and slice the apples, and measure your sugar and spices in advance for quick assembly.
    • Leftovers and storage- Store in an airtight container in the fridge for up to 4 days or freeze for up to 3 months.

    Nutrition

    Serving: 1servingCalories: 118kcalCarbohydrates: 31gProtein: 0.3gFat: 0.3gSaturated Fat: 0.04gPolyunsaturated Fat: 0.1gMonounsaturated Fat: 0.01gSodium: 2mgPotassium: 136mgFiber: 3gSugar: 25gVitamin A: 68IUVitamin C: 6mgCalcium: 11mgIron: 0.2mg
    Tried this recipe?Let us know how it was!

    Hot Artichoke Parmesan Dip

    Nov 17, 2025 · 2 Comments

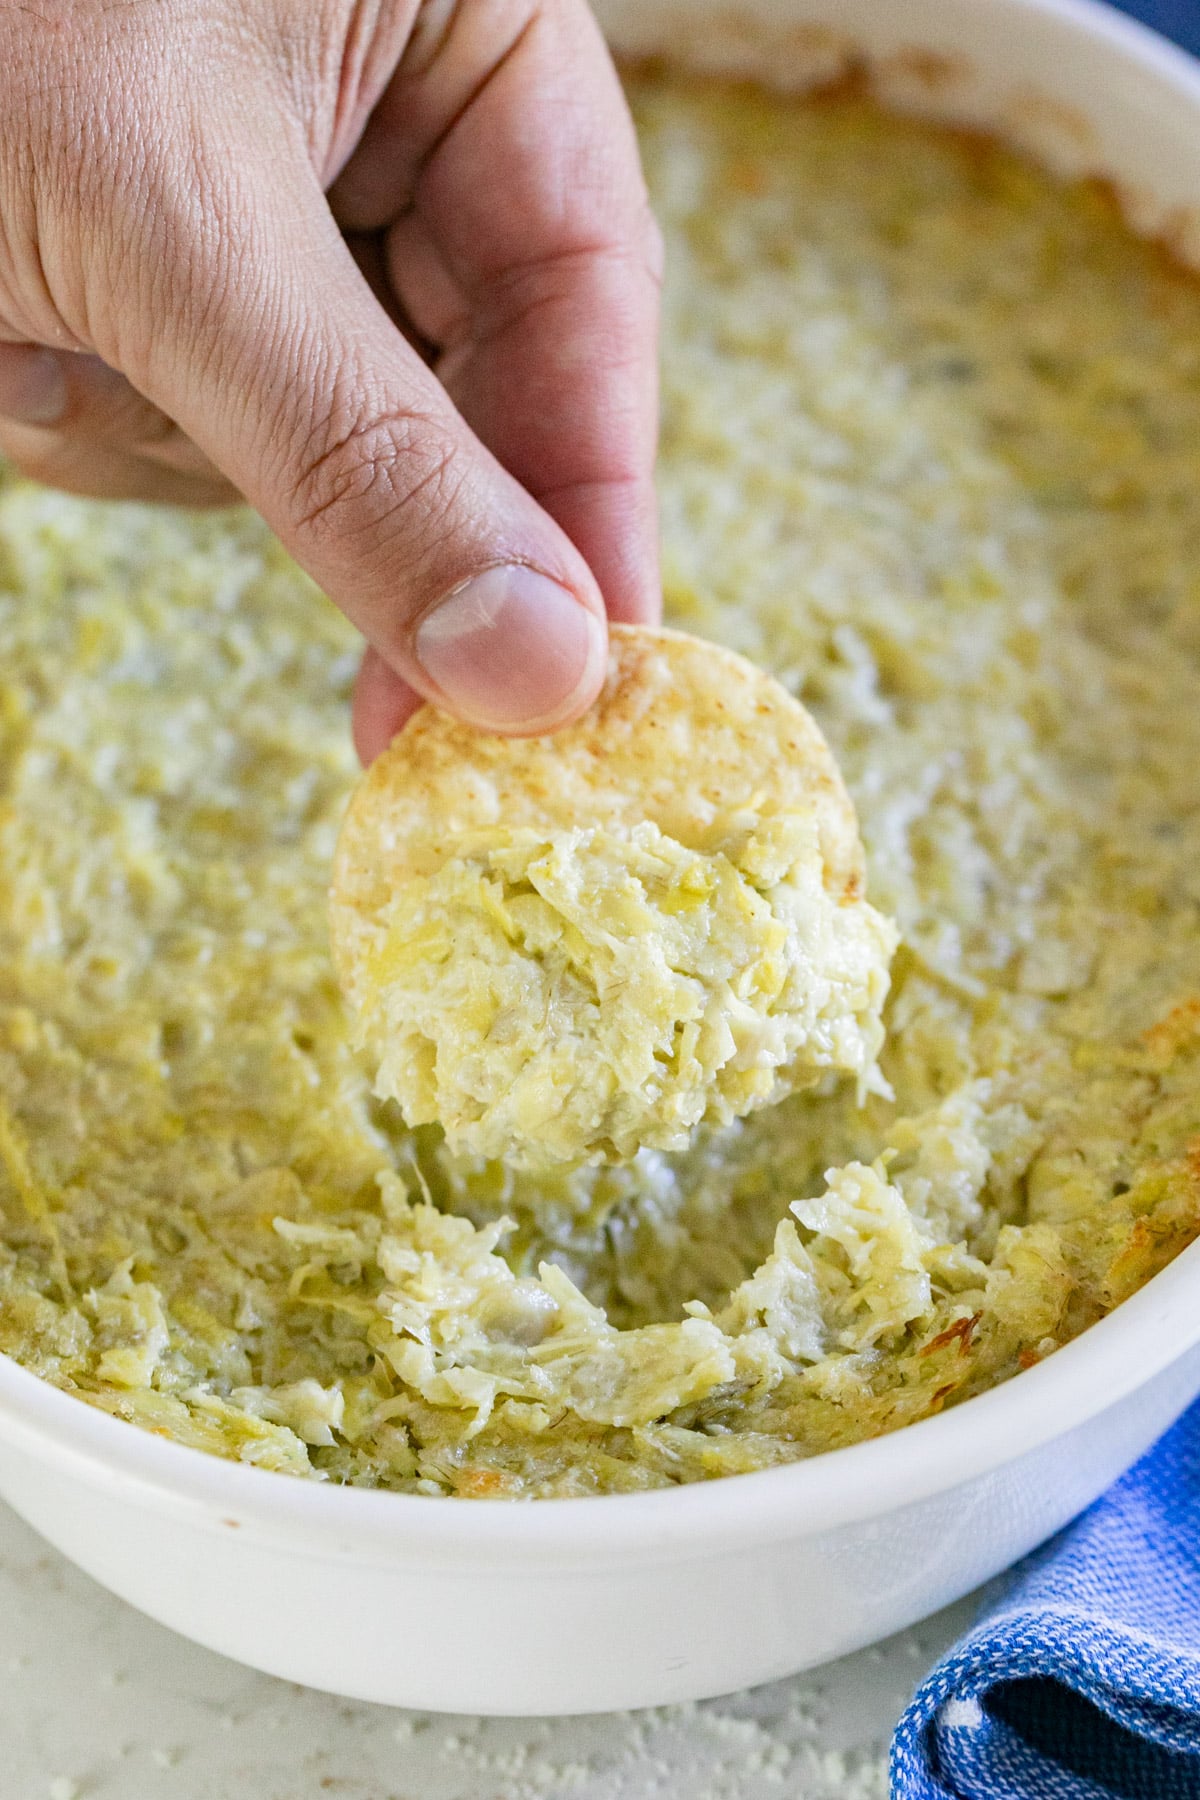
    A hand pulling a chip with artichoke dip out of a pan of it.

    This hot artichoke parmesan dip is creamy, cheesy, and unbelievably easy to make. With just a handful of simple ingredients, you can have this crowd-pleasing appetizer ready in under 45 minutes.

    A hand puling a chip with artichoke dip out of a pan of it.
    [feast_advanced_jump_to]

    Why You’ll Love This Hot Artichoke Dip

    This dip is one of my Grandma Eve’s signature recipes and is always a hit at family gatherings. It’s also incredibly easy to make! Just mix a few simple ingredients and bake until warm and bubbly.

    The creamy base, tangy artichokes, and savory Parmesan come together for a dip that feels special but takes hardly any effort. It’s no wonder this has become one of our favorite hot artichoke dip recipes to make and share for every occasion.

    It’s also a great change of pace from artichoke spinach dip, especially if you want something lighter or have guests who don’t love spinach. A touch of lemon brightens everything up, and the texture is perfectly creamy with just the right amount of bite. Here’s why you’ll love this recipe:

    • Creamy, cheesy, and full of flavor
    • Only a handful of ingredients
    • Great for holidays, game day, or potlucks
    • Make-ahead friendly
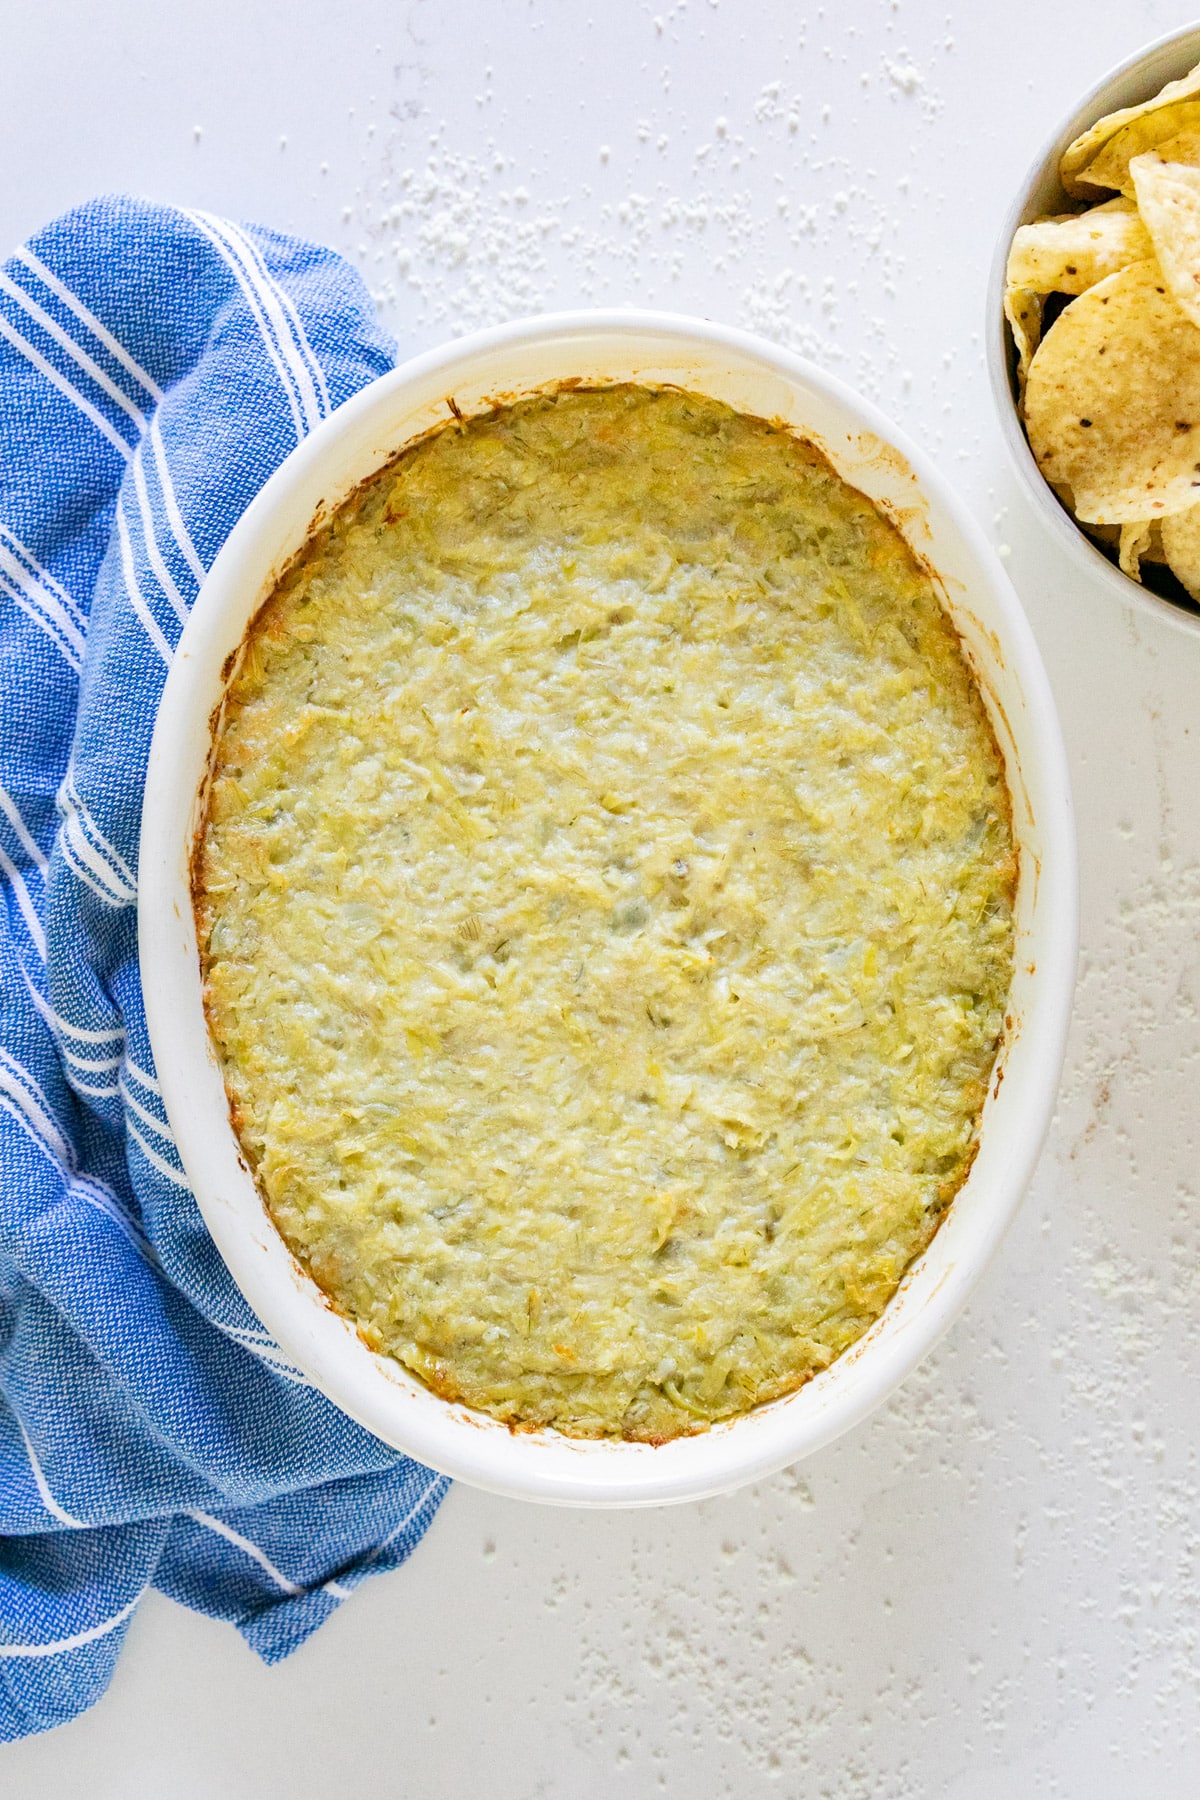
    An overhead image of a pan of artichoke dip with a blue towel and chips next to it.

    Ingredient Information And Substitutions

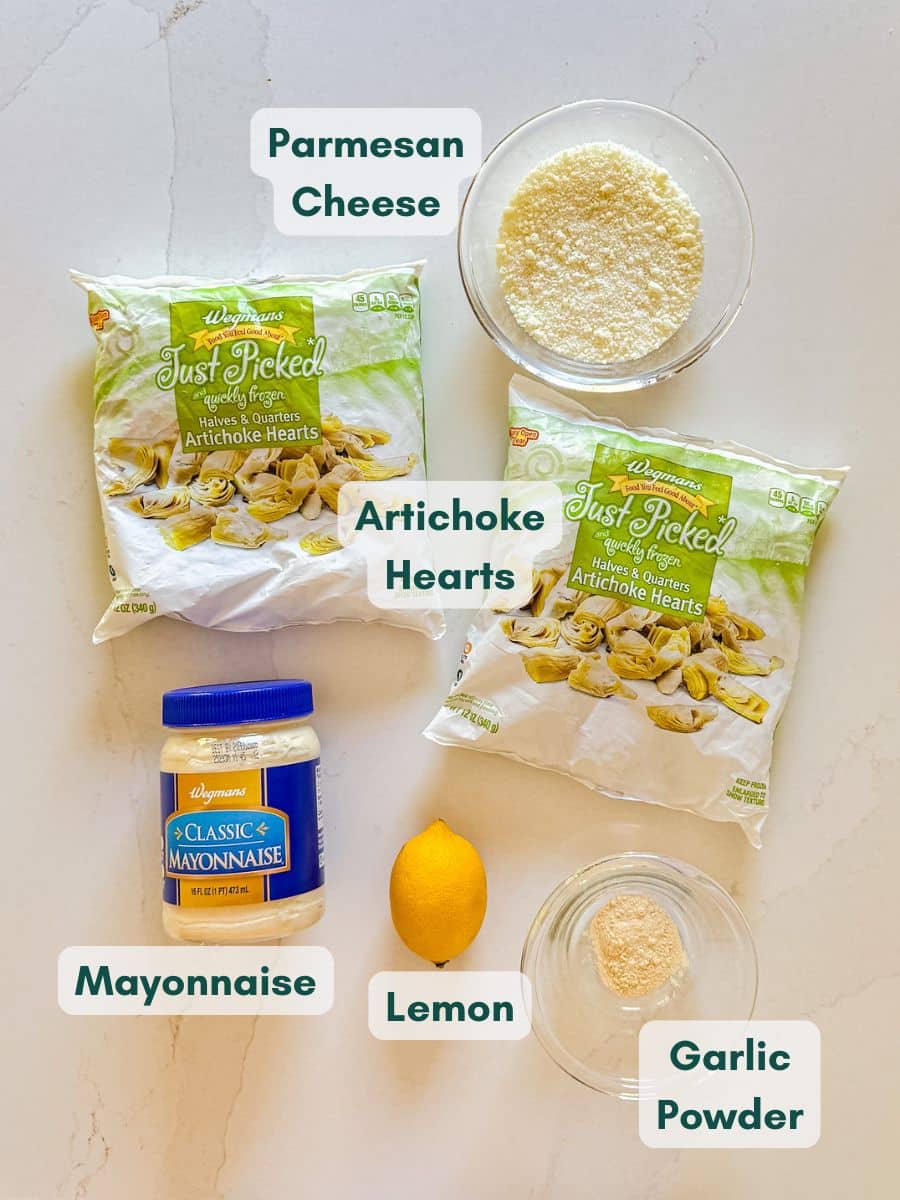
    • Frozen artichoke hearts- Thawed and lightly chopped. Canned (drained) or marinated artichokes make an easy swap with a tangy twist.
    • Romano or Parmesan cheese- Either one gives that rich, salty bite. You can even mix both!
    • Mayonnaise- Creates the creamy base. Substitute with half mayo and half sour cream if you prefer.
    • Lemon juice- Brightens the flavors. Fresh lemon is best, but bottled works in a pinch.
    • Cooking spray- Prevents sticking and makes cleanup easy. You can also brush the pan with a little olive oil or melted butter.
    • Garlic powder- Adds subtle flavor without overpowering the dip. Fresh minced garlic works too.
    An overhead image of labeled recipe ingredients.

    How To Make This Artichoke Dip

    Step 1- Prep the oven and pan.

    Preheat your oven to 325 degrees F and lightly coat an 8- or 9-inch baking dish with cooking spray.

    Step 2- Chop the artichokes.

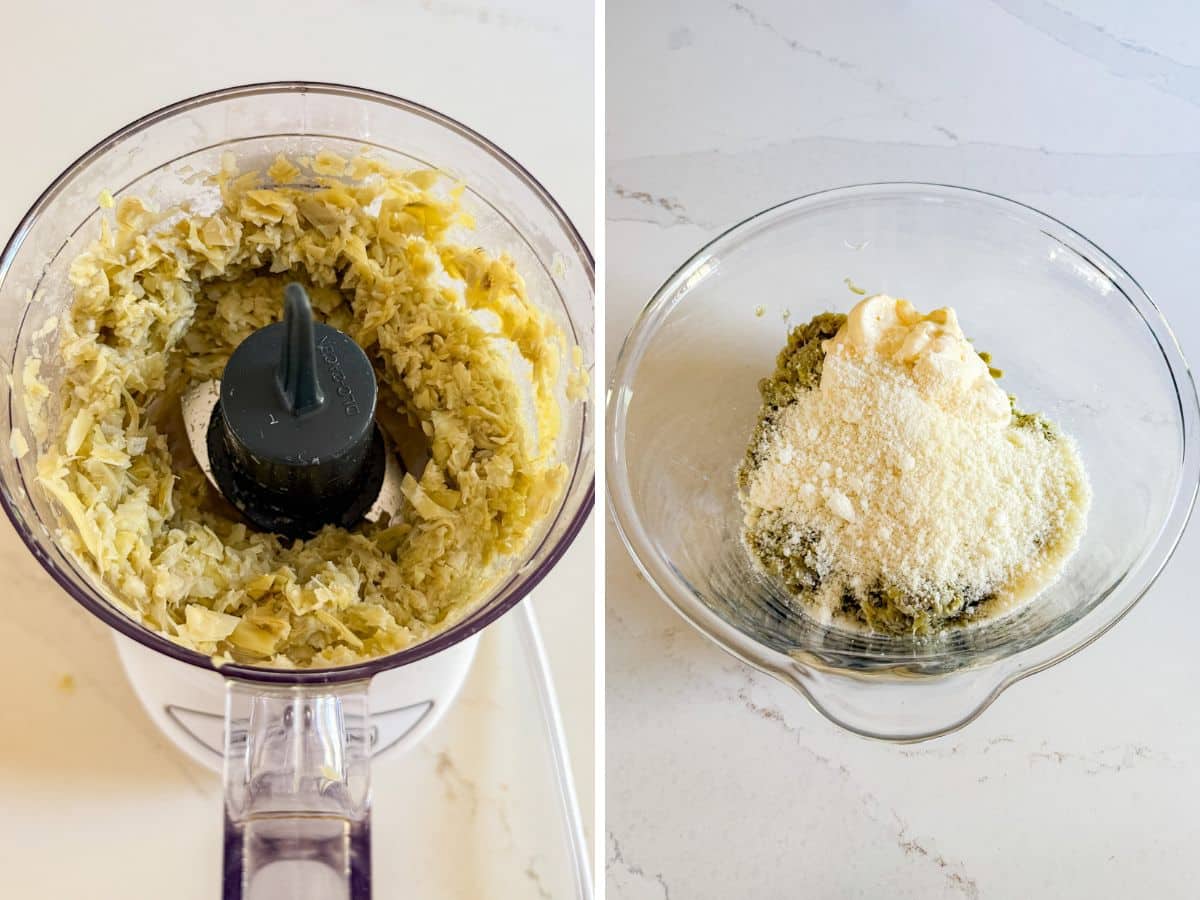
    Use a food processor or mini chopper to roughly chop the thawed artichoke hearts.  

    Chopped artichoke hearts in a food processor and recipe ingredients in a glass bowl.

    Step 3- Mix everything.

    In a mixing bowl, combine the artichokes, mayonnaise, garlic powder, grated cheese, and lemon juice. Stir until well combined.

    Step 4- Bake the dip. 

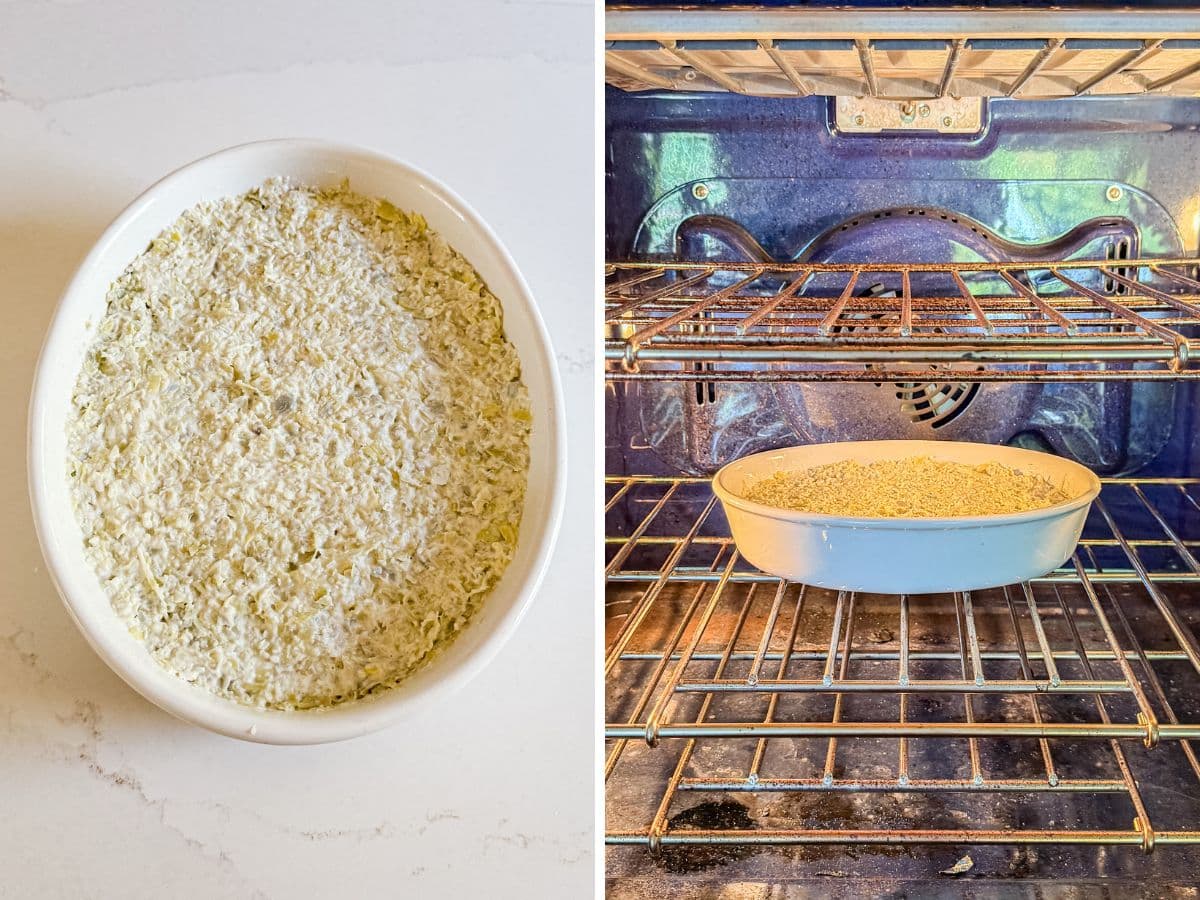
    Spread the mixture evenly in the prepared baking dish and bake uncovered for about 35 minutes, until hot and bubbly.

    The artichoke dip mixture in a pan and the pan in the oven.

    Step 5- Optional broil

    If you like a golden top, place it under the broiler for a minute or two. Just keep an eye on it.

    Serve immediately with chips, crackers, or bread for dipping.

    Frequently Asked Questions

    How long can I leave this dip out?

    If serving at a party, try to keep it out no longer than 2 hours. After that, pop it back in the fridge and reheat before serving again.

    Can I double the recipe for a crowd?

    Definitely. Bake it in a larger dish, like a 9x13 pan, and add a few extra minutes to the baking time.

    Can I make this dip without a food processor?

    Of course. Just chop the artichokes finely with a knife. It might take a few extra minutes, but the texture will still turn out great.

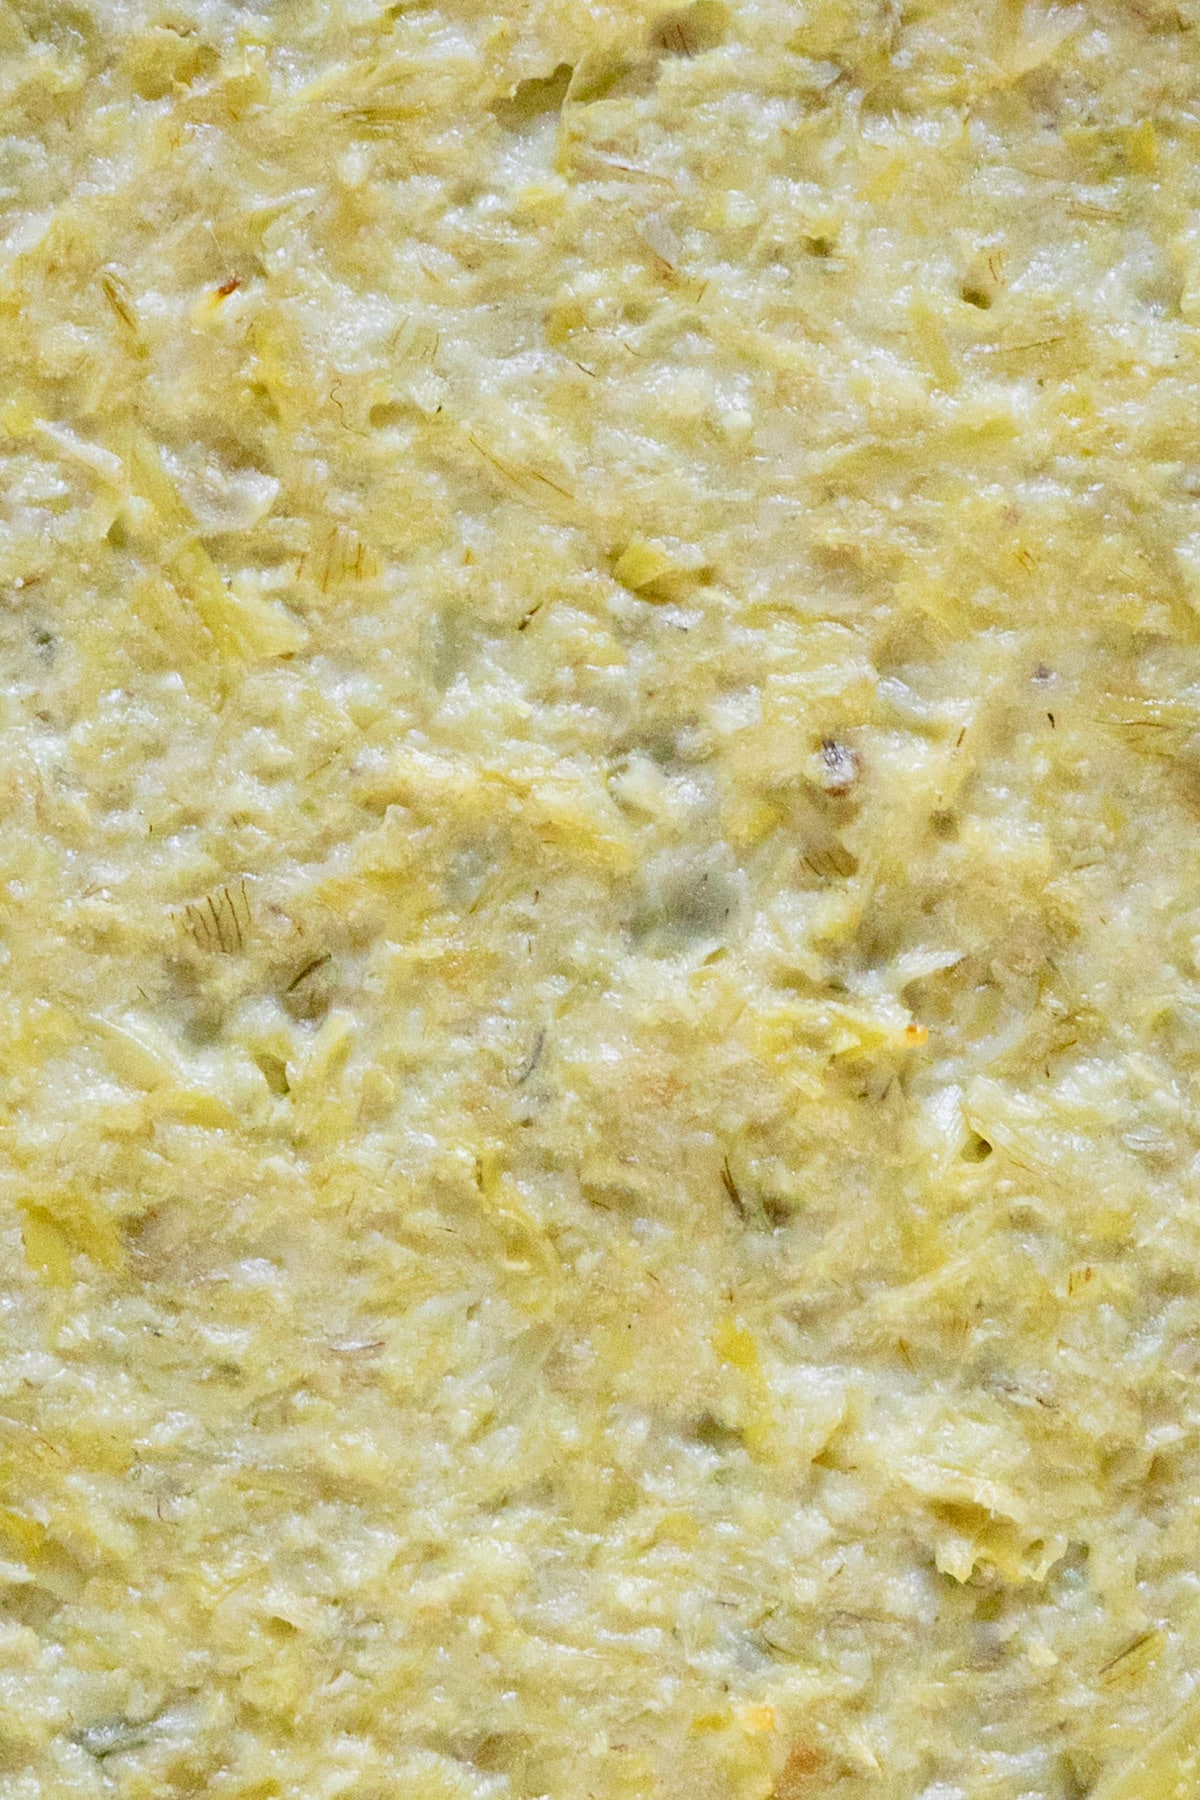
    A close up image of the top of the baked artichoke dip.

    Tips For Making Hot Artichoke Dip Recipe

    • Use good cheese. Freshly grated Parmesan or Romano melts better and gives more flavor.
    • When chopping the artichokes, leave small, uneven pieces. This gives the best texture and a satisfying bite instead of turning it into a puree.
    • Make it your own. Stir in a bit of chopped spinach, artichoke hearts, and sun-dried tomatoes. Crushed red pepper or chopped parsley adds a fun twist.
    • Serve it warm. This recipe for hot artichoke dip tastes best straight from the oven while it’s hot and melty.
    • Add a smoky touch. A little smoked paprika or some crispy bacon crumbles give the dip a deeper, savory flavor that makes it extra addictive.
    • Make individual servings. Spoon the mixture into small ramekins before baking. They look elegant, bake faster, and make serving guests a breeze.
    • Ingredients to prep ahead- Chop artichokes and grate the cheese a day in advance.
    • Leftovers and storage- Keep in an airtight container in the fridge for up to 4 days and reheat gently before serving. Freezing isn’t recommended, as the dip will become grainy and separate when thawed.
    A close up image of a chip in a pan of hot artichoke parmesan dip.

    What To Serve With This Artichoke Appetizer

    This appetizer is deliciously versatile and pairs well with just about anything. It’s great with tortilla chips, pita chips, or even fresh veggies. You can spoon it over toasted baguette slices or crostini for an easy finger food. If you’re building a full party spread, here are a few more dishes that go perfectly with this artichoke hot dip recipe:

    • Everything Pita Chips Recipe
    • Oven Fried Pickles Recipe
    • Cheddar and Broccoli Twice Baked Potatoes Recipe
    • Mushrooms in White Wine Sauce

    Other Tasty Dips To Try

    • This Artichoke Asiago Dip is the best easy recipe to throw together for a last-minute spring get-together. It only takes a couple of minutes to make and is fully of cheesy, delicious flavor! #ad
      Artichoke Asiago Dip
    • A hand pulling a chip with hot bean dip from the pan with cheese stretching.
      Hot Bean Dip Recipe
    • A hand dipping a slice of baguette into pepperoni dip.
      Pepperoni Dip
    • A hand putting a tortilla chip up with taco dip on it.
      7 Layer Taco Dip

    Love this recipe? Please leave a 5 star ⭐️⭐️⭐️⭐️⭐️ rating in the recipe card below ⬇️ and/or a review in the comment section further down. Check out my Amazon Store for all my favorite tools, including those used in this recipe. And follow @thelifejolie on Instagram and TikTok!

    A hand pulling a chip with artichoke dip out of a pan of it.

    Hot Artichoke Parmesan Dip

    Jessy Freimann
    This hot artichoke parmesan dip is creamy, cheesy, and unbelievably easy to make. With just a handful of simple ingredients, you can have this crowd-pleasing appetizer ready in under 45 minutes.
    No ratings yet
    Print Recipe Pin Recipe
    Prep Time 10 minutes mins
    Cook Time 35 minutes mins
    Total Time 45 minutes mins
    Course Appetizer, Snack, Vegetarian
    Cuisine American
    Servings 8 servings
    Calories 272 kcal

    Equipment

    • 8 inch pan
    • food processor
    • mixing bowl
    • Spatula
    • measuring cups
    • measuring spoons

    Ingredients
      

    • Cooking spray
    • 24 ounces frozen artichoke hearts thawed (or two 12 ounce jars, well drained)
    • 1 cup mayonnaise
    • 1 teaspoon garlic powder
    • 1 cup Romano cheese
    • 1 teaspoon lemon juice
    • Tortilla chips for serving

    Instructions
     

    • Preheat the oven to 325 degrees F. Lightly grease an 8 or 9 inch pan with cooking spray and set aside.
    • Using a mini prep processor or food processor, roughly chop the artichoke hearts.
    • In a mixing bowl, combine the artichoke hearts, mayonnaise, garlic powder, cheese, and lemon juice.
    • Once the mixture is well combined, place it in the baking pan and spread it into one even layer.
    • Bake uncovered for around 35 minutes or until heather through.
    • If you want a little brown on top you can pop it under the broiler, but keep a close eye on it. Serve immediately with tortilla chips.

    Video

    Notes

    • Use good cheese. Freshly grated Parmesan or Romano melts better and gives more flavor.
    • When chopping the artichokes, leave small, uneven pieces. This gives the best texture and a satisfying bite instead of turning it into a puree.
    • Make it your own. Stir in a bit of chopped spinach, artichoke hearts, and sun-dried tomatoes. Crushed red pepper or chopped parsley adds a fun twist.
    • Serve it warm. This recipe for hot artichoke dip tastes best straight from the oven while it’s hot and melty.
    • Add a smoky touch. A little smoked paprika or some crispy bacon crumbles give the dip a deeper, savory flavor that makes it extra addictive.
    • Make individual servings. Spoon the mixture into small ramekins before baking. They look elegant, bake faster, and make serving guests a breeze.
    • Ingredients to prep ahead- Chop artichokes and grate the cheese a day in advance.
    • Leftovers and storage- Keep in an airtight container in the fridge for up to 4 days and reheat gently before serving. Freezing isn’t recommended, as the dip will become grainy and separate when thawed.

    Nutrition

    Serving: 1servingCalories: 272kcalCarbohydrates: 8gProtein: 7gFat: 25gSaturated Fat: 6gPolyunsaturated Fat: 13gMonounsaturated Fat: 6gTrans Fat: 0.1gCholesterol: 25mgSodium: 368mgPotassium: 232mgFiber: 3gSugar: 0.3gVitamin A: 201IUVitamin C: 5mgCalcium: 152mgIron: 1mg
    Tried this recipe?Let us know how it was!

    Artichoke and Olive Spread

    Nov 14, 2025 · Leave a Comment

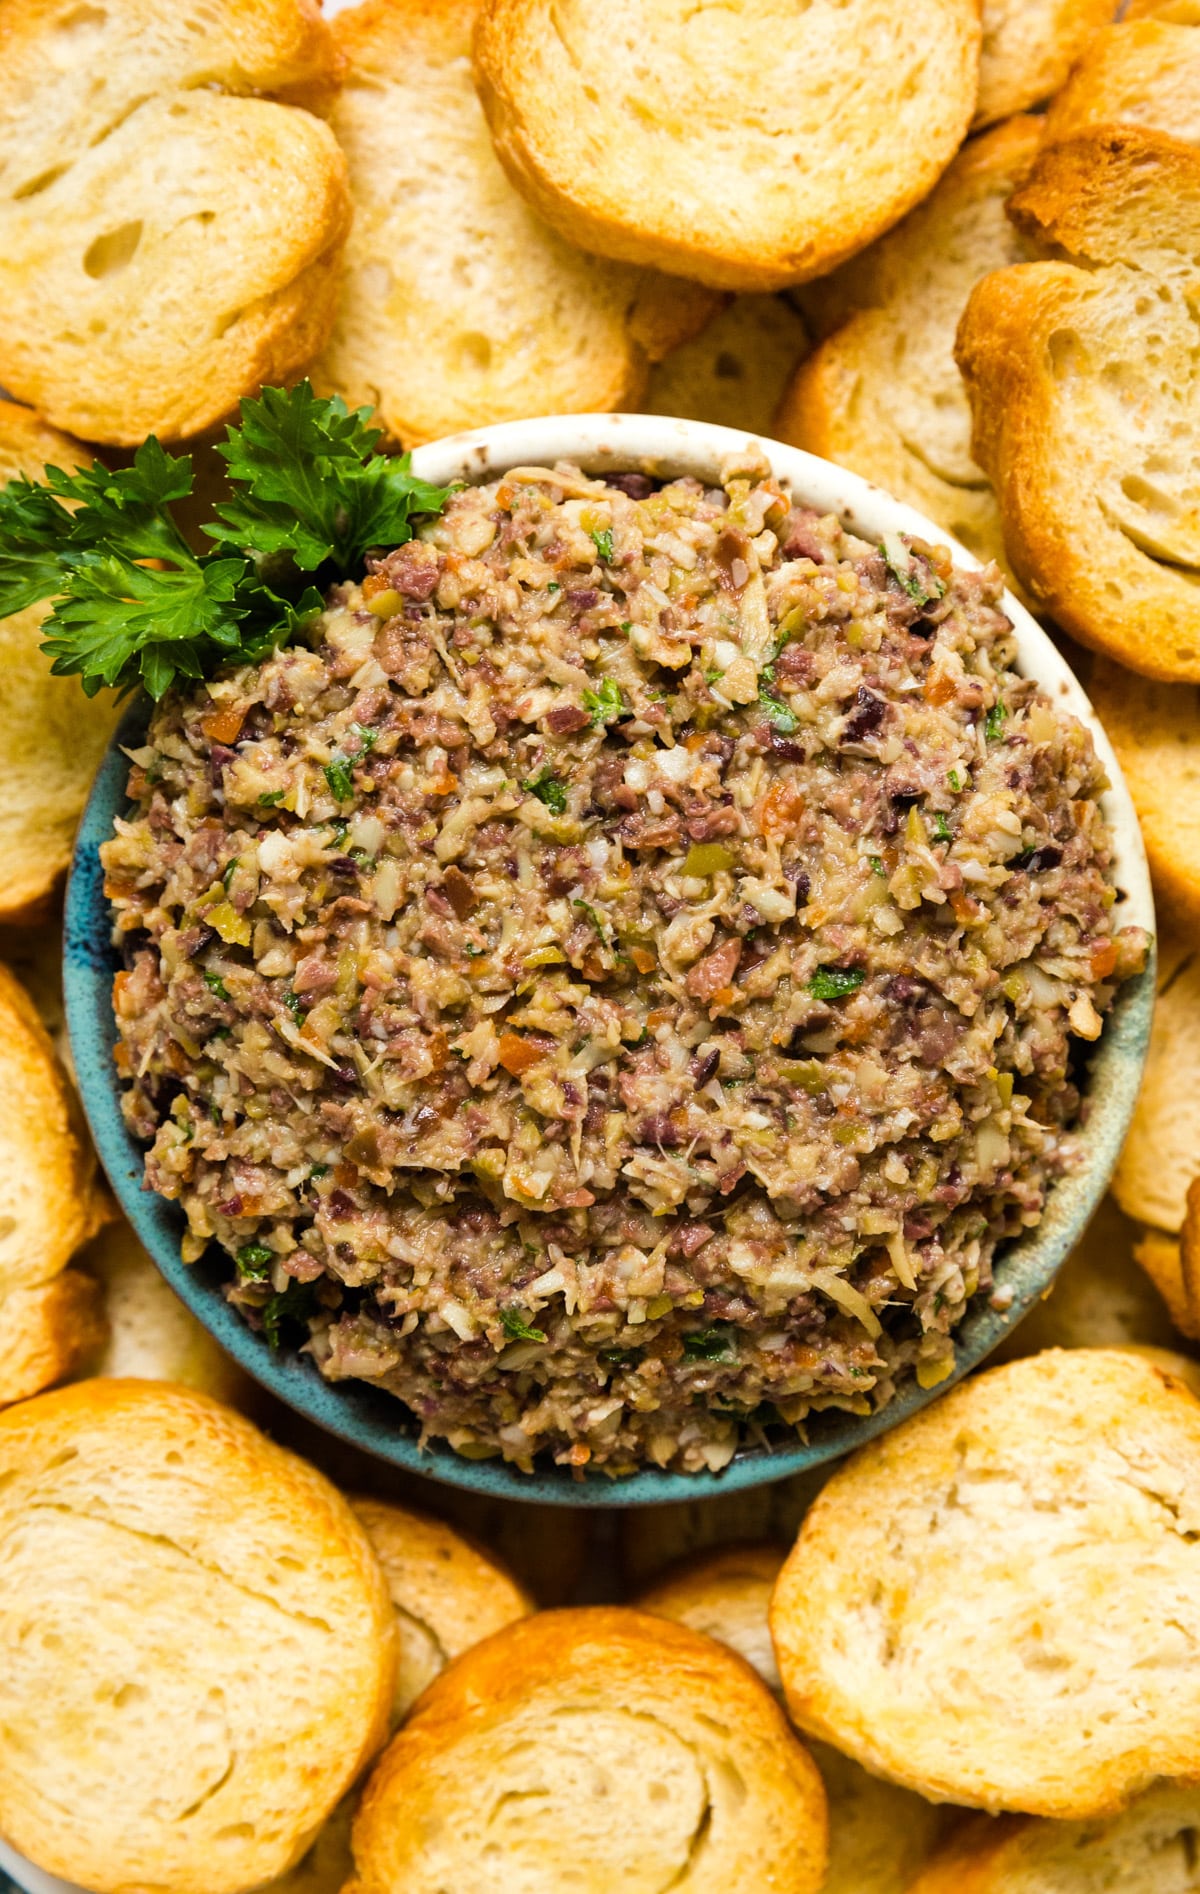
    A bowl or artichoke and olive spread surrounded by toasted baguette.

    Meet your new go-to appetizer: a savory artichoke and olive spread that’s ready in 10 minutes and tastes amazing with wine, crackers, or warm baguette slices.

    An overhead image of a bowl of olive spread surrounded by toasted baguette and a sprig of fresh parsley.
    [feast_advanced_jump_to]

    Why You’ll Love This Kalamata Olive Tapenade

    There’s something irresistible about salty, savory tapenade blended with tender artichokes for a touch of richness. I love having a few go-to recipes for those last-minute guests, and this one’s always a hit. It comes together in just 10 minutes using simple ingredients you probably already have on hand, and it pairs perfectly with a glass of wine.

    I was inspired by the one from Trader Joe’s, but wanted to give it my own twist. Adding artichoke hearts makes it lighter and more flavorful, while garlic, lemon zest, and a bit of parsley bring brightness and freshness to every bite. Serve it with a toasted baguette, spoon it over chicken or fish, or toss it with pasta for a quick, gourmet meal. You’ll love this black olive tapenade because:

    • Tastes even better the next day
    • It’s ready in just 10 minutes
    • Uses pantry-friendly ingredients
    • Works as a dip, spread, or topping
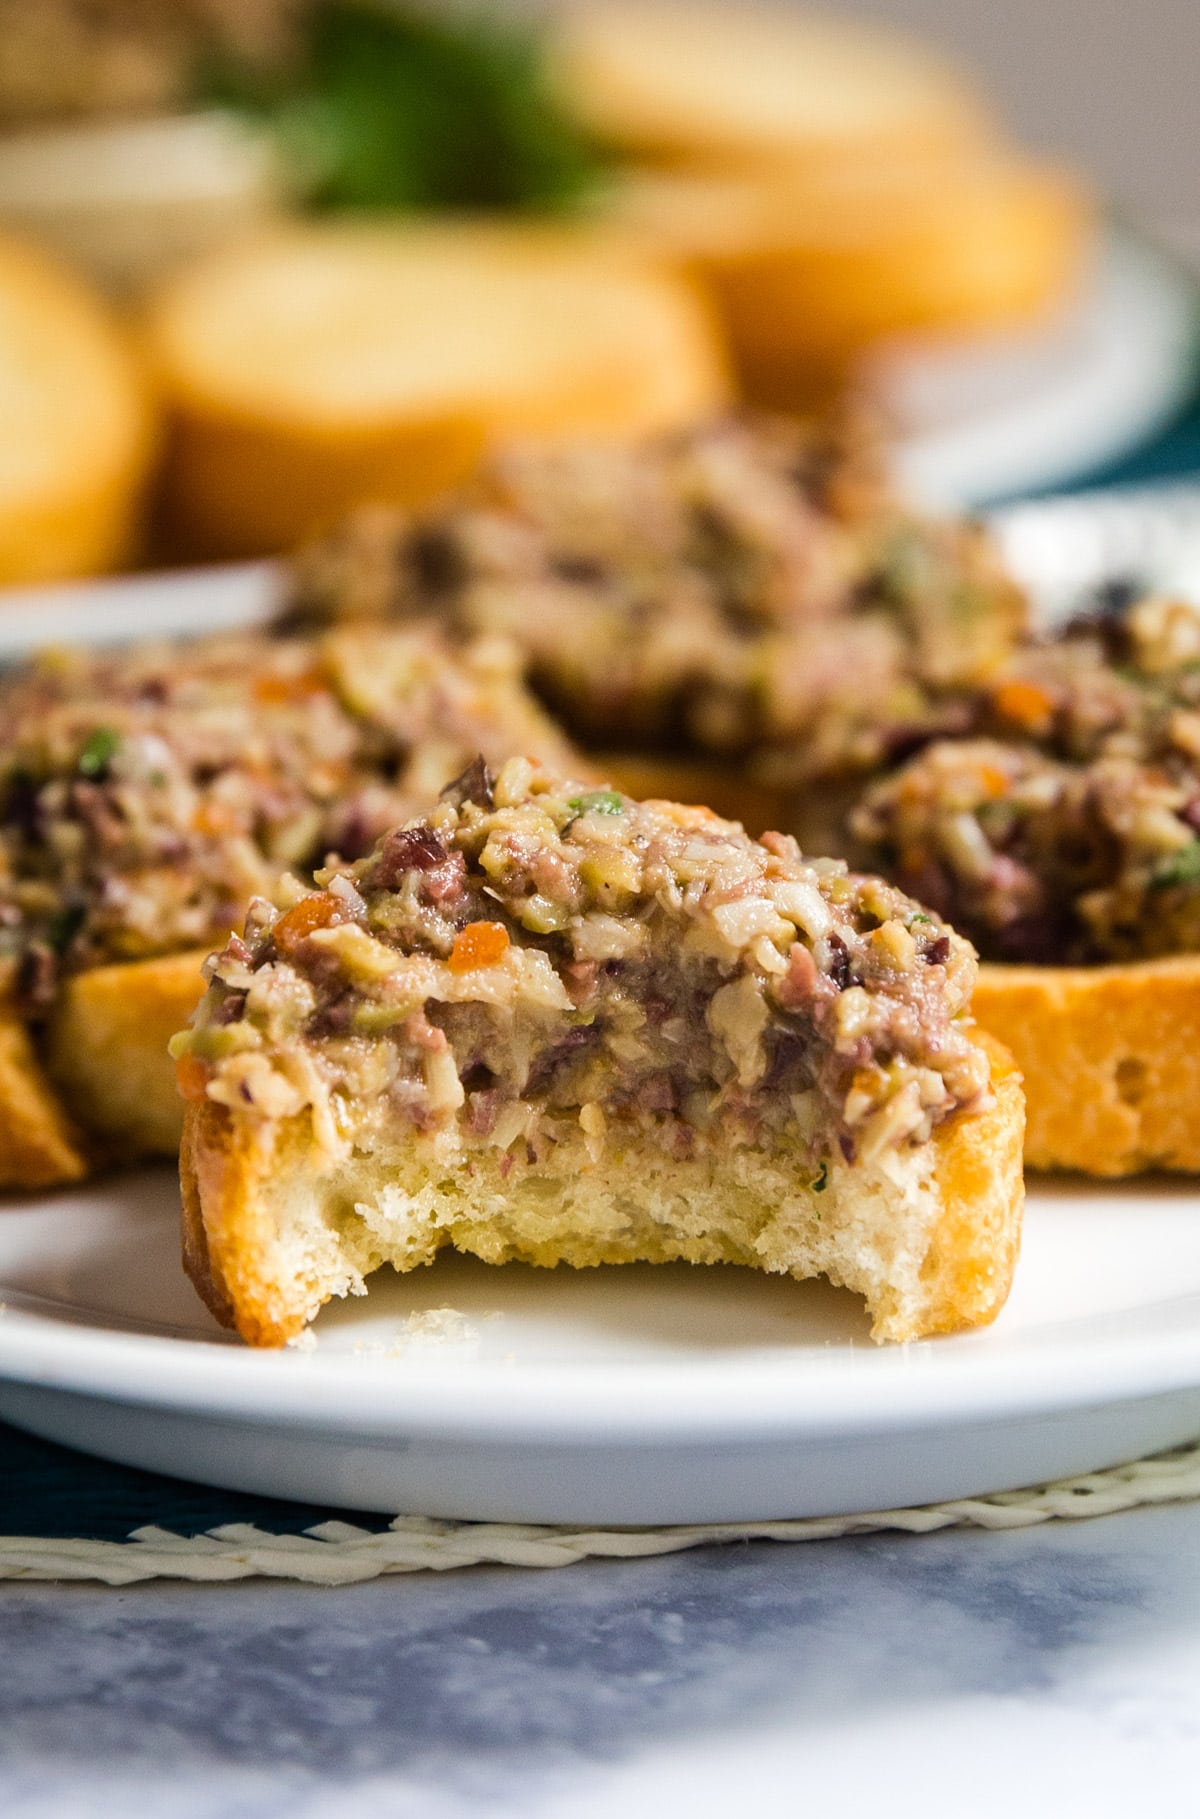
    A close up of a baguette slice with olive spread on it and a bite taken out of it.

    Ingredient Information And Substitutions

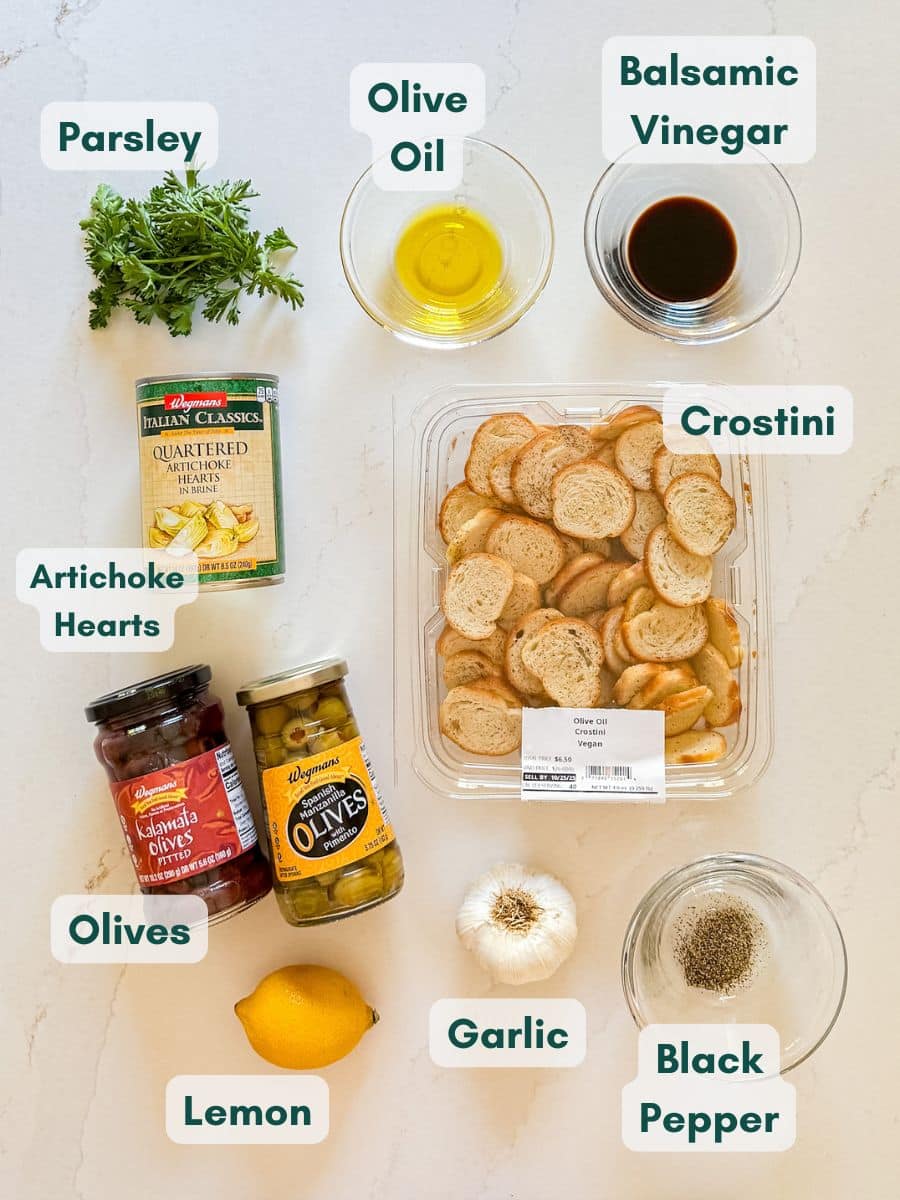
    • Kalamata olives- Their rich, fruity flavor anchors the dip. I like using pitted ones for convenience, but you can use any variety you enjoy. If you prefer, swap in black or Spanish olives for a milder flavor.
    • Green olives- They add brightness and balance. Manzanilla (especially the kind stuffed with pimentos) or Castelvetrano are both great options.
    • Artichoke hearts- Use marinated ones for extra flavor, or frozen if you prefer less acidity.
    • Lemon zest- Adds freshness and zing. A splash of juice works too.
    • Garlic- A single clove adds depth. Roasted garlic will make it more mellow.
    • Parsley- Brings color and lightness. Basil or thyme can also work.
    • Black pepper- Balances the briny notes. Add a dash of crushed red pepper for a kick.
    • Olive oil- Helps blend everything smoothly. Any neutral oil can substitute in a pinch.
    • Balsamic vinegar- Optional, though it adds a subtle sweetness and depth.
    An overhead image of labeled recipe ingredients.

    How To Make Green Olive Tapenade

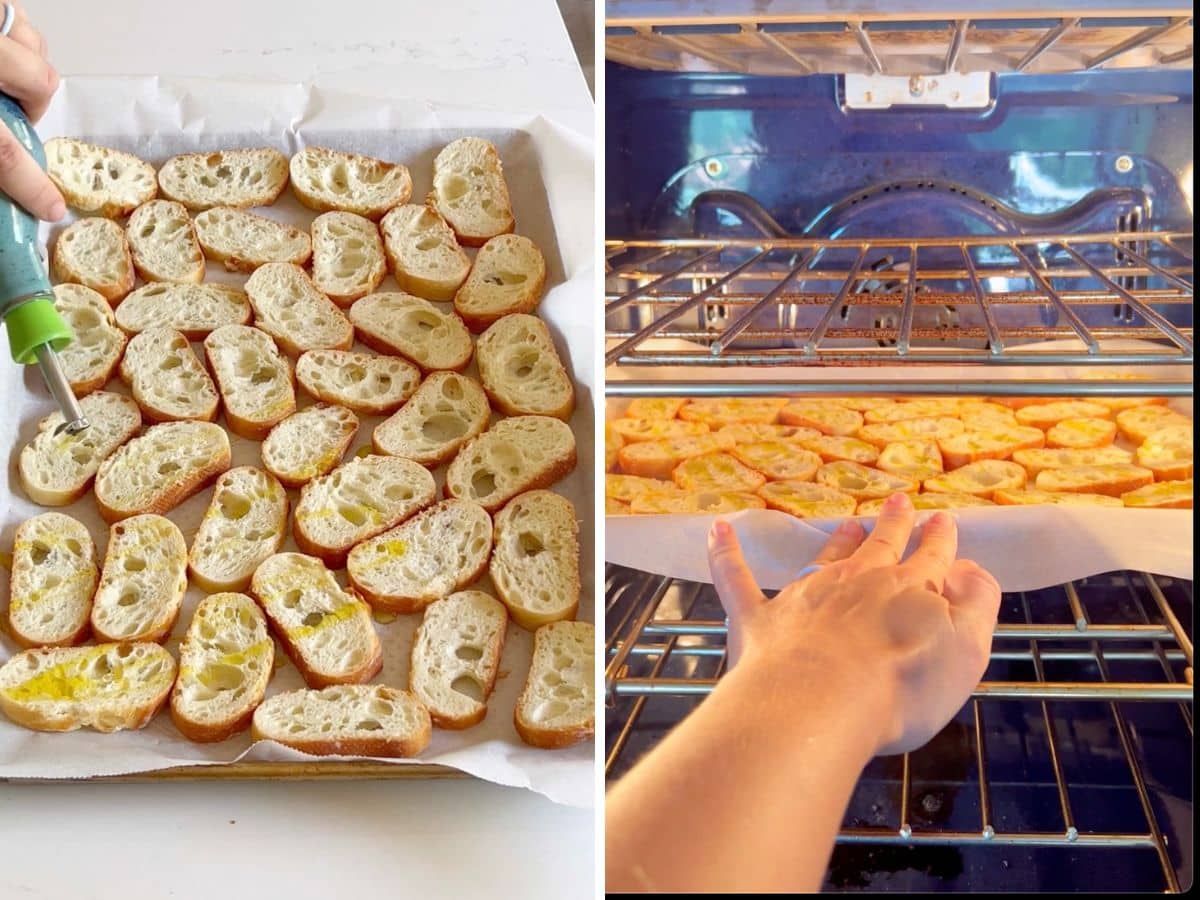
    Step 1- Toast the bread.

    Preheat the oven to 400 degrees F and line a sheet pan with parchment (only if using baguette). Arrange sliced baguette pieces in a single layer, drizzle with olive oil, and bake for about 10 minutes until just golden.

    Baguette on a pan and then the pan in the oven.

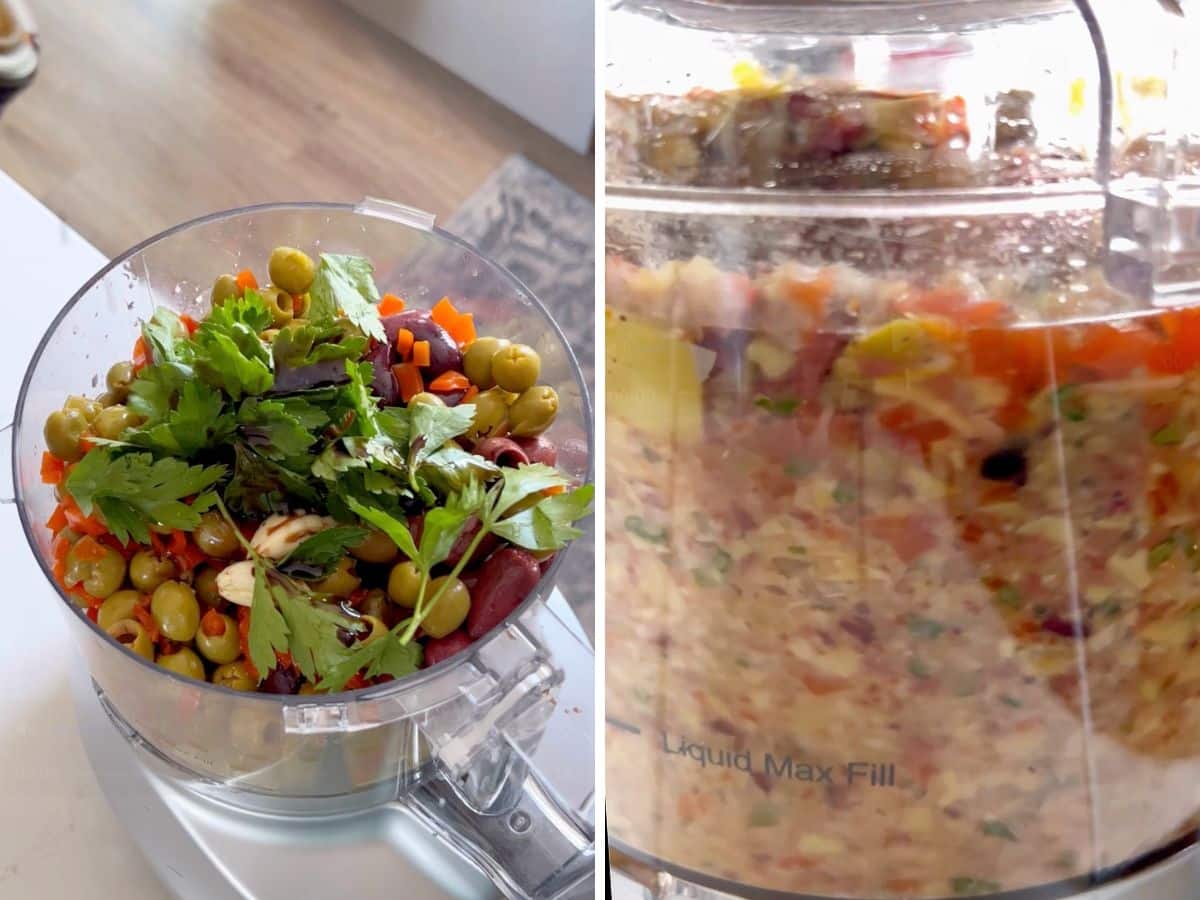
    Step 2- Blend the ingredients.

    Add green olives, kalamata olives, artichoke hearts, garlic, lemon zest, parsley, and black pepper to a food processor. Pulse several times, stopping to scrape down the sides a few times.

    Olive spread ingredients in a food processor and then the processor running.

    Step 3- Serve.

    Once the tapenade reaches your desired chunky, spreadable texture, serve it right away with the toasted baguette slices. Or, cover and refrigerate until ready to serve.

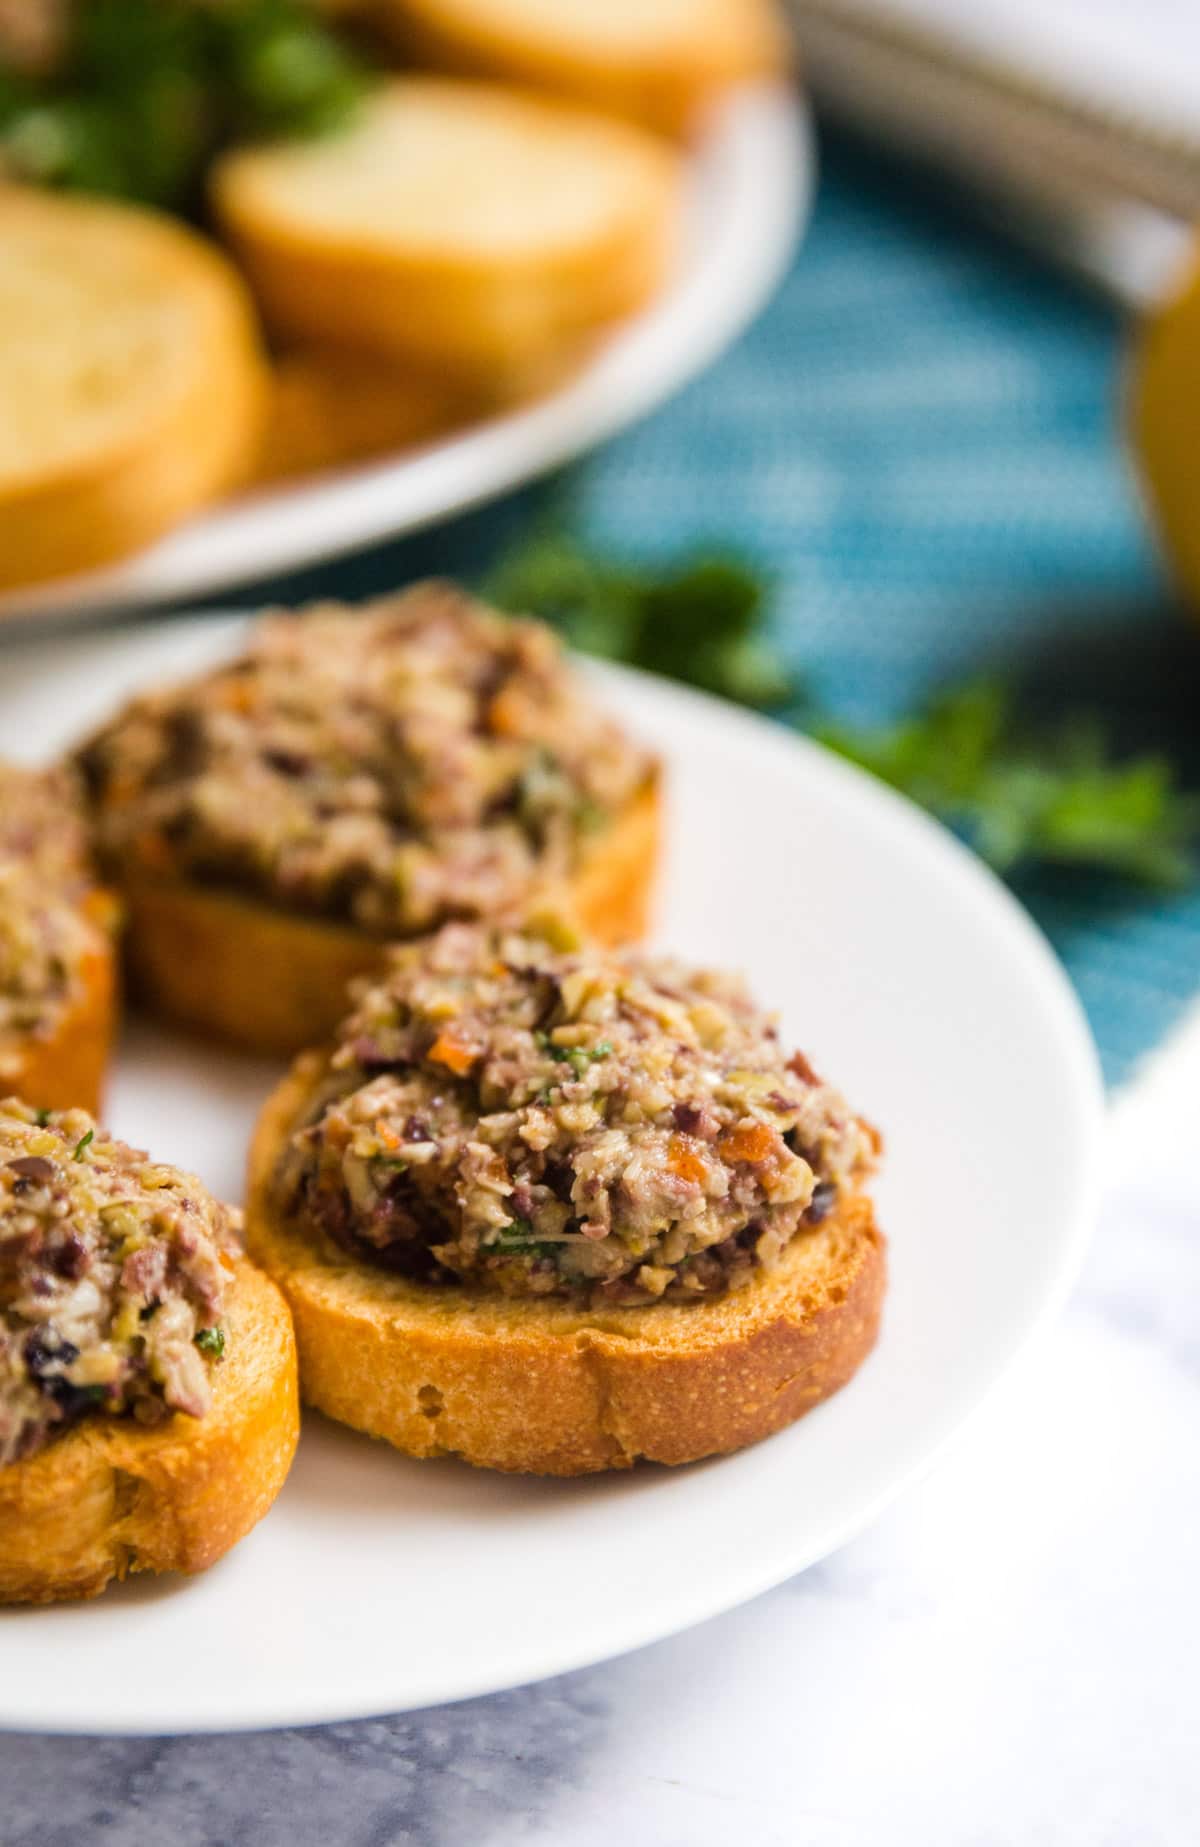
    A plate with baguette slices topped with olive spread.

    Frequently Asked Questions

    What is tapenade?

    Tapenade is a Provençal dip or paste traditionally made with olives, capers, and anchovies. I skipped the anchovies and capers and added artichokes, garlic, and fresh herbs, for a lighter, more modern twist.

    What is in tapenade?

    Typically, olives form the base (either green, black, or both), mixed with olive oil, garlic, and sometimes citrus. This variation adds artichokes and parsley for a bright, Mediterranean flavor that pairs beautifully with bread or crackers.

    Can I make this without a food processor?

    Yes. The food processor makes the process super quick and easy and helps get a nice, fine chop, but you can totally hand chop it.

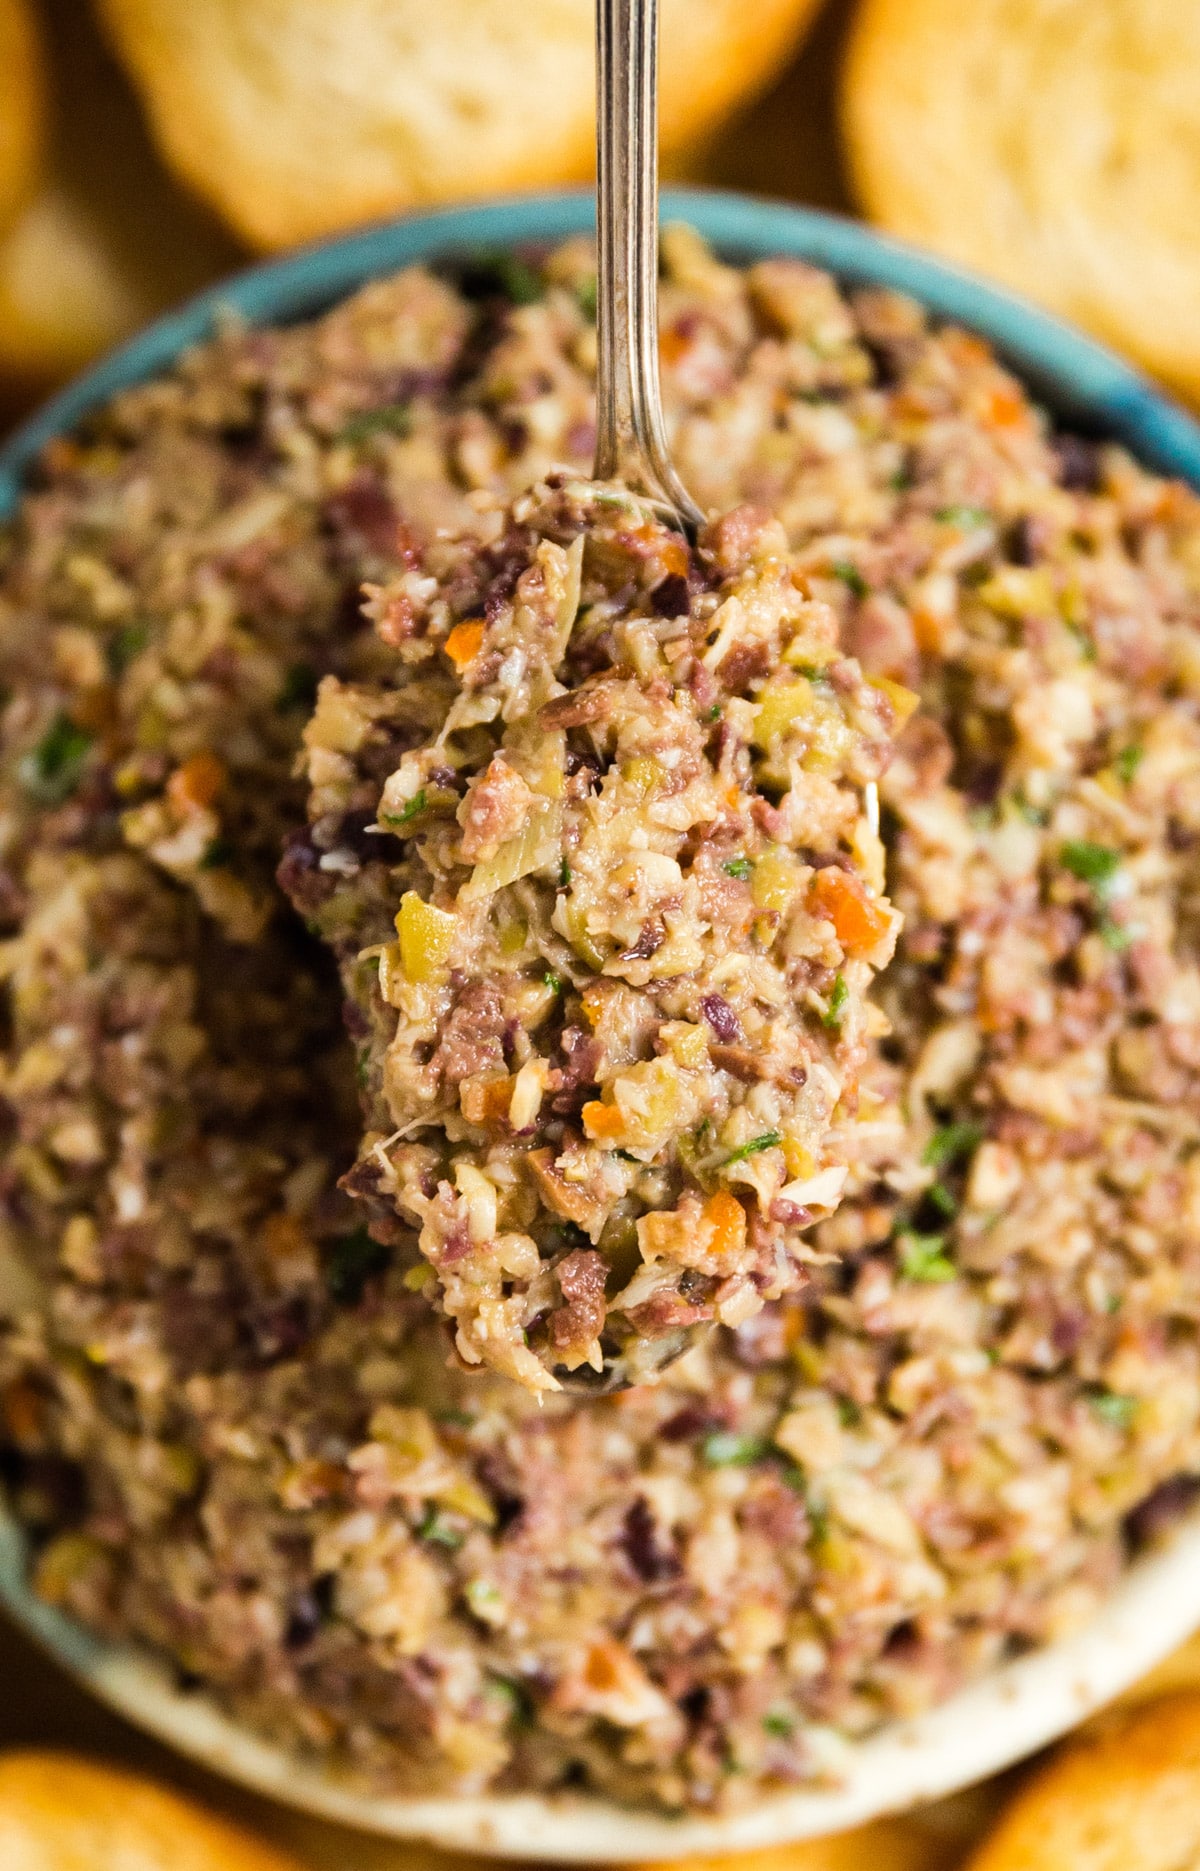
    A spoon holding up a spoonful of olive tapenade from the bowl.

    Tips For Making Green Olives Tapenade

    • Line your sheet pan with parchment or foil before toasting the baguette slices (if using baguette) for easy cleanup.
    • Use a food processor or mini chopper to quickly blend everything. It makes prep a breeze!
    • Pulse in short bursts and stop every so often to scrape down the sides for even mixing.
    • Leave some texture if you like a chunkier dip. Bigger olive and artichoke pieces taste great too.
    • Drizzle olive oil over the bread before baking for a golden, flavorful finish, and add a touch more before serving to give the tapenade a glossy, rich look.
    • Experiment with flavor. A sprinkle of fresh herbs or a pinch of red pepper flakes adds a fun twist.
    • Ingredients to prep ahead- Drain the olives and artichokes so they’re ready to go when it’s time to blend.
    • Leftovers and storage- Store in an airtight container in the fridge for up to 1 week.

    What To Serve With Kalamata Olives Tapenade

    This dip pairs beautifully with any appetizer spread. Spread it over warm baguette slices for an effortless artichoke bruschetta, or serve it with crackers to round out a cheese board or antipasto platter. It’s also delicious over grilled chicken, fish, or tossed with veggies for a quick flavor boost. Here are some favorite pairings:

    • Grandma's Shrimp Dip
    • Bloody Mary Cheese Ball
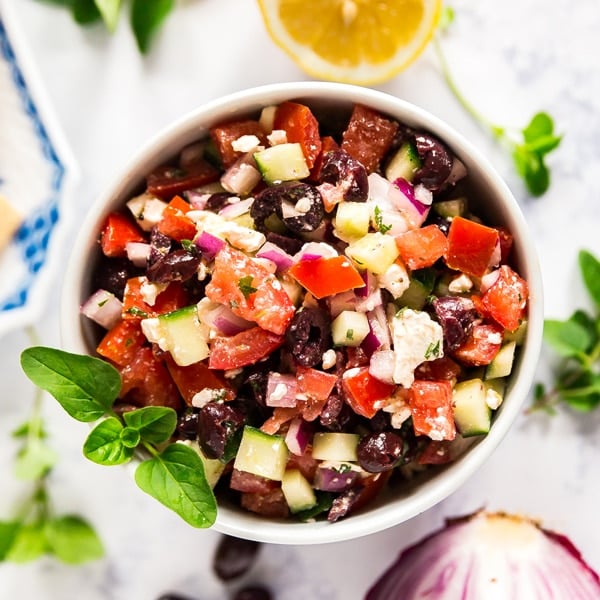
    • Greek Salsa
    • BLT Ranch Flatbread

    Other Appetizers To Try

    • Greek Salsa
      Greek Salsa
    • It's always a good idea to have an easy guacamole recipe up your sleeve and this one is seriously the best- fantastic, zesty flavor with an awesome secret ingredient to helps take the guacamole to the next level. It's a healthy snack for any celebration or game day!
      The most delicious guacamole EVER.
    • A square image of 10 Minute Shrimp Salsa.
      10 Minute Shrimp Salsa
    • A hand holding a chip with avocado salsa.
      Avocado Salsa

    Love this recipe? Please leave a 5 star ⭐️⭐️⭐️⭐️⭐️ rating in the recipe card below ⬇️ and/or a review in the comment section further down. Check out my Amazon Store for all my favorite tools, including those used in this recipe. And follow @thelifejolie on Instagram and TikTok!

    A bowl or artichoke and olive spread surrounded by toasted baguette.

    Artichoke and Olive Spread

    Jessy Freimann
    Meet your new go-to appetizer: a savory artichoke and olive spread that’s ready in 10 minutes and tastes amazing with wine, crackers, or warm baguette slices.
    No ratings yet
    Print Recipe Pin Recipe
    Prep Time 10 minutes mins
    Course Appetizer
    Cuisine French
    Servings 6 servings
    Calories 204 kcal

    Equipment

    • mixing bowl
    • Spatula
    • mini prep processor
    • chefs knife
    • cutting board
    • measuring cups
    • measuring spoons
    • sheet pan
    • Silpat

    Ingredients
      

    • 1 baguette, sliced
    • 1 Tablespoon olive oil + extra for drizzling on the bread
    • 10 ounces kalamata olives, pitted and drained
    • 10 ounces green olives, pitted and drained
    • 14 ounces artichoke hearts, quartered, marinated and drained
    • 1 clove garlic, peeled
    • 1 lemon, zest only
    • ½ teaspoon ground black pepper
    • 1 Tablespoon fresh parsley
    • 1 teaspoon balsamic vinegar (optional)

    Instructions
     

    • Preheat the oven to 400° F and line a sheet pan.
    • Place the baguette slices in a single layer on the sheet plan and drizzle with olive oil to taste.
    • Bake for 10 minutes to lightly toast.
    • While the bread toasts, place all ingredients into the food processor.
    • Pulse the food processor to chop and blend the ingredients, pausing between every couple pulses to scrape down the sides of the food processor with a spatula until the tapenade has reached your desired texture.
    • Serve immediately with the baguette slices or cover and refrigerate for up to a week.

    Video

    Notes

    • Line your sheet pan with parchment or foil before toasting the baguette slices (if using baguette) for easy cleanup.
    • Use a food processor or mini chopper to quickly blend everything. It makes prep a breeze!
    • Pulse in short bursts and stop every so often to scrape down the sides for even mixing.
    • Leave some texture if you like a chunkier dip. Bigger olive and artichoke pieces taste great too.
    • Drizzle olive oil over the bread before baking for a golden, flavorful finish, and add a touch more before serving to give the tapenade a glossy, rich look.
    • Experiment with flavor. A sprinkle of fresh herbs or a pinch of red pepper flakes adds a fun twist.
    • Ingredients to prep ahead- Drain the olives and artichokes so they’re ready to go when it’s time to blend.
    • Leftovers and storage- Store in an airtight container in the fridge for up to 1 week.

    Nutrition

    Serving: 1servingCalories: 204kcalCarbohydrates: 24gProtein: 5gFat: 11gSaturated Fat: 2gPolyunsaturated Fat: 1gMonounsaturated Fat: 7gSodium: 996mgPotassium: 105mgFiber: 3gSugar: 3gVitamin A: 247IUVitamin C: 11mgCalcium: 76mgIron: 2mg
    Tried this recipe?Let us know how it was!

    Originally posted at Easy Good Ideas.

    Baked Brie With Honey And Pomegranate

    Nov 10, 2025 · Leave a Comment

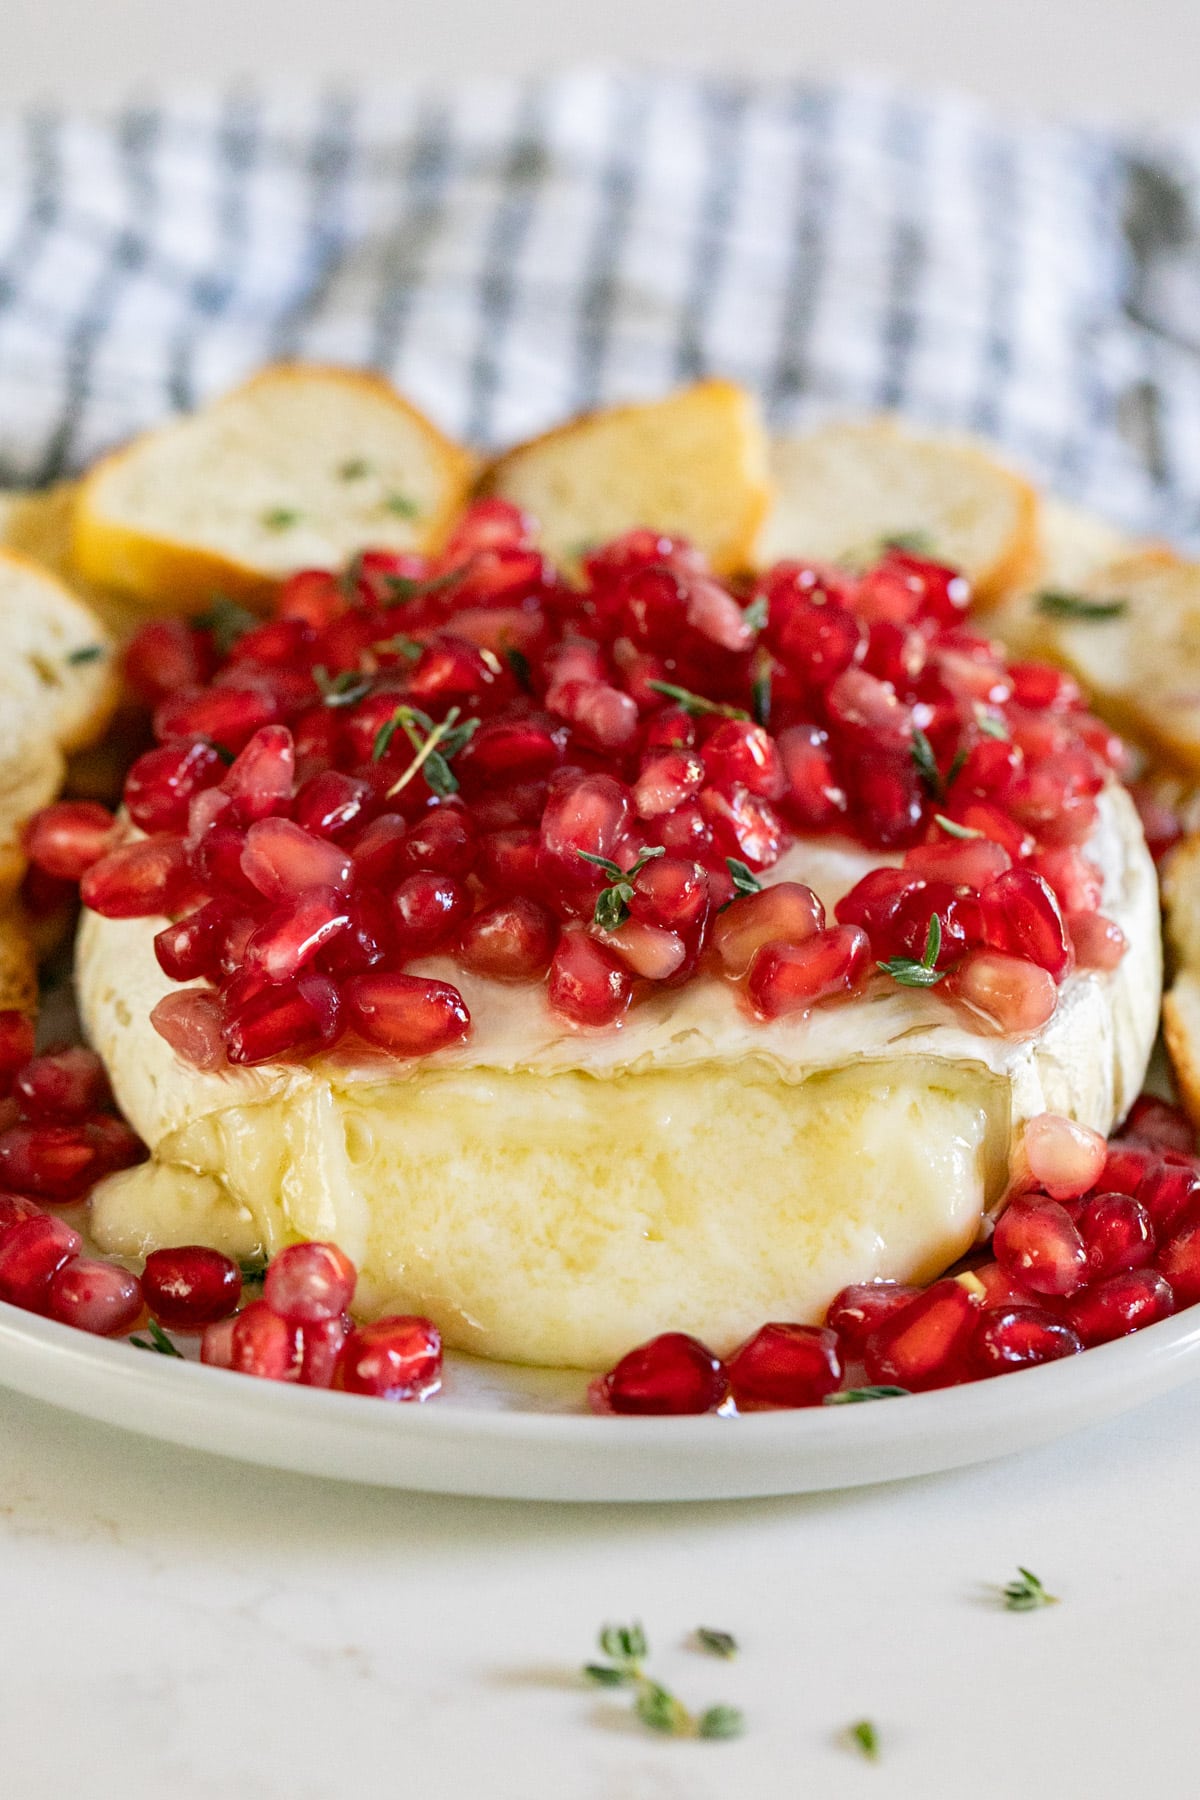
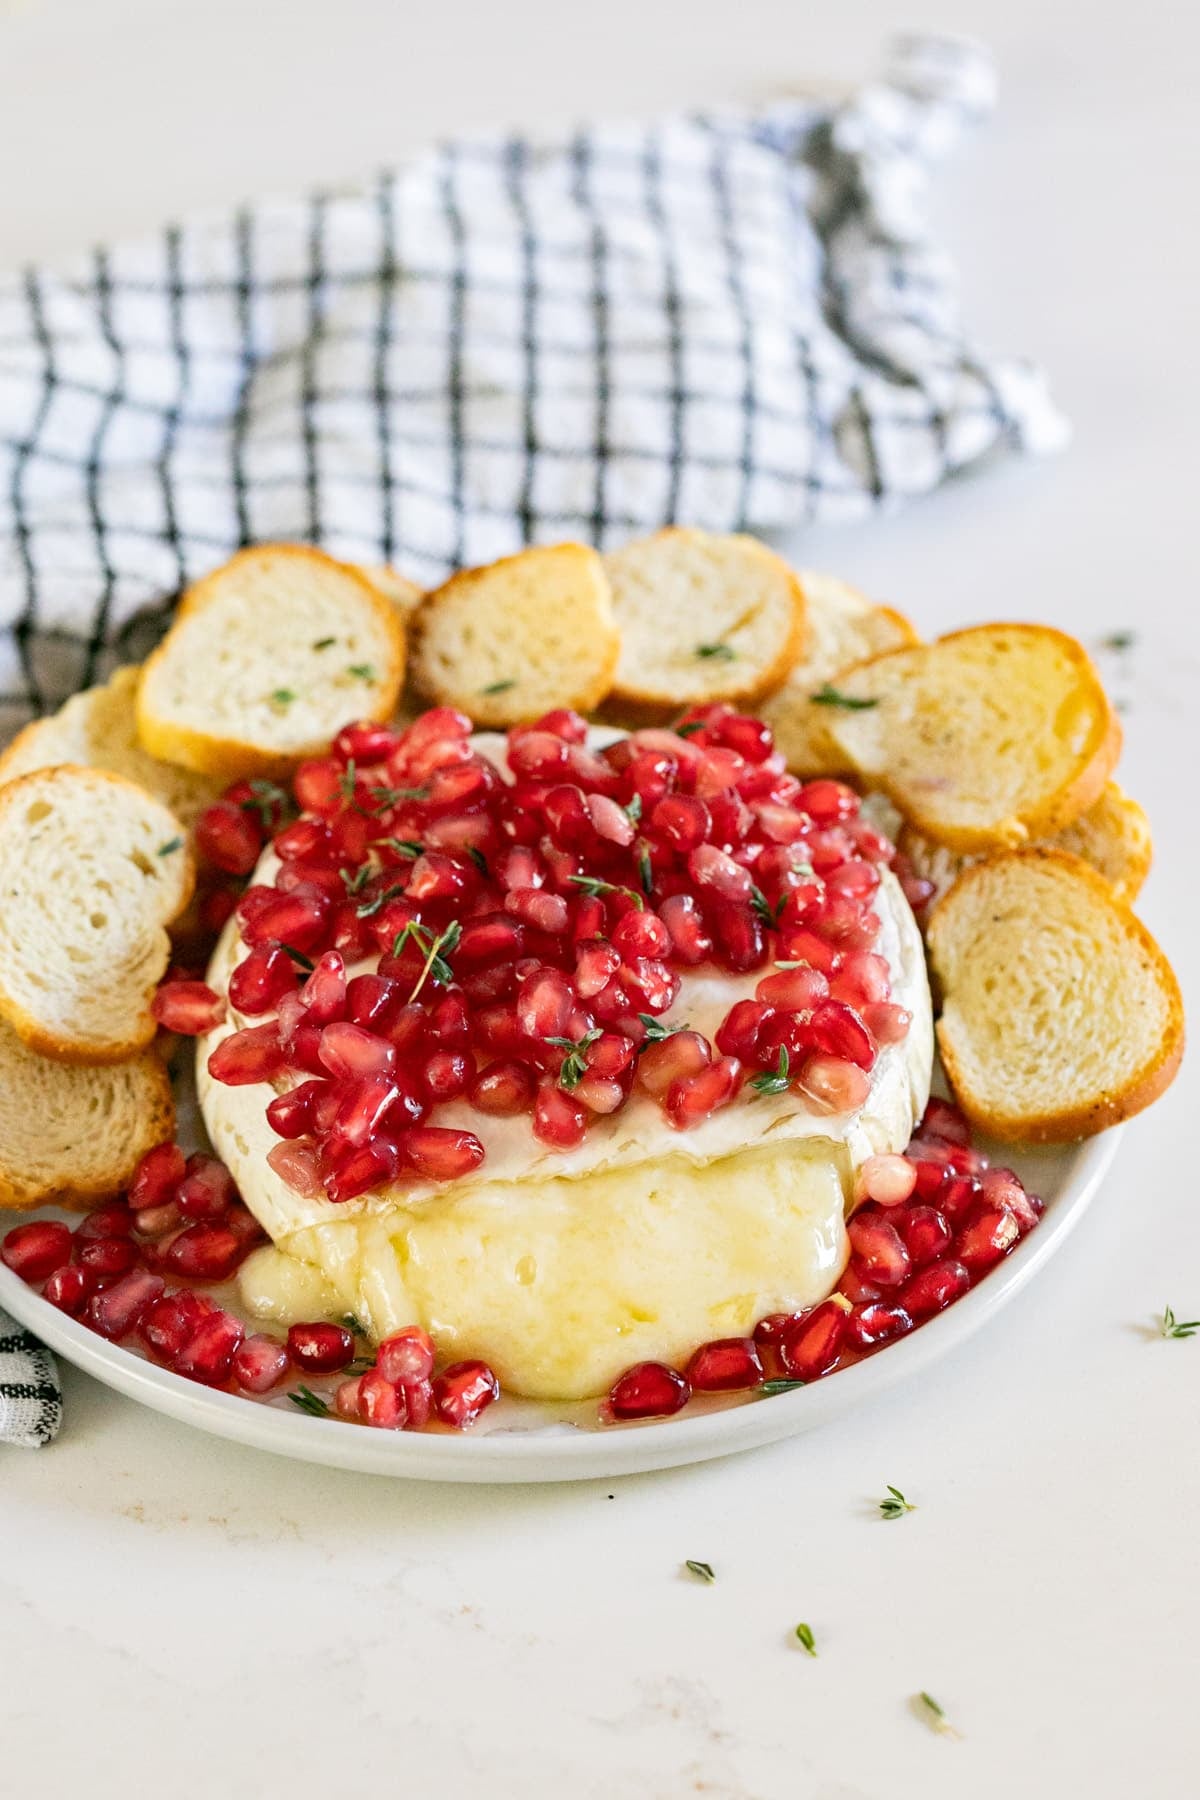
    A wheel of baked brie topped with pomegranates with the front cut off and the melty cheese flowing out.

    This baked brie with honey is a simple, elegant appetizer ready in just 30 minutes. Creamy brie, juicy pops of pomegranate, fresh thyme, and a drizzle of honey make the perfect sweet-and-savory bite.

    A wheel of baked brie topped with pomegranates with the front cut off and the melty cheese flowing out.
    [feast_advanced_jump_to]

    Why You’ll Love This Baked Brie And Honey

    The only thing better than brie cheese is when it's baked… perfectly creamy, melty, and irresistible. It’s one of those appetizers that looks impressive but takes almost no effort. Serve baked brie with toasted baguette slices or fresh fruit, and it’s guaranteed to disappear fast.

    I came up with this version as an easy yet elegant holiday starter, pairing brie’s rich creaminess with tangy pomegranate seeds, fresh thyme, and a drizzle of honey for sweetness. The flavors balance beautifully, and since pomegranates shine in winter, you can easily swap in fresh berries for summer. It’s festive, flexible, and always a crowd-pleaser. Here’s why you should make this baked brie recipe:

    • Easy to change up the toppings
    • Rich, creamy, and perfectly gooey
    • Sweet, tangy, and savory flavor combo
    • Beautiful for holidays or parties
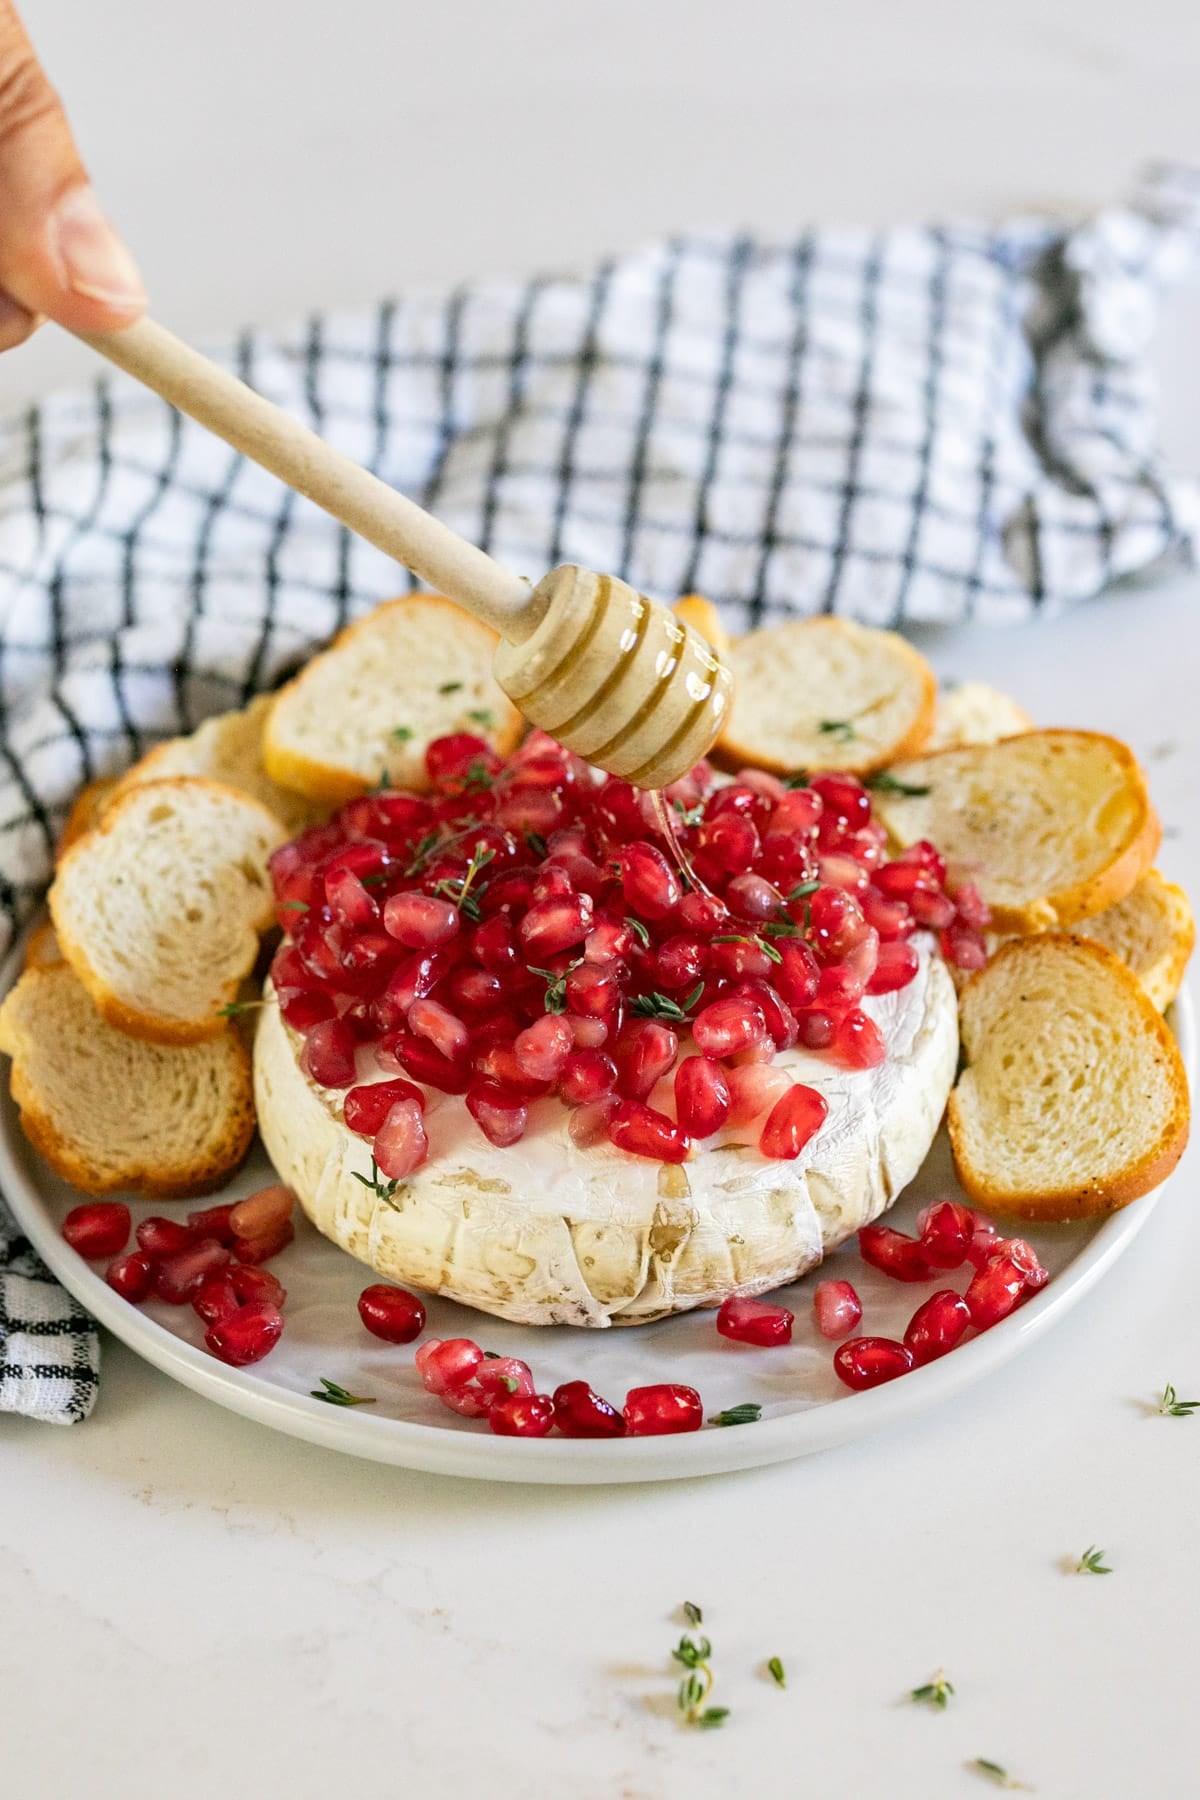
    A honey spoon drizzling honey on a pomegranate topped wheel of brie.

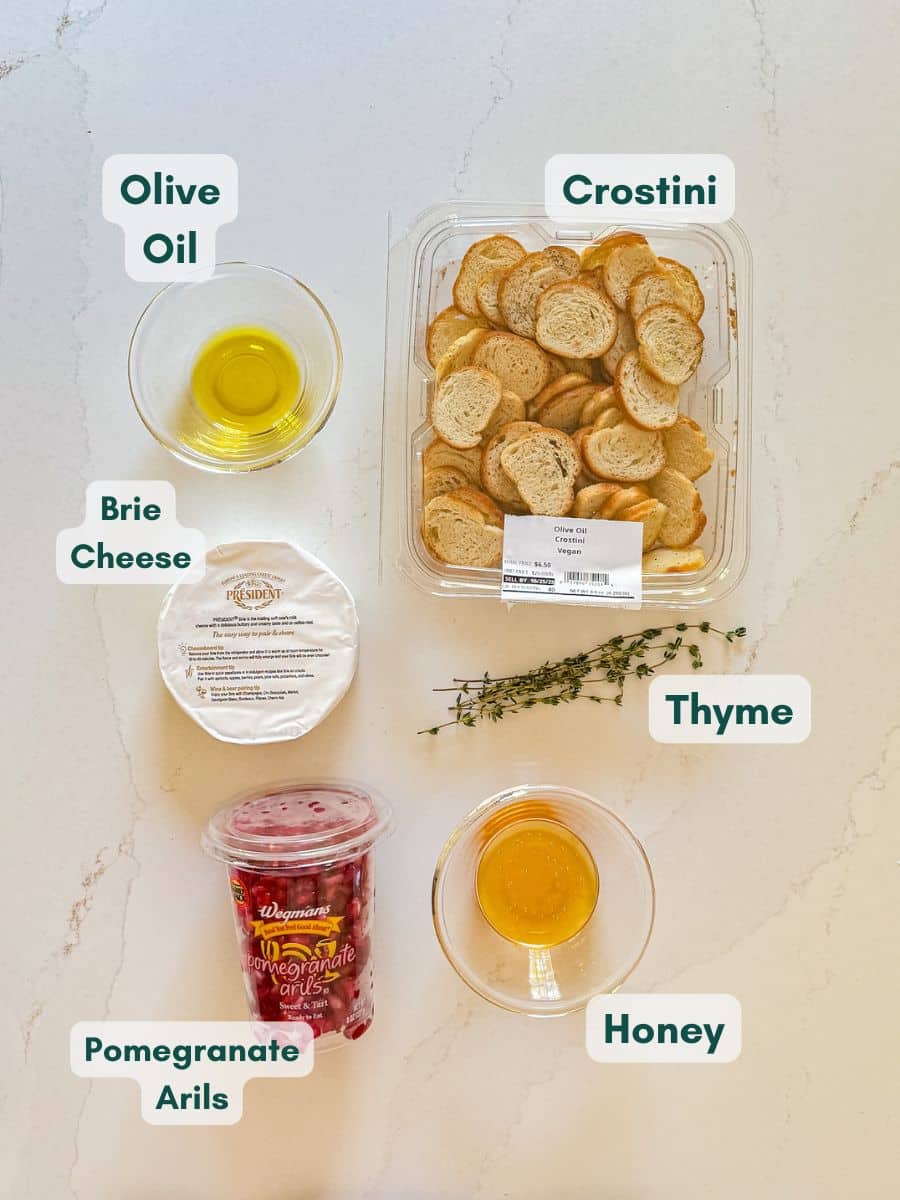
    Ingredient Information And Substitutions

    • Brie wheel- Choose a triple crème brie for the creamiest texture. You can also use Camembert for a similar flavor.
    • Pomegranate seeds- Add color and a tart pop. Try substituting with raspberries, blackberries, or blueberries in other seasons.
    • Fresh thyme- Gives a subtle earthy note. Rosemary or even fresh basil would also pair nicely.
    • Honey- Adds sweetness that ties everything together. Pure maple syrup is a great alternative.
    • Baguette- Slice and toast lightly. Crackers or fruit slices (like apple and pear) also work well for serving.
    • Olive oil- Used for toasting the bread. Butter can be swapped in for a richer flavor.
    An overhead image of labeled recipe ingredients.

    How To Make Baked Honey Brie

    Step 1- Preheat the oven.

    Set your oven to 350 degrees F and line two baking pans with parchment paper or a silicone mat.

    Step 2- Bake the brie.

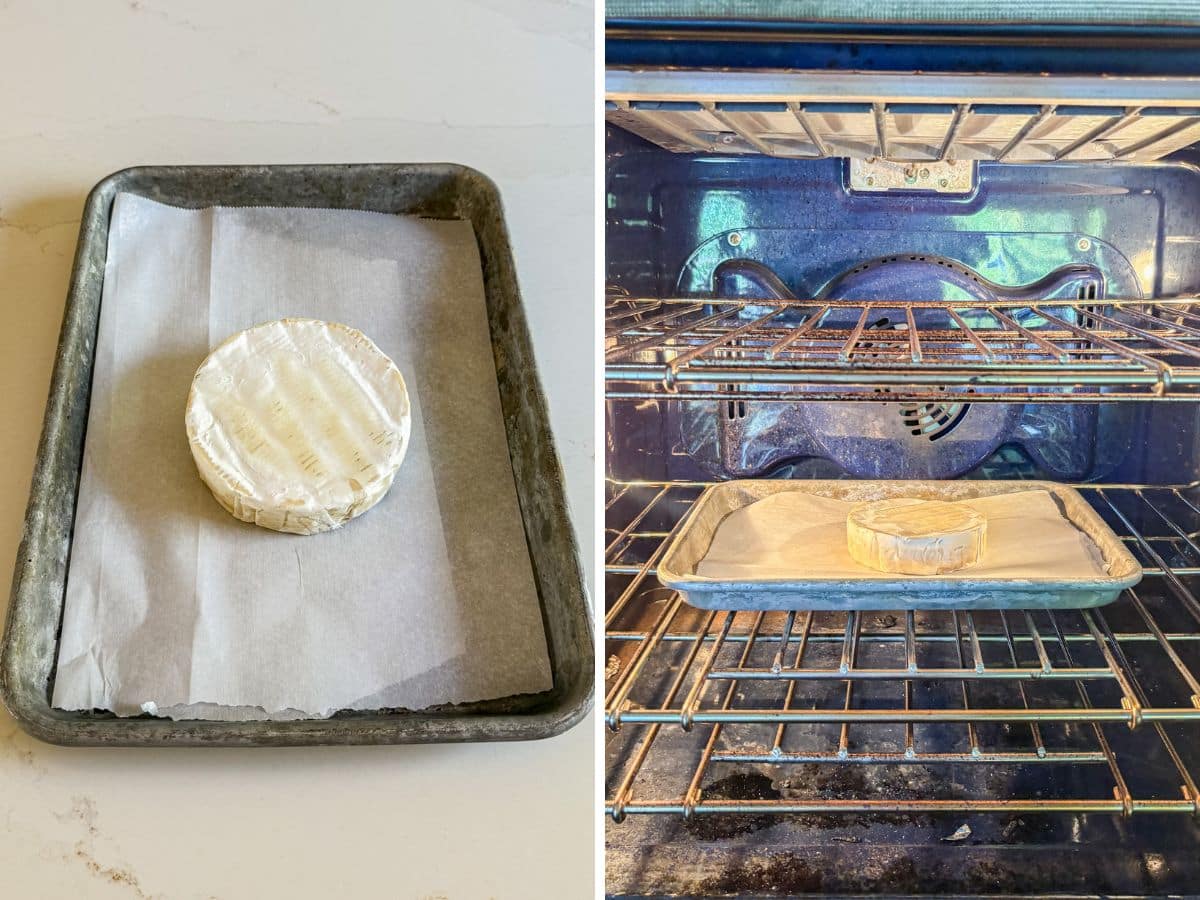
    Place the brie wheel on one of the prepared pans and bake for about 10 minutes, just until softened.

    A wheel of brie on a parchment-lined pan and then the pan in the oven.

    Step 3- Toast the baguette.

    This is optional- while the brie starts baking, arrange the baguette slices on the second pan in a single layer. Drizzle with olive oil.

    Step 4- Finish baking.

    After the first 10 minutes of baking, place the pan with the baguette slices on the other oven rack. Continue baking both for another 10 minutes, until the bread is golden and the brie turns perfectly melty.

    Step 5- Add toppings and serve.

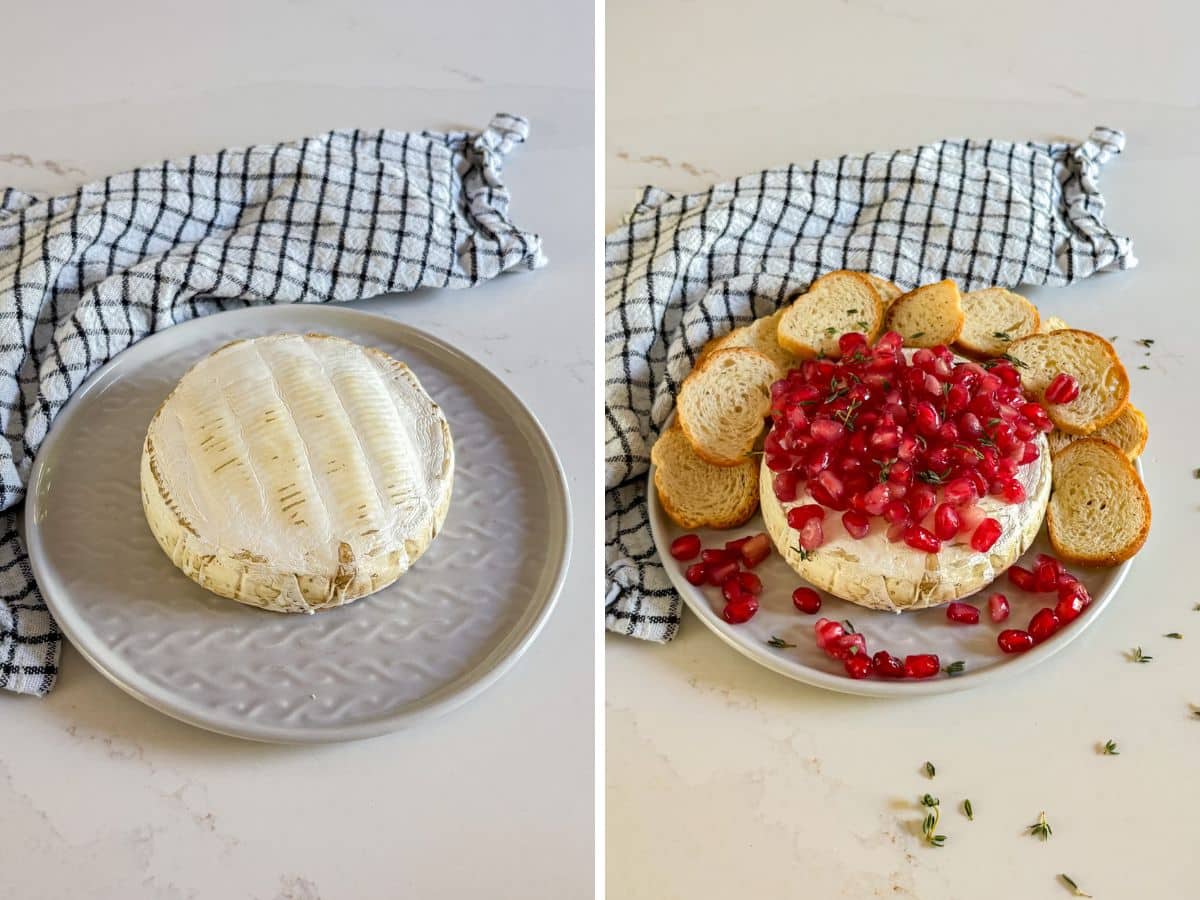
    Carefully move the warm brie to a serving dish, then add the pomegranate seeds, thyme, and a drizzle of honey. Serve the baked brie with toppings immediately with the toasted baguette or crackers.

    Baked wheel of brie on a plate and then topped with pomegranate, honey and thyme with crostini behind it.

    Frequently Asked Questions

    Can I make this ahead of time?

    It’s best served fresh, but you can prep the toppings and (if using) slice the bread a few hours in advance. Just bake the brie right before serving so it stays warm and gooey.

    Can I reheat baked brie?

    Yes. Place it back in a 350 degrees F oven for about 5 minutes until the center softens again.

    Do I need to remove the rind before baking?

    Nope! The rind helps the cheese hold its shape as it bakes and is totally edible. It also adds a subtle, earthy flavor.

    Baked brie topped with pomegranates with the melty cheese flowing out and crostini on the plate.

    Tips For Making Baked Brie Appetizer

    • Bake the brie on parchment paper so it’s easy to transfer to your serving plate. No sticking or mess!
    • Use room-temperature brie for the best melt. If it’s too cold, it won’t get as creamy in the oven.
    • Don’t over bake it. Once the cheese feels soft to the touch, it’s ready. If it starts leaking, pull it out right away.
    • Add the honey right before serving so it stays glossy and soft. It'll get hard and unpleasantly sticky if you add it before baking.
    • I love using pomegranate in winter, but this is just as good with fresh berries or figs when they’re in season.
    • You’ll know it’s done when the brie feels soft to the touch and looks slightly puffed. If it starts to ooze out a little, it’s perfectly melted and ready to serve.
    • Try adding chopped toasted nuts like pistachios or pecans for extra crunch. They add great texture to brie baked with honey.
    • Ingredients to prep ahead- Slice the baguette and remove the pomegranate seeds earlier in the day. Keep covered until ready to bake.
    • Leftovers and storage- Store any leftover brie in an airtight container in the fridge for up to 2 days.
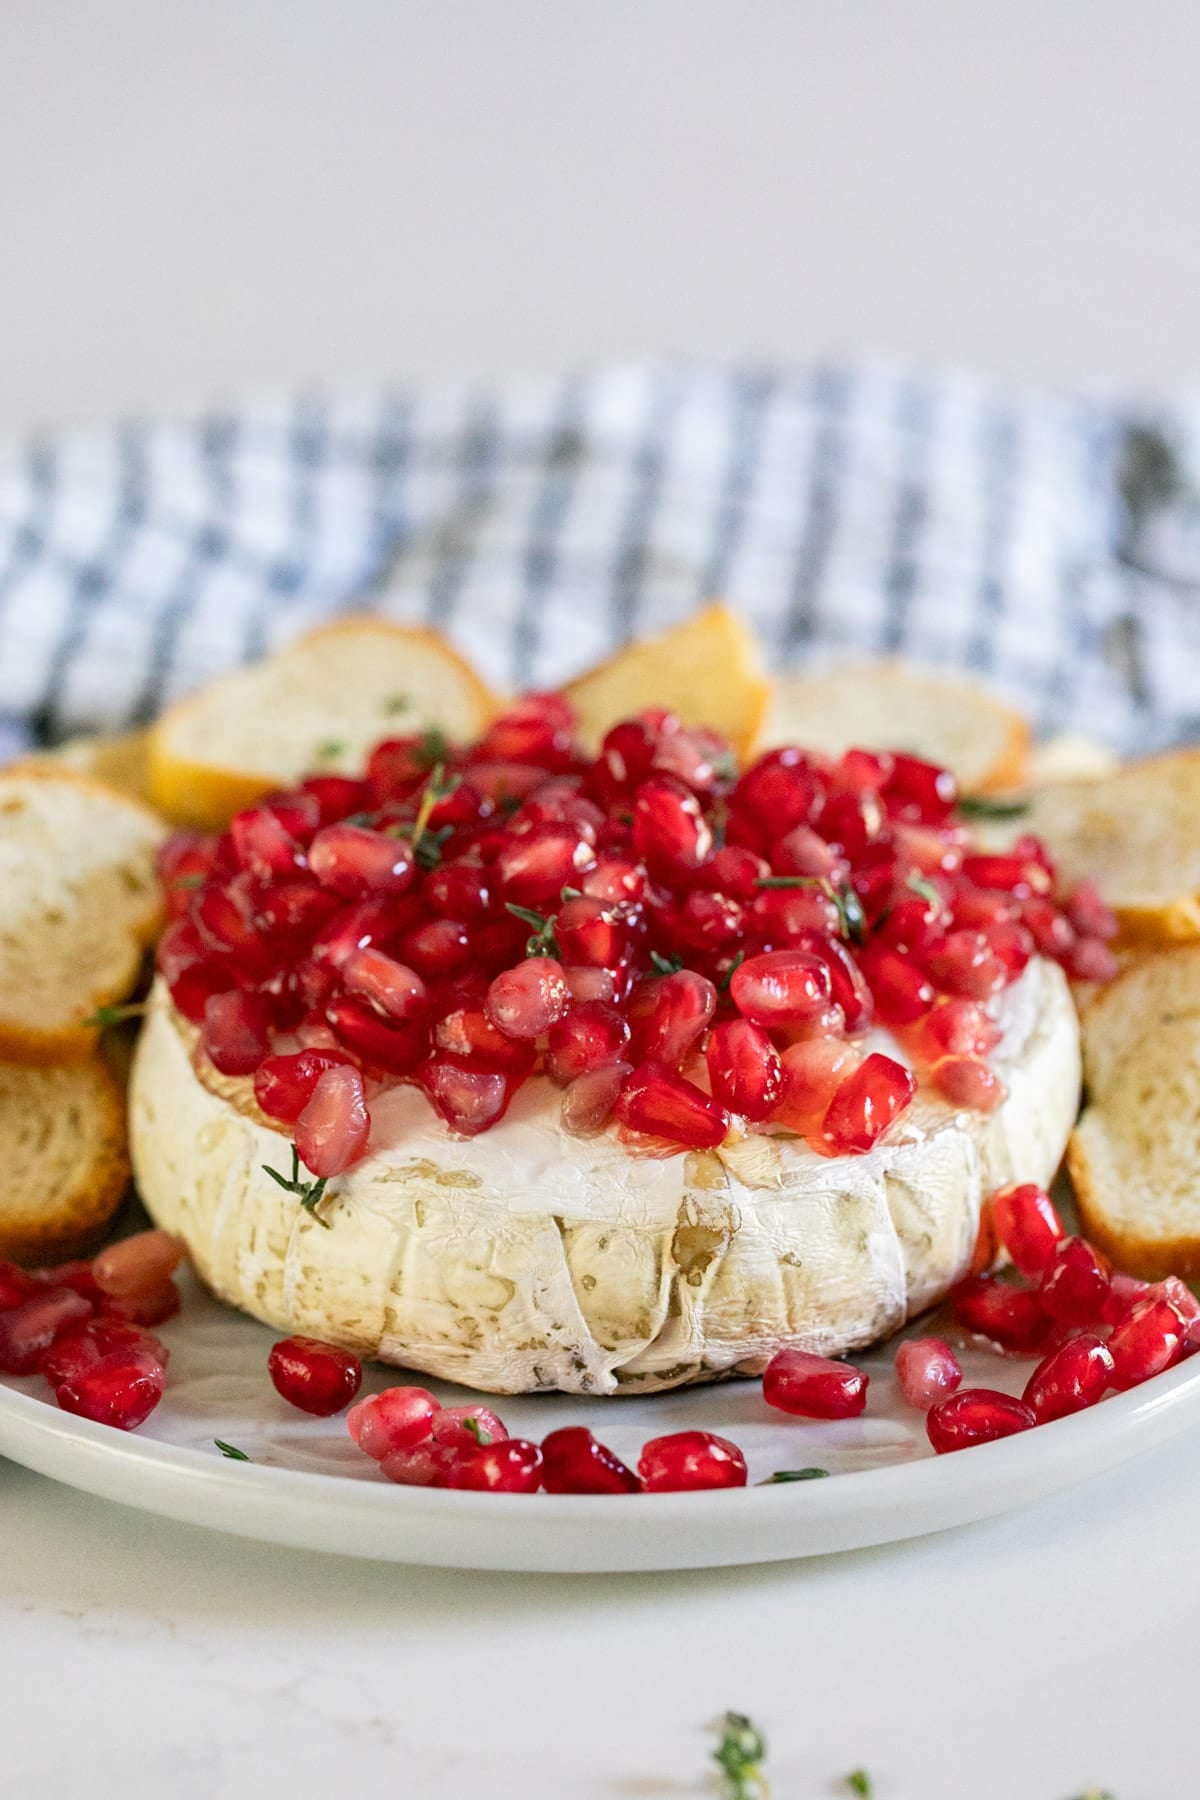
    A close up of a wheel of baked brie with pomegranstes on top.

    What To Serve With Baked Brie

    Round out your spread with a few more festive bites to create an appetizer table that feels effortless, inviting, and full of flavor. Mix and match a few of these favorites to make it complete:

    • Roast Turkey Thighs for Two
    • French Onion Creamy Mashed Potatoes
    • Savory Sauteed Green Beans
    • Apple Spice Muffins

    Other Cheese Appetizer Recipes To Try

    • A square image of Broccoli Rabe and Ricotta Crostini with a yellow broccoli rabe blossom in the foreground and some other crostini and a plate of broccoli rabe in the background.
      Broccoli Rabe and Ricotta Crostini
    • A close up image of a Brie Apple Phyllo Cup on a pan.
      Brie Apple Phyllo Cups
    • This Artichoke Asiago Dip is the best easy recipe to throw together for a last-minute spring get-together. It only takes a couple of minutes to make and is fully of cheesy, delicious flavor! #ad
      Artichoke Asiago Dip
    • A cranberry cheeseball with a portion taken off it revealing the creamy interior.
      Harvest Cranberry Cheeseball

    Hosting Thanksgiving?

    Discover the secret to hosting Thanksgiving without all the stress! Prepsgiving is your FREE guide to making a delicious Thanksgiving feast the easy way.

    Love this recipe? Please leave a 5 star ⭐️⭐️⭐️⭐️⭐️ rating in the recipe card below ⬇️ and/or a review in the comment section further down. Check out my Amazon Store for all my favorite tools, including those used in this recipe. And follow @thelifejolie on Instagram and TikTok!

    A wheel of baked brie topped with pomegranates with the front cut off and the melty cheese flowing out.

    Baked Brie With Honey And Pomegranate

    Jessy Freimann
    This baked brie with honey is a simple, elegant appetizer ready in just 30 minutes. Creamy brie, juicy pops of pomegranate, fresh thyme, and a drizzle of honey make the perfect sweet-and-savory bite.
    No ratings yet
    Print Recipe Pin Recipe
    Prep Time 10 minutes mins
    Cook Time 20 minutes mins
    Total Time 30 minutes mins
    Course Appetizer
    Cuisine American, appetizer, holidays
    Servings 8 servings
    Calories 119 kcal

    Equipment

    • sheet pan
    • chefs knife
    • cutting board

    Ingredients
      

    • 8 ounces brie cheese in wheel form
    • ½ cup Pomegranate seeds
    • 1 teaspoon Fresh thyme chopped
    • 2 Tablespoons Honey
    • Baguette or crackers
    • Olive oil (only if toasting baguette

    Instructions
     

    • Preheat the oven to 350 degrees F and line a baking pans with parchment paper or a silpat.
    • Place the brie on one of the pans and into the oven. Bake for 20 minutes.
    • (Optional step)- On another lined sheet other pan, line baguette slices up in a single layer and lightly drizzle with olive oil.
    • When the first 10 minutes of the cheese baking are up, place the pan of baguette slices onto the other oven rack and continue baking the brie and baguette slices for the other 10 minutes.
    • Remove all items from the oven.
    • Carefully transfer the brie to your serving plate.
    • Top the brie with pomegranate seeds, a sprinkle of fresh chopped thyme and a drizzle of honey, all to taste.
    • Serve immediately with the baguette or crackers.

    Video

    Notes

    • Bake the brie on parchment paper so it’s easy to transfer to your serving plate. No sticking or mess!
    • Use room-temperature brie for the best melt. If it’s too cold, it won’t get as creamy in the oven.
    • Don’t over bake it. Once the cheese feels soft to the touch, it’s ready. If it starts leaking, pull it out right away.
    • Add the honey right before serving so it stays glossy and soft. It'll get hard and unpleasantly sticky if you add it before baking.
    • I love using pomegranate in winter, but this is just as good with fresh berries or figs when they’re in season.
    • You’ll know it’s done when the brie feels soft to the touch and looks slightly puffed. If it starts to ooze out a little, it’s perfectly melted and ready to serve.
    • Try adding chopped toasted nuts like pistachios or pecans for extra crunch. They add great texture to brie baked with honey.
    • Ingredients to prep ahead- Slice the baguette and remove the pomegranate seeds earlier in the day. Keep covered until ready to bake.
    • Leftovers and storage- Store any leftover brie in an airtight container in the fridge for up to 2 days.

    Nutrition

    Serving: 1servingCalories: 119kcalCarbohydrates: 6gProtein: 6gFat: 8gSaturated Fat: 5gPolyunsaturated Fat: 0.2gMonounsaturated Fat: 2gCholesterol: 28mgSodium: 179mgPotassium: 72mgFiber: 0.5gSugar: 6gVitamin A: 180IUVitamin C: 1mgCalcium: 55mgIron: 0.2mg
    Tried this recipe?Let us know how it was!

    Turkey Broth Recipe

    Nov 7, 2025 · Leave a Comment

    A jar of turkey stock with an onion and carrots next to it.

    Forget the store-bought cartons! This turkey broth recipe is easy, flavorful, and ready in about 1 ½ hours. Plus, it freezes well, so you’ll always have broth on hand for soups, casseroles, or gravy.

    A jar of turkey stock with an onion and carrots next to it.
    [feast_advanced_jump_to]

    Why You’ll Love This Turkey Broth For Gravy

    When it comes to broth, having a really good one makes all the difference. It’s the foundation of so many recipes, from cozy soups to hearty casseroles. Sure, there are plenty of decent options on the market, but nothing compares to homemade. And I don't know about you, but it seems to be harder and harder to find turkey broth at the store... especially outside of holiday season.

    Making this broth from scratch doesn’t take much effort, and the reward is a flavorful liquid you can freeze and pull out whenever you need it. I love making a batch ahead of the holidays so I can use it to boost pan drippings for an amazing broth for gravy. It’s easy, it’s budget-friendly, and it makes everything you cook taste better. Here’s why it’s worth making yourself:

    • Hands-off cooking time
    • Freezer-friendly 
    • Customizable
    • Better than store-bought
    A jar of turkey broth with the cover off surrounded by root veggies.

    Ingredient Information And Substitutions

    • Turkey wings- My favorite cut to use, but you can swap in turkey necks, drumsticks, or even the carcass from a roasted turkey.
    • Onion- Adds sweetness and depth as it simmers. Shallots can be used instead.
    • Carrots- Give natural sweetness and color. Parsnips are a nice substitute.
    • Celery- Brings a fresh, earthy flavor. Fennel stalks can be used if you want something different.
    • Garlic- Smashed cloves add subtle flavor.
    • Olive oil- Helps brown the turkey pieces for a richer flavor. Vegetable oil is an easy substitute.
    • Fresh herbs- Sage, thyme, and parsley are classic pairings for turkey. And using fresh means you can bundle and remove them easily.
    • Whole peppercorns- Bring gentle heat and complexity. Cracked peppercorns or ground black pepper can be used, though the flavor will be stronger (and you'll have specks in the broth).
    • Kosher salt- Sea salt will also work.
    An overhead image of labeled recipe ingredients.

    How To Make Turkey Broth

    Step 1- Brown the turkey parts.

    Heat oil in a Dutch oven over medium-high heat. Add the turkey wings (or other pieces) and sear until golden brown on all sides, 5-7 minutes. Remove once browned.

    Raw turkey wings in a dutch oven and then the same wings browned.

    Step 2- Make the sachet.

    Add onion, carrots, and celery to the pot. Cook for about 7 minutes until softened and caramelized.

    Wrap garlic, herbs, and peppercorns in cheesecloth, then tie it closed. This makes it easy to remove later.

    Herbs, garlic and peppercorns on a piece of cheesecloth and then tied up in sachet form.

    Step 3- Caramelize the vegetables.

    Add onion, carrots, and celery to the pot. Cook for about 7 minutes until softened and caramelized.

    Step 4- Simmer the broth.

    Return the turkey to the pot along with the sachet and 12 cups of water. Bring to a light simmer, then lower the heat.

    Veggies cooking in the pot and then water added and simmering

    Step 5- Cook gently.

    Simmer uncovered for 1 ½ hours. Skim foam off the top if needed, and season with salt toward the end.

    Step 6- Strain and cool.

    Pour through a sieve to remove solids. Let cool completely before storing.

    Frequently Asked Questions

    Can I use raw turkey parts?

    Raw turkey pieces work perfectly for this recipe. Browning them first gives the broth a rich, layered flavor, and if you’ve ever wondered how do you make turkey stock taste truly homemade, that step is what sets it apart.

    Do I need cheesecloth?

    Not necessarily. You can add herbs and garlic directly, but the sachet makes straining much easier.

    Is this broth or stock?

    I use the words interchangeably. Stock is usually made with bones, cooks longer, and gels when cooled, while broth is lighter. This recipe leans more toward broth, but I use it the same way.

    A closed jar of turkey broth with ingredients surrounding it.

    Tips For Making The Best Turkey Broth Recipe

    • Don’t worry about chopping your veggies too small. Since you’ll strain them out later, big chunks are totally fine and save you time.
    • I like to bundle the herbs, garlic, and peppercorns in a piece of cheesecloth. It makes straining easier, and even though it’s not the “official” way to make a sachet d’épices, it works like a charm.
    • Use dried herbs if you must. About a tablespoon of each should do it. Still add it to the cheesecloth, or spoon the dried herbs into a teabag.
    • You can skim fat as the broth cooks, but I usually let it cool first. Once it’s chilled, the fat hardens on top and is super easy to remove. A fat separator works too if you want to speed things up.
    • Always let the broth cool completely before popping it in the fridge. This helps keep it fresh and safe.
    • Ingredients to prep ahead- Chop the onion, carrots, and celery. Wash the herbs and peel the garlic.
    • Leftovers and storage- Store cooled broth in the fridge for up to 5 days or freeze for up to 6 months. I like to portion it into jars or freezer bags for easy grab-and-go use.

    What To Serve With Turkey Broth

    This broth is the base of so many comfort foods. It’s perfect for soups, casseroles, and of course, a rich, homemade gravy during the holidays. A few favorites include:

    • Wild Rice Creamy Chicken Soup (Great with Turkey Too!)
    • French Onion Rice Pilaf with Orzo
    • Instant Pot Beef Tips and Gravy
    • Italian Bean Soup With Sausage

    Other Turkey Recipes To Try

    • An overhead image of a whole spatchcocked turkey cooked golden brown on a platter with limes and other thanksgiving sides and decorative leaves and garland around it.
      Cajun Turkey
    • An overhead image of a thanksgiving table with the platter of carved turkey in the middle and green beans, dressing and cranberry sauce around it.
      Turkey with Oranges and Rosemary
    • A sliced smoked turkey breast on a cutting board with the crispy skin on.
      Smoked Bone In Turkey Breast
    • An overhead image of sliced turkey on a platter surrounded by fresh herbs in the middle of a Thanksgiving table.
      Roasted Spatchcock Glazed Turkey with Bourbon

    Hosting Thanksgiving?

    Discover the secret to hosting Thanksgiving without all the stress! Prepsgiving is your FREE guide to making a delicious Thanksgiving feast the easy way.

    Love this recipe? Please leave a 5 star ⭐️⭐️⭐️⭐️⭐️ rating in the recipe card below ⬇️ and/or a review in the comment section further down. Check out my Amazon Store for all my favorite tools, including those used in this recipe. And follow @thelifejolie on Instagram and TikTok!

    A jar of turkey stock with an onion and carrots next to it.

    Turkey Broth Recipe

    Jessy Freimann
    Forget the store-bought cartons! This turkey broth recipe is easy, flavorful, and ready in about 1 ½ hours. Plus, it freezes well, so you’ll always have broth on hand for soups, casseroles, or gravy.
    No ratings yet
    Print Recipe Pin Recipe
    Prep Time 10 minutes mins
    Cook Time 1 hour hr 30 minutes mins
    Course How-to
    Cuisine American
    Servings 10 cups
    Calories 101 kcal

    Equipment

    • chefs knife
    • cutting board
    • Dutch oven
    • Ladle
    • wooden spoon
    • measuring cups
    • measuring spoons
    • Sieve

    Ingredients
      

    • 1 Tablespoon Olive oil
    • 2 turkey wings raw
    • 1 large onion cut into chunks
    • 4 medium carrots peeled and cut into chunks
    • 3 ribs celery cut into chunks
    • 2-3 sprigs fresh sage
    • 4-5 sprigs fresh thyme
    • 3-4 sprigs fresh parsley
    • 2 cloves garlic peeled and smashed
    • 8 whole peppercorns
    • 12 cups water
    • Kosher salt, to taste

    Instructions
     

    • Heat oil in a heavy bottom dutch oven over medium high heat.
    • Add turkey wings and brown until golden on each side making sure not to over load the pan, about 5-7 minutes. Remove from pan when browned.
    • Add onion, celery and carrots and sauté until they begin to caramelize, about 7 minutes.
    • While the vegetables caramelize, place fresh herbs, smashed garlic and peppercorns into the center of a cheese cloth. Roll it closed and tie the ends off to secure closed and form a sachet.
    • Add turkey wings, cheese cloth sachet and 12 cups of water into the pot. Bring to a light simmer and reduce heat to medium low.
    • Simmer for 1 ½ hours. Season with salt to taste if you want.
    • Cool and strain so that only the liquid remains. Refrigerate or freeze until you're ready to use.

    Video

    Notes

    • Don’t worry about chopping your veggies too small. Since you’ll strain them out later, big chunks are totally fine and save you time.
    • I like to bundle the herbs, garlic, and peppercorns in a piece of cheesecloth. It makes straining easier, and even though it’s not the “official” way to make a sachet d’épices, it works like a charm.
    • Use dried herbs if you must. About a tablespoon of each should do it. Still add it to the cheesecloth, or spoon the dried herbs into a teabag.
    • You can skim fat as the broth cooks, but I usually let it cool first. Once it’s chilled, the fat hardens on top and is super easy to remove. A fat separator works too if you want to speed things up.
    • Always let the broth cool completely before popping it in the fridge. This helps keep it fresh and safe.
    • Ingredients to prep ahead- Chop the onion, carrots, and celery. Wash the herbs and peel the garlic.
    • Leftovers and storage- Store cooled broth in the fridge for up to 5 days or freeze for up to 6 months. I like to portion it into jars or freezer bags for easy grab-and-go use.

    Nutrition

    Serving: 1cupCalories: 101kcalCarbohydrates: 5gProtein: 8gFat: 6gSaturated Fat: 1gPolyunsaturated Fat: 1gMonounsaturated Fat: 3gCholesterol: 24mgSodium: 61mgPotassium: 231mgFiber: 1gSugar: 2gVitamin A: 4183IUVitamin C: 4mgCalcium: 37mgIron: 1mg
    Tried this recipe?Let us know how it was!

    Stove Top Creamy Mac and Cheese

    Nov 3, 2025 · Leave a Comment

    A bowl of stovetop mac and cheese with a spoon in it.

    Nothing says comfort food like a bowl of stove top creamy mac and cheese. This homemade version is quick, easy, and ready in just 25 minutes, perfect for busy weeknights when you need something cozy on the table fast.

    A bowl of stovetop mac and cheese with a spoon in it.
    [feast_advanced_jump_to]

    Why You’ll Love Creamy Macaroni And Cheese

    When I think back to childhood lunches, nothing brings me more comfort than a big bowl of silky mac and cheese. Who doesn’t love it? While baked mac with its crispy top is delicious, stovetop mac has its own charm. It’s smooth, cozy, and instantly takes you back to the kitchen table.

    For years, I reached for the boxed stuff. But once I realized how easy it was to make mac and cheese from scratch on the stove, I never looked back. It’s quick, it’s homemade, and it feels just a little extra special. Here’s why this version belongs in your weeknight rotation:

    • Simple ingredients
    • Totally customizable
    • Ready in 25 minutes
    • Creamy all the way through
    A spoon holding up a scoop of creamy mac and cheese over the pan.

    Ingredient Information And Substitutions

    • Pasta- Classic elbow macaroni works best, but any short pasta like shells, cavatappi, or rotini will do. Be sure to salt the pasta water.
    • Flour- Thickens the sauce. If you need gluten-free, swap in a 1:1 gluten-free flour blend like King Arthur or Bob's Red Mill.
    • Butter- Creates the base for the roux. Unsalted works too, but adjust the seasoning at the end to your taste.
    • Milk- Whole milk gives the creamiest texture, but 2% works in a pinch. For extra richness, swap half the milk with cream.
    • Sharp cheddar cheese- Melts creamy and adds bold flavor. White or yellow cheddar both work.
    • Mozzarella cheese- Adds smooth, stretchy meltiness. Can swap in Monterey Jack or Gruyère for variety.
    • Garlic powder- Gives a subtle garlicky background without overpowering.
    • Ground mustard- Adds tang and depth, helping the cheese flavor shine.
    • Nutmeg- Just a pinch makes the sauce taste richer and more complex.
    • Salt- Enhances all the flavors. Kosher salt is best.
    • Black pepper- Adds a bit of warmth and balance to the cheese sauce. Freshly ground has the best flavor.
    An overhead image of labeled recipe ingredients

    How To Make Creamy Mac And Cheese

    Step 1- Melt the butter.

    Place a medium-sized saucepan over medium heat and add the butter. Let it melt completely.

    Step 2- Make the roux.

    Sprinkle in the flour and whisk until smooth with no lumps left. Keep whisking for about 2 minutes.

    Flour and butter in a saucepan and then milk whisked in.

    Step 3- Add liquids and seasonings.

    Slowly pour in the milk, then stir in the salt, pepper, mustard powder, garlic powder, and nutmeg. Keep whisking until combined.

    Step 4- Thicken the sauce.

    Let the mixture cook for 5-7 minutes, stirring continuously, until it thickens enough to coat the back of a spoon.

    Step 5- Stir in the cheese.

    Lower the heat and add the cheddar and mozzarella. Whisk until the cheese is fully melted and the sauce is creamy.

    Shredded cheese being whiisked into thickened sauce and then stirring pasta into the cheese sauce.

    Step 6- Combine with pasta. 

    Add the cooked pasta and stir until it’s well coated in the sauce. Let it warm through for another minute or two, then serve right away.

    A close up image of a bowl of mac and cheese.

    Frequently Asked Questions

    Can I double the recipe?

    Definitely! Just use a larger pot and double all of the ingredients. It’s great for family dinners or potlucks.

    Can I use pre-shredded cheese?

    Yes. Freshly shredded cheese melts a little smoothly, but I’ve made this plenty of times with the bagged kind, and it still turns out delicious.

    Can I make it gluten-free?

    Absolutely. Use gluten-free pasta and swap the flour for a gluten-free blend.

    A close up image of a spoon in a pan of mac and cheese.

    Tips For Making The Best Creamy Mac And Cheese Recipe

    • Whisk the sauce often over medium heat so it thickens smoothly without scorching. Keeping the heat gentle takes a little longer, but the creamy results are worth it.
    • You’ll know the sauce is thick enough when it coats the back of a spoon. That’s the perfect time to stir in the cheese.
    • Don’t stress if your cheese looks stringy at first. Just keep the heat low and keep stirring... it will smooth out.
    • I like to use a mix of cheeses for more flavor. Sharp cheddar is classic, but a little mozzarella or Gruyère takes it up a notch.
    • Switch things up! Try a pinch of cayenne, blanched veggies like broccoli or peas, canned green chiles, crispy bacon, or even lobster for a treat.
    • Ingredients to prep ahead- Shred the cheese and boil the pasta ahead of time. Just finish cooking the pasta when you’re ready to stir it into the sauce.
    • Leftovers and storage- Keep any leftovers in the fridge for up to 3 days. Reheat gently on the stove with a splash of milk so it stays creamy. Freezing isn’t recommended since the pasta gets mushy after thawing.

    What To Serve With This Creamy Mac And Cheese Recipe

    Make it a complete meal by adding a protein and something fresh on the side. These are a few of my go-to pairings:

    • Jalapeno Deviled Eggs
    • Grilled Balsamic Asparagus
    • Broccoli Rabe and Ricotta Crostini
    • Chocolate Cake Trifle

    Other Pasta Recipes To Try

    • An overhead image of a plate of baked ziti with herbs, garlic and a blue striped napkin next to it.
      Pasta al Forno
    • A plate of vodka pasta with fresh basil, Italian bread and a striped towel in the background.
      Creamy Vodka Pasta
    • An overhead image of a plate of pasta pomodoro with basil, a checked napkin and the rest of the pan around it.
      Pasta Pomodoro Recipe
    • A white bowl of tortellini salad with the main bowl in the background.
      Tortellini Pesto Pasta Salad

    Hosting Thanksgiving?

    Discover the secret to hosting Thanksgiving without all the stress! Prepsgiving is your FREE guide to making a delicious Thanksgiving feast the easy way.

    Love this recipe? Please leave a 5 star ⭐️⭐️⭐️⭐️⭐️ rating in the recipe card below ⬇️ and/or a review in the comment section further down. Check out my Amazon Store for all my favorite tools, including those used in this recipe. And follow @thelifejolie on Instagram and TikTok!

    A bowl of stovetop mac and cheese with a spoon in it.

    Stove Top Creamy Mac and Cheese

    Jessy Freimann
    Nothing says comfort food like a bowl of stove top creamy mac and cheese. This homemade version is quick, easy, and ready in just 25 minutes, perfect for busy weeknights when you need something cozy on the table fast.
    No ratings yet
    Print Recipe Pin Recipe
    Prep Time 10 minutes mins
    Cook Time 15 minutes mins
    Total Time 25 minutes mins
    Course dinner, Entree, Lunch, Main, Main Course, Side Dish
    Cuisine American
    Servings 4 servings
    Calories 473 kcal

    Equipment

    • measuring spoons
    • measuring cups
    • Whisk
    • saucepan

    Ingredients
      

    • 1 ½ cups elbow pasta, cooked per package directions and drained
    • 2 Tablespoons salted butter
    • 2 Tablespoons flour
    • 1 ½ cups whole milk
    • ½ teaspoon Kosher salt
    • ¼ teaspoon ground black pepper
    • ¼ teaspoon garlic powder
    • ¼ teaspoon ground mustard powder
    • 1 pinch ground nutmeg
    • 1 cup sharp cheddar cheese shredded
    • ½ cup mozzarella cheese shredded

    Instructions
     

    • In a medium saucepan, melt butter over medium heat.
    • Add flour and whisk until no lumps remain. Cook for 2 minutes stirring often.
    • Whisk in milk, salt, pepper, ground mustard, garlic powder and nutmeg.
    • Cook for 5-7 minutes stirring the entire time until the sauce has thickened enough to coat the back of a spoon.
    • Reduce heat to low and add both cheeses. Whisk until the cheese has melted and the sauce is smooth.
    • Mix well with pasta and cook for another minute or two. Serve immediately.

    Video

    Notes

    • Whisk the sauce often over medium heat so it thickens smoothly without scorching. Keeping the heat gentle takes a little longer, but the creamy results are worth it.
    • You’ll know the sauce is thick enough when it coats the back of a spoon. That’s the perfect time to stir in the cheese.
    • Don’t stress if your cheese looks stringy at first. Just keep the heat low and keep stirring... it will smooth out.
    • I like to use a mix of cheeses for more flavor. Sharp cheddar is classic, but a little mozzarella or Gruyère takes it up a notch.
    • Switch things up! Try a pinch of cayenne, blanched veggies like broccoli or peas, canned green chiles, crispy bacon, or even lobster for a treat.
    • Ingredients to prep ahead- Shred the cheese and boil the pasta ahead of time. Just finish cooking the pasta when you’re ready to stir it into the sauce.
    • Leftovers and storage- Keep any leftovers in the fridge for up to 3 days. Reheat gently on the stove with a splash of milk so it stays creamy. Freezing isn’t recommended since the pasta gets mushy after thawing.

    Nutrition

    Serving: 1servingCalories: 473kcalCarbohydrates: 48gProtein: 20gFat: 22gSaturated Fat: 13gPolyunsaturated Fat: 1gMonounsaturated Fat: 5gTrans Fat: 0.2gCholesterol: 65mgSodium: 646mgPotassium: 297mgFiber: 2gSugar: 6gVitamin A: 702IUVitamin C: 0.01mgCalcium: 398mgIron: 1mg
    Tried this recipe?Let us know how it was!

    Bourbon Apple Pie

    Oct 31, 2025 · Leave a Comment

    A slice of bourbon apple pie with a fork on the plate.

    This bourbon apple pie is a cozy, crowd-pleasing dessert. Juicy apples, warm spices, and a splash of liquor create a balanced, sweet-tart filling for the buttery crust.

    A slice of bourbon apple pie with a fork on the plate.
    [feast_advanced_jump_to]

    Why You’ll Love This American Apple Pie Recipe

    Is there anything more classic than a delicious, easy apple pie? This American favorite shows up at so many of our holidays and instantly makes the kitchen smell like fall. I’d been meaning to create a version for ages, but truth be told, pie and I have a bit of a rocky past. 

    So I keep it easy on myself, using a premade pie crust and focusing on making the most delicious filling I could. I threw in a little bourbon to spice things up a bit too.

    Warm, cozy, and just the right little twist. Honestly, the results were so good, I don’t think I’ll ever go back to another apple pie again. It’s simple enough for weeknights but still feels special enough for the holidays. Here’s why this easy apple pie recipe is a keeper:

    • Classic apple pie with bourbon
    • Sweet-tart apple balance
    • Easy with store-bought crust
    • Perfect for holidays and parties
    An overhead image of an apple pie with apples and a striped napkin.

    Ingredient Information And Substitutions

    • Pie crusts- Store-bought makes things simple, but you can use homemade if you prefer.
    • Apples- A mix of tart and sweet works best. I prefer RubyFrost apples.
    • Bourbon- The star twist! Whiskey or brandy can be substituted.
    • Butter- Adds richness to the filling.
    • Egg and water- For an egg wash that helps the crust brown.
    • Cornstarch- Helps thicken the filling. Arrowroot powder or flour are good alternatives.
    • Granulated sugar- Sweetens the filling. You can swap in brown sugar for a richer, caramely flavor.
    • Spices - Cinnamon, nutmeg, and cloves are the classic warm spice mix. Cardamom or allspice can also work.
    • Lemon zest- Adds brightness and acidity for balance. Orange zest works too.
    • Turbinado sugar- Sprinkled on top for crunch, though regular sugar works if that’s what you have.
    • Kosher salt- Balances the sweetness.
    An overhead image of labeled recipe ingredients.

    How To Make Apple Cinnamon Pie

    Step 1- Prep the oven and crust.

    Preheat to 425 degrees F. Line a baking sheet with foil or parchment. Roll out one crust on a floured surface and fit it into a pie plate, letting the edges hang over. Chill while you make the filling.

    Step 2- Mix the filling.

    In a large bowl, toss apples with sugar, spices, salt, cornstarch, lemon zest, and bourbon until evenly coated.

    Apples and filling ingredients in a bowl and then the apple filling mixed together.

    Step 3- Assemble the pie.

    Spoon the filling into the crust, then dot it with butter cubes. Place the second crust on top and crimp the edges to seal.

    Step 4- Add finishing touches.

    Cut a few slits in the top crust. Brush with egg wash and sprinkle with turbinado sugar.

    Filling in the crust with knobs of butter on top and then the top crust on the pie.

    Step 5- Bake, cool, and enjoy.

    Set the pie on the lined baking sheet. Bake for 20 minutes, then reduce the heat to 350 degrees F and bake 40 minutes more. Cover edges if they brown too quickly. Cool for at least 4 hours before slicing so the filling sets.

    Frequently Asked Questions

    Is there an option for gluten-free apple pie?

    Yes. If you’d like to make a gluten free apple pie, swap in a gluten-free crust or use 1:1 gluten-free flour to make the crust from scratch. The filling itself is naturally gluten-free.

    How to make mini apple pies?

    Use a muffin tin or small pans! Line each well with crust, add filling, and top with dough or lattice. Bake for 25-30 minutes. You can also make a single miniature apple pie in a smaller pie dish, which bakes a bit longer.

    How to make apple pie filling?

    Toss apples with sugar, spices, cornstarch, and lemon zest. A splash of bourbon adds depth. Use right away or freeze.

    Does apple pie need to be refrigerated?

    Not right away. It keeps at room temp for up to 2 days. After cutting, refrigeration helps it stay fresh longer.

    How to make lattice apple pie crust?

    Cut the dough into strips and weave them over the filling, pinching around the outer edge to seal. Brush with egg wash and bake.

    How to store apple pie?

    Cover and keep at room temperature for 2 days, or refrigerate up to 5 days.

    What are the best apples for apple pie?

    My absolute favorite are RubyFrost for their great flavor and the fact that they hold their shape, texture and color when baked. Granny Smith, Cortland, Braeburn, and 20 Ounce apples are also tasty options for baking. A mix of tart and sweet creates more depth.

    Can you freeze apple pie?

    Yes, wrap tightly and freeze it unbaked for the best results. Then, bake straight from frozen, adding 10-15 minutes to the bake time.

    A straight on, close up image of a slice of apple pie on a plate.

    Tips For Making Cinnamon Apple Pie

    • Use a pre-made crust to skip the hassle. I like the refrigerated kind since it comes with two for a double-crust pie.
    • Set the pie pan on a baking sheet to make it easier to transfer in and out of the oven. It'll also catch any drips if the filling bubbles and oozes!
    • Mix the apples, sugar, spices, and bourbon well in a big bowl so every slice of fruit gets coated.
    • Cut a few slits in the top crust before baking. This helps steam escape and keeps the filling from bubbling over.
    • Brushing the crust with egg wash and sprinkling turbinado sugar makes it golden, crunchy, and extra pretty.
    • Keep an eye on the edges as the pie bakes. If they start browning too fast, cover them with foil or use a pie shield.
    • Ingredients to prep ahead- Slice and toss the apples with lemon a few hours early, then keep them in the fridge until you’re ready to bake.
    • Leftovers and storage- Store at room temperature for 2 days or 5 days in the fridge. Freeze before baking instead of after.

    What To Serve With This Apple Pie Recipe

    Nothing beats warm apple pie, except maybe a la mode with a scoop of ice cream on top! When it comes to holidays, I'm a big fan of dessert tables, especially when you add these sweet and creamy extras:

    • Almond Shortbread Cookies
    • Pumpkin Chocolate Chip Bread
    • Rolo Pretzel Bites
    • Chocolate Mousse Cups

    Other Apple Desserts To Try

    • A serving spoon lifting a scoop of apple cranberry crisp from the corner of a white pan of it.
      Apple and Cranberry Crisp
    • A squaer image of Apple Cinnamon Thumbprint Cookies.
      Apple Cinnamon Thumbprint Cookies
    • Apple Spice Muffins are one of my favorite fall recipes. Made with tasty chunks of apple, applesauce with cinnamon, nutmeg and ginger, they're so easy to make and taste great as breakfast or as a dessert!
      Apple Spice Muffins
    • An overhead image of apple pie filling in a raw pie crust with apples and cinnamon sticks around it.
      How To Make Apple Pie Filling

    Hosting Thanksgiving?

    Discover the secret to hosting Thanksgiving without all the stress! Prepsgiving is your FREE guide to making a delicious Thanksgiving feast the easy way.

    Love this recipe? Please leave a 5 star ⭐️⭐️⭐️⭐️⭐️ rating in the recipe card below ⬇️ and/or a review in the comment section further down. Check out my Amazon Store for all my favorite tools, including those used in this recipe. And follow @thelifejolie on Instagram and TikTok!

    A slice of bourbon apple pie with a fork on the plate.

    Bourbon Apple Pie

    Jessy Freimann
    This bourbon apple pie is a cozy, crowd-pleasing dessert. Juicy apples, warm spices, and a splash of liquor create a balanced, sweet-tart filling for the buttery crust.
    5 from 1 vote
    Print Recipe Pin Recipe
    Prep Time 15 minutes mins
    Cook Time 1 hour hr
    Total Time 1 hour hr 15 minutes mins
    Course Dessert
    Cuisine American
    Servings 8 slices
    Calories 362 kcal

    Equipment

    • mixing bowl
    • measuring cups
    • measuring spoons
    • Spatula
    • pie plate
    • Pie crust shield

    Ingredients
      

    • 2 pie crusts I use premade from the refrigerated section of the grocery store.
    • 8 cups apples, peeled, cored and sliced about ½ inch thick
    • ¾ cup granulated sugar
    • 1 teaspoon ground cinnamon
    • ¼ teaspoon ground nutmeg
    • ¼ teaspoon ground cloves
    • ¼ teaspoon kosher salt
    • 1 ½ Tablespoon cornstarch
    • 1 teaspoon lemon zest (about 1 small lemon)
    • 2 Tablespoons bourbon
    • 1 Tablespoon salted butter, cut into small cubes
    • 1 large egg
    • 1 Tablespoon water
    • 1 teaspoon Turbinado sugar

    Instructions
     

    • Preheat the oven to 425 degreesF. Line a sheet pan with foil or parchment and set aside.
    • Gently press the first pie crust into the pie plate, allowing the edges to come up slightly over the sides of the plate. Place in the refrigerator to chill while preparing the filling.
    • In a large mixing bowl, combine apples, sugar, cinnamon, nutmeg, cloves, salt, corn starch, lemon zest and bourbon. Mix well until apples are evenly coated.
    • Place apples into the prepared pie crust in an even layer.
    • Scatter cubes of butter over the top of the apple mixture.
    • Place second crust on top of the pie. Crimp the bottom and top crusts together with the top crust. Use the tip of a sharp knife to cut a few slits onto the top crust.
    • Whisk egg and water and lightly brush egg wash onto top crust of the pie. Sprinkle with turbinado sugar.
    • Place pie plate onto prepared sheet pan and bake uncovered for 20 minutes and then reduce the temperature to 350 degrees F for an additional 40 minutes, covering edges if needed.
    • Remove from oven and cool to room temperature before serving.

    Video

    Notes

    • Use a pre-made crust to skip the hassle. I like the refrigerated kind since it comes with two for a double-crust pie.
    • Set the pie pan on a baking sheet to make it easier to transfer in and out of the oven. It'll also catch any drips if the filling bubbles and oozes!
    • Mix the apples, sugar, spices, and bourbon well in a big bowl so every slice of fruit gets coated.
    • Cut a few slits in the top crust before baking. This helps steam escape and keeps the filling from bubbling over.
    • Brushing the crust with egg wash and sprinkling turbinado sugar makes it golden, crunchy, and extra pretty.
    • Keep an eye on the edges as the pie bakes. If they start browning too fast, cover them with foil or use a pie shield.
    • Ingredients to prep ahead- Slice and toss the apples with lemon a few hours early, then keep them in the fridge until you’re ready to bake.
    • Leftovers and storage- Store at room temperature for 2 days or 5 days in the fridge. Freeze before baking instead of after.

    Nutrition

    Serving: 1servingCalories: 362kcalCarbohydrates: 59gProtein: 3gFat: 13gSaturated Fat: 4gPolyunsaturated Fat: 1gMonounsaturated Fat: 6gTrans Fat: 0.1gCholesterol: 4mgSodium: 260mgPotassium: 179mgFiber: 4gSugar: 32gVitamin A: 113IUVitamin C: 6mgCalcium: 20mgIron: 1mg
    Tried this recipe?Let us know how it was!

    Apple Yogurt Parfait With Granola

    Oct 30, 2025 · Leave a Comment

    3 apple yogurt parfaits with granola around them.

    An apple yogurt parfait with granola is a simple way to start your day or refuel in the afternoon. Creamy yogurt, crunchy granola, and fresh fruit, all done in under 10 minutes for a nourishing and satisfying treat.

    A close up image of a yogurt parfait with apples.
    [feast_advanced_jump_to]

    Why You’ll Love This Parfait with Greek Yogurt

    A good parfait checks all the boxes: creamy, crunchy, sweet, and filling. This version layers Greek yogurt, homemade granola or store-bought, and fresh fruit for a no-fuss dish you can enjoy morning, noon, or night. It feels a little indulgent while still being light, and the contrasting textures make every bite satisfying. 

    The best part? You can swap in whatever fruit is in season and adjust every layer to your taste. It’s a great way to use up apples, berries, or even peaches when summer is in full swing. I also love that these are easy to prep ahead for busy mornings... just keep the granola separate so it stays crunchy. And since every parfait is built individually, everyone can customize theirs with the toppings they love most. What’s to love about it:

    • Ready in just minutes
    • Works with any fruit or granola
    • Full of protein and natural sweetness
    • Great for breakfast, snack, or dessert

    Ingredient Information And Substitutions

    • Greek yogurt- Thick and creamy, it gives the parfait a rich base. Vanilla adds sweetness, while plain offers a tangier flavor. You can also use regular yogurt if you prefer.
    • Fruit- Brings natural sweetness and color. Apples add crunch (I love SnapDragon or RubyFrost), berries are juicy, and peaches or pears give a soft, sweet bite. Frozen fruit works too, just thaw and drain.
    • Granola- Adds the perfect crunch to balance the creamy layers. Use store-bought or try making your own. My cinnamon granola recipe is a great option! 
    • Extras- Honey or maple syrup for sweetness, nut butter for richness, and a sprinkle of shredded coconut or seeds for extra texture.
    A close up image of a parfait with each layer ingredients labeled.

    How To Make Yogurt Parfaits

    Step 1- Start with the base.

    Grab four 8-ounce glasses. Spoon a little granola into the bottom of each to create the first layer.

    Step 2- Add fruit.

    Layer chopped apples over the granola, turning some pieces skin-side out along the glass so the color shows through. 

    Step 3- Add yogurt.

    Spoon yogurt on top of the apples. Use a small spatula or spoon to gently spread it into an even layer. 

    Step 4- Repeat the layers.

    Add another round of granola, then fruit, then yogurt. Continue layering until the glasses are full, finishing with yogurt on top.

    Step 5- Finish and garnish.

    Smooth the top layer of yogurt, sprinkle with a little extra granola, and tuck in a couple of apple slices for garnish. Serve right away.

    3 apple yogurt parfaits with granola around them.

    Frequently Asked Questions

    Can I serve these for dessert?

    Definitely. Add a drizzle of honey, chocolate chips, or even crushed cookies on top, and it feels just like a light and refreshing dessert.

    Can I make parfaits ahead of time? 

    You can but it ill effect the texture of the granola because it will soften in the fridge.

    Tips For Making Yogurt And Granola Parfait

    • Show off those layers. Clear glasses or jars let the colorful fruit and creamy yogurt shine, or try layering them in stemmed glasses or wine goblets. They instantly look dressed up!
    • Alternate layers evenly, but don’t stress about exact measurements. You can eyeball the layers, and it’ll still come out great. 
    • If you’re using apples or pears, toss them with a little lemon juice to keep them from browning, especially if prepping ahead.
    • Keep the granola crunchy by adding it right before serving instead of letting it sit in the fridge.
    • Change up the crunch. Cinnamon, coconut, or even chocolate granola all bring their own vibe to the parfait.
    • Play with flavors by swapping in seasonal fruit or different yogurt flavors like honey or lemon. 
    • Make it fun for kids by setting up a parfait station and letting them build their own. 
    • Ingredients to prep ahead- Wash and chop fruit ahead of time.
    • Leftovers and storage- These parfaits taste best right after they’ve been assembled.
    A yogurt parfait with apples and granola on top.

    What To Serve With Greek Yogurt Parfait

    This parfait is light, refreshing, and versatile on its own, but it also fits beautifully into a bigger breakfast or brunch spread. For mornings, pair it with something warm and savory to balance the sweetness. As a snack, it can round out a small spread with muffins or a slice of quiche. Here are a few ideas:

    • Broccoli Cheddar Cheese Quiche
    • Chocolate Chip Banana Bread Muffins
    • Asparagus Leek Tart
    • California Breakfast Stack

    Other Breakfast Recipes To Try

    • A bundt shaped orange monkey bread on a white plate with an orange and black and white checked napkin behind it.
      Orange Cinnamon Pull-Apart Bread
    • A plate of sweet potato hash with an egg in it and onions and a green napkin behind it.
      Chorizo and Sweet Potato Breakfast Hash
    • a square image of Baked French Toast.
      Baked French Toast with Mixed Berries
    • A slice of breakfast pizza on parchment and a cutting board with a bite taken out of it and the rest of the pizza in the background.
      Puff Pastry Breakfast Pizza

    Love this recipe? Please leave a 5 star ⭐️⭐️⭐️⭐️⭐️ rating in the recipe card below ⬇️ and/or a review in the comment section further down. Check out my Amazon Store for all my favorite tools, including those used in this recipe. And follow @thelifejolie on Instagram and TikTok!

    3 apple yogurt parfaits with granola around them.

    Apple Yogurt Parfait With Granola

    Jessy Freimann
    An apple yogurt parfait with granola is a simple way to start your day or refuel in the afternoon. Creamy yogurt, crunchy granola, and fresh fruit, all done in under 10 minutes for a nourishing and satisfying treat.
    No ratings yet
    Print Recipe Pin Recipe
    Prep Time 10 minutes mins
    Total Time 10 minutes mins
    Course Breakfast, Brunch
    Cuisine American
    Servings 4 servings
    Calories 219 kcal

    Equipment

    • 1 Measuring cups and spoons
    • 1 mixing bowl
    • 1 Spatula

    Ingredients
      

    • 1 cup Granola
    • 1 ⅓ cups vanilla greek yogurt
    • 1 cup apples, chopped

    Instructions
     

    • Take four 8 ounce clear glasses. Place 2 Tablespoons of granola into an even layer at the bottom of the glass.
    • Next, place 2 Tablespoons chopped apples into the cup in an even layer on top of the granola, turning the apple skin sides toward the sides of the glass to expose the red color.
    • Now add 3 Tablespoons yogurt to the middle of the cup and use a small spatula to gently spread the yogurt into a single layer on top of the apples.
    • Repeat the steps by adding another layer of 2 Tablespoons granola, then 2 Tablespoons apples and a top layer of 3 Tablespoons yogurt.
    • Smooth and swirl the yogurt on the top. Sprinkle with a large pinch of granola and garnish with 2 thinly sliced apples. Serve immediately.

    Notes

    • Show off those layers. Clear glasses or jars let the colorful fruit and creamy yogurt shine, or try layering them in stemmed glasses or wine goblets. They instantly look dressed up!
    • Alternate layers evenly, but don’t stress about exact measurements. You can eyeball the layers, and it’ll still come out great. 
    • If you’re using apples or pears, toss them with a little lemon juice to keep them from browning, especially if prepping ahead.
    • Keep the granola crunchy by adding it right before serving instead of letting it sit in the fridge.
    • Change up the crunch. Cinnamon, coconut, or even chocolate granola all bring their own vibe to the parfait.
    • Play with flavors by swapping in seasonal fruit or different yogurt flavors like honey or lemon. 
    • Make it fun for kids by setting up a parfait station and letting them build their own. 
    • Ingredients to prep ahead- Wash and chop fruit ahead of time.
    • Leftovers and storage- These parfaits taste best right after they’ve been assembled.

    Nutrition

    Serving: 1servingCalories: 219kcalCarbohydrates: 34gProtein: 10gFat: 6gSaturated Fat: 1gPolyunsaturated Fat: 1gMonounsaturated Fat: 2gCholesterol: 3mgSodium: 33mgPotassium: 220mgFiber: 2gSugar: 19gVitamin A: 17IUVitamin C: 1mgCalcium: 29mgIron: 1mg
    Tried this recipe?Let us know how it was!

    Harvest Cranberry Cheeseball

    Oct 27, 2025 · Leave a Comment

    A cranberry cheeseball with a portion taken off it revealing the creamy interior.

    This harvest cranberry cheeseball is a creamy, festive appetizer filled with white cheddar, pecans, and cranberries. Quick to prep in just 15 minutes, it’s perfect for making ahead of the holidays.

    A cranberry cheeseball with a portion taken off it revealing the creamy interior.
    [feast_advanced_jump_to]

    Why You’ll Love This Cranberry Pecan Cheeseball

    I don’t really remember eating cheese balls at holidays growing up, which feels like a miss because they’re so good! That’s why I love making this version. It’s creamy, festive, and packed with my favorite fall flavors like cranberries, pecans, and thyme. It has that retro vibe but feels updated and fresh, and it always gets people excited when I bring it out.

    What makes this cheeseball recipe even better is how easy it is to pull together. You can make it in advance, shape it into one big cheeseball or mini bites, and it still looks impressive with hardly any effort. The sweet and savory combo works with almost anything on the table, which is why it’s become one of my go-to holiday appetizers. You’ll love this recipe because it's:

    • Quick to make
    • Great for prepping ahead
    • Can be one big ball or mini
    • Sweet and savory in every bite
    An overhead image of a cheese call with crackers and a striped napkin around it.

    Ingredient Information And Substitutions

    • Cream cheese- I use two blocks of regular cream cheese. You can swap in low-fat if you’d like.
    • Shredded white cheddar- Adds sharp flavor and even more creamy texture. Monterey Jack or mozzarella are good substitutes.
    • Pecans- Give crunch and nutty depth. Walnuts or almonds work if that’s what you have.
    • Dried cranberries- Sweet-tart and festive. Dried cherries are a sweeter option.
    • Fresh thyme- Adds freshness. Dried works in a pinch, reduce to 1 teaspoon.
    • Seasonings- A little salt, onion powder, and white pepper bring everything together. If you don’t have white pepper, black pepper works just fine.

    How To Make A Cheddar Cheeseball

    Step 1- Prep the nut mixture. 

    Pulse pecans, cranberries, and thyme in a food processor until finely chopped.

    Cranberries, thyme and pecans in a mini food processor and then chopped together.

    Step 2- Mix the cheeses.

    Use a hand mixer to combine the cream cheese, cheddar, salt, pepper, and onion powder until smooth.

    Step 3- Combine.

    Add half of the nut mixture to the cheese blend and mix until evenly distributed.

    Cheese components mixed together and then the cranberry mixture added.

    Step 4- Wrap and shape.

    Lay two sheets of plastic wrap on your counter, crossed in the middle. Drop the cheese mixture onto the center, then lift the edges of the wrap to gather and round it into a ball without getting your hands messy. Wrap tightly and refrigerate for at least an hour to firm up.

    The cheeseball shaped and then wrapped in plastic wrap.

    Step 5- Roll and serve.

    Once chilled, unwrap the ball and roll it in the remaining nut mixture, gently pressing so it sticks to the surface. Slice up a baguette, grab some crackers, or add veggie sticks for serving.

    Unwrapped, chilled cheeseball on a a plate of remaining cranberry mixture and then the cranberry mixture covering the cheese ball.

    Frequently Asked Questions

    Can I mix it without a mixer?

    Yes. Let the cream cheese soften, then stir everything together with a sturdy spoon (a wooden spoon works great) until really smooth.

    How do you make Harvest Cranberry Cheese ball bites?

    Portion the cheese mixture into tablespoon-sized scoops, each mini cheeseball about an inch each, and chill them on a parchment-lined tray. Once firm, roll the bites in the nut coating and press in a pretzel stick for a fun, easy-to-grab appetizer. This usually makes 20-25 mini cheeseballs.

    A close up of a RITZ cracker with some of the cheeseball spread on it.

    Tips For Making This Cream Cheese Ball

    • Let the cream cheese soften before mixing. This makes everything blend much more easily.
    • Give the pecans, cranberries, and thyme a quick blitz in the food processor. It makes the process easier, but you can always chop them by hand if you prefer.
    • Use freshly shredded cheddar if you can. The texture is a lot creamier and blends into the cream cheese more smoothly than pre-shredded.
    • Plastic wrap is your best friend. It keeps the mixture contained and helps you shape it neatly without sticky hands.
    • If you want to lighten it up, you can use reduced-fat cream cheese without losing much flavor.
    • Don’t stress about making it perfectly round. Once it’s coated, no one notices if it’s a little rustic.
    • Chill for at least an hour so the ball firms up and holds its shape when serving.
    • Ingredients to prep ahead- Shred the cheese and chop the nut mixture a day in advance.
    • Leftovers and storage- This cheeseball keeps well wrapped in plastic for up to a week in the fridge.
    A harvest cheeseball on a plate with crackers behind it.

    What To Serve With Thanksgiving Cheese Ball

    This appetizer is rich, creamy, and a little sweet, so it pairs well with both fresh and hearty meals. A colorful mix of dishes makes your holiday table feel complete, from savory potatoes to crisp salad and a seasonal dessert. Here are some of my favorites to serve alongside:

    • Citrus Cranberry Chutney
    • Ranch Potatoes Recipe
    • Turkey with Oranges and Rosemary
    • Cherry Cheese Pie

    Other Appetizer Recipes To Try

    • Grilled Artichokes are the perfect summer snack or appetizer! They're extremely easy to make with minimal ingredients and served with a dipping sauce of creamy lemon garlic aioli that you're sure to love!
      Grilled Artichokes
    • A hand holding a chip with avocado salsa.
      Avocado Salsa
    • A bloody mary cheeseball with crackers and celery in the background.
      Bloody Mary Spicy Cheeseball
    • A square close up image of the edge of a stack of quesadilla on top of each other showcasing the gooey cheese and fillings.
      Baked Quesadillas

    Hosting Thanksgiving?

    Discover the secret to hosting Thanksgiving without all the stress! Prepsgiving is your FREE guide to making a delicious Thanksgiving feast the easy way.

    Love this recipe? Please leave a 5 star ⭐️⭐️⭐️⭐️⭐️ rating in the recipe card below ⬇️ and/or a review in the comment section further down. Check out my Amazon Store for all my favorite tools, including those used in this recipe. And follow @thelifejolie on Instagram and TikTok!

    A cranberry cheeseball with a portion taken off it revealing the creamy interior.

    Harvest Cranberry Cheeseball

    Jessy Freimann
    This harvest cranberry cheeseball is a creamy, festive appetizer filled with white cheddar, pecans, and cranberries. Quick to prep in just 15 minutes, it’s perfect for making ahead of the holidays.
    No ratings yet
    Print Recipe Pin Recipe
    Prep Time 15 minutes mins
    Chill time 1 hour hr
    Total Time 1 hour hr 15 minutes mins
    Course Appetizer
    Cuisine American
    Servings 8 servings
    Calories 389 kcal

    Equipment

    • chefs knife
    • cutting board
    • measuring cups
    • measuring spoons
    • measuring spoons
    • Hand mixer
    • food processor

    Ingredients
      

    • 1 cup pecans
    • 1 cup dried cranberries
    • 2 teaspoons fresh thyme, roughly chopped
    • 16 ounces cream cheese, softened (2 blocks)
    • 1 cup white cheddar cheese shredded
    • ½ teaspoon kosher salt
    • ¼ teaspoon white pepper
    • ½ teaspoon onion powder
    • Crackers for serving

    Instructions
     

    • Place pecans, dried cranberries and thyme and pulse until everything is well mixed and ground into small pieces. Set aside.
    • Mix both cheeses, salt, pepper and onion powder until well combined.
    • Add half of the nut mixture and mix again until well combined.
    • Lay out a sheet or two of plastic wrap (cross them) onto a clean surface and place the cheese mixture into the center of it. Pull up the sides of the plastic wrap to use as a barrier so you can shape it without getting your hands dirty.
    • Shape into a rough ball shape and cover with the plastic wrap. Refrigerate for 1 hour.
    • Once chilled, remove plastic wrap and roll into remaining nut mixture. It helps to use your hands to press the mixture into the cheese ball so that it sticks to the outside. Serve immediately with your favorite crackers.

    Video

    Notes

    • Let the cream cheese soften before mixing. This makes everything blend much more easily.
    • Give the pecans, cranberries, and thyme a quick blitz in the food processor. It makes the process easier, but you can always chop them by hand if you prefer.
    • Use freshly shredded cheddar if you can. The texture is a lot creamier and blends into the cream cheese more smoothly than pre-shredded.
    • Plastic wrap is your best friend. It keeps the mixture contained and helps you shape it neatly without sticky hands.
    • If you want to lighten it up, you can use reduced-fat cream cheese without losing much flavor.
    • Don’t stress about making it perfectly round. Once it’s coated, no one notices if it’s a little rustic.
    • Chill for at least an hour so the ball firms up and holds its shape when serving.
    • Ingredients to prep ahead- Shred the cheese and chop the nut mixture a day in advance.
    • Leftovers and storage- This cheeseball keeps well wrapped in plastic for up to a week in the fridge.

    Nutrition

    Serving: 1servingCalories: 389kcalCarbohydrates: 18gProtein: 8gFat: 33gSaturated Fat: 15gPolyunsaturated Fat: 4gMonounsaturated Fat: 11gCholesterol: 71mgSodium: 417mgPotassium: 148mgFiber: 2gSugar: 14gVitamin A: 934IUVitamin C: 1mgCalcium: 168mgIron: 1mg
    Tried this recipe?Let us know how it was!

    Corn Pudding Casserole

    Oct 24, 2025 · Leave a Comment

    A close up image of a serving spoon holding a scoop of corn pudding in the pan of it.

    This corn pudding casserole is creamy, cheesy, and full of sweet corn flavor. Special enough for the holidays but easy enough for any night, it’s ready in under an hour and always a crowd-pleaser.

    A close up image of a serving spoon holding a scoop of corn pudding in the pan of it.
    [feast_advanced_jump_to]

    Why You’ll Love This Creamed Corn Casserole Recipe

    I’ll be honest, I didn’t grow up with corn casserole on the table. For us, corn usually meant a bag of frozen kernels with salt and pepper or corn on the cob slathered with butter. But once I started hosting holidays, I wanted to change things up with something a little more special. I thought about going the Jiffy cornbread route since that’s such a common base, and I even had a stack of mixes waiting in my pantry.

    But I knew I wanted something creamier and not bread-like. That’s how this version came about, and I couldn’t be happier with the result! It’s easy, full of flavor, and the combination of smoky bacon, creamy sauce, and buttery cracker topping makes it the kind of dish people ask for again and again. Here’s what sets this easy corn pudding recipe apart:

    • Simple to make, but holiday-worthy
    • Creamy filling without being too heavy
    • Sweet corn flavor in every bite
    • Buttery cracker topping adds crunch
    • Smoky, salty richness from bacon
    An overhead image of corn casserole in a pan with a blue and white checked towel next to it.

    Ingredient Information And Substitutions

    • Corn- Frozen corn that’s been thawed is the easiest option, but you can use fresh or well-drained canned corn as well.
    • Bacon- Brings smokiness and crunch. Ham or pancetta are good substitutes.
    • Onion- Adds savory depth. Shallots also work.
    • Cream cheese- Melts into the sauce for richness. Let it come to room temperature on the counter first.
    • Cheddar cheese- Sharp cheddar adds bold, savory flavor. Monterey Jack or Colby are good substitutes.
    • Milk- Whole milk makes it creamy, but 2% works too.
    • Ritz crackers- The buttery crunch is perfect here. Panko breadcrumbs can be used instead.
    • Seasonings- Seasoned salt and cayenne bring balance and a little heat. Add paprika or garlic powder for extra flavor.
    An overhead image of labeled recipe ingredients.

    How To Make Creamed Corn Casserole

    Step 1- Prep the dish. and cook the bacon.  

    Heat oven to 350 degrees F, grease a 9x9-inch pan (or similar), and set aside.

    In a large skillet over medium heat, fry the bacon until crisp. Remove and crumble, leaving the drippings in the pan.

    Step 2- Sauté the onion and start the base. 

    Add the diced onion to the skillet and cook until soft, about 3-5 minutes. Stir in the flour and cook for 1 minute.

    Bacon cooking in a pan and then onions cooked in the bacon grease with flour sprinkled in.

    Step 4- Make it creamy. 

    Add milk, corn, cream cheese, seasoned salt, and cayenne. Stir often until smooth and the cream cheese has melted.

    Milk thickened in the pan and then corn pudding ingredients in a bowl.

    Step 5- Mix in flavor. 

    Stir in 1 cup crushed Ritz crackers, ½ cup cheddar, and most of the crumbled bacon until everything is well combined.

    Remaining ingredients added and then the mixture spread in a baking dish.

    Step 6- Assemble and bake. 

    Spread the mixture into the prepared pan. Top with remaining cheese, crackers, and bacon. Bake 30 minutes, until hot and bubbly. Serve right away.

    A plate of corn pudding with a fork on it.

    Frequently Asked Questions

    Is corn casserole the same as corn pudding?

    Not exactly. Corn pudding tends to be creamier and spoonable, while corn casserole usually has more texture. This version is a little in between: creamy, cheesy, and hearty.

    Can I make it ahead?

    Yes! Assemble it up to a day in advance, then bake before serving. Just add a few extra minutes to the cook time.

    Do I need to cover it while it bakes?

    Nope, leave it uncovered so the topping gets golden and crisp.

    A close up image of the crisp corn casserole topping.

    Tips For Making Corn Pudding Without Jiffy

    • Cook the bacon over medium heat so it crisps up without burning. High heat can burn the bacon and drippings.
    • Be sure to thaw the frozen corn before adding it to the pan. I usually let the bags sit in the fridge overnight, but running them under cool water works in a pinch.
    • Crush the Ritz crackers right in the sleeve. Less mess and no extra dishes.
    • Save some of the crumbled bacon for the topping. I like to mix most of it into the casserole and scatter the rest on top for crunch.
    • Don’t be afraid to play with flavor! Extra cayenne adds heat, or swap in sharp white cheddar for more punch. It may not be traditional, but it’s the best corn pudding recipe I’ve tried.
    • Ingredients to prep ahead- You can fry and crumble the bacon, chop the onion, and thaw the corn.
    • Leftovers and storage- Keep covered in the fridge for up to 4 days. Reheat in the oven to keep the topping crispy. Freezing isn’t recommended.

    What To Serve With This Easy Recipe For Corn Pudding

    This dish fits right in on any holiday table, but it’s also great for weeknight dinners when you're craving some comfort food. Pair it with:

    • Smoked Bone In Turkey Breast
    • Crispy Fried Potatoes
    • Honey Soy Glazed Carrots and Parsnips
    • Cherry Cheese Pie

    Other Side Recipes To Try

    • This Salad with Shredded Brussel Sprouts Recipe is the perfect fall side dish. Made with apples and dried cherries and topped with a warm bacon dressing, this is the best way to make even the most avid Brussels Sprouts hater to change their minds!
      Salad with Shredded Brussel Sprouts Recipe
    • A plate of artichoke hearts with a fork on it and a white and red napkin and garlic behind it.
      Grandma's Baked Artichoke Hearts
    • A close up of a serving spoon in a pan of savory sweet potato casserole.
      Savory Sweet Potato Casserole
    • Garlic Parmesan Roasted Broccoli is a seriously easy side dish with a tasty kick of flavor. Just toss your broccoli florets with a few simple ingredients, pop them in the oven and you've go a deliciously addictive side dish!
      Garlic Parmesan Roasted Broccoli

    Love this recipe? Please leave a 5 star ⭐️⭐️⭐️⭐️⭐️ rating in the recipe card below ⬇️ and/or a review in the comment section further down. Check out my Amazon Store for all my favorite tools, including those used in this recipe. And follow @thelifejolie on Instagram and TikTok!

    A close up image of a serving spoon holding a scoop of corn pudding in the pan of it.

    Corn Pudding Casserole

    Jessy Freimann
    This corn pudding casserole is creamy, cheesy, and full of sweet corn flavor. Special enough for the holidays but easy enough for any night, it’s ready in under an hour and always a crowd-pleaser.
    No ratings yet
    Print Recipe Pin Recipe
    Prep Time 10 minutes mins
    Cook Time 45 minutes mins
    Total Time 55 minutes mins
    Course Side Dish
    Cuisine American
    Servings 8 servings
    Calories 310 kcal

    Equipment

    • chefs knife
    • cutting board
    • measuring cups
    • measuring spoons
    • Large saute pan
    • wooden spoon
    • 9" x 9" Baking Pan

    Ingredients
      

    • Cooking spray
    • 8 slices bacon
    • 1 cup onion, finely diced
    • 2 Tablespoons flour
    • ½ cup whole milk
    • 16 ounces frozen corn, thawed
    • 4 ounces cream cheese, cut into cubes
    • 1 teaspoon seasoned salt
    • ⅛ teaspoon cayenne pepper (or more if you want it spicy)
    • 1 ¾ cups Ritz crackers, crushed and divided (basically 1 and ½ sleeves of Ritz crackers)
    • 1 cup shredded cheddar cheese, divided

    Instructions
     

    • Preheat the oven to 350 degrees F and grease a 9" x 9" (or similar size pan) with cooking spray and set aside.
    • Over medium heat in a large sauté pan, fry 8 slices of bacon. Remove the bacon from the pan once crisp and leave all the bacon grease in the pan. 
    • Add diced onion to the pan and sauté until soft, about 3-5 minutes.
    • Add flour and stir until there are no lumps. Cook for 1 minute.
    • Add milk, corn, cream cheese, seasoned salt and cayenne pepper and stir frequently until the cream cheese has melted and everything is well combined.
    • Add 1 cup crushed Ritz crackers, ½ cup shredded cheddar and crumble in 6 slices of the bacon. Stir until well combined.
    • Pour into the greased pan and spread into an even layer. 
    • Top this with remaining shredded cheddar, remaining crushed Ritz crackers and crumble on remaining bacon.
    • Bake uncovered for 30 minutes or until hot and bubbly. Serve immediately.

    Video

    Notes

    • Cook the bacon over medium heat so it crisps up without burning. High heat can burn the bacon and drippings.
    • Be sure to thaw the frozen corn before adding it to the pan. I usually let the bags sit in the fridge overnight, but running them under cool water works in a pinch.
    • Crush the Ritz crackers right in the sleeve. Less mess and no extra dishes.
    • Save some of the crumbled bacon for the topping. I like to mix most of it into the casserole and scatter the rest on top for crunch.
    • Don’t be afraid to play with flavor! Extra cayenne adds heat, or swap in sharp white cheddar for more punch. It may not be traditional, but it’s the best corn pudding recipe I’ve tried.
    • Ingredients to prep ahead- You can fry and crumble the bacon, chop the onion, and thaw the corn.
    • Leftovers and storage- Keep covered in the fridge for up to 4 days. Reheat in the oven to keep the topping crispy. Freezing isn’t recommended.

    Nutrition

    Serving: 1servingCalories: 310kcalCarbohydrates: 27gProtein: 11gFat: 19gSaturated Fat: 7gPolyunsaturated Fat: 3gMonounsaturated Fat: 6gTrans Fat: 0.2gCholesterol: 34mgSodium: 693mgPotassium: 309mgFiber: 2gSugar: 3gVitamin A: 268IUVitamin C: 6mgCalcium: 120mgIron: 1mg
    Tried this recipe?Let us know how it was!

    No Drippings Turkey Gravy

    Oct 20, 2025 · Leave a Comment

    A green gravy boat pouring gravy onto a plate of turkey and mashed potatoes.

    This no drippings turkey gravy is easy to make and can be prepped ahead since it doesn't rely on anything from the bird! Thick, creamy, and full of flavor, it’s perfect for Thanksgiving or any turkey dinner.

    A green gravy boat pouring gravy onto a plate of turkey and mashed potatoes.
    [feast_advanced_jump_to]

    Why You’ll Love This Gravy Recipe For Turkey Without Drippings

    I don’t know about you, but when the gravy is really, really good, it’s my absolute favorite part of Thanksgiving dinner. Honestly, I could drown my whole plate in it... or sip it with a straw! It’s the most delicious compliment to any traditional meal (especially mashed potatoes!), and the best part is how easy it is to make from scratch.

    You don’t even need pan drippings to get that rich, savory flavor, though if you have them, feel free to stir them in for an extra boost. This recipe works whether you’re roasting a full bird or just cooking a smaller turkey breast, and you can even make it ahead so there’s one less thing to juggle on the big day. Here’s why this gravy is a keeper:

    • Perfect for holiday meals
    • Bold, full-bodied flavor
    • Velvety smooth texture
    • Make-ahead friendly option
    A close up image of mashed potatoes with a pool of gravy in them middle.

    Ingredient Information And Substitutions

    • Turkey pieces- Wings, giblets, or the backbone work well. If you don’t have extras, chicken wings or drumsticks make a good substitute.
    • Onion- Adds sweetness and depth. Swap in shallots or leeks if you prefer.
    • Celery- Brings a savory backbone to the broth. Fennel stalks can be used instead.
    • Garlic- Gives warmth and richness. Garlic powder works in a pinch.
    • Flour- To make a roux to thicken the gravy. 1:1 gluten free flour like King Arthur's is a good substitute.
    • Water- Covers everything as the broth simmers. Chicken stock can also be used for extra richness.
    • White wine- Adds brightness. If you prefer, use extra water or chicken stock instead.
    • Butter- Starts the base for roux. Use salted butter for extra flavor.
    • Fresh herbs- Rosemary, thyme, and sage give that classic Thanksgiving flavor. Dried herbs will do, though fresh is best.
    • Salt- Season to taste. Kosher salt is recommended for more control.
    • Peppercorns- Whole black peppercorns add gentle spice. A few cracks of black pepper can substitute.
    An overhead image of labeled recipe ingredients.

    How To Make Turkey Gravy Without Drippings

    Step 1- Brown the turkey pieces.

    Heat a Dutch oven over medium-high heat and coat with olive oil spray. Add the turkey pieces in batches and sear until golden brown, about 3-4 minutes per side. Set aside.

    Turkey wings browning in a dutch oven- first raw and then seared.

    Step 2- Sauté veggies.

    Add more cooking spray if needed, then add onion and celery to the pot. Cook about 4 minutes. Stir in garlic, herbs, and peppercorns and cook 2 minutes more.

    Veggies cooking in a dutch oven and then herbs added.

    Step 3- Deglaze and simmer.

    Pour in the wine and scrape up the browned bits, letting it simmer briefly.

    Return the turkey pieces to the pot, cover with water, and bring to a boil. Reduce the heat and let it simmer gently for 1 hour.

    Deglazing the pot with wine and then turkey pieces and water added back into the pan.

    Step 5- Make the roux.

    Pour the broth through a fine mesh sieve (twice if you want it extra smooth). Cool to room temperature and refrigerate until you’re ready to make the gravy.

    When ready to serve, melt the butter in a large pot over medium heat. Warm the broth in another pan. Whisk flour into the butter until smooth and cook for 2 minutes, whisking often.

    Whisking a roux in the pot and then the broth added in to make the gravy.

    Step 6- Finish the gravy.

    Slowly whisk the hot broth into the roux. Simmer until thickened, season with salt, and serve warm.

    A green gravy boat full of turkey gravy.

    Frequently Asked Questions

    Can I make turkey gravy ahead of time?

    Absolutely. You can prepare the broth days ahead, then thicken it just before serving. Or make the whole gravy and reheat with a splash of broth or water.

    How to make gluten free turkey gravy?

    Swap the all-purpose flour for a gluten-free 1:1 flour blend or cornstarch. If using cornstarch, mix it with cold water to make a slurry and whisk it in at the end until the gravy thickens.

    How do I thicken my gravy if it’s still thin?

    Make a quick slurry by whisking flour or cornstarch with water, then add a little at a time to the simmering gravy until it thickens. Let it cook for a few minutes so the flour taste cooks out.

    A ladle pulling up a scoop of gravy from the gravy boat.

    Tips For Making Turkey Gravy Recipe Without Turkey Drippings

    • Don’t stress about chopping the veggies super small since you’ll be straining them out later, just give them a good wash.
    • Get the pan really hot! You should hear a nice sizzle when the turkey pieces hit the surface. That sear adds loads of flavor.
    • Be mindful when turning the turkey pieces. I like to gently give the turkey wings a wiggle with my tongs. When it's ready to be turned, the turkey wing should easily come up from the bottom of the pan. If it's sticking, it needs more time, so give it a couple minutes and try again.
    • Strain twice for smoothness. I like to run the broth through a fine mesh sieve more than once to get an extra silky finish.
    • Use a fat separator if you want. It helps remove any tiny bits of fat that the sieve doesn't catch, but it’s totally optional.
    • Watch the roux closely. The butter and flour can burn quickly, so whisk often over medium while it cooks.
    • Ingredients to prep ahead- Chop onion and celery, peel garlic, and wash your herbs.
    • Leftovers and storage- Store gravy in an airtight container for up to 3 days in the fridge, or freeze up to 6 months. Reheat gently on the stove and add a splash of broth.
    A plate of turkey, green beans and mashed potatoes with gravy on it.

    What To Serve With This Turkey Gravy Recipe No Drippings

    Gravy has a way of turning a good holiday meal into something unforgettable. Of course, it’s perfect over turkey and mashed potatoes, but it’s just as delicious alongside these recipes:

    • Savory Sweet Potato Casserole
    • Crispy Parmesan Potatoes
    • Turkey with Oranges and Rosemary
    • Cream Cheese Pumpkin Crunch Cake

    Other Turkey Recipes To Try

    • A sliced smoked turkey breast on a cutting board with the crispy skin on.
      Smoked Bone In Turkey Breast
    • A white oval pan with roast turkey thighs in it and onions and a red and white napkin in the background.
      Roast Turkey Thighs for Two
    • An overhead image of a thanksgiving table with the platter of carved turkey in the middle and green beans, dressing and cranberry sauce around it.
      Turkey with Oranges and Rosemary
    • An overhead image of a whole spatchcocked turkey cooked golden brown on a platter with limes and other thanksgiving sides and decorative leaves and garland around it.
      Cajun Turkey

    Hosting Thanksgiving?

    Discover the secret to hosting Thanksgiving without all the stress! Prepsgiving is your FREE guide to making a delicious Thanksgiving feast the easy way.

    Love this recipe? Please leave a 5 star ⭐️⭐️⭐️⭐️⭐️ rating in the recipe card below ⬇️ and/or a review in the comment section further down. Check out my Amazon Store for all my favorite tools, including those used in this recipe. And follow @thelifejolie on Instagram and TikTok!

    A green gravy boat pouring gravy onto a plate of turkey and mashed potatoes.

    No Drippings Turkey Gravy

    Jessy Freimann
    This no drippings turkey gravy is easy to make and can be prepped ahead since it doesn't rely on anything from the bird! Thick, creamy, and full of flavor, it’s perfect for Thanksgiving or any turkey dinner.
    No ratings yet
    Print Recipe Pin Recipe
    Prep Time 10 minutes mins
    Cook Time 1 hour hr 15 minutes mins
    Total Time 1 hour hr 25 minutes mins
    Course Condiment, dinner
    Cuisine American
    Servings 10 servings
    Calories 260 kcal

    Equipment

    • chefs knife
    • cutting board
    • Dutch oven
    • Ladle
    • wooden spoon
    • measuring cups
    • measuring spoons
    • Sieve

    Ingredients
      

    • Olive oil cooking spray
    • 4 turkey wings raw (you can use your preferred turkey pieces)
    • 1 large onion, cut into large chunks
    • 4 ribs celery, cut into large chunks
    • 3 cloves fresh garlic, smashed
    • 2 sprigs fresh rosemary
    • 3 sprigs fresh thyme
    • 2 sprigs fresh sage
    • 8 whole peppercorns
    • ½ cup white wine (or water if you don't want to use alcohol)
    • 8 cups water (or more- you want to make sure the turkey is fully covered)
    • ½ cup salted butter (1 stick)
    • ½ cup flour
    • 1 ½ teaspoons kosher salt (or more to your taste)

    Instructions
     

    • Heat a large heavy-bottom dutch oven over medium high heat and spray with olive oil cooking spray.
    • Once the pan is hot, add turkey pieces. Cook until golden brown, about 3-4 minutes per side (do this in batches so you don't overload the pan). Once each side is browned, remove from pan.
    • Add additional cooking spray if necessary and add onions and celery to the pan. Sauté for 4 minutes, stirring often.
    • Add garlic, peppercorns and fresh herbs and sauté for 2 more minutes, stirring often.
    • Add wine and deglaze the pan. Cook for 2 minutes.
    • Add turkey pieces back into the pan and fill with water so everything is completely covered.
    • Bring to a boil and reduce heat to a simmer. Simmer for 1 hour.
    • Run broth through a fine mesh sieve twice. Cool to room temperature and store in the refrigerator until ready to thicken and serve.
    • When ready to serve, melt butter in large pot over medium heat. While butter melts, heat broth in a separate pan over medium heat.
    • Once butter is melted, add flour and whisk until no lumps remain. Cook 2 minutes, whisking often.
    • Whisk in broth and simmer until thickened.
    • Add salt and taste. Add additional salt if needed. Serve immediately.

    Video

    Notes

    • Don’t stress about chopping the veggies super small since you’ll be straining them out later, just give them a good wash.
    • Get the pan really hot! You should hear a nice sizzle when the turkey pieces hit the surface. That sear adds loads of flavor.
    • Be mindful when turning the turkey pieces. I like to gently give the turkey wings a wiggle with my tongs. When it's ready to be turned, the turkey wing should easily come up from the bottom of the pan. If it's sticking, it needs more time, so give it a couple minutes and try again.
    • Strain twice for smoothness. I like to run the broth through a fine mesh sieve more than once to get an extra silky finish.
    • Use a fat separator if you want. It helps remove any tiny bits of fat that the sieve doesn't catch, but it’s totally optional.
    • Watch the roux closely. The butter and flour can burn quickly, so whisk often over medium while it cooks.
    • Ingredients to prep ahead- Chop onion and celery, peel garlic, and wash your herbs.
    • Leftovers and storage- Store gravy in an airtight container for up to 3 days in the fridge, or freeze up to 6 months. Reheat gently on the stove and add a splash of broth.

    Nutrition

    Serving: 1servingCalories: 260kcalCarbohydrates: 8gProtein: 15gFat: 18gSaturated Fat: 8gPolyunsaturated Fat: 2gMonounsaturated Fat: 6gTrans Fat: 0.4gCholesterol: 72mgSodium: 483mgPotassium: 259mgFiber: 1gSugar: 1gVitamin A: 383IUVitamin C: 2mgCalcium: 35mgIron: 1mg
    Tried this recipe?Let us know how it was!

    Savory Sweet Potato Casserole

    Oct 17, 2025 · 10 Comments

    A close up of a serving spoon in a pan of savory sweet potato casserole.

    This savory sweet potato casserole is all about creamy potatoes, bold seasonings, and a golden onion topping. It’s simple to make, easy to prep ahead, and a hit at any fall gathering.

    A close up of a serving spoon in a pan of savory sweet potato casserole.
    [feast_advanced_jump_to]

    Why You’ll Love This Sweet Potato Casserole Without Nuts

    I’ve never really been into those ultra-sweet casseroles with marshmallows on top... I’d rather save my sugar fix for dessert. But sweet potatoes themselves? That’s a different story. They’re naturally sweet and so good when you play them up with savory herbs and spices instead of more sugar.

    This casserole takes that idea and runs with it. The potatoes get blended into a smooth, creamy base, seasoned with plenty of flavor, and finished with a layer of crispy French-fried onions that make every bite extra satisfying. It’s cozy, a little unexpected, and the kind of side dish that’ll have people going back for seconds. Reasons to love it:

    • Naturally lighter
    • No sugar overload
    • Crispy onion topping
    • Creamy, flavorful base
    • Easy but holiday-worthy
    A plate of sweet potato casserole with a fork on it.

    Ingredient Information And Substitutions

    • Sweet potatoes- Their natural sweetness pairs perfectly with savory herbs and spices. You can swap in yams, though the flavor will be slightly different.
    • Olive oil- Helps roast the potatoes. Melted butter also works.
    • Milk- Whole milk gives creaminess, but any milk or even unsweetened non-dairy milk will work.
    • Eggs- They help bind the casserole and give it a light, fluffy texture.
    • Seasonings- Salt, pepper, onion powder, garlic powder, thyme, smoked paprika, and a touch of cayenne. You can adjust spices to your taste or use Italian seasoning for a different twist.
    • French-fried onions- The crunchy finishing touch. If you don’t have them, try buttered panko crumbs or crushed crackers.
    An overhead image of labeled recipe ingredients.

    How To Make Savoury Sweet Potato Casserole

    Step 1- Roast the potatoes.

    Preheat to 425 degrees F. Grease a 9x9-inch baking dish and line a sheet pan with parchment.

    Toss the sliced sweet potatoes with olive oil, salt, and pepper. Spread in an even layers on the sheet pan and roast about 30 minutes, until fork-tender. Let cool for 10 minutes.

    Roasted sweet potato slices on a pan and then in a food processor with egg and milk.

    Step 2- Blend and season.

    Lower the oven to 350 degrees F. Add the potatoes, milk, and eggs to a food processor and puree until creamy, scraping the sides as needed. Work in batches if your machine is small.

    Transfer to a large bowl and stir in the remaining salt, onion powder, garlic powder, thyme, smoked paprika, and cayenne.

    The smooth potato mixture in the food processor and then in a bowl with the seasonings added in.

    Step 5- Bake.

    Spread the mixture into the prepared dish and bake uncovered for 30 minutes.

    Sprinkle French-fried onions over the top, press down lightly, and bake another 10 minutes. Serve hot.

    Sweet potato puree in a prepared pan and then after the first bake with french fried onions on top.

    Frequently Asked Questions

    Can I make this ahead of time?

    Yes. Assemble it up to the baking step, cover, and refrigerate. When you’re ready, bake as directed, but remove from the fridge 30 minutes prior to baking and check the temp before topping so it heats all the way through. 

    Do I have to peel the sweet potatoes? 

    I do, since it makes the casserole extra smooth. My trick is to cut off the ends and run a knife down the sides toward the cutting board to slip the skins off quickly.

    What if I don’t have a food processor?

    A high-powered blender works too. If you don’t mind a chunkier casserole, a potato masher or hand mixer also does the job.

    A close up of the casserole after being scooped revealing the tender inside.

    Tips For Making Make Ahead Sweet Potato Casserole

    • Roast the potatoes in even slices. They don’t need to look perfect, but keeping them the same size and thickness helps them cook evenly.
    • Let the potatoes cool before blending. Wait 10 minutes before mixing everything in to keep the eggs from scrambling.
    • Don’t skimp on blending. Stop and scrape down the sides so the potatoes turn out smooth and creamy instead of lumpy.
    • Wait to add the French-fried onions. Toss them on during the last 10 minutes of baking so they stay golden and crunchy, not burnt.
    • Want to mix it up? A little extra cayenne or smoked paprika gives the casserole some savory heat. If you're out of crispy onions, you can also swap them for buttery panko or cracker crumbs.
    • Ingredients to prep ahead- Clean the potatoes up to a day in advance. Store them in cold water in the fridge until you’re ready to roast.
    • Leftovers and storage- Keep leftovers in the fridge up to 3 days. Reheat in the oven for the best texture, adding a few fresh crispy onions on top if you’d like.
    A close up of a plate of sweet potato casserole.

    What To Serve With Mash Sweet Potato Casserole

    This casserole pairs perfectly with your holiday turkey or ham, but it’s also a nice side for simple weeknight mains. Add a green veggie and something sweet for a complete meal. Try it with:

    • Smoked Bone In Turkey Breast
    • Garlic And Butter Green Beans
    • Cranberry Chutney
    • No Bake Peanut Butter Pie

    Other Casserole Recipes To Try

    • The corner of a pan of green bean casserole with a serving spoon in it.
      Green Bean Casserole Without Mushroom Soup
    • A plate of ravioli casserole with the pan behind it.
      Ravioli Casserole
    • A plate of broccoli rice casserole with the pan and raw broccoli florets in the background.
      Rice and Broccoli Casserole
    • A bowl of tuna casserole with the pan behind it.
      Old Fashioned Tuna Casserole

    Hosting Thanksgiving?

    Discover the secret to hosting Thanksgiving without all the stress! Prepsgiving is your FREE guide to making a delicious Thanksgiving feast the easy way.

    Love this recipe? Please leave a 5 star ⭐️⭐️⭐️⭐️⭐️ rating in the recipe card below ⬇️ and/or a review in the comment section further down. Check out my Amazon Store for all my favorite tools, including those used in this recipe. And follow @thelifejolie on Instagram and TikTok!

    A close up of a serving spoon in a pan of savory sweet potato casserole.

    Savory Sweet Potato Casserole

    Jessy Freimann
    This savory sweet potato casserole is all about creamy potatoes, bold seasonings, and a golden onion topping. It’s simple to make, easy to prep ahead, and a hit at any fall gathering.
    4.50 from 4 votes
    Print Recipe Pin Recipe
    Prep Time 10 minutes mins
    Cook Time 1 hour hr 15 minutes mins
    Cooling time 10 minutes mins
    Total Time 1 hour hr 10 minutes mins
    Course Side Dish
    Cuisine American
    Servings 8 servings
    Calories 243 kcal

    Equipment

    • chefs knife
    • cutting board
    • sheet pan
    • measuring cups
    • measuring spoons
    • food processor
    • mixing bowl
    • Spatula
    • 9" x 9" Baking Pan

    Ingredients
      

    • Cooking spray
    • 5 large sweet potatoes, peeled and sliced into ½ inch thick pieces
    • 2 Tablespoons olive oil
    • 1 teaspoon Kosher salt + some extra for roasting the potatoes
    • Ground pepper to taste
    • ½ cup whole milk
    • 2 large eggs
    • ½ teaspoon onion powder
    • 1 teaspoon garlic powder
    • ½ teaspoon dried thyme
    • ½ teaspoon smoked paprika
    • ¼ teaspoon cayenne pepper
    • 1 ½ cups French fried onions

    Instructions
     

    • Preheat the oven to 425 degrees F. Grease a 9" x 9" baking pan with cooking spray and set aside. Line a sheet pan with parchment and set aside.
    • Place the potato slices in a large mixing bowl. Drizzle with olive oil and lay out in a single layer on the sheet pan. Sprinkle with salt and pepper to taste.
    • Bake for 30 minutes or until the potatoes are for tender. Cool for at least 10 minutes.
    • Reduce the oven temperature to 350 degrees F.
    • Place the potatoes into the food processor with the milk and eggs and process until smooth, scraping down the sides periodically (if necessary, process in batches so as not to overfill the food processor).
    • Place the potato mixture in a large bowl and add 1 teaspoon salt, onion powder, garlic powder, thyme, smoked paprika and cayenne pepper. Mix until well combined.
    • Pour the potato mixture into the prepared 9" x 9". Bake uncovered for 30 minutes.
    • Remove the pan from the oven and sprinkle French fried onions evenly over the top. Gently press them in with your hands.
    • Return to the oven and bake for another 10 minutes. Serve immediately.

    Video

    Notes

    • Roast the potatoes in even slices. They don’t need to look perfect, but keeping them the same size and thickness helps them cook evenly.
    • Let the potatoes cool before blending. Wait 10 minutes before mixing everything in to keep the eggs from scrambling.
    • Don’t skimp on blending. Stop and scrape down the sides so the potatoes turn out smooth and creamy instead of lumpy.
    • Wait to add the French-fried onions. Toss them on during the last 10 minutes of baking so they stay golden and crunchy, not burnt.
    • Want to mix it up? A little extra cayenne or smoked paprika gives the casserole some savory heat. If you're out of crispy onions, you can also swap them for buttery panko or cracker crumbs.
    • Ingredients to prep ahead- Clean the potatoes up to a day in advance. Store them in cold water in the fridge until you’re ready to roast.
    • Leftovers and storage- Keep leftovers in the fridge up to 3 days. Reheat in the oven for the best texture, adding a few fresh crispy onions on top if you’d like.

    Nutrition

    Serving: 1servingCalories: 243kcalCarbohydrates: 44gProtein: 6gFat: 5gSaturated Fat: 1gPolyunsaturated Fat: 1gMonounsaturated Fat: 3gTrans Fat: 0.01gCholesterol: 48mgSodium: 432mgPotassium: 767mgFiber: 7gSugar: 10gVitamin A: 30330IUVitamin C: 5mgCalcium: 92mgIron: 2mg
    Tried this recipe?Let us know how it was!

    Apple Cranberry Chutney

    Oct 13, 2025 · Leave a Comment

    A white bowl of apple cranberry chutney with a striped napkin behind it.

    This apple cranberry chutney blends tart cranberries, sweet apple, and citrus with warm spices for a vibrant holiday side. It’s ready in 30 minutes and can be made ahead for easy prep.

    A white bowl of apple cranberry chutney with a striped napkin behind it.
    [feast_advanced_jump_to]

    Why You’ll Love This Cranberry Apple Chutney

    Growing up, I was firmly on team canned cranberry sauce. I refused to even taste the fresh kind, and now I totally get how frustrating that is. I see the same thing with my girls. But once I finally tried a homemade chutney, I realized what I’d been missing.

    This recipe is the perfect mix of sweet, tart, and savory. The cranberries pop as they cook, the apples and citrus add brightness, and the warm spices round it all out. Best of all, it’s incredibly simple to make and actually tastes better if you prepare it ahead of time… holiday win! Here’s why this chutney deserves a spot on your table:

    • Works for turkey, sandwiches, and cheese boards
    • Fresh, vibrant flavors you just can’t get from a can
    • Ready in about 30 minutes
    • Make-ahead friendly
    A spoon pulling up a scoop of cranberry chutney from a bowl of it.

    Ingredient Information And Substitutions

    • Cranberries- Use fresh or frozen, no need to thaw if using frozen.
    • Apple- Adds sweetness and texture. A pear will also work nicely.
    • Orange- Both zest and supremes bring citrusy brightness. You could swap in tangerine or clementine.
    • Shallot- Brings a mild savory balance. Onion also works.
    • Cinnamon- Warm and cozy spice.
    • Cloves- Adds depth. Use sparingly or replace with a pinch of allspice.
    • Brown sugar- Balances the tartness. White sugar is a fine substitute.
    • Coarse mustard- Adds a little tang and depth. Dijon is a good swap.
    • White wine vinegar- Brightens the chutney. Apple cider vinegar works too.
    • Walnuts- Add crunch. Pecans or almonds make a nice alternative.
    • Olive oil- Keeps the shallots from sticking as they cook. Any neutral oil works in a pinch.
    • Kosher salt- Rounds out all the flavors.
    • Black pepper- Adds just the right hint of spice.
    An overhead image of labeled recipe ingredients.

    How To Make Cranberry Chutney

    Step 1- Saute the shallot.

    Warm the olive oil in a saucepan over medium heat. Add the diced shallot and cook for a few minutes until softened. Sprinkle in the cinnamon and cloves and stir until fragrant, about a minute.

    Shallots sautéing in a medium pan and then spices added.

    Step 2- Mix in fruit and liquids.

    Stir in the orange zest, chopped orange segments, diced apple, brown sugar, mustard, vinegar, and water. Cook until the sugar dissolves.

    Apples, citrus and liquids added to the pan and then cranberries added once they sugar dissolves.

    Step 3- Cook the cranberries.

    Add the cranberries and bring everything to a gentle boil. Cook for about 10 minutes, stirring now and then, until the berries burst and the chutney thickens.

    Sauce simmering after cranberries are added and then the sauce cooked down a bit with burst cranberries.

    Step 4- Finish with walnuts.

    Stir in the walnuts, season with salt and pepper, and cook for one more minute. Remove from heat and let cool. Serve at room temperature or chilled.

    Walnuts added and then fully stirred in.

    Frequently Asked Questions

    How do you thicken the chutney?

    The cranberries naturally release pectin as they cook, so the chutney thickens by itself. Just simmer until the berries burst and the mixture reduces a little. It also thickens a bit more as it cools.

    How far ahead can I make this?

    You can make it up to three days in advance. The flavors actually get better as it sits!

    How do you supreme an orange?

    Start by cutting off the top and bottom so the orange sits flat. Use a sharp knife to slice away the peel and all the white pith. Then, cut along the membranes on each side of a wedge to release clean, juicy segments without any bitterness.

    A close up image of cranberry chutney in a bowl.

    Tips For Making Fresh Cranberry Relish

    • You’ll know the chutney is ready for the last step when the cranberries begin to burst. The sauce should look glossy and slightly thickened.
    • Give it a taste before finishing. If it feels too tart, stir in a little extra sugar. If you want more tang, add a splash of vinegar.
    • This chutney works served warm, at room temperature, or chilled. I like to make it a day or two ahead because the flavors deepen as it rests.
    • Try switching up the flavors. A pinch of ginger, cardamom, or even a splash of red wine makes this chutney feel a little different without any extra effort.
    • Ingredients to prep ahead- Dice the shallots, wash the apple and orange, and chop the walnuts.
    • Leftovers and storage- Store in an airtight container in the fridge for up to a week. It reheats nicely, but I think it’s just as tasty chilled.
    A bowl of cranberry relish with orange zest on top.

    What To Serve With Easy Cranberry Relish

    My favorite way to enjoy this chutney is with Thanksgiving turkey, but it’s so much more versatile than that. It’s delicious tucked into a sandwich with leftovers, stirred into chicken salad, or spooned over baked brie. You can even serve it on a cheese platter for a festive appetizer. To round out a full holiday meal, try pairing it with:

    • Roasted Spatchcock Glazed Turkey with Bourbon
    • Phyllo Cups
    • Grilled Balsamic Asparagus
    • Copycat Panera Chicken BBQ Salad

    Other Cranberry Recipes To Try

    • A serving spoon lifting a scoop of apple cranberry crisp from the corner of a white pan of it.
      Apple and Cranberry Crisp
    • Homemade Cranberry Sauce with Dried Cherries and Shallots Recipe
    • An overhead image of a cranberry cake with citrus on a plate.
      Orange Cranberry Cake
    • This Salted Cranberry and Pistachio Bark could not be more delicious! It's insanely easy to make and the salty-sweet flavor combination cannot be beat! I'll definitely be making this over and over again!
      Salted Cranberry and Pistachio Bark

    Hosting Thanksgiving?

    Discover the secret to hosting Thanksgiving without all the stress! Prepsgiving is your FREE guide to making a delicious Thanksgiving feast the easy way.

    Love this recipe? Please leave a 5 star ⭐️⭐️⭐️⭐️⭐️ rating in the recipe card below ⬇️ and/or a review in the comment section further down. Check out my Amazon Store for all my favorite tools, including those used in this recipe. And follow @thelifejolie on Instagram and TikTok!

    A white bowl of apple cranberry chutney with a striped napkin behind it.

    Apple Cranberry Chutney

    Jessy Freimann
    This apple cranberry chutney blends tart cranberries, sweet apple, and citrus with warm spices for a vibrant holiday side. It’s ready in 30 minutes and can be made ahead for easy prep.
    No ratings yet
    Print Recipe Pin Recipe
    Prep Time 10 minutes mins
    Cook Time 20 minutes mins
    Total Time 30 minutes mins
    Course Condiment, Side Dish
    Cuisine American
    Servings 8 servings
    Calories 181 kcal

    Equipment

    • measuring spoons
    • measuring cups
    • Whisk
    • saucepan
    • chefs knife
    • cutting board

    Ingredients
      

    • 1 Tablespoon olive oil
    • 1 shallot, diced
    • ½ teaspoon ground cinnamon
    • ¼ teaspoon ground cloves
    • 1 orange, zest reserved and then peeled, supremed and chopped.
    • 1 apple, peeled, cored and diced
    • ½ cup brown sugar
    • 1 Tablespoons course mustard
    • ⅓ cup white wine vinegar
    • ½ cup water
    • 12 ounces cranberries (fresh or frozen)
    • ¾ cup chopped walnuts
    • ½ teaspoon Kosher salt, to taste
    • ¼ teaspoon Ground black pepper, to taste

    Instructions
     

    • Heat oil in a medium pan over medium heat. Add shallot and sauté until softened stirring periodically, about 3 minutes.
    • Stir in cinnamon and cloves and cook for 1 more minute until fragrant.
    • Add orange zest, diced orange supremes, apple, brown sugar, coarse mustard, vinegar and water. Stir until sugar is dissolved.
    • Add cranberries and raise heat to medium high to bring to a boil.
    • Cook for 10 minutes stirring periodically until the berries burst and chutney has thickened.
    • Stir in walnuts and add salt and pepper to taste.
    • Cook for 1 more minute then remove from heat and cool completely. Serve chilled or at room temperature.

    Video

    Notes

    • You’ll know the chutney is ready for the last step when the cranberries begin to burst. The sauce should look glossy and slightly thickened.
    • Give it a taste before finishing. If it feels too tart, stir in a little extra sugar. If you want more tang, add a splash of vinegar.
    • This chutney works served warm, at room temperature, or chilled. I like to make it a day or two ahead because the flavors deepen as it rests.
    • Try switching up the flavors. A pinch of ginger, cardamom, or even a splash of red wine makes this chutney feel a little different without any extra effort.
    • Ingredients to prep ahead- Dice the shallots, wash the apple and orange, and chop the walnuts.
    • Leftovers and storage- Store in an airtight container in the fridge for up to a week. It reheats nicely, but I think it’s just as tasty chilled.

    Nutrition

    Serving: 1servingCalories: 181kcalCarbohydrates: 25gProtein: 2gFat: 9gSaturated Fat: 1gPolyunsaturated Fat: 5gMonounsaturated Fat: 2gSodium: 152mgPotassium: 161mgFiber: 3gSugar: 19gVitamin A: 78IUVitamin C: 16mgCalcium: 37mgIron: 1mg
    Tried this recipe?Let us know how it was!

    Brie Apple Phyllo Cups

    Oct 10, 2025 · Leave a Comment

    A close up image of a Brie Apple Phyllo Cup on a pan.

    These brie apple phyllo cups make a quick appetizer with crisp SnapDragon apples, creamy Brie, smoky bacon, and a drizzle of honey. Ready in 20 minutes, they’re the perfect holiday starter or a simple snack for last-minute get-togethers.

    A close up image of a Brie Apple Phyllo Cup on a pan.
    [feast_advanced_jump_to]

    Why You’ll Love These Phyllo Dough Appetizer Cups

    Having an appetizer recipe that feels effortless is a lifesaver during the busy holiday season. These bites are incredibly flavorful, classy, and come together in less time than it takes to set the table. They pair perfectly with everything from a Thanksgiving turkey to a New Year’s Eve spread.

    The balance of flavors makes these irresistible: crunchy SnapDragon apples, creamy brie, savory bacon, and a whisper of honey to tie it all together. Plus, the phyllo shells mean no fussing with dough… just assemble, bake, and enjoy. Here’s why you’ll love the brie cheese bites:

    • Quick and easy, ready in 20 minutes
    • The perfect mix of savory, sweet, and crunchy
    • Made with just a handful of simple ingredients
    • Pretty enough for any holiday table
    • A guaranteed crowd-pleaser
    A plate with a few phyllo cup appetizers on it.

    Ingredient Information And Substitutions

    • Mini phyllo cups- Found in the freezer aisle near puff pastry. Substitute with puff pastry squares if needed.
    • Brie cheese- Creamy and rich. Swap with Camembert or even cream cheese for a milder option.
    • SnapDragon apples- Crisp and lightly sweet. Honeycrisp or Gala apples are the closest substitute. Toss in lemon juice to prevent browning.
    • Lemon juice- Keeps the apple slices fresh. Lime juice or orange juice also works.
    • Bacon- Adds smoky, savory flavor. Prosciutto or pancetta can be used for a more delicate touch.
    • Honey- For a touch of sweetness. Maple syrup or fig jam would also complement the flavors. 
    An overhead image of labeled recipe ingredients.

    How To Make Brie Apple Phyllo Cups

    Step 1- Prep the phyllo cups.

    Line a baking sheet with parchment. Arrange the phyllo shells so they aren’t touching, then tuck a small chunk of brie into each one.

    Phyllo cups with a piece of brie in each on on a parchment lined pan.

    Step 2- Prep and add apples.

    Thinly slice the apple, toss the pieces with a little lemon juice to keep them fresh, and then tuck a couple of slices into each brie-filled phyllo cup.

    Apples added into each phyllo cup.

    Step 3- Add bacon.

    Sprinkle crumbled bacon over the top of the apples and cheese, making sure it lands inside the cups (as best as you can!).

    Bacon sprinkled onto the phyllo cups.

    Step 4- Bake and drizzle.

    Bake at 350 degrees F for 10–15 minutes, until the brie is melted. Remove from the oven, add a drizzle of honey, and serve warm.

    A hand drizzling honey over the baked phyllo cups.

    Frequently Asked Questions

    Do you take the rind off brie before baking?

    This is a matter of personal preference. The rind is perfectly safe to eat, and I prefer to leave it on to save time.

    How can I keep them from getting soggy?

    Remove them from the sheet pan right after cooking, and make sure not to overload the phyllo cups with apples or honey. If you need to let them cool, place them on a wire rack to keep the bottoms crisp.

    Can I make these ahead of time?

    You can prep the ingredients in advance: cook the bacon, cut the brie, and slice the apples (store them with lemon juice). Assemble and bake right before serving for the best results.

    Do I need to thaw the cups first?

    Nope! The frozen phyllo shells can go straight onto the baking sheet. No defrosting required.

    A close up image of a honey dipper drizzling honey over a brie phyllo cup.

    Tips For Making Appetizers With Phyllo Dough Cups

    • Fry the bacon nice and crispy so you don’t end up with any chewy bites. 
    • No need to peel the apples. I think the skin adds a gorgeous pop of color to the dish!
    • Cut the brie into small, bite-sized chunks so it melts evenly. If the pieces are too big, they may not soften all the way through.
    • Tuck the apple slices into the brie at a little angle so they fan out. It makes the cups look extra pretty once they’re baked.
    • Go light on the honey drizzle. A little sweetness goes a long way and keeps the cups from getting soggy.
    • For an extra pop of flavor, sprinkle on chopped pecans, dried cranberries, or a touch of cinnamon.
    • Mix things up by swapping the apples for pears or figs for a fun twist on the classic brie apple combo.
    • Ingredients to prep ahead- Cook and crumble the bacon, slice the apple (tossed in lemon juice), and cut the brie into cubes.
    • Leftovers and storage- Leftovers keep in the fridge up to 3 days. Reheat in the oven so the shells stay crisp. Freezing isn’t recommended as phyllo loses its crunch and turns soggy.
    An overhead image of some phyllo cup appetizers on a plate.

    What To Serve With Phyllo Appetizers Cups

    These little bites make a great starter, but they’re even better as part of a full spread. Pair them with something fresh, something hearty, and something sweet to round out the table. Here are my favorite pairings:

    • Steak Bites And Potatoes
    • Baked Delicata Squash With Herbed Yogurt
    • Savory Spiced Butternut Squash Soup
    • No Bake Peanut Butter Pie
    A close up of a baked brie bite on a white plate.

    Other Appetizers To Try

    • A white bowl of fried pickles with the pan behind it and a blue and white towel in the background.
      Oven Fried Pickles Recipe
    • Crescent roll pizza slices lined up on a cutting board with veggies around it.
      Crescent Roll Veggie Pizza
    • A hand putting a tortilla chip up with taco dip on it.
      7 Layer Taco Dip
    • A close up of a jalapeno deviled egg on a plate with others.
      Jalapeno Deviled Eggs

    Hosting Thanksgiving?

    Discover the secret to hosting Thanksgiving without all the stress! Prepsgiving is your FREE guide to making a delicious Thanksgiving feast the easy way.

    Love this recipe? Please leave a 5 star ⭐️⭐️⭐️⭐️⭐️ rating in the recipe card below ⬇️ and/or a review in the comment section further down. Check out my Amazon Store for all my favorite tools, including those used in this recipe. And follow @thelifejolie on Instagram and TikTok!

    A close up image of a Brie Apple Phyllo Cup on a pan.

    Apple Brie Phyllo Cups

    Jessy Freimann
    These apple brie phyllo cups are a quick appetizer with crisp SnapDragon apples, creamy Brie, smoky bacon, and a drizzle of honey. Ready in 20 minutes, they’re the perfect holiday starter or a simple snack for last-minute get-togethers.
    No ratings yet
    Print Recipe Pin Recipe
    Prep Time 5 minutes mins
    Cook Time 15 minutes mins
    Total Time 20 minutes mins
    Course Appetizer, Snack
    Cuisine Christmas, Fall, Holiday, New Years, Thanksgiving
    Servings 12 pieces
    Calories 38 kcal

    Equipment

    • cutting board
    • chefs knife
    • Bowl
    • Spatula
    • sheet pan

    Ingredients
      

    • 12 mini phyllo cups (I find them frozen in near the phyllo dough)
    • 1 small wedge brie cheese or whatever creamy cheese you prefer
    • ½ apple sliced thin and cut into 1 inch pieces
    • 1 Tablespoon Lemon juice about ½ lemon
    • 3 slices bacon cooked until crispy and crumbled
    • 2 Tablespoons Honey for drizzling

    Instructions
     

    • Preheat oven to 350 degrees F and line a pan with parchment or foil for easy clean up.
    • Arrange phyllo cups on the pan.
    • Cut brie into bite size pieces and place them into the phyllo cups.
    • Drizzle apple pieces with lemon juice toss to evenly coated.
    • Place 2-3 pieces of the apples into each phyllo cup.
    • Sprinkle the crumbled bacon generously into each phyllo cup.
    • Bake for 10-15 minutes, until the cheese is nicely melted.
    • Drizzle very lightly with honey and serve immediately.

    Video

    Notes

    • Fry the bacon nice and crispy so you don’t end up with any chewy bites. 
    • No need to peel the apples. I think the skin adds a gorgeous pop of color to the dish!
    • Cut the brie into small, bite-sized chunks so it melts evenly. If the pieces are too big, they may not soften all the way through.
    • Tuck the apple slices into the brie at a little angle so they fan out. It makes the cups look extra pretty once they’re baked.
    • Go light on the honey drizzle. A little sweetness goes a long way and keeps the cups from getting soggy.
    • For an extra pop of flavor, sprinkle on chopped pecans, dried cranberries, or a touch of cinnamon.
    • Mix things up by swapping the apples for pears or figs for a fun twist on the classic brie apple combo.
    • Ingredients to prep ahead- Cook and crumble the bacon, slice the apple (tossed in lemon juice), and cut the brie into cubes.
    • Leftovers and storage- Leftovers keep in the fridge up to 3 days. Reheat in the oven so the shells stay crisp. Freezing isn’t recommended as phyllo loses its crunch and turns soggy.

    Nutrition

    Serving: 2piecesCalories: 38kcalCarbohydrates: 4gProtein: 1gFat: 2gSaturated Fat: 1gPolyunsaturated Fat: 0.4gMonounsaturated Fat: 1gTrans Fat: 0.01gCholesterol: 4mgSodium: 39mgPotassium: 14mgFiber: 0.01gSugar: 3gVitamin A: 3IUVitamin C: 1mgCalcium: 1mgIron: 0.04mg
    Tried this recipe?Let us know how it was!

    Quinoa Butternut Squash Salad

    Oct 8, 2025 · Leave a Comment

    A bowl of quinoa salad with butternut squash.

    This quinoa butternut squash salad combines roasted squash, tender quinoa, crisp apples, dried cherries, and feta in a bright vinaigrette. Ready in 30 minutes, it’s fresh, colorful, and tastes special without any fuss.

    A bowl of quinoa salad with butternut squash.
    [feast_advanced_jump_to]

    Why You’ll Love This Butternut And Quinoa Salad

    This salad is the kind of dish that feels equally at home on a festive holiday spread or tucked into your lunchbox for the week. Every bite hits that sweet-savory-tangy combo, with crisp apples and walnuts adding crunch to the tender roasted squash. 

    The best part? You can totally make it your own. Toss in whatever fruit, nuts, or cheese you’ve got, and it’ll still be delicious. It’s colorful, full of texture, and the kind of dish that just brightens up the table the second you set it down. Here’s why you’ll want to make this butternut quinoa salad:

    • Ready in 30 minutes
    • Hearty and refreshing
    • Great for make-ahead lunches
    • Doubles as a holiday-worthy side
    • Customizable with your favorite add-ins

    Ingredient Information And Substitutions

    • Quinoa- The light and fluffy base for the salad. Use white, red, or tricolor quinoa.
    • Walnuts- Add crunch and nuttiness. Pecans or pumpkin seeds make good alternatives.
    • Dried cherries- Bring tart-sweet flavor. Dried cranberries or raisins can be swapped in.
    • Apples- Add freshness. Crisp SnapDragons or RubyFrost apples are great choices.
    • Butternut squash- Roast until tender and caramelized. I prefer Honey nut squash but sweet potatoes work as substitutes.
    • Shallots- Add sweetness and a delicate oniony-garlicky flavor. Regular onions can be used if needed.
    • Feta cheese- Creamy and tangy, it balances the sweetness. Goat cheese is a tasty substitute.
    • Olive oil- Helps the veggies roast and emulsifies the vinaigrette. Avocado oil is a good swap.
    • Champagne vinegar- Gives brightness to the dressing. Use white wine vinegar as an alternative.
    • Apple cider vinegar- Adds tang with a hint of fruitiness. Lemon juice can be used instead.
    • Grainy mustard- Provides texture and depth in the vinaigrette. Dijon works too.
    • Honey- Sweetens and balances acidity. Maple syrup makes a nice swap.
    • Fresh herbs- Sage and parsley bring an earthy yet bright flavor. 
    • Garlic powder- Adds a savory note. A small, finely minced garlic clove can work too.
    • Kosher salt- Enhances flavor throughout the dish. Sea salt is a fine substitute.
    • Black pepper- Balances the sweetness with a little bite.
    An overhead image of label recipe ingredients.

    How To Make Butternut Squash Quinoa Salad

    Step 1- Roast the vegetables.

    Preheat your oven to 450 degrees F and line a baking sheet with parchment. Toss the diced squash and sliced shallots with olive oil, sage, garlic powder, salt, and pepper, then spread them out evenly onto the pan. Roast for 10 minutes, flip, and roast another 10 minutes until golden and tender. 

    Squash, shallots and seasonings on a pan and then into the oven.
    Squash mixture flipped and the pan back in the oven.

    Step 2- Make the dressing.

    While the veggies cook, whisk together champagne vinegar, apple cider vinegar, mustard, honey, salt, and pepper. Switch to an immersion blender and slowly stream in the olive oil while blending until the dressing is smooth and emulsified.

    Dressing ingredients in a bowl and then the ingredients mixed together into a creamy dressing.

    Step 3- Assemble the salad.

    Add the cooked quinoa to a large bowl along with the roasted squash and shallots, walnuts, dried cherries, feta, apples, and parsley. Pour over about ¾ of the dressing and toss gently until everything is coated. Give it a taste, adjust the seasoning, and add more dressing if you’d like. Serve immediately.

    Quinoa cooking in a pan with water and then the dressing ingredients in a large bowl.

    Frequently Asked Questions

    What is the best dressing for quinoa salad?

    A light vinaigrette is ideal since quinoa absorbs flavor easily. This one combines vinegars, mustard, and honey for a tangy-sweet balance that pairs perfectly with the squash, apples, and feta.

    How to cook quinoa for salad? 

    Most packages have direction listed. Use 2 parts liquid to 1 part quinoa. Simmer until the liquid is absorbed, rest covered for 5 minutes, then fluff with a fork.

    Can I make this salad ahead of time? 

    Yes, it gets better as it sits.

    A close up image of a butternut squash salad with quinoa.

    Tips For Making Quinoa and Butternut Squash Salad

    • Cut the squash evenly, so it roasts evenly.
    • Toast the nuts for extra crunch and flavor.
    • Dress lightly first and add more if needed. It’s easier to build up than to fix an overdressed salad.
    • Serve warm or cold. This quinoa squash salad is tasty right after roasting while still warm, and just as good chilled straight from the fridge.
    • Ingredients to prep ahead- Cook the quinoa, roast the squash, and whisk the dressing a day or two in advance. 
    • Leftovers and storage- Store in an airtight container in the fridge for up to 3 days. The apples may soften slightly, but the flavors remain bright.
    The side of a bowl of quinoa salad with butternut squash.

    What To Serve With Butternut Squash And Quinoa Salad

    This dish works beautifully as a main or a hearty side, and it’s even better when you add the right pairings. Here are my favorite ways to serve this quinoa salad with butternut squash:

    • Baked Chili Salmon
    • Italian Stuffed Zucchini Boats
    • Greens and Beans Recipe
    • Lemon Pistachio Cake

    Other Squash Recipes To Try

    • A side angle shot of Delicata squash with pomegranates and pepitas on top of it.
      Baked Delicata Squash With Herbed Yogurt
    • Cheesy Squash Casserole is the kind of side dish that will impress even the pickiest of eaters. Tender yellow squash and zucchini, savory bread crumbs and deliciously melty cheese make this side dish a total crowd pleaser!
      Cheesy Squash Casserole
    • A bowl of squash soup with burrata and cilantro on top and chunks of squash and cilantro in the background.
      Savory Spiced Butternut Squash Soup
    • A wooden spoon stirring a pan of zucchini and tomatoes.
      Sautéed Zucchini And Tomatoes

    Hosting Thanksgiving?

    Discover the secret to hosting Thanksgiving without all the stress! Prepsgiving is your FREE guide to making a delicious Thanksgiving feast the easy way.*

    Love this recipe? Please leave a 5 star ⭐️⭐️⭐️⭐️⭐️ rating in the recipe card below ⬇️ and/or a review in the comment section further down. Check out my Amazon Store for all my favorite tools, including those used in this recipe. And follow @thelifejolie on Instagram and TikTok!

    A bowl of quinoa salad with butternut squash.

    Quinoa Butternut Squash Salad

    Jessy Freimann
    This quinoa butternut squash salad combines roasted squash, tender quinoa, crisp apples, dried cherries, and feta in a bright vinaigrette. Ready in 30 minutes, it’s fresh, colorful, and tastes special without any fuss.
    No ratings yet
    Print Recipe Pin Recipe
    Prep Time 15 minutes mins
    Cook Time 30 minutes mins
    Total Time 45 minutes mins
    Course Salad, side, Side Dish
    Cuisine American
    Servings 8 servings
    Calories 504 kcal

    Equipment

    • mixing bowl
    • 1 Spatula
    • 1 chefs knife
    • 1 cutting board
    • 1 Measuring cups and spoons
    • 1 sheet pan
    • 1 Immersion Blender

    Ingredients
      

    Roasted squash:

    • 3 cups butternut squash peeled, seeds removed and diced into ½ inch pieces (unpeeled honey nut squash is also awesome!)
    • 1 cup shallots thinly sliced, about 2 medium shallots
    • 2 Tablespoons extra virgin olive oil
    • 1 Tablespoon fresh sage chopped or 1 teaspoon dried sage
    • 1 teaspoon Kosher salt
    • ¼ teaspoon ground black pepper
    • 1 teaspoon garlic powder

    Salad:

    • 8 ounces quinoa cooked per package directions
    • 1 cup chopped walnuts
    • ¾ cup dried cherries roughly chopped
    • 1 cup feta cheese crumbled
    • 2 cups SnapDragon apples diced
    • 3 Tablespoons fresh parsley chopped

    Dressing:

    • 6 Tablespoons champagne vinegar
    • 2 Tablespoons apple cider vinegar
    • 4 Teaspoons grainy mustard
    • 2 Tablespoons honey
    • Pinch Kosher salt
    • Pinch ground black pepper
    • ½ cup extra virgin olive oil

    Instructions
     

    Instructions:

    • Preheat the oven to 450 degrees F and line a sheet pan with parchment.
    • In a large bowl, combine squash, shallots, olive oil, sage, salt, pepper, and garlic powder. Toss until the vegetables are fully coated and spread in a single layer on the prepared pan.
    • Roast for 10 minutes, flip the vegetables and roast for an additional 10 minutes. Remove from the oven and cool.
    • While the vegetables cook, combine champagne vinegar, apple cider vinegar, mustard, honey, salt and pepper in a medium bowl. Use an immersion blender to mix the ingredients and while the mixer is running, slowly drizzle in the olive oil until the dressing is creamy and well combined. Set aside.
    • In a large bowl, combine cooked quinoa, walnuts, dried cherries, feta cheese, apples, parsley and the roasted squash mixture. Drizzle with ¾ of the dressing and toss until well combined. Taste and adjust seasonings and add more dressing if needed. Serve immediately.

    Video

    Notes

    • Cut the squash evenly, so it roasts evenly.
    • Toast the nuts for extra crunch and flavor.
    • Dress lightly first and add more if needed. It’s easier to build up than to fix an overdressed salad.
    • Serve warm or cold. This quinoa squash salad is tasty right after roasting while still warm, and just as good chilled straight from the fridge.
    • Ingredients to prep ahead- Cook the quinoa, roast the squash, and whisk the dressing a day or two in advance. 
    • Leftovers and storage- Store in an airtight container in the fridge for up to 3 days. The apples may soften slightly, but the flavors remain bright.

    Nutrition

    Serving: 1servingCalories: 504kcalCarbohydrates: 45gProtein: 11gFat: 33gSaturated Fat: 6gPolyunsaturated Fat: 10gMonounsaturated Fat: 15gCholesterol: 17mgSodium: 544mgPotassium: 550mgFiber: 6gSugar: 14gVitamin A: 6200IUVitamin C: 16mgCalcium: 177mgIron: 3mg
    Tried this recipe?Let us know how it was!

    Pumpkin Crunch Cake

    Oct 6, 2025 · 7 Comments

    A slice of pumpkin crunch cake on a white plate with the whole cake behind it.

    Pumpkin crunch cake never tasted this good… layers of spiced pumpkin cake, rich cheesecake, and a buttery pecan topping that steals the show. It’s the kind of dessert people beg you to bring again.

    A slice of pumpkin crunch cake on a white plate with the whole cake behind it.
    [feast_advanced_jump_to]

    Why You’ll Love This Pumpkin Cheesecake Cake

    So here’s the thing… I’ve never really been a pumpkin girl. But when I tested this recipe, something clicked. The balance of flavors and textures completely changed my mind, and suddenly even the pumpkin skeptics were asking for another slice.

    Another reason I love this cake? It’s the definition of low effort, high reward. You start with my favorite cake mix hack, stir in a few simple ingredients, and out comes a dessert that looks bakery-worthy.

    I’ve brought it to family dinners and holiday parties, and without fail, someone corners me to ask for the recipe. Here’s why you should make this easy pumpkin cake:

    • Zero fuss
    • Creamy middle
    • Buttery crunch
    • Crowd favorite
    An overhead image of a pumpkin cake in a pan featuring the crunch streusel topping.

    Ingredient Information And Substitutions

    • Yellow cake mix- Use any brand you like. Duncan Hines is my favorite. Vanilla cake mix would also work.
    • Instant vanilla pudding- For extra softness. You can swap in instant butterscotch or cheesecake pudding for a twist.
    • Pumpkin pie spice- Store-bought or homemade both work. Use cinnamon if that’s what you have on hand.
    • All-purpose flour- Holds the streusel together.
    • Granulated sugar- Brown sugar can be swapped for a deeper caramel flavor.
    • Confectioner’s sugar- Adds sweetness without grit. Granulated sugar can be substituted, but the filling won’t be as smooth.
    • Canned pumpkin (not pie filling)- Be sure it’s pure pumpkin purée. Fresh roasted and mashed pumpkin works if you drain off extra liquid.
    • Pecans- Walnuts, almonds, or even pumpkin seeds can be used, or leave them out for a nut-free version.
    • Cream cheese- Full-fat gives the best texture, but reduced-fat works in a pinch.
    • Heavy cream- Half-and-half makes it lighter but less rich.
    • Butter- Salted adds nice flavor balance, but unsalted works too.
    • Eggs- For moisture and structure.
    • Vegetable or canola oil- Melted butter works too, though it gives a slightly denser texture.
    • Cinnamon- Nutmeg, or pumpkin pie spice are good alternatives.
    • Vanilla extract- Pure vanilla tastes best, but almond extract can be swapped in for a different flavor.
    An overhead image of labeled recipe ingredients.

    How To Make Pumpkin Spice Cake From Cake Mix 

    Step 1- Prepare the pan.

    Preheat your oven to 325 degrees F and grease a 9x13 baking dish. Set it aside so it’s ready to go.

    Step 2- Make the pumpkin cake base. 

    In a mixing bowl, combine the cake mix, pudding mixes, pumpkin spice, oil, canned pumpkin, and eggs. Beat until just combined, then spread the batter evenly into the prepared pan.

    Pumpkin cake batter in a prepared casserole dish, and then a layer of the cheesecake mixture on top of it.

    Step 3- Mix the cheesecake layer.

    Beat the softened cream cheese with confectioner’s sugar, vanilla, and heavy cream until smooth. Gently spread this mixture on top of the pumpkin cake batter.

    Place the cake into the oven and bake for 15 minutes while you mix the streusel topping.

    Step 4- Make the streusel topping.

    In another bowl, stir together the sugar, flour, and cinnamon. Cut in the cold butter with a pastry cutter or two forks until it resembles coarse crumbs. Stir in the pecans.

    The cake and cheesecake batter baking in the oven and the butter cut into the streusel topping.

    Step 5- Finish baking the cake.

    Remove the partially baked cake from the oven and sprinkle the streusel topping evenly over the cake.

    Return it to the oven and bake for 45-55 more minutes, until the center is set and a toothpick comes out mostly clean. Cool the pumpkin crumb cake for at least an hour before slicing. 

    Streusel topping with pecans mixed in and the topped cake back in the oven.

    Frequently Asked Questions

    Can I make this cake ahead of time? 

    Yes! This cake actually tastes better after it rests. Bake it the day before, cool completely, cover tightly, and store in the fridge.

    Do I need a mixer for this recipe?

    A stand mixer or hand mixer makes the cheesecake filling smoother, but you can whip it up by hand.

    How sweet is this cake?

    It’s rich but not over-the-top sweet. The cheesecake layer balances out the pumpkin and streusel.

    A close up image of the side of the cake revealing all the delicious layers nand textures.

    Tips For Making Pumpkin Spice Cake With Cake Mix

    • Don’t over-mix the cake batter. If you do, the cake will come out tough and dense instead of soft and tender.
    • Make sure your cream cheese is softened. If you forget to take it out ahead of time, pop it in the microwave (unwrapped!) for 20-30 seconds.
    • For the streusel, cut cold butter into the dry mix until it looks like pea-sized crumbs. 
    • Spread the cheesecake layer gently. I like to dollop spoonfuls across the top of the cake batter and then smooth them out. It’s easier than trying to spread one big blob.
    • Serve it chilled or at room temperature. Simply let it rest on the counter to remove the chill. Don't try to reheat it!
    • Ingredients to prep ahead- Measure out the dry ingredients, chop the pecans, and soften the cream cheese.
    • Leftovers and storage- Store covered in the fridge for up to 4 days. Individual slices can be wrapped and frozen for up to 2 months.
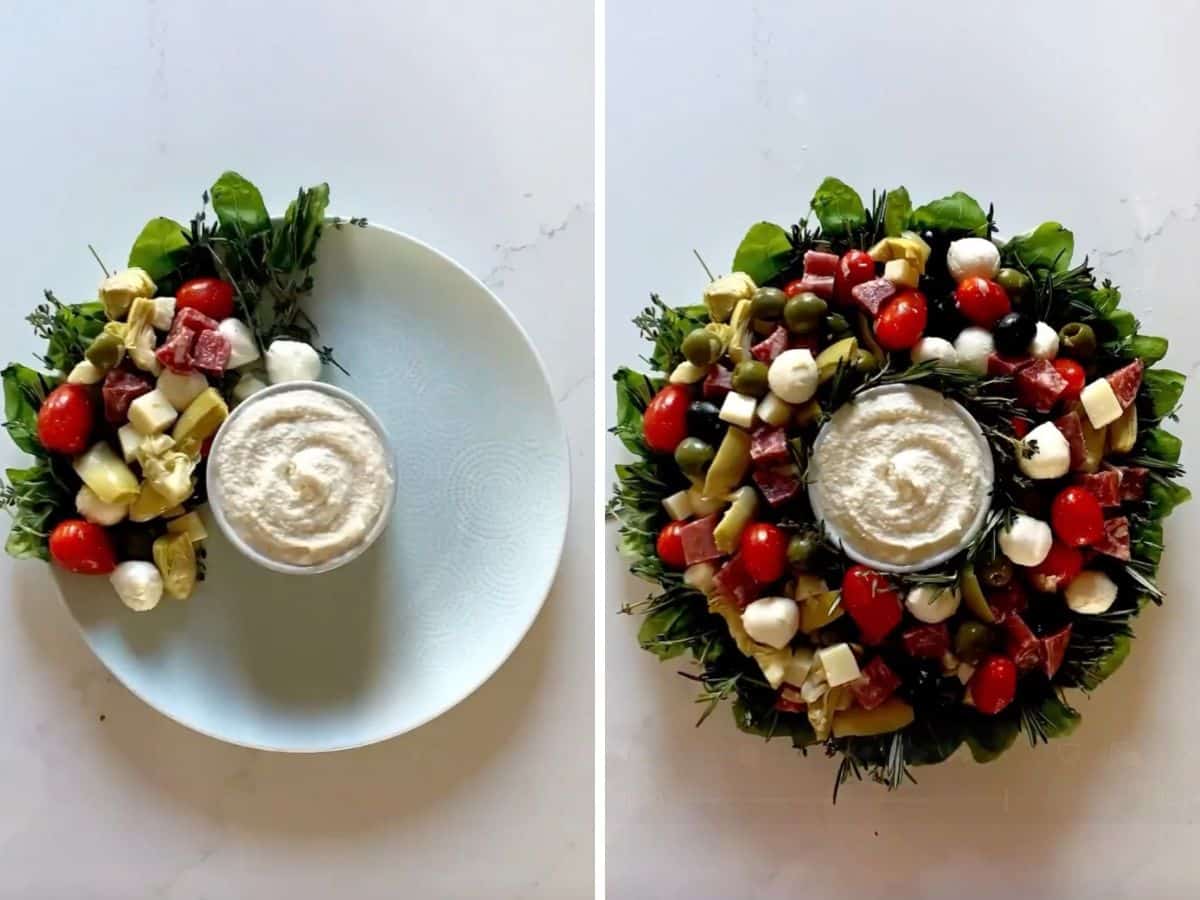
    A slice of pumpkin crunch cake with a bite taken from it.

    What To Serve With Pumpkin Cheesecake Swirl Cake

    I love a cold slice straight from the fridge, but it’s also fantastic with a dollop of whipped cream. If you’re making a full dessert spread for the holidays or a party, this cake pairs perfectly with a mix of light and rich treats so everyone has options. Here are a few ideas:

    • Coffee Cake with Cinnamon Streusel
    • Icebox Smores Cake 
    • Old Fashioned Pecan Pie
    • Chocolate Chip Banana Bread Muffins

    Other Pumpkin Desserts To Try

    • An image of a slice of pumpkin cake with a fork in front of it holding a bite of the cake on it.
      Pumpkin Spice Cake
    • A squaer image of Pumpkin Chocolate Chip Bread.
      Pumpkin Chocolate Chip Bread
    • Is it even a holiday table without Pumpkin Pie? This classic pumpkin pie recipe is an easy and delicious way to get everyone's favorite holiday dessert onto the table without all the hassle!
      Classic Pumpkin Pie Recipe
    • A close up image of a pumpkin donut with cinnamon sugar on it and the rest in the background.
      Pumpkin Spice Donuts

    Hosting Thanksgiving?

    Discover the secret to hosting Thanksgiving without all the stress! Prepsgiving is your FREE guide to making a delicious Thanksgiving feast the easy way.

    Love this recipe? Please leave a 5 star ⭐️⭐️⭐️⭐️⭐️ rating in the recipe card below ⬇️ and/or a review in the comment section further down. Check out my Amazon Store for all my favorite tools, including those used in this recipe. And follow @thelifejolie on Instagram and TikTok!

    A slice of pumpkin crunch cake on a white plate with the whole cake behind it.

    Pumpkin Crunch Cake

    Jessy Freimann
    Pumpkin crunch cake never tasted this good… layers of spiced pumpkin cake, rich cheesecake, and a buttery pecan topping that steals the show. It’s the kind of dessert people beg you to bring again.
    5 from 4 votes
    Print Recipe Pin Recipe
    Prep Time 10 minutes mins
    Cook Time 1 hour hr 10 minutes mins
    Total Time 1 hour hr 20 minutes mins
    Course Dessert
    Cuisine American
    Servings 12 servings
    Calories 675 kcal

    Equipment

    • measuring cups
    • measuring spoons
    • mixing bowl
    • Spatula
    • Pastry cutter
    • 9 x 13 Pan
    • Hand mixer

    Ingredients
      

    Pumpkin sheet cake

    • 1 yellow cake mix (I prefer Duncan Hines)
    • 3.7 ounces instant vanilla pudding mix (two smaller-sized packages)
    • 1 ½ teaspoons pumpkin pie seasoning
    • ¾ cup vegetable oil
    • 1 cup pure pumpkin puree (not pie filling, actual canned pumpkin)
    • 5 large eggs (extra large is preferable, so if you have extra large that's even better)

    Cheesecake Layer

    • 16 ounces cream cheese, softened
    • ½ cup confectioner's sugar
    • 2 teaspoons vanilla extract
    • ¼ cup heavy cream

    Pecan streusel topping

    • ¾ cup granulated sugar
    • ½ cup flour
    • 1 teaspoon cinnamon
    • 6 Tablespoons salted butter
    • 1 cup pecans, chopped

    Instructions
     

    Pumpkin sheet cake

    • Preheat the oven to 325 degrees F and grease a 9" x 13" baking pan. Set aside.
    • Beat together cake mix, instant pudding, pumpkin pie spice, oil, pumpkin and eggs until just combined. 
    • Spread in an even layer in the prepared pan.

    Cheesecake Layer

    • Beat together cream cheese, confectioner's sugar, vanilla extract and heavy cream until well combined and smooth.
    • Carefully spread in an even layer on top of the cake mix.
    • Bake uncovered for 15 minutes.

    Pecan streusel topping

    • In a medium bowl, combine granulated sugar, flour and cinnamon.
    • Using a pastry cutter or forks, cut in the butter until the mixture has a sandy texture and the butter is down to the size of peas.
    • Mix in the pecans and sprinkle everything evenly over the top of the cheesecake layer.
    • Return the cake to the oven uncovered and bake for 45-55 minutes until the center isn't jiggly and a toothpick comes out clean. Cool for at least an hour and serve.

    Video

    Notes

    • Don’t over-mix the cake batter. If you do, the cake will come out tough and dense instead of soft and tender.
    • Make sure your cream cheese is softened. If you forget to take it out ahead of time, pop it in the microwave (unwrapped!) for 20-30 seconds.
    • For the streusel, cut cold butter into the dry mix until it looks like pea-sized crumbs. 
    • Spread the cheesecake layer gently. I like to dollop spoonfuls across the top of the cake batter and then smooth them out. It’s easier than trying to spread one big blob.
    • Serve it chilled or at room temperature. Simply let it rest on the counter to remove the chill. Don't try to reheat it!
    • Ingredients to prep ahead- Measure out the dry ingredients, chop the pecans, and soften the cream cheese.
    • Leftovers and storage- Store covered in the fridge for up to 4 days. Individual slices can be wrapped and frozen for up to 2 months.
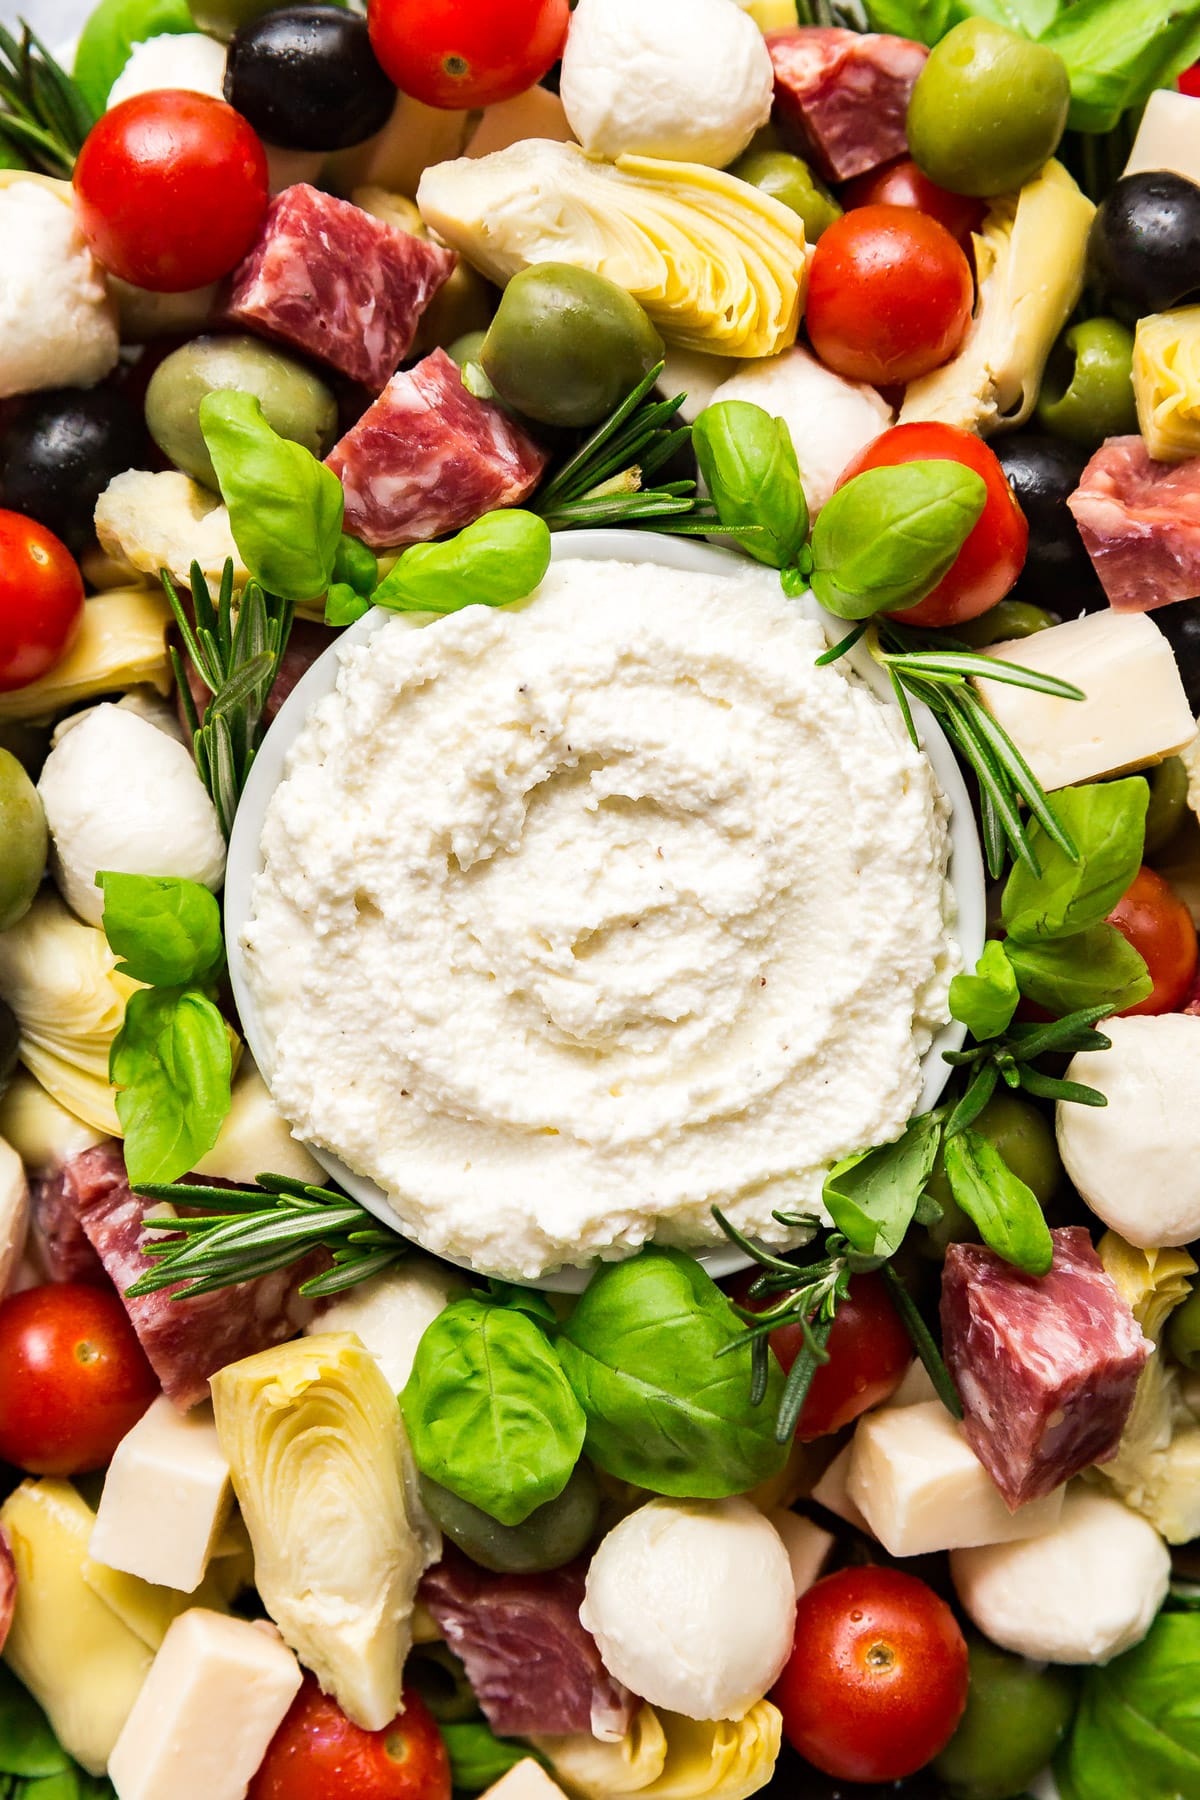
    Nutrition

    Serving: 1servingCalories: 675kcalCarbohydrates: 71gProtein: 8gFat: 43gSaturated Fat: 16gPolyunsaturated Fat: 11gMonounsaturated Fat: 13gTrans Fat: 0.4gCholesterol: 136mgSodium: 565mgPotassium: 190mgFiber: 2gSugar: 41gVitamin A: 4051IUVitamin C: 1mgCalcium: 158mgIron: 2mg
    Tried this recipe?Let us know how it was!

    Double Chocolate Peanut Butter Chip Cookies

    Oct 3, 2025 · 7 Comments

    A stack of 4 double chocolate peanut butter chip cookies.

    These double chocolate peanut butter chip cookies are rich, chewy, and packed with melty chips. Ready in under 20 minutes, they’re the perfect quick dessert or freezer-friendly treat!

    A stack of 4 double chocolate peanut butter chip cookies.
    [feast_advanced_jump_to]

    Why You’ll Love These Chocolate And Peanut Butter Chip Cookies

    If you’re all about that classic chocolate and peanut butter combo, these cookies are going to be your new favorite. They’re packed with dark cocoa powder for extra chocolate flavor and plenty of peanut butter chips for balance. Even better, the dough comes together quickly with simple pantry ingredients, and the cookies bake up soft and chewy every time!

    This chocolate chip and peanut butter chip cookie recipe actually came from a little church cookbook I picked up at our annual rummage sale. Those cookbooks are always a treasure trove of tried-and-true recipes, and this one was no exception. I only made a few small tweaks to suit my taste while keeping the spirit of the original intact. Here’s why you’ll love the sweet combination of chocolate cookies and peanut butter chips: 

    • Uses simple pantry staples
    • Soft, chewy, and balanced in flavor
    • Bakes in under 10 minutes
    • Freezer-friendly
    • Always a hit
    A close up overhead image of double chocolate cookies on a cooking rack.

    Ingredient Information And Substitutions

    • Butter- I like salted for a little extra flavor, but unsalted works too.
    • Granulated sugar- Keeps the cookies sweet and chewy.
    • Eggs- Add richness and help bind everything together.
    • Vanilla extract- Adds warm flavor. Almond extract would also be nice if you want a nutty twist.
    • All-purpose flour- The base of the dough.
    • Dark cocoa powder- Provides deep, rich chocolate flavor. Swap with regular cocoa powder for something lighter.
    • Baking soda- Helps the cookies rise and stay soft.
    • Kosher salt- Balances the sweetness. Table salt works too, but reduce the amount slightly.
    • Chocolate chips- Use semisweet, dark, or even white chocolate chips.
    • Peanut butter chips- If you don’t have them, use chopped Reese’s cups, peanut butter M&M’s, or even butterscotch chips for a twist.
    An overhead image of labeled recipe inbredients.

    How To Make Chocolate Peanut Butter Chips Cookies

    Step 1- Prep the pans and dry ingredients.

    Preheat the oven to 350 degrees F. Line baking sheets with parchment paper or a silicone baking mat and set aside.

    In a medium bowl whisk together the flour, cocoa powder, baking soda, and salt. Set aside.

    Dry ingredients in a pink bowl and then all those ingredients mixed together.

    Step 2- Cream butter and sugar. 

    Beat the butter and sugar together with a hand or stand mixer until fluffy, about 1–2 minutes.

    Butter and suar in a stand mixer bowl and then those things creamed together/

    Step 3- Add wet ingredients and then dry ingredients.

    Mix in the eggs and vanilla until smooth.

    Slowly add this to the wet mixture, mixing just until combined.

    Fold in both kinds of chips to get that rich chocolate cookie with peanut butter chips we all love. Cover and refrigerate for at least an hour, overnight is better.

    Wet ingredients mixed in and then the dry ingredients mixed in.

    Step 4- Scoop and bake.

    Scoop dough into 1-inch balls, place them on prepared baking sheets, and bake for 8–9 minutes. The cookies should puff while baking and then flatten slightly as they cool.

    Let cool for a few minutes before transferring to a wire rack. Once cooled completely, they'll stay fresh for days!

    Scoops of cookie dough on a lined pan and then add a few more peanut butter chips to the top.

    Frequently Asked Questions

    Do these cookies spread a lot?

    They do spread a bit. They will puff up while baking and settle as they cool. That's why I recommend chill the dough for 1 hour before baking. Overnight is better.

    Can I make the dough ahead of time?

    Yes! The texture is even better when the dough rests, since the flour has plenty of time to hydrate. Simply mix, cover tightly, and chill for up to 2 days before baking.

    Can I freeze the dough?

    Definitely. Scoop into balls, freeze on a tray, then transfer to a bag or container. Bake straight from frozen, but add 1-2 minutes to the bake time.

    A close up of a cookie on a pile of other cookies.

    Tips For Making Chocolate Cookies With Peanut Butter Chips

    • Line your baking sheets with parchment or a silicone mat. Makes cleanup way easier.
    • A cookie scoop is your best friend here. It keeps the cookies uniform so they bake evenly.
    • Chill the dough. These do spread a little but chilling helps with that- at least 1 hour to overnight.
    • Don’t over-bake! Pull them when they still look soft in the center. They’ll finish setting up as they cool.
    • Play with the chip ratio. Try more of the chocolate or peanut butter chips, or even a mix with white chocolate. That flexibility is what makes chocolate chip and peanut butter chip cookies so fun to bake.
    • Add a couple extra peanut butter chips to top of the dough balls before baking.
    • For extra flavor and texture, try adding chopped nuts, toffee bits, espresso powder, or a sprinkle of sea salt on top before baking.
    • Ingredients to prep ahead- Set out the butter and eggs so they’re at room temperature. Or make the dough ahead and chill overnight.
    • Leftovers and storage- Store in an airtight container for up to a week, or freeze for 3 months. Add a slice of bread to the container to keep them soft and chewy. 
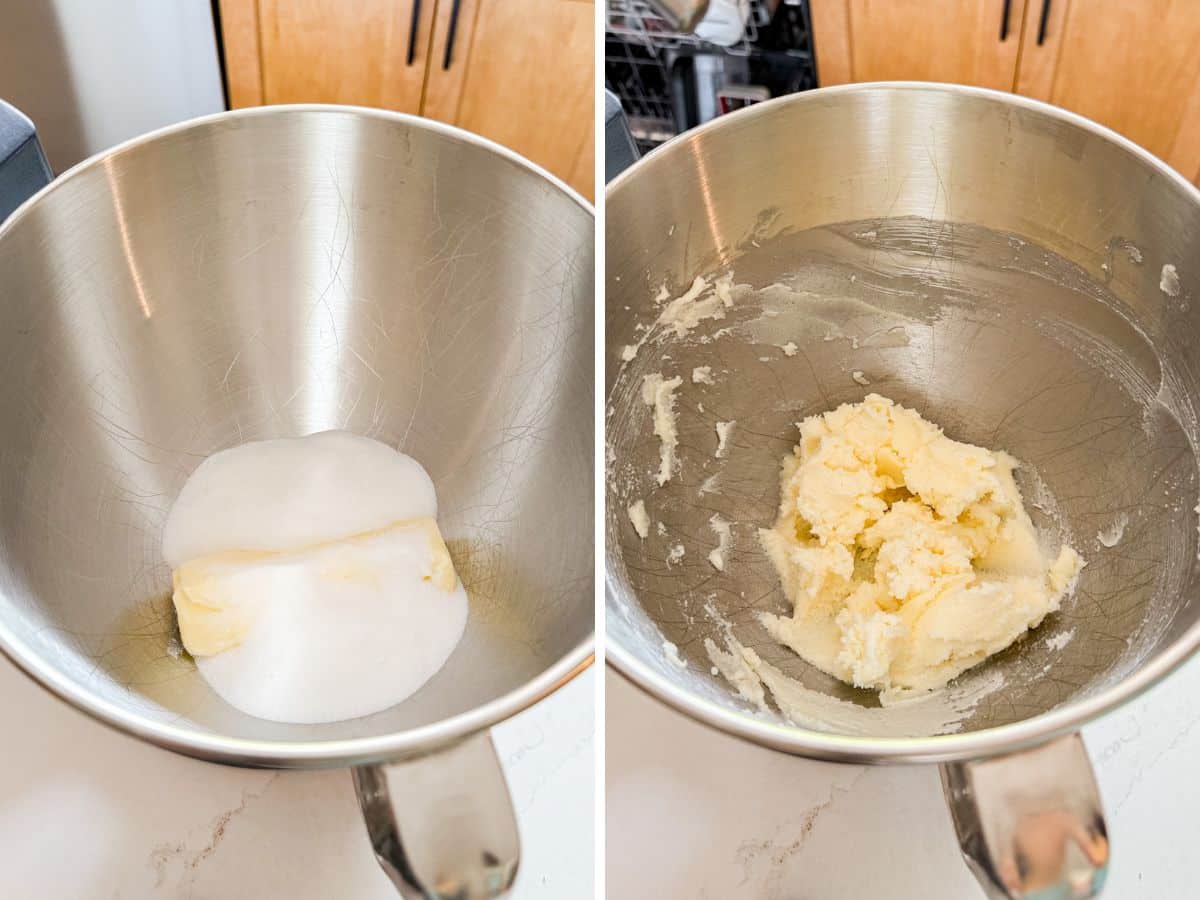
    A cookie with a bite out of it.

    What To Serve With Cookies With Chocolate Chips And Peanut Butter Chips

    These cookies are delicious on their own, but even better when you build a dessert spread around them. They pair beautifully with something creamy, crunchy, or festive on the side. Here are a few fun ideas to try with these chewy peanut butter and chocolate cookies:

    • Chocolate Mousse Cups
    • No Bake S'more Bars
    • Pumpkin Spice Donuts
    • Salted Cranberry and Pistachio Bark

    Other Cookie Recipes To Try

    • A close up image of a caramel blossom cookie on a pan.
      Caramel Blossom Cookies
    • A squaer image of Apple Cinnamon Thumbprint Cookies.
      Apple Cinnamon Thumbprint Cookies
    • A pile of sour cream cookies where the one in the middle has a bite out of it exposing the cakey center of the cookie.
      Sour Cream Cookies
    • A plate of chocolate dipper shortbread cookies on striped towel with a cup of coffee.
      Almond Shortbread Cookies

    Love this recipe? Please leave a 5 star ⭐️⭐️⭐️⭐️⭐️ rating in the recipe card below ⬇️ and/or a review in the comment section further down. Check out my Amazon Store for all my favorite tools, including those used in this recipe. And follow @thelifejolie on Instagram and TikTok!

    A stack of 4 double chocolate peanut butter chip cookies.

    Double Chocolate Peanut Butter Chip Cookies

    Jessy Freimann
    These double chocolate peanut butter chip cookies are rich, chewy, and packed with melty chips. Ready in under 20 minutes, they’re the perfect quick dessert or freezer-friendly treat!
    5 from 3 votes
    Print Recipe Pin Recipe
    Prep Time 10 minutes mins
    Cook Time 9 minutes mins
    Chill time 1 hour hr
    Total Time 1 hour hr 19 minutes mins
    Course Dessert
    Cuisine American
    Servings 36 cookies
    Calories 103 kcal

    Equipment

    • measuring cups
    • measuring spoons
    • mixing bowl
    • Spatula
    • stand mixer
    • Hand mixer
    • sheet pan
    • Silpat
    • Small cookie scoop

    Ingredients
      

    • 1 ¼ cups butter, softened- 2 ½ sticks
    • 2 cups granulated sugar
    • 2 large eggs
    • 2 teaspoons vanilla extract
    • 2 cups all purpose flour
    • ¾ cups dark cocoa powder
    • 1 teaspoon baking soda
    • ½ teaspoon kosher salt
    • 1 cup chocolate chips
    • 1 cup peanut butter chips

    Instructions
     

    • Preheat the oven to 350 degrees F and line sheet pans with a silat or parchment paper. Set aside.
    • In a medium bowl combine flour, cocoa, baking soda, and salt.
    • Cream butter and sugar with a mixer until light and fluffy, about 1-2 minutes.
    • Add eggs and vanilla extract and beat until well combined.
    • Gradually add dry ingredients into the wet ingredients, mixing until just combined.
    • Stir in chocolate chips  and peanut butter chips until evenly distributed. Cover and chill for at least an hour to overnight.
    • Scoop 1 inch balls onto lined cookie sheet and bake for 8-9 minutes. Don't over bake. The cookies will be soft and chewy; they will puff when the bake and flatted as they cool.
    • Cool slightly and then remove from the sheet pan. Serve warm or completely cooled and store for up to a week in an air-tight container with a slice of bread in it (to help the cookies maintain their chewy texture).

    Video

    Notes

      • Line your baking sheets with parchment or a silicone mat. Makes cleanup way easier.
      • A cookie scoop is your best friend here. It keeps the cookies uniform so they bake evenly.
      • Chill the dough. These do spread a little but chilling helps with that- at least 1 hour to overnight.
      • Don’t over-bake! Pull them when they still look soft in the center. They’ll finish setting up as they cool.
      • Play with the chip ratio. Try more of the chocolate or peanut butter chips, or even a mix with white chocolate. That flexibility is what makes chocolate chip and peanut butter chip cookies so fun to bake.
      • Add a couple extra peanut butter chips to top of the dough balls before baking.
      • For extra flavor and texture, try adding chopped nuts, toffee bits, espresso powder, or a sprinkle of sea salt on top before baking.
      • Ingredients to prep ahead- Set out the butter and eggs so they’re at room temperature. Or make the dough ahead and chill overnight.
      • Leftovers and storage- Store in an airtight container for up to a week, or freeze for 3 months. Add a slice of bread to the container to keep them soft and chewy. 
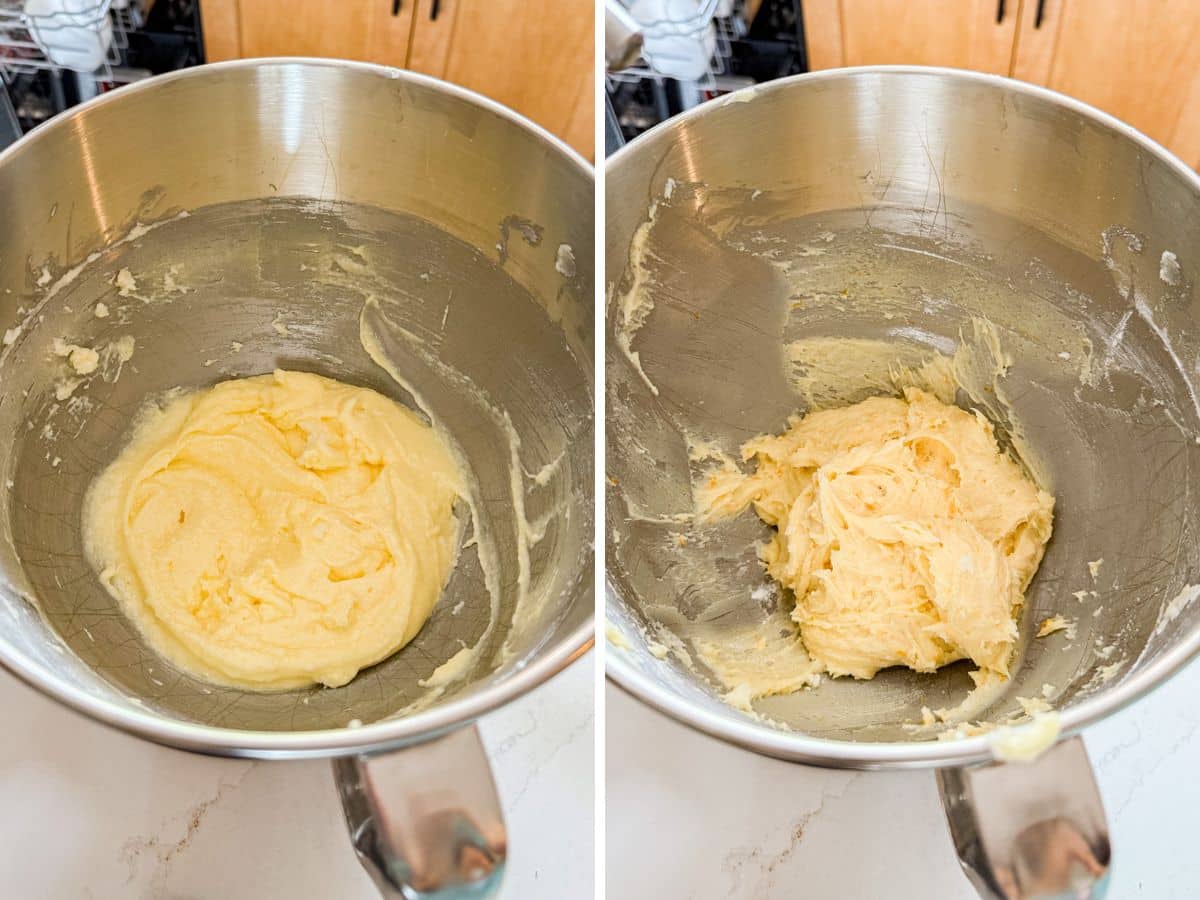
    Nutrition

    Serving: 3cookiesCalories: 103kcalCarbohydrates: 20gProtein: 1gFat: 2gSaturated Fat: 1gPolyunsaturated Fat: 0.1gMonounsaturated Fat: 0.2gTrans Fat: 0.001gCholesterol: 11mgSodium: 76mgPotassium: 37mgFiber: 0.2gSugar: 14gVitamin A: 29IUCalcium: 16mgIron: 0.4mg
    Tried this recipe?Let us know how it was!

    Spatchcock Chicken Recipe

    Sep 29, 2025 · 12 Comments

    An overhead image of a spatchcock chicken in a pan with onions.
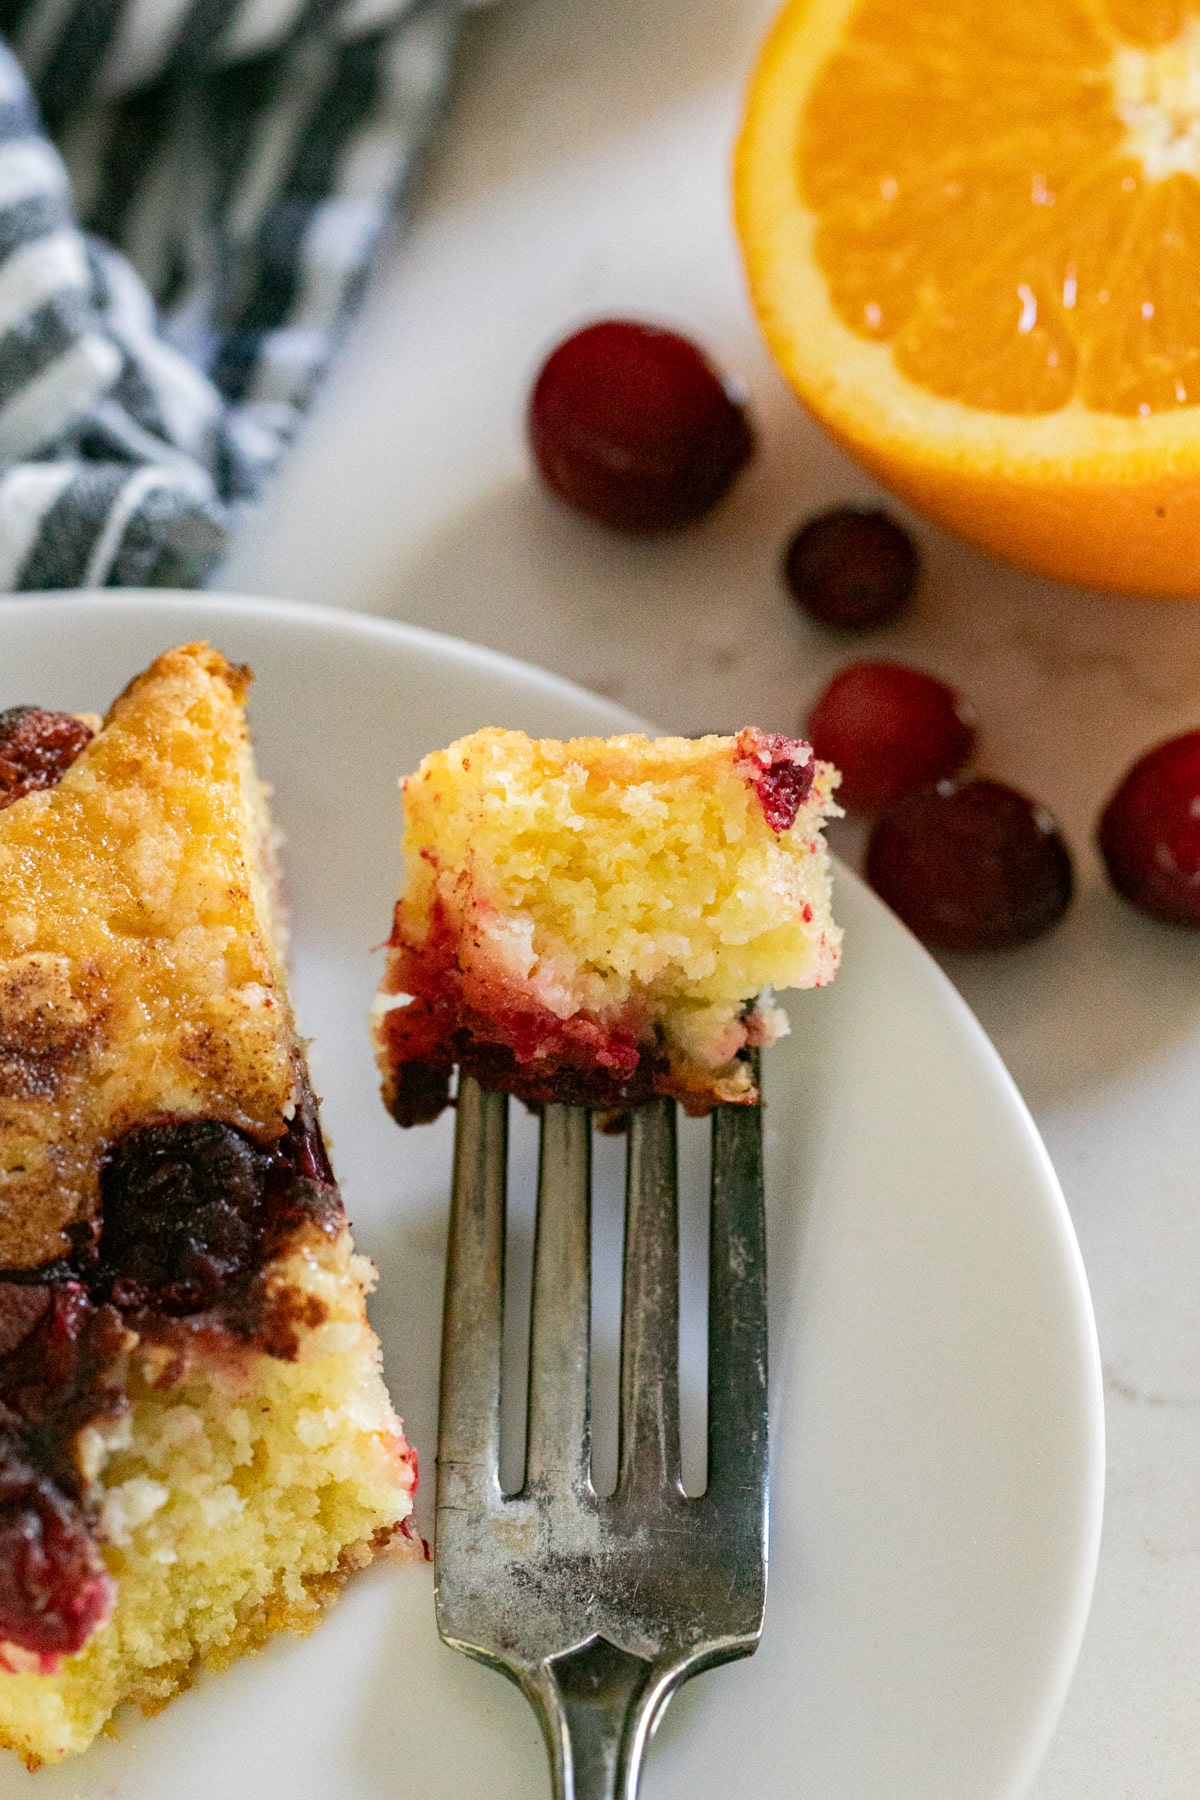
    This recipe for Spatchcock Chicken Recipe makes a cozy, comforting dinner. The chicken roasts up juicy with crispy skin, and with simple ingredients, it’s ready in about an hour.
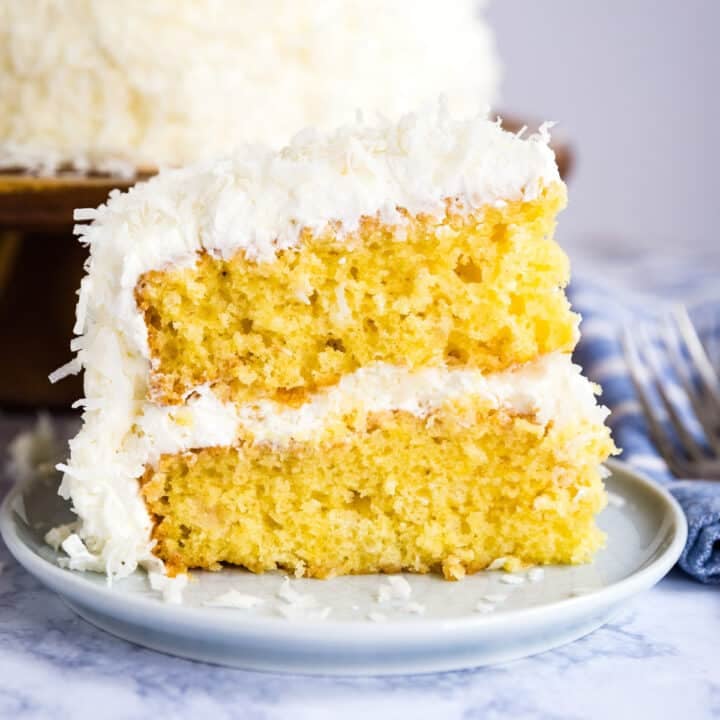
    An overhead image of a spatchcock chicken in a pan with onions.
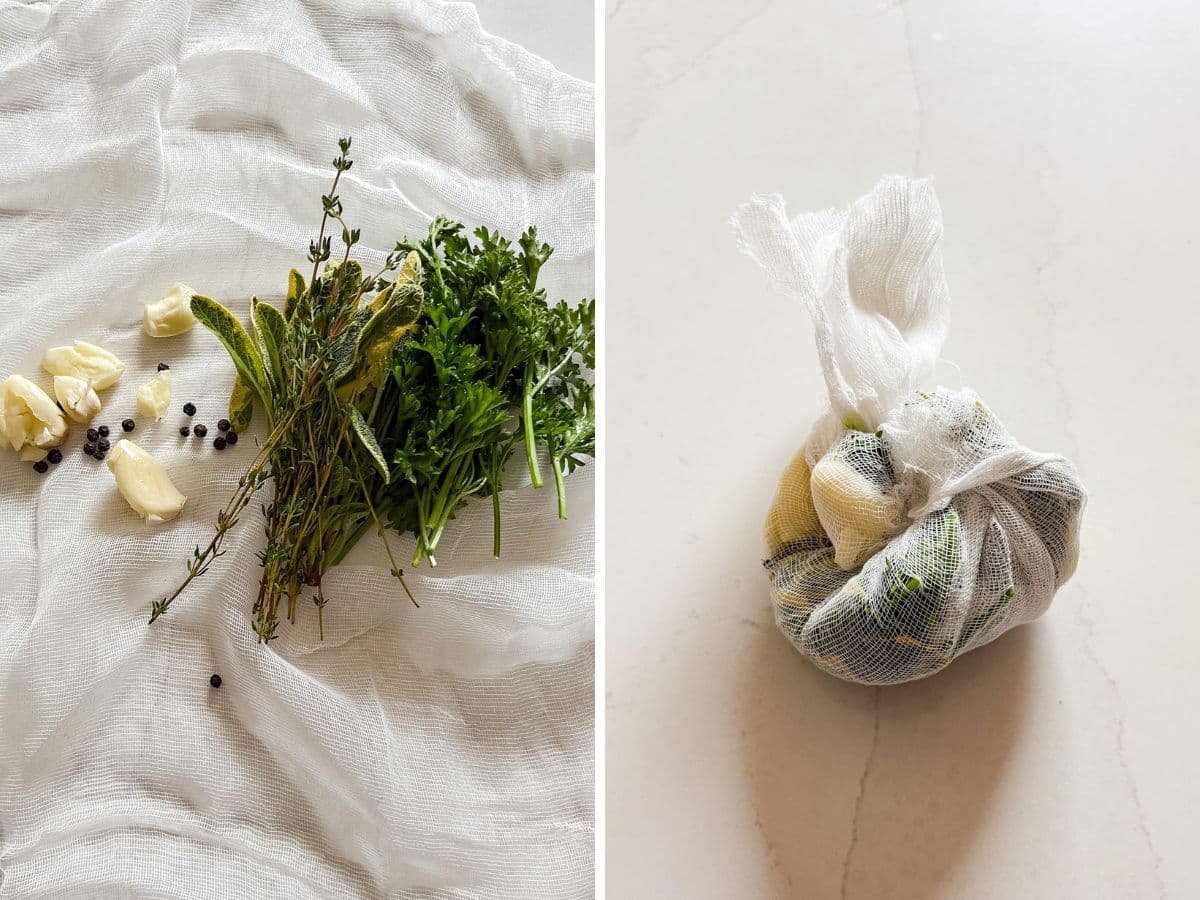
    [feast_advanced_jump_to]

    Why You’ll Love This Recipe For Spatchcock Chicken

    There is something so traditional and so classic about roasting a whole chicken. I’ll admit, it used to intimidate me. I worried about dry white meat and all those “extra” steps.
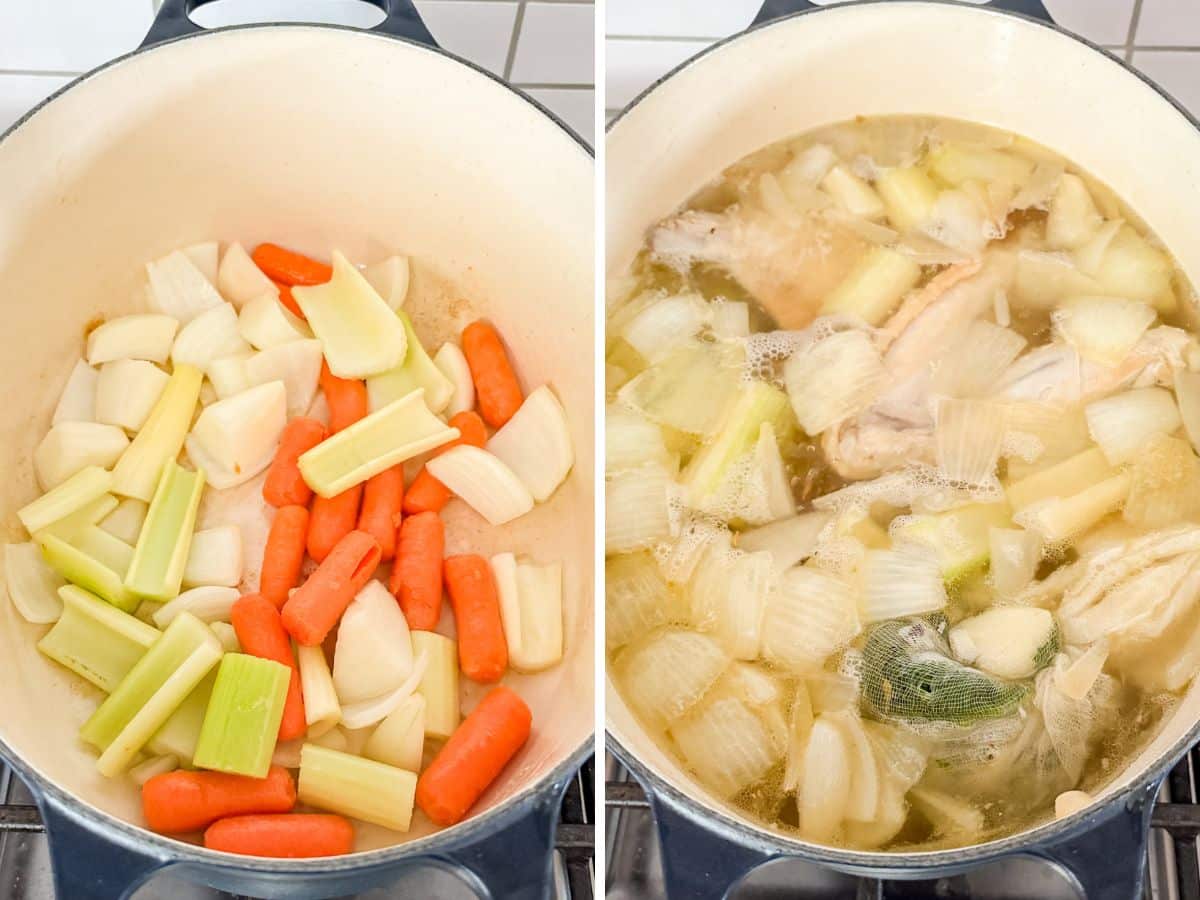
    One day, I discovered that you can cut out the backbone and cook the whole chicken completely flat- this allows it to cook faster and more evenly, resulting in a tender, juicy chicken!

    From then on, this became my go-to method. So much so, that I completely redid a very old whole roast chicken recipe to upgrade it into the recipe in this post. The flavor is so fresh and delicious, this will immediately become your go-to recipe! Here's why you'll love it:

    • Crispy skin, juicy meat 
    • Easy but impressive
    • Cooks up quickly
    • Pairs well with any side
    • Comes perfectly every time
    A close up image of tender sliced roasted chicken breast on a plate with the other chicken pieces.

    Ingredient Information And Substitutions

    • Whole roasting chicken- A 6-8 pound bird gives you plenty of meat while still cooking evenly. A smaller chicken works too and will roast a bit faster- just pay attention to the temperature.
    • Lemons- Brighten the flavor. Meyer lemons add extra sweetness, but regular lemons work fine. We use both the zesty and the juice for this.
    • Olive oil- Helps with browning and crisping the skin. Melted butter is a good alternative.
    • Seasonings- In addition to salt and pepper, sweet paprika, onion powder, garlic powder and Italian seasoning really round out the flavors. You can easily sub in your preferred seasonings for these.
    • Fresh Parsley- Adds the perfect fresh flavor!
    • Romano Cheese- This is the secret ingredient that really differentiates the flavor for this chicken recipe. It sounds strange, but trust me when I say, it bring it to the next level. You can also go with Parmesan cheese.
    • Onions- Add flavor and moisture to the pan and gives the chicken something to sit upon. Shallots or leeks can be swapped in.
    • Water- I add a small amount to the bottom of the pan to keep the onions from burning. That also make delicious pan juices that you can spoon over the chicken for serving.

    How To Make This Spatchcock Chicken Recipe

    Step 1- Preheat the oven and make the marinade.

    Preheat your oven to 425 degrees F. Lightly spray a large paking pan or sheet pan with cooking spray. Scatter onion chunks and set aside.

    In a food processor add olive oil, lemon juice, lemon zest, fresh parsley, seasonings and Romano cheese and pulse until well combined.

    Step 2- Spatchcock the chicken.

    Position the chicken on paper towels so the breast side is down (you'll know it's positioned correctly because the drumsticks are on the bottom and the top side of the chicken is flatter). Pat dry and remove the neck and gizzards from the carcass.

    With kitchen shears or a really sharp knife, cut down the back on either side of the back bone, which is directly in the center. Remove the backbone fully, you can use this for stock.

    Flip the chicken over so the open side is down and firmly press with both hands to flatten the chicken. You will hear a crack- this is good, as it will allow your chicken to lie completely flat.

    Step 3- Add the marinade.

    Rub a small amount of the marinade on the bottom of the chicken and flip it over. Take your hand and carefully work it underneath the skin on the breast meat and all the way down to the thigh and drum. The take some of the marinade and rub it under the skin on the breast, thigh and drum. Repeat with the other breast.

    Rub the remaining marinade all over the outside of the chicken. Place the chicken flat on top of the onions in the prepared pan and tuck the wing tips under the breasts to the tips don't burn.

    Place a meat thermometer into the thickest part of the breast (if you have a second thermometer, put that into the the thickest part of the thigh). Make sure the probe isn't touching a bone.

    Marinated chicken in the prepared pan and the chicken in the oven.

    Step 4- Roast the chicken.

    Pour ½ cup water into the bottom of the pan and roast until the breast meat reaches 161 degrees F (or the thigh will be around 180 degrees F once complete).

    Remove from the oven and rest for 7-8 minutes. Carve and serve!

    Frequently Asked Questions

    How can I cut up a whole chicken?

    Grab a nice, sharp knife. Start with where the legs meet the main body. and remove the legs and thighs so they're in once piece. I usually cut the leg off the thigh (use your knife to find the join- this allows you to get a clean cut). Cut off the wings, and finish by cutting off each whole breast piece and slicing the breast meat off the bone.

    Can I use a whole raw chicken?

    Yes! This recipe is made for a whole raw roasting chicken. Just check the cavity and pull out the gizzards or anything tucked inside.

    How long to cook a spatchcock chicken?

    The spatchcock chicken cooking time depends on size and oven, but usually 50-60 minutes at 425 degrees F. Check that it's done with a thermometer; the breast meat should read 161 degrees F and this temperature will rise to 165 degrees F while it rests.

    Can I make this a grilled spatchcocked chicken?

    Yes- it grills up beautifully- I like to have a high heat side and a lower heat side. Sear it on the high heat side, skin-side down until you have some nice grill marks and a bit of char. Then move it to the lower heat side and cooke covered until it reaches the safe temperature.

    A side angle image of a spatchcock roast chicken in a pan.

    Tips For Making A Spatchcock Chicken Roast

    • Make sure you hear a crack when you push down the chicken during spatchcocking- it's important that so that the chicken will lie flat and cook evenly.
    • Or ask your butcher to spatchcock it for you- work smarter. not harder!
    • A mini prep processor is a great tool for the marinade- Much smaller and easier clean up!
    • Get under the skin- don't skip this. While it's not my favrrite part of deal with raw chicken, it's vital for nice, flavorful meat!
    • Keep and eye on the chicken while cooking- if it's getting to brown, cover with a little foil. If the bottom of the pan is dry, add a little more water to avoid burnt onions.
    • Roast by temp, not time- each bird is a little different and by cooking by temp, you're ensuring perfectly cooked meat every time.
    • Don't skip the resting- This allow the chicken to finish cooking and the juices to redistribute through the bird so they don't come flowing out when you cut into it.
    • Ingredients to prep ahead- Chop onions, clean parsley, spatchcock your chicken.
    • Leftovers and storage- Store in an airtight container in the fridge for up to 3 days. Use leftovers in soups, salads, or sandwiches.
    An overhead image of the carded up chicken on a platter.

    What To Serve With Marinated Spatchcock Chicken

    This chicken makes a great centerpiece! Just add a couple of sides and something sweet for a complete spread. Here are some tasty ideas:

    • Gouda Cheese Mashed Potatoes
    • Garlic Parmesan Roasted Broccoli
    • Strawberry Salad With Goat Cheese
    • Lemon Parfait Cups Dessert

    Other Chicken Recipes To Try

    • An overhead image of chicken and rice stew in a blue bowl with a napkin and veggies around it.
      Italian Chicken and Rice Stew
    • A close up overhead image of grilled chicken thighs on a plate with lemons.
      Grilled Chicken Thighs Recipe
    • An overhead image of a chicken tostada on the pan with sour cream and avocado on top.
      Chicken Tostadas
    • An overhead image of a bowl of chicken chili.
      Easy Chili Chicken

    Love this recipe? Please leave a 5 star ⭐️⭐️⭐️⭐️⭐️ rating in the recipe card below ⬇️ and/or a review in the comment section further down. Check out my Amazon Store for all my favorite tools, including those used in this recipe. And follow @thelifejolie on Instagram and TikTok!

    An overhead image of a spatchcock chicken in a pan with onions.

    Spatchcock Chicken Recipe

    Jessy Freimann
    This recipe for Spatchcock Chicken Recipe makes a cozy, comforting dinner. The chicken roasts up juicy with crispy skin, and with simple ingredients, it’s ready in about an hour.
    No ratings yet
    Print Recipe Pin Recipe
    Prep Time 10 minutes mins
    Cook Time 1 hour hr
    Total Time 1 hour hr 10 minutes mins
    Course dinner, Main, Main Course, Main dish
    Cuisine American
    Servings 8 servings
    Calories 567 kcal

    Equipment

    • 1 roasting pan
    • 1 chefs knife
    • 1 cutting board
    • 1 Measuring cups and spoons
    • 1 mini prep processor
    • 1 kitchen shears

    Ingredients
      

    • 3 Tablespoons fresh parsley larger stems removed
    • ¼ cup olive oil
    • 2 small lemons zest and juice
    • ¼ cup Romano cheese or Parmesan cheese
    • 1 ½ teaspoons Kosher salt
    • ½ teaspoon ground black pepper
    • 1 teaspoon garlic powder
    • 1 teaspoon onion powder
    • 1 teaspoon sweet paprika
    • 1 teaspoon Italian seasoning
    • 2 large onions cut into chunks
    • 8 pound whole chicken spatchcocked
    • ½ cup water

    Instructions
     

    • Preheat the oven to 425 degrees F. Spray a roasting pan or sheet pan with cooking spray and scatter onion chunks into the pan. Set aside.
    • Place the parsley, olive oil, lemon juice, lemon zest, salt, pepper, garlic powder, onion powder, sweet paprika, Italian seasoning and Romano cheese into the food processor. Pulse until well combined.
    • Pat dry the chicken and rub a small amount of marinade onto the bottom of the chicken. Use your hand to gently separate the skin from the breasts, thighs and drums and rub marinade all over these pieces under the skin. Rub the remaining marinade all of the outside of the chicken.
    • Place the chicken on top of the onions in the pan, tuck the wing tips under the breast, and place a meat thermometer into the thickest part of the breast, avoiding touching the bone (if you have a second place it in the thickest part of the thigh). Pour water into the bottom of the pan.
    • Roast uncovered until the temperature reaches 161 degrees F in the breast (the thigh will be 180 degrees F), around an hour.
    • Remove from the oven, and rest the chicken on your cutting board for 7-8 minutes. Carve and serve immediately.

    Video

    Notes

    • Make sure you hear a crack when you push down the chicken during spatchcocking- it's important that so that the chicken will lie flat and cook evenly.
    • Or ask your butcher to spatchcock it for you- work smarter. not harder!
    • A mini prep processor is a great tool for the marinade- Much smaller and easier clean up!
    • Get under the skin- don't skip this. While it's not my favrrite part of deal with raw chicken, it's vital for nice, flavorful meat!
    • Keep and eye on the chicken while cooking- if it's getting to brown, cover with a little foil. If the bottom of the pan is dry, add a little more water to avoid burnt onions.
    • Roast by temp, not time- each bird is a little different and by cooking by temp, you're ensuring perfectly cooked meat every time.
    • Don't skip the resting- This allow the chicken to finish cooking and the juices to redistribute through the bird so they don't come flowing out when you cut into it.
    • Ingredients to prep ahead- Chop onions, clean parsley, spatchcock your chicken.
    • Leftovers and storage- Store in an airtight container in the fridge for up to 3 days. Use leftovers in soups, salads, or sandwiches.

    Nutrition

    Serving: 1servingCalories: 567kcalCarbohydrates: 7gProtein: 42gFat: 41gSaturated Fat: 11gPolyunsaturated Fat: 8gMonounsaturated Fat: 19gTrans Fat: 0.2gCholesterol: 167mgSodium: 630mgPotassium: 532mgFiber: 2gSugar: 2gVitamin A: 579IUVitamin C: 23mgCalcium: 82mgIron: 3mg
    Tried this recipe?Let us know how it was!

    One Pot Chili Mac Casserole

    Sep 26, 2025 · 1 Comment

    Chili Mac casserole in a white bowl.

    This chili mac casserole is the ultimate weeknight comfort food! It brings together hearty chili with creamy macaroni and cheese in under 30 minutes for a cozy meal the whole family will love.

    Chili Mac casserole in a white bowl.
    [feast_advanced_jump_to]

    Why You’ll Love This Chili Macaroni And Cheese Casserole

    Some of the best recipes come from combining two favorites, and that’s exactly what’s happening here. Chili and mac and cheese are already comfort food classics, but together they become the ultimate cozy dinner. You get flavorful beef chili with beans and tomatoes, all tossed with creamy, cheesy pasta. It’s a comfort food match made in heaven!

    This recipe has all the hearty, nostalgic flavors of Hamburger Helper chili mac, but made from scratch with simple, fresh ingredients. The bold flavors and cheesy goodness win over even the pickiest eaters, making this an easy weeknight victory. And the best part? This is a true one-pot wonder that’s ready in no time. Everything cooks together in one pan, so cleanup is a breeze! Here’s why this recipe is a keeper:

    • Ready in 30 minutes
    • One-pan cleanup
    • Cheesy comfort food
    • Easy to customize
    An overhead image of a pan of one pot chili mac.

    Ingredient Information And Substitutions

    • Ground beef- Brings hearty flavor and richness. Swap with ground turkey or chicken for a lighter option.
    • Onion- Adds savory depth. Yellow or white work best, or even shallots for a gentler bite.
    • Bell pepper- A touch of sweetness to balance the chili. Any color will do.
    • Green onions- Fresh pop of flavor on top. Optional, but nice for garnish.
    • Elbow macaroni- Classic shape that holds sauce well. Shells or rotini work too.
    • Pinto beans- Add protein and texture. Black beans or kidney beans are both great alternatives. Be sure to drain and rinse!
    • Sharp cheddar cheese- Creamy, tangy, melty goodness. Try Monterey Jack, Colby Jack, or a Mexican blend if you like.
    • Canned tomatoes- Bring acidity and brightness. I used petite diced tomatoes for their fresh flavor, but any quality brand will work.
    • Olive oil- Starts the cooking and adds flavor. Vegetable oil is a fine backup.
    • Chicken broth- Helps cook the pasta and adds savory depth. Vegetable broth works too.
    • Milk- Makes the sauce creamy. Half-and-half will make it even richer.
    • Chili powder, cumin, paprika- Build that classic chili flavor base. Taco seasoning works if you’re short on spices.
    • Kosher salt and black pepper- Ties everything together. Adjust to your taste.
    An overhead image of labeled recipe ingredients.

    How To Make Chili Cheese Macaroni Casserole

    Step 1- Sauté the veggies and brown the beef. 

    Heat oil in a large sauté pan over medium-high heat. Add the onion and bell pepper and cook until softened, about 4 minutes.

    Stir in the ground beef, breaking it apart with a spoon, and cook until no longer pink. Drain excess fat if necessary.

    Diced onion and pepper in a pan and then browned ground beef with it.

    Step 2- Add liquids and pasta.

    Mix in the chili powder, cumin, paprika, salt, and pepper. Let it cook for a couple of minutes to deepen the flavor.Stir in the canned tomatoes, beans, broth, milk, and macaroni. Bring everything to a boil.

    Once boiling, reduce the heat to medium-low. Cover and cook about 12 minutes, until the pasta is tender, stirring occasionally to prevent sticking.

    Seasonings and liquids added to the pan and the pan covered and simmering.

    Step 3- Finish with cheese.

    Uncover and stir in the cheddar cheese. Sprinkle the rest over the top, cover again, and turn off the heat. Let it sit for a few minutes until the cheese is melted. Garnish with green onions and serve.

    A spoon stirring the cooking chili mac and cheese added in.
    Cheese stirred into the chili mac and then more cheese added to the top to melt.

    Frequently Asked Questions

    Can I make it ahead of time?

    Yes! You can cook this chili macaroni casserole, cool it, and reheat gently on the stovetop with a splash of broth or milk to loosen the sauce. 

    Is this recipe spicy?

    Not really, as chili powder adds flavor more than heat. If you like it spicy, stir in cayenne or diced jalapeños.

    Can I double the recipe?

    Yes, just make sure to use a very large pot so the pasta cooks evenly.

    A close up image of a bowl of chili mac.

    Tips For Making Macaroni With Chili

    • Break up the beef as it cooks. A wooden spoon works great when crumbling it into smaller pieces.
    • Check your pasta early. Every brand cooks differently, so start tasting at the 11-minute mark and cook longer if needed.
    • Melt the cheese off the heat. That gooey finish is what takes this simple recipe for chili macaroni from good to downright irresistible.
    • Sneak in extra veggies. Zucchini, corn, or mushrooms all blend in nicely and boost the nutrition without changing the flavor too much.
    • Ingredients to prep ahead- Chop the onion and pepper, drain and rinse the beans, and shred the cheese.
    • Leftovers and storage- Keep in the fridge for up to 4 days, and reheat with a splash of broth or milk. Freezing isn’t recommended since the pasta and cheese can lose their texture.
    A wooden spoon holding up a scoop of chili macaroni and cheese from the pan.

    What To Serve With Chili Cheese Mac

    This dish is plenty hearty on its own, but if you want to turn it into a full dinner experience, add a simple side and finish with a little something sweet. Here are some tasty ideas: 

    • Tomato Onion Salad
    • Garlic And Butter Green Beans
    • Grilled Balsamic Asparagus
    • No Bake S'more Bars

    Other Chili Recipes To Try

    • A bowl of chili with cheese and sour cream on top.
      Black Bean Turkey Chili
    • An overhead image of a bowl of chicken chili.
      Easy Chili Chicken
    • Vegetarian Chili (Crockpot + IP)
    • Easy Instant Pot Chili will knock your socks off. Ready in around 30 minutes and full of mouthwatering flavor! Full of ground beef, ground pork, tons of chili seasonings, vegetables and beans it's quick and easy to make on a week night or for a party (game day anyone?!).
      Easy Instant Pot Chili Recipe

    Love this recipe? Please leave a 5 star ⭐️⭐️⭐️⭐️⭐️ rating in the recipe card below ⬇️ and/or a review in the comment section further down. Check out my Amazon Store for all my favorite tools, including those used in this recipe. And follow @thelifejolie on Instagram and TikTok!

    Chili Mac casserole in a white bowl.

    One Pot Chili Mac Casserole

    Jessy Freimann
    This chili mac casserole is the ultimate weeknight comfort food! It brings together hearty chili and creamy macaroni and cheese in under 30 minutes for a cozy meal the whole family will love.
    5 from 2 votes
    Print Recipe Pin Recipe
    Prep Time 10 minutes mins
    Cook Time 17 minutes mins
    Total Time 27 minutes mins
    Course dinner, Main, Main Course, Main dish
    Cuisine American
    Servings 6 servings
    Calories 641 kcal

    Equipment

    • chefs knife
    • cutting board
    • Large saute pan
    • wooden spoon
    • measuring cups
    • measuring spoons

    Ingredients
      

    • 2 teaspoons olive oil
    • ¾ cup diced onion
    • ½ cup diced red bell pepper
    • 1 pound ground beef
    • 2 teaspoons chili powder
    • 1 teaspoon ground cumin
    • ½ teaspoon sweet paprika
    • 1 teaspoon kosher salt
    • ¼ teaspoon ground black pepper
    • 14.5 ounces petite diced tomatoes canned and undrained
    • 14.5 ounces pinto beans canned- drained and rinsed
    • 2 cups chicken broth
    • 1 cup milk
    • 1 ½ cups elbow macaroni uncooked
    • 2 cups sharp cheddar cheese, shredded and divided
    • 2 green onions, sliced- garnish

    Instructions
     

    • Heat oil in a large sauté pan over medium high heat.
    • Add onions and peppers and saute for 4 minutes, stirring often.
    • Add ground beef and sauté until brown, breaking up as it cooks. Drain if needed.
    • Stir in chili powder, cumin, paprika, salt and pepper and cook for 2 minutes.
    • Add petite diced tomatoes, pinto beans, broth, milk and macaroni to the pot and stir to combine. Bring to a boil.
    • Once boil, reduce heat to medium low and cover. Cook for around 12 minutes stirring periodically to prevent sticking.
    • Uncover and stir in 1 ½ cups shredded cheddar. Top evenly with remaining shredded cheddar.
    • Cover and turn off heat. Leave covered for a few minutes until cheese is fully melted. Serve immediately topped with sliced green onion.

    Video

    Notes

    • Break up the beef as it cooks. A wooden spoon works great when crumbling it into smaller pieces.
    • Check your pasta early. Every brand cooks differently, so start tasting at the 11-minute mark and cook longer if needed.
    • Melt the cheese off the heat. That gooey finish is what takes this simple recipe for chili macaroni from good to downright irresistible.
    • Sneak in extra veggies. Zucchini, corn, or mushrooms all blend in nicely and boost the nutrition without changing the flavor too much.
    • Ingredients to prep ahead- Chop the onion and pepper, drain and rinse the beans, and shred the cheese.
    • Leftovers and storage- Keep in the fridge for up to 4 days, and reheat with a splash of broth or milk. Freezing isn’t recommended since the pasta and cheese can lose their texture.

    Nutrition

    Serving: 1servingCalories: 641kcalCarbohydrates: 53gProtein: 36gFat: 32gSaturated Fat: 14gPolyunsaturated Fat: 2gMonounsaturated Fat: 11gTrans Fat: 1gCholesterol: 98mgSodium: 1096mgPotassium: 921mgFiber: 9gSugar: 7gVitamin A: 916IUVitamin C: 8mgCalcium: 404mgIron: 5mg
    Tried this recipe?Let us know how it was!

    Cinnamon Granola

    Sep 25, 2025 · Leave a Comment

    A jar with homemade granola in it with the pan of it and a napkin in the background.

    This homemade cinnamon granola is crunchy, lightly spiced, and incredibly easy to make. With just a few pantry staples, you’ll have a big batch of golden clusters that are perfect for making parfaits!

    A jar with homemade granola in it with the pan of it and a napkin in the background.
    [feast_advanced_jump_to]

    Why You’ll Love Almond Granola

    I’ve been making this granola for years, and it’s one of those recipes I never get tired of. Every time I pull a pan out of the oven, I swear the smell alone could convince my family to wander into the kitchen and start sneaking bites before it even cools. I can’t blame them... I’m usually right there with them, sneaking little bites straight off the pan.

    What I love most is how effortless it feels to make. A few pantry staples, a quick stir, and suddenly there’s a tray of golden, crunchy bites cooling on the counter. It’s the kind of easy simple granola recipe that makes life feel a little manageable, even on a busy week. Here’s why this one’s a keeper:

    • Simple ingredients and minimal effort
    • Perfectly spiced with cinnamon
    • Great for breakfasts, snacks, or parfaits
    • Stays fresh for days
    An overhead image of a pan of granola.

    Ingredient Information And Substitutions

    • Old-fashioned oats- They give the best texture. Quick oats can be used too, but the final texture will be less crunchy.
    • Nuts- Almonds, walnuts, pecans, or a mix. Swap in pumpkin seeds or sunflower seeds if you prefer yours nut-free.
    • Coconut oil- Helps bind the mixture. Melted butter will also work.
    • Maple syrup- Adds natural sweetness. Honey or agave syrup can be substituted.
    • Cinnamon- The star seasoning here! Feel free to add a pinch of nutmeg or cardamom for more depth.
    • Kosher salt- Balances the sweetness. A smaller amount of table salt can be used too.
    • Vanilla extract- Adds warmth. Almond extract can be used for a different twist. 
    An overhead image of labeled recipe ingredients.

    How To Make Granola With Cinnamon

    Step 1- Mix the granola.

    Heat to 350 degrees F and line a sheet pan with parchment paper.

    In a large bowl, combine oats, nuts, coconut oil, maple syrup, cinnamon, salt, and vanilla. Stir until everything is well coated.

    Granola ingredients in a bowl and all the ingredients mixed together.

    Step 2- Bake.

    Spread the mixture onto the pan in an even layer. Bake for 10 minutes, stir, then bake another 15 minutes, until golden and fragrant.

    Raw granola in a pan and the pan in the oven.
    A spatula turning the granola in the pan and the pan back in the oven.

    Step 4- Cool and store.

    Let the granola cool completely on the pan. It will crisp up as it sits. Store in an air-tight container for up to 2 weeks.

    Baked granola cooking and then broken up in the pan.

    Frequently Asked Questions

    Can I double the recipe?

    Yes! Homemade granola disappears quickly in my house, so I do this often. Just use two sheet pans so it bakes evenly and doesn't steam.

    Is this recipe good for kids? 

    Definitely. This easy granola recipe is a hit with my own kids. They snack on the clusters like chips, eat them with milk for cereal, and love layering with yogurt and fruit to make homemade parfaits.

    Can I make the granola ahead of time?

    Yes. I usually bake a big batch on the weekend so we can snack on it all week long.

    A close up image of granola in a jar with oats around it.

    Tips For Making This Homemade Granola Recipe

    • Line your pan with parchment paper. It makes cleanup so much easier, and it’s a guarantee that nothing sticks.
    • Spread the mixture in an even layer. This helps it bake up evenly, nice and golden, without burning in spots or staying soft in others.
    • Don’t overbake it. The granola will keep crisping as it cools, so take it out once it’s lightly golden.
    • If you like big clusters, press the mixture together before baking and stir gently to avoid breaking them up as the mixture cools.
    • Make it your own! Try adding dried cranberries, raisins, or apricots after baking. You can even toss in chocolate chips once it cools completely.
    • Ingredients to prep ahead- Pre-chop the nuts and have the dry ingredients measured and ready to go. 
    • Leftovers and storage- Keep the cooled granola in an airtight container on the counter or in the pantry. It will stay fresh for several weeks.
    A close up image of granola in a pan.

    What To Serve With Baked Granola

    It’s incredibly tasty on its own, but the cinnamon flavor really shines when you turn it into something more. It’s the ideal easy granola recipe for yogurt, and it pairs just as well with other baked treats if you’re putting together brunch or a little dessert table. Here are a few more recipes to round things out: 

    • Apple Spice Muffins
    • Breakfast Cookies Recipe
    • Rolo Pretzel Bites
    • Pumpkin Spice Donuts

    Other Breakfast Recipes To Try

    • Two slices of banana bread next to the loaf with a banana on the side.
      Buttermilk Banana Bread Recipe
    • An overhead image of some chewy granola bars stacked on each other.
      Chewy Granola Bars
    • A squaer image of Pumpkin Chocolate Chip Bread.
      Pumpkin Chocolate Chip Bread
    • 3 breakfast cookies stacked on each other with the other cookies around it.
      Breakfast Cookies Recipe

    Love this recipe? Please leave a 5 star ⭐️⭐️⭐️⭐️⭐️ rating in the recipe card below ⬇️ and/or a review in the comment section further down. Check out my Amazon Store for all my favorite tools, including those used in this recipe. And follow @thelifejolie on Instagram and TikTok!

    A jar with homemade granola in it with the pan of it and a napkin in the background.

    Cinnamon Granola

    Jessy Freimann
    This homemade cinnamon granola is crunchy, lightly spiced, and incredibly easy to make. With just a few pantry staples, you’ll have a big batch of golden clusters that are perfect for making parfaits!
    No ratings yet
    Print Recipe Pin Recipe
    Prep Time 5 minutes mins
    Cook Time 25 minutes mins
    Cooling time 1 hour hr
    Total Time 1 hour hr 30 minutes mins
    Course Breakfast, Brunch
    Cuisine American
    Servings 8 servings
    Calories 441 kcal

    Equipment

    • 1 mixing bowl
    • 1 Spatula
    • 1 Measuring cups and spoons
    • 1 sheet pan

    Ingredients
      

    • 3 cups rolled oats
    • 2 cups chopped nuts I used a combination of sliced almonds, chopped walnuts and chopped pecans but use your favorite nuts
    • ⅓ cup coconut oil melted
    • ½ cup pure maple syrup
    • 2 teaspoons ground cinnamon
    • 1 teaspoon Kosher salt
    • 1 ½ teaspoons pure vanilla extract

    Instructions
     

    • Preheat the oven to 350 degrees F and line a sheet pan with parchment.
    • In a large bowl, combine oats, buts, coconut oil, maple syrup, cinnamon, salt and vanilla extract. Toss until everything is well combined and spread in a single layer on the prepared pan.
    • Bake for 10 minutes, flip the granola. Bake for 15 more minutes. Remove from the oven and cool completely, at least 1 hour. Store in an air-tight container until ready to use.

    Notes

    • Line your pan with parchment paper. It makes cleanup so much easier, and it’s a guarantee that nothing sticks.
    • Spread the mixture in an even layer. This helps it bake up evenly, nice and golden, without burning in spots or staying soft in others.
    • Don’t overbake it. The granola will keep crisping as it cools, so take it out once it’s lightly golden.
    • If you like big clusters, press the mixture together before baking and stir gently to avoid breaking them up as the mixture cools.
    • Make it your own! Try adding dried cranberries, raisins, or apricots after baking. You can even toss in chocolate chips once it cools completely.
    • Ingredients to prep ahead- Pre-chop the nuts and have the dry ingredients measured and ready to go. 
    • Leftovers and storage- Keep the cooled granola in an airtight container on the counter or in the pantry. It will stay fresh for several weeks.

    Nutrition

    Serving: 1servingCalories: 441kcalCarbohydrates: 39gProtein: 9gFat: 30gSaturated Fat: 10gPolyunsaturated Fat: 15gMonounsaturated Fat: 4gSodium: 295mgPotassium: 289mgFiber: 5gSugar: 13gVitamin A: 7IUVitamin C: 0.4mgCalcium: 72mgIron: 2mg
    Tried this recipe?Let us know how it was!
    • « Go to Previous Page
    • Page 1
    • Page 2
    • Page 3
    • Page 4
    • Page 5
    • Interim pages omitted …
    • Page 21
    • Go to Next Page »

    Primary Sidebar

    Jessy in a kitchen holding a white casserole pan and smiling.
    Hi, I'm Jessy!

    Welcome to The Life Jolie! I share simple, delicious recipes and ingredient prep tips to make your weeknight cooking a breeze!

    More about me →

    Easy Dinner Recipes

    • An overhead image of a Mexican Shrimp Quinoa Bowl.
      Shrimp Quinoa Bowls
    • A bowl of asian soup with meatballs with a spoon and noodles in it.
      Asian Soup with Cabbage and Meatballs
    • A close up of roasted red potatoes on a pan.
      Roasted Red Potatoes Recipe
    • A spoon lifting up a scoop of eggplant parm bake with melt cheese trailing behind it.
      Eggplant Parm Bake
    • A close up of a drum chicken wing in a pile of other wings.
      Oven Baked Chicken Wings
    • An overhead image of a bowl of minestrone soup.
      Traditional Minestrone Soup Recipe

    Popular Recipes

    • A glass bowl of melted chocolate with a spatula dripping some back into the bowl.
      How To Melt Chocolate Chips In The Microwave
    • Italian Stuffed Zucchini Boats are the healthy weeknight meal you'll want to make again and again. This is a seriously easy recipe that's full of delicious flavor without all the guilt!
      Italian Stuffed Zucchini Boats
    • A close up shot of the side of a shallow bowl of shrimp mac salad.
      Shrimp Macaroni Salad
    • A white pan pouring cheese sauce over a bowl of steamed broccoli.
      Cheese Sauce for Broccoli Recipe
    • An overhead image of a plate of chicken lettuce wraps with peanut sauce next to it and all the fixings surrounding it.
      Copycat Cheesecake Factory Thai Chicken Lettuce Wraps
    • A close up image of a piece of greek marinated chicken on a white plate with lemons on the plate and in the background.
      Greek Yogurt Chicken
    Jessy in a kitchen holding a white casserole pan and smiling.
    Hi, I'm Jessy!

    Welcome to The Life Jolie! I share simple, delicious recipes and ingredient prep tips to make your weeknight cooking a breeze!

    More about me →

    Easy Dinner Recipes

    • A close up of a bagel pizza with mini pepperonis on a pan.
      Bagel Pizzas Recipe
    • A bowl of chicken and orzo soup with a spoon in it.
      Chicken and Orzo Soup
    • A bowl of Swedish meatballs and noodles.
      Swedish Meatballs And Noodles
    • A close up image of a piece of coconut shrimp on top of others.
      Coconut Shrimp With Sauce
    • An overhead image of taco soup in a bowl.
      Crockpot Taco Chicken Soup
    • A spoon pulling up a scoop of skillet lasagna with melted cheese stretching behind it.
      No Bake Lasagna Skillet

    Popular Recipes

    • A glass bowl of melted chocolate with a spatula dripping some back into the bowl.
      How To Melt Chocolate Chips In The Microwave
    • Italian Stuffed Zucchini Boats are the healthy weeknight meal you'll want to make again and again. This is a seriously easy recipe that's full of delicious flavor without all the guilt!
      Italian Stuffed Zucchini Boats
    • A close up shot of the side of a shallow bowl of shrimp mac salad.
      Shrimp Macaroni Salad
    • A white pan pouring cheese sauce over a bowl of steamed broccoli.
      Cheese Sauce for Broccoli Recipe
    • An overhead image of a plate of chicken lettuce wraps with peanut sauce next to it and all the fixings surrounding it.
      Copycat Cheesecake Factory Thai Chicken Lettuce Wraps
    • A close up image of a piece of greek marinated chicken on a white plate with lemons on the plate and in the background.
      Greek Yogurt Chicken

    Footer

    ↑ back to top

    About

    • About Me
    • Privacy Policy + Disclaimer

    Newsletter

    • Sign Up! for emails and updates

    Contact

    • Contact
    • Video Production

    As an Amazon Associate I earn from qualifying purchases.

    Copyright 2014-2021 - Jolie Ventures, LLC. All Rights Reserved. Privacy Policy.

    Rate This Recipe

    Your vote:


    A rating is required
    A name is required
    An email is required