
• Skip to primary navigation
  • Skip to main content
  • Skip to primary sidebar
The Life Jolie logo
  • Easy Dinner Recipes
  • Recipes
  • About
  • Contact
    • Work with me!
    • Video Production
  • Nav Social Menu

    • Email
    • Facebook
    • Instagram
    • Pinterest
    • Twitter
    • YouTube
menu icon
go to homepage
subscribe
search icon
Homepage link
  • Easy Dinner Recipes
  • Recipes
  • About
  • Contact
    • Work with me!
    • Video Production
    • Email
    • Facebook
    • Instagram
    • Pinterest
    • Twitter
    • YouTube
  • ×
    The Life Jolie » Page 2

    No Bake Lasagna Skillet

    No Bake Lasagna Skillet

    Mar 2, 2026 · 25 Comments

    A spoon pulling up a scoop of skillet lasagna with melted cheese stretching behind it.

    This no bake lasagna skillet gives you all the cheesy, saucy comfort of the classic version without layering noodles or baking for an hour. It comes together in about 30 minutes, making it perfect for busy weeknights when you want something hearty but easy.
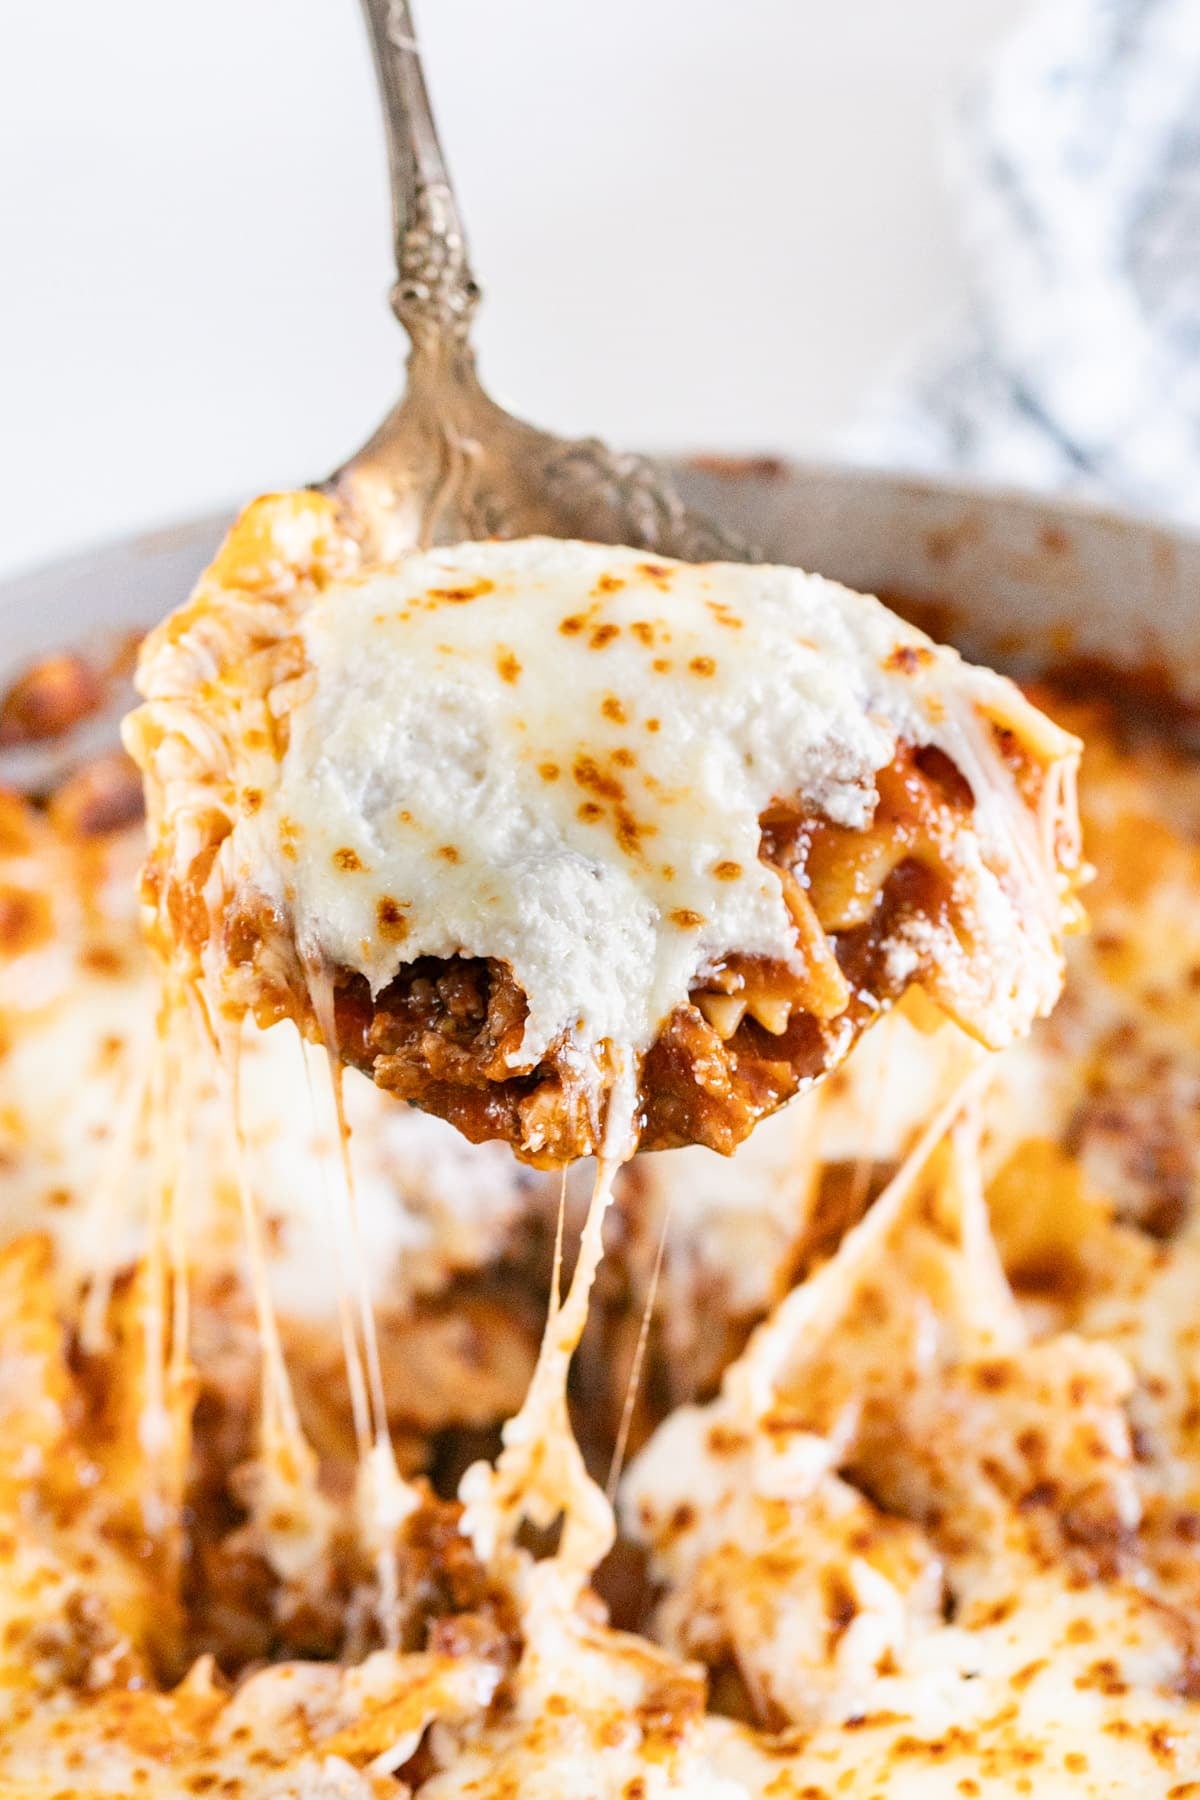
    A spoon pulling up a scoop of skillet lasagna with melted cheese stretching behind it.
    [feast_advanced_jump_to]

    Why You’ll Love This One Pan Lasagna Recipe

    There’s something so comforting about lasagna, but let’s be honest… traditional layering can feel like a whole event. This version keeps all the flavor but skips the extra steps. Everything cooks together, finishes under the broiler, and still delivers that cheesy, bubbly top.

    It’s one of those dinners that turns out so good the first time, you don’t even need to tweak it. I’ve made it multiple times since creating it, and it’s officially in our regular rotation. Here’s why one pan lasagna works so well:

    • Perfect for weeknights
    • Ready in about 30 minutes
    • Classic flavors without layering
    • Family-friendly and filling
    • Minimal cleanup
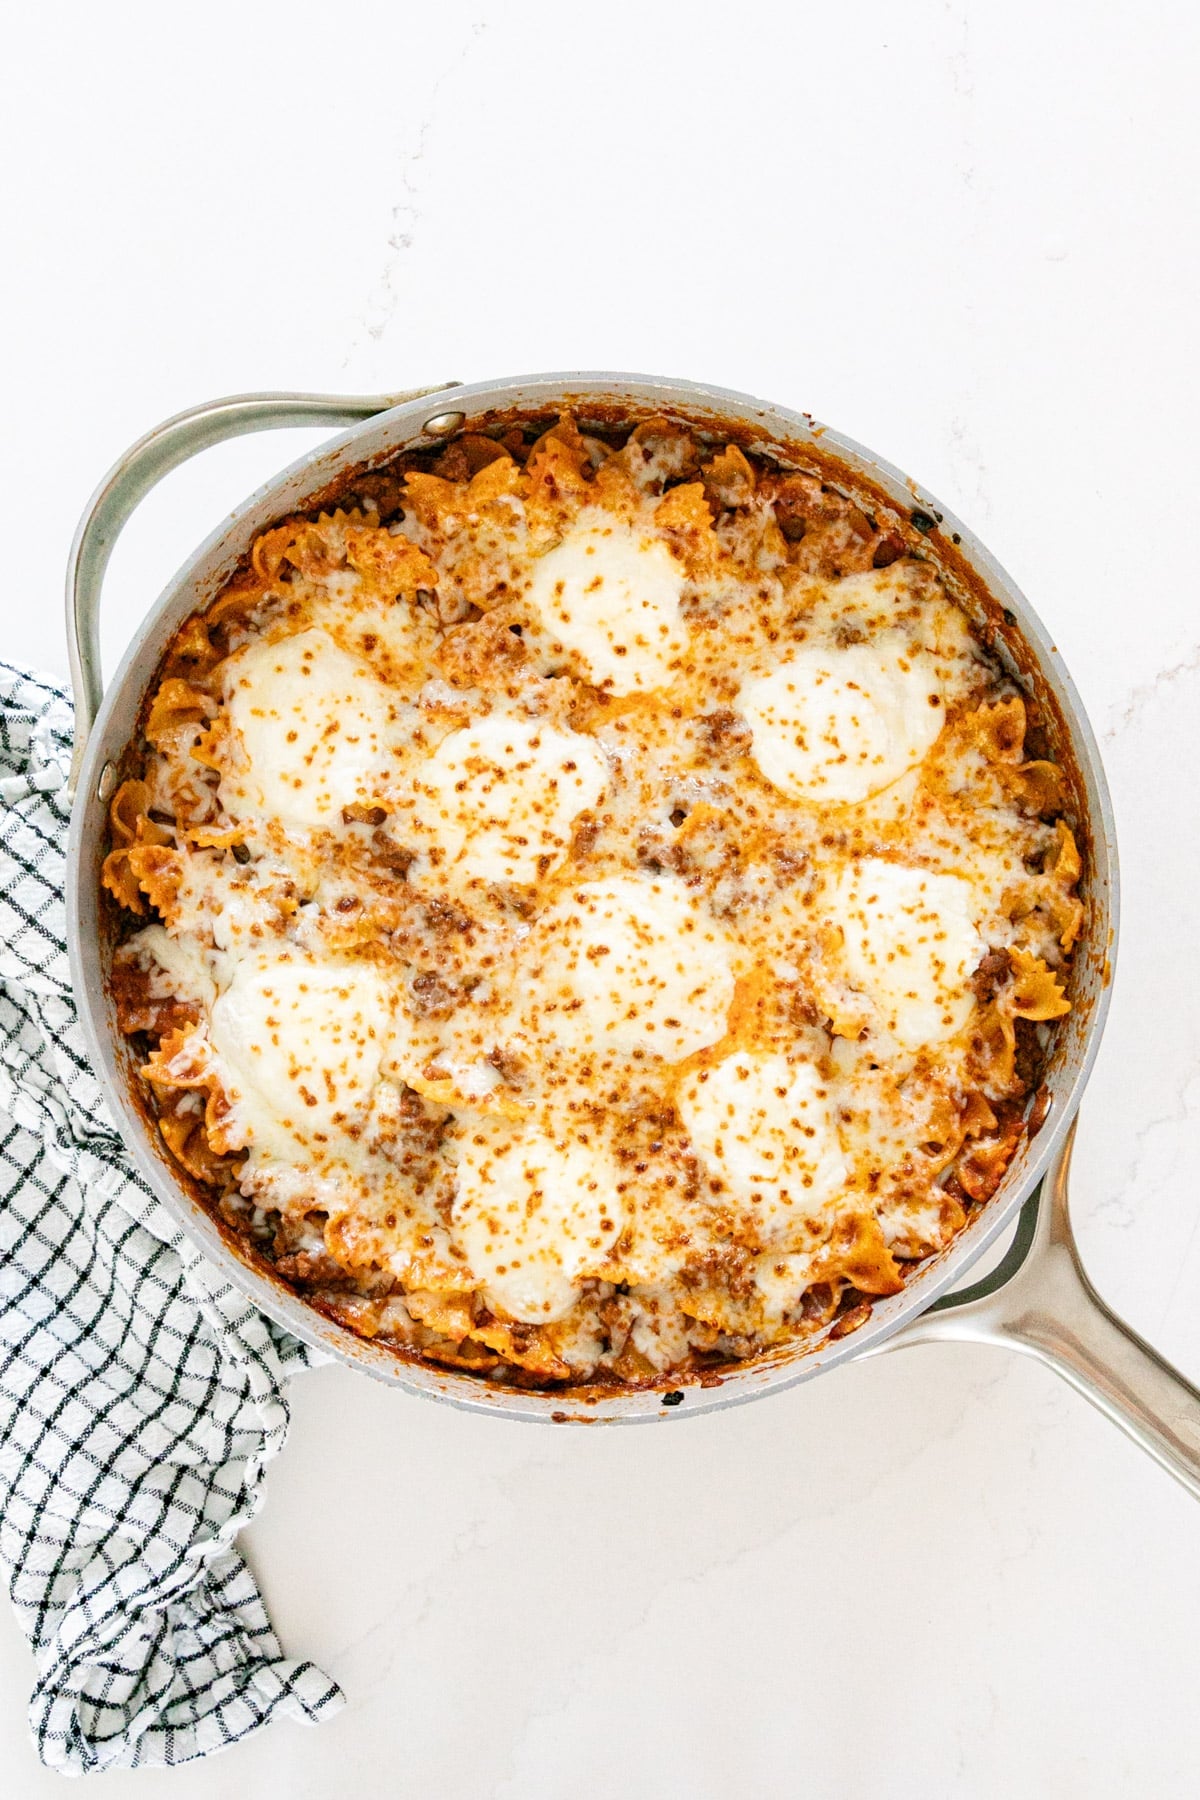
    An overhead image of a pan of skillet lasagna

    Ingredient Information And Substitutions

    • Ground beef- Makes the dish hearty and rich. Ground turkey or Italian sausage both work as well.
    • Onion- Adds natural sweetness and depth to the sauce. Yellow or white both work.
    • Garlic- Brings that classic savory flavor. Jarred garlic also works.
    • Farfalle pasta- Holds the sauce nicely and gives great texture. Any short pasta like penne or rotini works.
    • Olive oil- Helps soften the onion and garlic and build flavor at the start. Avocado oil also works.
    • Marinara sauce- The base of the flavor, so use one you really like. Either homemade marinara sauce or store-bought is fine.
    • Water- Loosens the sauce while it simmers, so everything combines evenly. Broth can be used instead for richer flavor.
    • Ricotta cheese- Adds creaminess and that traditional lasagna texture. Cottage cheese is a good substitute.
    • Romano cheese- Adds a sharper, salty bite. Parmesan works just as well.
    • Mozzarella cheese- Melts into that bubbly, golden top. Fresh is best, but pre-shredded is a good time-saver.
    • Garlic powder- Boosts the ricotta mixture with extra flavor. Can be skipped if needed.
    • Black pepper- Adds mild heat and balance.
    • Salt- Enhances all the flavors. Adjust based on how salty your sauce and cheese are.
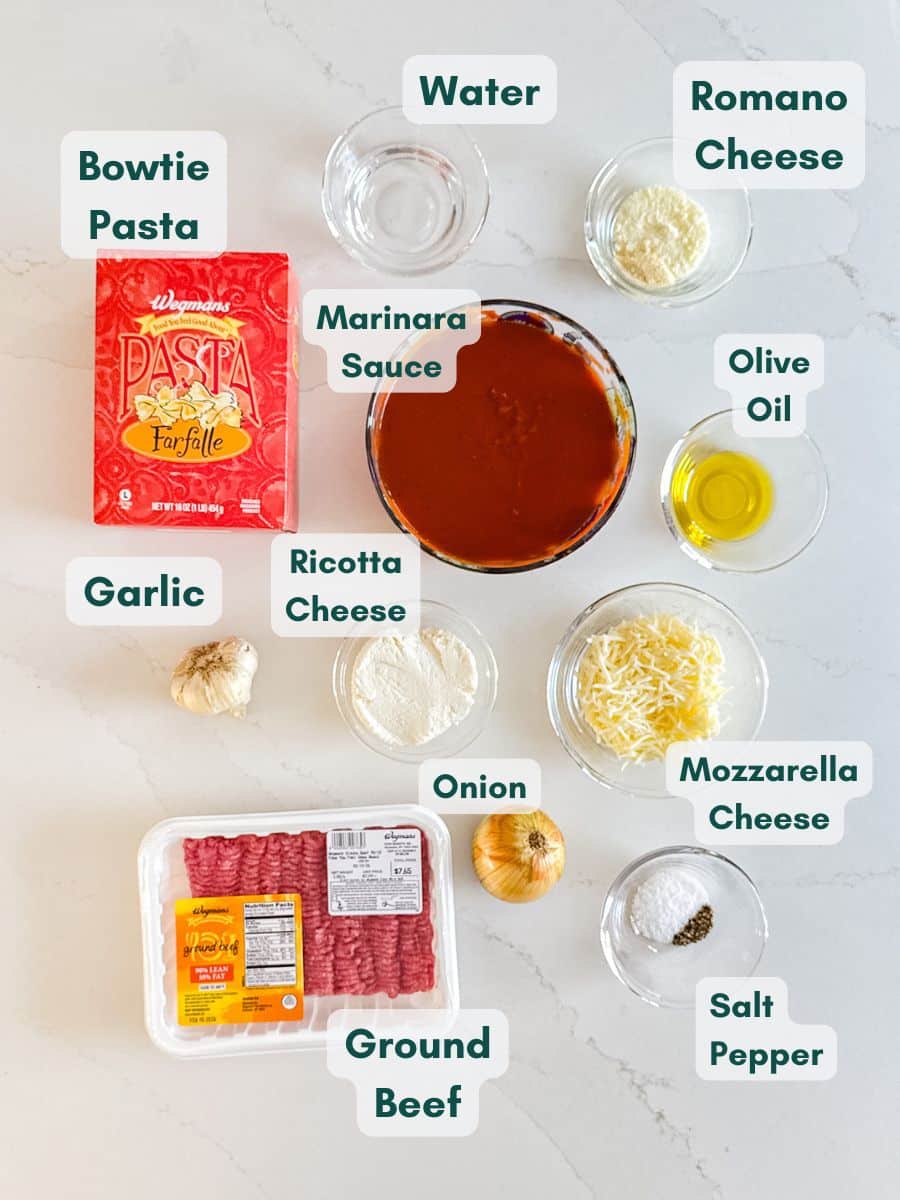
    An overhead image of labeled recipe ingredients.

    How To Make Skillet Lasagna

    Step 1- Heat the oil.

    Warm the olive oil in a skillet over medium-high heat. Add the diced onion and minced garlic and sauté for about 5-10 minutes, until the onion softens.

    Step 2- Brown the beef.

    Add the ground beef along with salt and pepper. Cook until fully browned, then drain any excess grease.
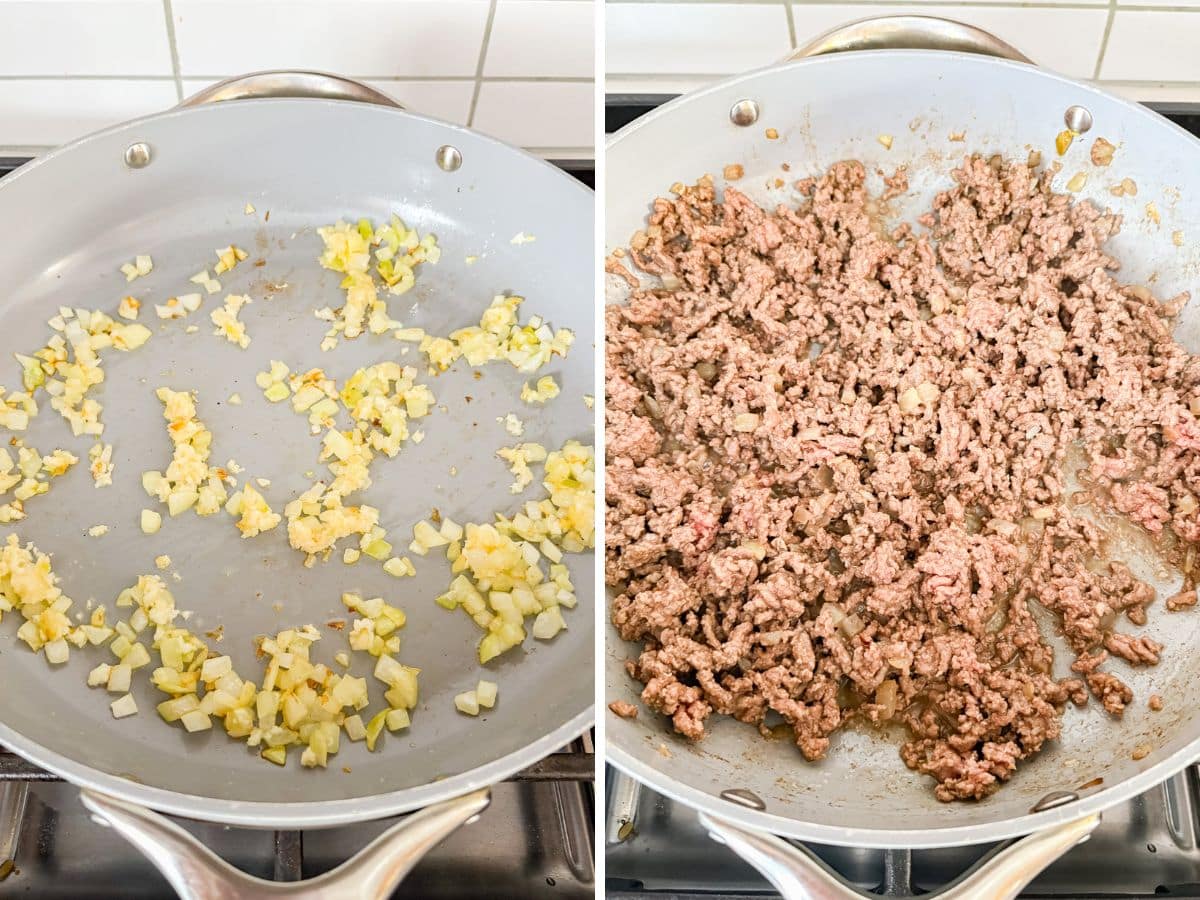
    Onions and garlic sautéing in oil and then browned ground beef in the pan.

    Step 3- Mix the cheese filling.

    While the skillet is simmering, combine the ricotta, 1 tablespoon of Romano cheese, and garlic powder in a small bowl. Preheat your broiler to low (about 350 degrees F if adjustable).
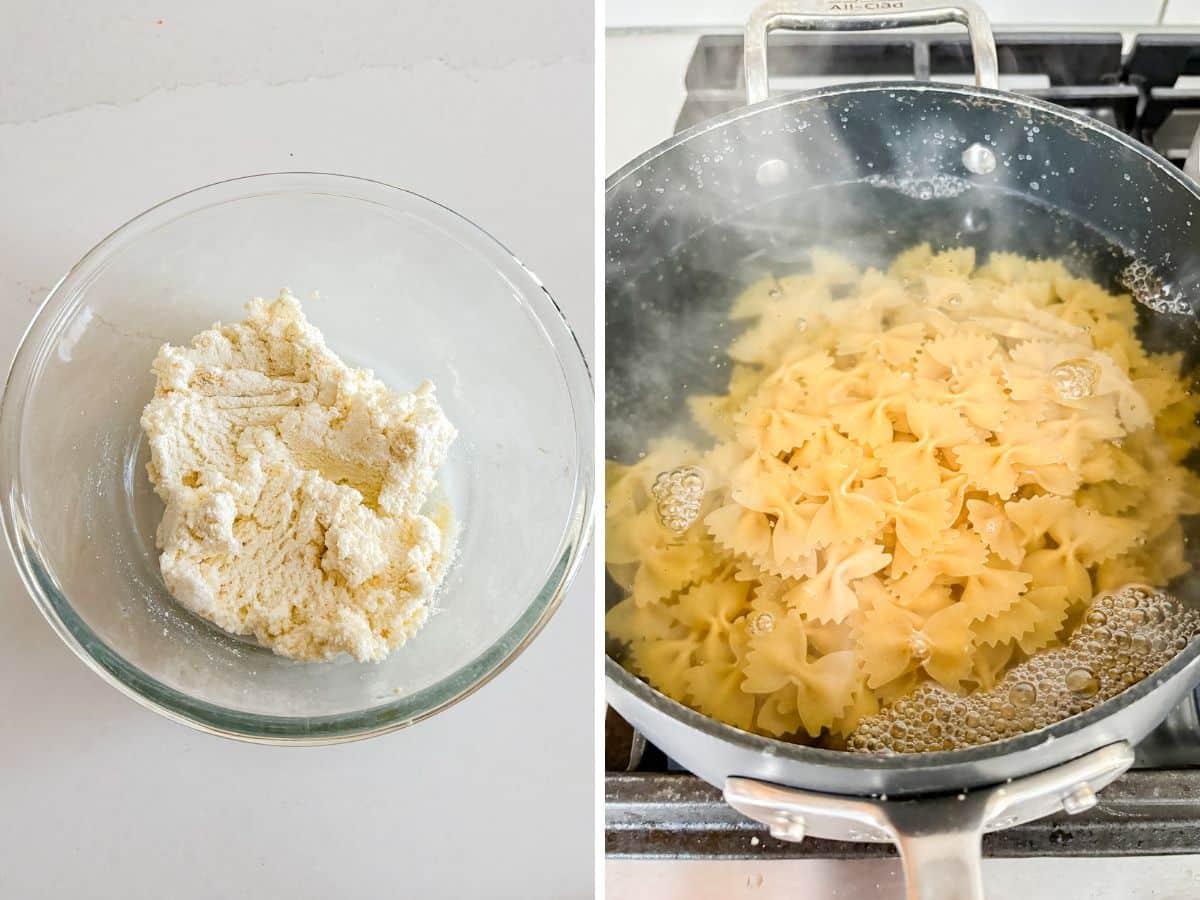
    The ricotta cheese mixture in a bowl and pasta being boiled.

    Step 4- Simmer everything together.

    Stir in the cooked pasta, marinara sauce, and water. Cover the skillet and let it simmer over medium heat for 7 minutes.

    Step 5- Add the ricotta mixture.

    Once the simmering time is up, poon generous dollops of the ricotta mixture over the top.
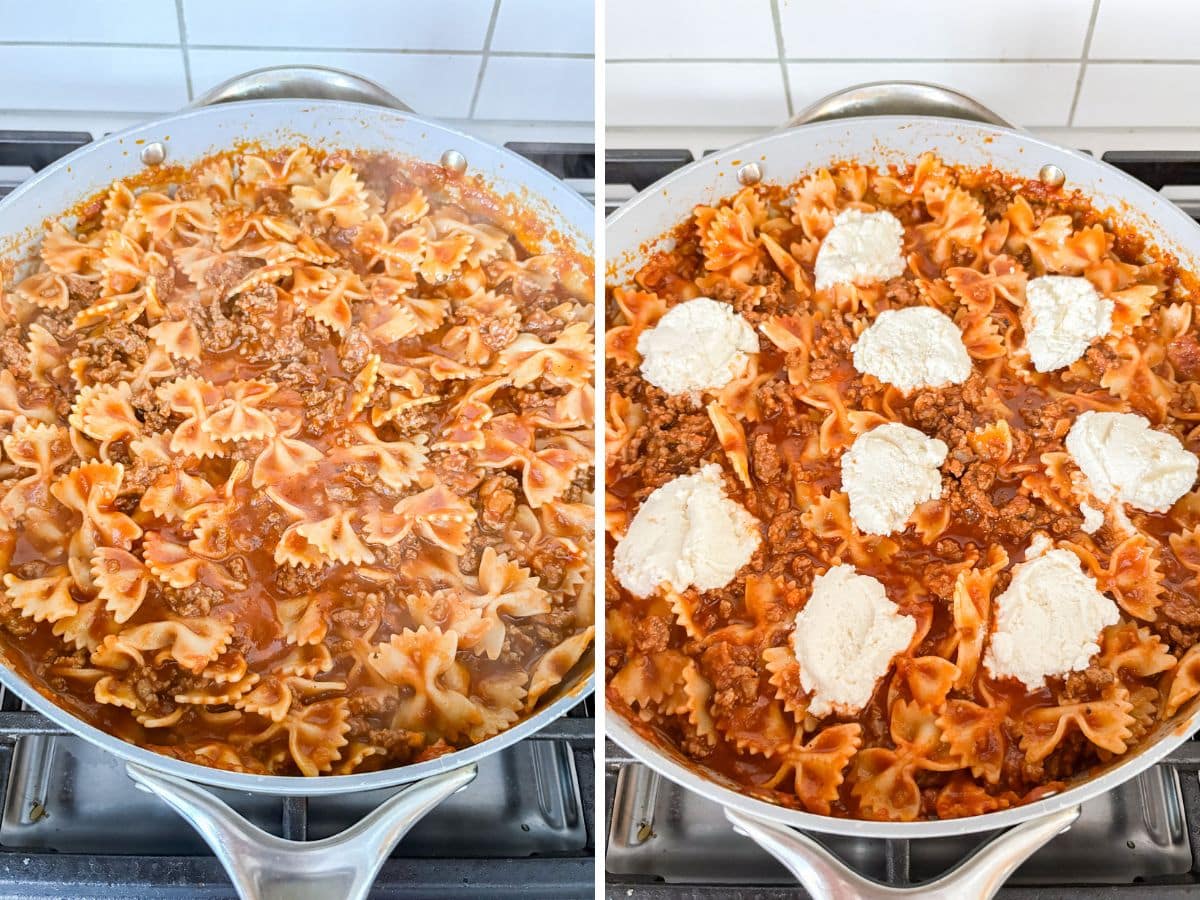
    Pasta and sauce mixed in with the beef and then dollops of the ricotta mixture on top.

    Step 6- Broil until bubbly.

    Sprinkle with mozzarella and extra Romano cheese. You can turn off the heat and cover to melt the mozzarella or transfer the mixture to an oven-safe dish if your pan isn’t oven-safe and place under the broiler for 3-5 minutes, until the cheese is melted and bubbly.
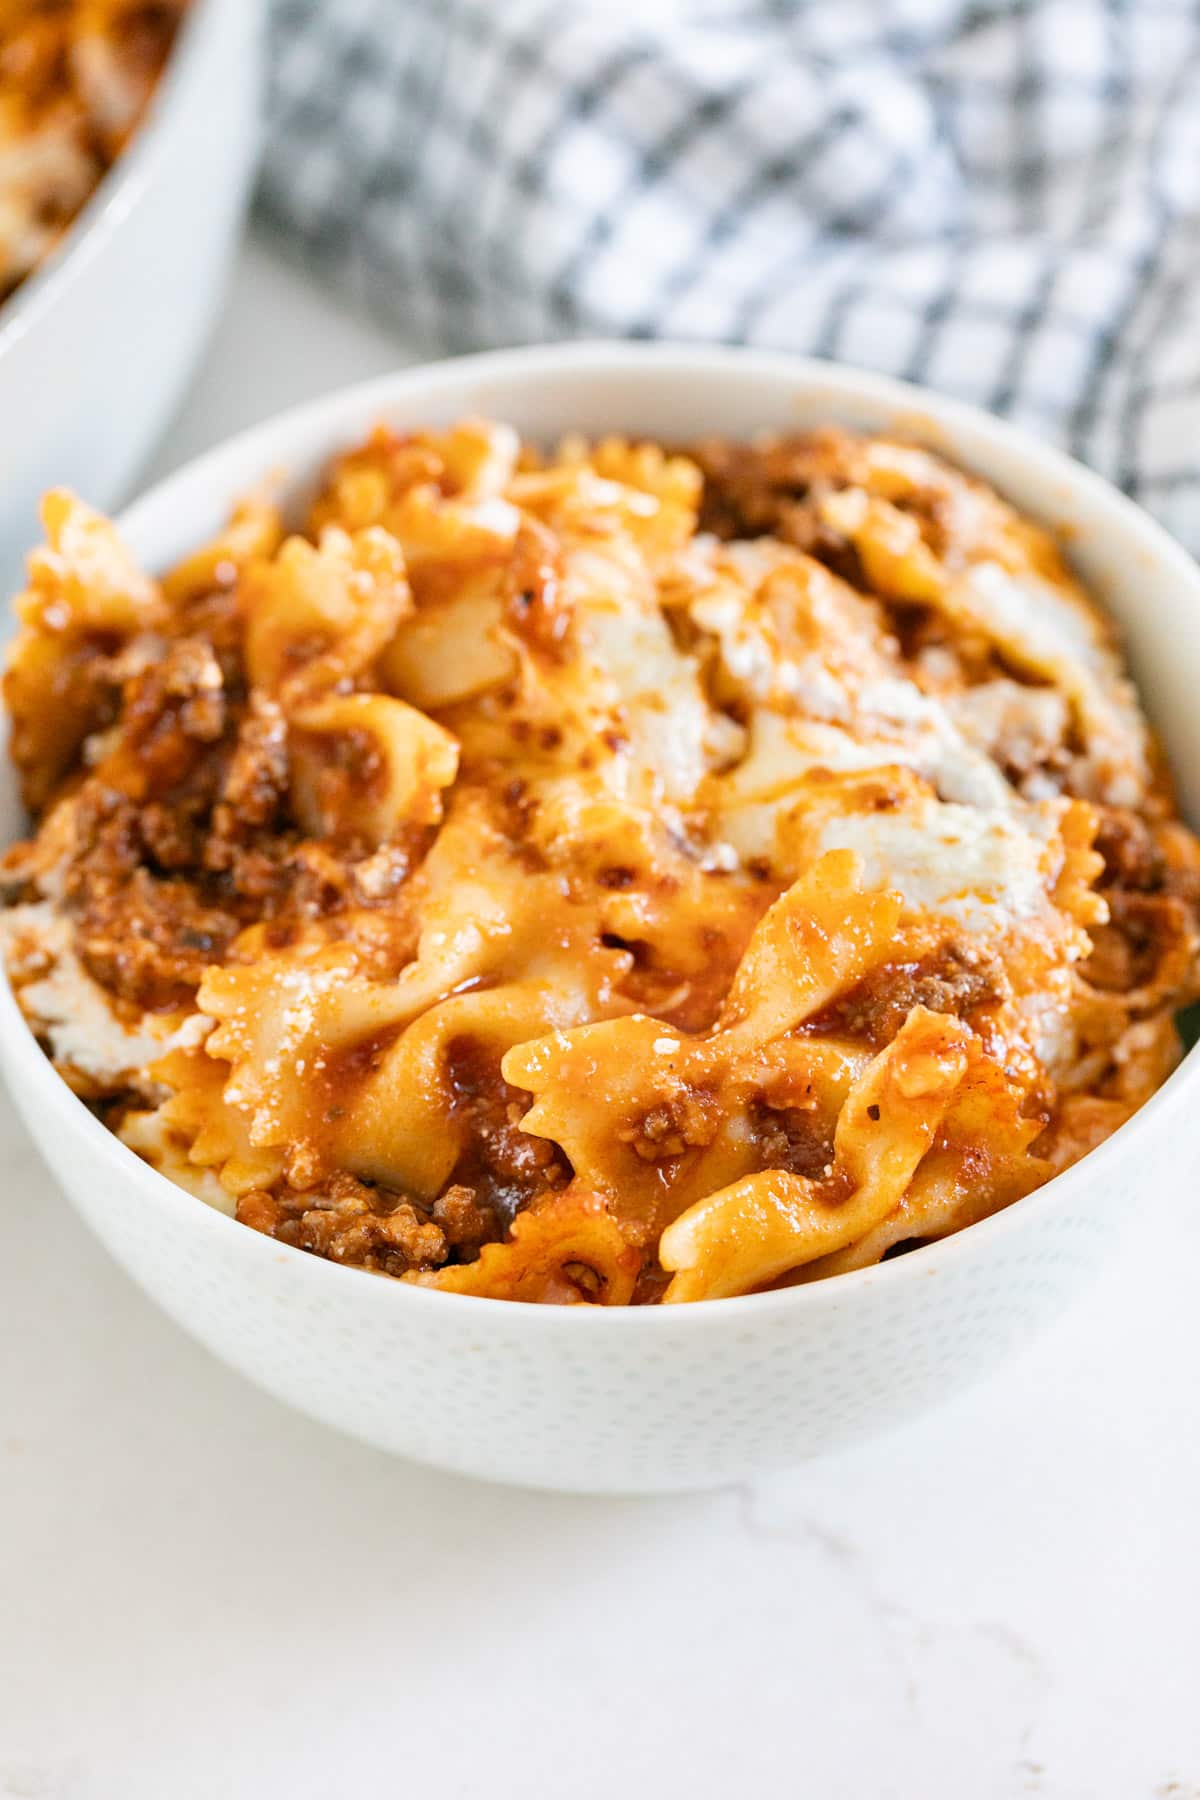
    A close up image of a bowl of no bake lasagna skillet.

    Frequently Asked Questions

    Do I have to transfer it to a baking dish?

    Nope! While I like the added steop of broiling the cheese, simply turning off the heat and covering it for a feww minutes will allow the mozzarella cheese to melt.

    Can I make this ahead of time?

    You can prepare the meat and mix with the sauce earlier in the day and then add the pasta, heat it all up and melt the cheese right before serving for the best texture.

    Can I double this recipe?

    When doubling this one pot lasagna recipe, make sure you’re using a large enough skillet or Dutch oven so everything cooks evenly without overflowing.
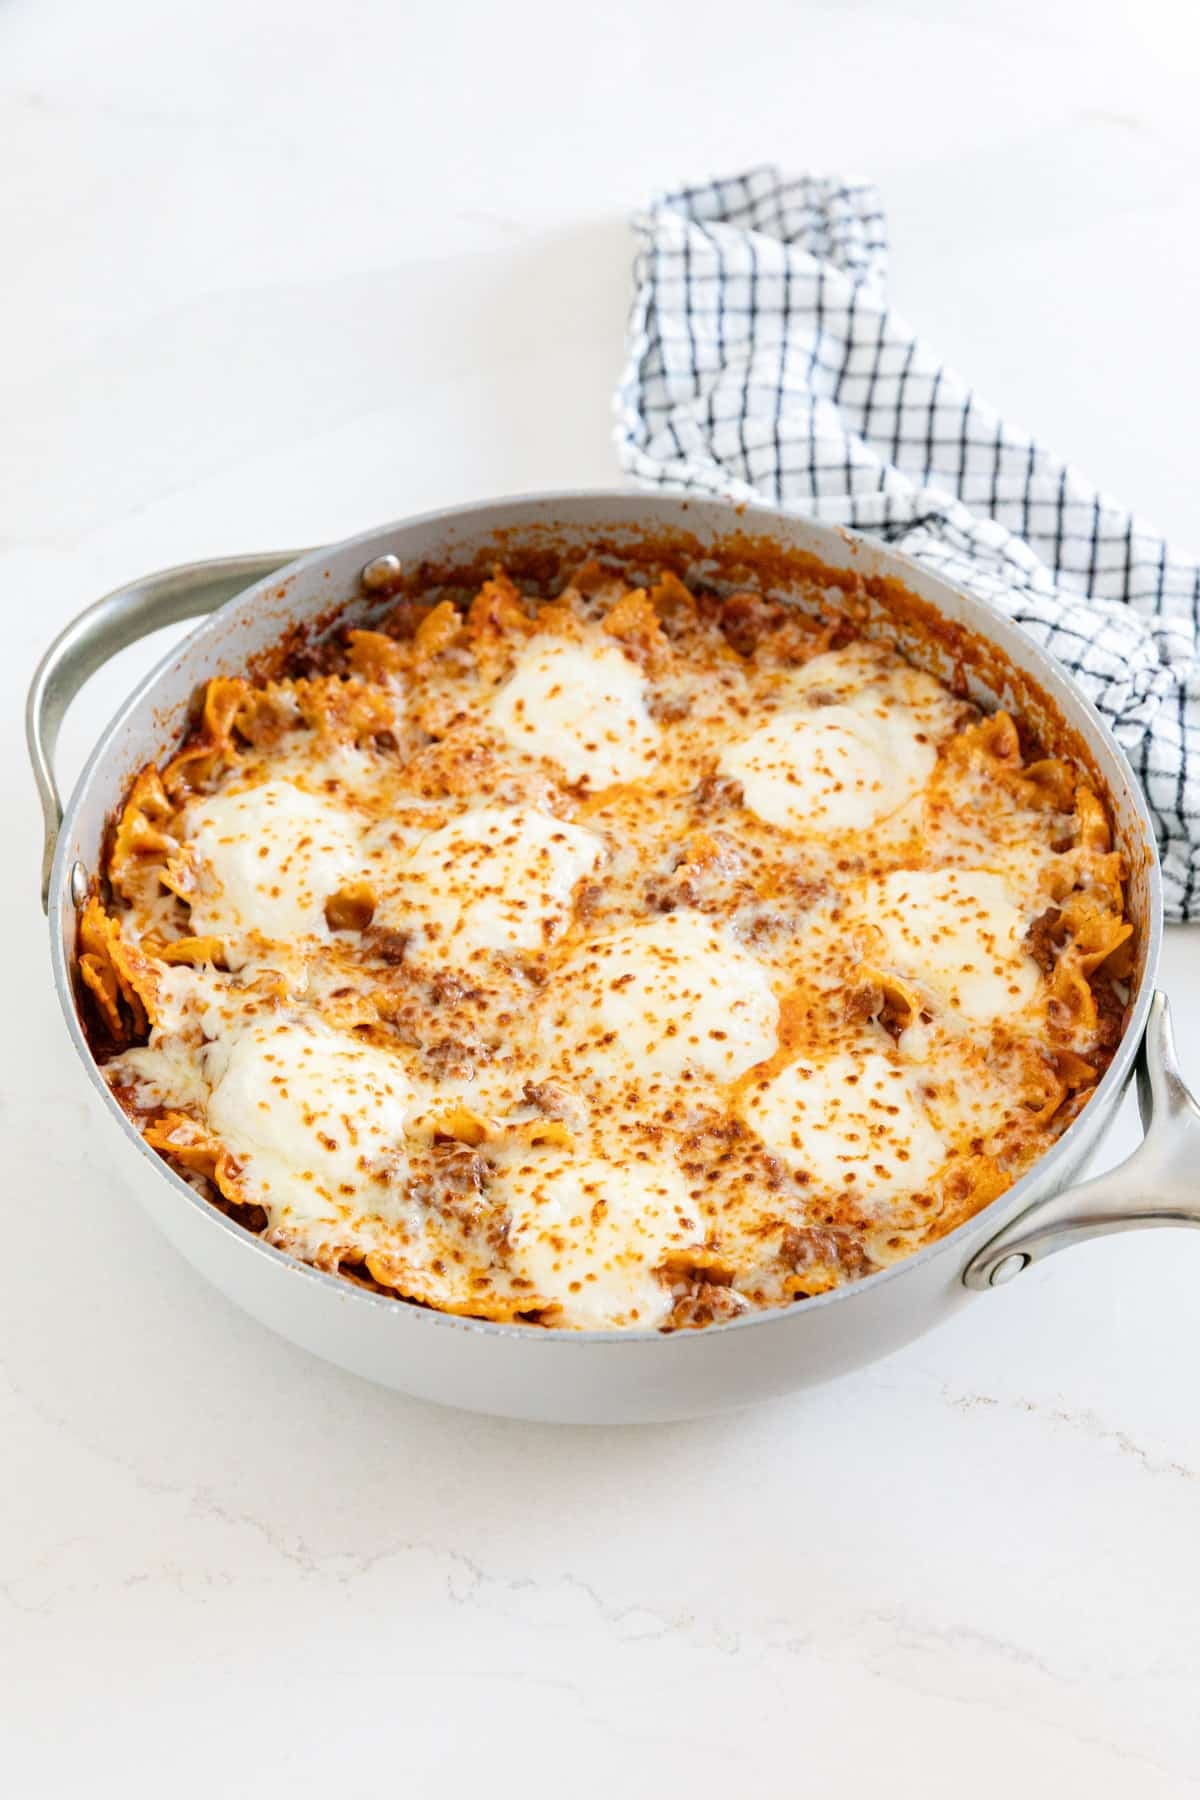
    A pan of lasagna skillet with a striped towel behind it.

    Tips For Making One Pot Lasagna

    • Cook the pasta al dente. Since it simmers briefly in the sauce, slightly firm pasta prevents it from becoming too soft when broiled.
    • Removing the extra fat after browning the meat helps prevent a greasy sauce, so be sure to drain it well if needed.
    • Melt the cheese to your liking. I prefer the broiler because that quick finish gives you that classic bubbly, golden cheese top, You can also turn off the heat and cover for a few minutes to make this truly no-bake.
    • Taste your marinara first. If your sauce is already salty, go lighter on additional salt.
    • Ingredients to prep ahead- Dice the onion, mince the garlic, and shred the cheese.
    • Leftovers and storage- Store in an airtight container in the fridge for up to 4 days. Freeze for up to 2 months. Thaw overnight and reheat until warmed through.
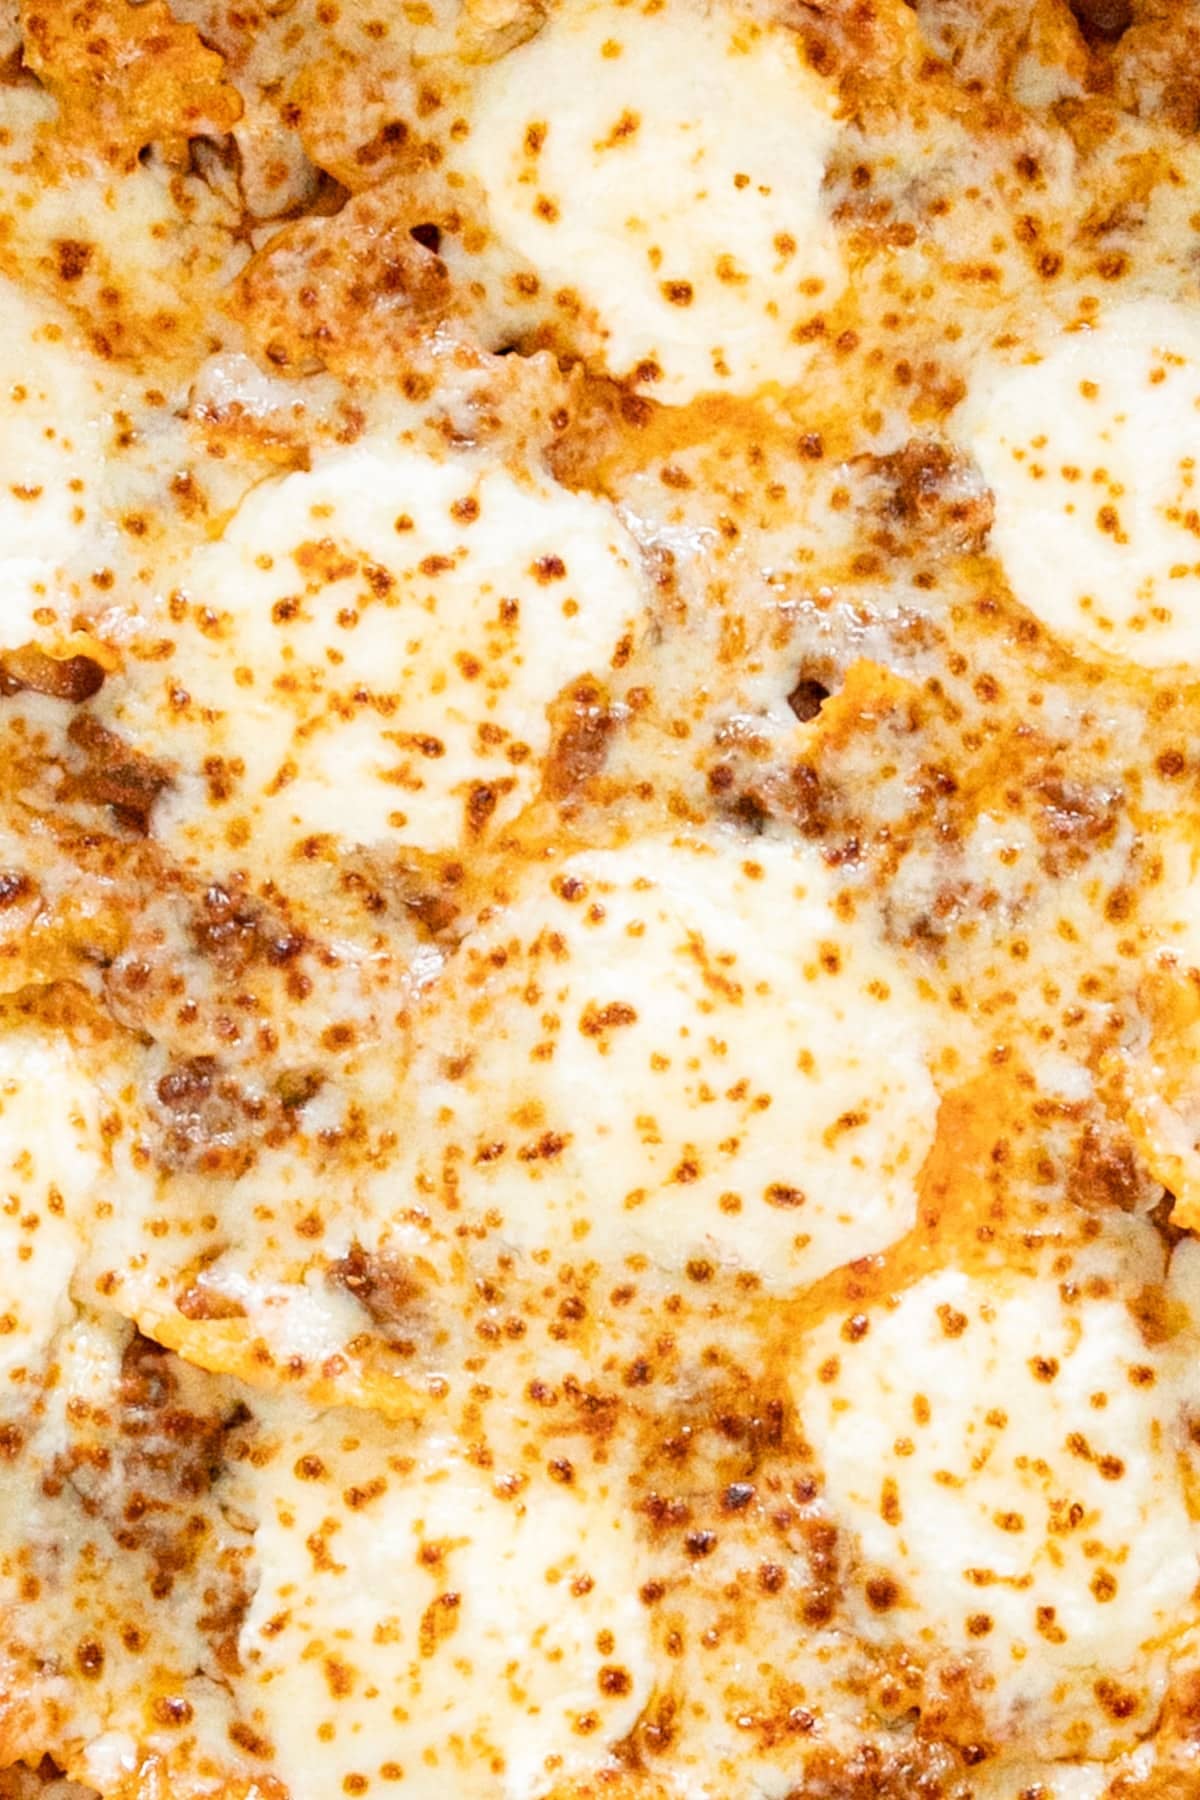
    A close up overhead image of the top of the pasta covered in melty cheese.

    What To Serve With Frying Pan Lasagna

    This dish is hearty on its own, but adding a simple side makes it feel like a full meal. I like pairing it with something fresh and crisp to balance the richness. Try serving this skillet lasagna recipe with:

    • Green Bean Salad
    • Roasted Vegetable Flatbread
    • Garlic Parmesan Roasted Broccoli
    • Apple Yogurt Parfait With Granola

    Other Pasta Recipes To Try

    • A spoon pulling a scoop of baked tortellini from the pan with melted cheese stretching.
      Tortellini Baked Pasta
    • An overhead image of a plate of pasta pomodoro with basil, a checked napkin and the rest of the pan around it.
      Pasta Pomodoro Recipe
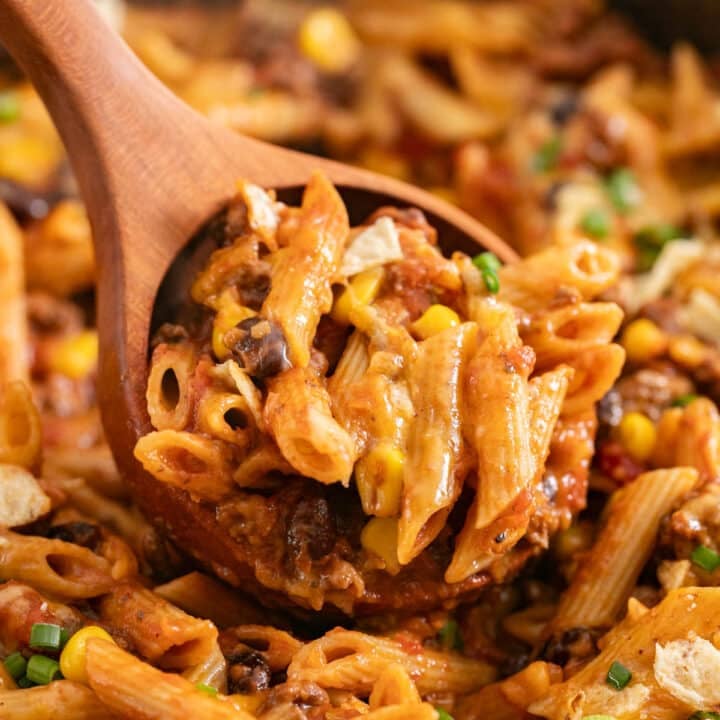
    • A wooden spoon scooping up creamy taco pasta from the pan.
      One Pot Cheesy Taco Pasta
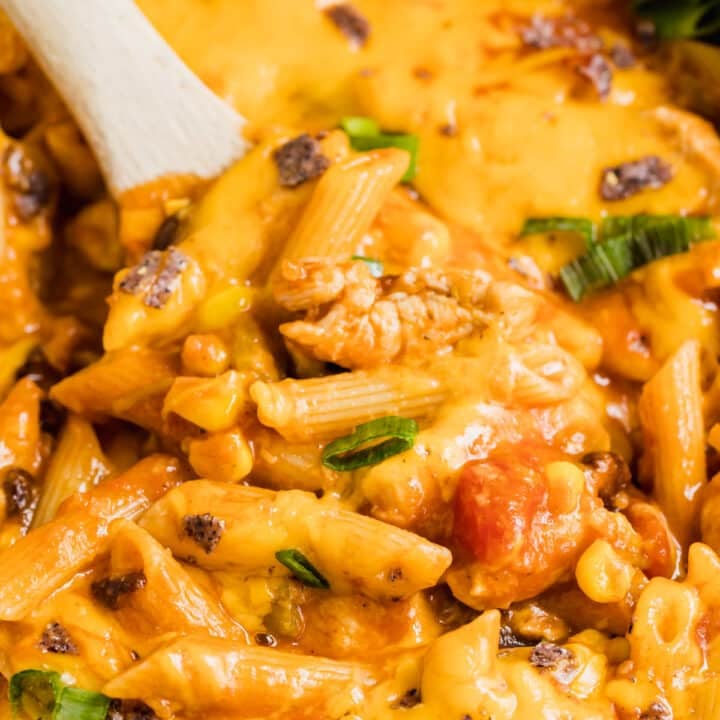
    • A close up of a wooden spoon in a pan of taco pasta.
      One Pan Taco Pasta With Chicken

    Love this recipe? Please leave a 5 star ⭐️⭐️⭐️⭐️⭐️ rating in the recipe card below ⬇️ and/or a review in the comment section further down. Check out my Amazon Store for all my favorite tools, including those used in this recipe. And follow @thelifejolie on Instagram and TikTok!

    A spoon pulling up a scoop of skillet lasagna with melted cheese stretching behind it.

    No Bake Lasagna Skillet

    Jessy Freimann
    This no bake lasagna skillet gives you all the cheesy, saucy comfort of the classic version without layering noodles or baking for an hour. It comes together in about 30 minutes, making it perfect for busy weeknights when you want something hearty but easy.
    No ratings yet
    Print Recipe Pin Recipe
    Prep Time 10 minutes mins
    Cook Time 25 minutes mins
    Total Time 35 minutes mins
    Course dinner, Main, Main Course, Main dish
    Cuisine Italian
    Servings 6 servings
    Calories 498 kcal

    Equipment

    • 1 cutting board
    • 1 chefs knife
    • 1 Skillet
    • 1 wooden spoon
    • 1 Measuring cups and spoons

    Ingredients
      

    • 1 Tablespoon olive oil
    • ½ cup onion finely diced
    • 3 cloves garlic minced
    • 1 pound ground beef 90/10
    • 1 teaspoon Kosher salt
    • ¼ teaspoon ground black pepper
    • 8 ounces farfalle cooked to al dente, as per the instructions on the box
    • 3 cups marinara sauce
    • ½ cup water
    • ⅔ cup ricotta cheese
    • 1 Tablespoons Romano cheese
    • ½ teaspoon garlic powder
    • 1 cup mozzarella cheese shredded

    Instructions
     

    • Heat oil skillet over medium high heat. Add onion and sauté for about 5 minutes until the onion has softened. Stir in garlic and cook for another minute until fragrant.
    • Add ground beef and break up, cooking until browned, about 5 minutes. Drain excess oil if needed. Season with salt and pepper.
    • Add sauce and water to the pan. Once it starts to bubble, reduce the heat to medium and and simmer for 10 minutes. Boil the pasta to al dente while the sauce simmers.
    • In a separate bowl, mix together your ricotta cheese, Romano cheese and garlic power while the sauce simmers. Preheat broiler if using.
    • Add the pasta to the sauce and mix well. Spoon dollops of the cheese mixture onto your pasta mixture.
    • Top with mozzarella turn off heat and cover for 5 minutes until mozzarella is melted. Or place it under the broiler for 2 minutes of until the cheese melts and starts to brown a tad. Serve immediately.

    Video

    Notes

    • Cook the pasta al dente. Since it simmers briefly in the sauce, slightly firm pasta prevents it from becoming too soft when broiled.
    • Removing the extra fat after browning the meat helps prevent a greasy sauce, so be sure to drain it well if needed.
    • Melt the cheese to your liking. I prefer the broiler because that quick finish gives you that classic bubbly, golden cheese top, You can also turn off the heat and cover for a few minutes to make this truly no-bake.
    • Taste your marinara first. If your sauce is already salty, go lighter on additional salt.
    • Ingredients to prep ahead- Dice the onion, mince the garlic, and shred the cheese.
    • Leftovers and storage- Store in an airtight container in the fridge for up to 4 days. Freeze for up to 2 months. Thaw overnight and reheat until warmed through.
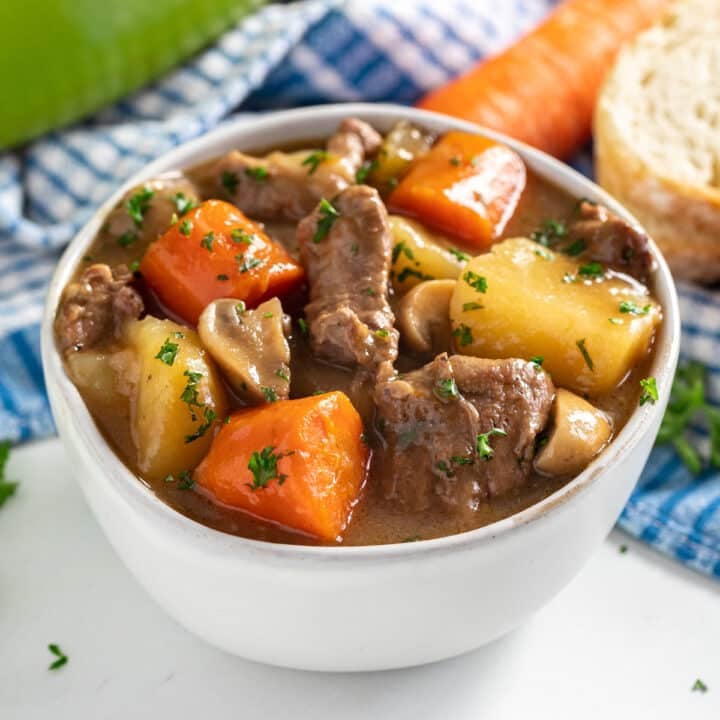
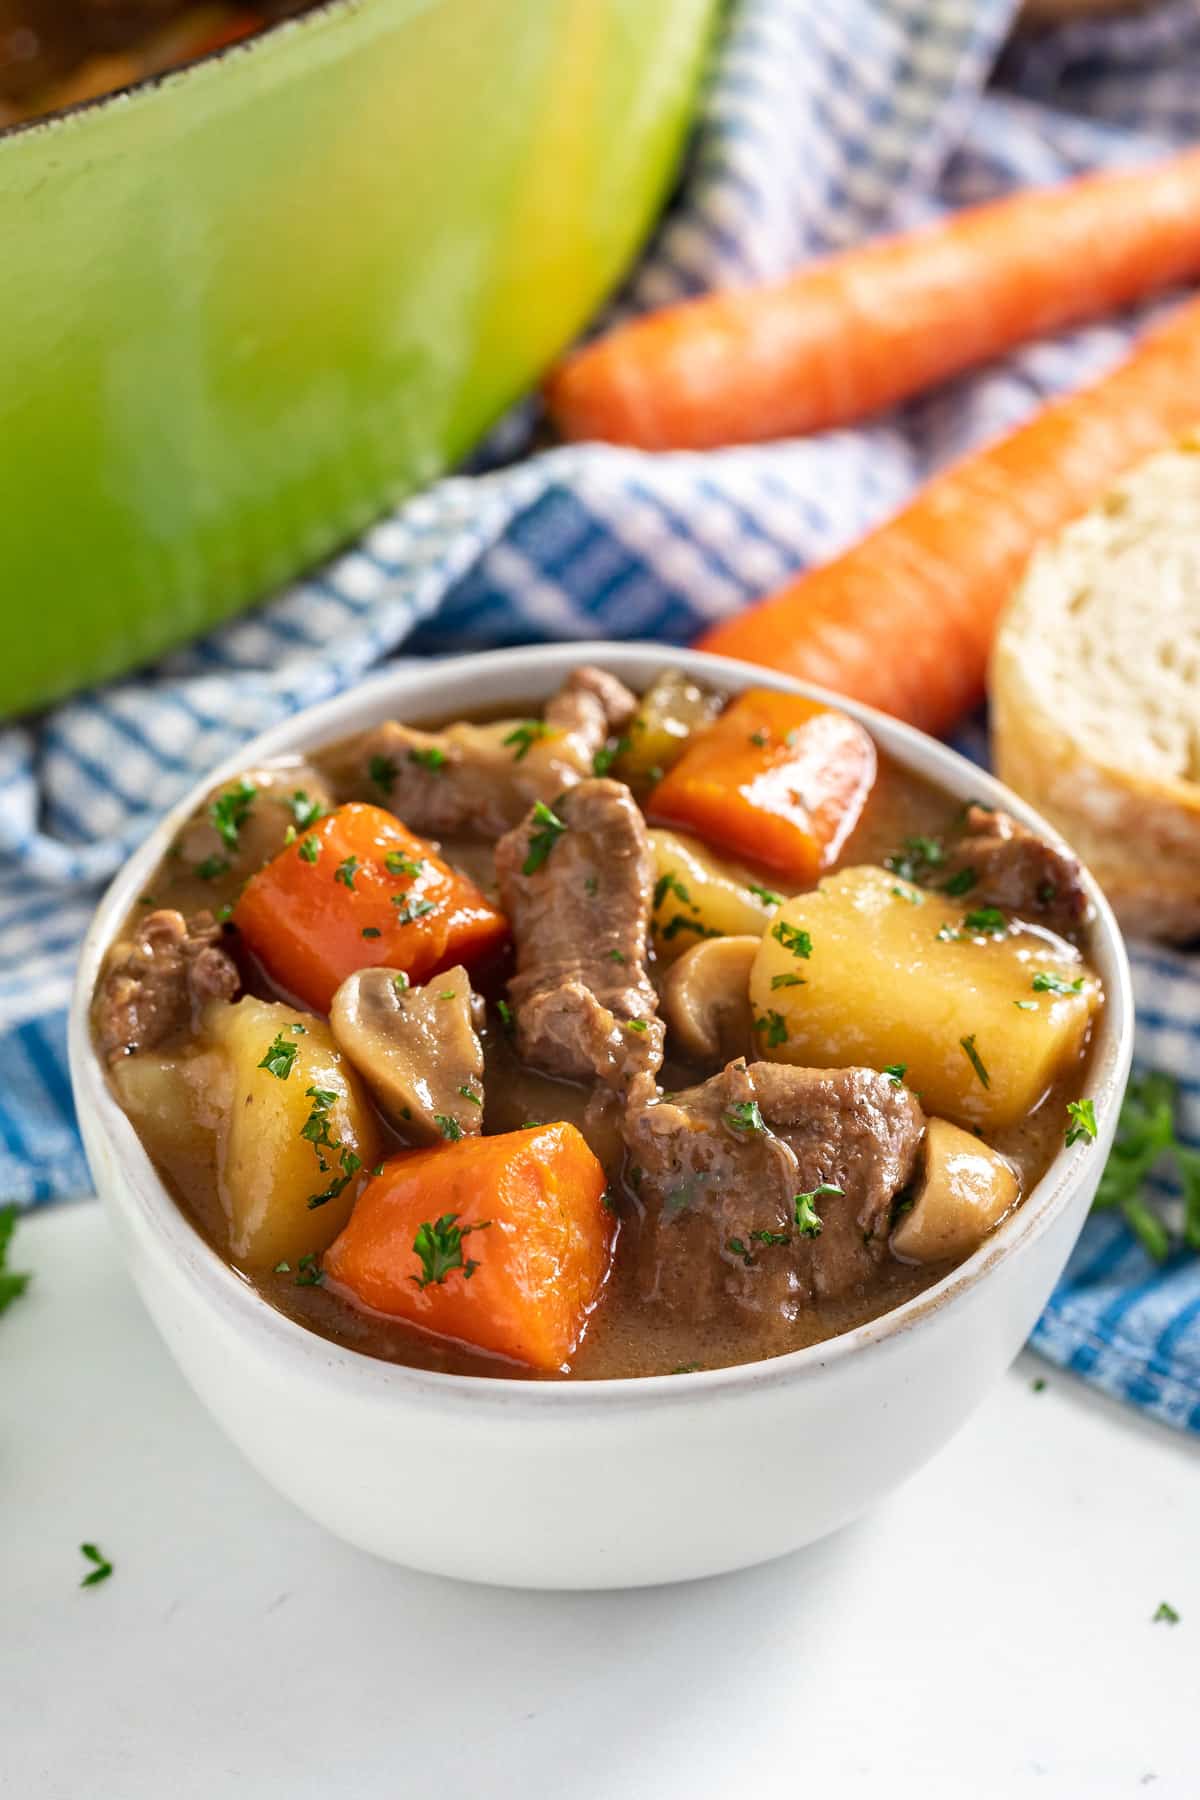
    Nutrition

    Serving: 1servingCalories: 498kcalCarbohydrates: 38gProtein: 27gFat: 26gSaturated Fat: 11gPolyunsaturated Fat: 1gMonounsaturated Fat: 11gTrans Fat: 1gCholesterol: 83mgSodium: 1173mgPotassium: 726mgFiber: 3gSugar: 6gVitamin A: 784IUVitamin C: 10mgCalcium: 206mgIron: 3mg
    Tried this recipe?Let us know how it was!

    Easy Lamb Stew Recipe

    Feb 27, 2026 · 2 Comments

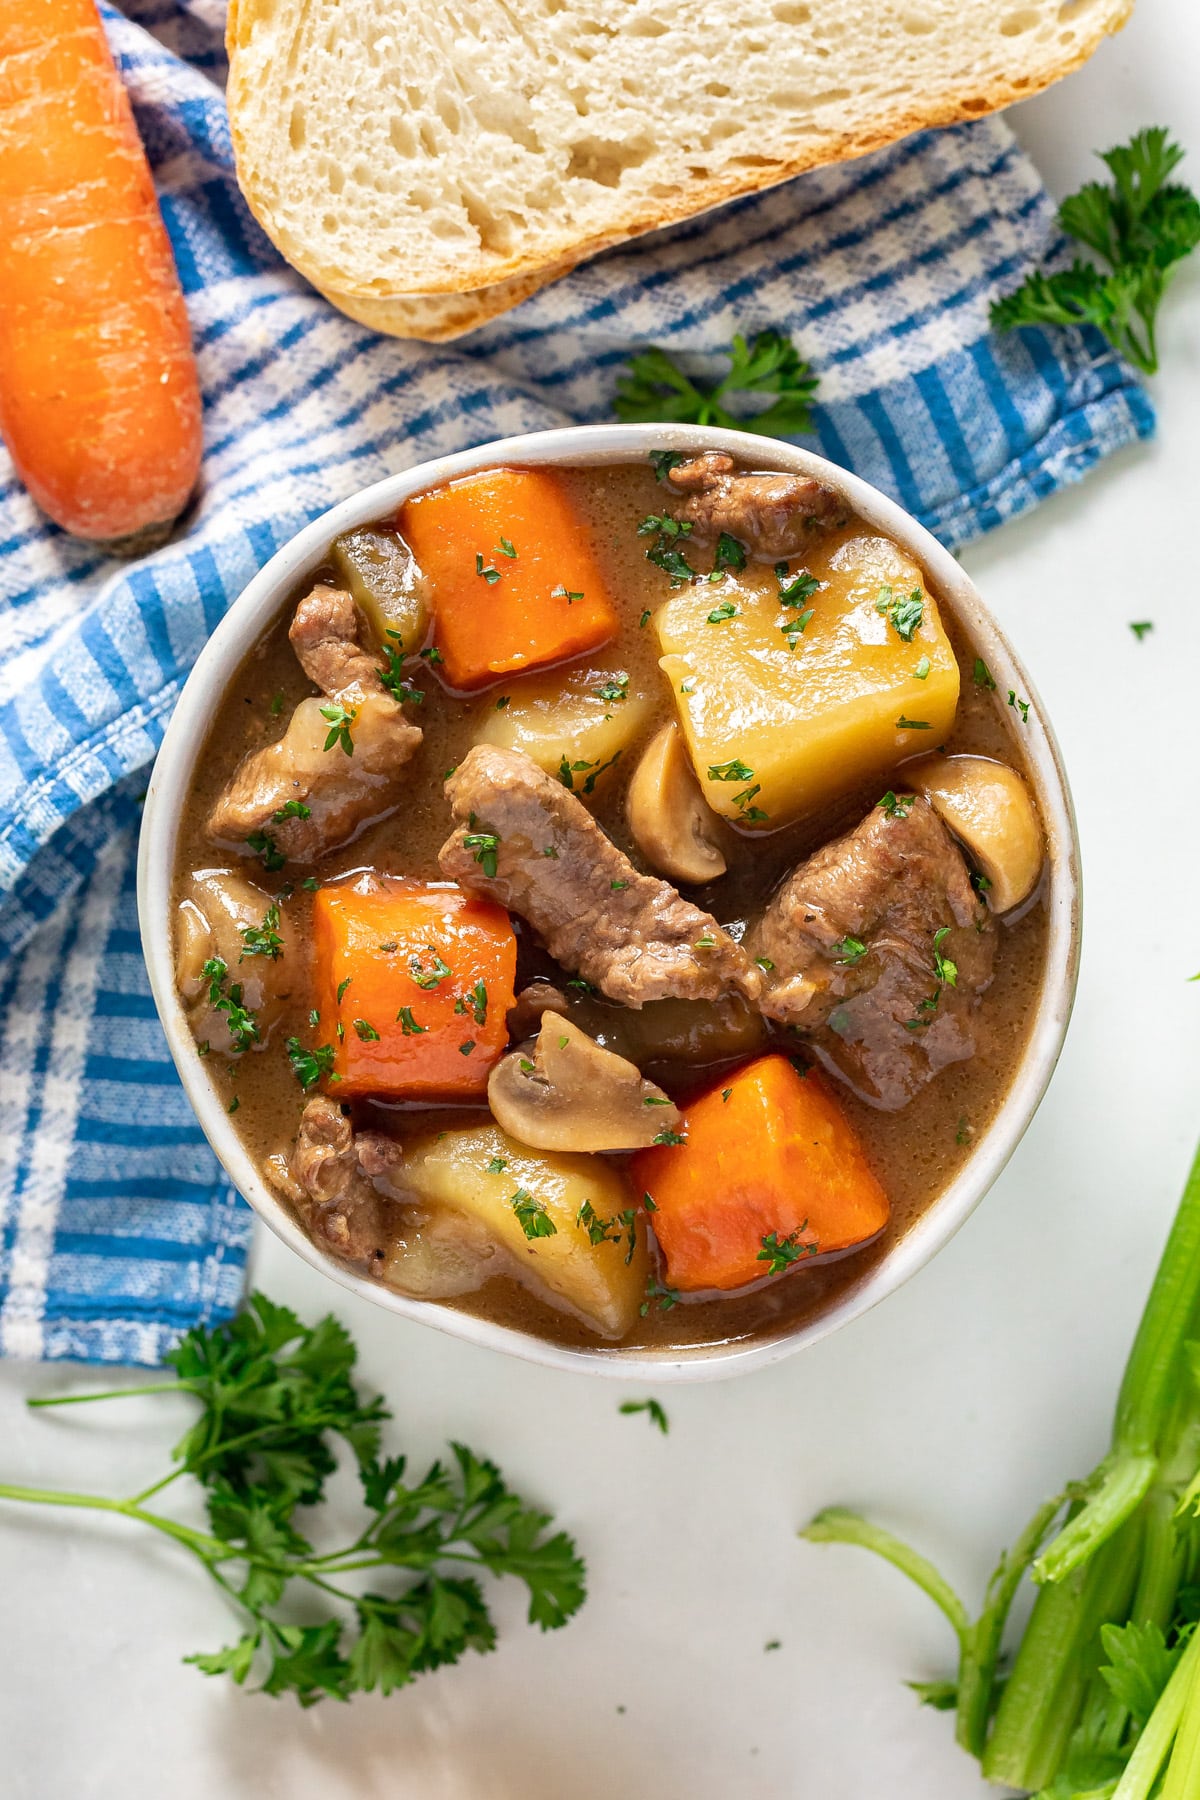
    A bowl of hearty lamb stew.

    This easy lamb stew recipe is the perfect cozy dinner, with tender lamb, hearty vegetables, and a rich Guinness gravy. It comes together with under 30 minutes of prep, and then the oven does the rest.

    A bowl of hearty lamb stew.
    [feast_advanced_jump_to]

    Why You’ll Love This Lamb Stew Recipe

    I love lamb, and I definitely don’t cook with it enough. When I spotted a package of stew meat at the store, I knew exactly what I wanted to make! While this dish feels perfect for St. Patrick’s Day, it’s really ideal anytime you’re craving something warm and cozy.  

    With less than 30 minutes of hands-on time, the oven does most of the work. As it cooks low and slow, the lamb turns melt-in-your-mouth tender, and the vegetables soak up all that rich flavor. Here’s why this Irish lamb stew works so well:

    • Quick prep time
    • Deep, rich flavor
    • Tender chunks of lamb
    • Easy to double
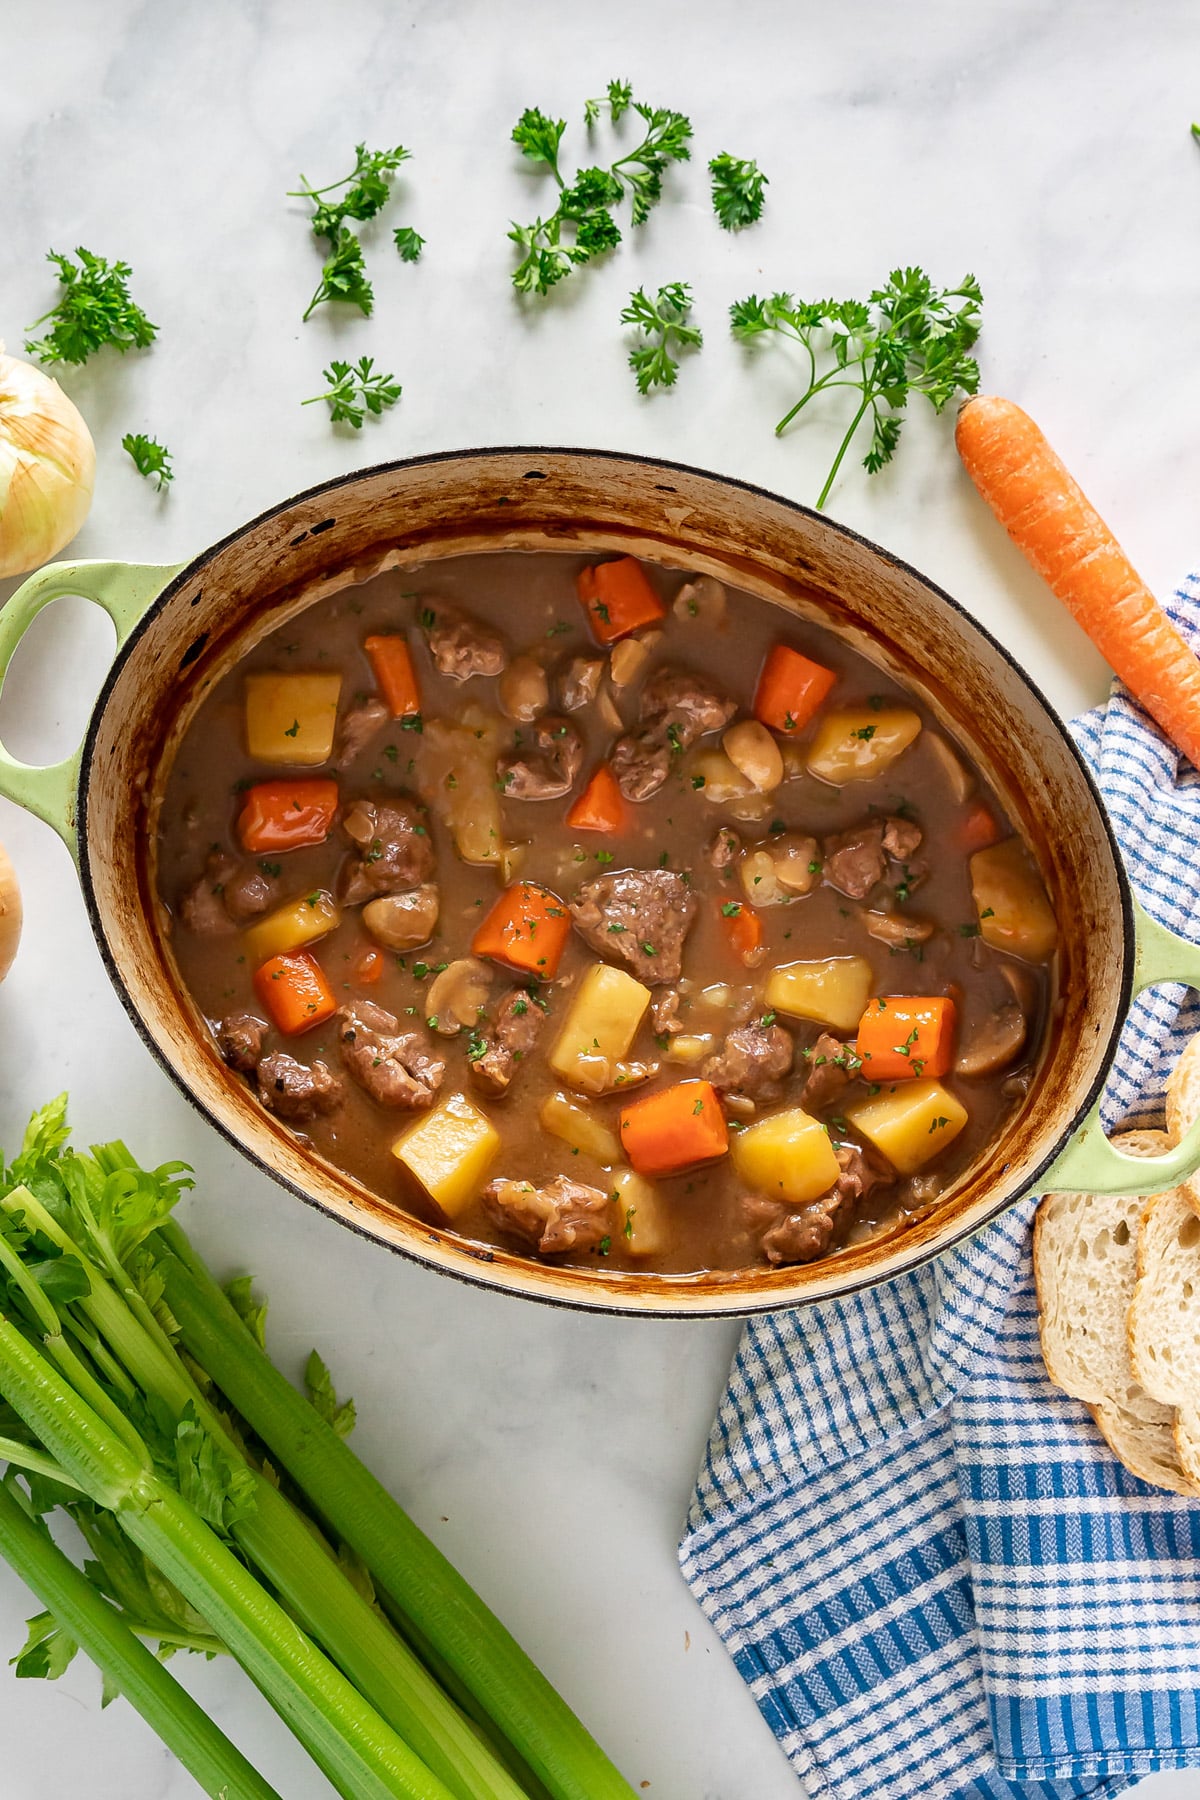
    An overhead image of a pot of lamb stew with veggies and a blue towel around it.

    Ingredient Information And Substitutions

    • Lamb stew meat- Becomes tender and flavorful when cooked low and slow. Lamb shoulder also works great, just cut it into 1.5-2 inch chunks.
    • Flour – Helps thicken the gravy and give it that rich, velvety texture.
    • Onion- Adds sweetness and depth. Yellow or white onions both work.
    • Celery- Brings subtle savory flavor.
    • Carrots- Add natural sweetness and texture. Parsnips are a great substitute.
    • Potatoes- Yukon gold or red potatoes both work well. Leave skins on if preferred.
    • Mushrooms- These add earthiness. Baby bella or white mushrooms are great options.
    • Garlic- Fresh is best, but jarred minced garlic works in a pinch.
    • Beef broth- Builds the savory base.
    • Guinness- Adds richness and depth. Use extra beef broth if you prefer no alcohol.
    • Vegetable or canola oil- Helps achieve a good sear. You can substitute avocado oil.
    • Black pepper- Freshly ground if possible.
    • Fresh herb- Thyme and rosemary bring savory depth and a light, earthy flavor. Dried works too, but reduce the amount.
    • Bay leaf- Adds subtle flavor to the broth. Omit if needed.
    • Kosher salt- Enhances flavor. Sea salt works too.

    How To Make This Lamb Stew Meat Recipe

    Step 1- Season and sear the lamb.

    Warm the oil in a large heavy-bottomed pot over medium-high heat. Preheat the oven to 325 degrees F.

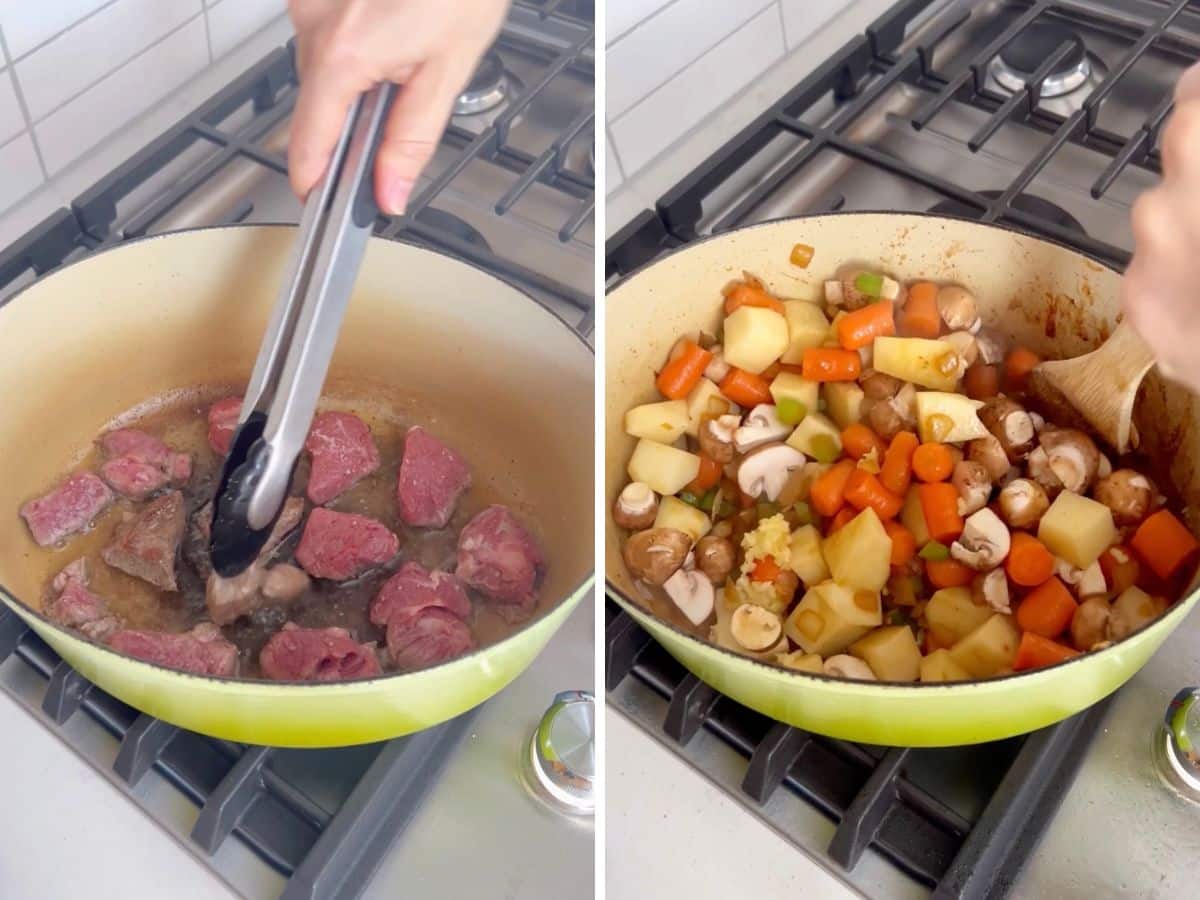
    Pat the lamb dry and season with salt and pepper. Working in batches, brown the meat on all sides, then remove it from the pan.

    Lamb stew meat being seared and then veggies added to the pot.

    Step 2- Cook the vegetables.

    Reduce the heat slightly and add the onion, celery, carrots, and potatoes. Sauté, stirring often, for 3 minutes. Add the mushrooms and garlic and cook for 2 more minutes.

    Step 3- Deglaze the pan.

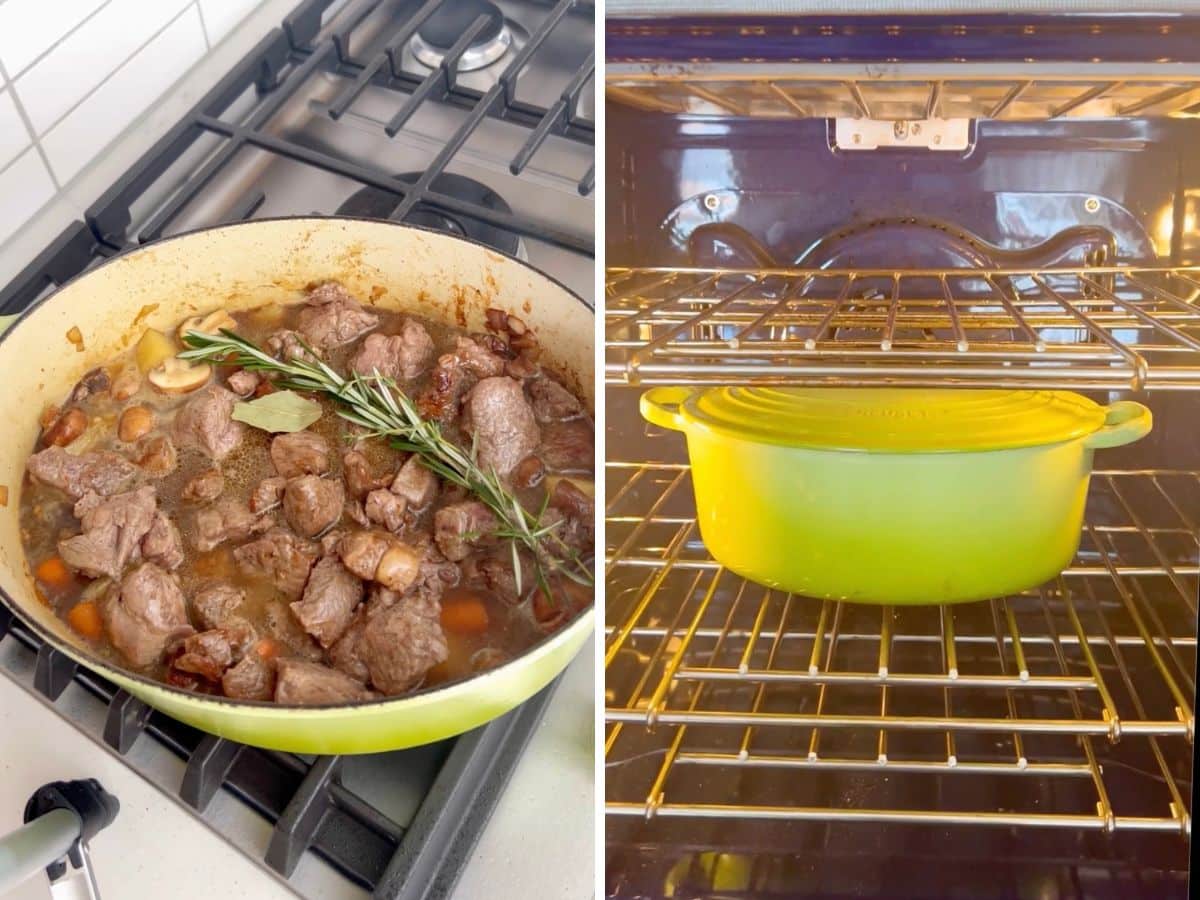
    Pour in the Guinness and use a wooden spoon to scrape up the browned bits from the bottom. Let it cook for 2-3 minutes.

    All stew ingredients in the pan simmering and then the pan in the oven baking.

    Step 4- Add the broth mixture and herbs.

    In a bowl, whisk the broth and flour until smooth. Stir it into the pot along with the lamb, thyme, rosemary, and bay leaf. Cover.

    Step 5- Bake until tender.

    Transfer to the oven and bake for 1½ hours. Taste and adjust salt and pepper if needed before serving. 

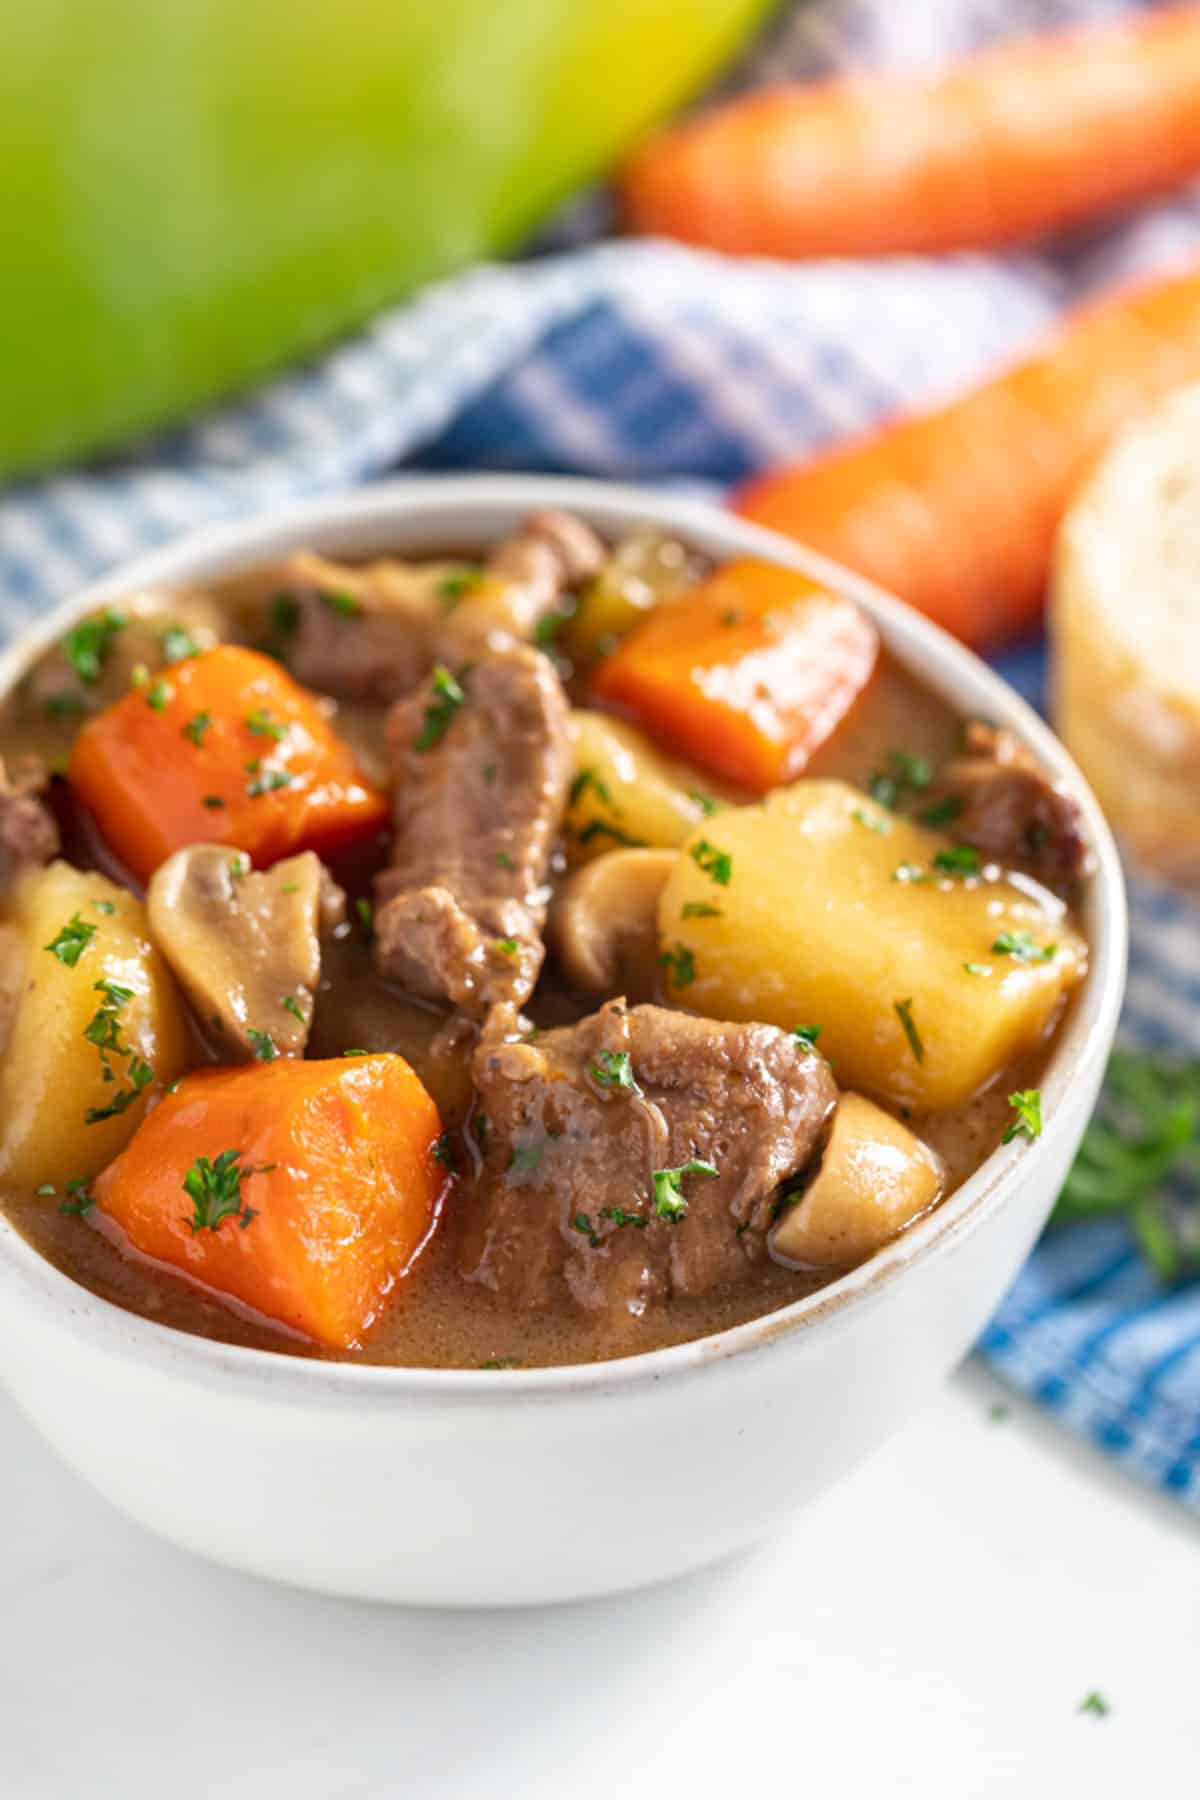
    A close up image of a bowl of lamb stew.

    Frequently Asked Questions

    How do you cook lamb stew meat?

    Cook it low and slow. Sear first for flavor, then bake or simmer gently until fork-tender.

    Can I make this in a slow cooker?

    To turn this into a slow cooker lamb stew, sear the meat first, then cook everything on low for about 8 hours until tender.

    Can I make this in an Instant Pot?

    This recipe works well as an Instant Pot lamb stew too. Sauté the meat first, working in batches, then add everything else and pressure cook until tender, about 30 minutes with a 15 minute natural release.

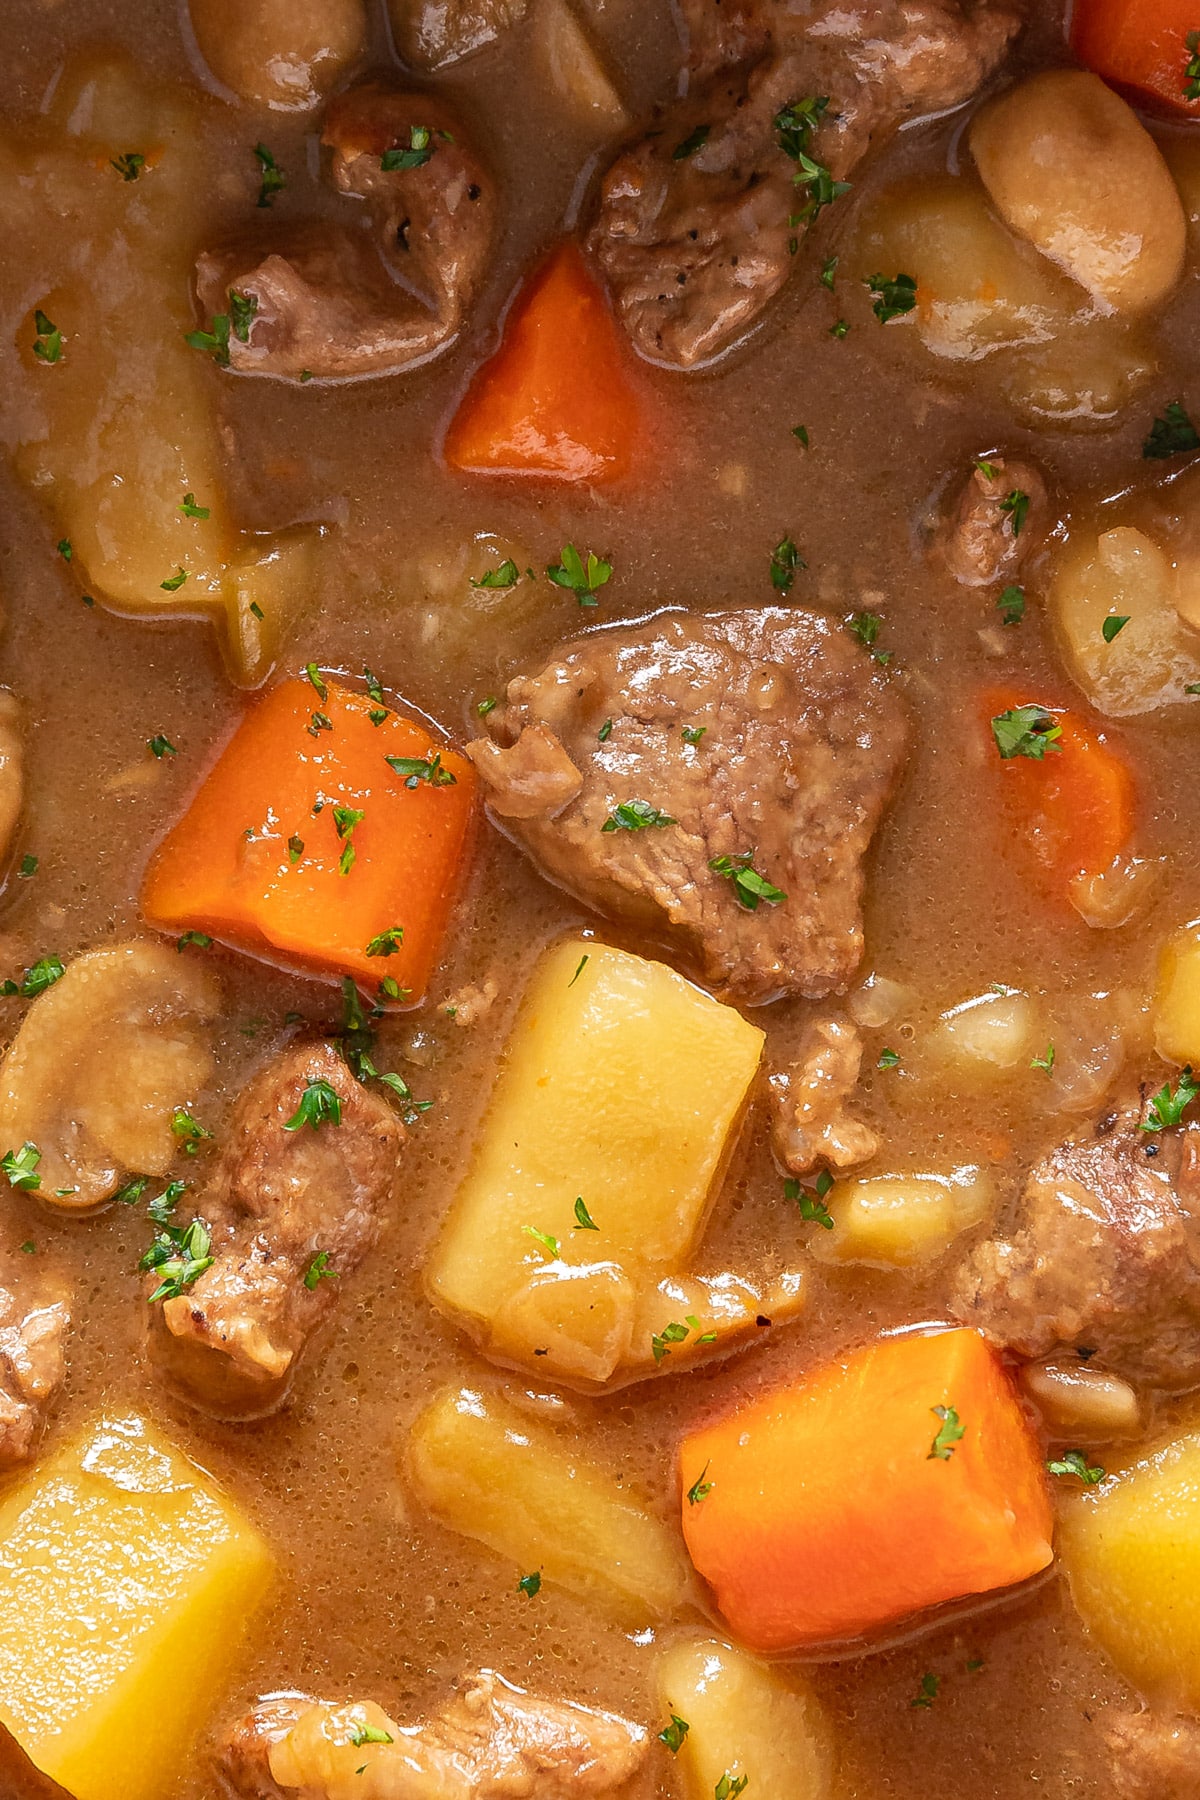
    A close up overhead image of lamb stew meat, potatoes, veggies and gravy in the pot

    Tips For Making This Old Fashioned Lamb Stew

    • I like to pat the lamb dry before seasoning it, so that I can get a really nice sear on the outside.
    • Sear the meat in batches and don’t overcrowd the pot. If you add too much at once, it will steam instead of brown.
    • Use a heavy Dutch oven if you have one. It cooks evenly from the stovetop to the oven and helps this recipe for lamb stew turn out perfectly tender.
    • When you deglaze with the Guinness, make sure to scrape up all those brown bits on the bottom. That’s where a lot of the flavor lives.
    • Ingredients to prep ahead- You can cube the lamb and chop all the vegetables.
    • Leftovers and storage- Store in an airtight container in the refrigerator for up to 4 days. Freeze for up to 3 months and thaw before reheating.
    An overhead image of a bowl of lamb stew.

    What To Serve With This Stew With Lamb

    This hearty dish is practically a meal on its own, but if you’d like to turn it into a full dinner with simple sides and something sweet to finish, my favorite ways to serve this recipe of lamb stew include:

    • Strawberry Salad With Goat Cheese
    • Roasted Fall Vegetables
    • Cabbage and Beans
    • Chocolate Orange Cake Recipe

    Other Stew Recipes To Try

    • An overhead image of chicken and rice stew in a blue bowl with a napkin and veggies around it.
      Italian Chicken and Rice Stew
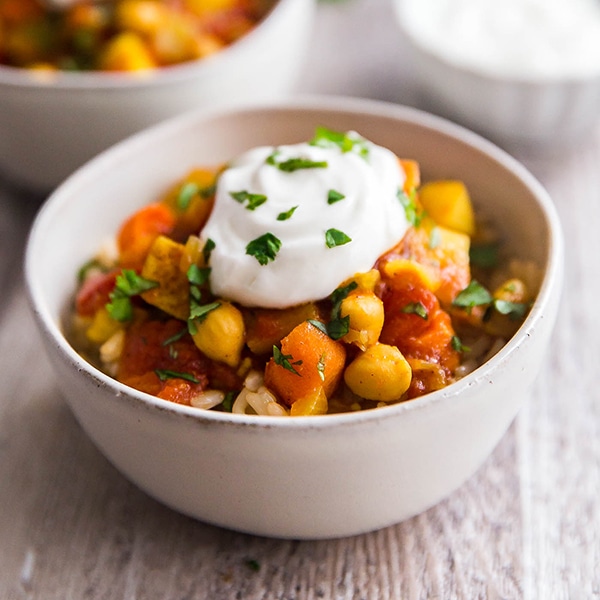
    • A square image of Moroccan Chickpea Vegetarian Stew.
      Moroccan Chickpea Stew
    • An overhead image of beef stew in a bowl of polenta with a napkin near it and mushrooms.
      Beef Italian Stew
    • A close up image of the side of a blue bowl of pork stew and mashed potatoes.
      Pork Chop Stew

    Love this recipe? Please leave a 5 star ⭐️⭐️⭐️⭐️⭐️ rating in the recipe card below ⬇️ and/or a review in the comment section further down. Check out my Amazon Store for all my favorite tools, including those used in this recipe. And follow @thelifejolie on Instagram and TikTok!

    A bowl of hearty lamb stew.

    Easy Lamb Stew Recipe

    Jessy Freimann
    This easy lamb stew recipe is the perfect cozy dinner, with tender lamb, hearty vegetables, and a rich Guinness gravy. It comes together with under 30 minutes of prep, and then the oven does the rest.
    No ratings yet
    Print Recipe Pin Recipe
    Prep Time 10 minutes mins
    Cook Time 2 hours hrs
    Total Time 2 hours hrs 10 minutes mins
    Course dinner, Main, Main Course, Main dish
    Cuisine Irish
    Servings 6 servings
    Calories 331 kcal

    Equipment

    • measuring spoons
    • measuring cups
    • chefs knife
    • cutting board
    • Whisk
    • Cast iron dutch oven 

    Ingredients
      

    • 2 pounds lamb stew meat 1.5 - 2 inch chunks
    • 1 teaspoon kosher salt
    • ¼ teaspoon black pepper
    • 2 Tablespoons vegetable oil
    • 1 cup diced onion (1 medium onion)
    • ⅓ cup diced celery (1 celery rib)
    • 1 ½ cups carrots peeled and cut to 1 inch chunks (around 3 medium carrots)
    • 1 ½ cups potato peeled and cut to 1 inch chunks (around 3-4 medium potatoes)
    • 1 ½ cups mushrooms halved or quartered
    • 3 cloves garlic, minced or pressed
    • 1 cup Guinness (can sub beef broth)
    • 1 14 ounce can beef broth
    • 3 Tablespoons flour
    • 1 sprig fresh thyme (or ¼ teaspoon dried thyme)
    • 1 sprig fresh rosemary (or ¼ teaspoon dried rosemary)
    • 1 bay leaf

    Instructions
     

    • Heat oil in a large heavy bottom pan over medium high heat. Preheat the oven to 325 degrees F.
    • While the oil heats, pat lamb stew meat dry and season with salt and pepper.
    • Working in batches, sear stew meat until all sides are browned and then remove from pan.
    • Reduce heat slightly and add onion, celery, carrots and potatoes to the pan. Saute stirring often for 3 minutes.
    • Add mushrooms and garlic and saute stirring often for 2 more minutes.
    • Deglaze the pan with Guinness and use a wooden spoon to scrape up all the brown bits on the bottom of the pan. Cook 2-3 more minutes.
    • In a medium bowl whisk broth into the flour until no lumps remain.
    • Add broth mixture to the pan along with lamb meat, thyme, rosemary and bay leaf. Stir and cover.
    • Bake covered for 1 ½ hours. Taste for flavor and add salt and pepper to taste if needed.
    • Serve immediately with crusty bread.

    Notes

    • I like to pat the lamb dry before seasoning it, so that I can get a really nice sear on the outside.
    • Sear the meat in batches and don’t overcrowd the pot. If you add too much at once, it will steam instead of brown.
    • Use a heavy Dutch oven if you have one. It cooks evenly from the stovetop to the oven and helps this recipe for lamb stew turn out perfectly tender.
    • When you deglaze with the Guinness, make sure to scrape up all those brown bits on the bottom. That’s where a lot of the flavor lives.
    • Ingredients to prep ahead- You can cube the lamb and chop all the vegetables.
    • Leftovers and storage- Store in an airtight container in the refrigerator for up to 4 days. Freeze for up to 3 months and thaw before reheating.

    Nutrition

    Serving: 1servingCalories: 331kcalCarbohydrates: 18gProtein: 33gFat: 13gSaturated Fat: 4gPolyunsaturated Fat: 3gMonounsaturated Fat: 4gTrans Fat: 0.03gCholesterol: 98mgSodium: 513mgPotassium: 842mgFiber: 2gSugar: 2gVitamin A: 5357IUVitamin C: 13mgCalcium: 36mgIron: 4mg
    Tried this recipe?Let us know how it was!

    Chewy Granola Bars

    Feb 23, 2026 · Leave a Comment

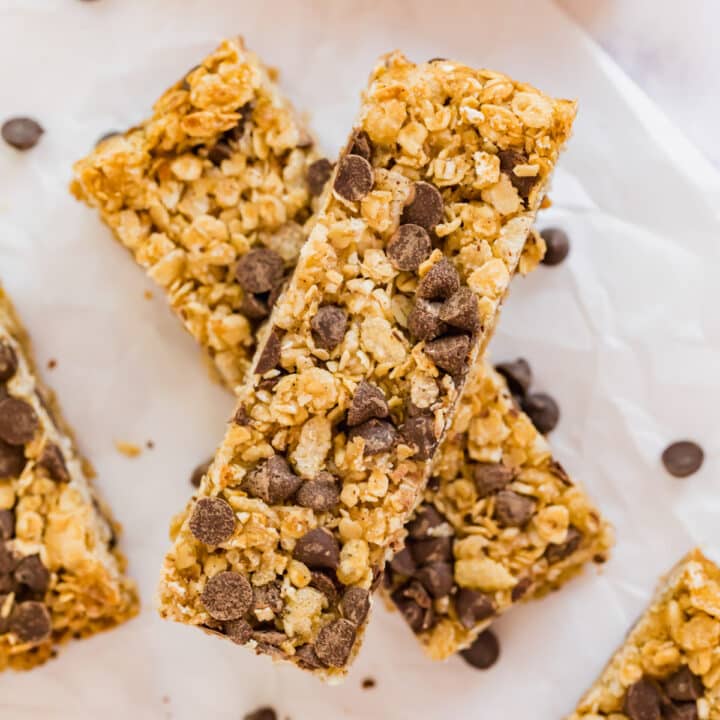
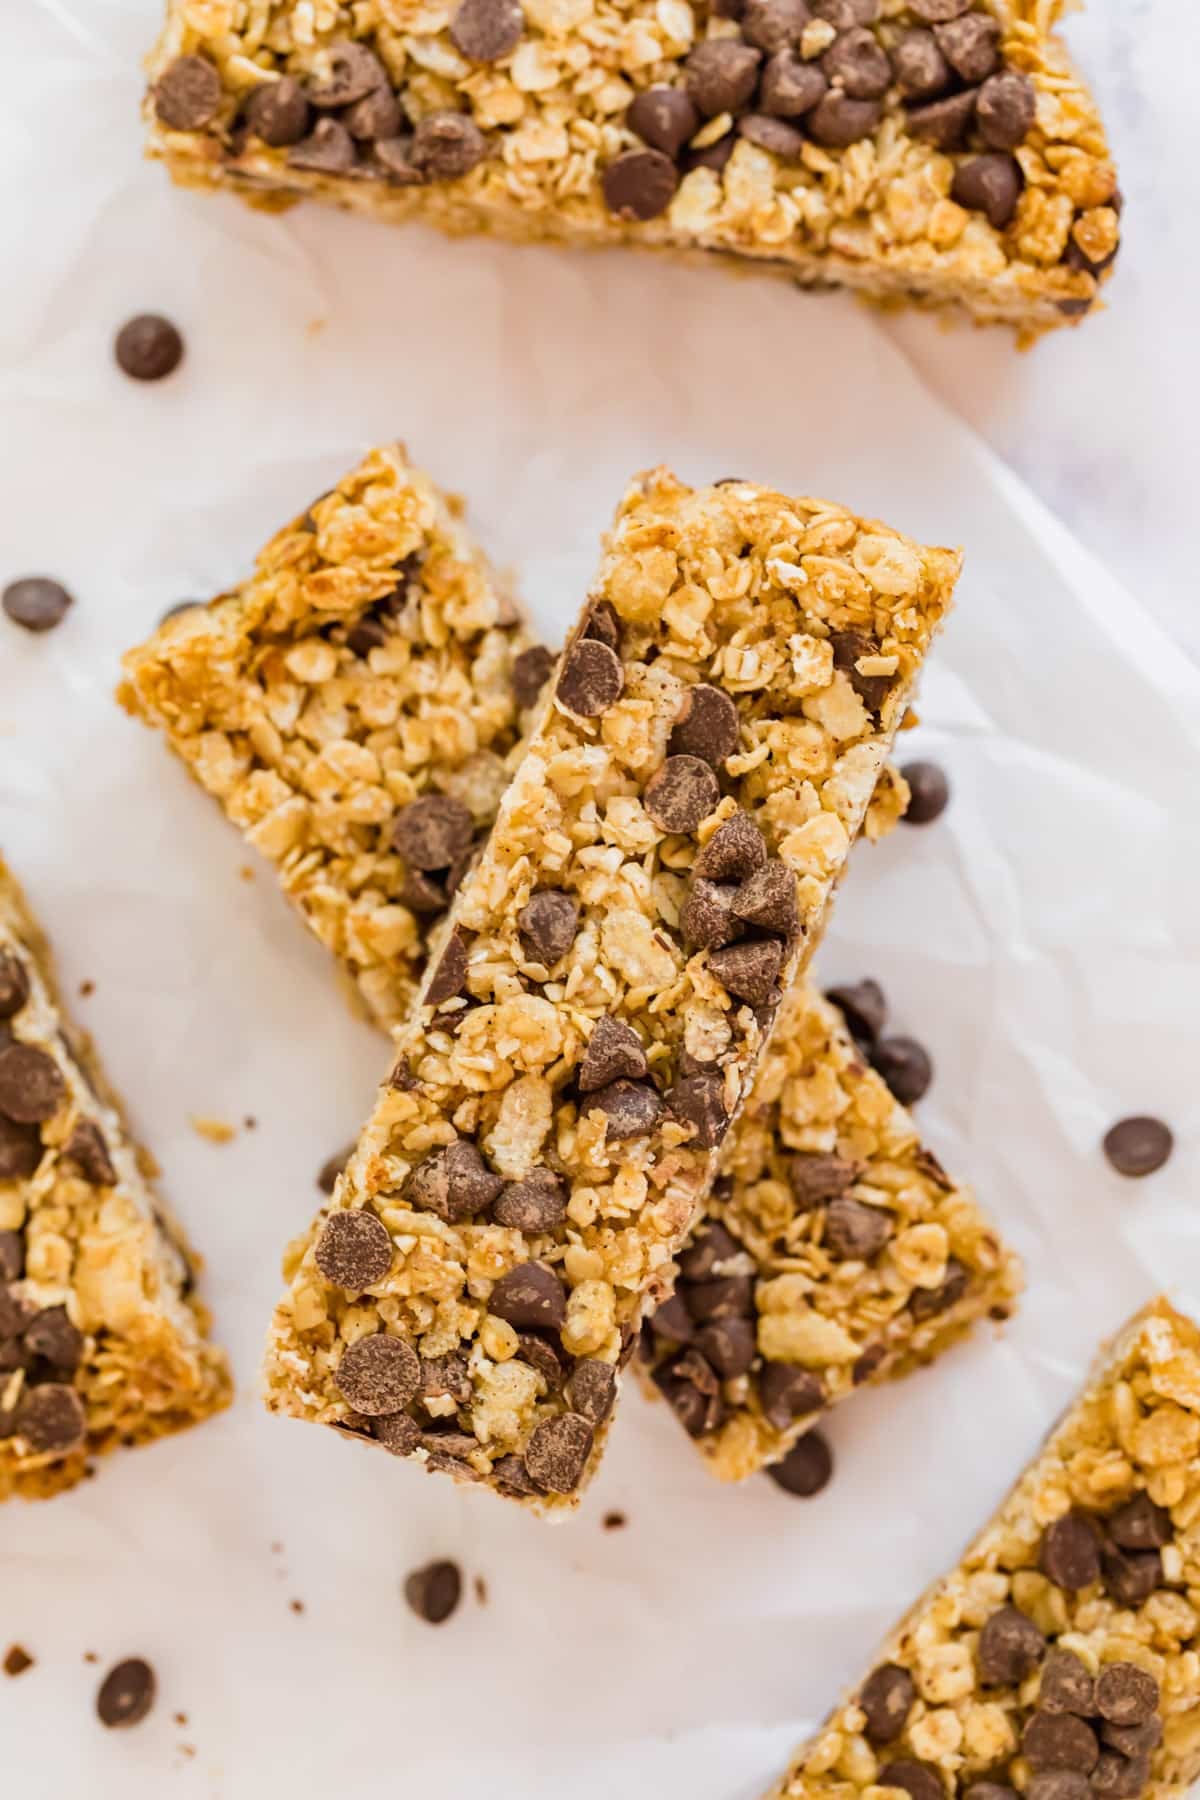
    An overhead image of some chewy granola bars stacked on each other.

    Who needs store-bought snacks when you can make chewy granola bars at home? Made with simple pantry staples and ready in about 20 minutes, they’re perfect for busy mornings, lunchboxes, or an easy after-school treat.

    An overhead image of some chewy granola bars stacked on each other.
    [feast_advanced_jump_to]

    Why You’ll Love These Sweet And Salty Granola Bars

    I’m not sure I’ve ever met anyone who didn't love a granola bar. Growing up, they always felt like such a treat. Before making these, I had never tried making granola bars from scratch, but once I did, I couldn’t believe how simple they were. I stuck with basic pantry staples we almost always have on hand, and they came together so easily.

    And honestly, that’s what makes them so good. When you make granola bars yourself, you know exactly what’s going on, and the texture turns out just right… soft in the center, lightly crisp around the edges, and sweet without being over-the-top. They have that homemade feel that’s hard to beat. Why you’ll love these junkless granola bars:

    • Simple pantry ingredients
    • Soft and chewy texture
    • Kid-approved and adult-loved
    • Easy to customize with mix-ins
    • Perfect for meal prep
    A pile of homemade granola bars.

    Ingredient Information And Substitutions

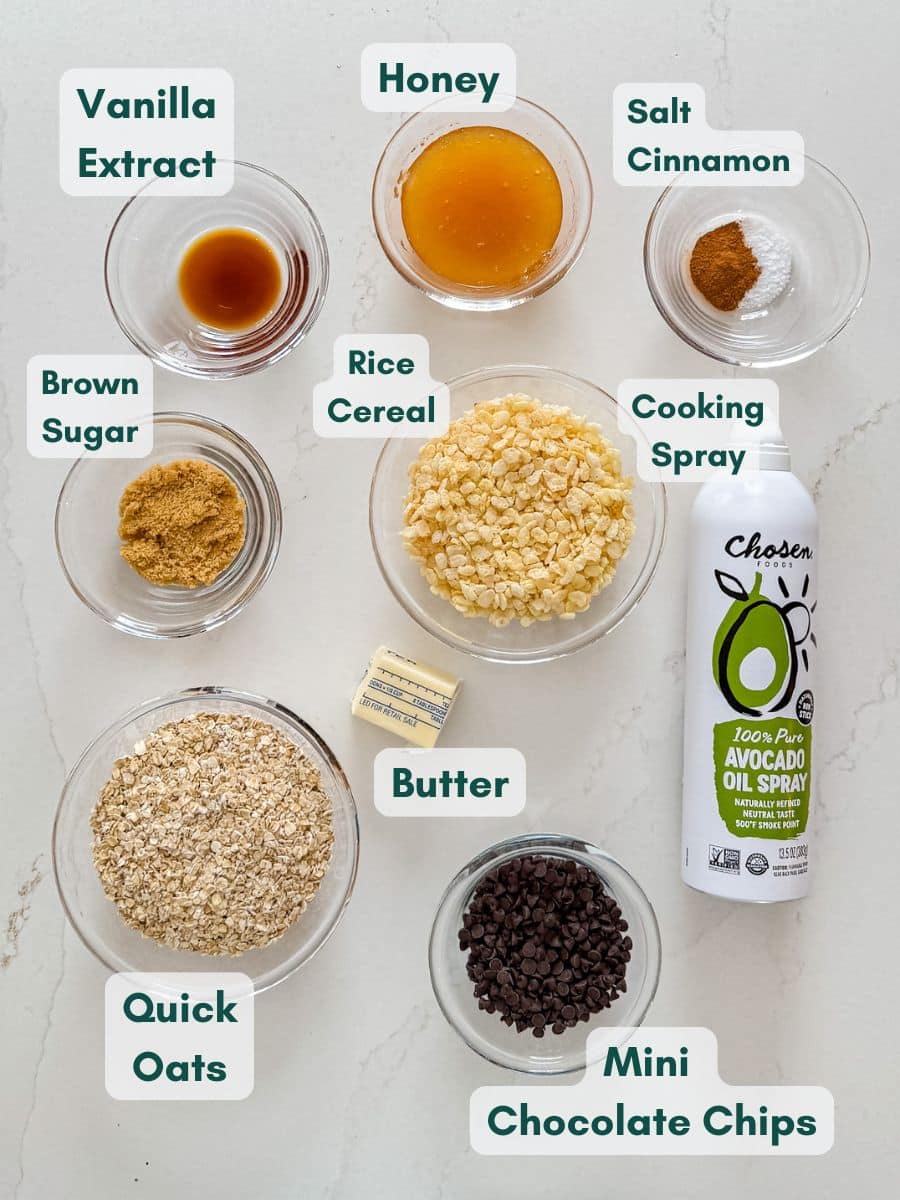
    • Quick oats- The base of the bars. Rolled oats can work, but the texture will be slightly heartier.
    • Rice Krispies cereal- Adds lightness and a subtle crunch. You can swap with another crisp rice cereal.
    • Ground cinnamon- Adds warmth. Feel free to omit or replace with pumpkin pie spice.
    • Kosher salt- Balances the sweetness. Regular salt works, but use a little less.
    • Butter- Helps bind everything together. Coconut oil can be substituted.
    • Honey- Naturally sweetens and acts as a binder. Maple syrup can be used, but the texture of the bars may be slightly softer.
    • Brown sugar- Adds moisture and depth. Light or dark both work.
    • Vanilla extract- Enhances flavor. Pure is preferred.
    • Mini chocolate chips- Semi-sweet mini chips have just the right balance between sweet and bitter, but milk or dark chocolate works too.
    An overhead image of labeled recipe ingredients.

    How To Make Easy Homemade Granola Bars

    Step 1- Mix the ingredients.

    Preheat the oven to 350 degrees F. Lightly coat an 8” x 8” baking pan with cooking spray, then line it with parchment paper, leaving a couple of inches hanging over the sides. Set aside.

    In a large mixing bowl, combine all ingredients thoroughly, setting aside a couple of tablespoons of chocolate chips before mixing so you can sprinkle them on top later. 

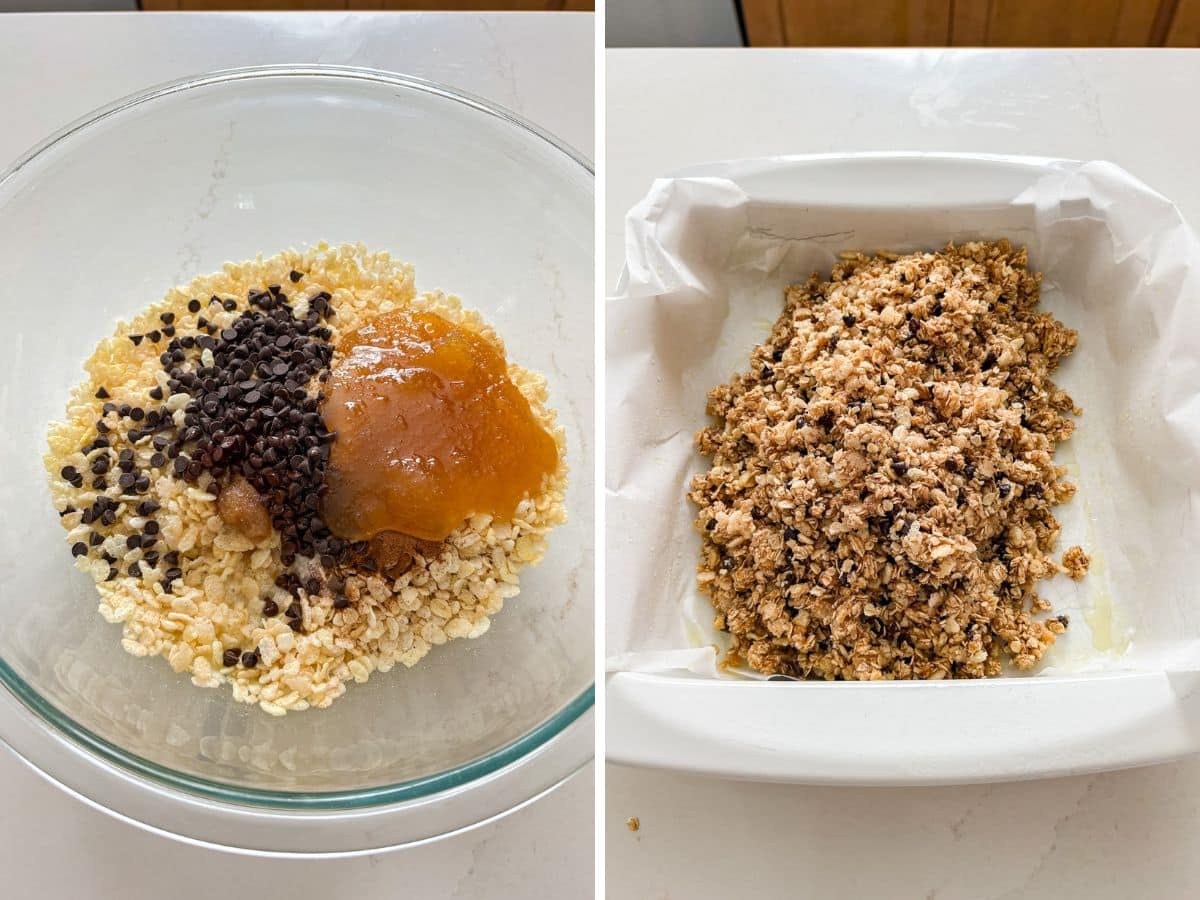
    Granola bar ingredients in a bowl and then placed in the prepared pan.

    Step 2- Press into the pan and bake.

    Transfer the mixture into the prepared pan and press it down into an even layer. Use a flat-bottomed drinking glass to firmly compact the mixture so the bars hold together well.

    Bake for 20 minutes, or until the top turns lightly golden. Allow the bars to cool completely, about an hour.

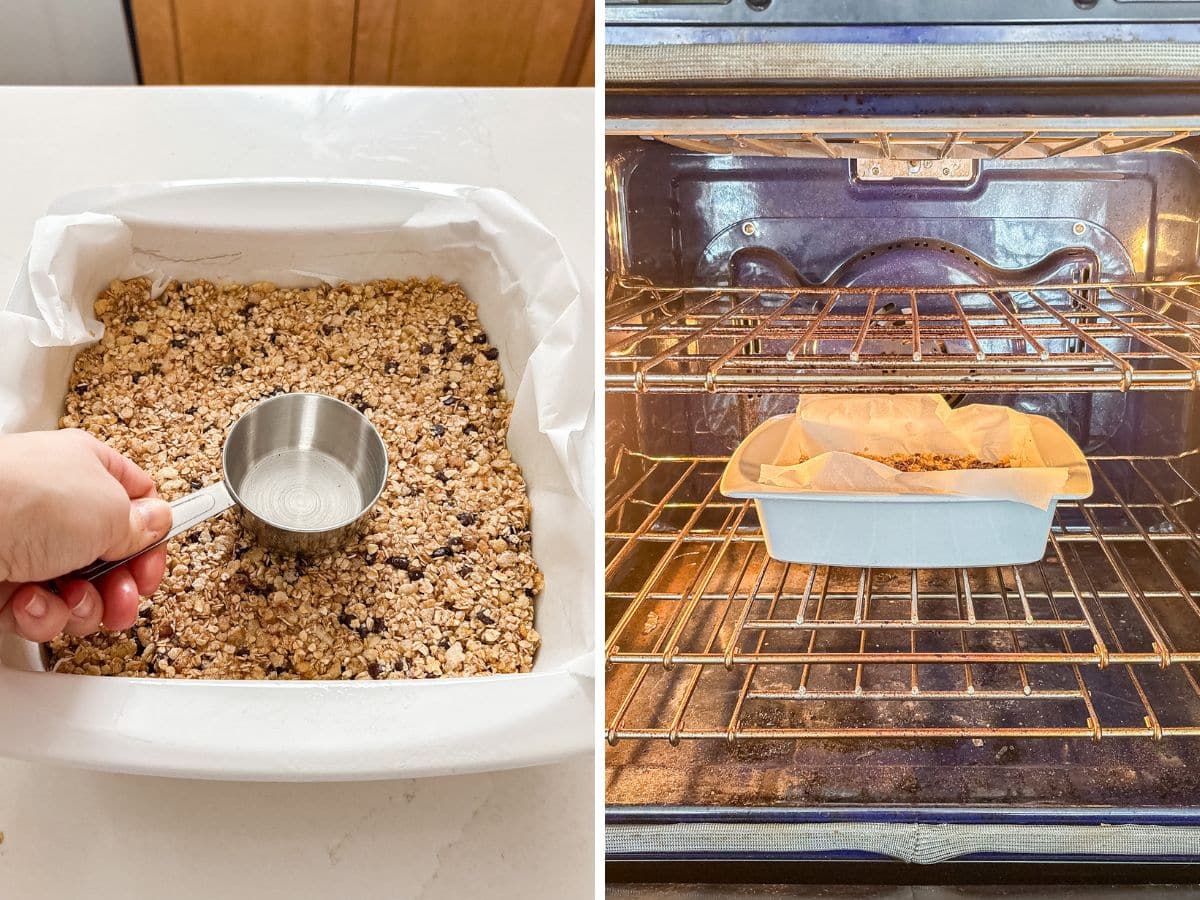
    THe granola bar mix being pressed into a pan with a flat bottomed measuring cup and then going into the oven.

    Step 5- Slice and serve.

    Lift the bars out using the parchment overhang. Cut once across the center, then slice in the opposite direction to create 12 bars, and serve right away.

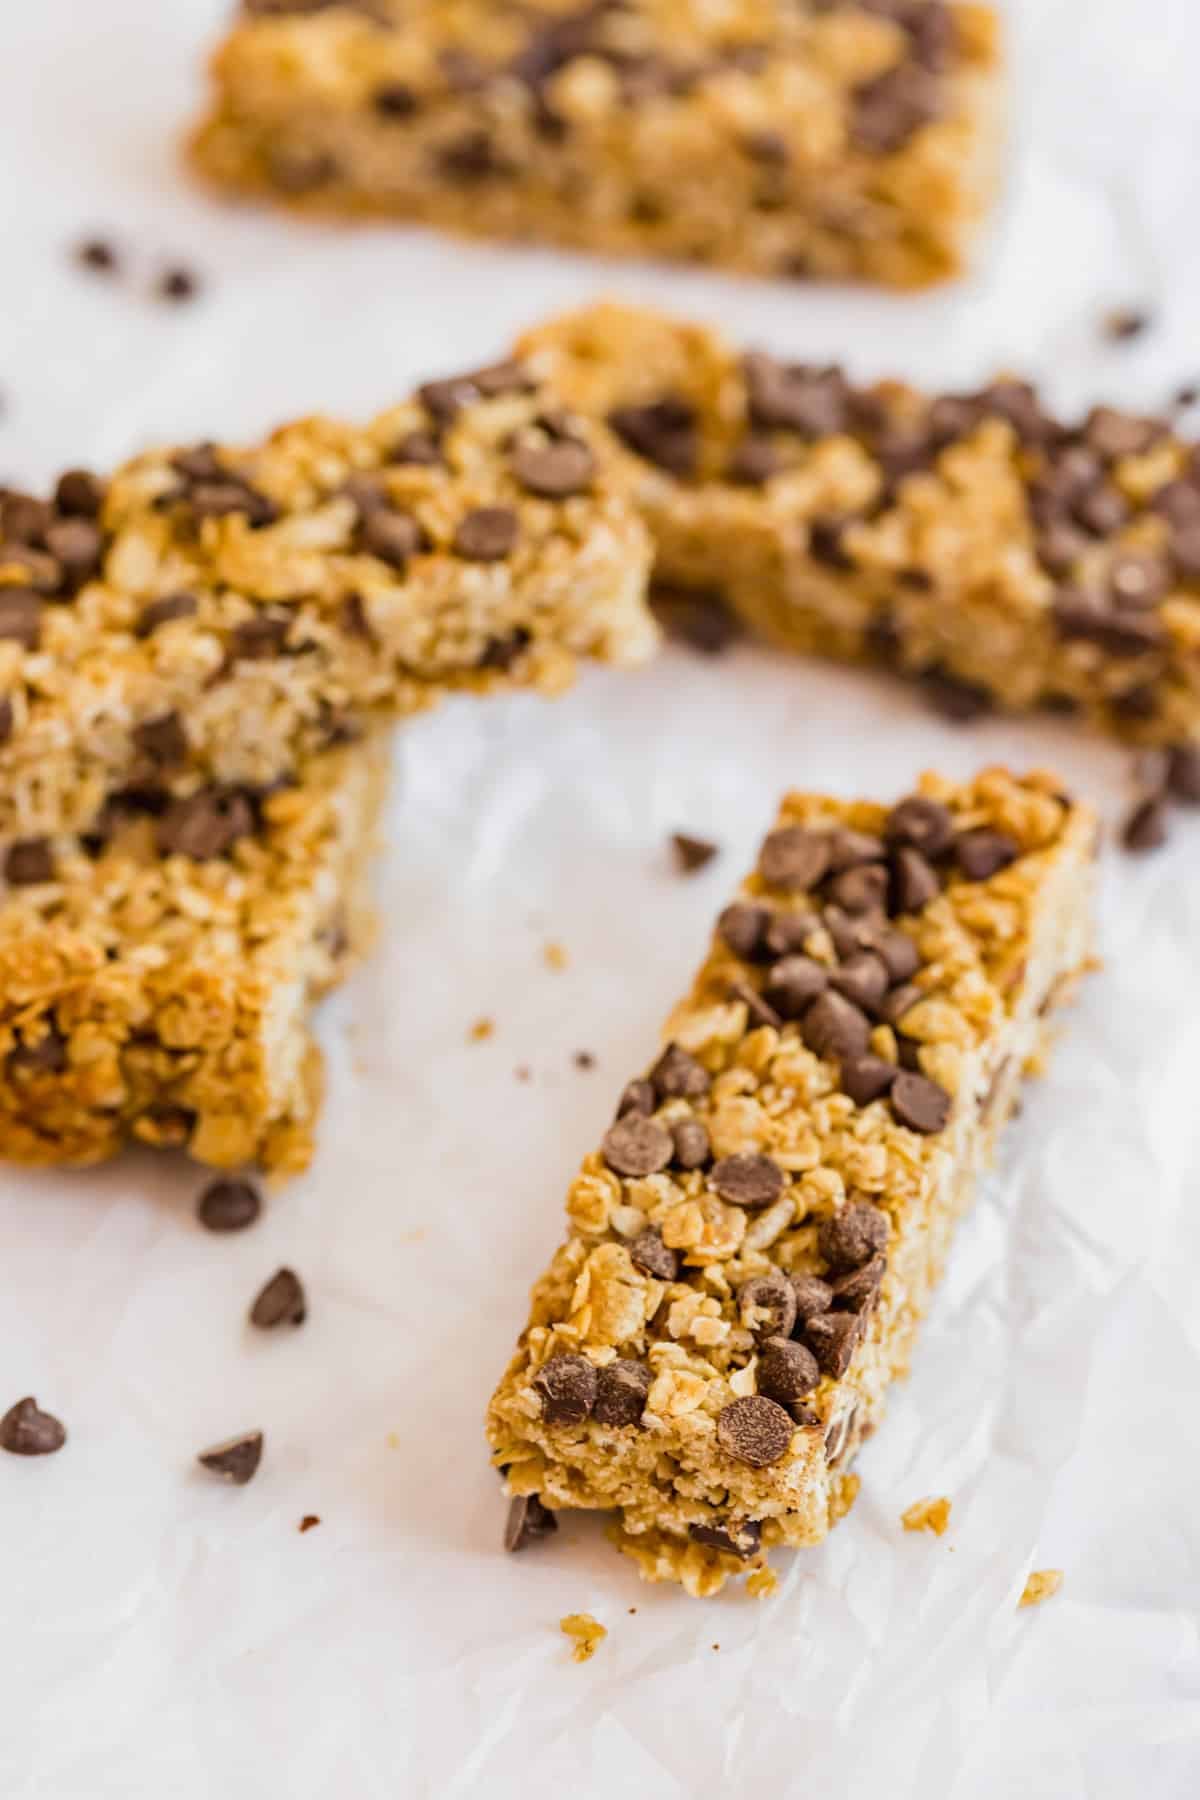
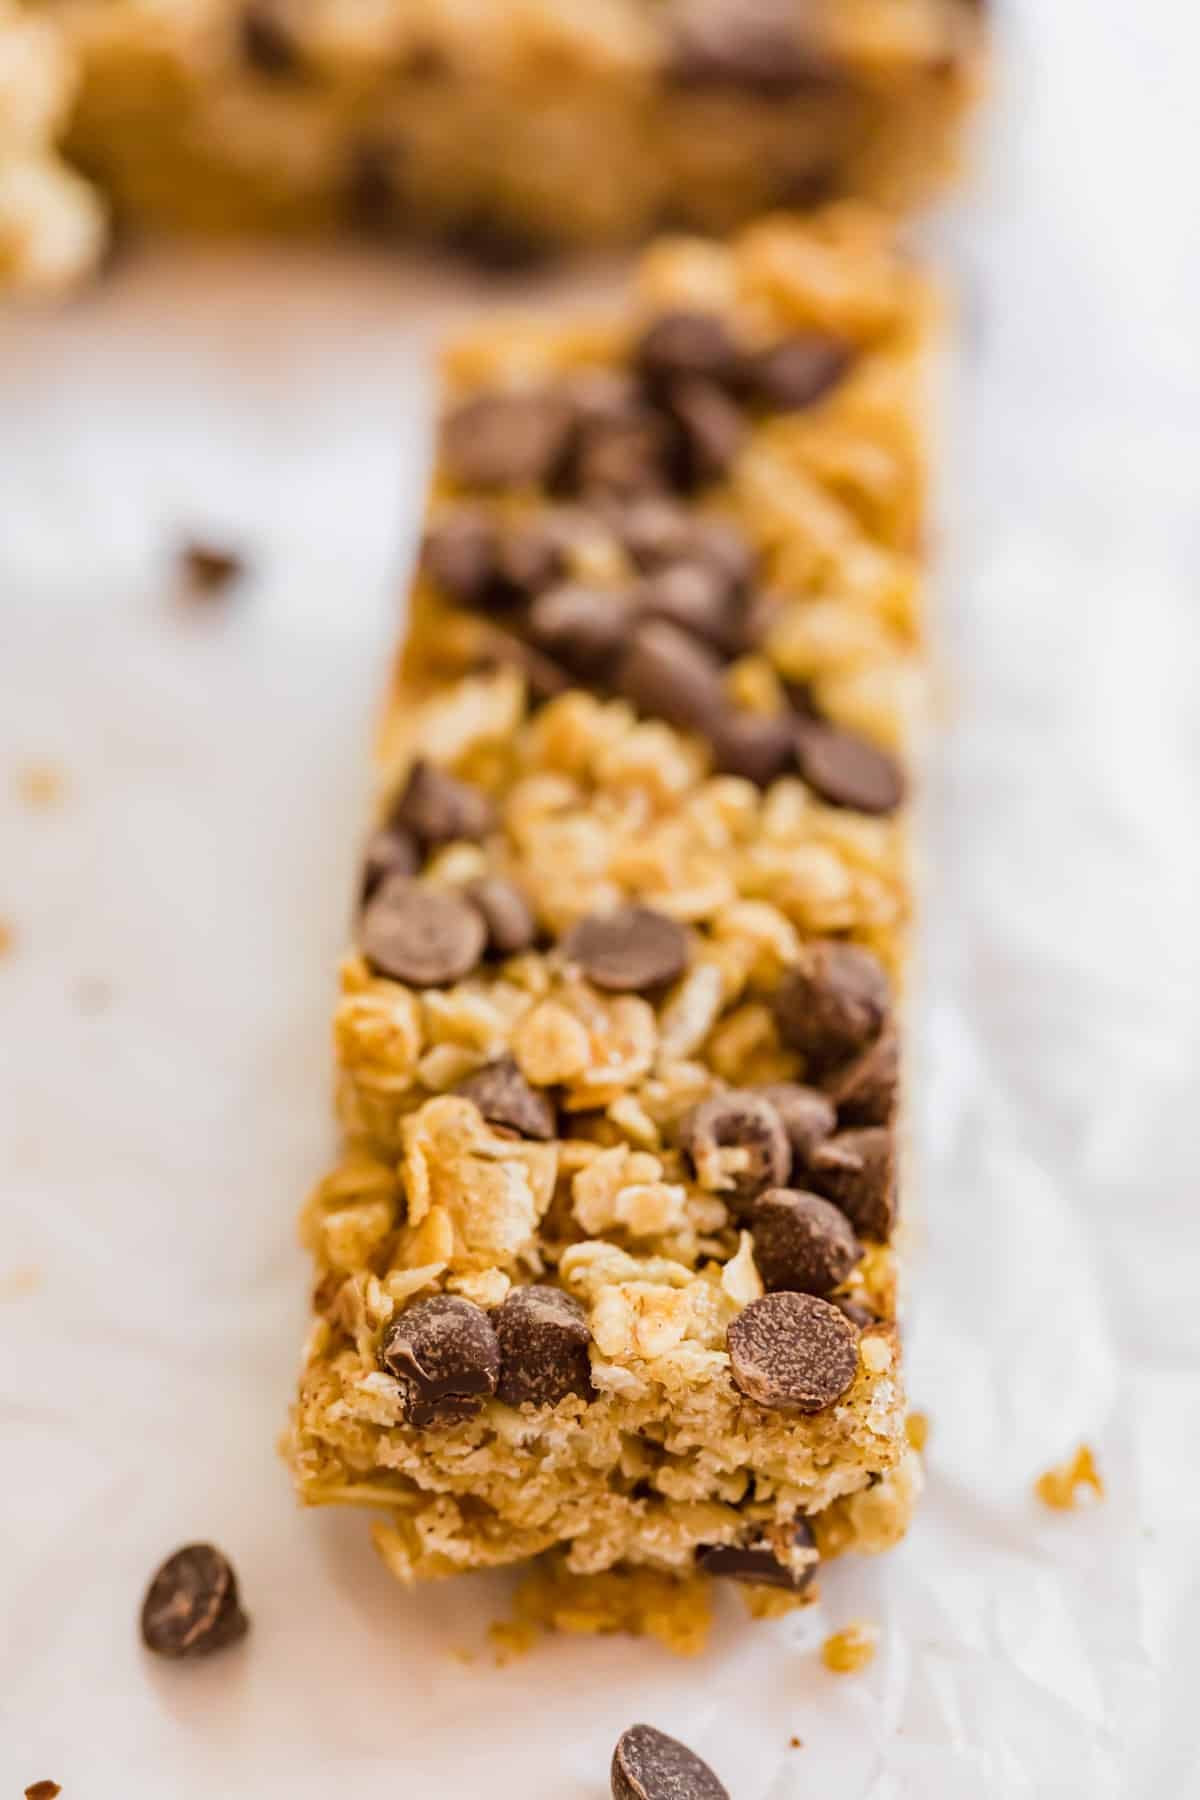
    A close up of a homemade granola bar.

    Frequently Asked Questions

    Can I make these gluten-free?

    Yes. Just use certified gluten-free oats and a gluten-free crisp rice cereal.

    Can I cut them into smaller squares instead of bars?

    Definitely. You can slice them into bite-sized squares for snack trays or little hands.

    Can I double the recipe?

    You can. Just use a 9x13-inch pan and keep an eye on the baking time. They may need a few extra minutes.

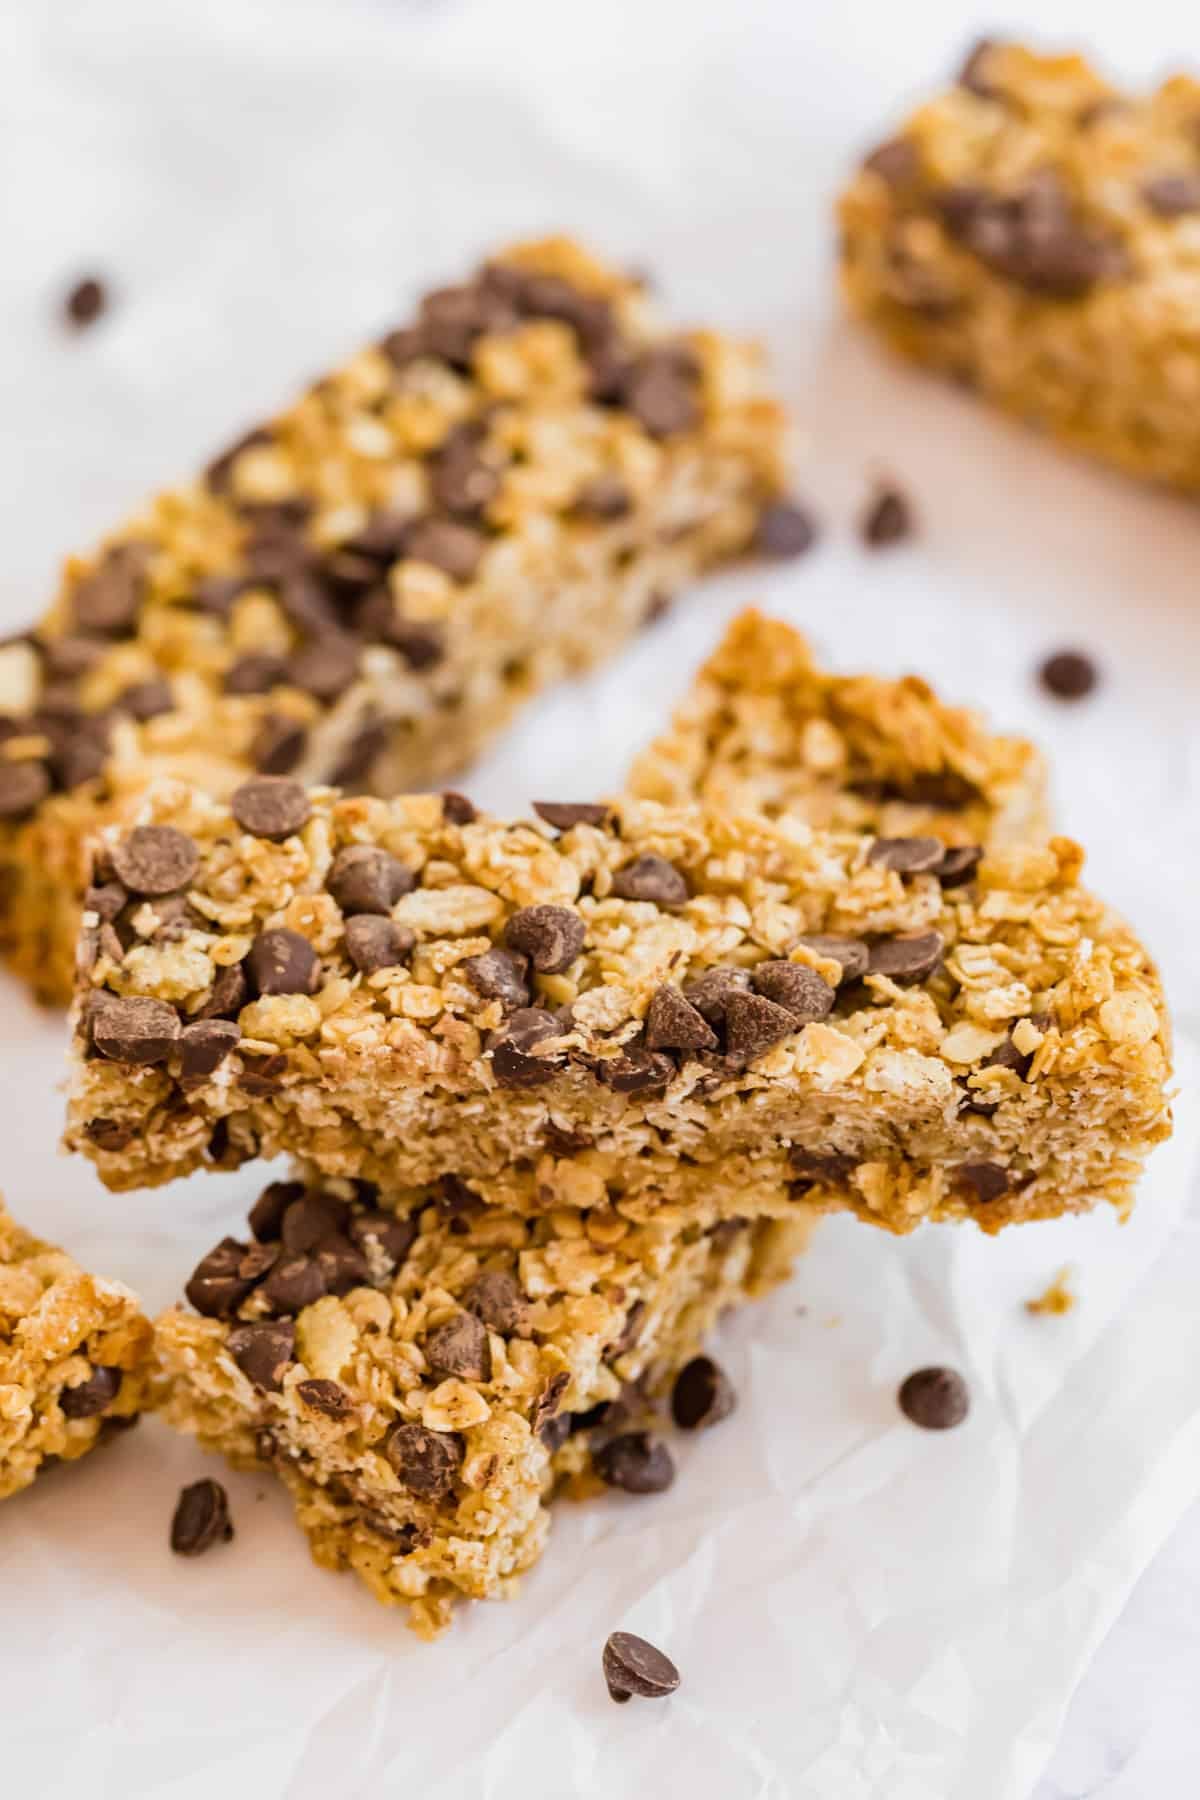
    Granola bars stacked on each other.

    Tips For Making The Best Granola Bars

    • If your honey is thick, gently warm it for 30 seconds in the microwave to help everything mix more evenly and bind better.
    • Sprinkle reserved chips on top, pressing them lightly into the surface before baking. This helps them stick and gives homemade chewy granola bars a bakery-style look.
    • Let the bars set completely before cutting. This helps them stay neat and hold their shape instead of crumbling.
    • If you prefer less sweetness, you can slightly reduce the brown sugar without affecting the texture too much.
    • Swap out the mini chocolate chips for white chocolate chips, dried fruit, chopped nuts, mini marshmallows, or mini M&Ms.
    • Ingredients to prep ahead- Measure out the dry ingredients and melt the butter.
    • Leftovers and storage- Keep in an airtight container at room temperature for up to a week. For longer storage, wrap individually and store up to a month, or freeze for up to 6 months. Thaw overnight before serving.

    What To Serve With These Chocolate Chip Granola Bars

    These pair perfectly with a simple breakfast spread or afternoon snack plate. Add protein and fruit to turn them into a more balanced option. Here are my favorite combos for this easy granola bars recipe:

    • Chorizo and Sweet Potato Breakfast Hash
    • Cinnamon Granola
    • Asparagus Leek Tart
    • Zucchini Pancakes

    Other Tasty Bar Recipes To Try

    • 3 s'mores bars stacked on top of each other with more bars in the background.
      No Bake S'more Bars
    • A close up image of a piece of cookie bar stacked on top of other cookie bars.
      Cherry Chocolate Cookie Bars
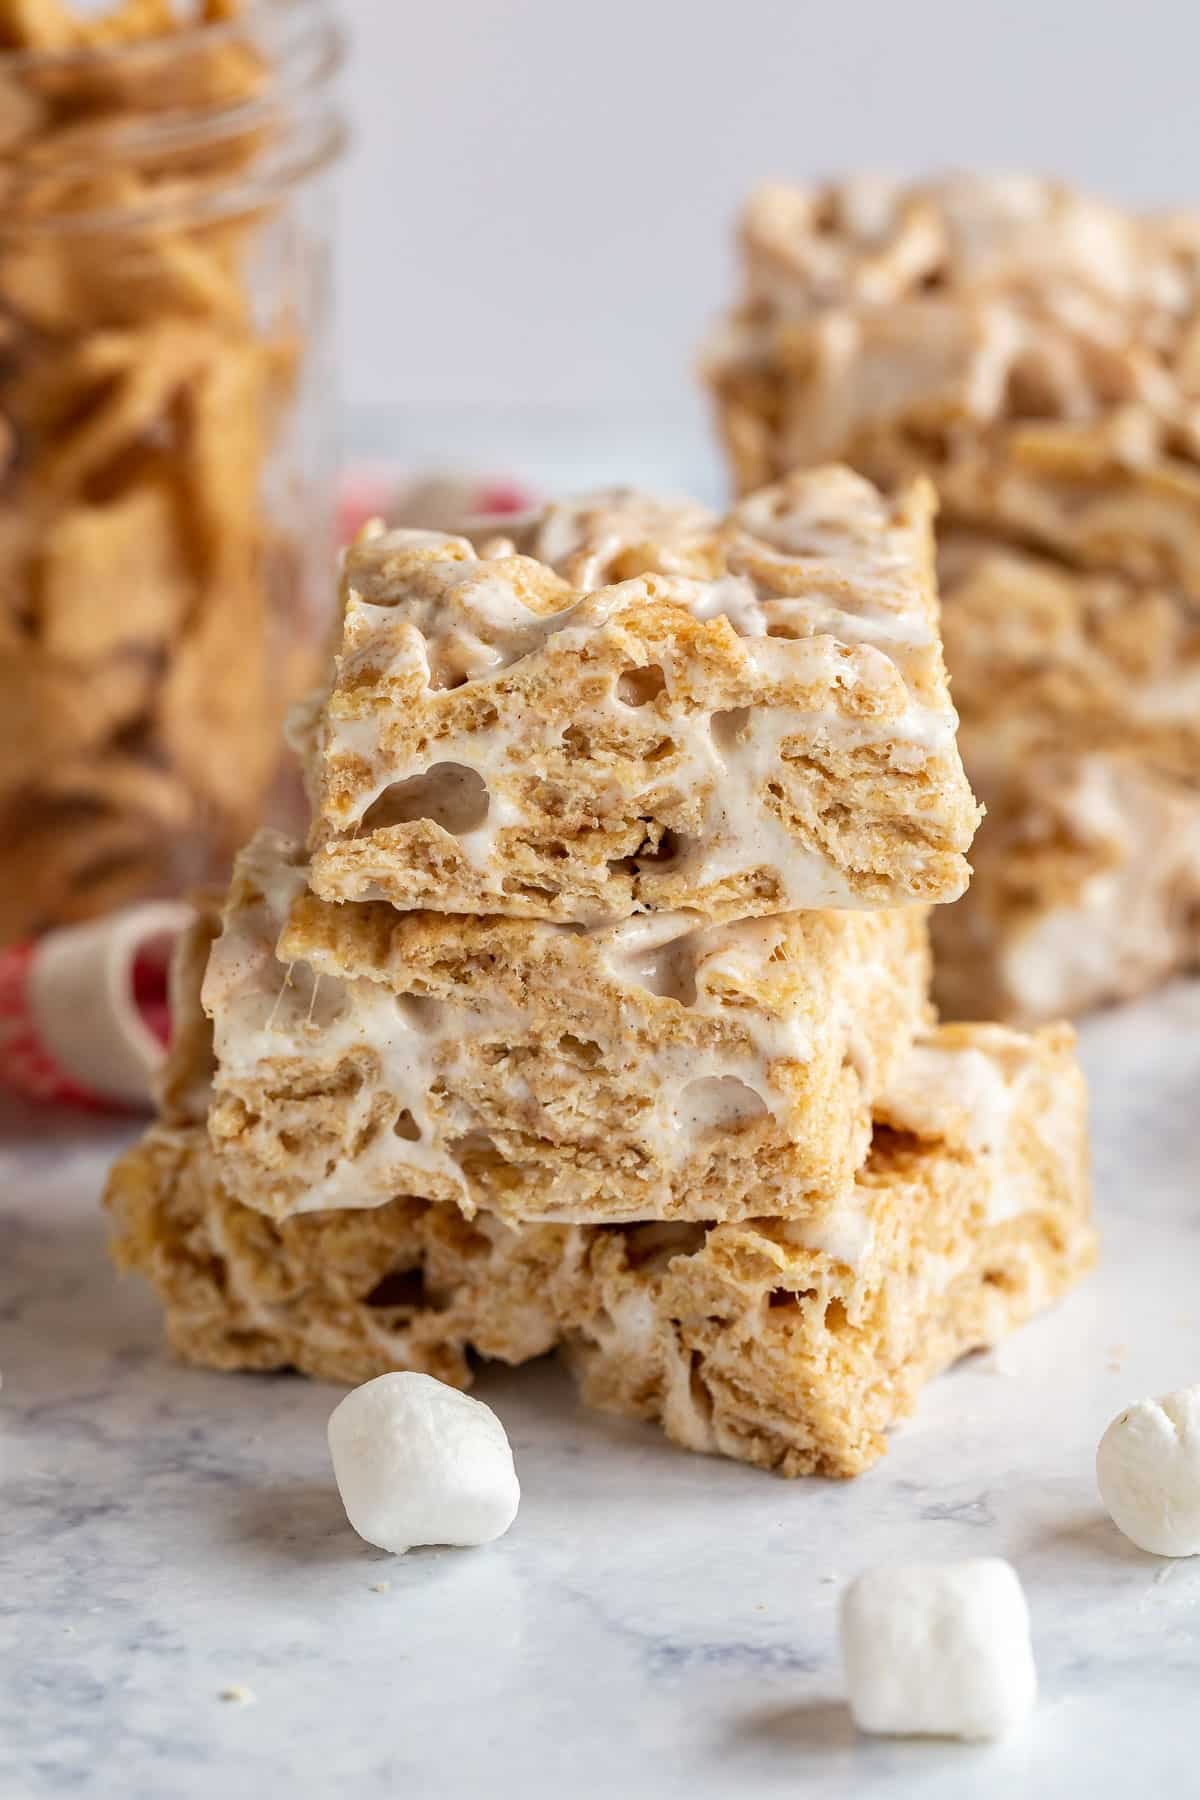
    • A straight on image of 3 cinnamon cereal bars stacked on each other exposing the inside of the bars.
      Cinnamon Toast Crunch Bars
    • A lemon square on a piece of parchment with a cut lemon behind it.
      Lemon Bars With Shortbread Crust

    Love this recipe? Please leave a 5 star ⭐️⭐️⭐️⭐️⭐️ rating in the recipe card below ⬇️ and/or a review in the comment section further down. Check out my Amazon Store for all my favorite tools, including those used in this recipe. And follow @thelifejolie on Instagram and TikTok!

    An overhead image of some chewy granola bars stacked on each other.

    Chewy Granola Bars

    Jessy Freimann
    Who needs store-bought snacks when you can make chewy granola bars at home? Made with simple pantry staples and ready in about 20 minutes, they’re perfect for busy mornings, lunchboxes, or an easy after-school treat.
    No ratings yet
    Print Recipe Pin Recipe
    Prep Time 10 minutes mins
    Cook Time 20 minutes mins
    Cooling time 1 hour hr
    Total Time 1 hour hr 30 minutes mins
    Course Breakfast, Snack
    Cuisine American
    Servings 12 servings
    Calories 165 kcal

    Equipment

    • 8" x 8" baking pan
    • measuring cups
    • measuring spoons
    • mixing bowl
    • wooden spoon
    • chefs knife
    • cutting board

    Ingredients
      

    • Cooking spray
    • 1 ½ cups quick oats
    • 1 ½ cups Rice Krispies cereal
    • ½ teaspoon ground cinnamon
    • 1 large pinch kosher salt
    • 1 teaspoon vanilla extract
    • 3 Tablespoons salted butter, melted
    • ½ cup honey
    • 2 Tablespoons brown sugar
    • ½ cup mini chocolate chips,  divided

    Instructions
     

    • Preheat the oven to 350 degreesF. Spray cooking spray onto an 8" x 8" baking pan and line with parchment paper, leaving a couple inches out on the sides (for easy removal later). Set aside.
    • Mix all ingredients well in a large mixing bowl (pull aside a couple tablespoons of chocolate chips before adding them for topping later).
    • Pour the granola into the prepared pan and press in to form an even layer. Then take a cup with a flat bottom and use that to press it in even tighter.
    • Bake for 20 minutes, or until it's beginning to turn golden. Cool completely (around an hour).
    • Pull the extra parchment on the sides to remove the granola bar in one piece. Cut once in across the center and then slice in the other direction to get 12 bars total. Serve immediately or store at room temperature in an airtight container for up to a week.

    Video

    Notes

    • If your honey is thick, gently warm it for 30 seconds in the microwave to help everything mix more evenly and bind better.
    • Sprinkle reserved chips on top, pressing them lightly into the surface before baking. This helps them stick and gives homemade chewy granola bars a bakery-style look.
    • Let the bars set completely before cutting. This helps them stay neat and hold their shape instead of crumbling.
    • If you prefer less sweetness, you can slightly reduce the brown sugar without affecting the texture too much.
    • Swap out the mini chocolate chips for white chocolate chips, dried fruit, chopped nuts, mini marshmallows, or mini M&Ms.
    • Ingredients to prep ahead- Measure out the dry ingredients and melt the butter.
    • Leftovers and storage- Keep in an airtight container at room temperature for up to a week. For longer storage, wrap individually and store up to a month, or freeze for up to 6 months. Thaw overnight before serving.

    Nutrition

    Serving: 1servingCalories: 165kcalCarbohydrates: 29gProtein: 2gFat: 5gSaturated Fat: 3gPolyunsaturated Fat: 0.4gMonounsaturated Fat: 1gTrans Fat: 0.1gCholesterol: 9mgSodium: 51mgPotassium: 52mgFiber: 1gSugar: 19gVitamin A: 337IUVitamin C: 2mgCalcium: 18mgIron: 2mg
    Tried this recipe?Let us know how it was!

    One Pan Taco Pasta With Chicken

    Feb 20, 2026 · 3 Comments

    A close up of a wooden spoon in a pan of taco pasta.

    One pan taco pasta with chicken comes together in about 30 minutes and is packed with bold, cheesy taco flavor. Everything cooks in one pan, which keeps cleanup simple and makes weeknights a little easier.

    A close up of a wooden spoon in a pan of taco pasta.
    [feast_advanced_jump_to]

    Why You’ll Love This Chicken Pasta

    This recipe takes all the bold, savory flavor you love from Taco Tuesday and turns it into an easy pasta dinner. It’s a fun twist on your usual weeknight meal, but still simple and comforting.

    I use regular pasta, so it takes slightly longer, but it’s still ready in about 30 minutes. The pasta cooks right in the sauce, soaking up all that taco flavor as it simmers. It’s a great option for nights when you want something a little different, but still easy. Here’s why this Mexican taco pasta works so well:

    • Easy to customize
    • Made in one pan
    • Ready in about 30 minutes
    • Great for leftovers
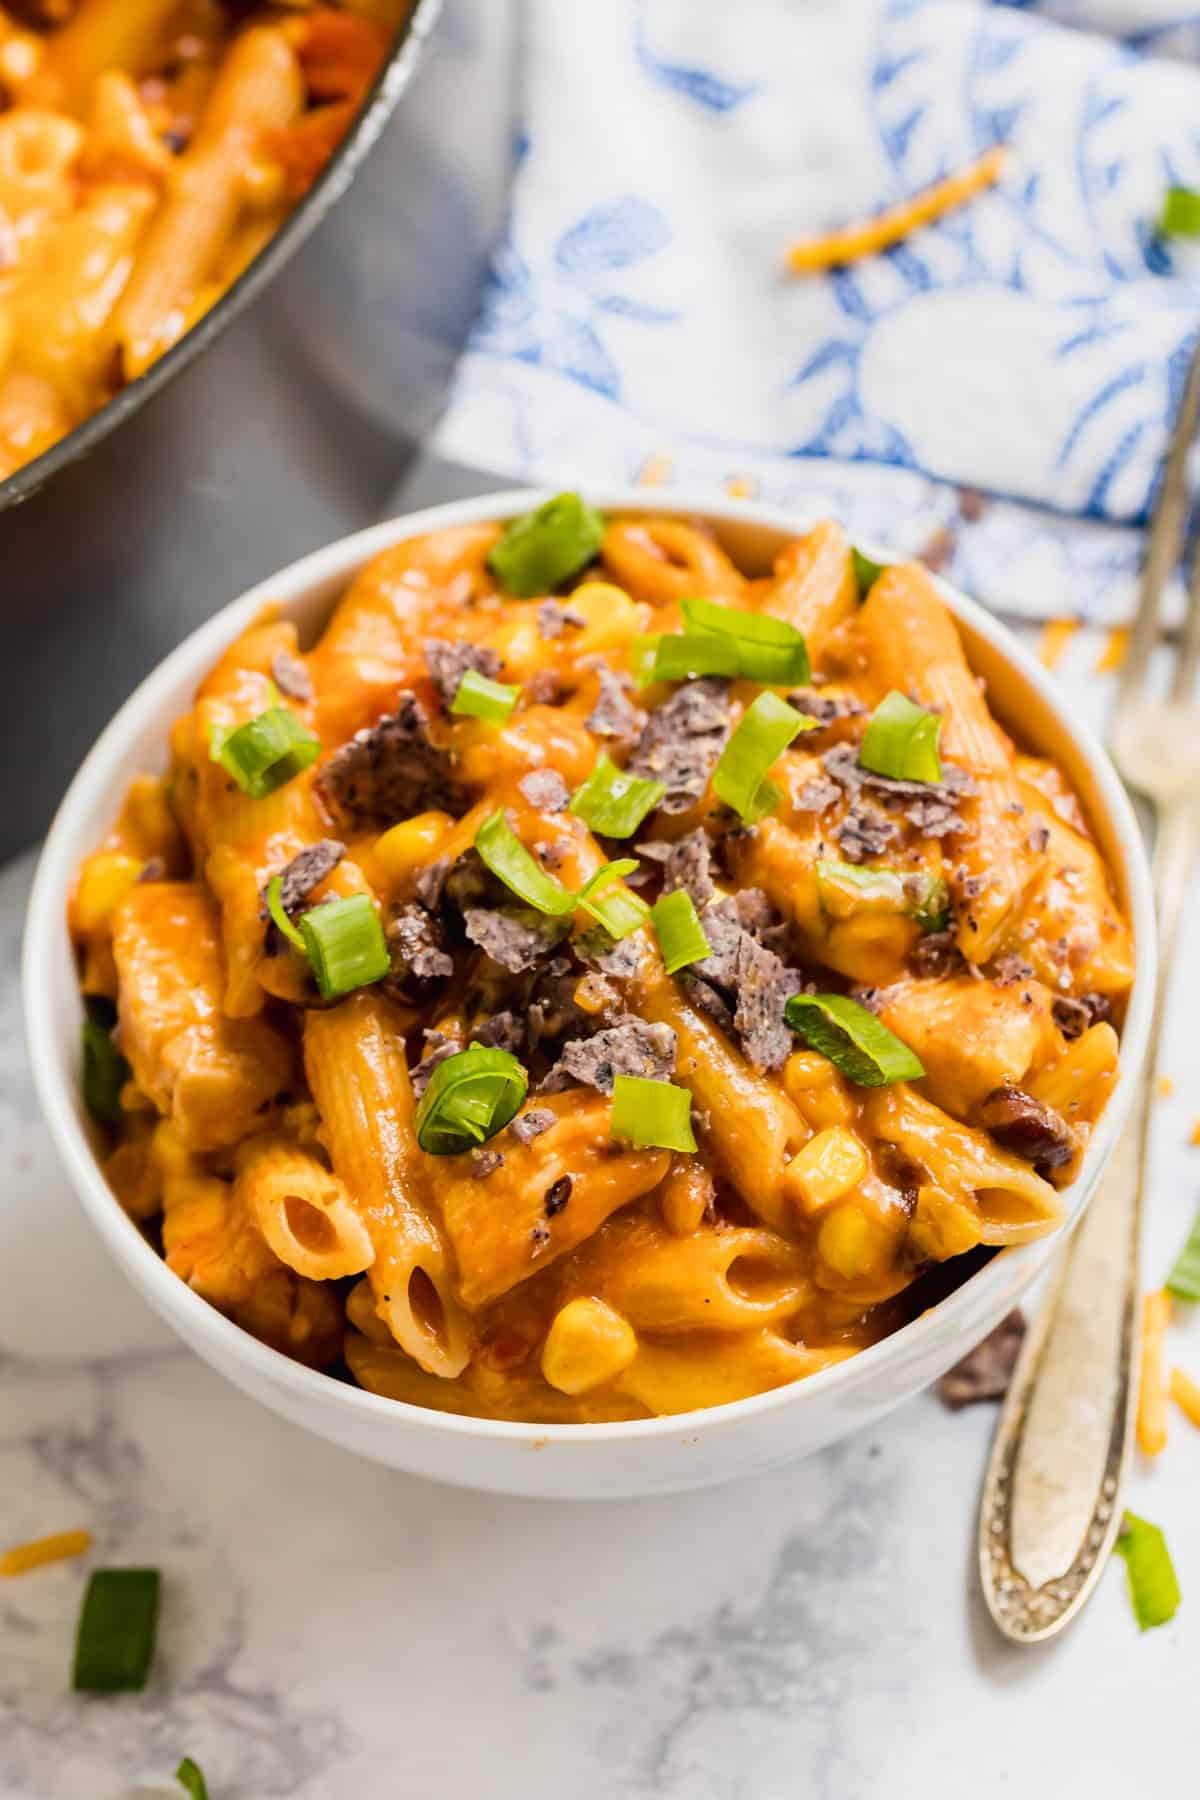
    A bowl of chicken taco pasta.

    Ingredient Information And Substitutions

    • Boneless skinless chicken breasts- Lean and quick-cooking when cut into uniform cbite-sized pieces., around 1 inch in size. Swap with boneless skinless thighs for darker, juicier meat.
    • Cooking spray- Prevents sticking. Olive oil works too.
    • Tomato sauce- Ties the sauce together. Crushed tomatoes can work in a pinch.
    • Water- Balances the liquid so the pasta cooks properly.
    • Chicken broth- Adds depth. Low-sodium is best, and vegetable broth works too.
    • Penne pasta- Holds the sauce well and cooks evenly. Rotini, ziti, or shells are great alternatives.
    • Chopped green chiles- Bring mild smokiness. Use hot for more spice.
    • Diced tomatoes- Add texture to the sauce. Crushed tomatoes work too, but the consistency will be smoother.
    • Black beans- Add heartiness and protein. Pinto beans are a good substitute.
    • Frozen corn- Adds sweetness and texture. No need to thaw first! Canned (drained) corn works too.
    • Cheddar cheese- Creates that creamy, cheesy finish. Monterey Jack, Colby Jack, or Mexican blend are easy swaps.
    • Dried minced onions- Add onion flavor without chopping. Substitute about ½ cup finely diced fresh onion.
    • Garlic powder- Quick, consistent flavor. Use 2-3 cloves of fresh minced garlic if preferred.
    • Kosher salt- Enhances flavor. Adjust based on broth and seasoning.
    • Ground black pepper- Adds subtle heat and balance.
    • Taco seasoning- Brings everything together in one step. Use a packet or a homemade blend.
    • Tortilla chips- Optional, but these add crunch and a taco-style finish.
    • Scallions- Fresh garnish with mild onion flavor. Cilantro is another great topping.
    An overhead image of labeled recipe ingredients.

    How To Make Creamy Chicken Pasta

    Step 1- Brown the chicken.

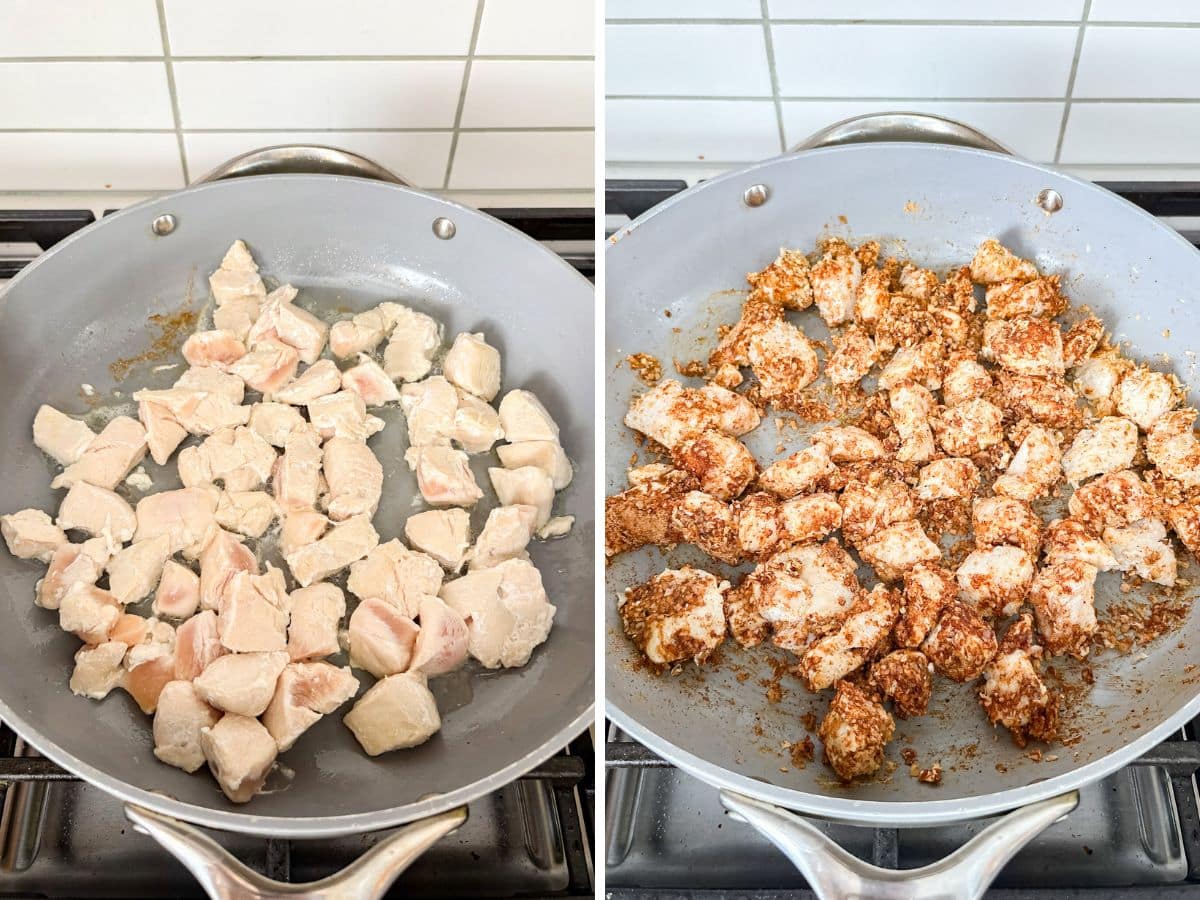
    Heat a large sauté pan over medium-high heat and spray with cooking spray. Add the chicken and cook, stirring, until it begins to brown, about 2 minutes. Add the dried onions, garlic powder, salt, and pepper while it cooks.

    Chicken breast pieces browning and then mixed with seasonings.

    Step 2- Add the sauce ingredients.

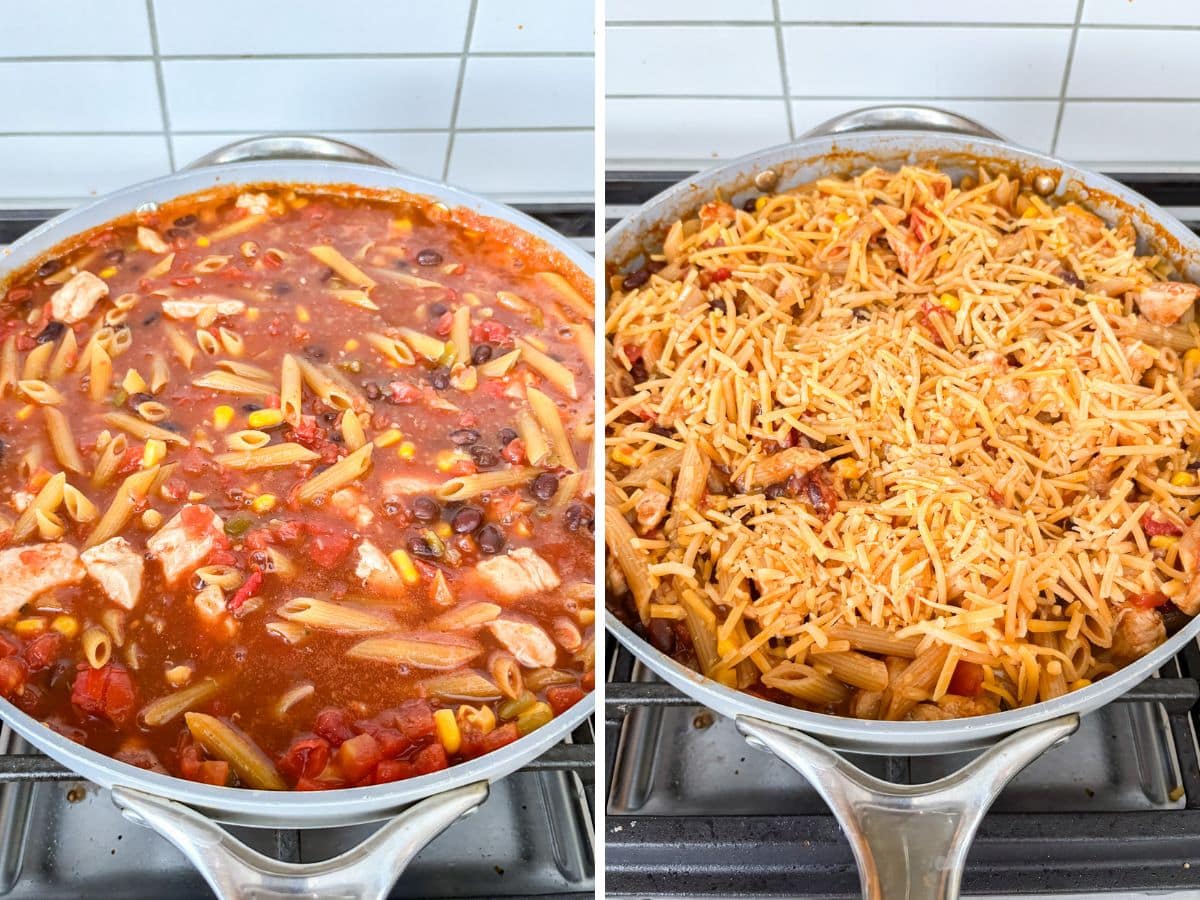
    Add the diced tomatoes, green chiles, tomato sauce, chicken broth, taco seasoning, black beans (with liquid), and frozen corn. Stir to combine and bring to a boil.

    Sauce ingredients added and then bubbling in the pan.

    Step 3- Cook the pasta.

    Once boiling, stir in the penne. Cover and reduce the heat to medium. Cook for about 15 minutes, until the pasta is tender. Stir every 5 minutes to keep the pasta from sticking to the pan.

    PAsta added to the pan and then sprinkled with shredded cheddar cheese after the pasta is cooked.

    Step 4- Add the cheese.

    Uncover and stir in ½ cup shredded cheddar. Sprinkle the remaining cheese on top, then cover and remove from the heat. Let it sit for a few minutes until the cheese has melted.

    Step 5- Garnish and serve.

    Uncover, top with chopped scallions and crushed tortilla chips, and serve immediately.

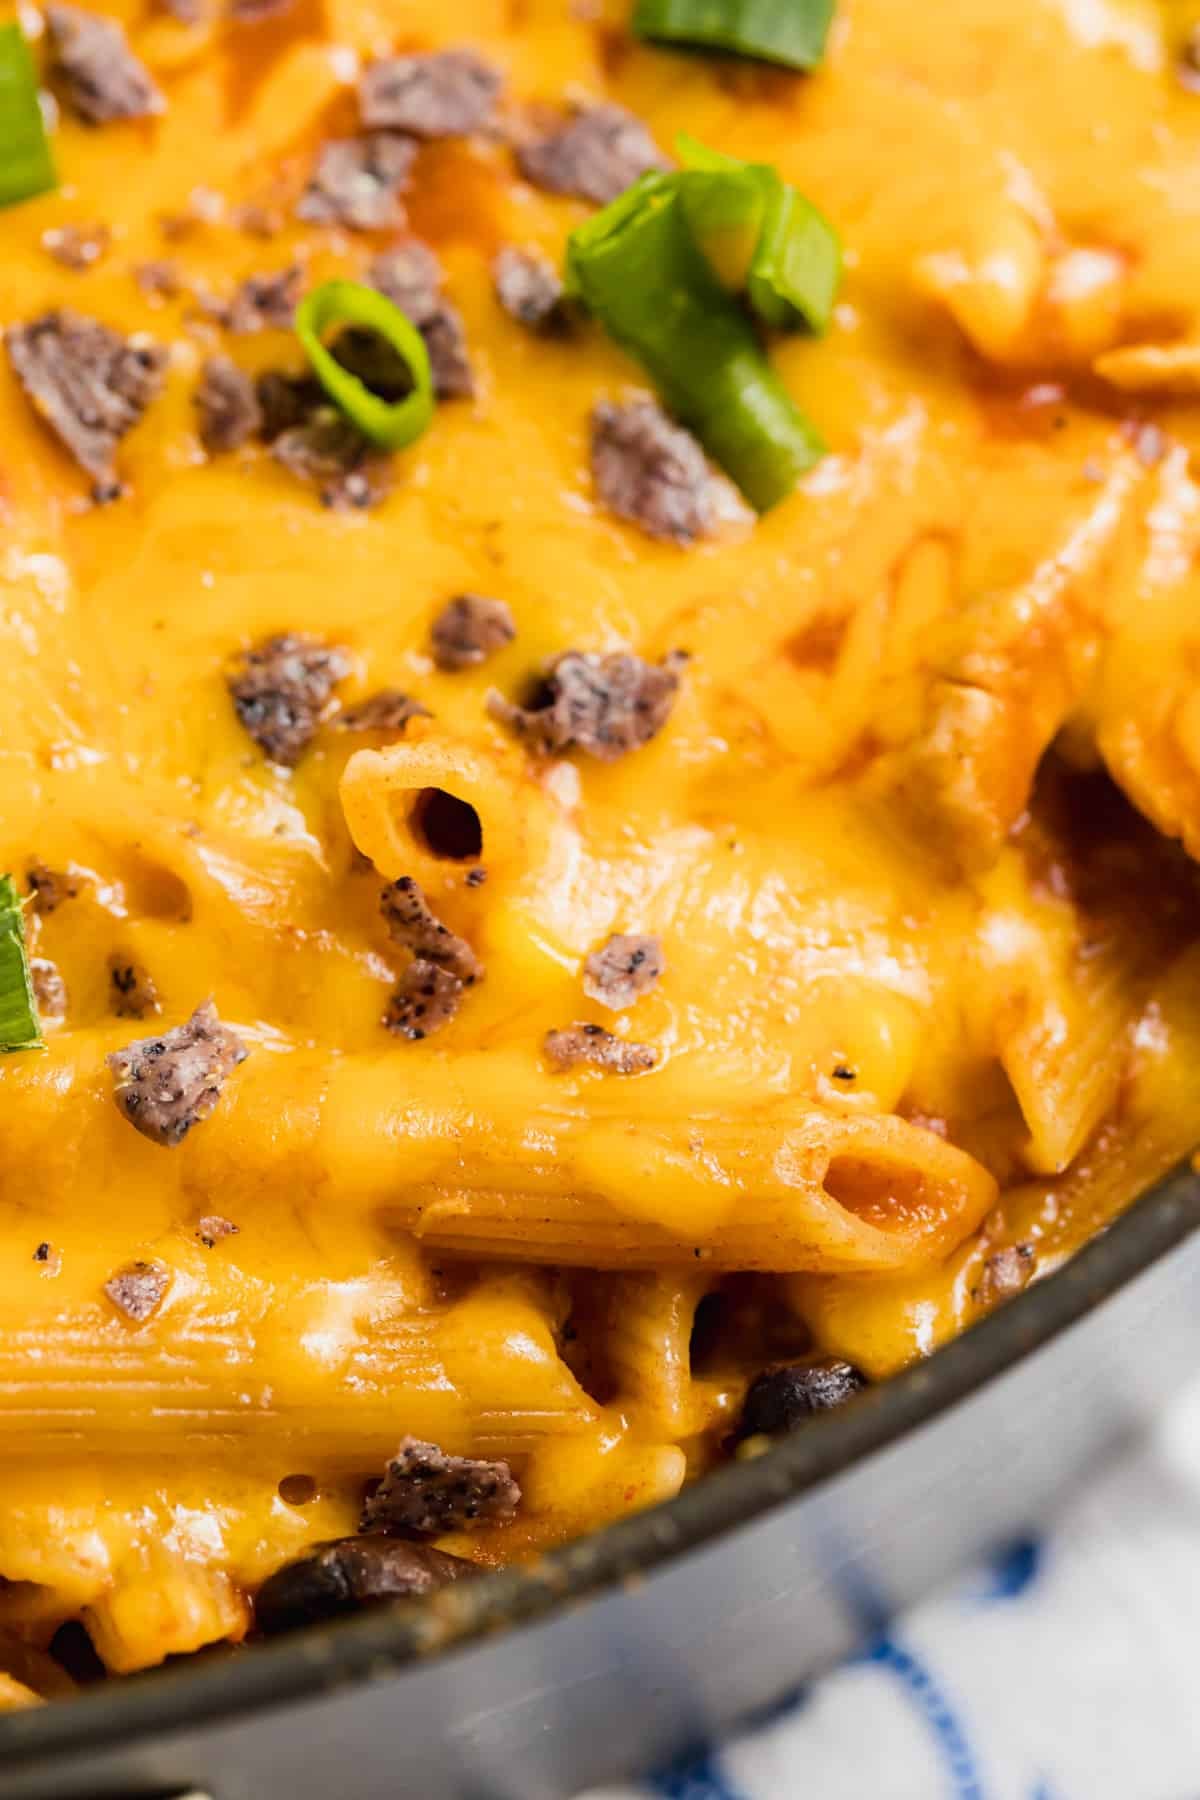
    A close up of pasta with melted cheese in the pan.

    Frequently Asked Questions

    Can I use pre-cooked chicken?

    You can. Stir it in when you add the pasta and and it will heated through as the pasta cooks.

    Can I make this ahead of time?

    Yes, you can make it a few hours ahead and reheat. The sauce may thicken as it sits, so add a splash of broth or water if needed.

    Can I add more vegetables?

    Yes. Diced bell peppers, zucchini, or even spinach can be added when you stir in the tomatoes and beans.

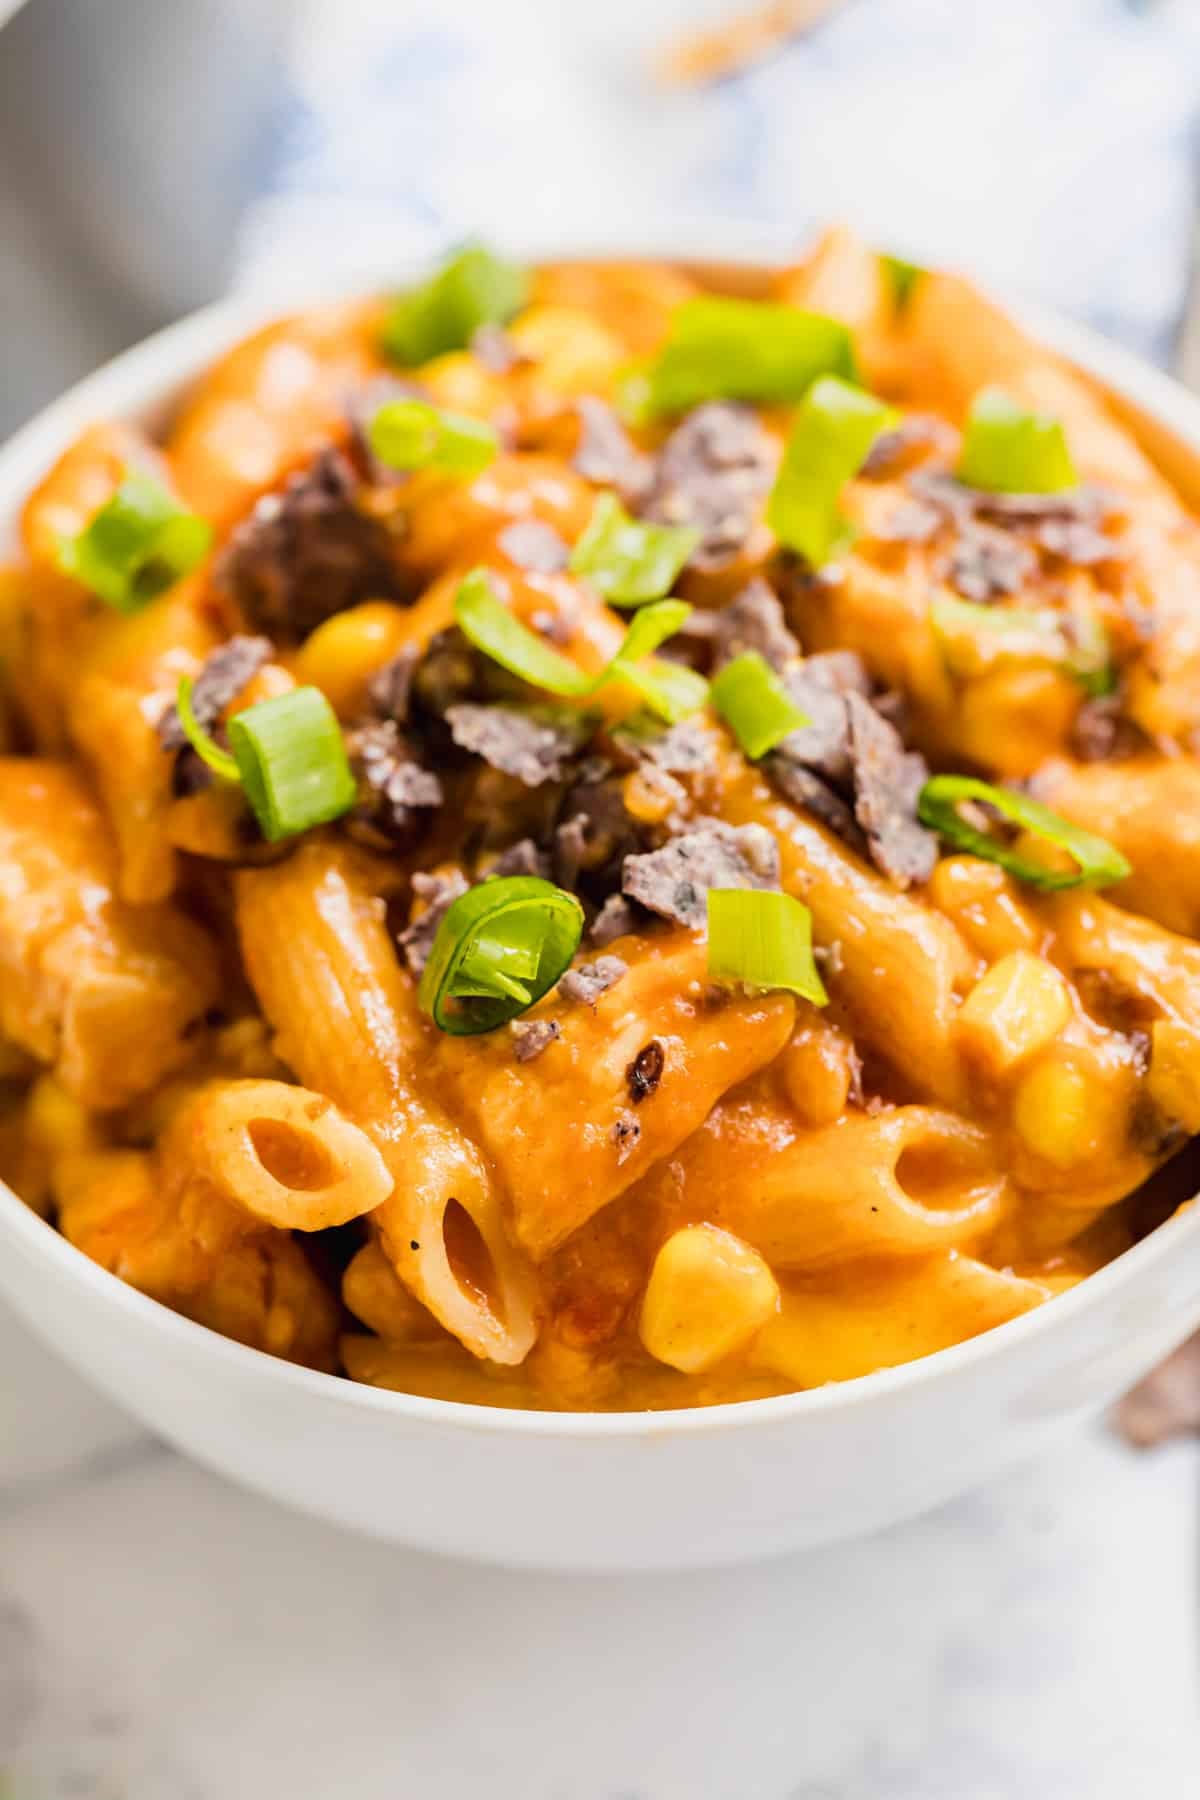
    A close up of a bowl of taco pasta.

    Tips For Making This Taco Pasta Recipe

    • Cut the chicken evenly. Keep the pieces about 1 inch in size and as similar as possible so they cook at the same rate and stay tender.
    • Don’t worry if the chicken isn’t fully cooked at first. Once it starts to brown, you’ll add the remaining ingredients, and it will finish cooking as everything simmers.
    • Use a non-stick pan if you can. It makes a big difference in preventing sticking and keeps cleanup easy.
    • Stir it a few times while simmering. This helps the pasta cook evenly and prevents sticking.
    • Ingredients to prep ahead- Cut the chicken and measure out your seasonings.
    • Leftovers and storage. Store in an airtight container in the fridge for 3-4 days and reheat on the stovetop or in the microwave. I’m not a big fan of freezing pasta since it can change the texture, but you can freeze it for up to 3 months if wrapped well.
    A wooden spoon holding up a scoop of taco pasta with chicken.

    What To Serve With This One Pot Taco Pasta

    This dish is hearty on its own, but a fresh side and a simple dessert make it feel complete. Try to serve this chicken in pasta recipe with:

    • Mexican Bean Salad Recipe
    • Avocado Corn and Black Bean Salad
    • The most delicious guacamole EVER
    • Chocolate Orange Cake Recipe

    Other Pasta Recipes To Try

    • A wooden spoon holding a scoop of creamy chicken Florentine pasta over the full pan of it.
      One Pot Chicken and Pasta Florentine
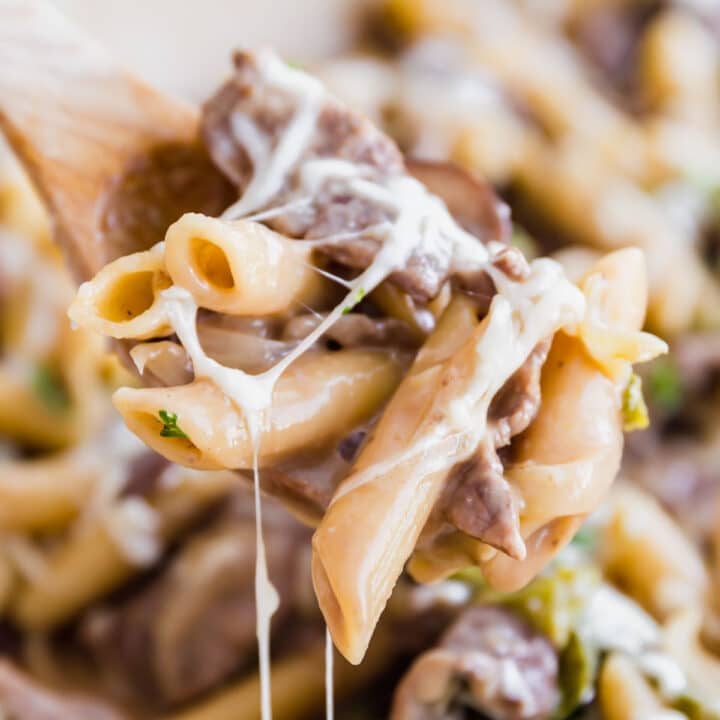
    • A wooden spoon holing a scoop of Philly steaks pasta with melty cheese all over it.
      One Pot Philly Cheesesteak Pasta
    • A square image of Supreme Pizza One Pot Pasta.
      Supreme Pizza One Pot Pasta
    • A wooden spoon scooping up creamy taco pasta from the pan.
      One Pot Cheesy Taco Pasta

    Love this recipe? Please leave a 5 star ⭐️⭐️⭐️⭐️⭐️ rating in the recipe card below ⬇️ and/or a review in the comment section further down. Check out my Amazon Store for all my favorite tools, including those used in this recipe. And follow @thelifejolie on Instagram and TikTok!

    A close up of a wooden spoon in a pan of taco pasta.

    One Pan Taco Pasta With Chicken

    Jessy Freimann
    One pan taco pasta with chicken comes together in about 30 minutes and is packed with bold, cheesy taco flavor. Everything cooks in one pan, which keeps cleanup simple and makes weeknights a little easier.
    5 from 1 vote
    Print Recipe Pin Recipe
    Prep Time 5 minutes mins
    Cook Time 30 minutes mins
    Total Time 35 minutes mins
    Course Main Course
    Cuisine Mexican
    Servings 6 servings
    Calories 657 kcal

    Equipment

    • chefs knife
    • cutting board
    • Large saute pan
    • Large saute pan
    • measuring cups
    • measuring spoons

    Ingredients
      

    • Cooking spray
    • 3 boneless skinless chicken breasts, cut into 1 inch chunks (if using cooked chicken, add with the pasta)
    • ¼ cup dried minced onions
    • 1 teaspoon garlic powder
    • 1 teaspoon Kosher salt, to taste
    • ¼ teaspoon Ground black pepper, to taste
    • 28 ounces diced tomatoes, canned and undrained
    • 4.5 ounces chopped green chiles, canned undrained (I used mild but you can always use spicy if you want a kick!)
    • 8 ounces tomato sauce canned
    • 2 cups chicken broth
    • 14.5 ounces black beans, canned and undrained
    • ¼ cup water
    • 1 packet taco seasoning
    • 1 cup frozen corn
    • 1 pound penne pasta
    • 1 ½ cups cheddar cheese, shredded and divided
    • 3 green onions chopped (for garnish)
    • 10 Tortilla chips, crumbled (for garnish)

    Instructions
     

    • Heat a large sauté pan over medium high heat and grease with cooking spray.
    • Add chicken and sauté stirring often until it's beginning to brown, around 2 minutes (it won't be fully browned yet). While it's browning add dried minced onions, garlic powder and salt and pepper to taste.
    • Add diced tomatoes, diced green chiles, tomato sauce, chicken broth, taco seasoning, undrained black beans and frozen corn. Mix well and bring to this to a boil, around 5-7 minutes.
    • Once it's boiling, add the pasta, cover and reduce the heat to medium.
    • Cook for 5 minutes and then remove the cover and stir.
    • Cover the pan and cook for another 5 minutes and then remove the cover and stir again.
    • Cover the pan and cook for another 5 minutes and then remove the cover and stir in ½ cup of shredded cheddar.
    • Sprinkle the remaining cheese on top of the pasta. Cover and remove from heat.
    • Let the cheese melt for a couple minutes then uncover. Sprinkle with scallions and crumbled tortilla chips and serve immediately.

    Video

    Notes

    • Cut the chicken evenly. Keep the pieces about 1 inch in size and as similar as possible so they cook at the same rate and stay tender.
    • Don’t worry if the chicken isn’t fully cooked at first. Once it starts to brown, you’ll add the remaining ingredients, and it will finish cooking as everything simmers.
    • Use a non-stick pan if you can. It makes a big difference in preventing sticking and keeps cleanup easy.
    • Stir it a few times while simmering. This helps the pasta cook evenly and prevents sticking.
    • Ingredients to prep ahead- Cut the chicken and measure out your seasonings.
    • Leftovers and storage. Store in an airtight container in the fridge for 3-4 days and reheat on the stovetop or in the microwave. I’m not a big fan of freezing pasta since it can change the texture, but you can freeze it for up to 3 months if wrapped well.

    Nutrition

    Serving: 1servingCalories: 657kcalCarbohydrates: 96gProtein: 38gFat: 14gSaturated Fat: 6gPolyunsaturated Fat: 2gMonounsaturated Fat: 3gTrans Fat: 0.01gCholesterol: 66mgSodium: 1701mgPotassium: 1155mgFiber: 13gSugar: 8gVitamin A: 1260IUVitamin C: 29mgCalcium: 306mgIron: 5mg
    Tried this recipe?Let us know how it was!

    Sheet Pan Sausage and Roasted Veggies

    Feb 17, 2026 · 6 Comments

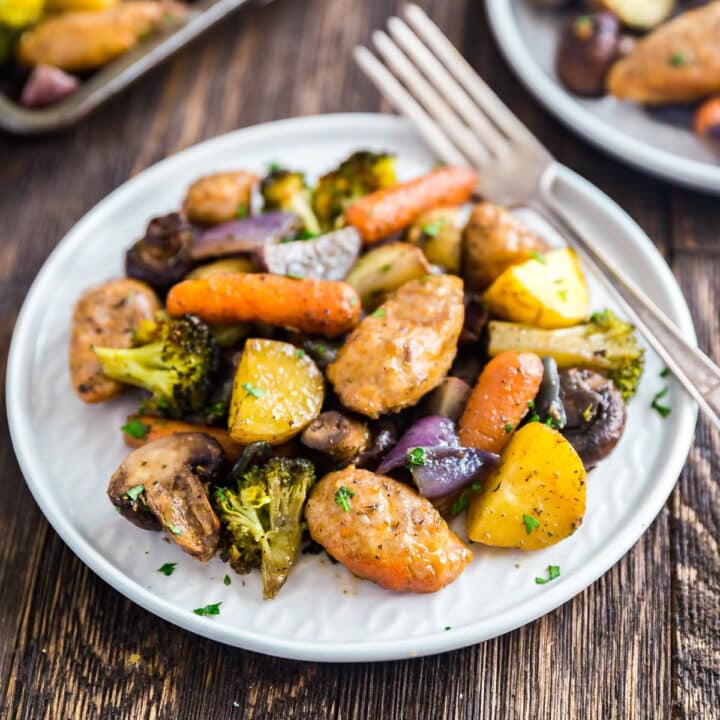
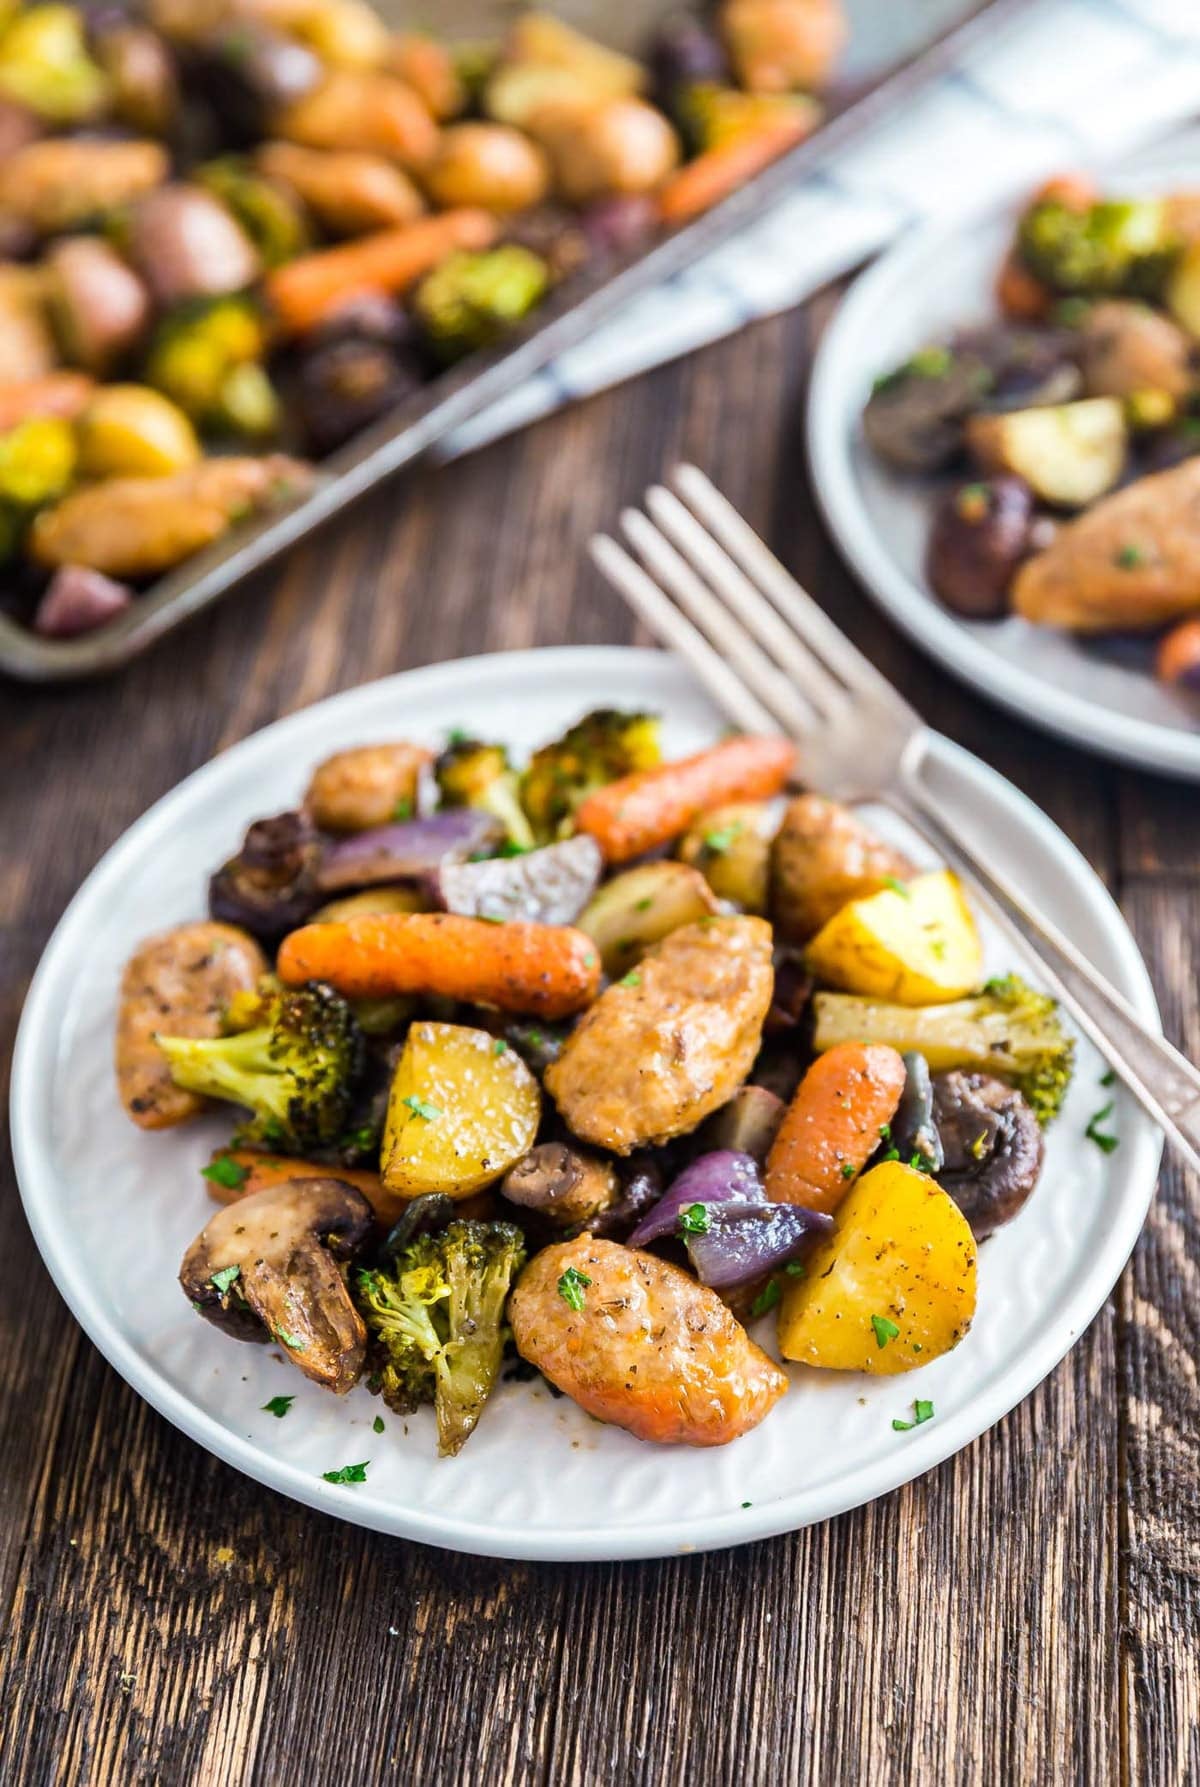
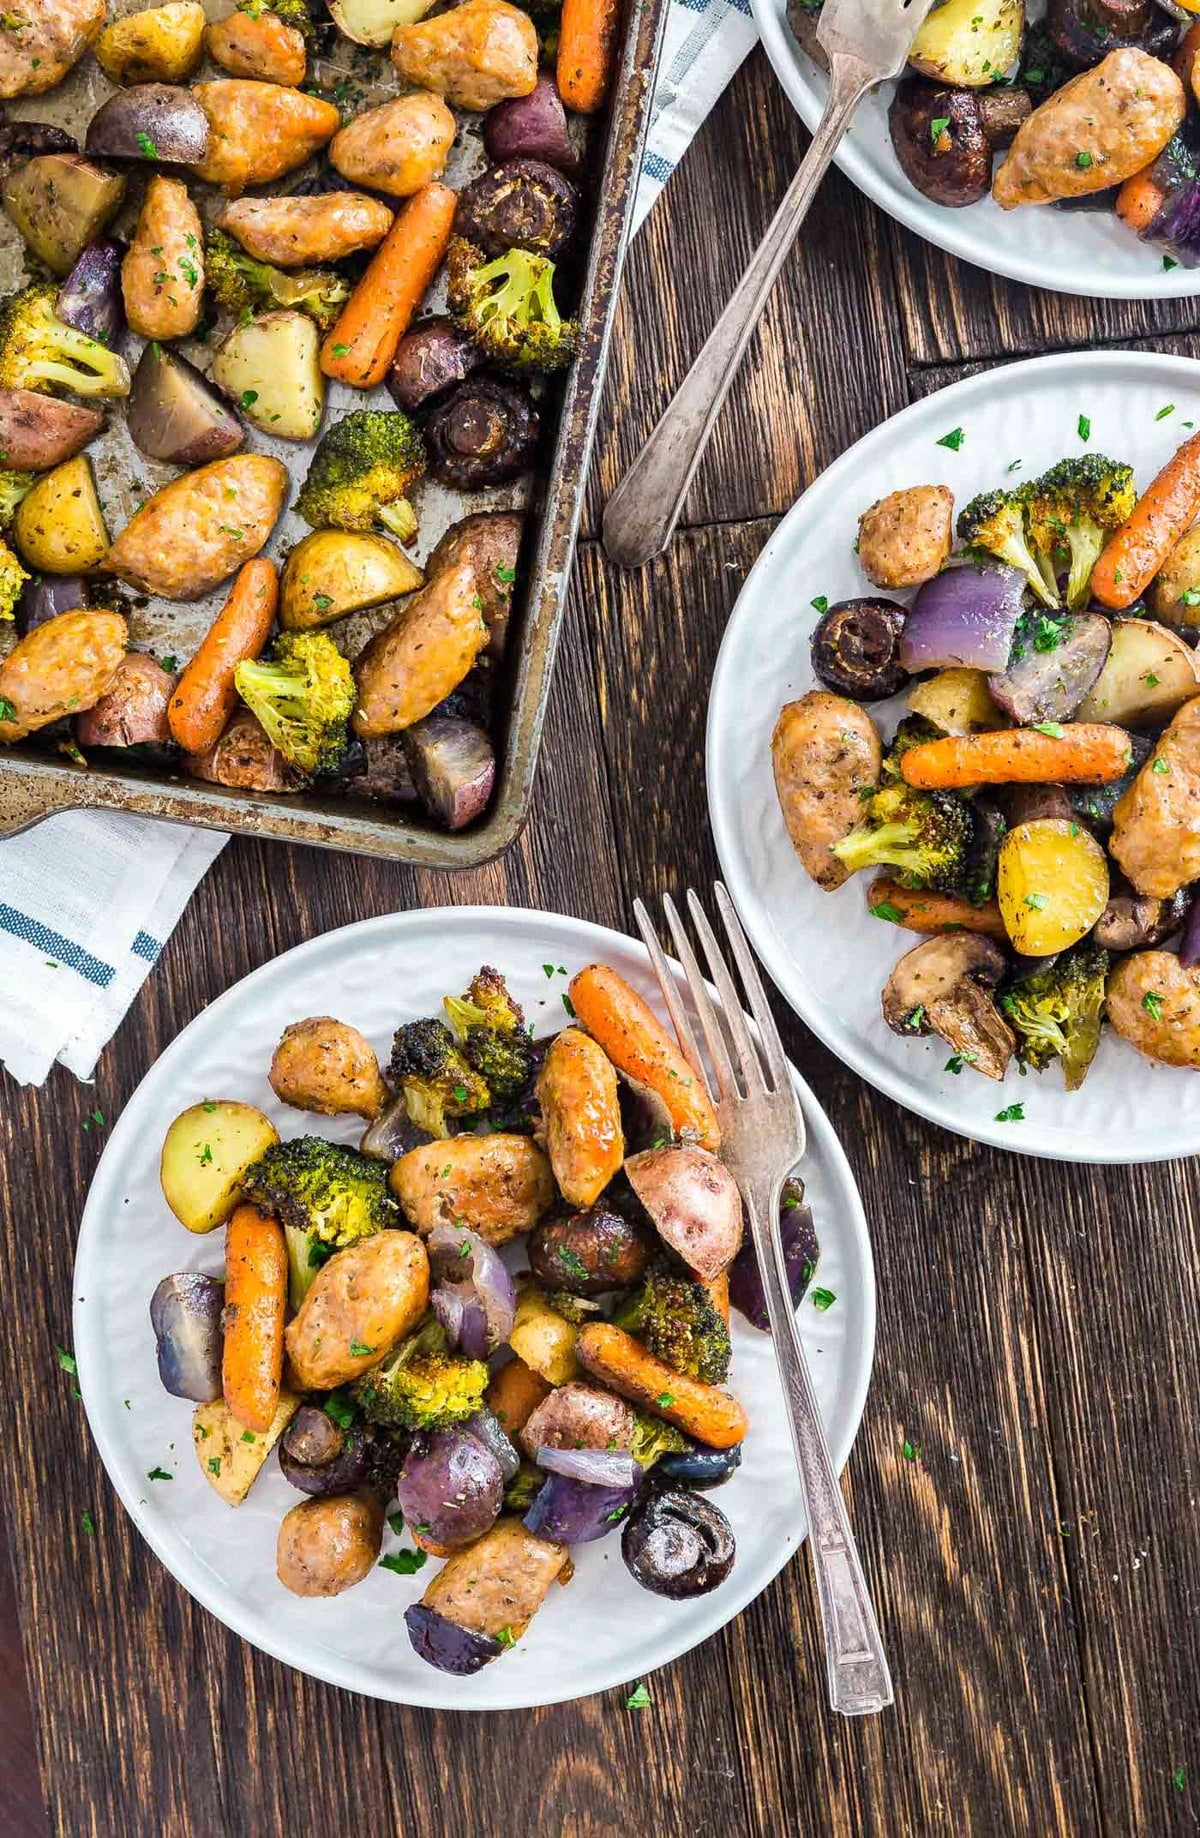
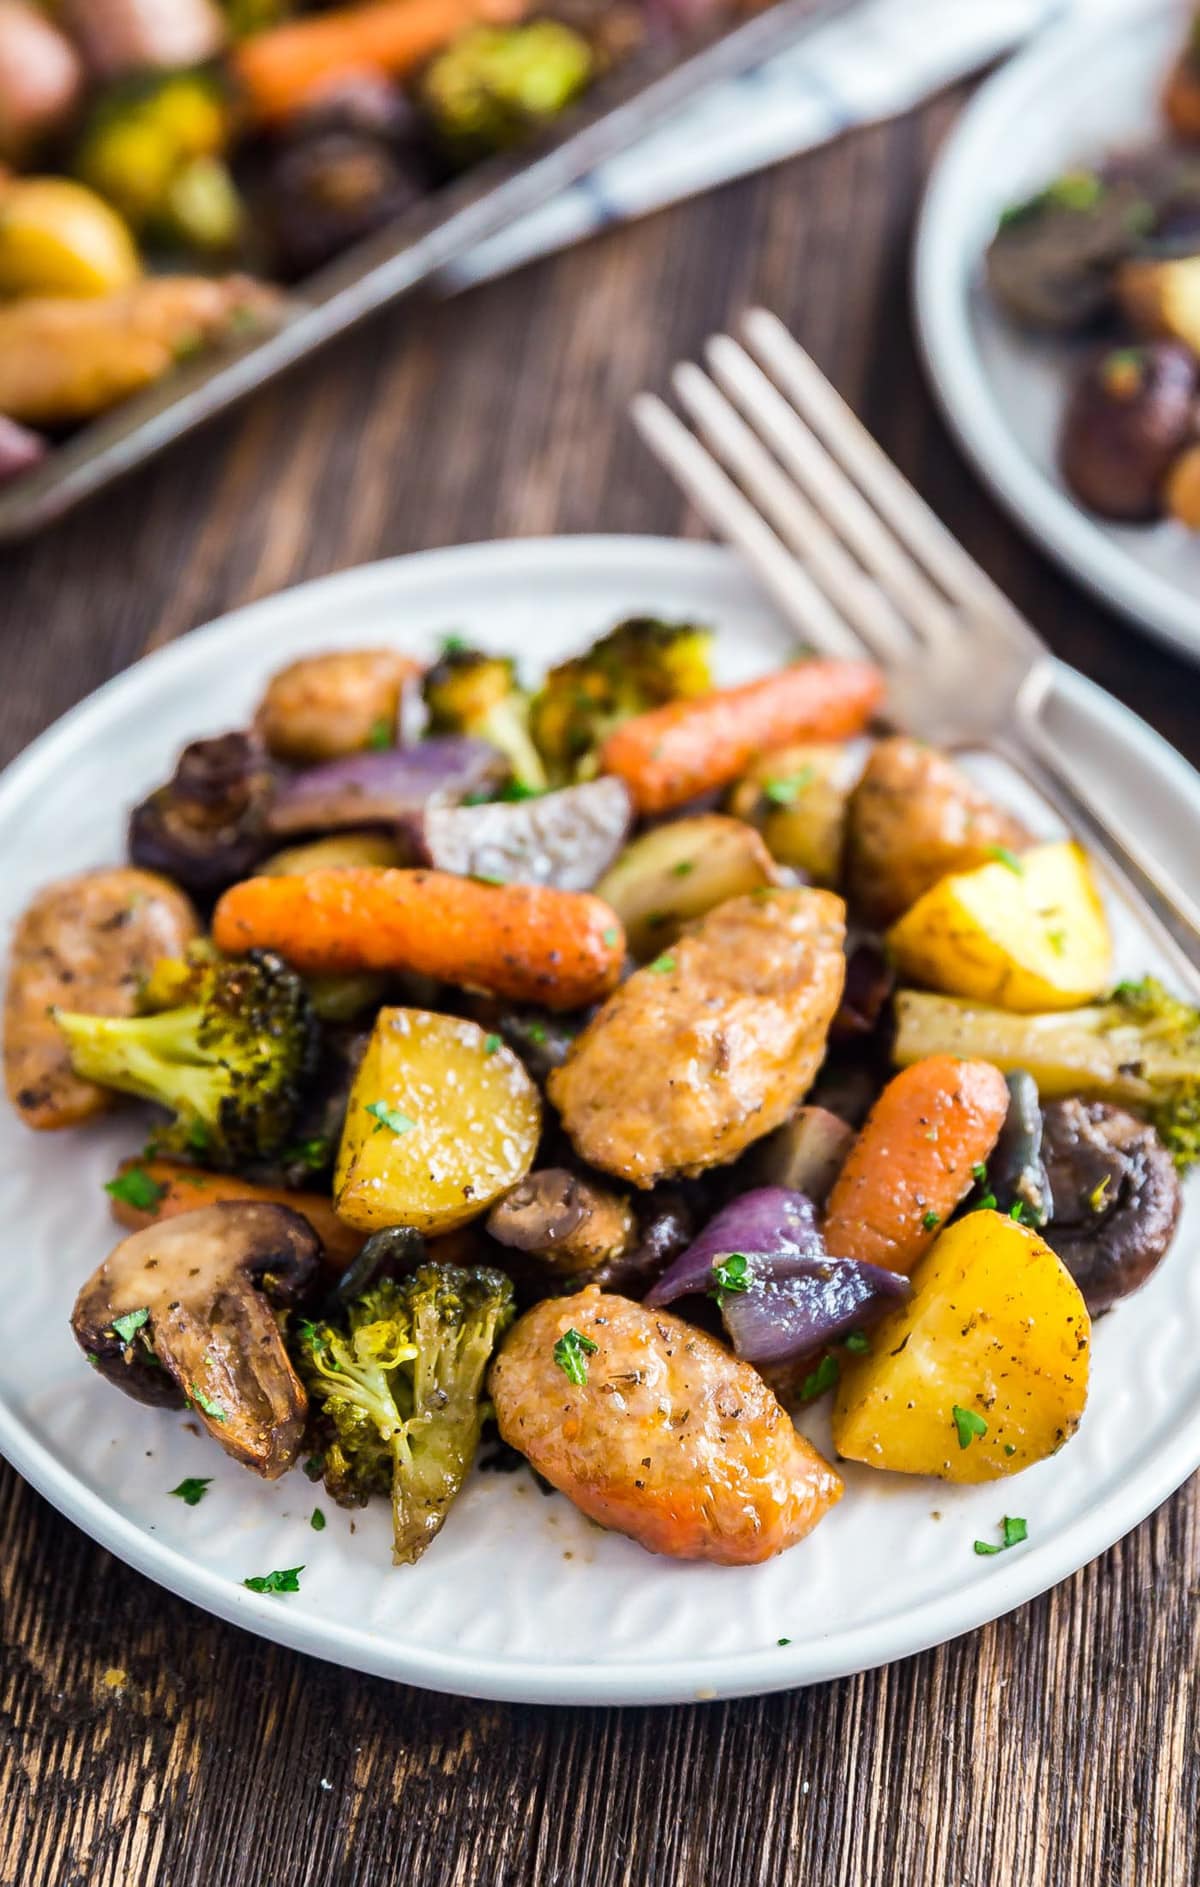
    A plate of sausage and veggies with a fork on it.

    This sheet pan sausage and roasted veggies dish is quick, low-stress, and still feels satisfying and hearty. Everything cooks in one pan in about 40 minutes, making it perfect for busy days when you don’t have the energy for a pile of dishes.

    A plate of sausage and veggies with a fork on it.
    [feast_advanced_jump_to]

    Why You’ll Love These Roasted Veggies And Sausage

    Weeknight meals aren’t always glamorous, especially on days when you’re tired and just want something easy that still tastes good. This dish was born out of one of those “use what you’ve got and get dinner on the table” moments, and it’s become a go-to for good reason. It is simple, satisfying, and doesn’t require hovering over the stove. 

    Everything roasts together in one pan, which means less cleanup and more time to relax once dinner is done. It’s also incredibly adaptable, so you can swap vegetables based on what’s in your fridge without stressing about exact measurements. Here’s why this dinner works so well:

    • One pan = minimal cleanup
    • Uses everyday ingredients
    • Easy to customize 
    • Great for meal prep
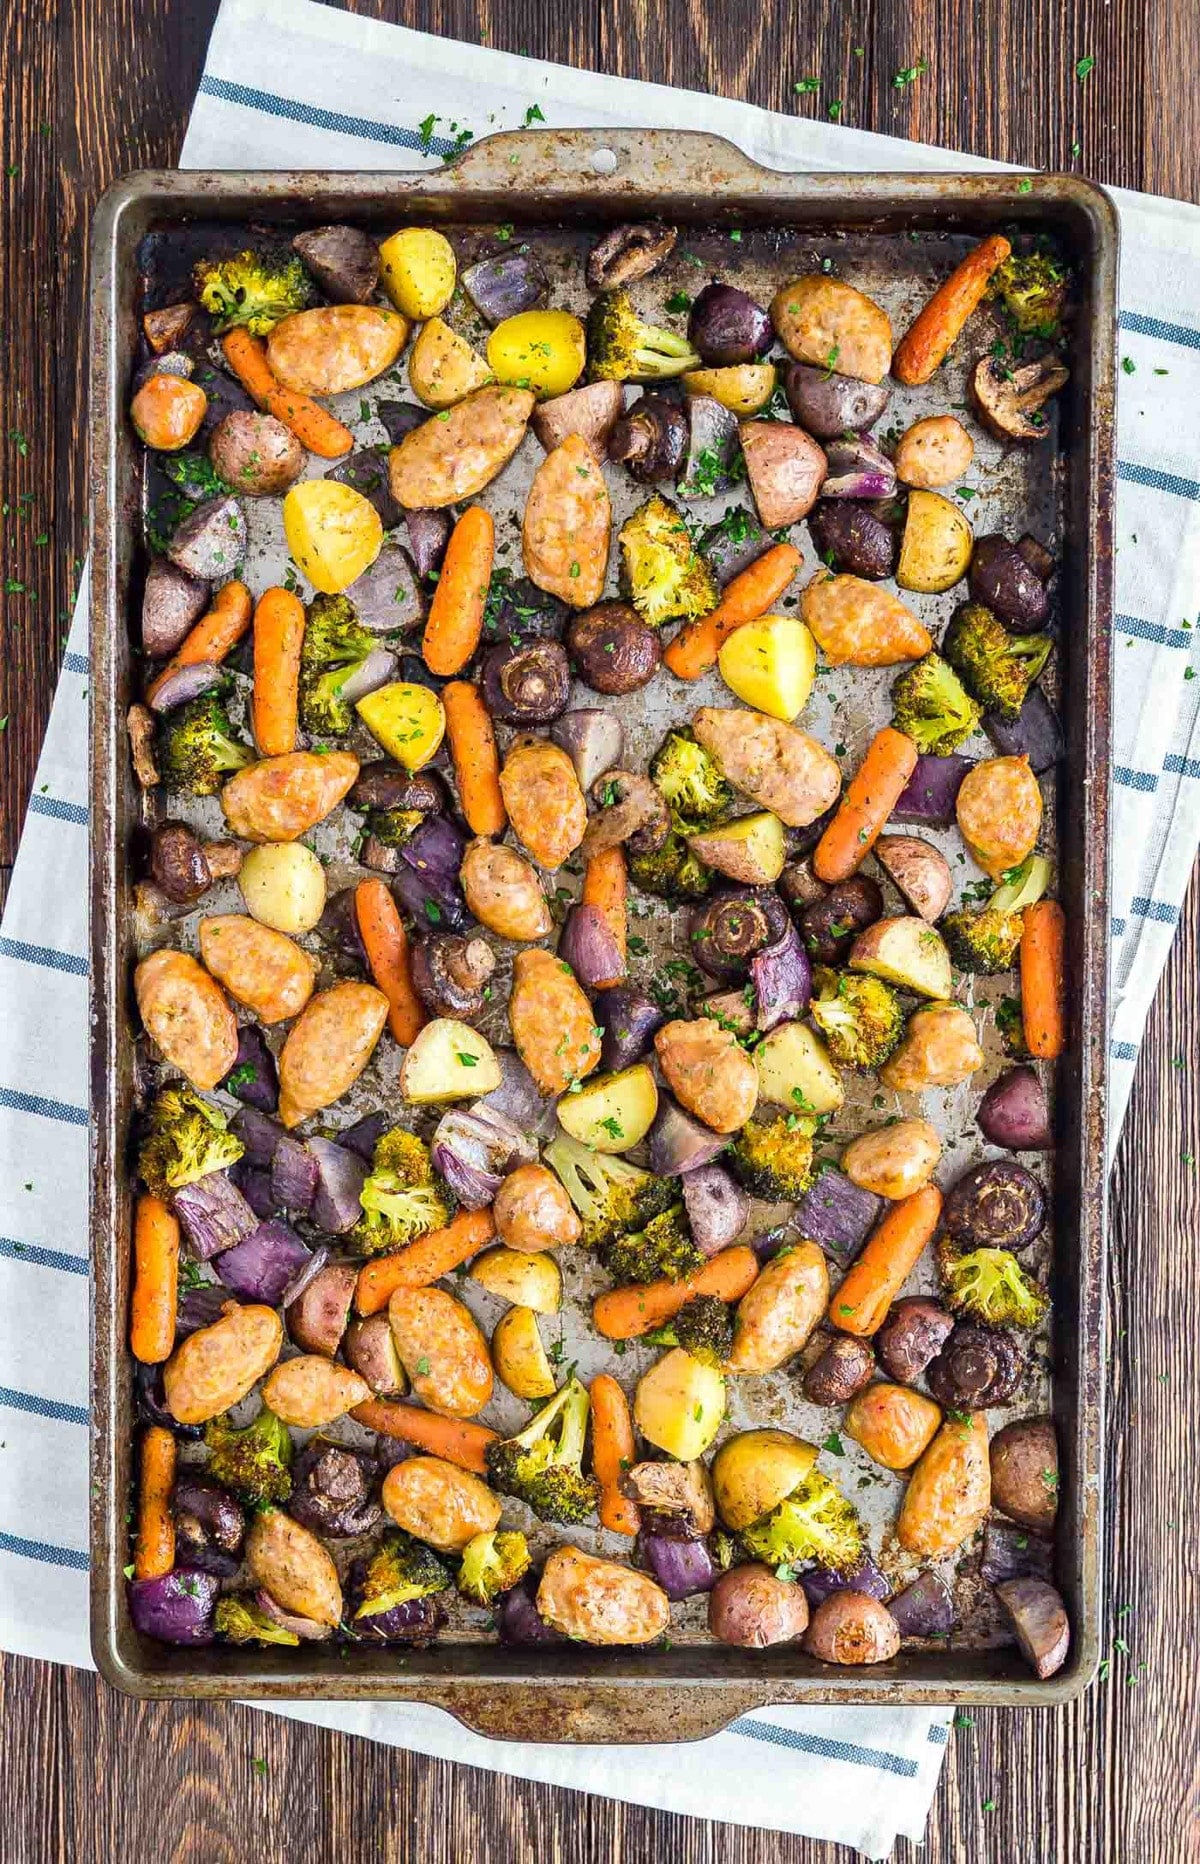
    An overhead image of a sheet pan with roasted sausage and veggies on it.

    Ingredient Information And Substitutions

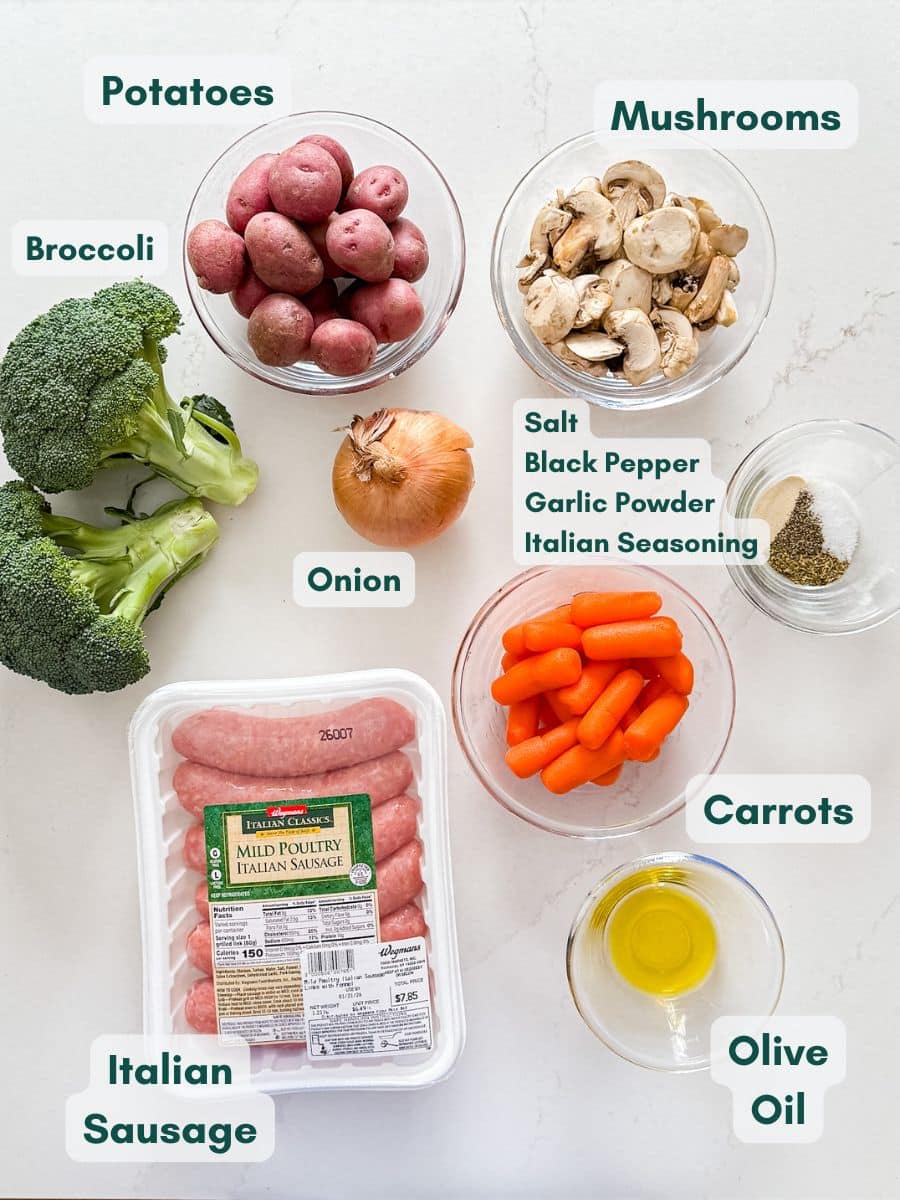
    • Sweet Italian sausage- Provides rich flavor and makes the dish hearty. Spicy Italian sausage works if you want some heat, or use chicken sausage for a lighter option.
    • Baby potatoes- Help make this a filling, complete meal, and absorb the seasoning well. Sweet potatoes are an easy substitute. You can sue larger potatoes, just cut them to the same size as the veggies for even cooking.
    • Broccoli florets- Add color and a bit of texture. Cauliflower or green beans work just as well.
    • Onion- Brings natural sweetness and depth as it roasts. Yellow, white, or red onions all work here.
    • Mushrooms- Add earthy flavor and balance the richness of the sausage. Cremini or button mushrooms are both great options.
    • Baby carrots- Add a touch of sweetness and roast up nicely. Chopped whole carrots can be used instead.
    • Olive oil- Helps everything roast evenly and develop good color. Avocado oil is a good substitute.
    • Garlic powder- Gives a garlicky flavor without burning in the oven. Onion powder also works.
    • Italian seasoning- Adds classic herb flavor that pairs well with sausage. Dried oregano or basil can be used if needed.
    • Black pepper- Adds mild heat without overpowering the dish.
    • Salt- Brings all the flavors together. Adjust to taste depending on how seasoned your sausage is.
    An overhead image of labeled recipe ingredients.

    How To Make Sheet Pan Sausages And Veggies

    Step 1- Season the vegetables.

    Preheat your oven to 400 degrees F so it’s fully heated.

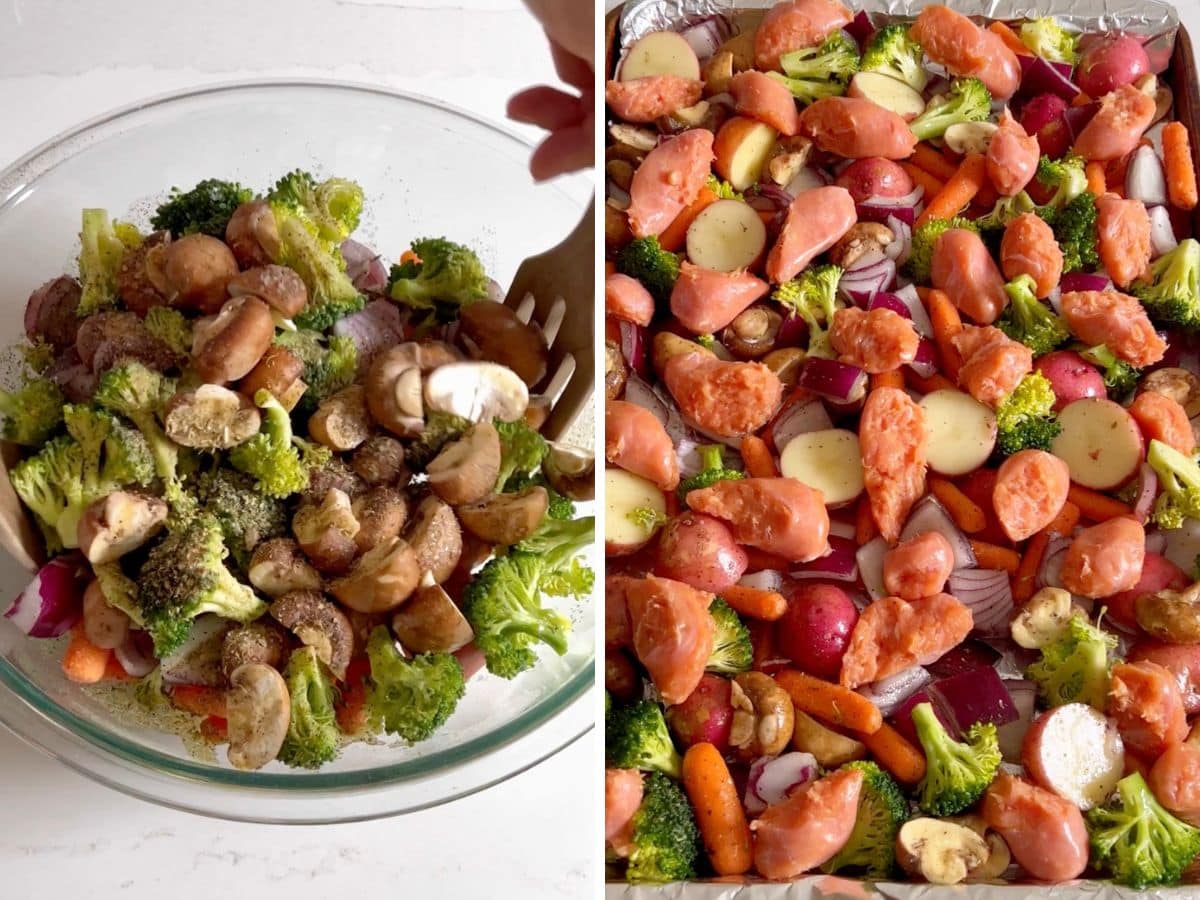
    Add all of the vegetables to a large bowl. Drizzle with olive oil, then sprinkle in the salt, pepper, garlic powder, and Italian seasoning. Toss well so everything is evenly coated.

    Veggies being mixed in a large bowl and veggies and sausage spread out on a sheet pan.

    Step 3- Add the veggies and the sausage to the pan.

    Spread the seasoned vegetables out onto a sheet pan in a single, even layer. Next, distribute the sliced sausage evenly over the vegetables so everything cooks at the same rate.

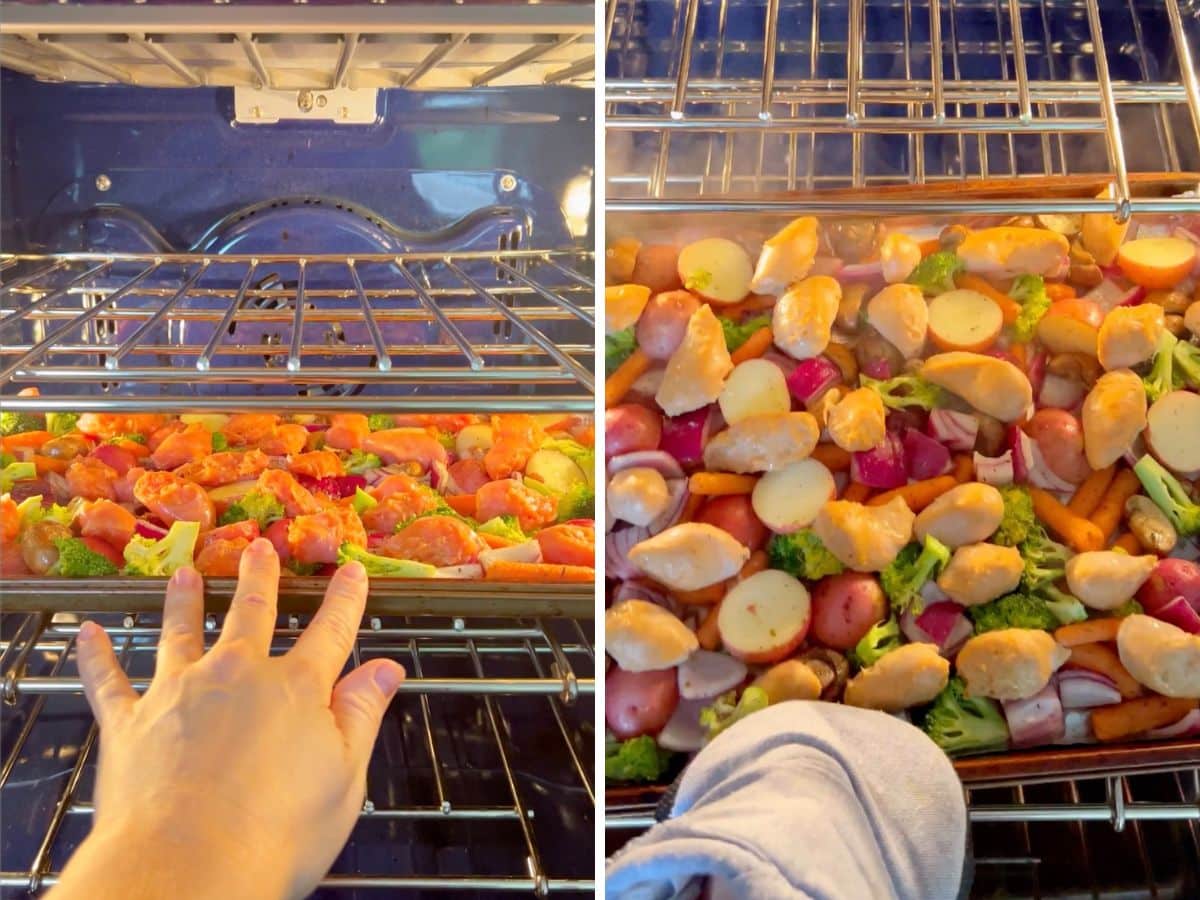
    The pan going in the oven to bake and then being shaken halfway through cooking.

    Step 4- Bake and serve.

    Bake for 30 minutes, giving the pan a good shake halfway through. Remove from the oven and serve warm.

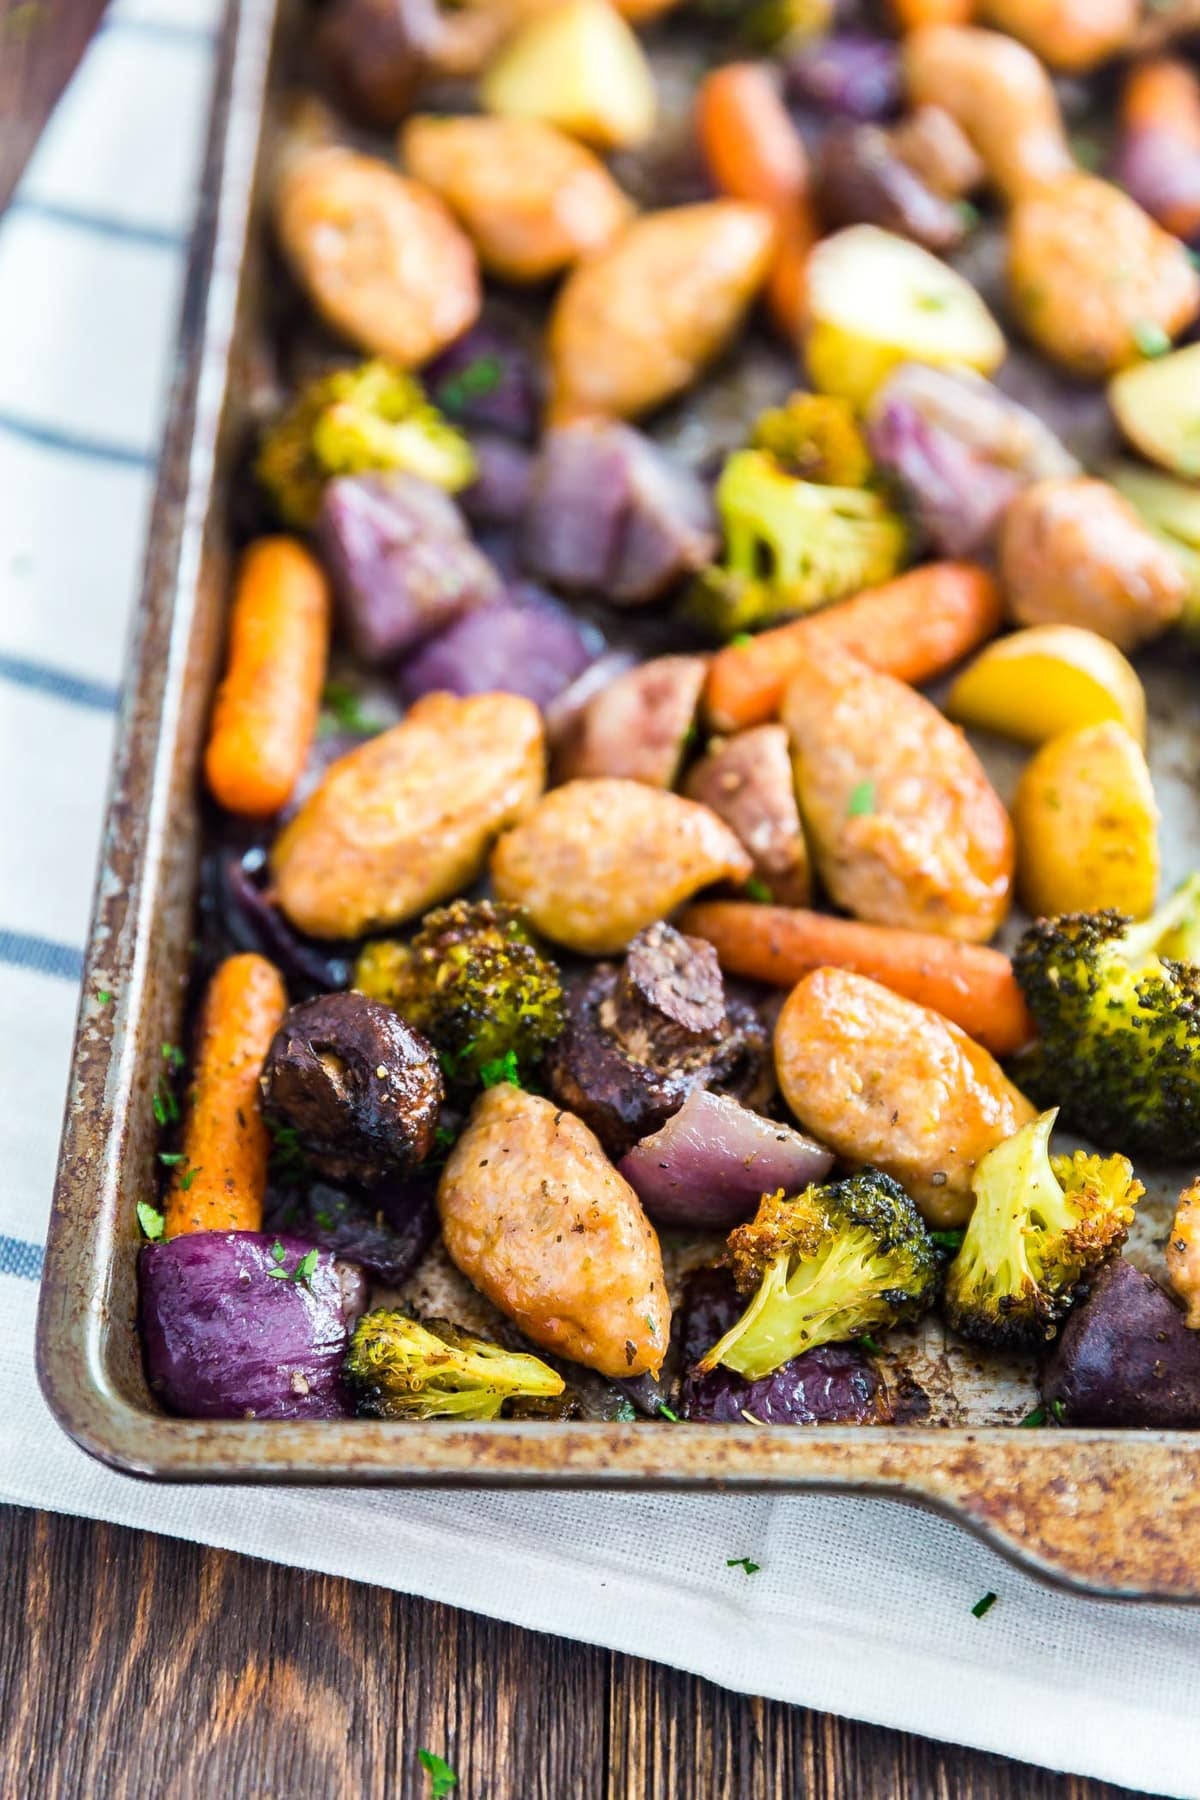
    A close up image of the corner of a pan of roasted veggies and sausage.

    Frequently Asked Questions

    How do I keep the vegetables from getting soggy?

    Make sure the pan isn’t overcrowded and use a large sheet pan so the vegetables roast instead of steaming. If your pan is two small to have a single layer, split them between two.

    How do I keep the sausage from drying out?

    Avoid overbaking and make sure the sausage has some oil from the vegetables to help keep it moist.

    What is the best seasoning for veggies?

    A simple mix of olive oil, salt, pepper, garlic powder, and Italian seasoning works well for most vegetables. You can also add smoked paprika, red pepper flakes, or extra herbs depending on what you like.

    An overhead image of plates of sausage and veggies next to the pan.

    Tips For Making Roasted Sausage And Veggies

    • Keeping the vegetables and potatoes close in size helps everything cook evenly at the same rate.
    • If you like your potatoes crispier, roast them in the pan for 10-15 minutes before adding the rest of the vegetables and sausage.
    • Use a large sheet pan. Giving everything enough space helps the vegetables roast instead of steaming. Divide between two pans if needed.
    • Finish with fresh herbs or cheese. A sprinkle of fresh parsley, basil, or grated Parmesan right before serving adds extra flavor with very little effort.
    • This recipe is very forgiving, so it’s a great way to use up whatever vegetables you already have in the fridge.
    • Ingredients to prep ahead- Chop the vegetables and slice the sausage.
    • Leftovers and storage- Store leftovers in an airtight container in the refrigerator for up to 3-4 days. Reheat in the oven or microwave until warmed through.
    A close up of a plate of sausage and vegetables.

    What To Serve With Sheet Pan Sausage And Veggies

    This dish is hearty on its own, but it pairs well with simple sides if you want to round out the meal. A fresh salad or a slice of crusty bread works great for soaking up any pan juices. Try serving it with:

    • Strawberry Salad With Goat Cheese
    • Chicken BBQ Sliders
    • Pasta Pomodoro Recipe
    • Lemon Pistachio Cake

    Other Italian Sausage Recipes To Try

    • A square image of Supreme Pizza One Pot Pasta.
      Supreme Pizza One Pot Pasta
    • Sausage and peppers pasta on a white plate with a napkin, onion and mushrooms in the background and a fork across the back of the plate.
      Pasta With Sausage Peppers And Onions
    • An overhead image of a bowl of Italian sausage and peppers with buns and a napkin next to it.
      Slow Cooker Italian Sausage
    • An overhead image of a bowl of bean soup with Italian sausage.
      Italian Bean Soup With Sausage

    Love this recipe? Please leave a 5 star ⭐️⭐️⭐️⭐️⭐️ rating in the recipe card below ⬇️ and/or a review in the comment section further down. Check out my Amazon Store for all my favorite tools, including those used in this recipe. And follow @thelifejolie on Instagram and TikTok!

    A plate of sausage and veggies with a fork on it.

    Sheet Pan Sausage and Roasted Veggies

    Jessy Freimann
    This sheet pan sausage and roasted veggies dish is quick, low-stress, and still feels satisfying and hearty. Everything cooks in one pan in about 40 minutes, making it perfect for busy days when you don’t have the energy for a pile of dishes.
    5 from 1 vote
    Print Recipe Pin Recipe
    Prep Time 10 minutes mins
    Cook Time 30 minutes mins
    Total Time 40 minutes mins
    Course Main Course
    Cuisine American
    Servings 4 servings
    Calories 568 kcal

    Equipment

    • 1 sheet pan
    • 1 cutting board
    • 1 chefs knife
    • 1 Measuring cups and spoons
    • 1 mixing bowl

    Ingredients
      

    • 2 cups baby potatoes halved
    • 2 cups broccoli florets
    • 1 cup onions cut to 1 inch chunks
    • 2 cups mushrooms half or quarter the large ones for uniform size- this was around a 6 ounce package for me
    • 1 cup baby carrots
    • 2 Tablespoons olive oil
    • 1 teaspoon salt
    • ½ teaspoon pepper
    • ½ teaspoon garlic powder
    • ½ teaspoon Italian seasoning
    • 1 pound Italian sausage links sliced on the bias (diagonal)

    Instructions
     

    • Preheat the oven to 400 degrees F. Place all the vegetables into a large bowl.
    • Add the olive oil, salt, pepper, garlic powder and Italian seasoning to the bowl and toss well to evenly coat all vegetables.
    • Spread the vegetables onto a sheet pan in one even layer.
    • Distribute the sausage slices throughout the pan.
    • Bake for 30 minutes giving the pan a good shake halfway through to prevent sticking. Serve immediately.

    Video

    Notes

    • Keeping the vegetables and potatoes close in size helps everything cook evenly at the same rate.
    • If you like your potatoes crispier, roast them in the pan for 10-15 minutes before adding the rest of the vegetables and sausage.
    • Use a large sheet pan. Giving everything enough space helps the vegetables roast instead of steaming. Divide between two pans if needed.
    • Finish with fresh herbs or cheese. A sprinkle of fresh parsley, basil, or grated Parmesan right before serving adds extra flavor with very little effort.
    • This recipe is very forgiving, so it’s a great way to use up whatever vegetables you already have in the fridge.
    • Ingredients to prep ahead- Chop the vegetables and slice the sausage.
    • Leftovers and storage- Store leftovers in an airtight container in the refrigerator for up to 3-4 days. Reheat in the oven or microwave until warmed through.
    Nutrition

    Serving: 1servingCalories: 568kcalCarbohydrates: 25gProtein: 21gFat: 43gSaturated Fat: 14gPolyunsaturated Fat: 5gMonounsaturated Fat: 21gCholesterol: 86mgSodium: 1459mgPotassium: 1044mgFiber: 5gSugar: 6gVitamin A: 4704IUVitamin C: 62mgCalcium: 78mgIron: 3mg
    Tried this recipe?Let us know how it was!

    Dutch Oven Chicken Noodle Soup

    Feb 13, 2026 · Leave a Comment

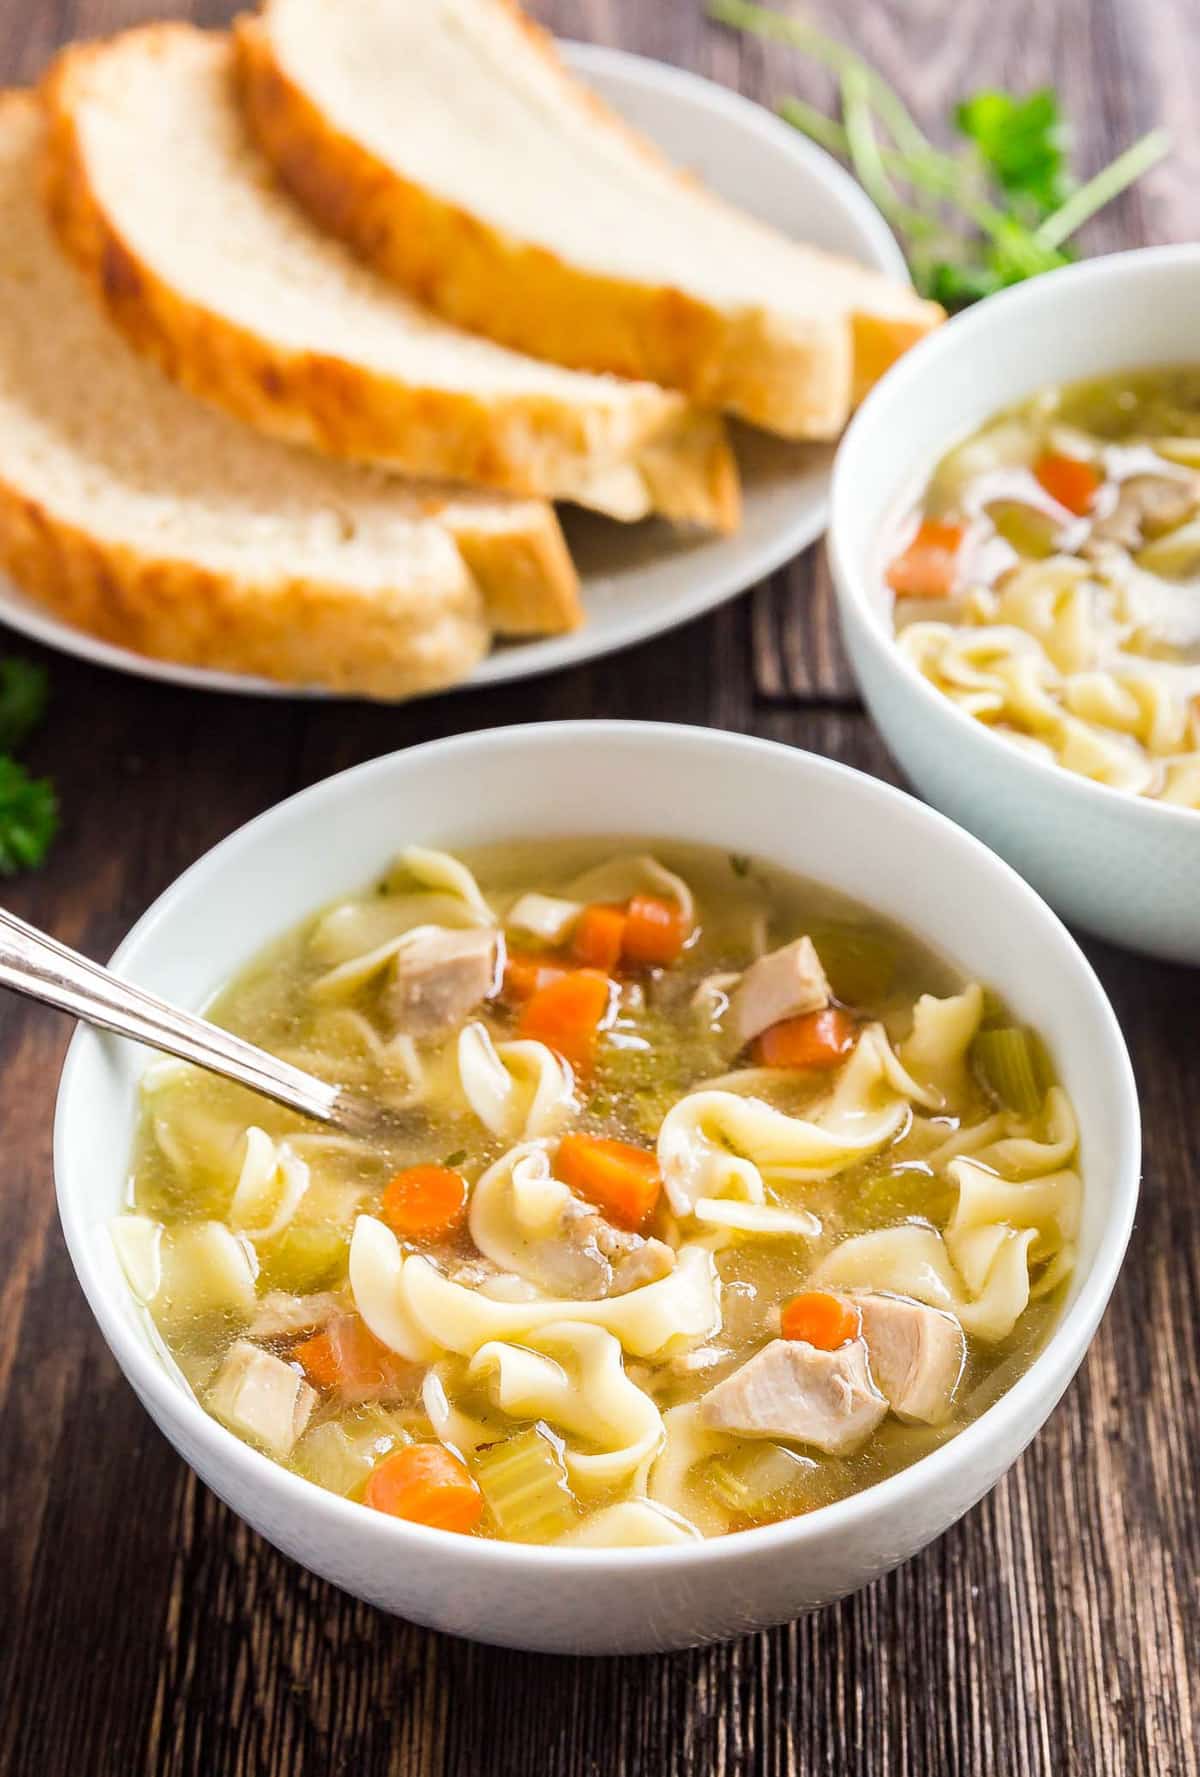
    A bowl of chicken and egg noodles soup with sliced bread and another bowl behind it.

    Making Dutch oven chicken noodle soup from scratch is easier than it sounds. With tender chicken, egg noodles, and plenty of vegetables, it’s a cozy, comforting meal you’ll come back to again and again.

    A bowl of chicken and egg noodles soup with sliced bread and another bowl behind it.
    [feast_advanced_jump_to]

    Why You’ll Love This Chicken Noodle Soup Recipe

    Everyone needs a solid chicken soup recipe they can rely on. This one checks all the boxes… comforting, flexible, and made with ingredients you likely already have on hand. What makes this soup especially great is how forgiving it is. You can make it with a rotisserie chicken, leftovers from a roast, or even just a carcass and a handful of vegetables. 

    Cooking it low and slow in a Dutch oven builds deep flavor without any extra work, making this easy homemade chicken noodle soup a true staple. It’s warm, nourishing, and exactly the kind of meal you want when someone’s under the weather, or you just want something simple and cozy. Here's why this one’s a keeper:

    • Simple method, big flavor
    • Easy to make with minimal prep
    • Great for using up leftovers
    • Freezer-friendly and make-ahead ready
    • Cozy without feeling heavy
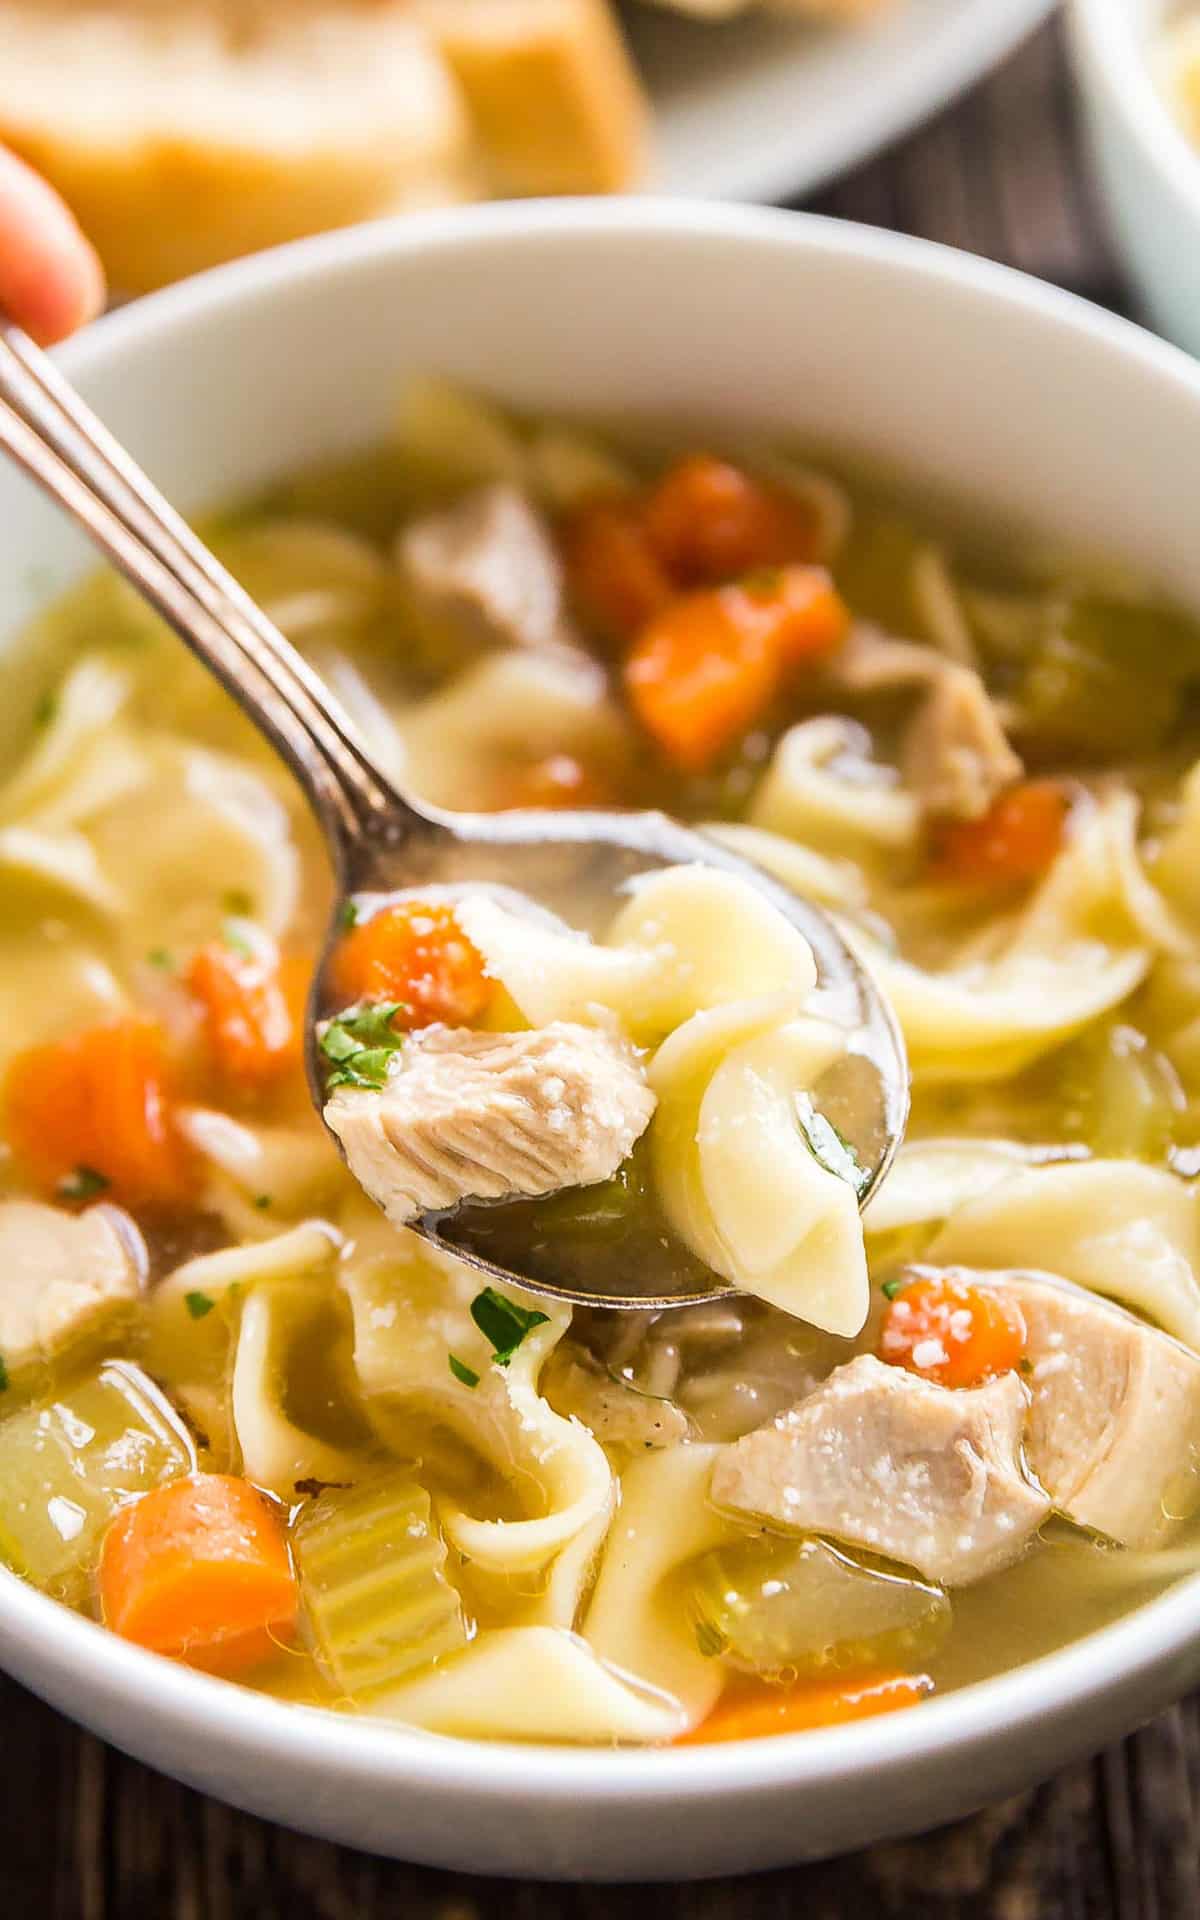
    A close up of a spoonful of chicken soup being held over the bowl.

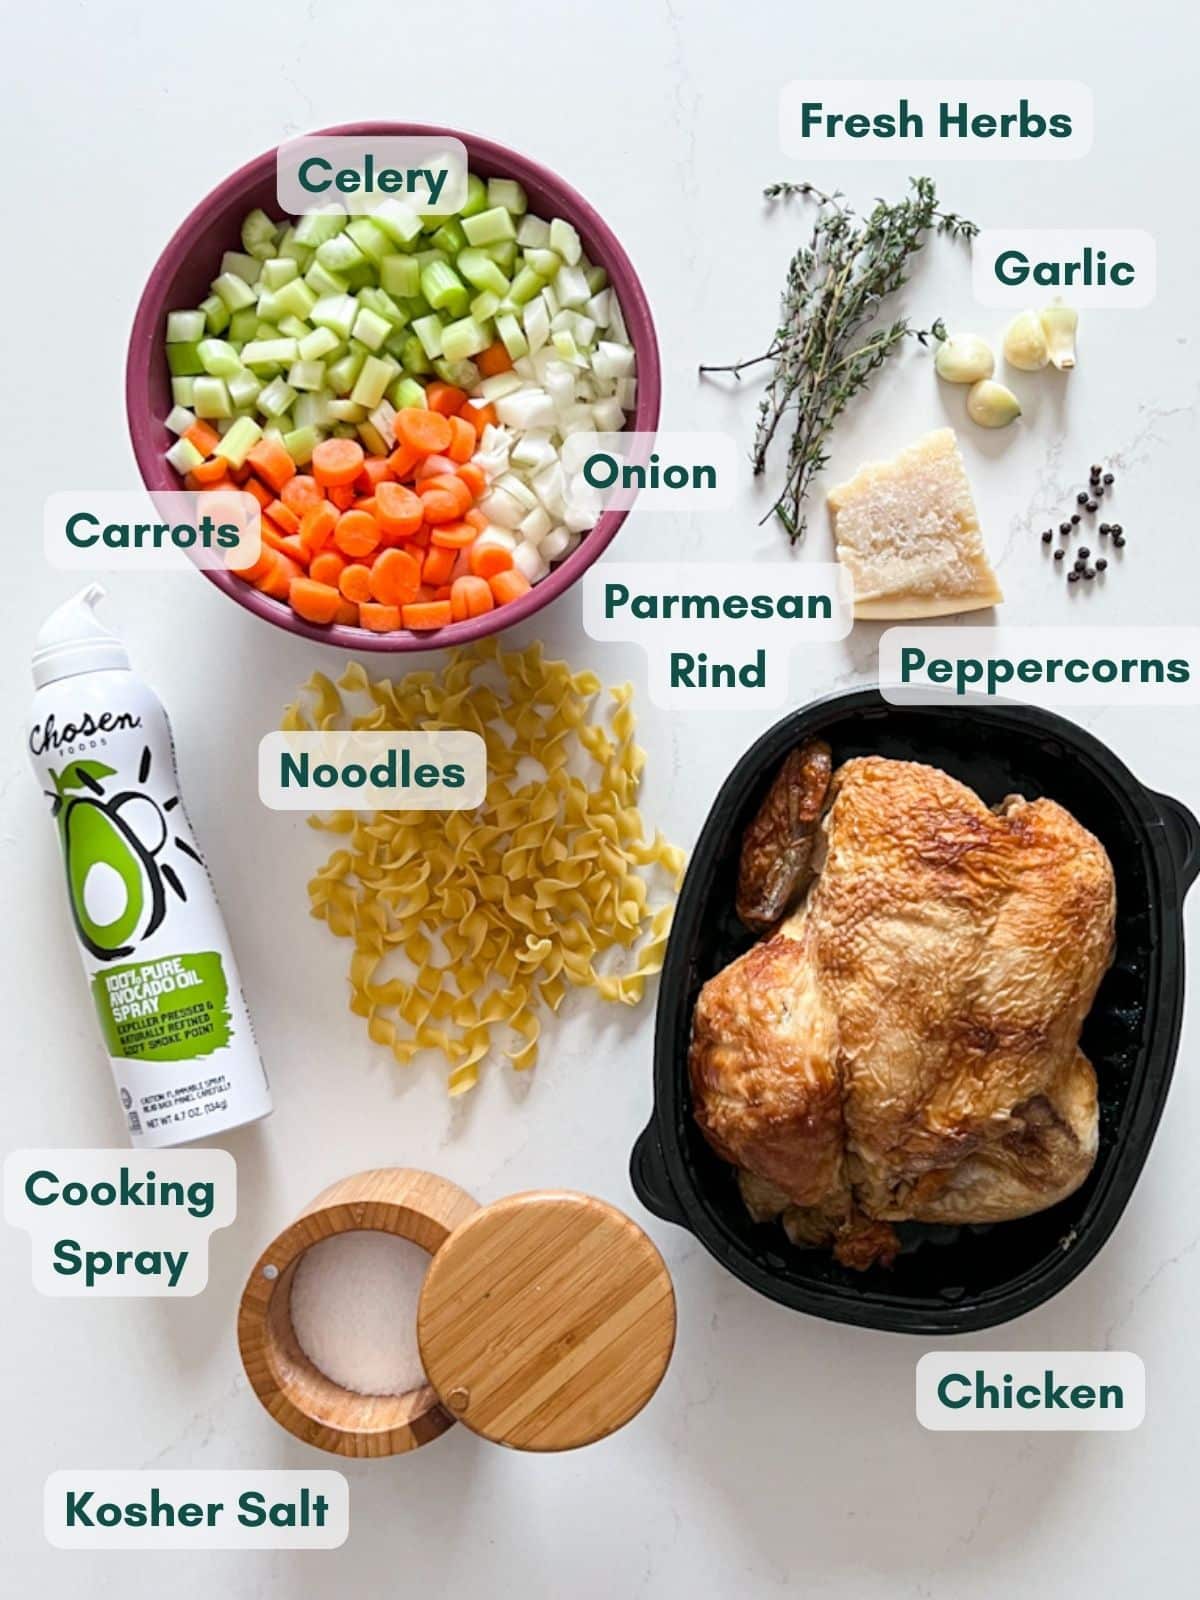
    Ingredient Information And Substitutions

    • Chicken- A rotisserie chicken works perfectly here- I love using the carcass for this. You can also use leftover roast chicken, turkey, or any cooked or raw chicken pieces you have.
    • Noodles- Egg noodles are classic, but any small or medium pasta will work.
    • Onion- Adds sweetness and depth to the broth as it cooks. Yellow or white onions both work well.
    • Carrots- Bring natural sweetness and balance out the savory flavors. Parsnips are a great swap.
    • Celery- Adds that classic savory backbone. Fennel can be used for a slightly different flavor.
    • Fresh herbs- Parsley adds freshness and keeps the soup tasting light, while thyme gives the soup a classic, cozy flavor. Dried herbs can be used in a pinch, but reduce the amount.
    • Garlic- Adds warmth and depth without overpowering the broth. Garlic powder works as a substitute.
    • Whole black peppercorns- Provide gentle heat and better flavor than ground pepper. Cracked black pepper works too.
    • Bay leaf- Optional. It adds subtle depth as the soup simmers. Remove before serving.
    • Parmesan rind- Also optional, but highly recommended for extra richness and depth. 
    An overhead image of labeled recipe ingredients.

    How To Make Chicken Noodle Soup In A Dutch Oven

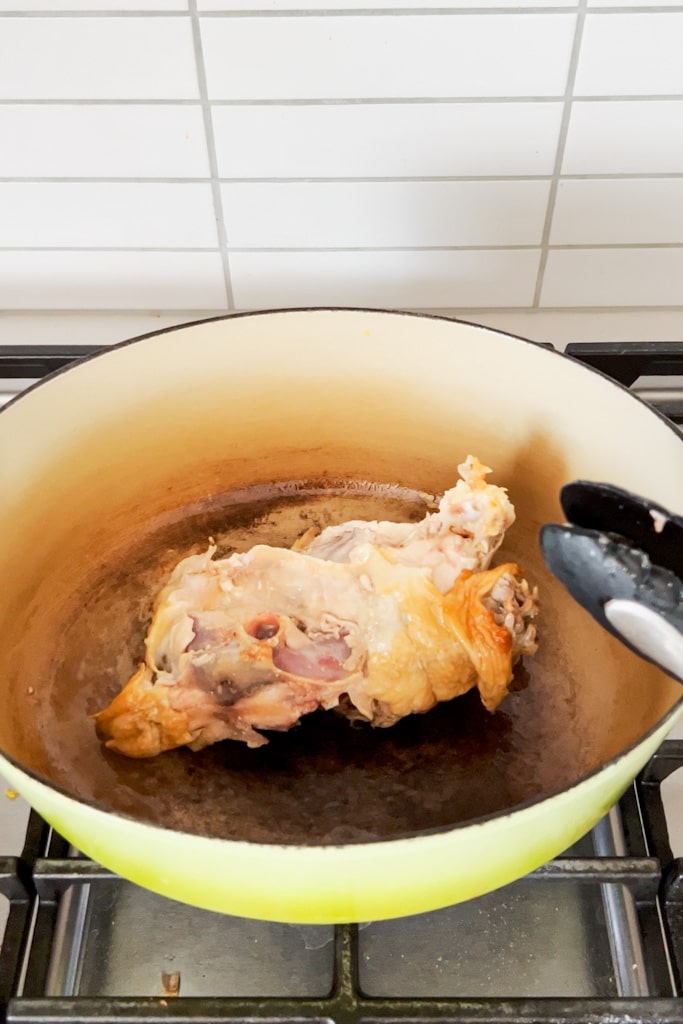
    Step 1- Brown the carcass.

    Heat a Dutch oven over medium-high heat with a little oil. Brown the chicken carcass on all sides, then remove it and set it aside. If using chicken pieces, sub them right in, if cooked omit this step and add with the water.

    A chicken carcass browning in a dutch oven on the stove.

    Step 2- Build the vegetable base.

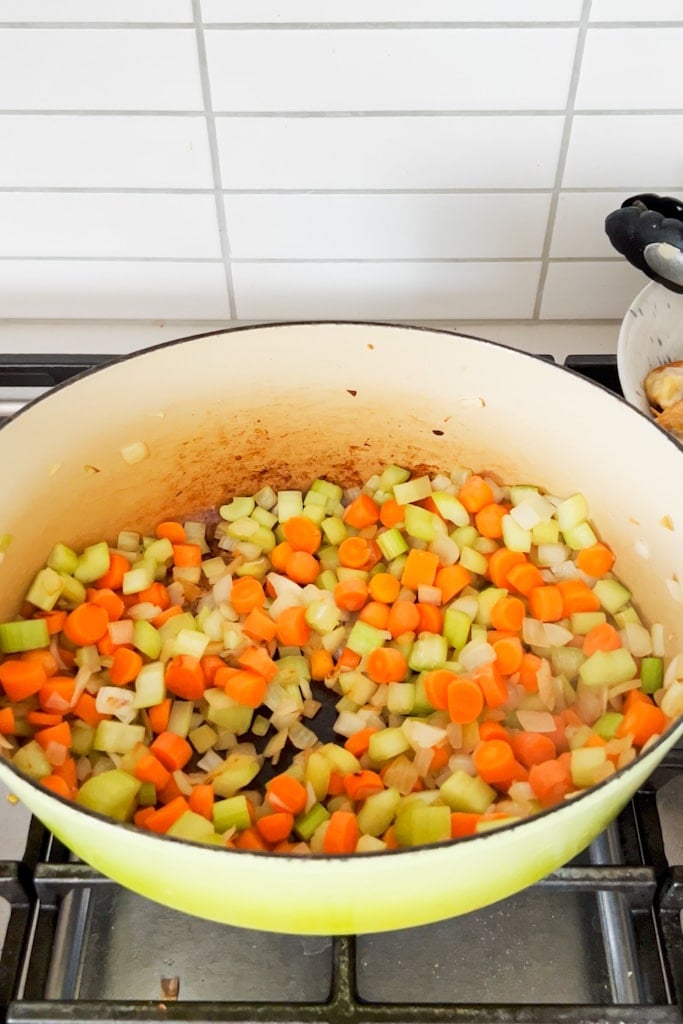
    Add the onion, carrots, and celery to the same pot. Cook, stirring often, until softened and lightly caramelized.

    Chopped vegetables caramelizing in a dutch oven on the stove.

    Step 3- Add water and return the carcass.

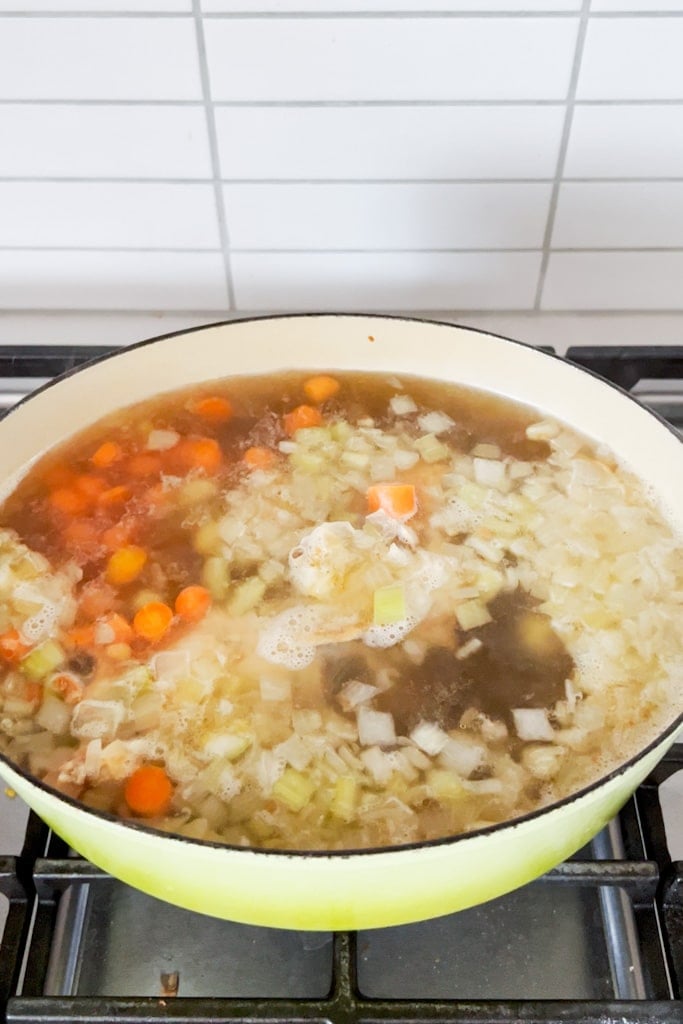
    Place the carcass back into the pot and add enough water to fully cover everything. Bring to a boil.

    Soup ingredients with water added in a dutch oven on the stove.

    Step 4- Add the flavor bundle.

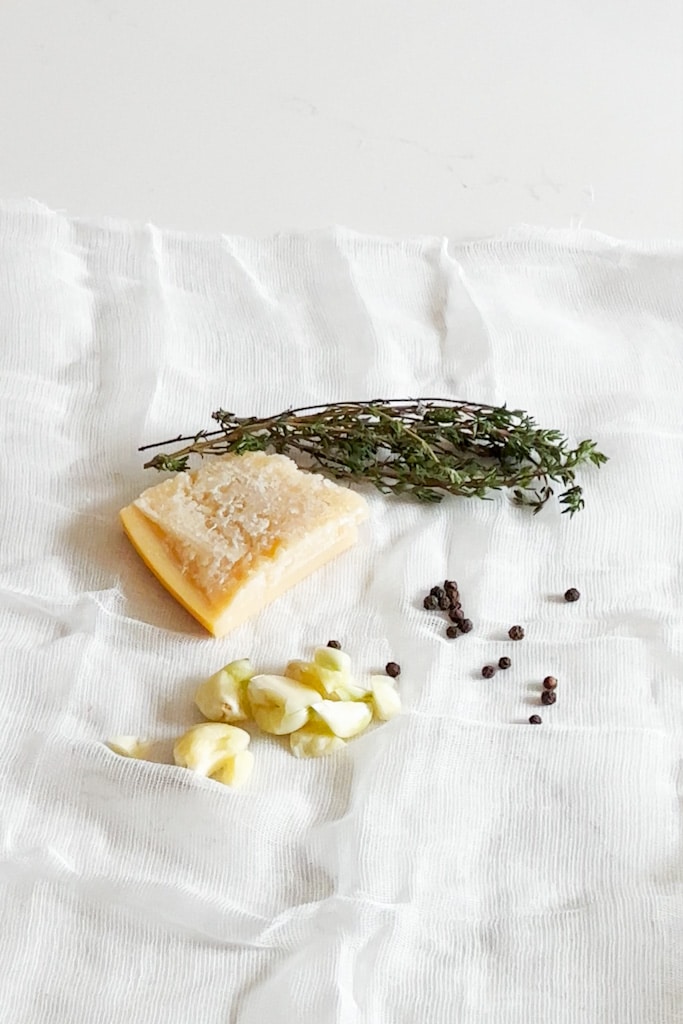
    Wrap the garlic, herbs, peppercorns, and Parmesan rind in cheesecloth and add them to the pot.

    Garlic, peppercorns, fresh herbs and a parmesan rind on top of a cheesecloth.

    Step 5- Simmer.

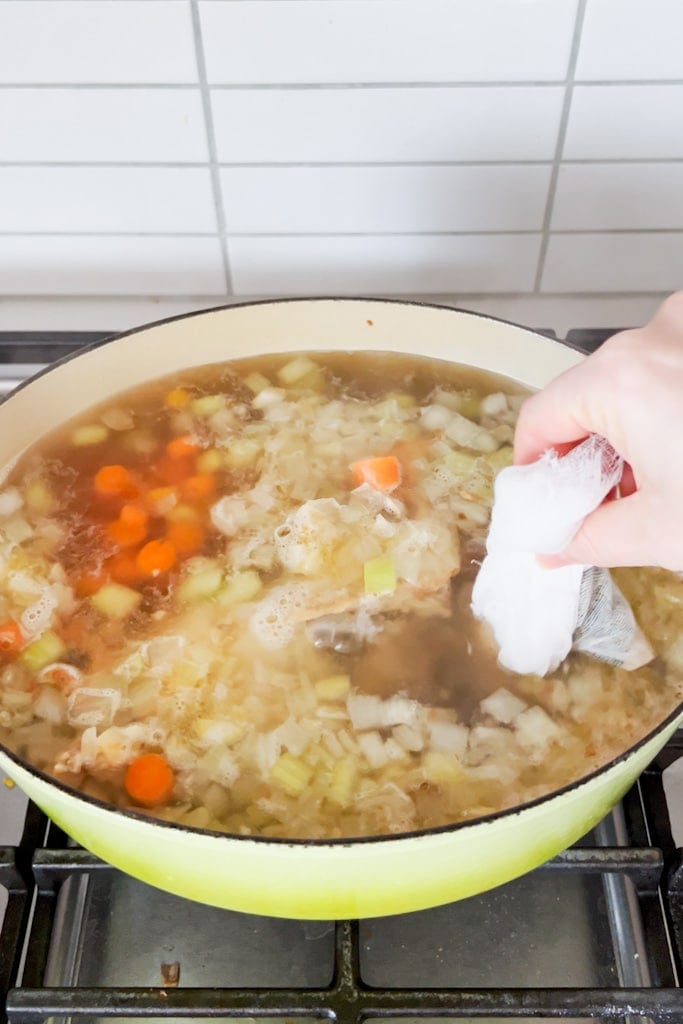
    Lower the heat and simmer gently for at least an hour. Remove the sachet and season with salt to taste.

    A hand adding a cheesecloth packet into the soup.

    Step 6- Serve with noodles.

    Ladle the soup over hot, cooked egg noodles and finish with grated Romano cheese.

    A close up image of a bowl for chicken soup with noodles.

    Frequently Asked Questions

    Can you freeze chicken noodle soup?

    Yes. Let it cool completely, then freeze without the noodles for the best texture. Add freshly cooked noodles when reheating and a little more chicken broth if needed.

    What to serve with chicken noodle soup?

    Crusty bread is always a great choice, especially warm and fresh. A simple green salad or a grilled cheese sandwich also pairs well, making the soup a complete meal.

    Tips For Making Chicken Noodle Soup From Carcass

    • This soup is a great way to use up leftover roast chicken and make the most of what you already have.
    • Watch the heat. Stir vegetables often and lower the heat if they start browning too quickly. Also, keep the soup at a simmer instead of a full boil.
    • Don’t skip the Parmesan rind. It adds depth without making the soup taste cheesy.
    • This recipe is very flexible. Use up any extra vegetables you have in the fridge when making chicken noodle soup with carcass.
    • Bundle your herbs. Using cheesecloth makes cleanup easy and keeps the broth clear.
    • Add salt gradually, tasting as you go until the flavor is just right.
    • Don't cook the noodles in the same pot. They'll absorb too much broth and turn mushy. Instead, cook the pasta al dente and ladle the soup over the noodles when serving.
    • Ingredients to prep ahead- Dice the vegetables and shred the chicken.
    • Leftovers and storage- Store in an airtight container in the fridge for up to 3-4 days. Reheat gently on the stovetop or in the microwave.
    An overhead image of a bowl of chicken pasta soup with sliced bread.

    What Goes With Chicken Noodle Soup

    This soup is comforting on its own, but pairing it with a few simple sides makes it even better. Try serving the leftover roast chicken noodle soup with:

    • Italian Tuna
    • Easy Homemade Sandwich Bread Recipe
    • Crispy Fried Potatoes
    • Lemon Pistachio Cake

    Other Hearty Soup Recipes To Try

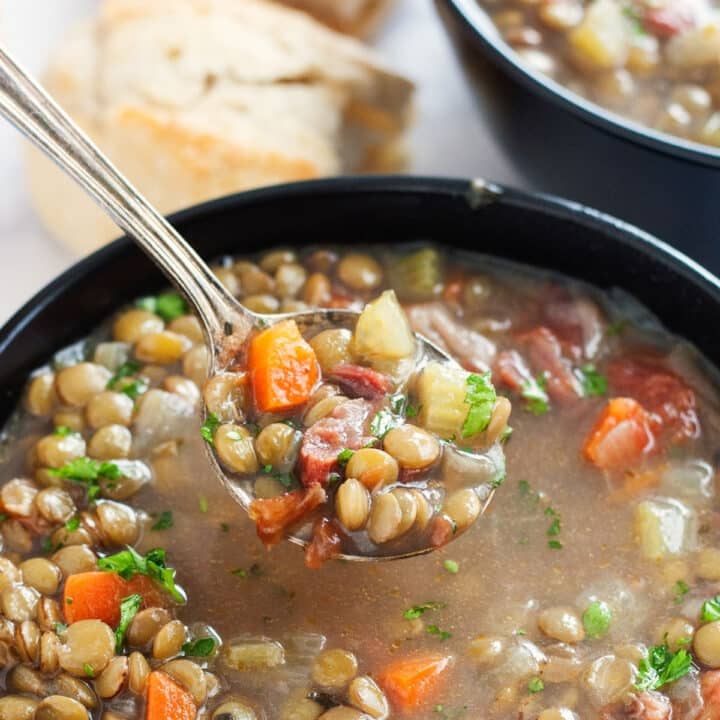
    • A spoon holding up a scoop of lentil soup with ham from a black bowl of it.
      Carrot and Lentil Soup
    • An overhead image of a bowl of bean soup with Italian sausage.
      Italian Bean Soup With Sausage
    • A spoon holding a scoop of potato ham soup.
      Creamy Ham and Potato Soup
    • A bowl of squash soup with burrata and cilantro on top and chunks of squash and cilantro in the background.
      Savory Spiced Butternut Squash Soup

    Love this recipe? Please leave a 5 star ⭐️⭐️⭐️⭐️⭐️ rating in the recipe card below ⬇️ and/or a review in the comment section further down. Check out my Amazon Store for all my favorite tools, including those used in this recipe. And follow @thelifejolie on Instagram and TikTok!

    A bowl of chicken and egg noodles soup with sliced bread and another bowl behind it.

    Dutch Oven Chicken Noodle Soup

    Jessy Freimann
    Making Dutch oven chicken noodle soup from scratch is easier than it sounds. With tender chicken, egg noodles, and plenty of vegetables, it’s a cozy, comforting meal you’ll come back to again and again.
    5 from 1 vote
    Print Recipe Pin Recipe
    Prep Time 10 minutes mins
    Cook Time 1 hour hr 20 minutes mins
    Total Time 1 hour hr 30 minutes mins
    Course Main
    Cuisine American
    Servings 8 servings
    Calories 56 kcal

    Equipment

    • cutting board
    • chefs knife
    • Cheesecloth
    • Dutch oven
    • wooden spoon

    Ingredients
      

    • Cooking spray
    • 1 chicken carcass or 1 package chicken thighs and use that meat
    • 1 cup diced onion
    • 1 cup diced carrot
    • 1 cup diced celery
    • 8-10 cups water, enough to cover all ingredients
    • 3 sprigs fresh Parsley
    • 3 springs fresh Thyme
    • 2-3 cloves fresh garlic
    • ½ teaspoon black peppercorns
    • 1 Parmesan rind optional but amazing!
    • 2 cups diced chicken meat
    • 2 cups cooked egg noodles cooked to al dente as per package directions
    • 1 teaspoon Kosher salt or more to taste
    • Romano cheese for garnish

    Instructions
     

    • Spray a large heavy bottom dutch oven with cooking spray and heat over medium high heat.
    • Brown the chicken carcass on all sides, around 5-6 minutes and remove from the pan.
    • Add the onions, carrots and celery and saute for 5-6 minutes to soften and begin caramelizing (reduce the heat if you need to so as not to burn them and stir often).
    • Return the carcass to the pan and fill the pan with water (about 6-8 cups). Bring to a boil.
    • While you're waiting for the soup to boil, lay out a piece of cheese cloth (around a square foot) and in the middle place the parsley, thyme, garlic cloves, black peppercorns and parmesan rind. Roll it up into the cheesecloth and tie the ends together to seal it in and make a small packet. Place this into the water along with the chicken meat..
    • Once it's boiling, reduce the heat to medium low. Simmer for around one hour (or more), partially covered, stirring periodically. You can add water as needed (or even broth at the end if you really need to).
    • Once you're done simmering the soup, remove the carcass and the herb packet from the pot.
    • Add the cooked noodles and salt the soup to taste (make sure you're started with a small amount, stirring it in and tasting. Repeat this process until it's reached the right flavor).
    • Ladle into bowls and sprinkle with Romano cheese. Serve with crusty bread.

    Video

    Notes

    • This soup is a great way to use up leftover roast chicken and make the most of what you already have.
    • Watch the heat. Stir vegetables often and lower the heat if they start browning too quickly. Also, keep the soup at a simmer instead of a full boil.
    • Don’t skip the Parmesan rind. It adds depth without making the soup taste cheesy.
    • This recipe is very flexible. Use up any extra vegetables you have in the fridge when making chicken noodle soup with carcass.
    • Bundle your herbs. Using cheesecloth makes cleanup easy and keeps the broth clear.
    • Add salt gradually, tasting as you go until the flavor is just right.
    • Don't cook the noodles in the same pot. They'll absorb too much broth and turn mushy. Instead, cook the pasta al dente and ladle the soup over the noodles when serving.
    • Ingredients to prep ahead- Dice the vegetables and shred the chicken.
    • Leftovers and storage- Store in an airtight container in the fridge for up to 3-4 days. Reheat gently on the stovetop or in the microwave.

    Nutrition

    Serving: 1servingCalories: 56kcalCarbohydrates: 10gProtein: 2gFat: 1gSaturated Fat: 0.2gPolyunsaturated Fat: 0.2gMonounsaturated Fat: 0.2gTrans Fat: 0.01gCholesterol: 12mgSodium: 305mgPotassium: 23mgFiber: 1gSugar: 0.2gVitamin A: 59IUVitamin C: 1mgCalcium: 15mgIron: 0.4mg
    Tried this recipe?Let us know how it was!

    Red Clam Sauce

    Feb 9, 2026 · 10 Comments

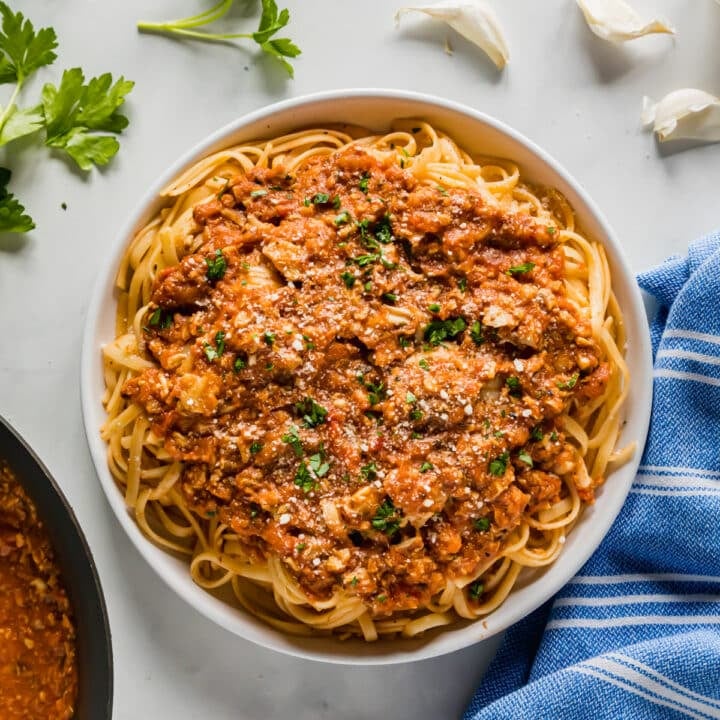
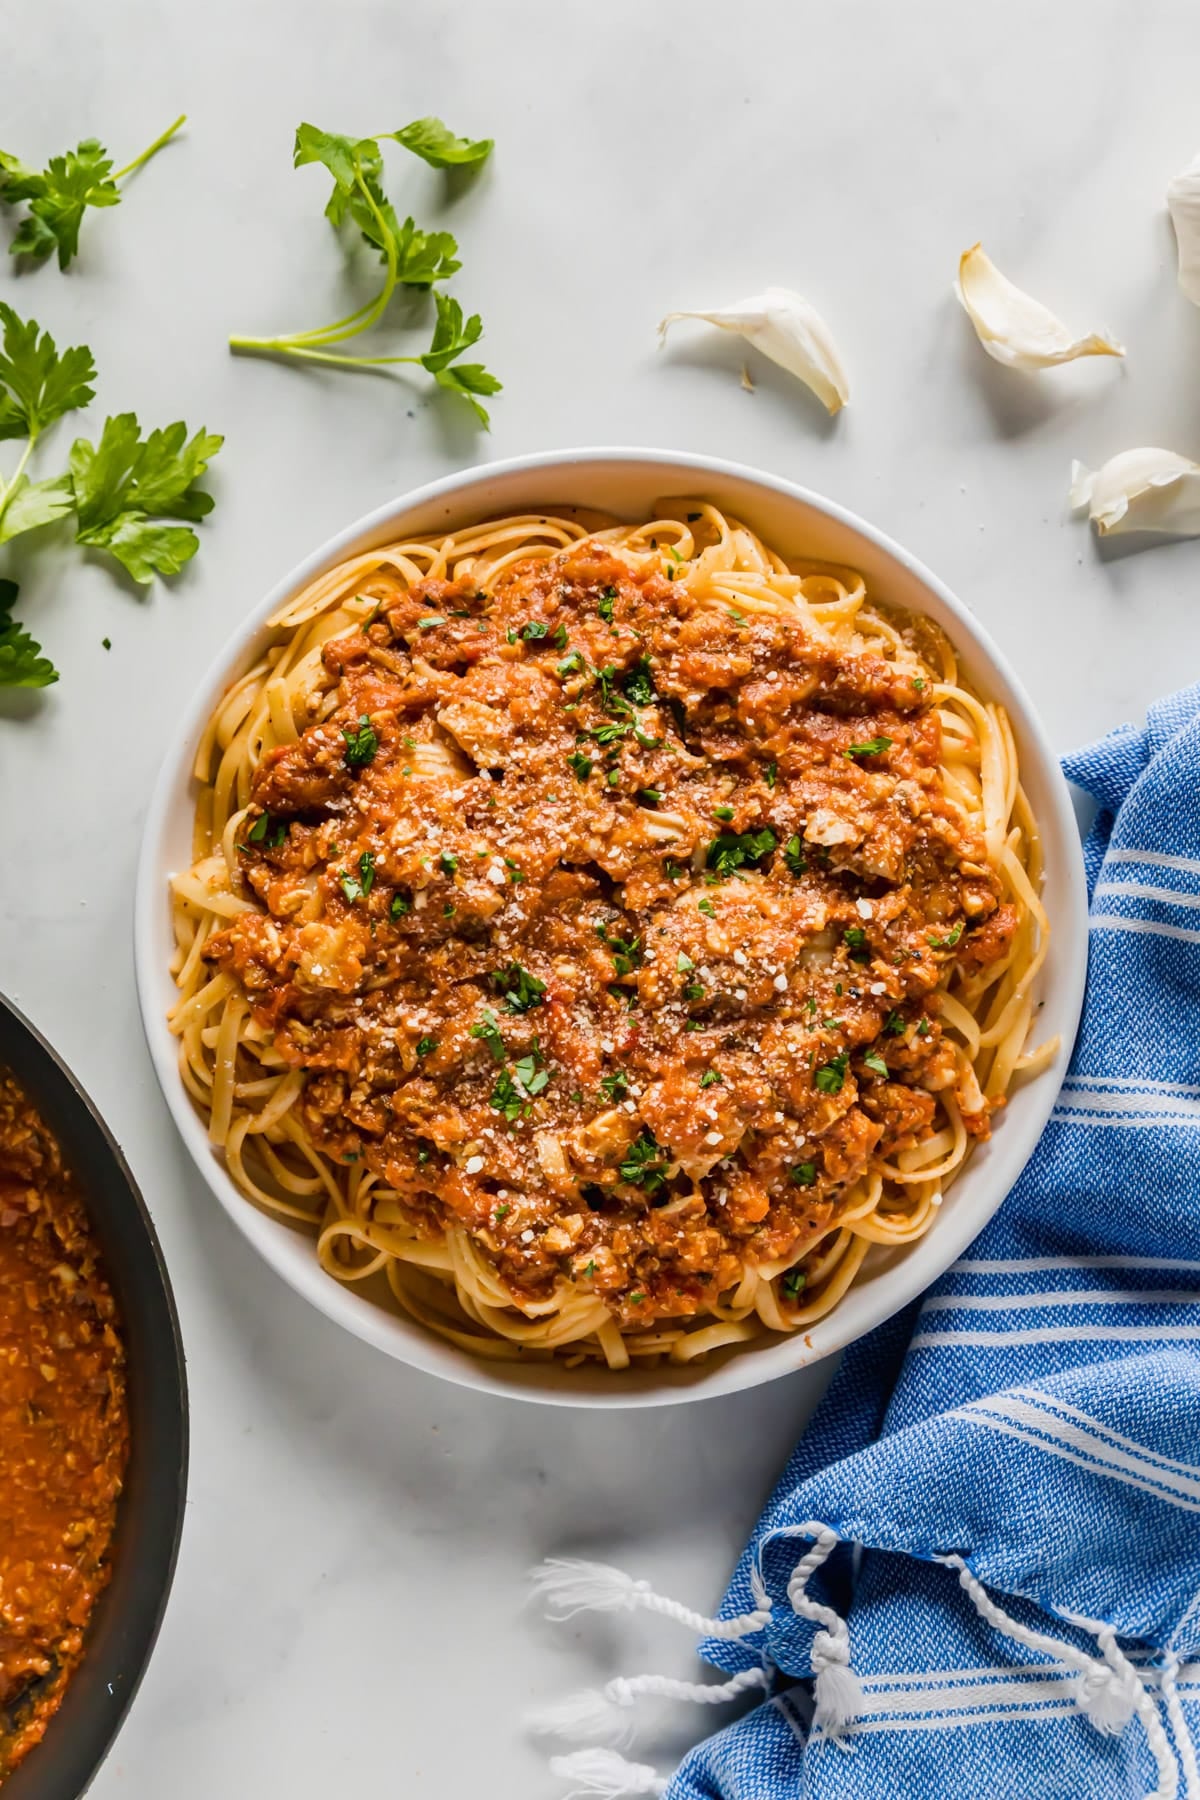
    An overhead image of a bowl of linguine with clam sauce.

    Pair red clam sauce with linguine for a classic Italian pasta dish made with tender clams, garlic, white wine, and tomatoes. It’s rich, comforting, and comes together in about 30 minutes, making it perfect for both busy weeknights and casual dinner guests.

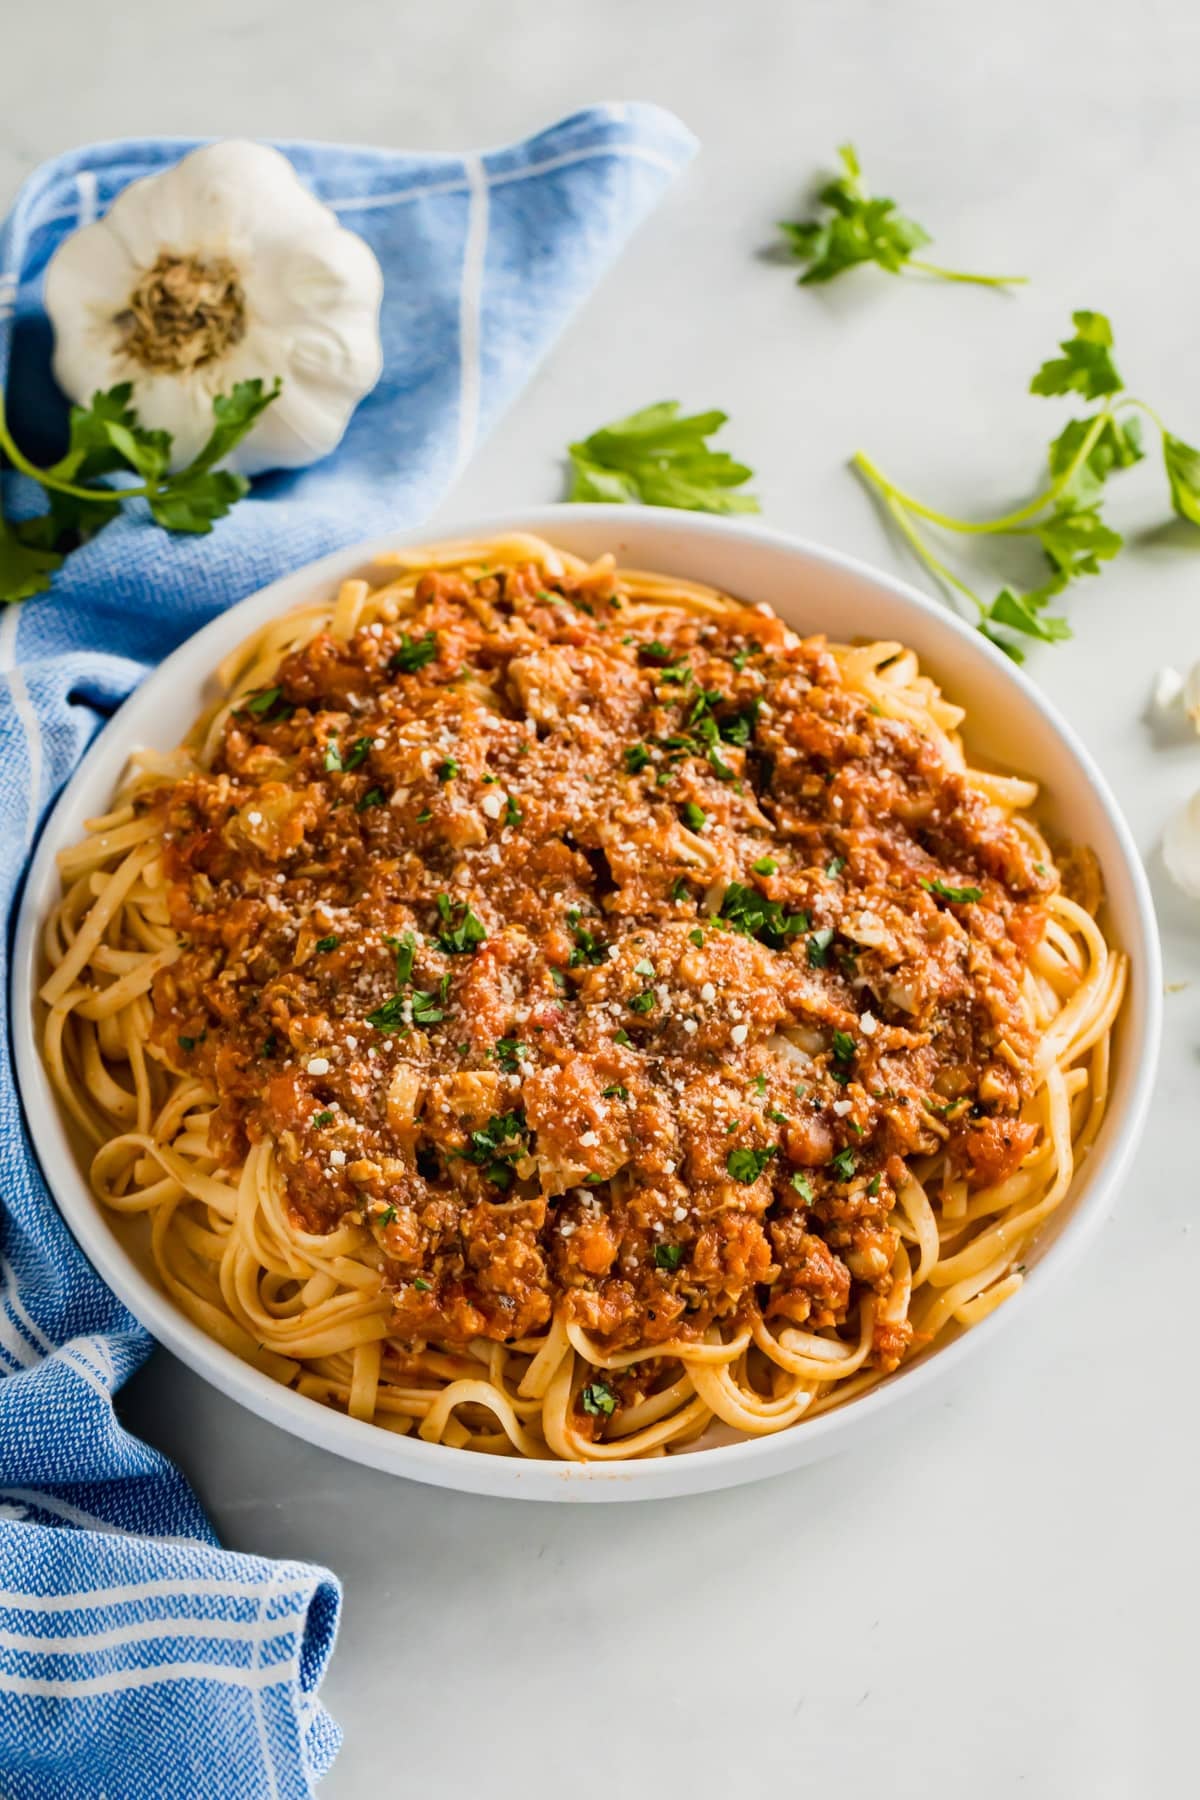
    A bowl of linguine and clams next to a blue towel with some garlic and parsley around it.
    [feast_advanced_jump_to]

    Why You’ll Love Linguine With Red Clam Sauce

    I’ve always been a lover of seafood. Ever since I was a little kid, if there was an opportunity to eat shellfish or shrimp, I was all over it. And being an Italian-American gal, clam sauce over pasta was always an absolute favorite in my house. It’s one of those meals that feels nostalgic, comforting, and special all at the same time.

    At most Italian restaurants, you’ll usually see two versions of clam sauce on the menu: white and red. Both are seriously delicious, but today I’m focusing on the tomato-based version. It’s rich, savory, and incredibly satisfying without feeling heavy. Here’s why you’ll love this linguine and clam sauce recipe as much as I do:

    • Rich, savory, and perfectly balanced
    • Works as a main or a side
    • Simple steps, no stress
    • Done in under 30 minutes
    • Great for entertaining
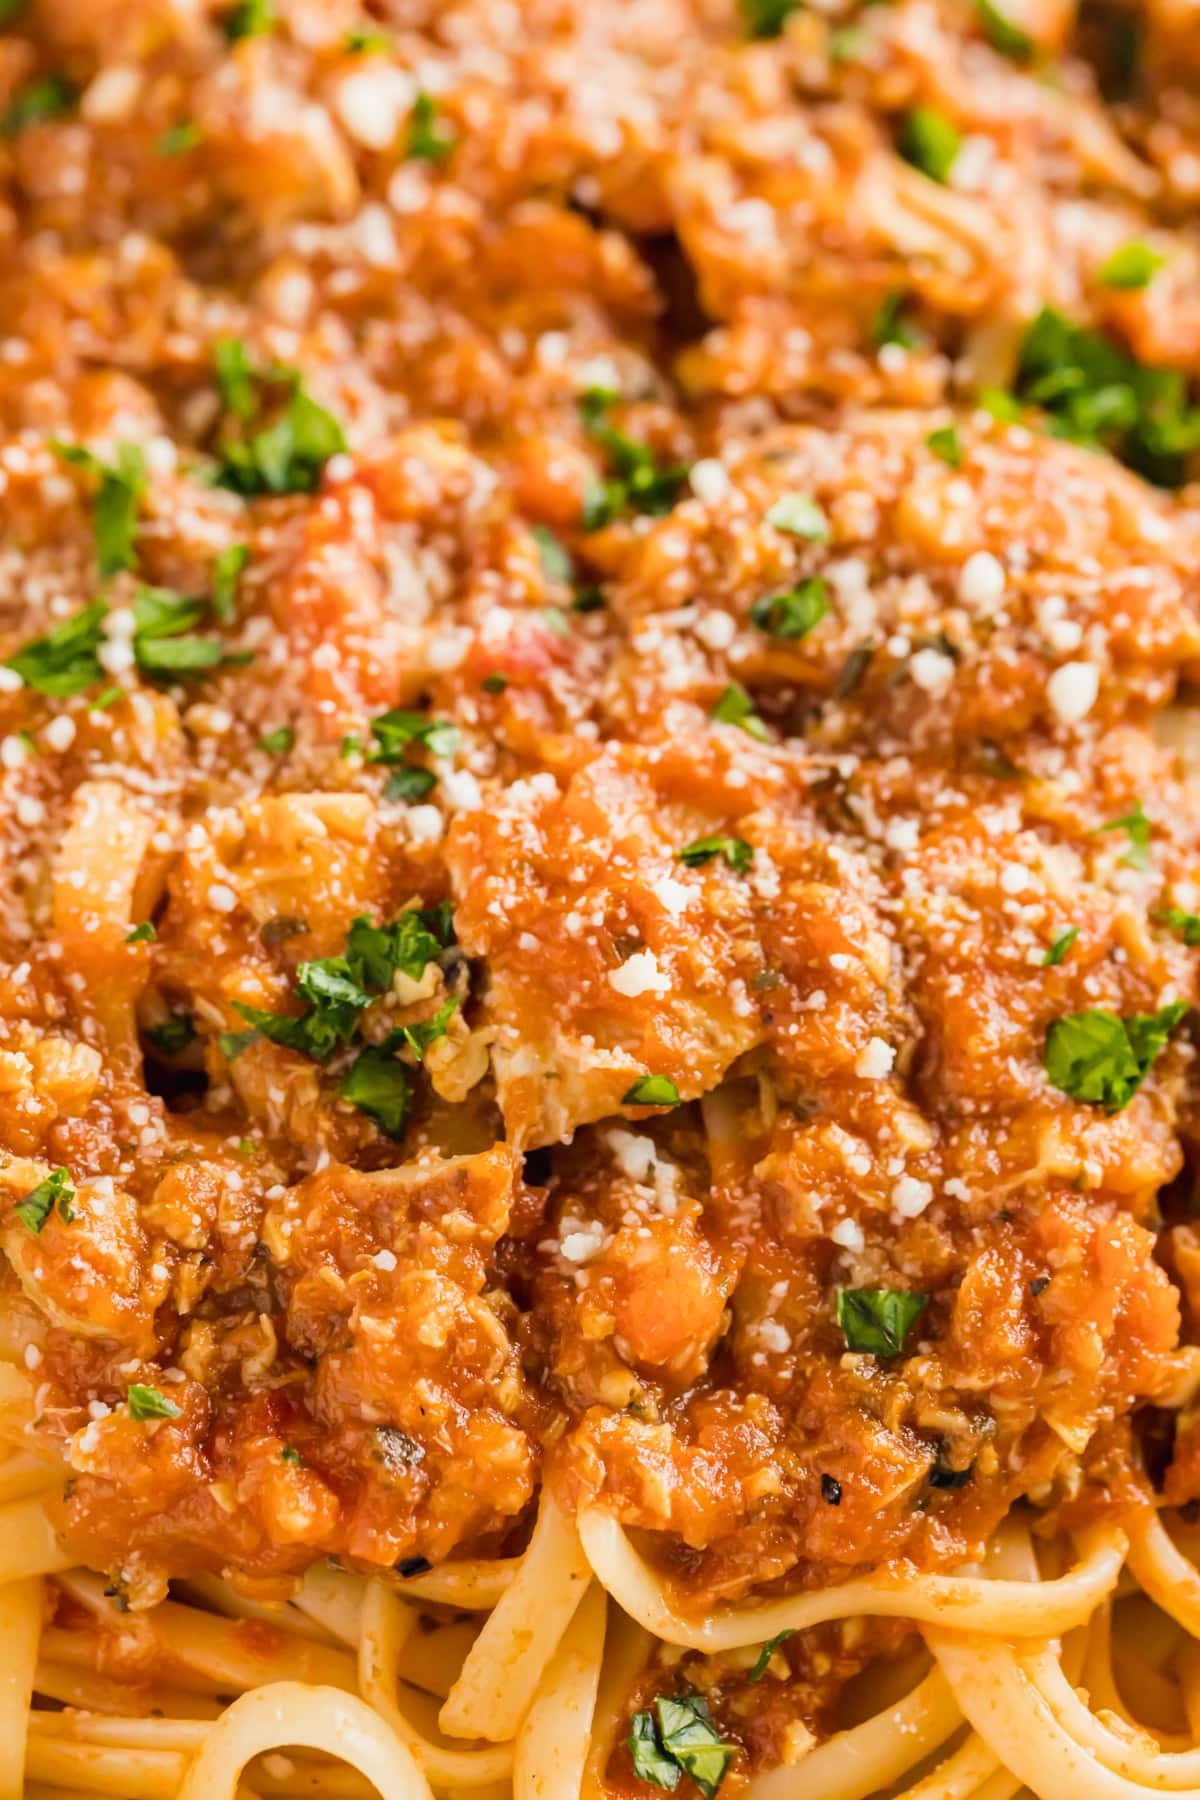
    A close up image of red clam sauce on linguine.

    Ingredient Information And Substitutions

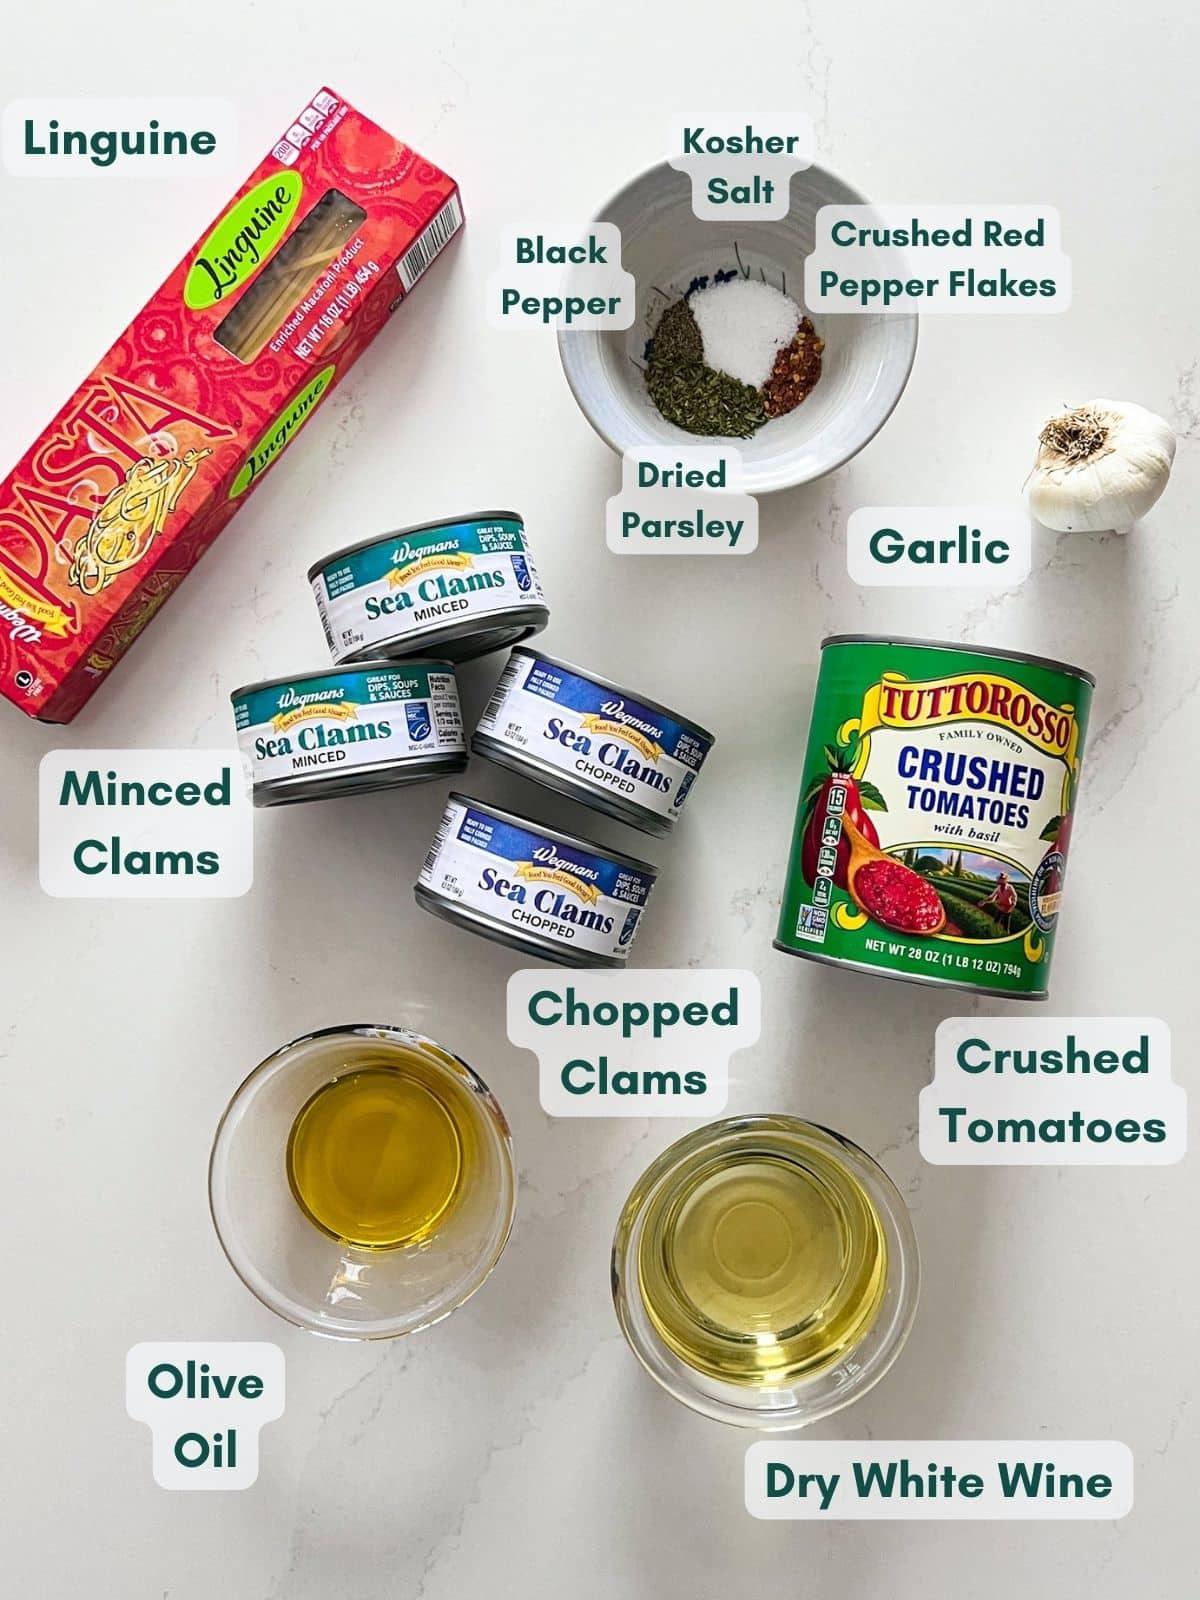
    • Clams- I use a mix of chopped and minced canned clams for great flavor and texture. You can use fresh baby clams if you’d like, but canned clams keep this recipe easy. Be sure to drain them well before adding.
    • Crushed tomatoes- Chunky crushed tomatoes give the sauce the best texture.
    • Linguine- The classic choice, but any long pasta will work.
    • Dry white wine- Pinot grigio or sauvignon blanc are great options. If skipping wine, use a low-sodium chicken or vegetable broth.
    • Olive oil- Forms the base of the sauce; avocado oil is a good substitute.
    • Water- Helps loosen the sauce as it simmers.
    • Garlic- Fresh garlic makes a big difference here, so don’t hold back.
    • Crushed red pepper flakes- Optional, but great for a little heat.
    • Kosher salt- Season to taste, especially depending on how salty your clams are.
    • Black pepper- Freshly ground if possible.
    • Dried parsley- Fresh parsley works just as well if you have it on hand. In that case, increase to 1 tablespoon.
    • Romano cheese- For finishing. Parmesan is a fine swap. 
    Ingredients used in clam sauce with linguine.

    How To Make This Linguini And Clam Sauce Recipe

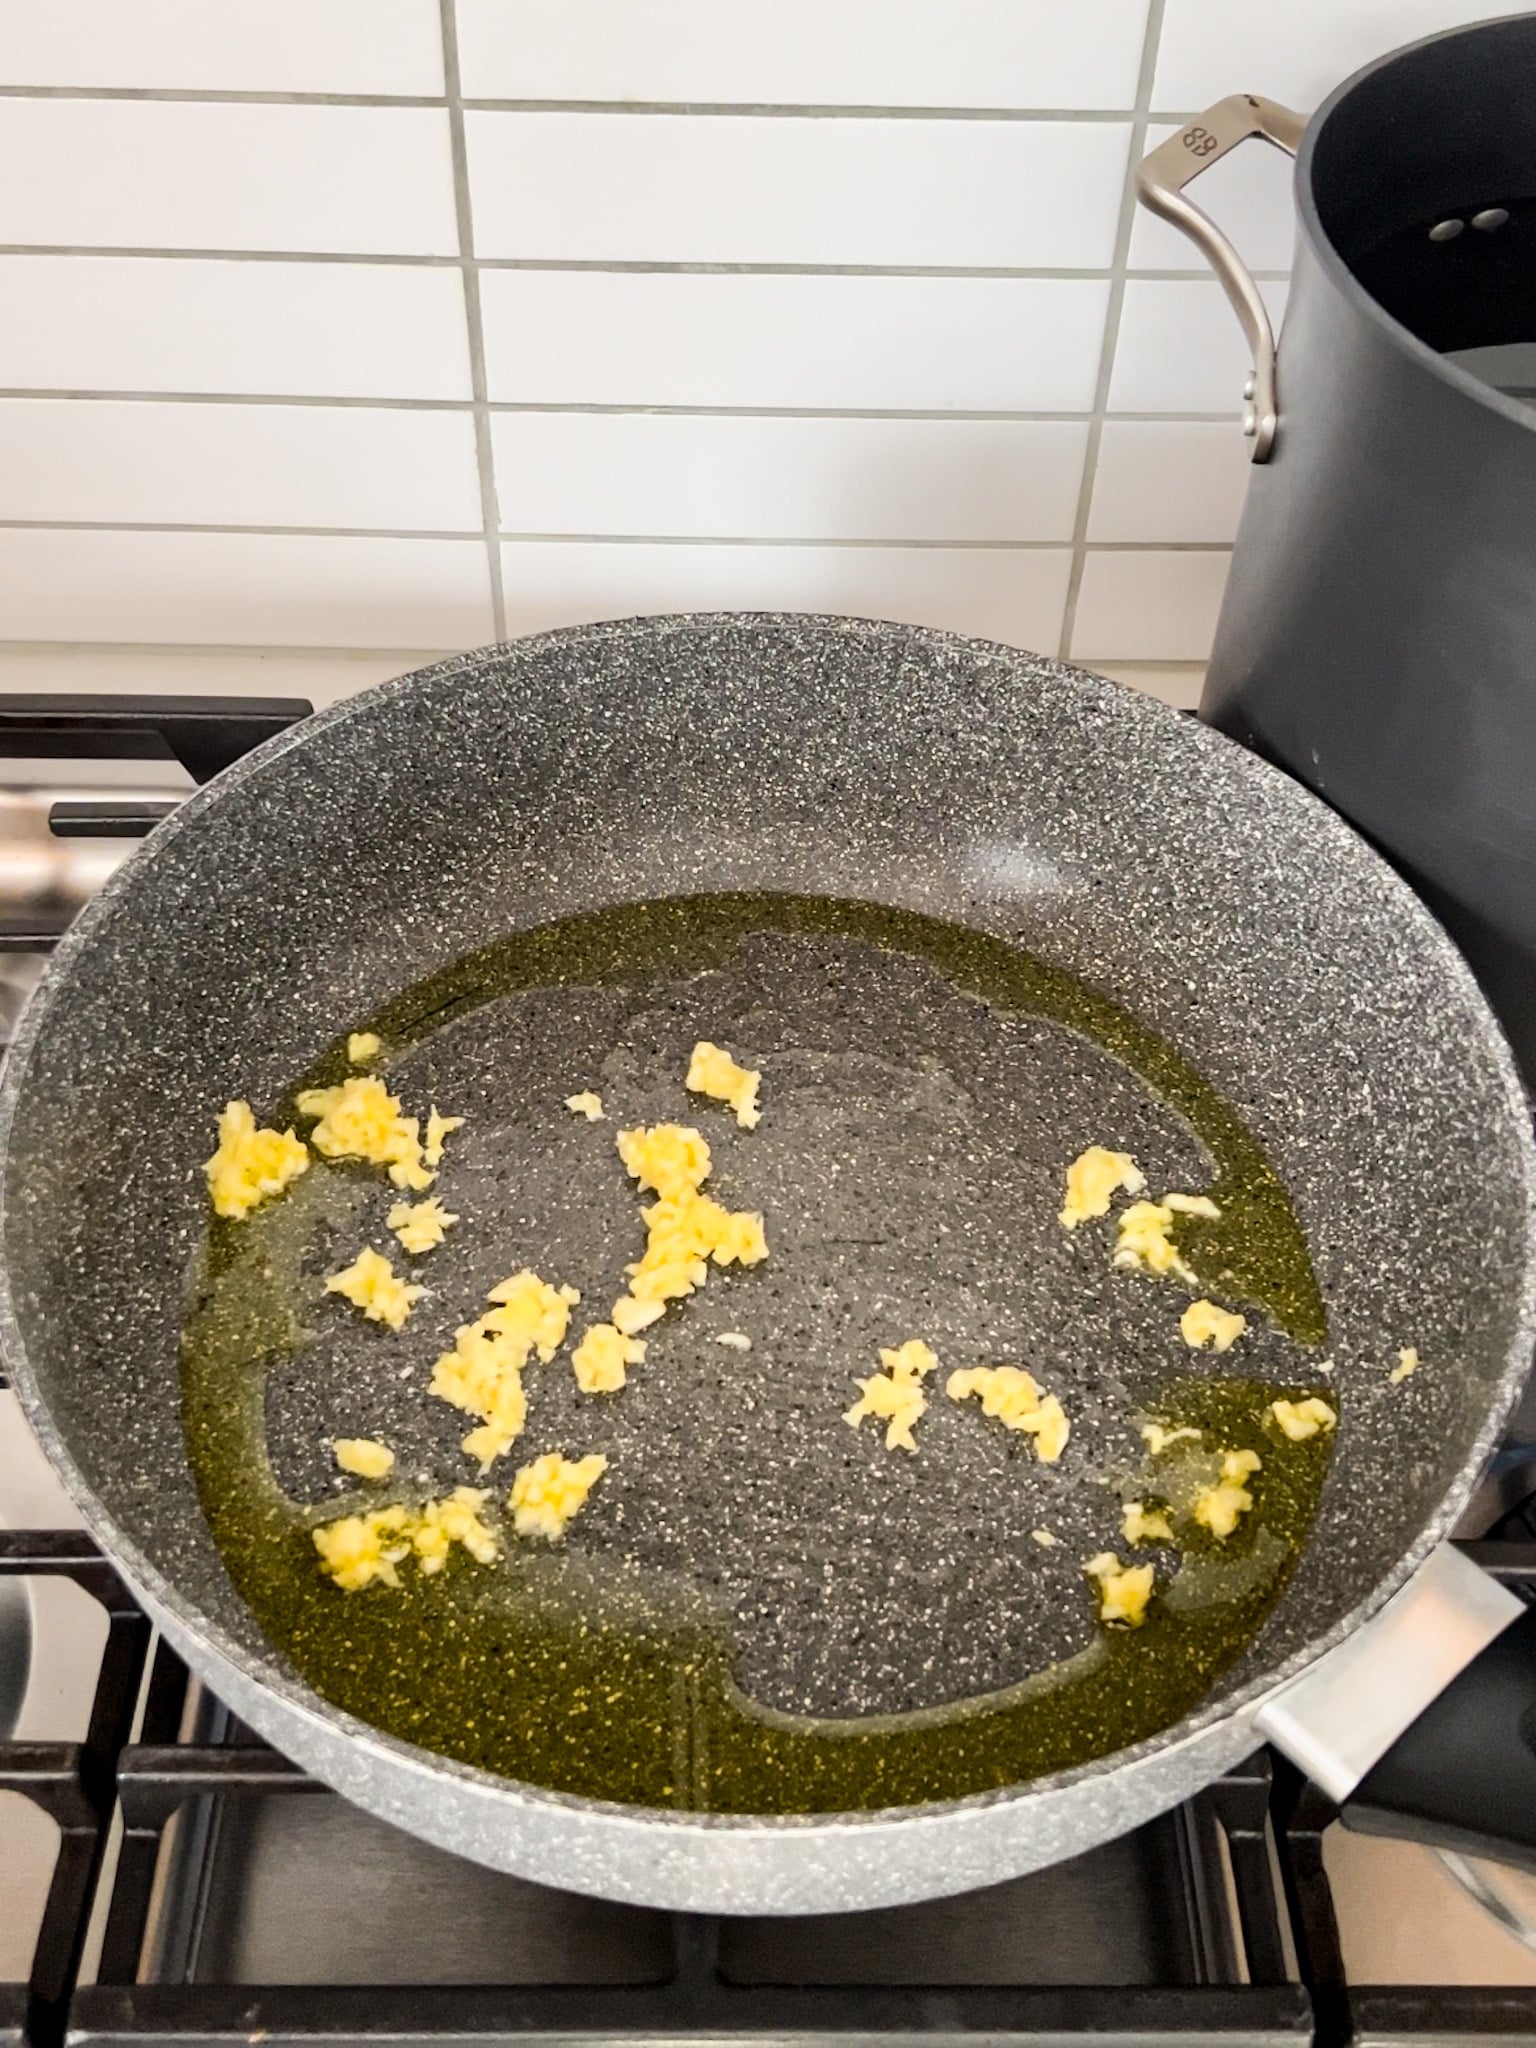
    Step 1- Sauté the garlic.

    Heat the olive oil in a large pan over medium-high heat. Add the garlic and cook for 2-3 minutes, stirring often so it doesn’t brown.

    A pan on a stove with sautéed garlic and oil.

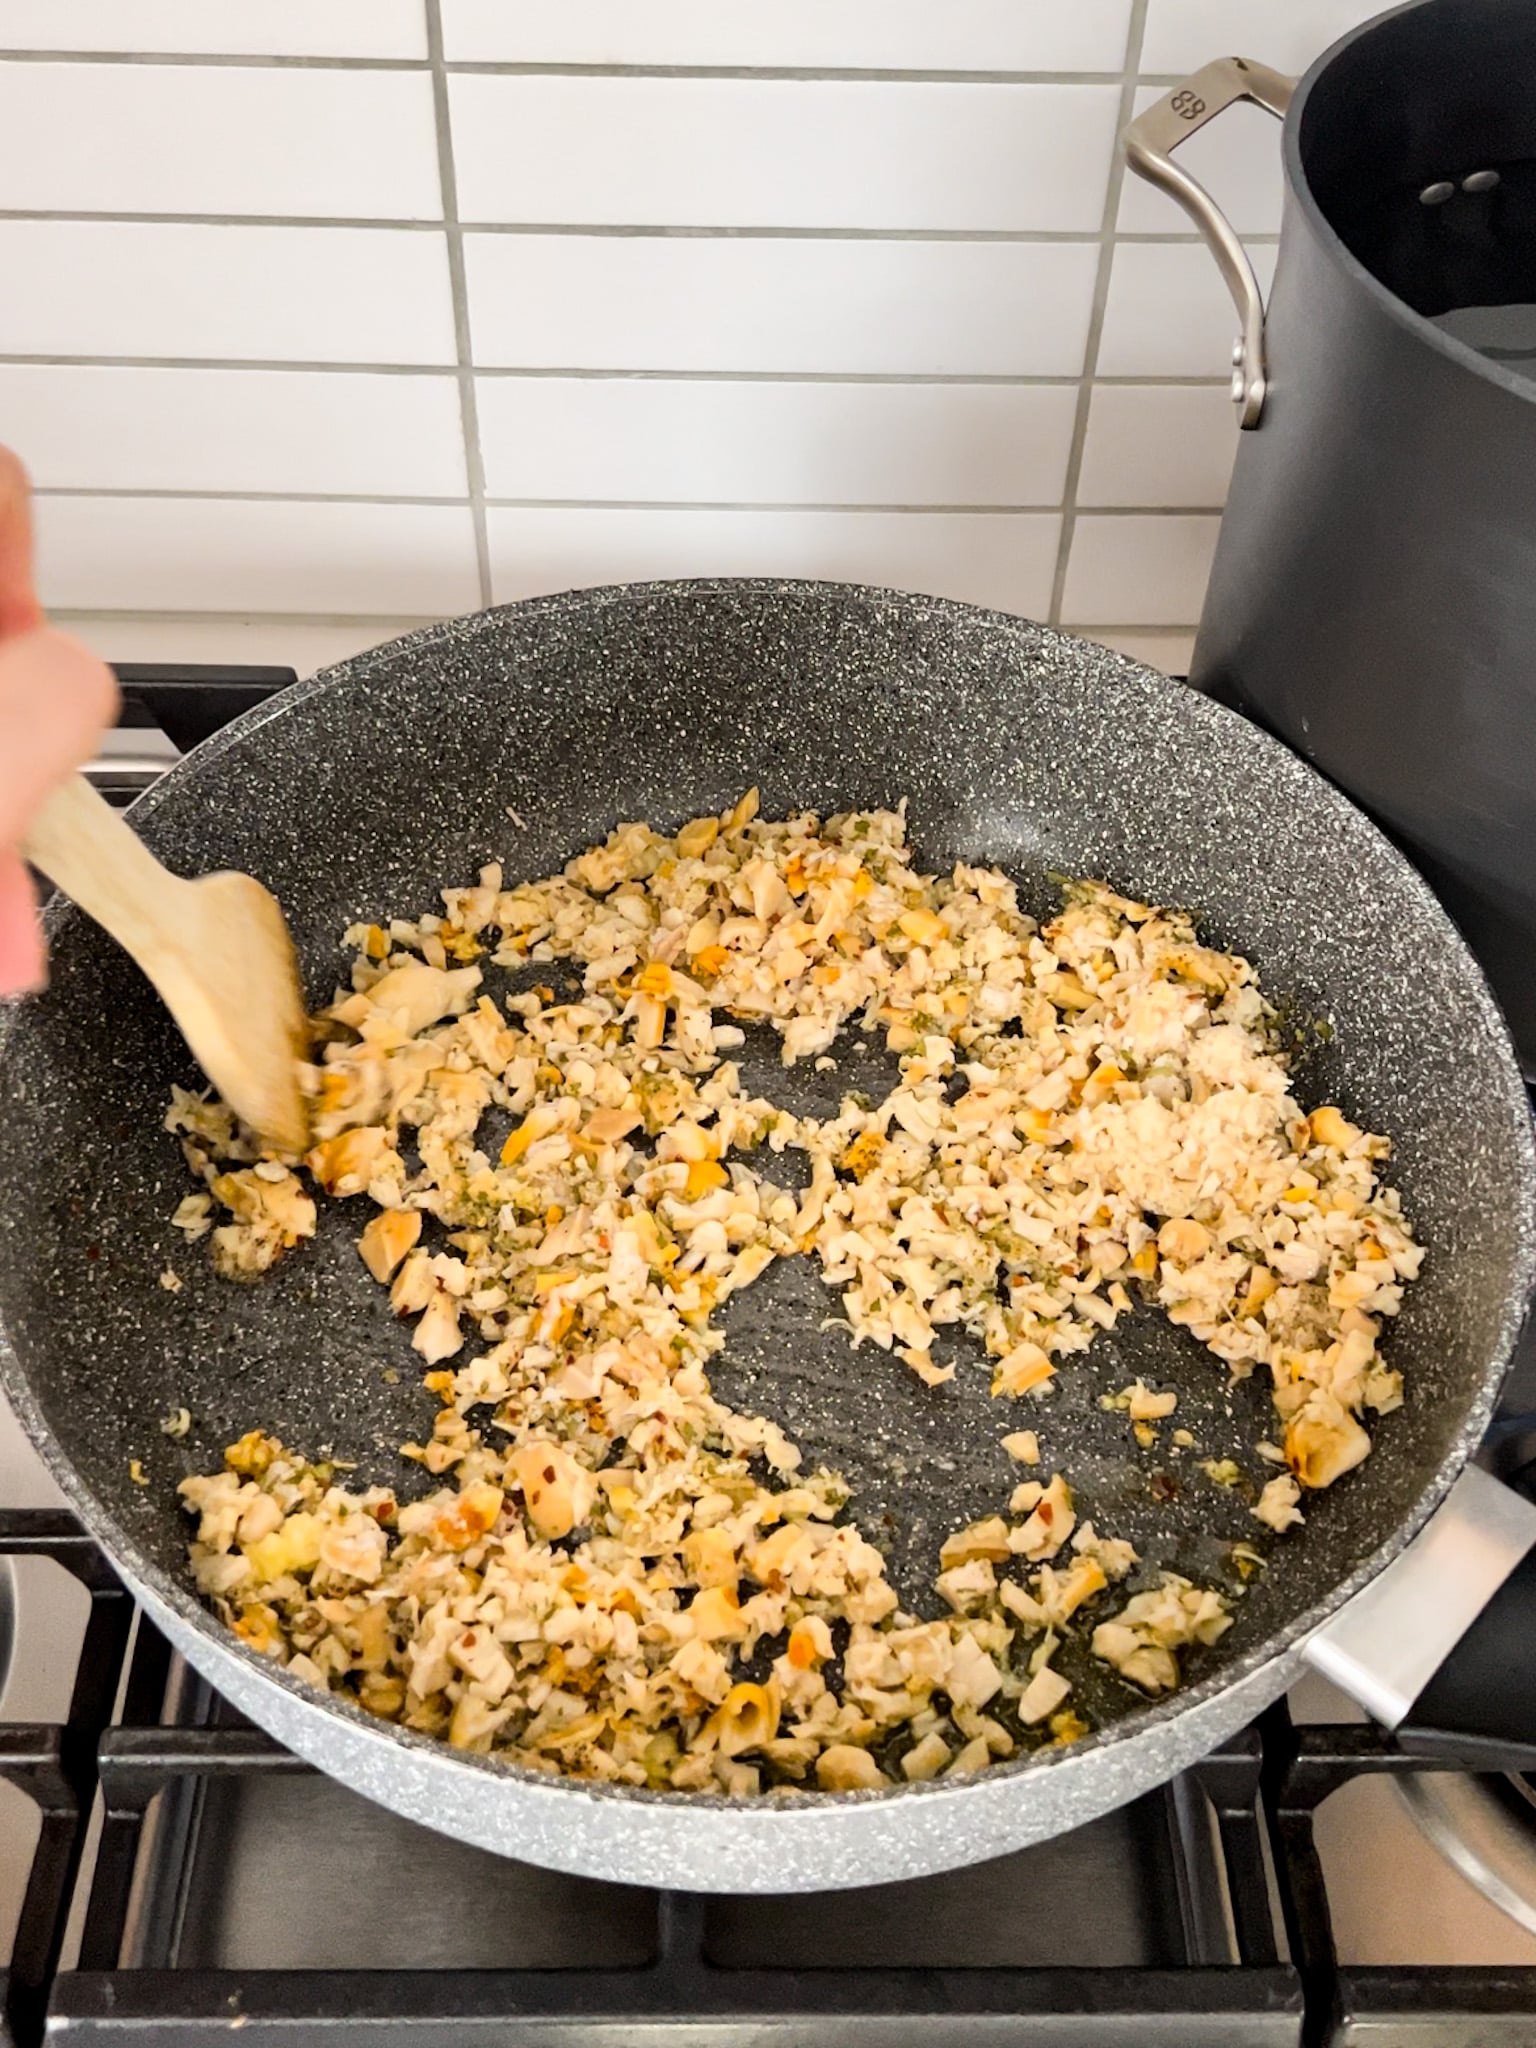
    Step 2- Add the clams and seasonings.

    Stir in the clams, salt, pepper, crushed red pepper flakes, and parsley. Cook for a few minutes, stirring frequently, until everything is warmed through.

    A pan with clams sautéing in it.

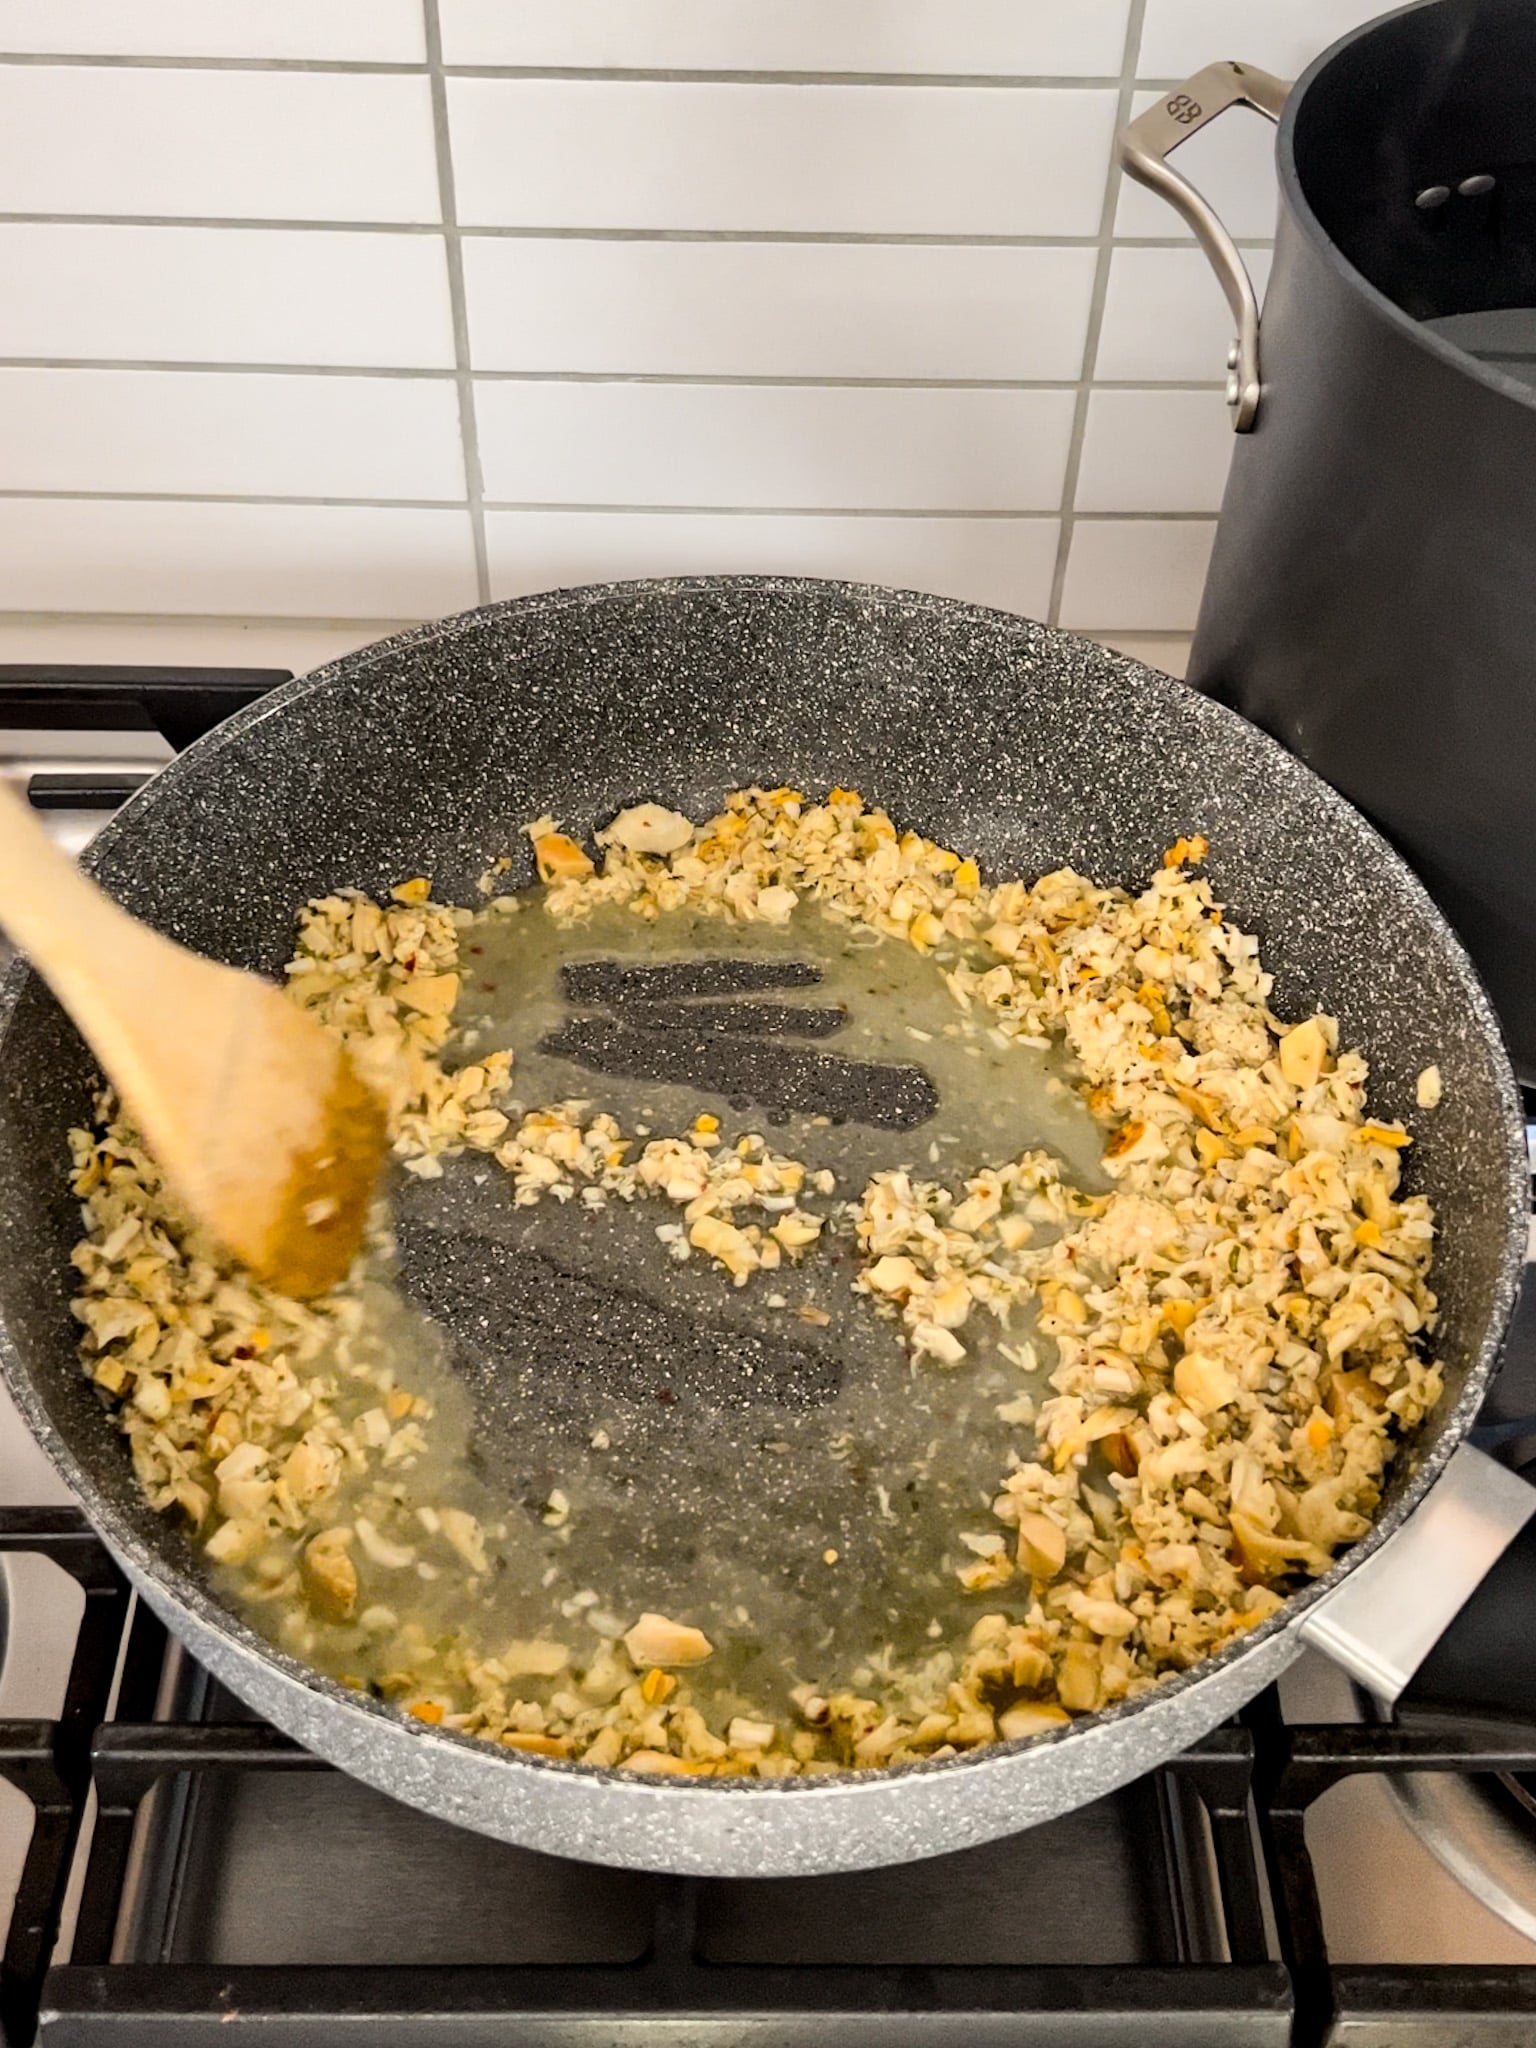
    Step 3- Deglaze with wine.

    Pour in the white wine and gently scrape up any browned bits from the bottom of the pan. Let it simmer for about 2 minutes to reduce slightly.

    A pan with wine deglazing the contents of a pan on a stove.

    Step 4- Add tomatoes and simmer.

    Stir in the crushed tomatoes. Swirl a little water in the empty can, then add it to the pan as well. Bring to a gentle simmer, reduce the heat, and cook for 10 minutes, stirring occasionally.

    A pan on a stove with sauce in it.

    Step 5- Cook pasta and serve.

    Cook the linguine until al dente according to package directions. Serve the sauce over hot pasta and finish with grated Romano cheese.

    Am overhead image of a bowl of linguine with clam sauce.

    Frequently Asked Questions

    Are canned clams fully cooked?

    Yes, canned clams are already fully cooked and ready to use.

    Should canned clams be rinsed first?

    It’s not necessary, but you can rinse them if you prefer, just drain well.

    What wine pairs well with this dish?

    A dry white wine like Pinot Grigio or Sauvignon Blanc pairs beautifully with this linguine with clam sauce recipe.

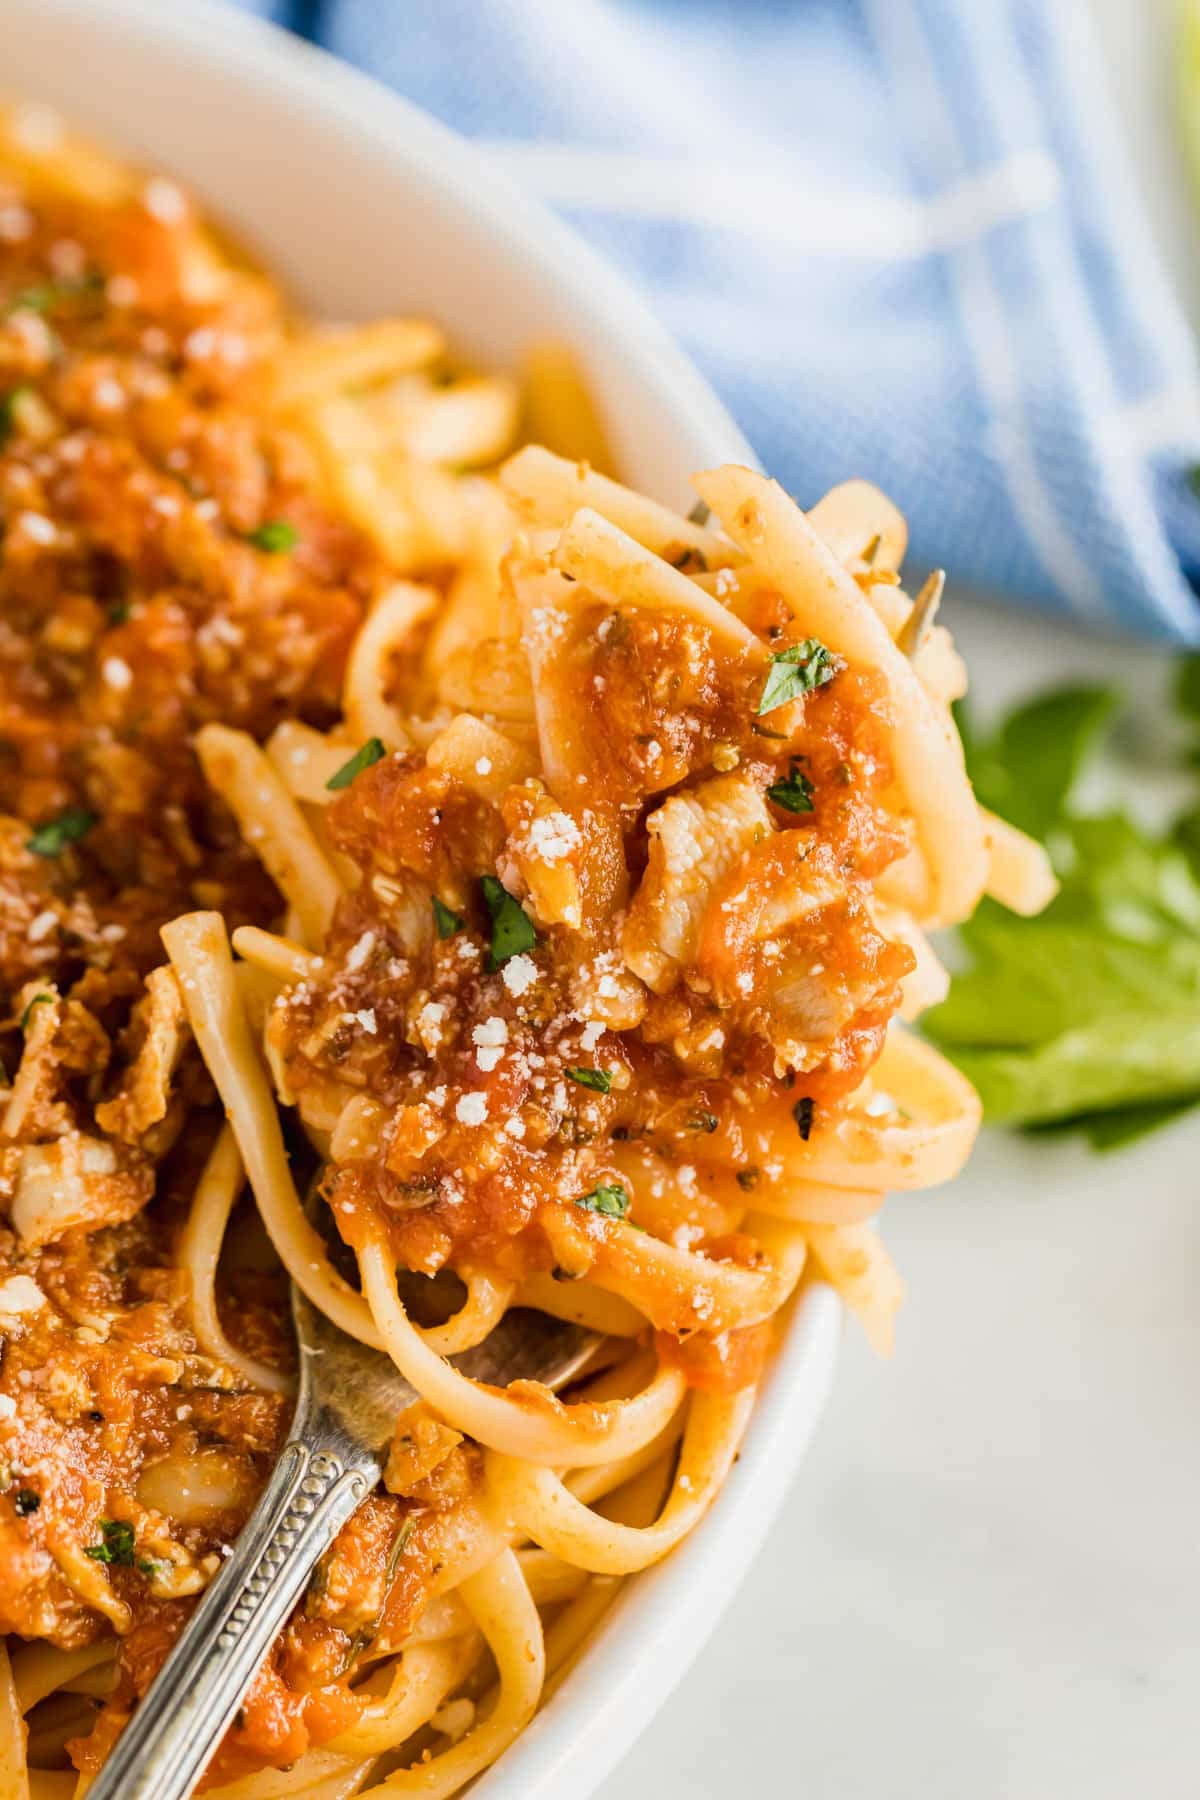
    A close up image of a fork with linguine and clam sauce twirled onto it.

    Tips For Making Pasta With Clam Sauce

    • Don’t skimp on the garlic. It adds so much flavor to the sauce, and this is one of those recipes where measuring with your heart really works.
    • Choose your clam texture. A mix of minced and chopped clams gives great flavor and bite in this Italian linguine with clam sauce. If you’re not big on texture, stick with minced only.
    • You can use fresh clams instead of canned. You’ll need about 2 cups, roughly 6 dozen small clams. Soak and scrub them, steam until they open, discard any that stay closed, then chop and add to the sauce.
    • You can use the reserved clam juice instead of wine. It adds extra seafood flavor and works great if you prefer to skip the wine.
    • Ingredients to prep ahead- Peel and mince the garlic, and cook the pasta just until al dente. Store separately until ready to use.
    • Leftovers and storage- Store leftovers in an airtight container in the refrigerator for up to 3 days. Reheat gently on the stovetop over medium heat or in the microwave until warmed through.
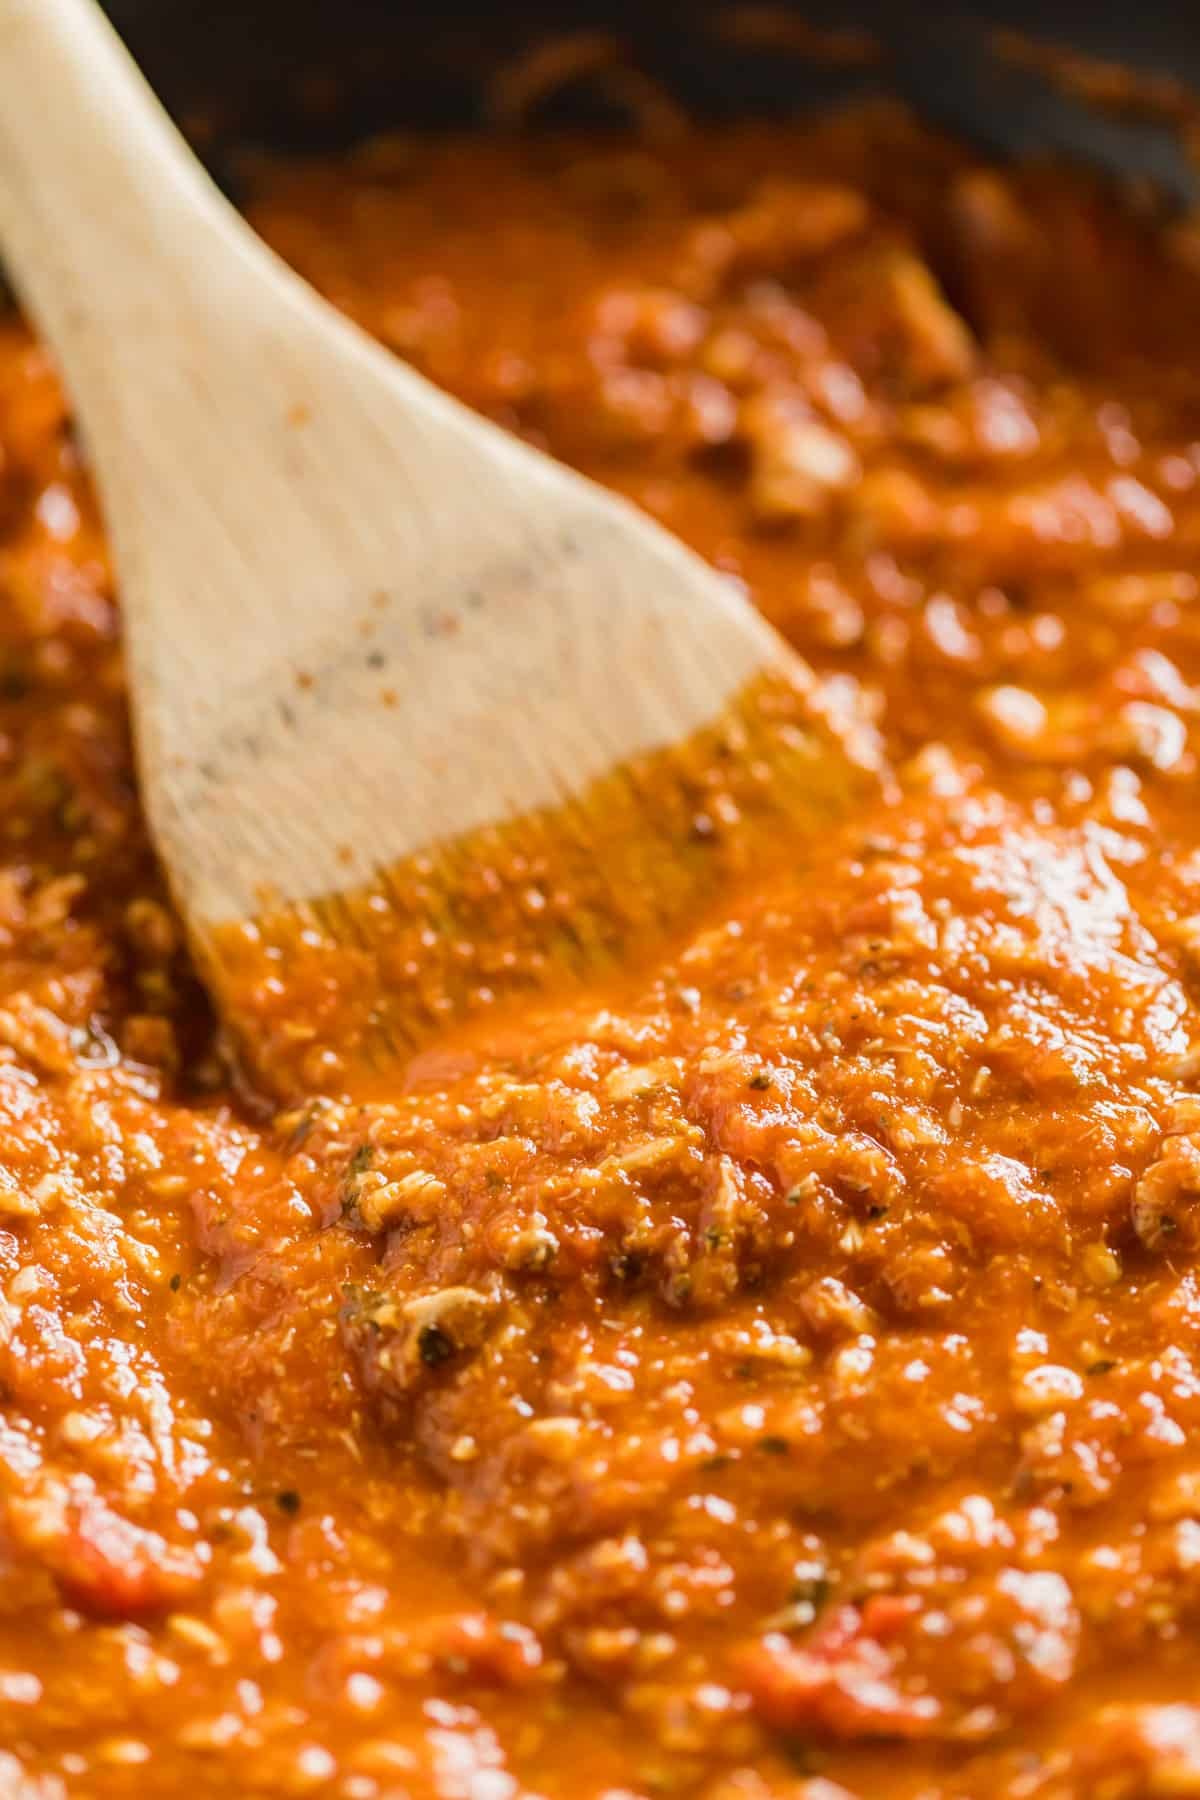
    A close up of a wooden spoon stirring red clam sauce.

    What To Serve With Clam Linguine With Canned Clams

    This pasta stands well on its own, but a few simple sides can turn it into a full Italian-style meal. Here are some great pairing ideas:

    • Garlic Parmesan Roasted Broccoli
    • Ciabatta Italian Bread Stuffing
    • Zesty Italian Pasta Salad
    • Italian Pizzelles

    Other Seafood Recipes To Try

    • A close up of parmesan crusted fish on a sheet pan.
      Parmesan Crusted Fish
    • A plate of baked clams with a cocktail fork and lemon wedge on it with the pan, a striped napkin, lemon and parsley behind it.
      Stuffed Clams (Clams Casino)
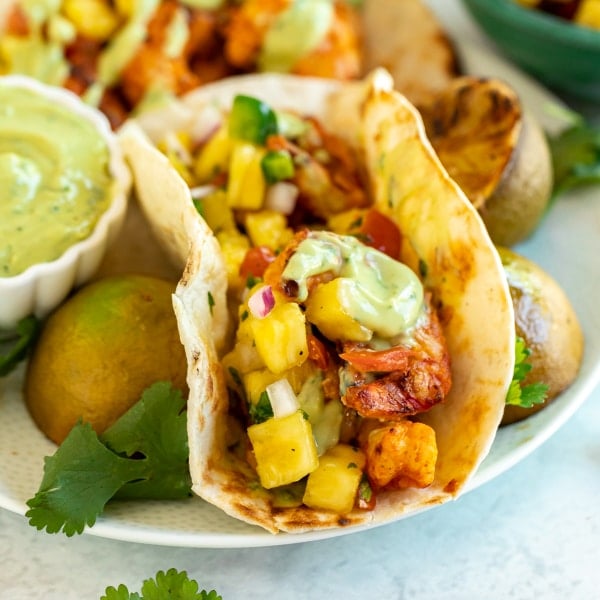
    • These easy Grilled Shrimp Tacos are about to be your new favorite summertime dinner recipe! Topped with pineapple salsa and an avocado cream sauce, they're quick and easy to make with flavor that will keep you coming back for more.
      Grilled Shrimp Tacos
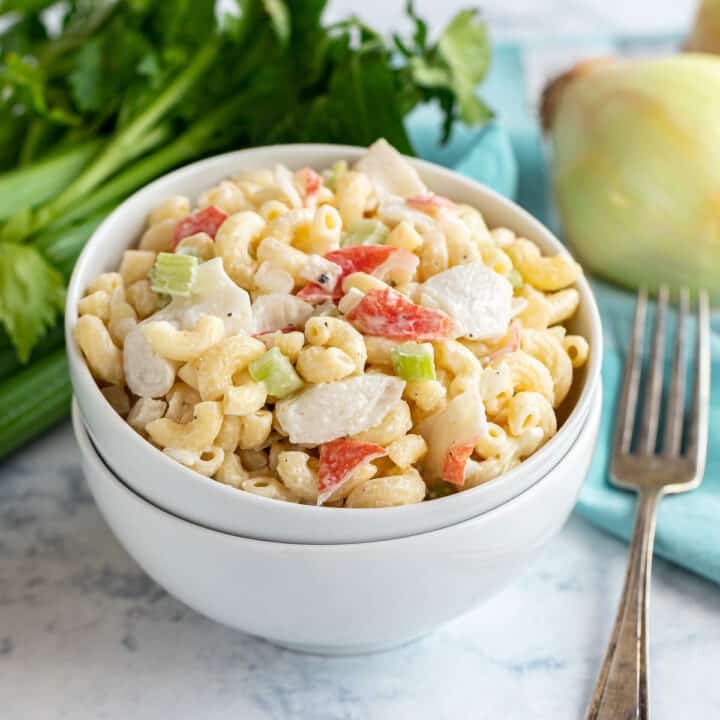
    • A bowl of crab mac salad on top of a second bowl with celery and an onion behind it.
      Crab Pasta Salad

    Love this recipe? Please leave a 5 star ⭐️⭐️⭐️⭐️⭐️ rating in the recipe card below ⬇️ and/or a review in the comment section further down. Check out my Amazon Store for all my favorite tools, including those used in this recipe. And follow @thelifejolie on Instagram and TikTok!

    An overhead image of a bowl of linguine with clam sauce.

    Red Clam Sauce

    Jessy Freimann
    Pair red clam sauce with linguine for a classic Italian pasta dish made with tender clams, garlic, white wine, and tomatoes. It’s rich, comforting, and comes together in about 30 minutes, making it perfect for both busy weeknights and casual dinner guests.
    4.97 from 32 votes
    Print Recipe Pin Recipe
    Prep Time 10 minutes mins
    Cook Time 20 minutes mins
    Total Time 30 minutes mins
    Course Main, Main Course, Main dish
    Cuisine Italian
    Servings 6 servings
    Calories 451 kcal

    Equipment

    • chefs knife
    • cutting board
    • Skillet
    • Dutch oven
    • wooden spoon
    • Can opener
    • measuring spoons
    • measuring cups

    Ingredients
      

    • 2 Tablespoons olive oil
    • 5 cloves garlic, minced
    • 13 ounces minced clams, drained (two 6.5 ounce cans)
    • 13 ounces chopped clams, drained (two 6.5 ounce cans)
    • ½ teaspoon crushed red pepper flakes
    • 1 teaspoon kosher salt
    • ¼ teaspoon ground black pepper
    • 1 teaspoon dried parsley
    • ½ cup dry white wine
    • 28 ounce Crushed Tomatoes canned
    • ¼ cup water
    • 1 pound linguine, cooked
    • Romano cheese, garnish

    Instructions
     

    • Heat oil in a large sauté pan over medium high.
    • Add garlic and sauté for 2-3 minutes, stirring often so the garlic doesn't burn.
    • Add clams, crushed red pepper, salt, black pepper and dried parsley and stir to combine.
    • Saute for 3-4 minutes stirring often until heated through.
    • Deglaze the pan with white wine and simmer for 2 minutes stirring often to reduce slightly.
    • Add crushed tomatoes and swirl water in empty can to get any tomatoes that may have been left behind and then stir the water into the pan.
    • Bring to a simmer and then reduce to medium low and simmer for 10 minutes stirring periodically.
    • Serve immediately over hot linguine with a sprinkle of Romano cheese.

    Video

    Notes

    • Don’t skimp on the garlic. It adds so much flavor to the sauce, and this is one of those recipes where measuring with your heart really works.
    • Choose your clam texture. A mix of minced and chopped clams gives great flavor and bite in this Italian linguine with clam sauce. If you’re not big on texture, stick with minced only.
    • You can use fresh clams instead of canned. You’ll need about 2 cups, roughly 6 dozen small clams. Soak and scrub them, steam until they open, discard any that stay closed, then chop and add to the sauce.
    • You can use the reserved clam juice instead of wine. It adds extra seafood flavor and works great if you prefer to skip the wine.
    • Ingredients to prep ahead- Peel and mince the garlic, and cook the pasta just until al dente. Store separately until ready to use.
    • Leftovers and storage- Store leftovers in an airtight container in the refrigerator for up to 3 days. Reheat gently on the stovetop over medium heat or in the microwave until warmed through.
    Nutrition

    Serving: 1servingCalories: 451kcalCarbohydrates: 83gProtein: 16gFat: 6gSaturated Fat: 1gPolyunsaturated Fat: 1gMonounsaturated Fat: 4gSodium: 1439mgPotassium: 1536mgFiber: 8gSugar: 18gVitamin A: 2019IUVitamin C: 30mgCalcium: 71mgIron: 5mg
    Tried this recipe?Let us know how it was!

    Cinnamon Toast Crunch Bars

    Feb 6, 2026 · 8 Comments

    A straight on image of 3 cinnamon cereal bars stacked on each other exposing the inside of the bars.

    Cinnamon toast crunch bars are an easy, no-bake dessert made with just 3 ingredients. They’re soft, gooey, and packed with that classic cinnamon sugar crunch everyone loves. Perfect for parties, potlucks, or an easy sweet snack.

    A straight on image of 3 cinnamon cereal bars stacked on each other exposing the inside of the bars.
    [feast_advanced_jump_to]

    Why You’ll Love This Cereal Bars Recipe

    I’m not usually a big cereal person (most get soggy way too fast for me), but Cinnamon Toast Crunch has always been my favorite. It probably goes back to my mom making cinnamon toast as a special breakfast when we were kids. That cinnamon-sugar flavor just hits differently… especially when it stays crunchy.

    Since you all loved my S’mores Bars so much, trying another version of homemade cereal bars felt like a no-brainer. These are especially perfect during the warmer months when turning on the oven feels like too much. With just 3 ingredients and a super quick prep, they’re ideal for last-minute desserts, busy weeknights, or when you need to bring something sweet to share. Here’s why you’ll want to make them:

    • Ready in under an hour
    • No-bake and summer-friendly
    • A hit with both kids and adults
    • Sweet, crispy, and gooey 
    • Great to make ahead
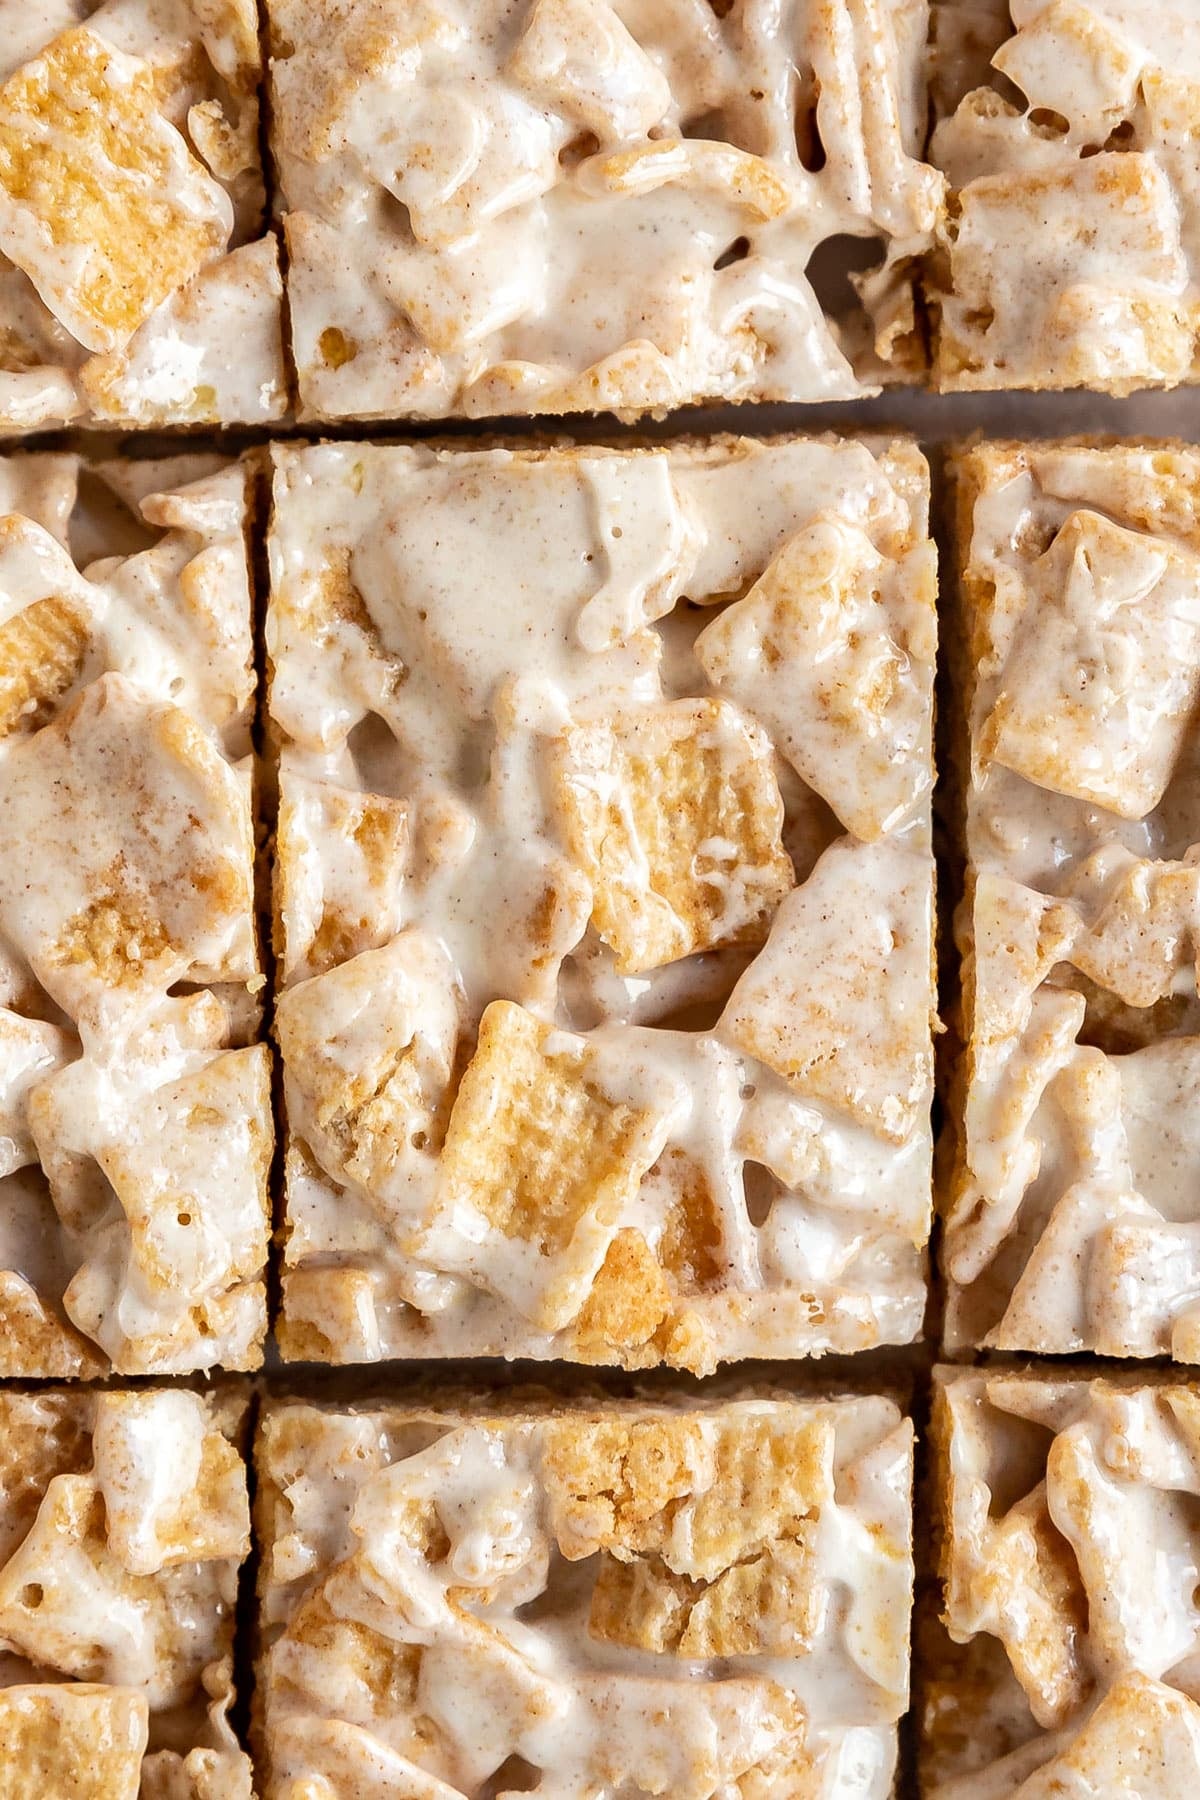
    A close up overhead shot of cinnamon treat bars that are cut into pieces.

    Ingredient Information And Substitutions

    • Cinnamon Toast Crunch- That cinnamon-sugar coating and sturdy crunch make it perfect for this recipe. If you want to switch things up, other cereals with a similar size and shape will also work well.
    • Marshmallows- Mini marshmallows melt quickly and evenly. You can also use one 10-ounce bag of regular marshmallows if needed. Marshmallow fluff isn’t recommended, as it changes the texture.
    • Salted butter- I prefer salted butter here because it helps balance the sweetness. Unsalted works too, but add a small pinch of salt.
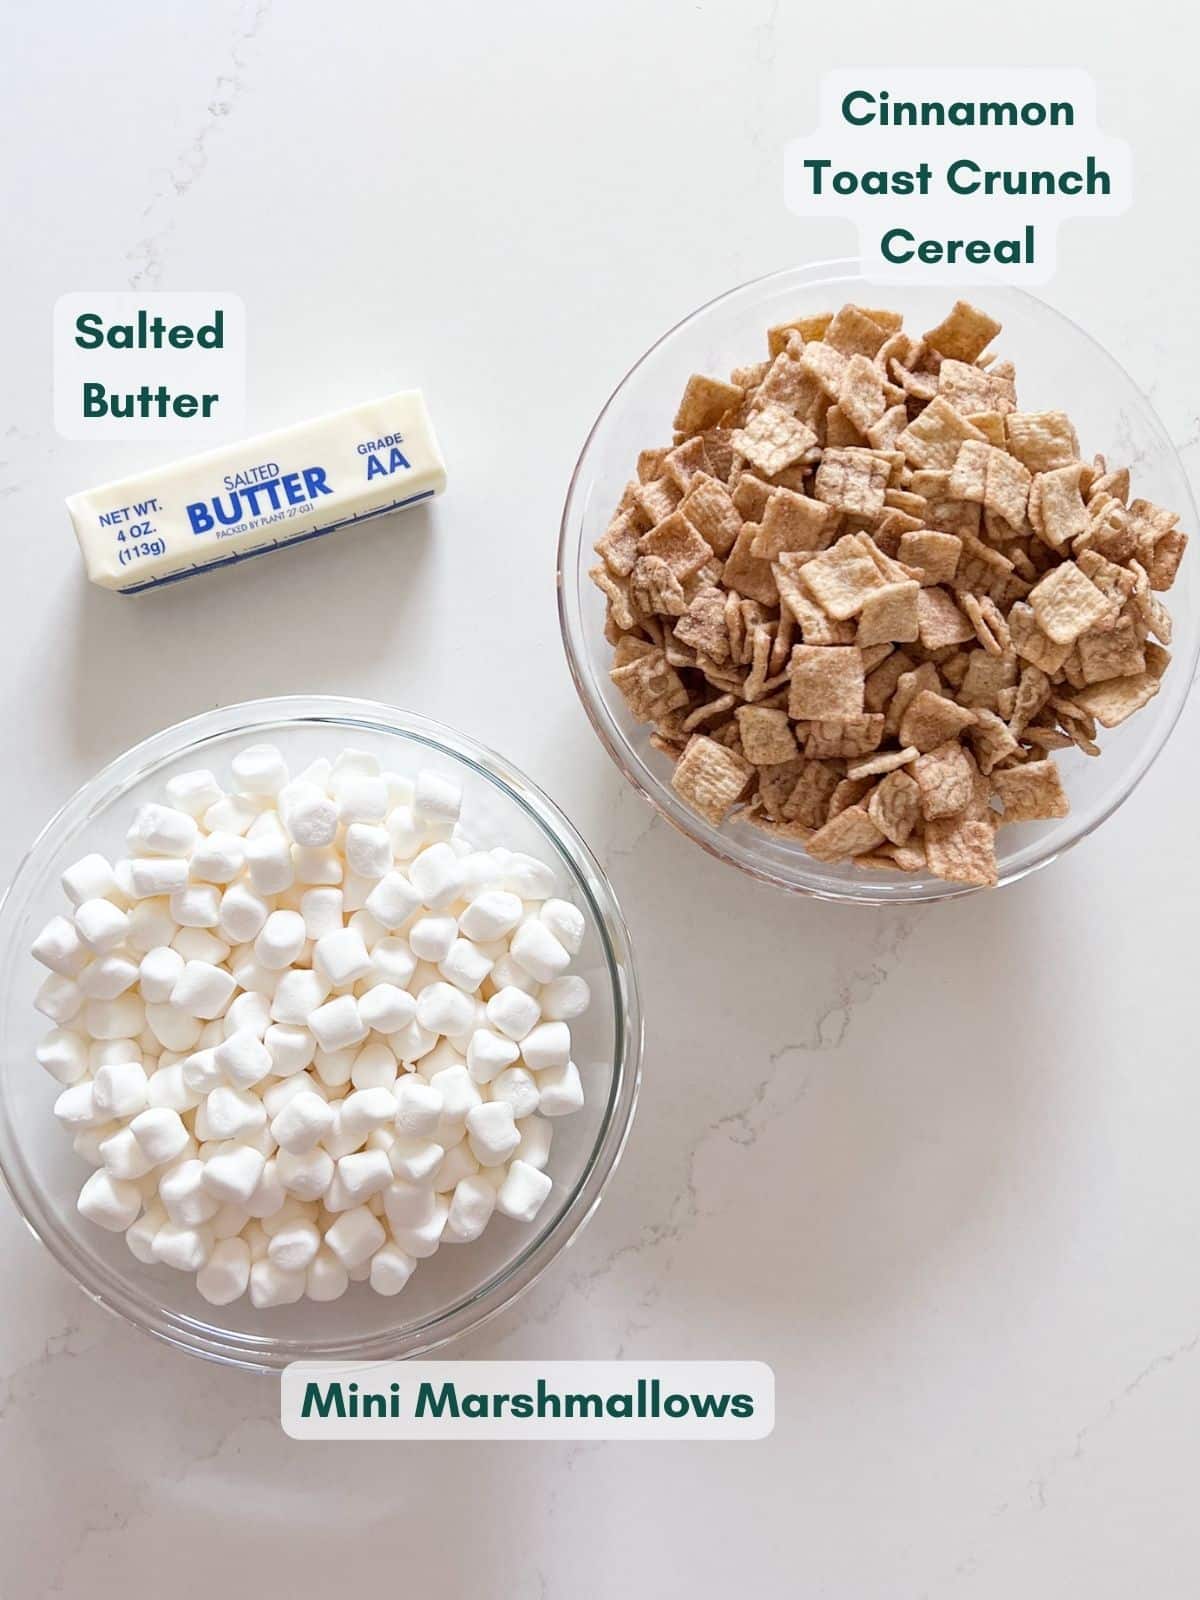
    The ingredients for cinnamon toast crunch bars, labeled in glass bowls.

    How To Make Cereal Bars

    Step 1- Prep the pan.

    Spray a 13 x 9 pan with cooking spray and line it with parchment paper, leaving extra paper hanging over the sides for easy removal later.

    Step 2- Melt the butter.

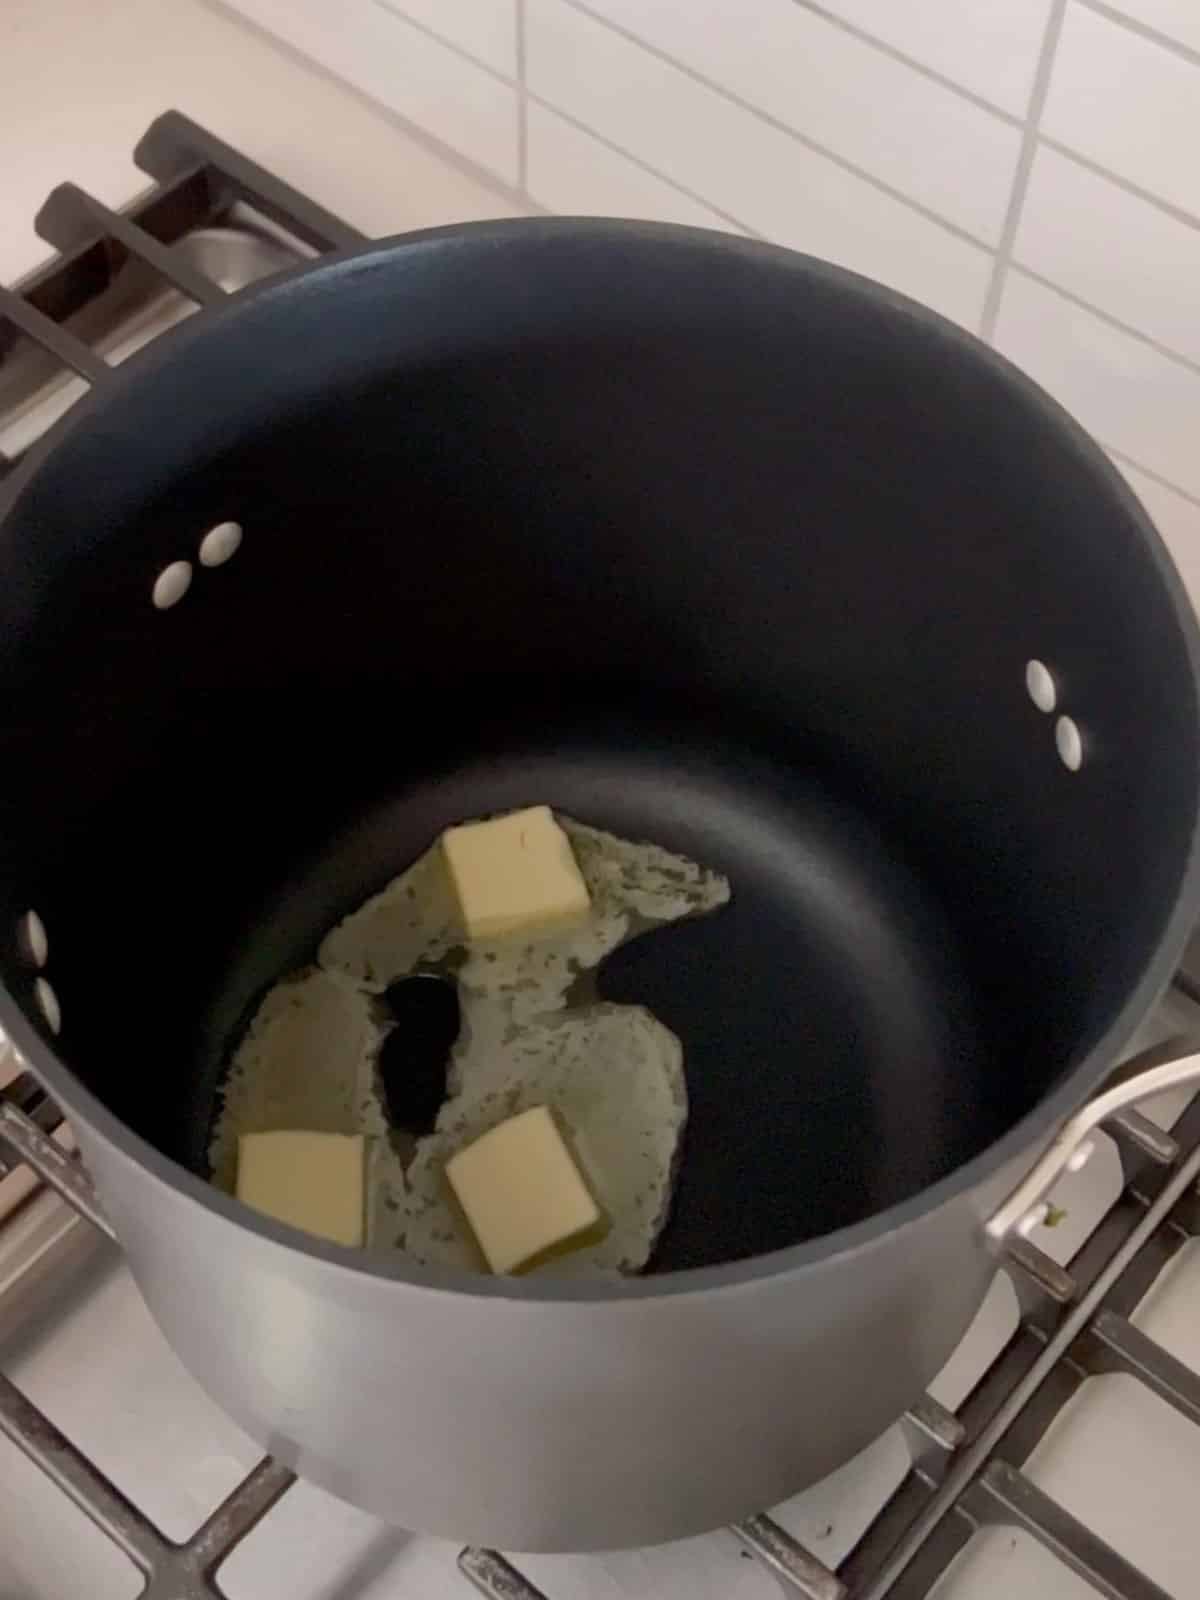
    Melt the butter in a large pot over medium heat. Once it’s fully melted, reduce the heat to low so it doesn’t scorch.

    Butter melting in a large pot.

    Step 3- Melt the marshmallows.

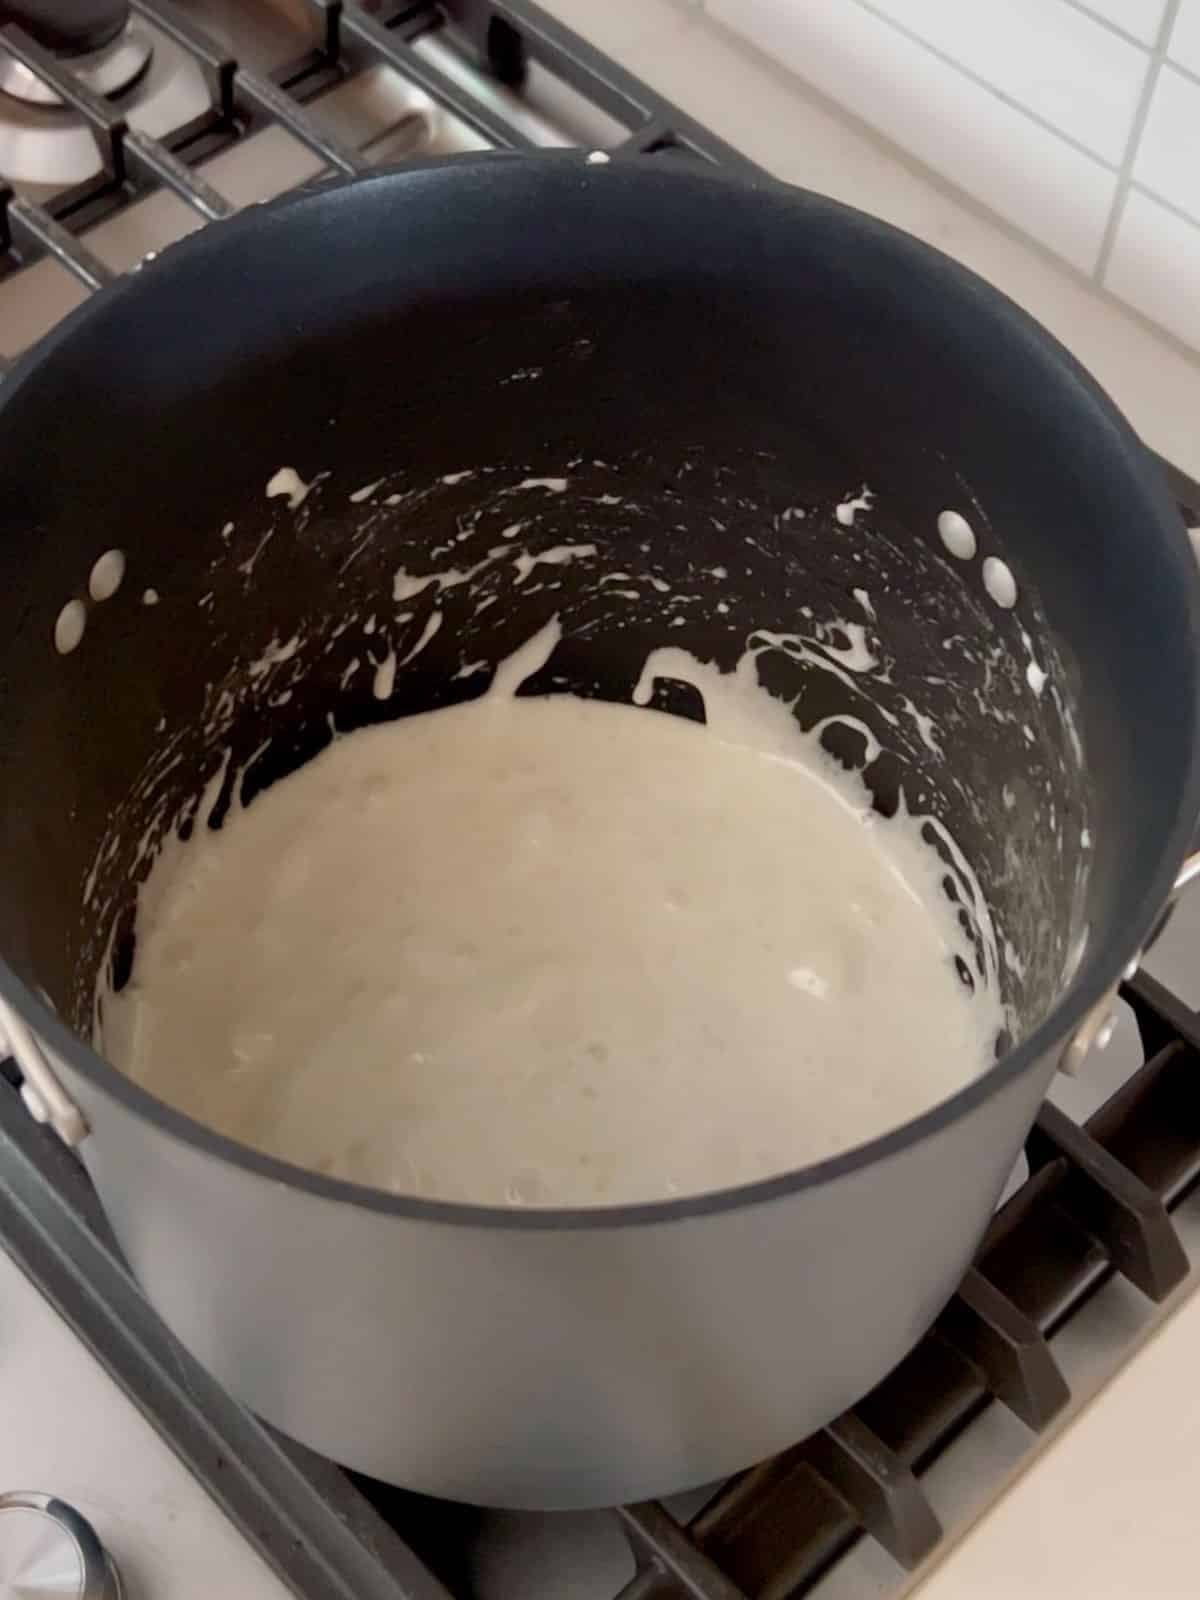
    Add the marshmallows to the pot. Lightly spray a mixing spoon with cooking spray and stir continuously until the marshmallows are completely melted and smooth.

    Melted marshmallows in a pot.

    Step 4- Add the cereal.

    Remove the pot from the heat and stir in the cereal until everything is evenly coated with the marshmallow mixture.

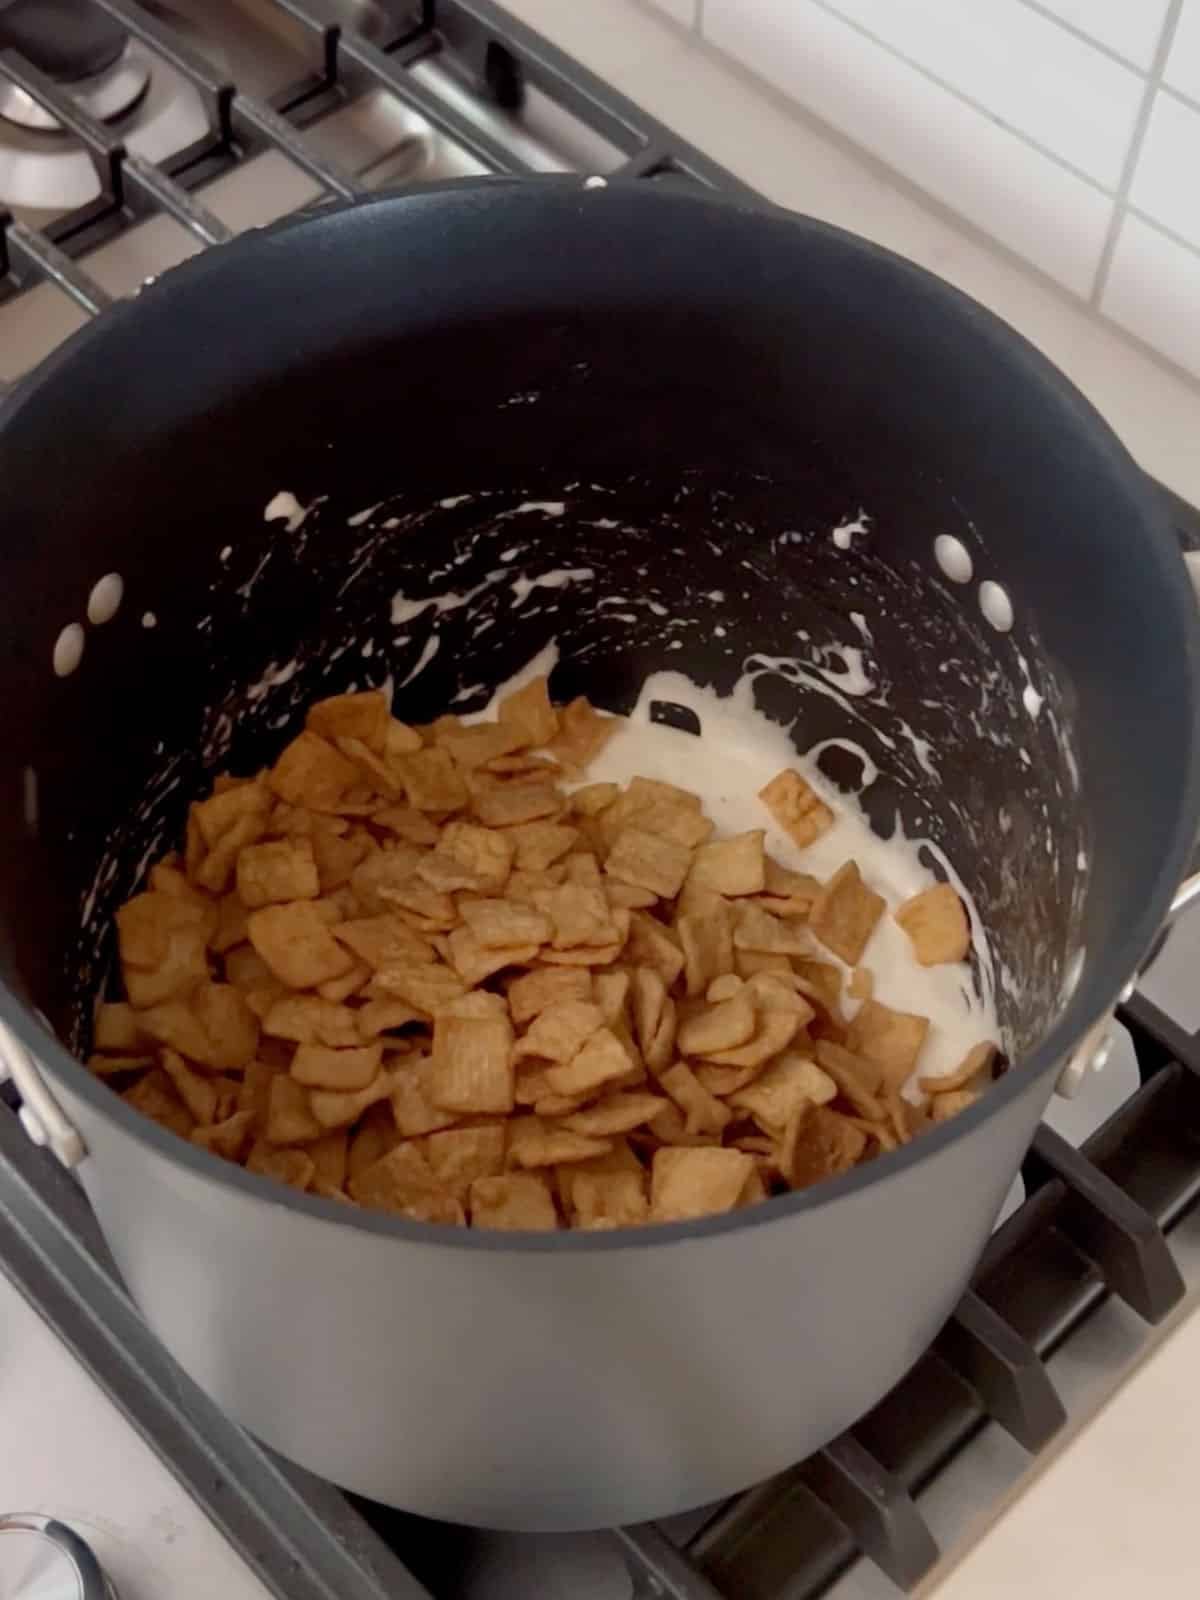
    Cereal added to the pot of melted marshmallows.

    Step 5- Press and set.

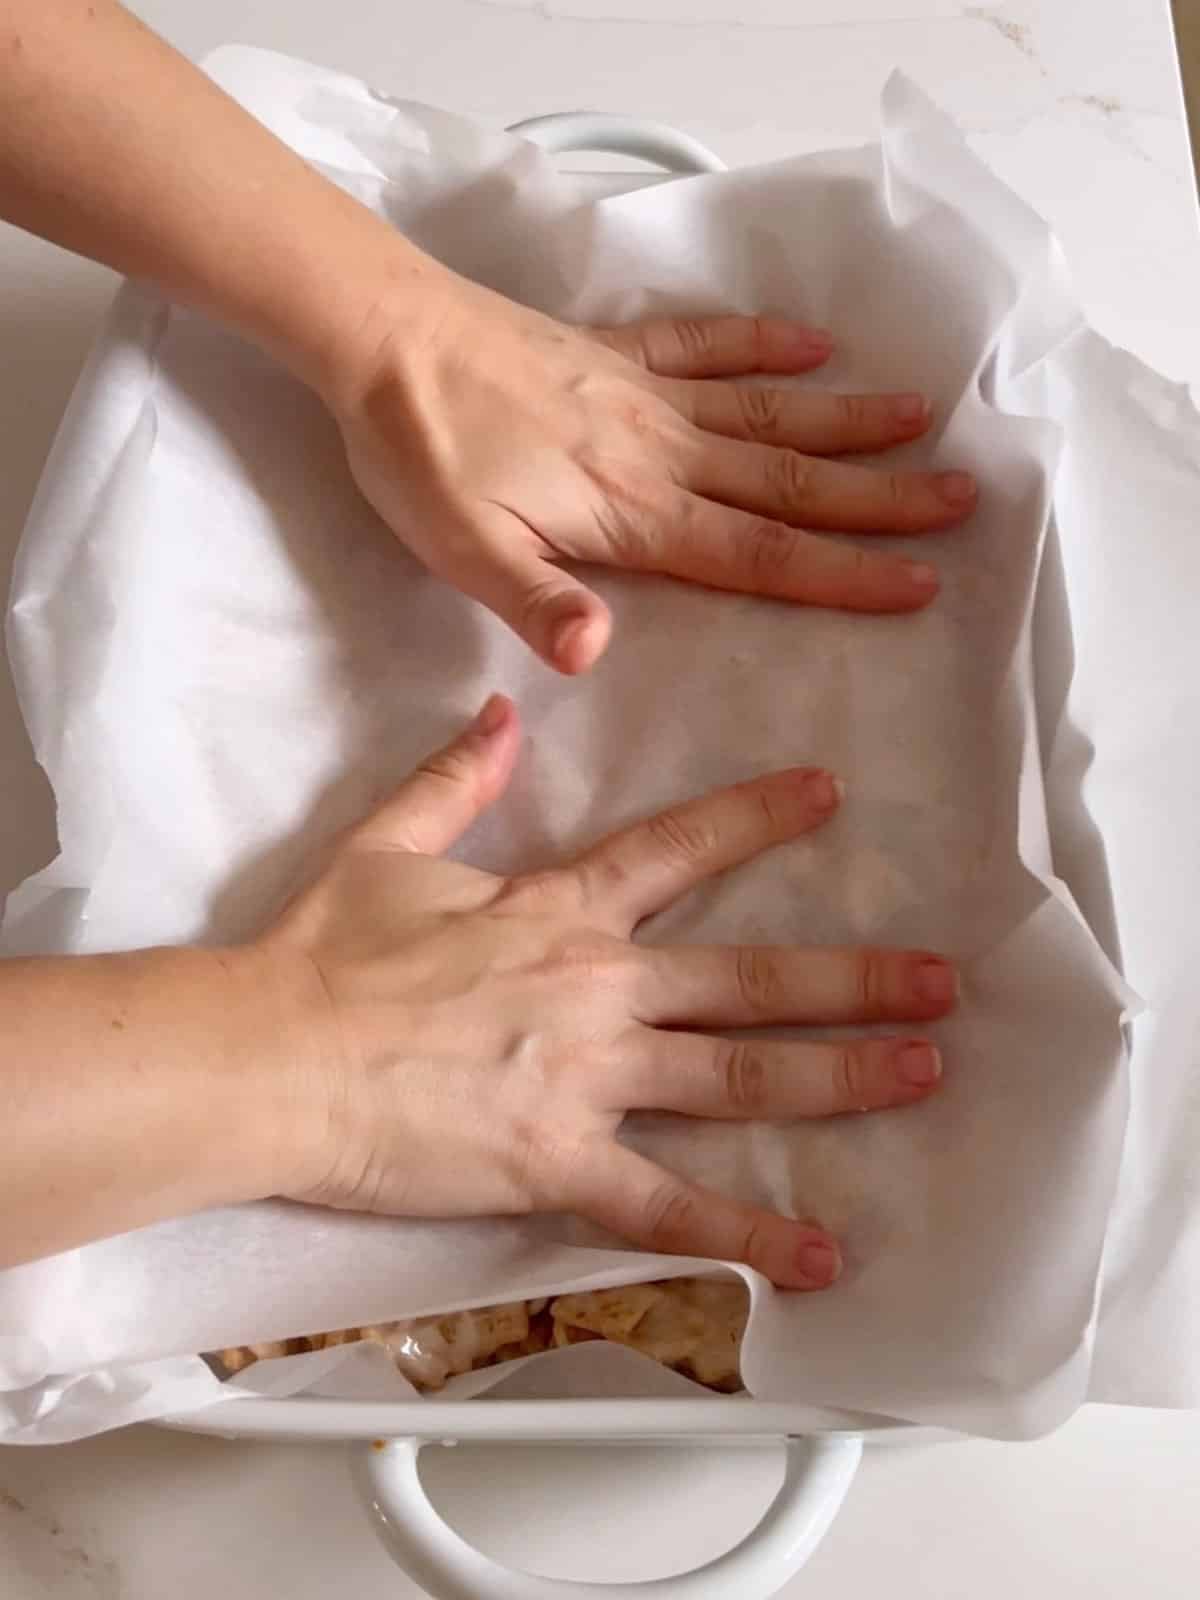
    Transfer the mixture to the prepared pan. Using an extra piece of parchment paper, gently press it into an even layer, holding the bottom parchment in place if needed. Let it cool completely, then remove, cut into cereal bars, and enjoy!

    Hands pushing the cereal mixture into a 9" x 13" pan with parchment paper.

    Frequently Asked Questions

    Can I make these ahead?

    Yes! I usually make them a day ahead, which also gives them plenty of time to set.

    How do I keep these bars soft?

    Store the bars in an airtight container and add a small piece of bread to help keep them soft. Melting the marshmallows over gentle heat and pressing lightly into the pan will also help maintain a chewy texture.

    Can I double the recipe?

    Yes, this recipe doubles easily. Just use a larger pan or divide the mixture between two pans so the bars aren’t too thick.

    Can I make these in the microwave?

    Sure. Melt butter and marshmallows together in a large, microwave-safe bowl for around 60 seconds on high. Stir and melt for an additional 15-30 seconds if needed. Then, stir in the cereal and proceed with the recipe as listed below.

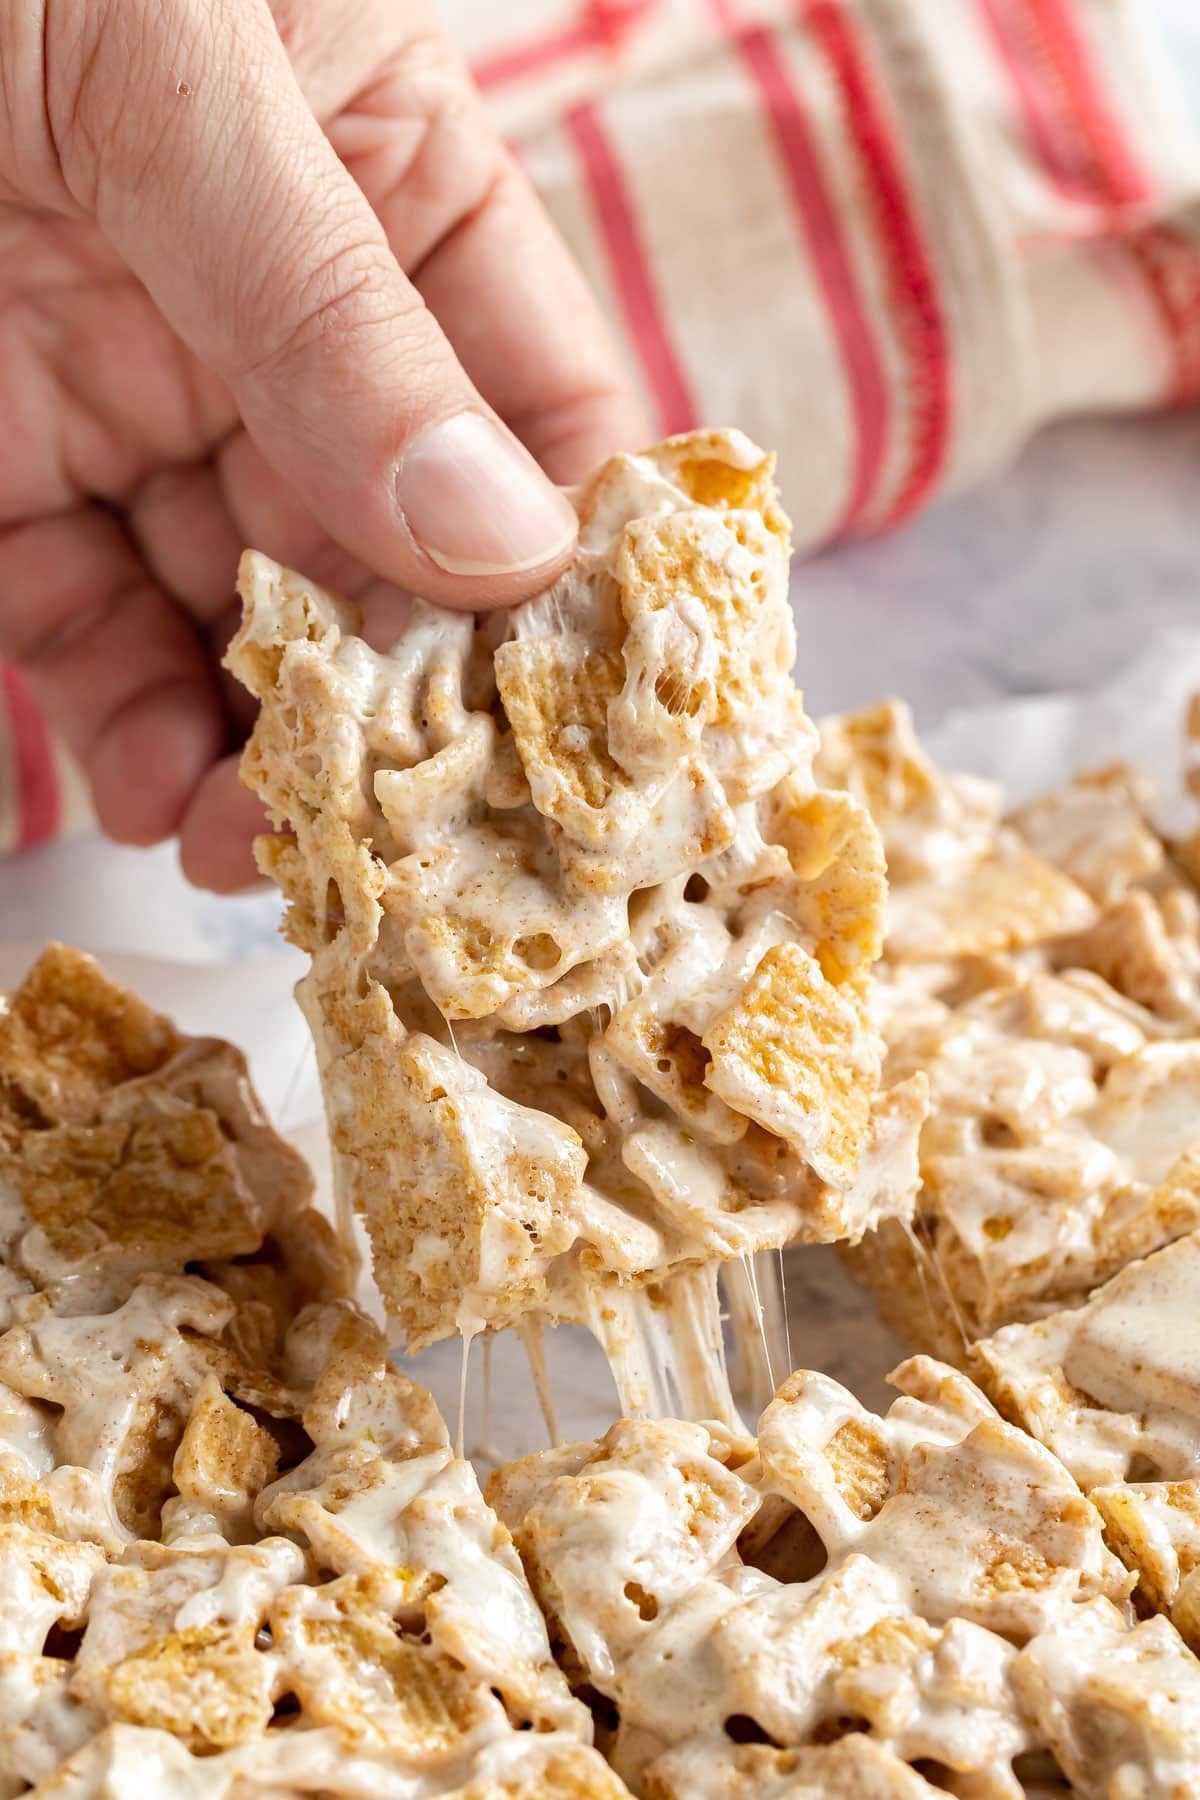
    A hand pulling a freshly cut cereal bar from the rest of them with marshmallow stretching.

    Tips For Making Homemade Cereal Bars

    • Line your pan before you start. I spray a 9 x 13 pan with cooking spray and add parchment paper with a little overhang so I can lift the bars out in one piece and slice them easily.
    • Keep the heat at medium when melting the butter and marshmallows. Higher heat can scorch them and will give you hard, brittle bars instead of soft and gooey ones.
    • A little cooking spray on your spoon goes a long way. Marshmallows are super sticky, and this makes stirring much easier.
    • Let the marshmallows melt completely. It takes a little patience, but the texture turns out so much smoother when they’re fully melted.
    • Be gentle when pressing the mixture into the pan. Packing it down too firmly can make the bars hard and dense instead of soft and chewy.
    • Ingredients to prep ahead- Measure everything before you start. Once the marshmallows are melted, things move quickly.
    • Leftovers and storage- Keep the bars in an airtight container at room temperature for up to 3 days. Place parchment paper between layers to prevent sticking. Freezing isn’t recommended, since it can affect the texture.
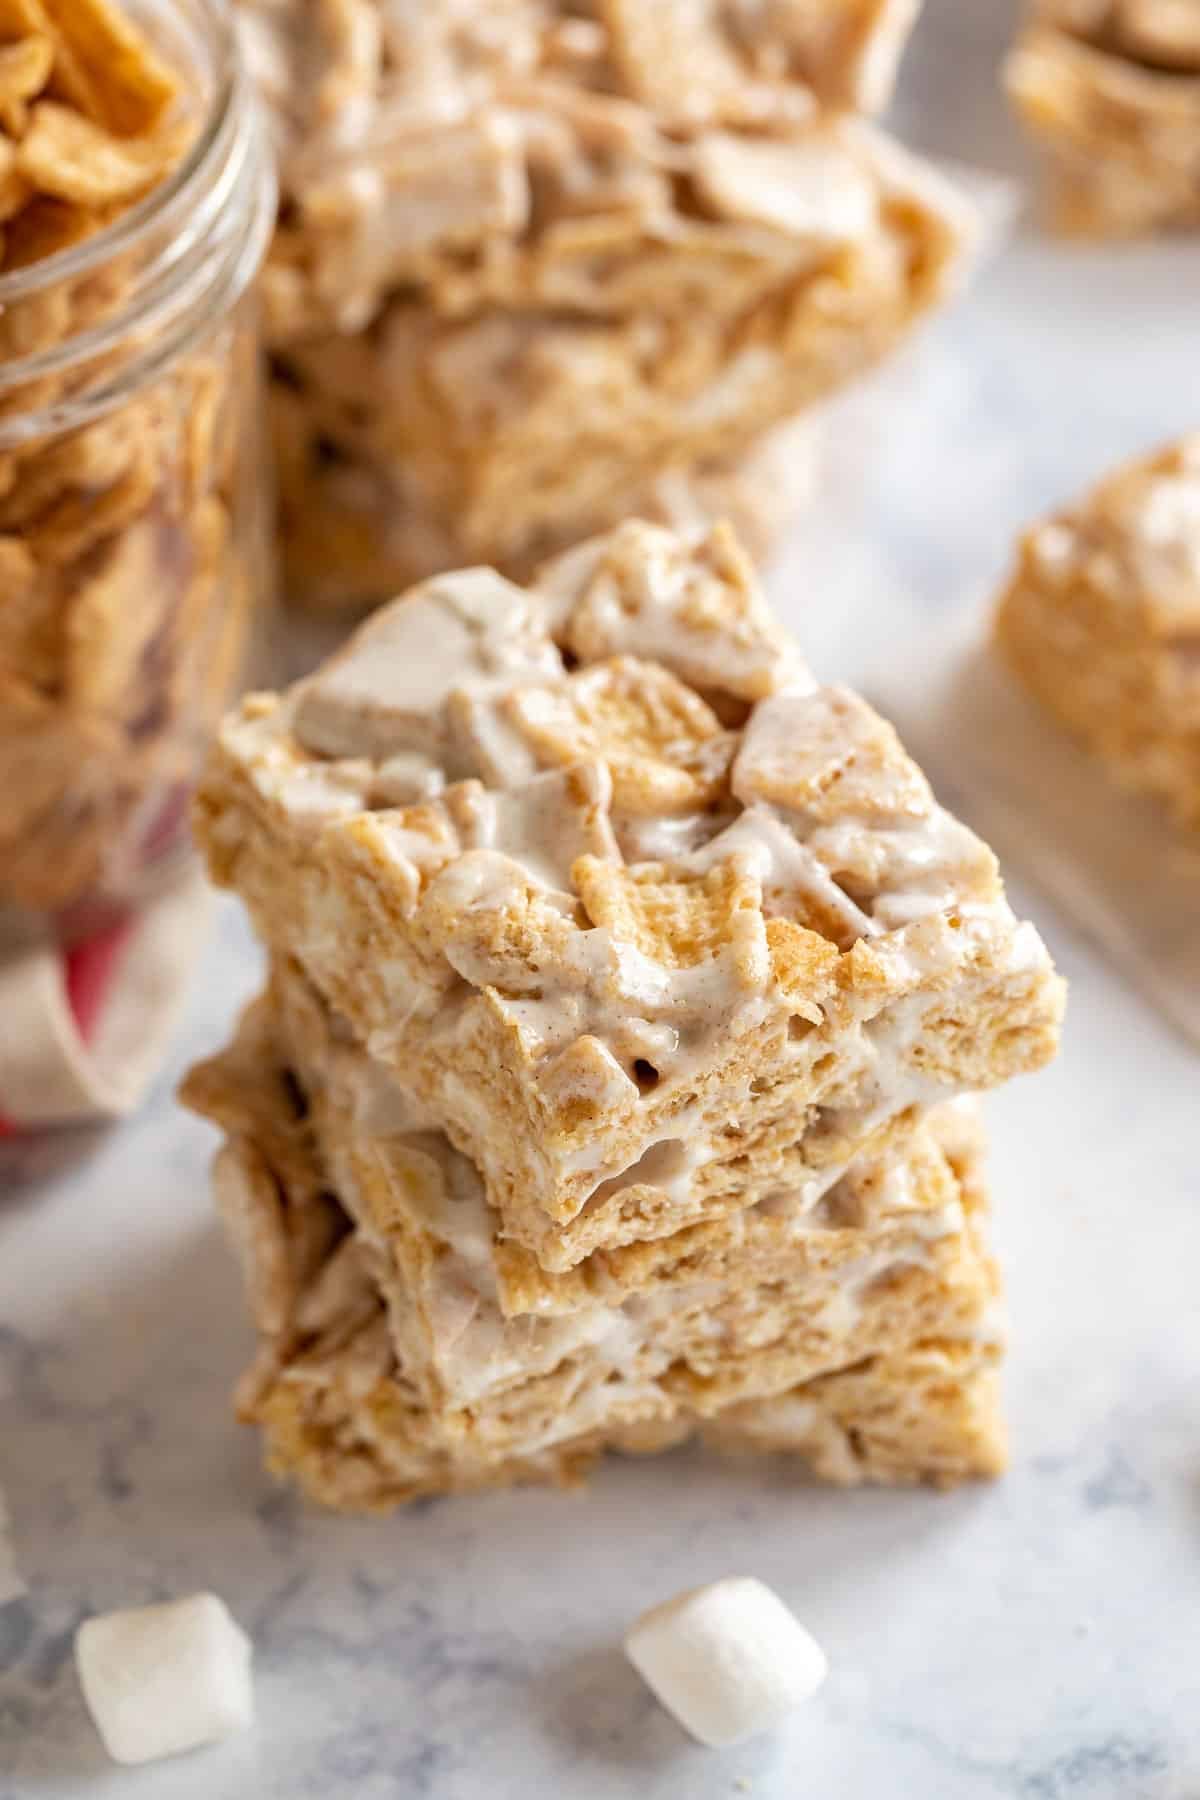
    A side angle shot of a stack of cinnamon toast crunch treats.

    What to Serve With These Marshmallow Cereal Bars

    These bars are sweet and cinnamon-forward, so they pair well with savory dishes when you’re serving them as part of a casual meal or gathering. They’re great for BBQs, potlucks, and family dinners where you want an easy dessert option. Try serving them alongside:

    • BBQ Lemon Pepper Chicken
    • Ranch Potatoes Recipe
    • Avocado Corn and Black Bean Salad
    • Oven Fried Pickles Recipe

    Other No-Bake Desserts To Try

    • These Peanut Butter No Bake Cookies have just the right amount of crunch while also being chewy- they're a hit with both kids and adults without all the hassle of having to bake them!
      Peanut Butter No Bake Cookies
    • A slice of lemon icebox pie being pulled from the rest of the pie.
      Raspberry Lemon Icebox Pie Recipe
    • A slice of peanut butter pie with a bite taken off revealing the silky interior of the pie
      No Bake Peanut Butter Pie
    • A slice of s'mores icebox cake on a white plate with more in the background.
      Icebox Smores Cake

    Love this recipe? Please leave a 5 star ⭐️⭐️⭐️⭐️⭐️ rating in the recipe card below ⬇️ and/or a review in the comment section further down. Check out my Amazon Store for all my favorite tools, including those used in this recipe. And follow @thelifejolie on Instagram and TikTok!

    A straight on image of 3 cinnamon cereal bars stacked on each other exposing the inside of the bars.

    Cinnamon Toast Crunch Bars

    Jessy Freimann
    Cinnamon toast crunch bars are an easy, no-bake dessert made with just 3 ingredients. They’re soft, gooey, and packed with that classic cinnamon sugar crunch everyone loves. Perfect for parties, potlucks, or an easy sweet snack.
    5 from 7 votes
    Print Recipe Pin Recipe
    Prep Time 10 minutes mins
    Cook Time 10 minutes mins
    Setting time 30 minutes mins
    Course Dessert, Snack
    Cuisine American
    Servings 15 bars
    Calories 80 kcal

    Equipment

    • Dutch oven
    • Wooden Spoons
    • 9 x 13 Pan
    • Parchment paper
    • Cooking spray

    Ingredients
      

    • 3 Tablespoons salted butter
    • 10 ounces mini marshmallows 1 bag
    • 5 cups Cinnamon Toast Crunch cereal

    Instructions
     

    • Spray a 13" x 9" pan with cooking spray and line it with parchment paper, leaving some extra paper over the sides.
    • Melt butter over medium heat in pot. Once it's melted, reduce the heat to low.
    • Add marshmallows to the pot. Spray a mixing spoon with cooking spray and continuously stir until marshmallows are fully melted.
    • Remove the pot from the heat and add the cereal. Stir well to combine.
    • Pour the mixture into the prepared pan. With an additional piece of parchment paper, gently press it down into an even layer in the prepared pan (you may need to hold the bottom paper in place to keep it from moving all around).
    • Cool completely and once set, pull the bar out of the pan in once piece using the parchment paper and slice. Store in an air tight container and enjoy!

    Video

    Notes

    • Line your pan before you start. I spray a 9 x 13 pan with cooking spray and add parchment paper with a little overhang so I can lift the bars out in one piece and slice them easily.
    • Keep the heat at medium when melting the butter and marshmallows. Higher heat can scorch them and will give you hard, brittle bars instead of soft and gooey ones.
    • A little cooking spray on your spoon goes a long way. Marshmallows are super sticky, and this makes stirring much easier.
    • Let the marshmallows melt completely. It takes a little patience, but the texture turns out so much smoother when they’re fully melted.
    • Be gentle when pressing the mixture into the pan. Packing it down too firmly can make the bars hard and dense instead of soft and chewy.
    • Ingredients to prep ahead- Measure everything before you start. Once the marshmallows are melted, things move quickly.
    • Leftovers and storage- Keep the bars in an airtight container at room temperature for up to 3 days. Place parchment paper between layers to prevent sticking. Freezing isn’t recommended, since it can affect the texture.

    Nutrition

    Serving: 1barCalories: 80kcalCarbohydrates: 15gProtein: 0.4gFat: 2gSaturated Fat: 1gPolyunsaturated Fat: 0.1gMonounsaturated Fat: 1gTrans Fat: 0.1gCholesterol: 6mgSodium: 33mgPotassium: 2mgFiber: 0.02gSugar: 11gVitamin A: 70IUCalcium: 1mgIron: 0.04mg
    Tried this recipe?Let us know how it was!

    Hot Bean Dip Recipe

    Feb 2, 2026 · 2 Comments

    A hand pulling a chip with hot bean dip from the pan with cheese stretching.

    This hot bean dip recipe is a warm, cheesy take on the classic party favorite that comes together in about 30 minutes. It’s layered with creamy, savory ingredients and just a little heat, making it perfect for game day, parties, or easy get-togethers.

    A hand pulling a chip with hot bean dip from the pan with cheese stretching.
    [feast_advanced_jump_to]

    Why You’ll Love This Cheesy Bean Dip

    If you love taco flavors and classic party dips, this recipe brings the best of both together. I’ve always been a fan of both traditional 7-layer dip and hot cheesy dips, and one day it finally clicked to combine them into one warm, layered version. That simple idea turned into a dip that’s now a staple for parties and get-togethers. It’s cozy, familiar, and loaded with flavor without being complicated.

    It starts with a rich layer of cream cheese, followed by bean dip and chili for richness. Rotel, corn, and green chiles add texture and a little kick, all drained well so the dip stays thick and scoopable. Everything is finished with plenty of cheese, because melty tops make hot dips better. Even better, it only takes about 10 minutes to assemble before baking. Here's why this dip is a must-try:

    • Stays warm and melty
    • Quick to assemble
    • Perfect for game day
    • Feeds a crowd easily
    An overhead image of hot cheesy bean dip with a blue napkin and green onions on the side.

    Ingredient Information And Substitutions

    • Cream cheese- Creates a creamy base. You can use reduced-fat if preferred.
    • Bean dip- Adds flavor and body. I've had trouble finding bean dip lately, but have been able to use refried beans with great success.
    • Chili- Use bean-less or with beans, depending on preference. I prefer bean-less since there's already bean dip in the mix.
    • Rotel- Brings acidity and mild heat. An off-brand can of diced tomatoes with green chiles works too.
    • Frozen corn- Adds sweetness and texture. Canned corn works too, but drain it really well.
    • Diced green chiles- Adds mild heat. Omit if you prefer less spice.
    • Shredded Mexican-blend cheese- Melts smoothly, but cheddar or Colby Jack are good alternatives.
    • Scallions- Optional garnish for freshness. Chives can be used instead.
    • Tortilla chips- For serving. Use sturdy chips for easy scooping.
    An overhead image of labeled recipe ingredients.

    How to Make This Easy Bean Dip

    Step 1- Prep the base.

    Preheat the oven to 400 degrees F. Spread the softened cream cheese evenly in a 9-inch pie plate, and then a layer of bean dip.

    Cream cheese spread in a thin layer on the bottom of a pie plate then a layer of bean dip.

    Step 2- Add the hearty layers.

    Next, spread an even layer of chili, followed by the drained Rotel.

    A layer of chili added then a layer of rotel.

    Step 3- Build the veggie layers.

    Now layer on the corn and green chiles evenly over the Rotel.

    A layer of corn added then a layer of green chiles.

    Step 4- Bake until heated.

    Bake uncovered for 20 minutes, until the dip is hot and heated through.

    The dip in the oven and then pilled out once par-baked.

    Step 5- Finish with cheese.

    Remove from the oven, sprinkle the shredded cheese evenly over the top, and return to the oven for another 10 minutes, or until melted and bubbly.

    Shredded cheese added to the top and then placed back in the oven.

    Step 6- Garnish and serve.

    Top with chopped scallions and serve warm with tortilla chips.

    A close up image of the melted cheese with chopped scallions on top.

    Frequently Asked Questions

    Can this be made ahead of time?

    Yes. Assemble the dip completely, cover, and refrigerate. Bake just before serving.

    Can I double this recipe for a crowd?

    Absolutely. Use a larger baking dish, like a 12" x 7" or even 9" x 14", and add a few extra minutes to the bake time as needed.

    Is this dip spicy?

    It’s mild overall, but if you want a little extra heat, try using spicy Rotel or adding a few sliced jalapeños to the top before baking.

    A close up of a chip in the hot bean dip.

    Tips For Making This Hot Bean Dip

    • Make sure your cream cheese is softened before spreading. This makes it much easier to create an even base and keeps the layers from mixing.
    • Take a minute to drain the Rotel, corn, and green chiles really well. Too much liquid will make the dip watery and harder to scoop.
    • Don’t stress about keeping the layers perfectly neat. Once it’s baked and bubbly, it all comes together, and no one will notice if things aren’t perfectly even.
    • I like using a beanless chili so the layers stay more distinct, but chili with beans works just fine if that’s what you have on hand.
    • This dip is great served straight from the baking dish while it’s hot and melty. If it starts to cool, a quick trip back into the oven brings it right back to life.
    • Ingredients to prep ahead- Drain all canned ingredients and shred the cheese.
    • Leftovers and storage- Store leftovers in an airtight container in the fridge for up to 3 days. Reheat in the oven or microwave until warmed through.
    A pan of ben dip with a blue napkin and green onions in the background.

    What To Serve With The Cream Cheese Bean Dip

    This dip pairs perfectly with other easy party foods and simple sides to round out a snack spread. Add a few fresh or crunchy options alongside it to balance out the richness. You can pair it with:

    • Everything Pita Chips Recipe
    • Brie Apple Phyllo Cups
    • Loaded Chicken Nachos
    • Jalapeno Deviled Eggs

    Other Tasty Appetizers To Try

    • It's always a good idea to have an easy guacamole recipe up your sleeve and this one is seriously the best- fantastic, zesty flavor with an awesome secret ingredient to helps take the guacamole to the next level. It's a healthy snack for any celebration or game day!
      The most delicious guacamole EVER.
    • A close up image of the corner of the pan of corn salsa.
      Roasted Corn Salsa
    • This Artichoke Asiago Dip is the best easy recipe to throw together for a last-minute spring get-together. It only takes a couple of minutes to make and is fully of cheesy, delicious flavor! #ad
      Artichoke Asiago Dip
    • A close up of a jalapeno deviled egg on a plate with others.
      Jalapeno Deviled Eggs

    Love this recipe? Please leave a 5 star ⭐️⭐️⭐️⭐️⭐️ rating in the recipe card below ⬇️ and/or a review in the comment section further down. Check out my Amazon Store for all my favorite tools, including those used in this recipe. And follow @thelifejolie on Instagram and TikTok!

    A hand pulling a chip with hot bean dip from the pan with cheese stretching.

    Hot Bean Dip Recipe

    Jessy Freimann
    This hot bean dip recipe is a warm, cheesy take on the classic party favorite that comes together in about 30 minutes. It’s layered with creamy, savory ingredients and just a little heat, making it perfect for game day, parties, or easy get-togethers.
    No ratings yet
    Print Recipe Pin Recipe
    Prep Time 10 minutes mins
    Cook Time 20 minutes mins
    Total Time 30 minutes mins
    Course Appetizer
    Cuisine Cinco de Mayo, Easy, Gameday, Healthy, Mexican, party
    Servings 8 servings
    Calories 209 kcal

    Equipment

    • 1 Pie pan
    • 1 Can opener
    • 1 Spatula
    • 1 Measuring cups and spoons

    Ingredients
      

    • 8 ounces cream cheese softened
    • 9 ounces bean dip or refried beans
    • 15 ounces chili canned
    • 10 ounces Rotel canned- drained
    • 1 cup frozen corn thawed and drained
    • 4 ounces diced green chiles canned- drained
    • 1 ½ cups Mexican blend shredded cheese shredded or cheddar
    • ¼ cup Chopped scallions for garnish
    • Tortilla chips for dipping

    Instructions
     

    • Preheat the oven to 400 degrees F.
    • In a 9 inch pie plate, spread the cream cheese in an even layer.
    • Next spread an even layer of bean dip on top of the cream cheese.
    • Spread an even layer of chili on top of the bean dip layer.
    • Now spread the Rotel on top of the chili layer.
    • After that spread the corn on top of the Rotel layer.
    • Next spread the green chiles on top of the corn layer.
    • Bake uncovered for 20 minutes.
    • Remove the dip from the oven and sprinkle cheese on top.
    • Bake for 10 more minutes or until the cheese is fully melted and it's hot and bubbly.
    • Sprinkle with scallions and serve immediately with tortilla chips.

    Video

    Notes

    • Make sure your cream cheese is softened before spreading. This makes it much easier to create an even base and keeps the layers from mixing.
    • Take a minute to drain the Rotel, corn, and green chiles really well. Too much liquid will make the dip watery and harder to scoop.
    • Don’t stress about keeping the layers perfectly neat. Once it’s baked and bubbly, it all comes together, and no one will notice if things aren’t perfectly even.
    • I like using a beanless chili so the layers stay more distinct, but chili with beans works just fine if that’s what you have on hand.
    • This dip is great served straight from the baking dish while it’s hot and melty. If it starts to cool, a quick trip back into the oven brings it right back to life.
    • Ingredients to prep ahead- Drain all canned ingredients and shred the cheese.
    • Leftovers and storage- Store leftovers in an airtight container in the fridge for up to 3 days. Reheat in the oven or microwave until warmed through.

    Nutrition

    Serving: 1servingCalories: 209kcalCarbohydrates: 14gProtein: 9gFat: 14gSaturated Fat: 8gPolyunsaturated Fat: 1gMonounsaturated Fat: 4gCholesterol: 42mgSodium: 318mgPotassium: 371mgFiber: 2gSugar: 5gVitamin A: 1070IUVitamin C: 86mgCalcium: 293mgIron: 1mg
    Tried this recipe?Let us know how it was!

    Baked Mac And Cheese With Bacon

    Jan 30, 2026 · 5 Comments

    A bowl of bacon mac and cheese.

    Try creamy baked mac and cheese with bacon and ranch for a zesty, smoky twist on the classic. The top gets extra crispy and golden, making it an easy winner for weeknight or game day dinners.

    A bowl of bacon mac and cheese.
    [feast_advanced_jump_to]

    Why You’ll Love This Macaroni With Cheese And Bacon

    Mac and cheese has been one of my favorite comfort foods since I was a kid. There’s just something so satisfying about creamy, cheesy pasta, especially when it has those slightly crispy edges. Growing up, my favorite part was always the golden corners, and I’ve never quite gotten over that love for a baked, crunchy topping.

    This version builds on that classic comfort with flavors we already love. J may be a (slightly) picky eater, but mac and cheese, bacon, and ranch are always a yes in our house. The smoky bacon and subtle ranch seasoning add just enough flavor without overpowering the dish, making it feel familiar but a little more fun. Here’s why you should try this macaroni and cheese recipe with bacon:

    • Creamy and comforting
    • Familiar flavors with a twist
    • Crispy, cheesy topping
    • Easy for weeknights, great for a crowd
    An overhead image of a pan of baked mac and cheese with bacon.

    Ingredient Information And Substitutions

    • Bacon- Regular or thick cut bacon works best. Turkey bacon can be used if needed, though it won’t get quite as crisp.
    • Butter- Either salted or unsalted works here. Use what you normally keep on hand.
    • Milk- Whole milk gives the creamiest result, but 2% will still work if that’s what you have.
    • Ranch seasoning- Use store-bought packets or a homemade mix. Start with a little less if yours is already salty.
    • Sharp cheddar cheese- Freshly shredded melts best. Colby Jack is a good swap for a milder flavor.
    • Mozzarella cheese- Helps make the sauce extra melty. Monterey Jack works well as a substitute.
    • Elbow macaroni- Any short pasta that holds sauce works, such as shells or cavatappi.
    • Flour- All-purpose flour thickens the sauce smoothly. A 1:1 gluten-free flour blend usually works as well.
    • Panko breadcrumbs- Adds crunch on top. Regular breadcrumbs or crushed crackers are good alternatives.
    An overhead image of labeled recipe ingredients.

    How To Make This Bacon And Mac And Cheese Recipe

    Step 1- Make the roux.

    Set the oven to 400 degrees F. In a medium saucepan, melt the butter over medium heat. Whisk in the flour until a smooth paste forms and cook for 1-2 minutes, stirring often.

    Butter melting in a sauce pan and flour being whisked in to make a roux.

    Step 2- Add the milk and seasoning.

    Slowly whisk in the milk, then add the ranch seasoning and continue stirring for about 10 minutes, until the sauce thickens slightly.

    Step 3- Melt the cheese.

    Stir a cup of the cheddar and a cup of the mozzarella until the sauce is smooth and creamy.

    Milk and seasonings being whisked into the roux and then cheese melting in.

    Step 5- Combine with pasta and bacon.

    Add the mixture to the cooked macaroni and crumble in about half of the bacon, stirring until everything is evenly coated.

    Step 6- Transfer to the baking dish.

    Pour the mixture into a greased 9×9 pan and spread it out evenly.

    Pasta boiling and then mixed with bacon and cheese sauce in the pan.

    Step 7- Add the topping.

    Sprinkle the remaining cheese, panko breadcrumbs, and the rest of the crumbled bacon over the top.

    Step 8- Bake and serve. 

    Bake until the top is crispy and the edges are bubbling. Let it cool slightly, then serve while hot and creamy.

    Topping added to the pan and then the pan in the oven.

    Frequently Asked Questions

    Can I make this ahead of time?

    Yes. You can assemble everything in the baking dish, cover it, and refrigerate it. Before baking, let it sit at room temperature for about 20 minutes so it heats evenly.

    Is the ranch flavor strong?

    No. It adds a subtle tang without overpowering the cheese. If you’re unsure, start with a little less seasoning and adjust to taste.

    How do I keep the sauce from getting grainy?

    Stick to medium heat and stir often. Using freshly shredded cheese instead of pre-shredded cheese also helps keep the sauce smooth.

    A spoon scooping mac and cheese out of the pan.

    Tips For Making Baked Bacon Macaroni And Cheese

    • Don’t rush the sauce. Medium heat and frequent stirring help keep it smooth and creamy without scalding the milk.
    • Shred your own cheese if you have the time. It melts better and gives you a richer texture overall.
    • Cook the pasta just to al dente. It will finish cooking in the oven, so slightly firm pasta works best.
    • It may look like there’s too much sauce at first, but don’t worry, the pasta absorbs some of it as it bakes without drying out.
    • This recipe is written for a crispy top. If you prefer a softer, mellower finish, wait to add the breadcrumbs and bacon until about 5 minutes before the baking time is up.
    • Ingredients to prep ahead- Cook and crumble the bacon, boil and drain the pasta, shred the cheese, and measure out the seasonings.
    • Leftovers and storage- Store leftovers in an airtight container in the fridge for up to 3-4 days. Reheat gently in the microwave or oven until warmed through.
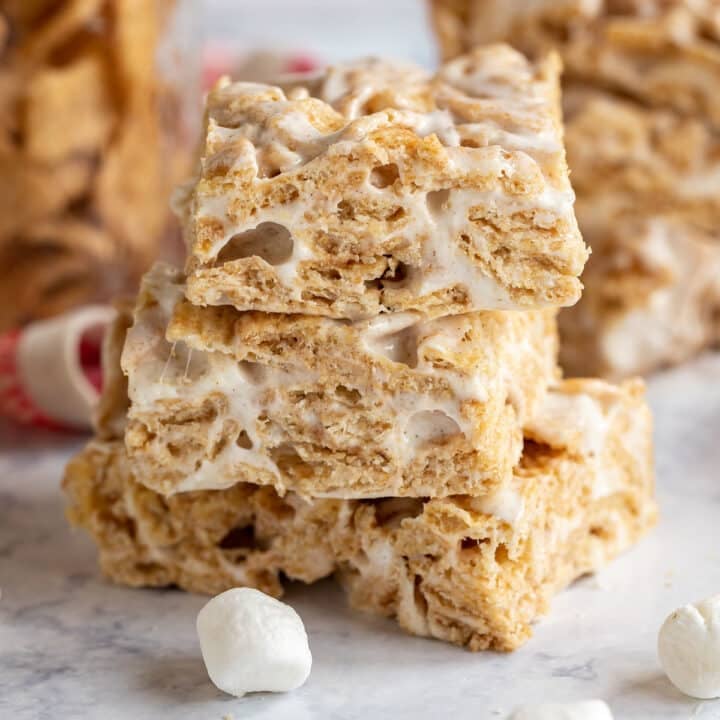
    A close up of a bowl of macaroni and cheese.

    What To Serve With Baked Macaroni And Cheese And Bacon

    This dish is rich and comforting, so pairing it with something fresh or simple helps balance things out. Here are a few easy ways to round out this bacon mac and cheese recipe:

    • Garlic Parmesan Roasted Broccoli
    • Shishito Peppers Recipe
    • Crescent Roll Pizza Braid
    • Chocolate Orange Cake Recipe
    A close up of the side of a pan of bacon mac and cheese.

    Other Pasta Recipes To Try

    • An overhead image of a plate of baked ziti with herbs, garlic and a blue striped napkin next to it.
      Pasta al Forno
    • A spoon pulling a scoop of baked tortellini from the pan with melted cheese stretching.
      Tortellini Baked Pasta
    • A white bowl of tortellini salad with the main bowl in the background.
      Tortellini Pesto Pasta Salad
    • An overhead image of a plate of pasta pomodoro with basil, a checked napkin and the rest of the pan around it.
      Pasta Pomodoro Recipe

    Love this recipe? Please leave a 5 star ⭐️⭐️⭐️⭐️⭐️ rating in the recipe card below ⬇️ and/or a review in the comment section further down. Check out my Amazon Store for all my favorite tools, including those used in this recipe. And follow @thelifejolie on Instagram and TikTok!

    A bowl of bacon mac and cheese.

    Baked Mac And Cheese With Bacon

    Jessy Freimann
    Try creamy baked mac and cheese with bacon and ranch for a zesty, smoky twist on the classic. The top gets extra crispy and golden, making it an easy winner for weeknight or game day dinners.
    No ratings yet
    Print Recipe Pin Recipe
    Prep Time 20 minutes mins
    Cook Time 30 minutes mins
    Total Time 50 minutes mins
    Course dinner, Main, Main Course, Main dish
    Cuisine American
    Servings 8 servings
    Calories 388 kcal

    Equipment

    • 1 saucepan
    • 1 9" x 9" Baking Pan
    • 1 Box grater
    • 1 Whisk
    • 1 Measuring cups and spoons
    • 1 Liquid measuring cup

    Ingredients
      

    • 8 slices bacon fried until crisp and then crumbled
    • 2 Tablespoons salted butter
    • 2 Tablespoons flour
    • 2 ½ cups whole milk
    • 2 Tablespoons ranch seasoning
    • 1 ¼ cups sharp cheddar cheese shredded and divided
    • ¾ cups mozzarella cheese shredded and divided
    • 1 ½ cups elbow macaroni cooked per package directions for al dente and drained
    • ¼ cup panko bread crumbs

    Instructions
     

    • Preheat the oven to 400 degrees F.
    • In a medium size saucepan, melt butter over medium heat.
    • Once fully melted, add flour and whisk to make a roux. Cook for 1-2 minutes, whisking often.
    • Whisk in milk and ranch seasoning.
    • Cook whisking continuously until it thickens slightly, around 10 minutes.
    • Turn off the heat and whisk in ¾ cup cheddar cheese and ½ cup of mozzarella cheese and whisk until fully melted and combined.
    • Add the cheese mixture to the macaroni and add ⅔ crumbled bacon. Stir until well combined and pour into a 9" x 9" pan.
    • Top with remaining cheese and panko bread crumbs. Bake uncovered for 30 minutes or until the top is crispy and the edges are bubbling.
    • Cool for 5 minutes, sprinkle with remaining bacon and serve immediately.

    Video

    Notes

    • Don’t rush the sauce. Medium heat and frequent stirring help keep it smooth and creamy without scalding the milk.
    • Shred your own cheese if you have the time. It melts better and gives you a richer texture overall.
    • Cook the pasta just to al dente. It will finish cooking in the oven, so slightly firm pasta works best.
    • It may look like there’s too much sauce at first, but don’t worry, the pasta absorbs some of it as it bakes without drying out.
    • This recipe is written for a crispy top. If you prefer a softer, mellower finish, wait to add the breadcrumbs and bacon until about 5 minutes before the baking time is up.
    • Ingredients to prep ahead- Cook and crumble the bacon, boil and drain the pasta, shred the cheese, and measure out the seasonings.
    • Leftovers and storage- Store leftovers in an airtight container in the fridge for up to 3-4 days. Reheat gently in the microwave or oven until warmed through.

    Nutrition

    Serving: 1servingCalories: 388kcalCarbohydrates: 29gProtein: 16gFat: 23gSaturated Fat: 11gPolyunsaturated Fat: 2gMonounsaturated Fat: 7gTrans Fat: 0.1gCholesterol: 57mgSodium: 675mgPotassium: 245mgFiber: 1gSugar: 5gVitamin A: 467IUCalcium: 283mgIron: 1mg
    Tried this recipe?Let us know how it was!


    Buffalo Chicken Sliders

    Jan 26, 2026 · 5 Comments

    A close up image of a buffalo chicken slider.

    These easy baked buffalo chicken sliders are just that — incredibly simple and quick to throw together in just 30 minutes. Beyond delicious and full of melty, stretchy cheese, they're pretty much the perfect game day snack!

    A close up image of a buffalo chicken slider.
    [feast_advanced_jump_to]

    Why You'll Love Buffalo Sliders

    We live in Bills Mafia territory. And while this team is hit-or-miss with games (again, this is the Bills we're talking about here), these tasty sliders are a guaranteed win. I mean, what is more synonymous with game day than Buffalo chicken dip (and really Buffalo chicken anything, everything)? I'm really just here for the snacks, clearly.

    Plus, you can definitely make buffalo wing sliders even when football isn't blasting in the background. I love them for potlucks, backyard parties, and barbecues too! Why? Glad you asked:

    • Made with a handful of easy-to-find ingredients
    • Flavorful and spicy
    • An ideal handheld appetizer
    • Easily make it ahead
    • Features the perfect balance of crispy bread, zesty ranch, and tender chicken with just the right amount of spicy buffalo sauce!
    A pan of buffalo sliders.

    Ingredients And Substitutions

    • Cooked Chicken- I used this recipe for shredded chicken since it takes all the work out of it!
    • Mini Slider Buns- Mini buns are the perfect size for a party-friendly appetizer. If you can't find any, try dinner rolls instead.
    • Buffalo Wing Sauce- Make sure it's wing sauce, not regular hot sauce. For that signature tangy and spicy flavor we all know and love. Frank's RedHot is my go-to, but any store-bought or homemade buffalo sauce works.
    • Mozzarella- The melty and gooey cheese that holds the sliders together. Other tasty options include provolone or cheddar.
    • Ranch Seasoning- Adds a herby ranch flavor that balances out some of the spiciness in the sauce. I use it to season the chicken and buns.
    • Ranch Dressing- I like to add a bit to the bottom of each slider bun before topping it with chicken — it's kind of like mayo, but more on theme!
    • Butter- Melt it and then add it to the tops of the buns before a sprinkle of ranch for a nice golden brown finish and buttery flavor.
    An overhead image of labeled recipe ingredients.

    How To Make Pulled Chicken Sliders

    Step 1- Toast the buns.

    Preheat the oven to 350 degrees F and grease the baking dish with nonstick cooking spray.

    Slice the slider buns in half, keeping them in one piece if you can (so you have tops and bottoms). Open them up and place in the baking dish, then toast for 5 minutes.

    Buns cut in half on a butting board and then the bottoms in the pan in the oven.

    Step 3- Mix the filling.

    In the meantime, combine the shredded chicken with the buffalo sauce and 1 tablespoon of ranch seasoning.

    Buffalo chicken mixed in a bowl and then the toasted bun bottoms in the pan with ranch dressing spread on it.

    Step 4- Assemble the sliders.

    Spread the ranch dressing in a thin layer along the bottom buns, top with the buffalo chicken mixture, then sprinkle with mozzarella.

    Buffalo chicken on the buns in the pan and the mozzarella cheese on top of that.

    Step 5- Cover and season the tops.

    In a small bowl, combine the remaining ranch seasoning with melted butter.

    Cover the sliders with the top bun and brush with the seasoned melted butter.

    Seasoned melted butter in a bowl and then the sliders in the oven.

    Step 6- Bake.

    Bake the sliders for 15-20 minutes or until the cheese is fully melted. Serve immediately and enjoy!

    Buffalo sliders on a plate.

    Frequently Asked Questions

    Why make chicken sliders instead of buffalo chicken dip?

    I love that they're super-easy to throw together! Who wants the hassle of dealing with a million different ingredients and so many extra steps when there's some perfectly good football to be watched? Besides me, of course, but we can't all be mega-geeks when it comes to food. I recognize this isn't the norm.

    Can I make these sliders ahead of time?

    Absolutely, but I'd prep all the components ahead of time and assemble and bake just before serving. You can make the shredded chicken and buffalo sauce mixture ahead, shred the cheese and cut the buns ahead and then throw it all together right before the game, and pop it into the oven. There's a whole lot of work-smarter-not-harder going on with this, and I'm all about that life.

    What cheese goes best with buffalo chicken sliders?

    I love mozzarella here, but you could also try shredded Monterey Jack, provolone, or cheddar.

    Can I use rotisserie chicken for this recipe?

    Definitely! Feel free to use any cooked chicken you like or have on hand. Just make sure to shred it before assembling the sliders.

    A buffalo wing slider being dipped in a bowl of ranch dressing.

    Tips For Making This Buffalo Chicken Sliders Recipe

    • Toasting the buns prevents soggy results. I find they hold up so much better when I pre-bake them before adding the ranch dressing and the rest of the fillings.
    • Don't shred the chicken too finely. The goal should be bite-sized pieces rather than super fine shreds. The texture will be much better and prevent the sliders from being too messy!
    • Even layers will ensure every mini sandwich has the perfect balance of spicy, creamy, and cheesy goodness in every bite. Take your time with it.
    • Let them cool slightly before serving. I know you'll be excited to dig right in, but that cheese will be bubbling hot and the filling will be steamy (YUM).
    • Ingredients to prep ahead- I encourage you to prep all of your ingredients so the toasted buns don't sit out too long and become dry! Cook and shred the chicken and mix it into buffalo chicken, shred the mozzarella, and cut the buns before getting started.
    • Leftovers and storage- Place any leftover sliders in an airtight container and store in the fridge for up to 3 days. To reheat, pop back in the oven at 350 degrees F, cover loosely with foil, and bake for 10-15 minutes until warmed through.

    An overhead image of buffalo sliders in a pan.

    What To Serve With Shredded Chicken Sliders

    Other than being one of my favorites to serve on football Sunday, I often pair these with other apps for parties and get-togethers. And, hey... my husband and I have also been known to polish off a tray for at-home date night too. They're super versatile and pair well with:

    • Cheesy Ranch Potato Wedges
    • Roasted Vegetable Flatbread
    • Sriracha Chex Mix
    • Jalapeno Deviled Eggs

    Other Delicious Buffalo Recipes To Try

    • Buffalo taquitos cut in half and stacked on each other.
      Buffalo Chicken Taquitos
    • A square image of Buffalo Chicken Braid .
      Buffalo Chicken Braid Recipe
    • This Buffalo Chex Mix recipe brings the crunchy goodness of Original Chex Mix but with a spicy Buffalo kick that we all love- it's down right addictive!
      Buffalo Chex Mix Recipe
    • Buffalo Chicken Quesadilla | The Life Jolie
      Buffalo Chicken Quesadilla

    Love this recipe? Please leave a 5 star ⭐️⭐️⭐️⭐️⭐️ rating in the recipe card below ⬇️ and/or a review in the comment section further down. Check out my Amazon Store for all my favorite tools, including those used in this recipe. And follow @thelifejolie on Instagram and TikTok!

    A close up image of a buffalo chicken slider.

    Buffalo Chicken Sliders

    Jessy Freimann
    These easy baked buffalo chicken sliders are just that — simple and quick to throw together in just 30 minutes. The perfect game day snack!
    No ratings yet
    Print Recipe Pin Recipe
    Prep Time 10 minutes mins
    Cook Time 20 minutes mins
    Total Time 30 minutes mins
    Course Appetizer, Snack
    Cuisine American
    Servings 15 sliders
    Calories 138 kcal

    Equipment

    • 9 x 13 Pan
    • chefs knife
    • cutting board
    • measuring cups
    • measuring spoons
    • silicone brush

    Ingredients
      

    • cooking spray
    • 15 mini slider buns I like King's Hawaiian rolls- try to get ones that are all connected.
    • 4 cups cooked chicken, lightly shredded
    • ½ cup buffalo wing sauce, I used ½ cup but you can add more if you want it spicier
    • 4 teaspoons ranch seasoning, divided
    • 2 ¼ cups mozzarella cheese, shredded
    • ¼ cup ranch dressing, to taste
    • 2 Tablespoons butter, melted

    Instructions
     

    • Preheat the oven to 350 degrees F and spray the pan down with cooking spray.
    • Slice the buns so that there's a top and a bottom (try to keep them in one piece if you can).
    • Place the bun bottoms into the pan and bake for 5 minutes.
    • While the bun bottoms are baking mix the chicken, buffalo wing sauce and 3 teaspoons ranch seasoning until well combined.
    • Once the bun bottoms are out of the oven, spread the ranch dressing in a thin layer onto the bun bottoms.
    • Next, top the bun bottoms with an even layer of the buffalo chicken and then sprinkle the mozzarella cheese in an even layer on top of the chicken.
    • In a separate bowl, combine the melted butter with remaining ranch seasoning.
    • Place your bun tops onto the sliders and finish them by brushing the butter mixture lightly onto each bun top.
    • Bake for 10-15 minutes until they're heated through and the cheese is melted. Cool for 3 minutes and serve immediately.

    Video

    Notes

    • Toasting the buns prevents soggy results. I find they hold up so much better when I pre-bake them before adding the ranch dressing and the rest of the fillings.
    • Don't shred the chicken too finely. The goal should be bite-sized pieces rather than super fine shreds. The texture will be much better and prevent the sliders from being too messy!
    • Even layers will ensure every mini sandwich has the perfect balance of spicy, creamy, and cheesy goodness in every bite. Take your time with it.
    • Let them cool slightly before serving. I know you'll be excited to dig right in, but that cheese will be bubbling hot and the filling will be steamy (YUM).
    • Ingredients to prep ahead- I encourage you to prep all of your ingredients so the toasted buns don't sit out too long and become dry! Cook and shred the chicken and mix it into buffalo chicken, shred the mozzarella, and cut the buns before getting started.
    • Leftovers and storage- Place any leftover sliders in an airtight container and store in the fridge for up to 3 days. To reheat, pop back in the oven at 350 degrees F, cover loosely with foil, and bake for 10-15 minutes until warmed through.
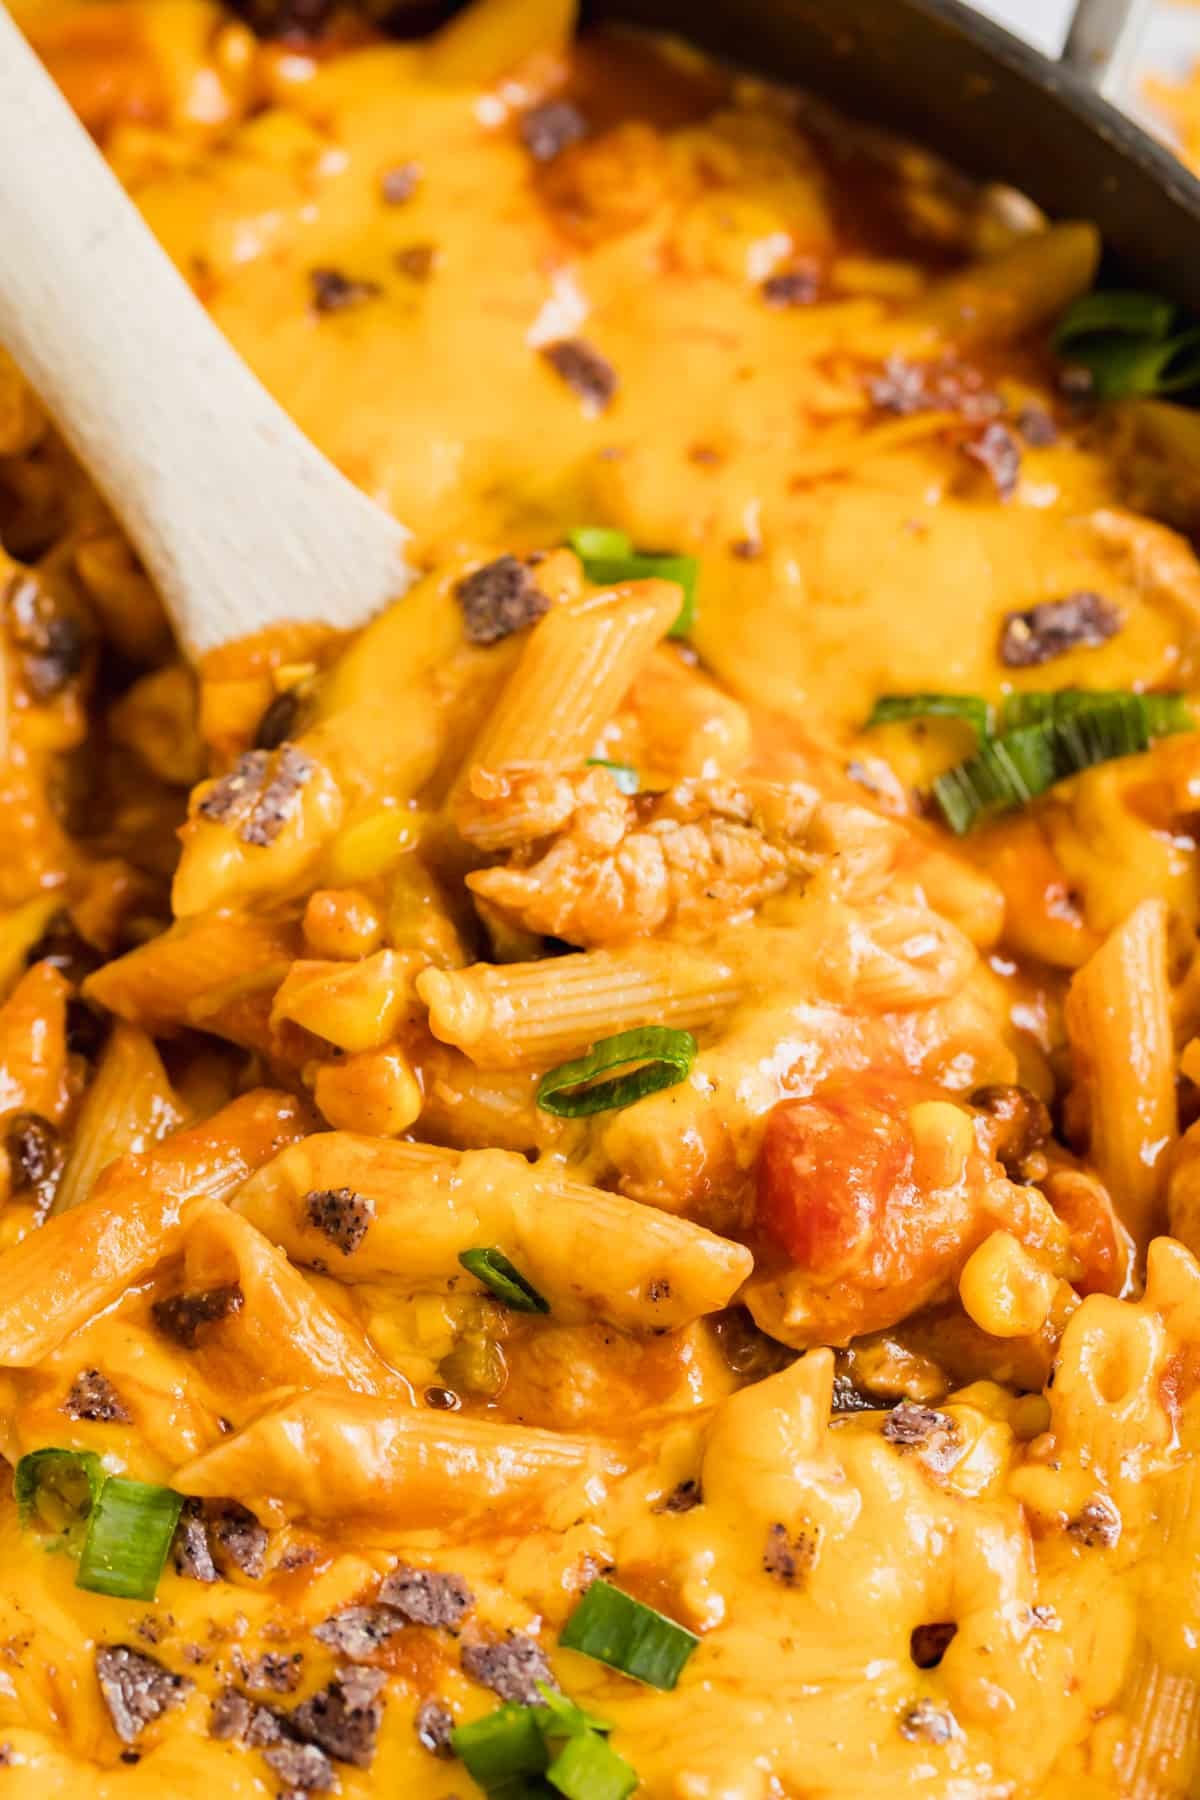
    Nutrition

    Serving: 3slidersCalories: 138kcalCarbohydrates: 2gProtein: 13gFat: 8gSaturated Fat: 3gPolyunsaturated Fat: 2gMonounsaturated Fat: 2gCholesterol: 43mgSodium: 291mgPotassium: 104mgFiber: 0.04gSugar: 1gVitamin A: 134IUCalcium: 93mgIron: 1mg
    Tried this recipe?Let us know how it was!

    Ground Beef Goulash

    Jan 23, 2026 · 3 Comments

    A wooden spoon holding up a scoop off ground beef goulash in a pan.

    This cozy ground beef goulash is a no-fuss dinner that always hits the spot. It’s hearty, made with simple pantry staples, and great for busy weeknights.

    A wooden spoon holding up a scoop off ground beef goulash in a pan.
    [feast_advanced_jump_to]

    Why You’ll Love This Goulash With Ground Beef

    When I think of goulash, this is the version that comes to mind. The old-fashioned kind a lot of us grew up with… ground beef, elbow macaroni, a tomato-based sauce, and whatever vegetables happened to be in the fridge at the time. Every family had their own take on it. Some used more pasta, some added different veggies, some kept it extra saucy. 

    This is not a traditional Hungarian goulash. I love that, but this isn't that. No matter the variation, it was always comforting and always filling. It’s the kind of meal that shows up on the table on busy nights and somehow still feels special. This is humble, cozy food at its best. The kind of recipe that makes great leftovers and keeps everyone coming back for just one more bowl. Here’s why I love this goulash with hamburger meat:

    • Made with basic ingredients
    • Feeds the whole family
    • Easy to customize
    • Tastes even better the next day
    A pan of hamburger goulash with napkins and onions in the background.

    Ingredient Information And Substitutions

    • Ground beef- I like using 80/20 for flavor, but leaner beef works too. Ground turkey can be swapped in if needed.
    • Potatoes- Russet or Yukon Gold both hold up well. Sweet potatoes would add a slightly different twist.
    • Onion- Yellow or white onion works best, but shallots can be used as a substitute.
    • Frozen corn- Canned corn is fine if that’s what you have. Just drain it well!
    • Green beans- Frozen or fresh are ideal. Canned can be used, but will be much softer.
    • Tomato sauce- Crushed tomatoes can work if you prefer a chunkier texture.
    • Elbow macaroni- Any other small pasta shape will do, like shells or ditalini.
    • Worcestershire sauce- Adds depth and balance. Soy sauce can be used as a backup.
    • Seasonings- Feel free to adjust salt, pepper, and herbs to taste.
    An overhead image of labeled recipe ingredients.

    How To Make This Ground Beef Goulash Recipe

    Step 1- Brown the onions and potatoes and add the beef.

    Add the potatoes and onions to a large pan over medium-high heat and sauté for 5 minutes to soften the onion.

    Add the ground beef and cook breaking up until fully cooked, then drain off any excess grease.

    Onion and potato cooking in a pan and then raw ground beef added.

    Step 2- Add the veggies and sauce.

    Add the green beans, corn, tomato sauce, seasonings, Worcestershire sauce and broth to the pot, stirring everything together well.

    Lower the heat and let the mixture simmer gently for about 45 minutes, stirring occasionally so nothing sticks.

    Remaining ingredients added to the pan and then the pan covered and cooking.

    Step 3- Stir in the pasta.

    Stir in the uncooked pasta and continue cooking for another 10-12 minutes or until the noodles are tender. If the mixture starts to look dry, add a splash of water or broth.

    Step 5- Serve and enjoy.

    Once the pasta is cooked through and everything is saucy and well combined, serve hot.

    A owl of American goulash with onions behind it.

    Frequently Asked Questions

    Can I make this ahead of time?

    Yes, this is a great make-ahead meal. You can cook it fully, let it cool, and store it in the fridge until ready to reheat.

    Is this spicy?

    Not at all. It’s mild and family-friendly, but you can add heat if you like.

    Do I need to cook the pasta separately?

    Nope. The pasta cooks right in the pot, which helps it soak up flavor and keeps cleanup simple.

    A close up overhead shot of ground beef goulash.

    Tips For Making This Hamburger Goulash Recipe

    • This makes really great leftovers and can easily be made ahead. We love it as a simple Sunday dinner, then enjoy the leftovers for lunch over the next few days.
    • If it starts to look dry while cooking, add a splash of water or chicken broth. You want it saucy, not soupy.
    • Feel free to swap in different vegetables or adjust ingredients based on what you have on hand.
    • Don’t rush the simmer. Letting it cook slowly helps the flavors meld together.
    • Taste before serving. A little extra salt at the end can make a big difference.
    • Ingredients to prep ahead- Dice the onion in advance to save time.
    • Leftovers and storage- Keep leftovers in an airtight container in the fridge for 3-4 days or freeze for up to 2 months. Thaw overnight and reheat gently on the stove or in the microwave.

    What To Serve With This American Goulash

    This dish is hearty enough to stand on its own, but simple sides make it feel like a complete meal. Something fresh or crunchy pairs especially well with the rich, saucy base. My favorite pairings include:

    • Garlic Parmesan Roasted Broccoli
    • Tomato Onion Salad
    • Eggplant Rollatini
    • Lemon Parfait Cups Dessert

    Other Beef Recipes To Try

    • A square image of the Easy Beef Stroganoff Recipe.
      Easy Beef Stroganoff Recipe (Instant Pot and Slow Cooker)
    • Ground Beef Oven Baked Tacos in dish
      Ground Beef Oven Baked Tacos Recipe
    • An overhead image of a beef burrito bowl with another next to it and limes and cilantro on the side.
      Beef Burrito Bowls
    • An overhead image of beef stew in a bowl of polenta with a napkin near it and mushrooms.
      Beef Italian Stew

    Love this recipe? Please leave a 5 star ⭐️⭐️⭐️⭐️⭐️ rating in the recipe card below ⬇️ and/or a review in the comment section further down. Check out my Amazon Store for all my favorite tools, including those used in this recipe. And follow @thelifejolie on Instagram and TikTok!

    A wooden spoon holding up a scoop off ground beef goulash in a pan.

    Ground Beef Goulash

    Jessy Freimann
    This cozy ground beef goulash is a no-fuss dinner that always hits the spot. It’s hearty, made with simple pantry staples, and great for busy weeknights.
    4 from 3 votes
    Print Recipe Pin Recipe
    Prep Time 5 minutes mins
    Cook Time 1 hour hr 15 minutes mins
    Total Time 1 hour hr 20 minutes mins
    Course dinner, Main, Main Course, Main dish
    Cuisine American
    Servings 6 servings
    Calories 405 kcal

    Equipment

    • wooden spoon
    • chefs knife
    • cutting board
    • Dutch oven
    • Peeler
    • measuring spoons
    • measuring cups

    Ingredients
      

    • 1 ½ cups potatoes, peeled and diced (about 4 medium)
    • ¼ cup onions, chopped
    • 1 pound ground beef, (I prefer 80/20)
    • 1 ½ cups frozen corn
    • 15 ounces green beans frozen or fresh
    • 16 ounces tomato sauce
    • ¼ cup chicken broth (possibly a bit more- only use it if seems too dry)
    • 2 teaspoons Worcestershire sauce
    • ½ cup water (swish this through the sauce can to get any remaining sauce out before adding)
    • 1 teaspoon kosher salt
    • ¼ teaspoon ground black pepper
    • 1 teaspoon garlic salt
    • ½ teaspoon dried basil
    • 1 cup elbow macaroni

    Instructions
     

    • In a large pan, cook onions and potatoes over medium-high heat for 5 minutes, stirring periodically.
    • Add ground beef and cook until browned, breaking up as you go. Drain if needed and return to the heat.
    • Add corn, green beans, tomato sauce, broth, Worcestershire sauce, Kosher salt, pepper, garlic salt, dried basil and mix well to combine. Bring to a boil.
    • Reduce the heat to medium low and simmer for 45 minutes, stirring periodically.
    • Add pasta and broth, cover and cook for another 10-12 minutes, stirring periodically. If it seems dry add more chicken broth.
    • Once pasta is tender serve immediately.

    Video

    Notes

    • This makes really great leftovers and can easily be made ahead. We love it as a simple Sunday dinner, then enjoy the leftovers for lunch over the next few days.
    • If it starts to look dry while cooking, add a splash of water or chicken broth. You want it saucy, not soupy.
    • Feel free to swap in different vegetables or adjust ingredients based on what you have on hand.
    • Don’t rush the simmer. Letting it cook slowly helps the flavors meld together.
    • Taste before serving. A little extra salt at the end can make a big difference.
    • Ingredients to prep ahead- Dice the onion in advance to save time.
    • Leftovers and storage- Keep leftovers in an airtight container in the fridge for 3-4 days or freeze for up to 2 months. Thaw overnight and reheat gently on the stove or in the microwave.

    Nutrition

    Serving: 1servingCalories: 405kcalCarbohydrates: 46gProtein: 21gFat: 16gSaturated Fat: 6gPolyunsaturated Fat: 1gMonounsaturated Fat: 7gTrans Fat: 1gCholesterol: 54mgSodium: 1259mgPotassium: 1003mgFiber: 6gSugar: 7gVitamin A: 822IUVitamin C: 28mgCalcium: 71mgIron: 4mg
    Tried this recipe?Let us know how it was!

    Breaded Pork Cutlets Recipe

    Jan 20, 2026 · 7 Comments

    A close up image of a plate of breaded thin pork chops with lemons behind it and parsley in the bowl with it.

    This breaded pork cutlets recipe is a go-to on busy nights. Thin pork chops cook quickly, turn crispy, and stay juicy, all in about 20 minutes with minimal effort.

    A close up image of a plate of breaded thin pork chops with lemons behind it and parsley in the bowl with it.
    [feast_advanced_jump_to]

    Why You’ll Love These Pan Seared Pork Cutlets

    This recipe firmly lives in the 20-minute dinner category, and honestly, that’s one of the biggest reasons I love it. It was one of those rare recipes that worked perfectly the very first time I tested it. I ended up making it again (and again) just to be sure, and because no one complained about having them twice in one week.

    I don’t see many pork cutlet recipes out there, but I really wanted one, especially after seeing how popular my chicken cutlets recipe are. This method might honestly be the best way to cook thin pork chops. They develop a flavorful, crispy crust while staying tender and juicy inside, which is exactly what you want from a quick, no-stress dinner. Here's why I love them:

    • Crispy outside and juicy inside
    • Ready in 20 minutes
    • Kid-friendly
    • Simple, everyday ingredients
    • Big flavor without a lot of effort
    A close up image of the breaded pork chop on a white plate with the pork cut into revealing a juicy and perfectly cooked center.

    Ingredient Information and Substitutions

    • Thin pork chops (pork cutlets)- Thinner cuts cook quickly and stay tender. Boneless works best, but thin bone-in chops are fine too.
    • Flour- The flour creates a dry surface so the egg sticks properly.
    • Eggs- Acts as the glue that helps the breadcrumb mixture adhere to the pork.
    • Panko breadcrumbs- These give the cutlets their light, crispy texture. Regular breadcrumbs will work, but the coating won’t be quite as crunchy.
    • Butter- Helps the cutlets brown evenly and adds richness. You can swap in ghee for a slightly higher smoke point and similar flavor.
    • Olive oil- Keeps the butter from burning while frying. Avocado oil or another neutral, high-heat oil works just as well.
    • Parmesan or Romano cheese- Adds a salty, savory bite to the breading. Either option works well.
    • Garlic powder- Adds flavor without overpowering the pork.
    • Onion powder- Balances the seasoning and adds depth.
    • Dried parsley- Optional, but it adds a nice touch of color and subtle flavor.
    • Salt and black pepper- Seasoning the pork before breading helps bring out the flavor and gives the coating something to cling to.
    • Lemon wedges- Totally optional, but a squeeze of lemon at the end adds a fresh, bright finish.
    An overhead image of labeled recipe ingredients.

    How To Make This Recipe For Thin Pork Cutlets

    Step 1- Prep the pork.

    Pat the pork cutlets dry and season both sides with salt and pepper.

    Raw thin pork chops on a paper towel with salt and pepper on them.

    Step 2- Set up the breading station.

    Place flour in one shallow bowl, beat the eggs in another, and mix the breadcrumbs, cheese, garlic powder, onion powder, and dried parsley in a third bowl.

    Eggs being whisked in a glass bowl.
    Breading ingredients in a bowl.

    Step 3- Bread the cutlets.

    Dredge each cutlet in flour, dip it in egg, then press firmly into the breadcrumb mixture. Set aside on a plate while the pan heats.

    Pork cutlet in a bowl of flour.
    Floured pork cutlet dipped in a bowl of egg.

    Step 4- Heat the pan.

    Heat the butter and olive oil in a large skillet over medium-high heat until hot and melted.

    Pork chop covered in the bread crumb mixture in the bowl.
    Butter and oil melting in a large sauté pan.

    Step 5- Cook the cutlets.

    Working in batches, cook for about 2 minutes per side until golden brown. Transfer to a paper towel-lined plate and let rest briefly before serving.

    Raw cutlets cooking in the pan.
    Cutlets after they've been turned revealing the perfect golden brown.

    Frequently Asked Questions

    How to cook pork cutlets?

    Pan-fry them in a hot skillet with oil and butter. Cook for a couple of minutes per side until golden and cooked through.
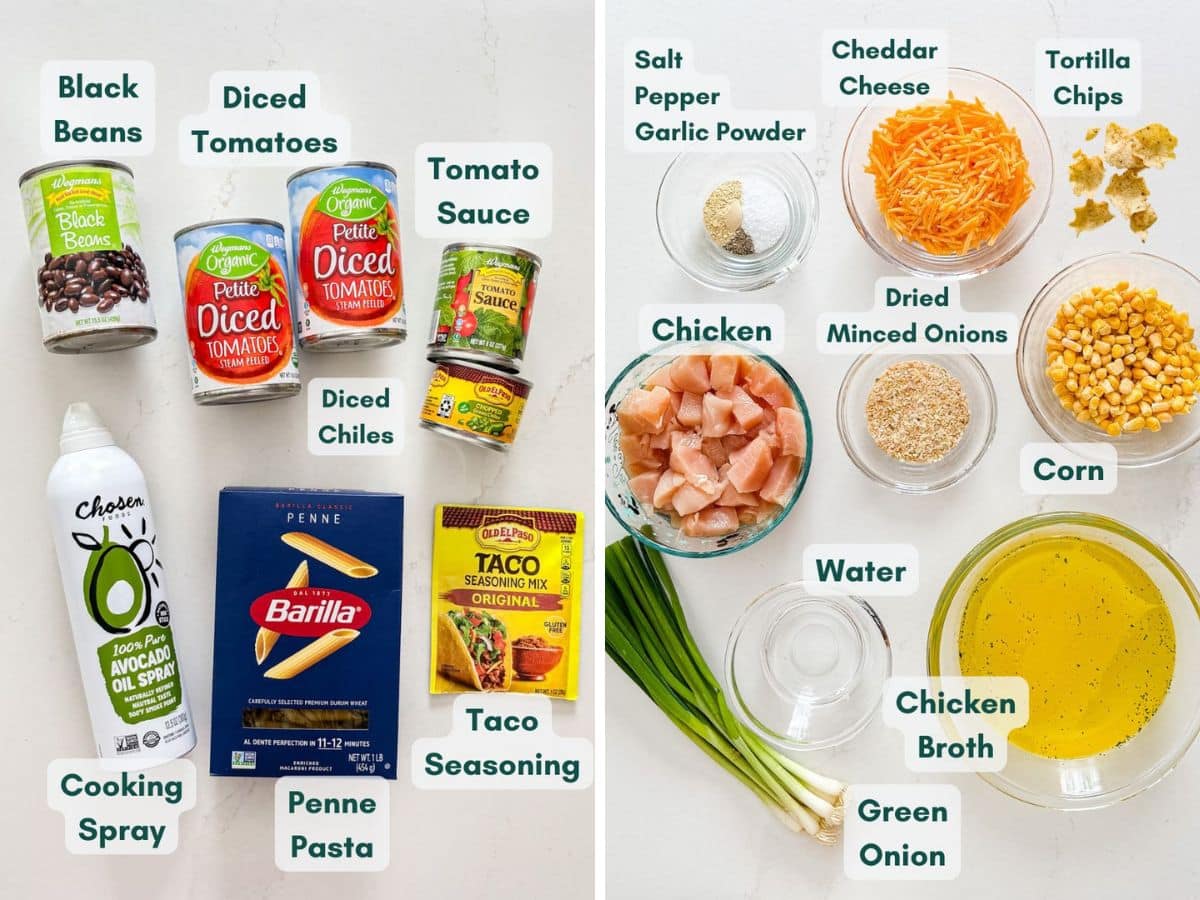
    How long to cook thin pork chops?

    About 2-4 minutes per side, depending on thickness. They’re done once golden and no longer pink in the center.

    Can you bread pork chops in advance?

    Sure, but only a few hours, not overnight. Letting them sit too long can make the coating soggy.

    An overhead image of a shallow bowl of pork cutlets with lemon wedges, parsley and a blue and white towel.

    Tips For Making Fried Pork Cutlets

    • Dry the pork well. Moisture prevents the breading from sticking and keeps the cutlets from browning properly.
    • Season the meat itself. Don’t rely only on the breading for flavor. Seasoning the pork makes a noticeable difference.
    • Don’t sprinkle, but press the breadcrumbs. Light pressure helps the coating stay in place while frying.
    • Let breaded cutlets sit briefly. Giving them a few minutes before cooking helps the breading adhere and reduces fall-off in the pan.
    • Keep the pan hot. A hot pan creates a crisp crust quickly without drying out the pork.
    • Cook in batches. Too many cutlets at once lowers the pan temperature and leads to steaming instead of browning.
    • Rest before serving. A short rest allows the juices to redistribute, keeping the pork tender.
    • Ingredients to prep ahead- The breadcrumb mixture can be mixed earlier and stored at room temperature for quick assembly.
    • Leftovers and storage- Store in an airtight container in the fridge for 3-4 days. Reheat gently on the stovetop or microwave in 30-second bursts. Freeze cooled cutlets for up to 2 months and thaw in the fridge before reheating.
    A plate of pork chops and broccoli with the bowl of pork chops and lemons behind it.

    What To Serve With Breaded Pork Cutlets

    I frequently serve this with my French onion rice pilaf and steamed broccoli. Some other tasty recipes to serve alongside these breaded cutlets include:

    • Tomato Onion Salad
    • Garlic Parmesan Roasted Broccoli
    • Roasted Fall Vegetables
    • Crispy Fried Potatoes

    Other Delicious Pork Chop Recipes To Try

    • A close up image of the side of a blue bowl of pork stew and mashed potatoes.
      Pork Chop Stew
    • A Bourbon pork chop on a white plate with a green salad.
      Brown Sugar Bourbon Pork Chops
    • A close up image of a red wine braised pork chop with onions on it in a gray bowl of other pork chops and sauce.
      Drunken Thin Pork Chops
    • Say goodbye to dry and tough pork chops: these Smothered Crock Pot Pork Chops are the ultimate fall-apart tender comfort food. With just 4 ingredients, this easy dinner will be your new go-to dump dinner!
      Fall Apart Slow Cooker Pork Chops

    Love this recipe? Please leave a 5 star ⭐️⭐️⭐️⭐️⭐️ rating in the recipe card below ⬇️ and/or a review in the comment section further down. Check out my Amazon Store for all my favorite tools, including those used in this recipe. And follow @thelifejolie on Instagram and TikTok!

    A close up image of a plate of breaded thin pork chops with lemons behind it and parsley in the bowl with it.

    Breaded Pork Cutlets Recipe

    Jessy Freimann
    This breaded pork cutlets recipe is a go-to on busy nights. Thin pork chops cook quickly, turn crispy, and stay juicy, all in about 20 minutes with minimal effort.
    5 from 5 votes
    Print Recipe Pin Recipe
    Prep Time 7 minutes mins
    Cook Time 8 minutes mins
    Resting time 5 minutes mins
    Total Time 20 minutes mins
    Course dinner, Main, Main Course, Main dish
    Cuisine American
    Servings 4 servings
    Calories 208 kcal

    Equipment

    • 1 Skillet
    • 1 cutting board
    • 1 Measuring cups and spoons
    • 1 Tongs

    Ingredients
      

    • 8 thin sliced pork chops
    • ¾ teaspoon Kosher salt to taste
    • ¼ teaspoon Ground black pepper to taste
    • ½ cup flour
    • 3 large eggs
    • 1 cup Panko bread crumbs
    • 1 cup grated Parmesan or Romano cheese
    • 1 teaspoon Garlic powder
    • 1 teaspoon Onion powder
    • 1 teaspoon Dried parsley
    • 1 Tablespoon Olive oil
    • 1 Tablespoon Butter
    • Lemon wedges, for serving

    Instructions
     

    • Pat pork cutlets dry and season to taste with salt and pepper.
    • Place flour in a shallow bowl, beat eggs in a second shallow bowl and mix bead crumbs, cheese, garlic powder, onion powder and dried parsley in the third shallow bowl.
    • Dredge each cutlet in flour and tap off the excess.
    • Dredge each floured cutlet in egg and tap off the excess.
    • Dredge each egg-covered cutlet in bread crumb mixture and tap off the excess. Place each finished chop on a plate.
    • Heat oil and butter over medium high heat in a large sauté pan until shimmering.
    • Working in batches, fry chops for 2-4 minutes per side (depending on thickness) until golden brown.
    • Remove each chop to a paper towel lined plate and rest for 5 minutes. Serve immediately.

    Video

    Notes

    • Dry the pork well. Moisture prevents the breading from sticking and keeps the cutlets from browning properly.
    • Season the meat itself. Don’t rely only on the breading for flavor. Seasoning the pork makes a noticeable difference.
    • Don’t sprinkle, but press the breadcrumbs. Light pressure helps the coating stay in place while frying.
    • Let breaded cutlets sit briefly. Giving them a few minutes before cooking helps the breading adhere and reduces fall-off in the pan.
    • Keep the pan hot. A hot pan creates a crisp crust quickly without drying out the pork.
    • Cook in batches. Too many cutlets at once lowers the pan temperature and leads to steaming instead of browning.
    • Rest before serving. A short rest allows the juices to redistribute, keeping the pork tender.
    • Ingredients to prep ahead- The breadcrumb mixture can be mixed earlier and stored at room temperature for quick assembly.
    • Leftovers and storage- Store in an airtight container in the fridge for 3-4 days. Reheat gently on the stovetop or microwave in 30-second bursts. Freeze cooled cutlets for up to 2 months and thaw in the fridge before reheating.

    Nutrition

    Serving: 1servingCalories: 208kcalCarbohydrates: 24gProtein: 9gFat: 8gSaturated Fat: 2gPolyunsaturated Fat: 1gMonounsaturated Fat: 4gTrans Fat: 0.01gCholesterol: 140mgSodium: 604mgPotassium: 119mgFiber: 1gSugar: 1gVitamin A: 210IUVitamin C: 0.2mgCalcium: 59mgIron: 2mg
    Tried this recipe?Let us know how it was!

    Chocolate Orange Cake Recipe

    Jan 16, 2026 · 12 Comments

    The side of a slice of orange cake with chocolate ganache revealing the moist crumb.

    This chocolate orange cake recipe is an easy cake mix hack that turns out incredibly moist and fluffy, finished with a rich chocolate ganache. It looks impressive without being complicated.

    The side of a slice of orange cake with chocolate ganache revealing the moist crumb.
    [feast_advanced_jump_to]

    Why You’ll Love This Chocolate Orange Cake

    I’ll be honest… orange and chocolate isn’t usually my first choice for dessert. I’ll eat it, sure, but it’s not a flavor combo I normally reach for. My husband, however, absolutely loves it, which is why I made this orange & chocolate cake in the first place. And somehow, it completely won me over.

    Even as someone who’s on the fence about a chocolate and orange, I couldn’t stop reaching for another slice. The cake is incredibly soft and fluffy, with a citrus flavor that’s noticeable but never overpowering. It’s special enough for occasions like Valentine’s Day or winter holidays, yet simple and cozy enough to bake just because. Here's why you'll love this easy orange cake:

    • Easy but impressive
    • Super moist, tender crumb
    • Balanced orange flavor
    • Rich chocolate ganache
    An orange bundt cake covered with chocolate ganache on a plate.

    Ingredient Information And Substitutions

    • Yellow Cake Mix- This recipe uses a classic yellow cake mix as the base. Any standard brand works well here, I prefer Duncan Hines.
    • Instant Vanilla Pudding Mix- Adds moisture and gives the cake that soft, bakery-style texture. Vanilla keeps the flavors balanced.
    • Eggs- I know it seems like a lot but the extra eggs help create structure and richness. Large or extra-large eggs both work.
    • Vegetable oil- Keeps the cake moist without adding flavor. Canola oil is an easy substitute.
    • Warm water- Helps everything blend smoothly and evenly. Milk can be used for a slightly richer crumb.
    • Orange extract- Gives a consistent orange flavor throughout the cake. Orange oil can work, but reduce the amount to ¼ teaspoon since it’s stronger. You'll need some for the ganache as well.
    • Orange zest- Adds fresh citrus flavor and aroma.
    • Heavy cream- Creates a rich, smooth ganache. You can substitute full fat coconut milk cream if needed.
    • Chocolate chips- Balances the sweetness of the cake. Dark chocolate cips are a good alternative.
    An overhead image of labeled recipe ingredients.

    How To Make This Chocolate And Orange Cake

    Step 1- Preheat the oven and mix the cake batter.

    Set your oven to 325 degrees F. Add all of the cake ingredients to a large mixing bowl. Mix until everything is smooth and well combined.

    Step 2- Prepare the pan and pour.

    Grease your bundt or loaf pan well, then pour the batter evenly into the pan.

    Cake ingredients in a mixing bowl and then batter poured into a prepared bundt pan.

    Step 3- Bake the cake.

    Bake for about 1 hour. Start checking around the 50-minute mark, since oven temperatures can vary.

    Step 4- Cool and unmold.

    Once baked, let the cake cool completely. Carefully flip it onto a serving plate before adding the ganache.

    Cake in the oven and then cream and chocolate chips about to be mixed into chocolate ganache.

    Step 5- Heat the cream.

    Place the heavy cream in a saucepan over medium heat. Stir often and heat just before it starts to boil, then remove from the heat.

    Step 6- Make the ganache.

    Add the chopped chocolate to a heat-safe bowl and pour the hot cream over it. Whisk until smooth, then stir in the orange extract.

    Step 7- Let it thicken and finish.

    Let the ganache sit for about 10 minutes to thicken slightly, then drizzle it over the cooled chocolate orange cake.

    A close up of the side of an orange bundt cake with ganache dripping down the side.

    Frequently Asked Questions

    How to make an orange cake?

    This recipe keeps things simple by starting with a cake mix and enhancing it with orange extract and fresh zest. Everything is mixed in one bowl, baked until set, and finished with a chocolate ganache once cooled.

    Can I make this cake ahead of time?

    Yes. You can bake the chocolate & orange cake a day in advance and add the ganache once it has fully cooled. It holds up really well and actually tastes great the next day.

    Is the orange flavor very strong?

    No. The orange flavor is noticeable but balanced. It adds brightness without tasting artificial or overpowering.

    The inside of the bundt cake after the cake slice was pulled out revealing the moist crumb.

    Tips For Making This Orange Bundt Cake

    • Don’t over-mix the batter. Mix just until everything is combined to keep the cake light and tender.
    • Trust the process mixing the ganache- it's going to seem like the chocolate and heavy cream are splitting as you whisk but it will slowly come together into a smooth ganache, so take your time and trust the process.
    • If you can't get the ganache smooth- it's ok, it just means your cream needed to be a tad hotter. Zap it in the microwave in 10-15 second increments, whisking between until smooth.
    • If the ganache sits too long, it will thicken into a spreadable consistency. That’s not a bad thing, but it’s best for drizzling while still pourable. You can gently warm it to loosen it back up if needed.
    • 2 loaf pans work well for this cake too. Start checking it a bit earlier, since the bake time can vary depending on the pan.
    • Ingredients to prep ahead- Zest the orange and chop the chocolate (if needed) before starting to make things easier.
    • Leftovers and storage- Store covered in the fridge for up to 3 days. Let slices sit at room temperature briefly before serving.
    A straight on shot of a slice of cake with a bite taken off the front.

    What To Serve With This Easy Orange Cake Recipe

    If you’re putting together a dessert spread, this cake pairs best with lighter options that balance the rich chocolate and citrus flavors. Here’s a mix of creamy, fresh, and simple desserts that help round everything out without competing with the cake:

    • Apple Yogurt Parfait With Granola
    • Rolo Pretzel Bites
    • Blueberry Lemon Dump Cake
    • Chocolate Cheesecake Stuffed Strawberries Recipe

    Other Cake Mix Recipes To Try

    • A slice of poppyseed cake being lifted from the rest of the cake.
      Poppyseed Cake
    • A piece of chocolate cake being pulled from the whole cake revealing the moist inside of the cake.
      The BEST Chocolate Overload Cake
    • A slice of pumpkin crunch cake on a white plate with the whole cake behind it.
      Pumpkin Crunch Cake
    • A piece of lemon cake with whipped cram on a white plate with the rest of the cake and lemons in the background.
      Lemon Pistachio Cake

    Love this recipe? Please leave a 5 star ⭐️⭐️⭐️⭐️⭐️ rating in the recipe card below ⬇️ and/or a review in the comment section further down. Check out my Amazon Store for all my favorite tools, including those used in this recipe. And follow @thelifejolie on Instagram and TikTok!

    The side of a slice of orange cake with chocolate ganache revealing the moist crumb.

    Chocolate Orange Cake Recipe

    Jessy Freimann
    This chocolate orange cake recipe is an easy cake mix hack that turns out incredibly moist and fluffy, finished with a rich chocolate ganache. It looks impressive without being complicated.
    No ratings yet
    Print Recipe Pin Recipe
    Prep Time 15 minutes mins
    Cook Time 55 minutes mins
    Total Time 1 hour hr 5 minutes mins
    Course Dessert
    Cuisine American
    Servings 8 servings
    Calories 694 kcal

    Equipment

    • Bundt pan
    • Hand mixer
    • mixing bowl
    • sharp knife
    • saucepan
    • Whisk

    Ingredients
      

    For the cake:

    • 1 yellow cake mix I like Duncan Hines
    • 3.7 ounces instant vanilla pudding (2 small boxes)
    • 5 large eggs
    • ¾ cup vegetable oil
    • 1 cup warm water
    • 1 teaspoon orange extract
    • 1 Tablespoon orange zest

    For the ganache:

    • ⅔ cup heavy cream
    • 1 cup chocolate chips chopped
    • 1 teaspoon orange extract

    Instructions
     

    For the cake:

    • Preheat the oven to 325 degrees F. Spray a bundt pan with cooking spray.
    • Add cake mix, instant pudding mixes, vegetable oil, water, orange extract and orange zest.Mix until just combined.
    • Pour batter into prepared bundt.
    • Bake uncovered for 50 minutes to 1 hour until a cake tester comes out clean.
    • Cool completely, flip it onto a plate and drizzle with the chocolate ganache (see the recipe below).

    For the ganache:

    • Place chocolate chips in a medium bowl and set aside.
    • Heat the heavy cream over medium heat. Stir it frequently so that it doesn't scald, until it's at the point just before it just begins boiling (it'll be beginning to simmer). Remove from the heat.
    • Pour the hot cream over the chocolate chips and let it sit for a few minutes.
    • Add orange extract and whisk slowly until it starts to come together as a thick ganache and the chocolate has fully melted and combined into the heavy cream (it takes a moment so be patient and keep whisking).
    • Drizzle over the cooled cake and serve immediately.

    Video

    Notes

    • Don’t over-mix the batter. Mix just until everything is combined to keep the cake light and tender.
    • Trust the process mixing the ganache- it's going to seem like the chocolate and heavy cream are splitting as you whisk but it will slowly come together into a smooth ganache, so take your time and trust the process.
    • If you can't get the ganache smooth- it's ok, it just means your cream needed to be a tad hotter. Zap it in the microwave in 10-15 second increments, whisking between until smooth.
    • If the ganache sits too long, it will thicken into a spreadable consistency. That’s not a bad thing, but it’s best for drizzling while still pourable. You can gently warm it to loosen it back up if needed.
    • 2 loaf pans work well for this cake too. Start checking it a bit earlier, since the bake time can vary depending on the pan.
    • Ingredients to prep ahead- Zest the orange and chop the chocolate (if needed) before starting to make things easier.
    • Leftovers and storage- Store covered in the fridge for up to 3 days. Let slices sit at room temperature briefly before serving.

    Nutrition

    Serving: 1servingCalories: 694kcalCarbohydrates: 81gProtein: 7gFat: 39gSaturated Fat: 14gPolyunsaturated Fat: 13gMonounsaturated Fat: 8gTrans Fat: 0.3gCholesterol: 139mgSodium: 605mgPotassium: 161mgFiber: 1gSugar: 52gVitamin A: 463IUVitamin C: 1mgCalcium: 186mgIron: 2mg
    Tried this recipe?Let us know how it was!


    Champagne Braised Chicken Recipe

    Jan 12, 2026 · Leave a Comment

    Champagne braised chicken on a plate with mashed potatoes.

    This Champagne braised chicken recipe makes an easy weeknight dinner that feels a little fancy. It comes together in about 35 minutes, with crispy chicken thighs simmered in a savory champagne sauce.

    Champagne braised chicken on a plate with mashed potatoes.
    [feast_advanced_jump_to]

    Why You’ll Love This Braised Chicken Leg Dinner

    I’m genuinely obsessed with this one. I made it twice in a single week and didn’t even pretend to feel bad about it. The chicken comes out perfectly crispy (which I will never apologize for loving), and between the smoky bacon, tender leeks, and savory mushrooms, every bite just works. It’s cozy, flavorful, and exactly the kind of food I crave when I want something comforting but not boring.

    What I love most is how easy it is and how special it feels. You can prep everything ahead, throw it together when dinnertime rolls around, and suddenly you’ve got a meal that looks and tastes like you tried harder than you actually did. It’s warm, inviting, and one of those dinners that makes the house smell amazing. Here's why this recipe works so well:

    • One pan from start to finish
    • Crispy skin with tender meat
    • Easy to double for guests
    • Cozy and comforting
    An overhead images of chicken thighs and gravy in a pan.

    Ingredient Information And Substitutions

    • Chicken thighs- Bone-in, skin-on thighs give the best texture. Chicken legs also work, but may need to cook a bit longer.
    • Bacon- Adds smokiness and depth. Pancetta works as well.
    • Shallots- Brings a mild, sweet onion flavor. Swap with a yellow onion if needed
    • Mushrooms- Add umami and richness. Cremini or button mushrooms both work well.
    • Fresh thyme- Lemon thyme is lovely, but regular thyme works just as well.
    • Champagne or sparkling wine- Light and slightly acidic. Sweeter wines can throw off the balance of the sauce. Dry white wine is a great substitute. 
    • Chicken broth- Makes a deliciously flavorful sauce.
    • Cornstarch- Thickens the sauce into a lovely gravy.
    • Salt and pepper- Because flavor is important.
    Ingredients in labeled dishes.

    How To Make Champagne Chicken

    Step 1- Sear the chicken.

    Preheat the oven to 400 degrees F. Pat dry chicken thighs and salt the skin side.

    Place the chicken thighs skin-side down in a deep, oven-safe skillet. Turn the heat onto medium high. Sprinkle a little salt and pepper on the bottom side of the chicken.

    Allow the chicken skin to sear until golden, not turning until the chicken thighs easily pull up from the pan without sticking, about 10 minutes. Cook the other side for two minutes and remove from the pan.

    Raw chicken thighs in a pan and then cooked to golden brown.

    Step 2- Add the shallots and bacon.

    Add the bacon and shallots and cook for 5 minutes stirring often to soften the shallots and crisp up the bacon.

    Add mushrooms and cook for 5 more minutes, stirring often.

    Shallots and raw bacon added to the pan and then browned up.

    Step 3- Cook mushroom and deglaze.

    Add mushrooms and cook for 5 more minutes, stirring often.

    Deglaze with champagne, using a wooden spoon to scrape up the brown bits from the bottom of the pan. Cook for 2 minutes.

    Mushrooms added to the pan and then champagne deglazing the pan.

    Step 4- Add the broth and chicken.

    Whisk the cornstarch in with your chicken broth and stir it into the pan with th remaining salt and pepper. Place the chicken thighs, skin-side-up and top with some sprigs of fresh thyme.

    Cornstarch whisked into chicken broth and then added into the pan.

    Step 5- Roast the chicken.

    Place the entire pan in the preheated oven for about 10-15 minutes, until the thickest part of the chicken thigh reaches 161 degrees F (be careful not to touch the bone with the temperature probe).

    Chicken and thyme added into the pan and the pan i nthe oven.

    Step 6- Rest and serve.

    Remove the chicken from the oven and rest for 5 minutes. Serve immediately.

    A close up image of a golden chicken thigh in champagne sauce.

    Frequently Asked Questions

    Can I make this ahead of time?

    You can prep all the ingredients ahead of time, but this dish is best cooked fresh so the chicken skin stays crispy. If needed, you can fully cook it earlier in the day and gently reheat before serving.

    Do I need an oven-safe skillet?

    An oven-safe pan is easiest, but not required. If you don’t have one, you can deglaze the pan after the vegetables soften, then transfer everything to a baking dish before baking. 

    Can I double this recipe?

    Yes, it doubles easily. Just make sure the chicken isn’t overcrowded in the pan so it can still sear properly. You may need to use a larger skillet or two pans.

    A close up of a perfectly cooked chicken thigh on a plate.

    Tips For Making Braised Chicken Thighs

    • Moisture is the enemy of crispiness. Pat the chicken skin dry with paper towels before seasoning and make sure you don't overcrowd the pan so they browns properly instead of steaming.
    • Start with a cold pan- this will allow the chicken fat to render and give you the perfect golden-brown sear on the chicken skin.
    • Be patient to the searing- it takes a good 10 minutes and the chicken will easily release when it's ready.
    • Don't put any black pepper on the chicken skin- to prevent burning. The other side is ok to add it.
    • Mince the bacon nice and small- try to let it be the same size and the small diced shallots so they cooked evenly.
    • Deglaze the pan properly. Scraping up the browned bits after adding the wine builds the base of the sauce. This step adds more flavor than any extra seasoning.
    • Rest the chicken after cooking- Pull the chicken when the thickest part of the chicken thigh registers at 161 degrees F. Remove from the oven then rest the chicken for 5 minutes. During this time, the juices will redistribute during this time and the temperature will rise to 165 degrees F resulting in perfectly cooked chicken every time.
    • Ingredients to prep ahead- Clean and slice the mushrooms, small dice the shallots and bacon.
    • Leftovers and storage- Store in an airtight container in the fridge for up to 3 days. Reheat gently in the oven to keep the meat tender.
    A close up image of a chicken thigh in the pan.

    What To Serve With This Braised Chicken Recipe

    This dish already has a rich, savory sauce, so simple sides work best. Pair it with something that can soak up all those juices, and finish the meal with a light dessert to balance everything out:

    • Crispy Fried Potatoes
    • Tomato Onion Salad
    • Grilled Balsamic Asparagus
    • Lemon Parfait Cups Dessert

    Other Chicken Recipes To Try

    • An overhead image of a chicken tostada on the pan with sour cream and avocado on top.
      Chicken Tostadas
    • A close up overhead image of grilled chicken thighs on a plate with lemons.
      Grilled Chicken Thighs Recipe
    • An overhead image of chicken and rice stew in a blue bowl with a napkin and veggies around it.
      Italian Chicken and Rice Stew
    • 3 BBQ Chicken sliders on a white plate.
      Chicken BBQ Sliders

    Love this recipe? Please leave a 5 star ⭐️⭐️⭐️⭐️⭐️ rating in the recipe card below ⬇️ and/or a review in the comment section further down. Check out my Amazon Store for all my favorite tools, including those used in this recipe. And follow @thelifejolie on Instagram and TikTok!

    Champagne braised chicken on a plate with mashed potatoes.

    Champagne Braised Chicken Recipe

    Jessy Freimann
    This Champagne braised chicken recipe makes an easy weeknight dinner that feels a little fancy. It comes together in about 35 minutes, with crispy chicken thighs simmered in a savory champagne sauce.
    No ratings yet
    Print Recipe Pin Recipe
    Prep Time 15 minutes mins
    Cook Time 20 minutes mins
    Total Time 35 minutes mins
    Course dinner, Main, Main Course, Main dish
    Cuisine Chicken, quick, weeknight
    Servings 4 servings
    Calories 760 kcal

    Equipment

    • oven-safe skillet
    • sharp knife
    • cutting board
    • Tongs
    • wooden spoon
    • Meat thermometer

    Ingredients
      

    • 2 ½ pounds chicken thighs bone-in, skin on
    • 2 strips bacon diced small
    • 1 cup shallots diced small
    • 1 cup mushrooms sliced
    • ¾ cup champagne or sparkling wine
    • 1 teaspoon kosher salt
    • ¼ teaspoon ground black pepper,
    • 4 sprigs fresh thyme lemon thyme is great if you have it!
    • 2 cups chicken broth
    • 2 Tablespoons cornstarch

    Instructions
     

    • Preheat the oven to 400 degrees F. Pat Dry chicken and sprinkle some of the salt on the skin side of the chicken. Mix remaining salt with black pepper and set aside.
    • Place chicken thighs skin-side-down in cold skillet and turn the heat on to medium-high. Sprinkle a pinch of the salt and pepper mixture onto the backside of the chicken pieces.
    • Sear until the chicken easily pulls up to flip the chicken, about 10 minutes. Thew chicken skin will be perfectly golden brown. Once you flip the chicken, cook 2 more minutes and remove from the pan.
    • Add the shallots and bacon to the pan and cook for 5 minutes, stirring often, to brown the bacon and soften the shallots.
    • Add the mushrooms to the pan and cook 5 more minutes stirring frequently.
    • Deglaze the pan with the champagne, scraping the bottom of the pan with a wooden spoon to bring up all the brown bits. Cook 2 minutes to reduce.
    • Whisk the cornstarch into the broth and add to the pan. Sprinkle with remaining salt and pepper and stir to combine.
    • Place chicken thighs back into the pan and place the pan into the preheated oven uncovered.
    • Bake until the thickest part of the thigh reaches 161 degrees F, about 10-15 minutes.
    • Remove from the oven and rest for 5 minutes; the internal temperature will rise to 165 degrees F during this time. Serve immediately.

    Video

    Notes

    • Moisture is the enemy of crispiness. Pat the chicken skin dry with paper towels before seasoning and make sure you don't overcrowd the pan so they browns properly instead of steaming.
    • Start with a cold pan- this will allow the chicken fat to render and give you the perfect golden-brown sear on the chicken skin.
    • Be patient to the searing- it takes a good 10 minutes and the chicken will easily release when it's ready.
    • Don't put any black pepper on the chicken skin- to prevent burning. The other side is ok to add it.
    • Mince the bacon nice and small- try to let it be the same size and the small diced shallots so they cooked evenly.
    • Deglaze the pan properly. Scraping up the browned bits after adding the wine builds the base of the sauce. This step adds more flavor than any extra seasoning.
    • Rest the chicken after cooking- Pull the chicken when the thickest part of the chicken thigh registers at 161 degrees F. Remove from the oven then rest the chicken for 5 minutes. During this time, the juices will redistribute during this time and the temperature will rise to 165 degrees F resulting in perfectly cooked chicken every time.
    • Ingredients to prep ahead- Clean and slice the mushrooms, small dice the shallots and bacon.
    • Leftovers and storage- Store in an airtight container in the fridge for up to 3 days. Reheat gently in the oven to keep the meat tender.

    Nutrition

    Serving: 1servingCalories: 760kcalCarbohydrates: 17gProtein: 51gFat: 52gSaturated Fat: 14gPolyunsaturated Fat: 11gMonounsaturated Fat: 21gTrans Fat: 0.3gCholesterol: 287mgSodium: 1320mgPotassium: 945mgFiber: 2gSugar: 6gVitamin A: 278IUVitamin C: 7mgCalcium: 60mgIron: 3mg
    Tried this recipe?Let us know how it was!


    Cabbage Soup with Hamburger

    Jan 9, 2026 · 10 Comments

    An overhead image of a bow of cabbage soup with a spoon in it.

    This cabbage soup with hamburger is healthy, simple, and perfect for chilly days. Made with ground meat and everyday vegetables, it’s cozy, nourishing, and easy to make.

    An overhead image of a bow of cabbage soup with a spoon in it.
    [feast_advanced_jump_to]

    Why You’ll Love This Soup With Cabbage And Hamburger

    I hadn’t made soup in a while, so revisiting this recipe felt like an easy, comforting choice. This is the soup that first got me to enjoy cabbage (something I avoided as a kid) simply because it always looked and tasted so good. My great aunt Jeanne, my Grandma Rose’s sister, used to make it, and it was always the best when she did. She had a real gift in the kitchen and was an incredible cook well into her 90s.

    This cabbage soup with hamburger meat is light, easy to eat, and made with simple ingredients. It’s also very flexible! You can use ground turkey instead of beef, adjust the barley, or swap in vegetables you enjoy. I always finish mine with a sprinkle of Romano cheese, because that’s how I grew up eating it, and it’s the perfect finishing touch. Why this recipe is a keeper:

    • Simple, no-fuss ingredients
    • Cozy and filling without being heavy
    • Easy to make in a big pot
    • Perfect for cold days and leftovers
    A bowl of cabbage soup with hamburger with a spoon in it and onions behind it.

    Ingredient Information And Substitutions

    • Green cabbage- The star of the soup! A piece of a full green cabbage or a mini green cabbage both work.
    • Ground beef- Adds richness and heartiness. Ground turkey works well if you want a lighter option.
    • Onions- Build the base flavor of the soup. Substitute with shallots if needed.
    • Potatoes- Make the soup filling without weighing it down. Sweet potatoes, or turnips are all good swaps.
    • Celery- Adds savory balance. Try fennel or a pinch of celery seed if you're not a fan.
    • Carrots- Bring a touch of sweetness and color. Parsnips or butternut squash are easy substitutes.
    • Stewed tomatoes- Add gentle acidity. Freshly chopped tomatoes can be used instead or even a can of diced tomatoes.
    • Water and chicken broth- A mix keeps the flavor light but satisfying.
    • Barley- Adds texture. Reduce the amount or skip it if you prefer more vegetables. Rice also works.
    An overhead image of labeled recipe ingredients.

    How To Make Beef Cabbage Soup

    Step 1- Cook the veggies and ground beef.

    Spray a large pot with cooking spray and heat over medium high heat and add the onion, celery, carrot and potatoes. Cook to soften, about 7 minutes, stirring often.

    Add the ground meat and cook until fully browned, breaking it up as it cooks. Once done, drain off the excess grease if needed.

    Veggies cooking in the pot and then raw ground beef added.

    Step 2- Add vegetables and simmer

    Add the tomatoes, cabbage, salt, pepper, broth and water to the pot. Bring everything to a boil, then lower the heat and let it simmer gently for about an hour.

    Cooked ground beef and veggies and then the liquid and cabbage added to the pot.

    Step 3- Add barley and finish.

    Stir in the barley and continue simmering for another 30 minutes, until the grains are tender and the soup thickens slightly. Add more broth if needed.

    Soup simmering and then barley added.

    Frequently Asked Questions

    Can I make this soup ahead of time? 

    Yes. This soup is a great make-ahead option, and the flavors tend to deepen after sitting overnight. Just reheat gently on the stove or in the microwave before serving. Be aware, the barley tends to suck up the broth, so either cook separate or keep on the side or plan to add more chicken broth later if needed.

    Can I leave out the barley or use something else? 

    Absolutely. You can leave it out completely or replace it with rice, farro, or another grain you enjoy. Just keep in mind that different grains may slightly change the texture or require different cooking times. I prefer to cook separately and keep it on the side.

    Does the cabbage get too soft? 

    No. The cabbage softens as it cooks but still holds its shape, giving the soup a tender texture rather than a mushy one.

    A close up image of a bowl of hamburger and cabbage soup.

    Tips For Making Cabbage Soup With Ground Beef

    • Use a large enough pot so there’s plenty of room for the cabbage. It'll soften and reduce as it cooks down.
    • Brown the meat well before adding anything else to build flavor right from the start.
    • Cut vegetables evenly so everything cooks at the same pace.
    • Let it simmer gently. Slow cooking helps the flavors build and meld together.
    • Season lightly at first, then taste and adjust toward the end once the soup has finished cooking.
    • Finish with cheese if you like. A sprinkle of Romano or Parmesan adds a savory touch.
    • Cook the barley separately. The original recipe calls for the barley to be cooked in the soup but I always prefer to cook grains or pasta separately and add them to the soup for serving so they don't suck up all the broth. If you do choose to cook the barley in the soup, have a couple cups of broth seperate to add if needed.
    • Ingredients to prep ahead- Chop all vegetables up to a day in advance and store them in the fridge.
    • Leftovers and storage- Store in the fridge for up to 4 days or freeze in airtight containers. If it thickens after chilling or freezing, add a splash of water or broth when reheating.
    A spoon holding up a bite of cabbage soup from the bowl.

    What To Serve With Ground Beef And Cabbage Soup

    This soup is light but satisfying, making it easy to turn into a complete meal without much effort. The flavors are simple and comforting, so I like to keep the sides just as easy and unfussy. Here are a few of my favorite things to serve with it:

    • Broccoli Rabe and Ricotta Crostini
    • Green Bean Salad
    • Roasted Fall Vegetables
    • Lemon Parfait Cups Dessert

    Other Soup Recipes To Try

    • A spoon holding up a scoop of lentil soup with ham from a black bowl of it.
      Carrot and Lentil Soup
    • A bowl of tomato soup on a plate with a spoon and grilled cheese.
      Tomato Bisque Soup Recipe
    • An overhead image of a bowl of zucchini soup with onions and a tea towel next to it.
      Zucchini Soup
    • An overhead image of a bowl of minestrone soup.
      Traditional Minestrone Soup Recipe

    Love this recipe? Please leave a 5 star ⭐️⭐️⭐️⭐️⭐️ rating in the recipe card below ⬇️ and/or a review in the comment section further down. Check out my Amazon Store for all my favorite tools, including those used in this recipe. And follow @thelifejolie on Instagram and TikTok!

    An overhead image of a bow of cabbage soup with a spoon in it.

    Cabbage Soup with Hamburger

    Jessy Freimann
    This cabbage soup with hamburger is healthy, simple, and perfect for chilly days. Made with ground meat and everyday vegetables, it’s cozy, nourishing, and easy to make.
    No ratings yet
    Print Recipe Pin Recipe
    Prep Time 10 minutes mins
    Cook Time 1 hour hr 30 minutes mins
    Total Time 1 hour hr 40 minutes mins
    Course Appetizer, Entree, Lunch, Main dish, Side Dish
    Cuisine Healthy, Italian, Light, Soup
    Servings 10 servings
    Calories 200 kcal

    Equipment

    • 1 Dutch oven
    • 1 cutting board
    • 1 chefs knife
    • 1 Measuring cups and spoons
    • 1 Wooden Spoons

    Ingredients
      

    • Cooking spray
    • 1 pound ground beef 90/10 is my preferred ratio
    • 2 cups onions diced
    • 2 cups celery diced
    • 2 cups carrots peeled and diced
    • 1 ⅕ cups potatoes peeled and diced
    • 14.5 ounces stewed tomatoes make sure you break them up a bit with your spoon
    • 1 teaspoon Kosher salt to taste
    • ¼ teaspoon ground black pepper to taste
    • 3 cups cabbage chopped, about ⅓ of a green cabbage
    • 5 cups chicken broth
    • 5 cups water
    • ¼ cup barley cook on the side per package directions
    • Romano cheese optional- for topping

    Instructions
     

    • Spray a large pot or dutch oven with cooking spray and heat over medium high.
    • Add onion, celery, carrot and potatoes and cook for about 7 minutes to soften, stirring periodically.
    • Add ground beef and use your spoon to break it up and brown it, stirring periodically, about 5 minutes.
    • Drain the beef if there is excess grease and add stewed tomatoes to the pot. use your spoon to break them up.
    • Add salt, pepper, cabbage, brother and water.
    • Bring to a boil and then reduce the heat to medium low and simmer for 1 hour.
    • Serve with cooked barley and a sprinkle of Romano cheese.

    Video

    Notes

    • Use a large enough pot so there’s plenty of room for the cabbage. It'll soften and reduce as it cooks down.
    • Brown the meat well before adding anything else to build flavor right from the start.
    • Cut vegetables evenly so everything cooks at the same pace.
    • Let it simmer gently. Slow cooking helps the flavors build and meld together.
    • Season lightly at first, then taste and adjust toward the end once the soup has finished cooking.
    • Finish with cheese if you like. A sprinkle of Romano or Parmesan adds a savory touch.
    • Cook the barley separately. The original recipe calls for the barley to be cooked in the soup but I always prefer to cook grains or pasta separately and add them to the soup for serving so they don't suck up all the broth. If you do choose to cook the barley in the soup, have a couple cups of broth seperate to add if needed.
    • Ingredients to prep ahead- Chop all vegetables up to a day in advance and store them in the fridge.
    • Leftovers and storage- Store in the fridge for up to 4 days or freeze in airtight containers. If it thickens after chilling or freezing, add a splash of water or broth when reheating.

    Nutrition

    Serving: 1servingCalories: 200kcalCarbohydrates: 18gProtein: 11gFat: 10gSaturated Fat: 4gPolyunsaturated Fat: 0.4gMonounsaturated Fat: 4gTrans Fat: 1gCholesterol: 35mgSodium: 837mgPotassium: 573mgFiber: 4gSugar: 6gVitamin A: 4463IUVitamin C: 20mgCalcium: 68mgIron: 2mg
    Tried this recipe?Let us know how it was!


    Apple Chicken Salad

    Jan 5, 2026 · 26 Comments

    A close up on a chicken salad stuffed tomato on a plate with others.

    Apple chicken salad is fresh, crunchy, and comes together in about 10 minutes, making it perfect for a quick lunch or easy make-ahead meal. It’s light, creamy, and full of texture thanks to tender chicken, crisp apples, and just the right amount of seasoning.

    A close up on a chicken salad stuffed tomato on a plate with others.
    [feast_advanced_jump_to]

    Why You’ll Love Chicken And Apple Salad

    I love having a quick, delicious recipe that I can pull together quickly, and this one has been in my rotation for years. The mix of tender chicken, crisp apples, and creamy dressing is so satisfying, and the fact that it’s naturally gluten-free is a bonus. It feels fresh without being fussy, and it’s the kind of lunch that keeps you full without weighing you down.

    I also really rely on recipes I can prep ahead, and this one fits the bill perfectly. I often batch-cook shredded chicken in the slow cooker and freeze it in one-cup portions, so meals like this are even easier. You can serve it as a sandwich or over greens, but stuffing it into tomatoes makes it look pretty with almost no effort. If you love a classic chicken salad recipe, this bright, crunchy twist is such a fun change. Why this recipe works:

    • Fresh, bright flavor
    • Great meal prep
    • Customizable
    • Naturally gluten-free
    An overhead image of a plate of apple chicken salad stuffed tomatoes.

    Ingredient Information And Substitutions

    • Chicken- Cooked and shredded chicken breast works best. Leftover rotisserie, baked, or poached chicken are all great options.
    • Celery- Adds freshness and crunch. You can swap in chopped cucumber or bell pepper.
    • Apple- Sweet-tart apples like SnapDragon or RubyFrost apples bring great flavor. Pears work for a milder, softer sweetness.
    • Tomatoes- Use large beefsteak tomatoes for a meal, or Campari tomatoes (slightly larger than cherry tomatoes) for appetizer-sized portions. You could also use lettuce wraps, avocado or in a sandwich.
    • Mayonnaise- For a classic creamy texture. Light mayo works well too.
    • Plain Greek yogurt- Adds creaminess while keeping things lighter. Regular yogurt or sour cream can be used instead. 
    • Lemon juice- Helps balance the creaminess and adds freshness. Apple cider vinegar works in a pinch, but start with a little less and adjust to your taste.
    • Dried dill- Adds mild herby flavor. Fresh dill also works.
    • Garlic powder- Brings savory depth without overpowering. Onion powder is a good substitute.
    • Kosher salt- Seasons everything evenly. Table salt can be used, but start with less.
    • Black pepper- Adds a little bite and brightness. White pepper works too.
    An overhead image of labeled recipe ingredients.

    How To Make Greek Yogurt Chicken Salad

    Step 1- Mix the chicken salad.

    Add the mayo, yogurt, dill, salt, pepper, garlic powder, and lemon juice in a bowl and whisk until it's all fully combined.

    Add chicken, celery, apple and stir until everything is evenly coated. Taste and adjust the seasonings to your taste.

    The sauce in a bowl with a whisk and then the the chicken, apple and celery mixed in.

    Step 2- Fill the tomatoes. 

    Gently cut the top of each tomato off and use the tip of your knife to carefully cut down into each tomato around the center until you can pull out the core. Be careful not to cut all the way through. Use a spoon to scoop out any seeds or bits of core until the tomato is hollow.
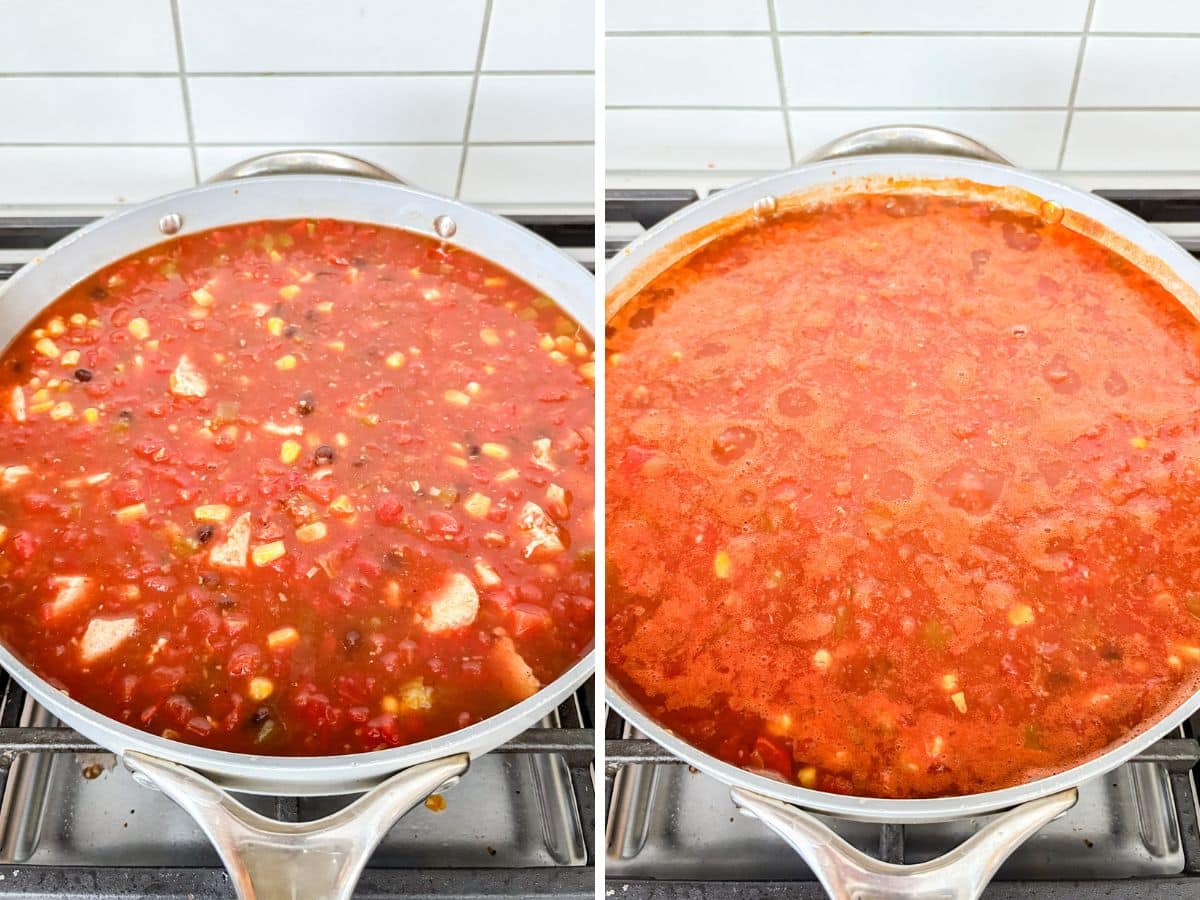
    If any of them tip over, trim an ultra-thin slice off the bottom to give it a flat surface. Just take off the tiniest bit so you don’t cut through the base.

    Gently pack the chicken salad into each hollowed tomato. Place the stuffed tomatoes in the fridge until you’re ready to eat.

    A hollowed out tomato and the tomato stuffed with chicken salad.

    Frequently Asked Questions

    How to cook chicken for chicken salad?

    Poach chicken in lightly salted water until cooked through, then cool and shred. Baking or slow-cooking works too.

    Can I make chicken salad with canned chicken?

    Absolutely. Canned chicken takes on flavor well, and with the right mix-ins, it’s not far off from the best canned chicken salad recipe style you’d make at home. Be sure to drain off the liquid really well so the salad isn't too soggy. I prefer Kirkland brand.

    Is chicken salad healthy?

    It can be. Using Greek yogurt, lean chicken, and plenty of fresh add-ins keeps this version lighter.

    Can you freeze chicken salad?

    I wouldn't recommend it. The texture becomes watery and unpleasant when thawed.

    A close up of a fork scooping some chicken salad from a stuffed tomato.

    Tips For Making Chopped Chicken Salad

    • Use cold chicken. It holds its shape better and mixes more evenly.
    • Chop everything evenly. This helps create that perfect scoopable texture.
    • Adjust the creaminess. Add more yogurt or mayo if you like it looser, or more chicken if you like it thick.
    • Stick to simple seasonings. The flavors in a traditional chicken salad recipe are intentionally basic, so a little dill, salt, pepper, and lemon juice go a long way. But tasting is key, so you can adjust it all to your unique taste.
    • Rotisserie chicken is a great shortcut. It’s already seasoned and tender, so you can make chicken salad with rotisserie chicken without adding extra cooking time.
    • Chill before serving. Even 20-30 minutes in the fridge helps the flavors blend.
    • Ingredients to prep ahead- Cook and shred the chicken, then chop the celery and dice the apples right before mixing.
    • Leftovers and storage- Store in an airtight container in the fridge for 3-4 days.
    A close up overhead image of a stuffed tomato with chicken salad.

    What To Serve With Chicken Apple Salad

    To make lunch feel extra satisfying, turn this into a full meal with a few simple sides. Serve this chicken salad with apples with these complementary dishes:

    • Chicken and Parmesan Soup with Spinach and Orzo
    • Baked Quesadillas
    • Pasta and Peas Recipe
    • Blueberry Lemon Dump Cake

    Other Salad Recipes To Try

    • A square image of Clementine and Fennel Salad.
      Clementine and Fennel Salad Recipe
    • An overhead image of a bowl of corn sand black bean salad.
      Avocado Corn and Black Bean Salad
    • A bowl of quinoa salad with butternut squash.
      Quinoa Butternut Squash Salad
    • A side view of a clear glass trifle dish with a layered taco salad with the dressing and salsa in jars on the side.
      7 Layer Taco Salad Recipe

    Love this recipe? Please leave a 5 star ⭐️⭐️⭐️⭐️⭐️ rating in the recipe card below ⬇️ and/or a review in the comment section further down. Check out my Amazon Store for all my favorite tools, including those used in this recipe. And follow @thelifejolie on Instagram and TikTok!

    A close up on a chicken salad stuffed tomato on a plate with others.

    Apple Chicken Salad

    Jessy Freimann
    Apple chicken salad is fresh, crunchy, and comes together in about 10 minutes, making it perfect for a quick lunch or easy make-ahead meal. It’s light, creamy, and full of texture thanks to tender chicken, crisp apples, and just the right amount of seasoning.
    No ratings yet
    Print Recipe Pin Recipe
    Prep Time 10 minutes mins
    Cook Time 0 minutes mins
    Total Time 10 minutes mins
    Course Appetizer, Main, Main Course, Main dish
    Cuisine American
    Servings 4 servings
    Calories 383 kcal

    Equipment

    • 1 chefs knife
    • 1 cutting board
    • 1 mixing bowl
    • 1 Spatula

    Ingredients
      

    • 2 cups chicken breast cooked and shredded
    • ½ cup diced celery
    • 1 large apple peeled and diced
    • ½ cup mayonnaise
    • ½ cup plain greek yogurt
    • ½ teaspoon dried dill
    • ½ teaspoon Kosher salt
    • ¼ teaspoon ground black pepper
    • ¼ teaspoon garlic powder
    • 1 Tablespoon lemon juice
    • 4 large beefsteak tomatoes tops removed and hollowed out (or around 20 Campari tomatoes)

    Instructions
     

    • In a large bowl, whisk mayonnaise, greek yogurt, dried dill, salt, pepper, garlic powder and lemon juice until well combined. Taste as you go and adjust seasonings as needed.
    • Mix chicken, celery, apple in with the dressing and toss until well combined.
    • Carefully stuff the tomatoes with chicken salad. Refrigerate until serving.

    Video

    Notes

    • Use cold chicken. It holds its shape better and mixes more evenly.
    • Chop everything evenly. This helps create that perfect scoopable texture.
    • Adjust the creaminess. Add more yogurt or mayo if you like it looser, or more chicken if you like it thick.
    • Stick to simple seasonings. The flavors in a traditional chicken salad recipe are intentionally basic, so a little dill, salt, pepper, and lemon juice go a long way. But tasting is key, so you can adjust it all to your unique taste.
    • Rotisserie chicken is a great shortcut. It’s already seasoned and tender, so you can make chicken salad with rotisserie chicken without adding extra cooking time.
    • Chill before serving. Even 20-30 minutes in the fridge helps the flavors blend.
    • Ingredients to prep ahead- Cook and shred the chicken, then chop the celery and dice the apples right before mixing.
    • Leftovers and storage- Store in an airtight container in the fridge for 3-4 days.

    Nutrition

    Serving: 1servingCalories: 383kcalCarbohydrates: 23gProtein: 22gFat: 24gSaturated Fat: 4gPolyunsaturated Fat: 13gMonounsaturated Fat: 5gTrans Fat: 0.1gCholesterol: 61mgSodium: 582mgPotassium: 1196mgFiber: 5gSugar: 16gVitamin A: 2912IUVitamin C: 52mgCalcium: 74mgIron: 1mg
    Tried this recipe?Let us know how it was!

    Meat Sauce Recipe

    Jan 2, 2026 · 14 Comments

    A plate of spaghetti with meat sauce on top of it.

    This meat sauce recipe is rich, cozy, and designed to bring everyone to the table. It’s perfect with homemade meatballs, slow-cooked pork, or your favorite pasta.

    A plate of spaghetti with meat sauce on top of it.
    [feast_advanced_jump_to]

    Why You’ll Love This Italian Meat Sauce Recipe

    This sauce comes straight from my grandma’s kitchen and was a staple at our family table growing up. Over the years, it became the kind of recipe she made on slow Sundays, simmering all afternoon while the house filled with the aroma of tomatoes, meat, and basil. Even though the steps are simple, the end result tastes like something that’s been passed down on purpose.

    Most importantly, it’s perfect for serving with my homemade authentic meatballs, since everything cooks together and builds flavor as it simmers. As a result, this Italian sauce with meat turns out rich and balanced without needing sugar. Plus, it’s hearty enough for big family dinners with plenty left over, and once you make it this way, it’s hard to go back. Here's why this recipe works so well:

    • A family recipe I grew up with
    • Meatballs simmer in the sauce
    • Deep, slow-cooked flavor
    • Perfect for leftovers
    A spoon pouring this meat sauce recipe on a plate of spaghetti.

    Ingredient Information And Substitutions

    • Tomato puree- This is the base of the sauce. I sometimes use half puree and half tomato sauce if that’s what I have on hand.
    • Water- Used to rinse out the cans and control the thickness. Add more or less depending on how thick you like your sauce.
    • Baking soda- Helps balance the acidity of the tomatoes without making the sauce sweet. Do not replace it with sugar.
    • Yellow onion- Adds natural sweetness as it cooks. Keep it whole so it’s easy to remove later.
    • Fresh or dried basil- Adds classic Italian flavor. Fresh basil works best when added at the end.
    • Romano cheese- Used instead of salt to season the sauce. Parmesan works if needed, but Romano has more bite.
    • Liquid Gold- this is a mix of the flavored grease from frying your meatballs and pork with some water and strained to remove any bits and chunk. This is where the flavor comes from and there is no substitution.
    An overhead image of labeled recipe ingredients.

    How To Make Meatball Sauce For Spaghetti

    Step 1- Add the tomato puree and water. 

    Add the tomato puree to a large sauce pot. Use water to get the last bits of tomato out of the cans, adding about 1½ cans' worth of liquid to the pot. Adjust the amount to control the sauce thickness.

    Liquid gold strained in a sink tomato sauce bubbling in a pot.

    Step 2- Bring the sauce to a boil.

    Place the pot over high heat and bring the sauce to a boil. Once it boils, reduce the heat to medium so it doesn’t burn.

    Step 3- Balance the tomato acidity.

    Let the sauce boil briefly to cook off the raw tomato flavor. It will taste sour at this stage. Stir in 1 leveled teaspoon of baking soda to balance the acidity. It will cause the sauce to foam, so scrape that off the top.

    Step 4- Taste and adjust.

    Lower the heat to medium-low and let the sauce settle. Taste again once the foaming calms down. If it still tastes acidic, add additional baking soda in very small amounts. Too much will make the sauce bitter.

    From this point on, keep the sauce at a gentle simmer. Don’t let it boil hard again, and check it occasionally so it doesn’t burn.

    A wooden spoon skimming the acidic foam from the top of the sauce and an onion, minced garlic and all the meat and grease added into the sauce.

    Step 5- Add the meat. 

    Add the browned meatballs and pork to the sauce, along with about half of the reserved cooking fat. Stir well and let the grease rise to the top as it cooks.

    Add one whole peeled onion to the pot, letting it cook in the sauce to add natural sweetness. If using garlic, add it now and remove it later.

    Step 6- Simmer until finished.

    Stir in the basil (either dried or fresh), cover, and let it simmer for a couple of hours. Check occasionally to be sure it doesn’t boil again.

    Fresh basil added to the sauce and then the sauce simmering.

    Step 11- Finish and taste.

    When the grease rises to the top, and the sauce tastes balanced, it’s done. Taste one last time before serving.

    An overhead image of meat sauce on spaghetti.

    Frequently Asked Questions

    How do you make the sauce for meatballs? 

    Let the meatballs finish cooking in the sauce so they release flavor as it simmers.

    Why don't you add sugar?

    My family doesn't like the taste of sugar in our sauce and the baking soda helps reduce the acidic, tart flavor.

    A plate of spaghetti with meatballs and sauce on it.

    Tips For Making This Italian Meat Sauce Recipe

    • Don’t add sugar. It sweetens the sauce instead of balancing it. Baking soda balances acidity without changing the flavor.
    • Start small with baking soda. Too much will leave your sauce bitter. You can always add more
    • Taste before adjusting the baking soda. Always let the sauce settle before adding more baking soda. Small adjustments make a big difference.
    • Never add salt. There’s already salt in the cooking fat and in the Romano cheese you'll top it with later. You should also be heavily salting your pasta cooking water.
    • Don’t rush the simmer. Low and slow is what gives this sauce its depth and balance.
    • Save the liquid gold! Leftover cooking fat from the meat is great for future batches. I usually use half of the liquid gold for a big pot of sauce and freeze the rest in smaller portions to add to my marinara later.
    • Ingredients to prep ahead- Meatballs and pork can be browned a day ahead and refrigerated along with the liquid gold.
    • Leftovers and storage- Store in airtight containers in the fridge for up to 4 days or freeze for longer storage.
    A close up of meat sauce on a bed of spaghetti.

    What To Serve With This Meat Sauce For Pasta

    This sauce is hearty enough to stand on its own, so I like to pair it with simple, classic sides:

    • Greens and Beans
    • Grandma’s Baked Artichoke Hearts
    • Rosie’s Famous Zucchini Soup
    • Grandma Rose's Pecan Tassies

    Other Tomato Sauce Recipes To Try

    • Homemade marinara sauce in a jar with a spoon in it.
      Sugar Free Marinara Sauce
    • A bowl of pizza sauce with a sprig of basil in it and pizza dough with sauce on it in the background.
      Italian Pizza Sauce
    • A plate of curly pasta with veal bolognese on top.
      Veal Bolognese Sauce
    • An overhead image of a bowl of linguine with clam sauce.
      Red Clam Sauce

    Love this recipe? Please leave a 5 star ⭐️⭐️⭐️⭐️⭐️ rating in the recipe card below ⬇️ and/or a review in the comment section further down. Check out my Amazon Store for all my favorite tools, including those used in this recipe. And follow @thelifejolie on Instagram and TikTok!

    A plate of spaghetti with meat sauce on top of it.

    Meat Sauce Recipe

    Jessy Freimann
    This meat sauce recipe is rich, cozy, and designed to bring everyone to the table. It’s perfect with homemade meatballs, slow-cooked pork, or your favorite pasta.
    No ratings yet
    Print Recipe Pin Recipe
    Prep Time 15 minutes mins
    Cook Time 3 hours hrs
    Total Time 3 hours hrs
    Course dinner, Entree
    Cuisine Family, Italian, Sunday Sauce
    Servings 14 servings
    Calories 93 kcal

    Equipment

    • 1 Large pot
    • 1 cutting board
    • 1 chefs knife
    • 1 Garlic Press
    • 1 wooden spoon
    • 1 Measuring cups and spoons
    • 1 Can opener

    Ingredients
      

    • 112 ounces Tomato puree four 28 ounce cans
    • 1 teaspoon baking soda
    • 1 large onion whole with skin removed and poked all over with the tip of your knife
    • 8 garlic cloves, minced or pressed
    • 1 ½ cups cooking grease from frying meatballs and pork- this is the liquid golf
    • 1 bunch fresh basil, or 2 Tablespoons dried basil

    Instructions
     

    • Put the tomato puree into a big sauce pot over medium-high heat. Rinse the cans out with water by flushing water between each can, adding about 1 ½ cans of water mixed with the puree that was in the cans to the pot. Stir well to mix and add more water if you prefer (based on your preference of sauce thickness).
    • Bring the sauce to a boil. Taste the sauce and you'll notice it will taste acidic and a bit tart.
    • Add 1 level teaspoon of baking soda into the sauce and stir it. You'll notice it starts to foam up at the top of the sauce. Scrape the foam off the top and dispose of it. Reduce the heat to medium.
    • When the sauce stops boiling and settles down, taste it again. If it's still too tart or acidic add a tiny bit more baking soda and repeat the process until the flavor is less acidic. Remember, less is more with the baking soda.
    • Add the whole onion, minced garlic, meat and liquid gold and stir to combine.Then stir in the fresh basil.
    • Reduce the heat to medium low, cover and let it simmer for a couple of hours, stirring periodically.
    • When it's all cooked the grease will come to the top- it's done! Serve immediately topped with plenty of Romano cheese or cool and store covered in the fridge or freezer.

    Video

    Notes

    • Don’t add sugar. It sweetens the sauce instead of balancing it. Baking soda balances acidity without changing the flavor.
    • Start small with baking soda. Too much will leave your sauce bitter. You can always add more
    • Taste before adjusting the baking soda. Always let the sauce settle before adding more baking soda. Small adjustments make a big difference.
    • Never add salt. There’s already salt in the cooking fat and in the Romano cheese you'll top it with later. You should also be heavily salting your pasta cooking water.
    • Don’t rush the simmer. Low and slow is what gives this sauce its depth and balance.
    • Save the liquid gold! Leftover cooking fat from the meat is great for future batches. I usually use half of the liquid gold for a big pot of sauce and freeze the rest in smaller portions to add to my marinara later.
    • Ingredients to prep ahead- Meatballs and pork can be browned a day ahead and refrigerated along with the liquid gold.
    • Leftovers and storage- Store in airtight containers in the fridge for up to 4 days or freeze for longer storage.

    Nutrition

    Serving: 1servingCalories: 93kcalCarbohydrates: 22gProtein: 4gFat: 0.5gSaturated Fat: 0.1gPolyunsaturated Fat: 0.2gMonounsaturated Fat: 0.1gSodium: 142mgPotassium: 1020mgFiber: 5gSugar: 11gVitamin A: 1187IUVitamin C: 25mgCalcium: 47mgIron: 4mg
    Tried this recipe?Let us know how it was!

    BBQ Lil Smokies Recipe

    Dec 29, 2025 · 2 Comments

    A close up of BBQ Lil Smokies with a tooth pick in the main one.

    This BBQ lil smokies recipe is the kind of easy appetizer everyone loves, and the kind you toss together in minutes and forget about until it’s time to eat. The sausages simmer in a sweet, smoky sauce that tastes like you spent way more time on it than you actually did.

    A close up of BBQ Lil Smokies with a tooth pick in the main one.
    [feast_advanced_jump_to]

    Why You’ll Love Beef Little Smokies

    Is it even a party without lil’ smokies? They’ve always been one of those appetizers that show up at every gathering we host, especially on game day. And honestly, what’s not to love? They’re basically tiny hot dogs simmering in a sweet, smoky barbecue sauce... and I could easily polish off a bowl on my own.

    One of the reasons I make them so often is because they truly are a dump-and-go dream. While plenty of recipes use grape jelly, this one keeps things simple with a straight-up barbecue-style sauce that lets the flavors shine. Everything cooks hands-off while you tackle the rest of your menu, and they stay warm beautifully right in the slow cooker. Why they’re great:

    • Easy to keep warm
    • Zero fuss
    • Crowd-pleasing flavors
    • Versatile cooking options
    • Perfect for entertaining
    A bowl of lil smokies in bbq sauce with tooth picks and scallions around it.

    Ingredient Information And Substitutions

    • Little smokies- Either beef or pork varieties work. Two packages make plenty for entertaining.
    • Tomato ketchup- The full-bodied base of the sauce. Regular ketchup works best. Avoid low-sugar versions, which can alter the flavor.
    • Liquid smoke- Adds that smoky depth. If you’re not into smoky flavor, use the same amount of soy sauce for a more savory, slightly Asian-inspired twist.
    • Brown sugar- Sweetens and thickens the sauce. Light or dark both work, so use what you have.
    • Onion- Small pieces melt into the sauce nicely. Yellow or white onions work best.
    • Green onions- Add a pop of color and freshness.
    An overhead image of labeled recipe ingredients.

    How To Make Barbecue Weenies

    Step 1- Mix the sauce.

    Combine the ketchup, liquid smoke, brown sugar, and minced onion right in the slow cooker or Instant Pot, stirring until everything looks evenly blended.

    Sauce ingredients in a slow cooker and then fully mixed together.

    Step 2- Add the sausages.

    Stir in the Little Smokies, making sure every piece is coated in sauce.

    Step 3- Cook them in your slow cooker or Instant Pot.

    Cover the slow cooker and let it go on high for 2 hours or low for 3 hours. Switch to warm once they’re ready and serve straight from the pot.

    For the Instant Pot, cook on manual high pressure for 5 minutes, then allow a 10-15 minute natural release.

    Cocktail wieners added to the slow cooker and then mixed in with the sauce and covered to cook.

    Step 4- Adjust the sauce if you use the Instant Pot.

    If the sauce feels thin, remove the sausages and simmer the sauce on the sauté until it thickens to your liking.

    Step 5- Serve.

    Top with chopped green onions if you want a fresh touch.

    A close up of the side of the bowl of BBQ cocktail wieners.

    Frequently Asked Questions

    Are Little Smokies already cooked?

    Yes, they’re fully cooked. You’re just heating them through and letting the sauce come together.

    Do I need to thaw before cooking?

    If you’ve frozen them in sauce, thawing first helps them heat more evenly.

    Can I leave out the onions?

    They add another layer of savory flavor, so it's best to leave them in. Or, swap with onion powder if you don't have fresh.

    A hand using a toothpick to grab a lil smokie from the bowl.

    Tips For Making This Recipe For Cocktail Weenies

    • Mix the sauce right in the pot. No need to pull out an extra bowl! Just add everything to the slow cooker or Instant Pot and stir until smooth.
    • Let the slow cooker do the work. You don’t need to fuss with them while they cook. I usually give them a quick stir once or twice, but it’s totally optional.
    • If you’re making a big batch of crock pot lil smokies for a party, switch the slow cooker to Warm so guests can help themselves throughout the night.
    • Skip the smoky flavor. If liquid smoke isn’t your thing, swap it for the same amount of soy sauce. It adds a savory, Asian-inspired twist to the sauce.
    • Adjust the sauce to taste. Want it sweeter? Add a little extra brown sugar. Prefer more tang? Stir in a splash of vinegar or a dash of hot sauce.
    • Ingredients to prep ahead- Mince the onion and measure the ketchup, brown sugar, and liquid smoke (or soy sauce) so you can dump everything in quickly.
    • Leftovers and storage- Keep leftovers in an airtight container in the fridge for 3-4 days. Reheat on the stovetop or in the microwave. Big batches can be rewarmed in the slow cooker. For the best texture, freeze before cooking rather than after.
    The side of a bowl of BBQ cocktail weenies.

    What To Serve With BBQ Little Smokies

    Turn these smokies into a full party spread by pairing them with easy, comforting dishes that play well with barbecue flavors.

    • Easy Instant Pot Chili Recipe
    • Garbage Plate Recipe
    • BLT Ranch Flatbread Pizza Recipe
    • No Bake Peanut Butter Pie

    Other Tasty Appetizers To Try

    • A white bowl of fried pickles with the pan behind it and a blue and white towel in the background.
      Oven Fried Pickles Recipe
    • Sweet and Spicy Kielbasa Sausage Bites are such an easy recipe! Just 3 simple ingredients and these glazed sausage bites are sure to be a hit at any holiday or game day party!
      Sweet and Spicy Kielbasa Sausage Bites
    • A bowl or artichoke and olive spread surrounded by toasted baguette.
      Artichoke and Olive Spread
    • A hand pulling a chip with hot bean dip from the pan with cheese stretching.
      Hot Bean Dip Recipe

    Love this recipe? Please leave a 5 star ⭐️⭐️⭐️⭐️⭐️ rating in the recipe card below ⬇️ and/or a review in the comment section further down. Check out my Amazon Store for all my favorite tools, including those used in this recipe. And follow @thelifejolie on Instagram and TikTok!

    A close up of BBQ Lil Smokies with a tooth pick in the main one.

    BBQ Lil Smokies Recipe

    Jessy Freimann
    This BBQ lil smokies recipe is the kind of easy appetizer everyone loves, and the kind you toss together in minutes and forget about until it’s time to eat. The sausages simmer in a sweet, smoky sauce that tastes like you spent way more time on it than you actually did.
    No ratings yet
    Print Recipe Pin Recipe
    Prep Time 5 minutes mins
    Cook Time 2 hours hrs
    Total Time 2 hours hrs 5 minutes mins
    Course Appetizer
    Cuisine American
    Servings 10 servings
    Calories 399 kcal

    Equipment

    • Gallon freezer zipper bags
    • measuring spoons
    • measuring cups
    • chefs knife
    • cutting board
    • Whisk
    • slow. cooker
    • instant pot

    Ingredients
      

    • 2 cups tomato ketchup
    • 2 Tablespoons liquid smoke (or you can substitute soy sauce for an Asian-inspired sauce)
    • 1 ½ cups brown sugar
    • ½ cup onion, minced
    • 26 ounces Little Smokies
    • Green onions for garnish, chopped (optional)

    Instructions
     

    Slow cooker instructions

    • Place ketchup, liquid smoke, brown sugar and onion into the crockpot. Stir to combine.
    • Add Little Smokies and stir until everything is well coated.
    • Cover the crockpot and cook on high for 2 hours or low for 3 hours. Set crockpot to warm and serve immediately with chopped green onions to garnish.

    Instant Pot instructions

    • Place ketchup, liquid smoke, brown sugar and onion into the Instant Pot. Stir to combine.
    • Add Little Smokies and stir until everything is well coated.
    • Cover the instant pot and set it for 5 minutes on manual high pressure with a natural release for 10-15 minutes. If the sauce isn’t thick enough for you, remove the Lil’ Smokies and reduce the sauce on the saute function until it reaches your desired level of thickness.
    • Serve immediately with chopped green onions to garnish.

    Video

    Notes

    • Mix the sauce right in the pot. No need to pull out an extra bowl! Just add everything to the slow cooker or Instant Pot and stir until smooth.
    • Let the slow cooker do the work. You don’t need to fuss with them while they cook. I usually give them a quick stir once or twice, but it’s totally optional.
    • If you’re making a big batch of crock pot lil smokies for a party, switch the slow cooker to Warm so guests can help themselves throughout the night.
    • Skip the smoky flavor. If liquid smoke isn’t your thing, swap it for the same amount of soy sauce. It adds a savory, Asian-inspired twist to the sauce.
    • Adjust the sauce to taste. Want it sweeter? Add a little extra brown sugar. Prefer more tang? Stir in a splash of vinegar or a dash of hot sauce.
    • Ingredients to prep ahead- Mince the onion and measure the ketchup, brown sugar, and liquid smoke (or soy sauce) so you can dump everything in quickly.
    • Leftovers and storage- Keep leftovers in an airtight container in the fridge for 3-4 days. Reheat on the stovetop or in the microwave. Big batches can be rewarmed in the slow cooker. For the best texture, freeze before cooking rather than after.

    Nutrition

    Serving: 1servingCalories: 399kcalCarbohydrates: 48gProtein: 10gFat: 20gSaturated Fat: 7gPolyunsaturated Fat: 2gMonounsaturated Fat: 10gCholesterol: 47mgSodium: 1205mgPotassium: 318mgFiber: 0.3gSugar: 44gVitamin A: 246IUVitamin C: 3mgCalcium: 45mgIron: 1mg
    Tried this recipe?Let us know how it was!

    Bacon-Wrapped Chicken Bites

    Dec 26, 2025 · Leave a Comment

    A close up of a bacon wrapped chicken bite in a bowl of others.

    These bacon-wrapped chicken bites are sweet, savory, and so easy to make. With just a few simple ingredients, they’re ready in under 45 minutes and perfect for parties or snacking.

    A close up of a bacon wrapped chicken bite in a bowl of others.
    [feast_advanced_jump_to]

    Why You’ll Love Brown Sugar Bacon Wrapped Chicken

    If you’re anything like me, you’re always up for a tasty, meaty appetizer, especially on game days. These little bites deliver juicy chicken wrapped in savory bacon with a caramelized brown sugar coating that gives you that sweet-and-salty vibe everyone loves. They’re the kind of snack that disappears the second they hit the table.

    Longtime readers might remember my Brown Sugar Bacon Wrapped Lil Smokies, which we’re all basically obsessed with around here. These crispy chicken bites are a fun twist on that same idea and just as addictive to munch on. I did a little experimenting to get the balance right, and the key ended up being a quick par-cook of the bacon so you get that perfect crisp without overcooking the chicken. Here's why this recipe is so great:

    • Oven-friendly
    • Sweet + savory combo
    • Crowd-pleasing
    • Simple prep
    • Great for entertaining
    A bowl of bacon brown sugar chicken bites.

    Ingredient Information And Substitutions

    • Boneless skinless chicken breasts- Lean, tender, and easy to work with. Chicken thighs work too, and they stay extra juicy!
    • Bacon slices- Regular-cut works best. Turkey bacon can be used, but it won’t crisp quite the same.
    • Kosher salt- Helps season the chicken from the inside out. Sea salt works as well.
    • Black pepper- Adds a light kick. Feel free to increase for more heat.
    • Brown sugar- Light or dark, both work.
    An overhead image of labeled recipe ingredients.

    How To Make Brown Sugar And Bacon Wrapped Chicken

    Step 1- Prep the chicken and bacon

    Trim and cut the chicken into uniform 1 inch chunks.  Cut bacon strips into thirds.

    Heat the oven to 375 degrees F and line a sheet pan with parchment or a Silpat to prevent sticking.

    Chicken chunks of a cutting board and cut bacon on a cutting board.

    Step 2- Season the chicken.

    Add your cubed chicken to a bowl and sprinkle with salt, pepper, and brown sugar. Toss everything together until each piece is well-coated, then let it marinate for about 20 minutes.

    Chicken seasoning ingredients in a bowl and then all of it mixed together.

    Step 3- Par-cook the bacon. 

    Arrange the bacon pieces in a single layer on a plate and microwave them for about 60-80 seconds.

    Raw pieces of bacon on a paper plate and then the same bacon partially cooked.

    Step 4- Wrap the chicken.

    Wrap each piece of chicken with a strip of bacon and secure it with a toothpick.

    Step 5- Coat in more brown sugar.

    Place all the wrapped pieces back into the bowl with the remaining brown sugar and gently toss to coat every side.

    Bacon wrapped pieces of chicken with tooth picks on them and then sprinkled with brown sugar and in the oven.

    Step 6- Bake until crisp.

    Arrange the bites on your prepared pan, ensuring they don’t touch each other. Bake for 15 minutes. If the bacon needs more crisping, switch the oven to broil for a minute or two.

    Step 7- Serve.

    Let them cool slightly, then serve warm with your favorite dipping sauce.

    A close up of the inside of a chicken bite with perfectly cooked chicken.

    Frequently Asked Questions

    Can I marinate the chicken longer?

    Yes, up to a few hours. Just cover and refrigerate.

    Is there a dipping sauce you recommend?

    Ranch, honey mustard, BBQ sauce, or even chipotle mayo all pair well.

    Can I make these in advance?

    Yes, you can assemble everything ahead of time, which makes this chicken bites recipe extra convenient when you’re hosting. Just bake right before serving.

    A hand picking up a chicken bite from the plate of them.

    Tips For Making Oven Baked Chicken Bites

    • Cut the chicken evenly. Aim for 1-inch pieces and keep them as uniform as possible so everything cooks at the same rate.
    • Par-cook bacon in the microwave. I cut each slice into thirds and nuked it for 1 minute in batches so as not to overload the plate. Go for a single layer
    • Use a rack if you want extra crispness. Setting the bites on a wire rack over the sheet pan allows heat to circulate underneath.
    • Ingredients to prep ahead- Cut the bacon and chicken and keep in the refrigerator until you're ready to assemble.
    • Leftovers and storage- Store in an airtight container in the fridge for up to 3 days. Reheat in the oven or air fryer so the bacon crisps back up.

    What To Serve With Baked Chicken Bites

    Turn these tasty bites into a full party spread with a mix of sides and sweets. They work perfectly with simple dips, veggie sides, and a fun dessert. Here are my favorite pairings: 

    • Greens and Beans Recipe
    • Ranch Potatoes Recipe
    • Artichoke and Olive Spread
    • Chocolate Cake Trifle

    Other Chicken Recipes To Try

    • A close up image of a buffalo chicken slider.
      Buffalo Chicken Sliders
    • A square image of Chicken Swiss Dip.
      Chicken Swiss Dip
    • The side of a sheet pan of chicken nachos with all the fixings.
      Loaded Chicken Nachos
    • A bbq chicken flatbread on a pan with another behind it.
      BBQ Chicken Flatbread

    Love this recipe? Please leave a 5 star ⭐️⭐️⭐️⭐️⭐️ rating in the recipe card below ⬇️ and/or a review in the comment section further down. Check out my Amazon Store for all my favorite tools, including those used in this recipe. And follow @thelifejolie on Instagram and TikTok!

    A close up of a bacon wrapped chicken bite in a bowl of others.

    Bacon Wrapped Chicken Bites

    Jessy Freimann
    These bacon-wrapped chicken bites are sweet, savory, and so easy to make. With just a few simple ingredients, they’re ready in under 45 minutes and perfect for parties or snacking.
    No ratings yet
    Print Recipe Pin Recipe
    Prep Time 10 minutes mins
    Cook Time 20 minutes mins
    Marinating time 20 minutes mins
    Total Time 30 minutes mins
    Course Appetizer
    Cuisine American
    Servings 30 pieces
    Calories 58 kcal

    Equipment

    • chefs knife
    • cutting board
    • measuring cups
    • measuring spoons
    • mixing bowl
    • sheet pan
    • Spatula
    • Silpat

    Ingredients
      

    • 10 slices bacon, cut into thirds
    • 2 large boneless skinless chicken breasts, cut into uniform 1 inch chunks
    • 1 teaspoon kosher salt
    • ¼ teaspoon ground black pepper
    • ⅔ cup brown sugar, divided

    Instructions
     

    • Place the chicken breast chunks into a bowl.
    • Sprinkle with salt, pepper, and ⅓ cup brown sugar and toss to fully coat.
    • Let the chicken marinate for at least 20 minutes.
    • Preheat the oven to 375 degrees Fand line a sheet pan with parchment paper and set aside.
    • Par-cook the pieces of bacon in the microwave for 1 minute- 1 minute and 20 seconds (this will vary by microwave). Make sure to form a single layer on a plate. I did them in batches.
    • Wrap a piece of the cut up bacon around each chicken chunk and secure it with a toothpick.
    • Once all chicken chunks are wrapped in bacon, place them all back in the bowl with the other ⅓ cup brown sugar and gently toss to coat each one.
    • Spread them on the pan in a single layer but not touching.
    • Bake for 15 minutes and if needed, turn up the oven to broil and broil them for a couple minutes to crisp up the bacon.
    • Cool for a couple minutes and serve immediately.

    Video

    Notes

    • Cut the chicken evenly. Aim for 1-inch pieces and keep them as uniform as possible so everything cooks at the same rate.
    • Par-cook bacon in the microwave. I cut each slice into thirds and nuked it for 1 minute in batches so as not to overload the plate. Go for a single layer
    • Use a rack if you want extra crispness. Setting the bites on a wire rack over the sheet pan allows heat to circulate underneath.
    • Ingredients to prep ahead- Cut the bacon and chicken and keep in the refrigerator until you're ready to assemble.
    • Leftovers and storage- Store in an airtight container in the fridge for up to 3 days. Reheat in the oven or air fryer so the bacon crisps back up.

    Nutrition

    Serving: 6piecesCalories: 58kcalCarbohydrates: 5gProtein: 3gFat: 3gSaturated Fat: 1gPolyunsaturated Fat: 1gMonounsaturated Fat: 1gTrans Fat: 0.01gCholesterol: 10mgSodium: 136mgPotassium: 49mgFiber: 0.004gSugar: 5gVitamin A: 5IUVitamin C: 0.1mgCalcium: 5mgIron: 0.1mg
    Tried this recipe?Let us know how it was!

    Homemade Meatballs In Sauce

    Dec 22, 2025 · 10 Comments

    A pile of homemade meatballs in tomato sauce.

    These homemade meatballs in sauce bring all the cozy Sunday dinner vibes, with tender beef, flavorful pork, and that rich “liquid gold” that makes the whole pot something special.

    A pile of homemade meatballs in tomato sauce.
    [feast_advanced_jump_to]

    Why You’ll Love Italian Tomato Sauce For Meatballs

    There’s something truly comforting about a sauce that’s been passed down through generations, and this one comes straight from my Grandma Rosie. It’s the same Sunday sauce that filled the house with warmth, and even though the steps are detailed, the rhythm becomes relaxing. The result... pure comfort.

    Plus, this recipe is incredibly flexible. Make everything in one cozy day, or break it up by doing the meat and liquid gold first and the sauce later. It makes a big batch, perfect for freezing and easy future meals. Most of all, it’s a recipe full of love and memories, and one that’s meant to be shared. Here’s why this one's a keeper:

    • Family-style cooking
    • Generational tradition
    • Deep, rich flavor
    • Freezer-friendly
    An overhead image of a bowl of meatballs and pork in sauce.

    Ingredient Information And Substitutions

    • Ground beef (80/20)- The fat keeps the meatballs tender, as leaner blends can dry them out. If using a lower fat content, add a bit more water.
    • Country-style pork ribs- Bone-in or boneless work. Pork steaks or blade cuts are good substitutes.
    • Italian sausage- If using, cook it separately so the grease doesn’t change the sauce flavor.
    • Seasoned bread crumbs- Italian-style adds great flavor. If you only have plain, mix in 1 tablespoon Italian seasoning.
    • Small onion- Use white or yellow for the best flavor.
    • Garlic cloves- Give them a nice smash.
    • Romano cheese- Gives a salty, savory boost. Parmesan also works.
    • Olive oil- For searing the pork. Substitute any neutral oil.
    • Eggs- Use 2 eggs per pound of meat to bind and tenderize.
    • Warm water- Softens the mixture so the meatballs stay tender.
    • Garlic powder- Adds a classic savory note. Granulated garlic is fine too, but use a little less.
    • Salt and pepper- Brings out the flavors and adds mild heat.
    An overhead image of labeled recipe ingredients.

    How To Make Homemade Meatballs

    Step 1- Prep the pork. 

    Add the oil and peeled garlic cloves to a frying pan, but leave the heat off. Trim the fat and thin membrane from the pork, then season it with salt, pepper, and garlic powder. If desired, cut the meat into smaller pieces.

    Meatball ingredients in a bowl and raw country pork ribs seasoned on a cutting board.

    Step 2- Mix the meatball base.

    Add the ground beef to a large bowl, then start mixing in the eggs (2 per pound of meat), seasoned breadcrumbs, Romano cheese, and a sprinkle of salt, pepper, and garlic powder.

    As you continue mixing everything with your hands, add a couple handfuls of warm water to soften the meat. Add as much as needed until you reach the texture you want. The goal is for it to me soft and malleable without being soupy and it should smell flavorful.

    Pull out a small amount of the mixture and shape it into a small patty. Cook it in the skillet of oil, then taste it and adjust the mixture. Add more water for softness or more cheese, breadcrumbs, or seasoning for flavor.

    Meatball mixture mixed together and pork and garlic frying in oil.

    Step 3- Brown the pork. 

    Place the pork in the pan, then turn the heat on high, lowering it to medium-high as it starts to cook. Brown the pork on all sides until golden, seasoning lightly as you turn it. Remove and set on a paper towel-lined plate.

    Step 4- Shape and brown the meatballs.

    Peel and chop the onion and add it to the pan. Shape the meatballs to be around the size of a golf ball.

    Cook the meatballs in the skillet in batches, just until lightly browned. Transfer then to the plate with the pork, picking off any browned bit and onion stuck to the outside so the sauce stays clean.

    Raw meatballs and onions added to the oil and then the pan of cooked meatballs.

    Step 8- Make the liquid gold. 

    Add water to the pan until it comes halfway up the side. Bring it to a boil and scrape the bottom of the pan to release all the browned bits. Then, strain the liquid well so it’s clear.

    A pan scraping up browned bits in the oil and water mixture int he pan and then the liquid gold strained into a bowl in the sink.

    Step 9- Move on to the sauce.

    If you're cooking everything in one day, now's the time to start the sauce. Otherwise, wrap up the pork, meatballs, and liquid gold and refrigerate everything until the next day.

    A meatball on a bed of pasta with sauce and Romano cheese sprinkled on top.

    Frequently Asked Questions

    Can I make the meat and liquid gold ahead?

    Yes, you can prepare everything a day in advance and refrigerate it. It also freezes well- cool completely, freeze in an air tight container for up to 3 months (or on a sheet pan for the meatballs and pork pieces then transfer to an airtight container).

    Do the meatballs need to be fully cooked?

    No, browning is enough. They finish cooking in the sauce.

    What type of pan works best for browning?

    A heavy skillet or cast-iron pan browns the meat most evenly, but non stick also works fine.

    A wooden spoon scooping a meatball from a pot of sauce.

    Tips For Making Traditional Italian Meatballs In Tomato Sauce

    • Don’t rush the pork. Let it get a nice golden sear before you pull it from the pan.  
    • Trim the pork as much or as little as you like. Leaving a bit of fat adds flavor as it cooks, but more fat to eat around. Use your judgement.
    • Use 80/20 beef for tender meatballs, but if you go with a leaner mix, add a bit more water when mixing the meatballs.
    • Make a tiny beef patty and fry it up- taste and adjust the meatball mix as needed; to your taste. More cheese for added flavor and texture, more water if they are too hard, more bread crumbs if too soft.
    • If the flavor needs a boost, add more Romano cheese before adding extra breadcrumbs.
    • Keep the sauce smooth by brushing off any browned bits that stick to the meatballs.
    • Ingredients to prep ahead- Trim the pork, measure the breadcrumbs and cheese, and chop the onion.
    • Leftovers and storage- Refrigerate 3-4 days or freeze for up to 3 months.
    A bowl of meatballs in sauce with pork in sauce.

    What To Serve With Traditional Italian Meatballs 

    You can turn this Sunday-style meat-and-sauce dish into a full meal with a few simple sides:

    • Tomato Onion Salad
    • Peas with Onions
    • Greens and Beans Recipe
    • Grandma's Baked Artichoke Hearts

    Other Meatball Recipes To Try

    • Greek Baked Turkey Meatballs are a tasty appetizer or an excellent main dish. They're insanely easy to whip up and a healthy option as well! Ground turkey, lemon juice and greek spices make a delicious and flavorful meatball that tastes awesome with tzatziki sauce!
      Greek Baked Turkey Meatballs Recipe
    • A close up image of a bowl of meatballs in BBQ with a toothpick in the focus meatball.
      Slow Cooker BBQ Meatballs
    • A bowl of lamb meatballs with tzatziki and couscous.
      Greek Lamb Meatballs
    • A plate of stuffed meatballs with one cut open revealing the mozzarella cheese inside.
      Cheesy Stuffed Meatballs

    Love this recipe? Please leave a 5 star ⭐️⭐️⭐️⭐️⭐️ rating in the recipe card below ⬇️ and/or a review in the comment section further down. Check out my Amazon Store for all my favorite tools, including those used in this recipe. And follow @thelifejolie on Instagram and TikTok!

    A pile of homemade meatballs in tomato sauce.

    Homemade Meatballs In Sauce

    Jessy Freimann
    These homemade meatballs in sauce bring all the cozy Sunday dinner vibes, with tender beef, flavorful pork, and that rich “liquid gold” that makes the whole pot something special.
    No ratings yet
    Print Recipe Pin Recipe
    Prep Time 10 minutes mins
    Cook Time 1 hour hr
    Total Time 1 hour hr 10 minutes mins
    Course dinner, Entree
    Cuisine Family, Italian, Sunday Sauce
    Servings 42 pieces
    Calories 128 kcal

    Equipment

    • frying pan
    • large mixing bowl
    • chefs knife
    • Box grater
    • Tongs

    Ingredients
      

    Pork:

    • 1 cup olive oil
    • 5 garlic cloves smashed
    • 6 country-style pork ribs
    • 1 teaspoon kosher salt
    • ¼ teaspoon ground black pepper,
    • ½ teaspoon garlic powder

    Meatballs:

    • 2 pounds ground beef 80/20
    • 4 large eggs,
    • 1 cup Seasoned Bread Crumbs
    • 1 cup Romano Cheese
    • ½ teaspoon kosher salt
    • ½ teaspoon ground black pepper,
    • ½ teaspoon garlic powder
    • 1 small onion roughly chopped
    • 3 Tablespoons water

    Liquid Gold:

    • 1 cup water

    Instructions
     

    Pork:

    • Add oil to a large fry pan or skillet and heat over medium-high heat. Add garlic to the pan.
    • Pat pork ribs dry and season well with salt pepper and garlic powder.
    • Sear pork ribs, turning until golden on all sides. Manage heat and remove garlic if it's getting too dark (don't burn it!). Remove pork to a paper towel-lined plate once golden brown on all sides.

    Meatballs:

    • Gently mix all meatball ingredients except for the chopped onion in a large bowl with clean hands. Add palm-fuls of a warm water until the meat is malleable but not soup.
    • Make a tiny beef patty and fry it in the oil. Cool and taste. Adjust meatball ingredients based on taste (more cheese for added flavor and texture, more water if they are too hard, more bread crumbs if too soft).
    • Then roll the meat mixture into meatballs about the size of a golf ball. Use a cookie scoop for uniform sizing.
    • Add chopped onion to the pan and add meatballs, in a single layer and not touching.
    • Turn meatballs so they're a deep brown color on each side without burning. Remove the meatballs to a paper towel-lined plate. Remove any bits of onion, garlic or other little pieces that can be left on the meatballs.

    Liquid gold:

    • Add 1 cup water or more to the fry pan so that it's filled up to around half and bring it to a boil.
    • Gently scrape the bottom of the fry pan to get all the little bits off the bottom.
    • Now take the water and grease that was mixed with bits and pieces from the fry pan and strain it through a mesh sieve.
    • If you're doing the sauce the next day you'll wrap and refrigerate your liquid gold and your meat to use in the next day's sauce recipe. Or move on to the sauce recipe linked at the beginning of this post.

    Video

    Notes

    • Don’t rush the pork. Let it get a nice golden sear before you pull it from the pan.  
    • Trim the pork as much or as little as you like. Leaving a bit of fat adds flavor as it cooks, but more fat to eat around. Use your judgement.
    • Use 80/20 beef for tender meatballs, but if you go with a leaner mix, add a bit more water when mixing the meatballs.
    • (more cheese for added flavor and texture, more water if they are too hard, more bread crumbs if too soft).
    • If the flavor needs a boost, add more Romano cheese before adding extra breadcrumbs.
    • Keep the sauce smooth by brushing off any browned bits that stick to the meatballs.
    • Ingredients to prep ahead- Trim the pork, measure the breadcrumbs and cheese, and chop the onion.
    • Leftovers and storage- Refrigerate 3-4 days or freeze for up to 3 months.

    Nutrition

    Serving: 2piecesCalories: 128kcalCarbohydrates: 2gProtein: 6gFat: 11gSaturated Fat: 3gPolyunsaturated Fat: 1gMonounsaturated Fat: 6gTrans Fat: 0.3gCholesterol: 36mgSodium: 172mgPotassium: 77mgFiber: 0.2gSugar: 0.2gVitamin A: 41IUVitamin C: 0.2mgCalcium: 38mgIron: 1mg
    Tried this recipe?Let us know how it was!

    Poppyseed Cake

    Dec 19, 2025 · 2 Comments

    A slice of poppyseed cake being lifted from the rest of the cake.

    This poppyseed cake is a quick, foolproof dessert that tastes like it came from a bakery. With just a handful of ingredients, you’ll have a moist, rich cake in about an hour, perfect for holidays, potlucks, or last-minute guests.

    A slice of poppyseed cake being lifted from the rest of the cake.
    [feast_advanced_jump_to]

    Why You’ll Love This Poppy Seed Cake

    Recipes don’t have to be complicated to be delicious, and this poppy seed cake is proof. It’s one of those “mix, pour, and bake” desserts that somehow tastes like it came from a fancy bakery. The butterscotch pudding makes it incredibly moist and gives every bite a buttery, caramel-like flavor. I usually bake it in a bundt pan because it looks beautiful without any extra work, but it’s just as lovely in loaf pans for gifting.

    I love that this is one of those recipes you can always count on when you need something quick that still feels special. It’s a great go-to for holidays, brunches, or last-minute get-togethers, and it always disappears fast. Dust it with powdered sugar and you’ve got a simple, elegant dessert that never fails to impress. Reasons you’ll love this cake:

    • Super moist texture
    • Buttery, rich flavor
    • Quick and easy prep
    • Crowd-pleaser every time 
    A whole poppy seed bundt cake on a white plate with a striped napkin in the background.

    Ingredient Information And Substitutions

    • Cake mix- A yellow cake mix keeps things simple. White or butter cake mix also works.
    • Instant butterscotch pudding- Adds a subtle caramel flavor and moisture.
    • Eggs- While the original recipe calls for extra-large eggs, large eggs work just as well if that's what you have.
    • Vegetable oil- Keeps the crumb moist. Canola oil or avocado oil can also be used. 
    • Warm water- Helps the batter come together smoothly. Milk can be substituted for a slightly richer texture. 
    • Poppy seeds- Add texture and a hint of nuttiness. You can use less if you prefer a lighter poppy flavor.
    An overhead image of labeled recipe ingredients.

    How To Make This Poppy Seed Cake Recipe

    Step 1- Prepare the oven and pan.

    Preheat your oven to 325 degrees F. Grease a bundt or loaf pan well to prevent sticking.

    Dry ingredients in a glass bowl and then wet ingredients added.

    Step 2- Combine ingredients.

    In a large bowl, mix the cake mix, pudding, eggs, oil, water, and poppy seeds until smooth and well combined.

    Cake batter mixed together and then in a prepared bundt pan.

    Step 3- Bake the cake.

    Pour the batter into your prepared pan. Bake for about 50–60 minutes, checking around the 50-minute mark if using loaf pans. Cool completely.

    Dust with powdered sugar before serving. Enjoy!

    A slice of poppyseed cake on a white plate.

    Frequently Asked Questions

    Can I make this poppy seed cake ahead of time?

    Yes, it stays moist for several days when stored in an airtight container at room temperature.

    Do I have to use a bundt pan?

    No, you can also divide the batter between two loaf pans. Just check for doneness starting at 45 minutes.

    Can I use this recipe to make mini poppy seed cakes? 

    Yes! Pour the batter into mini loaf pans or muffin tins, and adjust the baking time to 20-25 minutes. They’re perfect for brunches, showers, or gifting.

    A close up of a bite of poppy seed cake on a fork.

    Tips For Making This Butterscotch Cake

    • Don’t over-mix the batter. Once everything looks smooth and combined, stop stirring. Over-mixing can make the crumb dense instead of tender.
    • Use room temperature eggs. It's an easy way to prevent overmixing! I'll usually crack them into the bowl and whisk lightly, then let them sit while the oven preheats.
    • Let it cool completely. This helps the flavors settle and makes slicing much cleaner. It’s even better the next day!
    • Dress it up with a glaze. A simple powdered sugar glaze adds a sweet touch. But my usual go-to is a dusting of powdered sugar.
    • Use loaf pans for gifting. Split the batter into two smaller pans. They make perfect edible gifts for neighbors or friends. Check for doneness starting at 45 minutes.
    • Ingredients to prep ahead- Bring the eggs to room temperature and grease your pans in advance so the batter goes right in when it’s ready.
    • Leftovers and storage- Store any leftover cake in an airtight container at room temperature for up to 3 days, or refrigerate for up to 5. To freeze, wrap slices tightly and thaw overnight on the counter.
    A slice of poppyseed cake with a bite taken from it revealing the moist crumb center.

    What To Serve With Butterscotch Cake Recipe

    This cake has a rich, buttery flavor that pairs beautifully with lighter, fruit-forward desserts or something creamy and cool. If you’re serving it after dinner, add a simple side or beverage to make it feel extra special. Here are my favorite recipes to round out your dessert spread:

    • Apple Yogurt Parfait With Granola
    • Lemon Bars With Shortbread Crust
    • Almond Shortbread Cookies
    • Cinnamon Spiced Candied Pecans

    Other Tasty Cake Recipes To Try

    • An image of a slice of pumpkin cake with a fork in front of it holding a bite of the cake on it.
      Pumpkin Spice Cake
    • A piece of lemon cake with whipped cram on a white plate with the rest of the cake and lemons in the background.
      Lemon Pistachio Cake
    • A piece of chocolate cake being pulled from the whole cake revealing the moist inside of the cake.
      The BEST Chocolate Overload Cake
    • The side of a slice of orange cake with chocolate ganache revealing the moist crumb.
      Chocolate Orange Cake Recipe

    Love this recipe? Please leave a 5 star ⭐️⭐️⭐️⭐️⭐️ rating in the recipe card below ⬇️ and/or a review in the comment section further down. Check out my Amazon Store for all my favorite tools, including those used in this recipe. And follow @thelifejolie on Instagram and TikTok!

    A slice of poppyseed cake being lifted from the rest of the cake.

    Poppyseed Cake

    Jessy Freimann
    This poppyseed cake is a quick, foolproof dessert that tastes like it came from a bakery. With just a handful of ingredients, you’ll have a moist, rich cake in about an hour, perfect for holidays, potlucks, or last-minute guests.
    No ratings yet
    Print Recipe Pin Recipe
    Prep Time 5 minutes mins
    Cook Time 1 hour hr
    Total Time 1 hour hr 5 minutes mins
    Course Dessert
    Cuisine Holiday, Special occasion
    Servings 8 servings
    Calories 472 kcal

    Equipment

    • Bundt pan
    • mixing bowl
    • wooden spoon
    • measuring cups
    • measuring spoons

    Ingredients
      

    • 1 Yellow Cake Mix
    • 3.7 ounces Instant Butterscotch Pudding (2 small boxes)
    • 5 large eggs
    • ¾ cup vegetable oil
    • 1 cup warm water
    • ½ ounce poppy seeds

    Instructions
     

    • Preheat the oven to 325 degrees F and grease a bundt pan. Set aside..
    • Place cake mix, instant pudding mixes, eggs, oil, water and poppy seeds in a large bowl and mix until just combined.
    • Pour batter into prepared pan and smooth top.
    • Bake for 50-60 minutes until cake tester comes out clean.
    • Cool completely, dust with confectioner's sugar and serve.

    Video

    Notes

    • Don’t over-mix the batter. Once everything looks smooth and combined, stop stirring. Over-mixing can make the crumb dense instead of tender.
    • Use room temperature eggs. It's an easy way to prevent overmixing! I'll usually crack them into the bowl and whisk lightly, then let them sit while the oven preheats.
    • Let it cool completely. This helps the flavors settle and makes slicing much cleaner. It’s even better the next day!
    • Dress it up with a glaze. A simple powdered sugar glaze adds a sweet touch. But my usual go-to is a dusting of powdered sugar.
    • Use loaf pans for gifting. Split the batter into two smaller pans. They make perfect edible gifts for neighbors or friends. Check for doneness starting at 45 minutes.
    • Ingredients to prep ahead- Bring the eggs to room temperature and grease your pans in advance so the batter goes right in when it’s ready.
    • Leftovers and storage- Store any leftover cake in an airtight container at room temperature for up to 3 days, or refrigerate for up to 5. To freeze, wrap slices tightly and thaw overnight on the counter.

    Nutrition

    Serving: 1servingCalories: 472kcalCarbohydrates: 54gProtein: 7gFat: 26gSaturated Fat: 5gPolyunsaturated Fat: 13gMonounsaturated Fat: 6gTrans Fat: 0.3gCholesterol: 116mgSodium: 517mgPotassium: 86mgFiber: 1gSugar: 28gVitamin A: 169IUVitamin C: 0.02mgCalcium: 180mgIron: 2mg
    Tried this recipe?Let us know how it was!


    Mint Chip Ice Cream Cake

    Dec 15, 2025 · 22 Comments

    A piece of mint chip ice cream cake being lifted out of the pan.

    This mint chip ice cream cake is a fun, festive dessert that comes together in just 15 minutes! With a crunchy Oreo crust, creamy mint chocolate chip ice cream, and a fluffy whipped cream topping, it’s the perfect make-ahead treat for the holidays.

    A piece of mint chip ice cream cake being lifted out of the pan.
    [feast_advanced_jump_to]

    Why You’ll Love Ice Cream Pies

    In honor of my love for all things chocolate and peppermint, I give you this minty ice cream cake, a dessert I first made for Christmas Eve (as if our dessert table needed more sweets!). It was an instant hit, and it’s easy to see why.

    You get the best of both worlds: a crunchy Oreo crust, creamy mint chip ice cream, and a fluffy layer of whipped cream. Top it all with chocolate sauce or mini chips, and you’ve got yourself a show-stopping, no-bake dessert. Best of all, it takes just a few ingredients and about 15 minutes to put together before the freezer does the rest of the work. Why you’ll love it:

    • The perfect chocolate-peppermint combo
    • Quick, easy, and no baking required
    • Great for holidays or parties
    • Always a crowd favorite
    An overhead image of a peppermint pie with chocolate chips around it and on top.

    Ingredient Information And Substitutions

    • Oreo cookie crust- A classic chocolate base that pairs perfectly with mint ice cream. You can also use a homemade crust or gluten-free sandwich cookies for a gluten-free option.
    • Mint chocolate chip ice cream- Use your favorite brand! Peppermint ice cream or mint chocolate cookie ice cream also works.
    • Heavy cream- Whip it yourself for the best flavor and texture, or use whipped topping for a shortcut.
    • Vanilla extract- Adds a subtle flavor boost to your homemade whipped cream.
    • Confectioner’s sugar- Sweetens and stabilizes the whipped cream.
    • Chocolate sauce or mini chocolate chips- Garnish with one or both! You can also add crushed peppermint or shaved chocolate for a festive touch.
    An overhead image of labeled recipe ingredients.

    How To Make An Ice Cream Cake

    Step 1- Soften the ice cream.

    Take the ice cream out of the freezer and let it sit for about 10 minutes (a bit longer if it’s extra firm). 

    Step 2- Whip the cream.

    In a stand mixer fitted with a whisk attachment (or using a hand mixer), beat the heavy cream, vanilla, and confectioner’s sugar until soft peaks form. Set aside.

    Step 3- Fill the crust.

    Gently scoop the softened ice cream into the Oreo crust, smoothing the top with a spatula. Leave a little room at the top for the whipped cream layer.

    Step 4- Add the whipped cream.

    Spoon or pipe the whipped cream over the ice cream layer.

    Ice cream in the oreo crust and then spread evenly in it.

    Step 5- Garnish and freeze.

    Drizzle with chocolate sauce, sprinkle mini chocolate chips, or decorate with both. Freeze uncovered for at least 1 hour before serving so the cake can set

    Whipped cream being piped on top of the cake and chocolate chips being sprinkled on top.

    Frequently Asked Questions

    Can I use a different flavor of ice cream?

    Yes! This recipe works with almost any flavor: chocolate, coffee, or even cookies and cream would all be delicious.

    How far ahead can I make this ice cream pie?

    You can make it up to 2-3 days ahead. Just cover it tightly with plastic wrap to prevent freezer burn.

    What’s the best way to slice an ice cream cake?

    Run a sharp knife under warm water, wipe it dry, and slice quickly. It makes clean, easy cuts every time.

    A straight on image of ice cream pie with a bite taken from it.

    Tips For Making This Ice Cream Pie Recipe

    • Soften the ice cream first. Let the ice cream sit out for about 10–15 minutes before assembling. This makes spreading it into the crust so much easier.
    • Handle the crust gently. Oreo crusts can be delicate, so take your time when pressing and filling to avoid cracks.
    • Use freshly whipped cream if you can. It gives the best flavor and texture, but store-bought whipped topping totally works in a pinch.
    • Line your freezer shelf. Place the pie on a flat surface or baking sheet to keep it level as it freezes.
    • Don’t skip the chill time. Give it at least an hour in the freezer to firm up before serving. Overnight is even better!
    • Ingredients to prep ahead- Whip the cream and soften the ice cream before you start layering.
    • Leftovers and storage- Cover tightly with plastic wrap or foil and store in the freezer for up to 2 months.
    A close up of a bite of ice cream pie.

    What To Serve With Mint Chocolate Chip Ice Cream Cake

    Since the cake is cool and refreshing, it pairs especially well with hearty mains and vibrant salads. Serve it after a family dinner or during the holidays when you want something light and sweet to balance out all the rich foods. Here are a few dishes that make a great match:

    • Mini Meatloaf Recipe with Potatoes
    • Italian Chicken and Rice Stew
    • Roasted Beet Salad with Feta and Dill
    • Strawberry Salad With Goat Cheese
    A close up image of of the point of an ice cream pie.

    Other Dessert Recipes To Try

    • A close up image of a piece of cookie bar stacked on top of other cookie bars.
      Cherry Chocolate Cookie Bars
    • 2 jars with chocolate almonds with a red and green towel and more almonds in the background on a sheet pan.
      Dark Chocolate Covered Almonds (2 Ways!)
    • A square image of Chocolate Cheesecake Stuffed Strawberries.
      Chocolate Cheesecake Stuffed Strawberries Recipe
    • This Black Forest Ice Cream Pie is a quick and easy no bake dessert recipe. Made with an Oreo Cookie crust, chocolate ice cream, maraschino cherries and whipped topping this pie is a pretty addition to any dessert table! It's perfect for the holidays or to keep in the freezer "just because"!
      Black Forest Ice Cream Pie

    Love this recipe? Please leave a 5 star ⭐️⭐️⭐️⭐️⭐️ rating in the recipe card below ⬇️ and/or a review in the comment section further down. Check out my Amazon Store for all my favorite tools, including those used in this recipe. And follow @thelifejolie on Instagram and TikTok!

    A piece of mint chip ice cream cake being lifted out of the pan.

    Mint Chip Ice Cream Cake

    Jessy Freimann
    This mint chip ice cream cake is a fun, festive dessert that comes together in just 15 minutes! With a crunchy Oreo crust, creamy mint chocolate chip ice cream, and a fluffy whipped cream topping, it’s the perfect make-ahead treat for the holidays.
    No ratings yet
    Print Recipe Pin Recipe
    Prep Time 10 minutes mins
    Chill time 1 hour hr
    Total Time 10 minutes mins
    Course Dessert
    Cuisine American
    Servings 8 servings
    Calories 103 kcal

    Equipment

    • Spatula
    • stand mixer or hand mixer
    • measuring cups
    • measuring cups
    • Open star pastry tip

    Ingredients
      

    • 1 Oreo pie crust
    • 24 ounces mint chip ice cream, the recipe uses about half of the box, give or take
    • ½ pint heavy cream if you're whipping it yourself, you can use ½ pt. of heavy cream, 1 tsp. of vanilla extract and ¼ cup of confectioner's sugar whipped unt
    • 1 teaspoon vanilla extract
    • 14 cup confectioner's sugar
    • Chocolate sauce or mini chocolate chips for garnish or both if you like to live dangerously

    Instructions
     

    • Pull ice cream out of the freezer for 5-10 minutes to soften (if the box has already been opened, but may take a minute or two longer to soften than an unopened box).
    • While the ice cream softens, place heavy cream, vanilla extract and confctioner's sugar into a stand mixer with a whisk attachment or bowl with a hand mixer and whip until they form nice, fluffy peaks of whipped cream. Set aside.
    • Carefully scoop ice cream into the pie crust, leaving a small amount of space on top for the layer of whipped cream. Using a spatula, smooth it out a bit on top so that it's level.
    • Next, pipe or scoop whipped cream on top of the pie.
    • If you're planning on garnishing with chocolate sauce and/or mini chocolate chips, add them at this point.
    • Place the pie in the freezer to harden uncovered. Let it freeze for a couple of hours or longer and serve.

    Video

    Notes

    • Soften the ice cream first. Let the ice cream sit out for about 10–15 minutes before assembling. This makes spreading it into the crust so much easier.
    • Handle the crust gently. Oreo crusts can be delicate, so take your time when pressing and filling to avoid cracks.
    • Use freshly whipped cream if you can. It gives the best flavor and texture, but store-bought whipped topping totally works in a pinch.
    • Line your freezer shelf. Place the pie on a flat surface or baking sheet to keep it level as it freezes.
    • Don’t skip the chill time. Give it at least an hour in the freezer to firm up before serving. Overnight is even better!
    • Ingredients to prep ahead- Whip the cream and soften the ice cream before you start layering.
    • Leftovers and storage- Cover tightly with plastic wrap or foil and store in the freezer for up to 2 months.

    Nutrition

    Serving: 1servingCalories: 103kcalCarbohydrates: 220gProtein: 1gFat: 11gSaturated Fat: 7gPolyunsaturated Fat: 0.5gMonounsaturated Fat: 3gTrans Fat: 0.01gCholesterol: 33mgSodium: 9mgPotassium: 29mgFiber: 0.003gSugar: 1gVitamin A: 435IUVitamin C: 0.2mgCalcium: 20mgIron: 0.03mg
    Tried this recipe?Let us know how it was!


    Citrus Cranberry Shortbread Cookies

    Dec 12, 2025 · Leave a Comment

    A stack of cranberry shortbread cookies.

    These citrus cranberry shortbread cookies are buttery, crisp, and perfectly sweet… impossible to resist! They mix up fast with simple ingredients and a quick chill, making them ideal for holiday trays or last-minute guests.

    A plate of slice and bake cookies with the pan and a red and green napkin behind it.
    [feast_advanced_jump_to]

    Why You’ll Love Orange Cranberry Cookies

    I’ve always been more of a savory snacker than a dessert person, except when the holidays roll around. Then suddenly, all bets are off, and I find myself reaching for just one more cookie. These have become one of my go-to treats this time of year. I first discovered this recipe years ago on Smitten Kitchen and loved how flexible the base dough was. 

    It’s simple, buttery, and easy to customize... citrus and cranberries quickly became my favorite combo. These cookies are buttery and crumbly like classic shortbread, not overly sweet, and so easy to whip up (though a quick chill in the fridge helps them hold their shape). Here’s why you’ll love these cranberry cookies:

    • Buttery, tender shortbread texture
    • Tart cranberries + fresh citrus
    • Quick, no-fuss slice-and-bake dough
    • Perfect for gifting or cookie swaps
    • Freezer-friendly for easy holiday prep
    A stack of cranberry shortbread cookies.

    Ingredient Information And Substitutions

    • Flour- Use all-purpose. A 1:1 gluten-free baking blend works as a substitute.
    • Confectioners’ sugar- Adds a smooth sweetness and keeps the texture tender. You can use granulated sugar in a pinch, but it will be a different texture.
    • Butter- Softened butter is key for that classic shortbread crumb.
    • Egg yolks- Give richness and structure. Save the whites for meringues or omelets!
    • Orange zest- Brightens the flavor and pairs beautifully with cranberries. Lemon zest works too.
    • Vanilla extract- Adds warmth and depth. Almond extract would also be lovely here.
    • Dried cranberries- Provide tart pops of color and sweetness. For a twist, you could swap in dried cherries.
    • Salt- Balances the sweetness and enhances all the flavors.
    An overhead image of labeled recipe ingredients.

    How To Make Cranberry Orange Cookies

    Step 1- Cream the butter and sugar. 

    In a mixing bowl, beat the butter until smooth, then add the confectioner's sugar. Mix until light and fluffy about 2 minutes.

    Butter and powdered sugar in a mixing bowl an then creamed together.

    Step 2- Add the wet ingredients.

    Beat in the egg yolks, vanilla, orange zest, cranberries and salt until combined.

    Wet ingredients in the bowl and then mixed together.

    Step 3- Mix in the dry ingredients.

    Gradually add the flour, mixing just until everything comes together. The dough will look a bit sticky, which is exactly what you want.  

    Dry ingredients added and then mixed into the dough.
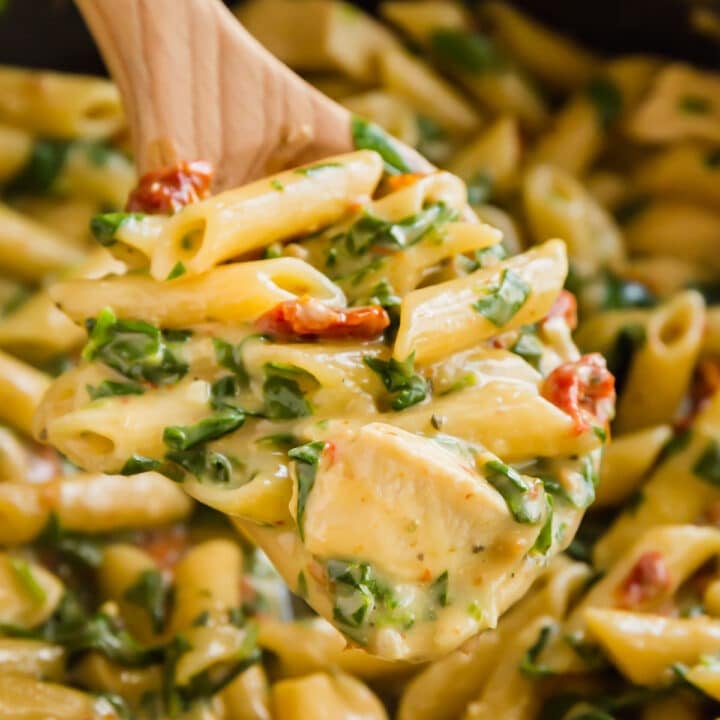
    Step 4- Shape and chill.

    Turn the dough onto a sheet of wax paper and shape it into two logs, about 1 ¼ inches thick. Wrap them up tightly and refrigerate for at least 1-2 hours.
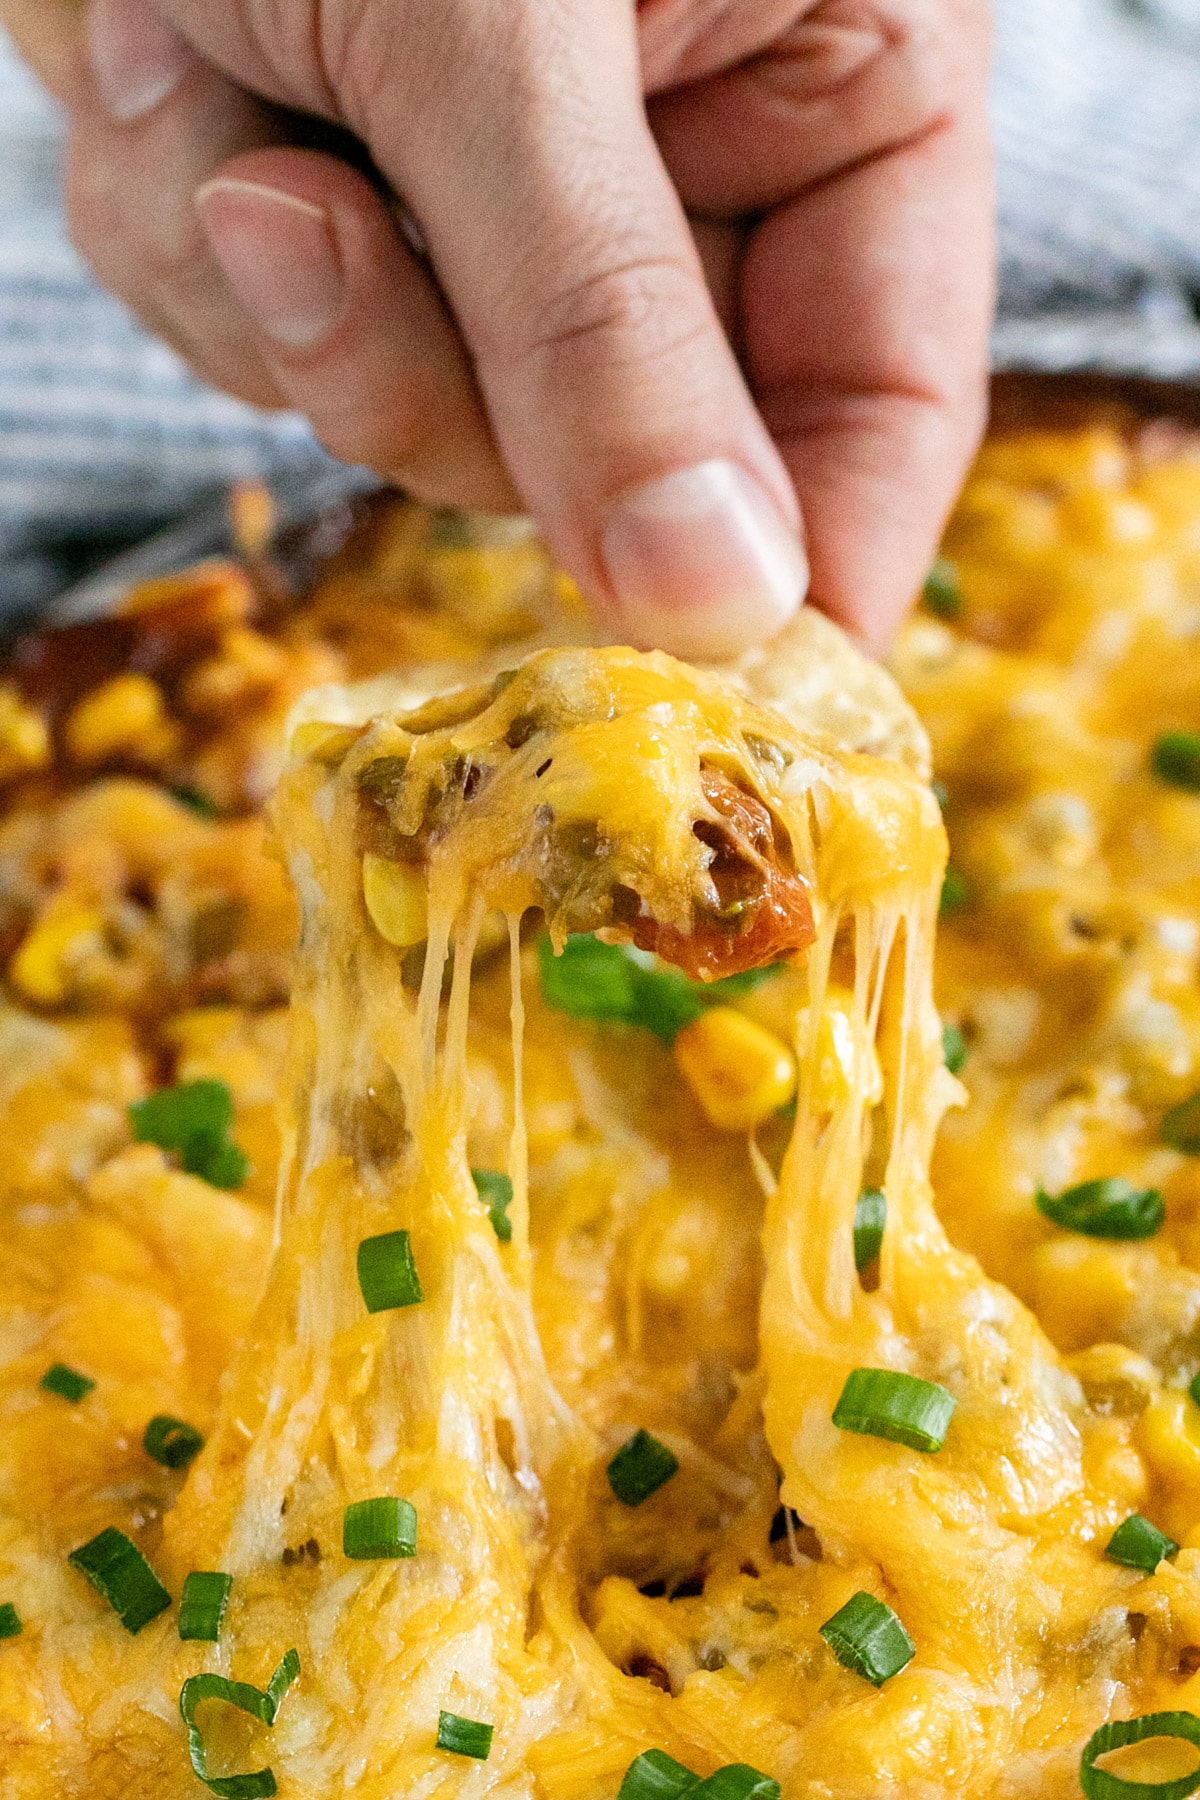
    Cookie dough on a piece of parchment and then shaped into a 1 ¼ inch thick log.

    Step 6- Slice and bake.

    Preheat your oven to 350 degrees F. Unwrap the dough logs, slice into ⅓-inch thick rounds, and place on a parchment-lined baking sheet.

    Chilled dough logs and then the dough sliced into cookies on a pan in the oven.

    Step 7- Bake to perfection.

    Bake for 12-14 minutes, until the edges are set but not browned. Cool the pan for a few minutes before transferring cookies to a wire rack.

    An overhead image of slice-and-bake cookies on a pan.

    Frequently Asked Questions

    Do I have to chill the dough?

    Chilling is key. It helps the cookies hold their shape and develop that perfect shortbread texture. It also makes slicing so much easier.

    Can I use fresh cranberries instead of dried?

    Dried cranberries work best here. Fresh ones release too much moisture and can make the dough soggy. They don't provide the right chewy texture either.

    Do they spread while baking?

    Not much! That’s part of what makes them great slice-and-bake cookies. They hold their shape beautifully.

    A pile of shortbread cookies with a bite taken out of one revealing a crumbly interior.

    Tips For Making Slice And Bake Cookies

    • Don’t rush the butter. Make sure it’s softened so it creams easily and gives you that perfect shortbread texture.
    • Chill thoroughly. Cold dough means crisp edges and perfect slices. Overnight is best. The flavors meld beautifully, and the dough firms up for neater cuts.
    • When shaping the dough logs, roll them tightly to avoid gaps or cracks once sliced.
    • Make them extra festive. Dip half of each cookie in chocolate and sprinkle with finely more orange zest.
    • Ingredients to prep ahead- Chop the cranberries and zest the oranges.
    • Leftovers and storage- Keep cookies in an airtight container at room temperature for up to 5 days, or freeze the dough or baked cookies for up to 3 months.
    Cranberry cookies lined up on a sheet pan.

    What To Serve With This Cranberry Cookies Recipe

    These cookies are the perfect sweet bite on a holiday dessert spread! Pair them with cozy drinks or other festive treats like:

    • Chocolate Cake Trifle
    • No Bake S'more Bars
    • Rice Krispie Treats Turkey
    • Firecracker Vanilla Cupcakes

    Other Festive Cookie Recipes To Try

    • A plate of Neapolitan cookies stacked into a pyramid shape.
      Italian Rainbow Cookie Recipe
    • A stack of crinkle chocolate cookies with a bite taken out of the top cookie.
      Crinkle Chocolate Cookies
    • A pile of sour cream cookies where the one in the middle has a bite out of it exposing the cakey center of the cookie.
      Sour Cream Cookies
    • A plate of chocolate dipper shortbread cookies on striped towel with a cup of coffee.
      Almond Shortbread Cookies

    Love this recipe? Please leave a 5 star ⭐️⭐️⭐️⭐️⭐️ rating in the recipe card below ⬇️ and/or a review in the comment section further down. Check out my Amazon Store for all my favorite tools, including those used in this recipe. And follow @thelifejolie on Instagram and TikTok!

    A stack of cranberry shortbread cookies.

    Citrus Cranberry Shortbread Cookies

    Jessy Freimann
    These citrus cranberry shortbread cookies are buttery, crisp, and perfectly sweet… impossible to resist! They mix up fast with simple ingredients and a quick chill, making them ideal for holiday trays or last-minute guests.
    No ratings yet
    Print Recipe Pin Recipe
    Prep Time 1 hour hr
    Cook Time 14 minutes mins
    Total Time 1 hour hr 14 minutes mins
    Course Dessert
    Cuisine American
    Servings 36 cookies
    Calories 38 kcal

    Equipment

    • Hand mixer
    • stand mixer
    • Measuring cups and spoons
    • Spatula
    • sheet pan
    • cutting board
    • chefs knife

    Ingredients
      

    • 1 cup butter softened (2 sticks)
    • ⅔ cup confectioner's sugar sifted
    • 2 large egg yolks
    • 1 pinch Kosher salt
    • 1 teaspoon vanilla extract
    • 2 Tablespoon orange zest 2 oranges
    • ½ cup dried cranberries chopped
    • 2 cups all-purpose flour

    Instructions
     

    • Cream the butter until smooth and then mix in the sugar until fluffy, about 2 minutes.
    • Add egg yolks, salt, vanilla extract, orange zest and cranberries and mix until well combined.
    • Add flour and mix until just combined. The dough will be sticky.
    • On a parchment paper-covered surface, form two logs with your dough, around 1 ¼ inches thick. Wrap them in parchment paper and chill for at least an hour to overnight.
    • Preheat the oven to 350 degrees F and line sheet pans with parchment paper.
    • Unwrap logs and slice to around ⅓ of an inch cookies. Place them on a the prepared pan.
    • Bake for 12 to 14 minutes or until they are done, but not quite browned. Cool and serve.

    Video

    Notes

    • Don’t rush the butter. Make sure it’s softened so it creams easily and gives you that perfect shortbread texture.
    • Chill thoroughly. Cold dough means crisp edges and perfect slices. Overnight is best. The flavors meld beautifully, and the dough firms up for neater cuts.
    • When shaping the dough logs, roll them tightly to avoid gaps or cracks once sliced.
    • Make them extra festive. Dip half of each cookie in chocolate and sprinkle with finely more orange zest.
    • Ingredients to prep ahead- Chop the cranberries and zest the oranges.
    • Leftovers and storage- Keep cookies in an airtight container at room temperature for up to 5 days, or freeze the dough or baked cookies for up to 3 months.

    Nutrition

    Serving: 4cookiesCalories: 38kcalCarbohydrates: 9gProtein: 1gFat: 1gSaturated Fat: 0.2gPolyunsaturated Fat: 0.1gMonounsaturated Fat: 0.2gCholesterol: 11mgSodium: 9mgPotassium: 19mgFiber: 0.3gSugar: 2gVitamin A: 26IUVitamin C: 0.5mgCalcium: 11mgIron: 0.4mg
    Tried this recipe?Let us know how it was!
    • « Go to Previous Page
    • Page 1
    • Page 2
    • Page 3
    • Page 4
    • Interim pages omitted …
    • Page 21
    • Go to Next Page »

    Primary Sidebar

    Jessy in a kitchen holding a white casserole pan and smiling.
    Hi, I'm Jessy!

    Welcome to The Life Jolie! I share simple, delicious recipes and ingredient prep tips to make your weeknight cooking a breeze!

    More about me →

    Easy Dinner Recipes

    • An overhead image of a Mexican Shrimp Quinoa Bowl.
      Shrimp Quinoa Bowls
    • A bowl of asian soup with meatballs with a spoon and noodles in it.
      Asian Soup with Cabbage and Meatballs
    • A close up of roasted red potatoes on a pan.
      Roasted Red Potatoes Recipe
    • A spoon lifting up a scoop of eggplant parm bake with melt cheese trailing behind it.
      Eggplant Parm Bake
    • A close up of a drum chicken wing in a pile of other wings.
      Oven Baked Chicken Wings
    • A close up of a bagel pizza with mini pepperonis on a pan.
      Bagel Pizzas Recipe

    Popular Recipes

    • A glass bowl of melted chocolate with a spatula dripping some back into the bowl.
      How To Melt Chocolate Chips In The Microwave
    • Italian Stuffed Zucchini Boats are the healthy weeknight meal you'll want to make again and again. This is a seriously easy recipe that's full of delicious flavor without all the guilt!
      Italian Stuffed Zucchini Boats
    • A close up shot of the side of a shallow bowl of shrimp mac salad.
      Shrimp Macaroni Salad
    • A white pan pouring cheese sauce over a bowl of steamed broccoli.
      Cheese Sauce for Broccoli Recipe
    • An overhead image of a plate of chicken lettuce wraps with peanut sauce next to it and all the fixings surrounding it.
      Copycat Cheesecake Factory Thai Chicken Lettuce Wraps
    • A close up image of a piece of greek marinated chicken on a white plate with lemons on the plate and in the background.
      Greek Yogurt Chicken
    Jessy in a kitchen holding a white casserole pan and smiling.
    Hi, I'm Jessy!

    Welcome to The Life Jolie! I share simple, delicious recipes and ingredient prep tips to make your weeknight cooking a breeze!

    More about me →

    Easy Dinner Recipes

    • A bowl of chicken and orzo soup with a spoon in it.
      Chicken and Orzo Soup
    • A bowl of Swedish meatballs and noodles.
      Swedish Meatballs And Noodles
    • A close up image of a piece of coconut shrimp on top of others.
      Coconut Shrimp With Sauce
    • An overhead image of taco soup in a bowl.
      Crockpot Taco Chicken Soup
    • A spoon pulling up a scoop of skillet lasagna with melted cheese stretching behind it.
      No Bake Lasagna Skillet
    • A bowl of hearty lamb stew.
      Easy Lamb Stew Recipe

    Popular Recipes

    • A glass bowl of melted chocolate with a spatula dripping some back into the bowl.
      How To Melt Chocolate Chips In The Microwave
    • Italian Stuffed Zucchini Boats are the healthy weeknight meal you'll want to make again and again. This is a seriously easy recipe that's full of delicious flavor without all the guilt!
      Italian Stuffed Zucchini Boats
    • A close up shot of the side of a shallow bowl of shrimp mac salad.
      Shrimp Macaroni Salad
    • A white pan pouring cheese sauce over a bowl of steamed broccoli.
      Cheese Sauce for Broccoli Recipe
    • An overhead image of a plate of chicken lettuce wraps with peanut sauce next to it and all the fixings surrounding it.
      Copycat Cheesecake Factory Thai Chicken Lettuce Wraps
    • A close up image of a piece of greek marinated chicken on a white plate with lemons on the plate and in the background.
      Greek Yogurt Chicken

    Footer

    ↑ back to top

    About

    • About Me
    • Privacy Policy + Disclaimer

    Newsletter

    • Sign Up! for emails and updates

    Contact

    • Contact
    • Video Production

    As an Amazon Associate I earn from qualifying purchases.

    Copyright 2014-2021 - Jolie Ventures, LLC. All Rights Reserved. Privacy Policy.

    Rate This Recipe

    Your vote:


    A rating is required
    A name is required
    An email is required