
• Skip to primary navigation
  • Skip to main content
  • Skip to primary sidebar
The Life Jolie logo
  • Easy Dinner Recipes
  • Recipes
  • About
  • Contact
    • Work with me!
    • Video Production
  • Nav Social Menu

    • Email
    • Facebook
    • Instagram
    • Pinterest
    • Twitter
    • YouTube
menu icon
go to homepage
subscribe
search icon
Homepage link
  • Easy Dinner Recipes
  • Recipes
  • About
  • Contact
    • Work with me!
    • Video Production
    • Email
    • Facebook
    • Instagram
    • Pinterest
    • Twitter
    • YouTube
  • ×
    The Life Jolie » Page 11

    Roast Turkey Thighs for Two

    Roast Turkey Thighs for Two

    Mar 11, 2024 · 69 Comments

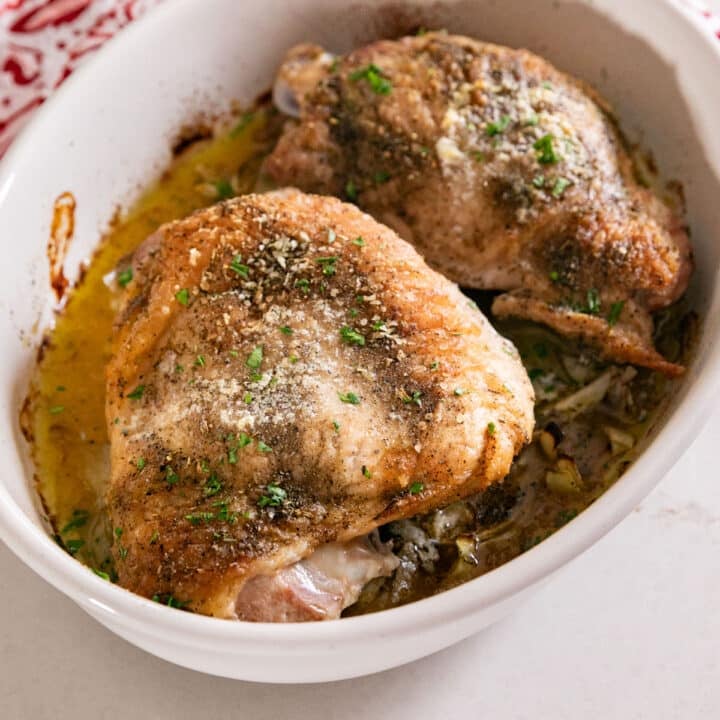
    A white oval pan with roast turkey thighs in it and onions and a red and white napkin in the background.

    These Roast Turkey Thighs for Two are a mouthwatering, tender turkey dinner without the hassle of roasting a whole bird!
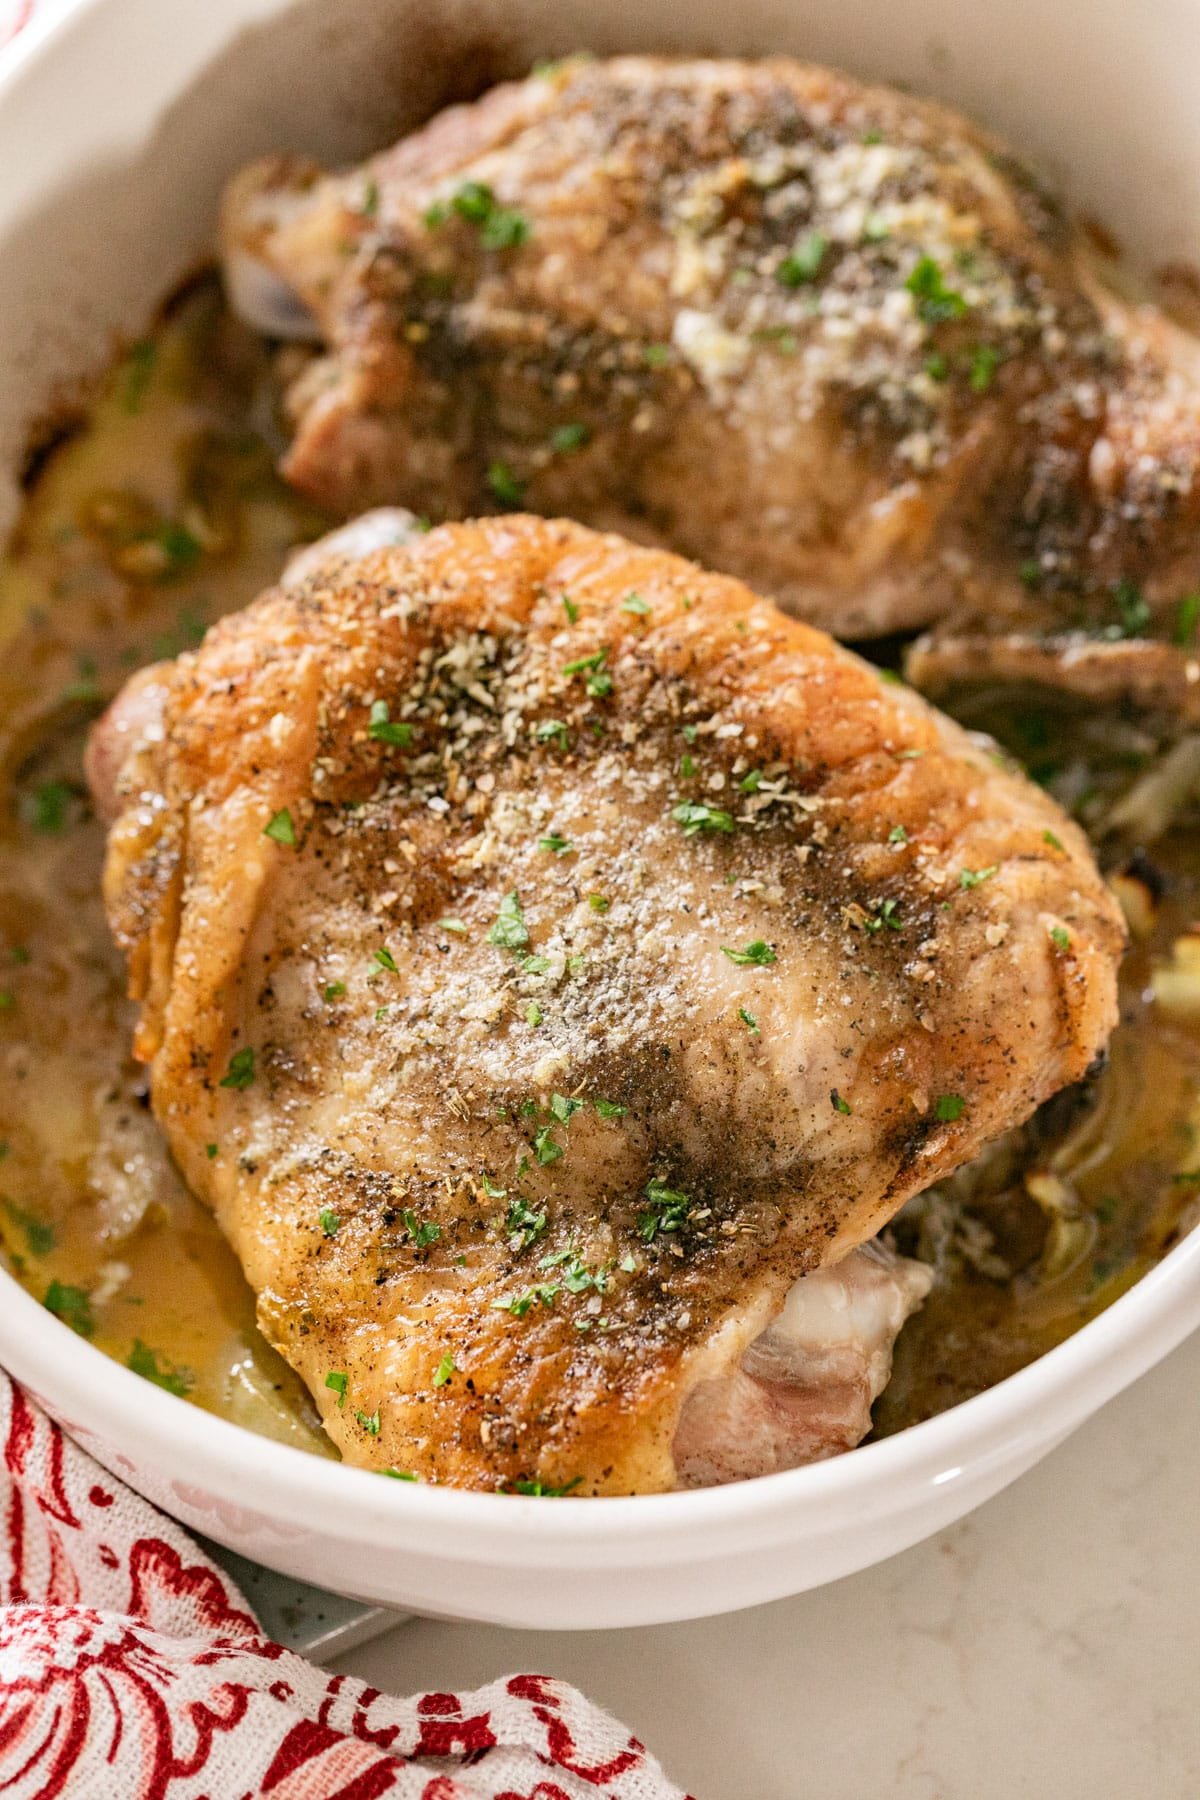
    A close up image of golden brown roast turkey thighs in a white pan focusing on one of the turkey thighs with a red and white napkin off to the side.
    [feast_advanced_jump_to]

    Why You'll Love Roasted Turkey Thighs

    My mom does this thing every Thanksgiving. If it's not her year to host, she has a second Thanksgiving with just us kids because she likes to have lots of leftovers. And sometimes, instead of making a gigantic turkey like she opts to make a smaller turkey and serve some roasted turkey thighs alongside it.

    Each turkey thigh is always so flavorful and tender. So naturally, I did what I always do; I recreated them. My mom gave me some basic information, and I got to work. A little less than an hour later, I was thrilled to open my oven and find a couple of the juiciest, tender turkey thighs ever. They had just the right amount of seasoning and the most crispy, crackly skin on top.

    Baked turkey thighs are special enough to make and serve for a holiday but simple enough for your usual Sunday or weeknight dinner. You can whip this recipe up in an hour, and it's very easy to put together as well. Don't you just love recipes that use simple ingredients that everyone has on hand? here's why I love these:

    • 1 hour 15 minutes start to finish
    • Easy and delicious
    • Incredibly tender & juicy
    • Kid-approved
    • Holiday favorite
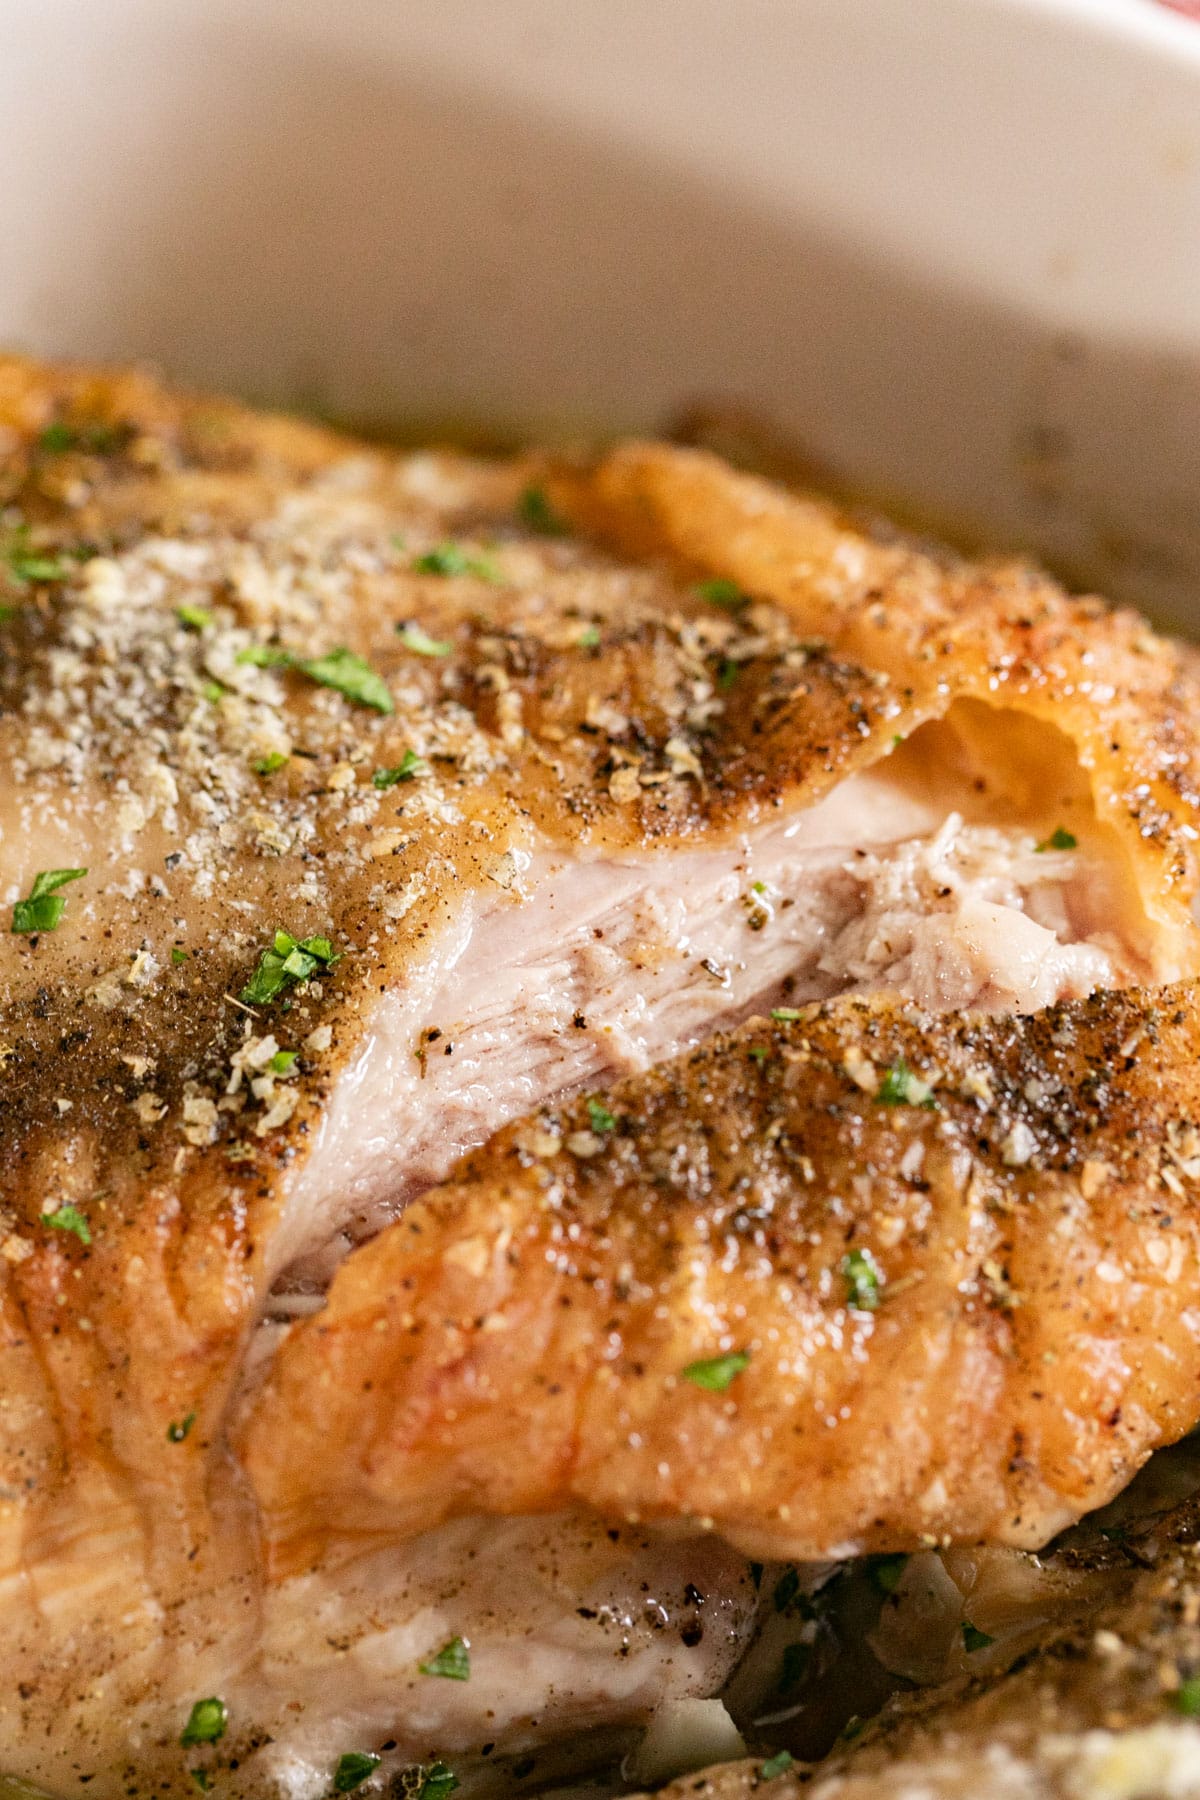
    A close up image of the top of a turkey thigh cut into exposing the juicy, perfectly cooked meat inside.

    Ingredient Information and Substitutions

    • Olive oil - I love the results when using olive oil, but you can certainly swap it for your favorite variety of oil.
    • Onion - The slices of onion add huge amounts of flavor!
    • Turkey Thighs - Try to buy turkey thighs that are the same size so they cook evenly.
    • Salt & Pepper - Add as little or as much as you like.
    • Poultry seasoning - Any variety of poultry seasoning works or you can you your favorite seasonings.
    • Butter - The butter adds flavor but also makes the skin crispier.
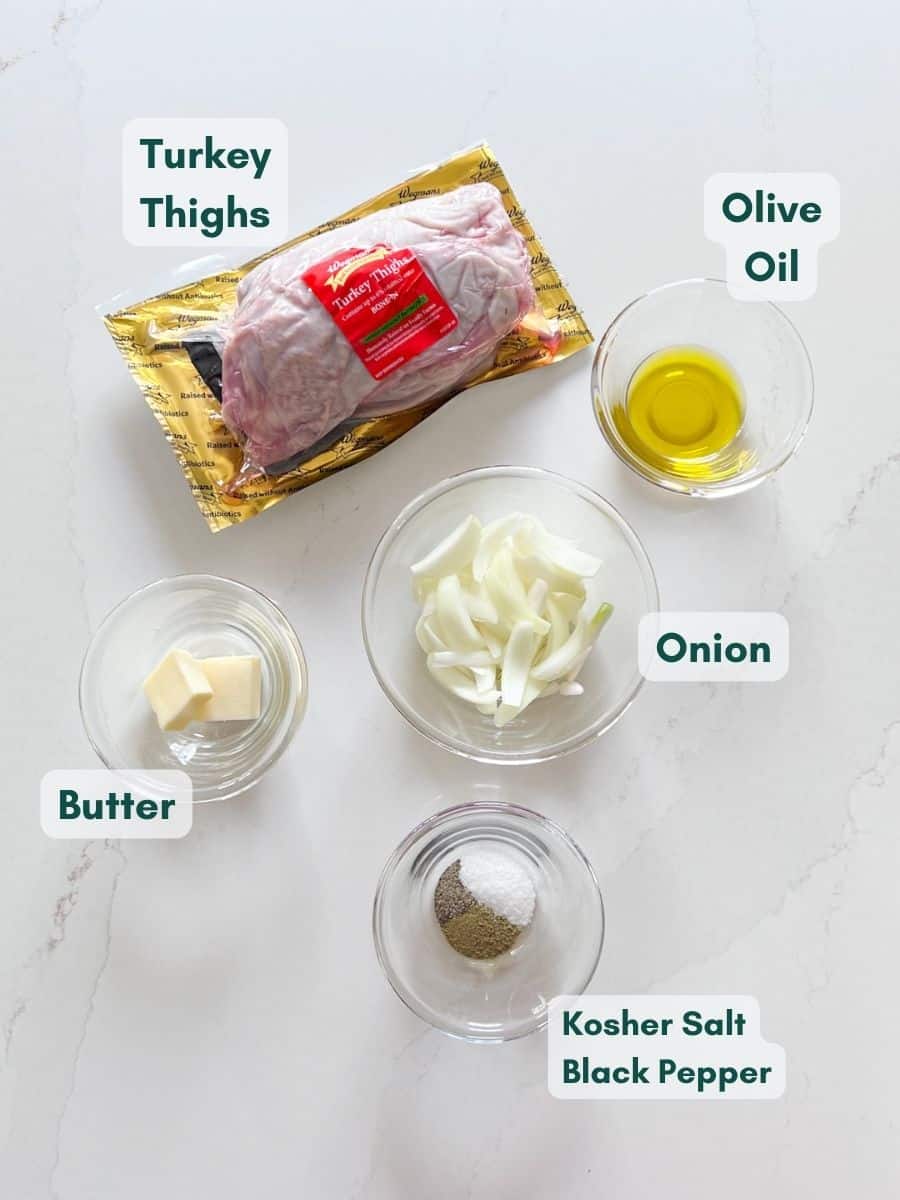
    An overhead image of labeled recipe ingredients.

    How To Cook Turkey Thighs

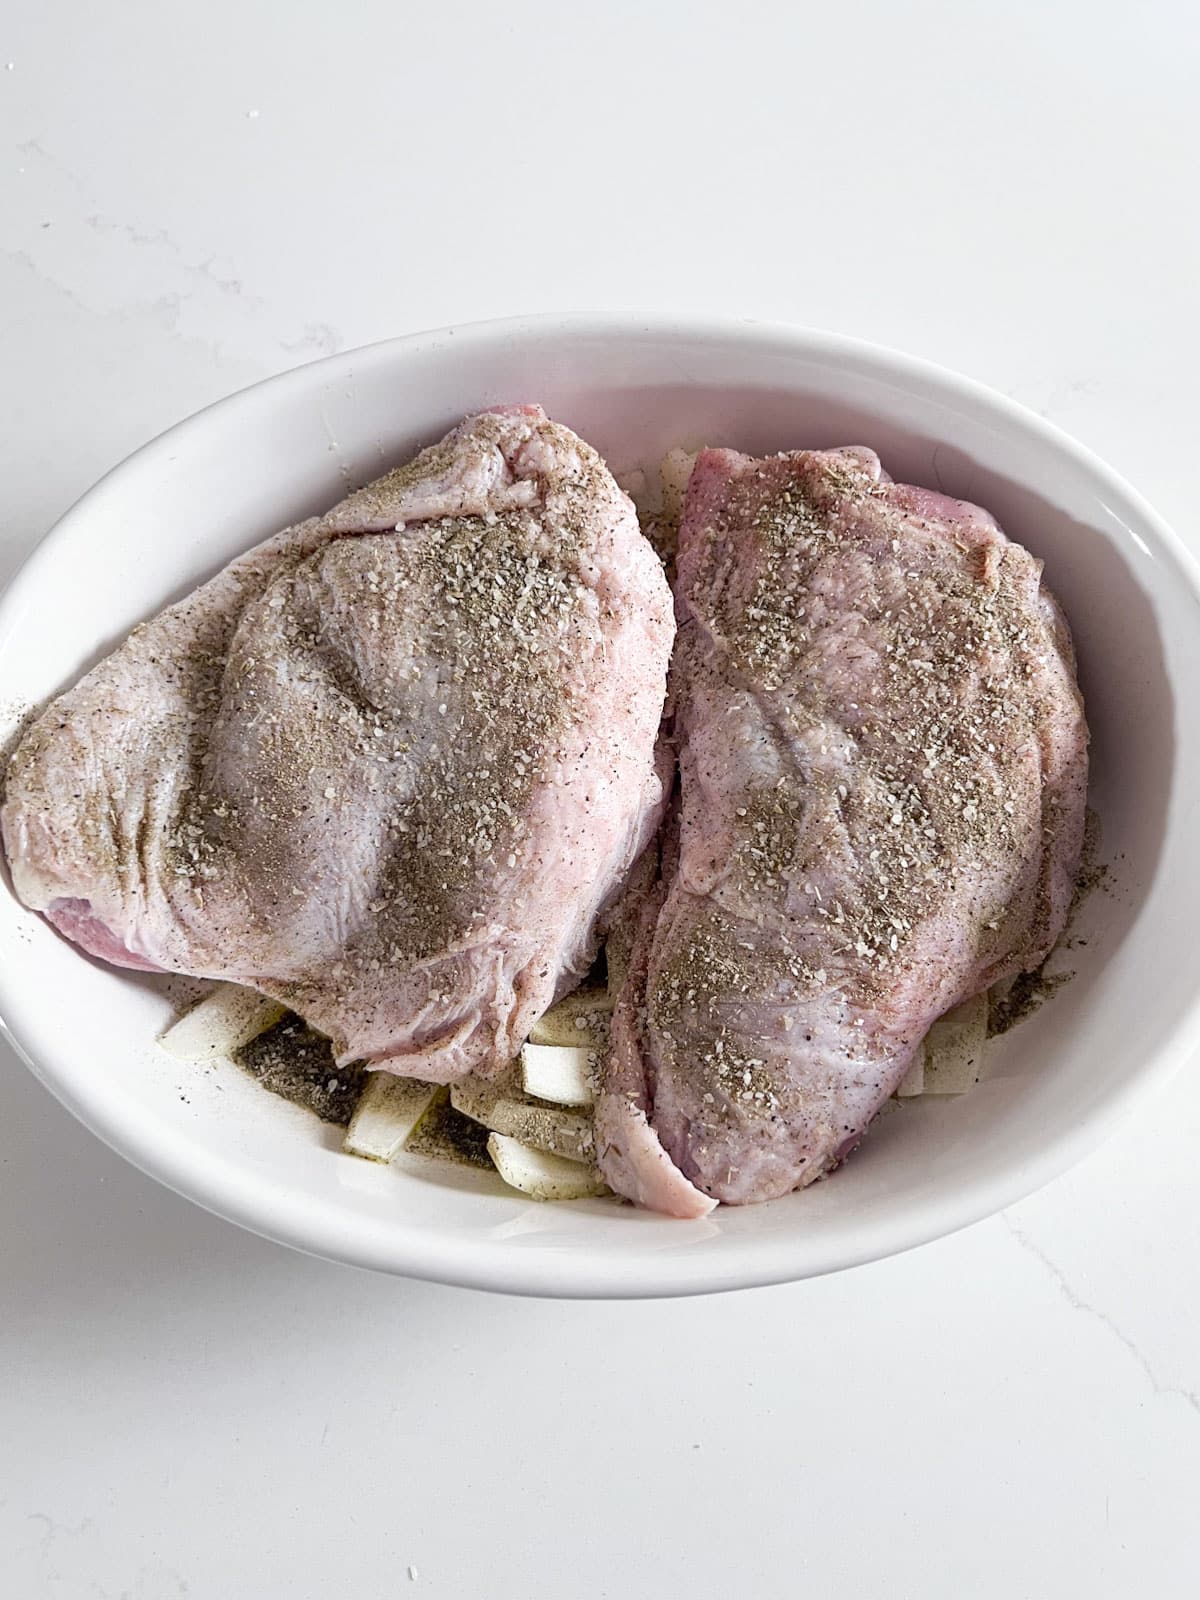
    Step 1: Add ingredients to pan

    Begin by preheating the oven and drizzling oil in the bottom of the pan. Layer sliced onions on the bottom and top with seasoned turkey thighs (skin side up).
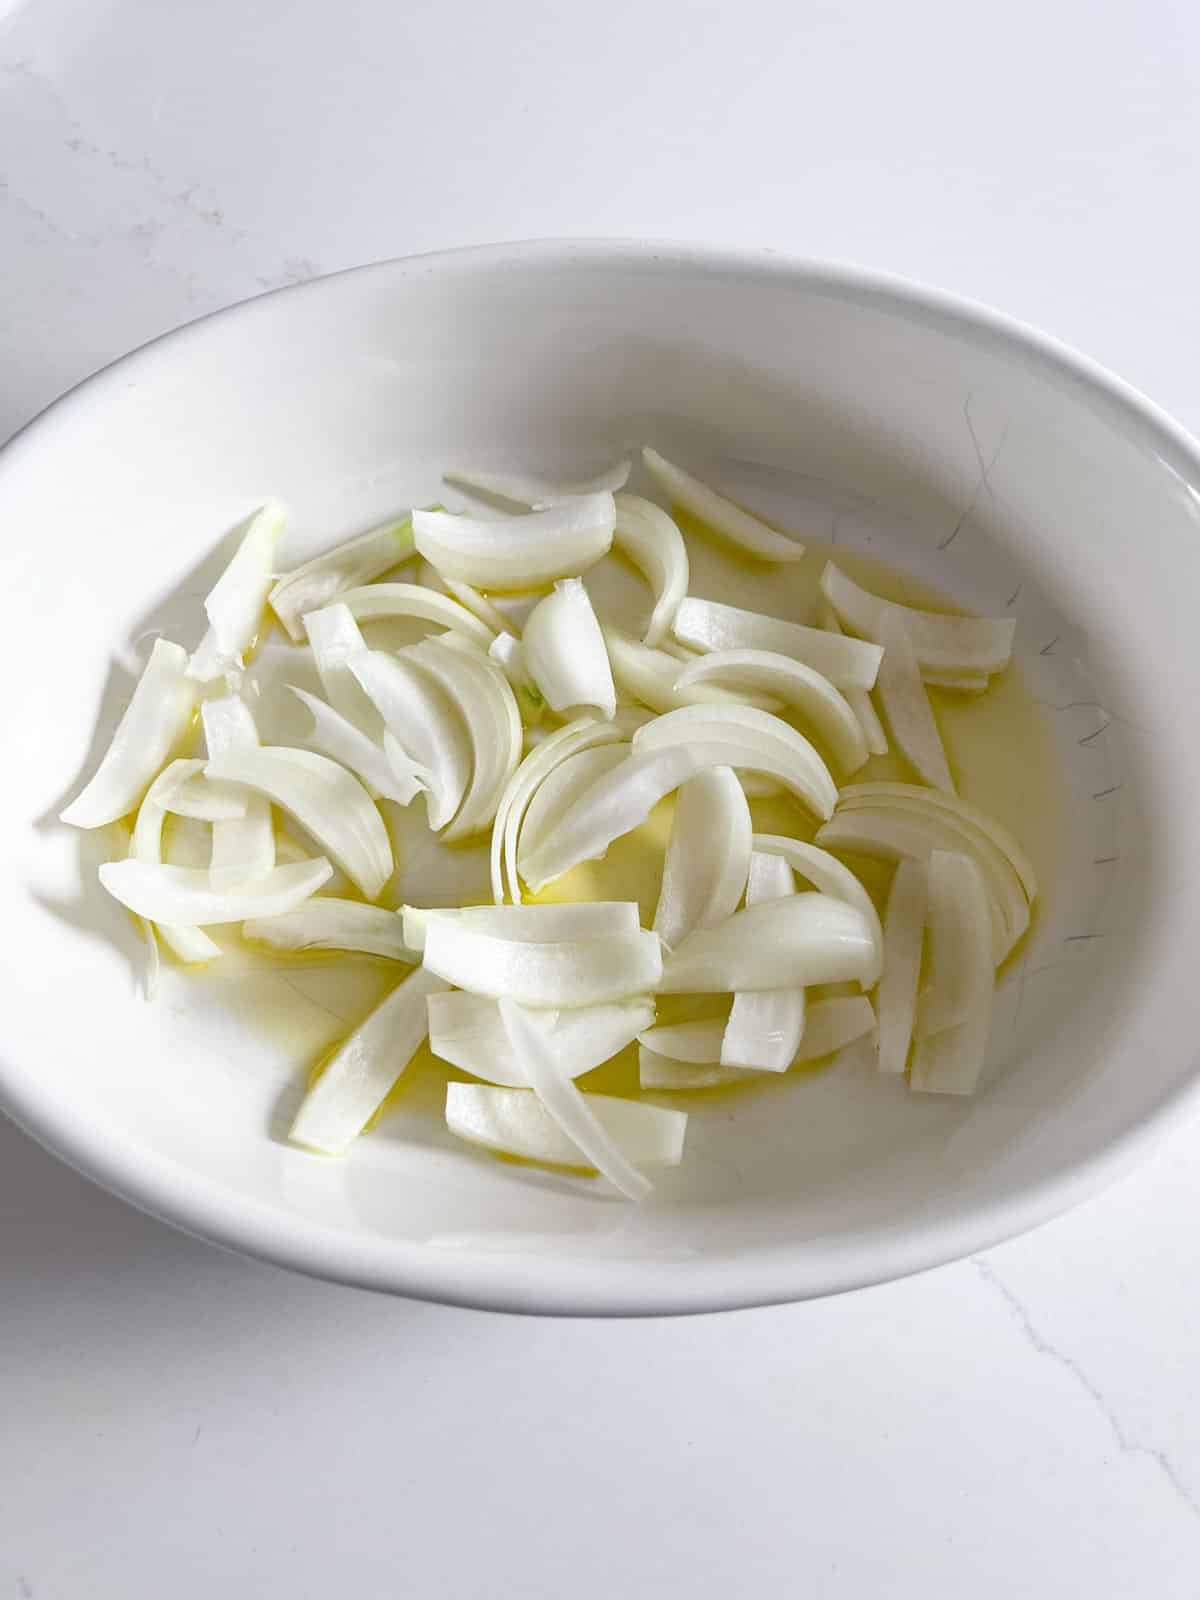
    Sliced onions and oil in a white oval baking pan.
    Raw turkey thighs with seasoning on them in the white oval baking pan.

    Step 2: Roast

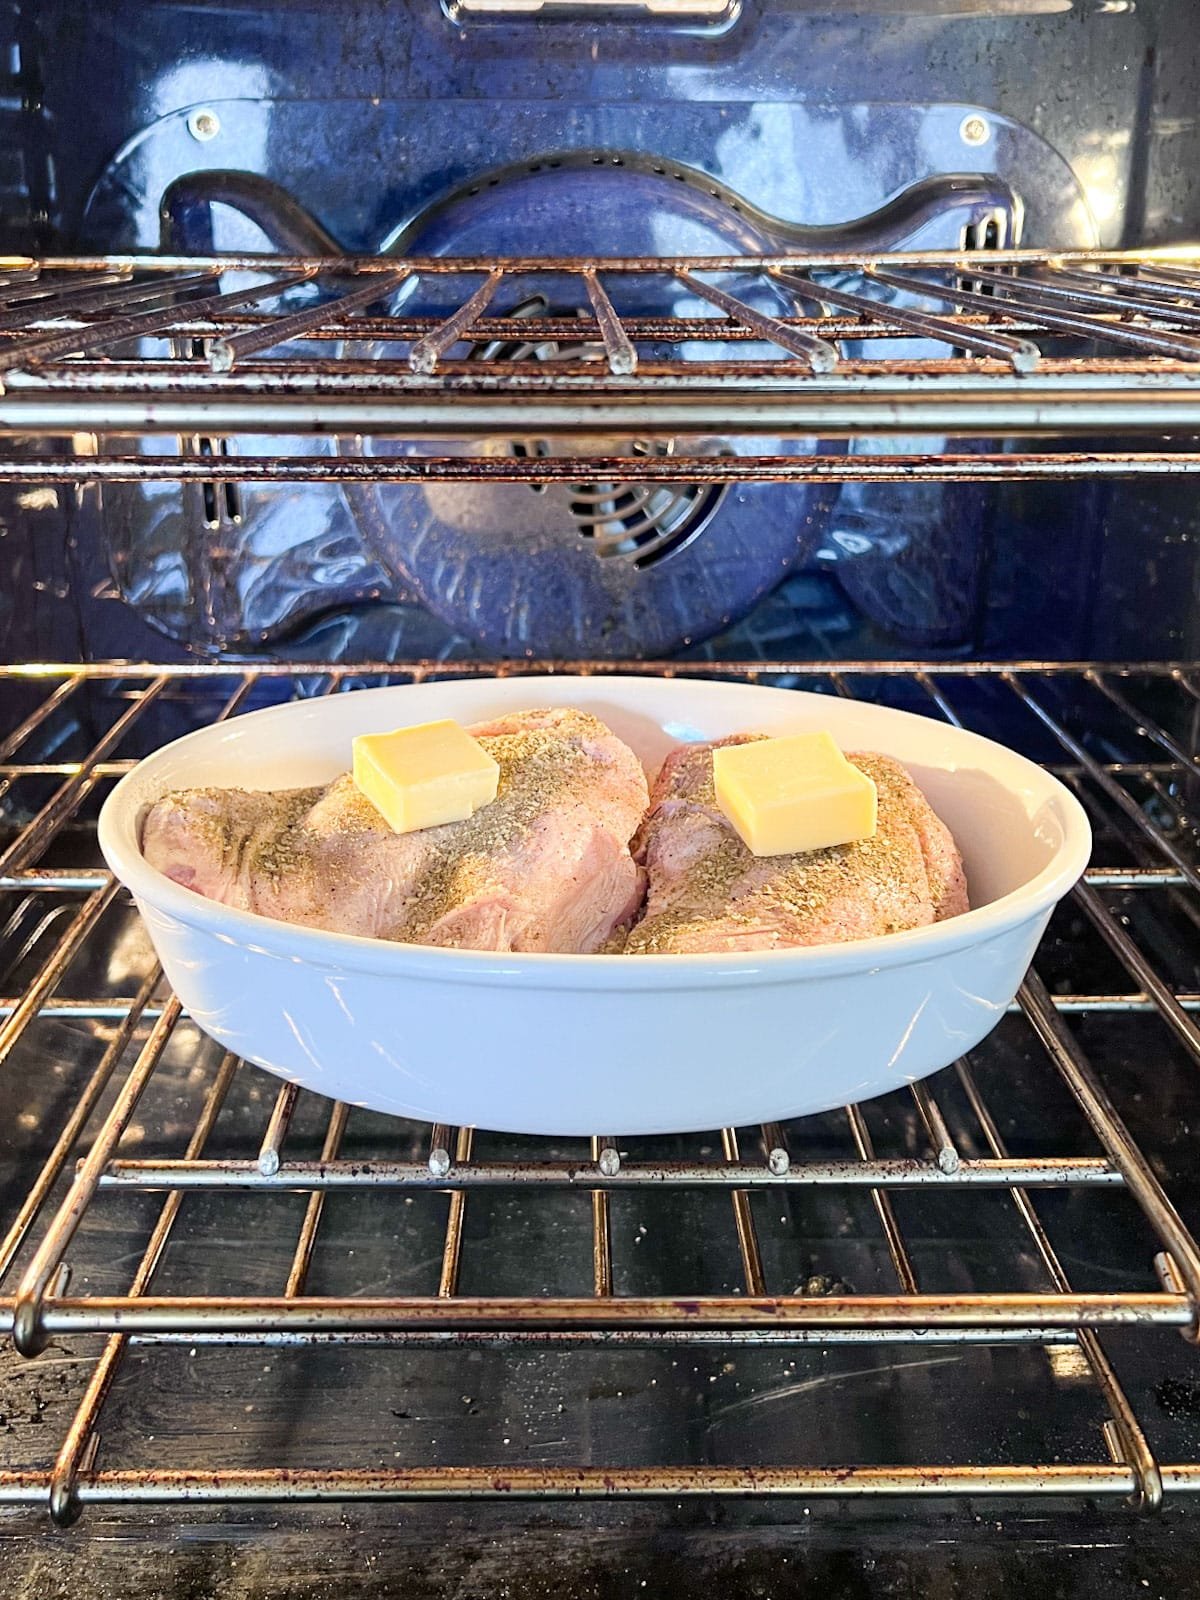
    Place butter on top of each turkey thigh and roast for 50 minutes - 1 hour, until the internal temperature reaches 165 degrees.
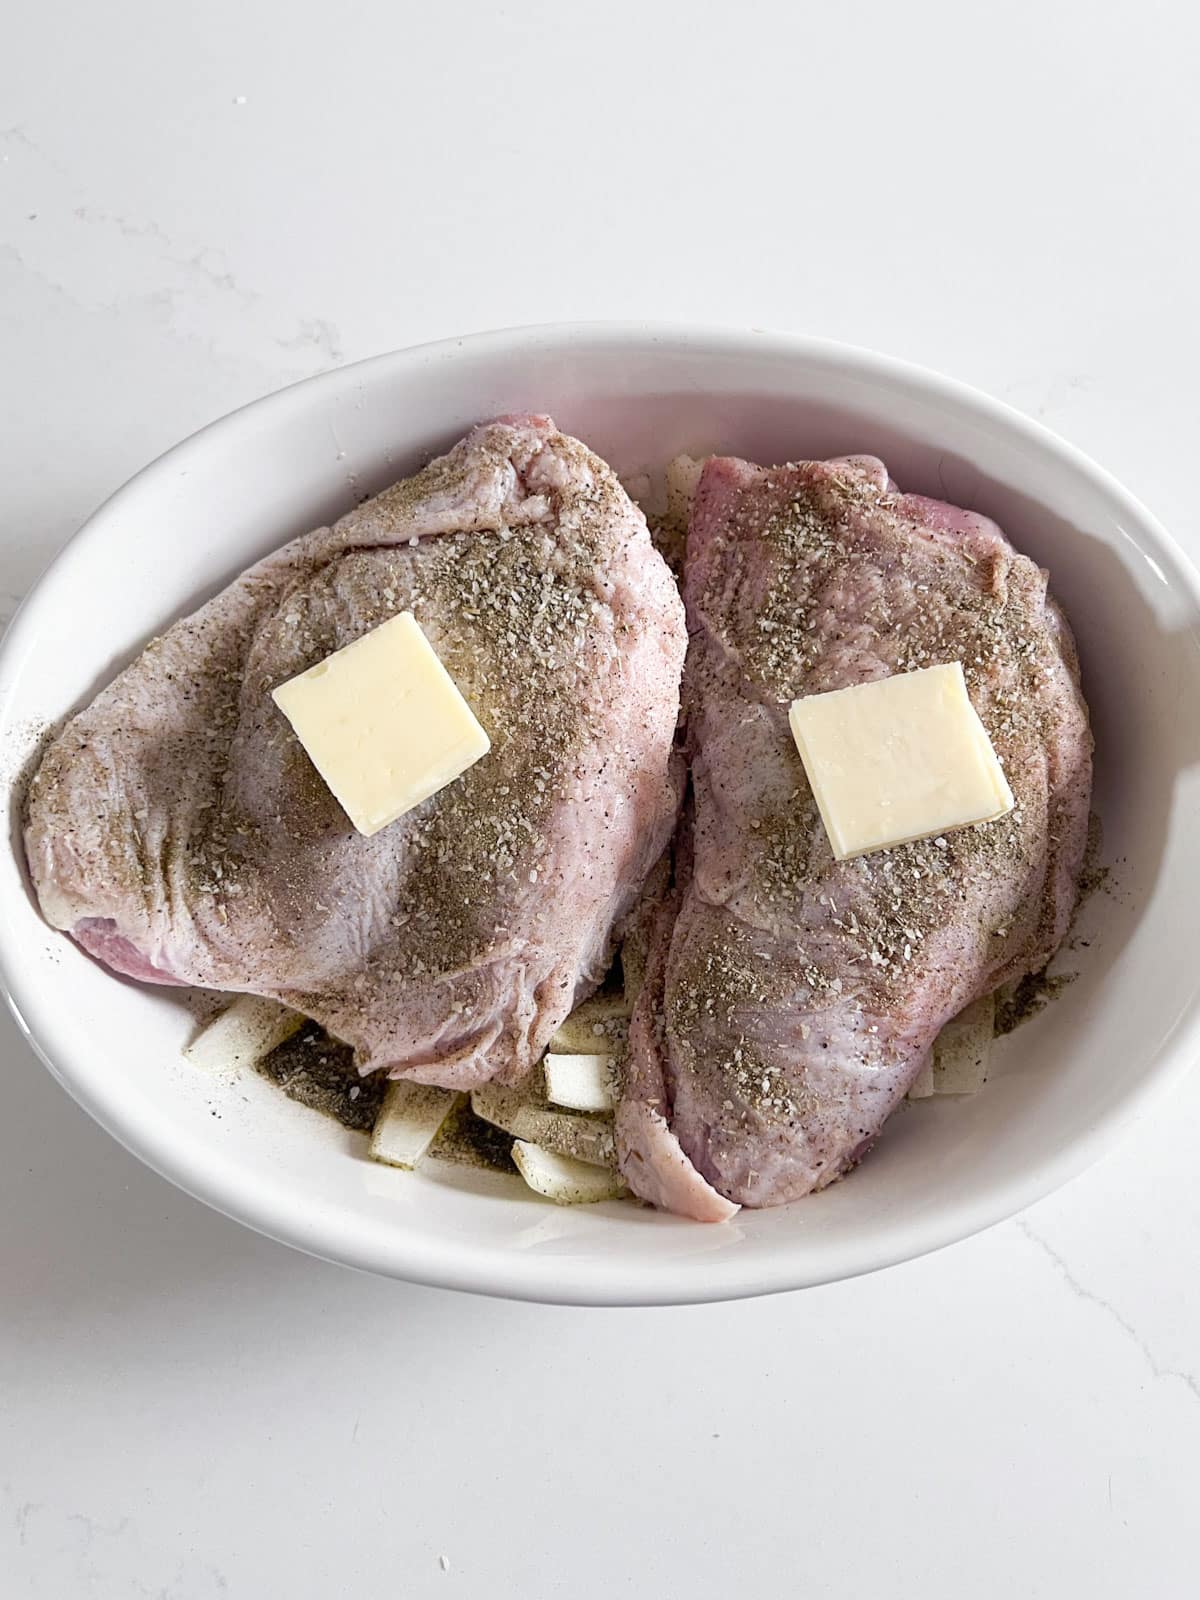
    Pats of butter added to the top of the turkey thighs in a white oval baking pan.
    Turkey thighs in a white oval baking pan in the oven about to cook.

    Step 3: Rest and serve

    Take the baked turkey thighs out of the oven and rest under an aluminum foil tent for 10 minutes. Serve and enjoy!

    Frequently Asked Questions

    Can I make roasted turkey thighs for more than 2 people?

    Definitely. That’s part of the reason I left the basic ingredient amounts open. Just be sure to use the right size baking dish to accommodate the number of turkey thighs you make so as not to overcrowd the pan. They’re also a great way to supplement and have extra dark meat available alongside a whole bird.

    How long do leftovers last?

    These last 3-5 days when covered in the refrigerator.

    Can I use a turkey breast instead?

    You can! You’ll want to roast it for about 20 minutes per pound but keep an eye on it so as not to overcook- remove when the thickest part reaches an internal temperature of 161 degrees and rest for 10 minutes before slicing. You can also check out my recipe for smoked turkey breast if you have a smoker.

    What temperature do you cook turkey thighs?

    I like to cook mine at 400 degrees.

    What temperature are roasted turkey thighs done?

    165 degrees is a safe internal temperature for consuming poultry. I remove at 161 and rest for 5-10 minutes during which time the temperature will rise to 165.

    How many turkey thighs per person?

    1 per person is plenty if it's the only meat.
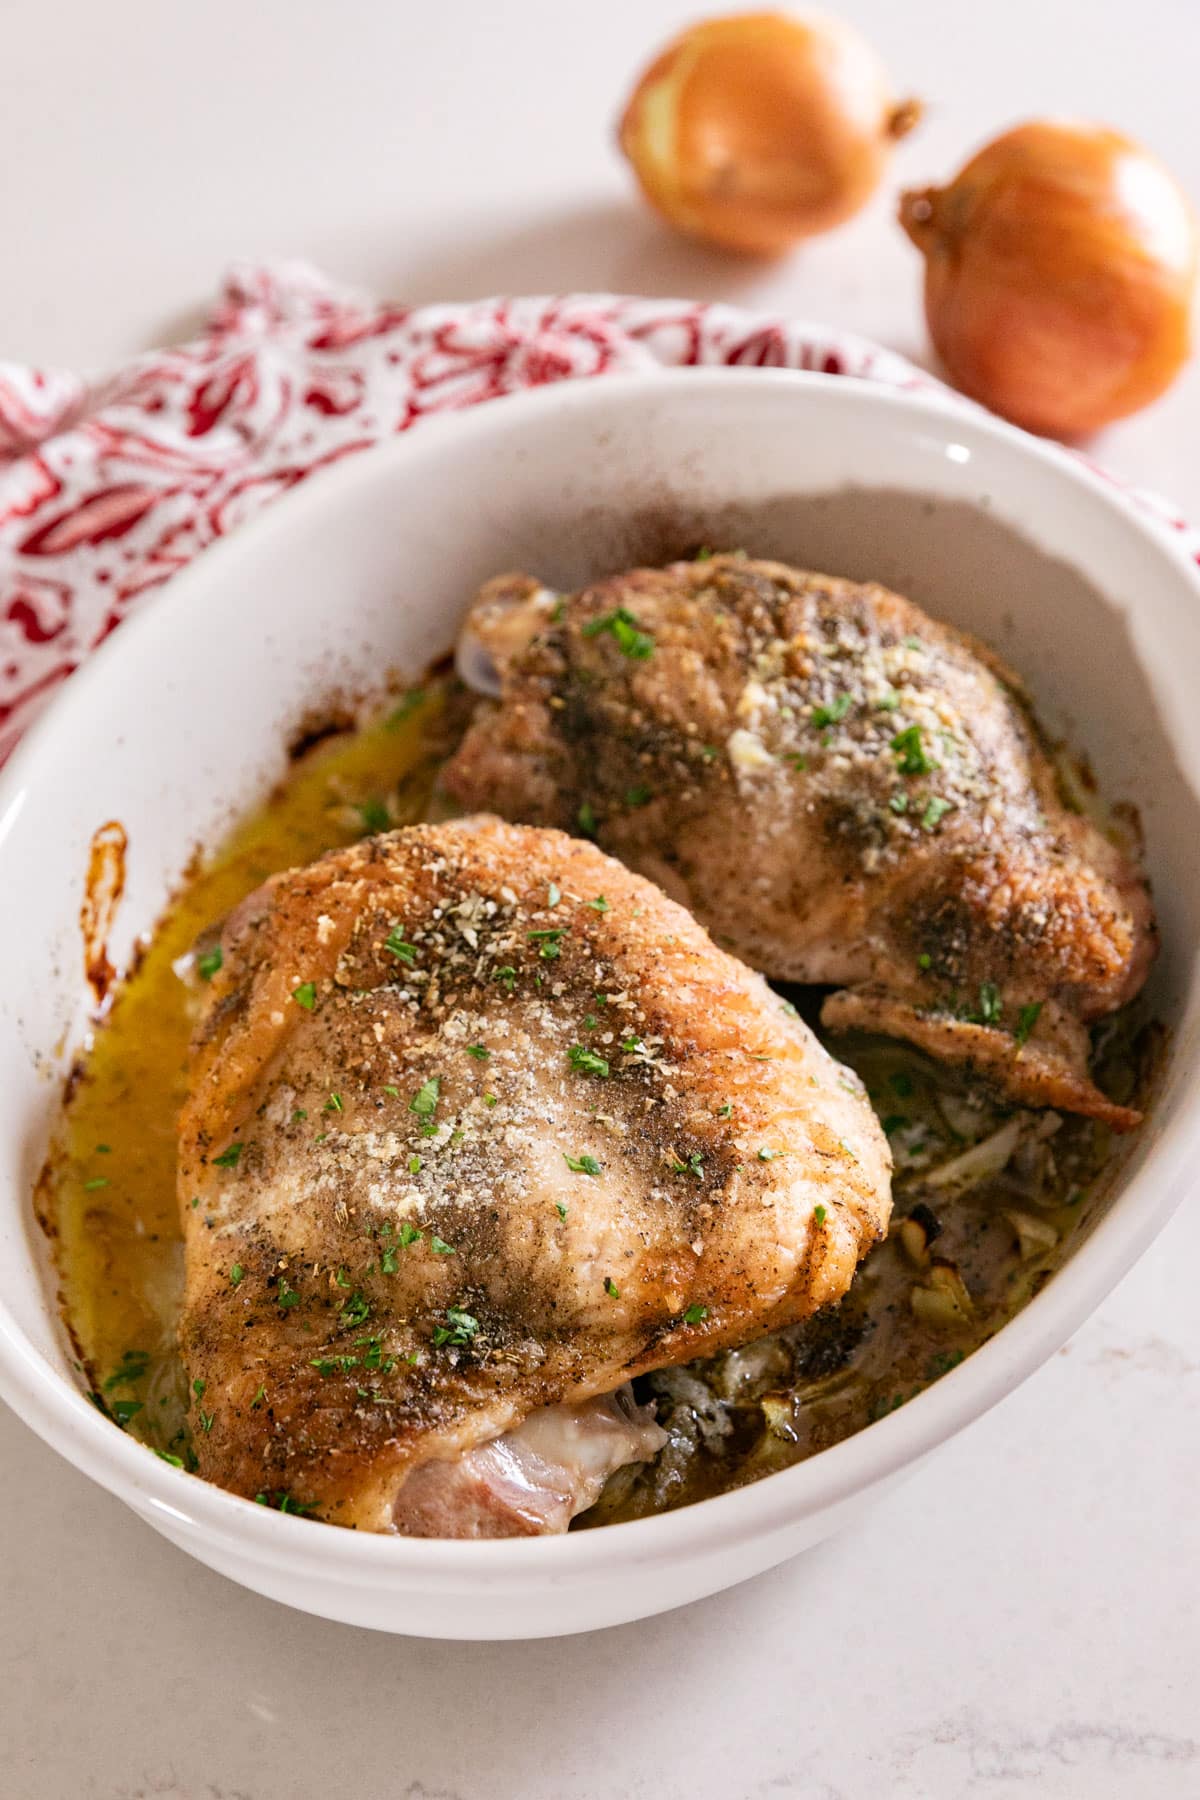
    A white oval pan with roast turkey thighs in it and onions and a red and white napkin in the background.

    Tips For Making Baked Turkey Thighs

    • Season to taste. I left most of the ingredient amounts pretty open. I always season it to taste, although I do tend to have a lighter hand with the poultry seasoning.
    • Go digital. Everyone’s oven may vary, as will the size of your turkey thighs. I’d recommend temping each turkey thigh with a digital thermometer at the 45 minute mark. Insert the probe at the thickest part of the thigh, making sure you don't touch the bone. While these still taste great if they’re a little over cooked (gotta love dark meat!), they’re best when they temp out at 161 degrees and rested during which the temp will come to 165 degrees.
    • Rest them! Let them rest for 10 minutes to redistribute the juices. Trust me on this!
    • Prep Ahead: Slice onions.
    • Leftovers and Storage: These will last 3-5 days covered in the refrigerator.
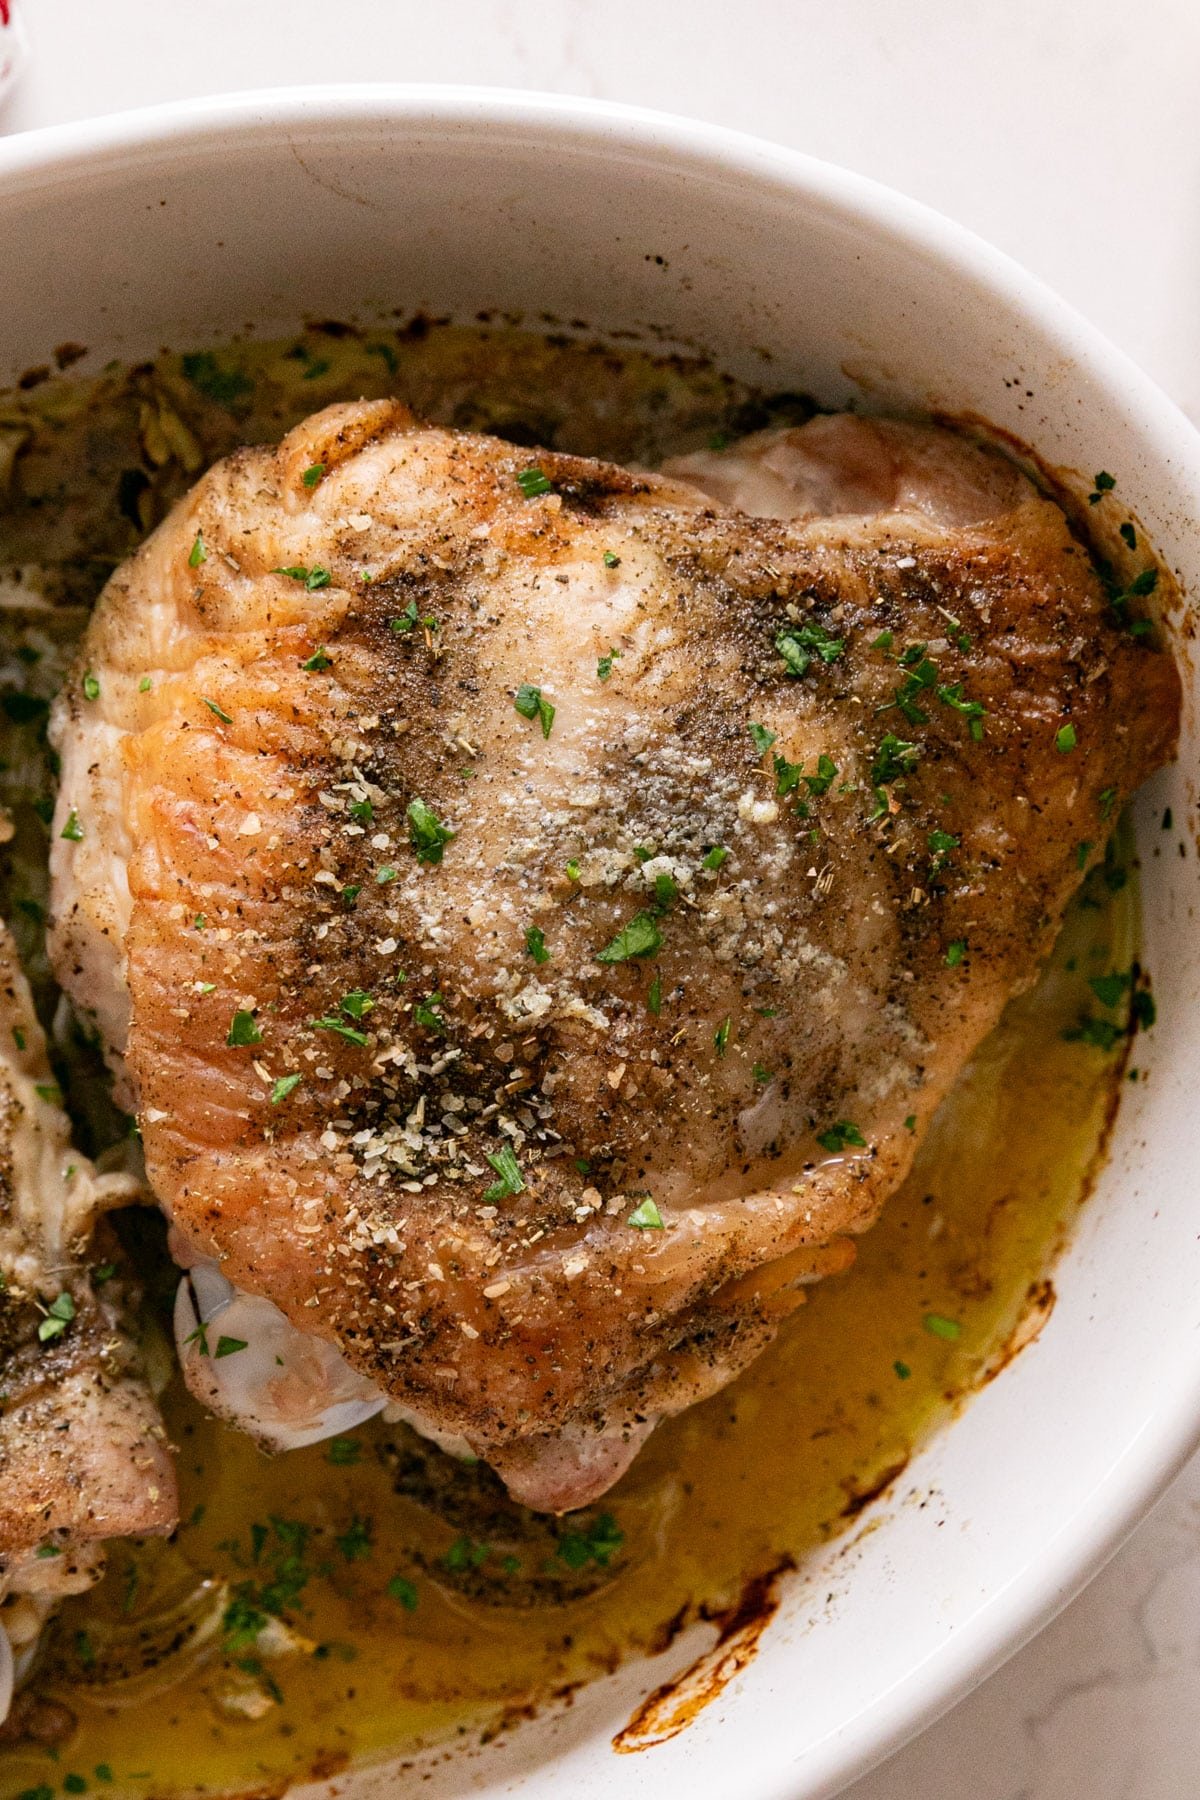
    A close up overhead shot of a perfectly roasted turkey thigh in a white oval baking pan.

    What To Serve With Turkey Thighs

    A few great recipes to round out and complete this meal are:

    • French Onion Creamy Mashed Potatoes
    • Homemade Cranberry Sauce
    • Easy Garlic Green Beans
    • Sausage and Corn Bread Dressing
    • Chocolate Cream Pie

    Other Turkey Recipes to Try...
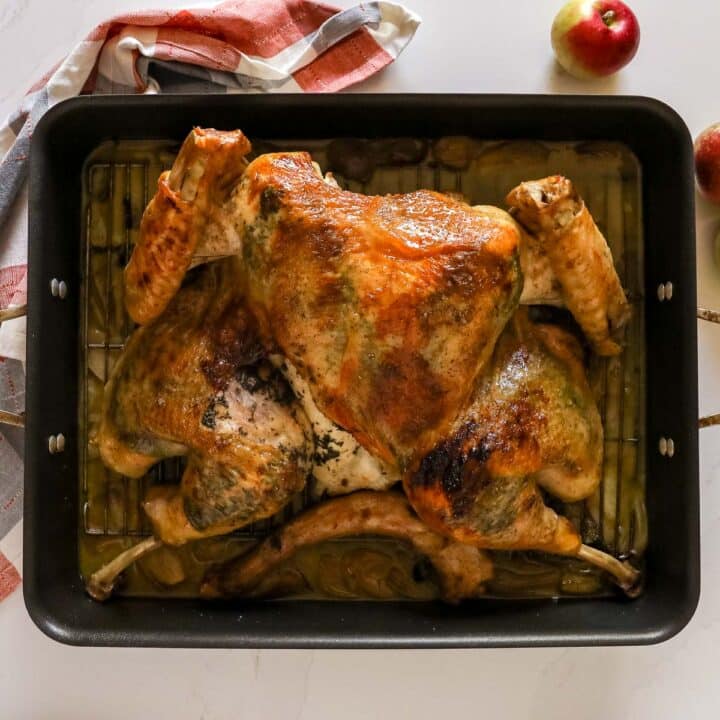
    • An overhead image of a roasted whole turkey butterflied and laid out in a roasting pan on a orange and grey towel with apples on the side of it.
      Apple Cider Glazed Roast Turkey Recipe
    • A jar of turkey stock with an onion and carrots next to it.
      Turkey Broth Recipe
    • A green gravy boat pouring gravy onto a plate of turkey and mashed potatoes.
      No Drippings Turkey Gravy
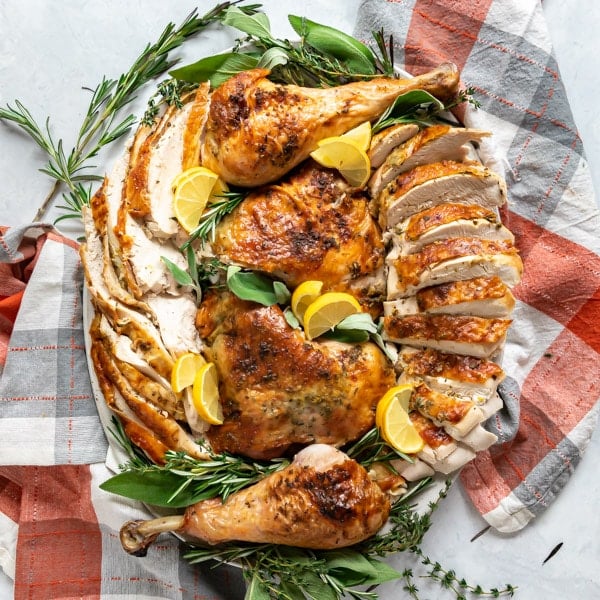
    • An overhead image of a carved turkey arranged on a serving platter with fresh herbs and lemons surrounding it.
      Spatchcocked Lemon Herb Roast Turkey
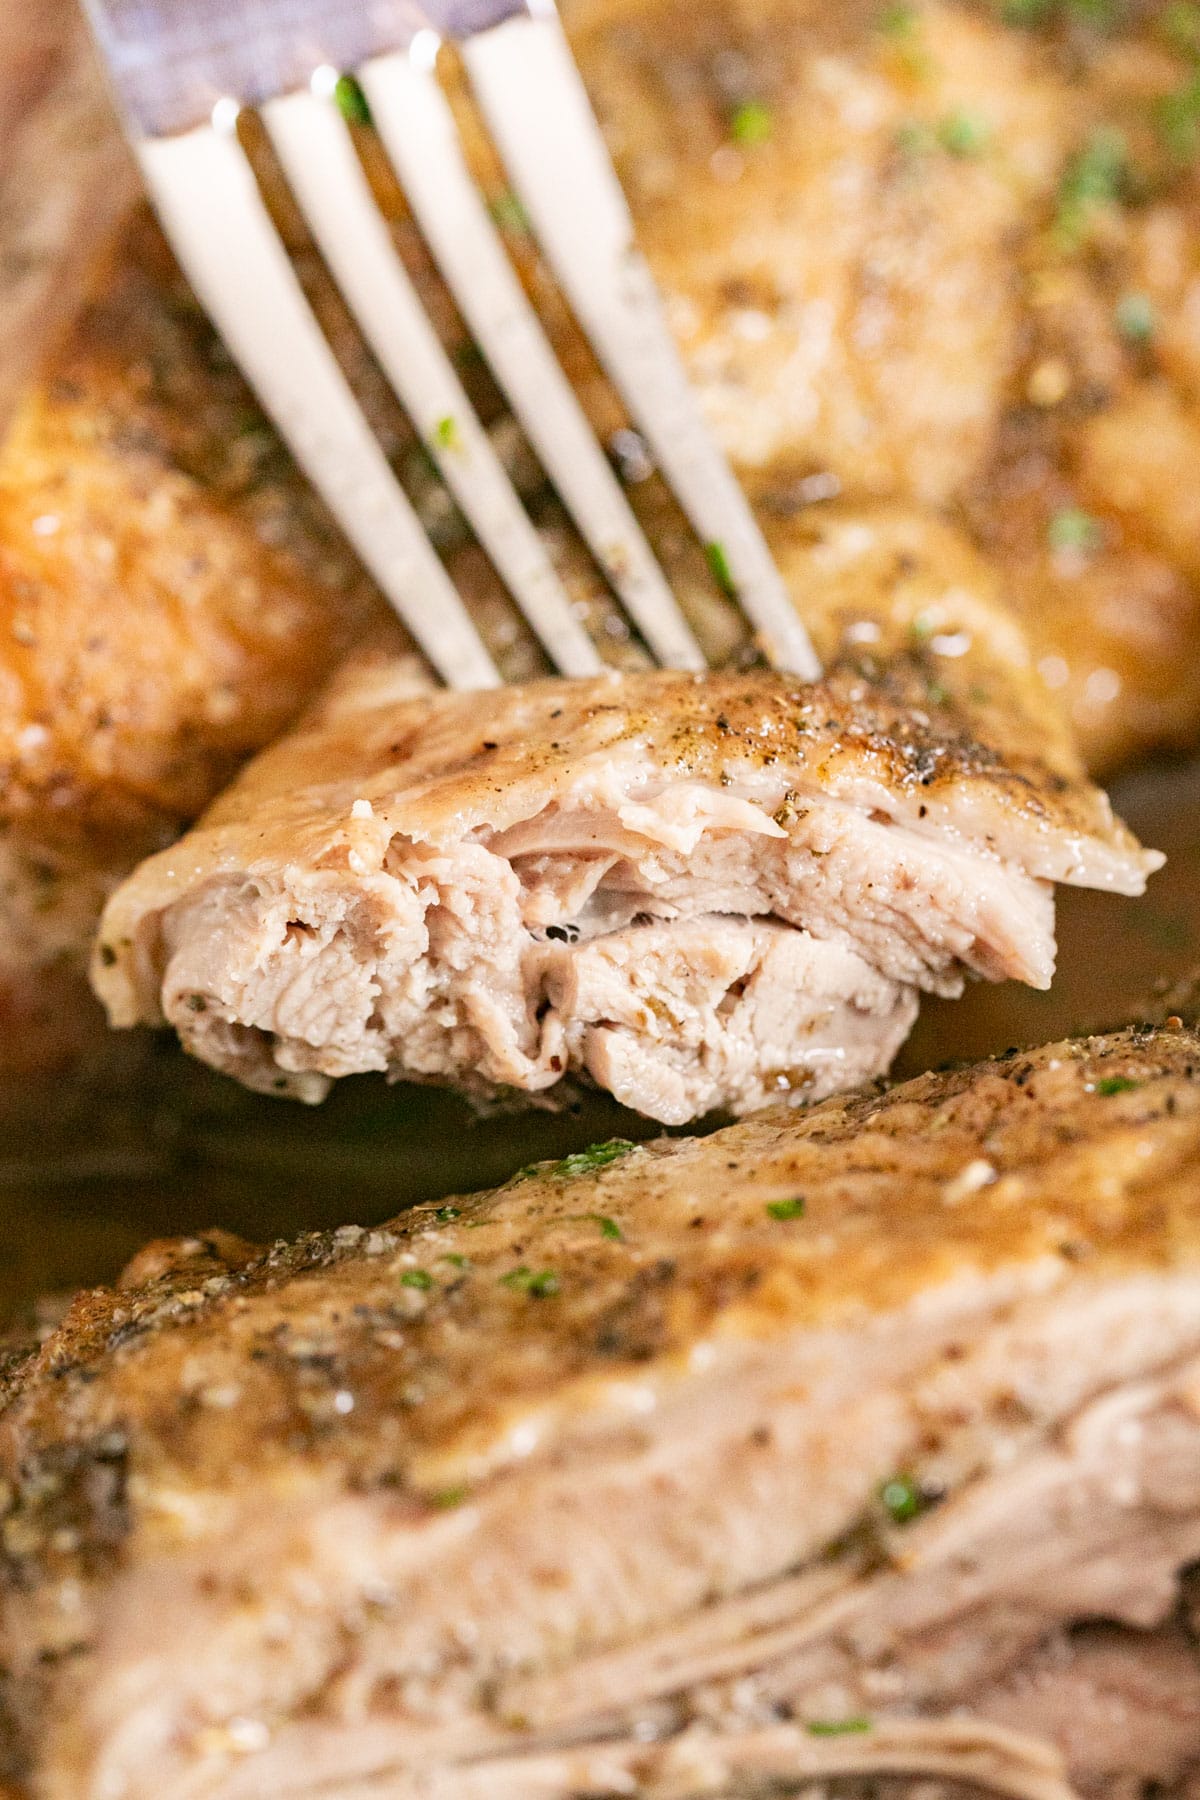
    A close up image of a fork holding a bite of roast turkey thigh exposing the juicy inside of the meat.

    Hosting Thanksgiving?

    Discover the secret to hosting Thanksgiving without all the stress! Prepsgiving is your FREE guide to making a delicious Thanksgiving feast the easy way.

    Love this recipe? Please leave a 5 star ⭐️⭐️⭐️⭐️⭐️ rating in the recipe card below ⬇️ and/or a review in the comment section further down. Check out my Amazon Store for all my favorite tools, including those used in this recipe. And follow @thelifejolie on Instagram and TikTok!

    A white oval pan with roast turkey thighs in it and onions and a red and white napkin in the background.

    Roast Turkey Thighs for Two

    Jessy Freimann
    These Roast Turkey Thighs for Two are a mouthwatering, tender turkey dinner without the hassle of roasting a whole bird!
    4.96 from 25 votes
    Print Recipe Pin Recipe
    Prep Time 5 minutes mins
    Cook Time 1 hour hr
    Resting time 10 minutes mins
    Total Time 1 hour hr 15 minutes mins
    Course Main Course
    Cuisine American
    Servings 2 turkey thighs
    Calories 75 kcal

    Equipment

    • 9 x 13 Pan
    • cutting board
    • chefs knife

    Ingredients
      

    • 1 Tablespoon Olive oil
    • ½ cup sliced onion
    • 2 turkey thighs
    • 1 teaspoon Kosher salt
    • ¼ teaspoon Ground black pepper
    • ½ teaspoon Poultry Seasoning
    • 2 Tablespoons butter

    Instructions
     

    • Preheat the oven to 400 degrees.
    • Lightly drizzle a small amount of oil on the bottom of the pan and spread the sliced onions into a layer..
    • Season the turkey thighs on each side with salt, pepper and poultry seasoning to taste (the poultry seasoning is strong so use a light hand with this).
    • Cut each pat of butter into smaller cubes and place them on various spots all over the skin on each turkey thigh.
    • Place the turkey thighs, skin side up, on top of the onions.
    • Roast for 50 minutes-1 hour until they reach an internal temperature of 161 degrees.
    • Remove them from the oven and let them rest for 5-10 minutes. Serve immediately.

    Video

    Notes

    • Season to taste. I left most of the ingredient amounts pretty open. I always season it to taste, although I do tend to have a lighter hand with the poultry seasoning.
    • Go digital. Everyone’s oven may vary, as will the size of your turkey thighs. I’d recommend temping each turkey thigh with a digital thermometer at the 45 minute mark. Insert the probe at the thickest part of the thigh, making sure you don't touch the bone. While these still taste great if they’re a little over cooked (gotta love dark meat!), they’re best when they temp out at 161 degrees and rested during which the temp will come to 165 degrees.
    • Rest them! Let them rest for 10 minutes to redistribute the juices. Trust me on this!
    • Prep Ahead: Slice onions.
    • Leftovers and Storage: These will last 3-5 days covered in the refrigerator.
    Nutrition

    Serving: 1turkey thighCalories: 75kcalCarbohydrates: 1gProtein: 1gFat: 8gSaturated Fat: 1gPolyunsaturated Fat: 1gMonounsaturated Fat: 5gCholesterol: 2mgSodium: 1183mgPotassium: 30mgFiber: 0.1gSugar: 1gVitamin A: 39IUVitamin C: 0.1mgCalcium: 24mgIron: 0.3mg
    Tried this recipe?Let us know how it was!

    Piña Colada Pineapple Dump Cake

    Mar 7, 2024 · 9 Comments

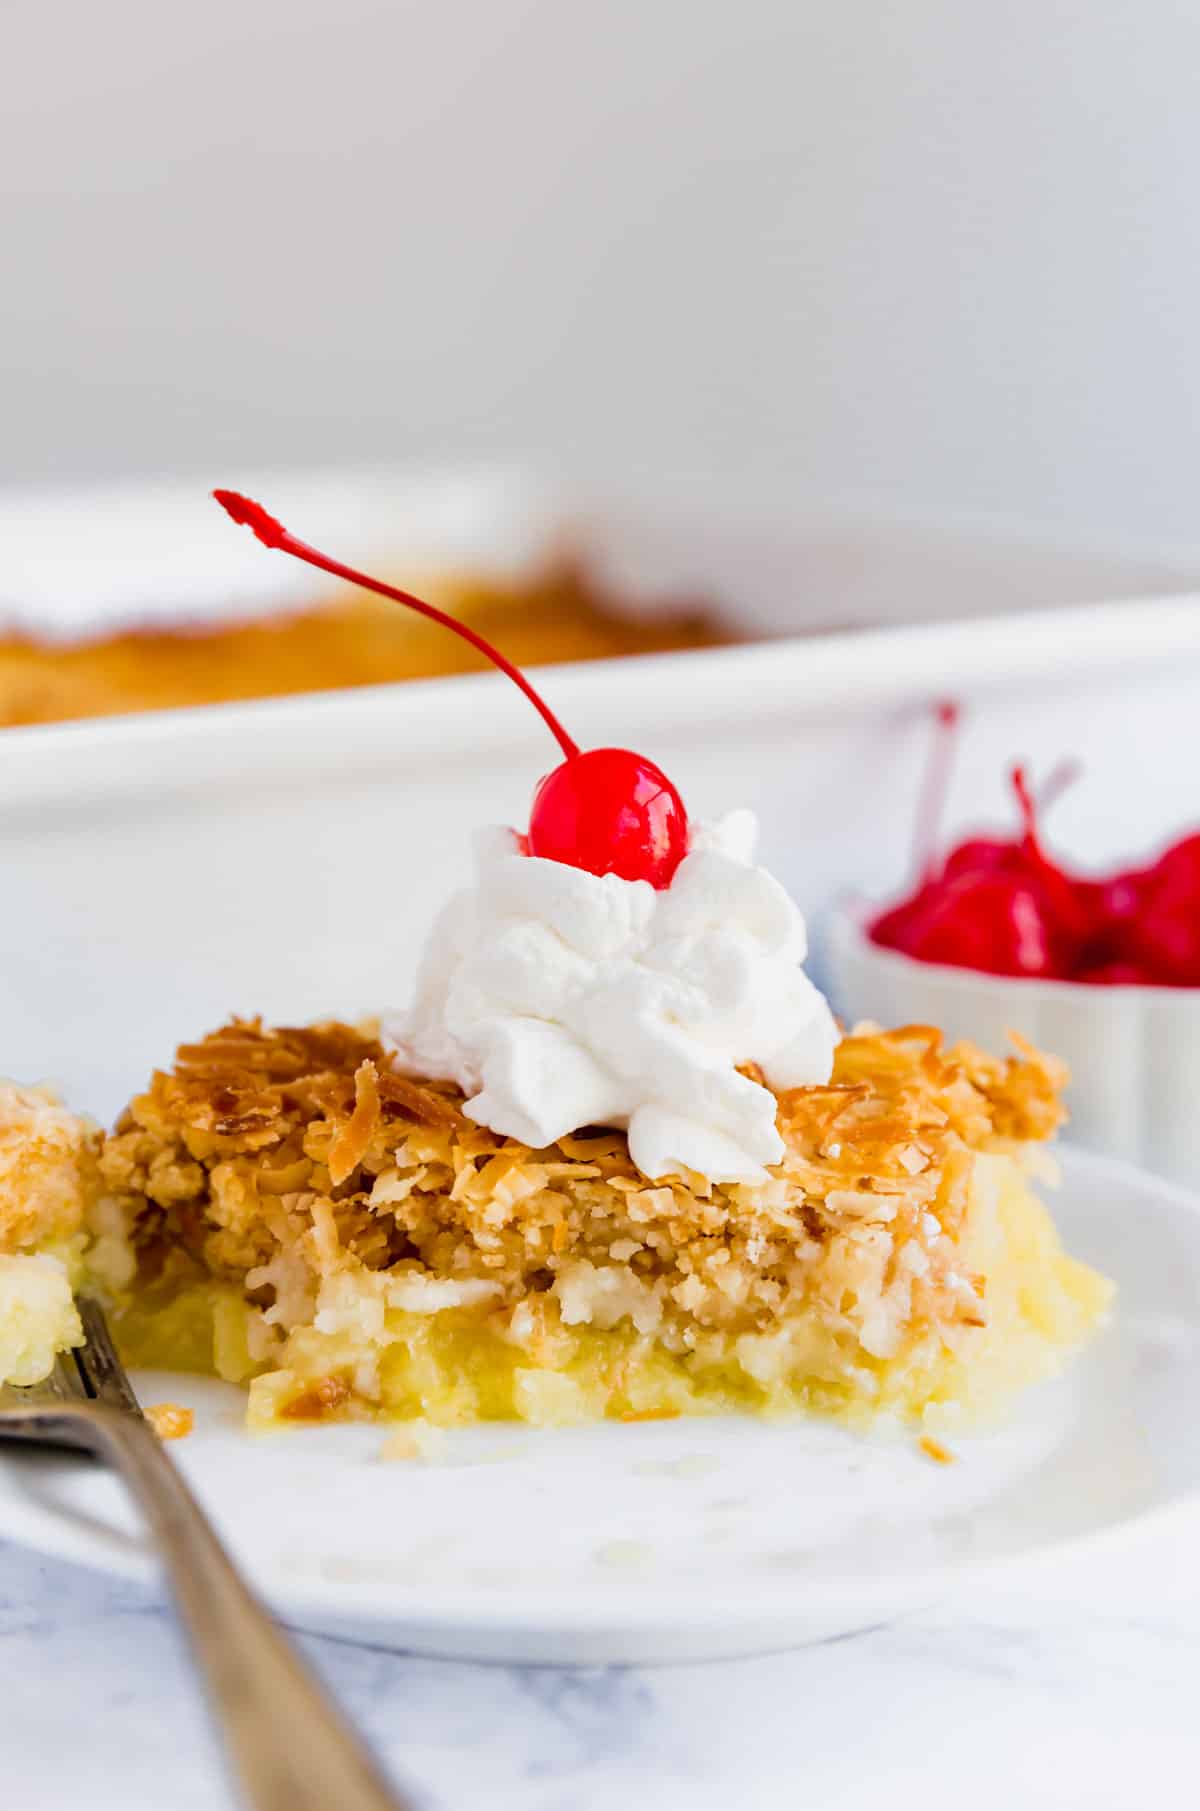
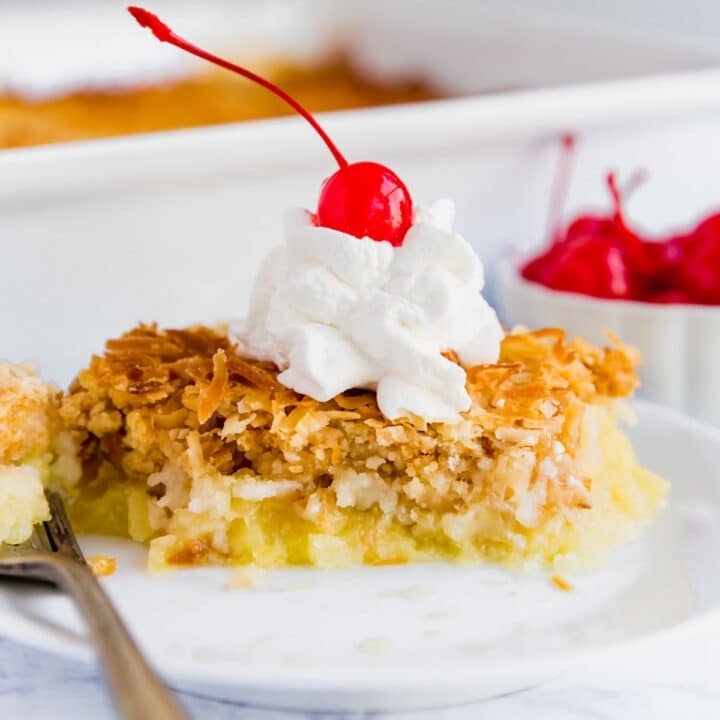
    A close up image of Piña Colada dump cake on a plate with whipped cram and a cherry on top on a white plate with a fork.

    Piña Colada Pineapple Dump Cake is one of the easiest desserts you’ll ever make! Simply dump the ingredients into the pan and let the oven do the rest of the work! Made with coconut and pineapple and topped with maraschino cherries, it really tastes like your favorite cocktail in cake form!

    A close up image of Piña Colada dump cake on a plate with whipped cram and a cherry on top on a white plate with a fork.
    [feast_advanced_jump_to]

    Why You'll Love This Pineapple Dump Cake Recipe

    This is actually a variation on a pineapple cherry dump cake recipe that I found in my mom’s recipe box (no idea who it’s from, so if you’re related to me and you know, please let me know!). I was a little skeptical at first because you don’t even stir the ingredients. But the results were awesome and someday I'll share that on here (another great dump cake variation to try is this Blueberry Lemon Dump Cake).

    This definitely comes out with a taste and texture that is less like a traditional cake and more like a crumble or a cobbler. With fruity crushed pineapple, the sweetness of the cake mix, and the toasted coconut on top, the flavor mimics everyone’s favorite tropical drink, but without the booze! I also love this piña colada cake because:

    • It's great for parties or get-togethers
    • Boasts a unique and delicious flavor
    • Only 5 minutes of prep time required
    • Baked and ready in under 1 hour
    • Moist, tender, and a touch crunchy thanks to the coconut flakes!
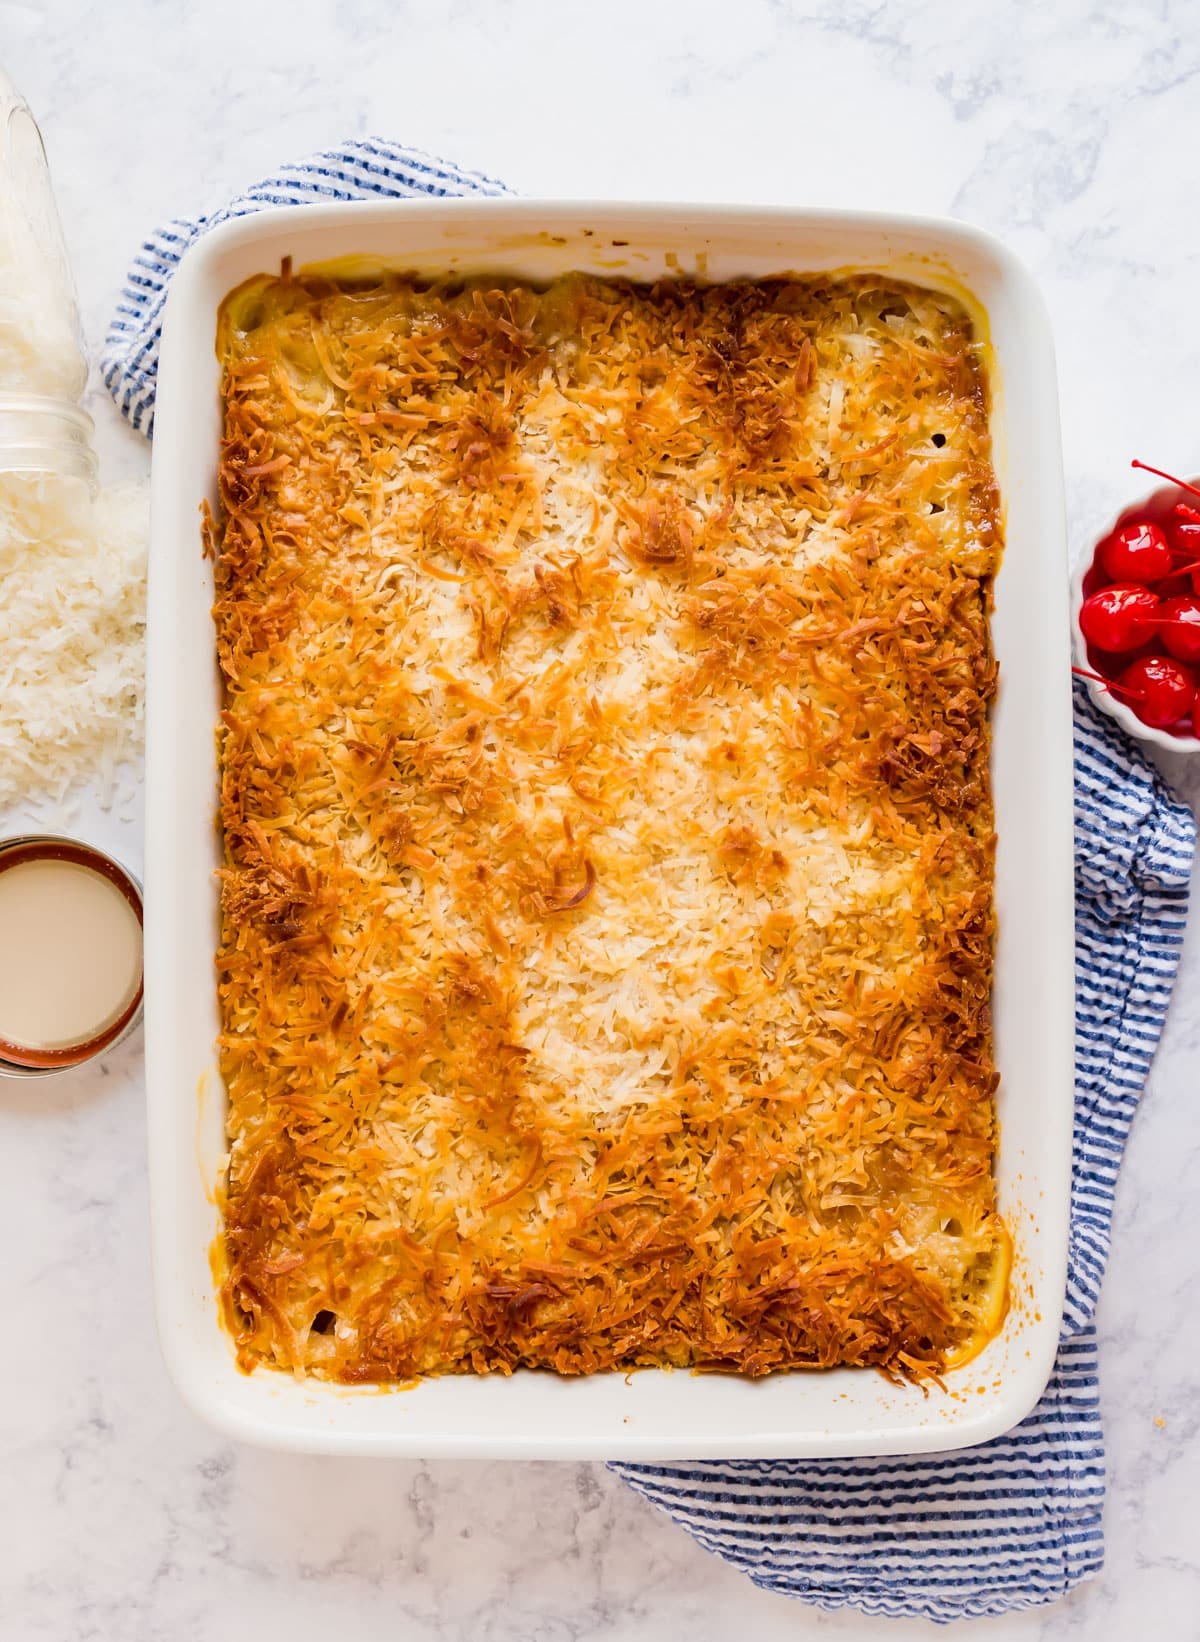
    An overhead image of pineapple dump cake in a white baking pan on a blue nad white striped towel with coconut flakes and a bowl of maraschino cherries on the sides of it.

    Ingredients Information and Substitutions

    • Crushed Pineapple - Canned crushed pineapple is perfectly fine for pina colada dump cake! No need to spend extra time making it fresh... in fact, this recipe won't work with the fresh stuff.
    • White Cake Mix - I like white cake mix best, but you could also use vanilla or yellow.
    • Sweetened Flaked Coconut - To add some sweetness and texture, I'm using flaked coconut. It also reminds me so much of pina coladas, so it's a must for me in this pina colada cake!
    • Salted Butter - I know many people typically use unsalted butter for baking, but as this recipe doesn't include any extra salt, I'm using salted butter here for a little extra flavor. Use whichever option you prefer.
    • Whipped Cream - For the topping! Store-bought it fine, though you could make it from scratch if you want to — refer to the notes section on the recipe card to learn how.
    • Maraschino Cherries - Also for the topping, maraschino cherries add more sweetness and a pop of color.
    • Cooking Spray - So your pineapple coconut dump cake doesn't stick to the pan!
    An overhead image of labeled ingredients for this recipe.

    How to Make Pineapple Upside Down Dump Cake

    Step 1: Preheat your oven to 350 degrees F and spray a 9"x13" baking pan with cooking spray. Add the crushed pineapple and all of its juices to the bottom of the pan.

    A clear glass baking pan with crushed pineapple spread along the bottom of it.

    Step 2: Sprinkle the cake mix on top of the pineapple, then add the coconut. Remember — no need to stir it!

    A layer of cake mix added on top of the pineapple layer in a glass baking pan.
    A layer of coconut sprinkled on top of the cake mix layer in a glass baking pan.

    Step 3: Place the pats of butter evenly over the coconut layer.

    Pats of butter scattered across the top of the dump cake.

    Step 4: Bake your pineapple dump cake for 45 minutes, making sure the coconut layer doesn't burn (cover with foil as needed). Allow to cool before serving with whipped cream and a maraschino cherry on top. Enjoy!

    The pan of dump cake ingredients in the oven ready to bake.

    Frequently Asked Questions

    Can I use fresh pineapple for pineapple dump cake?

    No — as mentioned, this recipe is designed to use canned crushed pineapple because the juices makes the texture that much better. It also helps keep things as simple and easy as possible!

    Can you make a dump cake ahead of time?

    Yes, you can! You can make this pineapple coconut dump cake up to 24 hours in advance. Just make sure to let it cool completely before covering and storing at room temperature.

    How long does pina colada dump cake last?

    When properly stored in an airtight container on the countertop, it will keep for 3-4 days. You can also store it in the fridge if you'd like.

    Do you refrigerate dump cakes?

    Again, you don't have to. But, if you like pineapple dump cake served cold, store it in the refrigerator!

    What goes with pineapple dump cake?

    I like to serve my pineapple dump cake recipe with a dollop of whipped cream and a maraschino cherry on top, as shown in the pictures!

    A side angle shot of a pice of dump cake with whipped cream and a cherry on top with a bowl of maraschino cherries and the whole dump cake int he background.

    Tips For Making Cake Mix Pineapple Dump Cake

    • Spray the pan with cooking spray to help avoid sticking.
    • Be sure to layer everything evenly in the pan.
    • I know this sounds crazy, but don’t stir the ingredients — keep them layered. Trust me.
    • Cut your butter into quarters, then cut the quarters into thirds. Line those thirds up evenly over the top of the coconut. This helps the coconut get nice and toasty.
    • Spray the top of the cake with cooking spray before baking- this helps with even browning.
    • Check the cake once or twice during cooking, and if the coconut is getting too dark, cover with foil.
    • If you want to serve with homemade whipped cream: whip up 1 cup heavy cream, ¼ cup confectioner’s sugar and 1 teaspoon vanilla extract (or better yet, a splash of rum!) until it forms stiff peaks.
    • Prep ahead: Instead of prepping individual ingredients ahead, prep the whole thing the day before!
    • Leftovers and storage: Leftovers are super tasty and this lasts up to 4 days covered at room temperature or in the fridge.
    An overhead image of a pice of dump cake on a white plate with a fork on it and coconut and a bowl of cherries next to it.

    What To Serve With Upside Down Pineapple Dump Cake

    • Scalloped Potatoes and Ham Casserole
    • Crunchy Red Cabbage Salad
    • Green Bean Salad

    Other Fruity Desserts to Try...

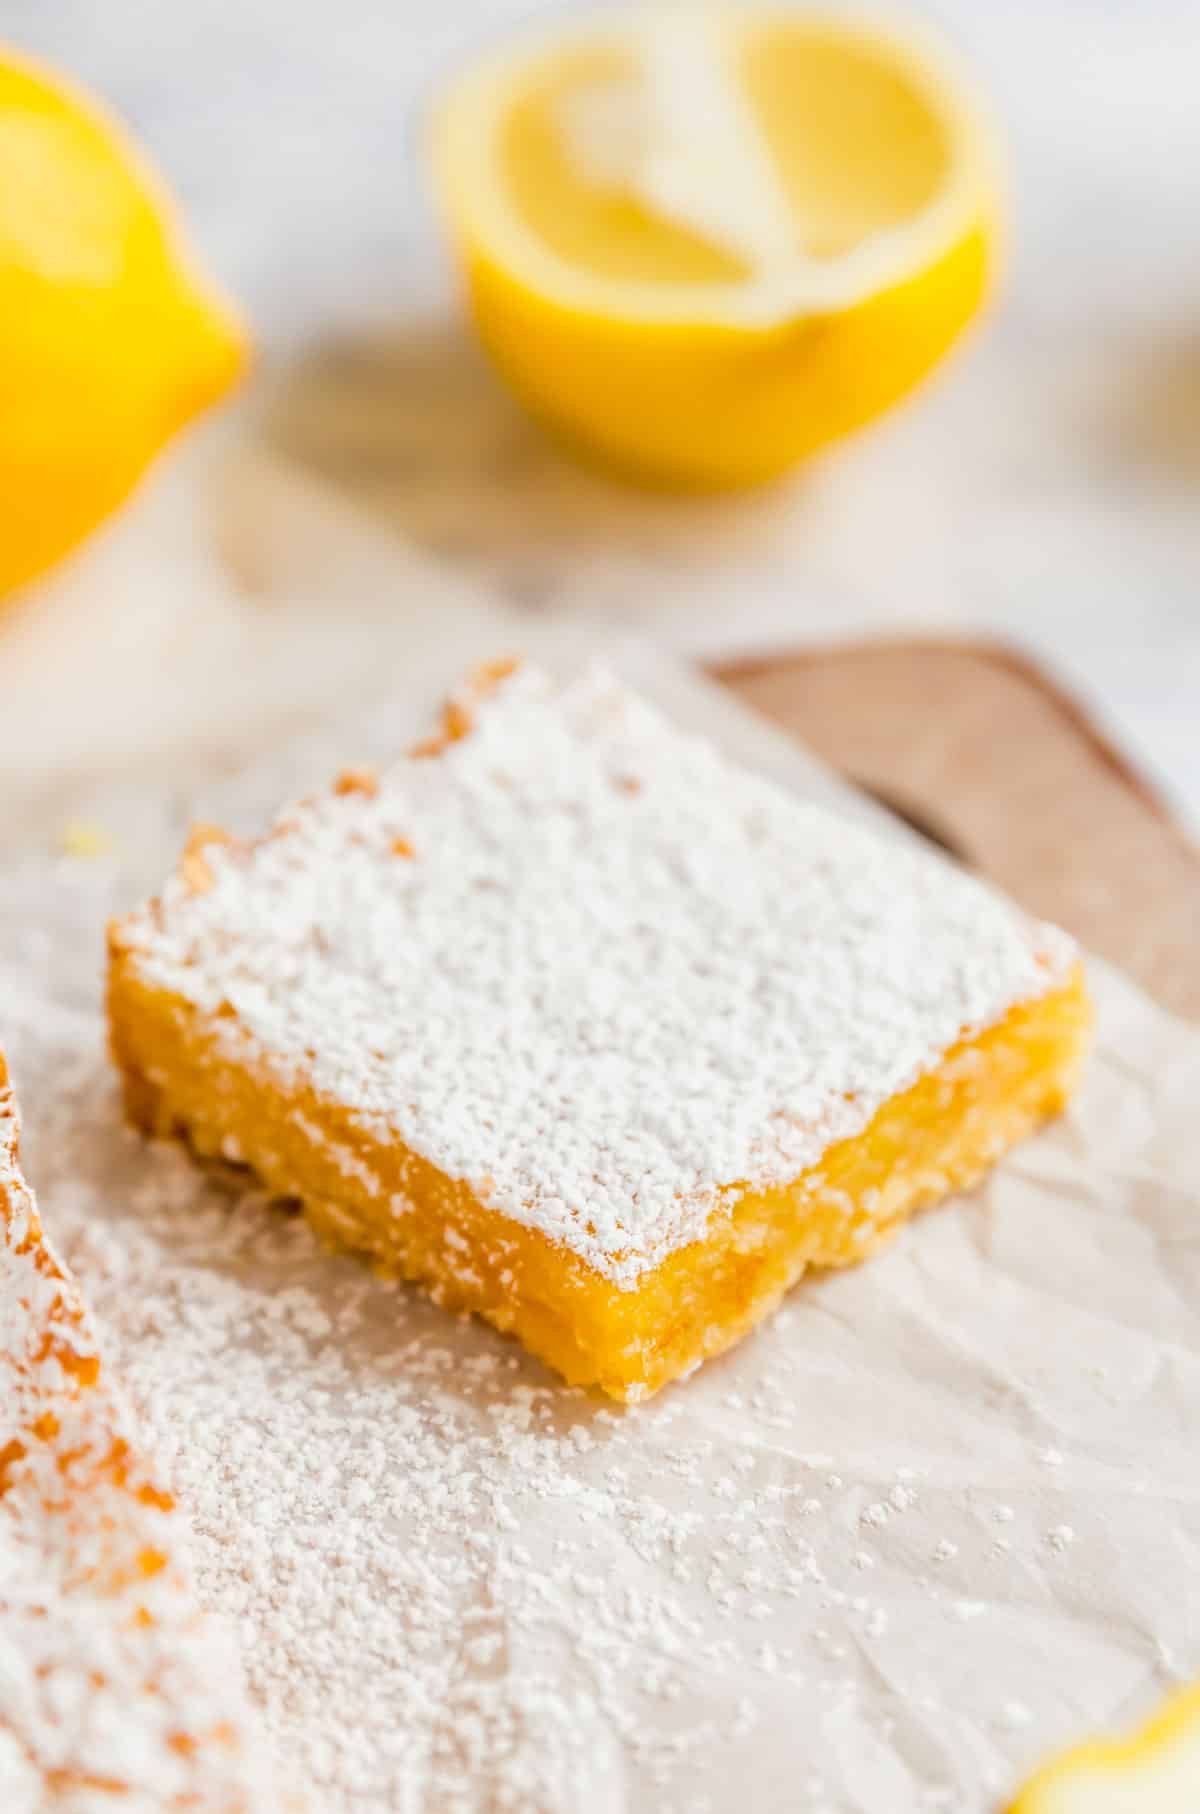
    • A lemon square on a piece of parchment with a cut lemon behind it.
      Lemon Bars With Shortbread Crust
    • A slice of coconut cake on a place with the full cake behind it.
      Easy Coconut Cake Recipe
    • Strawberry Cake on a plate with a bite taken out revealing the inside of the cake.
      Strawberry Shortcake Crumb Cake
    • A straight-on image of 3 lemon parfait cups with the center one in the front.
      Lemon Parfait Cups Dessert

    Love this recipe? Please leave a 5 star ⭐️⭐️⭐️⭐️⭐️ rating in the recipe card below ⬇️ and/or a review in the comment section further down. Check out my Amazon Store for all my favorite tools, including those used in this recipe. And follow @thelifejolie on Instagram and TikTok!

    A close up image of Piña Colada dump cake on a plate with whipped cram and a cherry on top on a white plate with a fork.

    Piña Colada Pineapple Dump Cake

    Jessy Freimann
    Piña Colada Pineapple Dump Cake is one of the easiest desserts you’ll ever make! Simply dump the ingredients into the pan and let the oven do the rest of the work! Made with coconut and pineapple and topped with maraschino cherries, it really tastes like your favorite cocktail in cake form!
    4.80 from 10 votes
    Print Recipe Pin Recipe
    Prep Time 5 minutes mins
    Cook Time 45 minutes mins
    Total Time 50 minutes mins
    Course Dessert
    Cuisine American
    Servings 8 servings
    Calories 391 kcal

    Equipment

    • 9 x 13 Pan
    • Measuring cups and spoons
    • Spatula

    Ingredients
      

    • Cooking spray
    • 2 20 ounce cans crushed pineapple, undrained
    • 1 box white cake mix
    • 1 cup sweetened flaked coconut
    • ½ cup salted butter, ((1 stick) sliced into quarters and then each quarter sliced into thirds
    • Whipped cream, for topping
    • Maraschino cherries, for topping

    Instructions
     

    • Preheat the oven to 350 degrees and spray a 9" x 13" baking pan with cooking spray.
    • Spread the pineapple and the juices from the can evenly over the bottom of the pan.
    • Sprinkle all of the cake mix evenly over the pineapple.
    • Sprinkle the coconut evenly over the cake mix.
    • Place the pats of butter evenly over the coconut layer.
    • Bake for 45 minutes (check one or twice in the baking and if the coconut is getting too dark, cover with foil).
    • Allow to cool slightly before serving with a dollop of whipped cream and a maraschino cherry on top of each piece.

    Video

    Notes

    • Spray the pan with cooking spray to help avoid sticking.
    • Be sure to layer everything evenly in the pan.
    • I know this sounds crazy, but don’t stir the ingredients — keep them layered. Trust me.
    • Cut your butter into quarters, then cut the quarters into thirds. Line those thirds up evenly over the top of the coconut. This helps the coconut get nice and toasty.
    • Spray the top of the cake with cooking spray before baking- this helps with even browning.
    • Check the cake once or twice during cooking, and if the coconut is getting too dark, cover with foil.
    • If you want to serve with homemade whipped cream: whip up 1 cup heavy cream, ¼ cup confectioner’s sugar and 1 teaspoon vanilla extract (or better yet, a splash of rum!) until it forms stiff peaks.
    • Prep ahead: Instead of prepping individual ingredients ahead, prep the whole thing the day before!
    • Leftovers and storage: Leftovers are super tasty and this lasts up to 4 days covered at room temperature or in the fridge.

    Nutrition

    Serving: 1pieceCalories: 391kcalCarbohydrates: 58gProtein: 3gFat: 17gSaturated Fat: 11gPolyunsaturated Fat: 1gMonounsaturated Fat: 4gTrans Fat: 1gCholesterol: 31mgSodium: 569mgPotassium: 82mgFiber: 2gSugar: 31gVitamin A: 355IUCalcium: 146mgIron: 1mg
    Tried this recipe?Let us know how it was!

    Easy Sautéed Vegetables

    Mar 4, 2024 · 8 Comments

    A close up image of sautéed veggies in a pan with a wooden turner in it.

    Meet your new go-to side dish: Easy Sautéed Vegetables! This flavorful recipe for sautéed veggies comes together quickly and can be made with the vegetables of your choice — perfect for picky eaters!

    A white bowl of mixed vegetables with raw veggies behind it.
    [feast_advanced_jump_to]

    Why You'll Love These Sautéed Mixed Vegetables

    After tasting some delicious vegetables that my mom sautéed for dinner recently, I knew I had to share the recipe with you. We can all use more great vegetable side dishes, right? I've already shared my garlic sauteed asparagus, sauteed kale with mushrooms and tomatoes, and easy garlic green beans, but I'm always in the market for more veggies in my life.

    This vegetable sauté was perfectly cooked, bursting with delicious flavor, and best of all, you can easily make changes based on what you have on hand- perfect for cleaning out your fridge and preventing food waste!

    And in case you need even more reasons to love this dish, here are a few:

    • Made with simple, wholesome ingredients
    • Customizable- use your favorite veggies or whatever you have in your fridge
    • Ready in 35 minutes
    • Family-friendly
    • So easy to make!
    A close up image of sautéed veggies in a pan with a wooden turner in it.

    Ingredient Information and Substitutions

    • Olive Oil - My go-to cooking oil for sautéing vegetables is olive oil. But use whatever you have on hand — I also like avocado oil and grape seed oil.
    • Garlic Cloves - For some tasty savory flavor! It wouldn't be a sautéed recipe without a healthy dose of garlic, in my opinion. You could also use onion.
    • Baby Carrots - I like baby carrots as I don't have to worry about peeling them or cutting them. You can use full size if you prefer.
    • Asparagus - One of my favorites! When cooked right, they come out perfectly tender. So good!
    • Zucchini - Same goes for zucchini. They add a pop of bright color- summer squash also works here!
    • Mushrooms - Tender and flavorful when sautéed, use your favorite kind.
    • Anaheim Peppers - Tangy and a bit smoky, Anaheim peppers also boast a very subtle sweetness. Bell pepper also works, and so do Poblano peppers if you want a little kick.
    • Seasonings - I'm using kosher salt, ground black pepper, and Italian seasoning for a simple but powerful flavor boost. Feel free to use your favorites.
    An overhead image of labeled ingredients for this recipe.

    How To Sauté Vegetables

    The Bottom Line: What makes this recipe so customizable is is the method. You can easily switch out various vegetable options, the key to this is when you add each veggie into the pan. Vegetables that take longer to cook (like carrots, potatoes, parsnips, winter squash etc.) will need to go into the pan first. Conversely, veggies that cook up faster like mushrooms or thin-skinned peppers like Anaheim peppers will go in last. This way, the veggies all come out perfectly cooked.

    Step 1: Heat the oil in a large sauté pan over medium heat until it starts to shimmer. Add the garlic to the pan and cook for 3-4 minutes, being careful not to let it burn.

    A sauté pan with hot oil and sliced garlic in it.

    Step 2: Add the carrots next, and cook for about 4 minutes.

    A sauté pan with carrots added to the hot oil and sliced garlic in it.

    Step 3: Introduce the asparagus and zucchini into the pan. Reduce the heat slightly below medium and stir. Sauté the vegetables for 5 minutes, continuing to stir.

    Asparagus and sliced zucchini added to the sauté pan.

    Step 4: Add the mushroom and Anaheim peppers, season with salt, pepper, and Italian seasoning, and stir. Allow the vegetables to cook for 10 more minutes, making sure to stir often. Serve immediately and enjoy!

    Mushrooms, peppers and seasoning added to sauté pan.

    Frequently Asked Questions

    What are best vegetables to saute?

    Honestly, most vegetables are good to sauté. It's all about managing their cooking times and starting with the ones that take longer to cook. Follow my cooking instructions carefully — the order in which you add the veggies to the pan is intentional!

    Can you sauté frozen vegetables?

    Yes, you can make sautéed vegetables from frozen veggies. Just be aware that they are often blanched before freezing, so they may cook quicker. Take this into account when deciding when to add them to the pan. I also recommend letting them thaw a bit before cooking them for the best texture.

    What does it mean to sauté vegetables?

    Sautéing is a French culinary term that involves cooking in a small amount of fat over high heat while stirring frequently to prevent the food from sticking. The word sauté in French literally means "jump" — some chefs even lift the pan from the fire to make the food "jump" as they stir it.

    How much oil do you use to sauté vegetables?

    I use 2 tablespoons of oil in this recipe. That said it really depends on how much you're making. I recommend that you add 1 or so tablespoons at a time to determine how much you'll really need.

    What veggies do you stir fry first?

    The order is key when it comes to sautéed mixed vegetables! I add the garlic first, then carrots, asparagus and zucchini, mushrooms, and Anaheim peppers... in that specific order. As a rule, start with the the veggies that take the longest to cook first and add the other veggies in order from longest cooking time to shortest.

    What is the difference between sautéing and stir-frying?

    The only true difference is the equipment: stir-frying occurs in a wok and sauteing occurs in a saute pan. But I use the terms interchangeably, as do most people!

    How do you saute vegetables without making them soggy?

    The best way to avoid soggy sauteed vegetables is to add them at different times based on how quickly they cook. Again, that's why it's important to follow my recipe closely. The order is intentional!

    An overhead image of a bowl of sautéed veggies on top of a green and white striped towel with raw veggies around it.

    Tips For Making Sautéed Mixed Vegetables

    • Be sure to heat your oil before adding anything to the pan.
    • Don't burn the garlic! Burnt garlic adds a terribly, bitter flavor. Stir often, manage your heat and keep an eye on the garlic. It also helps that you're frequently adding more uncooked veggies to the pan- this brings down the temperature slightly.
    • Try to cut the veggies to uniform in size to help with even cooking.
    • The veggies I listed are suggestions, you can totally change them up based on what you have on hand. Any mixed vegetables will work.
    • The biggest key to this recipe is to manage the different cooking times of each vegetable. Certain veggies take longer to cook, like carrots, sweet potatoes, and other root vegetables. You'll add those first. Other things like mushrooms and Anaheim peppers (which have thinner skin than bell peppers) go quicker so you'll wait until the other longer-cooking veggies have cooked for a little bit.
    • I wait to season everything until after the final veggies go into the pan to make sure everything is evenly seasoned.
    • Prep Ingredients Ahead: Peel garlic, wash all veggies, cut carrots, trim and cut asparagus, slice zucchini, cut mushrooms and slice peppers.
    • Leftovers and storage: Although this is best consumed immediately, the leftovers are super tasty and will last covered in the fridge for up to 4 days.
    A close up image of mixed veggies in a white bowl with raw veggies in the background.

    What To Serve With Pan Fried Vegetables

    Make it a meal and serve your veggies alongside these tasty recipes:

    • Hearty Beef Tips
    • Make Ahead Mashed Potatoes
    • Cucumber Tomato Salad
    • Cherry Oatmeal Chocolate Chip Bars

    Other Dishes Featuring Mixed Vegetable...

    • A close up overhead image of roasted autumn vegetables on a pan.
      Roasted Fall Vegetables
    • An overhead image of one side of a bowl of vegetable salad on a blue placemat.
      Marinated Vegetable Salad
    • Need a good, meatless dinner or appetizer? This Roasted Vegetable Flatbread delivers! It's super easy to throw together and tastes fantastic.
      Roasted Vegetable Flatbread
    • A wooden spoon stirring a pan of zucchini and tomatoes.
      Sautéed Zucchini And Tomatoes

    Hosting Thanksgiving?

    Discover the secret to hosting Thanksgiving without all the stress! Prepsgiving is your FREE guide to making a delicious Thanksgiving feast the easy way.

    Love this recipe? Please leave a 5 star ⭐️⭐️⭐️⭐️⭐️ rating in the recipe card below ⬇️ and/or a review in the comment section further down. Check out my Amazon Store for all my favorite tools, including those used in this recipe. And follow @thelifejolie on Instagram and TikTok!

    A close up image of sautéed veggies in a pan with a wooden turner in it.

    Easy Sautéed Vegetables

    Jessy Freimann
    Meet your new go-to side dish: Easy Sautéed Vegetables! This flavorful recipe for sautéed veggies comes together quickly and can be made with the vegetables of your choice — perfect for picky eaters!
    5 from 5 votes
    Print Recipe Pin Recipe
    Prep Time 10 minutes mins
    Cook Time 25 minutes mins
    Total Time 35 minutes mins
    Course Side Dish
    Cuisine American
    Servings 4 servings
    Calories 65 kcal

    Equipment

    • saute pan
    • Wooden Spoons
    • cutting board
    • chefs knife
    • Measuring cups and spoons

    Ingredients
      

    • 2 Tablespoons olive oil
    • 2 large garlic cloves thinly sliced
    • 1 cup baby carrots halved length-wise
    • 1 cup asparagus, trimmed and cut into thirds
    • 1 cup sliced zucchini
    • 1 cup quartered mushrooms
    • 2 seeded and sliced Anaheim peppers
    • 1 teaspoon kosher salt
    • ¼ teaspoon ground black pepper
    • ½ teaspoon Italian seasoning

    Instructions
     

    • Heat oil in a large sauté pan until shimmering over medium heat.
    • Add garlic to pan and sauté for 3-4 minutes, stirring often (do not let it burn!).
    • Add carrots and cook for 4 minutes, stirring often.
    • Add asparagus and zucchini and reduce the heat to slightly below medium. Sauté for 5 minutes stirring often.
    • Add mushrooms and Anaheim pepper. Season with salt, pepper and Italian seasoning.
    • Sauté for 10 minutes stirring often. Serve immediately.

    Video

    Notes

    • Be sure to heat your oil before adding anything to the pan.
    • Don't burn the garlic! Burnt garlic adds a terribly, bitter flavor. Stir often, manage your heat and keep an eye on the garlic. It also helps that you're frequently adding more uncooked veggies to the pan- this brings down the temperature slightly.
    • Try to cut the veggies to uniform in size to help with even cooking.
    • The veggies I listed are suggestions, you can totally change them up based on what you have on hand. Any mixed vegetables will work.
    • The biggest key to this recipe is to manage the different cooking times of each vegetable. Certain veggies take longer to cook, like carrots, sweet potatoes, and other root vegetables. You'll add those first. Other things like mushrooms and Anaheim peppers (which have thinner skin than bell peppers) go quicker so you'll wait until the other longer-cooking veggies have cooked for a little bit.
    • I wait to season everything until after the final veggies go into the pan to make sure everything is evenly seasoned.
    • Prep Ingredients Ahead: Peel garlic, wash all veggies, cut carrots, trim and cut asparagus, slice zucchini, cut mushrooms and slice peppers.
    • Leftovers and storage: Although this is best consumed immediately, the leftovers are super tasty and will last covered in the fridge for up to 4 days.

    Nutrition

    Serving: 1cupCalories: 65kcalCarbohydrates: 1gProtein: 0.1gFat: 7gSaturated Fat: 1gPolyunsaturated Fat: 1gMonounsaturated Fat: 5gSodium: 582mgPotassium: 11mgFiber: 0.2gSugar: 0.03gVitamin A: 5IUVitamin C: 0.5mgCalcium: 8mgIron: 0.2mg
    Tried this recipe?Let us know how it was!

    Steak Bites And Potatoes

    Feb 29, 2024 · 15 Comments

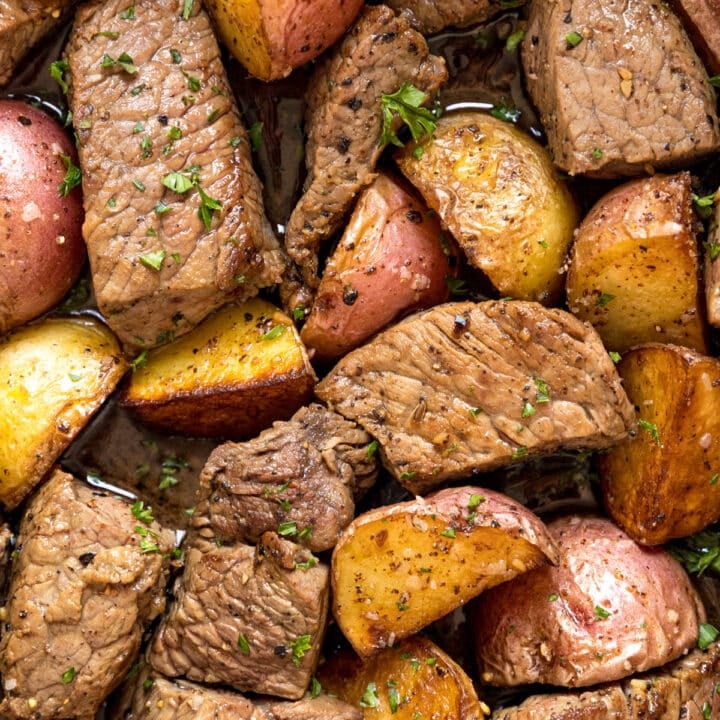
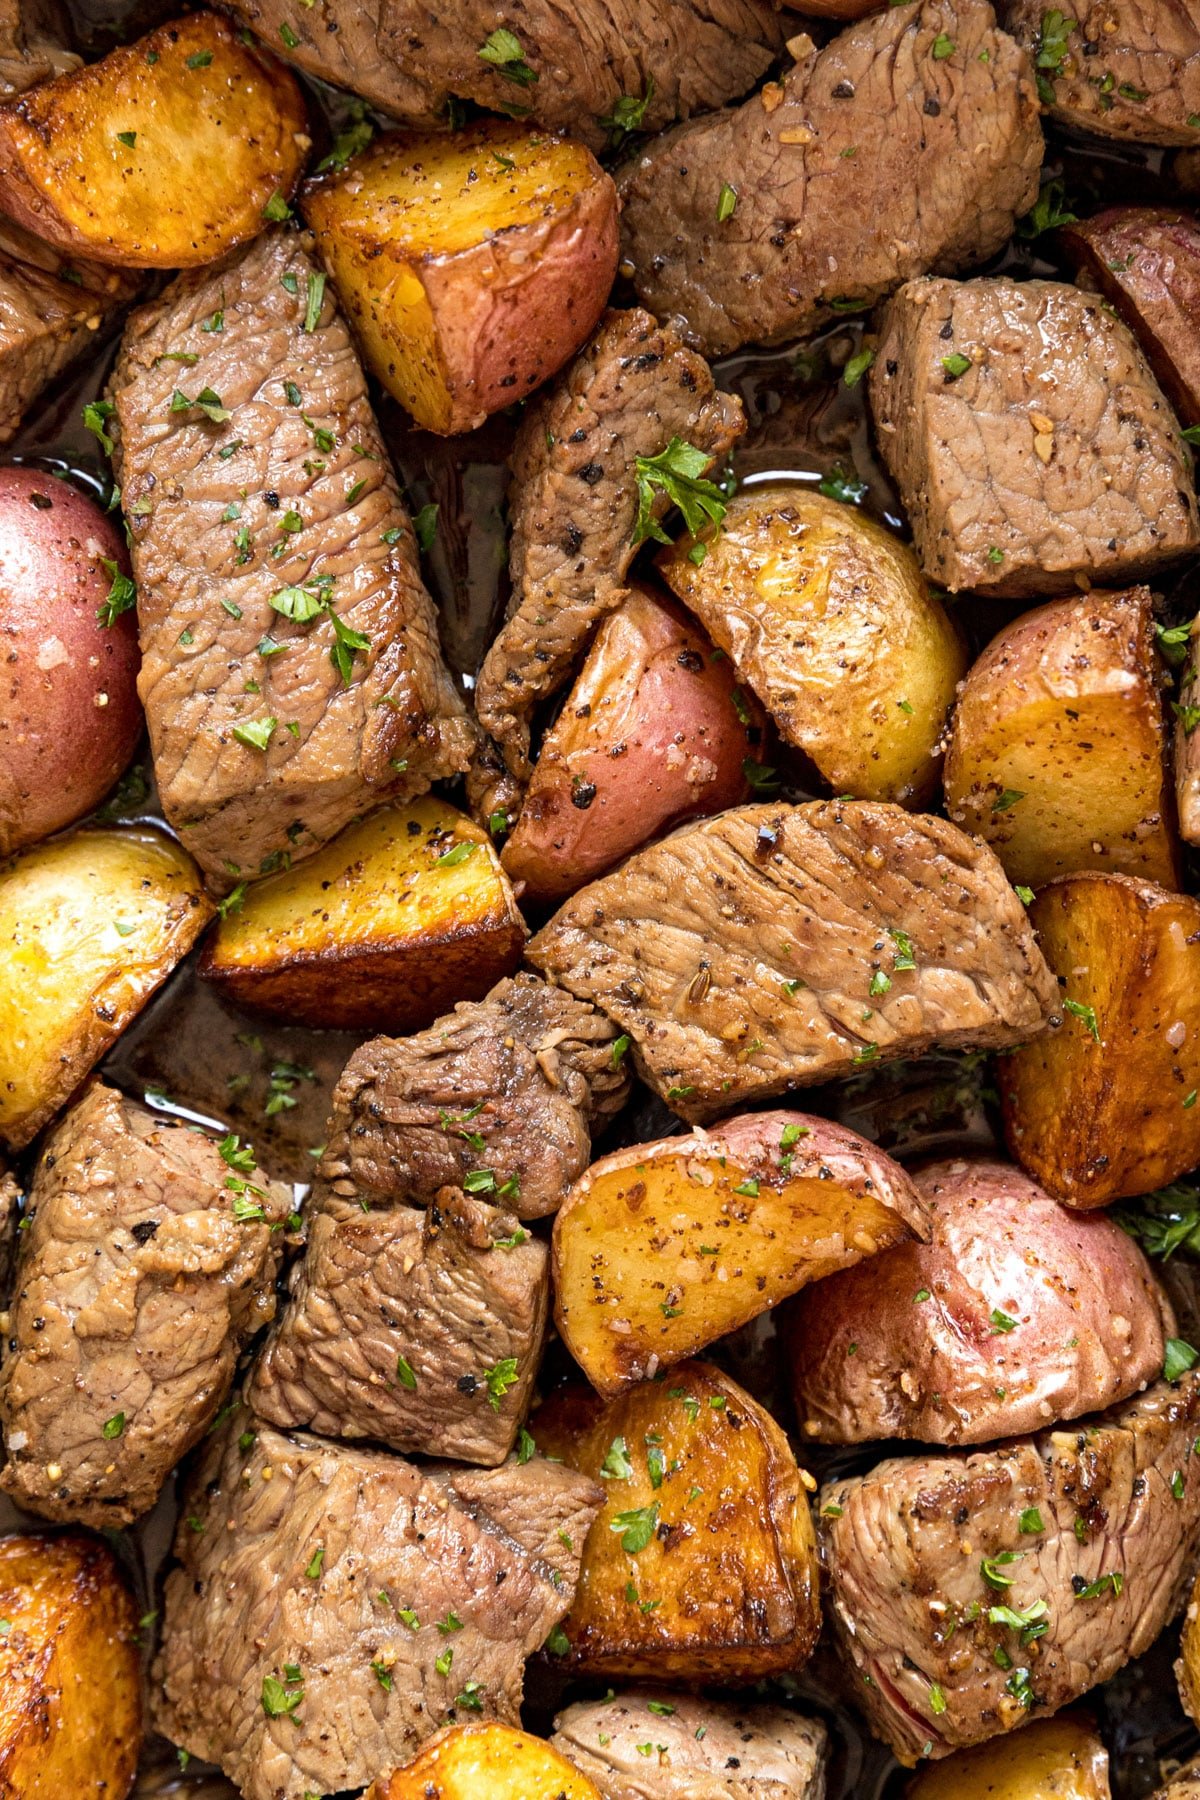
    Overhead close up image of cooked steak and potatoes.

    Steak Bites and Potatoes are an easy one-pan dinner. It's full of delicious flavor and comes together in less than 30 minutes- the perfect option for meat-and-potatoes on a weeknight.

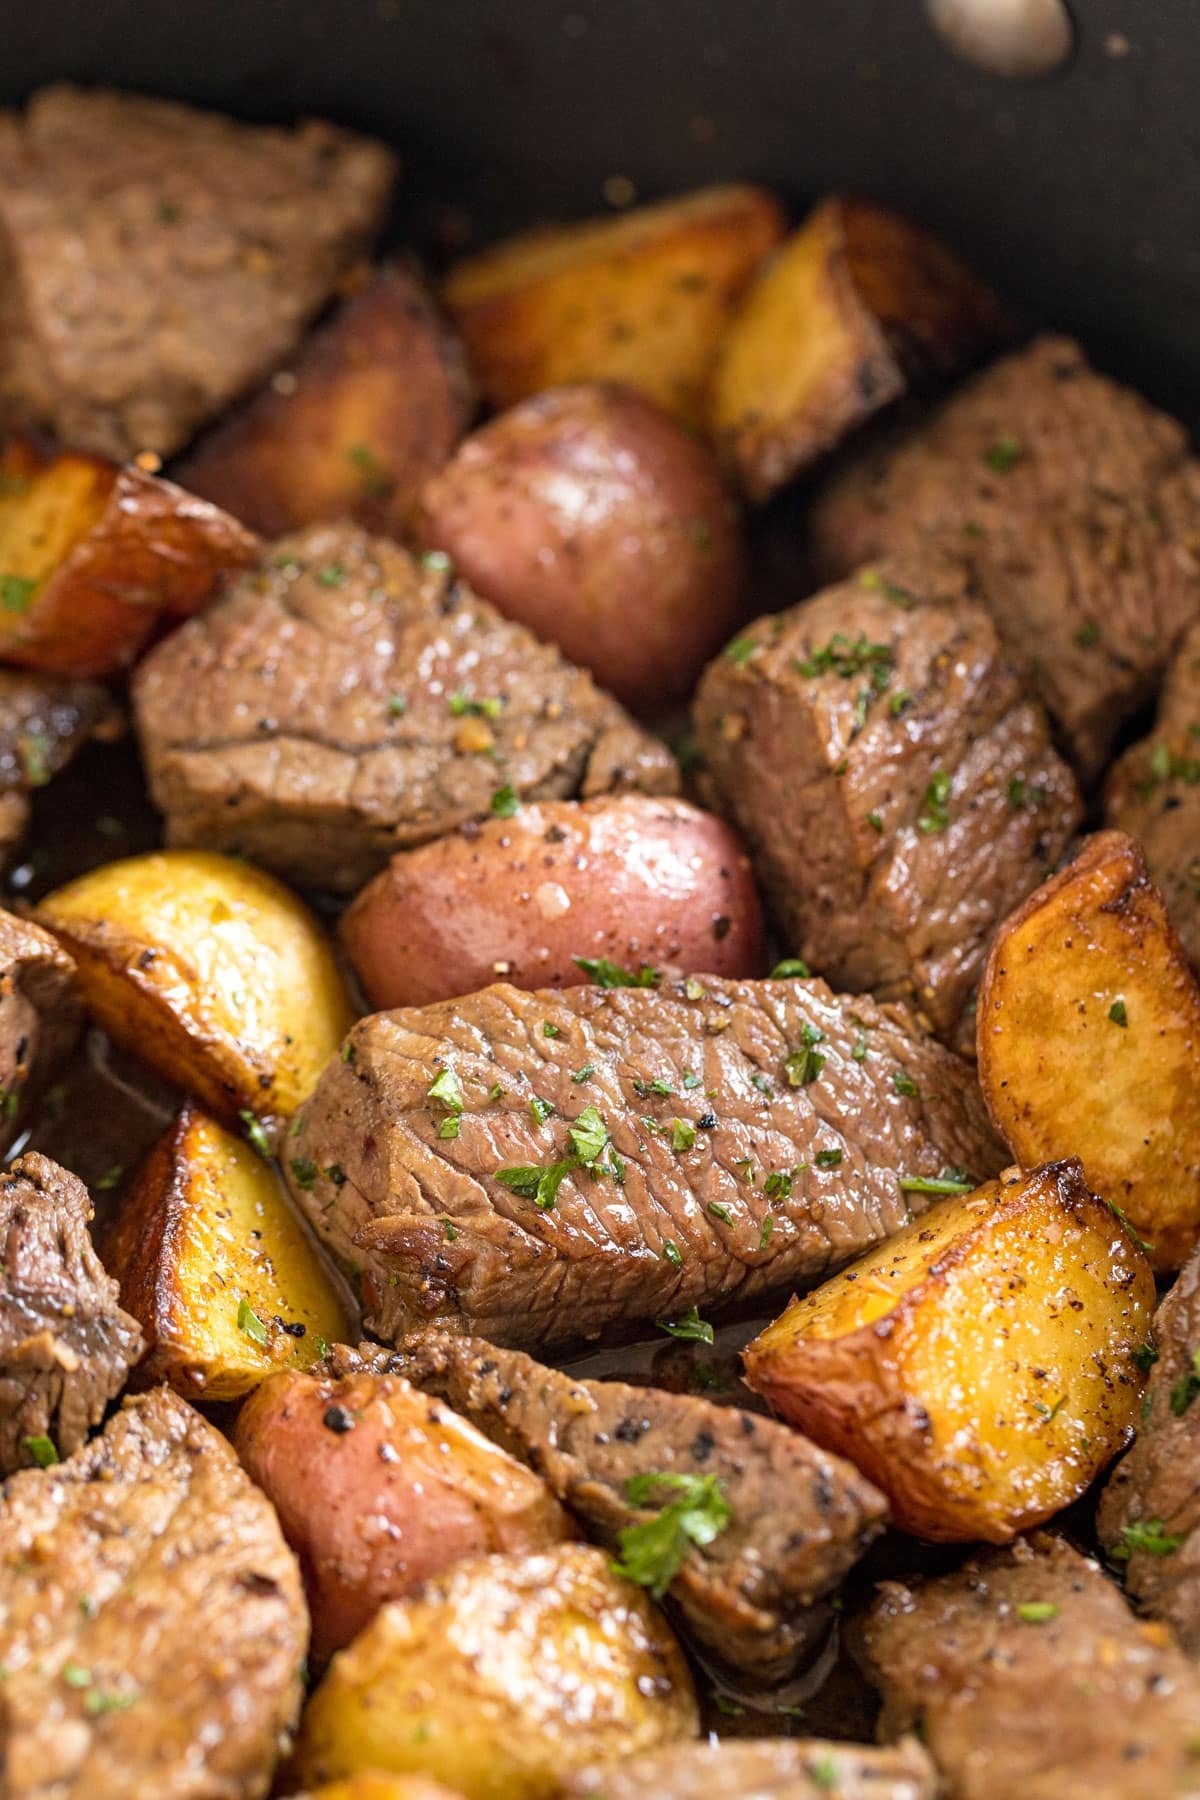
    A close up image of steak and potatoes in a skillet.
    [feast_advanced_jump_to]

    Why You'll Love Garlic Butter Steak Bites And Potatoes

    I married a man who is extremely picky. We compare his palate to that of a toddler and joke that he's the kids menu guy since those are the foods he prefers. But he's also a big steak and potatoes guy. So, having good steak recipe options is a must for us.

    We all love a good steak dinner (Ps if you want something that's hearty and tender and works for your slow cooker or Instant Pot try these awesome Steak Tips!). Having them in bite-size pieces in the same pan as deliciously crispy potatoes is a surefire way to impress your family on a busy weeknight! Here's why I love this recipe:

    • 30-minute meal
    • Super comforting and flavorful
    • Great for entertaining
    • Easy enough for weeknights
    • Hearty and satisfying
    • Kid-friendly
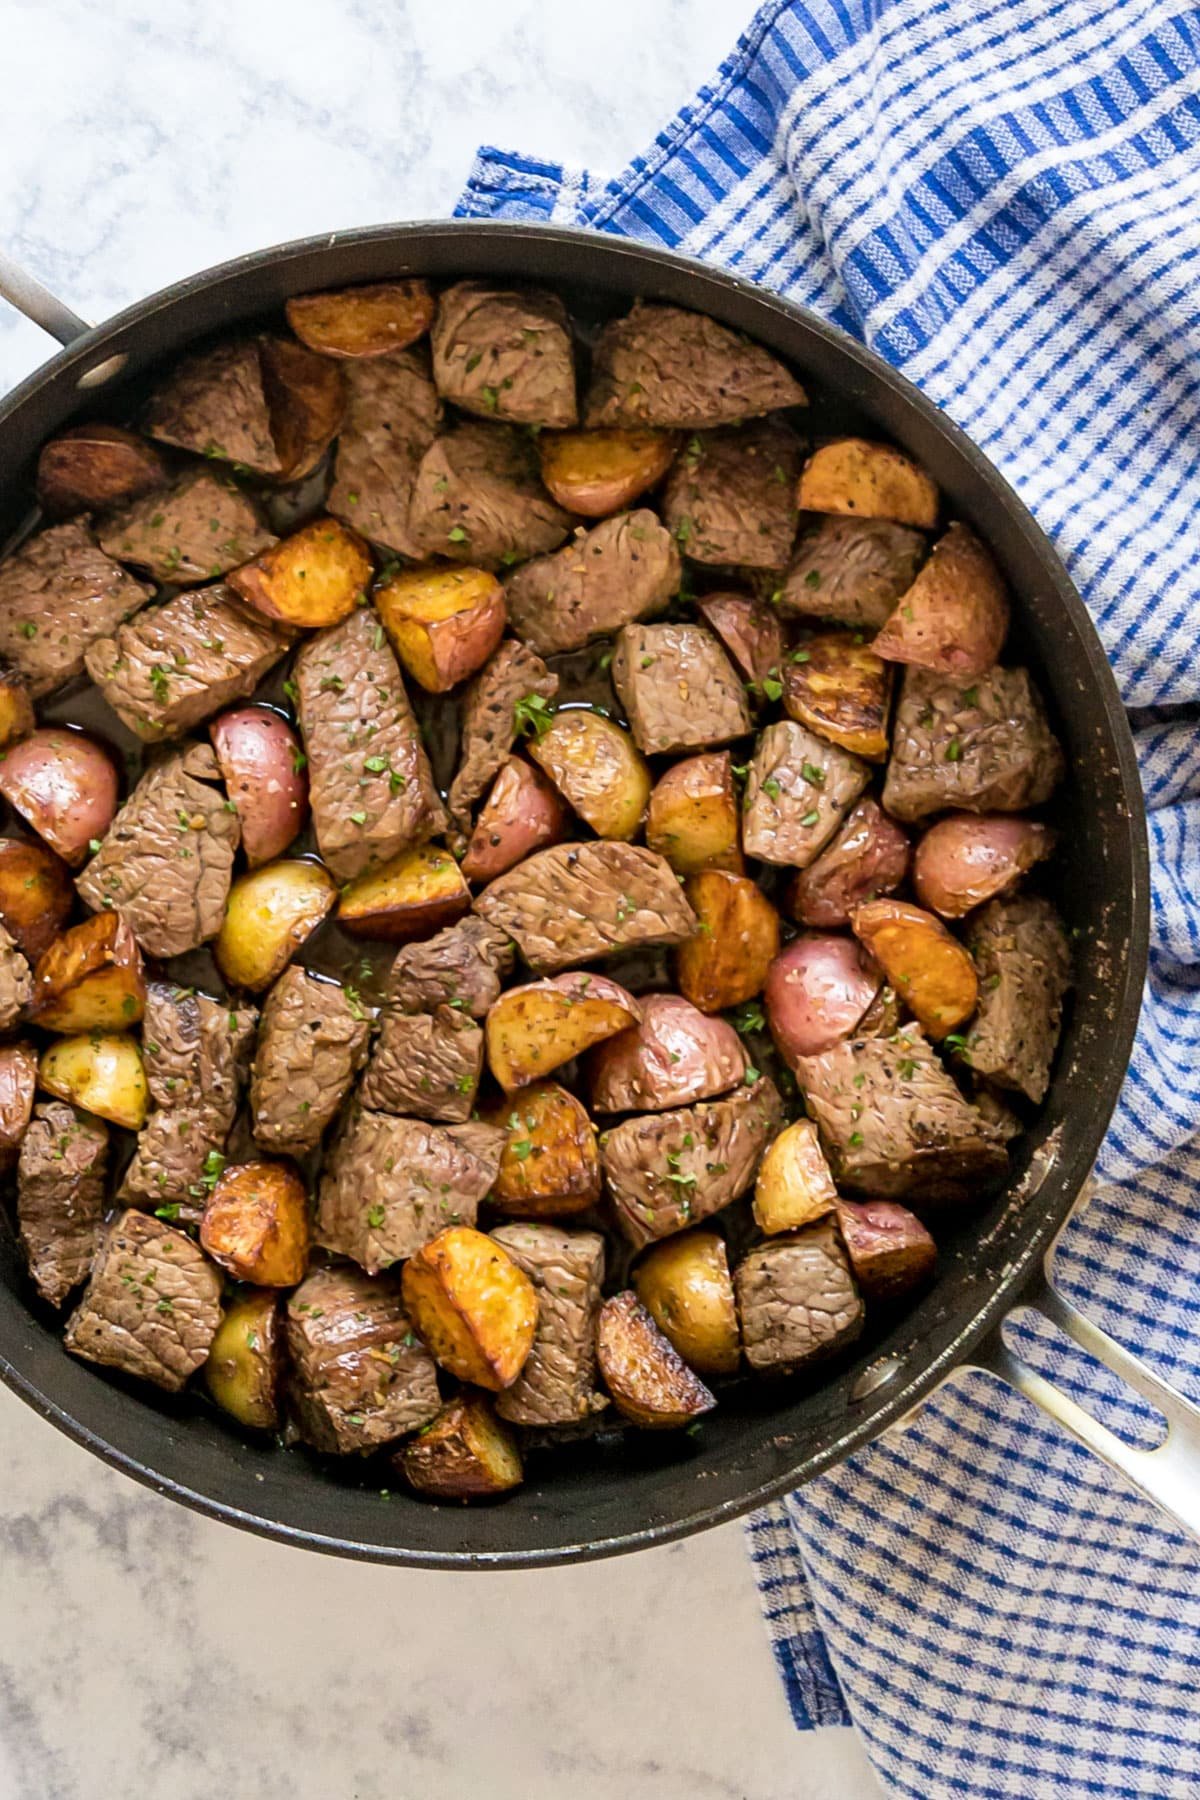
    An overhead image of a skillet of steak and potato bites with a blue towel next to it.

    Ingredient Information And Substitutions

    • Steak- My preferred cut for this is Top Sirloin as it's very economical for a weeknight dinner. If you prefer a different cut, you can totally use that (perhaps avoid braising cuts like chuck and short ribs as those tend to be tough when they aren't slow cooked). The key here is uniform cuts for even cooking, I trim off gristle and extra fat and aim for 1.5 inch - 2 inch chunks.
    • Potatoes- I like using baby potatoes. Any color and variety works, Once again make sure you cut the potatoes to uniform size so they cook evenly. I aim for 1 inch chunks.
    • Fats- Olive oil and salted butter are my fats of choice for this. The oil helps keep the butter from burning.
    • Seasonings- My preferred seasonings for this are onion powder, garlic powder, Kosher salt and black pepper. For the steak, you can use your favorite steak seasoning. I use low sodium Montreal Steak seasoning but I included alternate measurements for a full sodium steak seasoning as well.
    • Fresh herb garnish- This is totally optional but a sprinkle of fresh chopped parsley for garnish is always a pretty and tasty way to finish a dish.
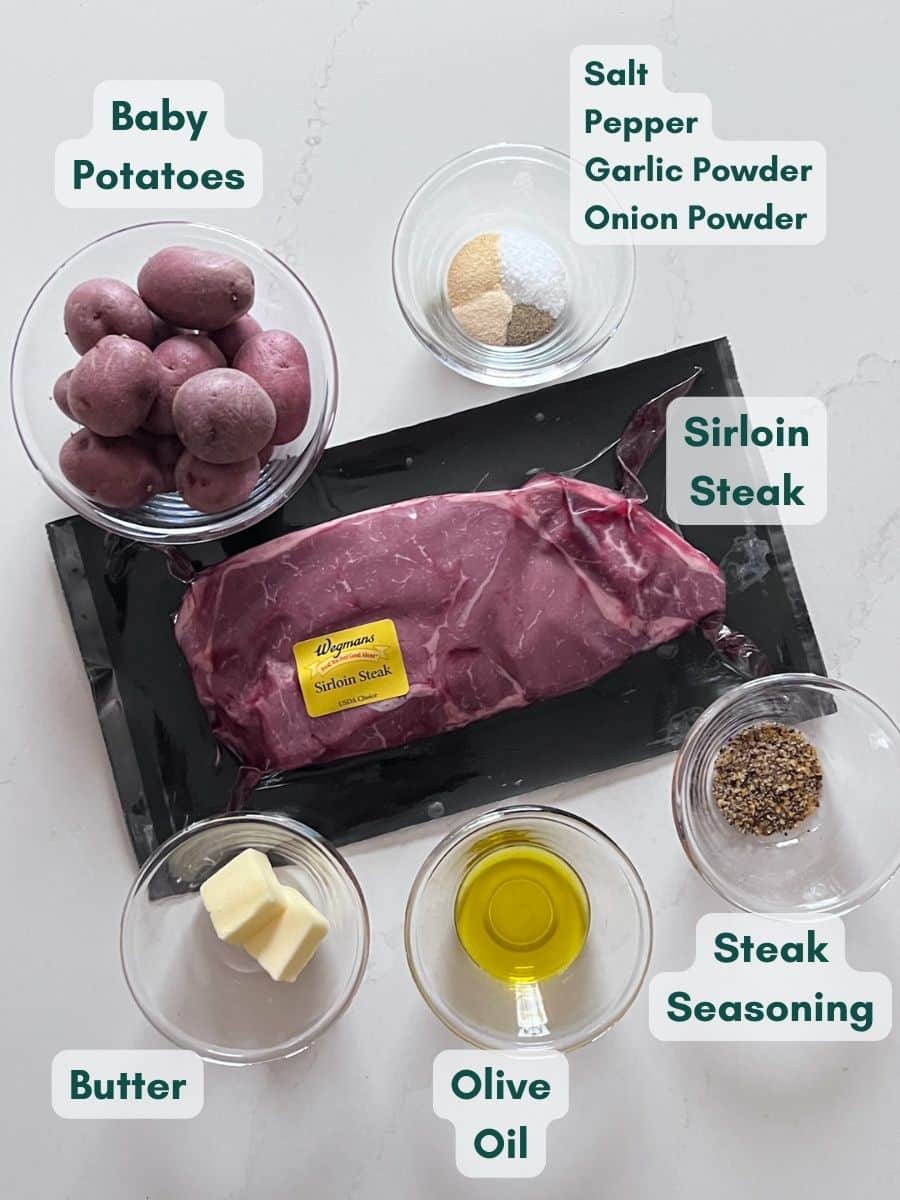
    An overhead image of the labeled ingredients.

    How To Make Sirloin Steak Tips and Potatoes

    Step 1: Cook potatoes

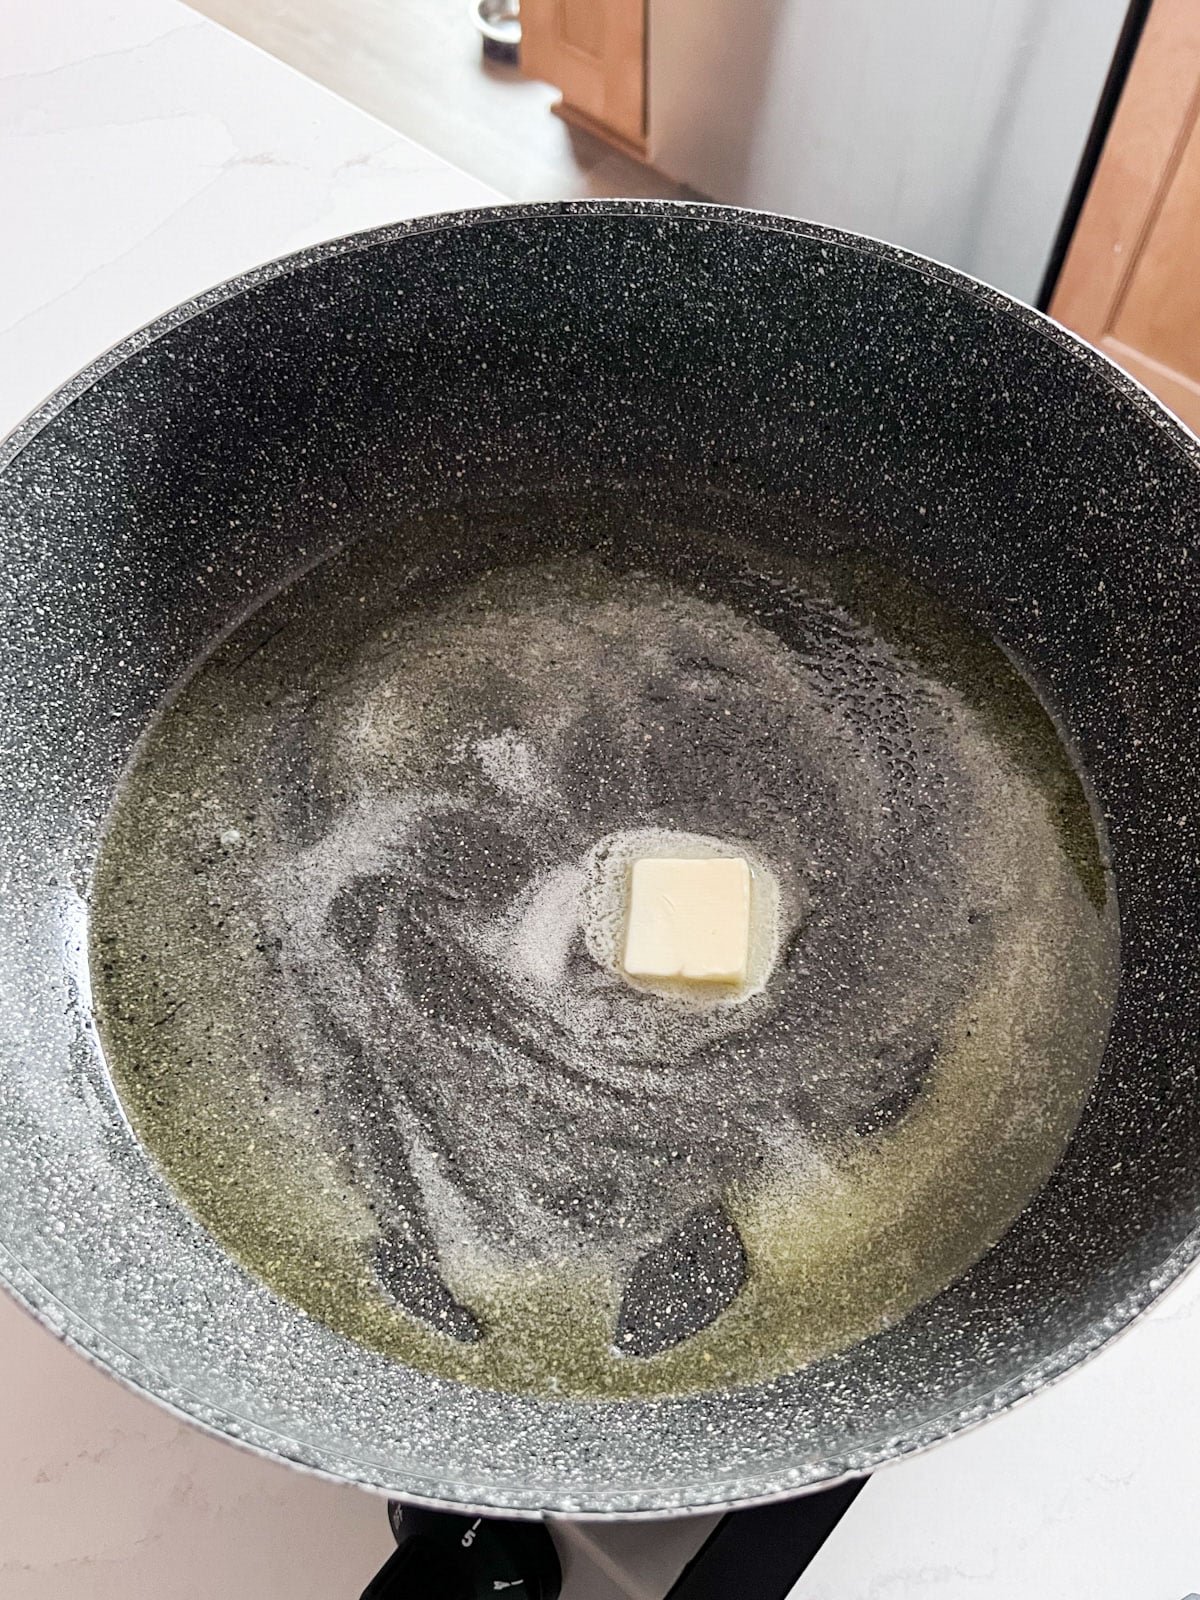
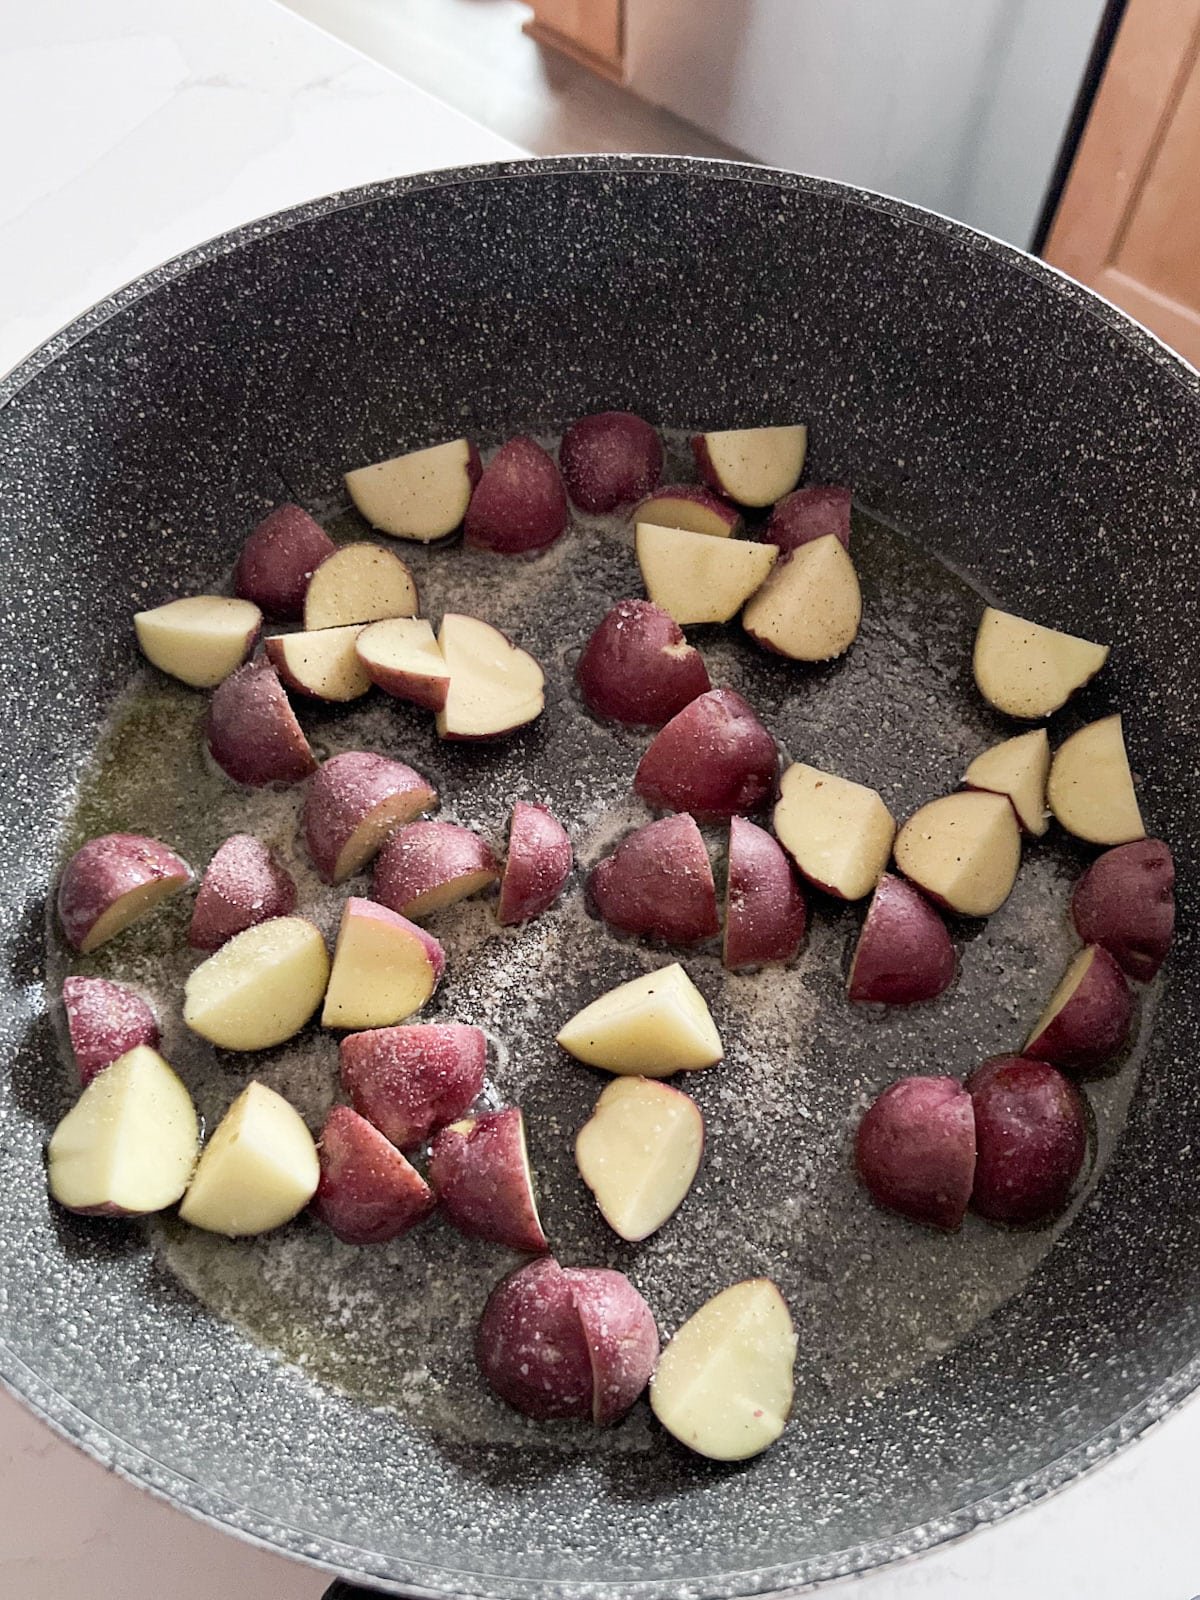
    Heat butter and oil in a sauté pan. Combine salt, pepper, onion powder, and garlic powder in a bowl. Add potatoes to pan along with half the seasonings. Cook 4-5 minutes.

    Butter melting in a hot skillet.
    Potatoes added to the butter in the skillet.

    Step 2: Prep top sirloin filet bites

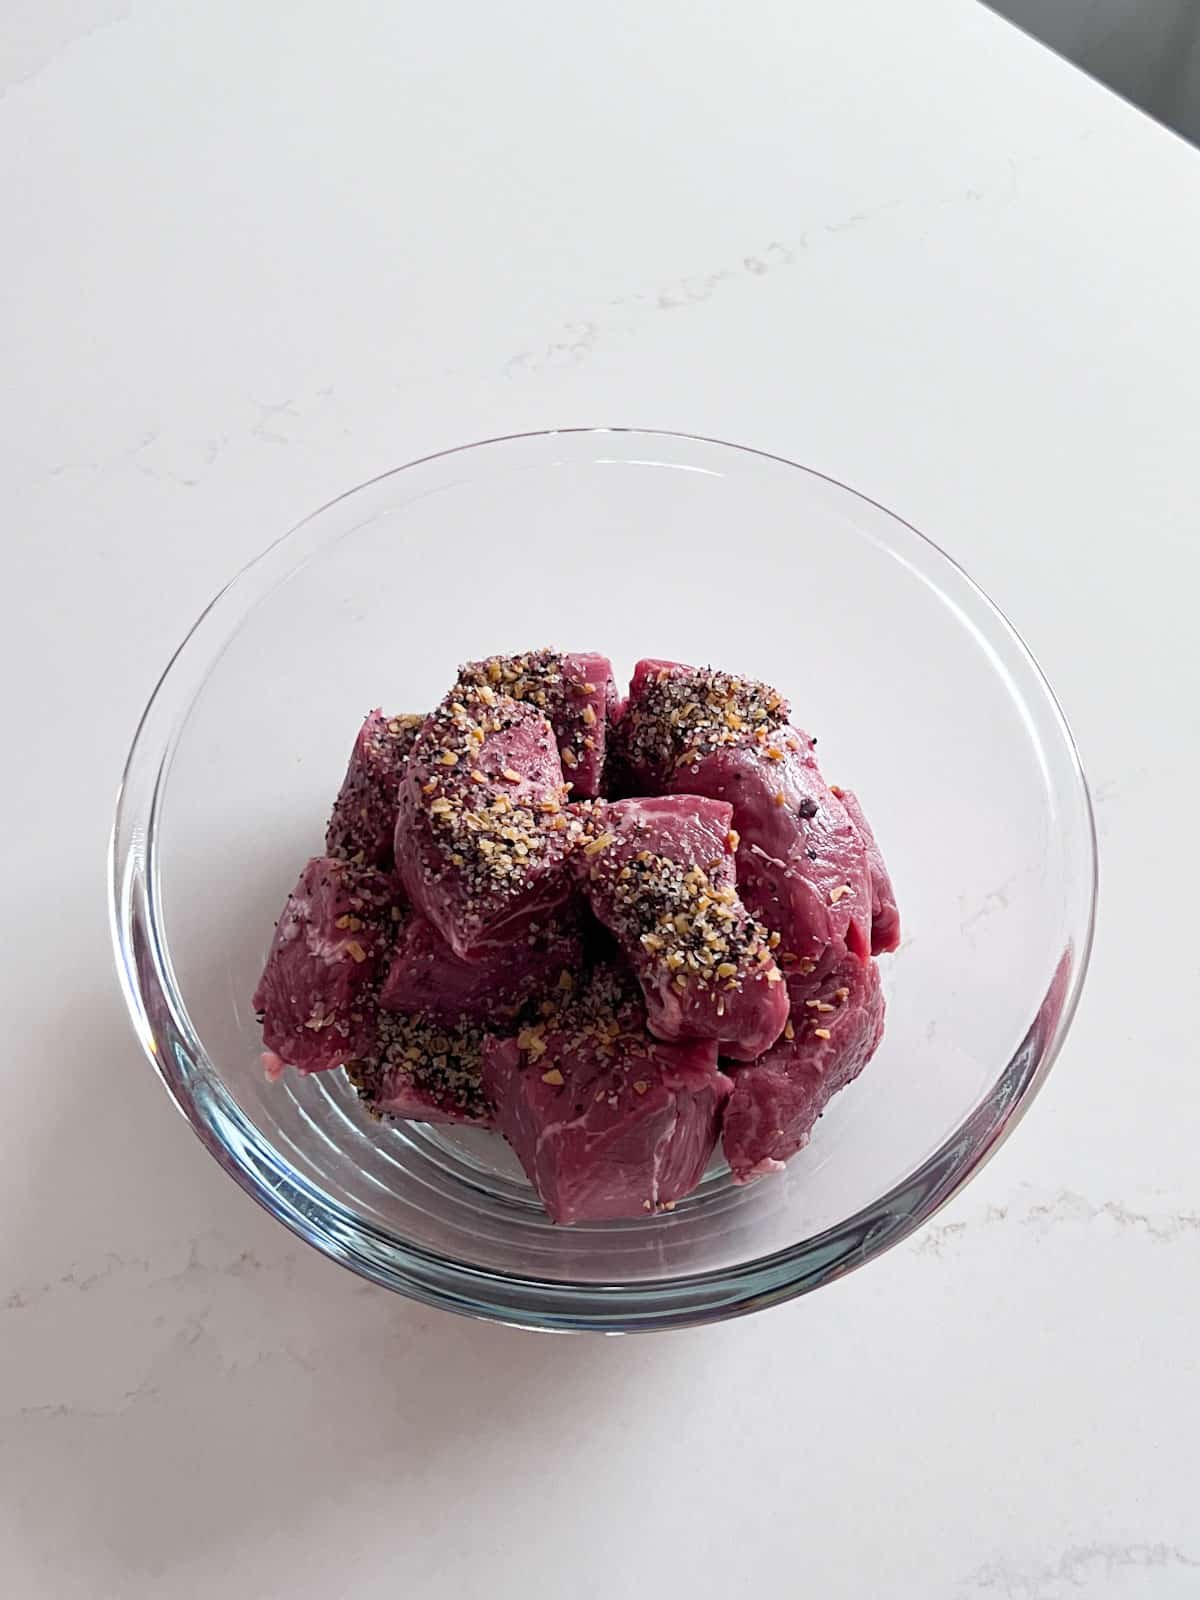
    While the potatoes cook, toss the sirloin steak tips in the Montreal Steak Seasoning.

    Steak bites in a glass bowl with seasoning on them.

    Step 3: Remove Potatoes

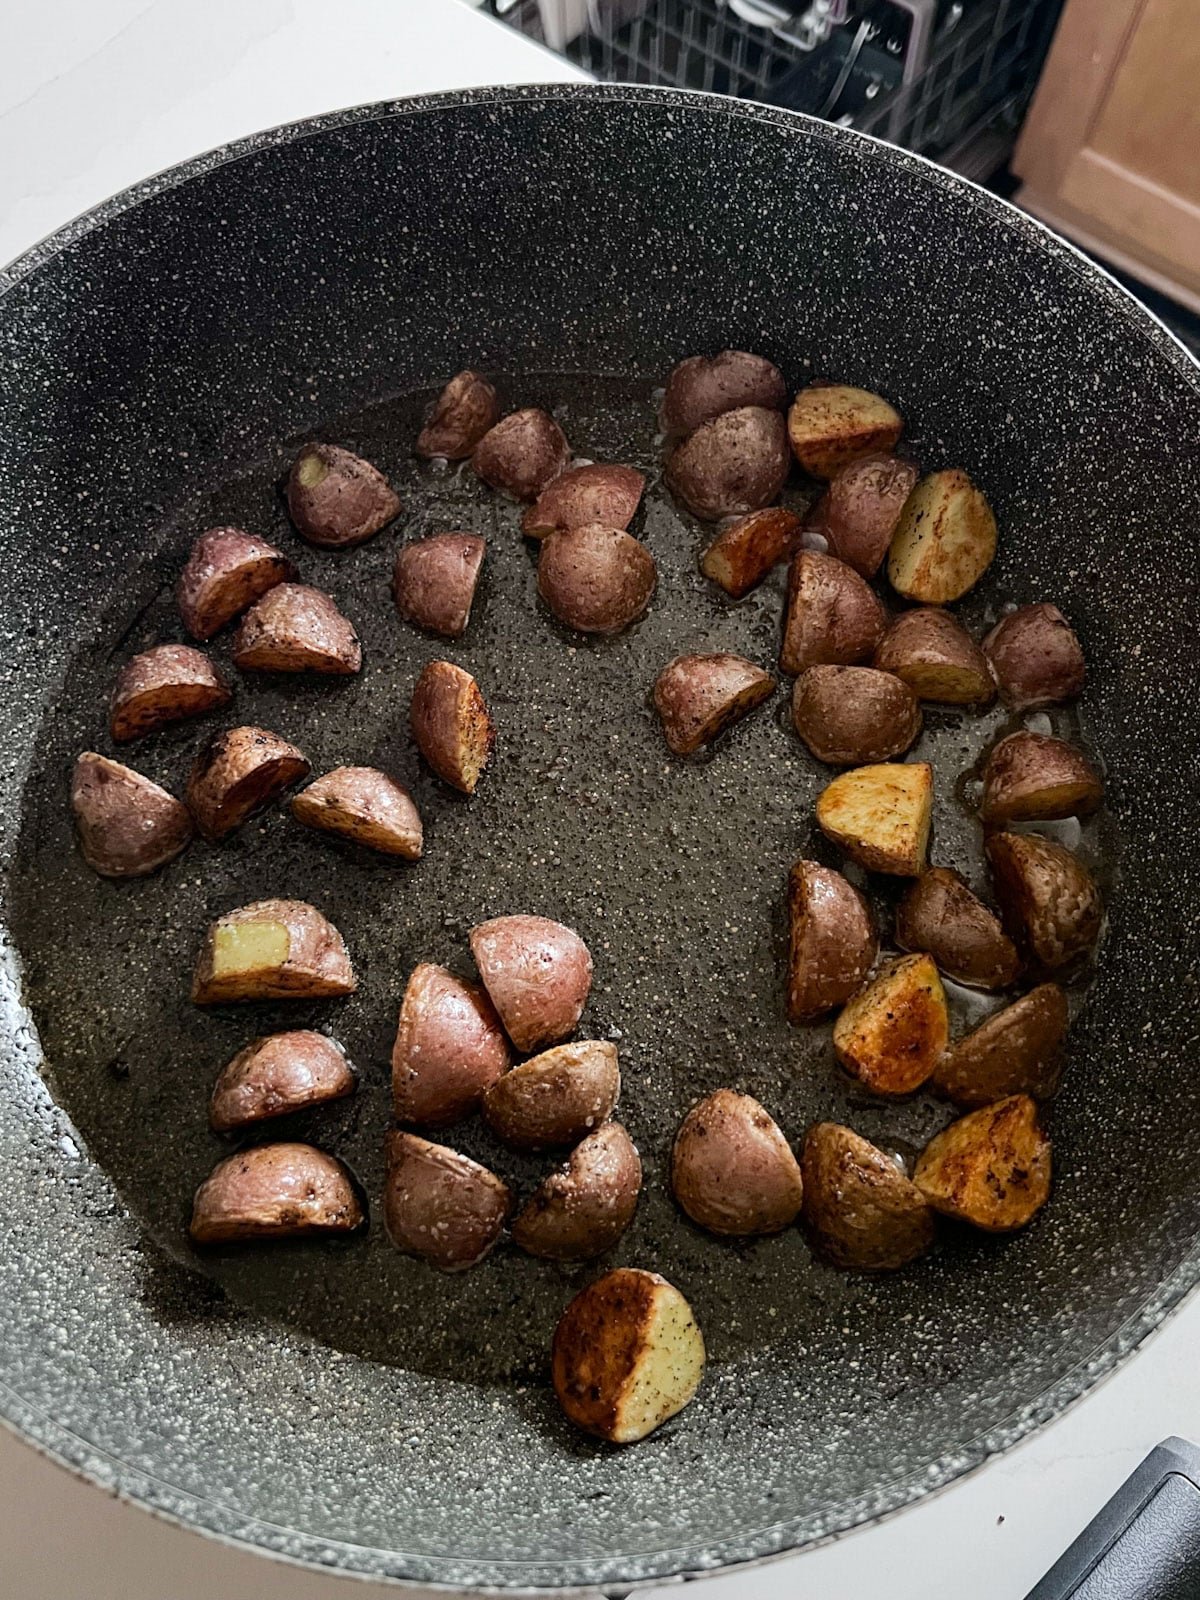
    Turn the potatoes and sprinkle with the rest of the seasoning. Continue cooking, then remove from the pan and cover with foil to help finish cooking with the steam.

    Partially cooked potatoes in a greased skillet cooking.
    Almost fully cooked potatoes cooking in a skillet.

    Step 4: Add steak

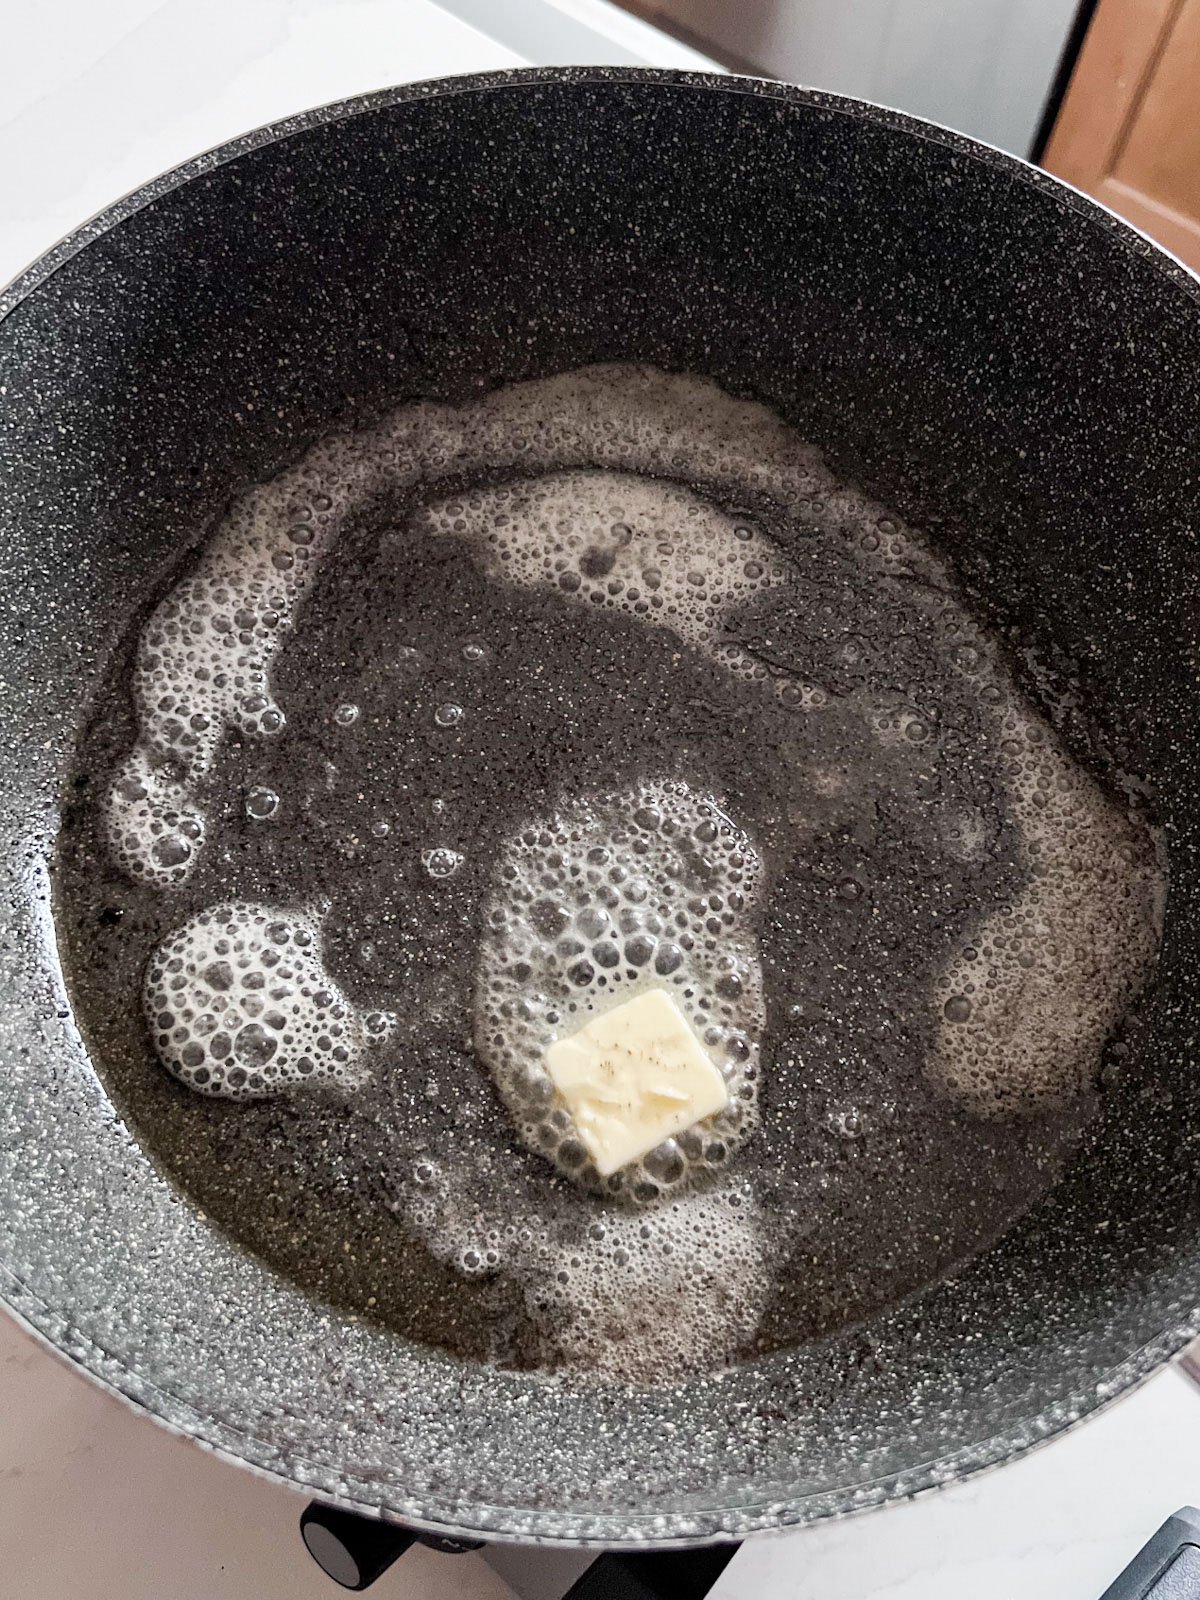
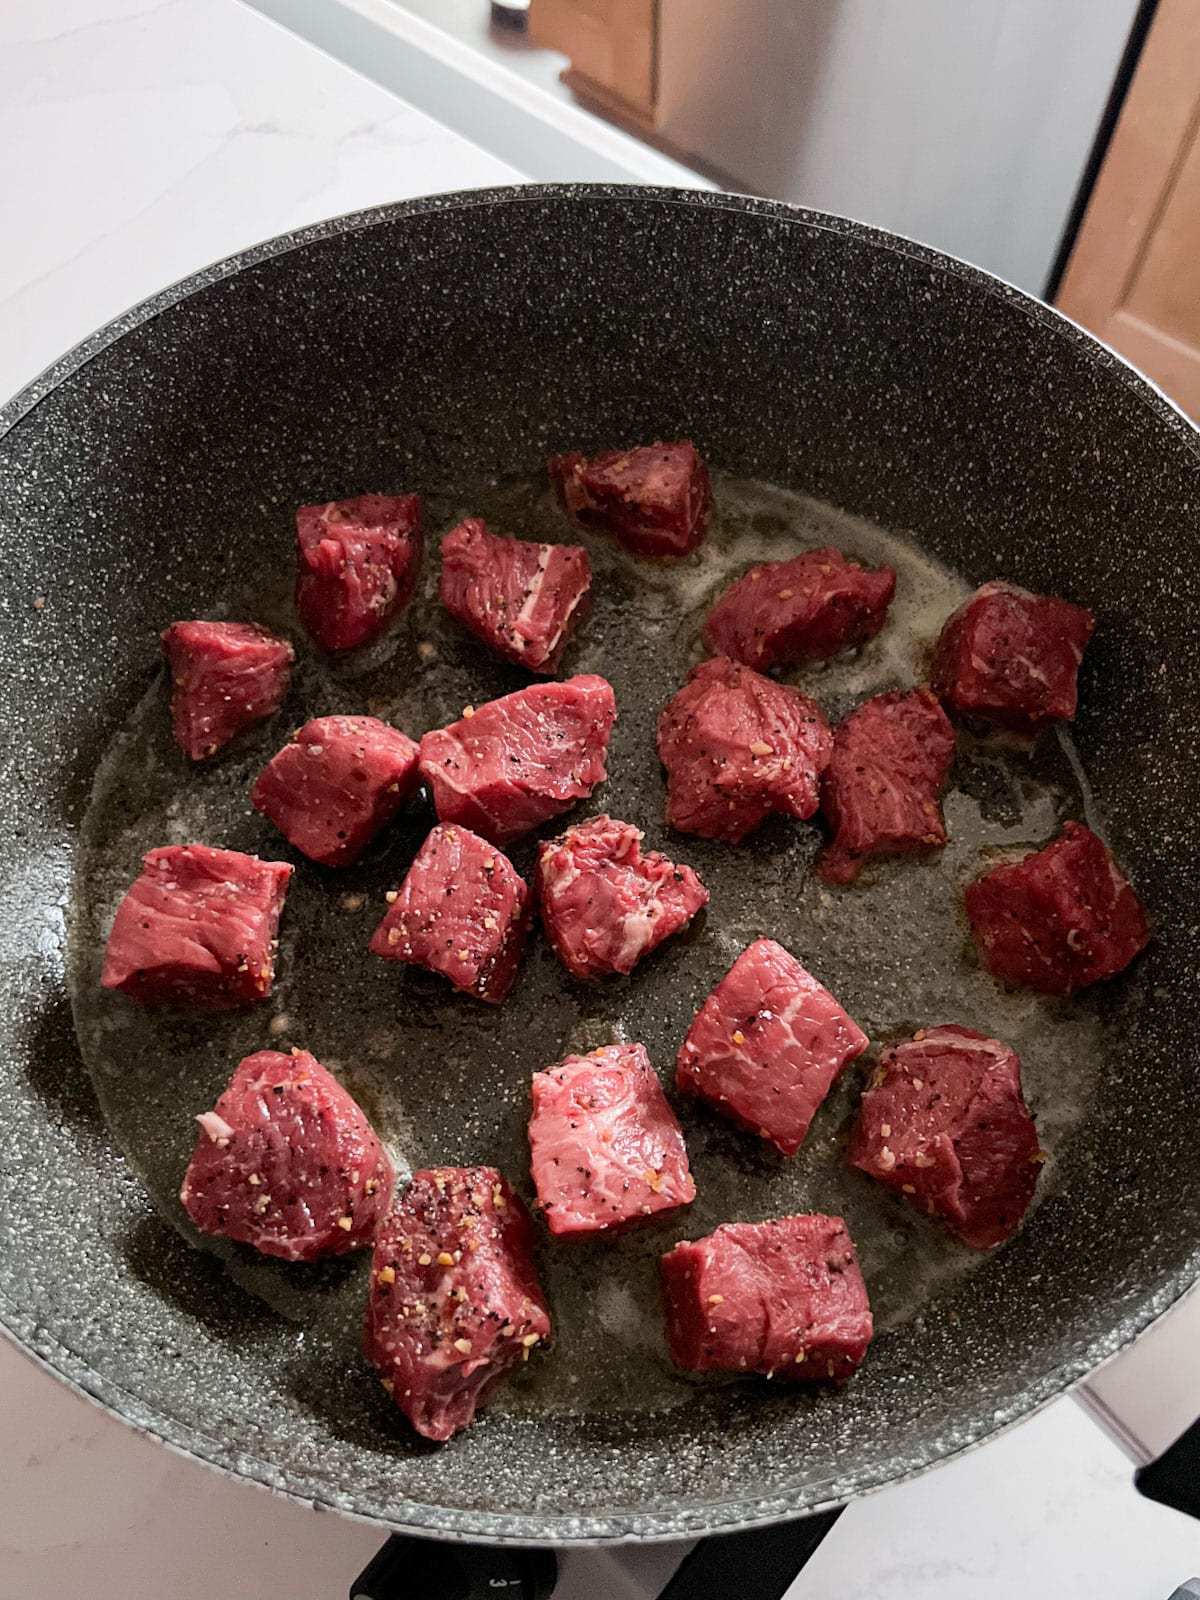
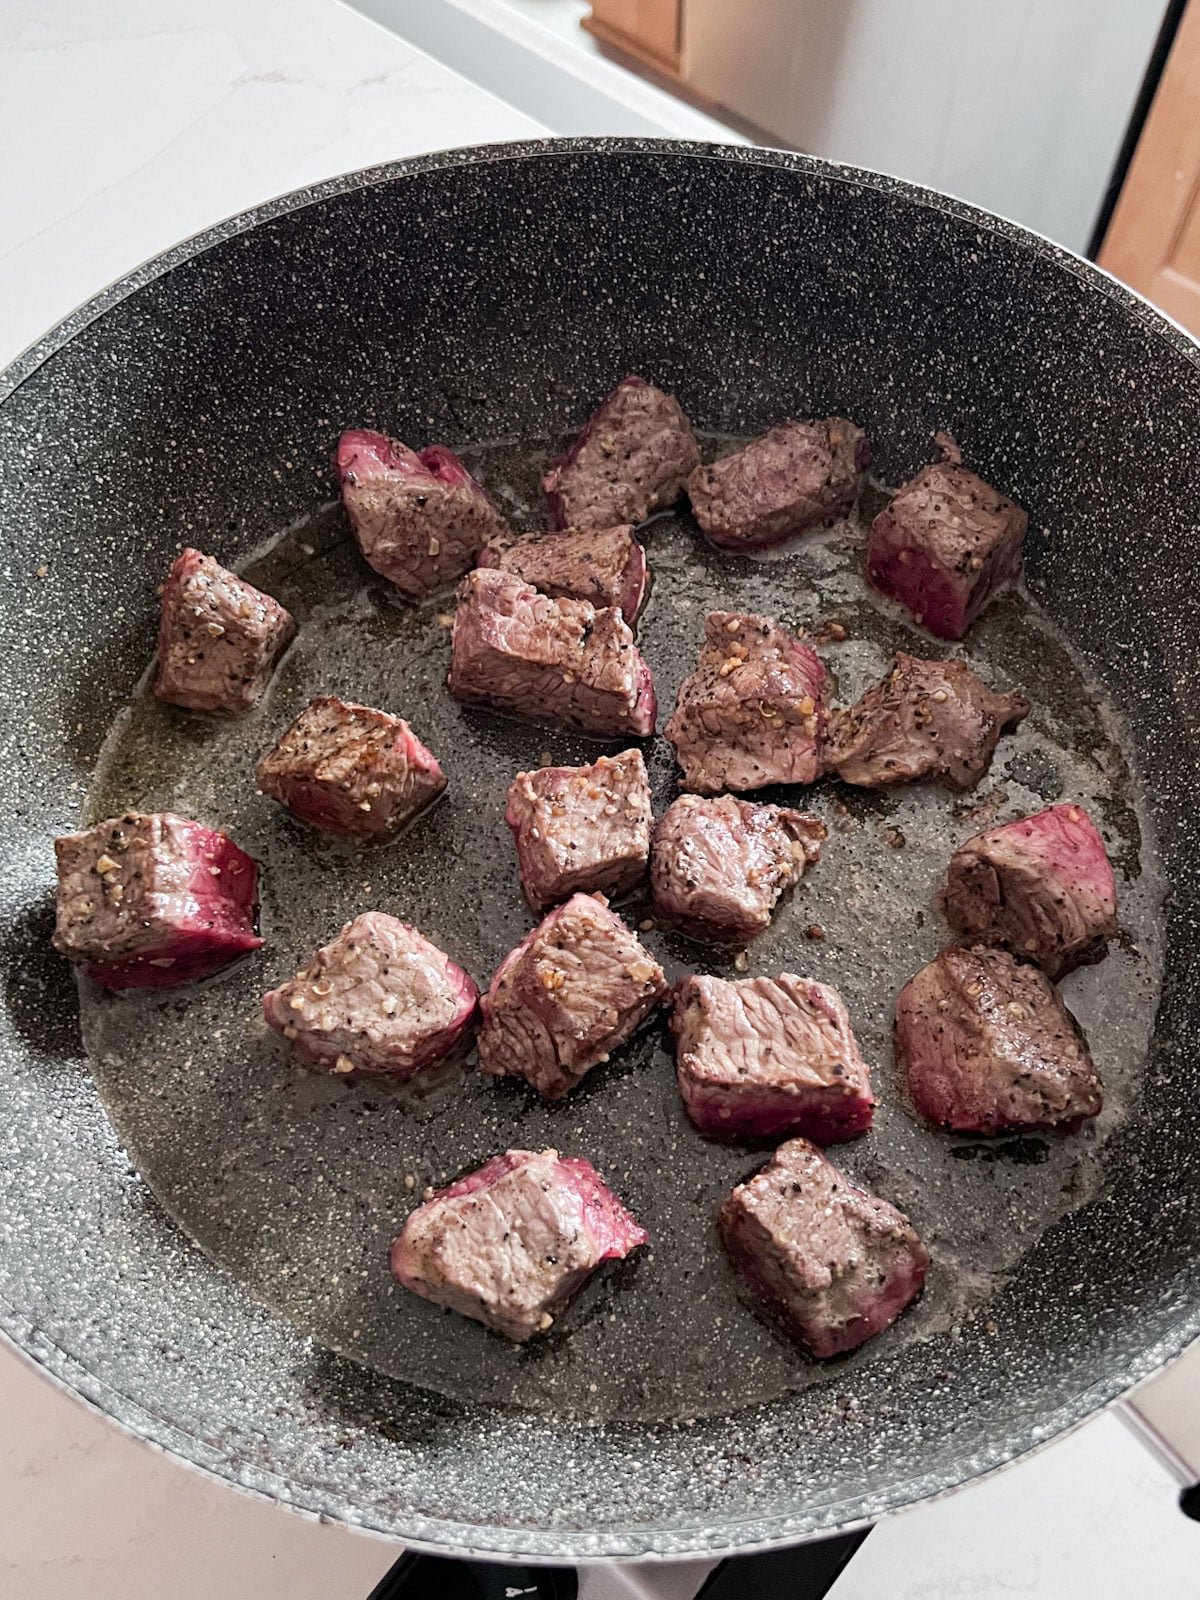
    Add more butter to pan and add top sirloin steak. Cook until brown on all sides.

    Butter melting in a hot skillet.
    Raw beef chunks added to the melted butter in the skillet.

    Step 5: Finish cooking

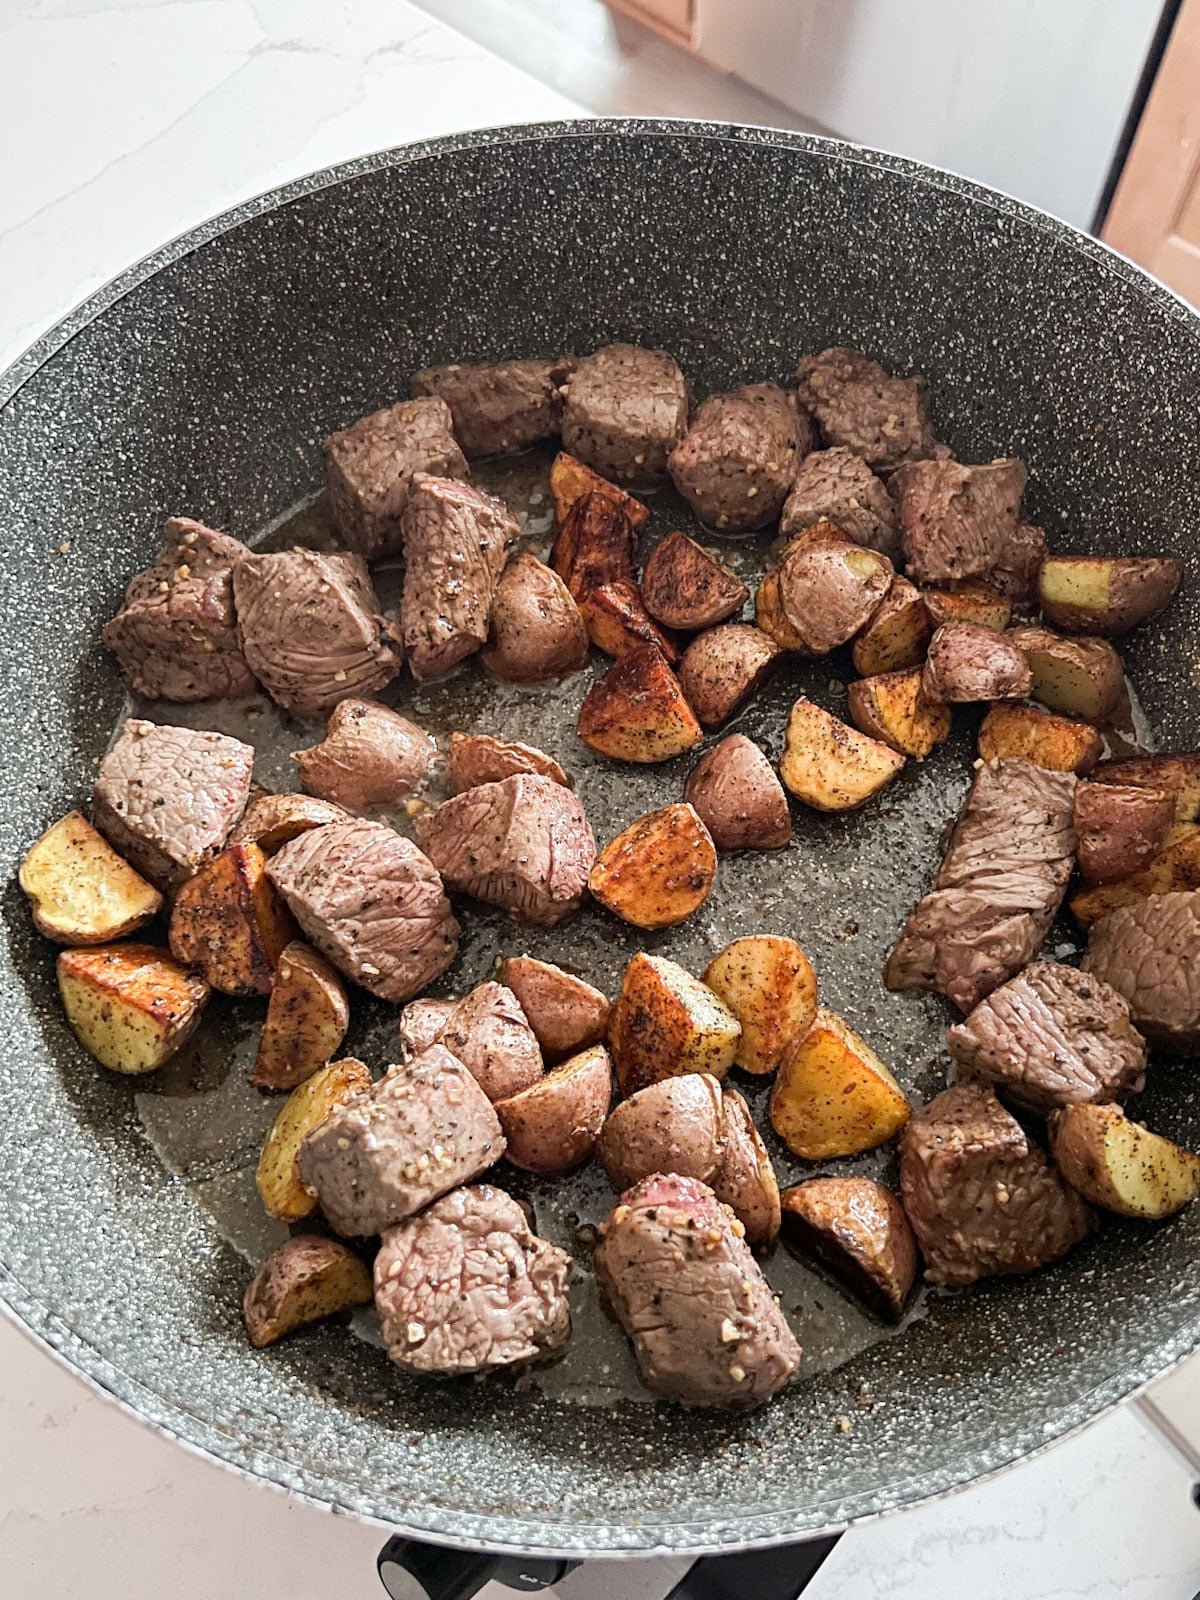
    When the top sirloin bites are almost done add potatoes back to the pan. Let rest for 2 minutes then serve with chopped parsley. Enjoy!

    Partially cooked beef chunks cooking in a skillet.
    Potatoes added to the skillet of cooked beef.

    Frequently Asked Questions

    What cut of beef is Sirloin?

    Sirloin comes from the rear portion of the cow and it comes in two parts, top and bottom. I prefer top sirloin steak because it tends to be more tender. But both types will work- the key to this cut is short cooking time a quick sear on each side makes for the perfect medium rare- you can cook longer for more doneness if you prefer.

    Can you make sirloin steak tips ahead?

    While I wouldn't encourage you to cook the whole top sirloin steak recipe ahead, you can cut the steak ahead of time, wash the potatoes and even measure out the seasonings.

    Can I substitute regular potatoes for baby potatoes?

    Yes, just cut them to a uniform size (around 1 inch is ideal).

    Can I make this top sirloin steak recipe dairy-free?

    Yes! Just sub in a non-dairy butter alternative or even olive oil.

    How long do top sirloin steak bites last?

    While this recipe are best served immediately, the leftovers will last 3 days covered in the refrigerator and can be reheated in a pan or the microwave.

    Overhead close up image of cooked steak and potatoes.

    Tips For Making Garlic Steak Bites

    • Room temperature is best. I like to pull the top sirloin filet out at the beginning and let it sit and come closer to room temperature for 30 minutes while I prep and cook the potatoes.
    • Dry sirloin steak tips. Pat the steak dry for optimal pan searing.
    • Uniform-sized is key. Cut the potatoes and steak pieces to around the same size so that they cook evenly. I prefer 1 inch chunks for the potatoes and 1 ½ - 2 inch chunks for the beef.
    • Combine butter and oil for best results. Using a mix of butter and olive oil helps prevent the butter from burning.
    • Cook evenly. Turn the potatoes often to help crisp each side evenly. I find the flat sides brown up super nice
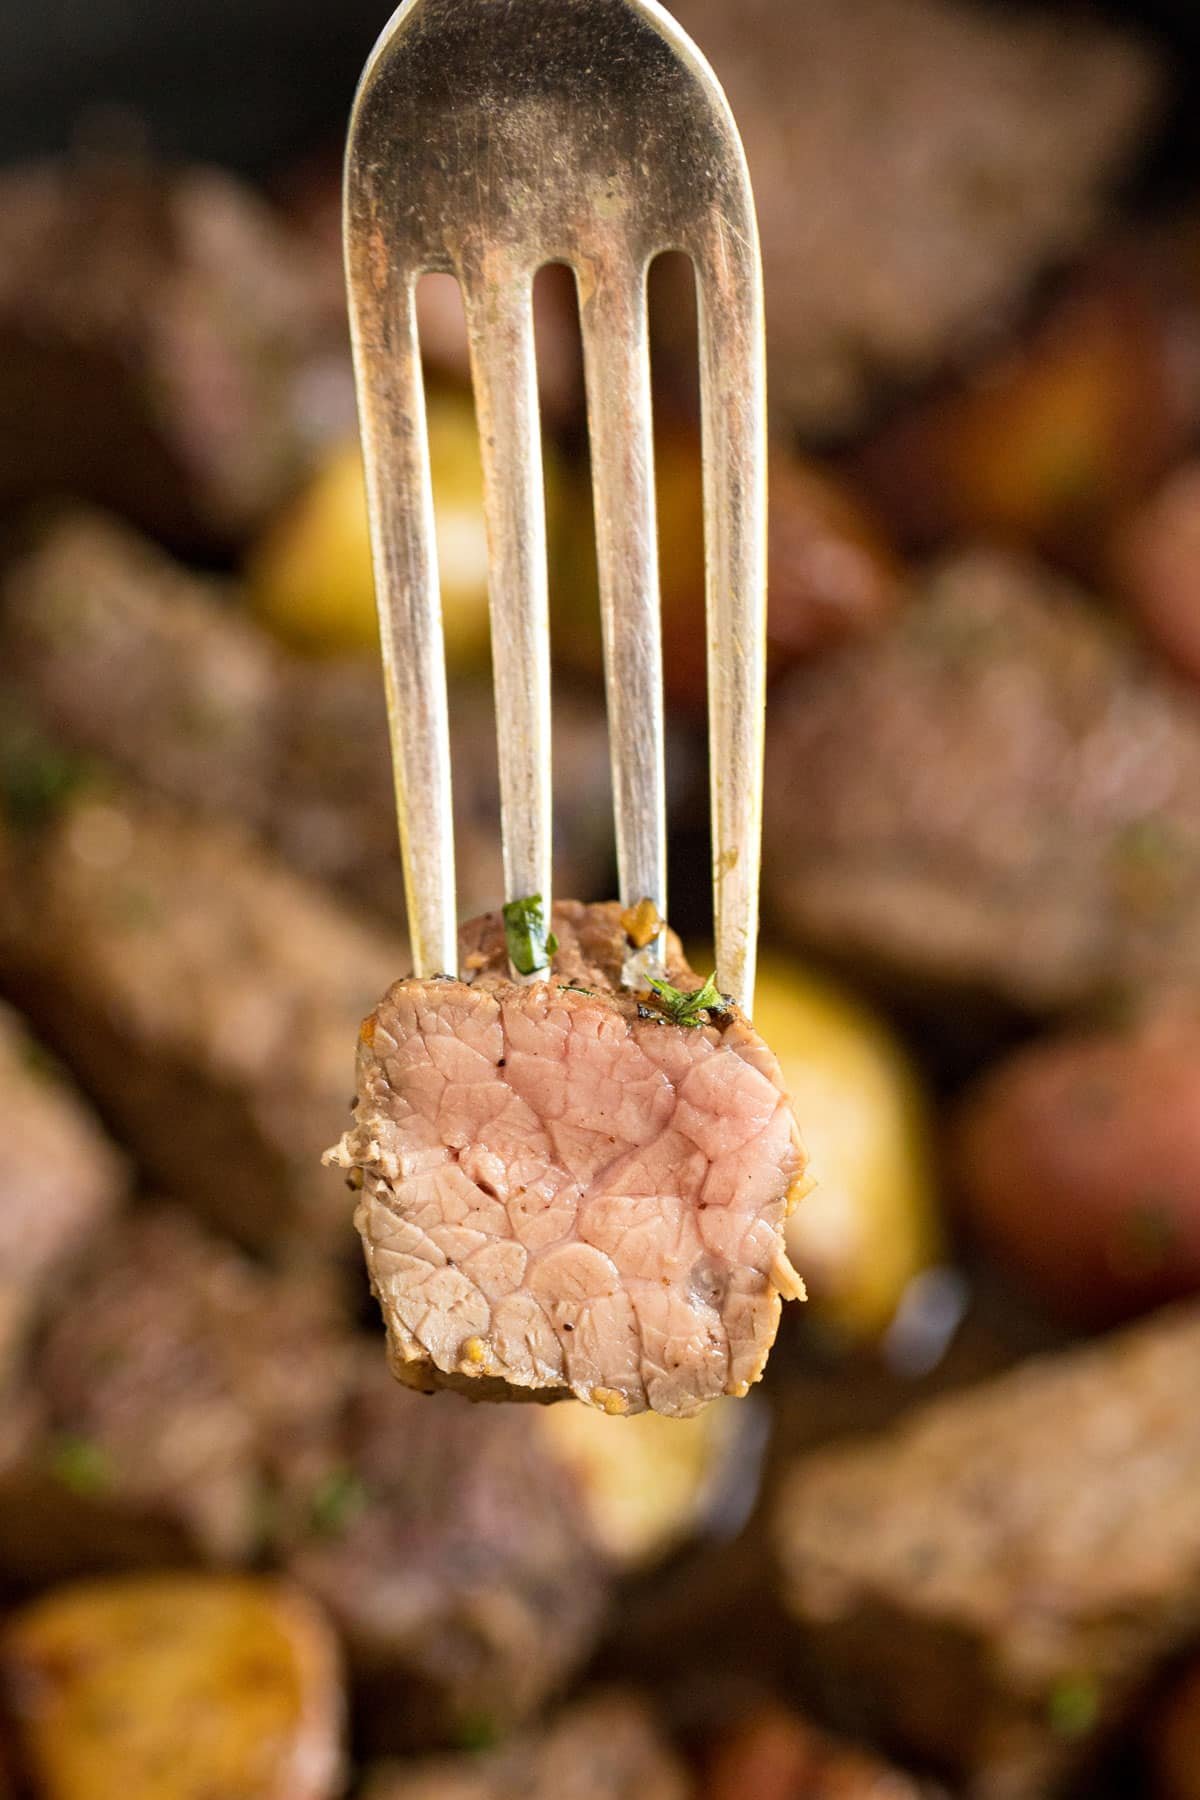
    • Steak cooks quickly. The cooking goes pretty fast with the steak- in terms of cooking time, I cook mine about 2 minutes per side so they're a nice medium rare inside but if you like them a little more well done, just keep them in a minute or two longer (just remember- you can always put them back into the pan if they're under cooked- but once they're overcooked you can't go back).
    • Turn often. Be sure you're turning the steak bites often to brown each side. The idea is to get a quick sear so you're not overcooking.
    • Don't forget to rest it! Let the steak rest for a couple minutes before serving.
    • Prep ahead: Cut meat, wash potatoes and measure seasonings.
    • Storage and Leftovers: Leftovers will last up to 3 days covered in the refrigerator.
    A close up image of a fork holding up a cooked piece of steak that's cut revealing the medium inside of the steak.

    What To Serve With Garlic Butter Steak Bites

    Round your dinner out with the delicious recipes:

    • Marinated Vegetable Salad
    • Parmesan Roasted Broccoli
    • Black Forest Ice Cream Pie

    Other Fantastic Steak Recipes

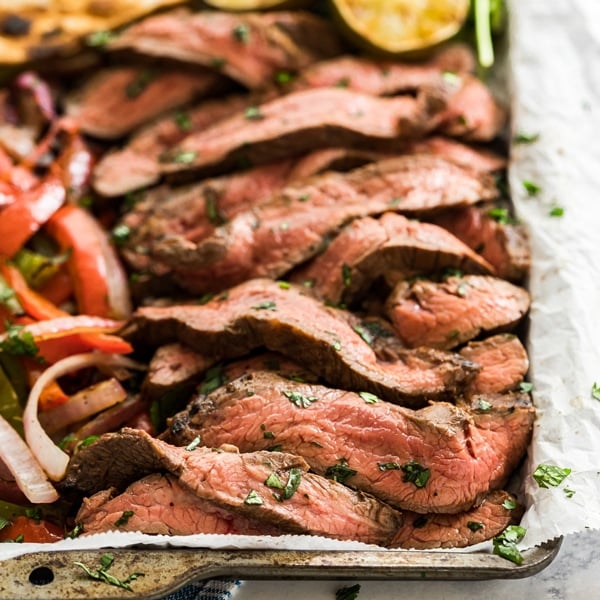
    • Steak Fajitas are good, but Grilled Steak Fajitas are better! Tender flank steak makes a great fajita protein with charred peppers and onions- this is an easy dinner that's perfect for a summer get-together.
      Grilled Steak Fajitas
    • One of the best ways to make a steak is on the grill and I'm going to teach you how to cook steak on the grill. In this tutorial you'll learn tips, tricks, hacks and everything you need to know to make it as easy as possible!
      How to Cook Steak on the Grill | The Life Jolie Kitchen Basics
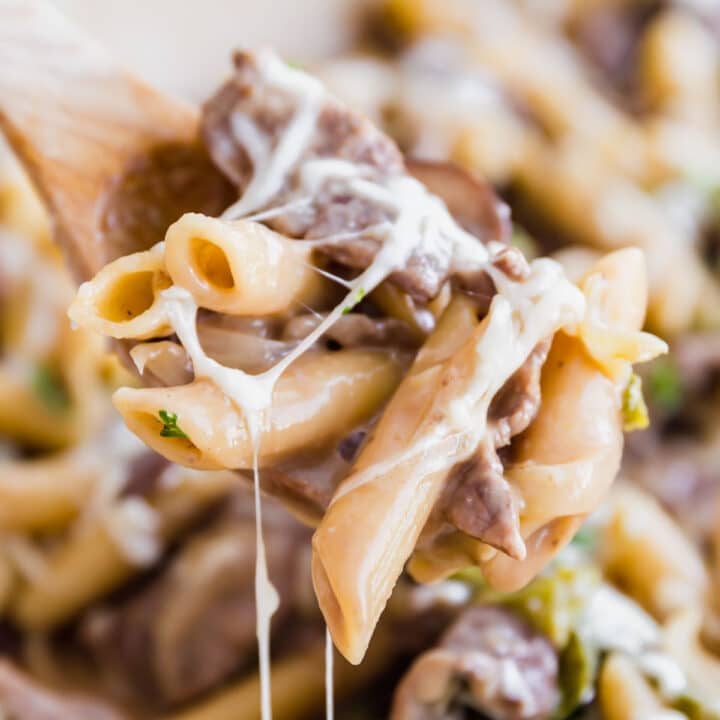
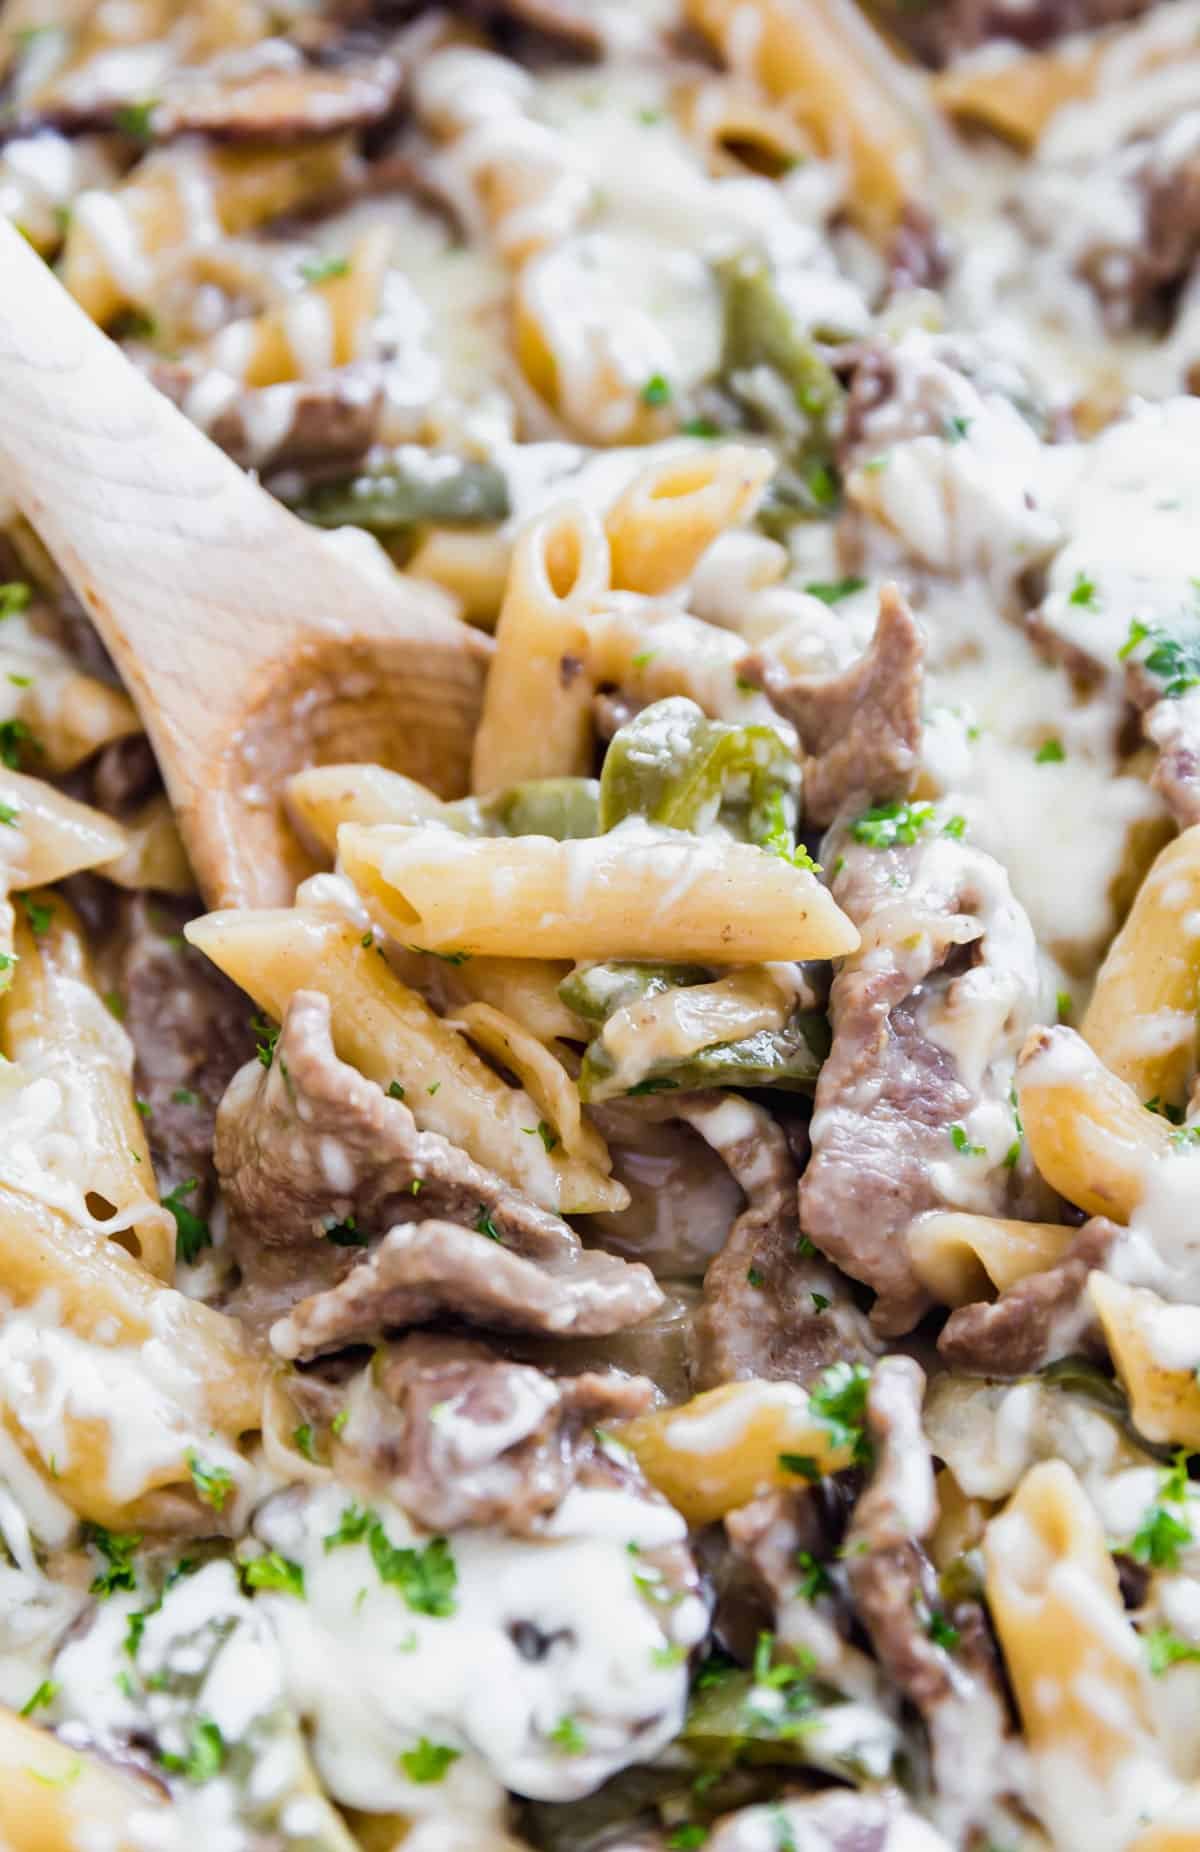
    • A wooden spoon holing a scoop of Philly steaks pasta with melty cheese all over it.
      One Pot Philly Cheesesteak Pasta
    • A flank steak with slices cut and lined up in front of it and fresh thyme around it.
      Red Wine Flank Steak Marinade

    Love this recipe? Please leave a 5 star ⭐️⭐️⭐️⭐️⭐️ rating in the recipe card below ⬇️ and/or a review in the comment section further down. Check out my Amazon Store for all my favorite tools, including those used in this recipe. And follow @thelifejolie on Instagram and TikTok!

    Overhead close up image of cooked steak and potatoes.

    Steak Bites and Potatoes

    Jessy Freimann
    Steak Bites and Potatoes are an easy one-pan dinner. It's full of delicious flavor and comes together in less than 30 minutes- the perfect option for meat-and-potatoes on a weeknight.
    4.89 from 17 votes
    Print Recipe Pin Recipe
    Prep Time 10 minutes mins
    Cook Time 15 minutes mins
    Resting time 3 minutes mins
    Course dinner, Main, Main Course, Main dish
    Cuisine American
    Servings 4 servings
    Calories 170 kcal

    Equipment

    • cutting board
    • Chef Knife
    • Measuring cups and spoons
    • Wooden Spoons
    • Skillet

    Ingredients
      

    • 1 Tablespoon olive oil
    • 2 Tablespoons salted butter, divided
    • ¾ teaspoon kosher salt
    • ¼ teaspoon ground black pepper
    • ½ teaspoon onion powder
    • ¼ teaspoon garlic powder
    • 1 pound baby potatoes halved to 1 inch chunks (or full size potatoes cut to 1 inch chunks)
    • 2 pounds top sirloin steak, cut to 2 inch chunks
    • 1 teaspoon Low Sodium Montreal Steak Seasoning (or ½ teaspoon if full sodium)
    • Fresh parsley chopped- for garnish

    Instructions
     

    • In a large saute pan, melt 1 Tablespoon butter and olive oil over medium high heat.
    • In a small bowl combine, salt, pepper, onion powder and garlic powder. Set aside.
    • Once oil is shimmering, add potatoes flat-side down to the pan in a single layer and sprinkle them with ½ the seasoning mixture. Cook for around 4-5 minutes.
    • While potatoes cook, toss steak bites in Montreal Steak Seasoning.
    • Turn the potatoes and sprinkle with remaining seasoning. Cook for 4-5 more minutes. Remove from pan to a bowl and cover with foil to steam. Set aside.
    • Melt 1 Tablespoon butter and add steak bites in a single layer. Cook for 2 minutes per side for medium rare (or a little long if you'd like it more well done). Turn frequently to brown all sides- this goes fast!
    • Add potatoes back into the pan and cook for 1 more minute.
    • Rest for 2 minutes and serve immediately with a sprinkle of parsley for garnish.

    Video

    Notes

    • Room temperature is best. I like to pull the top sirloin filet out at the beginning and let it sit and come closer to room temperature for 30 minutes while I prep and cook the potatoes.
    • Dry sirloin steak tips. Pat the steak dry for optimal pan searing.
    • Uniform-sized is key. Cut the potatoes and steak pieces to around the same size so that they cook evenly. I prefer 1 inch chunks for the potatoes and 1 ½ - 2 inch chunks for the beef.
    • Combine butter and oil for best results. Using a mix of butter and olive oil helps prevent the butter from burning.
    • Cook evenly. Turn the potatoes often to help crisp each side evenly. I find the flat sides brown up super nice
    • Steak cooks quickly. The cooking goes pretty fast with the steak- in terms of cooking time, I cook mine about 2 minutes per side so they're a nice medium rare inside but if you like them a little more well done, just keep them in a minute or two longer (just remember- you can always put them back into the pan if they're under cooked- but once they're overcooked you can't go back).
    • Turn often. Be sure you're turning the steak bites often to brown each side. The idea is to get a quick sear so you're not overcooking.
    • Don't forget to rest it! Let the steak rest for a couple minutes before serving.
    • Prep ahead: Cut meat, wash potatoes and measure seasonings.
    • Storage and Leftovers: Leftovers will last up to 3 days covered in the refrigerator.

    Nutrition

    Serving: 1cupCalories: 170kcalCarbohydrates: 20gProtein: 2gFat: 9gSaturated Fat: 4gPolyunsaturated Fat: 1gMonounsaturated Fat: 4gTrans Fat: 0.2gCholesterol: 15mgSodium: 488mgPotassium: 486mgFiber: 3gSugar: 1gVitamin A: 178IUVitamin C: 22mgCalcium: 17mgIron: 1mg
    Tried this recipe?Let us know how it was!

    Slow Cooker Chicken With Pineapple

    Feb 26, 2024 · 2 Comments

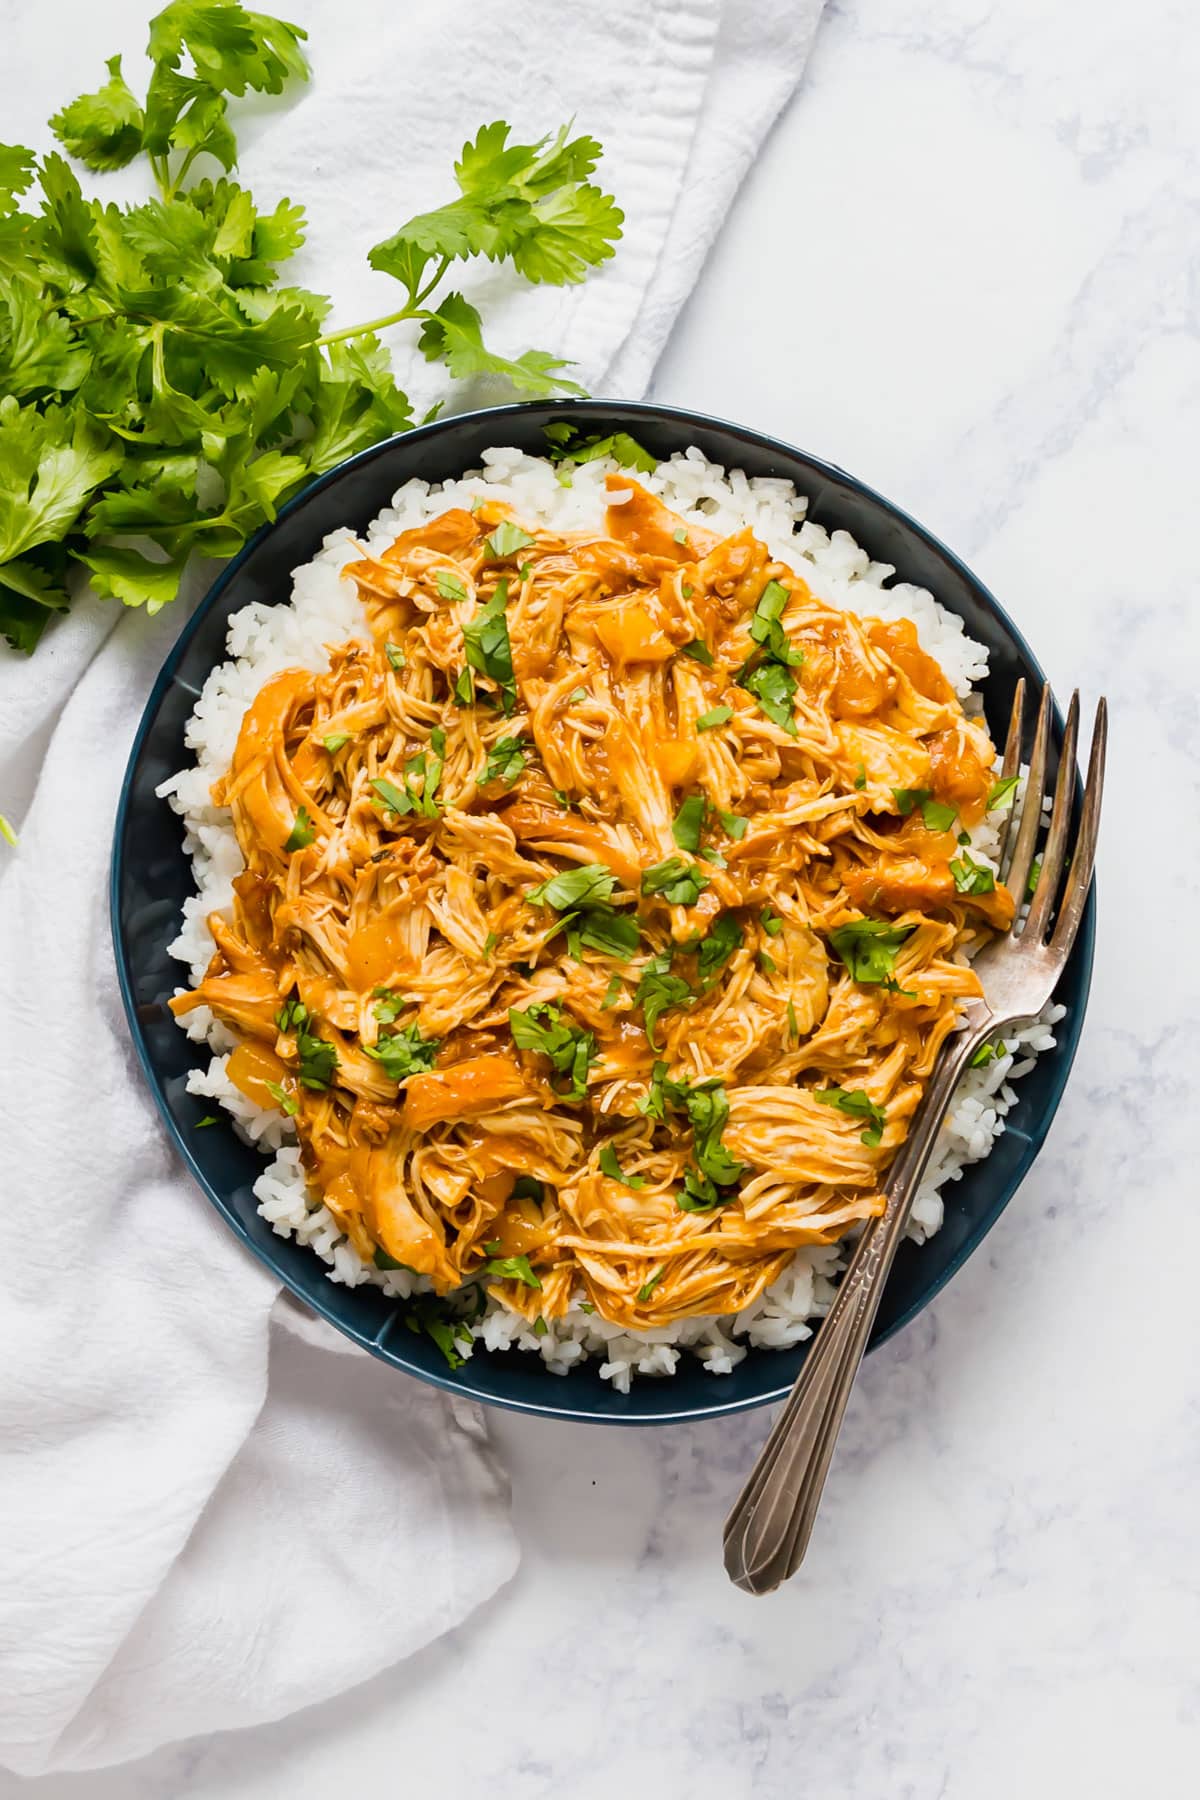
    pineapple chicken and rice in a blue bowl with cilantro behind it.

    Do you want an easy, 3 ingredient dinner without a ton of work? Make this Slow Cooker Chicken With Pineapple in your Crockpot or Instant Pot and serve it over rice, in a sandwich, or on top of a salad! 

    pineapple chicken and rice in a blue bowl with cilantro behind it.
    [feast_advanced_jump_to]

    Why You'll Love Slow Cooker Chicken Pineapple

    I love a good shredded chicken recipe! There are so many options for ways to serve it and repurpose it for multiple meals and meal preps. So I thought it would be fun to mix things up with a tropical chicken recipe.

    I love the idea of taking only a couple of ingredients and dumping them into a crockpot or instant pot and letting the machine to the rest. The great thing about these is that the chicken ends up fall-apart-tender and the other ingredients give it a robust flavor that will keep everyone coming back for more!

    • Crockpot or Instant Pot Friendly
    • Delicious
    • Tropical flavors
    • Great for weeknight dinners
    • Family Friendly
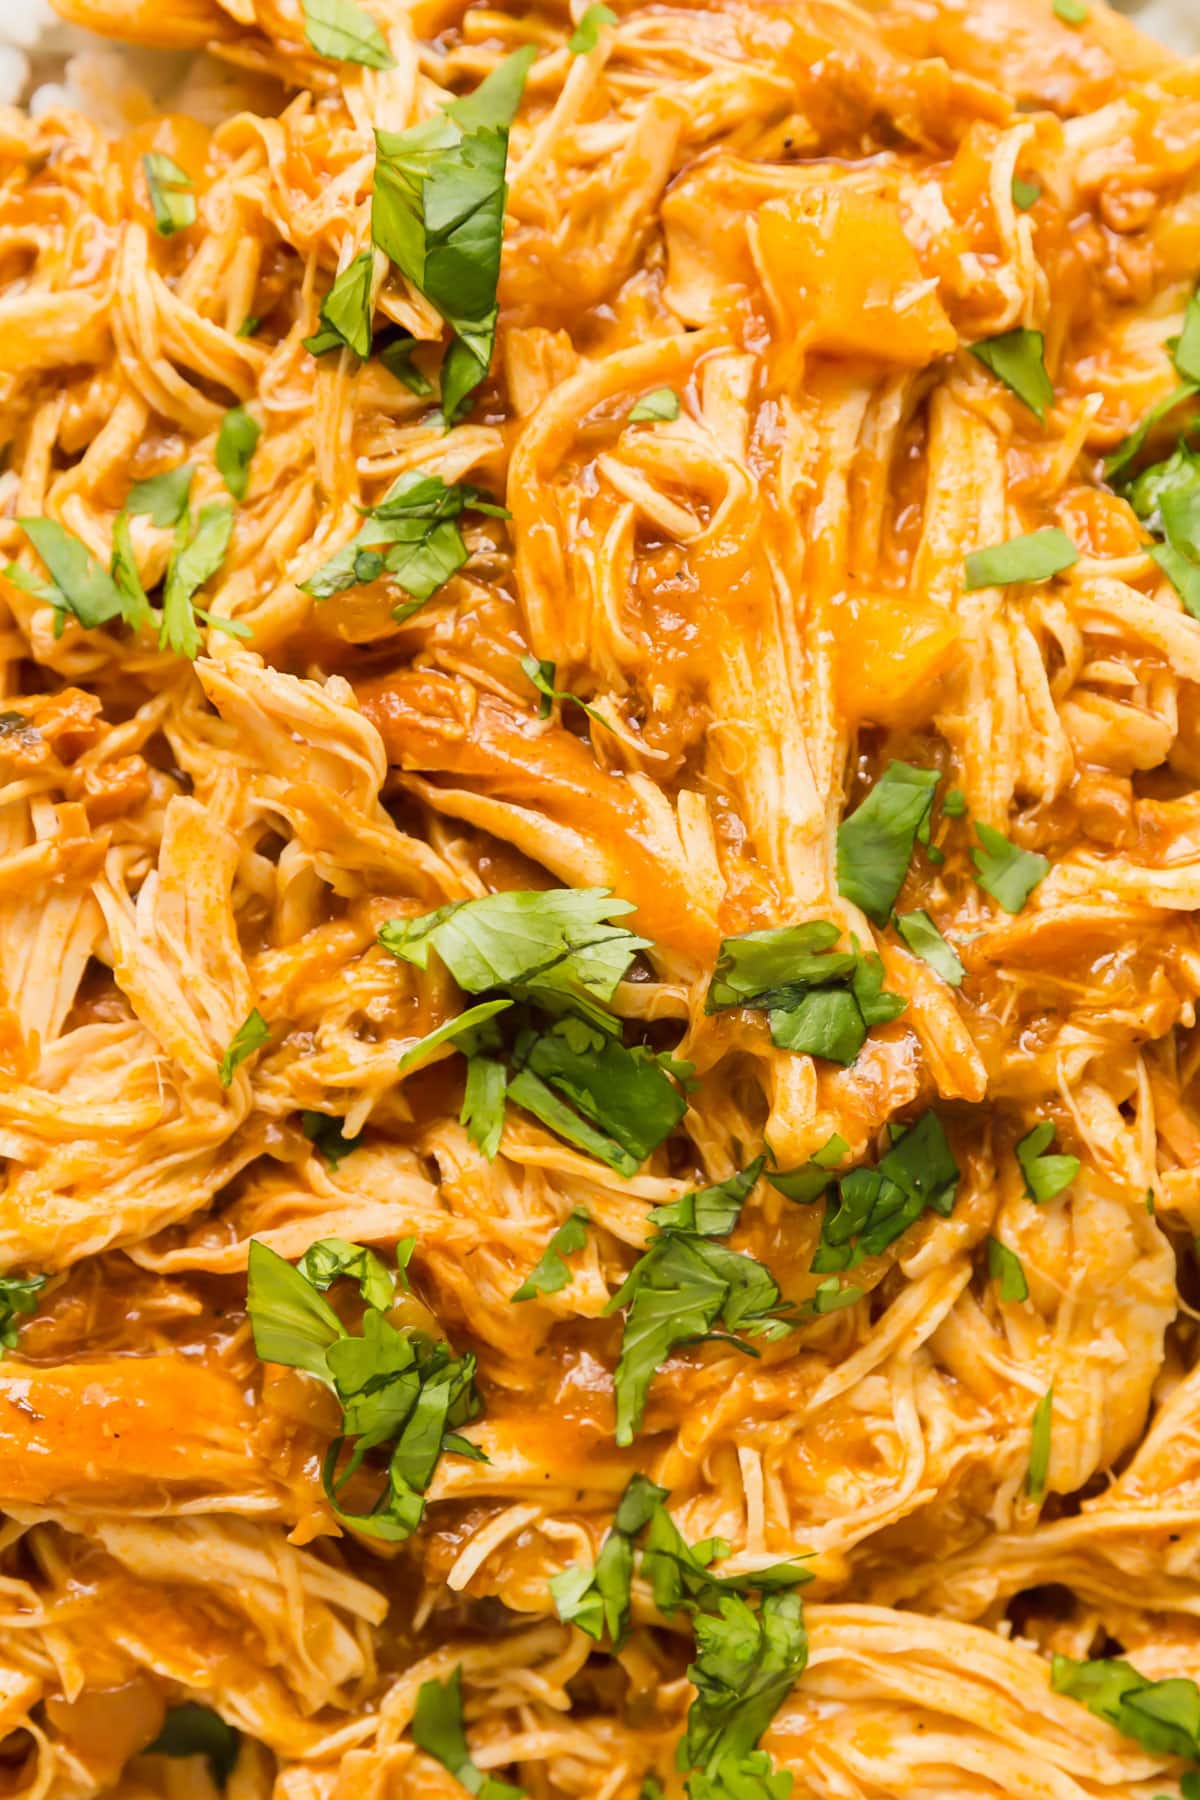
    A close up of the shredded chicken with pineapple and chopped cilantro on top of it.

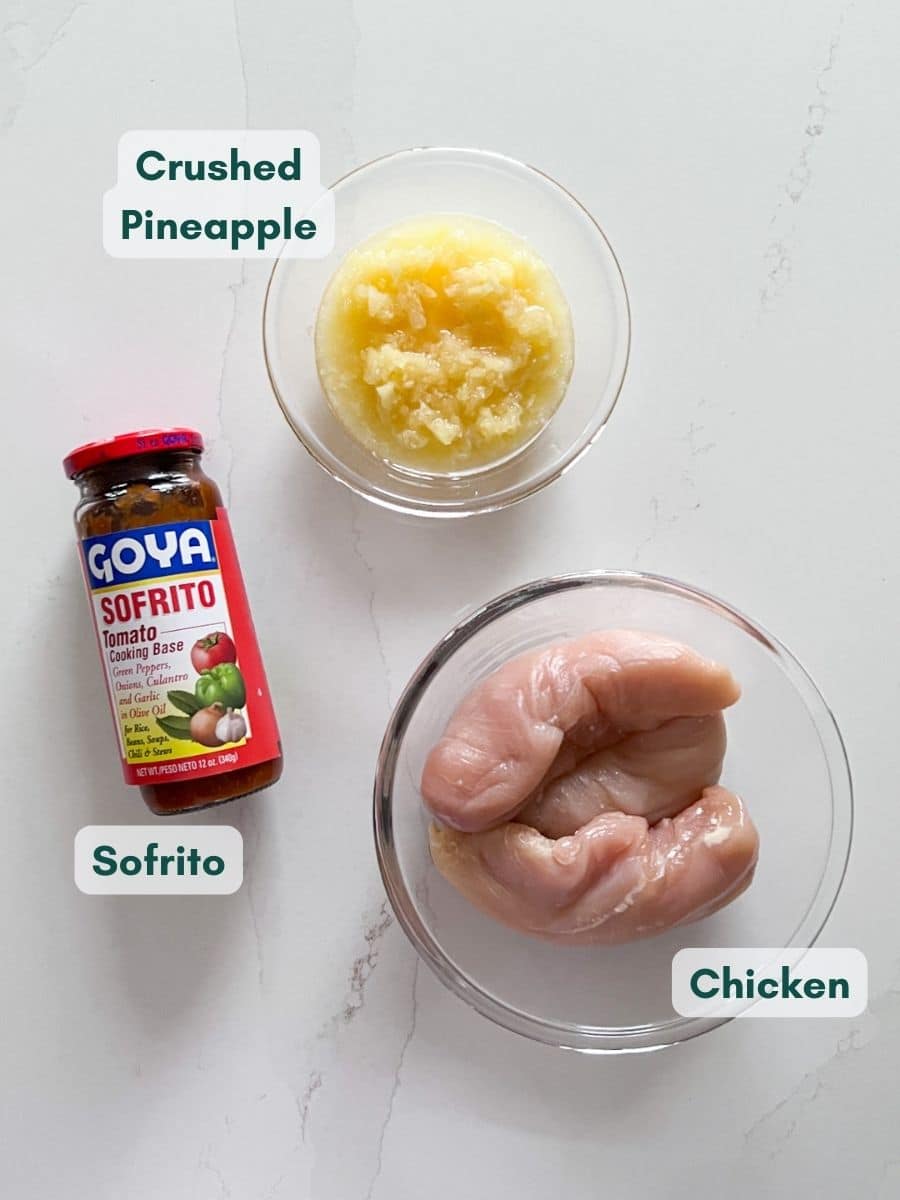
    Ingredient Information and Substitutions

    • Chicken- I prefer boneless skinless chicken breasts, but you could also make this recipe with chicken thighs as well.
    • Sofrito- It's a tasty tomato cooking base that gives the dish plenty of flavor. In a pinch salsa will work, but Sofrito is where its at!
    • Pineapple- For best results, use crushed pineapple. It allows the chicken to really soak up the sweet pineapple juices. Make sure you don't drain it!
    • Cilantro- While it's optional, cilantro adds some extra vibrance and flavor when sprinkled on top just before serving!
    Labeled ingredients for pineapple chicken.

    How To Make Pineapple Slow Cooker Chicken

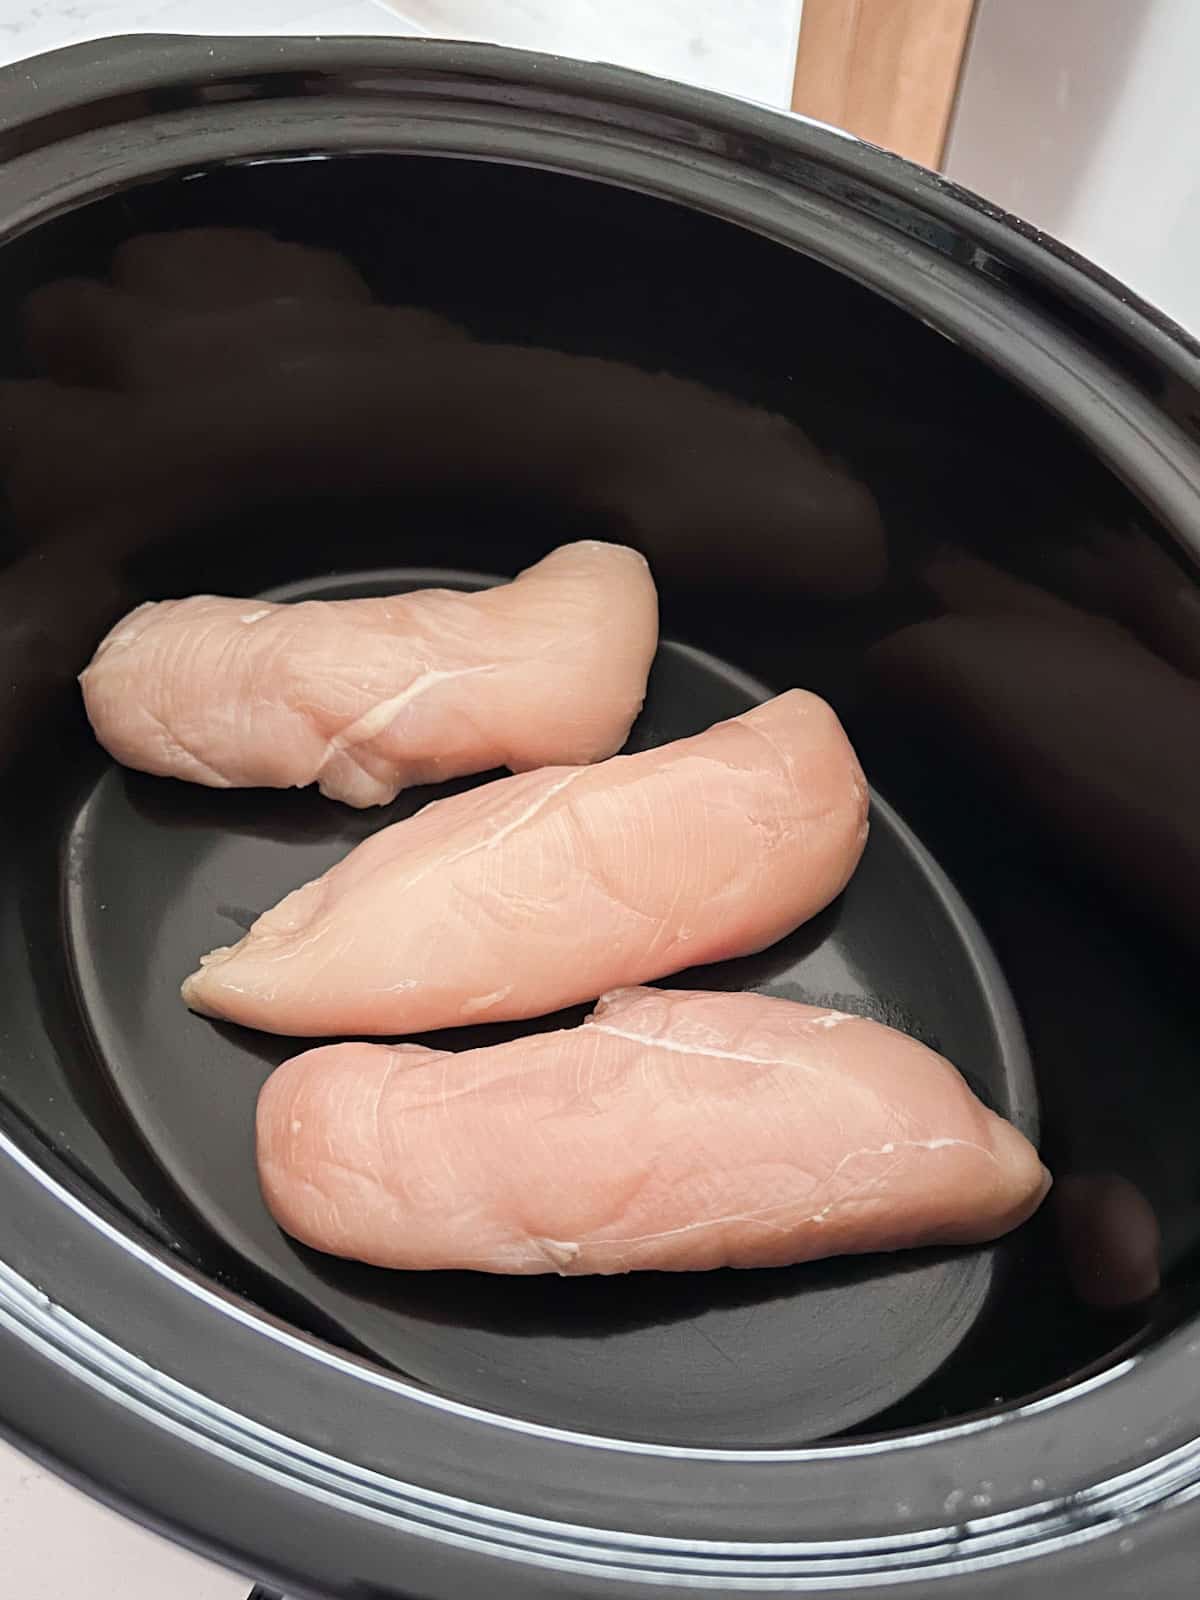
    Step 1: Place the chicken into the pot.

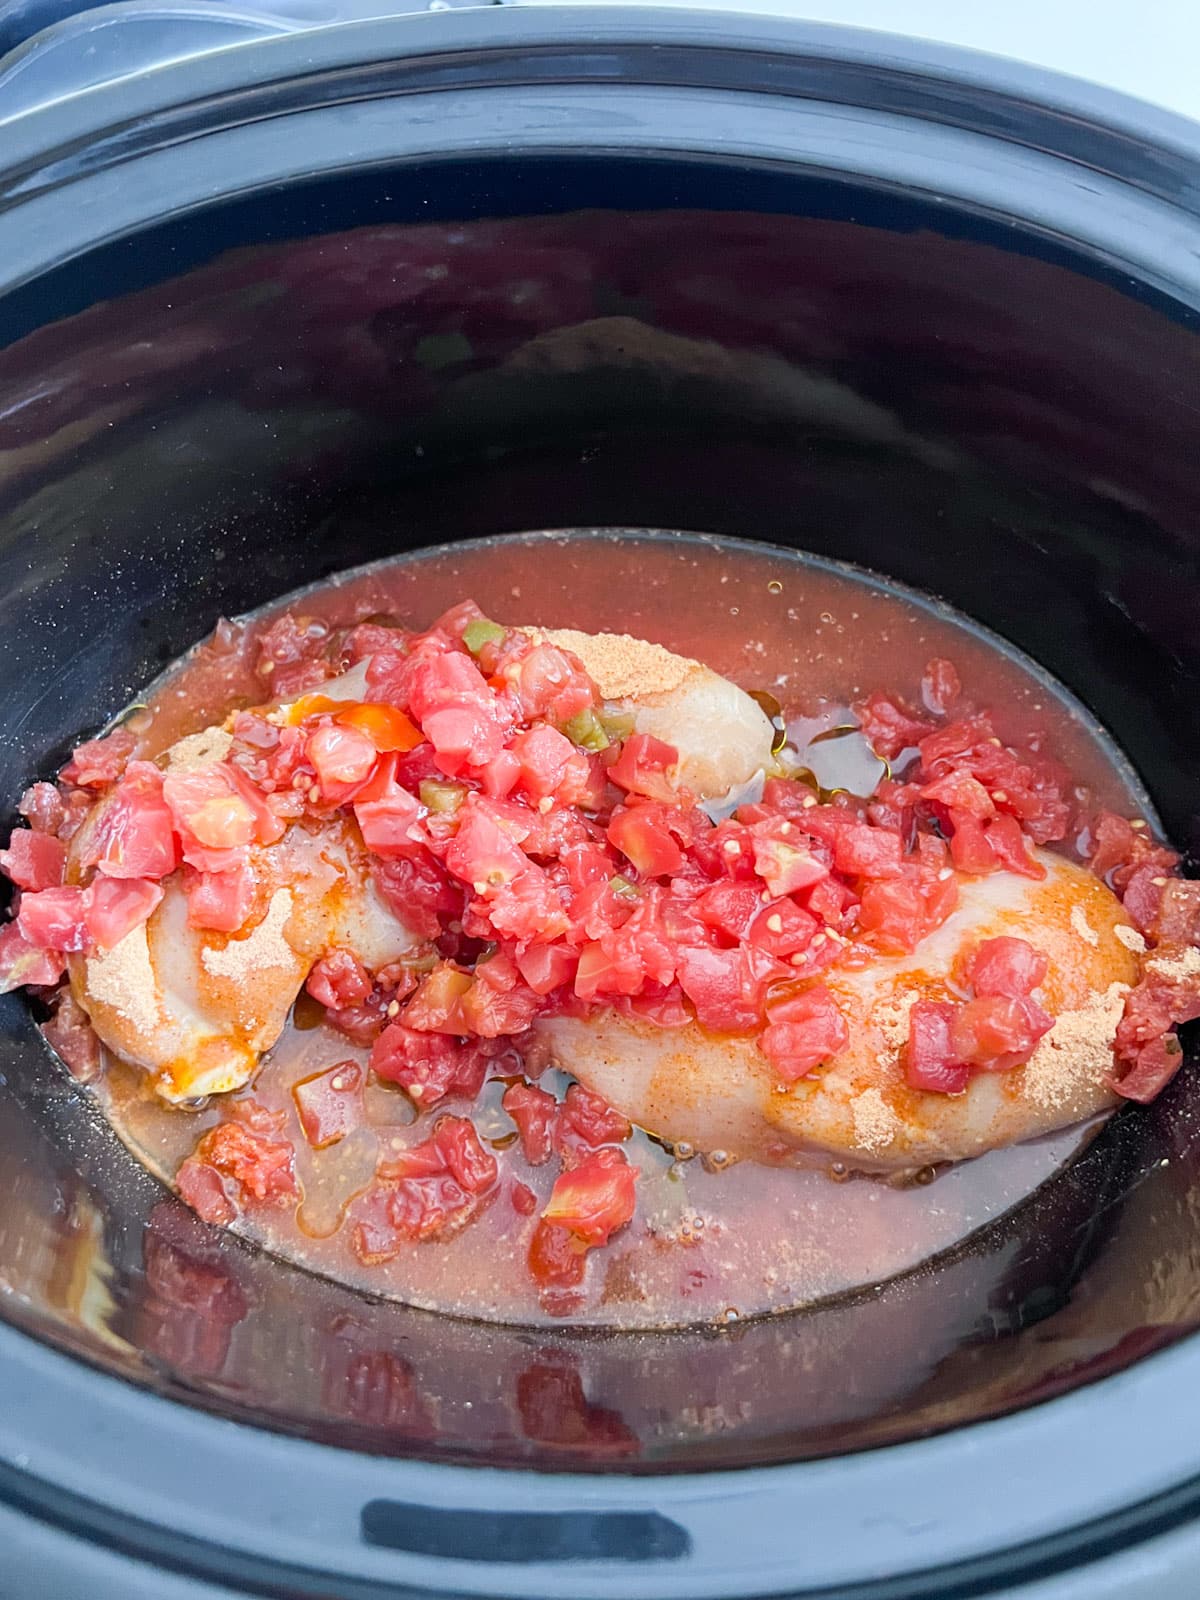
    3 raw chicken breasts in a crockpot.

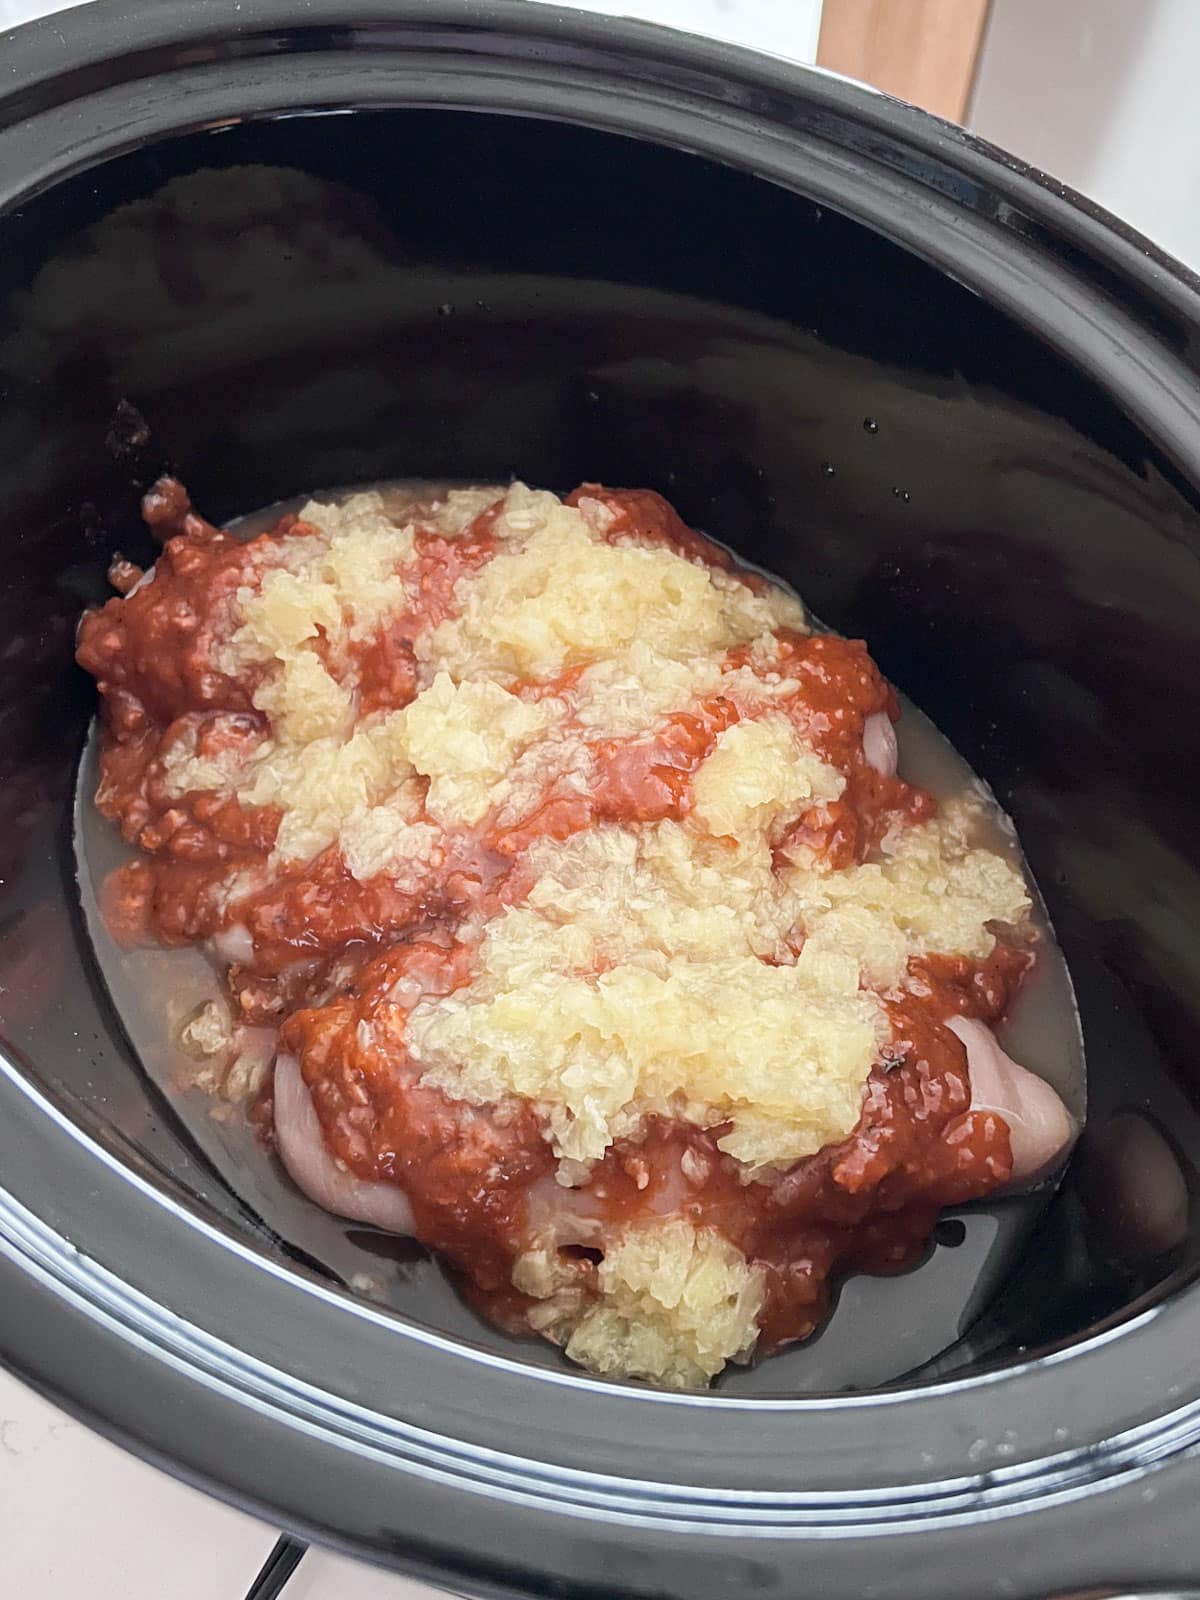
    Step 2: Pour the Sofrito and the crushed pineapple with it's juices over the top of the chicken.

    Sofrito and crushed pineapple on top of the raw chicken in the slow cooker.

    Step 3: Cover and cook as per the recipe directions (depending on which machine you're using).

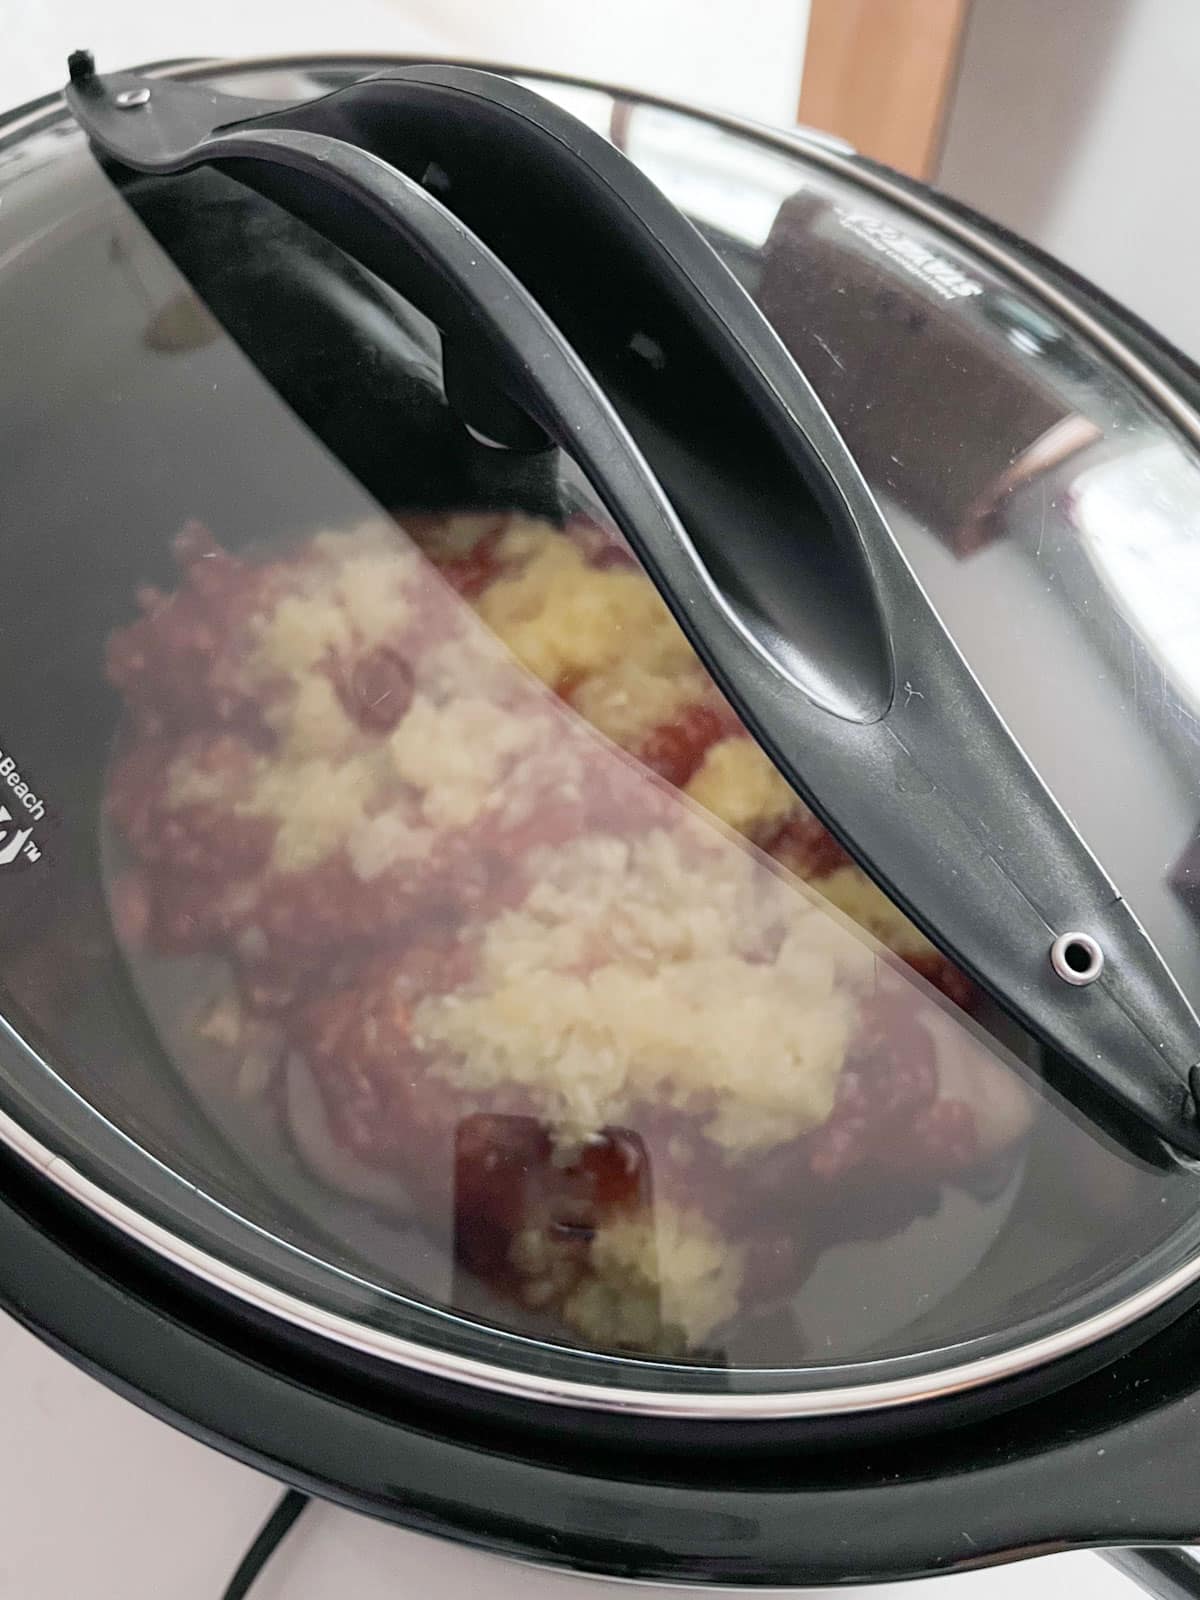
    Pineapple chicken in a slow cooker with the cover on top.

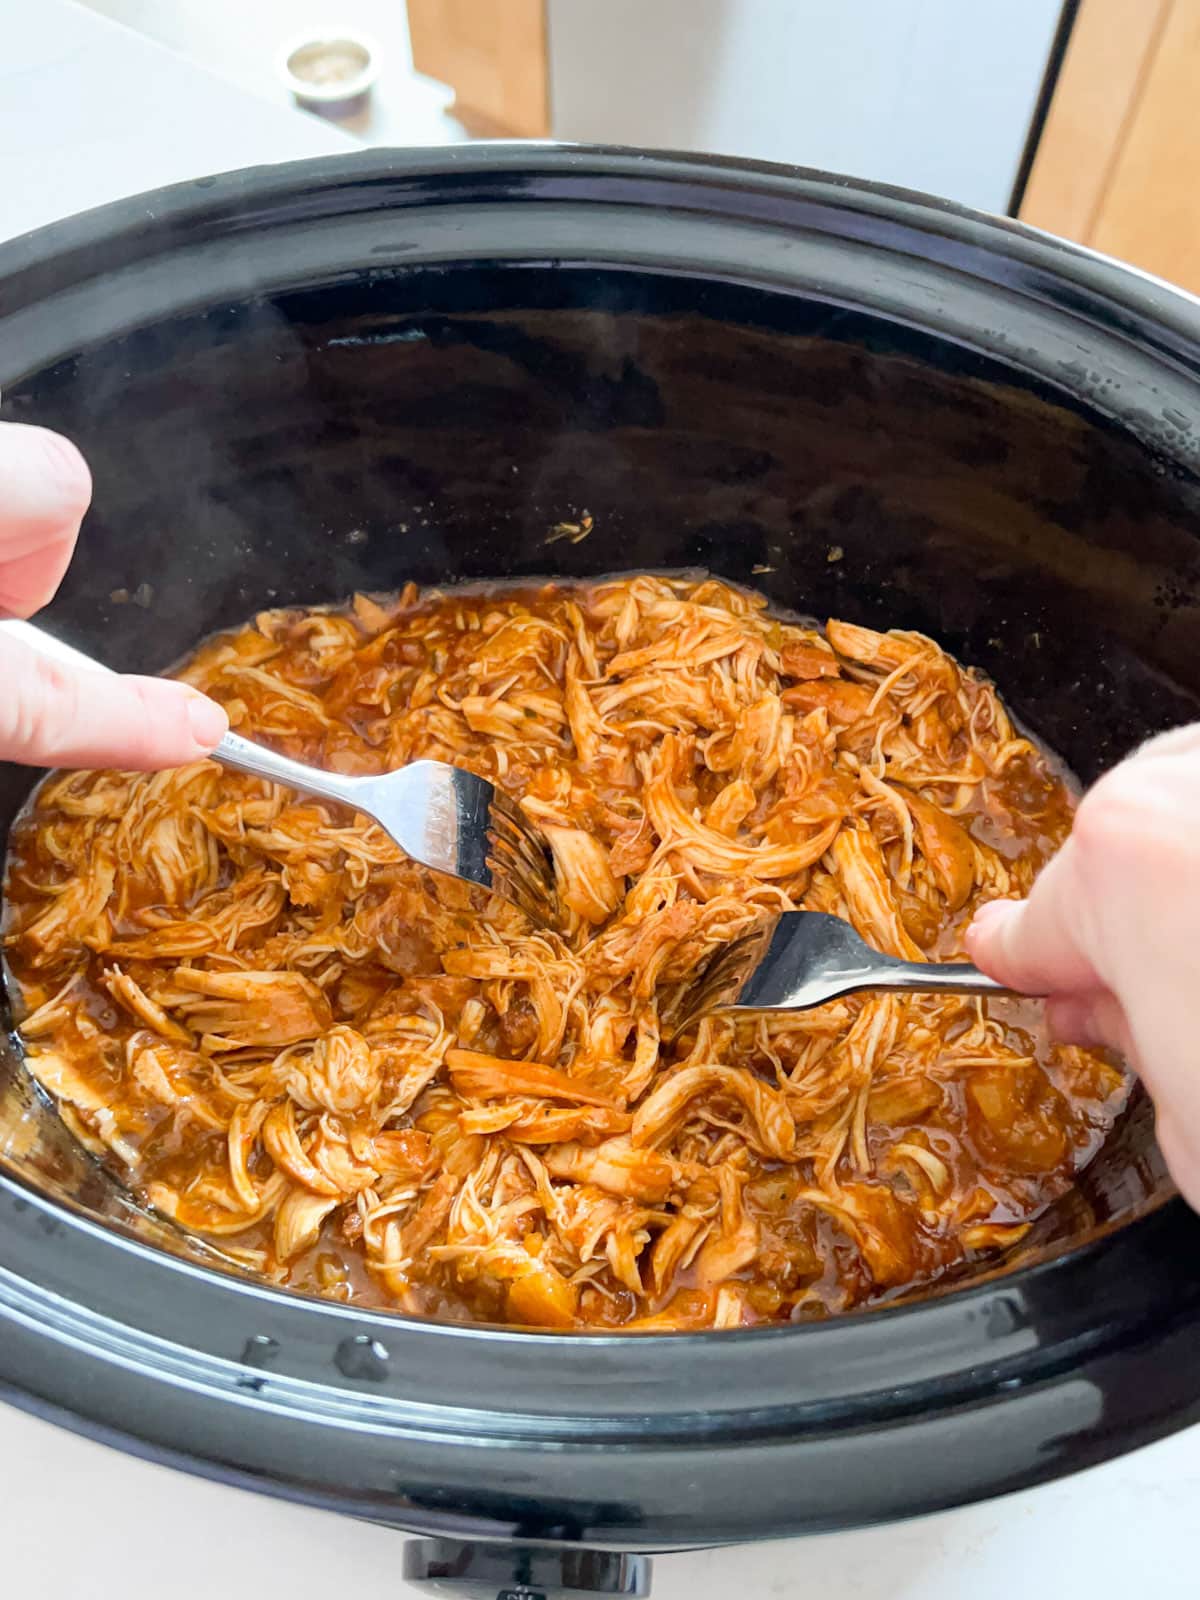
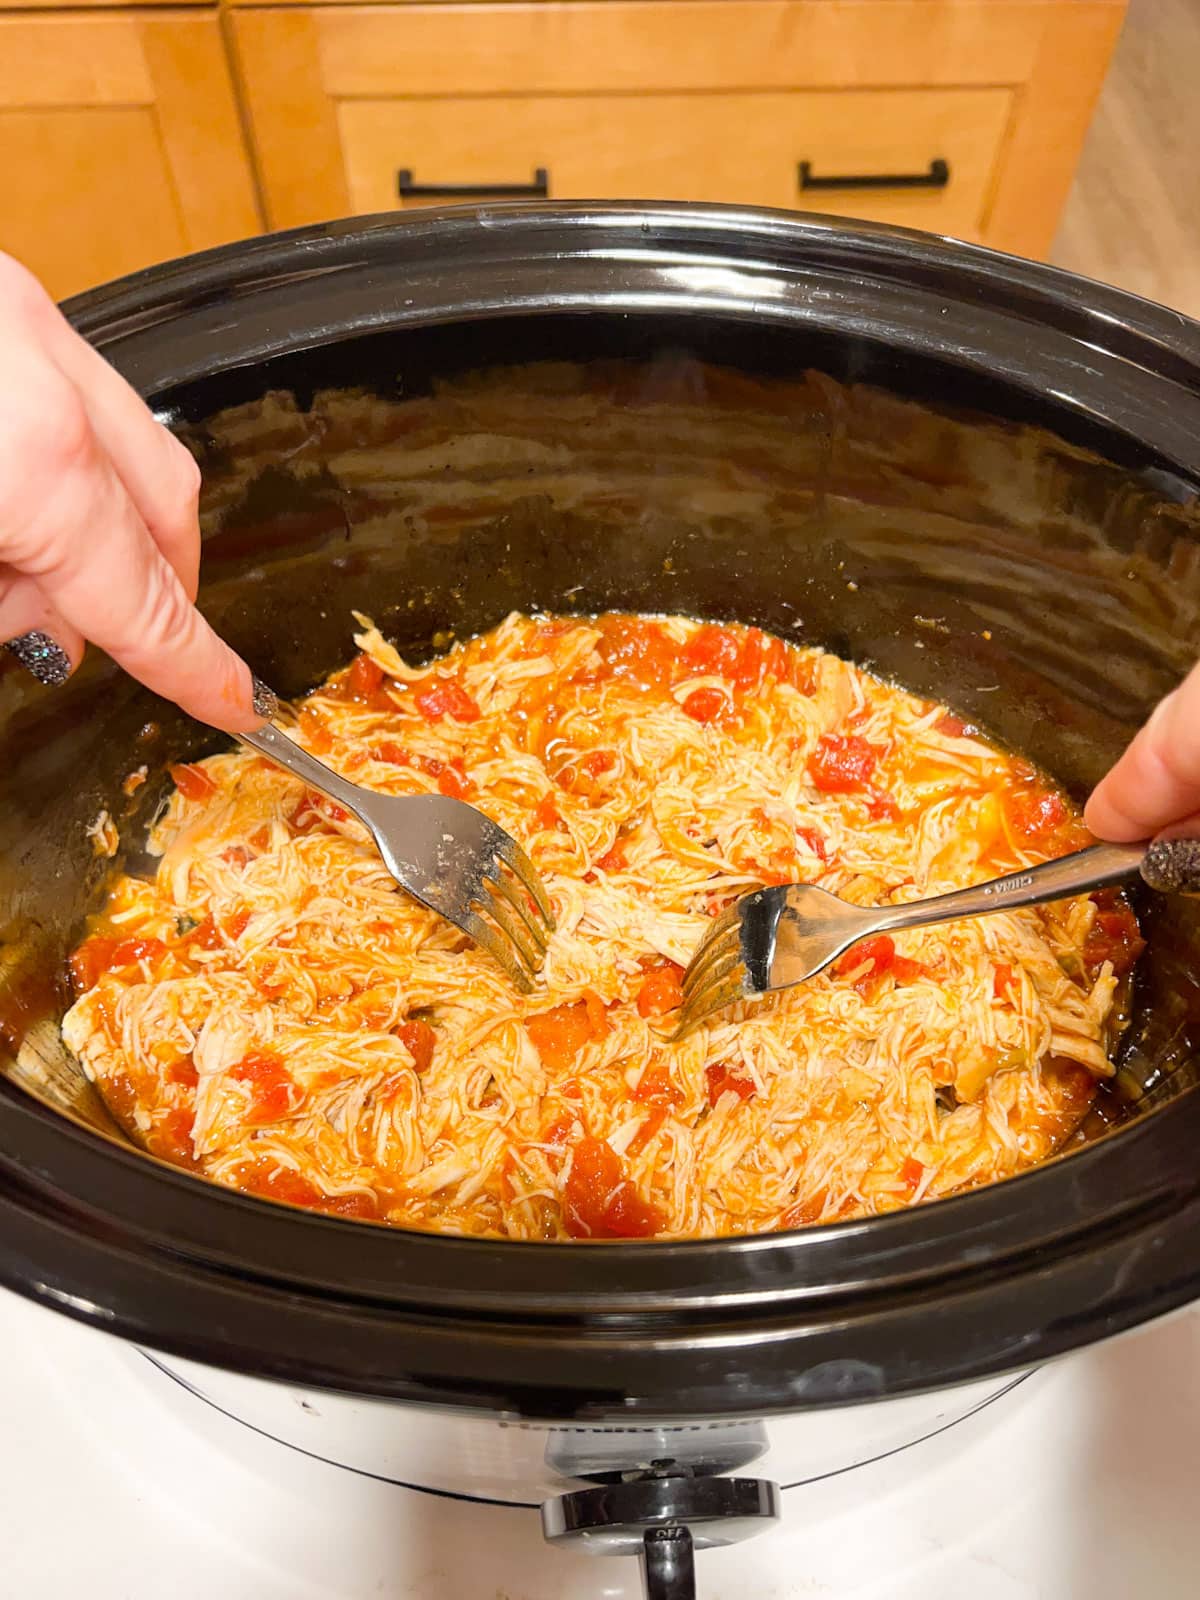
    Step 4: Once cooking is done, shred chicken.

    Stir the shredded chicken with the sauce to combine and serve with chopped cilantro. Devour!

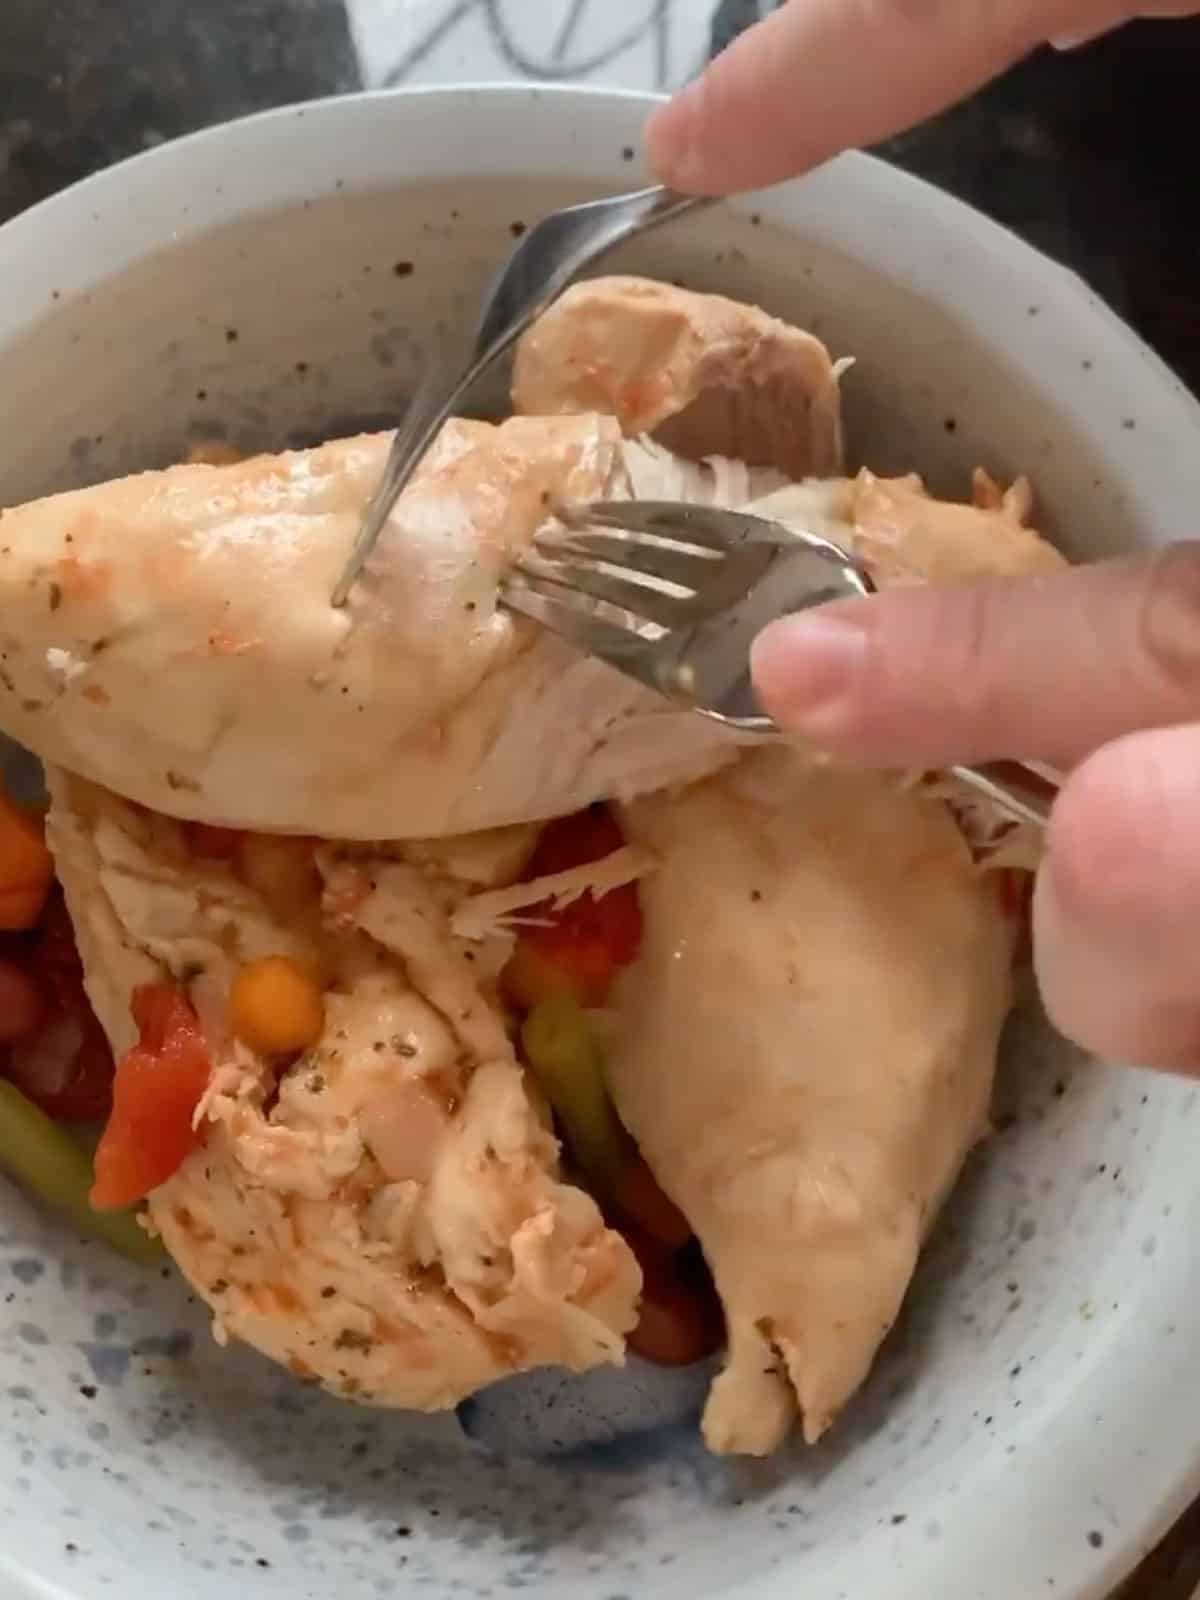
    Hands using two forks to shred the cooked chicken in the crockpot.

    Frequently Asked Questions

    What cut of chicken is best?

    I made this with chicken breasts to keep it on the leaner side, but this would also be delicious with boneless skinless chicken thighs (about 4-6 of them since they're smaller).

    How do you serve tropical chicken?

    One thing I love about this recipe is that it offers several serving options. It's excellent on its own with the sides of your choice. You can serve it over white or brown rice. Put it in some Hawaiian rolls or the bread of your choice for sandwiches. Use it to make tacos. Or, for a healthier twist, use it as a salad topper.

    Where does pineapple chicken come from?

    I've heard various mixed opinions in terms of the origin of classic pineapple and chicken recipes. Some say they have Asian origins (these variations are typically enjoyed in stir fry form).

    Others say Hawaii is the place of origin since many people are quick to associate pineapple with Hawaii. For this particular recipe, I was inspired by my brother-in-law Les. He is of Puerto Rican background and is an excellent cook. He was the person who introduced me to Sofrito as an ingredient, and the addition of the pineapple seemed delicious and lent the "tropical" feel.

    Can you make pineapple chicken with fresh pineapple?

    Yes- I would dice it pretty small (use around 1 cup of diced) and add ¼ cup of water since there won't be juice like you find in the canned pineapple. You can also pop it into a food processor and pulse it a couple times to chop it. Just be carefully you don't overdo and puree the pineapple.

    Is crockpot pineapple chicken sweet?

    A little but but the Sofrito adds a nice balance, so it ends up being a little bit sweet and a little bit savory.

    Can you freeze this?

    Yes! You can place all ingredients into a plastic zipper bag and freeze and then thaw before cooking. You can also freeze this covered once cooked if you'd rather (just be sure you don't shred it too finely if doing this).

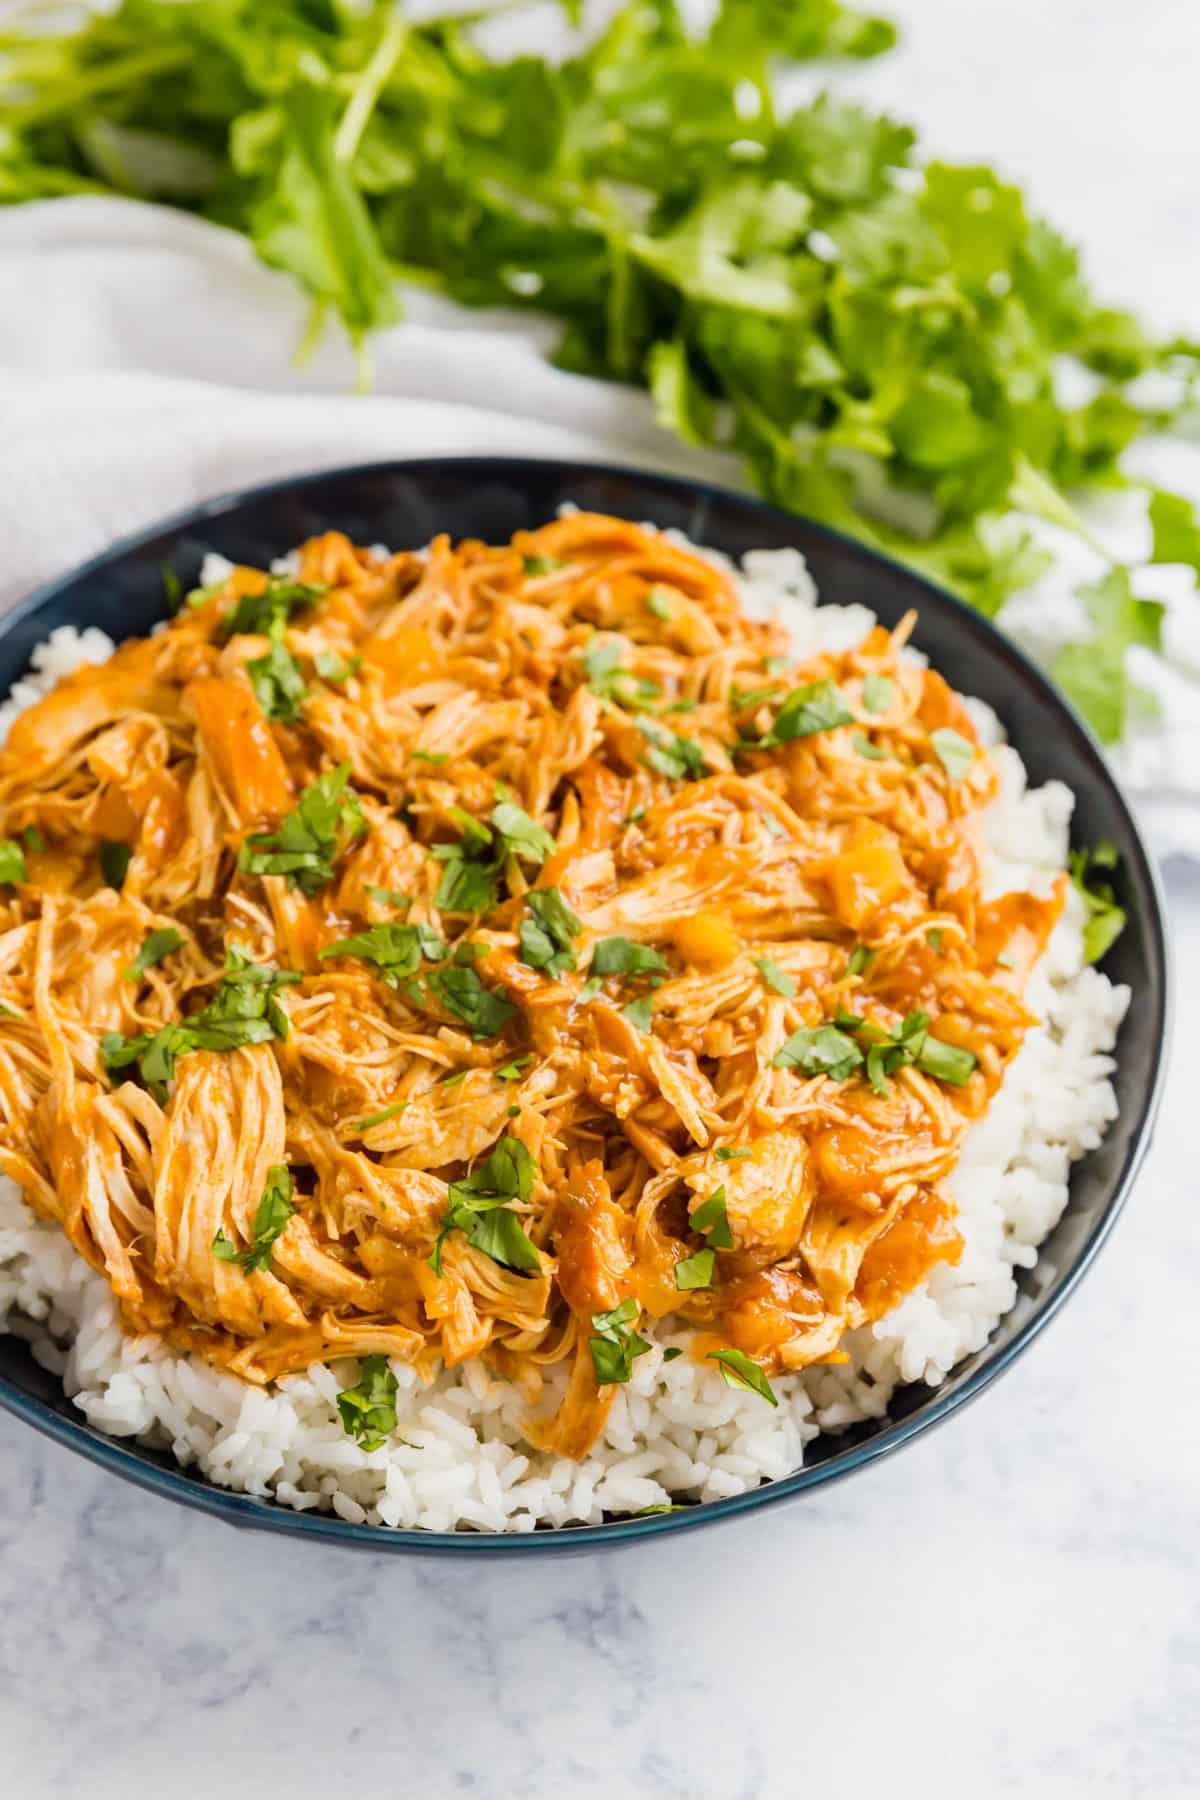
    An overhead image of the chicken and pineapple with cilantro on top of a bed of white rice in a blue bowl with fresh cilantro on the side and a white towel.

    Tips For Making Crock Pot Pineapple Chicken

    • Trim any extra fat from the chicken breasts to that it's all meat and nothing weird or chewy.
    • You don't even have to stir the ingredients- this is a true dump-and-go recipe.
    • I always taste it before serving and if you feel it needs salt and pepper, you can totally add it (specific to your taste) but don't feel like you need to!
    • Prep Ahead- You can place all the ingredients into a zipper bag and freeze or have it prepped in your fridge for a day or two later.
    • Storage and Leftovers- This will last up to 4 days covered in the refrigerator. up to 3 months in the freezer.
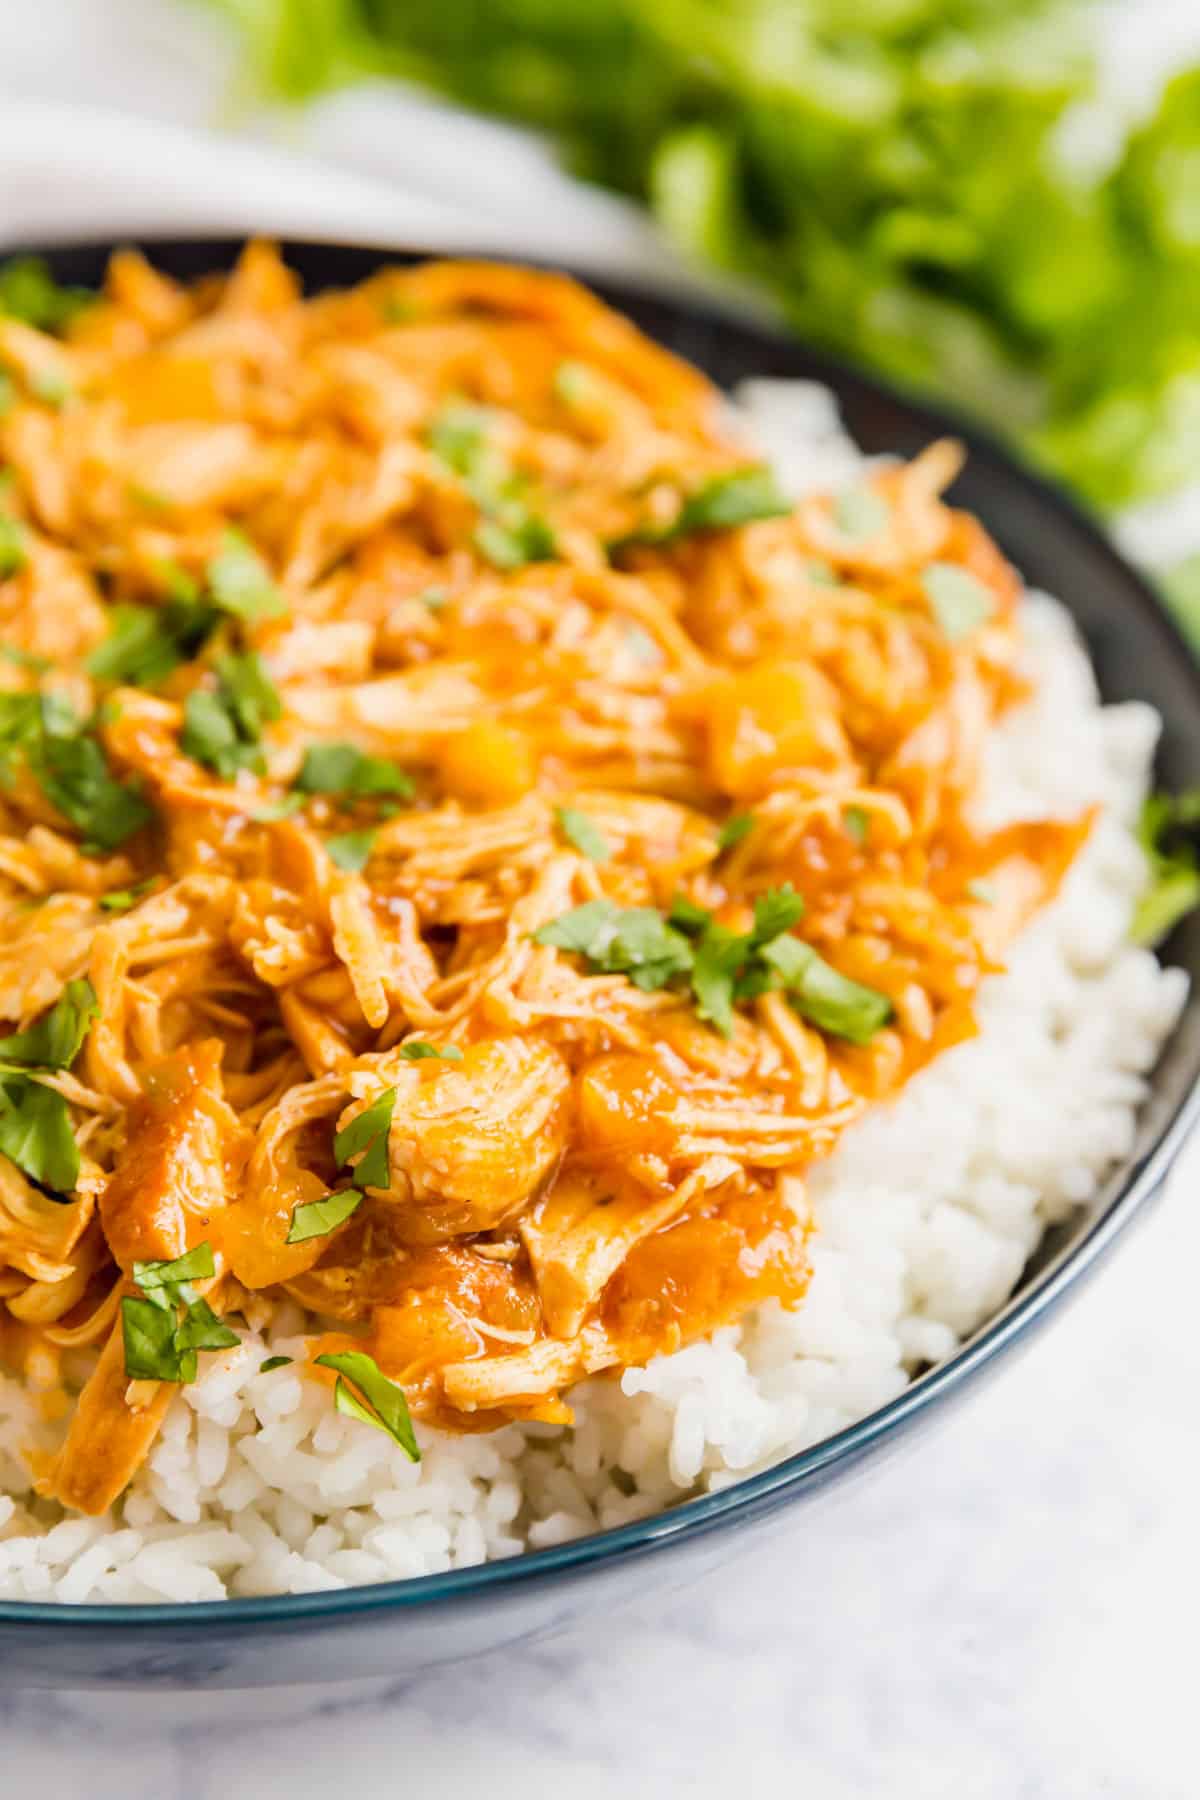
    A close up of the side of a blue bowl of chicken and pineapple with sofrito sauce on a bed of rice with chopped cilantro on top and a bunch of cilantro in the background.

    What To Serve With Chicken Pineapple

    A few great recipes to round out and complete this meal would be:

    • Ramen Noodle Coleslaw
    • Rainbow Asian Chicken Salad
    • Mai Tai Cupcakes

    Other Delicious Slow Cooker Chicken Recipe

    • A ladle holding chicken minestrone with the rest of the pot behind it.
      Chicken Minestrone Soup (Slow Cooker + Instant Pot)
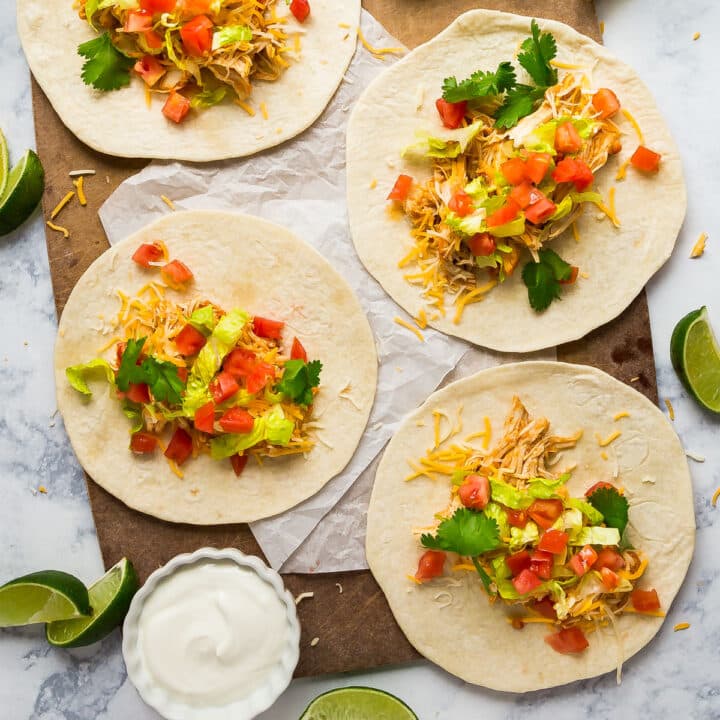
    • An overhead image of tortillas topped with taco meat, lettuce, tomatoes and cheese with limes and sour cream on the sides.
      Slow Cooker Taco Meat (and Instant Pot!)
    • An overhead image of chicken and rice stew in a blue bowl with a napkin and veggies around it.
      Italian Chicken and Rice Stew
    • Pulled bbq chicken in a bun on a white plate.
      Pulled BBQ Chicken Recipe

    Love this recipe? Please leave a 5 star ⭐️⭐️⭐️⭐️⭐️ rating in the recipe card below ⬇️ and/or a review in the comment section further down. Check out my Amazon Store for all my favorite tools, including those used in this recipe. And follow @thelifejolie on Instagram and TikTok!

    pineapple chicken and rice in a blue bowl with cilantro behind it.

    Slow Cooker Chicken With Pineapple

    Jessy Freimann
    Do you want an easy, 3 ingredient dinner without a ton of work? Make this Slow Cooker Chicken With Pineapple in your Crockpot or Instant Pot and serve it over rice, in a sandwich, or on top of a salad! 
    No ratings yet
    Print Recipe Pin Recipe
    Prep Time 5 minutes mins
    Cook Time 6 hours hrs
    Total Time 6 hours hrs 5 minutes mins
    Course Main Course
    Cuisine American
    Servings 6 servings
    Calories 64 kcal

    Equipment

    • slow. cooker
    • instant pot
    • Can opener

    Ingredients
      

    • 3 boneless skinless chicken breasts
    • 1 12 ounce jar Sofrito tomato cooking base
    • 1 8 ounce can crushed pineapple, undrained
    • Fresh cilantro, chopped (optional- for garnish)
    • Cooked white rice, rolls or a salad for serving optional

    Instructions
     

    Slow Cooker Instructions

    • Place chicken breasts into pot.
    • Pour Sofrito and crushed pineapple and it's juices onto the top of the chicken breasts.
    • Cover the pot and cook on high for 4-6 hours.
    • Remove cover, shred chicken and stir to combine.
    • Serve immediately with chopped cilantro over the top.

    Instant Pot Instructions

    • Place chicken breasts into pot.
    • Pour Sofrito and crushed pineapple and it's juices onto the top of the chicken breasts.
    • Cover the pot and set the Instant Pot to manual high pressure for 12 minutes. Set the gasket to sealing.
    • Once the 12 minutes is up to a natural pressure release for 15 minutes and then do a quick release.
    • Remove cover, shred chicken and stir to combine.
    • Serve immediately with chopped cilantro over the top.

    Video

    Notes

    • Trim any extra fat from the chicken breasts to that it's all meat and nothing weird or chewy.
    • You don't even have to stir the ingredients- this is a true dump-and-go recipe.
    • I always taste it before serving and if you feel it needs salt and pepper, you can totally add it (specific to your taste) but don't feel like you need to!
    • Prep Ahead- You can place all the ingredients into a zipper bag and freeze or have it prepped in your fridge for a day or two later.
    • Storage and Leftovers- This will last up to 4 days covered in the refrigerator. up to 3 months in the freezer.

    Nutrition

    Serving: 1cupCalories: 64kcalProtein: 12gFat: 1gSaturated Fat: 0.3gPolyunsaturated Fat: 0.2gMonounsaturated Fat: 0.4gTrans Fat: 0.01gCholesterol: 36mgSodium: 66mgPotassium: 209mgVitamin A: 17IUVitamin C: 1mgCalcium: 3mgIron: 0.2mg
    Tried this recipe?Let us know how it was!

    Old Fashioned Chocolate Pie

    Feb 22, 2024 · 4 Comments

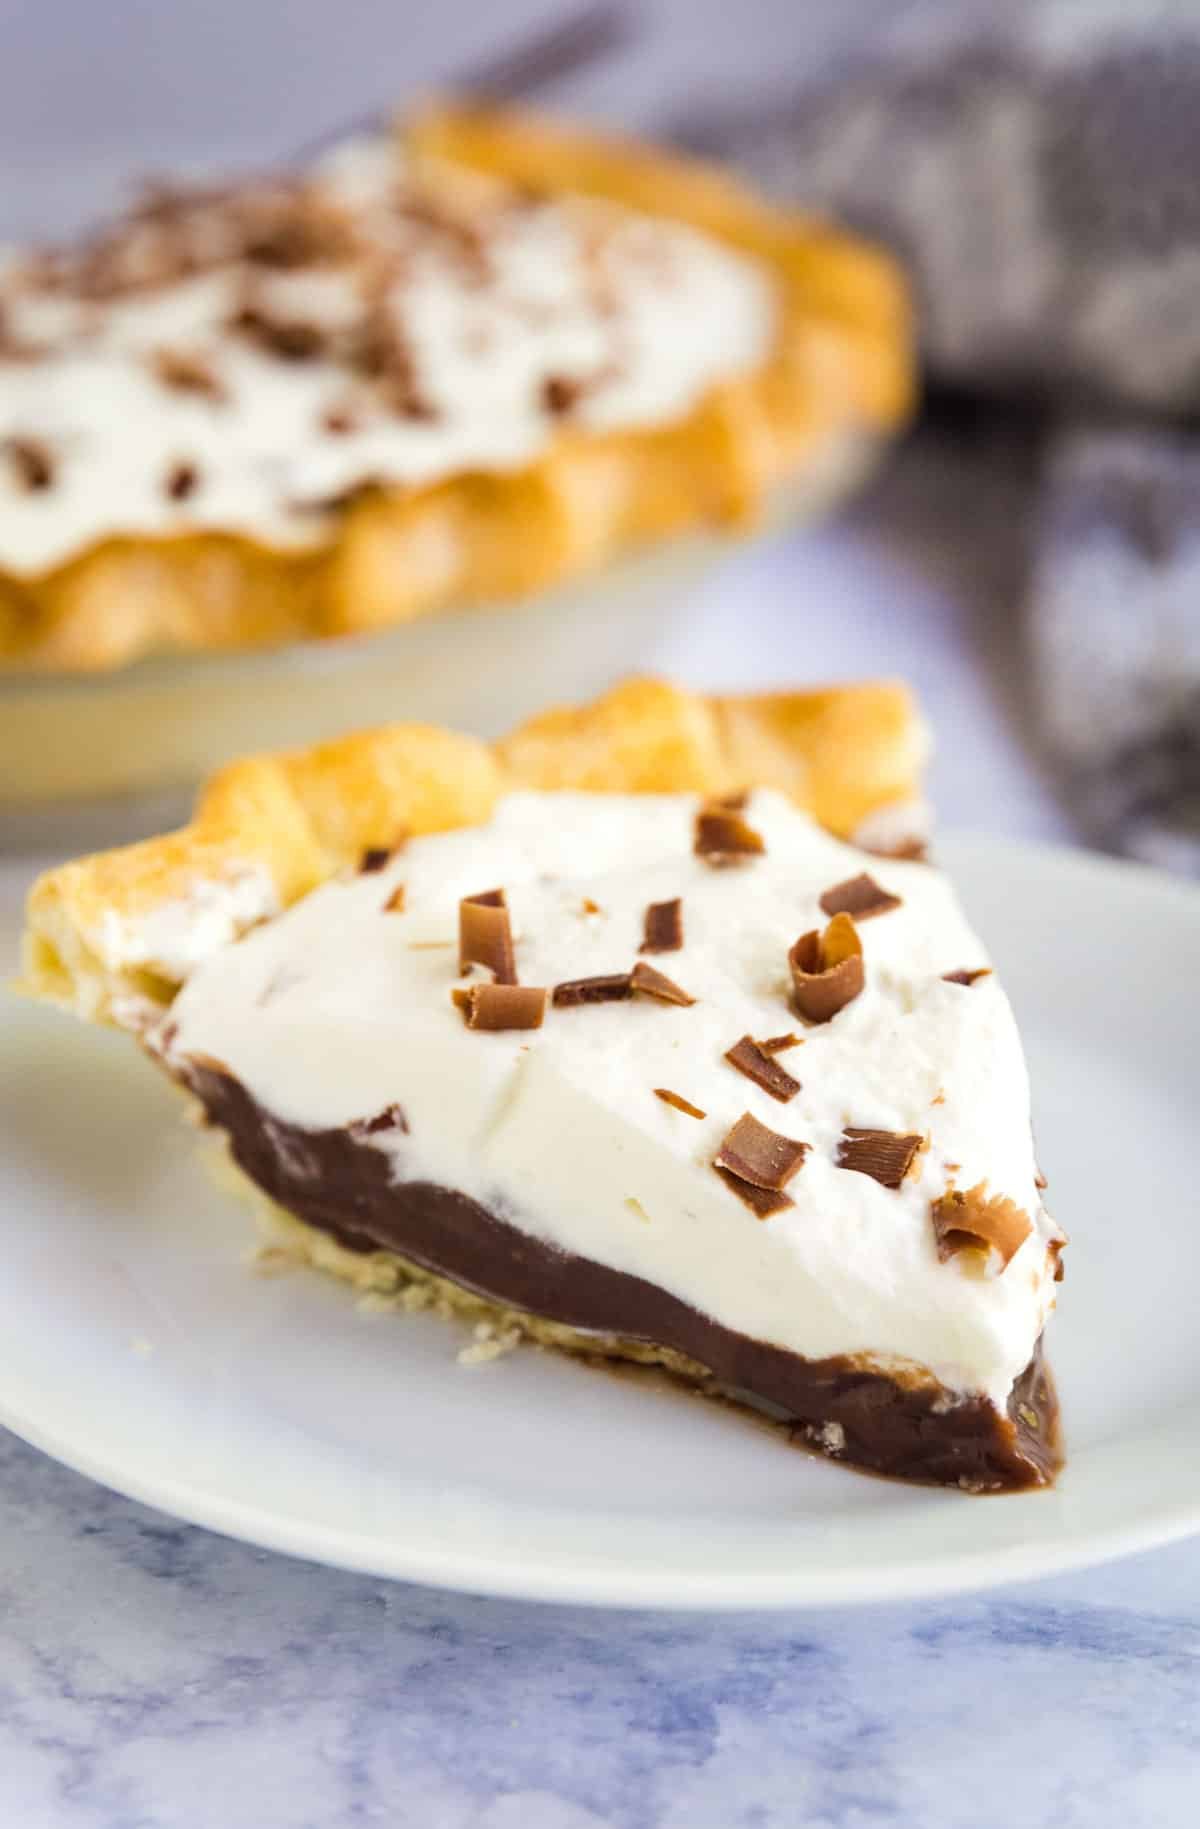
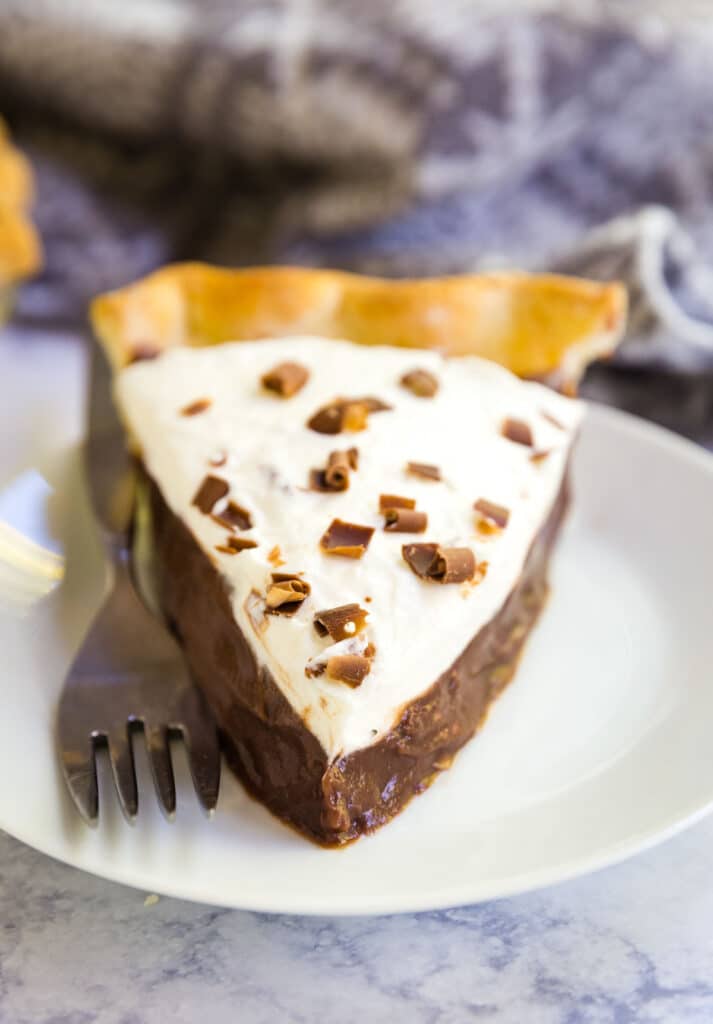
    A close up image of a slice of chocolate pudding pie on a white plate with the rest of the pie behind it.

    My family makes this easy Old Fashioned Chocolate Pie over and over again. It's effortless to put together and we always fight for seconds! If you want a rich, creamy, and chocolatey with a wonderfully crispy and buttery crust you'll love this- it's perfect for every occasion!

    A close up image of a slice of chocolate pudding pie on a white plate with the rest of the pie behind it.
    [feast_advanced_jump_to]

    Why You'll Love Chocolate Pudding Jello Pie

    I think that everyone needs to have a good, easy recipe for a chocolate pie up their sleeve. Now, chocolate pie means different things to different people. For some, it can be a super labor-intensive homemade chess pie made with all the love in the world. For others, it's a chocolate mousse pie that you find already prepared in the freezer section, thawed with love. By the way, no judgment — those are both so good! I've been known to pick up the latter in a pinch!

    But in our family, in the most basic of terms, it's a chocolate pudding pie with jello pudding. You know I'm all about working smarter and not harder. For us, this also means a pre-made pie crust. Pudding that starts in a box. Whipped cream. And if you're feeling extra fancy, you can even shave some chocolate shavings on top.

    And I'll tell you right now, it's not the most gorgeous, artisan pie you'll ever make. But it's easy-peasy, consistently delicious, and I guarantee everyone will be fighting for that last slice every time! And if that's not enough reason to try it, here are a few more:

    • An almost no-bake recipe
    • Made with only 6 ingredients
    • Perfect for parties
    • Kid-friendly and approved
    • Quite possibly one of the easiest desserts to make!
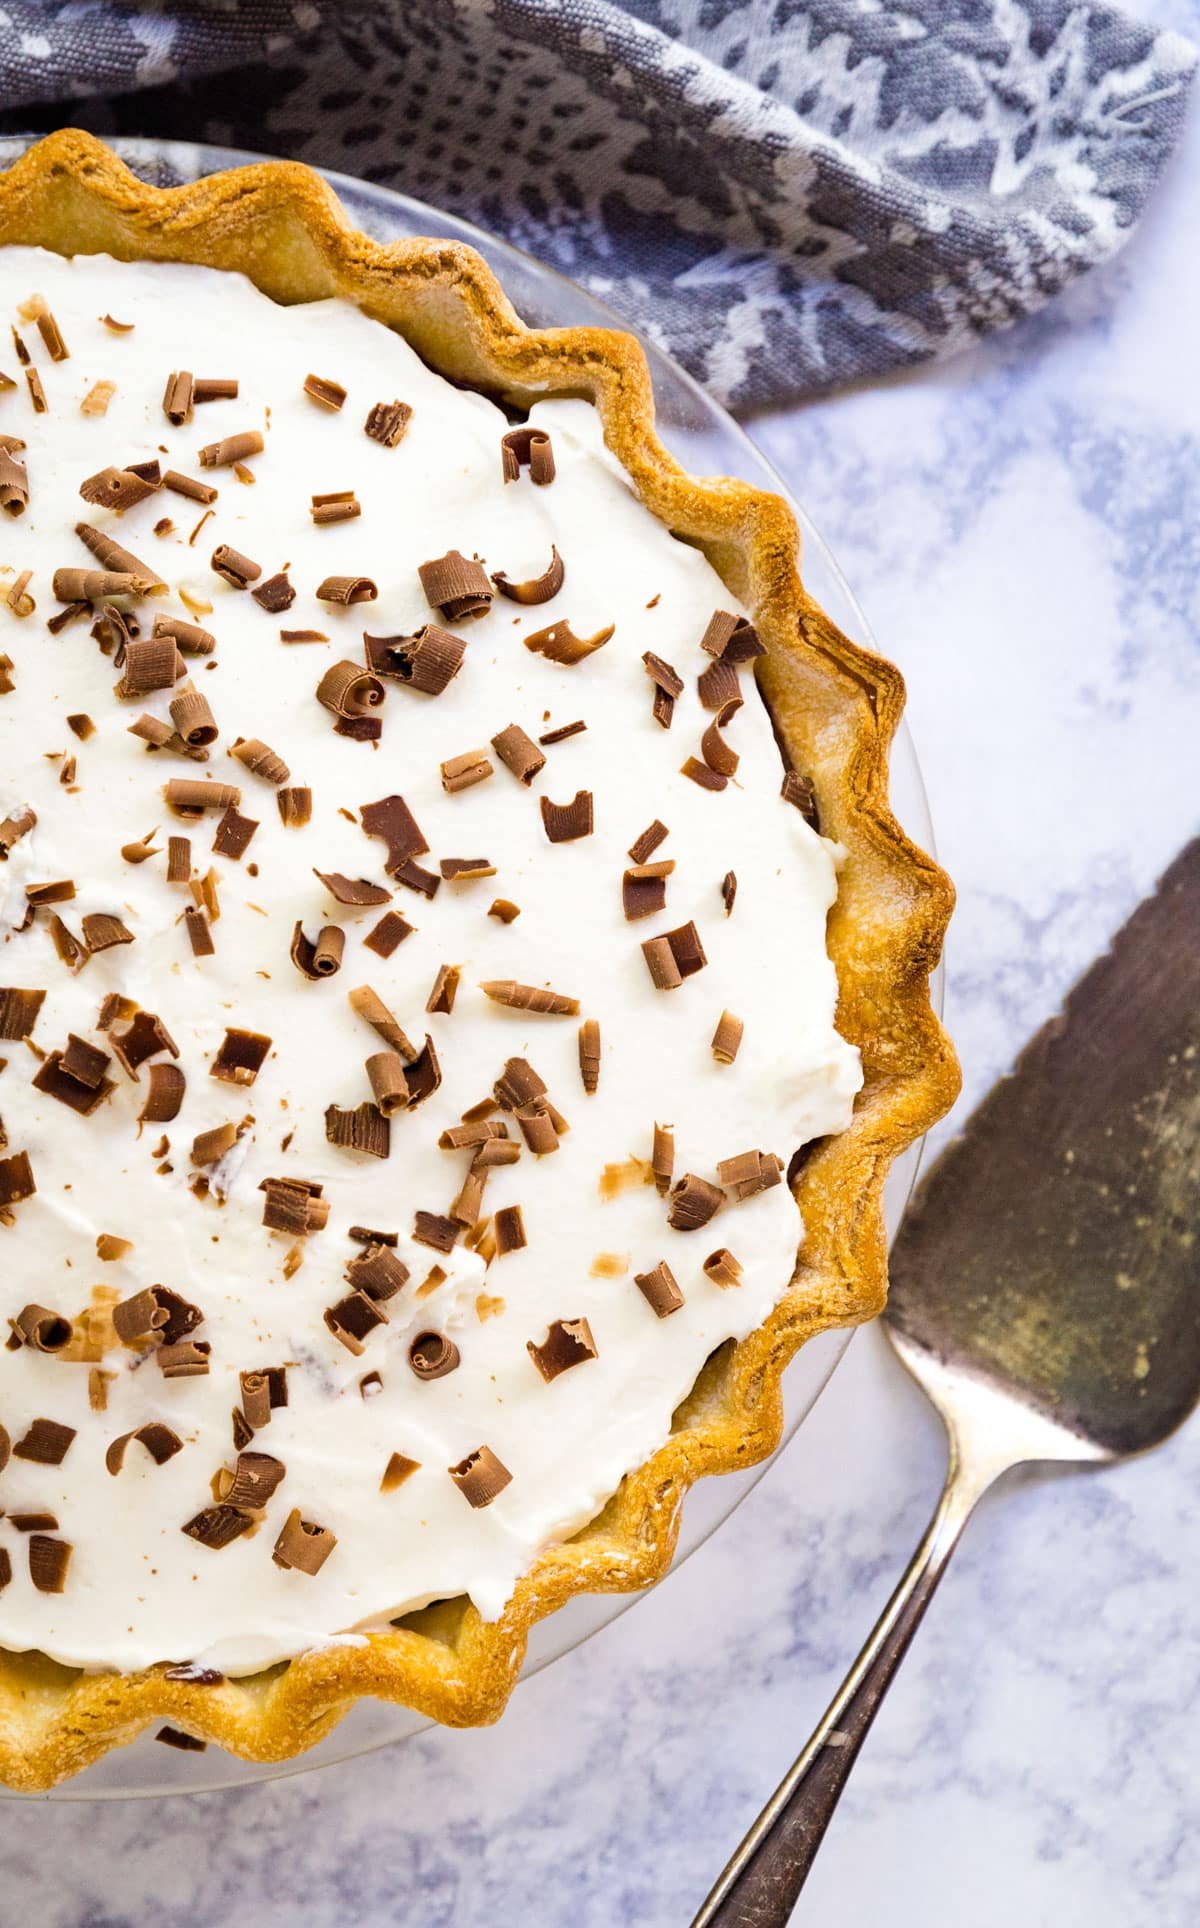
    An overhead image of half the chocolate pie with a gray towel and pie cutter next to it.

    Ingredient Information And Substitutions

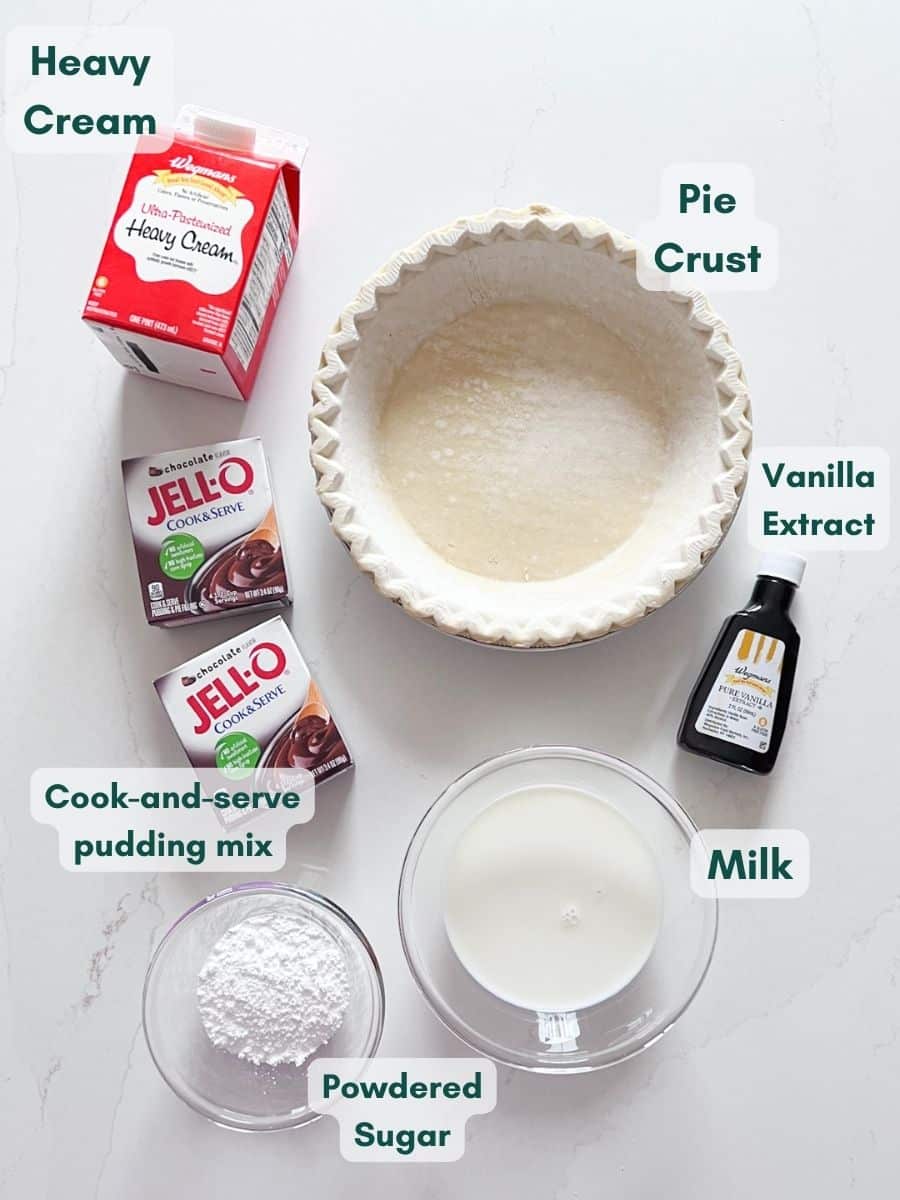
    • Chocolate Pudding Mix - I typically use Jello pudding mix, but feel free to use your favorite or whatever you have on hand. The most important thing to note here is to make sure it is NOT instant pudding! You want to make sure you're getting the regular size cook-and-serve Jello puddings.
    • Milk - Needed to turn the pudding mix into, well, pudding. I like whole milk , but use what you have on hand. My recipe uses a bit less milk than the recipe on the box, to end up with a slightly thicker pudding that works better for a pie.
    • Pie Crust - To make this Jello pudding pie even easier, I use a store-bought pie crust. Make sure that it's baked before you get started. But if you prefer chocolate pie with graham cracker crust then you can also make your own or buy a pre-made graham cracker crust for a truly no-bake chocolate pie.
    • Heavy Cream - For the homemade whipped cream. Heavy cream is key here! you can also totally make your chocolate pie with cool whip for equally delicious results.
    • Vanilla Extract - Try to find real, pure vanilla extract. Also for the whipped cream, it really does make a difference in terms of flavor.
    • Powdered Sugar - The final ingredient for your homemade whipped cream. Powdered sugar pretty much guarantees smooth results.
    An overhead image of the labeled ingredients.

    How to Make Chocolate Satin Pie

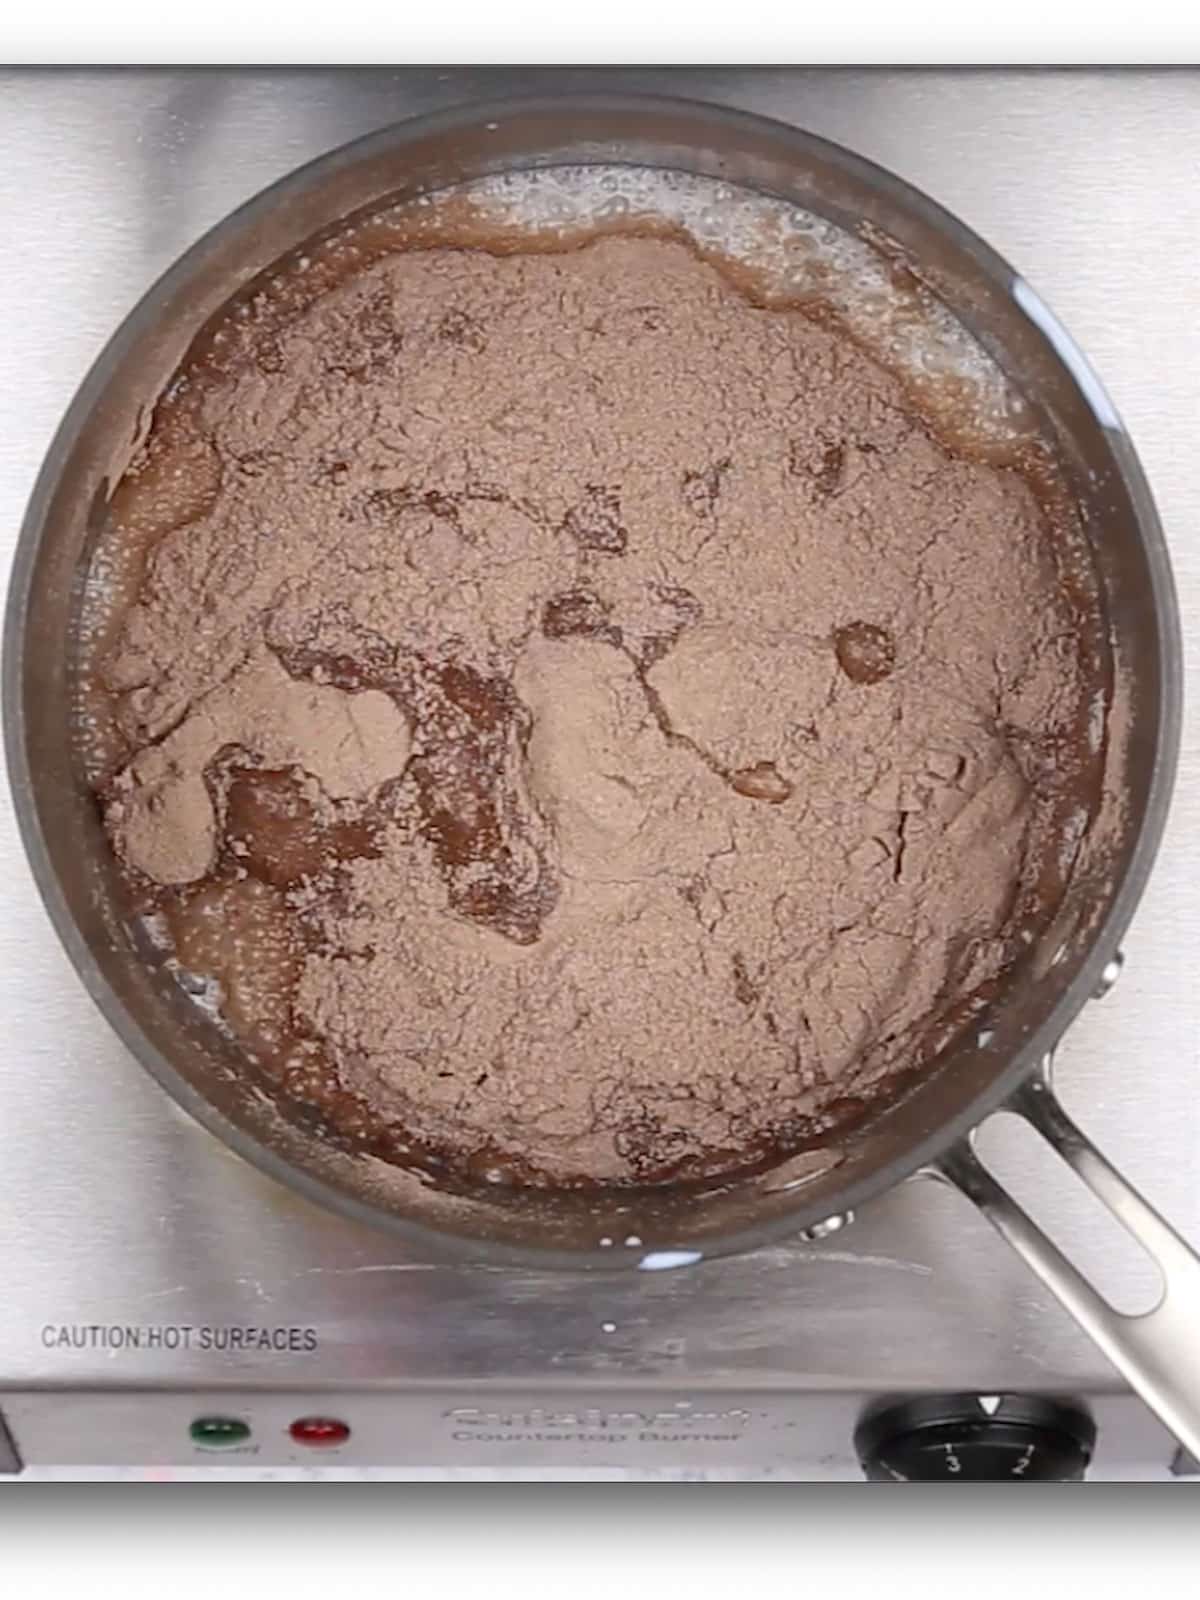
    Step 1: Bake your pie crust per the package directions and cool completely. Add the pudding mixes and milk to a medium-sized saucepan and simmer over medium heat until thickened.

    An overhead image of a pan with milk and pudding mix in it.

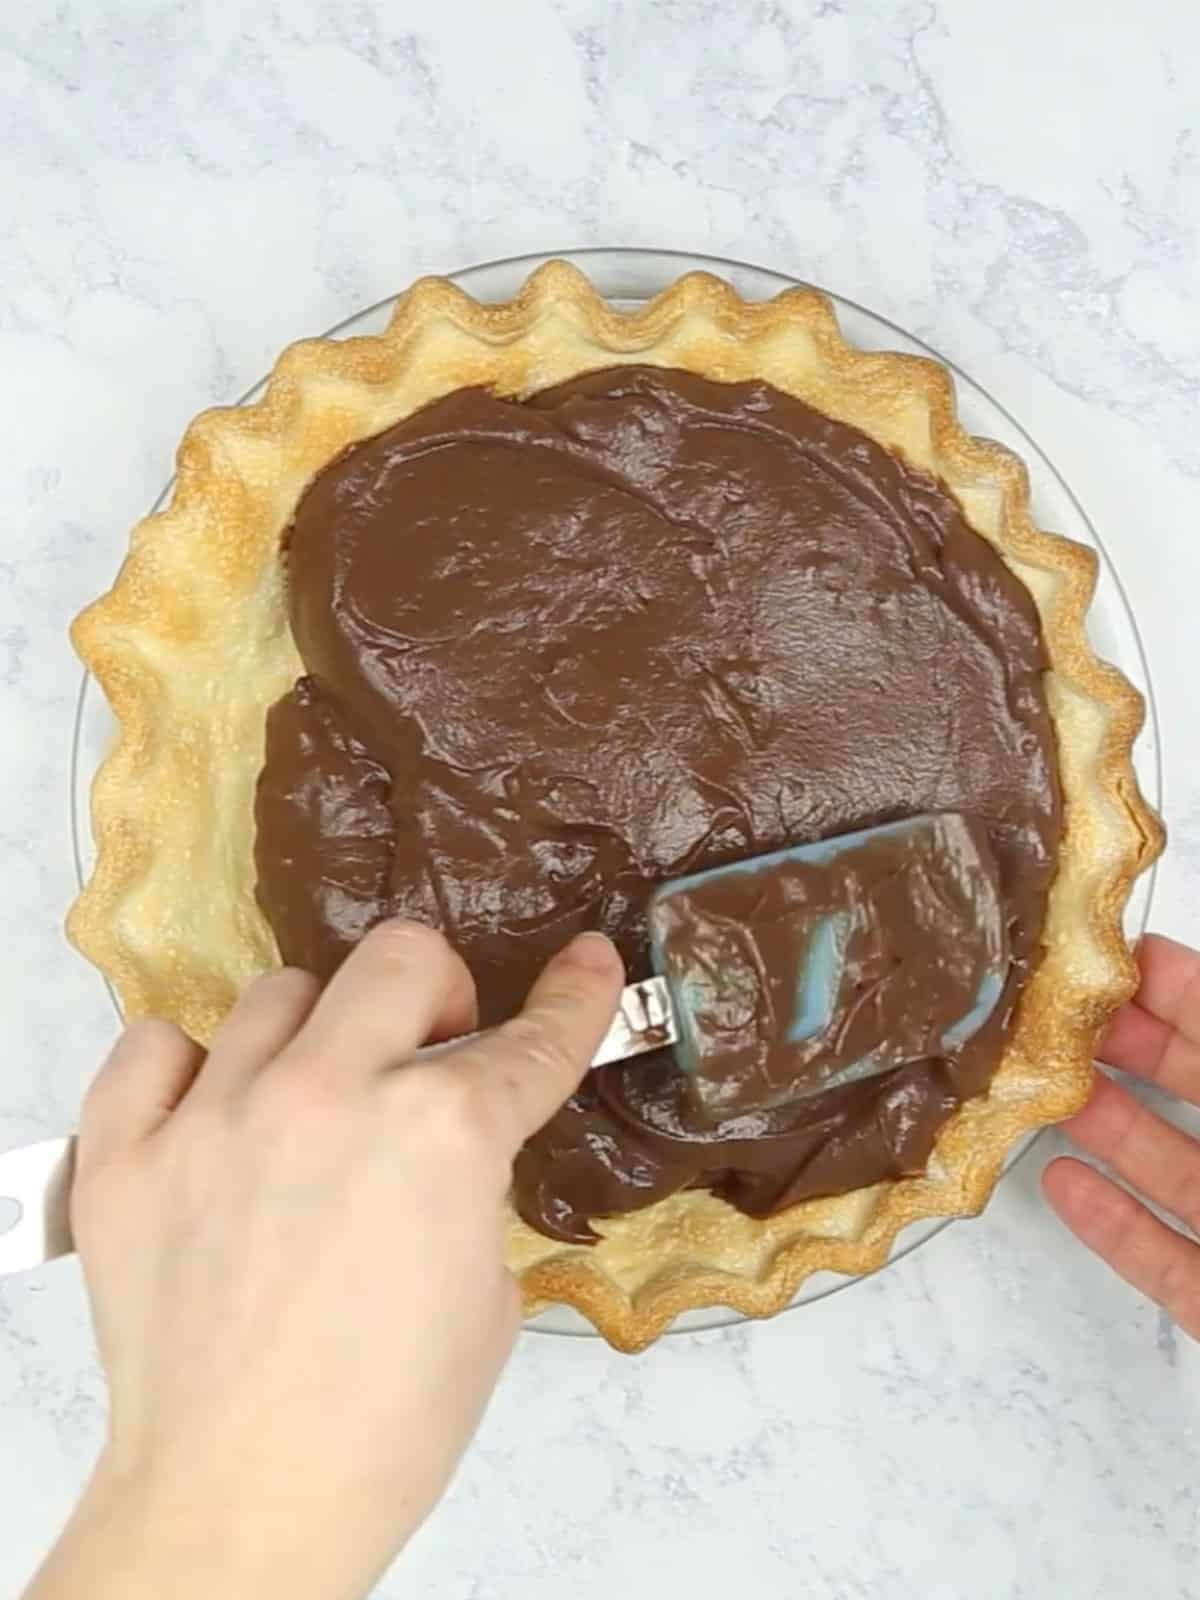
    Step 2: Remove the saucepan from heat, then place the pudding mixture in a different container. Cover and cool in the fridge until you're ready to make the your pie — it will keep for up to 2 days, making this a great make-ahead recipe!

    When ready to assemble, add the pudding to the baked pie crust, then pop in the fridge.

    Chocolate pudding being spread in a baked pie crust.

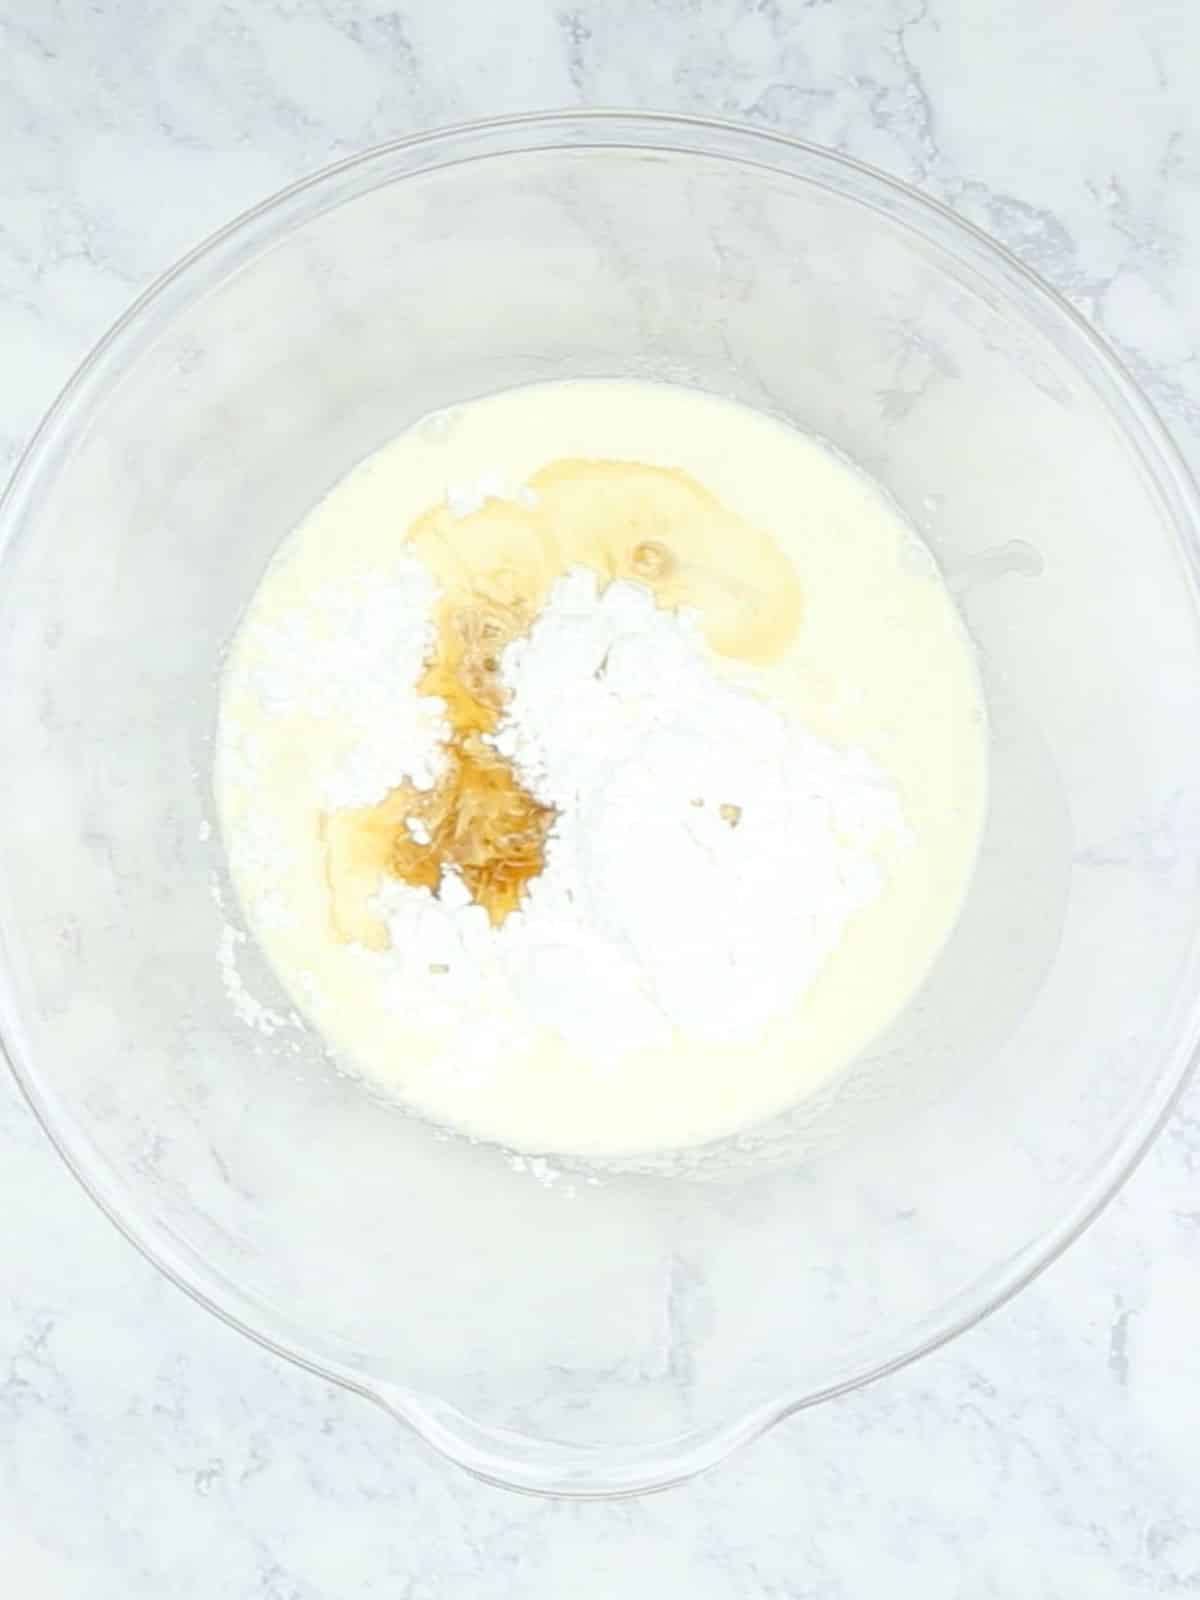
    Step 3: While the chocolate layer sets, make the whipped cream. Add the heavy cream, vanilla, and powdered sugar to a large bowl and whip just until until stiff peaks form.

    Whipped cream ingredients in a glass bowl.

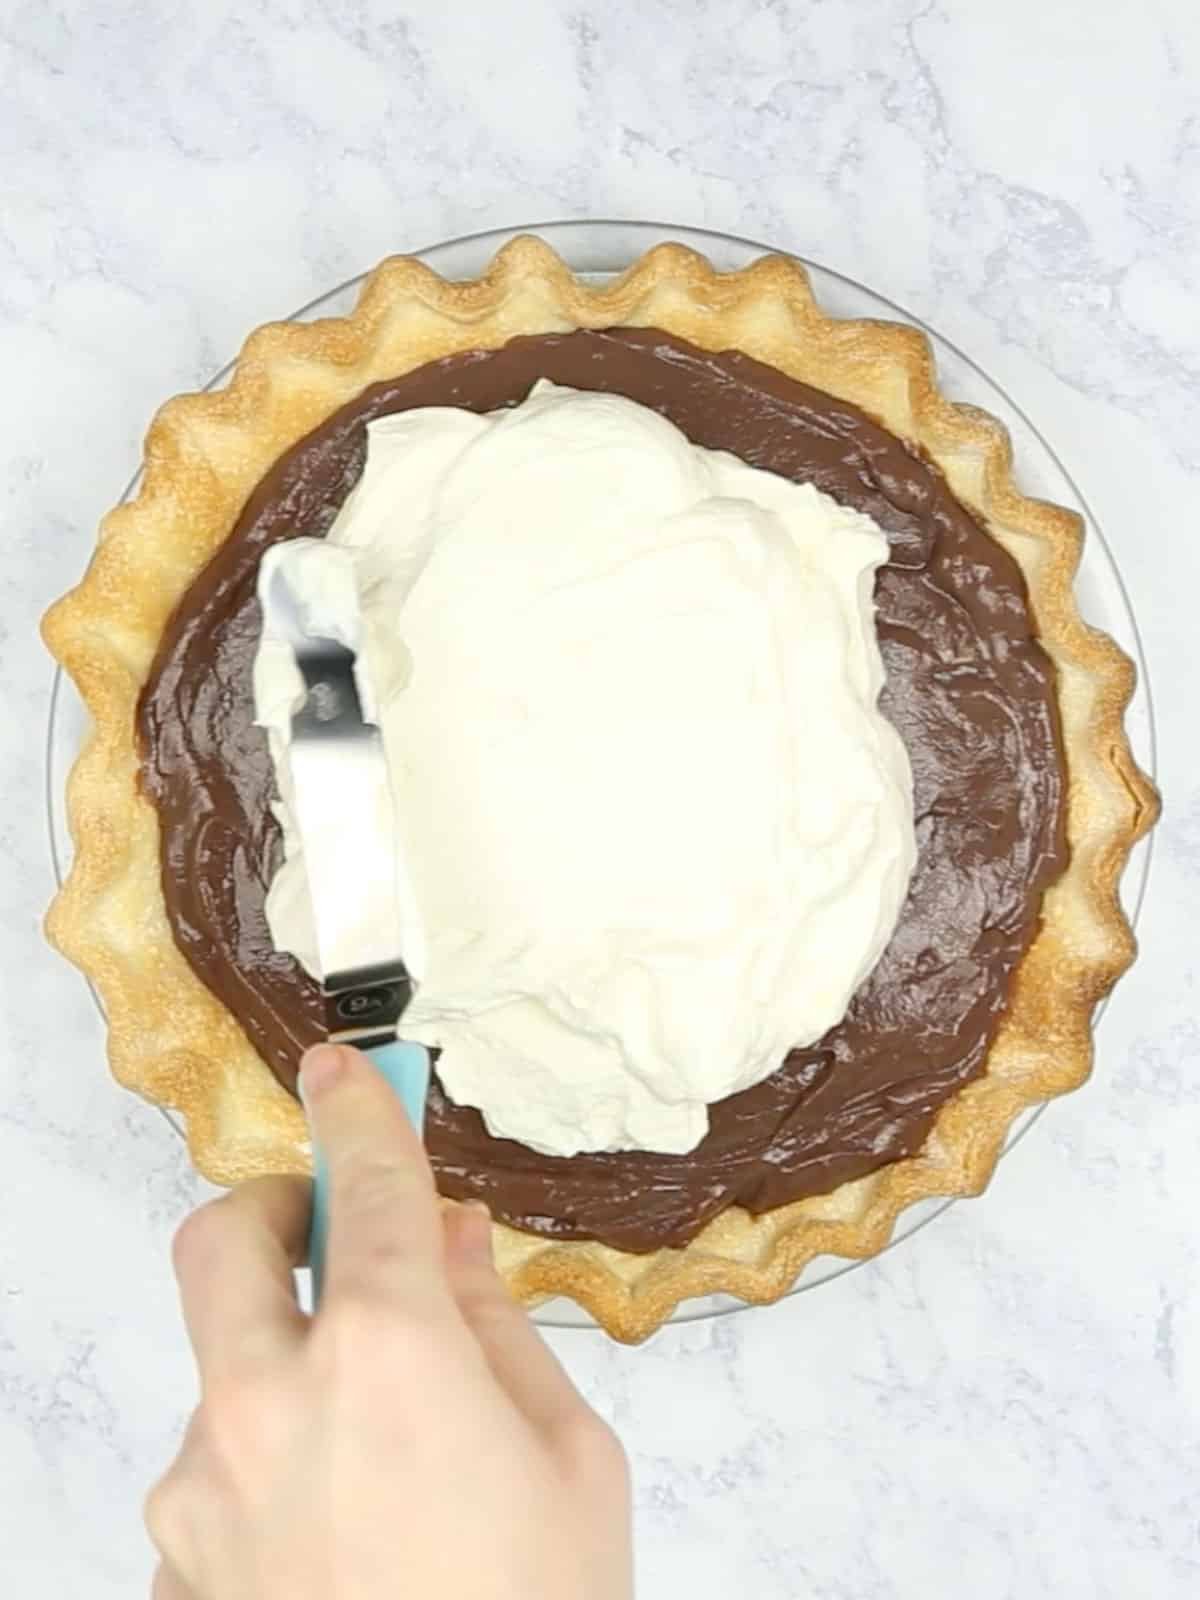
    Step 4: Spread on top of the chocolate layer and if you want, add some chocolate shavings on top for an even more impressive presentation. Serve and enjoy!

    Whipped cream being spread onto the chocolate pie.

    Frequently Asked Questions

    Can I make this ahead of time?

    Absolutely! You can definitely make every component of this recipe ahead, though I'd encourage you to wait until the day-of to put it all together. As a note, you may need to give the whipped cream an extra whip or two before adding it to the pudding layer, if making ahead.

    Can I make chocolate pudding pie with an Oreo crust?

    You sure can — and I bet it would be delicious! That said, I recommend buying a pre-made Oreo crust so you have less work!

    Does chocolate pudding pie need to be refrigerated?

    Yes, you need to refrigerate this until you're ready to serve. It also tastes the best when chilled, in my opinion!

    How long do leftovers last?

    This dessert will keep for 2-3 days, covered in the fridge. Although, I have to say, it is always the most popular dessert at whatever party I bring it to. I doubt you'll have leftovers!

    A straight-on image focusing on the point of the slice of pie with a fork on the plate next to it on the plate.

    Tips For Making This Chocolate Pie Recipe

    • Don't use instant pudding. I know it's tempting to grab the instant stuff. But trust me, the cook-and-serve variety always comes out superior.
    • When you cover the pudding before cooling, use plastic wrap and push it down so that it touches the entire top of the pudding — this should help avoid that gross "skin" that pudding can sometimes develop.
    • I cut down the amount of milk from what it says on the pudding mix box to try and make it a little thicker. I mean, this is a chocolate pudding pie, so it's not going to get a perfect, gorgeous cut no matter how you slice it (see what I did there?). But it's so darn delicious that no one ever cares and a slightly thicker pudding texture definitely helps.
    • I generally wait until the day of serving to put the pudding into the pie crust to make sure it doesn't get soggy.
    • You can totally use whipped topping if you want, freshly whipped is preferable, but store bought is fine, like Ina says!
    • The chocolate shavings are totally optional but are always a fun addition. For this particular chocolate cream pie, I used "fun size" chocolate bars from my kids' Halloween candy. No regrets.

    Other Chocolate Desserts to Try...

    • An image of a chocolate mousse cup with a spoon in it and a raspberry on top.
      Chocolate Mousse Cups
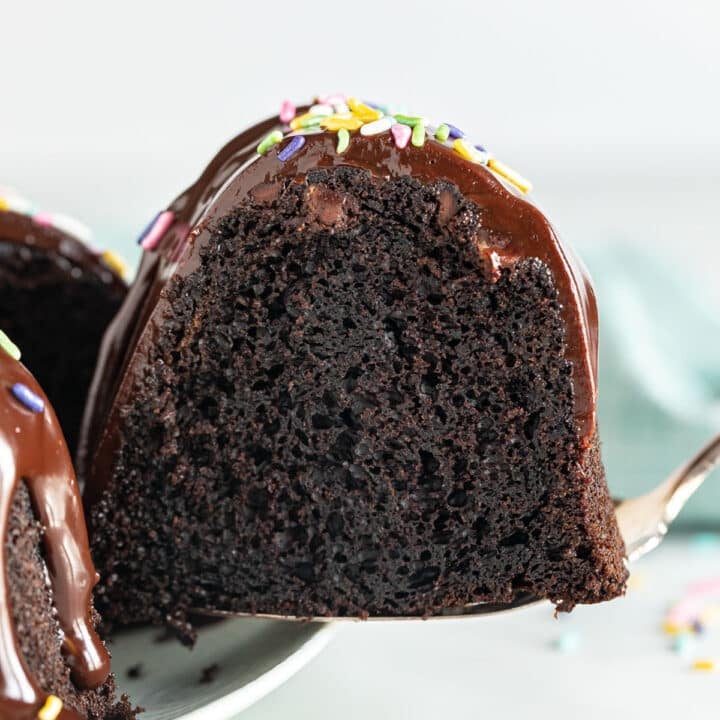
    • A piece of chocolate cake being pulled from the whole cake revealing the moist inside of the cake.
      The BEST Chocolate Overload Cake
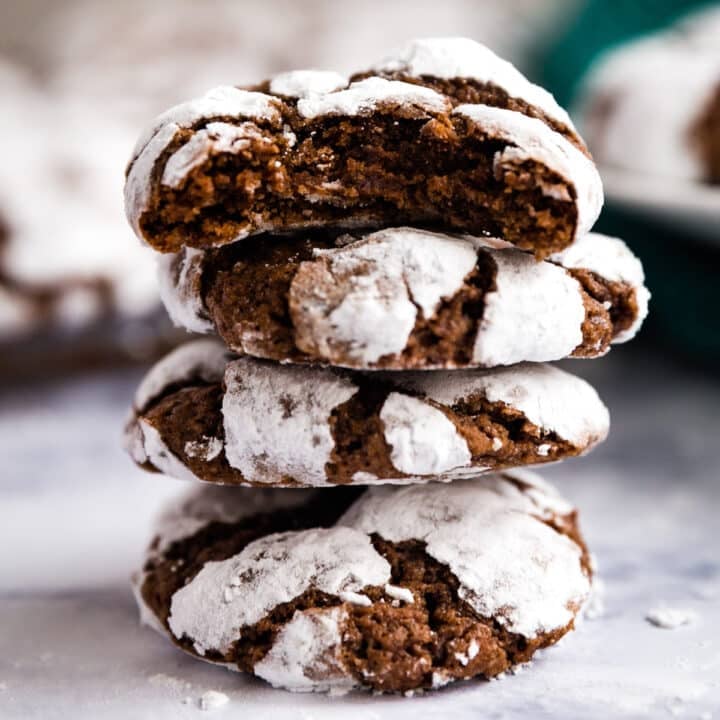
    • A stack of crinkle chocolate cookies with a bite taken out of the top cookie.
      Crinkle Chocolate Cookies
    • A tall glass bowl of chocolate trifle showing the layers with chocolate toffee candies scattered around it.
      Chocolate Cake Trifle

    Hosting Thanksgiving?

    Discover the secret to hosting Thanksgiving without all the stress! Prepsgiving is your FREE guide to making a delicious Thanksgiving feast the easy way.

    Love this recipe? Please leave a 5 star ⭐️⭐️⭐️⭐️⭐️ rating in the recipe card below ⬇️ and/or a review in the comment section further down. Check out my Amazon Store for all my favorite tools, including those used in this recipe. And follow @thelifejolie on Instagram and TikTok!

    A close up image of a slice of chocolate pudding pie on a white plate with the rest of the pie behind it.

    Old Fashioned Chocolate Pie

    Jessy Freimann
    My family makes this easy Old Fashioned Chocolate Pie over and over again. It's effortless to put together and we always fight for seconds! If you want a rich, creamy, and chocolatey with a wonderfully crispy and buttery crust you'll love this- it's perfect for every occasion!
    5 from 1 vote
    Print Recipe Pin Recipe
    Prep Time 20 minutes mins
    Cook Time 10 minutes mins
    Total Time 30 minutes mins
    Course Dessert
    Cuisine American
    Servings 8 slices
    Calories 225 kcal

    Equipment

    • Pie pan
    • Pie shield
    • mixing bowl
    • stand mixer
    • Hand mixer
    • Spatula
    • Measuring cups and spoons
    • Liquid measuring cup
    • Small sauce pan
    • Whisk

    Ingredients
      

    • 2 3.4 ounce cook and serve chocolate pudding mixes (not instant!)
    • 1 ½ cups whole milk
    • 1 pie crust, baked
    • ½ pint heavy cream
    • ½ teaspoon real vanilla extract
    • ¼ cup confectioner's sugar

    Instructions
     

    • Combine pudding mixes and milk in a medium saucepan and simmer over medium heat until thickened. 
    • Remove from heat and transfer to a different container and chill in the refrigerator.
    • On the day you're planning to serve this, place the pudding into the pie crust and smooth the top. Refrigerate.
    • In a large mixing bowl, whip the heavy cream, vanilla extract and confectioner's sugar until it makes stiff peaks. 
    • Spread the whipped cream on top of the pie and if you're feeling extra fancy, shave some chocolate on top. Serve immediately or refrigerate until serving.

    Video

    Notes

    • Don't use instant pudding. I know it's tempting to grab the instant stuff. But trust me, the cook-and-serve variety always comes out superior.
    • When you cover the pudding before cooling, use plastic wrap and push it down so that it touches the entire top of the pudding — this should help avoid that gross "skin" that pudding can sometimes develop.
    • I cut down the amount of milk from what it says on the pudding mix box to try and make it a little thicker. I mean, this is a chocolate pudding pie, so it's not going to get a perfect, gorgeous cut no matter how you slice it (see what I did there?). But it's so darn delicious that no one ever cares and a slightly thicker pudding texture definitely helps.
    • I generally wait until the day of serving to put the pudding into the pie crust to make sure it doesn't get soggy.
    • You can totally use whipped topping if you want, freshly whipped is preferable, but store bought is fine, like Ina says!
    • The chocolate shavings are totally optional but are always a fun addition. For this particular chocolate cream pie, I used "fun size" chocolate bars from my kids' Halloween candy. No regrets.

    Nutrition

    Serving: 1sliceCalories: 225kcalCarbohydrates: 17gProtein: 4gFat: 18gSaturated Fat: 9gPolyunsaturated Fat: 1gMonounsaturated Fat: 6gCholesterol: 39mgSodium: 112mgPotassium: 117mgFiber: 1gSugar: 3gVitamin A: 509IUVitamin C: 0.2mgCalcium: 80mgIron: 1mg
    Tried this recipe?Let us know how it was!

    Cheese Sauce for Broccoli Recipe

    Feb 19, 2024 · 25 Comments

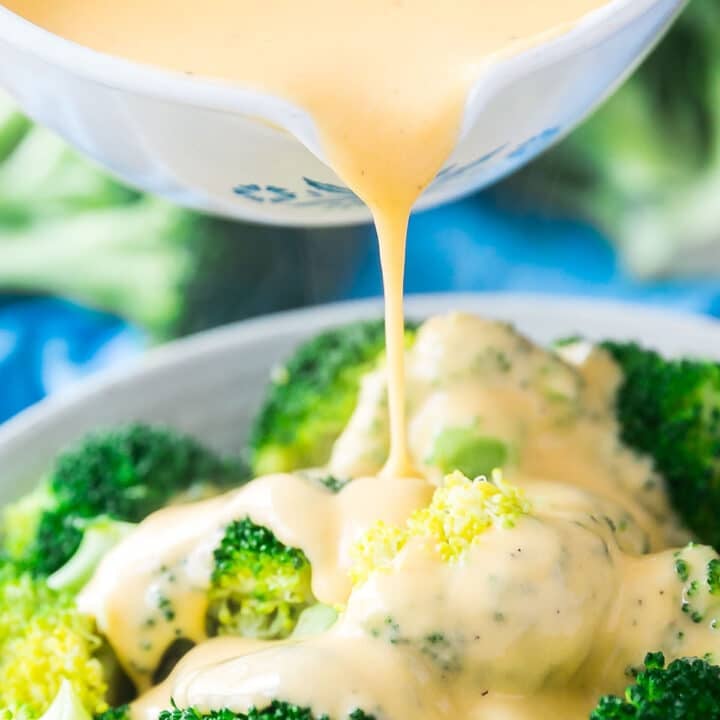
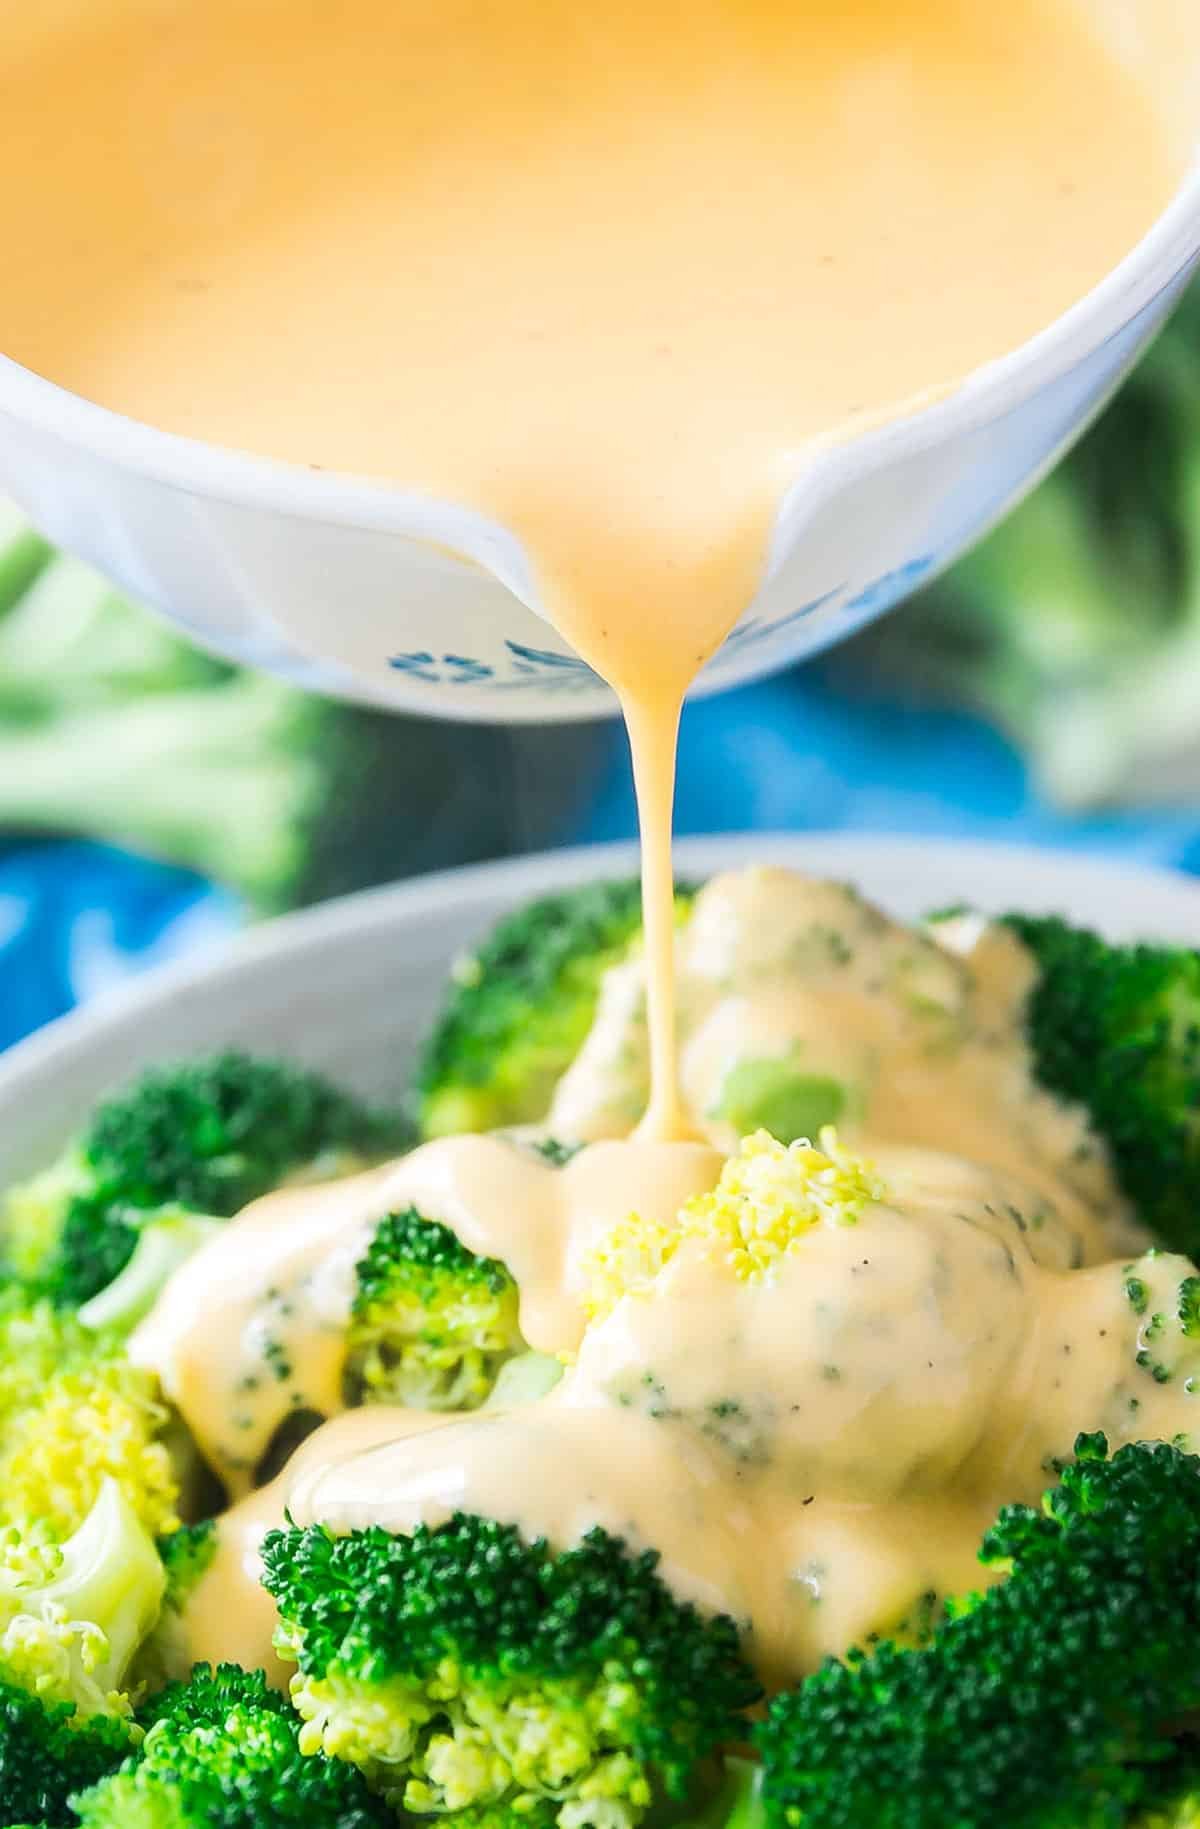
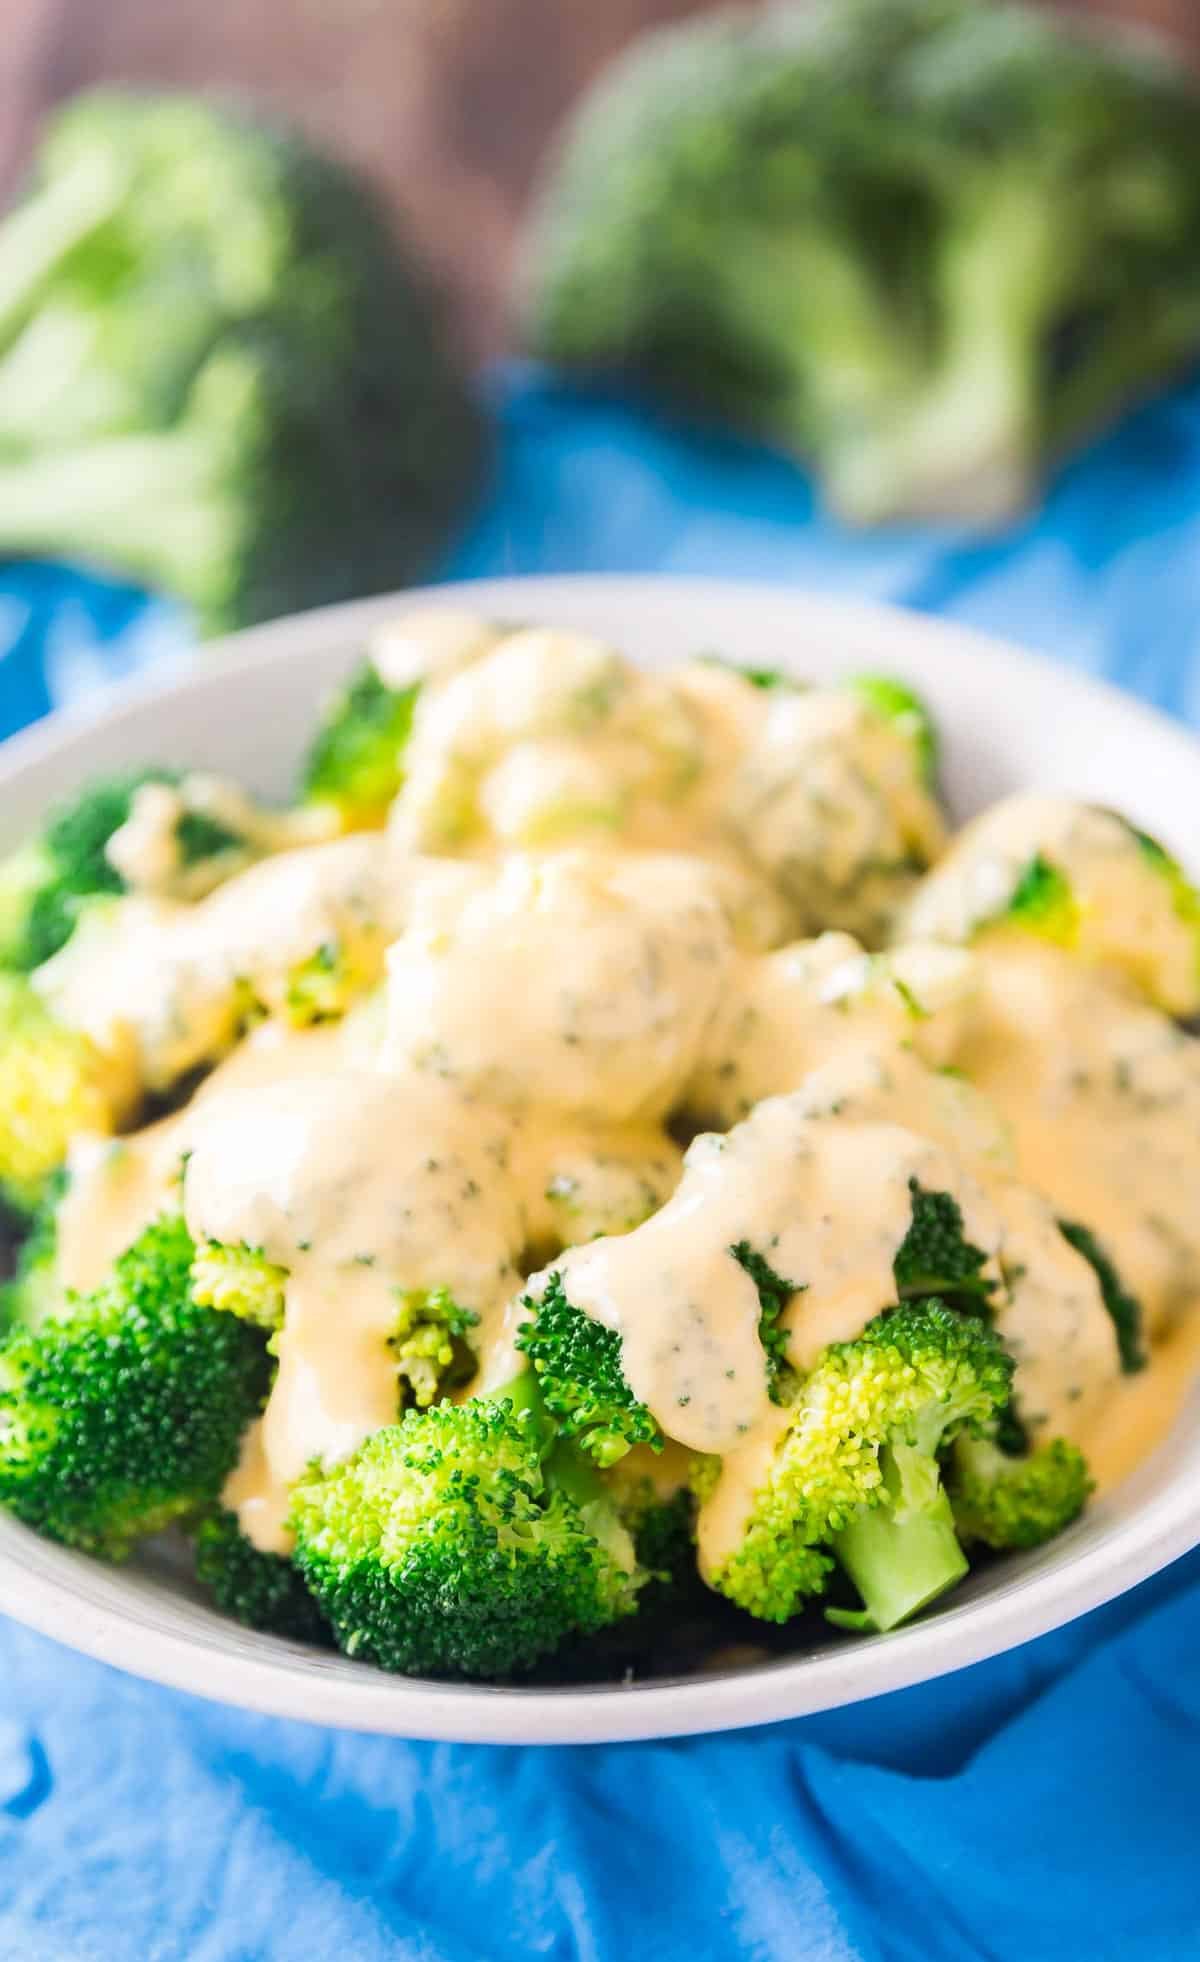
    A white pan pouring cheese sauce over a bowl of steamed broccoli.

    Wanna get your kids to eat vegetables? Rich and creamy Cheese Sauce For Broccoli is a game changer. Made with cheddar cheese and basic ingredients, it's the perfect topping for broccoli or any other veggies.

    A white pan pouring cheese sauce over a bowl of steamed broccoli.
    [feast_advanced_jump_to]

    Why You'll Love Broccoli & Cheese Sauce

    Wanna know my favorite way to get kids to love broccoli? My Grandma's homemade cheese sauce is my secret weapon! It's creamy, delicious, and so easy to make. Your family will be fighting for seconds!

    Growing up, I had always heard that some people don't like broccoli. This was always baffling to me because I love broccoli and so do my kids! But whichever veggie you love to hate, my favorite way to turn people into veggie believers is this cheddar cheese sauce recipe. It's a pretty simple and quick recipe. It does require a little love. Trust me when I say, your efforts will be well rewarded!

    Why you'll love this recipe:

    • Incredibly easy to make
    • Super simple, common ingredients
    • A tried and true recipe
    • Kid approved
    • 15 minutes, start to finish
    • Easy to follow directions
    • Tastes incredible
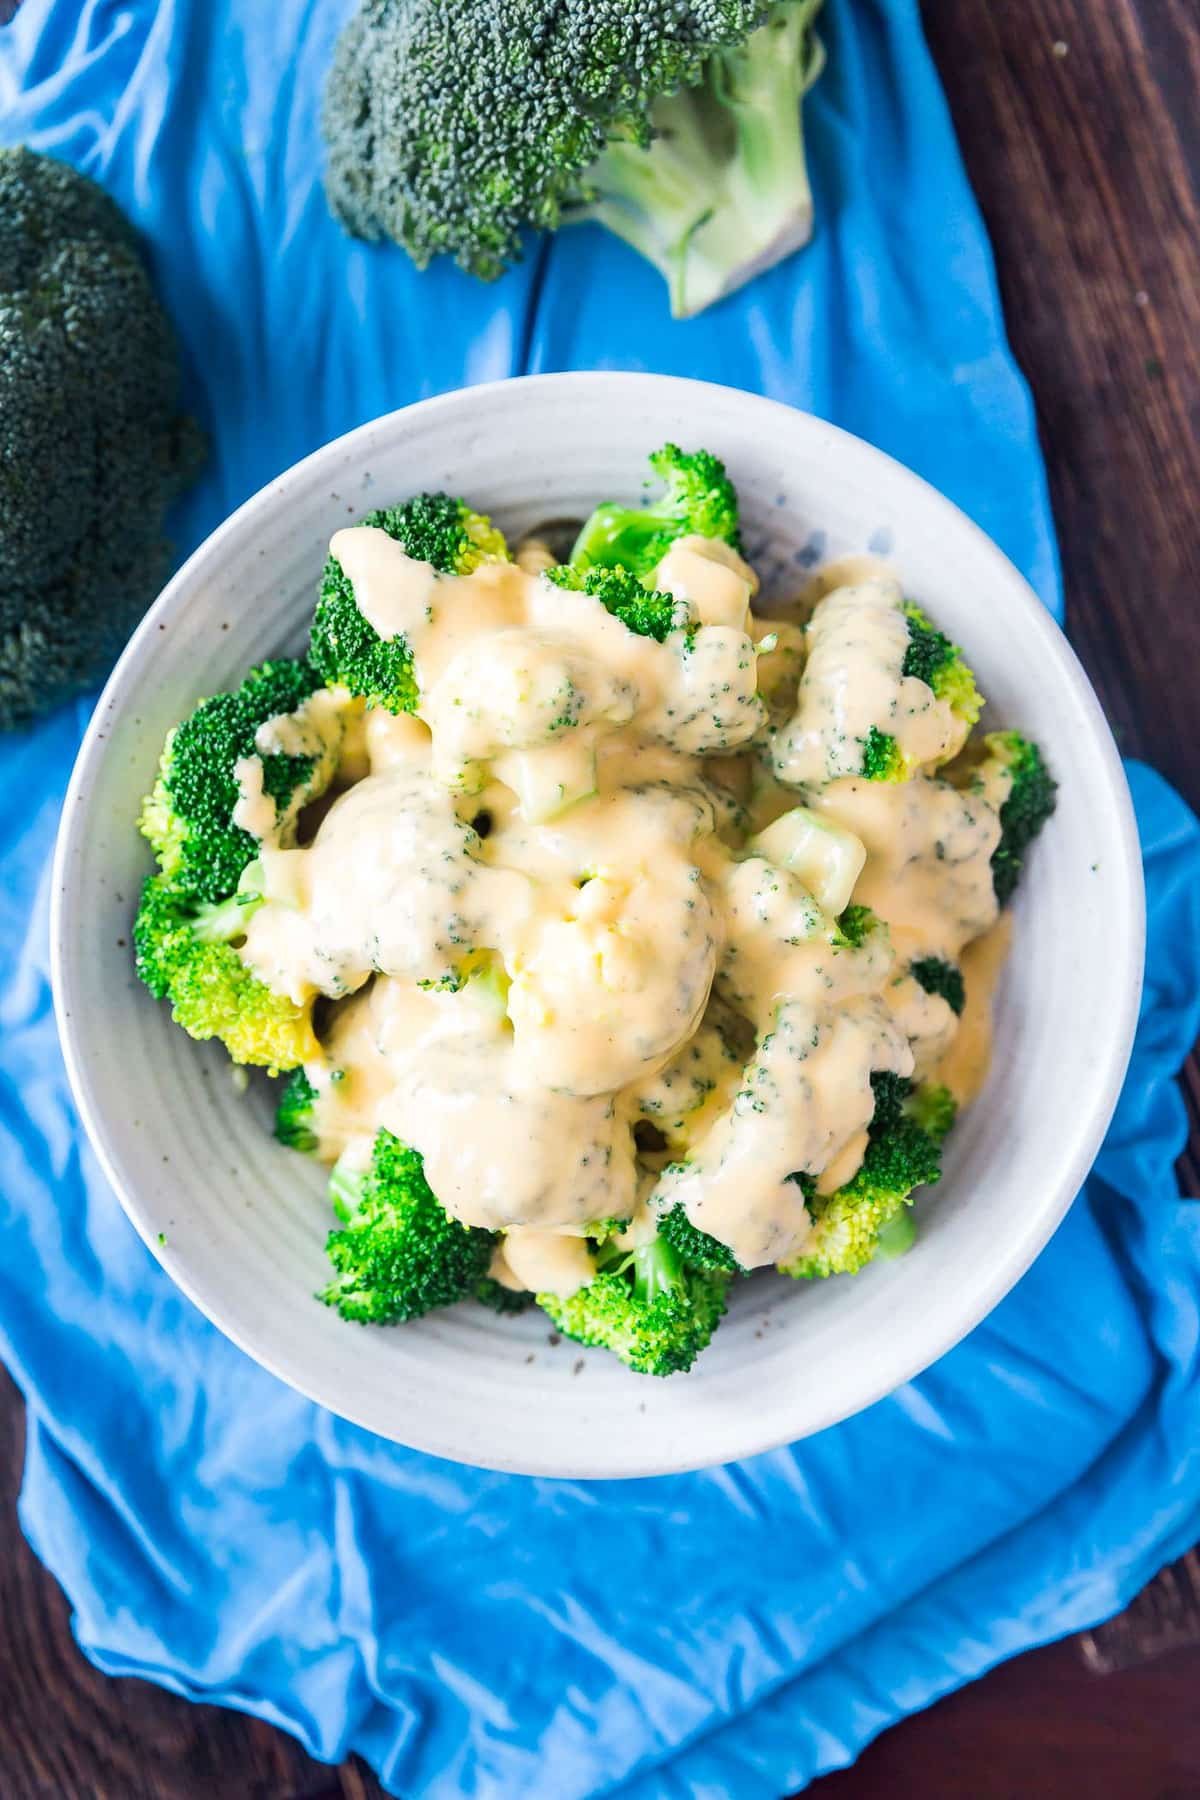
    An overhead image of a bowl of steamed broccoli topped with homemade cheese sauce in a gray bowl on a blue napkin.

    Ingredient Information and Substitutions

    • Cheese-My go-to cheese for this recipe is shredded cheddar cheese. Hand-shredding will allow it ot melt easier but it also works with pre-shredded. You can totally use your favorite cheese like Monterey jack or white cheddar.
    • Roux- Melted salted butter and flour mix together to thicken this sauce. I always cook my roux for a couple minutes before adding the milk to get rid of the raw flour flavor.
    • Milk- Adds just the right liquid component without making it too heavy. YOu could always use half and half or heavy cream, but I think whole milk makes it just the right texture.
    • Seasoning- Garlic powder and ground black pepper round out the flavors in this. Once it's ready and you've tasted it, you can totally add salt, but Grandma never felt it was needed additional salt.
    • Steamed broccoli- This is my preferred veggie to go with this cheese sauce but I've also enjoyed it with cauliflower. That said, this would be delicious on whatever veggie you love most.
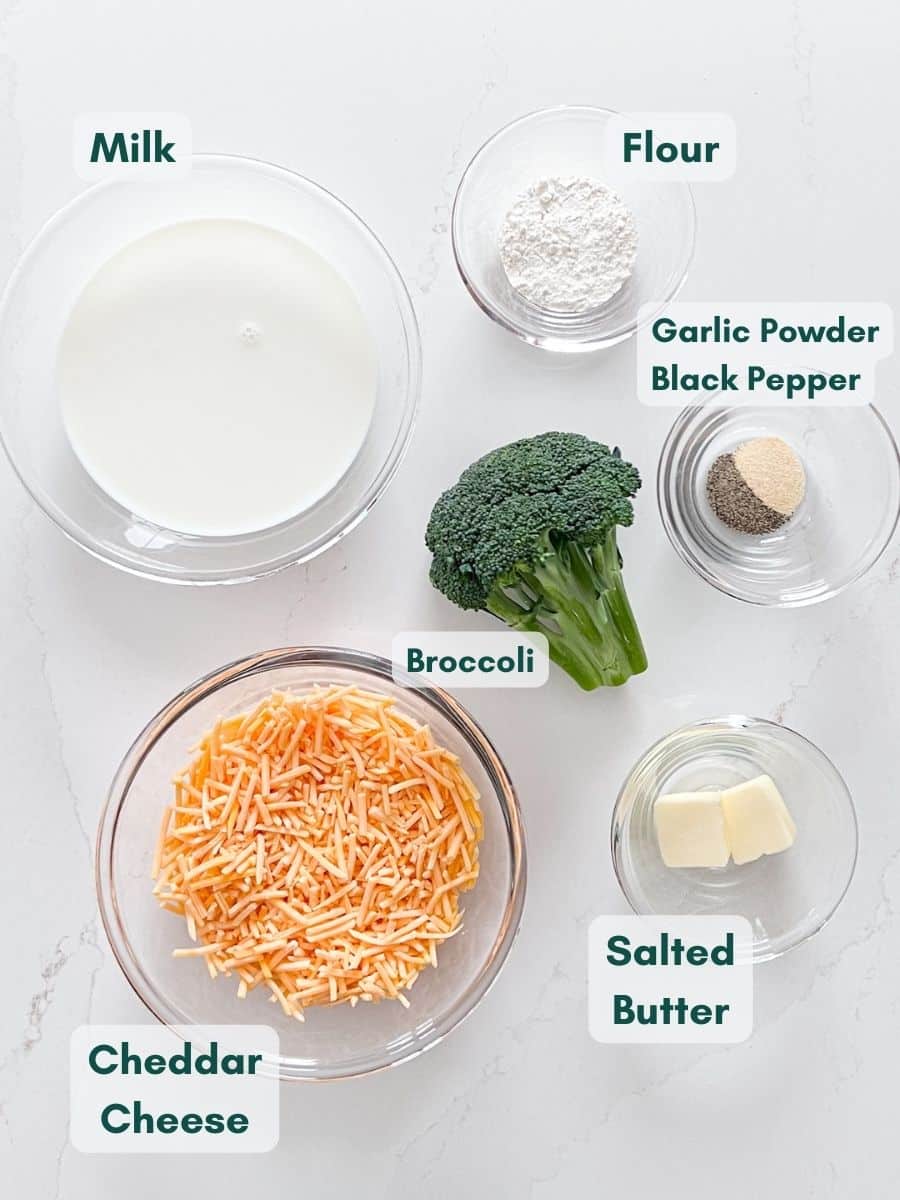
    An overhead image of the labeled ingredients in glass bowls.

    How To Make Cheese Sauce For Broccoli

    Step 1: Make a roux

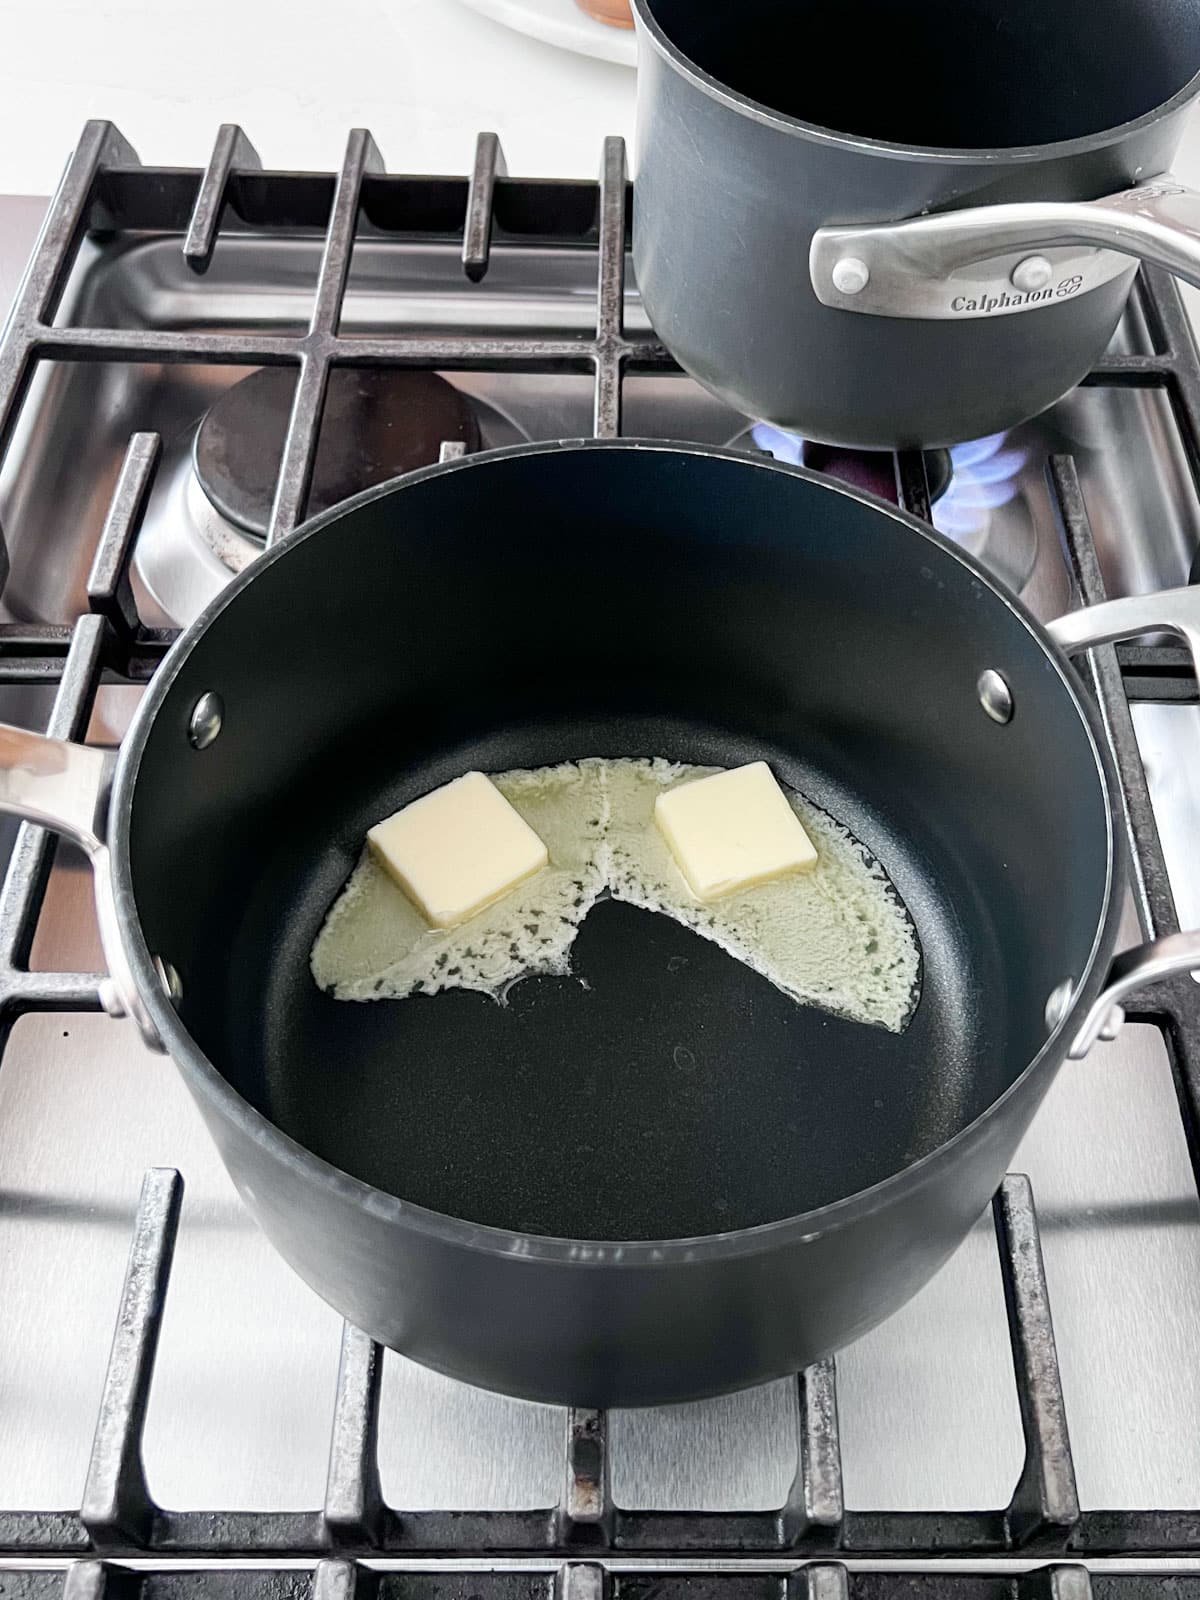
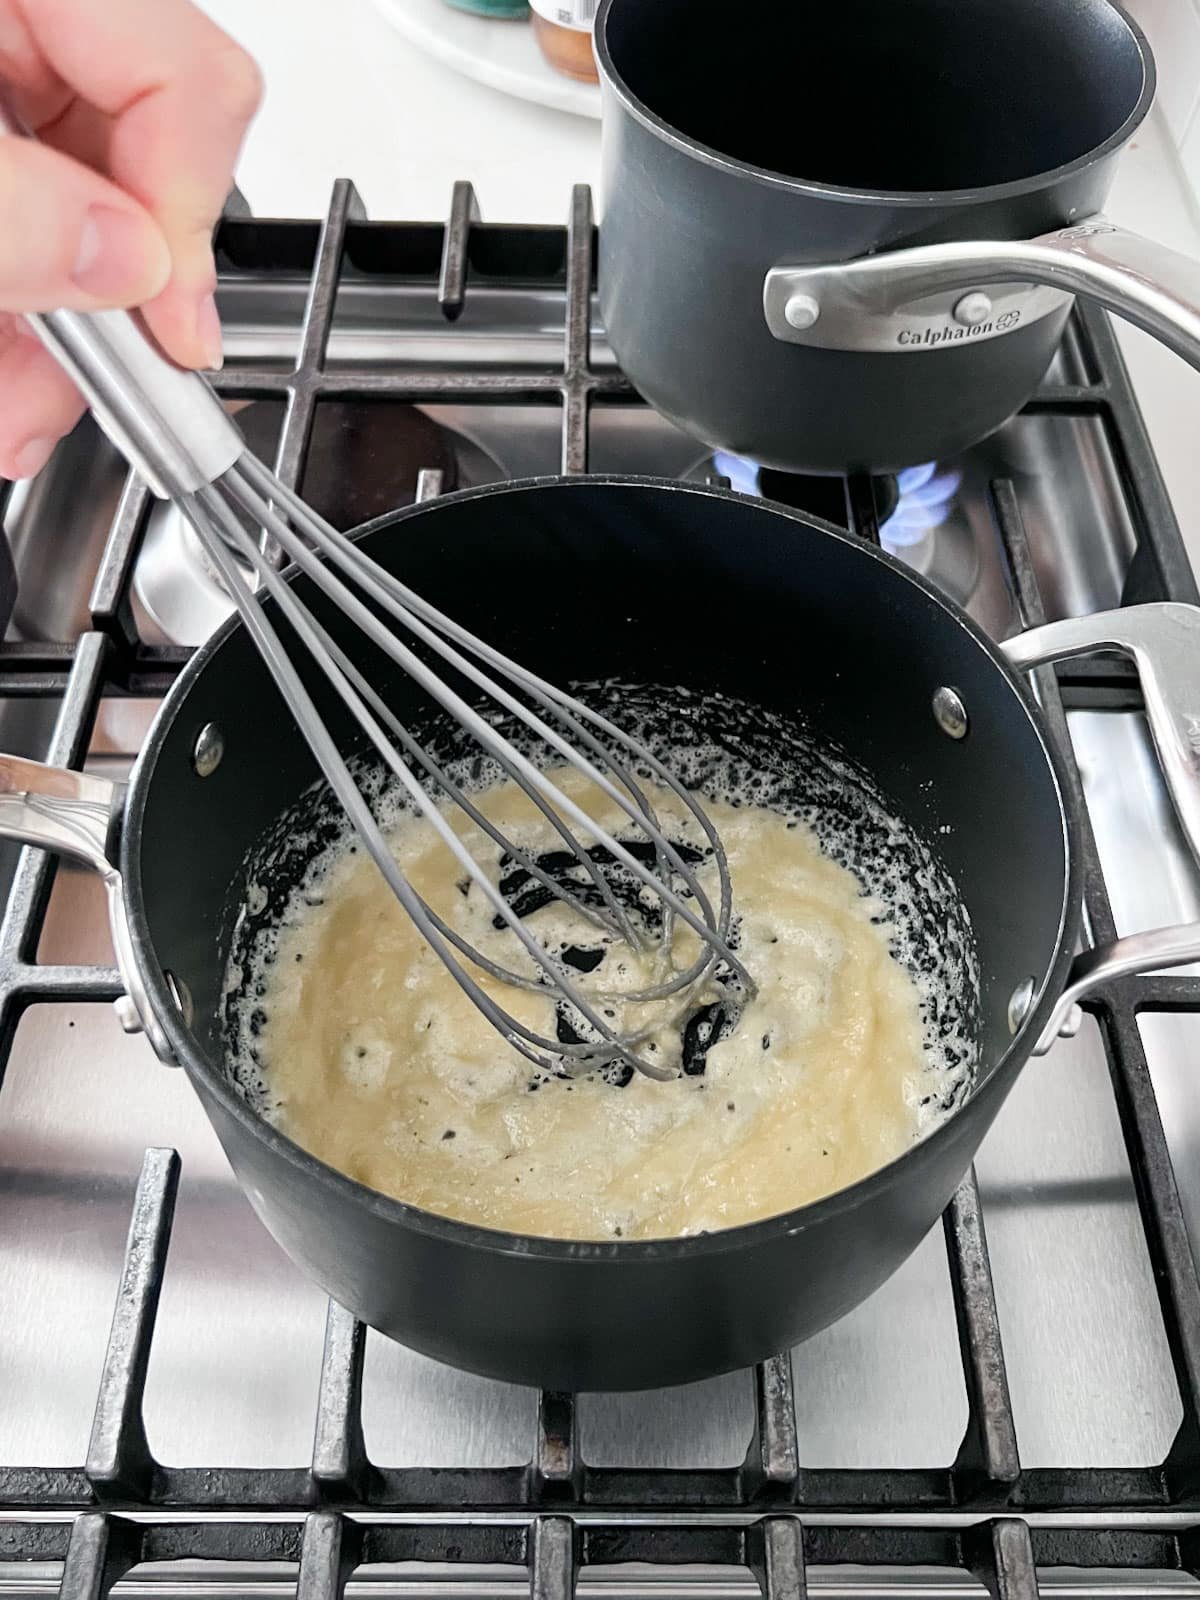
    Begin by melting the butter in a medium size pan over medium heat. Once melted, add in flour and whisk to combine. Allow it to cook for 1-2 minutes.

    Butter melting in a sauce pan on the stove.
    Flour being whisked into the butter making a roux in the sauce pan.

    Step 2: Add ingredients

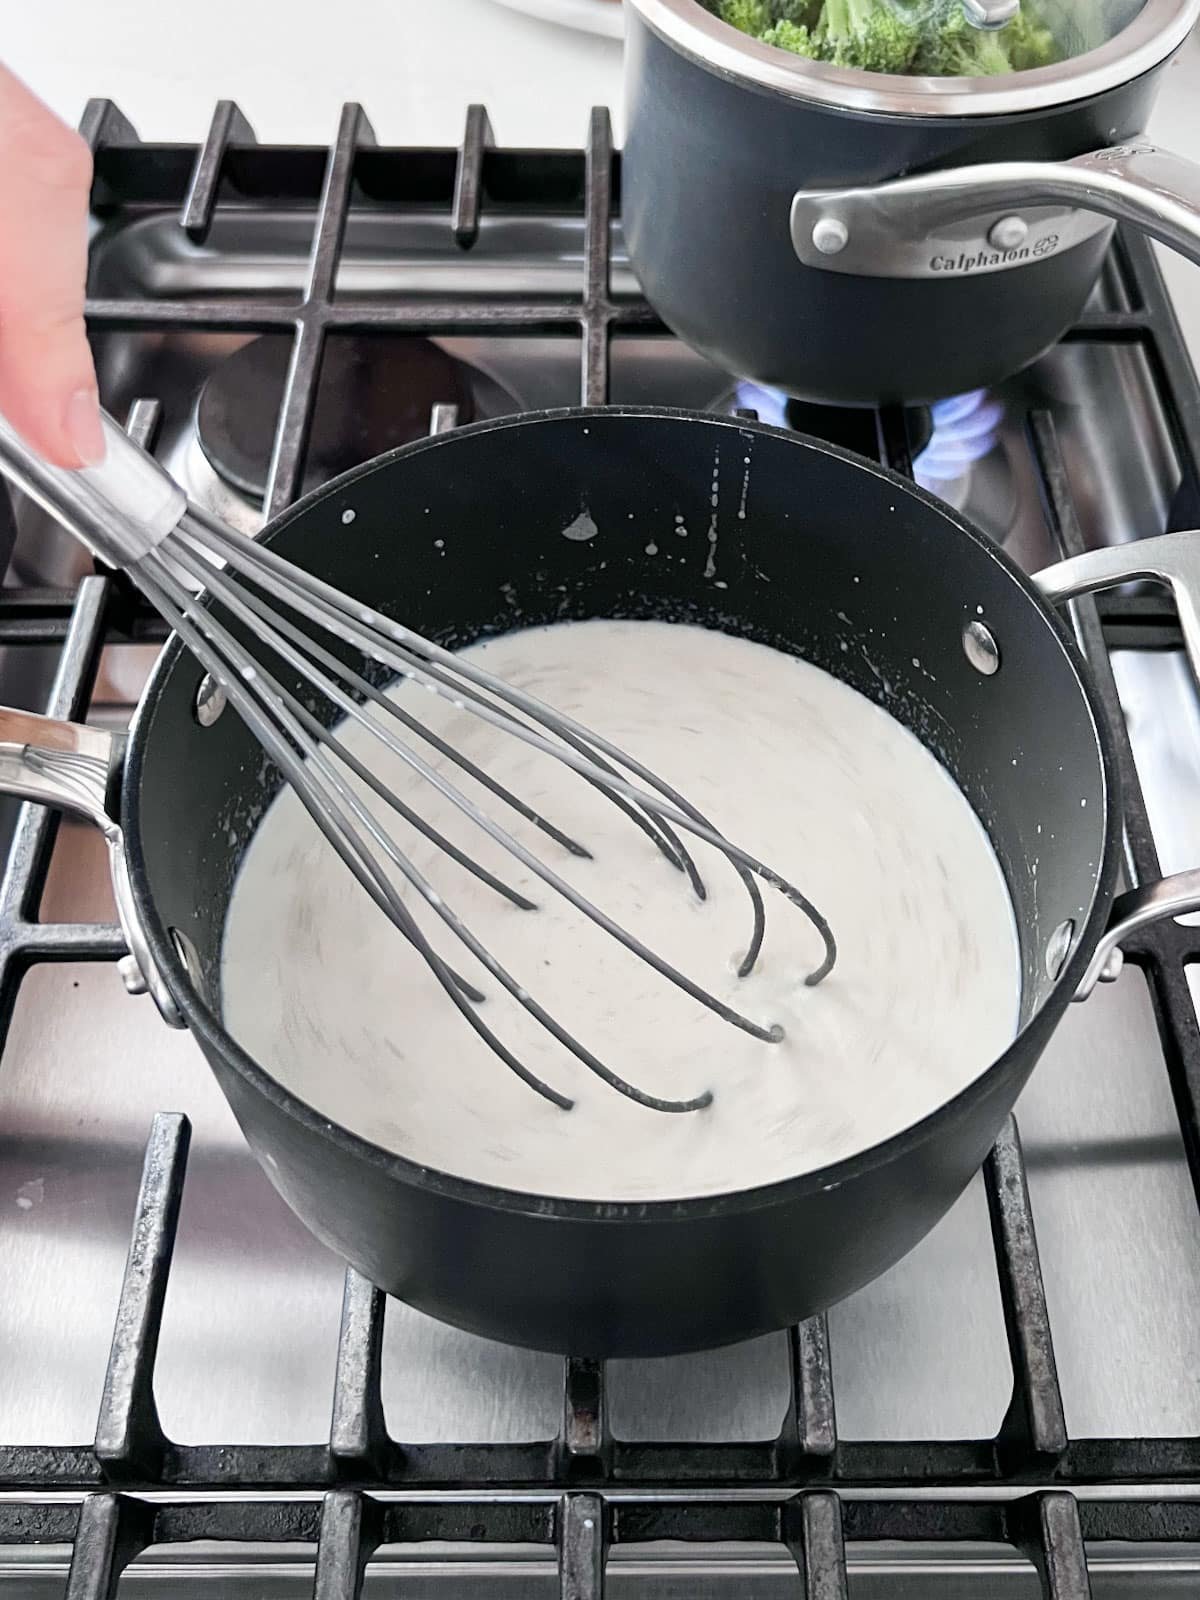
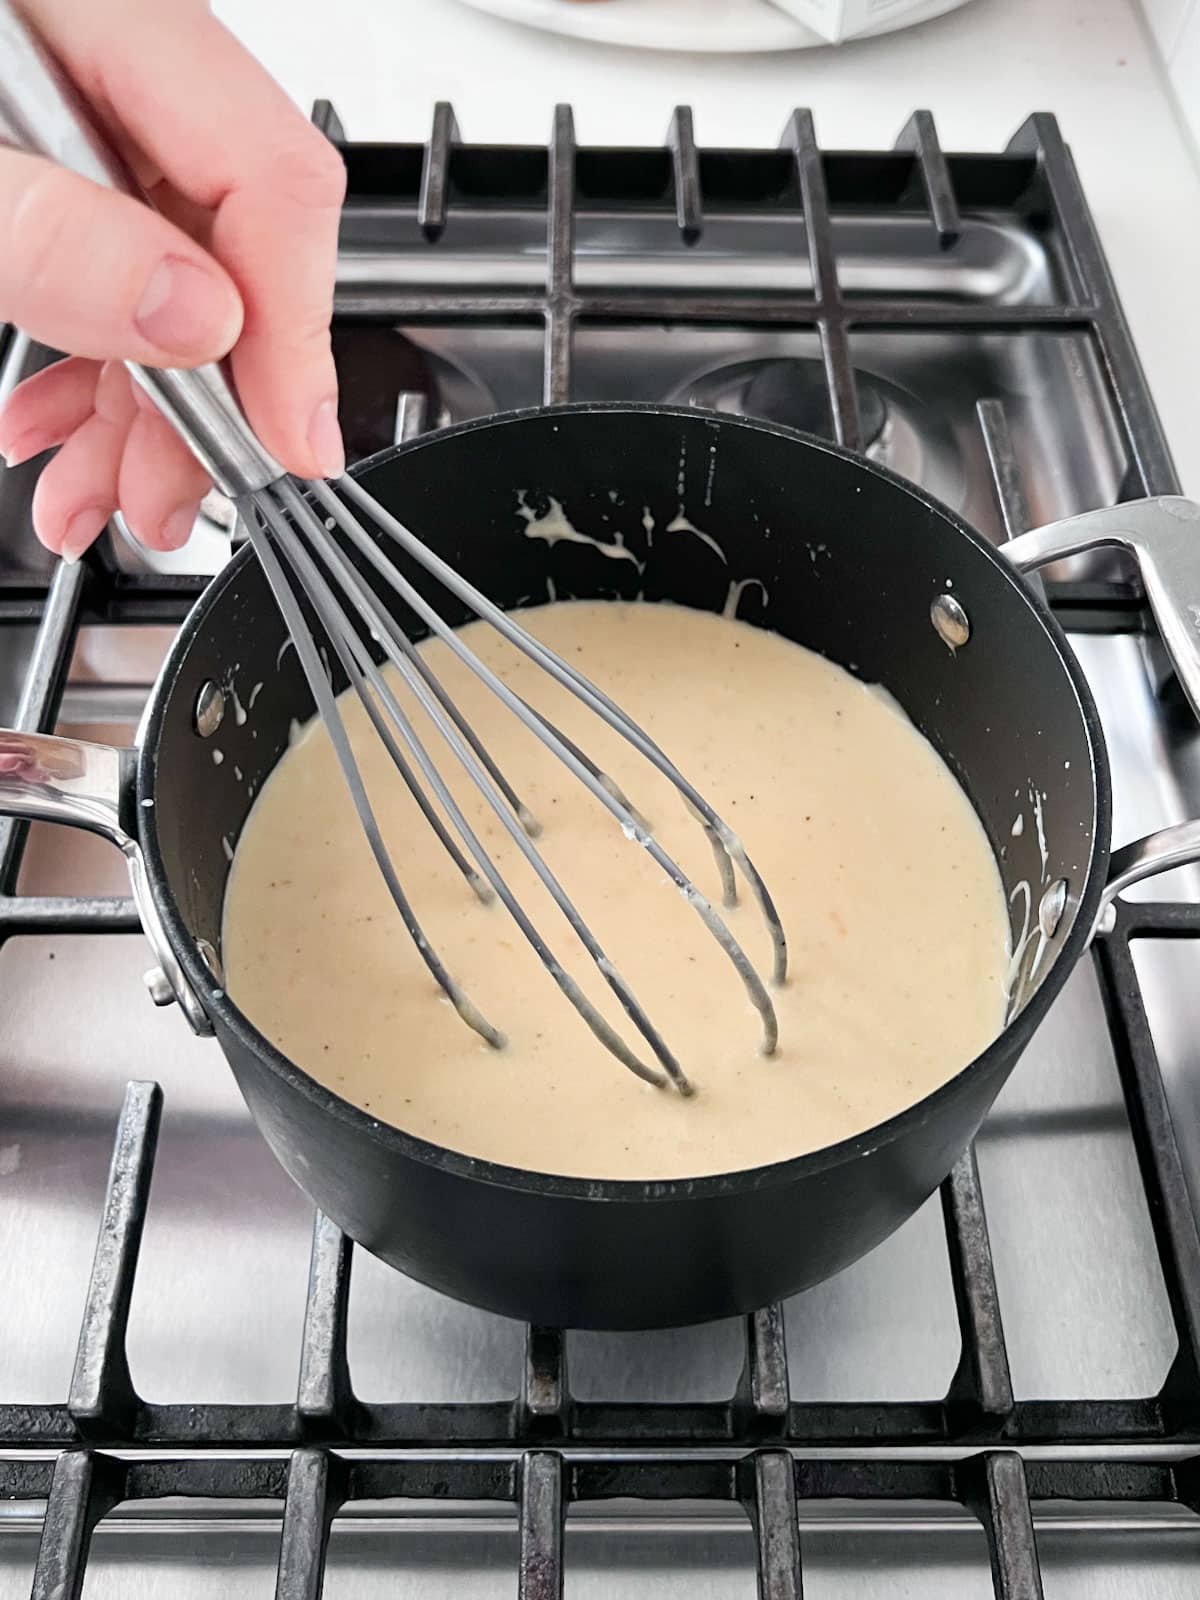
    Whisk in the milk. Sprinkle with garlic powder and pepper.

    Milk, garlic powder and black pepper being whisked in the sauce pan.

    Step 3: Cook

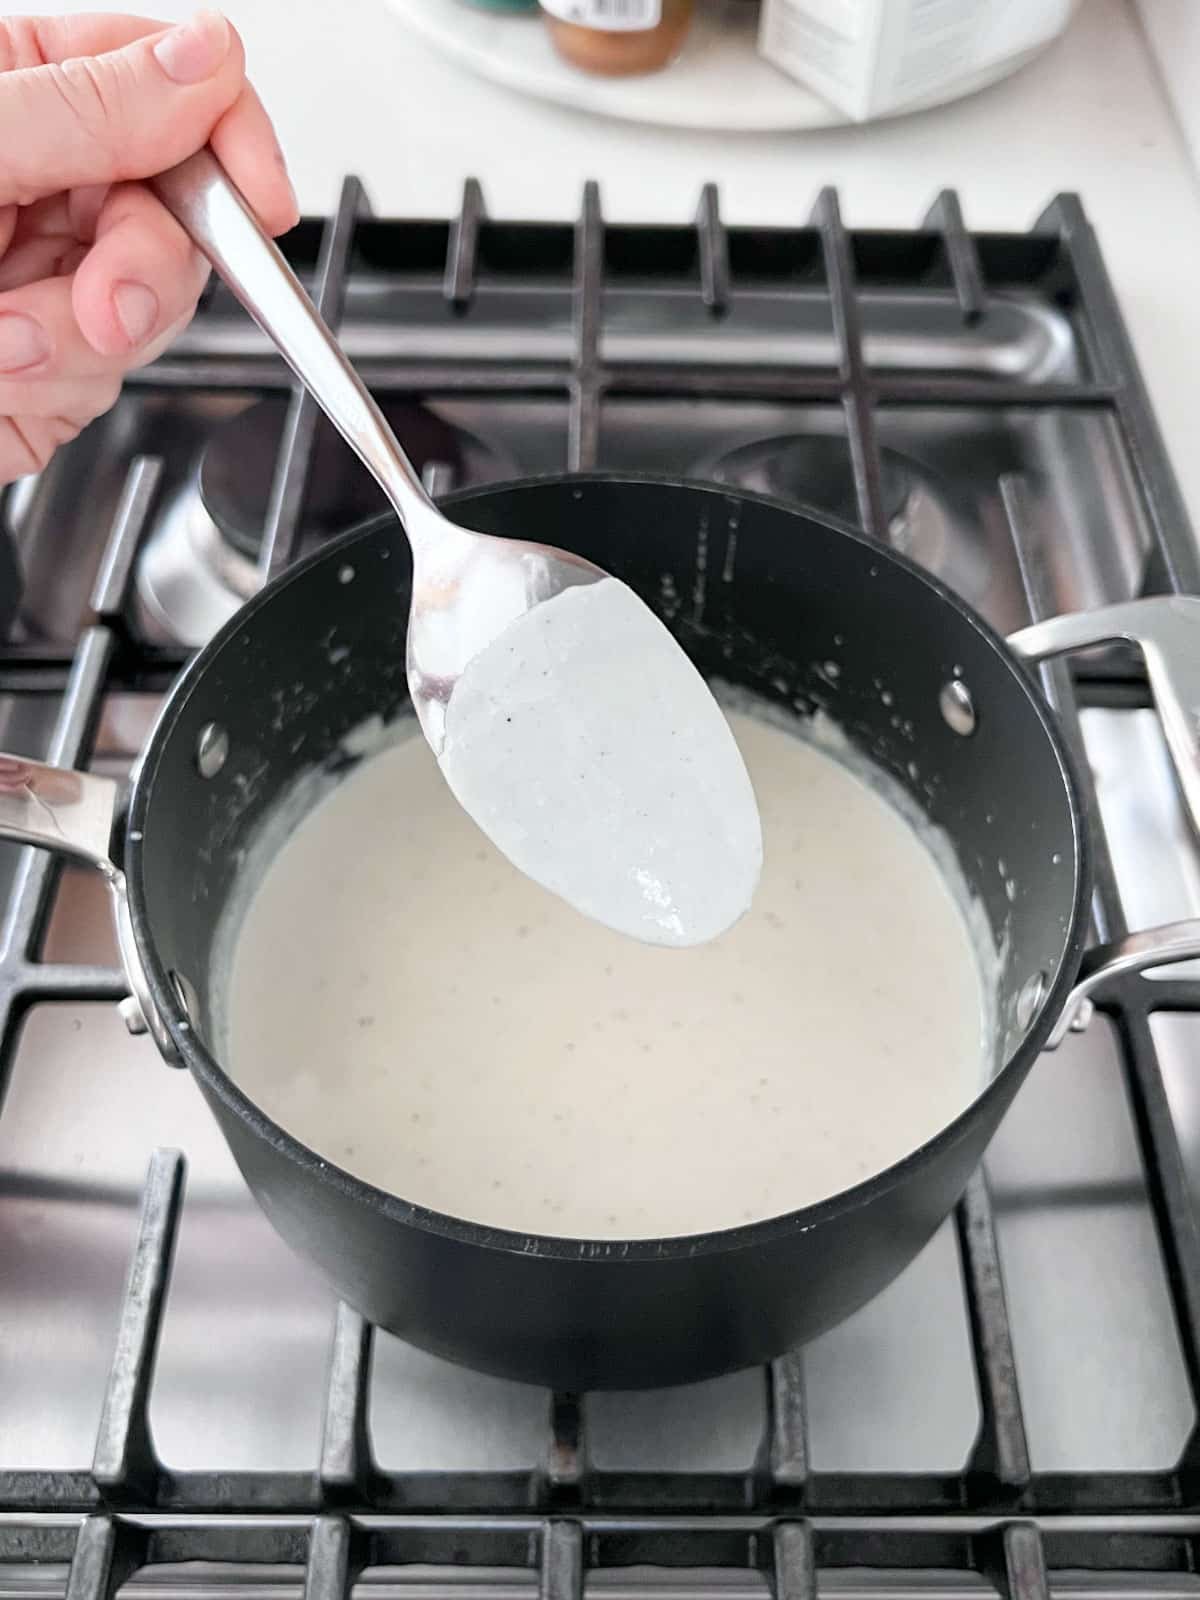
    Cook the sauce base for 10 minutes or until thickened enough to coat the back of a spoon. Be sure to stir continuously, so the milk doesn't scald.

    Thickened sauce in the pan with a spoon in front of it showing how the sauce coats the back of the spoon.

    Step 4: Add cheese

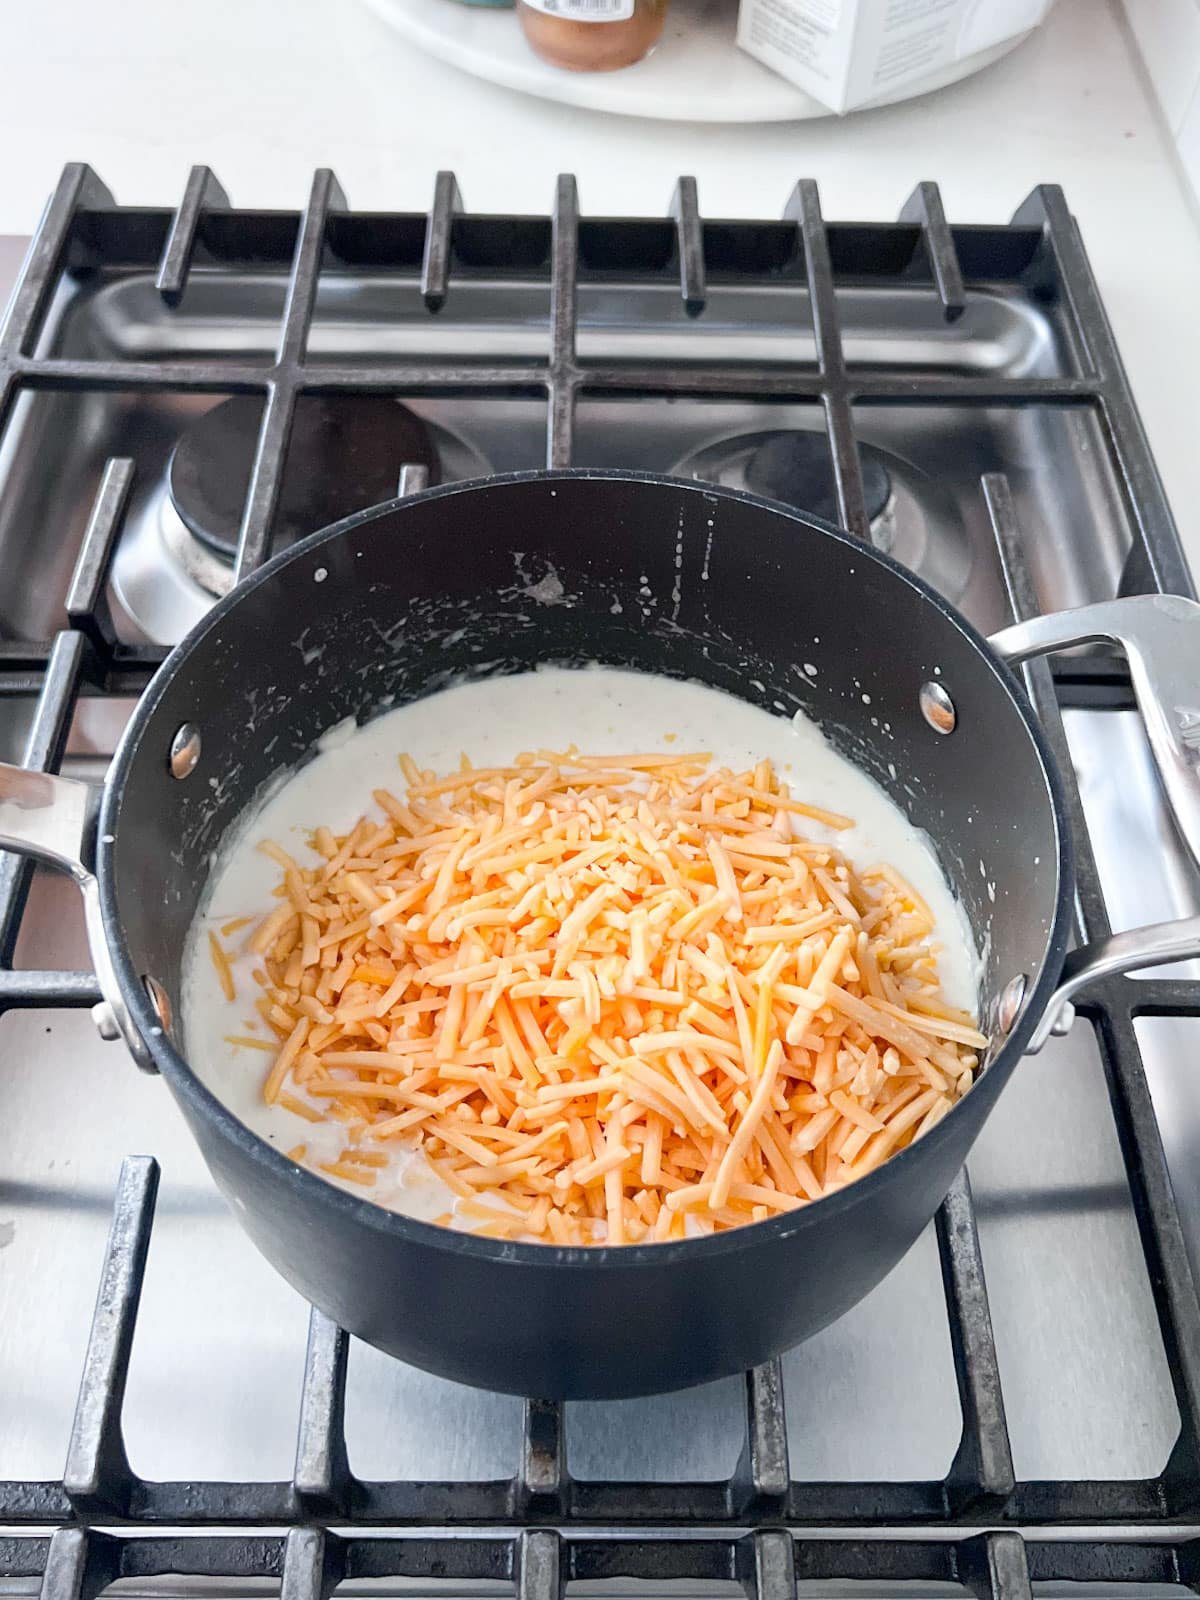
    Add shredded cheese to the pan and stir until melted. Serve over cooked broccoli or any other veggie that you like. Enjoy!

    Shredded cheese added to the sauce in the pan.
    Cheese sauce being whisked in the pan.

    Frequently Asked Questions

    Can you substitute cheese?

    Sure — feel free to change up the cheese. I always make this cheese sauce with cheddar because it's our favorite, but you can certainly swap it for something else. The key is choosing a cheese that will melt easily, so you get the perfect creamy sauce every time!

    How do I make sure my cheese sauce is smooth?

    If you can shred the cheese yourself, that always melts better because it doesn't have the anti-caking element on it.

    Another thing I have found that makes a big difference is using full fat cheese. It melts better and gives you a much creamier result.

    Can this be made gluten free?

    I've heard that King Arthur 1:1 GF Flour behaves very similarly to regular AP flour. That said, I cannot guarantee results since I I haven't tested this recipe using GF flours. If you try it, please comment and let me know how it works for you!

    How to thicken cheese sauce?

    I like to make a roux by melting butter, whisking in equal parts four and cooking for a few minutes. Then I add the liquid and cook until thickened. The roux adds the perfect texture without being grainy.

    Can cheese sauce be made ahead?

    I generally don't recommend making ahead and reheating, as the cheese sauce tends to coagulate as it cools. If you do want to reheat it, this is best done in a small pan over medium heat on the stove. I whisk in a little milk the thin it out a bit and add a little creaminess.

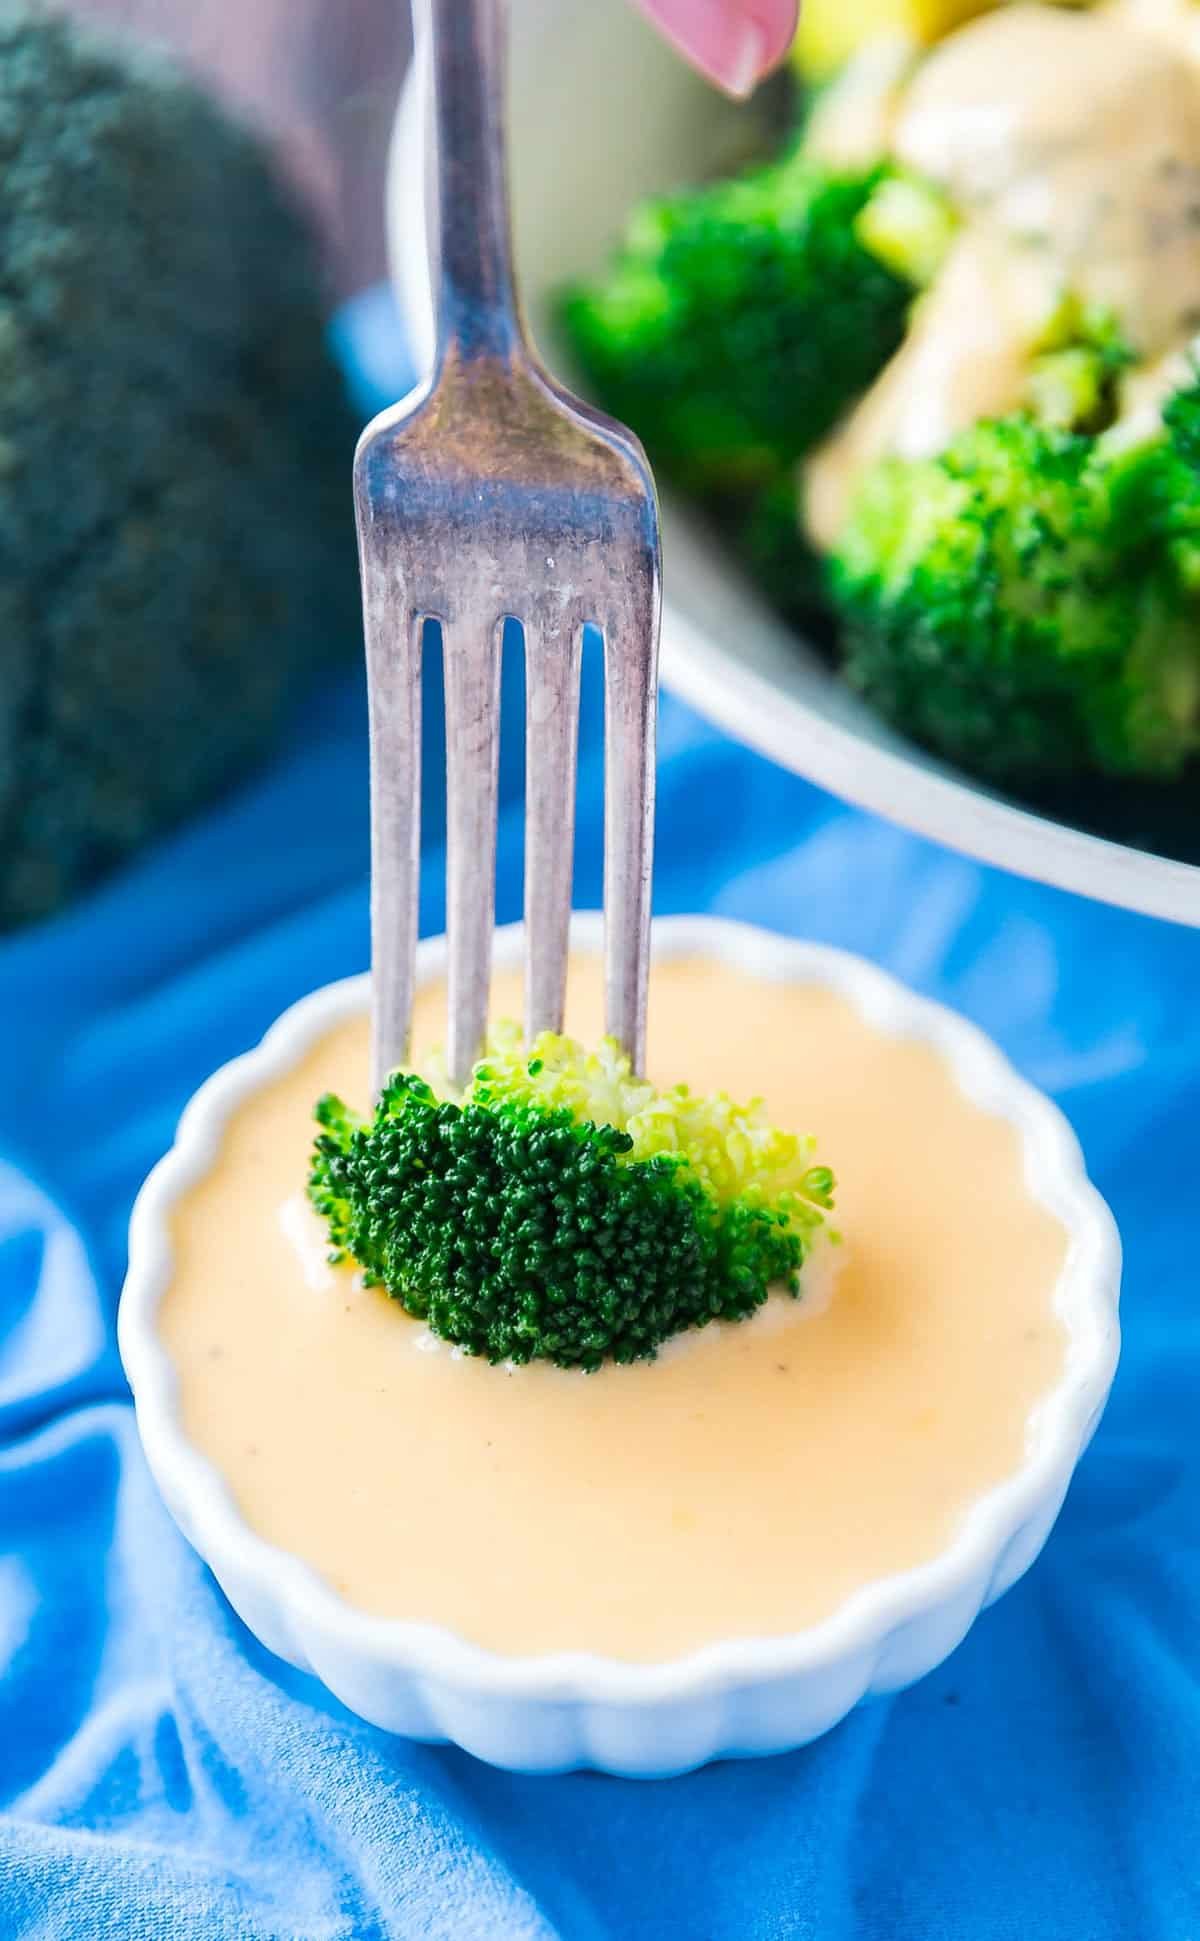
    A fork dipping a piece of broccoli into a small white bowl of cheddar cheese sauce.

    Tips For Making Broccoli Cheese Sauce

    • Cook down the roux before adding liquid. Cook the flour mixture while whisking often for a couple of minutes to get rid of the floury flavor.
    • Don't scald your milk. In general, when you do anything involving milk on your stovetop, you'll want to give it a good amount of attention — constantly stirring so as not to scald the milk. Also, make sure you don't cook it over anything higher than medium heat.
    • How to tell when your sauce has thickened- A good way to tell that the milk has thickened enough to add the cheese is by sticking a spoon into it. Once it coats the back of a spoon, you're ready for cheese.
    • Hand shred the cheese if you can for optimal melting.
    • Turn off the heat before you whisk in the shredded cheddar cheese so it doesn't scald.
    • Keep broccoli the same size. Be sure to cut your broccoli florets to a similar size for evenly cooked steamed broccoli.
    • Prep ahead- You can clean and cut broccoli and shred the cheese ahead.
    • Leftovers and storage- Leftover cheese sauce can be stored for up to 3 days covered in your refrigerator and reheated over medium heat in a small sauce pan- whisk in a small amount of milk to thin it out.
    A gray bowl of broccoli with cheese sauce on top and pieces of raw broccoli in the background.

    What To Serve With This Broccoli Cheese Sauce Recipe

    Round out your meal with these tasty recipe options:

    • Mom's Easy Meatloaf
    • French Onion Rice Pilaf
    • Red Cabbage Salad
    • Lemon Bars

    Other Recipes Featuring Broccoli And Cheese

    • A serving spoon holding up a scoop of broccoli mac and cheese from the pan.
      Baked Broccoli Mac and Cheese
    • A slice of quiche been pulled up and out of a broccoli quiche with broccoli and a cloth napkin in the background.
      Broccoli Cheddar Cheese Quiche
    • A square image of Cheddar and Broccoli Twice Baked Potatoes
      Cheddar and Broccoli Twice Baked Potatoes Recipe
    • A plate of broccoli rice casserole with the pan and raw broccoli florets in the background.
      Rice and Broccoli Casserole

    Love this recipe? Please leave a 5 star ⭐️⭐️⭐️⭐️⭐️ rating in the recipe card below ⬇️ and/or a review in the comment section further down. Check out my Amazon Store for all my favorite tools, including those used in this recipe. And follow @thelifejolie on Instagram and TikTok!

    A white pan pouring cheese sauce over a bowl of steamed broccoli.

    Cheese Sauce For Broccoli

    Jessy Freimann
    Wanna get your kids to eat vegetables? Rich and creamy Cheese Sauce For Broccoli is a game changer. Made with cheddar cheese and basic ingredients, it's the perfect topping for broccoli or any other veggies.
    4.82 from 11 votes
    Print Recipe Pin Recipe
    Prep Time 5 minutes mins
    Cook Time 12 minutes mins
    Total Time 17 minutes mins
    Course Side Dish
    Cuisine American
    Servings 6 servings
    Calories 157 kcal

    Equipment

    • Small sauce pan
    • Whisk
    • Box grater
    • cutting board
    • chefs knife
    • Measuring cups and spoons
    • Liquid measuring cup

    Ingredients
      

    • 2 Tablespoon salted butter you can use unsalted, but you may want to add a little salt if you do
    • 2 Tablespoon flour
    • 2 cups whole milk
    • ¼ teaspoon garlic powder
    • ¼ teaspoon black pepper
    • 2 cups shredded cheddar cheese or any other shredded cheese that you like
    • Steamed broccoli florets

    Instructions
     

    • Melt butter in a medium size pan over medium heat. 
    • Sprinkle in the flour and whisk until combined. Let it cook for a minute or two. 
    • Add milk, garlic powder and pepper. 
    • Cook until thickened stirring often, about 10 minutes until it coats the back of a spoon. 
    • Turn off the heat and whisk in your cheese until well combined and serve immediately over the broccoli or the vegetable of your choice.

    Video

    Notes

    • Cook down the roux before adding liquid. Cook the flour mixture while whisking often for a couple of minutes to get rid of the floury flavor.
    • Don't scald your milk. In general, when you do anything involving milk on your stovetop, you'll want to give it a good amount of attention — constantly stirring so as not to scald the milk. Also, make sure you don't cook it over anything higher than medium heat.
    • How to tell when your sauce has thickened- A good way to tell that the milk has thickened enough to add the cheese is by sticking a spoon into it. Once it coats the back of a spoon, you're ready for cheese.
    • Hand shred the cheese if you can for optimal melting.
    • Turn off the heat before you whisk in the shredded cheddar cheese so it doesn't scald.
    • Keep broccoli the same size. Be sure to cut your broccoli florets to a similar size for evenly cooked steamed broccoli.
    • Prep ahead- You can clean and cut broccoli and shred the cheese ahead.
    • Leftovers and storage- Leftover cheese sauce can be stored for up to 3 days covered in your refrigerator and reheated over medium heat in a small sauce pan- whisk in a small amount of milk to thin it out.

    Nutrition

    Serving: 0.5cupCalories: 157kcalCarbohydrates: 7gProtein: 12gFat: 9gSaturated Fat: 6gPolyunsaturated Fat: 0.3gMonounsaturated Fat: 2gTrans Fat: 0.2gCholesterol: 28mgSodium: 292mgPotassium: 153mgFiber: 0.1gSugar: 4gVitamin A: 327IUVitamin C: 0.002mgCalcium: 258mgIron: 0.3mg
    Tried this recipe?Let us know how it was!

    Blueberry Lemon Dump Cake

    Feb 15, 2024 · Leave a Comment

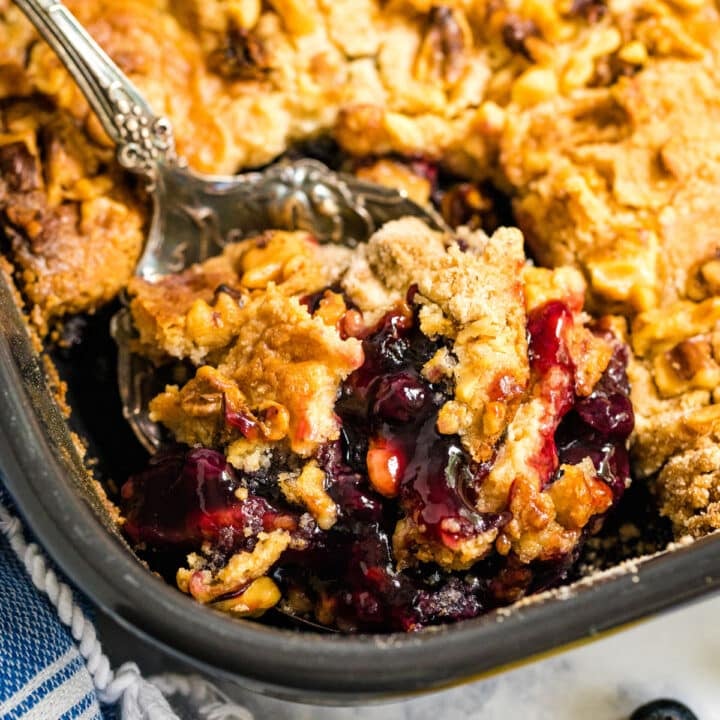
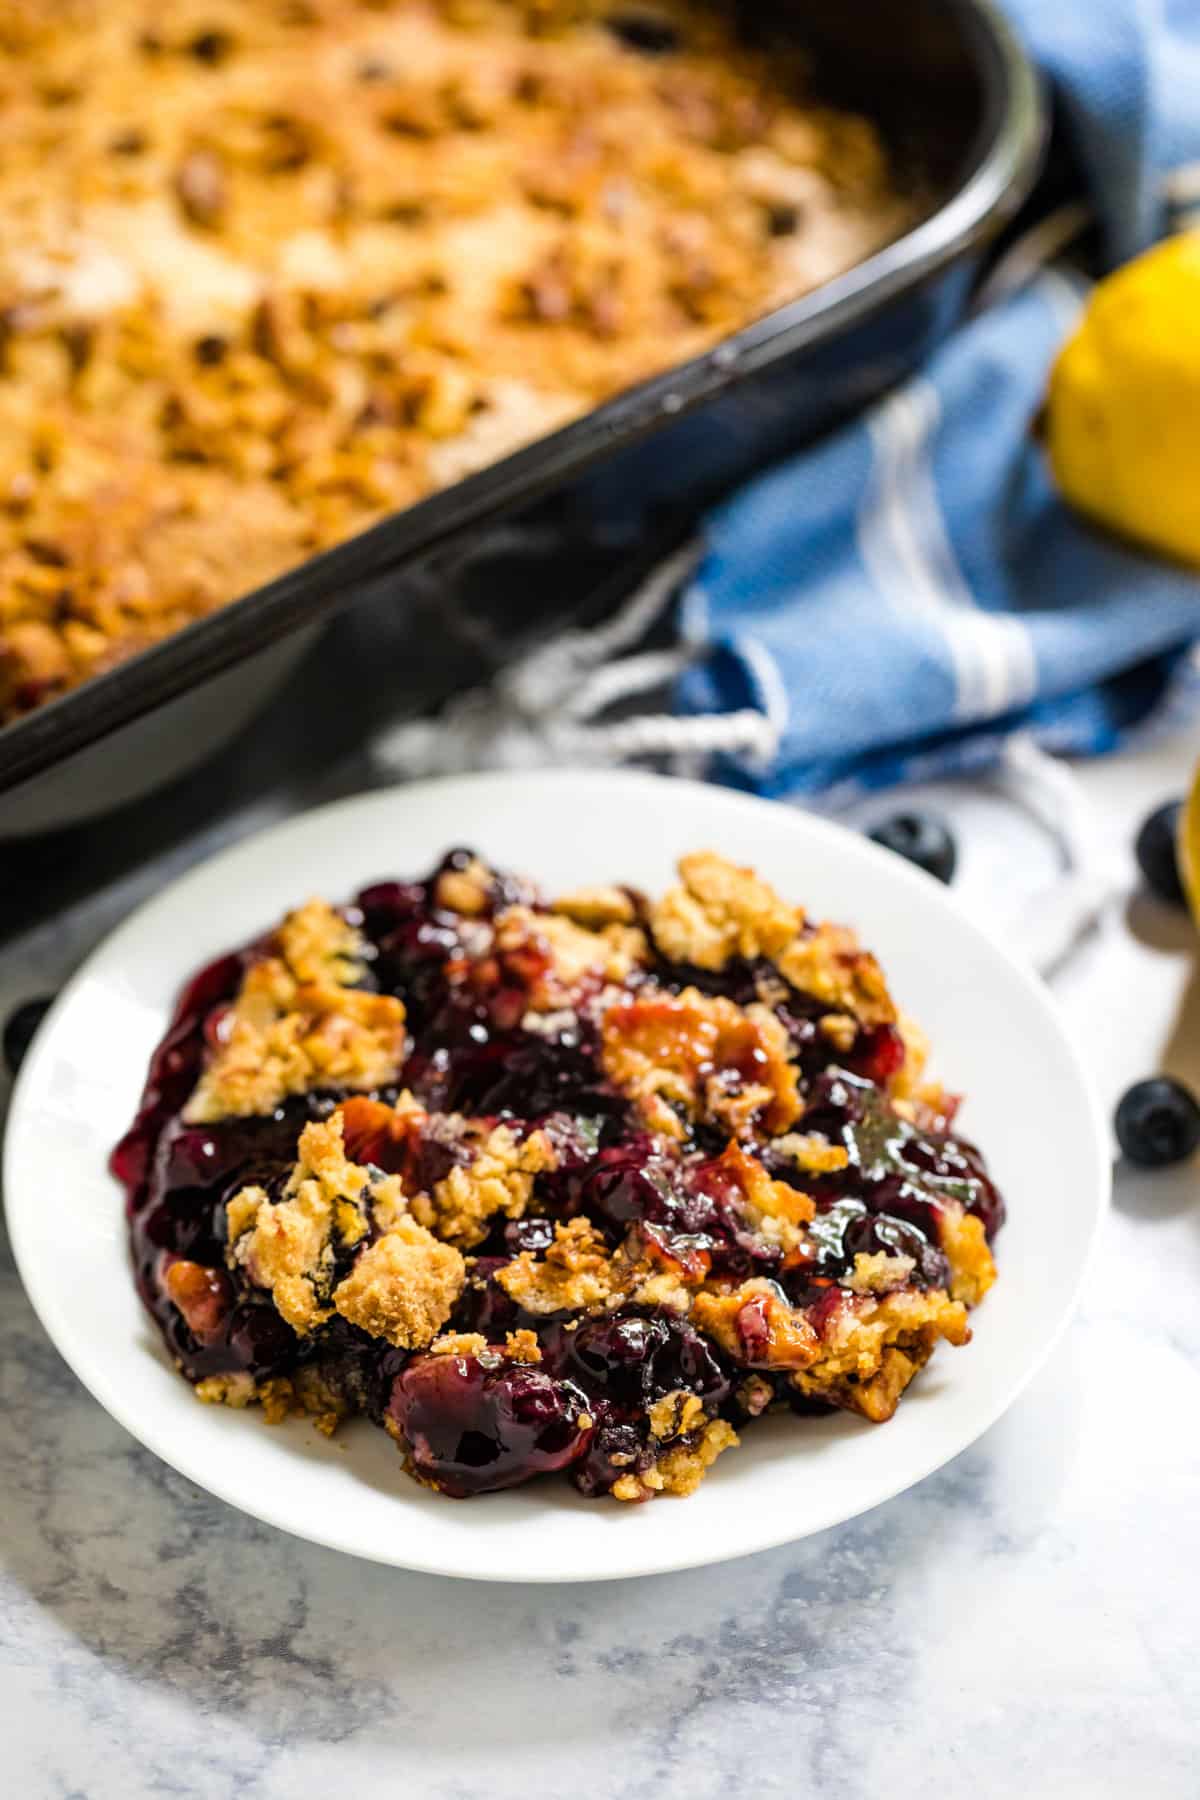
    The corner of a pan of blueberry dump cake with a spoon in it revealing the berry mixture along with the crust.

    Make this Blueberry Lemon Dump Cake for a seriously easy dessert that is sure to wow your friends and family. Just dump the ingredients and bake — you don't even have to stir!

    The corner of a pan of blueberry dump cake with a spoon in it revealing the berry mixture along with the crust.
    [feast_advanced_jump_to]

    Why You'll Love This Lemon Blueberry Dump Cake

    This is another variation of my Pineapple Coconut dump cake (think Pina Colada in cake form!) which is SO delicious. If you've been looking for dump cakes recipes to make with blueberries, you're going to love this one. Plus the overall deliciousness factor is off the charts!

    You're probably wondering: how do you make dump cake? The concept is simple. You "dump" all of the ingredients into one pan and then bake. It really is that easy!

    A layer of blueberry pie filling brings that berry deliciousness we all know and love (and the lemon zest adds a subtle zing!). Walnuts add a great crunch and the butter melts into the cake mix, creating a crust that gives this a texture similar to that of a cobbler. Basically, the perfect fruit dessert! Here are more reasons why I love it (in case you needed any!):

    • So easy to pull together
    • Full of fresh flavor
    • Perfect for summer parties
    • Only 5 minutes of prep time
    • Kid-friendly
    • Uses minimal ingredients
    A white plate with lemon blueberry dump cake and the pan of dump cake behind it along with a blue and white striped towel and a lemon in the background.

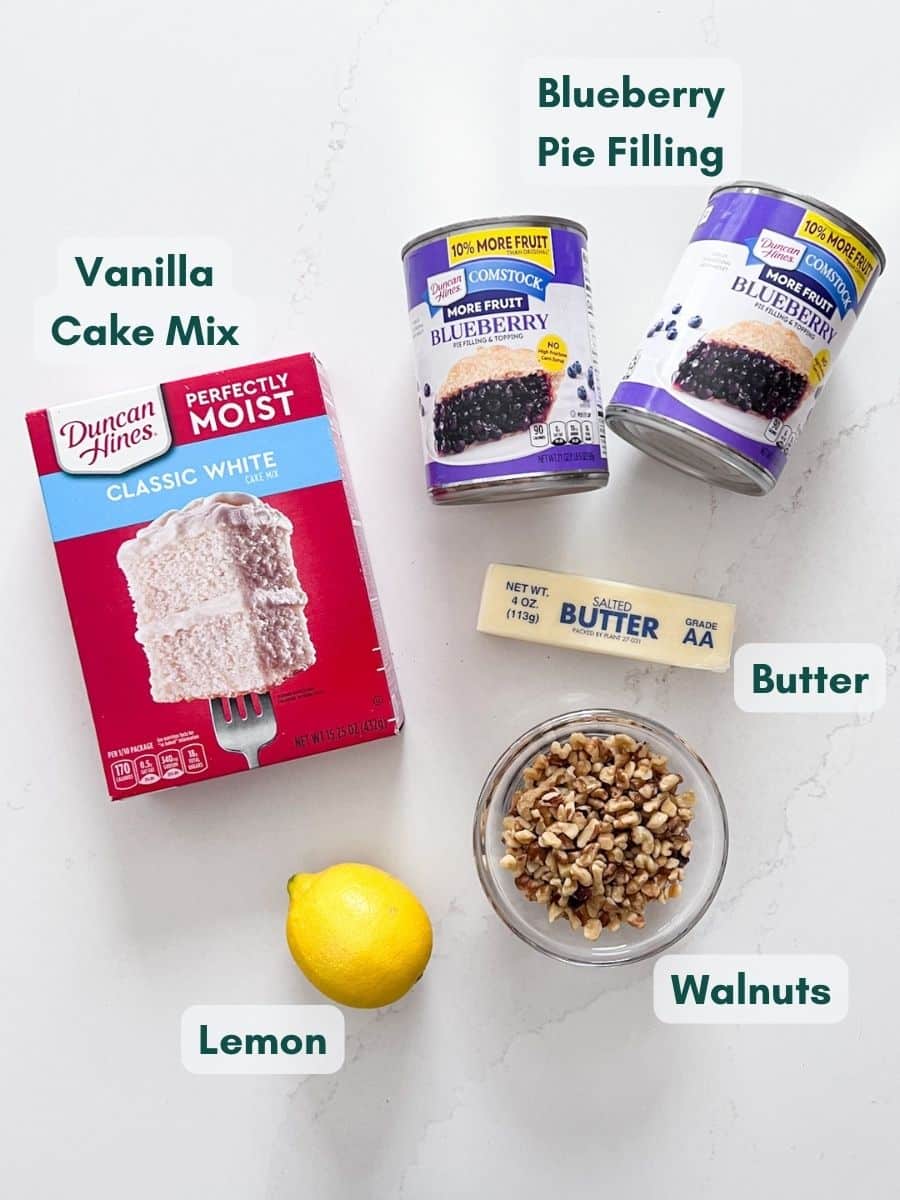
    Ingredients Information and Substitutions

    • Canned Blueberry Pie Filling- This blueberry dump cake recipe is full of shortcuts. Don't worry about cooking down a bunch of berries — use pie filling instead!
    • Vanilla Cake Mix- Another easy shortcut! Gotta love a cake mix dump cake recipe, am I right? You can also use White Cake mix or Yellow Cake Mix.
    • Lemon Zest- An absolute must for added freshness and zing.
    • Walnuts- I love adding freshly chopped walnuts for a bit of crunch. Chopped pecans or sliced almonds also work!
    • Butter- The butter will melt over the top of your cake to create a crumble-like crust. Yum!
    An overhead image of the labeled ingredients.

    How To Make Blueberry Dump Cake

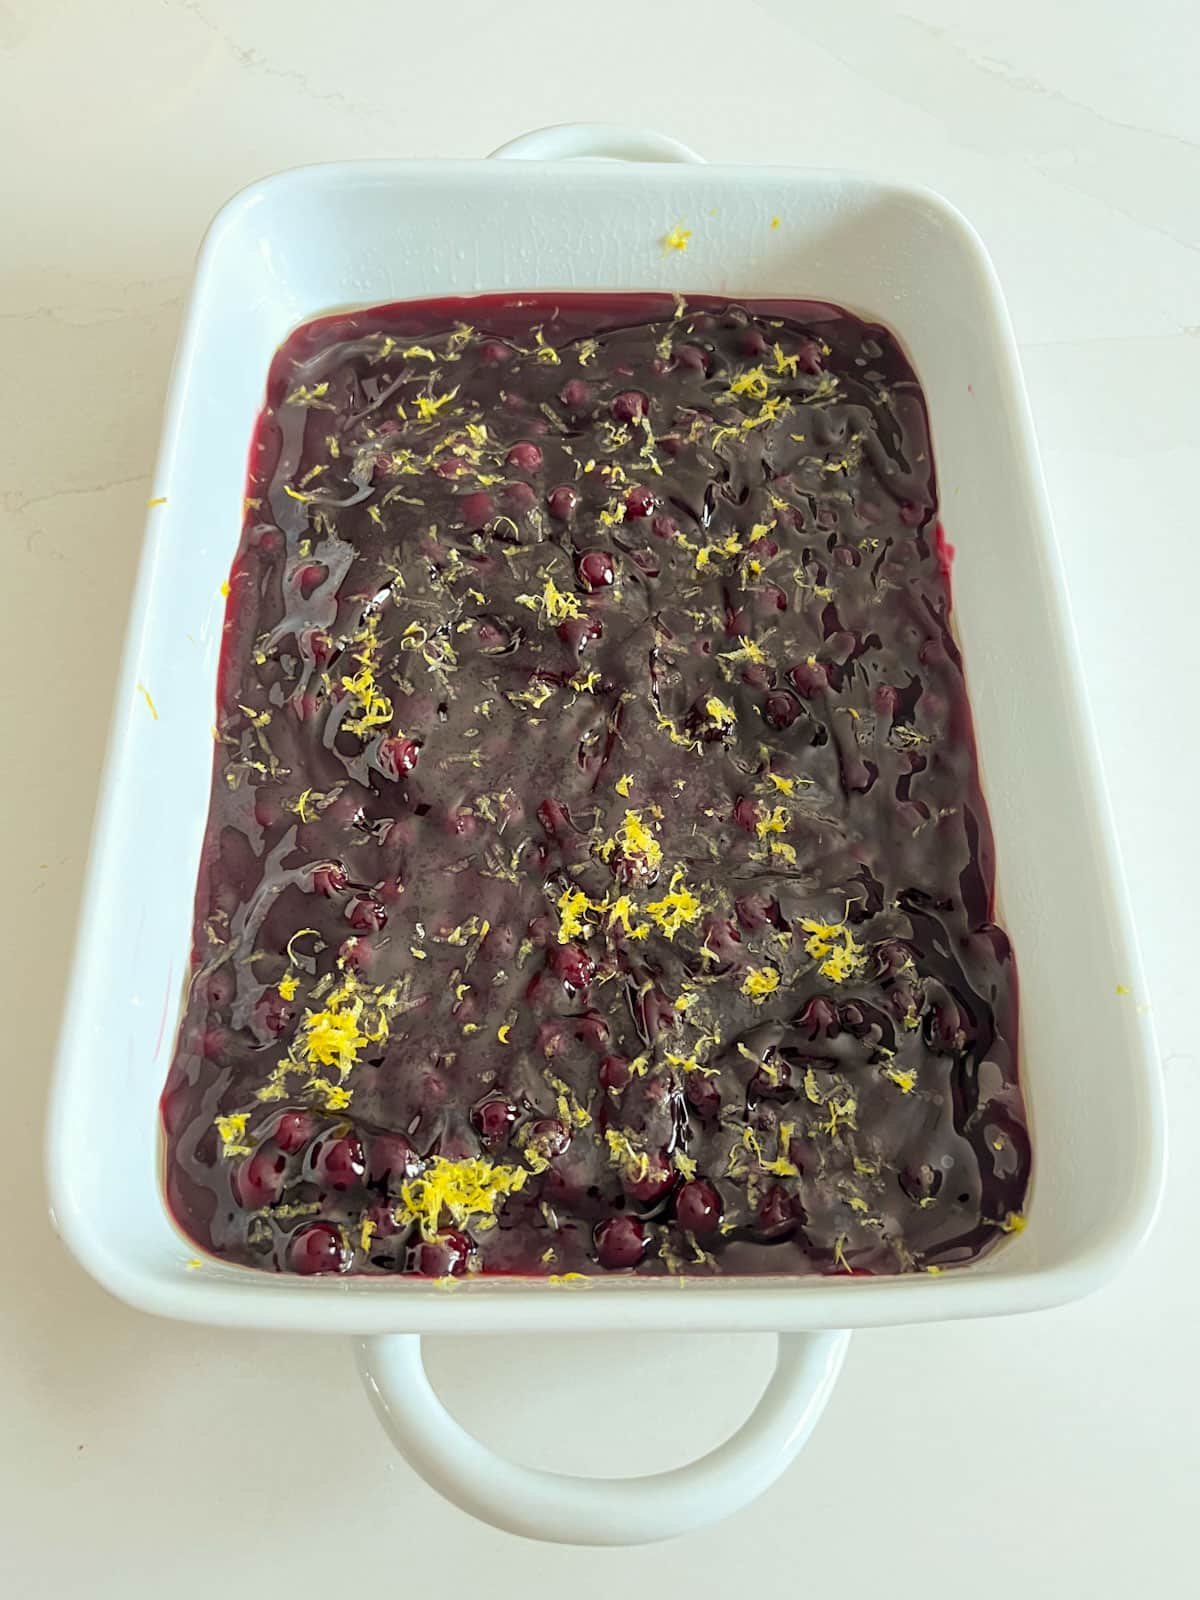
    Step 1: Make the fruit layer

    Preheat your oven and grease your 9x13-inch baking pan with cooking spray. Spread the blueberry pie filling in an even layer at the bottom of the baking pan. Then, sprinkle the lemon zest all over the berry layer.

    A white baking pan with blueberry pie filling spread in an even layer and topped with lemon zest.

    Step 2: Add the cake mix dump cake layer

    Next, evenly sprinkle the cake mix on top. Add the walnuts over the cake mix.

    The cake pan with the even layer of cake mix on top and chopped walnuts sprinkled on that.

    Step 3: Finish with butter and bake

    Finish it all off with pats of butter evenly distributed on top of the cake mix layer. Bake for about 1 hour checking halfway and if it's getting too dark, top with foil. Allow it to cool a bit before serving, and enjoy!

    Dump cake in baking dish with pats of butter spread along the top and ready to be put into the oven.

    Frequently Asked Questions

    Can I use fresh blueberries?

    My blueberry dump cake recipe is designed to use canned blueberry pie filling because the syrup benefits the texture of the dessert.

    Can you freeze dump cake?

    I don't recommend it — this is not a freezer-friendly recipe.

    Do you refrigerate dump cakes?

    You don’t have to. That said if you like it served cold, you can refrigerate it.

    How long does blueberry dump cake last?

    Store any leftovers in an airtight container on your countertop. It will keep for 3-4 days.

    Can you make dump cake ahead of time?

    You can make this cake mix dump cake a day in advance. Make sure you let it cool completely before covering it so that it doesn't get soggy on top.

    What goes with dump cake?

    You can totally add a scoop of vanilla ice cream and most desserts taste great with a nice cup of coffee.

    An overhead image featuring the top golden crust of the dump cake in a dark pan with a blue and white striped towel, blueberries and lemons around it.

    Tips for Making This Blueberry Dump Cake Recipe

    • Spray the pan with cooking spray to help avoid sticking.
    • Be sure to layer everything evenly in the pan. This allows for even cooking.
    • Do NOT stir the ingredients — keep them layered. Trust me.
    • Cut your butter into quarters and then cut the quarters into thirds. Line those thirds up evenly over the top of the cake mix and nuts. The butter melts into the cake mix to help give it a more cake-like texture.
    • Check the cake once or twice during cooking and if the top is getting too dark, cover it with foil.
    • Leftovers and Storage- This will last up to 3-4 days covered on your countertop.
    A close up image of the side of a white plate of blueberry dump cake focusing on the blueberry filling and golden brown crust.

    Other Easy Cake Recipes to Try...

    • A slice of s'mores icebox cake on a white plate with more in the background.
      Icebox Smores Cake
    • A close up image of Piña Colada dump cake on a plate with whipped cram and a cherry on top on a white plate with a fork.
      Piña Colada Pineapple Dump Cake
    • A piece of chocolate cake being pulled from the whole cake revealing the moist inside of the cake.
      The BEST Chocolate Overload Cake
    • A slice of coconut cake on a place with the full cake behind it.
      Easy Coconut Cake Recipe

    Love this recipe? Please leave a 5 star ⭐️⭐️⭐️⭐️⭐️ rating in the recipe card below ⬇️ and/or a review in the comment section further down. Check out my Amazon Store for all my favorite tools, including those used in this recipe. And follow @thelifejolie on Instagram and TikTok!

    The corner of a pan of blueberry dump cake with a spoon in it revealing the berry mixture along with the crust.

    Blueberry Lemon Dump Cake

    Jessy Freimann
    Make this Blueberry Lemon Dump Cake for a seriously easy dessert that is sure to wow your friends and family. Just dump the ingredients and bake — you don't even have to stir!
    No ratings yet
    Print Recipe Pin Recipe
    Prep Time 5 minutes mins
    Cook Time 1 hour hr
    Total Time 1 hour hr 5 minutes mins
    Course Dessert
    Cuisine American
    Servings 10 servings
    Calories 312 kcal

    Equipment

    • 9 x 13 Pan
    • Spatula
    • cutting board
    • chefs knife
    • Can opener
    • Microplane

    Ingredients
      

    • Cooking spray
    • 2 20 ounce cans blueberry pie filling
    • 1 teaspoon lemon zest (1 large lemon)
    • 1 box vanilla cake mix
    • ½ cup walnuts chopped
    • 1 stick salted butter

    Instructions
     

    • Preheat the oven to 350 degree and grease a 9" x 13" baking pan with cooking spray.
    • Spread the blueberry pie filling in an even layer along the bottom of the pan.
    • Sprinkle lemon zest onto the blueberry pie filling.
    • Sprinkle cake mix evenly over the blueberry pie filling.
    • Sprinkle the chopped walnuts over the cake mix.
    • Place the pats of butter evenly over the cake mix layer.
    • Bake for an hour, checking on it once or twice to make sure it's not getting too dark on top (if it is, cover it with foil- I didn't run into this issue). Cool and serve.

    Video

    Notes

    • Spray the pan with cooking spray to help avoid sticking.
    • Be sure to layer everything evenly in the pan. This allows for even cooking.
    • Do NOT stir the ingredients — keep them layered. Trust me.
    • Cut your butter into quarters and then cut the quarters into thirds. Line those thirds up evenly over the top of the cake mix and nuts. The butter melts into the cake mix to help give it a more cake-like texture.
    • Check the cake once or twice during cooking and if the top is getting too dark, cover it with foil.
    • Leftovers and Storage- This will last up to 3-4 days covered on your countertop.

    Nutrition

    Serving: 0.75cupCalories: 312kcalCarbohydrates: 43gProtein: 3gFat: 15gSaturated Fat: 7gPolyunsaturated Fat: 3gMonounsaturated Fat: 3gTrans Fat: 1gCholesterol: 24mgSodium: 431mgPotassium: 61mgFiber: 1gSugar: 22gVitamin A: 284IUVitamin C: 0.3mgCalcium: 122mgIron: 1mg
    Tried this recipe?Let us know how it was!

    Chicken Minestrone Soup (Slow Cooker + Instant Pot)

    Feb 12, 2024 · 2 Comments

    A ladle holding chicken minestrone with the rest of the pot behind it.

    Chicken Minestrone Soup is an easy and comforting dish to serve for an easy lunch or dinner. It's full of delicious vegetables and fall-apart-tender chicken, with a secret ingredient that gives the most fantastic flavor! Plus, make it in the slow cooker or the Instant Pot.

    A ladle holding chicken minestrone with the rest of the pot behind it.
    [feast_advanced_jump_to]

    Why You'll Love Minestrone Soup with Chicken

    Full of delicious vegetables, beans, and pasta, minestrone is a well-loved soup that often gets passed down through the generations. I know my family has a minestrone soup recipe that we've all eaten since we were kids.

    So I figured, why not add some chicken into the mix? Everyone loves chicken, too, right?! The great thing about making it crockpot or instant pot style is that you just dump it all in and after the machine does its work, your chicken basically shreds apart if you gently touch it.

    That's why this IP/slow cooker minestrone soup recipe is a great dump-and-go recipe It's all about making delicious food with minimal prep, no pre-cooking, and the ability to freeze for a good make-ahead meal. And trust me when I say, easy never tasted so good!

    If you're not convinced yet, here's why you should try it:

    • Made with wholesome ingredients
    • Hearty and comforting
    • Can be made in the slow cooker or Instant Pot
    • Only 10 minutes of prep time
    • Perfect freeze or prep ahead dump-and-go dinner!
    • Family-friendly
    An overhead image of a white bowl of chicken minestrone with veggies, Parmesan rind and a blue stripped napkin around it.

    Ingredients Information and Substitutions

    • Vegetables - You'll need carrots, celery, green beans, kidney beans, canned diced tomatoes, and zucchini. This soup is seriously veggie-packed and you can also substitute other favorite veggies and beans if you'd like!
    • Aromatics - Onion and garlic start all of the flavors in this minestrone with chicken. Talk about small yet mighty!
    • Chicken Broth - Also adds a lot of flavor. I don't recommend replacing with water, but you can certainly use vegetable broth instead if you'd like.
    • Parmesan Rind - Yup, you guessed it — to add more flavor. Parmesan rind boasts a savory and umami taste that will elevate the broth flavor. These can be found in the cheese section of your grocery store and are often super cheap to buy. They also last for a long time in the fridge, so I always have some on hand. Remove this just before serving.
    • Chicken Breasts - It wouldn't be a chicken minestrone without the addition of chicken, of course. I usually use breasts, but boneless, skinless thighs also work.
    • Ditalini Pasta - To make the whole thing even more heartier, add pasta. You can technically use any shape you like — elbow macaroni is another popular option. I like to cook it separately and serve on the side so they don't suck up all the broth.
    • Seasonings - I'm using a combination of Italian seasoning, kosher salt, and black pepper. Feel free to switch things up and add your favorites!
    An overhead image of the labeled ingredients in glass bowls.

    How to Make Chicken Minestrone in the Instant Pot

    Step 1: Place the vegetables, onion, garlic, chicken broth, Parmesan rind, and seasonings into your Instant Pot and stir well to combine, then add the chicken breasts.

    The broth, veggies and soup seasonings in the instant pot.
    Raw chicken pieces added to the instant pot the the rest of the soup ingredients.

    Step 2: Cover and cook on High Pressure for 15 minutes then perform a Natural Pressure Release for 15 minutes. Remove chicken and shred.

    Hands shredding chicken with forks in a gray bowl.

    Step 3: Change the setting to Sauté and add the zucchini and shredded chicken back into the pot. Cook for 5-10 minutes, or until the zucchini has softened. Serve immediately over cooked pasta with extra Parmesan on top!

    shredded chicken about to be poured into the pot which now has zucchini added to it.

    How to Make Slow Cooker Minestrone

    Step 1: Place the vegetables, onion, garlic, chicken broth, Parmesan rind, and seasonings into your slow cooker and stir well to combine, then add the chicken breasts.

    Step 2: Cover and cook on High for 4-6 hours or on Low for 8 hours. Add the zucchini during the last 30 minutes of cooking time.

    Step 3: Add the cooked pasta and serve immediately with extra Parmesan on top!

    A bowl of minestrone with a second bowl behind it and veggies and Parmesan rinds around it.

    Frequently Asked Questions

    Why is it called minestrone soup?

    Minestrone means "big soup" in Italian, which is pretty fitting considering the fact that's it's full of all sorts of veggies, meat, beans, and pasta. The word actually originated from minestra which means to serve.

    What kind of pasta do you use in minestrone soup?

    I prefer ditalini for my minestrone soup with chicken, but as mentioned, any small pasta that you prefer will work!

    What is the difference between minestrone and vegetable soup?

    Technically speaking, vegetable soup can be made from any veggies whereas minestrone soup is traditionally made with thick Italian vegetables.

    How do I thicken minestrone?

    I generally don't thicken my chicken minestrone. If you like yours a bit heartier, I recommend adding a few tablespoons of tomato paste or a corn starch slurry.

    Is minestrone soup healthy? 

    Although everyone has a different idea of what "healthy" means, I'd say it is. It's light and full of vegetables and protein.

    Can you freeze minestrone?

    Yes, this freezes wonderfully! You can freeze either before or after cooking. Allow it to cool completely before placing it in an airtight, freezer-safe container — it will keep in the freezer for about 3 months. I'd encourage you to avoid adding pasta, as freezing could adversely effect the texture.

    How long does minestrone last in the refrigerator?

    Again, let it cool completely before placing leftovers in an airtight container. Minestrone soup with chicken lasts for around 4-5 days when properly stored in the fridge.

    What's the best way to reheat chicken minestrone?

    I usually reheat individual portions in the microwave in 30-second bursts. For larger quantities, heat in a pot on the stove over medium for 10-15 minutes until warmed through.

    A close up image of a soup spoon holding a scoop of soup up with the bowl behind it.

    Tips For Making Authentic Italian Minestrone

    • Hold off on adding the zucchini until later in the cooking time (the last 30 minutes for the slow cooker or after pressure cooking on the sauté setting for Instant Pot). That way they don't break down to nothing throughout the cooking process.
    • I know this sounds strange, but the secret ingredient I use to make the flavor extra awesome is a parmesan rind. They usually sell it for a couple of bucks in the cheese section of the grocery store. I know that sounds really strange because you typically don't actually eat the rind, but if you put it in with stews and sauces, it brings out all the other flavors in the soup. And then you just pull it out before serving (the way you do with bay leaves in other recipes). Trust me on this.
    • For fall-apart chicken in the Instant Pot- do a natural release for 15 minutes instead of a quick release- this allows the meat the break down and makes it super tender and easy to shred.
    • I always boil and keep the pasta on the side until I'm ready to actually eat the soup. I've found that if you add it into the soup and cook it there, it sucks up too much of the broth and gets kind of overcooked and mushy.
    • Prep ahead- This entire recipe can be prepped ahead and frozen or held for a day or two in the refrigerator before cooking.
    • Leftovers and storage- This lasts for around 4-5 days covered in the refrigerator.
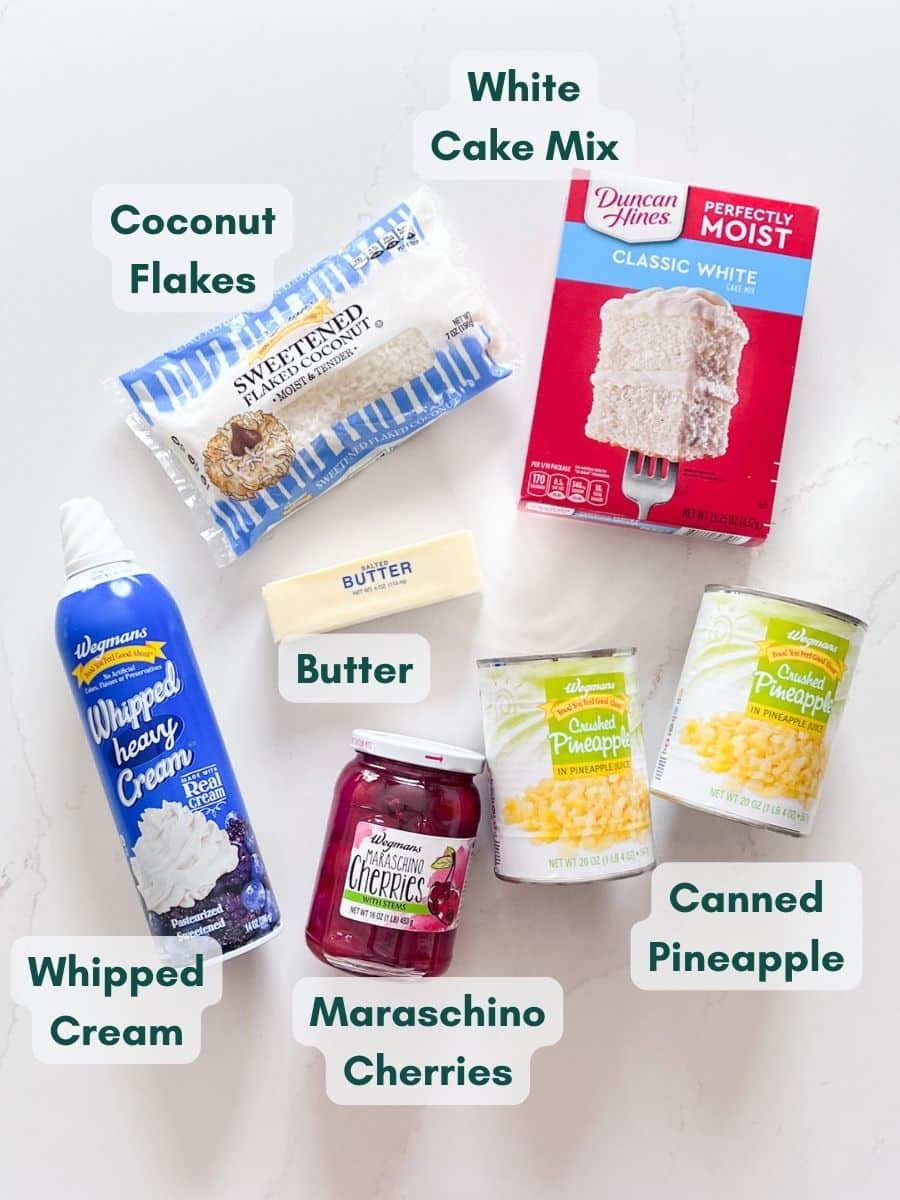
    What To Serve With Italian Minestrone Soup

    A few great recipes to round out and complete this meal would be:

    • Three Cheese Garlic Bread
    • Roasted Beet Salad
    • Summer Bounty Strawberry Salad
    • Four Ingredient Chocolate Mousse

    Other Soups With Chicken To Try...

    • A bowl of chicken and orzo soup with a spoon in it.
      Chicken and Orzo Soup
    • A bowl of chicken and egg noodles soup with sliced bread and another bowl behind it.
      Dutch Oven Chicken Noodle Soup
    • An overhead image of taco soup in a bowl.
      Crockpot Taco Chicken Soup
    • A close up of a bowl of chicken wild rice creamy soup with a spoon in it and another bowl in the background.
      Wild Rice Creamy Chicken Soup (Great with Turkey Too!)

    Love this recipe? Please leave a 5 star ⭐️⭐️⭐️⭐️⭐️ rating in the recipe card below ⬇️ and/or a review in the comment section further down. Check out my Amazon Store for all my favorite tools, including those used in this recipe. And follow @thelifejolie on Instagram and TikTok!

    A ladle holding chicken minestrone with the rest of the pot behind it.

    Chicken Minestrone Soup (Slow Cooker + Instant Pot)

    Jessy Freimann
    Chicken Minestrone Soup is an easy and comforting dish to serve for an easy lunch or dinner. It's full of delicious vegetables and fall-apart-tender chicken, with a secret ingredient that gives the most fantastic flavor! Plus, make it in the slow cooker or the Instant Pot.
    5 from 2 votes
    Print Recipe Pin Recipe
    Prep Time 10 minutes mins
    Cook Time 6 hours hrs
    Total Time 6 hours hrs 10 minutes mins
    Course Main Course
    Cuisine Italian
    Servings 8 servings
    Calories 50 kcal

    Equipment

    • instant pot
    • slow. cooker
    • cutting board
    • chefs knife
    • Measuring cups and spoons
    • Liquid measuring cup

    Ingredients
      

    • 1 cup diced onion diced
    • 1 cup diced carrot diced
    • 1 cup diced celery diced
    • 2 cloves garlic minced or pressed
    • 1 cup trimmed and roughly diced green beans
    • 1 14 ounce can kidney beans drained and rinsed
    • 1 14 ounce can diced tomatoes undrained
    • 1 46 ouncess chicken broth (1 32 ounce box + 1 14 ounce can)
    • 1 parmesan rind optional but I highly recommend you use it- it makes the flavor so much better!
    • 1 teaspoon Italian seasoning
    • 1 teaspoon Kosher salt
    • ¼ teaspoon ground black pepper
    • 3 boneless skinless chicken breasts
    • 1 cup diced zucchini
    • 2 cups Cooked Ditalini pasta optional

    Instructions
     

    Slow Cooker Instructions:

    • Place onion, carrot, celery, garlic, green beans, kidney beans, diced tomatoes and their juices, chicken broth, parmesan rind, Italian seasoning, salt and pepper into pot.
    • Stir well to combine.
    • Add chicken breasts.
    • Cover and cook on high for 4-6 hours or on low for 8 hours.
    • During the last 30 minutes of cooking, add zucchini.
    • Serve immediately over cooked pasta and additional Parmesan cheese.

    Instant Pot Instructions:

    • Place onion, carrot, celery, garlic, green beans, kidney beans, diced tomatoes and their juices, chicken broth, parmesan rind, Italian seasoning, salt and pepper into pot.
    • Stir well to combine.
    • Add chicken breasts.
    • Cover and cook on high pressure for 15 minutes and then do a natural pressure release for 15 minutes.
    • Turn the Instant Pot to the saute setting and add the zucchini. Cook for 5-10 minutes or until the zucchini has softened a bit.
    • Serve immediately over cooked pasta and additional Parmesan cheese.

    Video

    Notes

    • Hold off on adding the zucchini until later in the cooking time (the last 30 minutes for the slow cooker or after pressure cooking on the sauté setting for Instant Pot). That way they don't break down to nothing throughout the cooking process.
    • I know this sounds strange, but the secret ingredient I use to make the flavor extra awesome is a parmesan rind. They usually sell it for a couple of bucks in the cheese section of the grocery store. I know that sounds really strange because you typically don't actually eat the rind, but if you put it in with stews and sauces, it brings out all the other flavors in the soup. And then you just pull it out before serving (the way you do with bay leaves in other recipes). Trust me on this.
    • For fall-apart chicken in the Instant Pot- do a natural release for 15 minutes instead of a quick release- this allows the meat the break down and makes it super tender and easy to shred.
    • I always boil and keep the pasta on the side until I'm ready to actually eat the soup. I've found that if you add it into the soup and cook it there, it sucks up too much of the broth and gets kind of overcooked and mushy.
    • Prep ahead- This entire recipe can be prepped ahead and frozen or held for a day or two in the refrigerator before cooking.
    • Leftovers and storage- This lasts for around 4-5 days covered in the refrigerator.
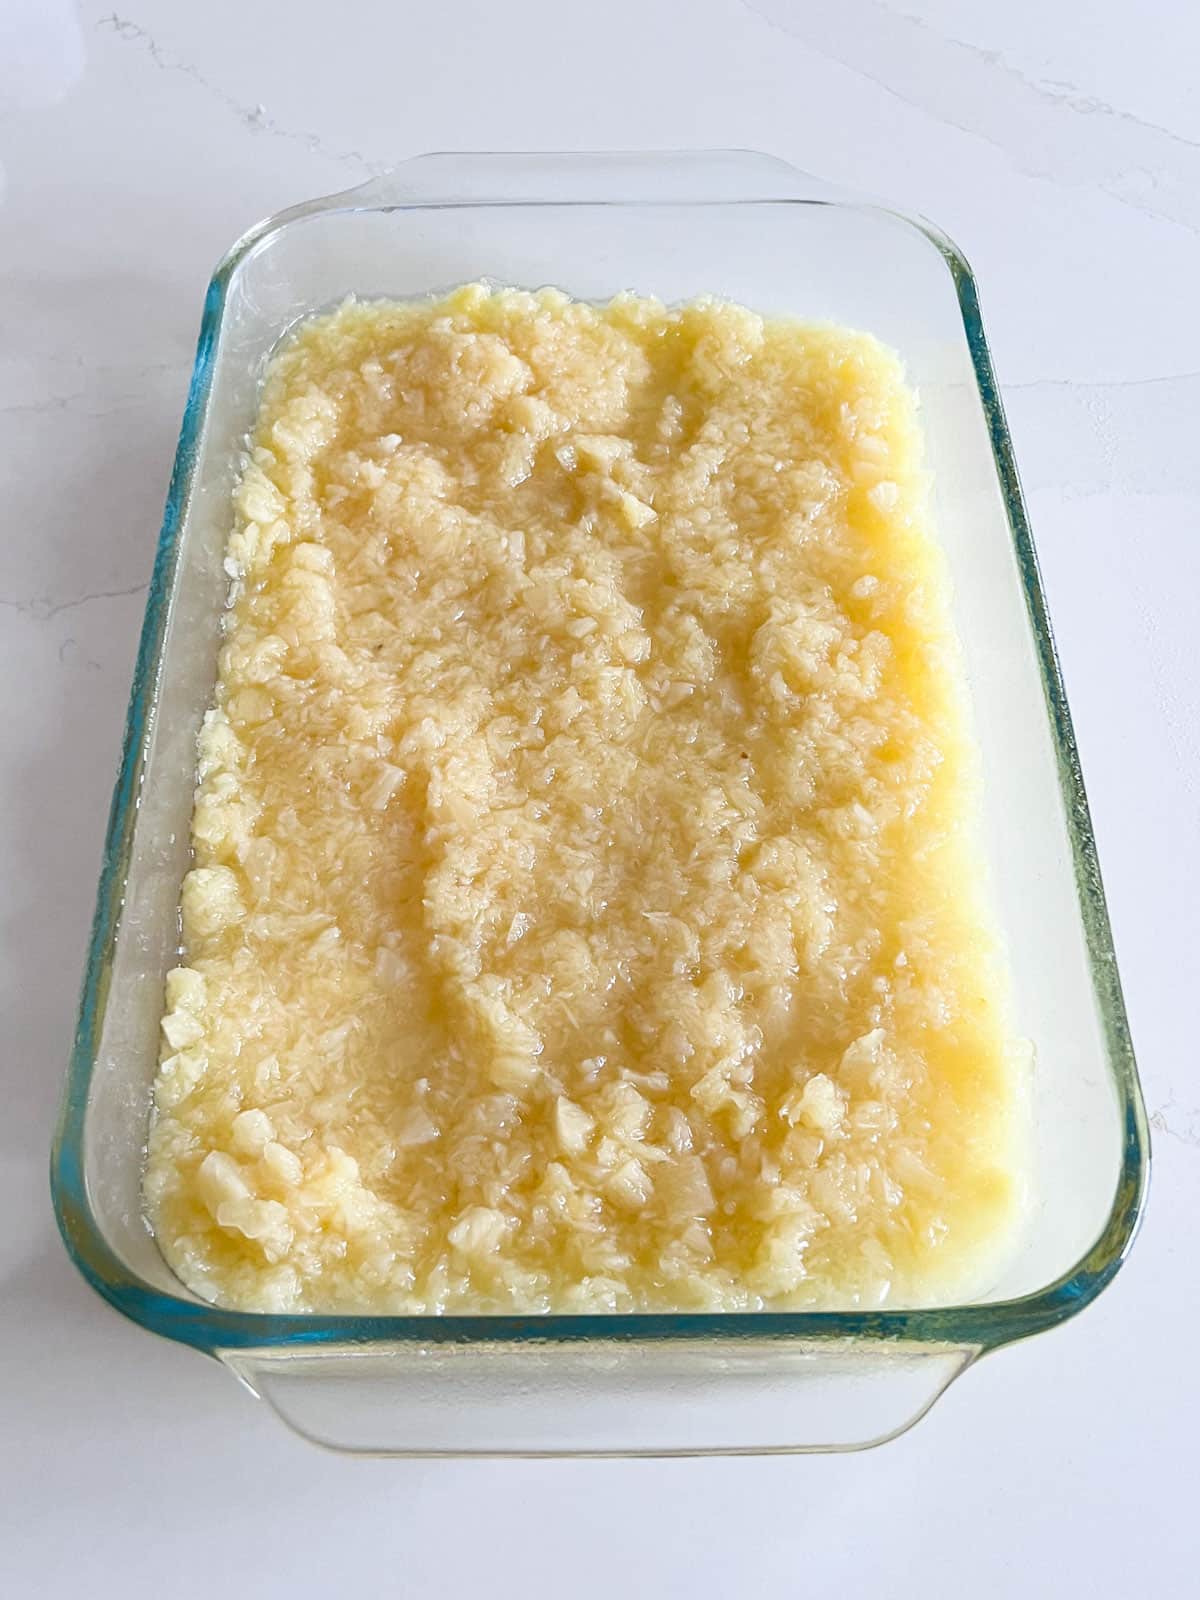
    Nutrition

    Serving: 2cupsCalories: 50kcalCarbohydrates: 0.5gProtein: 9gFat: 1gSaturated Fat: 0.2gPolyunsaturated Fat: 0.2gMonounsaturated Fat: 0.3gTrans Fat: 0.01gCholesterol: 27mgSodium: 341mgPotassium: 164mgFiber: 0.1gSugar: 0.02gVitamin A: 18IUVitamin C: 1mgCalcium: 8mgIron: 0.3mg
    Tried this recipe?Let us know how it was!

    The BEST Chocolate Overload Cake

    Feb 5, 2024 · 114 Comments

    A piece of chocolate cake being pulled from the whole cake revealing the moist inside of the cake.

    This Chocolate Overload Cake is the indulgent, and decadent dessert you have been looking for with the most moist cake you've ever tasted and covered with rich chocolate ganache. This easy cake mix hack is sure to be a family favorite!

    Chocolate bundt cake with chocolate ganache dripping down the sides and sprinkles on top with a teal napkin behind it.
    [feast_advanced_jump_to]

    Why You'll Love Chocolate Pudding Cake

    I recently changed the name of this cake. This is because it is so loaded with chocolate that a chocolate overload cake recipe seemed like the most accurate thing to call it. And I’m not exaggerating when I say this is the absolute BEST recipe for a moist chocolate cake you will ever taste.

    Not everyone has the time to put a ton of work into a fancy, made-from-scratch dessert. But this cake is so perfectly rich and completely moist — your friends and family will beg you for the recipe, and they'll never know that it’s actually an easy cake mix with pudding hack! By the way- if you love a good cake mix hack but aren't craving chocolate- you've got to try my Poppy Seed Cake- everyone goes nuts over it!

    So while this isn’t a “scratch” cake, I think it's nice to have an in-between option that takes mere minutes of your time to throw together (the rest is baking time), minimal ingredients, and is virtually foolproof. And of course, the big game changer is the variation of ingredients — or the "hack" — that results in winning dessert that blows your normal boxed cake mix right out of the water! Here's what I love about it:

    • Made with pantry staples
    • Super moist
    • Party favorite
    • Easy dessert for any occasion
    • Great for holidays
    • Fool-proof for beginning bakers (my 9 year old makes it all the time!)

    Ingredient Information and Substitutions

    • Dark chocolate cake mix - My preference is dark chocolate cake mix but you can use any chocolate cake mix you like, including Devil's food!
    • Instant chocolate pudding mixes - It's important that you grab instant pudding not the kind that you have to heat up. And get the regular-size boxes which are 2.03 ounces.
    • 5 eggs - Yes, 5! That's what gives the cake mix with pudding the ultimate texture and perfect amount of moisture.
    • Vegetable oil - Also enhances the moistness of the cake with pudding. Canola oil also works, or your favorite neutral oil.
    • Water - Or you can go wild and swap it for coffee or Kahlua!
    • Chocolate Chips- Mini or regular chocolate chips work well for this, it all depends on how much texture you want in your cake.
    • Heavy Cream- This is for the ganache and I do NOT encourage you to substitute milk or half and half for this. The high fat content in the heavy cream is what bring the ganache together.
    A overhead image of a bundt cake with ganache and sprinkles on top with a teal napkin and other sprinkles on the side.

    How To Make Chocolate Fudge Cake

    Step 1: Make the batter

    Preheat the oven to 325 degrees and grease a bundt pan. Combine the box of cake mix, instant pudding, warm water, oil, and eggs together. Fold in chocolate chips.

    Cake batter ingredients in stand mixer bowl.
    Cake batter with chocolate chips in stand mixer bowl.

    Step 2: Bake

    Pour the cake batter into the bundt cake pan. Bake for 1 hour or until the cake is done. Cool completely.

    Cake batter in a bundt pan.
    Chocolate bundt cake cooking on a cooling rack.

    Step 3: Make the ganache

    In a small pan, heat heavy cream over medium heat, stirring continuously to prevent scalding until just beginning to simmer. Pour over chocolate chips and let sit for 1-2 minutes. Whisk until it comes together and becomes a smooth and silky ganache. Let sit for a few minutes to thicken slightly for easier pouring

    Hot heavy cream covering chocolate chips in a glass bowl.
    A hand beginning to whisk heavy cream and chocolate in a glass bowl.
    A hand whisking chocolate ganache in a glass bowl once it's come together.

    Step 4: Pour over the cake

    After the cake has fully cooled, pour the ganache over the cake and if you want, add some sprinkles. Enjoy!

    A close up image of the side of a chocolate cake showing the drips of ganache and rainbow sprinkles on top of it.

    Frequently Asked Questions

    Can you make this cake ahead?

    Absolutely! I’d bake the cake and let it cool overnight.

    Can I do this as a layer cake and frost it?

    Sure! Prepare this moist chocolate cake recipe as directed, but don't use a bundt pan. Instead, spray two 9 inch round cake pans with cooking spray and line the bottom with parchment. Bake at 325 degrees for 30 minutes (begin checking it around 25 minutes just to be safe). You'll probably want to double the ganache so you have extra for filling. You can also whip the ganache for a fluffier frosting.

    Can I make this recipe in a 9” x 13” pan?

    Yes! It’ll take about an hour to bake at 325 degrees (give or take some time depending on your oven). Check it at 45 minutes and remove when a toothpick comes out clean.

    Can I make this as cupcakes?

    Yup — line a standard size muffin pan with cupcake liners and fill them ¾ of the way (an ice cream scoop works well for this!). Bake for 15-20 minutes at 325 degrees until your cake tester comes out clean.

    Can you freeze this cake?

    Yes, just freeze before frosting and wrap it really well. It will last up to 3 months in the freezer.

    What makes this chocolate cake moist?

    In this particular chocolate pudding cake recipe, the eggs are what makes it super moist and delicious. Do not cut down the number of eggs (it may seem excessive, but if you’re going to eat a cake, go big and eat a cake!). That said, you do not need to use extra large eggs. They’re ideal, but I’ve made this several times with large eggs, and it’s come out perfect every single time.

    What is the best topping for this cake?

    My favorite is making chocolate ganache and pouring it over the top. It adds an extra "wow" factor and ganache is pretty fool proof to make. If you really don't want ganache, a simple dusting of powdered sugar adds a little something extra without any additional work.

    A piece of chocolate cake being pulled from the whole cake revealing the moist inside of the cake.

    Tips For Making This Chocolate Ganache Cake

    • Warm water works great! Don’t feel like you need to have water that’s so hot it’s boiling. I just run my tap water until it is warm, then fill my measuring cup for this cake recipe.
    • Be sure to grease the pan. Grease your cake pan with cooking spray so the cake pops out easily without sticking. 
    • Chocolate chips can be omitted from the cake batter. The chocolate chips are totally optional, but I personally love the texture they add.
    • Don't leave batter behind. Be sure to scrape all the batter out of the large bowl with a spatula when you pour the batter into the bundt pan.
    • Check the cake early. Every oven is different, so start checking the cake at 40 minutes. If the tester comes out clean, pull it then.
    • Cool the cake completely. I let it cool quite a bit before inverting. Often, I’ll let it cool completely in the pan. It’s fine either way. But make sure it's completely cool before pouring over ganache, so that the ganache sits on top without being absorbed.
    • Tips for easy cake removal- When it’s time to remove the cake from the pan, run a butter knife around the outside between the cake and the pan, then place the serving plate on top of the pan and turn it all over. The cake slides right out onto the serving plate.
    • Leftovers and storage- the leftovers taste great for up to 5 days covered at room temperature.
    A close up of a fork cutting a bite of a slice of chocolate cake.

    Other Chocolate Desserts to Try...

    • A close up image of a slice of chocolate pudding pie on a white plate with the rest of the pie behind it.
      Old Fashioned Chocolate Pie
    • A stack of 4 double chocolate peanut butter chip cookies.
      Double Chocolate Peanut Butter Chip Cookies
    • An image of a chocolate mousse cup with a spoon in it and a raspberry on top.
      Chocolate Mousse Cups
    • A slice of s'mores icebox cake on a white plate with more in the background.
      Icebox Smores Cake

    Love this recipe? Please leave a 5 star ⭐️⭐️⭐️⭐️⭐️ rating in the recipe card below ⬇️ and/or a review in the comment section further down. Check out my Amazon Store for all my favorite tools, including those used in this recipe. And follow @thelifejolie on Instagram and TikTok!

    A piece of chocolate cake being pulled from the whole cake revealing the moist inside of the cake.

    The BEST Chocolate Overload Cake

    Jessy Freimann
    This Chocolate Overload Cake is the indulgent, and decadent dessert you have been looking for with the most moist cake you've ever tasted and covered with rich chocolate ganache. This easy cake mix hack is sure to be a family favorite!
    4.95 from 53 votes
    Print Recipe Pin Recipe
    Prep Time 10 minutes mins
    Cook Time 1 hour hr 10 minutes mins
    Cooling time 1 hour hr
    Total Time 2 hours hrs 20 minutes mins
    Course Dessert
    Cuisine American
    Servings 8 slices
    Calories 522 kcal

    Equipment

    • stand mixer
    • Hand mixer
    • Liquid measuring cup
    • Spatula
    • Bundt pan
    • mixing bowl
    • Whisk
    • Small sauce pan
    • Cooling rack

    Ingredients
      

    • 1 box chocolate cake mix
    • 2 small boxes instant chocolate pudding
    • 1 cup warm water
    • ¾ cup oil
    • 5 extra-large eggs (large is also fine)
    • 1 ¾ cup chocolate chips divided
    • ½ cup heavy cream

    Instructions
     

    • Preheat the oven to 325 degrees and grease a bundt pan with cooking spray. Set aside.
    • In a stand mixer or with a hand mixer, mix together cake mix, pudding mixes, water, oil and eggs until just combined.
    • Stir in the ¾ cups of chocolate chips if you're using them and put batter into the prepared bundt pan.
    • Bake for around 1 hour or until a cake tester comes out clean. Check it at 50 minutes, because it can go a little faster depending on your oven. Cool completely.
    • When the cake is cool, heat ½ cup heavy cream in a small pan stirring continuously until it's just beginning to simmer (it’ll be steaming).
    • Pour cream over 1 cup of chocolate chips and let it sit for a 1-2 minutes, then keep whisking until it turns into a silky, smooth ganache.
    • Let the ganache sit for a couple minutes to thicken slightly and then pour over the cake and top with sprinkles if you'd like. Serve immediately.

    Video

    Notes

    • Warm water works great! Don’t feel like you need to have water that’s so hot it’s boiling. I just run my tap water until it is warm, then fill my measuring cup for this cake recipe.
    • Be sure to grease the pan. Grease your cake pan with cooking spray so the cake pops out easily without sticking. 
    • Chocolate chips can be omitted from the cake batter. The chocolate chips are totally optional, but I personally love the texture they add.
    • Don't leave batter behind. Be sure to scrape all the batter out of the large bowl with a spatula when you pour the batter into the bundt pan.
    • Check the cake early. Every oven is different, so start checking the cake at 40 minutes. If the tester comes out clean, pull it then.
    • Cool the cake completely. I let it cool quite a bit before inverting. Often, I’ll let it cool completely in the pan. It’s fine either way. But make sure it's completely cool before pouring over ganache, so that the ganache sits on top without being absorbed.
    • Tips for easy cake removal- When it’s time to remove the cake from the pan, run a butter knife around the outside between the cake and the pan, then place the serving plate on top of the pan and turn it all over. The cake slides right out onto the serving plate.
    • Leftovers and storage- the leftovers taste great for up to 5 days covered at room temperature.
     

    Nutrition

    Calories: 522kcalCarbohydrates: 47gProtein: 8gFat: 36gSaturated Fat: 6gPolyunsaturated Fat: 9gMonounsaturated Fat: 18gTrans Fat: 0.1gCholesterol: 133mgSodium: 508mgPotassium: 227mgFiber: 1gSugar: 27gVitamin A: 191IUCalcium: 101mgIron: 3mg
    Tried this recipe?Let us know how it was!

    Grandma's Shrimp Dip Recipe

    Feb 1, 2024 · 7 Comments

    A close up image of a white bowl of shrimp dip with a whole shrimp on top and chips and celery in the background.

    My Grandma's Shrimp Dip Recipe is a huge family favorite, passed down through the generations. It's creamy, seasoned perfectly, filled with tender shrimp and super-quick to throw together!

    A close up image of a white bowl of shrimp dip with a whole shrimp on top and chips and celery in the background.
    [feast_advanced_jump_to]

    Why You'll Love Grandma's Shrimp Dip

    One thing that my family is very serious about is my Grandma Eve's easy Shrimp Dip Recipe. We take no prisoners when it comes to this. It would always make an appearance at our Christmas Eve celebration, and every single one of us would happily dive in. If you were late? Too bad. This dip is so good that it was every man for himself, no apologies, no regrets.

    I hope you'll make this and feel the love Eva always put into it. This Shrimp cream cheese dip comes together super quickly and easily and is always a major hit at any occasion, regardless of the season! Here's why you'll love it:

    • Only 8 ingredients
    • Quick to make
    • Easy appetizer for holidays or dinner parties
    • Family favorite
    • Delicious
    An overhead image of shrimp dip with a whole shrimp on top next to a bowl of chips and a bowl of celery sticks.

    Ingredients Information and Substitutions

    • Cream Cheese - For best results, use softened cream cheese- you can leave it out for an hour before mixing this together or you can zap it in the microwave for 30 seconds. This allows it to blend smoother and give you the best texture.
    • Sour Cream - I prefer full fat because it makes the dip extra creamy, but you can I've also made a lower fat version and it was still super tasty.
    • Onion - Mince it fairly fine, and it will be perfect! Tip: If you don't love a strong raw onion flavor, soak the minced onion in cold water for 10 minutes before draining really well for a more mellow onion flavor.
    • Seasonings - I use a combination of celery salt and garlic powder to give the shrimp cream cheese dip lots of flavor.
    • Hot sauce - The dip needs a hint of heat, and Frank's Red Hot is my favorite. You can also use any hot sauce you like.
    • Mayonnaise - Stick with real mayo for the best results.
    • Shrimp - You can use frozen shrimp that has been thawed and is pre-cooked. This will save time and tastes great!
    An overhead image of the shrimp dip ingredients labels in glass bowls.

    How To Make Cream Cheese Shrimp Dip

    Step 1: Combine ingredients

    Combine the cream cheese, sour cream, onion, celery salt, Tabasco sauce, garlic powder, and mayonnaise in a large bowl until well combined.

    All dip ingredients except the shrimp in a glass bowl.
    All dip ingredients except the shrimp mixed together in a glass bowl.

    Step 2: Fold in shrimp

    Give the dip a taste and add any extra seasonings you want. Fold in the shrimp and stir to combine.

    Shrimp dip with chopped cooked shrimp on top.
    Shrimp dip with chopped cooked shrimp mixed in.

    Step 3: Chill

    Put the cream cheese shrimp dip in the fridge and chill for 4 hours or overnight. Serve with chips and enjoy!

    A hand lifting a chip with shrimp dip on it from the bowl of dip.

    Frequently Asked Questions

    Is shrimp dip with cream cheese gluten free?

    It sure is!

    Can you make this dip ahead?

    Yes, it needs to be refrigerated prior to serving and can absolutely be made the night before serving.

    How long does shrimp cream cheese dip last?

    This will last a couple of days covered in your refrigerator.

    What goes with shrimp dip?

    I like to serve this with potato chips, but it also goes well with tortilla chips, celery sticks or even a sliced baguette.

    Can cream cheese shrimp dip be frozen?

    I wouldn't recommend freezing it, as it could negatively effect the texture.

    Could I substitute crab for shrimp? 

    Yes! This would make an awesome crab dip recipe as well!

    A very close up image of shrimp dip in a white bowl.

    Tips for making Grandma's Shrimp Dip Recipe

    • Use precooked shrimp! Make your life easier and buy your shrimp precooked and peeled. That way you won't have the hassle of having to cook and chill the shrimp — you can just chop them up and throw this dip together in record time!
    • Don't forget to garnish. Grandma often left a few pieces of shrimp whole to garnish the top of the dip, and once in a while, she would hide a couple of pieces of whole shrimp inside the dips as well. It was always a sweet jackpot moment for whoever happened to scoop that up! Another option would be to hold a small amount of chopped shrimp and sprinkle that on top just before serving.
    • Be sure to taste test. The key to getting the perfect shrimp cream cheese dip is to taste it and adjust the seasonings to your taste. This is important with any savory recipe, but especially this one.
    • Don't skip chilling! This really helps bring the flavors together.
    • Prep ahead- You can prep the whole dip the day before or just chop the onion and the shrimp ahead.
    • Leftovers and storage- This will last a couple days covered in your refrigerator.

    What To Serve With Shrimp & Cream Cheese Dip

    Round out this appetizer-heavy meal with these awesome recipes:

    • Olive and Artichoke Tapenade
    • BBQ Crockpot Meat Balls
    • Antipasto Salad
    • BLT Ranch Flat Bread Pizza
    • Lemon Pound Cake

    Other Shrimp Recipes to Try...

    • These easy Grilled Shrimp Tacos are about to be your new favorite summertime dinner recipe! Topped with pineapple salsa and an avocado cream sauce, they're quick and easy to make with flavor that will keep you coming back for more.
      Grilled Shrimp Tacos
    • A close up of shrimp and chicken fried rice in a pan with a wooden spoon in it.
      Shrimp and Chicken Fried Rice
    • An overhead image of a white bowl of sautéed shrimp with fresh dill and a grey napkin around it.
      Garlic Sautéed Shrimp
    • A close up shot of the side of a shallow bowl of shrimp mac salad.
      Shrimp Macaroni Salad

    Love this recipe? Please leave a 5 star ⭐️⭐️⭐️⭐️⭐️ rating in the recipe card below ⬇️ and/or a review in the comment section further down. Check out my Amazon Store for all my favorite tools, including those used in this recipe. And follow @thelifejolie on Instagram and TikTok!

    A close up image of a white bowl of shrimp dip with a whole shrimp on top and chips and celery in the background.

    Grandma's Shrimp Dip Recipe

    Jessy Freimann
    My Grandma's Shrimp Dip Recipe is a huge family favorite, passed down through the generations. It's creamy, seasoned perfectly, filled with tender shrimp and super-quick to throw together!
    5 from 21 votes
    Print Recipe Pin Recipe
    Prep Time 10 minutes mins
    Chill Time 2 hours hrs
    Total Time 2 hours hrs 10 minutes mins
    Course Appetizer
    Cuisine American
    Servings 8 servings
    Calories 142 kcal

    Equipment

    • cutting board
    • Chef Knife
    • Measuring cups and spoons
    • Spatula
    • mixing bowl

    Ingredients
      

    • 4 ounces cream cheese, softened
    • 8 ounce container sour cream
    • 3 Tablespoons mayonnaise
    • 4 drops tabasco sauce or the hot sauce of your choice
    • ¼ cup onion, minced
    • ½ teaspoon celery salt
    • ¼ teaspoon garlic powder
    • ½ pound deveined frozen cooked shrimp, thawed and chopped (or more if you want)

    Instructions
     

    • In a large bowl, beat together cream cheese, sour cream, onion, celery salt, tabasco sauce, garlic powder and mayonnaise until well combined. 
    • Taste the mixture and adjust seasonings to taste. Stir in shrimp.
    • Refrigerate for 2 hours or overnight. Serve with chips.

    Video

    Notes

    • Use precooked shrimp! Make your life easier and buy your shrimp precooked and peeled. That way you won't have the hassle of having to cook and chill the shrimp — you can just chop them up and throw this dip together in record time!
    • Don't forget to garnish. Grandma often left a few pieces of shrimp whole to garnish the top of the dip, and once in a while, she would hide a couple of pieces of whole shrimp inside the dips as well. It was always a sweet jackpot moment for whoever happened to scoop that up! Another option would be to hold a small amount of chopped shrimp and sprinkle that on top just before serving.
    • Be sure to taste test. The key to getting the perfect shrimp cream cheese dip is to taste it and adjust the seasonings to your taste. This is important with any savory recipe, but especially this one.
    • Don't skip chilling! This really helps bring the flavors together.
    • Prep ahead- You can prep the whole dip the day before or just chop the onion and the shrimp ahead.
    • Leftovers and storage- This will last a couple days covered in your refrigerator.

    Nutrition

    Serving: 0.33cupCalories: 142kcalCarbohydrates: 2gProtein: 2gFat: 14gSaturated Fat: 6gPolyunsaturated Fat: 3gMonounsaturated Fat: 3gTrans Fat: 0.01gCholesterol: 33mgSodium: 245mgPotassium: 57mgFiber: 0.01gSugar: 2gVitamin A: 371IUVitamin C: 1mgCalcium: 43mgIron: 0.1mg
    Tried this recipe?Let us know how it was!

    Garlic Sautéed Shrimp

    Jan 25, 2024 · 6 Comments

    An overhead image of a white bowl of sautéed shrimp with fresh dill and a grey napkin around it.

    This Garlic Sautéed Shrimp will knock your socks off! Made with lemon, dill and chopped shallots, it's full of insanely delicious flavor and ready in under 20 minutes!

    An overhead image of half a white bowl of lemon shrimp with fresh dill next to the bowl.
    [feast_advanced_jump_to]

    Why You'll Love This Shrimp In Garlic Sauce

    I am seriously excited to share this recipe with you guys today. My Aunt has been making this for years and we all go crazy over it. Sometimes she serves it as a main dish and other times it's an appetizer. But every single time it's makes it's way to our family table, it goes fast. And with good reason.

    Originally from the Silver Palate Cookbook, the recipe's name is Spicy Shrimp. I've never really understood why it's called this because it's not spicy at all. So perhaps they mean flavor- of which this has plenty! Minced shallots and plenty of garlic blend beautifully with the freshness of lemon juice and dill.

    Here's why you'll love it:

    • Minimal ingredients
    • Maximum flavor
    • Lightning fast- ready in less than 20 minutes
    • Great as a main or appetizer
    • Make ahead potential- can be served hot or cold
    A close up of a garlic shrimp in a white bowl with other shrimp and butter dill sauce.

    Ingredient Information and Substitutions

    • Shrimp- Frozen raw shrimp is my go-to for this and I like to remove the tails. In terms of the size of the shrimp, this recipe works best with large shrimp (the package may say 35/40 shrimp and this indicates how many shrimp per pound at that size). I prefer them peeled, deveined and tails removed for effortless eating.
    • Fats- I mix olive oil with salted butter because the oil helps keep the butter from burning. My preference for salted butter is all about adding more flavor, but if you only have unsalted, just add a little more salt as they cook.
    • Produce- Chopped shallot and minced garlic (measure with your heart) add a ton of flavor while lemon juice and chopped fresh dill add just the right burst of freshness. Fresh lemon juice is preferable and you can always substitute fresh chopped dill for 1-2 teaspoons of dried dill.
    • Seasoning- I keep it simple with Kosher salt and ground black pepper- be sure to season as the shrimp are cooking for the best results and of course, taste and adjust seasonings just before serving.
    An overhead image of labeled ingredients in glass bowls.

    How To Make Lemon Garlic Shrimps

    Step 1: Melt the fats

    In a large skillet over medium-low heat, add oil and butter and cook until fully melted together.

    A skillet on a stove with butter and oil melting together.

    Step 2: Sauté garlic and shallots

    Add garlic and shallots to the pan and sauté until softened and fragrant, for a few minutes.

    Shallots and garlic sautéing in melted butter and oil in a skillet on the stove.

    Step 3- Add shrimp

    Add the shrimp to the pan in a single layer and cook for around 2-3 minutes per side, turning once. Add salt and pepper as the shrimp cooks.

    Shrimp sautéing in a pan on a stove.

    Step 4- Add dill and lemon juice off the heat

    Pour the shrimp mixture into a bowl and stir in dill and lemon juice. Adjust for seasoning as needed and either serve hot immediately or chill and serve later.

    Shrimp in a glass bowl with dill and lemon juice on it being stirred with a wooden spoon.

    Frequently Asked Questions

    What is the best way to thaw frozen shrimp?

    I have two favorite ways- if you have the time you can place the bag of frozen shrimp into your fridge to that overnight. The quickest way is to fully submerge in a bowl of cold water for 15-20 minutes until fully thawed and drain well.

    How do you peel and devein shrimp?

    I always encourage you to purchase shrimp that has already been peeled and deveined to save time, but you can also do it yourself. Here are the steps:
    1. Take a sharp paring knife and make a shallow slit down the shrimp's back.
    2. Peel off the shell- I gently pull the legs and usually that brings the shell with it. At this point you can also gently pull the tail off.
    3. Use the tip of your knife to carefully remove the black vein going along the shrimp's back and dispose of this.

    How do I know the shrimp is cooked?

    Typically, raw shrimp is gray and when it's cooked the color will changed to pink and the texture will be a bit more solid and opaque. The shrimp will also curl into more of a c shape.

    Why is my shrimp rubbery?

    Rubbery shrimp is typically an indication that your shrimp is overcooked. Shrimp tends to cook quickly, so try to turn after two minutes and remove from heat after another 2 minutes.

    An overhead image of a white bowl of sautéed shrimp with fresh dill and a grey napkin around it.

    Tips For Making Garlic Butter Sauce For Shrimp

    • Buy the shrimp peeled and deveined with tails removed. Less work for you!
    • Use fresh dill. In general fresh herbs are always preferable. But especially for this recipe, the fresh dill really shines.
    • Don't overcook the shrimp. It can be really easy to do this, but I encourage you to keep a close eye on it  and remove the lemon shrimp when it is just cooked.
    • If you're cooking for a crowd, make a double batch. Trust me on this, these go fast at a party.
    • Season during cooking for the best flavor in the shrimp.
    • Taste it when it's done for seasoning. And add additional salt and pepper if needed
    • Serve Hot or Cold- The original recipe calls for the shrimp to be chilled for a few hours and served cold but it really is awesome either way.
    • Prep ahead- Peel garlic, dice shallots, wash dill and lemon, thaw and prep shrimp.
    • Leftovers and Storage- This will last up to 2 days covered in the refrigerator.
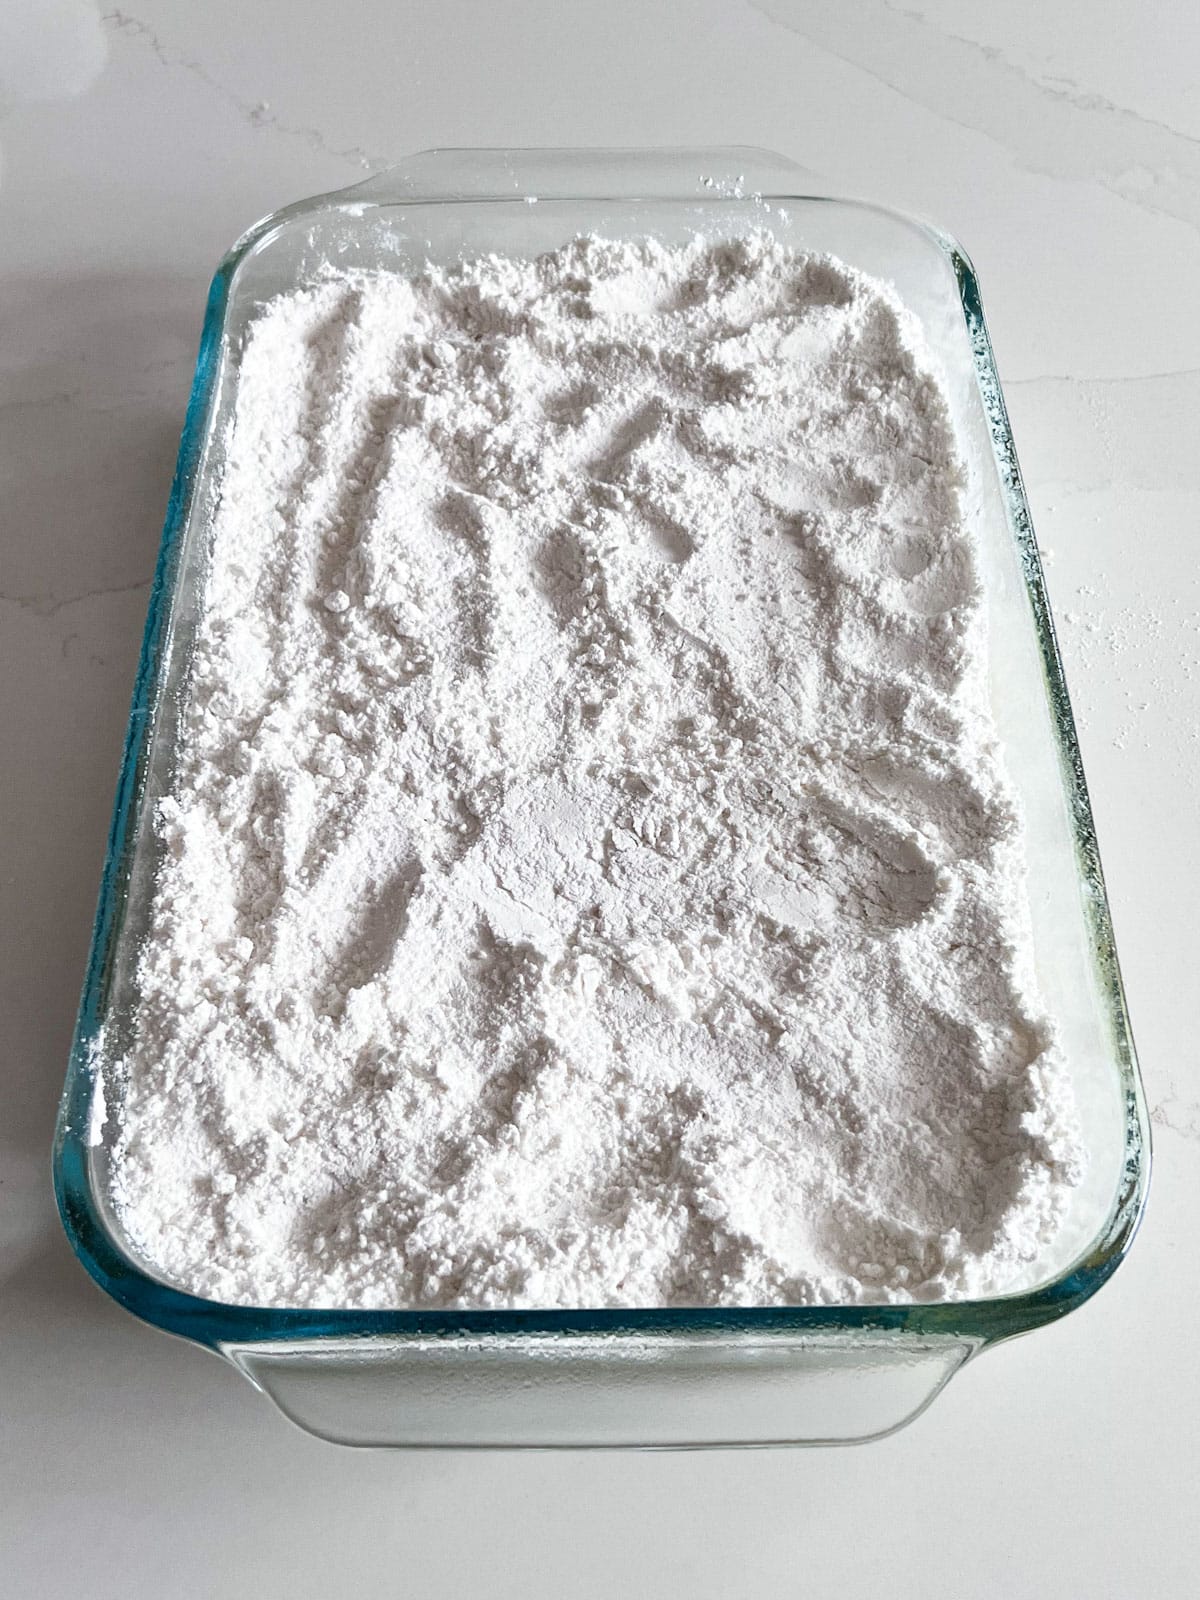
    A close up image of a fork piercing into a cooked piece of shrimp.

    What To Serve With Garlic Lemon Shrimp Recipe

    Here are a few tasty option to round out this meal:

    • Blueberry Cucumber Salad
    • Roasted Vegetable Flatbread
    • Hot Artichoke Dip
    • Chocolate Dipped Almond Shortbread Cookies

    Other Delicious Shrimp Recipes

    • A close up shot of the side of a shallow bowl of shrimp mac salad.
      Shrimp Macaroni Salad
    • An overhead image of a plate of snow pea stir fry with shrimp over white rice with raw snow peas, a striped towel and rice around it.
      Shrimp and Snow Pea Stir Fry
    • These easy Grilled Shrimp Tacos are about to be your new favorite summertime dinner recipe! Topped with pineapple salsa and an avocado cream sauce, they're quick and easy to make with flavor that will keep you coming back for more.
      Grilled Shrimp Tacos
    • A close up of shrimp and chicken fried rice in a pan with a wooden spoon in it.
      Shrimp and Chicken Fried Rice

    Love this recipe? Please leave a 5 star ⭐️⭐️⭐️⭐️⭐️ rating in the recipe card below ⬇️ and/or a review in the comment section further down. Check out my Amazon Store for all my favorite tools, including those used in this recipe. And follow @thelifejolie on Instagram and TikTok!

    An overhead image of a white bowl of sautéed shrimp with fresh dill and a grey napkin around it.

    Garlic Sautéed Shrimp

    Jessy Freimann
    This Garlic Sautéed Shrimp will knock your socks off! Made with lemon, dill and chopped shallots, it's full of insanely delicious flavor and ready in under 20 minutes!
    5 from 3 votes
    Print Recipe Pin Recipe
    Prep Time 10 minutes mins
    Cook Time 7 minutes mins
    Chill time 3 hours hrs
    Total Time 3 hours hrs 17 minutes mins
    Course Appetizer, Entree, Main Course
    Cuisine American
    Servings 4 servings
    Calories 176 kcal

    Equipment

    • Skillet
    • Wooden Spoons
    • cutting board
    • Chef Knife
    • Citrus reamer
    • Measuring cups and spoons
    • Tongs
    • Garlic Press
    • Bowls

    Ingredients
      

    • 1 ¾ pounds large shrimp peeled, deveined and tails removed
    • 2 Tablespoons butter
    • 1 Tablespoon olive oil
    • 1 Tablespoon minced fresh garlic, or pressed
    • 2 Tablespoons minced shallots,
    • Kosher salt, to taste
    • Ground black pepper, to taste
    • 2 Tablespoons fresh lemon juice, or more to taste
    • 2 Tablespoons finely chopped fresh dill or 1-2 teaspoons dried dill

    Instructions
     

    • Heat a large skillet over medium-low heat and melt the butter and olive oil together.
    • Add garlic and shallots to the pan and cook for around two minutes, stirring often (don't let them brown).
    • Add the shrimp to the pan and increase the heat slightly. Cook for around 3-4 minutes, turning once until just done to taste (the shrimp will turn pink). Add salt and pepper to taste and toss to combine.
    • Remove shrimp to a bowl and scrape all sauce into the bowl as well.
    • Add lemon juice and dill to the bowl and mix well
    • Serve immediately or refrigerate for 3-4 hours before serving chilled.

    Video

    Notes

    • Buy the shrimp peeled and deveined with tails removed. Less work for you!
    • Use fresh dill. In general fresh herbs are always preferable. But especially for this recipe, the fresh dill really shines.
    • Don't overcook the shrimp. It can be really easy to do this, but I encourage you to keep a close eye on it  and remove the lemon shrimp when it is just cooked.
    • If you're cooking for a crowd, make a double batch. Trust me on this, these go fast at a party.
    • Season during cooking for the best flavor in the shrimp.
    • Taste it when it's done for seasoning. And add additional salt and pepper if needed
    • Serve Hot or Cold- The original recipe calls for the shrimp to be chilled for a few hours and served cold but it really is awesome either way.
    • Prep ahead- Peel garlic, dice shallots, wash dill and lemon, thaw and prep shrimp.
    • Leftovers and Storage- This will last up to 2 days covered in the refrigerator.
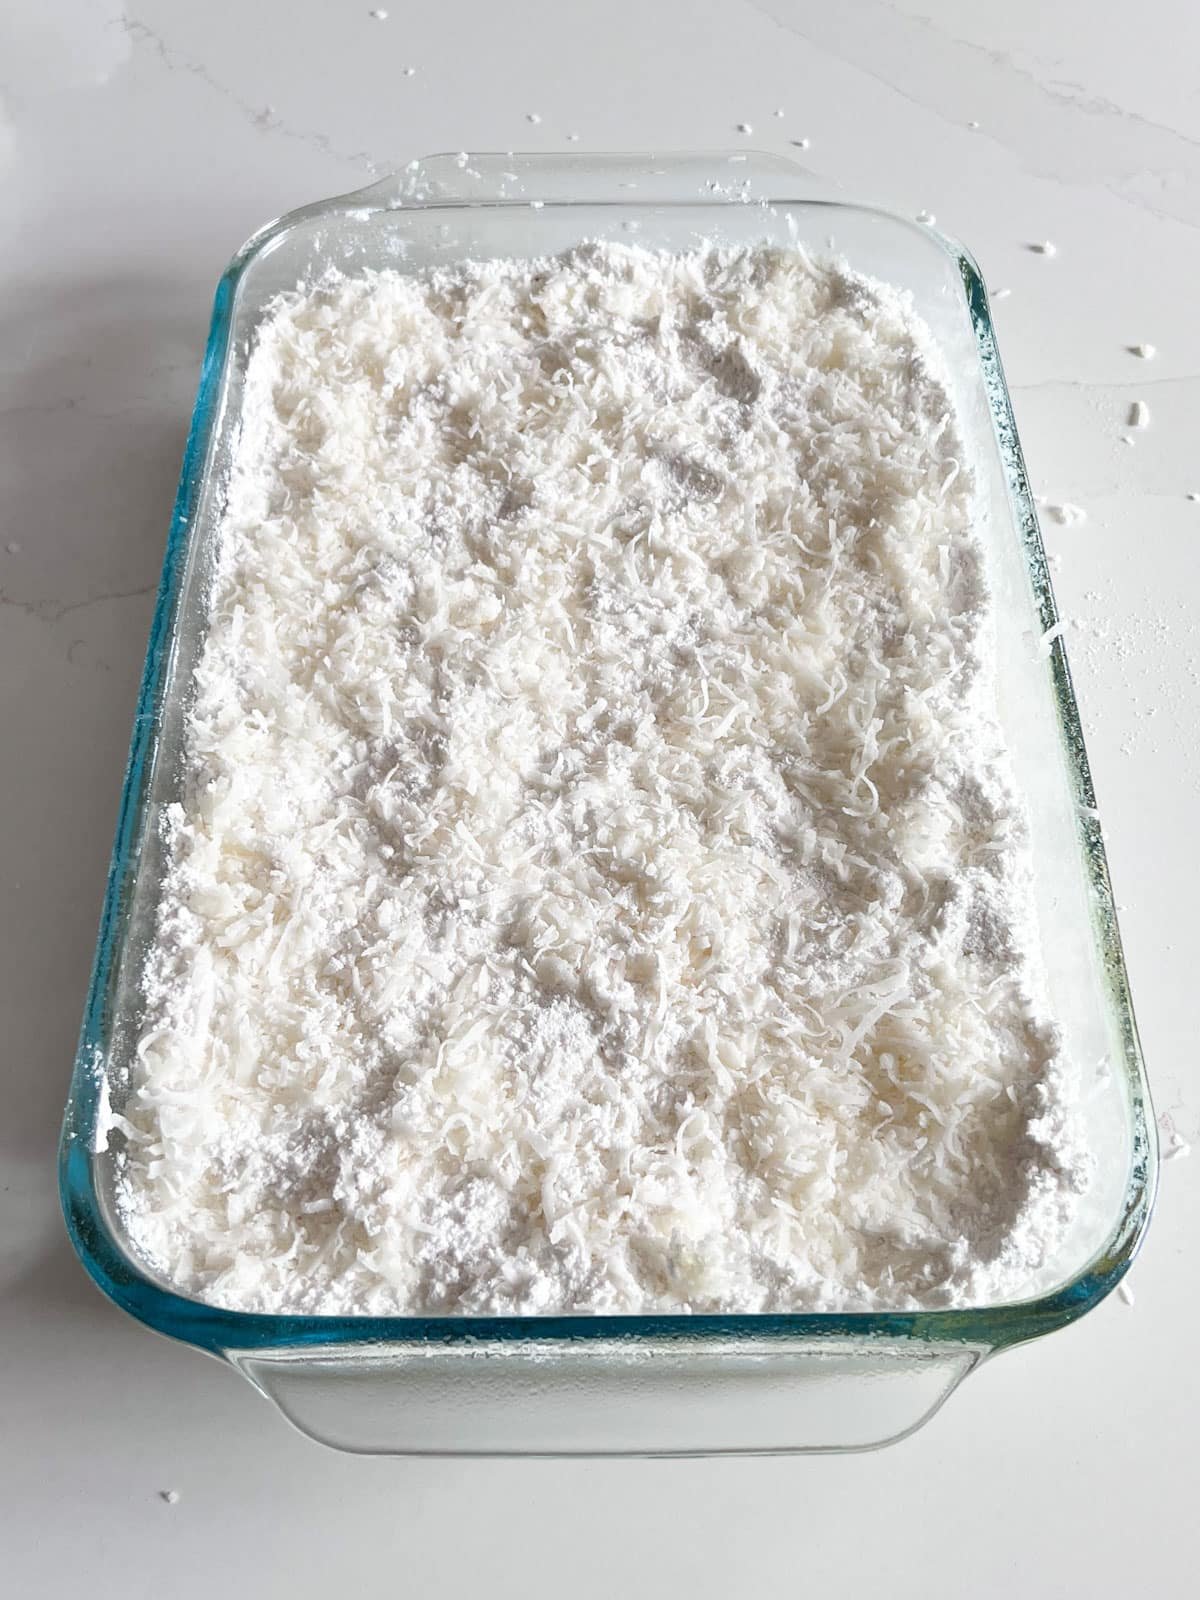
    Nutrition

    Serving: 10piecesCalories: 176kcalCarbohydrates: 2gProtein: 27gFat: 6gSaturated Fat: 1gPolyunsaturated Fat: 1gMonounsaturated Fat: 3gTrans Fat: 0.01gCholesterol: 251mgSodium: 1131mgPotassium: 234mgSugar: 0.4gVitamin A: 370IUCalcium: 116mgIron: 0.4mg
    Tried this recipe?Let us know how it was!

    One Pot Philly Cheesesteak Pasta

    Jan 22, 2024 · 25 Comments

    A wooden spoon holing a scoop of Philly steaks pasta with melty cheese all over it.

    One Pot Philly Cheesesteak Pasta has all the great flavor of the famous Philly cheesesteak sandwiches that we all know and love but in a one pot, creamy and cheesy pasta dish that's ready in under 40 minutes!

    A close up of a wooden spoon in cheesy Philly pasta with beef and peppers and mushrooms.
    [feast_advanced_jump_to]

    Why You've Got To Try This Philly Cheesesteak Pasta

    Ugh, I hate doing dishes. So naturally, I'm making a point to create more one pot or one pan meals. And if my family loves them, I'll sharing them in hopes that you and your family will too! As you've probably figured out, this Philly Steak Pasta made the cut with flying colors!

    Tender slices of beef, sweet bell peppers, sliced mushrooms and onions sautéed together and mixed with a savory, creamy sauce, penne pasta and plenty of cheese. So if a Philly Cheese Steak and pasta had a baby this would be it! And what a beautiful baby it is! Here's why I love this:

    • One pot = minimal dishes
    • Easy to prep ingredients ahead of time
    • Ready in less than 40 minutes
    • Easy to make
    • Kid-friendly
    • Creamy and full of flavor

    Ingredient Information And Substitutions

    • Beef- I like to buy shaved beef from the grocery store to save time. If that's not available, you can grab a sirloin steak and slice it as thinly as possible Slicing tip: pop it into the freezer for 30 minutes prior to slicing to make it easier to get thin, clean slices.
    • Pasta- Penne pasta is my shape of choice for this, but any similar size and shape pasta works here.
    • Cheese- I know many purists believe American cheese is the only way to go for a Philly Cheesesteak, but I prefer mozzarella for this. You can also sub in Provolone or Monterey Jack.
    • Vegetables- Bell pepper, onion and mushrooms add excellent flavor and texture. Any color bell pepper will work.
    • Seasonings- Kosher salt, black pepper and garlic powder add a delicious kick of flavor.
    • Sauce- The ingredients that bring together this killer, creamy sauce include beef broth, Worcestershire Sauce, heavy cream and corn starch. You can easily substitute half and half for the cream.
    An overhead image of labeled ingredients in glass bowls.

    How To Make Philly Cheese Steak Pasta

    Step 1: Cook the veggies

    Heat oil over medium-high heat and sauté the onions, peppers and mushrooms to soften.

    Onions, peppers and mushrooms in a skillet being sautéed.

    Step 2: Add beef

    Add the shaved beef to the pan and begin browning it. Season with salt, pepper and garlic powder.

    Meat added to the vegetables in the sauté pan cooking.

    Step 3: Make sauce and add pasta

    Whisk together broth, cream, Worcestershire sauce, and corn starch and pour into the pan along with the pasta. Bring to a boil.

    Sauce and pasta added to the sauté pan of meat and veggies.

    Step 4: Cover and cook

    Once boiling, reduce the heat to medium and cover. Simmer covered for 15 minutes, stirring periodically to prevent sticking.

    A hand putting cover onto the skillet for cooking.

    Step 5: Add cheese

    Stir in ½ cup cheese and top with remaining cheese. Cover and simmer 2-3 more minutes to melt cheese on top and serve immediately.

    Shredded cheese added to skillet of pasta.

    Frequently Asked Questions

    What is a Philly cheesesteak made of?

    Traditionally, a Philly cheesesteak consists of thinly sliced/shaved steak, melty cheese and a hoagie roll (and sometimes onions).

    What cut is best for Philly steak meat?

    If your store offers shaved steak, grab that to reduce hands-on work. Otherwise I like to use sirloin steak or even top round.

    How to cut steak for Philly Cheesesteak?

    If you have to cut it, follow these steps:
    1. Place steak into the freezer for 30 minutes
    2. Using a very sharp knife slice as thinly as possible, against the grain- try to cut in one swift motion.

    A wooden spoon holing a scoop of Philly steaks pasta with melty cheese all over it.

    Tips For Making Authentic Philly Cheesesteak Pasta:

    • Soften the veggies- By cooking for a few minutes at the beginning.
    • When you add the sauce, the beef won't be fully cooked yet- That's ok! It will fully cook as the pasta cooks and add flavor to the sauce.
    • Use the size right pan. I like a nice deep skillet or braiser.
    • Hand-shred the cheese- if possible. It melts easier.
    • Stir often- Especially once it's covered and simmering. This prevents the pasta from sticking to the bottom of the pan.
    • Ingredients you can prep ahead- Slice mushrooms, peppers, onions and beef. You can also shred the mozzarella.
    • Leftovers and storage- This will last up to 3 days covered in the refrigerator. You can reheat individual portions in the microwave. Or you can reheat in a pan over medium heat-add a splash of milk to help loosen it up and make it creamy.
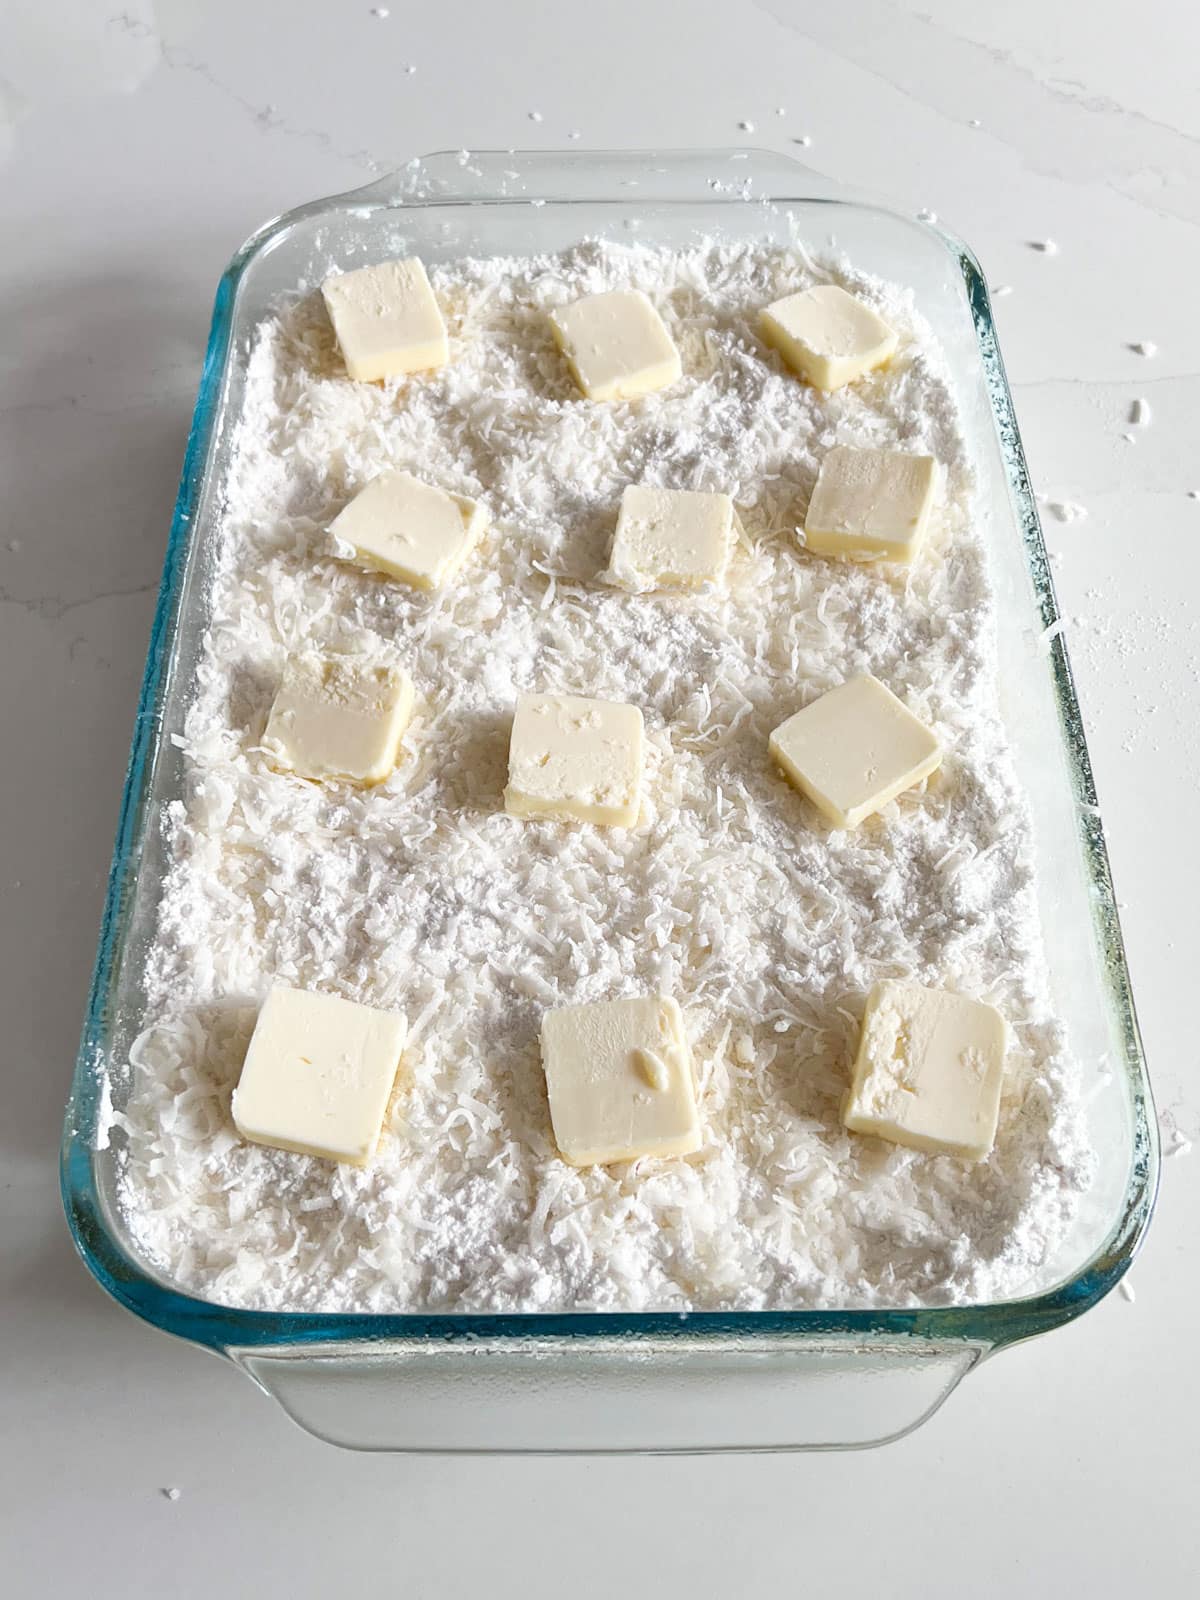
    What To Serve with Philly Pasta

    These tasty recipes will round out your meal:

    • Strawberry Green Salad
    • Fast Sandwich Bread
    • Lemon Bars

    Try These Other Tasty One Pot Pastas

    • A wooden spoon scooping up creamy taco pasta from the pan.
      One Pot Cheesy Taco Pasta
    • A wooden spoon holding a scoop of creamy chicken Florentine pasta over the full pan of it.
      One Pot Chicken and Pasta Florentine
    • Chili Mac casserole in a white bowl.
      One Pot Chili Mac Casserole
    • A square image of Supreme Pizza One Pot Pasta.
      Supreme Pizza One Pot Pasta

    Love this recipe? Please leave a 5 star ⭐️⭐️⭐️⭐️⭐️ rating in the recipe card below ⬇️ and/or a review in the comment section further down. Check out my Amazon Store for all my favorite tools, including those used in this recipe. And follow @thelifejolie on Instagram and TikTok!

    A wooden spoon holing a scoop of Philly steaks pasta with melty cheese all over it.

    One Pot Philly Steak Pasta Recipe

    Jessy Freimann
    A wooden spoon holing a scoop of Philly steaks pasta with melty cheese all over it.
    4.94 from 45 votes
    Print Recipe Pin Recipe
    Prep Time 5 minutes mins
    Cook Time 30 minutes mins
    Inactive time 10 minutes mins
    Total Time 35 minutes mins
    Course Main Course
    Cuisine American

    Ingredients
      

    • 2 Tablespoons olive oil
    • 1 cup bell pepper, sliced (about medium 1 pepper)
    • 1 cup onion, sliced (about 1 medium onion)
    • 8 ounces mushrooms, sliced
    • 1 pound sandwich steaks, thinly sliced
    • 1 teaspoon kosher salt
    • ¼ teaspoon black pepper
    • ½ teaspoon garlic powder
    • 1 Tablespoon corn starch
    • 2 cups beef broth
    • ½ cup heavy cream
    • 1 teaspoon Worcestershire sauce
    • 2 cups penne pasta, heaping
    • 1 ¼ cups mozzarella cheese, shredded

    Instructions
     

    • Heat oil in large saute pan over medium high heat.
    • Add peppers onions and mushrooms to the pan and saute to soften, around 5 minutes.
    • Add beef and season with salt, pepper and garlic powder. Saute for 2-3 minutes to begin browning.
    • While beef begins to brown, whisk together corn starch, broth, heavy cream and Worcestershire sauce until well combined. Pour into the pan and mix well.
    • Add pasta to the pan and bring to a boil.
    • Cover and reduce heat to medium. Simmer for 15 minutes stirring periodically.
    • Remove cover and stir in ½ cup of cheese. 
    • Sprinkle the remaining cheese on top and cover and cook for 5 more minutes to melt the cheese. Serve immediately.

    Video

    Tried this recipe?Let us know how it was!

    Lemon Bars With Shortbread Crust

    Jan 18, 2024 · 1 Comment

    A lemon square on a piece of parchment with a cut lemon behind it.

    Lemon Bars with Shortbread Crust Recipe are a classic family favorite- they’re super easy to throw together with a bright and tangy-sweet lemon curd layer and shortbread crust.

    A stack of 3 lemon squares with lemons behind them.
    [feast_advanced_jump_to]

    Why You’ll Love These Lemon Bars

    I think dessert-loving people fall into one of two categories. Chocolate Dessert Lovers and Fruity Dessert Lovers. And although I try to be an equal opportunity eater- and I really do love chocolate- I am a Fruity Dessert Lover. Guilty as charged, no regrets!

    I probably don't share enough fruity dessert recipes, so I figured I should probably share this lemon bars recipe. I mean who doesn't love lemon squares? A delicious layer of buttery shortbread topped with sweet and tangy lemon curd and a dusting of confectioners sugar. It's a dessert of champions for sure

    Here’s why you’ve got to try this:

    • Simple ingredients
    • Minimal work
    • Sweet but also tangy
    • Very easy to make
    • A traditional classic recipe
    A person sifting powdered sugar onto cut lemon bars.

    Ingredient Information And Substitutions:

    • Shortbread- The bottom layer is a simple shortbread cookie made of butter, flour and confectioners sugar. I prefer to use salted butter for this recipe as it adds another delicious dimension to the flavor without overpowering the cookie.
    • Lemon curd- Although the idea of making lemon curd can sound intimidating, in this particular recipe, it’s as simple as mixing a few common ingredients together. Eggs and baking powder add fluffiness and leavening, granulated sugar provides sweetness and lemon juice adds the perfect tang to balance out the sweetness. A pinch of kosher salt rounds out all the flavors and brings it all together.
    An overhead image of the ingredients labeled in clear bowls.

    How To Make This Lemon Cookie Bars Recipe

    Step 1: Mix together the shortbread ingredients

    Preheat the oven to 350 degrees and line an 8” x 8” baking pan with parchment. Using an electric or stand mixer, mix the butter, flour and confectioners sugar until well combined. It’ll look crumbly and that’s ok.

    A mixing bowl of the cookie crust mixture.

    Step 2: Press cookie dough into the pan and bake

    Gently press the dough together into a single layer in the pan, pressing it up the sides of the pan about a ½ inch. I like to use a drinking glass with a flat bottom. Bake for 25 minutes.

    A hand using a glass to press the cookie crust into a lined baking pan.

    Step 3: Make the lemon curd

    Rinse out and dry your mixer bowl and then in that same bowl combine eggs, lemon juice, granulated sugar, baking powder and salt until fluffy and well combined, about 2 minutes.

    Lemon curd being mixed in a blue stand mixer.

    Step 4: Top shortbread with lemon curd and bake

    Once the shortbread layer is done baking, pour the lemon curd over the top, spreading into an even layer. Bake for another 40 minutes and then remove from the oven and cool completely.

    A baking pan with the baked shortbread crust and lemon curd poured on top.

    Step 5: Sprinkle with confectioners sugar

    Once cooled, sprinkle with powdered sugar and cut into squares and enjoy!

    A hand sifting powdered sugar onto the baked lemon bars.

    Frequently Asked Questions

    Do lemon bars have to be refrigerated?

    Yes, this particular recipe will last for a week stored in an airtight container in your refrigerator.

    How do you slice lemon bars?

    The easiest way to line the pan with parchment paper or foil with extra hanging over the sides, this will make it easier to pull out of the pan in one piece and cut.

    When are lemon bars done?

    If you lightly touch the center, it shouldn't make an imprint.

    Can lemon bars be made ahead?

    Yes! Just refrigerate until you're ready to serve.

    Can you make lemon bars with graham crack crust?

    Yes! If you prefer to make graham cracker crust lemon bars, simply omit the shortbread ingredients and steps. I love this recipe for graham cracker crust.

    A lemon square on a piece of parchment with a cut lemon behind it.

    Tips For Making Lemon Squares

    • Soften your butter to room temperature.
    • Use a flat-bottom drinking glass to gently press the shortbread dough into the pan to help create a tight, even layer.
    • Use real lemon juice if you can, it makes all the difference.
    • Be sure to roll the lemon while pressing it down on your counter before juicing to get the most juice out of the lemon.
    • Storage and leftovers- These will last up to 4 days covered in the refrigerator.
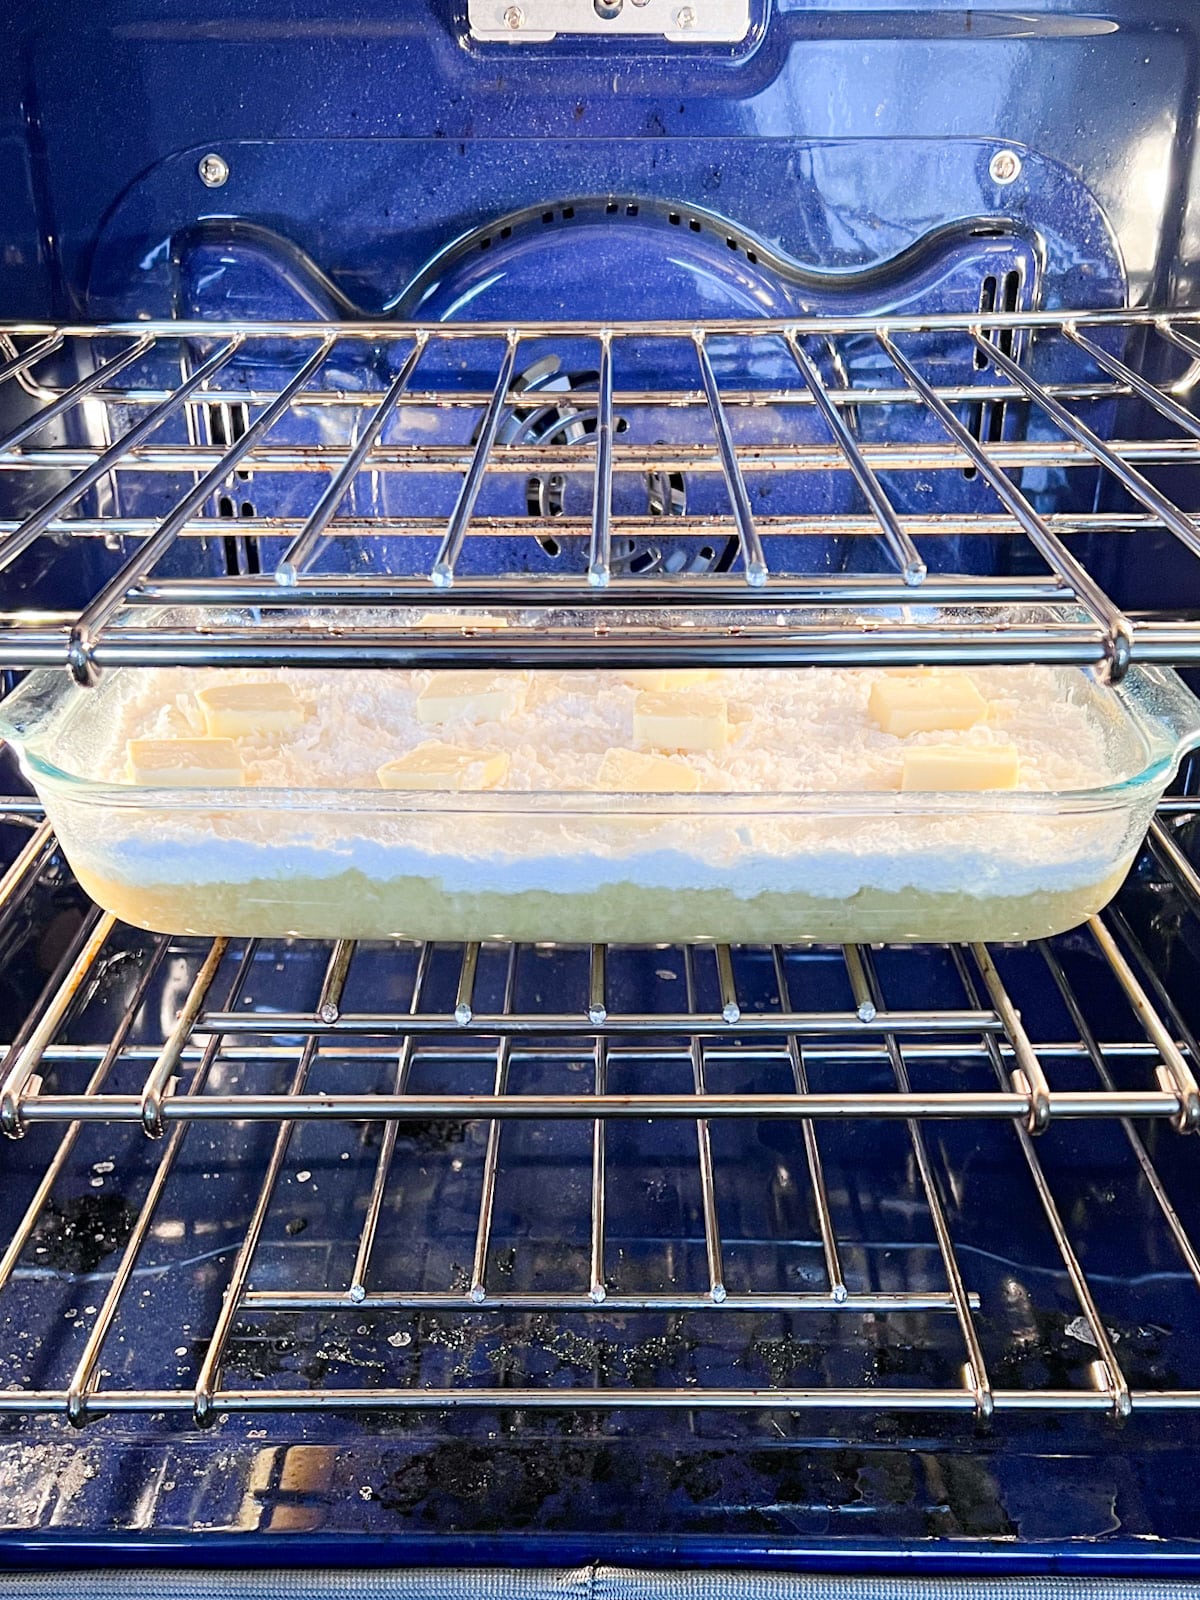
    An overhead image of this lemon bar recipe cut into squares and scattered with one that has a bite out of it and a half lemon.

    Make it a What To Serve With this Lemon Bars Recipe

    A few great recipes to round out and complete this meal would be:

    • Italian Chicken Stew
    • Mom's Meatloaf
    • Roasted Beet Salad
    • Summer Bounty Strawberry Salad
    • Four Ingredient Chocolate Mousse
    • Cherry Chocolate Oatmeal Cookie Bars

    Other Delicious Lemon Dessert Recipes:

    • A straight-on image of 3 lemon parfait cups with the center one in the front.
      Lemon Parfait Cups Dessert
    • My Great Grandma's Lemon Pound Cake Recipe is a serious keeper! Easy to make, subtly sweet with a light and moist crumb that no one can resist.
      Great Grandma Hinz's Lemon Pound Cake Recipe
    • A slice of lemon icebox pie being pulled from the rest of the pie.
      Raspberry Lemon Icebox Pie Recipe
    • A piece of lemon cake with whipped cram on a white plate with the rest of the cake and lemons in the background.
      Lemon Pistachio Cake

    Love this recipe? Please leave a 5 star ⭐️⭐️⭐️⭐️⭐️ rating in the recipe card below ⬇️ and/or a review in the comment section further down. Check out my Amazon Store for all my favorite tools, including those used in this recipe. And follow @thelifejolie on Instagram and TikTok!

    A lemon square on a piece of parchment with a cut lemon behind it.

    Lemon Bars with Shortbread Crust

    Jessy Freimann
    Lemon Bars with Shortbread Crust Recipe are a classic family favorite- they’re super easy to throw together with a bright and tangy-sweet lemon curd layer and shortbread crust.
    5 from 1 vote
    Print Recipe Pin Recipe
    Prep Time 10 minutes mins
    Cook Time 45 minutes mins
    Total Time 55 minutes mins
    Course Dessert
    Cuisine American
    Servings 12 bars
    Calories 182 kcal

    Equipment

    • stand mixer
    • Hand mixer
    • mixing bowl
    • Citrus reamer
    • Measuring cups and spoons
    • 8 inch square pan
    • Spatula

    Ingredients
      

    • 1 cup flour
    • ½ cup salted butter
    • ¼ cup confectioner's sugar + more for dusting
    • 2 large eggs
    • 1 cup granulated sugar
    • ½ teaspoons baking powder
    • ¼ teaspoon kosher salt
    • 2 Tablespoons fresh lemon juice

    Instructions
     

    • Preheat the oven to 350 degrees and line an 8" x 8" pan with parchment or foil, letting the ends hang out for easy removal later (if using foil, grease with cooking spray first).
    • Mix flour, butter and confectioner's sugar until well combined.
    • Press evenly into the pan building it up around a ½ inch around the edges and set aside.
    • Bake for 20 minutes.
    • While the crust bakes, beat together eggs, granulated sugar, baking powder, kosher salt and lemon juice until well combined an smooth.
    • When crust is done baking, pour lemon mixture evenly over the crust.
    • Bake for around 25 minutes or until there's no imprint left behind when you lightly press the middle.
    • Cool and remove from pan in one piece.
    • Cut into squares and dust with confectioners sugar. Serve immediately or refrigerate until serving.

    Video

    Nutrition

    Serving: 1squareCalories: 182kcalCarbohydrates: 27gProtein: 2gFat: 9gSaturated Fat: 5gPolyunsaturated Fat: 0.5gMonounsaturated Fat: 2gTrans Fat: 0.3gCholesterol: 51mgSodium: 139mgPotassium: 25mgFiber: 0.3gSugar: 17gVitamin A: 281IUCalcium: 18mgIron: 1mg
    Tried this recipe?Let us know how it was!

    One Pot Cheesy Taco Pasta

    Jan 16, 2024 · 36 Comments

    A wooden spoon scooping up creamy taco pasta from the pan.

    One Pot Cheesy Taco Pasta is such an easy weeknight dinner recipe. It's creamy, cheesy and full of great flavor that the whole family will love and best of all, ready in under 30 minutes! 

    A wooden spoon scooping up creamy taco pasta from the pan.
    [feast_advanced_jump_to]

    Why You've Got To Try This Taco Macaroni

    Weeknight meals are a challenge no mater how you slice it. There are always some nights where the day just got away from us and you can't imagine spending a whole hour (or more!) cooking. And I say this as a gal who loves cooking! So it's always helpful to have a recipe up your sleeve where the ingredients are all in your pantry/fridge/freezer and it can be thrown together quickly with minimal work, minimal clean up but maximum flavor.

    Taco night is always a favorite in our home, but since we often make our taco meat in the slow cooker, this isn't exactly a good last minute option. But combining taco night with pasta night provides flavors the whole family always love, the easy way! Here's why you'll love it:

    • Ready in under 30 minutes
    • Simple ingredients we all tend to have on hand
    • One pot = minimal clean up
    • Deliciously creamy with zesty flavor
    • Kid-friendly
    • Reheats easily for delicious leftovers
    An overhead image of taco pasta in a skillet topped with crushed tortilla chips and chopped scallions.

    Ingredient Information And Substitutions

    • Ground Beef- I like to go with a leaner ground beef mix, like 90/10 to minimize the amount of grease, but if you use one with a higher fat content you can always drain the grease before adding seasonings.
    • Pasta- My preferred pasta for this is penne but if you favor a different shape, feel free to use that. The big thing is choosing a pasta shape of a similar size, noodles aren't really ideal for this recipe. Other great options are Rotini or Farfalle.
    • Seasonings- A combination of a taco seasoning packet, salt, pepper, garlic powder and dried minced onions add robust flavor.
    • Sauce- The sauce is made up of chicken broth (beef also works), diced tomatoes, chopped green chiles, tomato sauce, black beans and frozen corn. Make sure you don't drain any of the canned items, as the liquid in them helps make the sauce. If you want to substitute canned corn for frozen, it will work, just make sure you drain that.
    • Cheese- I personally enjoy shredded sharp cheddar for this but mild or white cheddar also work and so does a Mexican blend or Colby. Hand-shredded cheese melts better, but this recipe works just fine with pre-shredded.
    • Toppings- While optional, I think topping this with crushed tortilla chips and chopped scallions adds even more great flavor and texture.
    An overhead image of the labeled ingredients in glass bowls.

    How To Make One Pot Taco Pasta

    Step 1: Brown ground beef

    Add ground beef to a skillet over medium-high heat and break up with a spoon. While it browns, mix in seasoning.

    Browning ground beef and seasoning in a skillet on a stove.

    Step 2: Add sauce ingredients

    Add diced tomatoes, chopped green chiles, tomato sauce, chicken broth, beans and corn to the skillet and stir to combine. Bring to a boil.

    Skillet on a stove with wet ingredients added to the beef mixture.

    Step 3: Stir in pasta and cover

    Stir in pasta and cover, keeping heat at medium-high. Cook covered for 10 minutes stirring 2-3 times during cooking to keep it from sticking.

    The pasta in a skillet on a stove cooking with a clear cover on it.

    Step 4: Add cheese

    Stir in ½ cup of cheese and top with remaining cheese. Turn off heat, cover and cook for 2 more minutes to melt cheese. Top with crushed tortilla chips and scallions and serve immediately.

    Skillet of one pot taco pasta on a stove with shredded cheese sprinkled on top.

    Frequently Asked Questions

    Do I need to boil the pasta before adding it?

    Nope! The amount of liquid allows the pasta to boil while it's covered and the pasta absorbs extra liquid leaving just the right amount of sauce.

    How long does taco pasta last in the refrigerator?

    The leftover will last covered in the fridge for up to 4 days.

    Tips For Making This Taco Pasta Recipe

    • Drain grease if needed- When browning the beef, if you notice its pretty greasy, drain the grease before adding the seasonings. I haven't run into this issue when using lean ground beef, but a mix with a higher fat content may cause this.
    • Prep all ingredients before you start cooking. This is called a Mise en Place and it's a good idea to make every recipe run smoothly. But it's especially important for this recipe because the hands-on part of the cooking tends to go quickly.
    • Do not turn the heat down once you cover it. This is key for getting the pasta to cook through in the sauce while it's covered.
    • Stir while it's covered. While it's covered and cooking, I try to stir it every few minutes to prevent the pasta from sticking to the bottom of the pan.
    • Feel free to add toppings once the pasta is cooked. Although this is great on it's own, in addition to green onions and chips, this would be awesome with some guacamole, sour cream, etc. The world is your oyster!
    • Leftovers and storage- This will last up to 4 days covered in the refrigerator. I typically reheat individual portions in the microwave but you can always reheat in a pan over medium heat on the stove stirring often. A splash of water or broth will help if it seems too dry.
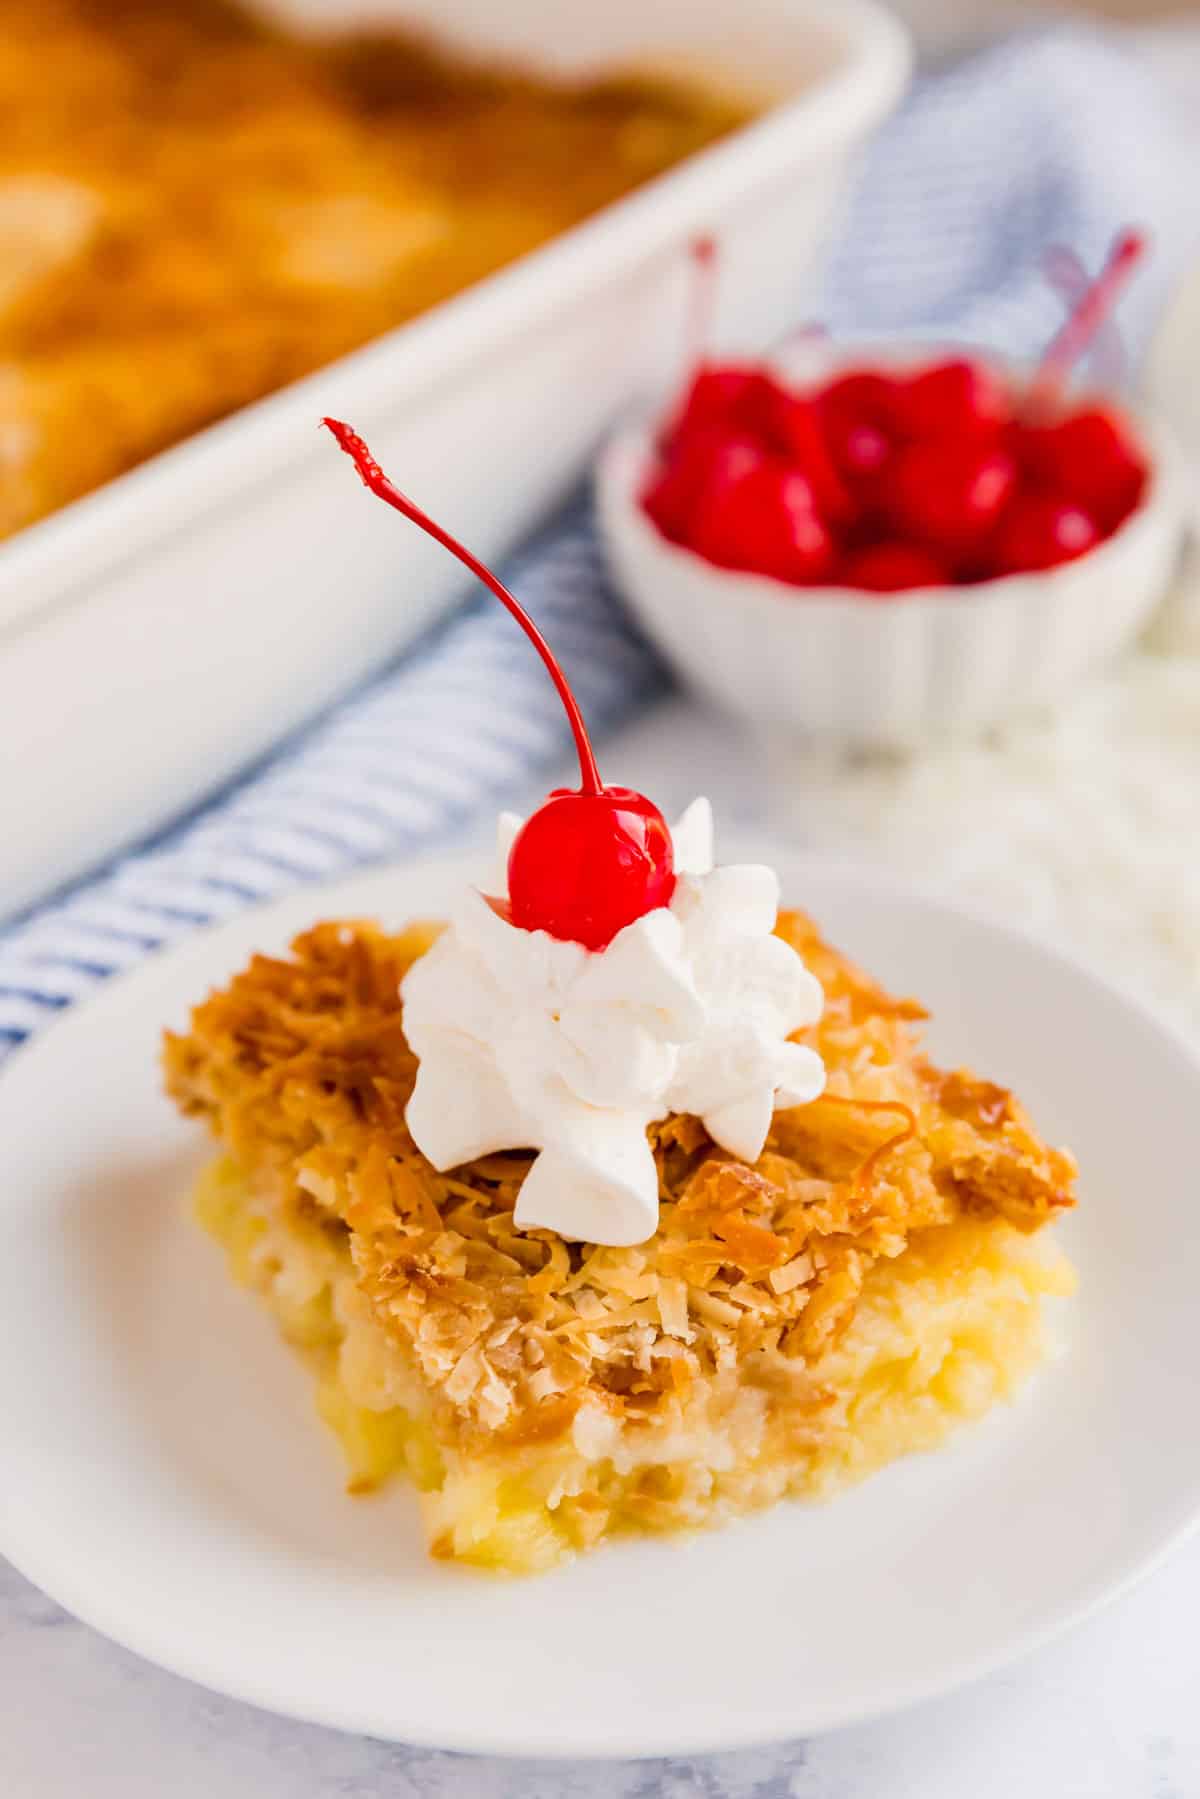
    A close up image of a bowl of taco pasta with crushed chips and green onion on top.

    What To Serve With Mexican Pasta

    Round out your meal with these delicious recipes:

    • Hot 7 Layer Bean Dip
    • Avocado Salsa
    • Classic 7 Layer Dip
    • Mexican Bean Salad

    Other Great Taco-Themed Recipes

    • A small square image of Cheesy Chicken Taco Bowls
      Cheesy Chicken Taco Bowls Recipe
    • A close up of a wooden spoon in a pan of taco pasta.
      One Pan Taco Pasta With Chicken
    • An overhead image of tortillas topped with taco meat, lettuce, tomatoes and cheese with limes and sour cream on the sides.
      Slow Cooker Taco Meat (and Instant Pot!)
    • These easy Grilled Shrimp Tacos are about to be your new favorite summertime dinner recipe! Topped with pineapple salsa and an avocado cream sauce, they're quick and easy to make with flavor that will keep you coming back for more.
      Grilled Shrimp Tacos

    Love this recipe? Please leave a 5 star ⭐️⭐️⭐️⭐️⭐️ rating in the recipe card below ⬇️ and/or a review in the comment section further down. Check out my Amazon Store for all my favorite tools, including those used in this recipe. And follow @thelifejolie on Instagram and TikTok!

    A wooden spoon scooping up creamy taco pasta from the pan.

    One Pot Cheesy Taco Pasta

    Jessy Freimann
    One Pot Cheesy Taco Pasta is such an easy weeknight dinner recipe. It's creamy, cheesy and full of great flavor that the whole family will love and best of all, ready in under 30 minutes! 
    5 from 3 votes
    Print Recipe Pin Recipe
    Prep Time 10 minutes mins
    Cook Time 20 minutes mins
    Total Time 20 minutes mins
    Course Main Course
    Cuisine Mexican
    Servings 6 servings
    Calories 281 kcal

    Equipment

    • saute pan
    • Wooden Spoons
    • cutting board
    • chefs knife
    • Measuring cups and spoons
    • Box grater
    • Can opener

    Ingredients
      

    • 1 pound ground beef
    • ¼ cup dried minced onion
    • 1 teaspoon garlic powder
    • Salt and pepper, to taste
    • 1 packet taco seasoning
    • 1 28 ounce can diced tomatoes
    • 1 4.5 ounce can chopped green chiles (I used mild but you can always use spicy if you want a kick!)
    • 1 8 ounce can tomato sauce
    • 1 14.5 ounce can chicken broth
    • 1 14 ounce can black beans, undrained
    • 1 cup frozen corn
    • 1 pound uncooked penne pasta
    • 1 ½ cups shredded cheddar cheese, divided (I used sharp but this would also be delicious with mild)
    • Chopped green onions for garnish
    • Crumbled tortilla chips for garnish

    Instructions
     

    • In a large sauté pan, brown ground beef over medium-high heat. Use a wooden spoon to break the beef up.
    • Add dried minced onions, garlic powder, salt, pepper and taco seasoning. Stir to combine while browning.
    • Once beef is fully browned, add diced tomatoes, diced green chiles, tomato sauce, chicken broth, undrained black beans and frozen corn. Mix well and bring to this to a boil.
    • Once it's boiling, stir in pasta and cover. Do not reduce heat, leave it at medium-high.
    • Cook covered for 10 minutes, stirring every few minutes to prevent sticking.
    • Stir in ½ cup cheddar cheese and then sprinkle the remaining cup of cheddar cheese over the top. Cover the pasta again and turn off heat. Let sit for 2 minutes to melt cheese.
    • Sprinkle with green onions and crumbled tortilla chips and serve immediately.

    Video

    Notes

      • Drain grease if needed- When browning the beef, if you notice its pretty greasy, drain the grease before adding the seasonings. I haven't run into this issue when using lean ground beef, but a mix with a higher fat content may cause this.
      • Prep all ingredients before you start cooking. This is called a Mise en Place and it's a good idea to make every recipe run smoothly. But it's especially important for this recipe because the hands-on part of the cooking tends to go quickly.
      • Do not turn the heat down once you cover it. This is key for getting the pasta to cook through in the sauce while it's covered.
      • Stir while it's covered. While it's covered and cooking, I try to stir it every few minutes to prevent the pasta from sticking to the bottom of the pan.
      • Feel free to add toppings once the pasta is cooked. Although this is great on it's own, in addition to green onions and chips, this would be awesome with some guacamole, sour cream, etc. The world is your oyster!
      • Leftovers and storage- This will last up to 4 days covered in the refrigerator. I typically reheat individual portions in the microwave but you can always reheat in a pan over medium heat on the stove stirring often. A splash of water or broth will help if it seems too dry.
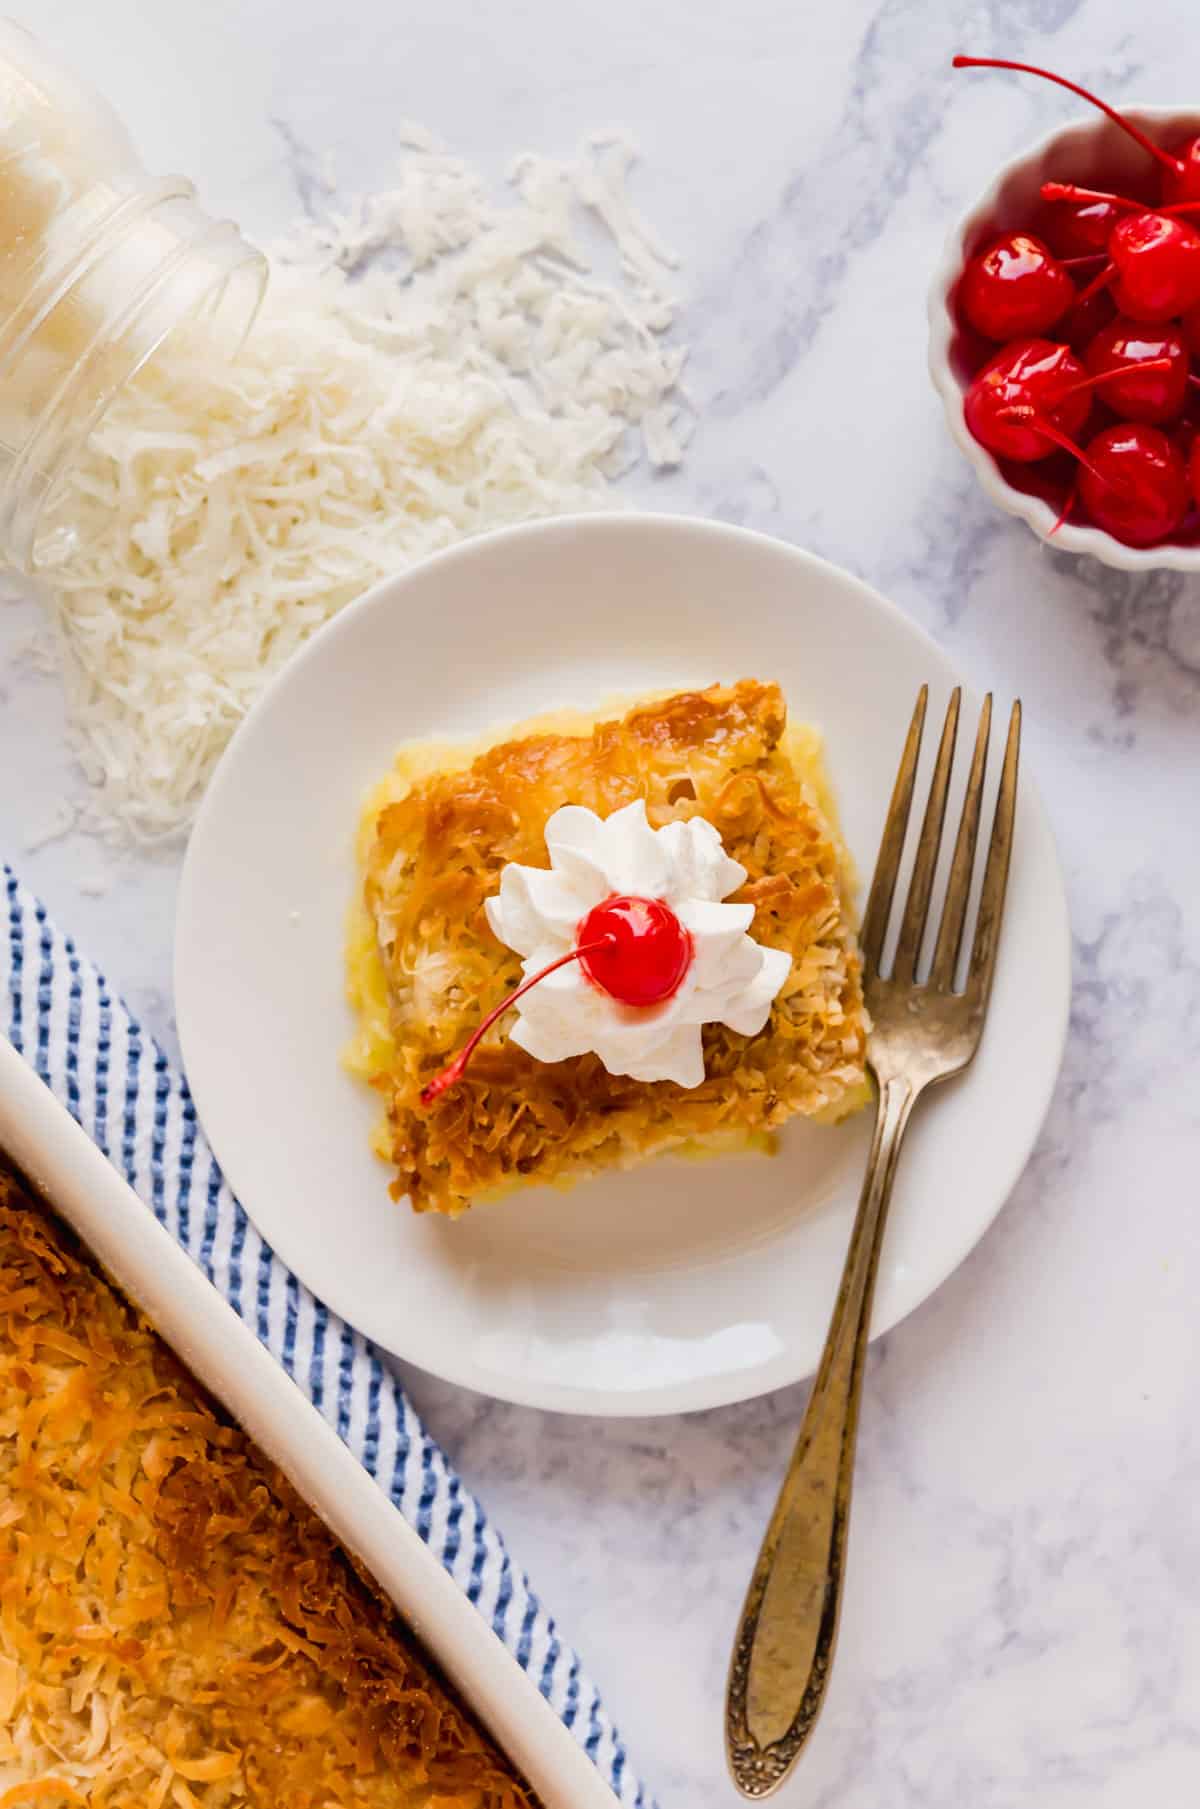
    Nutrition

    Serving: 1.5cupsCalories: 281kcalCarbohydrates: 11gProtein: 21gFat: 17gSaturated Fat: 7gPolyunsaturated Fat: 1gMonounsaturated Fat: 7gTrans Fat: 1gCholesterol: 60mgSodium: 698mgPotassium: 311mgFiber: 2gSugar: 1gVitamin A: 608IUVitamin C: 5mgCalcium: 133mgIron: 2mg
    Tried this recipe?Let us know how it was!

    Slow Cooker Taco Meat (and Instant Pot!)

    Jan 12, 2024 · 31 Comments

    An overhead image of tortillas topped with taco meat, lettuce, tomatoes and cheese with limes and sour cream on the sides.

    This Slow Cooker Taco Meat recipe is the easiest taco meat you'll ever make. I use it for chicken tacos but any shreddable meat works great. With just 4 ingredients and minimal effort, your taco Tuesday will never be the same!

    A close up straight on image of a shredded chicken taco stacked next to other tacos with lettuce, tomatoes and cheese on top/
    [feast_advanced_jump_to]

    Why You’ll Love This Chicken For Tacos Recipe

    When I was growing up, taco night meant ground beef mixed with a packet of taco seasoning. And it was delicious- taco night has always been a favorite! But once I started making this chicken taco recipe, I never looked back (well almost never, except for these amazing Baked Tacos).

    I’ve been making this for so long, I don’t even know where I even found the recipe to begin with. But this shredded chicken taco recipe is not only crazy easy to throw together, it makes the most deliciously satisfying taco meat that everyone in our family goes crazy over!

    Here’s why you’ve got to try this:

    • Minimal work
    • Options for Instant pot and slow cooker
    • Simple ingredients
    • Delicious savory flavor
    • Awesome leftovers
    • Very easy to make
    A close up image of shredded chicken taco meat in a slow cooker.

    Ingredient Information And Substitutions:

    • Chicken Breasts- The main character in this recipe is boneless skinless chicken breasts. But you can totally use a different cut of meat if that’s your preference. Just make sure if you use something larger like chuck roast, you cut it into chunks the same size as a chicken breast so you can keep the cook times the same. 
    • Rotel- The flavors and textures from a can of Rotel adds a wonderful tomato base. If you’re cooking for kids, you may want to use the Mild variety of Rotel unless your kids enjoy food that’s a bit spicy, since the original variety has a nice kick to it.
    • Taco Seasoning- One taco seasoning packet ads a nice kick of flavor.
    • Liquid- I use a combination of olive oil and water- both ¼ cup to make it saucy without being soupy.
    An overhead image of the ingredients for slow cooker taco meat labeled  in glass bowls.

    How To Make Chicken Tacos (The Easy Way!)

    Step 1: Place ingredients into the pot and cook

    Place chicken, Rotel, taco seasoning packet, oil and water to the slow cooker. Cover and cook on high for 4-6 hours.

    Ingredients for taco meat in a slow cooker.

    Step 2: Shred the chicken

    Once cooked, open the slow cooker and use two forks to gently shred the chicken and mix it with the sauce inside the pot.

    Hands shredding taco chicken with forks in slow cooker.

    Step 3: Make tacos!

    Place the taco meat into taco shells with your choice of toppings and dig in!

    A hand holding a taco with chicken, lettuce, tomatoes and cheese.

    Frequently Asked Questions

    Can you freeze chicken taco meat?

    Yes- either combine before cooking or cool and freeze after cooking.

    Can I use other types of meat?

    Yes, I’ve used a 2-3 pound chuck roast and and a half pork butt before with great results. Either cut larger pieces of meat to the size of chicken breasts or extend the cooking time by an hour or two.

    What toppings go with pollo tacos?

    I like to top mine with lettuce, tomatoes, shredded cheese, cilantro, sour cream but the world is your oyster!

    Can I use shredded chicken taco meat in other ways besides tacos?

    Yes! I love to use it as my primary protein for rice bowls (I add cauliflower rice to make it more veggie-forward) and it tastes great over a salad or in quesadillas or burritos.

    Can I make this in the instant pot?

    Yes- Place ingredients into the instant pot, cook on Manual high pressure for 12-15 minutes and do a 15 minute natural release before shredding and serving.

    Tips For Making Taco Chicken

    • Dump and go- you don’t even have to stir everything once it’s in the pot. It’s a true dump-and-go recipe.
    • Change the meat- The key to using a different protein is cutting it the size of chicken breast if you want to keep the cooking time the same. The other option is to keep a larger cut whole and add an hour or two to the cooking time.
    • Feed a crowd- This recipe can easily be doubled or tripled if feeding a crowd.
    • Prep ahead- this makes an excellent base for weekly meal prep for lunches.
    • Storage and leftovers- Leftovers last 3-4 days covered in the refrigerator. I reheat this in the microwave, in individual portions, but in a fry pan over medium heat works as well.
    An overhead image of tortillas topped with taco meat, lettuce, tomatoes and cheese with limes and sour cream on the sides.

    What To Serve With Slow Cooker Shredded Taco Chicken

    A few great recipes to round out and complete this meal would be:

    • Mexican Bean Salad
    • 7 Layer Dip
    • Cajun Black Bean and Corn Salad
    • Guacamole

    Other Delicious Taco-Inspired Recipes:

    • These easy Grilled Shrimp Tacos are about to be your new favorite summertime dinner recipe! Topped with pineapple salsa and an avocado cream sauce, they're quick and easy to make with flavor that will keep you coming back for more.
      Grilled Shrimp Tacos
    • An overhead image of taco soup in a bowl.
      Crockpot Taco Chicken Soup
    • Ground Beef Oven Baked Tacos in dish
      Ground Beef Oven Baked Tacos Recipe
    • A side view of a clear glass trifle dish with a layered taco salad with the dressing and salsa in jars on the side.
      7 Layer Taco Salad Recipe

    Love this recipe? Please leave a 5 star ⭐️⭐️⭐️⭐️⭐️ rating in the recipe card below ⬇️ and/or a review in the comment section further down. Check out my Amazon Store for all my favorite tools, including those used in this recipe. And follow @thelifejolie on Instagram and TikTok!

    An overhead image of tortillas topped with taco meat, lettuce, tomatoes and cheese with limes and sour cream on the sides.

    Slow Cooker Taco Meat

    Jessy Freimann
    This Slow Cooker Taco Meat recipe is the easiest taco meat you'll ever make. I use it for chicken tacos but any shreddable meat works great. With just 4 ingredients and minimal effort, your taco Tuesday will never be the same!
    No ratings yet
    Print Recipe Pin Recipe
    Prep Time 5 minutes mins
    Cook Time 4 hours hrs
    Total Time 4 hours hrs 5 minutes mins
    Course Main Course
    Cuisine Mexican
    Servings 6 servings
    Calories 81 kcal

    Equipment

    • slow. cooker
    • Measuring cups and spoons

    Ingredients
      

    • 3 large boneless skinless chicken breasts
    • 1 packet taco seasoning
    • 1 10 ounce can Rotel
    • ¼ cup water
    • ¼ Tablespoons olive oil

    Instructions
     

    Crockpot Instructions:

    • Place chicken into crockpot.
    • Place remaining ingredients over the top of the chicken (don't even bother stirring it).
    • Cover and cook on high for 4-6 hours.
    • Shred chicken with two forks (it will shred very easily and quickly) and stir to mix juices. Serve immediately in tacos, over salad, over nachos or in quesadillas.

    Instant Pot Instructions:

    • Place chicken into Instant Pot.
    • Place remaining ingredients over the top of the chicken (don't even bother stirring it).
    • Cover and set Instant Pot to manual high pressure for 15 minutes.
    • When the time is up do a natural release for 15 minutes.
    • Shred chicken with two forks (it will shred very easily and quickly) and stir to mix juices. Serve immediately in tacos, over salad, over nachos or in quesadillas.

    Video

    Notes

    • Dump and go- you don’t even have to stir everything once it’s in the pot. It’s a true dump-and-go recipe.
    • Change the meat- The key to using a different protein is cutting it the size of chicken breast if you want to keep the cooking time the same. The other option is to keep a larger cut whole and add an hour or two to the cooking time.
    • Feed a crowd- This recipe can easily be doubled or tripled if feeding a crowd.
    • Prep ahead- this makes an excellent base for weekly meal prep for lunches.
    • Storage and leftovers- Leftovers last 3-4 days covered in the refrigerator. I reheat this in the microwave, in individual portions, but in a fry pan over medium heat works as well.
    Nutrition

    Serving: 1cupCalories: 81kcalCarbohydrates: 3gProtein: 12gFat: 2gSaturated Fat: 0.4gPolyunsaturated Fat: 0.3gMonounsaturated Fat: 1gTrans Fat: 0.01gCholesterol: 36mgSodium: 537mgPotassium: 209mgFiber: 1gSugar: 1gVitamin A: 564IUVitamin C: 3mgCalcium: 3mgIron: 1mg
    Tried this recipe?Let us know how it was!

    Mini Meatloaf Recipe with Potatoes

    Jan 8, 2024 · 39 Comments

    A close up of a meatloaf muffin topped with cheesy potatoes on a white plate.

    This Easy Mini Meatloaf Recipe with Potatoes gives you meat and potatoes all in one delicious shot! Make meatloaf and cheesy potatoes when you're craving something hearty, in miniature form. And best of all, dinner's on the table in just around 30 minutes!

    A CLoser up of a meatloaf muffin topped with cheesy potatoes on a white plate.
    [feast_advanced_jump_to]

    Why You'll Love Mini Meatloaf

    I don't know about you, but we are totally a meat and potatoes family! Between my super picky husband and our gals who can be fickle at times, a good meatloaf dinner is a sure-fire win in our home.

    Now, my mom has a killer meatloaf recipe. But, it requires you to wait 1+ hours for dinner to be ready, not to mention figuring out boiling/mashing/roasting/baking potatoes. So I decided to streamline the process a bit.

    We've all seen mini meatloaf cups, or as I like to call them, muffin tin meatloaf. This is a super efficient way to get dinner on the table quicker, with the added bonus of everyone getting some of the crispy bits that are usually reserved for the end piece (I live for the end pieces!).

    But I've decided to take it a step further. In addition to all the mini meatloaf action happening here, I'm also adding potatoes to this easy cooking process to kill two birds with one stone.

    Satisfy your hearty dinner craving with this meatloaf and potatoes recipe. Here are just a few more reasons to try it:

    • Quick and easy
    • Family-approved
    • Totally delicious!
    • Perfect for weeknight dinner
    • Ready in 30 minutes
    A side angle shot of a mini meatloaf with potatoes on top cut in half exposing the cooked inside of the meatloaf.

    Ingredient Information and Substitutions

    • Ground Beef - You can use your preference, but I recommend buying ground beef with a lower fat content so this isn't too greasy.
    • Seasonings - You'll need salt, black pepper, and garlic powder for both the meatloaf and potatoes.
    • Worcestershire Sauce - To give your loaf a complex umami flavor.
    • Ketchup - A key ingredient for most meatloaf recipes, don't skip it! I also serve this on this side to make it even more kid-friendly.
    • Parmesan - I also love adding a touch of Parmesan or Romano cheese to the mix for more flavor and texture.
    • Breadcrumbs - Also for flavor and texture, breadcrumbs help to bind everything together too.
    • Egg - Your other binder!
    • Potatoes - Make sure they're peeled and sliced thin. I used red skinned potatoes, but any kind will work as long as they're thin.
    • Olive Oil - So that the potatoes crisp up nice and golden.
    • Cheddar Cheese - For a cheesy finish!
    An overhead image of the  meatloaf and potatoes ingredients in clear bowls labeled.

    How to Make This Mini Meatloaf Recipe

    Step 1: Combine the meatloaf mixture

    Preheat your oven to 400 degrees F and mix all of the meatloaf ingredients in a large bowl until just combined — don't overwork the meat.

    The meatloaf ingredients combined in a glass bowl.

    Step 2: Assemble the meatloaf cups

    Spray a muffin tin with non-stick cooking spray. Try to use a non-stick pan too if you have one.

    Divide the meat mixture evenly into each muffin cup and press down slightly until they are filled halfway.

    The mini meatloafs in the prepared muffin tin.

    Step 3: Prepare the potatoes and bake

    Place peeled and thinly sliced potatoes in a bowl and drizzle with olive oil, salt, pepper, and garlic powder. Toss to coat evenly and add 4-5 slices on top of each mini meatloaf. Bake for 20 minutes.

    Seasoned sliced  potatoes in a glass bowl.
    The mini meatloaves topped with seasoned sliced potatoes in a muffin tin.

    Step 4: Melt cheese

    Remove meatloaf muffins from the oven and add your cheddar cheese on top. Return the pan to the oven and bake for about 10 more minutes to melt the cheese.

    Let the meatloaf and potatoes cool for 5 minutes before removing them from the muffin tin. Serve and enjoy!

    Mini meatloaves and potatoes in a muffin tin with shredded cheddar cheese on top of them.

    Frequently Asked Questions

    Can I make this as a turkey meatloaf?

    Sure! Just make sure you use a heavy hand with the seasonings — you want to be able to smell it! Here's the exact recipe for ground turkey and sweet potatoes mini meatloaves.

    Can I leave the skins on the potatoes?

    Yes! The only reason I peeled them is that my daughters can be weird about potato skins (kid life!).

    How do you make tender meatloaf?

    The liquid content helps make it tender, but don't add too much liquid or it can be soggy. Also, try not to overwork the meat. Be aware that when you're making smaller meatloaves, you tend to have more of the crispy edges.

    Why does my meatloaf always fall apart?

    This goes back to the last question: not enough liquid. While you don't want it to be soggy, the liquid binds all the dry parts and meat together. It takes a little while to get to the point where you can "feel" the right texture, but once you've made it a few times, it gets into your bones. Trust me on this!

    How long does meatloaf last?

    3-4 days covered in the refrigerator.

    Can you eat cold meatloaf?

    Yes, as long as it's been refrigerated. I personally love to slice up the leftovers and eat them on a sandwich with white bread and ketchup (and serve the leftover potatoes on the side). That said, I know people can be weird about leftovers, so no judgment if cold meatloaf isn't your thing.

    A side angle shot of the cheesy potatoes and meatloaves in a muffin tin.

    Tips For Making The Best Meatloaf and Potatoes Dinner

    • Use meat with a lower fat content. Normally I'm an 80/20 kind of gal, but for this recipe, you'll want a lower fat ratio for the beef. It still tastes good with 80/20, but it tends to be greasier. Lower fat helps eliminate the extra grease factor.
    • These tend to stick to the pans. The best way to combat this is to use a non-stick muffin pan and spray them well with cooking spray.
    • Be careful not to overwork the meat as it can get tough quickly.
    • Once all the ingredients are mixed together, smell it. I know this sounds weird, but it should smell flavorful. If it doesn't, add more of the ingredients. Also, if it feels too dry, add a tiny bit of water.
    • Be sure to slice the potatoes super thin as if you were slicing them for scalloped potatoes. This will make sure that they cook through. A Mandoline is super helpful for this.
    • I don't add the cheese until the last 10 minutes of cook time to avoid it being overcooked.
    • For easy removal from the pan: cool them for 5 minutes and use a butter knife to cut around the edge of each muffin — start where the meat meets the sides of the muffin tin, then around the bottom, and carefully remove each one. They do stick a little so be careful.
    • Make it GF: One of our readers, Erin left a comments sharing that she made these grain-free by substituting the bread crumbs with the same amount of almond flour (1:1). 
    3 Mini Meatloaf Muffins topped with cheesy potatoes on a white plate with the pan behind it.

    Make it a meal!

    A few great recipes to round out and complete this meal would be:

    • Peas with Onions
    • Easy Garlic Green Beans
    • Summer Bounty Strawberry Salad
    • Grandma's Best Banana Cake
    • Quick and Easy Chocolate Pudding Cake

    More Meatloaf Dinner Recipes to Try...

    • A close up image of chicken parm muffin pan meatloaf on the side of a white dish with another below it and some spaghetti in the background.
      Chicken Parm Mini Meatloaf Muffins
    • A meatloaf and potatoes muffin on a plate with another behind it as well as green beans.
      Mini Turkey Meatloaf Muffins
    • This is my mom's meatloaf recipe- it is seriously the best meatloaf I've ever had- it's super simple and really easy to make. It's the ultimate of comfort foods and one of my favorite dinners!
      Mom's Meatloaf Recipe
    • A wooden spoon pulling a a scoop of unstuffed peppers from the skillet.
      Unstuffed Peppers Skillet

    Love this recipe? Please leave a 5 star ⭐️⭐️⭐️⭐️⭐️ rating in the recipe card below ⬇️ and/or a review in the comment section further down. Check out my Amazon Store for all my favorite tools, including those used in this recipe. And follow @thelifejolie on Instagram and TikTok!

    A close up of a meatloaf muffin topped with cheesy potatoes on a white plate.

    Mini Meatloaf Recipe with Potatoes

    Jessy Freimann
    This Easy Mini Meatloaf Recipe with Potatoes gives you meat and potatoes all in one delicious shot! Make meatloaf and scalloped potatoes when you're craving something hearty, in miniature form. And best of all, dinner's on the table in just around 30 minutes!
    4.89 from 18 votes
    Print Recipe Pin Recipe
    Prep Time 10 minutes mins
    Cook Time 30 minutes mins
    Total Time 40 minutes mins
    Course Main Course
    Cuisine American
    Servings 12 meatloaf muffins
    Calories 198 kcal

    Equipment

    • Peeler
    • cutting board
    • chefs knife
    • Measuring cups and spoons
    • Muffin tin

    Ingredients
      

    Meatloaf

    • Cooking spray
    • 1 pound ground beef, 90/10
    • ½ teaspoon garlic powder
    • ½ teaspoon kosher salt
    • ¼ teaspoon ground black pepper
    • ¾ teaspoon Worcestershire sauce
    • 2-4 Tablespoons ketchup
    • ⅓ cup Romano or Parmesan cheese
    • ⅓ cup seasoned breadcrumbs
    • 1 large egg
    • Warm water (optional- this is only necessary if your mixture feels to dry- start with a little if you need it)

    Potatoes

    • 3-5 medium potatoes, peeled and sliced thin
    • 2 teaspoons olive oil
    • ½ teaspoon kosher salt
    • ¼ teaspoon ground black pepper
    • ¼ teaspoon garlic powder
    • 1 cup cheddar cheese, shredded

    Instructions
     

    • Preheat the oven to 400 degrees and spray a 12 cup non-stick muffin time with cooking spray. Set aside.
    • In a large bowl, mix all meatloaf ingredients until combined. Be sure you don't over work the meat.
    • Divide the meat between each muffin cup and press into the tin to evenly cover it (it should come up right around half way).
    • Place the potato slices in a large bowl. Drizzle with oil and sprinkle with salt, pepper and garlic powder. Toss until each slice is coated.
    • Place about 4-5 slices onto the tops of the meatloaf in the muffin pan.
    • Bake for 20 minutes.
    • Remove the pan from the oven and sprinkle the cheese onto each meatloaf and potato muffin.
    • Return the pan to the oven for an additional 10 minutes to melt the cheese.
    • Let them cool for 5 minutes. Use a butter knife to cut around the outside where each meatloaf meets the sides of the muffin tin and carefully remove them from the tin (they do stick a bit so do this carefully). Serve immediately.

    Video

    Notes

    • Use meat with a lower fat content. Normally I'm an 80/20 kind of gal, but for this recipe, you'll want a lower fat ratio for the beef. It still tastes good with 80/20, but it tends to be greasier. Lower fat helps eliminate the extra grease factor.
    • These tend to stick to the pans. The best way to combat this is to use a non-stick muffin pan and spray them well with cooking spray.
    • Be careful not to overwork the meat as it can get tough quickly.
    • Once all the ingredients are mixed together, smell it. I know this sounds weird, but it should smell flavorful. If it doesn't, add more of the ingredients. Also, if it feels too dry, add a tiny bit of water.
    • Be sure to slice the potatoes super thin as if you were slicing them for scalloped potatoes. This will make sure that they cook through. A Mandoline is super helpful for this.
    • I don't add the cheese until the last 10 minutes of cook time to avoid it being overcooked.
    • For easy removal from the pan: cool them for 5 minutes and use a butter knife to cut around the edge of each muffin — start where the meat meets the sides of the muffin tin, then around the bottom, and carefully remove each one. They do stick a little so be careful.
    • Make it GF: One of our readers, Erin left a comments sharing that she made these grain-free by substituting the bread crumbs with the same amount of almond flour (1:1). 

    Nutrition

    Serving: 2piecesCalories: 198kcalCarbohydrates: 13gProtein: 10gFat: 12gSaturated Fat: 5gPolyunsaturated Fat: 0.5gMonounsaturated Fat: 5gTrans Fat: 0.5gCholesterol: 36mgSodium: 356mgPotassium: 355mgFiber: 1gSugar: 1gVitamin A: 116IUVitamin C: 11mgCalcium: 87mgIron: 1mg
    Tried this recipe?Let us know how it was!

    One Pot Balsamic Chicken

    Jan 5, 2024 · 8 Comments

    A close up overhead image of the chicken breast nestled in a skillet of green beans, peppers and mushrooms.

    This One Pot Balsamic Chicken is one of the quickest and easiest weeknight dinner recipes around! Complete with tender meat, crisp veggies, and loads of flavor, this balsamic chicken recipe is a one pan wonder that's ready in under an hour!

    An close up overhead image of the chicken breast nestled in a skillet of green beans, peppers and mushrooms.
    [feast_advanced_jump_to]

    Why You'll Love This Balsamic Chicken Recipe

    Is it just me, or have you guys noticed that life always feels busy? Between school, activities and work, things are crazy. It's times like these that one pot meals are a lifesaver!

    I'm not sure I know anyone who actually likes doing dishes. So when I can find a recipe that has the glorious combo of minimal dishes and super quick turnaround time, you can bet that I make a point to give it a try! And this balsamic chicken breast recipe is definitely one to add to the rotation. PS- if you love balsamic vinegar with chicken, try this Honey Balsamic Chicken Marinade!)

    It's full of fantastic flavor — the zing of the balsamic mellows out a bit when it mixes with the savory flavor of the chicken and other seasonings (along with a tiny bit of sugar for balance). The veggies cook up beautifully, and the chicken ends up being perfectly cooked. If that isn't enough, here are a few more reasons you'll love one pan balsamic chicken:

    • Quick and easy meal
    • Bursting with bright balsamic flavor
    • Healthy ingredients
    • Perfect for meal prep
    • Ready in less than an hour
    • Easy to customize
    • Minimal cleanup
    A close up image of a fork holding a cut piece of chicken revealing the juicy cooked inside.

    Ingredient Information and Substitutions:

    • Olive Oil - I prefer the flavor and versatility of olive oil, but you can use another oil if needed. Just be sure it has a somewhat neutral flavor and a high smoke point.
    • Chicken Breast - This recipe is crafted to use boneless, skinless chicken breasts. However, feel free to use thigh meat or bone-in chicken if desired. Just be sure to adjust cooking times as needed to achieve an internal temp of 165 degrees F after cooking and resting.
    • Balsamic Vinegar - Bold, bright, and zingy balsamic vinegar is the star of the show here! It has one of those flavor profiles that teases just about every tastebud.
    • Sugar - A small touch of sweetness is perfect for balancing and harmonizing the flavor of any dish. If preferred, you can substitute a bit of honey or maple syrup instead.
    • Seasonings - This mouthwatering balsamic chicken breast is brought to you by an all-star cast of spices including rosemary, oregano, black pepper, garlic powder, and salt. Adjust as needed to suit your tastes.
    • Vegetables - I chose crunchy green beans, crisp bell peppers, and savory mushrooms for this one pot balsamic chicken meal. Feel free to switch it up and use carrots, zucchini, tomatoes, onions, or any of your favorite vegetables instead.
    An overhead image of the ingredients labeled in glass bowls.

    How To Make Balsamic Vinegar Chicken

    Step 1: Sear the chicken.

    Preheat your oven to 350 degrees F and place a large skillet (with the oil) over medium high heat. Add the chicken breasts to the hot skillet and cook for about 4 minutes on each side, or until golden brown.

    Chicken breasts being seared in oil in a blue pan on a stove.

    Step 3: Make the marinade.

    While the chicken is browning, use a mixing bowl to whisk together the balsamic vinegar, olive oil, sugar, salt, black pepper, oregano, rosemary, and garlic.

    A hand whisking the balsamic marinade in a white bowl.

    Step 4: Add the vegetables.

    Toss the green beans, mushrooms, and peppers into the pan with the chicken. Carefully pour the marinade over the top and stir to evenly coat.

    Veggies and chicken with the balsamic marinade cooking in a blue pan on a stove.

    Step 5: Cover, simmer and Transfer to oven

    Cover the pan, turn the heat down to medium low, and simmer for 5-7 minutes.

    Remove the cover and transfer the pan to the preheated oven to cook for about 20 minutes. Rest for 5 minutes before serving. The dish is done when the chicken reaches an internal temperature of 165 degrees F.

    A blue pan covered on a stove.

    Frequently Asked Questions

    What is one pan balsamic chicken?

    This recipe for balsamic chicken takes one pot cooking to a delicious new level. Start with tender, juicy chicken breast cooked to perfection. Add in crunchy green beans and red peppers, savory mushrooms, and a killer balsamic vinegar sauce, and you've got a meal the whole family will love!

    What should I pair with this balsamic chicken recipe?

    While hearty and satisfying enough to be enjoyed by itself, this balsamic chicken breast recipe also pairs beautifully with a number of side dishes. If you want to add something to your meal, I recommend choosing a starchy side dish, like rice or quinoa. Couscous, mashed potatoes, or sweet potatoes are also great choices.

    Can I use the slow cooker for balsamic chicken breast?

    Definitely! Your crockpot will make this easy balsamic chicken even easier. Simply combine all ingredients in the slow cooker and cook on low for 6-8 hours or on high for 3-4. Make sure to whisk the marinade ingredients together first. For a flavor boost, you can quickly sear the chicken before tossing it in, but it isn't required.

    An overhead image of a blue pan with balsamic chicken nestled in vegetables.

    Tips for Making Easy Balsamic Chicken

    • Don't be afraid to prep ahead of time. This could include trimming the chicken, cutting the vegetables, and even mixing the balsamic sauce. This will make it even easier to throw together.
    • Use a pan that is oven-safe. I'm a huge fan of my Le Creuset Braiser. It's the perfect size for a one pot meal, transfers easily from stovetop to oven, and cleans really easily.
    • This is also great for meal prep. After I photographed this, I packed it up for a few days of work lunches, and it reheated pretty well. I really felt good about the fact that it was on the healthier side without sacrificing great taste. Boom! Easy balsamic chicken meal prep!
    • Add rice. When I make this for my family, I often serve it over rice. It's even better with extra sauce!
    • Leftovers and storage: This will last up to 4 days covered in the refrigerator.

    A close up side angle shot of a chicken breast and veggies in a blue pan.

    Other One Pot Meals to Try...

    • An overhead image of a pan of chicken and biscuits with a spoon in it.
      Chicken and Biscuits
    • A wooden spoon holing a scoop of Philly steaks pasta with melty cheese all over it.
      One Pot Philly Cheesesteak Pasta
    • A wooden spoon holding a scoop of creamy chicken Florentine pasta over the full pan of it.
      One Pot Chicken and Pasta Florentine
    • Chili Mac casserole in a white bowl.
      One Pot Chili Mac Casserole

    Love this recipe? Please leave a 5 star ⭐️⭐️⭐️⭐️⭐️ rating in the recipe card below ⬇️ and/or a review in the comment section further down. Check out my Amazon Store for all my favorite tools, including those used in this recipe. And follow @thelifejolie on Instagram and TikTok!

    A close up overhead image of the chicken breast nestled in a skillet of green beans, peppers and mushrooms.

    One Pot Balsamic Chicken

    Jessy Freimann
    This One Pot Balsamic Chicken is one of the quickest and easiest weeknight dinner recipes around! Complete with tender meat, crisp veggies, and loads of flavor, this balsamic chicken recipe is a one pan wonder that's ready in under an hour!
    5 from 2 votes
    Print Recipe Pin Recipe
    Prep Time 10 minutes mins
    Cook Time 35 minutes mins
    Total Time 45 minutes mins
    Course Main Course
    Cuisine American
    Servings 4 servings
    Calories 211 kcal

    Equipment

    • cutting board
    • chefs knife
    • Measuring cups and spoons
    • Braiser
    • Wooden Spoons

    Ingredients
      

    • 2 Tablespoon olive oil, divided
    • 3-4 boneless skinless chicken breasts
    • ¼ cup balsamic vinegar
    • 1 teaspoon sugar
    • 1 teaspoon salt
    • ¼ teaspoon black pepper
    • ½ teaspoon rosemary
    • ½ teaspoon oregano
    • ½ teaspoon garlic powder
    • 2 cups red bell pepper, sliced
    • 2 cups mushrooms, sliced
    • 2 ½ cups green beans, trimmed of the ends
    • Chopped fresh parsley for garnish optional

    Instructions
     

    • Preheat the oven to 350 degrees.
    • In a large skillet, heat oil over medium-high heat.
    • Cook chicken breasts for 4 minutes per side or until golden brown.
    • In a separate bowl whisk the balsamic vinegar, remaining oil, sugar, salt, black pepper, rosemary, oregano and garlic powder while the chicken is browning.
    • Add the peppers, mushrooms and green beans to the pan and pour the balsamic vinegar mixture over everything. Stir to combine.
    • Reduce the heat to medium low, cover the pan and cook for 5-7 minutes.
    • Uncover and transfer the pan to the oven and bake for 20 minutes or until the chicken reaches an internal temperature of 165 degrees. Sprinkle with parsley and serve immediately.

    Video

    Notes

    • Don't be afraid to prep ahead of time. This could include trimming the chicken, cutting the vegetables, and even mixing the balsamic sauce. This will make it even easier to throw together.
    • Use a pan that is oven-safe. I'm a huge fan of my Le Creuset Braiser. It's the perfect size for a one pot meal, transfers easily from stovetop to oven, and cleans really easily.
    • This is also great for meal prep. After I photographed this, I packed it up for a few days of work lunches, and it reheated pretty well. I really felt good about the fact that it was on the healthier side without sacrificing great taste. Boom! Easy balsamic chicken meal prep!
    • Add rice. When I make this for my family, I often serve it over rice. It's even better with extra sauce!
    • Leftovers and storage: This will last up to 4 days covered in the refrigerator.

    Nutrition

    Serving: 1cupCalories: 211kcalCarbohydrates: 11gProtein: 21gFat: 10gSaturated Fat: 2gPolyunsaturated Fat: 1gMonounsaturated Fat: 6gTrans Fat: 0.01gCholesterol: 54mgSodium: 690mgPotassium: 639mgFiber: 3gSugar: 7gVitamin A: 505IUVitamin C: 10mgCalcium: 41mgIron: 2mg
    Tried this recipe?Let us know how it was!

    Broccoli Rabe Recipe with Garlic

    Nov 30, 2023 · Leave a Comment

    A square photos of broccoli rabe with garlic on a plate.

    This Broccoli Rabe Recipe is elevated thanks to savory garlic and spicy crushed red pepper flakes. It's so easy to make — and is a great option for a healthy Italian-inspired side dish! And perhaps more importantly, sautéed broccoli rabe is super delicious and flavorful!

    broccoli rabe recipe with garlic on an oval plate with the left side of the plate cut off
    [feast_advanced_jump_to]

    Why You'll Love This Recipe for Broccoli Rabe

    This is one of my Grandma Rosie's recipes that was in her rotation. I'm not even sure if rotation is the best word because she made it very frequently. She had a number of dishes that always seemed to be readily available whenever I went over there. Other standbys included Zucchini Soup, Peppers and Eggs, Sandwich Steaks. And of course, the pinnacle: Sunday Sauce (seriously- the BEST!).

    So here's the big question when it comes to this recipe for broccoli rabe. Is it broccoli rabe? Or rapini? Rappi? Perhaps it's simply greens? Whatever you call them, I like them and I can't wait to share this recipe with you!

    In truth, it took me a little while to warm up to sautéed broccoli rabe. While I consciously knew that everything Grandma made was delicious, sometimes kids get weird about green foods (as we all know!).

    But this is oh-so-simple and so homey. I know that's an odd choice of descriptor. But it just tastes like home to me. Perfectly savory. A little bit juicy (in a good way) with a nice little kick from the crushed red pepper.

    This is one of those without-measurements recipes. You can make as much or as little as you want, and I encourage you to do everything by taste. And most of all, enjoy! PS- This tastes amazing on crostini with whipped ricotta!

    Here are just a few more reasons to love this broccoli rabe recipe:

    • Comforting
    • Wholesome
    • Family-friendly (with a bit of coaxing, maybe!)
    • Simply delicious
    closeup: sautéed broccoli rabe with garlic in a sauté pan

    Ingredient Information

    • Broccoli Rabe - The star of this recipe for broccoli rabe, of course! Make sure to wash and trim it first. Around here, you can even get it pre-washed and trimmed, which I am all about.
    • Olive Oil - For cooking the broccoli rabe. I like olive oil myself, but you could also use avocado oil or even canola if that's what you have on hand.
    • Garlic - I'm using about 3-4 peeled cloves for my broccoli rabe with garlic. You can also use garlic powder instead — or a combination of fresh and powered! The big thing is this- make sure you don't burn your garlic- it adds a bitter taste and will ruin your dish. If you burn it, you'll want to wash the pan and start over again.
    • Crushed Red Pepper Flakes - For a bit of heat. I love spicy foods, but if you don't, you can skip this ingredient.
    • Salt - To taste.
    An overhead image of rapini recipe ingredients labeled.

    How to Make Broccoli Rabe With Garlic

    Step 1: Sauté the garlic

    Start by heating the olive oil in a skillet over medium-high heat. Add the garlic and crushed red pepper flakes and sauté until the garlic turns golden.

    A skillet on a stove with oil, garlic and chili flakes cooking in it.

    Step 2: Add the broccoli rabe

    Introduce the rabe to the skillet with a bit of salt and a few spoonfuls of water. Allow it to cook for 10 minutes. Stir it periodically as it cooks.

    A skillet on a stove with raw broccoli rabe added to it.

    Step 3: Garnish and serve

    When your broccoli rabe with garlic is done, garnish with a bit more salt, garlic, and crushed red pepper to taste. Serve immediately and enjoy!

    A skillet on a stove with the broccoli rabe cooked down in it.

    Frequently Asked Questions

    How do you cook broccoli rabe so it's not bitter?

    Sautéed broccoli rabe often gets a bad rap for being bitter — but it doesn't have to be! I find that simply cooking it long enough does a lot to get rid of its naturally bitter taste. Some chefs swear by parboiling it first, as mentioned on the recipe card below. It's worth a try if bitterness is a real concern.

    Do you take the leaves off broccoli rabe before cooking?

    While the leaves and stalks are both edible, I do like to trim the leaves a bit before cooking broccoli rabe. You'll definitely want to remove the base of the stalk as it is pretty tough to bite into. And if you don't want to cut it off completely, you can always peel it with a vegetable peeler.

    What's the difference between broccolini and broccoli rabe?

    The names are very similar, but broccolini and broccoli rabe are two different vegetables. Broccolini is mild and sweet and looks a lot like broccoli with very long stems. Rabe is leafier and boasts a stronger taste.

    closeup: cooking broccoli rabe in a skillet

    Tips For Cooking Broccoli Rabe

    • Don't be afraid to customize. I love broccoli rabe with garlic and crushed pepper flakes, but you can feel free to add your favorite spices and seasonings! I love the idea of adding some citrus juice or even a drizzle of balsamic on top.
    • Use high heat and a wide pan. Cooking broccoli rabe over medium-high heat in a large enough skillet or sauté pan makes all the difference! Both allow for quick cooking and caramelization which will help mellow out that bitter taste.
    • Don't overcrowd the pan. Along the same lines as using a large enough pan when cooking broccoli rabe, don't be tempted to overload the skillet. Sauté in batches if you have to! Overcrowding can cause the greens to steam rather than sauté, resulting in a less flavorful and slightly mushy texture.
    • Prep ahead- You can peel the garlic and clean and trim the greens in advance.
    • Leftovers and storage- This will last up to a week covered in the refrigerator.
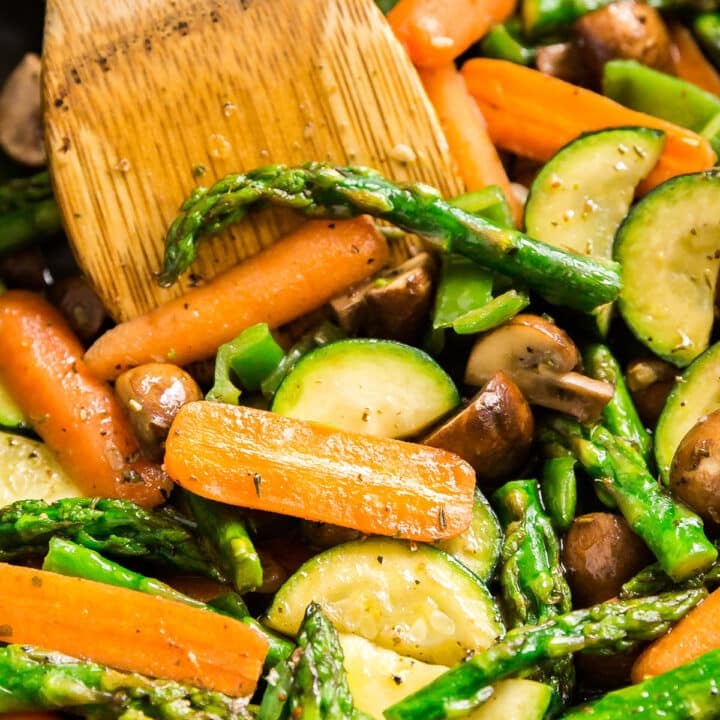
    overhead: broccoli rabe with garlic showing about three quarters of a pan

    What To Serve With Sautéed Broccoli Rabe

    Round out your meal and serve these other tasty recipe with your sautéed rapini:

    • Wine Braised Chicken
    • French Onion Rice Pilaf
    • Oatmeal Raisin Cookies
    closeup: recipe for broccoli rabe on a plate with garlic showing

    Other Delicious Recipes Featuring Leafy Greens

    • A plate of dandelion greens with bread.
      Dandelion Greens Recipe
    • Sautéed Kale with Mushrooms and Tomatoes is the best healthy side dish. It whips up super quickly and easily and tastes fantastic! This also makes a satisfying vegetable main dish.
      Sautéed Kale with Mushrooms and Tomatoes
    • A white plate of rapini and sausage pasta with the pan and a blue napkin in the background.
      Sausage and Rapini Pasta
    • Need a delicious and satisfying detox meal? This Super Foods Kale Salad Recipe is just what you're looking for! And you won't want to miss my tips for making the kale much more enjoyable to eat raw!
      Reader Request: Super Foods Kale Salad Recipe

    Love this recipe? Please leave a 5 star ⭐️⭐️⭐️⭐️⭐️ rating in the recipe card below ⬇️ and/or a review in the comment section further down. Check out my Amazon Store for all my favorite tools, including those used in this recipe. And follow @thelifejolie on Instagram and TikTok!

    A square photos of broccoli rabe with garlic on a plate.

    Broccoli Rabe Recipe with Garlic

    Jessy Freimann
    This Broccoli Rabe Recipe is elevated thanks to savory garlic and spicy crushed red pepper flakes. It's so easy to make — it's a great option for a healthy Italian-inspired side dish! And perhaps more importantly, sautéed broccoli rabe is super delicious and flavorful!
    No ratings yet
    Print Recipe Pin Recipe
    Prep Time 10 minutes mins
    Cook Time 15 minutes mins
    Total Time 25 minutes mins
    Course dinner, Lunch, Side Dish, Vegetarian
    Cuisine Family, Healthy, Italian, side dish, Vegan, vegetables, vegetarian
    Servings 4 servings
    Calories 135 kcal

    Equipment

    • 1 Skillet
    • 1 cutting board
    • 1 chefs knife
    • 1 Measuring cups and spoons
    • 1 wooden spoon

    Ingredients
      

    • 3 bunches broccoli rabe cleaned and trimmed of stalks and chopped into chunks
    • 3 Tablespoons Olive oil
    • 4 garlic cloves or garlic powder or both!
    • ½ teaspoon Crushed red pepper
    • 1 teaspoon Kosher Salt

    Instructions
     

    • Heat the oil in your pan over medium-high heat.
    • Add the garlic and some crushed red pepper and saute for a few minutes until the garlic is golden (keep an eye on it because burned garlic ruins the dish).
    • Add the broccoli rabe to the pan along with some salt and garlic powder and a couple spoonfuls of water.
    • Stir periodically until the broccoli rabe cooks down, around 10 minutes.
    • Once it's cooked down a bit taste it and added additional salt and crushed red pepper as needed.
    • Serve immediately.

    Notes

    • Don't be afraid to customize. I love broccoli rabe with garlic and crushed pepper flakes, but you can feel free to add your favorite spices and seasonings! I love the idea of adding some citrus juice or even a drizzle of balsamic on top.
    • Use high heat and a wide pan. Cooking broccoli rabe over medium-high heat in a large enough skillet or sauté pan makes all the difference! Both allow for quick cooking and caramelization which will help mellow out that bitter taste.
    • Don't overcrowd the pan. Along the same lines as using a large enough pan when cooking broccoli rabe, don't be tempted to overload the skillet. Sauté in batches if you have to! Overcrowding can cause the greens to steam rather than sauté, resulting in a less flavorful and slightly mushy texture.
    • Prep ahead- You can peel the garlic and clean and trim the greens in advance.
    • Leftovers and storage- This will last up to a week covered in the refrigerator.
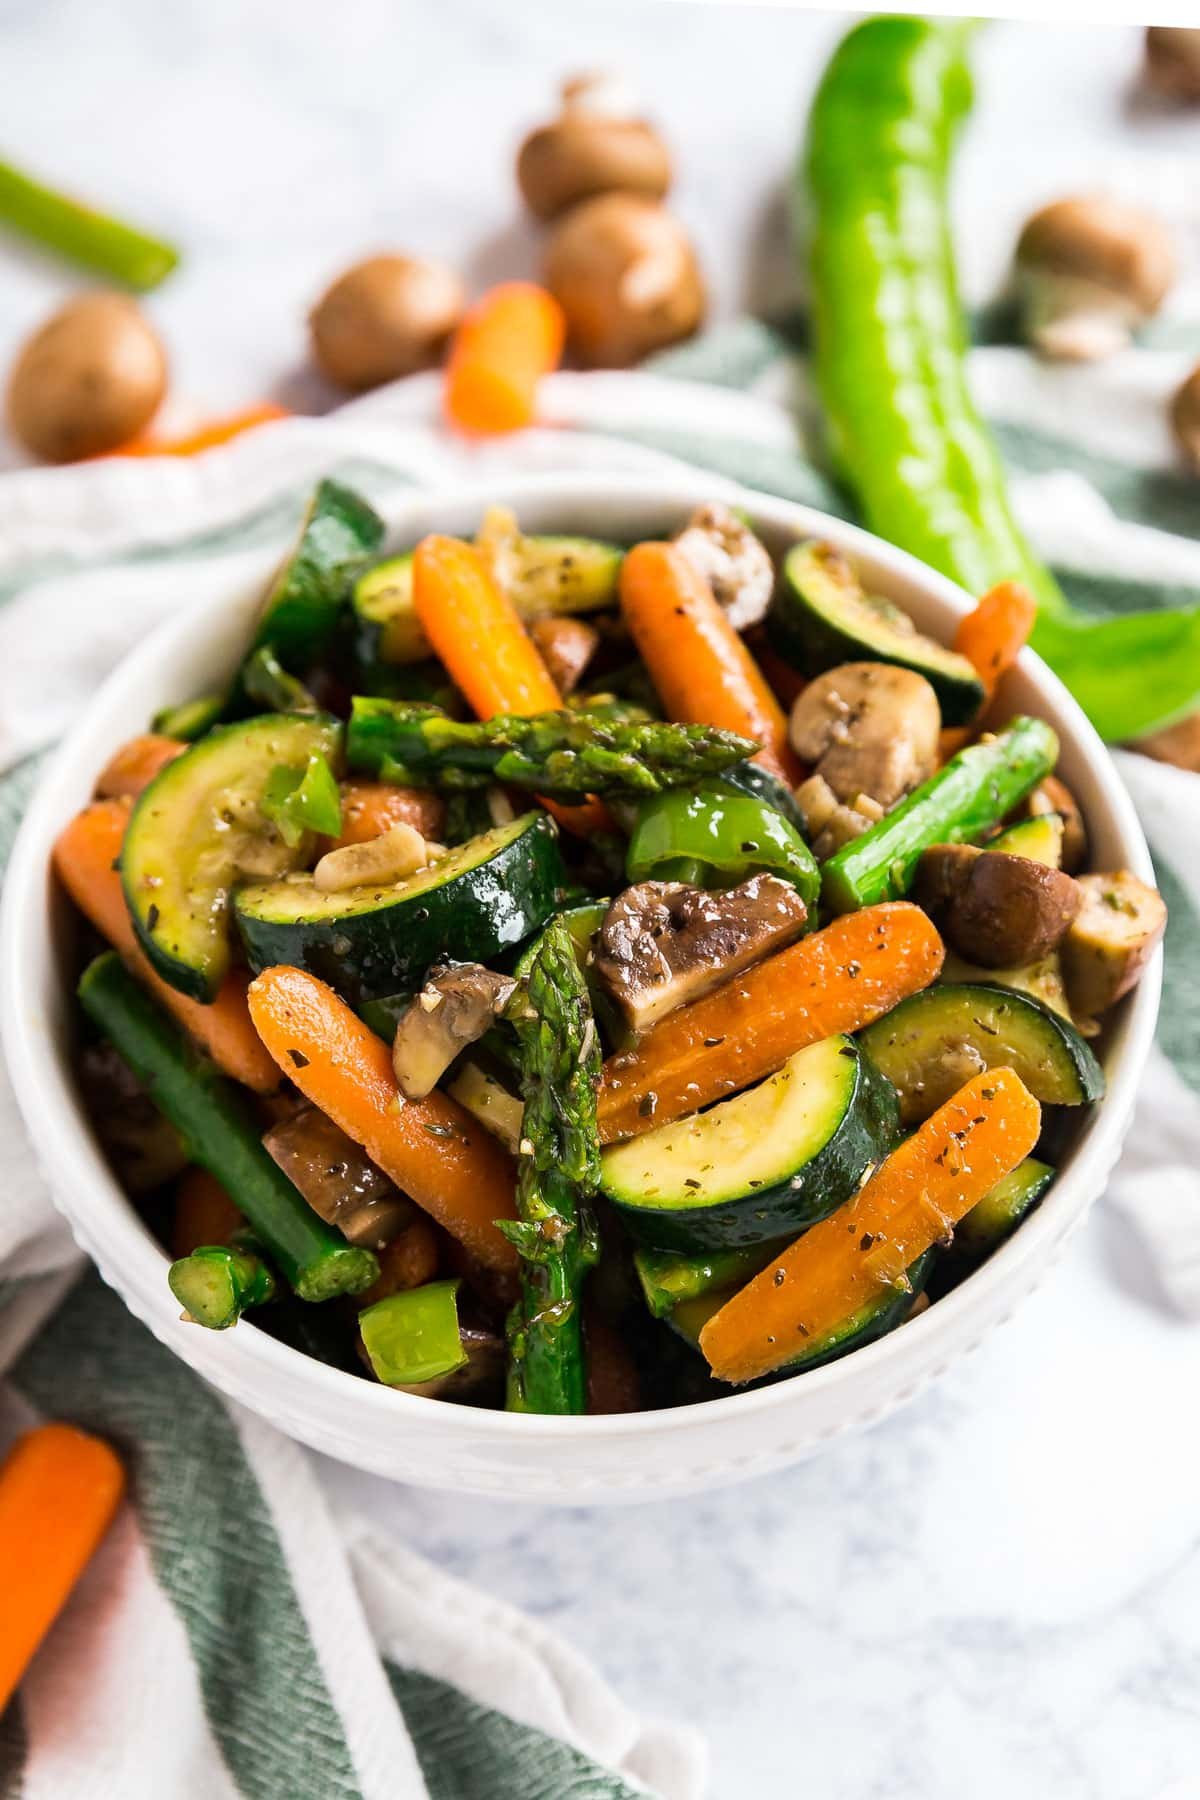
    • Variation: You can also boil the broccoli rabe for a couple minutes before adding it to the pan. If you do this, you'll scoop it directly from the pot into the pan so that some of the water comes with it- if you do it this way, you won't need to add any additional water. But make sure you're extra careful when you add the broccoli rabe because if the oil is super hot and you add the soaked broccoli rabe it will cause the oil to splash up. So take the pan off the heat for a couple minutes before you add it.

    Nutrition

    Serving: 1servingCalories: 135kcalCarbohydrates: 6gProtein: 6gFat: 11gSaturated Fat: 2gPolyunsaturated Fat: 2gMonounsaturated Fat: 8gSodium: 642mgPotassium: 349mgFiber: 5gSugar: 1gVitamin A: 4519IUVitamin C: 35mgCalcium: 190mgIron: 4mg
    Tried this recipe?Let us know how it was!

    Baked Delicata Squash With Herbed Yogurt

    Nov 15, 2023 · Leave a Comment

    A side angle shot of Delicata squash with pomegranates and pepitas on top of it.

    Add a fancy flair to your holiday table with this Baked Delicata Squash With Herbed Yogurt- it looks gorgeous and is deceptively easy to make. And the best part is, it tastes fantastic!

    A side angle shot of Delicata squash with pomegranates and pepitas on top of it.
    [feast_advanced_jump_to]

    Why You'll Love This Roast Delicata Squash Recipe

    Truth be told: I'm not a big squash fan. I've come around to it a bit over the years, but overall, it's not my first choice of veggie. That said, one kind of squash I find to be delicious is Delicata Squash. The flavor is similar to a sweet potato and the skin is thin and edible, so you don't have to peel it.

    I've been meaning to develop a recipe for this squash and this year, I finally got around to it. This is a side dish that is as pretty as it is delicious. By pairing this squash with a tangy herbed yogurt sauce and topping with tart pomegranate arils and crunchy pepitas, you've got a side dish that is sure to impress.

    Here's why you should give it a try:

    • Easy to make
    • Amazing flavor
    • Can be served warm or room temperature
    • Gorgeous presentation
    • Tasty textures
    Overhead image of delicata squash with pomegranate arils and pepitas on an oval plate.

    Ingredient Information and Substitutions

    • Delicata Squash- This is the star of the show! Baked until tender, with golden edges and the flavor of sweet potatoes. You can also use butternut or acorn squash. I flavor it with neutral oil (avocado or vegetable oil work great!) salt, pepper and garlic powder. And half way through roasting, I brush it with just a little bit of honey for a hint of sweetness and gorgeous caramelization. Tip: if you like a kick, use hot honey!
    • Herbed Yogurt- Plain yogurt brings the perfect tang. I like to mix in salt, pepper, lemon juice and fresh herbs. My herbs of choice for this are parsley and thyme but you can always use your favorite fresh herbs.
    • Toppings- The toppings for this add the perfect texture and pop of color. I love pomegranate arils for a bit of fruit flavor and crunchy pepitas for an unforgettable texture. Be sure to check out my post on how to peel a pomegranate so you don't end up with stained hands!
    An overhead image of labeled ingredients in glass bowls.

    How To Make This Roasted Delicata Squash Recipe

    Step 1- Make the herbed yogurt

    Mix yogurt, salt, pepper, lemon juice and chopped herbs until well combined. Refrigerate until serving.

    A glass bowl of herbed yogurt.

    Step 2- Season squash and spread on a pan

    Drizzle prepared squash with oil and season with salt, pepper and garlic powder. Spread in a single layer on a parchment-lined sheet pan and bake at 425 degrees for 20 minutes.

    A bowl of delicata squash slices.
    Dleicata squash slices in a single layer on a parchment-lined sheet pan.

    Step 4- Brush honey onto squash slices

    Flip the squash slices and lightly brush with honey. Bake for 20 more minutes.

    A hand brushing hones on slices of delicata squash on a parchment-lined pan.

    Step 5- Plate the squash

    Spread the herbed yogurt along a medium serving plate. Top with roast squash and sprinkle with pomegranate arils and pepitas and serve immediately.

    A serving platter with herbed yogurt spread on it.
    Delicata squash piled onto the platter over the yogurt.

    Frequently Asked Questions

    How to choose delicata squash at the store?

    You'll want to look for a warm yellow colored squash with orange/yellow ridges- they can have green in them. You want a firm squash and stem without bruising or mold, although a bit of woody veining is ok.

    How to prepare delicata squash

    Start by washing and drying the squash. Slice in half length-wise and use a spoon to remove the seeds. Place the flat-side down and slice into ½ inch thick pieces. Season and roast.

    Can you eat the skin?

    Yes, the skin on this type of squash is thin and edible.

    Can you eat the seeds?

    Yes, you should wash them and remove any pulp first. Then season to your taste and roast at 400 degrees for around 30 minutes, flipping once.

    Can this be made ahead?

    Yes- it tastes great warm and also at room temperature. You can make the yogurt ahead and prepare the pomegranate arils. You can also prep the squash and bake just before serving.

    A close up image of he squahs with pomegrate seeds and pumpkin seeds on a platter over yogurt.

    Tips For Making This Recipe For Roasted Delicata Squash

    • Refrigerate the herbed yogurt until just before serving.
    • Slice the squash into uniform size pieces for even cooking.
    • Melt the honey for 10-20 seconds in the microwave for easier brushing.
    • You can also serve the yogurt on the side if you have a group with mixed dietary needs or preferences.
    • Ingredients to prep ahead: Make herbed yogurt, clean and slice squash, peel pomegranate.
    • Storage and leftovers: This will last up to 4 days covered in the refrigerator.
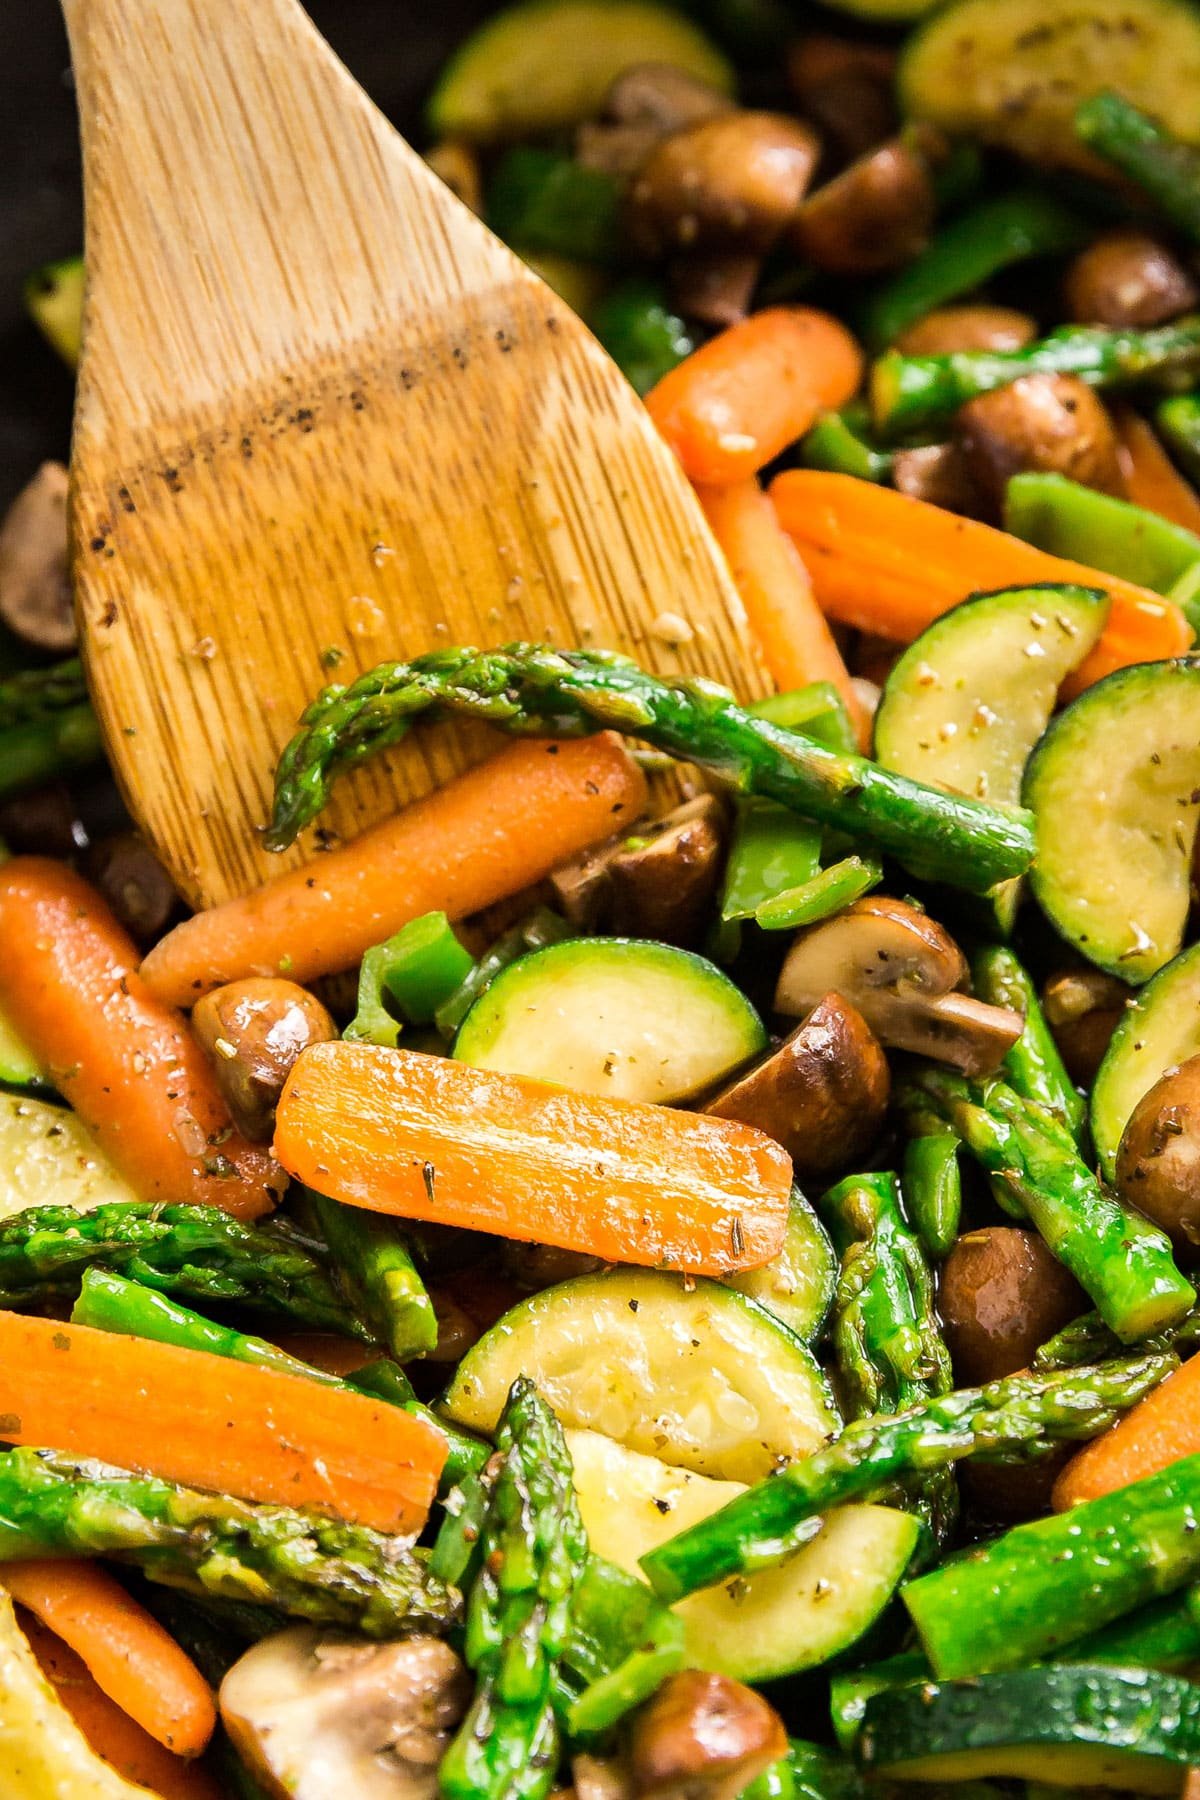
    A plate of squash with yogurt, pomegranate arils and pepitas with a plater of asparagus behind it.

    What To Serve With This Squash Recipe

    This recipe will be delicious served with:

    • Apple Cider Glazed Turkey
    • Cheddar Broccoli Twice Baked Potatoes
    • Cornbread Dressing
    • Sautéed Veggies
    • Pumpkin Pie

    Other Tasty Squash Recipes

    You might also love these squash recipes:

    • A bowl of squash soup with burrata and cilantro on top and chunks of squash and cilantro in the background.
      Savory Spiced Butternut Squash Soup
    • Cheesy Squash Casserole is the kind of side dish that will impress even the pickiest of eaters. Tender yellow squash and zucchini, savory bread crumbs and deliciously melty cheese make this side dish a total crowd pleaser!
      Cheesy Squash Casserole
    • A close up overhead image of roasted autumn vegetables on a pan.
      Roasted Fall Vegetables
    • A close up of a wooden spoon in a pan of Ratatouille.
      Nanou's Authentic Ratatouille

    Hosting Thanksgiving?

    Discover the secret to hosting Thanksgiving without all the stress! Prepsgiving is your FREE guide to making a delicious Thanksgiving feast the easy way.

    Love this recipe? Please leave a 5 star ⭐️⭐️⭐️⭐️⭐️ rating in the recipe card below ⬇️ and/or a review in the comment section further down. Check out my Amazon Store for all my favorite tools, including those used in this recipe. And follow @thelifejolie on Instagram and TikTok!

    A side angle shot of Delicata squash with pomegranates and pepitas on top of it.

    Baked Delicata Squash With Herbed Yogurt

    Jessy Freimann
    Add a fancy flair to your holiday table with this Baked Delicata Squash With Herbed Yogurt- it looks gorgeous and is deceptively easy to make. And the best part is, it tastes fantastic!
    No ratings yet
    Print Recipe Pin Recipe
    Prep Time 15 minutes mins
    Cook Time 40 minutes mins
    Total Time 55 minutes mins
    Course side, Side Dish
    Cuisine American
    Servings 8 servings
    Calories 119 kcal

    Equipment

    • cutting board
    • Chef Knife
    • Measuring cups and spoons
    • mixing bowl
    • Whisk
    • Spatula
    • sheet pan
    • Brush

    Ingredients
      

    • 3 medium delicata squash cleaned, seeds removed and sliced
    • 1 ½ teaspoons Kosher Salt divided
    • 1 teaspoon ground black pepper divided
    • 1 teaspoon garlic powder
    • 1-2 Tablespoons honey melted
    • 1 ¼ cup plain yogurt
    • 1 Tablesppon chopped fresh thyme
    • 1 Tablespoon chopped fresh parsley
    • 1 Tablespoon lemon juice
    • ⅓ cup pomegranate arils
    • ½ cup pepitas

    Instructions
     

    • Preheat oven to 425 degrees and line sheet pans with parchment paper.
    • Cut each Delicata squash in half length-wise and remove stem. Remove seeds and cut each half into ½ inch slices.
    • In a large bowl, combine squash, oil, 1 teaspoon salt, ½ teaspoon pepper and garlic powder. Mix well until squash is evenly coated.
    • Divide squash between the pans in a single layer.
    • Roast for 20 minutes and remove from oven.
    • Flip the squash and brush honey lightly onto each piece of squash.
    • Return to the oven and roast for an additional 20 minutes until golden and remove from oven.
    • While squash roasts combine yogurt, remaining salt and pepper, lemon juice and chopped herbs in a medium bowl. Mix well.
    • Spread yogurt mixture on a medium serving platter.
    • Pile squash slices on top of the yogurt mixture. Sprinkle squash with pepitas and pomegranate arils and serve immediately.

    Video

    Notes

    • Refrigerate the herbed yogurt until just before serving.
    • Slice the squash into uniform size pieces for even cooking.
    • Melt the honey for 10-20 seconds in the microwave for easier brushing.
    • You can also serve the yogurt on the side if you have a group with mixed dietary needs or preferences.
    • Ingredients to prep ahead: Make herbed yogurt, clean and slice squash, peel pomegranate.
    • Storage and leftovers: This will last up to 4 days covered in the refrigerator.
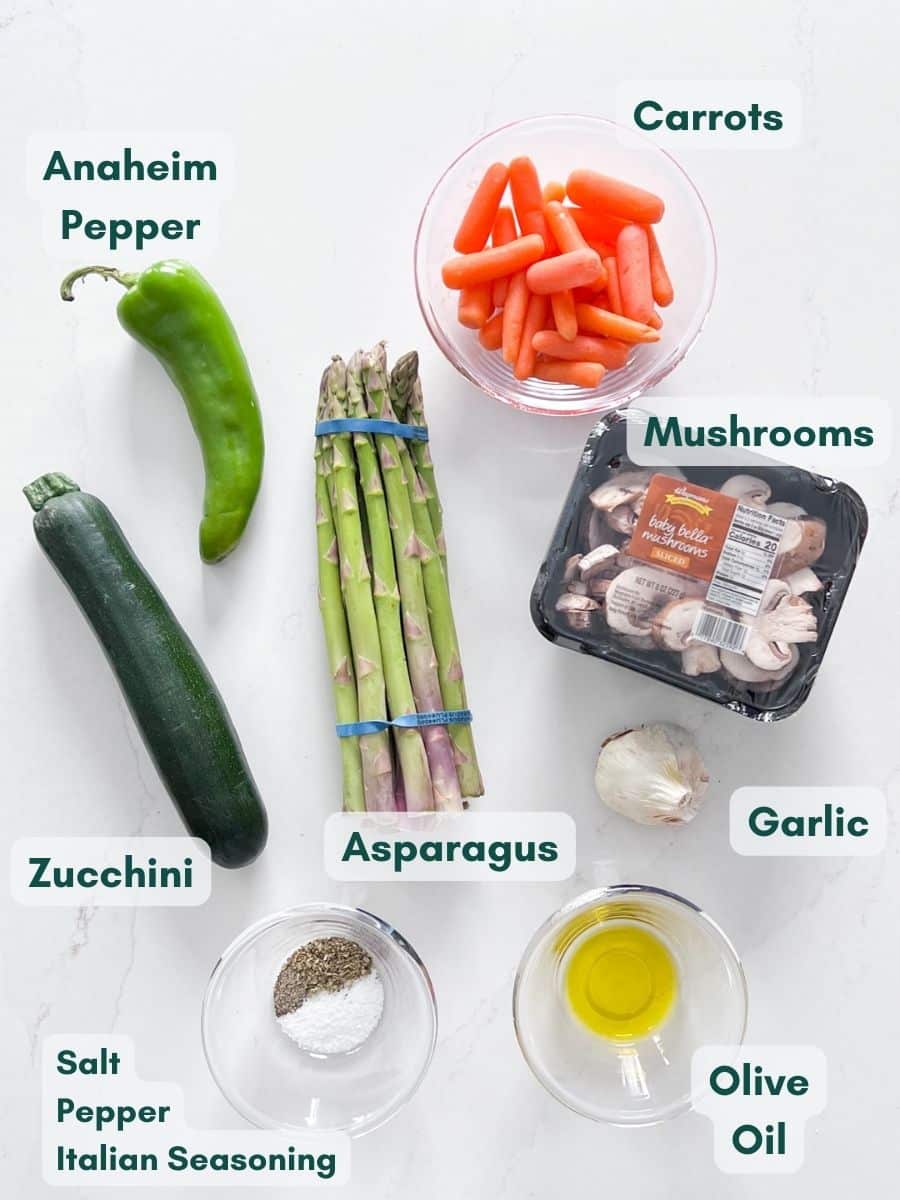
    Nutrition

    Serving: 0.5cupCalories: 119kcalCarbohydrates: 21gProtein: 4gFat: 4gSaturated Fat: 1gPolyunsaturated Fat: 1gMonounsaturated Fat: 1gTrans Fat: 0.003gCholesterol: 5mgSodium: 461mgPotassium: 714mgFiber: 3gSugar: 9gVitamin A: 2362IUVitamin C: 23mgCalcium: 98mgIron: 1mg
    Tried this recipe?Let us know how it was!

    Old Fashioned Pecan Pie

    Nov 13, 2023 · Leave a Comment

    A slice of pecan pie being pulled from the pie with plates and cinnamon sticks in the background.

    Old Fashioned Pecan Pie is a sweet and delicious dessert that is the perfect addition to any holiday table. It's so easy to throw together and make ahead for a classic treat everyone raves about!

    A slice of pecan pie being pulled from the pie with plates and cinnamon sticks in the background.
    [feast_advanced_jump_to]

    Why You've Got To Try Pecan Tart Pie

    I didn't actually grow up eating pecan pie. At Christmas my Grandma made the most fantastic Pecan Tassies which were basically little pecan pies and they were my absolute favorites, so I'm excited to share this pecan pie recipe!

    It's sweet and delicious with a crisp top, plenty of pecans and a soft and gooey center baked in a flaky pie crust. This has holidays all over it and is outrageously easy to make.

    Here's why you'll love it:

    • Classic dessert nostalgia
    • Quick and easy to throw together
    • Make ahead
    • A crowd-pleasing sweet treat
    • Simple ingredients
    An overhead image of a pecan pie with a striped napkin and cinnamon sticks next to it.

    Ingredient Information and Substitutions

    • Pecans- I went with a 10 ounce bag shelled and halved pecans for the perfect bite size nutty crunch.
    • Pie Crust- I'm lazy, so I go with refrigerated pie crust, but you can totally make your own from scratch if you prefer.
    • Salted Butter- While most people prefer unsalted butter for their baking, I'm the opposite- I like the flavor salted butter bring to baked goods. You'll want to melt the butter before assembling the rest of the ingredients so it has a few minutes to cool.
    • Corn Syrup- This is one of the ingredients that's absolutely necessary to get the correct texture for your pie filling. I used dark corn syrup for a deeper flavor, but light corn syrup also works well.
    • Eggs- This is the other absolutely necessary ingredient for the right texture for the filling- make sure you use large eggs.
    • Maple Syrup- When I initially tested this, I didn't include maple syrup- it was an addition I made later at the recommendation of a friend who LOVES pecan pie and has eaten plenty of it. I used Pure Maple Syrup and it added a great flavor.
    • Brown Sugar- Adds a bit more sweetness and depth of flavor. I used light but dark brown sugar works great too.
    • Flour- A little bit of all-purpose flour helps ensure the right texture for the filling.
    • Flavor Add-ons- Kosher Salt is always necessary to bring out all the flavors of your baked goods. Ground Cinnamon and pure vanilla extract also add a really nice flavor to this pie filling.
    An overhead image of the ingredients labeled.

    How To Make This Recipe For Pecan Pie

    Step 1- Melt the butter and mix your filling ingredients

    Melt the butter before you start so it has a few minutes to cool a bit. Mix all the filling ingredients in a large mixing bowl until well combined.

    All the filling ingredients for the pie in a large mixing bowl.

    Step 2- Add pecans to the pie crust and pour filling on top of it

    Place all the pecans into the pie crust in an even layer and pour the filling over it so each pecan is covered in filling.

    Raw pie crust with pecans and filling in it.

    Step 3- Begin baking

    Begin baking in a an oven preheated to 350 degrees.

    Pecan pie being put in the oven.

    Step 4- Cover the crust

    After 30 minutes of baking, use a pie shield or foil to cover the outer crust and keep baking for around another hour until the edges are fully set and the center has only a very slight jiggle. Remove from the oven and cool for at least 3 hours to overnight before serving.

    A partially baked pie with a green pie shield over the outer crust.

    Frequently Asked Questions

    Can I make pecan pie ahead of time?

    Yes- you can and you should. This pie needs at least 3 hours to fully set up but overnight is preferable making it the perfect make-ahead dessert.

    Why didn't my pecan pie set up?

    The first thing to know is this type of pie is meant to have a soft set- so it should be thick and gooey. What you don't want is runny filling. If it is runny, that means it needs to bake more. The center should reach at least 200 degrees due to the high sugar content (but you can totally aim for 210 degrees just to be safe).

    That said, I typically don't temp it- I like to give it a little shake when I think it's done. The edges shouldn't move and the center should just barely have the teeniest amount of jiggle. Then you need to let it sit for at least 3 hours to fully cool and set up (but overnight is better if you can). Once cool, putting it into the fridge gives it even more help in setting up.

    Does pecan pie need to be refrigerated?

    I've stored it on my counter and in the fridge, but I think best results come from refrigerating. Pull it out 30 minutes prior to slicing.

    Can you freeze pecan pie?

    You can! Wrap it really well once baked and cooled and it will last up to 3 months covered in the freeze. Pull it out to thaw in the fridge the night before serving.

    A close up image of the inside of the pie after a slice has been removed.

    Tips For Making The Easiest Pecan Pie Recipe

    • Melt the butter before starting- you want it to have a chance to cool before adding it to the filling.
    • Cover the pecans fully in the filling- this prevents them from burning.
    • Line a sheet pan and place it under the pie when baking- This way, if you have any leakage, it doesn't get all over your oven. I do this for every pie.
    • Use a pie crust shield after 30 minutes- to keep the crust from burning. You can also use foil (just be gentle so you don't break the crust).
    • Make it the night before- It'll give the pie plenty of time to set up and allows you to have less to do the day you're planning to serve it.
    • Pull it from the fridge 30 minutes prior to serving- to bring it to room temp.
    • Storage and Leftovers- This will last up to 4 days covered in the fridge.
    A slice of pecan pie on a white plate with a fork on it and the rest of the pie behind it.

    What To Serve With Pecan Pie

    These recipes will round out a great meal with your pie:

    • Smoked Turkey Breast
    • Parmesan Roasted Potatoes
    • Peas and Onions
    • Citrus Cranberry Chutney

    Other Classic Pie Recipes

    Try these other super delicious pies:

    • A slice of bourbon apple pie with a fork on the plate.
      Bourbon Apple Pie
    • Is it even a holiday table without Pumpkin Pie? This classic pumpkin pie recipe is an easy and delicious way to get everyone's favorite holiday dessert onto the table without all the hassle!
      Classic Pumpkin Pie Recipe
    • A close up image of a slice of chocolate pudding pie on a white plate with the rest of the pie behind it.
      Old Fashioned Chocolate Pie
    • A piece of cherry cheese pie being pulled up from the rest of the pie.
      Cherry Cheese Pie

    Hosting Thanksgiving?

    Discover the secret to hosting Thanksgiving without all the stress! Prepsgiving is your FREE guide to making a delicious Thanksgiving feast the easy way.

    Love this recipe? Please leave a 5 star ⭐️⭐️⭐️⭐️⭐️ rating in the recipe card below ⬇️ and/or a review in the comment section further down. Check out my Amazon Store for all my favorite tools, including those used in this recipe. And follow @thelifejolie on Instagram and TikTok!

    A slice of pecan pie being pulled from the pie with plates and cinnamon sticks in the background.

    Old Fashioned Pecan Pie

    Jessy Freimann
    Old Fashioned Pecan Pie is a sweet and delicious dessert that is the perfect addition to any holiday table. It's so easy to throw together and make ahead for a classic treat everyone raves about!
    5 from 1 vote
    Print Recipe Pin Recipe
    Prep Time 10 minutes mins
    Cook Time 1 hour hr
    Cooling time 3 hours hrs
    Total Time 4 hours hrs 10 minutes mins
    Course Dessert
    Cuisine American
    Servings 8 slices
    Calories 348 kcal

    Equipment

    • mixing bowl
    • Whisk
    • Measuring cups and spoons
    • Pie pan
    • Pie shield
    • sheet pan

    Ingredients
      

    • 1 pie crust in pan, edges fluted.
    • ¼ cup salted butter, melted (half stick)
    • ¾ cup dark corn syrup (or light)
    • ¼ cup pure maple syrup
    • 3 large eggs
    • ½ cup brown sugar packed
    • 1 large pinch Kosher salt
    • ½ teaspoon ground cinnamon
    • ½ teaspoon pure vanilla extract
    • 1 Teaspoon all purpose flour
    • 1 10 ounce bag shelled and halved pecans

    Instructions
     

    • Preheat the oven to 350 degrees. Melt butter and set aside.
    • Mix corn syrup, maple syrup, eggs, sugar, salt, cinnamon, vanilla extract and flour until well combined.
    • Whisk in cooled melted butter until well combined.
    • Place pecans in an even layer in the raw pie crust.
    • Pour filling over pecans so that each pecan is covered.
    • Place pie pan onto lined sheet pan and bake uncovered for 30 minutes.
    • Add the pie shield around the crust on the edges and resume baking for another 30-40 minutes until the edges are set and the middle is only ever-so-slightly jiggly.
    • Remove from oven and remove the pie crust shield. Cool completely for at least 3 hours to oven night, placing in the fridge once cool. Remove from the fridge 30 minutes prior to serving.

    Video

    Notes

    • Melt the butter before starting- you want it to have a chance to cool before adding it to the filling.
    • Cover the pecans fully in the filling- this prevents them from burning.
    • Line a sheet pan and place it under the pie when baking- This way, if you have any leakage, it doesn't get all over your oven. I do this for every pie.
    • Use a pie crust shield after 30 minutes- to keep the crust from burning. You can also use foil (just be gentle so you don't break the crust).
    • Make it the night before- It'll give the pie plenty of time to set up and allows you to have less to do the day you're planning to serve it.
    • Pull it from the fridge 30 minutes prior to serving- to bring it to room temp.
    • Storage and Leftovers- This will last up to 4 days covered in the fridge.

    Nutrition

    Serving: 1sliceCalories: 348kcalCarbohydrates: 56gProtein: 4gFat: 13gSaturated Fat: 6gPolyunsaturated Fat: 1gMonounsaturated Fat: 5gTrans Fat: 0.2gCholesterol: 85mgSodium: 218mgPotassium: 104mgFiber: 1gSugar: 44gVitamin A: 279IUVitamin C: 0.01mgCalcium: 46mgIron: 1mg
    Tried this recipe?Let us know how it was!

    Turkey with Oranges and Rosemary

    Nov 10, 2023 · Leave a Comment

    An overhead image of a thanksgiving table with the platter of carved turkey in the middle and green beans, dressing and cranberry sauce around it.

    Whole turkey with oranges and rosemary is seriously delicious. This is a super easy turkey recipe where the flavors blend magically, giving you a delicious, impressive turkey without any hassle.

    A whole turkey on a platter atop oranges and rosemary.
    [feast_advanced_jump_to]

    Why You’ll Love This Orange Turkey With Rosemary

    The first time I tried cooking a turkey I was so nervous that I accidentally brought a grapefruit to stuff it with instead of the orange my mom told me to get (she basically coached me through that first turkey, and let me just say, the grapefruit did add fantastic flavor!).

    But today I am here to make it all easier for you. If you've never cooked a turkey before, it can seem a little bit intimidating. Believe me when I say, I was in your shoes (as you may have gathered above)! That’s the beauty of this recipe- it's a super simple and outrageously delicious turkey recipe you’ll always want to come back to. 

    Here’s why you should make this:

    • Great beginner recipe
    • Awesome flavors that compliment turkey
    • Major crowd please 
    • Tons of great leftovers
    • Looks show-stoppingly gorgeous

    Since this is so beginner friendly, I’m also going to share the basic A-Z of making a turkey so you’ll know everything you need to know for total turkey success! Let’s go!

    An overhead image of a thanksgiving table with the platter of carved turkey in the middle and green beans, dressing and cranberry sauce around it.

    Ingredient Information and Substitutions

    • Whole Turkey- Now, I’ll be honest- I prefer a spatchcocked bird. I wrote an entire post on why and how to spatchcock a turkey, but the main reason is it cooks quicker and more evenly for a juicier bird. That post will show you how to do it but you can also ask your butcher to do it for you. I wrote this recipe for a 15 pound turkey but you can always alter it for a smaller or larger bird. I
    • Brine- If roasting the whole bird without butterflying, you can submerge in a brine of water, Kosher salt, brown sugar, rosemary, orange and bay leaf for a juicier and more flavorful bird. If spatchcocking, this is not necessary.
    • Compound Butter- Salted butter, Kosher salt, black pepper, garlic powder onion powder, rosemary and orange zest make for a perfectly flavored and delicious turkey.
    • Prepping The Pan and Turkey- I always prep my pan with a layer of onions, garlic, rosemary and oranges with a some water. I also place onions, garlic oranges and rosemary into the cavity of the bird after seasoning it with salt and pepper. These help make delicious drippings that can be mixed with additional Turkey Broth and thickened into your gravy while the bird rests.
    A whole turkey in it's packaging.
    An overhead image of all the other ingredients besides the turkey with labels.

    How To Thaw A Turkey

    The safest way to defrost a turkey is in the refrigerator. You'll want to plan for around 4 pounds thawing per day, so a 16 pound bird will need 4 days in the refrigerator (the USDA tells us its 5 pounds per day, but better safe than sorry!). Here are some things to keep in mind:
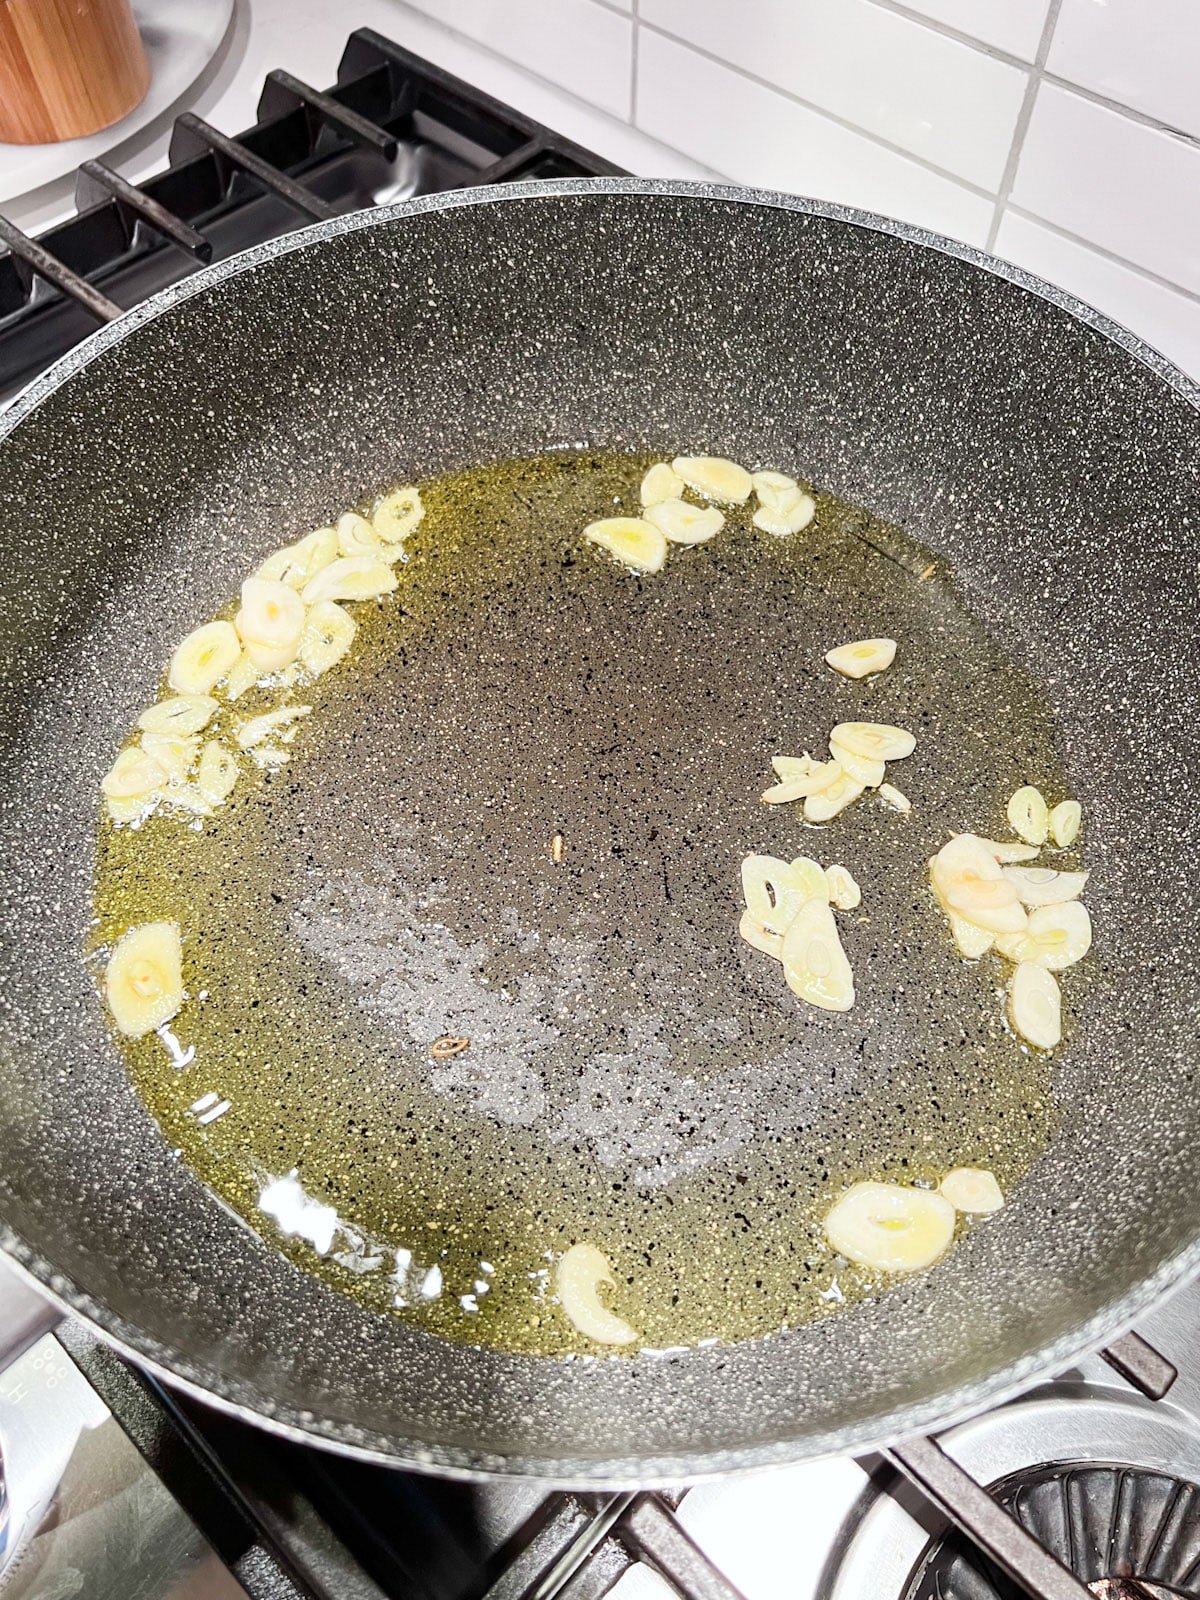
    • Thaw it on the bottom shelf and keep it well wrapped to avoid cross-contamination.
    • Place the bird breast side up in the back of the fridge to avoid temperature fluctuation. You'll know it’s breast side up because the drums face the top and the wings on the other side are toward the bottom.
    • Be sure to cook it within 4 days of thawing.
    A close up image of juicy, perfectly sliced turkey with orange slices next to it.

    Brining A Turkey

    I’ve seen many debates on whether or not to brine a turkey and I’ve made many turkeys with and without brines, with great success both ways. I typically don’t brine my turkey if I’ll be spatchcocking it because I don’t think it’s necessary in that case since the bird cooks more quickly evenly and tends to be more juicy that way. But bringing a whole bird can help it cook fast with juicier results. It’s up to you.

    Here are some tips for brining a turkey:

    • You'll want to brine it for a minimum of 12 hours but can brine up to 24 hours.
      • Remove the hock lock which is the plastic thing holding the drums together. Although it's safe to cook with it on, I find it easier to remove the neck and the giblets before brining once the hock lock is removed (but don't dispose of them!).
    • Be sure to cool your brine completely before submerging the turkey to avoid temperature fluctuations. I like to use a brining bag to keep my brine contained and fully submerged.
    • Once you're done brining, carefully rinse the turkey (try not to have anything around your sink while doing this to avoid cross-contamination). Then pat the turkey dry with paper towel.
      • An optional but excellent trick for crispier skin is to refrigerate the turkey after patting it dry to help the skin dry out even more. Less moisture = crispier skin.
      • So the ideal timeline would be to prepare the brine 2 days before roasting the turkey.
        • Day 1: Submerge the turkey in the brine first thing in the morning the day before roasting for at least 12 hours.
        • Day 2: Rinse and pat dry before going to bed the night before roasting the turkey. This includes patting the inside of the carcass dry. Then store it in your fridge uncovered to air dry. Be sure to have nothing else around it (I place it in the pan you'll be roasting it in). Please note this step is optional as not everyone has that kind of fridge space available. If this is not the right option for you, you can always just brine it the day before and then rise and pat dry the morning you'll be cooking it.
    An overhead image of a whole turkey on a platter with rosemary and oranges.

    How To Prep A Turkey

    Since this post is about cooking the bird whole, these directions will be for prepping a whole bird (you can find cooking directions to make this recipe for a spatchcocked turkey in the notes of the recipe card at the bottom of this post.

    Here’s how I prep this turkey recipe for roasting:

    • Pull the turkey out of the fridge an hour before cooking so that it can get closer to room temperature.
    • If your roasting pan doesn't come with a rack (or if you're the smart person who prioritizes the convenience of a disposable roasting pan over the pretty store-bought ones- more power too you) pop a metal baking rack into the pan before adding the turkey. This will help keep the bottom from burning and make it easier to remove the bird once he's cooked.
    • Be sure to salt and pepper the inside cavity of the turkey for added flavor to the inside meat.
    • To stuff or not to stuff? I am in the camp of not stuffing your turkey with actual stuffing for a few reasons (although you should totally make my delicious Cornbread and Sausage Dressing and serve it along side this turkey! Trust.):
      • You need to also make sure that the stuffing comes to a safe temperature for eating or you'll risk getting food borne illness.
      • Because of the last reason, you're much more likely to overcook your turkey if you stuff it with actual stuffing since you'll probably want to avoid the aforementioned food borne illness.
    • That said, I still encourage you to place things like citrus, herbs, alliums inside the cavity. Just don't over stuff it.
    • For the outside of the turkey, I went with a compound butter in this recipe to add great flavor and help with browning. You'll want to make sure you soften your butter in advance so that it's easy to work with. I just leave a stick out the night before.
      • First, rub ⅓ of the compound butter under the skin, directly onto the turkey breast. Make sure you get all up in there. I'm serious. It's important to get all that delicious flavor onto the actual meat, not just the skin!
      • I rubbed ⅔ of the compound butter all over the outside of the turkey.
    • Tie the drums together with a bit of cooking twine. I also tuck the wings under the turkey so they don’t burn.
    • Place the neck and giblets into the bottom of the pan as they provide excellent flavor for the juices/gravy (in our family we also fight for the neck as the meat is fantastically tender).
    A bowl of compound butter.
    The prepared turkey pan of onions and oranges with a metal rack in it.
    A spatchcocked turkey covered in butter in a prepared pan.

    How To Slow Roast Turkey

    When roasting a whole turkey, you'll want to start at a higher heat to render some of the fat out quickly before reducing the heat for the remainder for the cooking time. While it typically takes around 20 minutes of cooking per pound there can be a ton of variables that can change this, so my biggest turkey cooking rule is cook by temperature not by time for a perfectly cooked turkey. 

    Here’s how I cook my turkey:

    • I start my bird at 450 degrees for the first 20 minutes and then reduce the heat to 350 degrees for the remainder of the cooking time.
    • To get the right temperature, insert the thermometer into the thickest part of the thigh, near where the thigh meets the breast and push it into the thigh meat. Make sure you don't touch any bone (if you have a duel probe you can also place the other one into the other thigh). I also like to have a good instant read thermometer to double check but this is optional.. That said, don't rely on the pop up thermometers that come in the turkey.
    • To baste or not to baste? There are certainly arguments on both sides. I've done it both ways, but I haven't really been pulled strongly in either direction. The turkey in my images was not basted and as you can see, it has some gloriously crispy skin. At the end of the day, I didn't want to let heat out of the oven and have to extend my cooking time, so I didn't baste. But you do you!
    • If the turkey breast is getting too dark too quickly (check it periodically) you can tent just that part with foil to help keep it from burning.
    • I recommend pulling the turkey out of the oven at 161 degrees. While technically poultry is safe to eat at 165 degrees, it will continue to cook while it rests and get up to 165 degrees during that time while staying tender and juicy.
    • Make sure you rest your turkey for at least 30 minutes to redistribute the juices before carving.
    A spatchcocked turkey in a pan that's just been placed in the oven.

    How to Carve a Turkey

    This can seem intimidating but doesn’t have to be. When separating parts, it helps to find the joint for easier separating and be sure to slice meat against the grain. 

    Here’s how I break down my rested turkey:

    • If possible remove the wishbone. You can find this on the wing side of the turkey under the turkey breasts. You'll slice on either side of it and give it a good yank to get it out. This is optional, but it makes removing the breast meat easier.
    • Next slice through the skin connecting the leg and breast meat and pull the turkey leg down exposing the joint (use your muscles!!). Start with the tip of your knife and cut through the hip joint to remove the legs. Then you can separate the drums from the thighs by cutting through the joint that connects those and if you want, remove the bone from the thigh meat and slice it.
    • Remove the breast meat in one piece by slicing down the side of the breast bone and peeling the breast meat down (go for longer strokes so that you're not sawing the meat). Then slice the breast against the grain from tip to tip.
    • Pull down the wings to expose the joint. Cut through the joint and remove the wings.
    • Be sure to save the carcass to make turkey soup and be sure to use all the pan drippings to make gravy (you can add additional store-bought or homemade turkey broth and thicken with a flour or cornstarch slurry on your stovetop. Be sure to use a fat separator first!).
    A plate of turkey, dressing and green beans with cranberry with the whole bird and cranberry sauce behind it sauce.

    Frequently Asked Questions and Turkey Troubleshooting

    What if I don't eat butter or can't eat dairy?

    No problem, this will also work well with olive oil and add a another ¼ teaspoon of salt to the rub. It's a slightly different flavor but still delicious.

    What if I start carving my turkey and realize it's not all cooked to temp?

    No biggie, it happens to us all from time-to-time! For the legs, leave the drums and thighs connected and either pop them back into the pan with the juices or braise them in the cooking juices in a large pan on the stovetop. For breast meat, I'd encourage you to leave that on the carcass, tent it in foil to prevent the skin from burning and pop it back into the pan. Either way keep an eye on it so that you don't accidentally overcook it! One thing to note is that breast meat tends to cook a little faster than leg meat, so you can always start with carved breast meat while the leg meat comes to temp.

    What do I do if I forgot to thaw my turkey?

    I've got you! Submerge it (the whole turkey must stay fully submerged) in cold water, Throw a few ice cubes in so it stays below 40 degrees. Change that water every 30 minutes (seriously, set a timer!) planning on around 30 minutes per pound and then cook right away once thawed. Also, stir it once in a while while thawing.

    I got some last-minute guests and I'm worried there won't be enough turkey- what do I do?

    It's ok, send your spouse or dad or someone equally as awesome to the store and have them grab a package of turkey thighs- my Roast Turkey Thighs for Two recipe can be ready in an hour!

    What do I do if I overcook my turkey?

    It'll be ok! The dark meat is fattier and tends to be more tender so that'll probably be fine. As for the breast meat, cover it in pan drippings and turkey (or chicken broth) and pop it back into the oven for a few minutes. And then use plenty of gravy when serving.

    A close up image of the turkey legs in the roasting pan.

    What Do I Make With Turkey Leftovers?

    These are some of my recipes that are made with cooked turkey and also chicken recipes that you can easily substitute cooked turkey:

    • Turkey Tetrazzini
    • Day After Thanksgiving Sandwich
    • Copycat Panera Bread BBQ Chicken Salad
    • Chicken Caesar Pinwheels
    • Baked Buffalo Chicken Sliders
    • Copycat Panera Bread Napa Almond Chicken Salad
    • Buffalo Chicken Braid
    • Rainbow Asian Chicken Salad
    • Cheesy Chicken Taco Bowls
    • Sheet Pan Chicken Nachos
    • Chicken Salad Stuffed Tomatoes
    • BBQ Chicken Flat Bread Pizza
    • Homemade Chicken Noodle Soup

    Other Delicious Roast Turkey Recipes

    • An overhead image of sliced turkey on a platter surrounded by fresh herbs in the middle of a Thanksgiving table.
      Roasted Spatchcock Glazed Turkey with Bourbon
    • An overhead image of a roasted whole turkey butterflied and laid out in a roasting pan on a orange and grey towel with apples on the side of it.
      Apple Cider Glazed Roast Turkey Recipe
    • An overhead image of a carved turkey arranged on a serving platter with fresh herbs and lemons surrounding it.
      Spatchcocked Lemon Herb Roast Turkey
    • A sliced smoked turkey breast on a cutting board with the crispy skin on.
      Smoked Bone In Turkey Breast

    Hosting Thanksgiving?

    Discover the secret to hosting Thanksgiving without all the stress! Prepsgiving is your FREE guide to making a delicious Thanksgiving feast the easy way.

    Love this recipe? Please leave a 5 star ⭐️⭐️⭐️⭐️⭐️ rating in the recipe card below ⬇️ and/or a review in the comment section further down. Check out my Amazon Store for all my favorite tools, including those used in this recipe. And follow @thelifejolie on Instagram and TikTok!

    An overhead image of a thanksgiving table with the platter of carved turkey in the middle and green beans, dressing and cranberry sauce around it.

    Turkey with Oranges and Rosemary

    Jessy Freimann
    Whole turkey with oranges and rosemary is seriously delicious. This is a super easy turkey recipe where the flavors blend magically, giving you a delicious, impressive turkey without any hassle.
    No ratings yet
    Print Recipe Pin Recipe
    Prep Time 20 minutes mins
    Cook Time 3 hours hrs
    Brine time 12 hours hrs
    Total Time 3 hours hrs 20 minutes mins
    Course Main Course
    Cuisine American
    Servings 12 servings
    Calories 110 kcal

    Equipment

    • cutting board
    • chefs knife
    • Measuring cups and spoons
    • mixing bowl
    • roasting pan
    • Meat thermometer

    Ingredients
      

    Turkey Brine

    • 2 gallons water, divided
    • 1 cup kosher salt
    • ½ cup brown sugar
    • 2 sprigs rosemary
    • 1 orange cut into eighths
    • 1 bay leaf

    Compound Butter

    • ½ cup salted butter, softened (1 stick)
    • 1 orange worth of orange zest
    • 1 ½ Teaspoon fresh rosemary, chopped
    • ½ teaspoon kosher salt
    • ½ teaspoon black pepper
    • ½ teaspoon garlic powder
    • ½ teaspoon onion powder

    The Turkey

    • 1 15 pound Shady Brook Farms Frozen Young Turkey
    • Kosher salt and black pepper to taste
    • 1 onion, cut into chunks
    • 3-4 cloves garlic
    • 1 orange, cut into chunks
    • 1-2 large sprigs fresh rosemary

    Instructions
     

    Turkey brine

    • In a large pot, combine 1 gallon water, salt, brown sugar, rosemary, orange pieces and bay leaf. Simmer until sugar and salt have dissolved and remove from heat. Cool completely.
    • While the mixture cools, remove the hock lock and the pop up thermometer from the turkey as well as the giblets and neck. Keep the giblets and neck in an container in the refrigerator.
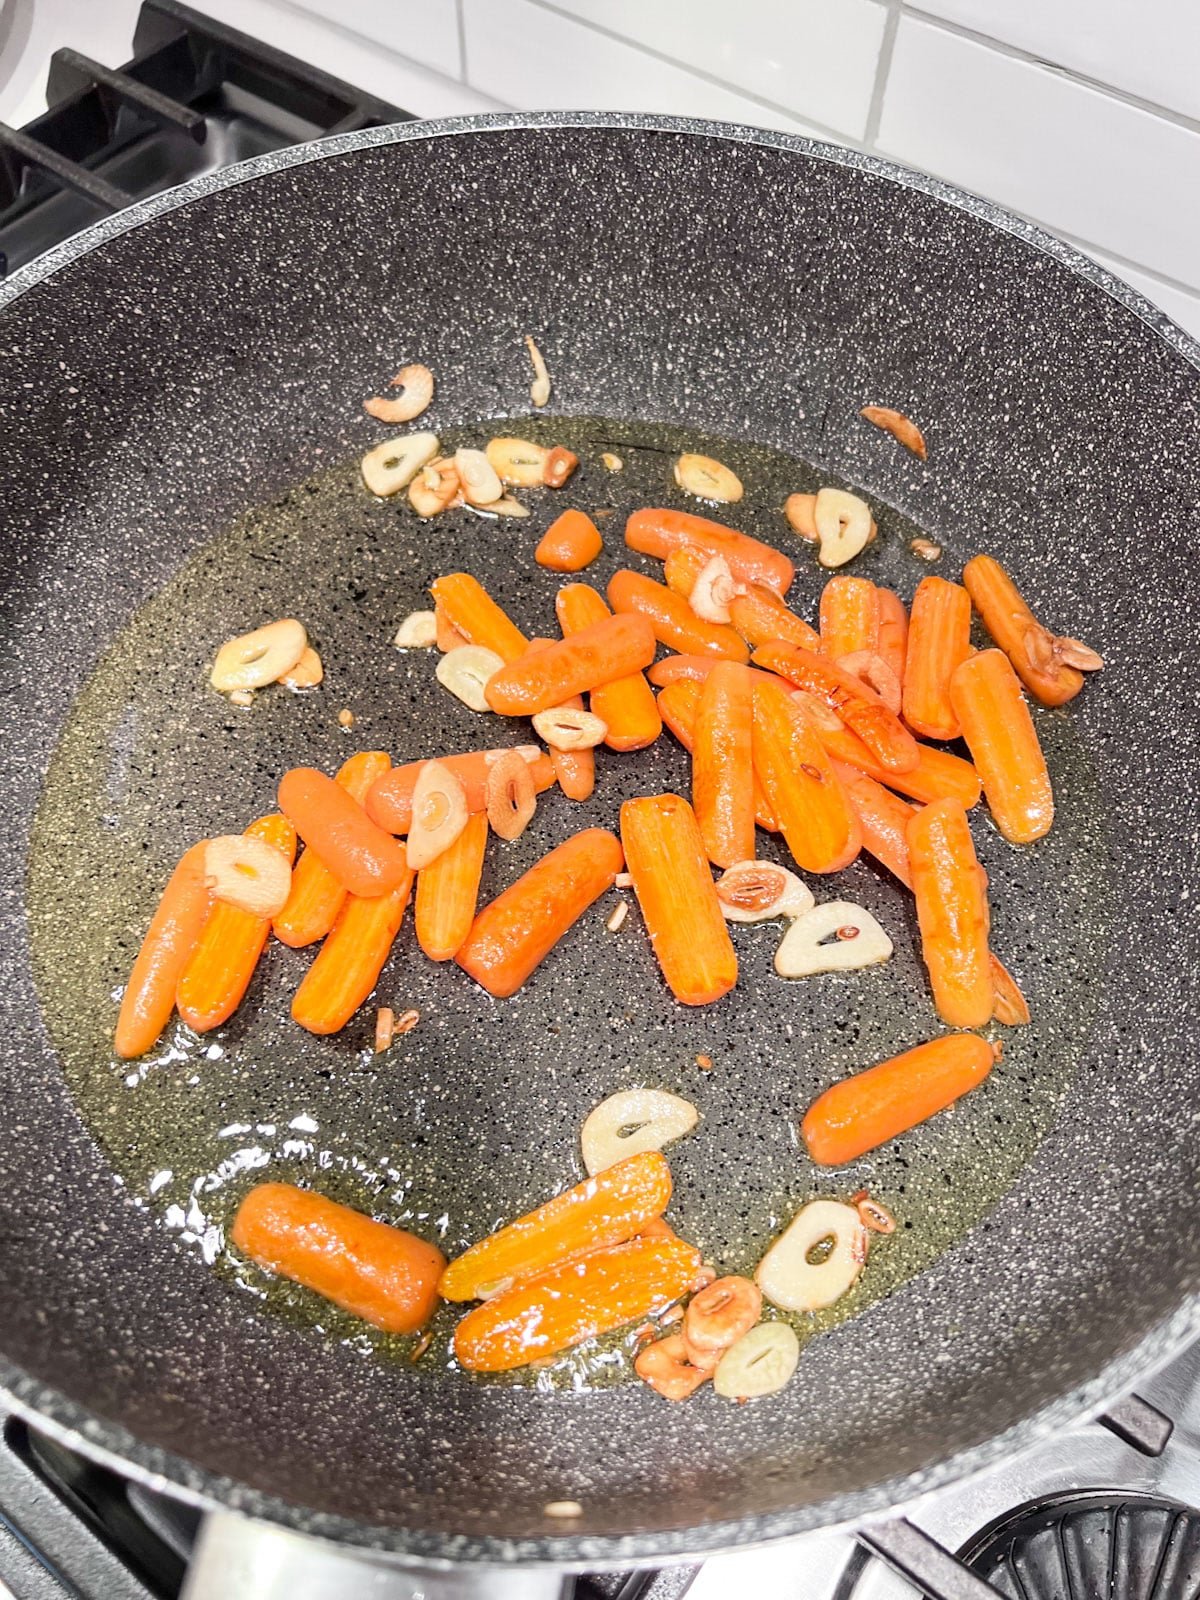
    • Combine the cooled mixture with another gallon of water and submerge the turkey in this brine for 12-14 hours- be sure to keep it all in the back of the refrigerator so it stays at a safe temp (below 40 degrees F). 
    • When you're done brining, rinse the turkey and pat dry with a paper towel.
    • Refrigerate uncovered until you're ready to roast. 
    • Optional: Finish brining and rinsing the night before and allow the turkey to sit in the refrigerator over night uncovered to dry the skin and promote crispier skin.

    Compound butter

    • In a medium bowl add 1 stick softened salted butter, zest of 1 orange, chopped fresh rosemary, salt, pepper, garlic powder and onion powder.
    • Stir until well combined. Set aside.

    The Turkey

    • Preheat the oven to 450 degrees. Place the oven racks at the lowest level.
    • Remove the turkey from the refrigerator 1 hour before roasting and give the turkey one more good pat-down with paper towel, both inside and outside. 
    • Sprinkle a generous amount of salt and pepper into the cavity of the turkey. 
    • Place onion chunks, garlic cloves, orange chunks and rosemary into the carcass, being careful not to over stuff it.
    • Rub ⅓ of the compound butter under the turkey skin. Make sure you get all the way to the bottom of the breast meat.
    • Rub the remaining compound butter all over the outside of the turkey. 
    • Gently tie the drumsticks together with a bit of butcher's twine.
    • Place the turkey on a rack in the roasting pan and gently tuck the wings a bit under. Also place the giblets and neck into the pan.
    • Insert the meat thermometer probe into the thickest part of the thigh and place the turkey into the oven and roast for 20 minutes.
    • Reduce the heat to 350 degrees and roast until the internal temperature reaches 161 degrees, around 2-3 hours. If the breast skin is browning too quickly, tent it in foil.
    • Once you've removed the turkey from the oven, rest it for at least 30 minutes before carving, reserving pan dripping for gravy. Serve immediately.

    Video

    Notes

    Directions for Spatchcocked Turkey:
    1. Skip the brining. Remove the spatchcocked turkey 1 hour prior to roasting and preheat the oven to 425 degrees. 
    2. Prepare the pan as written above and rub ¼ of the butter under the skin and the remaining butter on all sides. Place in pan with the meat-side up and place the thermometer in the thickest part of the breast making sure not to touch the bone. Tuck the wing tips under the turkey.
    3. After 30 minutes reduce the heat to 375 degrees and cover any parts that are getting too brown.
    4. Cook until the temperature reaches 161 degrees (around 1 more hour) and remove from oven.
    5. Rest for 25-30 minutes, carve and serve immediately.

    Nutrition

    Serving: 0.75poundCalories: 110kcalCarbohydrates: 11gProtein: 0.3gFat: 8gSaturated Fat: 5gPolyunsaturated Fat: 0.3gMonounsaturated Fat: 2gTrans Fat: 0.3gCholesterol: 20mgSodium: 9623mgPotassium: 43mgFiber: 0.3gSugar: 10gVitamin A: 265IUVitamin C: 6mgCalcium: 42mgIron: 0.2mg
    Tried this recipe?Let us know how it was!

    Savory Spiced Butternut Squash Soup

    Nov 7, 2023 · 22 Comments

    A bowl of squash soup with burrata and cilantro on top and chunks of squash and cilantro in the background.

    This Savory Spiced Butternut Squash Soup is rich, velvety and surprisingly savory. It can be made in the Instant Pot, slow cooker or right on your stove top and is so easy to throw together with minimal work!

    A bowl of squash soup with burrata and cilantro on top and chunks of squash and cilantro in the background.
    [feast_advanced_jump_to]

    Why You’ll Love This Creamy Butternut Squash Soup Recipe

    A while back, I went on a brand tour in the Finger Lakes area, which is local to me and had the pleasure of dining at FLX Table. The entire meal was fantastic, but the most memorable to me was a savory butternut squash soup that completely changed my preconceived notions of what a squash soup could be.

    I’ll be honest, I’m not a huge squash fan. I’ve been working on acquiring a taste for them but it’s a slow process for me. But this soup was different. It was light but rich. With a deliciously savory and slightly spicy flavor. And topped with creamy burrata cheese, a drizzle of chili oil and chopped cilantro.

    While most squash soup recipes that I’ve tried tend to be on the sweet side, this soup was my gateway to savory butternut squash soup recipes. So naturally I had to make my own version and you should too!

    Here’s why you’ve got to try this:

    • Minimal work
    • Options for Instant pot and slow cooker
    • Simple ingredients
    • Delicious savory flavor
    • Not overly heavy
    • Very easy to make
    A close up image inside the bowl of butternut squash soup with burrata and cilantro on top.

    Ingredient Information And Substitutions:

    • Butternut Squash- this is our main character, so I typically don’t recommend substituting a different squash. Make sure you peel the squash and move the seeds. I’ve found that one large butternut squash provides around 6 cups.
    • Aromatics- Onion and garlic contribute to the fantastic savory flavor of this soup. I used yellow onion, but any onion variety will work.
    • Seasonings- In addition to Kosher salt and ground black pepper, the flavors are rounded out by chili powder, ground cumin and ground cinnamon.
    • Liquid- Chicken broth provides the liquid base for this soup but if you’re looking for a vegetarian option, you can totally use vegetable broth. A couple Tablespoons of heavy cream is added at the end to make it even creamer and slightly decadent. If you aren’t looking to use heavy cream, you can also use coconut cream.
    • Toppings- I topped mine with burrata cheese and chopped cilantro. While the restaurant served it with chili oil, I went with a sprinkle of chili powder for the same flavor and similar look without buying an infrequently used ingredient.
    An overhead image of the labeled ingredients for this recipe.

    How To Make Instant Pot Butternut Squash Soup

    Step 1: Place ingredients into the pot

    Place squash, onion, garlic, spices, and broth to the instant pot and secure the cover on top.

    Ingredients in an Instant Pot.

    Step 2: Cook in Instant Pot

    Choose the Soup setting (which is also 30 minutes manual) and cook. When the cooking time is up, do a quick release to depressurize the Instant Pot and uncover. Purée the ingredients until smooth.

    Soup being pureed by a stick blender in the Instant Pot.

    Step 3: Stir in cream

    Stir in cream until combined. Serve immediately topped with Burrata, chili powder and chopped cilantro.

    A spoon stirring cream into soup in the Instant Pot.

    Frequently Asked Questions

    Can I use frozen Butternut Squash cubes?

    You absolutely can without making any changes to the recipe.

    Is this soup gluten-free?

    It sure is! 

    How long does butternut squash soup last in the refrigerator?

    Around 5 days covered in the refrigerator.
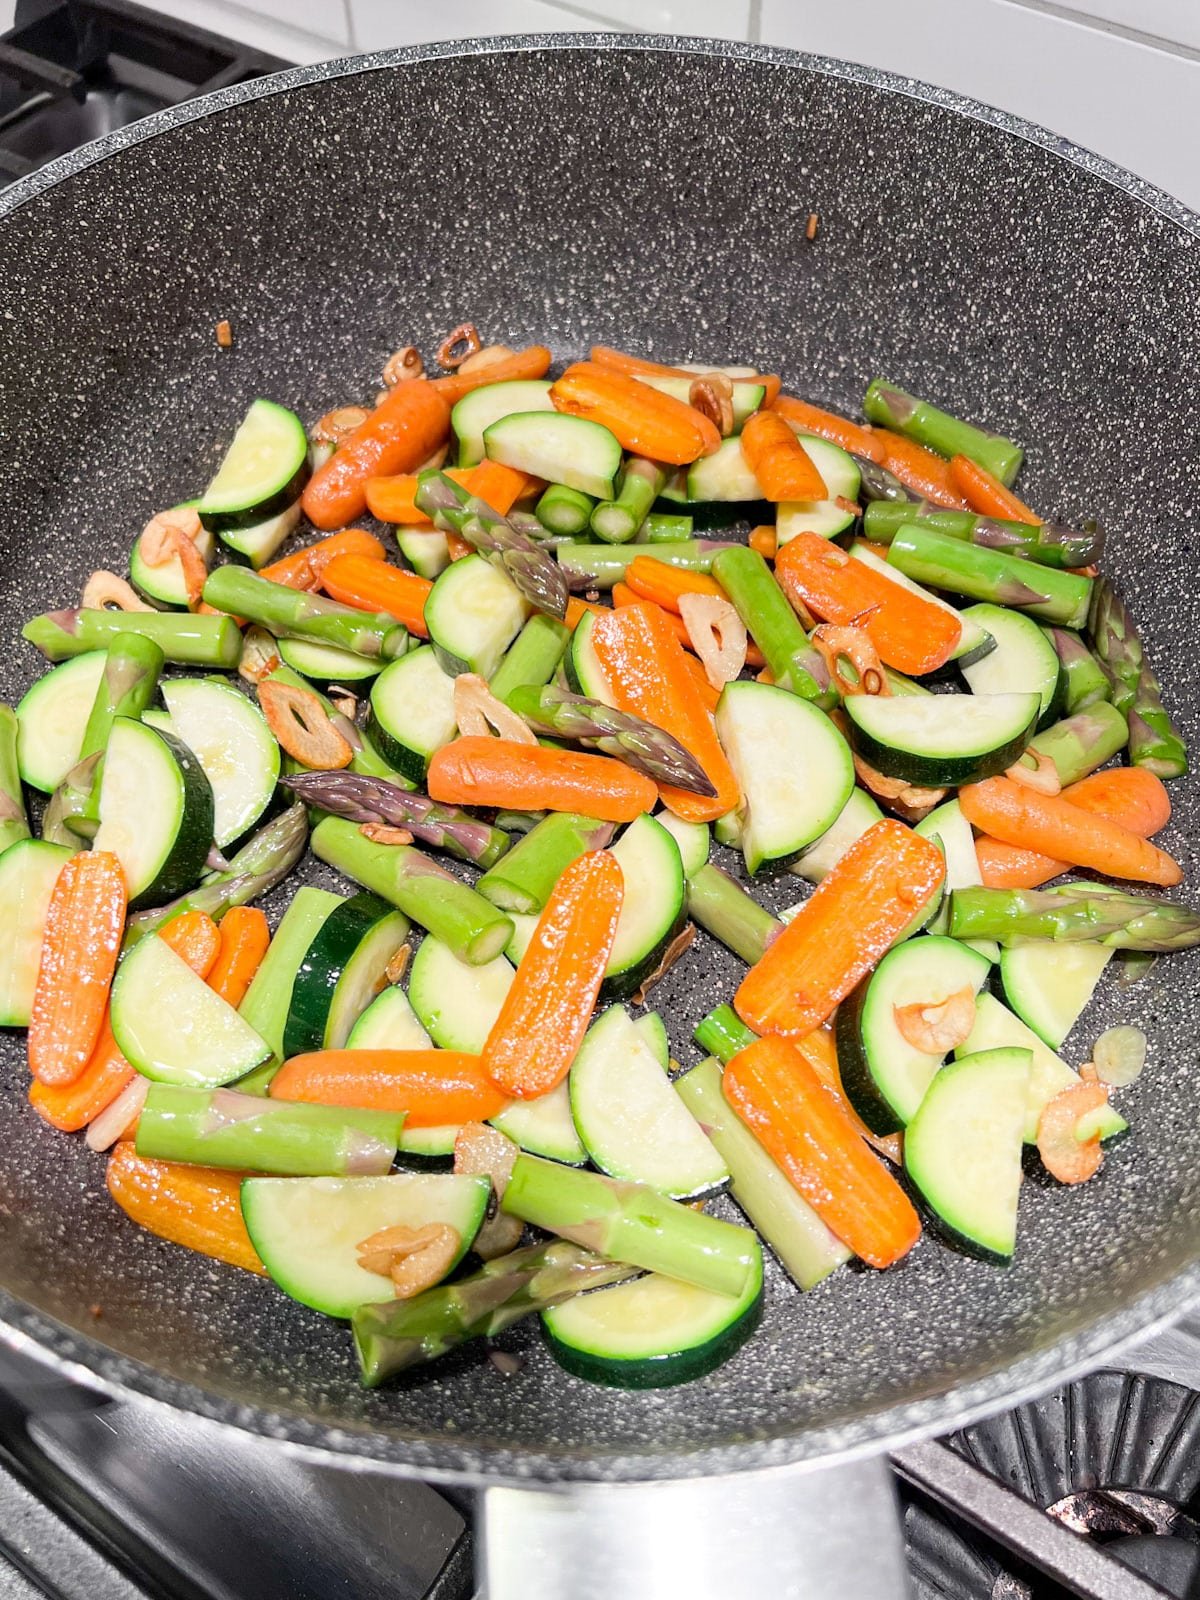
    Can I make this vegetarian?

    Yes! Substitute vegetable broth and coconut cream in place of chicken broth and heavy cream respectively and leave out the burrata.

    How do you serve butternut squash soup?

    I like to serve it with a big hunk of burrata cheese, a sprinkle of chili powder and plenty of chopped cilantro.

    Can you freeze butternut squash soup?

    Yes- it will keep for a few months in an airtight container in the freezer.

    Can I make crockpot butternut squash soup?

    Yes! Add squash, onion, garlic, spices, and broth to the slow cooker pot. Cover and cook on low for 6 hours or on high for 3 hours. Puree with a stick blender and stir on heavy cream. Ladle the soup into bowls and top with a sprinkle of chili powder, a hunk of Burrata and roughly chopped cilantro. Enjoy!

    An overhead image of the soup with cheese and cilantro on top and surrounding the bowl.

    Tips For Making Spicy Butternut Squash Soup

    • To prep the squash you’ll peel it, remove the seeds and cut to pieces around 1-2 inches.
    • Don’t worry about making perfect cuts, you’ll be pureeing this once cooked. The goal should be trying to cut them to uniform size.
    • Blend to puree. I use an immersion blender (or stick blender as some call it) to puree the soup once the cooking is done but you can also use a food processor or a high powered blender like a Vitamix.
    • Prep ahead by cutting up the squash, chopping onions and peeling the garlic.
    • Storage and leftovers: this will last up to 5 days covered in the refrigerator.
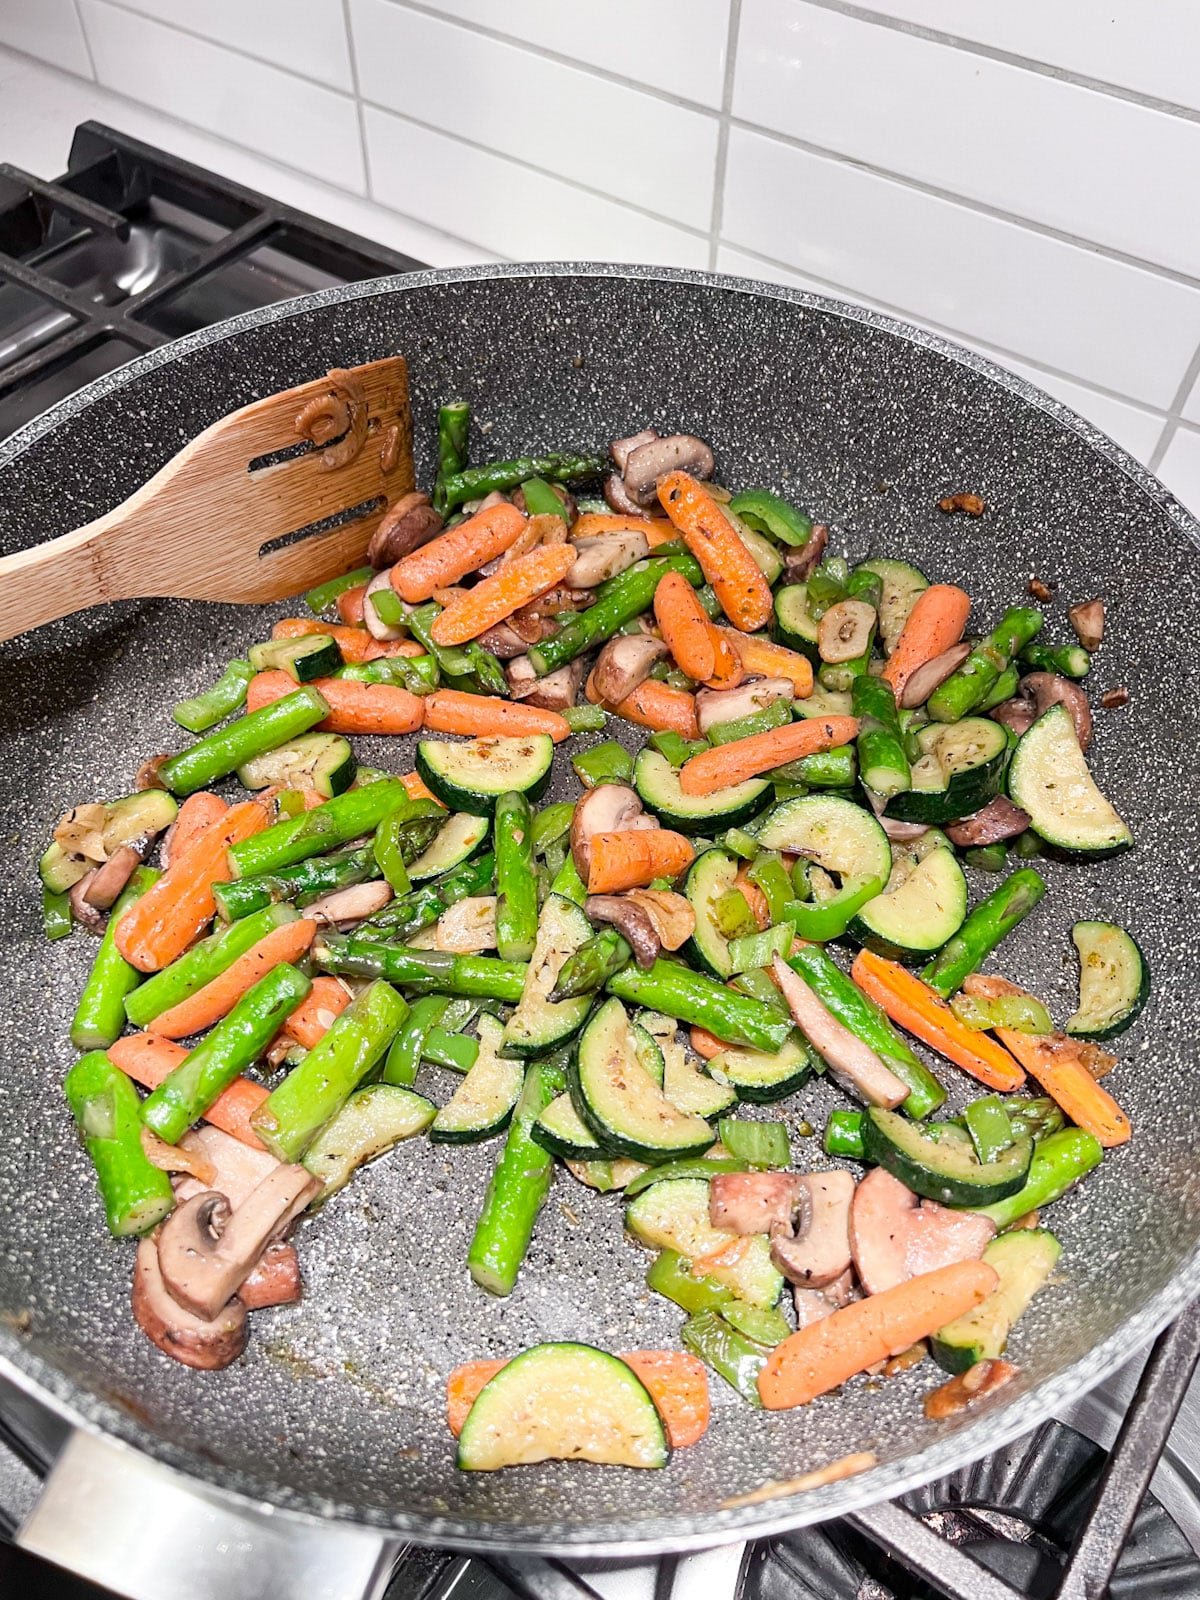
    A side angle image of a bowl of squash soup with all the toppings and squash chunks and cilantro behind it.

    What To Serve With Creamed Butternut Squash Soup

    A few great recipes to round out and complete this meal would be:

    • Three Cheese Garlic Bread
    • Roasted Beet Salad
    • Summer Bounty Strawberry Salad
    • Four Ingredient Chocolate Mousse
    • Cherry Chocolate Oatmeal Cookie Bars

    Hosting Thanksgiving?

    Discover the secret to hosting Thanksgiving without all the stress! Prepsgiving is your FREE guide to making a delicious Thanksgiving feast the easy way.

    Love this recipe? Please leave a 5 star ⭐️⭐️⭐️⭐️⭐️ rating in the recipe card below ⬇️ and/or a review in the comment section further down. Check out my Amazon Store for all my favorite tools, including those used in this recipe. And follow @thelifejolie on Instagram and TikTok!

    A bowl of squash soup with burrata and cilantro on top and chunks of squash and cilantro in the background.

    Easy Butternut Squash Soup Recipe

    Jessy Freimann
    This Easy Butternut Squash Soup Recipe can be made in the Instant Pot, slow cooker, or right on your stovetop! Each bite is rich and velvety, plus this savory butternut squash soup is so easy to throw together with minimal work.
    4.91 from 11 votes
    Print Recipe Pin Recipe
    Prep Time 10 minutes mins
    Cook Time 30 minutes mins
    Total Time 40 minutes mins
    Course Soup
    Cuisine American
    Servings 8 servings
    Calories 21 kcal

    Equipment

    • 1 chefs knife
    • 1 cutting board
    • Measuring cups and spoons
    • instant pot
    • slow. cooker
    • Dutch oven
    • Ladle
    • Wooden Spoons
    • Immersion Blender

    Ingredients
      

    • 6 cups raw butternut squash, cut into 1 inch squares- this was basically one large squash
    • 1 cup onion, diced
    • 2-3 cloves garlic
    • 1 teaspoon chili powder + a little extra for garnish
    • 1 teaspoon cumin
    • ¼ teaspoon cinnamon
    • 1 teaspoon kosher salt if using low sodium broth, double this
    • ¼ teaspoon ground black pepper
    • 3 cups chicken broth
    • 2 Tablespoons heavy cream
    • Burrata cheese
    • Cilantro to taste roughly chopped

    Instructions
     

    Instant Pot Instructions

    • Add squash, onion, garlic, spices, and broth to the instant pot and secure the cover on top.
    • Choose the "Soup" setting on the Instant Pot and leave it at normal. This will show up as 30 minutes.
    • Once the Instant Pot indicates that it's done, do a quick release to depressurize the Instant Pot.
    • Use a stick blender to puree the soup until smooth.
    • Stir in the heavy cream.
    • Ladle the soup into bowls and top with a sprinkle of chili powder, a hunk of Burrata and roughly chopped cilantro. Serve immediately.

    Crockpot Instructions

    • Add squash, onion, garlic, spices, and broth to the crockpot.
    • Cover and cook for 6 hours on low or 3 hours on high.
    • Uncover and use a stick blender to puree the soup until smooth.
    • Stir in the heavy cream.
    • Ladle the soup into bowls and top with a sprinkle of chili powder, a hunk of Burrata and roughly chopped cilantro. Serve immediately.

    Stovetop Instructions

    • Add squash, onion, garlic, spices, and broth to the pot. Bring to a boil over medium high heat.
    • Once boiling reduce heat and simmer for 1 hour partially covered.
    • Uncover and use a stick blender to puree the soup until smooth.
    • Stir in the heavy cream.
    • Ladle the soup into bowls and top with a sprinkle of chili powder, a hunk of Burrata and roughly chopped cilantro. Serve immediately.

    Video

    Notes

    • To prep the squash you’ll peel it, remove the seeds and cut to pieces around 1-2 inches.
    • Don’t worry about making perfect cuts, you’ll be pureeing this once cooked. The goal should be trying to cut them to uniform size.
    • Blend to puree. I use an immersion blender (or stick blender as some call it) to puree the soup once the cooking is done but you can also use a food processor or a high powered blender like a Vitamix.
    • Prep ahead by cutting up the squash, chopping onions and peeling the garlic.
    • Storage and leftovers: this will last up to 5 days covered in the refrigerator.
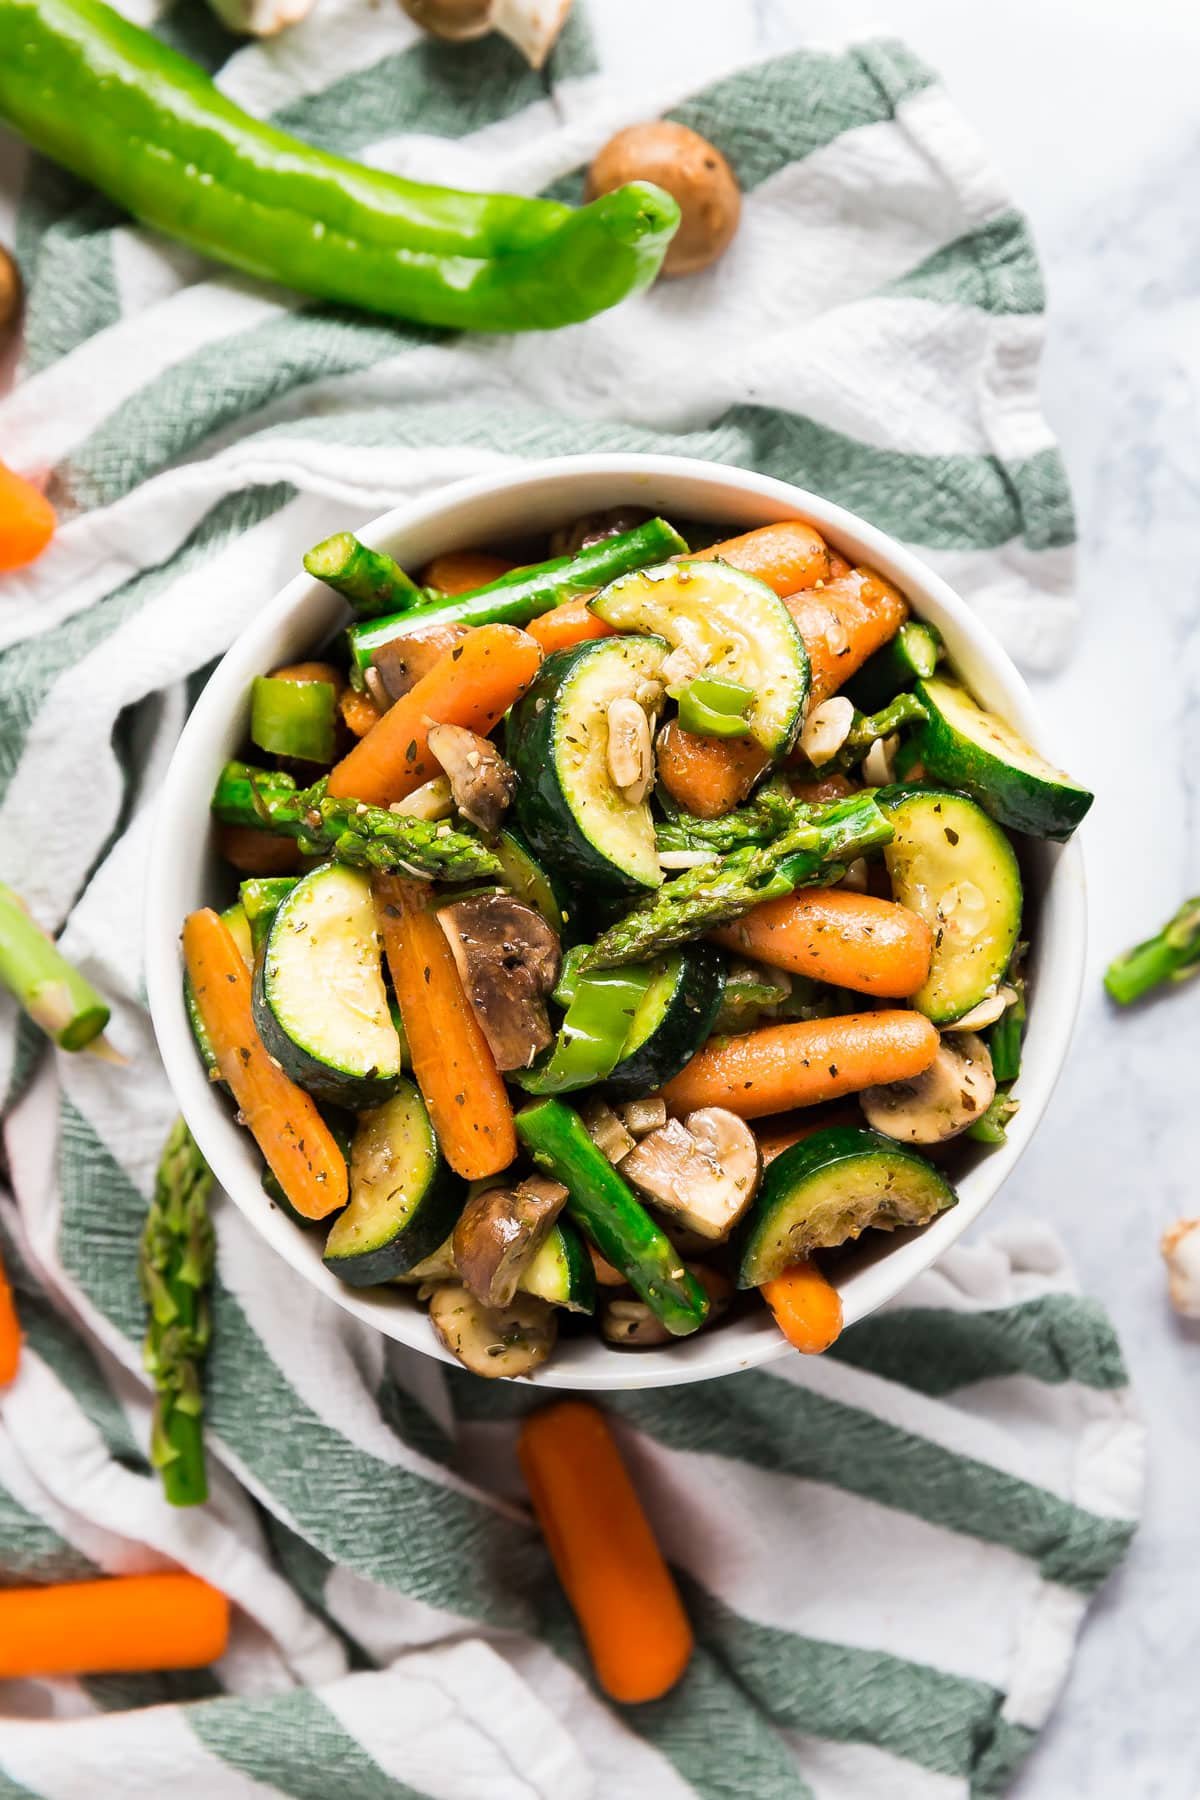
    Nutrition

    Serving: 1.5cupsCalories: 21kcalCarbohydrates: 1gProtein: 1gFat: 2gSaturated Fat: 1gPolyunsaturated Fat: 0.1gMonounsaturated Fat: 0.4gCholesterol: 6mgSodium: 623mgPotassium: 33mgFiber: 0.2gSugar: 1gVitamin A: 135IUVitamin C: 0.3mgCalcium: 12mgIron: 0.3mg
    Tried this recipe?Let us know how it was!

    Gouda Cheese Mashed Potatoes

    Nov 6, 2023 · Leave a Comment

    An overhead image of mashed potatoes with melting butter and chives on top.

    Bring delicious flavor to your holiday table with Gouda Cheese Mashed Potatoes, where creamy indulgence meets the rich, subtle notes of Smoked Gouda. This classic comfort dish will push your dinner to a new level that the whole family will love!

    An overhead image of mashed potatoes with melting butter and chives on top.
    [feast_advanced_jump_to]

    Why You'll Love This Cheesy Mashed Potatoes Recipe

    I don't know about you, but for us, it's not a holiday meal without a killer potato side dish. And if you ask my husband it absolutely needs to be classic mashed potatoes.

    Since I'm of the firm belief that cheese makes most things infinitely better, it seemed like a natural next step to make a cheesy mashed potatoes recipe that will knock everyone's socks off, and this one delivers!

    Here's what makes this cheesy mash so great:

    • Minimal ingredients
    • Easy to make ahead
    • Delicious flavor
    • Rich, creamy and the perfect compliment to any main dish
    • The ultimate comfort food
    • Super kid-friendly
    A close up image of mashed potatoes with butter and chives in a white bowl.

    Ingredient Information And Substitutions:

    • Potatoes- For this recipe, I like using red skin potatoes and keeping the skins on for delicious texture and gorgeous presentation (and I may or may not have been feeling lazy when developing it and skipped peeling). You can totally peel them if you want to. A good substitute would be Yukon Gold Potatoes or Butter Potatoes.
    • Cheese- The other start of the show here is cheese. For this, I went with Smoked Gouda. It melts really nicely and brings a subtle smokiness that is the perfect addition to this cheesy potato mash. I prefer to shred it myself, it melt easier that way. If you can't find smoked gouda, look for another smoked cheese like Smoked Cheddar or Smoked Provolone.
    • Liquids- I went with whole milk and salted butter so that it's creamy and flavorful without being too heavy. I like to add the butter to the pan after draining the potatoes and then place the hot potatoes on top of the butter so that it melts. I start the mashing sprocess then to begin breaking it down before switching to my stand mixer (again, lazy. And it works like a charm). And don't forget to warm your milk before adding it!
    • Seasonings- In an effort to let the cheese and potatoes shine, I kept it simple by adding Kosher salt, ground black pepper and garlic powder. Be sure to taste and adjust the seasonings to your unique palate before serving.
    An overhead image of the ingredients labeled for gouda cheese mashed potatoes.

    How To Make Cheesy Mashed Potatoes

    Step 1: Boil the potatoes

    Cover the potatoes in cold water and inch or two above them. Bring to a boil and cook for around 15-20 minutes or until fork tender and cooked through. Turn off the heat and drain well.

    Potatoes boiling in a pot on a stove.

    Step 2: Add butter and mix potatoes

    Place butter in the empty pot and add drained potatoes over the butter. Gently begin mashing the potatoes into the butter.

    Drained potatoes back in their pan on the stove.

    Step 3: Mix in other ingredients

    Place the potato mixture into the stand mixer (or keep mashing in the pot). Add seasonings, cheese and ½ the milk. Run mixer on medium, scrapping the sides periodically until potatoes are fully mashed. Taste and adjust seasonings or add more milk if necessary and serve immediately.

    Partially mashed potatoes in stand mixer bowl with other ingredients ready to finish being mashed.

    Frequently Asked Questions

    Can I make mashed potatoes ahead of time?

    You can! While these are at their absolute best served immediately, I will often make them earlier in the day and place them in a warm slow cooker, stirring periodically.

    What are the best potatoes for mashed potatoes?

    For these garlic cheese mashed potatoes I like red skinned potatoes since I keep the skins on. But Yukon Gold or Butter potatoes also work really well.

    How long do you boil potatoes?

    This will vary based on how large or small your potatoes are cut (try and keep. them uniform). In my experience, they usually boil for 15-20 minutes once the water comes to a boil for 1 inch chunks of potatoes.

    My mashed potatoes aren’t creamy enough; how can I fix that?


    Stir in a small amount of warm milk to bring back the creaminess. Start with a small amount and add more only if needed

    How long will this keep in the fridge?

    These last up to 4 days covered in the refrigerator.
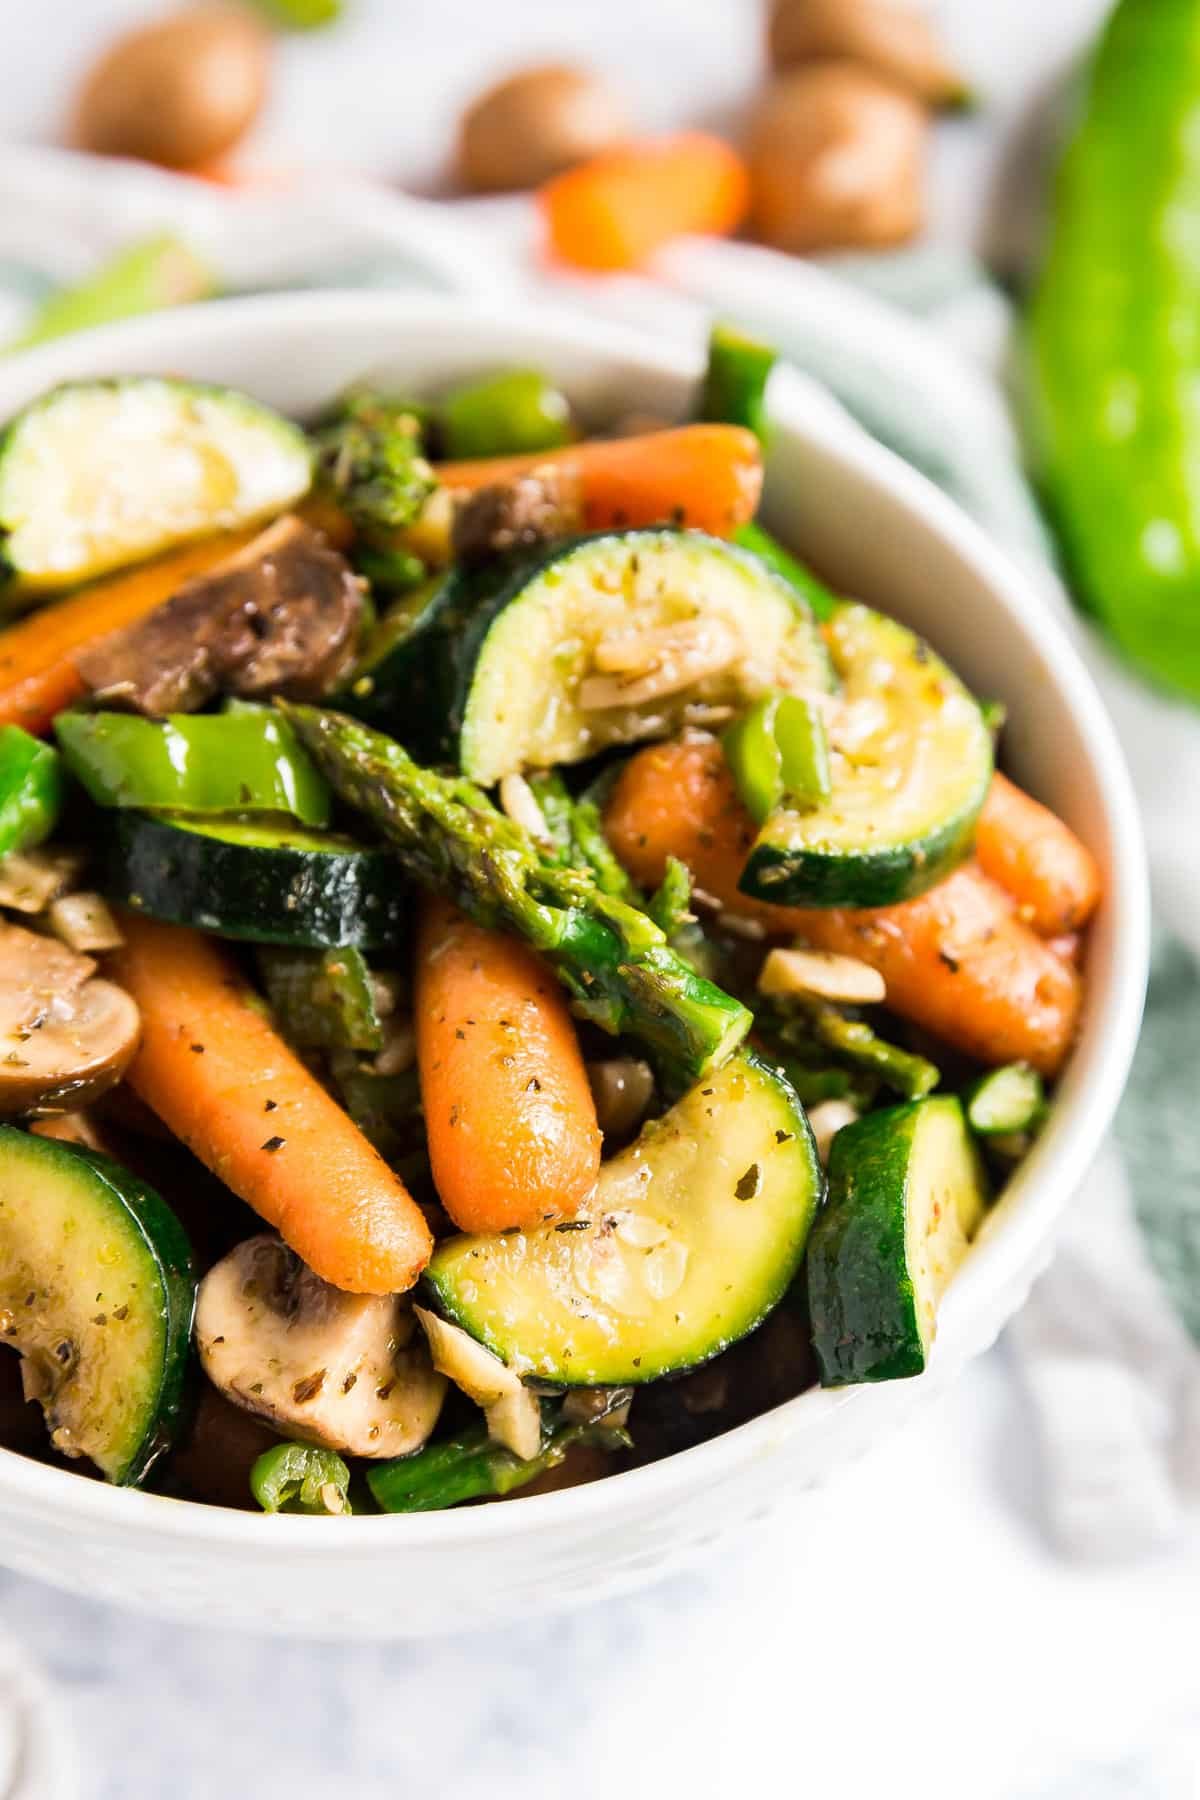
    Tips For Making Mashed Potatoes With Cheese

    • Keep your cuts uniform: when you cut the potatoes. This allows them to cook more evenly. I usually aim for 1 inch chunks.
    • Shred the cheese yourself. This will help the cheese melt easier.
    • Place the hot potatoes into the chunks of butter: For quick melting.
    • Begin the mashing in the pot. This tip is for those who will use their stand mixer. Giving them a quick mash (not too much, just getting them started) begins the process of mixing in the butter and helps you avoid overloading your stand mixer.
    • Scrape down the sides as you mix so that everything gets fully combined.
    • Warm your milk so that your potatoes stay nice and hot.
    • Start with only half the milk. You can always add more but you don't want them soupy.
    • Taste for seasonings. Everyone has different taste and this gives you a chance to adjust the seasonings to your liking before serving.
    • Ingredients to prep ahead: Wash potatoes, shred cheese.
    • Leftovers and storage: These will last up to 4 days covered in the refrigerator.
    A bowl of mashed potatoes on a Thanksgiving table with the turkey platter behind it.

    What To Serve With Cheesy Whipped Potatoes

    Here are some of my favorite recipes to compliment your mashed potatoes:

    • Glazed Turkey with Bourbon
    • Homemade Green Bean Casserole
    • Sausage and Cornbread Dressing
    • Citrus Cranberry Chutney
    • Pumpkin Pie

    Other Awesome Potato Recipes

    • An overhead image of a bowl of mashed potatoes with melting pats of butter and chopped parsley on top with a head of garlic, grey napkin and sprigs of parsley round it.
      Roasted Garlic Mashed Potatoes
    • Is it even a holiday dinner without mashed potatoes?! I say, ditch the hassle and make these easy Make Ahead Mashed Potatoes recipe. Made with cream cheese and sour cream, they're creamy, flavorful and totally delicious!
      Make Ahead Mashed Potatoes
    • A square image of French Onion Creamy Mashed Potatoes.
      French Onion Creamy Mashed Potatoes
    • A close up of a serving spoon in a pan of savory sweet potato casserole.
      Savory Sweet Potato Casserole

    Hosting Thanksgiving?

    Discover the secret to hosting Thanksgiving without all the stress! Prepsgiving is your FREE guide to making a delicious Thanksgiving feast the easy way.

    Love this recipe? Please leave a 5 star ⭐️⭐️⭐️⭐️⭐️ rating in the recipe card below ⬇️ and/or a review in the comment section further down. Check out my Amazon Store for all my favorite tools, including those used in this recipe. And follow @thelifejolie on Instagram and TikTok!

    An overhead image of mashed potatoes with melting butter and chives on top.

    Gouda Cheese Mashed Potatoes

    Jessy Freimann
    Bring delicious flavor to your holiday table with Gouda Cheese Mashed Potatoes, where creamy indulgence meets the rich, subtle notes of Smoked Gouda. This classic comfort dish will push your dinner to a new level that the whole family will love!
    No ratings yet
    Print Recipe Pin Recipe
    Prep Time 15 minutes mins
    Cook Time 35 minutes mins
    Total Time 50 minutes mins
    Course dinner, side, Side Dish
    Cuisine American
    Servings 8 servings
    Calories 311 kcal

    Equipment

    • 1 Dutch oven
    • 1 cutting board
    • 1 chefs knife
    • 1 Box grater
    • 1 Measuring cups and spoons
    • 1 Wooden Spoons
    • 1 stand mixer
    • 1 Spatula
    • 1 Potato masher

    Ingredients
      

    • 5 pounds red skinned potatoes cleaned and cut into 1 inch chunks
    • ½ cup salted butter 1 stick cut into chunks
    • 1 ½ teaspoon Kosher salt
    • ½ teaspoon ground black pepper
    • 1 teaspoon garlic powder
    • 2 cups shredded smoked gouda
    • ½ cup milk, warmed

    Instructions
     

    • Place cut potatoes in a large pot of water and cover with water a couple inches above the potatoes.
    • Bring to a boil and once boiling, cook for 15-20 minutes until the potatoes are fork tender and cooked through. Drain well and turn off the burner.
    • Place butter into empty pot and then place drained hot potatoes on top of them. Gently begin mashing the potatoes into the butter. Don't mash all the way.
    • Place the potato mixture into the stand mixer. Add seasonings and cheese and mix on medium, scraping the sides.
    • Add half the milk and continue mixing until no lumps remain. Taste and adjust seasonings and if necessary, add milk (only if needed). Serve immediately.

    Notes

    • Keep your cuts uniform: when you cut the potatoes. This allows them to cook more evenly. I usually aim for 1 inch chunks.
    • Shred the cheese yourself. This will help the cheese melt easier.
    • Place the hot potatoes into the chunks of butter: For quick melting.
    • Begin the mashing in the pot. This tip is for those who will use their stand mixer. Giving them a quick mash (not too much, just getting them started) begins the process of mixing in the butter and helps you avoid overloading your stand mixer.
    • Scrape down the sides as you mix so that everything gets fully combined.
    • Warm your milk so that your potatoes stay nice and hot.
    • Start with only half the milk. You can always add more but you don't want them soupy.
    • Taste for seasonings. Everyone has different taste and this gives you a chance to adjust the seasonings to your liking before serving.
    • Ingredients to prep ahead: Wash potatoes, shred cheese.
    • Leftovers and storage: These will last up to 4 days covered in the refrigerator.
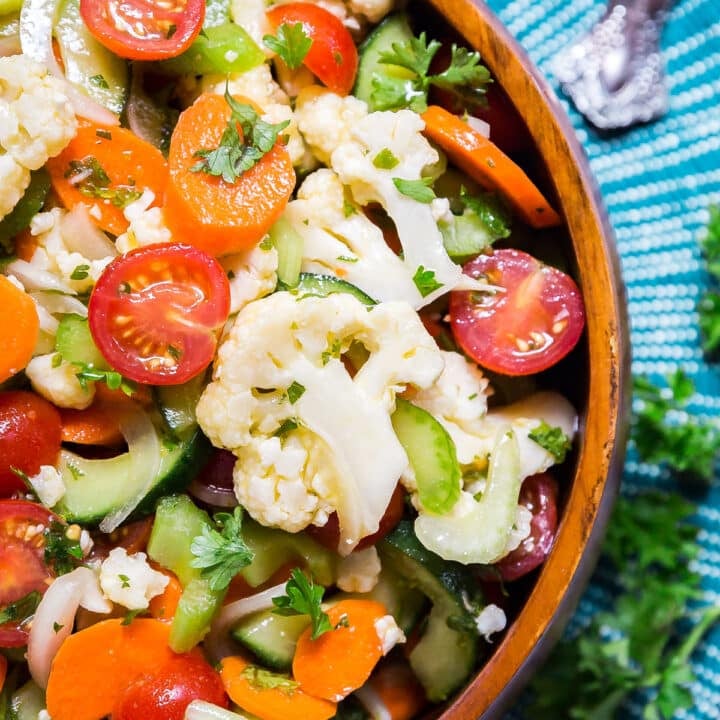
    Nutrition

    Serving: 1cupCalories: 311kcalCarbohydrates: 46gProtein: 6gFat: 12gSaturated Fat: 8gPolyunsaturated Fat: 1gMonounsaturated Fat: 3gTrans Fat: 0.5gCholesterol: 32mgSodium: 584mgPotassium: 1322mgFiber: 5gSugar: 4gVitamin A: 400IUVitamin C: 24mgCalcium: 52mgIron: 2mg
    Tried this recipe?Let us know how it was!
    • « Go to Previous Page
    • Page 1
    • Interim pages omitted …
    • Page 9
    • Page 10
    • Page 11
    • Page 12
    • Page 13
    • Interim pages omitted …
    • Page 21
    • Go to Next Page »

    Primary Sidebar

    Jessy in a kitchen holding a white casserole pan and smiling.
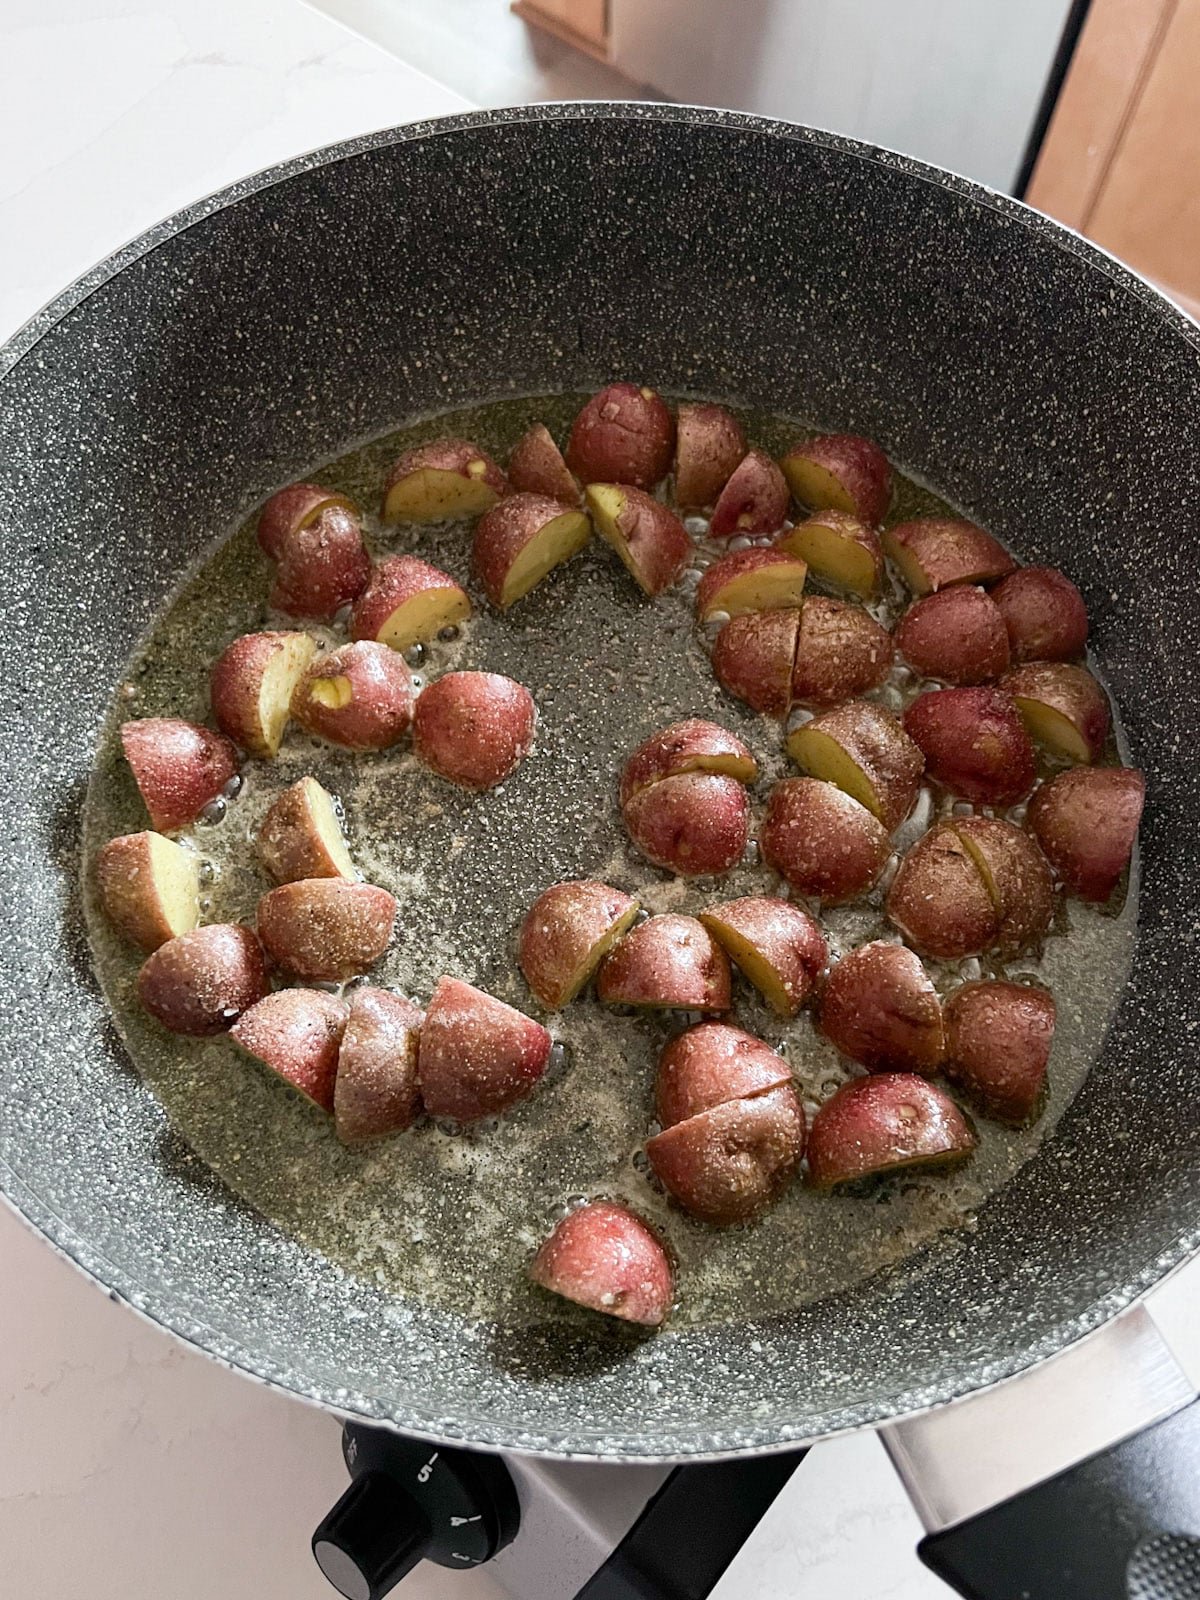
    Hi, I'm Jessy!

    Welcome to The Life Jolie! I share simple, delicious recipes and ingredient prep tips to make your weeknight cooking a breeze!

    More about me →

    Easy Dinner Recipes

    • An overhead image of a Mexican Shrimp Quinoa Bowl.
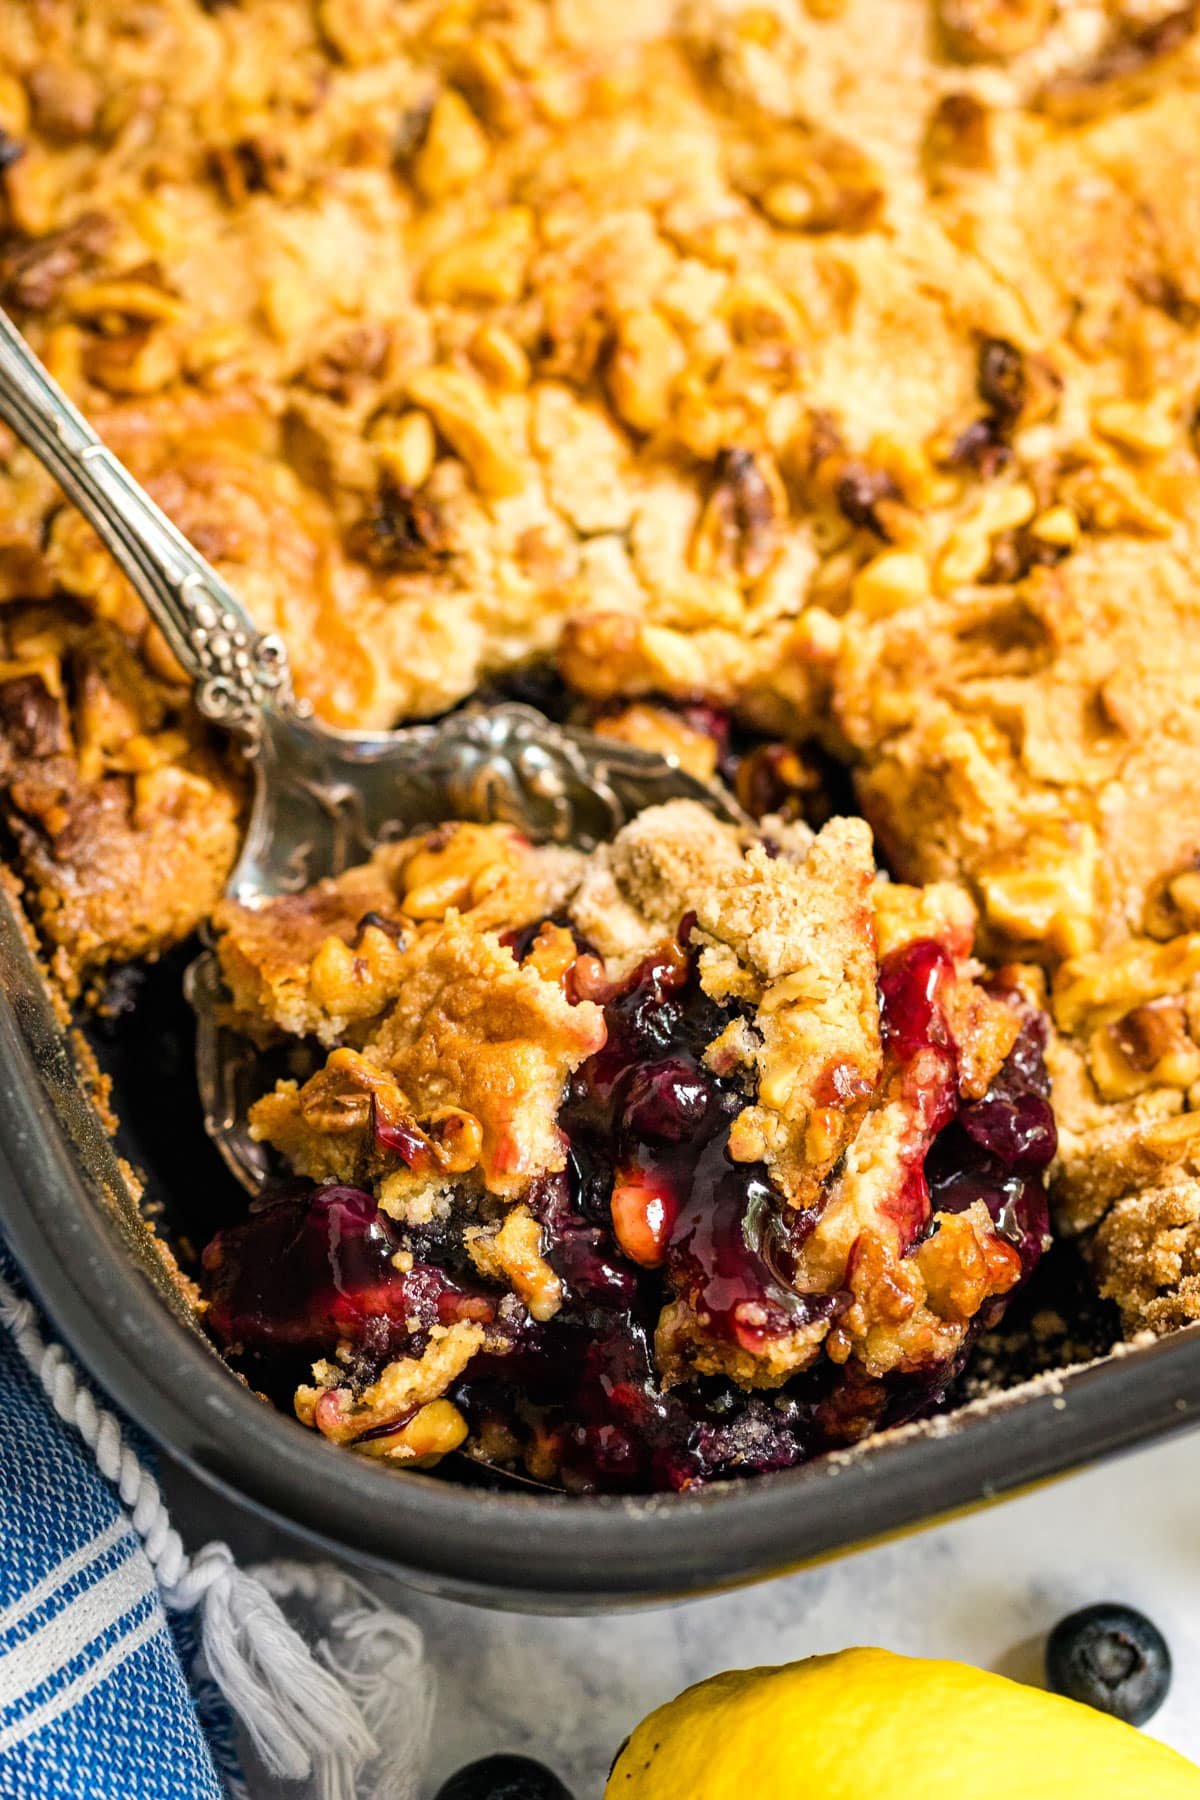
      Shrimp Quinoa Bowls
    • A bowl of asian soup with meatballs with a spoon and noodles in it.
      Asian Soup with Cabbage and Meatballs
    • A close up of roasted red potatoes on a pan.
      Roasted Red Potatoes Recipe
    • A spoon lifting up a scoop of eggplant parm bake with melt cheese trailing behind it.
      Eggplant Parm Bake
    • A close up of a drum chicken wing in a pile of other wings.
      Oven Baked Chicken Wings
    • An overhead image of a bowl of minestrone soup.
      Traditional Minestrone Soup Recipe

    Popular Recipes

    • A glass bowl of melted chocolate with a spatula dripping some back into the bowl.
      How To Melt Chocolate Chips In The Microwave
    • Italian Stuffed Zucchini Boats are the healthy weeknight meal you'll want to make again and again. This is a seriously easy recipe that's full of delicious flavor without all the guilt!
      Italian Stuffed Zucchini Boats
    • A close up shot of the side of a shallow bowl of shrimp mac salad.
      Shrimp Macaroni Salad
    • A white pan pouring cheese sauce over a bowl of steamed broccoli.
      Cheese Sauce for Broccoli Recipe
    • An overhead image of a plate of chicken lettuce wraps with peanut sauce next to it and all the fixings surrounding it.
      Copycat Cheesecake Factory Thai Chicken Lettuce Wraps
    • A close up image of a piece of greek marinated chicken on a white plate with lemons on the plate and in the background.
      Greek Yogurt Chicken
    Jessy in a kitchen holding a white casserole pan and smiling.
    Hi, I'm Jessy!

    Welcome to The Life Jolie! I share simple, delicious recipes and ingredient prep tips to make your weeknight cooking a breeze!

    More about me →

    Easy Dinner Recipes

    • A close up of a bagel pizza with mini pepperonis on a pan.
      Bagel Pizzas Recipe
    • A bowl of Swedish meatballs and noodles.
      Swedish Meatballs And Noodles
    • A close up image of a piece of coconut shrimp on top of others.
      Coconut Shrimp With Sauce
    • A spoon pulling up a scoop of skillet lasagna with melted cheese stretching behind it.
      No Bake Lasagna Skillet
    • A bowl of hearty lamb stew.
      Easy Lamb Stew Recipe
    • A plate of sausage and veggies with a fork on it.
      Sheet Pan Sausage and Roasted Veggies

    Popular Recipes

    • A glass bowl of melted chocolate with a spatula dripping some back into the bowl.
      How To Melt Chocolate Chips In The Microwave
    • Italian Stuffed Zucchini Boats are the healthy weeknight meal you'll want to make again and again. This is a seriously easy recipe that's full of delicious flavor without all the guilt!
      Italian Stuffed Zucchini Boats
    • A close up shot of the side of a shallow bowl of shrimp mac salad.
      Shrimp Macaroni Salad
    • A white pan pouring cheese sauce over a bowl of steamed broccoli.
      Cheese Sauce for Broccoli Recipe
    • An overhead image of a plate of chicken lettuce wraps with peanut sauce next to it and all the fixings surrounding it.
      Copycat Cheesecake Factory Thai Chicken Lettuce Wraps
    • A close up image of a piece of greek marinated chicken on a white plate with lemons on the plate and in the background.
      Greek Yogurt Chicken

    Footer

    ↑ back to top

    About

    • About Me
    • Privacy Policy + Disclaimer

    Newsletter

    • Sign Up! for emails and updates

    Contact

    • Contact
    • Video Production

    As an Amazon Associate I earn from qualifying purchases.

    Copyright 2014-2021 - Jolie Ventures, LLC. All Rights Reserved. Privacy Policy.

    Rate This Recipe

    Your vote:


    A rating is required
    A name is required
    An email is required